I can't wait to see this thing painted and put back together. Maybe I missed it in another post, but what is the plan for the colour?
Hey c4 the colour plan is still Shadow Mica 1F4
Here is the hub bearing update:
Stock 88 units are disassembled to get the mounting plate for transfer to the new unit. Notice how much larger and stronger the centre shaft will be once the conversion is complete:
Cylinders have been bored 20 over to eliminate damage and wear from old rings:
Heads are refreshed and ready for reassembly:
New pistons are in and should help increase compression:
GM hardware plus new gaskets and pump are here:
GM intermediate plate / seal for two section pan:
I know this is boring stuff but I wanted these photos are here for my record and future reference of parts replaced and work performed during engine rebuild.
Originally posted by aaronkoch: I've always wondered how they do that.. So they weigh the piston, rod, pins, etc, and match that weight with their red thingies?
Yes and these guys use a glorified wheel balancer - old school
I got my parts back from powder coating today and I'm happy with the aluminum look:
Thanks to fellow forum members who has been supplying parts for me lately. The 88 intermediate shaft arrived and was painted:
88 Steering rack was painted and new tie-rod ends ordered:
During the sandblasting, one of the outer bushings blew through due to rust. I grabbed one of the extra LCA rubber bushings I had and burned the rubber out. This left the outer sleeve I needed to install into my powdercoated control arm:
New Prothane poly bushings (this time I chose black over red) were installed into both LCA's:
Originally posted by vinny: Have you ever thought about a modded Archie wide-body kit on this car? I have dreamed about a stretched wide-body and yours would look great. Vinny
Yes I have Vinny but not in the plans for this phase of the build...
Thanks Pat, - BTW I picked up another piece of the puzzle...
bad move you can not paint the relucter wheel it will interfer with magnetic signal no paint on that part at all must be bare metalaround all the teeth and groves as it is stated in the manual
Thanks Joe, glad to see you're keeping an eye on the thread. I'll have to get the manual out anyways to ensure the timing mark goes back together in the right spot - of course they didn't mark it when it came apart... BTW - Please post here when there's progress on the hub bearings. Cheers!
[This message has been edited by Fiero2m8 (edited 06-01-2010).]
Picked up the Sherwin Williams paint and reducer today. I got the order in for the Ultra 7000 I wanted to use just prior the the July 1st date when the government has forced it to be pulled from the shelves (lower VOC and water based now).
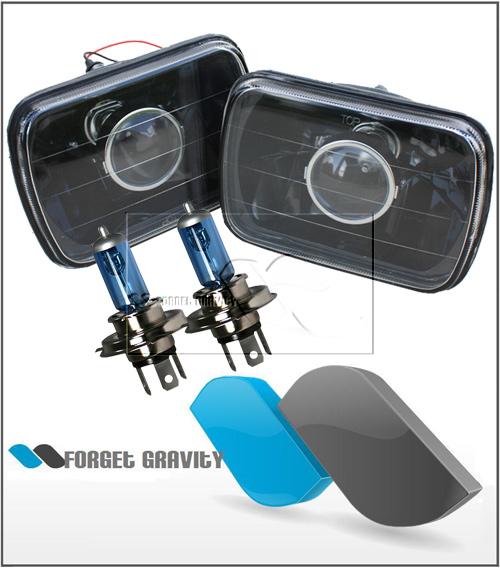
I disassembled the headlight assemblies but I'm not sure which direction to go in with the headlights...
With so many options out there like flush mount, surface mount, low profile, HID, LED, I need to put more thought into them. They have to look good and integrate with the rest of the car's design without need to modify the hood headlight openings. Space is also a consideration since my new trunk is going to be in the front compartment. This is one of the few styling cues I don't yet have a plan on during the reassembly phase, but's there's plenty of time...
Test fitting of the front cross member is going well. Some redrill the frame but I decided to use the existing space frame holes and redrill the cross member.
Here is the differences after measuring both:
1984 Space Frame – mounting holes measured centre to centre O < ---------------------------- 29-1/4” ------------------------------> O 4-1/2” O
1988 Suspension cross member – holes measured centre to centre O < ---------------------------- 30-1/4” -------------------------------> O 4-1/4” O
Using the locating pin to ensure the side to side and fore/aft position is correct takes the guess work out of it.
[This message has been edited by Fiero2m8 (edited 07-14-2010).]
I disassembled the headlight assemblies but I'm not sure which direction to go in with the headlights...
Has anyone - like you, who wants to not modify the hood - tried these? I've just recently stuck a set in my truck, and they look pretty good (compared to OE headlights). Pretty sure they're the same size as the Fiero headlights.
Those ebay headlights are absolute garbage. They are downright dangerous at night they throw no light through the projectors, it all gets directed outwards. Total junk, I sold mine on craigslist for $10.
[This message has been edited by Mr.PBody (edited 07-15-2010).]
The homemade headers are finally done after welding, sandblasting and now back from ceramic coating inside and out.
I went with a polished stainless steel finish that will closely match the stainless pipe I plan to use when it's time to replace the rest of the system.
Front crossmember from underneath - you can see back side of locating pin. The 84-87 frame has these 3 holes inline:
Use these measurements to mark centre of new holes (1/2" further toward tires and a 1/4" further apart from each other or 1/8" further from existing holes):
1984 Space Frame – mounting holes measured centre to centre O < ---------------------------- 29-1/4” ------------------------------> O 4-1/2” O
1988 Suspension cross member – holes measured centre to centre O < ---------------------------- 30-1/4” -------------------------------> O 4-1/4” O
Here is roughly the centre of where the new 1/2" holes go creating slots looking from underneath. I dropped cross member and measured accurately from top and drilled the new holes:
Here it is reinstalled with new holes creating the slots and bolted in with existing hardware:
As you can see the front holes don't line up either however the outside edge of the frame is flush with the outside edge of the crossmember on both frame rails:
All that is required is a new hole creating a "T" slot so that the original bolts and threads can be used:
For the pair of rear holes, new brackets need to fabricated to align with the crossmember holes:
Mr plan is to tac weld the exisiting bung thread plate into the correct position. Then I can drop the whole suspension and have room to weld in strengthening braces that will support the rear of the front suspension cradle:
Here is a front view of the 88 crossmember cradle bolted into the indy chassis nice and square ready for the rest of the suspension components:
I disassembled the headlight assemblies but I'm not sure which direction to go in with the headlights...
Up...
>.>
hehehe
seriously though you should go with some lower profile headlights either some stock lights from another vehicle, i personally like the 4x6 headlights found on the S10 and Blazer (i think) theyve got some nice ones on ebay that are clear lenses and that have projectors here is a thread where someone took a pair and put HID bulbs in them https://www.fiero.nl/forum/Forum1/HTML/076247.html i wouldnt do the HID in em, too bright and not legal i dont think
or do like alot of others and go with the hella lights
i would love some flush mount headlights on my car, better aerodynamics and i think it looks better but the slight curve of a stock fiero hood makes it kinda hard
ive thought abou taking the actual HID projectors from another car and retrofitting them into the fiero there are lots of pojectors for sale on ebay, these are the ones i like the most http://cgi.ebay.com/ebaymot...&hash=item4a9f62323e
E55 bi-xenon projectors, used in several different cars would have to rig up a mounting and adjustment system and protect it from the elements but there are lots of other projectors on ebay as well
you seem like you could have the resources to do this project much more easily than i would and some low profile HID pop ups with true projectors would look so sweet on this car
something i would like to eventually do to my car
here is the thread i was trying to find, someone on here has done a good potion of the work, just needs to complete the enclosures as im sure those bulbs would not be happy hitting water... https://www.fiero.nl/forum/Forum2/HTML/106422.html
low profile would allow you to do limited modification to the headlights, HID low profile would require some fabrication for weatherproof enclosures for the projectors, flush mmount would give you the most space saving under the hood i would think i like the low profile pop up look myself
[This message has been edited by yashmack (edited 07-25-2010).]


 That is all...