Pennock's Fiero Forum
  The Construction Zone
  newest project (Page 73)

Post New Topic  Post A Reply
Email This Page to Someone! | Printable Version

This topic is 78 pages long:  1   2   3   4   5   6   7   8   9   10   11   12   13   14   15   16   17   18   19   20   21   22   23   24   25   26   27   28   29   30   31   32   33   34   35   36   37   38   39   40   41   42   43   44   45   46   47   48   49   50   51   52   53   54   55   56   57   58   59   60   61   62   63   64   65   66   67   68   69   70   71   72   73   74   75   76   77   78 
Previous Page | Next Page
next newest topic | next oldest topic
newest project by bubbajoexxx
Started on: 09-12-2003 06:18 PM
Replies: 3111 (374102 views)
Last post by: Trinten on 04-23-2023 11:02 PM
Will
Member
Posts: 14226
From: Where you least expect me
Registered: Jun 2000


Feedback score: (1)
Leave feedback


Total ratings: 237
Rate this member

Report this Post06-12-2012 07:55 AM Click Here to See the Profile for WillSend a Private Message to WillEdit/Delete MessageReply w/QuoteDirect Link to This Post
If you can find one, I suggest you replace it. You can chase a leak for a long time and have doubts every time you shut the car off and catch a whiff of coolant...
IP: Logged
Fiero2m8
Member
Posts: 1928
From: Niagara, Ontario, Canada
Registered: Feb 2006


Feedback score:    (10)
Leave feedback

Rate this member

Report this Post06-12-2012 05:51 PM Click Here to See the Profile for Fiero2m8Click Here to visit Fiero2m8's HomePageSend a Private Message to Fiero2m8Edit/Delete MessageReply w/QuoteDirect Link to This Post
 
quote
Originally posted by Will:

If you can find one, I suggest you replace it. You can chase a leak for a long time and have doubts every time you shut the car off and catch a whiff of coolant...


Yes good advice Will.

We are on page 73 now, so page 72 has been added to the newest project build thread Table of Contents on page 55.
Check it out if you're new to this thread in the Construction Zone...

FIero2m8
IP: Logged
Fiero2m8
Member
Posts: 1928
From: Niagara, Ontario, Canada
Registered: Feb 2006


Feedback score:    (10)
Leave feedback

Rate this member

Report this Post06-12-2012 05:55 PM Click Here to See the Profile for Fiero2m8Click Here to visit Fiero2m8's HomePageSend a Private Message to Fiero2m8Edit/Delete MessageReply w/QuoteDirect Link to This Post

Fiero2m8

1928 posts
Member since Feb 2006

[This message has been edited by Fiero2m8 (edited 06-12-2012).]

IP: Logged
Fiero2m8
Member
Posts: 1928
From: Niagara, Ontario, Canada
Registered: Feb 2006


Feedback score:    (10)
Leave feedback

Rate this member

Report this Post06-30-2012 04:06 PM Click Here to See the Profile for Fiero2m8Click Here to visit Fiero2m8's HomePageSend a Private Message to Fiero2m8Edit/Delete MessageReply w/QuoteDirect Link to This Post
My experience with this product is it either works or it doesn't - so far it has worked beautifully given the leak was so minor.


This week, I was working on finalized the ride height prior to a 4 wheel alignment due to 88 front suspension installation.
I was finding the front about an inch too low and it took me 3 tries to get it just right.

The first attempt involved swapping front springs to other stock ones I had with a coil removed.
Even though these were 3/4 of a coil longer, there was no effect to ride height due to a softer spring rate.

Next I decided to install coil end spacers on the end of the stiff springs.
I couldn't find any to purchase, so I made my own from a coil helper kit.
What I forgot was that changing the coil length an inch changes ride height almost double.
This is due to the geometry arc of the control arm and the spring being halfway between the pivot point and the lower ball joint.

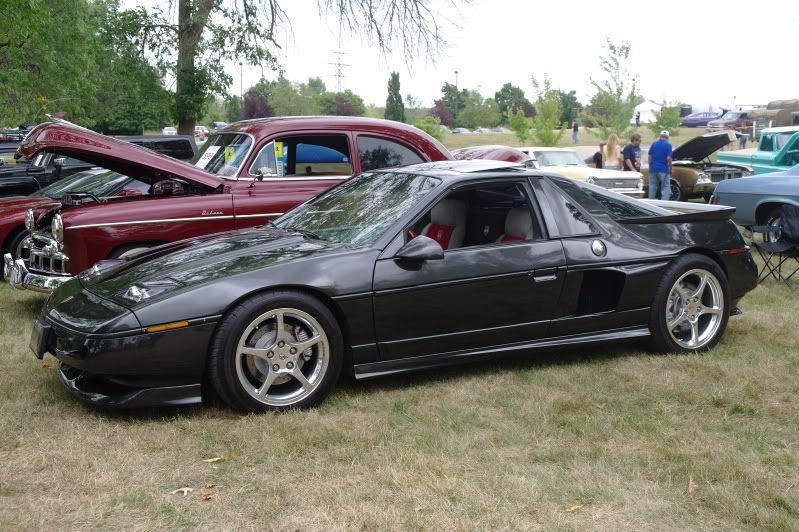
Anyways, third time was the charm and I now have 1-1/2" gap tire to fender all around (or 2 finger spaces as I like to measure with).
The actual height from ground to fender lip at wheel centreline is 27-1/2" rear and 26-3/4" front using my tire combination.

Here are the pictures of the final install:

I'm getting pretty fast at a spring swap for me - now takes under an hour


These are the the rubber spacers I used available at any local auto parts store - I just cut them to the length needed:


Since these coil helpers are designed to go between coils, I grinded the top flat with an angle grinder to the 3/4" thickness I was looking for:


This replaces the stock rubber spring isolator - I used 3 ty-raps to hold it in position for the install:


As you can see here the spacer sits perfectly against the metal locating ring in the strut tower so the spring can't move laterally:


This was a cheap and easy solution. The spring can be installed without a spring compressor (just floor jack on the lower contol arm).
The spring always has pre-load once the shock is re-installed.
After a test drive ride height is good, springs are quiet and handling is still firm.

Before:


After:

[This message has been edited by Fiero2m8 (edited 06-30-2012).]

IP: Logged
Fiero2m8
Member
Posts: 1928
From: Niagara, Ontario, Canada
Registered: Feb 2006


Feedback score:    (10)
Leave feedback

Rate this member

Report this Post07-05-2012 12:34 AM Click Here to See the Profile for Fiero2m8Click Here to visit Fiero2m8's HomePageSend a Private Message to Fiero2m8Edit/Delete MessageReply w/QuoteDirect Link to This Post
This week's project has been to build a new exhaust system after a splitting open one of the mufflers last week on a test drive.
The muffler's were installed in August 2006 and although they didn't get much use, it appears they slowly rusted from the inside out.
Time to remove them and build something new:


I was able to remove the old mufflers without removing the rear bumper cover.
After license plate was out of the way I had enough access:


It's a shorty version of a Cherry Bomb Turbo (12" length case):


Everything removed and I decided that I will try this project myself rather than bringing it to a custom muffler shop.


This is another opportunity to upgrade and continue to evolve the project as my own so stay tuned...
IP: Logged
Fiero2m8
Member
Posts: 1928
From: Niagara, Ontario, Canada
Registered: Feb 2006


Feedback score:    (10)
Leave feedback

Rate this member

Report this Post07-05-2012 10:20 PM Click Here to See the Profile for Fiero2m8Click Here to visit Fiero2m8's HomePageSend a Private Message to Fiero2m8Edit/Delete MessageReply w/QuoteDirect Link to This Post

Fiero2m8

1928 posts
Member since Feb 2006
Today I ordered the mufflers - I chose Flowmaster HP-2 Shortys

http://www.flowmastermuffle...pn6u07nhkf3q41ar6436

"The HP-2 line of mufflers utilize Flowmaster's revolutionary core design and deliver a moderate sound level with a rich traditional tone. Featuring a distinctive narrow case profile, the mufflers utilize Cool Shell Technology which minimizes radiant heat from the muffler body. Perfect for applications such as street rods, customs and rock crawlers that have limited space or can't fit a traditional oval shape muffler. Constructed with Stainless Steel materials and fully welded for maximum durability."

•Stainless 304S Polishable Case
•Patented Laminar Flow Technology
•Cool Shell for Reduced Radiant Heat
•Compact Design
•Internal Components Are 409s Stainless

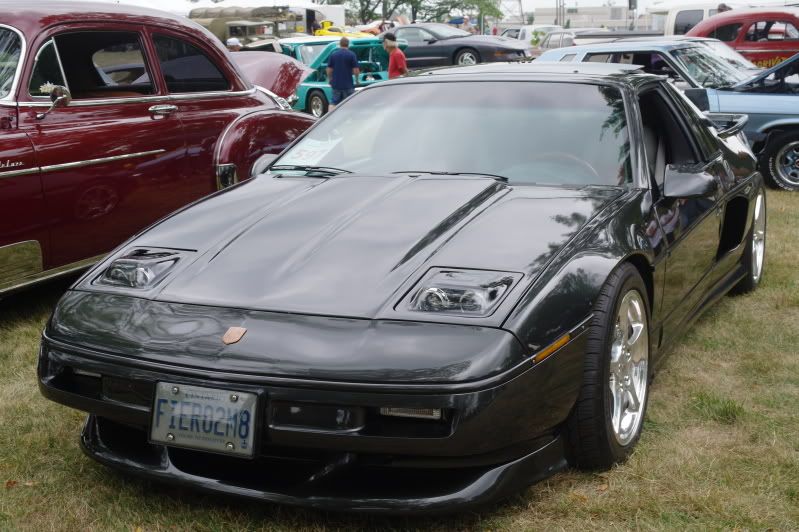
This evening was the ingural hand washing and detailing since the restoration - I am trying all Meguiars products this year.
Check out the new stance as well - here are the pics:


IP: Logged
Fiero2m8
Member
Posts: 1928
From: Niagara, Ontario, Canada
Registered: Feb 2006


Feedback score:    (10)
Leave feedback

Rate this member

Report this Post07-05-2012 10:46 PM Click Here to See the Profile for Fiero2m8Click Here to visit Fiero2m8's HomePageSend a Private Message to Fiero2m8Edit/Delete MessageReply w/QuoteDirect Link to This Post

Fiero2m8

1928 posts
Member since Feb 2006
Cleaning up I found my beer and coffee stained notepad that had my "15 STEPS to Fiero body removal".
I just wanted to document my removal steps here for future reference so scroll down if this doesn't pertain to your interests

TOOLS:
-----------------------------------------------------------------------------------------------------------------------------------
Jack and 4 jackstands
Cordless drill
T50 (Seat Belts)
T30 (Doors)
T15 (Interior)
13mm / 11mm / 10mm / 7mm wrenches & sockets
Pliers / side cutters
Screwdrivers
Hammer
Chisel
Bags & box

15 STEPS (in order of disassembly):
------------------------------------------------------------------------------------------------------------------------------------
1) 4 jackstands / Wheels off / Disco battery / remove Front trunk lid
2) Side marker lights (7mm / T15) / Wheelwell liners / Gas cap / Rear hatch (or decklid)
3) Tailights / Doorsills / Sideskirts / Driprails
4) Rear bumper cover (top clips / plugs for plate lights)
5) Front bumper cover (bottom to top) / Indicator lights
6) Front fenders (rivet under then top screws)
7) Upper seat belts / Trim / 11mm Sail panels
8) Dome light / Sun visors / Drop headliner
9) Side moldings / 10mm in ceiling
10) Remove rear quarter panels (rivets / screws)
11) Rear clip (Side / Back / Top screws (Fuel filler disco)
12) Interior door panels / Power Mirrors (10mm / wire)
13) T30 Nuts (4 Back / 3 Front) on inner door panels
14) 7mm screws / Moulding / Remove outer door panels / Handle rod
15) Roof Panel (cutting wire)

Installation is reverse order.
IP: Logged
doublec4
Member
Posts: 8289
From: Oakville, Ontario, Canada
Registered: Jun 2003


Feedback score:    (20)
Leave feedback


Total ratings: 150
Rate this member

Report this Post07-06-2012 06:06 AM Click Here to See the Profile for doublec4Send a Private Message to doublec4Edit/Delete MessageReply w/QuoteDirect Link to This Post
Lookin good!!
IP: Logged
Fiero2m8
Member
Posts: 1928
From: Niagara, Ontario, Canada
Registered: Feb 2006


Feedback score:    (10)
Leave feedback

Rate this member

Report this Post07-07-2012 04:24 PM Click Here to See the Profile for Fiero2m8Click Here to visit Fiero2m8's HomePageSend a Private Message to Fiero2m8Edit/Delete MessageReply w/QuoteDirect Link to This Post
Yesterday I had the afternoon off and the muffler's came in so I welded in the new exhaust setup:


Since the old mufflers touched the frame I trimmed some metal that could potentially interfer during engine torquing:


I also grinded the back of the transaxle at the two mounting points not used in my application to gain additional clearance and allow flowmasters to be installed straight:


The case length was actually 12.5 inches or 1 inch longer than the Cherry Bombs, so I cut 1 inch off each end of them to help manage finished overall length.


I reused the flanges and welded them in the correct orientation:


The exit of the mufflers are secured with stainless steel clamps to ensure I can R/R the exhaust without need to remove bodywork:


New chrome oval tips were welded in to exit just below the license plate as before:


\
I am very pleased with the look and sound of the new system and proud I did it myself versus a muffler shop...

[This message has been edited by Fiero2m8 (edited 07-07-2012).]

IP: Logged
doublec4
Member
Posts: 8289
From: Oakville, Ontario, Canada
Registered: Jun 2003


Feedback score:    (20)
Leave feedback


Total ratings: 150
Rate this member

Report this Post07-07-2012 08:43 PM Click Here to See the Profile for doublec4Send a Private Message to doublec4Edit/Delete MessageReply w/QuoteDirect Link to This Post
Nice work, I like those tips much better. I can't wait to see this thing in person soon!
IP: Logged
Fiero2m8
Member
Posts: 1928
From: Niagara, Ontario, Canada
Registered: Feb 2006


Feedback score:    (10)
Leave feedback

Rate this member

Report this Post07-10-2012 03:57 PM Click Here to See the Profile for Fiero2m8Click Here to visit Fiero2m8's HomePageSend a Private Message to Fiero2m8Edit/Delete MessageReply w/QuoteDirect Link to This Post
 
quote
Originally posted by doublec4:

Nice work, I like those tips much better. I can't wait to see this thing in person soon!


Thanks, it was very popular at the Sunday evening cruise in Niagara Falls...


Plan to bring it to the Welland Seaway Mall Cruise this Friday evening as well.
IP: Logged
PFF
System Bot
Reallybig
Member
Posts: 974
From: Calgary Alberta Canada
Registered: Mar 2011


Feedback score: N/A
Leave feedback

Rate this member

Report this Post07-10-2012 08:56 PM Click Here to See the Profile for ReallybigSend a Private Message to ReallybigEdit/Delete MessageReply w/QuoteDirect Link to This Post
You really appreciate the artistry of exhaust system fabrication once you've tried it yourself! The new tips seem to blend better the all the body mods than the others did. Looks great, can't argue with improvements!
IP: Logged
Fiero2m8
Member
Posts: 1928
From: Niagara, Ontario, Canada
Registered: Feb 2006


Feedback score:    (10)
Leave feedback

Rate this member

Report this Post07-12-2012 08:38 AM Click Here to See the Profile for Fiero2m8Click Here to visit Fiero2m8's HomePageSend a Private Message to Fiero2m8Edit/Delete MessageReply w/QuoteDirect Link to This Post
 
quote
Originally posted by Reallybig:

You really appreciate the artistry of exhaust system fabrication once you've tried it yourself! The new tips seem to blend better the all the body mods than the others did. Looks great, can't argue with improvements!


Thanks for the feedback.
This weeks project has been to finish plumbing the A/C lines to new condenser and charge the system.

IP: Logged
Fiero2m8
Member
Posts: 1928
From: Niagara, Ontario, Canada
Registered: Feb 2006


Feedback score:    (10)
Leave feedback

Rate this member

Report this Post07-14-2012 11:50 AM Click Here to See the Profile for Fiero2m8Click Here to visit Fiero2m8's HomePageSend a Private Message to Fiero2m8Edit/Delete MessageReply w/QuoteDirect Link to This Post
Took Friday off so after getting the A/C charged my son Andrew and I had time take it to a cruise night at Seaway Mall Welland.


The tuning is better dialed in, as I worked on the carb setup.

Installed richer idle jets I drilled to a Dellorto #58 (size .0225")
After starting with rich (safe) #160's the best Main Jets have been the #150's as the venturi's I'm using are 36mm (times rule of 4 or 4.2)
Unisync guage was used to rebalance airflow on all 8 carbs to "6" on my guage (at idle of 850rpm)

Still experimenting will the timing advance but the latest settings after stabilizing the carb adjustments are:

Mechnical timing 0-400 rpm 10 degrees
Initial timing 1000-3000 rpm 8 degrees
Advance timing 3000-redline rpm 14 degrees

From what I've read online total timing stock for my engine is only 26 degrees and modified should be around 31 degrees.
I'm running 94 Octane and the redline limiter set at 7000 rpm.
Of course I'd like the most timing without detonation.
I think I'm going to need use of a chassis dyno to find the best ratio between the adjustable initial and advance settings.

FIero2m8
IP: Logged
Fiero2m8
Member
Posts: 1928
From: Niagara, Ontario, Canada
Registered: Feb 2006


Feedback score:    (10)
Leave feedback

Rate this member

Report this Post07-16-2012 09:41 PM Click Here to See the Profile for Fiero2m8Click Here to visit Fiero2m8's HomePageSend a Private Message to Fiero2m8Edit/Delete MessageReply w/QuoteDirect Link to This Post
FYI locals - Fiero2m8 is going to be at the Gateway Niagara cruise Tuesday evening

IP: Logged
Fiero2m8
Member
Posts: 1928
From: Niagara, Ontario, Canada
Registered: Feb 2006


Feedback score:    (10)
Leave feedback

Rate this member

Report this Post07-21-2012 03:43 PM Click Here to See the Profile for Fiero2m8Click Here to visit Fiero2m8's HomePageSend a Private Message to Fiero2m8Edit/Delete MessageReply w/QuoteDirect Link to This Post
Good news for Fiero2m8 as I spent over an hour in stop and go traffic on the QEW in 37 degrees C heat without a cooling issue - the minor rad leak is fixed.

Bad news was later in the week when I broke an axle during a hard launch requiring a tow home
With the increased horsepower and the Kevlar clutch/pressure plate setup working well, the new weakest link ended up being a Porsche CV joint on the drivers side of the transaxle.
Turns out the axle was fine but the cage broke inside the CV housing, so I removed the axle and disassembled it in under an hour.
Looks like I am going to need a new one piece boot (guessing 1974 version based on numbers molded into boot as I think the 1975 version was a two piece setup).
I found a boot for the 944 but it is different so I need the 914.
Also need to make sure the splined end of the Porsche axle is stock diameter - this will ensure I get the correct CV for it.
Still not sure if it broke due to excessive torque or if the axle bottomed into the transaxle flange when the suspension compressed.
Since there were a few marks on the end of the axle, I got proactive and shortened the axle approximately 1/4" anyways.
Here are some pictures of the disassembly:


[This message has been edited by Fiero2m8 (edited 07-21-2012).]

IP: Logged
northeastfiero
Member
Posts: 511
From: Norwich / Uk
Registered: Mar 2005


Feedback score: N/A
Leave feedback

Rate this member

Report this Post08-10-2012 12:49 PM Click Here to See the Profile for northeastfieroSend a Private Message to northeastfieroEdit/Delete MessageReply w/QuoteDirect Link to This Post
Hi do you have a complete list of parts required for the 88 front and rear hub upgrade. I will have to do this to cope with the extra torque of the v12.

Thanks Carl
IP: Logged
bubbajoexxx
Member
Posts: 1630
From: Ontario Canada
Registered: Aug 2003


Feedback score: N/A
Leave feedback


Total ratings: 112
Rate this member

Report this Post08-11-2012 08:33 PM Click Here to See the Profile for bubbajoexxxClick Here to visit bubbajoexxx's HomePageSend a Private Message to bubbajoexxxEdit/Delete MessageReply w/QuoteDirect Link to This Post
 
quote
Originally posted by northeastfiero:

Hi do you have a complete list of parts required for the 88 front and rear hub upgrade. I will have to do this to cope with the extra torque of the v12.

Thanks Carl


t he rear of the car is a custom frame I made using a c5 vet rear suspension cradle mounted to a custom set of frame rails
here is the link
https://www.fiero.nl/forum/F.../HTML/000007-33.html

[This message has been edited by bubbajoexxx (edited 08-11-2012).]

IP: Logged
Fiero2m8
Member
Posts: 1928
From: Niagara, Ontario, Canada
Registered: Feb 2006


Feedback score:    (10)
Leave feedback

Rate this member

Report this Post08-13-2012 08:56 PM Click Here to See the Profile for Fiero2m8Click Here to visit Fiero2m8's HomePageSend a Private Message to Fiero2m8Edit/Delete MessageReply w/QuoteDirect Link to This Post
 
quote
Originally posted by northeastfiero:
Hi do you have a complete list of parts required for the 88 front and rear hub upgrade. I will have to do this to cope with the extra torque of the v12.
Thanks Carl


Hi Carl,

For the front hubs, below is what we used for hub bearings.
It does require some minor machine work to fit them in the 88 spindles.

"After some more R&D we are going to mod Bearing #513009 due to its outer diameter size of 2.79" vs. 88 spindle of 2.74"

Timken or FAG #513009
Cross Ref #7466902 7470539 7470540
Non-Drive (FWD)
REAR w/Disc Brakes
Non-ABS

Fits:
1979-1985 Buick Riviera
1979-1985 Cadillac Eldorado
1980-1985 Cadillac Seville
1979-1981 Oldsmobile Toronado
1982-1985 Oldsmobile Toronado

http://www.alibaba.com/prod...eel_unit_513009.html

Good luck with the V12 project!

------------------

Indy Northstar-Stretch

IP: Logged
Fiero2m8
Member
Posts: 1928
From: Niagara, Ontario, Canada
Registered: Feb 2006


Feedback score:    (10)
Leave feedback

Rate this member

Report this Post08-14-2012 09:33 PM Click Here to See the Profile for Fiero2m8Click Here to visit Fiero2m8's HomePageSend a Private Message to Fiero2m8Edit/Delete MessageReply w/QuoteDirect Link to This Post
Stopped by to see Auguste and he has ordered me a boot and cv joint.
Turns out the 914 one didn't fit so we went with a VW bus one that needed slight modification.


Two of the opposing 6 holes were countersunk drilled so I could transfer the locating pins from my old cv housing


I am chalking this part failure up to unknown age of the part - if it breaks again, I will find a way to upgrade to larger flanges and CV's

Reinstalled with new grade 12.9 bolts, cv grease and made my own gaskets with RTV
IP: Logged
Fiero2m8
Member
Posts: 1928
From: Niagara, Ontario, Canada
Registered: Feb 2006


Feedback score:    (10)
Leave feedback

Rate this member

Report this Post08-15-2012 12:34 AM Click Here to See the Profile for Fiero2m8Click Here to visit Fiero2m8's HomePageSend a Private Message to Fiero2m8Edit/Delete MessageReply w/QuoteDirect Link to This Post
Well I managed to pull off bringing a Fiero project to tinker with during my vacation week up at the cottage
I purchased one of the prototype headlight kits from doublec4 since I hadn't gotten around to rebuilding my headlight motor (probably because I wanted to do a mod on the headlights anyways).

When I stopped by to pick them up, I found out that Fiero's weren't the only similar vehicles in the driveway to mine


After I finished reading my Top Gear book, I decided to start working on the headlight buckets.
First I slotted the projector mounting holes for adjustment purposes to match the current kit version.


Also the holes on the outer side of the bucket were relocated (again these were prototypes I modded).


After throughly cleaning the oil off the bare metal, I painted buckets and brackets with a black rust paint.


After several light coats, they were allowed to cure in the shed for 24 hrs.


Here I am enjoying a few pints while assembling the projector hardware...


They should look something like this providing you've followed the instructions.


Once you've done both sides, you decide on a pattern for painting the lenses.


Masking the lens and more importantly ensure the other one is a mirror image of it requires some thought, measuring and patience.
For this reason I waited until the next day prior to happy hour.


Once you've masked your pattern on the outside with painter's tape, you can flip it over and mask the remaining clear portion on the inside of the lens.


Finish up masking the rest of the outside and then you're ready to paint the inside with around 6 light coats of paint.


This is the paint I chose for the lenses (same matching paint I used on my Fiero tailights)


I waited another 24hrs before removing the masking tape and this is how they came out.


Since the inside is painted, they look great from the outside like they were bought that way.


Next I mounted the supplied Velcro and trimmed to them to fit the bucket lips.


After removing the existing stock headlight assemblies and doors the buckets are bolted in.
Once the depth is adjusted you can install the lenses and they should look something like this...


Make sure to allow the Velcro adhesive to cure to the lens prior to trying to remove them.


If you're looking to custom update the look and performance of the Fiero headlamps with a bolt in that could later be returned to stock, I highly recommend this kit.


Cheers,
Fiero2m8
IP: Logged
PFF
System Bot
doublec4
Member
Posts: 8289
From: Oakville, Ontario, Canada
Registered: Jun 2003


Feedback score:    (20)
Leave feedback


Total ratings: 150
Rate this member

Report this Post08-15-2012 06:11 AM Click Here to See the Profile for doublec4Send a Private Message to doublec4Edit/Delete MessageReply w/QuoteDirect Link to This Post
Great write up, Ryan,

Thank you!

They look really nice on your car! One of the most unique Fieros ever built!
IP: Logged
1988holleyformula
Member
Posts: 4109
From: SE MN
Registered: Jul 2009


Feedback score: (3)
Leave feedback


Total ratings: 68
Rate this member

Report this Post08-15-2012 06:50 PM Click Here to See the Profile for 1988holleyformulaSend a Private Message to 1988holleyformulaEdit/Delete MessageReply w/QuoteDirect Link to This Post
 
quote
Originally posted by doublec4:

Great write up, Ryan,

Thank you!

They look really nice on your car! One of the most unique Fieros ever built!


I'll second this, and would humbly ask for a head-on picture with those lights installed.
IP: Logged
Fiero2m8
Member
Posts: 1928
From: Niagara, Ontario, Canada
Registered: Feb 2006


Feedback score:    (10)
Leave feedback

Rate this member

Report this Post08-15-2012 07:17 PM Click Here to See the Profile for Fiero2m8Click Here to visit Fiero2m8's HomePageSend a Private Message to Fiero2m8Edit/Delete MessageReply w/QuoteDirect Link to This Post
 
quote
Originally posted by 1988holleyformula:


I'll second this, and would humbly ask for a head-on picture with those lights installed.


Thanks, ask and you shall receive...


Just FYI projector's are not aimmed yet as I still need to pick up my HID kit.
IP: Logged
Fiero2m8
Member
Posts: 1928
From: Niagara, Ontario, Canada
Registered: Feb 2006


Feedback score:    (10)
Leave feedback

Rate this member

Report this Post08-15-2012 09:36 PM Click Here to See the Profile for Fiero2m8Click Here to visit Fiero2m8's HomePageSend a Private Message to Fiero2m8Edit/Delete MessageReply w/QuoteDirect Link to This Post

Fiero2m8

1928 posts
Member since Feb 2006
Here's a few pics taken from the GM Powertrain Plant Car Show in St. Catharines
http://www.gmpowertrain.ca/carshow.html

It's a free annual show that included a plant tour to see the LS3 engine line.
Also my son and I met Canadian Indy driver of the Go Daddy car James Hinchcliffe outside the factory.


Oh yeah they also had a mobile chassis dyno at the event for testing in (front of the crowd) what power you are REALLY putting to the wheels
IP: Logged
FieroWannaBe
Member
Posts: 2289
From: USA
Registered: Oct 2004


Feedback score: N/A
Leave feedback

Rate this member

Report this Post08-21-2012 09:30 AM Click Here to See the Profile for FieroWannaBeSend a Private Message to FieroWannaBeEdit/Delete MessageReply w/QuoteDirect Link to This Post
 
quote
Originally posted by Fiero2m8:

Oh yeah they also had a mobile chassis dyno at the event for testing in (front of the crowd) what power you are REALLY putting to the wheels


and... did you give it a try? Interested to see how your carb tuning is turning out on a wideband.

I like the look with the new headlights. Cant wait to get mine installed on my Chump Car.
IP: Logged
Fiero2m8
Member
Posts: 1928
From: Niagara, Ontario, Canada
Registered: Feb 2006


Feedback score:    (10)
Leave feedback

Rate this member

Report this Post08-21-2012 06:23 PM Click Here to See the Profile for Fiero2m8Click Here to visit Fiero2m8's HomePageSend a Private Message to Fiero2m8Edit/Delete MessageReply w/QuoteDirect Link to This Post
 
quote
Originally posted by FieroWannaBe:
and... did you give it a try? Interested to see how your carb tuning is turning out on a wideband...


Yes I did. While it was not a tuning session I did make three pulls (noting my carb and timing settings) so now I have a baseline to work off of.
It also helps answer one of the top questions I get other than "how long did it take to build?" and "how much does it weigh?" (which I still need to get a measurement on).

Here I am in line for the dyno:


My son took some pictures of me on the mobile trailer:


After it was strapped in, tach lead was connected and blower fans moved to the side of the car...


I did 3 runs in 4th gear pulling to redline:


Here is the view from the car of the spectators watching the monitor:


And my view of the engine (I did remove the air cleaners for the test):


IP: Logged
Fiero2m8
Member
Posts: 1928
From: Niagara, Ontario, Canada
Registered: Feb 2006


Feedback score:    (10)
Leave feedback

Rate this member

Report this Post08-21-2012 07:04 PM Click Here to See the Profile for Fiero2m8Click Here to visit Fiero2m8's HomePageSend a Private Message to Fiero2m8Edit/Delete MessageReply w/QuoteDirect Link to This Post

Fiero2m8

1928 posts
Member since Feb 2006
Don't worry, we managed to get a video of the third run as well
Third run produced the best numbers but all three all were very consistent...


If you have a decent computer speaker system, it will give you a good idea of how the Indy Northstar sounds (one of my favourite features of the newst project)
I decided to share the results here on the build thread and will post the graph too.
Hopefully I'll get some positive ratings and useful feedback versus regretting sharing

Fiero2m8
IP: Logged
Fiero2m8
Member
Posts: 1928
From: Niagara, Ontario, Canada
Registered: Feb 2006


Feedback score:    (10)
Leave feedback

Rate this member

Report this Post08-21-2012 07:19 PM Click Here to See the Profile for Fiero2m8Click Here to visit Fiero2m8's HomePageSend a Private Message to Fiero2m8Edit/Delete MessageReply w/QuoteDirect Link to This Post

Fiero2m8

1928 posts
Member since Feb 2006

IP: Logged
doublec4
Member
Posts: 8289
From: Oakville, Ontario, Canada
Registered: Jun 2003


Feedback score:    (20)
Leave feedback


Total ratings: 150
Rate this member

Report this Post08-21-2012 11:29 PM Click Here to See the Profile for doublec4Send a Private Message to doublec4Edit/Delete MessageReply w/QuoteDirect Link to This Post
Nice!!

Sounds great and looks incredible. Very awesome to see this car come so far. Great work Ryan.
IP: Logged
bubbajoexxx
Member
Posts: 1630
From: Ontario Canada
Registered: Aug 2003


Feedback score: N/A
Leave feedback


Total ratings: 112
Rate this member

Report this Post08-22-2012 05:10 PM Click Here to See the Profile for bubbajoexxxClick Here to visit bubbajoexxx's HomePageSend a Private Message to bubbajoexxxEdit/Delete MessageReply w/QuoteDirect Link to This Post
 
quote
Originally posted by Fiero2m8:

Don't worry, we managed to get a video of the third run as well
Third run produced the best numbers but all three all were very consistent...


If you have a decent computer speaker system, it will give you a good idea of how the Indy Northstar sounds (one of my favourite features of the newst project)
I decided to share the results here on the build thread and will post the graph too.
Hopefully I'll get some positive ratings and useful feedback versus regretting sharing

Fiero2m8


you should have shifted to fith as I could here the rev limiter kick in before you hit top speed with the 4:13 gear fith is needed to reach top speed

you also are short on timming you need 38 deg. total at 6000 rpm

[This message has been edited by bubbajoexxx (edited 08-22-2012).]

IP: Logged
PFF
System Bot
Fiero2m8
Member
Posts: 1928
From: Niagara, Ontario, Canada
Registered: Feb 2006


Feedback score:    (10)
Leave feedback

Rate this member

Report this Post08-22-2012 06:28 PM Click Here to See the Profile for Fiero2m8Click Here to visit Fiero2m8's HomePageSend a Private Message to Fiero2m8Edit/Delete MessageReply w/QuoteDirect Link to This Post
 
quote
Originally posted by doublec4:

Nice!!

Sounds great and looks incredible. Very awesome to see this car come so far. Great work Ryan.


Thanks, you have been proactively contributing to this thread since 2004 and I appreciate your feedback!

Cheers,
Fiero2m8
IP: Logged
Fiero2m8
Member
Posts: 1928
From: Niagara, Ontario, Canada
Registered: Feb 2006


Feedback score:    (10)
Leave feedback

Rate this member

Report this Post08-22-2012 07:11 PM Click Here to See the Profile for Fiero2m8Click Here to visit Fiero2m8's HomePageSend a Private Message to Fiero2m8Edit/Delete MessageReply w/QuoteDirect Link to This Post

Fiero2m8

1928 posts
Member since Feb 2006
 
quote
Originally posted by bubbajoexxx:
you should have shifted to fith as I could here the rev limiter kick in before you hit top speed with the 4:13 gear fith is needed to reach top speed
you also are short on timming you need 38 deg. total at 6000 rpm


Hi Joe,
I asked about that and they said that the dyno is most accurate when you are in a gear with a 1:1 ratio.
Assuming that the stock porsche "V" gear is still in this transaxle, 4th would have a ratio of 0.93 (the closest).
I agree that top speed will be achieved in 5th due to the final drive ratio I'm using.

Sorry I forgot to post the timing settings - here they are (and yes I kept my foot in it until my preset 7500 rpm rev limit engaged):


With 10 degrees mechanical timing plus these settings I thought I was at 34 for my baseline runs.
IP: Logged
Will
Member
Posts: 14226
From: Where you least expect me
Registered: Jun 2000


Feedback score: (1)
Leave feedback


Total ratings: 237
Rate this member

Report this Post08-22-2012 07:51 PM Click Here to See the Profile for WillSend a Private Message to WillEdit/Delete MessageReply w/QuoteDirect Link to This Post
 
quote
Originally posted by Fiero2m8:

I asked about that and they said that the dyno is most accurate when you are in a gear with a 1:1 ratio.


Umm...

"Accurate" means a lot of things... in a front engine rear drive car like a Camaro or Corvette, the 1:1 ratio means that the input shaft of the transmission is locked directly to the output shaft and the power doesn't go through any gear meshes. This means that the 1:1 gear has the lowest frictional parastic loss.

In a transmission like the Fiero's or like the Porsche's, there is no "direct" gear. ALL of the ratios transfer power through gear meshes. No gear has an advantage over any other in terms of frictional loss.

However, there is a balance of inertial losses that must be considered. It takes energy accelerate the driveline rotating mass. That mass is split between engine speed rotating mass and wheel speed rotating mass. The engine speed rotating items that matter are the clutch and flywheel. The wheel speed rotating items that matter are the brake rotors, wheels and tires.

So if the gear ratio is numerically large and the acceleration of the engine speed rotating mass consumes more power than acceleration of the wheel speed rotating mass, upshift. If the wheel speed rotating mass requires more power to accelerate, downshift.

Of course the easiest way to do this is to do a complete pull in each gear in order to see which one gives you the best numbers.

IP: Logged
Fiero2m8
Member
Posts: 1928
From: Niagara, Ontario, Canada
Registered: Feb 2006


Feedback score:    (10)
Leave feedback

Rate this member

Report this Post08-22-2012 08:45 PM Click Here to See the Profile for Fiero2m8Click Here to visit Fiero2m8's HomePageSend a Private Message to Fiero2m8Edit/Delete MessageReply w/QuoteDirect Link to This Post
Thanks Will.
Yes he basically said 4th gives the best result.
Almost all other cars tested were new Camaros.

I also heard many guesses on what flywheel hp would be.
Quite a range!
IP: Logged
Fiero2m8
Member
Posts: 1928
From: Niagara, Ontario, Canada
Registered: Feb 2006


Feedback score:    (10)
Leave feedback

Rate this member

Report this Post08-22-2012 10:07 PM Click Here to See the Profile for Fiero2m8Click Here to visit Fiero2m8's HomePageSend a Private Message to Fiero2m8Edit/Delete MessageReply w/QuoteDirect Link to This Post

Fiero2m8

1928 posts
Member since Feb 2006
Picked up the HID lights and harness to install into the doublec4 buckets:


Hopefully will work on them this weekend.


IP: Logged
Fiero2m8
Member
Posts: 1928
From: Niagara, Ontario, Canada
Registered: Feb 2006


Feedback score:    (10)
Leave feedback

Rate this member

Report this Post08-23-2012 12:03 AM Click Here to See the Profile for Fiero2m8Click Here to visit Fiero2m8's HomePageSend a Private Message to Fiero2m8Edit/Delete MessageReply w/QuoteDirect Link to This Post
Thanks Will.
Yes he basically said 4th gives the best result.
Almost all other cars tested were new Camaros.

I also heard many guesses on what flywheel hp would be.
Quite a range!
IP: Logged
Will
Member
Posts: 14226
From: Where you least expect me
Registered: Jun 2000


Feedback score: (1)
Leave feedback


Total ratings: 237
Rate this member

Report this Post08-23-2012 08:35 AM Click Here to See the Profile for WillSend a Private Message to WillEdit/Delete MessageReply w/QuoteDirect Link to This Post
 
quote
Originally posted by Fiero2m8:

Thanks Will.
Yes he basically said 4th gives the best result.
Almost all other cars tested were new Camaros.

I also heard many guesses on what flywheel hp would be.
Quite a range!


What I was saying is that because your car doesn't have a "direct" fourth, you'll have to experiment to see which gear does give the best results. The 1:1 "rule" does not apply.
IP: Logged
Fiero2m8
Member
Posts: 1928
From: Niagara, Ontario, Canada
Registered: Feb 2006


Feedback score:    (10)
Leave feedback

Rate this member

Report this Post08-23-2012 02:31 PM Click Here to See the Profile for Fiero2m8Click Here to visit Fiero2m8's HomePageSend a Private Message to Fiero2m8Edit/Delete MessageReply w/QuoteDirect Link to This Post
 
quote
Originally posted by Will:
What I was saying is that because your car doesn't have a "direct" fourth, you'll have to experiment to see which gear does give the best results. The 1:1 "rule" does not apply.


Yes I agree with your explanation, sorry for not clarifying I understood.
Once I book a dyno tuning session, I will be sure to find the best gear for my application prior to making changes to the tune.

IP: Logged
Will
Member
Posts: 14226
From: Where you least expect me
Registered: Jun 2000


Feedback score: (1)
Leave feedback


Total ratings: 237
Rate this member

Report this Post08-23-2012 03:19 PM Click Here to See the Profile for WillSend a Private Message to WillEdit/Delete MessageReply w/QuoteDirect Link to This Post
It's pretty much academic... it could give you higher numbers, but as long as you use the same gear every time, you can still compare results.
IP: Logged
Previous Page | Next Page

This topic is 78 pages long:  1   2   3   4   5   6   7   8   9   10   11   12   13   14   15   16   17   18   19   20   21   22   23   24   25   26   27   28   29   30   31   32   33   34   35   36   37   38   39   40   41   42   43   44   45   46   47   48   49   50   51   52   53   54   55   56   57   58   59   60   61   62   63   64   65   66   67   68   69   70   71   72   73   74   75   76   77   78 
next newest topic | next oldest topic

All times are ET (US)

Post New Topic  Post A Reply
Hop to:

Contact Us | Back To Main Page

Advertizing on PFF | Fiero Parts Vendors
PFF Merchandise | Fiero Gallery | Ogre's Cave
Real-Time Chat | Fiero Related Auctions on eBay


Copyright (c) 1999, C. Pennock