He did not ask me what the torque was for the flywheel but it is 45 ftlbs on 8 mm 12.9 thats the yeld for that spacific bolt and for the stock bolts its the same
The porsche bolts he is refuring to are 13 mm x 1.25 , 12.9 and they use 75 ftlbs yeld
The stock Northstar flywheel bolts are not 12.9 (might even be 8.8) and are torqued to yield via a torque + angle process.
if it was aluminum it would not hurt to much but the case is magnesium and the torque output of the starter is extreemly high turning an engine with 11 :1 compresson so the load is transfered to the case and the starter ring takes that force as the starter has a collar that fits tight in the starter ring
Has anyone actually broken it? The bolts do so much more than the ring...
On the water pump bolt issue, I considered opening the clearance hole a little but ended up taking the extra time to temp slide the transaxle back an inch, tighten and reinstall.
For the flywheel yes the GM manual mentions torque + degree yield but I am not using a stock flywheel or bolts. I feel 60 is comfortably between 45 and 75 ft/lbs and I can confirm using new 12.9 bolts.
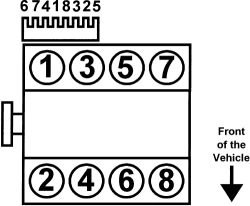
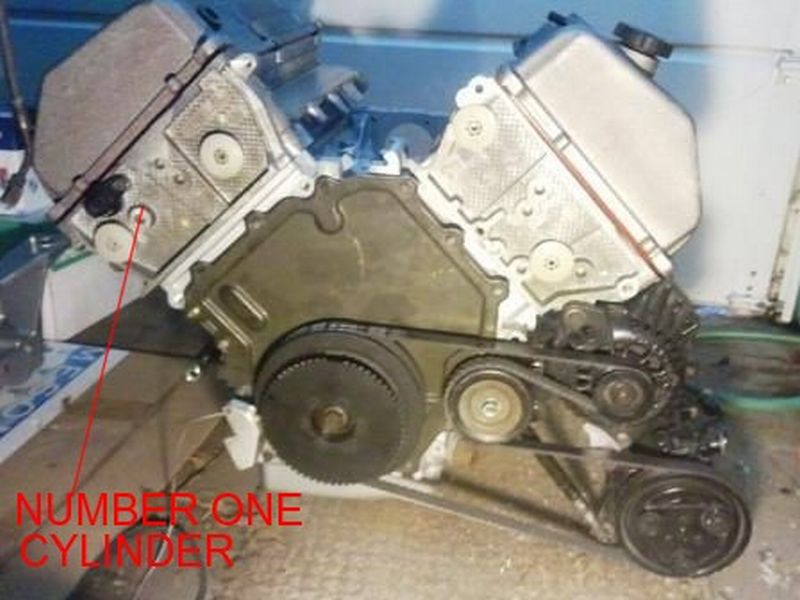
TDC cylinder #1 is very important for my crank sensor. I got my info online based on the Northstar being installed transverse in a Cadillac. Please post a diagram on the Northstar cylinders numbered please since I have conflicting info.
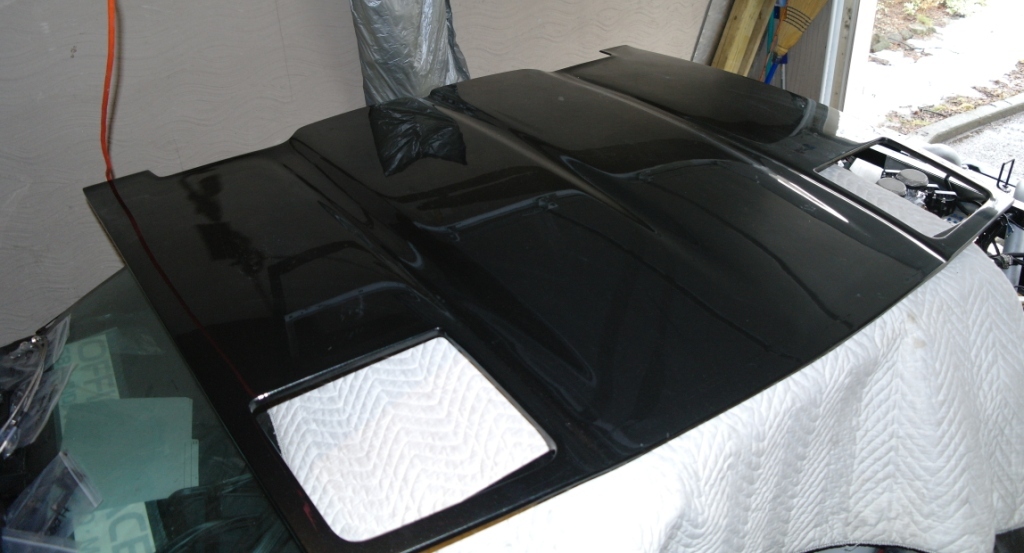
As far as updates, I picked up the rest of the painted panels tonight except the rear clip and roof panel - they'll be done in a couple weeks.
For the flywheel yes the GM manual mentions torque + degree yield but I am not using a stock flywheel or bolts. I feel 60 is comfortably between 45 and 75 ft/lbs and I can confirm using new 12.9 bolts.
Doesn't matter what 60 is comfortably between if it's way too much for the bolts. http://www.cncexpo.com/MetricBoltTorque.aspx I use the factory torque + angle procedure on 12.9 bolts on my flywheel, and can confirm that they are permanently deformed by the procedure.
quote
TDC cylinder #1 is very important for my crank sensor. I got my info online based on the Northstar being installed transverse in a Cadillac. Please post a diagram on the Northstar cylinders numbered please since I have conflicting info.
The Northstar has right bank forward. #1 is the forward cylinder in the right bank. This contrasts with LS1 and SBC engines, which have the left bank forward. If you timed your trigger wheel to the forward cylinder in the left bank, then you timed it to #2 and it's 90 degrees off.
Originally posted by Will: If you timed your trigger wheel to the forward cylinder in the left bank, then you timed it to #2 and it's 90 degrees off.
So Will would I need to rotate the relucter wheel 90 degrees counterclockwise, correct? That should be the easiest method with the motor now in the car.
quote
Originally posted by Will: I use the factory torque + angle procedure on 12.9 bolts on my flywheel, and can confirm that they are permanently deformed by the procedure.
So what are you suggesting Will other than we both have deformed bolts on our flywheels? I need to make a decision if I should be ripping everything apart to replace the bolts with another new set at some lower torque setting. If 30ft lbs (377in lbs) is the bolts limit as per that link you provided, I would expect bolts to be snapping at double that torque or that 30 isn't tight enough for this application.
Yes Bubbajoe, there are Cadillac forums telling people the #1 spark plug is the rear bank near the front of the passenger door - no wonder I'm so confused
So Will would I need to rotate the relucter wheel 90 degrees counterclockwise, correct? That should be the easiest method with the motor now in the car.
So what are you suggesting Will other than we both have deformed bolts on our flywheels? I need to make a decision if I should be ripping everything apart to replace the bolts with another new set at some lower torque setting. If 30ft lbs (377in lbs) is the bolts limit as per that link you provided, I would expect bolts to be snapping at double that torque or that 30 isn't tight enough for this application.
Yes Bubbajoe, there are Cadillac forums telling people the #1 spark plug is the rear bank near the front of the passenger door - no wonder I'm so confused
Not sure what's in the way in your chassis, but the right cam cover's not hard to pull off by itself. It shouldn't be that hard to actually find TDC an retime it. Theoretically, yes, you could just turn it 90 degrees. What ignition controller are you using? Do you want to set the trigger wheel bias by trial and error? When you don't know what other problems you might have in the system that will keep the engine from running right? BTW, you have a '00 or newer engine, right? How will your ignition include the '99 and older coil pack?
As or the flywheel bolts, take the idea of simple torque and throw it away. Use the factory torque + angle procedure, as it's been proven to work. Torque + angle is far more precise way to stretch a bolt than simple torque anyway. Yes, pulling the trans to play with flywheel bolts is a pain. I've had to do it too.
Originally posted by Will: FYI, #1 is in the right bank
The Northstar has right bank forward. #1 is the forward cylinder in the right bank. This contrasts with LS1 and SBC engines, which have the left bank forward. If you timed your trigger wheel to the forward cylinder in the left bank, then you timed it to #2 and it's 90 degrees off. Doesn't matter where it is in the car if the engine's on the stand. Northstars have the right bank forward, as I mentioned above. ...
Guys, you are both right and better yet I timed the correct cylinder as #1TDC.
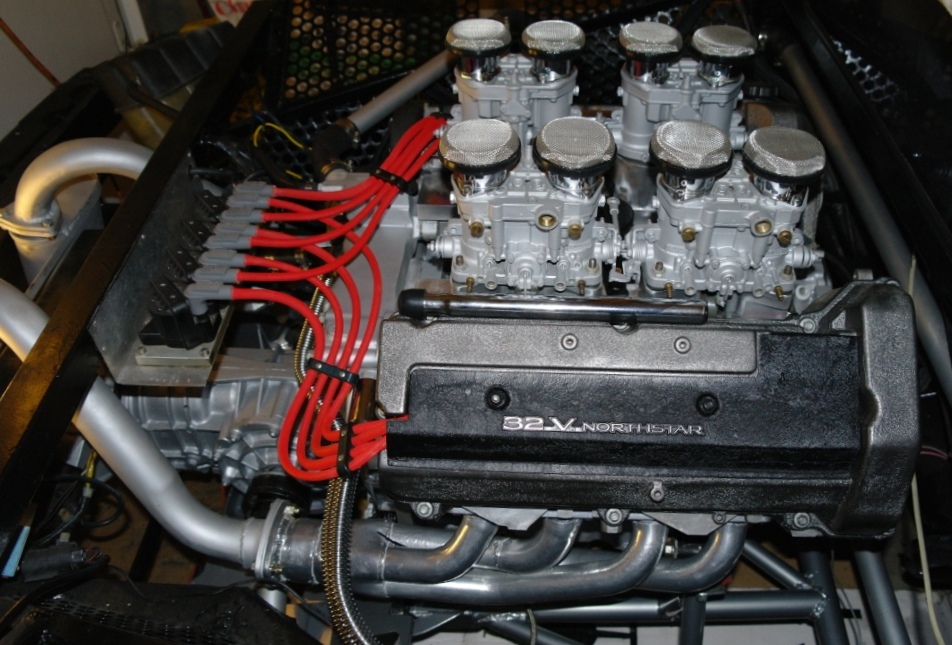
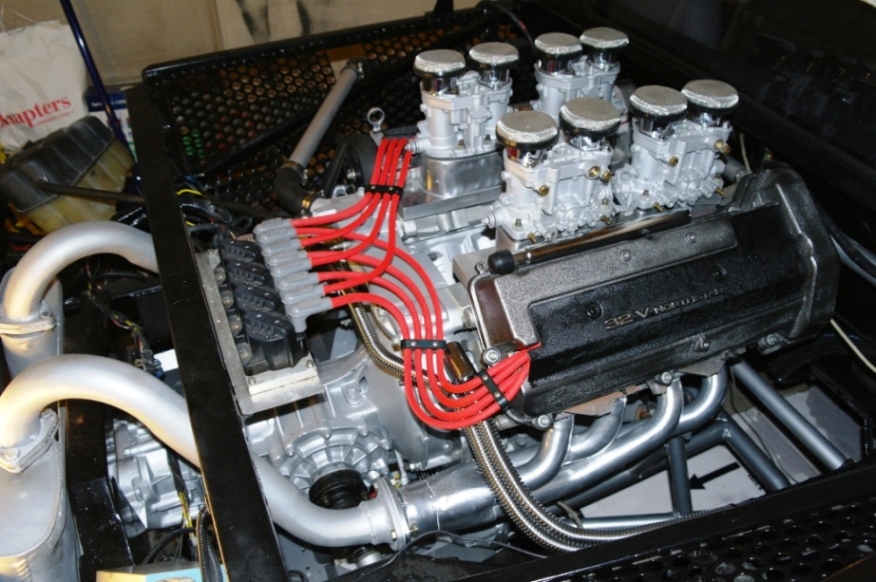
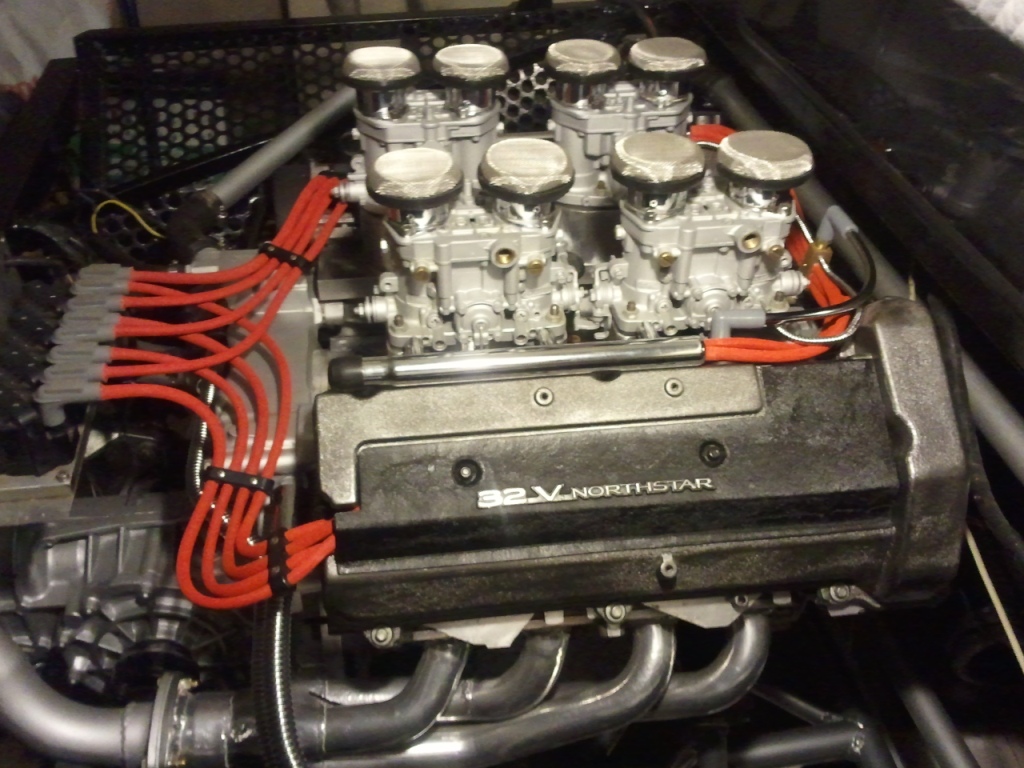
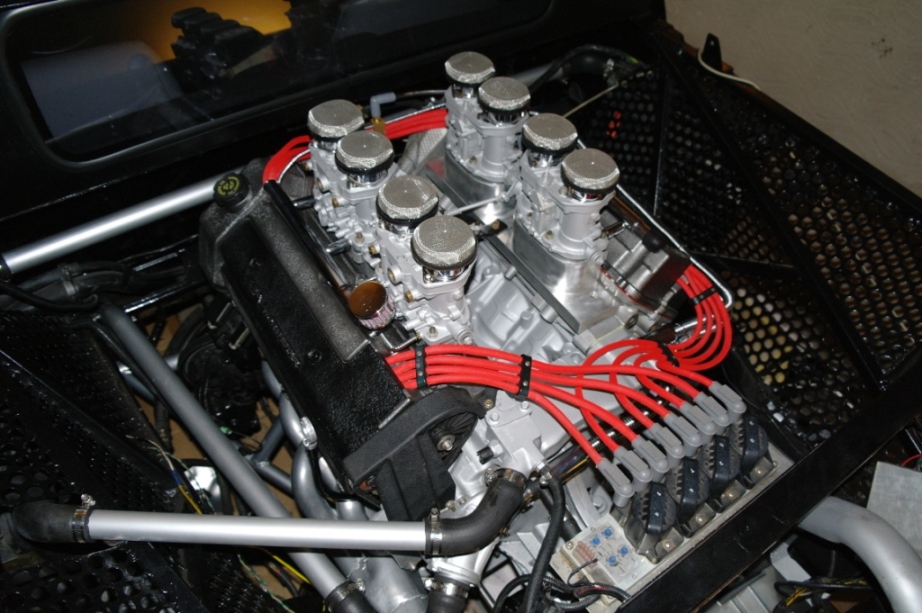
When I re-read the posts and noticed Will didn't post any pics, I checked the GM service manual and of course you're both right. I was thinking how could two guys so familiar with the Northstar give different answers on something as basic as cylinder numbering... I started the whole thing by saying "Left side" because I was referring to the picture in the previous post. Bubbajoe also said "Left side when viewing from the front". Will referred to "Right Bank is number 1" which is also correct. GM describes left and right while sitting in the driver's seat so in a longitudinal setup the left bank is the drivers side and right the passenger side. Since it becomes slightly confusing when the engine is transverse, I looked up the cam covers (valve covers). GM calls the one with the oil filler cap and water pump drive hole the left bank and the other is right bank (has PVC hole). When you view the picture above taken aerial from behind the engine the right side is the right bank. If I face the motor's front it would be my left (same cylinder as "right bank"). You also notice that this is the closest cylinder to the harmonic balancer so it is #1 when you use the method of pushing V into inline arrangement for numbering cylinders. I posted this to benefit a future forum member new to Northstar's looking for resolution on this dicussion.
I used grade 12.9 at 60lb/ft and concede I exceeded the recommended torque above. Bubbajoe said he measured the torque after 11+50 degrees and he got reading of 45lb/ft. However I am planning a future upgrade project to go from 215mm to a 225mm clutch, pressure plate and flywheel. For this reason, I have made the executive decision to leave the current setup as is.
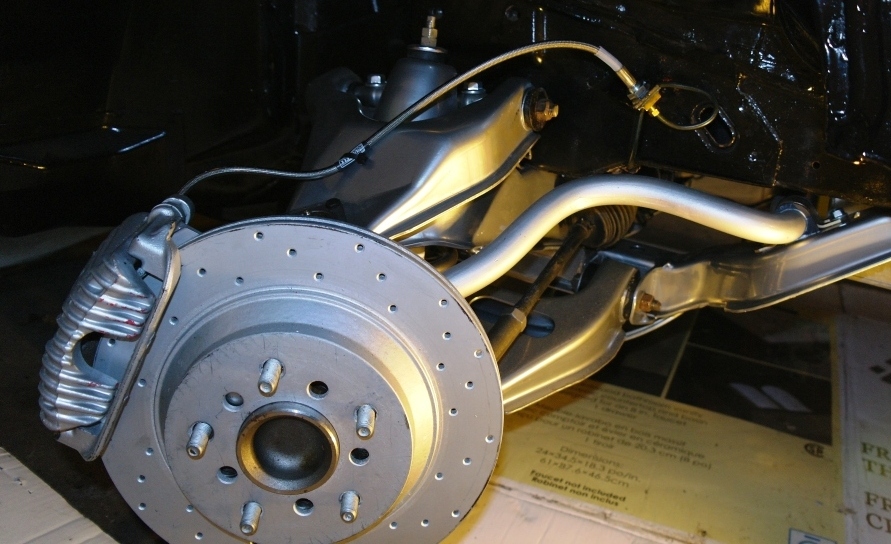
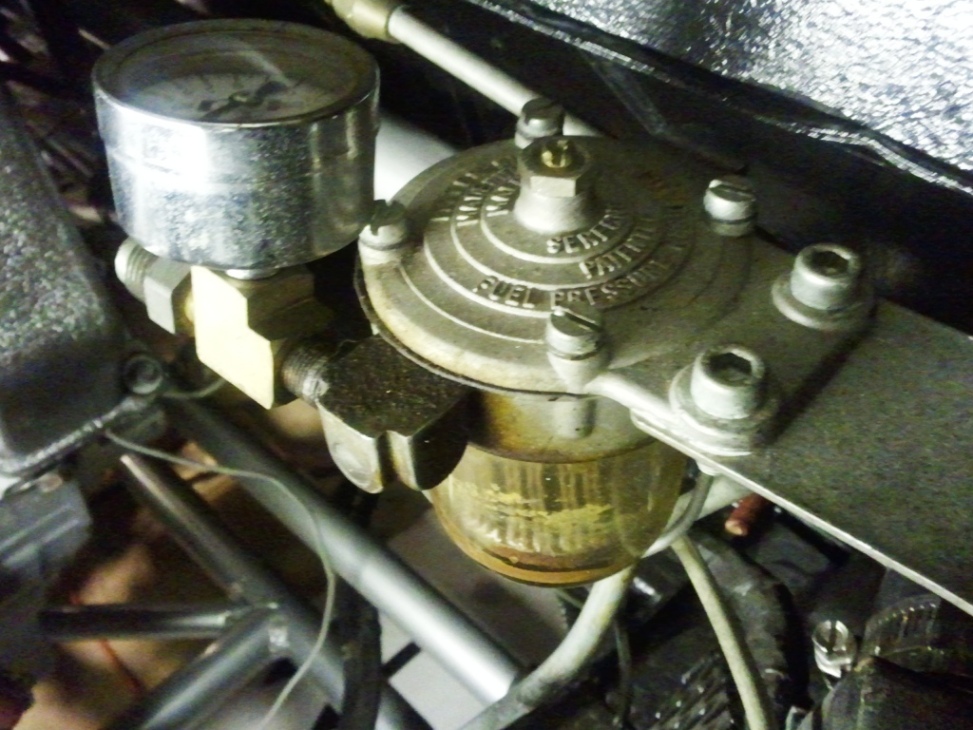
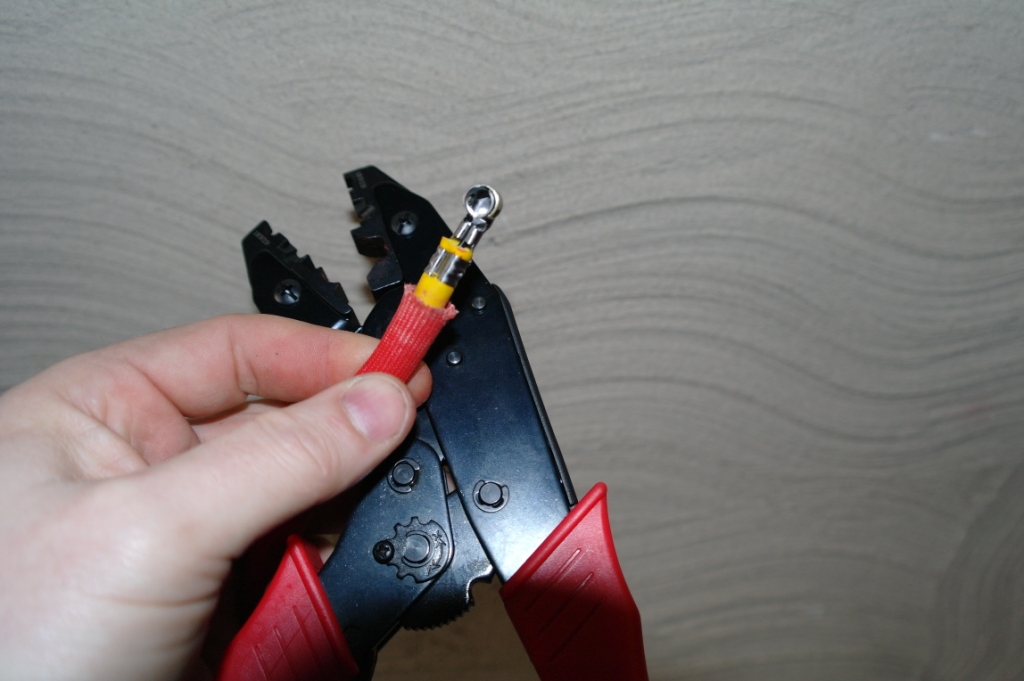
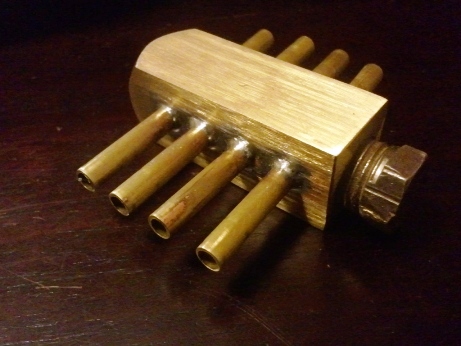
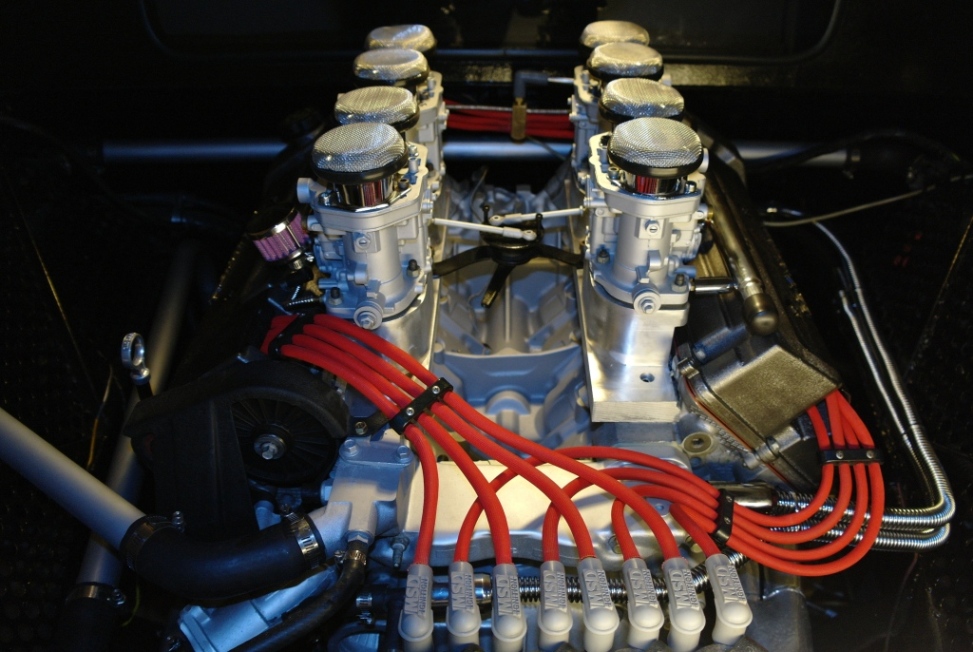
Today I came home to these in the mailbox:
Tomorrow I'll be installing them and working on plumbing all new hard and flex brake lines...TTYL.
Originally posted by Fiero2m8: I used grade 12.9 at 60lb/ft and concede I exceeded the recommended torque above. Bubbajoe said he measured the torque after 11+50 degrees and he got reading of 45lb/ft.
And the Cylinder #1 thing isn't that complicated... The car doesn't care where #1 is... only the engine cares about that. The engine (ie, on a stand) has a pretty obvious front and back, which gives it a pretty obvious left and right... Trying to locate an engine feature in "car coordinates" doesn't work well when the coordinate frames don't line up.
[This message has been edited by Will (edited 03-04-2011).]
been there had a flywheel and clutch come off a boss 302 ford in a pinto the flywheel and clutch came though the floor and dash and stoped as it cut through the winshield very scarry at 3000 rpm lucky i did not loose my feet
I agree with you Will and I read the RFT thread where you got your information.
I'm just saying that with the 12.9 bolts, red loctite and lockwashers I used, I expect my flywheel to stay on despite that it is on tighter than GM recommended. They didn't recommend a Porsche 914 transaxle either but I drove it for two years to prove the engineering works. I'm also glad the flywheel is well behind me after hearing Bubbajoe's experience.
Will, I read your whole build thread, nice project you have there. We share a passion for the Fiero. Our approach to building a project car varies probably due to different backgrounds, but thats what makes us uniquely human.
I'm just saying that with the 12.9 bolts, red loctite and lockwashers I used, I expect my flywheel to stay on despite that it is on tighter than GM recommended.
Well... it's your engine and flywheel... My opinion is that Steven's flywheel bolts backed out because they relaxed first and lost tension, due to dramatic overtorque. Bolts are one of those things which you just can't examine in situ to see how healthy they are.
quote
Will, I read your whole build thread, nice project you have there.
Thanks.
[This message has been edited by Will (edited 03-05-2011).]
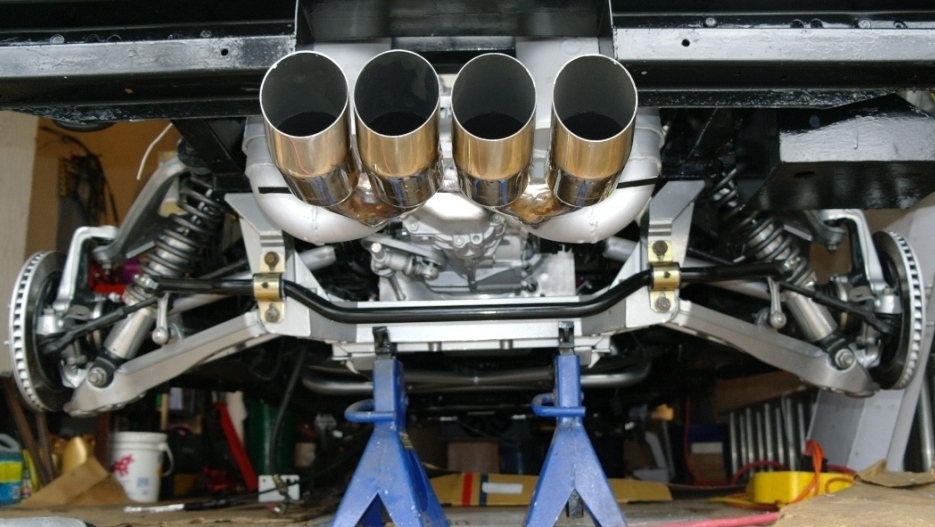
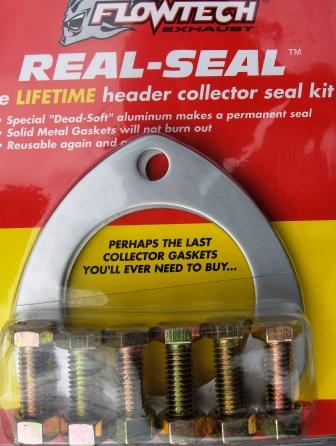
Exhaust is complete after installing stainless hardware and these collector gaskets I've always had good experience with dead soft aluminum collector gaskets.
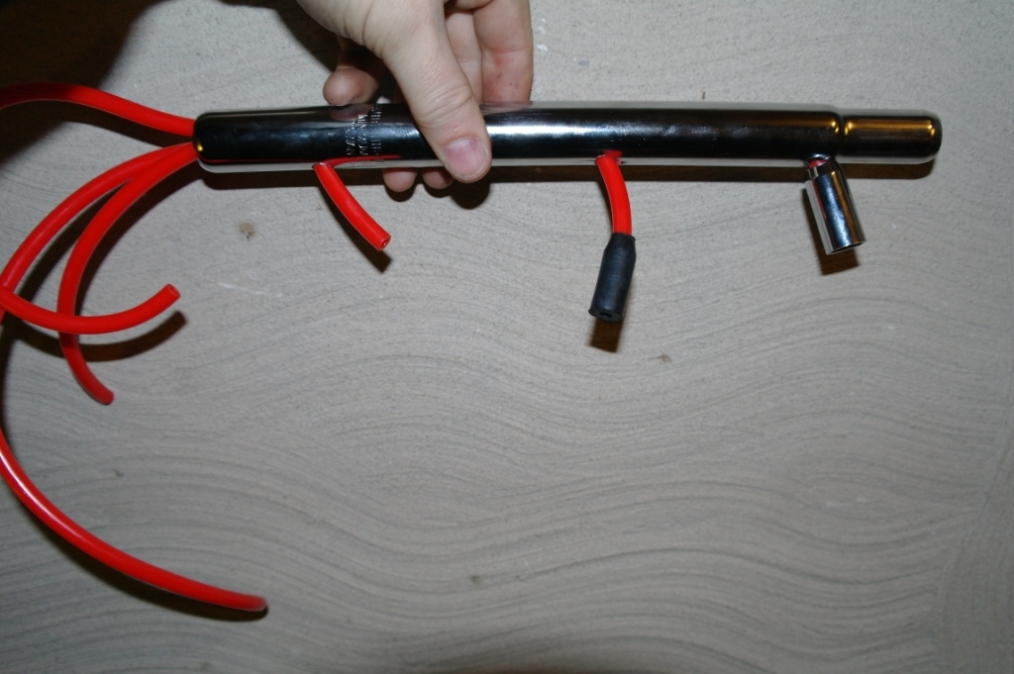
Also ordered a set of 4 MSD ignition coils like these
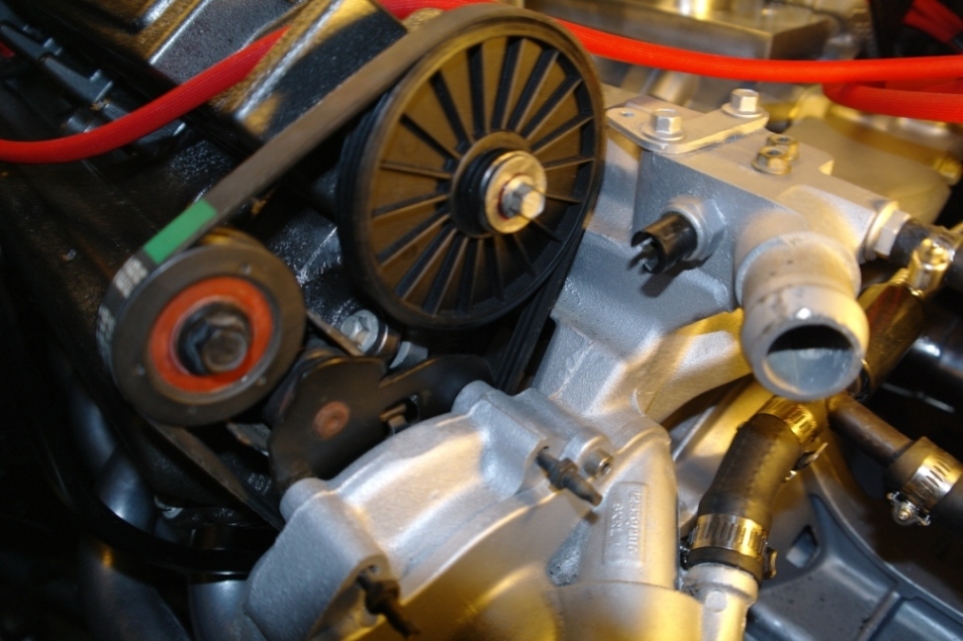
Next I'm working on the engine coolant plumbing. Bubbajoe, please chime in with the correct fill procedure on this - should be simplier than a stock Fiero. Also I was wondering if I need a special tool to install the water pump drive pulley...
Exhaust is complete after installing stainless hardware and these collector gaskets I've always had good experience with dead soft aluminum collector gaskets.
Also ordered a set of 4 MSD ignition coils like these
Next I'm working on the engine coolant plumbing. Bubbajoe, please chime in with the correct fill procedure on this - should be simplier than a stock Fiero. Also I was wondering if I need a special tool to install the water pump drive pulley...
to fill the system is so simple it hurts put every thing back togetter as it was before take the cap off the recovery tank and fill no burping needed just fill till full start the car run till warm and top off the tank
[This message has been edited by bubbajoexxx (edited 03-08-2011).]
to fill the system is so simple it hurts put every thing back togetter as it was before take the cap off the recovery tank and fill no burping needed just fill till full start the car run till warm and top off the tank
Hey guys, I wanted to post some pics for you, but I have a MAC and the download for PIP is ony for PC ...... SOOOOOoooooooo........ I made a construction vid on youtube for you all to see. Sorry its my first time making a slideshow. next time I will include sound from a song or something. please post comments either here or on youtube.... I would love to hear what you think .... If you read the video description, you will see a little history of my fiero idea.
Cool, but umm... it doesn't really have much to do with this thread.
If you start a new topic in the general area, then you'll get more posts of what you're looking for. If you keep updating that thread, it will get moved to the construction zone. Hope it helps
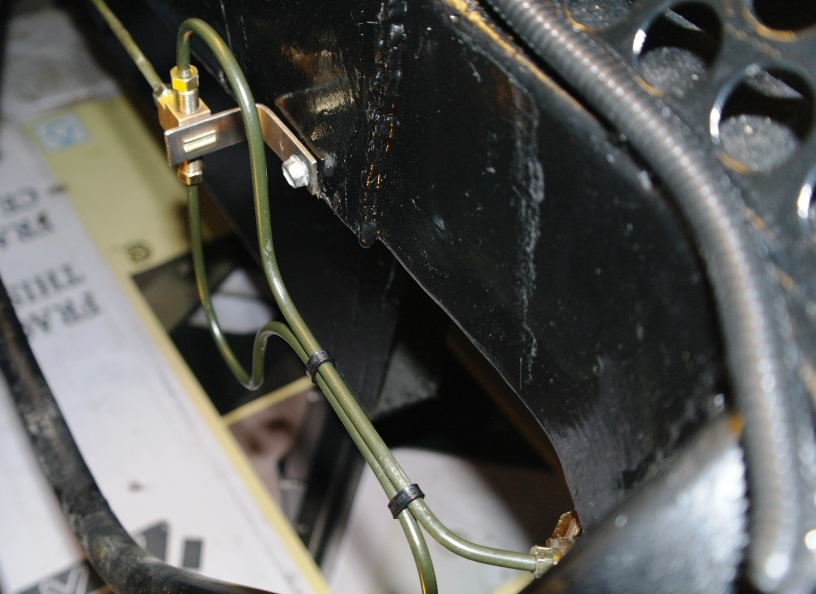
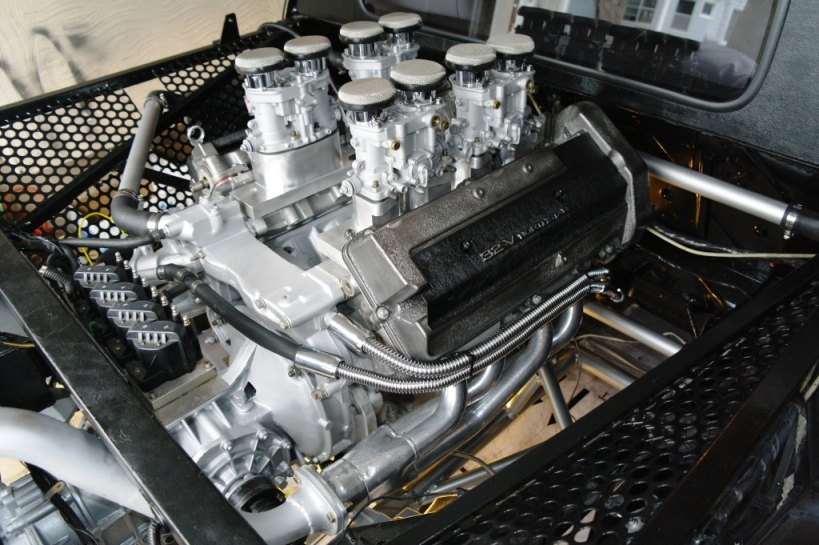
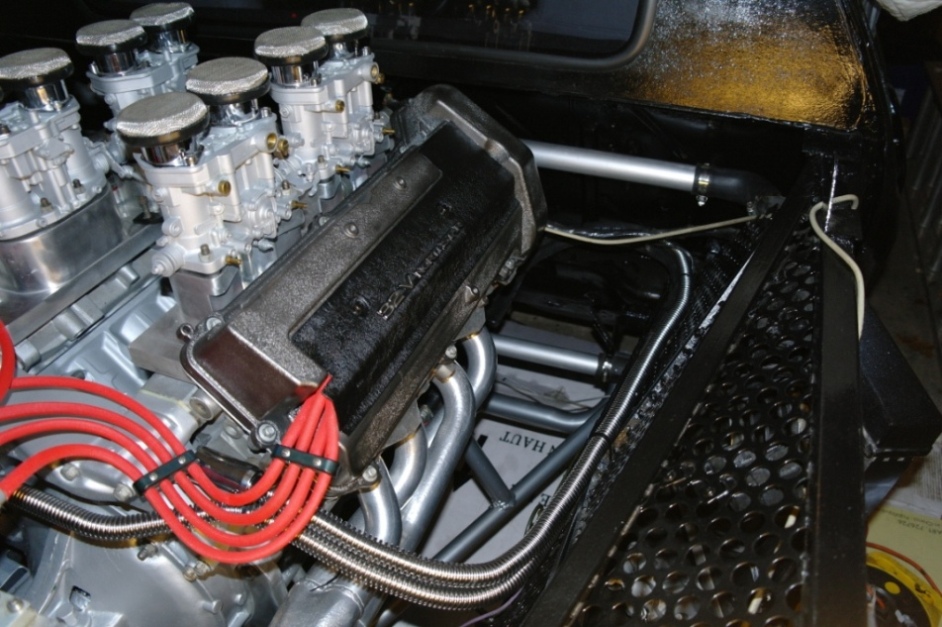
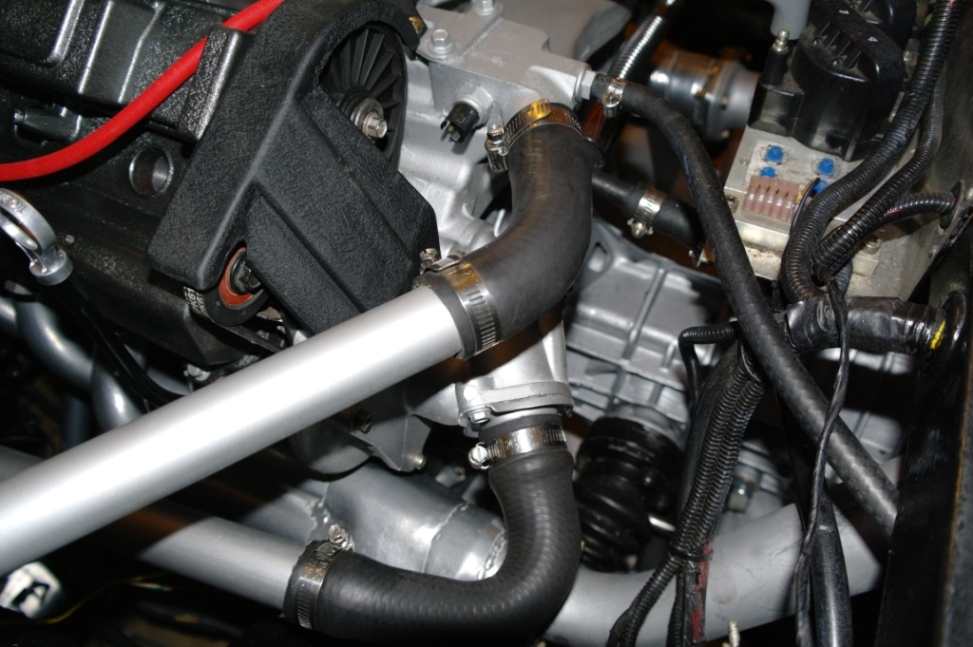
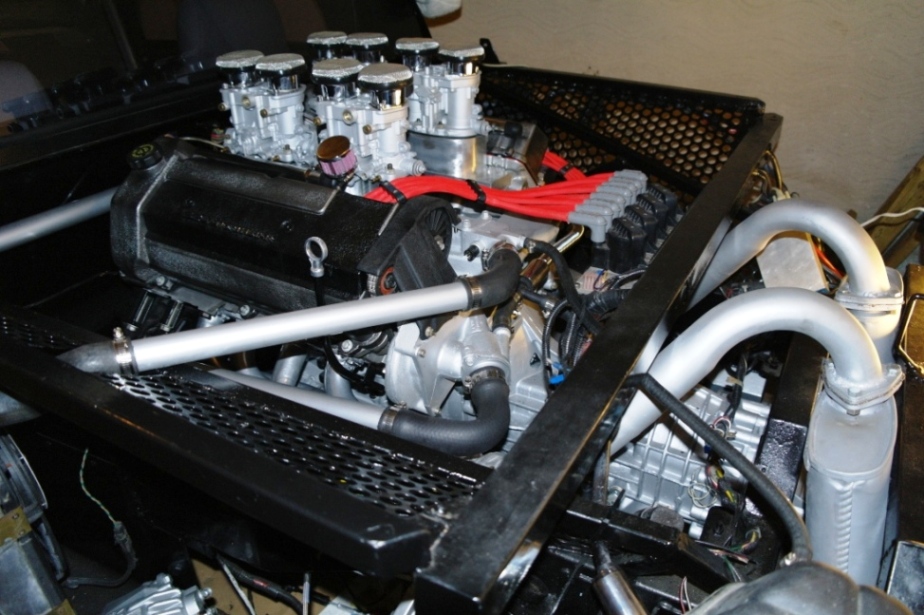
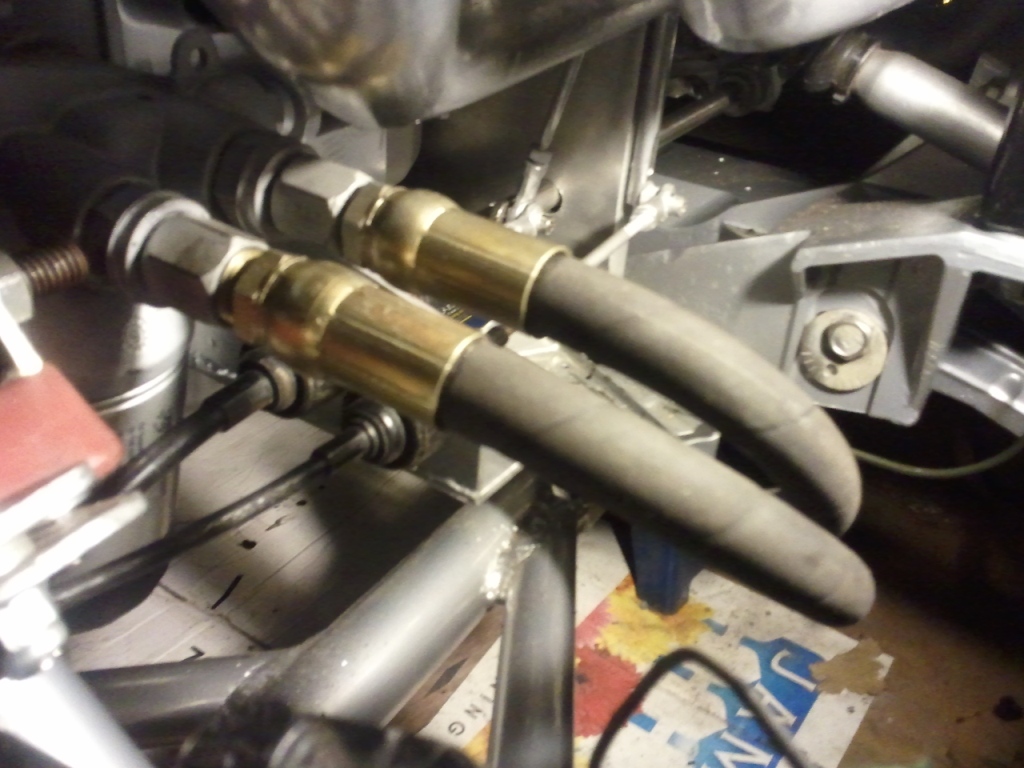
get those hoses away from the headers or you will boil the waterout and cause an air lock the headers produce too much heat for the hoses to be that close
get those hoses away from the headers or you will boil the waterout and cause an air lock the headers produce too much heat for the hoses to be that close
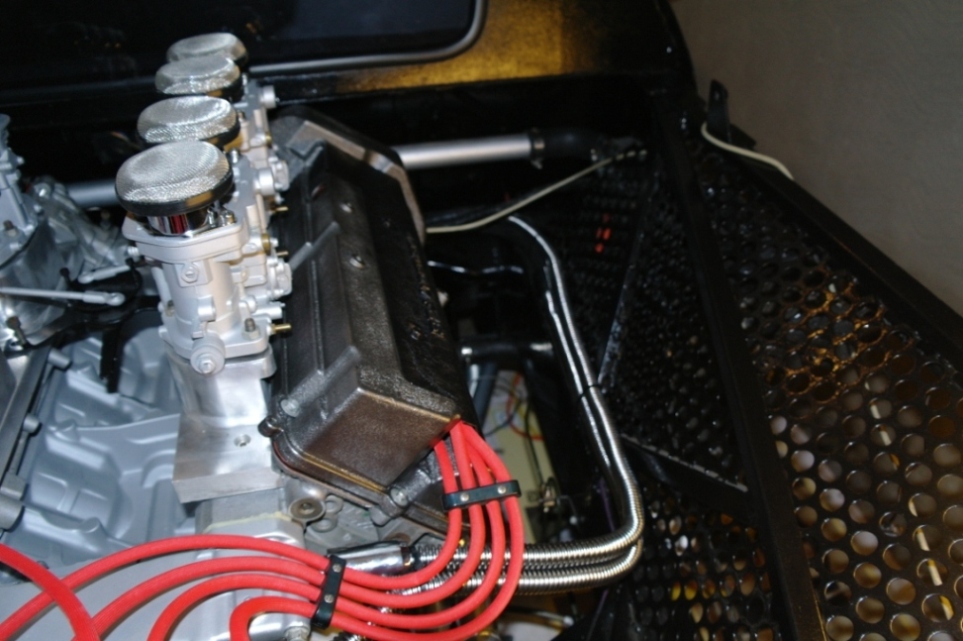
10-4 Joe, will post the reroute this week. Fiero2m8
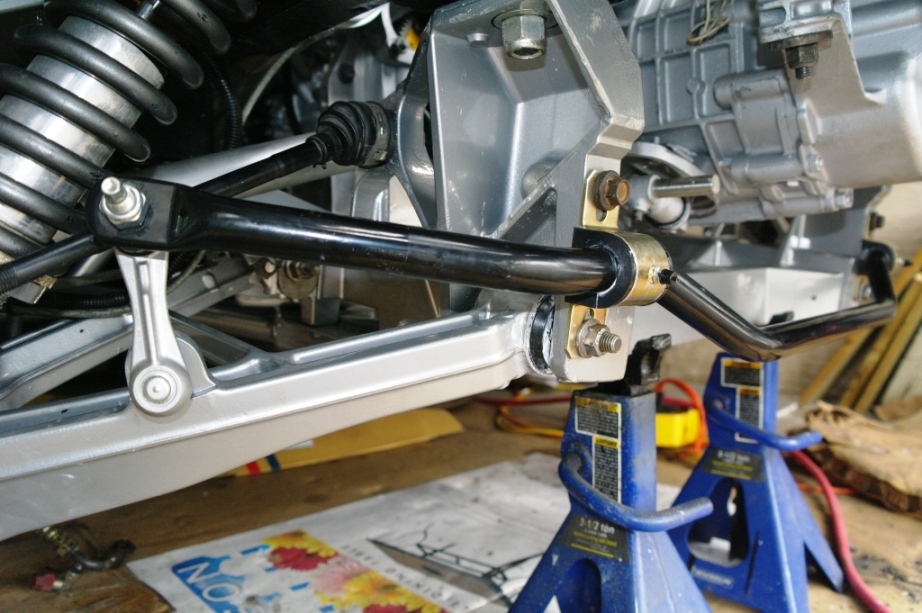
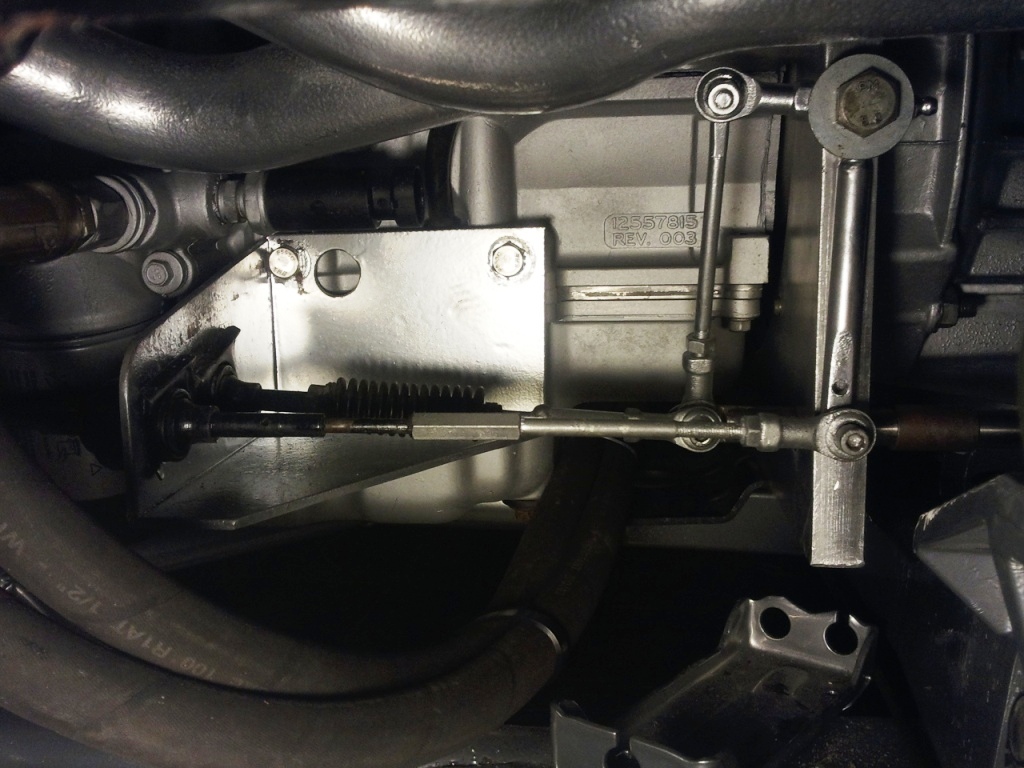
nice jod on the rerout and wires and vac lines keep it up you make me proud
by the way put the bushing back in the adapter plate I see it is pushed out
Thanks Joe, your approval is valued. Yes I noticed the sleeve when I posted the picture. The shifter movement is stiff at the moment so I will need to check that out later too.