Why remove the whole drive-train if the supercharger is a "bolt-on" unit? Is this because of the belt problem?
Well there are several reasons we pulled the engine out as part of this installation.
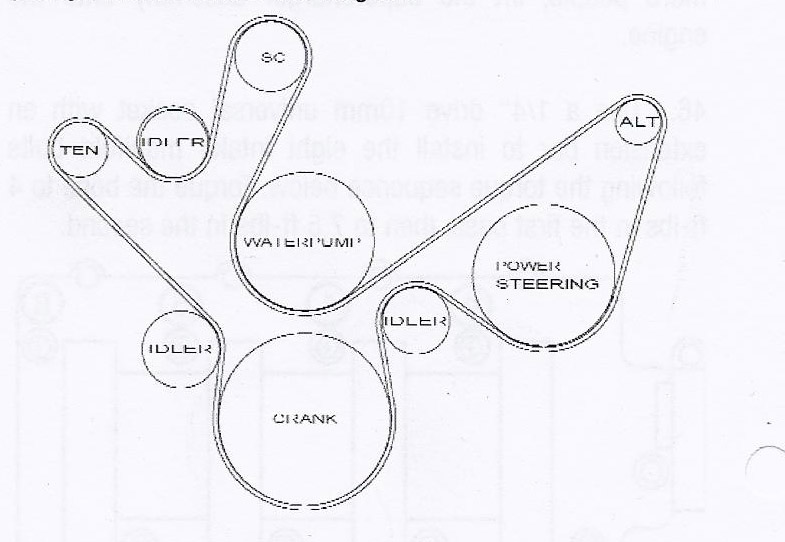
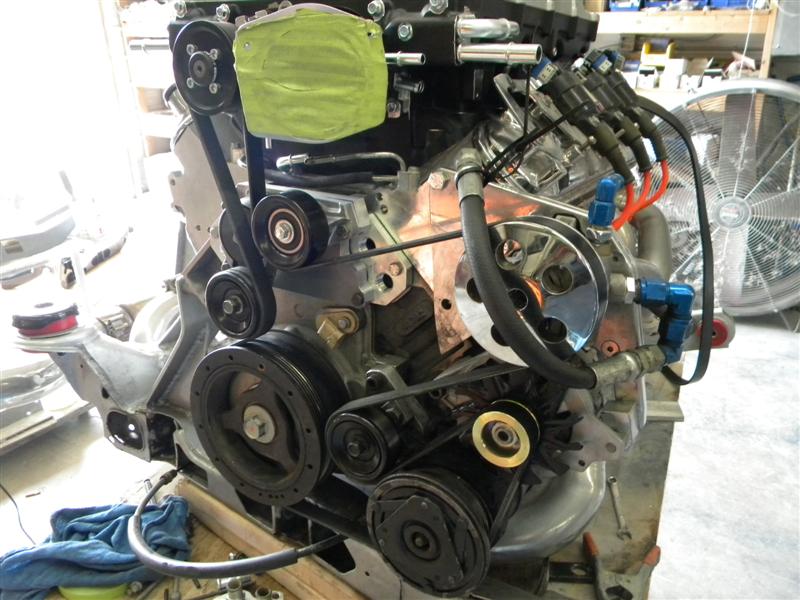
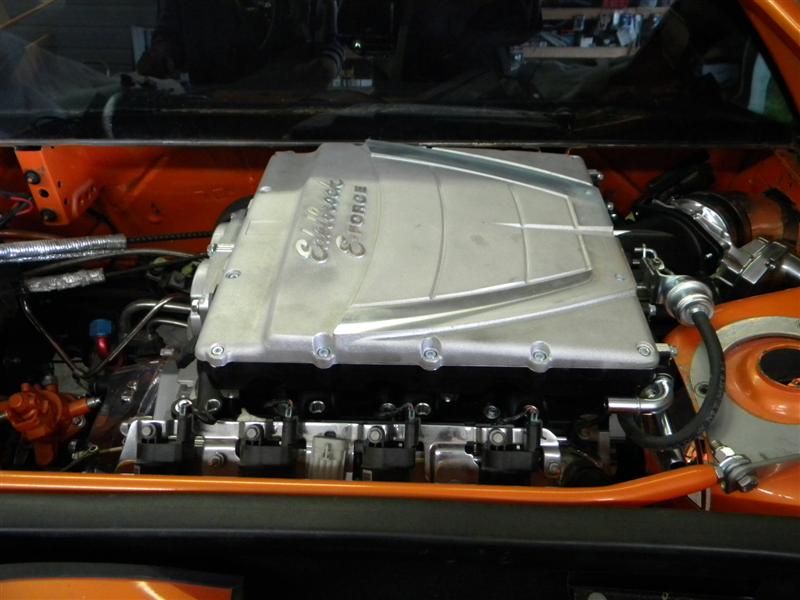
The first reason is that the E-Force kit is a "bolt-on" if you're putting it in a Camaro or Corvette. Sure the Blower bolts to the engine but, It's not a bolt on in a Fiero until someone develops the parts & methods to make it such. One of the reasons is that we have to make the belt drive fit.
If installing the SC into a Camaro or Corvette Edelbrock supplies all the mounts & brackets to make it a bolt in. However the Belt routing on the C. or C. kits won't work on the Fiero. When looking at the front of the engine, this is the typical belt routing that the kits would have...
On the LS installation into the Fiero all of the pullies & idlers you see to the left of the Harmonic Balancer Pulley can't be used because the Fiero shock tower is in the way.
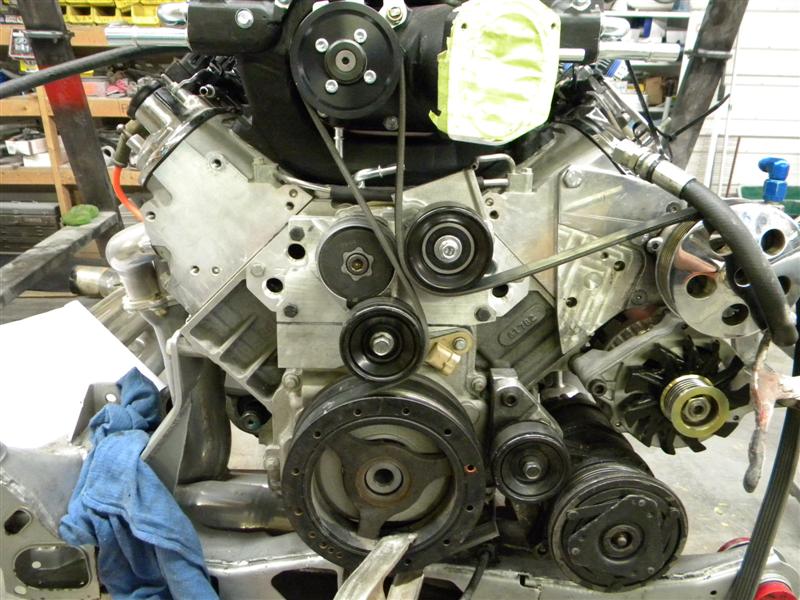
We knew this going into this project. In the original installation of the LS7 into Troy's car we also had to keep everything to the front side of the engine. In this picture the Blue vertical line represents the forward side of the Fiero shock tower...
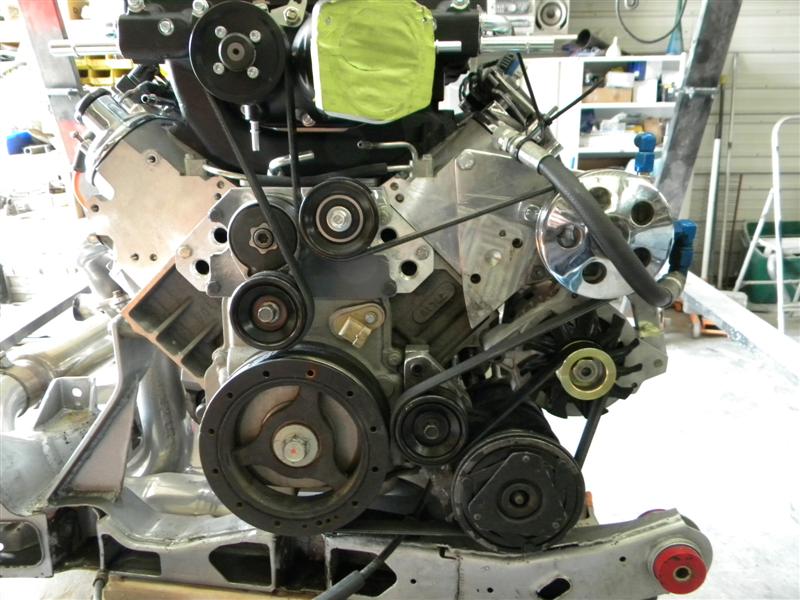
While it's not completed yet this is a mock-up of what we have on belt routing so far. (PLEASE NOTE, we don't need to be told that it's not complete yet or that it's not all shined up & pretty yet. That's why it has been pointed out that it's an in process picture......."It's a mock-up".......)
There are several other reasons we took the engine out of the car for this installation.
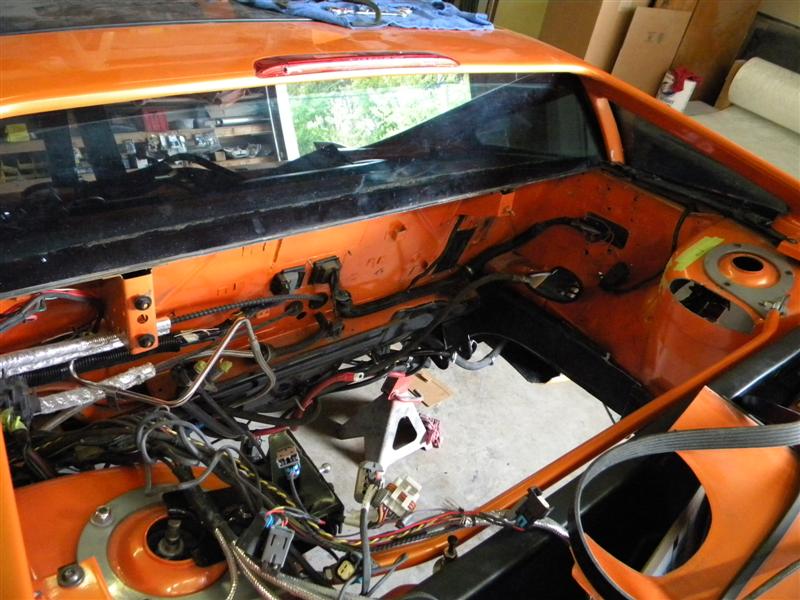
On the original installation the intake manifold was turned around putting the Throttle Bbody & the C.I.A. on the drivers' side of the engine. With this SC, we have to relocate the C.A.I. To the right side of the engine compartment. Plus the original installation had hoses, electric W/P, P.S. fluid tank & wiring on the right side of the engine compartment. A lot of this stuff has to be re-routed or moved to make room for the C.A.I. & the new belt routing.
Additionally, we have to make 2 small notches in the shock tower to clear parts of the blower. It's easier to make these mods & box them in & repaint the area with the engine out of the car.
Hope that helps
Archie
[This message has been edited by Archie (edited 05-05-2012).]
Testing for fit everywhere & working on setting up the Throttle Body & CAI.
Then figureing where things are going to be routed & how it all going to go together.
Found a place to remount the Electric W/P & Thermostat housing block & working on calculating the routing of hoses.
We will continue on this trial fitting tomorrow.
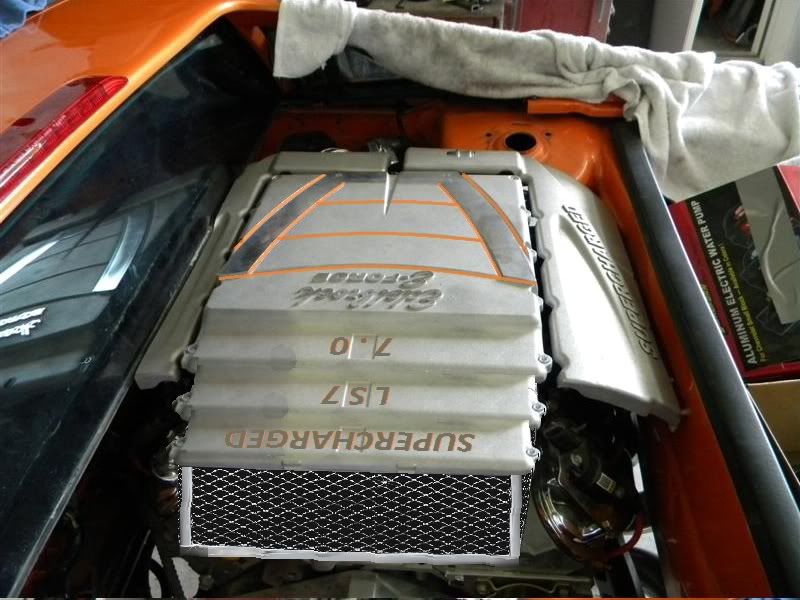
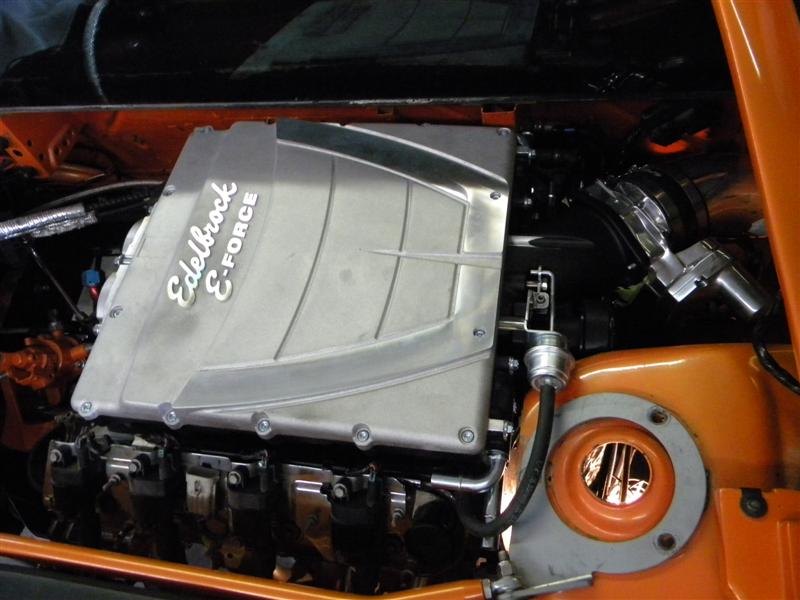
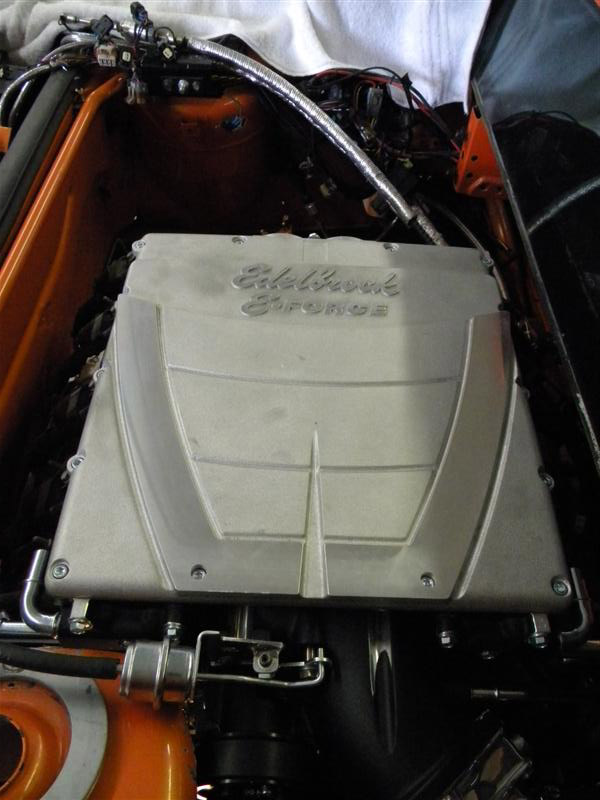
Notice that the top of the SC is only about 2" from the rear window. We have determined that, on final assembly, we can't install the engine into the car with the SC on the enigne, it has to be put on the engine with the engine in the car. You have to bolt the blower down & then install the injectors & fuel rails in that order. With 2" to work with, that was going to be difficult.
We've determined that on installation after we set the blower onto the engine & start a bolt or 2, we will lower the back end of the engine cradle keeping the front bolts in the cradle. That will piviot the engine away from thew rear window a couple of inches & allow us more room to put everything together.
That supercharger is crazy and fantastic. But I have to say that flat top looks so boring. Maybe paint it body color and air brush a bikini babe or something
That supercharger is crazy and fantastic. But I have to say that flat top looks so boring. Maybe paint it body color and air brush a bikini babe or something
It's getting better looking as we go.......
We're already set to have the bikini babe taken care of.
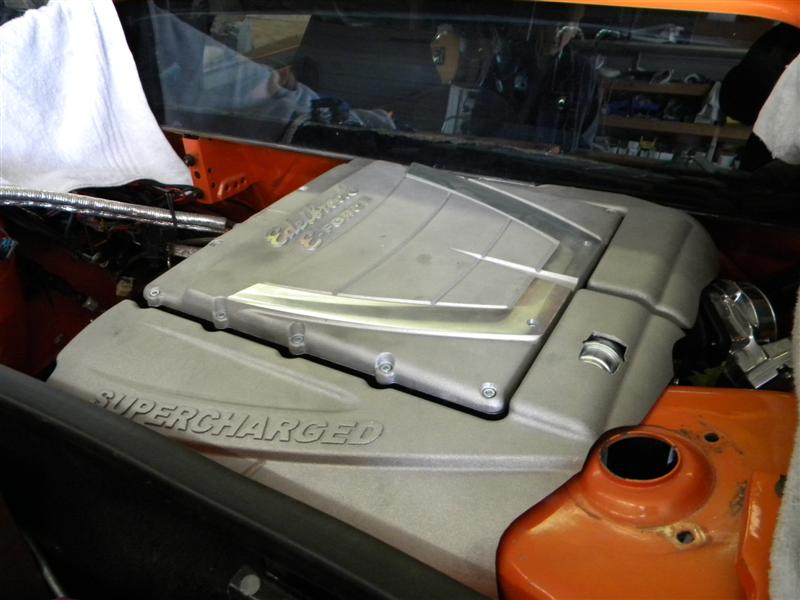
While we think the back end of the SC looks cool, we're open to any suggestions you might have.
Chrome the top and side skirts, paint the now polished "V" orange and the lettering black. Chrome the back of the SC.
you are so close, as soon as we finish the cuts the covers are set to go out to the chrome shop with other parts. I'm still up in the air about the paint on top of the chrome, may just pinstripe the outlines.
[This message has been edited by troyboy (edited 05-10-2012).]
The last 2 days were spent taking care ofthe little things.
Asside from fitting the coil covers we needed to figure out how things we needing to be mounted & routed.
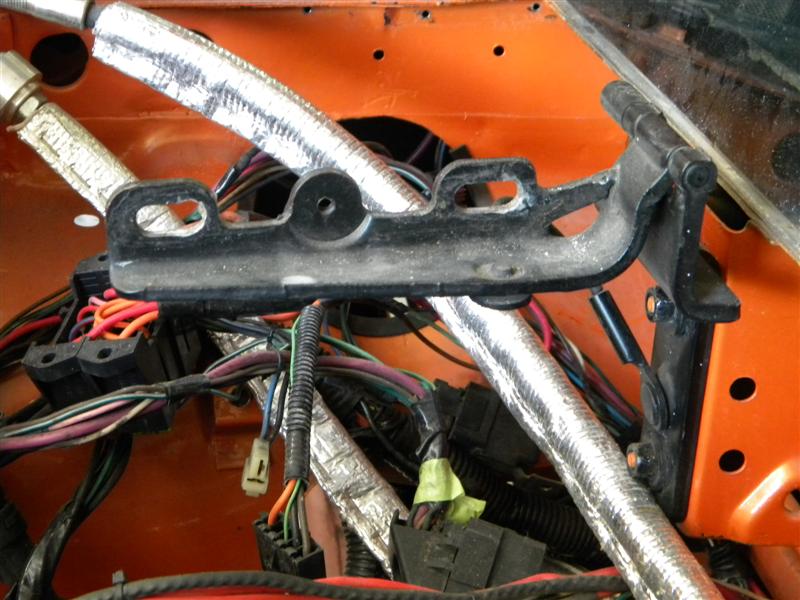
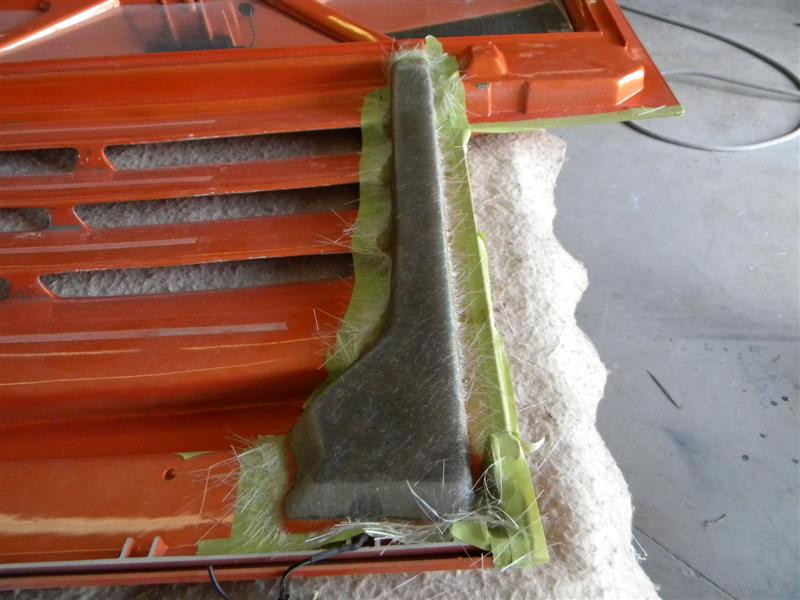
Before the SC installation both decklid hinges were basically stock. On the right side the SC was going to interfere with the hinge. We had anticipated this before the SC arrived from Edelbrock. The good thing is that our measurements from before the SC arrived indicated that the SC didn't interfere with the pivot pin location on the right side. The whole hinge needed to be modified but we knew it would work because we didn't need to relocate the hinge pins.
To have 2 hinges that are on the same axis you have to have the hinges pins in the same relative position.
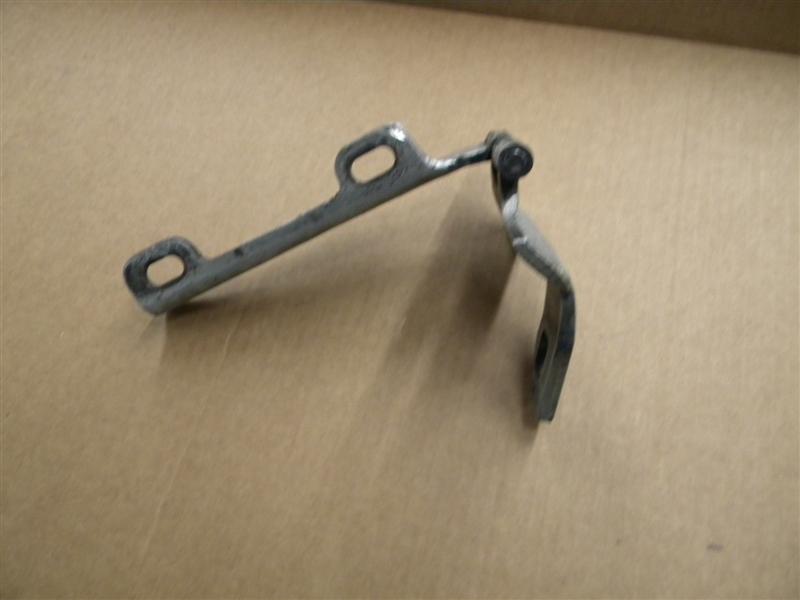
Everyone knows what a stock hinge looks like..... in case you don't this is one.....
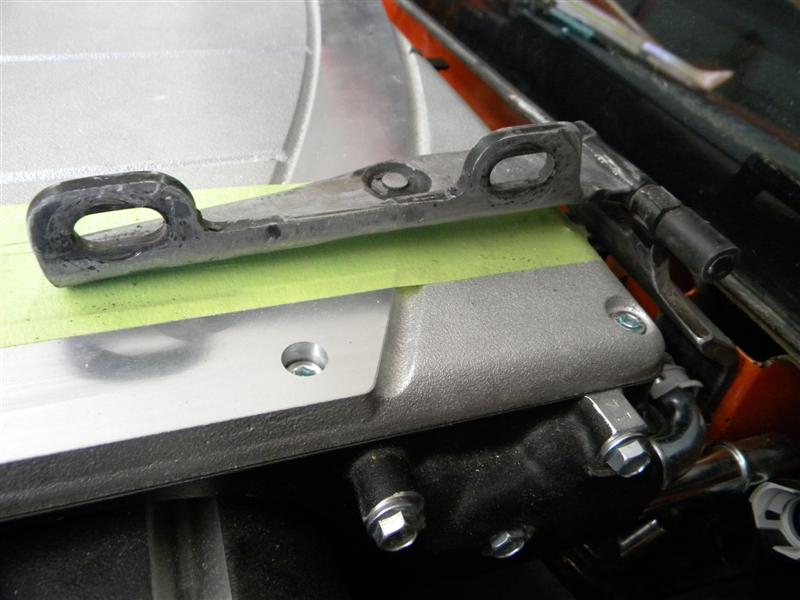
Our right side hinge, had to have the top half modified & to clear one of the intercooler line fittings the bottom half had to be modified too. When finished it looks like this ...
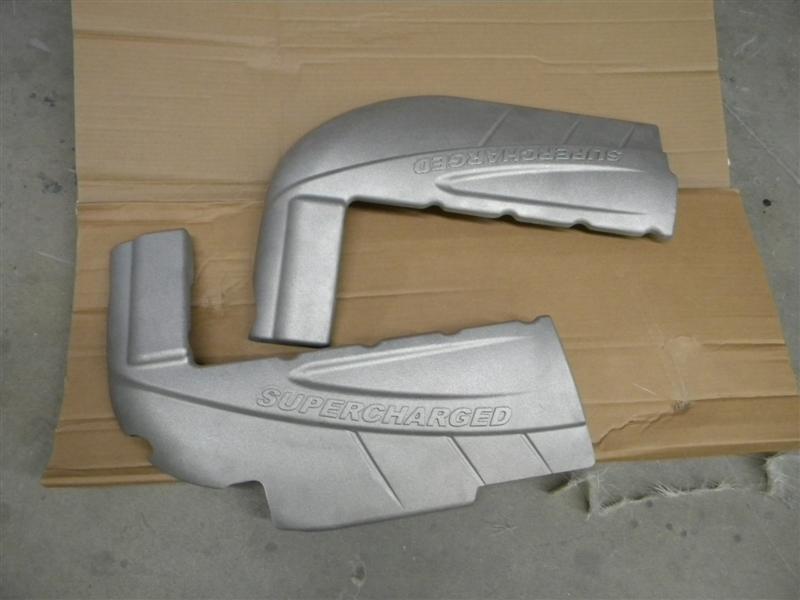
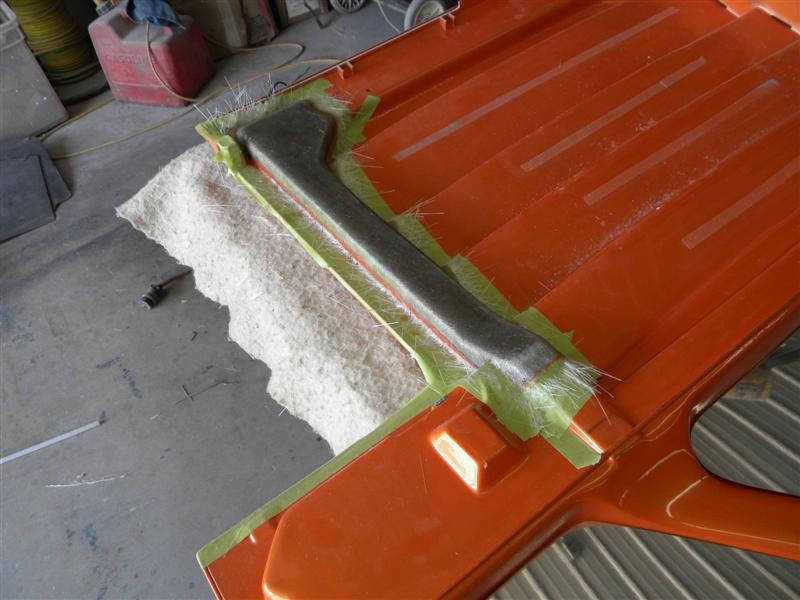
Wednesday, you could see that we had been modifying the Coil covers.
Before Wednesday's mods they looked like this ...
At the EOD Wednesday they looked like this....
I showed you pics of the covers on the engine on Wednesday, However, that wasn't going to be good enough. Even though there wasn't much left of the front cover, we still needed to be able to open the decklid & to make some clearance in the cover for the modified hinge.....
When that was done the covers looked like this .......
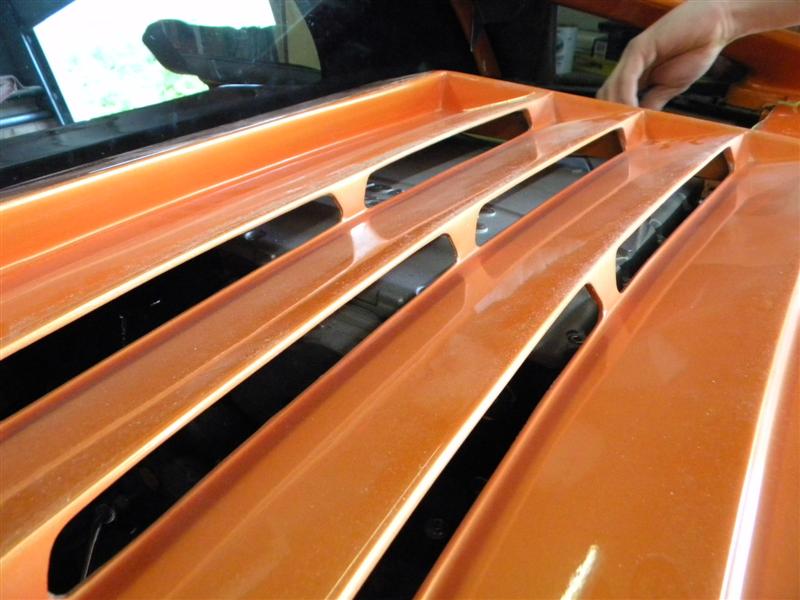
On the engine with the decklid in place.....
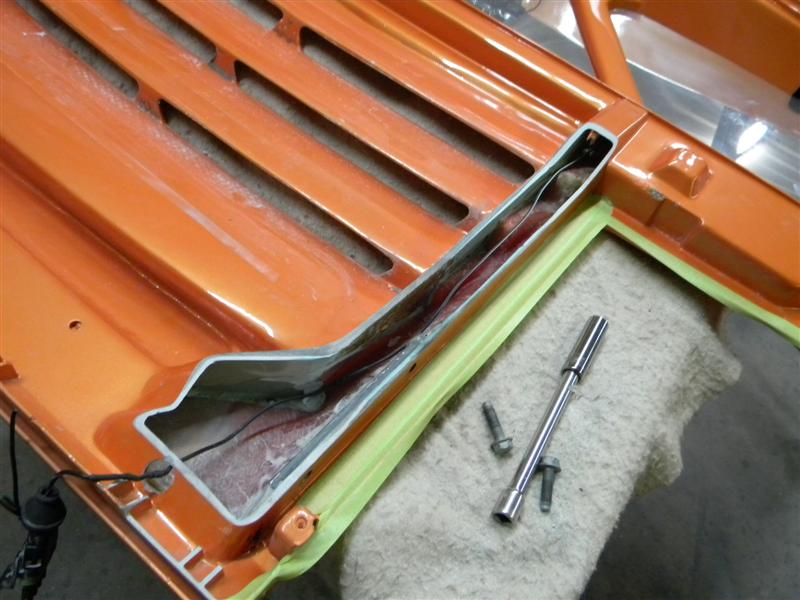
To clear the SC we also had to modify the right rib on the underside of the decklid...
By the end of the day, we pulled the engine back out of the car so we can get some welding & cleaning up in the engine compartment
But, first you can see the engine thru the louvers in the decklid... & I had to get a few pics of it....
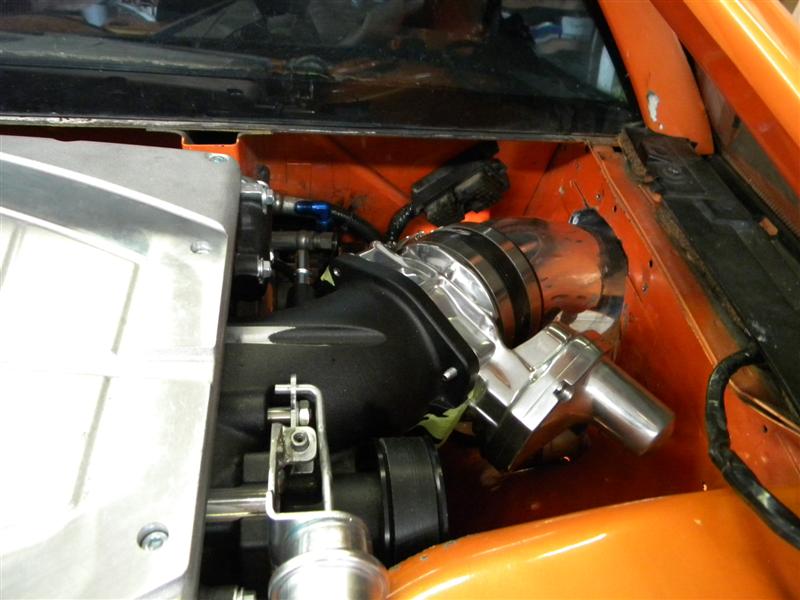
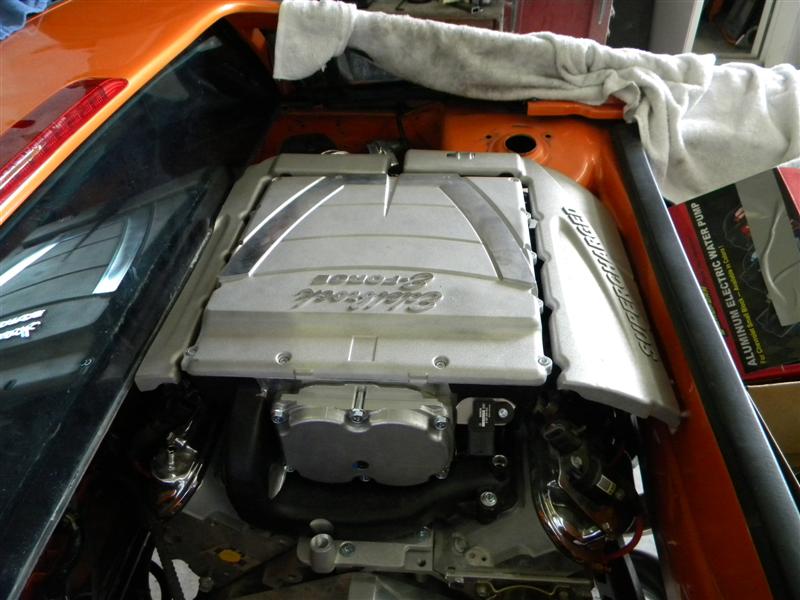
One thing when you're doing something that hasn't been done before, you have to put together a plan on putting it all together. When taking this engine in & out of the car you have to have the SC removed. Among other things keeping us from leaving it on during R&R is that trhe SC has an intercooler connection that just to the right of the right decklid hinge block & it can't be moved. Also the SC drive is into a notch in the right shock tower by about 3/8". So when removing the SC you need to lift on the rear of the SC to get the pulley up out of the notch it's in & then lift the SC to clear out the intercooler connection.
The one thing that makes this SC low enough that we can get it under the decklid of a Fiero is that instead of having the intercooler under the rotors, you have 2 smaller intercooler mounted above & outboard of the rotors. That makes the top of the SC wider instead of taller.
The problem with that is that the fasteners that bolt the SC to the engine are up under the intercoolers.......
You also have to install these bolts before you install the injectors & fuel rails.
That's all fine & dandy if your installing the SC in a Camaro or 'Vette. On those cars at least you can reach in from either side of the car to do this. On our Fiero with the front side of the Sc top only 2" from the back window, you're going to have a problem.
We planned around this problem by planning to use a floor jack up under the rear of the cradle (with the car on jackstands) & removing the 2 vertical cradle bolts & lowering the back of the cradle a couple of inches to give us more room to do all the assembly on both side of the SC at the same time. We will also be removing both sets of coils to try to get to the fasteners without an universal joint.
That's all for today....... you can have the rest of the day off.
Archie
[This message has been edited by Archie (edited 05-11-2012).]
What did you use on the back of the trunk lid when fiberglassing that "rib" ? I mean so that the fiberglass wont "sink" into the grove. Do you use foam or something similar ?
Also, if possible (pretty please ) Could you please tell me What is the distance between the floor and the bottom of the back of the engine cradle on Troy's car ? With the drivetrain in the car and the car on the ground. I know it might sound crazy but I just want to have a reference point for my little project. Thank you very much in advace
Great write-up Archie, you guys are doing a great job as always. Just one more thing.... I know we have to repaint the decklid so..... One more mod PLEASE........... I promise it will be the last one. . .(for today that is )
More air flow can't hurt.
The cover for the left side that we are making is going to look great under there. I suck at photoshop so this is the best I could do. If someone wants to take a crack at it ( the cover and the trunk cut-out ) we would greatly appreciate it.
Here's a suggestion. Why not purchase another set of theses.
then flip the the extra set around-then tweak, so that it balances out the engine install put also covers part of the tranny? Cut were the "L" corners are and cut off right before the super charged engraving starts. This will then match the other side near the strut tower. If possible you might be able to join the parts together like the other side so that you end up with 2-large pieces.
You could then add a shaped aluminum plate nearer to the tranny to cover wires and what nots.
[This message has been edited by madcurl (edited 05-12-2012).]
Sounds like a good idea, but I want some of the LS7 to show and the wires will be tucked and not seen . What you will see is the chrome tranny, chrome dry sump oil tank, chrome oil over flow tank....... I want you to see all the separate components that make the odd ball setup work. I don't want my engine compartment to look like one big cover, I want people that know motor setups to be able to appreciate the complexity of what they are looking at. Hell people may think Im using just a cover over a 2.8 , that's why I want them to see those sweet LS7 heads and block with a coilpack or two showing (that's why I had the billet coilpack covers made and chromed.)
but thanks for the input Curly, it is greatly appreciated and wanted. Now if only a few photoshop gurus would step in and clean up my idea for the mini-cover .
What did you use on the back of the trunk lid when fiberglassing that "rib" ? I mean so that the fiberglass wont "sink" into the grove. Do you use foam or something similar ?
Also, if possible (pretty please ) Could you please tell me What is the distance between the floor and the bottom of the back of the engine cradle on Troy's car ? With the drivetrain in the car and the car on the ground. I know it might sound crazy but I just want to have a reference point for my little project. Thank you very much in advace
We hot glued a flat pc. of think fiberglass sheet in there. Then fiberglassed over it several times.
With all the other stuff we are doing to this car & the GT40 we're building, it will be a few weeks before we have the car back on the ground & on wheels.
I'll try to remember to get a measurement for you then.
Thank you very much Archie I knew there had to be a trick.....
Troy I have to say that this was funny "I know we have to repaint the decklid so..... One more mod PLEASE........... I promise it will be the last one. . .(for today that is )"
I also agree and think the extra vents would look nice
Troy, do you think you might take the car to Daytona ? I would love to see this car all done, I remember when Archie took it to Daytona and I was VERY impressed w/ it
Troy, do you think you might take the car to Daytona ? I would love to see this car all done, I remember when Archie took it to Daytona and I was VERY impressed w/ it
I would love to, but thats a long haul from NY for a few days. Thats about 2000. to 2500. round trip for a transporter and with the nose so low to the ground I wouldnt drive it all the way down. I would do a mid way show like in VA.
When we started this car back in 2006, we had a lot of plans & a lot of work ahead of us.
For the most part, we've had a plan going in for virtually every mod we've done.
While we've read thru & considered several suggestion from PFF members, We've never really flat out asked for help until now.
This time is different. We need to find a way to tastefully cover the left end of the blower & a few hoses & wires. We need a base design for some type of cover that incorporates "LS7 & "427" or "7.0L".
I know it's only been a day since Troy posted the post below, we've been discussing it for a week or more & can't seem to settle on anything we all like.
So, we'd like some input "photoshop" or other wisefor what we can do.
"Photoshoppers", here's a couple of pics you can work with.....
A free V-8 Archie "T" shirt (featureing Troy's car) to the guy who gives us something we can work with.
Archie
quote
Originally posted by troyboy:
The cover for the left side that we are making is going to look great under there. I suck at photoshop so this is the best I could do. If someone wants to take a crack at it ( the cover and the trunk cut-out ) we would greatly appreciate it.
I was wondering if you could incorporate the rear cover, facing the rear of the car somehow. I really like how it looks and the fact that it describes the engine, with LS7 and Corvette. I also like the fact that is facing the rear of the car and easy to read.
Another idea that came to mind is more elaborate but I am sure that Archie and his crew could do it. If there is room... make a cover for the whole top of the engine, do it by making molds of the lettering on the rear cover, (where it says Corvette n LS7 ) , the lettering "SUPERCHARGED" on the side covers of the supercharger The lettering on cover should fave the back of the car, so that it would be easy to read when the eng lid is open. I hope this give you some ideas
------------------ 87 GT Tilt Clip-Widebody-RamAir-Fastback-GlassHatch Powered by SBC 383 6-speed w/ NOS Build Thread Goals in Life: 1. Get Married..........Check! 2. Build Dream Car..........Check! 3. Get Wife to Come Back... 4. o.k. sell dream car and woo wife back......................................check 5. Convince Wife Dream Car was built for her..........Check! 6. Buy Dream Car Back..........Check!
[This message has been edited by ClayTonto (edited 05-16-2012).]
Thanks for the reply! That looks cool. Today I sent a few drafts to a company that makes custom billet badges, Ill see if they can incorporate steps into the design. Thank you so much for your input.
[This message has been edited by troyboy (edited 05-18-2012).]


.jpg)


 MORE PICS PLEASE!
.JPG)


.JPG)
 ...... I promise it will be the last one. . .(for today that is


.JPG)
.JPG)
_2.JPG)
_1.JPG)
_2.JPG)