Since you're into wiring right now... Do you run 22ga wires to the alternator control terminals? Fieros have 18ga wires to the F/I and L terminals, while the 2006 Corvette that's volunteering my engine management has 22ga. I'm just trying to make sure I can drive the voltage light with 22ga without problems.
Edit: Are you using DR25? What sizes do you run with various wire bundles? E.g. 1/4" tubing with a 3 wire bundle?
[This message has been edited by Will (edited 06-19-2023).]
I kept the stock LS2 wiring from the ECM to the alternator terminals (22ga) and spliced in the stock Fiero wire from the 500 connector for the light.
Yes, I am using DR25 heat shrink. I have 25+ ft in each of the various sizes from about 3/16 up to 1 1/2". I just see if the sleeve will go over the bundle with ease, if not I move to the next larger size.
I kept the stock LS2 wiring from the ECM to the alternator terminals (22ga) and spliced in the stock Fiero wire from the 500 connector for the light.
So you have the L terminal on your alternator is connected to both the ECM terminal AND the Fiero voltage light (C500-B3)? I will be running a 2006 Corvette .bin with table updates by Sinister. He told me that unless both of the ECM alternator connections were connected, the ECM would not be happy. I had not gone so far as to ask if he's ever known one to be run with BOTH connected.
quote
Originally posted by fieroguru:
Yes, I am using DR25 heat shrink. I have 25+ ft in each of the various sizes from about 3/16 up to 1 1/2". I just see if the sleeve will go over the bundle with ease, if not I move to the next larger size.
Well that sounds way too easy. I was about to order a collection (well... really just a couple of sizes to civilize my small bundles) and wondering if I should order 3/16" or if 1/4" should be the smallest. I'm thinkin 1/4" would be fine for 3x 22ga bundles
[This message has been edited by Will (edited 06-19-2023).]
Originally posted by Will: So you have the L terminal on your alternator is connected to both the ECM terminal AND the Fiero voltage light (C500-B3)?
Yes.
quote
Originally posted by Will: Well that sounds way too easy. I was about to order a collection (well... really just a couple of sizes to civilize my small bundles) and wondering if I should order 3/16" or if 1/4" should be the smallest. I'm thinkin 1/4" would be fine for 3x 22ga bundles
The smallest connection would be 2 wires so I use of 3/16 for all those. I normally put 6" to 12" on those before I start combining multiple connectors.
quote
Originally posted by Will: What's the temperature rating on that P-clamp?
I have been out of town since Friday and taking advantage of the hotel time to get the base tune updated for all the various changes (2 Bar OS, MAF, IAC, MAP, Injectors, Flex Fuel, F40 VSS, unused DTCs, and much more).
Overall there were 114 changes to the various cells and tables in the calibration. This should allow the engine to start and all fiero gauges to work, but a lot more tuning will be needed to dial in the new parts to the changes made in the engine and the addition of flex fuel and the turbo.
I am planning to get back to the harness work on Monday afternoon.
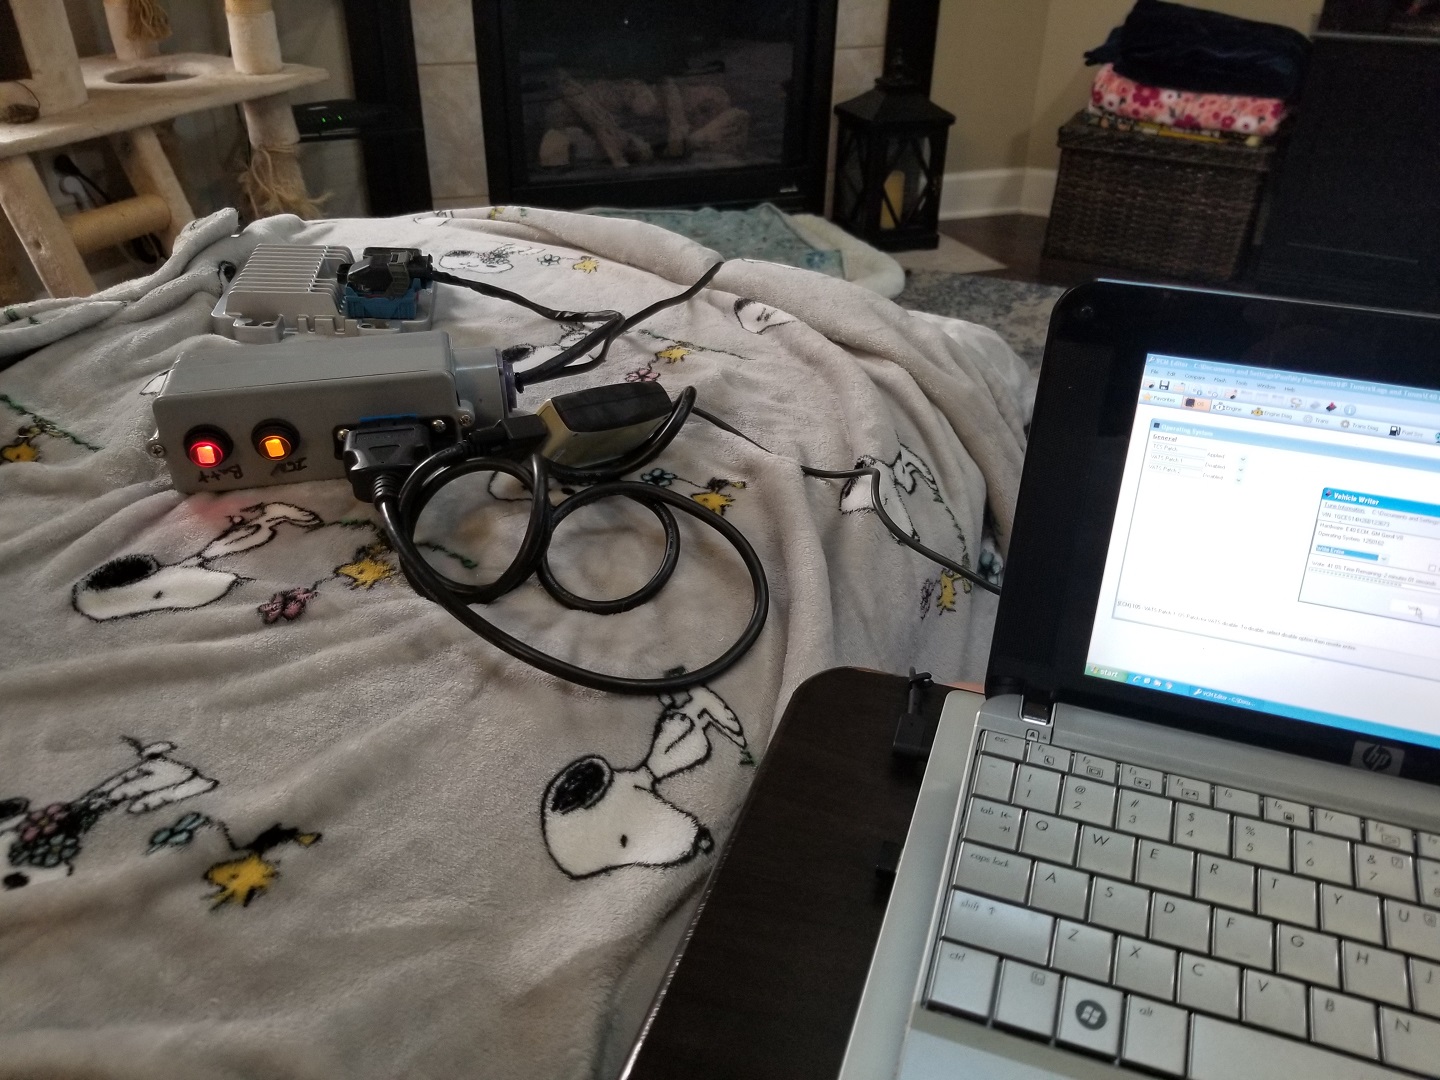
Got home about 2 PM and loomed up a few more circuits... but didn't take any new pictures. I did load the baseline tune into the ecm. A year or so back I made a bench tuning device, so I can tune the ecm while sitting on the couch. It works like a charm. It sure beats waiting to do this until everything is in the car and powered up!
[This message has been edited by fieroguru (edited 06-26-2023).]
Looking really good, what tubing are you using for the coolant crossover? I did not have much luck trying to find some stainless tubing in a similar diameter to the stock coolant lines that run under the car.
Looking really good, what tubing are you using for the coolant crossover? I did not have much luck trying to find some stainless tubing in a similar diameter to the stock coolant lines that run under the car.
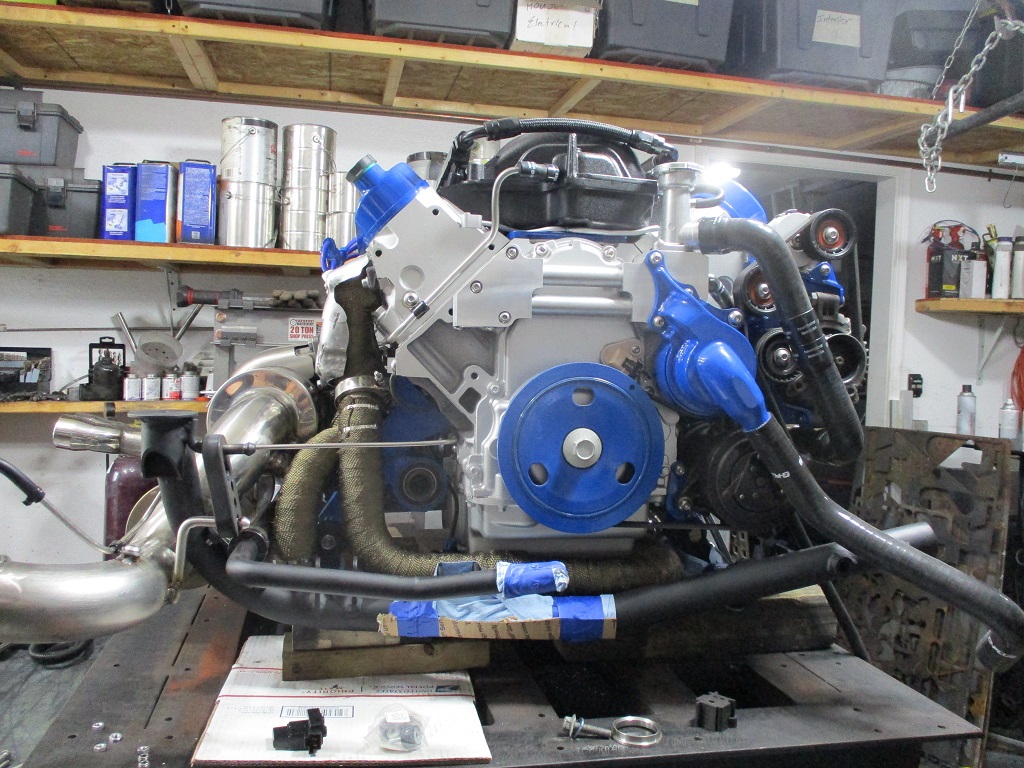
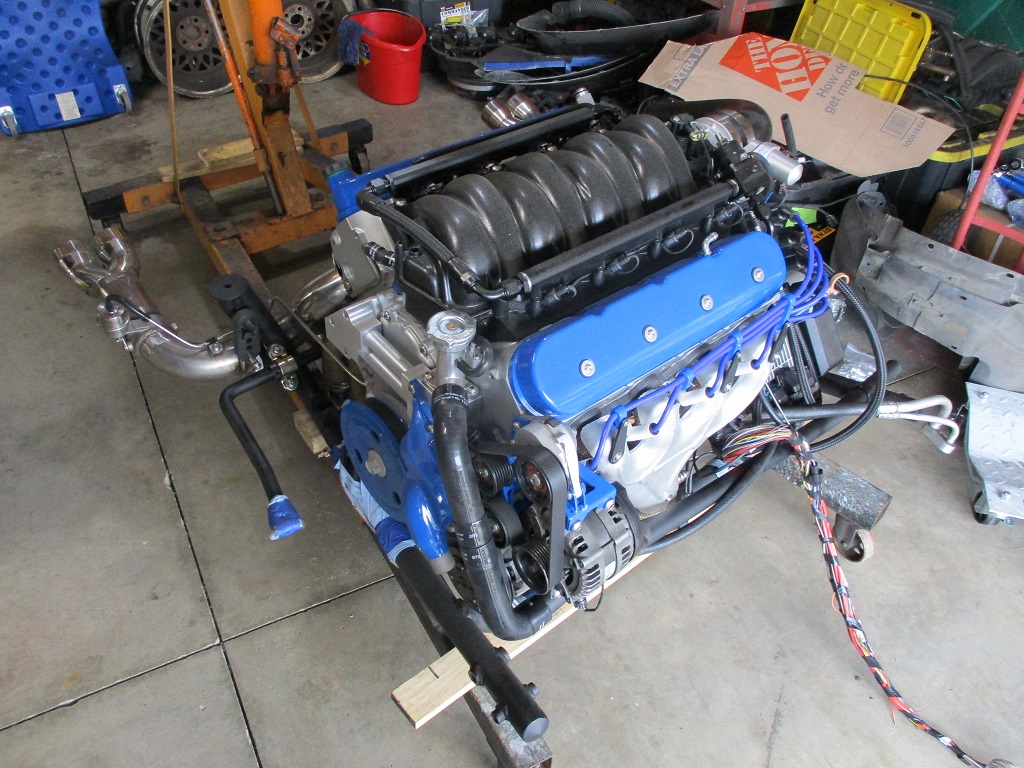
While I really wanted to have my LS4/F40/Turbo swap completed before the 40th Fiero Anniversary Show, that isn't going to happen. I have been on vacation this week and made some significant progress with the swap and it is nearly ready to go in the chassis. I still need to add the coil ends to the plug wires and remove the gold paint from the plug wires and make some refinements to the PCV system.
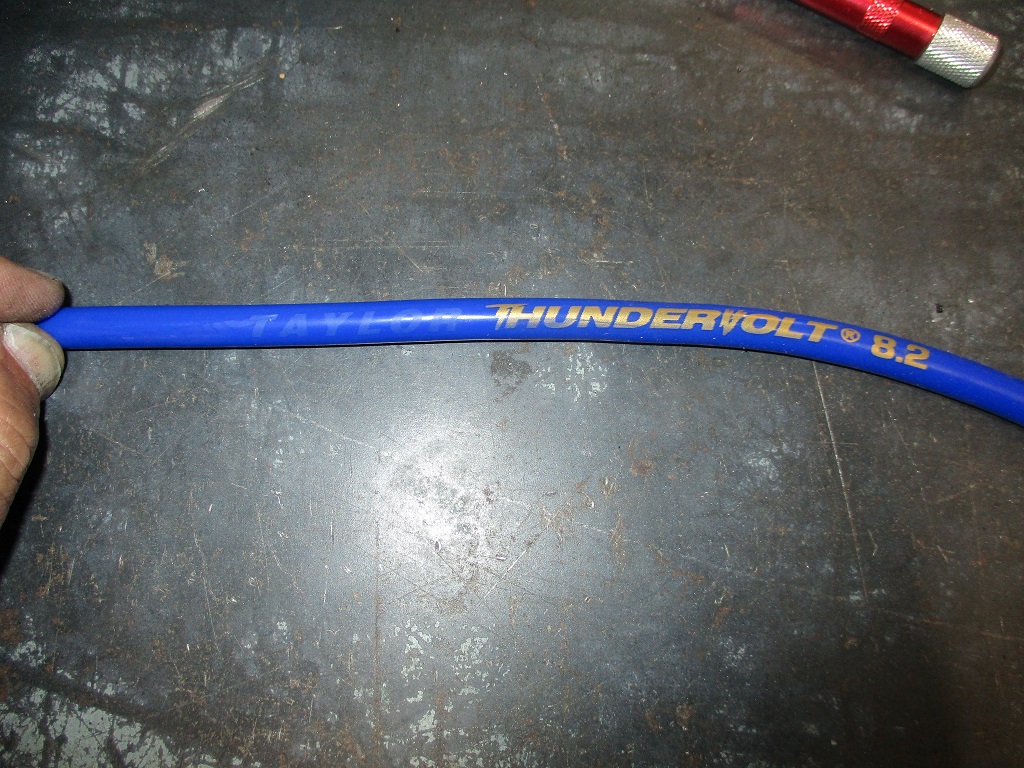
Not sure why the text on the plug wires was gold, but I don't like it. Did some experimenting and brake clean will remove it, so I will take the time to remove all the gold (if I don't then it will annoy me every time I look at the engine). In this picture the TALYLOR to the left was gold and now is not!
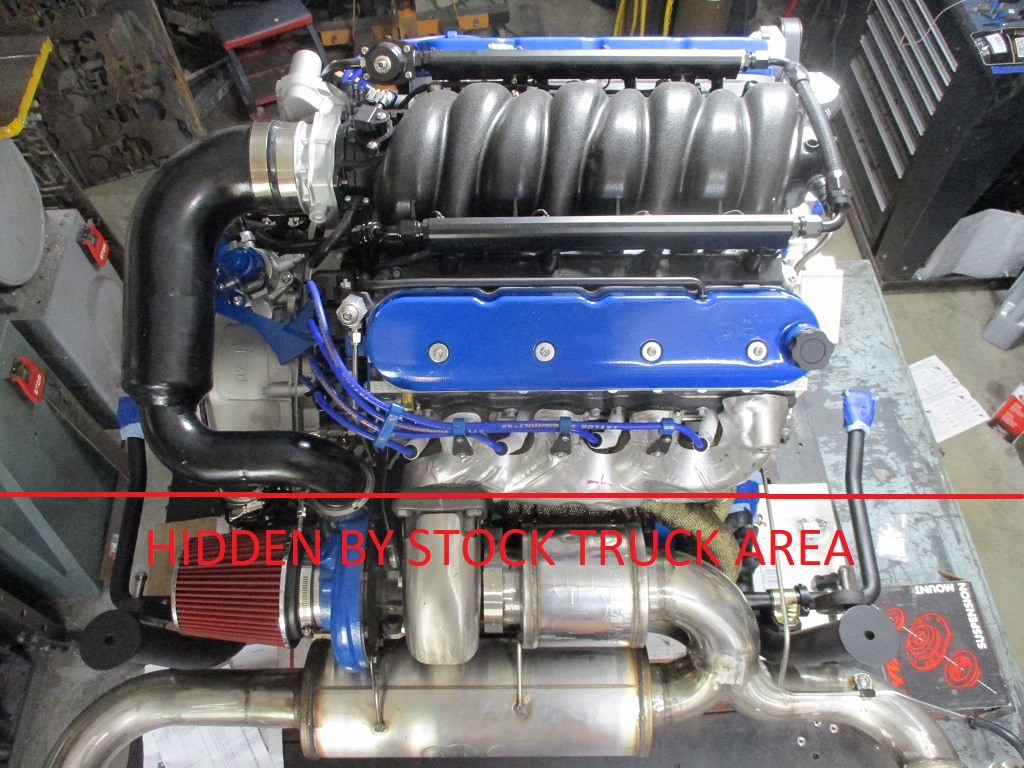
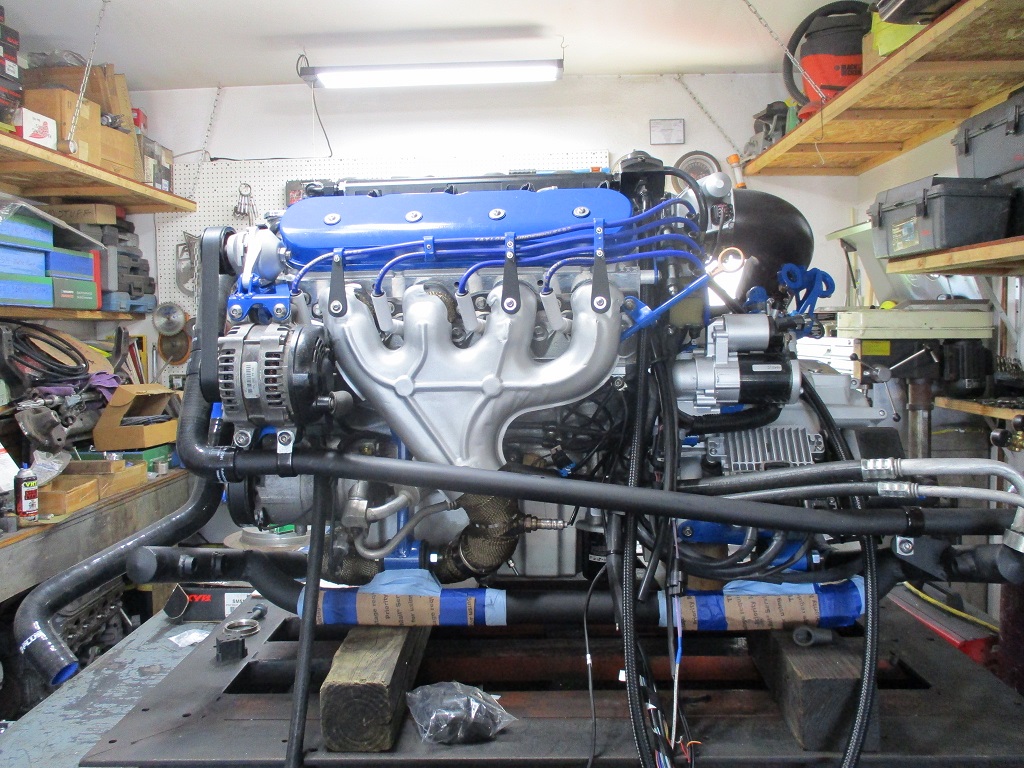
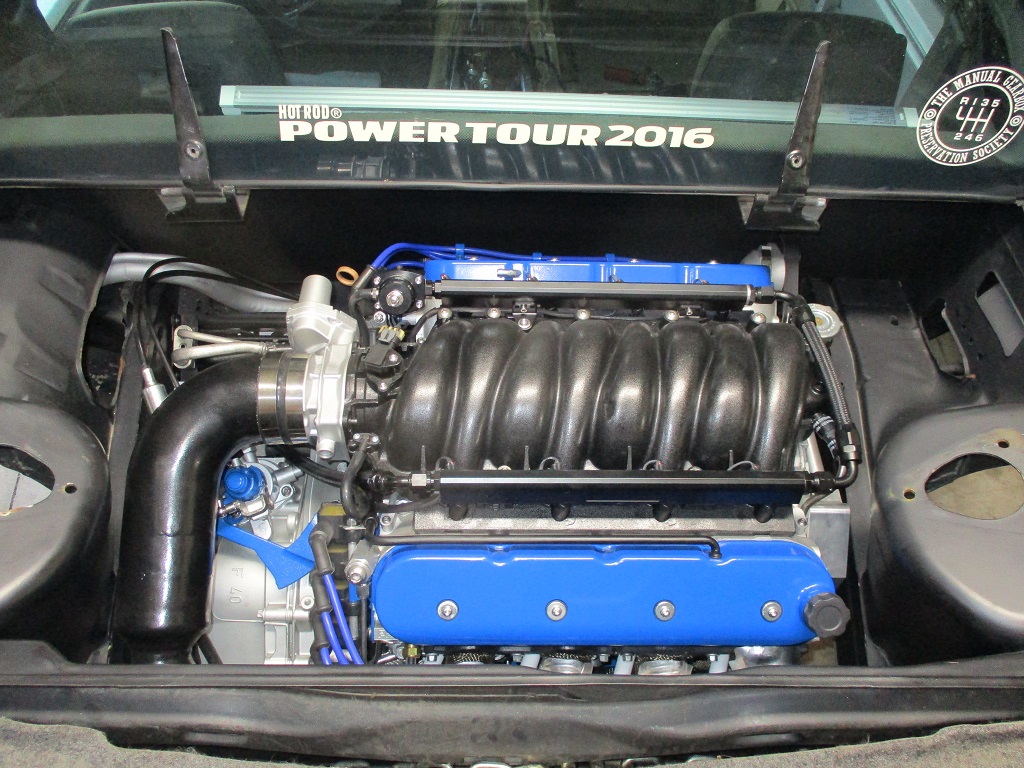
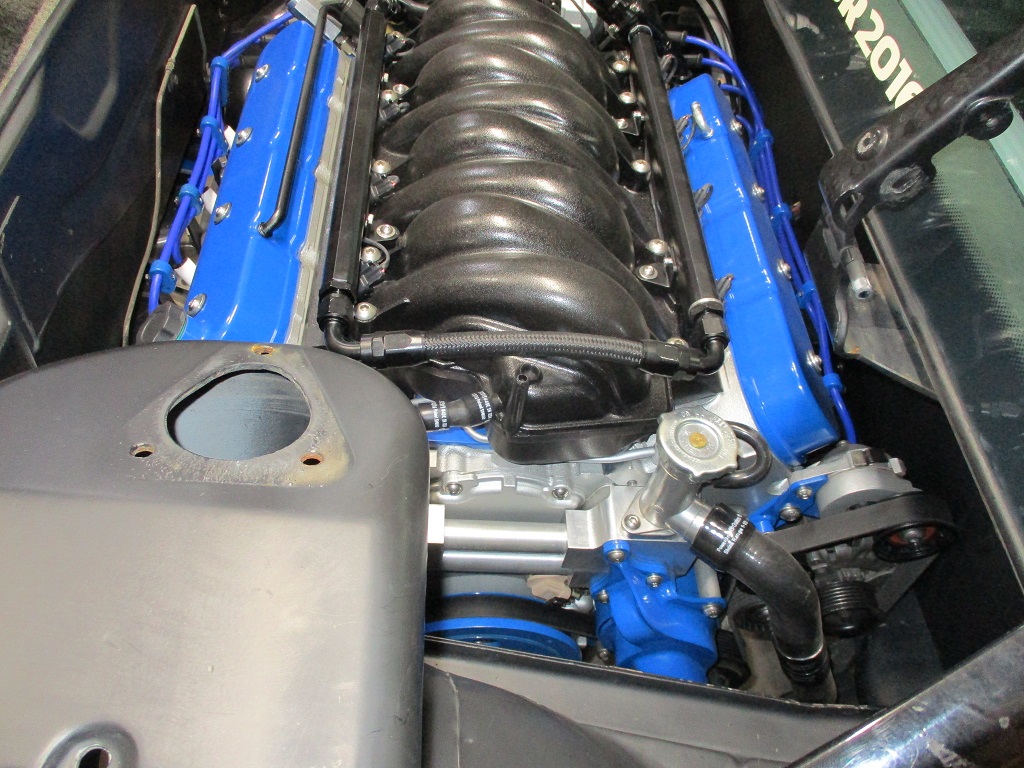
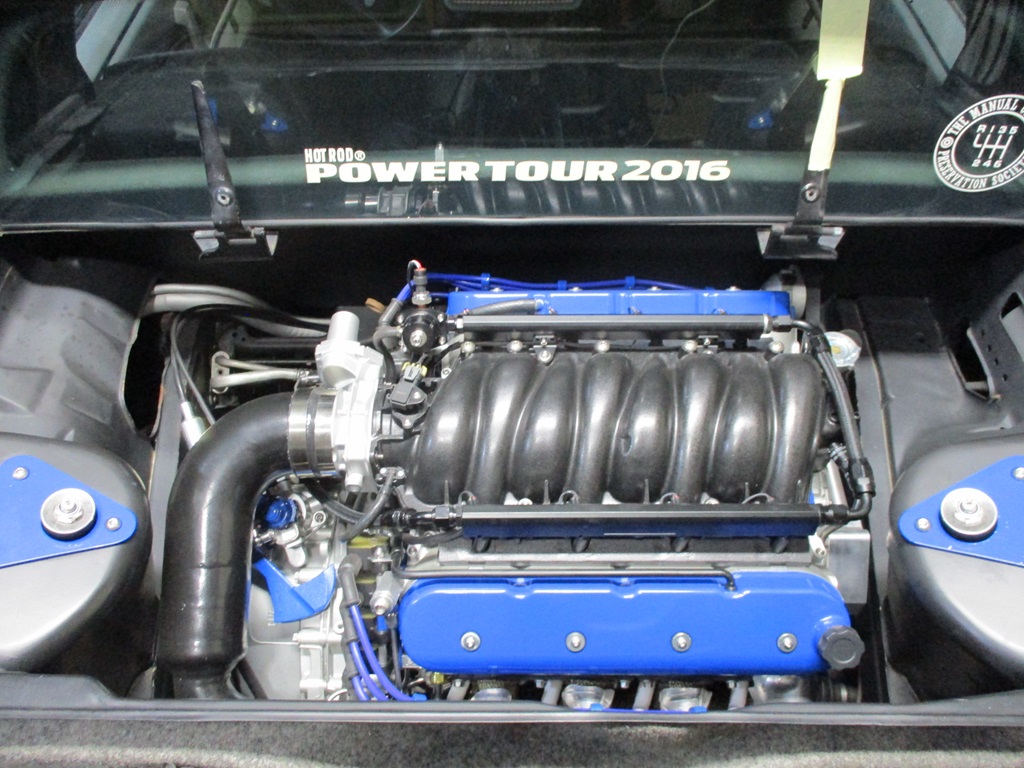
Here is how the Fiero will be viewed when installed in the Fiero. The engine is fully wired and hosed in this picture. Nothing additional will be added to the top side of the engine at this point.
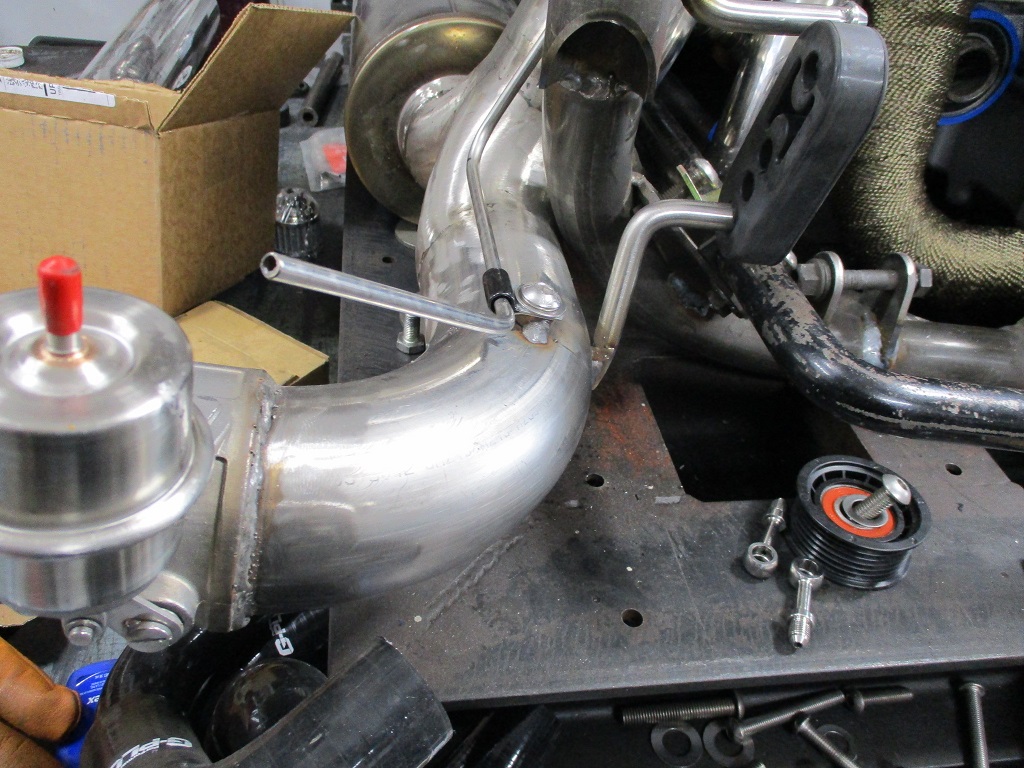
Much of the turbo and exhaust stuff will be hidden as well. Here is a picture showing everthing that will be under the stock truck area (no modifications to the trunk performed).
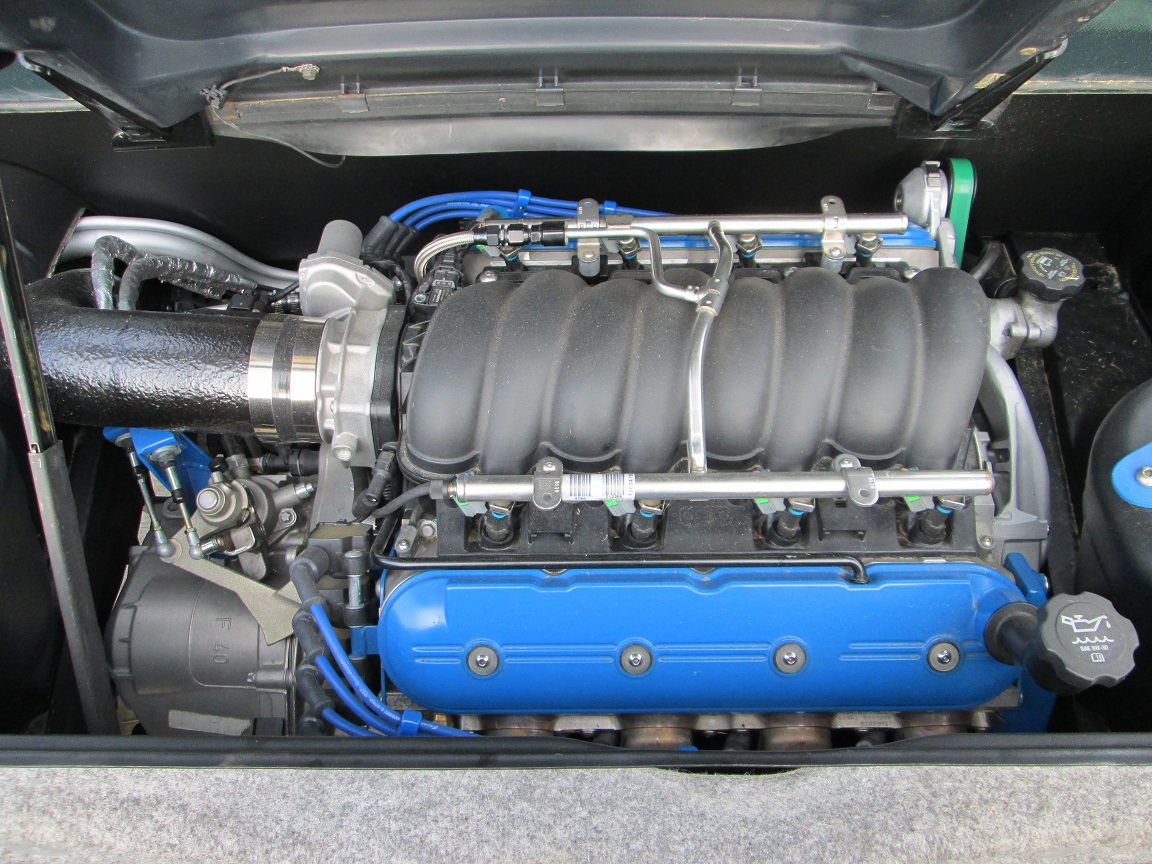
For reference, here is what the swap looked like when NA. I really liked the presentation of this engine in the bay, so I didn't want to screw that up.
Here is the rear view of the drivetrain/exhaust/cradle:
Accessory side:
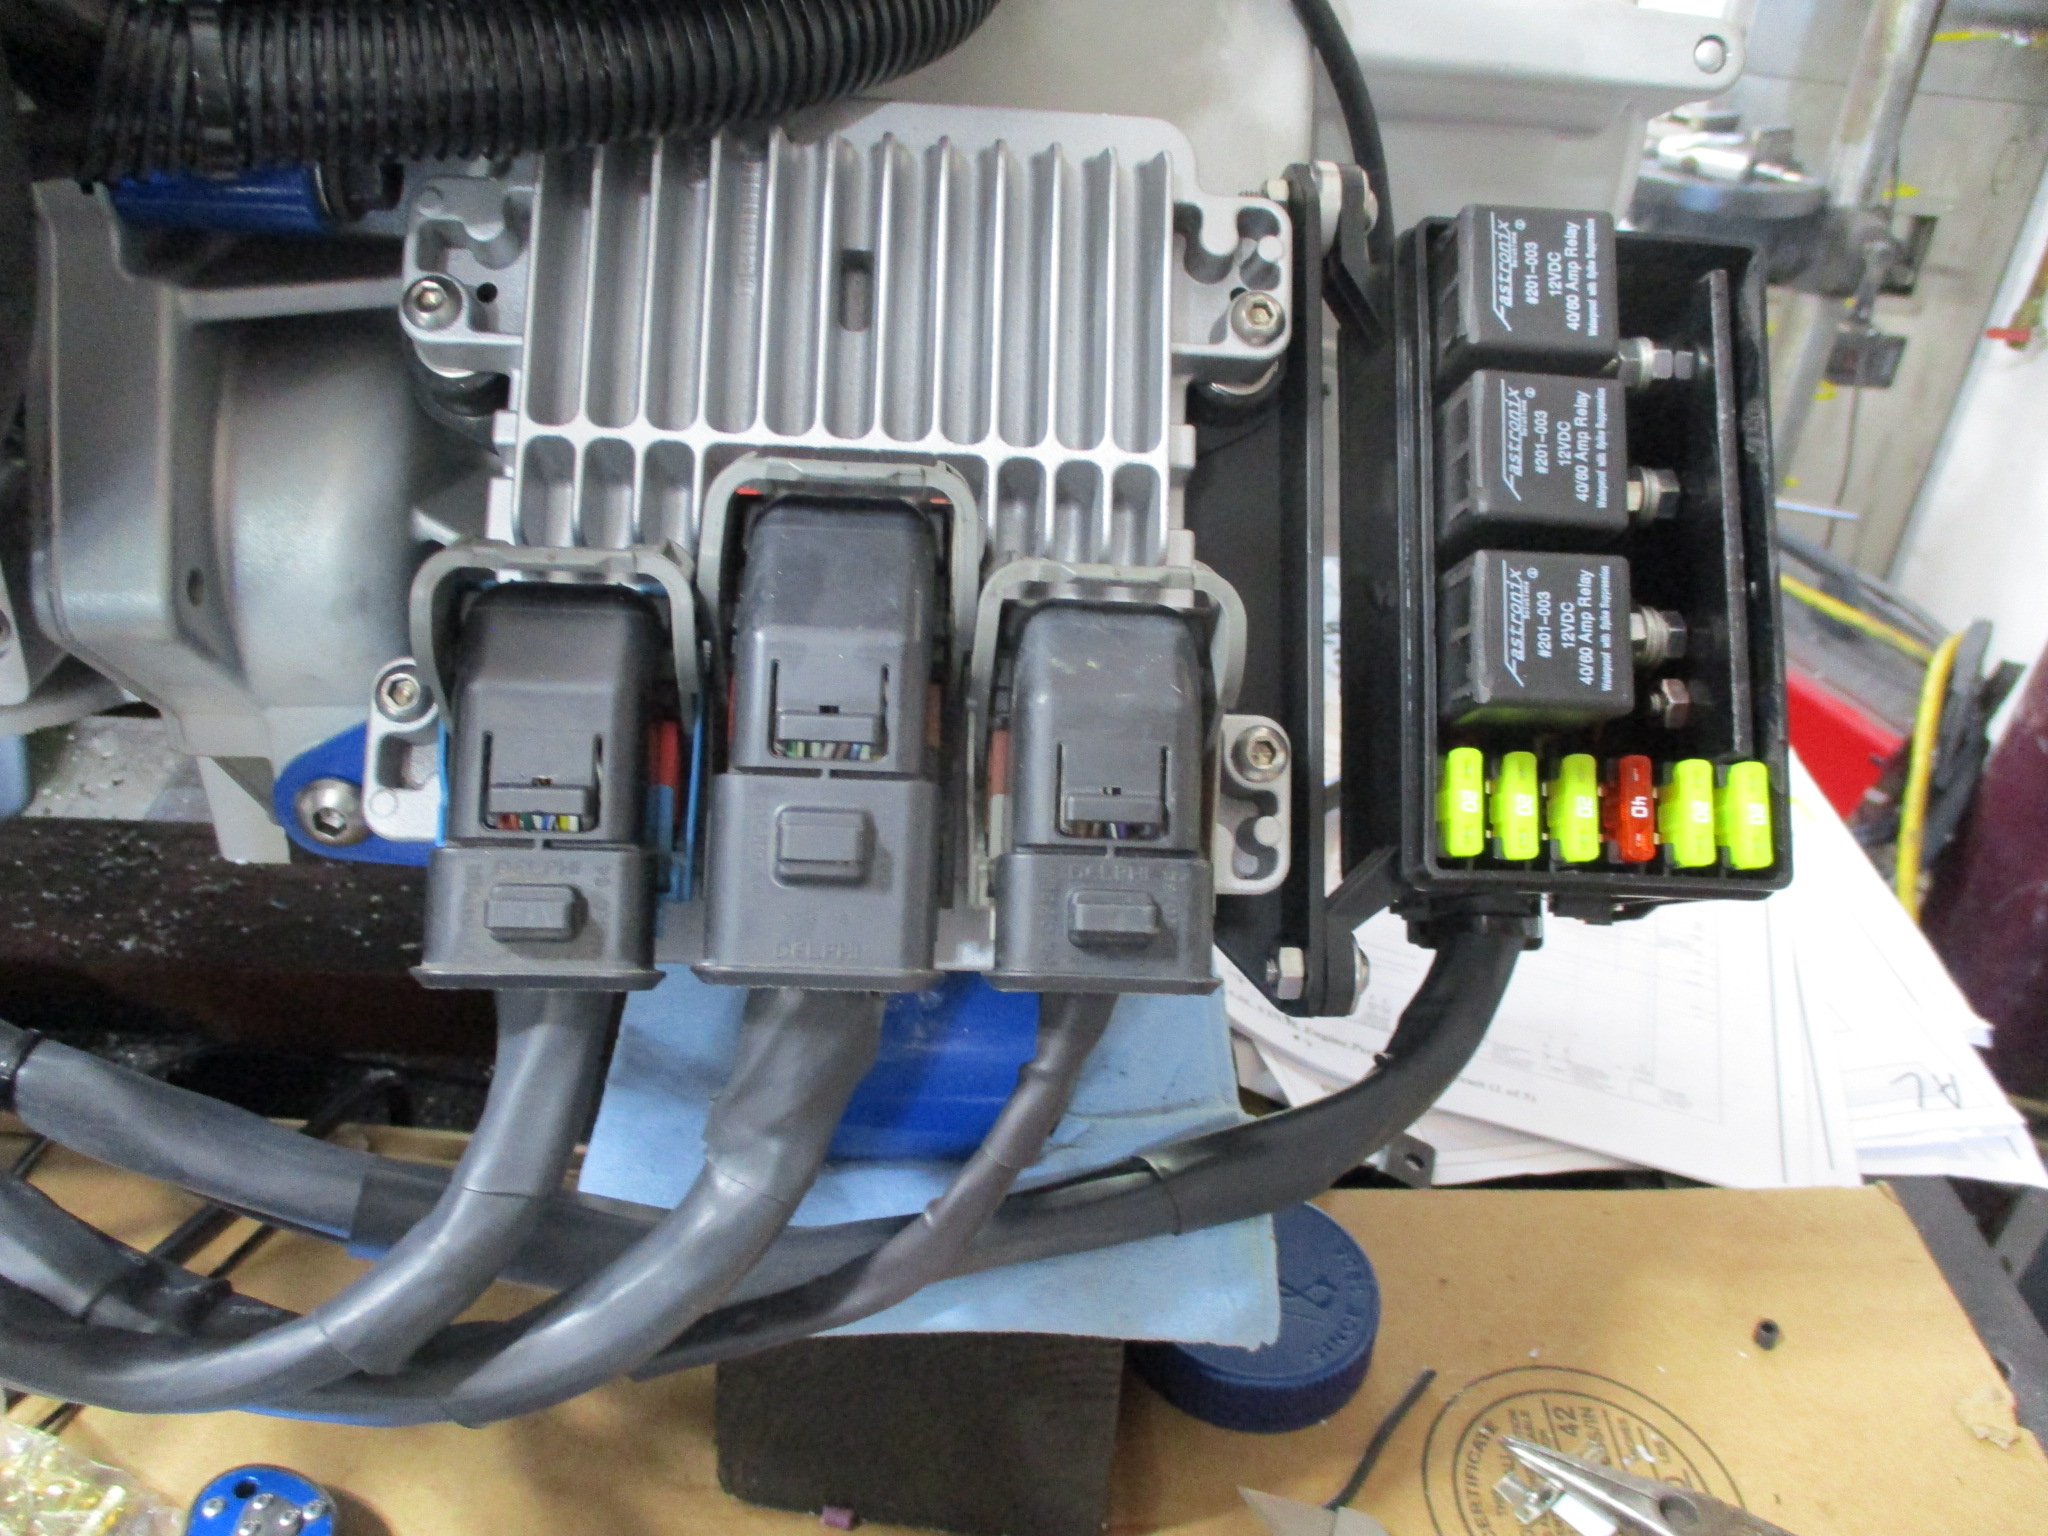
Front side. This is the side that is up against the firewall and not really visible. So it becomes the business end for the majority of the harness, hoses, ecm and fuse box.
Here is what the harness to the ecm and fuse box looks like:
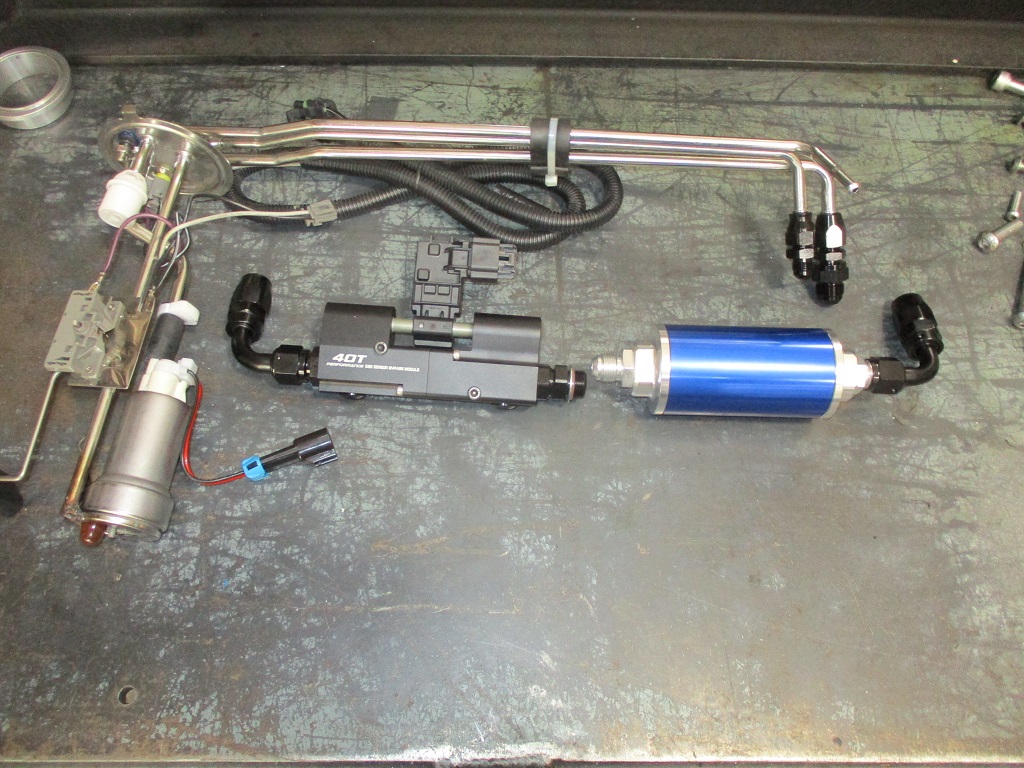
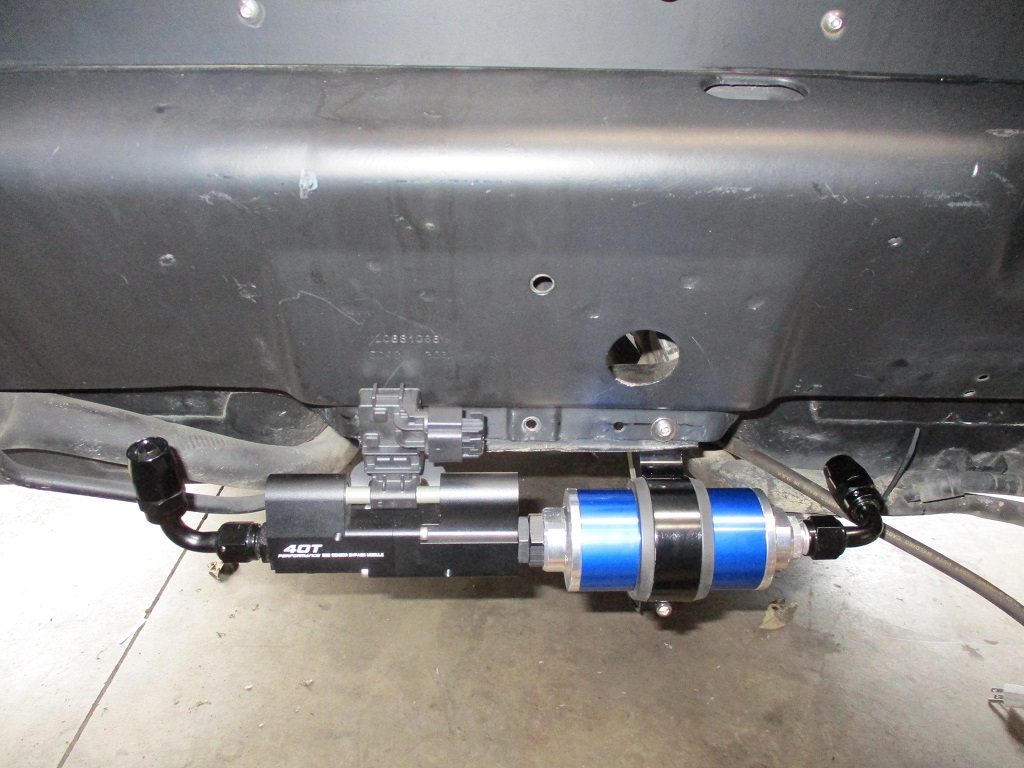
Completed several modifications to the Fierostore fuel sending unit. The picture also shows the flex fuel sender/bypass and filter assembly. - Added a sealed ground stud. This will allow me to use 2 of the existing wires (vs. 1) for the fuel pump (Walbro 450 lph). - Added -6 AN fittings and then an adapter to -8AN - all fuse hoses and fuel rails are -8AN - Modified the pump support so the larger fuel pump would fit - cut the stock one off, rotated it, then welded it back in place and added a brace.
I am taking the rest of the extended weekend off to attend the 40th Fiero Anniversary Show.
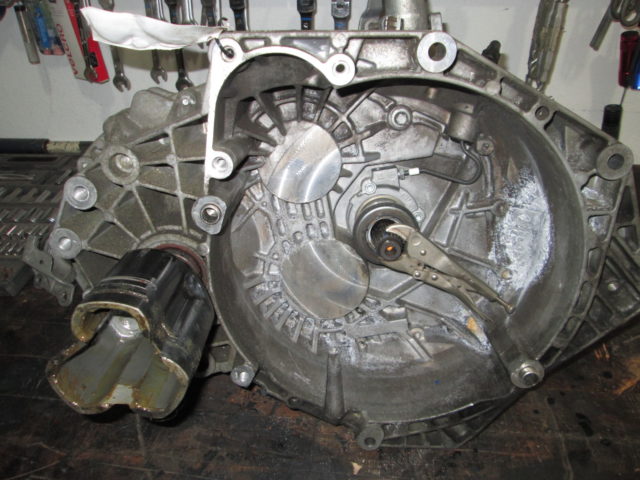
Once the shifter assy is removed (needs to be in neutral), remove the bolt from inside the bellhousing (see picture below), and then remove the bolts around the case. Set the transmission on the bellhousing flange and pry the gear side of the case up.
Once the shifter assy is removed (needs to be in neutral), remove the bolt from inside the bellhousing (see picture below), and then remove the bolts around the case. Set the transmission on the bellhousing flange and pry the gear side of the case up.
Thanks!
Yeah, right after I posted that, I found the one bolt inside the bellhousing that I'd missed... then it was cake.
Took a little rest from the car... but slowly getting back at it.
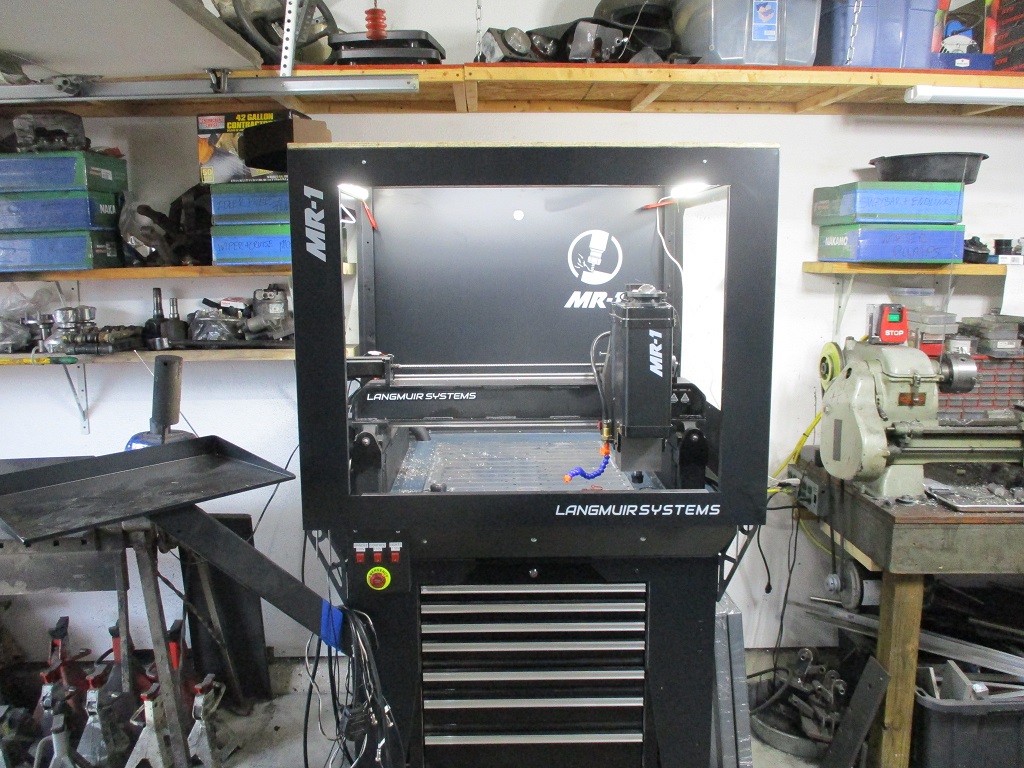
Part of the rest was to move the MR-1 Mill into its position (remove/modify shelves, reorganize the stuff on the shelves, level the mill, and start installing the enclosure, install the lights, etc.). Still more to do before I start using it, but it needed to be moved out of the way.
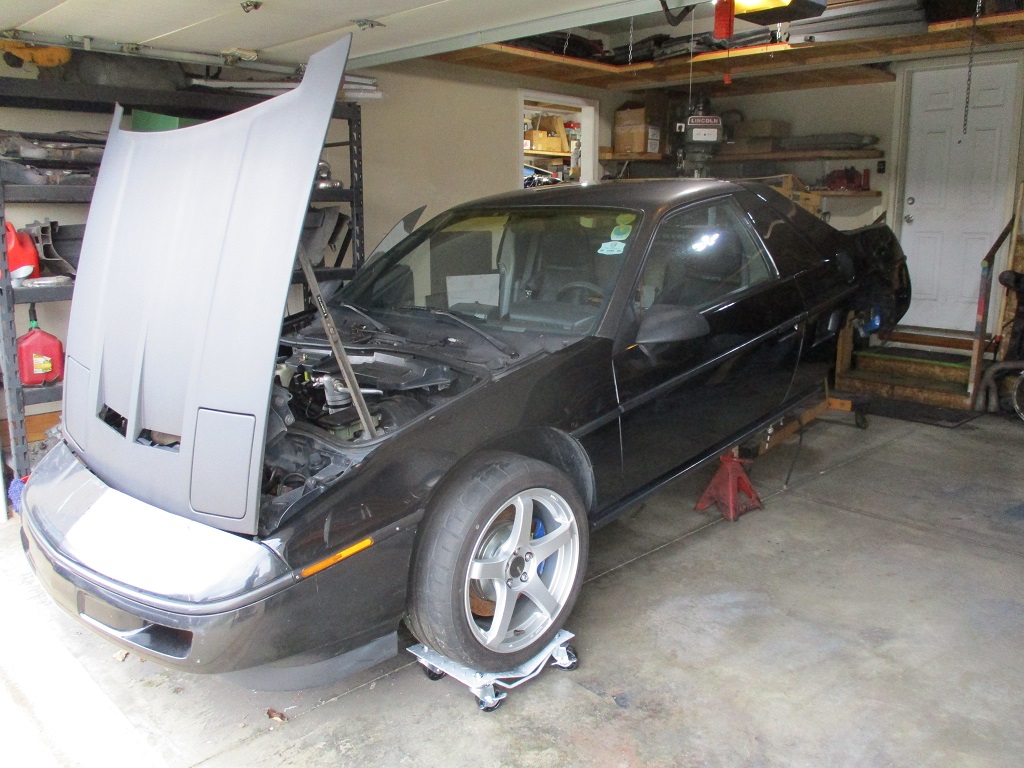
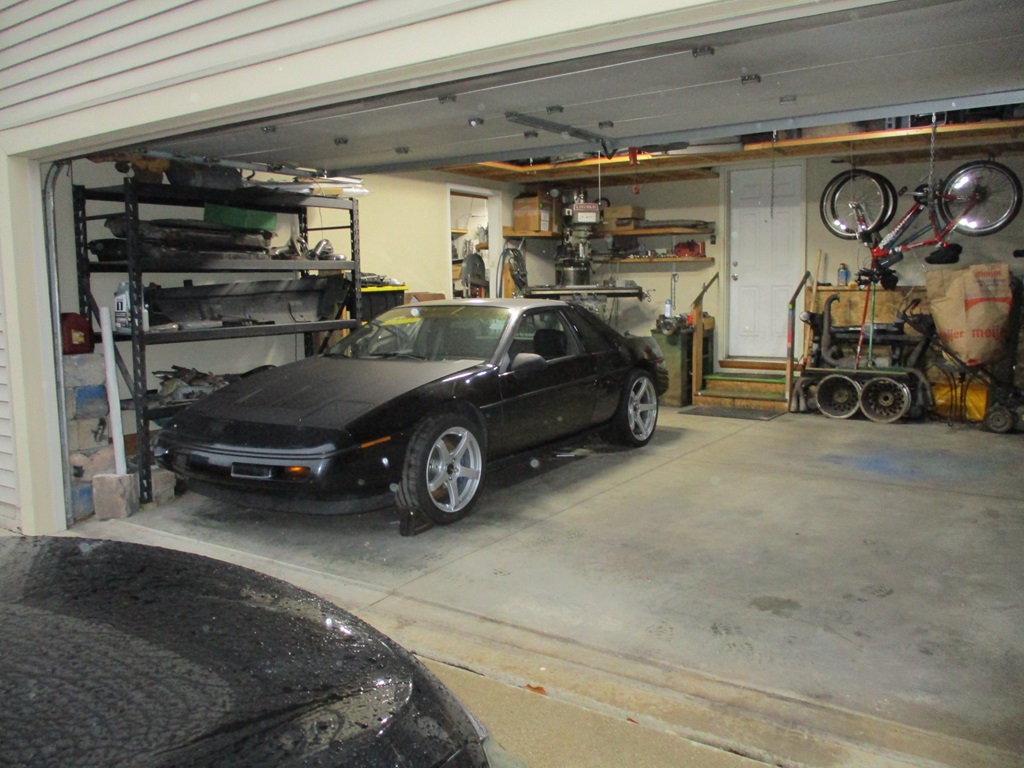
Then I moved the car out from its resting spot in the side of the garage and washed nearly 4 years of dust off it.
The engine bay was also washed - not too bad for it being 10+ years since it was last painted:
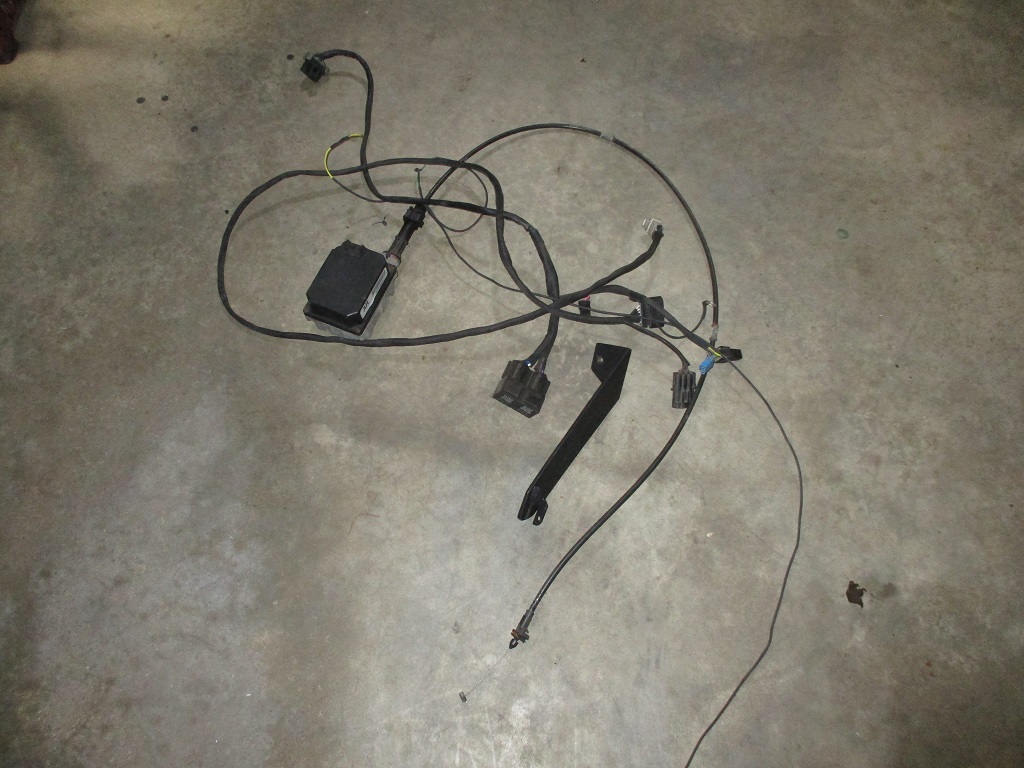
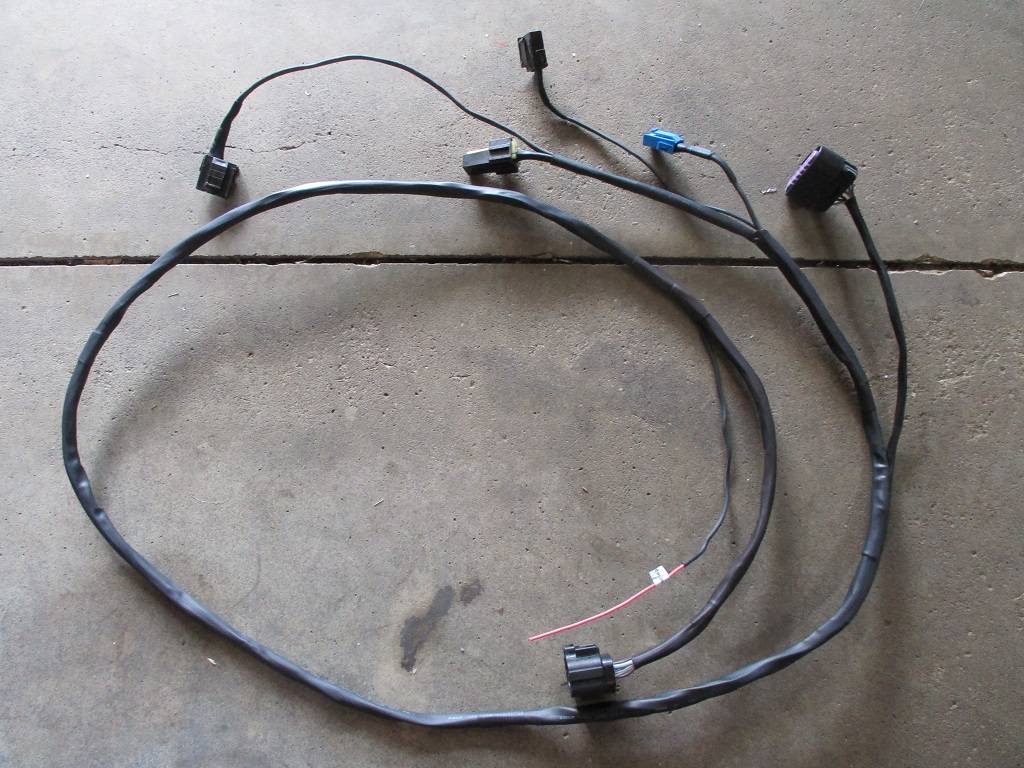
Then took the console, instrument cluster and dash out so I could remove everything that I wouldn't need going forward. Primarily all the parts for the AR cruise (module, cable, pedal brackets, harness). I ordered a new pedal as I had welded some cruise brackets to the old one.
Went ahead and made the new pedal/cruise/clutch sub harness that will reside in the console area (there are 13 wires in this harness):
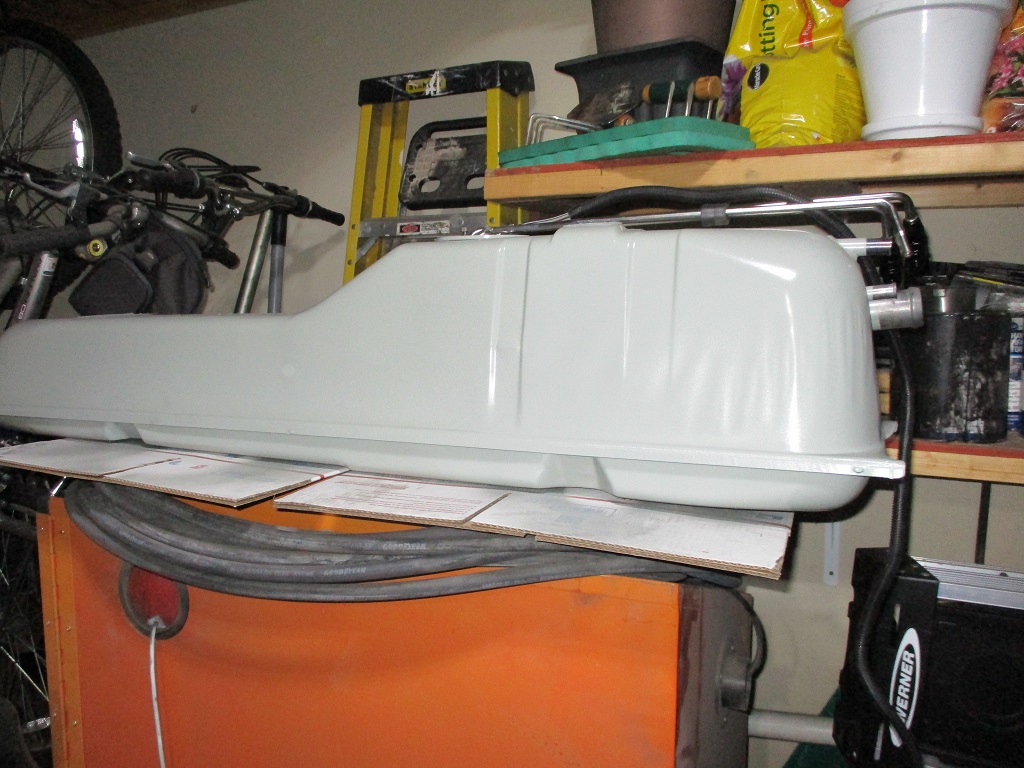
Fuel tank is also ready to go back in. In addition to the new/modified fuel sender unit, the 450 lph e85 fuel pump, the tank was modified with a new vent tube. It sticks about 12" into the tank and rests along the side.
Hey FieroGuru! First off, every part of this build is incredible and I can't wait to see the final result. Can I ask how did you do those decklid hinges?
------------------ Zander Holmes 19 year old who's here about 20 years to late Black 88GT - LQ1 swap on the way
Hey FieroGuru! First off, every part of this build is incredible and I can't wait to see the final result. Can I ask how did you do those decklid hinges?
Thanks!
Credit for the idea of the decklid hinge box modification goes to JefrySuko from discussions we had at the 25th Fiero Anniversary show, i just made them a reality. Here is a build thread where I showed how they are made. It has taken about 12 years, but I am starting to see more of these out in the wild. Several were at the the 40th. https://www.fiero.nl/forum/Forum1/HTML/085829.html
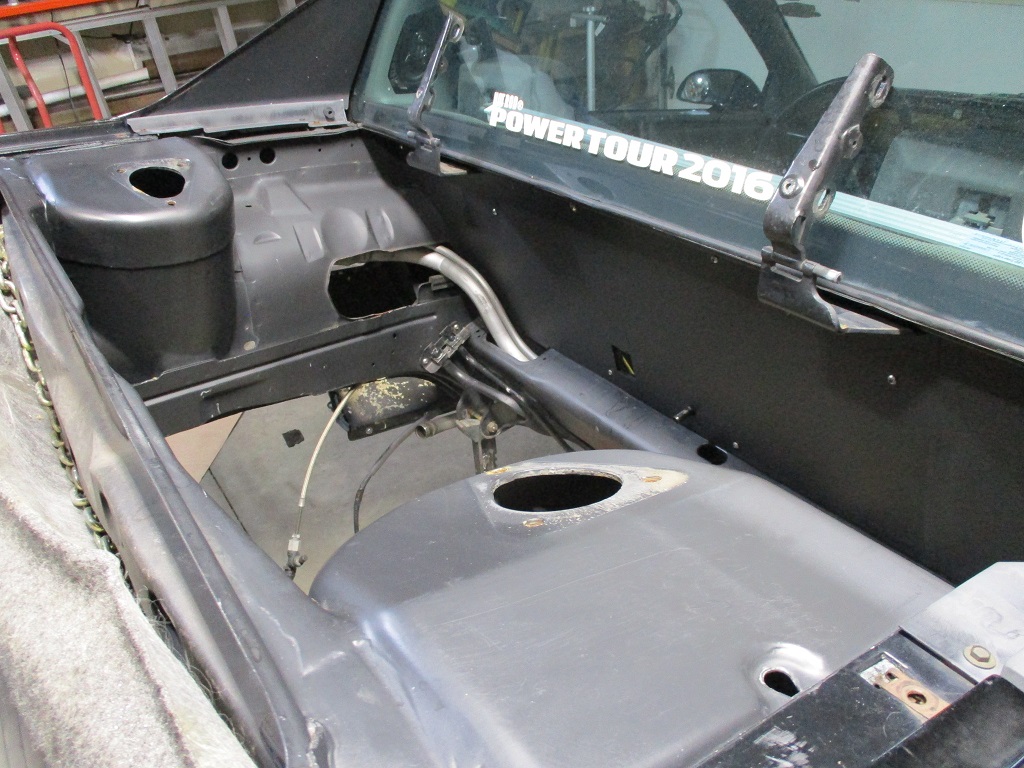
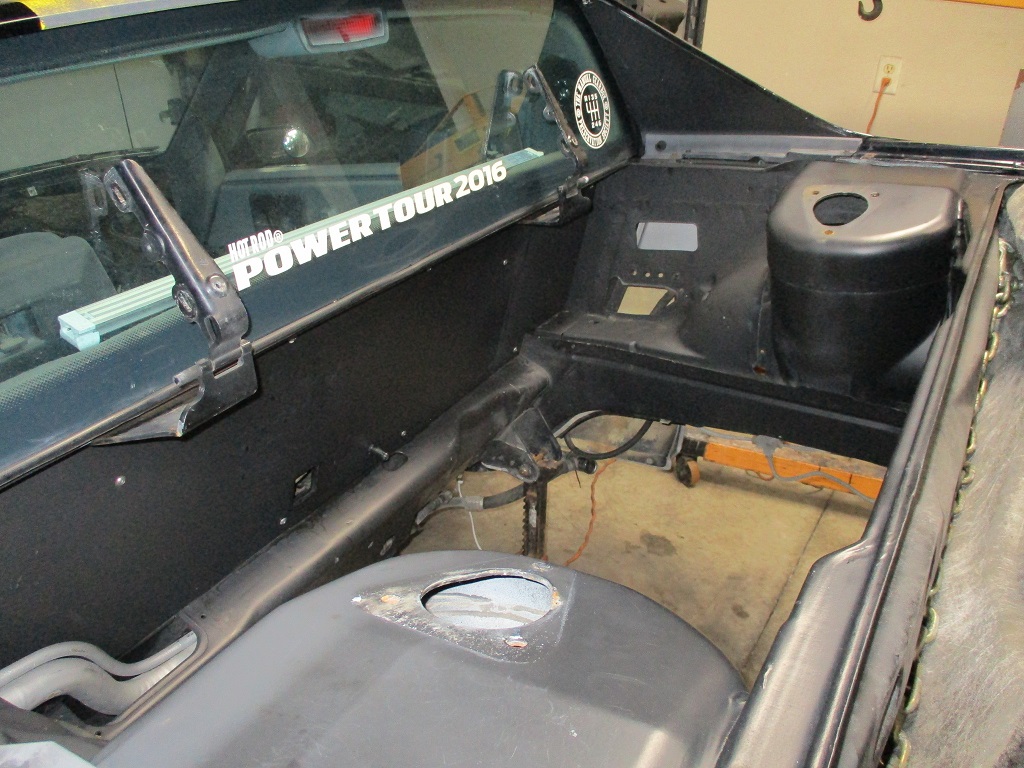
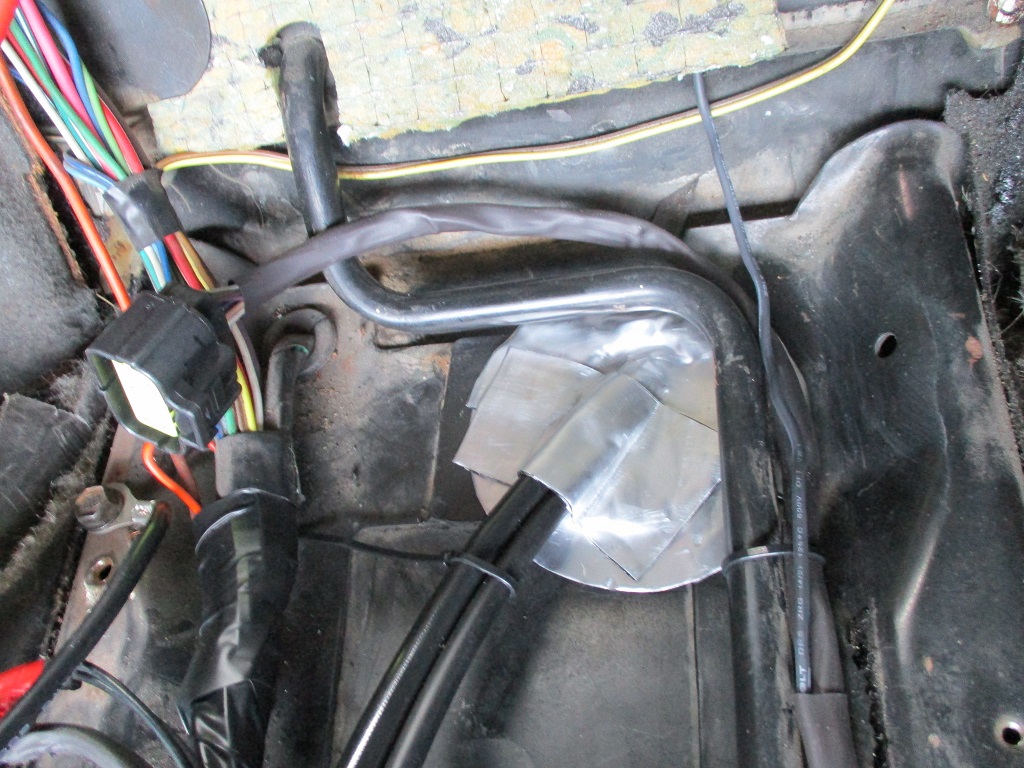
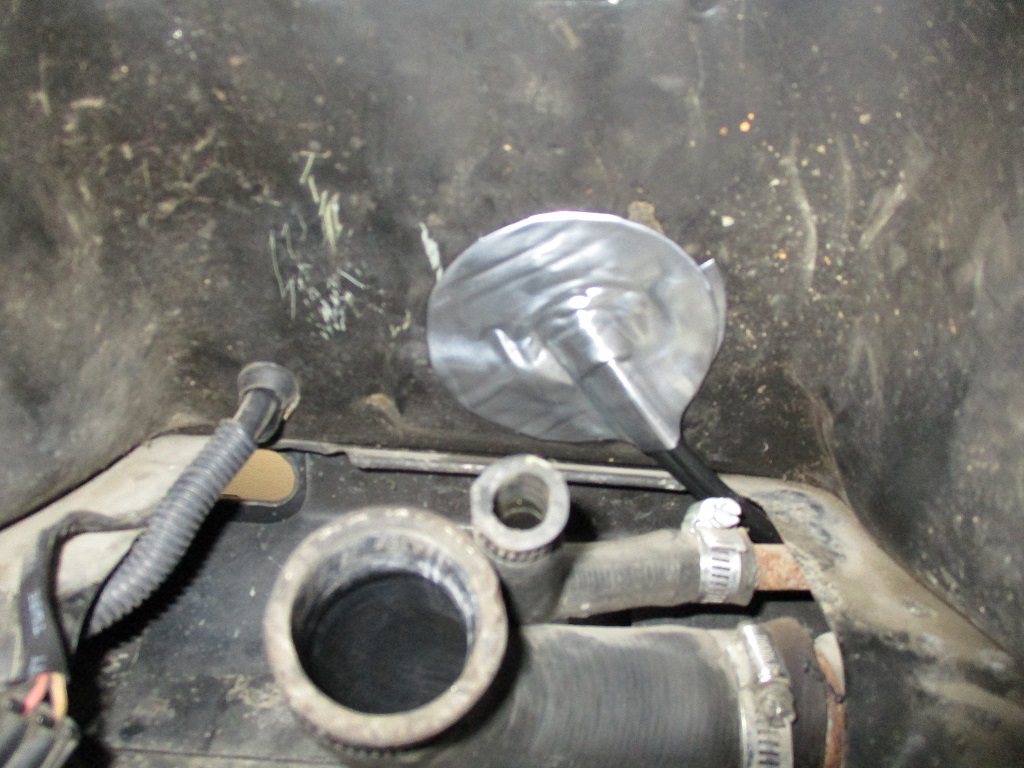
Before putting the engine in for the last time, I needed to get the new shifter cables installed. I kept with the routing through the fuel fill double firewall panel and used some peal & seal to seal the top and bottom of the opening.
Designed this bracket for the flex fuel manifold and cut it on the plasma table:
Fuel filter and flex fuel sender in place. All fuel lines are -8AN.
Complete drivetrain out of the 3rd bay and ready to slide under the Fiero:
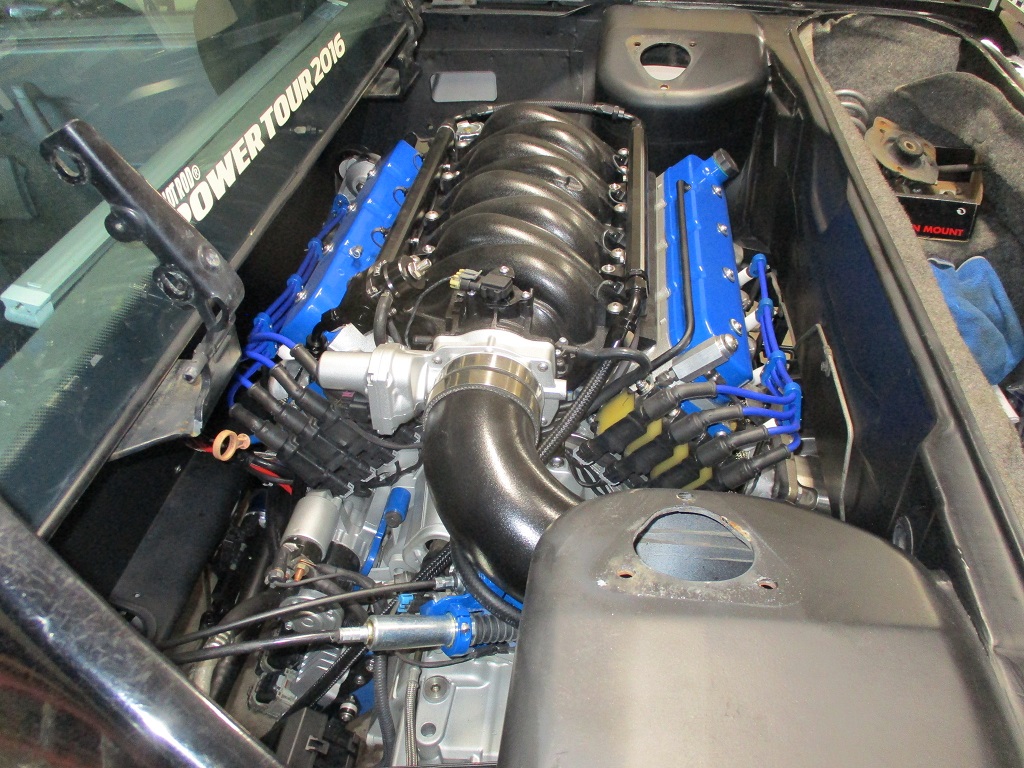
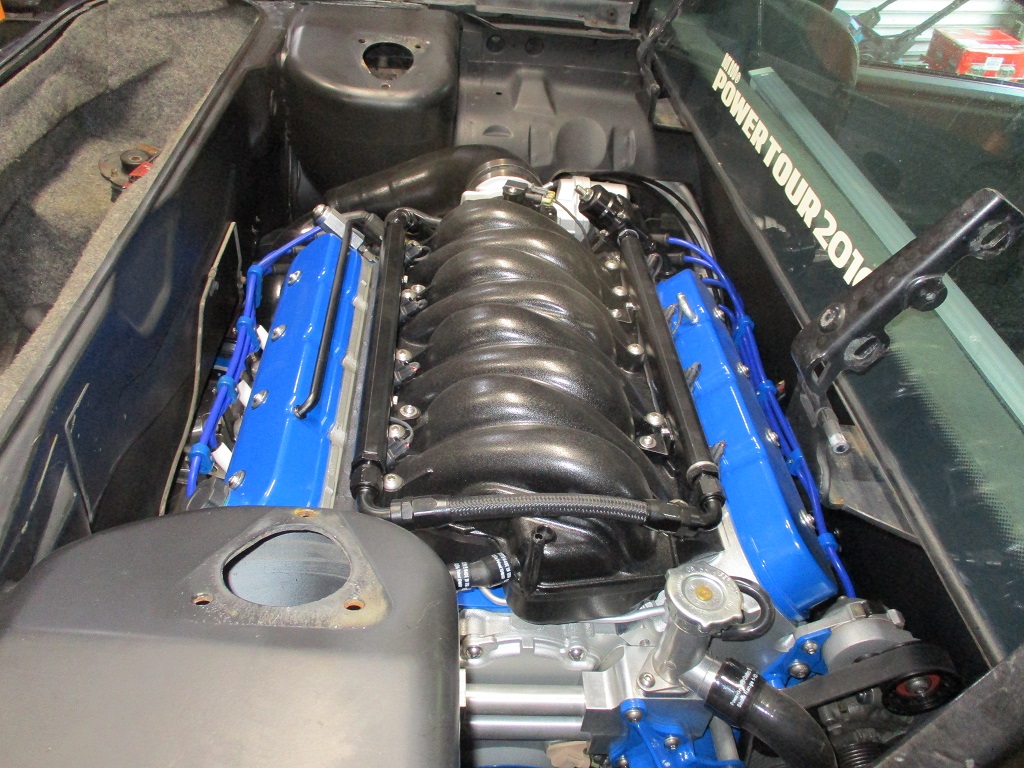
Engine in the car, shifter cables and clutch line connected - need to connect the PCV hose to the rear valve cover, but other than that all other remaining connections are on the bottom side or inside the cabin. The engine is fully wired now on the engine bay side, but very little of the harness is visible. I wanted a very clean and clutter free turbo swap while keeping the stock truck... I am very pleased with the outcome.
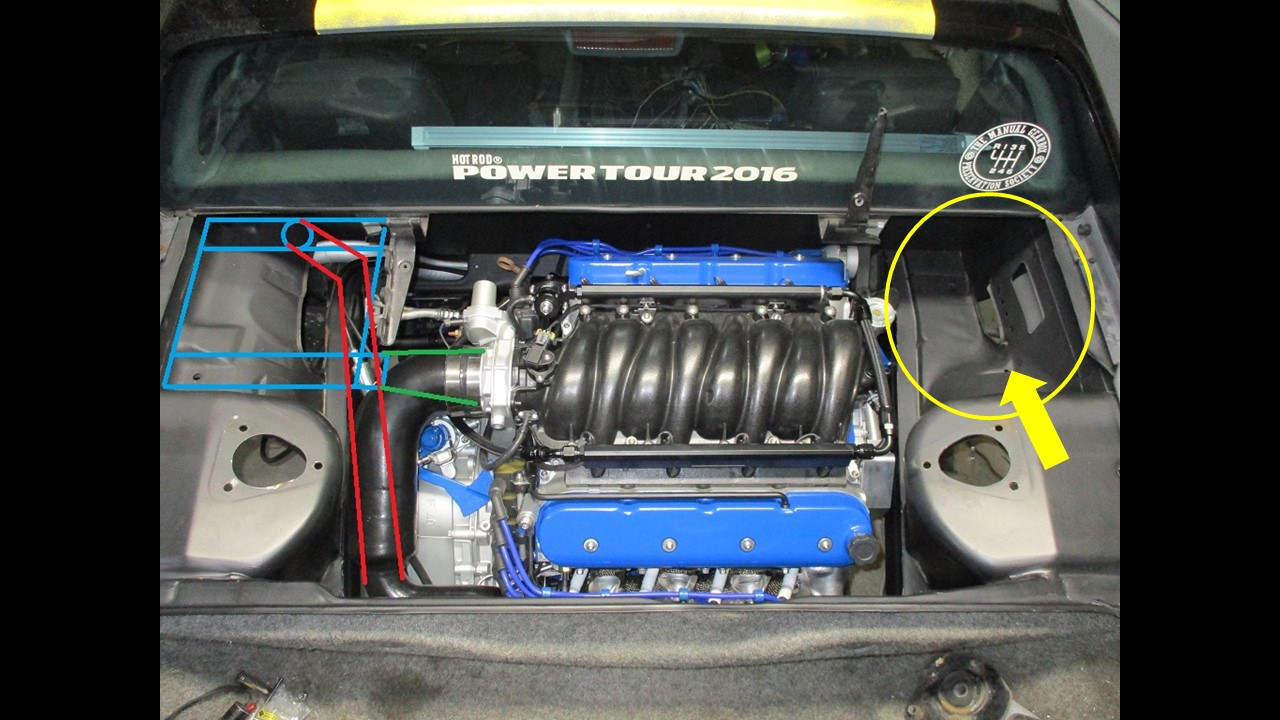
Hard to believe I messed around with this side of the swap for a couple of years trying to get the right setup. Most other LS swaps in Fieros this area packed with hoses, remote thermostat housings, electric water pumps and some even cantilever the alternator into this space. Mine has a mechanical water pump, alternator and A/C with a clutter free vast open space. This might be my proudest area of the swap.
Now I need to finish connecting all the lower connections and the needed harness terminations in the cabin...
[This message has been edited by fieroguru (edited 09-04-2023).]
Dude that things a masterpiece wow! Where is the harness/ how did you route it? I stared at the pics looking for it lol. That is friggin clean!
shem
Thanks!
For the engine harness, using heat shrink to loom keeps the overall size of the harness minimized and allows routing under or behind other parts on the engine. Also the black heat shrink will also hide in plain sight with routed over a black part - like the intake manifold and fuel rail. For the top of the engine the harness to the injectors is routed under the fuel rails. Most of the main harness runs over the top of the bellhousing and is hidden by the coils. The throttle body is mounted upside down to the harness connects from the less visible side and the MAF sensor connection is hidden by the cold tube. When I have the option, I route as many harness wires under the exhaust and up alongside the engine block.
The other big change is I relocated where the wiring passes through the firewall. For the 500 connector all chassis related wiring (tail lights, etc) was modified to run through the double firewall panel out the passenger side and outside the engine bay entirely. All engine related wiring for the 500 connector is combined in the harness and routed through a single firewall passthrough fitting. This single firewall pass through was moved lower so it is hidden by the engine.
Page 13 about 3/4 the way down shows the 500 chassis wires going through the double firewall section and relocating the firewall pass through to a location down by the stock shifter cable pass through (which is also relocated).
Bled the clutch - twin disk clutch seems to be releasing and the HTOB didn't overextend, so that was good! Won't be able to test it further until the engine runs.
Fabbed the lower engine to chassis coolant hoses and the heater hose connector. Filled the coolant system with water for a leak check. Seems to be leak free at zero pressure, more testing will be needed once the engine runs.
Awesome build. I mounted my turbo just like that on my build. However, you currently have a HOT air intake. I just started logging data and found out that my IAT are way to high for my liking. I may have to come up with something to remedy the temps..
Awesome build. I mounted my turbo just like that on my build. However, you currently have a HOT air intake. I just started logging data and found out that my IAT are way to high for my liking. I may have to come up with something to remedy the temps..
Thanks! I am expecting my IAT to be in the low 200 - 235 degree range with 8-10 lbs of boost.
Fuel tank went in this past weekend and all the -AN fuel lines were made. Few other odds and ends on the underside of the drivetrain were also completed. All that is left is finishing up the electrical wire terminations in the cabin.
[This message has been edited by fieroguru (edited 09-19-2023).]
Thanks! I am expecting my IAT to be in the low 200 - 235 degree range with 8-10 lbs of boost.
Fuel tank went in this past weekend and all the -AN fuel lines were made. Few other odds and ends on the underside of the drivetrain were also completed. All that is left is finishing up the electrical wire terminations in the cabin.
Wow, I thought 150 degrees was way too high.. This IC could help and would still fit your intake theme.
Originally posted by nosrac: Wow, I thought 150 degrees was way too high.. This IC could help and would still fit your intake theme.
Right now, there are a lot of conflicting goals...
Trying to fully offset the additional weight of the turbo to limit overall weight to 2850 lbs (was 2807 in N/A form with lighter wheels/tires), as my next round of upgrades (AWD) will add 150+ lbs, which I will try to offset as well).
550+ rwhp target (to start), but not a max effort build.
I don't want the engine bay to scream turbocharged engine, while also keeping the stock trunk.
E85/Flex Fuel conversion because allows higher IATs and I wanted to keep the turbo plumbing simple and avoid methanol injection (just another complexity and weigh challenge).
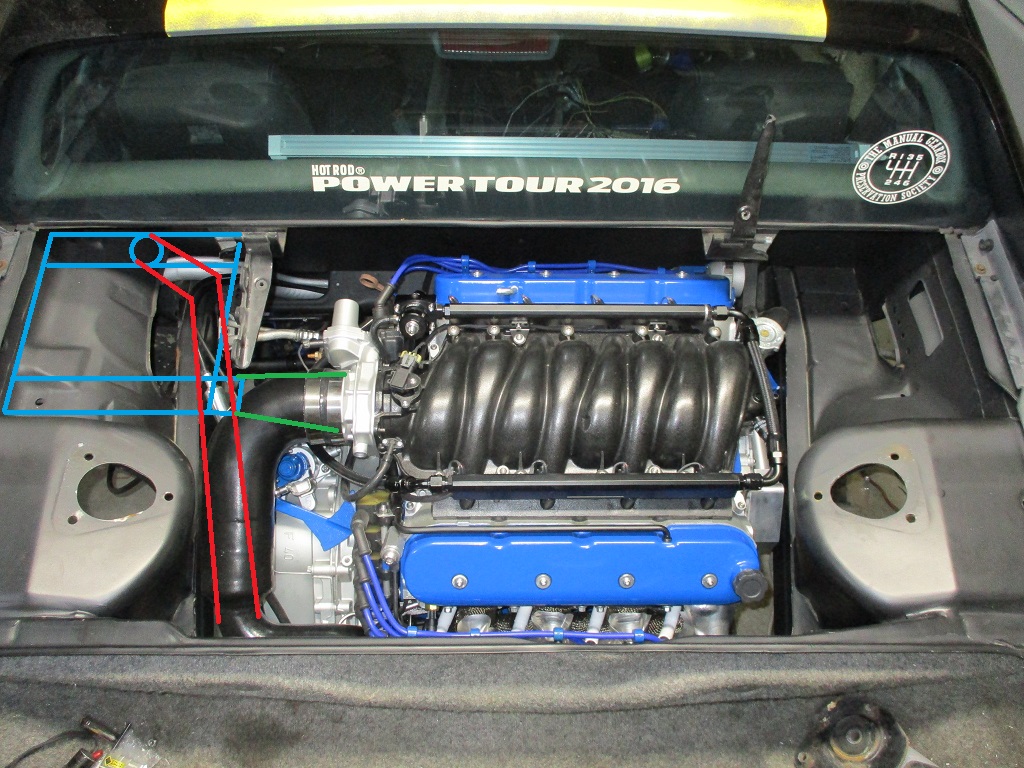
If I find I need to cool the charge pipe, I will likely just make or have made an A2A intercooler for this location. The red pipe would pass under the intercooler and enter from the bottom. The exit from the intercooler would be on the side. It would be the simplest and lightest solution and with some black paint most of it could hide in plain sight.
[This message has been edited by fieroguru (edited 09-20-2023).]
Nothing picture worthy... Still working on the wiring inside the cabin. Have loomed all the branches of the engine harness (500, 203, DBW/Cruise, DLC) and have the 500 connector wires terminated. Still need to crimp on the pins and install the connectors for the 203, DBW/Cruise, and DLC.
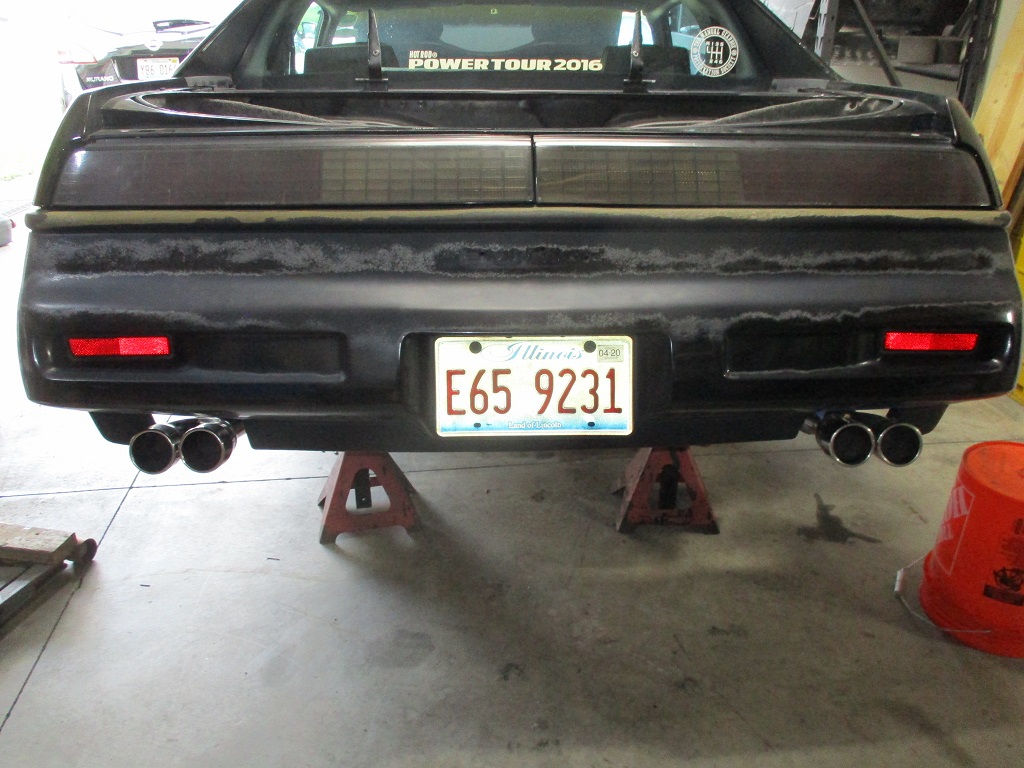
Car started about a week ago and I have been working on the electrical check out and base tune. So far my count is 3 bad brand new sensors... At this point the car has probably ran about 2-3 hours. With the longest stint about 30 minutes. Spent a fair amount of time with the scanner adding channels, creating custom PIDs, adding more tables, and adjusting the ranges on the gauges. The wideband is installed and logging through the ECM and the idle tune has been roughed in. The clutch engages and disengages and the water pump appears to be keeping the engine cool at idle. Even with the dual mufflers (3.5" and 3" open path perf tube), the car is still on the loud side, but part of that could be the car in the garage.
I still need to wire up the monitoring gauges inside the car and reassemble the rear suspension, align it, and start some road tuning.
I want to get the tune dialed in NA on gas, then enable flex fuel and dial in that portion, then install a larger spring in the wastegate and start building some boost.
Originally posted by La fiera: That is awesome Guru! Can't wait to hear it wail!
Thanks! We will see how the day goes and if I get some idle and some video of it revving.
quote
Originally posted by qwikgta: I know you already mentioned it, but just WOW, this is amazing. My LS3 swap is full of crap here. Looks great.
Thanks! To accomplish the look in that particular area probably added 2 years to the upgrade. I probably had 7+ solutions that in the end I wasn't happy with, so they were scrapped and I started over. To me it was worth the effort to raise the bar on a clutter free 550+ whp LS swap.
Rear suspension and brakes are installed. Car is on blocks and ready for the alignment. I still need to wire up some of the gauges to the temp gauge panel, and then the car should move out of the garage under its own power today... might even makes a spin around the neighborhood.
Sara had other plans for me today... supposed to be in the 20's tonight, so the Murano needed its spot in the garage back. This means I had to do a fair amount of cleaning up the garage. It was also raining most of the day, so didn't want to take the car out.
I did get the alignment done, wheels on, axle nuts torqued, new dyna batt battery installed, and some temporary sway bar end links. It appears I have misplaced my rear zero lash sway bar links, so I ordered a new set from Rodney.
Here is how the car sits now with room for the Murano:
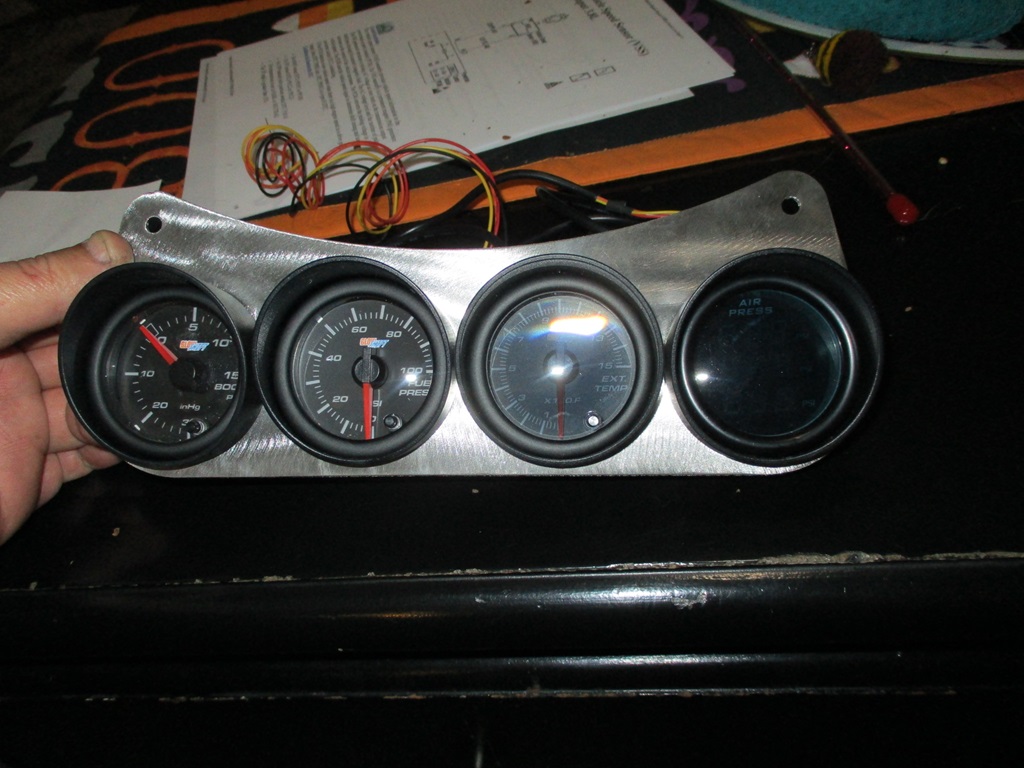
The console is out of the car, but the dash is installed. So I fabbed this temp gauge bracket that will mount under the center vents on the dash. From left to right: Boost, Fuel Pressure, EGT, 3-way pressure - Intake tube, exhaust manifold, exhaust post turbo.
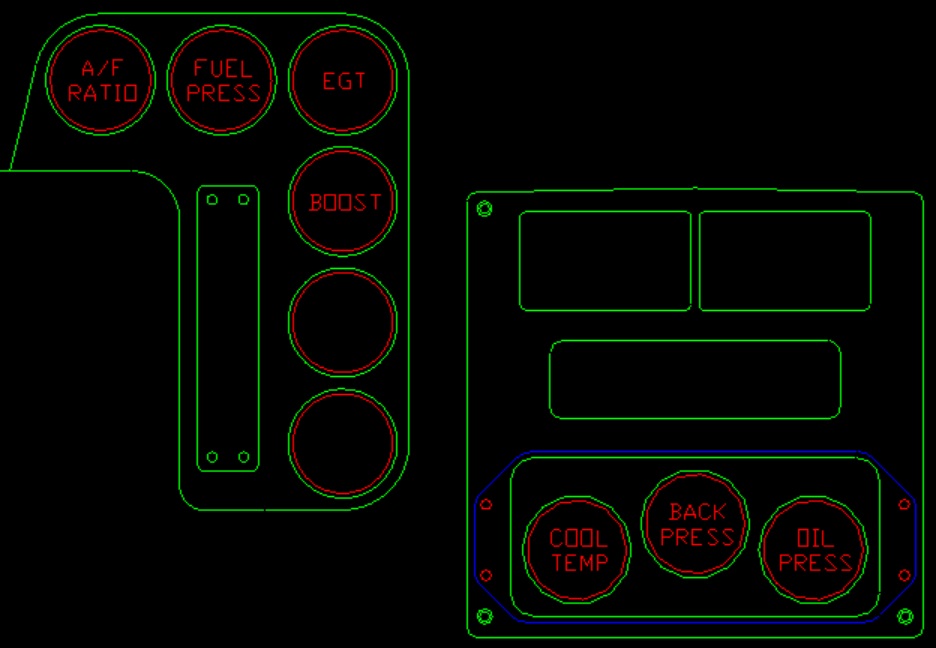
Here is what I am thinking will be the more final gauge layout. I am moving the radio to the aux gauge location and installing 3 gauges down in the radio location. The rest will be on a panel that will bolt to the dash using the pre-existing holes for the defrost/decklid release panel (my car does not have either). Not sure if there will be 2 more gauges, or if I will use the lower section for boost control and/or some switches.
Here is the engine bay pic with the struts installed:
After a little more than 4 years, the LS4/F40 Fiero is back on the road and moving under its own power! I have driven it about 25 or so miles, but haven't ventured more than about 3-4 miles from home yet.
The lower range of VE as well as MAF have been tuned within about 5%. Still need to work on the idle spark and air flow as well as some full throttle runs with the light wastegate spring to keep it out of boost.
Yes, if can keep from breaking it, I will be doing the HRPT and LS Fest to start. Might take it to a few other places. It was built to drive, so it will get a lot of miles on it!
[This message has been edited by fieroguru (edited 11-05-2023).]