Originally posted by fieroguru: I am ditching DoD for a camshaft with more power and better drivabilty.
Have you thought about retrofitting VVT as well, or done any research on it? I did a bit of research into how the VVT on the newer Gen IV engines works, last night, and am now leaning very strongly toward going with VVT on my build. It of course limits the cam choices again, but allows some pretty interesting things with balancing performance and economy too.
Have you thought about retrofitting VVT as well, or done any research on it? I did a bit of research into how the VVT on the newer Gen IV engines works, last night, and am now leaning very strongly toward going with VVT on my build. It of course limits the cam choices again, but allows some pretty interesting things with balancing performance and economy too.
Originally posted by ericjon262: FWIW, Mast Motorsports does VVT LSx cams
Yep, so does Comp Cams, Texas Speed, and several others. They also do DOD cams. Ran across plenty of them yesterday when searching for info on how the LSx VVT setup works.
Have you thought about retrofitting VVT as well, or done any research on it? I did a bit of research into how the VVT on the newer Gen IV engines works, last night, and am now leaning very strongly toward going with VVT on my build. It of course limits the cam choices again, but allows some pretty interesting things with balancing performance and economy too.
Just curious what your thoughts are on it.
Yes, I have looked into it. My engine is already a Gen 4, the E67 ecm is already setup for VVT, and has the tables populated so I think the conversion would be fairly simple - add the VVT hardware + timing cover, wire it up, see if it works, then tune it.
The only real issue is the timing cover needs a little more than 1" of additional room between the timing cover and the water pump for the VVT hardware to fit. switching to an electric water pump would be about the only way I could do it w/o having to completely rework the whole accessory drive to shift the balancer/belt out the needed amount, which puts it in the middle of the frame rail. But I don't want to run an electric water pump.
My next 2 electrical upgrades would be: 1. see if the LS4 E67 ECM will run my swap w/o transmission - concern is speedo input function 2. upgrade will be to flex fuel. I just need to add the sensor to the return line and run a couple wires to the ecm. I will need larger injectors and fuel pump too, but then I can switch to running E85 which is about $0.80/ gallon cheaper than the 93 octane it uses now. Then I can tune it for E85 as well and limit the MPG. I could still fill up with gas if I travel to place w/o flex fuel. The tables are already in the E67 LS4 calibration.
The rest of the summer is going to be quite busy with 2 more brake kits to launch (12" kit for Hybrids - 84-87 front/88 rear and the 13" for the 84-87), the LS4 flywheel/starter bracket launch, making some modified decklid hinges, and starting 1-2 other personal swaps... so the LS4/F40 Fiero probably won't get much attention for a while.
Originally posted by fieroguru: The only real issue is the timing cover needs a little more than 1" of additional room between the timing cover and the water pump for the VVT hardware to fit. switching to an electric water pump would be about the only way I could do it w/o having to completely rework the whole accessory drive to shift the balancer/belt out the needed amount, which puts it in the middle of the frame rail. But I don't want to run an electric water pump.
I haven't really looked at the Gen V engines much yet, but I see the Ecotec3 truck engines have a water pump that routes over top of the VVT hardware on the timing cover, and hang off to the driver side of the engine. It looks like it doesn't hang out as far as the LS4 manifold does, and the thermostat is back up top. I don't know if it will bolt up to the Gen IV engine yet though. Still have to dig a bit to see. If they do though, they could be a pretty good option for people doing LS swaps who want a mechanical pump, with a custom exit/fill tube at the thermostat similar to the stock 2.8, and possibly converting the intake port on the pump to an angled connection (or cutting it off and welding up an exit to the rear, to be more suitable for the Fiero.
The Gen V engine also has the new variable displacement oil pump, which will help slightly with MPG and avoid torque loss. If it will fit the Gen IV engines as well, I think I might install one on my build.
On the subject of E85, the Gen V has a sensor on the feed line that measures more accurately the content of ethanol in the fuel. I don't know if the signal is the same between it and the older system though. If it is, then maybe it would be a better option. The tech article I just read about it in, stated that one would no longer need to wait until an empty tank to switch between E85 and regular fuel in the trucks, like is necessary on the Gen IV flex fuel engines. I don't know enough about how that works yet, to say if it would be good for you, but it might be something you want to look into before doing the conversion, if you're going to add flex fuel capability.
Originally posted by dobey: I haven't really looked at the Gen V engines much yet, but I see the Ecotec3 truck engines have a water pump that routes over top of the VVT hardware on the timing cover, and hang off to the driver side of the engine. It looks like it doesn't hang out as far as the LS4 manifold does, and the thermostat is back up top. I don't know if it will bolt up to the Gen IV engine yet though.
They will physically bolt to the block, but the ports are wrong. The top hole is still round, but its a different diameter and offset (not the issue). The bottom one is rectangular on both engines, but the rectangle is 90 degree from each other, so there are areas of the ports that won't seal up with a normal gasket. The other issue is the "inside" of the belt is 4 5/8" from the block vs. the LS4's about 1 1/2"... so a shimmed LS4 pump to clear VVT will still have the belt closer to the engine than this pump.
quote
Originally posted by dobey: On the subject of E85, the Gen V has a sensor on the feed line that measures more accurately the content of ethanol in the fuel. I don't know if the signal is the same between it and the older system though. If it is, then maybe it would be a better option. The tech article I just read about it in, stated that one would no longer need to wait until an empty tank to switch between E85 and regular fuel in the trucks, like is necessary on the Gen IV flex fuel engines. I don't know enough about how that works yet, to say if it would be good for you, but it might be something you want to look into before doing the conversion, if you're going to add flex fuel capability.
I am not sure where the fuel sensor is in the OEM Gen 4 engines (might be in the tank somewhere), but the guys converting to flex fuel are putting the sensor in the return line (which was my plan), which should work just like the Gen 5 setup. The E67 ecm has a table to change the stoich A/F ratio for 0 to 100% alcohol in 6.25% increments so it shouldn't matter what concentration of E85 to gas is ran. With the sensor in the return line, it should know the % alcohol that is running through the engine and compensate for it in a quasi-real time fashion (there is a slight lag between the fuel splitting and a portion making its way to the injectors and the other portion going back through the return line. Installing it on the fuel rail (If you have aftermarket fuel rails) might be even better.
I would love to do a Gen 5 4.3L swap, but I want to wait till the tuning software is further developed/understood.
[This message has been edited by fieroguru (edited 07-18-2014).]
Ah, well that sucks about the water pump. I finally managed to find a picture and indeed they're wrong. Would need an adapter with Gen IV gasket on one side, and Gen V on the other. Guess I won't be trying that then.
Thanks.
Hopefully the oil pump will fit though. The variable displacement pump is a nice way to get a little drag reduction.
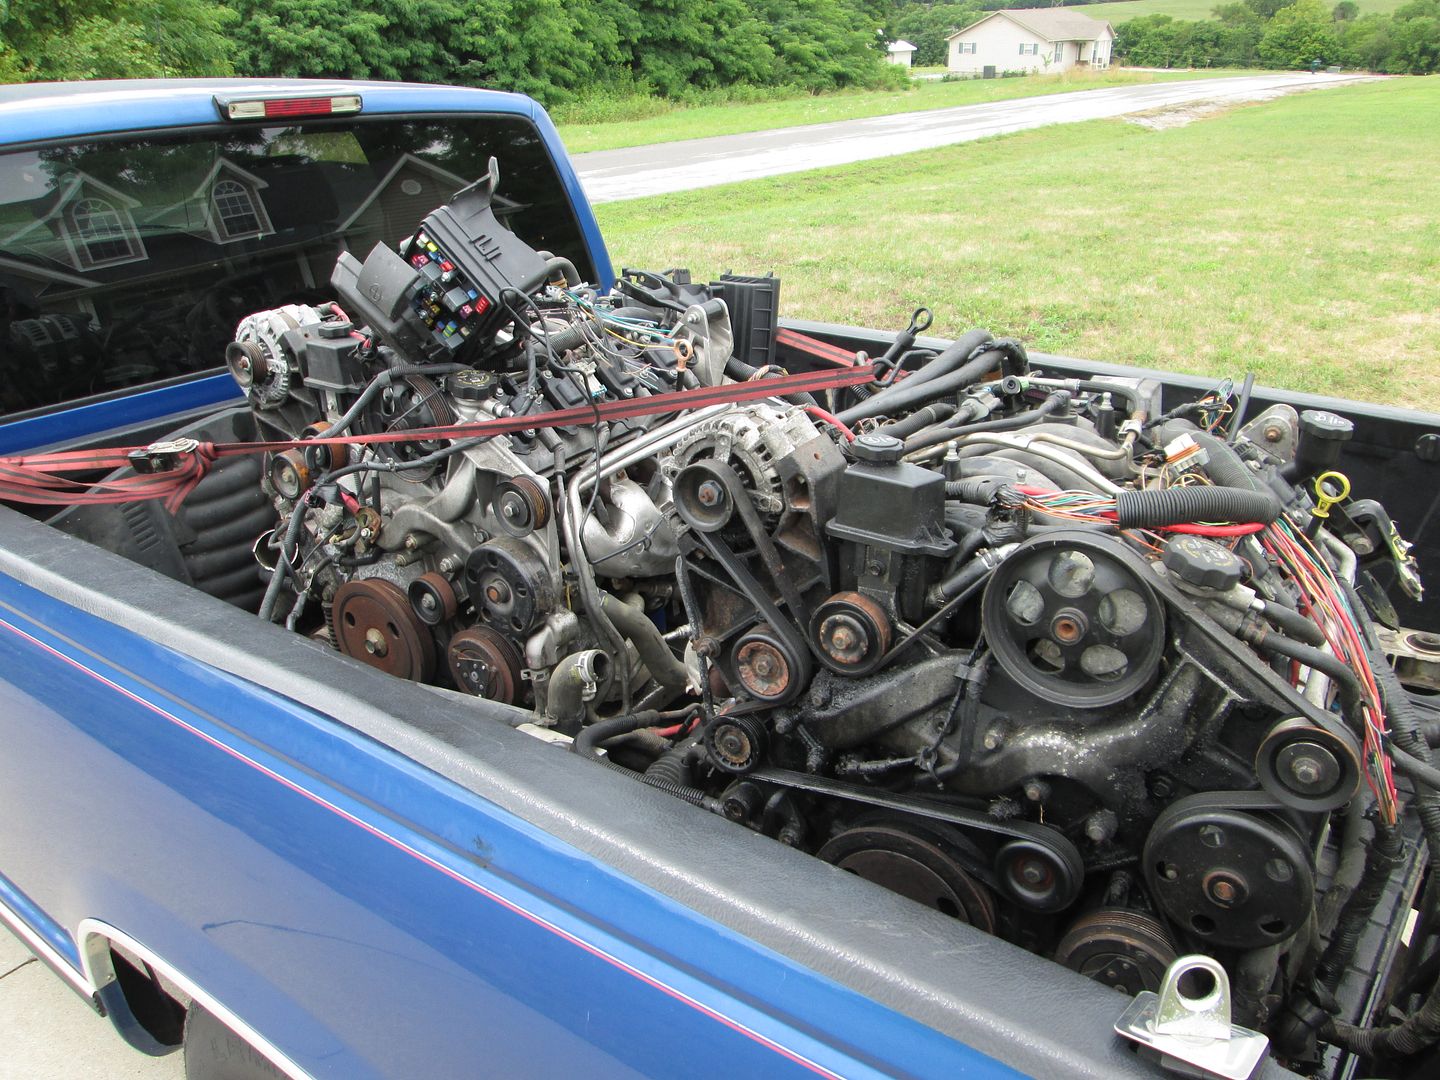
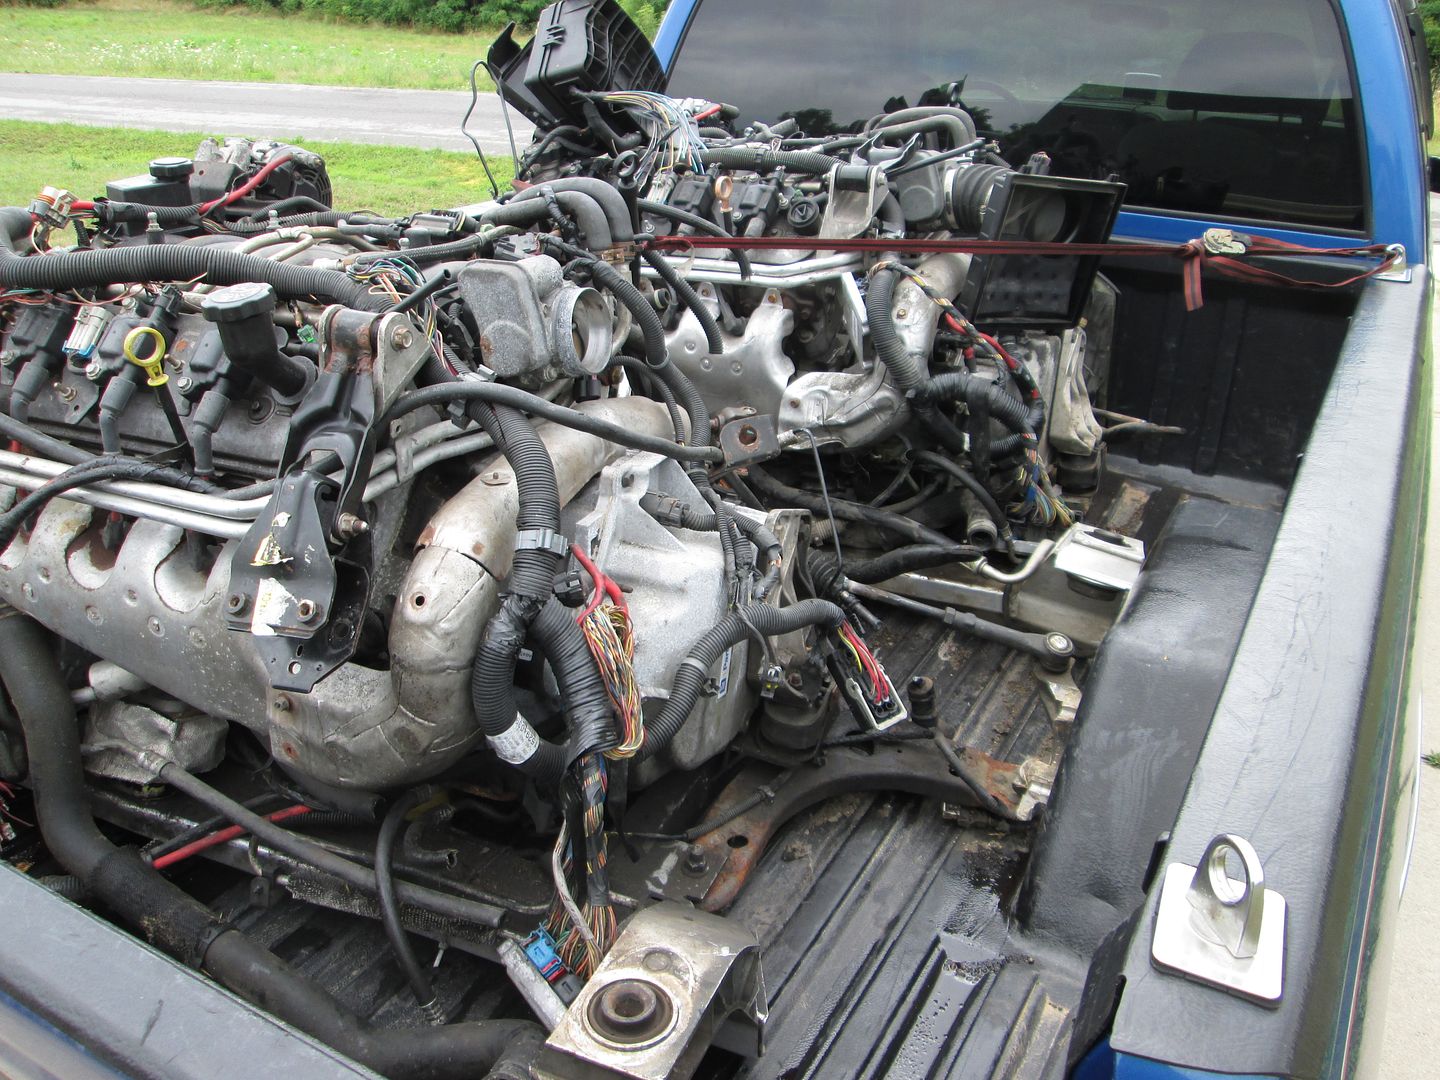
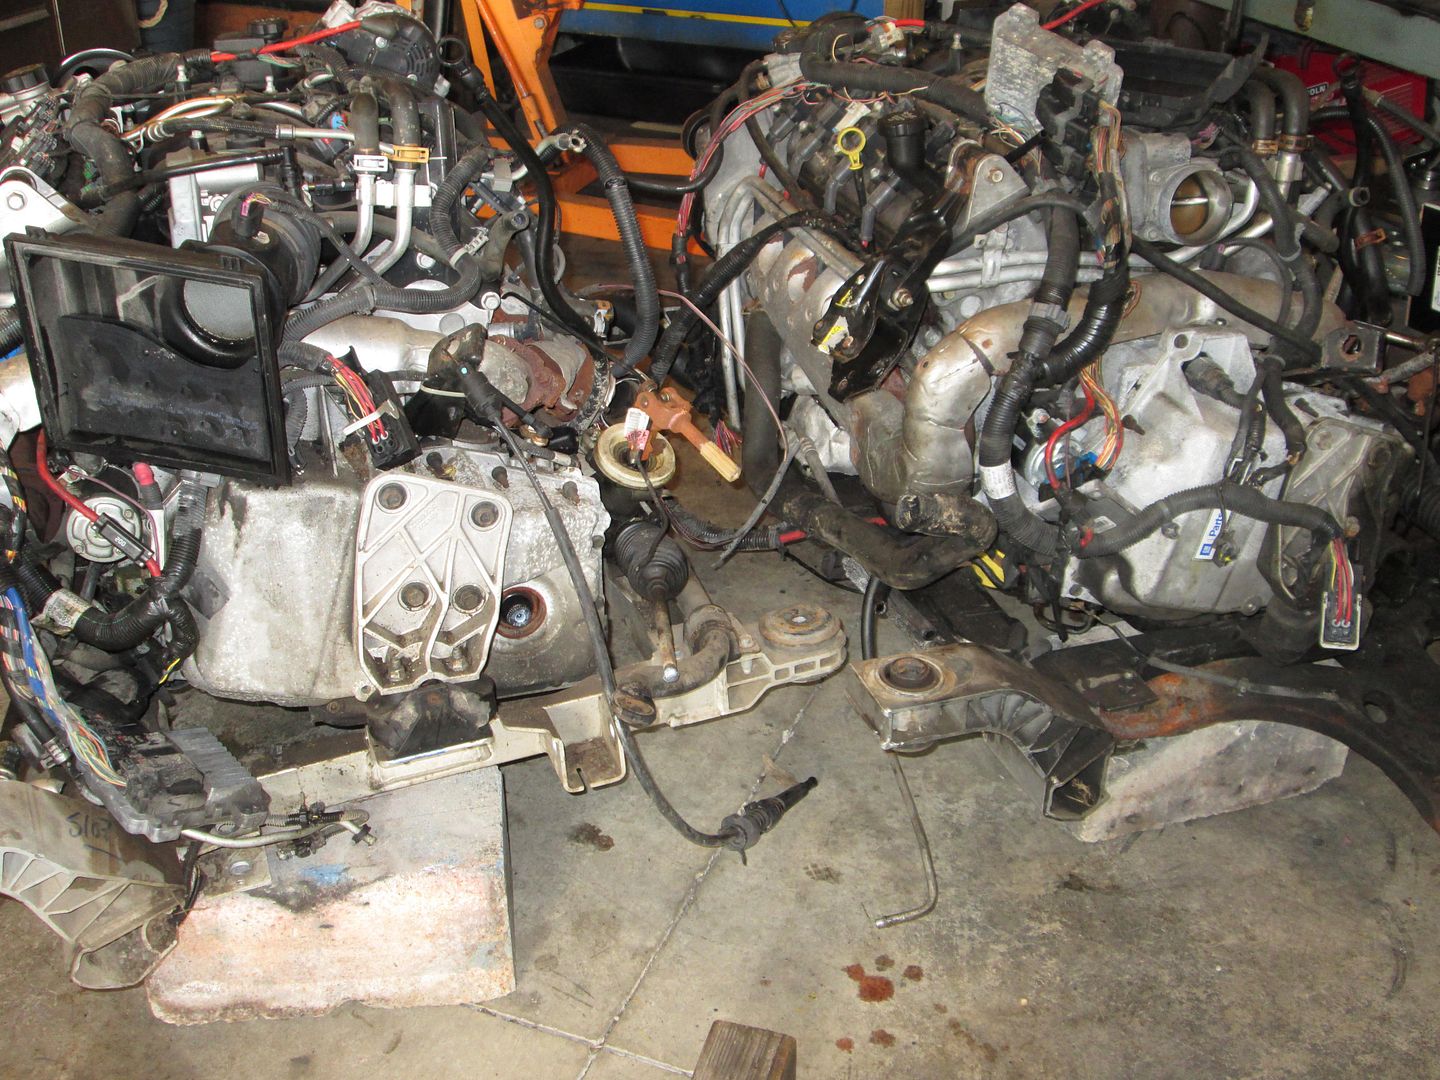
Now I have the engines for my next two LS4 projects. One is a 92K 2006 and the other is a 114K 2007 - both from Impala's. I only needed one to start my next LS4/F40 project, but the other one had a factory replacement transmission (unknown how long since its been replaced), so I picked them both up. They are complete drop outs (except one is missing the MAF - but I have 2 on the shelf) and I could have had the suspension, but both wouldn't fit with it on and putting them in the bed of the truck would have made it even more overweight. It was a 3 hr drive back home and I didn't want to press my luck too much.
My plans with these is I will do two more LS4 swaps. Both will be bone stock with zero performance upgrades. A custom harness will be the only aesthetic upgrade (both engines have covers), but I will clean them up and paint the aluminum to keep it from oxidizing. One will have the F40 6 speed, the other will keep the 4T65e-hd. Once they are running/driving I will likely sell them either as dropouts (on 88 cradles) or as complete cars. The buyers could have me do some performance upgrades before they pick them up, but I don't want to overbuild them...
Waiting for something to be done with them (the 06 one had a pretty bad power steering leak and oil soaked the accessory drive):
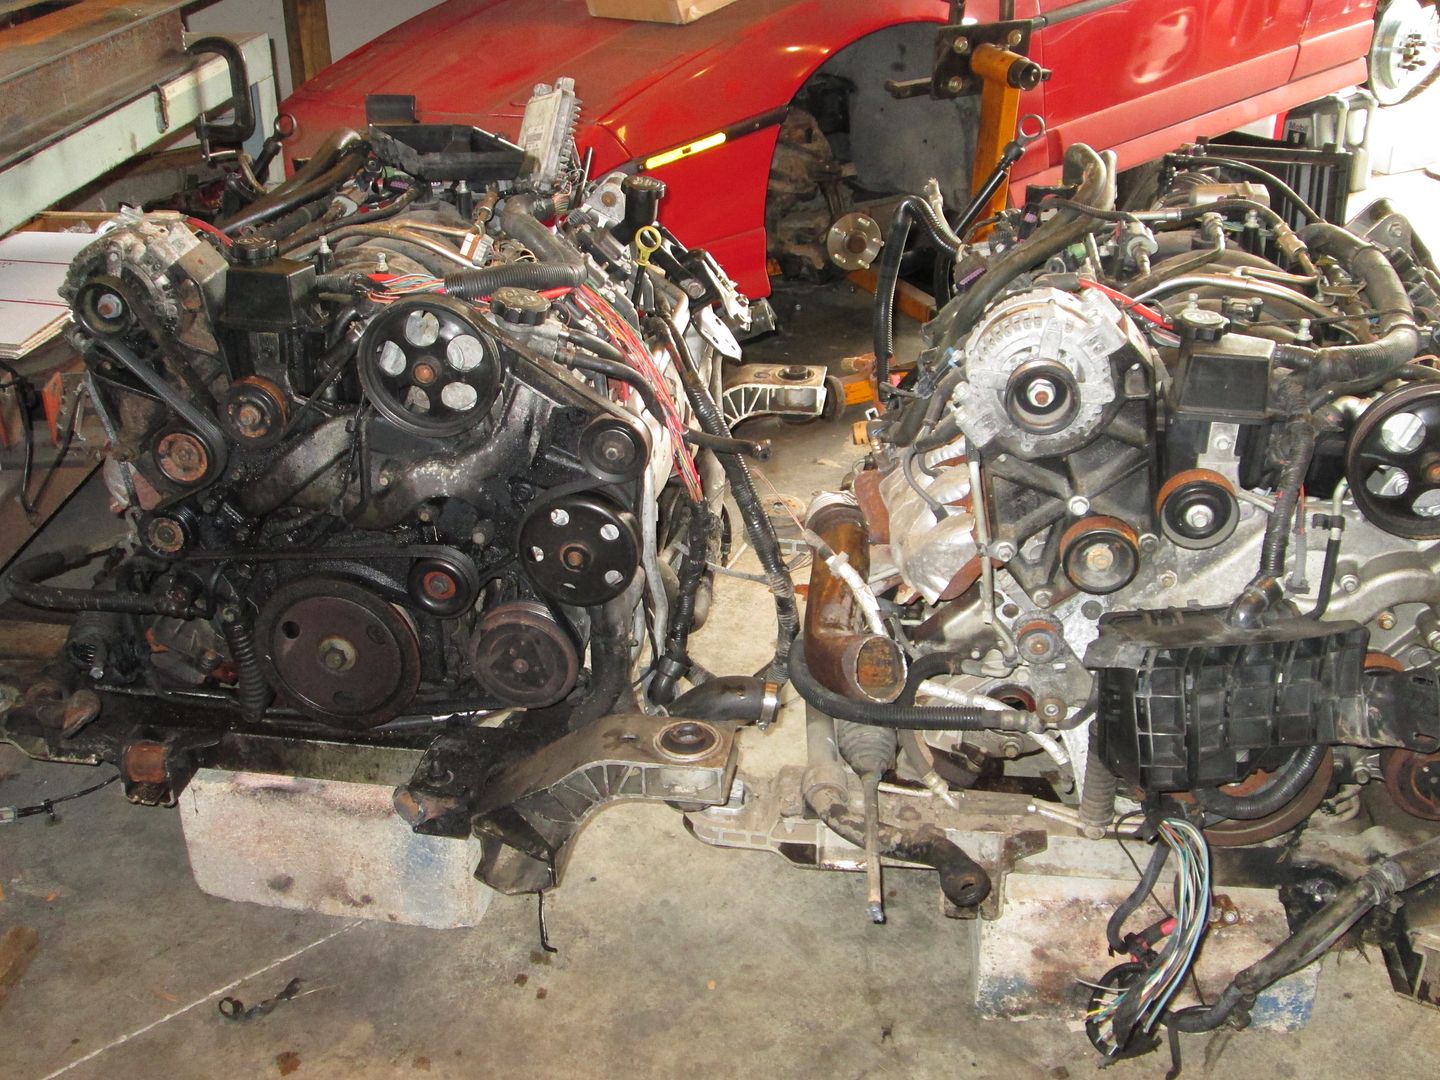
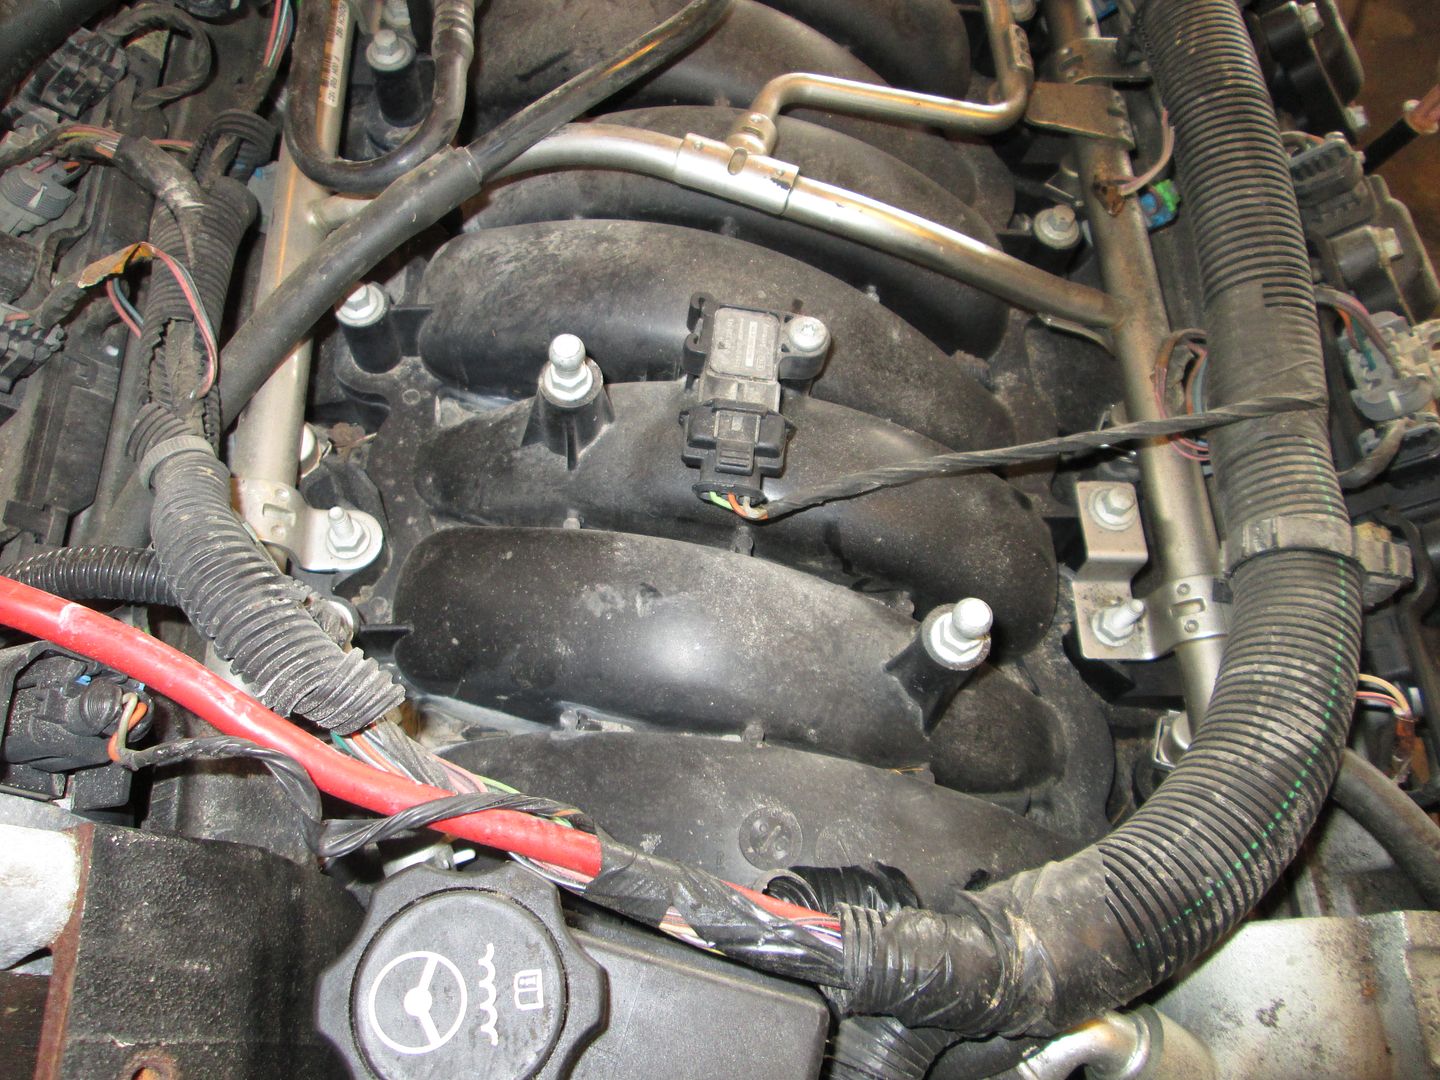
One of the easiest ways to tell an 05/06 (Gen III) from an 07+ (Gen IV) is the placement of the MAP sensor.
07 (right on top of the manifold):
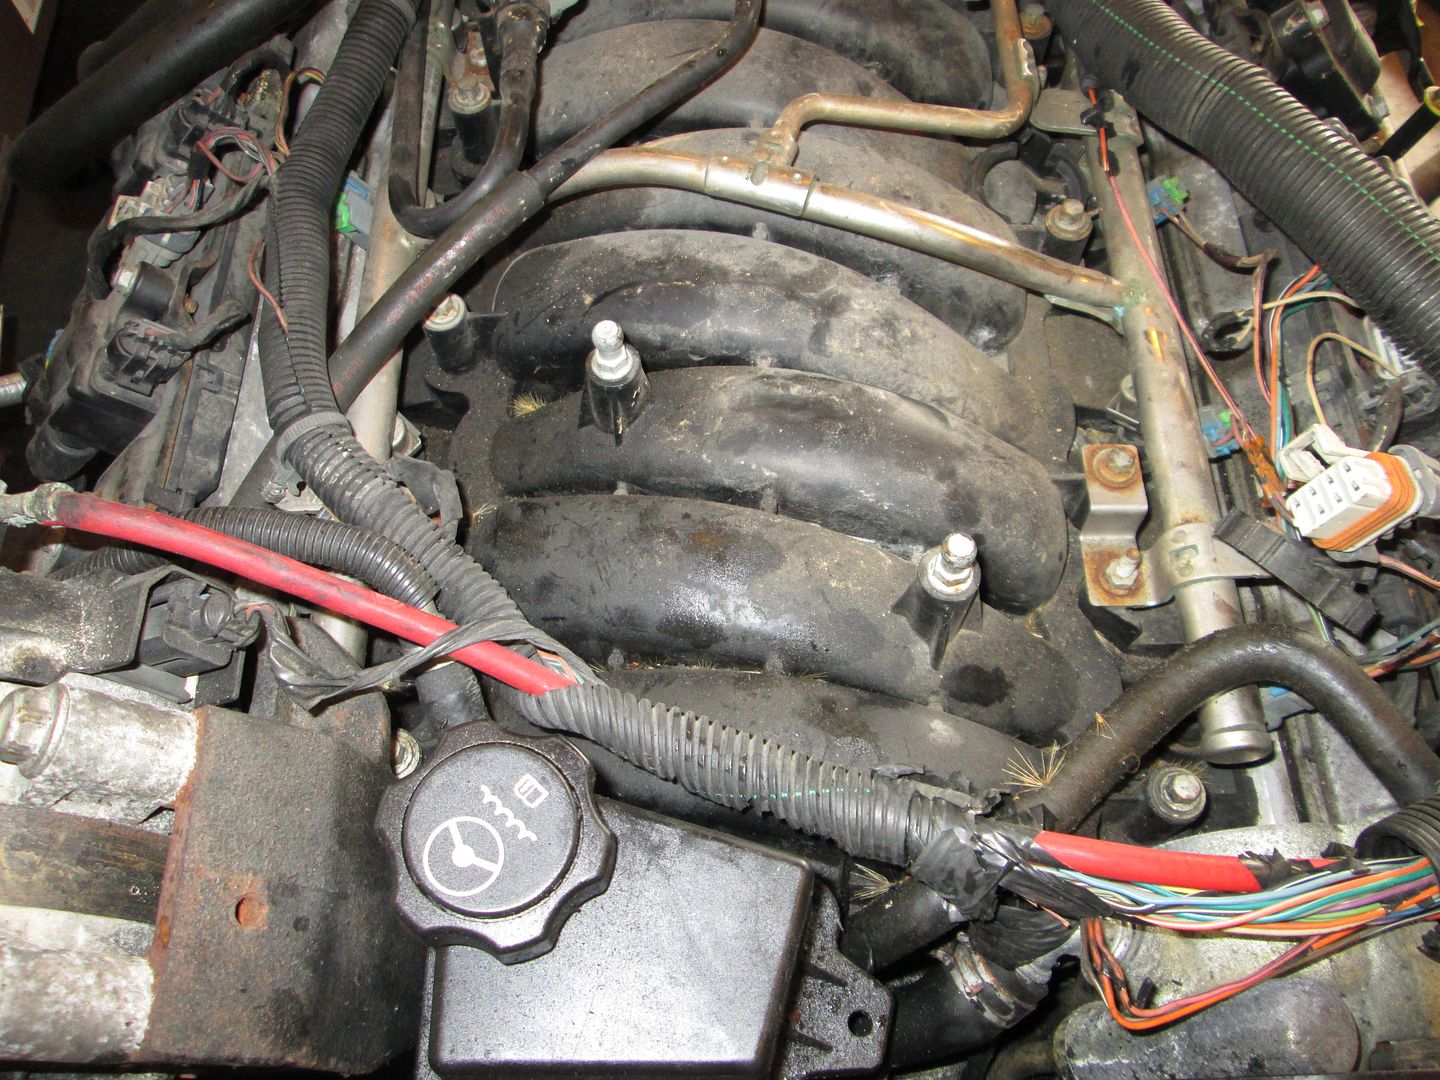
06 (is on the end behind the power steering pump - or not on the top of the intake):
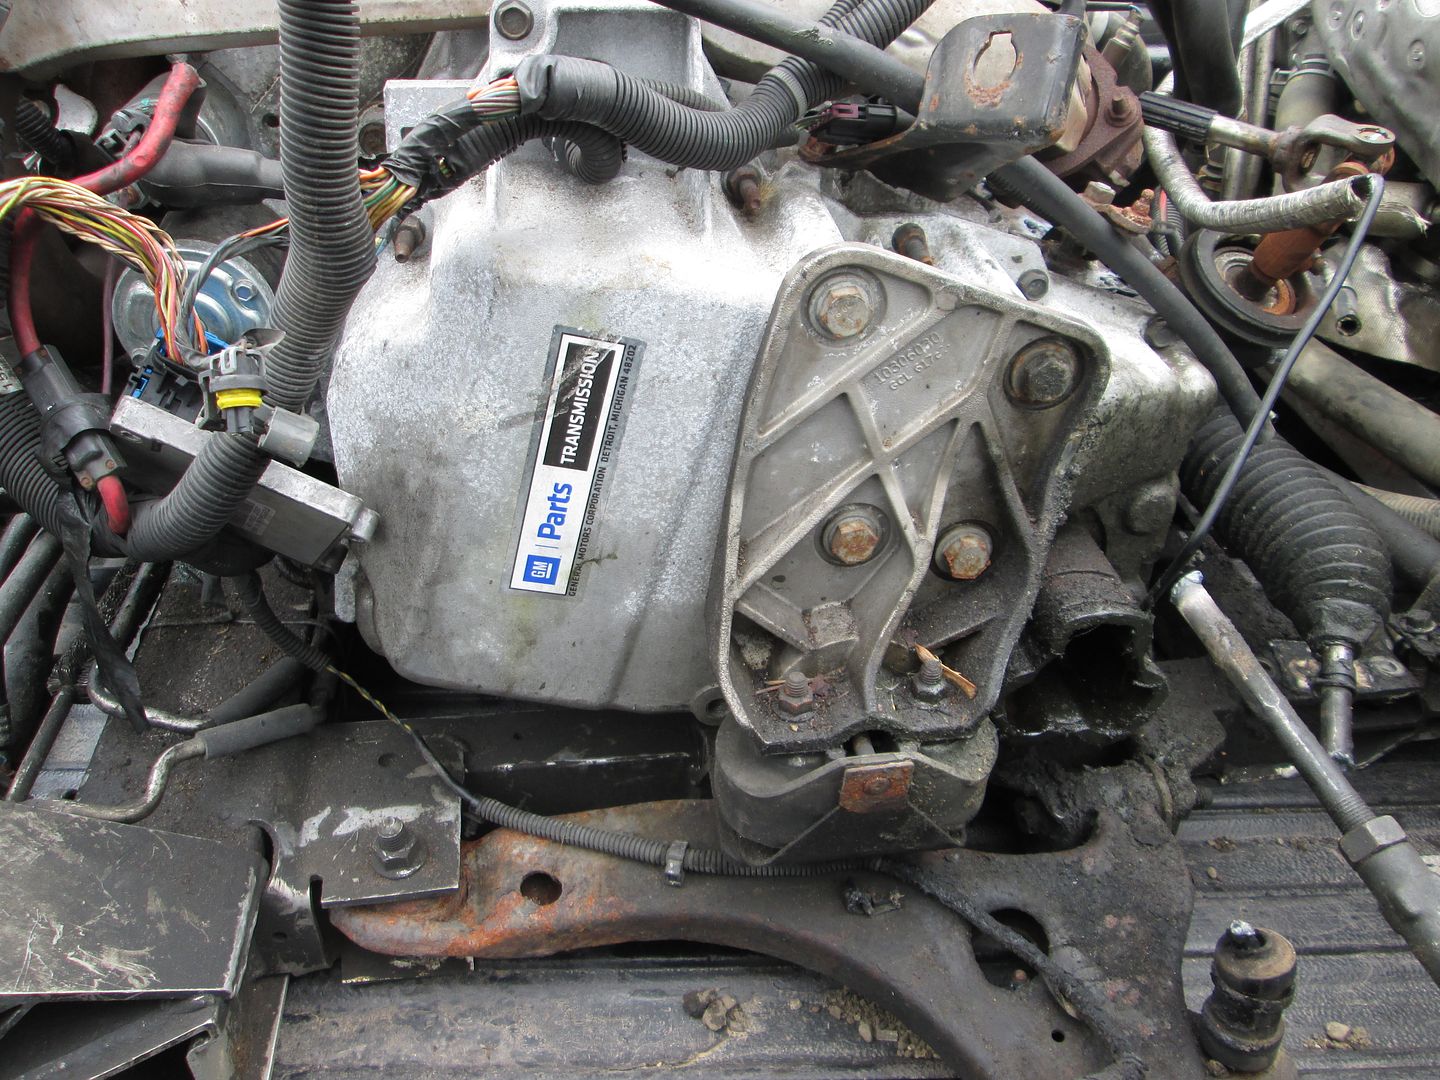
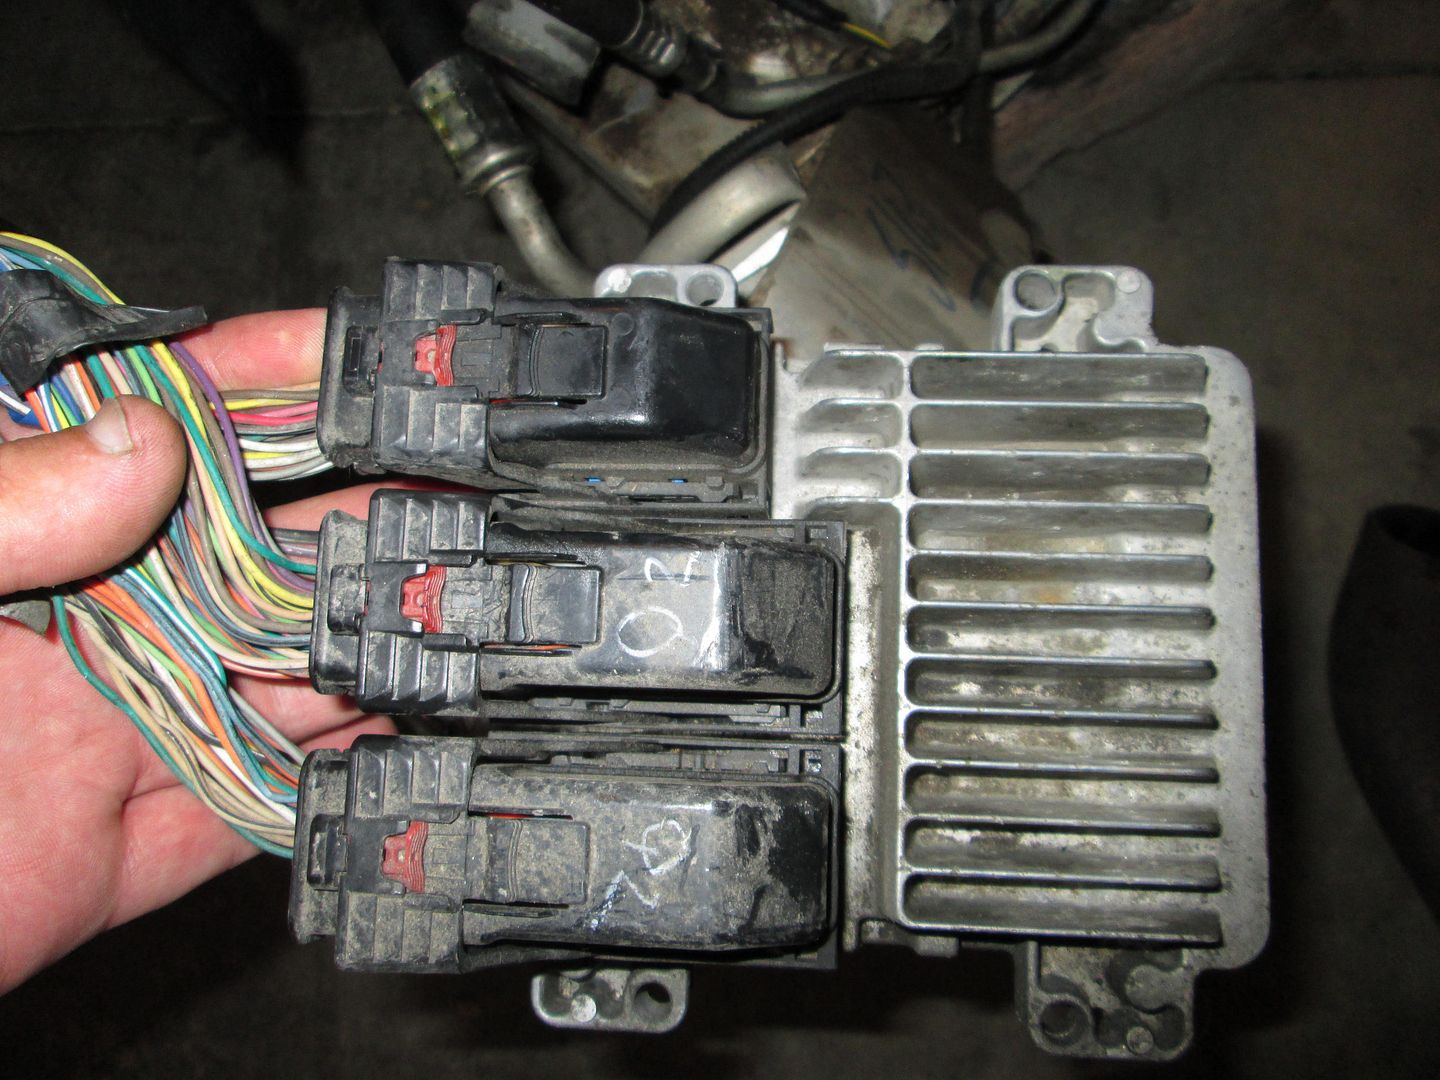
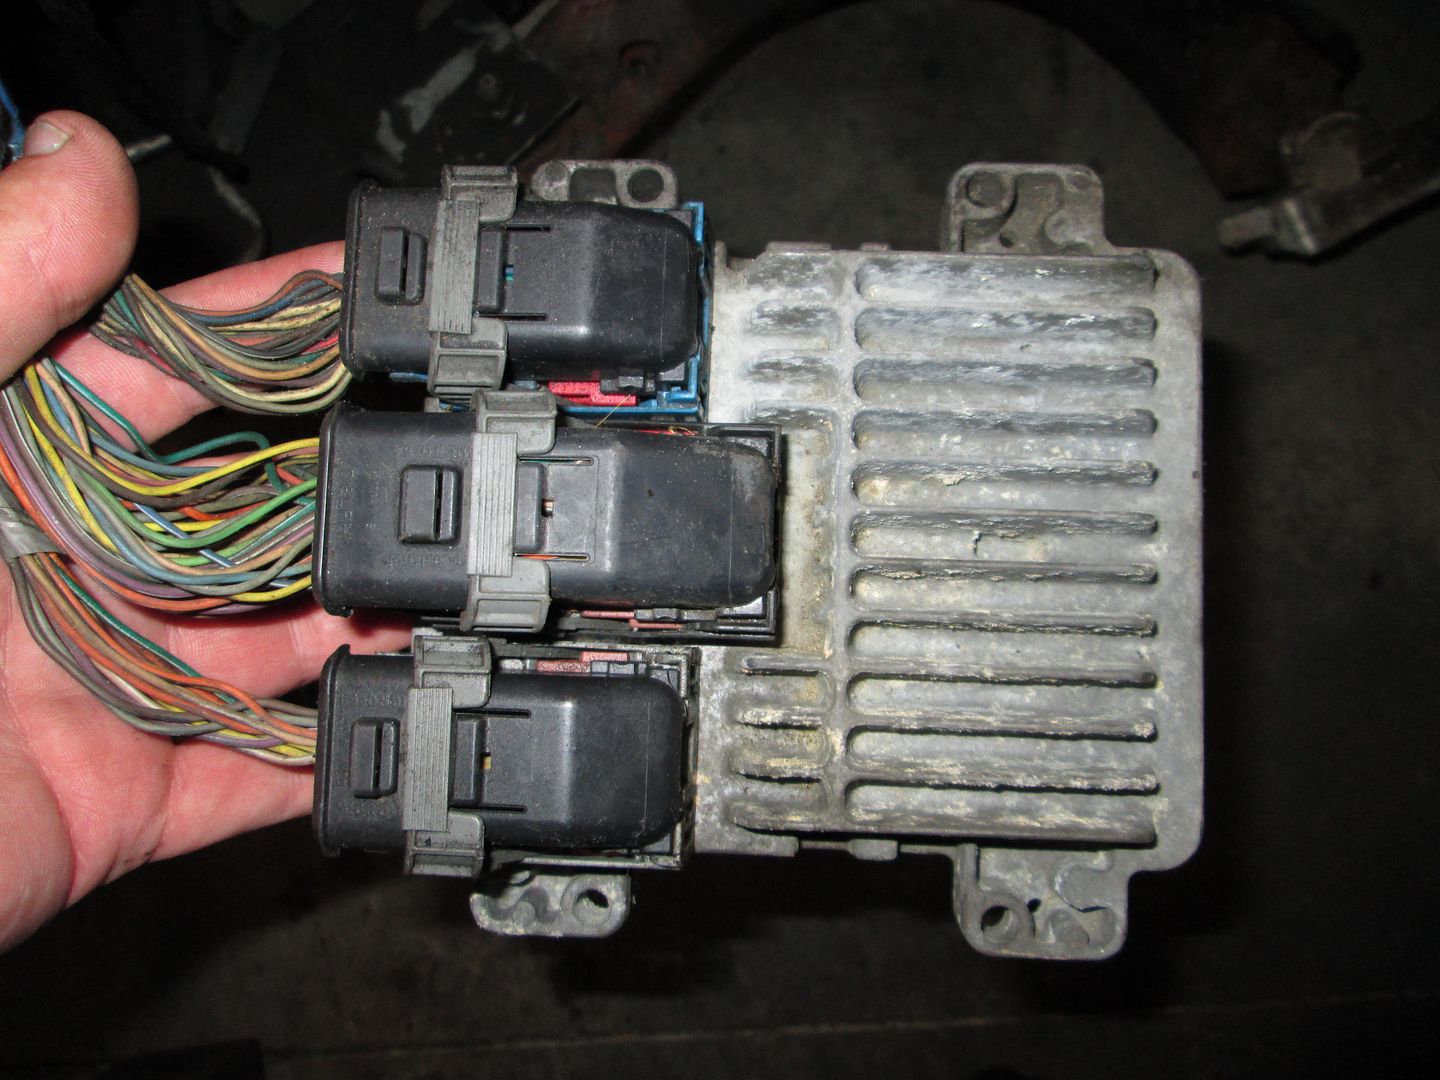
Here is the small difference in the ECMs. The 07 uses the E67 ecm. It has the longer gray connector:
The 05/06 uses the E40 ECM and has the shorter gray connector:
[This message has been edited by fieroguru (edited 07-19-2014).]
Originally posted by dobey: Hopefully the oil pump will fit though. The variable displacement pump is a nice way to get a little drag reduction.
Looks like the new oil pump won't fit on the Gen III/IV engines either. The pickup is a little different, and the bolt holes and pump outlet don't line up either. So no using the variable displacement pump. :-/
Been lurking on this build for a while and have to say your a master at working on cars. Have a few questions about some of the tools you are using. What kind of brake are you using to bend the steel? And I would really be interested in the LS4 with the auto transmission once you are done with it.
Keep up the good work, I one day hope I have half as much talent as you do
Thanks for the compliment!
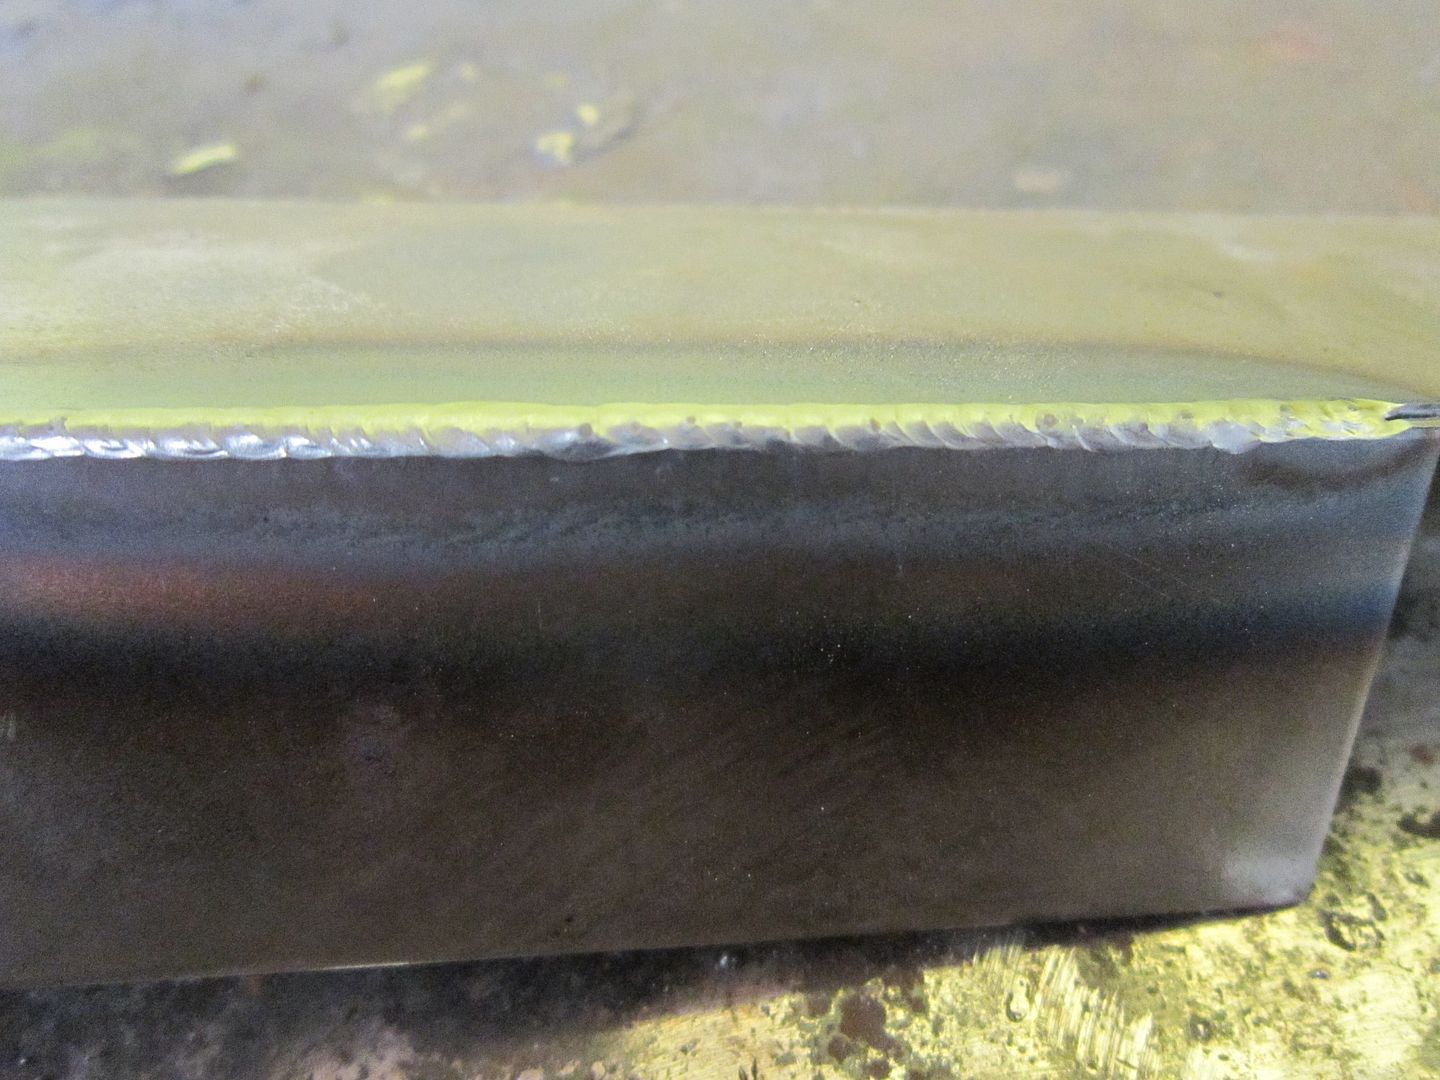
I have an old 48" home-made brake (I didn't build it) that I can use for 16ga and thinner. Most of the 1/8" metal bends I use a cut off tool to score the bend line (make it thinner - about 16ga), then bend it with a vice and hammer. Once it is at the right angle, I go back and weld the scored seam to restore the material thickness. Then I grind down the weld so it is a nice smooth seam. Depending on the shape of the seam, sometimes I just butt two pieces of 1/8" together and weld it solid on the outside and stitch weld the inside. Then go back and grind the outside weld down smooth.
I like fabricated parts to not look like they were fabricated, so I take the extra time to clean them up and give the corners a uniform radius (bolt/clamp a washer to the corner and grind the edge to match the washer).
Tools help, but lot of it is process, technique, and just plain old effort and willingness to do it again if you don't like it.
As for the LS4's, I am not quoting prices or letting anyone claim dibs on them until much further down the road. There are several things I want to research with them and figure out before I will be done with them.
That makes a lot of sense about doing the bends. I have worked on a lot of custom paintball rigs and I use a similar method on bending the aluminium for the braces on the dual bottle remote setups we use for paintball scenario games. I will give it a shot when I make my own mounts for the 3800 swap. Thanks Paul
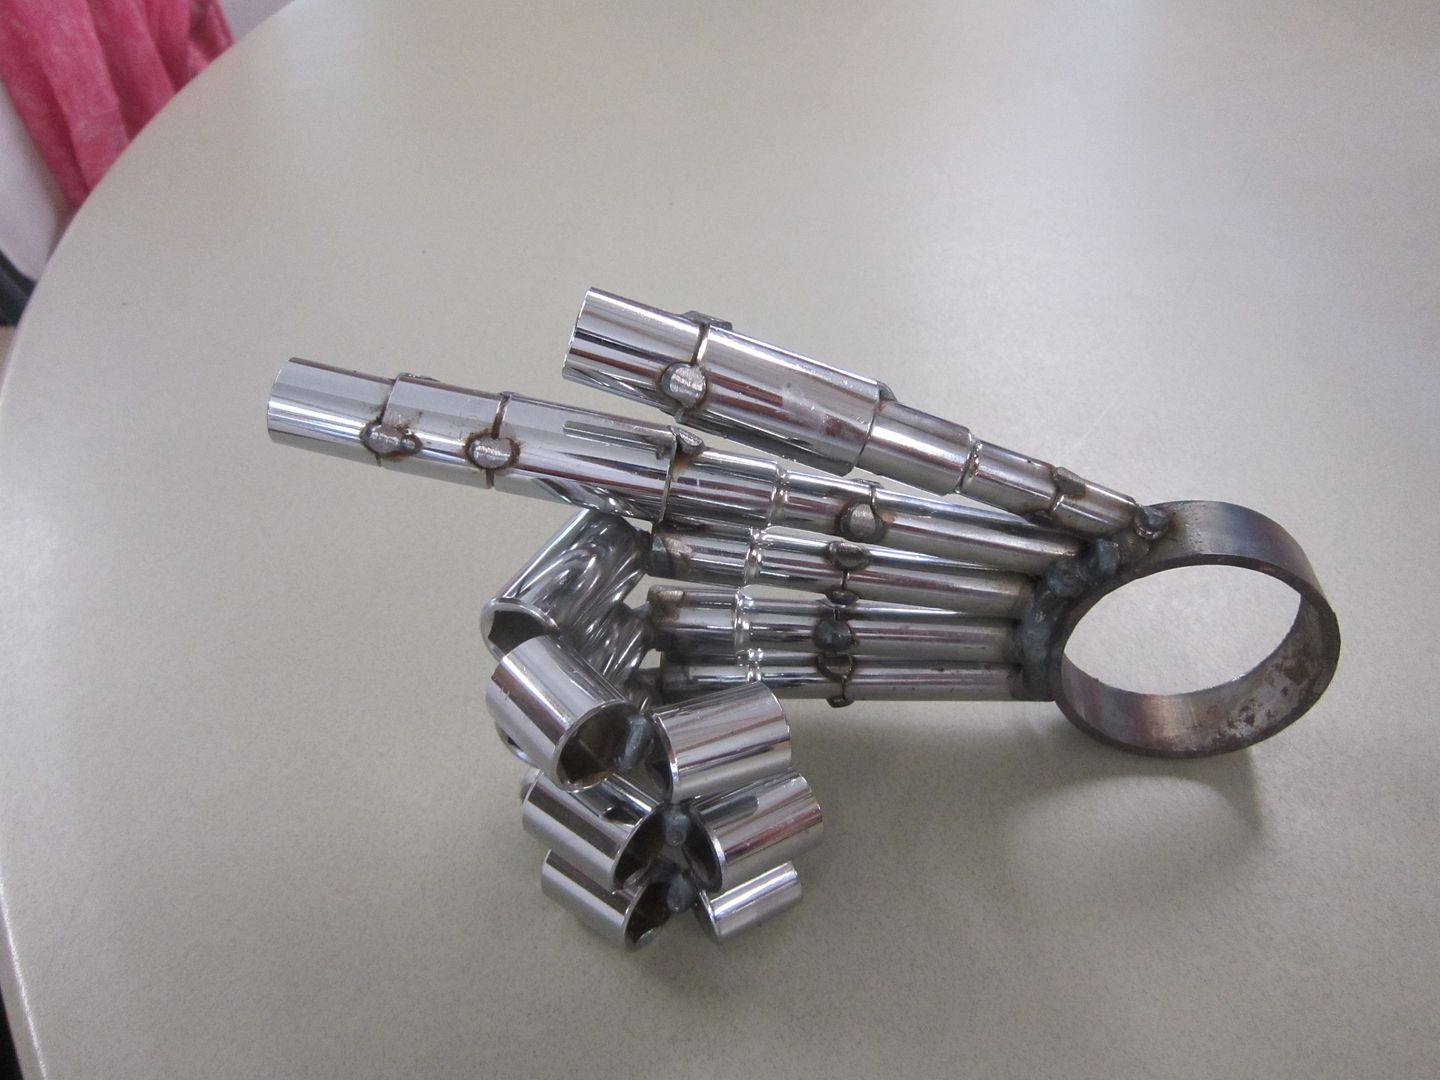
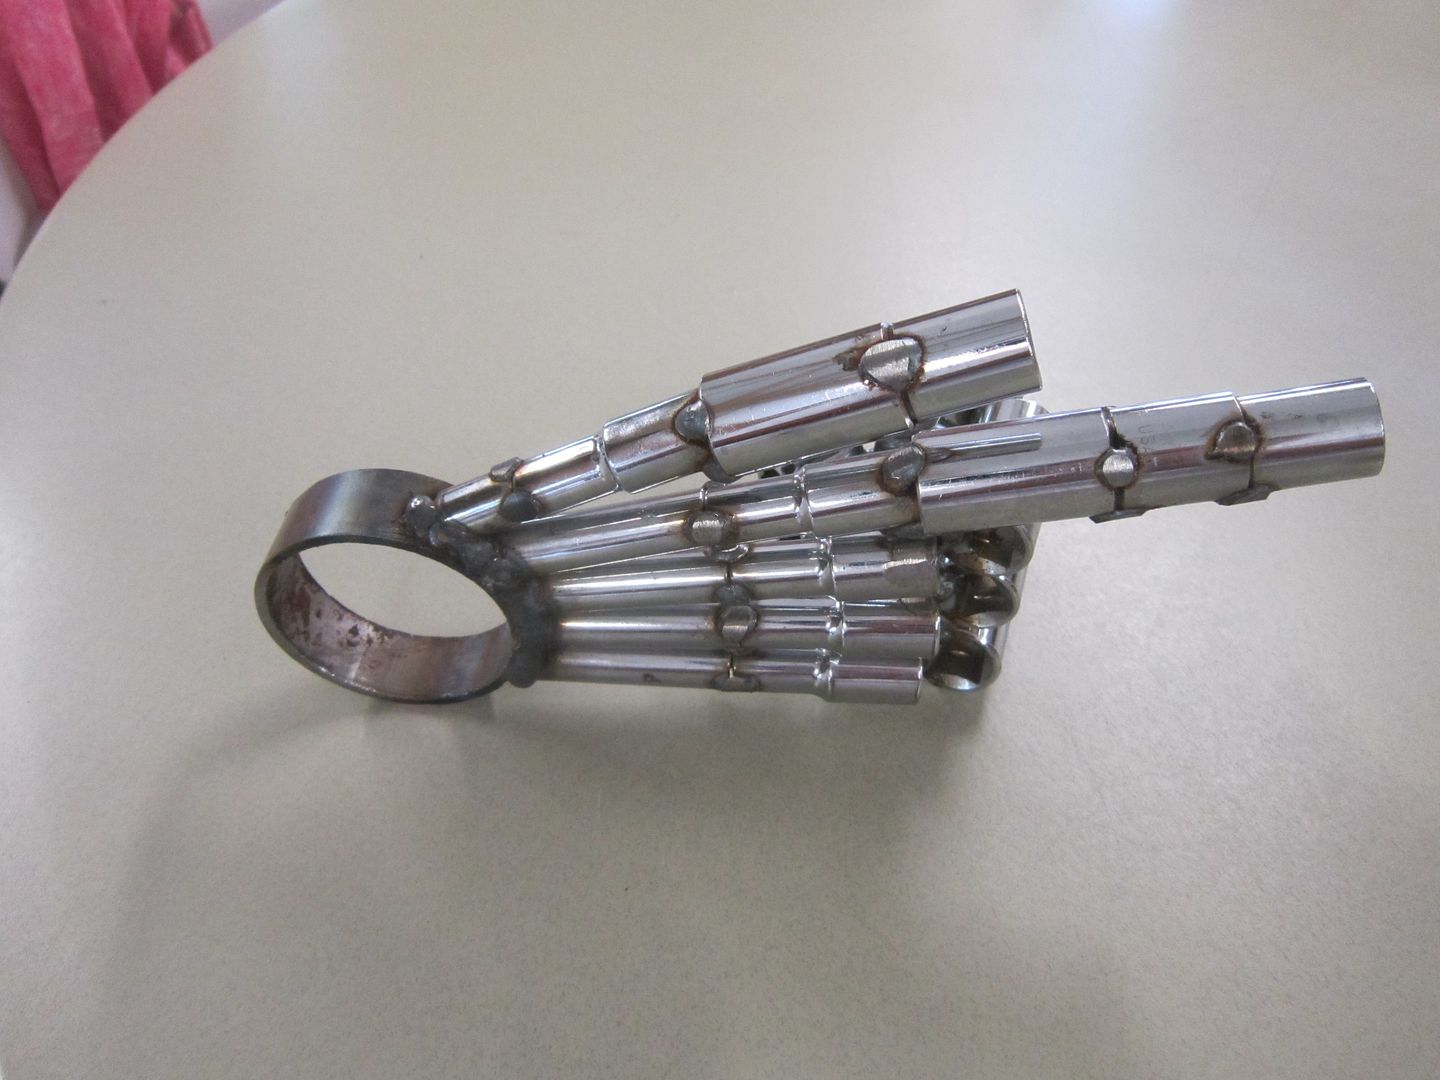
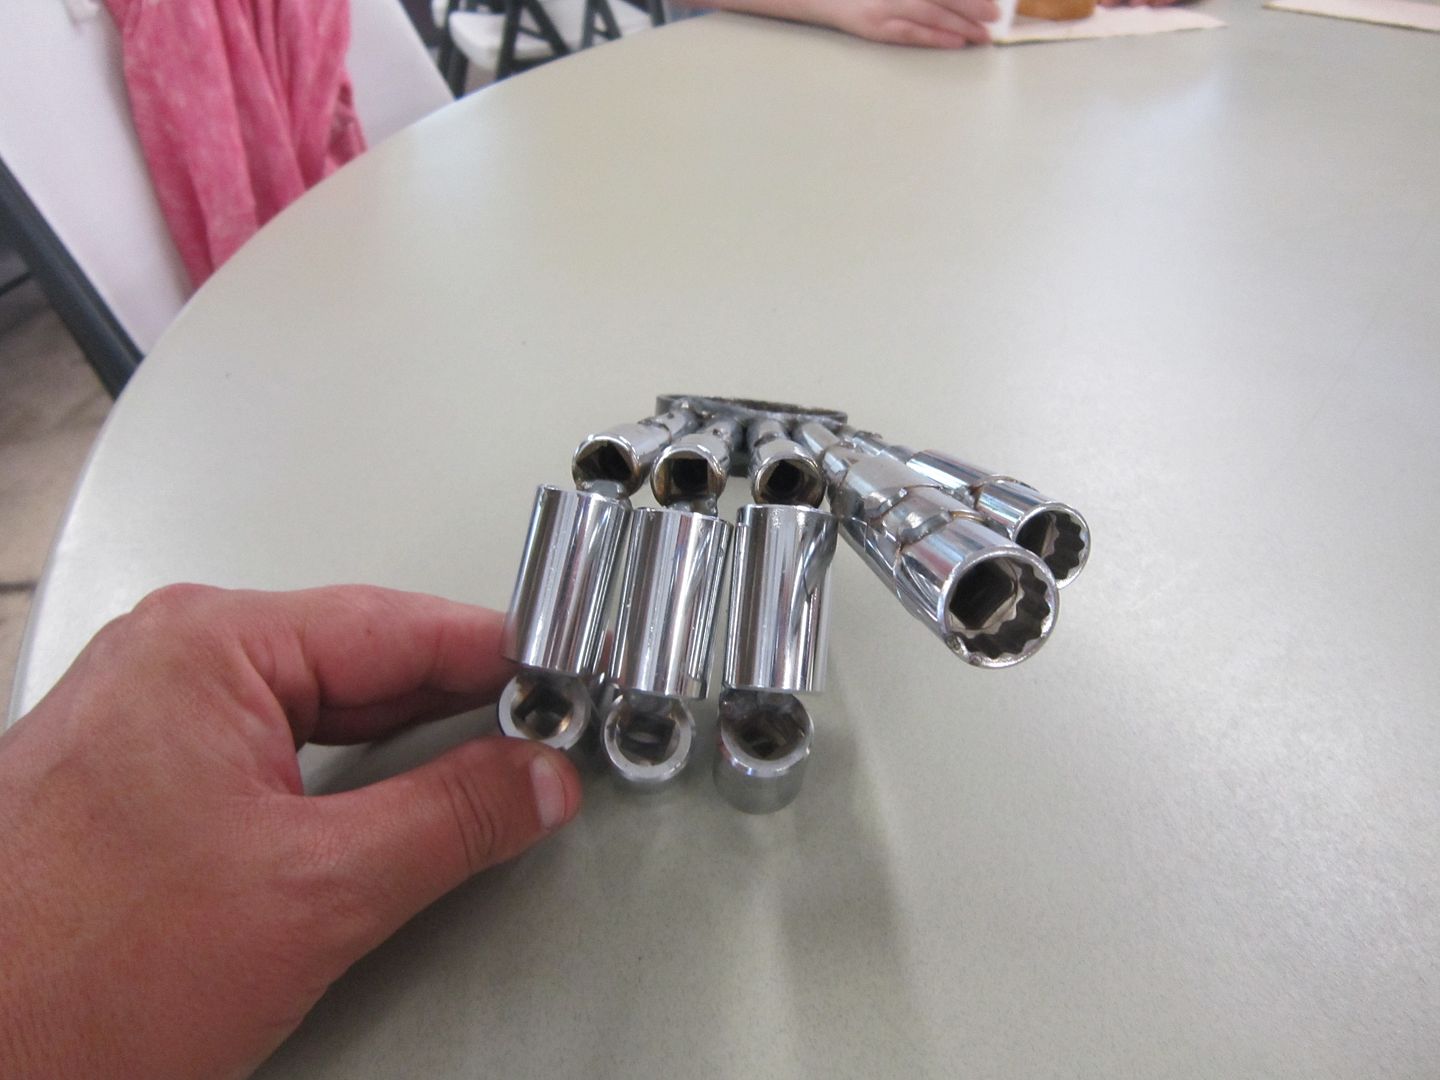
While away this past week I had the opportunity to take a short/simple welding class (5 hrs total) with my wife. I did manage to get some free time to work on my own projects. They had a bunch of scrap sockets from a local mfg and I decided to make a "terminatorish" hand:
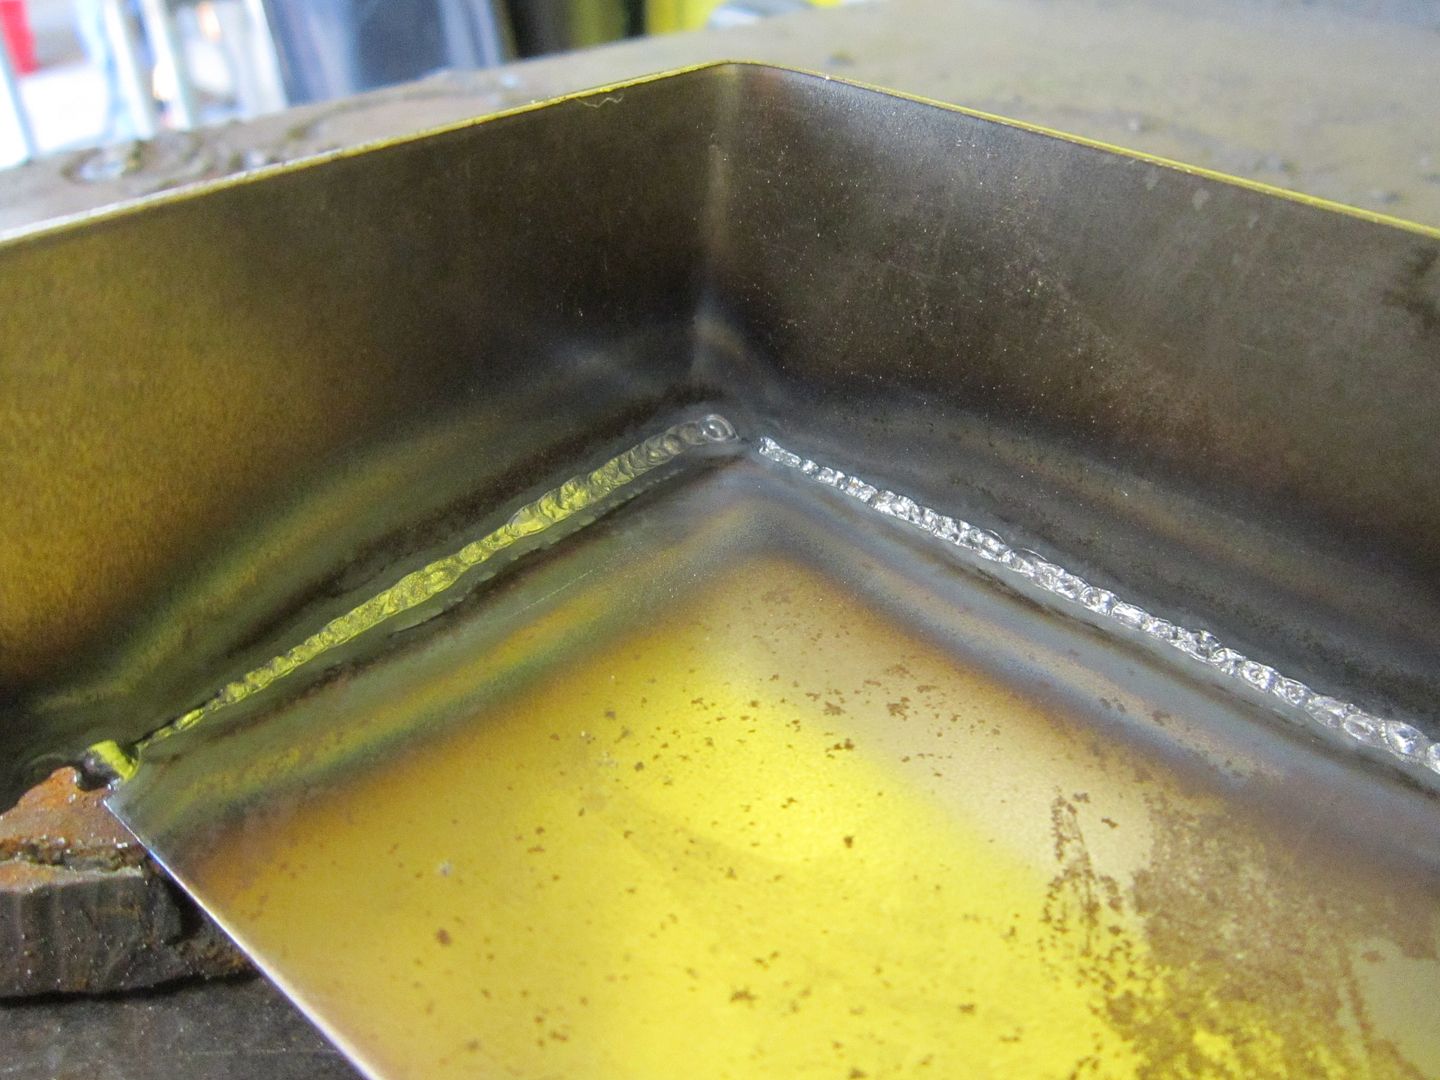
I also had about 30 minutes to play with the TIG (larger Lincoln) and some 16ga sheet metal. This was only my 2nd time using a TIG (first time was over 16 years ago for about an hour that time). This was a butted 90 w/o any filler rod... I really need to get one of these!
While at the class I quickly came to the realization that I really like my tools and my shop setup. They had a Lincoln 180 Mig and I am used to my Lincoln ProMig 175. It is very similar mine (newer generation), but theirs the wire tip was bent and came out more towards the side vs. in the center (and I didn't take the time to fix it). I also didn't like the feel of their welding helmet, really didn't like the button location on the grinder, and like welding from a vice vs. on a welding table. If I go back (and that's a big if), I am taking the class solo (so I have more time for my projects) and bringing my own tools.
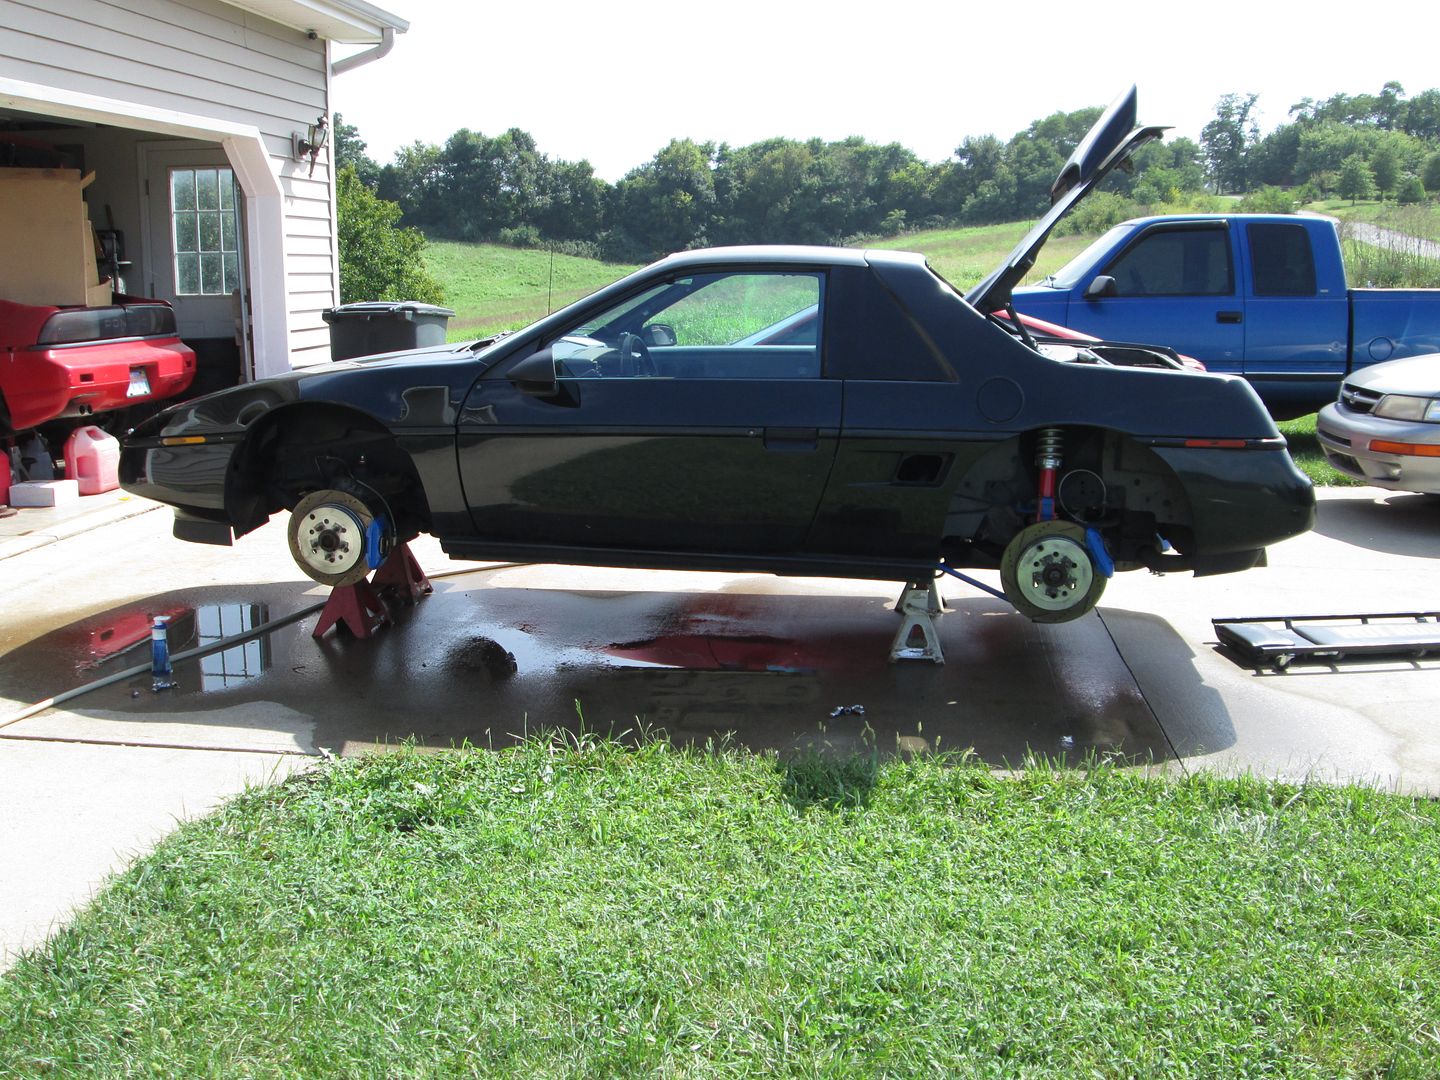
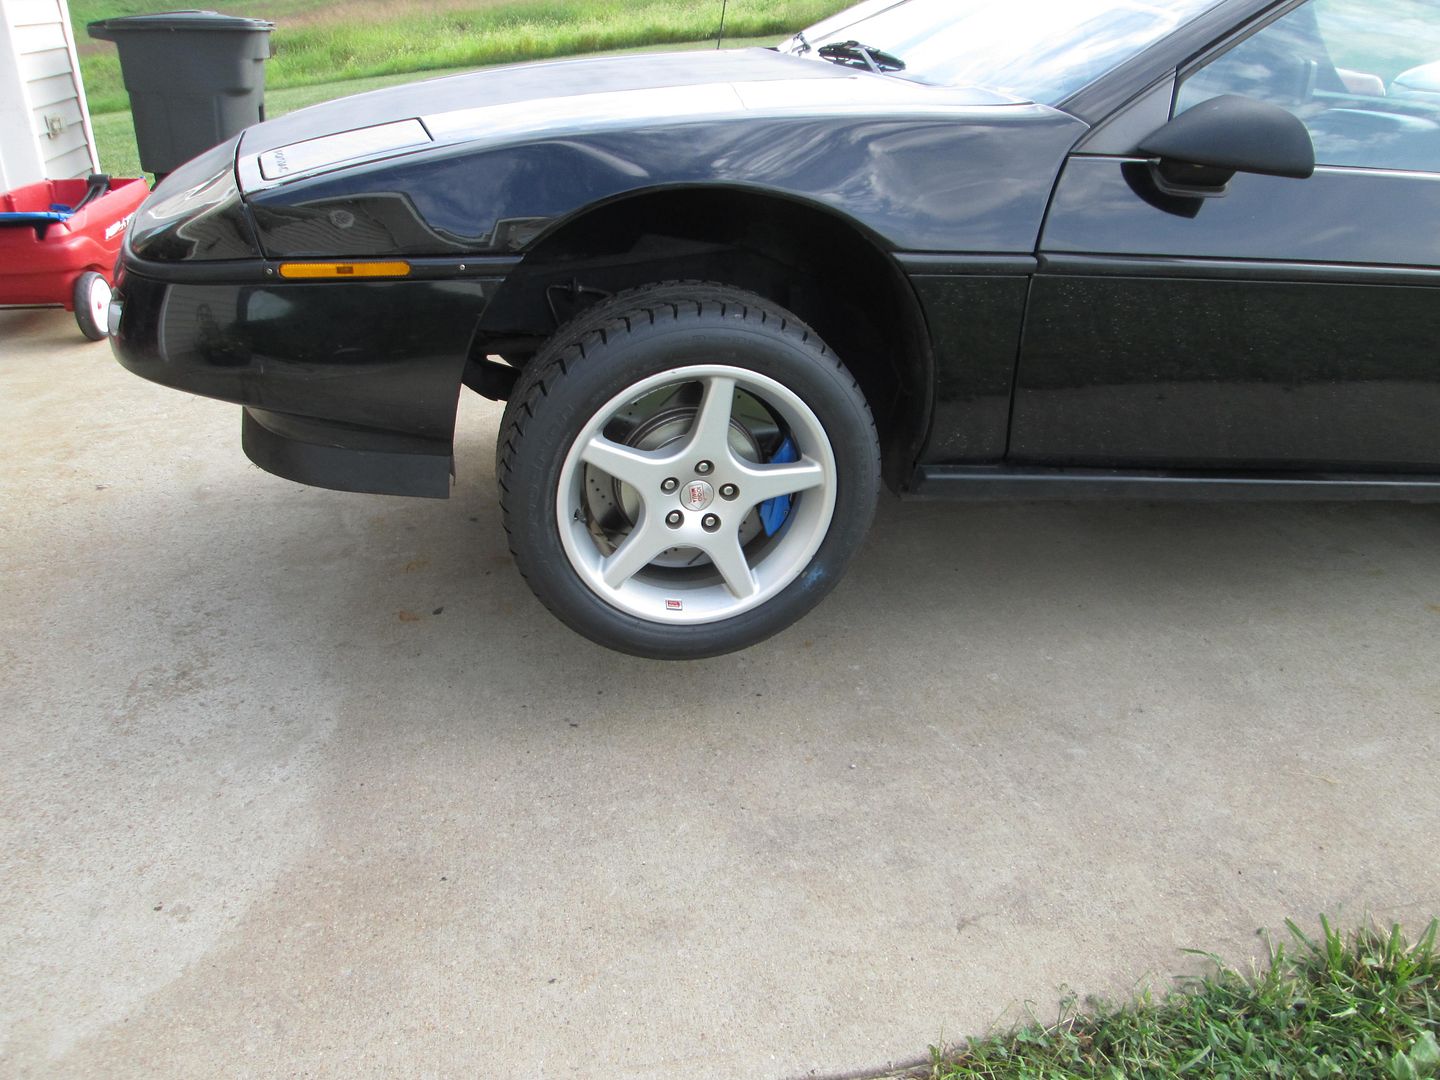
I took the wheels off so I could clean them well and inspect everything brake/suspension related. Also changed the oil (Mobil 1 5w30) and replaced the fuel filter. This is like the 4th fuel filter I have put on this car. The first one was before I knew the inside of the tank was super rusty. Then I cleaned it with vinegar and installed a new pump/filter. I ran the 2nd filter until LS Fest of last year, and changed it for peace of mind. The 3rd one lasted a year, but I am going to keep changing it annually.
I have 2 new front tires coming (BFG G-Force Comp 2 - 205/50/16) that will match the rears (245/45/16) and have a new Goodyear Gatorback serpentine belt on its way (not looking too good from when the alternator was slightly mis-aligned).
Then it was time to clean up the engine bay some. I really regret not painting the transmission and throttle body when they were out, as both are starting to oxidize. The car sits outside 24/7 and is driven in the rain, so the raw aluminum really should have been better protected from the elements. Eventually I will pull this engine/transmission and when I do I will clean up all the aluminum and paint it aluminum color to protect it going forward.
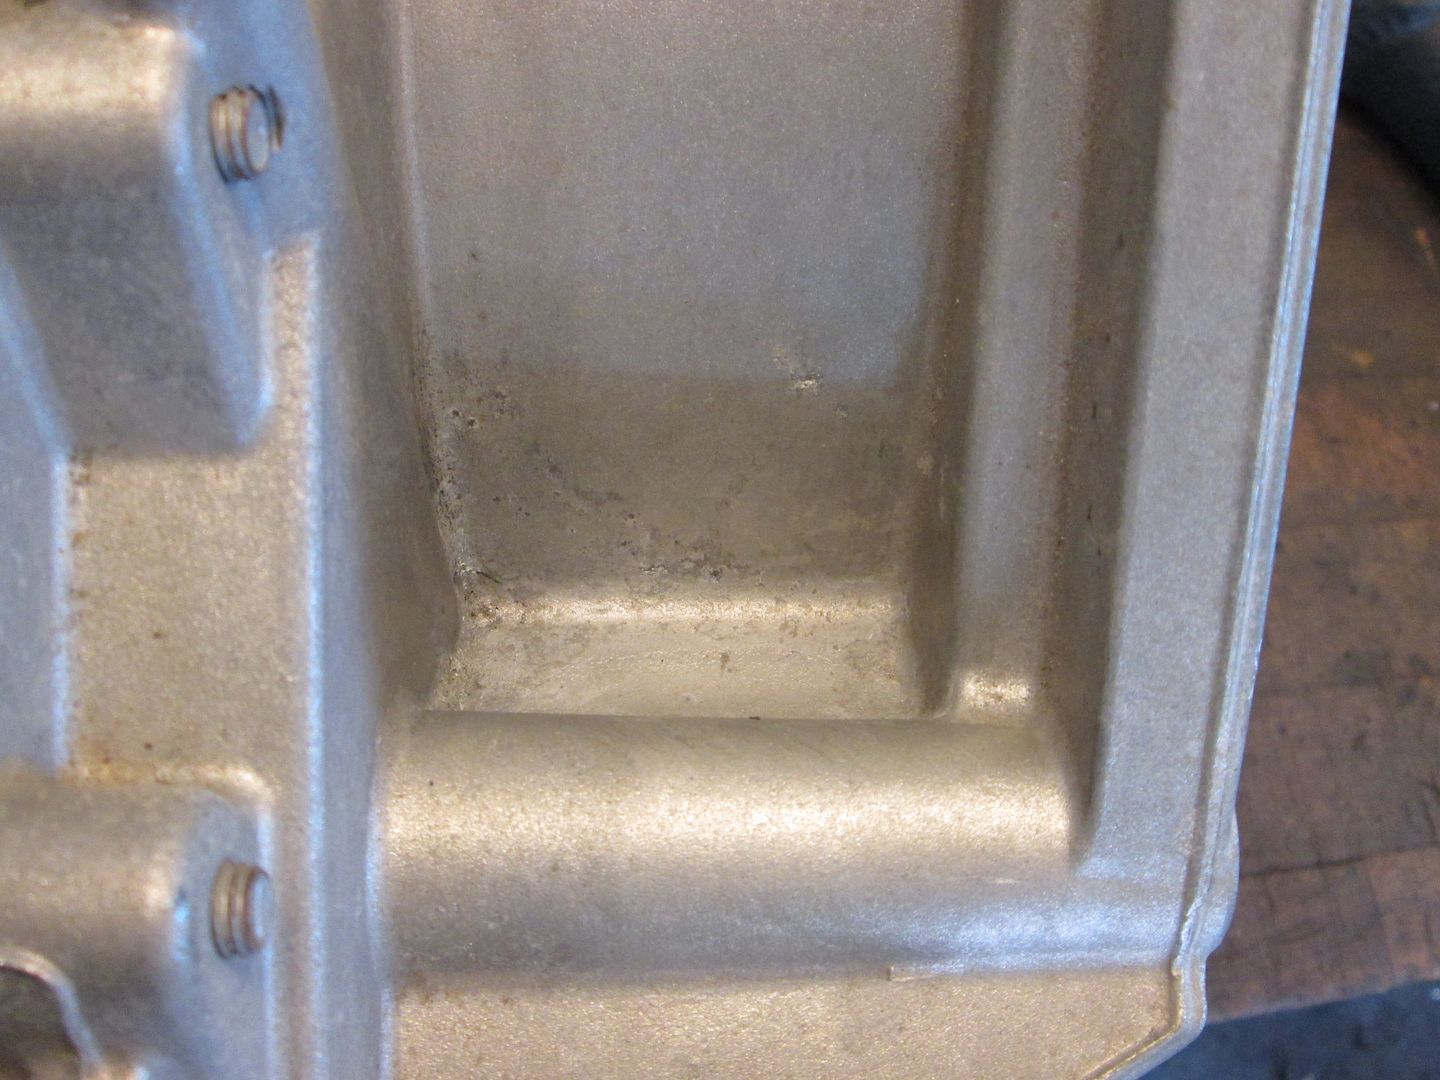
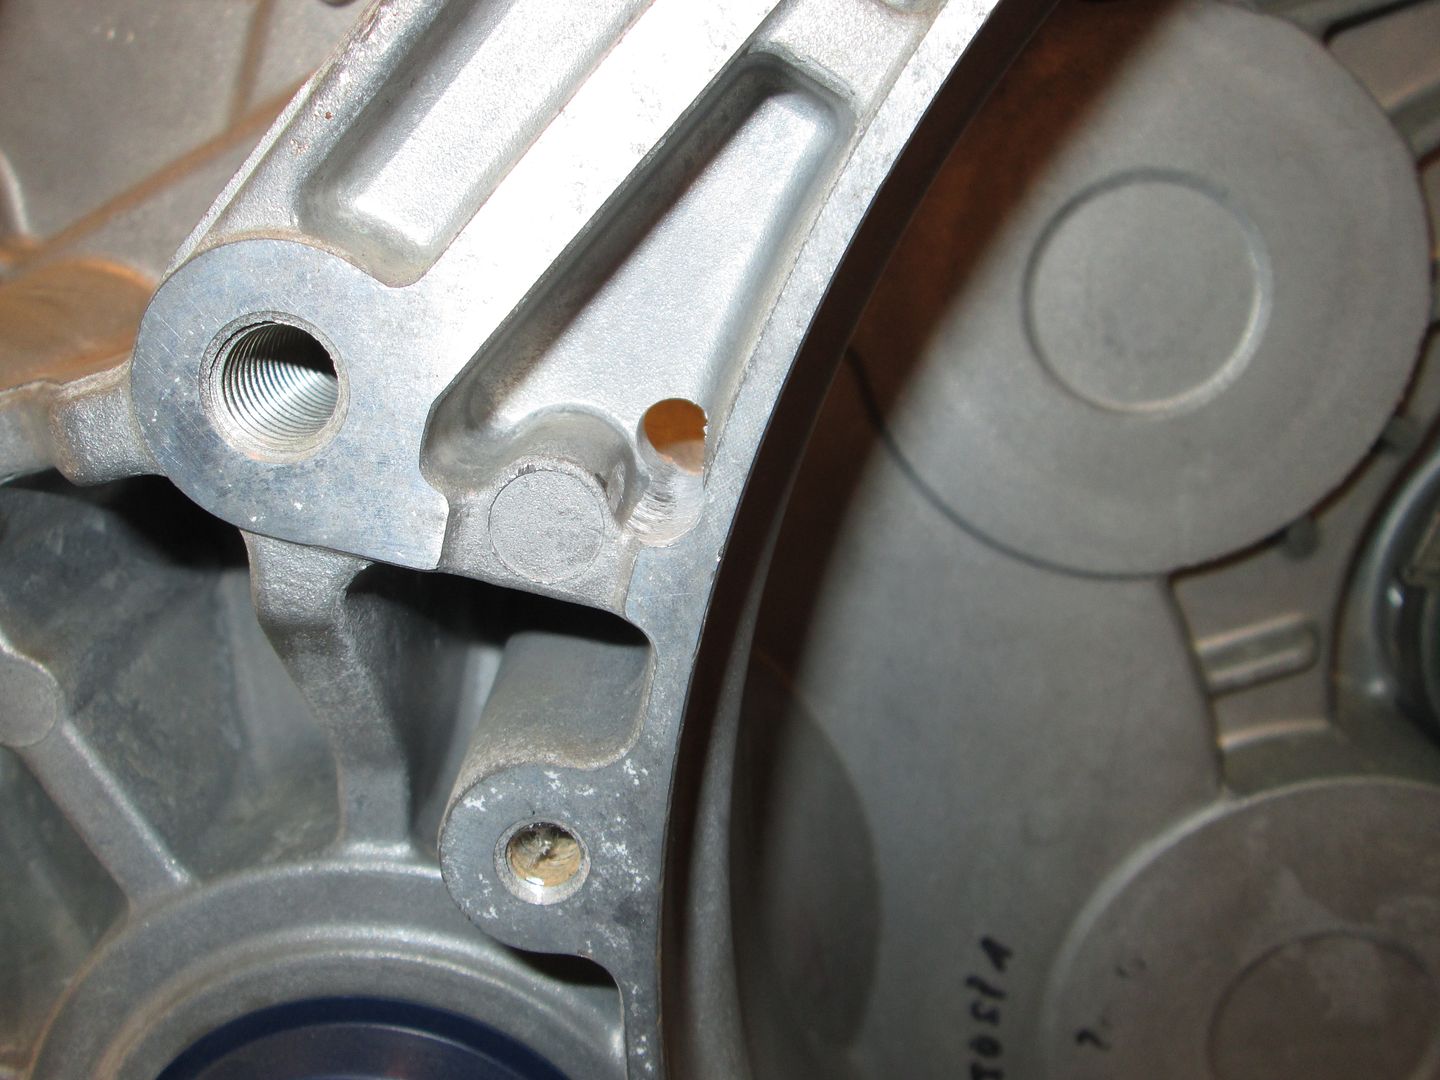
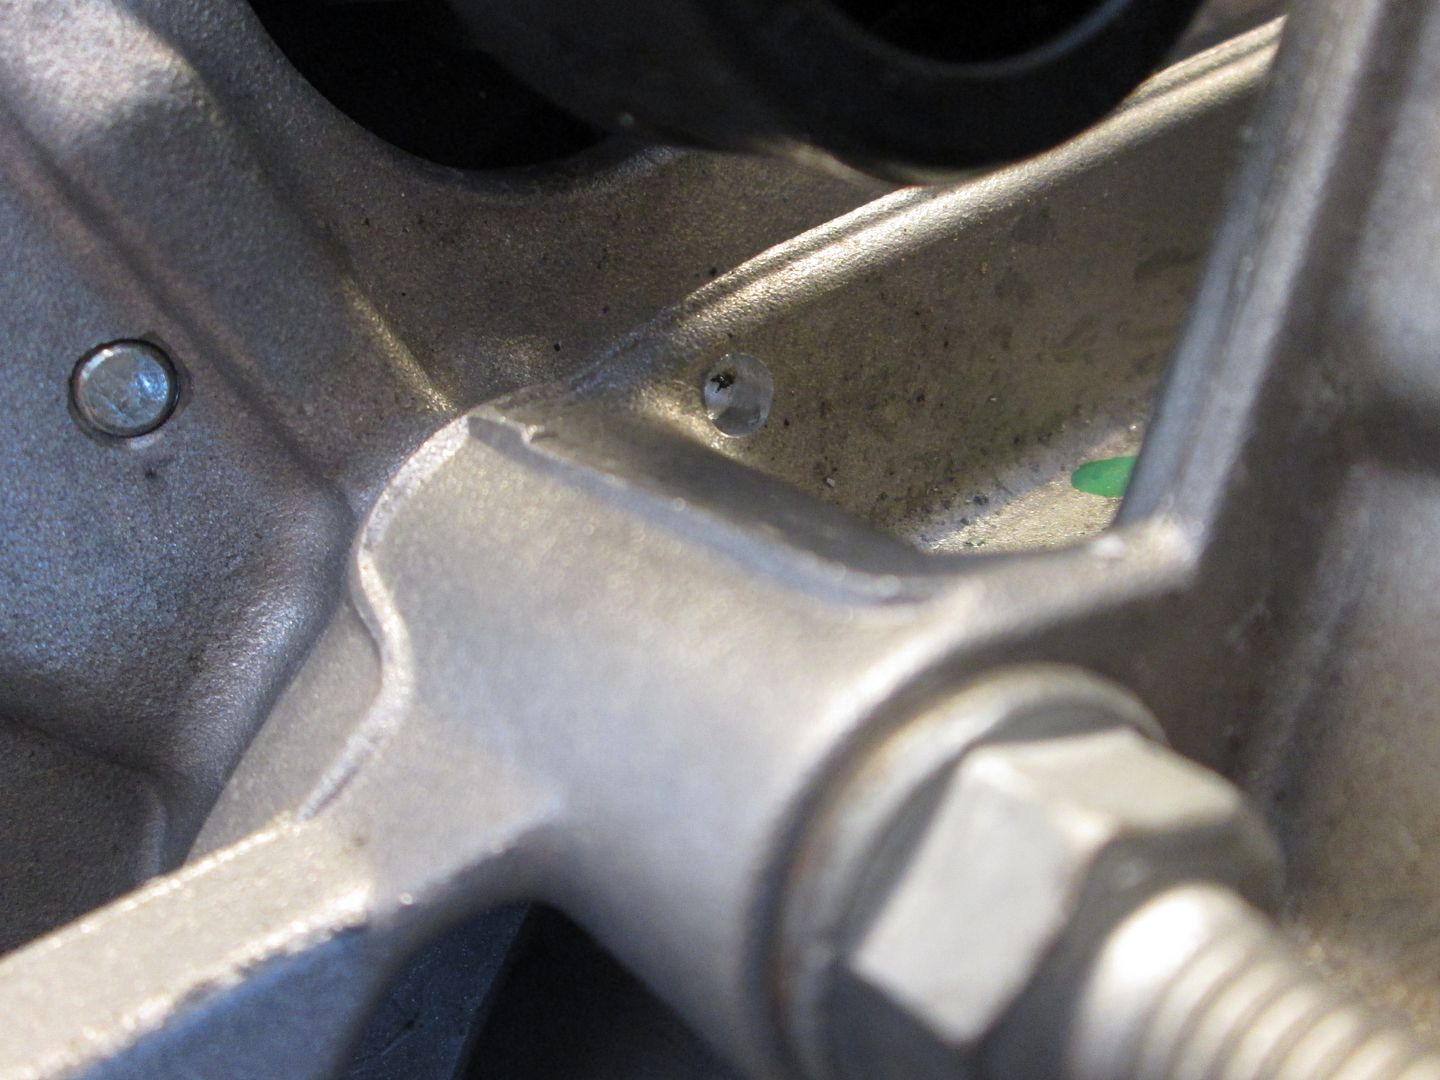
One of my annoyances with the F40 is that it has several places where water collects and pools. This just makes the oxidation issue even worse and over time could breakdown any paint protective barrier. So while I can't fix the F40 in my car, I can fix the F40 that is on the shelf by adding some strategic water drain holes.
The largest most visible area where water can collect is right by the differential. The valley is about 1" deep and the only ways to get the water out of there is with an air hose or towel. I drilled a 5/16" hole from the bellhousing face into the valley: Empty swimming pool:
Drain at bottom installed:
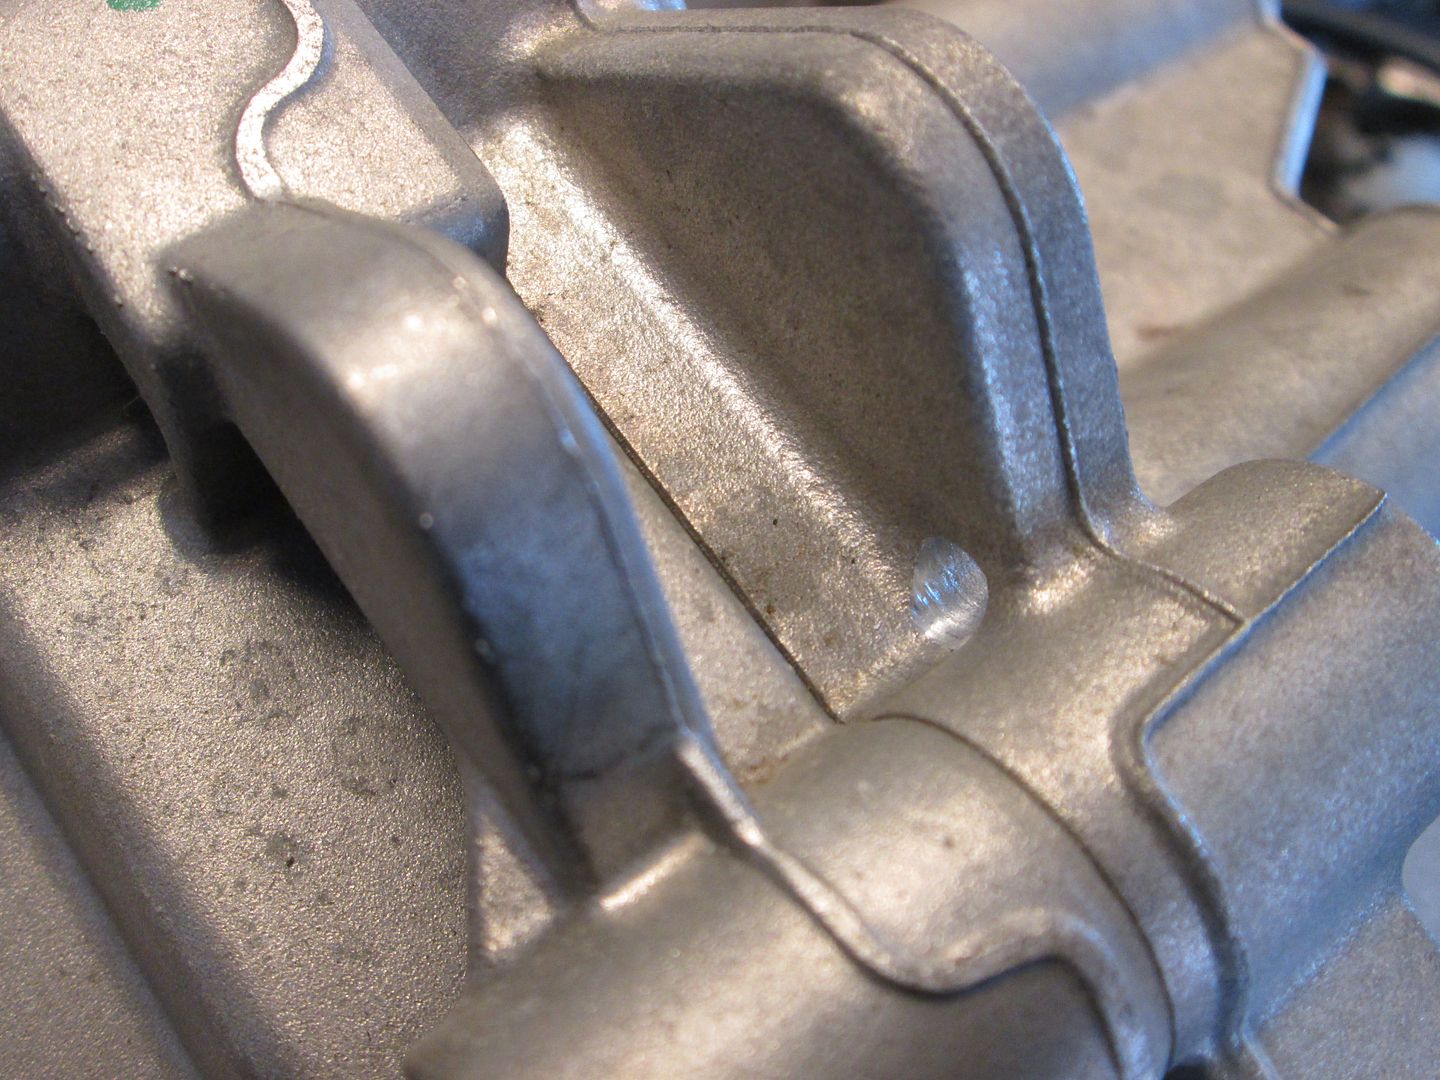
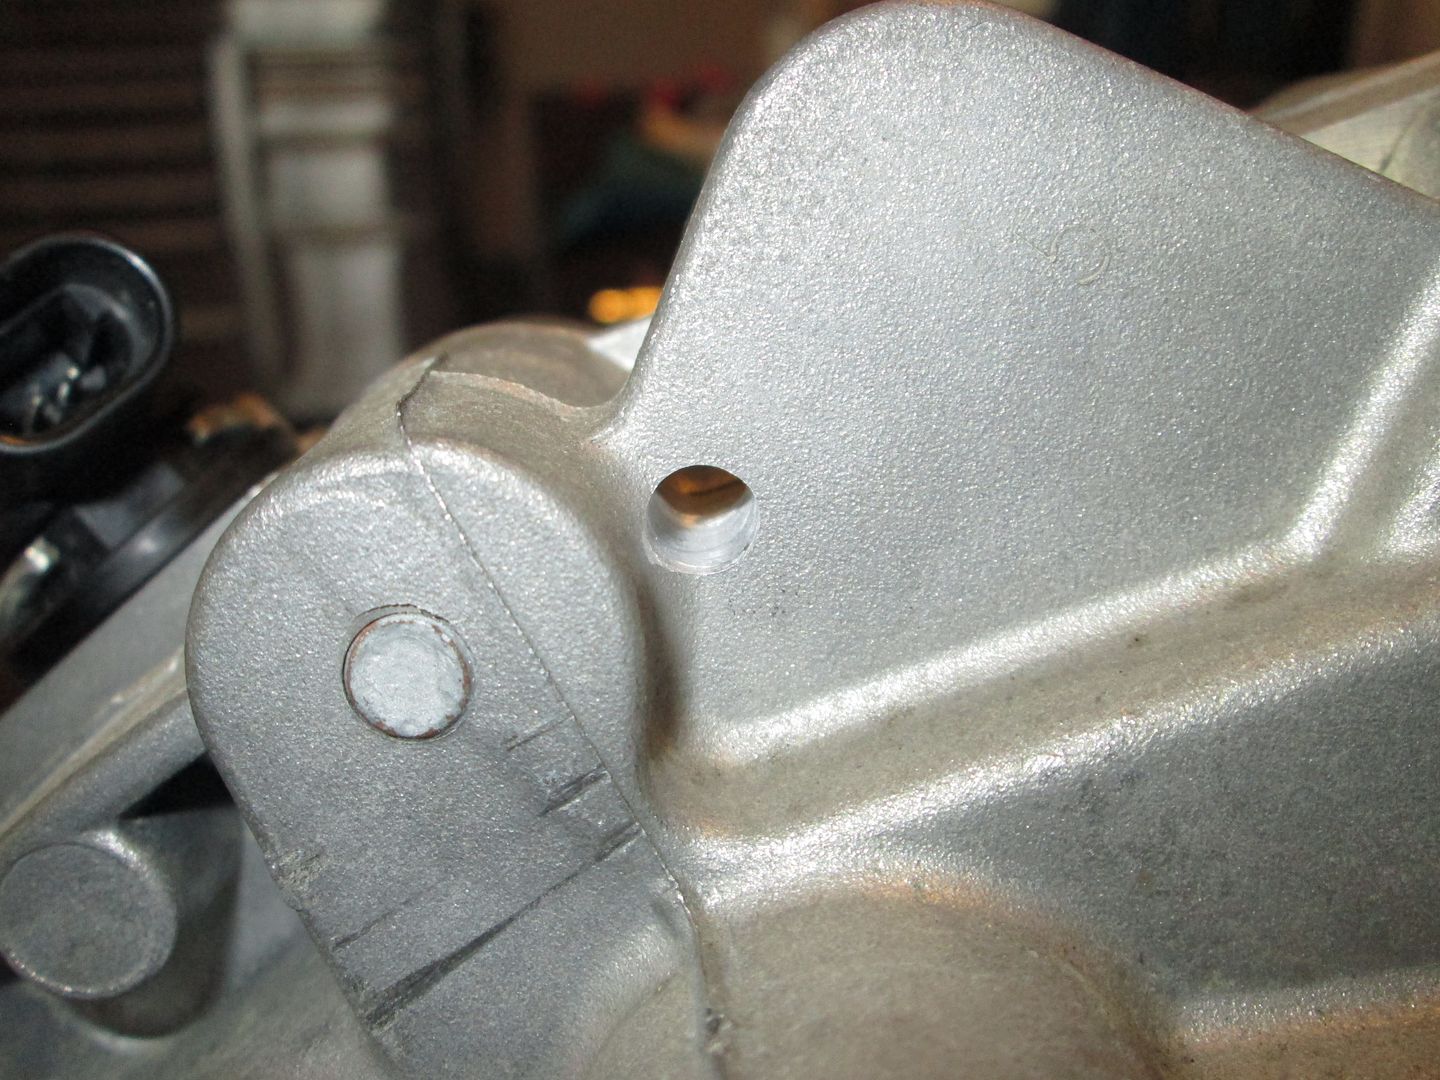
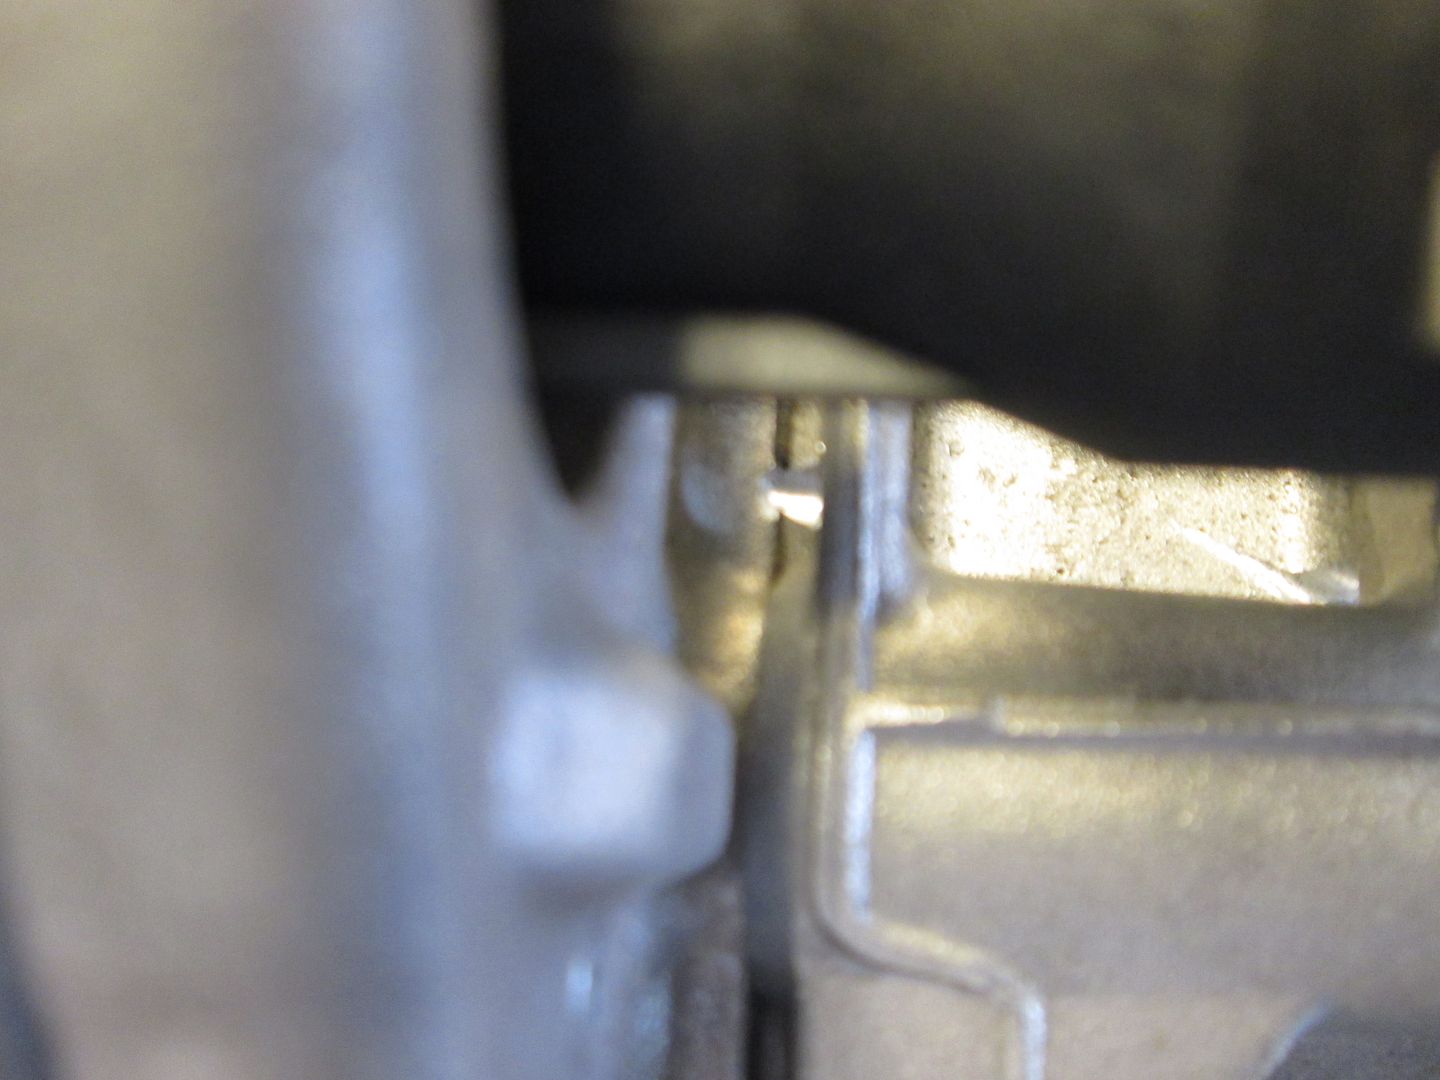
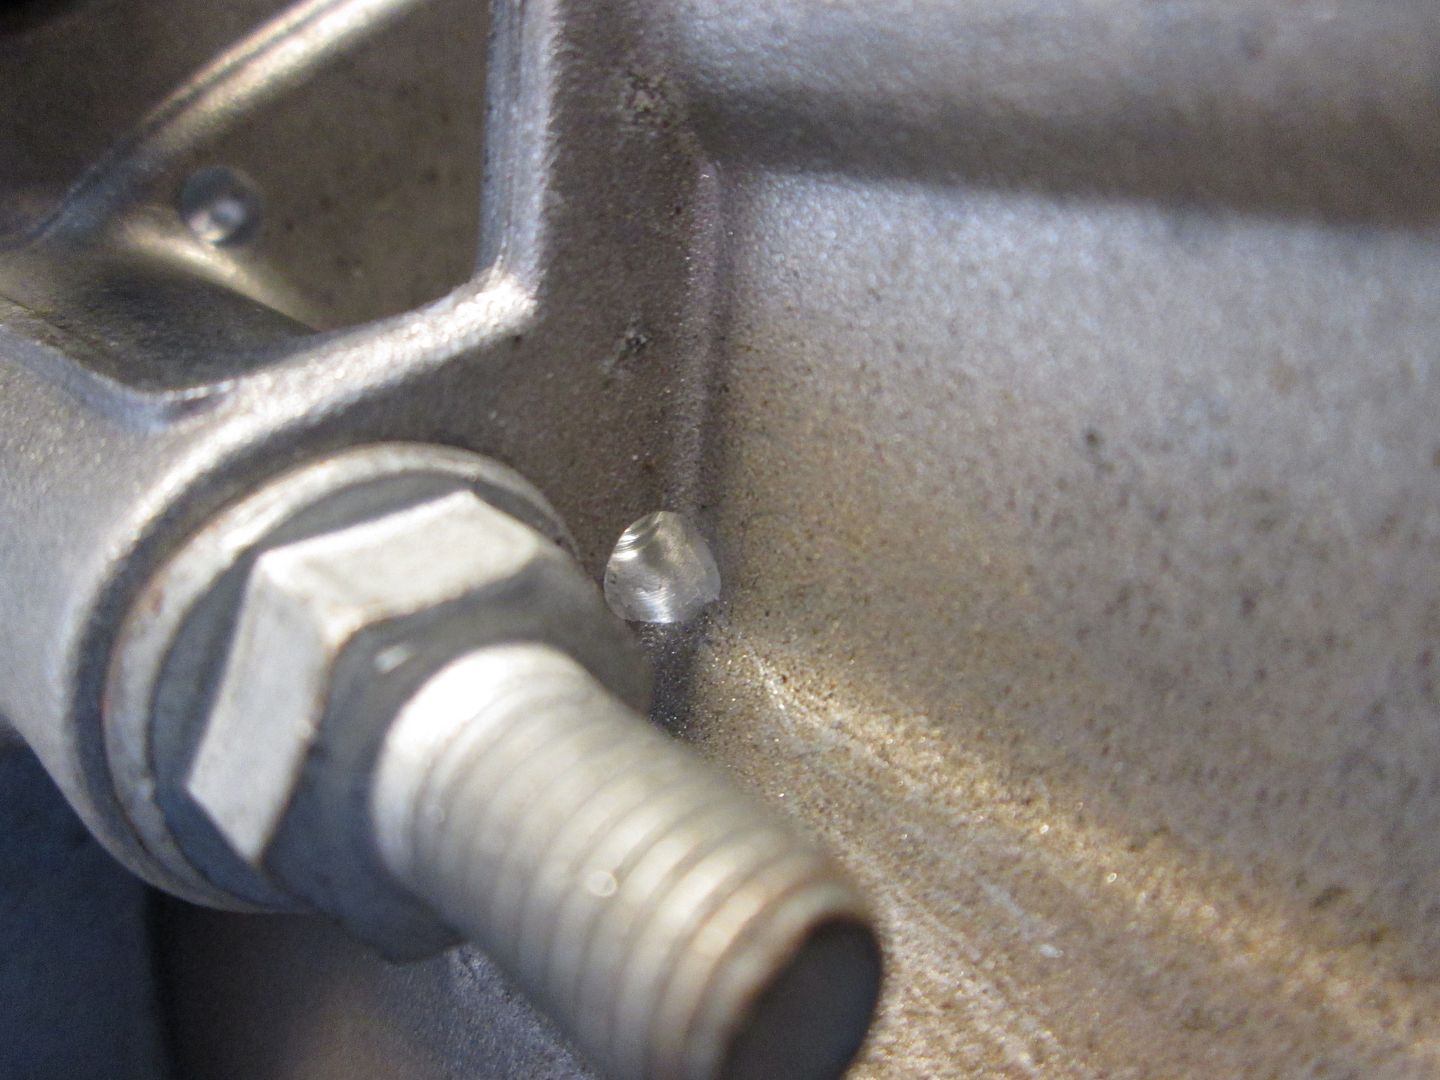
Next area were three areas where the two case halves meet and are bolted together that could cause water to puddle. These bolt bosses help create the openings where water can puddle. Here are the drain holes I made for them:
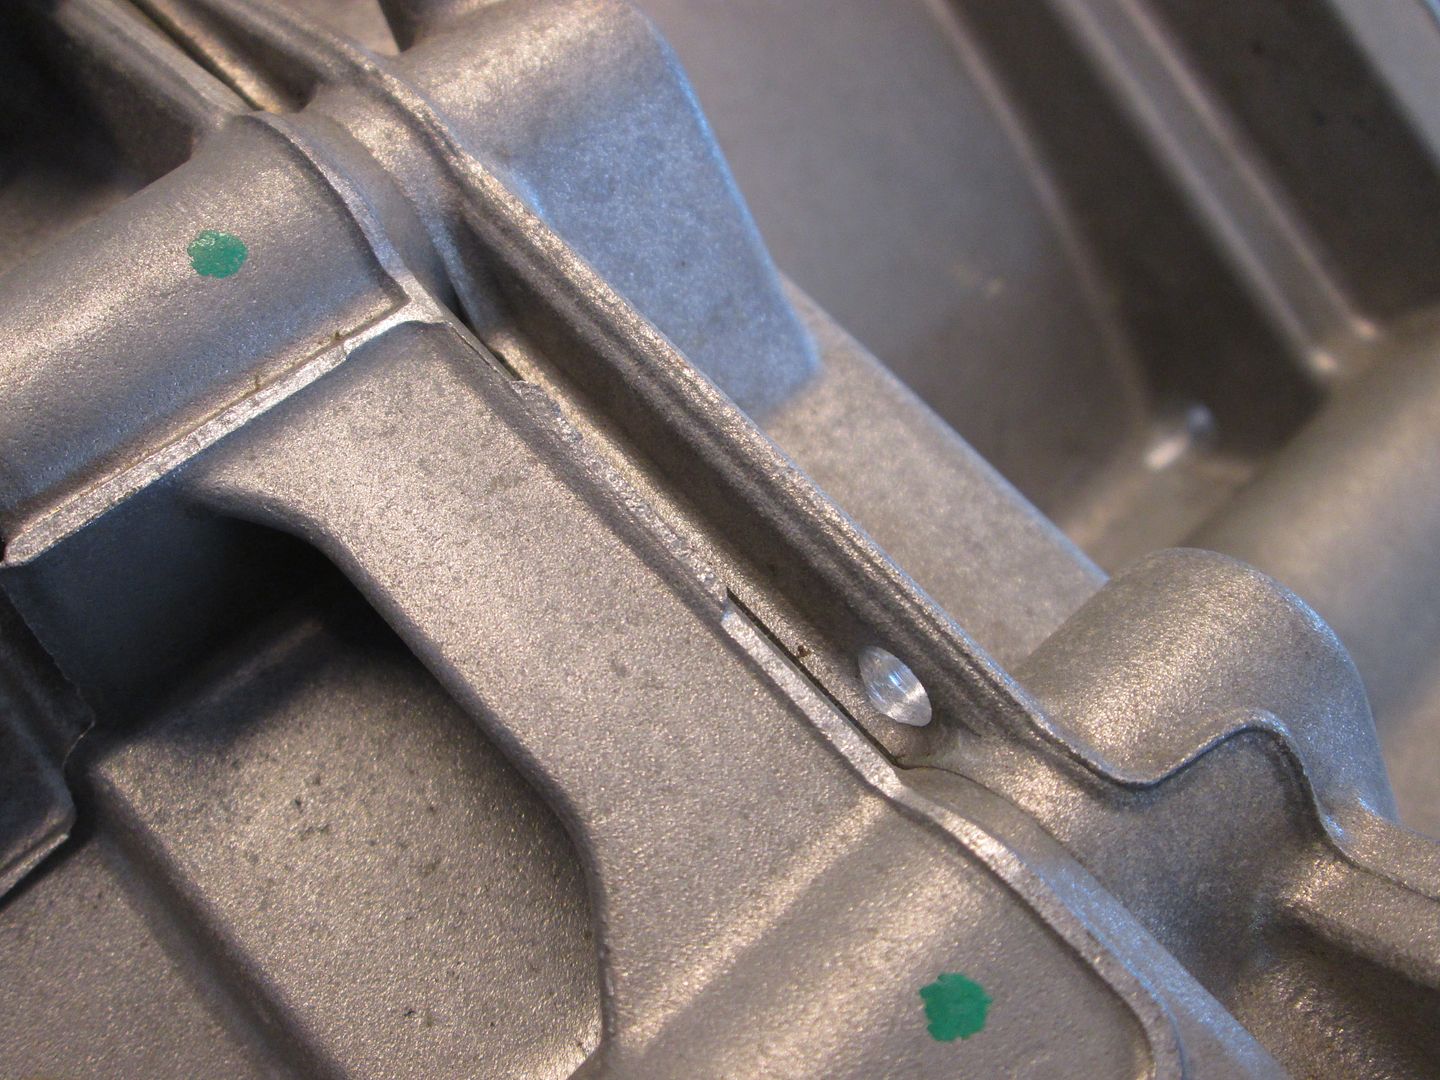
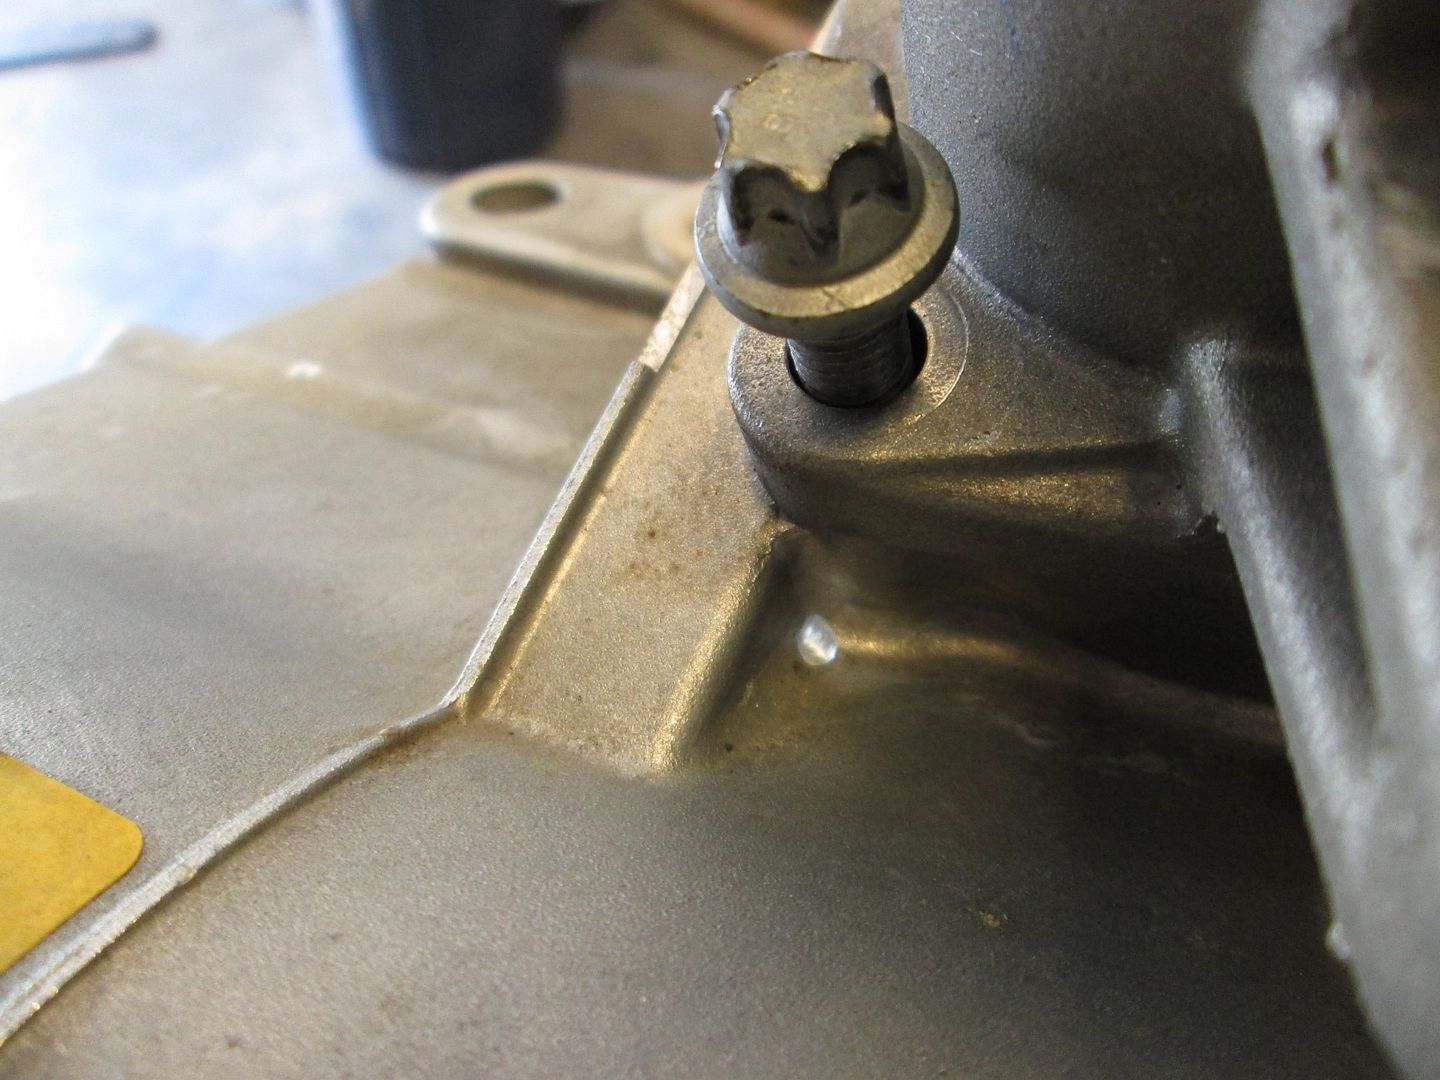
The area around the shifter also has two area where water can pool - these are very hard to get a towel into to soak up water after washing:
With these drain holes, the F40 should shed any water that finds it way onto it w/o puddling!
[This message has been edited by fieroguru (edited 09-01-2014).]
My LS Fest weekend was cut short before it could really begin.
I took Thursday off as a vacation day so I could wait for my new front tires, get them installed, and make it to early registration in Bowling Green (3 hrs away) before 9 PM. Normally, the UPS guy stops by about noon, but noon came and went. At 3 PM I checked the tracking, and they said the truck broke down. Called UPS to see if I could meet the truck or pick up the package... it was one of 16 left on the broken down truck, the driver was back on his route, and I would have to wait till the wrecker takes it to the local hub. So I get everything loaded up in the truck and put the fiero on the dolly (will install the tires in Bowling Green) and get to the hub about 6 PM (its 30 miles towards Bowling Green). Wait, wait, wait... finally the guy reaches the wrecker and gets a 9:30 PM ETA for it to be back at the hub (it broke down at noon). So I make arrangements to pickup my tires at 5:30 AM the next morning and head back home.
Friday starts out early, picked up the tires at 5:30, in Bowling Green by 7:15 AM (local time - Central, I am on Eastern), check into the hotel and they only charge me for 1/2 day for Thursday, take the wheels (I have 8 total wheels for the Mille Miglia MII - so I brought more with bad tires to get the new ones), find a Wal-mart, get the tires mounted and balanced for $19 and head back to the hotel to swap out the wheels. When installing the PS one, the wheel would rock nearly 3/4" with my hands at 3 and 9... cussing ensued. Lower ball joint is toast and there is no way I would risk autocrossing or running the 1/4 mile with it. So found a Firestone tire place and asked if they did ball joints, they did and proceeded to call everyone in town to see when they could get one... none before Saturday... and the estimate to replace both lowers was about $430.
That's when I decided to just pack everything back up and go back home... and miss the LS Fest. I was only at the hotel for 3 hrs, and only had to pay for the 1/2 day after I cancelled my 3 day stay... probably the best news of the trip.
90% of my reason to go was to push the limits of my car. Friday (today) is pretty much open drag strip and 6 hrs of autocrossing - this is the main day for unlimited access to the strip and autocross. Saturday the drag strip is limited to classes with about 30 minutes of test/tune and then eliminations start. The autocross track is mostly open in the morning. Sunday the drag strip is closed for my class and autocross is done - only 3S is open. Even if I over-nighted the parts, it would likely be 1-3 PM Saturday before I had my car running/driving and I would have already missed the majority of the fun... and paid $430 for a repair I can easily do at home.
I was back home at 3:15 PM (Eastern Time) on Friday. I have the 88 4cyl fastback car sitting here and 2 complete 88 front suspensions under the bench. So it would be possible to just replace the lower control arm with another one and then turn around and go back to be there for all of Saturday. However, those would also be used and in unknown condition and I would feel safer having 4 new ball joints on it before I beat on the car some more. Besides nothing about this trip has gone smoothly yet and I just want to relax and stay home at this point.
Now about that ball joint... I had removed both front springs about a month ago to increase the spring rate. It was tight at that time. Before heading out for the trip, I had removed and installed all the wheels a couple of times and make it a habit to check for play, but didn't notice any play yesterday. I pulled the car to Bowling Green with a tow dolly and had the front wheels on the dolly. There was a very bad bump on the parkway where they had cut out the road and placed some 1" thick plates for the very large earth movers to cross the road, there was a sign for a "Bump" but it was early, dark, and I wasn't expecting there to be a 2" drop between the road to the plate and a 2" wall to get back to the road on the other side... so needless to say I went over it at 50ish and it was quite rough. I think that bump did in the ball joint that was likely already close to the end of its service life.
So I now have 4 new ball joints on order from Rodney and should have the LS4/F40 car back on the road before next weekend. I might even pull the trigger and do the rack bushing and all 4 tie rods as well. This might also give me a good excuse to install the poly bushing set for the front suspension that has been sitting on the shelf for over 2 years...
Well that's gotta' suck. If there absolutely have to be some days of bad luck, it's amazing that they tend to fall on the days you've waited all year long for, rather than on the days when all you're doing is mowing the lawn or vacuuming the shop.
Well that's gotta' suck. If there absolutely have to be some days of bad luck, it's amazing that they tend to fall on the days you've waited all year long for, rather than on the days when all you're doing is mowing the lawn or vacuuming the shop.
Yes, that is the way it normally works.
All told I am out the $150 for the show registration, $35.16 for the hotel and about $140 in gas there an back = $325 Had I stayed all 3 days it would have been $150 registration, $210 for hotel, $90 in food, $50 in gas for the Fiero, and either $430 for the repair, or another $140 in gas (to come back home, fix the car, and then return) = $640 min, $930 Max
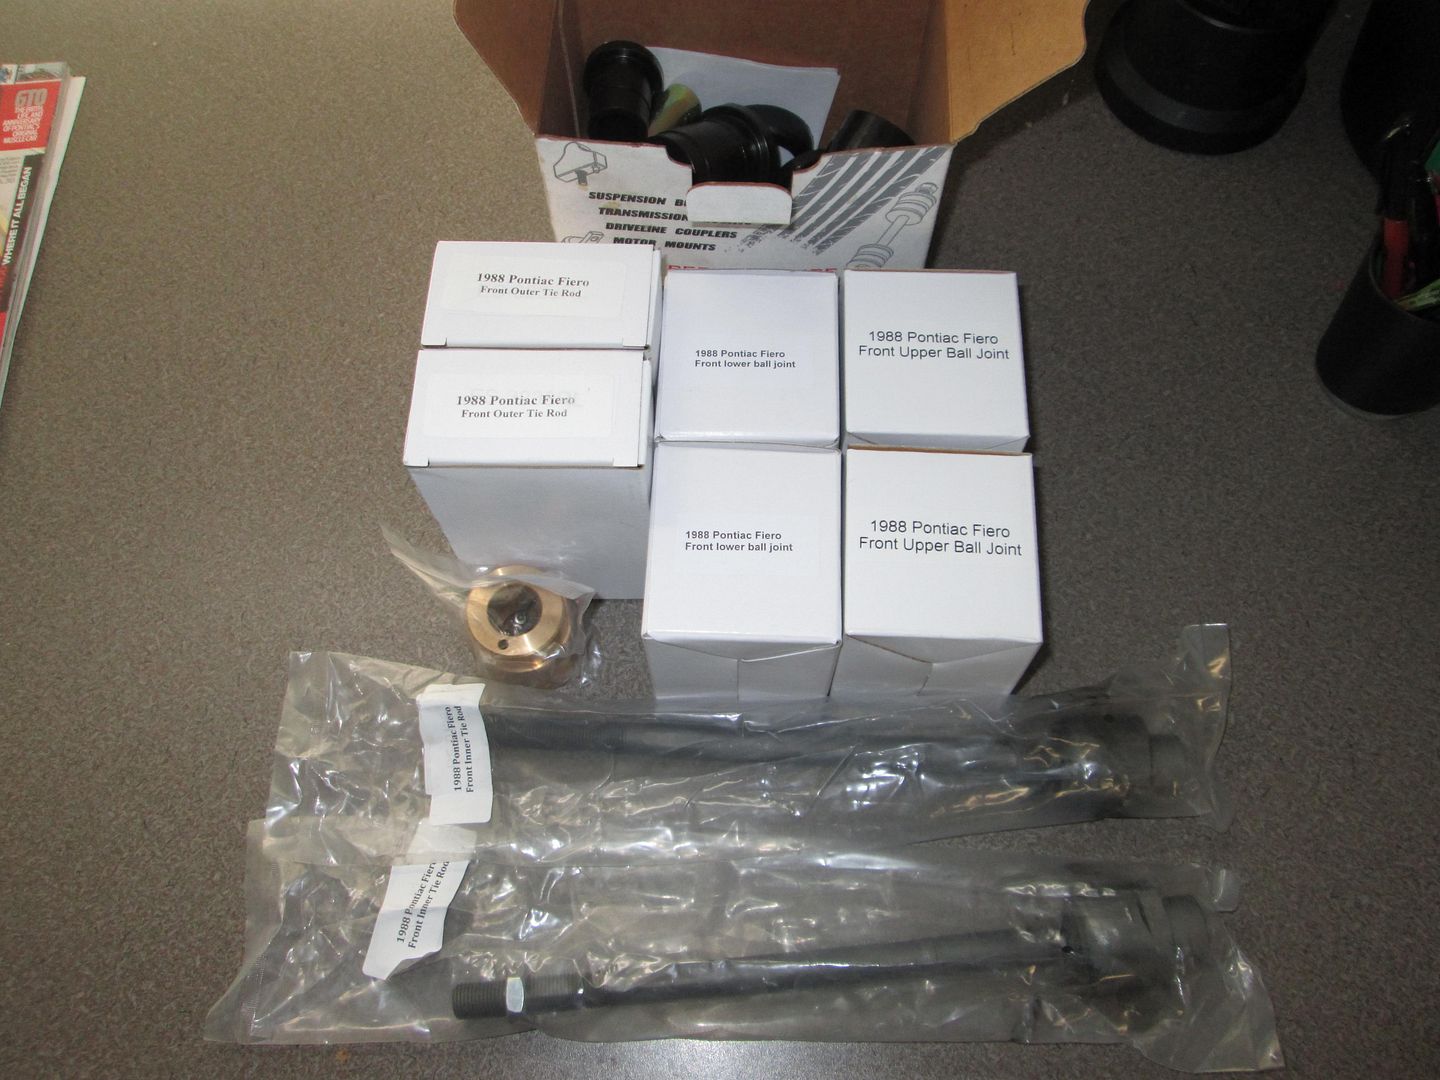
Since I am $315 to the good from my planned expense for this weekend, I went ahead and ordered 4 new ball joints, all 4 tie rods, and the rack bushing from Rodney = $224, not including shipping, but also not including the 10% discount on large groups of suspension parts.
So if I am going to miss the LS Fest, I might as well get a completely rebuild front suspension for it (it already has new Koni shocks and Rodney's zero lash end links)... Then the only suspension wear items left OEM are the front wheel bearings.
[This message has been edited by fieroguru (edited 09-06-2014).]
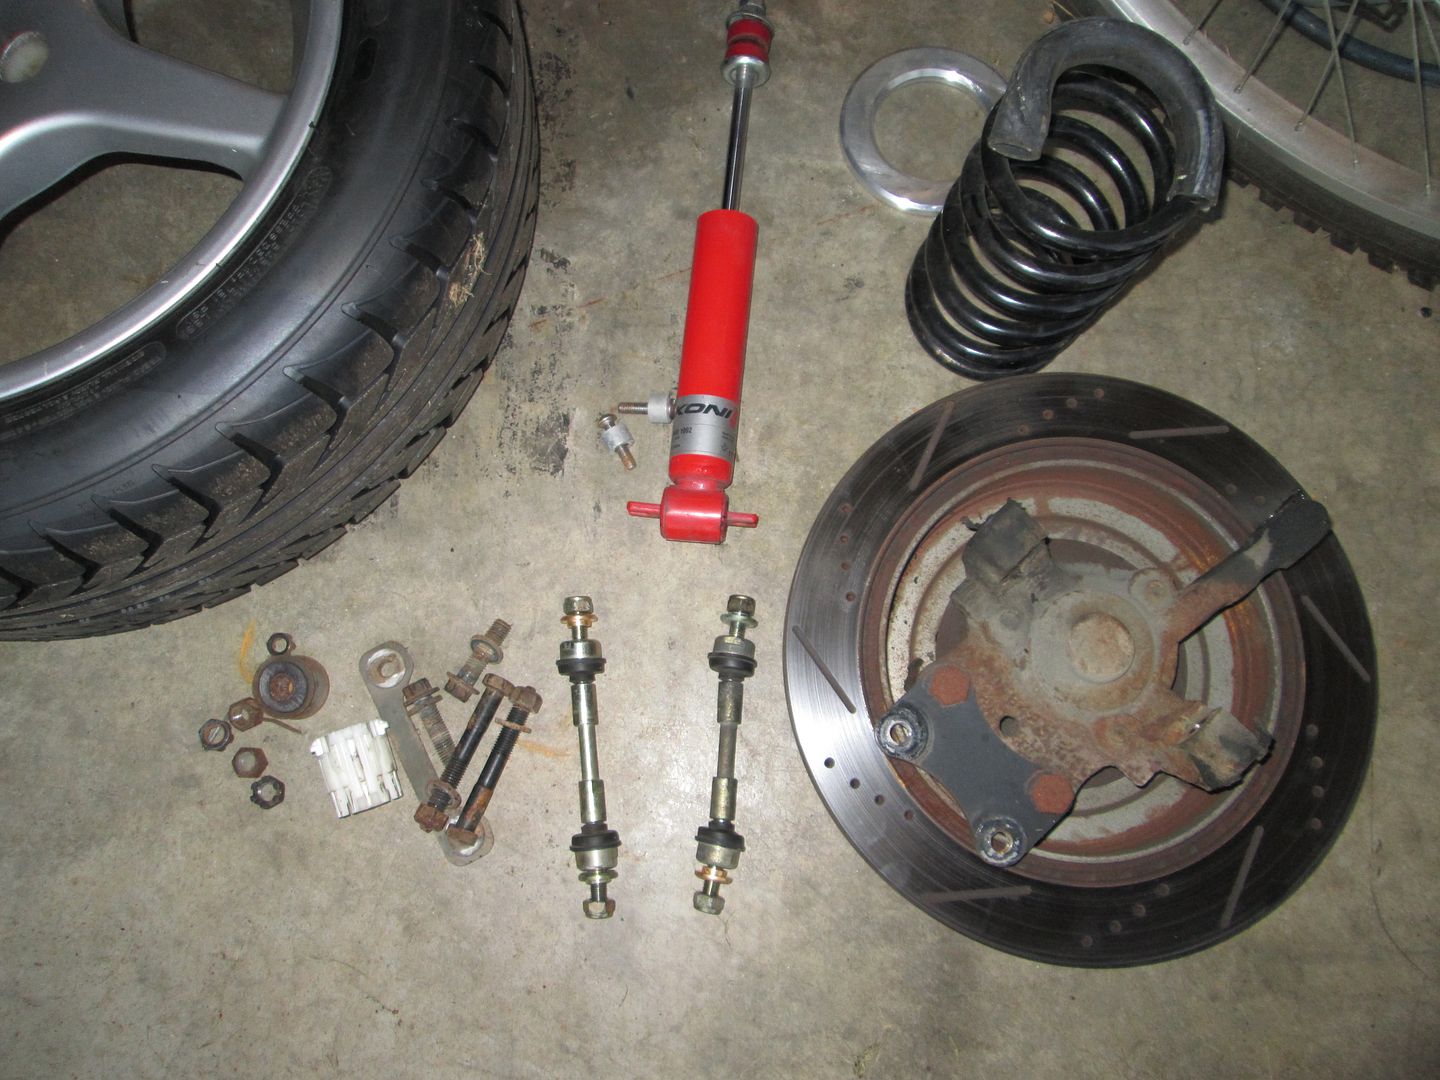
All the parts to rebuild the front suspension came in today:
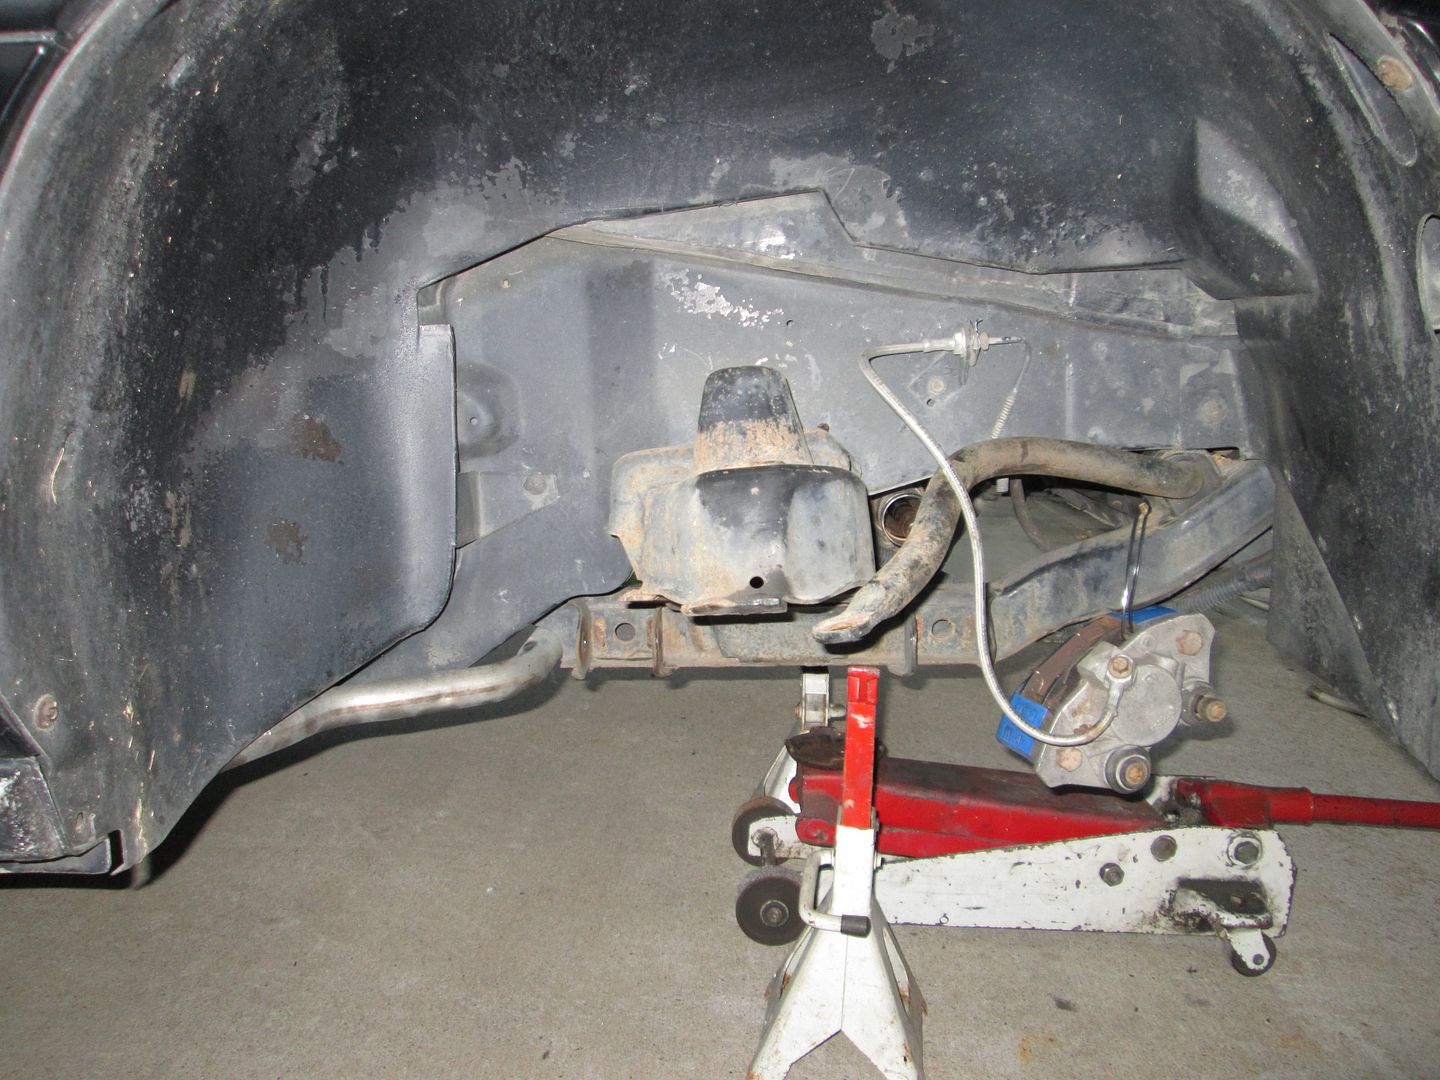
Then jacked the front up:
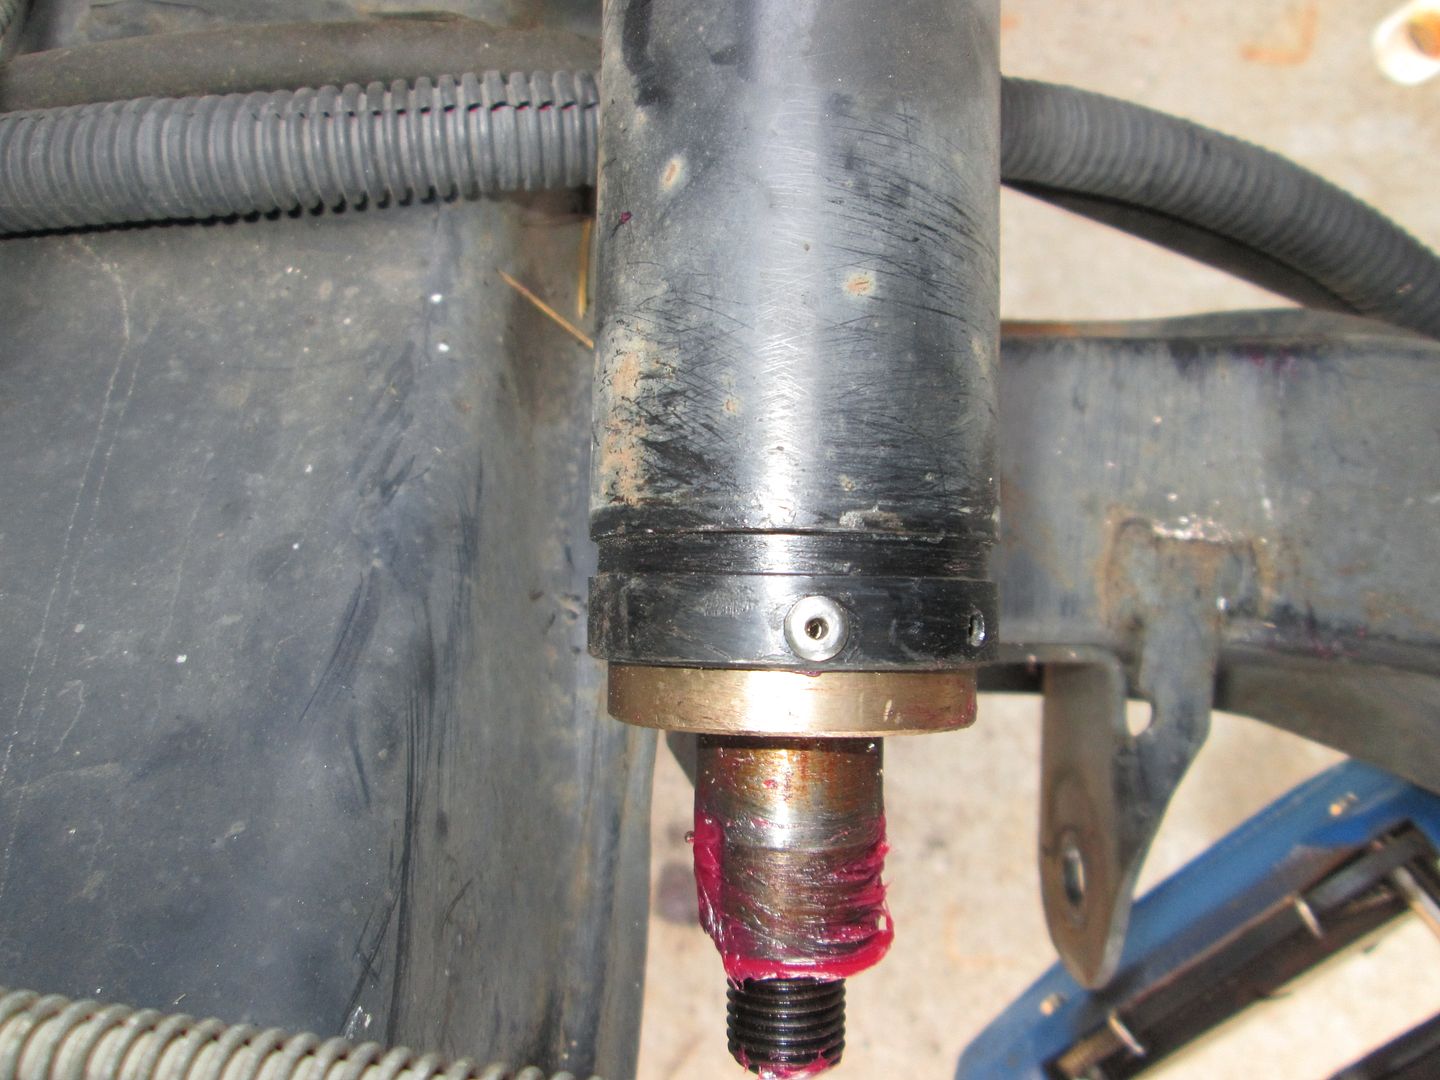
Took off everything on the PS. My rack bushing wasn't too bad, so there wasn't room to get my wrench on it to remove the inner tie rod, so I cut the rod off and welded a nut to the flange and use the nut to take the inner flange off.
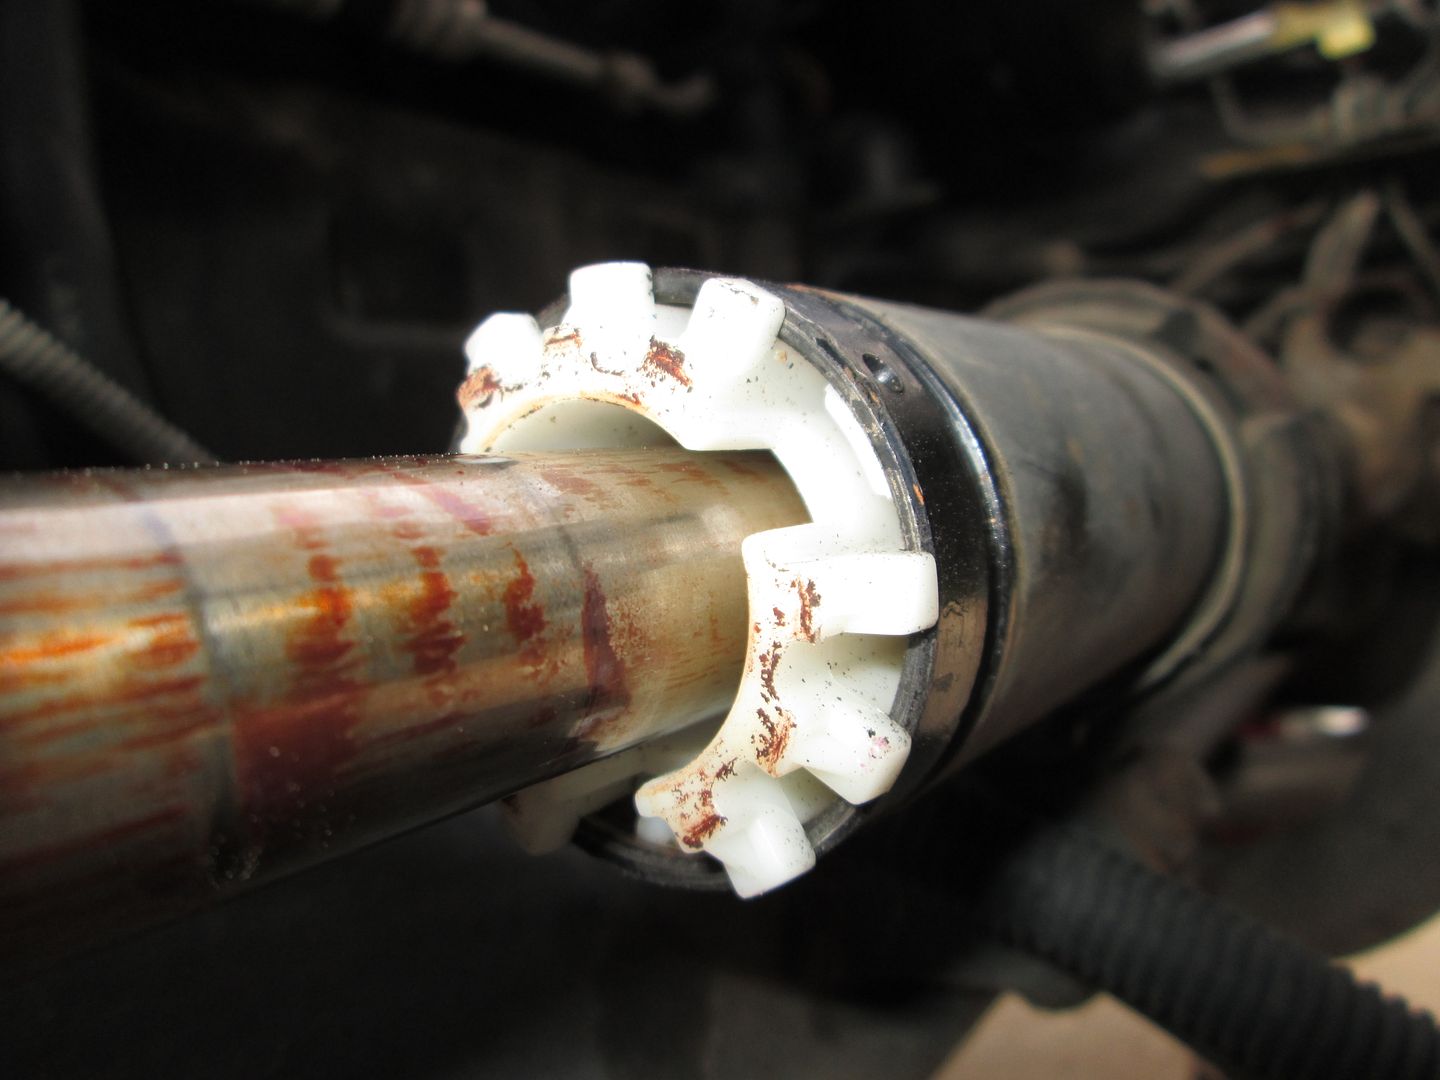
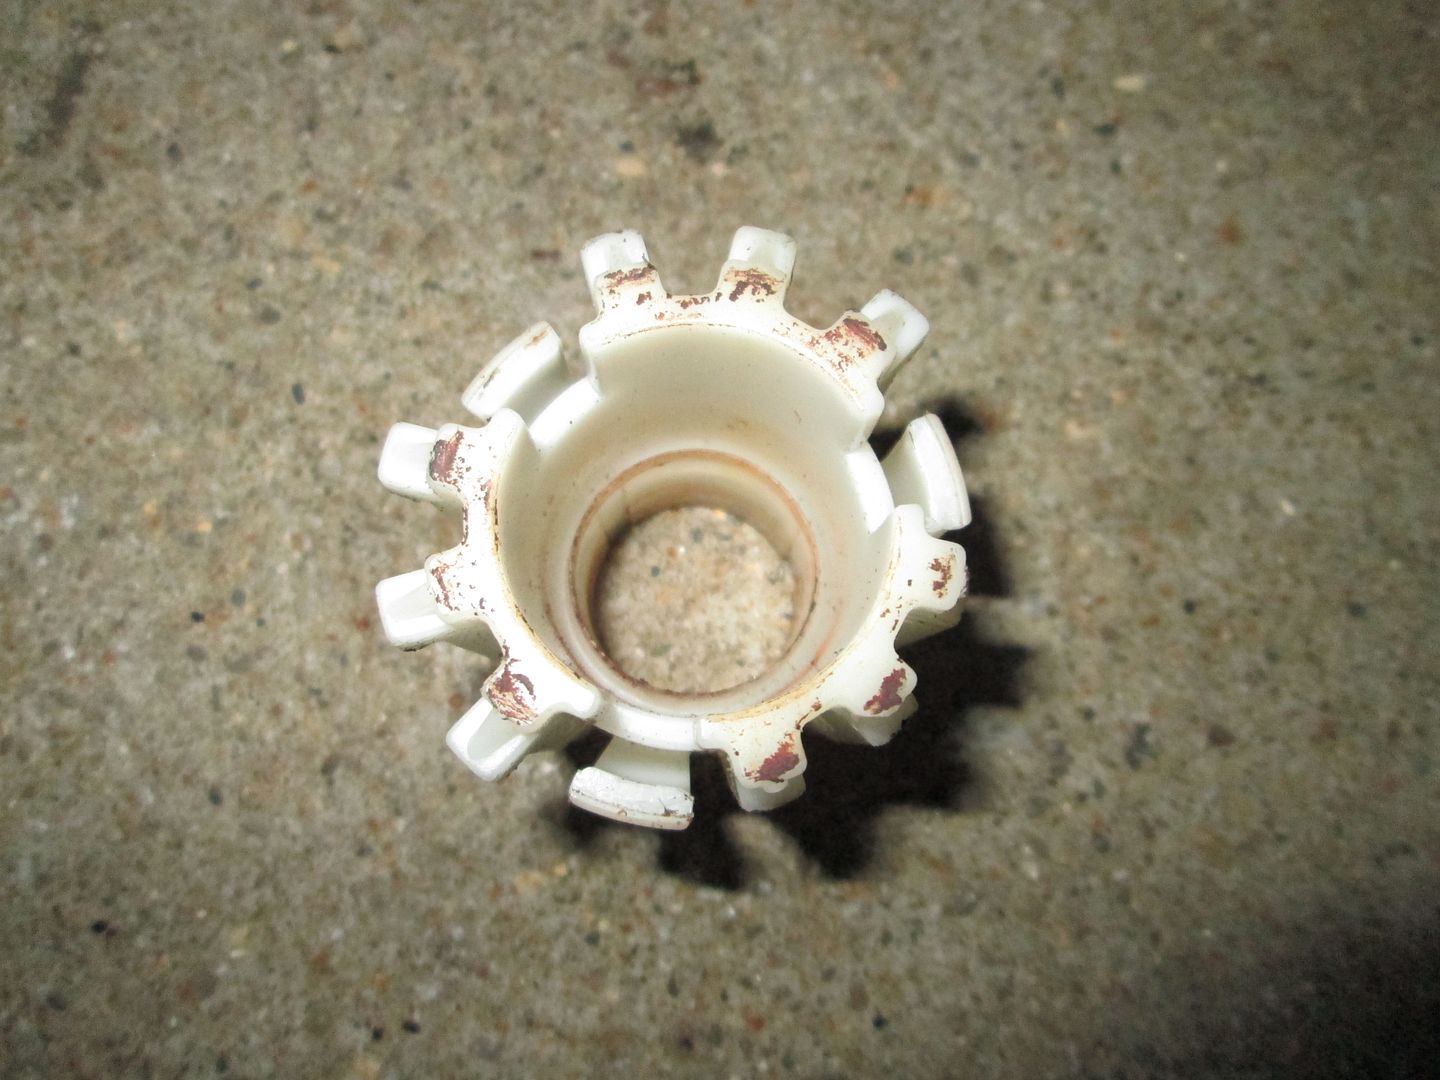
Here are a couple of pictures of the rack bushing. It is held in with 3 tabs and there is 1 hole in the rack where you can insert a small pin to release the tabs. As I pushed the tabs in, I slide a screw driver under the tab. Then rotated the bushing to the next tab, released, & installed the screwdriver. Once the 3rd one was in, the whole bushing just pulls out.
Have you looked at converting to coil overs like Steven Snyder's done?
Also, if you know of something like this:
(steel on steel, sealed, automotive grade)
with a max OD of ~30mm (1.187), I'd love to hear about it. I have a design for spherical bearings in the control arm pivots, but all the sealed units I've found so far have been around 40mm OD, which is just too big.
Originally posted by Will: The Northstar crank pilot is smaller than the 60 degree V6 pilot.
Thanks for the info. Blooze gave me the dimensions for the N* from when he adapter my flywheel design, but hadn't compared them to anything yet.
quote
Originally posted by Will:
Have you looked at converting to coil overs like Steven Snyder's done?
Also, if you know of something like this:
(steel on steel, sealed, automotive grade)
with a max OD of ~30mm (1.187), I'd love to hear about it. I have a design for spherical bearings in the control arm pivots, but all the sealed units I've found so far have been around 40mm OD, which is just too big.
I have thought a lot about doing the same coil over mod as Steven and likely will get there, but I don't really want car the car to be down very long right now and don't want to spend the $$$ on new shocks/springs at the moment either.
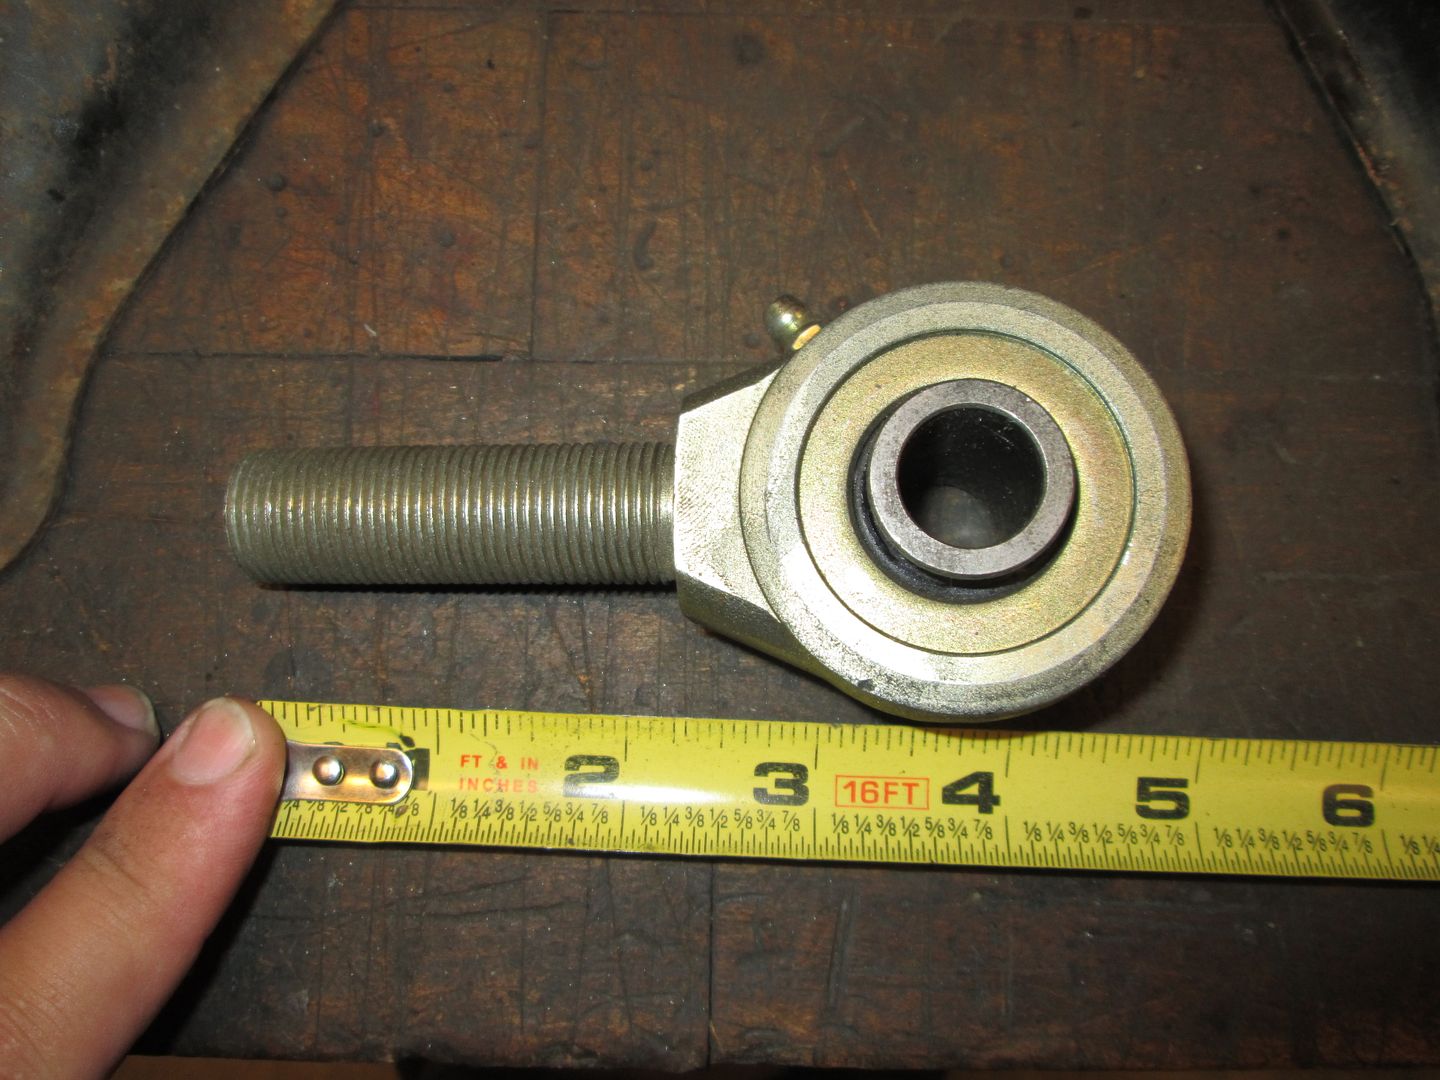
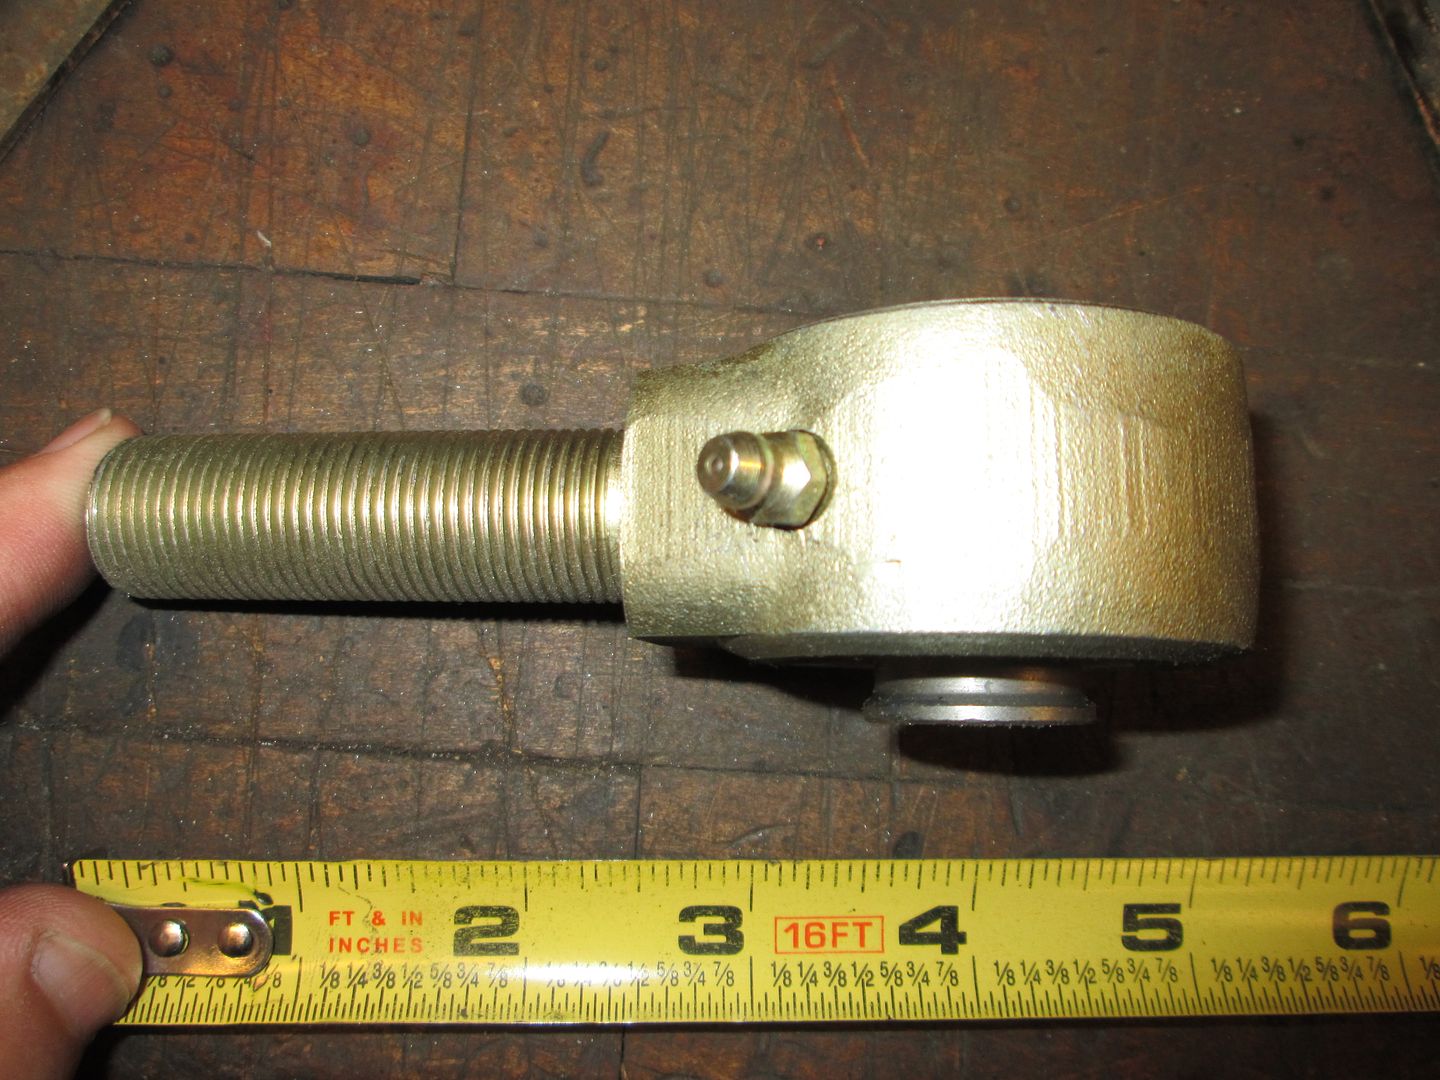
I haven't come across a large sealed bearing like that. The metric seals rod ends in Jims88 LS4 thread were about $66 (steal), $87 (Galvanized), or $93 (Stainless) for a M12 one (they emailed me a catalog and the pricing for that size). I do have a large rebuildable rod end for rock crawlers that I got just to see what it looked like. I can take a picture of it when I get home.
Have you looked at converting to coil overs like Steven Snyder's done?
Also, if you know of something like this:
(steel on steel, sealed, automotive grade)
with a max OD of ~30mm (1.187), I'd love to hear about it. I have a design for spherical bearings in the control arm pivots, but all the sealed units I've found so far have been around 40mm OD, which is just too big.
Thank you for this link, these will work perfectly for my project.
I haven't come across a large sealed bearing like that. The metric seals rod ends in Jims88 LS4 thread were about $66 (steal), $87 (Galvanized), or $93 (Stainless) for a M12 one (they emailed me a catalog and the pricing for that size). I do have a large rebuildable rod end for rock crawlers that I got just to see what it looked like. I can take a picture of it when I get home.
I've seen industrial sealed spherical bearings. I need to call New Hampshire Ball Bearing about some of their offerings. However, I'd been putting that off until I felt I exhausted the offerings of automotive manufacturers, since my application is automotive.
Anything that says "Porsche" is too spendy for my Fiero budget. Did you look at the prices? An '88 car needs 4 units for the front lower arms, while an '87 like my Northstar car needs 8 for front lowers and rear control arms.
Would work well as the bearing has a 29mm OD while the seals drop the ID to 12mm (although the seal claims its A2 dimension is 29.5 mm, so I'm not sure that would work out). I wouldn't want to go to a bolt smaller than the stock 12mm units. That's the only bearing/seal combo that has the right mix of ID and OD to get where I need to go.
I haven't seen any product for which length is actually a problem when replacing the stock bushings.
[This message has been edited by Will (edited 09-12-2014).]
Originally posted by Will: I have a design for spherical bearings in the control arm pivots, but all the sealed units I've found so far have been around 40mm OD, which is just too big.
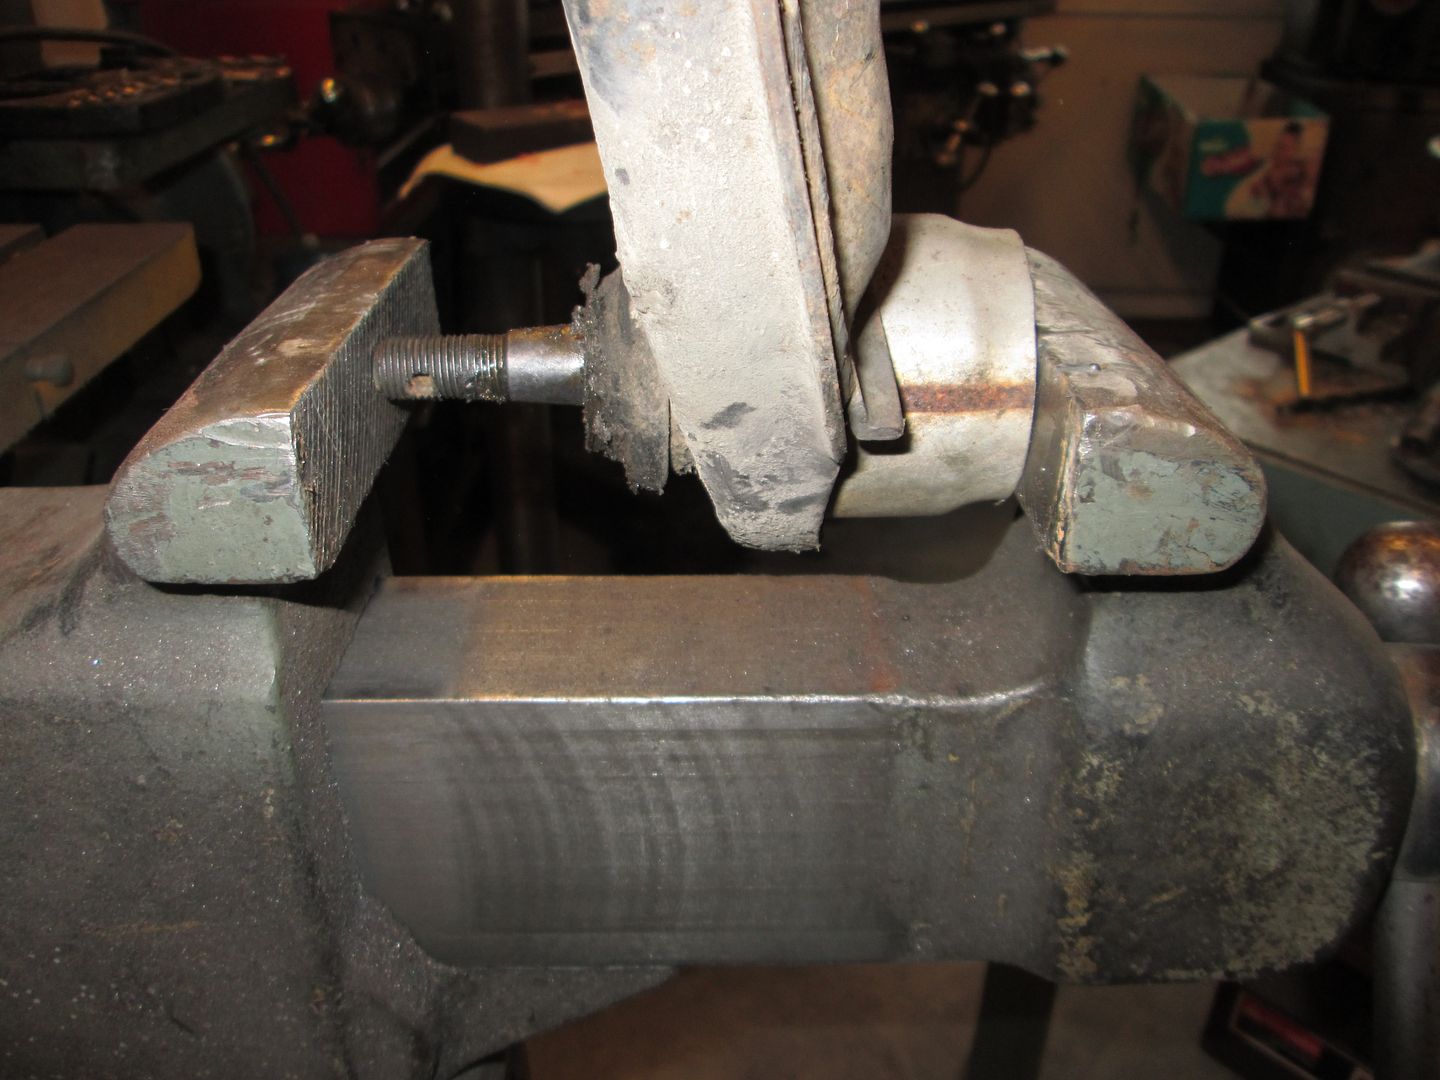
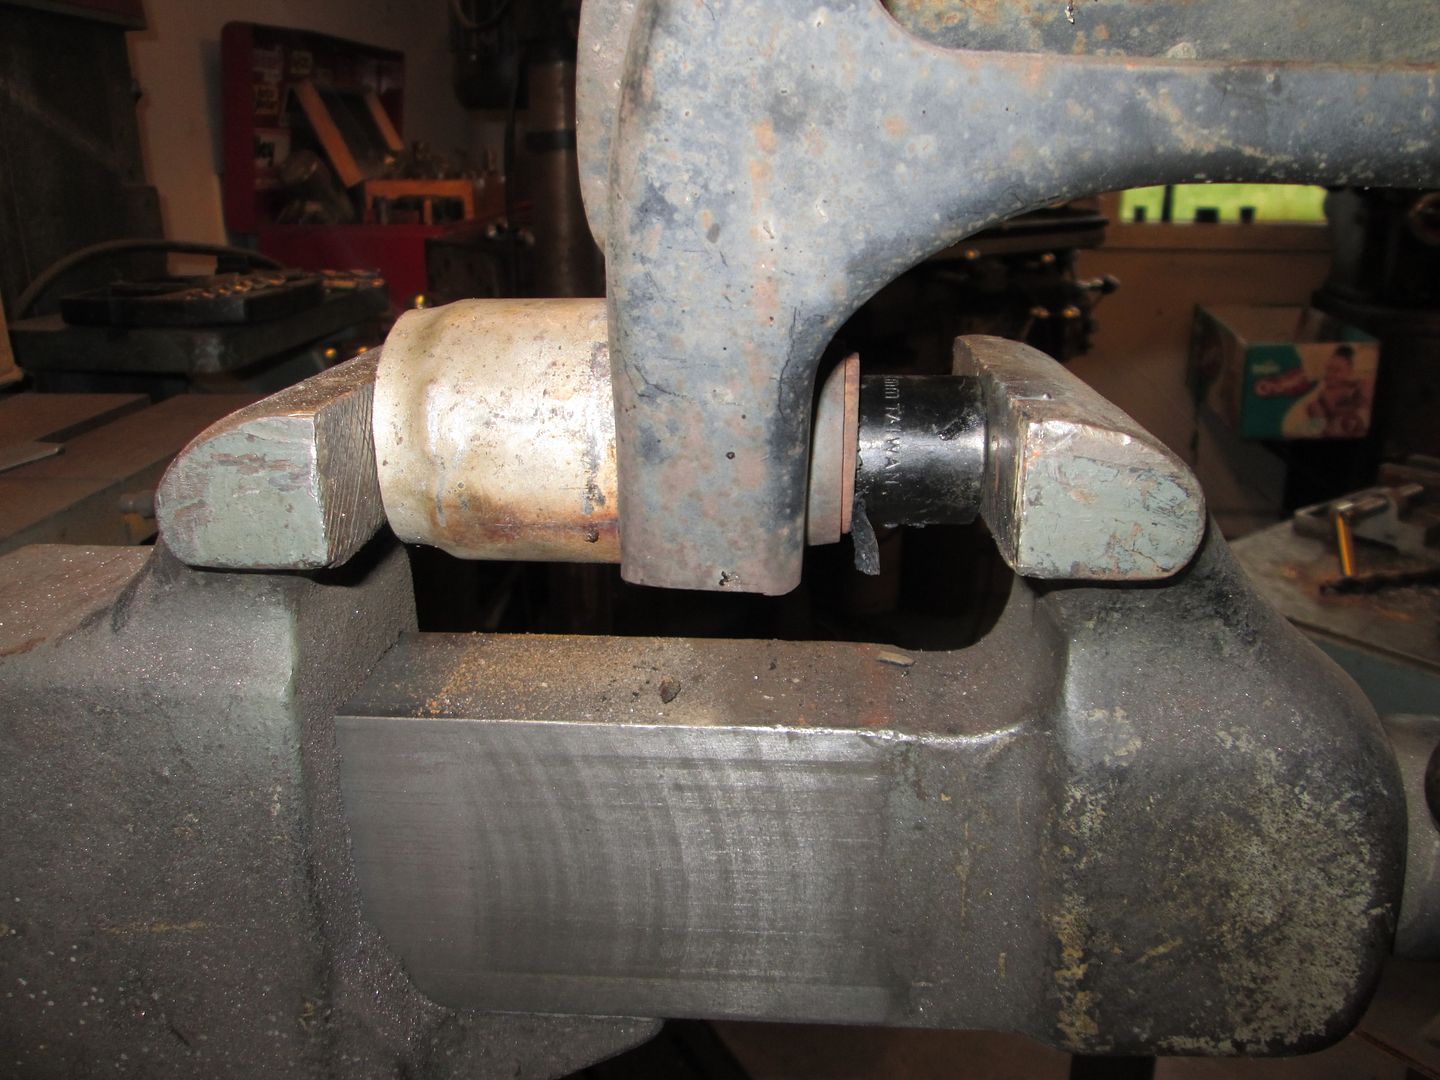
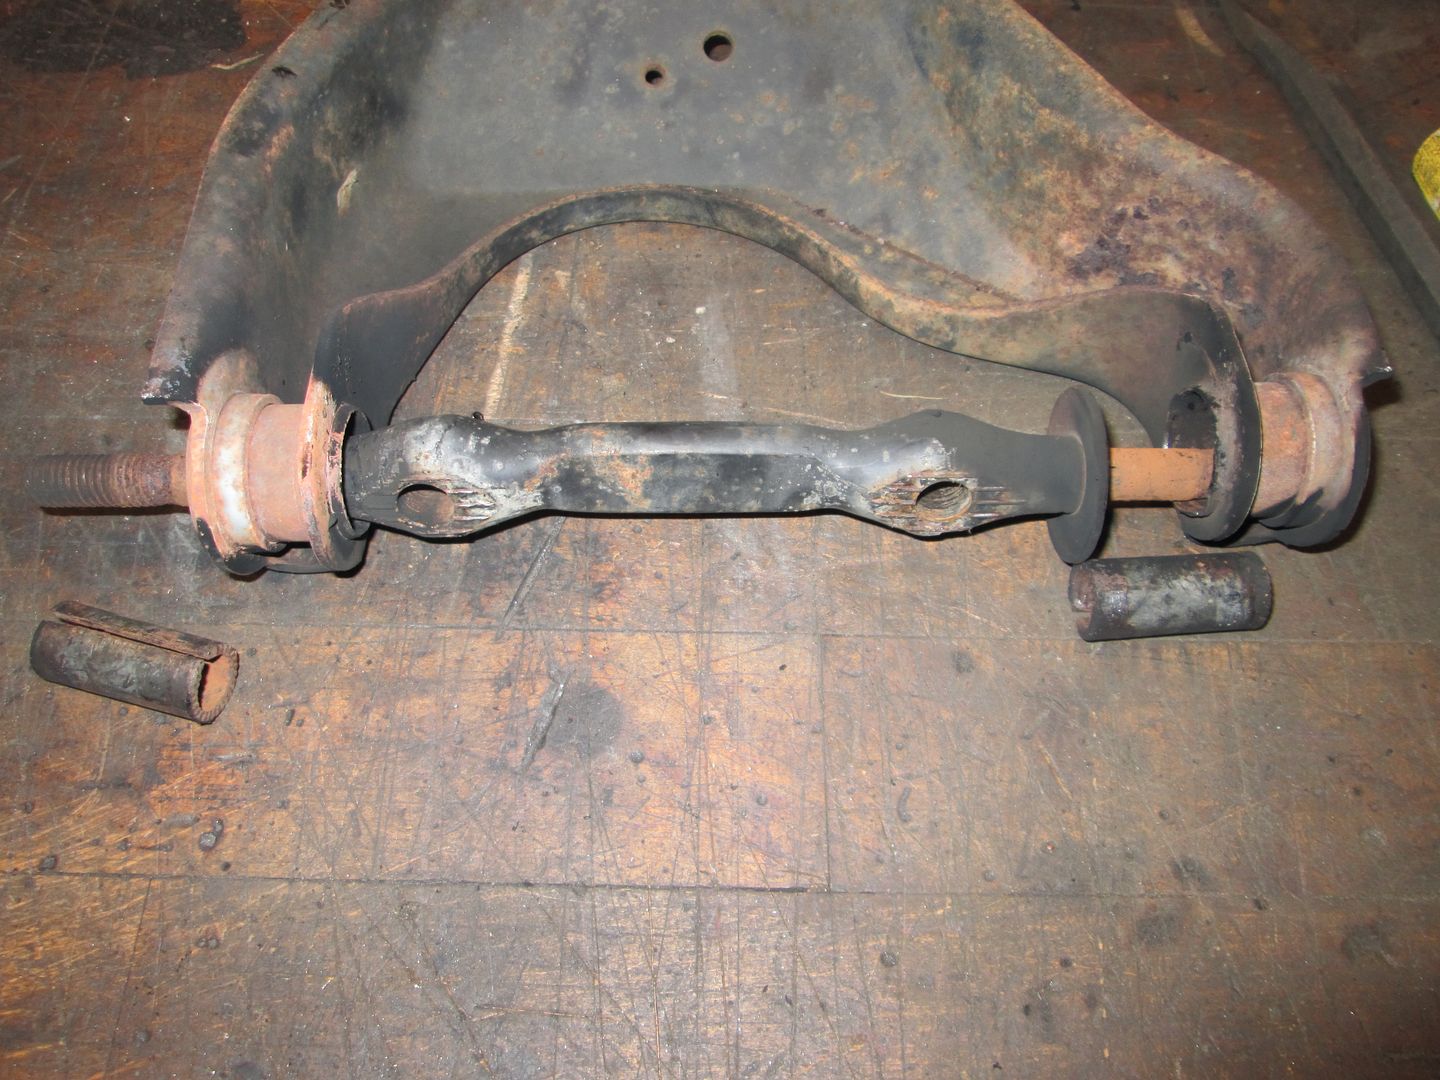
To press the lower ball joints out, I used a short section of exhaust pipe and my vice:
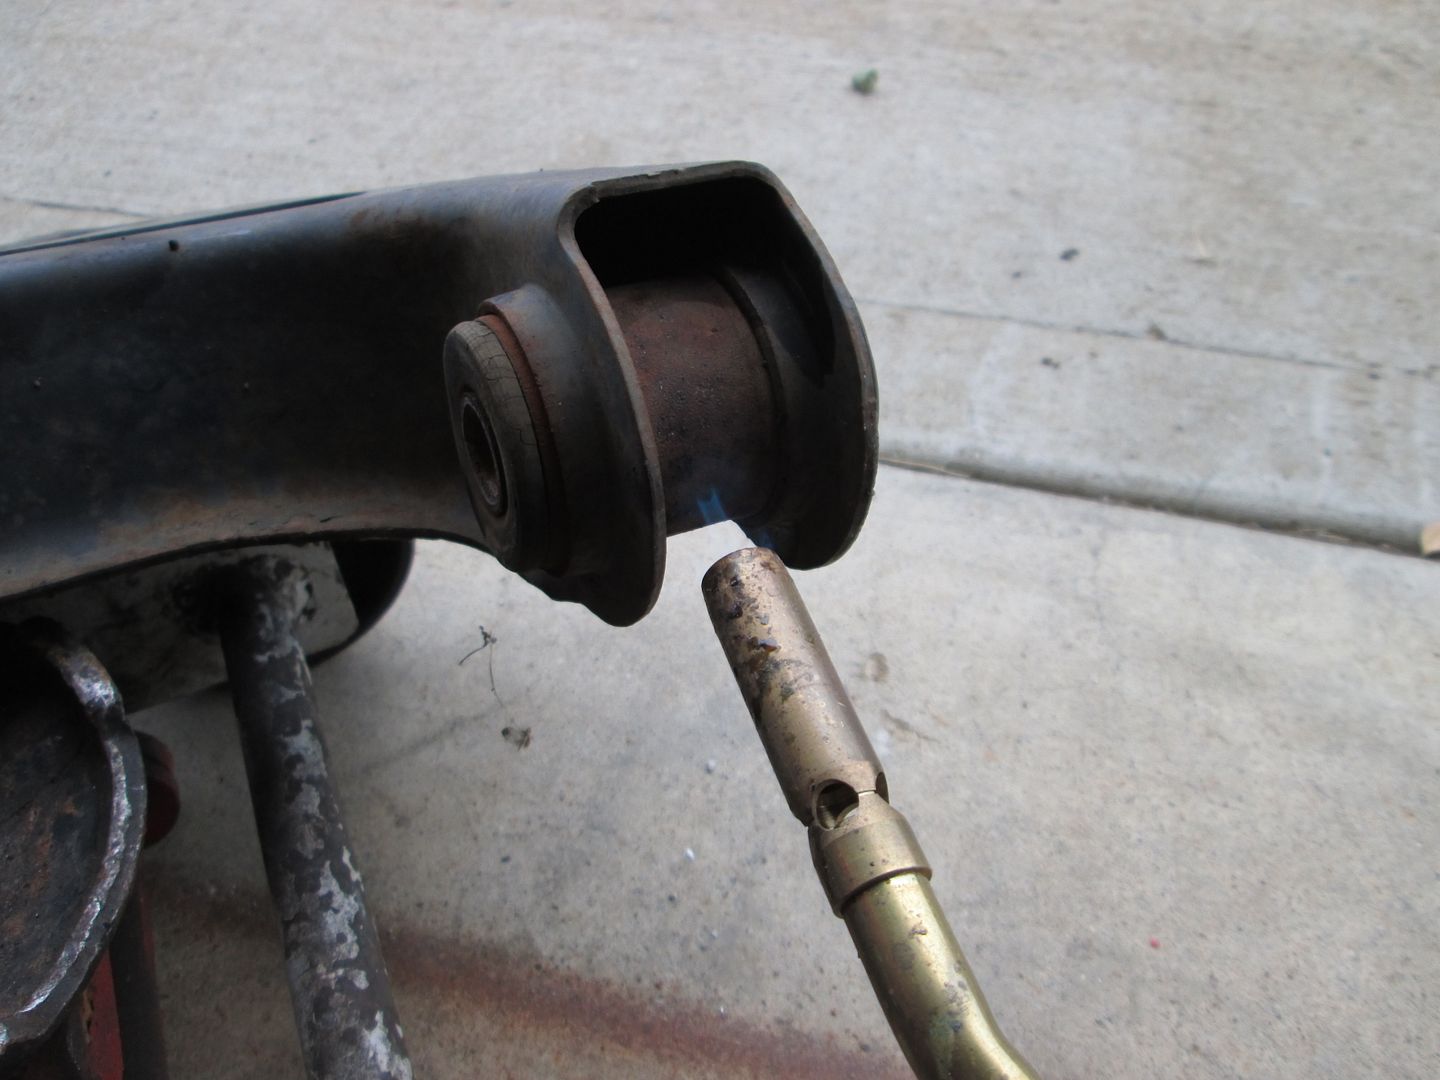
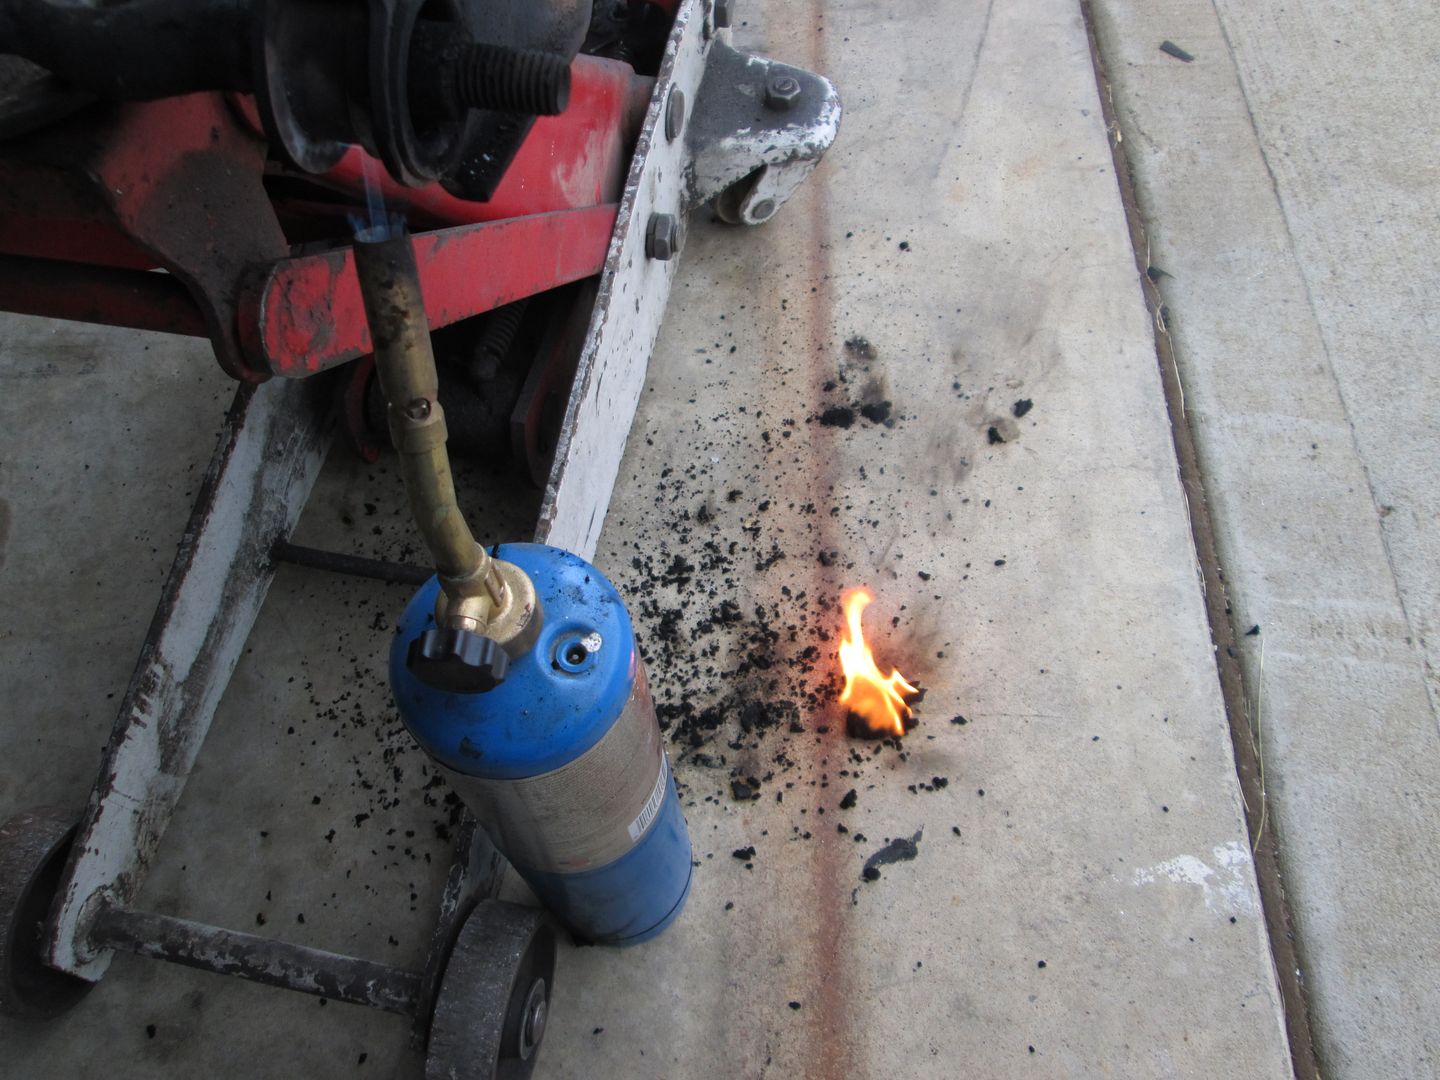
To remove the rubber bushings w/o much smoke or mess. Use a propane torch to heat the bushing sleeve while moving the heat around the sleeve about 3 minutes:
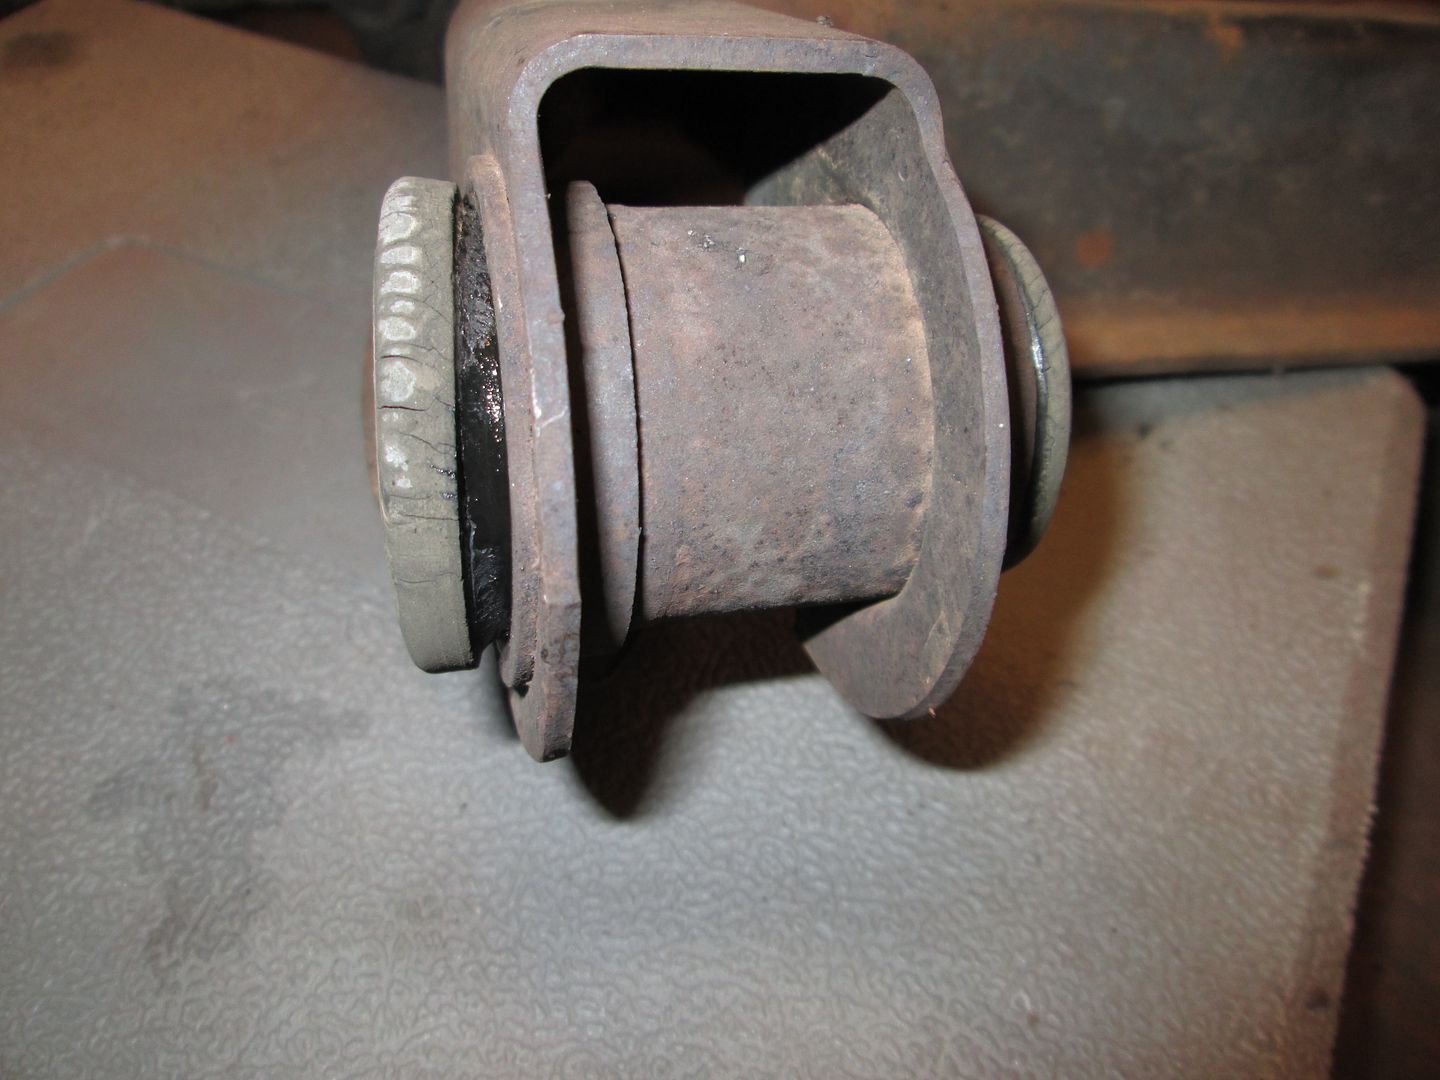
You want to hear the bushing start popping and see the large flange end start pulling away from the sleeve like this:
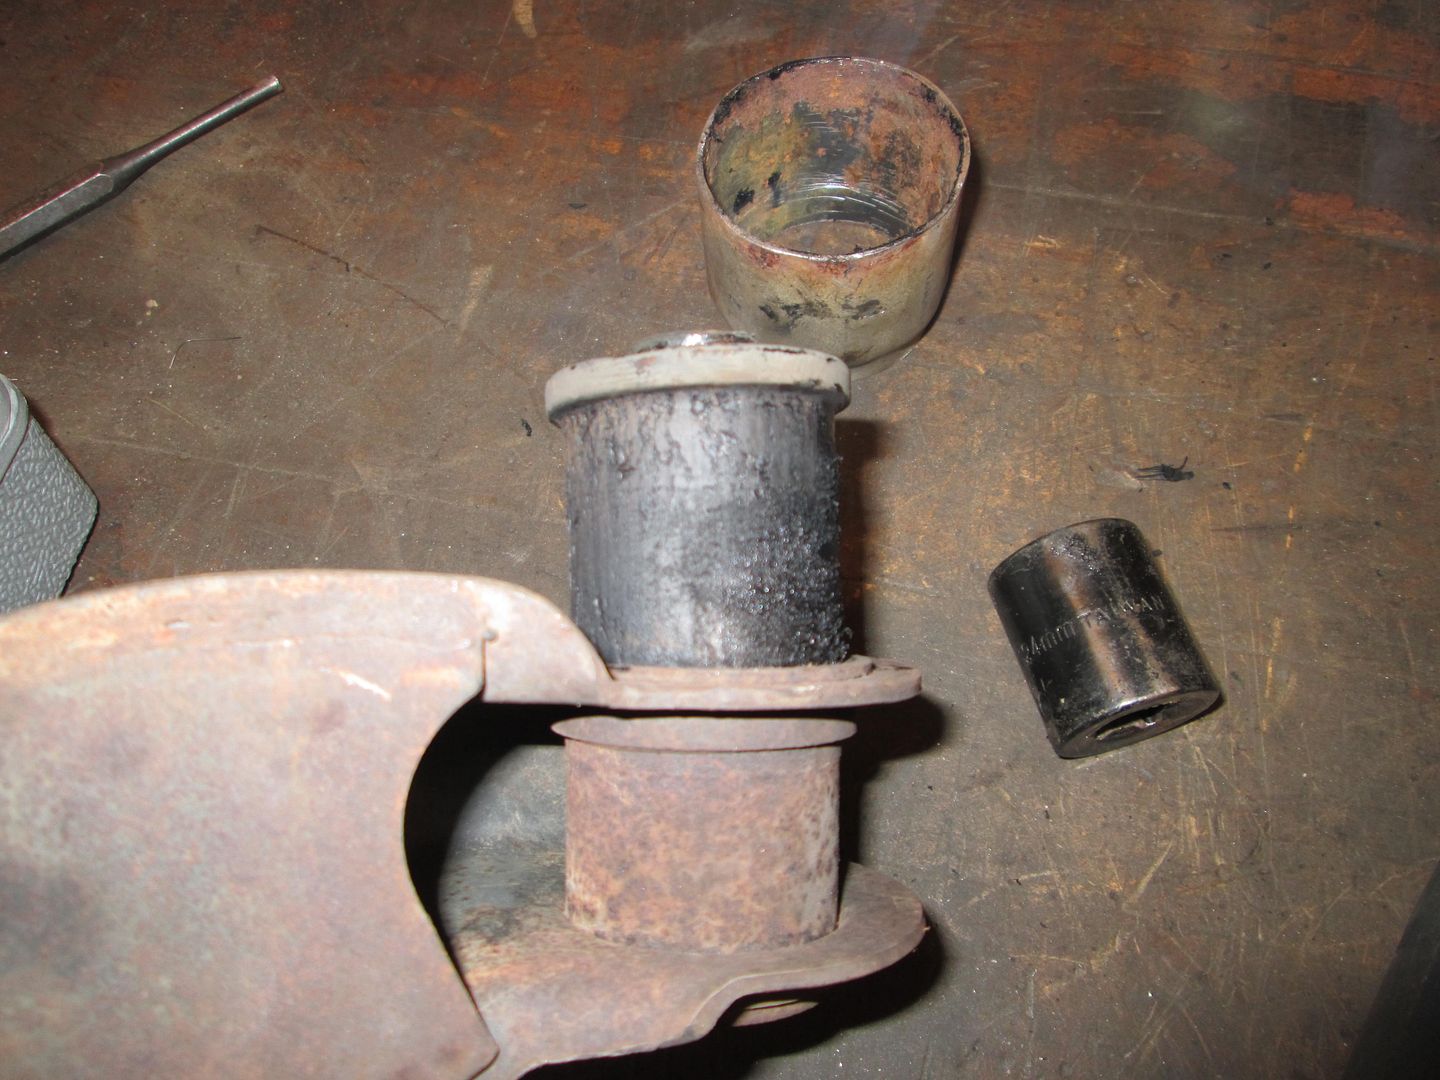
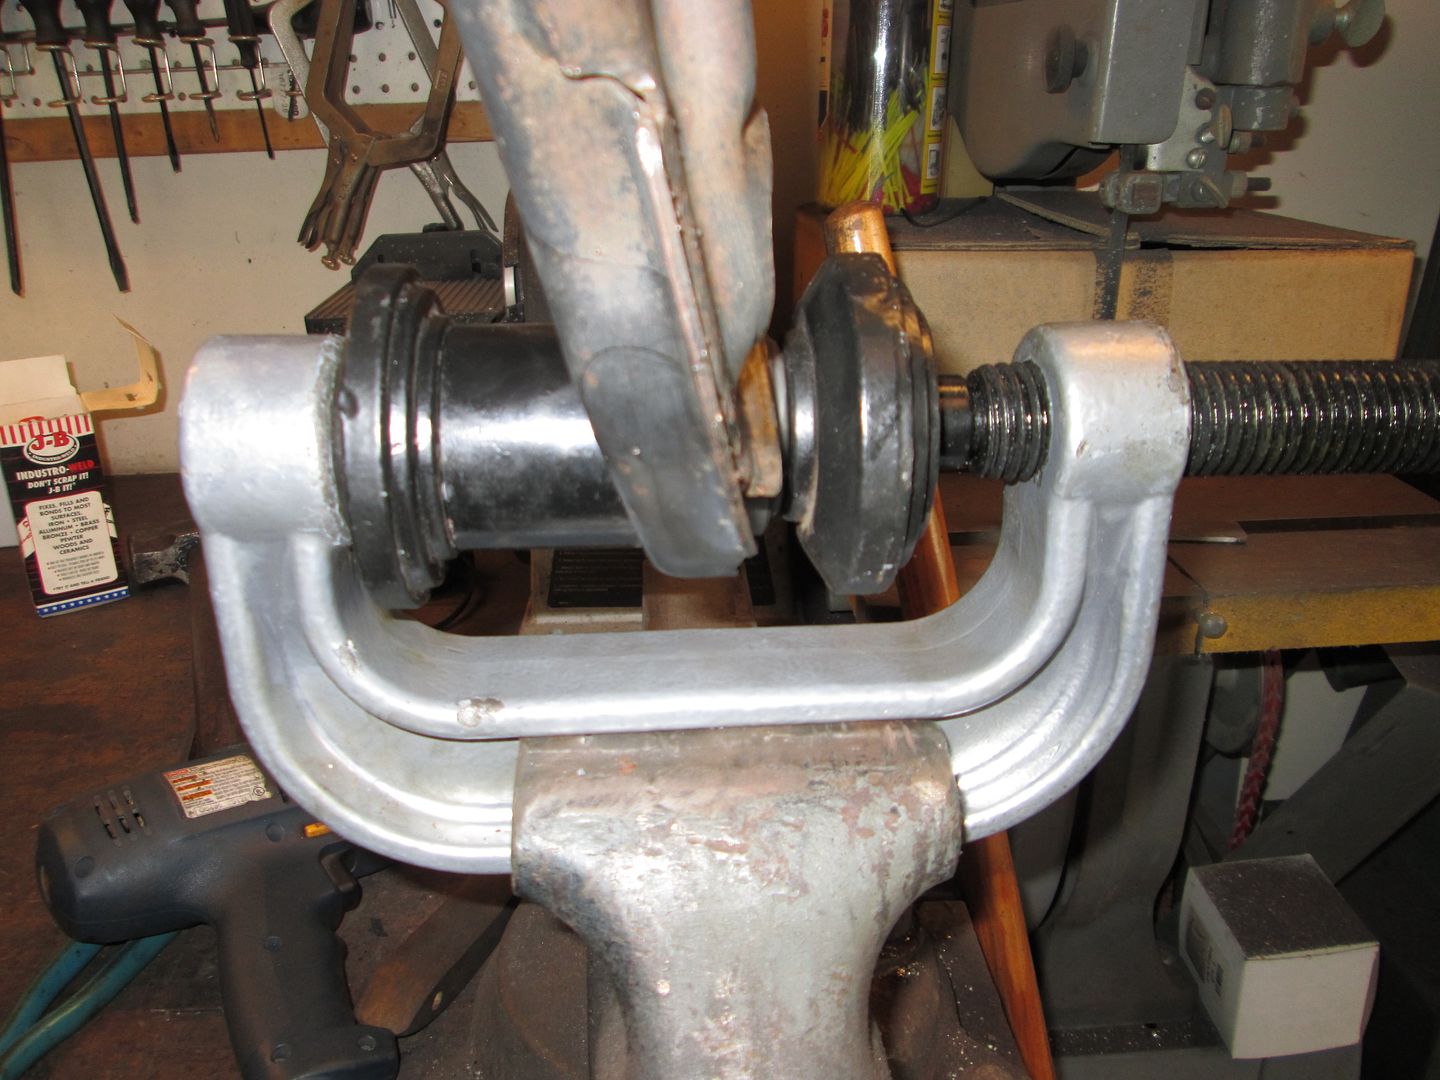
Now back to the vice with the same piece of exhaust pipe on the large end and a decent size socket on the other. Use the vice to press the bushing out. It slides out w/o much fuss since the majority of the outer surface has started to melt:
The removed bushing looks like this:
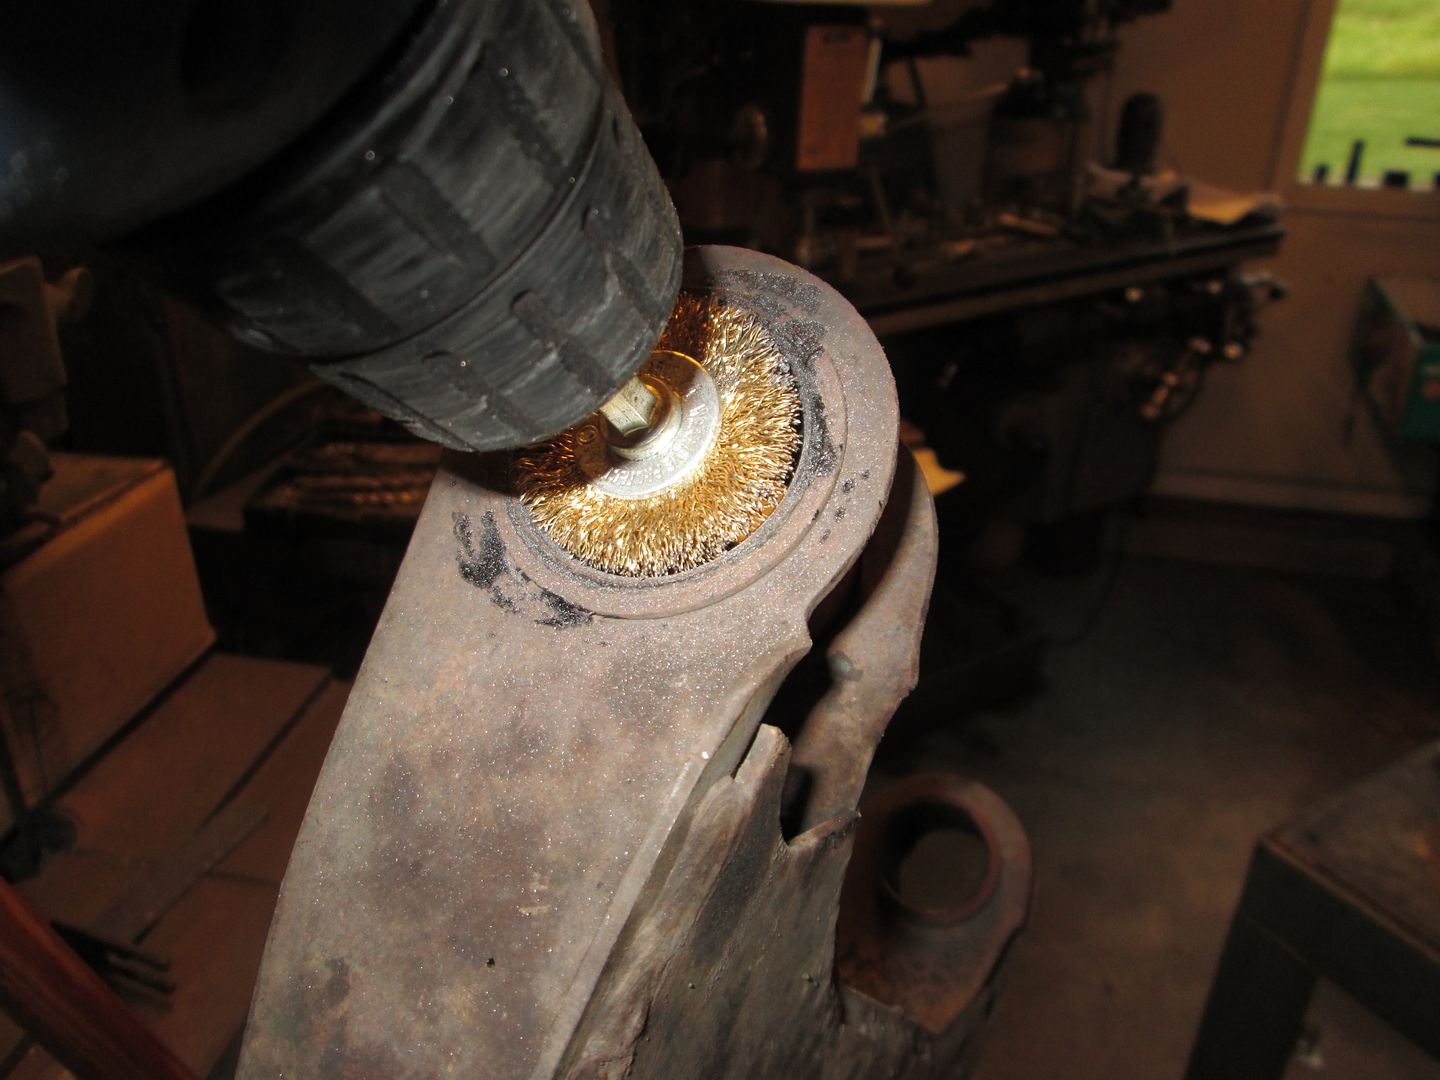
Then use a round wire brush on a drill to clean the ID of the sleeves:
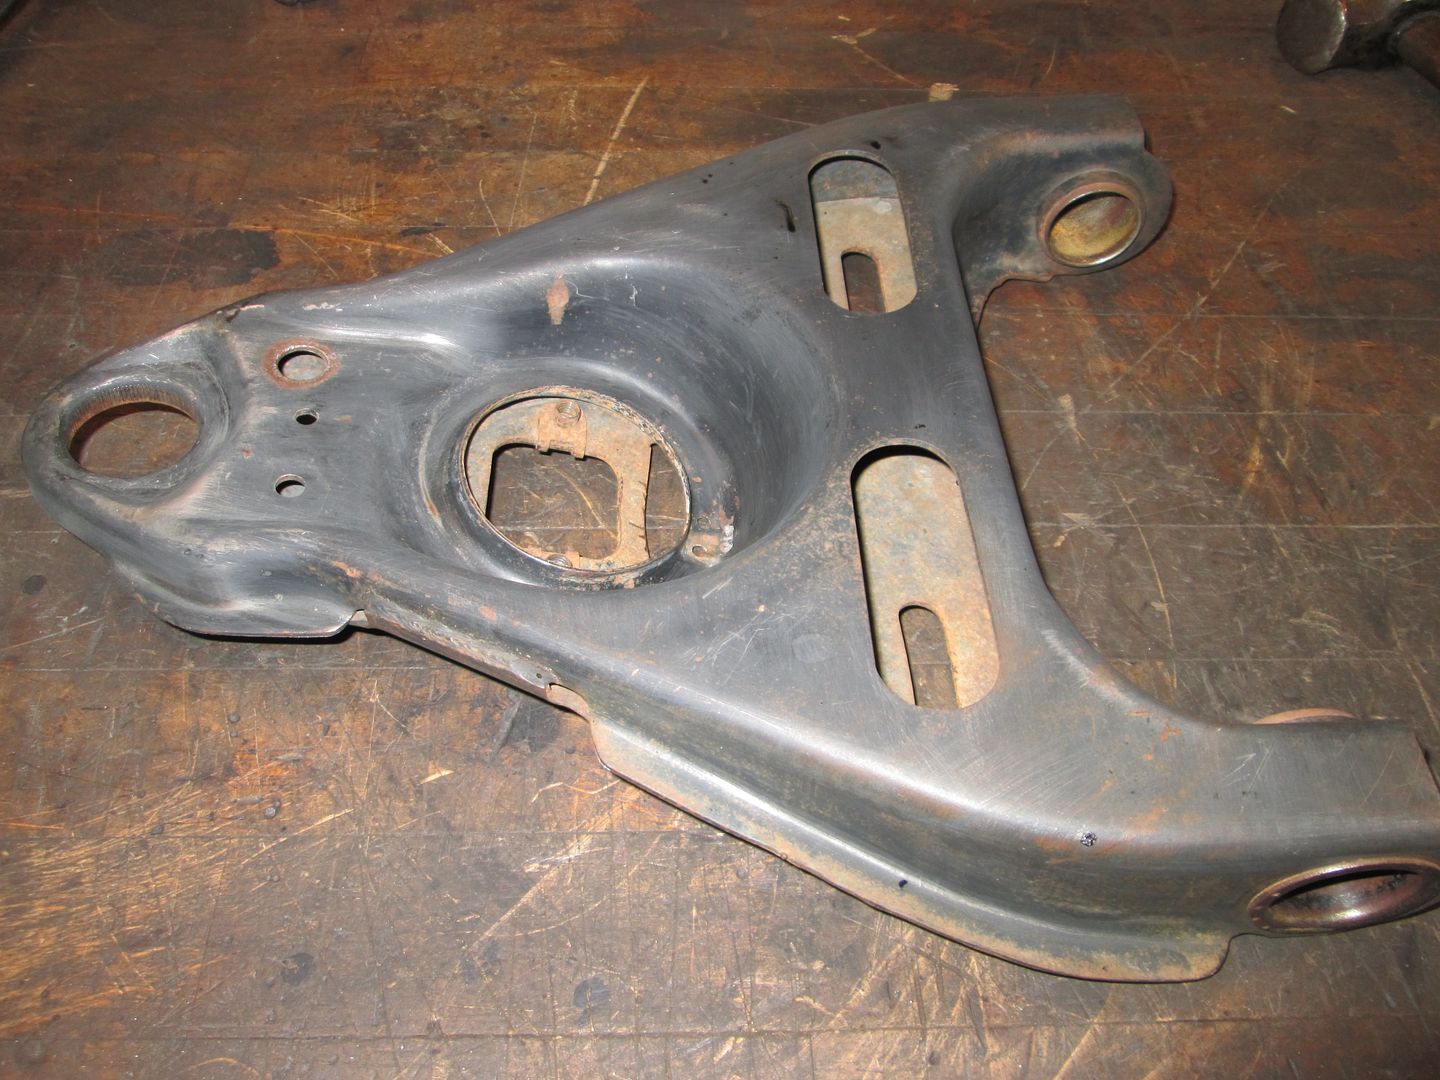
On the upper a-arm, just grind down the tops of the rivets and pop out the ball joint. I ran out of propane before getting the rubber bushings off. So this is how I left it for this evening:
Originally posted by fieroguru: To remove the rubber bushings w/o much smoke or mess. Use a propane torch to heat the bushing sleeve while moving the heat around the sleeve about 3 minutes:
You want to hear the bushing start popping and see the large flange end start pulling away from the sleeve like this:
Now back to the vice with the same piece of exhaust pipe on the large end and a decent size socket on the other. Use the vice to press the bushing out. It slides out w/o much fuss since the majority of the outer surface has started to melt:
My experience has been that if you keep the heat on it, the bushing walks itself right out of the sleeve and you don't have to push on it at all.
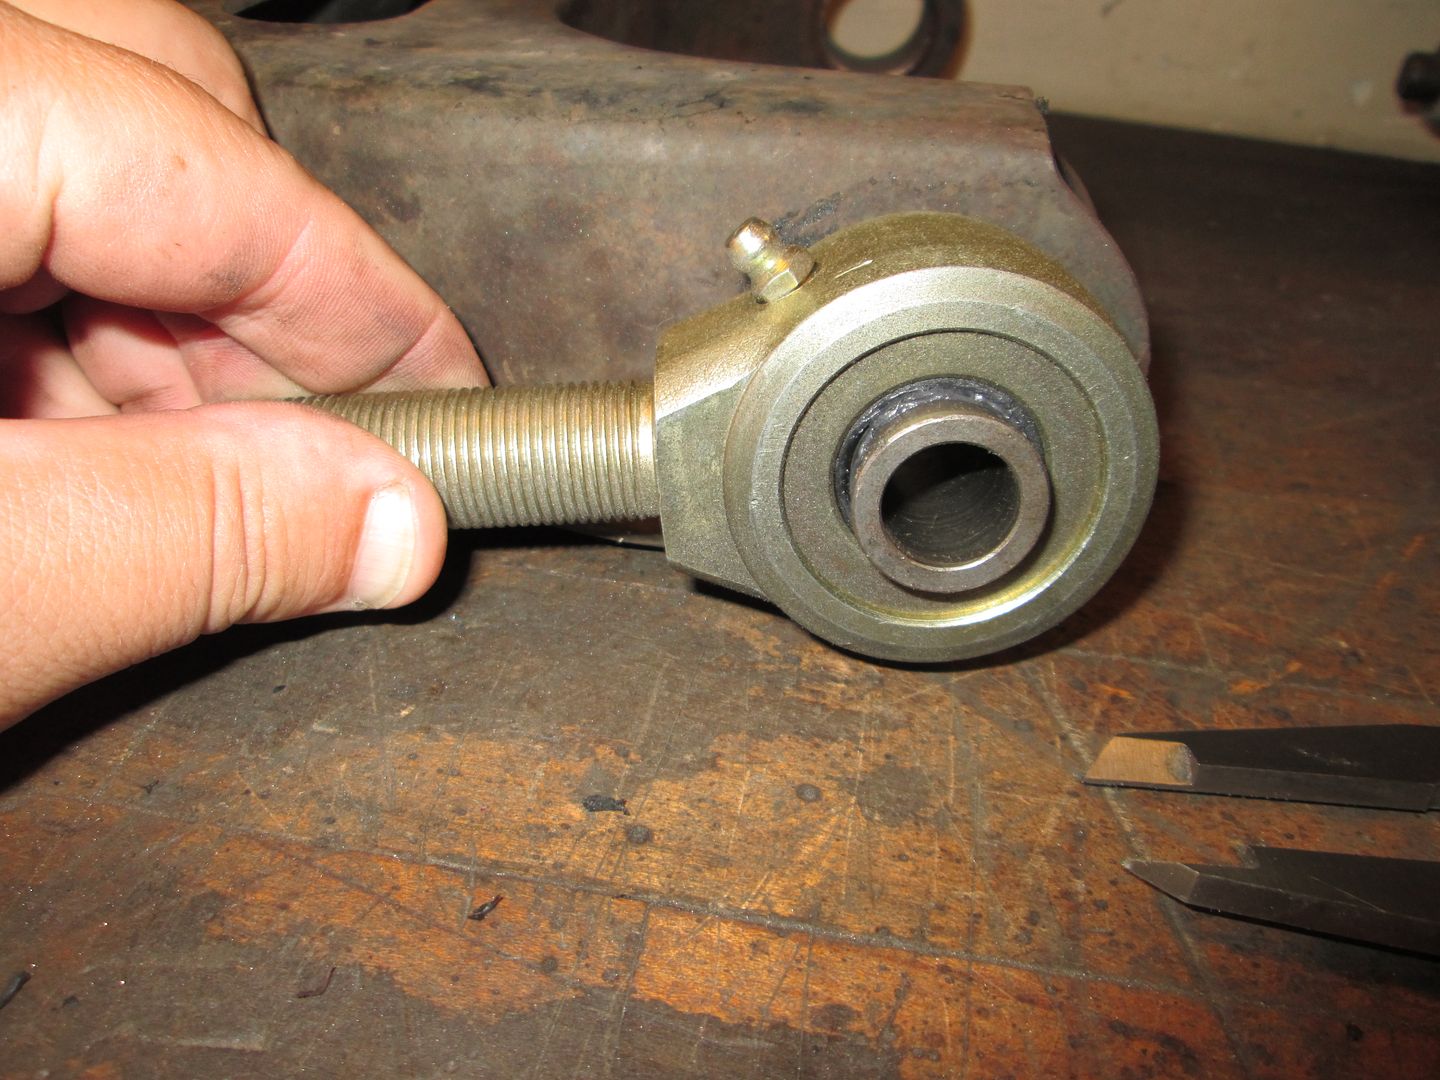
Looks closer to 1.5" OD... still too big. I have the design for weld in shells to replace the stock bushing sleeves, but any bearing over 1.187 OD doesn't leave enough wall thickness to maintain strength.
Originally posted by Will: My experience has been that if you keep the heat on it, the bushing walks itself right out of the sleeve and you don't have to push on it at all.
I used to do it that way as well. Only downsides is it takes longer and produces a lot more smoke and fumes. This way is faster with less smoke/fumes (3 minutes to heat, 1 minute to press out)... just need to have a large enough vice.
For the upper control arms, I will just heat them till they slide out on their own as the cross shaft doesn't leave much room to press them out.
quote
Originally posted by Will: Looks closer to 1.5" OD... still too big. I have the design for weld in shells to replace the stock bushing sleeves, but any bearing over 1.187 OD doesn't leave enough wall thickness to maintain strength.
The smallest ones they have are 2" OD with the 3/16" sleeve. They do have one that has a .480" center hole and is 1.600" wide. You could likely use them for the control arms if you cut the stock bushing sleeve end off and radius it to fit the larger sleeve and weld it together. http://currieenterprises.re...ub_cr_id=32380332462
[This message has been edited by fieroguru (edited 09-13-2014).]
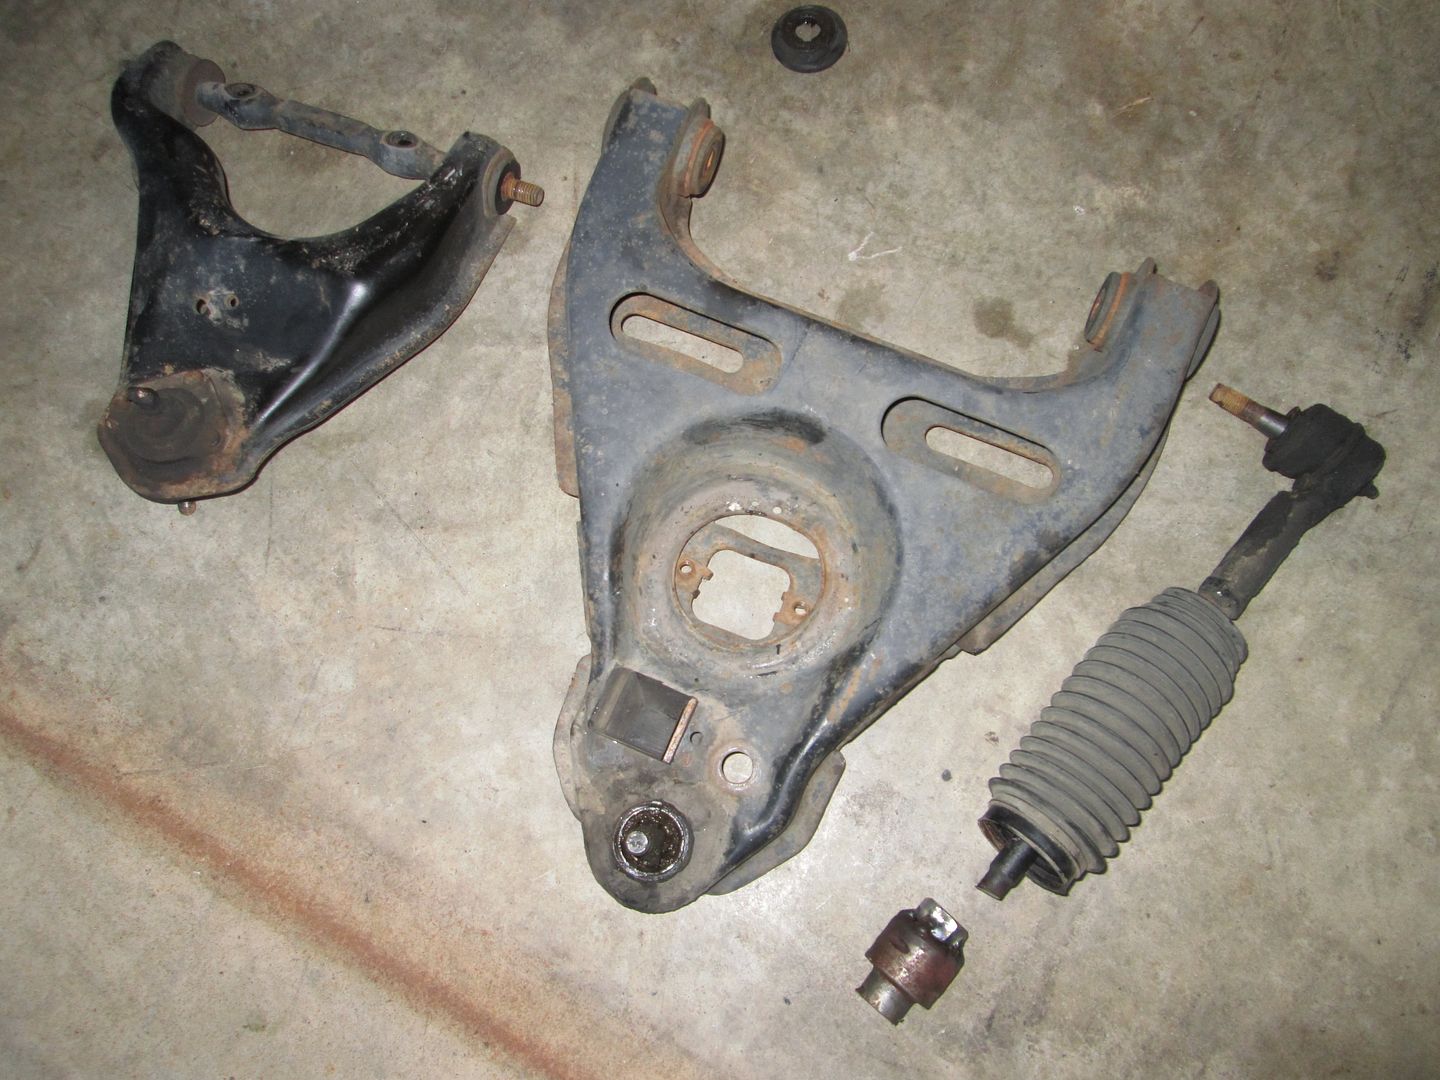
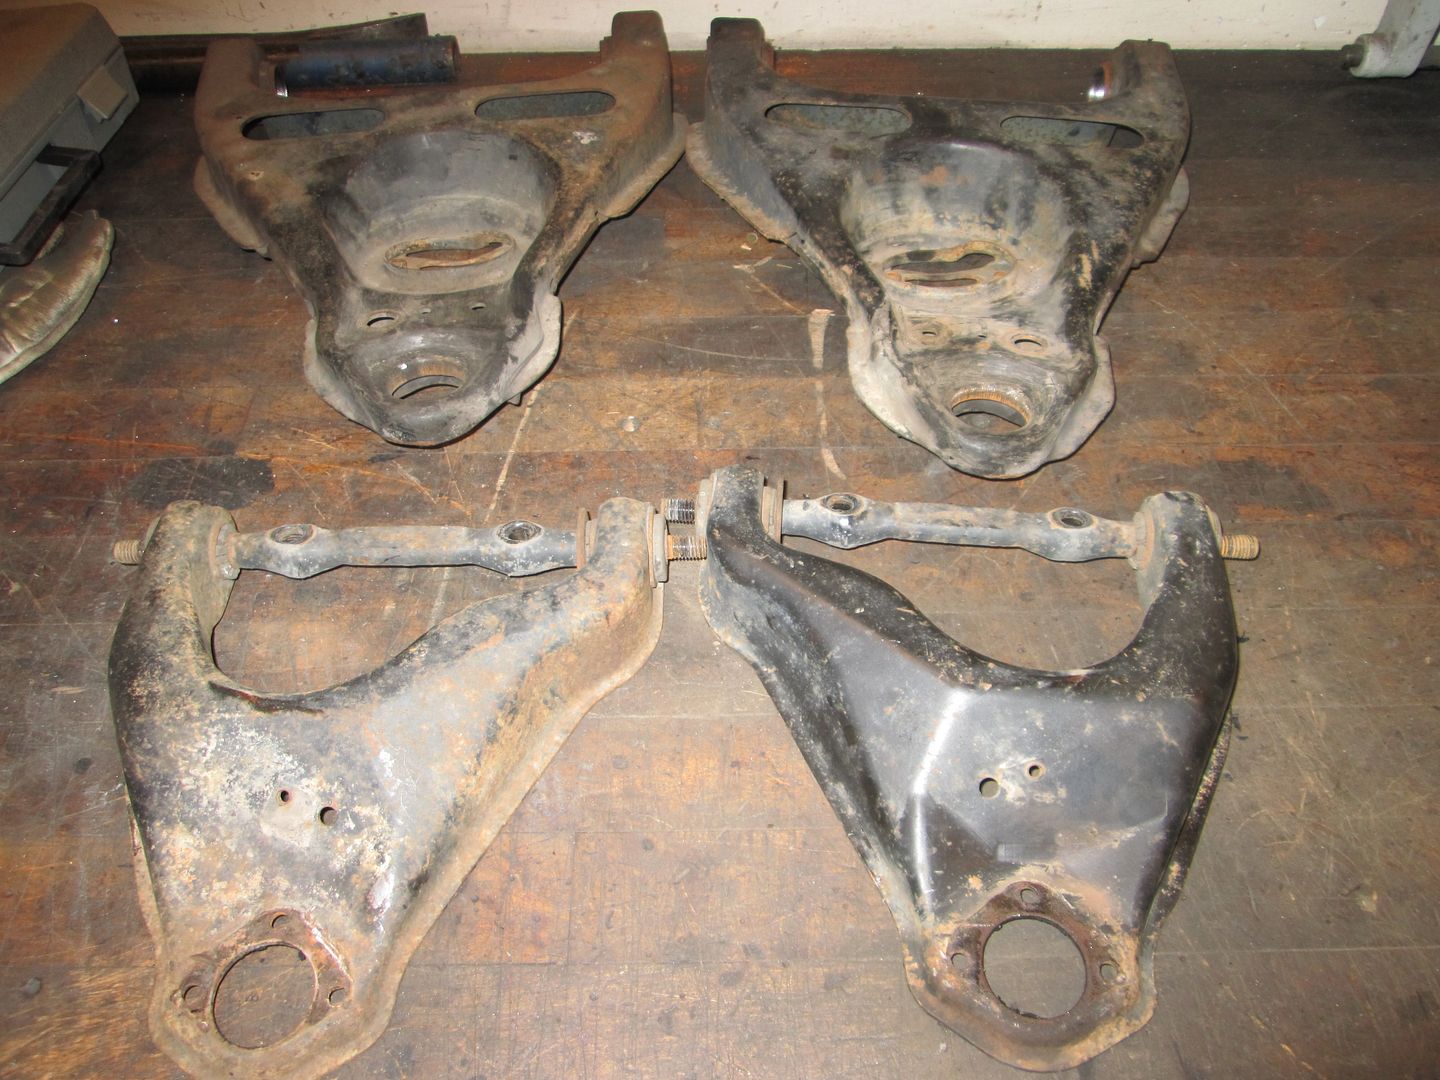
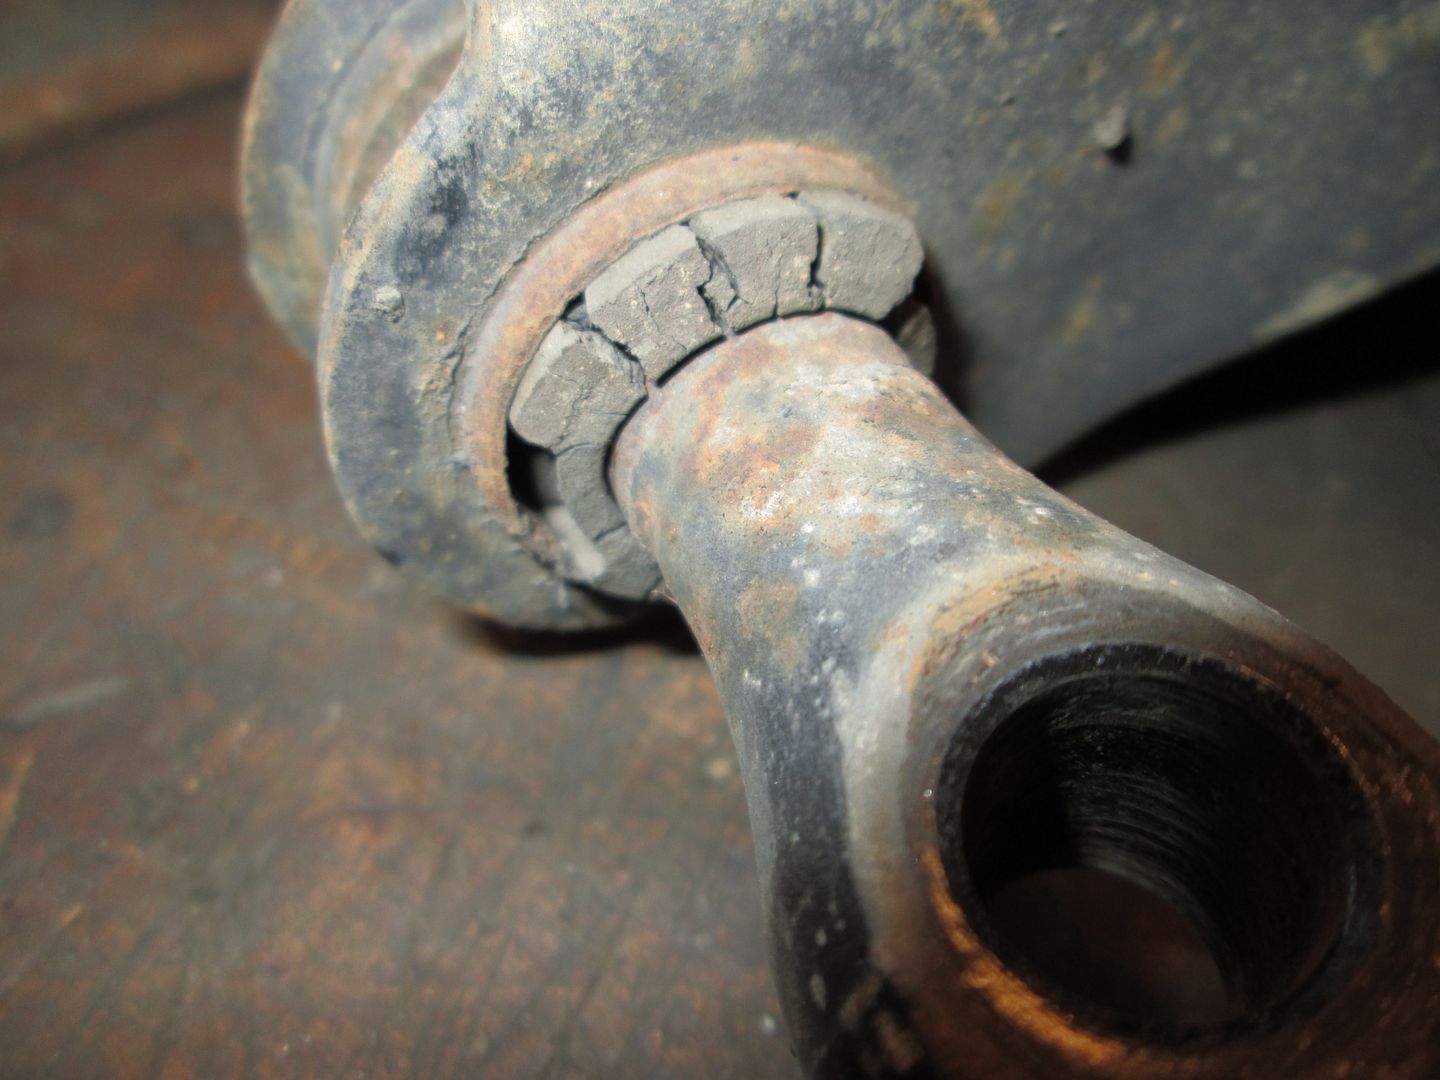
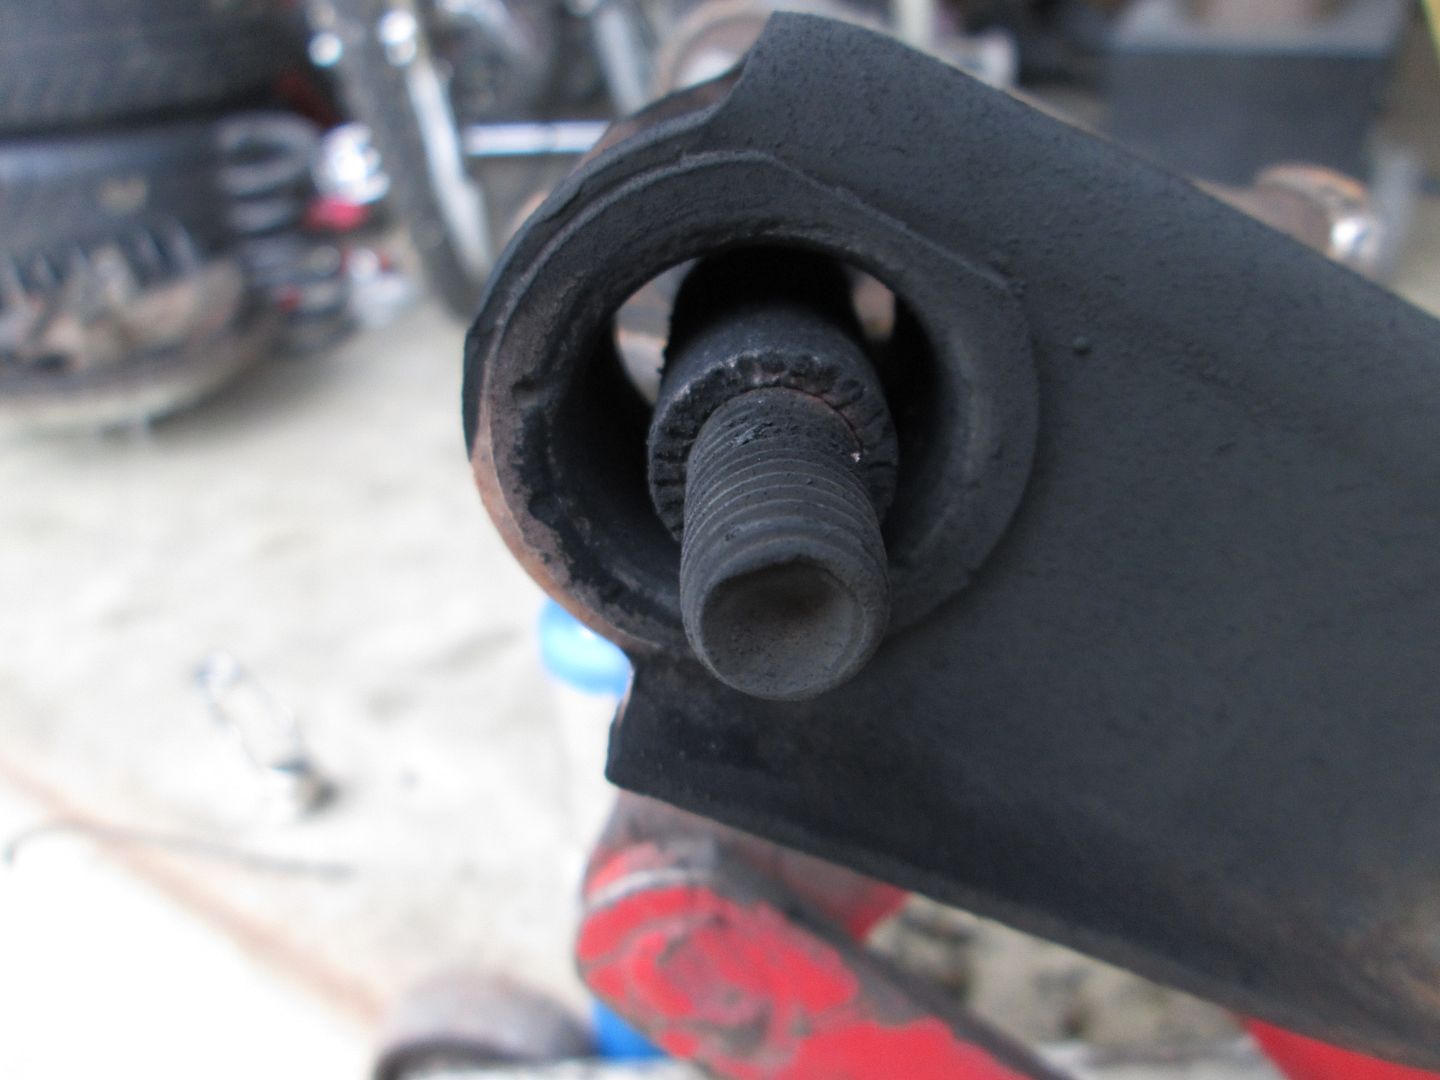
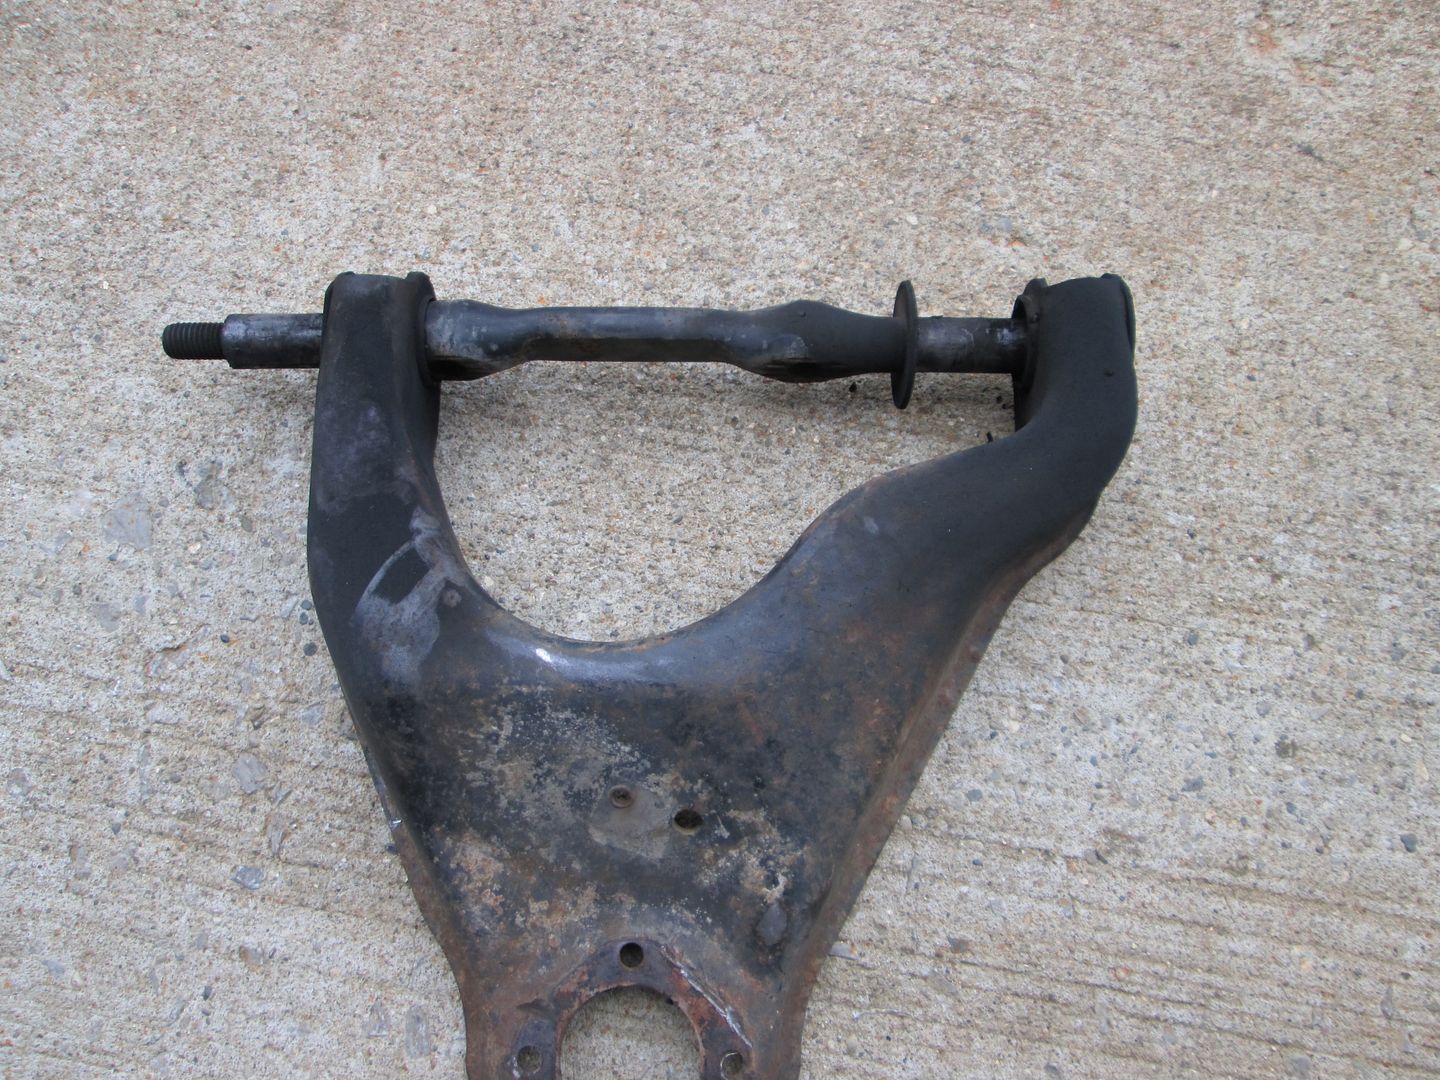
Here are a couple of pictures of the upper a-arm bushings. They were in need of replacement!
Set the upper a-arms on the jack, set the propane bottle under it and let it burn for about 10 minutes. Lots of smoke/fire, but got the bushings out.
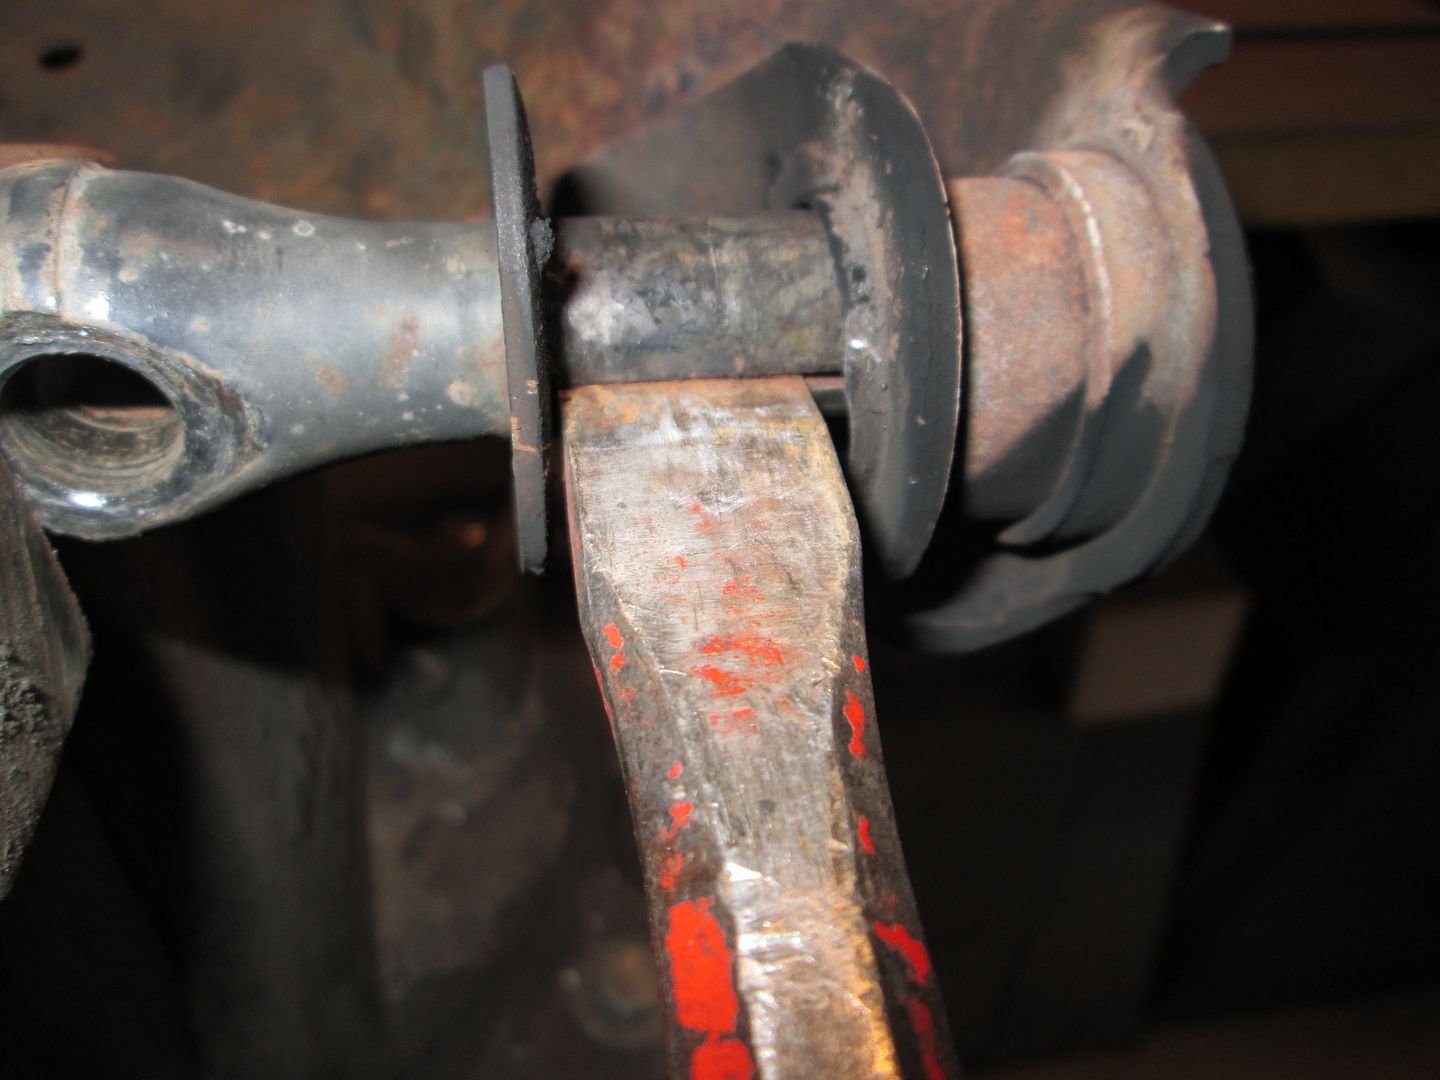
The bushing sleeves were stuck, so I took a chisel and used it to open the seam and spread the sleeve so it would slide off.
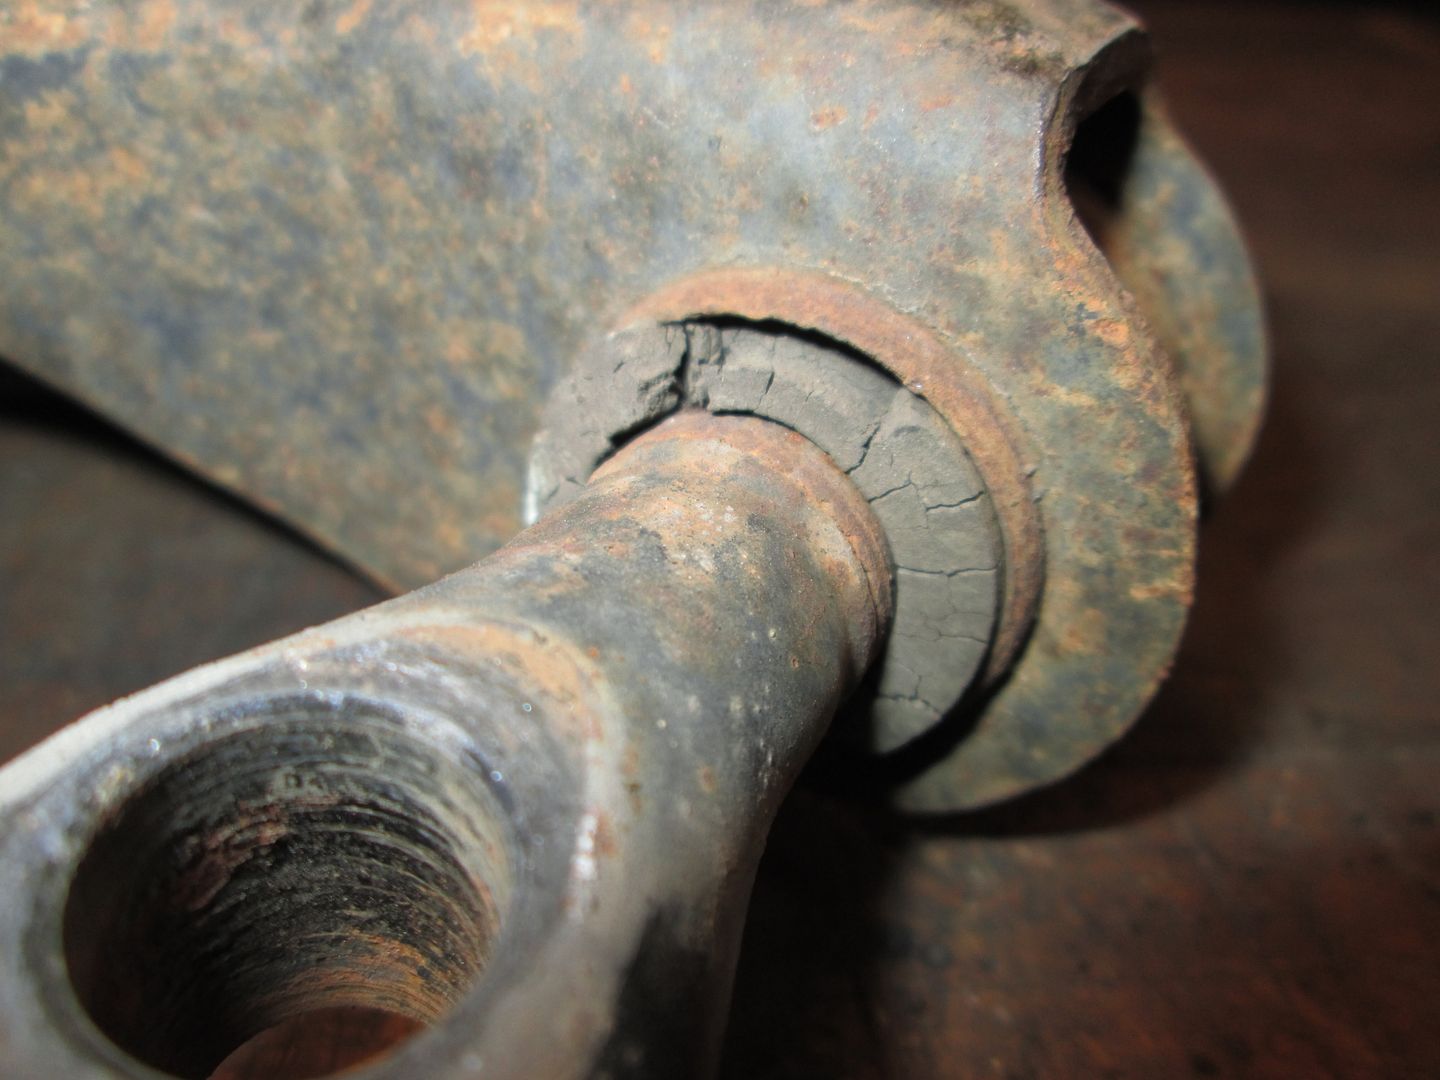
Then I wired brushed the upper and lower control arms, washed them in the kitchen sink with dawn, and baked them in the oven at 300 to make sure they were dry.
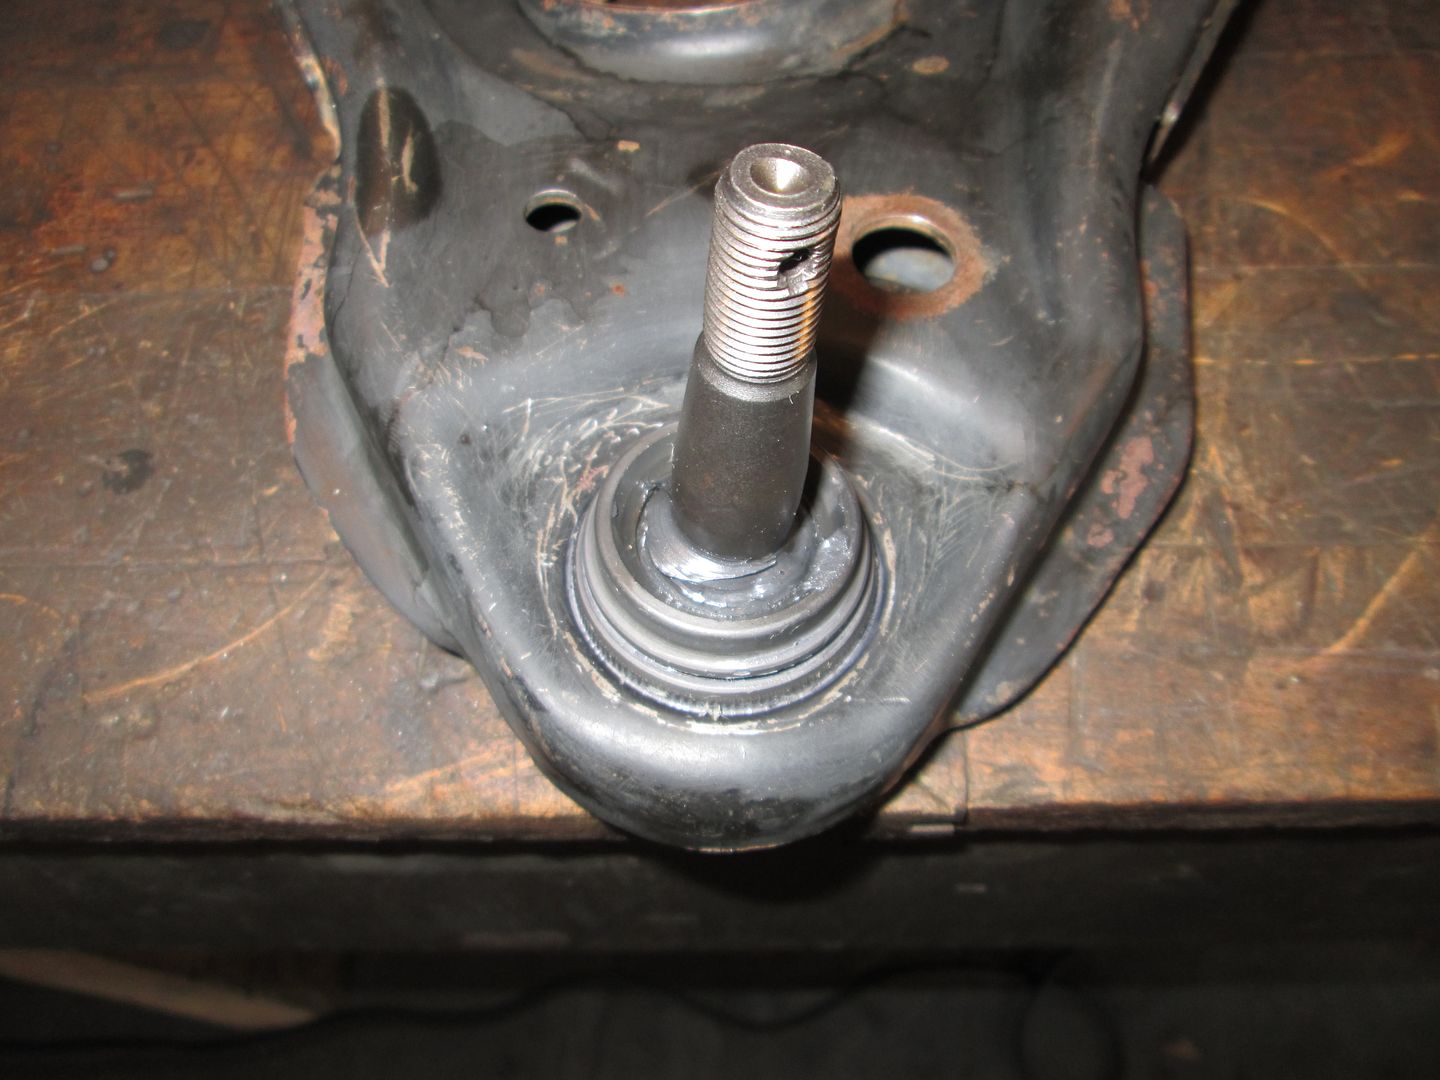
Time to install the lower ball joints... I used a ball joint press for this. They went in much harder that they came out, which is a good thing:
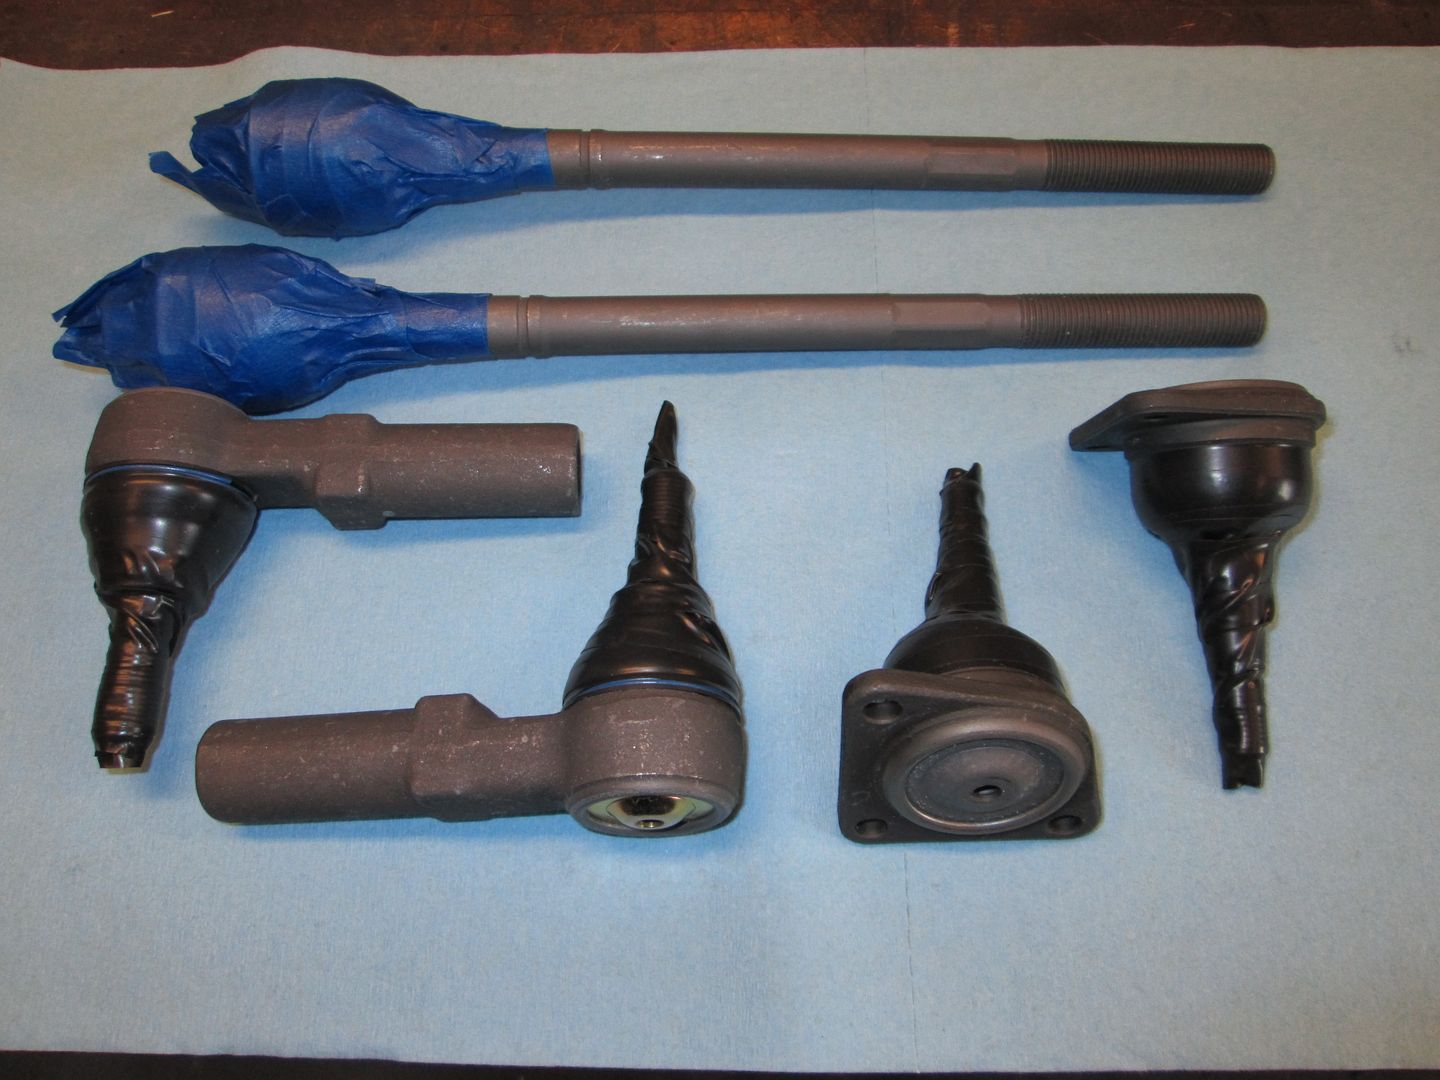
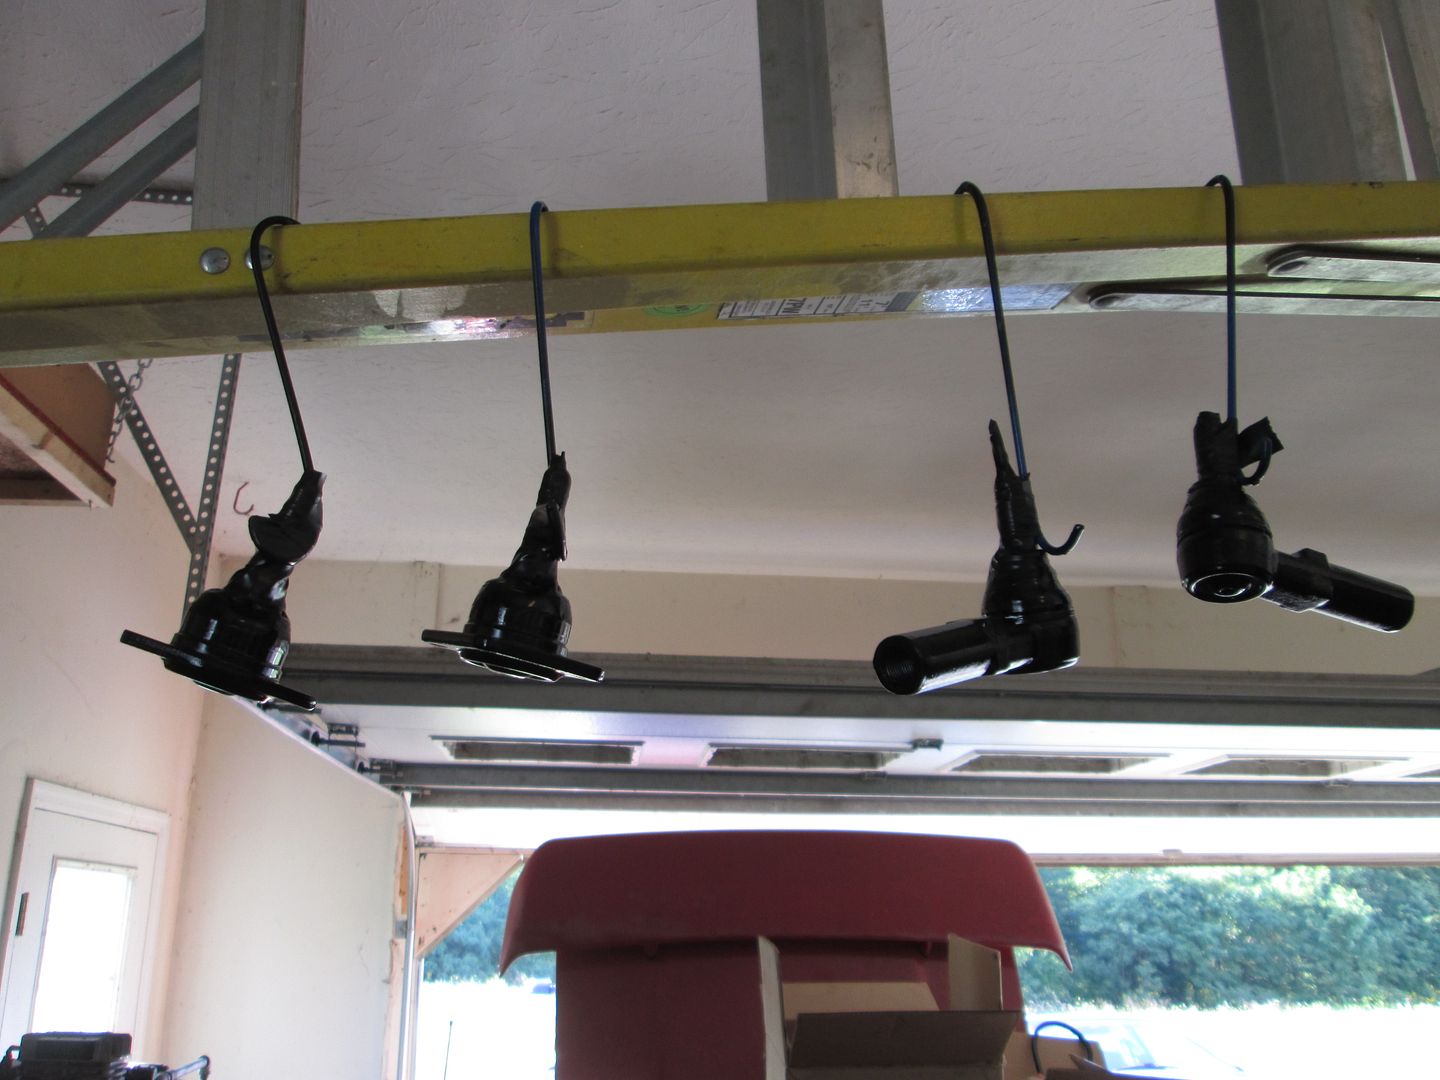
Taped up the ball joints so I can paint the lower a-arms:
Took the time at this point to also prep the upper ball joints and tie rods for paint as well:
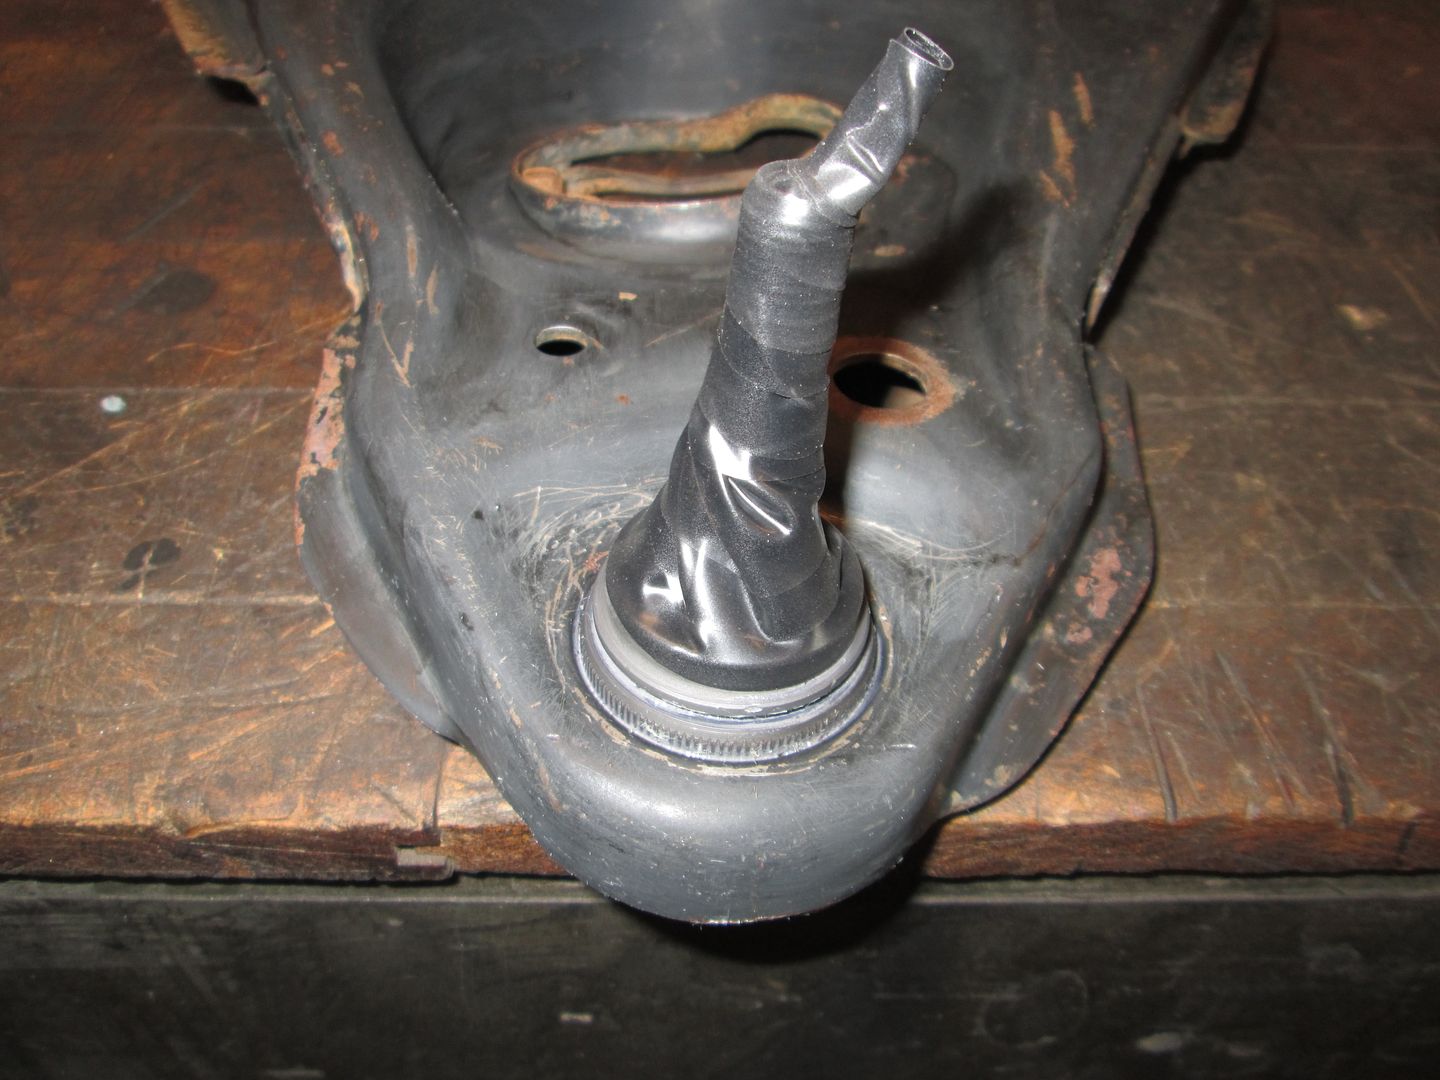
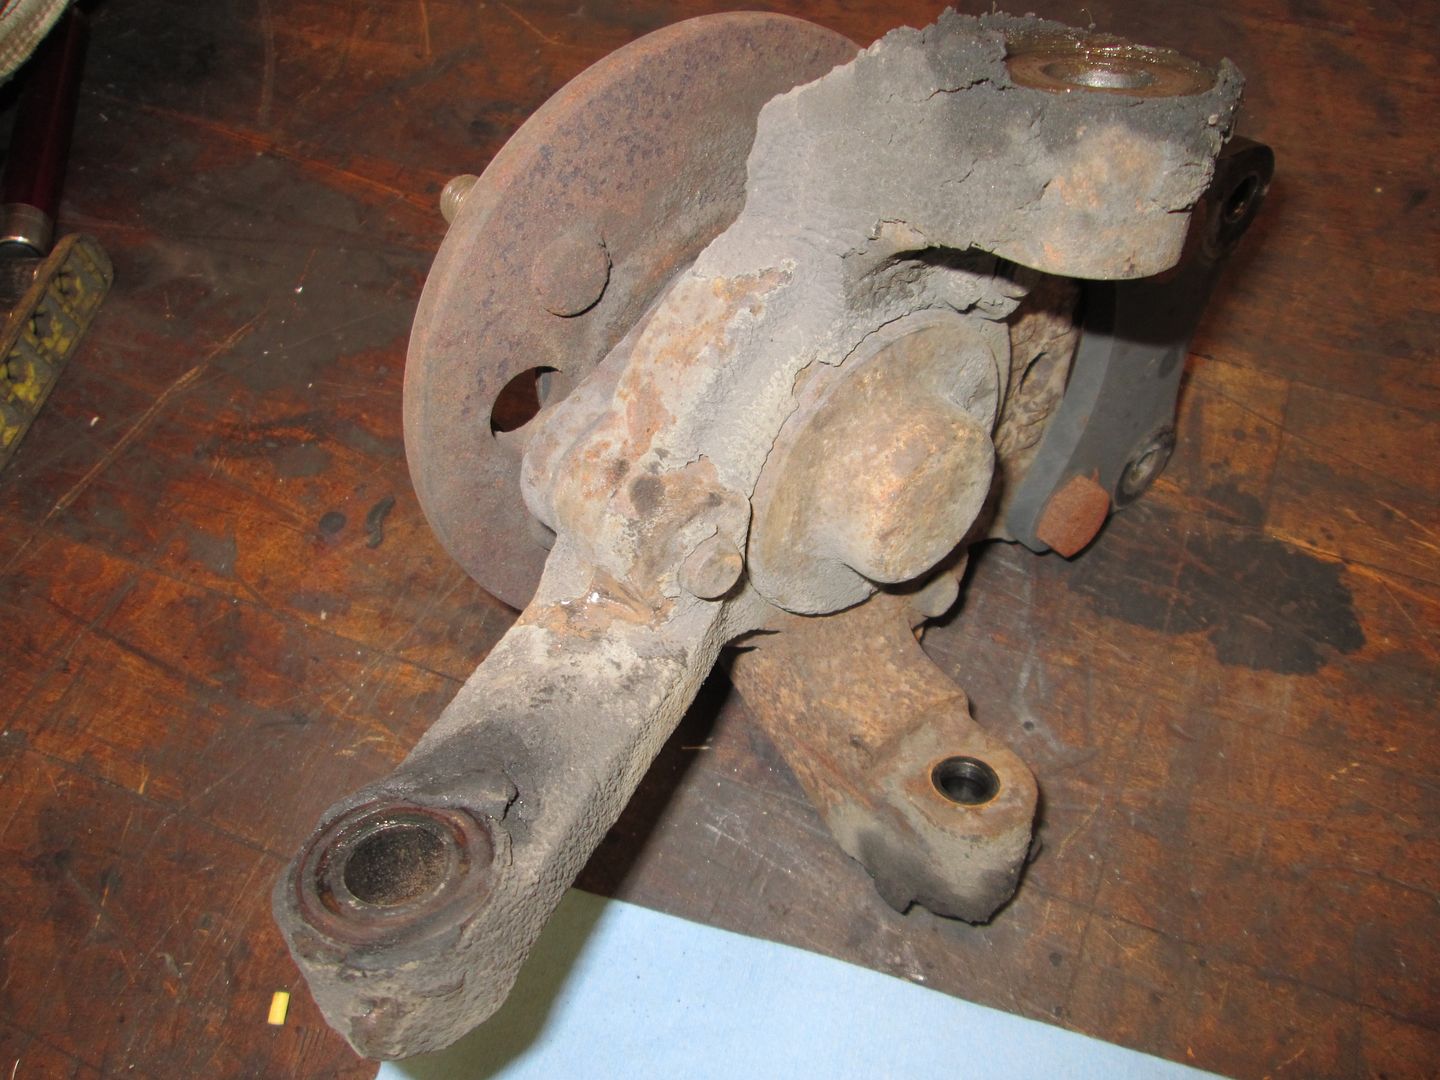
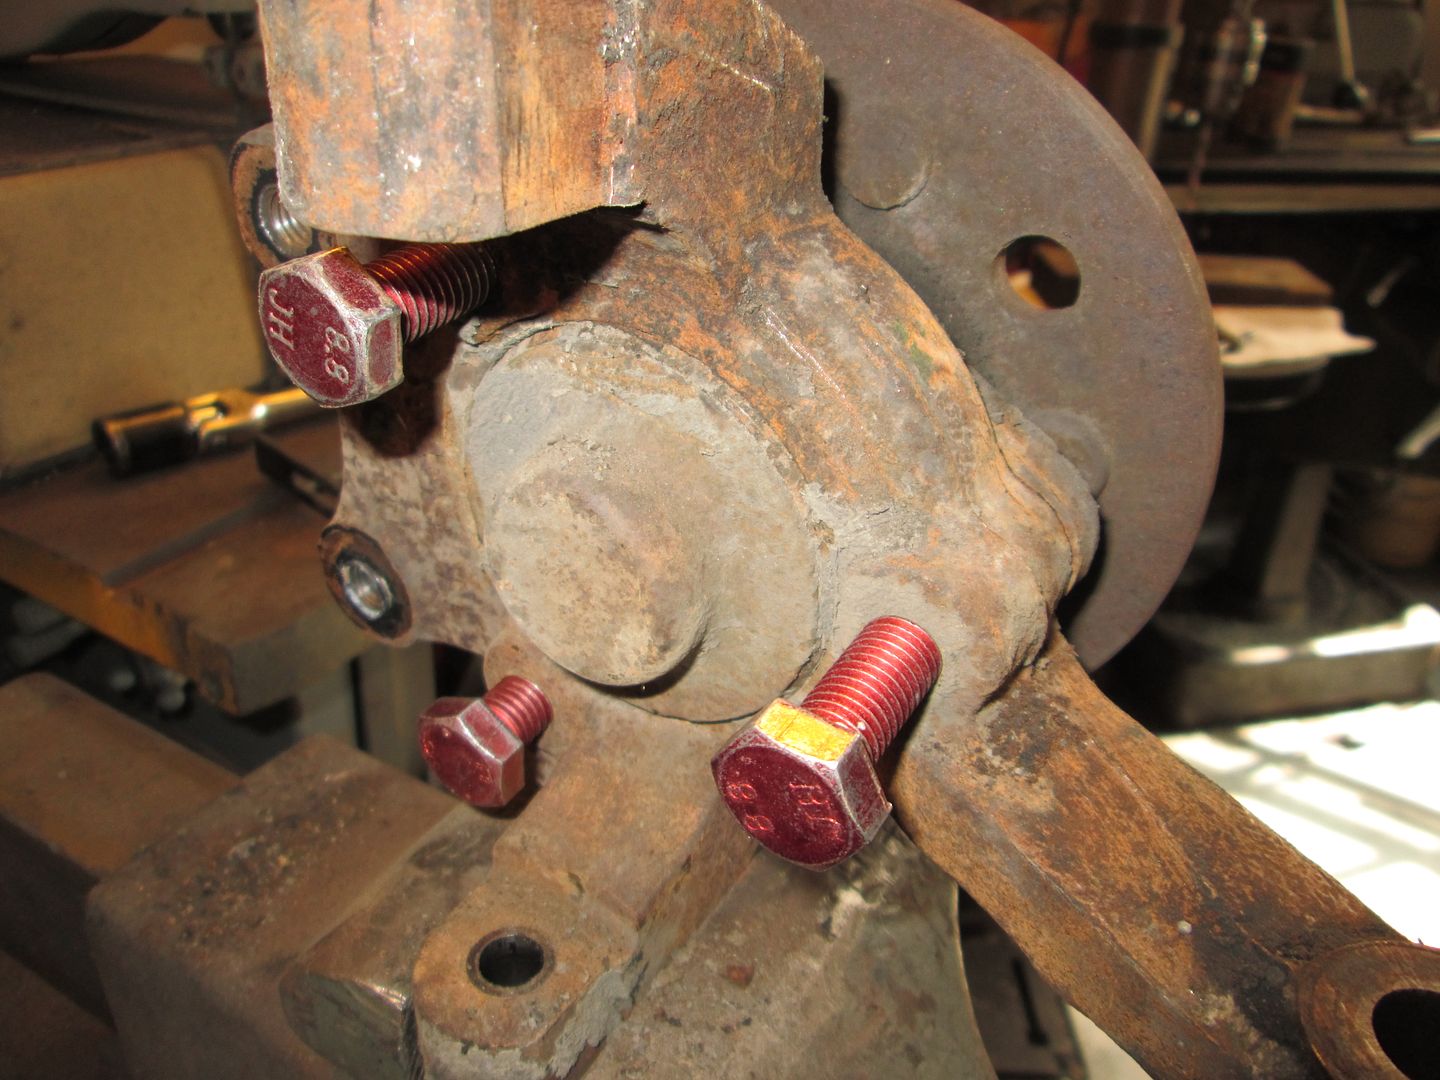
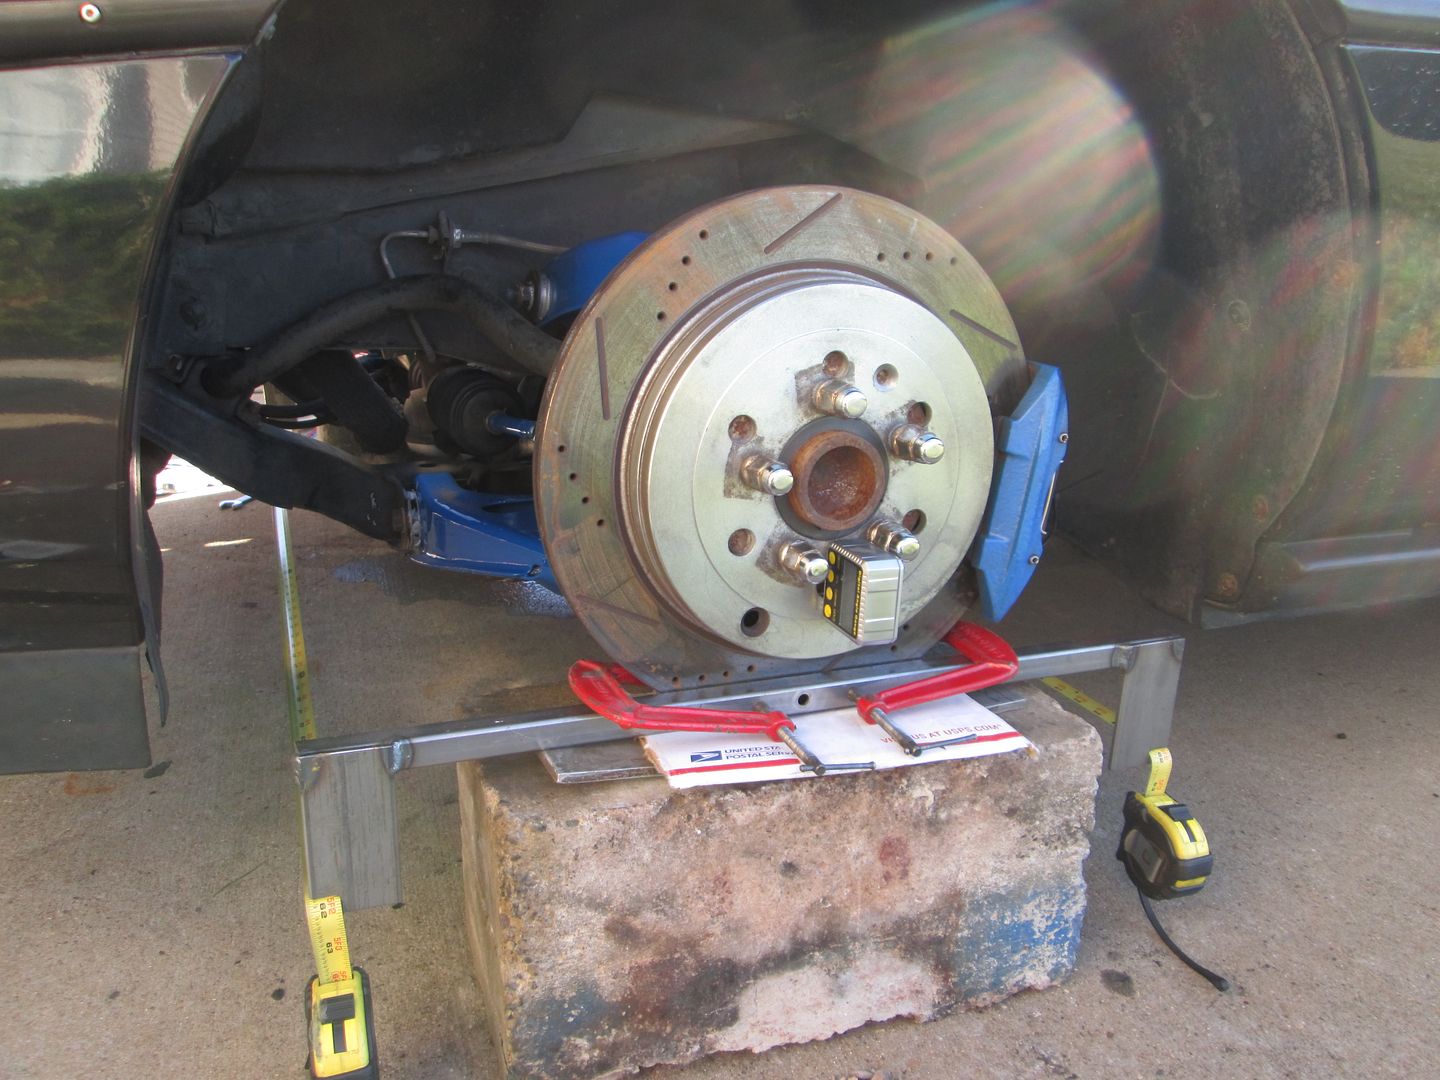
Decided to also disassemble the front uprights for painting too. Here is a before shot:
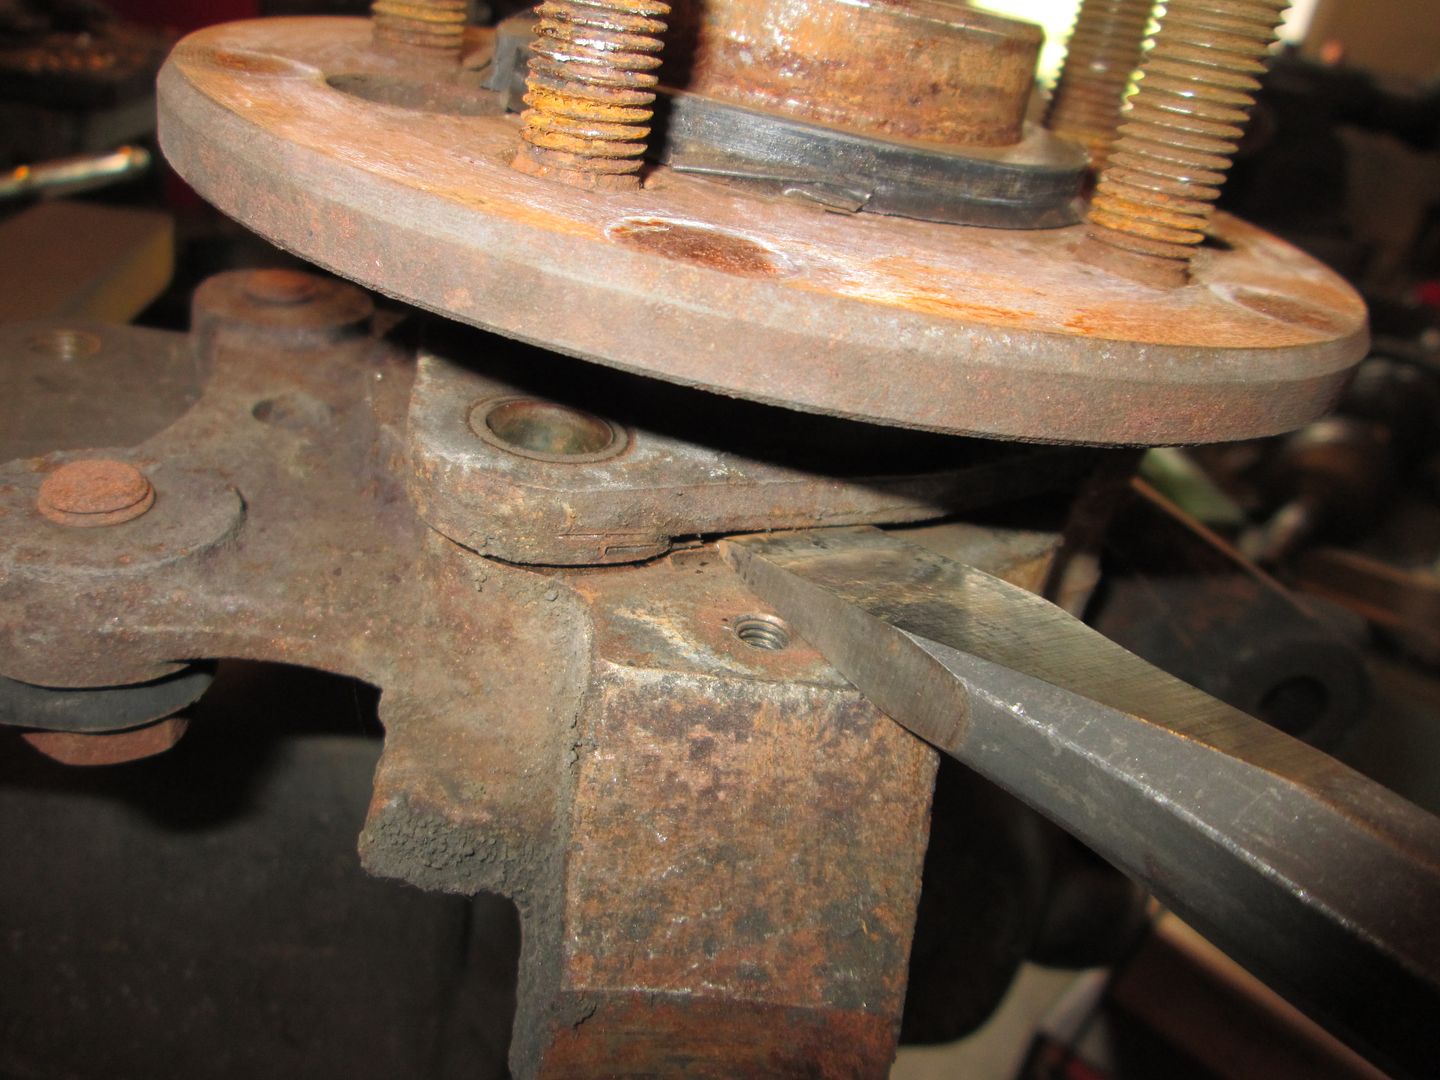
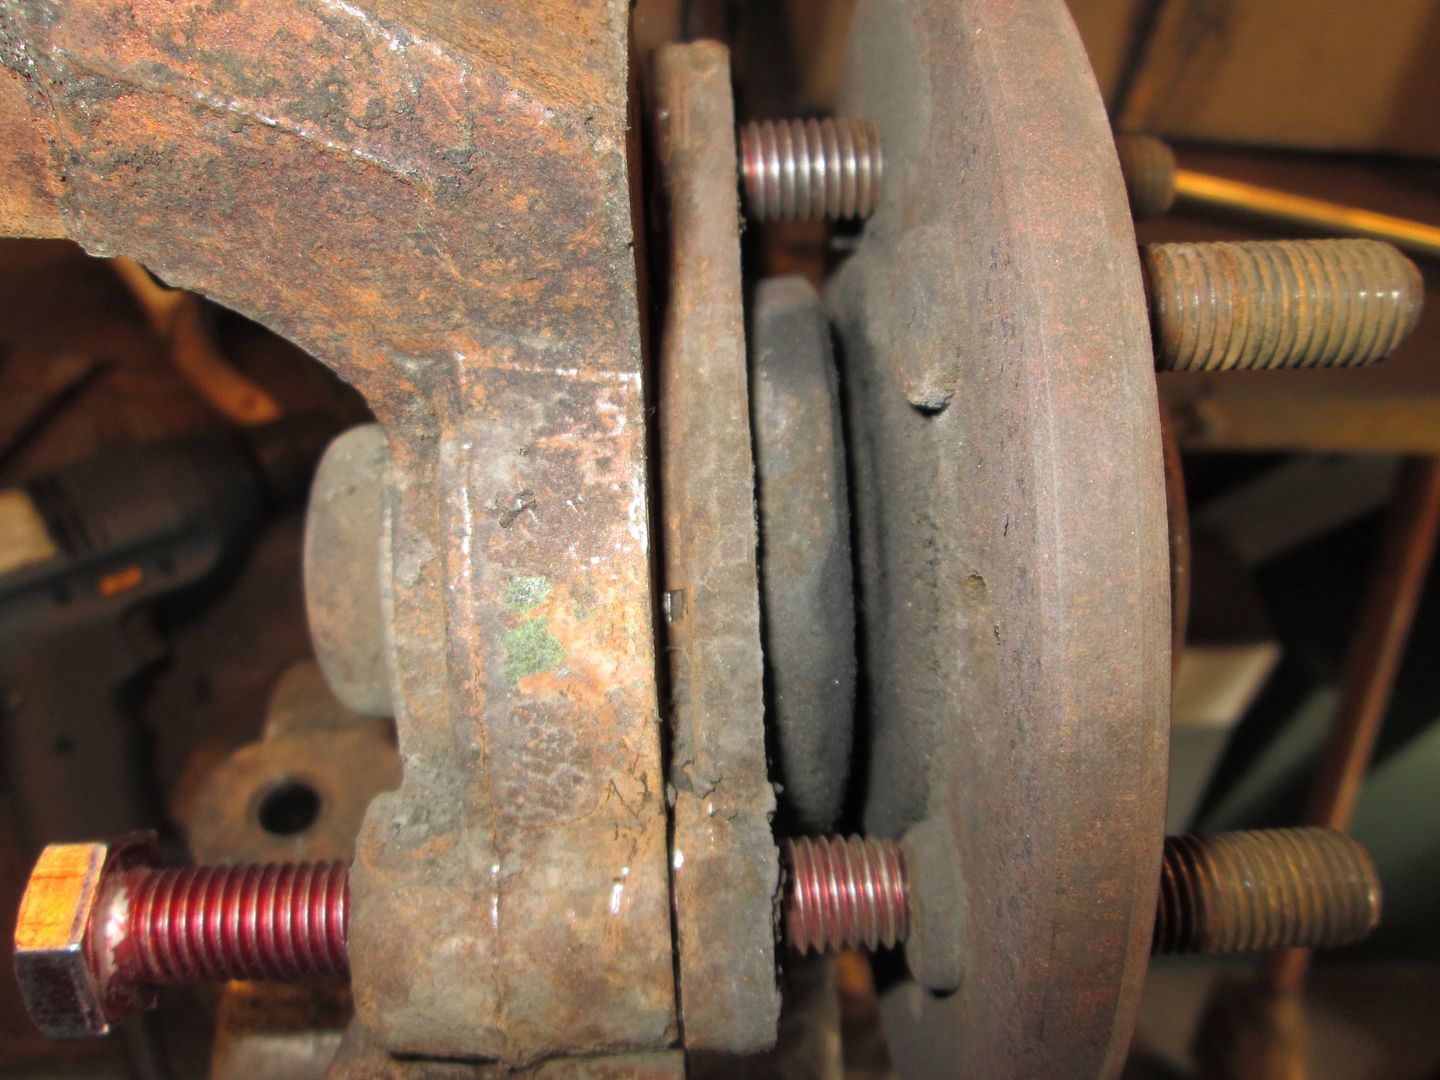
Used a chisel to break the bearing free from the upright (notice the gap):
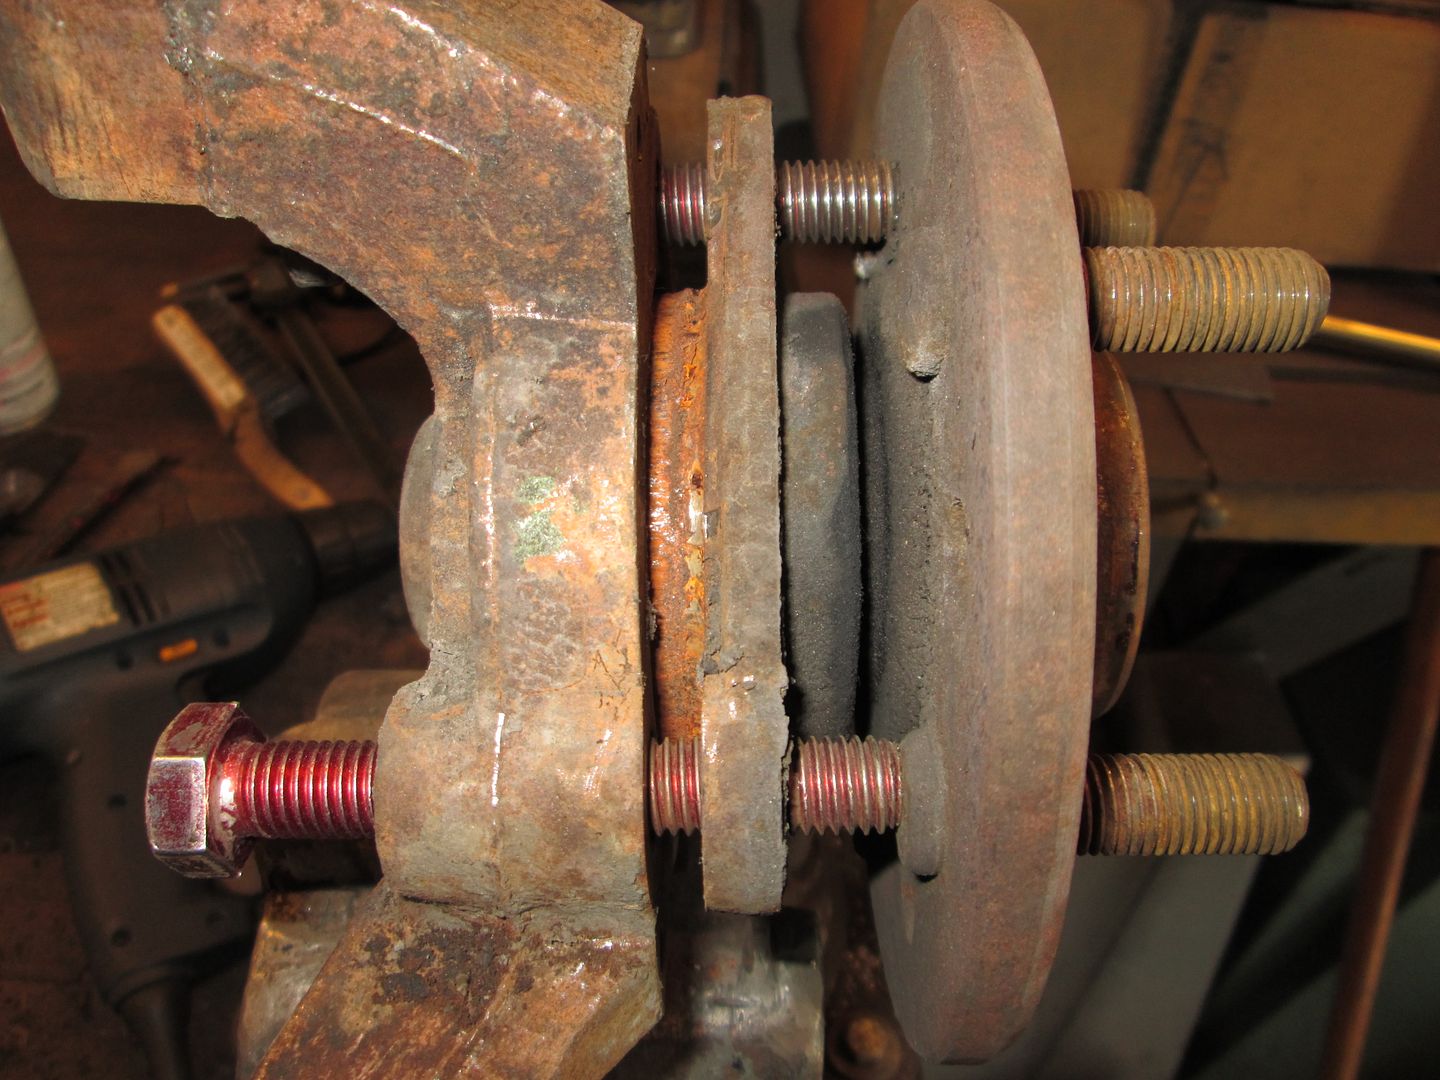
Then used 3 long M12x1.75 bolts to push the bearing the rest of the way out. Once the bolts were touching the backside of the flange, I turned each bolt 1/4 turn at a time as I walked the bearing out.
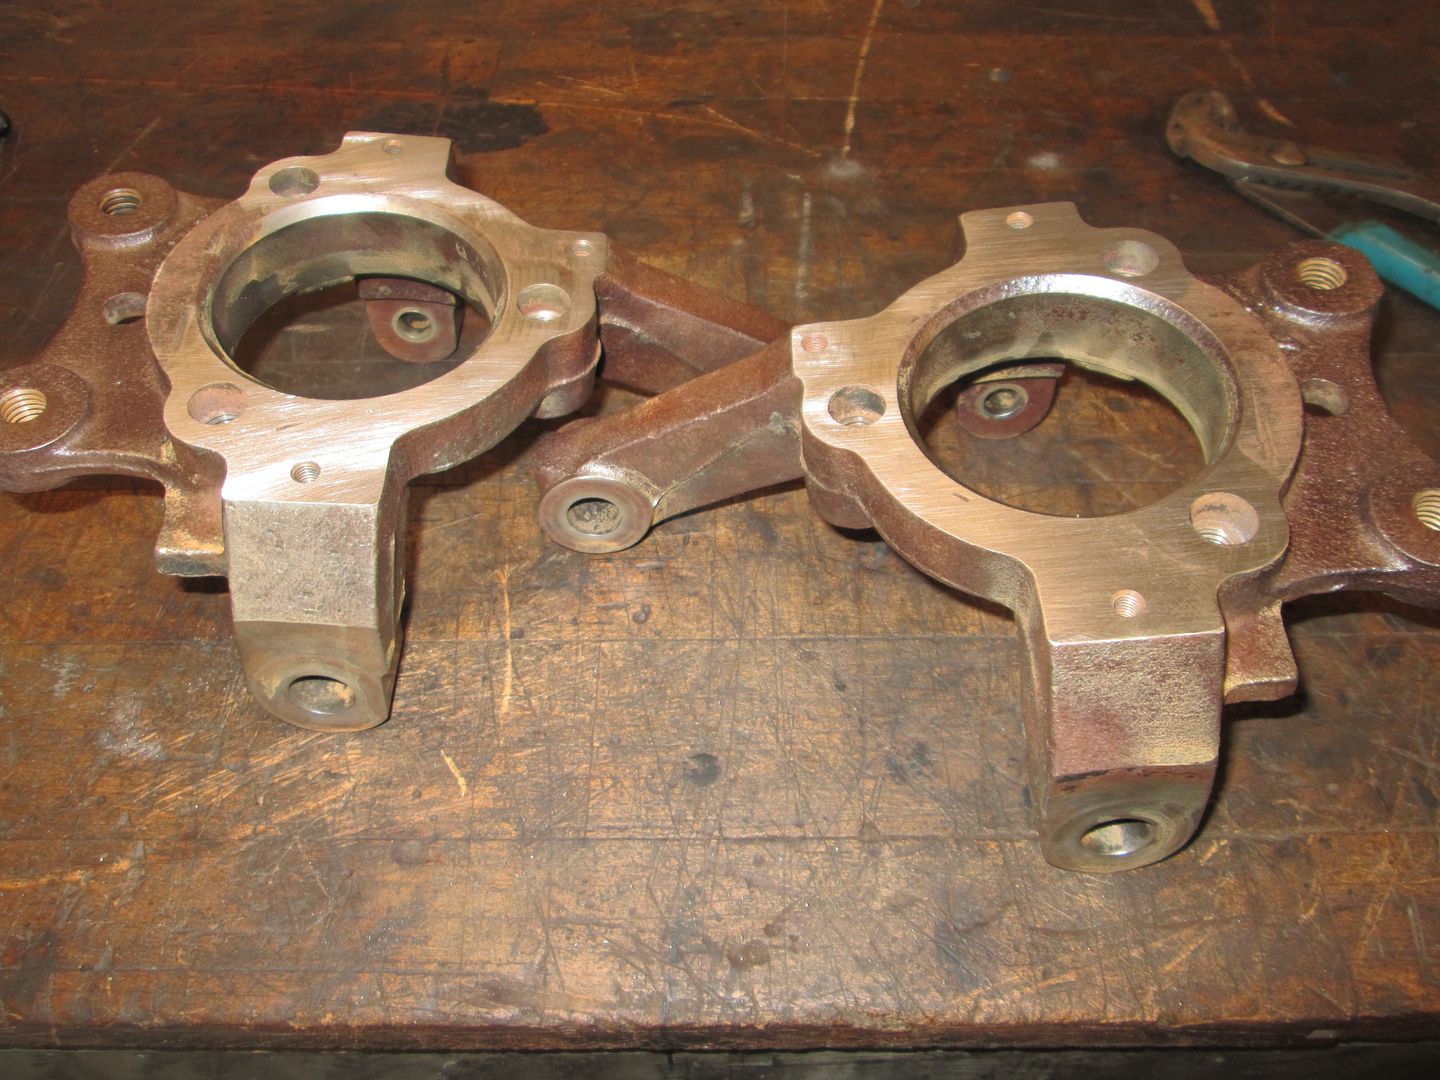
Lots of scraping, wiring brushing, cleaning, oven time, and placed the wheel bearing face on the belt sander:
Looking great! For your upper ball joints, it looks like you unscrewed the grease fittings. I thought maybe you were going to put tape over that whole face where the grease fitting goes, but in the "hanging/drying" pic, it looks like you painted that surface as well without taping it over? Or is it just an illusion, or did you do something else?
The upper and lower ball joints are supplied w/o the grease fittings installed. I wanted them to be fully painted on their exterior and will install the grease fittings today. The holes are pretty small, and most the painting was sprayed at an angle to avoid much paint finding its way into the actual ball joint area.
Wire brushed and painted the upper part of the crossmember:
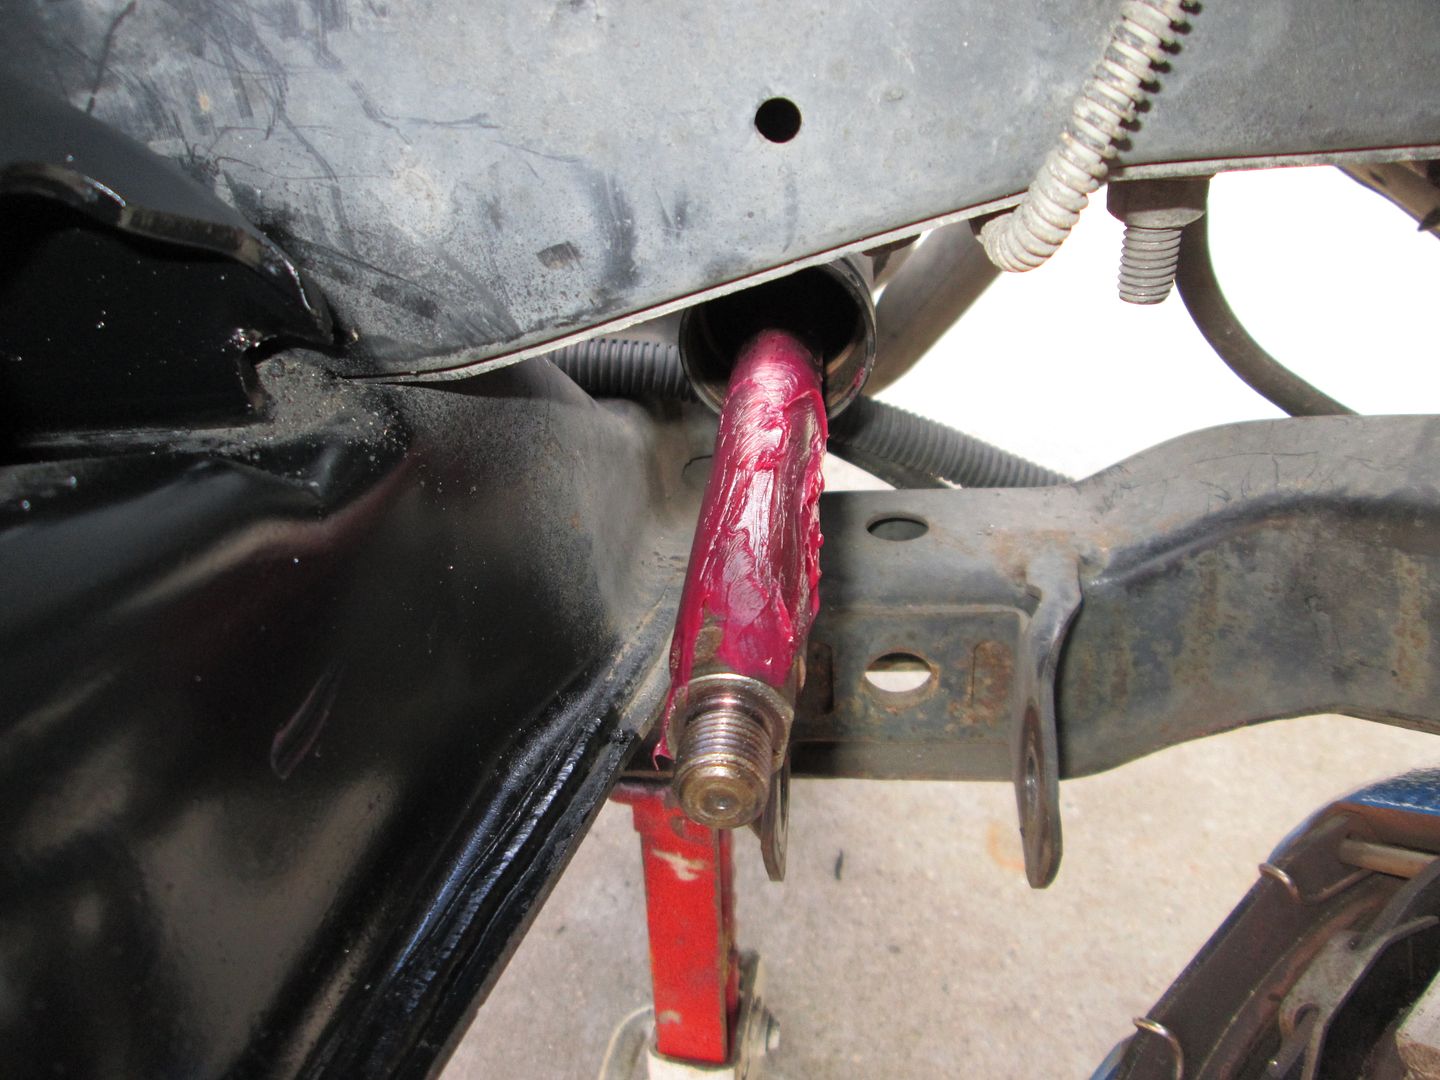
Then greased up the rack shaft, turned it so it was most of the way to the DS, slid the brass bushing into place, drilled a couple of holes and riveted it in place.
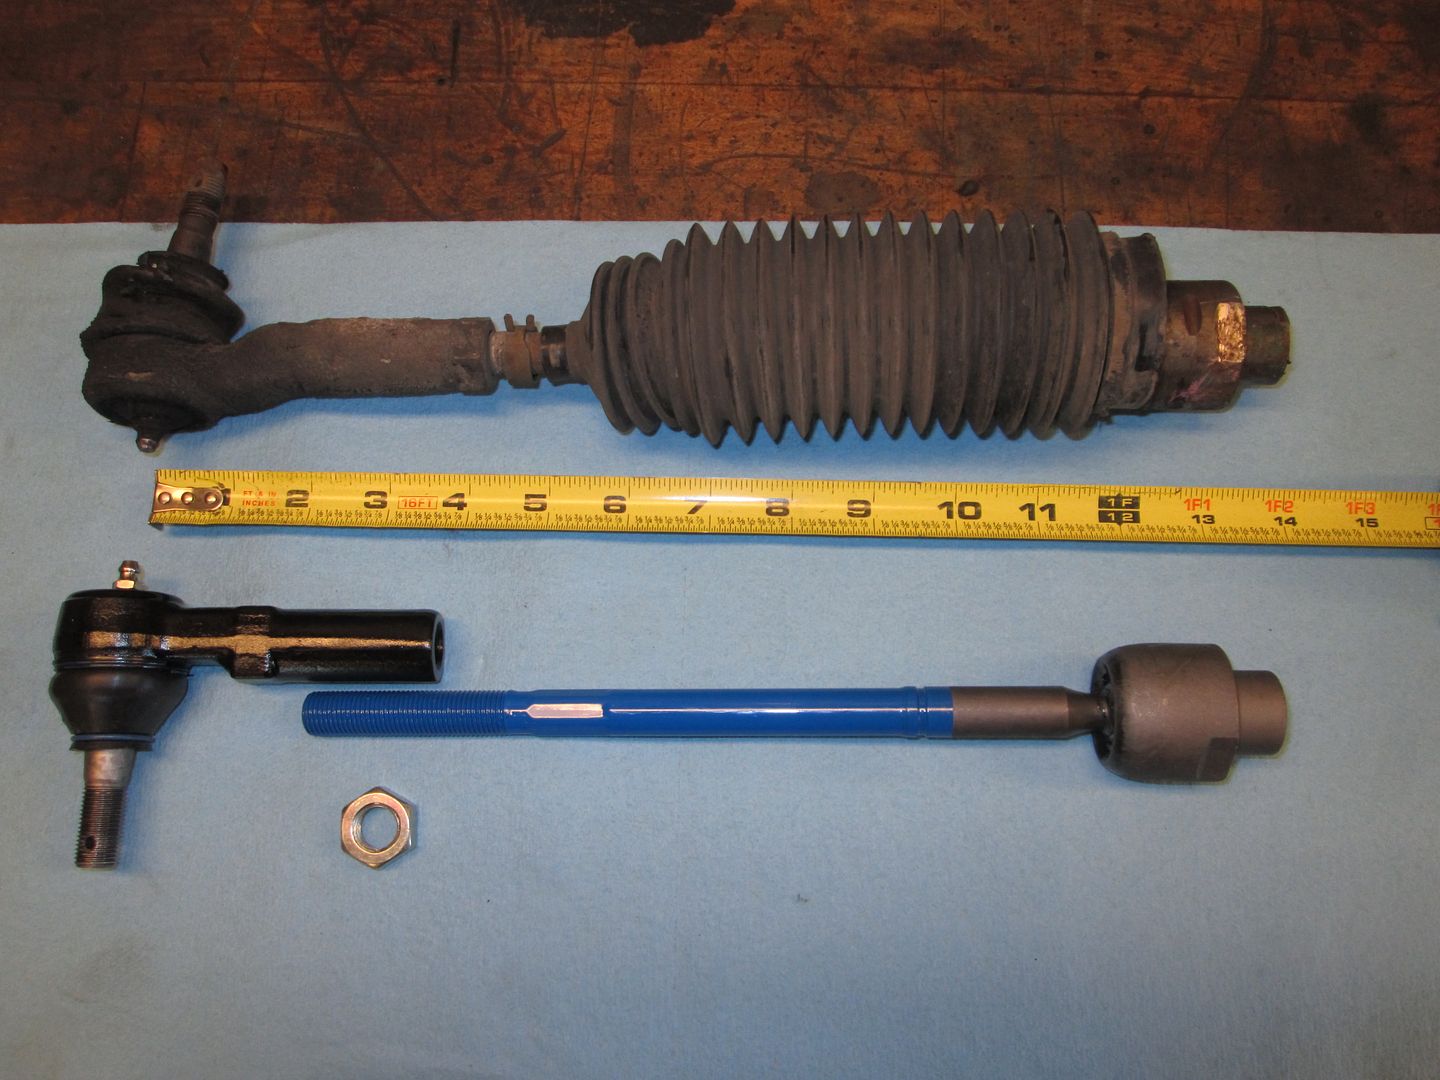
Then I started on the reassembly process for the tie rods. Measured the length of one of the old ones and built the new ones to the same length just as a starting point. I even took the rack books and brushed them with dawn to clean them up as well:
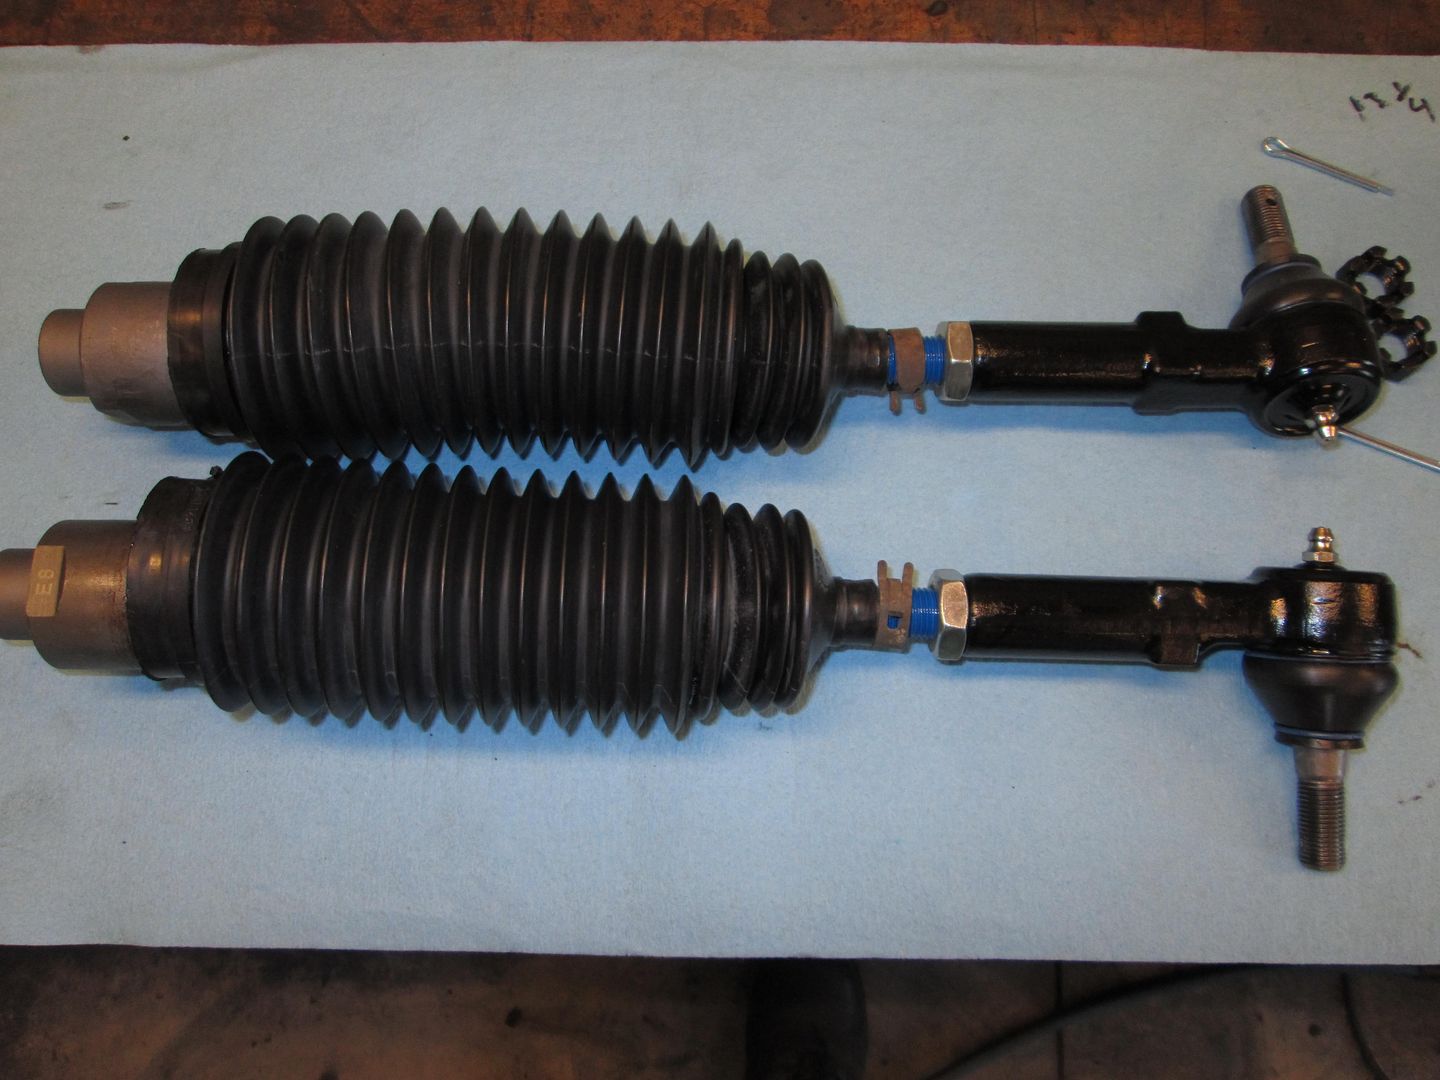
Then after lots of assembly, bushing installation, and anti-sieze:
More assembly:
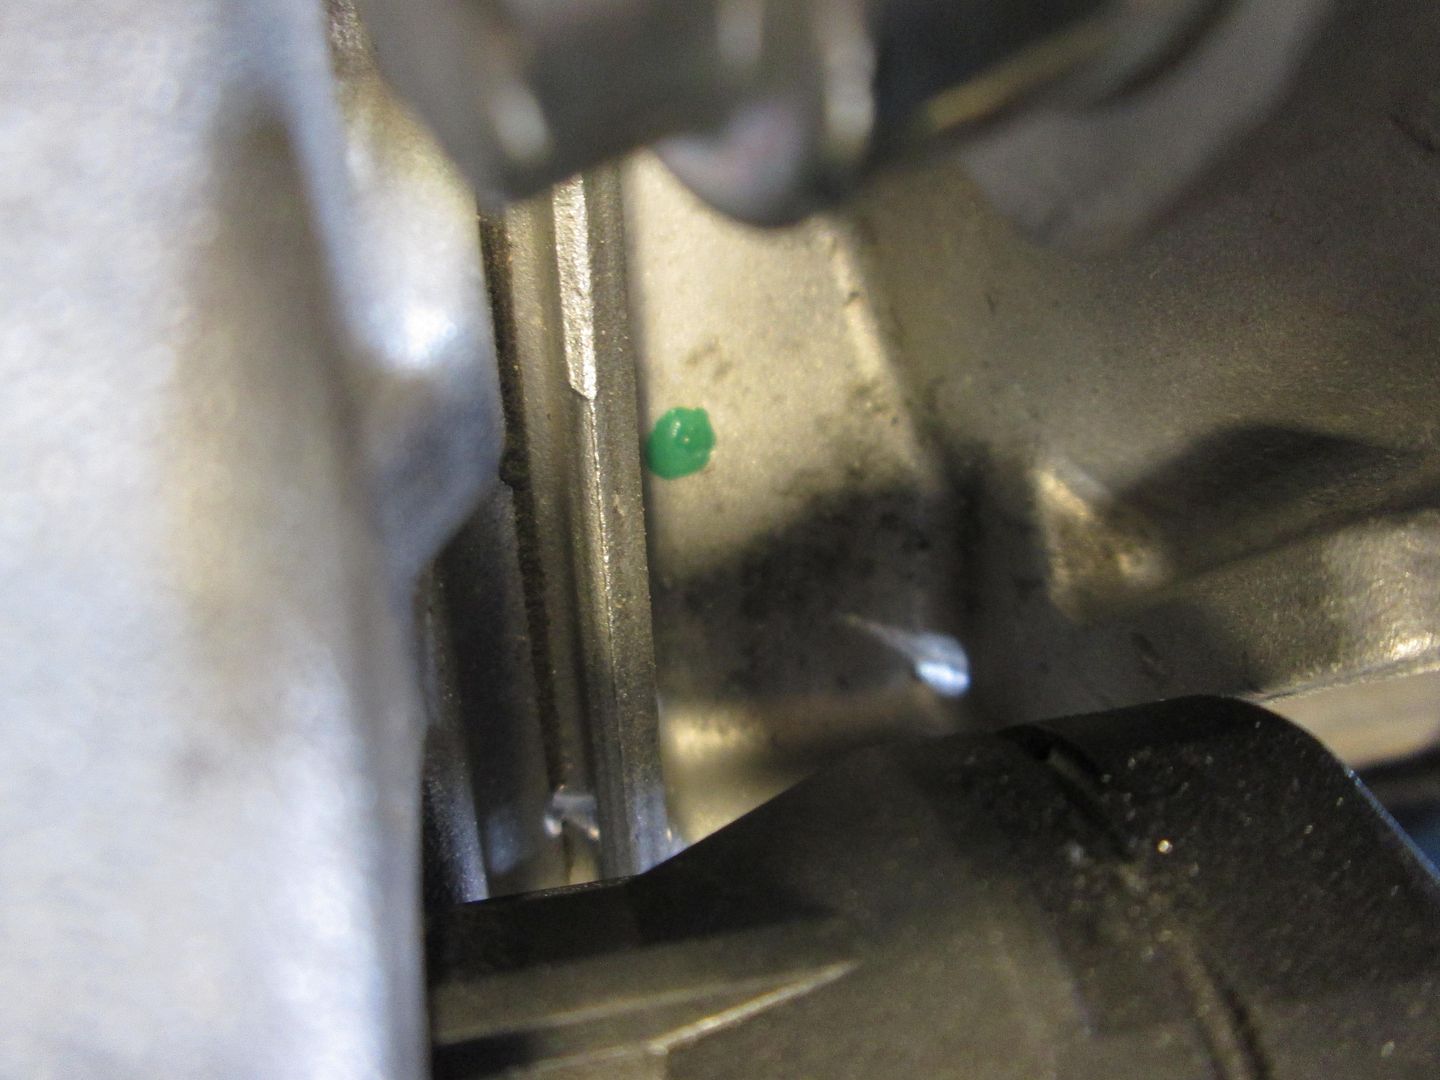
DIY alignment. Camber is within .1 degree side to side (.5 neg) and .1 degree caster side to side - reading was 10.5, but the front the car is raised up a few degrees. It is the maximum amount available. Toe is 1/32 toe in at the front. On Monday I will install the shocks, end links and bump stops, and take it for a shake down run.
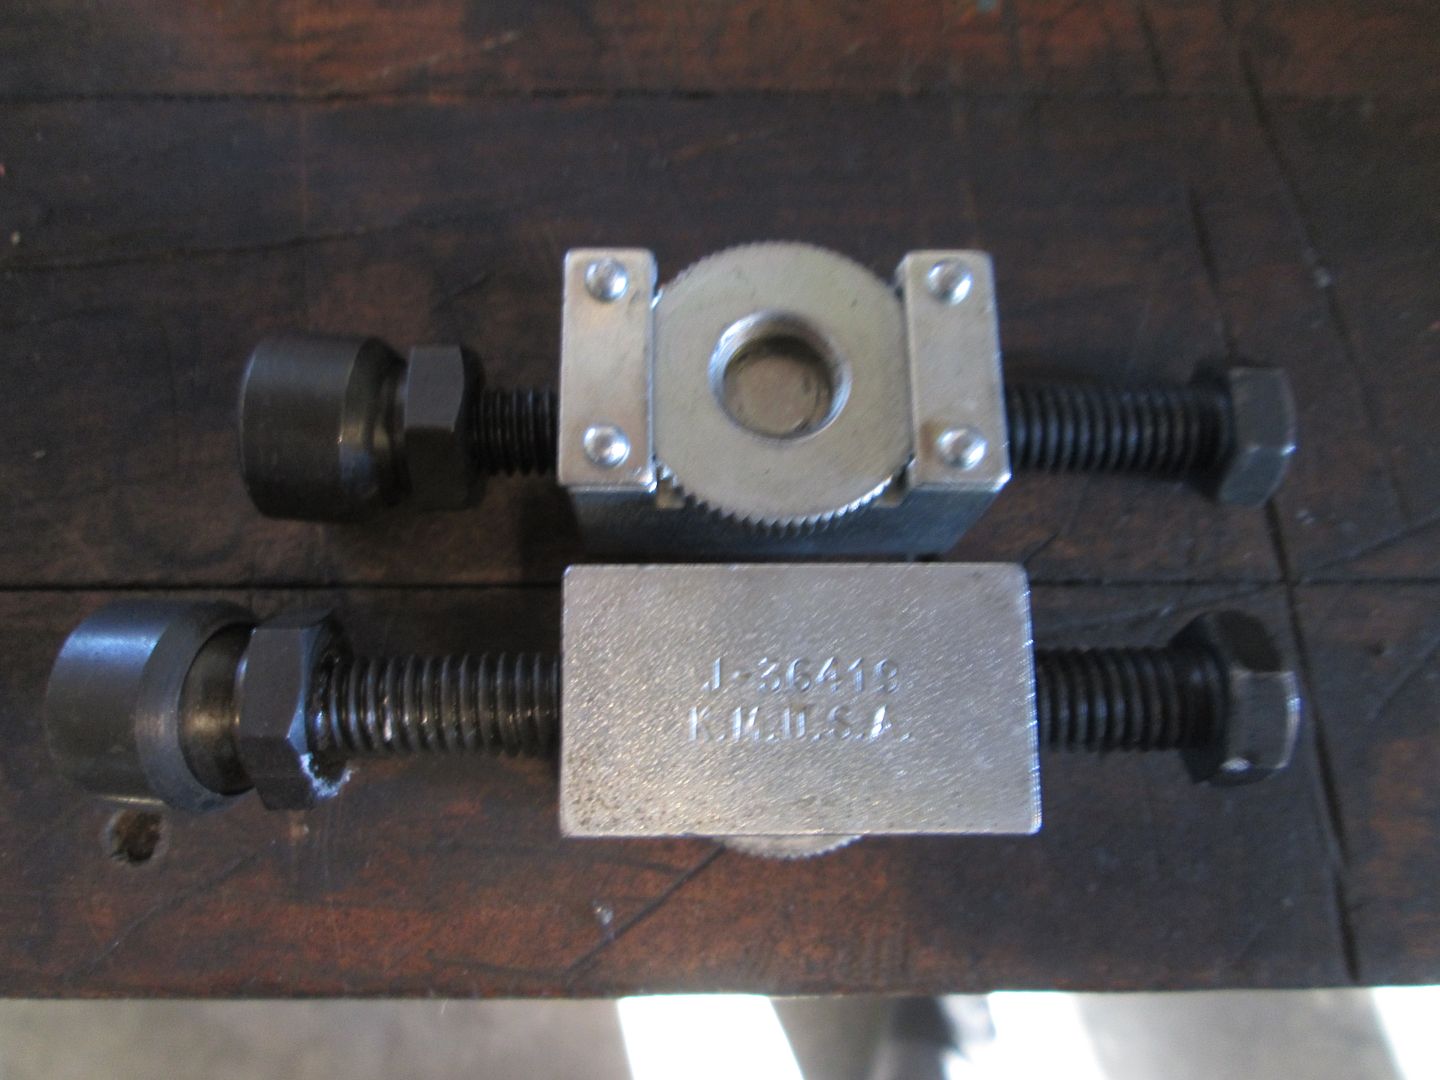
If you have an 88 Fiero and don't have the special tool (Kent Moore J-36419) that makes dialing in precise caster/camber a breeze, you need to get it. The adjusters bolt to the end of the cross shaft and push against the frame rail to make small/precise movements to the cross shaft with the suspension loaded and at ride height. The kit contains 2 adjusters, but it would be nice to have another set. I had to adjust both sides to the max to find which one was the true limit, then bring the other back to match the other side.
[This message has been edited by fieroguru (edited 09-14-2014).]


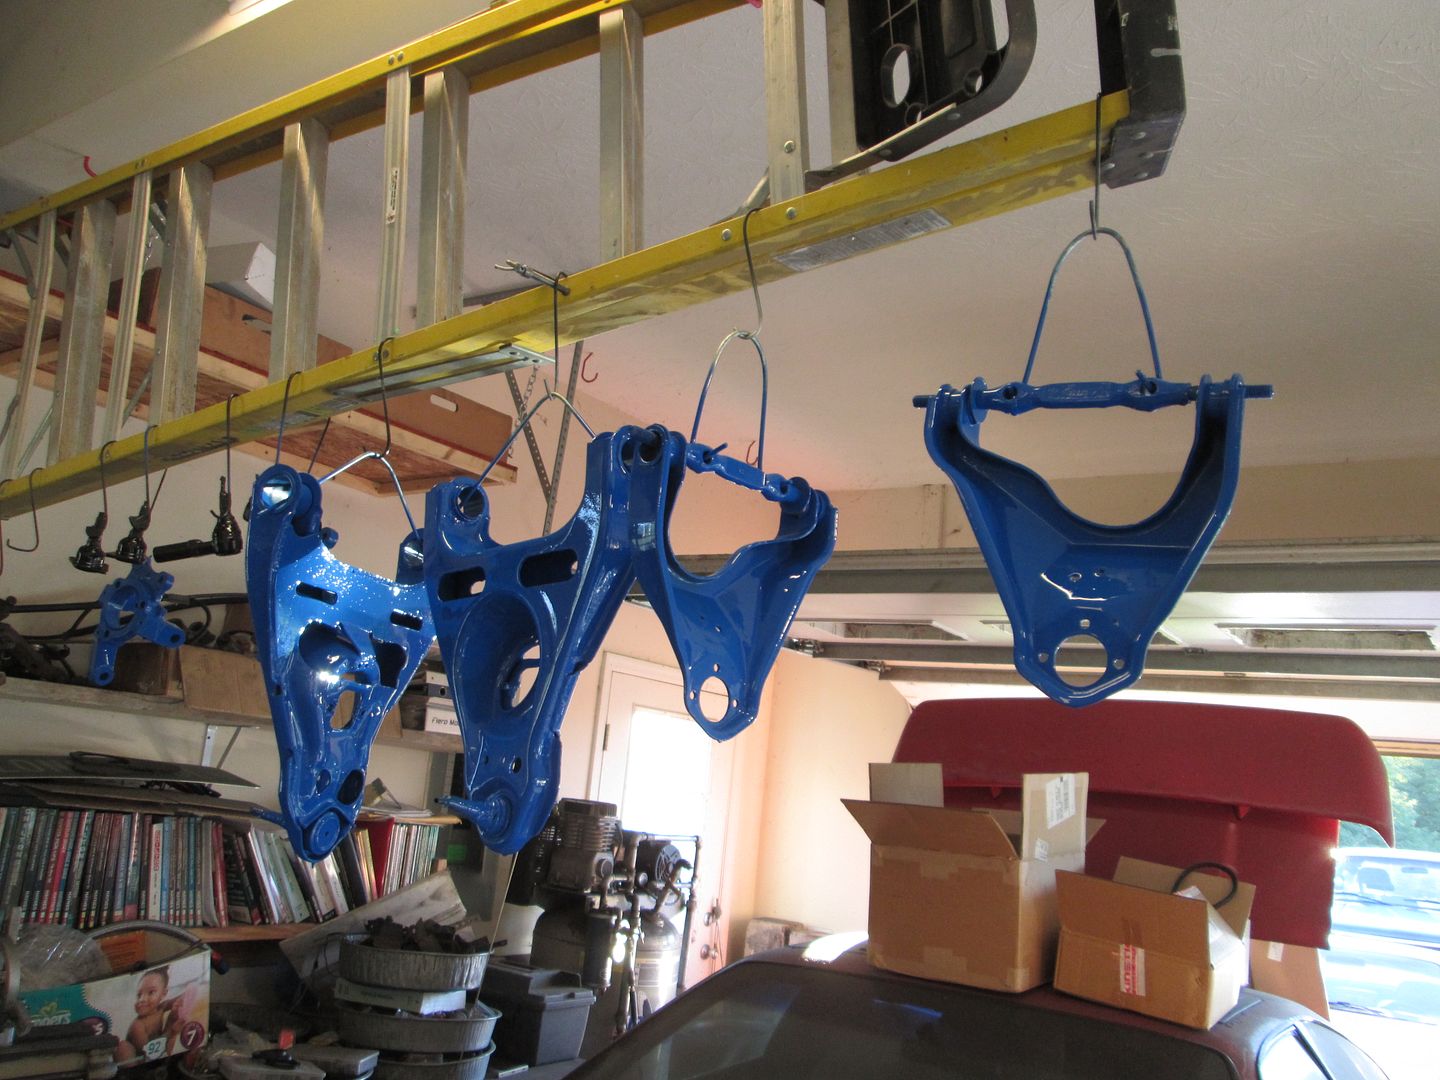

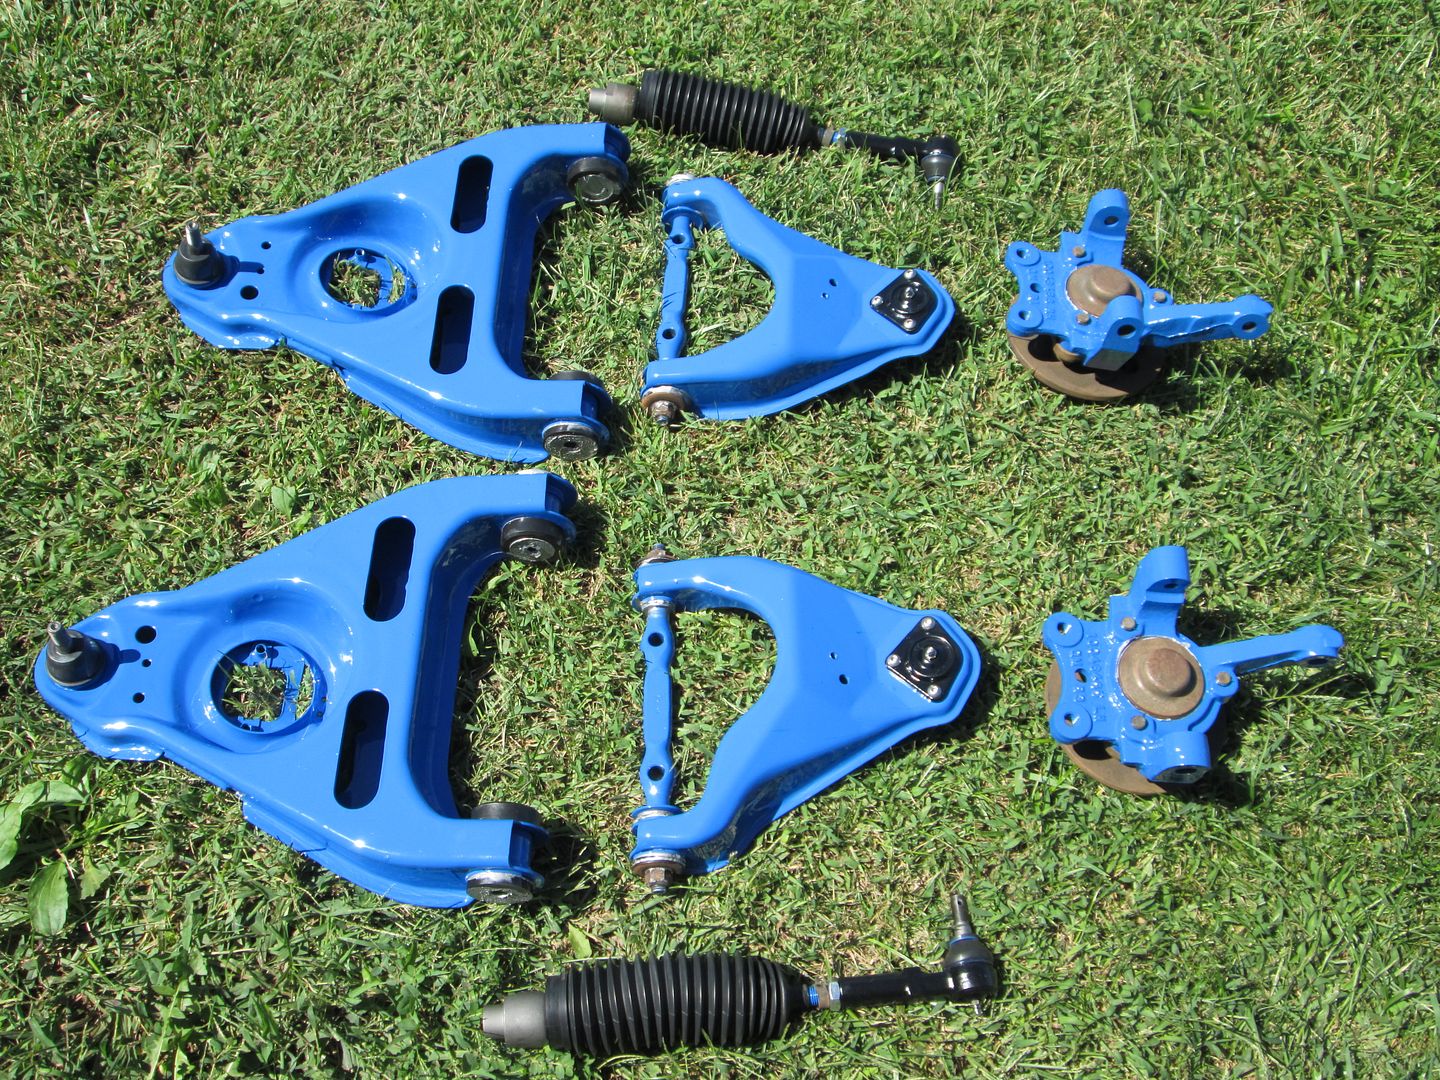

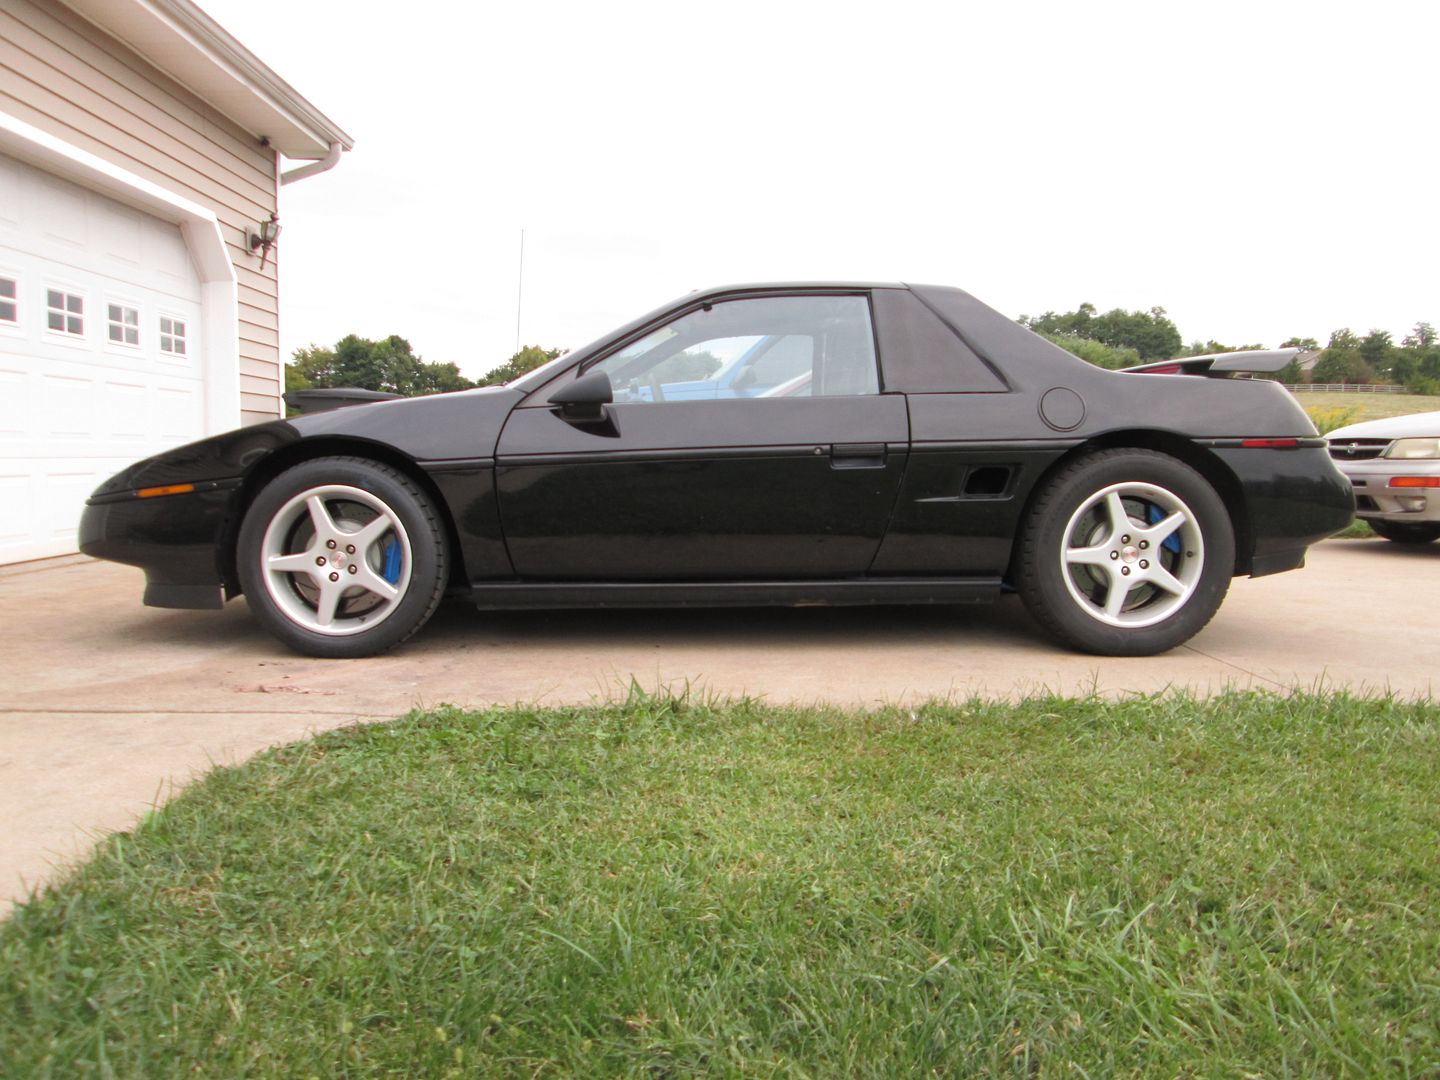
 ........What was the color blue you used on the suspension?


