Just knocking out a bunch of little stuff. Air/Fuel tune adjustments are pretty much complete for MAF and SD (just not for DoD). Fixed the loose connection in the back of the instrument cluster that kept the fuel gauge and check engine light from coming on (from when I took it out and reinstalled in a couple weeks ago. Cleaned all the windows with a scotch-brite pad and Windex. Car had been sitting for about 6-7 years so there was quite a bit of build up that just wouldn't wipe away. Now the windows are clear. Bypassed the heater core... sprung a leak on the way to work last Monday. New one is on order, but wanted to be able to drive the car. Made more progress with peel & sealing the inside of the b-pillars, the roof structure behind the sunroof opening and the underside of the roof panel (still need to do the rest of the roof). Evac and charged the A/C system... works like a champ. Searched high and low for my kahines GT style, notchie sail panels... no where to be found. I think some of my little helpers who were trashing boxes during the move might not have noticed them still in the box.
Still need to: Install the lower rocker panel on the PS and attach all the round trim pieces. Continue to tweak the cruise timing at 55, 60, 65, 70, 75, 80, 85 to maximize cruise fuel economy. Replace the side mirrors (DS one is mangled and broke) and peel & seal the door frame. Install my lateral link relocation brackets in the rear and re-align the car. Order and install another set of sail windows. Remove interior again so I can use the better dash, carpet and a few trim pieces from the 86 GT acquisition as they are in better condition than the ones in this car. Install a passenger seat. Buff the black paint on the car to make it looks as decent as possible. Some sections are pretty ratty... but not time/money for paint right now.. Good deep wash of the car... and the engine bay, it has been getting dusty/dirty with all the driving. Dyno the car... so when people ask how much hp it has I will know for sure.
Looks like you might be cutting it close for the 30th, impressive that you got so much done to such a high level of detail done in your spare time. I was talking with some other guys yesterday about your build and trying to get the DOD to play nice with a manual, they were impressed with the concept, and said they did not envy what you'd have to do to trick the computer(s) to play nice. lol
I still have about a month before the 30th and the car is running/driving with a bout 1500 shakedown miles on the swap... which a worlds better than than my Ramjet build for my Wedding/2006 HRPT. I finished the swap, tore every panel off the car and painted them 3 days before going going on a 3000 mile road trip. I assembled the car, drove it in town for a 50 mile test drive and then took off.
The DoD side of things has been a pain. With HP tuners, I can't turn off a couple of key DTC's (like the ISS sensor) and with the code present, DoD will not activate. Maybe EFI Live or Tuner Cat II would have access to turning off the code, but presently that is the main hold up. A fellow PFFr (he can identify himself if he wishes) works with controllers and data via the CAN wires and is looking into options. He sent me a scanner tool that splices in the the CAN wires between the TCM and ECM and will log all communication data. Once I take several logs and send him the data, he will see if he has the right conversion file to read the data. Once we have access to the data stream, there are a few different options for adding a different controller to either replace the TCM entirely, or to act as an intercept/filter of the signals between the ECM/TCM, or use the controller to generate the needed signals to keep the TCM happy... lots more work to do and who knows if he can make something happen and how much it will cost me. DoD is the key to me getting 30+mph. Right now I am bumping the timing in the cruise ranges to improve on the 27mpg I got on my last trip. I would like the V8 tune to get 30mpg and the DoD to get me another 3-5mpg.
All I am working on at this point are cosmetic issues and if they get done or not, the car will be going to the 30th. We are leaving a few days early to go canoeing at Turkey Run - I used to go there every summer and my girls have never been. I will probably leave the LS4/F40 car in Indy at my sisters house as we pass through.
As for progress, I try to get something done or progress towards something each day after work but I usually take Thursdays and Mondays off to spend the evening with the girls. Saturdays and Sundays are the major opportunities for progress.
So far today I haven't done anything car related. Inflated a 10x5 pool for the girls, filled it, dug up a couple patches for flowers, pulled the patio umbrella and cushions from the attic... hopefully after lunch I will tear into the door panels/mirrors. I will be traveling for work Tues/Weds this week and Thursdays are booked... so after today not much will happen before next weekend.
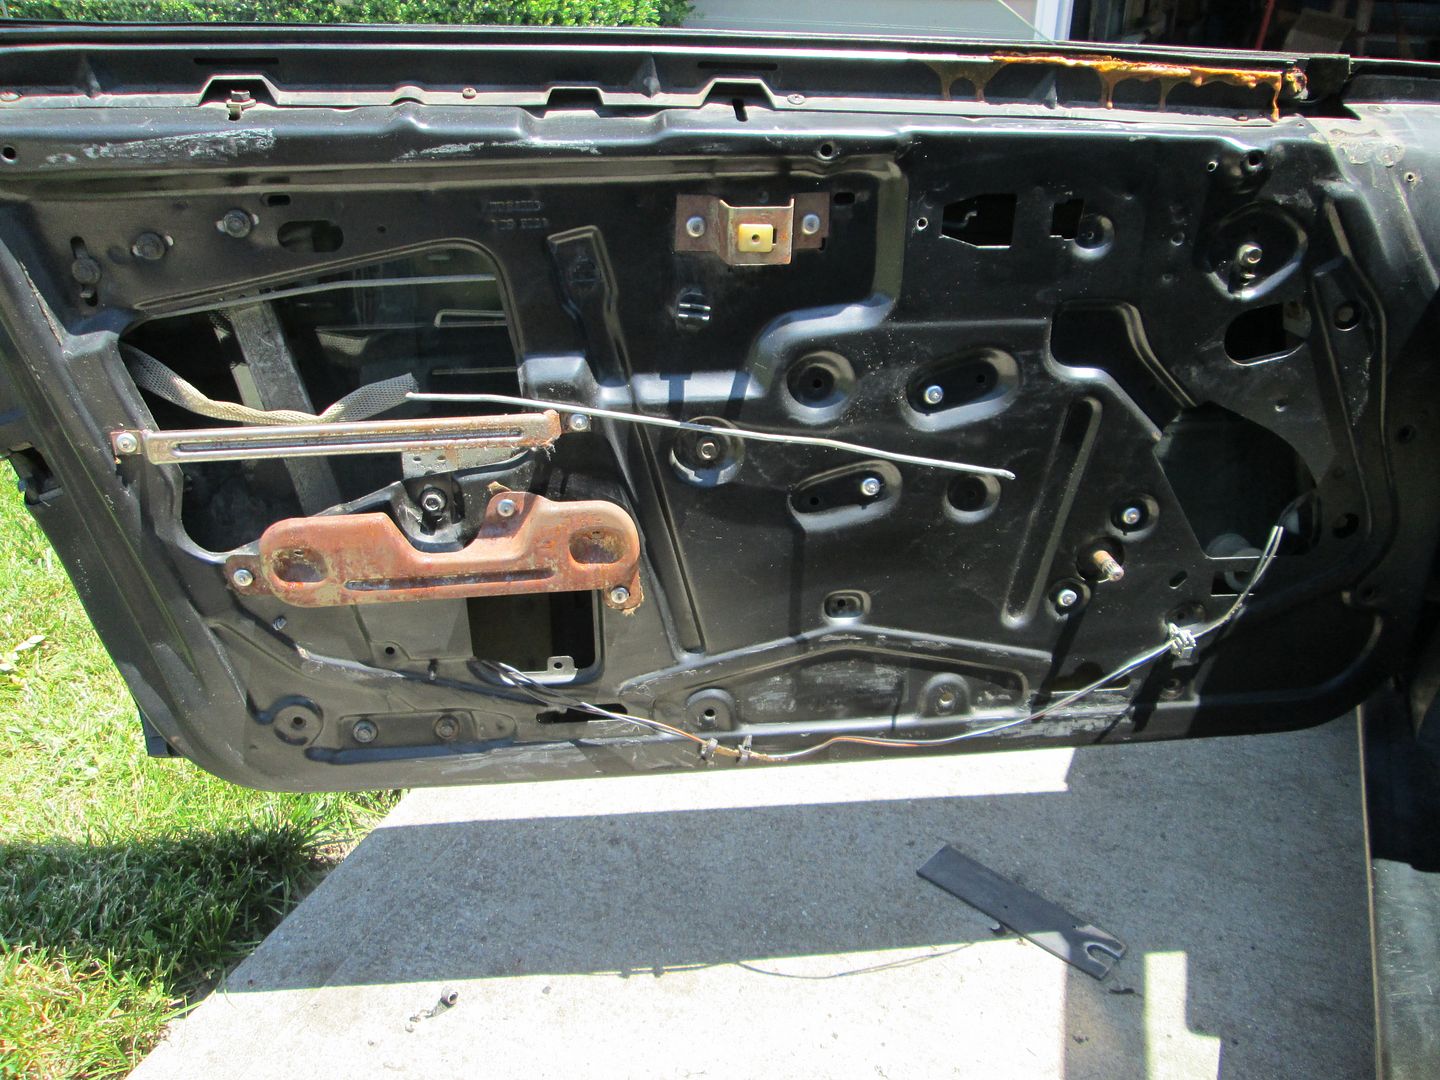
The mirrors and sound deading the doors took most of the afternnon, and they still are not back together.
Bare door:
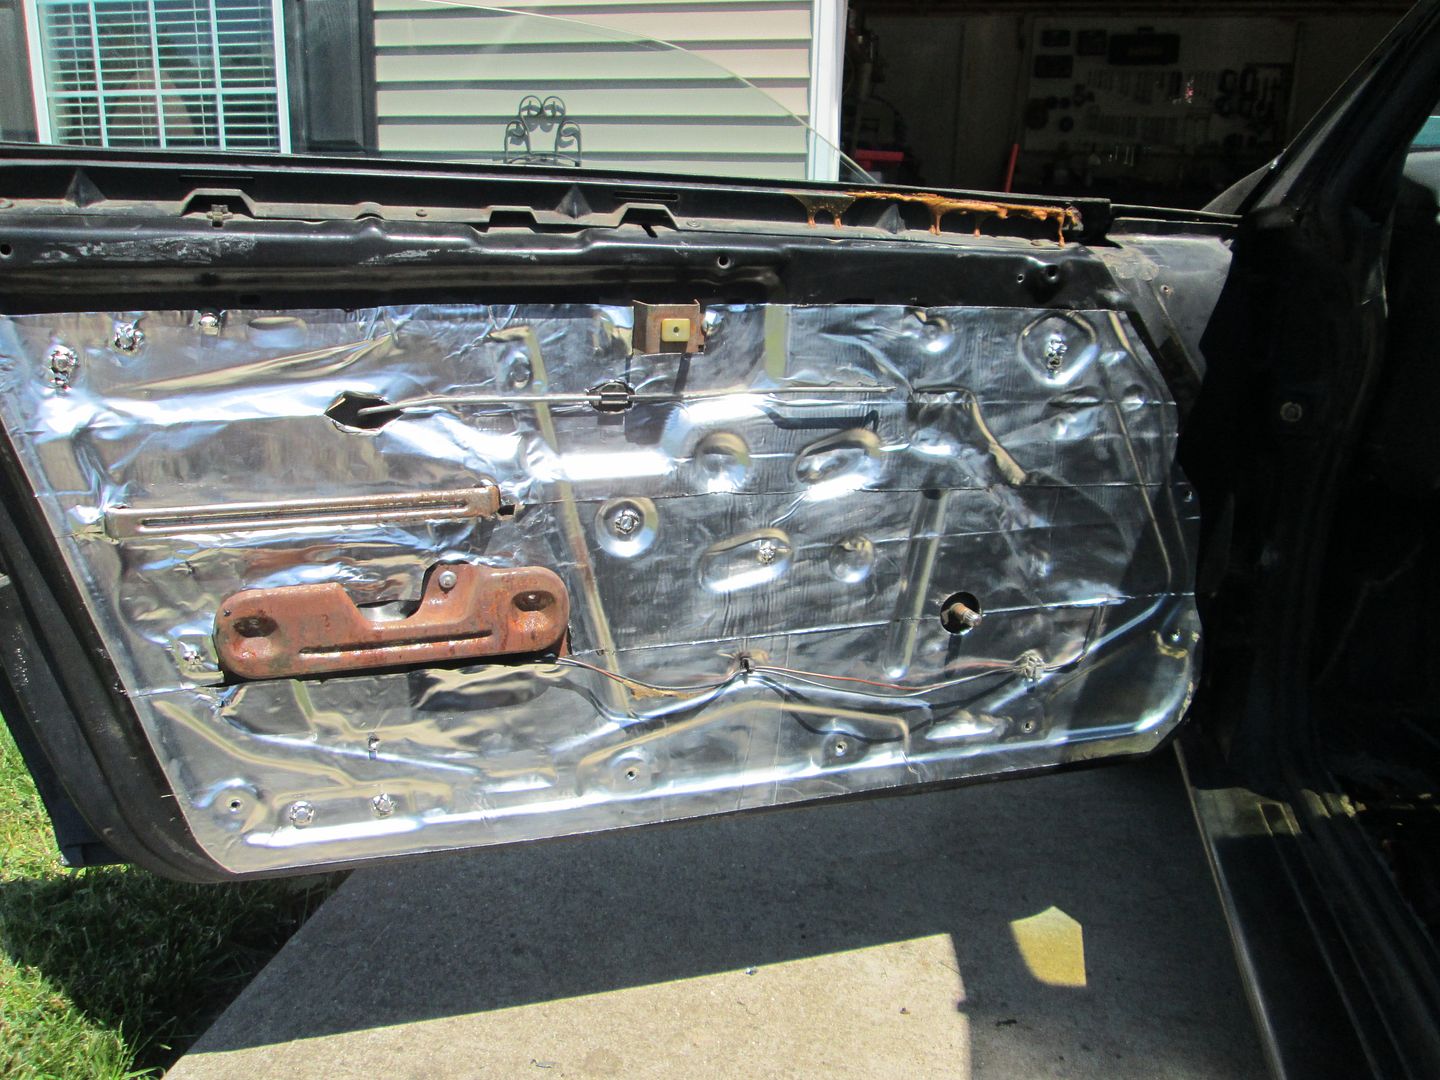
Peal & sealed - my fingers are sore from pushing/forming it to all the recesses:
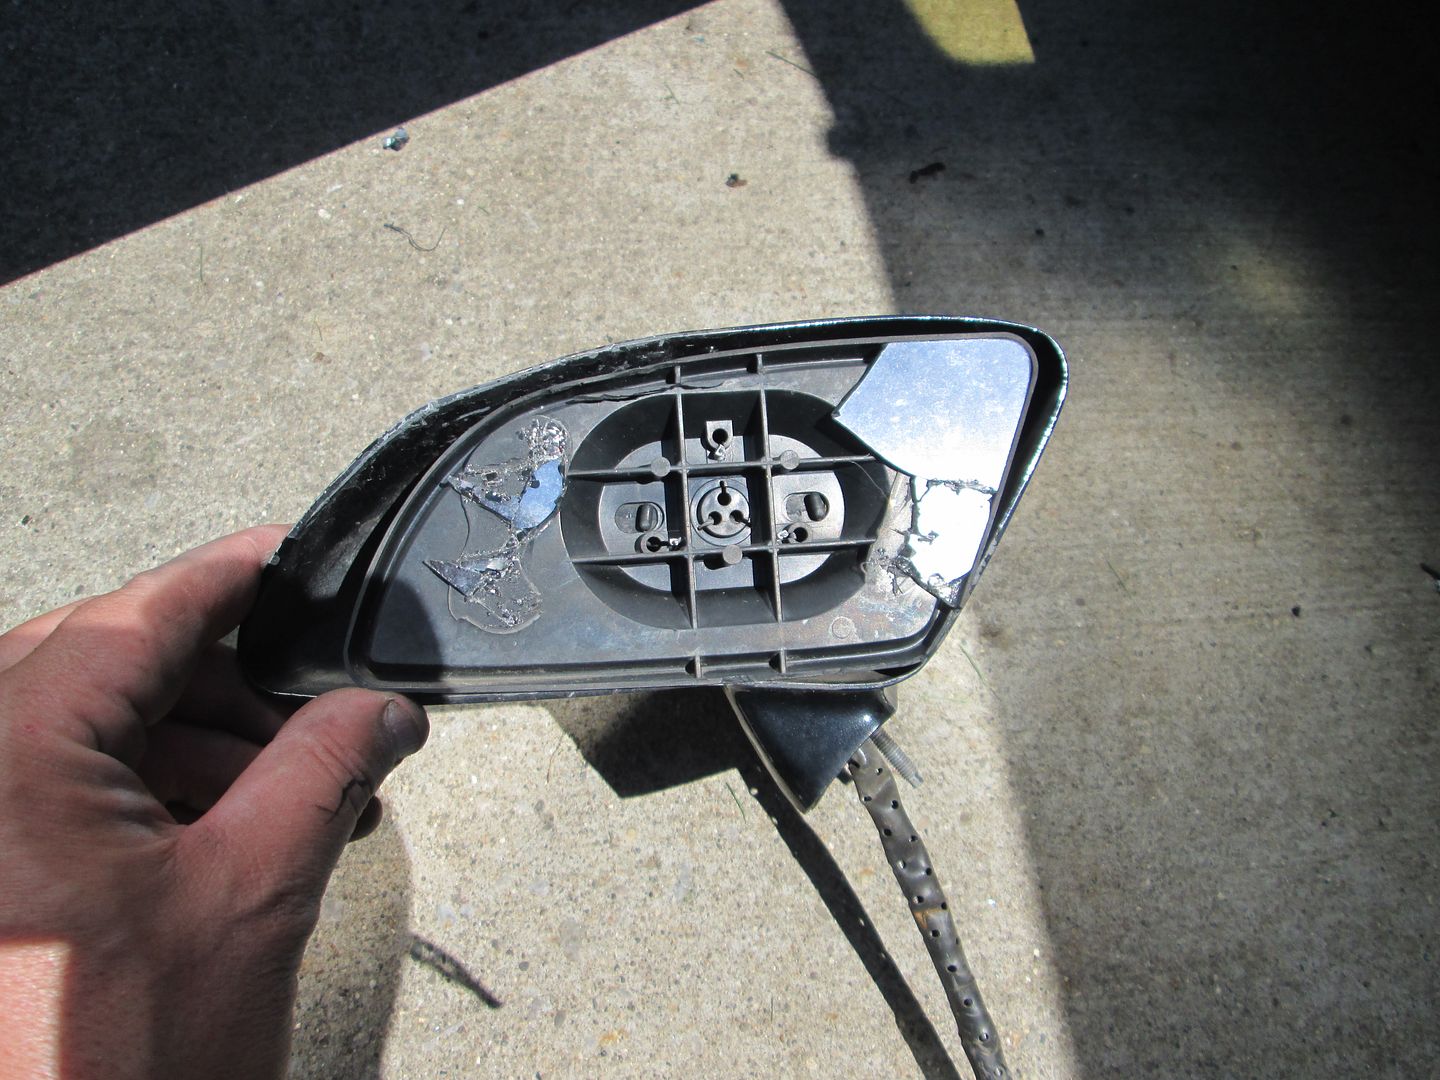
Busted up mirror and bent housing:
So now both doors are sealed and the new mirrors installed, but if you noticed the glue in the first pic what was holding the door panel... it was there because the metal clip that holds retaining pin in the upper corner was gone. So I ended up grabbing some other similar tabs and gluing them onto both panels... so now I have to wait for the glue to set before putting the door panels back on.
So I took the car out for another drive and remembered that I hadn't measured the temp of the decklid vents after a drive to see if the LS7 manifolds with their built in heat shields were helping to reduce engine bay temps. My old SBC swap with cast manifolds would see about 165 degrees on the PS vent and 135 on the DS one. After the drive today, the PS one was 142 degrees and the DS one was 104. The front and rear firewalls were between 175-180 degrees right across from the manifolds, so its safe to say the heat shields seem to be working as expected.
Curious with the new cam have you played with the injector timing ?
my motor seems to like a little later of an injection .
Not yet. Might have to do some research if there are any benefits with changing it from the stock setup. The stock LS4 injector timing "Boundary" and "Normal End Of Injection Target vs. ECT" are the same between LS4, LS2, LS7 and LS3. However the LS4 "Normal EOI vs. RPM" is the same as the LS2, but different from the LS3 and LS7's. The LS4/LS2 is 0 degrees for all RPM's and the LS7 starts at 32 degrees at idle, reduces to 4 at 1100 RPM and then increases to 93 degrees by 4100 RPM (max of the table).
Not yet. Might have to do some research if there are any benefits with changing it from the stock setup. The stock LS4 injector timing "Boundary" and "Normal End Of Injection Target vs. ECT" are the same between LS4, LS2, LS7 and LS3. However the LS4 "Normal EOI vs. RPM" is the same as the LS2, but different from the LS3 and LS7's. The LS4/LS2 is 0 degrees for all RPM's and the LS7 starts at 32 degrees at idle, reduces to 4 at 1100 RPM and then increases to 93 degrees by 4100 RPM (max of the table).
in terms of benefits you would need very expensive equipment to quantify results. For me I adjusted till I got the richest AFR @ operating temp idle, then the theory is for every 1000 rpm increase you would want 40* added. After 4000-5000 rpms the timing has no real impact as the PW is so long it covers most of the valve duration. Seeing as how you don't have a stock cam I believe playing with injector timing could benefit you .
Once you have your hot idle timing dialed you can adjust your timing vs clt table, normally a cold engine would like to have the fuel sit on the back of the intake valve a little longer than a hot engine. Better fuel atomization.
in my setup my intake valve starts to open @ 385* and my injector timing at idle is 395*. For my tuning software that is 10* before the valve starts to open, In all reality the difference between 385 and 395 is so little vacuum is the only way I can really see it and that maybe 3 kPa . The point of reference for this is 360* is TDC of exhaust stroke. What I found most intersting in this is that with 51* of overlap it doesn't seem like I am sending unburned fuel out . I thought with the scavenging effect that it may do that . When I was testing this I had a injection time of 415* and that is a few degrees after my exhaust valve had closed. I believed that when that event occurred I would have the highest air speed into the cylinder. Datalogs have shown otherwise.
[This message has been edited by Kemp3 (edited 05-29-2013).]
I did some research into the injector timing and it looks like it is something that needs changed. I do have a strong exhaust smell at idle and my camshaft does have a decent amount of overlap. Thanks for the tip!
My camshaft has 59 degrees of overlap (.006 intake lobe open to .006 exhaust lobe closed) and 2 degrees overlap at .050 lobe lift. The factory ecms work backwards where you define the end of injection and the ECM figures out where to start based on all the various parameters. I added 32.5 degrees to mine so it ends in between the .050 and .006 exhaust closed values and add up to 152.5 degrees by 4K RPM. This seemd to do the trick as this morning the gas smell at idle was much less.
Last night I took a more detailed look into the EOIT values to find the best offset to use at idle. My car already runs open loop at idle, so after the car was up to temp, I let it idle for 3.5 minutes per offset value while logging the data. I did this for 20, 30, 35, 40, 45, 50, 55, 60, 100 and 150 degree delay in injector timing just to see the trend and to find the ideal offset value at idle.
I was supposed to have seen the A/F ratio go rich on the wideband as the injector timing became more beneficial, but the max/min of the entire range was 15.49 to 15.93. Without any injector offset, I was at 15.51, at 20 it dipped to 15.49, but from there on it was a small but constant increase to the lean side. There is only about 3% difference between the max/min, so I started to look at some of the other data I logged.
Delivered Torque is a calculated number from several sensors/inputs/calculations (air flow, fuel, ignition timing, etc). When I compared these values, the min was 31.41 (at zero offset) and it peaked at 34.83 @ 55 degrees of offset, then gradually decreased to 34.24 at 100 and 33.09 at 150 This shows a 10.8% increase in calculated delivered torque at the 55 degree setting. So that is where I have decided to set the offset at idle.
Finding the ideal offset values for the rest of the RPM range (idle to 4100 RPM) is difficult w/o a load based dyno. So to get something "closer" I looked at the LS7 tables as that is the highest revving factory LS(x) based engine and I figure GM did their work to find the ideal values for it (especially since they are actually using the RPM based table - LS4/LS2 have no RPM based offsets used). At idle the LS7 injector offset is 32.5 (vs. stock LS4) and gradually increases to 93 at 4100 RPM. So for my table, I started with 55, then used a similar gain rate as the LS7 to end up with 112.5 offset at 4100. My starting offset is 22.5 higher (more aggressive camshaft) and the ending offset is 19.5 higher... this should be better than no RPM based gain and should be in a beneficial range w/o going too far. Time will tell.
The downside to making this adjustment, is it requires going back and retuning the MAF/VE tables slightly, but if it helps with MPG and low rpm torque, then it will be worth it.
[This message has been edited by fieroguru (edited 06-01-2013).]
Is there not a load-based dyno shop anywhere near you that might let you do a couple cheap pulls/cruises to log data? (just last weekend I learned the difference of load-based/"brake operated" dynos and the "common" dynos. Had no idea such differences existed!)
Last night I took a more detailed look into the EOIT values to find the best offset to use at idle. My car already runs open loop at idle, so after the car was up to temp, I let it idle for 3.5 minutes per offset value while logging the data. I did this for 20, 30, 35, 40, 45, 50, 55, 60, 100 and 150 degree delay in injector timing just to see the trend and to find the ideal offset value at idle.
I was supposed to have seen the A/F ratio go rich on the wideband as the injector timing became more beneficial, but the max/min of the entire range was 15.49 to 15.93. Without any injector offset, I was at 15.51, at 20 it dipped to 15.49, but from there on it was a small but constant increase to the lean side. There is only about 3% difference between the max/min, so I started to look at some of the other data I logged.
Delivered Torque is a calculated number from several sensors/inputs/calculations (air flow, fuel, ignition timing, etc). When I compared these values, the min was 31.41 (at zero offset) and it peaked at 34.83 @ 55 degrees of offset, then gradually decreased to 34.24 at 100 and 33.09 at 150 This shows a 10.8% increase in calculated delivered torque at the 55 degree setting. So that is where I have decided to set the offset at idle.
Finding the ideal offset values for the rest of the RPM range (idle to 4100 RPM) is difficult w/o a load based dyno. So to get something "closer" I looked at the LS7 tables as that is the highest revving factory LS(x) based engine and I figure GM did their work to find the ideal values for it (especially since they are actually using the RPM based table - LS4/LS2 have no RPM based offsets used). At idle the LS7 injector offset is 32.5 (vs. stock LS4) and gradually increases to 93 at 4100 RPM. So for my table, I started with 55, then used a similar gain rate as the LS7 to end up with 112.5 offset at 4100. My starting offset is 22.5 higher (more aggressive camshaft) and the ending offset is 19.5 higher... this should be better than no RPM based gain and should be in a beneficial range w/o going too far. Time will tell.
The downside to making this adjustment, is it requires going back and retuning the MAF/VE tables slightly, but if it helps with MPG and low rpm torque, then it will be worth it.
Your description on idle EOI tuning makes me wonder, does the GM computer have some type of ego correction ? Is there something trying to always hold a set AFR ? If so it sounds as if that needs to be disabled for the test.
Originally posted by Trinten: Is there not a load-based dyno shop anywhere near you that might let you do a couple cheap pulls/cruises to log data? (just last weekend I learned the difference of load-based/"brake operated" dynos and the "common" dynos. Had no idea such differences existed!)
There is a dynojet drum dyno about 30 miles away that costs 100 for the 1st hour and 5 pulls, then $75/hr and unlimited pulls after that. But it isn't the load based one that would be handy. In reality it isn't that big of an issue or worth spending a $100+ to get perfect. Maybe if I get DoD working, I will come back and revisit it on a dyno. If I don't get DoD working, I will probably upgrade to another camshaft.
quote
Originally posted by Kemp3: Your description on idle EOI tuning makes me wonder, does the GM computer have some type of ego correction ? Is there something trying to always hold a set AFR ? If so it sounds as if that needs to be disabled for the test.
It has short/long term fuel trims that will adjust the fueling, but I have those disabled below 1000 rpm, so there is no a/f correction going on. My guess is the issue is I am running 100% MAF, not SD so if I put more air into the engine, more fuel is automatically added... I think this is the cause, which is why I looked at delivered torque (and cylinder airmass) to find the most benefit. For grins when I get more time I will switch over to SD and do the tests again to see if both methods key in on the same offset value.
Rest of the afternoon I am welding up a couple sets of lateral link relocation brackets.
[This message has been edited by fieroguru (edited 06-01-2013).]
It has short/long term fuel trims that will adjust the fueling, but I have those disabled below 1000 rpm, so there is no a/f correction going on. My guess is the issue is I am running 100% MAF, not SD so if I put more air into the engine, more fuel is automatically added... I think this is the cause, which is why I looked at delivered torque (and cylinder airmass) to find the most benefit. For grins when I get more time I will switch over to SD and do the tests again to see if both methods key in on the same offset value.
Rest of the afternoon I am welding up a couple sets of lateral link relocation brackets.
Is that for a dyno tune? I was qouted like 400 to 500 here.
Is that for a dyno tune? I was qouted like 400 to 500 here.
That is just to use the dyno. They are not setup to do any EFI tuning as they cater to the hotrods, race cars, and pulling truck (carb) market, but they are close. I am responsible for doing all tuning. When I tuned my SBC/Getrag swap, I did 18 pulls/tune tweaks in 2 hrs for $175. With the wideband in the LS4/F40 I should have almost everything dialed in before I take it to the dyno so the initial 5 pulls should be OK.
I am curious how does the GM computer deal with a overrun fuel cut. what parameters have to be met before that event occurs ? I was using ORFC but seems like my motor doesn't really like it, may just be that I need to finish breaking the motor in as it sat for 3 years and had 1500 miles on it.
If you have access to a Load dyno that would be best, the inertia dyno lets you safely tune WOT so its better than nothing. I am in the same boat unfortunately ..... Load dyno 4-5 hours away . An inertia dyno 30 mins away just the operator is a flake :/
[This message has been edited by Kemp3 (edited 06-02-2013).]
I am curious how does the GM computer deal with a overrun fuel cut. what parameters have to be met before that event occurs ? I was using ORFC but seems like my motor doesn't really like it, may just be that I need to finish breaking the motor in as it sat for 3 years and had 1500 miles on it.
The E67 ECM can limit maximum engine RPM via Fuel, Spark, or ETC (electronic throttle control). Each one has an enable/disable option. The main parameter you set is the RPM for Extreme Cutoff and Extreme Resume. There are not any tables to dial in how quick or slow it tries to limit RPM, like % fuel reduction for RPM beyond limit, or spark reduction... or at least I haven't found them. For the auto guys there is also the ability to have different rev limit for each individual transmission gear, but they all have to be at or lower than the Extreme Cutoff value.
Mine is set for ETC so the ecm will just close the throttle blade to avoid overrun, but to be honest I haven't hit it yet (mine is set at 7000 rpm), so I do not know how smoothly the ETC method works. I need to upgrade to a better tach that is scaled out to 7500 rpm and accurate... Every time I take it about 1/2" past the 6500 mark on the tack I end up short and only reaching 6800ish RPM and the laptop is too far away and in the wrong direction to watch it during a WOT run.
That is just to use the dyno. They are not setup to do any EFI tuning as they cater to the hotrods, race cars, and pulling truck (carb) market, but they are close. I am responsible for doing all tuning. When I tuned my SBC/Getrag swap, I did 18 pulls/tune tweaks in 2 hrs for $175. With the wideband in the LS4/F40 I should have almost everything dialed in before I take it to the dyno so the initial 5 pulls should be OK.
Gotcha, I was worried they were trying to shaft me.
Originally posted by fieroguru: Mine is set for ETC so the ecm will just close the throttle blade to avoid overrun, but to be honest I haven't hit it yet (mine is set at 7000 rpm), so I do not know how smoothly the ETC method works. I need to upgrade to a better tach that is scaled out to 7500 rpm and accurate... Every time I take it about 1/2" past the 6500 mark on the tack I end up short and only reaching 6800ish RPM and the laptop is too far away and in the wrong direction to watch it during a WOT run.
I'm not sure exactly which method the Cruze 1.4 turbo setup uses, but I do know that when you hit that RPM the cutoff is abrupt. I hit it a few times when I had the Cruze Eco, and every time it felt like I had just hit something. Not a good feeling, but it does kind of force you to lift off the gas and shift. :P
There are: master Enable/Disable engine temps (Stock LS4 is 86F enable, 77F disable, mine is set at 493F to disable this feature while tuning). master Enable/Disable engine RPM (Stock LS4 is 1350 rpm enable, 950 rpm disable)
Enable as well as a Disable table Vehicle Speed vs. Transmission Gear (Enable is 25 mph for all gears except 1st = 15 mph. Disable is 22 mph for all gears except 1st = 12 mph) Enable/Disable Cylinder Airmass (g/cyl) vs. RPM (Enable is 0.09 for all RPMs, and Disable is 0.14) Enable/Disable TPS vs RPM (Enable is 0.10 for all RPMs, Disable is 0.20 for all RPMs) DFCO entry Spark adjustments and DFCO exit spark adjustments. (Entry is 10.0 degrees for all RPM's, Disable is 0 below 3000, 2 @ 3072, 3 @ 3584, 4 @ 4096, 6 @ 4608, 7 @ 5120, 8 @ 5632, 9 @ 6144, 10 @ 6656, 12 @ 7186, 13 @ 7680, 14 @ 8192
Cylinder Airmass & RPM are also the scales for the main timing table. The lowest value is .08 g/cyl with the 2nd lowest being .12 g/cyl. The highest on the table is 1.36 g/cyl, but at WOT with my LS4 I am seeing Airmass in the .76 to .80 range for reference.
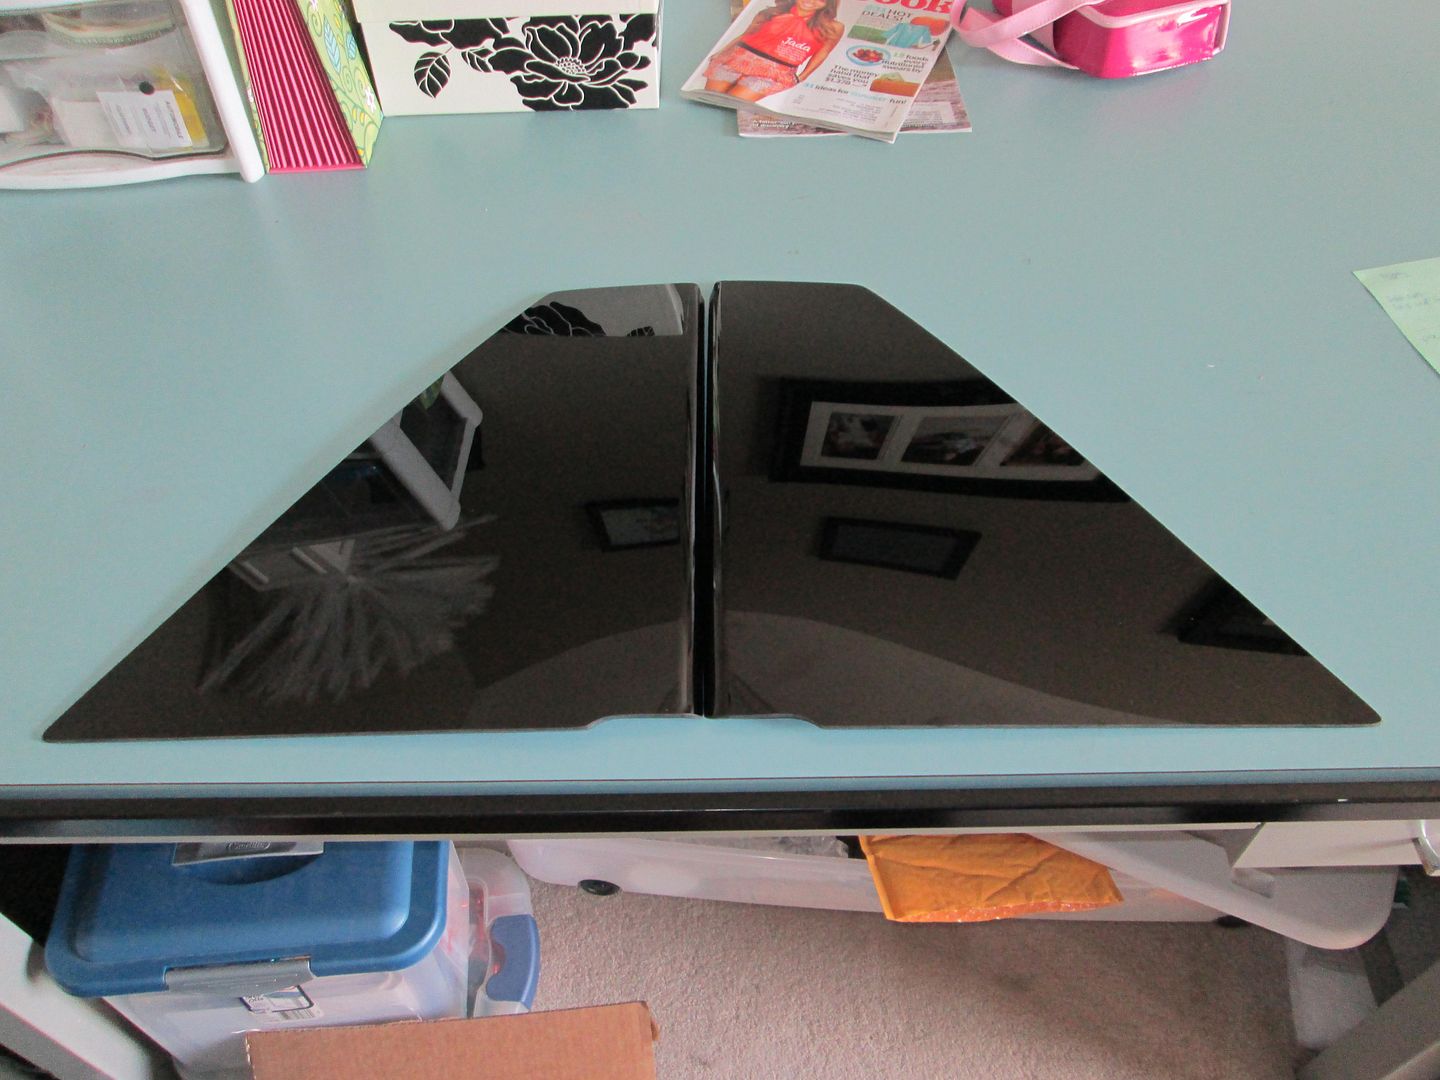
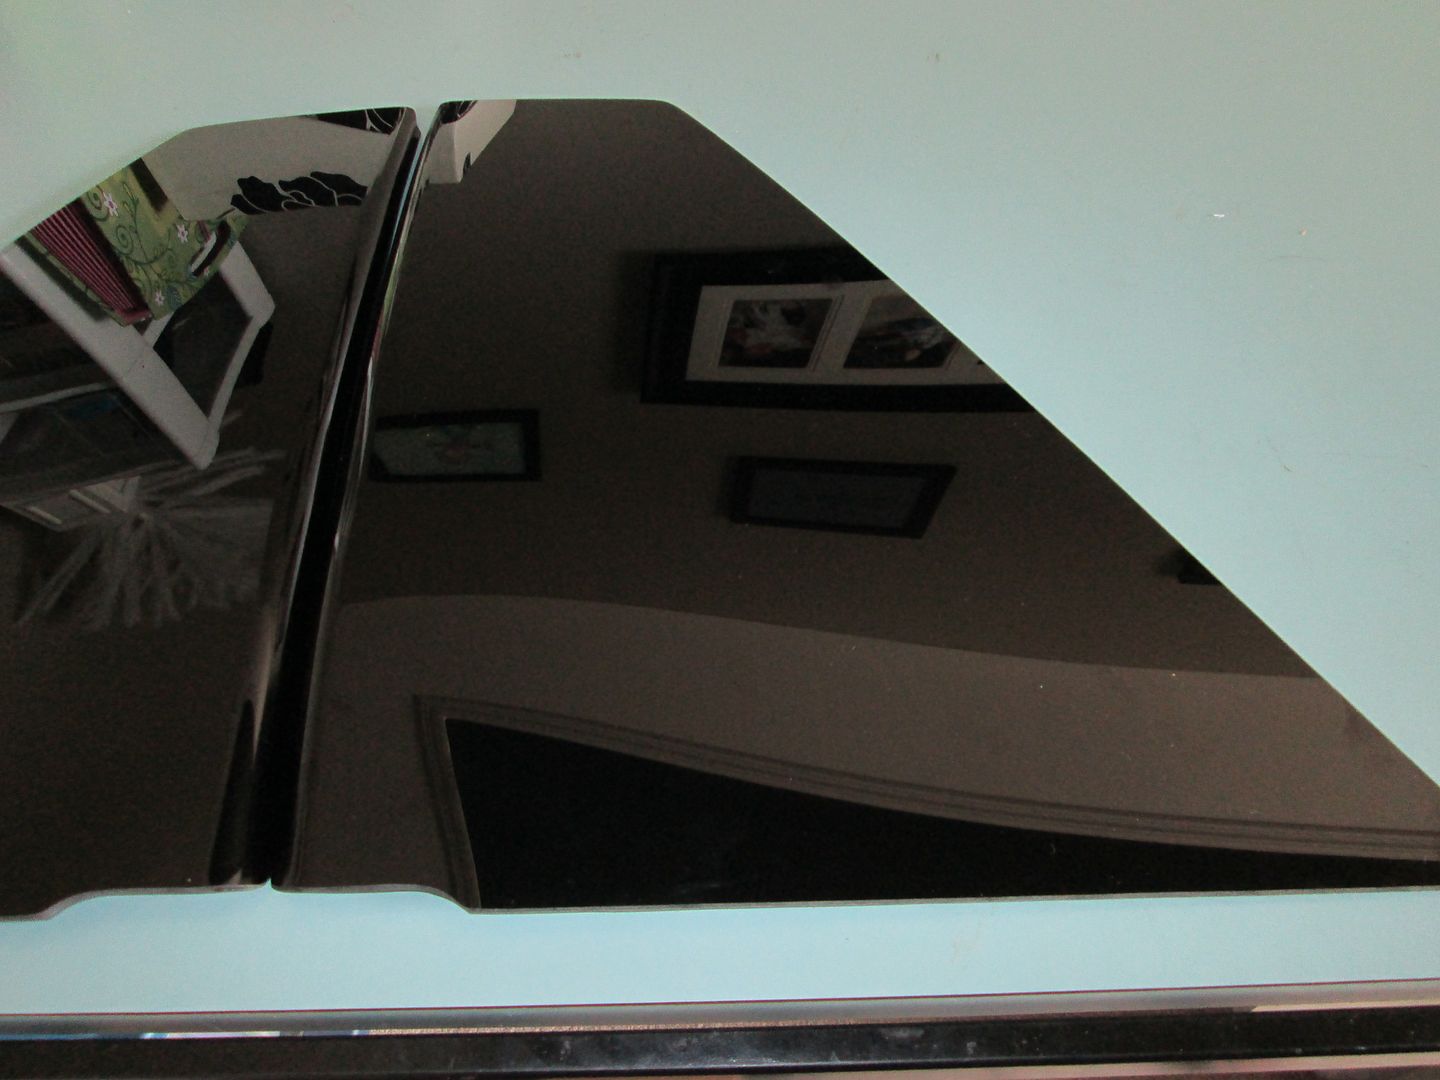
My sail windows came in from Kahines and they look good! I have been a fastback guy for years and prefer the clean/smooth transition between the window to the sail panels vs. having the bulky notchie transition.
Panels:
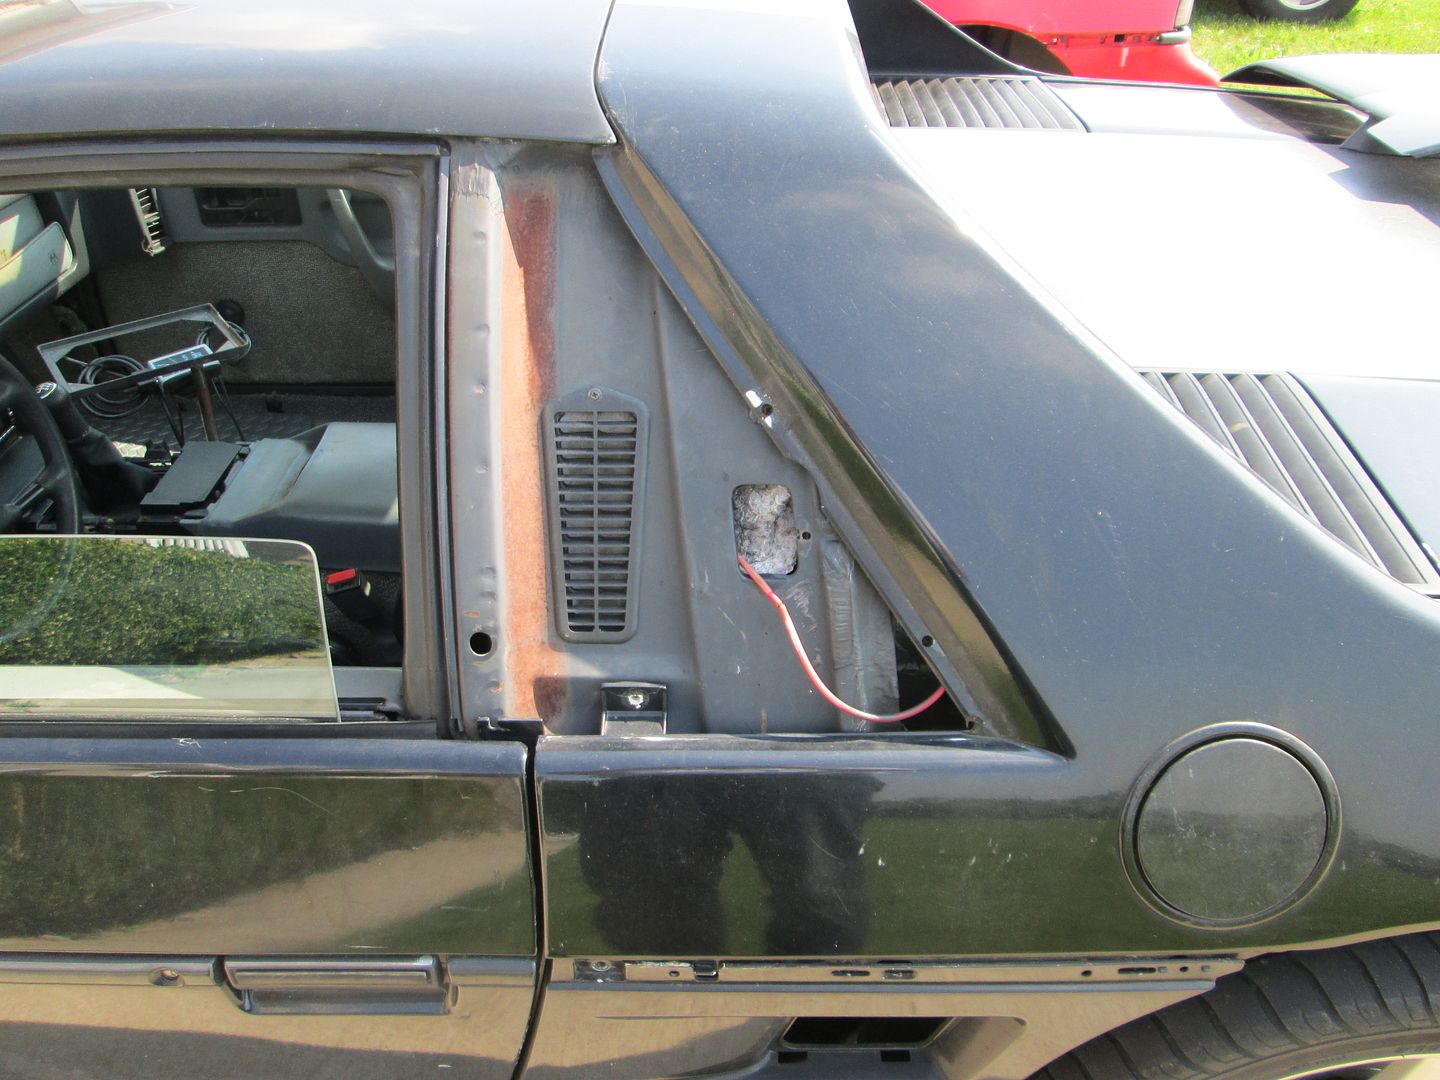
The ugly section of the car that needs covering:
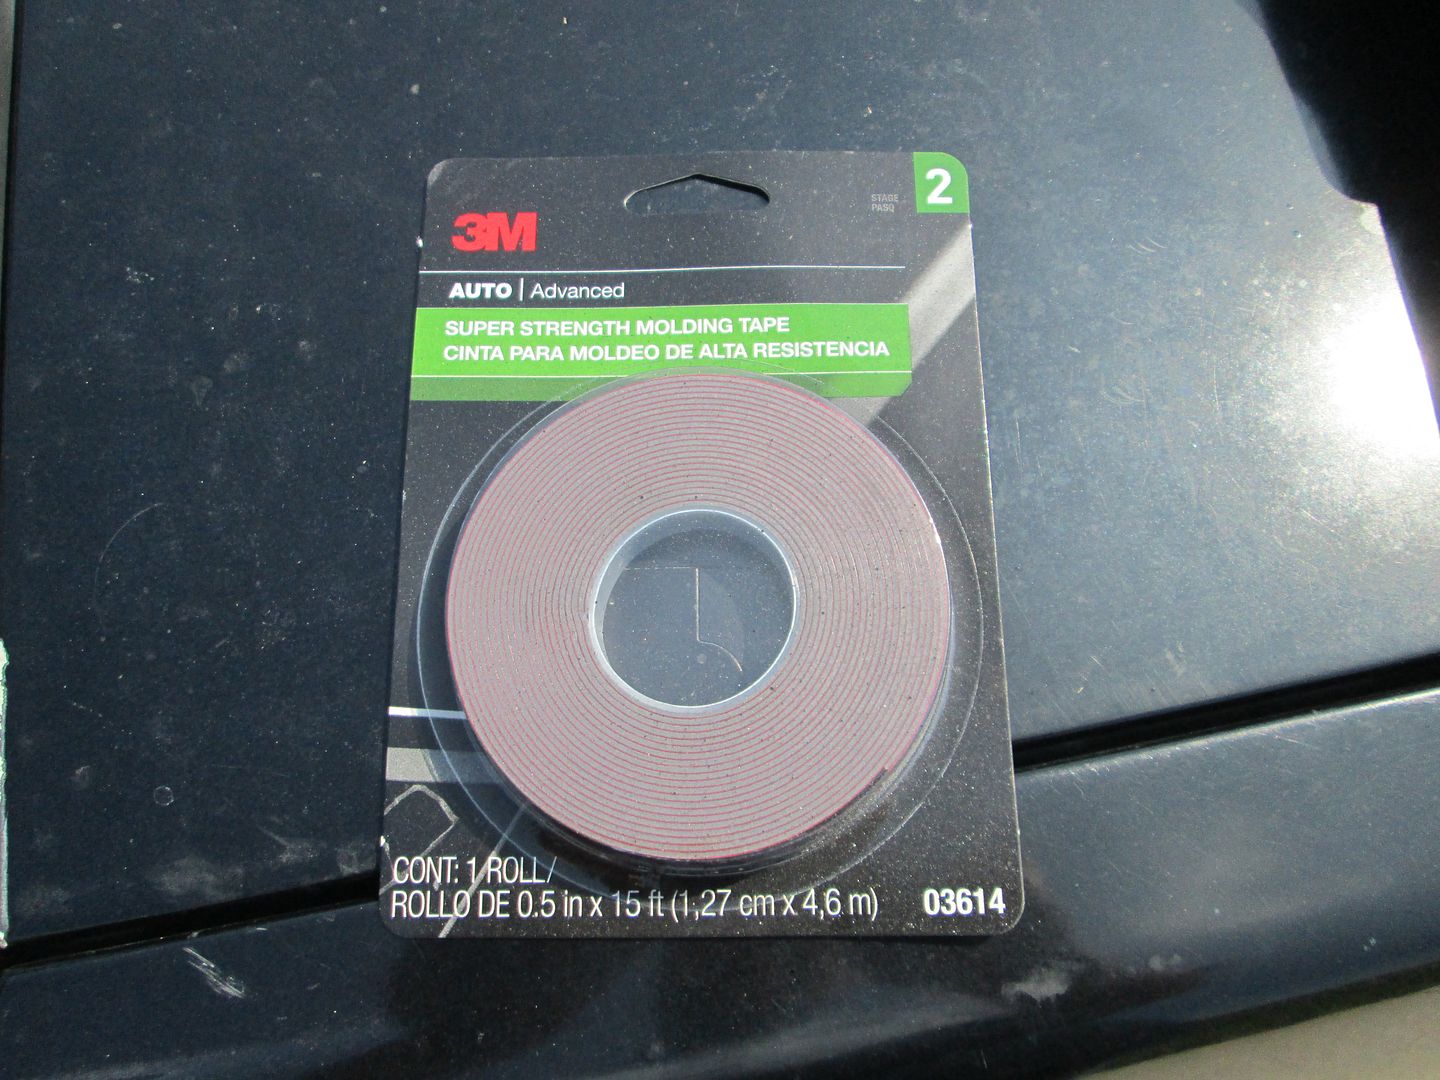
3M molding tape:
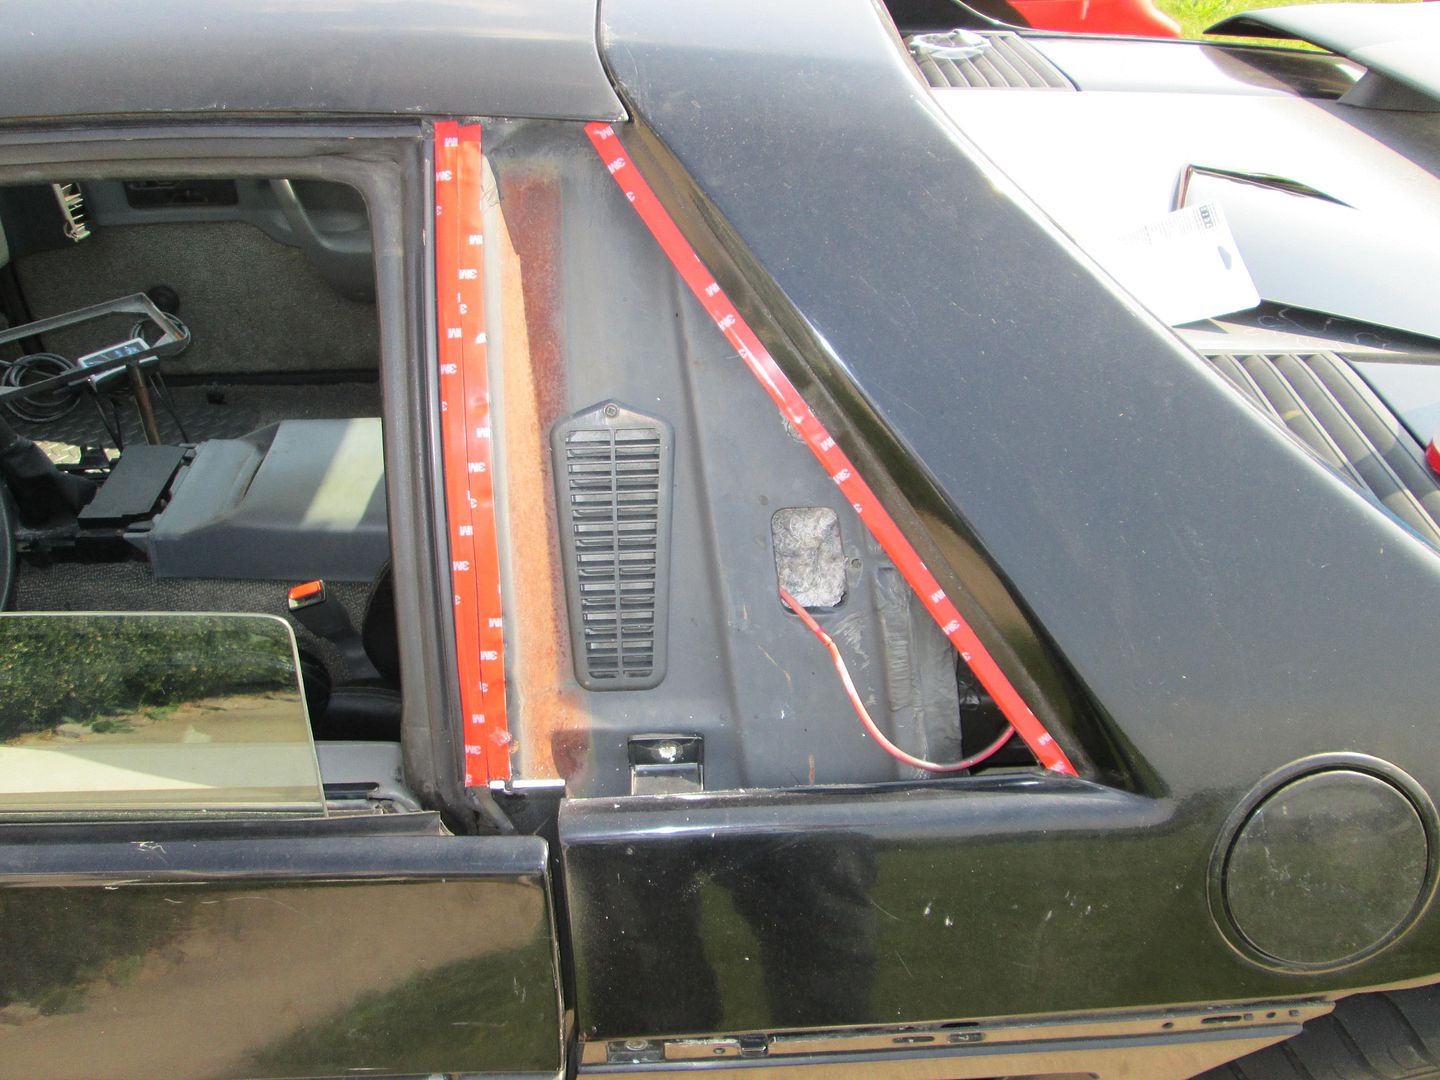
One place of interference. The top of the 1/4 panel sticks up past the top of the tape surface. I used a hand held grinder to bevel the top of this panel (it is hidden behind the sail panel) and did add a 2nd layer of 3M tape to the bottom 2" of the window so the edge would be held with tape and the gap where it transitioned between 1 layer and 2 layers of 3M tape would happen mid window.
Installed:
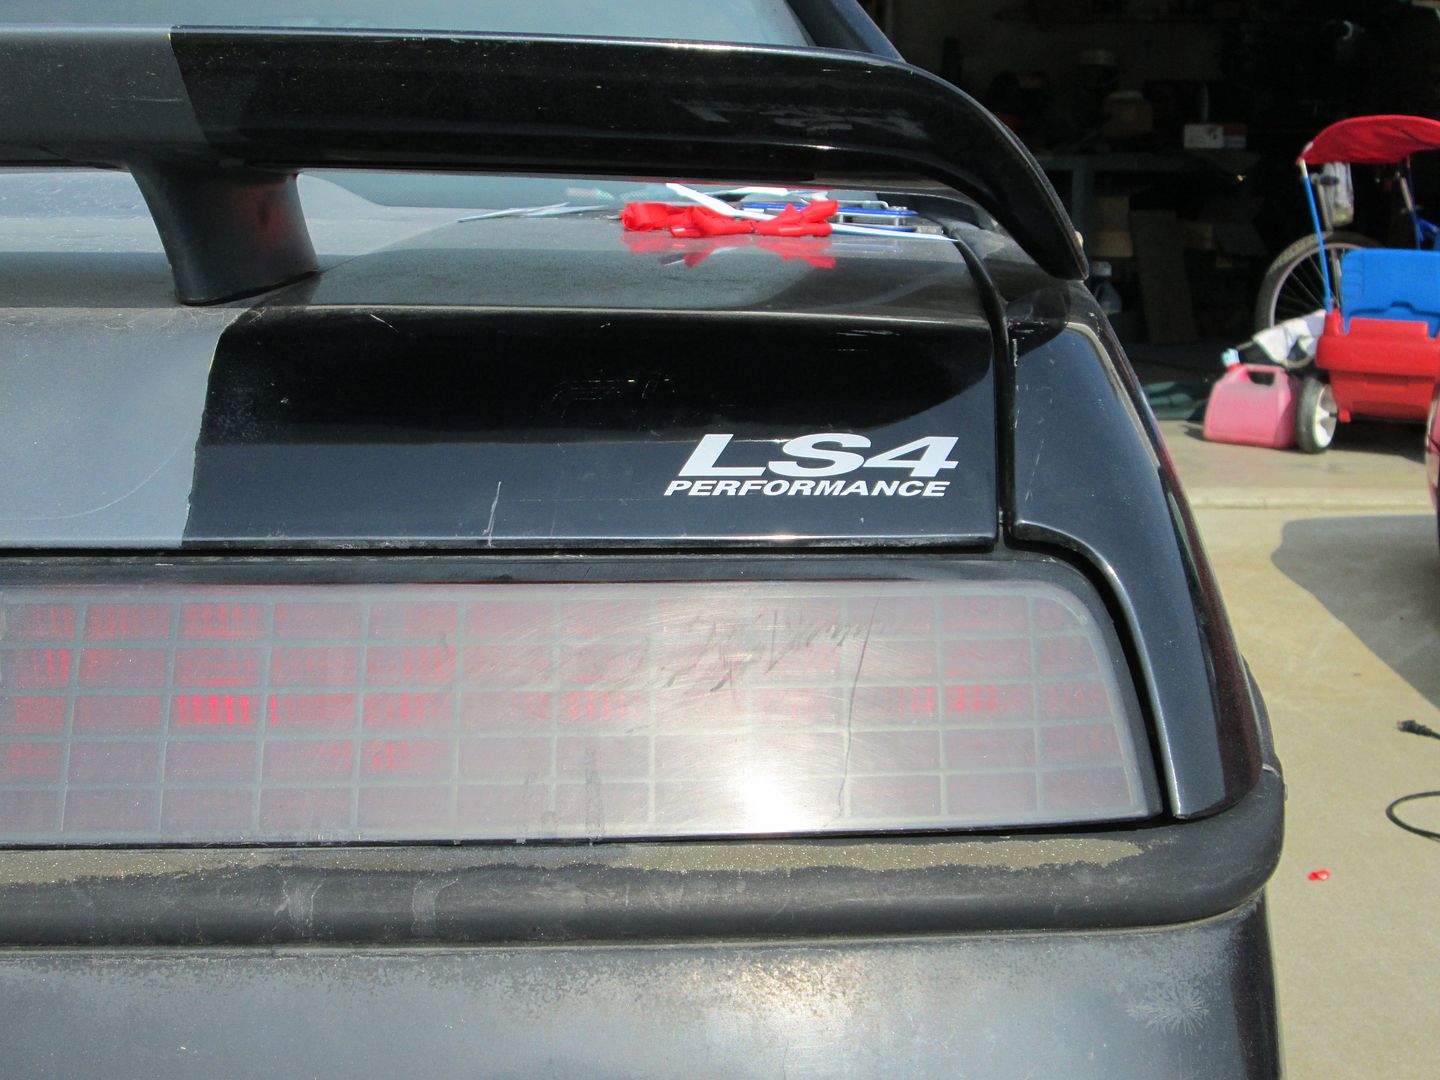
While working on the side windows, I also installed the decal for the rear decklid:
I have 2 more of these and thought about placing them on the sail windows, but for now I am going to leave them off. The car's exhaust gives it enough "presence" and I don't want the badging to be too "look at me". Understated looks with overstated exhaust note...
[This message has been edited by fieroguru (edited 06-08-2013).]
There are: master Enable/Disable engine temps (Stock LS4 is 86F enable, 77F disable, mine is set at 493F to disable this feature while tuning). master Enable/Disable engine RPM (Stock LS4 is 1350 rpm enable, 950 rpm disable)
Enable as well as a Disable table Vehicle Speed vs. Transmission Gear (Enable is 25 mph for all gears except 1st = 15 mph. Disable is 22 mph for all gears except 1st = 12 mph) Enable/Disable Cylinder Airmass (g/cyl) vs. RPM (Enable is 0.09 for all RPMs, and Disable is 0.14) Enable/Disable TPS vs RPM (Enable is 0.10 for all RPMs, Disable is 0.20 for all RPMs) DFCO entry Spark adjustments and DFCO exit spark adjustments. (Entry is 10.0 degrees for all RPM's, Disable is 0 below 3000, 2 @ 3072, 3 @ 3584, 4 @ 4096, 6 @ 4608, 7 @ 5120, 8 @ 5632, 9 @ 6144, 10 @ 6656, 12 @ 7186, 13 @ 7680, 14 @ 8192
Cylinder Airmass & RPM are also the scales for the main timing table. The lowest value is .08 g/cyl with the 2nd lowest being .12 g/cyl. The highest on the table is 1.36 g/cyl, but at WOT with my LS4 I am seeing Airmass in the .76 to .80 range for reference.
that's good info thank you , since your not using it when or if you enable it you may see a little bump in MPG.
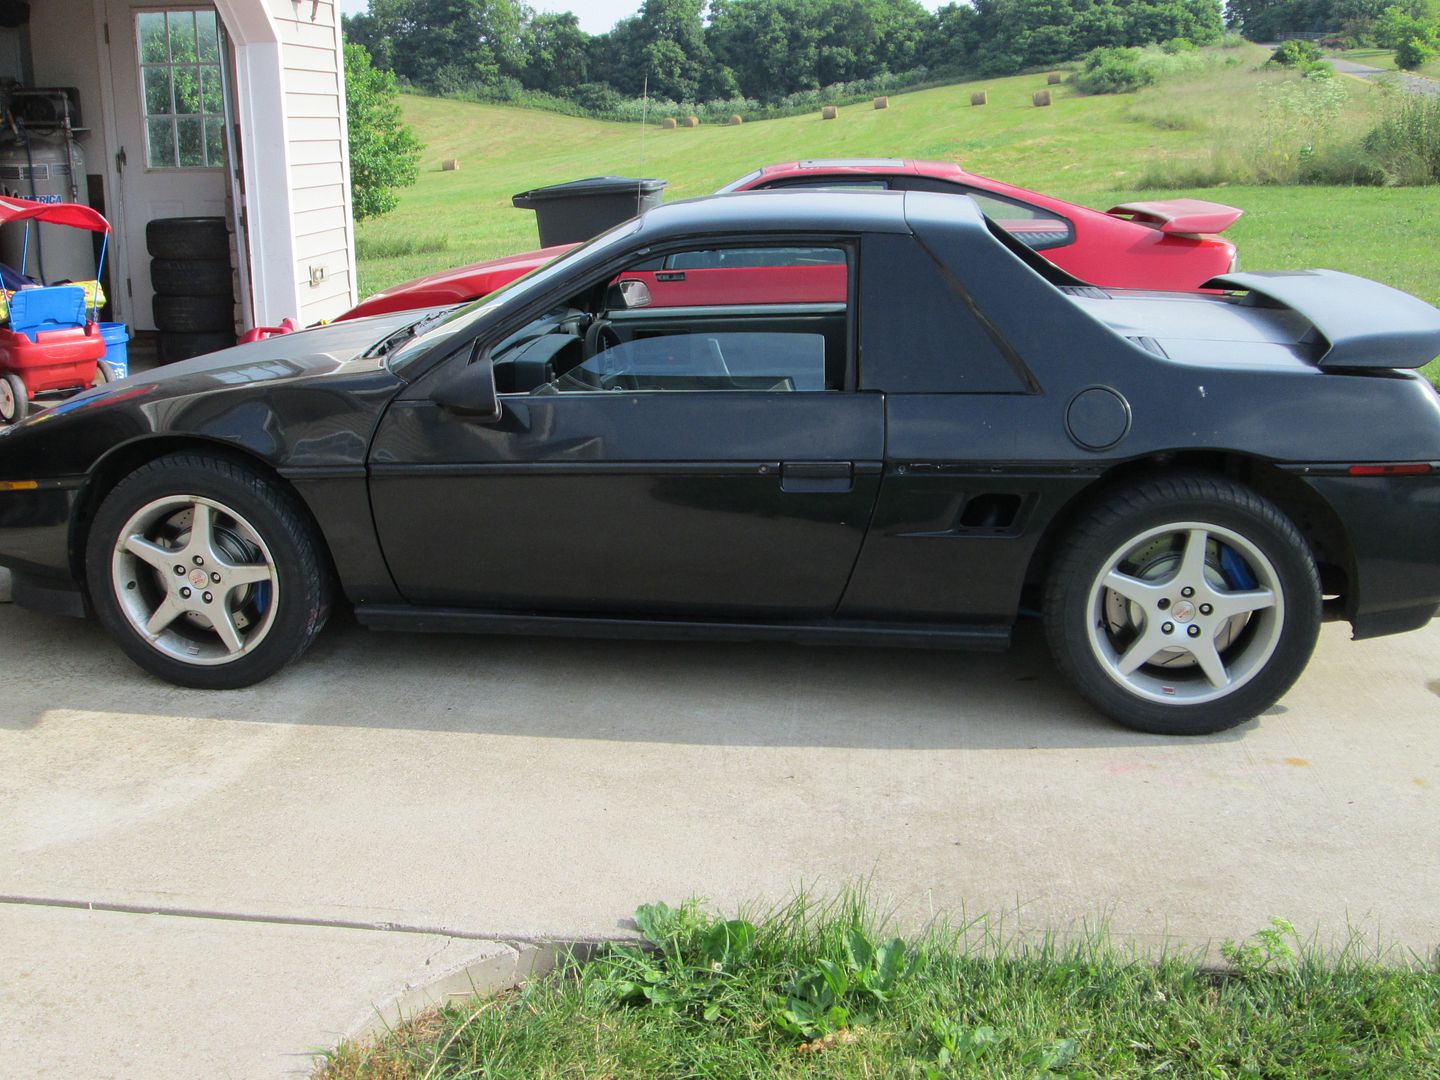
The car finally has every exterior panel/trim piece installed... Put the PS rocker panel back on as well the missing sections of round molding. The exterior is pretty much done with the exception of buffing the old paint to make it look as good as possible until I find time/$$ to get it painted.
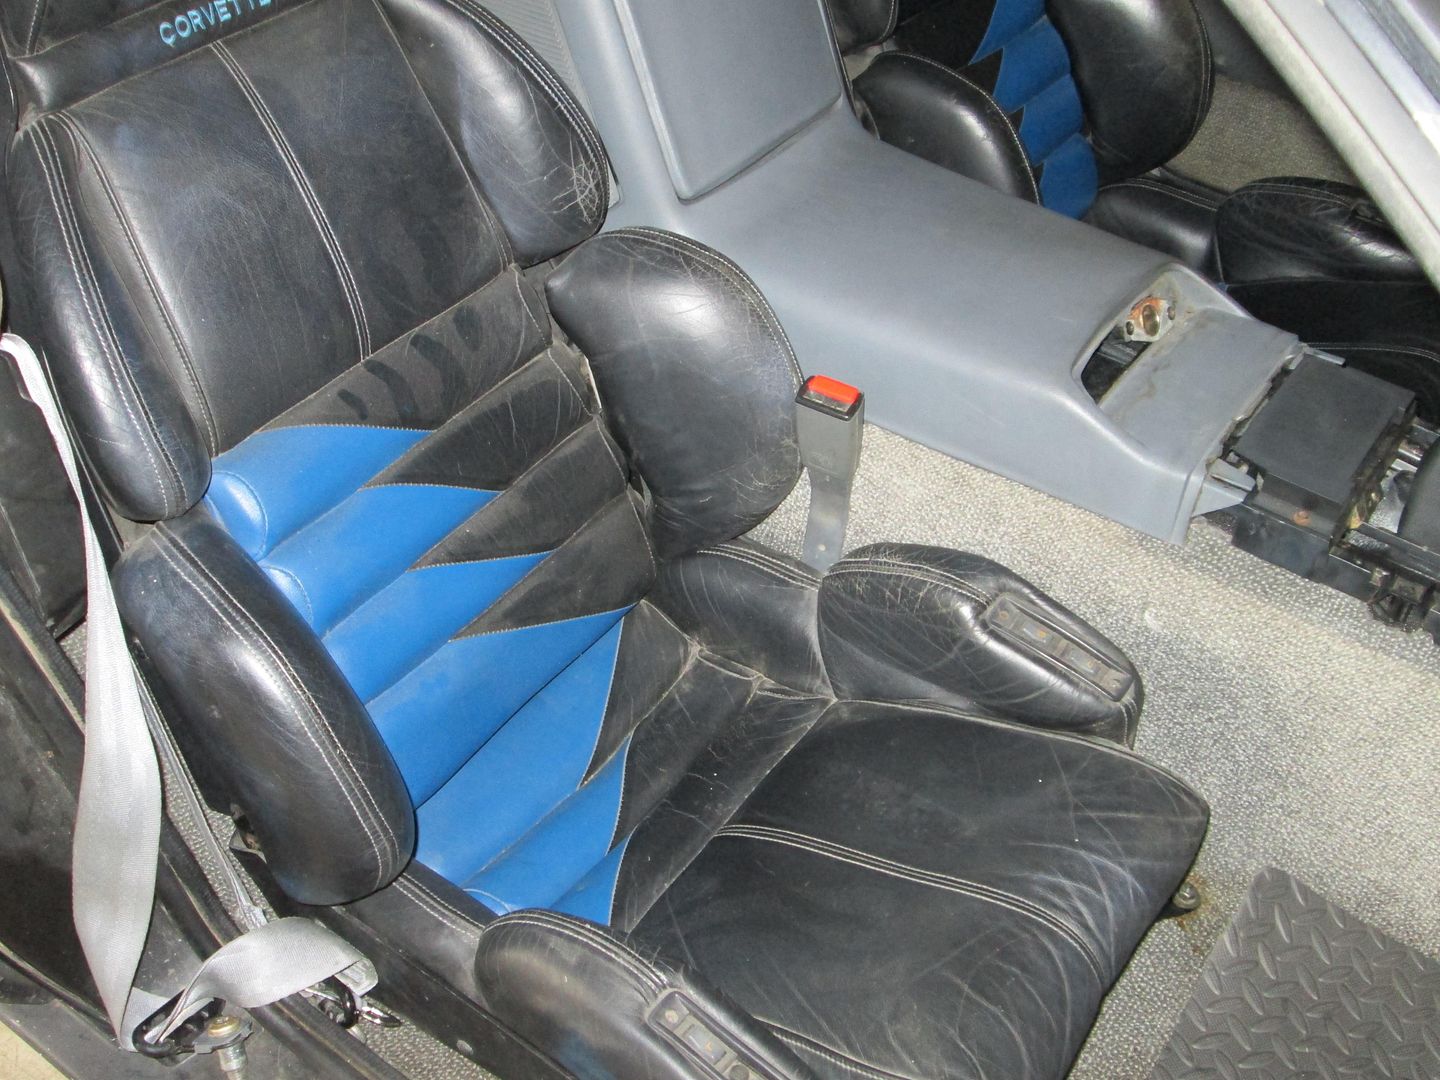
I also fabbed up the passenger side seat mounts. Like the driver side, they are 16ga sheet metal bent into a tapered "C" shape so I could pickup the stock fiero seat studs and mount the C4 vette seats to the top side of the "C". The lower seat cushion comes out for mounting, so that makes it easy, especially since the seats are mounted in a fixed position vs. on sliders. Notice how dusty the PS seat is vs. the DS... I need to clean it or take some buddies for a ride.
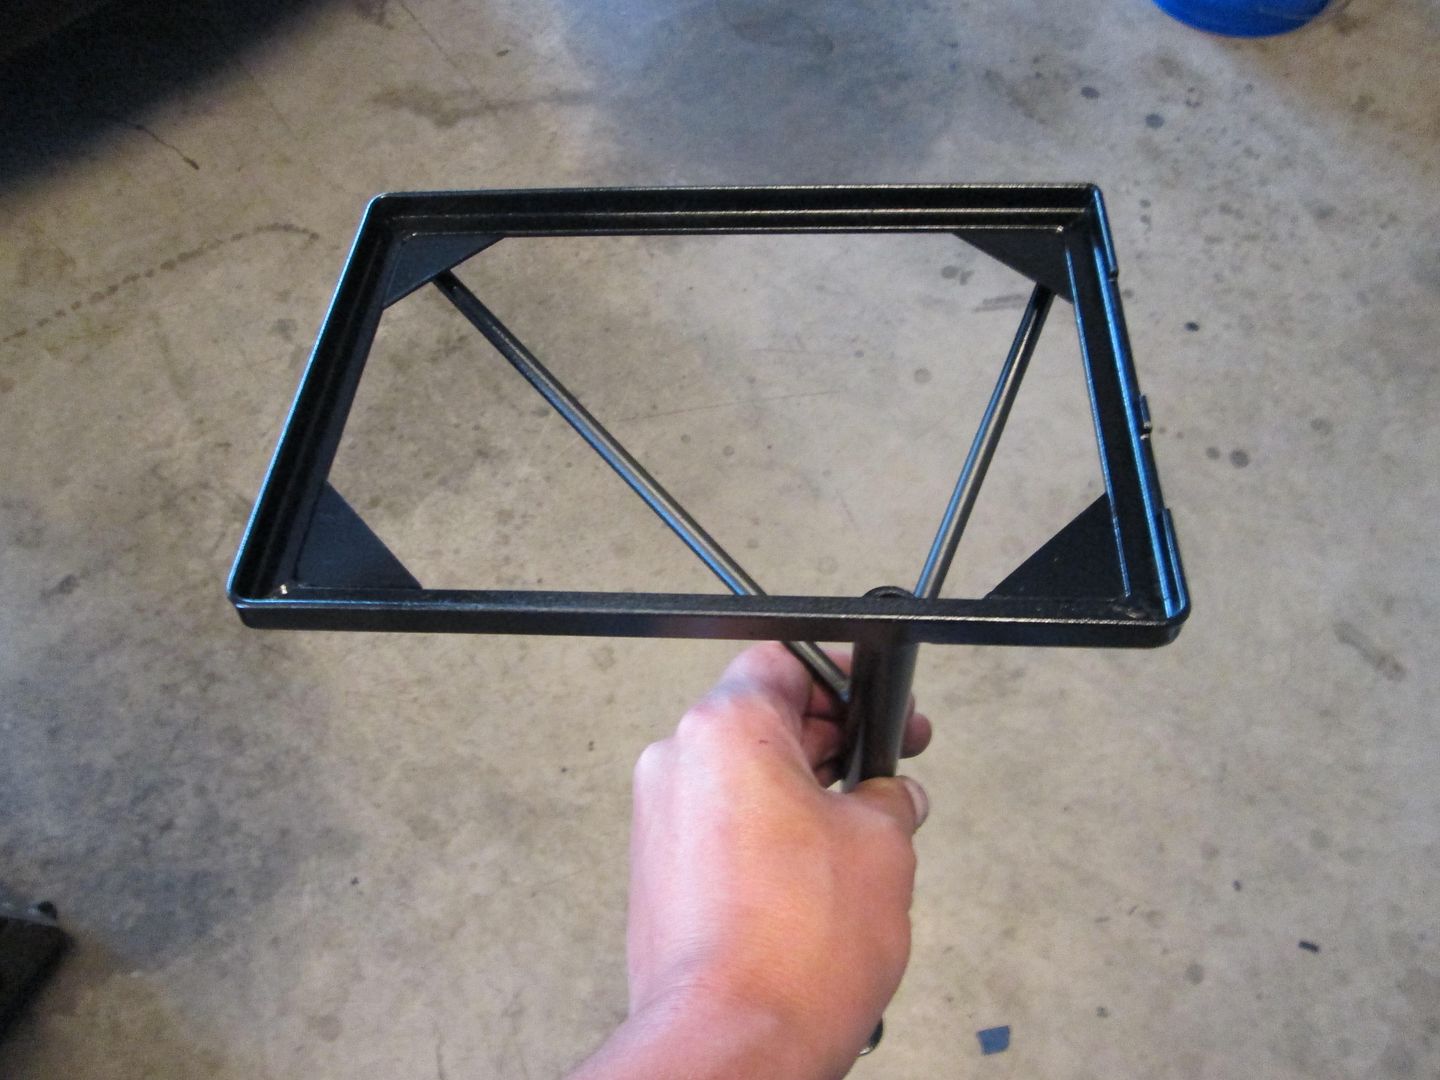
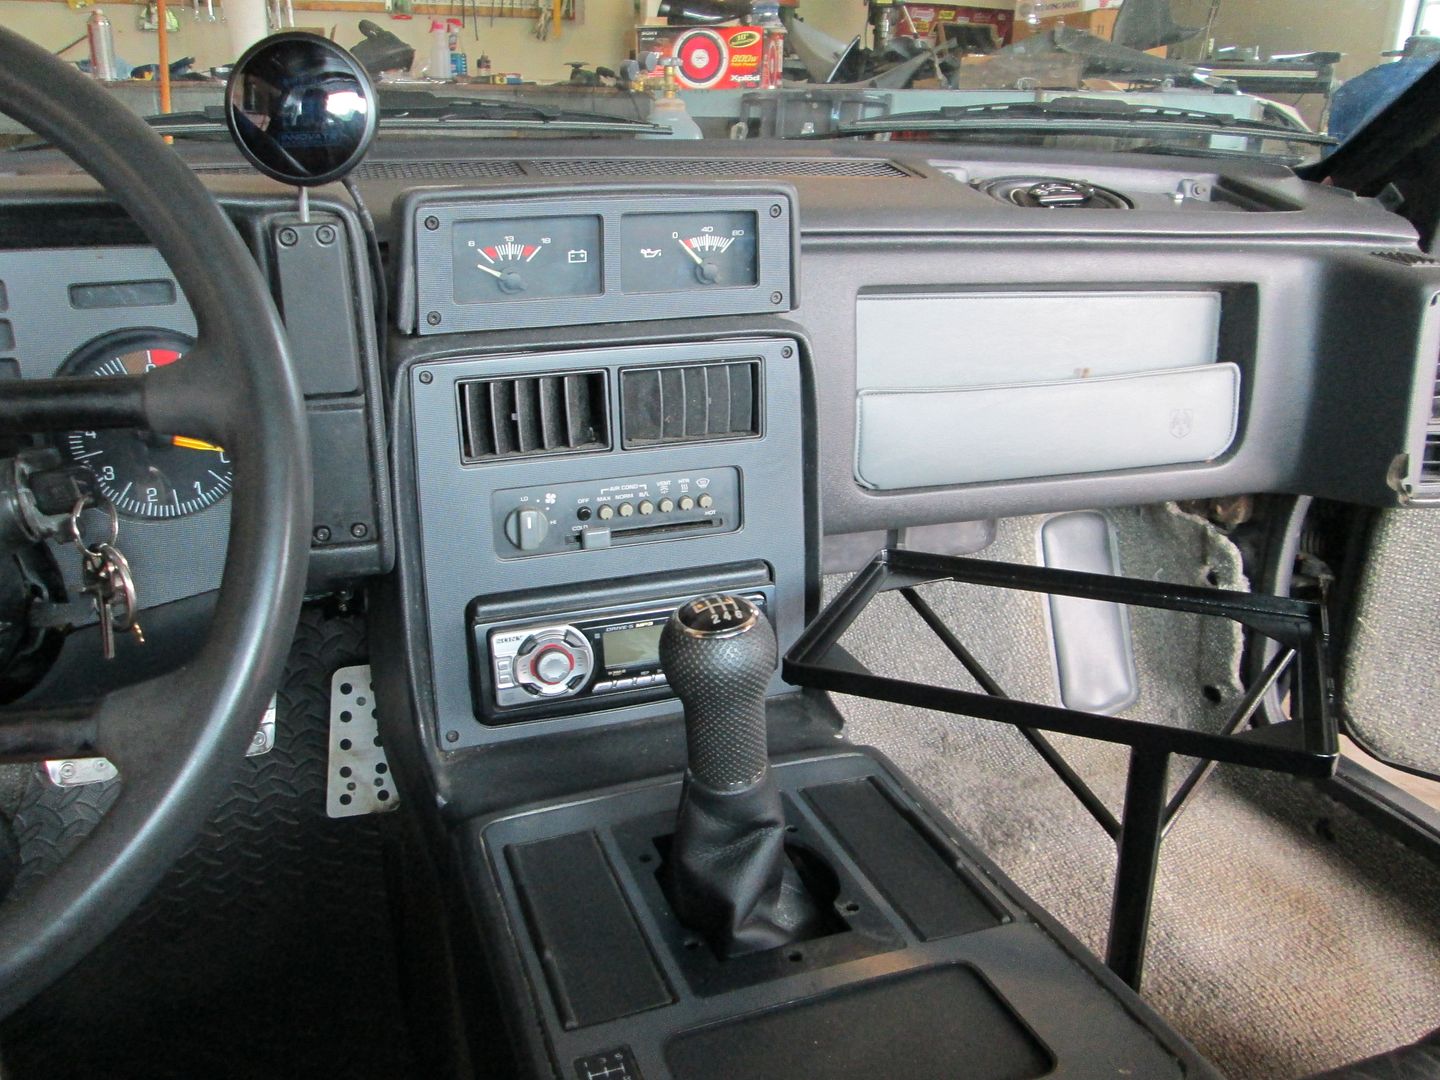
While I was painting, I went ahead and painted the Laptop stand, once it was dry installed it as well as the rest of the console interior stuff:
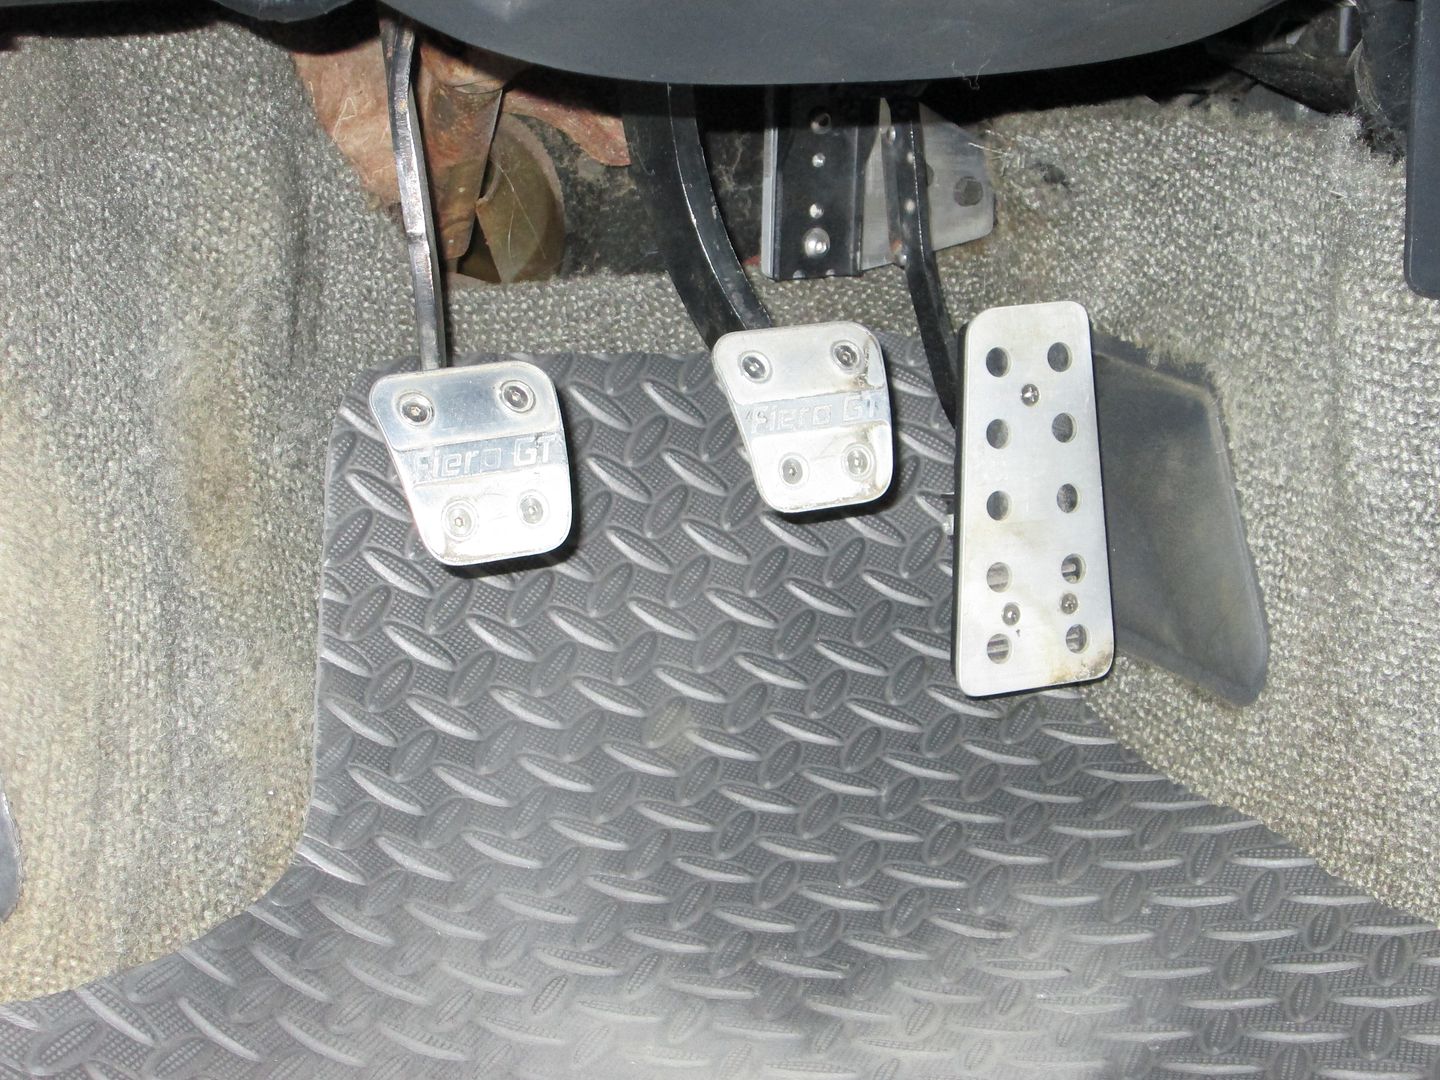
Also went ahead and installed the aluminum faces for the pedals. These were originally installed on the Blue SBC car (so they say Fiero GT). They need a cleaning as well, but when you drive the car daily stuff will get dirty.
Now I am on the hunt for a non-sunroof headliner. I made a posting in the Mall, but if I can't find one used, I will probably buy a fiberglass version from Archie. I am not planning on putting the A and B pillar trim back in until I have the head liner...
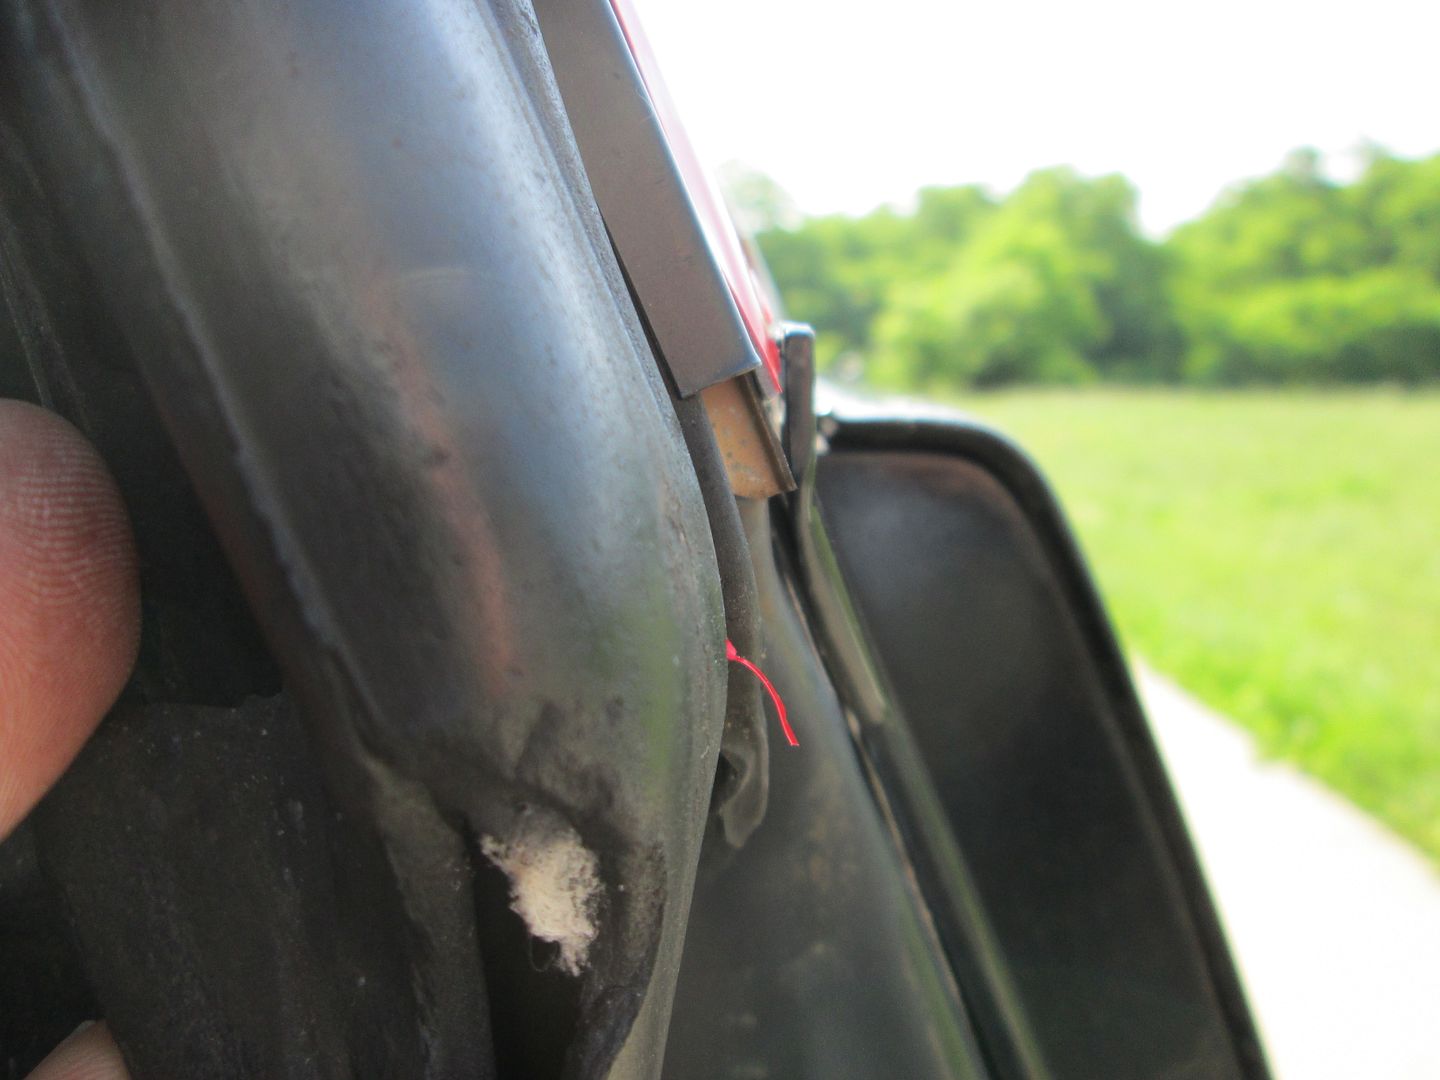
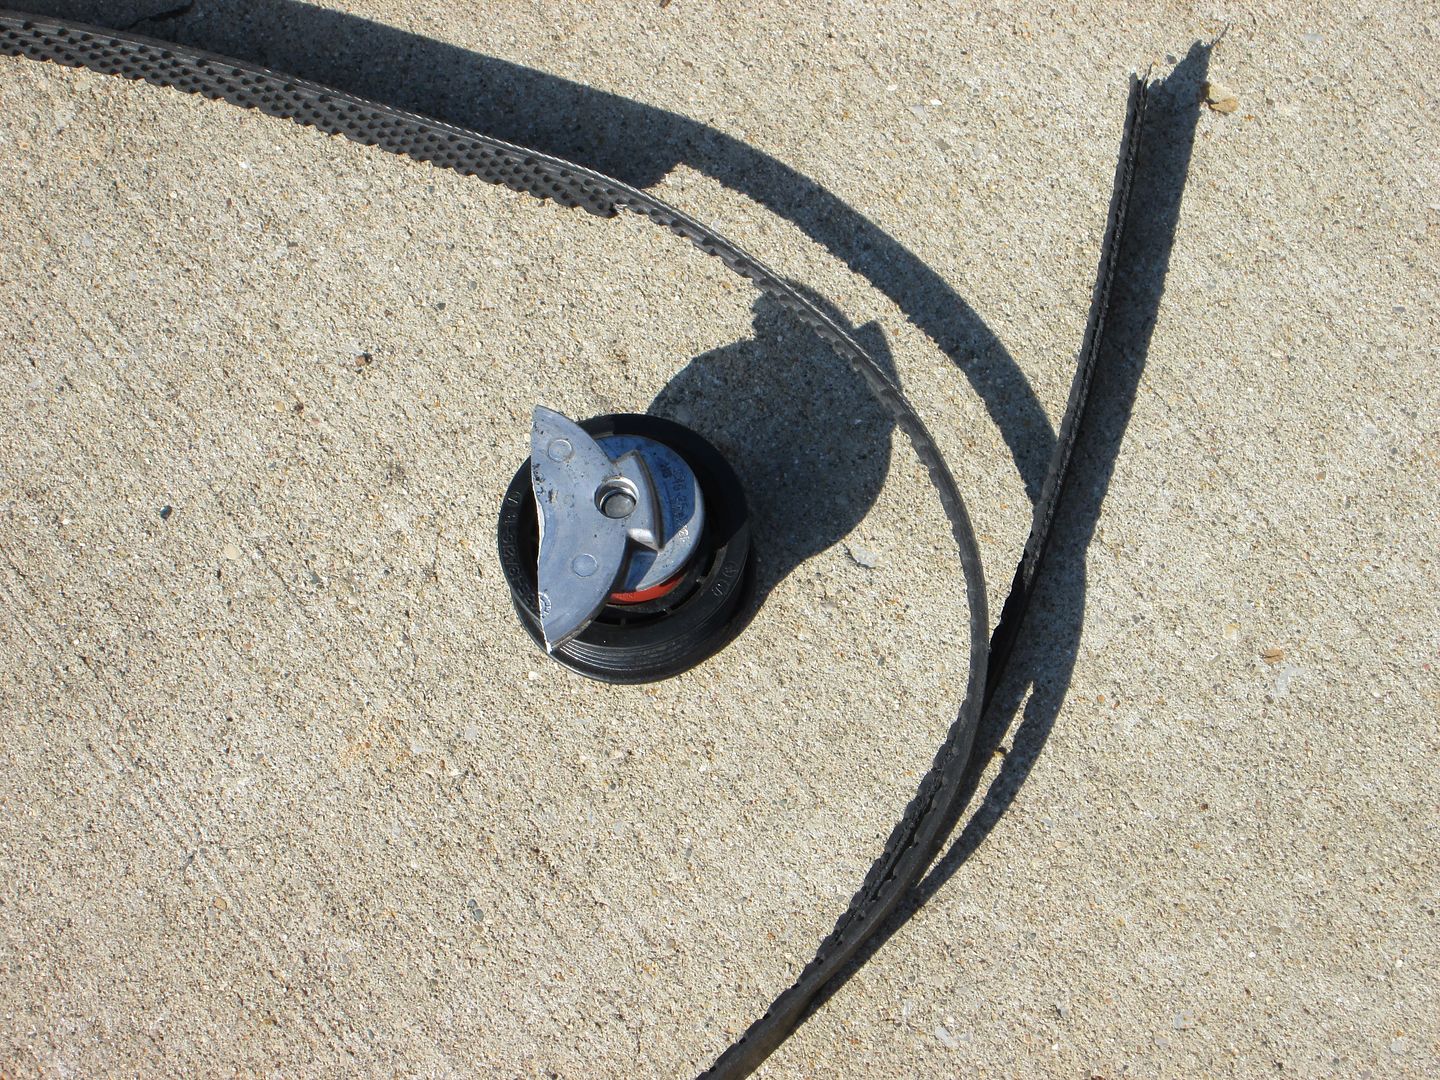
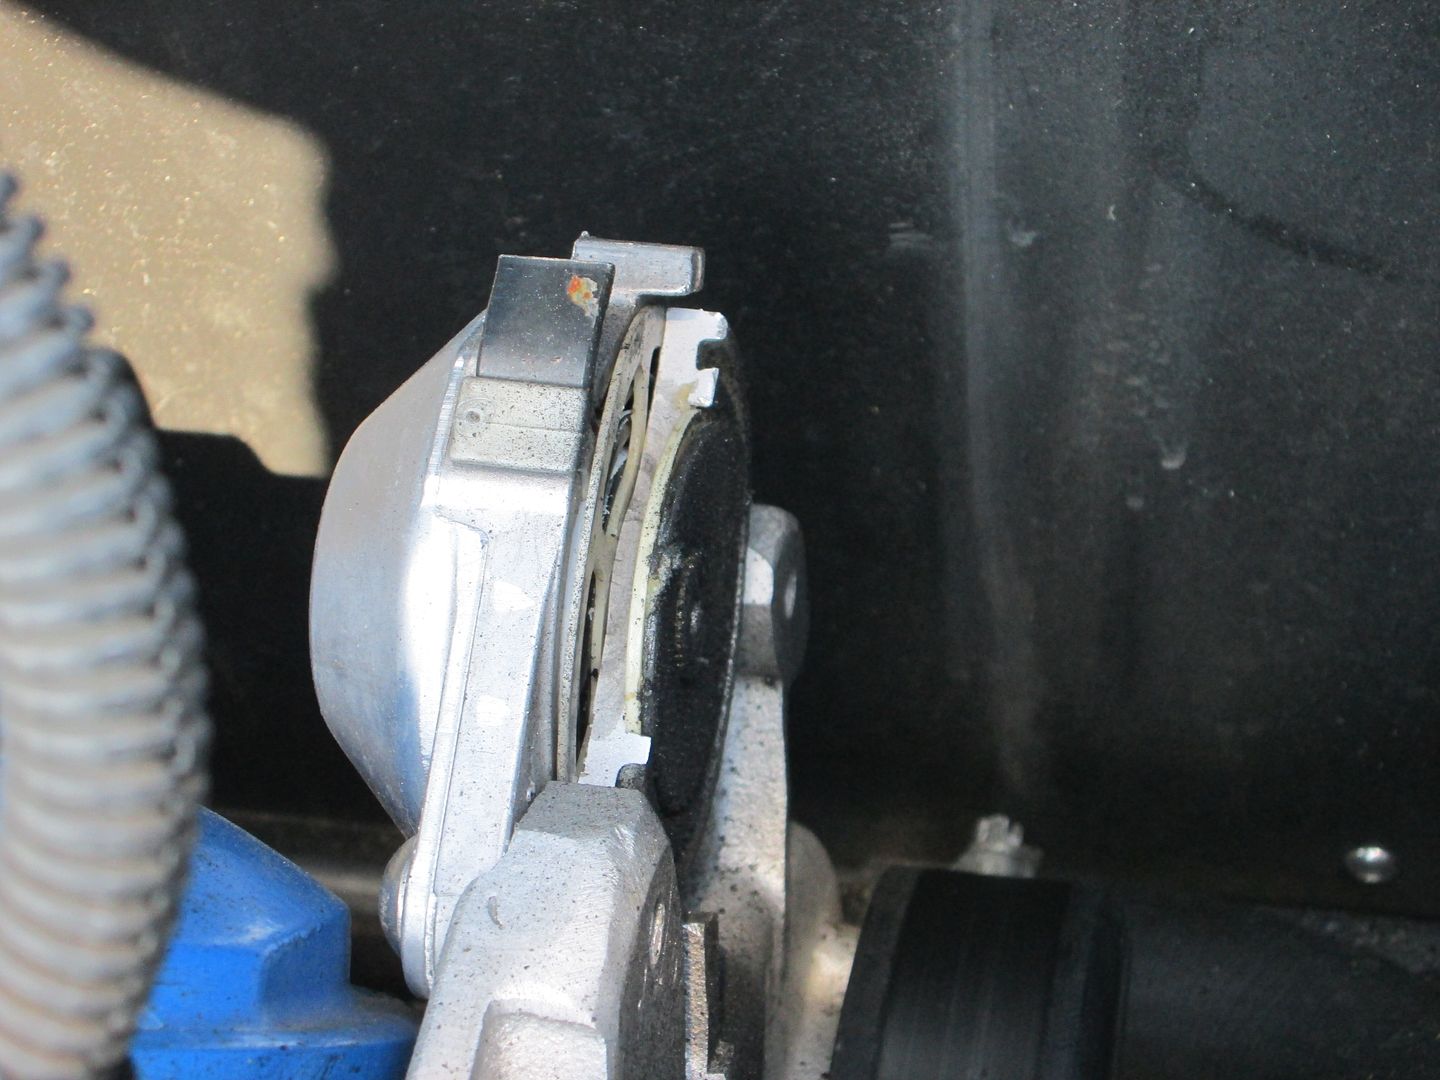
Snapped the belt tensioner today... been pretty easy on the car the last several days and was just starting/idling/stopping the engine doing some more idle refinement on the tune when I hear a snap/crash/cling type sound when I turned the key... This was the cause:
Already have a new tensioner installed... I will watch it a little closer for the next month of two to see if it shows any signs of a similar type failure.
No modifications to the tensioner correct, just the front housing it mounts to? Gotta love using stock parts from other applications with high availability in the parts stores.
Ouch - glad it didn't bust up anything else when it all broke loose!
Yeah it probably would have been ugly if it had let loose at 7K RPM and 110 MPH...
quote
Originally posted by Jefrysuko: Did it cut the belt too?
No modifications to the tensioner correct, just the front housing it mounts to? Gotta love using stock parts from other applications with high availability in the parts stores.
The belt got slit, but I suspect it happened after the tension broke and the belt wrapped around something.
Yes, the tensioner is bone stock from a V6 camaro and the parts stores keep them in stock, so I just needed to make a trip to town and drop $35 on a new one.
[This message has been edited by fieroguru (edited 06-13-2013).]
I'm pretty sure it was you I passed earlier today, on my way to Danville. Car looked good!
Tony
Probably was. I have been driving the car to work daily. I still haven't done a good cleaning/waxing on it yet, so it is pretty dirty at the moment. Next time you are in the area you will have to stop by and go for a ride.
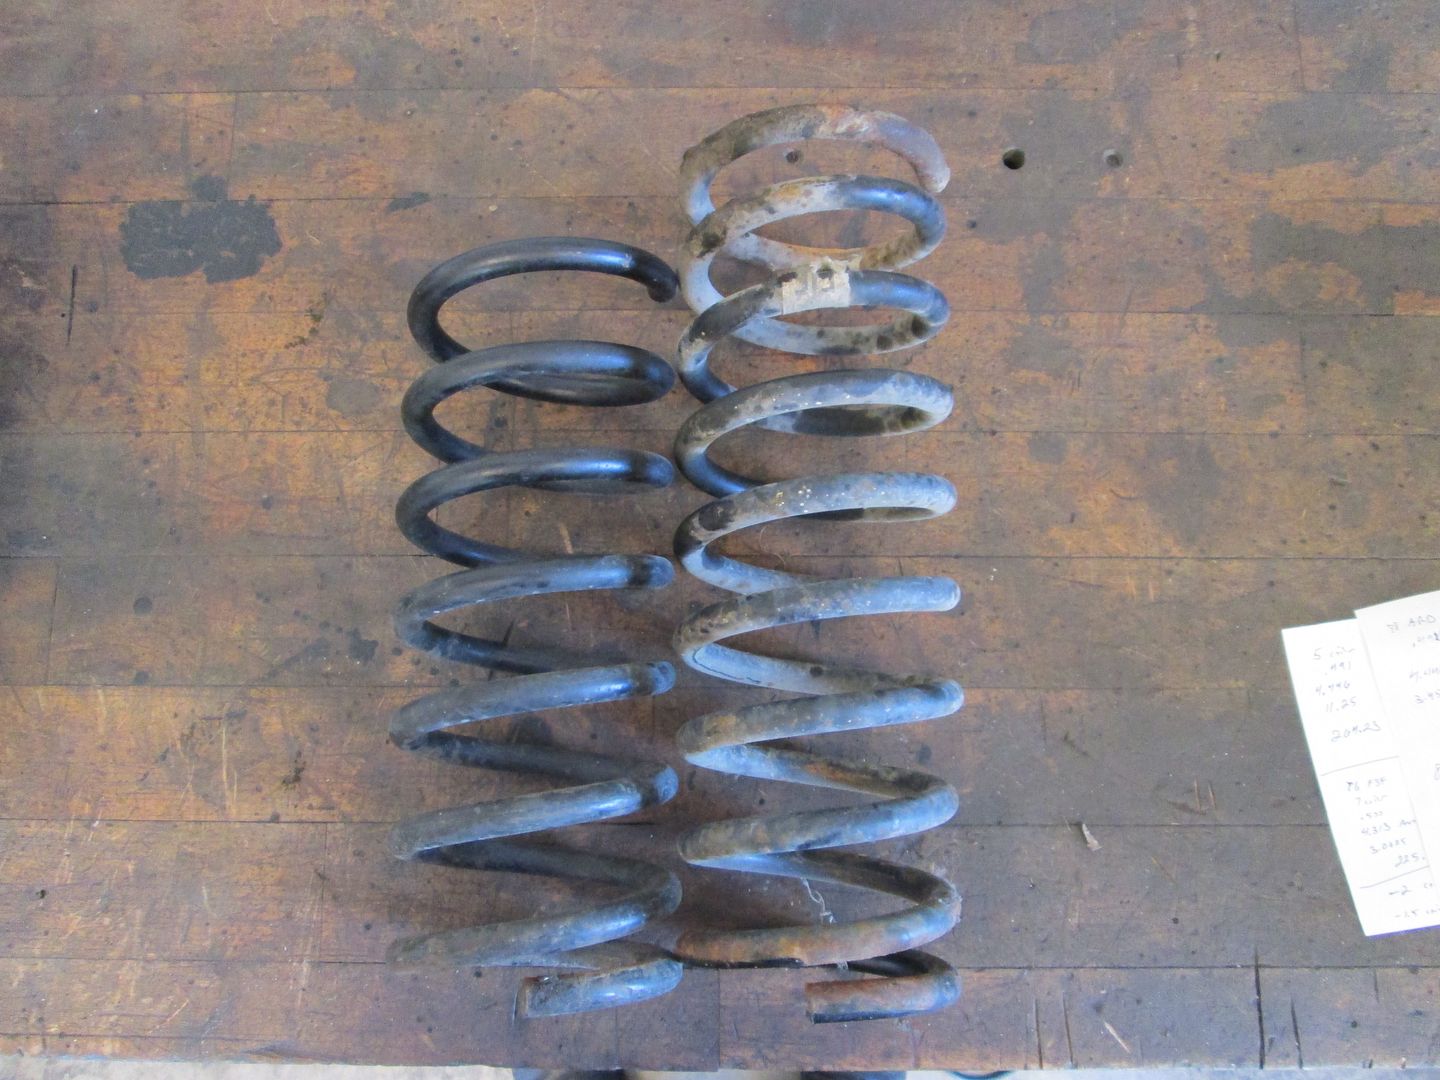
Decided to knock out the front spring upgrade today. I had been running the stock 88 front springs with 1 coil removed, but much prefer a slightly stiffer setup and have done the 84-86 GT spring upgrade a couple times before to get the needed rate improvement. Since I pulled home an 86 GT a few weeks back, it lost its springs today for the LS4/F40 car. It took about 2 hrs to get them off the car with the vast majority of that time dealing with the wheel lock lug nuts that I didn't have a key for. Ended up welding a nut to the lug nuts and then removing them. It was a trial/error type deal and took 3-4 times of trying to finally get them free... not looking forward to doing the rears...
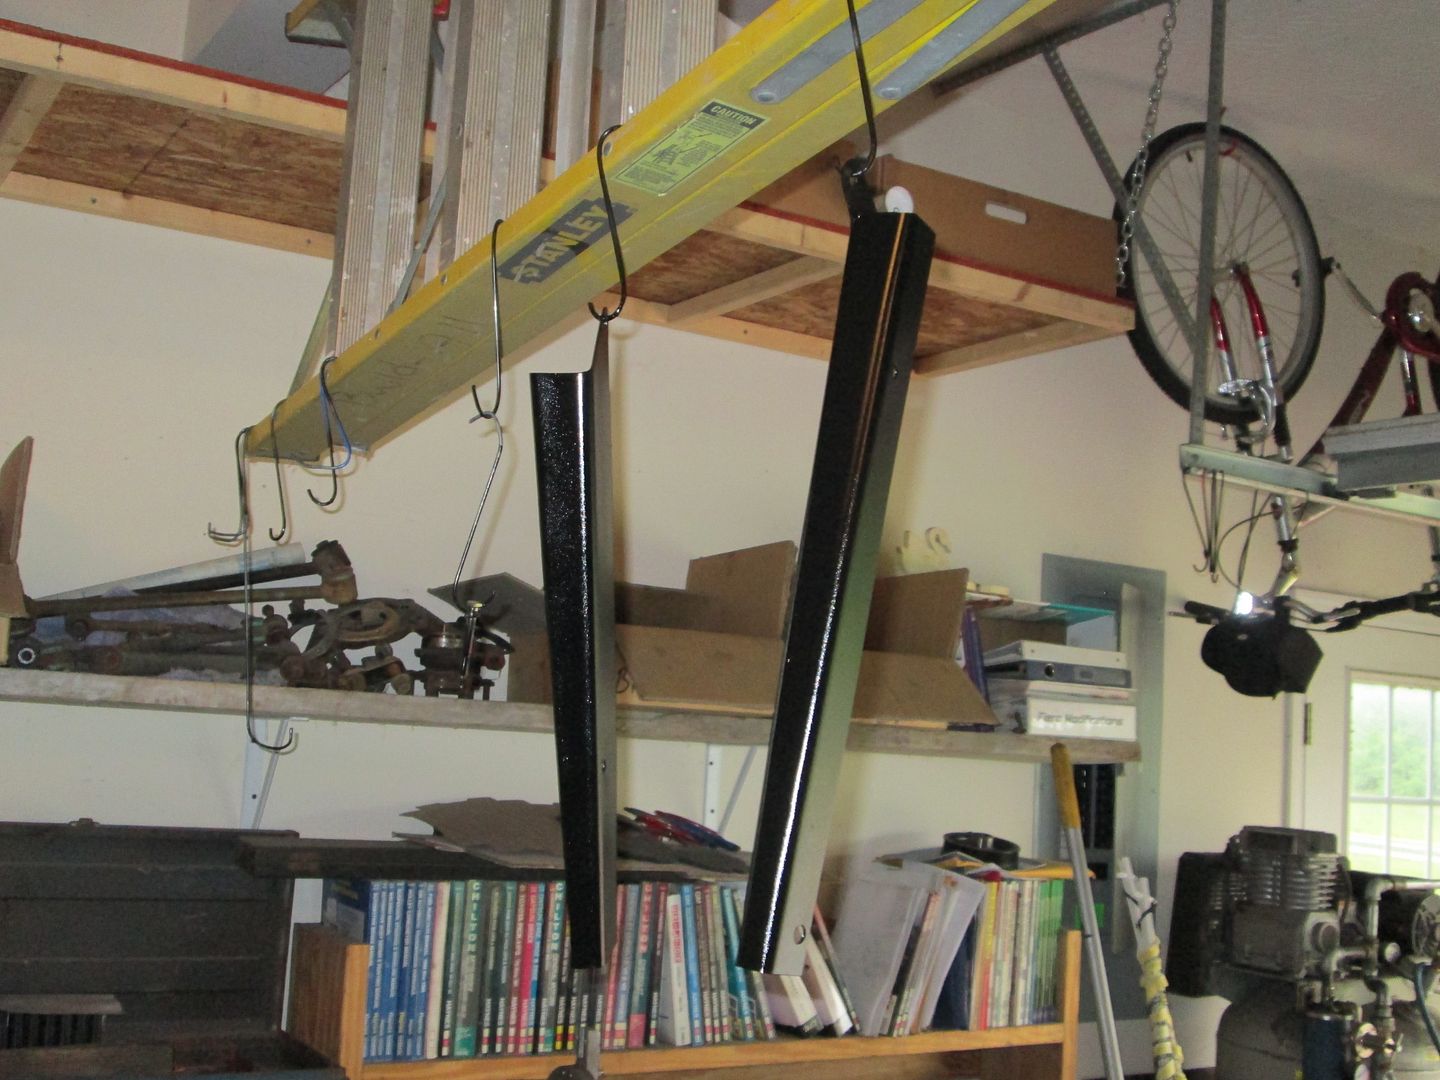
So with the 86 FJF springs free on the bench, it took about 20 minutes to have the ones of the LS4 car out as well. Here they are laying next to each other. The long one is the 86 spring:
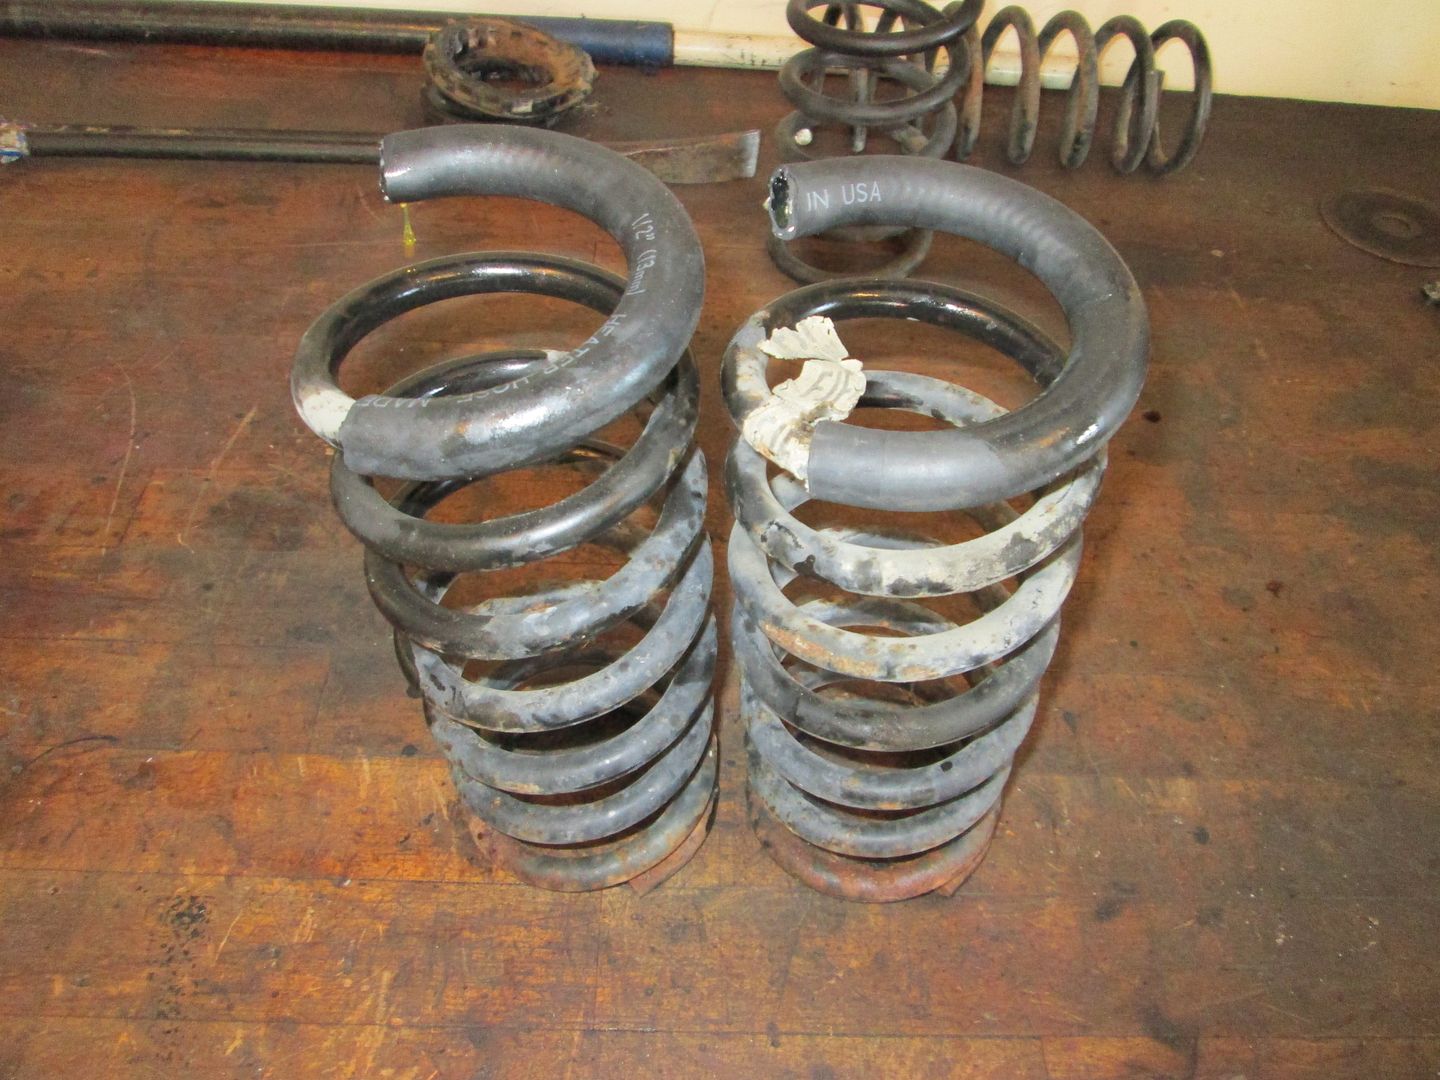
I cut 1 3/4 coils off the FJF spring, so it should have a rate of about 275lb/in and match the 275lb/in coilover springs in the rear. 1 1/2 coils makes the two springs have the same free length, but with the higher rate it will compress less. With the extra 1/4 coil removed it will be slightly shorter and should keep the car close to its current ride height, but with a higher spring rate. Springs ready to go back in:
The springs are back in and I did another bleed of the front brakes, and added the front ground wire from the battery to the chassis (now I have two 2ga grounds to the chassis, + a 2ga + & - going right to the engine).
Last project for the day was to weld up some lateral link relocation brackets for the LS4/F40 car. I am planning on installing them on Sunday and then redoing the alignment.
[This message has been edited by fieroguru (edited 06-16-2013).]
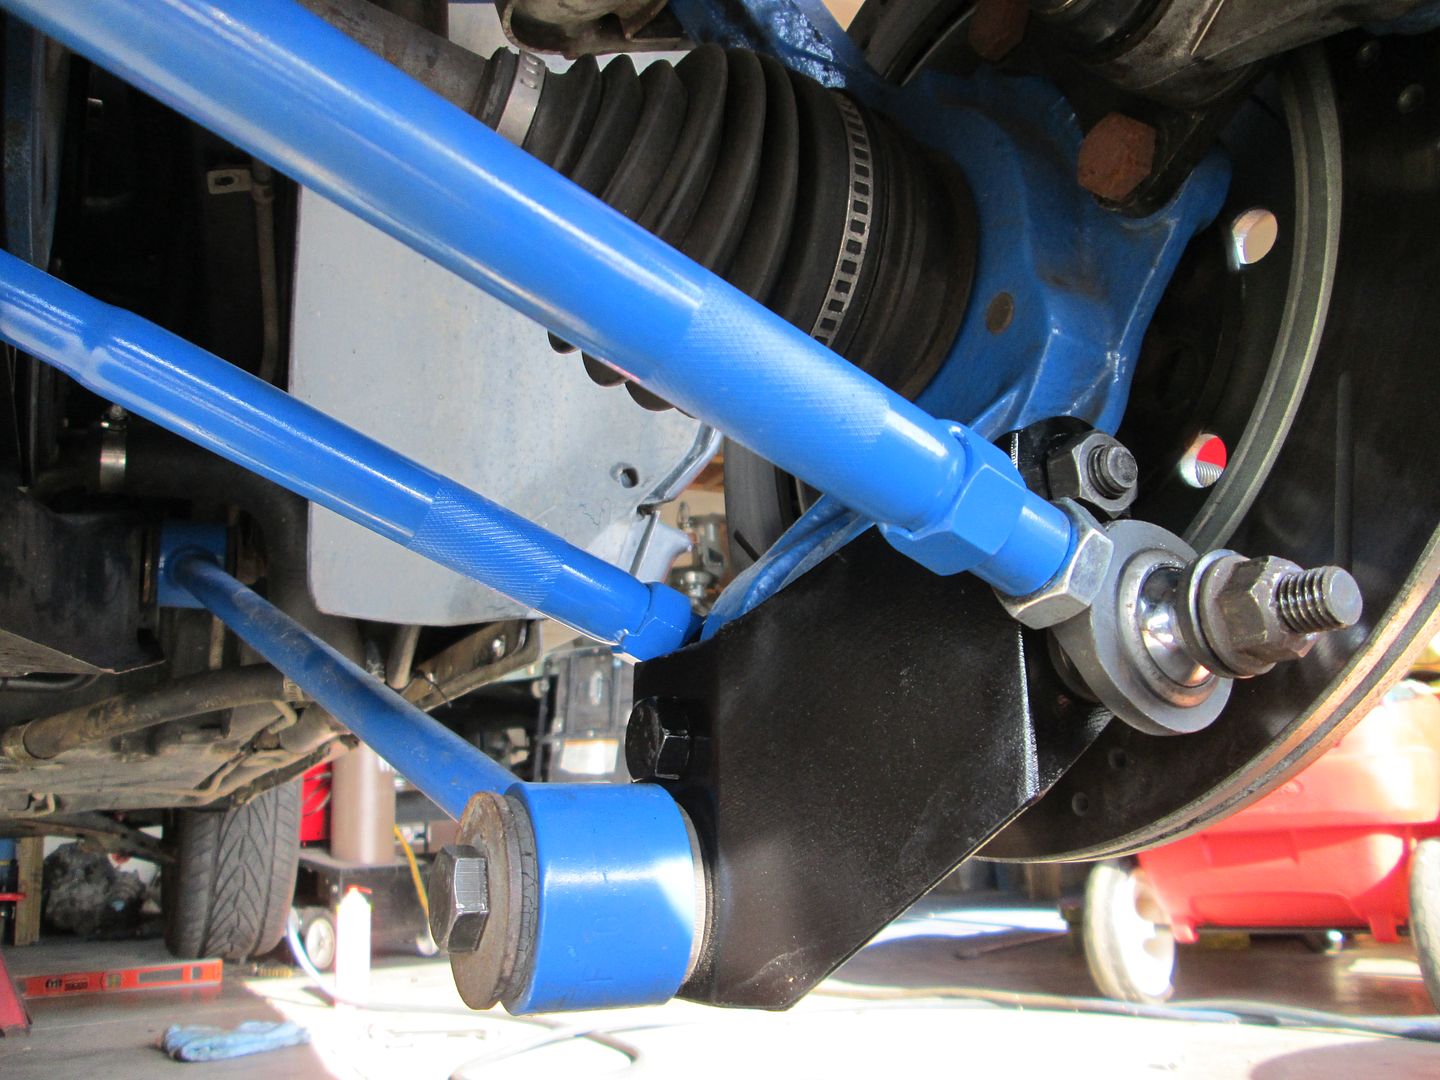
Lateral link relocation brackets are now installed. I had to make a slight clearance mod for them to clear the 16" wheels, but now they fit. You can also see the rod end lateral links as well. The car is now setup for the alignment, which I will do on Wednesday evening.
[This message has been edited by fieroguru (edited 06-18-2013).]
Alignment is done and I took it out and put another 25 miles on it.
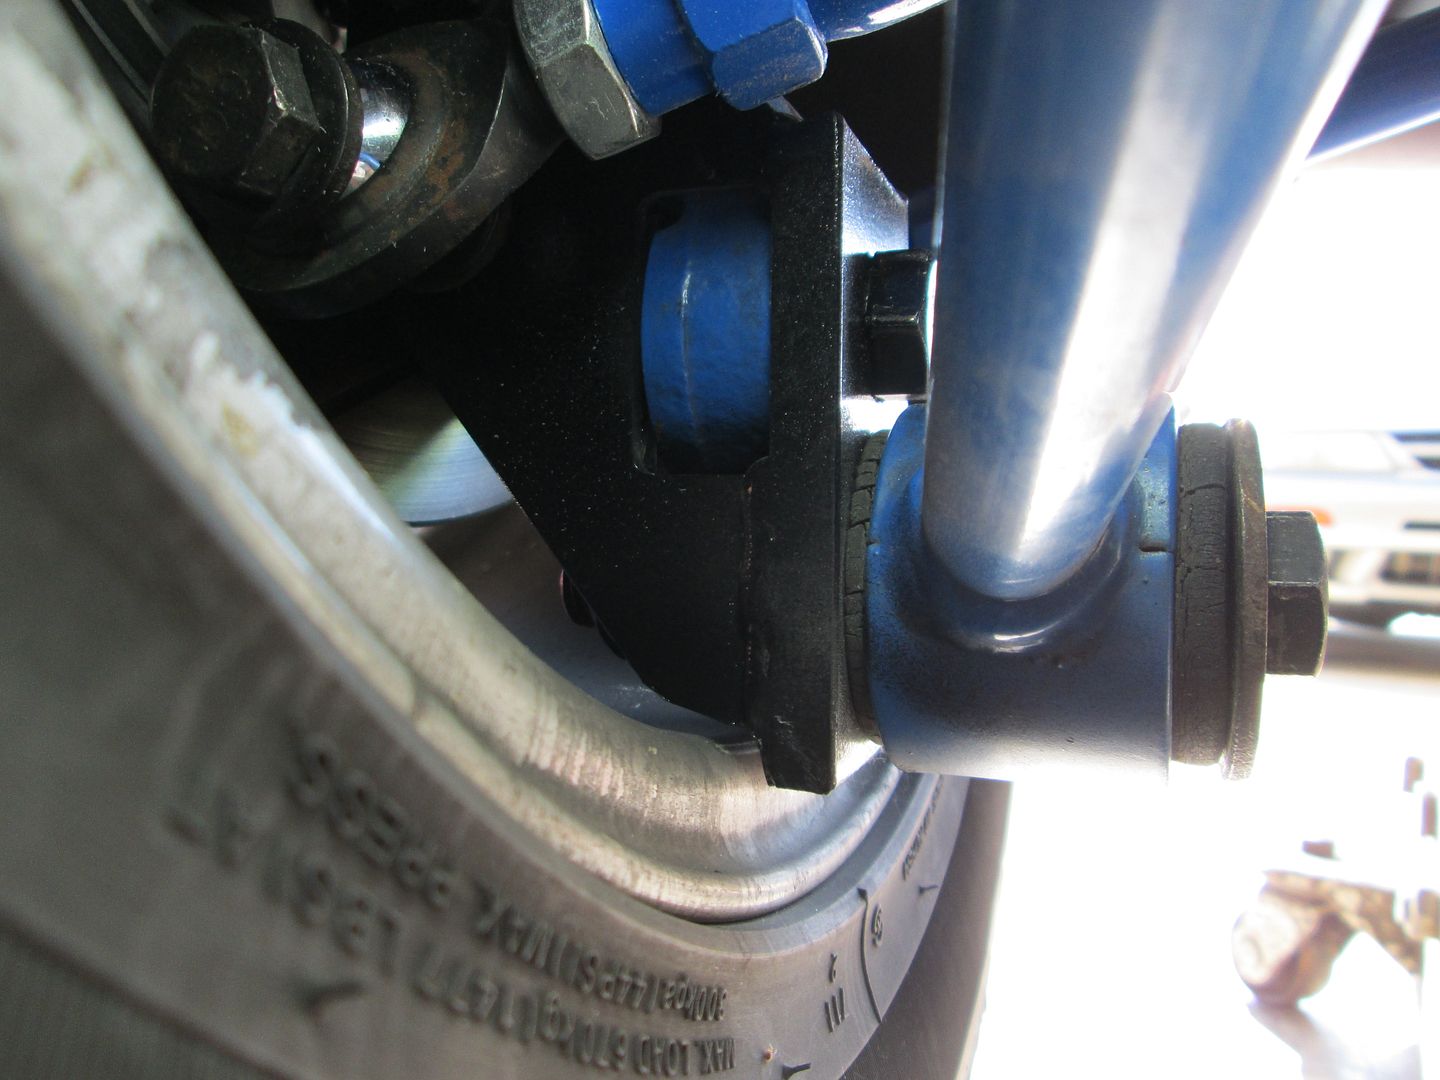
Here is a picture of the slight notch I made on the lateral link to fit the 16" wheel (they fit w/o issue on 17's and larger). There is about 1/8" clearance. Yes, I need to get some new rubber bushings, but waiting for Rodney's to come out.
Between the lateral links and the 13" brake kit shoehorned inside the 16" wheels, I can't use lip mounted wheel weights for balancing. only stick on ones in the center of the wheel.
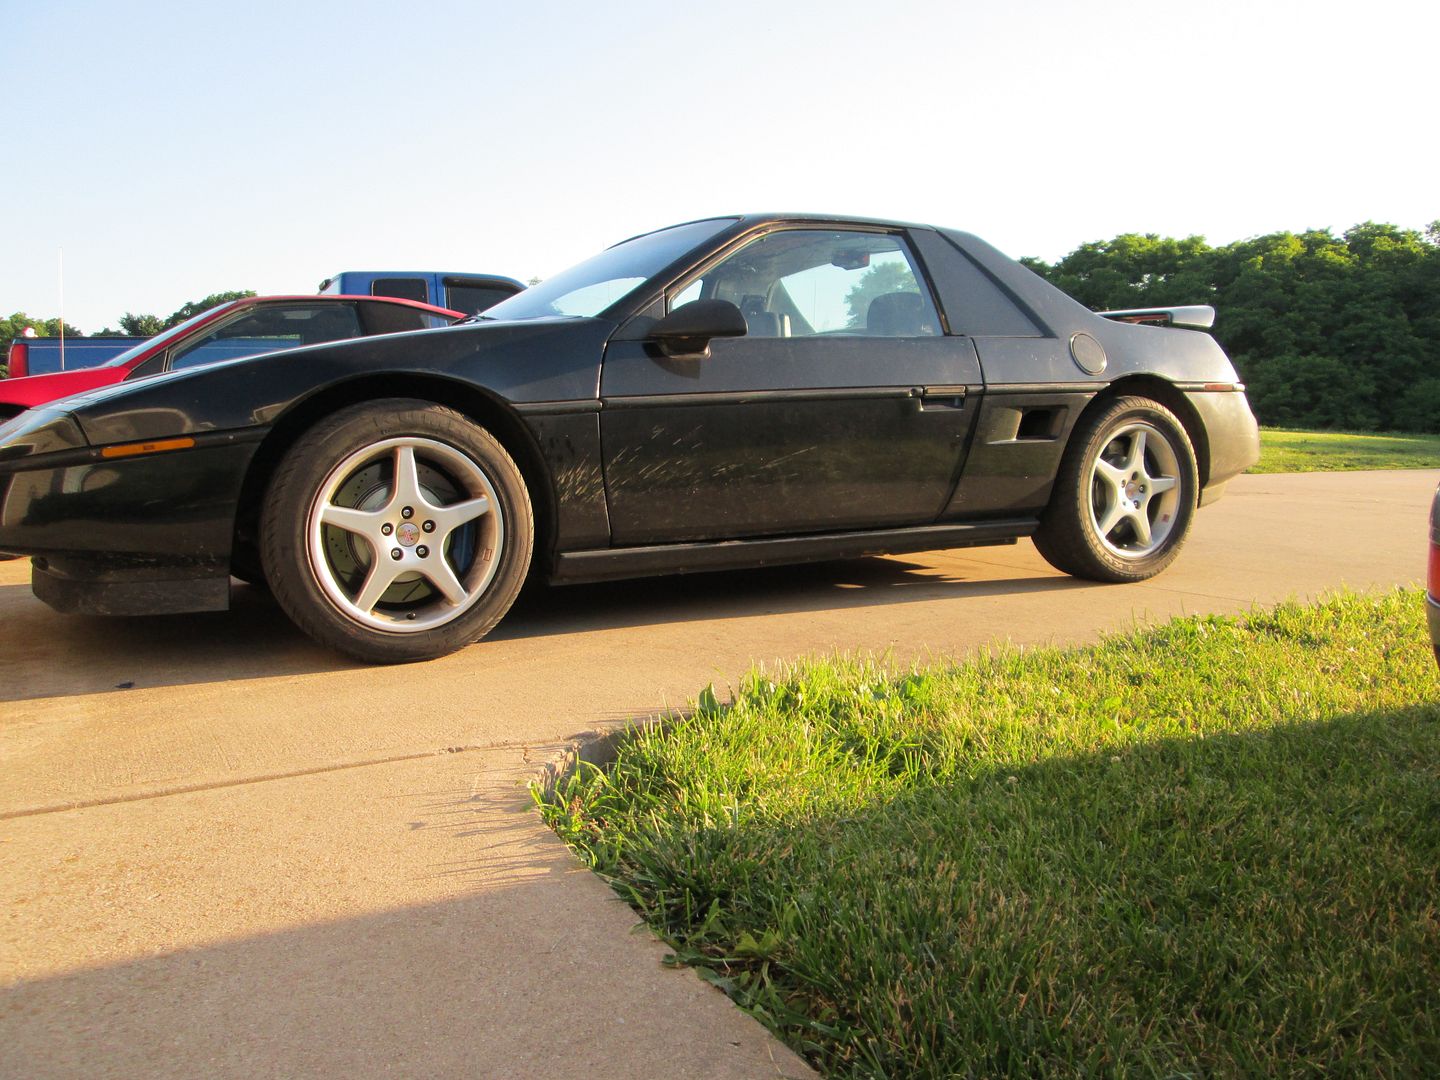
With the spring change, the ride height is still within about 1/8" of where it was before:
I do need to level out the rear coilovers... but that will be the last mechanical thing I do to the car before the 30th.
Next up is buffing the paint to make it look as good as possible.
I saw a few pics of the injector adaptors on another swap on LS1 Tech, and I did not see any keepers? Are yours that way? When I made mine I made a few of them then changed the design to incororate the original keepers and had to buy 8 new keepers for a total of 2 keepers for each adaptor. With 60 psi pushing on 8 injectors (reduced to 30 psi because of the small boar of the inector) I did not want to take any chances of any of the 16 joints leaking. IF you want a set of mine, let me know. I can make them in diferent length too.
[This message has been edited by Rickady88GT (edited 06-20-2013).]
Originally posted by Trinten: Wow, cut it close man!! lol Looks nice though, that blue really does pop.
I would prefer to call it taking full advantage of the available time! This car has so many areas that need further work, I was just trying to get as much done before the 30th as possible. After the 30th I will probably shift gears and focus the majority of my efforts on something else besides the LS4/F40 car (but still continue work on the DoD front).
quote
Originally posted by Rickady88GT:
I saw a few pics of the injector adapters on another swap on LS1 Tech, and I did not see any keepers? Are yours that way? When I made mine I made a few of them then changed the design to incorporate the original keepers and had to buy 8 new keepers for a total of 2 keepers for each adaptor. With 60 psi pushing on 8 injectors (reduced to 30 psi because of the small boar of the injector) I did not want to take any chances of any of the 16 joints leaking. IF you want a set of mine, let me know. I can make them in different length too.
No, mine didn't have any keepers for the spacer to fuel rail or injector to spacer. They were quite snug and relied on the limited space between the injector boss and the fuel rail... there just isn't enough room for them to separate while installed without raising the fuel rail.
Thanks for the offer, but mine are back sitting on the shelf and the larger (longer) LS2 injectors are back in. I used them on a temporary basis with the LS4 injectors while I dialed in the MAF tune.
That is some fine machining you did on those adapters!
[This message has been edited by fieroguru (edited 06-20-2013).]
dealing with the wheel lock lug nuts that I didn't have a key for. Ended up welding a nut to the lug nuts and then removing them. It was a trial/error type deal and took 3-4 times of trying to finally get them free... not looking forward to doing the rears...
I have a cheap 4 way lug wrench, that I cut 1 end off. stick the stub on the nut, weld and remove. I've had to deal with this a lot as a mechanic back in the day.
No, mine didn't have any keepers for the spacer to fuel rail or injector to spacer. They were quite snug and relied on the limited space between the injector boss and the fuel rail... there just isn't enough room for them to separate while installed without raising the fuel rail.
Thanks for the offer, but mine are back sitting on the shelf and the larger (longer) LS2 injectors are back in. I used them on a temporary basis with the LS4 injectors while I dialed in the MAF tune.
That is some fine machining you did on those adapters!
Thanks, If you need any let me know. I just dont see GM using the keepers unless there were a real good reason, and spraying fuel all over the top of the engine seems like something I want to avoid I cant find my login for LS1, so IF you get he time could you pass this info along? I would hate to see somebodies project go down in flames if the "friction fit" adaptors come apart. I dont trust my life with the 4 tiny bolts that are holding the fuel rail to the plastic manifold thru pressed in brass threads.
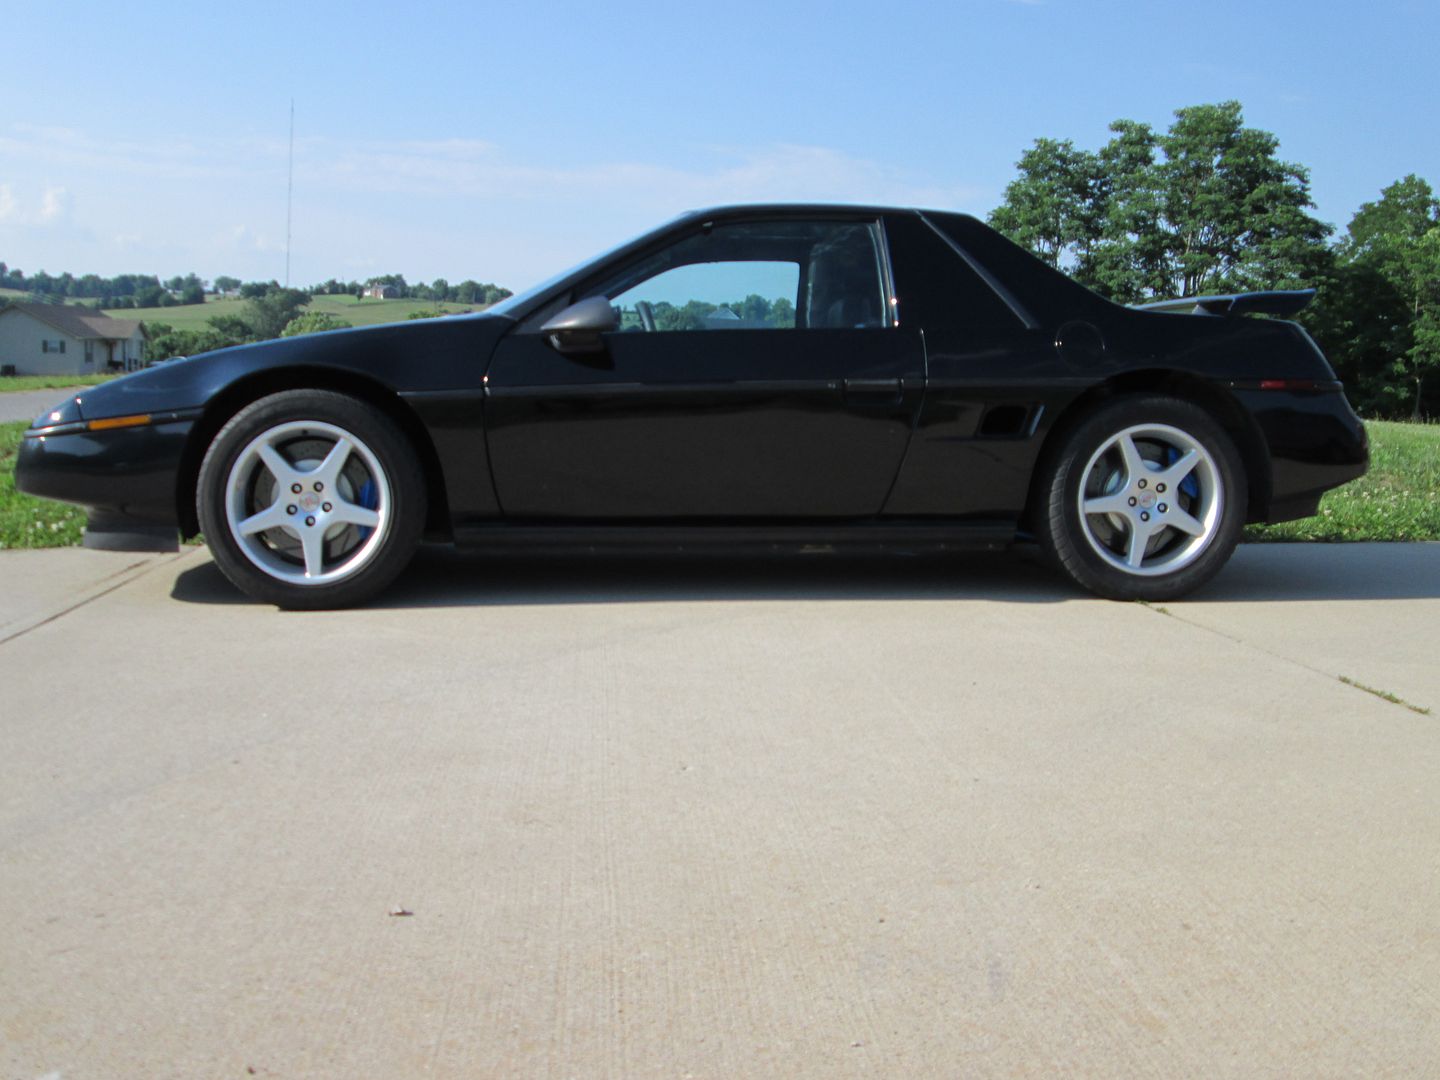
Buffed the car and it is now ready for traveling to the 30th (its a good 20' car, much closer than that you start to see all the issues with the paint).
We are leaving on Monday so we can stop off at Turkey Run and go canoeing for a couple of days before the show.
Took the car on a 281 mile trip and used 9.6 gallons of gas. So it got 29.3 mpg. If it hadn't been for the 4 stops along the way it probably could have broke 30. Maybe on the way back...