Update System
  Pennock's Fiero Forum
  The Construction Zone
  LS4 / F40 swap - fieroguru (Page 55)

Post New Topic  Post A Reply
Email This Page to Someone! | Printable Version
This topic is 55 pages long:  1   2   3   4   5   6   7   8   9   10   11   12   13   14   15   16   17   18   19   20   21   22   23   24   25   26   27   28   29   30   31   32   33   34   35   36   37   38   39   40   41   42   43   44   45   46   47   48   49   50   51   52   53   54   55 
Previous Page | Next Page
next newest topic | next oldest topic
LS4 / F40 swap - fieroguru by fieroguru
Started on: 12-13-2010 01:34 PM
Replies: 2186 (178179 views)
Last post by: fieroguru on 07-28-2026 07:49 PM
fieroguru
Member
Posts: 12724
From: Champaign, IL
Registered: Aug 2003


Feedback score:    (45)
Leave feedback


Total ratings: 258
Rate this member

Report this Post01-03-2026 04:38 PM Click Here to See the Profile for fieroguruSend a Private Message to fieroguruEdit/Delete MessageReply w/QuoteDirect Link to This Post
Earlier this summer, I started the process up upgrading my 36" 16ga shear for a 52" 16ga on. The 36" Pexto sold a while back, but it took a while before I found a 52" one in a price range I wanted to pay. It has the front/rear arms/supports and backstop, but I will likely remove all of them and put them in storage for now.


It was in New Lenox, and there happened to be a guy selling a black notchie clip and taillights about 25 miles away, so it became a multi-part trip.


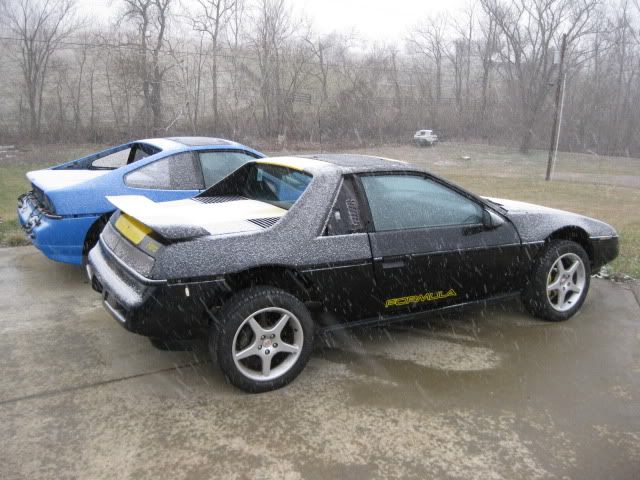
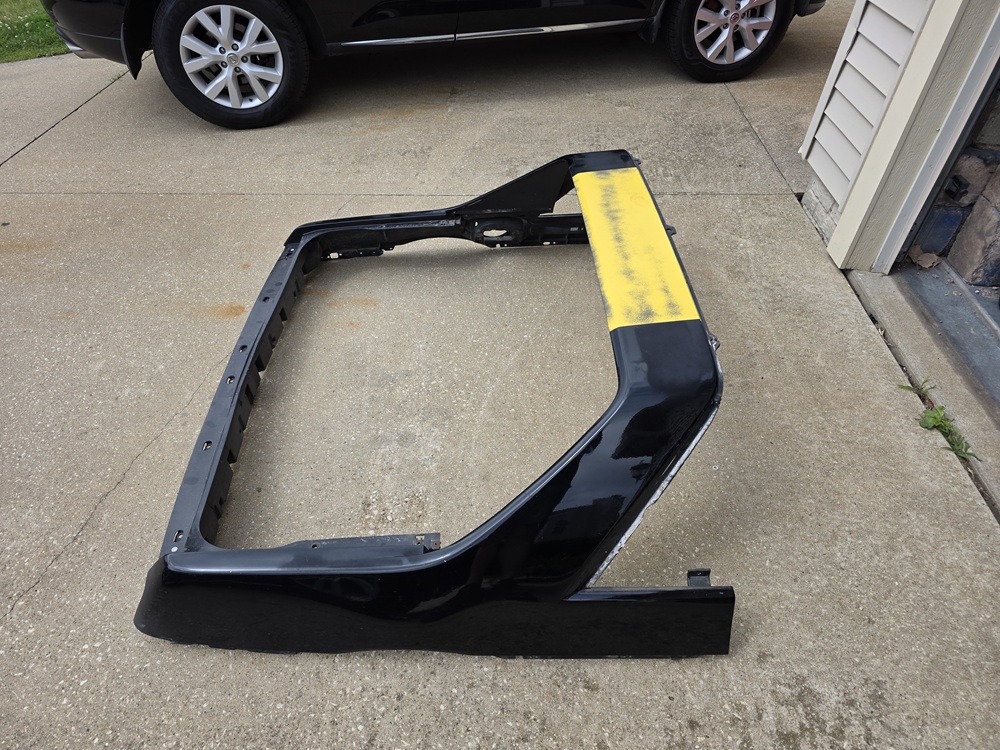
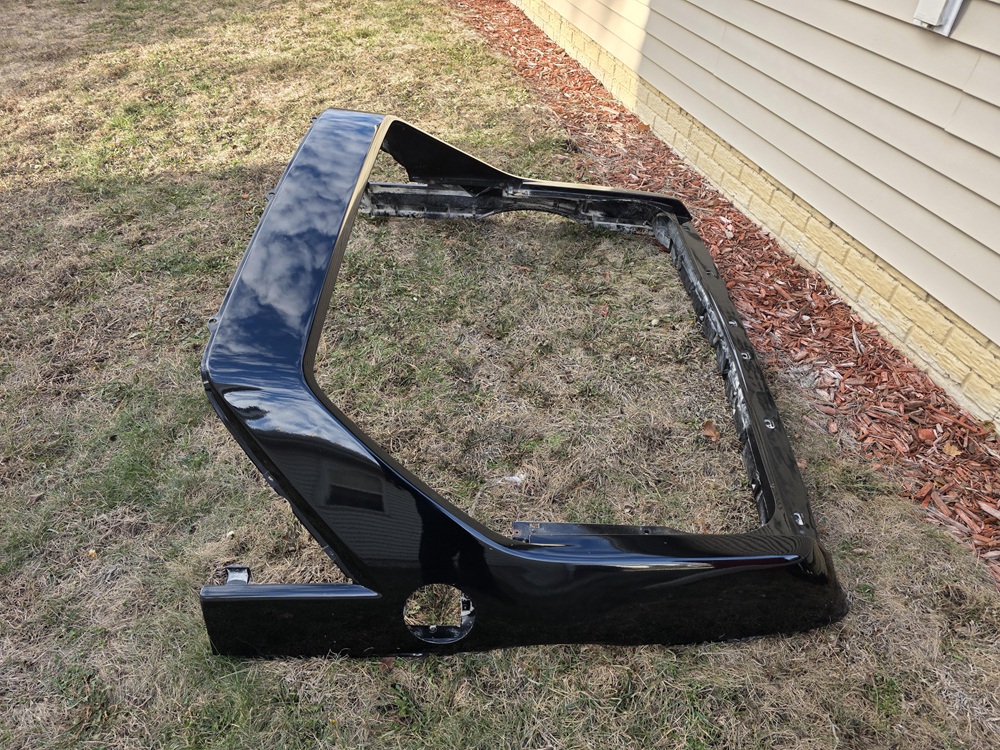
This will allow me to replace the last panel remaining with the yellow stripe. Only took 13 years...

IP: Logged
fieroguru
Member
Posts: 12724
From: Champaign, IL
Registered: Aug 2003


Feedback score:    (45)
Leave feedback


Total ratings: 258
Rate this member

Report this Post01-04-2026 05:31 PM Click Here to See the Profile for fieroguruSend a Private Message to fieroguruEdit/Delete MessageReply w/QuoteDirect Link to This Post
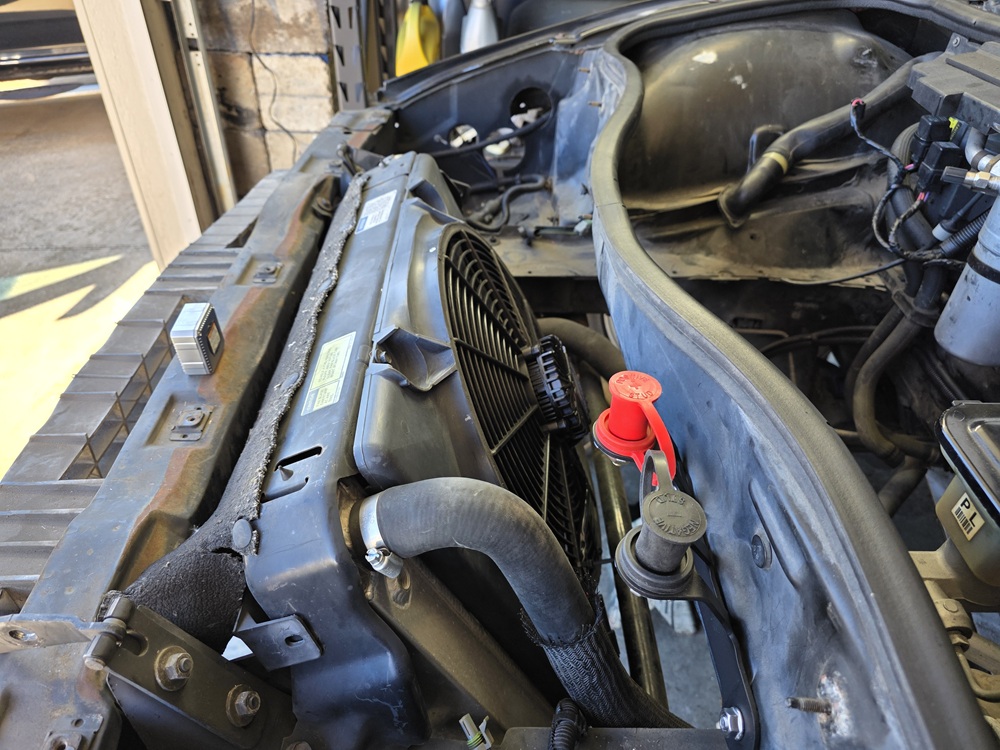
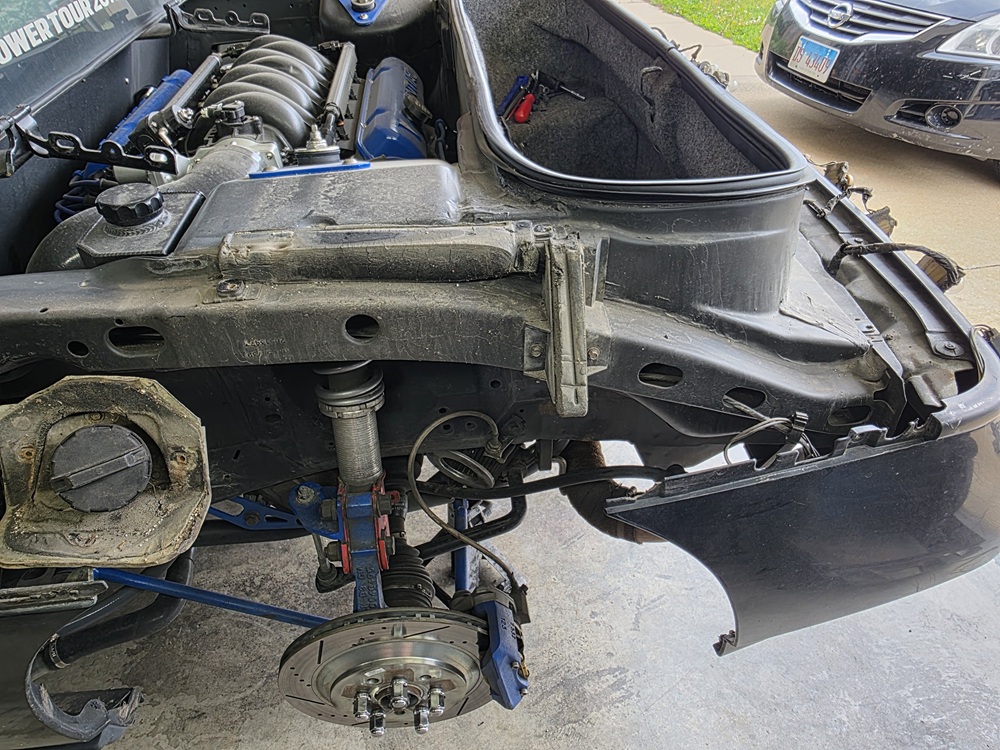
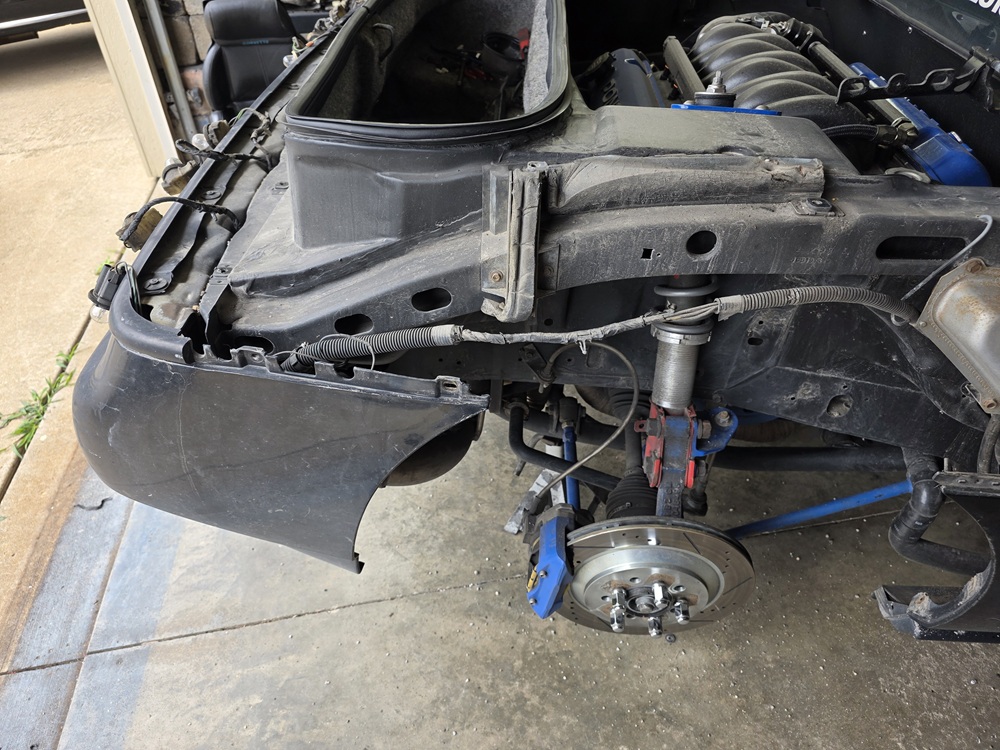
Went ahead and removed the hood, lights, and front facia for better access to the various projects for the front end.


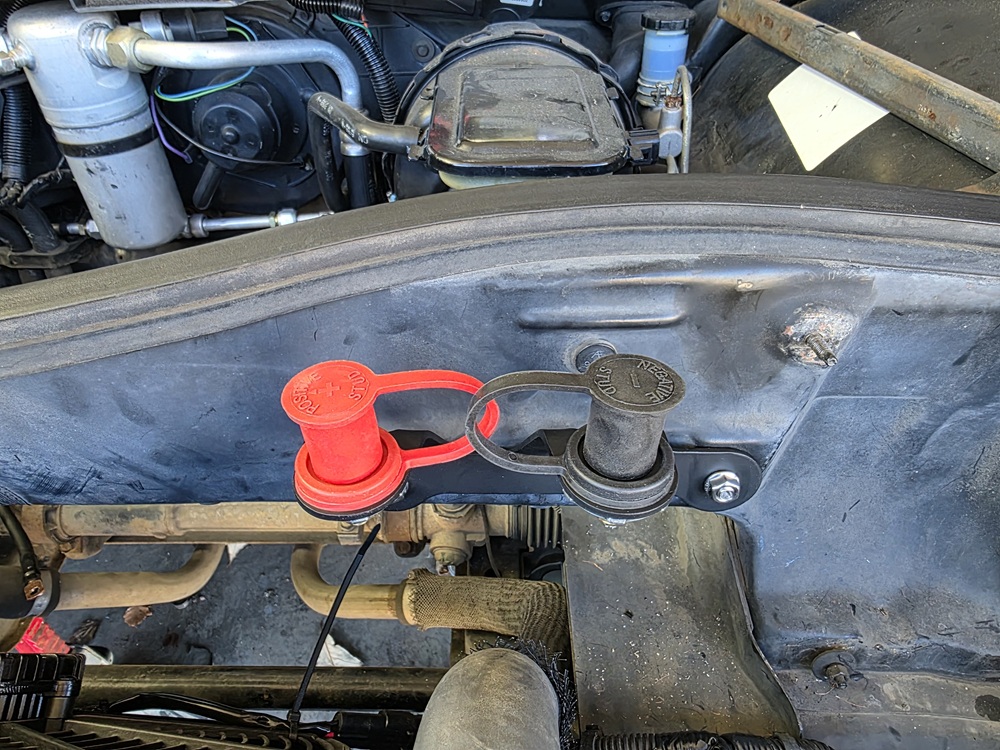
One of those projects is to clean up the power distribution at the battery. With it under the front headlight that area is getting busy with the following items having battery conenctions (Starter, Haltech Rebel LS, 5 channel Amp, Radiator Fan. These will allow me to limit the wires under the healight and shorten many of the cable runs. I also plan to install two jump lugs in a more accessable location.
IP: Logged
Spadesluck
Member
Posts: 2229
From: Georgia
Registered: Jul 2016


Feedback score:    (8)
Leave feedback

Rate this member

Report this Post01-21-2026 12:43 AM Click Here to See the Profile for SpadesluckSend a Private Message to SpadesluckEdit/Delete MessageReply w/QuoteDirect Link to This Post
I am sure you mentioned it before at some point, but did you notice a difference with the drilled holes in the headlight area?
IP: Logged
fieroguru
Member
Posts: 12724
From: Champaign, IL
Registered: Aug 2003


Feedback score:    (45)
Leave feedback


Total ratings: 258
Rate this member

Report this Post01-21-2026 08:47 PM Click Here to See the Profile for fieroguruSend a Private Message to fieroguruEdit/Delete MessageReply w/QuoteDirect Link to This Post
 
quote
Originally posted by Spadesluck:

I am sure you mentioned it before at some point, but did you notice a difference with the drilled holes in the headlight area?


Back on page 19 is when I did that mod. At that time the headlight covers were popping up around 80 mph and the hidden vent took that to about 90 mph. Helped some. When I put the stock air dam back on there, that raised the limit some more to around 115 mph. Eventually I added the hood vent and enlarged it some in the last year so they stay closed at 135 mph. I have broken two drivers side heatlight cover brackets in the last 2 yeas. Once I was running 80 down a 2 lane and a semi was coming the other direction at 55+. The other one popped up aroung 125 mph during a tuning run.

Eventually, I will add a front splitter, but that will make it challenging getting into and out of my driveway.
IP: Logged
fieroguru
Member
Posts: 12724
From: Champaign, IL
Registered: Aug 2003


Feedback score:    (45)
Leave feedback


Total ratings: 258
Rate this member

Report this Post02-07-2026 03:54 PM Click Here to See the Profile for fieroguruSend a Private Message to fieroguruEdit/Delete MessageReply w/QuoteDirect Link to This Post
Slowly making progress due to other commitments and the cold...

I am always looking for ways to improve my fabrication processes.

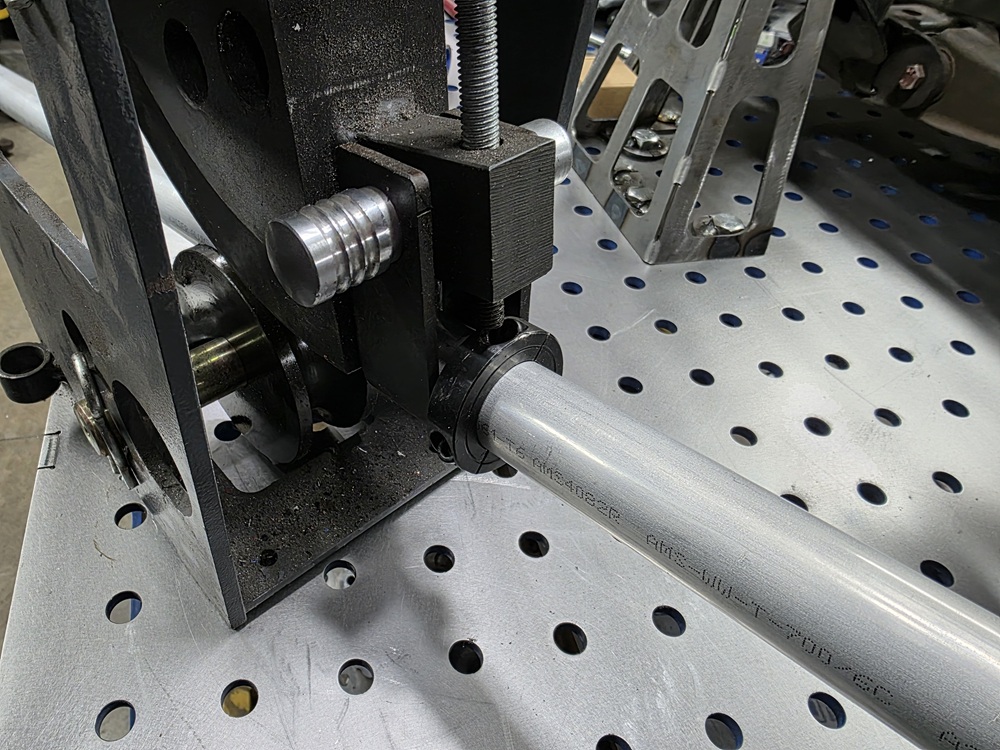
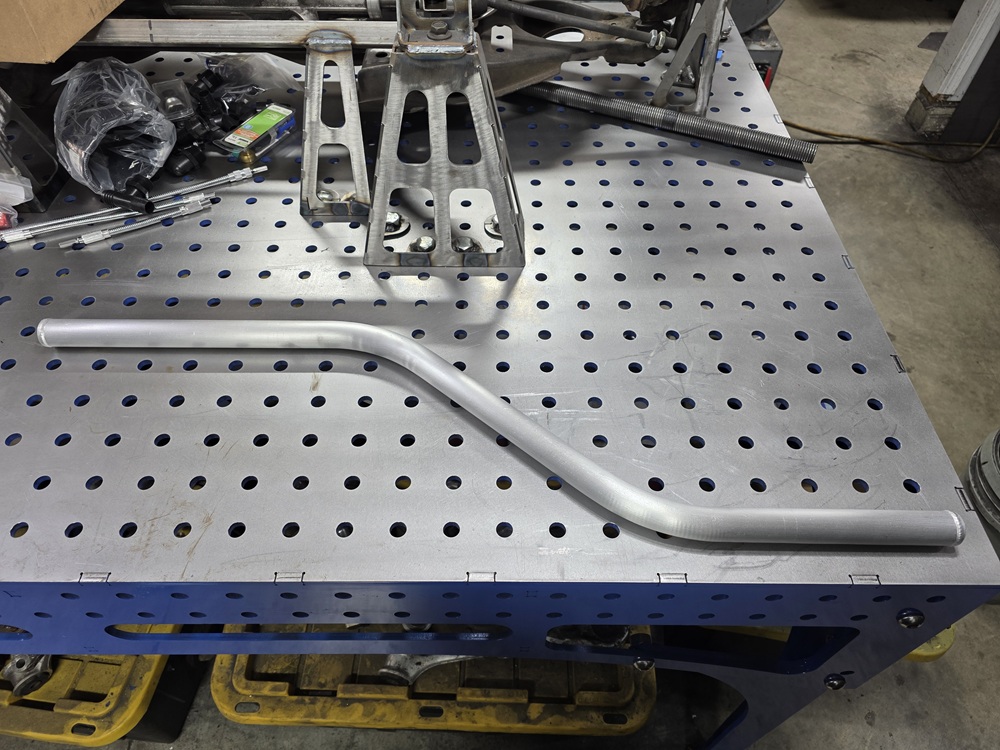
The thin wall alumimum tubes are hard to bend smooth. The lock bolt on the bender either dents or just slides on the bender. So the first process change was to use a shaft collar to hold the end of the tube.


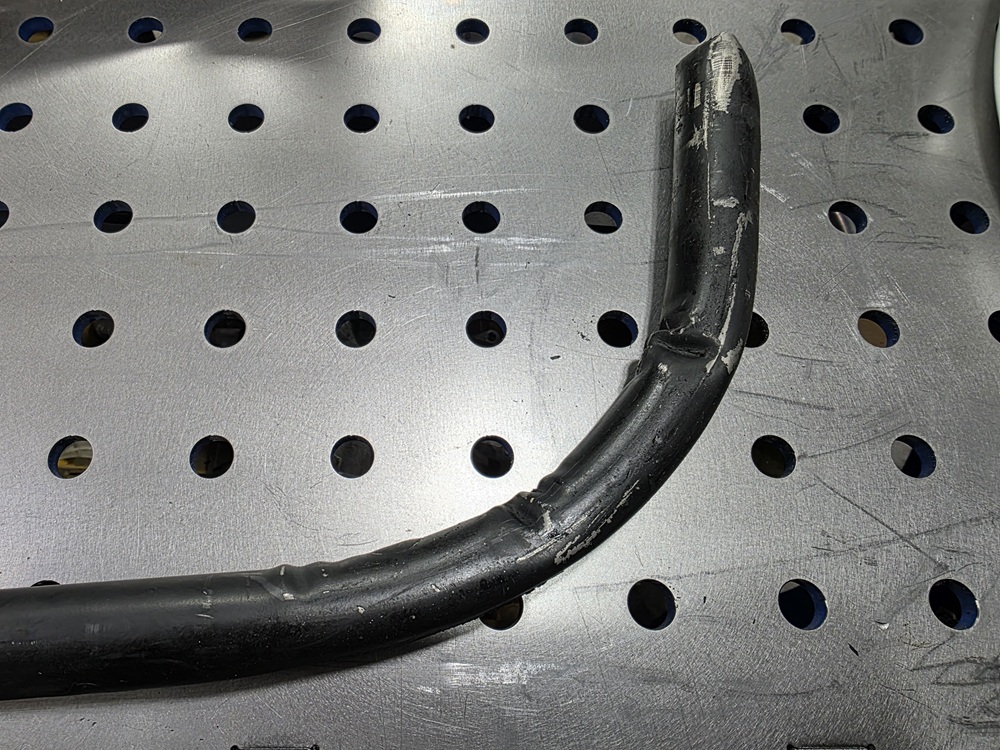
Here is what you get with just the proper die and the shaft collar - kink city:


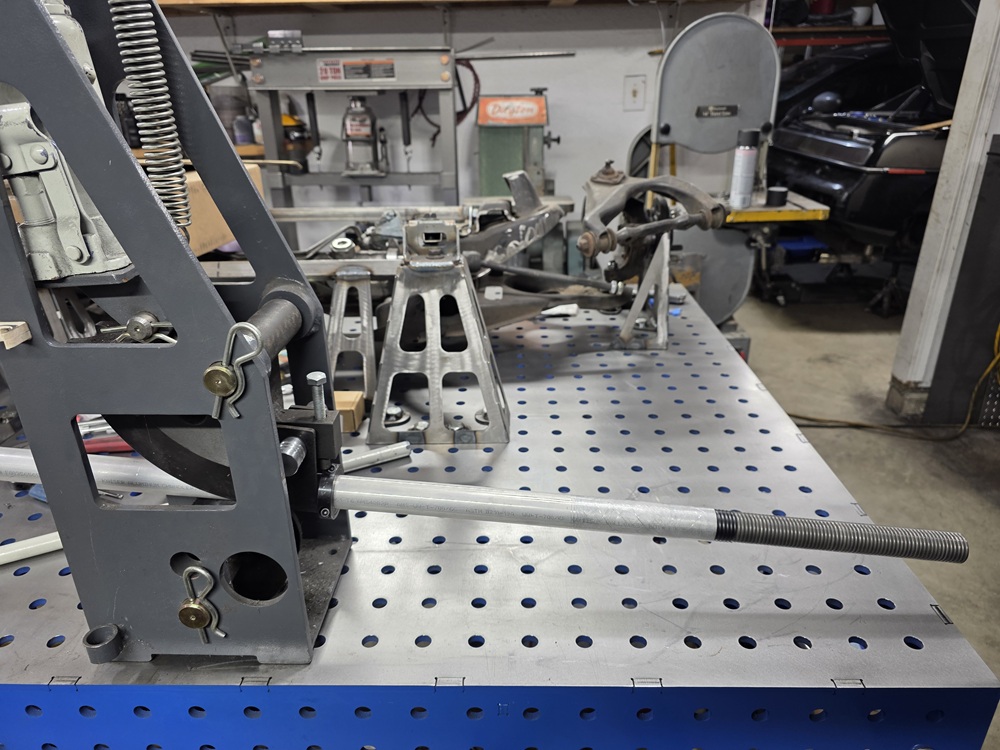
The next change was then to find and source a 36" long spring that can go inside the tube to support it during the bend. It takes some twisting of the spring to reduce its OD to feed it in, and even more effort to remove at the end.


Here is the new coolant crossover with much better bend quality:


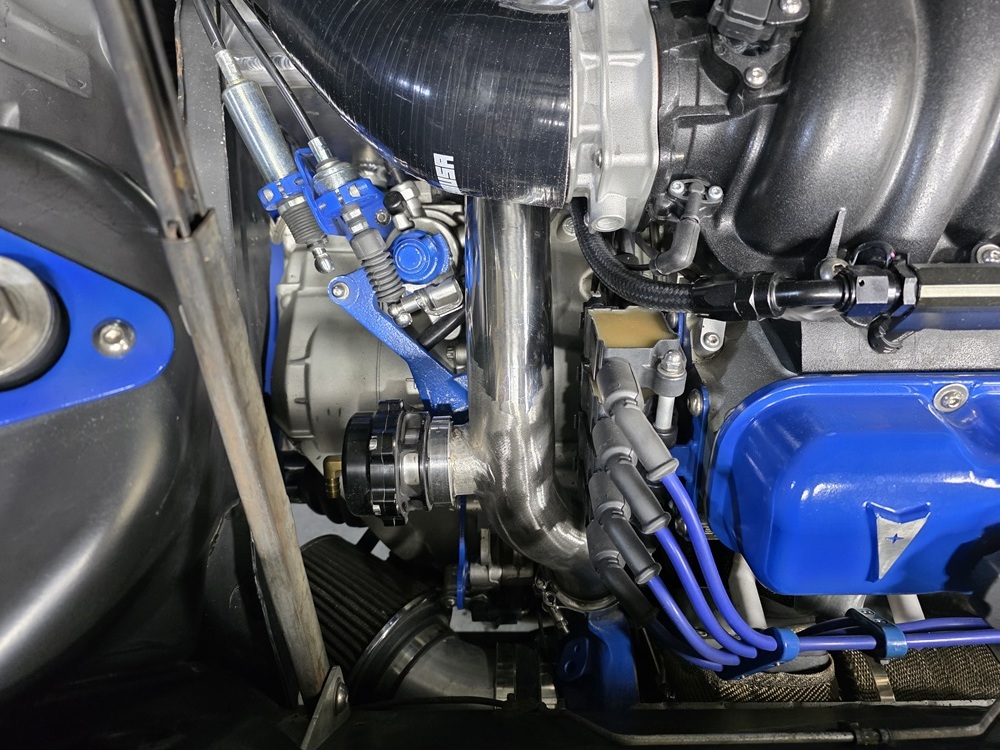
Also welded up the charge pipe and added the blow-off valve.


IP: Logged
fieroguru
Member
Posts: 12724
From: Champaign, IL
Registered: Aug 2003


Feedback score:    (45)
Leave feedback


Total ratings: 258
Rate this member

Report this Post02-15-2026 06:13 PM Click Here to See the Profile for fieroguruSend a Private Message to fieroguruEdit/Delete MessageReply w/QuoteDirect Link to This Post
Got the coolant crossover tube painted black, the cradle drilled/tapped for the clamp to support it, and the hose cut for the driver side. Just need to finish a few other things before I seal up the heat shrink clamps.

The hot side of the charge pipe has also been texturized. Again, just need to finish up some other things and I will heat shrink the connectors.

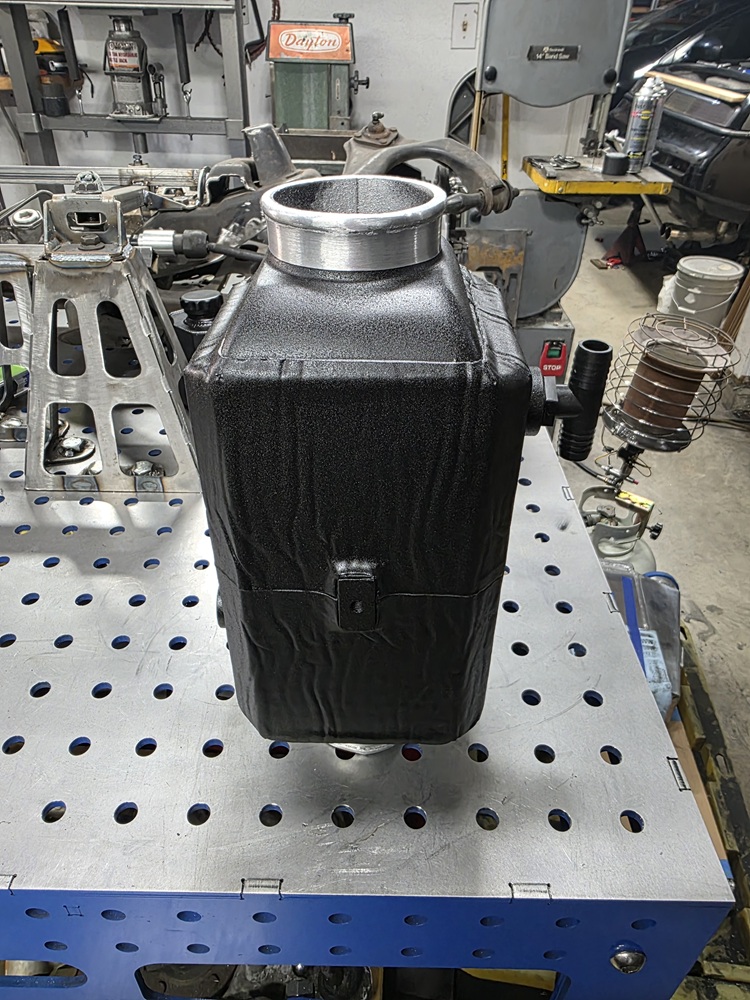
Also added some insulating material to the A2W intercooler. One layer on the Air side, 2 layers on the water side, then texturized it as well.


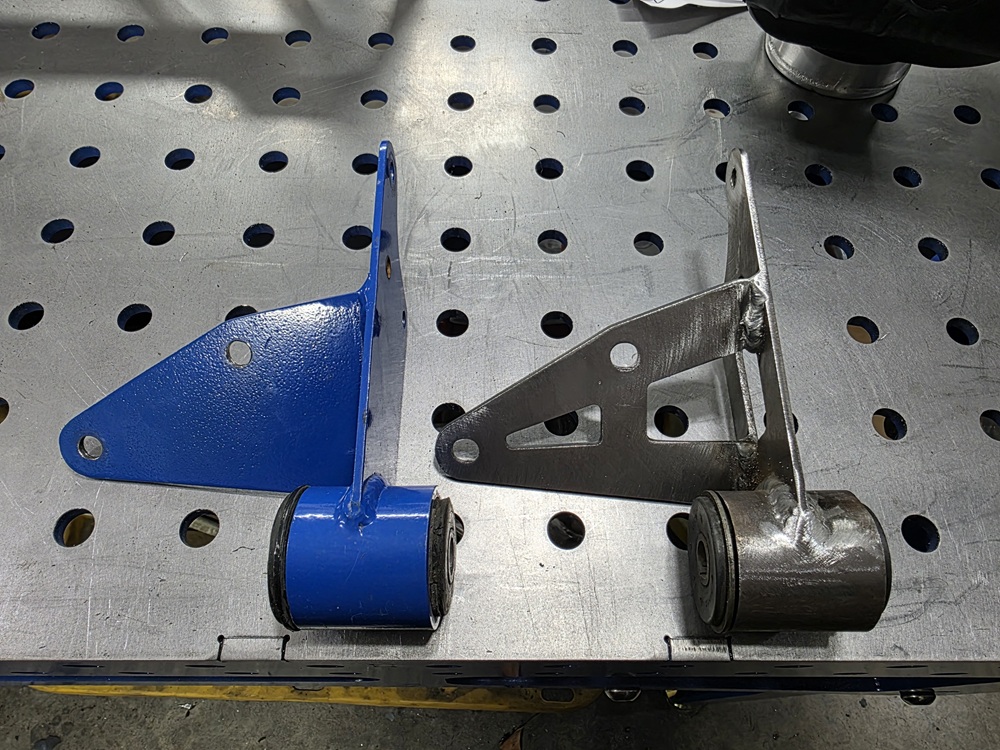
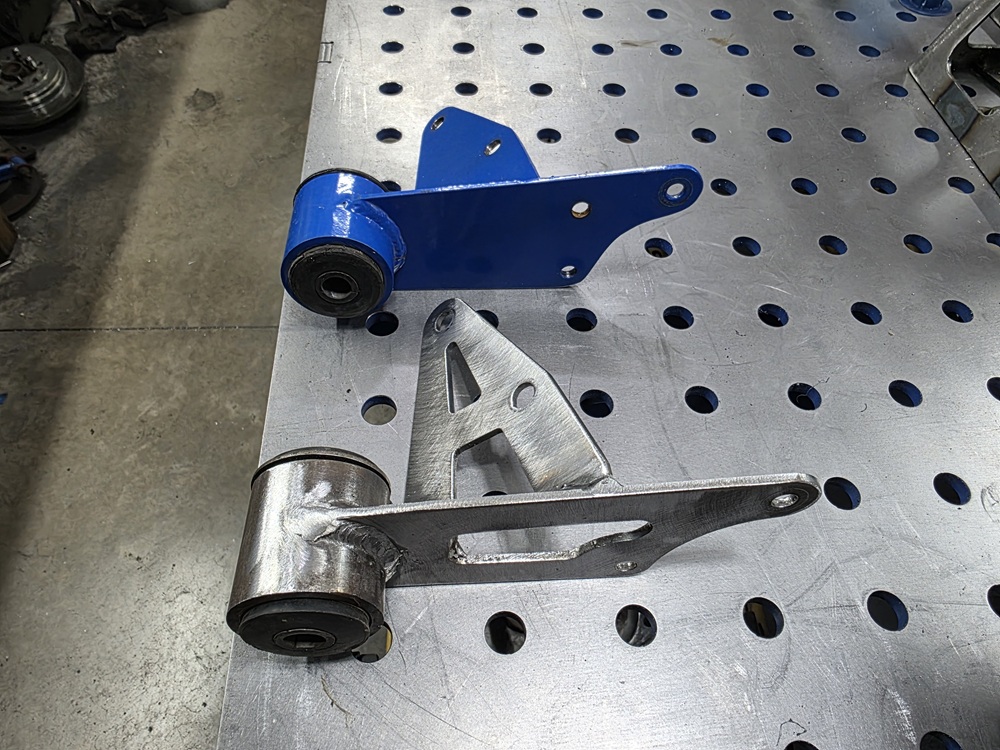
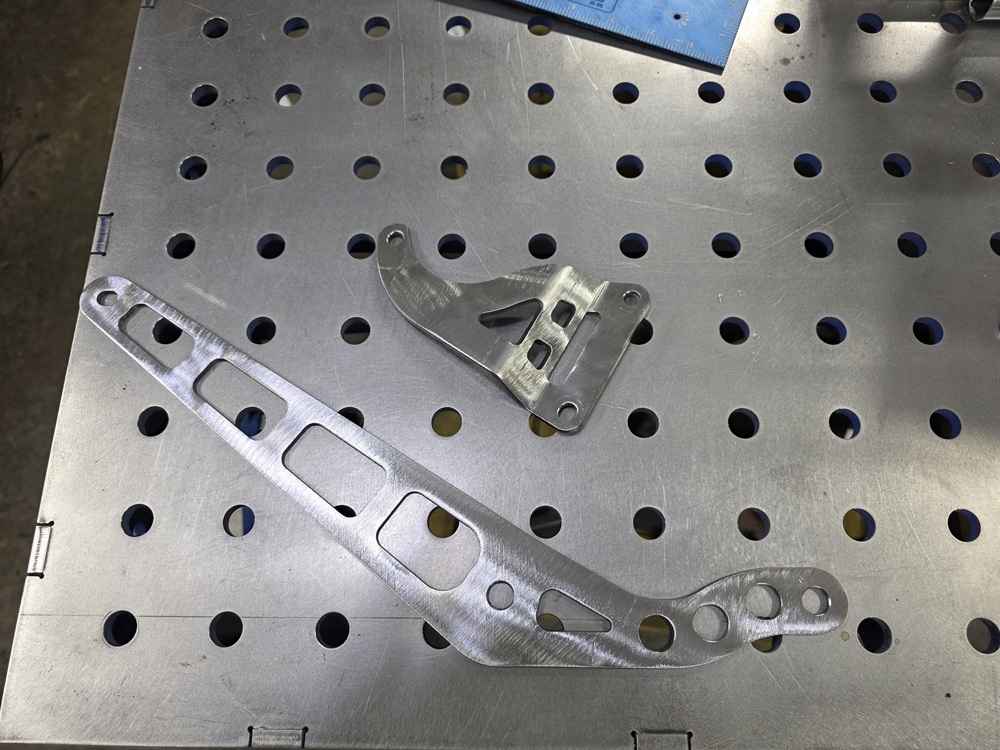
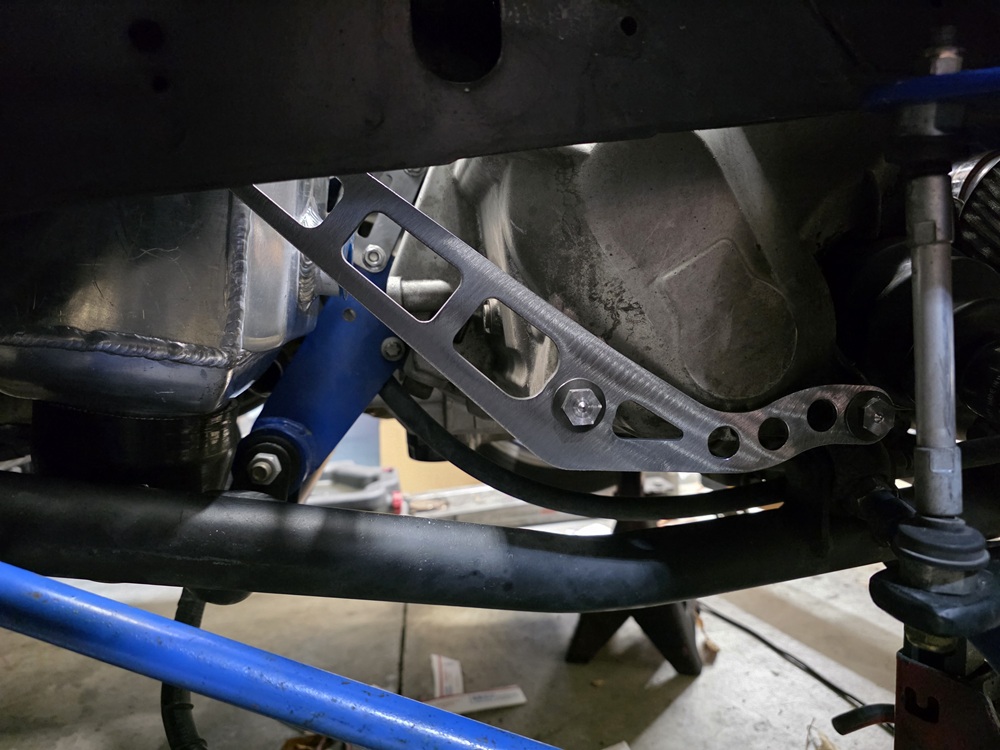
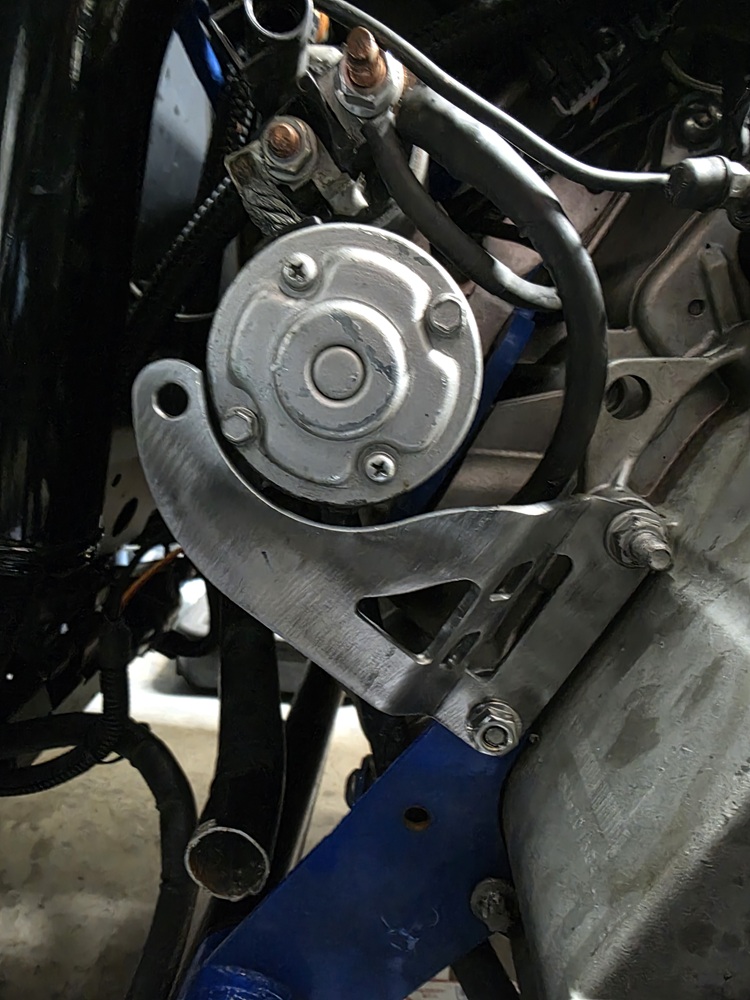
Remade the front transmission mount so I have it in AutoCAD and to make it lighter (3 oz). The original mounts were made before I got the CNC plasma, and didn't bother remaking them at the time.


I think I will go ahead and rework the rear transmission mount as well as the intermediate shaft. The intermediate shaft has about 12" of 1/2" wall steel tube inside it, so that might shed 4-5 lbs.

I am trying to get all the parts reworked than need powedercoating, so I only setup the sand blaster cabinet and power coat area 1 time.

[This message has been edited by fieroguru (edited 02-15-2026).]

IP: Logged
Bob2112
Member
Posts: 133
From: Middle Tennessee
Registered: Nov 2015


Feedback score: N/A
Leave feedback

Rate this member

Report this Post02-15-2026 07:37 PM Click Here to See the Profile for Bob2112Send a Private Message to Bob2112Edit/Delete MessageReply w/QuoteDirect Link to This Post
What are you doing with the old mounts? Are they for sale? Asking for a friend.....
IP: Logged
dskebo
Member
Posts: 71
From: Bell Buckle Tennessee
Registered: Jan 2012


Feedback score: N/A
Leave feedback

Rate this member

Report this Post02-15-2026 09:41 PM Click Here to See the Profile for dskeboClick Here to Email dskeboSend a Private Message to dskeboEdit/Delete MessageReply w/QuoteDirect Link to This Post
to bend them pipes I pack them with sand and cap the ends it makes perfect bends.
IP: Logged
fieroguru
Member
Posts: 12724
From: Champaign, IL
Registered: Aug 2003


Feedback score:    (45)
Leave feedback


Total ratings: 258
Rate this member

Report this Post02-17-2026 07:14 PM Click Here to See the Profile for fieroguruSend a Private Message to fieroguruEdit/Delete MessageReply w/QuoteDirect Link to This Post
 
quote
Originally posted by Bob2112:

What are you doing with the old mounts? Are they for sale? Asking for a friend.....


I am going to hold onto it for a while. It really doesn't help anyone w/o the tubular cradle.


quote
Originally posted by dskebo:

to bend them pipes I pack them with sand and cap the ends it makes perfect bends.


I have done that in the past too, but for this application I would have to weld caps on the aluminum tube. The spring was $23 + shipping and the bends were quick to make after that.
IP: Logged
fieroguru
Member
Posts: 12724
From: Champaign, IL
Registered: Aug 2003


Feedback score:    (45)
Leave feedback


Total ratings: 258
Rate this member

Report this Post04-15-2026 08:42 AM Click Here to See the Profile for fieroguruSend a Private Message to fieroguruEdit/Delete MessageReply w/QuoteDirect Link to This Post
I have been slacking on updates... but slowly making progess.

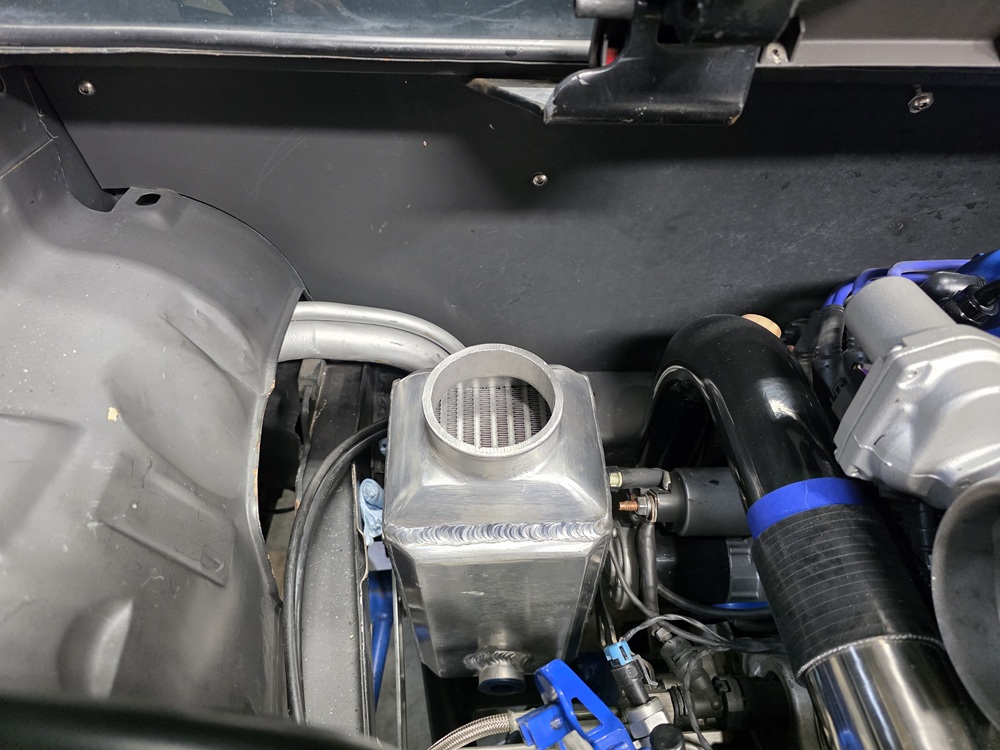
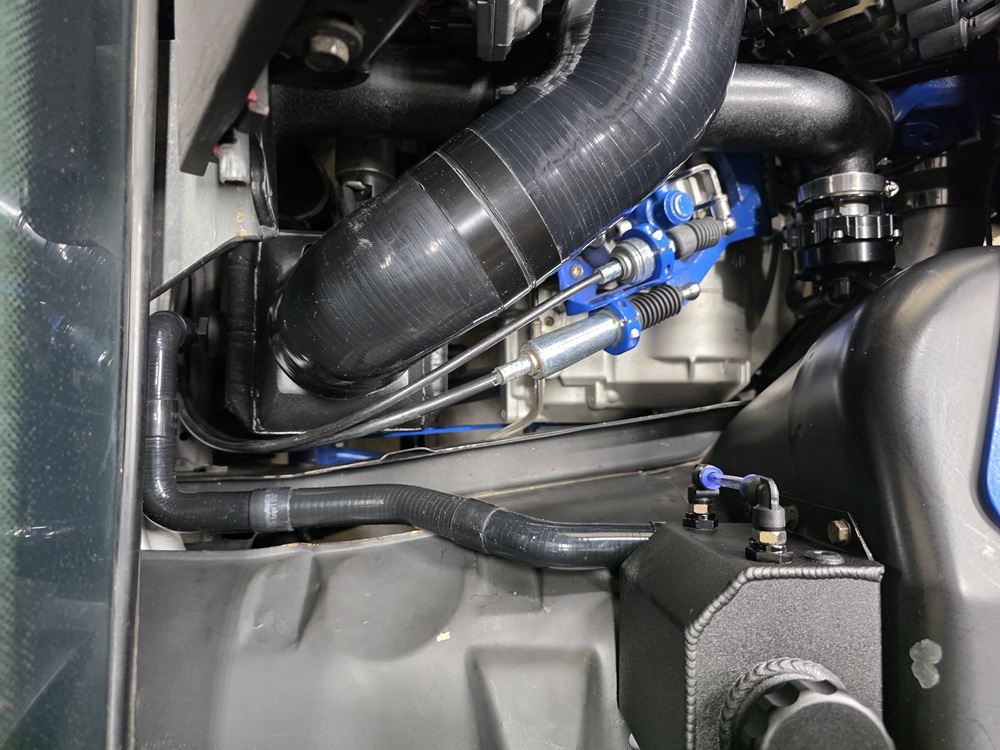
The frozen boost A2W intercooler type 26 has been istalled:


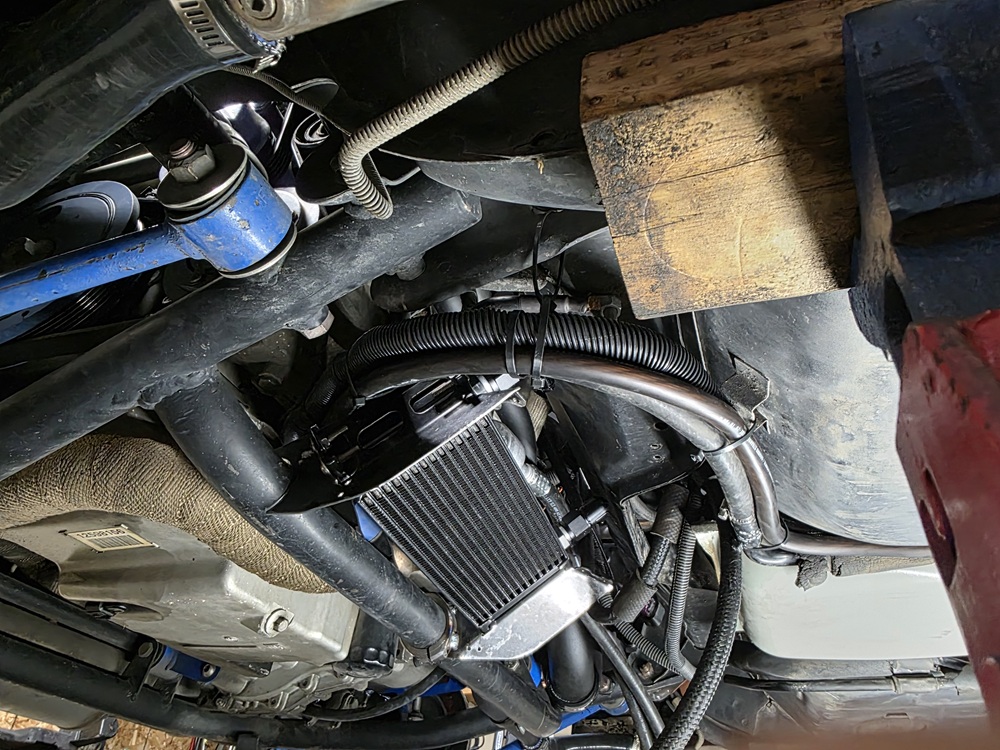
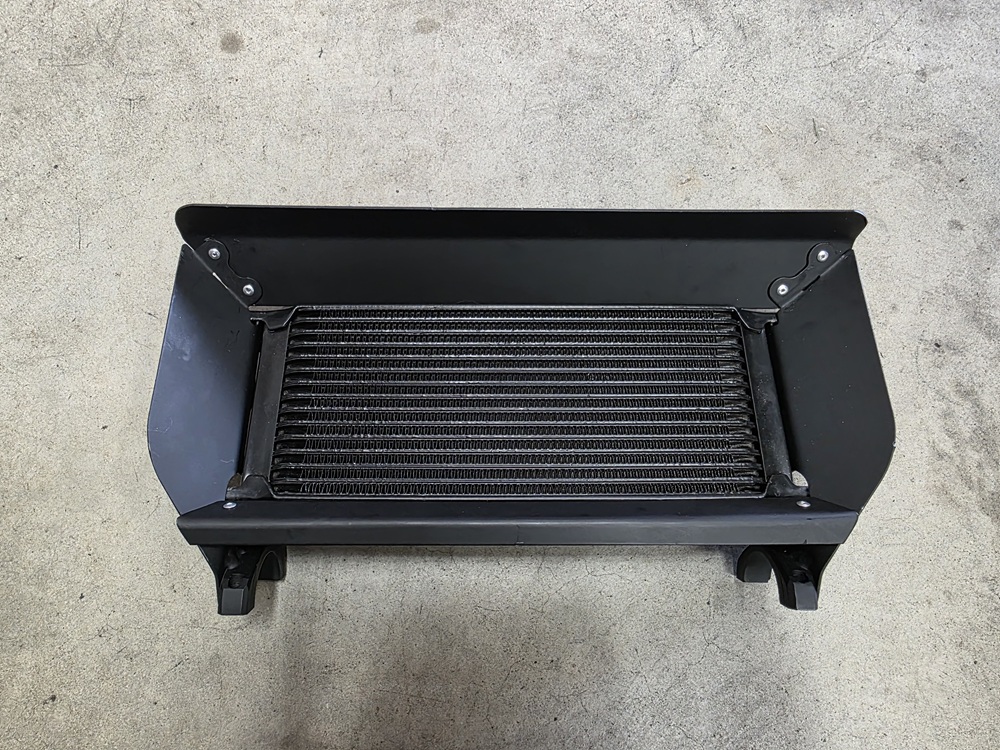
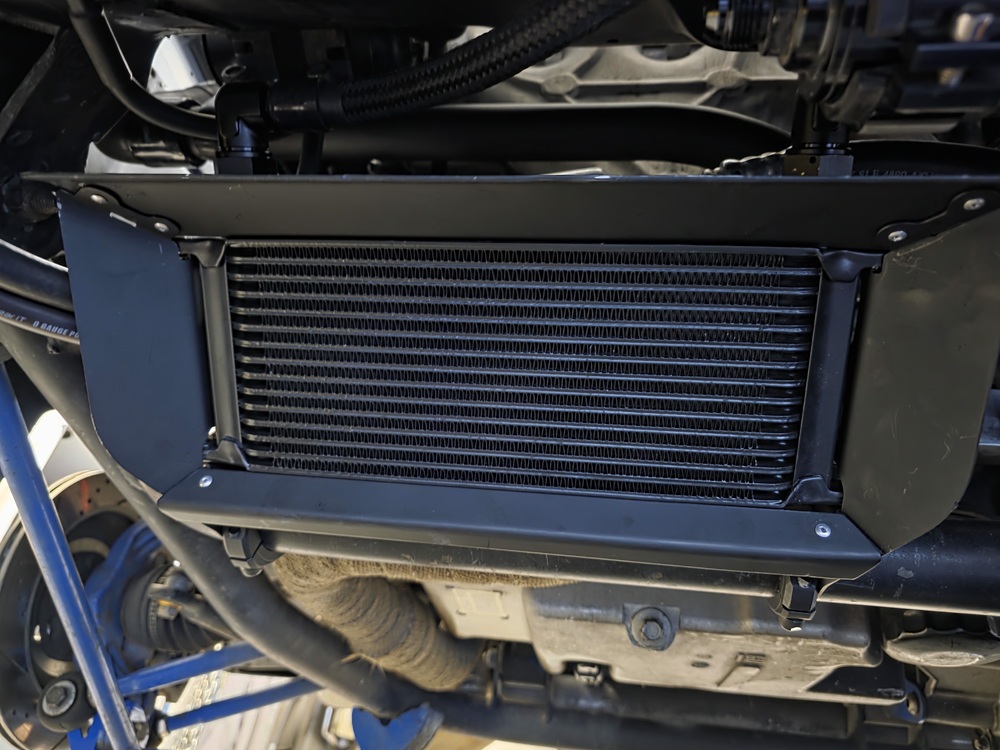
Installed a 15 row heat exchanger on the fuel return line. Temps in the fuel tank were reaching 140+ degrees due to the large fuel pump and return fuel system upgrade. At some point I might switch to returnless and PWM, but for now this was a pretty simple fix that will help lower fuel temps.


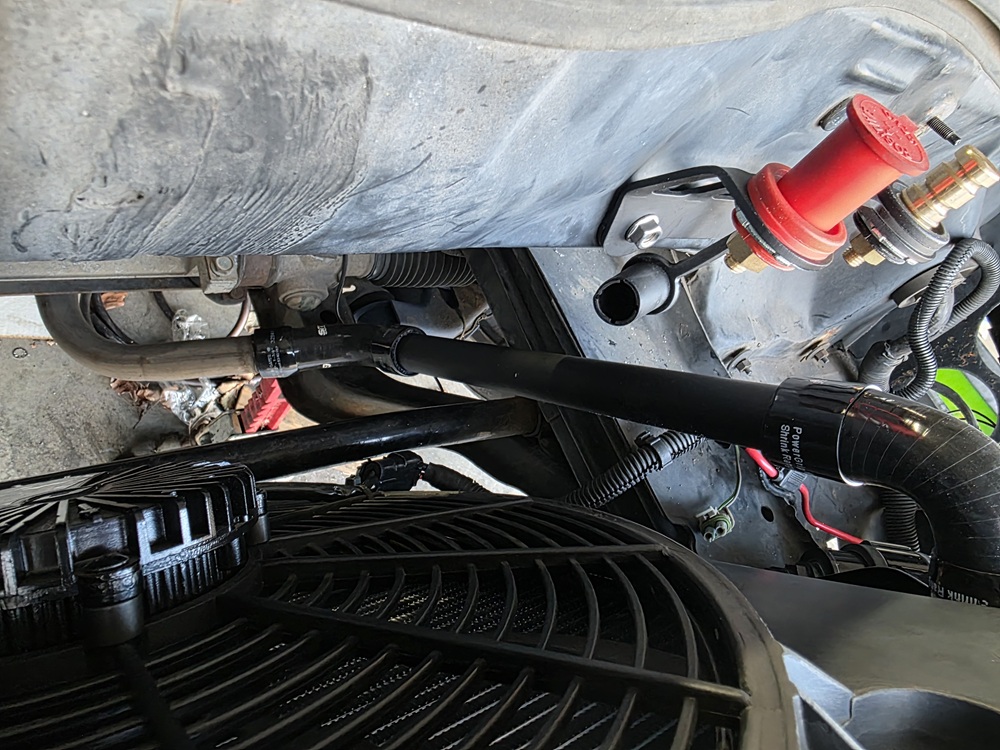
Added a couple of battery terminals in a more accessable location with the battery under the the passenger headlight.


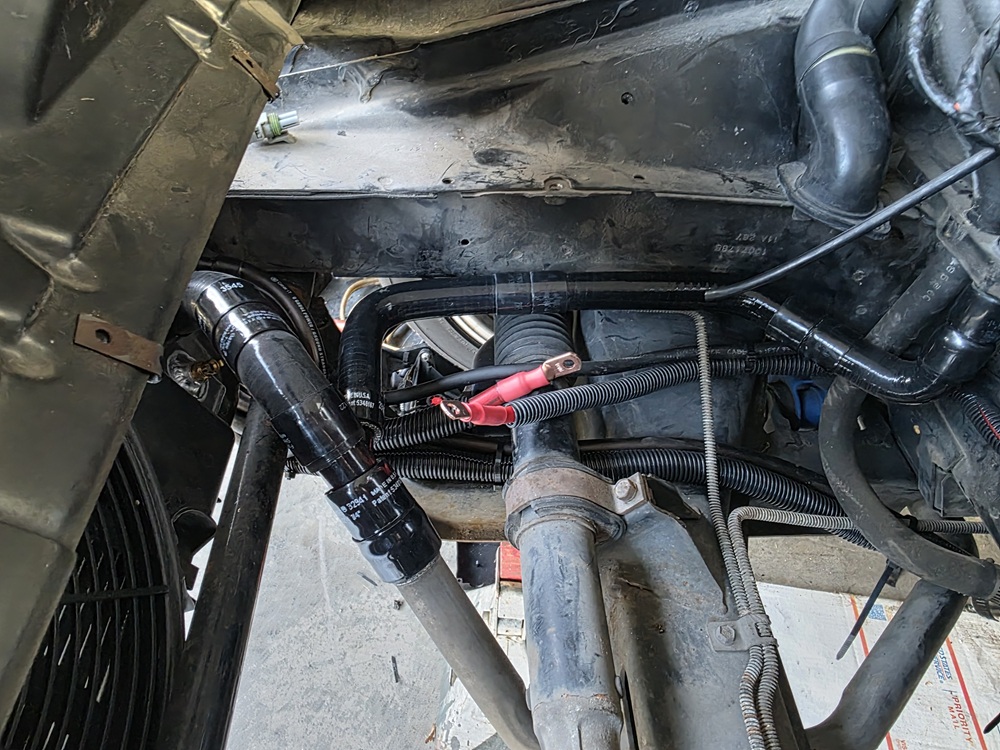
Removed the heater core return line that dumped into the passenger coolant tube and reconnected the heater core return to the passenger coolant tube up front. I already have a 3/8" restrictor on the hot supply to the heater core (reducing its flow) and the car is never driven in temps below 50 degrees, so I don't need much heating capacity, but didn't want to just eliminate it entirely.


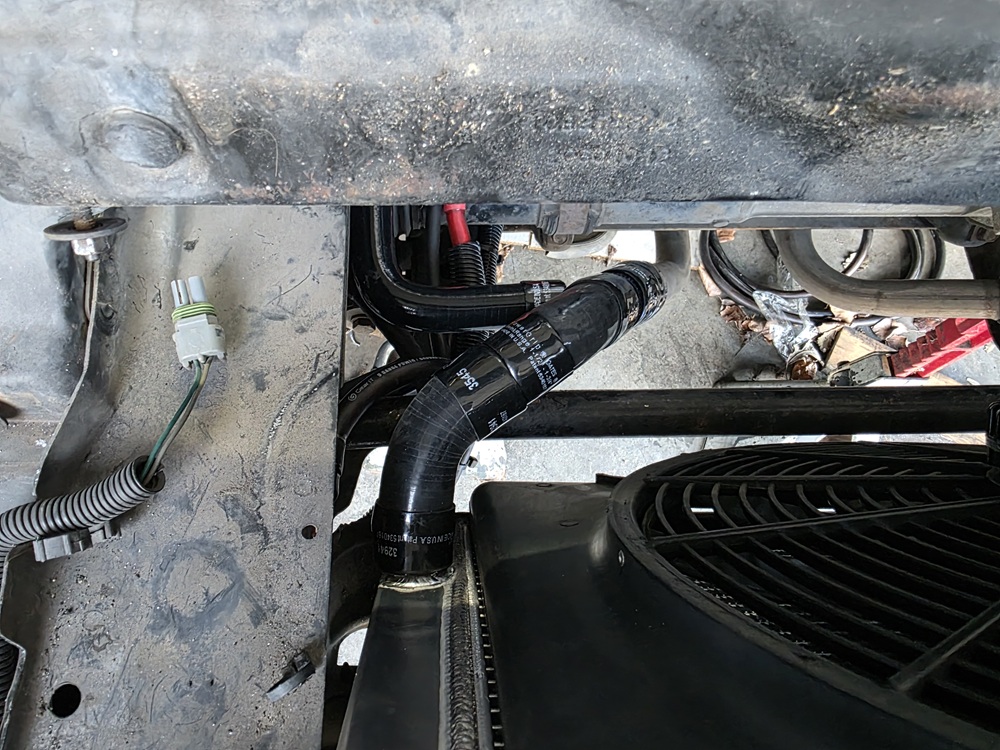
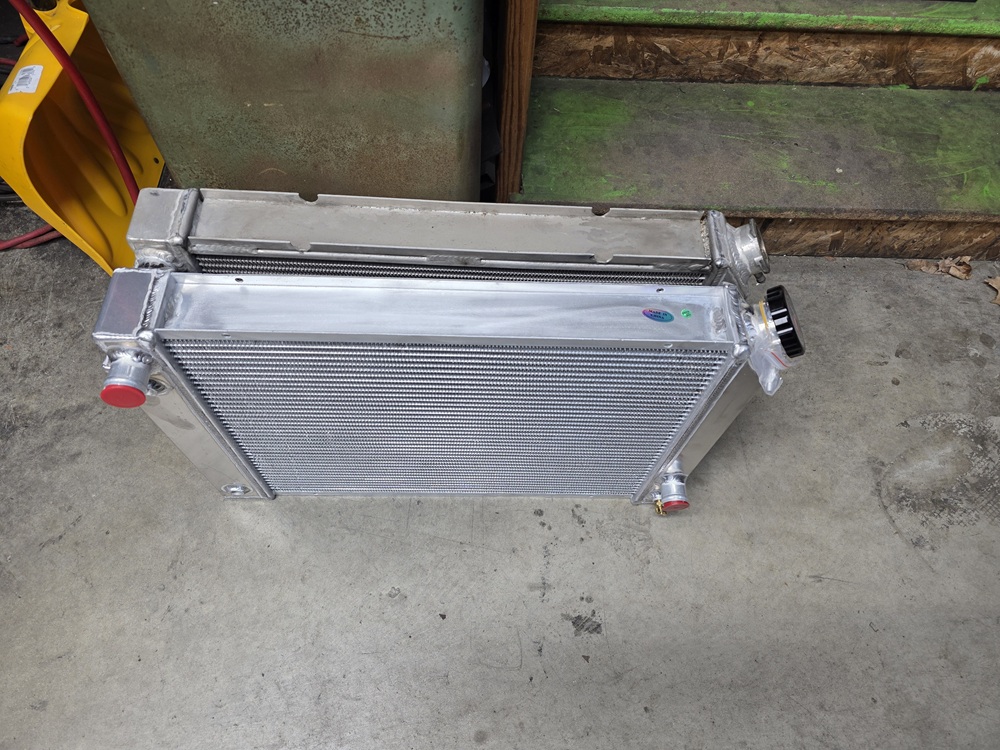
Upgraded from a 3-core champion to a 4 core radiator. Had to further mod the upperr and lower brackets and isolators for it to fit, but it does. The end caps go from 2-1/2" to 2-7/8, and the depth of the core goes from 2" to 2-3/8".


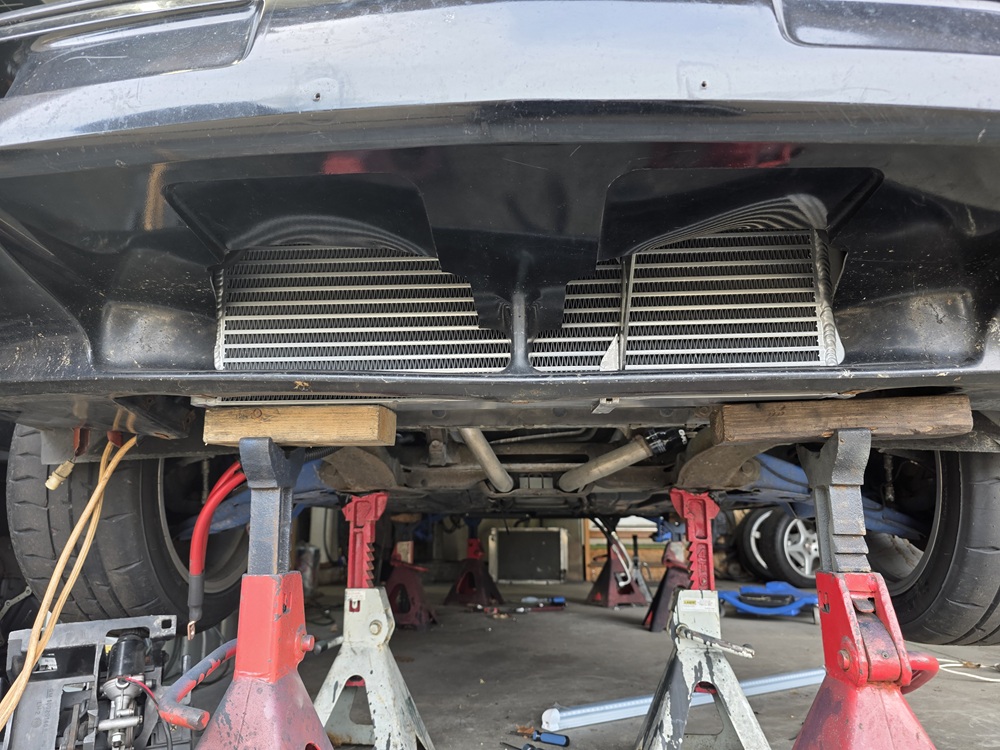
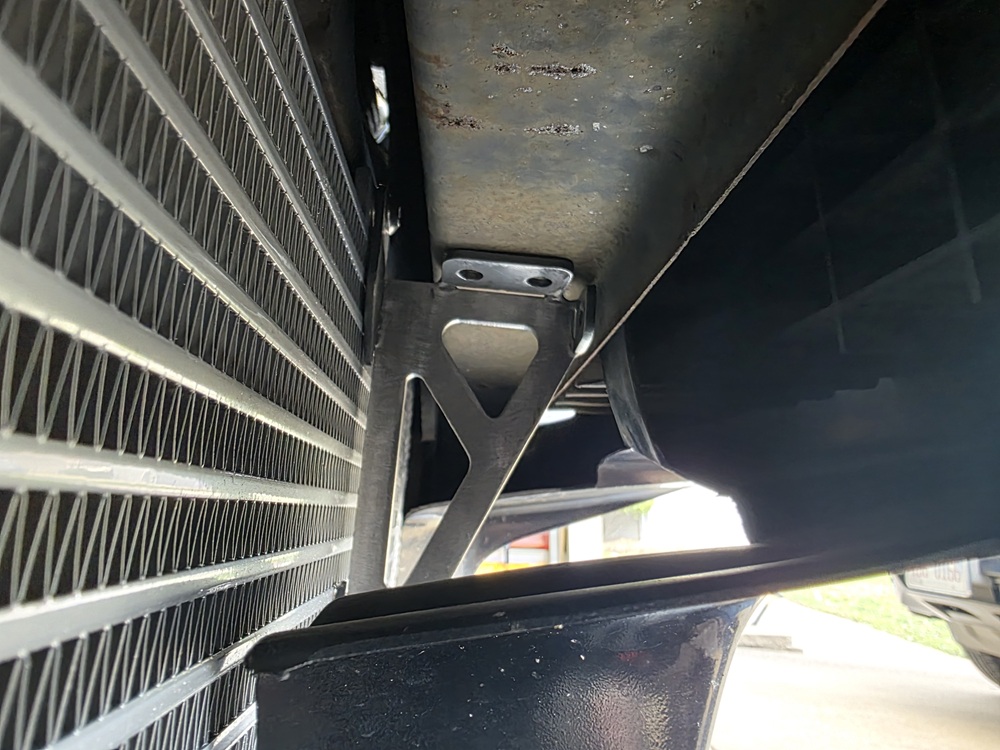
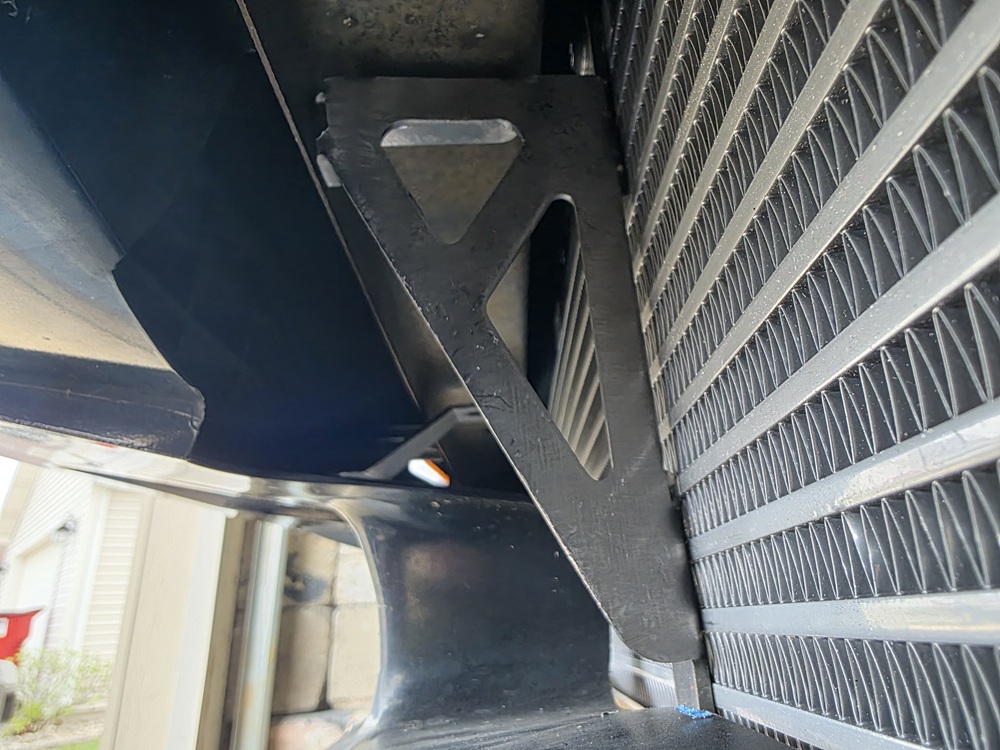
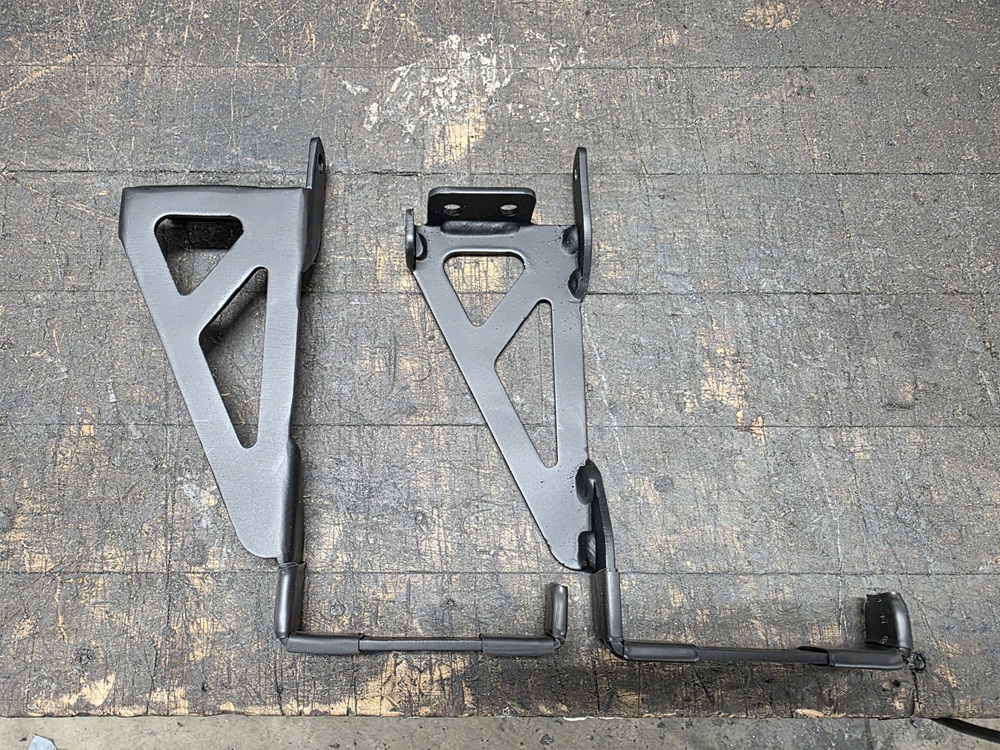
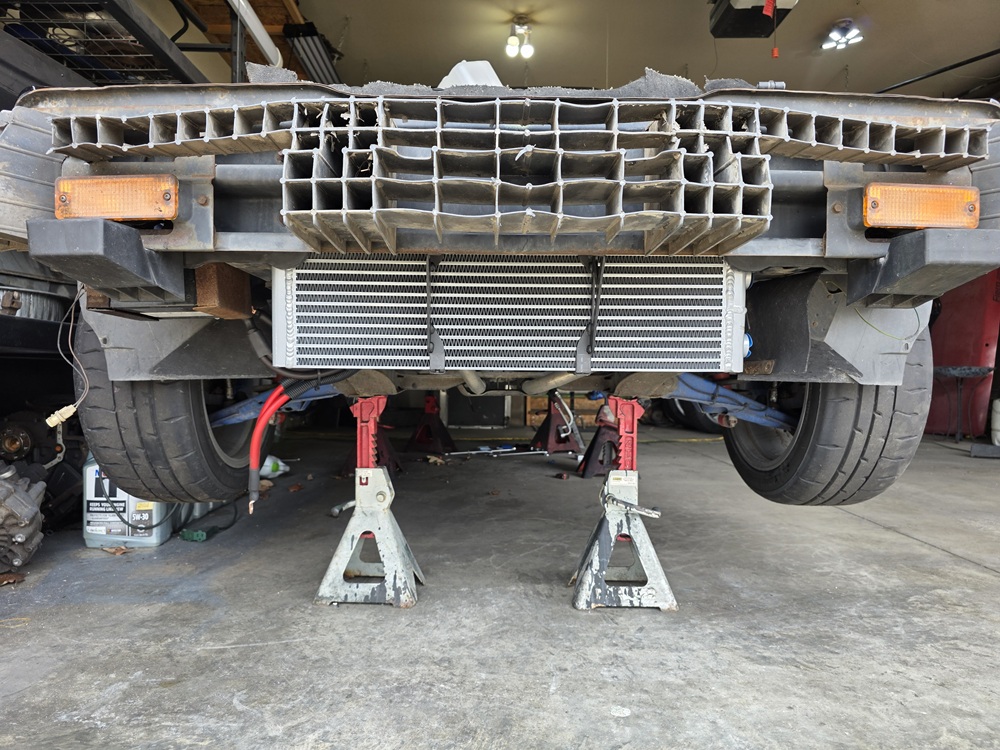
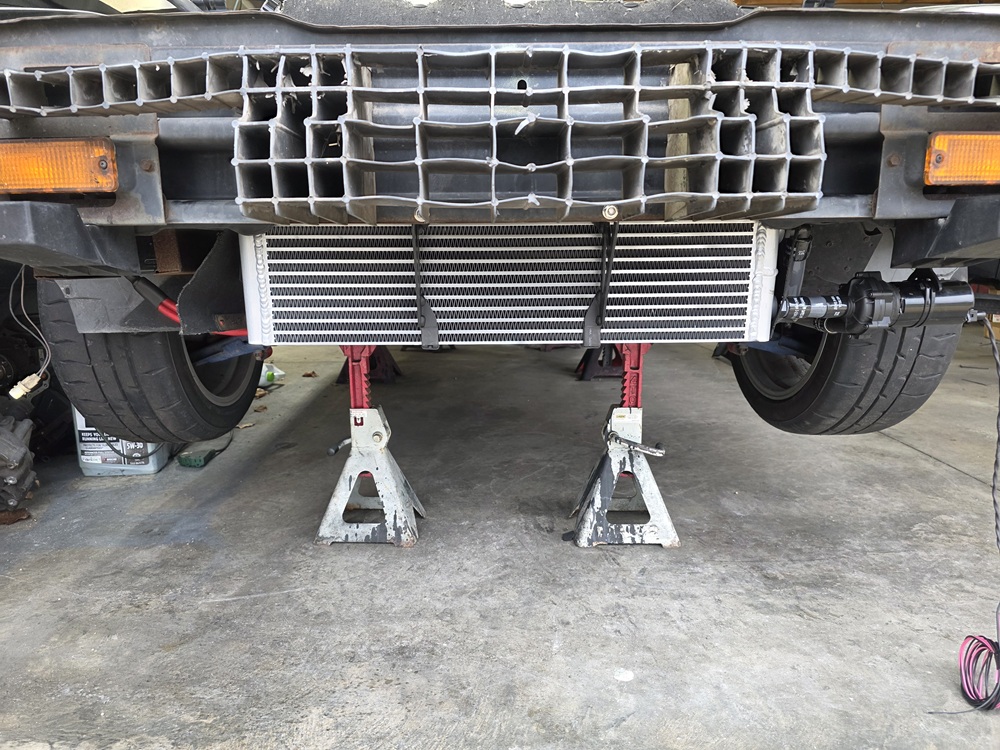
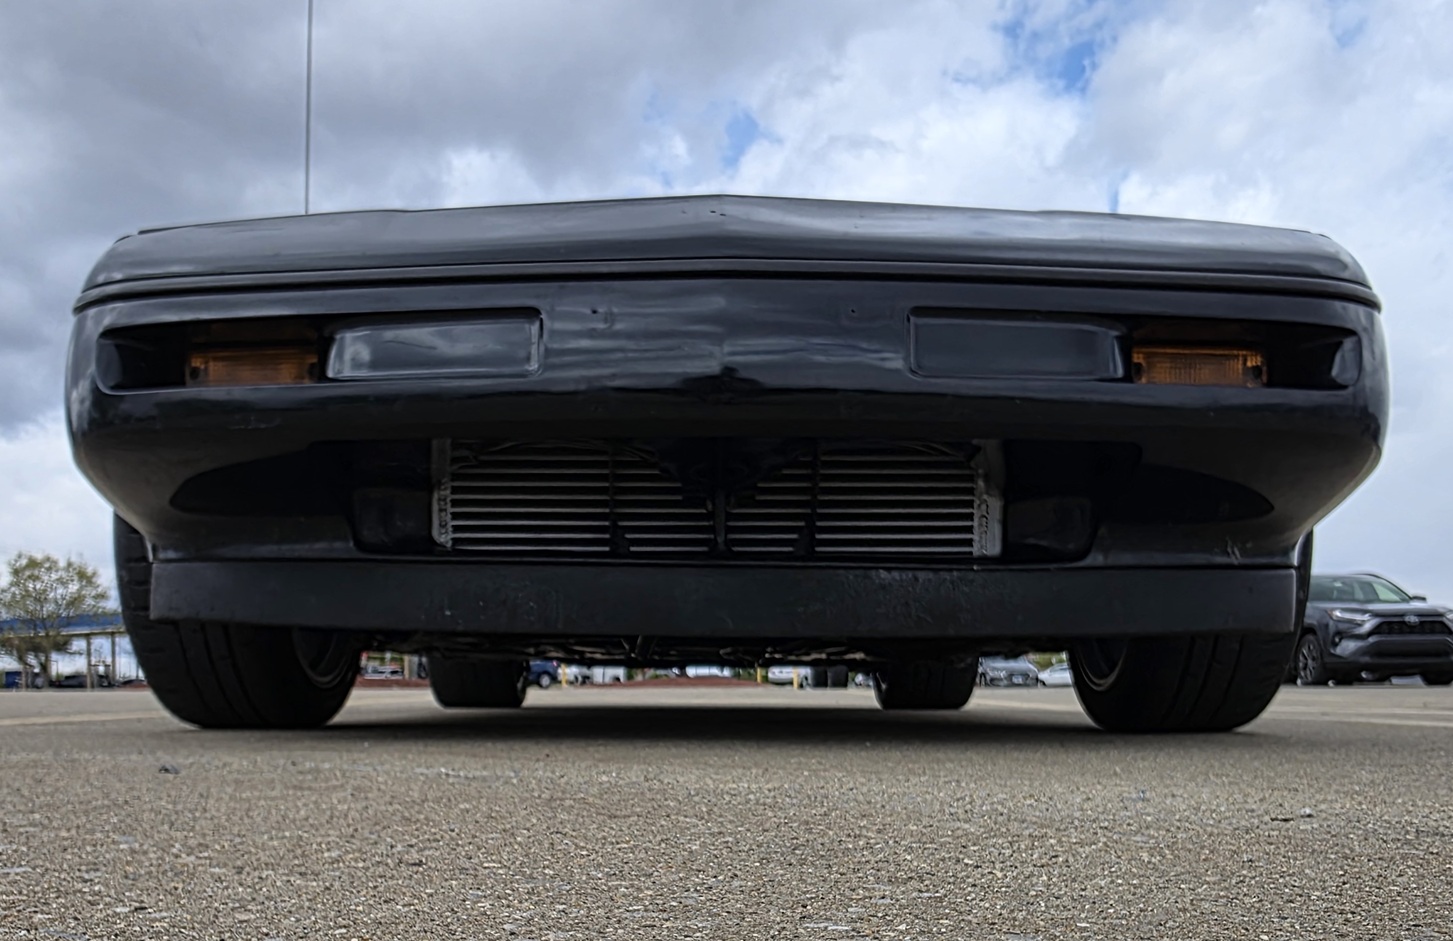
Almost done with the installation of the front mount frozen boost type 101 heat exchanger: Here is one of the earlier test fits:


Then the brackets to bolt it to the front bumper:


Brackets supporting heat exchanger:


IP: Logged
fieroguru
Member
Posts: 12724
From: Champaign, IL
Registered: Aug 2003


Feedback score:    (45)
Leave feedback


Total ratings: 258
Rate this member

Report this Post04-18-2026 07:49 PM Click Here to See the Profile for fieroguruSend a Private Message to fieroguruEdit/Delete MessageReply w/QuoteDirect Link to This Post
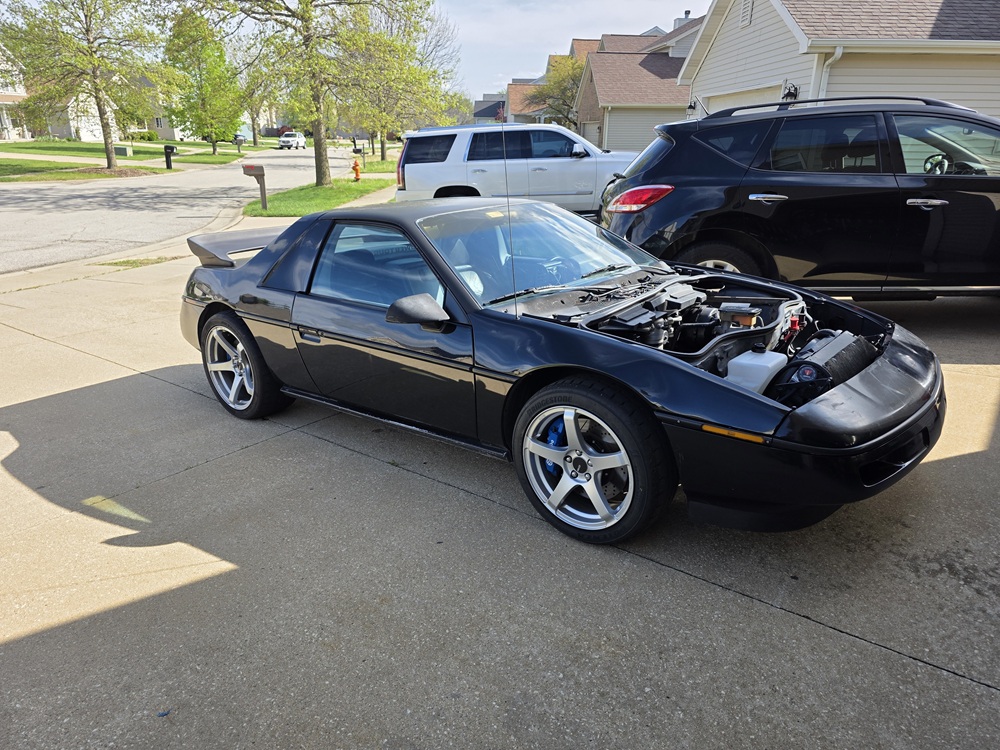
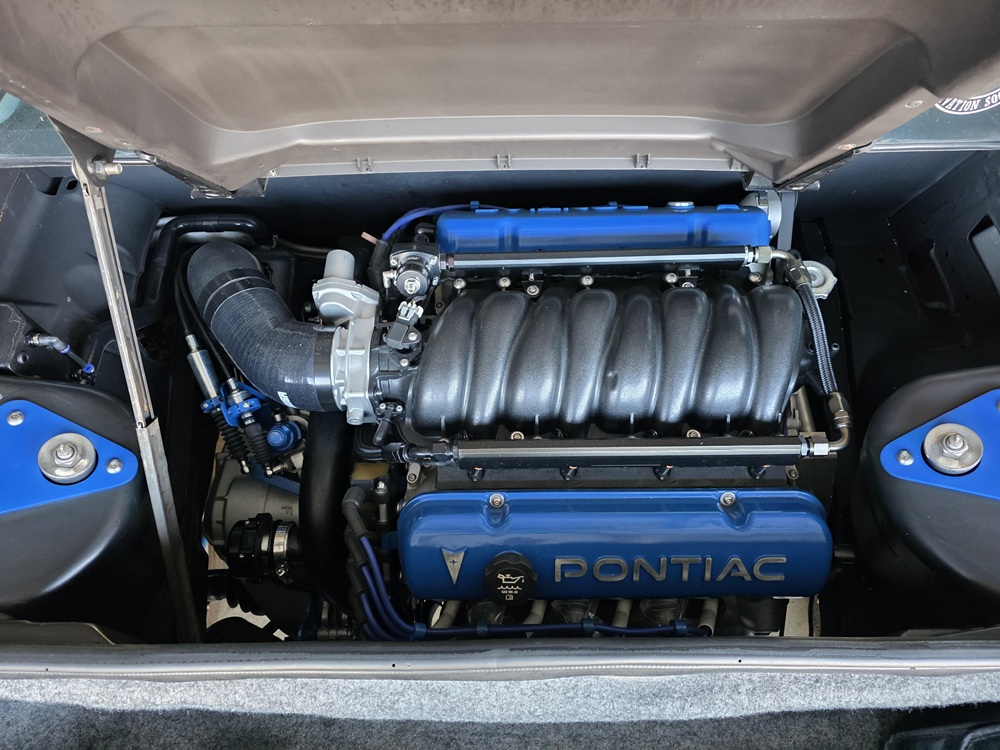
The car is back running! Took it to the carwash w/o the hood to pressure wash the front compartment. Then took it on a 25 mile drive.

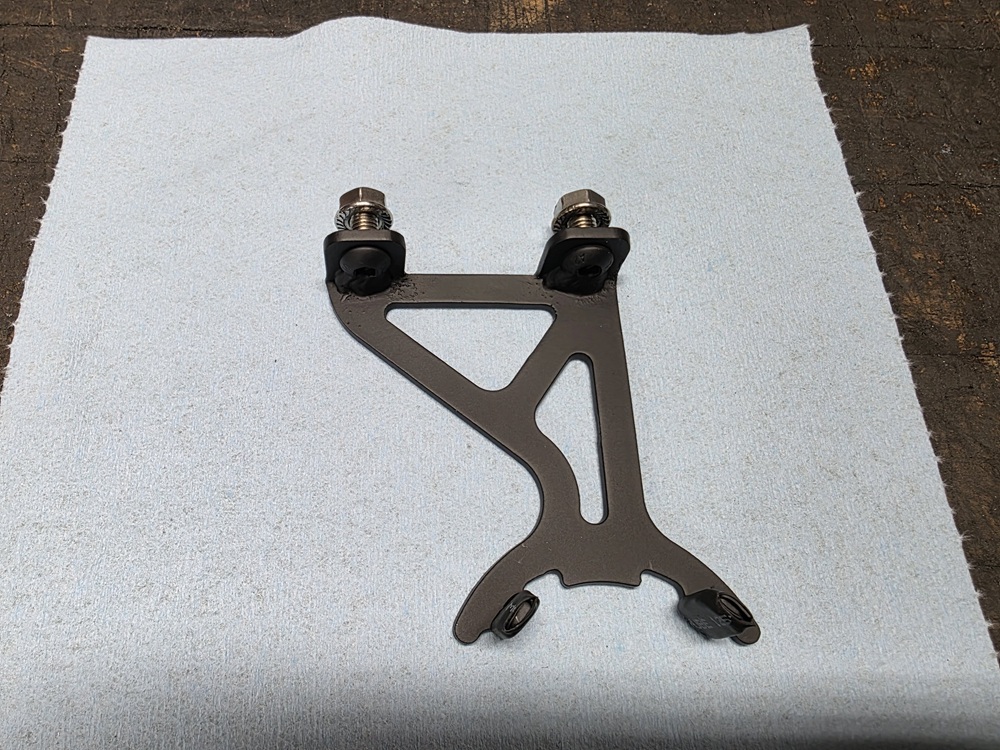
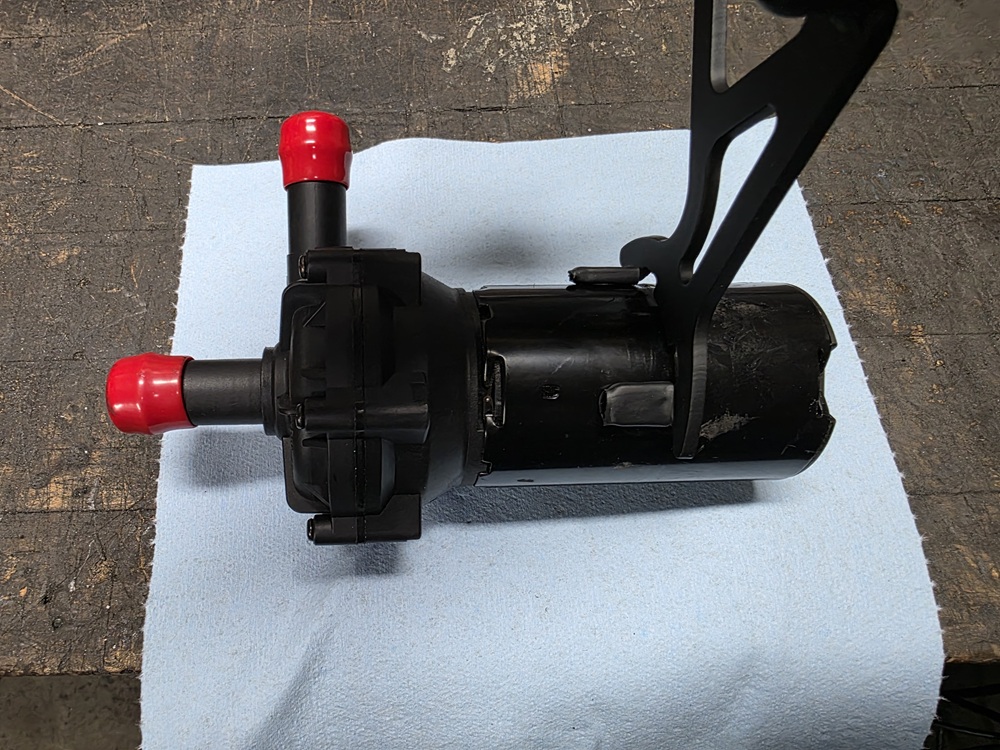
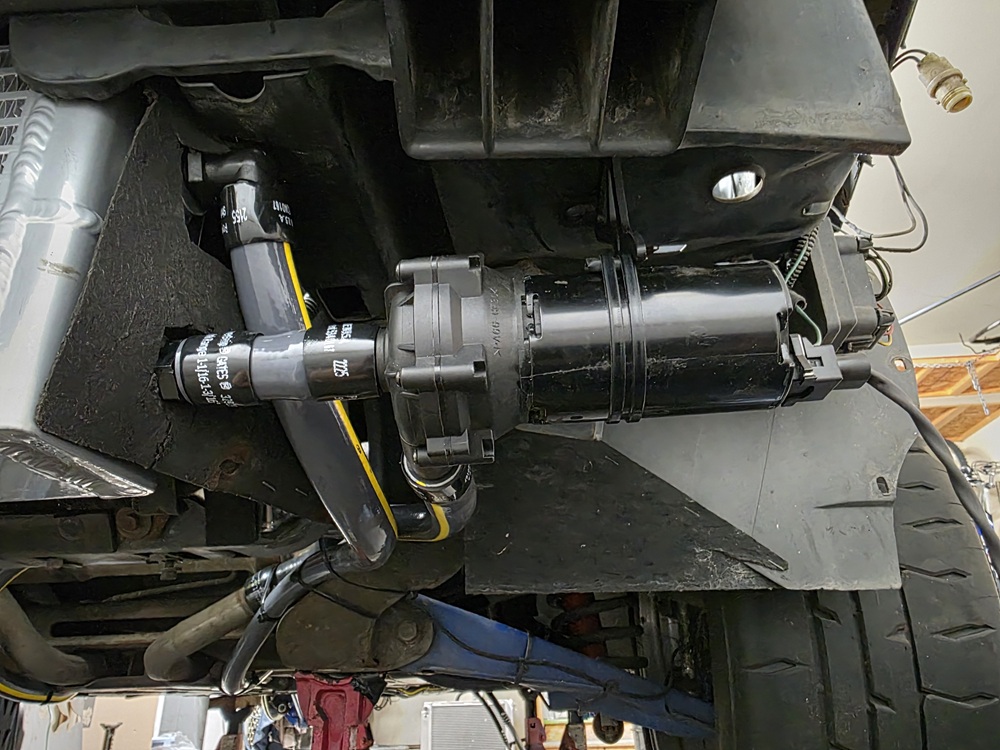
Here are some pictures of the intercooler pump braket and installation:


IP: Logged
PFF
System Bot
fieroguru
Member
Posts: 12724
From: Champaign, IL
Registered: Aug 2003


Feedback score:    (45)
Leave feedback


Total ratings: 258
Rate this member

Report this Post04-19-2026 08:24 PM Click Here to See the Profile for fieroguruSend a Private Message to fieroguruEdit/Delete MessageReply w/QuoteDirect Link to This Post
Up to about 90 miles since I got it back together and just doing some shakedown runs

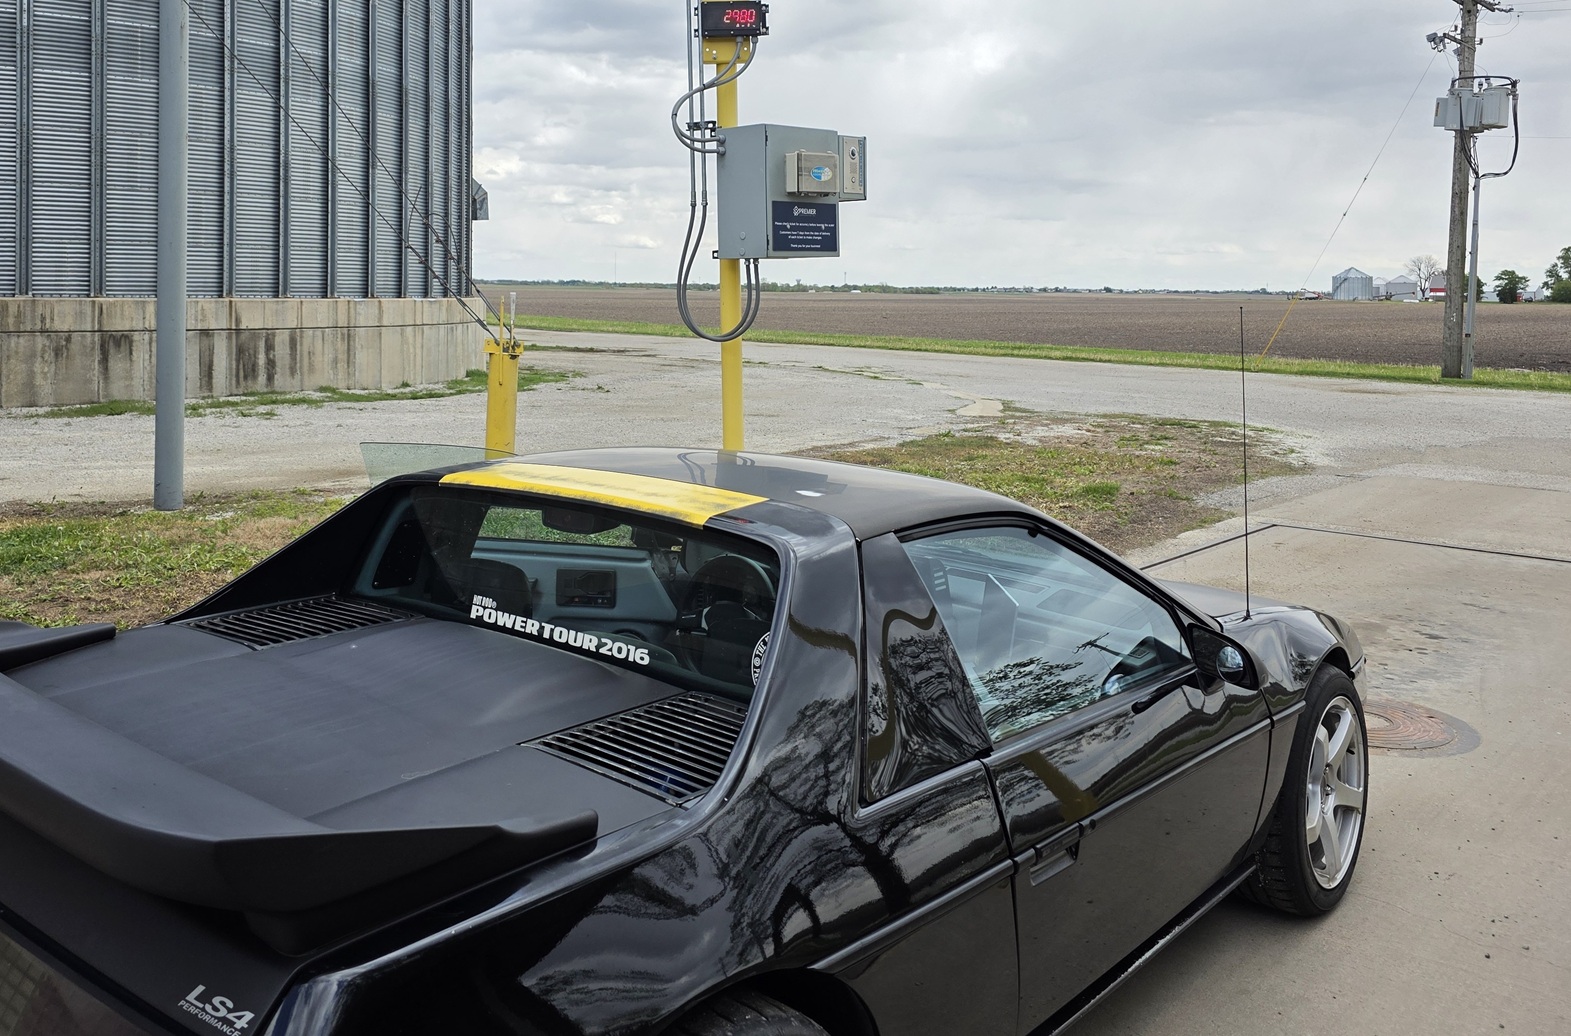
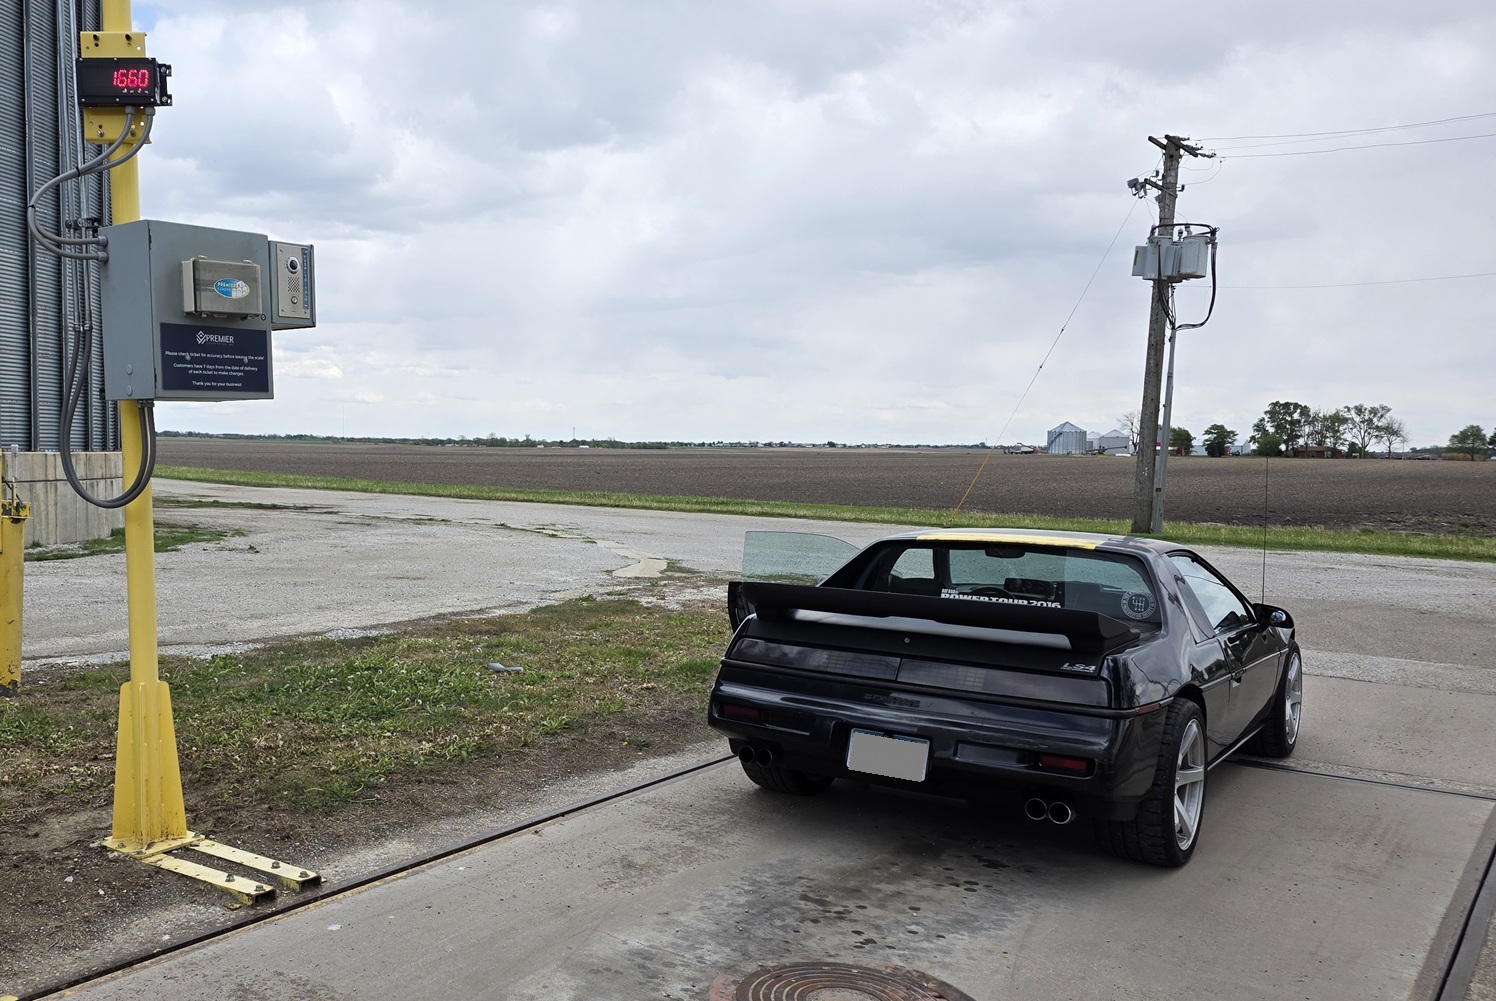
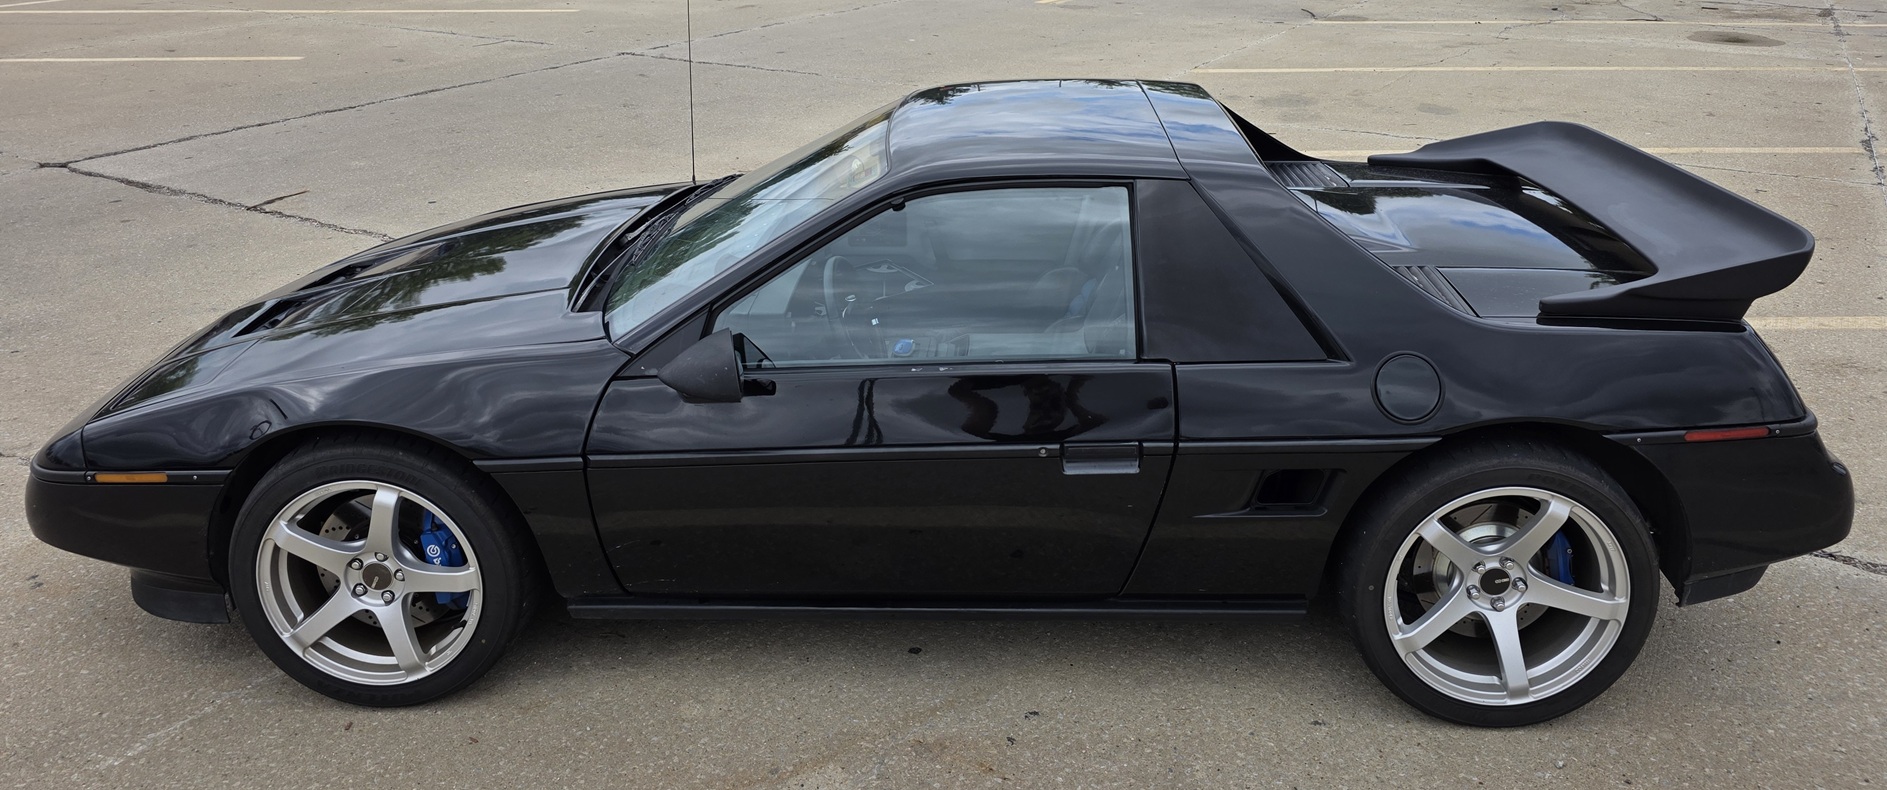
The car needs to go on a diet as it tips the scales at 2980 lbs (1320/1660 44%/56% F/R split) w/o me. My goal is to have it weight just shy of 2899 lbs.

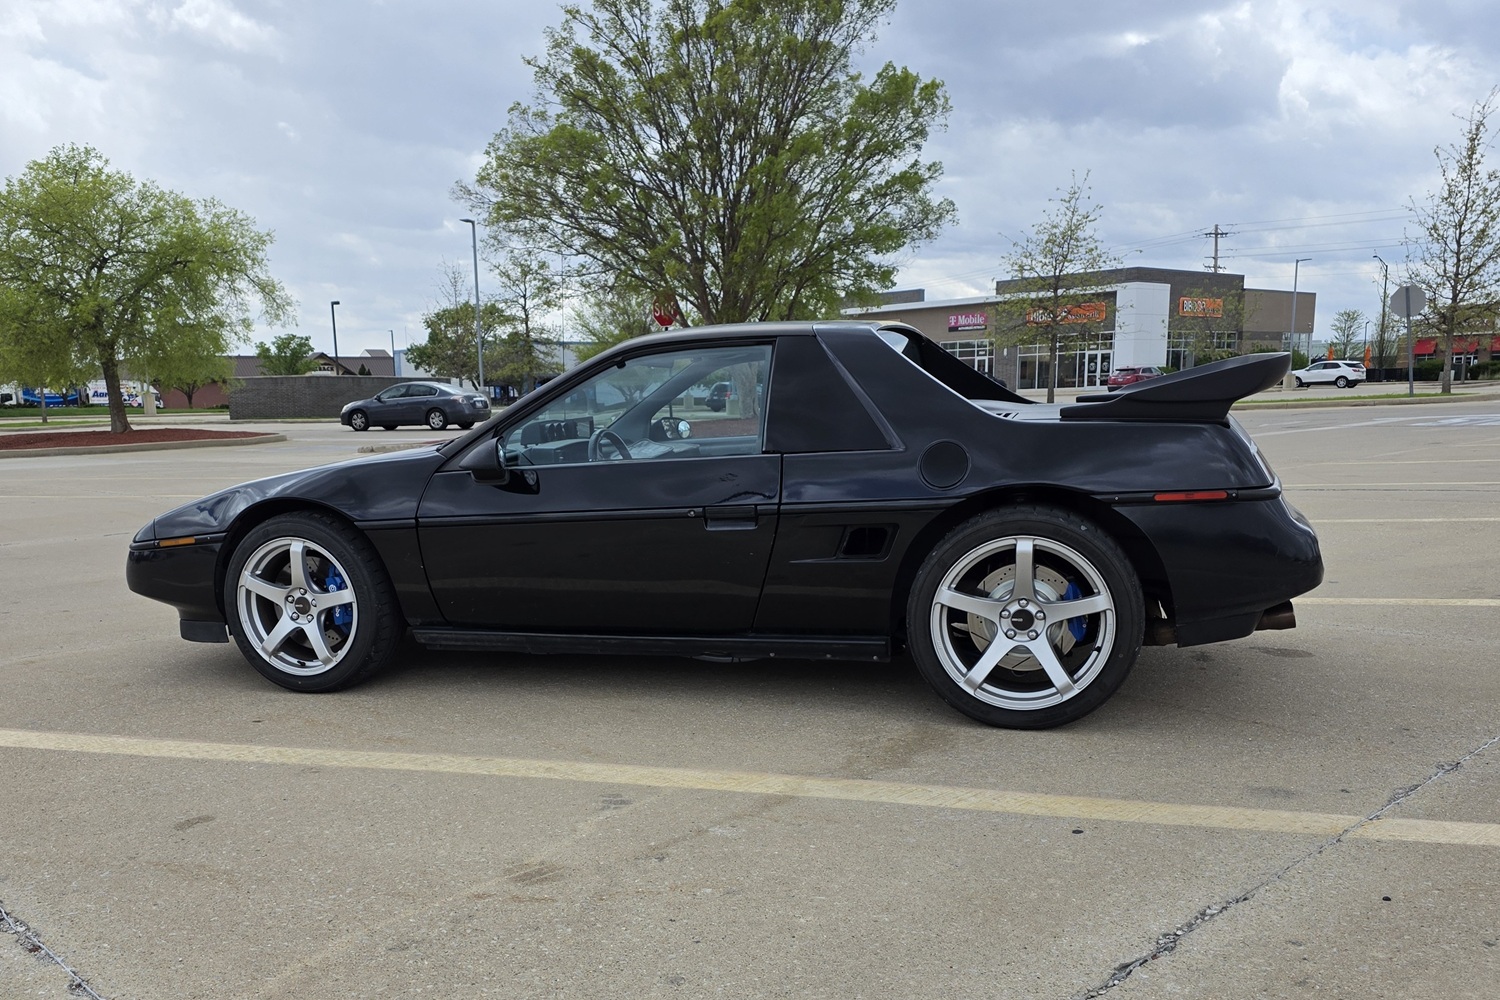
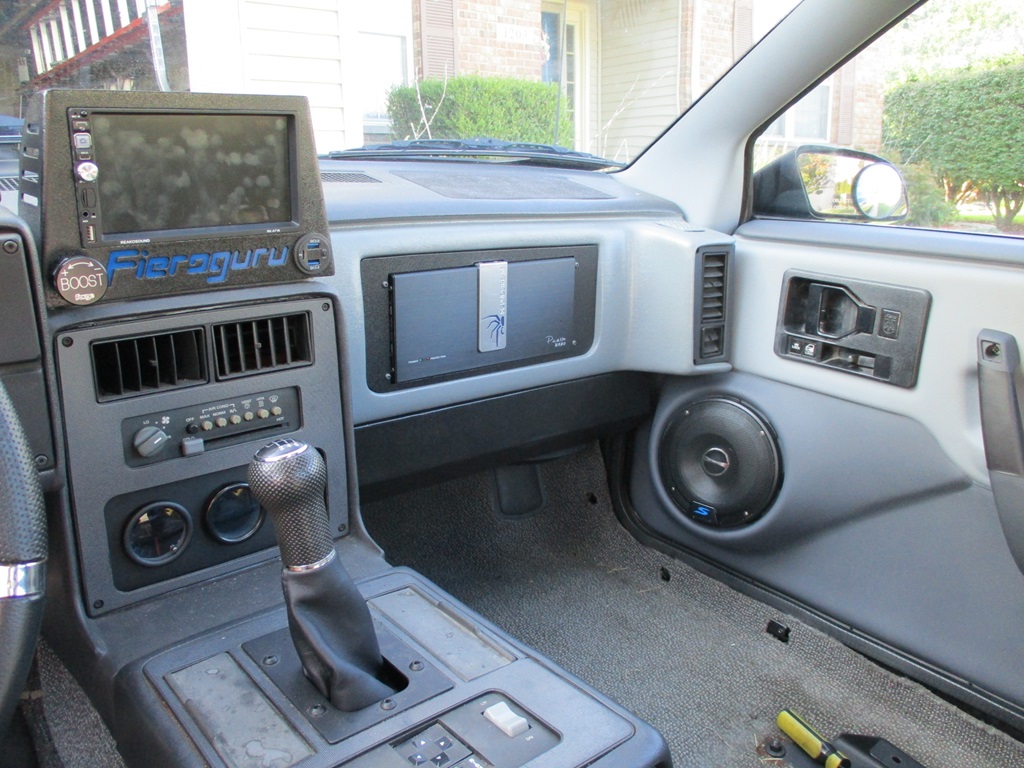
The car has the LS4/F40, twin disk clutch, Turbo with A2W intercooler and heat exchanger, 3 mufflers, helmholz tube, 4 core radiator, 17/18 wheels, 13" brakes, sound deadening on the floors, side/door panels, and roof, 5 channel amp, 8" sub and dual 6-1/2" speakers in the doors, power window, power locks, cruise and A/C. So it has everything to make excessive power, while keeping the car a very nice daily driver.

I really love "feeling" the music in this car!

Also need to swap out the notchback panel to get rid of the last of the yellow stripe (it used to go from bumper to bumper).


IP: Logged
davylong86
Member
Posts: 928
From: waterloo,il
Registered: Mar 2014


Feedback score: (1)
Leave feedback

Rate this member

Report this Post05-23-2026 01:00 PM Click Here to See the Profile for davylong86Send a Private Message to davylong86Edit/Delete MessageReply w/QuoteDirect Link to This Post
Damn! What's your guess on 1/4 mile time? This thing is turning into a Fiero beast
IP: Logged
fieroguru
Member
Posts: 12724
From: Champaign, IL
Registered: Aug 2003


Feedback score:    (45)
Leave feedback


Total ratings: 258
Rate this member

Report this Post05-23-2026 05:52 PM Click Here to See the Profile for fieroguruSend a Private Message to fieroguruEdit/Delete MessageReply w/QuoteDirect Link to This Post
 
quote
Originally posted by davylong86:

Damn! What's your guess on 1/4 mile time? This thing is turning into a Fiero beast


Planning to run the 1/4 mile a on the HRPT in a couple of weeks. I have also picked up a Dragy Pro so I can monitor progress w/o the 2 hr drive each way to the nearest 1/4 mile drag strip.

I will likely keep bumping the boost until it does 135 mph in the quarter as that is 7200 rpm in 3rd and plenty fast.
IP: Logged
fieroguru
Member
Posts: 12724
From: Champaign, IL
Registered: Aug 2003


Feedback score:    (45)
Leave feedback


Total ratings: 258
Rate this member

Report this Post05-24-2026 03:13 PM Click Here to See the Profile for fieroguruSend a Private Message to fieroguruEdit/Delete MessageReply w/QuoteDirect Link to This Post
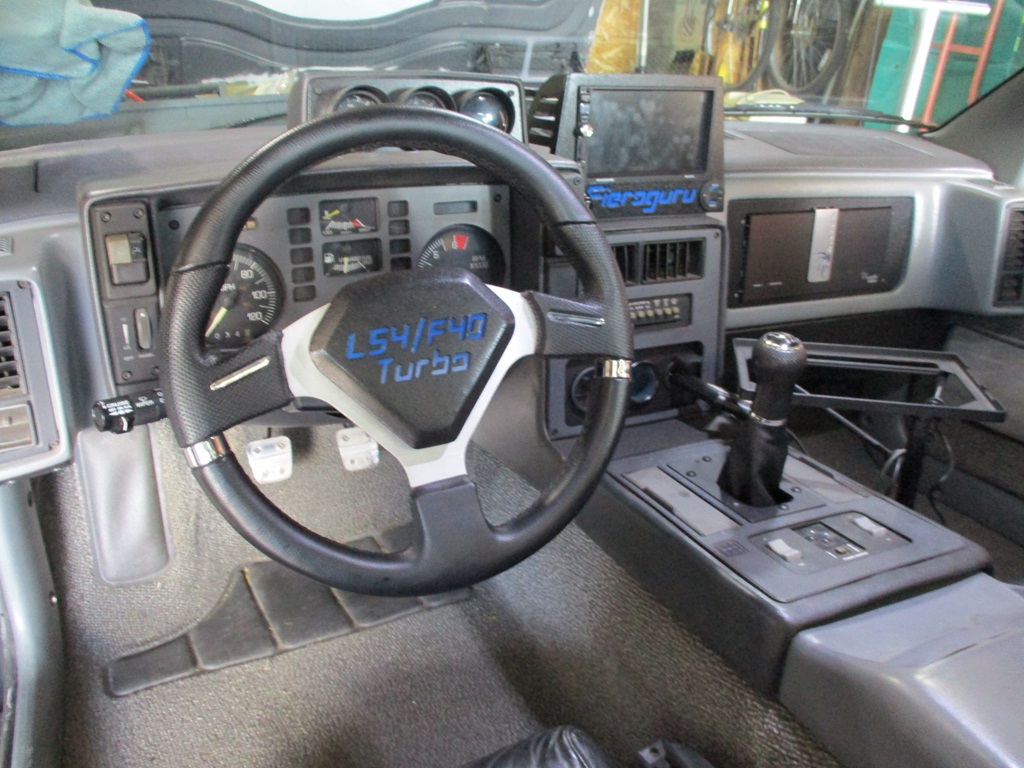
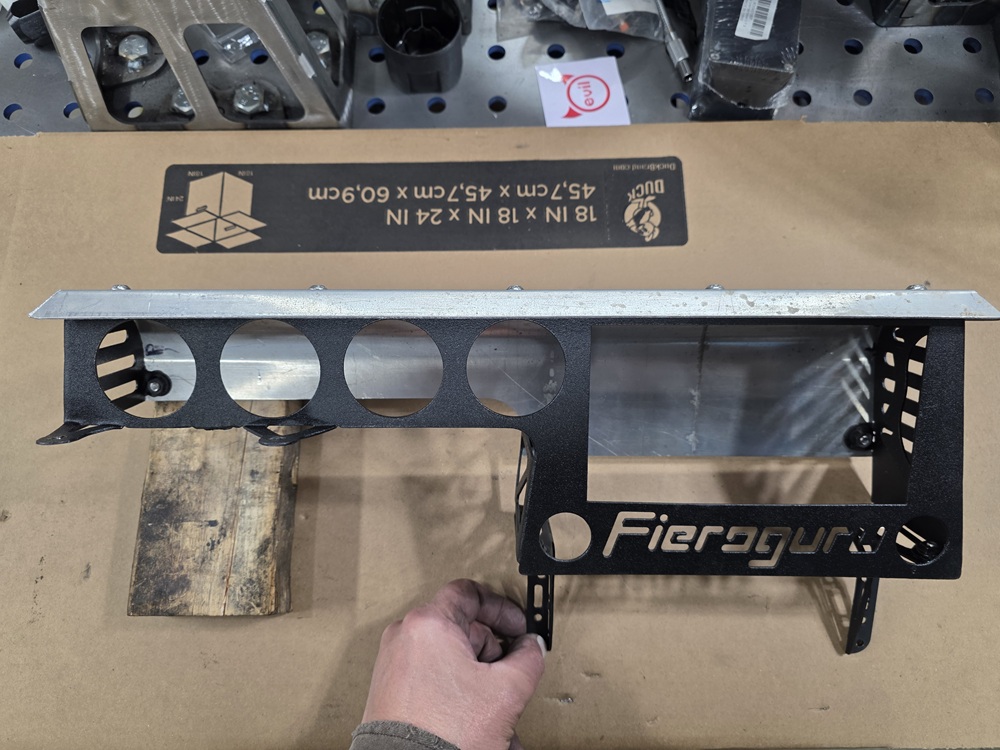
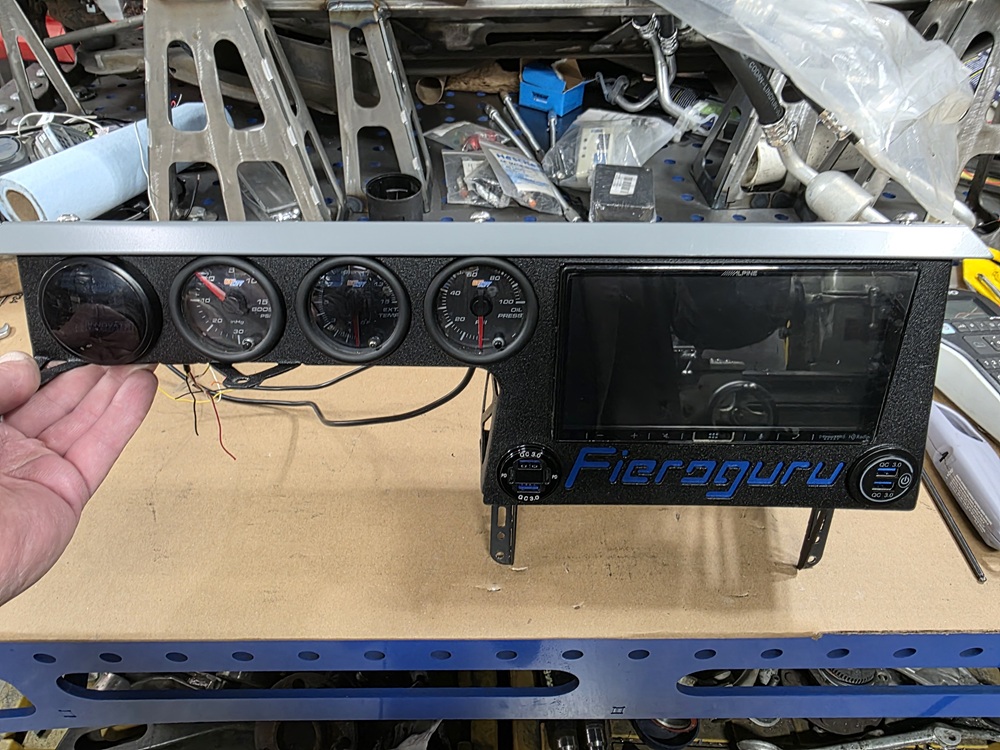
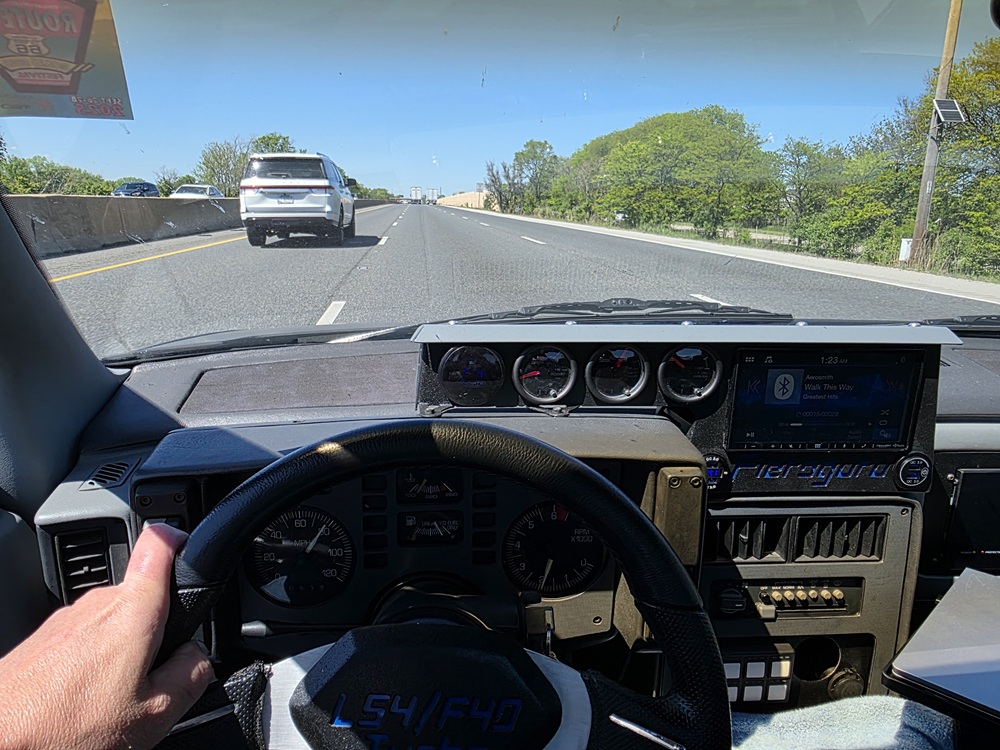
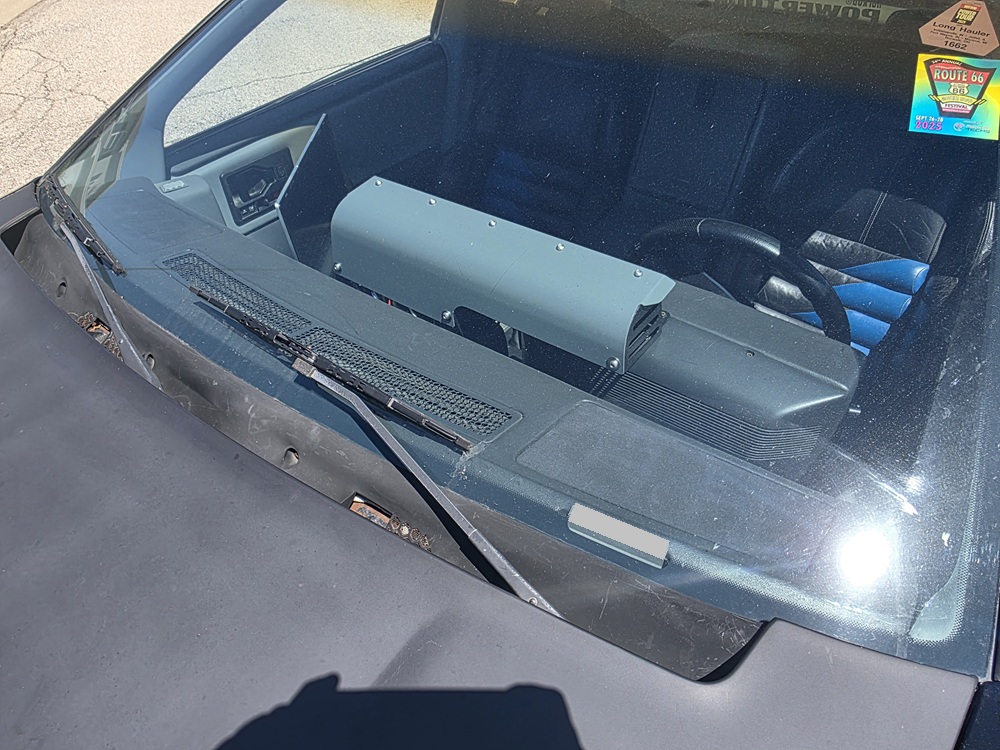
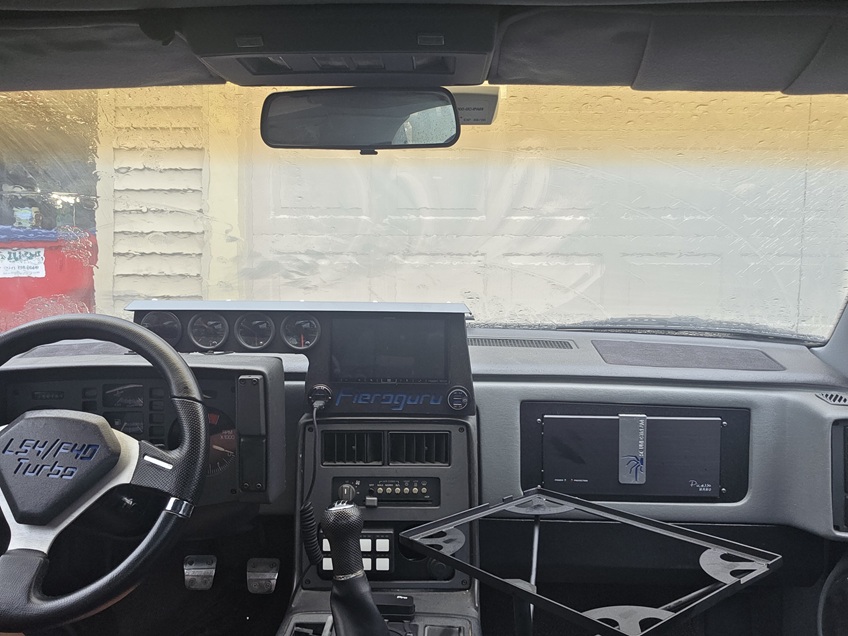
Was able to finish up the new radio and 4 gauge cluster:


Also swapped out the old notchback panel to eliminate the yellow stripe


Frame rails are looking good for 38 years and 300k+ miles:


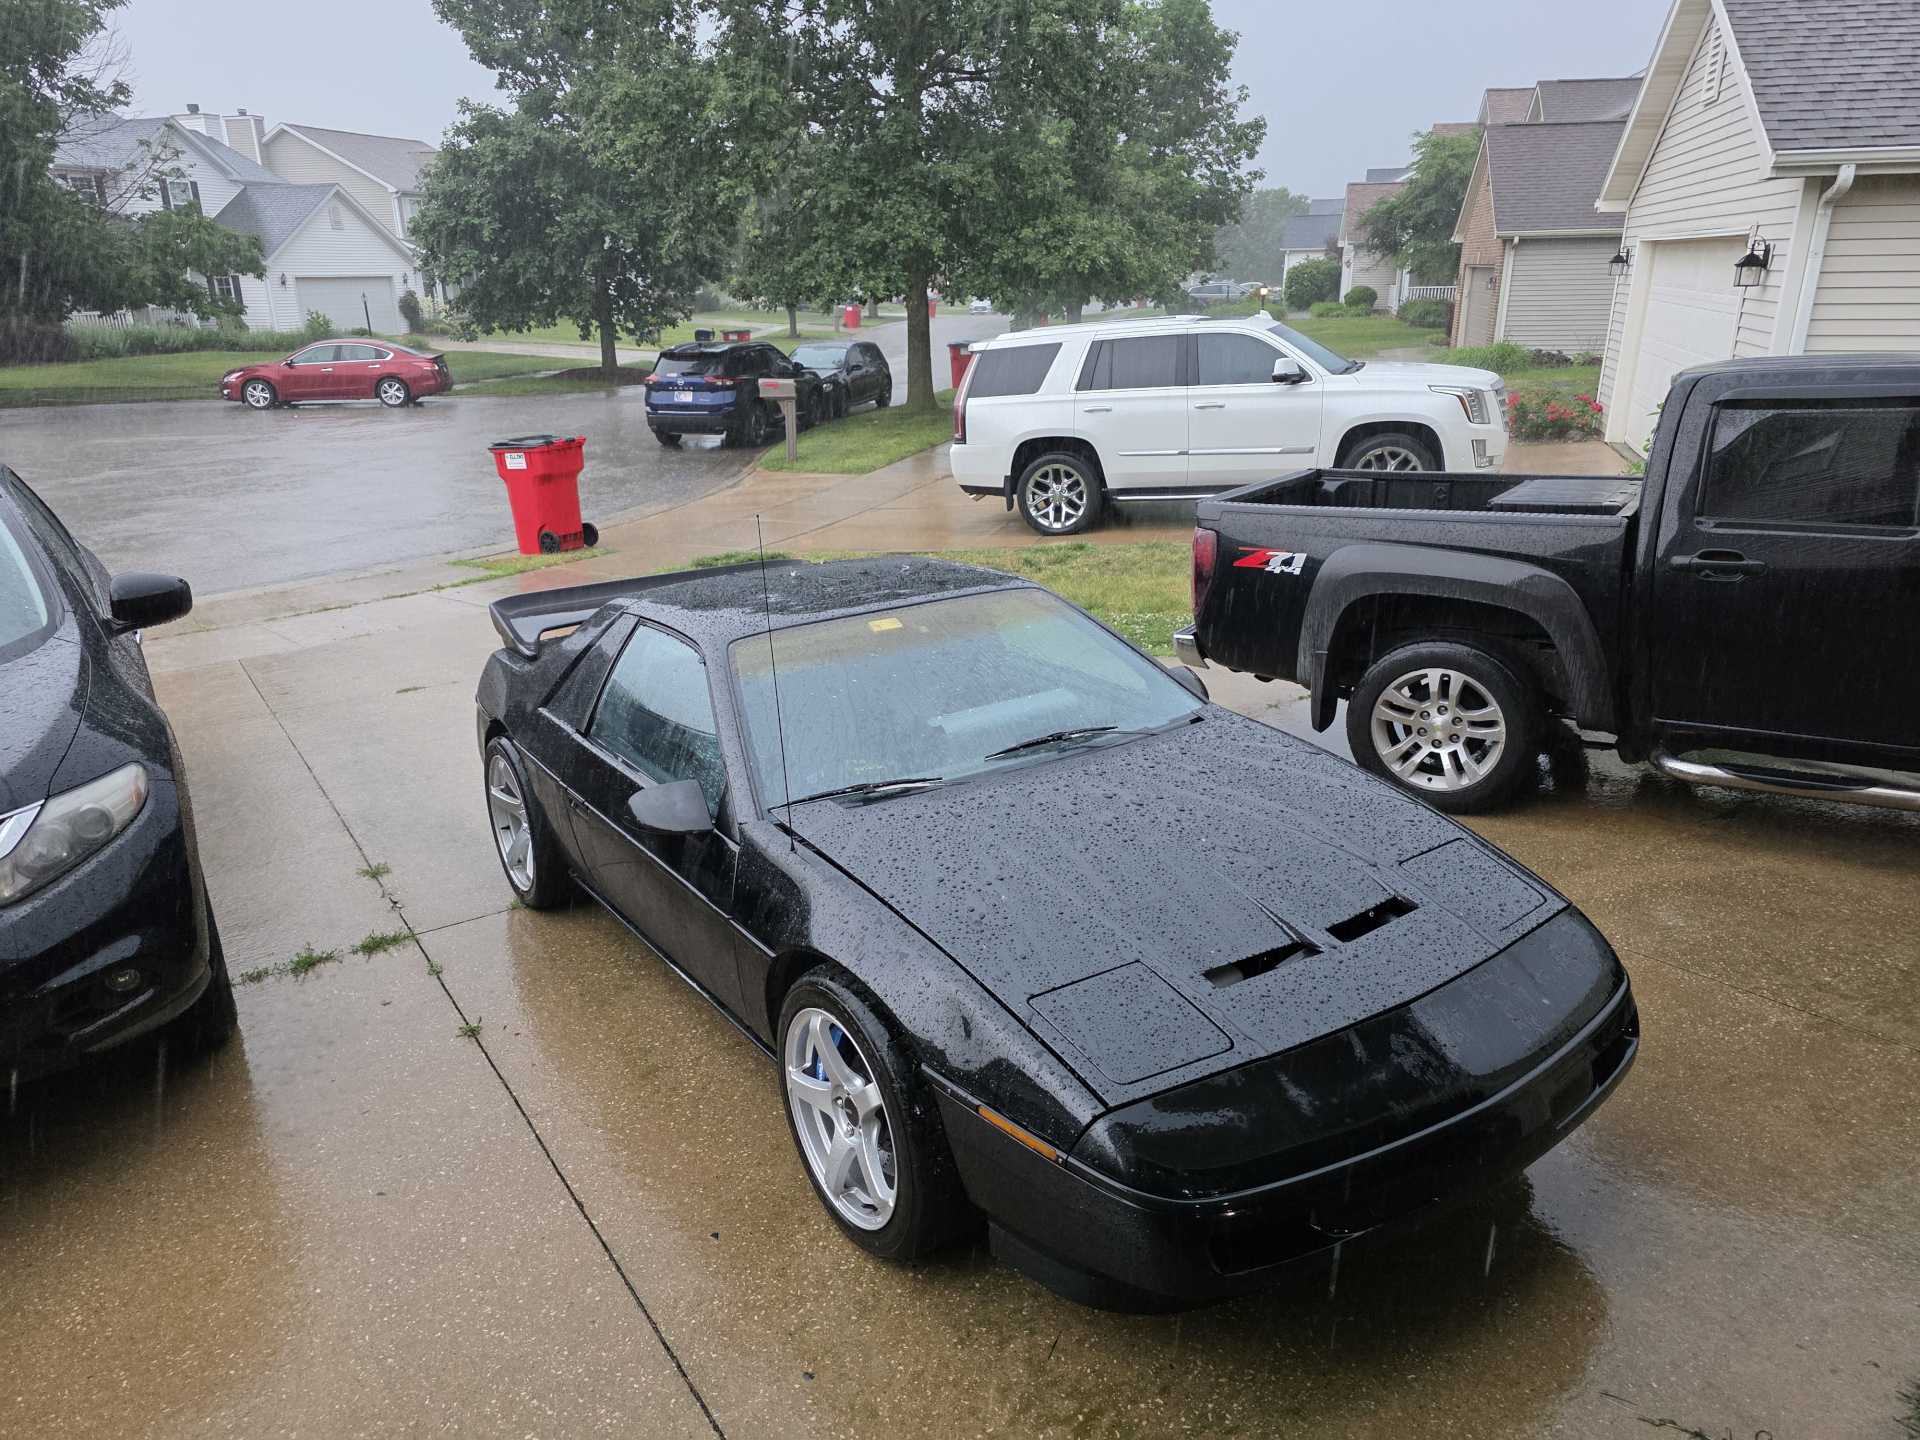
After 1000 miles of daily commutes, work trips and driving in the rain. Nothing some power washing can't fix.


Just a few more things to wrap up before the HRPT.
IP: Logged
fieroguru
Member
Posts: 12724
From: Champaign, IL
Registered: Aug 2003


Feedback score:    (45)
Leave feedback


Total ratings: 258
Rate this member

Report this Post06-08-2026 02:57 PM Click Here to See the Profile for fieroguruSend a Private Message to fieroguruEdit/Delete MessageReply w/QuoteDirect Link to This Post
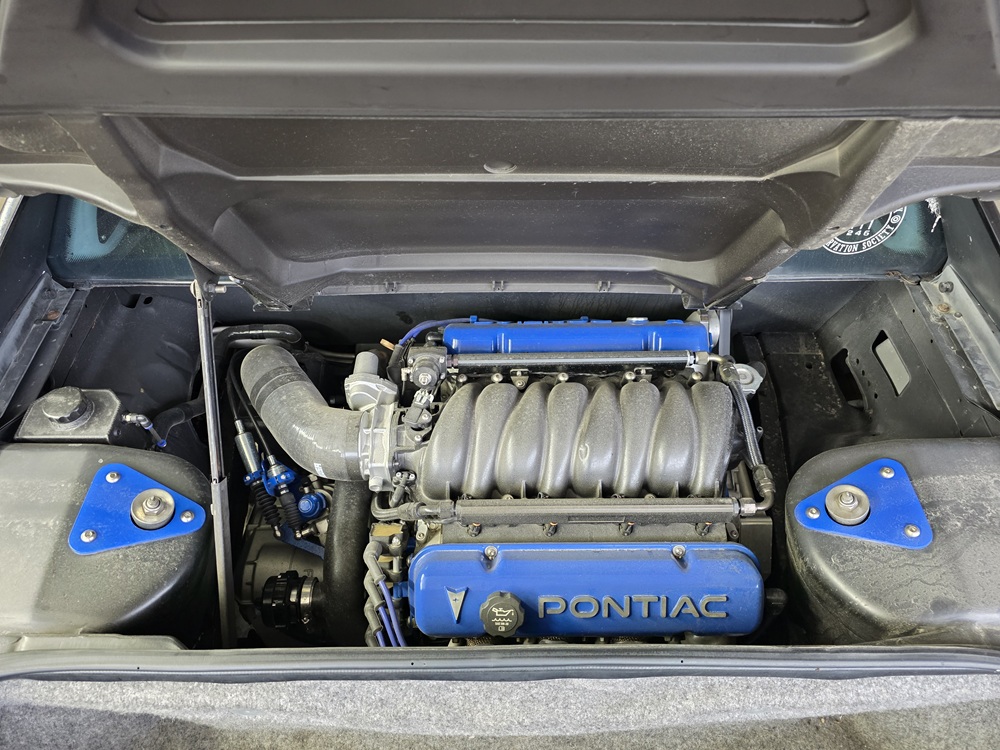
Day 1 of the HRPT! Engine bay was clean, and the outside was pretty clean before the 2 hours of driving of driving in the rain.


IP: Logged
Trinten
Member
Posts: 1458
From: Mebane, N.C.
Registered: Sep 2008


Feedback score:    (8)
Leave feedback

Rate this member

Report this Post06-08-2026 07:36 PM Click Here to See the Profile for TrintenSend a Private Message to TrintenEdit/Delete MessageReply w/QuoteDirect Link to This Post
Man! Your engine bay looks so clean! It's embarrassing given how little I drive my car and how bad my engine bay is. lol

I would really like to do this tour some year. I hope the weather improves!
IP: Logged
fieroguru
Member
Posts: 12724
From: Champaign, IL
Registered: Aug 2003


Feedback score:    (45)
Leave feedback


Total ratings: 258
Rate this member

Report this Post06-09-2026 04:00 PM Click Here to See the Profile for fieroguruSend a Private Message to fieroguruEdit/Delete MessageReply w/QuoteDirect Link to This Post
Thanks Vince!

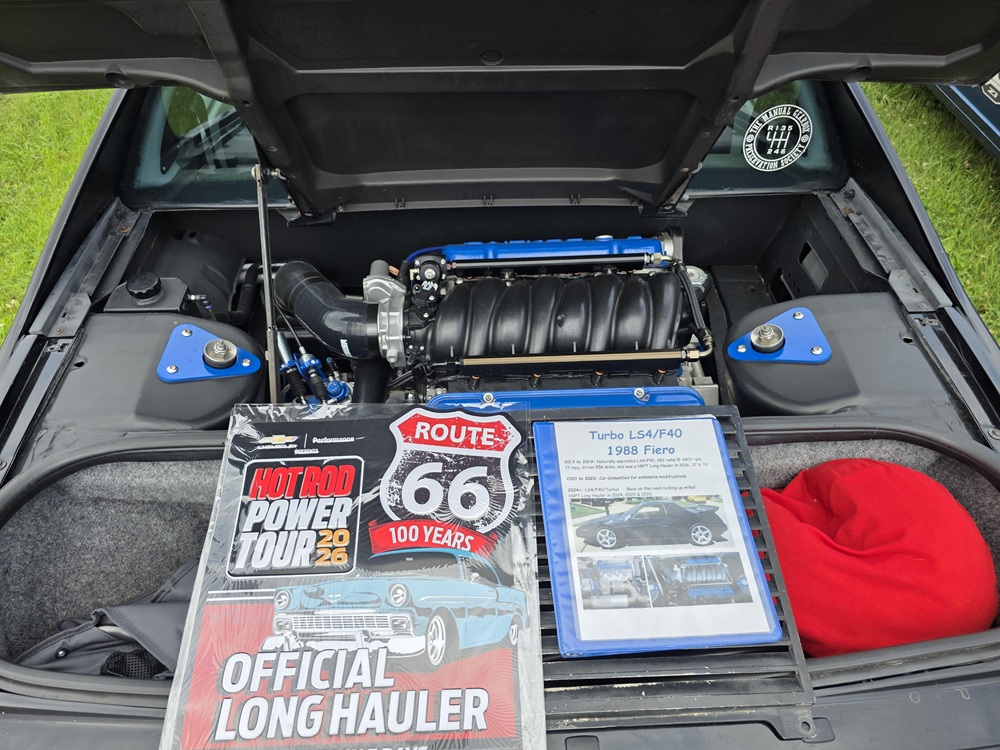
You did have a super clean engine bay!

Day 2 of HRPT!
IP: Logged
fieroguru
Member
Posts: 12724
From: Champaign, IL
Registered: Aug 2003


Feedback score:    (45)
Leave feedback


Total ratings: 258
Rate this member

Report this Post06-09-2026 07:20 PM Click Here to See the Profile for fieroguruSend a Private Message to fieroguruEdit/Delete MessageReply w/QuoteDirect Link to This Post

fieroguru

12724 posts
Member since Aug 2003
Thanks Vince!

You did have a super clean engine bay!

Day 2 of HRPT!
IP: Logged
fieroguru
Member
Posts: 12724
From: Champaign, IL
Registered: Aug 2003


Feedback score:    (45)
Leave feedback


Total ratings: 258
Rate this member

Report this Post06-13-2026 12:04 PM Click Here to See the Profile for fieroguruSend a Private Message to fieroguruEdit/Delete MessageReply w/QuoteDirect Link to This Post
Another HRPT in the books. Got back from Tulsa last night about 8:45 PM.

This car has now longhauled 2016, 2017, 2019, 2024, 2025, 2026


IP: Logged
fieroguru
Member
Posts: 12724
From: Champaign, IL
Registered: Aug 2003


Feedback score:    (45)
Leave feedback


Total ratings: 258
Rate this member

Report this Post06-15-2026 08:09 PM Click Here to See the Profile for fieroguruSend a Private Message to fieroguruEdit/Delete MessageReply w/QuoteDirect Link to This Post
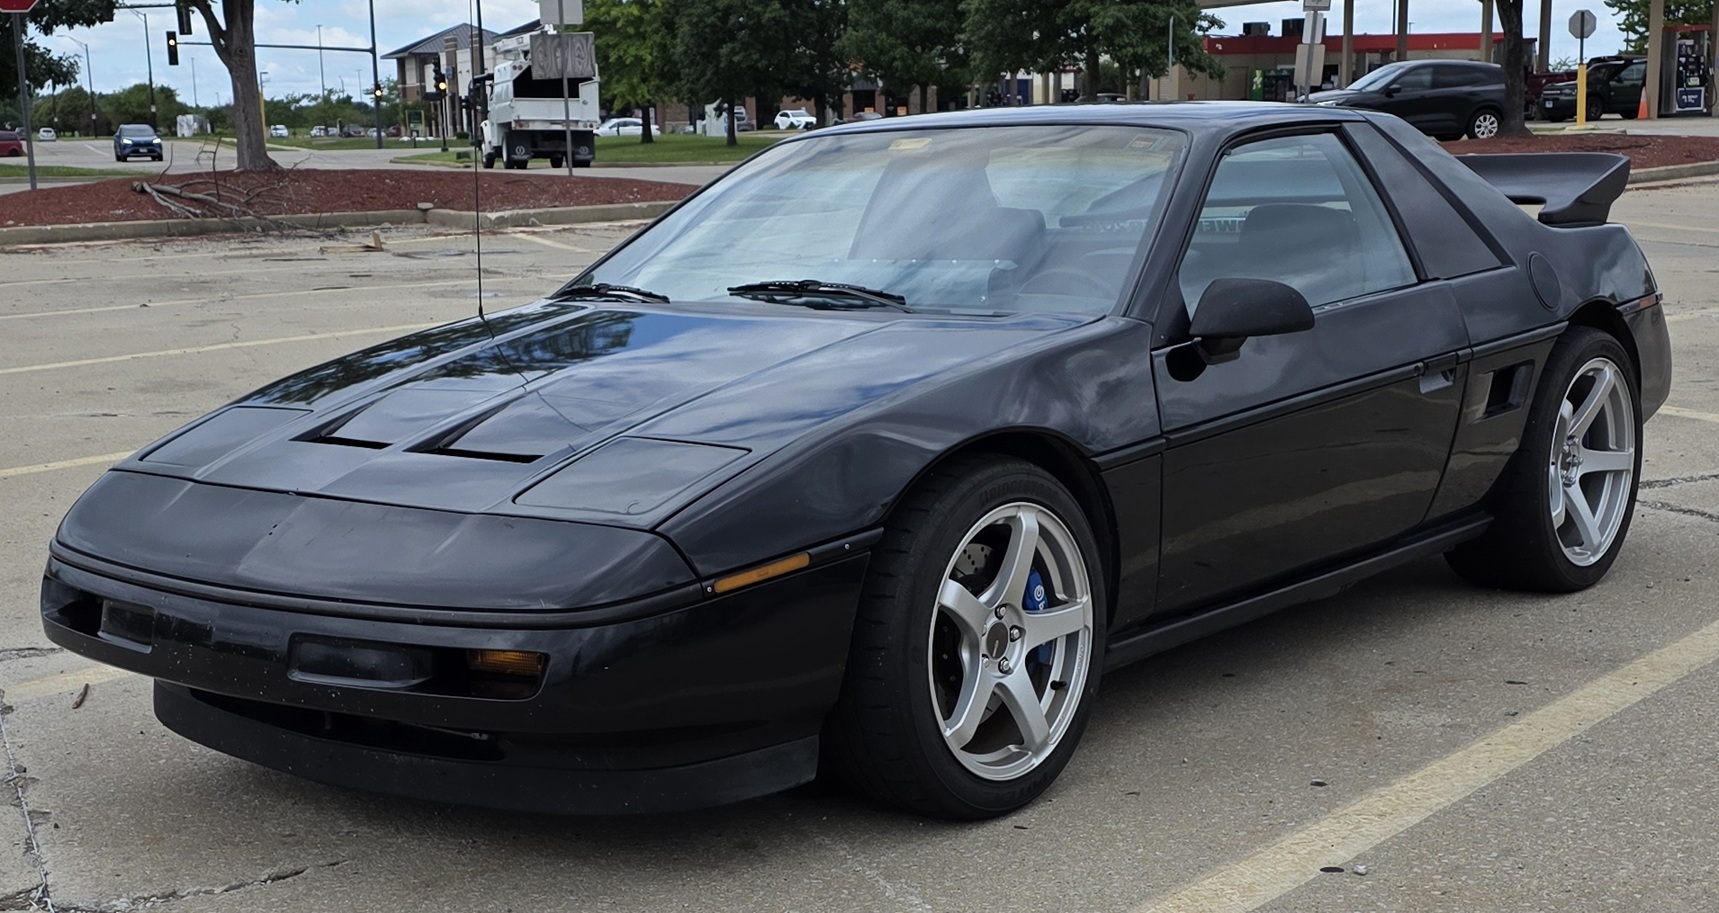
Here are some post Power Tour pics:


Check out 1:48


Check out 3:36
IP: Logged
PFF
System Bot
fieroguru
Member
Posts: 12724
From: Champaign, IL
Registered: Aug 2003


Feedback score:    (45)
Leave feedback


Total ratings: 258
Rate this member

Report this Post06-21-2026 05:51 PM Click Here to See the Profile for fieroguruSend a Private Message to fieroguruEdit/Delete MessageReply w/QuoteDirect Link to This Post
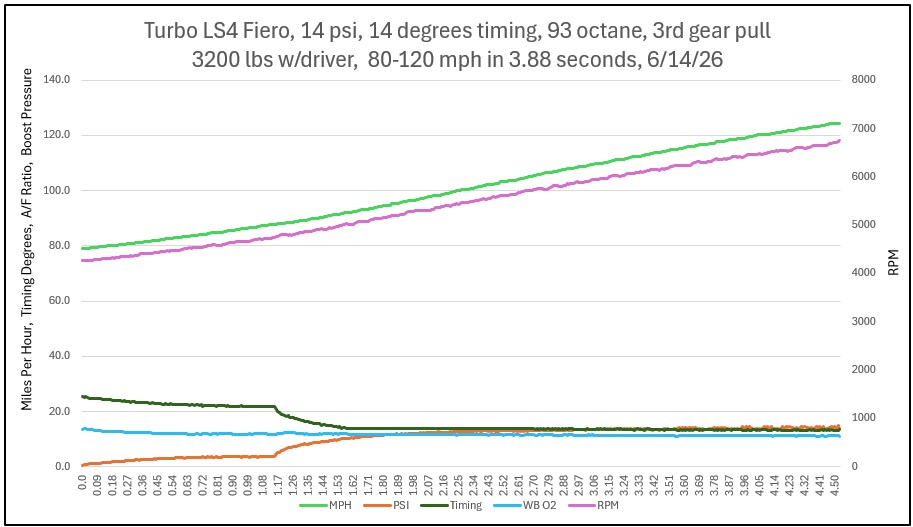
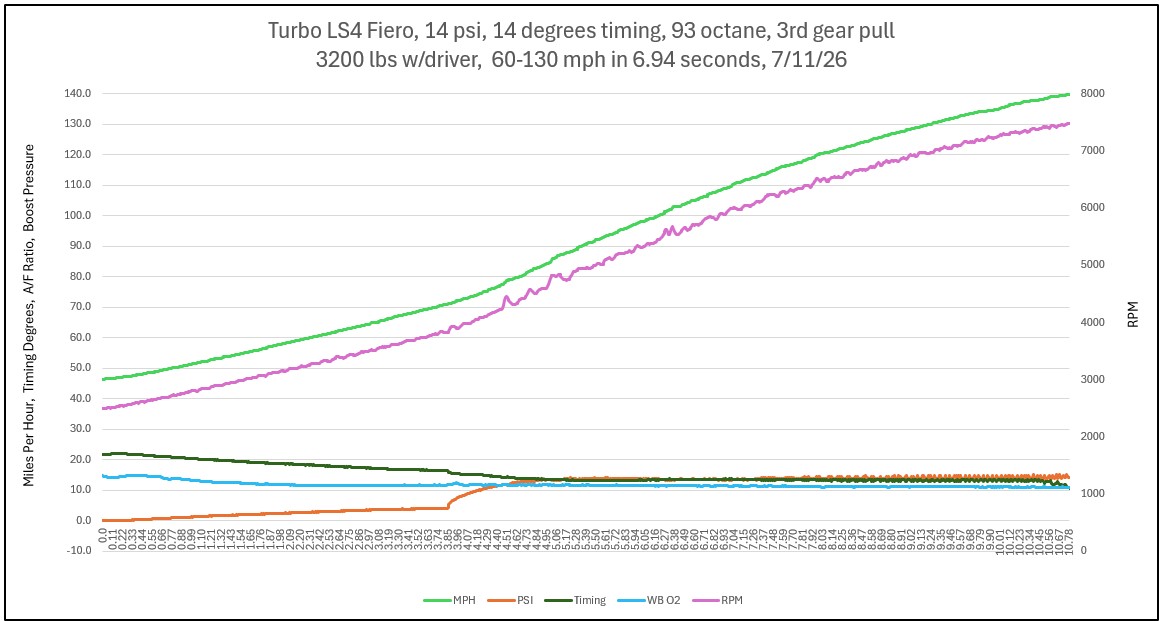
Mac valve for the boost controller failed, so I am running just on the wastegate spring currently. 14 psi, 14 degrees of timing, 93 octane, and the car weighs 3200 lbs with me in it. Here is a datalog (100 rows of data/sec) from a 3rd gear pull. 80-120 mph in 3.88 seconds. After the 2-3 shift it took about 1.6 seconds to get to 14 psi and follows the timing changes. I probably need to lower the timing in the lower boost/rpm range to help the turbo spool faster.


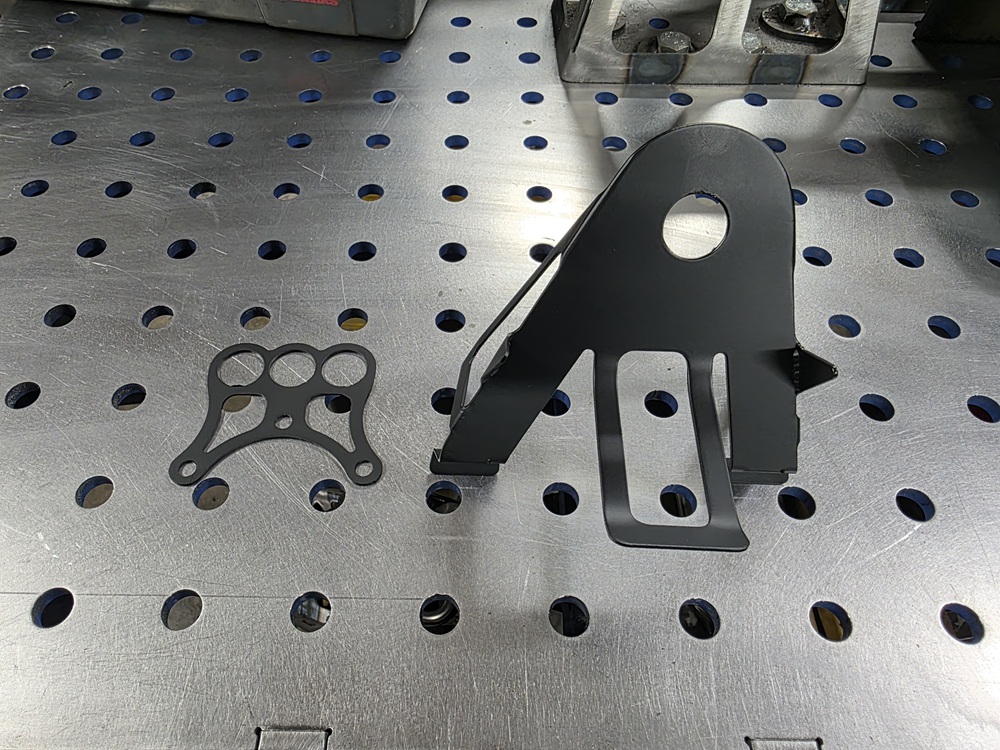
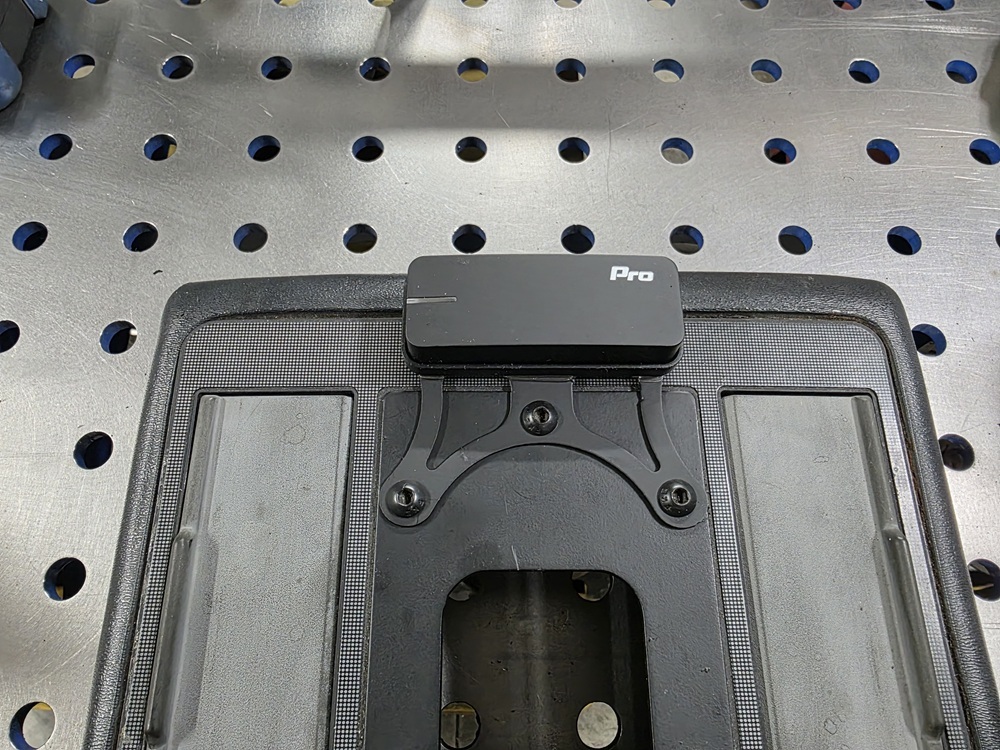
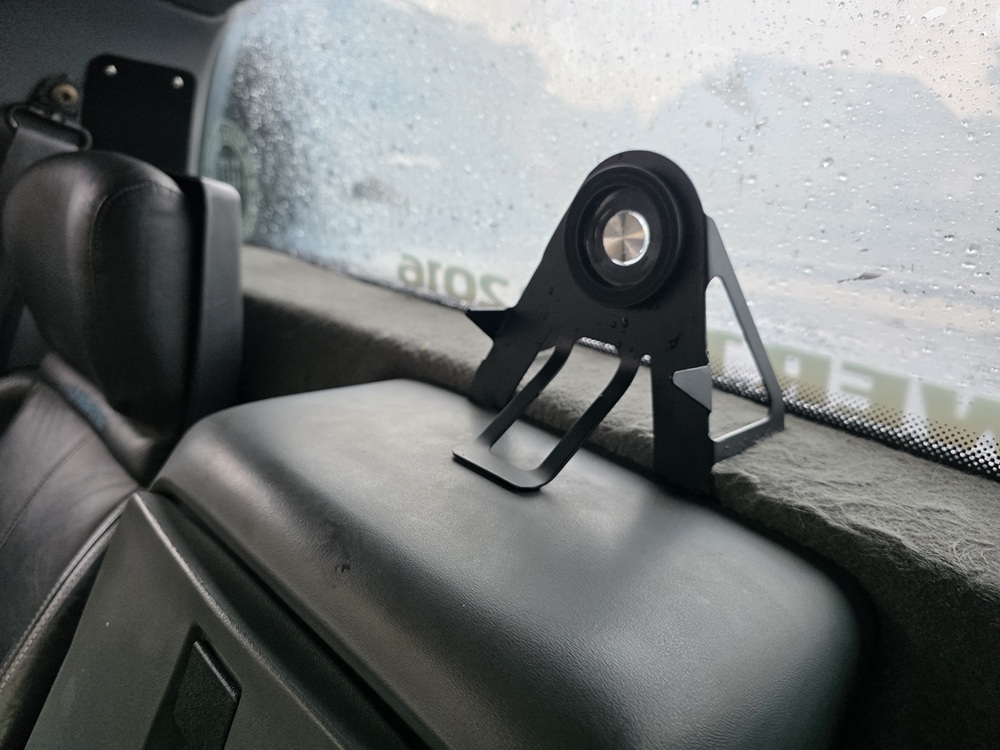
As I prepare for more WOT runs and tuning I made a couple of brackets that will aid in those efforts. The one on the left is a bracket to mount the Dragy Pro accelerometer. I wanted it somewhere out of the way, so it could just live in the car w/o drawing a lot of attention.


Here it is installed on the shifter console:


The larger bracket, is a cell phone mount bracket on the center console. The bracket does't use any screws, but is clamped in place by the console pressing it in the groove of the carpet and front/rear supports.


Here is the view the camera has on the new mount.


IP: Logged
ericjon262
Member
Posts: 3208
From: everywhere.
Registered: Jan 2010


Feedback score:    (10)
Leave feedback


Total ratings: 66
Rate this member

Report this Post06-21-2026 07:17 PM Click Here to See the Profile for ericjon262Send a Private Message to ericjon262Edit/Delete MessageReply w/QuoteDirect Link to This Post
I have a gopro mount in my back window near that spot, it makes for cool footage. congrats on surviving powertour!

------------------
"I am not what you so glibly call to be a civilized man. I have broken with society for reasons which I alone am able to appreciate. I am therefore not subject to it's stupid laws, and I ask you to never allude to them in my presence again."

I invited Lou Dias to trash me in my own thread, he refused. sorry. if he trashes your thread going after me. I tried.

IP: Logged
fieroguru
Member
Posts: 12724
From: Champaign, IL
Registered: Aug 2003


Feedback score:    (45)
Leave feedback


Total ratings: 258
Rate this member

Report this Post07-12-2026 09:50 PM Click Here to See the Profile for fieroguruSend a Private Message to fieroguruEdit/Delete MessageReply w/QuoteDirect Link to This Post
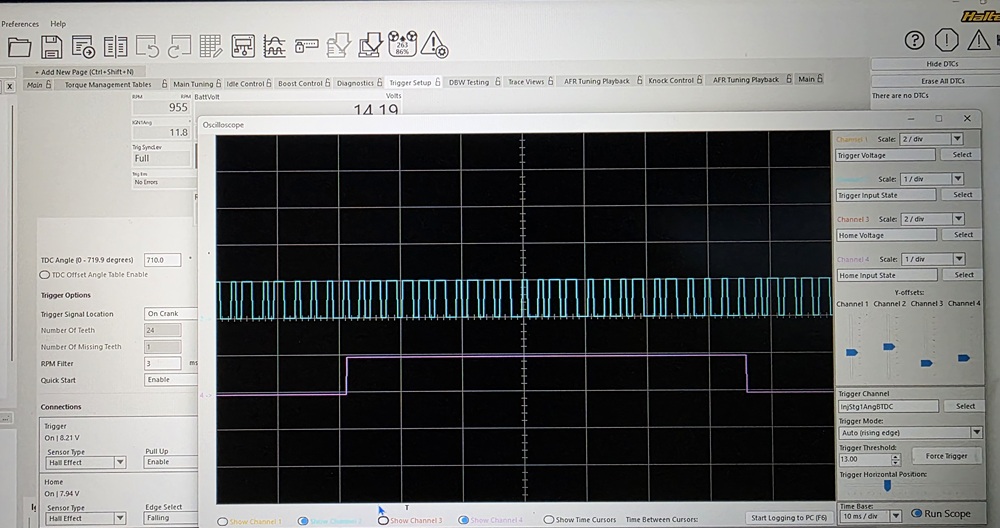
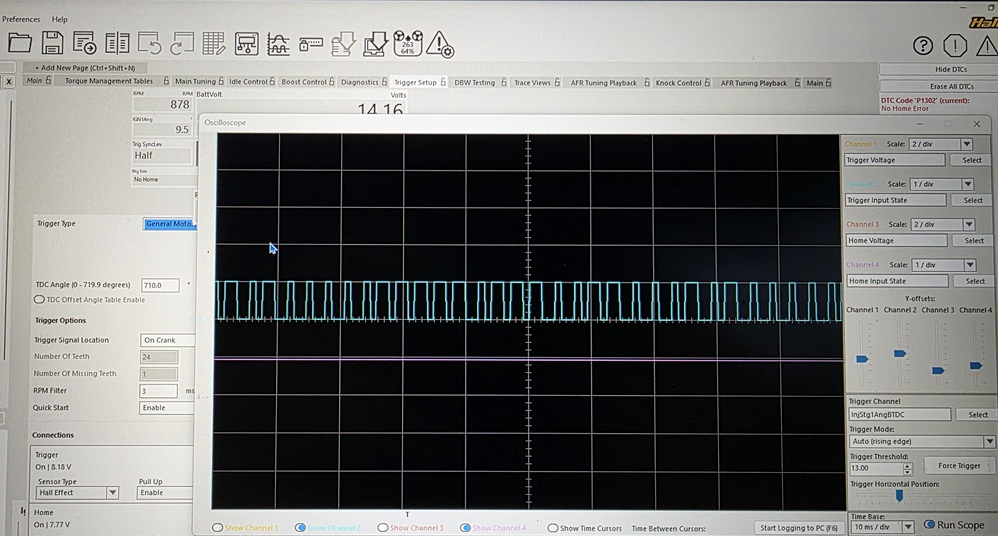
Took the car on another 500 mile work trip to WI last week and the best tank of gas was 26.7 mph. Only issue was it started setting a no-home error. It would sync and home for the first start of the day, but as it warmed up, it would set the error. Did some some logging the crankshaft and cam sensors and found that the cam sensor signal was falling out as it warmed up.

24X crankshaft position with 1X camshaft postion sensor - everything working and full sync:


24X crankshaft position with no camshaft postion signal and half sync.


With the half sync, the ecm reverts to batch fire and waste spark which runs fine, but negates the benefits of timing injectors (below 2500 rpm) to start spraying fuel only once the exhaust valve is closed. This is one of the keys to good fuel economy with a performance camshaft.

Changed the camshaft position sensor and it was back running error free, so I decided find an answer to something someone asked. I had posted the 80-120 mph time, and the questions was what it could do from 60-130mph. 6.94 seconds. This log went right up to the 7500 rpm limiter and 140 mph... Still more in it, but I need to fix the boost control mac valve before so boost comes on faster than just with the wastegate spring.


I have said it many times before.... but this car is AWESOME!

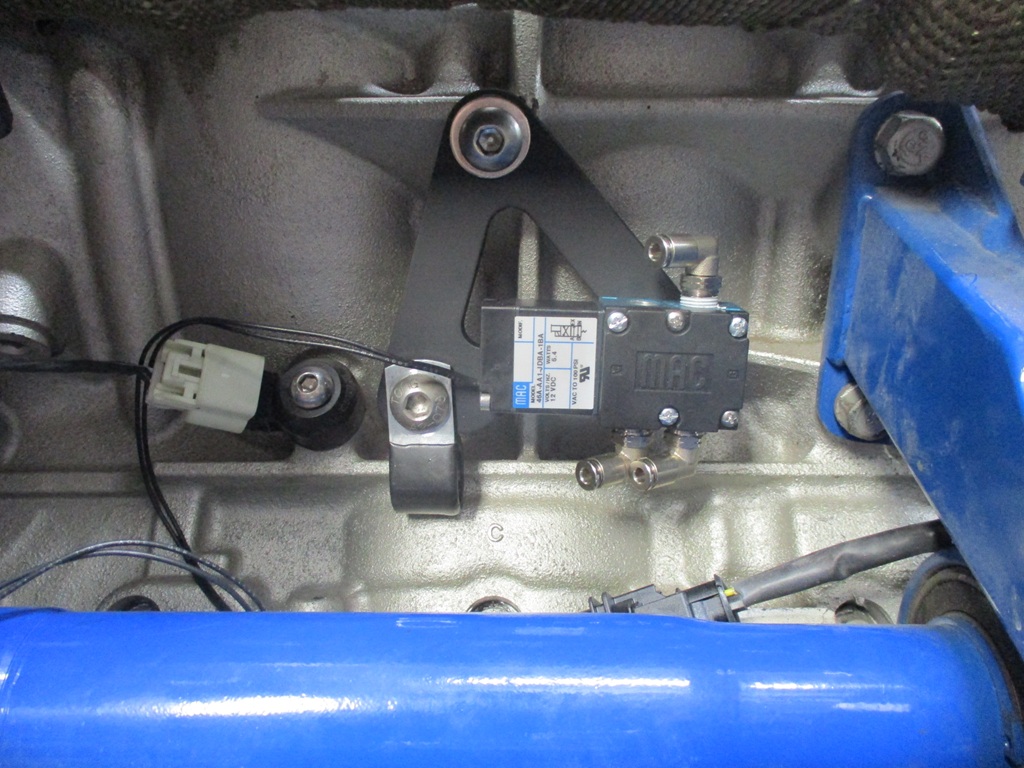
After I had my fun and saw the delayed boost response, that motivated me to finally replace the mac valve for the boost controller. Took about 1.5 hours because it is over the passenger intermediate shaft and I had to remove the wastegate muffler to access it.
Here is a reminder of where it is mounted:


Also converted the 3rd brake light to LED panel following the details in this thread. It worked out well!
https://www.fiero.nl/forum/Forum2/HTML/146359.html

The car is still on jackstands and I will work on a few more maintenance items this week.


IP: Logged
fieroguru
Member
Posts: 12724
From: Champaign, IL
Registered: Aug 2003


Feedback score:    (45)
Leave feedback


Total ratings: 258
Rate this member

Report this Post07-16-2026 07:15 PM Click Here to See the Profile for fieroguruSend a Private Message to fieroguruEdit/Delete MessageReply w/QuoteDirect Link to This Post
4:42 to 6:34 in this video the Turbo LS4 Fiero gets some attention.


The bad part is you have to look and listen to me.
Very Cool!
IP: Logged
La fiera
Member
Posts: 2319
From: Mooresville, NC
Registered: Jun 2008


Feedback score:    (7)
Leave feedback

Rate this member

Report this Post07-16-2026 10:36 PM Click Here to See the Profile for La fieraSend a Private Message to La fieraEdit/Delete MessageReply w/QuoteDirect Link to This Post
That was great Paul!
IP: Logged
fieroguru
Member
Posts: 12724
From: Champaign, IL
Registered: Aug 2003


Feedback score:    (45)
Leave feedback


Total ratings: 258
Rate this member

Report this Post07-28-2026 07:49 PM Click Here to See the Profile for fieroguruSend a Private Message to fieroguruEdit/Delete MessageReply w/QuoteDirect Link to This Post
 
quote
Originally posted by La fiera:

That was great Paul!


Thanks!

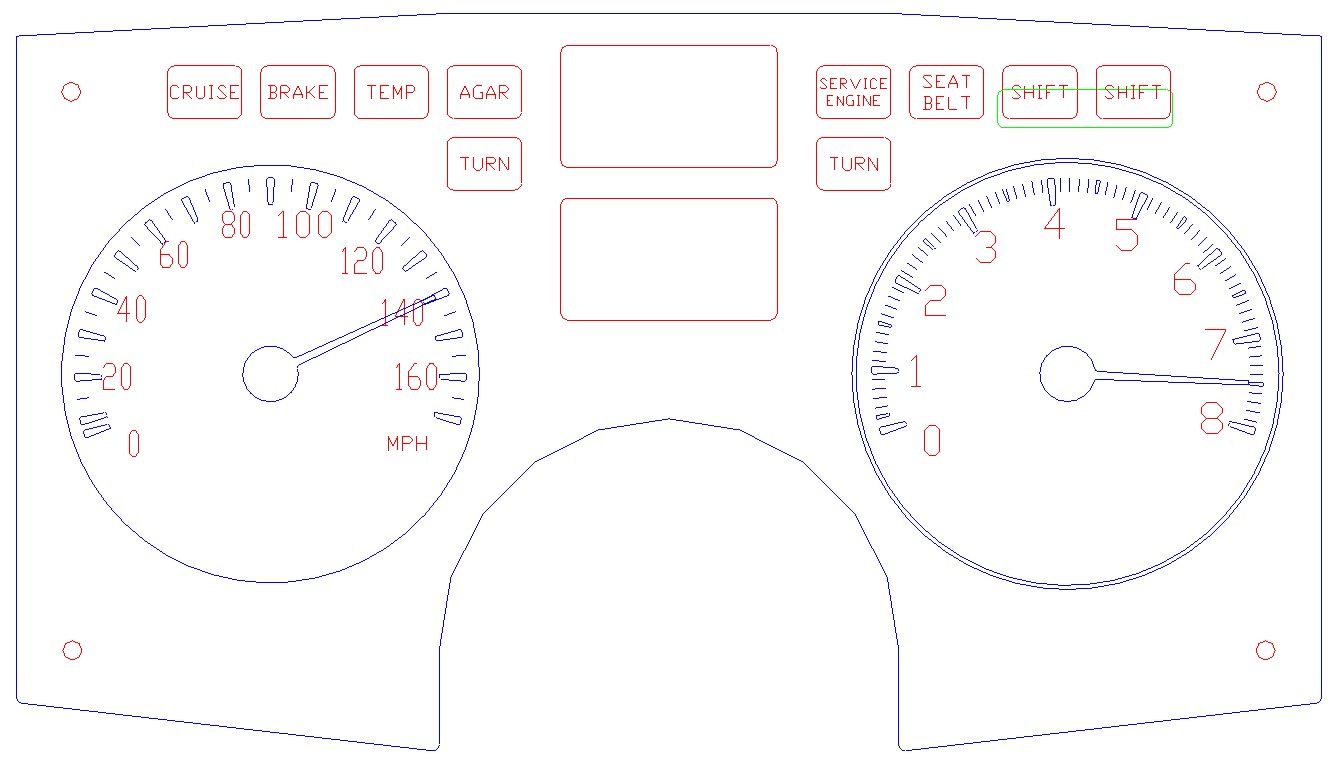
Now that the Turbo LS4/F40 Fiero will go 140 mph in 3rd gear at 7500 rpm, I need some gauges that will work for these elevated limits. Working on a solution for that!
IP: Logged
Previous Page | Next Page

This topic is 55 pages long:  1   2   3   4   5   6   7   8   9   10   11   12   13   14   15   16   17   18   19   20   21   22   23   24   25   26   27   28   29   30   31   32   33   34   35   36   37   38   39   40   41   42   43   44   45   46   47   48   49   50   51   52   53   54   55 
next newest topic | next oldest topic

All times are ET (US)

Post New Topic  Post A Reply
Hop to:

Contact Us | Back To Main Page

Advertizing on PFF | Fiero Parts Vendors
PFF Merchandise | Fiero Gallery
Fiero Related Auctions on eBay

Copyright (c) 1999, C. Pennock