When I was swapping in my new 5.7L I was really considering a Dedenbear kit for my cooling system ... here is a link to it. I think this is really innovative... http://www.dedenbear.com/TXTwHead.htm#WH regards Danyel
So I have a question for you, are you going to do anything with the radiator? does it need to be upsized to accommodate for the v8 or is it going to be sufficient? I had the company truck the other day and it had low coolant and made me think about that.
So I have a question for you, are you going to do anything with the radiator? does it need to be upsized to accommodate for the v8 or is it going to be sufficient? I had the company truck the other day and it had low coolant and made me think about that.
My car already has a 26x19x3" aluminum radiator up front from the SBC swap - stock is 24x16x1.5... it has plenty of excess cooling capacity.
So I have a question for you, are you going to do anything with the radiator? does it need to be upsized to accommodate for the v8 or is it going to be sufficient? I had the company truck the other day and it had low coolant and made me think about that.
Aluminum 3-core from Champion is what's going in mine.
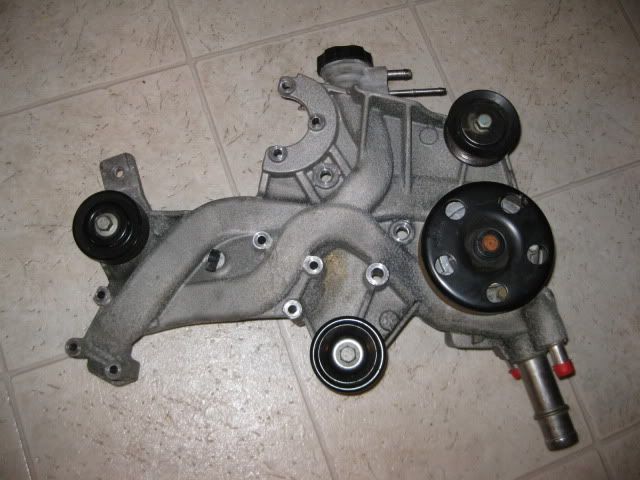
Yet another LS4 water pump showed up today (thanks ZombiePenguin!).
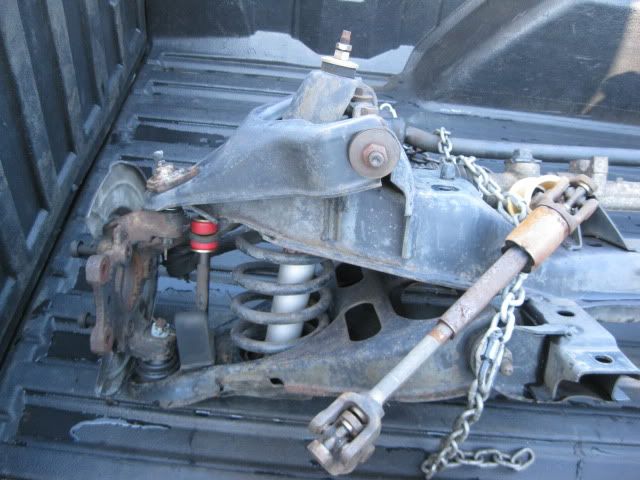
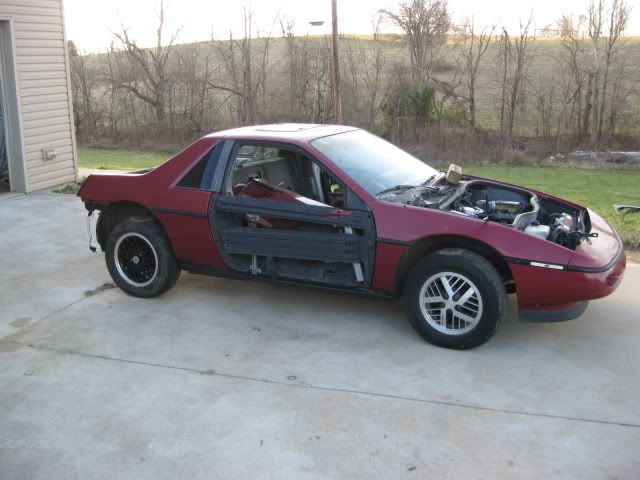
Been busy stripping down an 88 parts car to get back under my allowable # of personal fieros (2). Started with this:
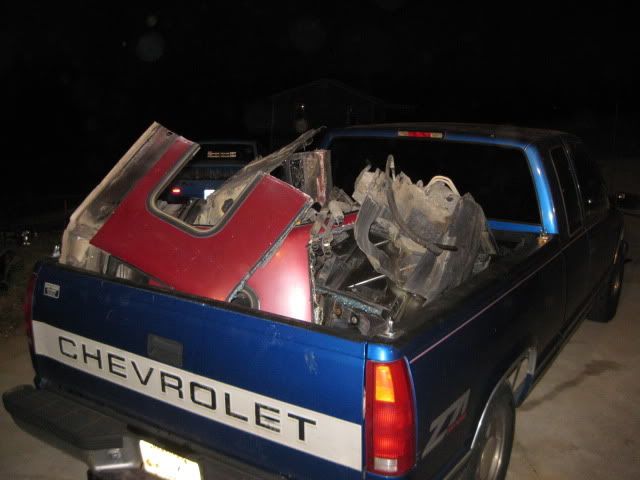
Ended with this:
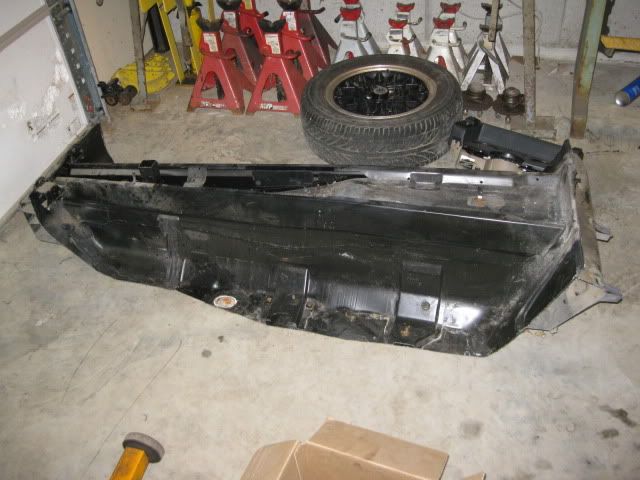
Kept this for a fuel tank project:
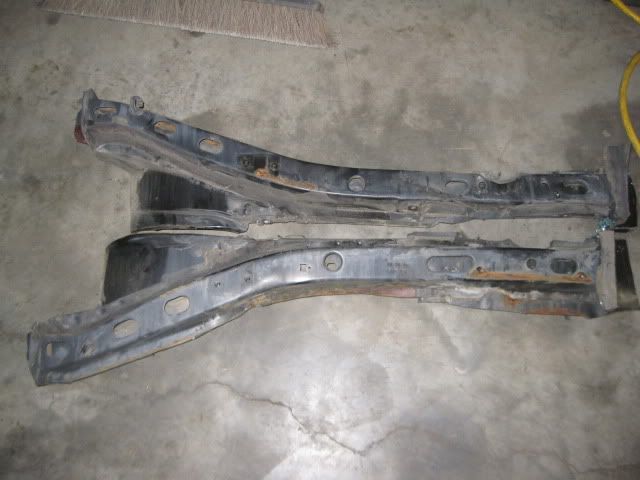
The rear frame rails were too good to scrap, so they were given to another PFFer:
I also gave away the 4.3/F40 engine/tranny/tubular cradle to get more shop space and 1 less distraction.
After this weekend, I should be done with all the fabrication getting the hardware for first 25 brake kits done, which has been a significant time drain for the past several weeks.
I am hoping to spend a little time on the LS4 swap this weekend and identify and order the needed wiring pigtails for some of my sensor changes.
I ordered the appropriate wiring pigtail for the 3-wire temp sensor (with analog temp output for factory guages) and the LS1/LS2 map sensor. Once these get here, then I will be back working on the harness... I hate wiring...
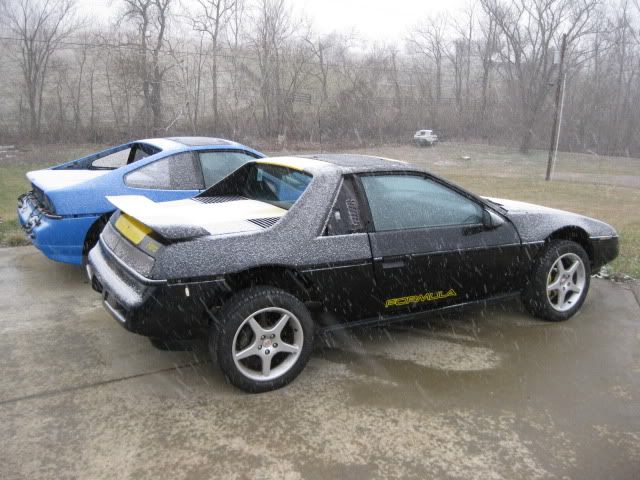
I have never been one to name cars (besides the color/year designation), but I think the black/yellow car will get the Impala SS LS4, G6 F40, the 13" brakes, S10 coilovers in front, C5 vette wheels, and an S10 wheel bearing upgrade... I think it deserves to be named the "Parts Bin Banshee"
Wow! That's the last time I take a car to you for a few tweeks.
Bump for a great project and thread.
------------------ Ron The key thing is to wake up breathing! All the rest can be fixed. (Except Stupid - You can't fix that) Always remember these words of wisdom.
"The Lord must truly love fools, for he made them in abundance."
Wow! That's the last time I take a car to you for a few tweeks.
That's the new collapsible option to make the fiero into a subcompact that will fit in the bed of a full size truck! Haven't quite worked out the process for expanding it back to normal size... so I will need you be bring a couple more 88's down so I can try some more!
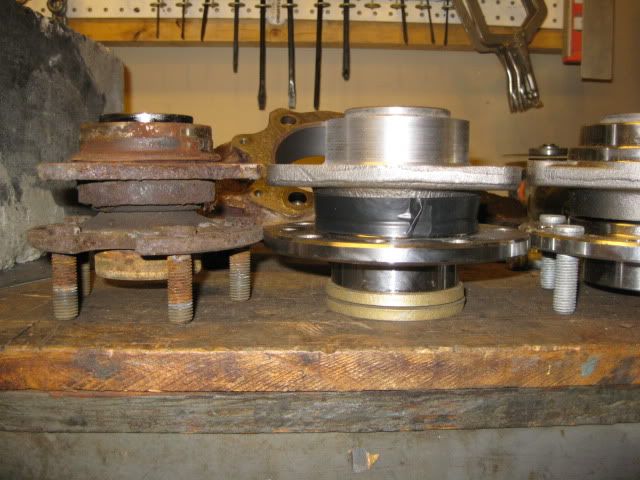
Whats up with the front wheel bearings. I guess I missed it but are you S10 ones bolt up?
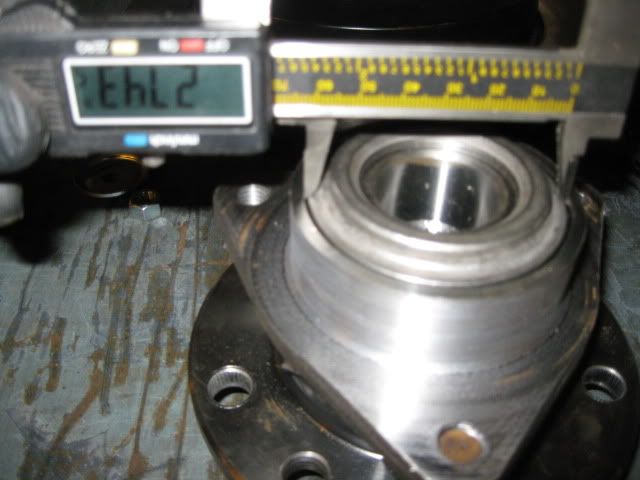
For the fronts, I am going to redrll the stock bearing flange for 5 x 4 3/4. The S10 bearing in the rear requires extensive machining to the bearing and upright to get the two to work together. The S10 bearing housing is 3.6" in OD and the hole in the upright is 2.8". Both are being modified to about 3.10 to allow them to fit each other.
[This message has been edited by fieroguru (edited 01-25-2012).]
Not sure if you have already done the work on the bearings etc. for the rear hubs but the kitcar world uses S10 bearings as you are and an '89 Cutlass Ciera hub. Same mounting points but bigger bnearing mounting to fit the S10 bearing. I am pretty sure nothing is required for machining the bearing or hub to have them mate up.
Not sure if you have already done the work on the bearings etc. for the rear hubs but the kitcar world uses S10 bearings as you are and an '89 Cutlass Ciera hub. Same mounting points but bigger bnearing mounting to fit the S10 bearing. I am pretty sure nothing is required for machining the bearing or hub to have them mate up.
Cheers Don
I will have to check into that... but I would prefer to only buy 2 bearings vs. 4.
[This message has been edited by fieroguru (edited 01-25-2012).]
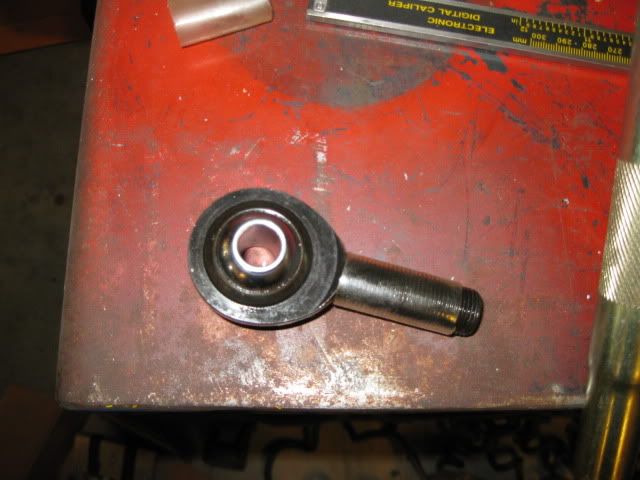
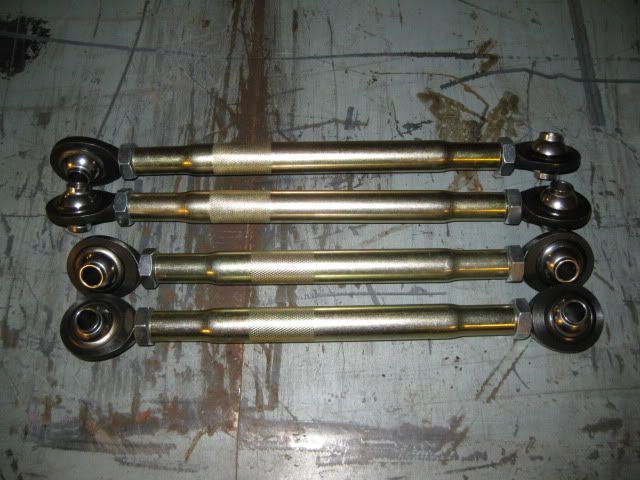
The rod ends/heim joints finally showed up (on back order for 1 month) so I can get started on the rod end lateral link upgrade. The rod ends are chromoly, teflon lined, with a wide format 1/2" hole on the ball end and 5/8-18 threads. They are rated for 24K lbs. The wider format and 1/2" hole greatly simplify the mounting in the stock lateral link pockets... just need two thick washers about .175" thick.
In addition to all the suspension/brake upgrades listed above, the car will also have poly bushings in front, rear coil overs, aluminum sway bar bushings front/rear and zero lash sway bar links... and that should wrap up the handling upgrades... (unless I make some aluminum upper a-arm bushings for the front..)
Work has been nuts this week and we are at peak activity for the next 3 weeks... But I should have time to continue to make progress on the weekends.
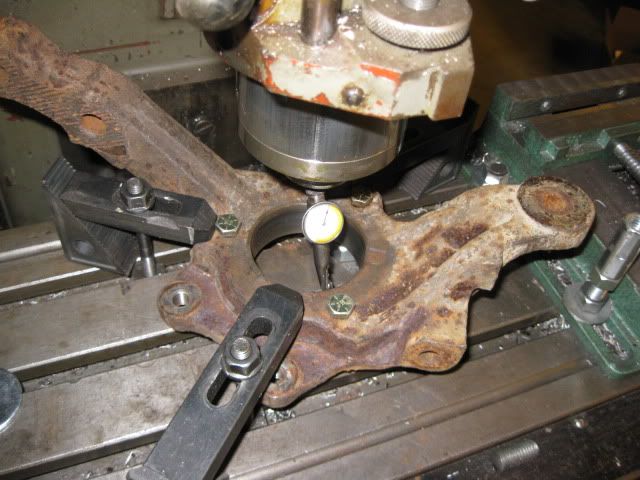
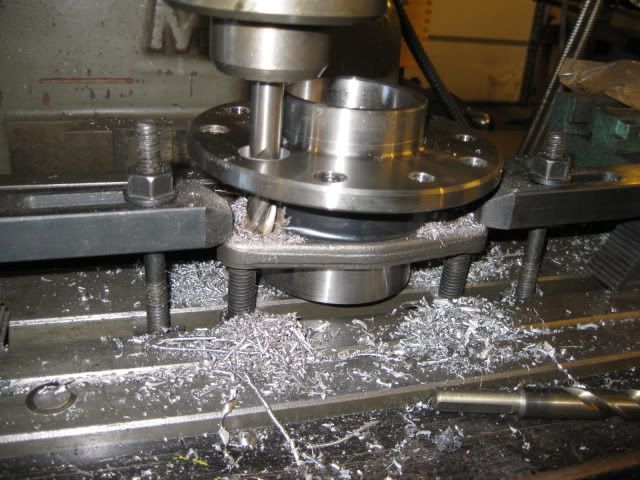
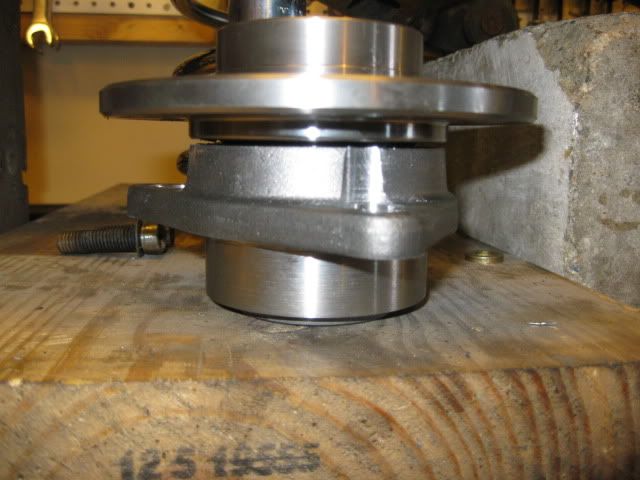
Almost done with the modifying the S10 bearing and 88 upright to fit the two together... just need to modify the bearing to upright bolt pattern on the bearing now.
For the fronts, I am going to redrll the stock bearing flange for 5 x 4 3/4. The S10 bearing in the rear requires extensive machining to the bearing and upright to get the two to work together. The S10 bearing housing is 3.6" in OD and the hole in the upright is 2.8". Both are being modified to about 3.10 to allow them to fit each other.
So the fronts will still be 88 Fiero. I was hoping there was a better choice for the front. thanks,
So the fronts will still be 88 Fiero. I was hoping there was a better choice for the front. thanks,
I might check into doing this same bearing/upright mod to the front as well. The bore in the upright is just a little smaller, but the bolt pattern is about 1/4" in diameter smaller.
Excellent work there fieroguru! If my eyes don't deceive me, it looks like this mod will push the wheel mounting flange outboard by only a couple millimeters as compared to stock.
Excellent work there fieroguru! If my eyes don't deceive me, it looks like this mod will push the wheel mounting flange outboard by only a couple millimeters as compared to stock.
Yes, as it is right now, the flange is pushed outboard slightly. I will probably remove the needed material from the face of the upright to bring it back to the stock location.
I might check into doing this same bearing/upright mod to the front as well. The bore in the upright is just a little smaller, but the bolt pattern is about 1/4" in diameter smaller.
Sounds good. I have a new set of 88 bearings stored but would be nice to have a beefier bearing. The wife's car is running some serious meat on the front. I did a z28 front PS rack a while back with your mechanical skills it might be something to add to your arsenal of goods. I will be needing a PS set up latter. (hint)
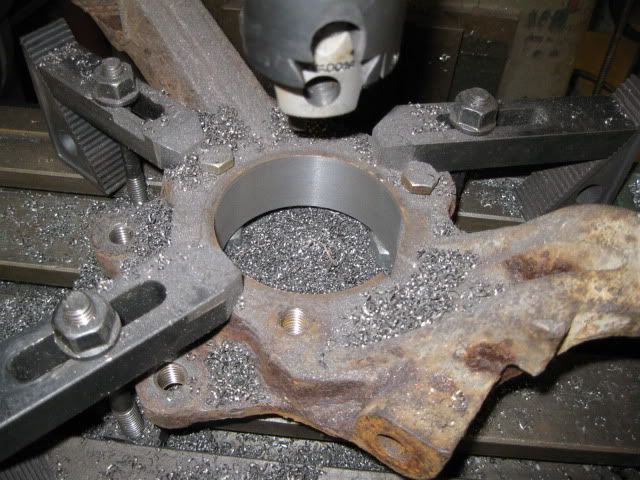
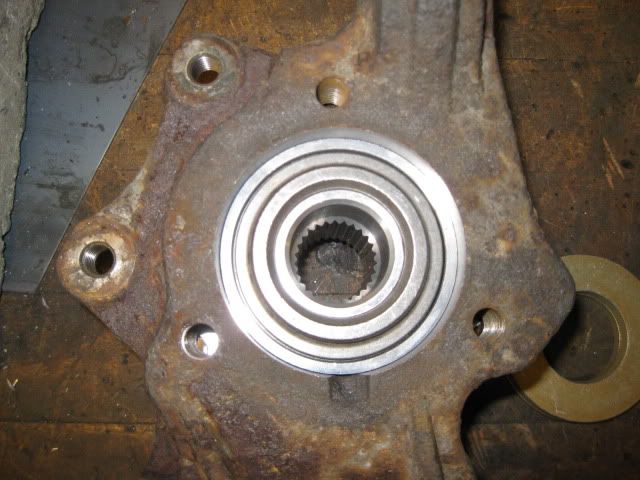
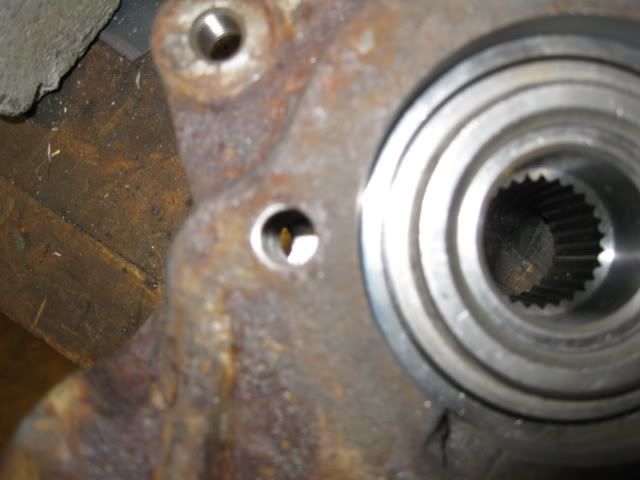
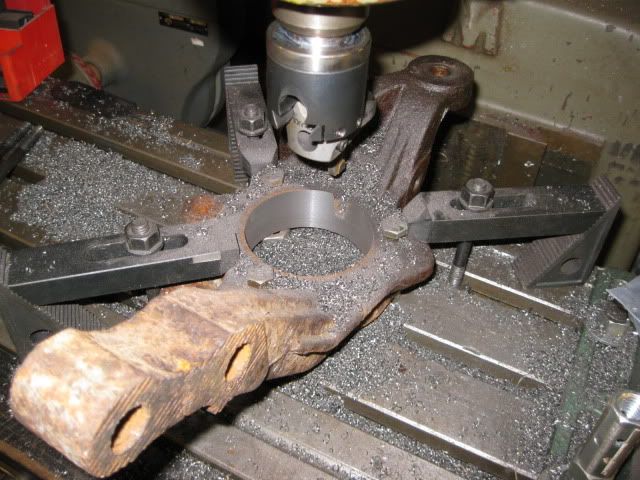
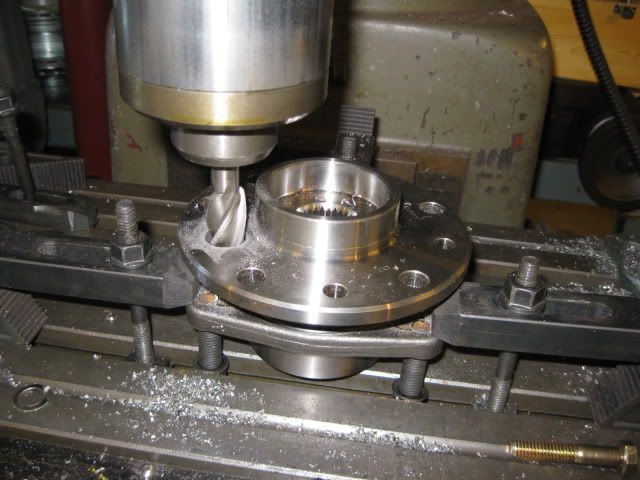
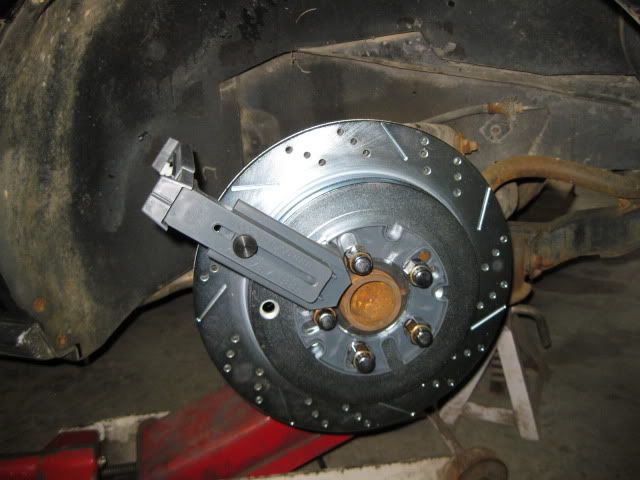
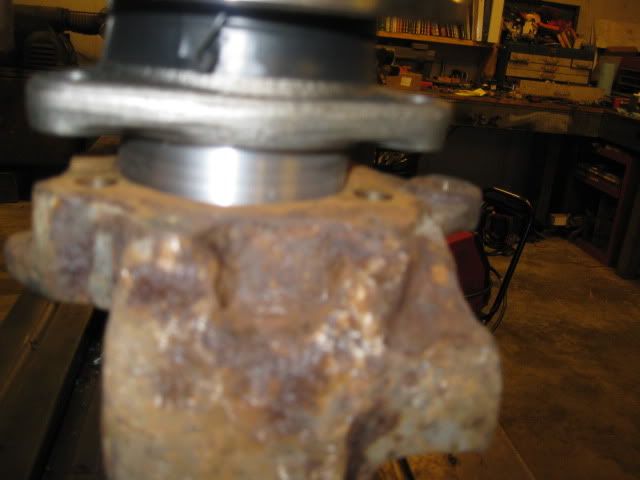
Only had about 2 hrs to spend in the garage today, but I was able to tear down the upright for the other side and get it bored as well:
Also, looked into the possibility of installing a modified S10 wheel bearing in a modified front 88 upright. In this pic, the calipers are set for the 3.062" dimension that the S10 wheel bearing is turned down to.
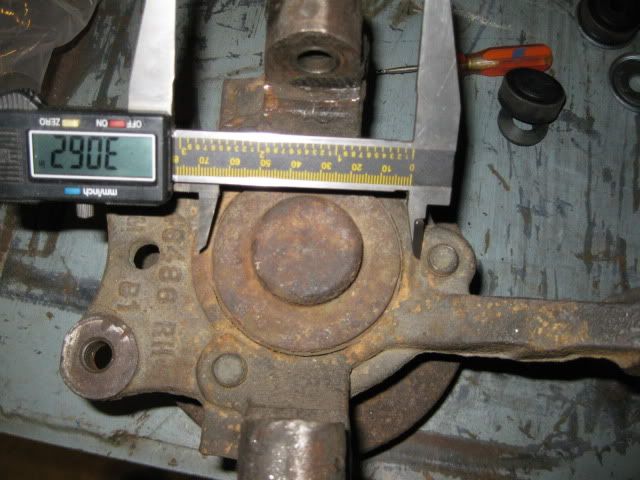
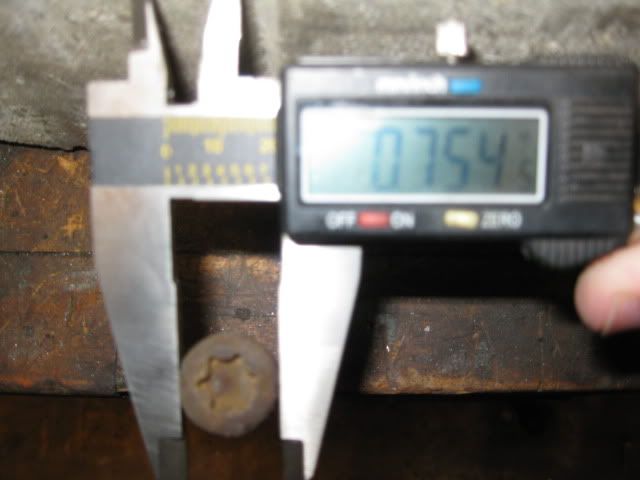
The 88 front bearing bolt pattern is 3.74" diameter and a M12 bolt is .472". So the inner edge of the bolt threads will be at 3.268". With the 3.063 hole, the wall thickness would be .103"... not too much.
The other issue, is the bolt heads are .754"
The ID of the bearing housing (where the balls are) is 2.743"
So by the time the front side of the bearing housing is clearanced for the bolt heads, the wall thickness would be reduced to .122" at the notched portion.
The stock bearing wall thickness for the 88 rear wheel bearing is .117", which is thinner than the .122" the modified S10 bearing will have at the notched for the mounting bolts. The modified S10 bearing has .160" wall thickness with it turned down to 3.062", so I could turn it down some more (.040" more) and increase the wall thickness of the upright at the bolts to .143" from .103"
The last issue would be the flange protrusion depth. The S10 wheel bearing would push the wheel flange out .44" on each side... and there really isn't mush of an opportunity to trim down the bearing (1/8" max) and the upright (probably another 1/8" max). There are 4 Timken part #'s for 4 3/4" wheel bearings that have a 1.66" wheel flange depth (vs. 1.86" on the S10 and 1.42" on the 88 Front wheel bearing), they only come with ABS and I do not know how that would impact modifying the bearing housing.
For the time being, I will probably just redrill the stock 88 front wheel bearing flanges for the 5 x 4 3/4".
Sounds good. I have a new set of 88 bearings stored but would be nice to have a beefier bearing. The wife's car is running some serious meat on the front. I did a z28 front PS rack a while back with your mechanical skills it might be something to add to your arsenal of goods. I will be needing a PS set up latter. (hint)
I posted the information about installing the bearing in the 88 front above. The biggest issue would be the flange depth, but you could take care of that with the proper wheel purchase. If doing both front and rear, I would recommend making all the bearings the same, that way you can do 5 at once and have a spare that will work for both front/rear.
I probably will not be doing anything with power steering for quite some time. Adding a pump to my current accessory drive would be problematic. Besides, my wife likes my muscular arms, so might as well keep the daily workout out for them.
[This message has been edited by fieroguru (edited 01-28-2012).]
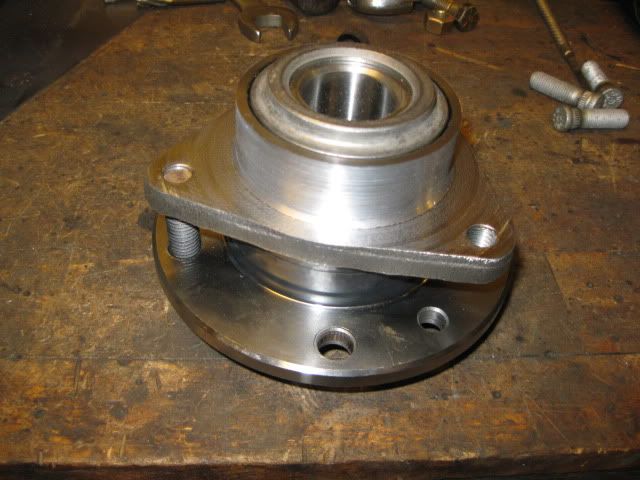
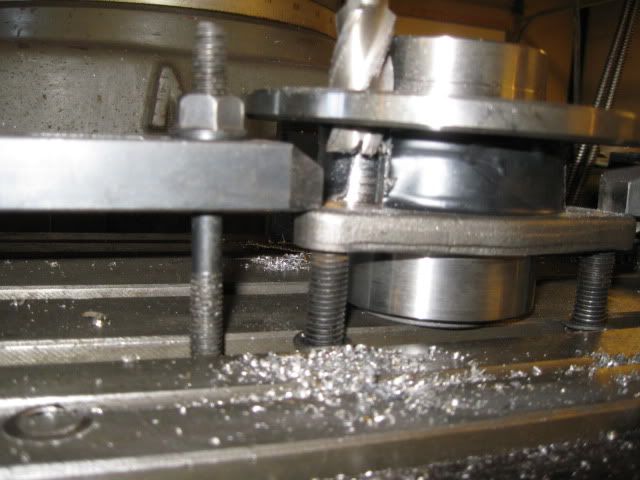
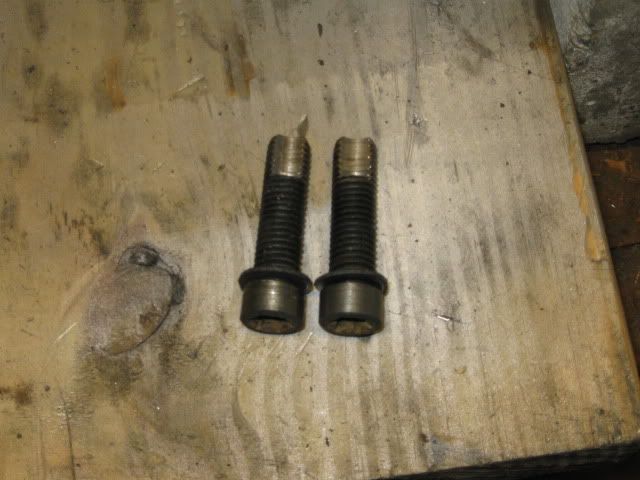
The mount bolt holes on the flange of the S10 wheel bearing are tapped, so I modified 2 of the bolts to fit into the T-slot of the mill.
Once everything was indicated in, I drilled through the wheel flange and enlarged the hole to 3/4". Then used a 3/4" end mill to clearance the side of the bearing housing for the bolt head and to flatten the casting at the base.
Then went back though with a 1/2" end mill to drill the new holes (for the fiero upright pattern):
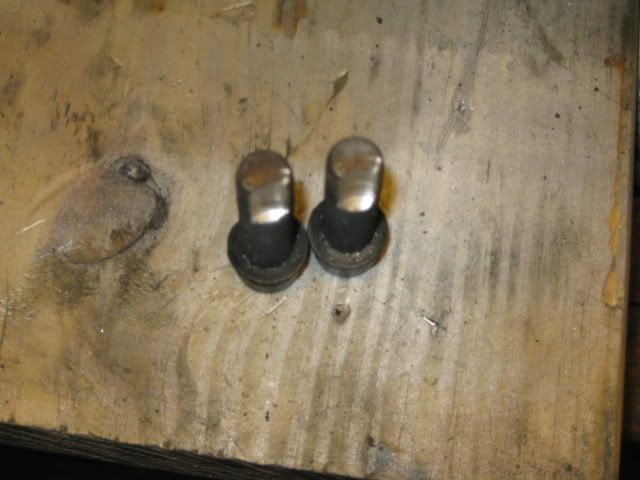
The two locating bolts were sacrificed for the drilling process:
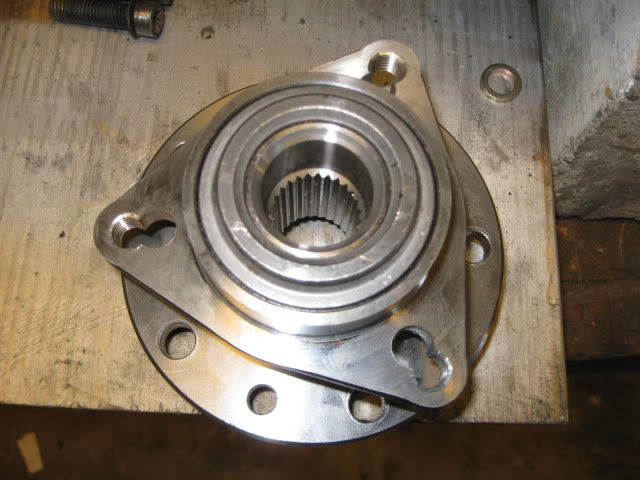
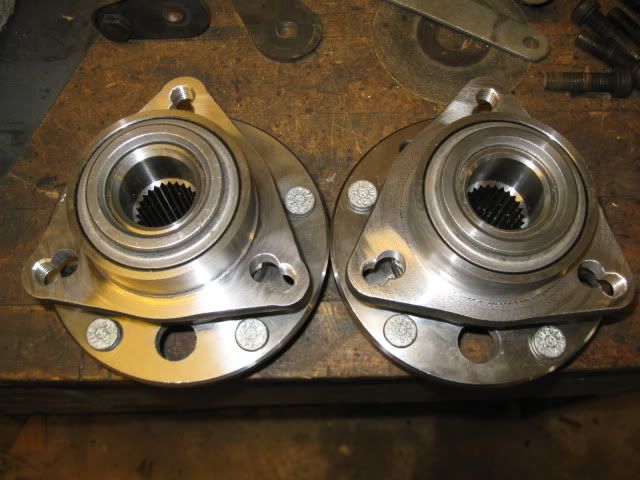
Bearing all modified:
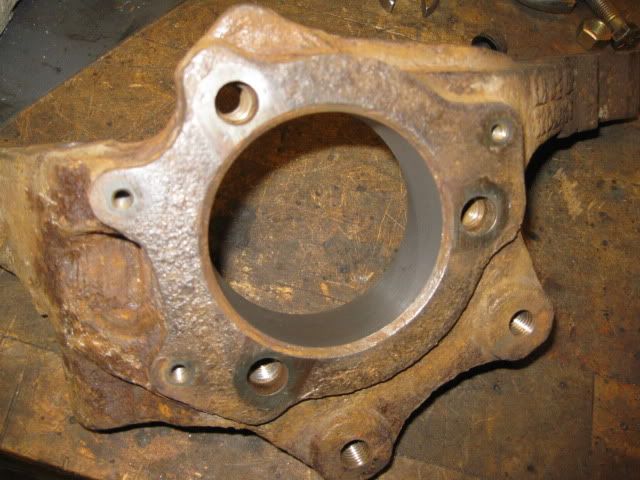
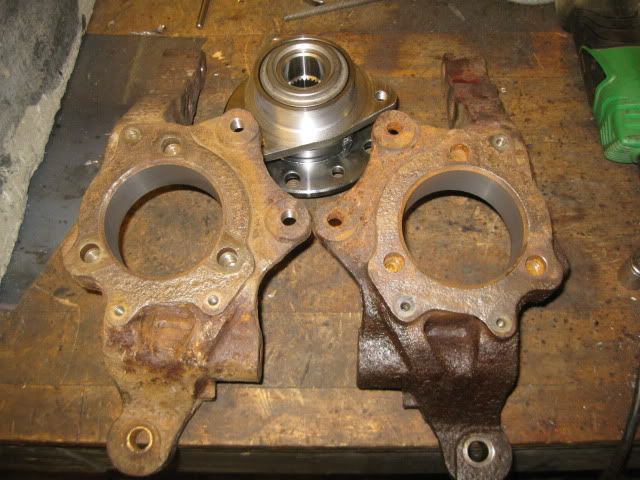
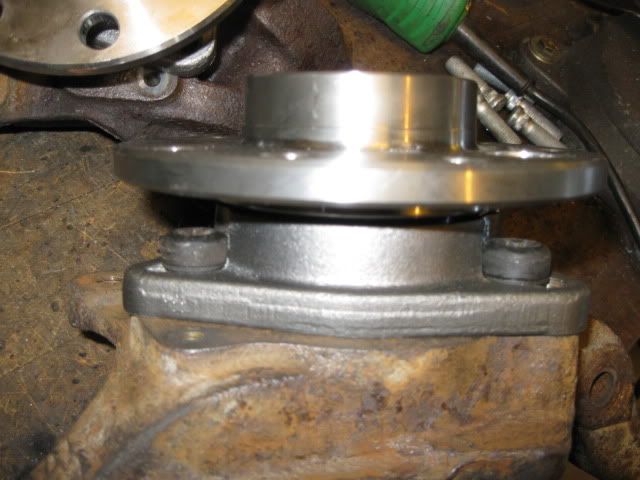
Bolted in place on the 88 Fiero rear upright:
The work to install the modified S10 wheel bearings into a modified 88 rear upright is now complete. The only part left for this project is swapping the outer CV for one from the S10 (27 spline).
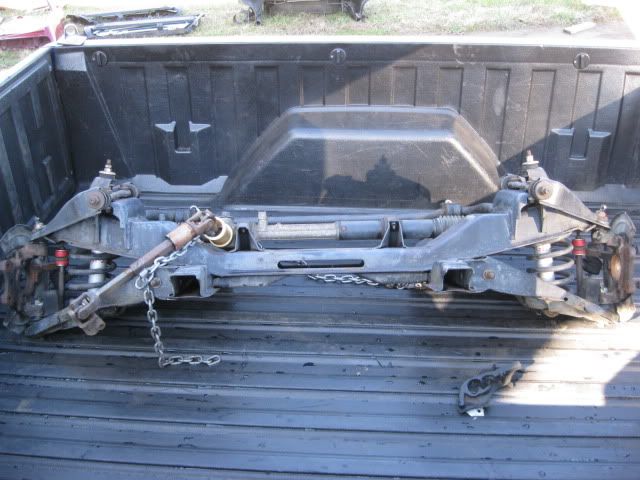
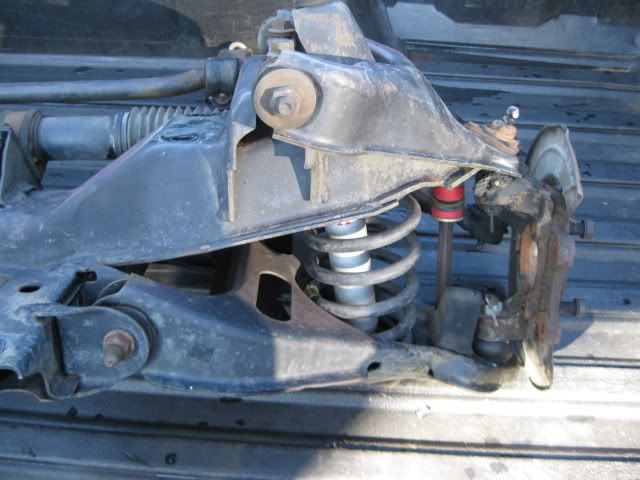
I also put one of the spare 88 front suspensions in the truck and took it to the car wash to clean it up some. This will be the one that gets the S10 coil over setup, poly bushings and a fresh coat of paint.
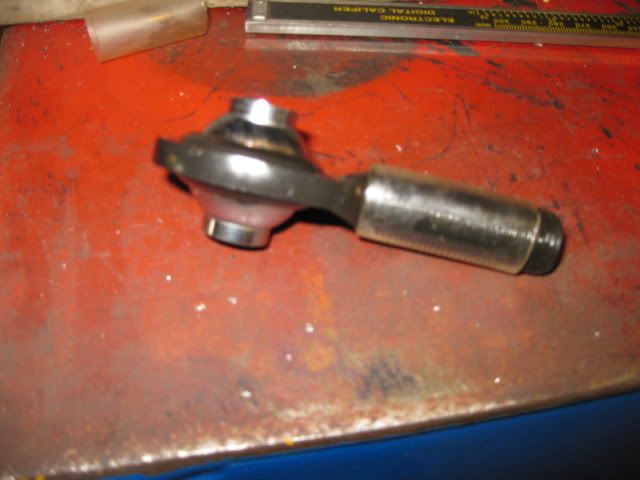
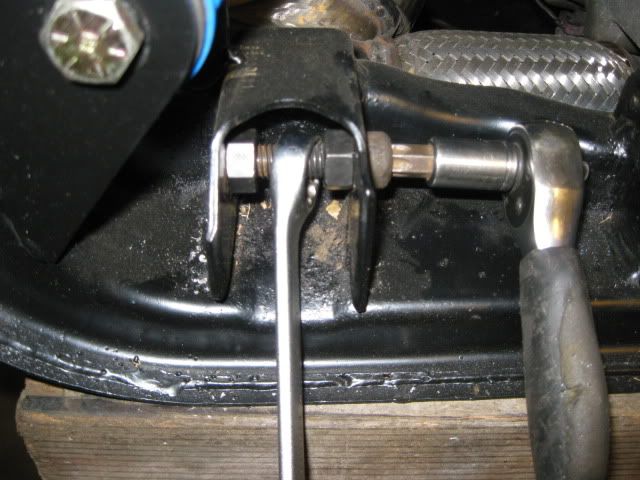
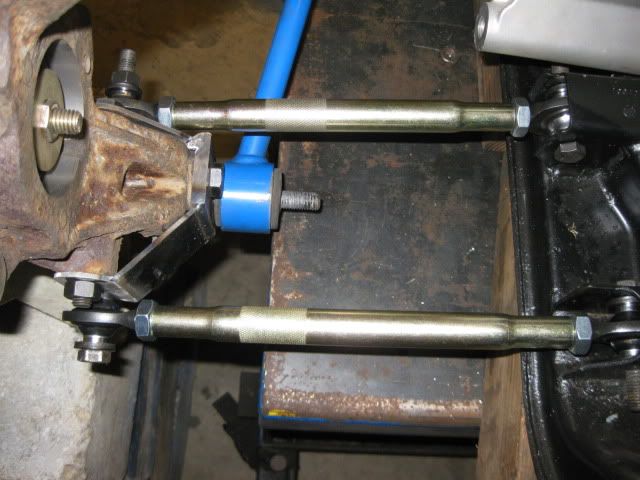
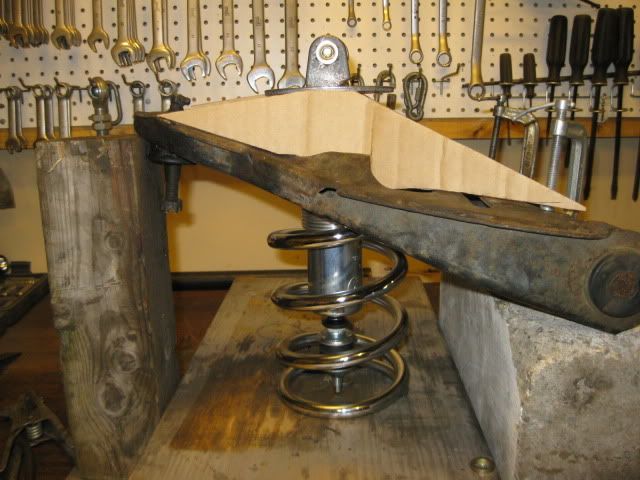
One of the suspension/handling upgrades for my 88 Fiero is to replace the poly bushing lateral links with some rod end lateral links. This will eliminate any lateral deflection and provide a more consistent toe setting (important for good tire wear for the width of tires I plan to run). Several vendors already sell this upgrade, but I wanted to see if I could build a set using available off the shelf components (no custom spacers required).
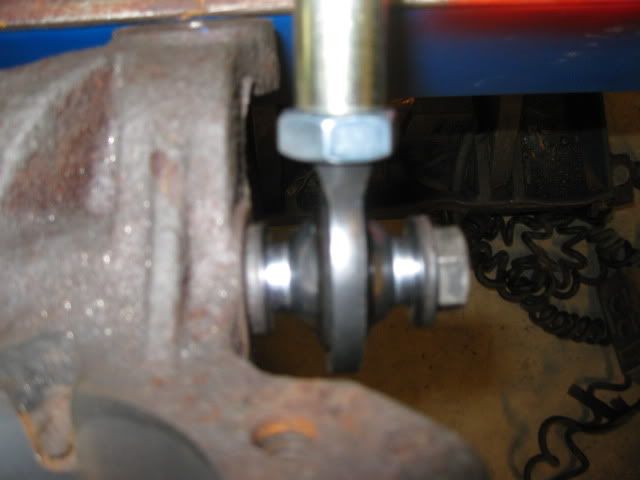
The key to this conversion is the QA1 rod end that essentially has a built in spacer shaft. This is a teflon lined, chromoly, rod end that is rated for 24,000 lbs. The hole is 1/2" and it nearly fills the length of the mounting pocket on the cradle.
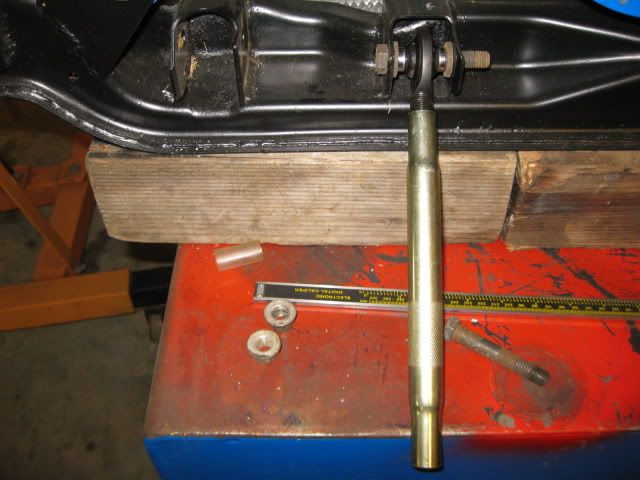
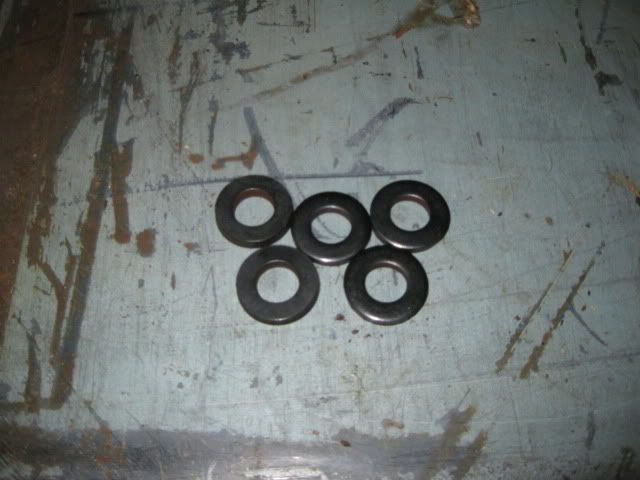
A test fit showed that finding a couple of washers the proper thickness could close up the gap quite well. In this pic, the washers are the washers from the lateral link bolts, but they are slightly too thin.
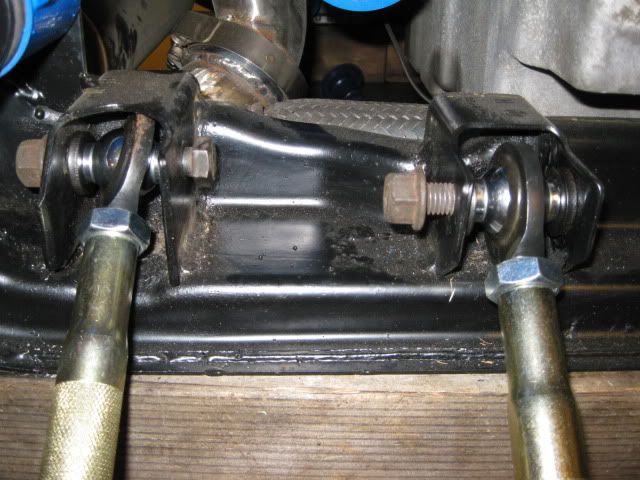
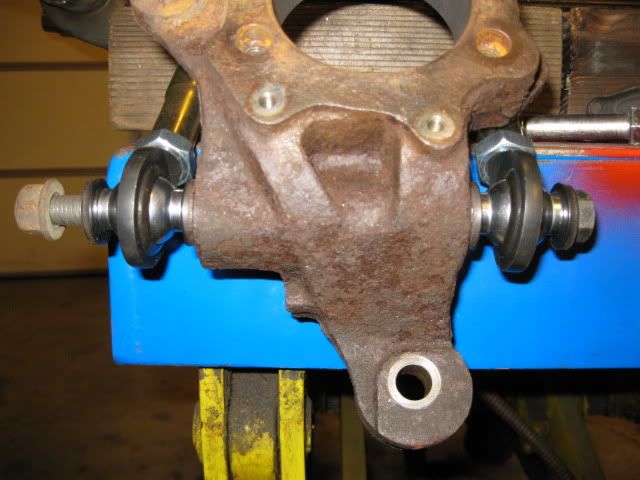
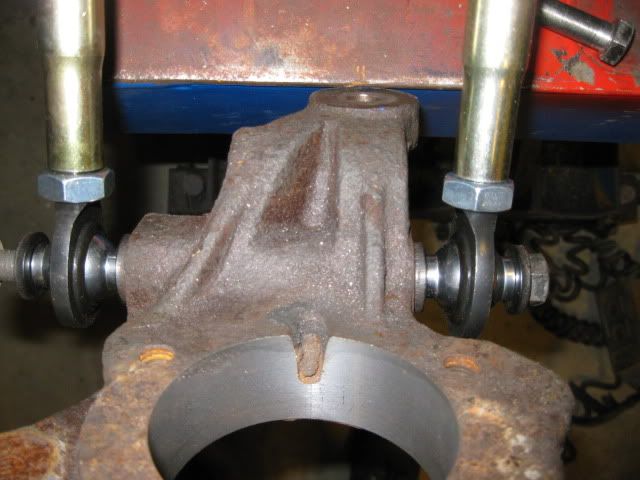
To put the lateral link assemblies together, you need the rod ends, swaged tubes, 5/8" jam nuts, and some spacers to close the gaps in the mounting pockets on the cradle.
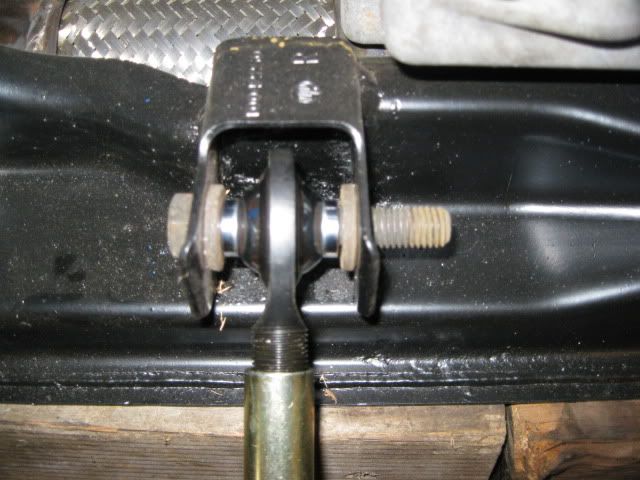
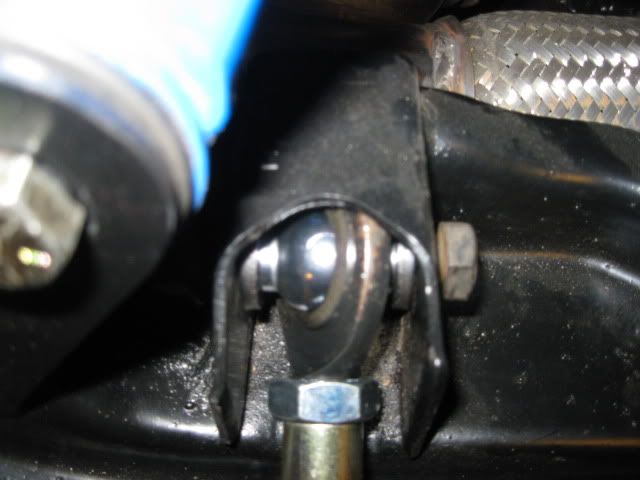
Due to manufacturing tolerances, you may need to slightly widen the lateral link pocket. I used a wheel bearing bolt and 2 nuts. Thread the bolt into the nuts and install the closed end of the wrench as shown. Once the nut it tight to the head end of the bolt, tighten the other one to push the wall out slightly:
Then install the links with the thick washers on both sides:
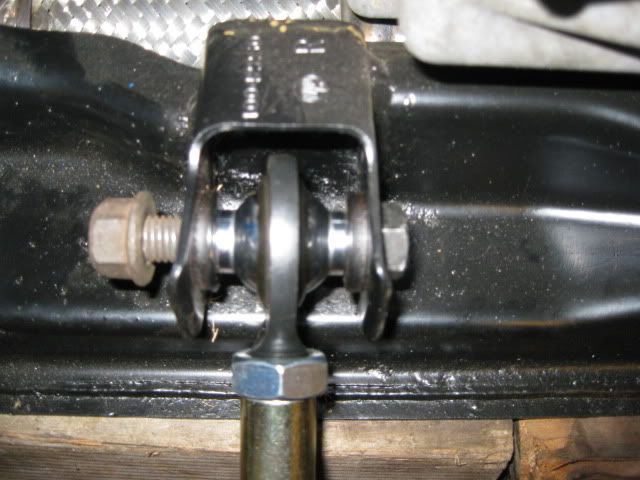
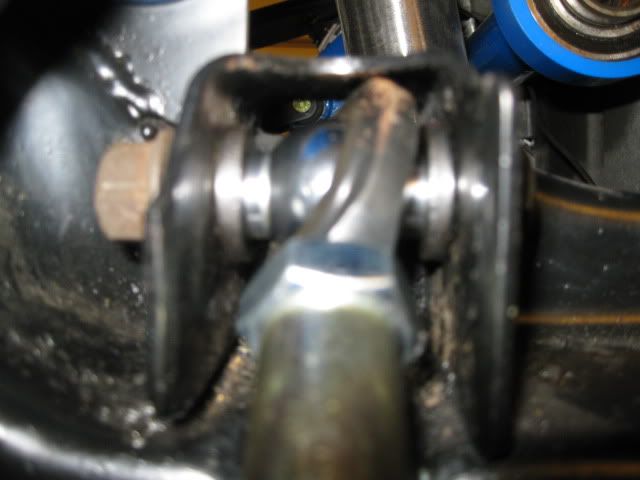
The rear pocket is a little short to allow the rod end to stand up. You could use a pry bar to push the top of the pocket up, or just leave the rod end at an angle:
The links mount to the upright with thick washers on both sides of the rod ends:
Here is a list of part #'s, quantities and prices:
The QA1 rod ends and Afco tubes were purchased from Summit Racing - it did take about 1 month for the QA1 rod ends to arrive (they were back ordered at the time). The rest of the nuts/bolts/washers came from McMasterCarr.
As you can see this project will set you back about $205 + shipping which is less than most vendors are charging for this upgrade. You might be able to save some $$ on the jam nuts and spacers, but I wanted the nuts grade 5 and zinc coated and a single thick washer on both sides.
I am sure these components are not DOT approved, so this should be considered for off-road use only (and no, I will not be selling these kits).
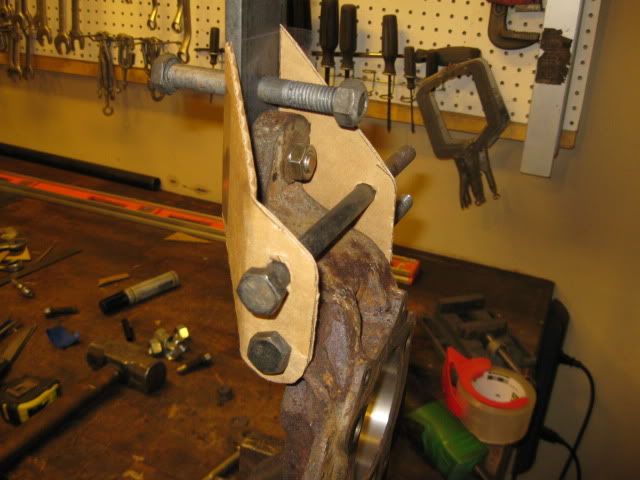
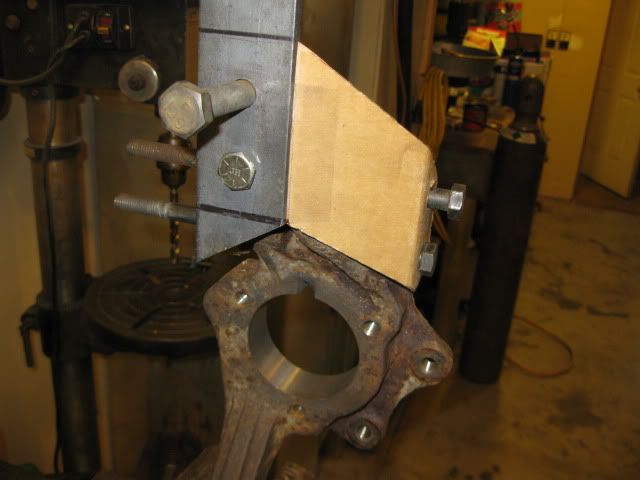
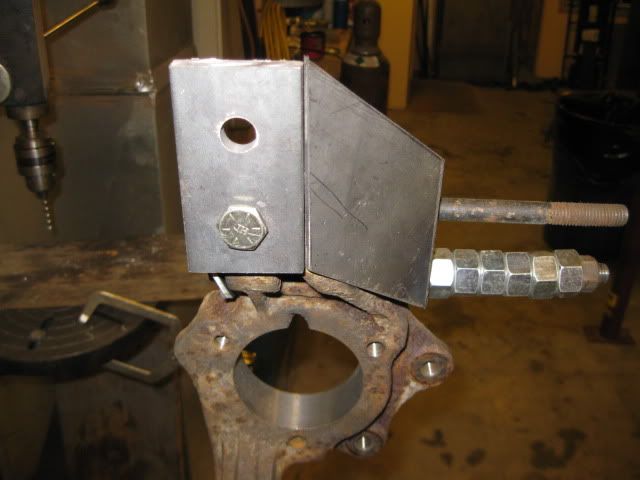
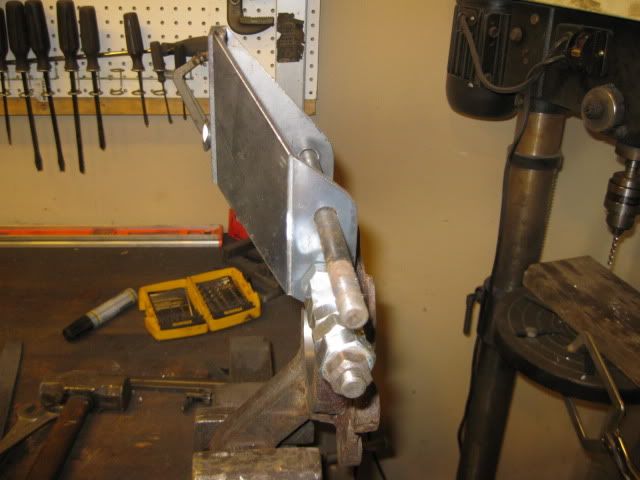
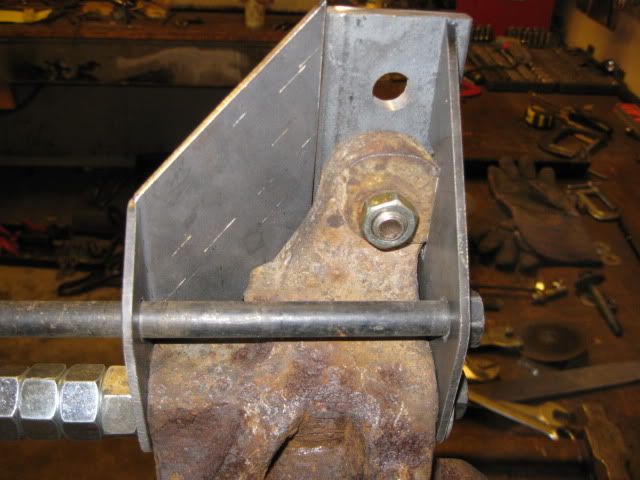
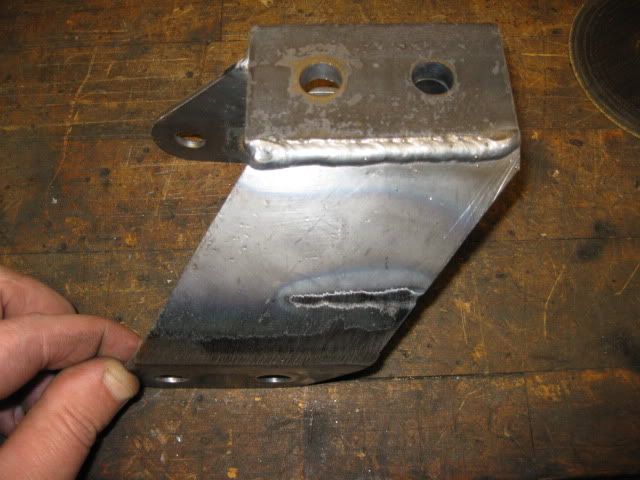
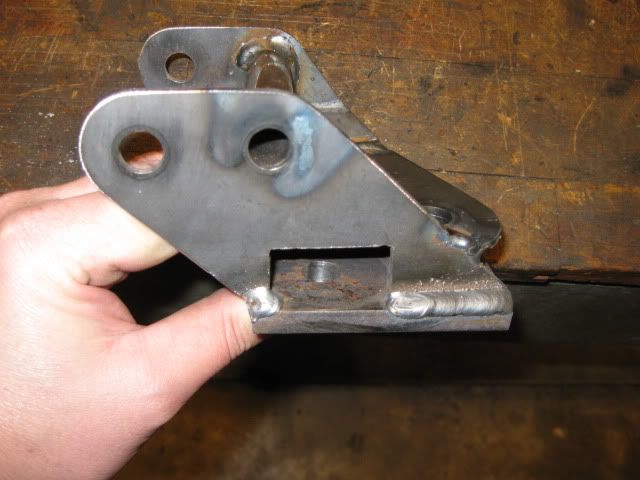
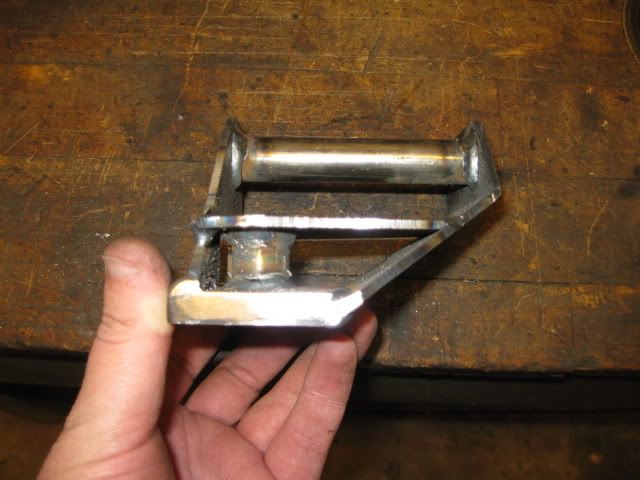
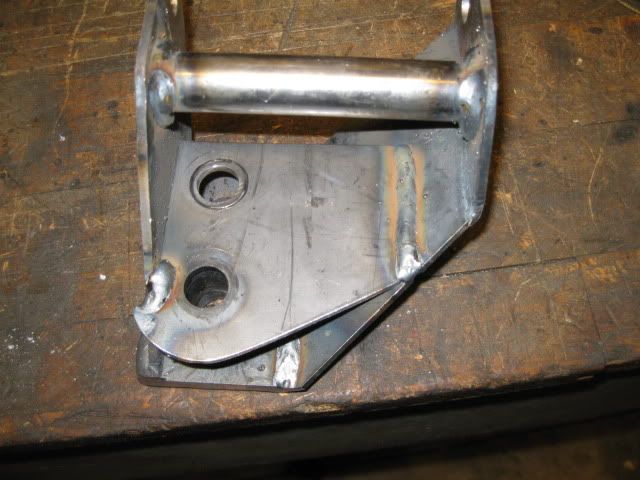
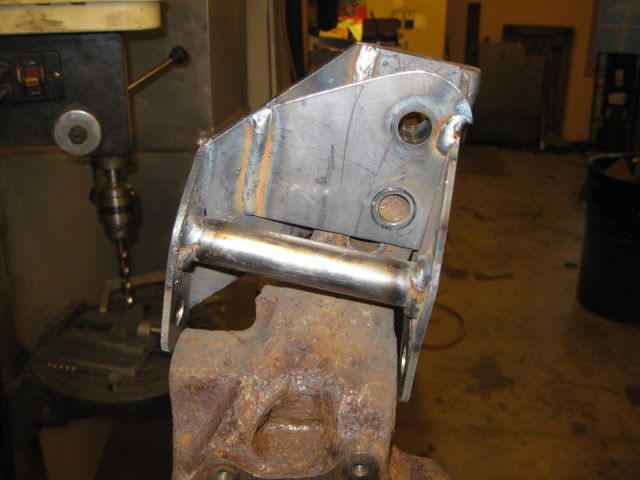
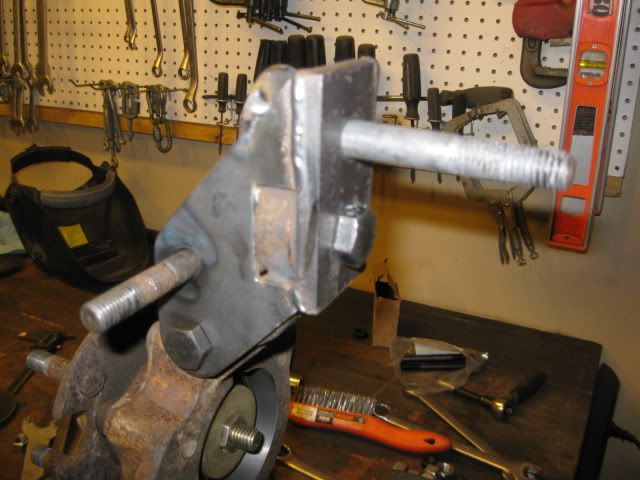
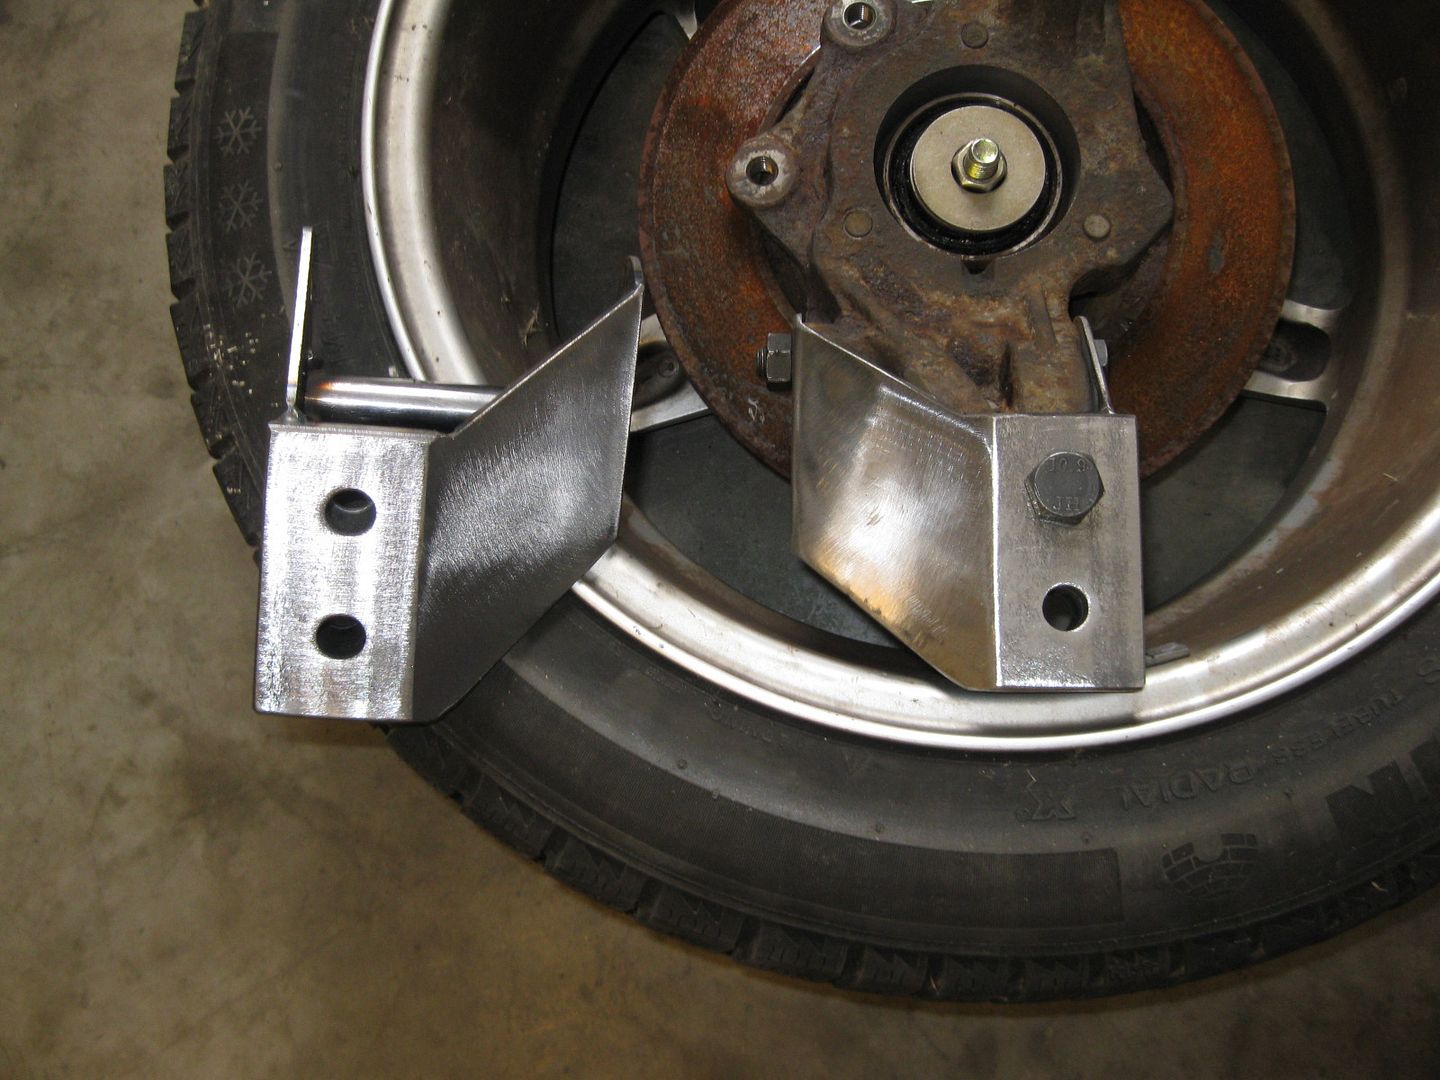
Almost done with the lateral link relocation at the upright. This modification lowers the lateral and trailing links at the upright to either restore the supension to the stock geometry when the rear is lowered 1.5" OR to improve the camber curve on a stock height Fiero. The lateral link mount locations are lowered 1 1/2" from stock.
Cardboard vision:
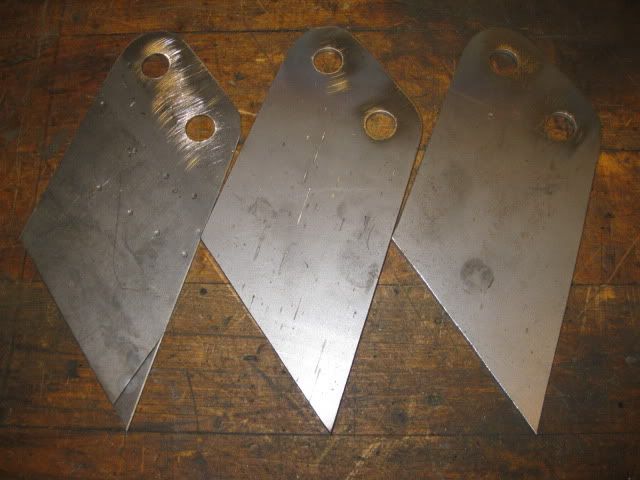
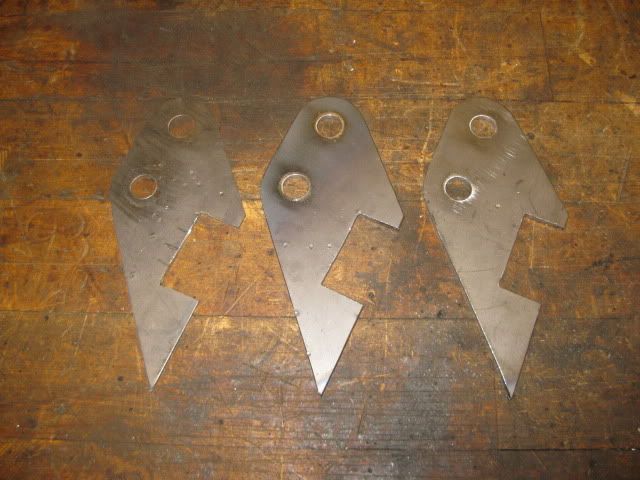
16ga template (left) and then the 1/8" steel parts for both uprights:
Bolted together:
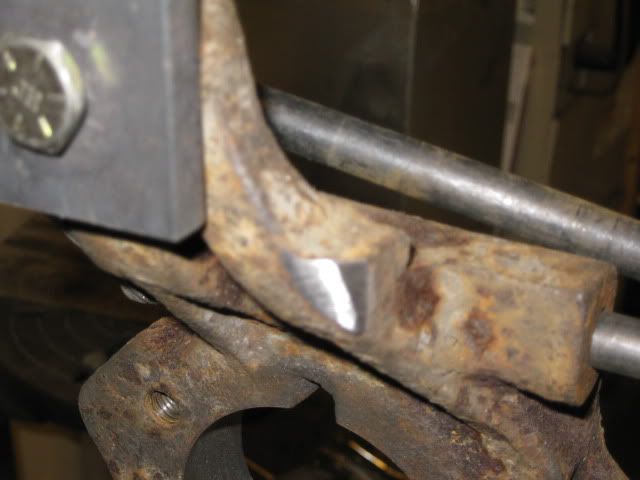
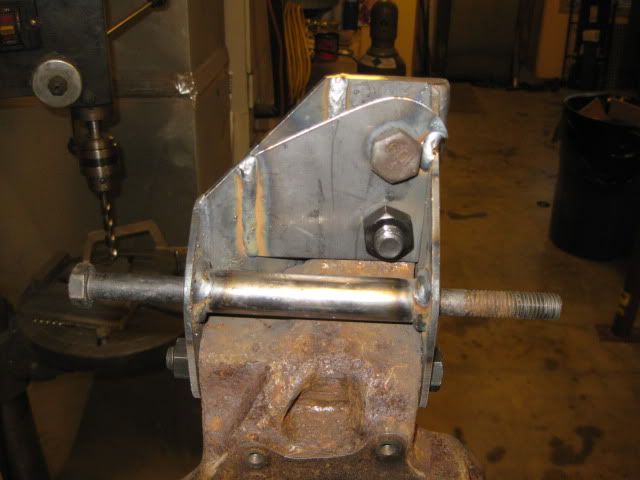
I still need to make the piece that will bolt to the backside of the casting (under the nut in the pic) and help reinforce the trailing link mount: The only mod to the upright is this corner of the casting is rounded off:
I am still waiting on the steel sleeve for the new lateral link mounts and shorter M14 and M12 bolts.
wow, I really like that solution to the 88 geometry issue. I hope you sell those and if you need another to try it out I will be putting an 88 cradle in my 3.4 turbo car within the next couple months and really like the look of these as the car is lowered substantially.
wow, I really like that solution to the 88 geometry issue. I hope you sell those...
Keep up the good work!
Thanks! Once I get them finished and figure out all the time/materials to make them, I might offer them for sale... probably in the $250 to $300 range for the set.
Sounds good, keep us all informed. I think this is the best solution to this problem. Raising the brackets on the cradle makes less sense to me and definitely causes more interference issues and strength issues.
this should bring the rear suspension behavior back in line with stock even with a fairly aggressive lowering.
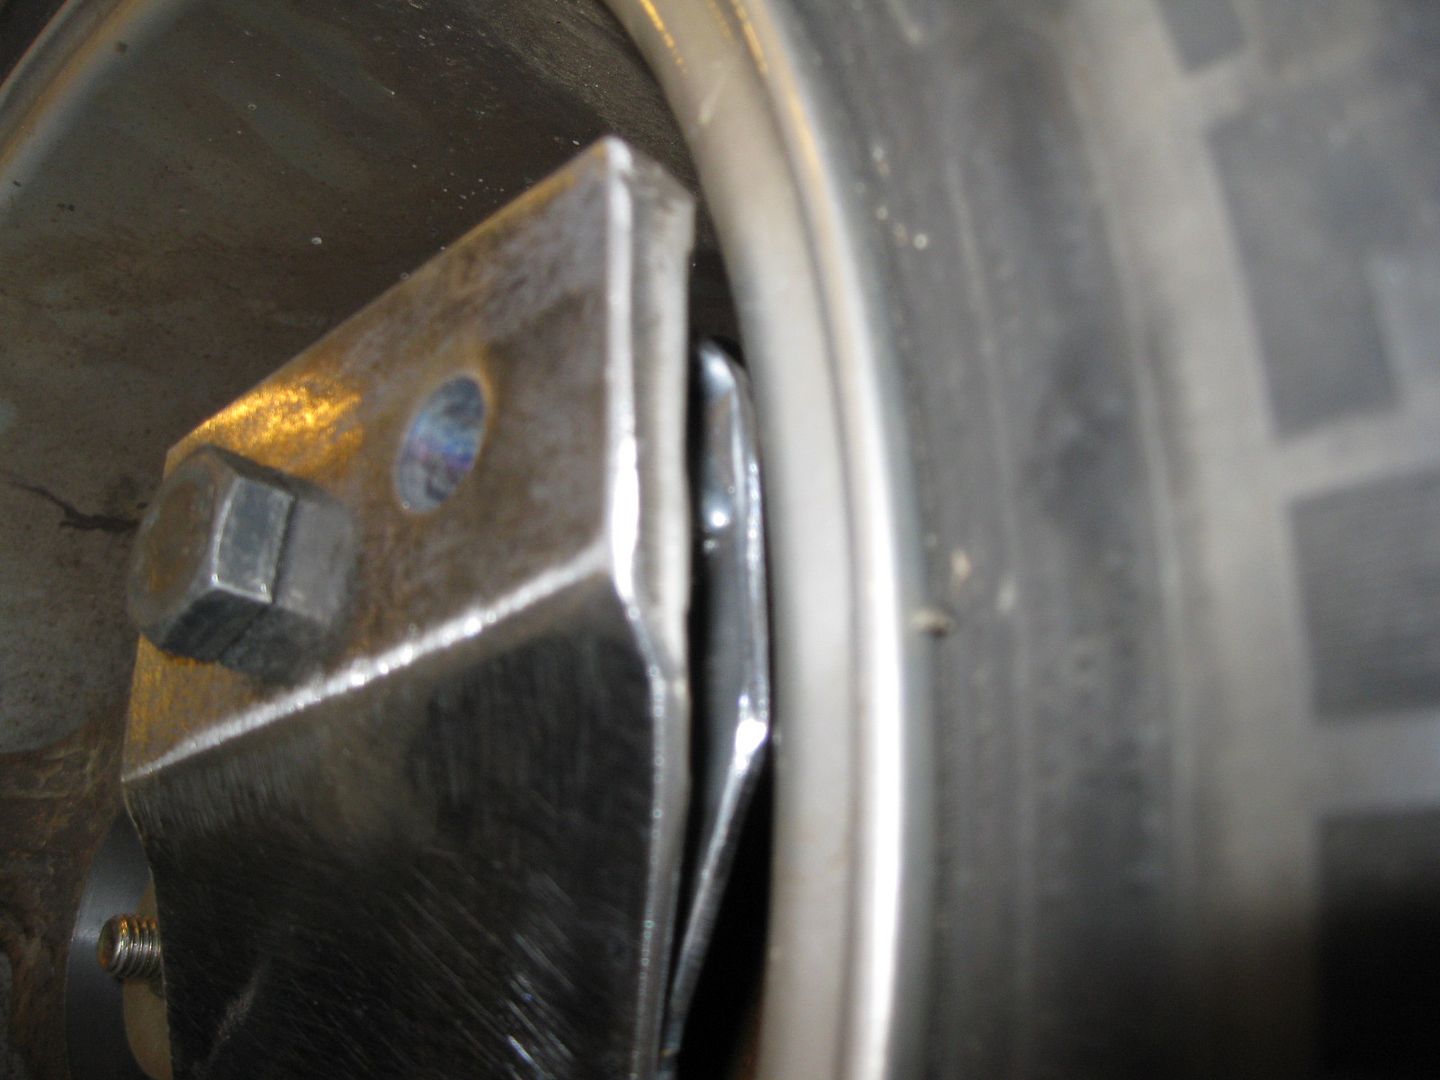
Here are some quick mockups. I did shim the wheel about 3/8" outboard to clear the new lateral link bracket on a 16" wheel. Once I get my wheels, tires and decide on a ride height, I will probably make another custom set of these and change them from the 1.5" relocation to something in the 2-2.5 range... just have to make sure they clear my wheels.
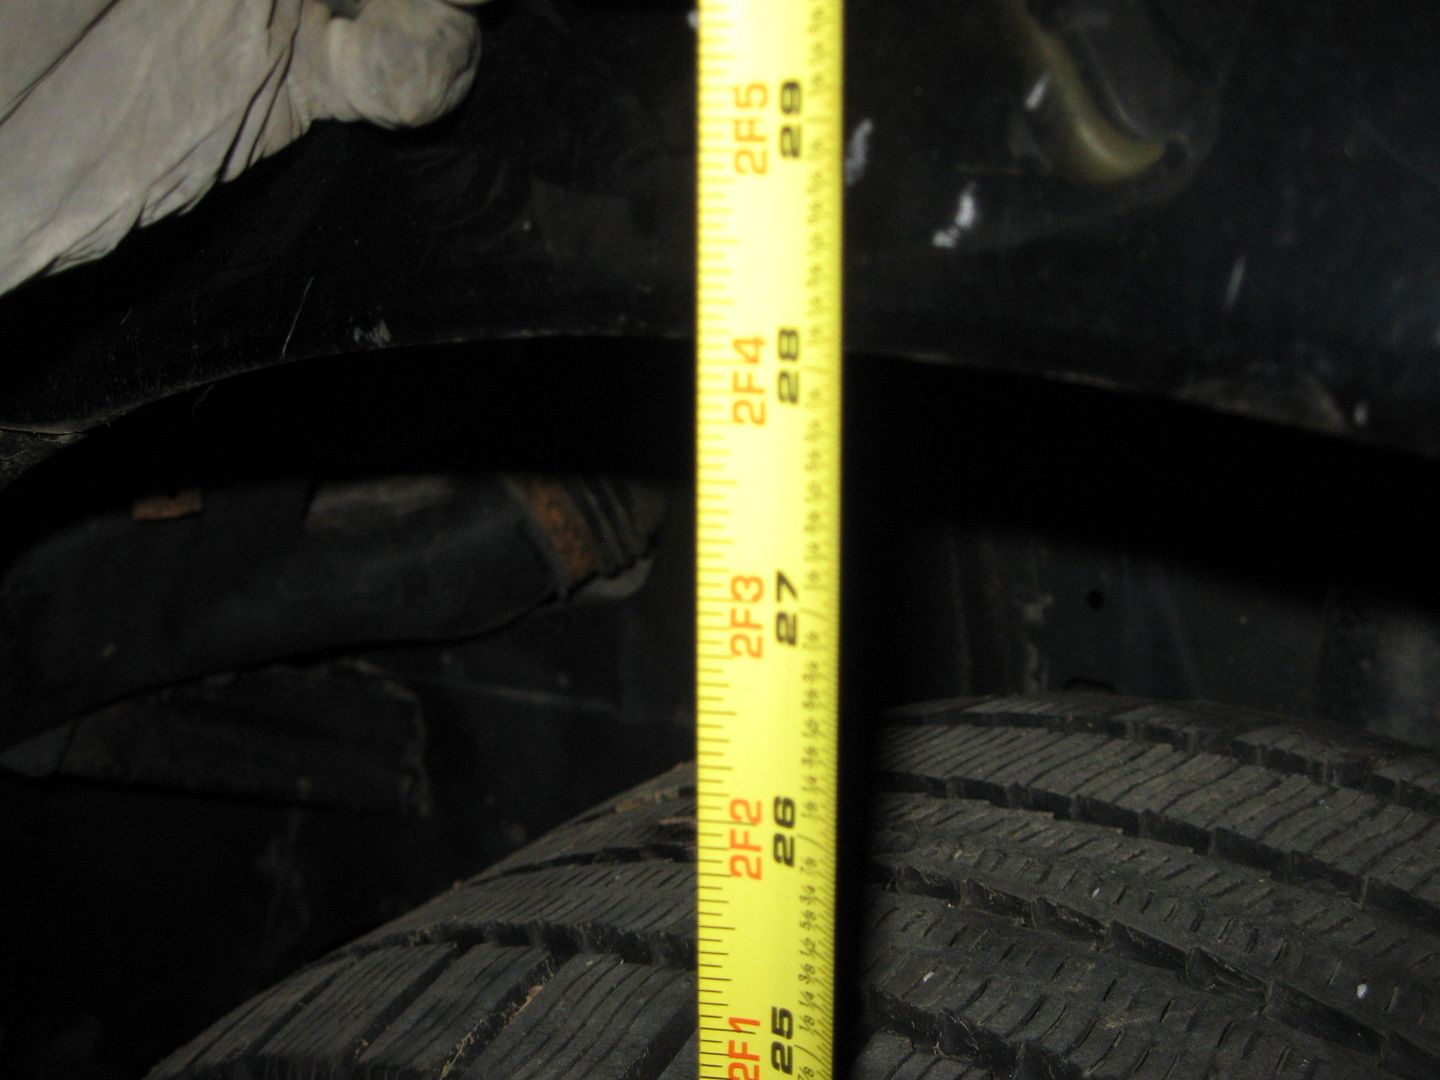
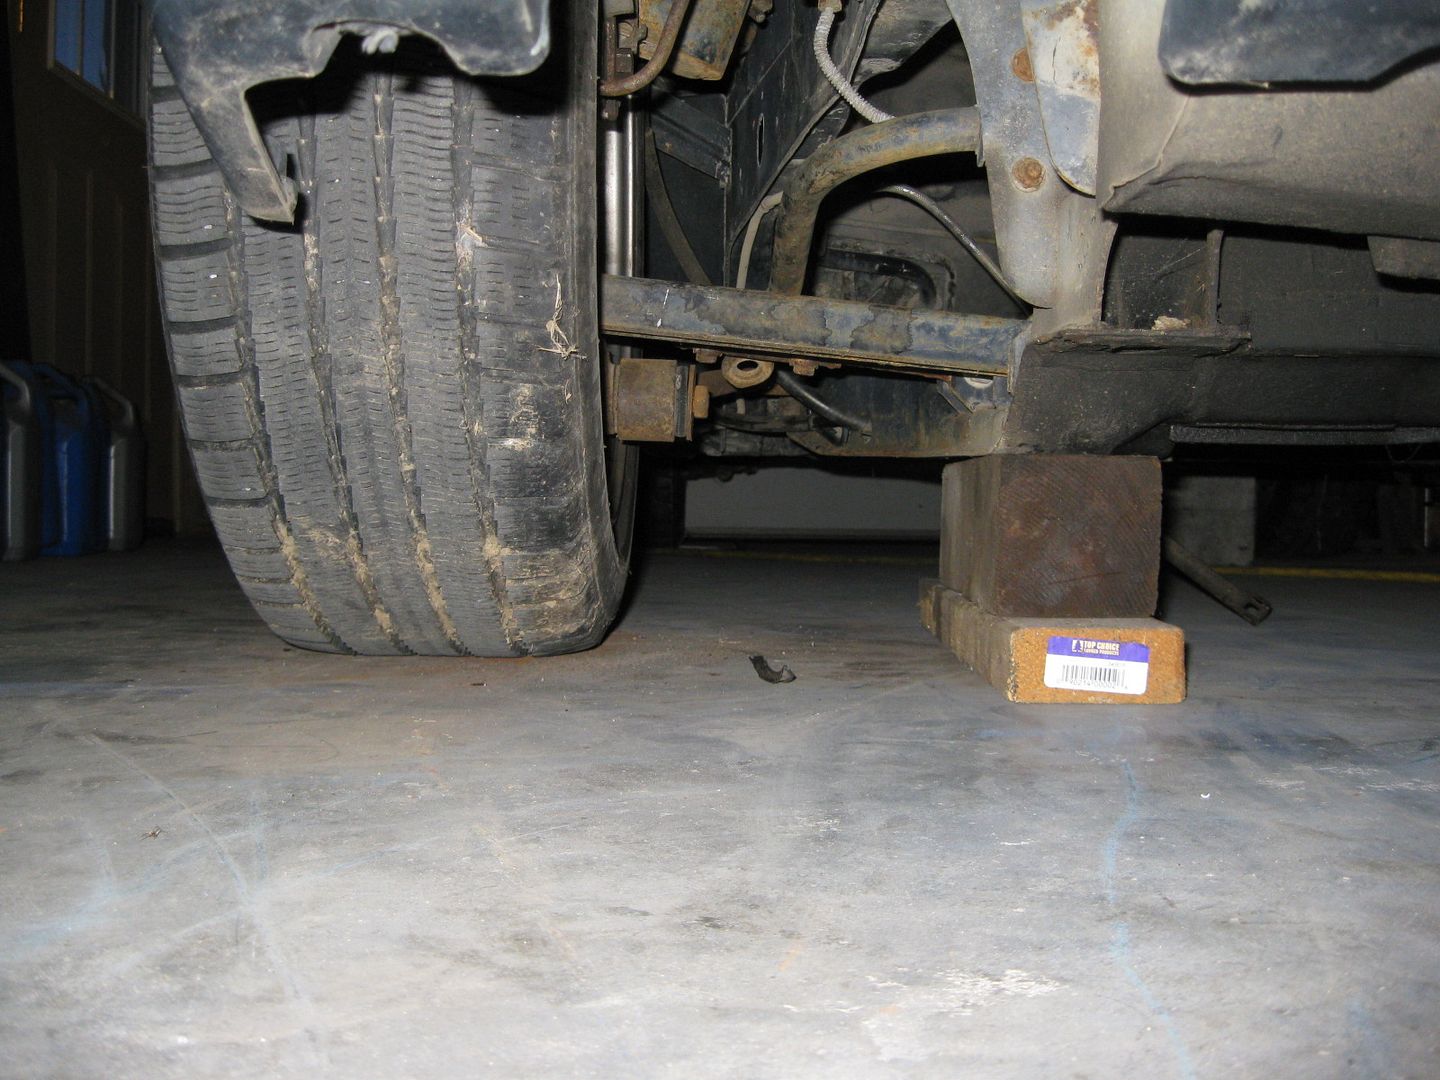
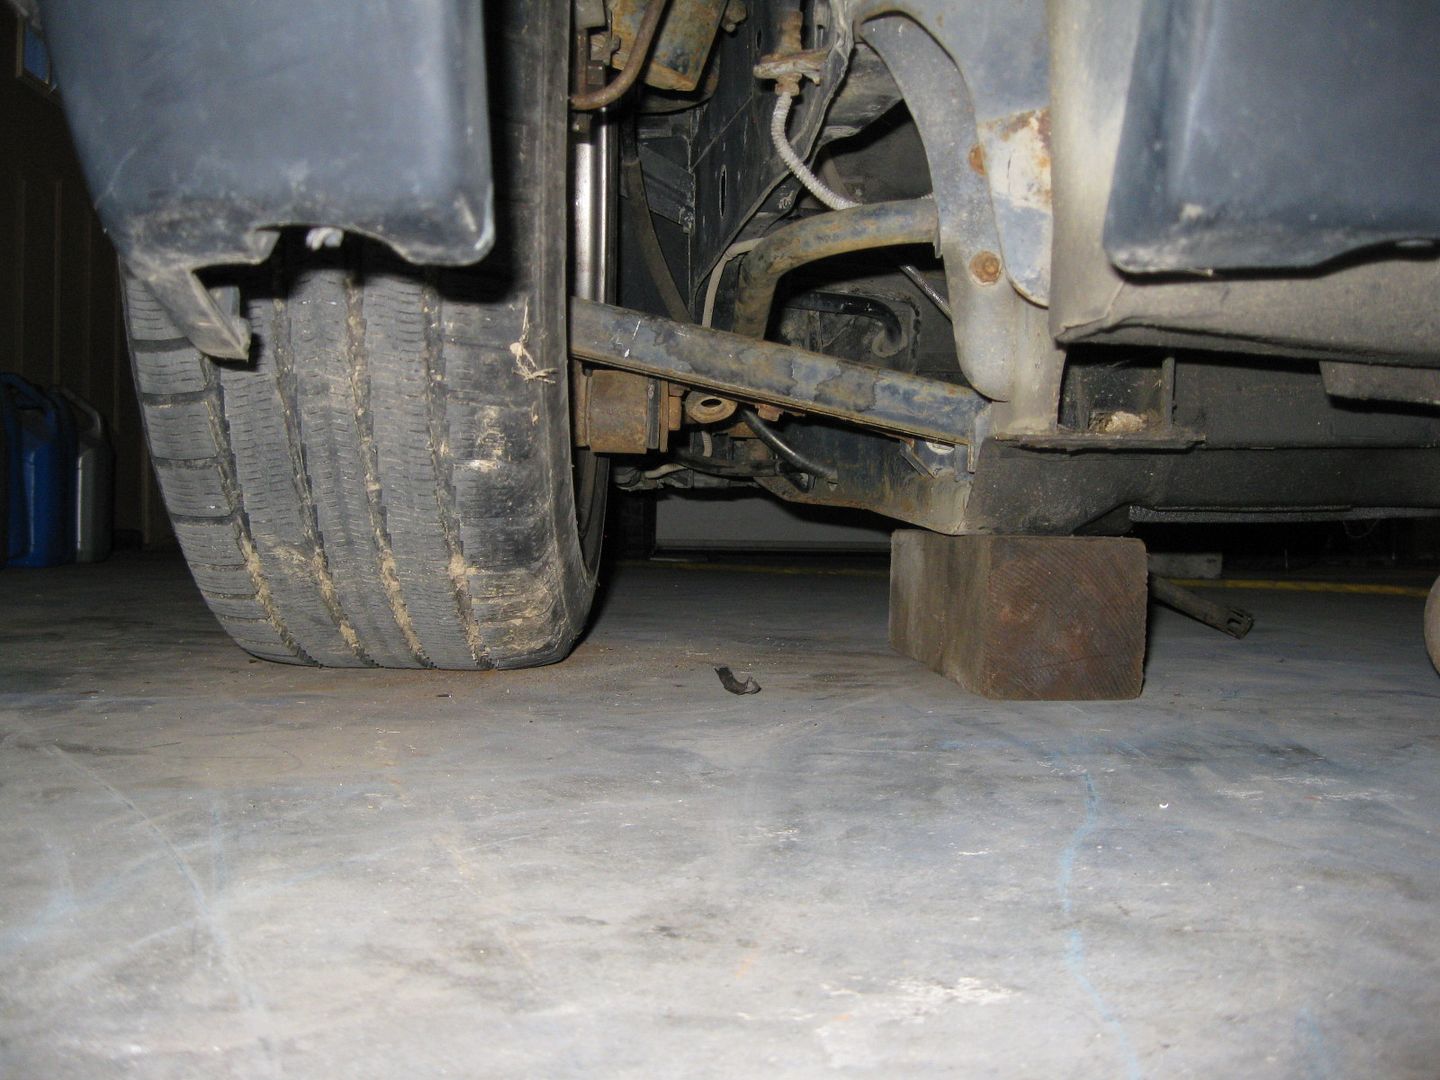
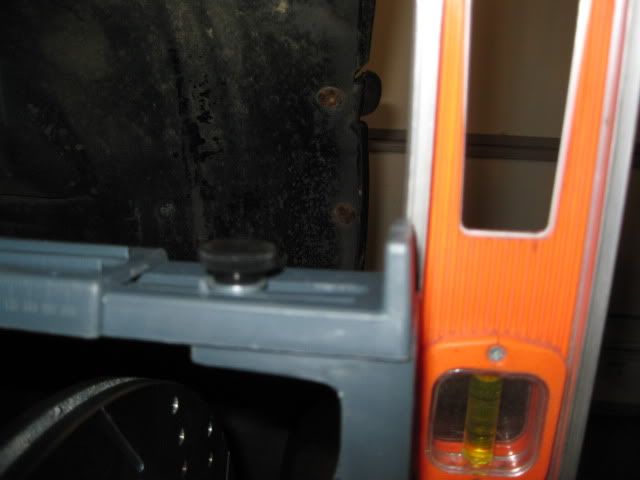
With 6 1/2" between cradle and floor (1/4" higher than stock ride height specified in Bloozberry's drawings) or 28" to center of wheel well opening:
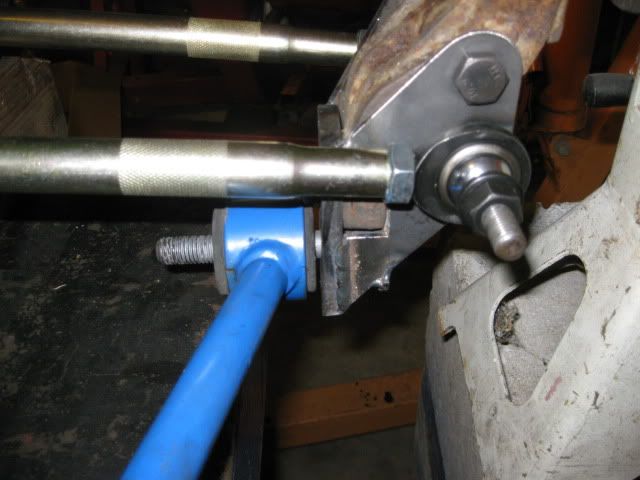
Stock (lateral links are almost level):
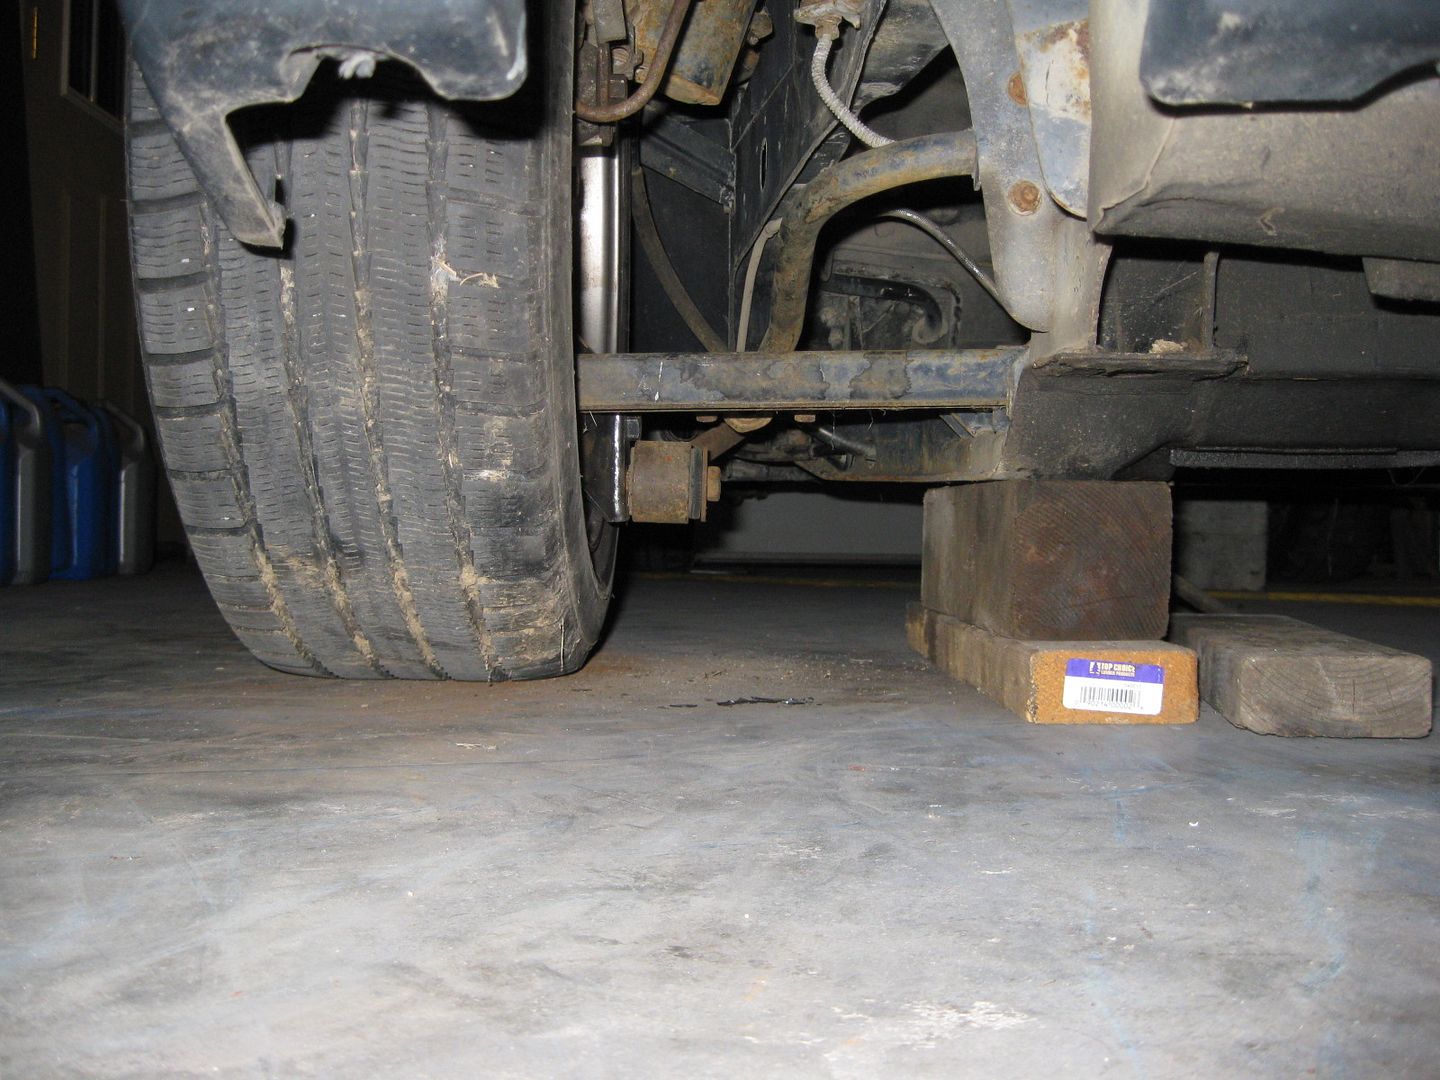
With fieroguru lateral link relocation (lateral links angle down, will kick out the bottom of the tire for positive camber gain under compression):
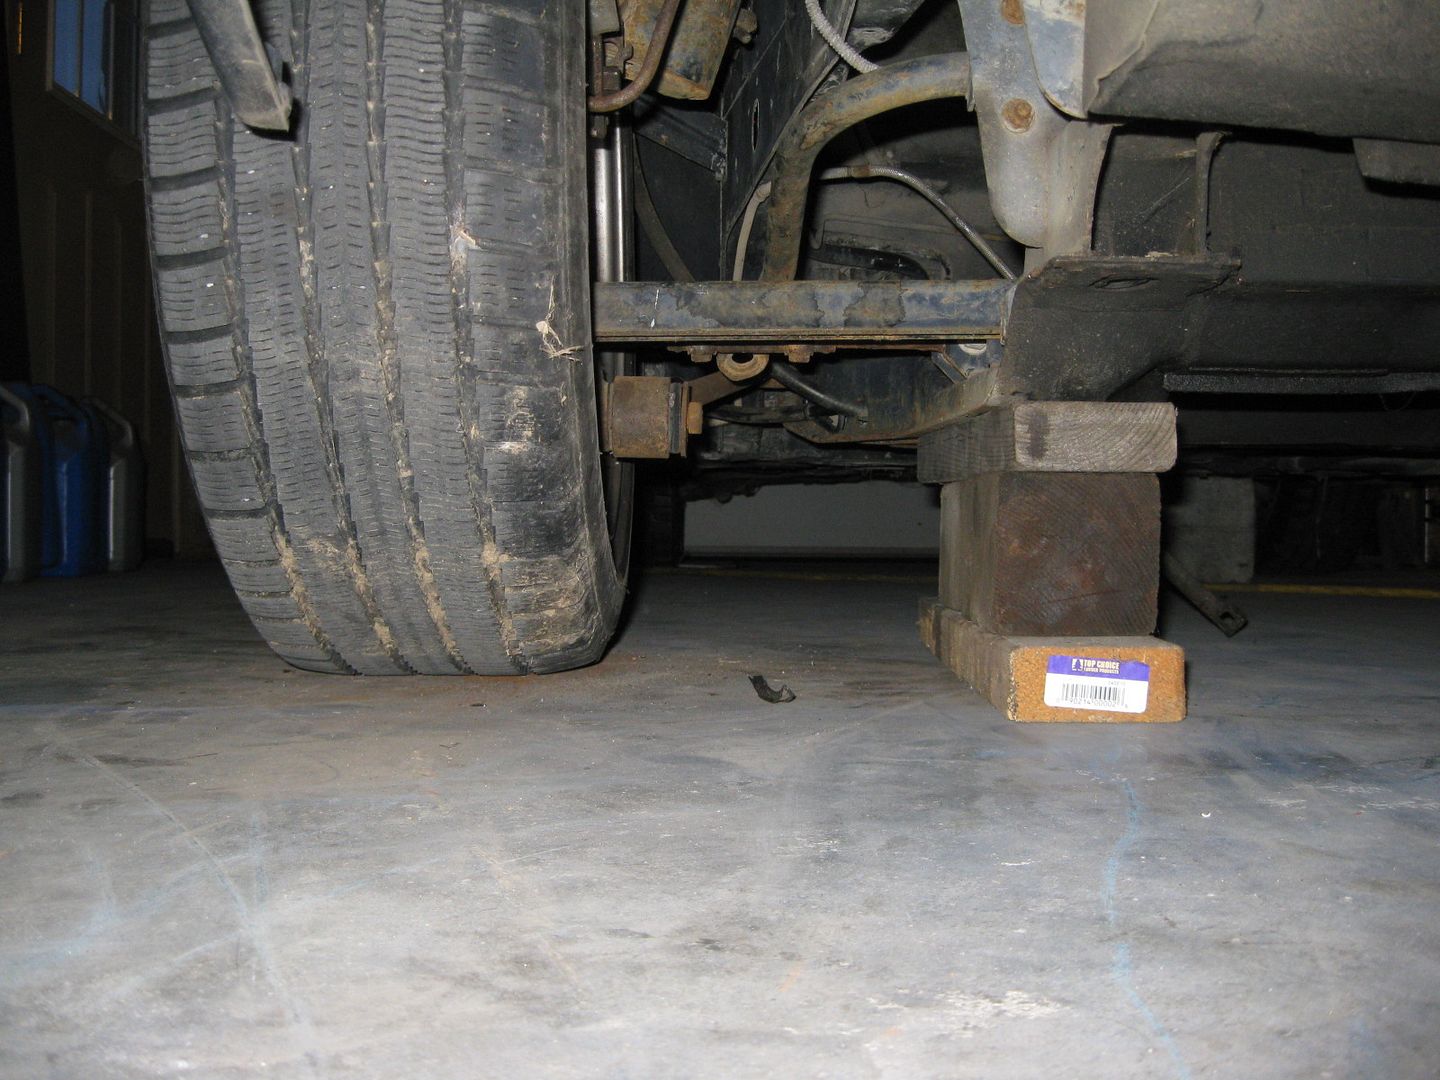
With 5" between cradle and floor (1 1/4" lower than stock ride height) or 26.5" to center of wheel well opening: Stock (lateral links already pointing up to the wheels) With fieroguru lateral link relocation (lateral links close to level again - restores to stock suspension geometry with 1 1/2" lowering):
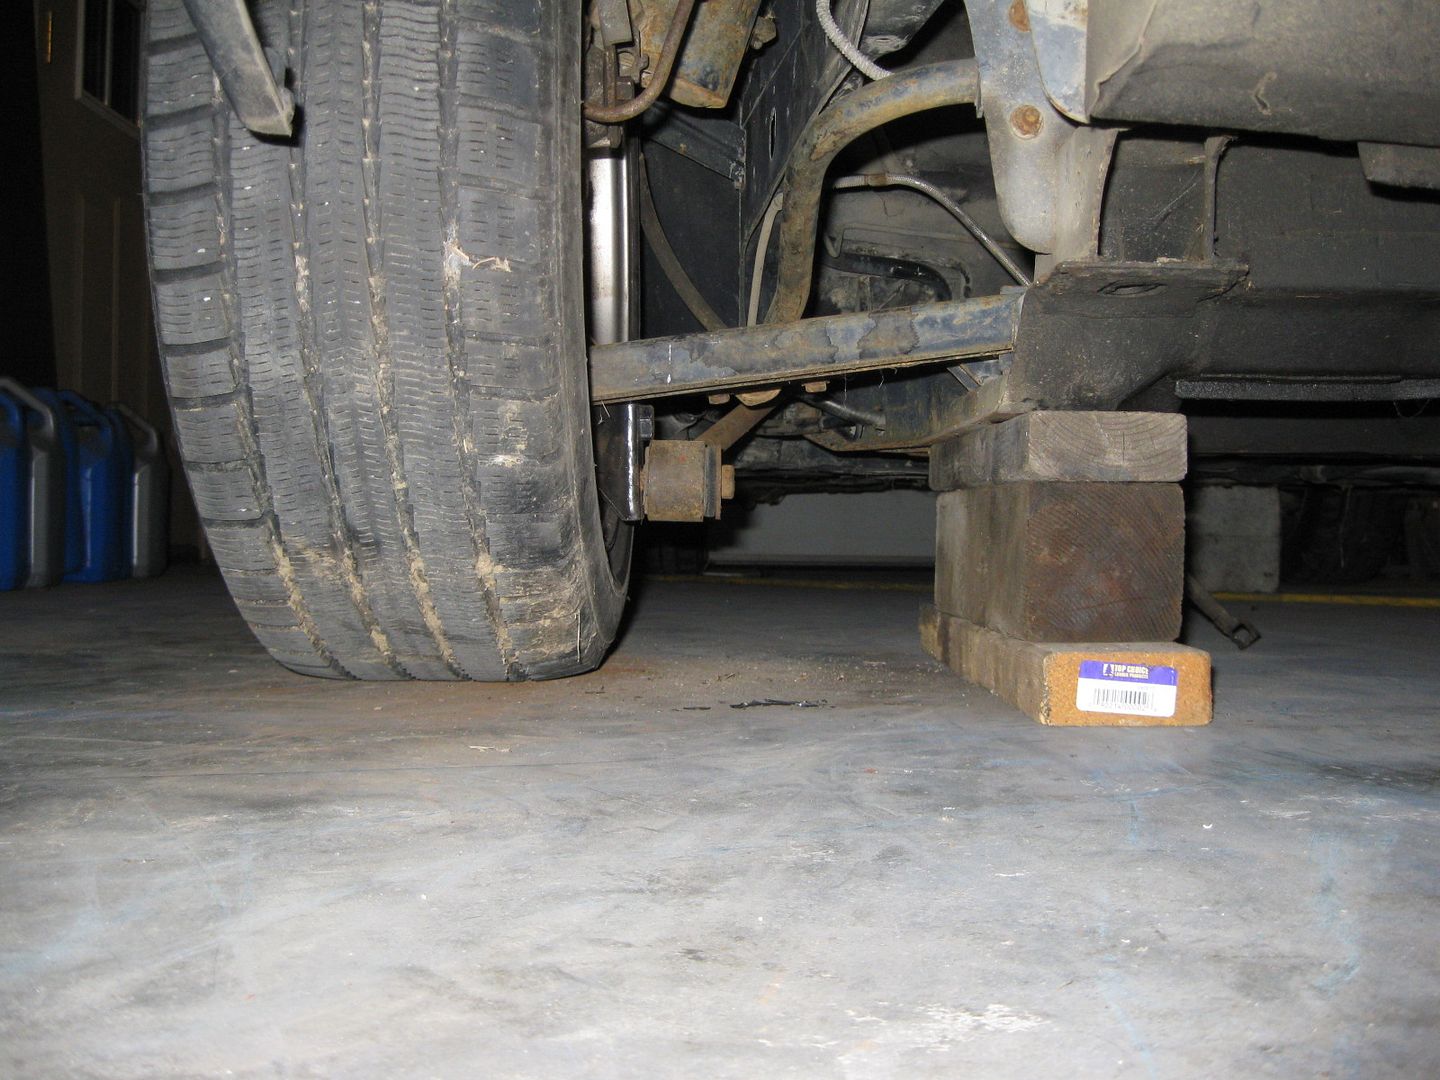
With 3 1/2" between cradle and floor (2 3/4" lower than stock ride height) or 25.0" to center of wheel well opening:
Stock (significant negative camber gain... definitely not good)
With fieroguru lateral link relocation (less bad - pretty much the same as the stock suspension lowered 1 1/2"):
I have to get my welding gas refilled, then I can weld up the other side.
I finished the other side and modified the backing plate slightly (made it flat across the bottom) so they will now clear a 16 x 7 wheel (38mm offset):


 That's the last time I take a car to you for a few tweeks.