Pennock's Fiero Forum
  General Fiero Chat
  Decklid Hinge Boxe Modification / Elimination for a Cleaner Firewall

Post New Topic  Post A Reply
Email This Page to Someone! | Printable Version


next newest topic | next oldest topic
Decklid Hinge Boxe Modification / Elimination for a Cleaner Firewall by fieroguru
Started on: 05-30-2011 01:10 PM
Replies: 13 (2463 views)
Last post by: Danyel on 02-26-2016 07:50 PM
fieroguru
Member
Posts: 12127
From: Champaign, IL
Registered: Aug 2003


Feedback score:    (45)
Leave feedback


Total ratings: 258
Rate this member

Report this Post05-30-2011 01:10 PM Click Here to See the Profile for fieroguruSend a Private Message to fieroguruEdit/Delete MessageReply w/QuoteDirect Link to This Post
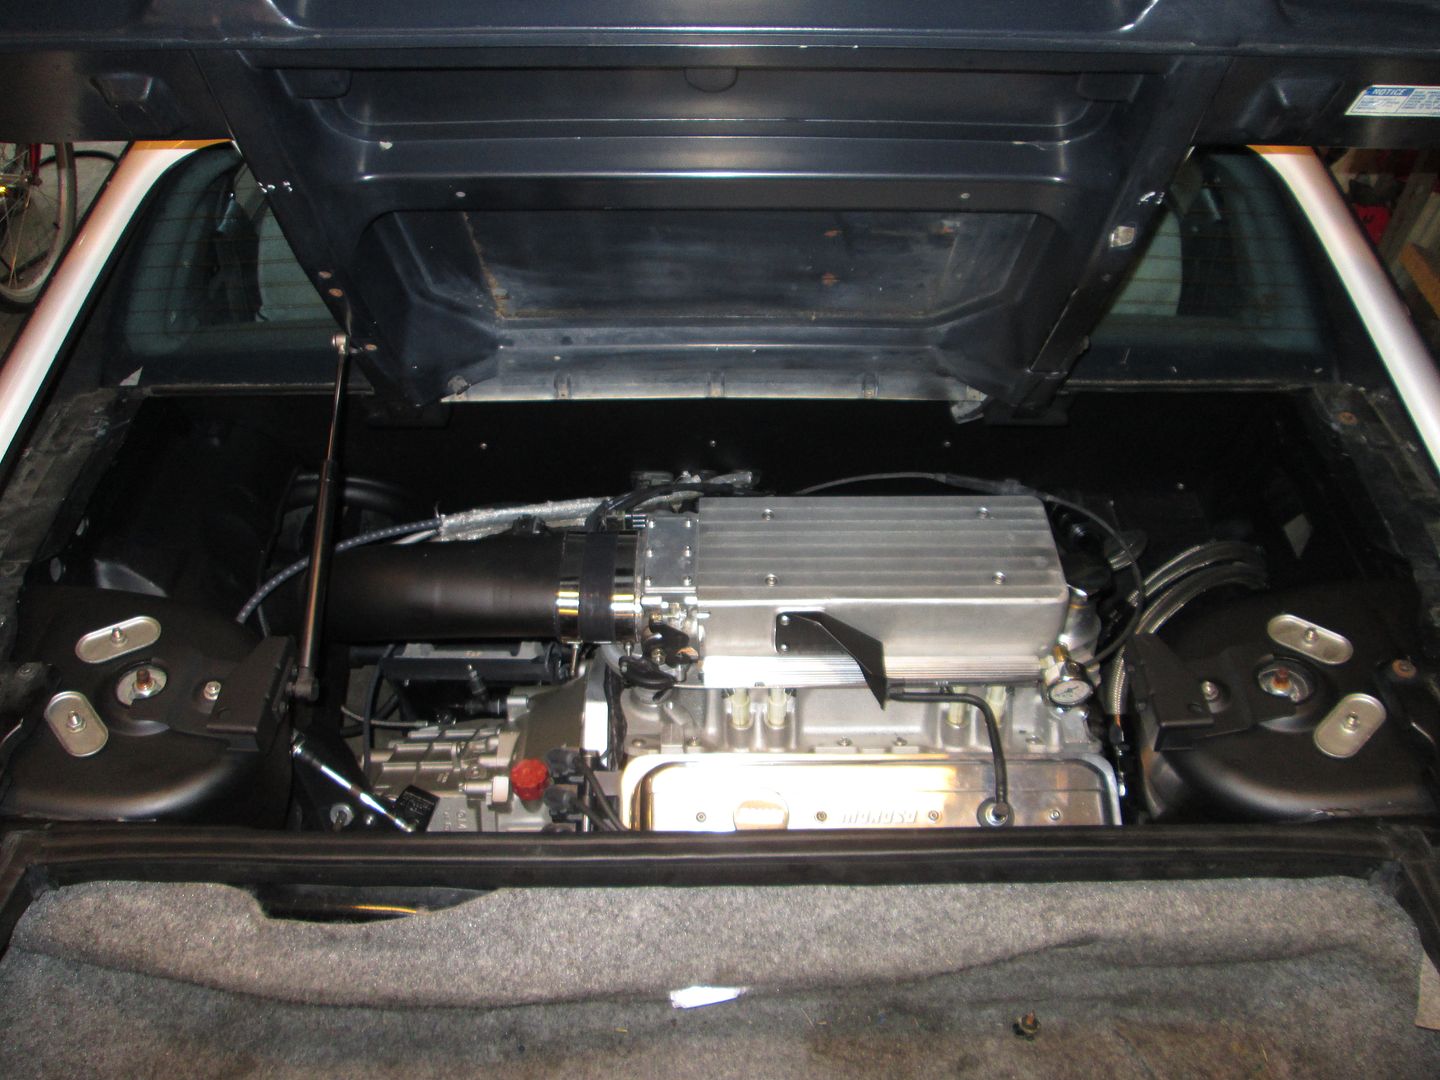
While at the 25th JefrySuko and I were discussing the smooth firewall on my old SBC/Getrag swap and he suggested reworking the hinges to do away with the hinge boxes that hang down pretty far. They are an eyesore and on several swaps the DS one ends up being cut/modified anyways. So after a few discussions, we figured out how it could be done and then it was finding the right opportunity me to do it. Well my old SBC swap was removed for an LS4 swap, so now is the perfect time to perform this modification.

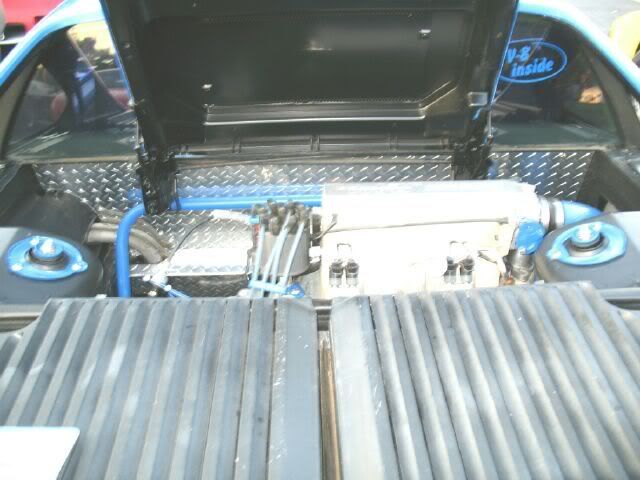
Old setup with a smooth firewall and the hinge boxes cluttering up the look:


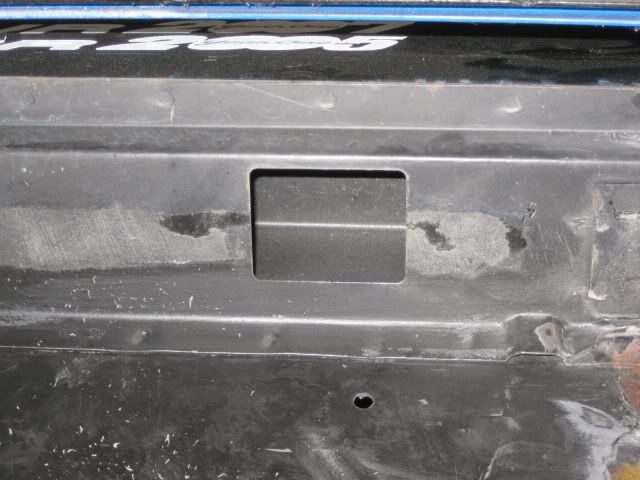
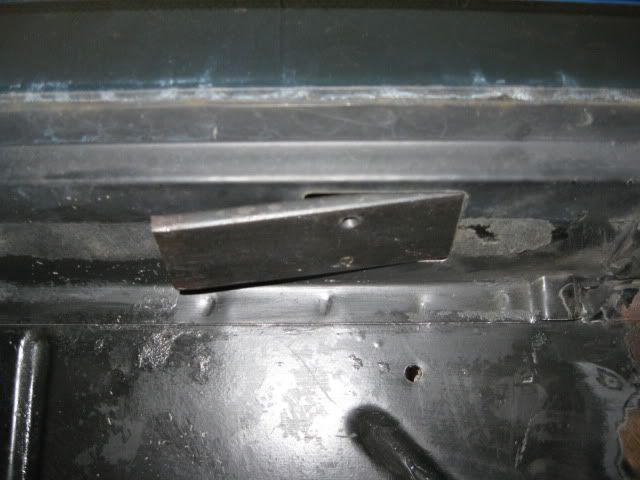
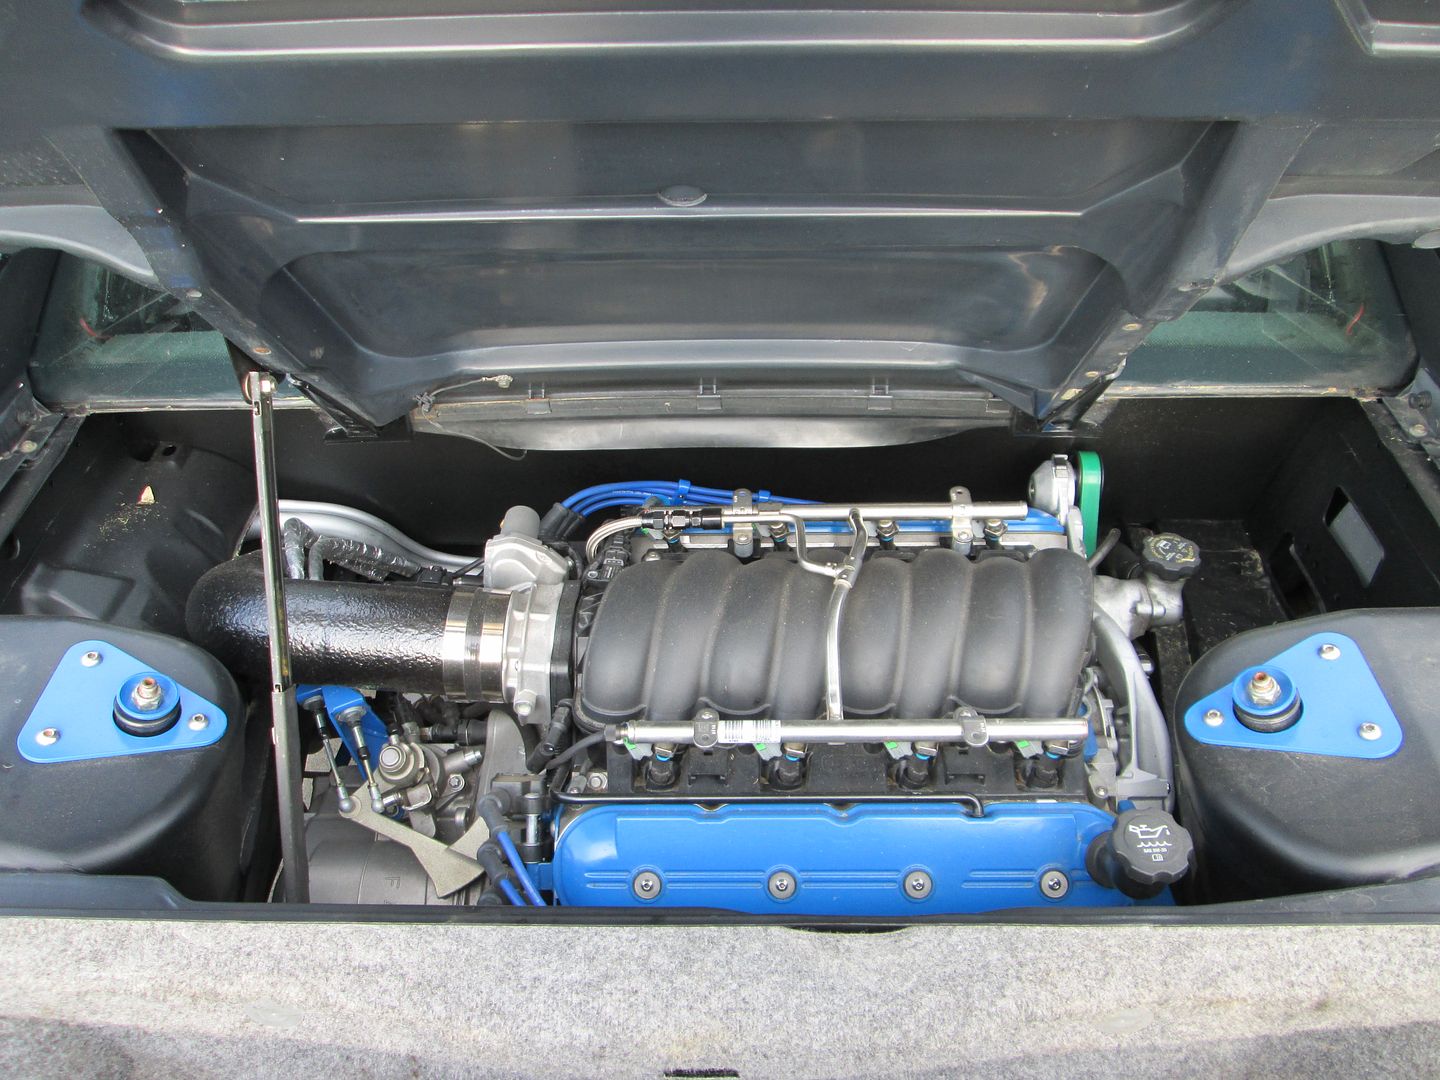
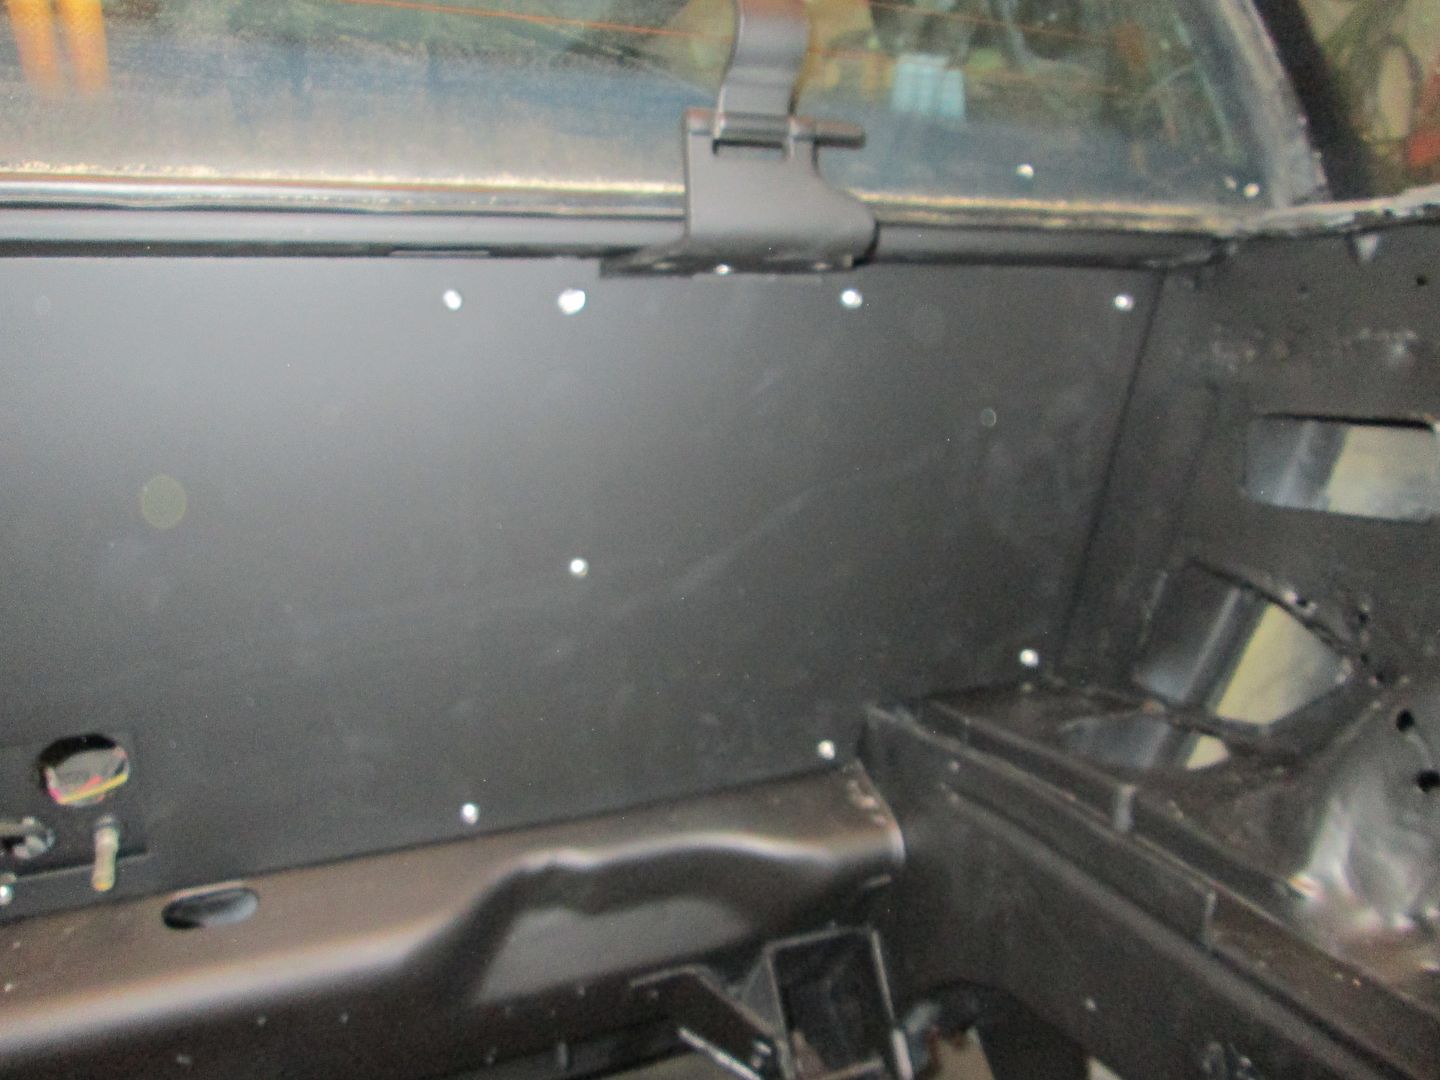
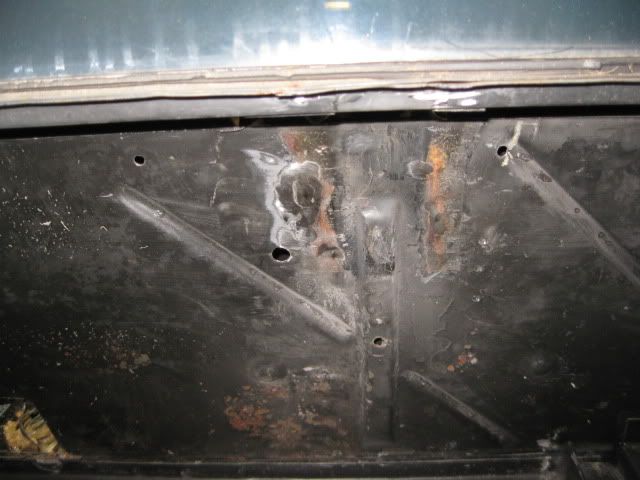
With the drivetrain and everything removed, they really stand out:


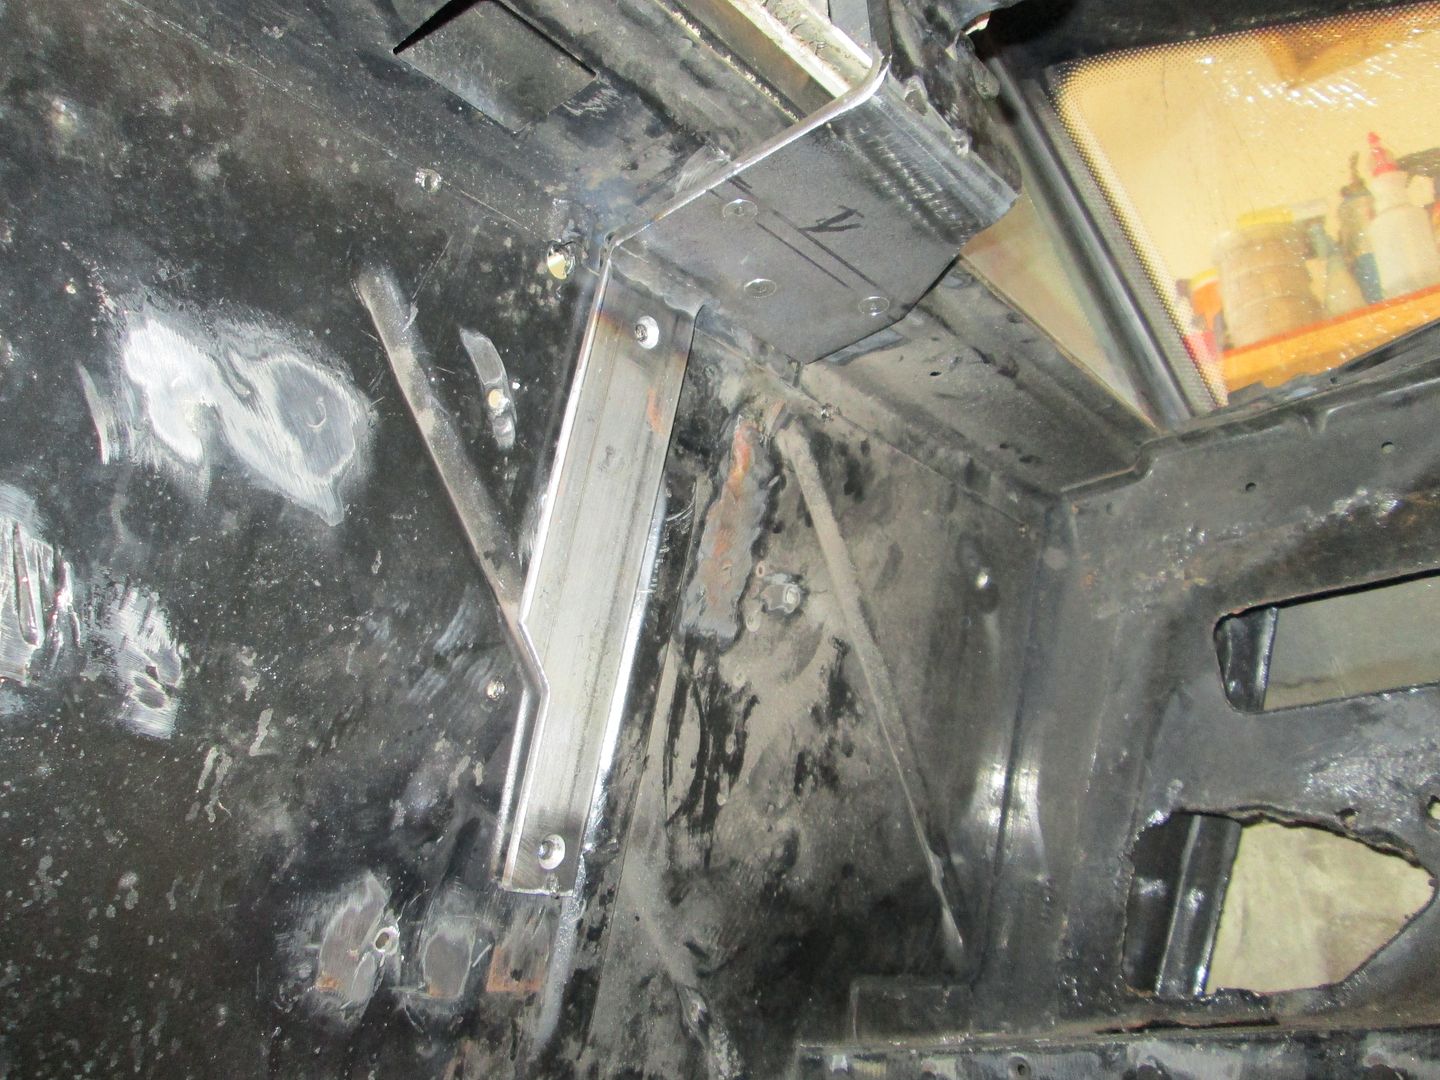
Since I wasn't planning to reinstall these boxes, I just rough cut them to remove them and then went back and drilled out the spot welds to smooth everything out:


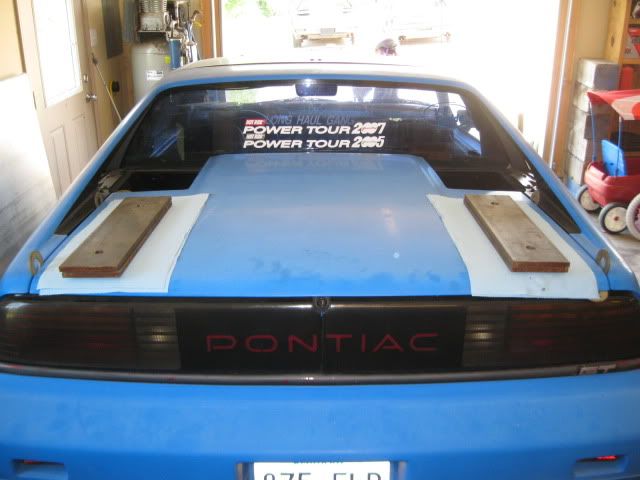
Once they were gone, I put the decklid back on, put some weight on the rear of it and used some washers to set the panel gaps:


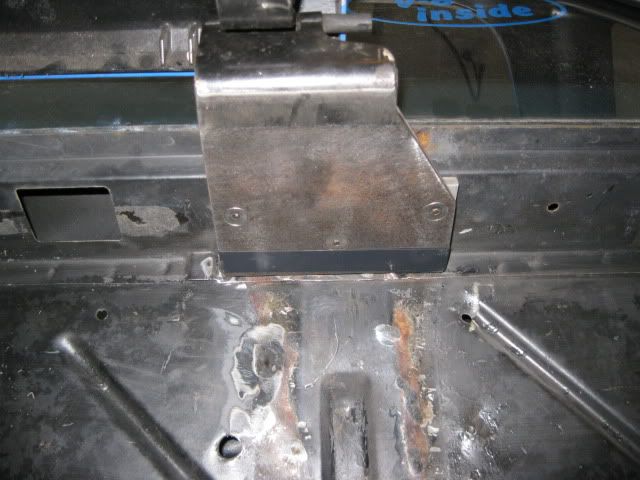
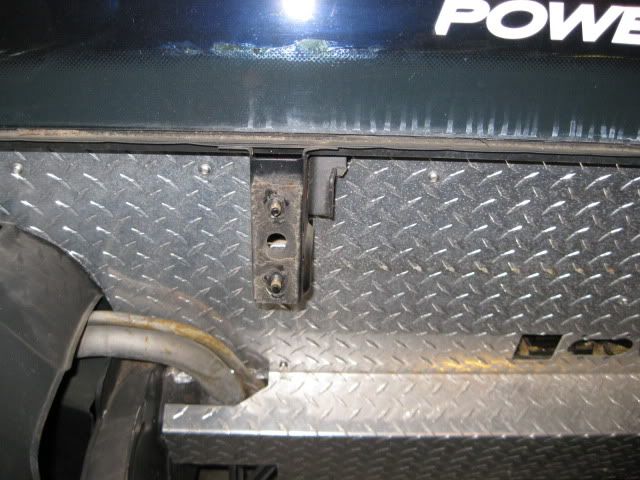
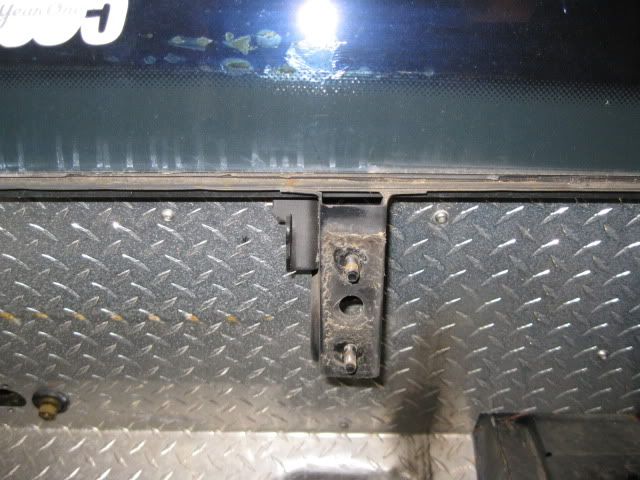
Then reinstalling the stock hinge looks like this:


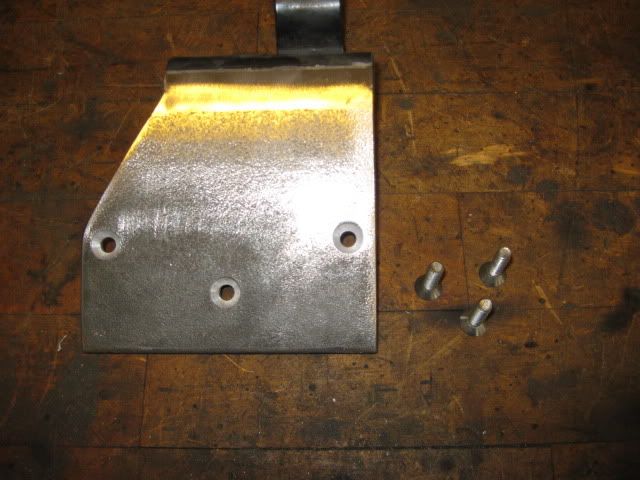
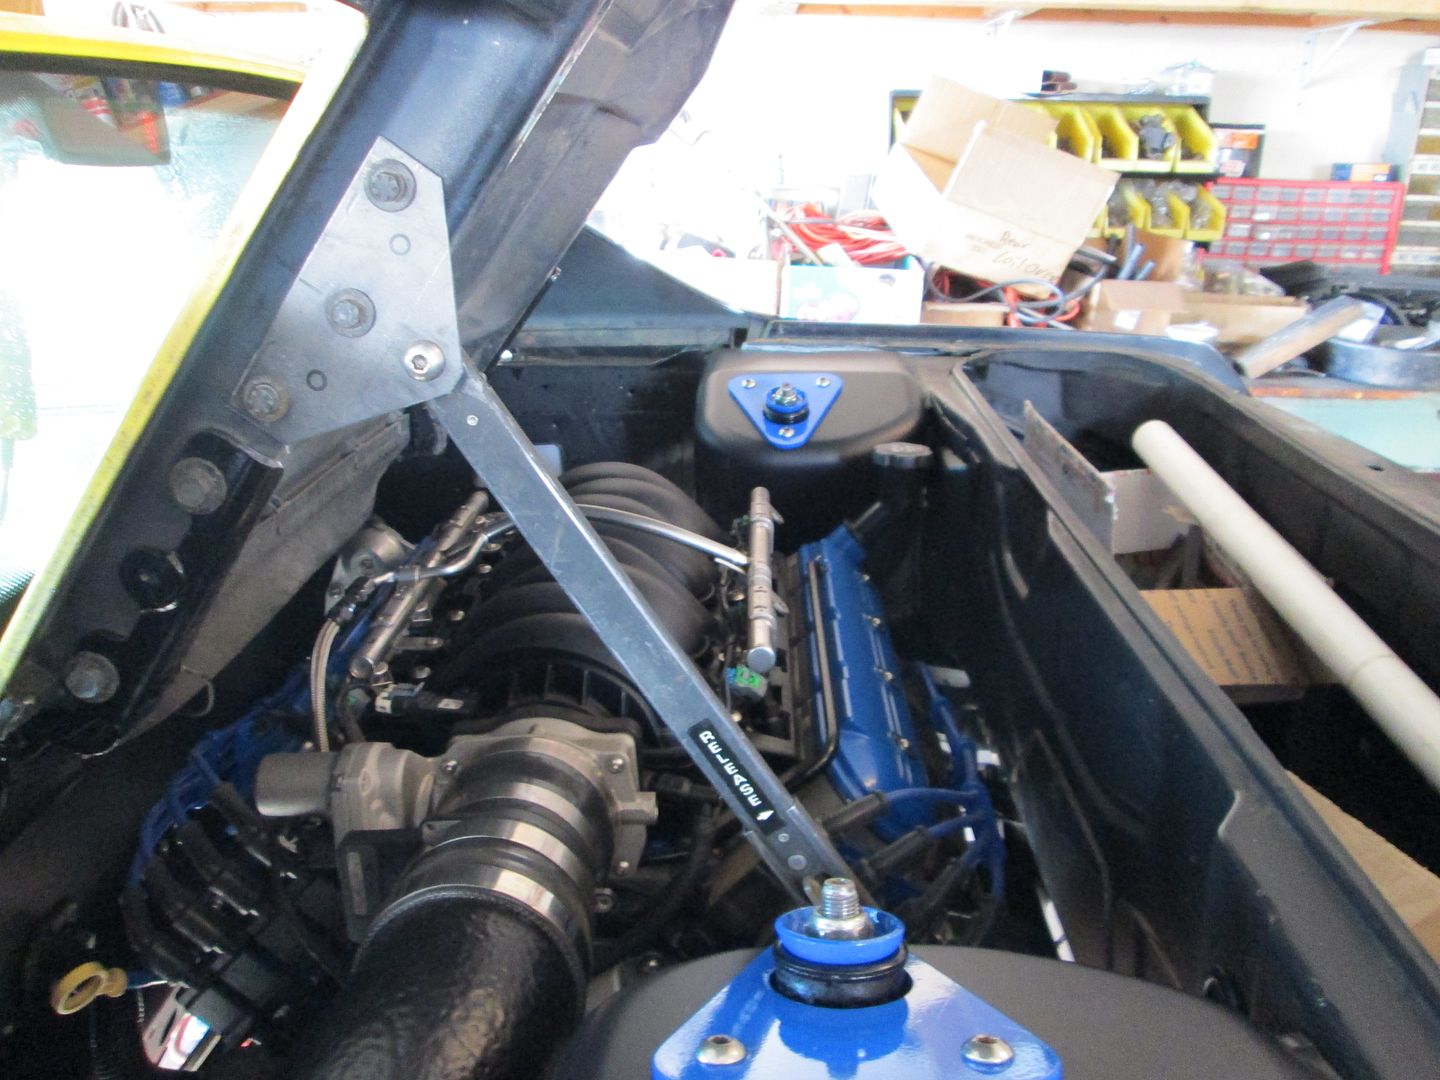
The idea is to cut the stock hinge where is bends 90 degrees right above the stock mounting location. Then weld on a piece of 1/4" steel plate and bolt it to the underside of the rear window tube. Here is the template made from 16ga and how it should fit:


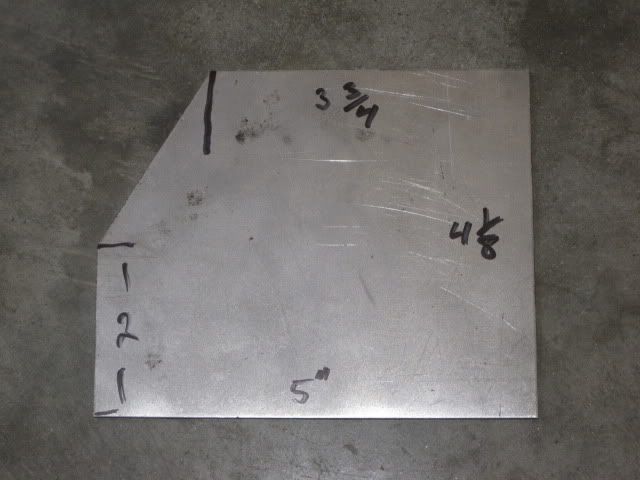
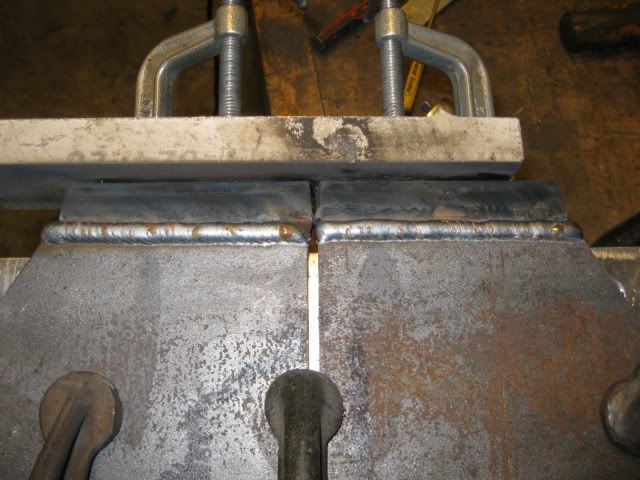
Little bit of work and I have the two new plates made from 1/4" steel:


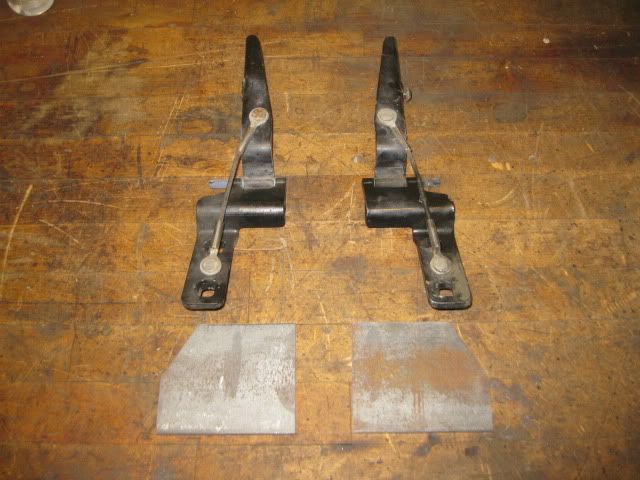
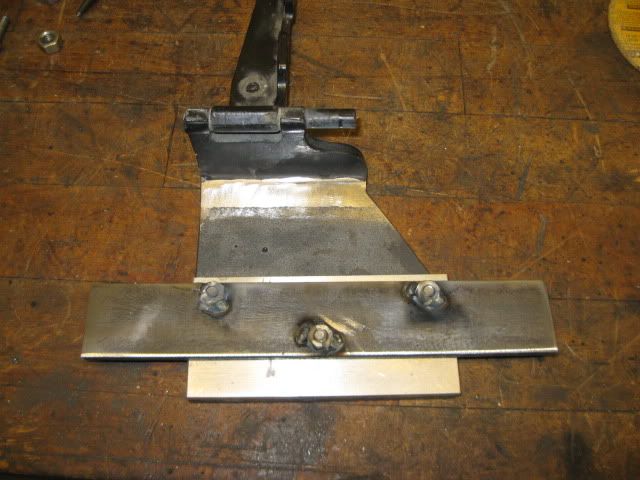
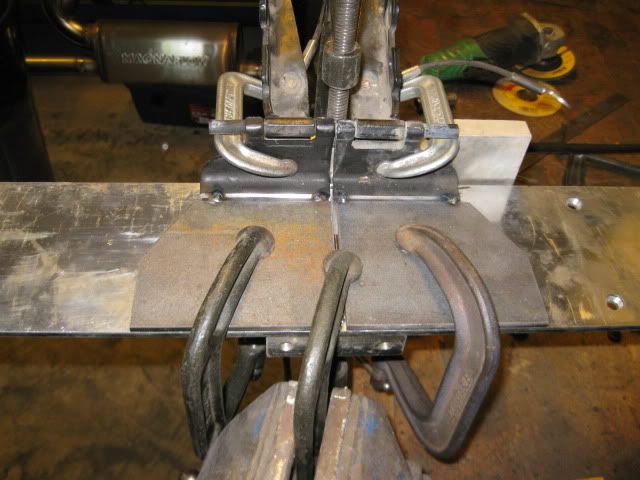
Time to cut the hinges:


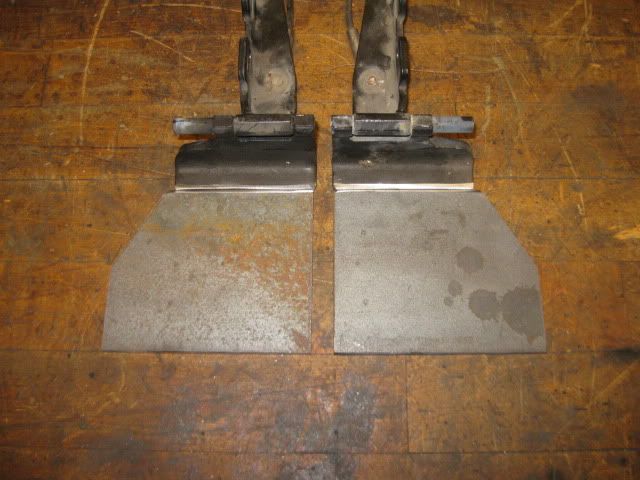
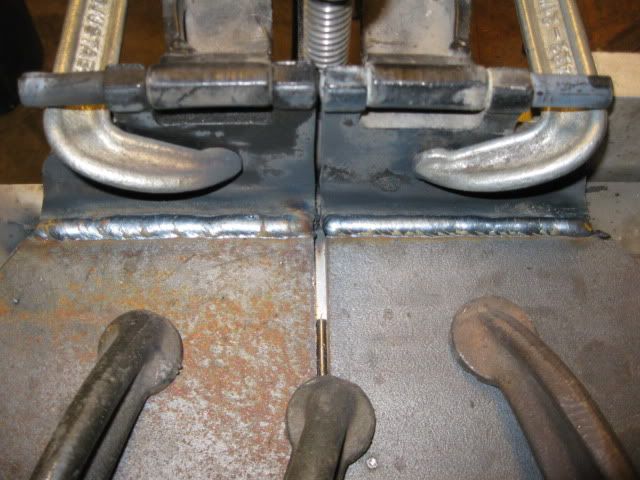
Then clamp everything together to ensure both sides are the same and then weld the seam on top and bottom:


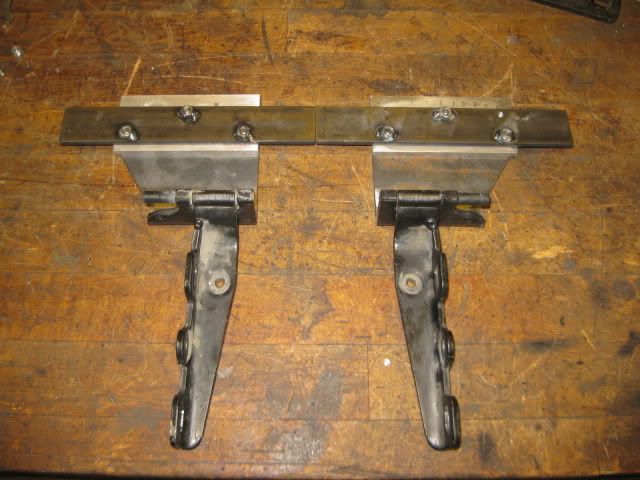
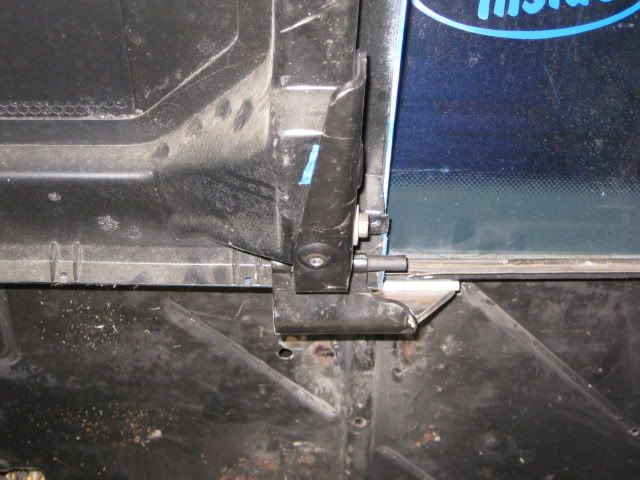
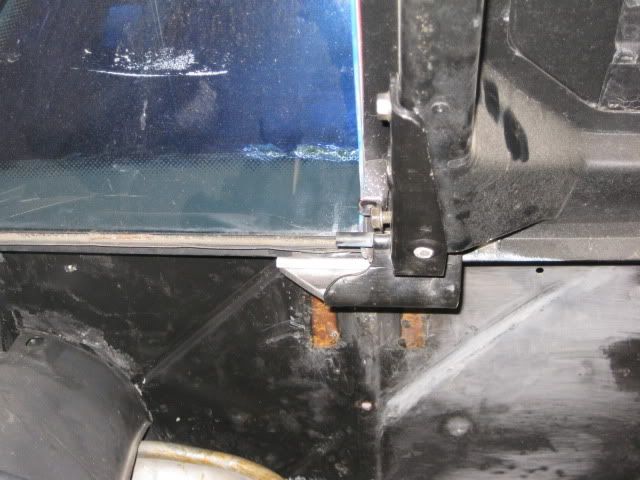
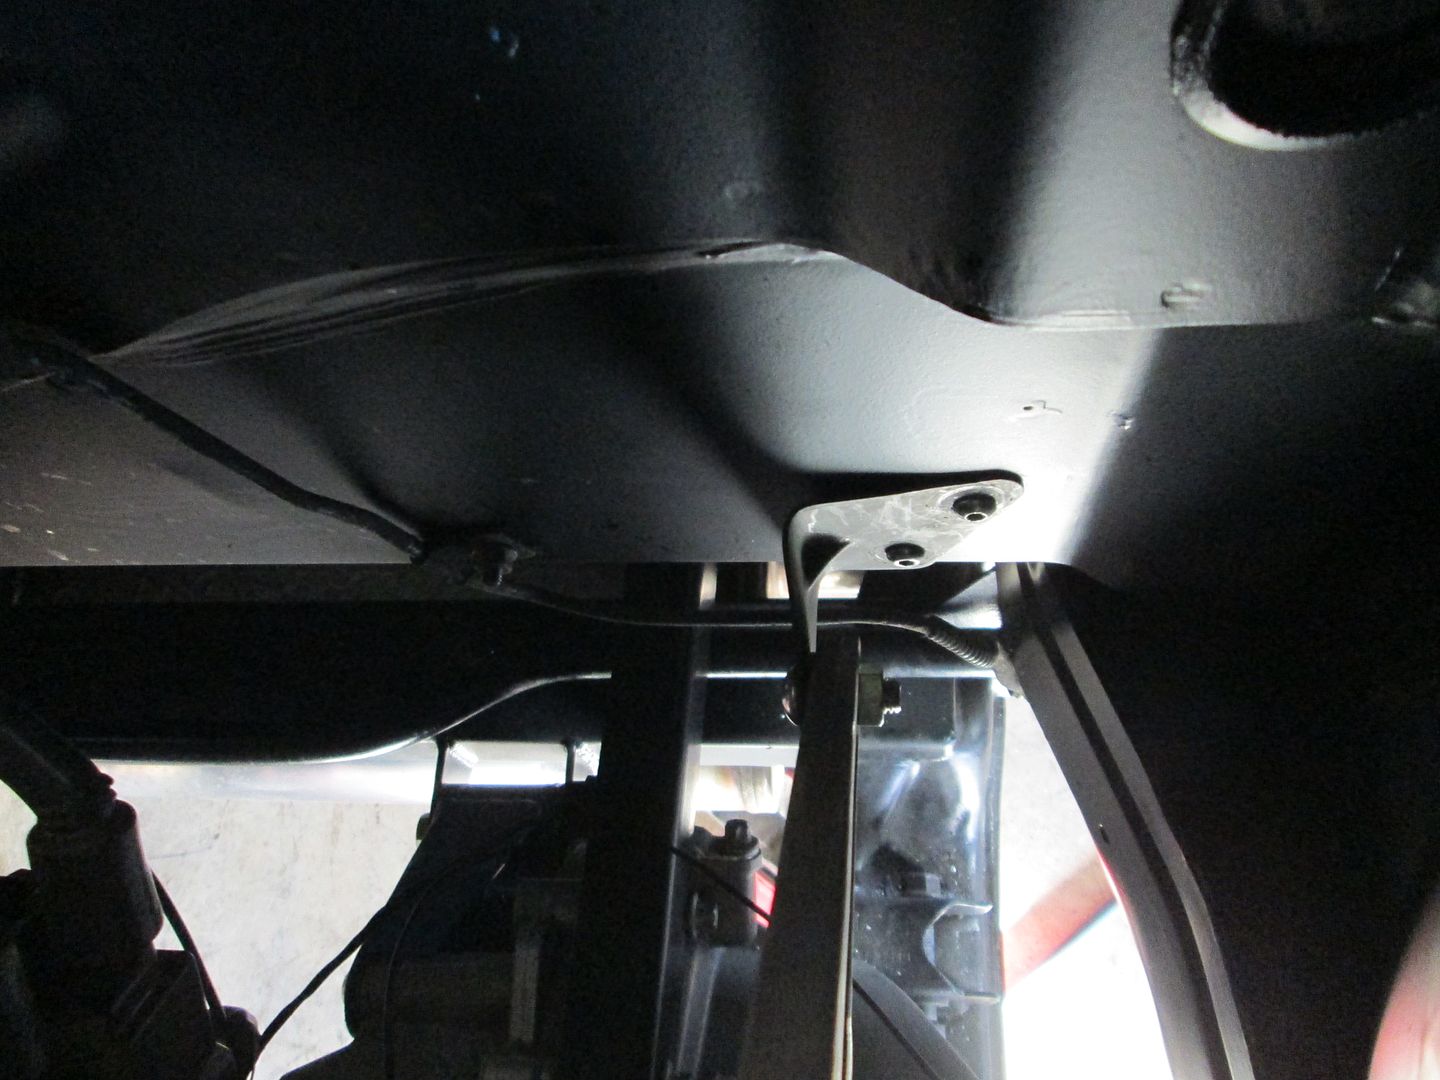
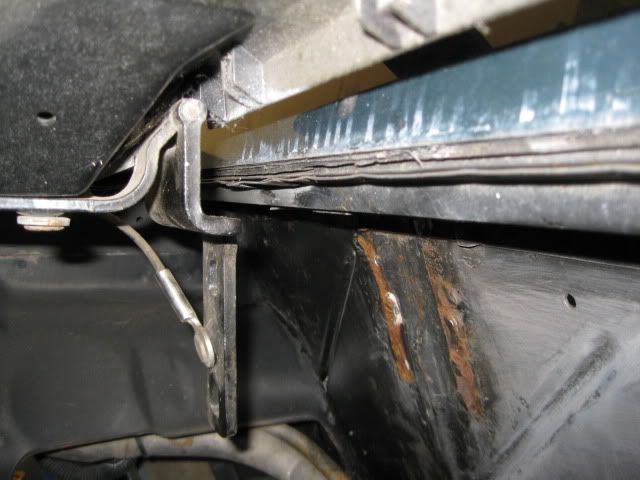
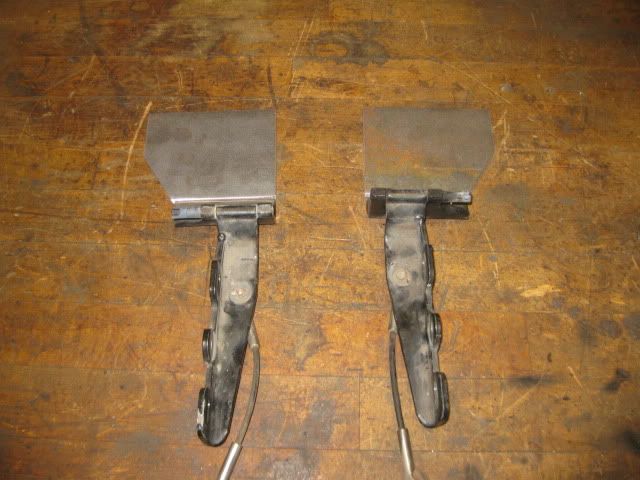
Test fit with the modified hinge:


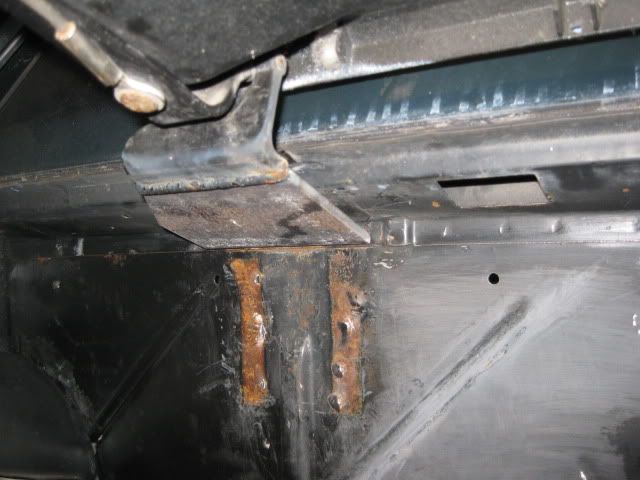
There is about 1/4" gap between the frame and the hinge, so I will need to make up some 1/4" spacers to fill the gap. After nap time, I will grind the upper and lower welds down flush just so the brackets will look stock to the non-fiero crowd.

The bottom of the rear window tube has a slot on both sides that is slightly wider than 1 1/2" wide. So I purchased some 1 1/2" x 1/4 material and will slide it through this hole and use it as the back support for bolting these modified hinges in place.


IP: Logged
PFF
System Bot
fieroguru
Member
Posts: 12127
From: Champaign, IL
Registered: Aug 2003


Feedback score:    (45)
Leave feedback


Total ratings: 258
Rate this member

Report this Post05-30-2011 06:45 PM Click Here to See the Profile for fieroguruSend a Private Message to fieroguruEdit/Delete MessageReply w/QuoteDirect Link to This Post
Smoothed the welds on the driver side hinge, drilled/countersunk the 3 holes, fabricated a 1/4" aluminum spacer, and fabricated the inner threaded plate that will go up into the tube.


I have a few more things to finish on the passenger side hinge and then it will be time to install them into the chassis. Once they are in the chassis, I plan to fabricate a 1/8" plate that will bolt to the firewall a couple inches down and be welded to the hinge plate to help stiffen the hinge mounting.
IP: Logged
fieroguru
Member
Posts: 12127
From: Champaign, IL
Registered: Aug 2003


Feedback score:    (45)
Leave feedback


Total ratings: 258
Rate this member

Report this Post05-30-2011 07:35 PM Click Here to See the Profile for fieroguruSend a Private Message to fieroguruEdit/Delete MessageReply w/QuoteDirect Link to This Post

fieroguru

12127 posts
Member since Aug 2003
Here are both hinges ready to be installed...


IP: Logged
marc-alan
Member
Posts: 373
From: pottstown, pa usa
Registered: Mar 2010


Feedback score:    (8)
Leave feedback

Rate this member

Report this Post05-30-2011 07:48 PM Click Here to See the Profile for marc-alanSend a Private Message to marc-alanEdit/Delete MessageReply w/QuoteDirect Link to This Post
Awesome! I think you need to start making these as a kit.

IP: Logged
KVCFIERO
Member
Posts: 153
From: USA
Registered: Aug 2009


Feedback score: N/A
Leave feedback

Rate this member

Report this Post05-30-2011 07:51 PM Click Here to See the Profile for KVCFIEROSend a Private Message to KVCFIEROEdit/Delete MessageReply w/QuoteDirect Link to This Post
 
quote
Originally posted by marc-alan:

Awesome! I think you need to start making these as a kit.


I second that
IP: Logged
Jefrysuko
Member
Posts: 3491
From: Oreana IL
Registered: Apr 2000


Feedback score:    (17)
Leave feedback


Total ratings: 108
Rate this member

Report this Post05-30-2011 11:15 PM Click Here to See the Profile for JefrysukoSend a Private Message to JefrysukoEdit/Delete MessageReply w/QuoteDirect Link to This Post
Guru,

I'm speechless.

Thanks for never forgetting to give me credit with the idea. We discussed some general ideas about how to pull this off and you are doing an amazing job of making it even better than I had imagined.

If you feel like making some of these for others I would love to be your first customer.
IP: Logged
87_special
Member
Posts: 266
From: San Diego, CA
Registered: Oct 2006


Feedback score: (3)
Leave feedback

Rate this member

Report this Post05-31-2011 02:34 PM Click Here to See the Profile for 87_specialSend a Private Message to 87_specialEdit/Delete MessageReply w/QuoteDirect Link to This Post
Looks good Guru! That should really clean up the engine bay. I'm guessing you're using a shock style lift support to hold the wieght of the lid while its up.

------------------
1987 SE / Fastback - 3500 Turdbowd / Alcoholic / '92 5-speed swap

No bandwagon here...

IP: Logged
fieroguru
Member
Posts: 12127
From: Champaign, IL
Registered: Aug 2003


Feedback score:    (45)
Leave feedback


Total ratings: 258
Rate this member

Report this Post05-31-2011 06:17 PM Click Here to See the Profile for fieroguruSend a Private Message to fieroguruEdit/Delete MessageReply w/QuoteDirect Link to This Post
Sorry, guys.... I probably will not make any more of these to sell. But you all are free to make your own!

Hinges are pretty much done. Everything went together pretty well, but I do want to fine tune the thickness of the spacer to make my panel alignment perfect. Looks like 1/8" vs. 1/4" would be better, but I may try it w/o any to see if that goes too far. The hinges are petty stiff w/o the additional firewall bracket, so I will leave them off.

The inner plates slide into place like this:


Then it takes some trial and error to located the holes between the hinges and the inner plate. Once the hinges are painted and they are installed for the last time, I will probably put a couple of circles of RTV on the inner plates to hold them solid for future removal of the hinges.


I will use some kind of struts to hold the decklid up (and to limits its upward travel since the limiting cables are no more), but I need to get them figured out. Sure Rodney sells a kit, but his kit attaches at a bracket I no longer have (part of my button head conversion to the top side of the struts), so I will have to come up with some clean mount for them.

IP: Logged
av8fiero
Member
Posts: 917
From: Whitewater Wisconsin
Registered: Apr 2008


Feedback score: (3)
Leave feedback

Rate this member

Report this Post06-01-2011 08:53 AM Click Here to See the Profile for av8fieroSend a Private Message to av8fieroEdit/Delete MessageReply w/QuoteDirect Link to This Post
I don't know if there is enough room to make it fit but possibly you could use a front hood slider support to hold up the decklid. The advantage to using one of those if it would fit is that it will never wear out. Your hinge plate mod looks like it will solve many clearance issues around the passenger side hingebox. Awesome work!
IP: Logged
Goldenfoot05
Member
Posts: 69
From: Ogden, Utah, USA
Registered: Dec 2011


Feedback score: N/A
Leave feedback

Rate this member

Report this Post01-05-2013 02:15 PM Click Here to See the Profile for Goldenfoot05Send a Private Message to Goldenfoot05Edit/Delete MessageReply w/QuoteDirect Link to This Post
FieroGuru, its been a while now since you've done this mod. How is it holding up? Anything you would change? This is probably on the LS4 / F40 swap car tho and you havent had much use on the hinges yet, right!? Im thinking of doing it on my swap to help clear the supercharger pulley. Thanks for sharing!
IP: Logged
fieroguru
Member
Posts: 12127
From: Champaign, IL
Registered: Aug 2003


Feedback score:    (45)
Leave feedback


Total ratings: 258
Rate this member

Report this Post01-05-2013 04:16 PM Click Here to See the Profile for fieroguruSend a Private Message to fieroguruEdit/Delete MessageReply w/QuoteDirect Link to This Post
I have done this mod to 2 fieros, but neither has seen any road time as of yet.
IP: Logged
PFF
System Bot
MulletproofMonk
Member
Posts: 3079
From: Dayton, OH (Bellbrook, OH 45305)
Registered: Oct 2005


Feedback score:    (50)
Leave feedback


Total ratings: 78
Rate this member

Report this Post02-26-2016 02:39 PM Click Here to See the Profile for MulletproofMonkClick Here to visit MulletproofMonk's HomePageSend a Private Message to MulletproofMonkEdit/Delete MessageReply w/QuoteDirect Link to This Post
 
quote
Originally posted by fieroguru:

I have done this mod to 2 fieros, but neither has seen any road time as of yet.


I did the same mod (thanks Paul) and ran the car for 2 years daily with no issues...
IP: Logged
fieroguru
Member
Posts: 12127
From: Champaign, IL
Registered: Aug 2003


Feedback score:    (45)
Leave feedback


Total ratings: 258
Rate this member

Report this Post02-26-2016 07:27 PM Click Here to See the Profile for fieroguruSend a Private Message to fieroguruEdit/Delete MessageReply w/QuoteDirect Link to This Post
My LS4/F40 Fiero has had this mod done since 2013 w/o issue as well. To hold the decklid open, I modified the front hood support...


I also did this mod on Trinten's Fiero, but since he was using the lift cylinders, I added some additional metal down the firewall to stiffen it up further. Those lift cylinders apply signficant pressure when closed...


You can't see the extra metal once the smooth firewall panel is in place:


IP: Logged
Danyel
Member
Posts: 6087
From: Lévis, Québec, Canada
Registered: Sep 2008


Feedback score:    (91)
Leave feedback


Total ratings: 171
Rate this member

Report this Post02-26-2016 07:50 PM Click Here to See the Profile for DanyelClick Here to visit Danyel's HomePageSend a Private Message to DanyelEdit/Delete MessageReply w/QuoteDirect Link to This Post
That is ONE CLEAN and sharpy sharp engine compartement

------------------

Black Widow Build Thread 2007 - 2014 Tylers Toy
My Low Profile Buckets for sale My LED Sidemarkers for sale

IP: Logged

next newest topic | next oldest topic

All times are ET (US)

Post New Topic  Post A Reply
Hop to:

Contact Us | Back To Main Page

Advertizing on PFF | Fiero Parts Vendors
PFF Merchandise | Fiero Gallery | Ogre's Cave
Real-Time Chat | Fiero Related Auctions on eBay


Copyright (c) 1999, C. Pennock