I am guessing that the MAP sensors from the 07+ LS4s doesn't work, but the one on the 05-06 does work on the LS2 intake. Mine's an 06 and it just popped right in. The 07+ LS4 moved the MAP sensor to the top rear of the intake though, so I guess the body on the sensor changed to add a bolt hole?
They moved it, to help with emissions control. I'm thinking I might try to mount mine on the back side of the manifold as well. Not sure yet what I would do to fill in the hole on the throttle neck though.
And nice job on the half-shaft and axles. Great info as always!
The issue with the MAP sensor has more to do with the port that goes into the manifold being too large to fit the LS2 intake hole. I probably could have over sized the hole, but was concerned about the plastic getting too thin... and I didn't like the look of the unused bolt hole in the LS4 sensor. The LS2 one is much better "looking" and keeps everything intake related (intake, throttle body, fuel rail, and injectors) all LS2 components.
If you wanted to relocate the MAP sensor to the rear of the manifold, you could probably tap the current hole for a plug, find a freeze plug that will slide into place, or just fill the hole with some sort of epoxy.
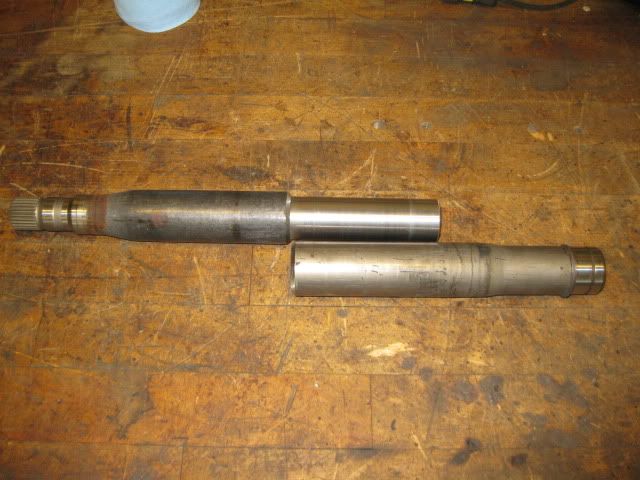
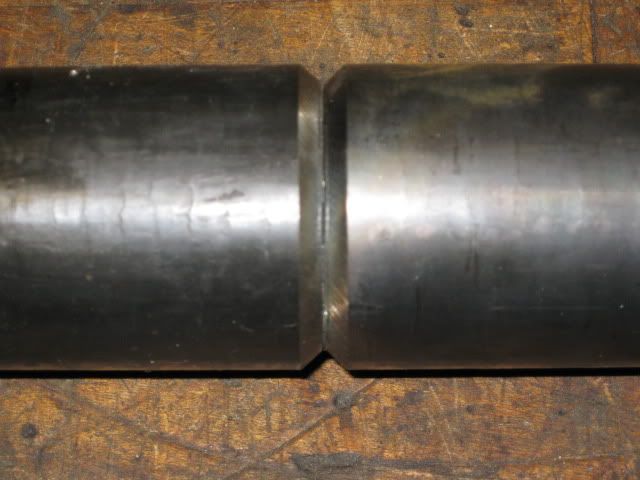
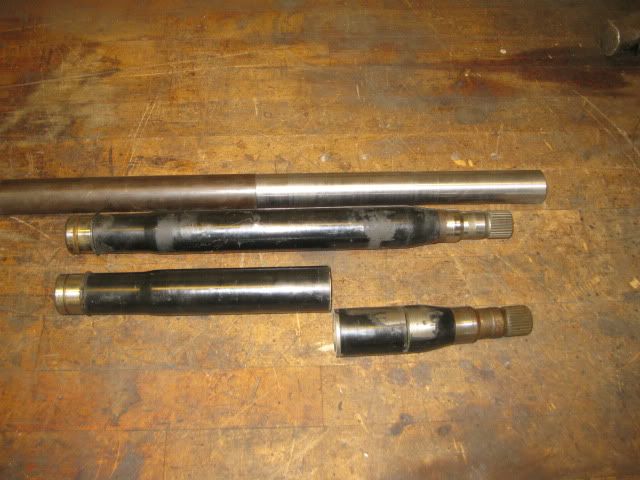
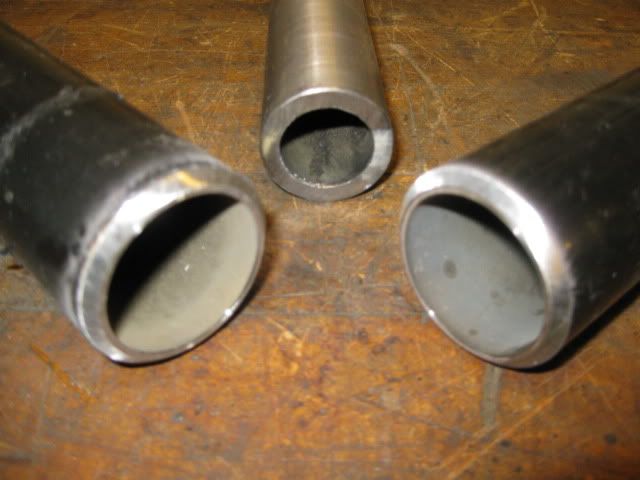
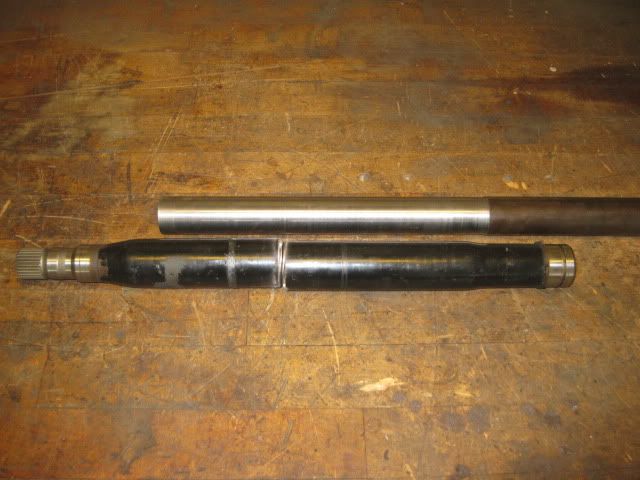
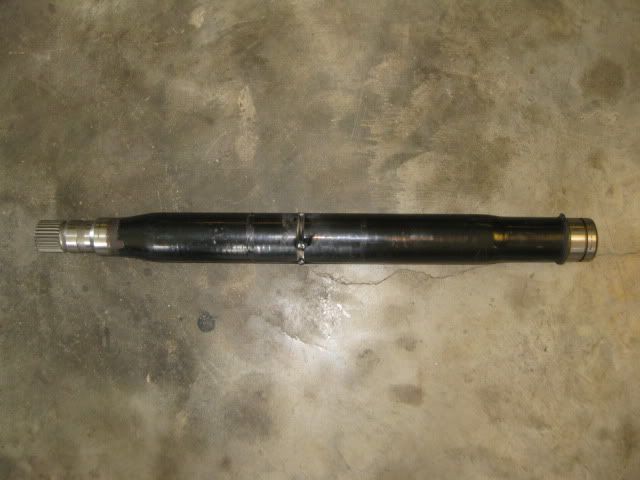
A little further on the intermediate shaft. The inner sleeve was 1 1/2" 1/2" wall DOM material. It needed turned down to about 1.45". I moved the cut on the first intermetiate shaft to place the seam closer to the center on the final product (and to make room for the inner sleeve to extend about 5-6" past the seam). Also located the cut line on the second intermediate shaft to increase the total length by 1 7/8" as a starting point. The edges of both intermediate halves were beveled as well for good weld penetration (and I do not need to worry about blowing out the back side since the sleeve will be there). I will tack weld the two ends together w/o the sleeve to test fit and check for axle binding in the chassis.
I am going to work on the chassis to remove the aluminum firewall (being replaced) and the hinge boxes. Then I can do another test fit with everything on the engine.
I see your still building on my car. make sure you have it done by this week! i wana drive it lol.
You can't drive it until you catch up on your progress payments! Until you are current with the payments, I will consider it mine. The parts list (including engine/transmission purchase) of just the final components used in the swap is over $6K not including my labor charge.
The parts costs for this swap is still on track for being less expensive than the previous Ramjet/HTOB Getrag swap... and will be lighter with a stronger transmission, more HP and better fuel efficiency... I just need to make it look as good as my old Ramjet setup and I will be pretty happy!
[This message has been edited by fieroguru (edited 05-07-2011).]
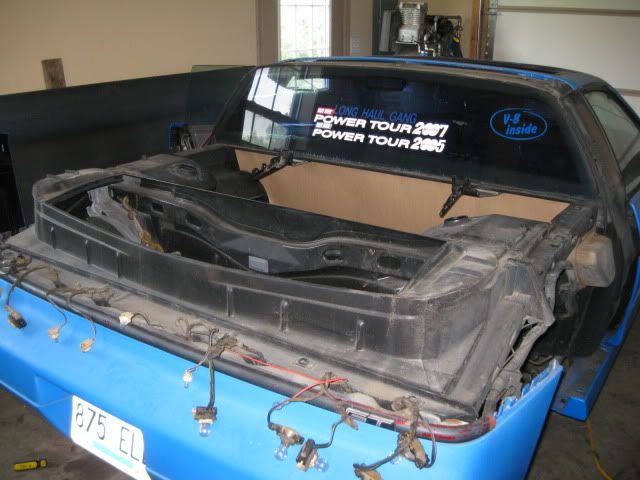
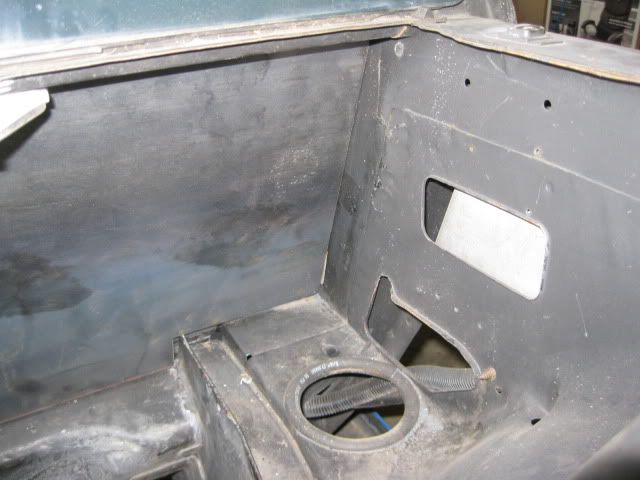
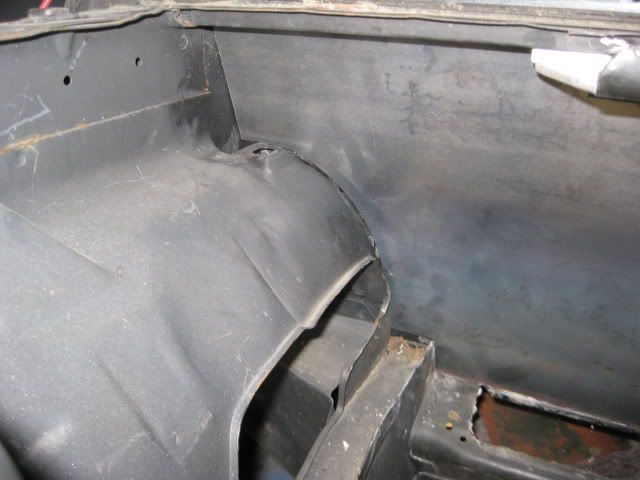
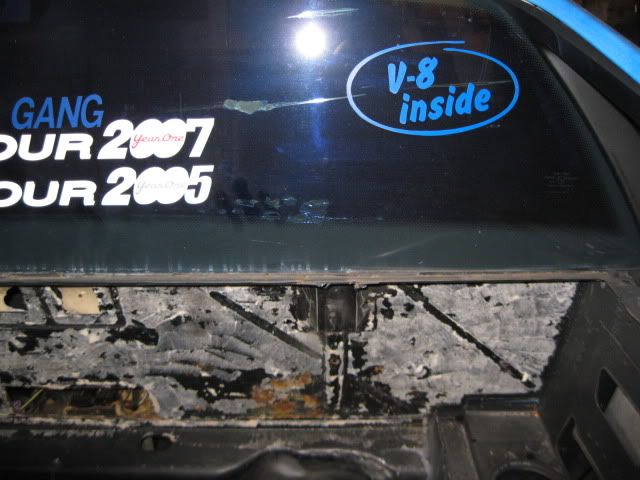
Here are the hinge boxes and the aluminum firewall:
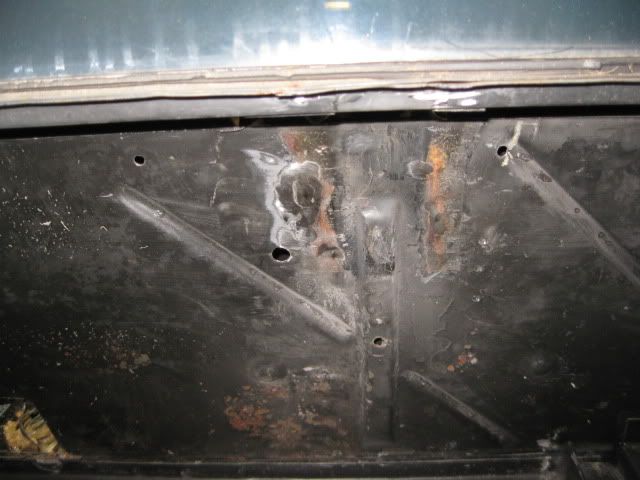
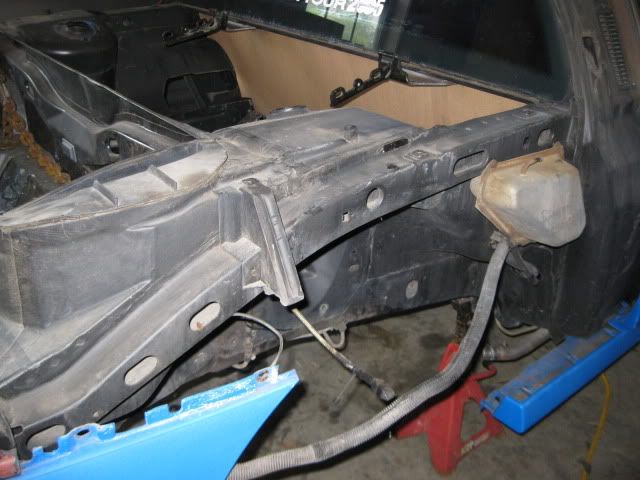
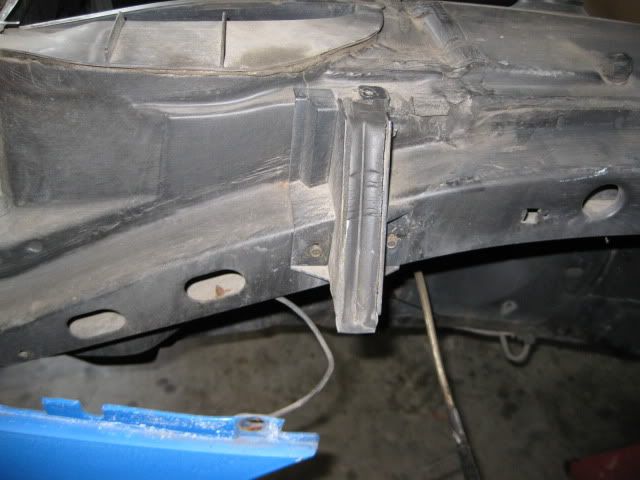
Here they are mostly gone... excuse the left over adhesive from the Tac Mat:
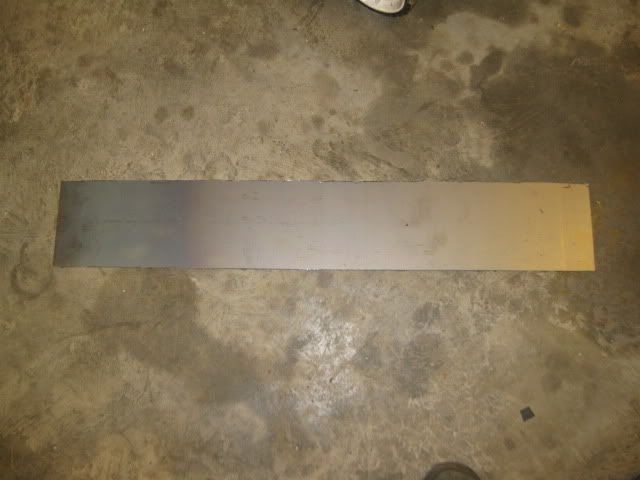
I still need to grind down the remaining portions of the hinge boxes and then clean all the left over adhesive. I picked up 2 4x8 sheets of 16ga steel yesterday for the firewall panel and another project.
This particular modification to eliminate the hinge boxes came from JefrySuko during the 25th. We discussed it at great length during the 25th and figured out what all it would take. It should really declutter the front firewall with them gone and a smooth panel for the new firewall as well as provide clearance for my idler pulley on the LS4.
[This message has been edited by fieroguru (edited 05-07-2011).]
Although I haven't posted in this thread yet, I've been watching it from the beginning.. I am amazed with you resourcefulness and ability to make parts out of thin air...-Jason
Although I haven't posted in this thread yet, I've been watching it from the beginning.. I am amazed with you resourcefulness and ability to make parts out of thin air...-Jason
It decided to crack one of the fastback sail panels on removal, so it suffered the appropriate punishment and is no longer a piece anyone would want...
The single large panel was a major pain to install the first time w/o scratching or tearing anything up (I was in a time crunch for the 2007 HRPT and didn't want to take the time to remove the fastback), so when I make the new one, I will take the fastback off and remove the fuel fill tubes to have better access. This will also allow me to sand and repaint the back half of the chassis again (last done in 2005), since the car has spent since 2006 pretty much living outside (no garage space to store it).
The new firewall panel will only be the upper section and it will be a single flat panel, it will not bend down around the double firewall panel this time, mainly to save weight and the double firewall panel is already pretty smooth once the brackets are removed and the AC lines relocated from the driver side of the chassis. I am kicking around ideas to only have the single brake booster vacuum line pass through this panel and have everything else exit out the double firewall panel below...
Had the wife pick up some acetone so some time later this week I will remove all the unsightly adhesive from the factory fire wall and continue to make progress.
It decided to crack one of the fastback sail panels on removal, so it suffered the appropriate punishment and is no longer a piece anyone would want...
Good to know you are indeed human, and had an appropriate response.. :P
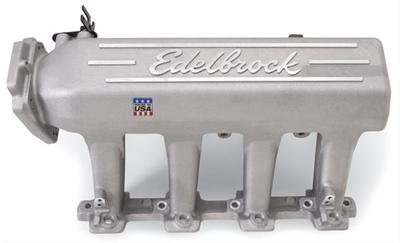
I like that intake and probably prefer the new Holley one that has removable upper sections (but it only works with the square port heads, not cathedral). http://www.holley.com/300-116.asp
Both intakes would lose bottom end torque even on the larger cube engines, but with the fiero weight and F40 ratios that isn't necessarily a bad thing. If/when I swap to a larger cube setup I will probably swap to one of these tunnel ram type intakes (probably also send my heads out for some CNC porting during the same upgrade time).
But for now I am trying not to get distracted so I can get this car on the road this summer. An LS Fest is in Bowling Green (2 1/2 hrs away) in September and I would love to take it down there... but it needs to be running, tuned and dynod well before then.
[This message has been edited by fieroguru (edited 05-12-2011).]
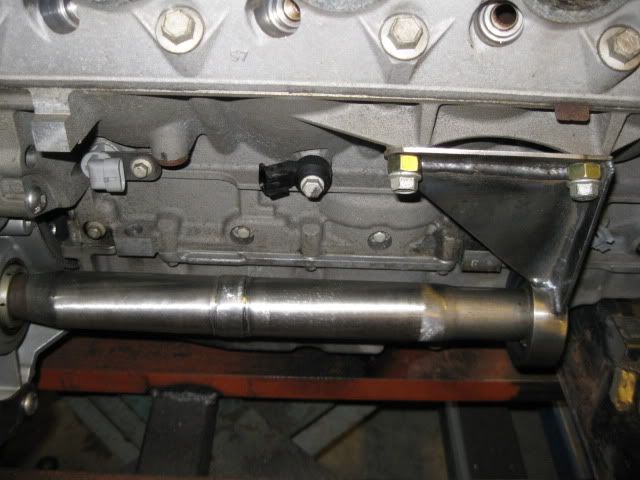
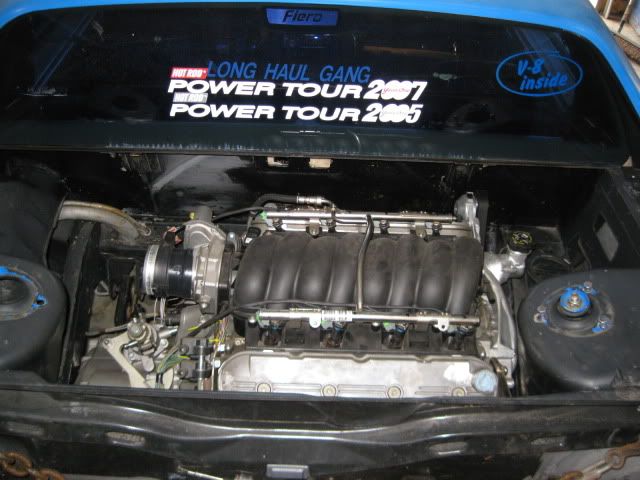
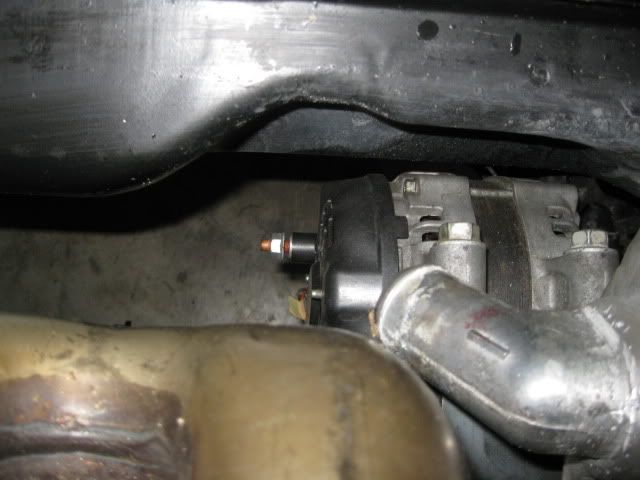
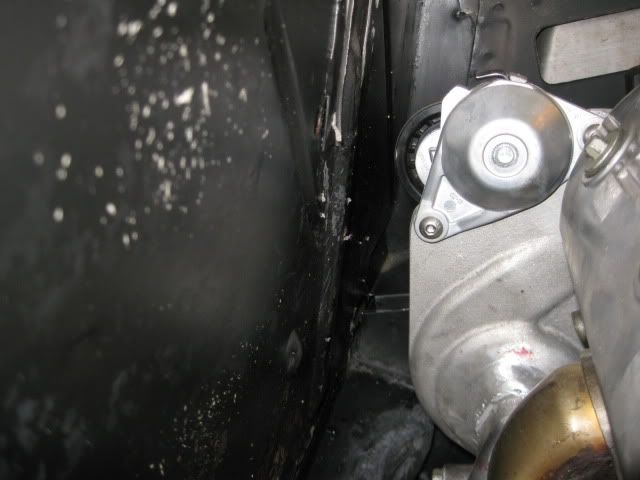
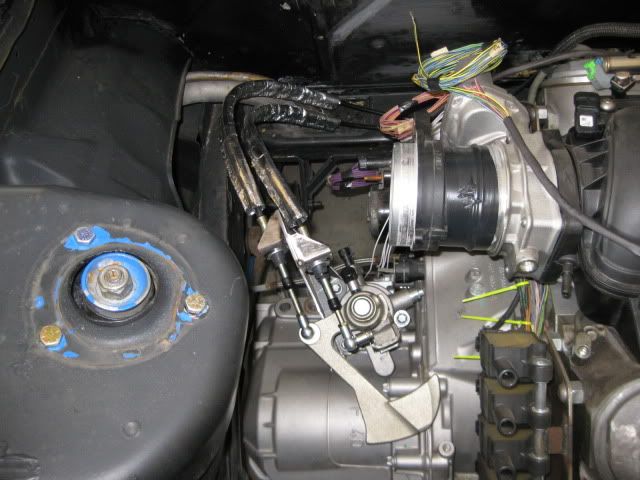
Tacked the two parts of the intermediate shaft together and then put the engine/tranny/cradle back into the fiero to confirm the final length of the intermediate shaft and check clearance to the alternator and upper belt tensioner:
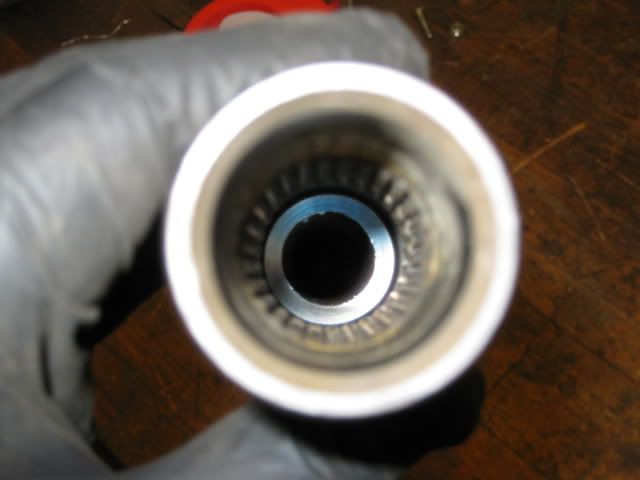
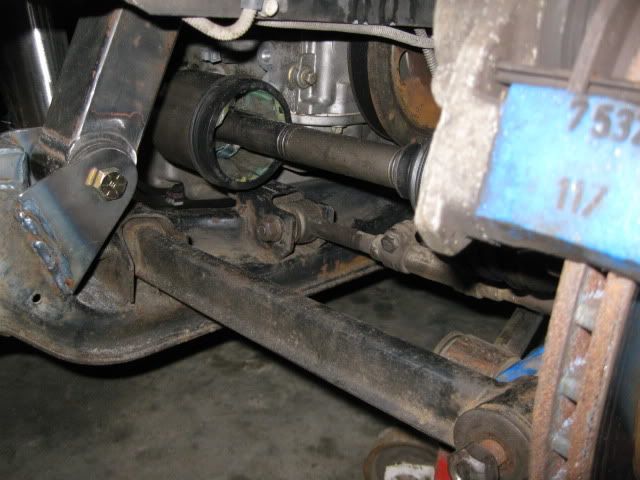
Before I could confirm the axle length, I had to swap out the G6 CV with a fiero CV:
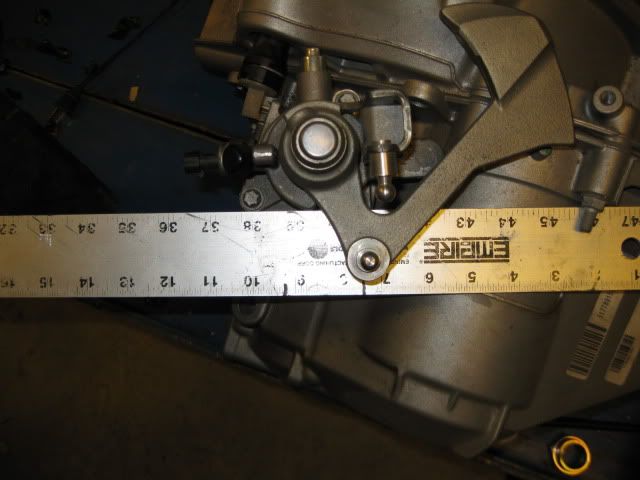
Then I put the PS rear suspension on and leveled the lateral links to check the placement of the tripod rollers in the tripod cage. There was 3/8" of clearance before the rollers were bottomed out and with the rollers bottomed out there was 1 1/2" from the edge of the rollers to the edge of the tripod cage. So shortening the intermediate shaft by 3/8" will center the tripod rollers in the tripod cage at "stock" ride height.
Originally posted by fieroguru: The issue with the MAP sensor has more to do with the port that goes into the manifold being too large to fit the LS2 intake hole. I probably could have over sized the hole, but was concerned about the plastic getting too thin... and I didn't like the look of the unused bolt hole in the LS4 sensor. The LS2 one is much better "looking" and keeps everything intake related (intake, throttle body, fuel rail, and injectors) all LS2 components.
If you wanted to relocate the MAP sensor to the rear of the manifold, you could probably tap the current hole for a plug, find a freeze plug that will slide into place, or just fill the hole with some sort of epoxy.
Ah. I didn't realize they changed the size of the port on the sensor as well. Mine looks exactly the same as your LS2 sensor, and popped right in on the LS2 manifold for me, when I test fit it.
I thought about epoxy, but don't want to have it break loose at some point and get sucked into the engine. Tap and plug might work, if I can find something to bolt in that place. But I don't want to just stick a bolt in it, since I do want it to look stock. I'm sure I'll figure something out though, when I get to the point of having to concentrate on it. Thanks for the suggestions.
Went ahead and test fitted the DS axle (hybrid tripod housing with 96 corsica axle) and had 7/8" before bottoming out at stock ride height. It should be fine as is, but I may install a 1/8" spacer between the bearing and the CV joint to make it 3/4" so it will match the PS.
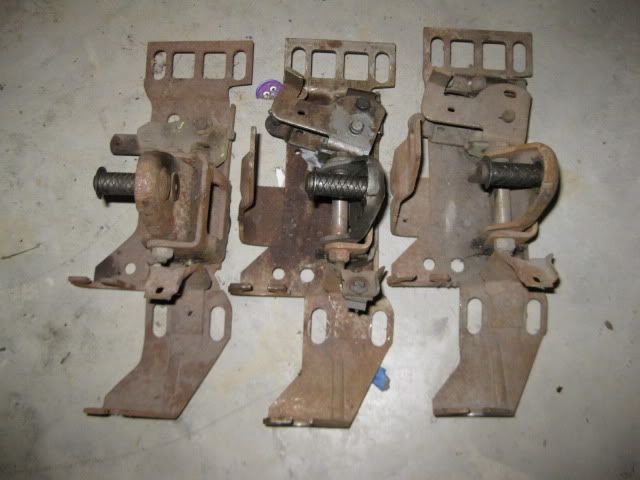
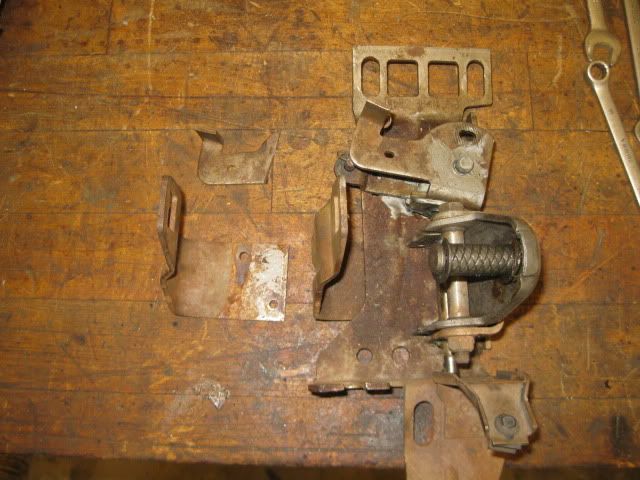
Then it was time to start modifying the shifter. So back to the shelf and pulled off these shifters for parts. Two are 4 speed shifters (with each missing a part from the reverse lockout) and an isuzu.
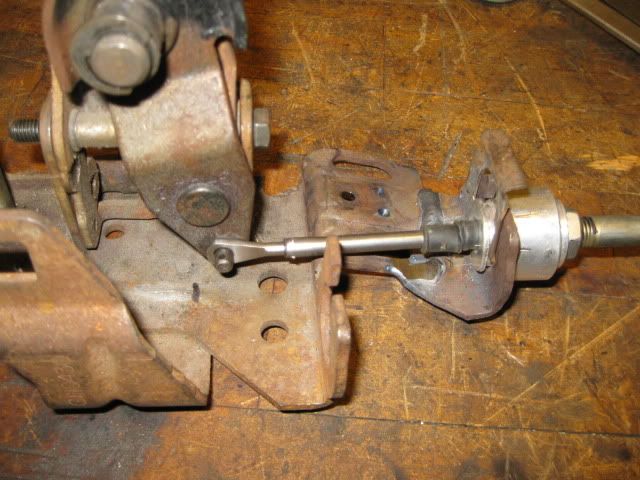
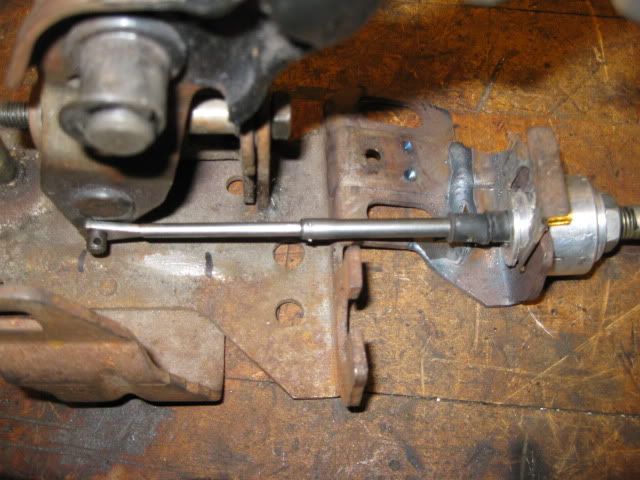
Tore one of the 4 speed shifters down and then installed my isuzu shifter lever and the old getrag select cable. With the cable in the stock 4 speed bracket, the shifter has very limited range. The first picture is with the cable fully extended and the 2nd one is with the shifter at is full range... there is about 1 5/8 gap:
Going the other way with the cable fully collapsed vs. the shifter results in a 1" gap:
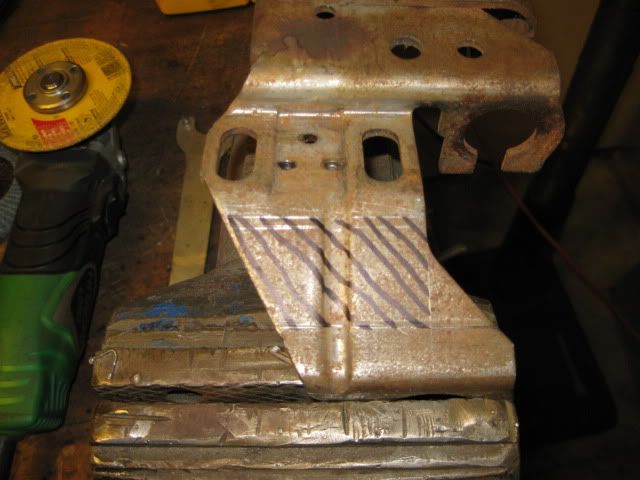
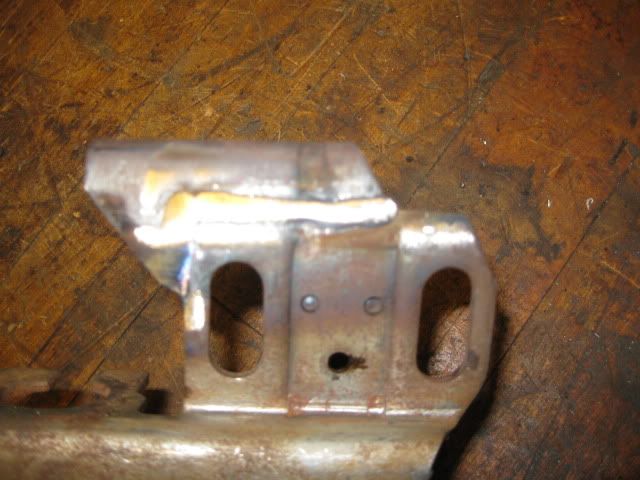
So the cable bracket needs to be moved forward. Anywhere between 1" and 1 5/8" probably would work, but I chose 1 5/16" to keep everything centered - that way I could build up the shifter stops to reduce cable abuse. Here is where I marked the section to remove:
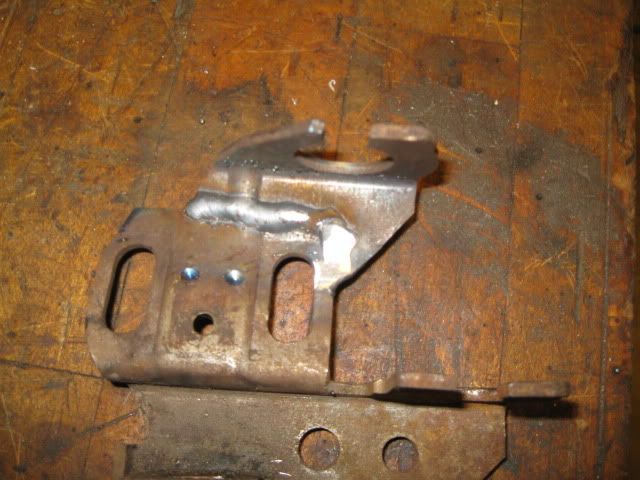
And welded back up with a range of motion checks:
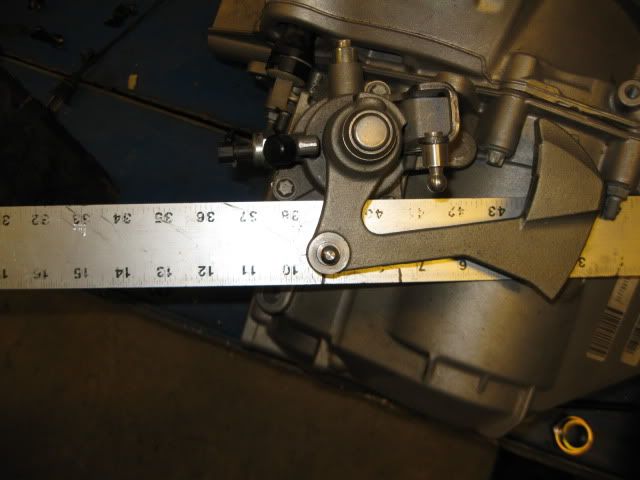
Since the Getrag Select cable only has 1 3/4" range of motion, I went and checked the needed range of motion on the F40 (the one for the 4.3) and got 1 3/4" as well, but I need to take it again in a more precise manner.
Rodney is the greatest. I had used the left over Getrag select cable for my SBC/Getrag combo that I had purchased from him back in 2005 to confirm the pivot ball would pop out and fit on the pivot balls attached to the F40. Everything checked out, so I went and ordered 2 new Getrag Select cables for this swap. Before sending them, he called to confirm I was using them on the F40 and commented about his newest style of cable ends not having a removable pivot ball. Luckily he still has some of the older style ends with the removable ball studs and is going to send my cables with the older style ends.
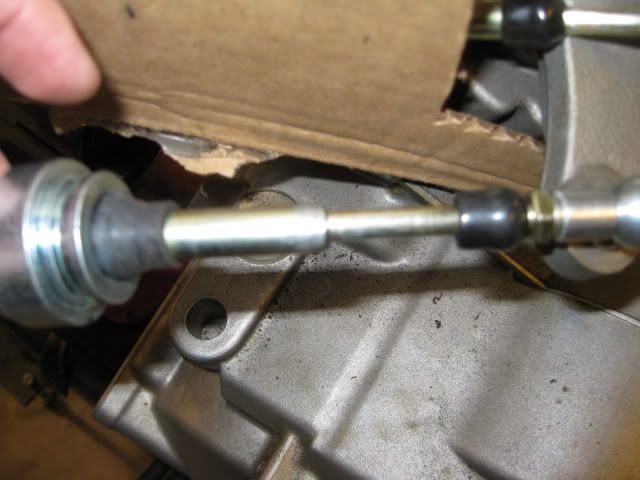
My new Rodney Getrag Select cables showed up yesterday. With a 10 second mod I was able to increase the travel from 1 3/4" to 2"... so no worries about range of motion for the Getrag select cable used as the F40 shift cable. Now I need to work on the select side and work on the cable mounting brackets at the transmission.
So how are you gonna keep you decklid down now that you have no hinges?
I will be making a thin "L" shaped bracket (about 30" in length) that will bolt to the panel under the rear window and top portion of the firewall panel, then the lower portion of the stock hinge will be modified and turned 90 degrees to attach to this new hidden bracket under the rear glass. The torsion rods are gone for good and will be replaced with some gas charged lift cylinders.
If you can when you get to that point can you try and document that clearly on here. I've been wanting to get rid of mine forever just for cleanliness of wiring and what not especially with my ICM and coils located against the firewall on that side.
If you can when you get to that point can you try and document that clearly on here. I've been wanting to get rid of mine forever just for cleanliness of wiring and what not especially with my ICM and coils located against the firewall on that side.
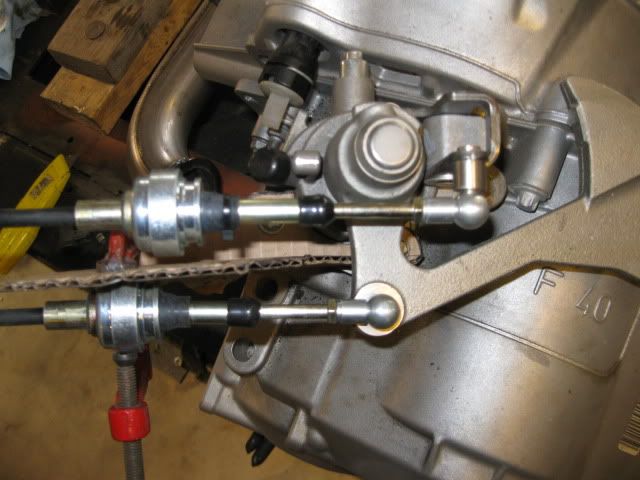
The shifter work is pretty much done. Just need to test fit in the chassis with the cables routed as they will be just to make sure everything is positioned right, then I can do all the finish welding on the bracket.
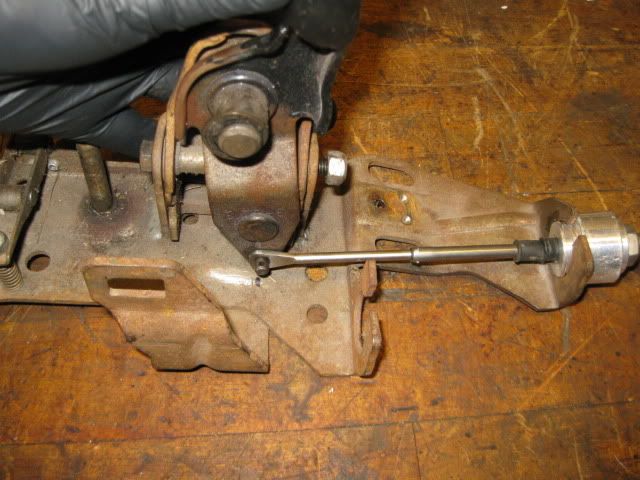
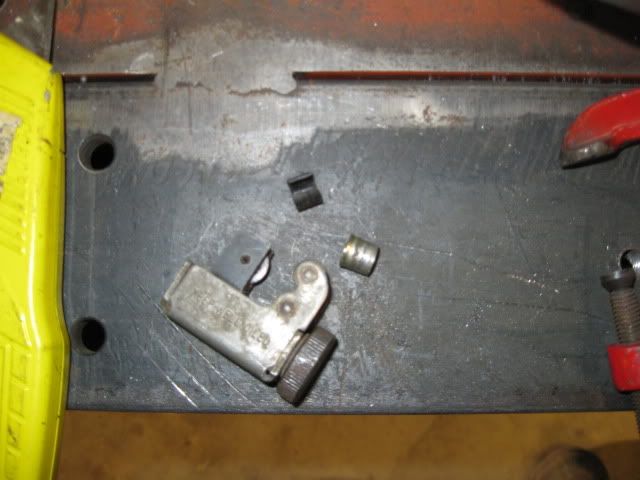
I started out with two Getrag select cables from Rodney Dickman. The cable that will become the shift cable was modified slightly to increase its stroke. Just took a tubing cutter and removed about 3/8" from the inner sleeve:
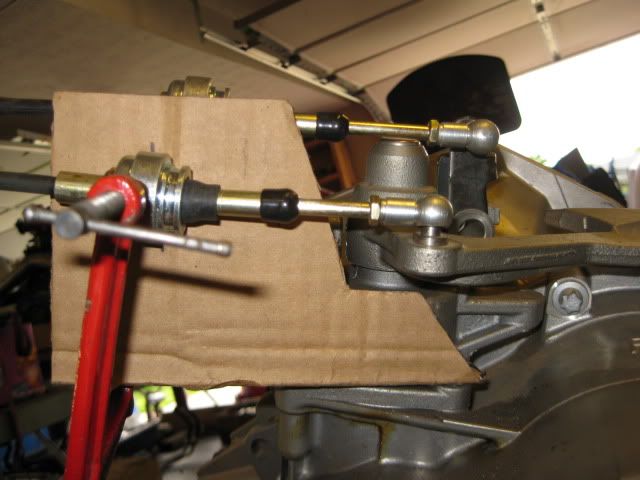
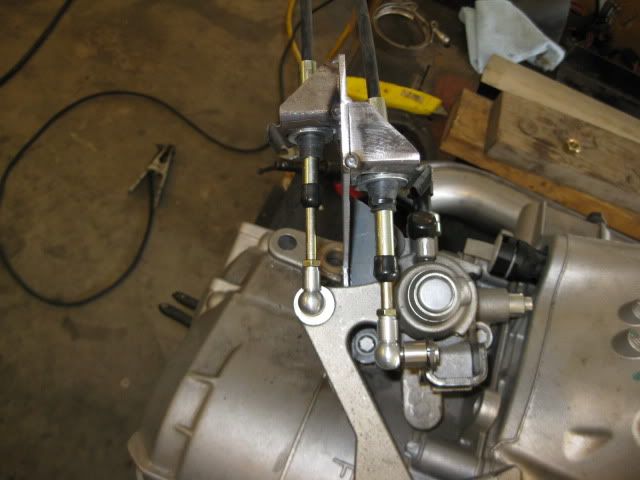
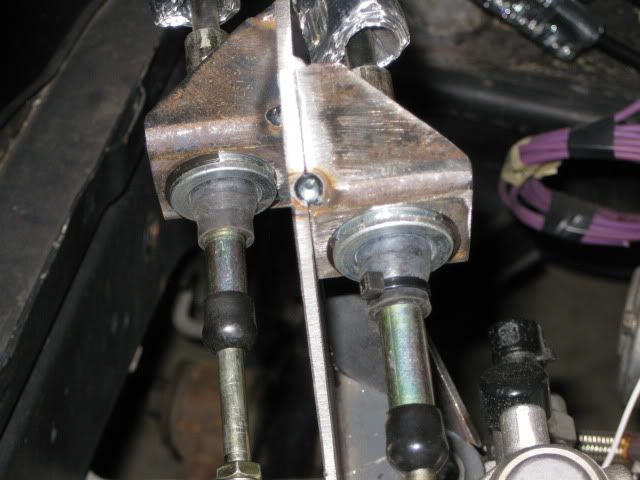
Then a card board mockup to get the general size/shape of the bracket and the approximate cable positions:
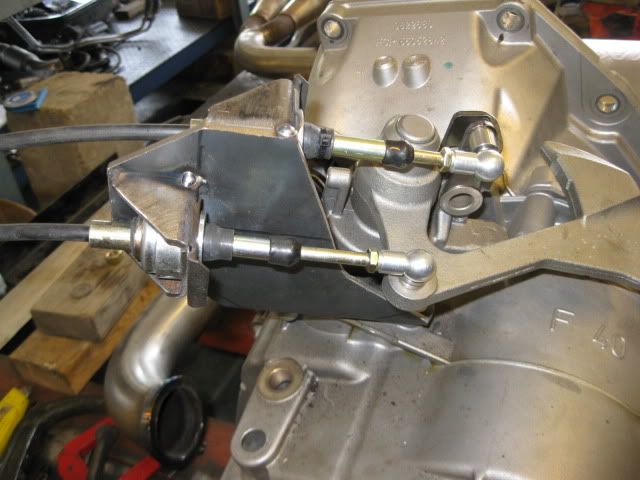
Transfer the card board pattern to some 1/8" steel, bent to shape and then use some 1 1/2" square stock, drilled some 1" holes for the cables (need to enlarge slightly more than 1") and then cut then into wedges. The round bodies of the cable ends needed about 1/8" removed (flattened so they would fit within the tubes). Then tack it all together and cut off the excess:
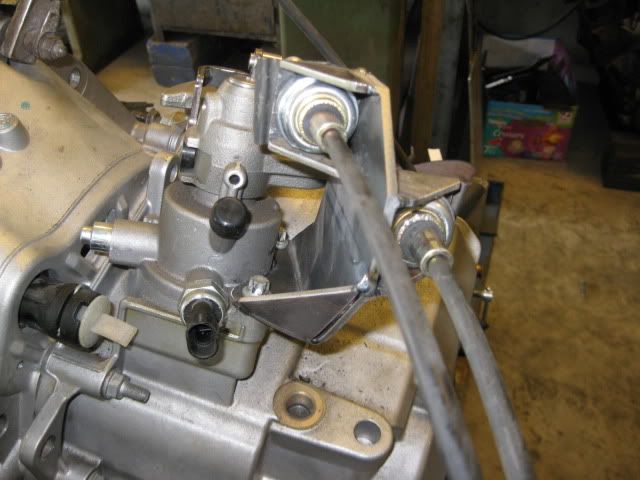
Everything works as it should. I modified the reverse lockout to make it easier to engage and might have gone a little too far...nothing that the welder cant fix though.
Here are a couple of the brackets for the console mounted reverse switch that I went ahead and removed:
Thanks! I researched all the F40 install threads and settled on doing is similar to zac88gt but with my own spin.
It is hard to see in the above pics, but I found some cleaner looking clips to hold the cable ends in place for under $4 from Tractor Supply (2 in a package):
[This message has been edited by fieroguru (edited 05-22-2011).]
Originally posted by blackrams: Ah, excuse me but, I've gotten used to frequent updates and I'm finding this interuption of the information flow to be somewhat similar to withdrawl.
Not that I'd know what that is like but, I can imagine. How bout an update there Paul?
Been slacking this week... work and family commitments have kept me slammed. I am hoping to get back to it on Friday evening and through the weekend. The engine needs to come back out of the engine bay so I can start working on the decklid hinges and the new firewall panel.
I was able to get an early start to the 3 day weekend by pulling the intermediate shaft back out of the car, shortening it 3/8" (final overall length will be 19 1/2"), beating in the first side 4" cold (and some slight heating once it was over 2" in) and then leaving 5" for the other side.
I used a propane torch to heat up the powdercoat material and scraped it all off. The female side is now in the oven at 500 degrees and the male end is in the freezer. After about 30 mintues in these conditions, I am hoping the other side will go together without much effort with the addition... brought a 2x12x24 piece of wood to put on the kitchen floor, my mini-sledge and a 2x4 for the top side... wife is pretty proud of me this evening!
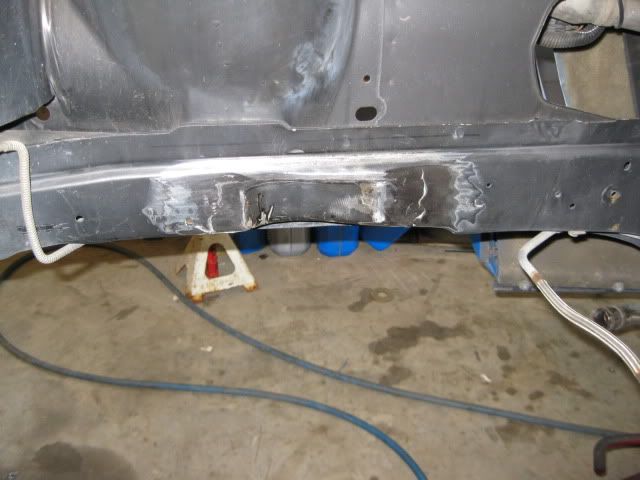
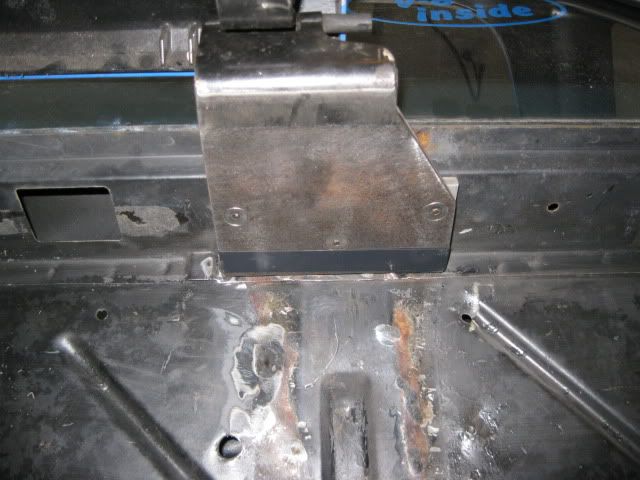
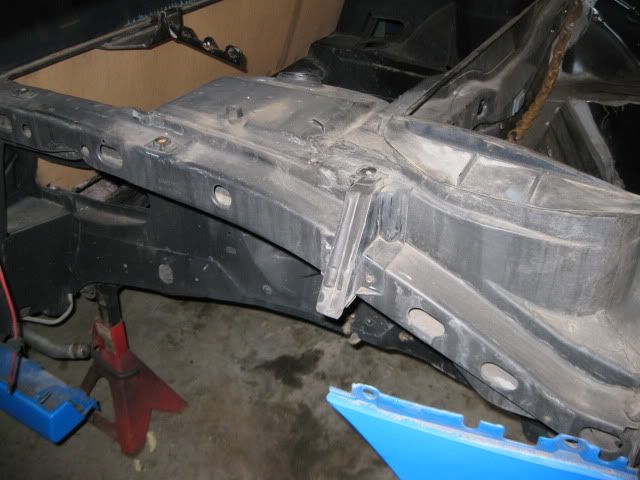
Started the work on the engine bay today. Welded in the relocated panel on the DS frame rail, removed the last remnants of the decklid hinge boxes and pulled the 6 1/2' x 4' sheet of 1/8" steel out to cut a 30" x 48" piece (easier to handle for future small pieces vs. always pulling out the large sheet) and from that piece I cut a 6" x 36" piece that I will bend into an somewhat open "L" for attaching to the firewall and rear glass tube.
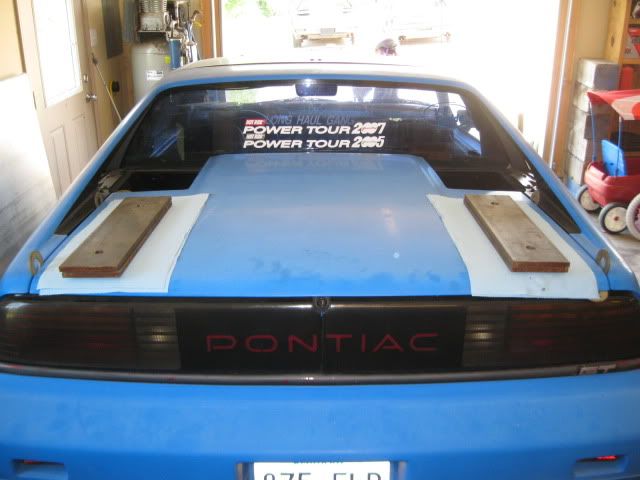
I put the decklid back on the car, weighted down the rear and then used some large washers to set the panel gap:
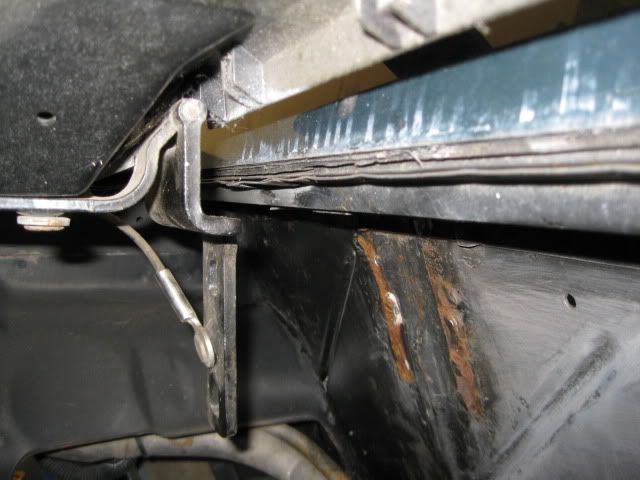
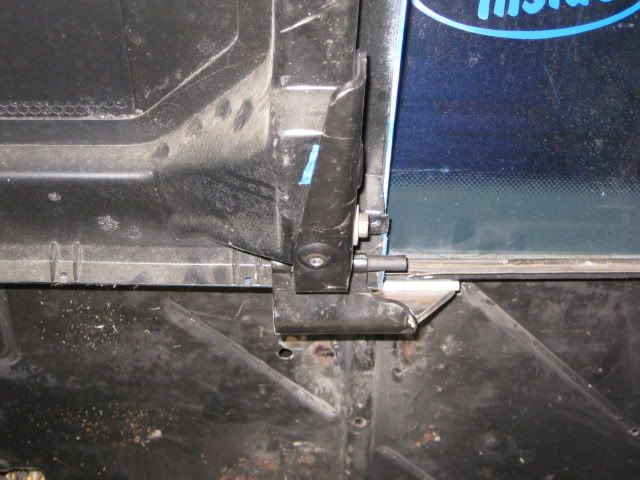
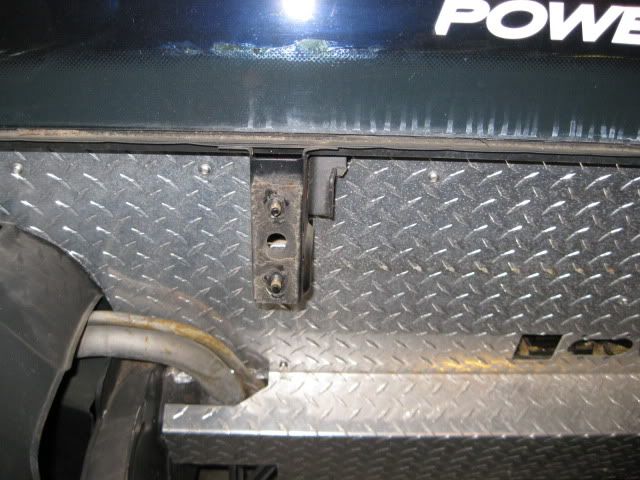
Here is an underside view of the factory hinge:
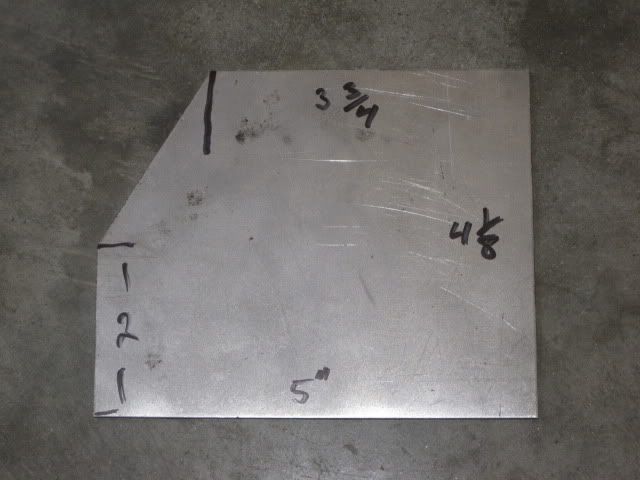
The plan is to cut the hinge off where it bends for the attachment to the stock hinge boxes. Then weld a piece of 1/4" steel to the hinge and have this plate bolted to the fiero chassis... something like this:
When my youngest gets up from nap, I will cut out the pieces from 1/4" steel and continue. A bar with nuts welded to the back side will be slid into place inside the rear window tube to help spread the load of the decklid across it. The 6x30x1/8" piece probably will not be needed, but it may be used to make a few brackets.
[This message has been edited by fieroguru (edited 05-29-2011).]
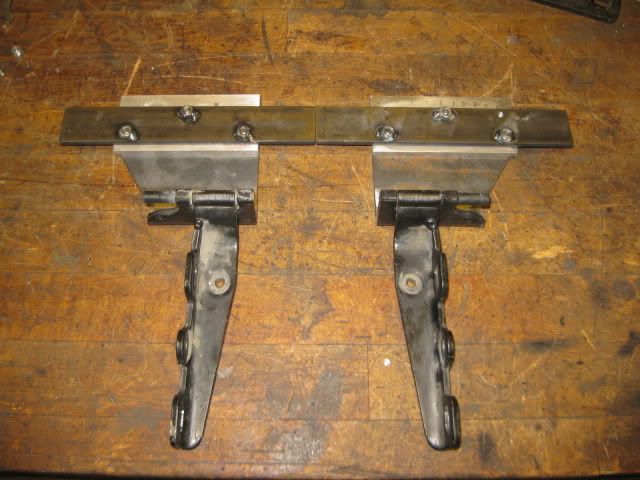
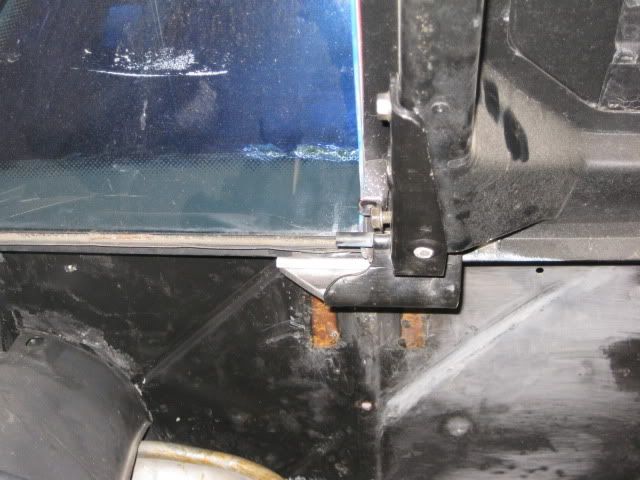
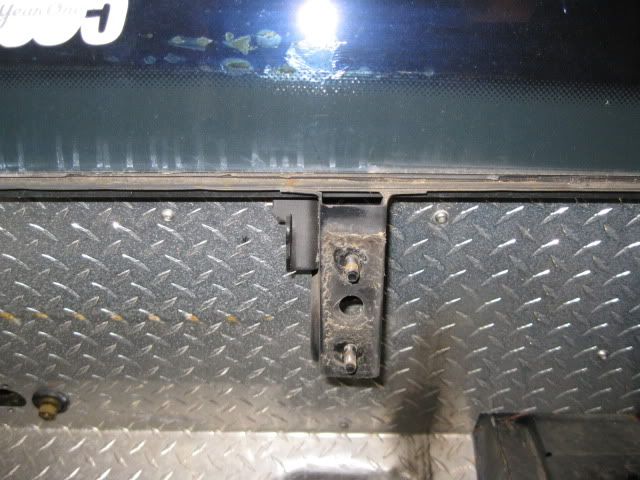
Hinges are pretty much done, I may reduce the 1/4" spacer to 1/8" to better line up the body line at the decklid vents:
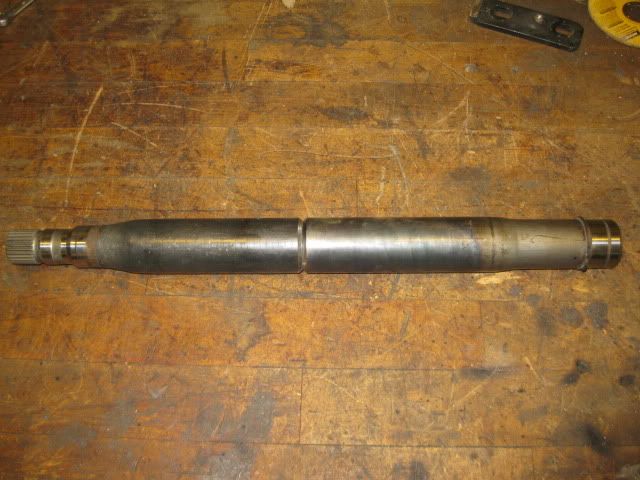
My 12 ton home made press didn't have enough push to slide the two ends of the intermediate shaft together, so I took it to work and got it done. There is about 4 1/2" of overlap on each side. I would have it welded already, but ran the welder out of wire... :
My 12 ton home made press didn't have enough push to slide the two ends of the intermediate shaft together, so I took it to work and got it done. There is about 4 1/2" of overlap on each side. I would have it welded already, but ran the welder out of wire... :
As my ole Pappy used to say, "You needed a bigger hammer!".
------------------ Ron
[This message has been edited by blackrams (edited 06-04-2011).]
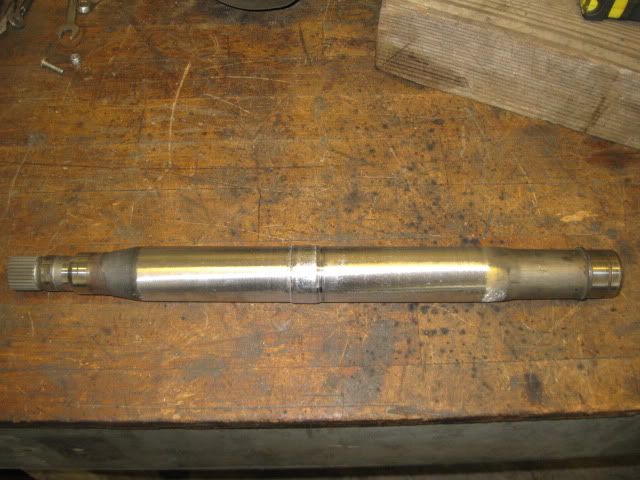
The intermediate shaft is now fully welded. I built up the area around the seam and enlarged the OD about 1/4" and then turned it down smooth about 1/8" thicker at the seam. This should help ensure the welded seam is at least as thick as the original tube thickness. This intermediate shaft is 19 1/4" in length.
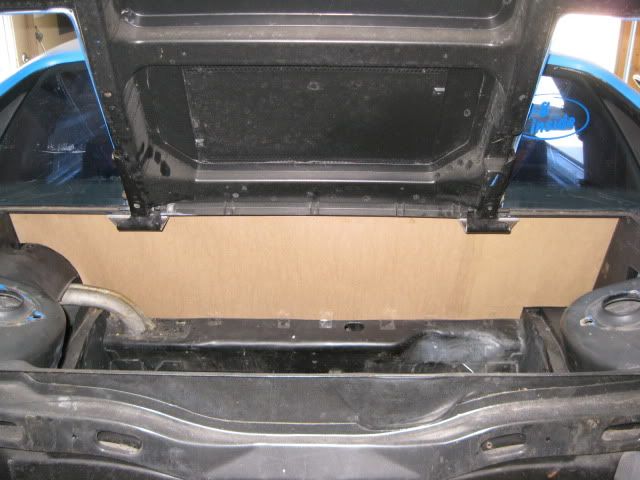
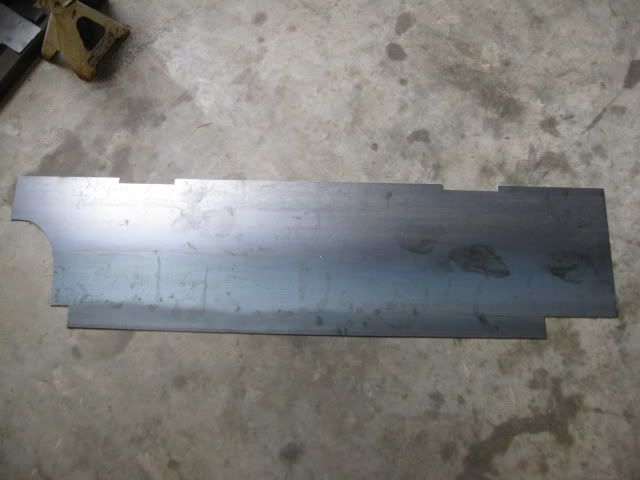
Also, made the template for the new firewall panel:
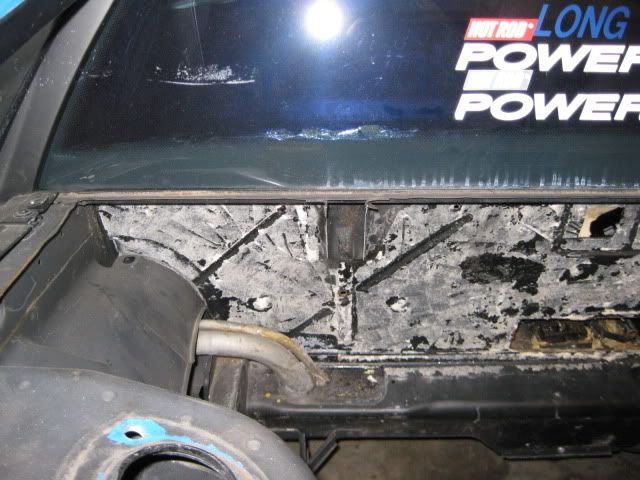
Took the fastback clip off so the new firewall panel could be installed easier and it also gave me an opportunity to check out the frame rails (been 6 years since the clip has been removed).
They are still rust free! I purchased this fiero from KY back in 2000 and in 2005 stripped it down to the spaceframe and cleaned and repainted the back half of the chassis. The paint looks like it has done its job especially since this car has lived outdoors since for the last 5 years.
Then used the cardboard template and traced the shape of the panel on the sheet metal.
Hopefully, I will get this cut and test fitted this evening.
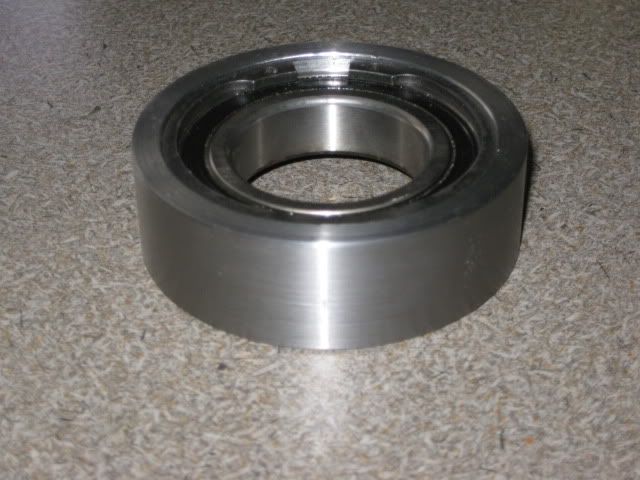
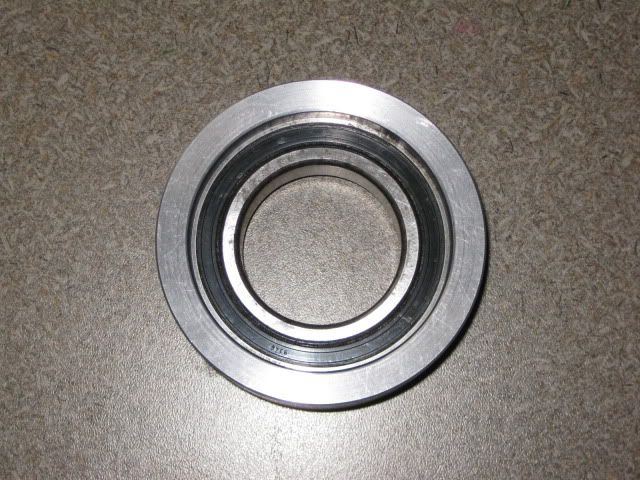
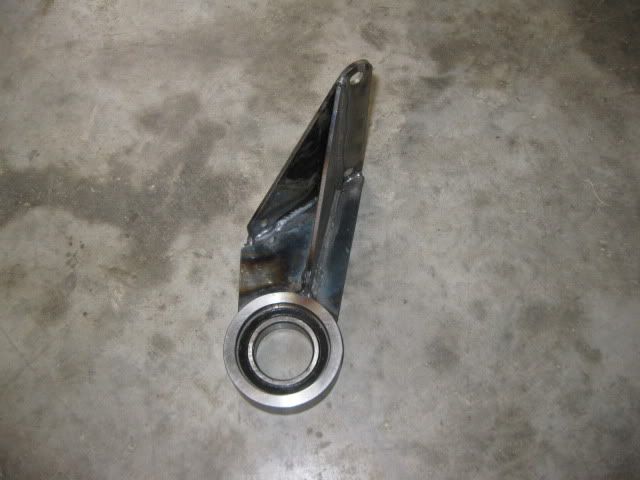
A large clamp collar is on order for the intermediate shaft bearing housing. I will turn the ID so the bearing can slide into it and then turn a snap ring groove to hold the bearing in place. Then the collar can be welded to the remaining portion of the bracket that bolts to the engine via the stock engine mount holes.
A replacement 12" digital caliper is also on order... I broke the display on my other one...
I only have a couple more weeks to make progress on this swap, before it will go on the back burner for a couple of months. June 26th I have another 88 Fiero coming here for a SBC/Getrag swap.
looks good. What color will the firewall piece be? Why not diamond plate this time?
Are you going to tune the engine yourself?
also, I'm jealous of your chassis.
I haven't decided on a color for the engine bay yet. Black would be easy, but then most would not notice the majority of the engine bay tweaks, so it needs to be a lighter color that would still go with the blue on the engine. Been kicking around a light gray/charcoal color or even painting it blue to match the body. I didn't do the diamond plate again for a couple of reasons. Cleaning it was a pain, and the polished finish would scratch with just a sponge rubbing over the top. The tread pattern had sharp edges and would also tear up the sponge and leave sponge debris. Then there is the cost of a 4x8 sheet that would only have a single use (I still have the left over portion from the original one) since I do not use tread plate much for anything else. With the flat mild steel panel, the left over material will be put to use **cough - gas tank - cough**.
I purchased HP Tuners and a wide band for this project and plan to do all my own tuning. My experience with mail order tunes (from 3 vendors) on my RamJet swap was just a waste of $$$ and convinced me that I needed to learn how to do my own tunes.
The chassis on this 88 is pretty decent and better than most ($800, base coupe from KY), but it was tapped a little in the front/back and the rear frame rails about 4" right behind the bumper are slightly wavey. I picked up another 88 this year with a near perfect chasiss... only issue with it is someone cut a hole in the driver side frame rail with a torch to fix the rear cradle bolt. Even with that hole, this other car has an even better chassis... I just haven't decided what that car will get.
[This message has been edited by fieroguru (edited 06-13-2011).]
Originally posted by fieroguru: I haven't decided on a color for the engine bay yet. Black would be easy, but then most would not notice the majority of the engine bay tweaks, so it needs to be a lighter color that would still go with the blue on the engine. Been kicking around a light gray/charcoal color or even painting it blue to match the body.
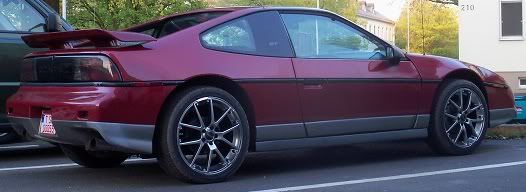
What about aluminum or silver? I know it's been done before, but Rickady88GT's engine bay is sexy in that color.
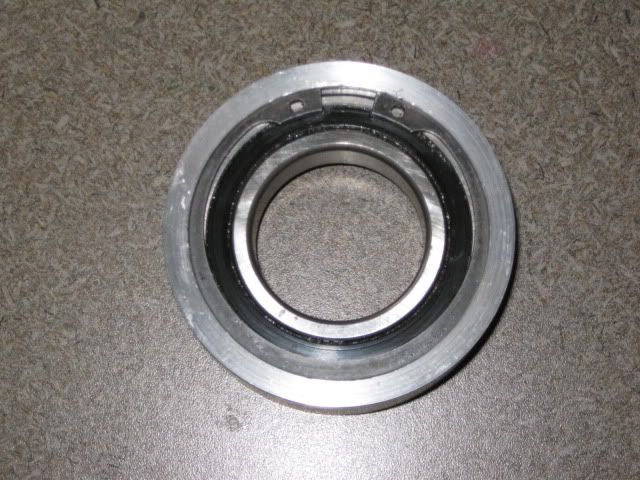
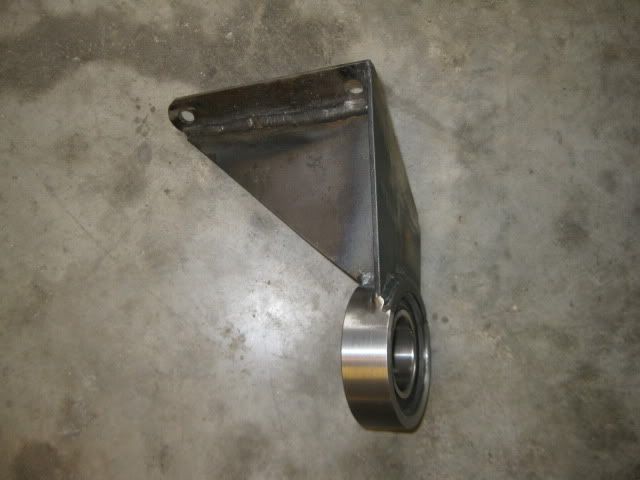
Finally got around to making the bearing holder for the intermediate shaft. The ring is 1/4" thick around the bearing and had a machined lip on one side and a snap ring groove on the other. Now I can weld this bearing holder to the rest of the bracket (once I finish making it).
What about aluminum or silver? I know it's been done before, but Rickady88GT's engine bay is sexy in that color.
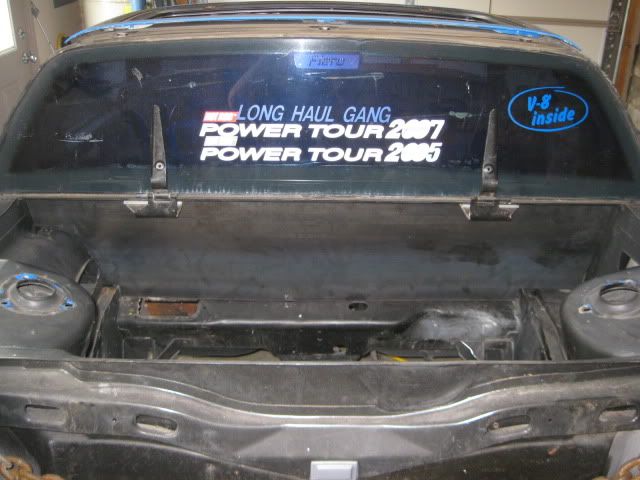
I always loved that engine bay, and I love the use of factory stickers too. I would not normally use stickers, but in that case, it looked good. Thought about re-doing mine and using LS3 type of stickers from a vette or camaro.


 Ah, excuse me but, I've gotten used to frequent updates and I'm finding this interuption of the information flow to be somewhat similar to withdrawl.