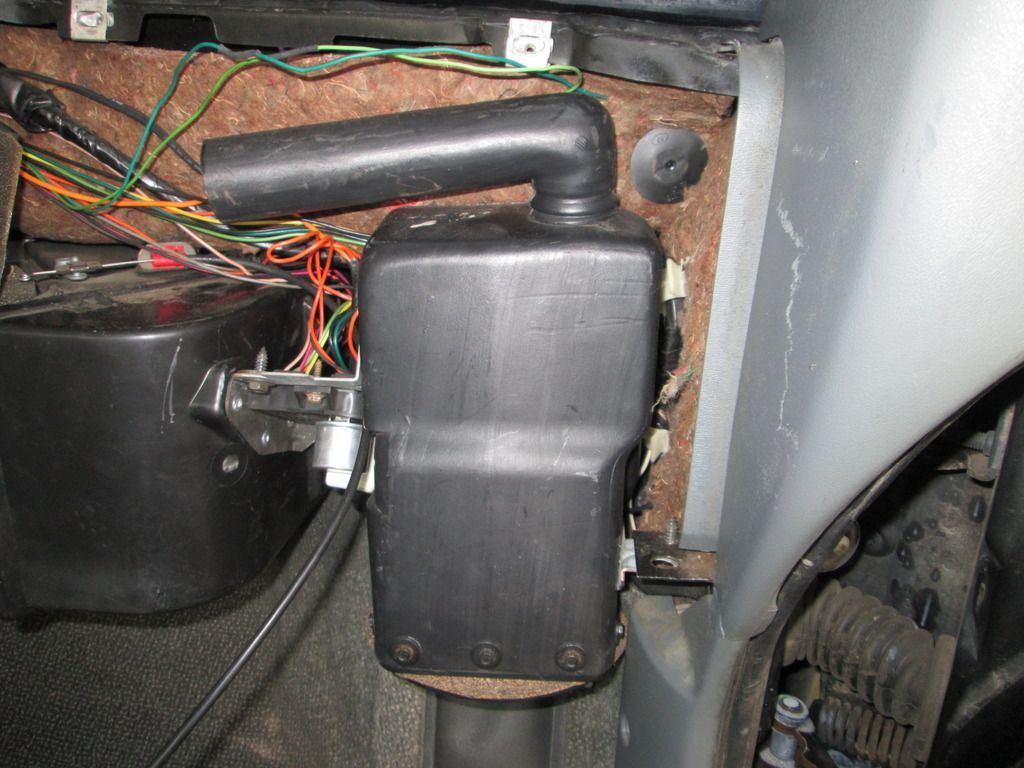
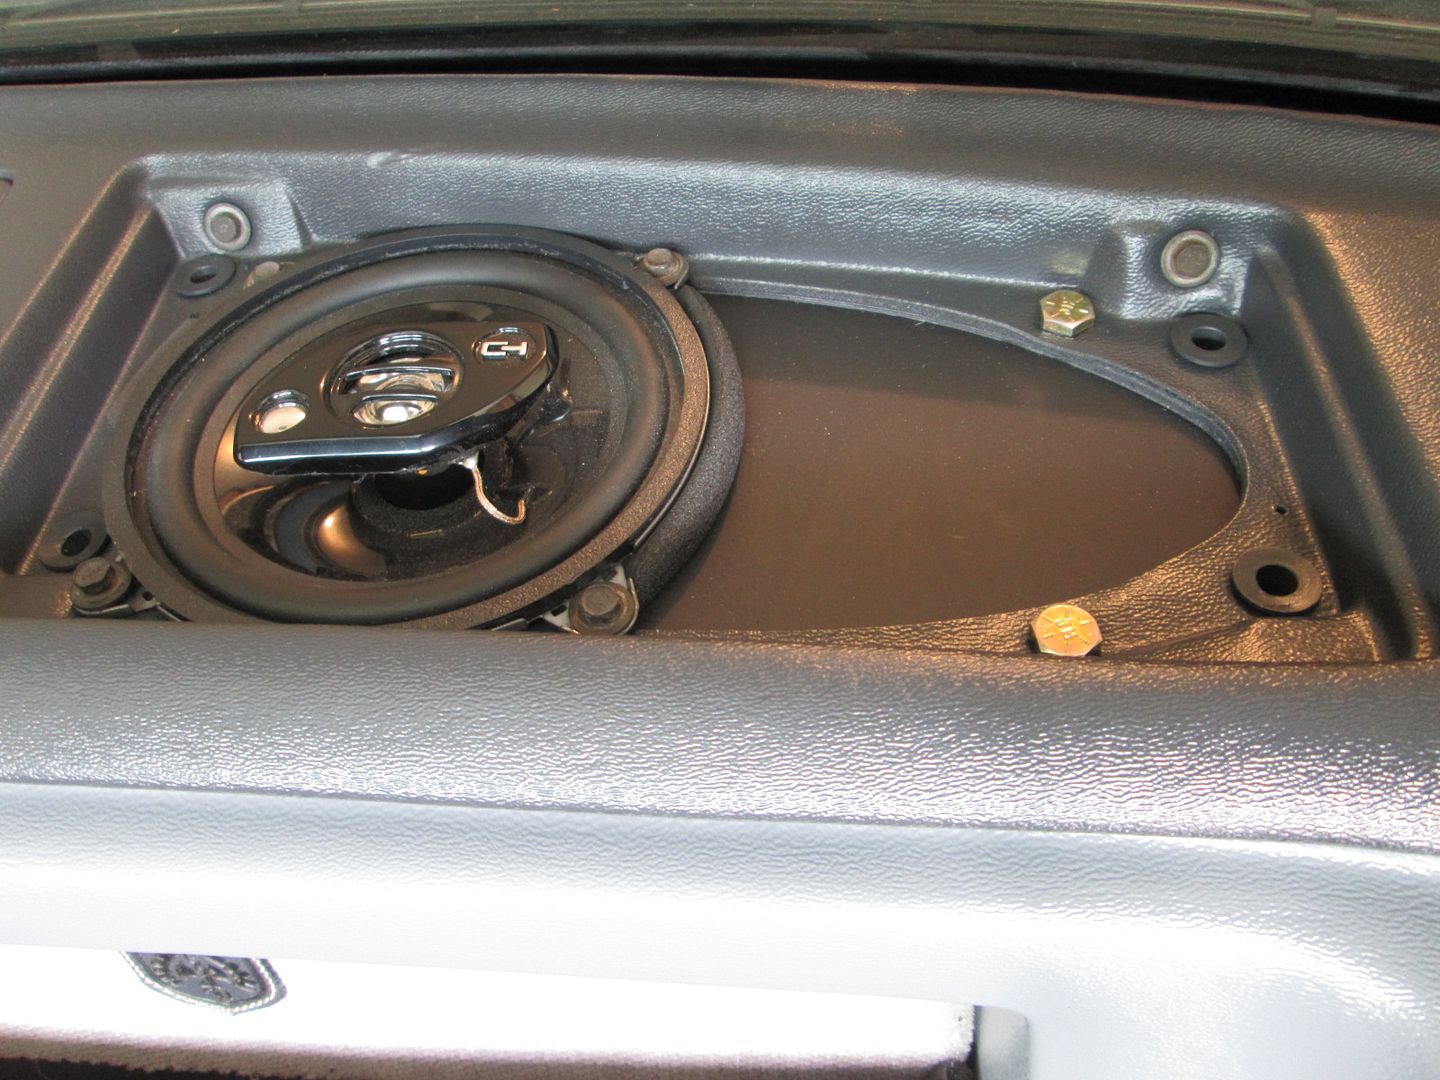
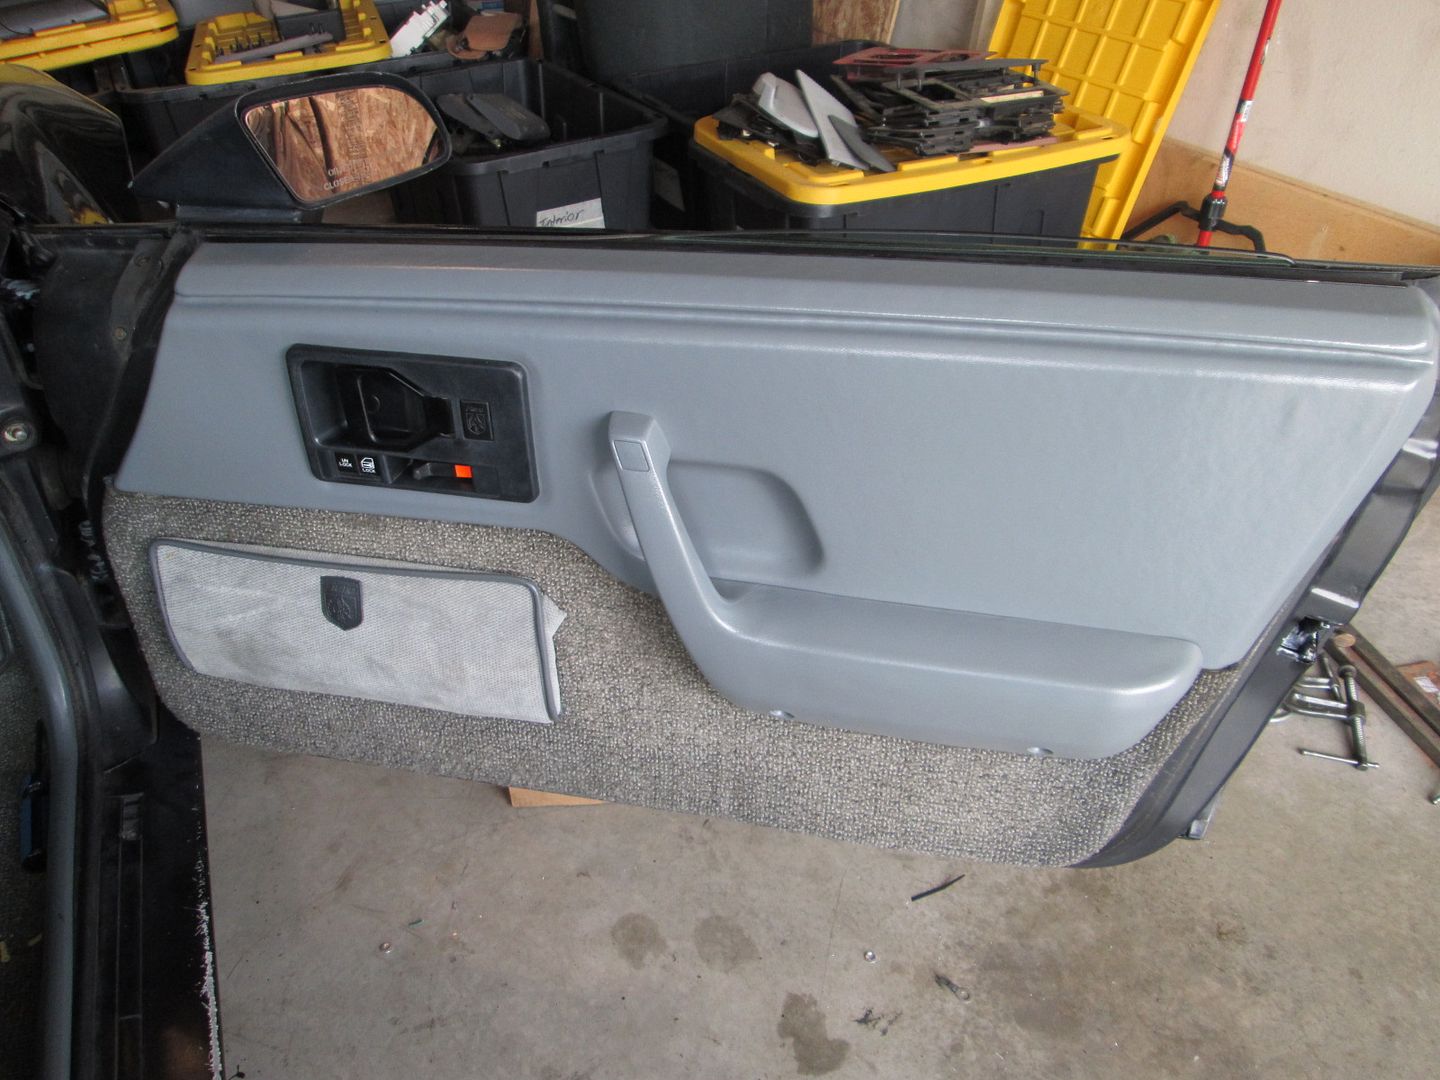
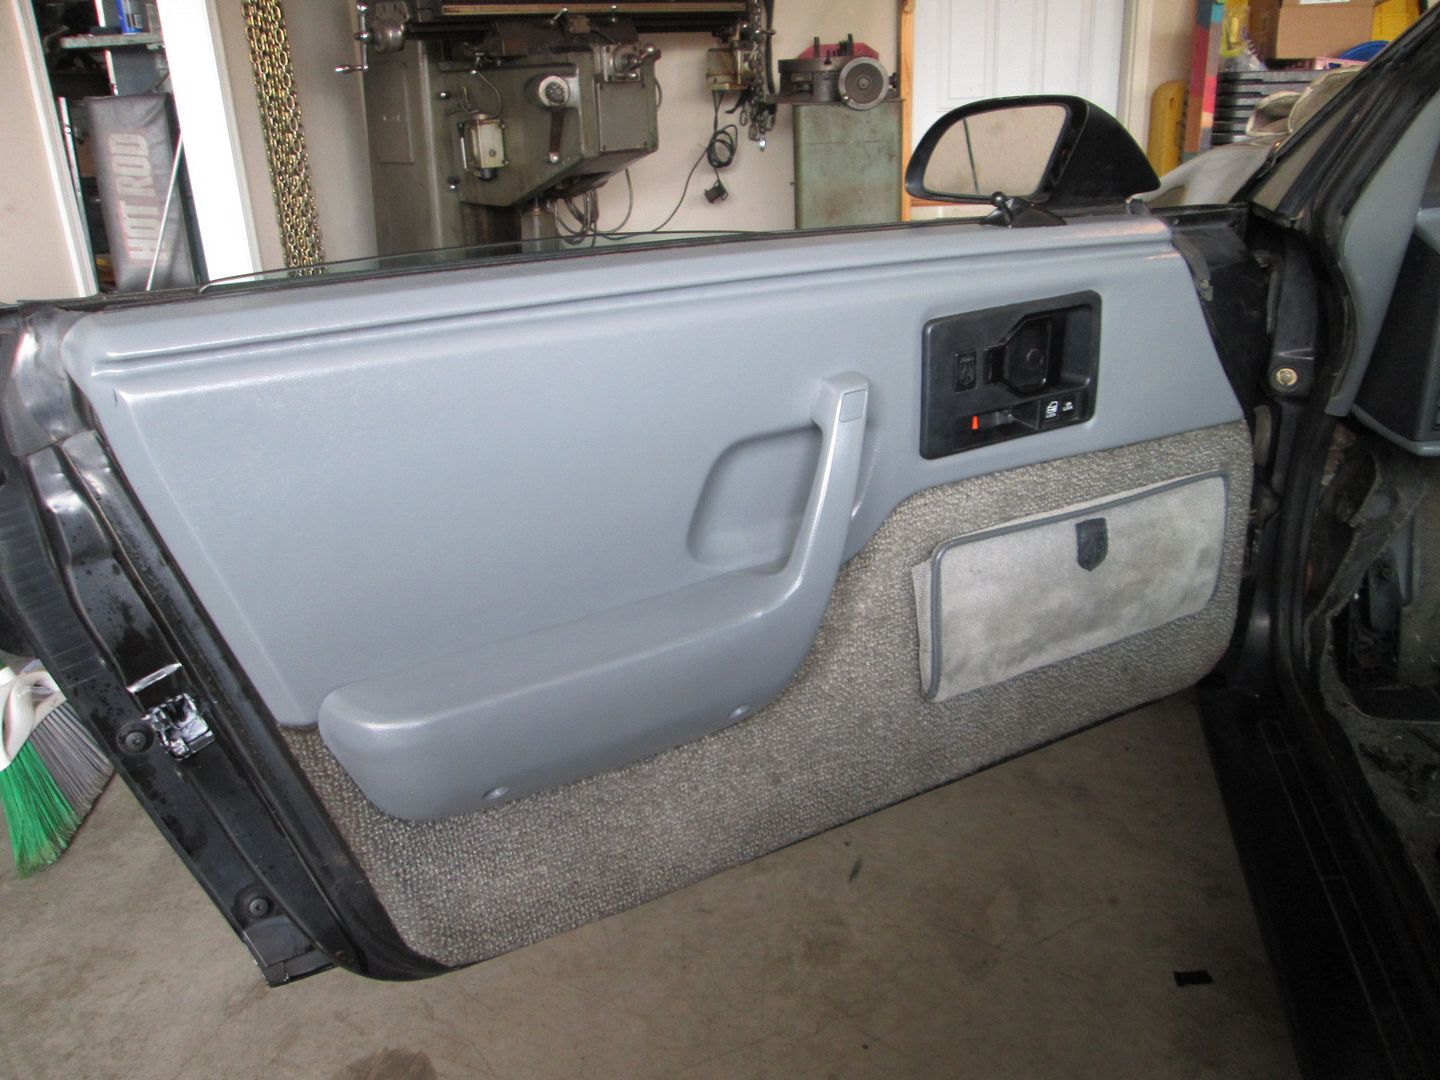
Relocated the cruise servo to the center console area ahead of the shifter Remade cruise harness for new location and enable the On/Off control on the stalk to control power to the clutch/brake pedal relays Fabricated cell phone mounting stand for my cell phone for GPS use Fabricated new 5 1/4" speaker plates out of metal for dash (and modify new dash for them) Fabricated metal Tang Band mounting rig for factory subwoofer housing Converted both doors to have PW and PL and upgraded to the 97 Chevy truck window motors (much, much faster) Installed PW/PL harness in chassis Performed the "always on" modification so the power windows work w/o the key on Rebuilt both DS door hinges and replaced the striker with a new one Repaired the warping on the aux gauge panel, HVAC surround, and both door handles/arm rests Fabricated a support plate for the manual mirror control so it won't distort the door panel
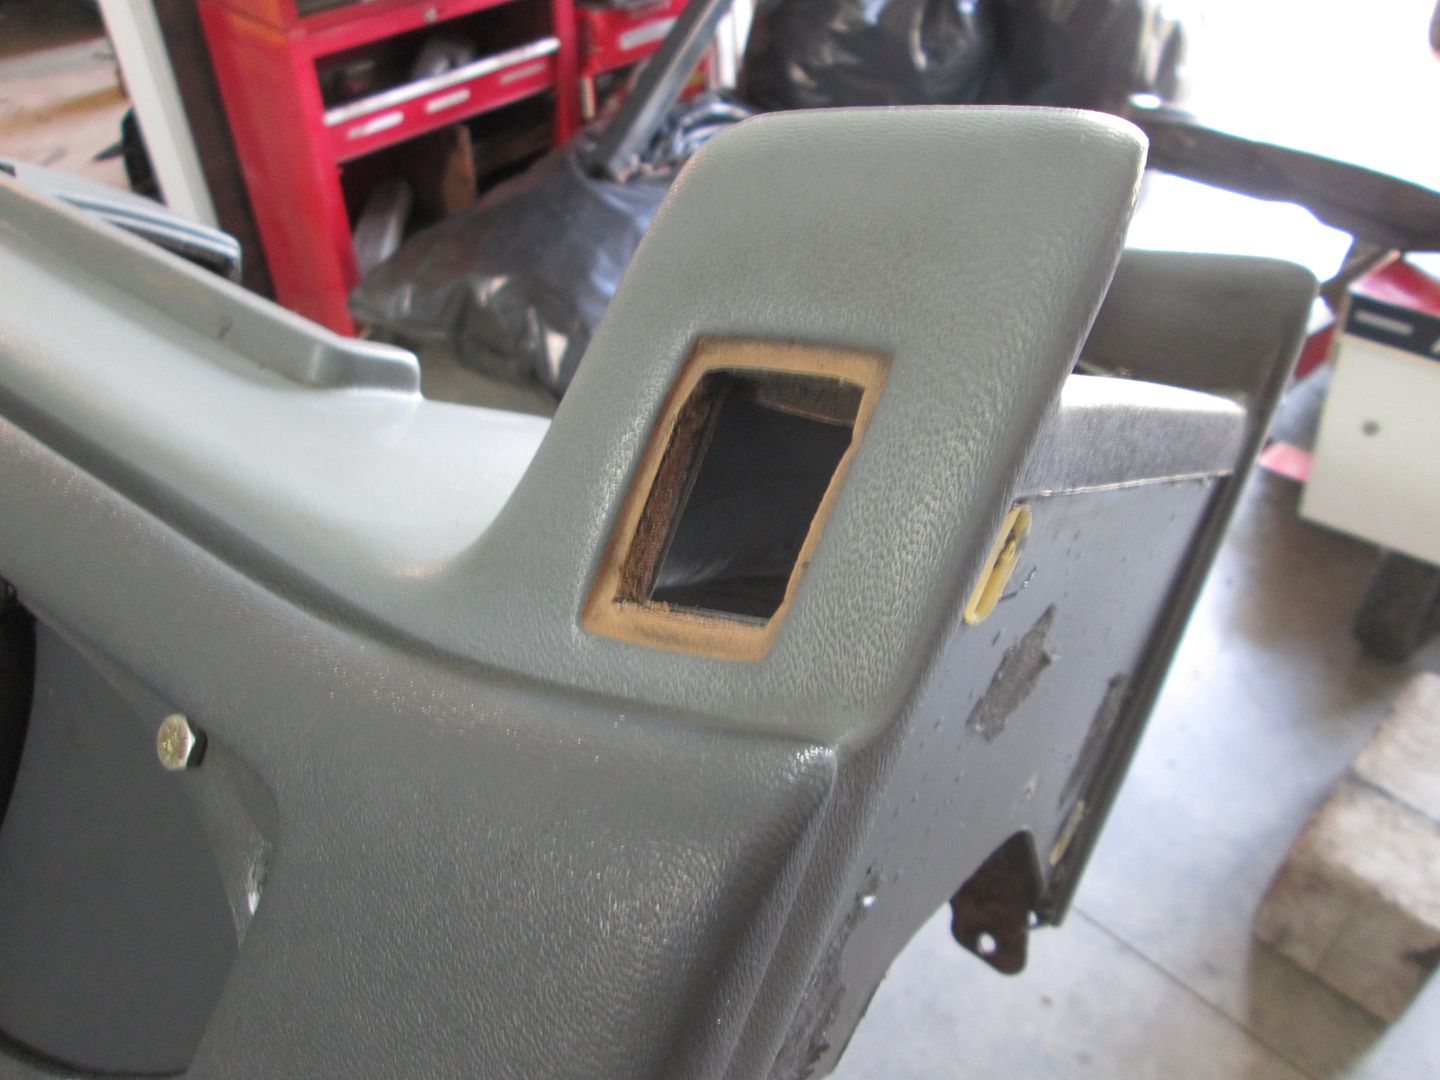
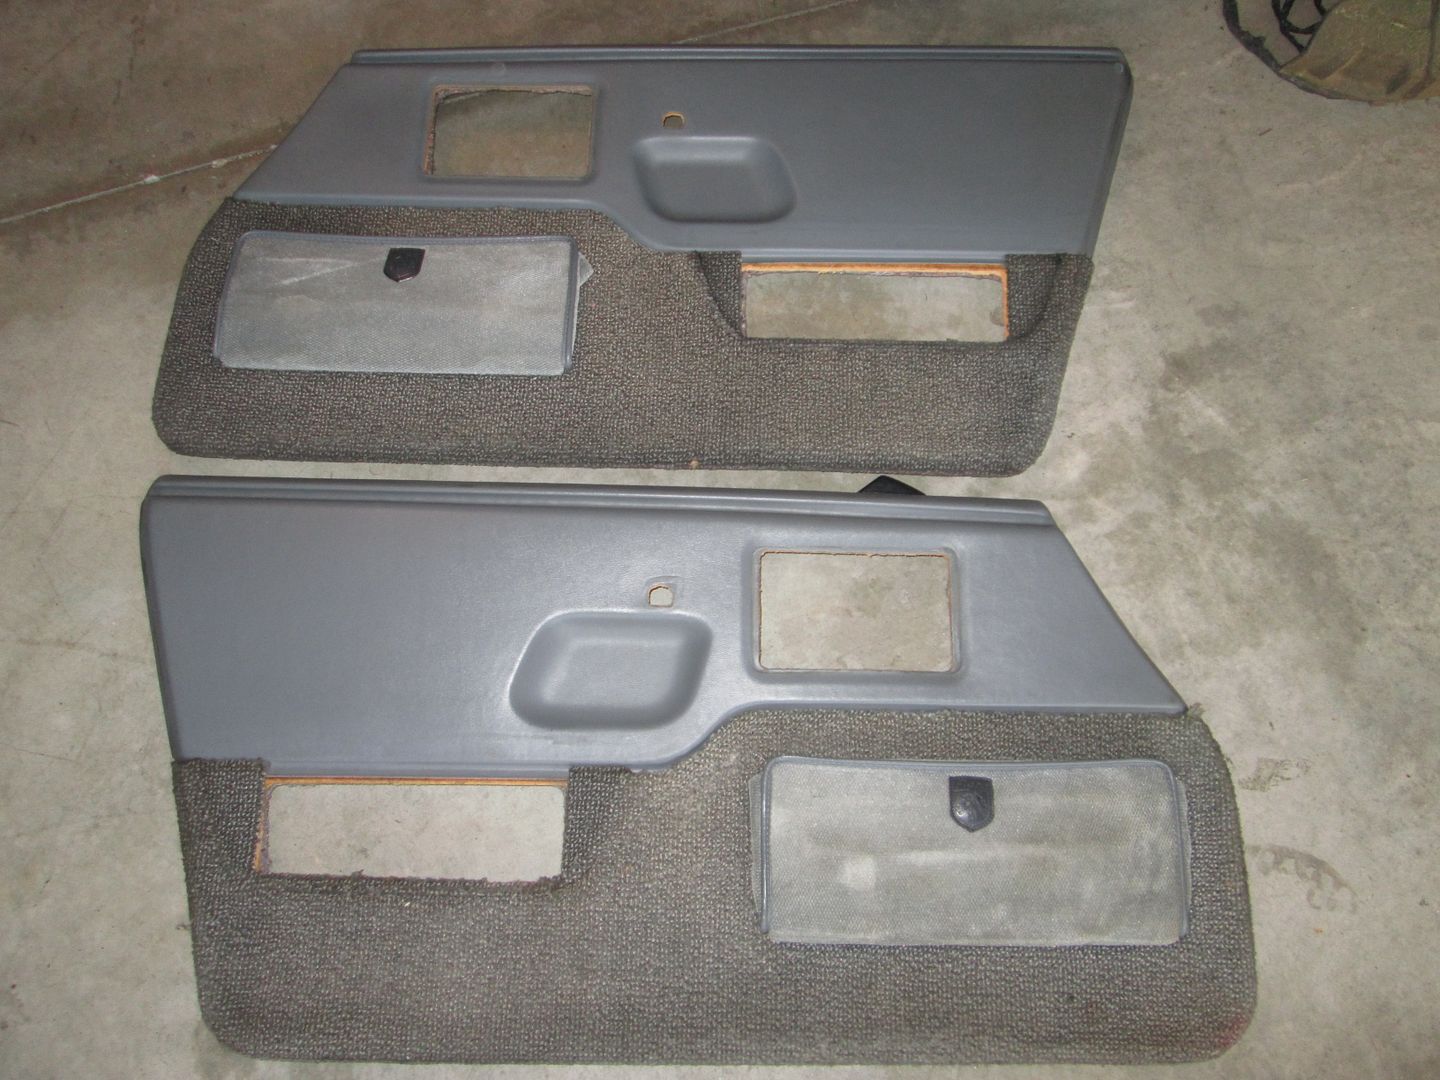
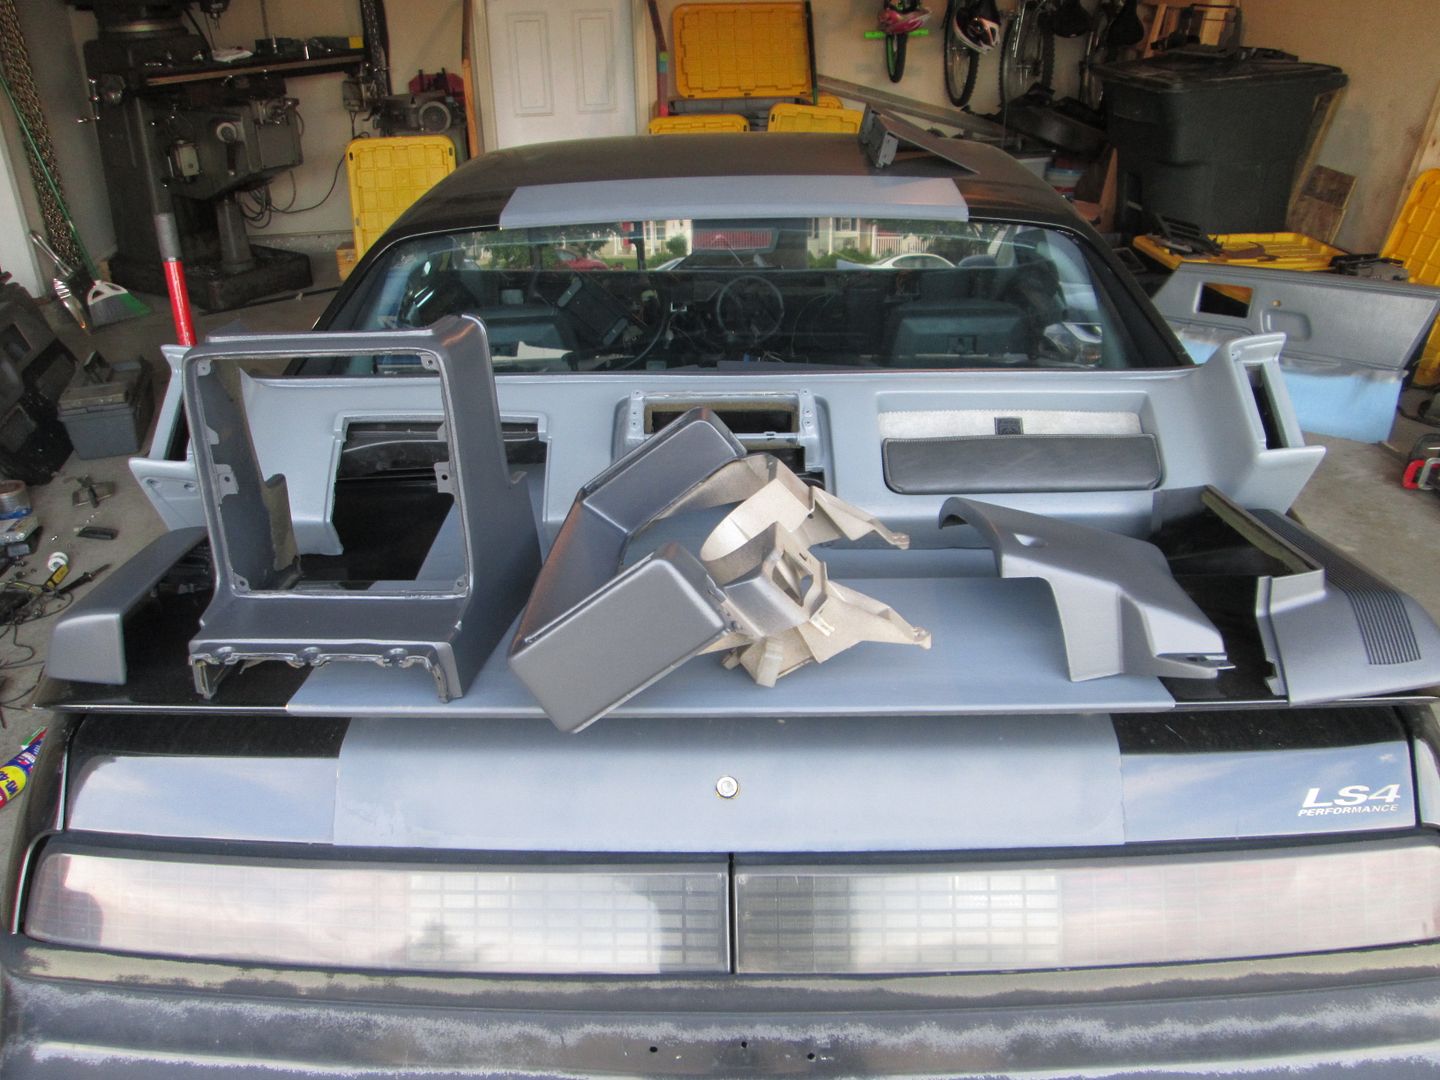
The exterior is all back together, but the dash, center console, and door panels are still out of the car and need more work. I am waiting on some paint to freshen up the new dash, new power lock solenoids, PL switches, and PW switches are all on order, the door panels need cleaned and some TLC, and I want to address the warping on the center console glovebox area... I am hoping to make progress on these items during the evenings this week.
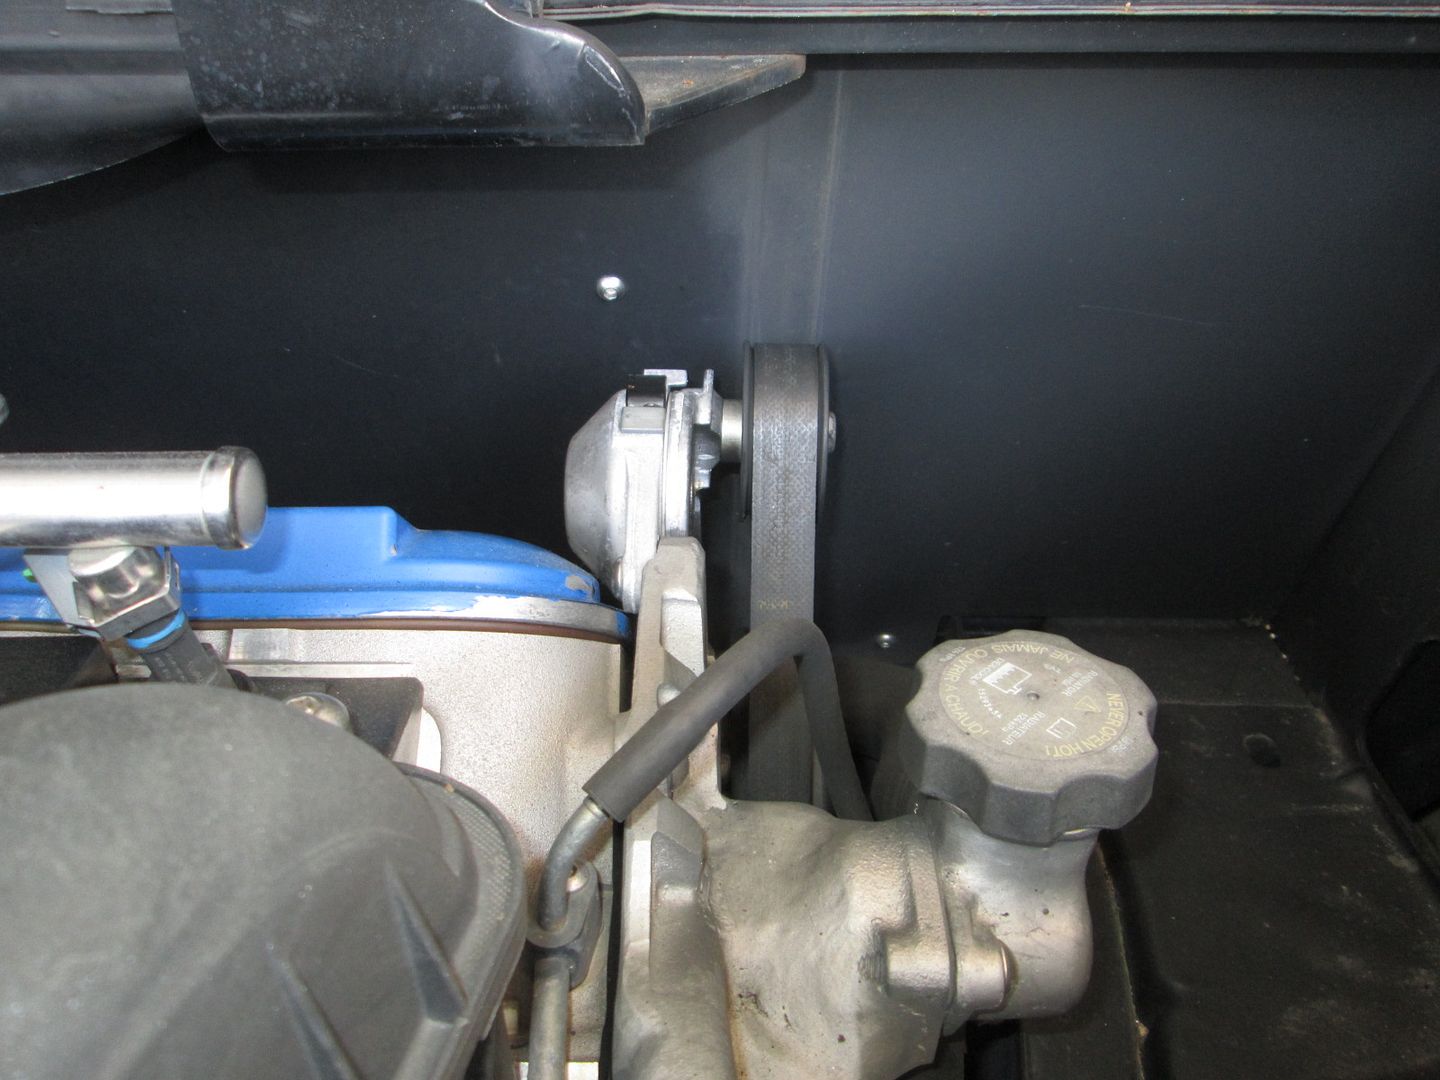
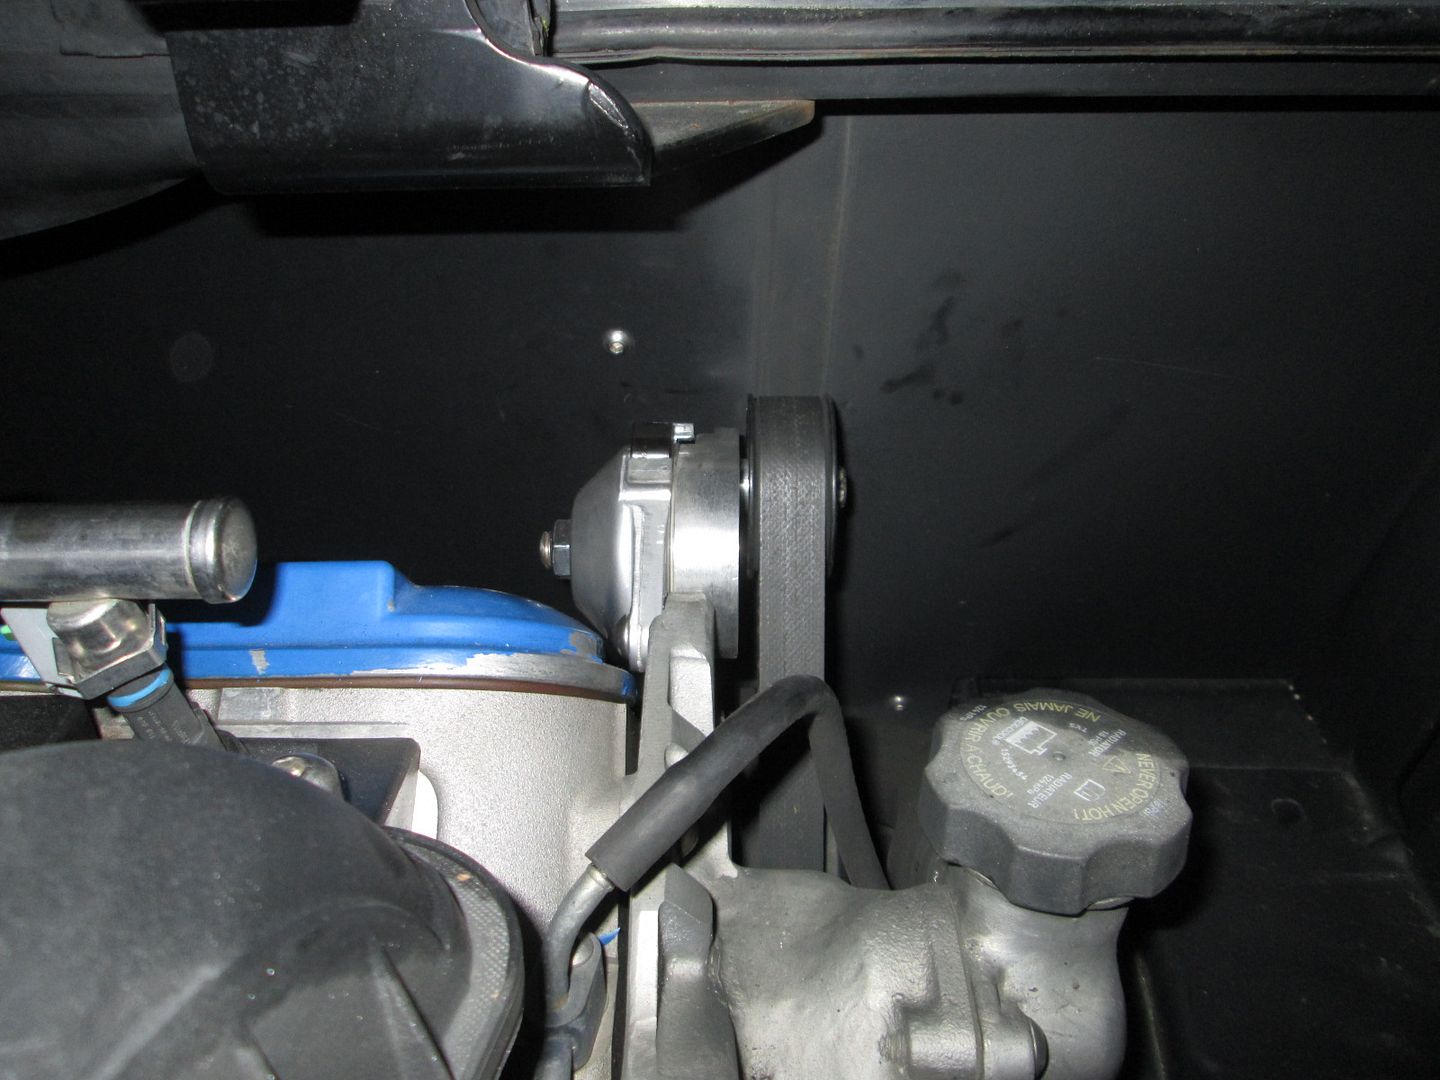
The three other main projects I want to have done before the HRPT are: Fabricate new tensioner arm for accessory drive AC system - make new chassis to engine hose, replace all o-rings in the system, and recharge Clean engine bay and buff the paint
Good thing next weekend is a 4 day weekend!
[This message has been edited by fieroguru (edited 05-22-2016).]
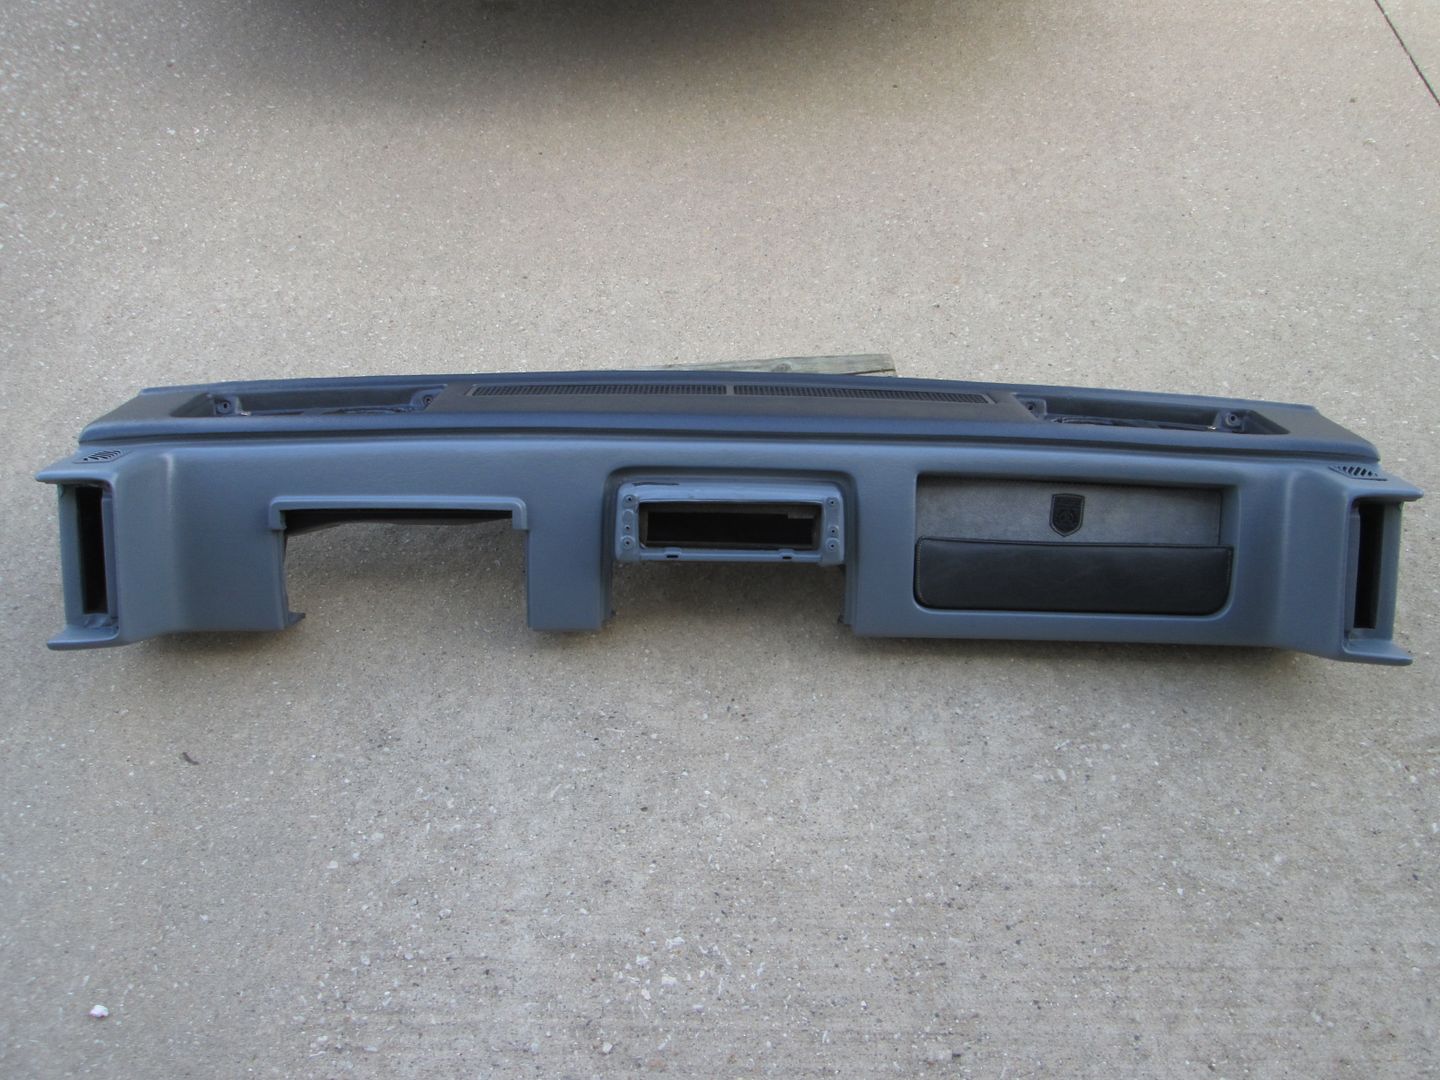
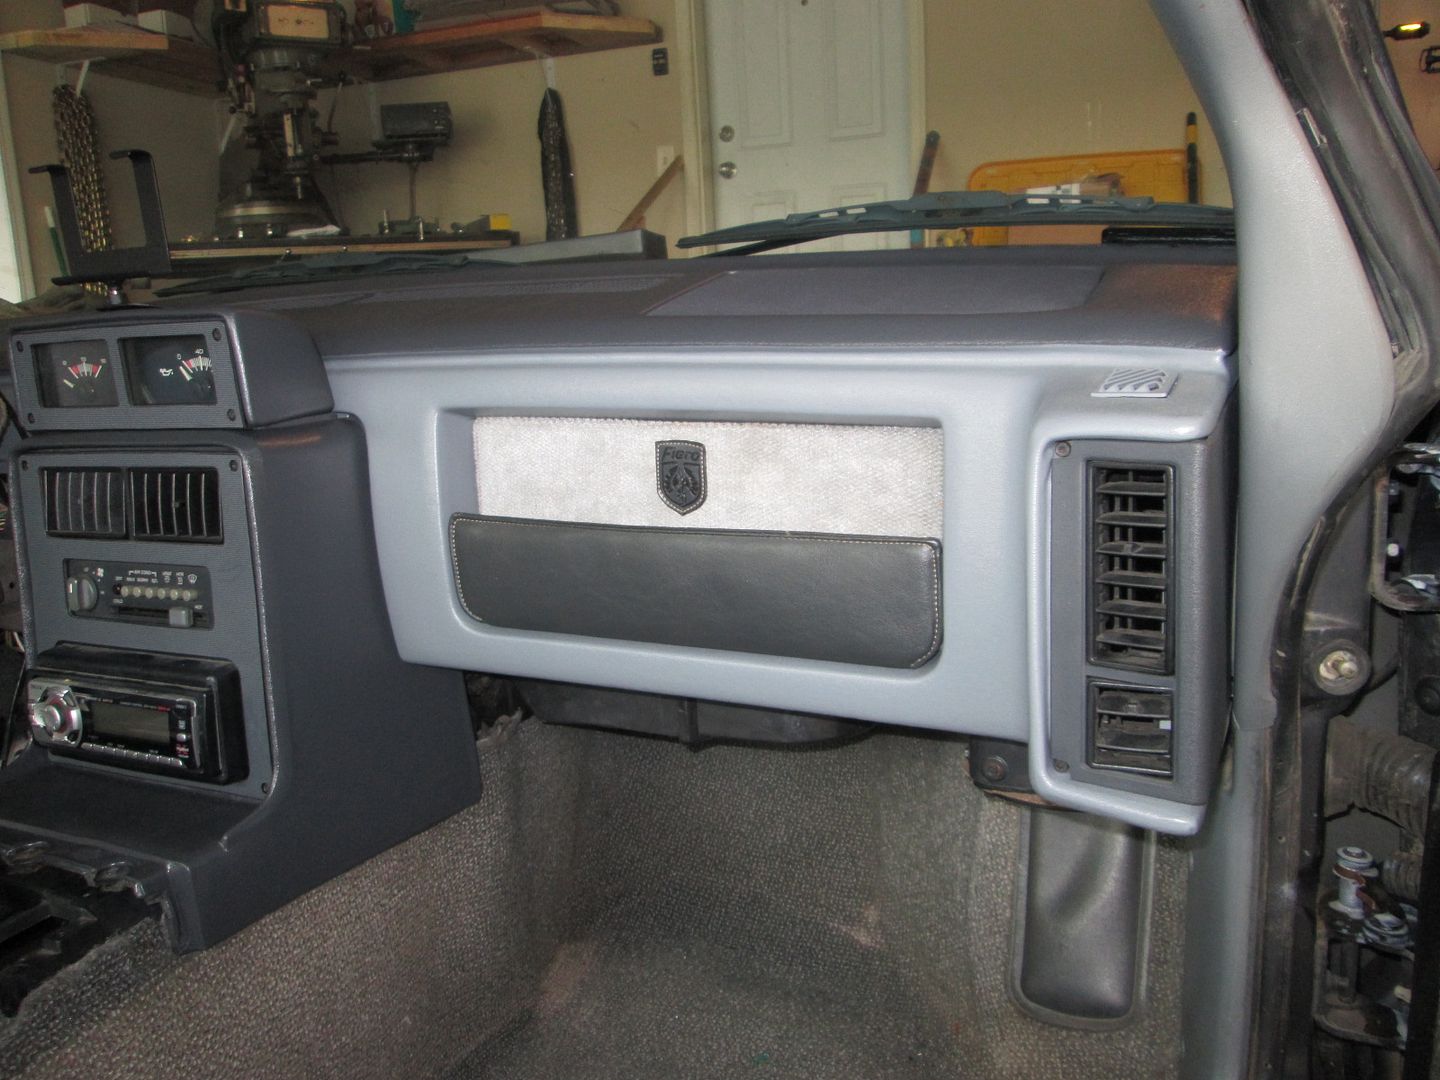
The Fiero Store interior paint arrived today, so it was time to repaint the dash. I say repaint because the dash used to be tan/beachwood and had been previously painted the 2 tone grey/charcoal:
Fresh coat of paint:
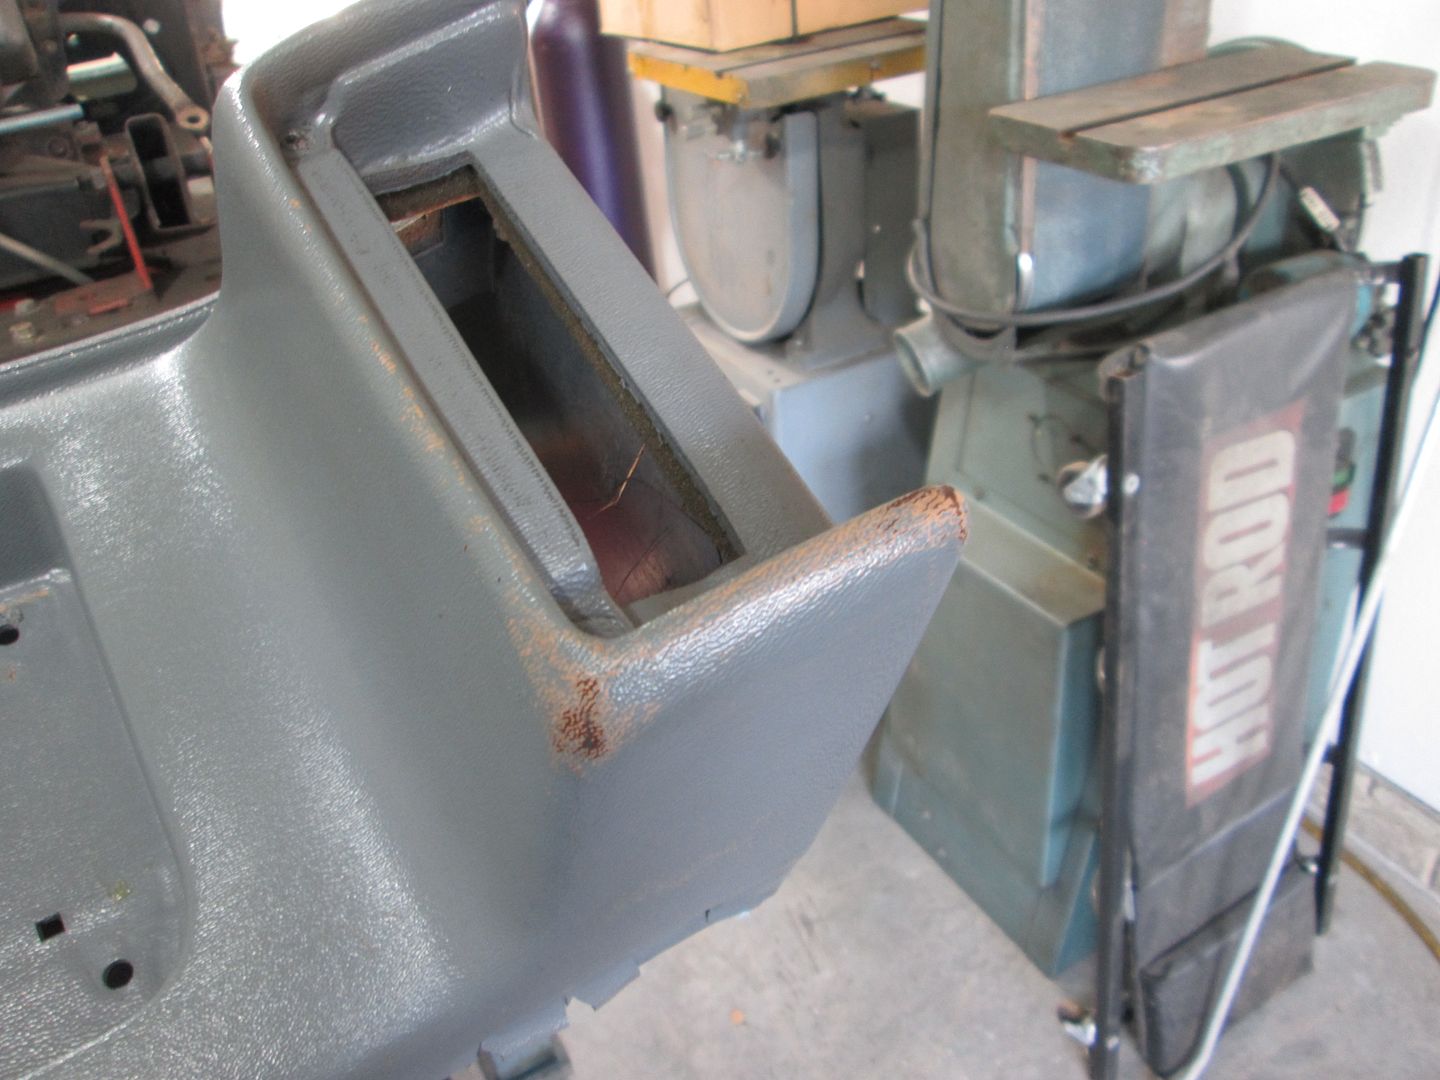
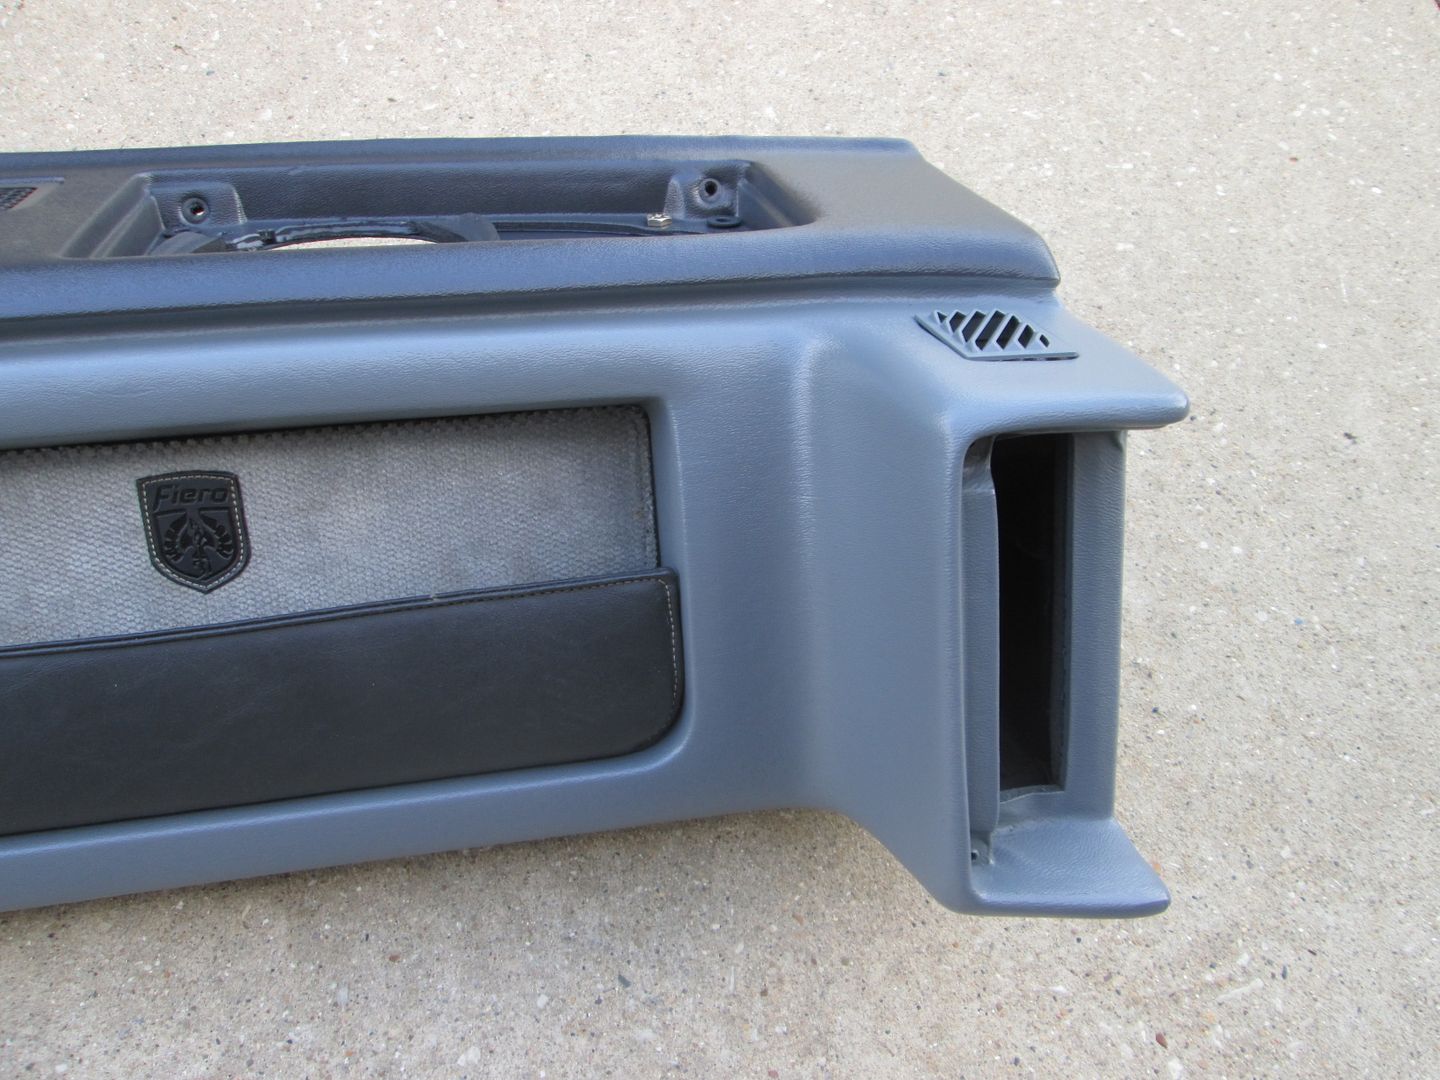
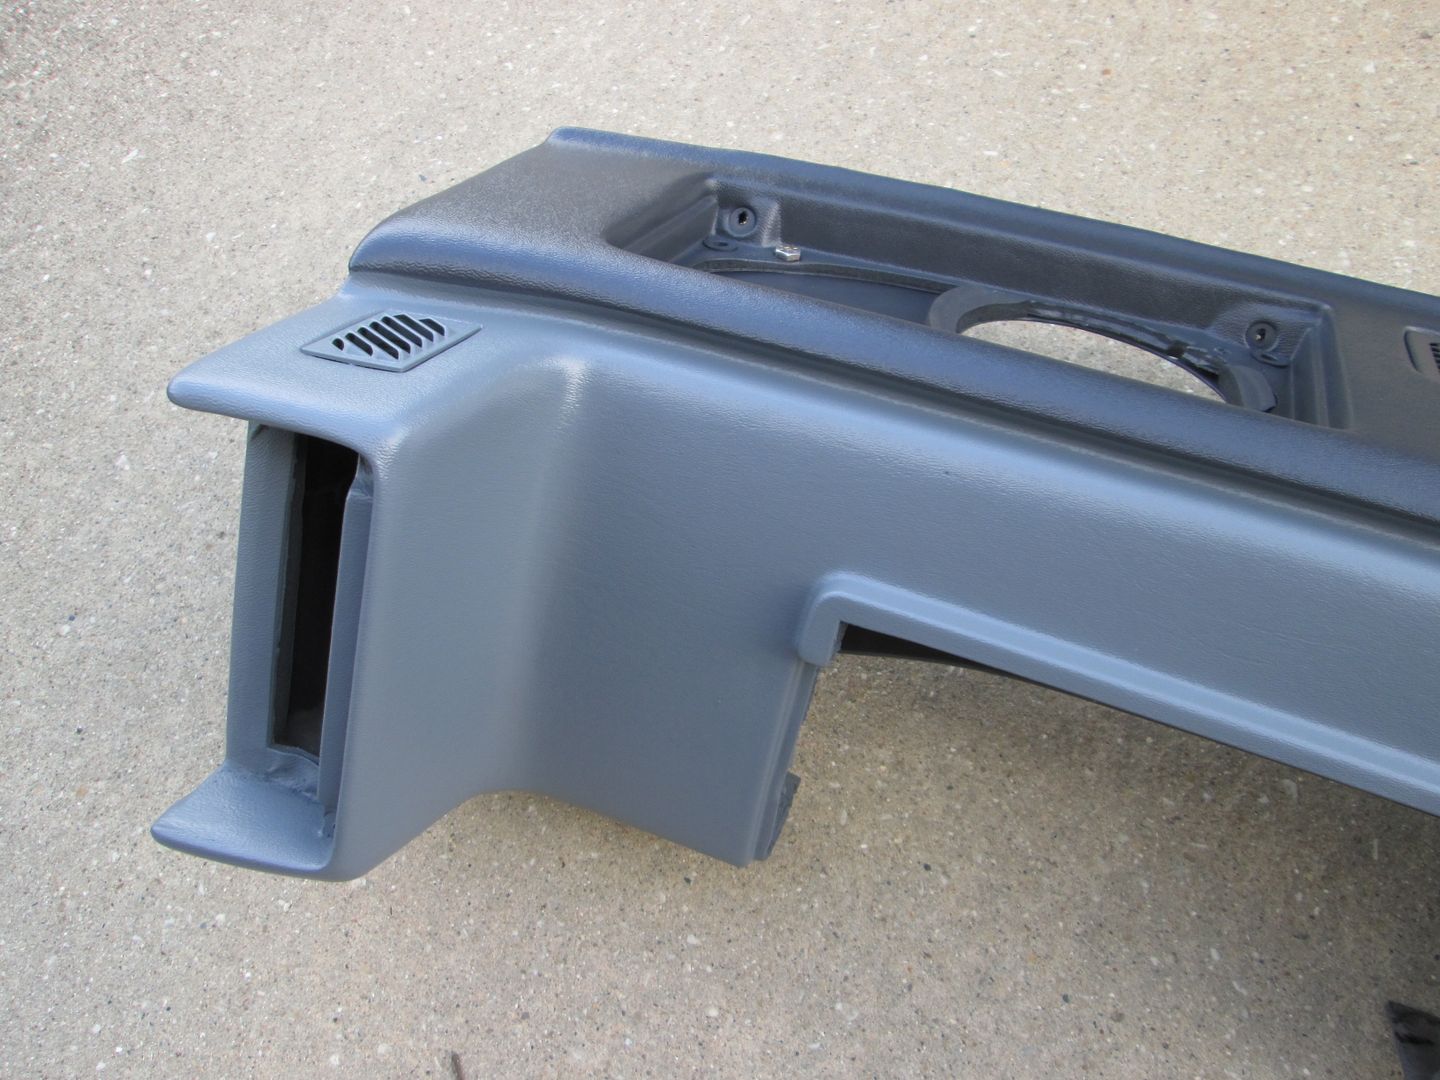
Work on warping continues:
Here is the "repaired" edge of the console:
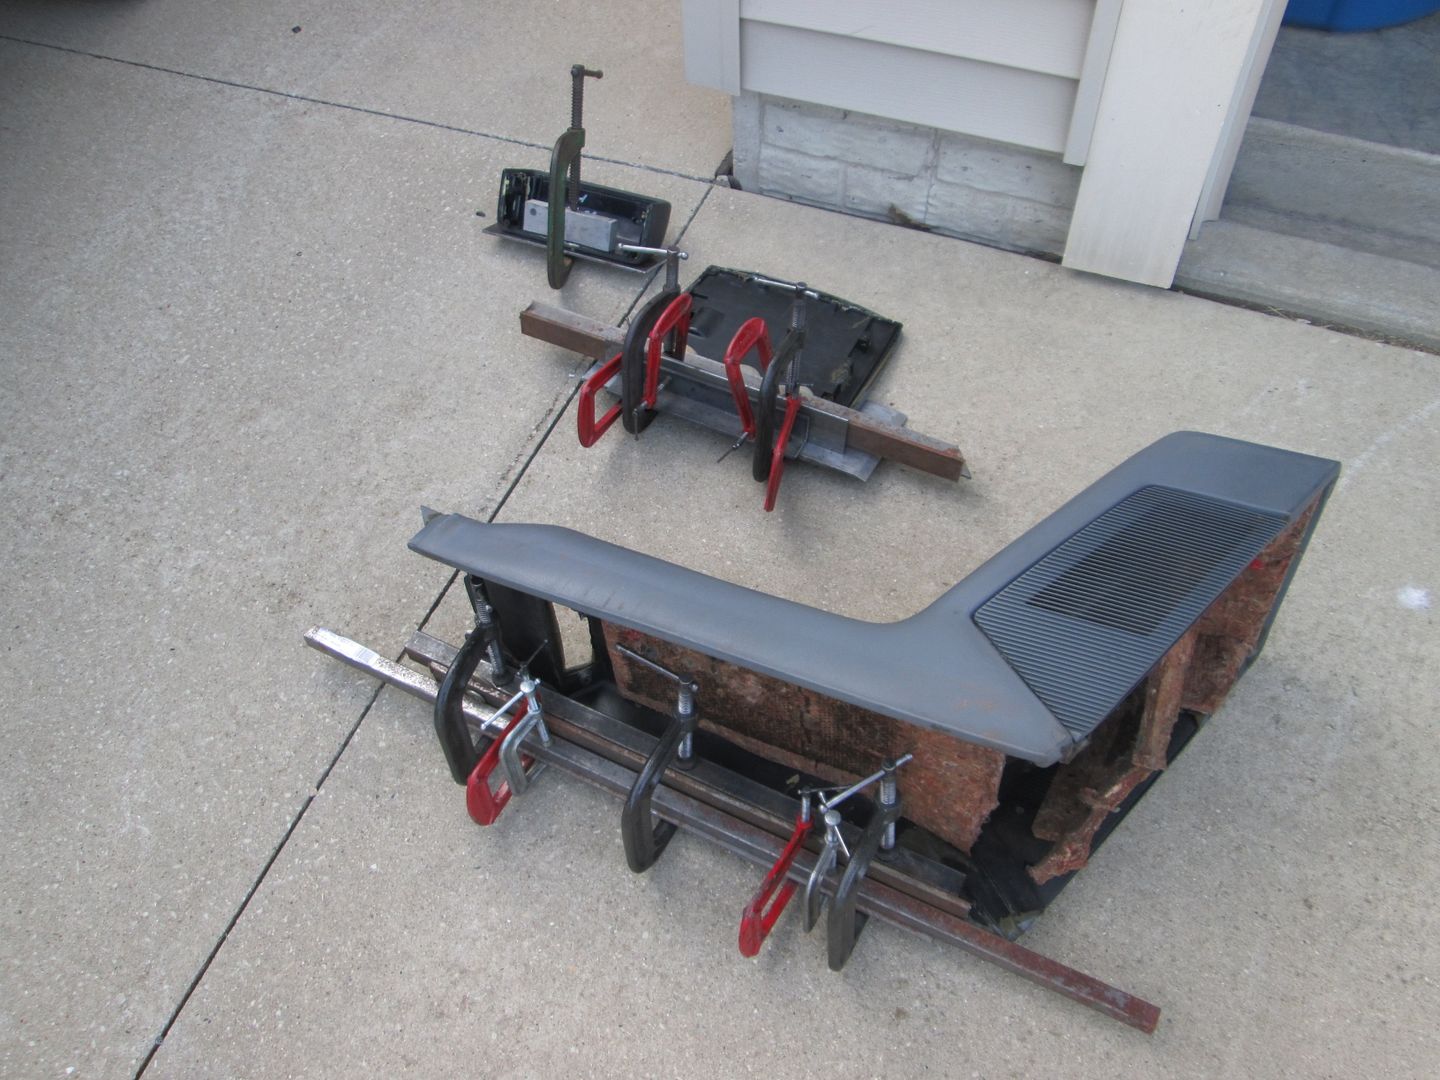
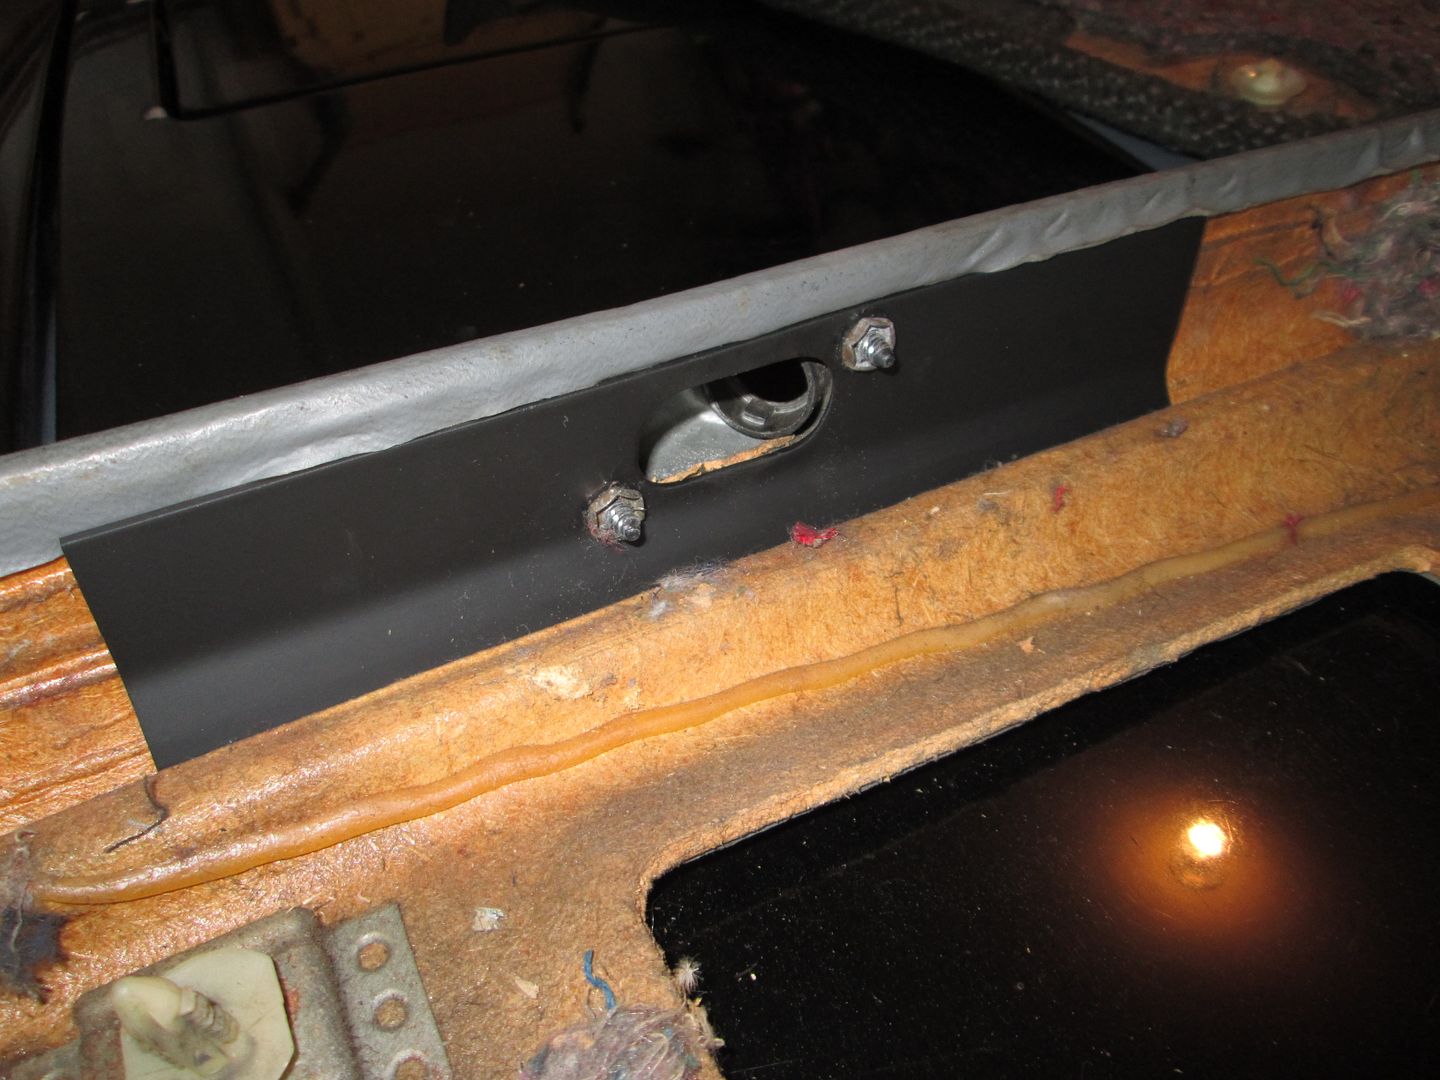
Here is the reinforcing plate for the manual mirror control:
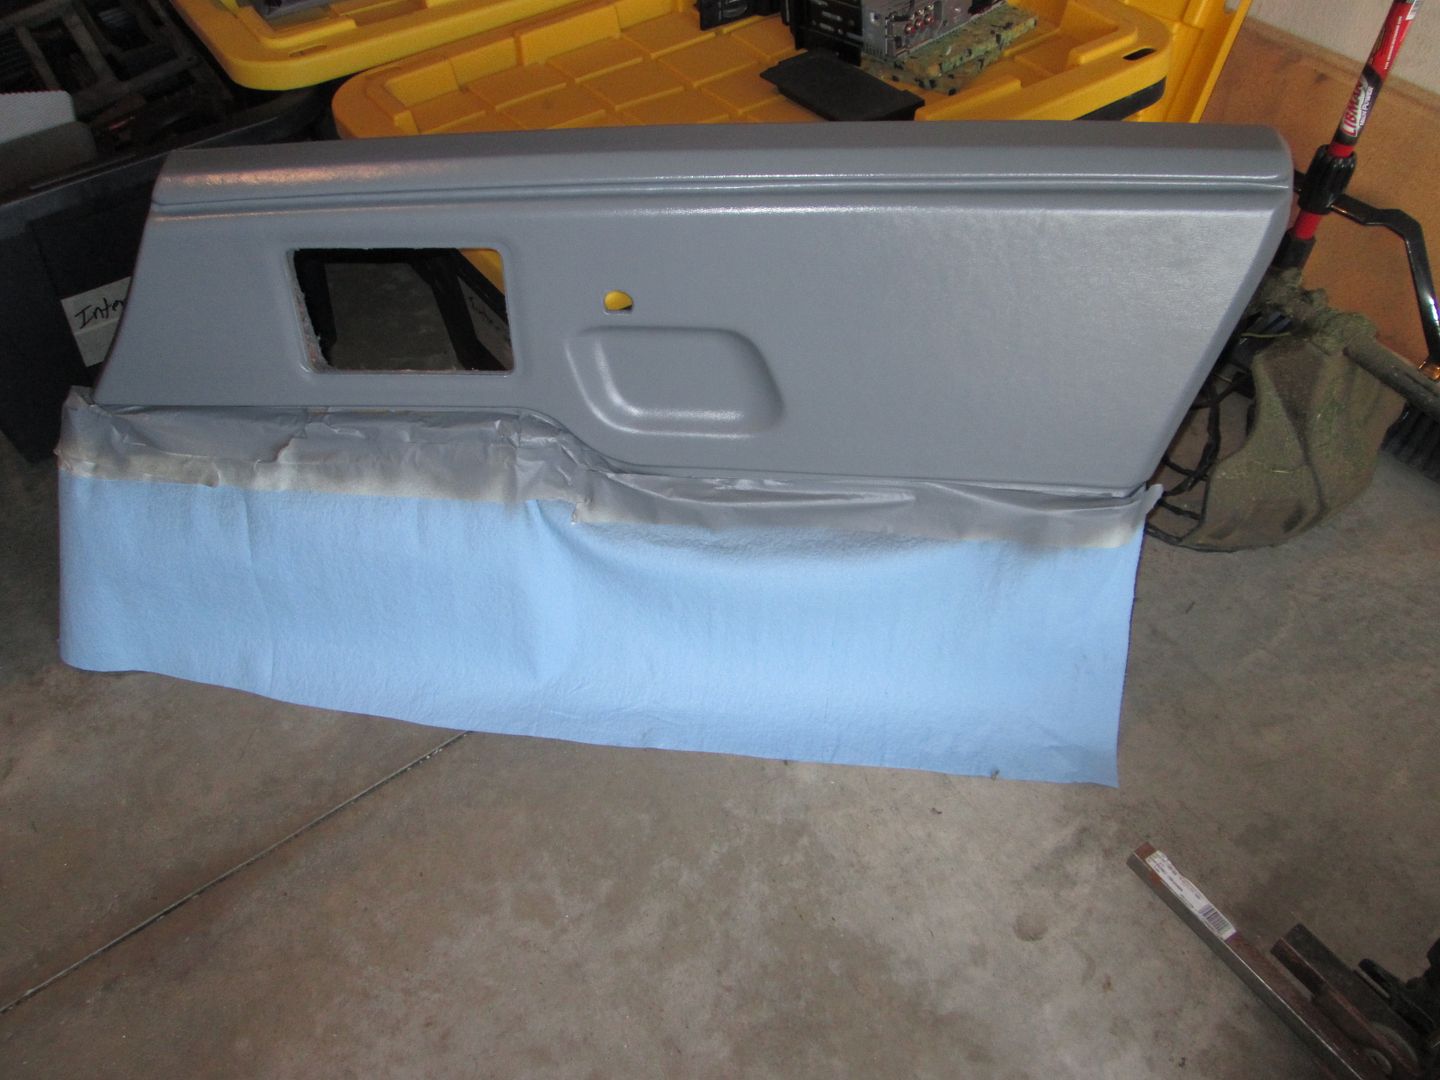
Also started cleaning the PW/PL door panels:
[This message has been edited by fieroguru (edited 05-23-2016).]
Painted the top side of the dash this evening and I think it came out pretty decent!
Then I painted several other parts... this car started out as a $500 purchase and will never be a show car, but I would like it to be less of a disaster from and interior (and eventual exterior) perspective.
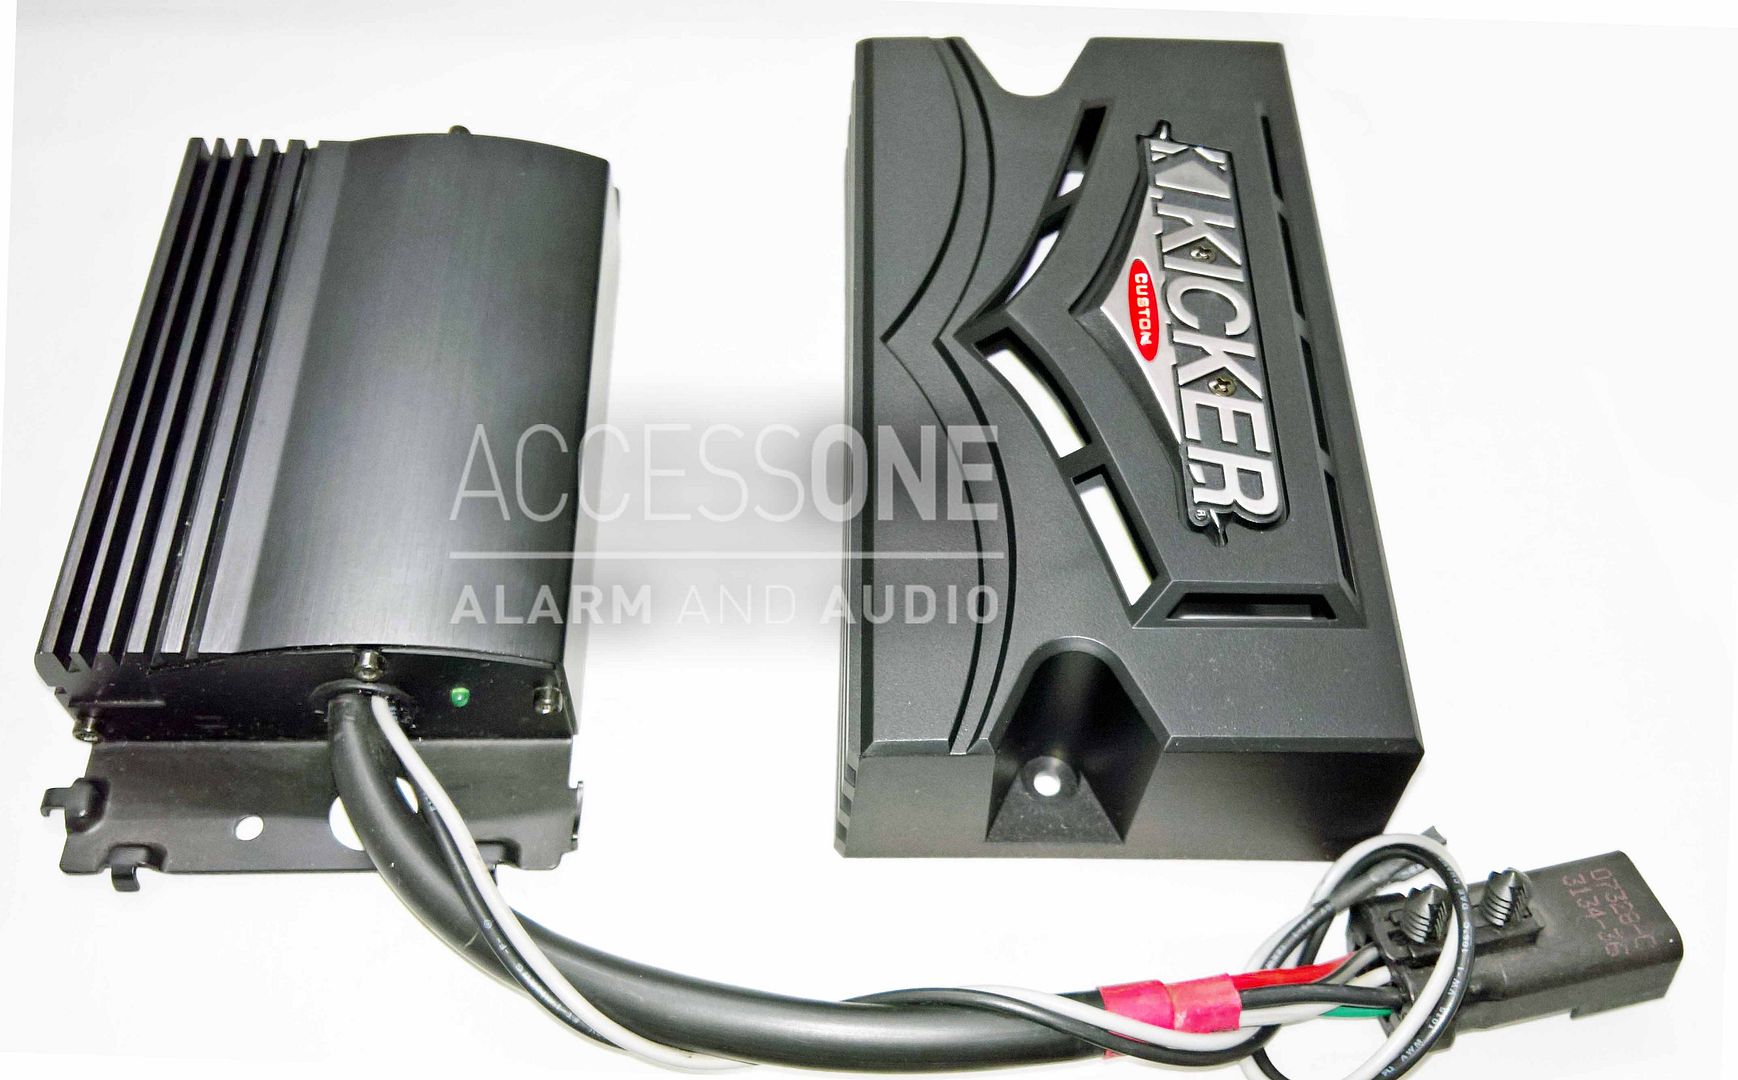
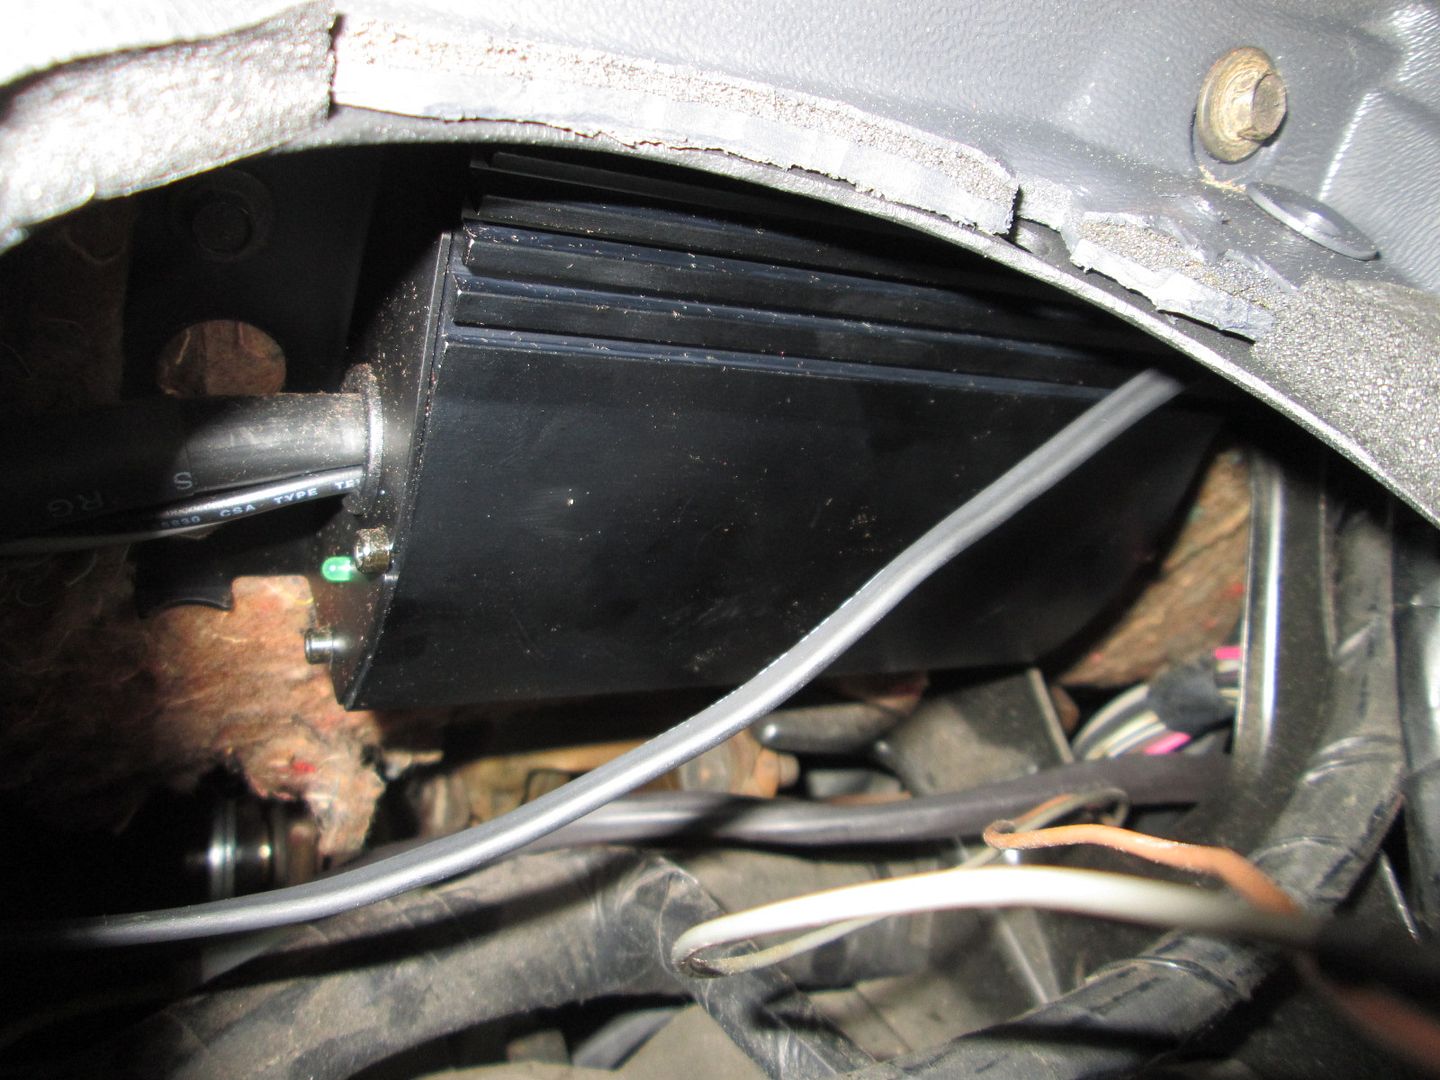
I also ordered a "dealer option" kicker 100W amplifier that drives the subwoofer in the Jeep SRT8. It is a small amp with a built in low pass filter I will use it to drive the Tang Band sub.
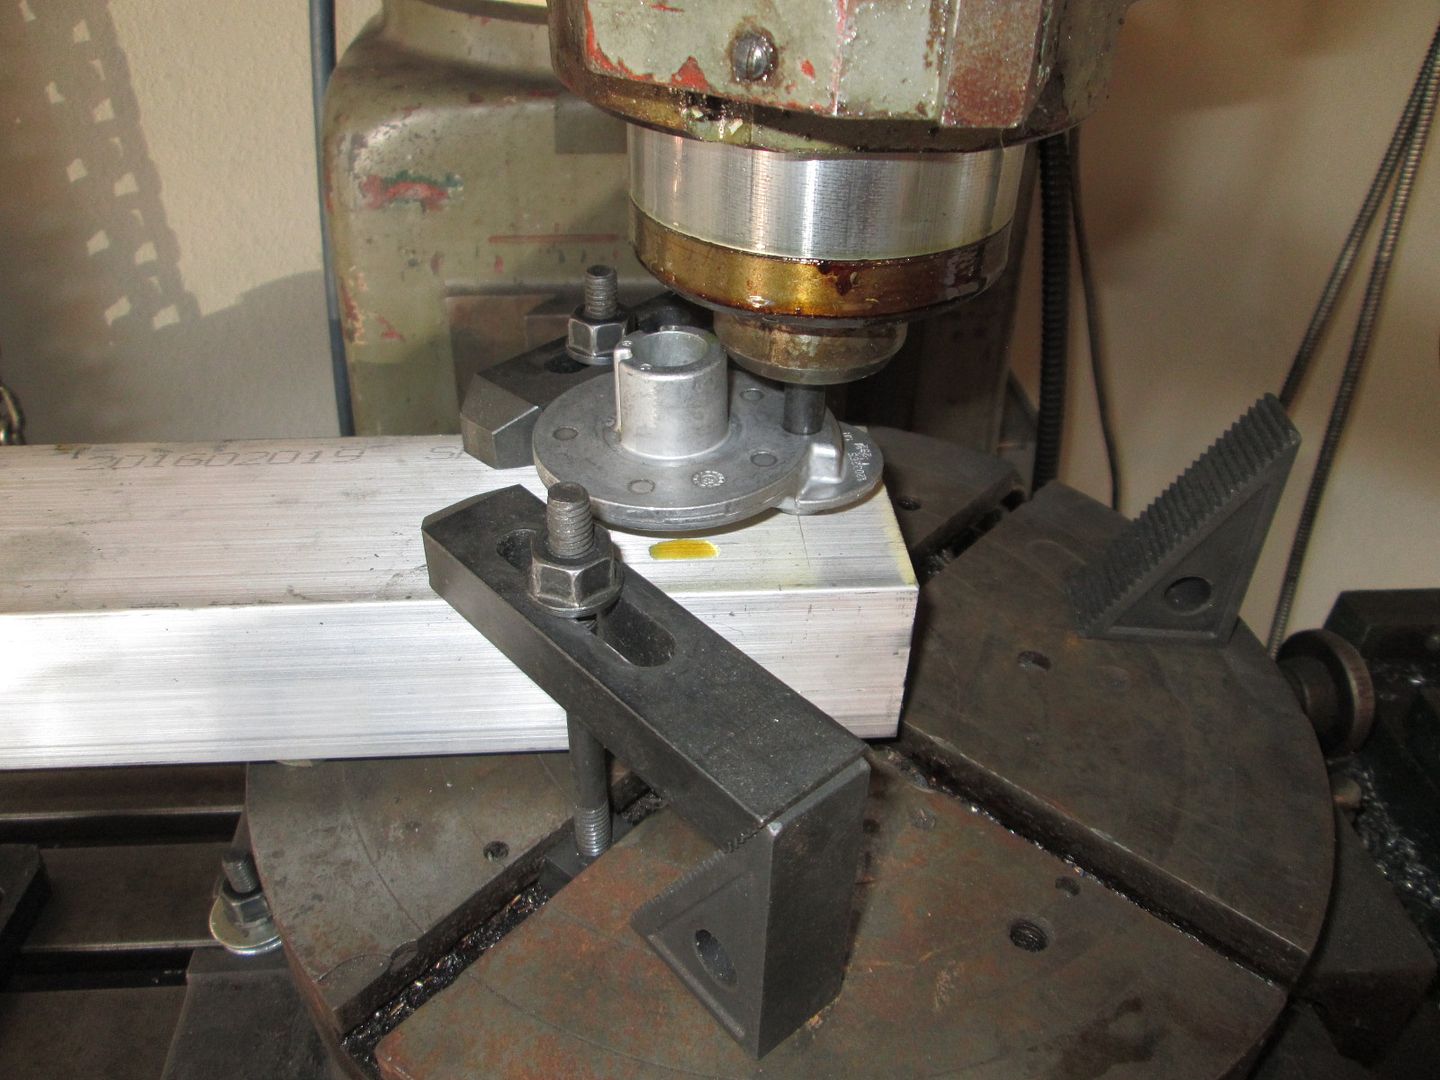
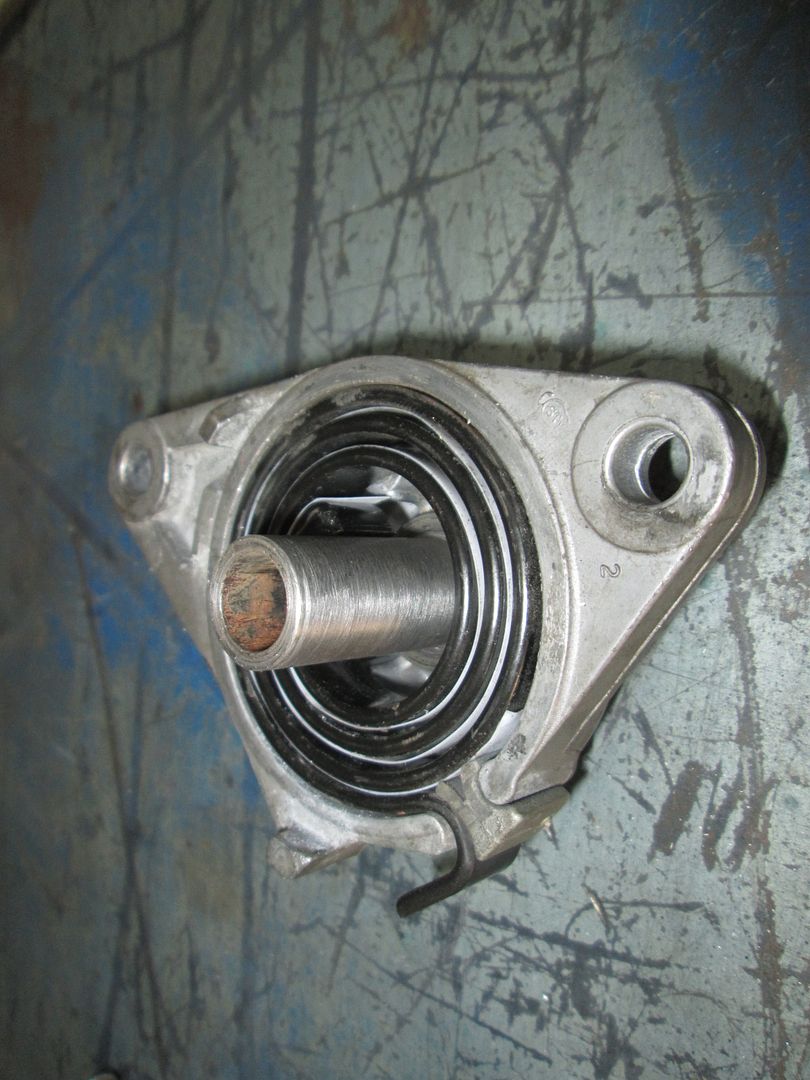
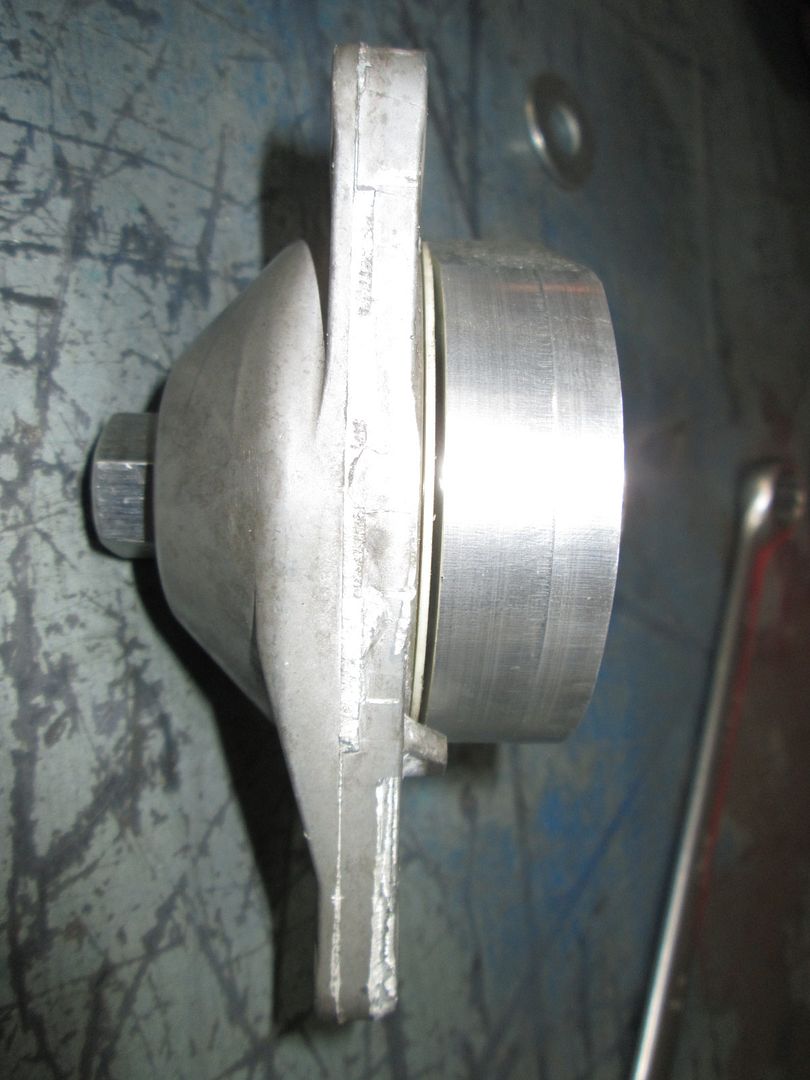
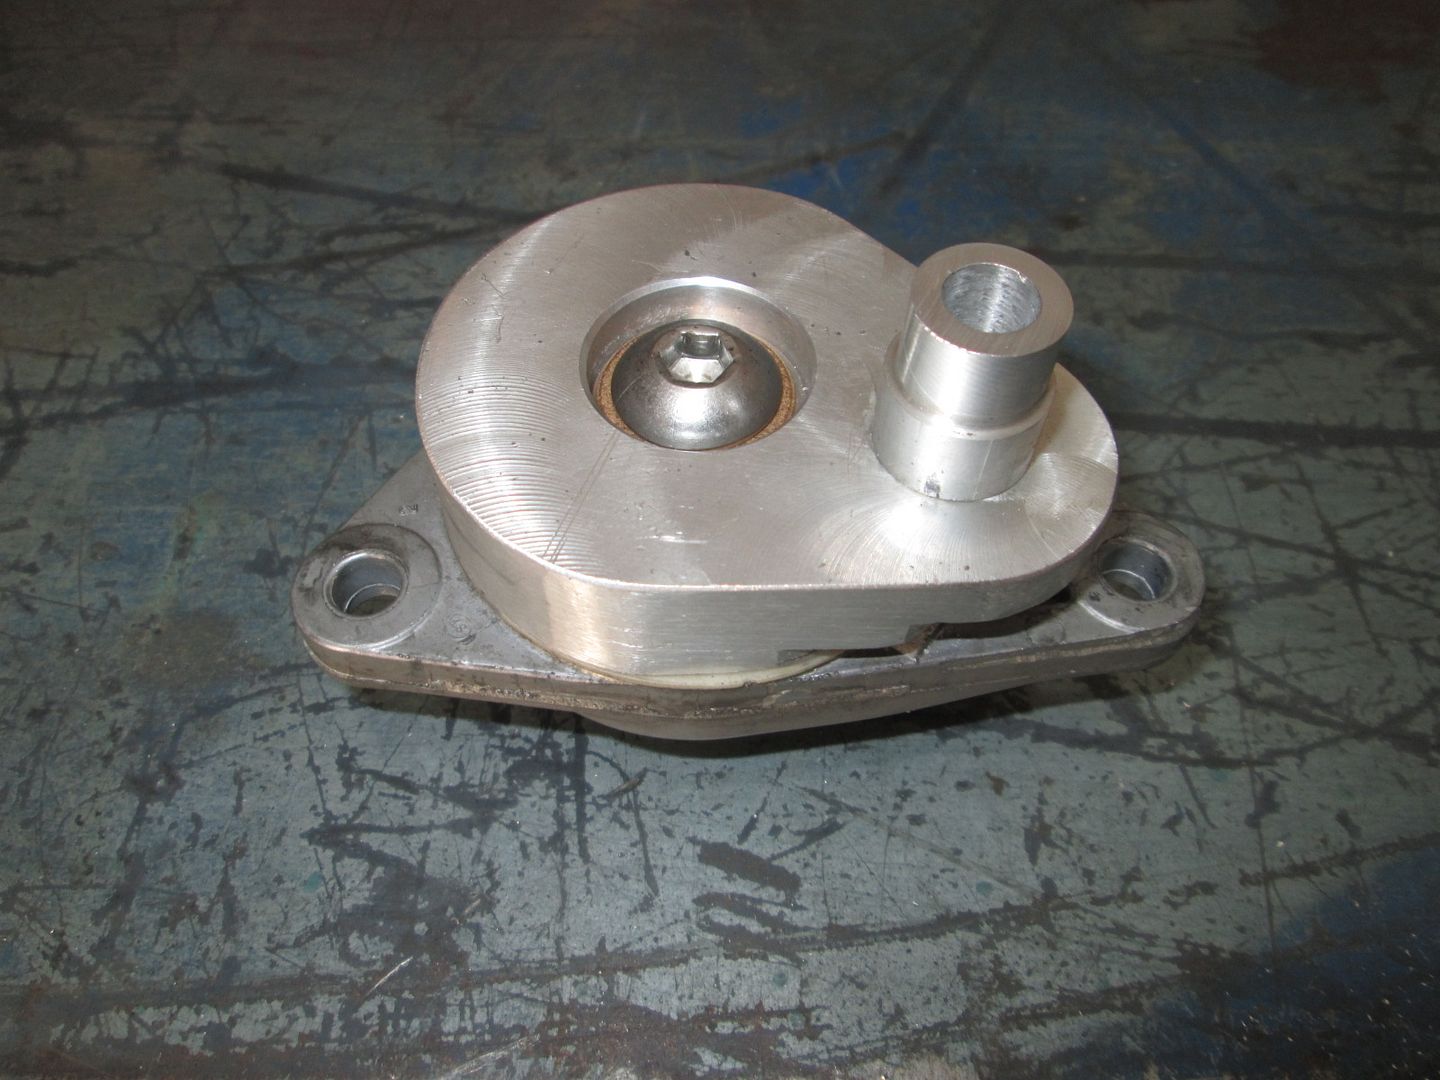
Spent most of the day in front of the mill and lathe, and have another hour or two of work, but the tensioner arm is nearing completion. Lots of individual setups with the mill and rotary table, but it is nearly done!
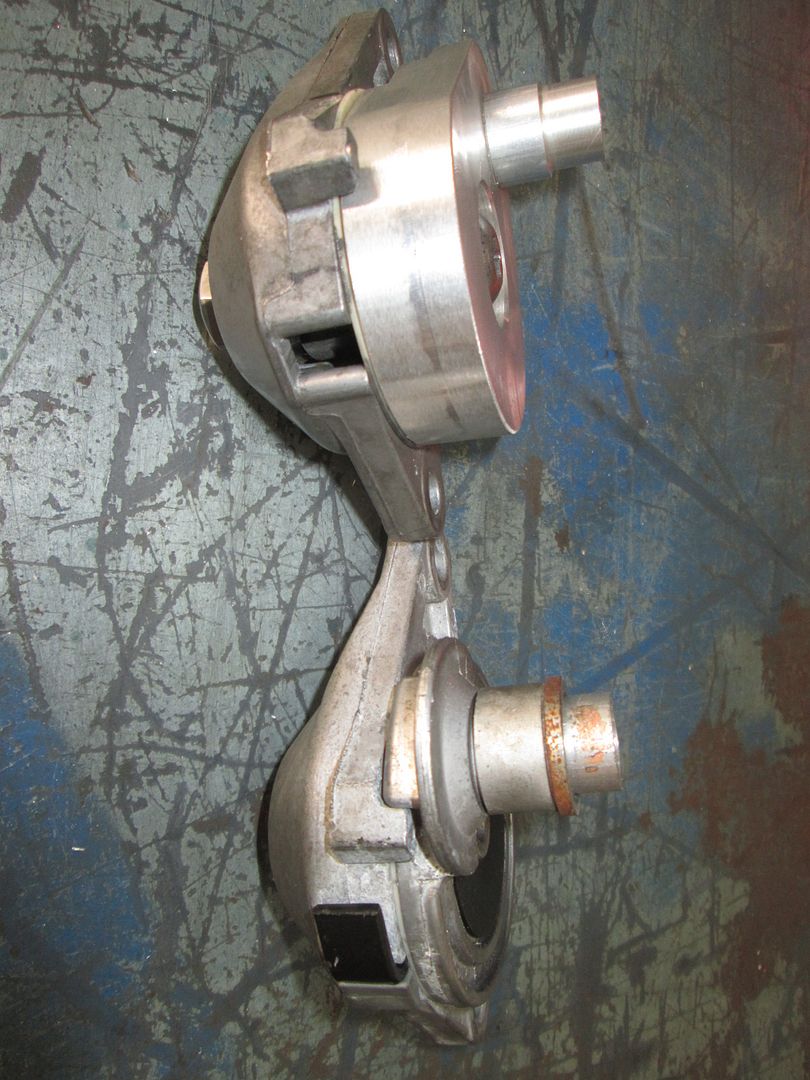
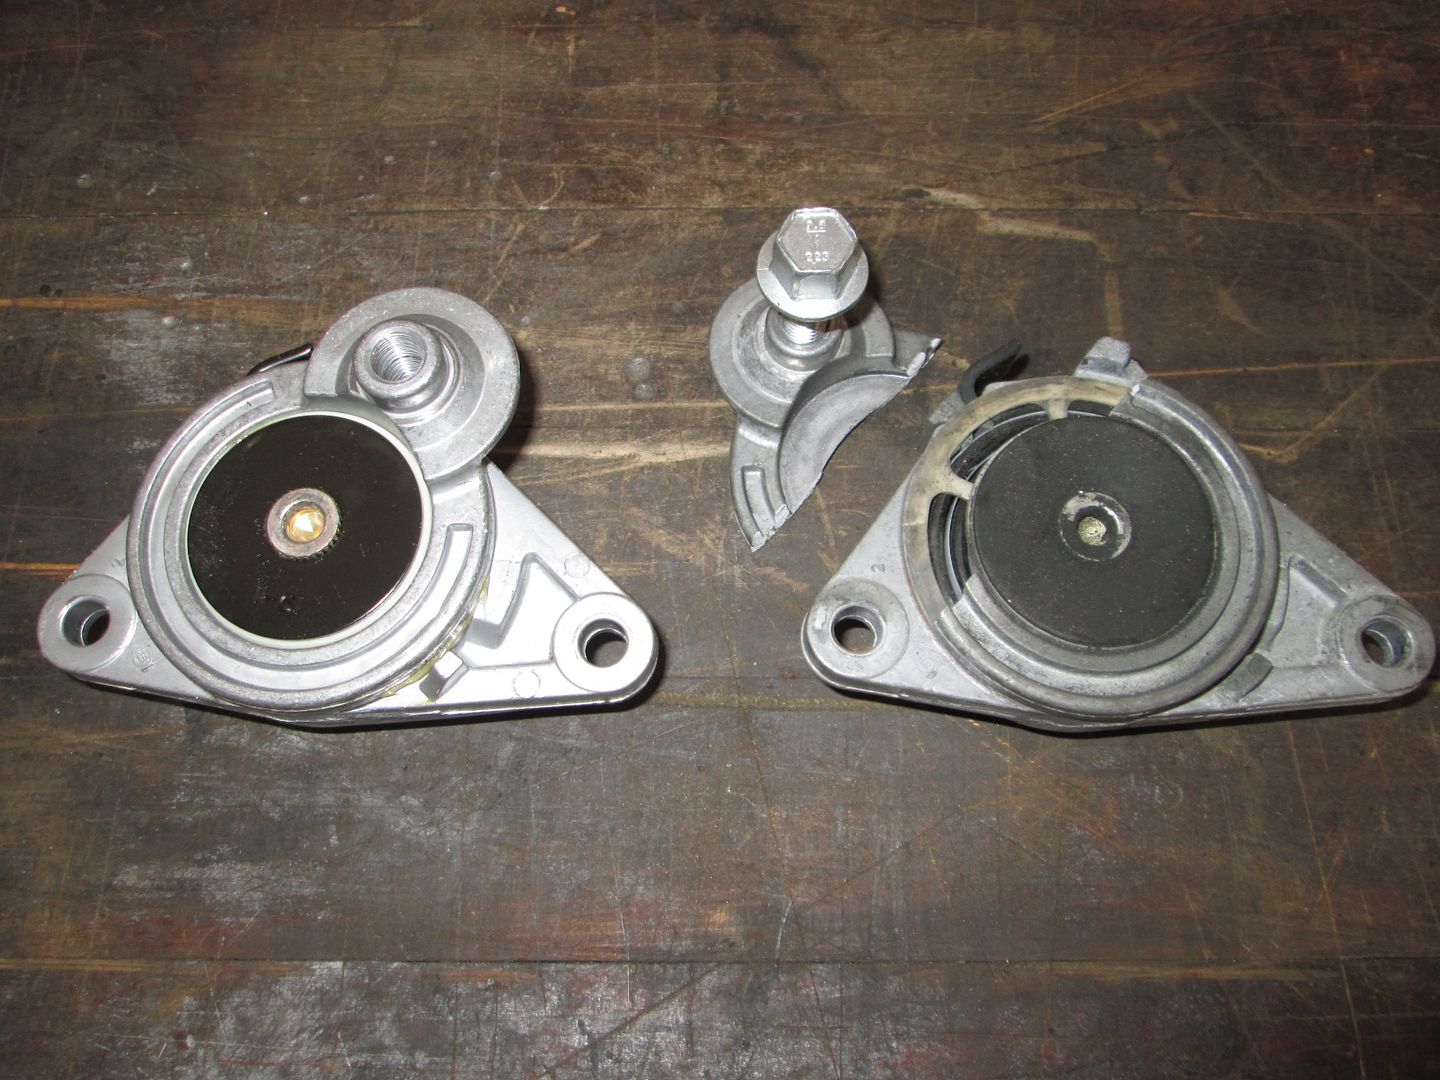
New tensioner next to OEM one:
The new tensioner will be held together by a 1/2" bolt. I make a stepped steel sleeve that will be the primary support for the tensioner arm. The back of the tension housing has a flat area a little larger than 1" in diameter, which is what the stepped portion of the sleeve is. The backside of the housing is about 1/4" thick and I tapped it for 1/2-13 and will have a jam nut on the backside. With the proper clearance between all the parts, I will be able to torque down the bolt to stabilize the sleeve, while allowing the tensioner to move freely.
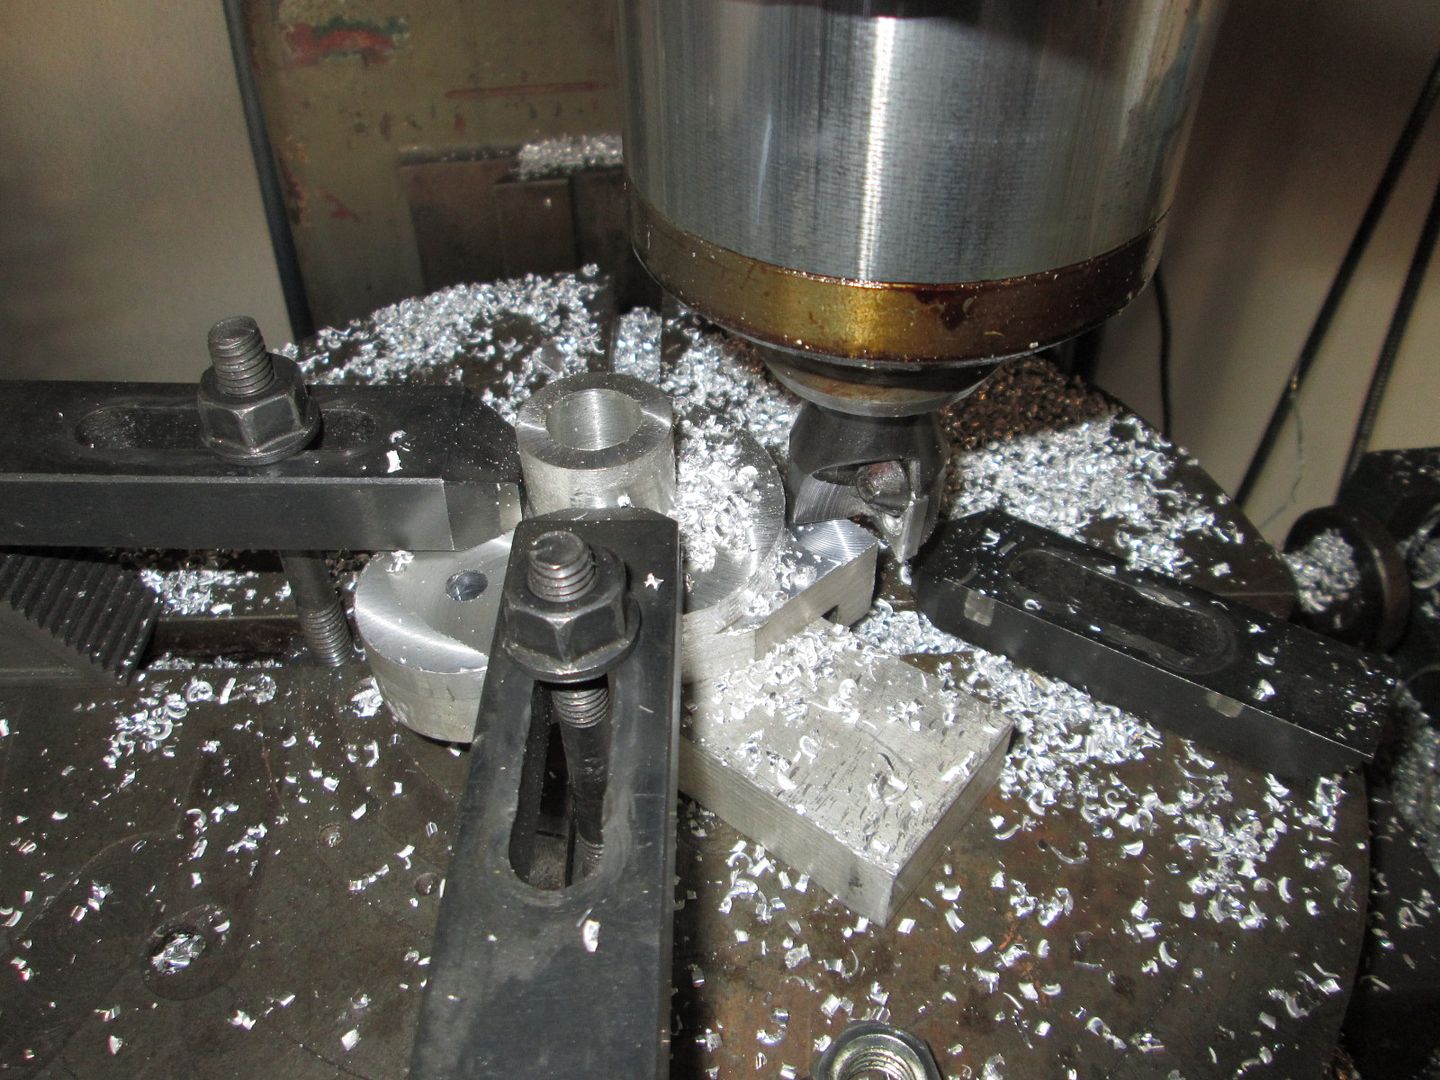
I am reusing the stock wear strip to avoid aluminum to aluminum rubbing:
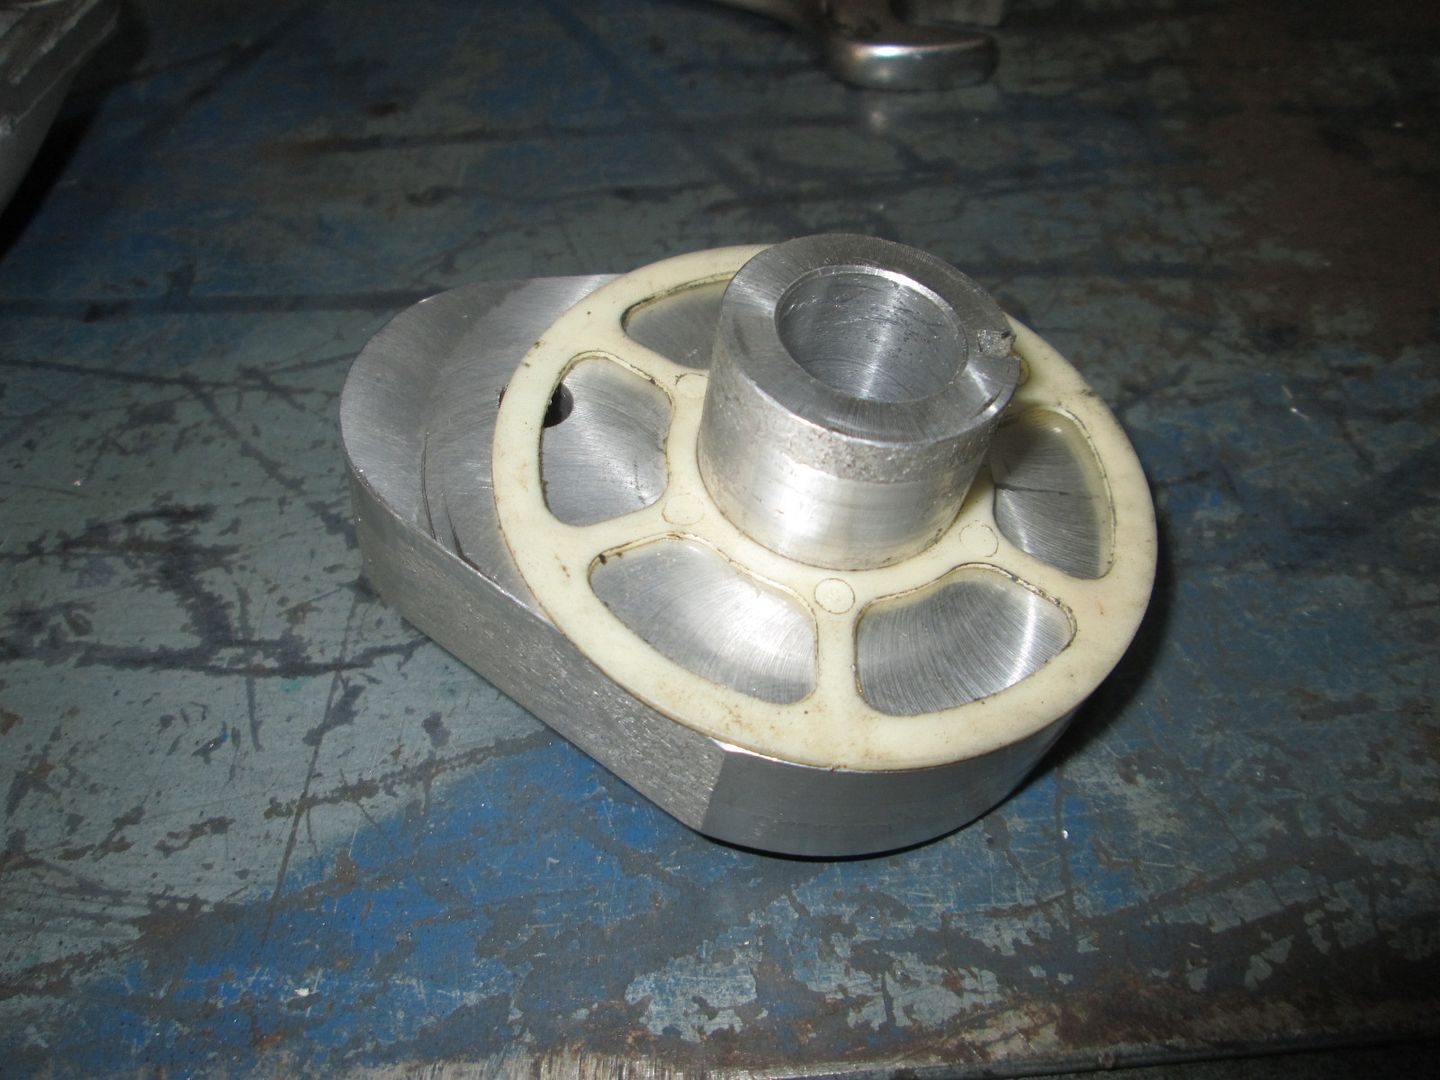
Here is a pic with the range of motion stops. I need to take the tensioner arm and set it back up in the mill and cut the clearance slot on the backside so these can be used. You can also see the steel sleeve slightly recessed below the tensioner arm. I need to counter bore the tensioner body so the bolt head will be flush, then turn down the sleeve the account for the counter bore. There will be a bronze washer at the bottom of the counter bore. The bolt with tighten the washer to the sleeve, and the sleeve the reach housing, all while keeping a few thousandths clearance between the bronze washer and the arm as well as the plastic wear strip... or at least that is the plan...
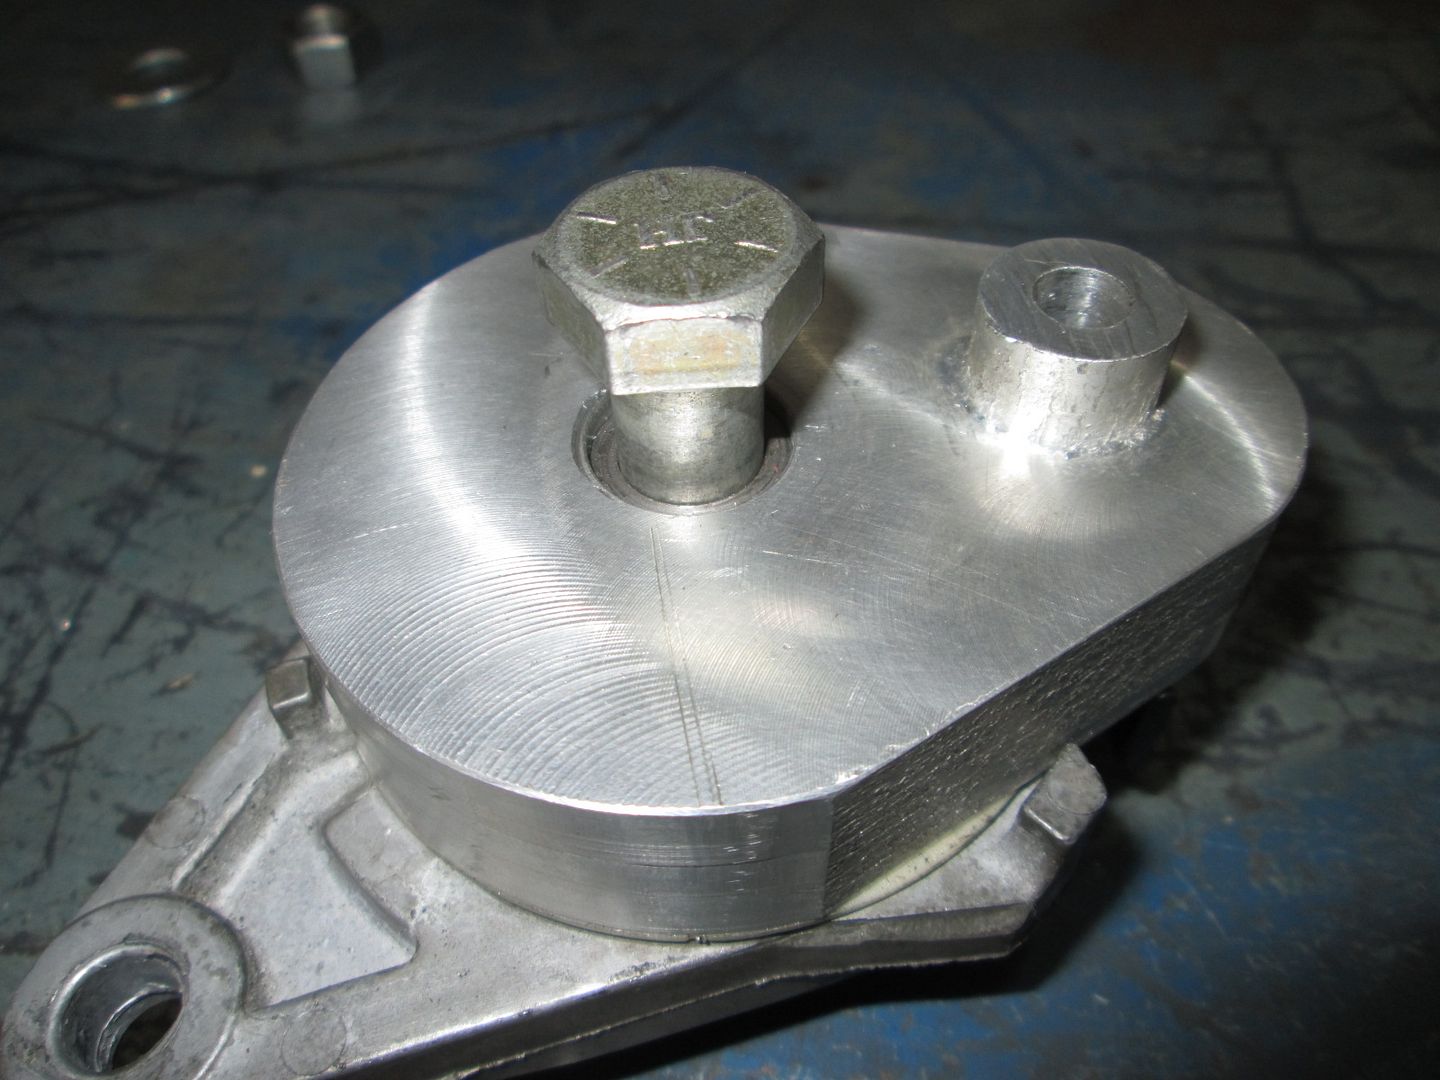
The bolt will be a stainless socket head bolt and like I said it will be recessed to be flush with the surface:
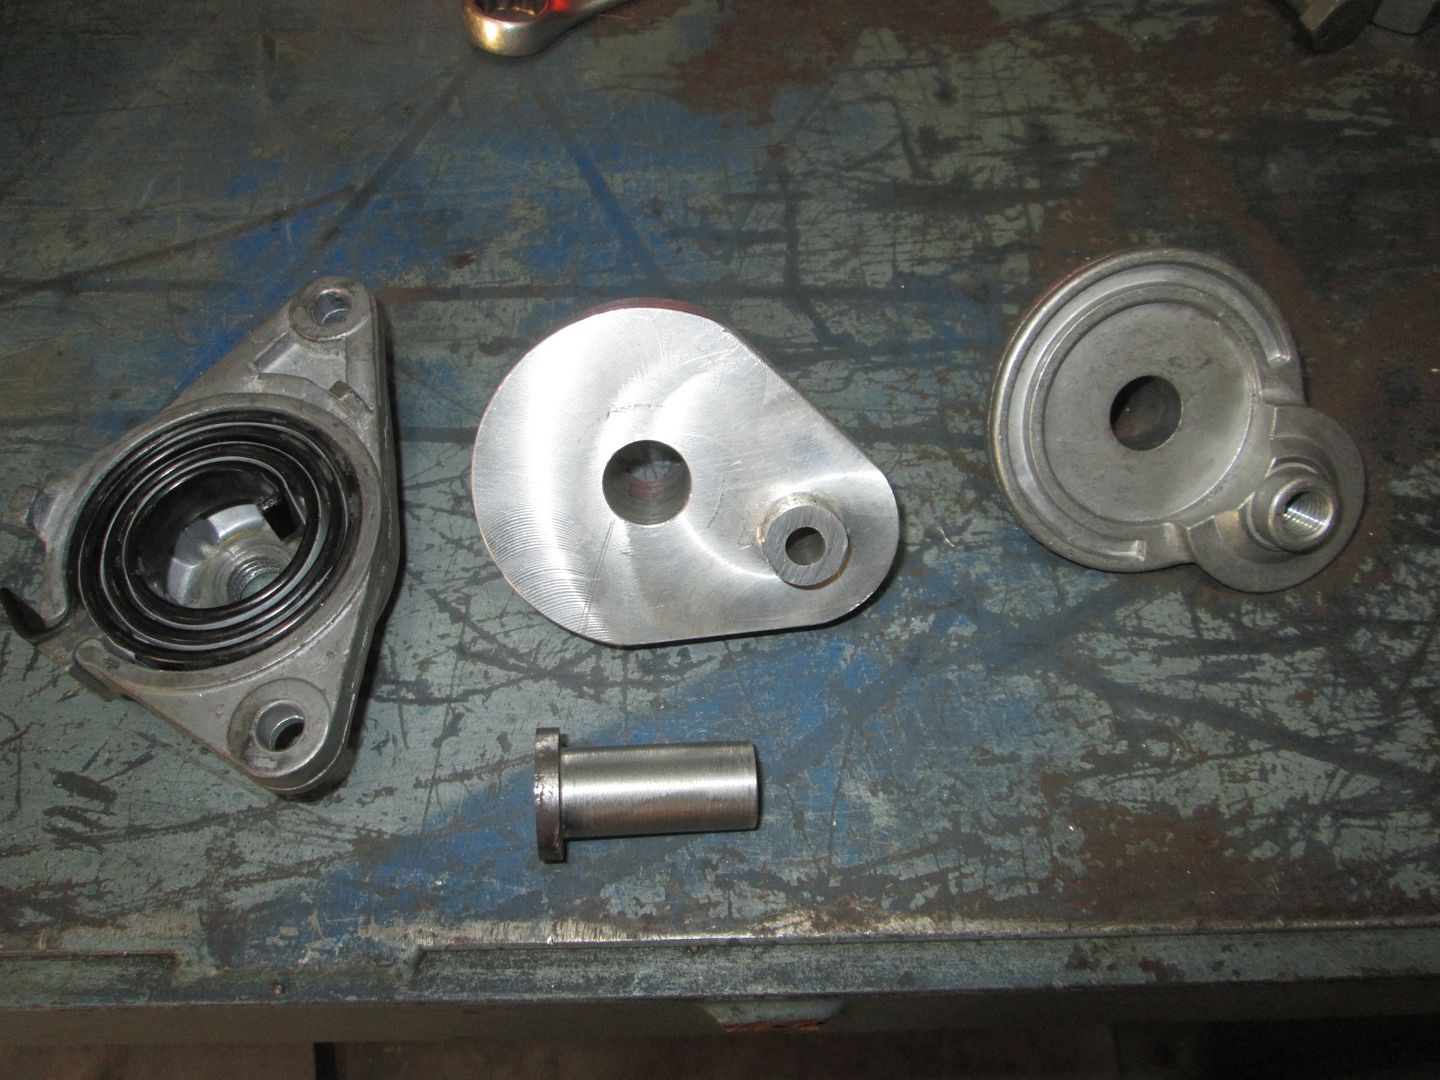
Here is the jam nut on the backside. The 1/2-13 threads in the body are not that deep, so this nut will really the primary clamping nut. It will be stainless as well.
As you can see I need to put the sleeve in the lathe and reduce the thickness of the stepped seat to reduce this clearance.
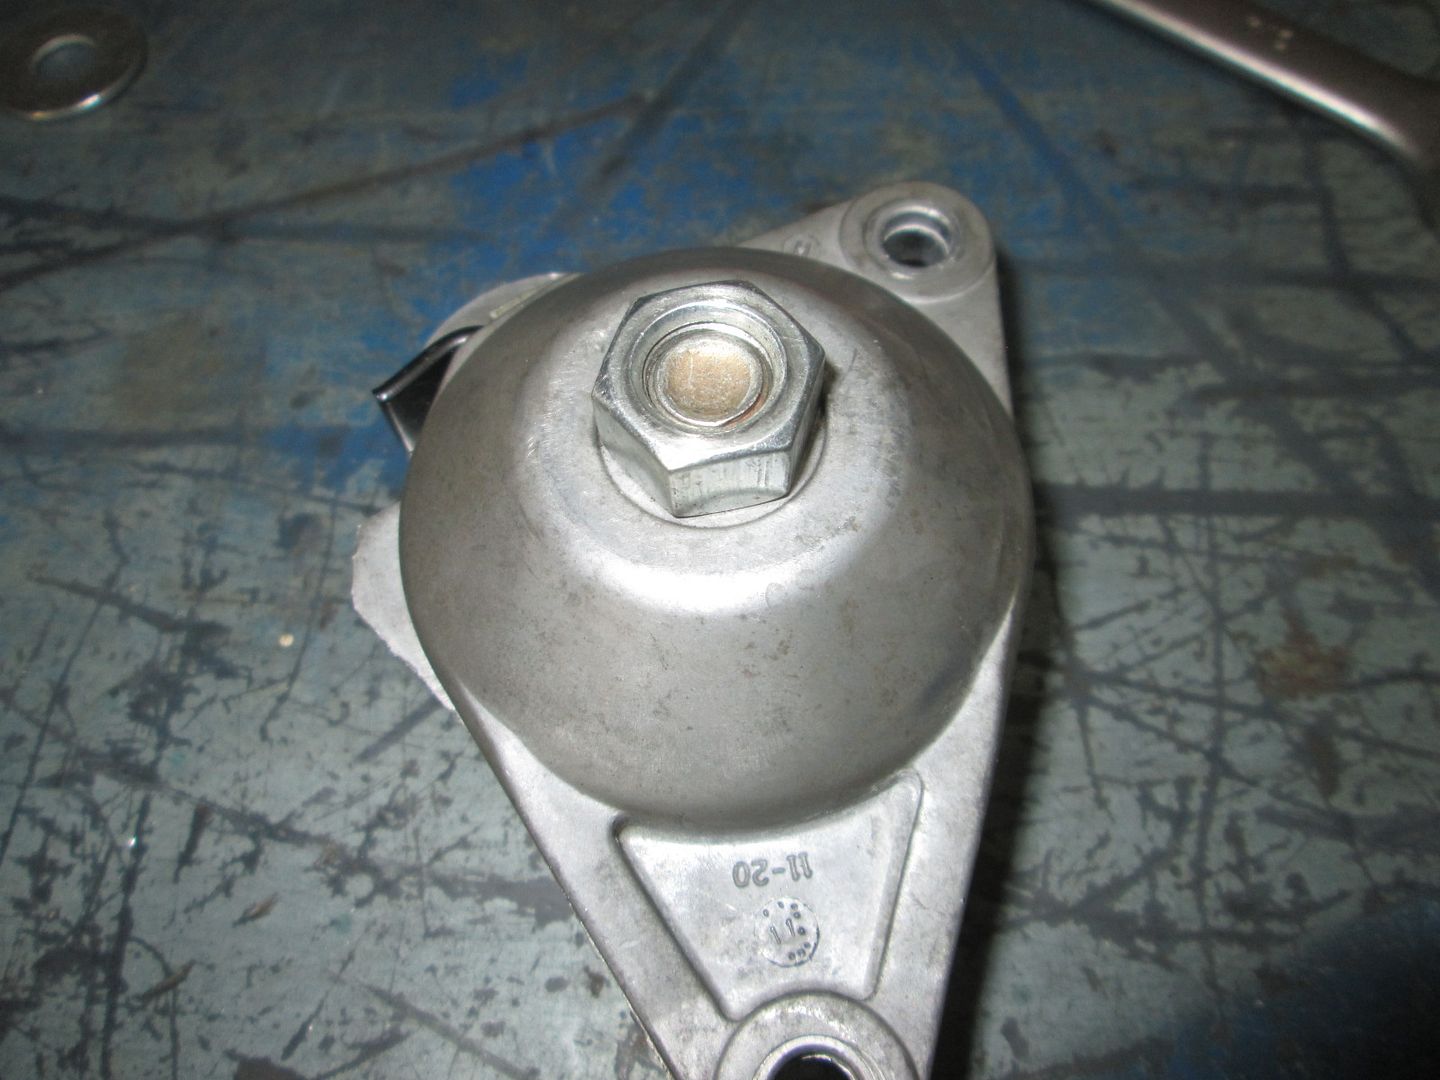
I took the old tensioner off today so I could mockup the new one and check for full range of motion.
Here is a side by side picture of old vs. new. Notice the new mock up one doesn't have the wrap spring installed. This was so I could cycle it by hand to verify proper clearance. Also notice the raised pulley stand off. That is a 2nd part and is pressed onto the smaller stand on the arm. I would have liked to make it all 1 piece, but the aluminum was only 2" x 3" and needed to be about 3" x 3". The pressed on standoff did help keep the tap perpendicular during the threading process.
Here are a couple of other pics:
Now I am just waiting for a longer stainless bolt and a larger OD bronze bushing... and then it will be put back together 1 last time.
As always, nice work, the revised tensioner should be more than up to the job. Have fun on the Power Tour, at the rate they are moving back west they should be in my neck of the woods in oh about another 3 or 4 years, the first two Power Tours came through Colorado, I did the Colorado leg in my V-8 S10 pu, had a great time.
What I think would be super lucrative for him is if he setup a deal to teach a fabrication course at a community college. How to think about stuff like this, how to figure out how to take them apart (safely), figure out what's failing, how to make it better, crank it out, then put the damn thing back together.
I didn't even know idler arms could be rebuilt. I figured they were a "If you take it apart, it's broken" kind of thing.
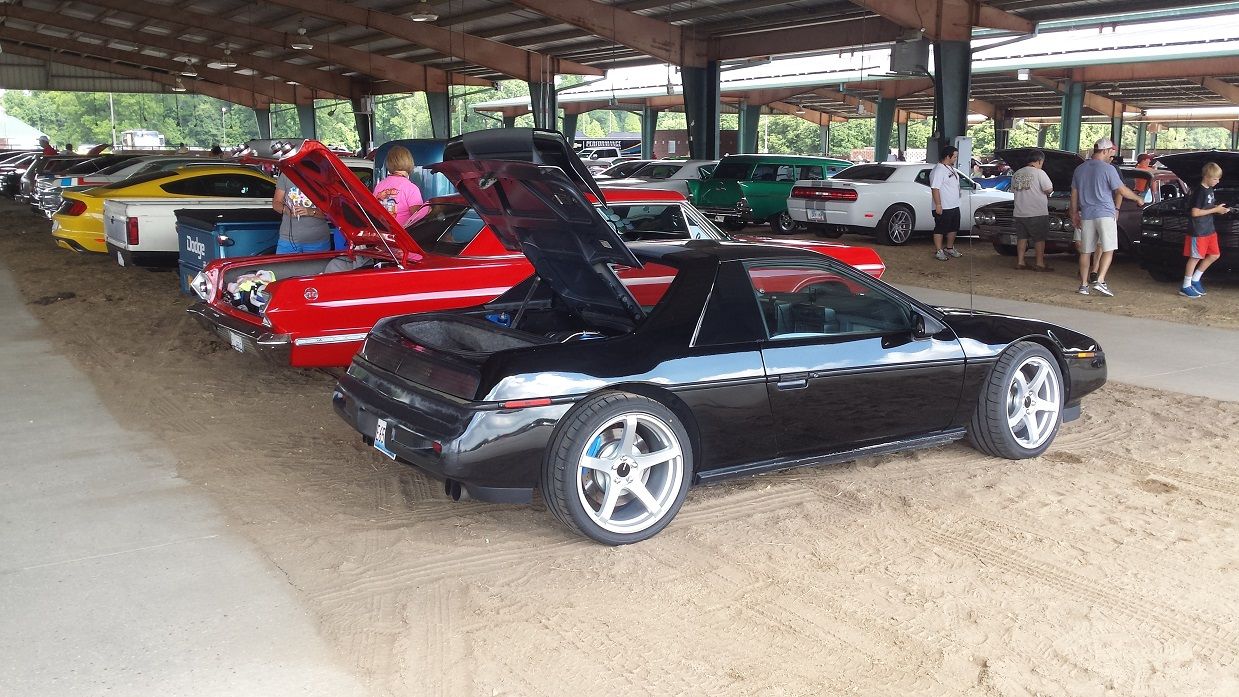
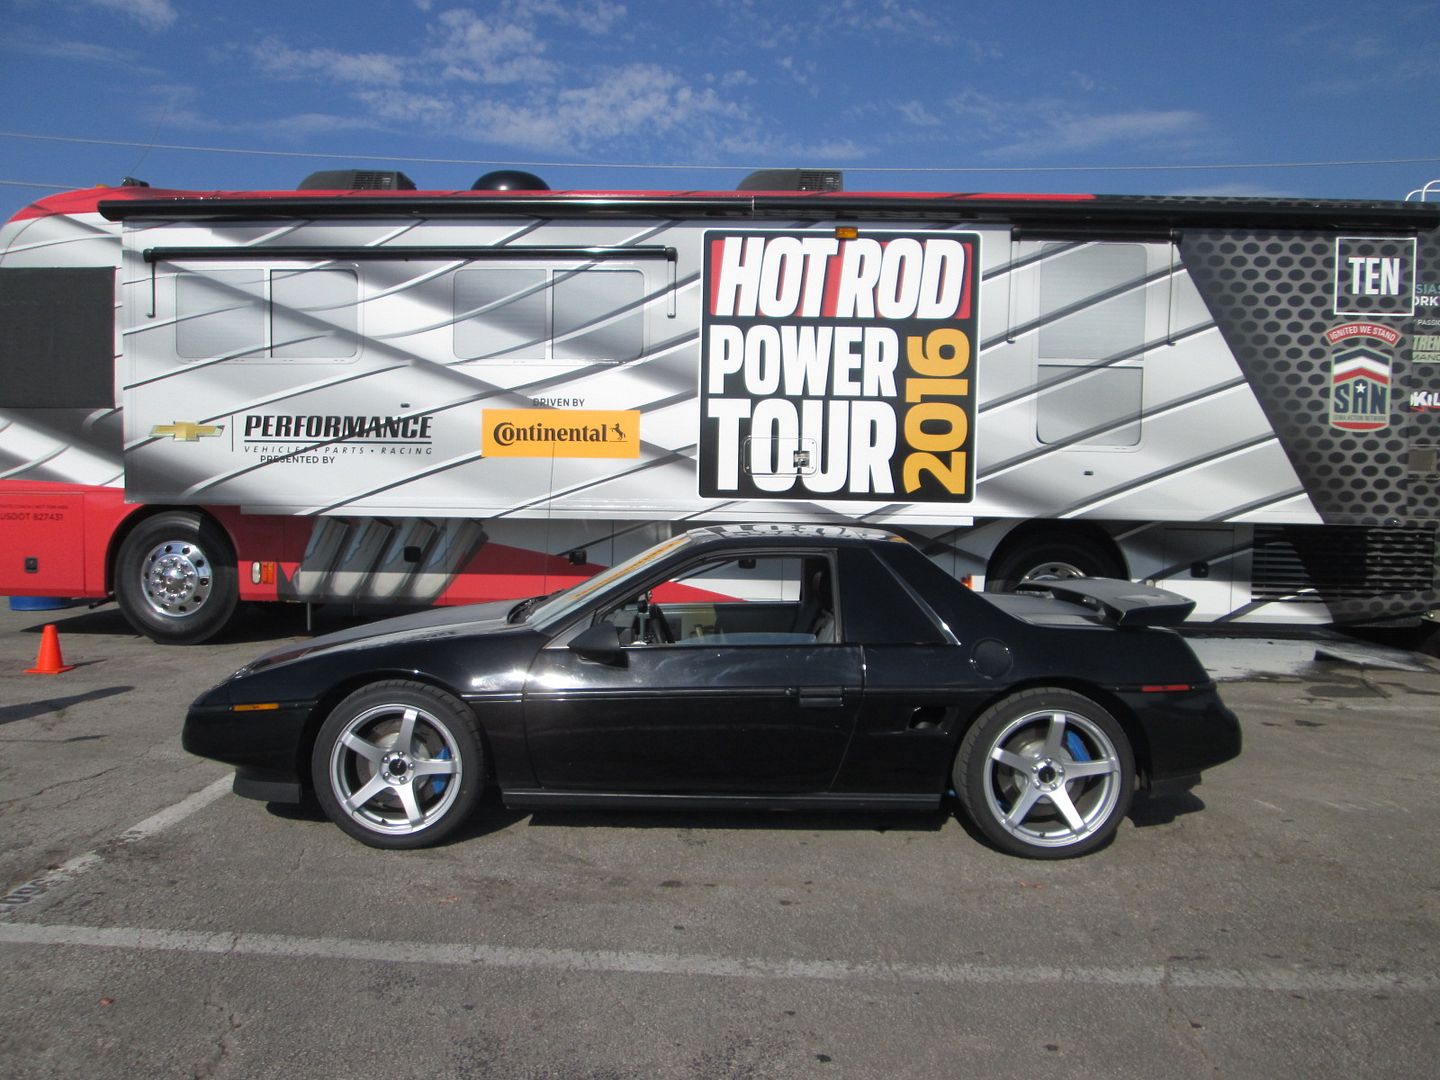
Yesterday, I drove the car about 775 miles to start the HRPT. For the first venue, I was able to park under a pavilion which was nice during the rain and just sitting around chatting with people:
Two LS4 Fieros are long hauling the tour (mine and Tom Slick)!
I posted this video in another thread, but for $50 we got to drive on the Circuit of the Americas track. I appoligize for the video in advance, I started it with my smart phone in its stand, but it over temped and shut down. So I grabbed my trusty camera and held it.
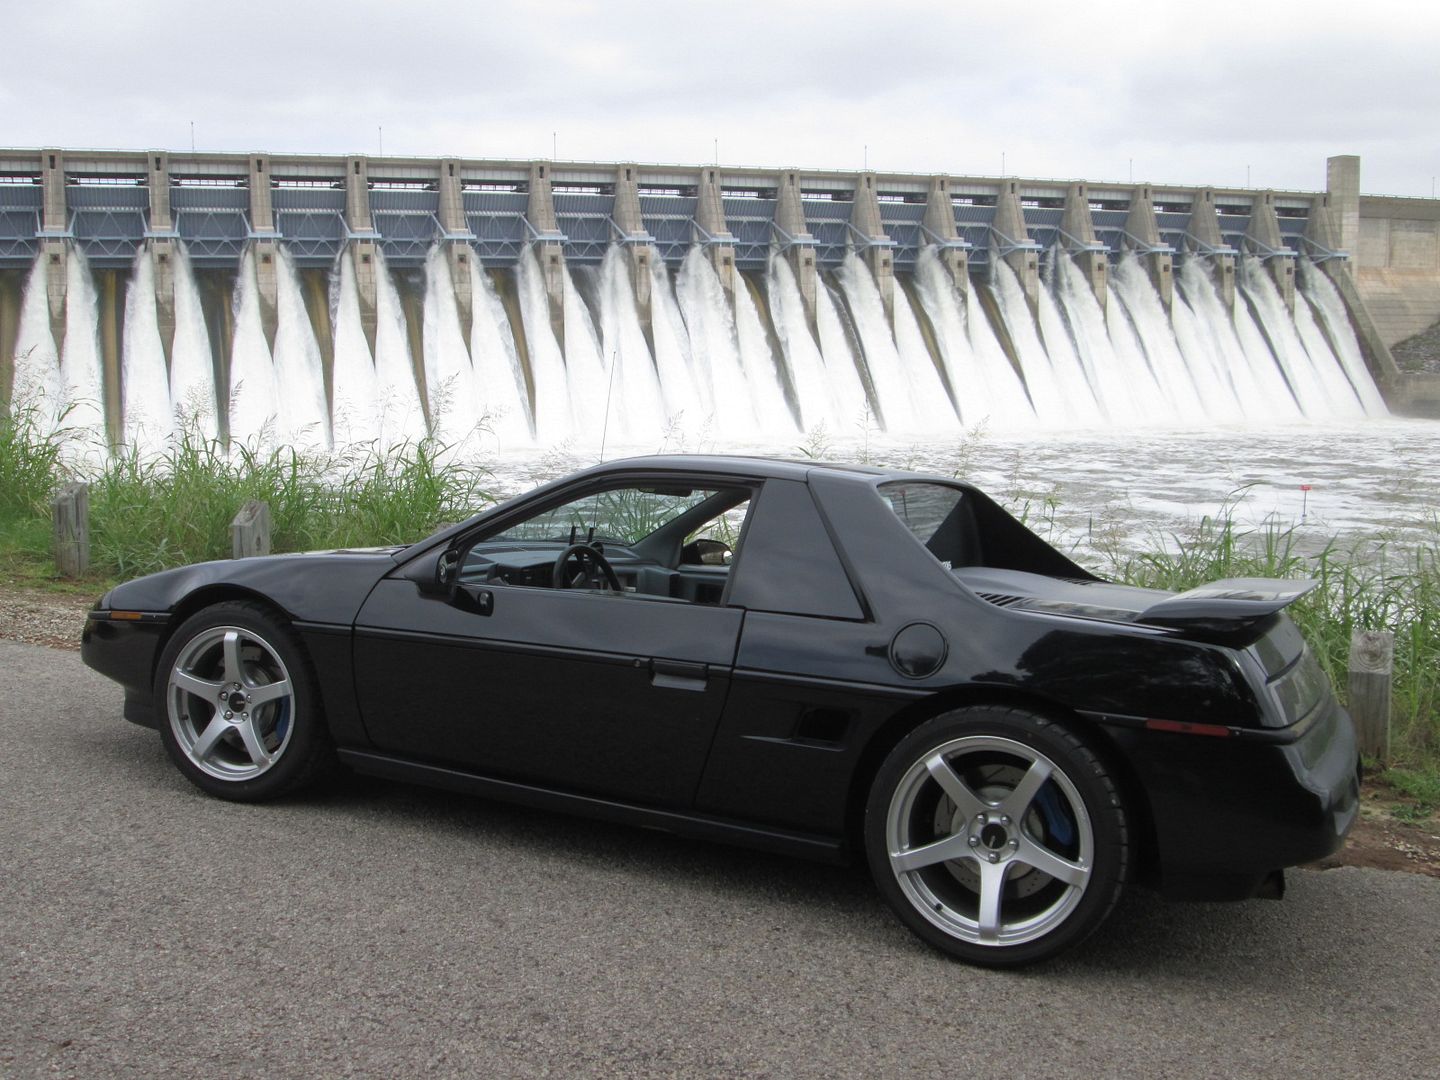
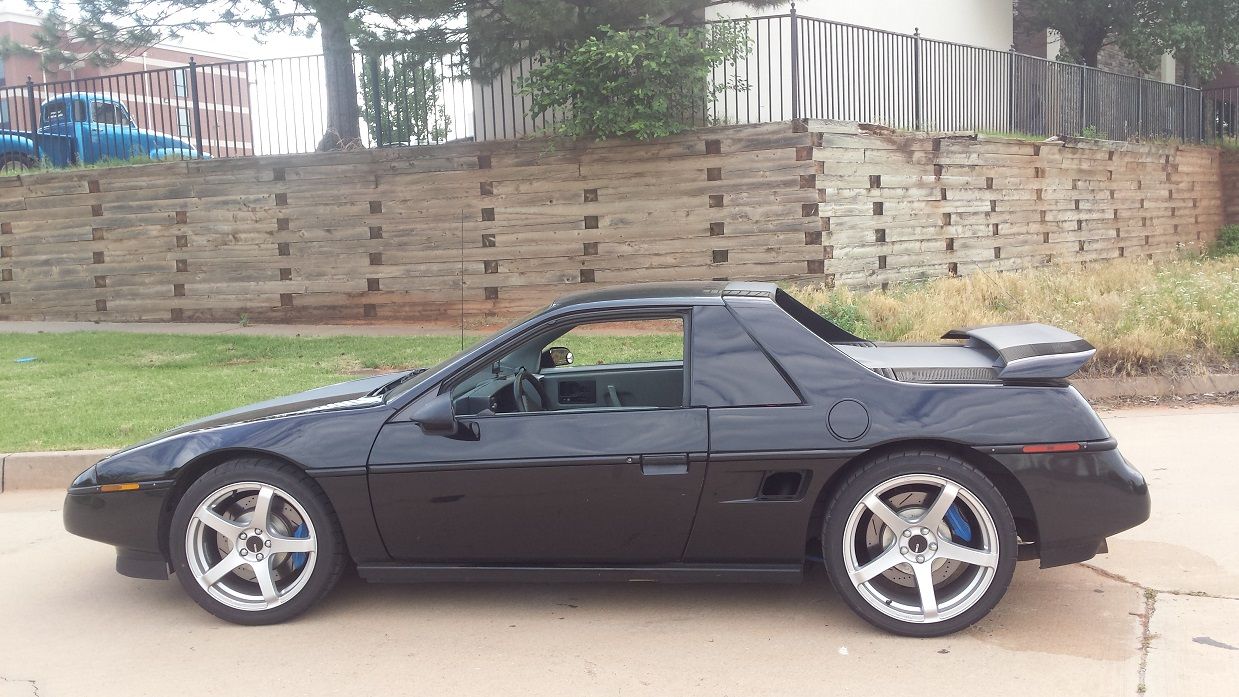
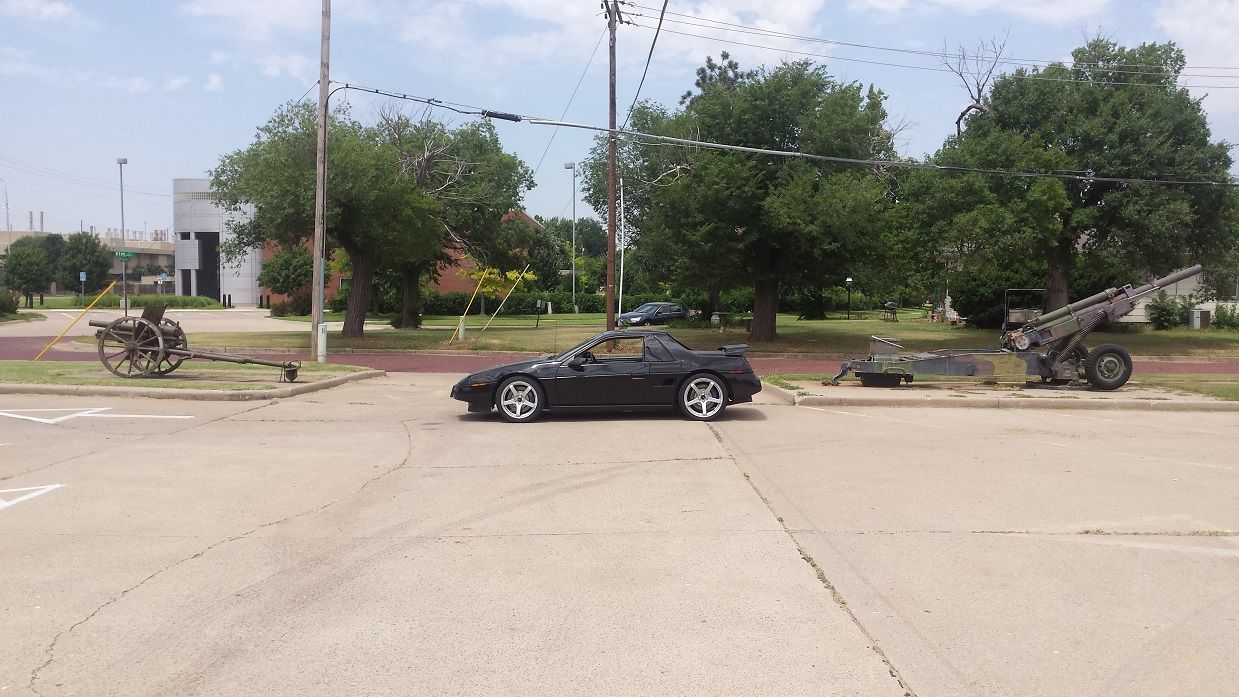
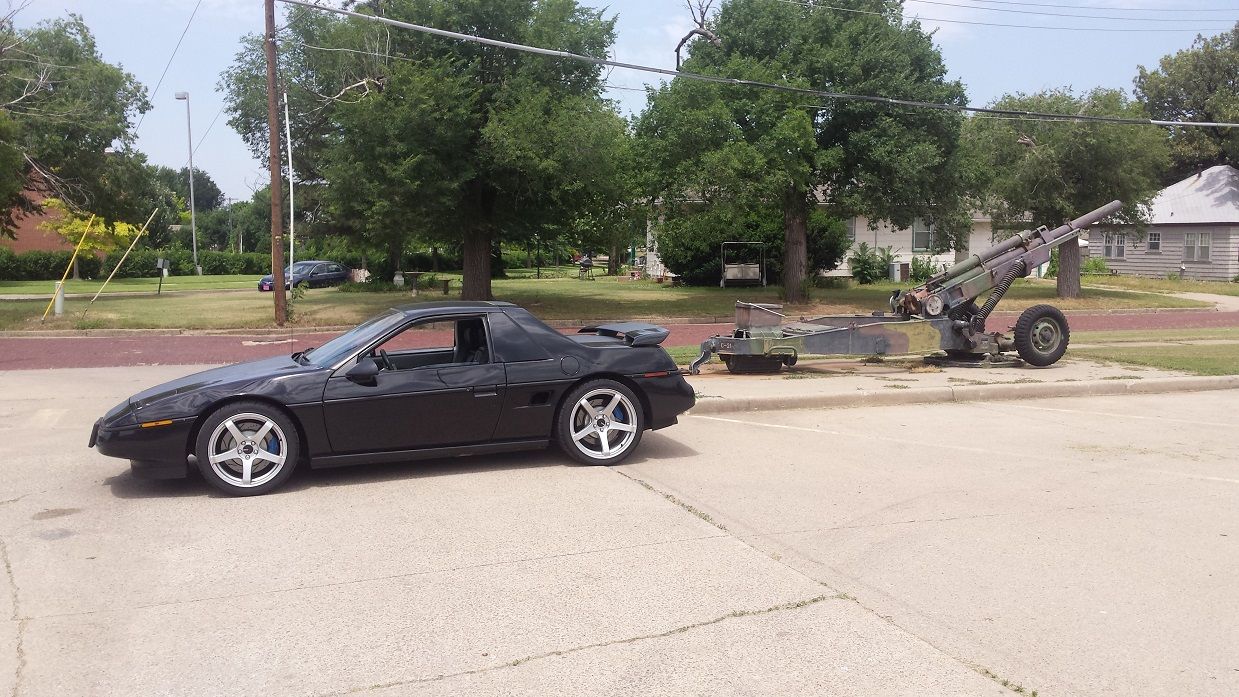
Here are a couple more pics of my fiero out and about:
I am finally back home from the HRPT and spending the weekend in STL with Sara and the girls!
It was great fun with 5 Fieros long hauling: blakeinspace, Tom Slick, Cajun, gtoformula, and fieroguru.
We also saw these others PFF members (or former members) on the trip: ltlgt88, KMFDMFAN, Troy and Elvi (can't remember their forum ID), TXGOOD, 2MidV8, fierocarparts, 3.4Turbo, Rare87GT, fieroX, Jazzman, MustangsBware, infinitewill, and a few others.
The overall trip was 2853 miles for me with the distance to start the HRPT and get back home. My best tank of fuel averaged 27.5 miles (no AC, dropped to 25.0 with AC on and cruise set to 72-74), the worst tank was 19.1 (only a 4.5 gallon top off), and the overall average for the trip was 22.9 mpg.
We started the trip with torrential rain for the first 2 days and ended with 95+ degree temps at the last 4 venues with the last day being 100 degrees. The rain, heat, miles, and rough roads challenged all of our Fieros, but the 5 long hauling Fieros made it to the end with only having minor issues. The only issues with my car were the new DS windshield wiper didn't want to stay on (wire ties fixed it) and had a couple of tail light bulbs go out (replaced). Overall it handled the rain and heat well and continues to be very reliable (but I did identify a sticking caliper and replace it prior to the tour). Within the next week, I expect to pass 30K miles post swap!
This was the first long trip with AC running. When I first started the swap, the AC hose had a leak that I never fully addressed until the day before the tour. So while the AC worked great, it would stall the engine when I came to a stop. Several reasons for this: ** E67 ECM - doesn't have an AC request signal, only clue the ECM has that the AC is on is via the line pressure switch which is hooked up. ** Manual Transmission - I am using the LS4 auto calibration, so it doesn't "see" when I press the clutch, a dedicated manual transmission calibration would work better. ** Aluminum flywheel and camshaft - not much low end torque or rotational momentum, so my engine struggles more to spin the AC compressor at idle than the stock LS4 would. I can feel a significant difference in engine load while launching from a stop with the AC "ON" vs. "OFF".
The tour gave me the opportunity to do more tuning for the AC to avoid the clutch in stalling. In the AC torque table, I doubled the values below 800 (to account for the camshaft low rpm torque loss), then copied the same values into the table up to 4000 rpm (so the ecm adjusts for the load while driving, vs adjusting for it at clutch in). In the BRAF table, I took the airflow at 1200 rpm, used 125% of this for 1600 rpm, and then copied that value to all cells above 1600 rpm. This slowed the RPM drop, especially in the 2000 rpm to 1200 rpm range. This worked quite well, and as I approached a stop, I could clutch in, shift to neutral, and coast to the stop, while the RPMs came down and settled to idle w/o stalling. Now the only stalling issue with throttle blips and some parking lot maneuvers, but I am getting better at driving it in town with the AC on. It only stalled 1 time while driving around STL and the return trip to Champaign.
I do need to revisit my cell phone holder for use as a GPS. It works great, but sitting in the sun and with the display on, it gets too hot and starts shutting programs off, eventually shutting off the phone to allow it to cool down. If I held the phone in front of one of the AC vents, then it would quickly cool down, so I need to find a cooler (temp wise) mounting location.
[This message has been edited by fieroguru (edited 06-30-2016).]
Originally posted by qwikgta: But can any 88 run that rear rim/tire w/out the mods that you made? would the rim/tire hit in a stock install?
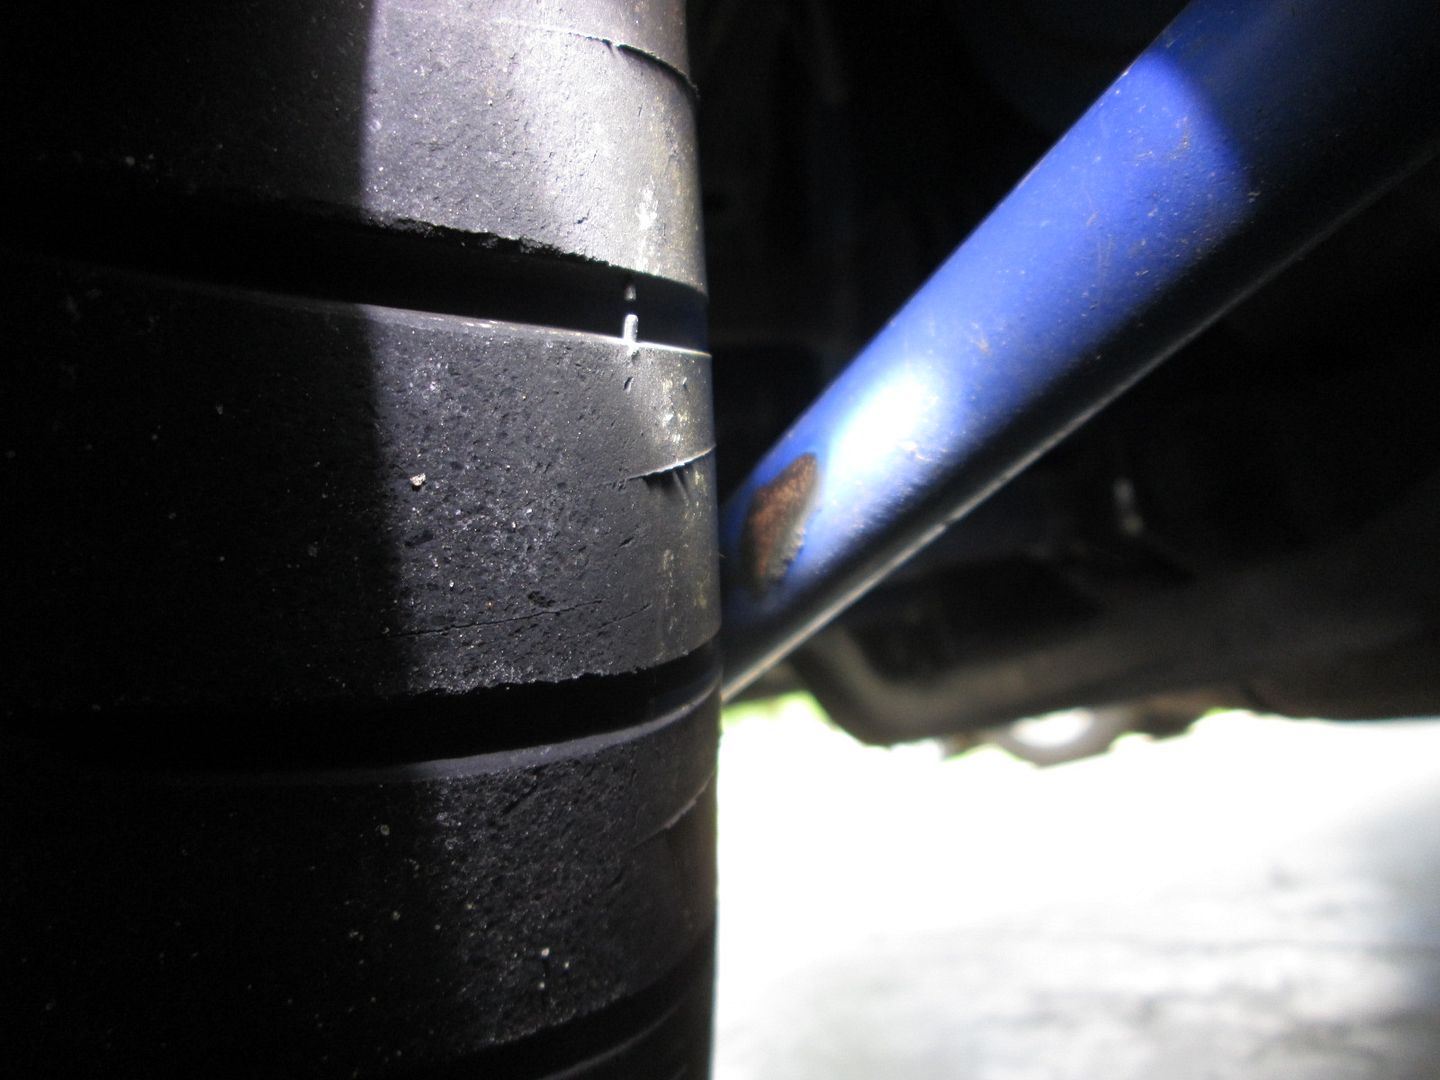
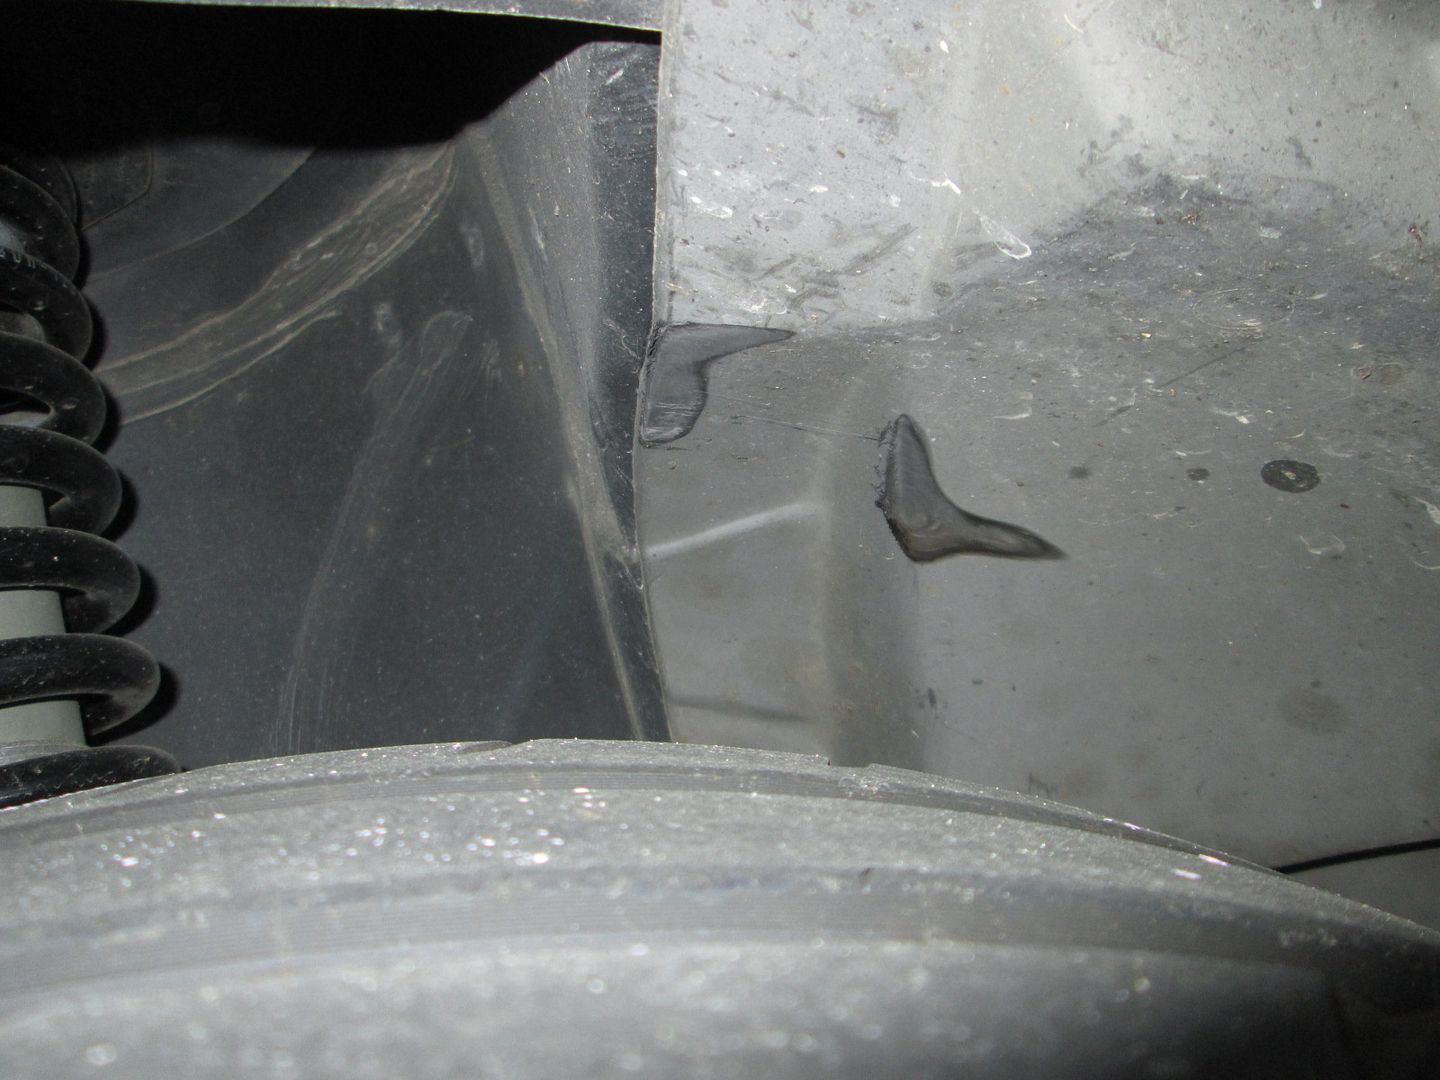
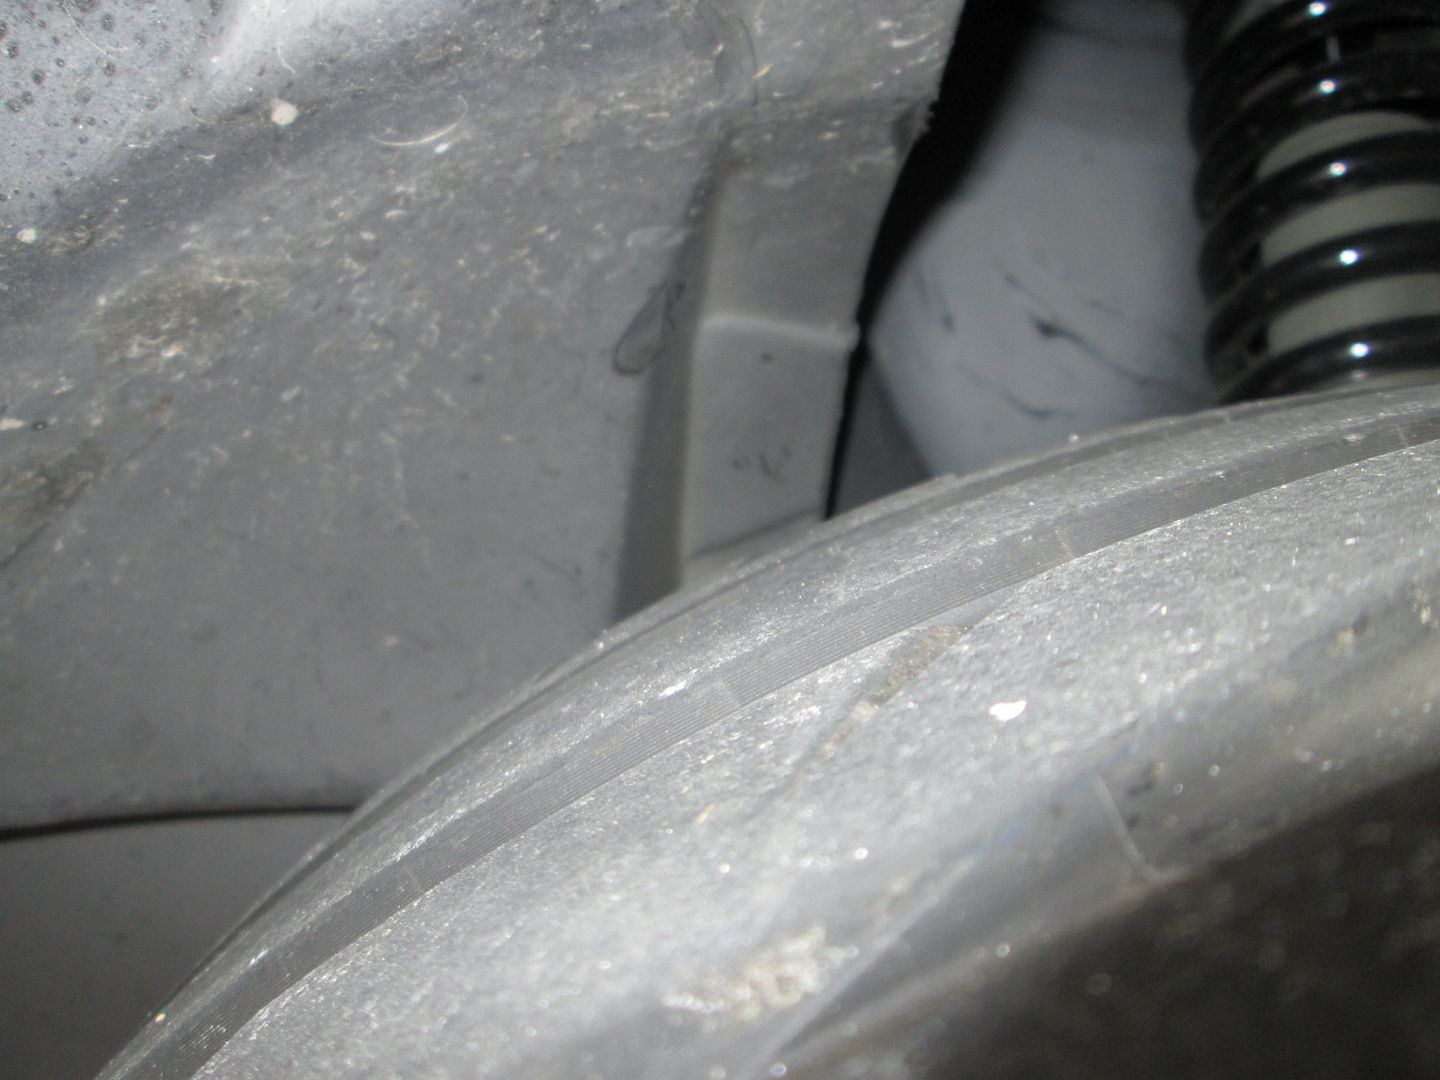
There isn't much special about the front, they should fit any 88, but the clearance is very tight and lowering, camber, toe settings, and centering of the steering rack will all come into play. Most consider a 7" wheel with 48 ET ideal for the 88 front, so this wheel sticks out 15mm further (12.5mm for the extra 1" and 3mm less offset). Opinions will vary... I used to run 245s with 35 ET, so running 235s with 45 et better tucks the wheels in.
On my car, the clearance is about 1/2" to the side of the lateral link (relocation bracket lower 1 end - which makes clearance worse, but that end is also spaced 3/8" inboard, which helps the clearance...) either way, on aggressive autocross events, the tire will rub the side of the trailing link slightly, so I will be making some offset trailing links sometime this summer.
I do have more clearance to the coilover adjuster ring since the top of my struts are relocated 1" inboard, this helps with clearance to the coil overs adjuster ring, but pulls the top of the wheels in further under compression... I also have a couple of areas on the wheel well liner that show some slight rubbing...
However, if you build your coilovers to sit on the original spring perch weld bead (have to run shorter springs), then there is no clearance concerns with the adjuster ring.
Tom Slick is running the same size rear wheel 18x9.5 45et (different style, but same mfg) with a mostly stock 88 rear suspension with the exceptions of coil overs.
Did you ever figure out the DOD with the manual? Or is that just kind of an afterthought now?
Nope. It most likely needs the BCM hooked up and the brake switch installed for the E67 to enable DoD. I haven't missed it and over the winter will likely do a DoD delete and camshaft upgrade.
If I recall you had posted some good mileage numbers. So those MPG were without DOD? That's pretty good news. There is still that part of me that would love to see it working with the manual trans just to see how much better mpg you could get.
If I recall you had posted some good mileage numbers. So those MPG were without DOD? That's pretty good news. There is still that part of me that would love to see it working with the manual trans just to see how much better mpg you could get.
I never got DoD to engage with the manual, so all mpg values were in V8 mode. My goal was to break 30 mpg on the interstate and got to 29, but with the wider/stickier tires and the car being more setup for autocross, I have only seen 27.5 mpg recently. Less with the A/C on, but still being able to have 20+ mpg average for my daily commute with 400+ fwhp on tap is pretty good.
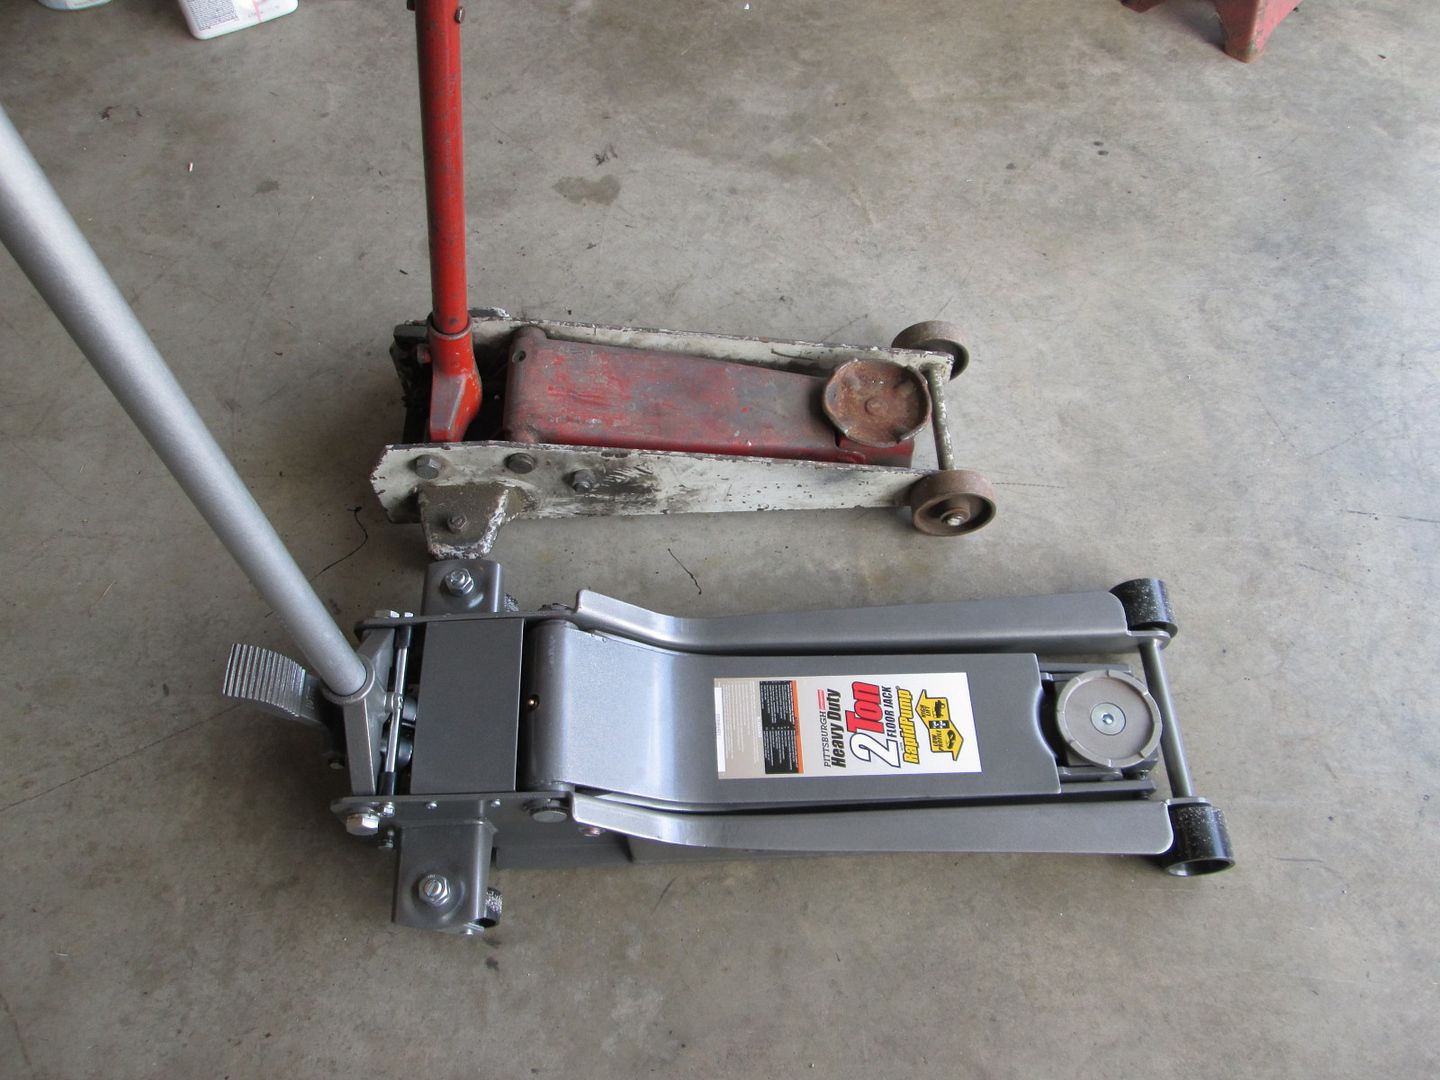
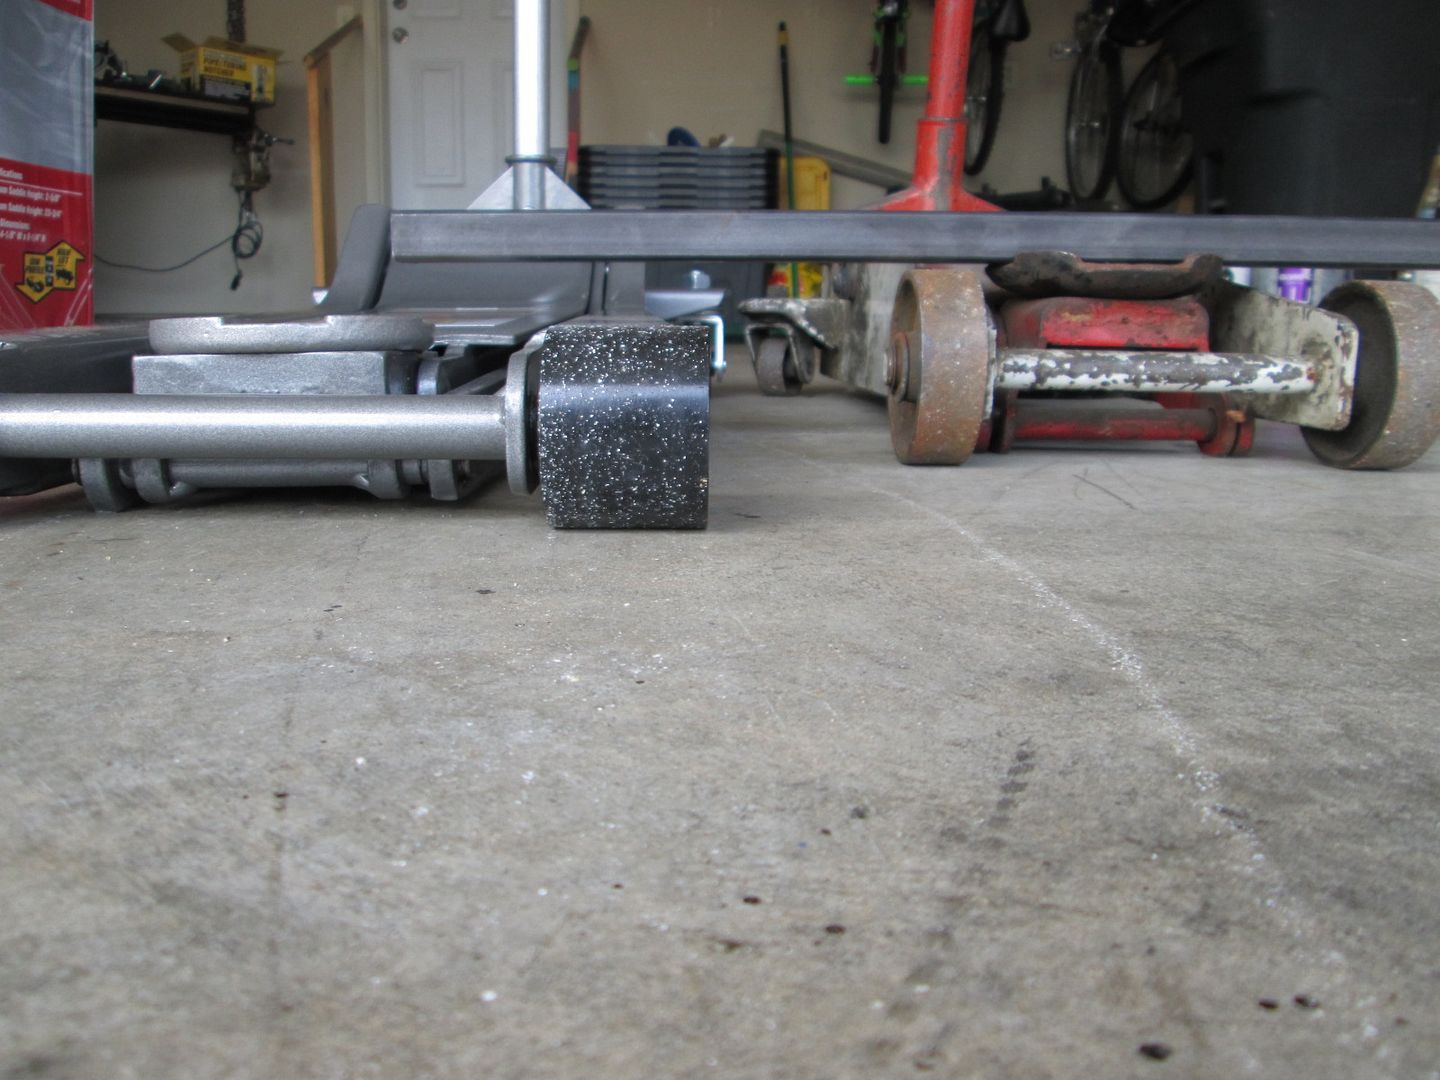
A new tool joined the collection in the garage today. After something like 20 years with my old Larin jack, I finally picked up a new one from Harbor Freight (the Larin jack will still be in the tool rotation). My primary goal was lower profile and a longer reach so it would be easier to jack up the LS4/F40 Fiero that has been lowered. To use the Larin jack, I would push it in as far as it would go, jack it lightly to slide the tire in, then lower it some (it would now sit higher due to the tire movement), and slide it in far enough to lift on the lower frame rails.
Time will tell how durable this jack is, but I really like the low profile (about 1 1/4" lower than the Larin) and nose length!
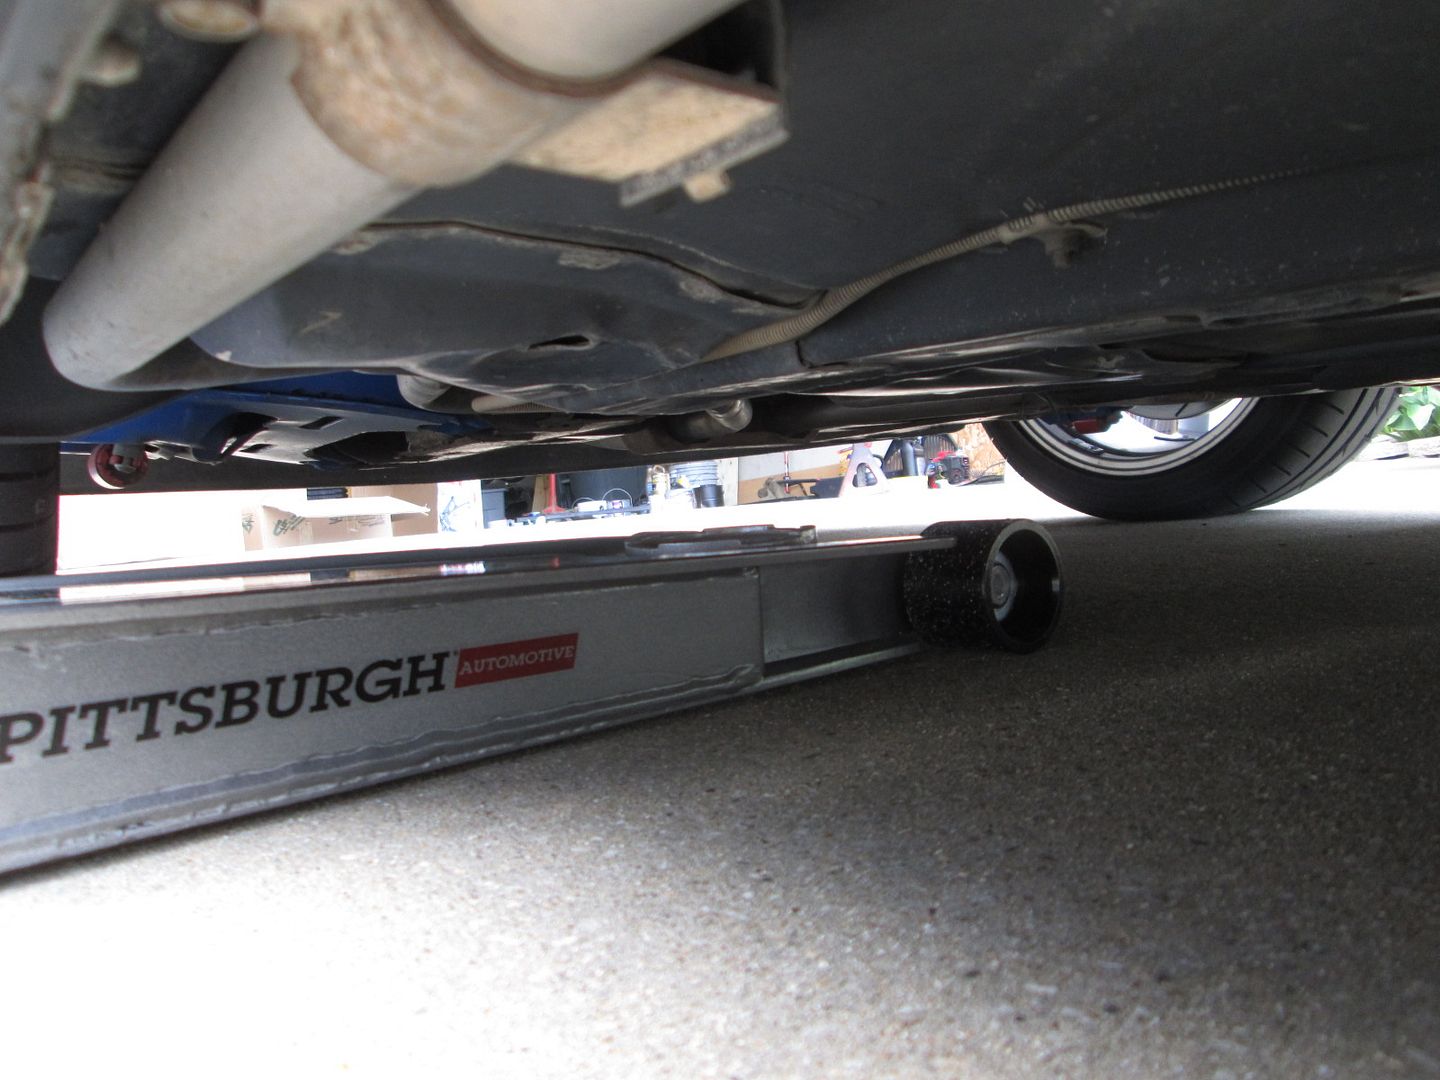
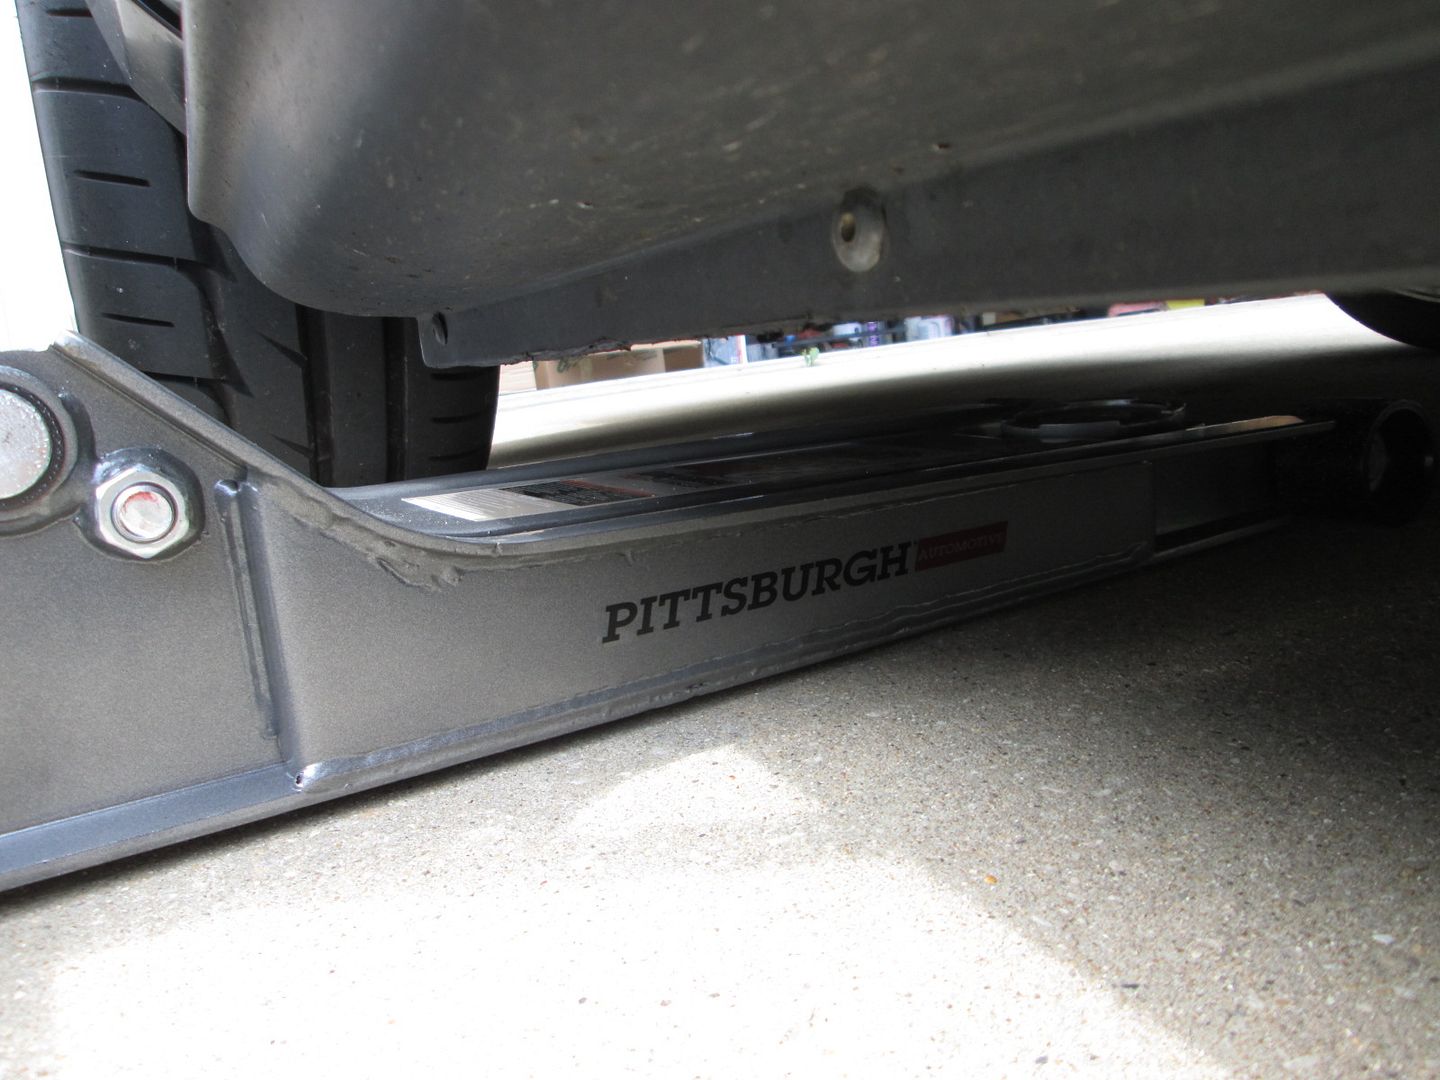
Here is what I was after! The jack pad is right under the front lower frame rail:
How low is that jack? i.e. how much clearance do you need? I'm having real issues with my jack as I build my Aventador...it's just so damn low that I almost can't get the front end jacked up. Right now I can squeeze the jack through the vents in the front bumper...but once the grills are installed that option will go away. Your jack may be the answer...
The top of the lift pad is only 2 5/8" tall. The body stays under 3" tall for most of its length, until it gets to the rear portion where its height increases quickly. The lift height is 23 3/4"
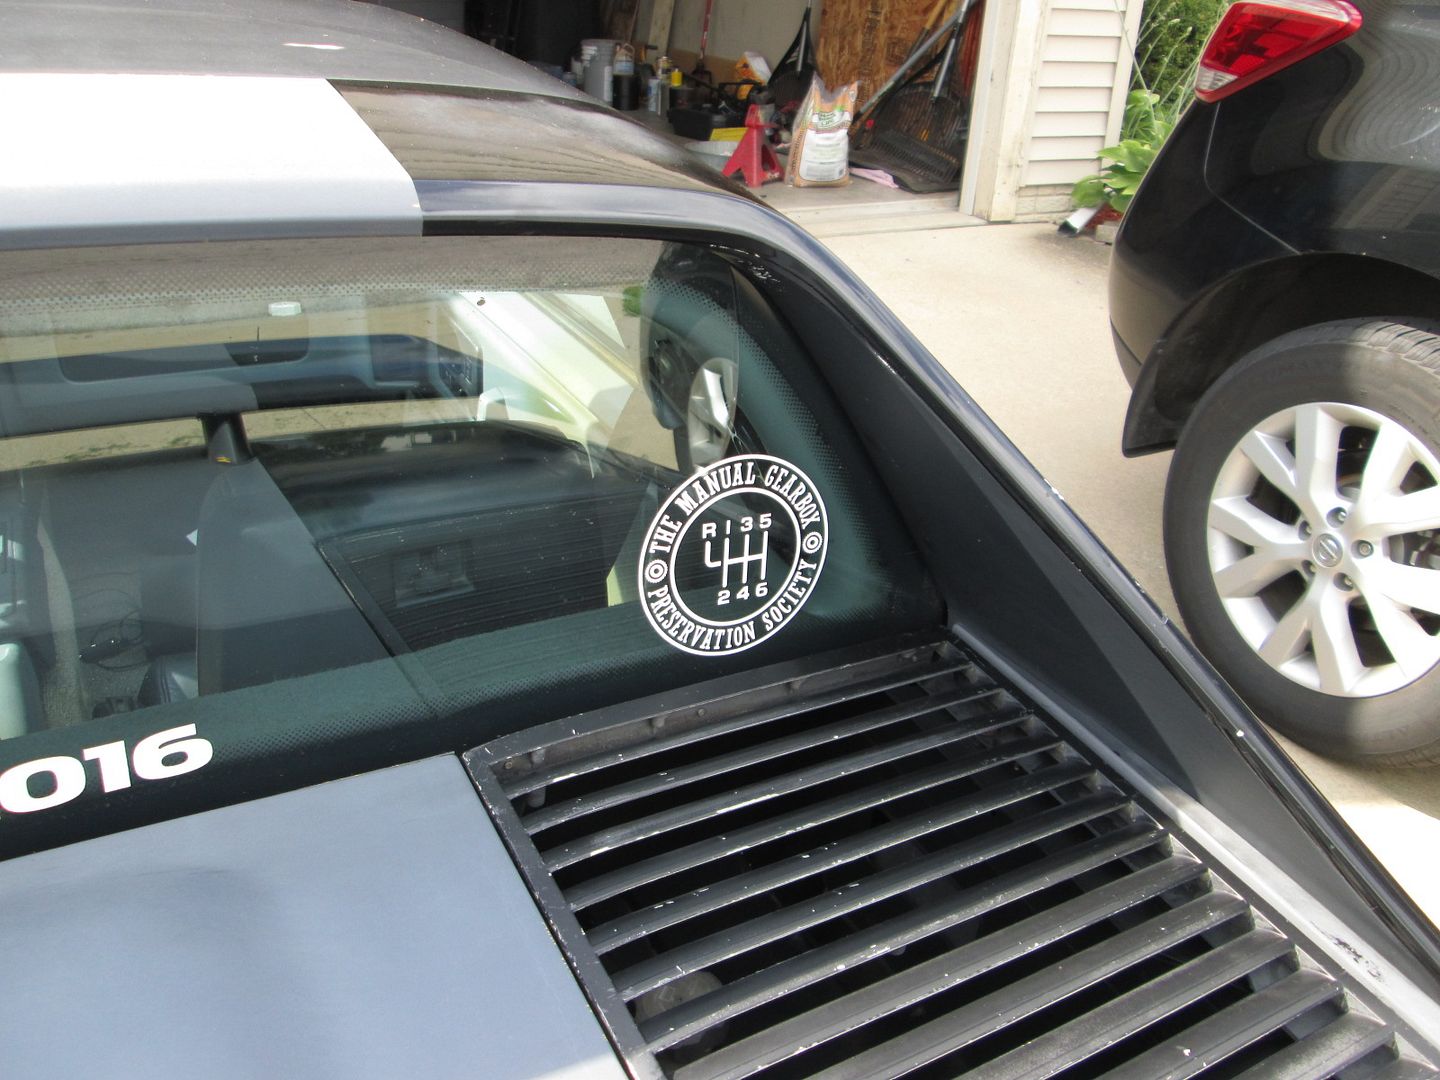
On the way home from the HRPT, I met the family at the St. Louis Arch and a guy there was wearing a shirt with a "Manual Gearbox Preservation Society" logo. It had the proper 6 speed shift pattern as the F40, so I told the wife to find it and buy me a shirt. Well, they also have graphics, so she got me one of those too! http://thecurbshop.com/collections/tmgps
The top of the lift pad is only 2 5/8" tall. The body stays under 3" tall for most of its length, until it gets to the rear portion where its height increases quickly. The lift height is 23 3/4"
Will you be going to any of the autocross events in August? I would love to see what your car is capable of with the v8 and suspension mods you have. I have been going to events in Rantoul for over 10 years on and off with my blue 87GT.
Will you be going to any of the autocross events in August? I would love to see what your car is capable of with the v8 and suspension mods you have. I have been going to events in Rantoul for over 10 years on and off with my blue 87GT.
August isn't looking good, but the next Rantoul event is the 20th and 21st so I still have a couple of weeks to decide. This is the busiest time of the year for my day job and I have several fiero R&D projects underway which are taking up my free time.
I really enjoy the autocrosses, but I leave the house about 8:30 AM and get back about 3:30 to 4 PM and spend a total of about 10 minutes running around the course during that time (at least that has been my experience). That is a pretty significant time commitment for a a few minutes of driving fun vs. the progress I could make on R&D projects during the 8 hrs.
PM me your email address or send me an email at fieroguruperformancellc@gmail.com and I will let you know if I decide to go to the event on the 20th or 21st.
Been a while since I updated this... not much new with the LS4/F40 Fiero... just racking up the miles.
My 97 Silverado Z71 4x4 lost 3rd and 4th gears in the transmission... truck has 285K and starting to rust pretty bad. Looking for a 2007ish crew cab Colorado 4x4 to replace it with. I am looking for a southern truck and will likely do a fly down/drive back deal when I find the right one.
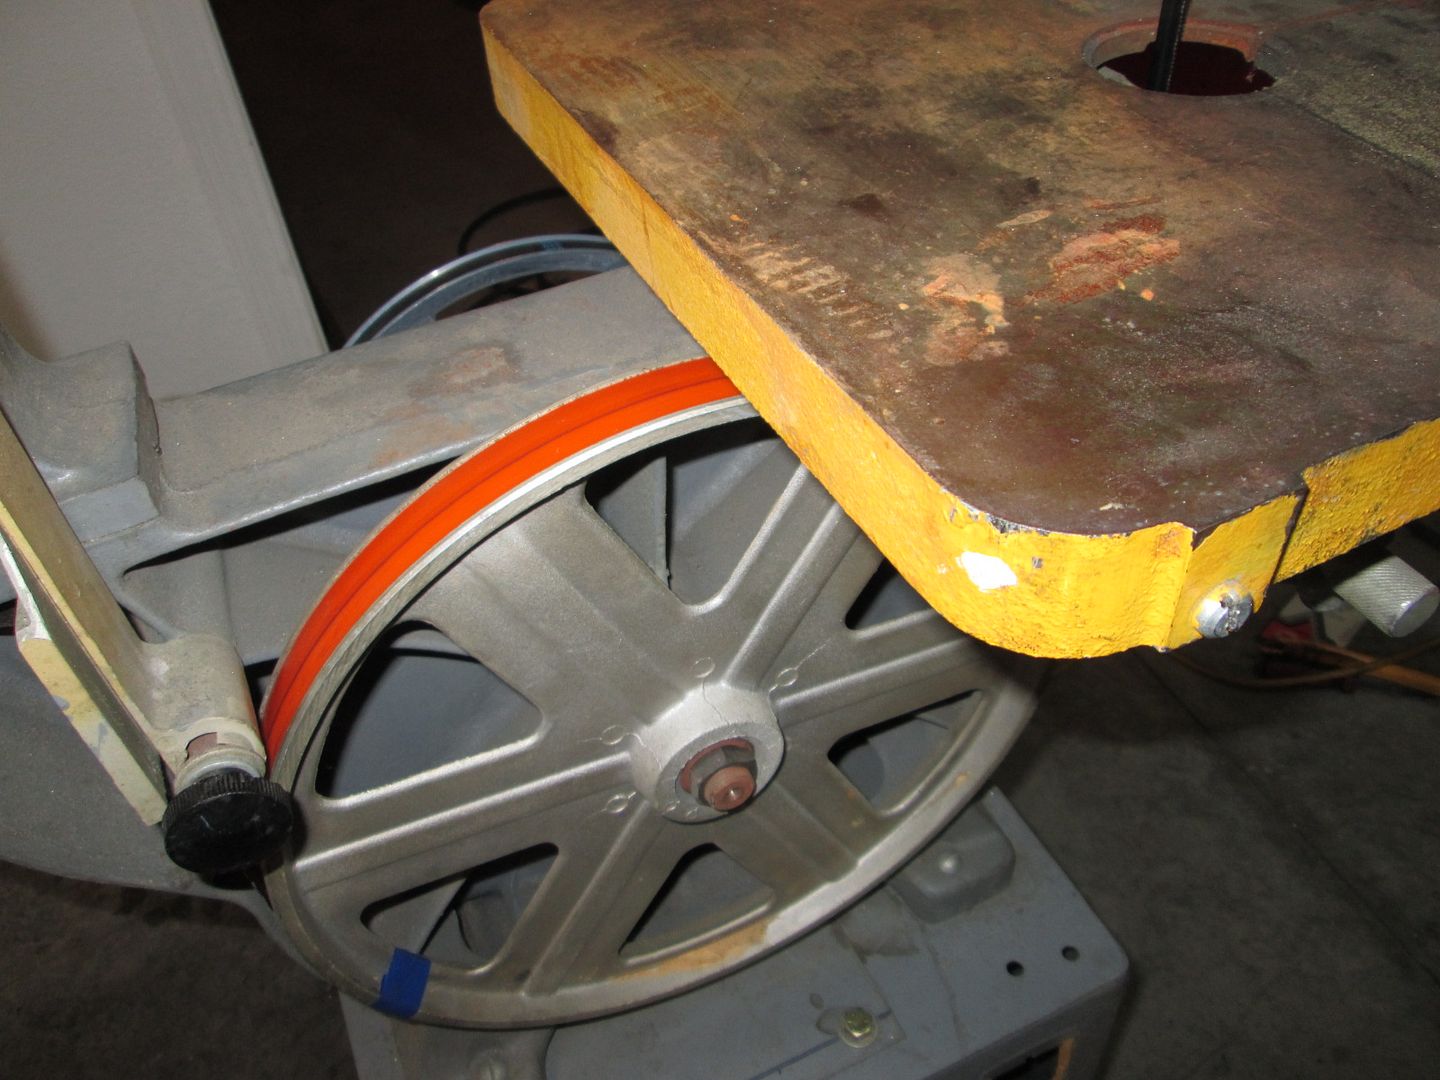
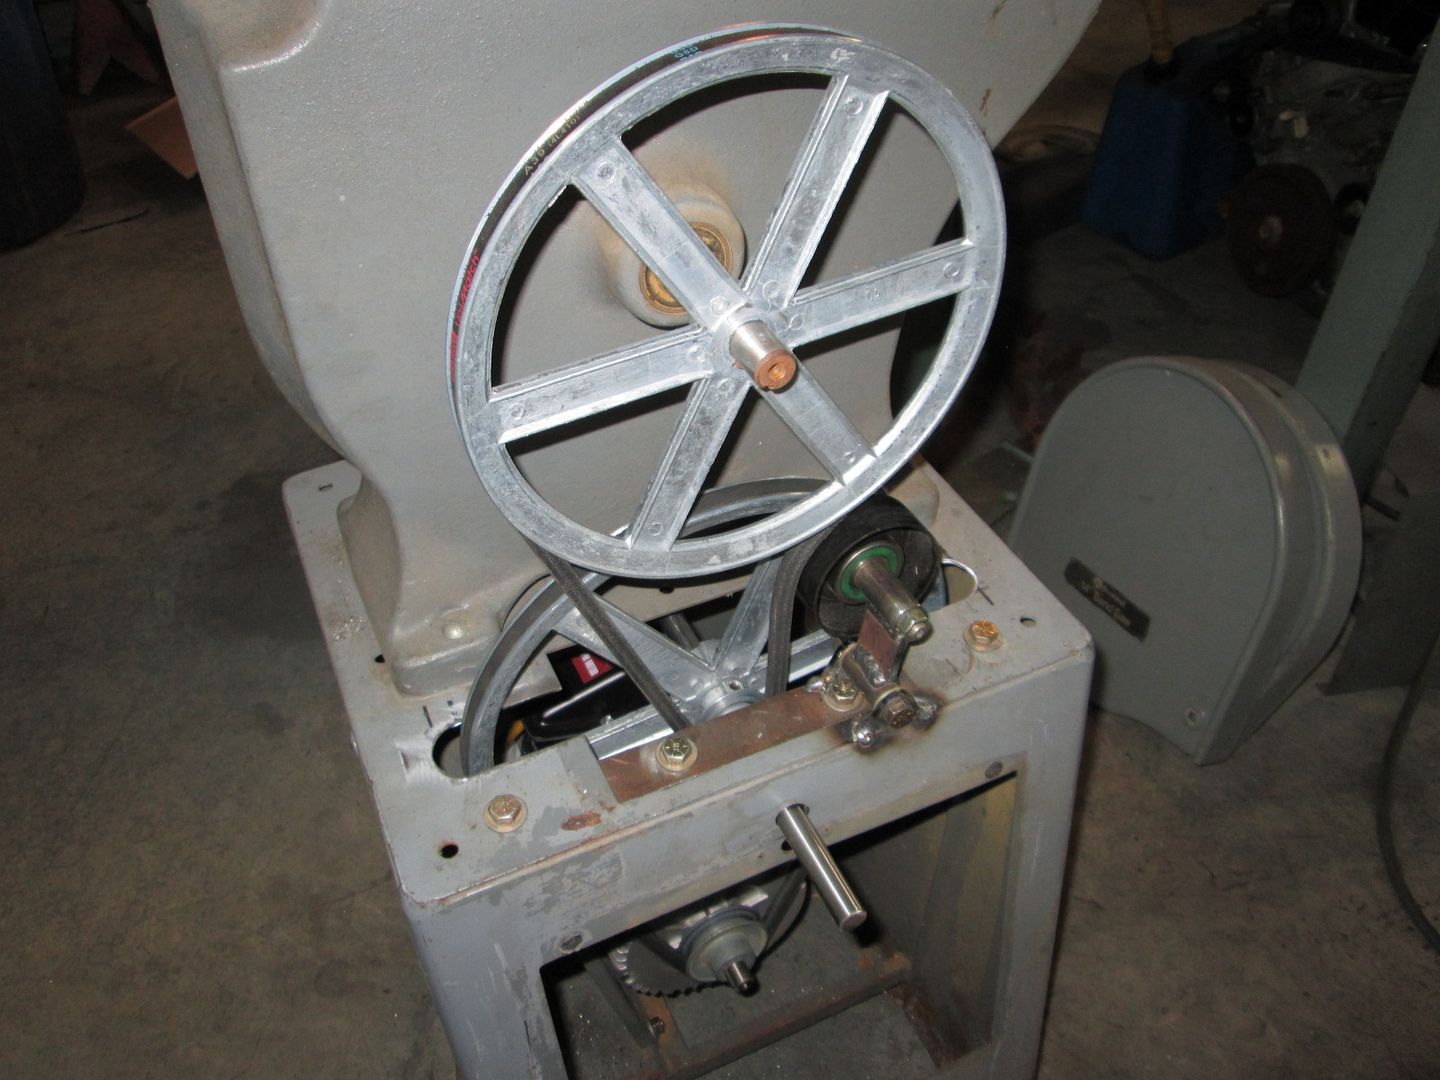
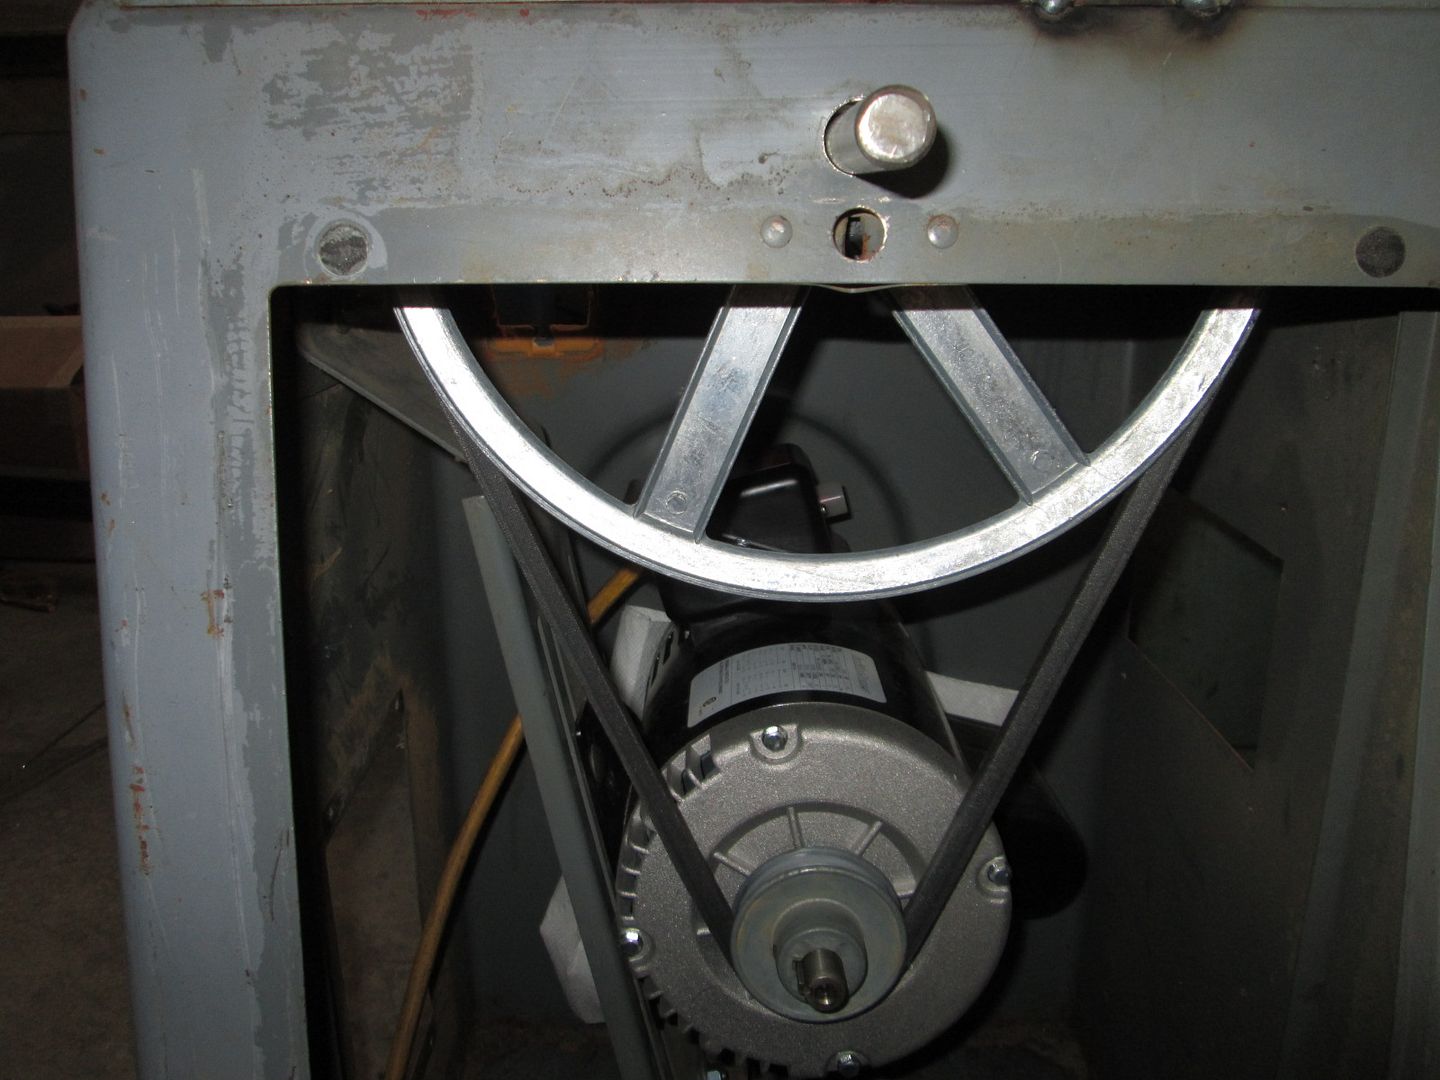
Had a little free time and decided to get the Rockwell 14" bandsaw actually running. I picked it up 4+ years ago on craigslist as surplus from a school, but it was setup for wood (3000 ft/min blade speed) and 3 phase. To convert it to a metal bandsaw, I needed to slow it way, way down. Right now it is 252 ft/min and I have a smaller pulley for the motor to get it slower.
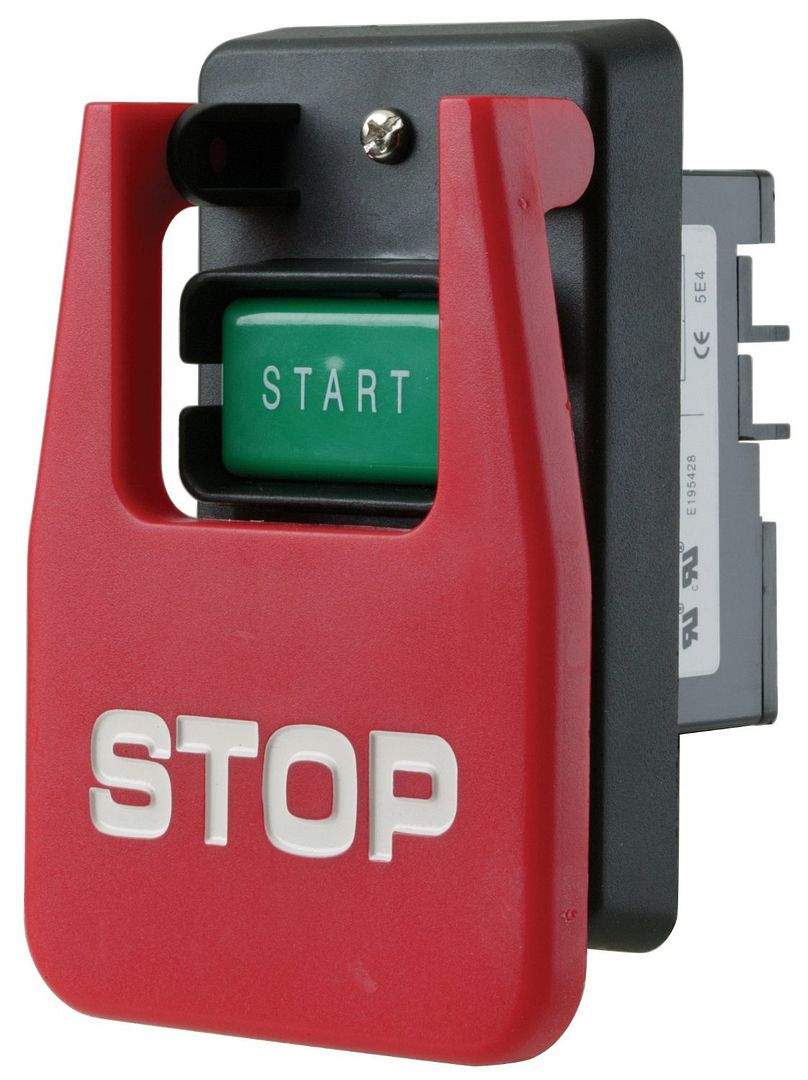
New 120V motor, bi-metal blade, poly tires for the wheels, fabed up the jack shaft, assortment of pulleys, a little trim work on the base to fit the pulleys, and used a LS4 accessory pulley as a tensioner!... I still need to fab up a new belt guard, get the filler puck for the center hole around the blade, and I am waiting for my new start/stop switch to show up.
One of the casualties of this project was my 1/2" drill. Can't remember how old it is, but I think I got it about the same time as my dewalt saws all - probably 15 or so years ago. I have abused it relentlessly and it finally stopped working. I have been abusing a 4 1/2" Hitachi angle grinder for 5+ years and quite happy with it (went through several dewalts and others before this one), so I decided to tryout their 1/2" drill. Time will tell how this one holds up, but it spun the 1 3/8" hole saw though the base in a couple of spots.
Next tool related project is to get my 6" Dayton belt sander running as well. It is already 120V, just needs a new motor (1 1/2 hp and 3450 rpm). I did order the same start/stop switch for it so as well.
[This message has been edited by fieroguru (edited 09-04-2016).]
I know that several of us w/ 88's and LS motors want to run larger rims/tires in the rear. Some have taken the time to measure the offset and order custom rims to take advantage of the space available. Looking forward to your redesign of the rear trailing link to allow a wider rim/tire. I already have the AMS/Held tubular lateral - trailing link setup w/ heim joint ends, similar to your design, and have wondered what can be done to make some more room. Not sure if a "bent" arm would work, or be a good idea?
I know that several of us w/ 88's and LS motors want to run larger rims/tires in the rear. Some have taken the time to measure the offset and order custom rims to take advantage of the space available. Looking forward to your redesign of the rear trailing link to allow a wider rim/tire. I already have the AMS/Held tubular lateral - trailing link setup w/ heim joint ends, similar to your design, and have wondered what can be done to make some more room. Not sure if a "bent" arm would work, or be a good idea?
Buckling under full throttle acceleration is the only concern with this method. I still need to sit down and do the math to see how much of a concern it would be and what could be done with material diameter and thickness to alleviate. However, any additional tube diameter increases the needed offset. Additionally, I need to decide if I just want to make it work with the current wheel/tire setup or if I want to make it with additional clearance for a future wheel width increase (that would also require other mods).