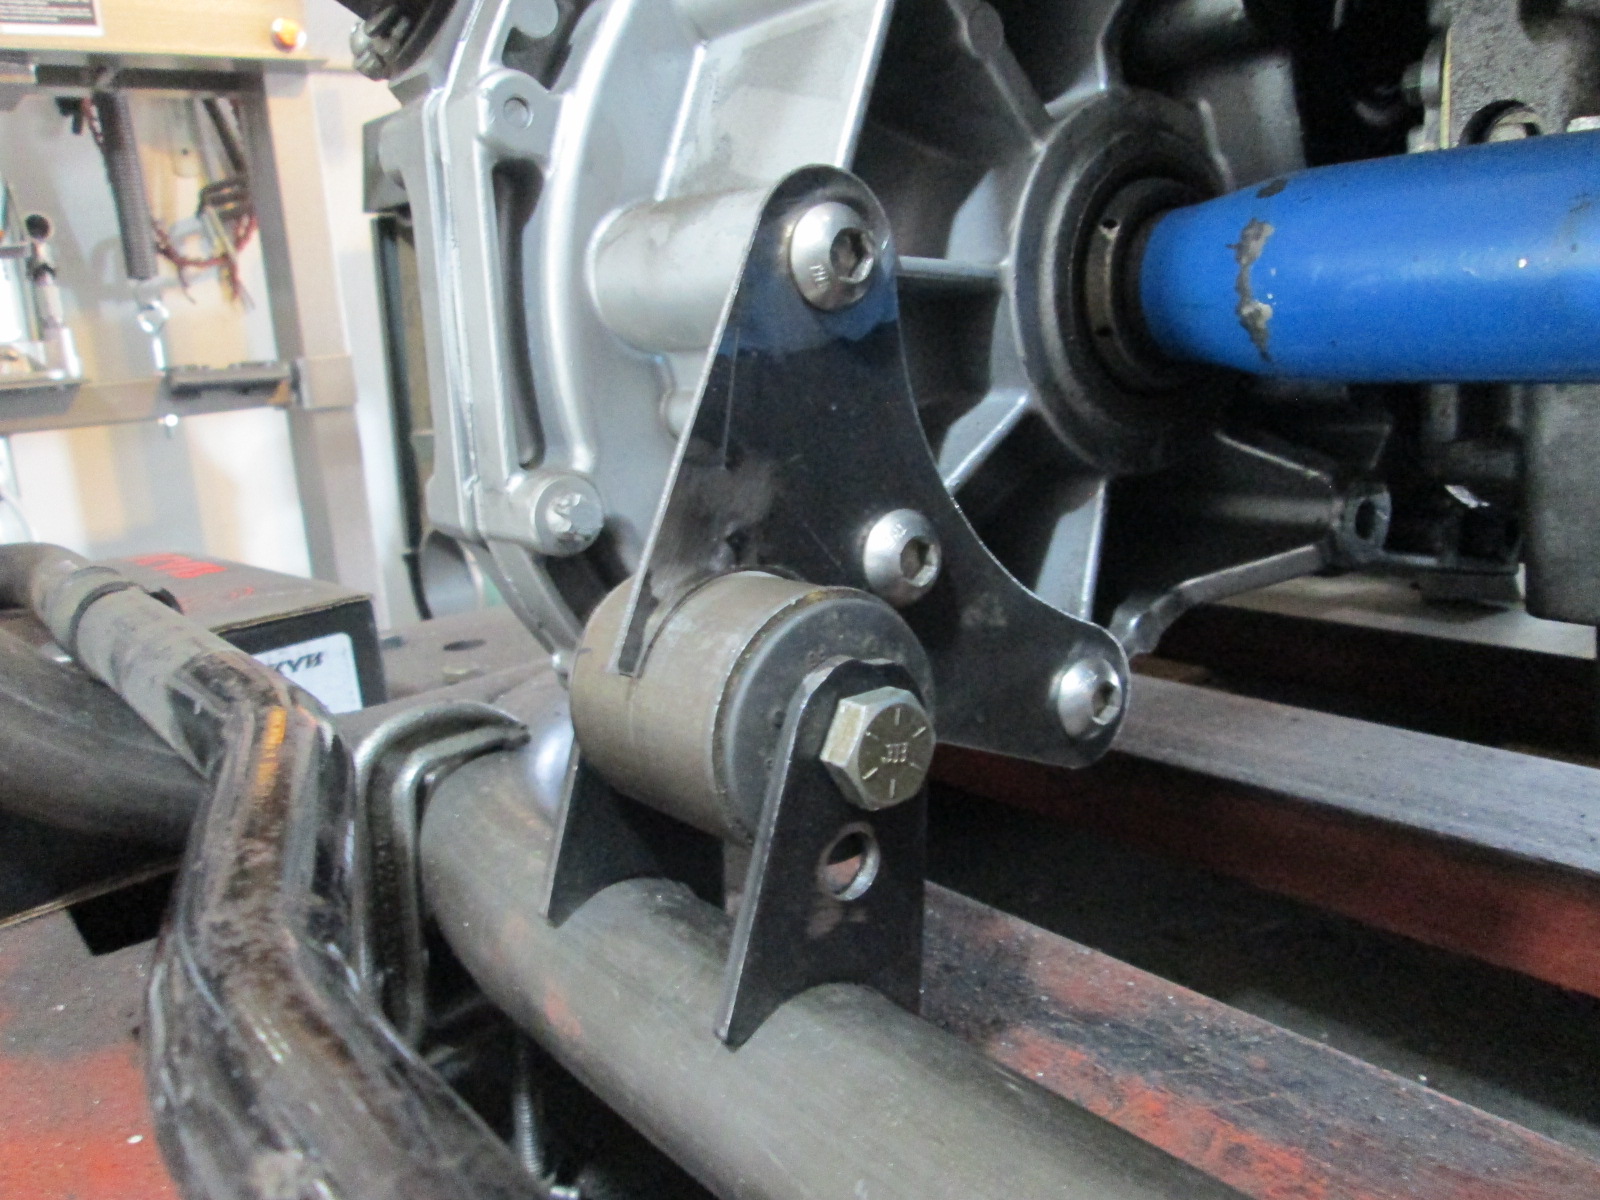
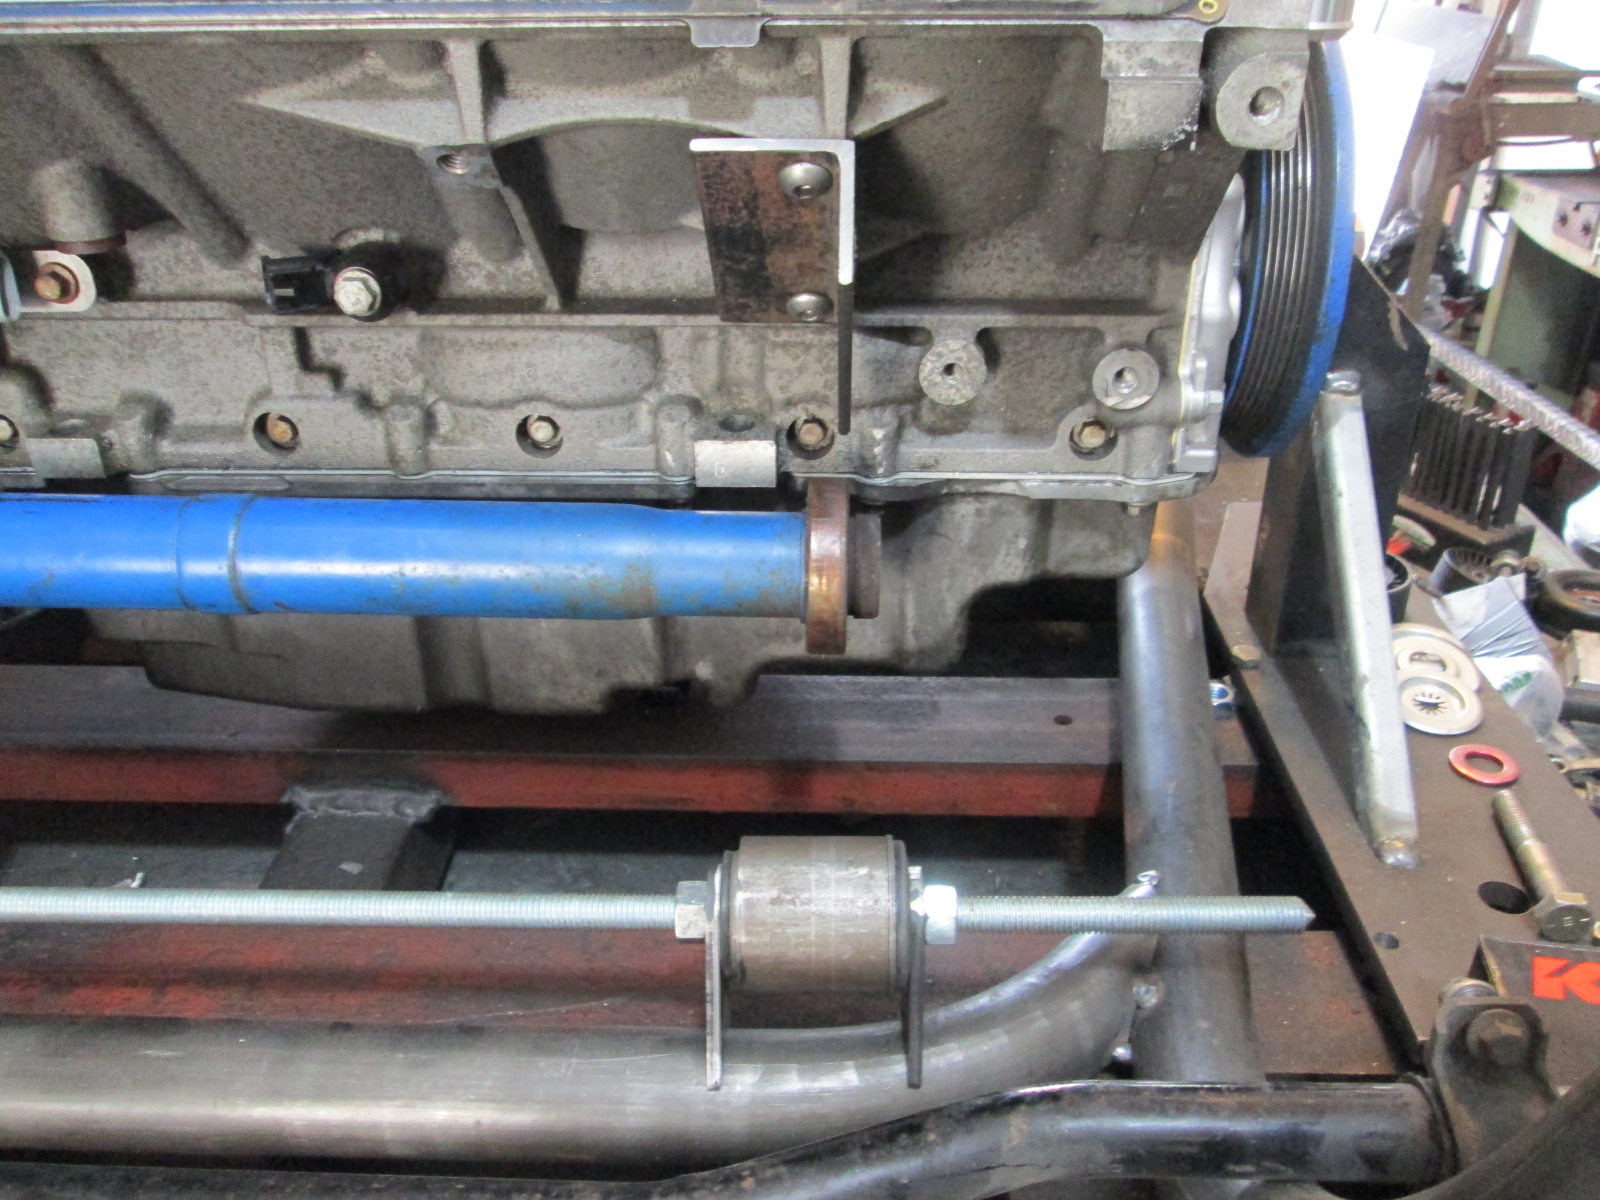
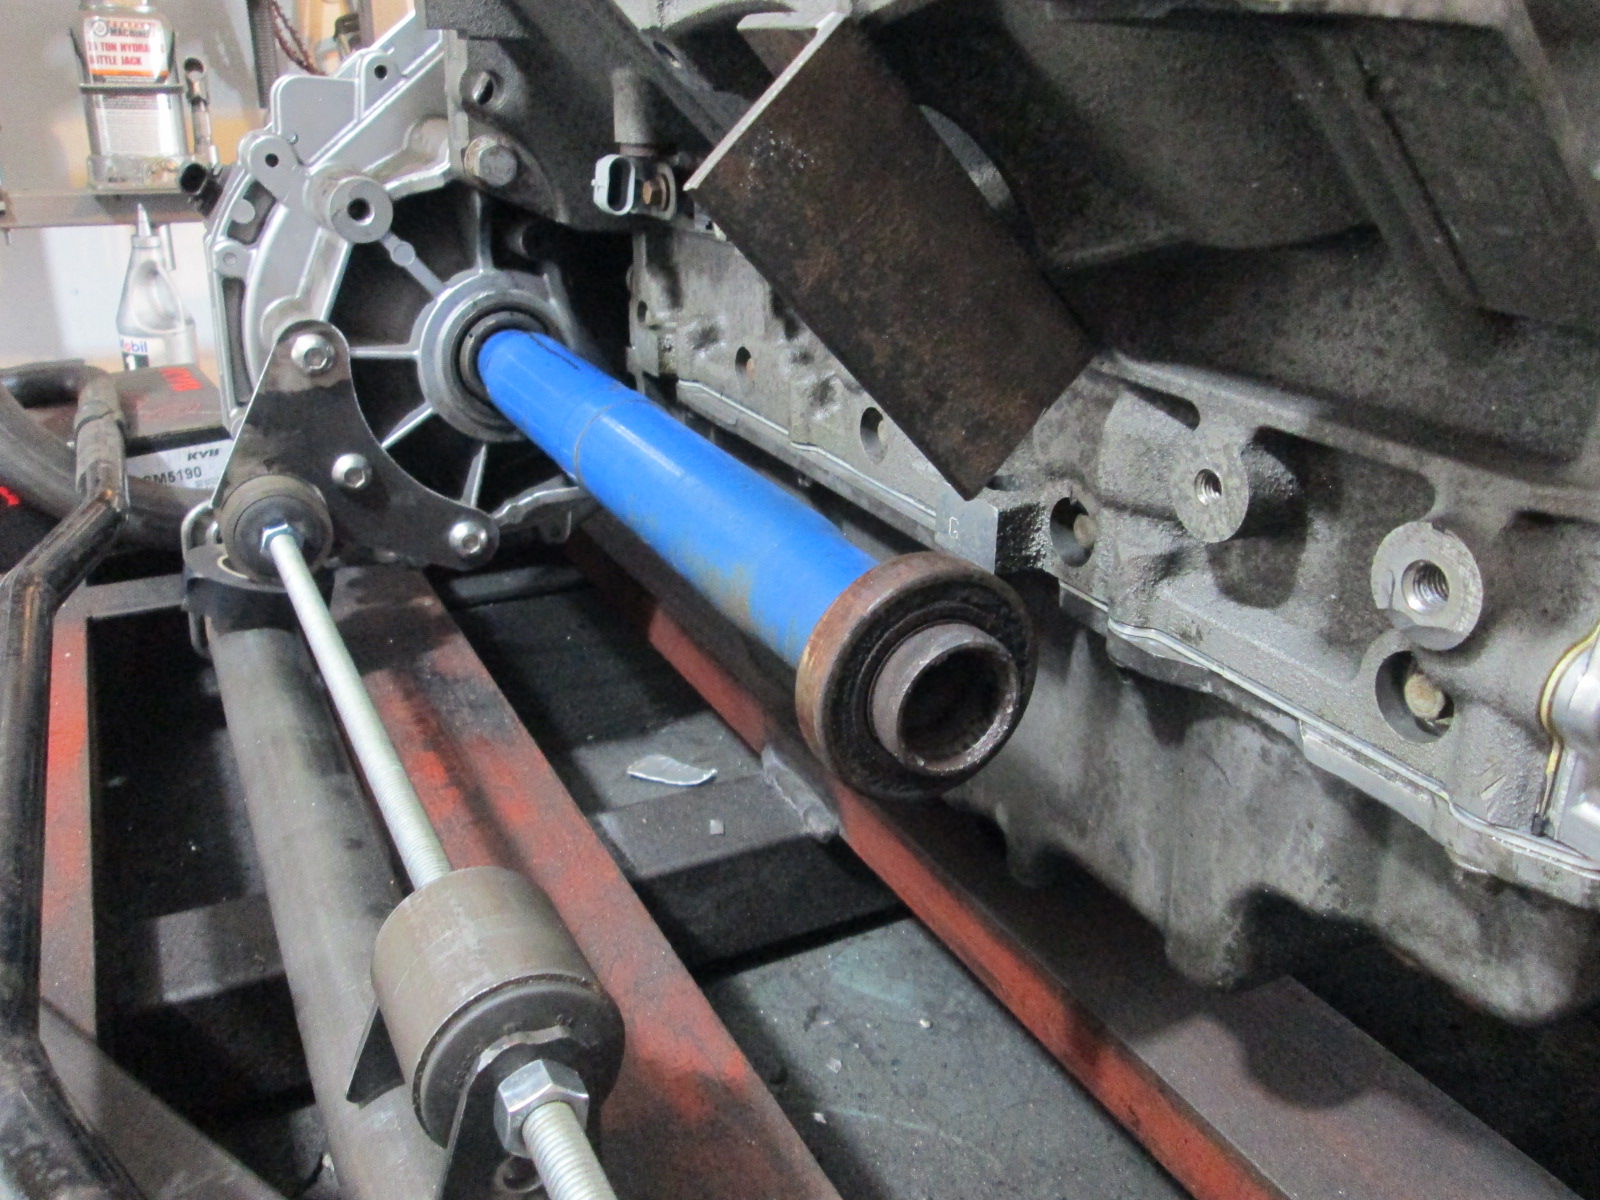
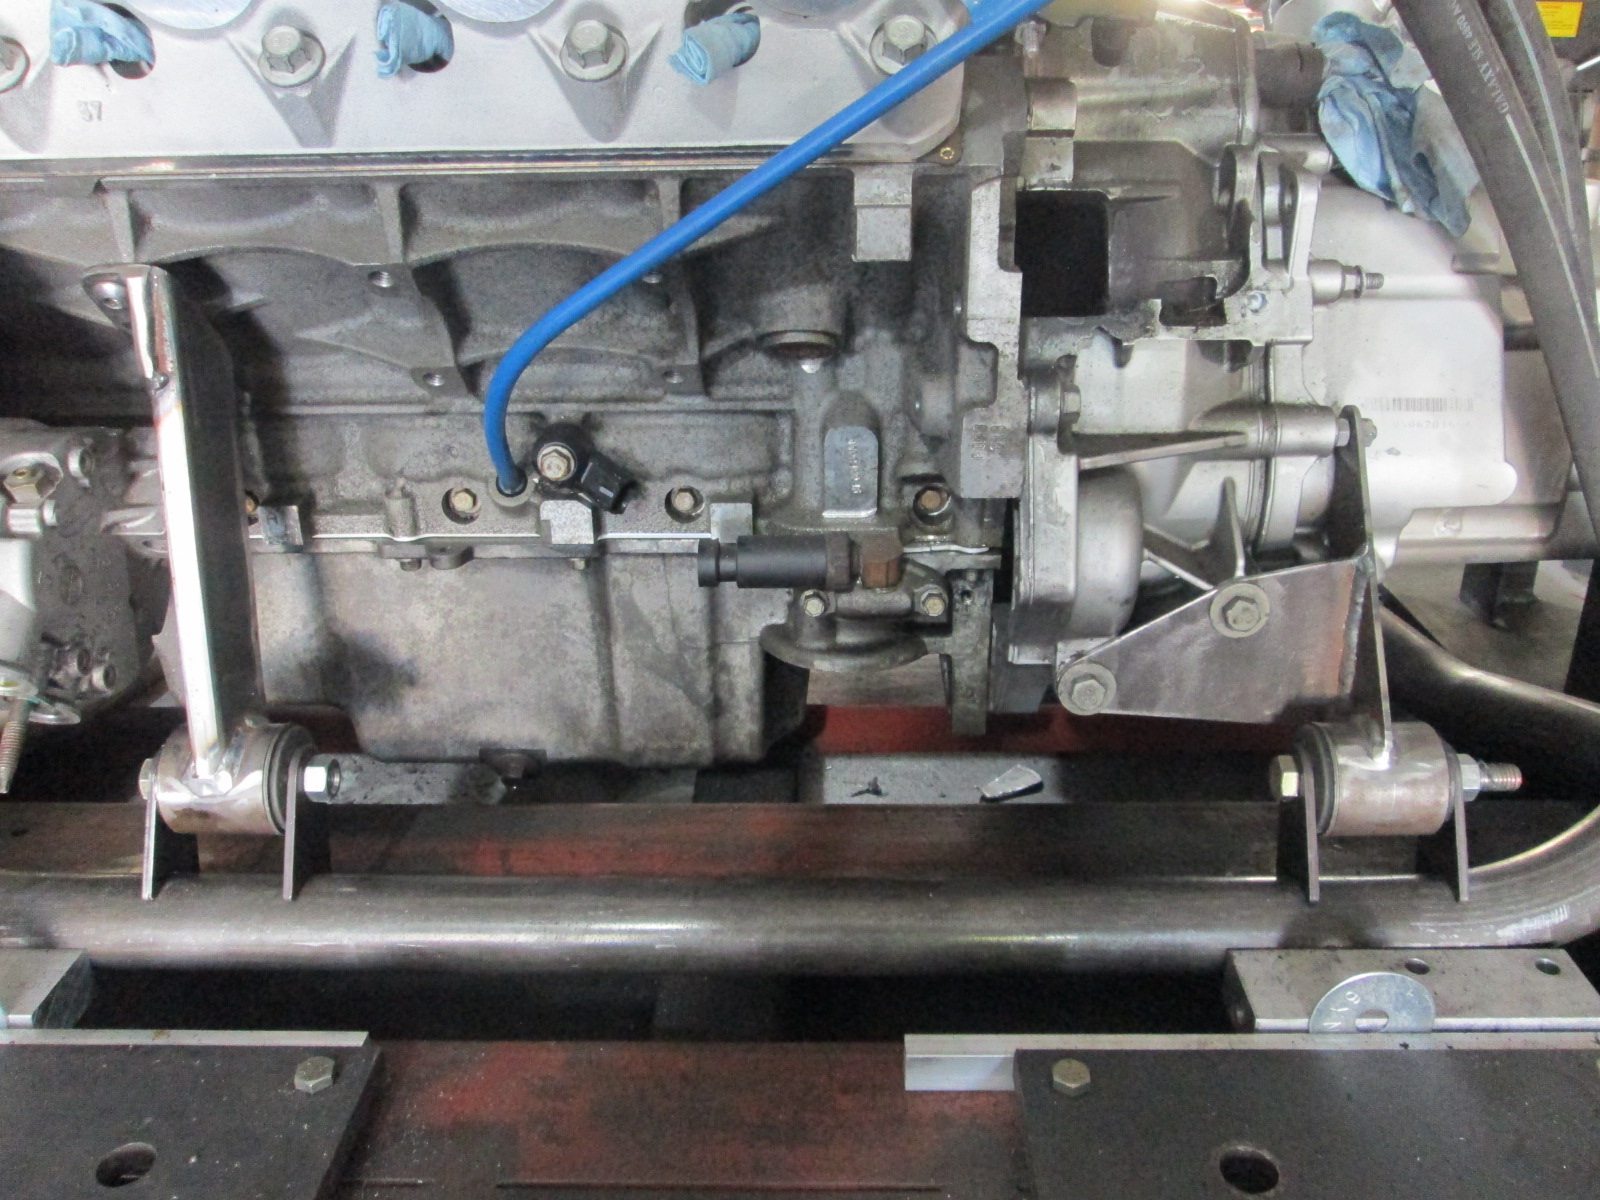
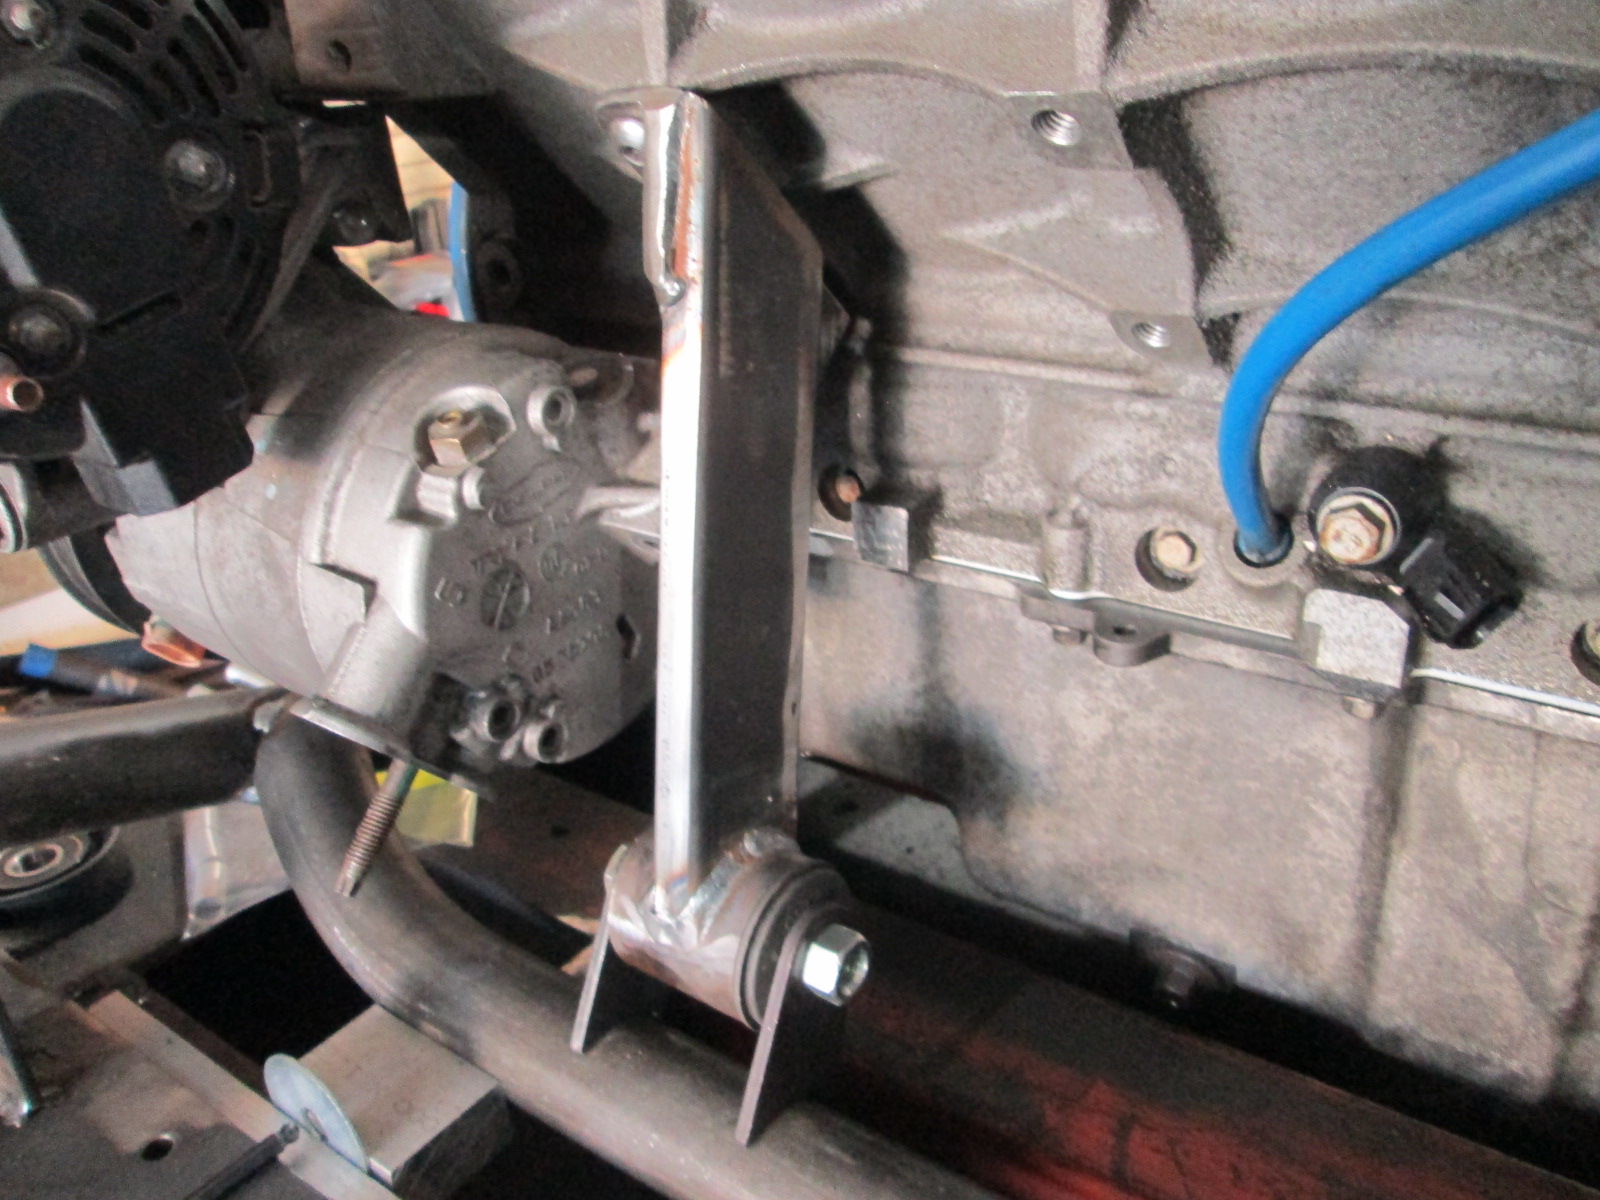
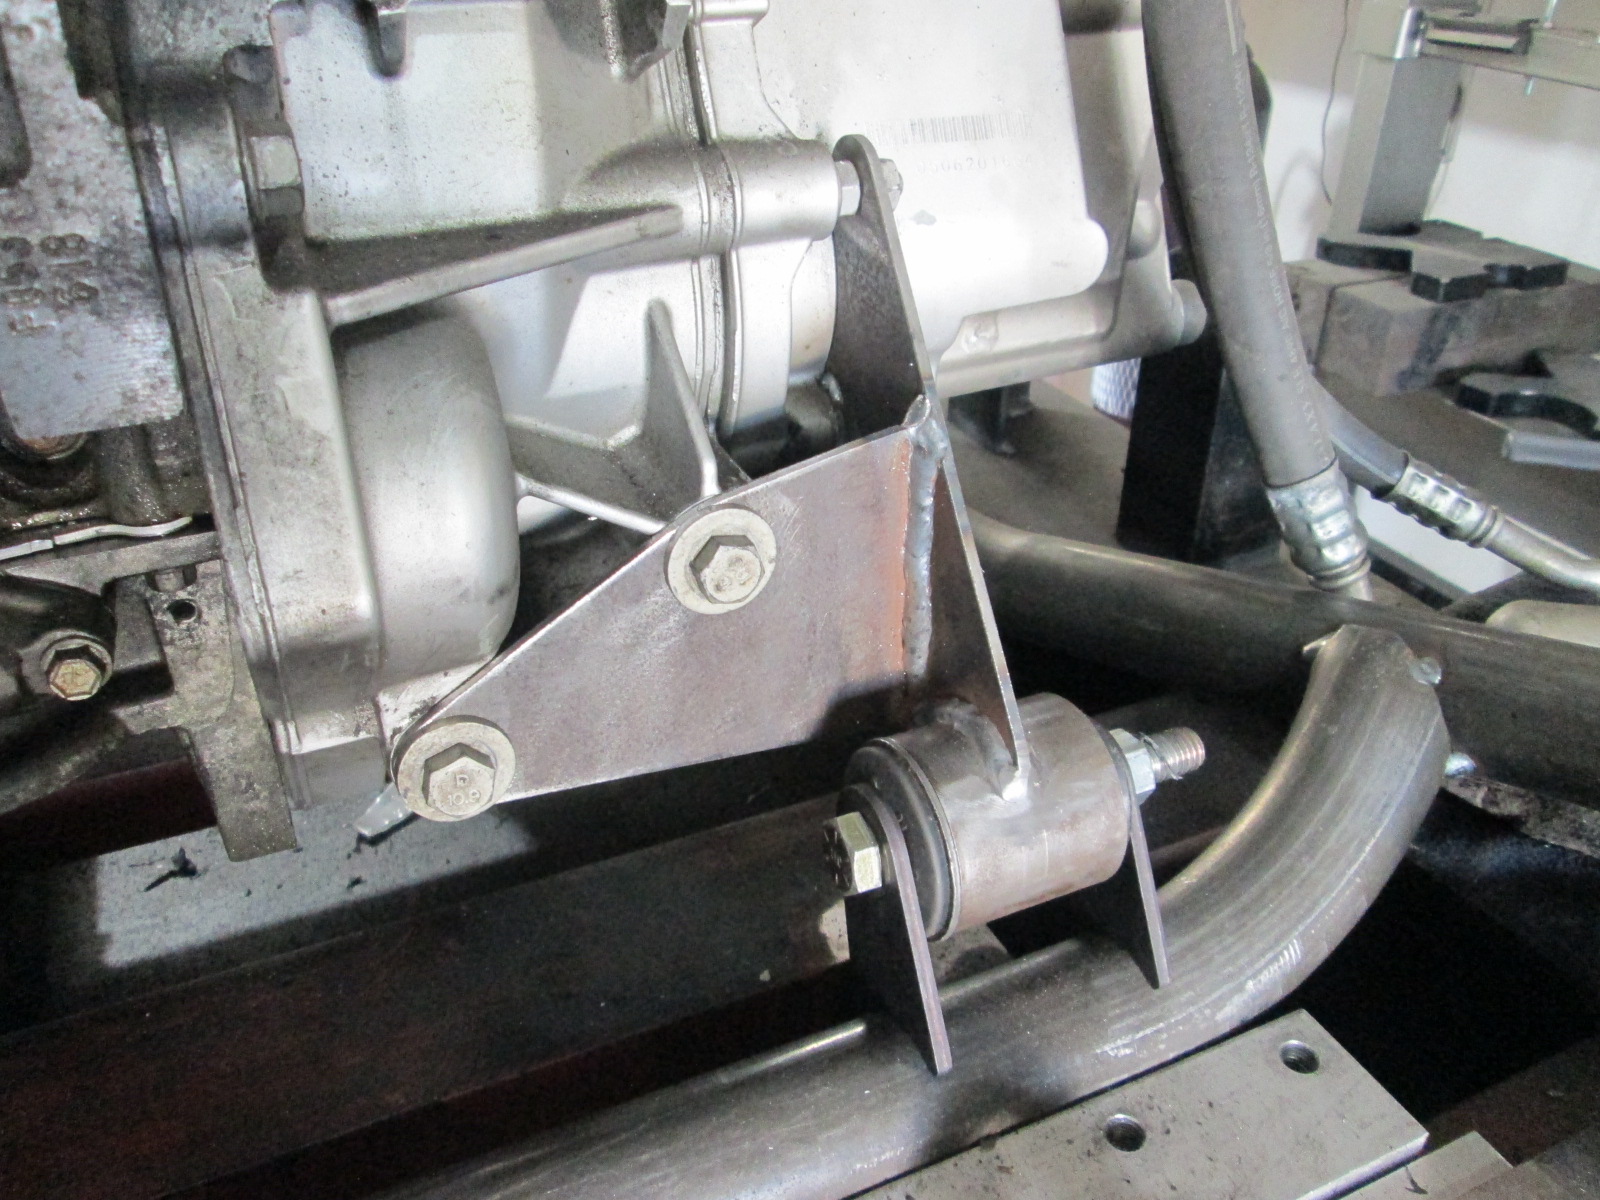
All the mounts are now complete. The other good news is that the new mounts are 9 lbs 0.7 oz lighter than the original ones.
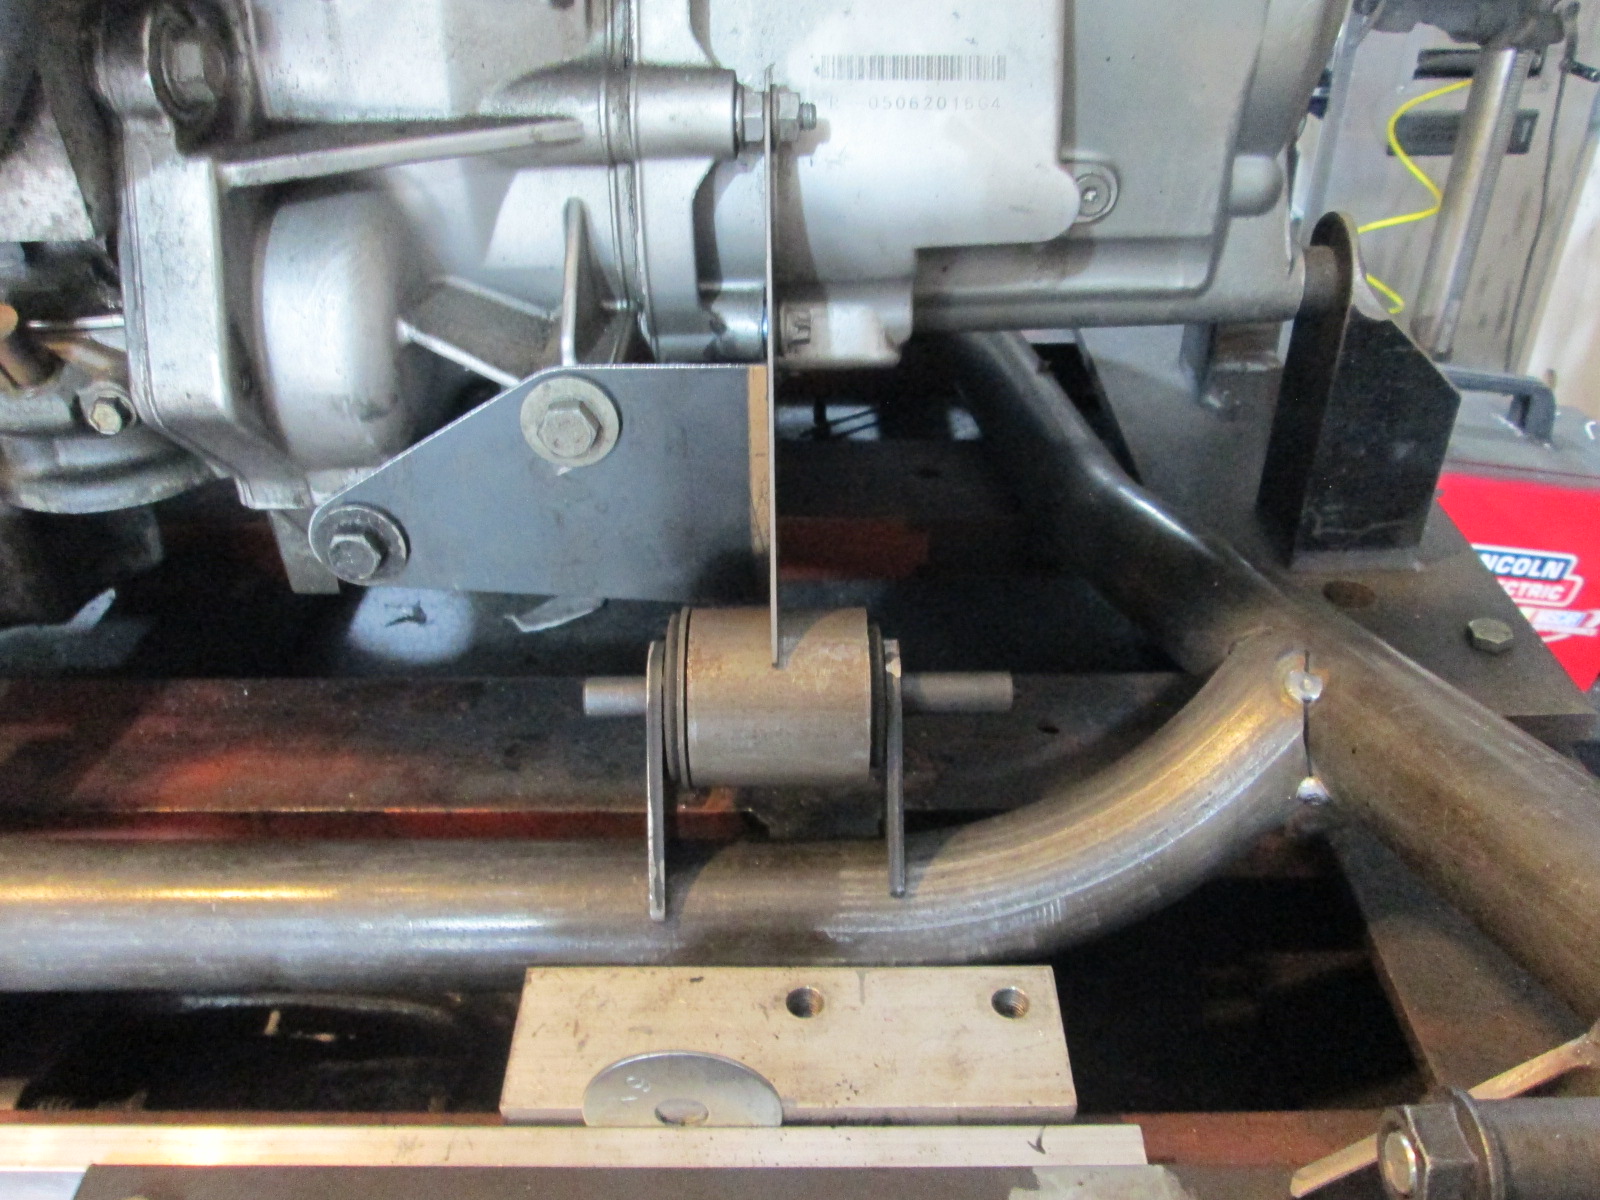
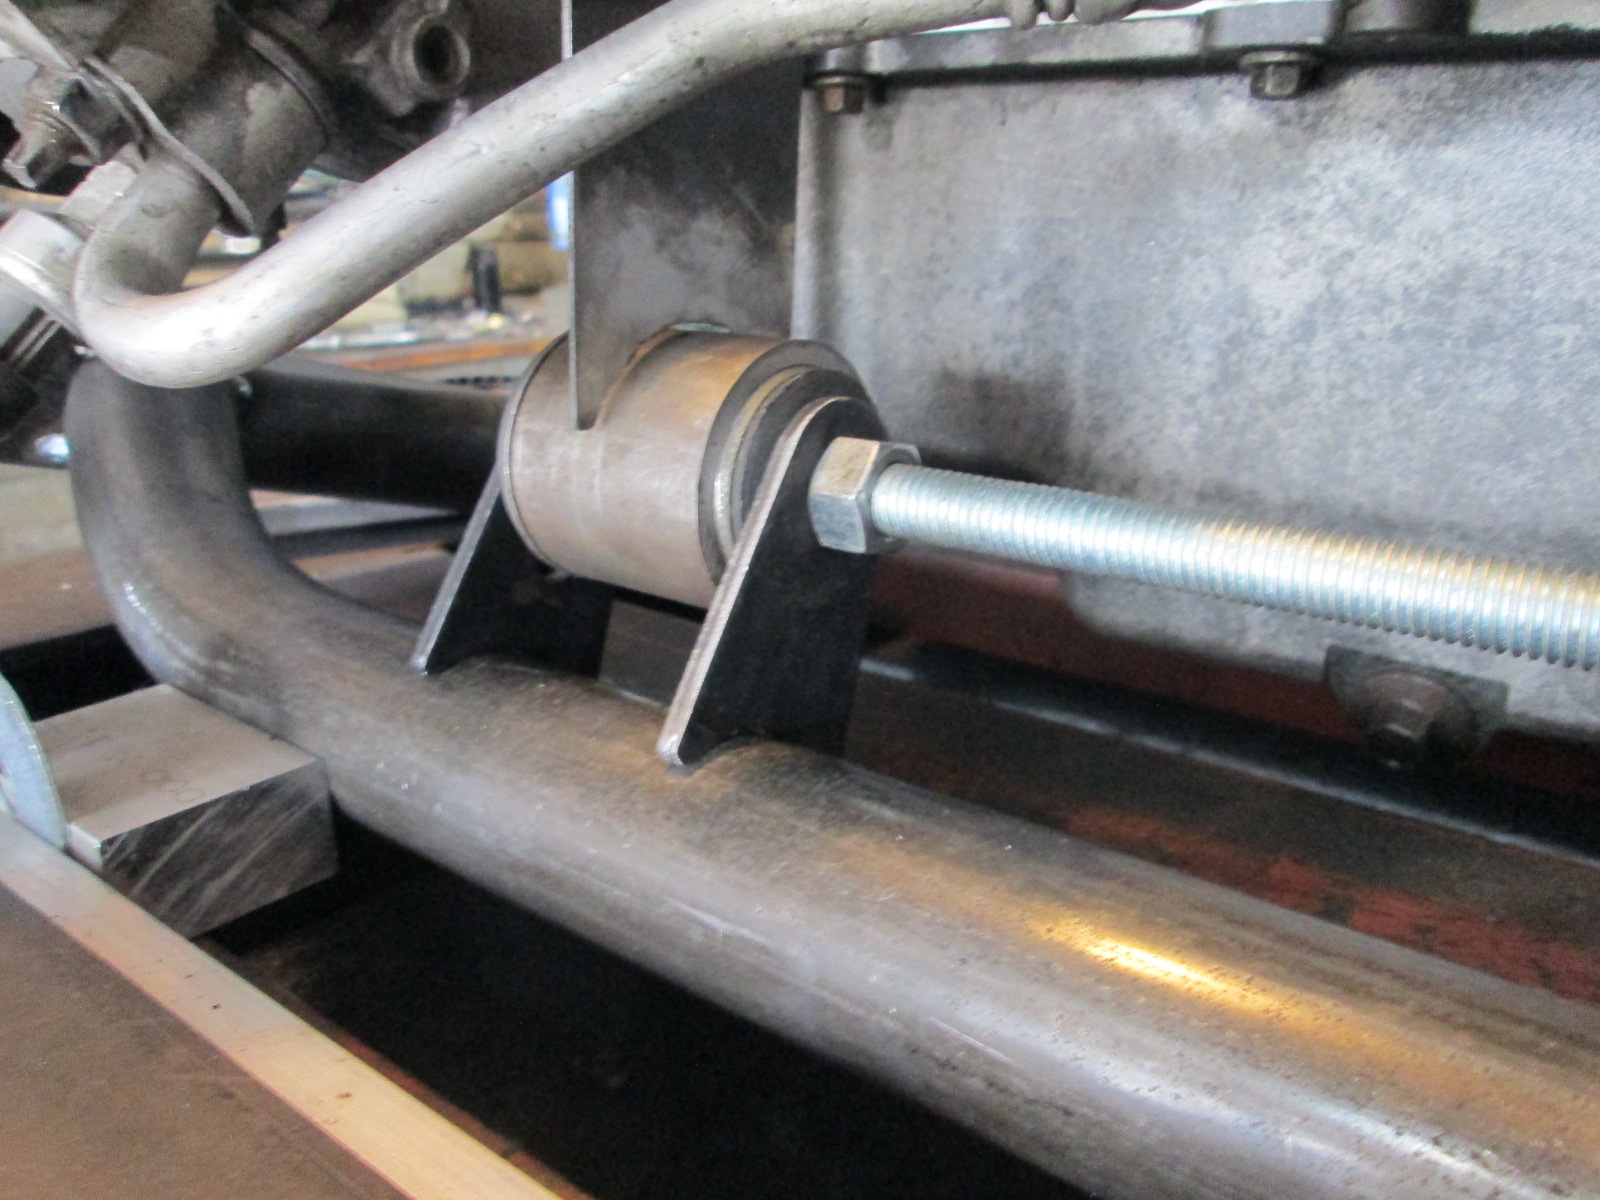
Front Side:
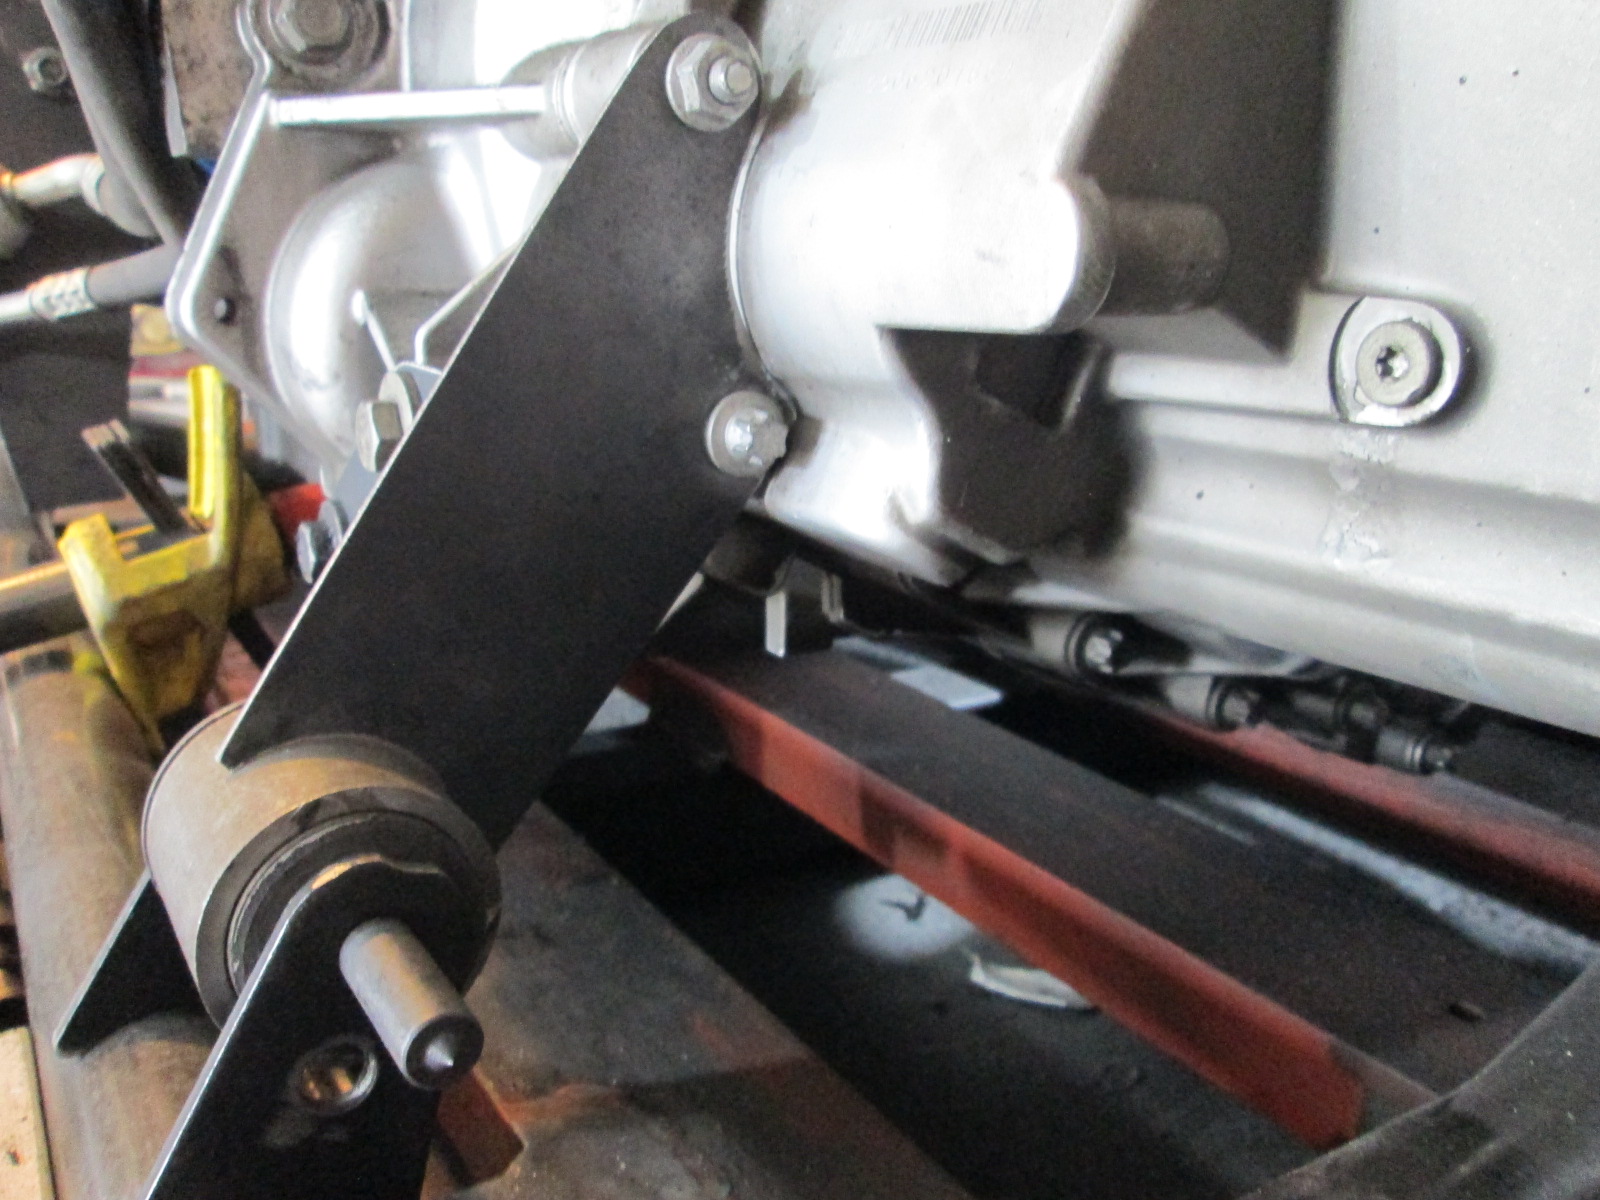
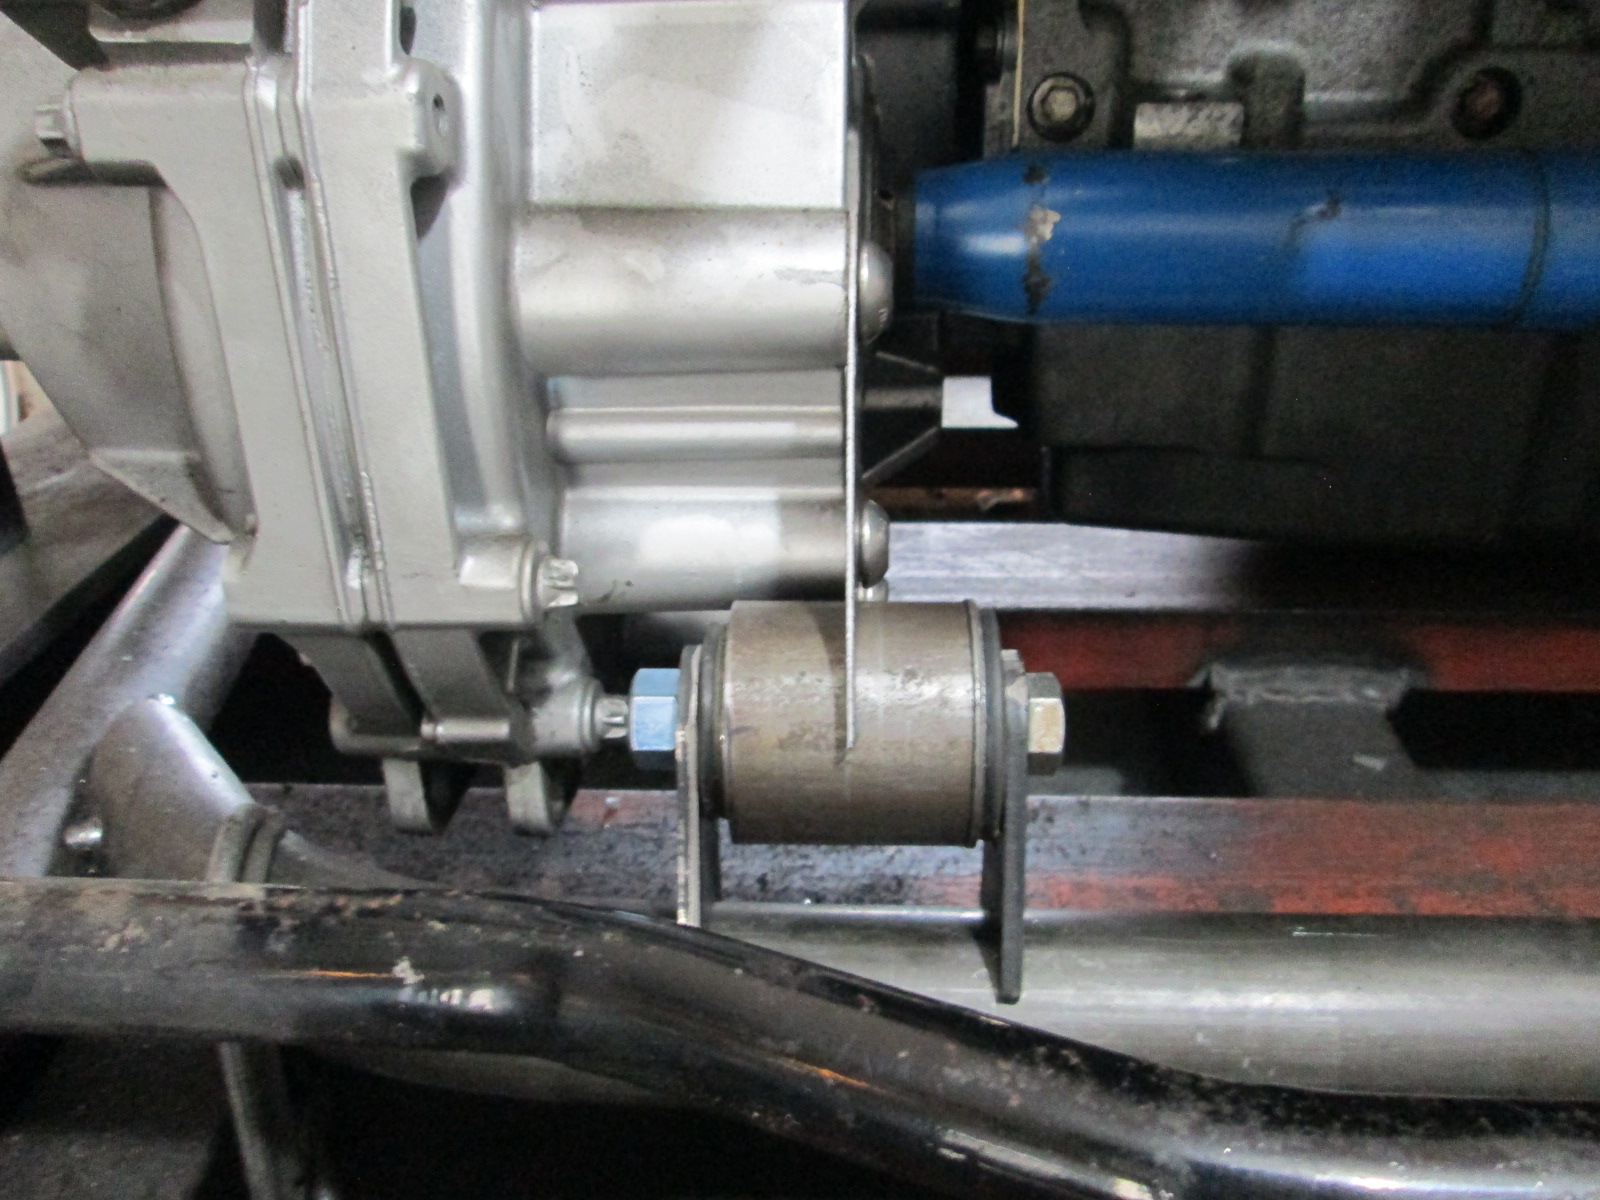
Rear Side:
The next step is to finish tacking the bushing tabs to the front crossmember, then do another test fit so I can locate the 3" muffler to ensure it clears the trunk.
[This message has been edited by fieroguru (edited 09-13-2020).]
Yes, it was a great feeling for the mounts to be done (except paint and final welding on the tabs), but there are a bunch of additional milestones I need to meet before it will be ready to run. Finishing up the cradle to verify additional weight savings as well as the exhaust setup are the next big focus areas.
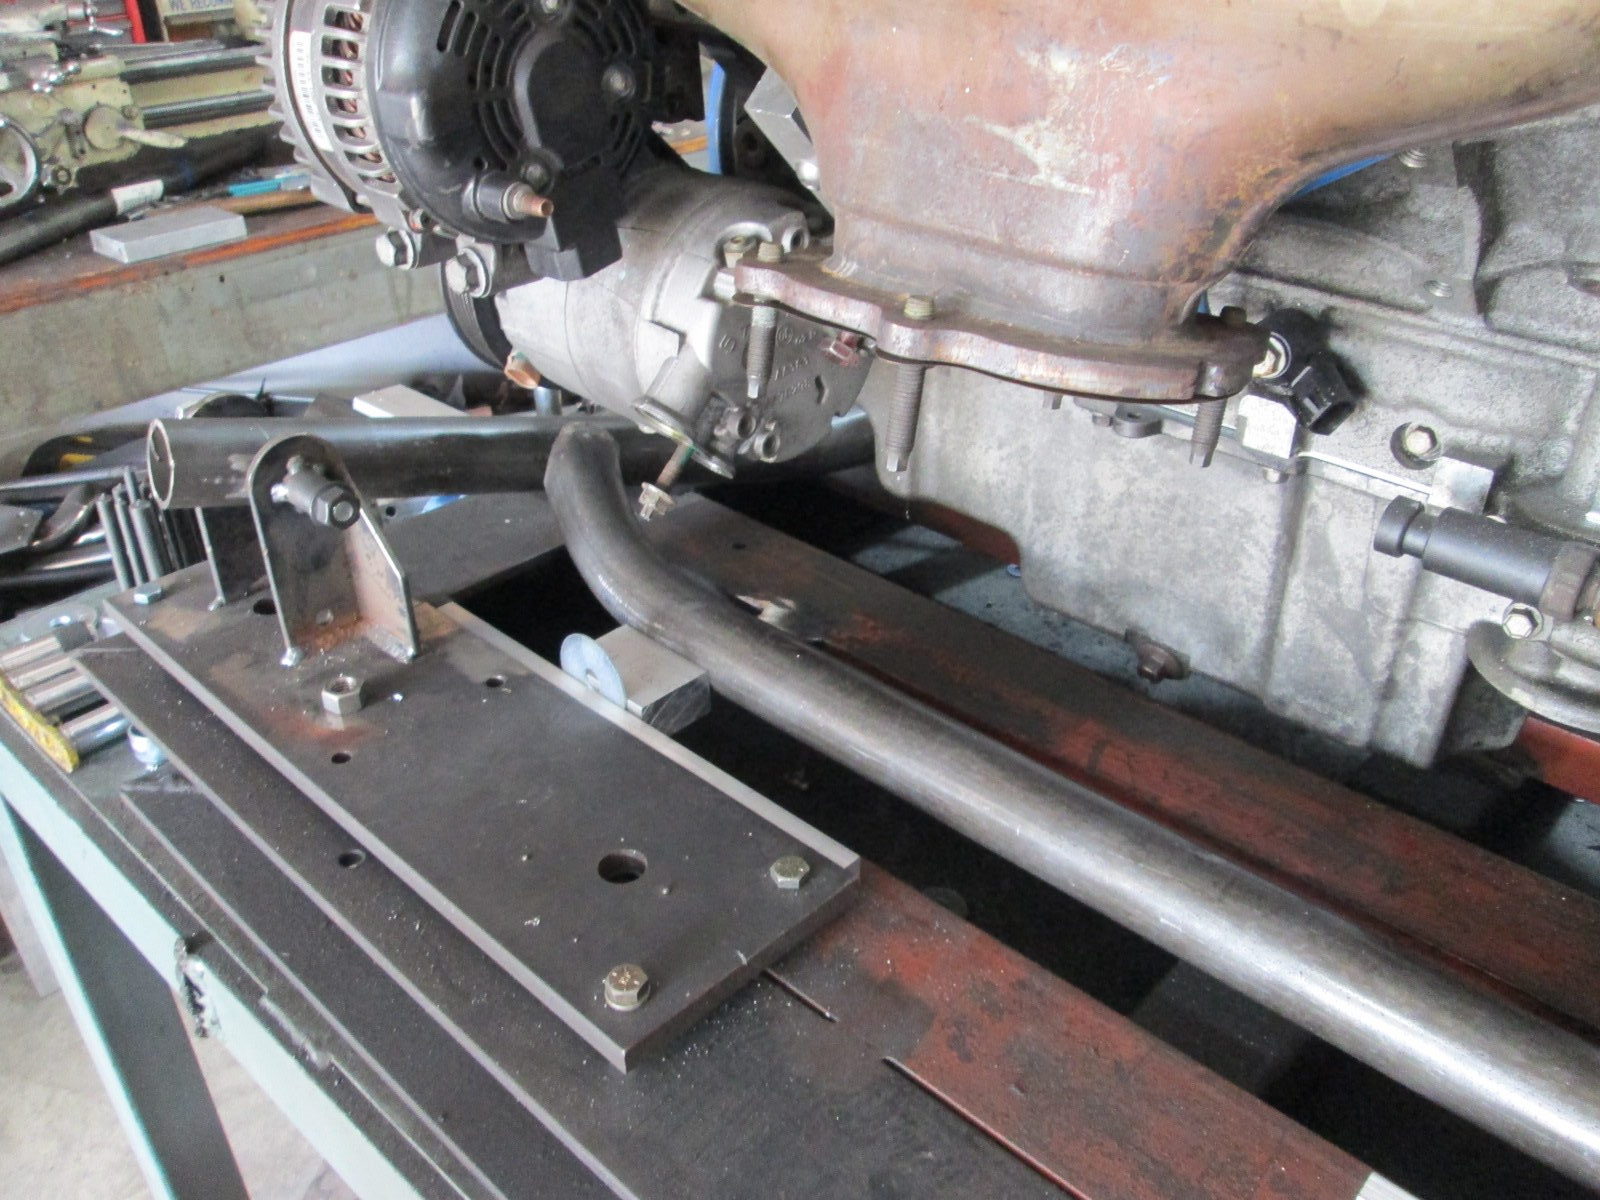
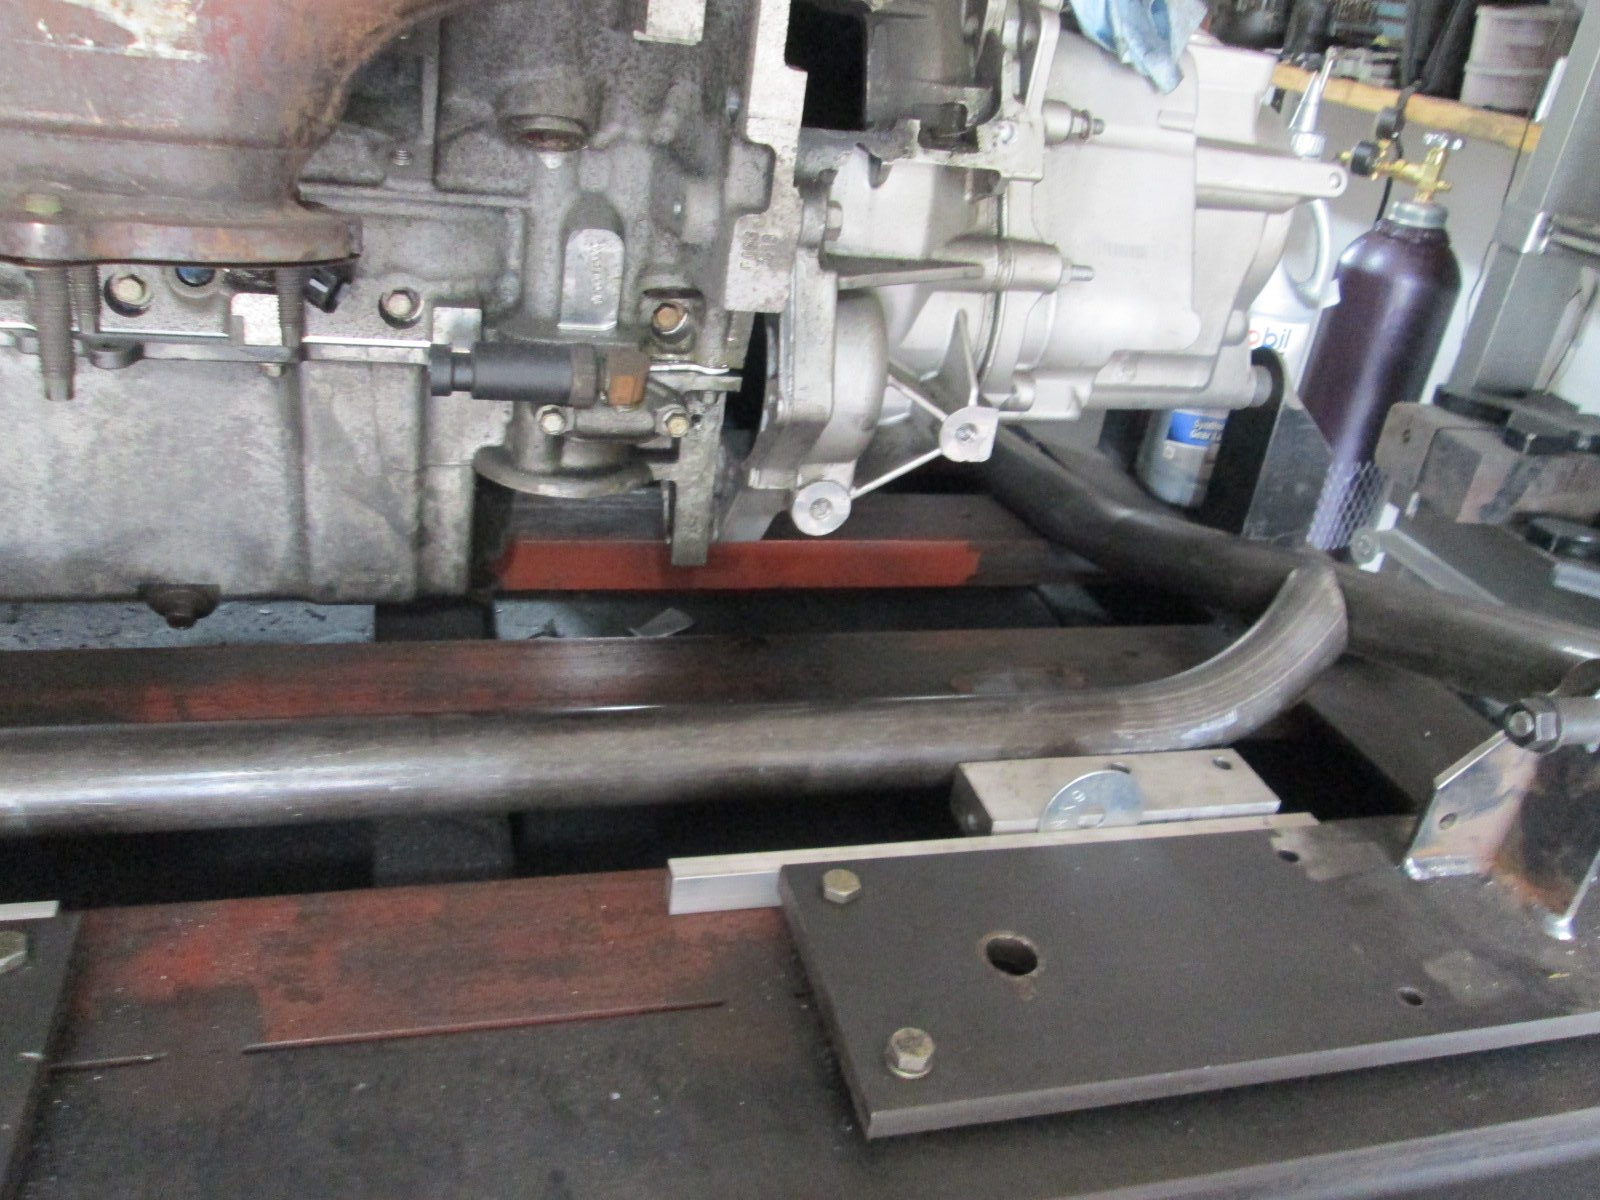
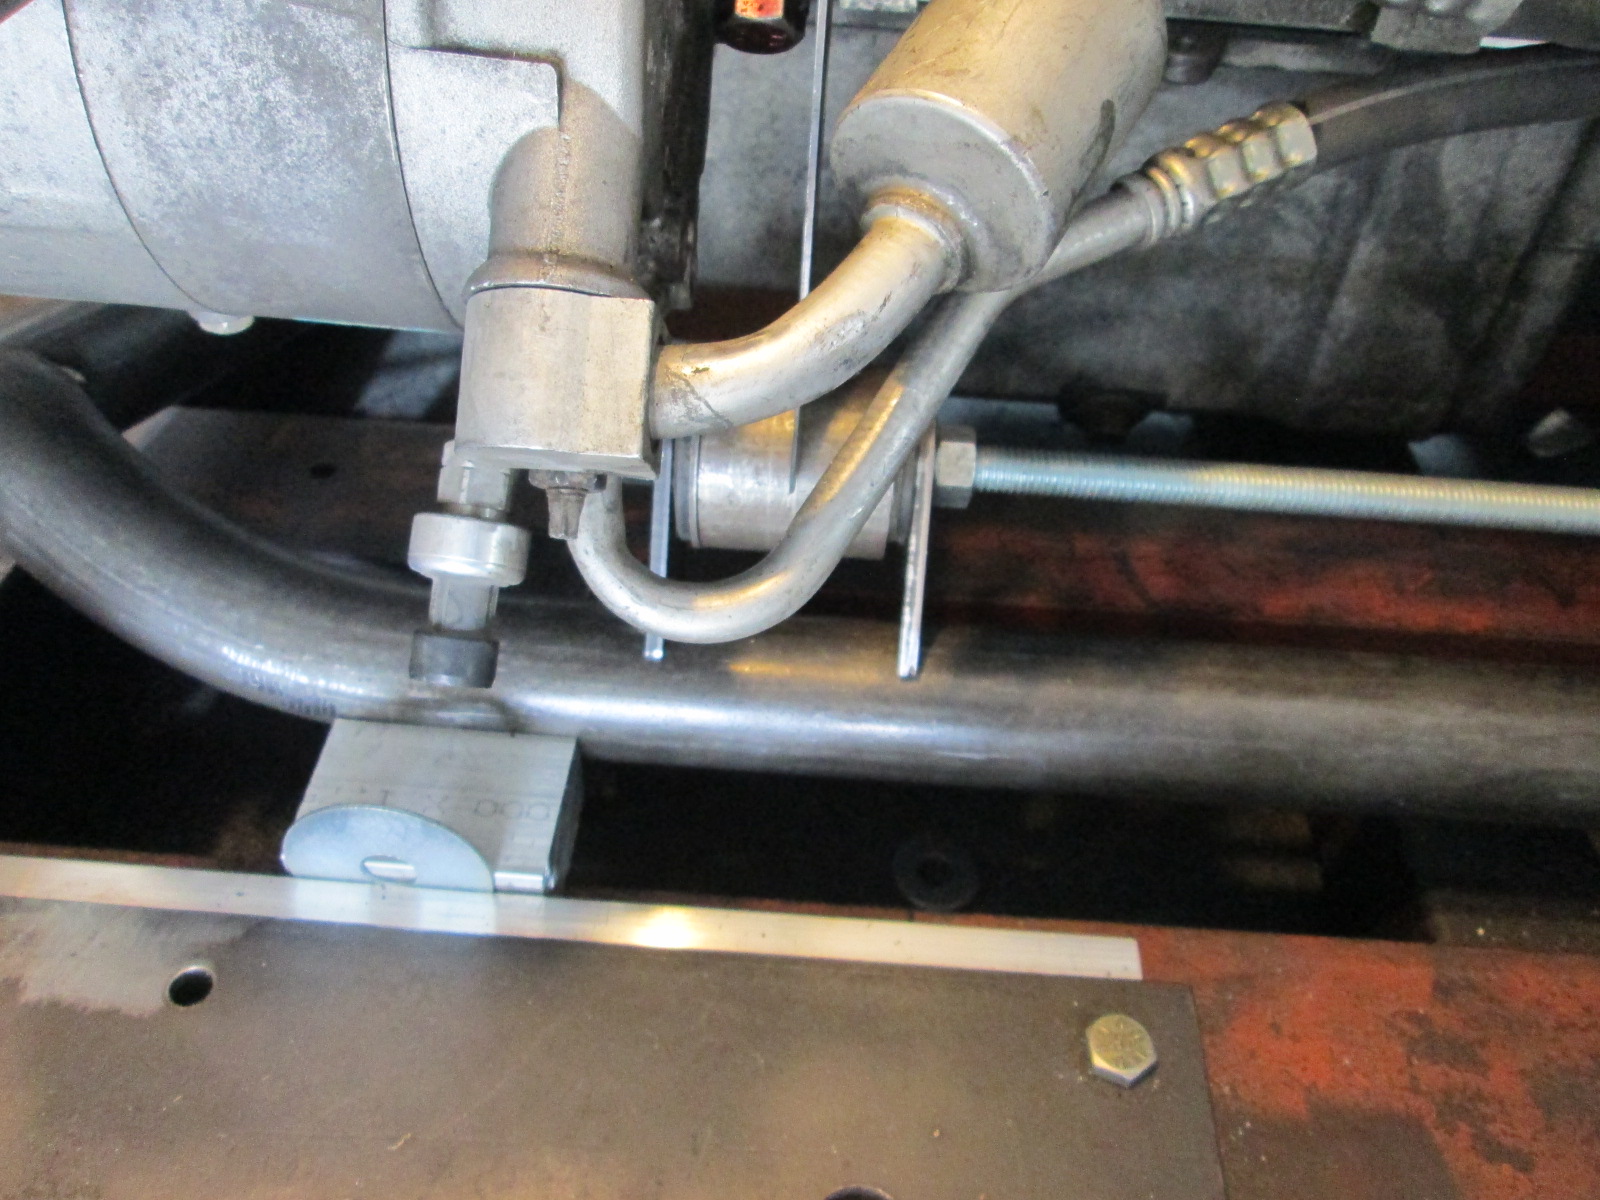
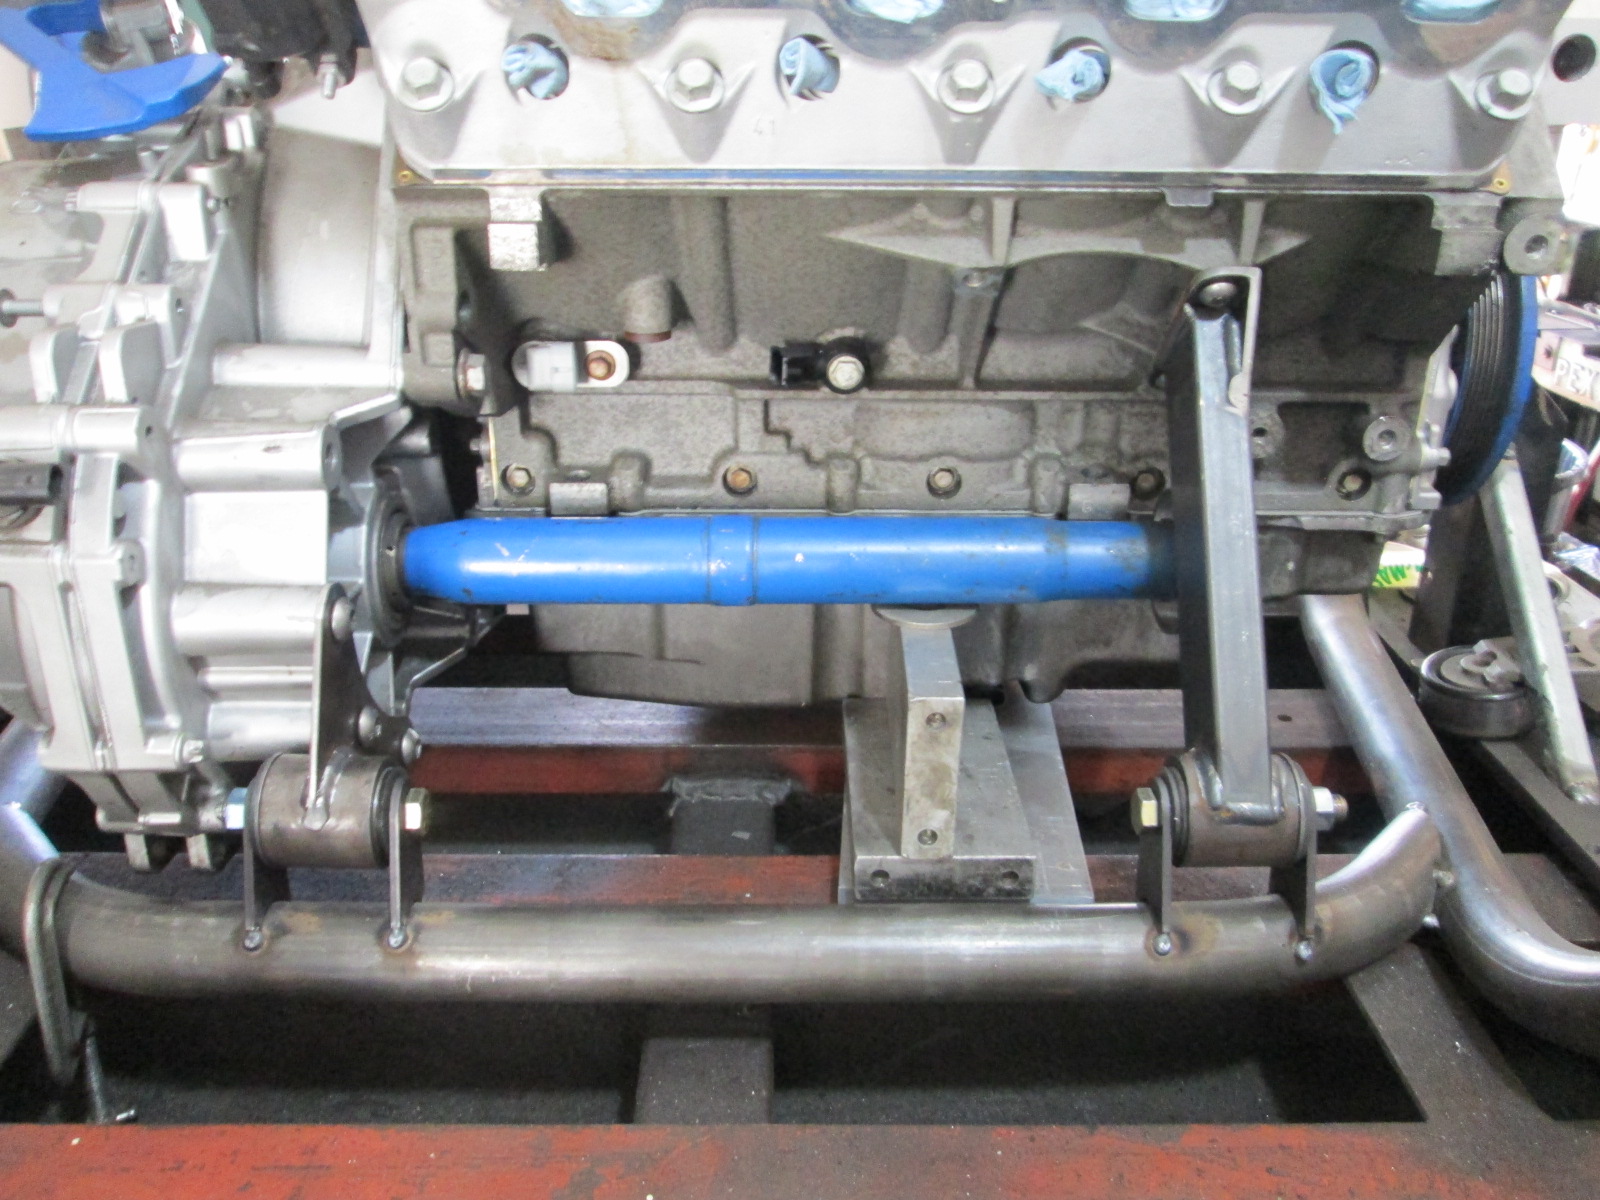
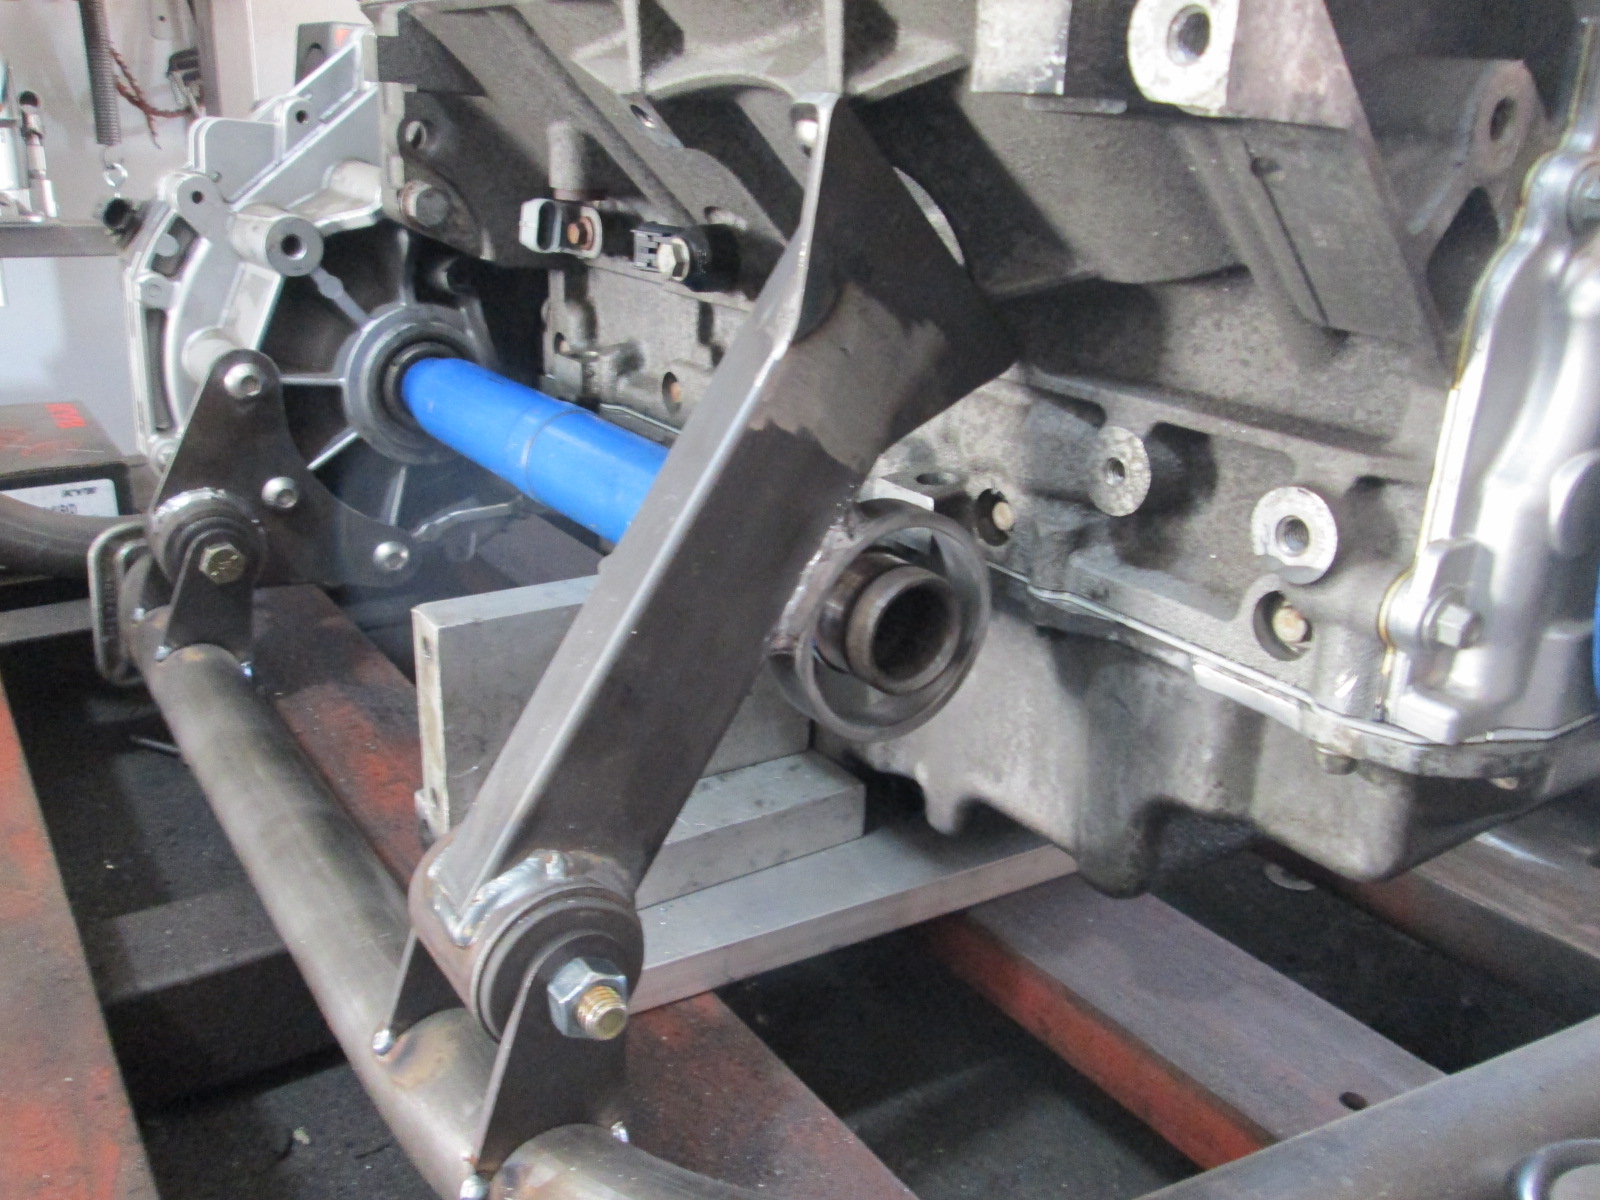
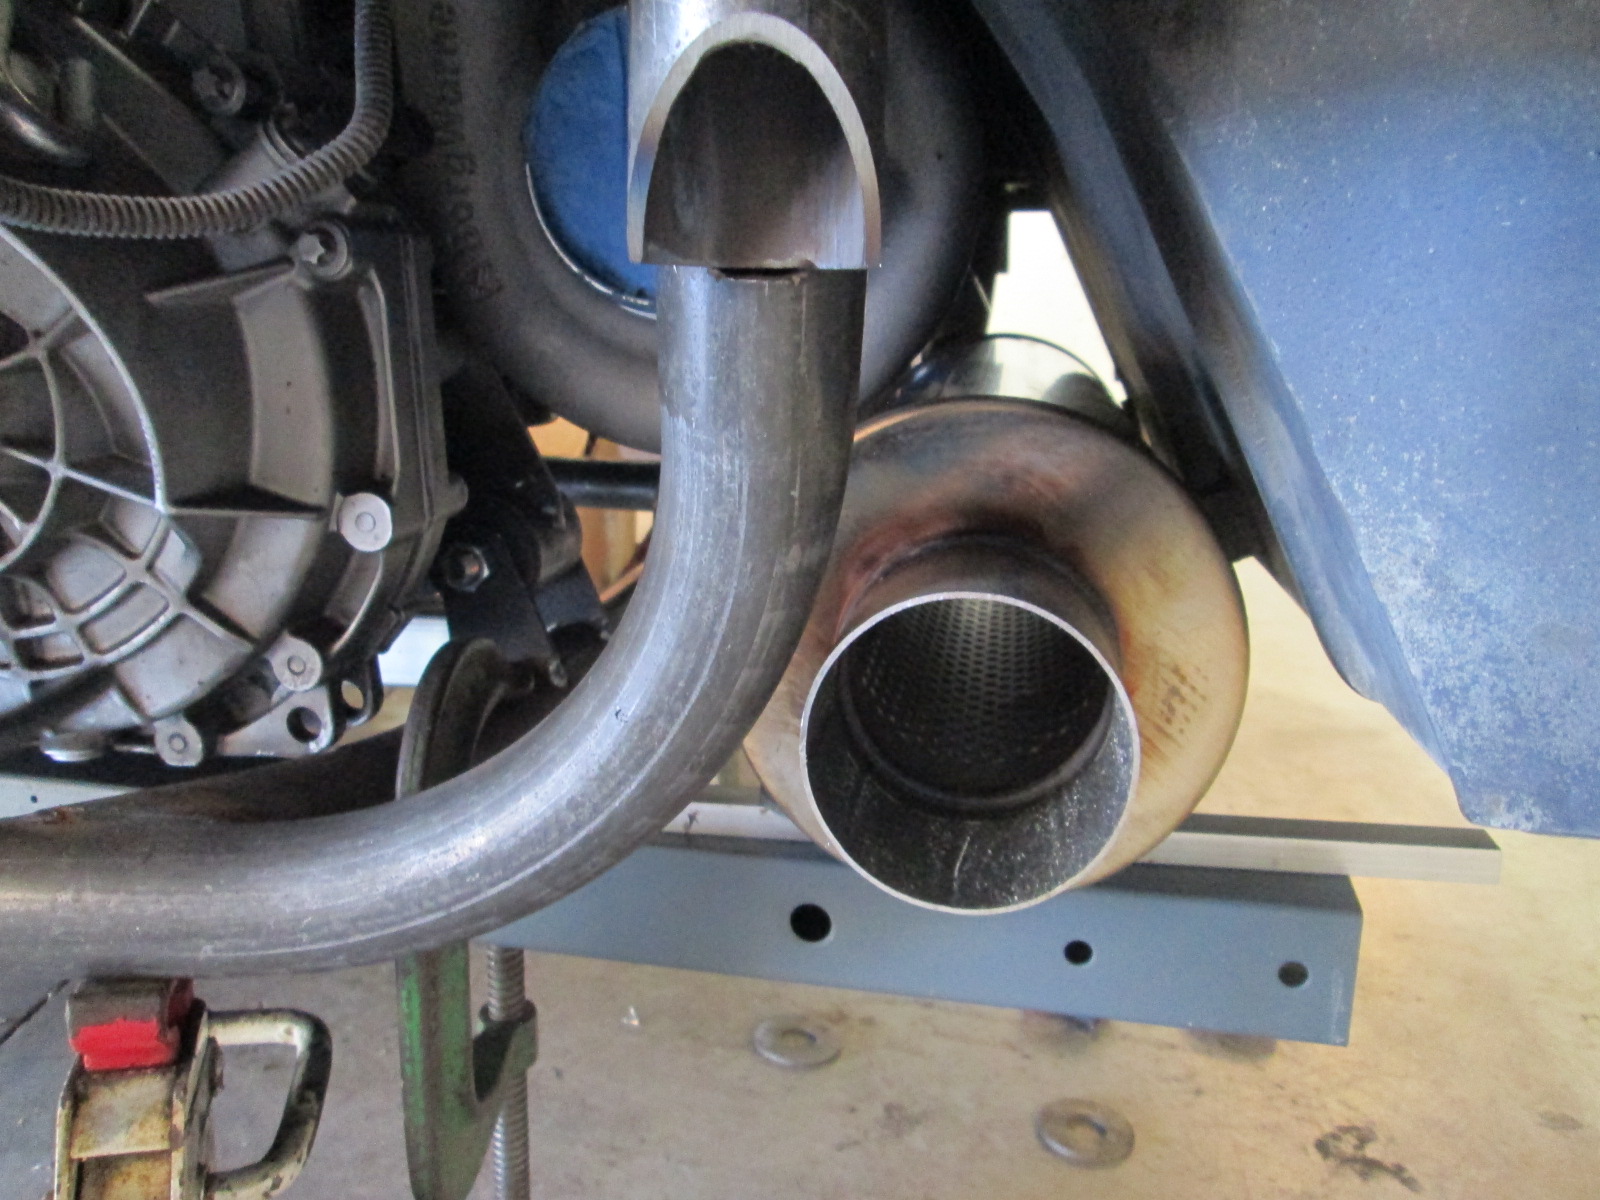
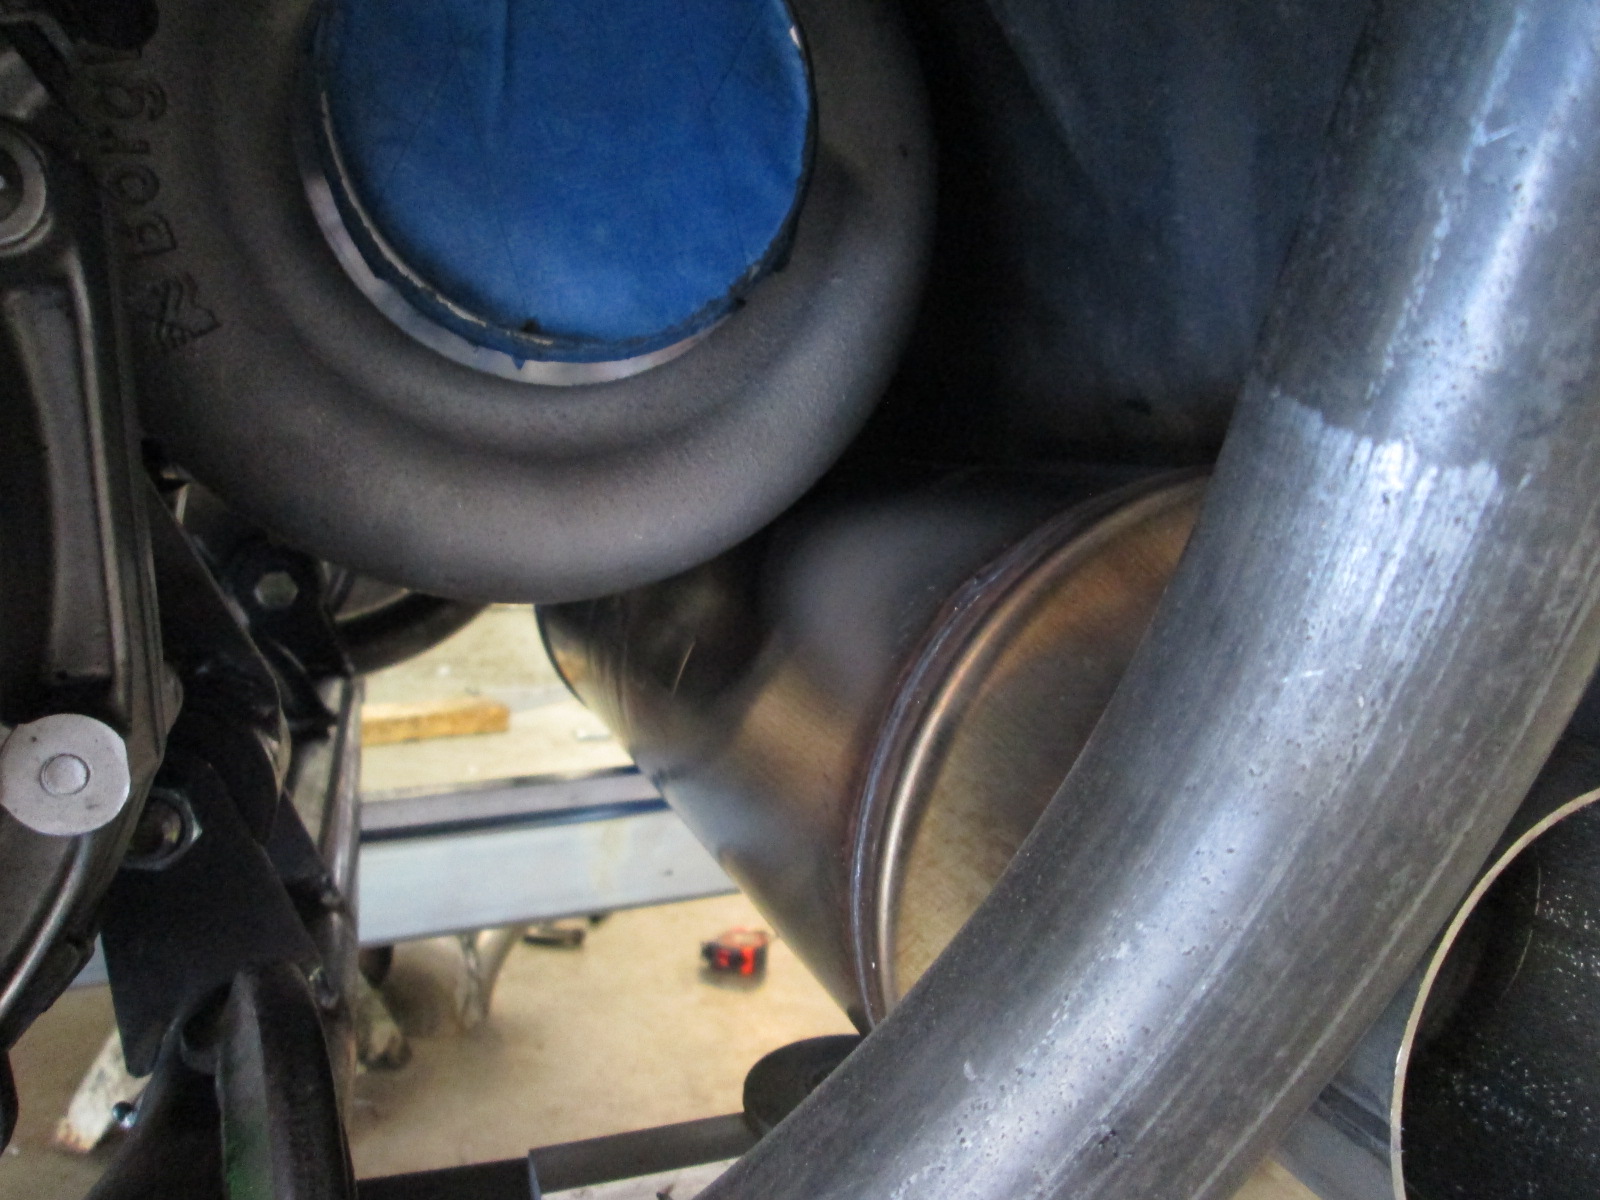
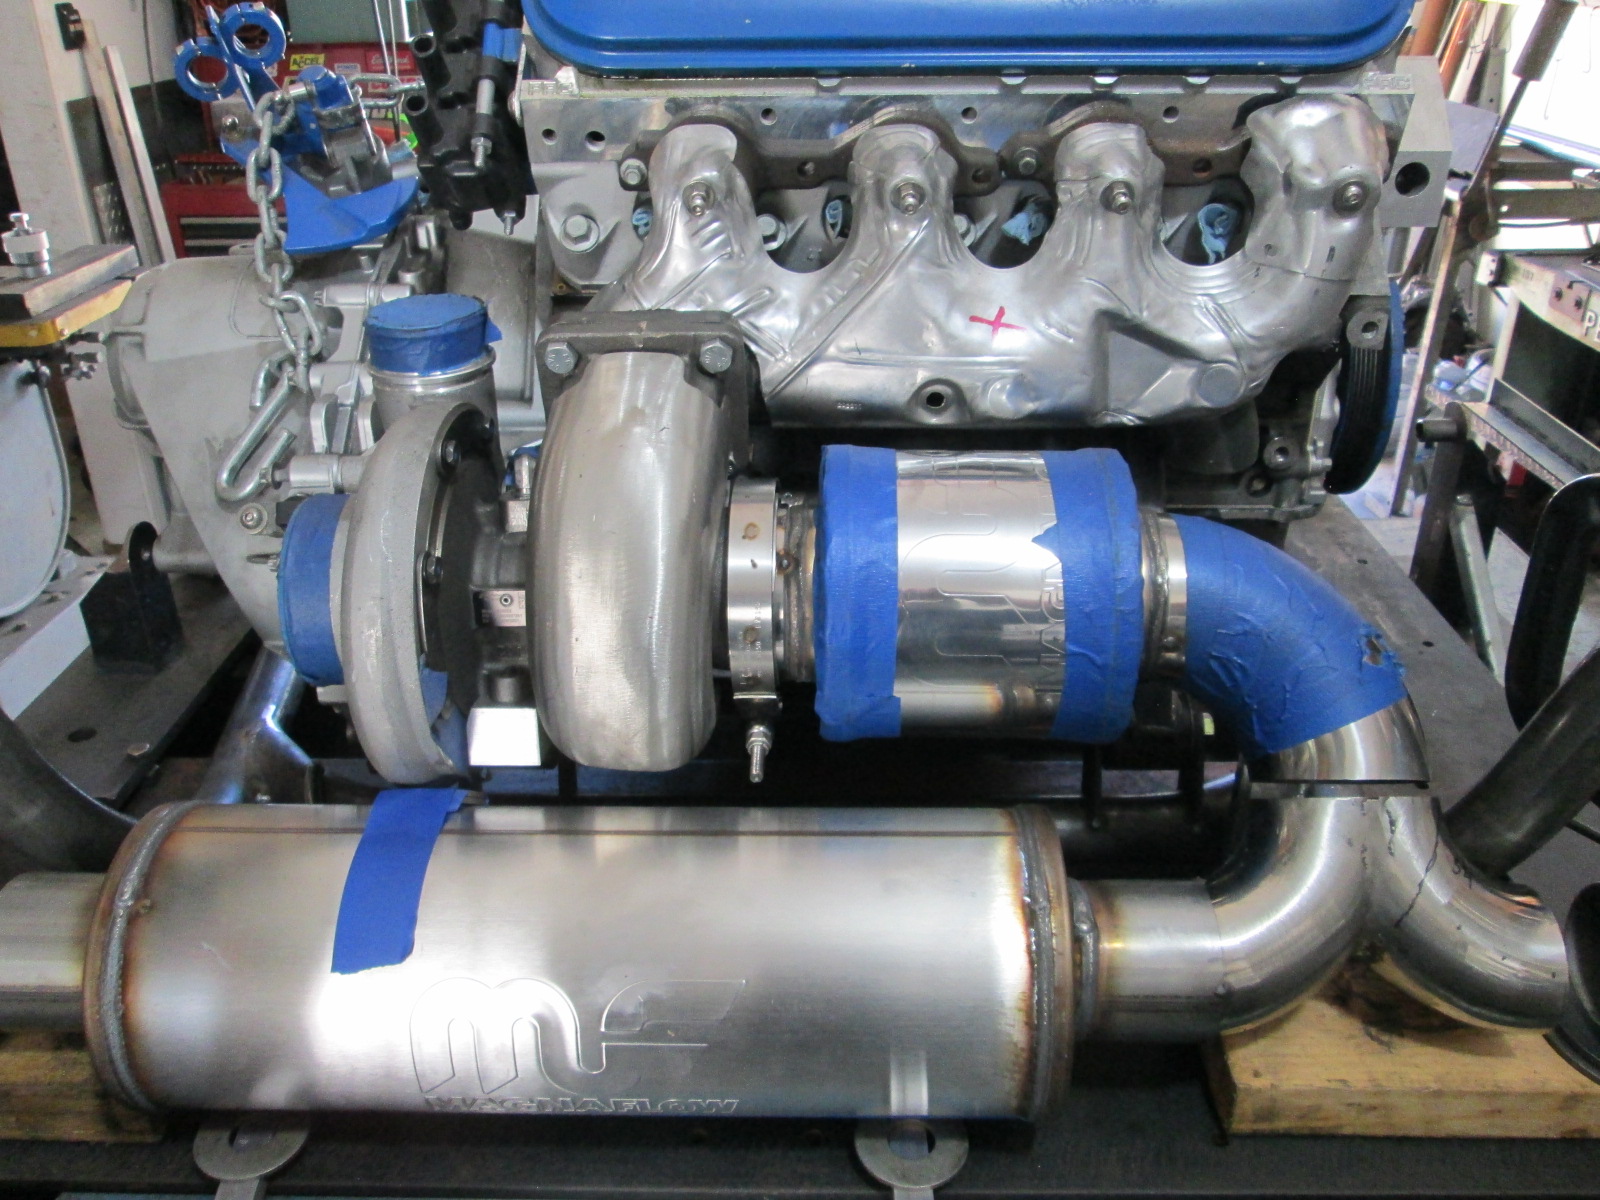
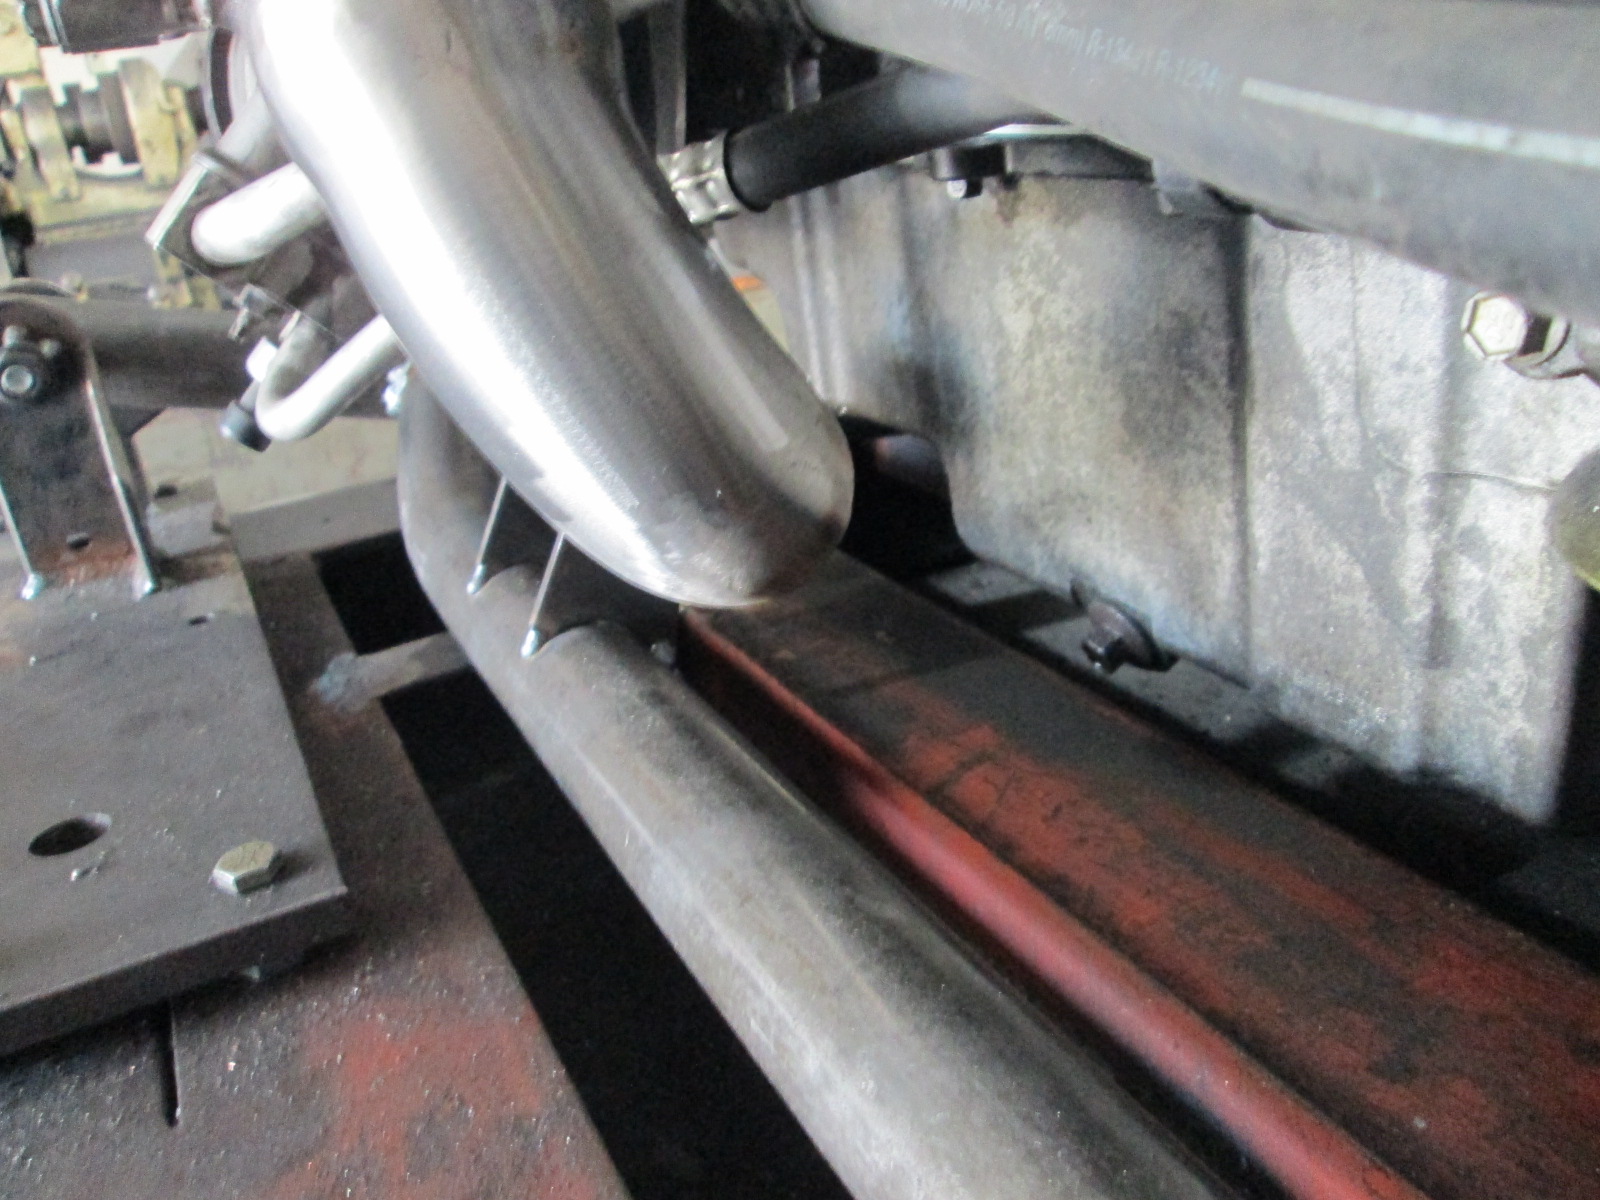
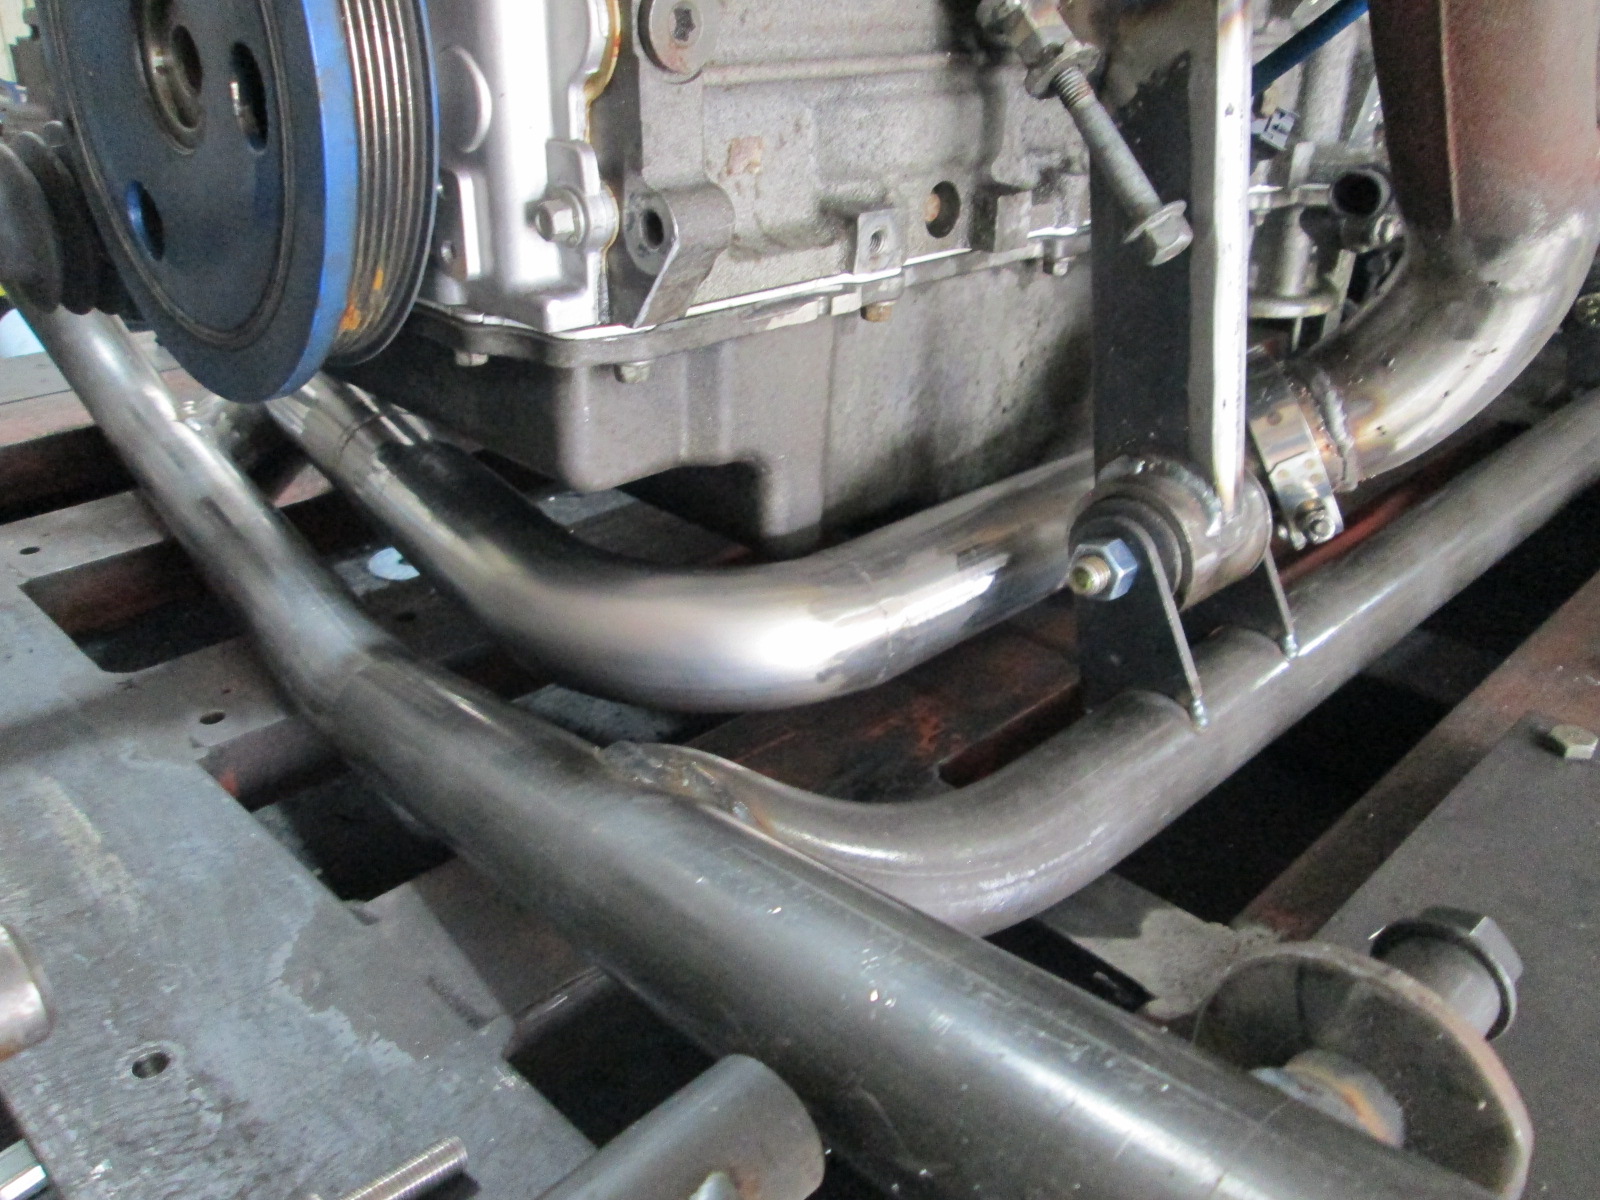
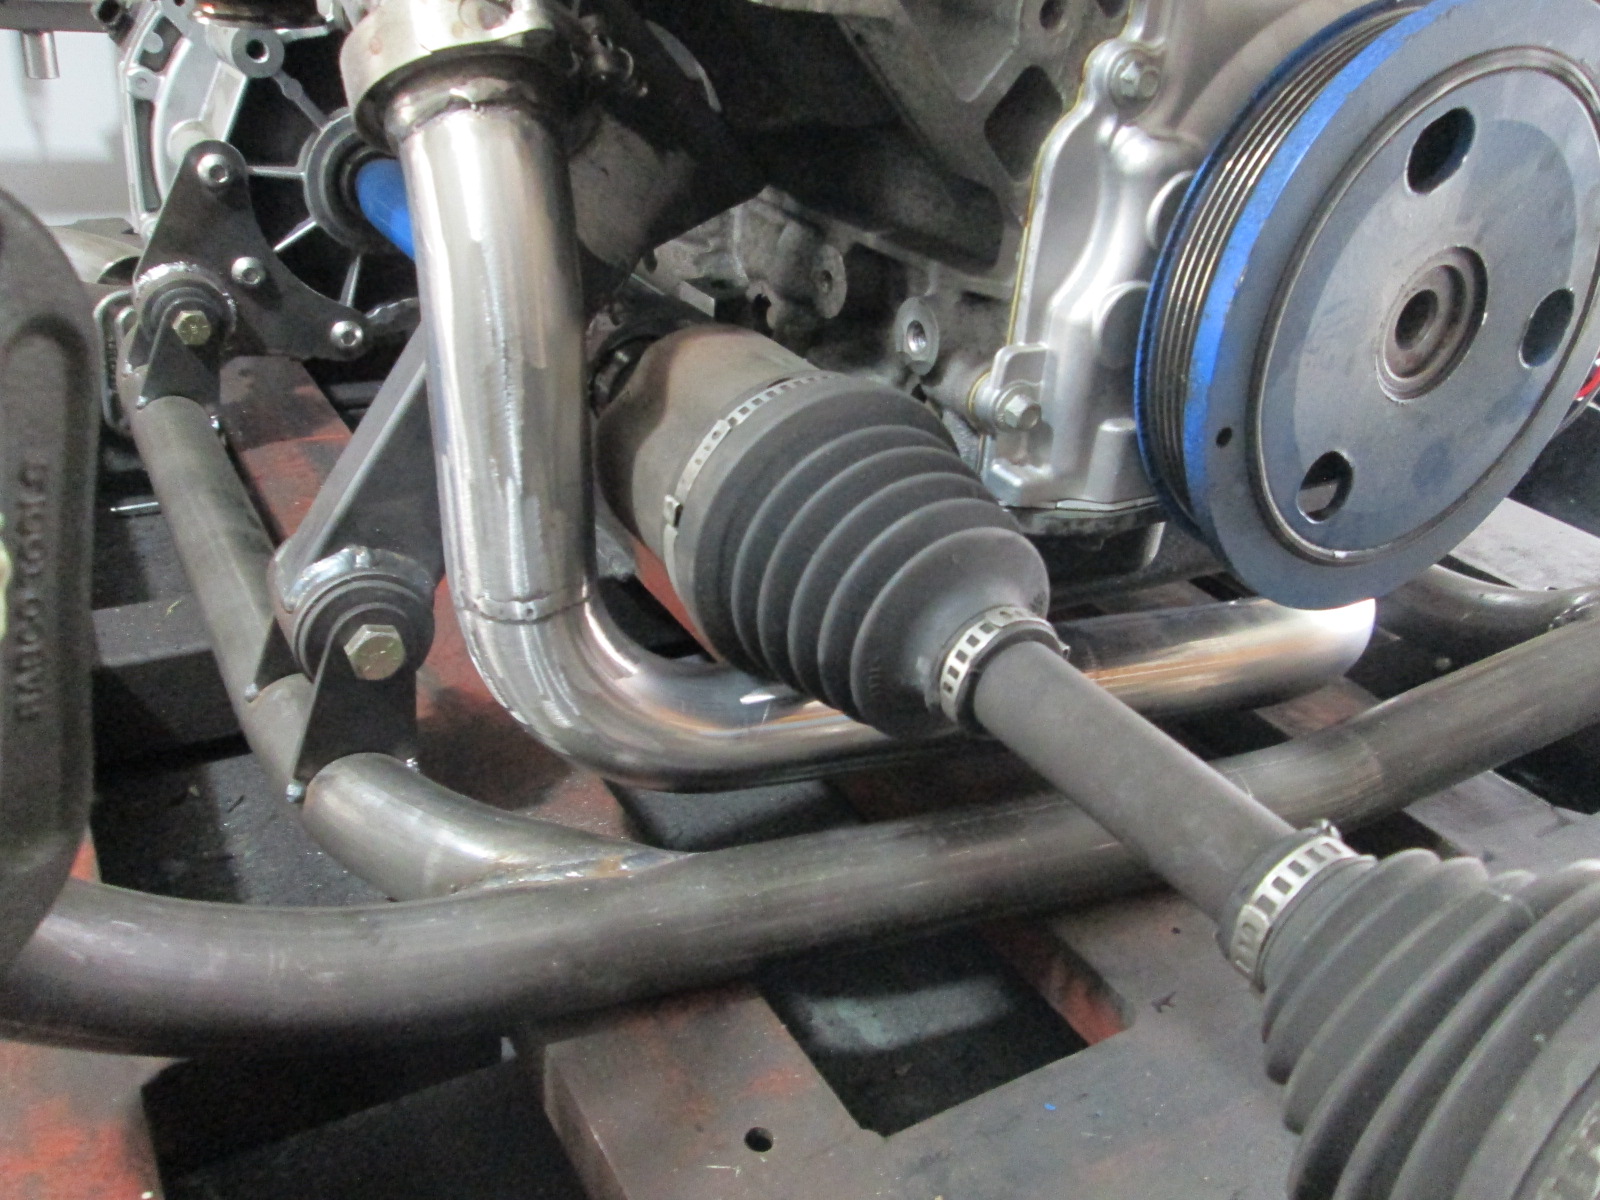
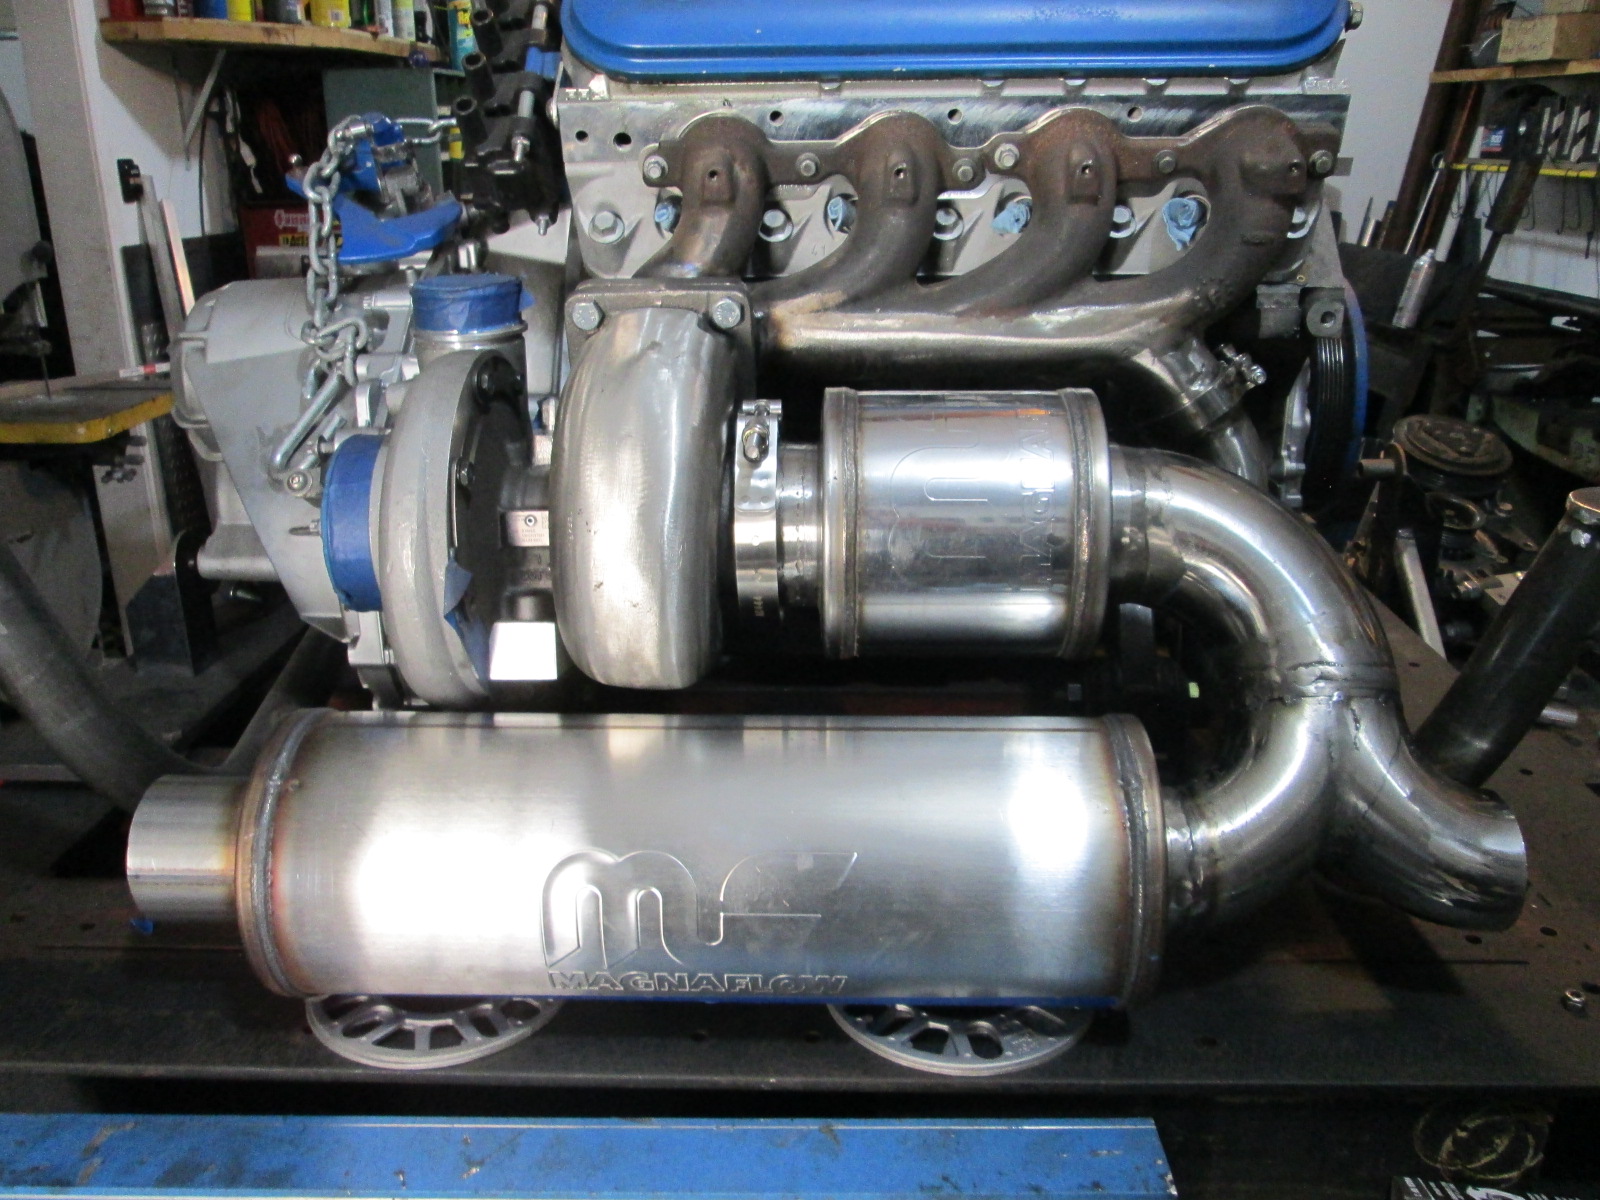
With the mounts done, I needed to test fit the engine in the chassis so I could locate the 3" muffler location. In this picture, the tubes supporting the muffler are clamped to the bottom of the cradle and the muffler is sitting on 1/2" spacers, so it is 1/2" above the bottom of the cradle. At this elevation, there is just enough room to clear the compressor housing with a stainless heat shield on the muffler and the trunk with an aluminum heat shield on it. Overall, I am pretty happy with the clearance.
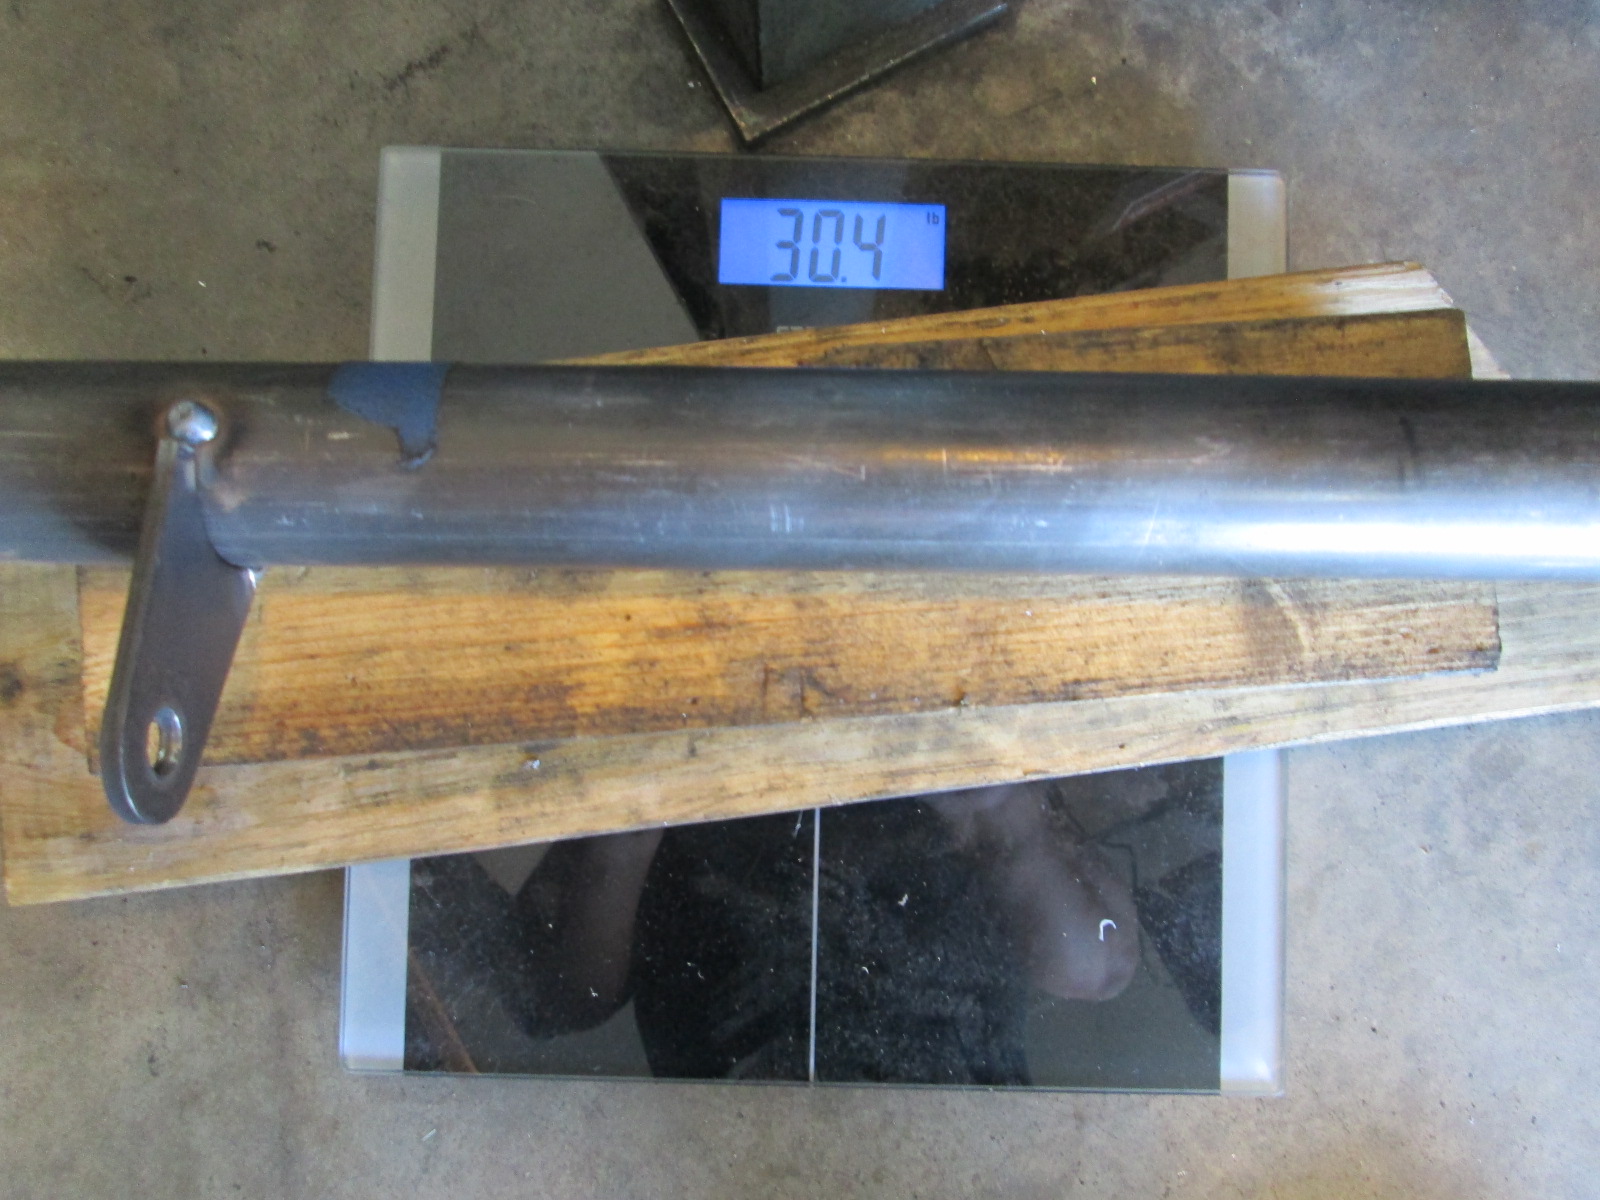
The cradle still needs several items added to it, so the weight will continue to go up, but it currently is 30.4 lbs.
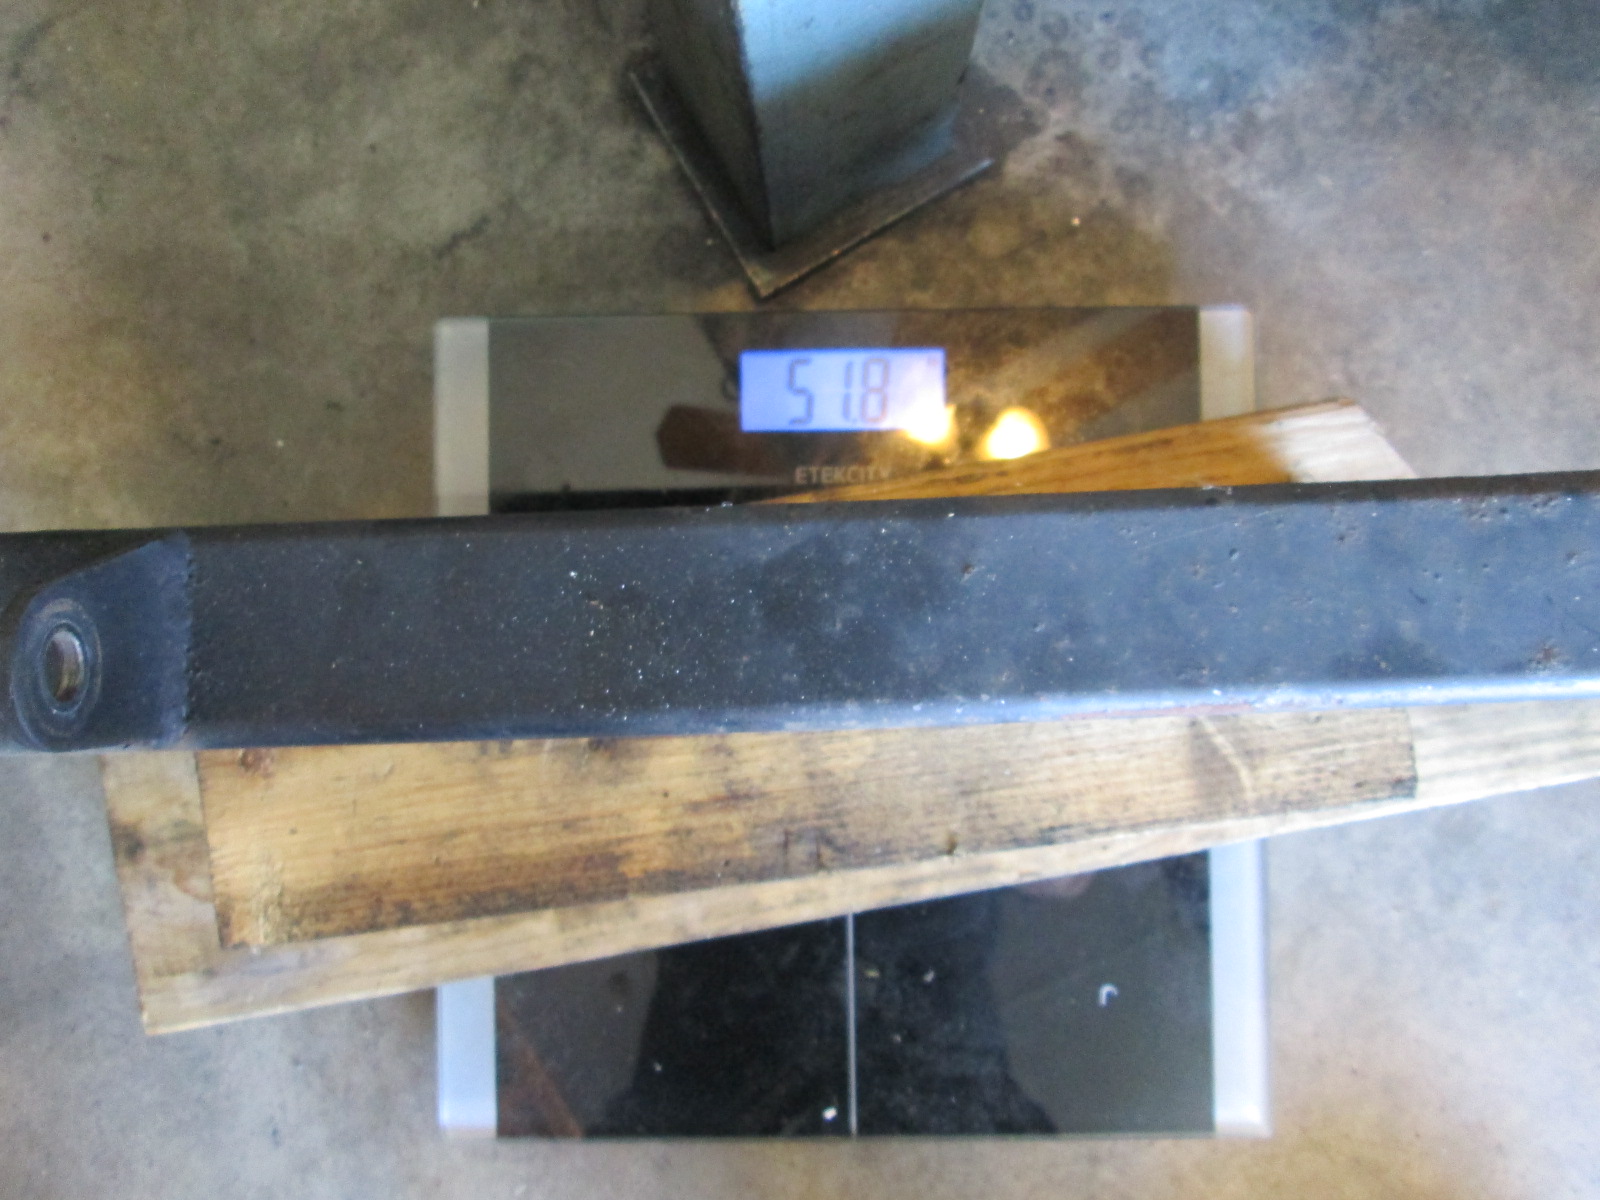
The bare cradle used in my original swap weighs 51.8 lbs.
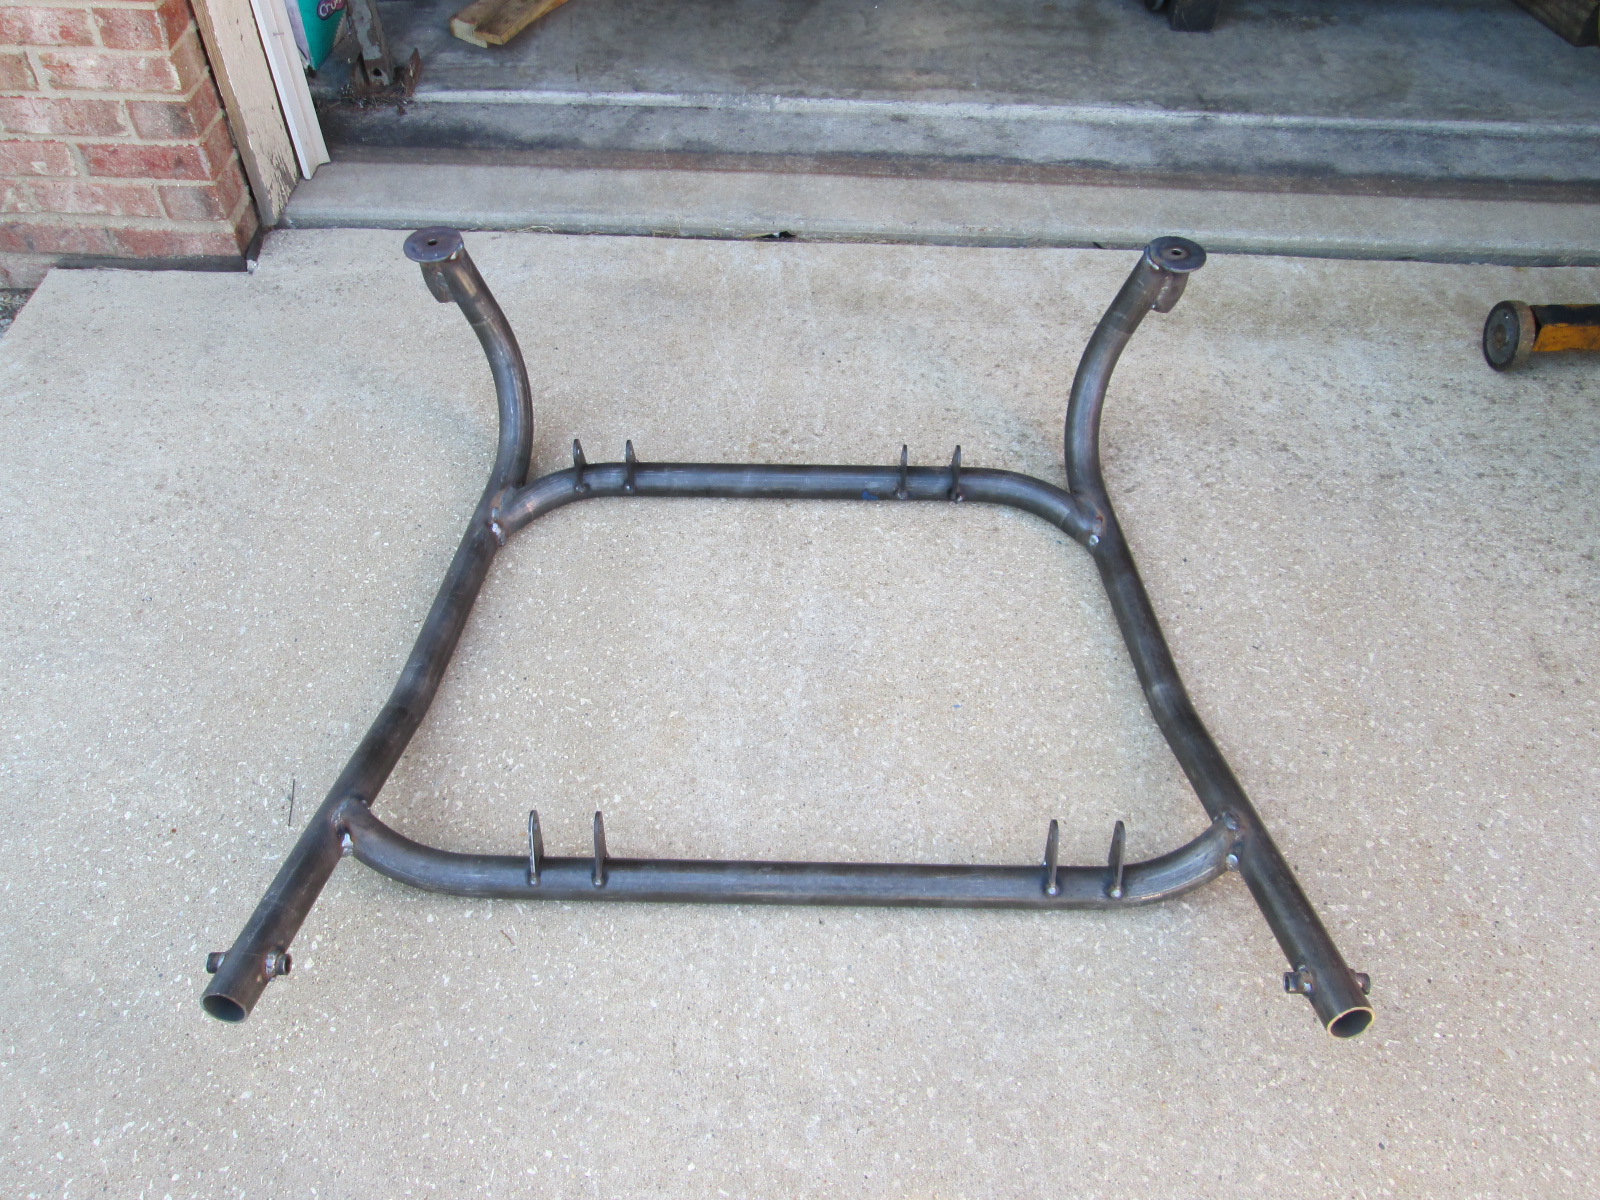
So right now it is 21.8 lbs lighter, but will continue to get heavier. If I can end up with the cradle 15 lbs lighter, that would be awesome! Here is the tubular cradle in its current state. I still need to weld the mount tabs, add the lateral and trailing link suspension tabs, and add a few gusset tubes.
Now that I know where the muffler fits, I can do more exhaust work from the turbo to the 3" muffler.
[This message has been edited by fieroguru (edited 09-19-2020).]
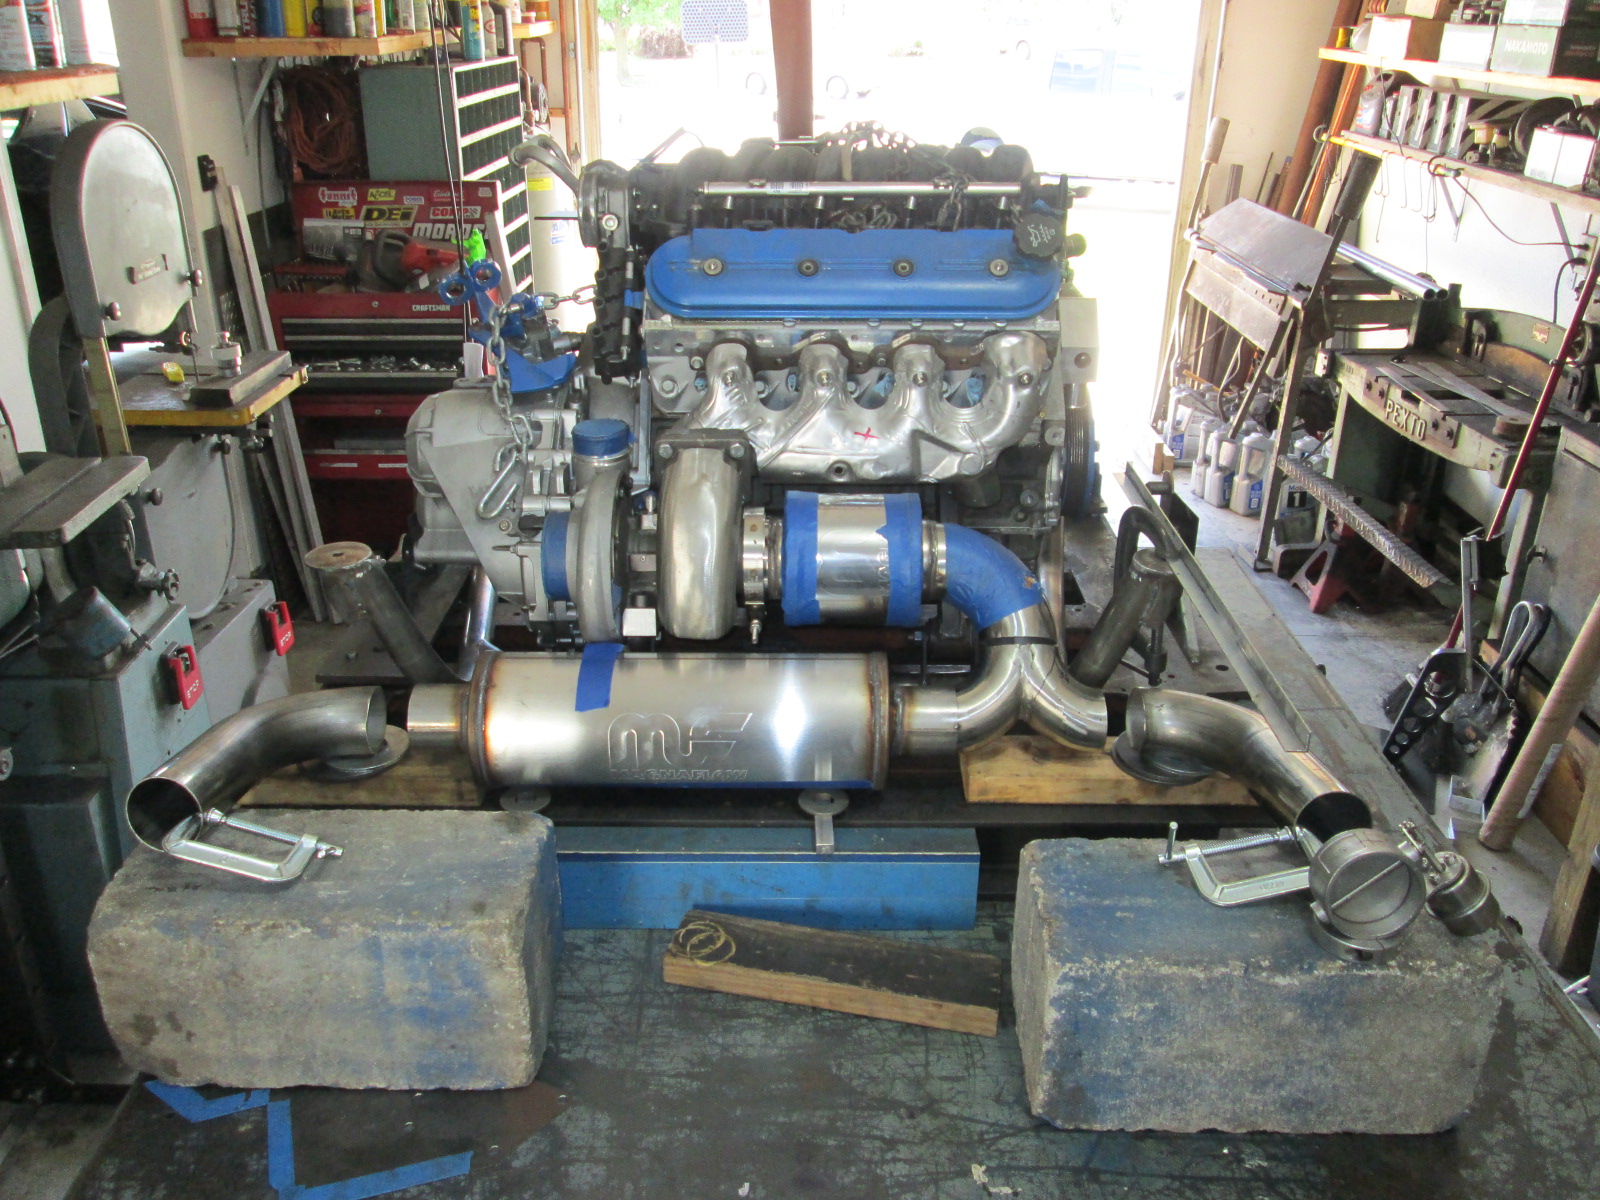
Drivetrain and cradle are back on the table with some rough mockup of the exhaust. The cradle is sitting on the fixture, the muffler is raised 1/2" with the aluminum bars, there is a spacer taped to the muffler to keep it the proper distance from the compressor housing as well as the trunk wall.
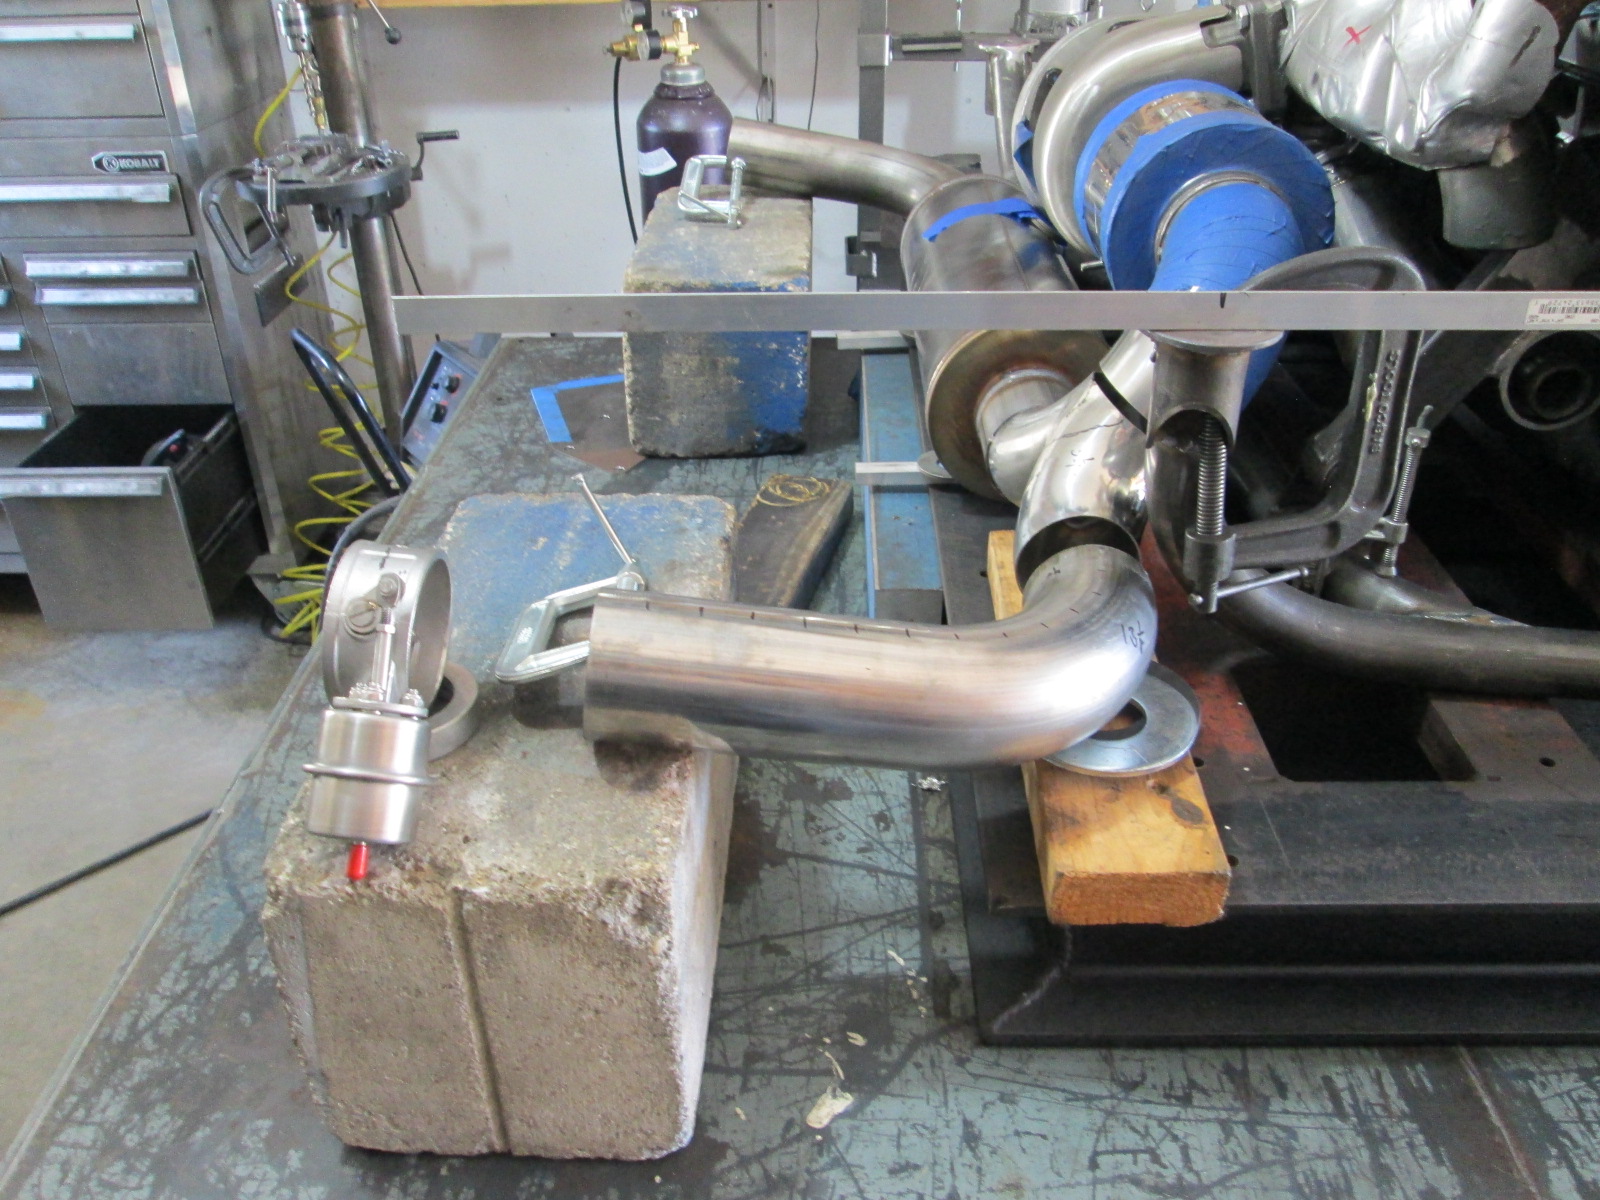
Here I added the tailpipes to the setup just to start checking lengths. For reference, the openings in the fascia have a 43" center and the end of the bumper is 20" past the rear cradle mount bolt.
The aluminum angle off the top bolt location of the cradle is 16" (20 would be end of bumper)
I want this swap to be drone free while cruising from 65 to 85 mph in 6th gear, but have zero idea if it will drone or not with the turbo and dual muffler setup. So as I lock down the exhaust setup, I want to leave room to add the proper length helmholtz tube if needed. 65 to 85 is 1700 to 2200 rpm which is 113Hz to 146Hz, which will have the tube length anywhere from 25 3/4" (200 degree exhaust) to 42" (600 degree exhaust). FOr cruise 200 degrees is probably more realistic, that would reduce the length needed to 33.3".
I have two general spots where I could fit a helmholtz resonator. Preferred option - make cutout tube work as helmholtz when closed. In the picture above, the cutout location at 16" from the cradle bolt (4" from edge of bumper) only gives me about 21". I need to explore options to loop the pipe in the wheel well to add length. The cutout needs to be hidden for stealth purposes.
The other option is to trim down the right flange on the 3" muffler so I can move the muffler more to the center and create room at the exit of the muffler for a 3" 90. Then I can run the dedicated helmholtz tube in the space in front of the muffler (and below the sway bar). This location would allow 30+ inches w/o any additional loops. I think I will go ahead and move the muffler so I can pick from either option at a later date.
I like that tubular sub frame. Modern, simple, direct. If it were possible to sell that subframe with F40/LS4 mount tabs on it, you would sell a few. Maybe not many, but the ones that got one would appreciate having one. The whole build is awesome!
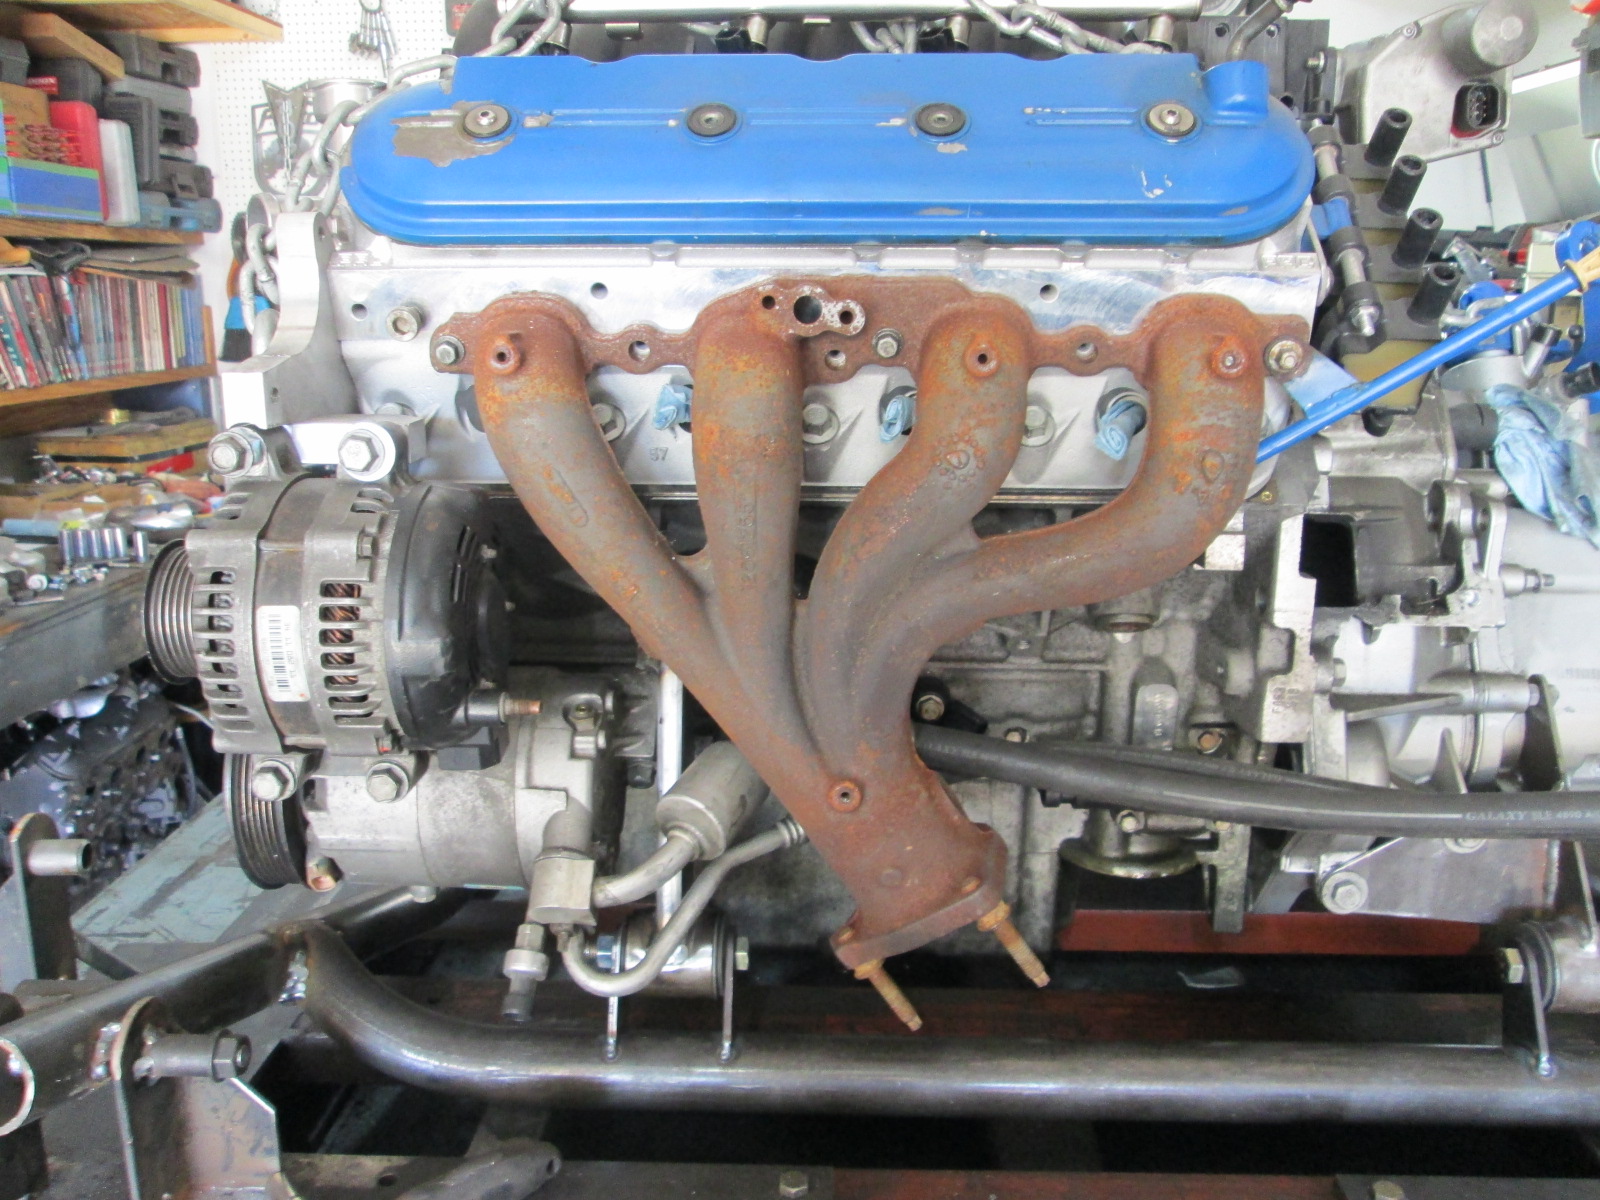
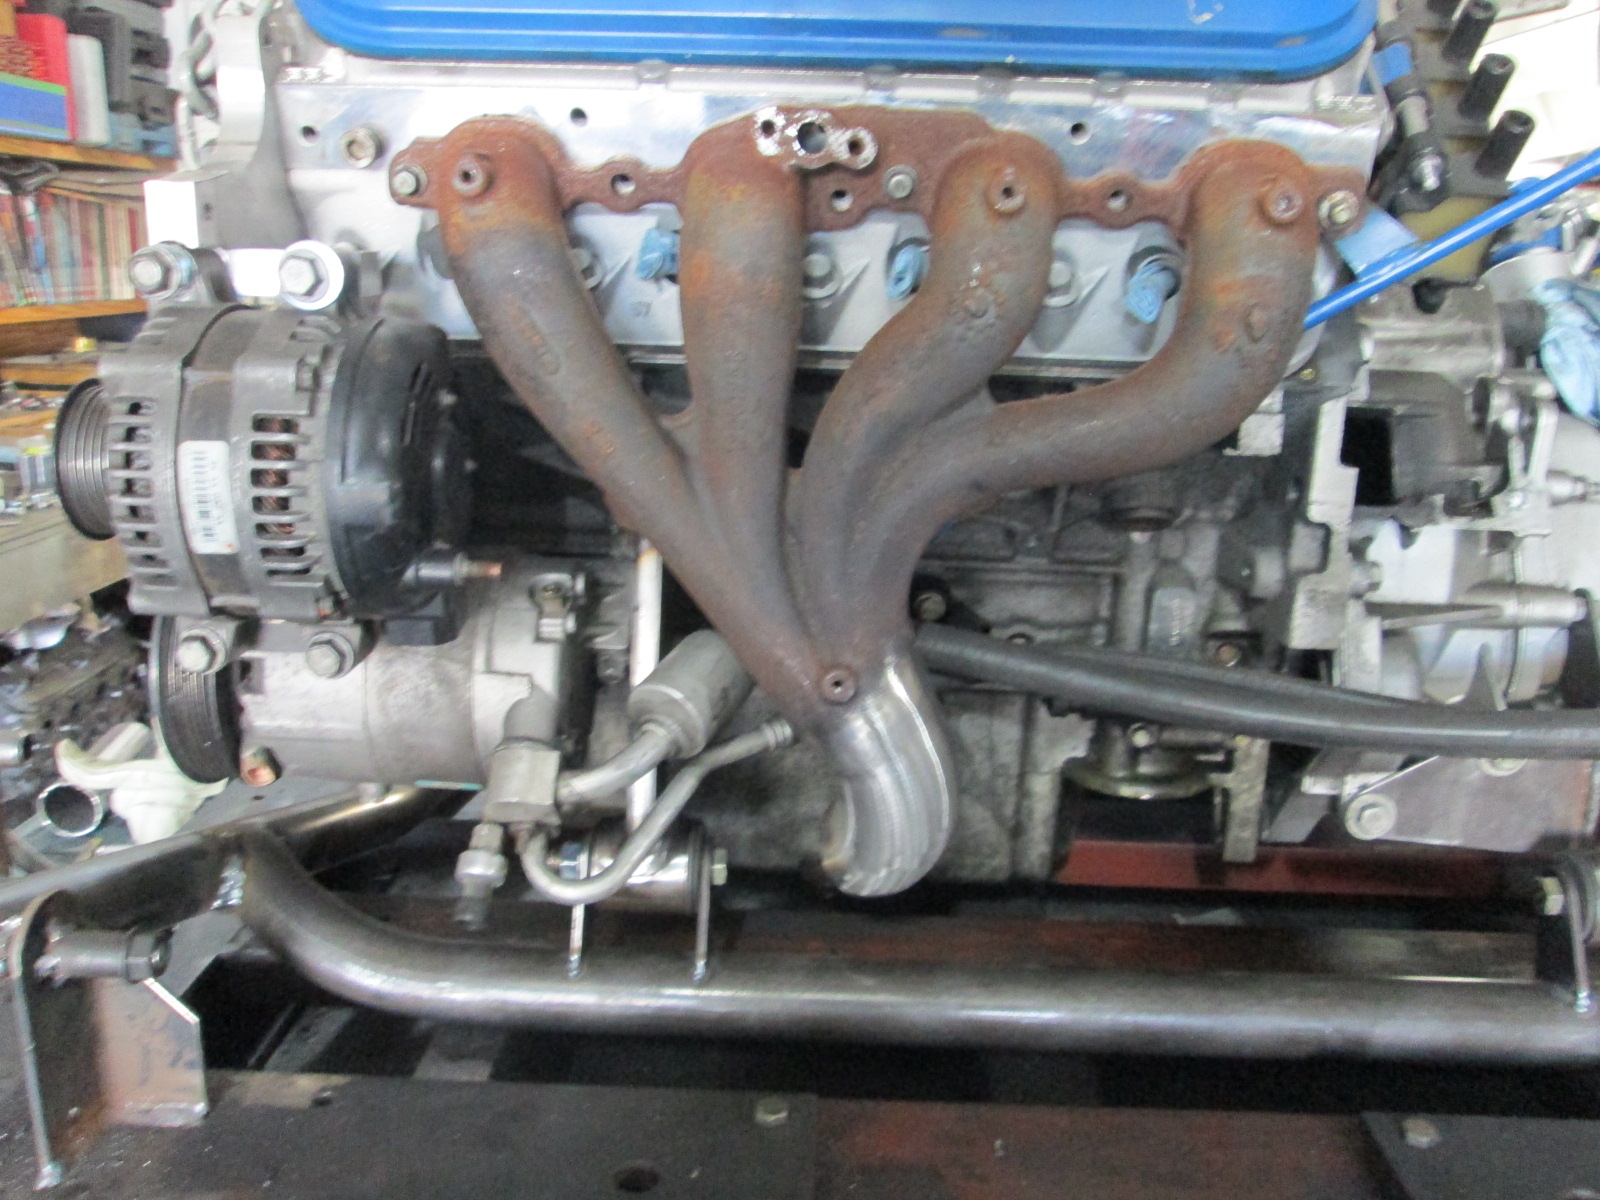
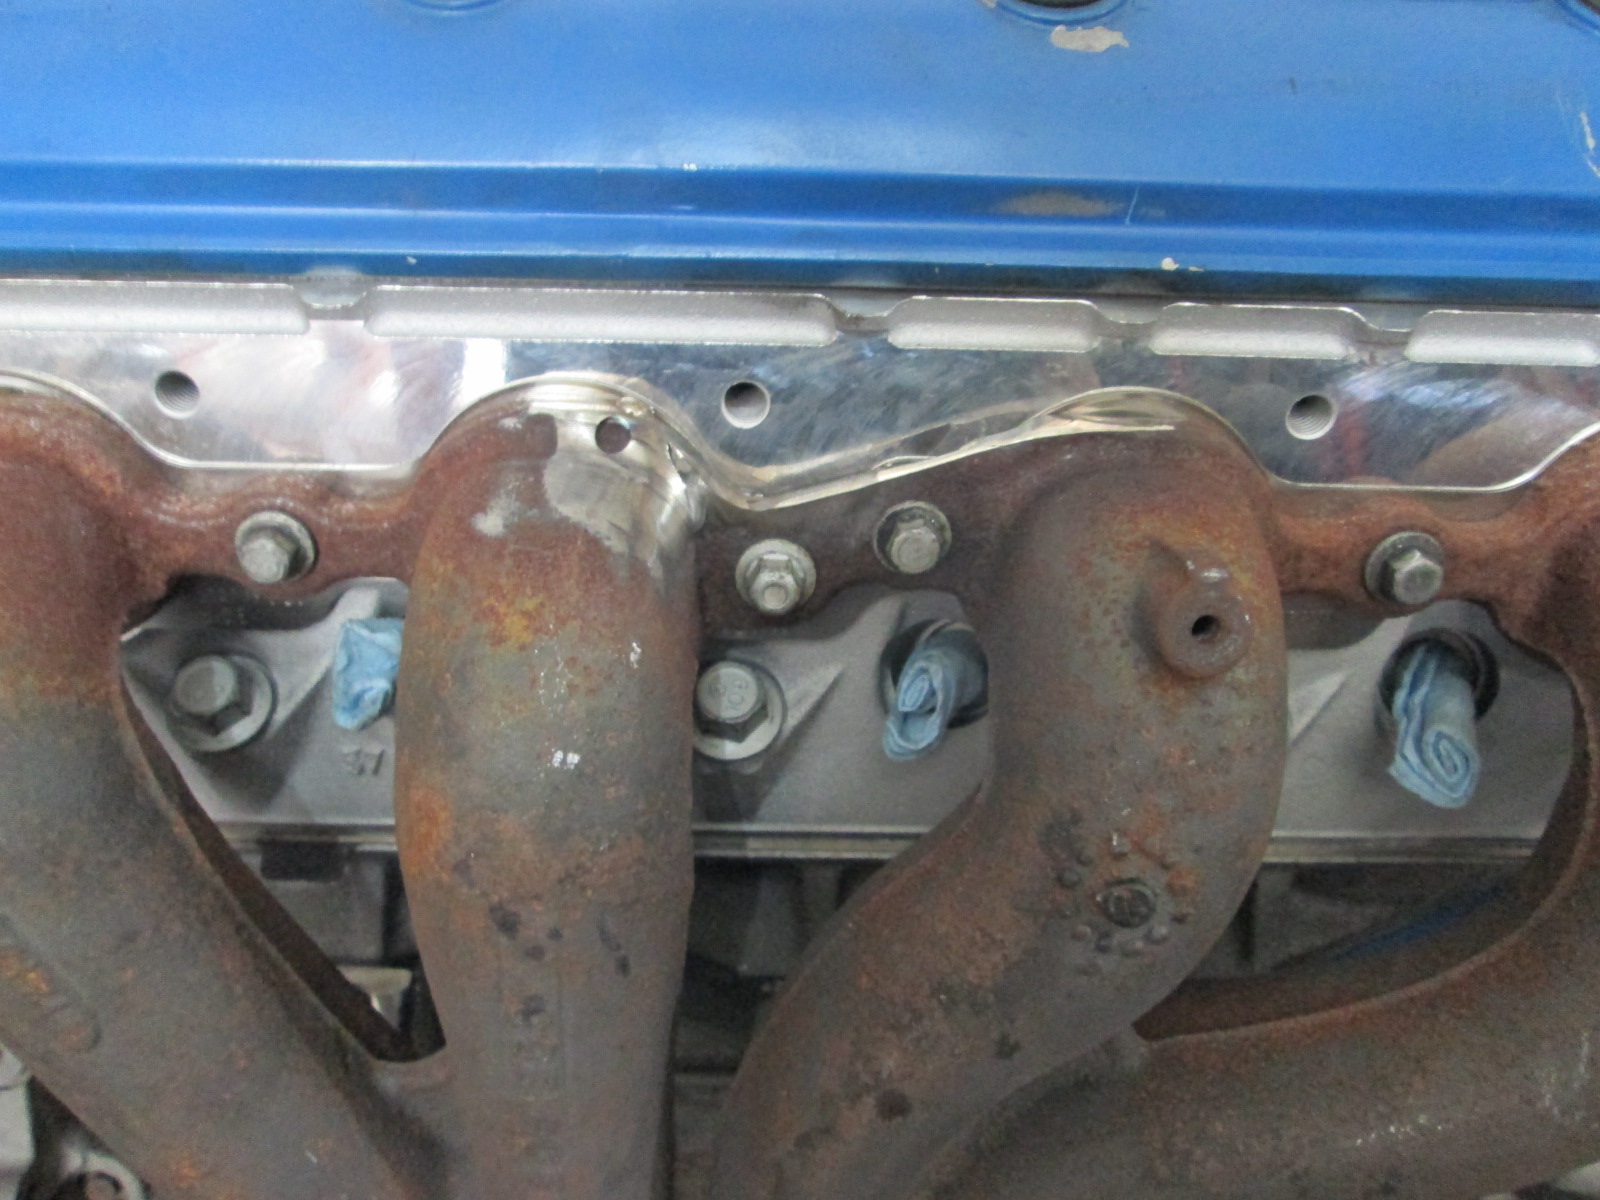
Started more work on the exhaust. I had been planning to use the LS7 manifold for the front bank like my old swap did, but I didn't really like idea of the necking the large oval collector down to a 2" tube to crossover to the rear bank. After looking at options, I decided to use one of my LS6 cast manifolds. They flow good, are cast steel to help retain heat, have factory heat shields, and the collector is 2.5".
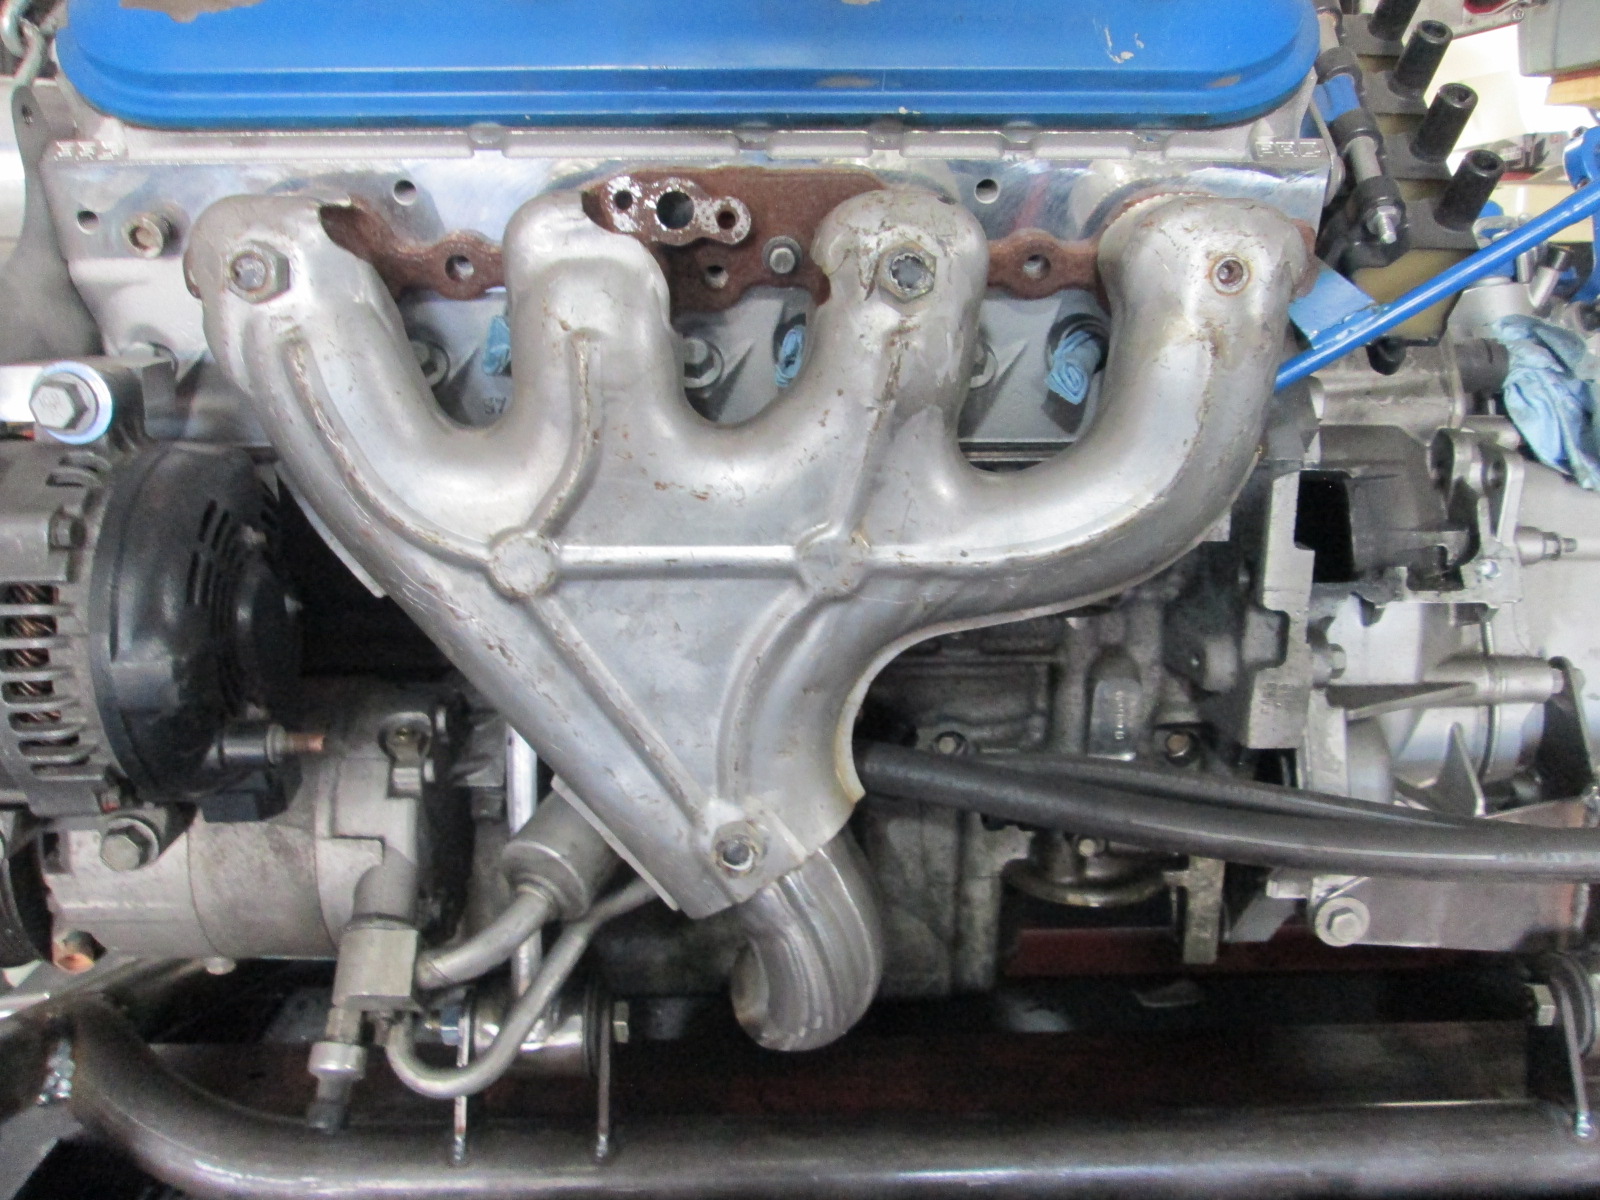
When I was determining the alternator location, I test fit every stock manifold I had, so they all would fit. This would be the easy solution:
The manifold was a little long and I don't like factory collector connections, plus I wanted the outlet to point to the rear of the front crossmember, and I wanted the outlet closer to 2" ID. So I took the hard way...
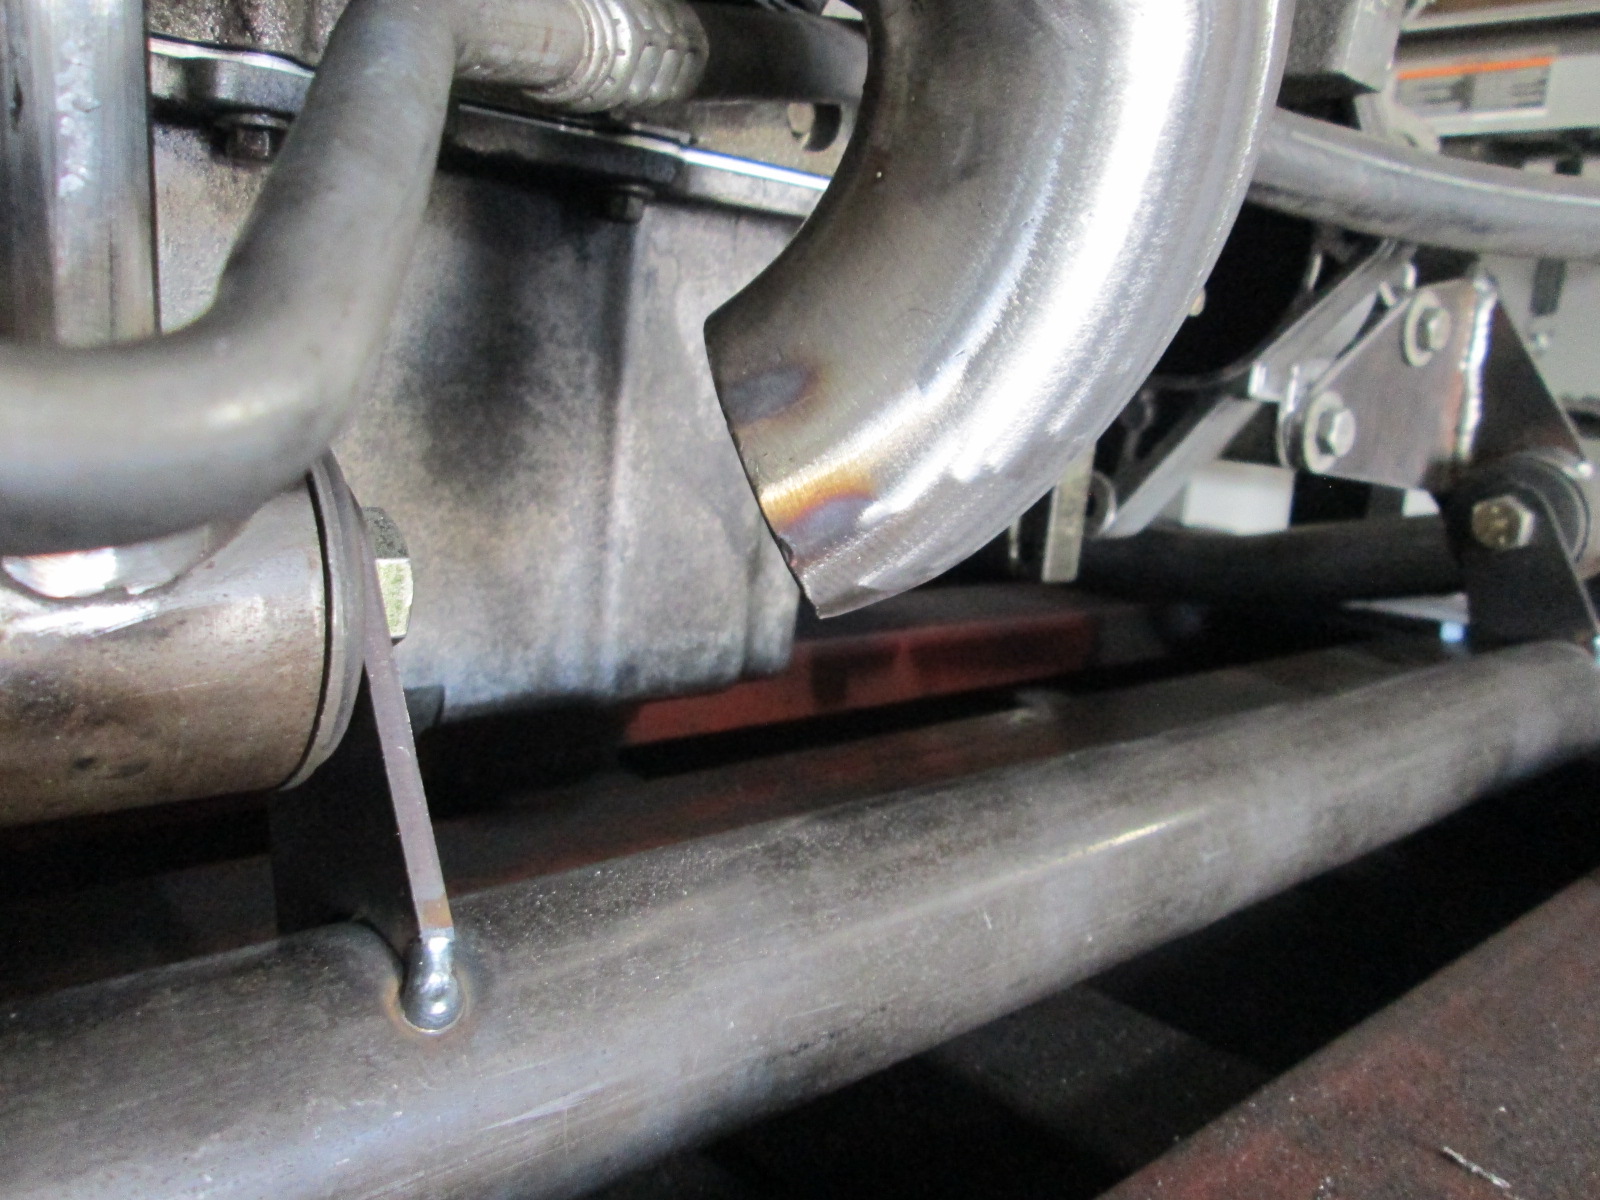
The 90 started out as a 2" Schedule 10 stainless 90. The ID is about 2.15", so I enlarged the inlet side to 2 1/2" ID and reduced the outlet end to just under 2". Lots of cutting, welding, grinding and smoothing... but I think the end result was worth it.
I will likely buy a new (or nicer) factory heat shield. I will also tack a 16ga stainless heat shield on the backside to help keep the AC lines and wiring away from excessive temps.
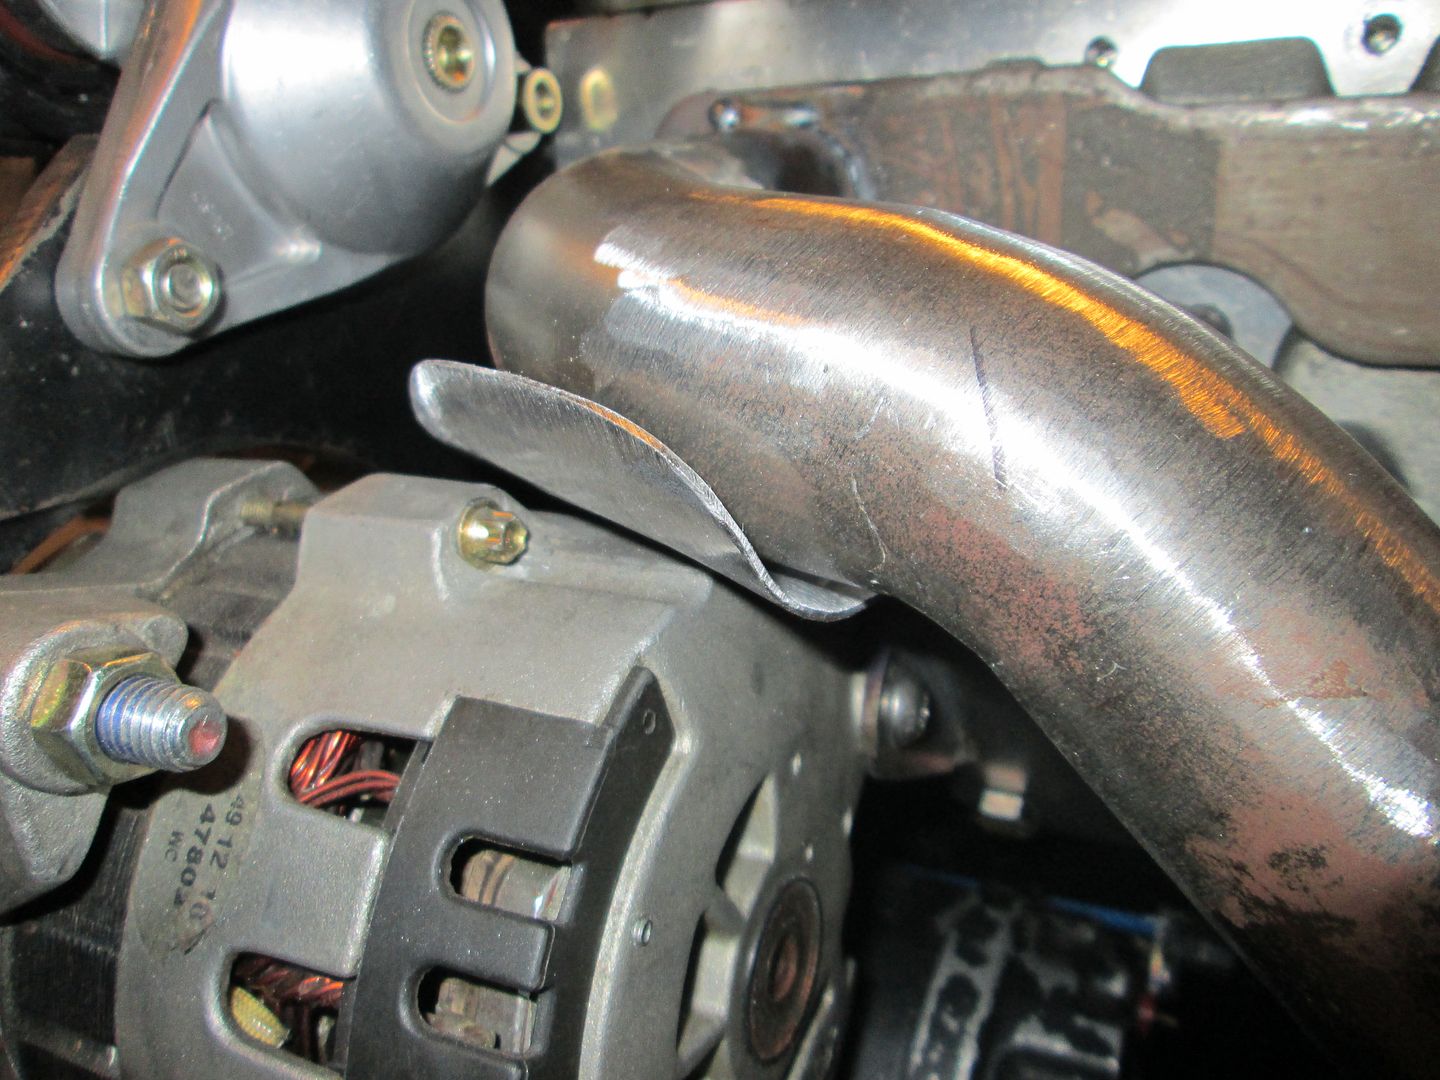
Looks good but one question or possible issue. I run an LT1 in my car with things roughly in the same spots. I have replaced the alternator once already and I get a dim light on after a few minutes of driving with the new one. It seems the exhaust is overheating the alternator. I am not sure that stock heat shield will be enough to deal with the heat. Just a thought for you to consider before you get it in the car. I am eventually going to have to pull mine to deal with this issue and some minor issues with the belt path. Easier now for you.
I suspect you are using a stock Fiero alternator on your setup w/o a heat shield setup. Pics of your setup would be helpful. Those alternators are only 95A and don't have near the efficiency and cooling of the later model units (part of the reason prior to 88 they had heat shields and cool air blowing on them - stock).
Heat management in swaps using metal heat shields to keep radiant heat from heat sensitive components has been a significant focus of mine with a swaps in the last 15+ years. I have had success with heat shields allowing alternators to be less than 1/4" away from headers, like this setup (the headers also were ceramic coated).
LS4 alternators are 130A, dual fan, much more efficient and less sensitive to heat, but I will still make sure a proper heat shield is in place to keep all the radiant heat off the alternator body. Not expecting any issues with this approach and alternator position.
I am running a cs130 (88 fiero) on it, I do have a heat shield that I put in after the swap as best I could. (I did not do the swap) the headers are wrapped but not coated. I also run a fan that is ducted to blow on it. I cannot really get pics of it due to its location, that and I out of the country right now. If you have run them like that in the past you are set. Just wanted to bring it up before you get it in the car.
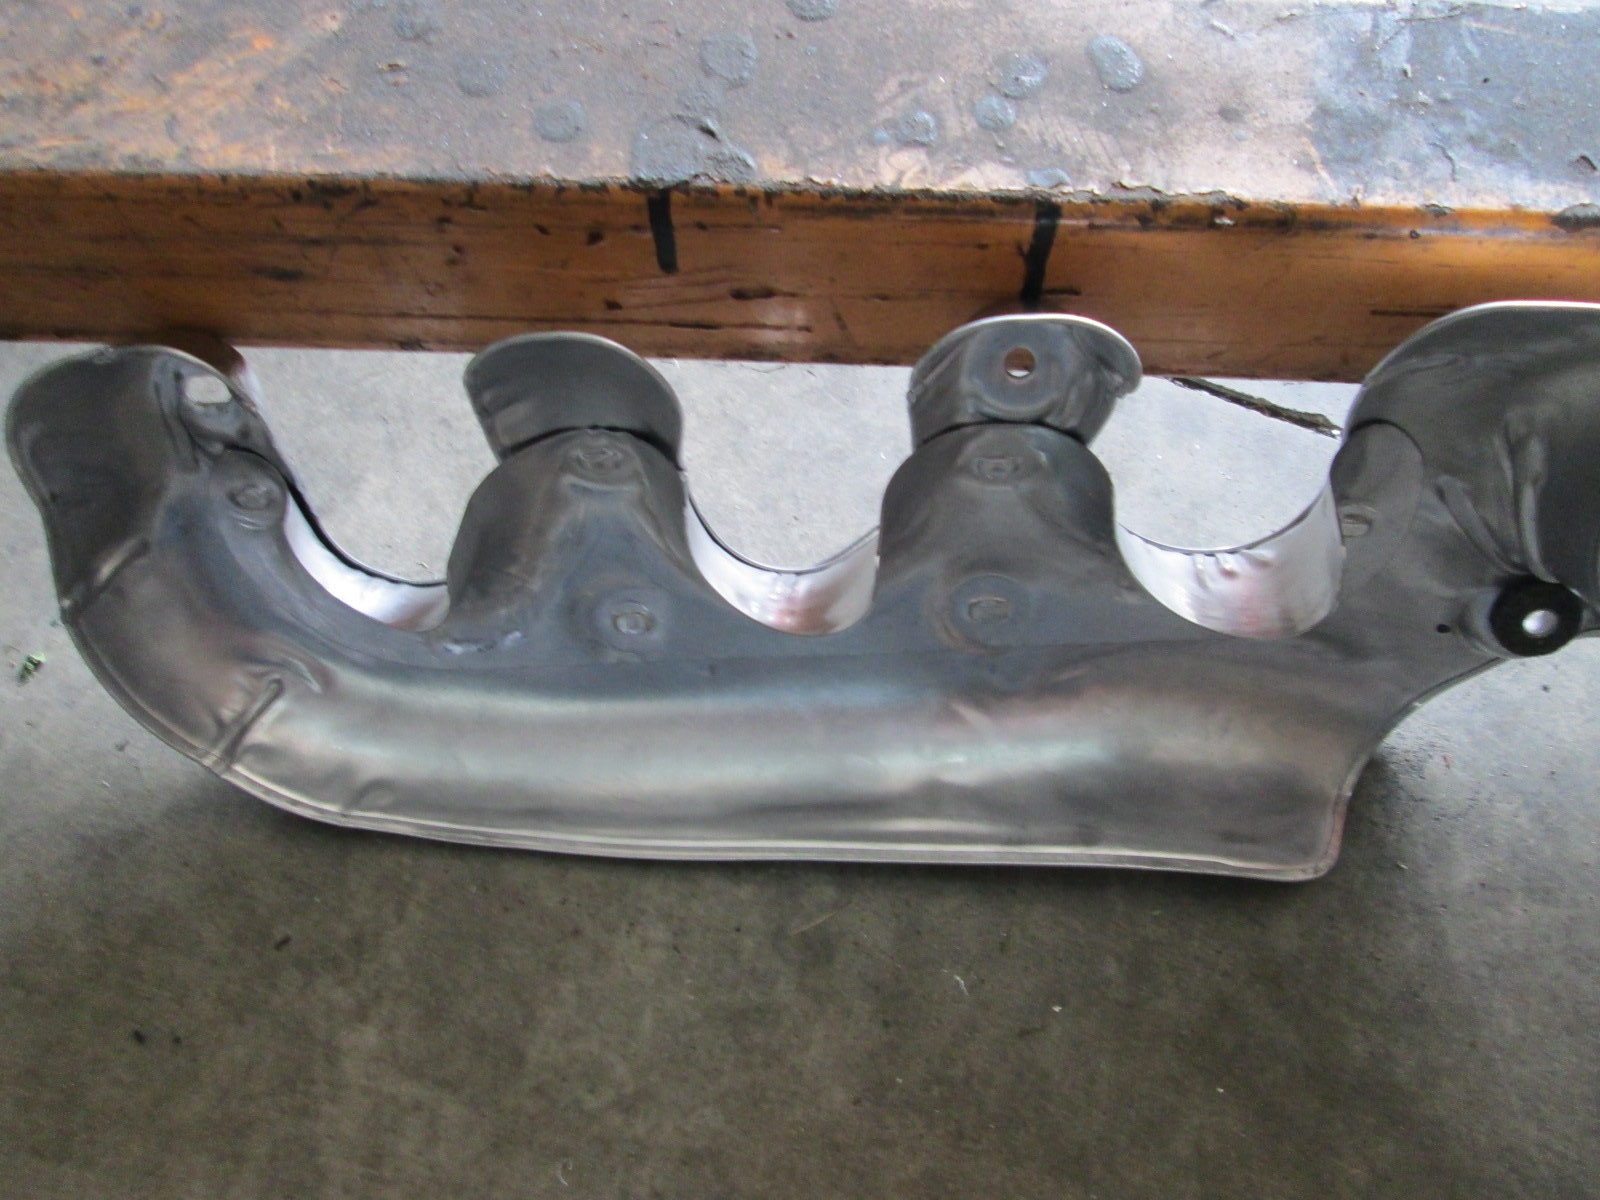
The new rear heat shield showed up today. It is actually from the 2015+ LT series truck engines, but it should be able to be made to work. I like the smoother look as well as the heat shield extends deeper into the plug openings.
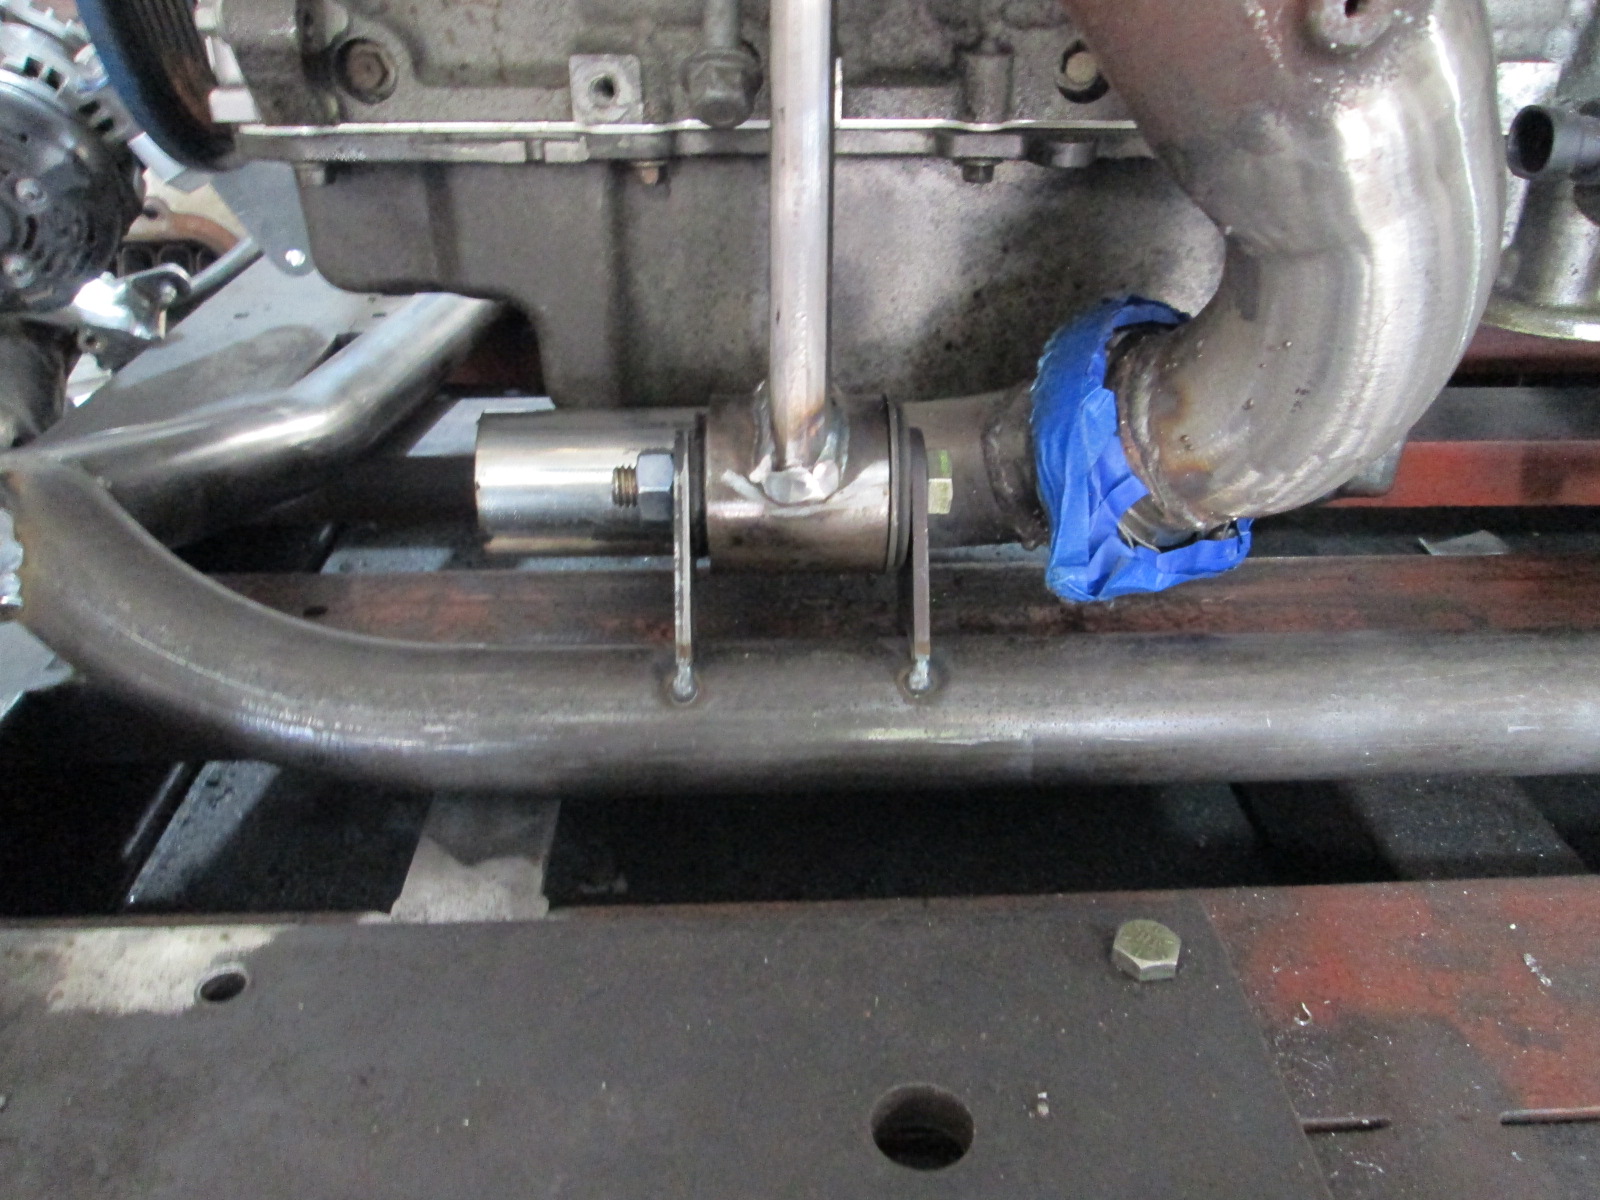
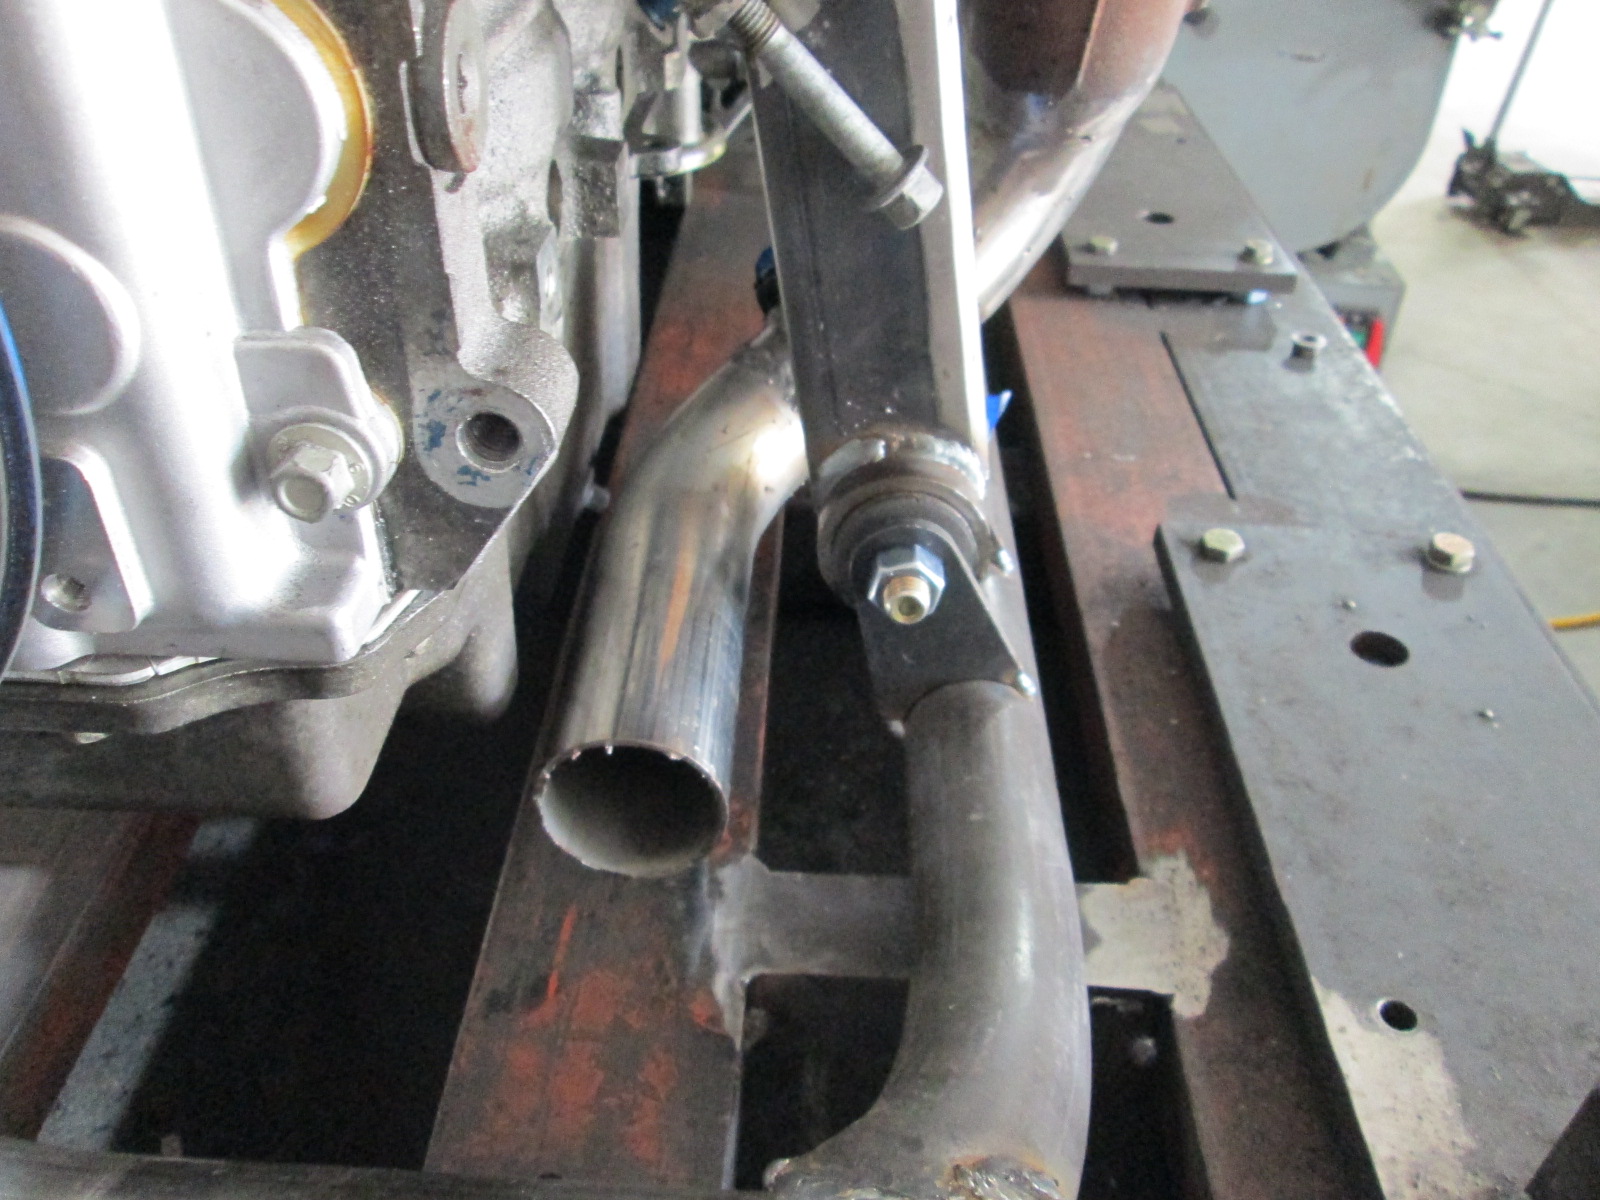
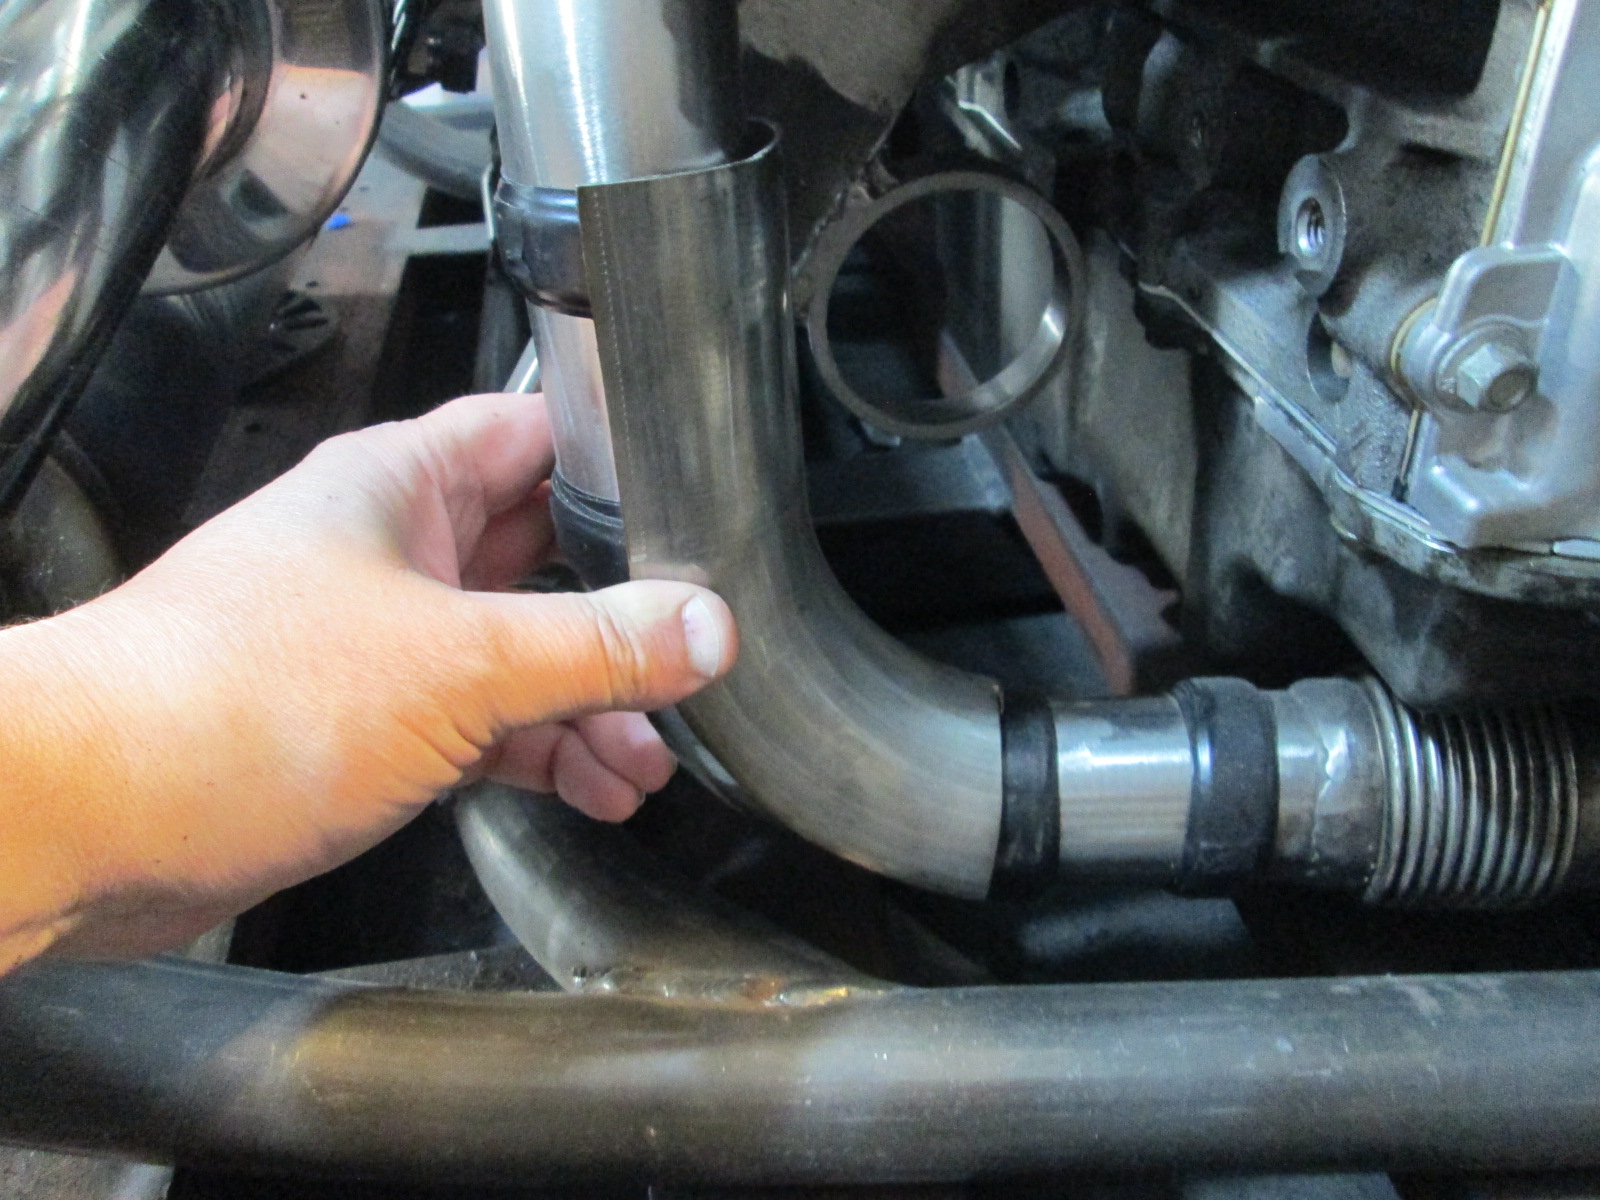
Also started routing the 2" exhaust from the front manifold. Got the V-band, the first bend and a section of tube to the location of the 2nd bend roughed in.
Also started welding the mufflers to the elbows. Notice I did cut back the flange for the 3" muffler as discussed.
[This message has been edited by fieroguru (edited 09-27-2020).]
Very cool, love what you've done with the mounts/cradle/exhaust. Never dreamed you could fit all of that so well. I really want to unload my second turbo 3800 car and try the LS4 manual swap this off season.
Originally posted by Steel: Very cool, love what you've done with the mounts/cradle/exhaust. Never dreamed you could fit all of that so well.
Thanks! It just takes time, preplanning, and willingness to redo things a few times to get what you wanted.
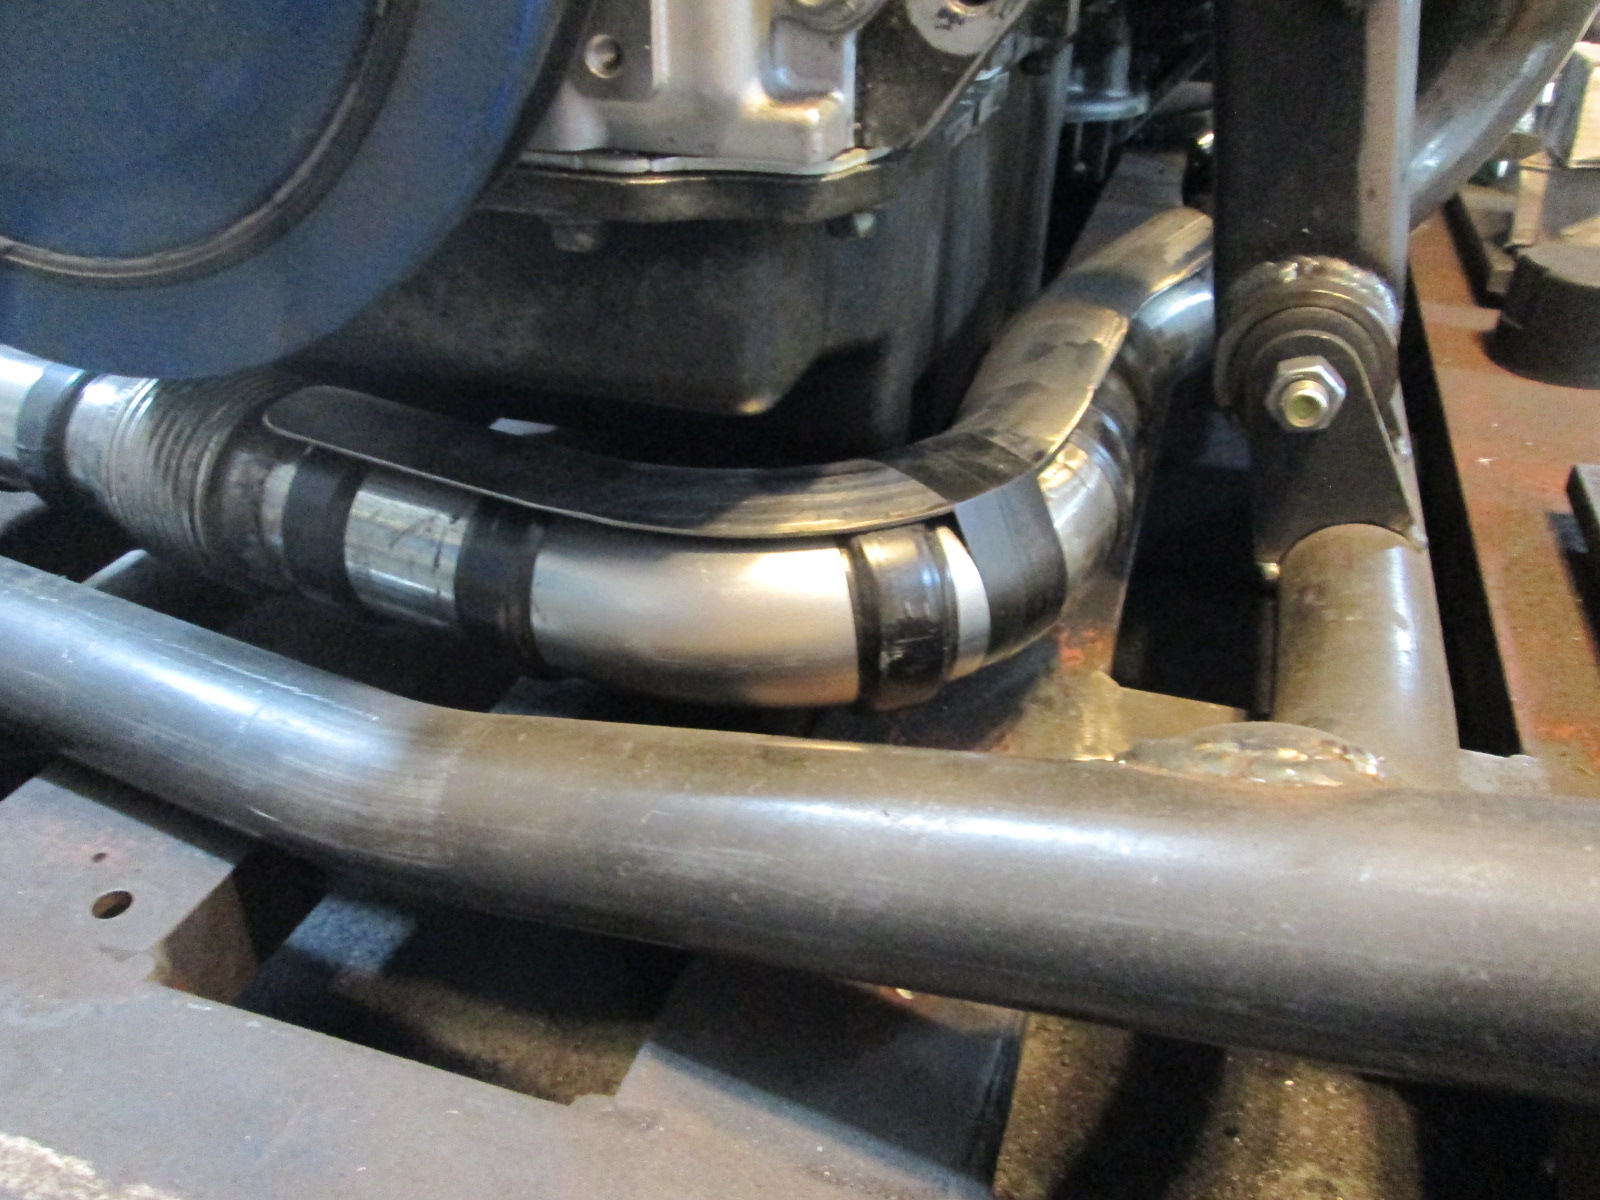
Crossover exhaust pipe is done, except for the heat shields around the oil pan and the tripot housing. It is 1" above the bottom of the cradle.
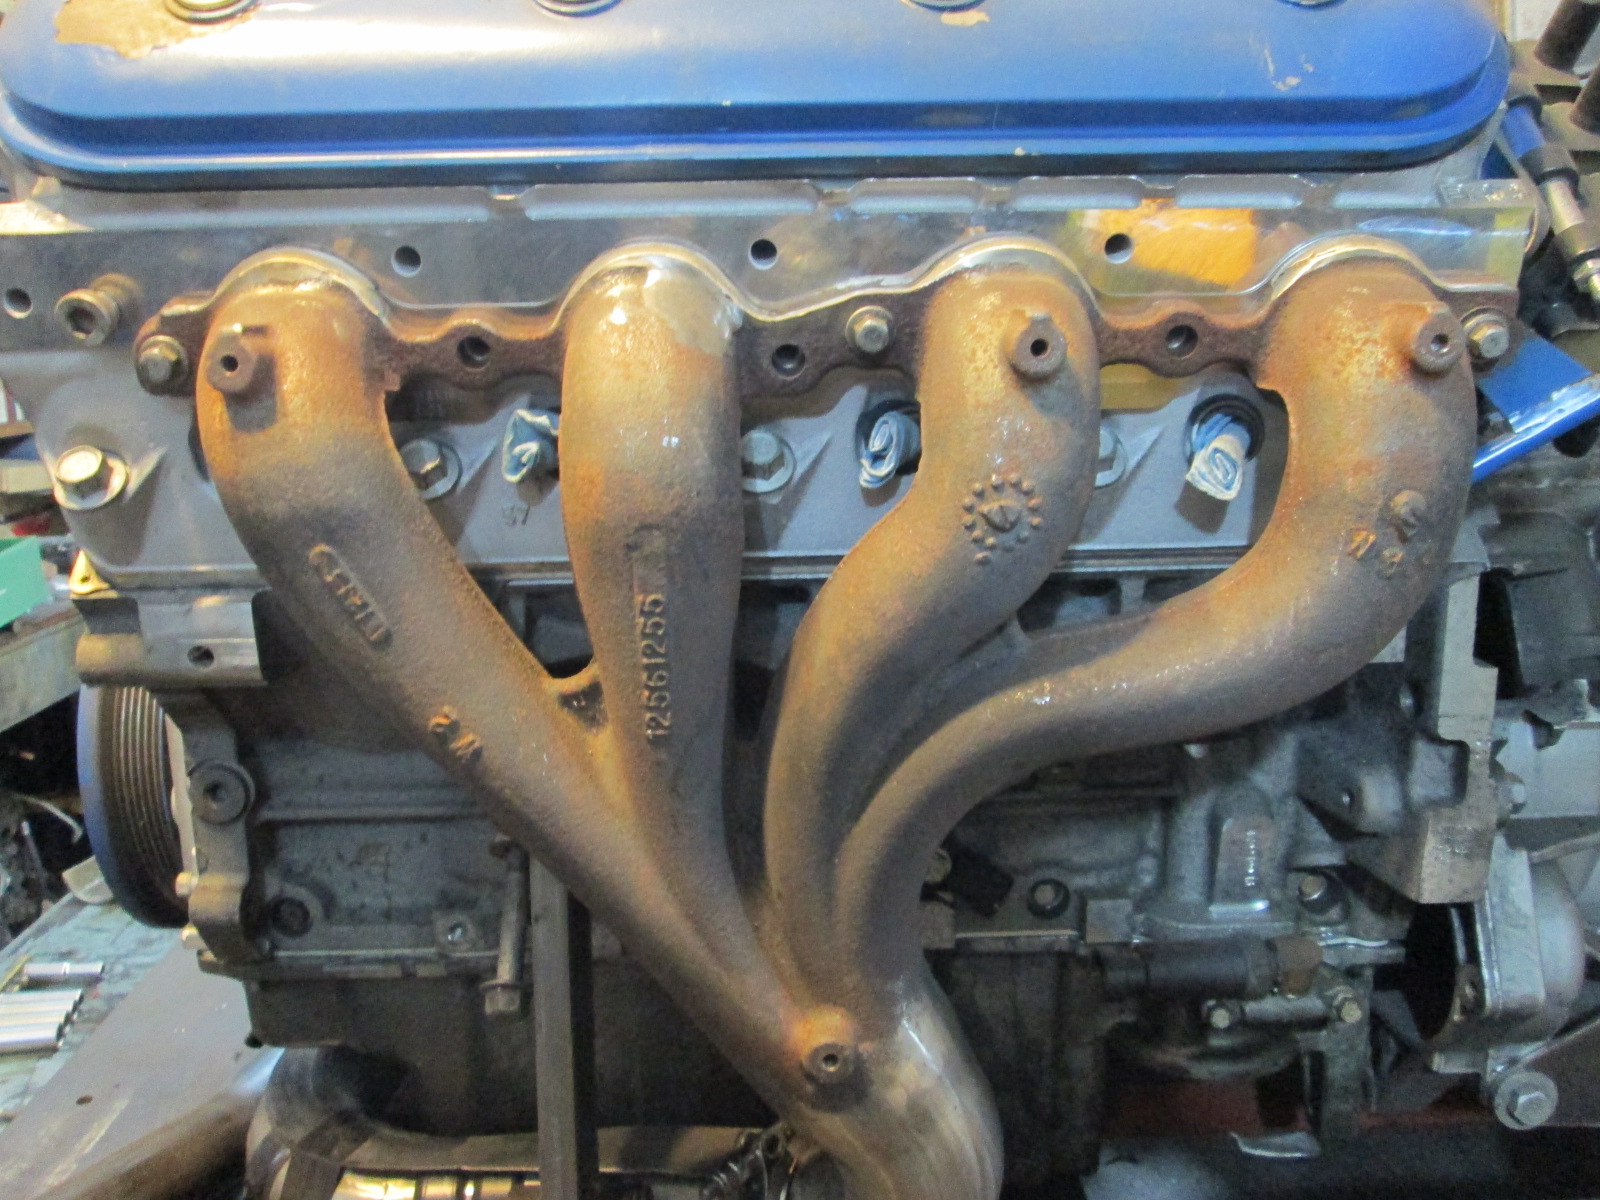
I also started to remove the egr pocket. I welded the ports closed on the two center runners and have started to trim away the excess material. Still a little fine tuning to this area is needed.
Prior to fabbing up the crossover, I looked into the use of a bellows, ran some preliminary numbers...
With the crossover being a large U shape structure (legs 9", center 15") they tend to be more flexible vs. the same length of straight pipe, which keeps stresses lower and less prone to cracking.
The area of most concern is the 15" section at the bottom as expansion in this area will try to push the two legs apart (which will try to pry the manifolds from the heads). A 15" section of stainless will expand 0.082" with a 600 degree delta-T. It grows to 0.1375" at 1000 degree delta-T. With one end of the crossover attached and moderate hand force, I can make it deflect about 1/16" (.0625), which is in the range of the 600 degree delta-t deflection.
The other factor is the bellows is built to flex (expand/contract) and with this U pipe being pre-turbo, there will be pressure in the exhaust. I don't really know what it will be, but with a smallish single on a LS, a 2:1 pressure ratio isn't unheard of. So if I target 10psi boost pressure, the pre-turbo exhaust could easily see 20psi. With the ID being 1.875" that would be 55 lb-force being applied at the same area with the bellows in use (and nothing to resist it). To really get the benefit of reduced stress in the U pipe, I would have to run a support between the two legs to absorb the back pressure force from the bellows.
Since I can move the end of the pipe about 1/16" with just hand force, there is close to the needed "flex" built into the system with the use of just the "rigid" exhaust tubing. Adding the bellows would likely trade one stress for another stress of similar magnitude and add cost, weight, complexity, and an additional failure point (bellows do end up cracking too) to the situation.
I have weighed the pros/cons and at this time I am planning to leave the bellows off the U pipe and see what actually happens. Worse case I crack the U pipe and have to add add the bellows.
[This message has been edited by fieroguru (edited 10-04-2020).]
Cleaned up the welds at the V-bands on both manifolds as well as the exit 90 from the 3 1/2" muffler. Built up the LS6 manifold to head flange at the top of the primary ports so there is more material to clamp the LS7 (or LS4) gaskets. Cleaned up the port alignment on both manifolds to the ported heads. Welded a 7" section of 3" tail pipe for the driver's side exit from the 3" muffler - this is too long, but will allow me to cut and fit that side once the drivetrain is back in the car for its next test fit. Also tried to test fit the LT heat shield... no go. The LS primary pipes are more angled and the LT are more vertical, so the spark plug pockets on the new shield won't clear the primary tubes.
Heat management in swaps using metal heat shields to keep radiant heat from heat sensitive components has been a significant focus of mine with a swaps in the last 15+ years. I have had success with heat shields allowing alternators to be less than 1/4" away from headers, like this setup (the headers also were ceramic coated).
LS4 alternators are 130A, dual fan, much more efficient and less sensitive to heat, but I will still make sure a proper heat shield is in place to keep all the radiant heat off the alternator body. Not expecting any issues with this approach and alternator position.
I used a header wrap on the stock manifolds under the stock heat shields. I popped the heat shields off and replaced them over the wrap.
I scanned this thread real quick because you mentioned the LS6 intake. Are you going to use an LS6? Did you make brackets for the injector rails? Sorry if you already mentioned it, but I did not see it. I love the plasma cutter, how is it working for you? Any regrets or issues? Options you should have got? Add ons you had to get after purchase ar modifications you had to make or tweek?
Originally posted by Rickady88GT: I used a header wrap on the stock manifolds under the stock heat shields. I popped the heat shields off and replaced them over the wrap.
Not really a fan of header wrap for a daily driver 3 season car. I will stick with metal heat shields.
quote
Originally posted by Rickady88GT: I scanned this thread real quick because you mentioned the LS6 intake. Are you going to use an LS6? Did you make brackets for the injector rails? Sorry if you already mentioned it, but I did not see it. I love the plasma cutter, how is it working for you? Any regrets or issues? Options you should have got? Add ons you had to get after purchase ar modifications you had to make or tweek?
I am using the Dorman LS2 intake manifold. As part of the design they made us dual use so it accepts 3 and 4 bolt throttle bodies, has several of the LS1/LS6 ports and openings and fuel rail mounting bosses (whcih are different than the LS2 (and LS4 fuel rail mounting bosses). So far I haven't got back to making the adapter brackets so I can use the LS4 fuel rail on it. I am also using a LS6 exhaust manifold on the front side of the engine.
I haven't had much free time to play with the plasma cutter... either I am working 70+ hrs at the day job, or work for customer orders has spiked, or I focus my limited free time making progress on the turbo upgrade. One of these days it will be a higher priority.
Thanks for your continued updates. I have run my LS4 without the fuel rail hold downs for years. I am not saying that it is ok to do, but I have gotten away with it. I just want the hold downs to look good. This is why I am looking so close at this part of your swap.
btw, when I replaced my Northstar starter I drove it for 30 miles before seeing fuel coming out from under the fuel regulator while looking under the hood. Eek. No wonder it took 2 feet to drive the car. Forgot the replace the clip holding it down.
60+ hrs/week at the day job and processing fiero parts orders has been keeping me very busy, so not much time for the LS4/F40/Turbo...
One of the projects that took far longer than needed (and wasn't really needed) was cleaning up the front manifold. The stock LS6 front manifold had an EGR connection and passage on the backside. The tops of the primary flange was also more oval than round and let the top of the gasket stick out about 1/8". Even though this manifold will be up front and not visible, I took the time to make it look nicer (and gasket match them to the LS7 MLS exhaust gaskets). Before:
After:
Finally got the start of the rear exhaust welded up.
The heat shields between the exhaust and the oil pan and tripot joint are coming along, but still need more work. I did add a bellows after I figured out I could connect the heat shields on each side to support the bellows from boost pressure.
[This message has been edited by fieroguru (edited 12-24-2020).]
Thank you. Knew you were covered up or there woulda been updates. I don't miss those kinda work hours and doing anything afterwards for certain pretty well covers available time. I only got paid for 40 of the hours myself. Somehow it still wasn't good enough.
I have been salary exempt since 1998. Long hours don't really bother me (borderline workaholic), especially since I enjoy what I do for my day job as well as all the work I do with Fiero related R&D projects. But there definitely are times where I would prefer to be working on my Fiero related projects.
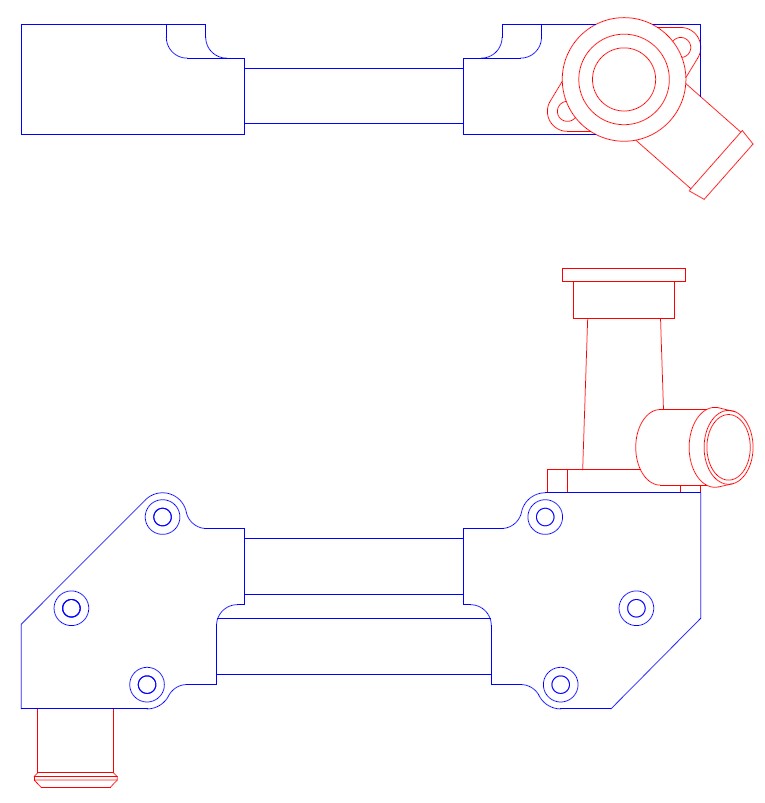
Over the last couple of months, I have been working with a local CNC shop to start making several of my parts. In another couple of weeks I should have 50 F23/F40 clutch line connectors, 25 LS4 Multi-Port Oil bypass plates, and we have finished the redesign of the LS water manifold.
The original monoblock design required the drilling of two 7/8" holes about 10 3/4" deep from two sides. I was never able to find a shop able to produce them at an acceptable price point, so I took a step back and did a major rework to the design. Now the body is 4 parts: 2 blocks and 2 tubes. The two side blocks are about 4x4x2 and easily fit the capabilities of their 5 axis machining centers. I have placed the order for the first 2 sets for validation, as well as the first production run of 15 sets. Still working on dates for the first two as well as first production run, but these should finally be available in Q1 2021.
How are you going to seal the tubes to the blocks? O-rings?
and can someone point me to the page/post where he swaps the 24X for the 58X reluctor wheel pls? Have to do that soon and just want to check one (important!) detail! For some reason, I can't search for it and have tried every term I can think of. Appreciate it; thanks in advance; GP
and can someone point me to the page/post where he swaps the 24X for the 58X reluctor wheel pls? Have to do that soon and just want to check one (important!) detail! For some reason, I can't search for it and have tried every term I can think of. Appreciate it; thanks in advance; GP
------------------ "I am not what you so glibly call to be a civilized man. I have broken with society for reasons which I alone am able to appreciate. I am therefore not subject to it's stupid laws, and I ask you to never allude to them in my presence again."
Personally, after reading what he went through and the "Gotchas" involved, it was easier for me to buy a NOS crank with the reluctor on it that I wanted. I found one from GMPartsGiant (I think), and it was around 250 bucks with shipping, I think. Probably that much because it shipped in a wooden crate with built in supports!
I still have a LS4 crank with the 58x reluctor on it, it's in good shape, might just need a little polishing. Not sure how much it would cost to get to you safely, though. I have made sure to store it "standing up", as I was told crankshafts over time when stored horizontally can 'flex' and be out of balance or something. No idea how true that is, so, gain of salt!
[This message has been edited by Trinten (edited 12-30-2020).]
thanks guys; much appreciated. I see I had it backwards; he's taking out the 58 and installing a 24. I'll be doing the reverse but the pix are still good for my purposes. Happy New Year to you and yours, all!