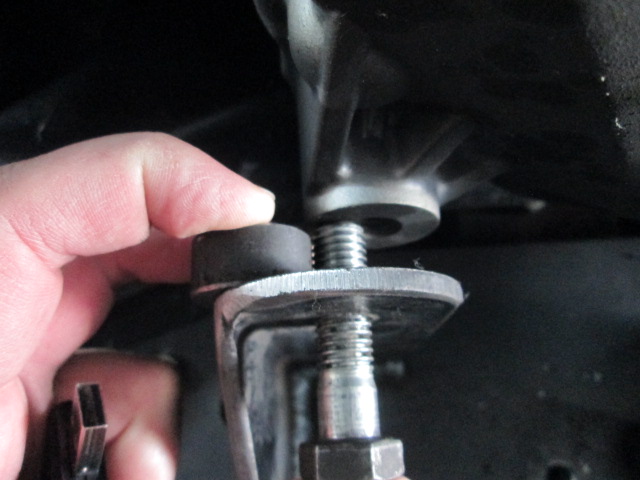
DoD lifter failure on the #7 exhaust valve. I knew it would happen someday, but glad it lasted 6.5 years, 55K mile (+ 18K miles before swap), and hundreds of WOT pulls to 7000+ rpm. Now I won't feel bad taking the car off the road for a little bit and doing some performance upgrades.
The current upgrade list: 1. DoD delete - all needed parts are now sitting on the shelf. 2. Camshaft swap. Tick Stage 2 Turbo camshaft for the 4.8/5.3L engines, 219/223 .617/.595 LSA114+3, sitting on the shelf 3. Dorman LS2 intake manifold. Sitting on the shelf 4. Flex fuel conversion. Flex fuel sensor and the Fierostore stainless steel sender are on the shelf. 5. Rework as many brackets, mounts, and smooth firewall panel in aluminum to help shed some weight. 6. Change the ECM to a RWD/6 speed manual ecm. This will allow me to remove the TCM and assorted wiring and likely remove my old school cruise module (weight savings). 7. Mockup and test fit Borg Warner SXE-369 turbo.
[This message has been edited by fieroguru (edited 09-29-2019).]
DoD lifter failure on the #7 exhaust valve. I knew it would happen someday, but glad it lasted 6.5 years, 55K mile (+ 18K miles before swap), and hundreds of WOT pulls to 7000+ rpm. Now I won't feel bad taking the car off the road for a little bit and doing some performance upgrades.
The current upgrade list: 1. DoD delete - all needed parts are now sitting on the shelf. 2. Camshaft swap. Tick Stage 2 Turbo camshaft for the 4.8/5.3L engines, 219/223 .617/.595 LSA114+3, sitting on the shelf 3. Dorman LS2 intake manifold. Sitting on the shelf 4. Flex fuel conversion. Flex fuel sensor and the Fierostore stainless steel sender are on the shelf. 5. Rework as many brackets, mounts, and smooth firewall panel in aluminum to help shed some weight. 6. Change the ECM to a RWD/6 speed manual ecm. This will allow me to remove the TCM and assorted wiring and likely remove my old school cruise module (weight savings). 7. Mockup and test fit Borg Warner SXE-369 turbo.
Originally posted by motoracer838: It was good that the lifter failed after the Power Tour...
Joe
It made it through the HRPT of 2016, 2017, 2019. I have driven the car about 3K miles since the HRPT this year. Of course it broke 2.5 hrs from home on my way to work. So had it towed to the in-laws, picked up a rental, came back with my truck and tow dolly, and took it home. Been working on clearing out space in the garage to pull it back in for the repair and other work.
I do wish it would have lasted a few more weeks. I was registered for a HPDE event on the 12/13th of October.
quote
Originally posted by Will: Is your engine a 24x or 58x?
The engine in the car is 58x, but I also have one of each on the shelf as well.
The '09 Trailblazer OS can take direct-wired cruise control without needing a BCM. Not sure if that's what you had planned or if you were looking at another option.
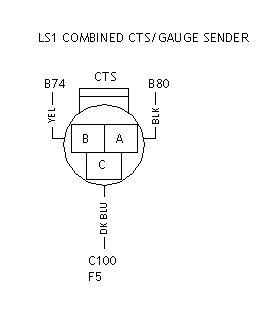
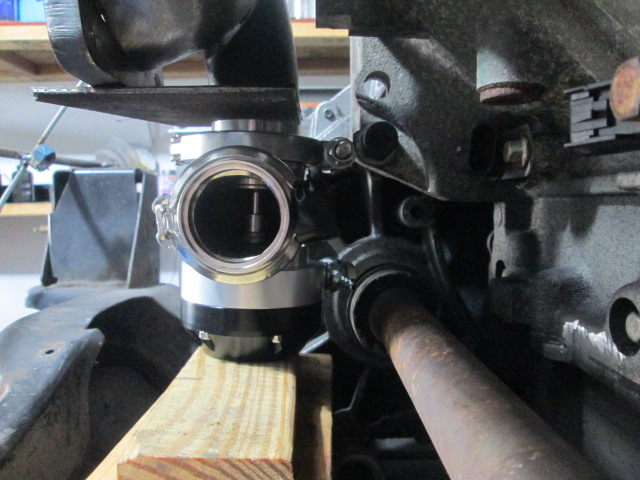
3 wire LS1 temp sender GM # 12551708, application 1998 Camaro w/ LS1, pigtail is the same as the TPS sensor on the fiero 2.5 and later model applications.
The bottom wire is for the gauge.
Only downside to using this 3 wire setup is I will loose the temp light, but the gauge is much more important anyways. I like the idea of 1 less sensor.
Is this pinout is looking at the mating face of the connector?
[This message has been edited by Will (edited 10-05-2019).]
Is this pinout is looking at the mating face of the connector?
I think it is the face of the connector (vs. the face of the sensor), but I will need to check the service manual when I get back home this coming Friday...
We just swapped my dad's truck* from two wire sensor + original gauge sender to the three wire sensor/sender combo. We figured it out.
* Truck = 1990 3/4 ton Suburban, original diesel chassis, now with 3.21:1 14bff rear, Cadillac 500 and 4L80E trans. We run '90's LT1 controls via the optical trigger wheel mounted in the bottom of a large case HEI distributor.
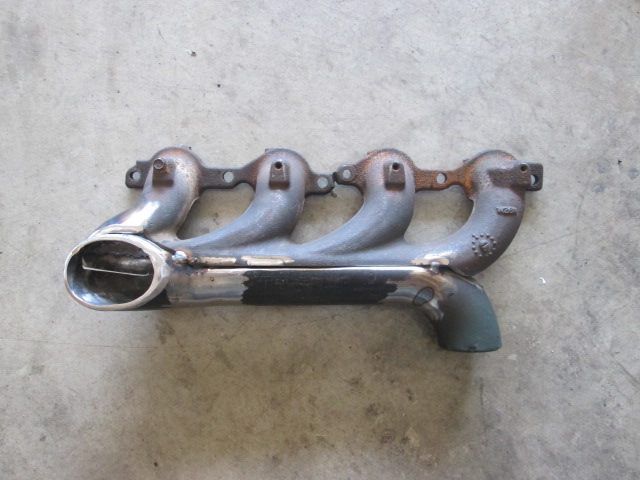
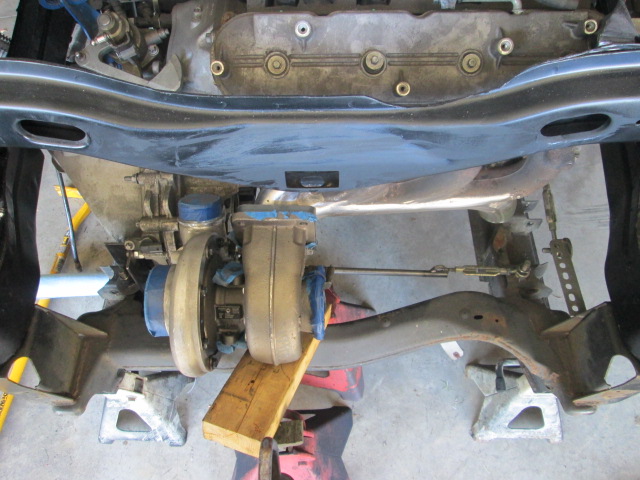
Over the past several weekends, I have been slowly working on the turbo manifold, and it has been a lot of work, but I am pretty happy with it.
Started with a truck manifold from the passenger side, cut the bottom half of the main tube off. Took some 2 1/2" back pipe, cut it a little longer than needed, cut out about 1/3 of the circumference the length of the pipe, then trim, trim trim until it would mate up well with the truck manifold. I use the vice to give it a taper as the exit end is larger and I wanted a smooth seem between the two pieces. I used a combination of 2 1/2", 2" and 1 1/2" elbow that were cut and shaped to smooth out all the transitions starting with the front bank tube all the way to the end where the T4 flange will be welded on.
Lots and lots of cutting, grinding, welding and more grinding got me to this point.
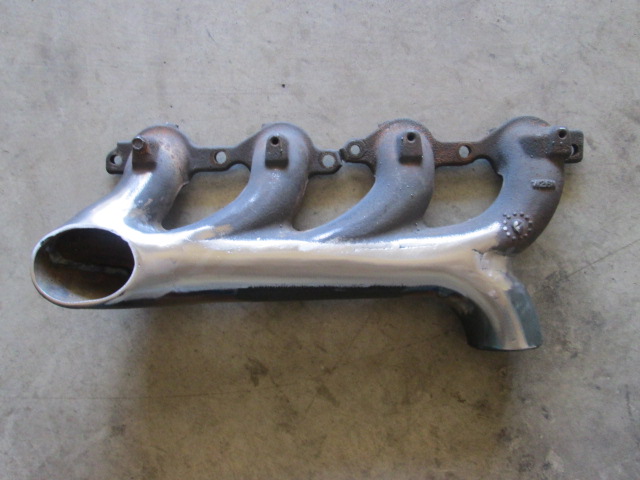
I bolted the manifold to one of my spare/junk heads and welded everything up. I started with a root pass along the seam, only doing about 2" at a time before jumping to the next section. Followed that up with a heavy top weld with about 1/8" overlap past the base material on each side. I went as fast as my 220V welder would allow, which kept the manifold quite hot through the top weld portion. Then I let it cool while I mowed the grass.
Removed the manifold and is was still flat at the head, which is good.
Then back to grinding....
I still have a lot of work to finish the smoothing process, but it is starting to look like a turbo manifold.
So after nearly 21 years working for the same company I finally decided to move on and switch industries. Part of it was to exit a quickly declining industry on my own terms, part of it was to reduce my travel commitments with a plant level assignment vs. a corporate position. I am about 2.5 weeks into the new job. Still working 10 to 12 hr days as I learn a lot of new things, but at least I am home every night and weekend.
With the new job, I hope to continue to make progress on the LS4 upgrades.
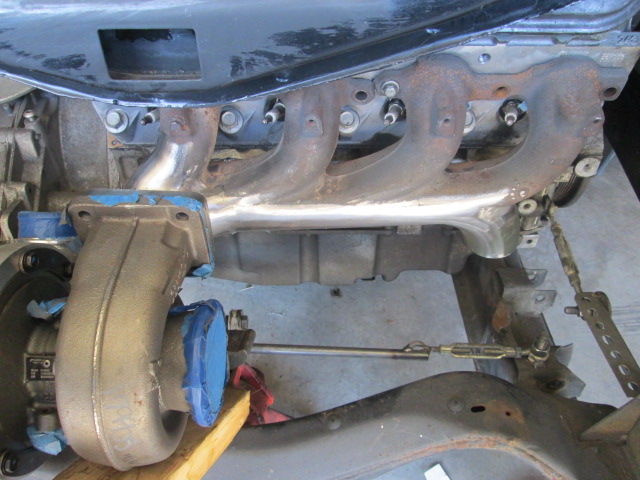
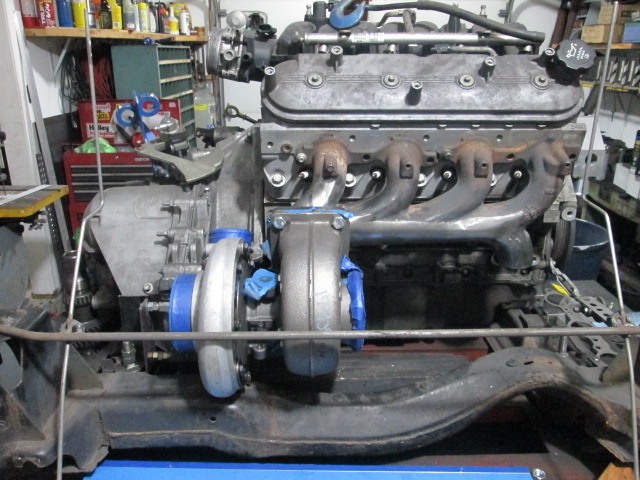
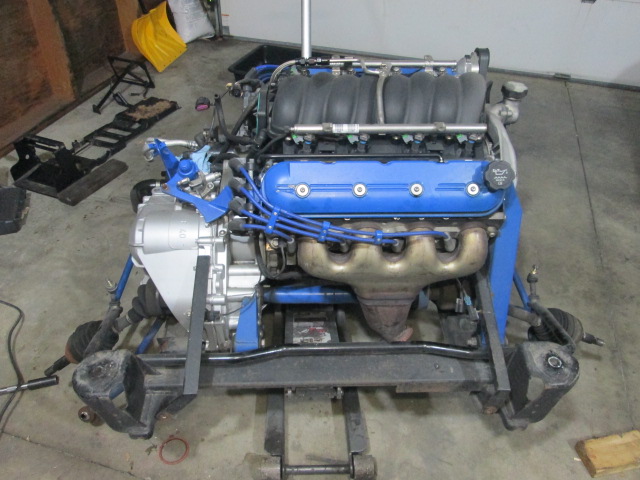
Last weekend I had a few hours to remove the LS4/F40 mockup engine and cradle from the parts chassis, mount it on my cradle fixture, and do a little more cleanup to the turbo manifold. I tack welded the T4 flange to the manifold and bolted the turbo up. It is very close to fitting w/o any modification to the stock trunk, but I likely either need to mill the manifold to allow the flange to be closer to the engine or mill the manifold so the T4 flange is closer to the same angle as the head. Either method will pull the compressor housing a little further from the trunk wall.
Swaps are a lot like playing Chess... you need to plan out 5 steps ahead to make sure everything had a planned location and nothing looks like an afterthought. The issue I am pondering now is how best to integrate the waste-gate. It needs to be accessible, but I am kinda going for a stealth turbo install, so it needs to be relatively hidden and the manifold and turbo location doesn't leave much room.
Originally posted by fieroguru: Swaps are a lot like playing Chess... you need to plan out 5 steps ahead to make sure everything had a planned location and nothing looks like an afterthought. The issue I am pondering now is how best to integrate the waste-gate. It needs to be accessible, but I am kinda going for a stealth turbo install, so it needs to be relatively hidden and the manifold and turbo location doesn't leave much room.
Many of the so called "Sloppy Mechanics" weld the WG flange directly to the turbine housing and seem to have good results.
------------------ "I am not what you so glibly call to be a civilized man. I have broken with society for reasons which I alone am able to appreciate. I am therefore not subject to it's stupid laws, and I ask you to never allude to them in my presence again."
Originally posted by ericjon262: Many of the so called "Sloppy Mechanics" weld the WG flange directly to the turbine housing and seem to have good results.
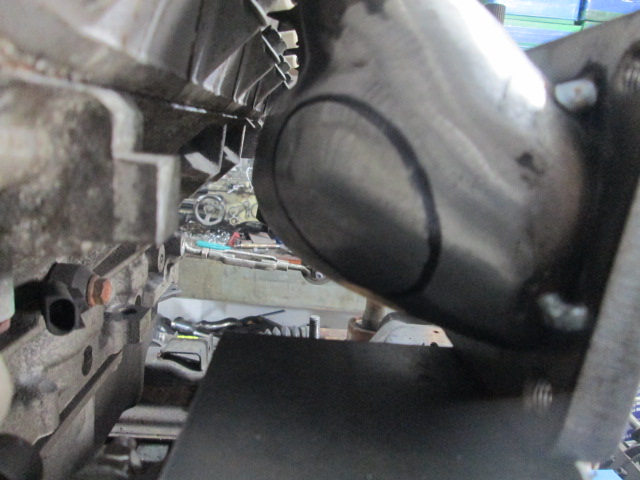
That is one of the options, but there isn't much room between the turbine housing and the trunk shelf... I need to pull the drivetrain from my car for the cam swap and do a test fit to validate clearance and fitment options.
[This message has been edited by fieroguru (edited 11-06-2019).]
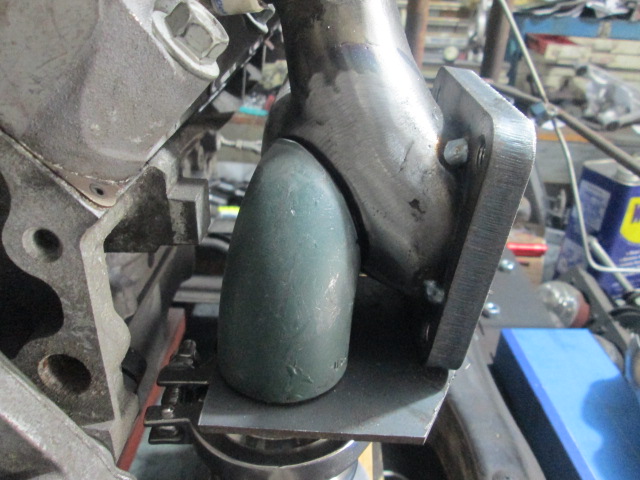
I think I have decided on the general placement of the wastegate for this phase of the build. Its placement should have good flow, the discharge can be easily plumbed into the 3 1/2" down pipe/muffler, and everything will be hidden from view. The only 2 downsides are manual adjustments will have to happen from under the car and phase II with AWD will likely require modification of this location (but that is realistically 2-3 years away and I want more power this summer).
I tacked the 1/8" plate onto the flange to establish a level surface so I could work on fitment of the elbow.
Before I commit to this location I need to explore the routing of the oil return line and determine if it will go above the axle (if so the waste gate will likely need to be lowered some.
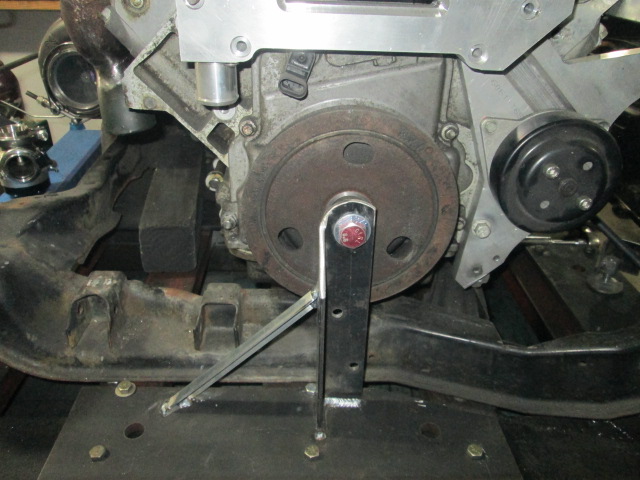
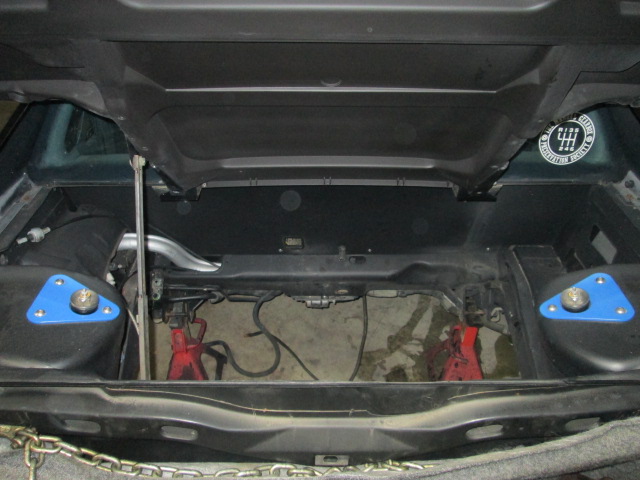
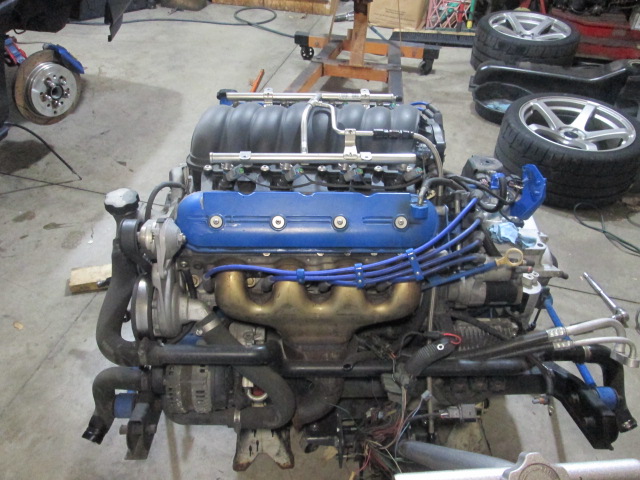
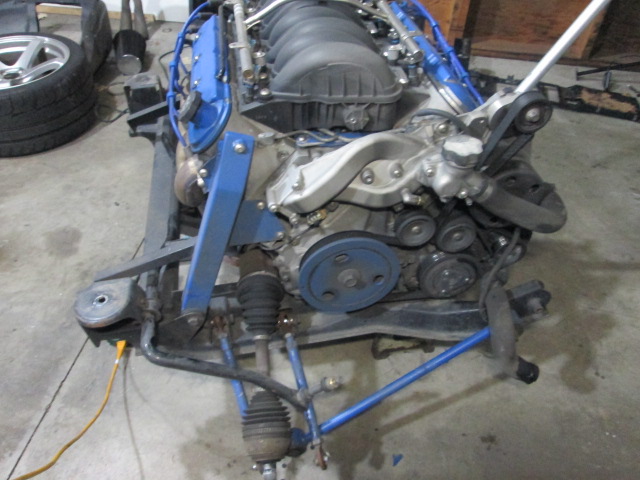
These fixture brackets were made and installed on the cradle fixture to locate and support the LS4/F40 above the cradle. This placement is level and square to the front cradle bolts and optimizes the available clearances in the engine bay. These brackets fully support the drivetrain and allow it to hover above the Fiero cradle for mount fabrication and installation purposes.
Now I need to pull my original LS4/F40 drivetrain and see how close it is to this placement and decide if I want to change it over or keep it like is has been, I don't believe the two placements will be more than 1/4" off in any direction.
[This message has been edited by fieroguru (edited 11-28-2019).]
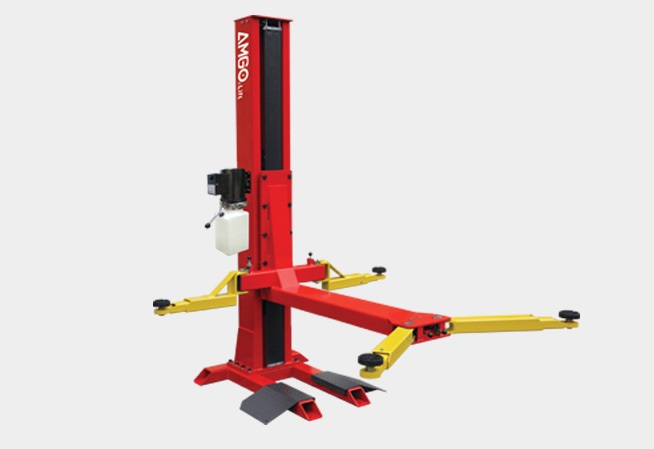
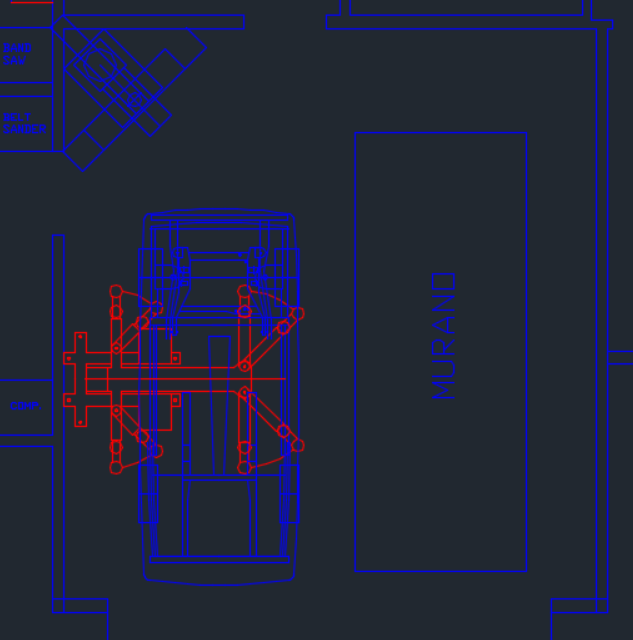
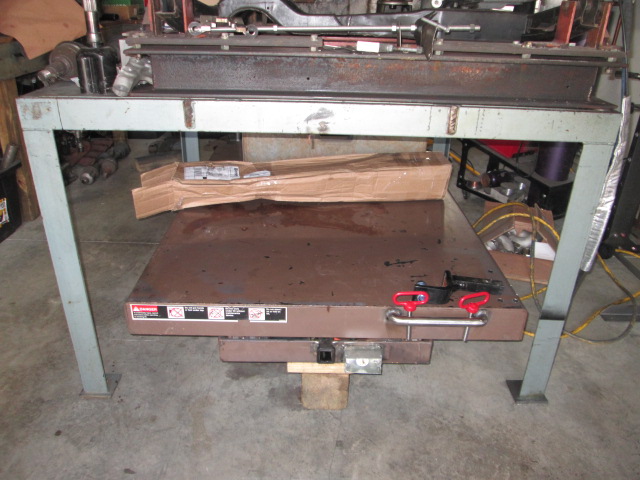
Starting to get serious about a lift for my garage... but space is very limited. There is zero room for a twin post lift, so I have been looking at the Amgo SL-6 single post lift: http://www.amgohyd.com/lift...emid_94_lcid_38.html
Here is a proposed layout of it with a fiero (centered for lifting with engine/transmission).
The main post is 108" and my garage is 113" - which will work.
The in the layout above, the center of the main post is 96" from the roll up garage door. In the picture below, the edge of the metal rack shelving is 90", so the racking will have to go, but the main post of the lift will clear the garage door in the raised position.
Without changing the path of the garage door, I could lift the Fiero up about 35 with the door in the raised position. This is plenty high to remove the cradle. I could also raise the garage door at some point as well to allow higher lifting.
To use the lift the Fiero will need to be about 6" further to the center of the garage than it currently sits. But I could slide it over to the current position when not using the lift.
The install is very tight. Given the limited room between the roll up door and the mill, the lift probably couldn't be used for my truck or the wife's Murano, which is a bummer.
I likely would want to relocate the hydraulic pump to the other side or further down the wall. Also the lock release would only have about 4" to the wall, so that might need to be relocated as well. The lift is about $2500 shipped, but I would likely have $3000 to $3500 in it for all the changes to optimize the install.
I'd pass and save the money to build a workshop with high enough ceilings for a larger lift.
------------------ "I am not what you so glibly call to be a civilized man. I have broken with society for reasons which I alone am able to appreciate. I am therefore not subject to it's stupid laws, and I ask you to never allude to them in my presence again."
I probably would have bought a lift like that if it was available at the time I bought my lift. The two post lift I have limits placement of other cars. I have 10 foot ceiling in my garage so height was only a minor issue. I can work standing up under all of our vehicles but I am only 5'8" tall. As for the slab, I have a 4" thick floor (5" is recomended by the lift mfr) and it has not been an issue. But I do have rebar in the floor.
------------------ 86 GT built 2.2 ecotec turbo rear SLA suspension QA1 coilovers on tube arms
Originally posted by ericjon262: I'd pass and save the money to build a workshop with high enough ceilings for a larger lift.
Adding more garage space is tricky and expensive. I am at the HOA limit (3 car garage) and at the setback limit (6') for my cul-de-sac lot. To add on I would have to demolish the 3rd bay and build a new one further back so it could be wired (but not wide enough to be a 2 car). No free standing structures besides the house are allowed, so no detached garage either. All in it would likely be a $30K to 50K expense and my house value is already at the upper limit of the neighborhood... I have several plans drawn up, but not ready to pull the trigger at this point.
quote
Originally posted by Will: How thick is your slab? Is it thick enough to adequately anchor the post?
4" thick and the spec for the lift is 4".
quote
Originally posted by wftb: I probably would have bought a lift like that if it was available at the time I bought my lift. The two post lift I have limits placement of other cars. I have 10 foot ceiling in my garage so height was only a minor issue. I can work standing up under all of our vehicles but I am only 5'8" tall. As for the slab, I have a 4" thick floor (5" is recomended by the lift mfr) and it has not been an issue. But I do have rebar in the floor.
If my garage was about 18" wider, this single post lift would be a no-brainer... I think it will work just fine for the summer months when the Murano is evicted to the driveway, but would be rather snug in the winter months. I am also concerned with the legs and structure being in the way when I don't need the lift.
The other option is to do some concrete work on the floor and install my 44 x 64 6000 lb scissor lift with 50" rise so it is flush with the floor (7" deep pit required). It would work well for swaps and have less clearance challenges, but not sure I am ready to commit to that path either.
Adding more garage space is tricky and expensive. I am at the HOA limit (3 car garage) and at the setback limit (6') for my cul-de-sac lot. To add on I would have to demolish the 3rd bay and build a new one further back so it could be wired (but not wide enough to be a 2 car). No free standing structures besides the house are allowed, so no detached garage either. All in it would likely be a $30K to 50K expense and my house value is already at the upper limit of the neighborhood... I have several plans drawn up, but not ready to pull the trigger at this point.
If my garage was about 18" wider, this single post lift would be a no-brainer... I think it will work just fine for the summer months when the Murano is evicted to the driveway, but would be rather snug in the winter months. I am also concerned with the legs and structure being in the way when I don't need the lift.
The other option is to do some concrete work on the floor and install my 44 x 64 6000 lb scissor lift with 50" rise so it is flush with the floor (7" deep pit required). It would work well for swaps and have less clearance challenges, but not sure I am ready to commit to that path either.
Yeah, HOAs just suck.
A slightly shallower pit isn't any less work, but if you recessed the single post into the floor until the under-car arm was flush, then it wouldn't be as much in the way when not in use.
[This message has been edited by Will (edited 12-03-2019).]
I've seen a few scissor lift systems for cars, I think they are pretty slick if they have the right safety features. I'd like to put those in my garage floor sometime in the future.
Sorry you have to deal with an HOA
I refused to buy a house in an HOA. "Protecting the value of my property" at the price of being told what I can and can't do, and potentially being outvoted and straddled with new R&Rs that I can't opt out of... is too high a cost.
HOAs only protect their own authority. Zoning laws that make development hard "protect" the value of your property by ensuring that housing supply has no chance of keeping up with housing demand in an area of rising population.
I didn’t even know single post lifts existed until I saw this post. Have you considered the mobile type single post lifts? With a pallet jack style handle for mobility.
There are quite a few. Just google portable single post lift. The one pictured is by eagle equipment- mobile man 6000 But the specs say not good for low vehicles.
The brand Fieroguru posted has a portable model with a min height of 4 1/2”. Same as the bolt down model. Amgo SML-6
Originally posted by KissMySSFiero: The brand Fieroguru posted has a portable model with a min height of 4 1/2”. Same as the bolt down model. Amgo SML-6
Correct. I don't have room for the pallet jack components on the backside. The mast needs to be as close to the wall as possible.
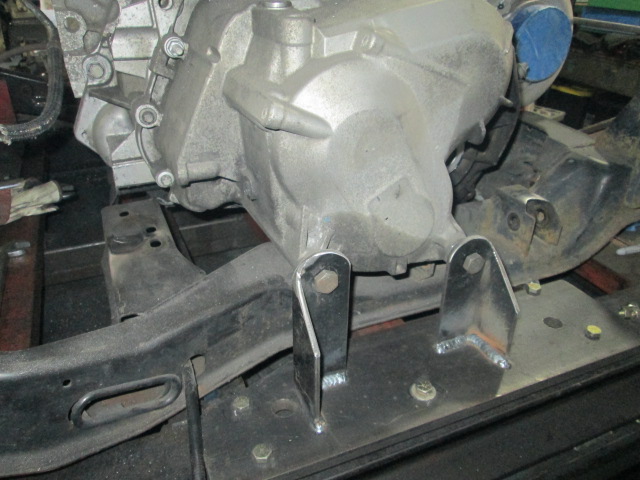
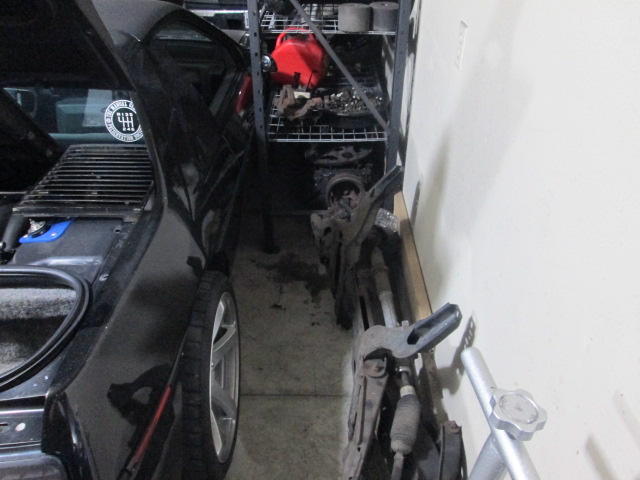
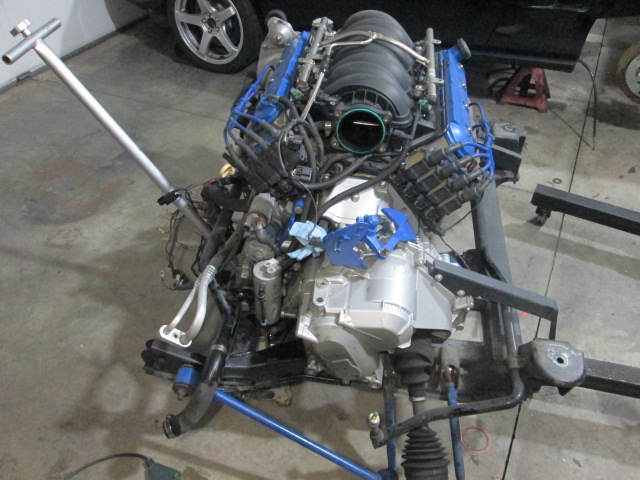
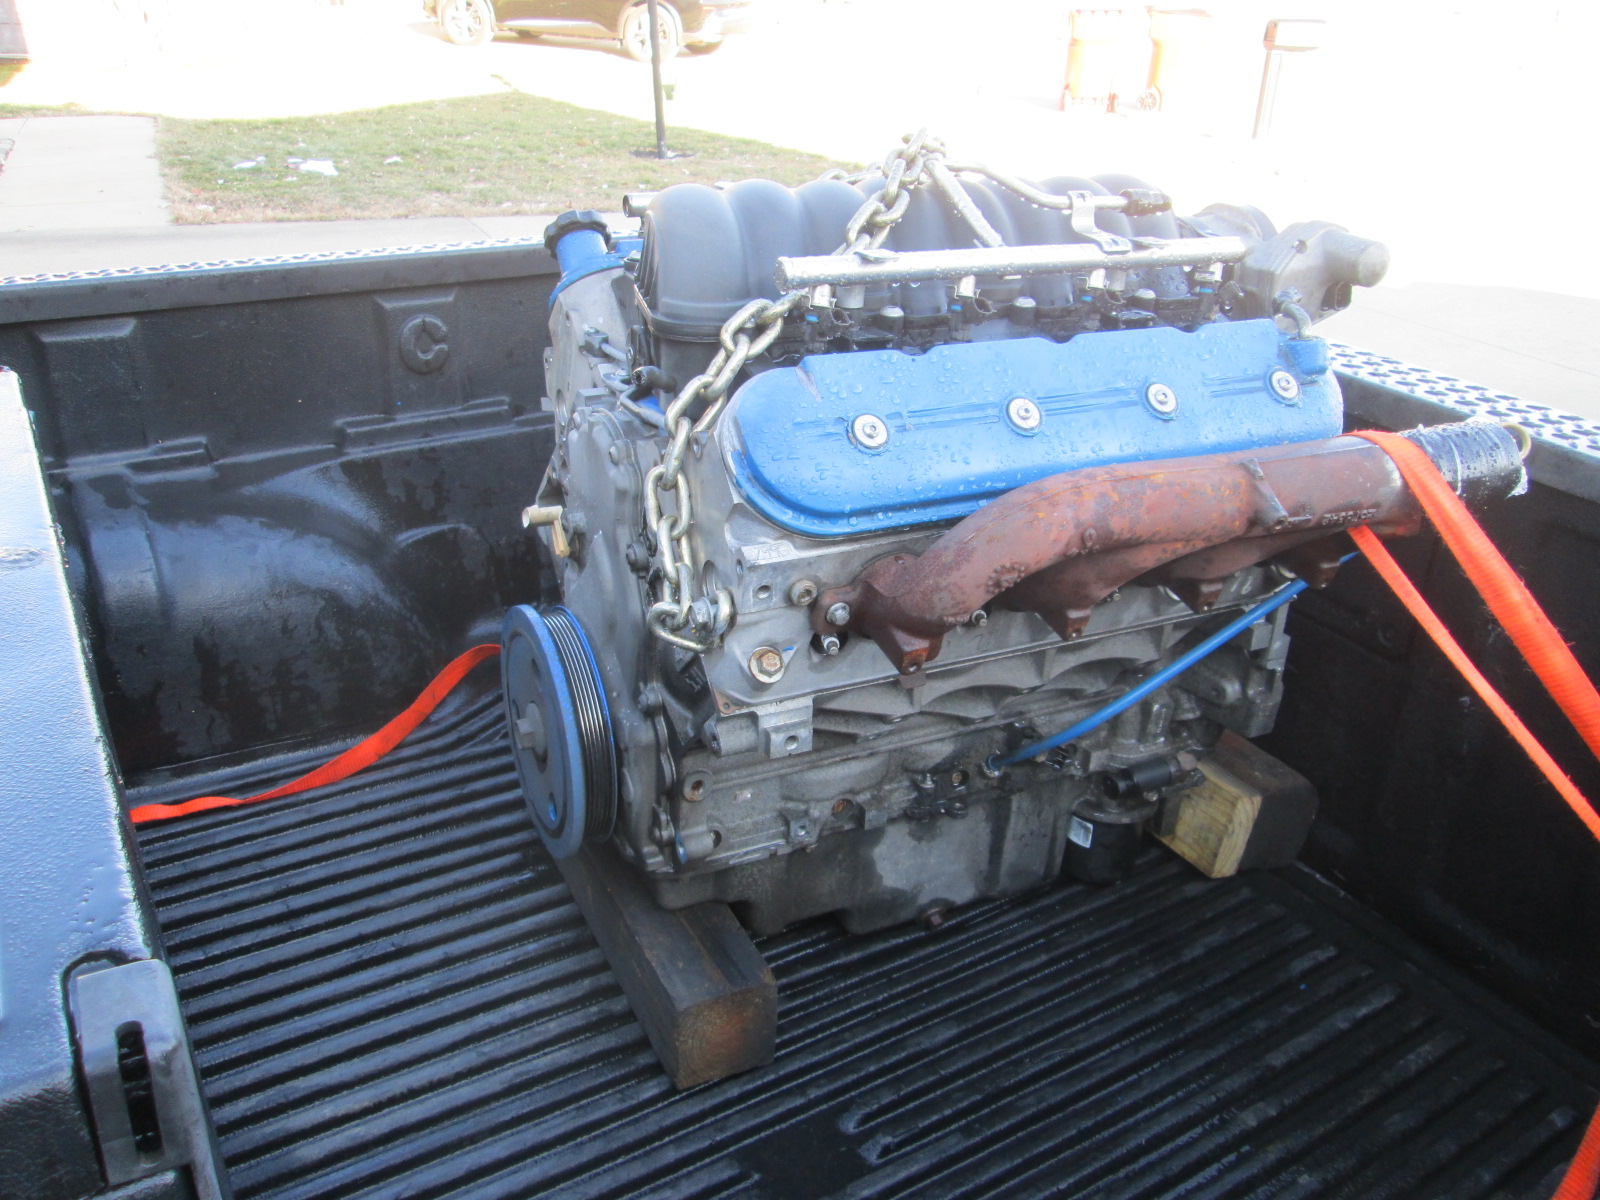
Moved the mockup drivetrain to the floor and put the original drivetrain on the cradle fixture.
The original drivetrain placement is about 1/8" lower, 1/8" closer to the passenger side, and 1/4" further to the rear than the placement for the mockup drivetrain. The primary reason for the change in placement is to better nestle the F40 into the factory notch on the driver side frame rail w/o moving it like I did with my original swap
Now I need to disassemble everything to separate the engine...
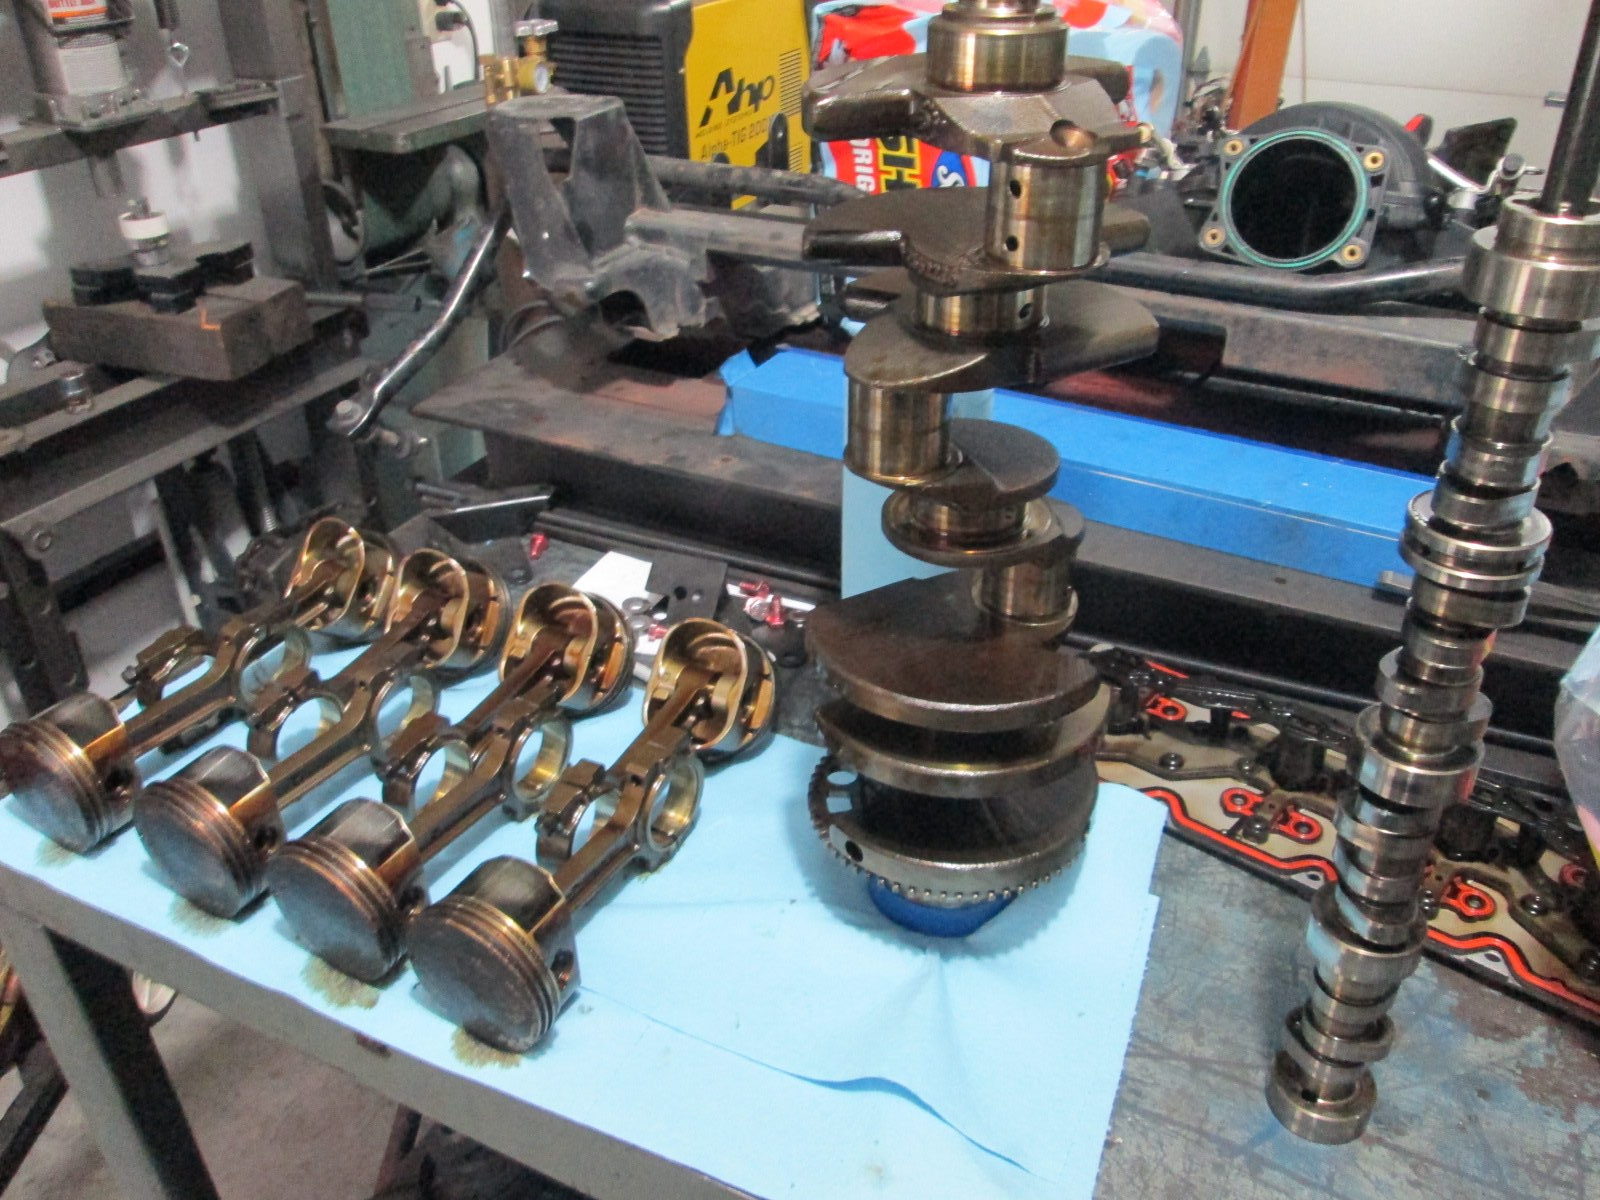
I got everything torn down and disassembled. I still need to wash the engine a little more before I put it on the engine stand for disassemby...
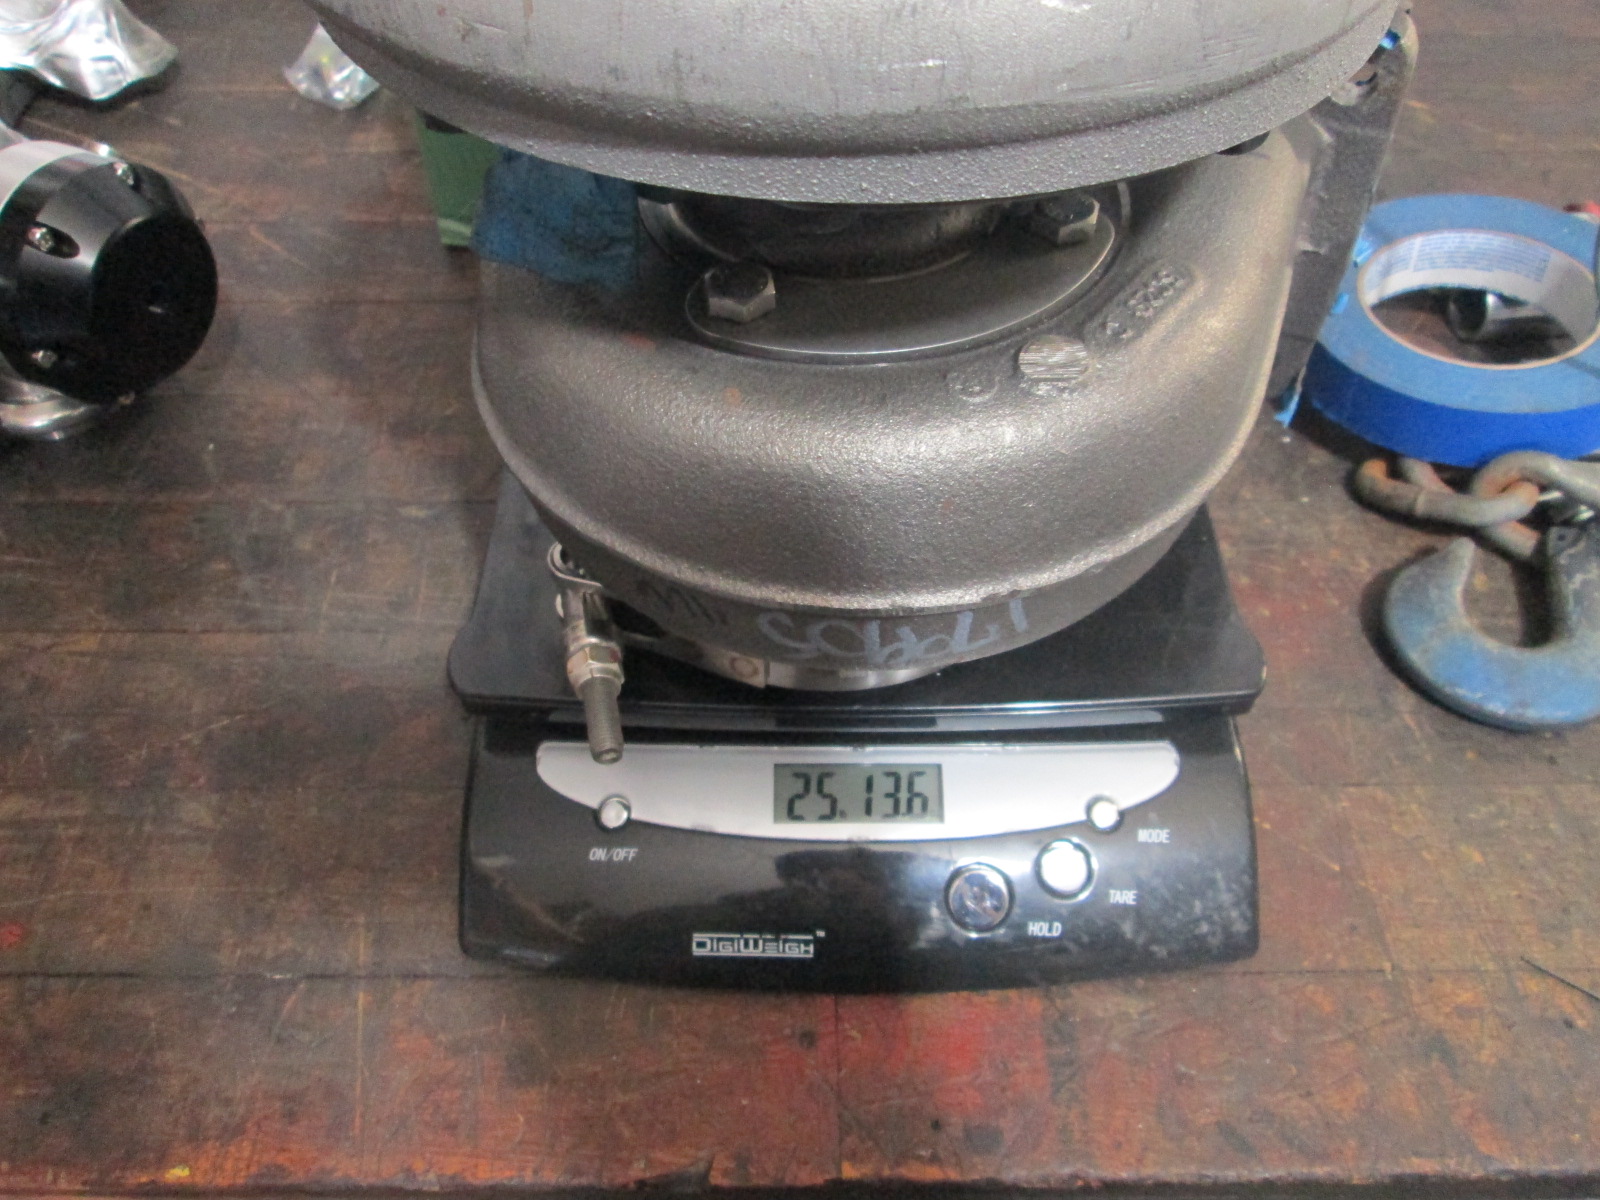
Besides all the performance upgrades, I am hoping to find enough options for using aluminum vs. steel to offset the 30+ lbs I will be adding with the turbo.
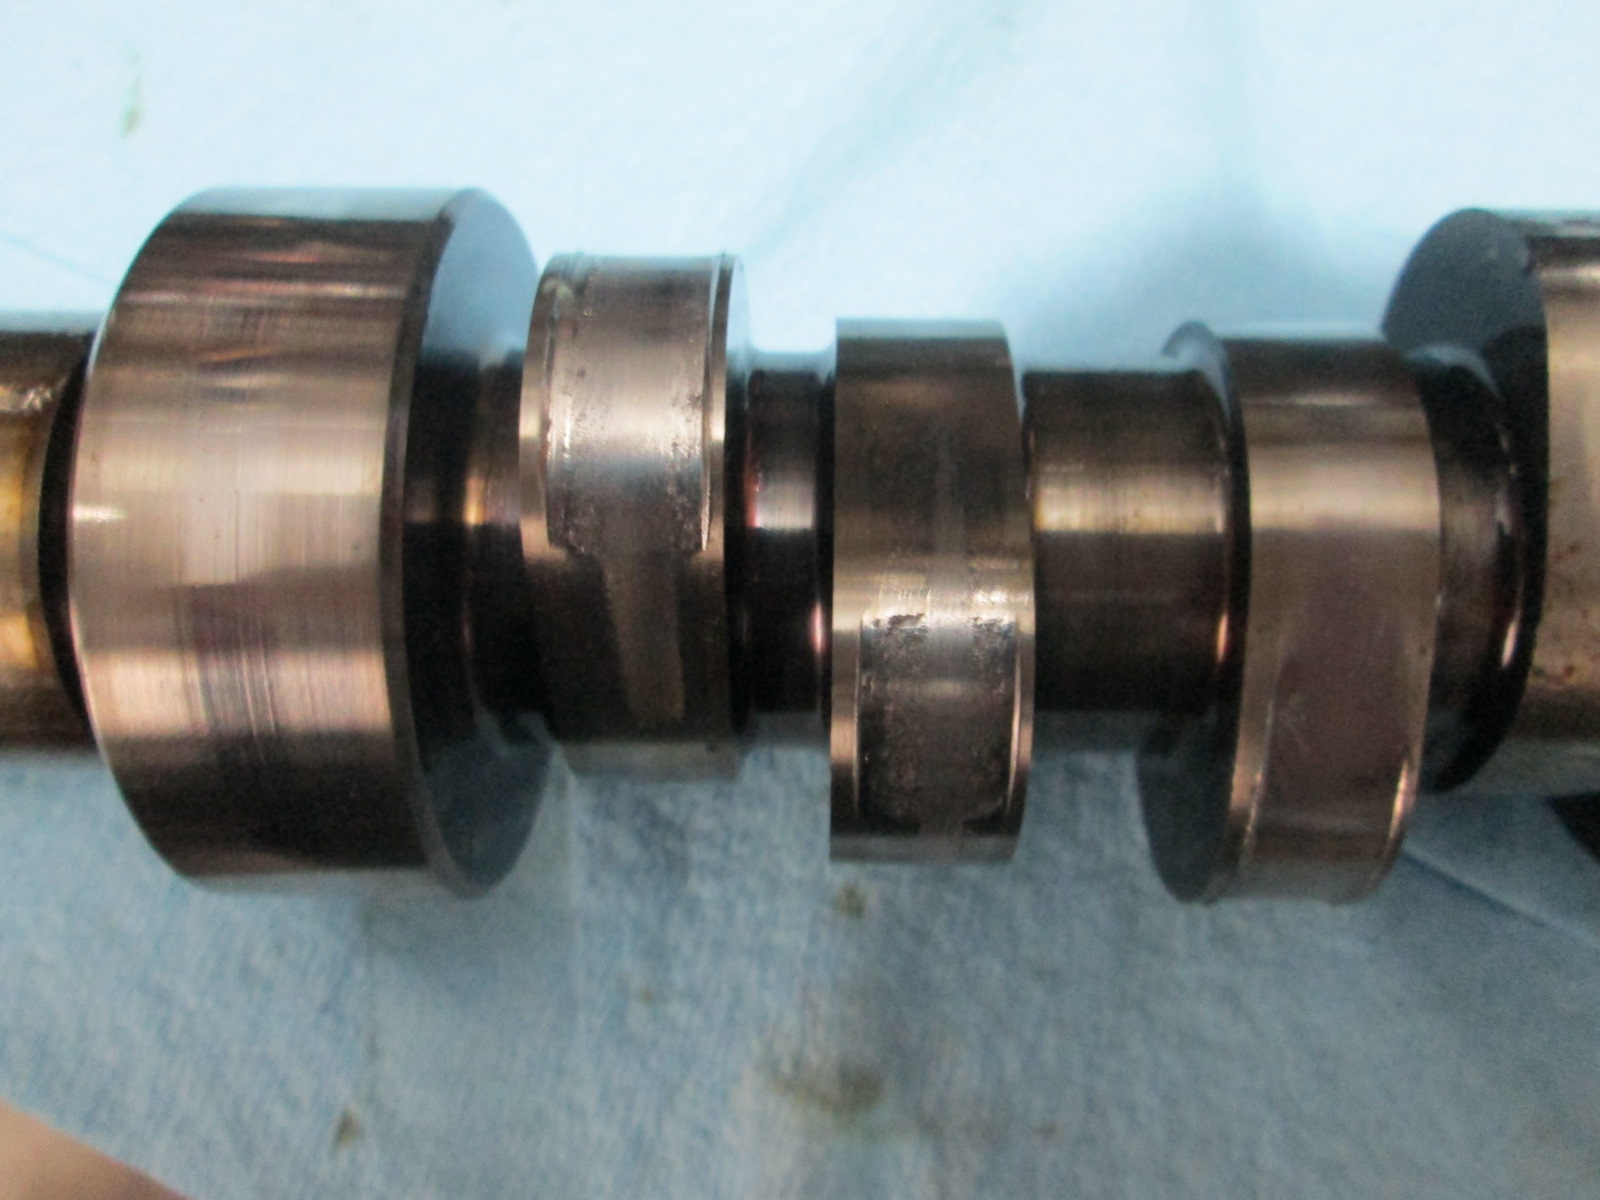
Originally posted by Will: Defective heat treatment on the camshaft? That looks way outside the realm of normal wear.
Probably something like that. The OEM rollers didn't look that bad. Just some galling on the edges of some.
I am not sure if it is just marketing nonsense or has some merit, but I am now seeing custom cam mfgs speaking of dedicated cores for each camshaft and specifically state this is so that less of the heat treated surface is ground away at the final processing steps. What I read into this is that some of the mid lift cams might have needed more grinding from a high lift core and ground too much of the heat treated surface away...
Who really knows at this point. Just glad it was caught before major damage to the engine. I need to check the markings on the cam, I am pretty sure it was a comp cam core that New Era has someone grind for them.