The only thing I would add is to swap to a LS2 or LS3 timing cover. The LS4 cam sensor is in an odd ball location, so if you ditch the LS4 ecm, then swap the timing cover as well.
I wouldn't skimp on the camshaft. There are a lot better ones than stock GM ones, especially with higher lift. I have a 222/226 with 600 lift custom camshaft spec'd which has less overlap than my current one. It should raise torque across the power band and net me 400+ whp. Just haven't been able to bring myself to taking the car down long enough to pull the engine... the camshaft swap with the dod delete is about $1000... and the car is a blast the way it is.
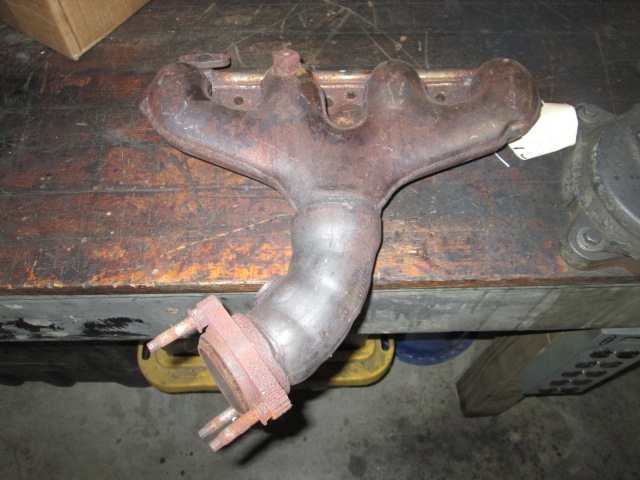
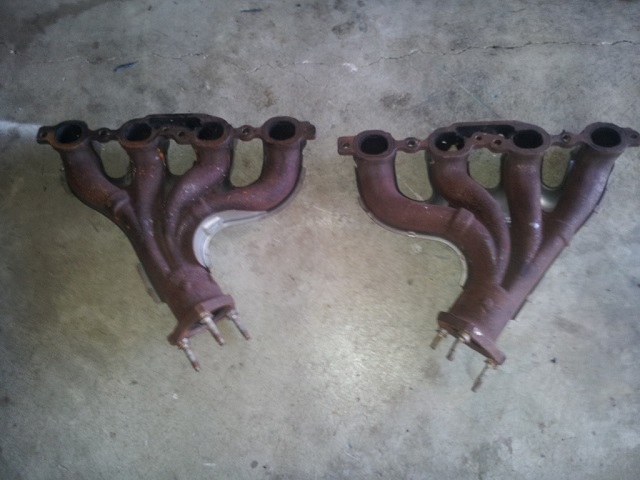
You might want to consider some of the earlier exhaust manifolds as a lower cost option to the LS7. These are OEM stainless as well. I would cut them off before the bend, but that is just me.
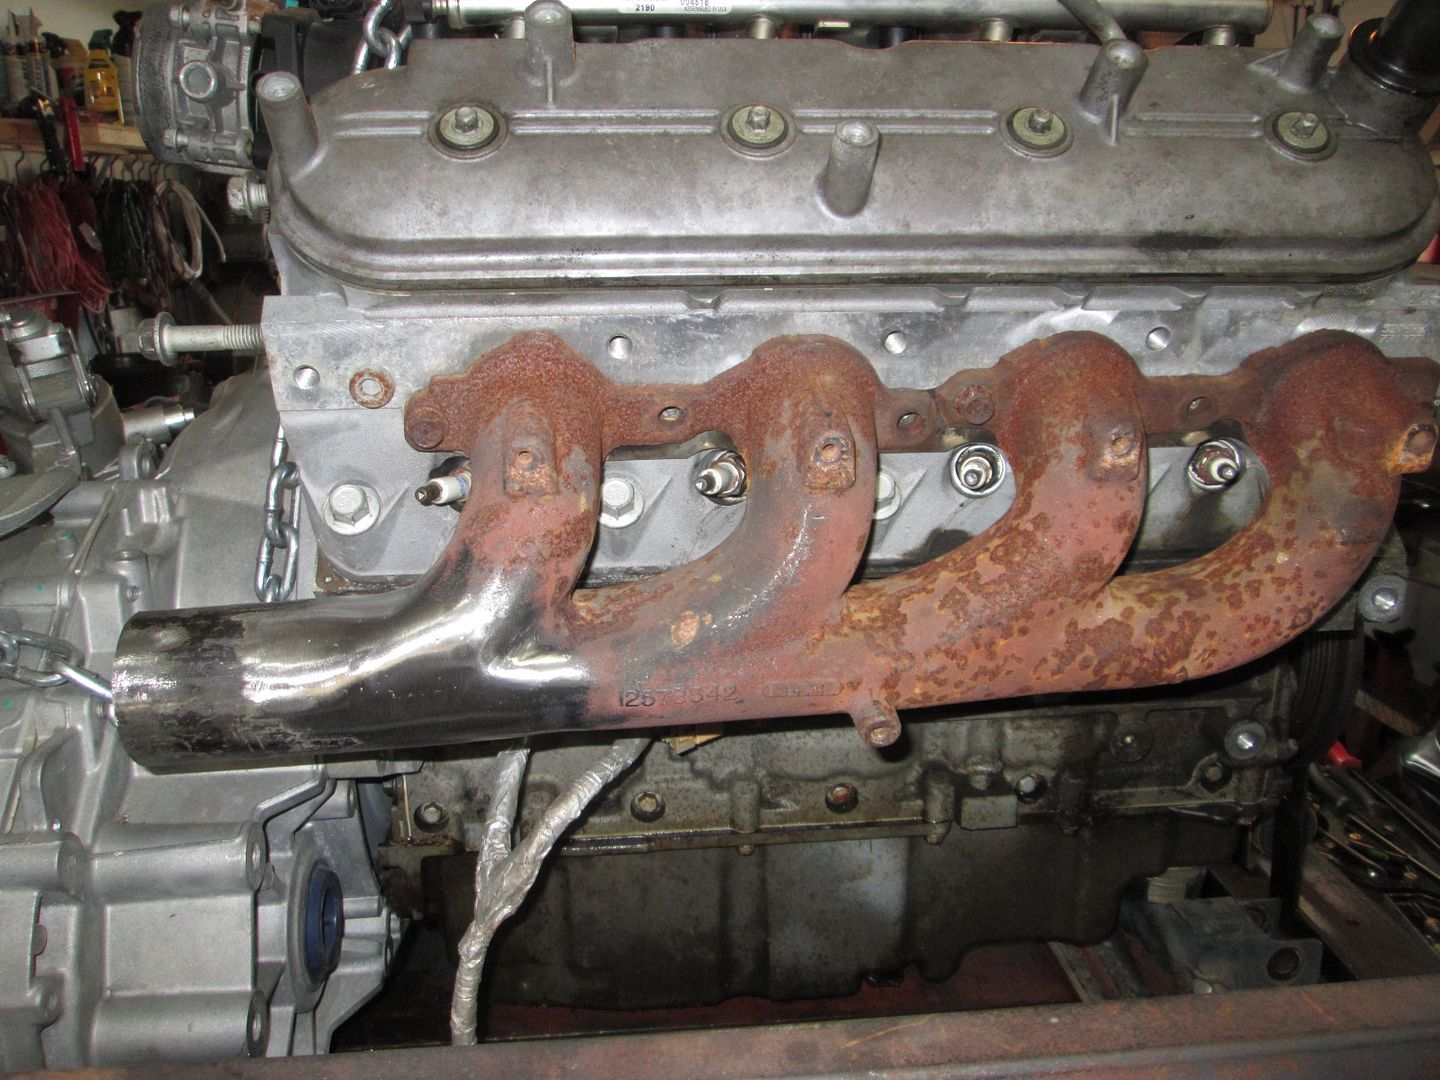
There is also the LS6 version that is cast iron but will require some EGR port welding and machining:
Or you could run the exhaust in the factory Fiero path by using the LS4 front manifold and modifiying a truck one for the rear.
The only thing I would add is to swap to a LS2 or LS3 timing cover. The LS4 cam sensor is in an odd ball location, so if you ditch the LS4 ecm, then swap the timing cover as well. You might want to consider some of the earlier exhaust manifolds as a lower cost option to the LS7. These are OEM stainless as well. I would cut them off before the bend, but that is just me. Most of my more recent developments for the LS4/F40 are in this thread... https://www.fiero.nl/forum/Forum1/HTML/094411.html
Thanks for the tip on the timing cover, about the cam, I'll take a look at something better once I see how much money I've spent getting there.
LS1 manifolds are an option, I have a set on my 98 C5 parts car, the trouble is it still moves under it's own power, disabling before I'm ready to take it apart will make it a major pain to move.
It's been a while since I looked in on that thread, I remember that joker fishing for info on the water pump...
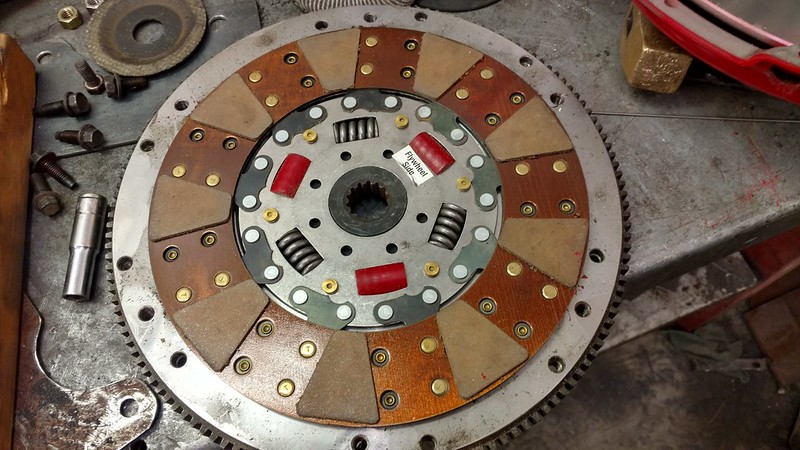
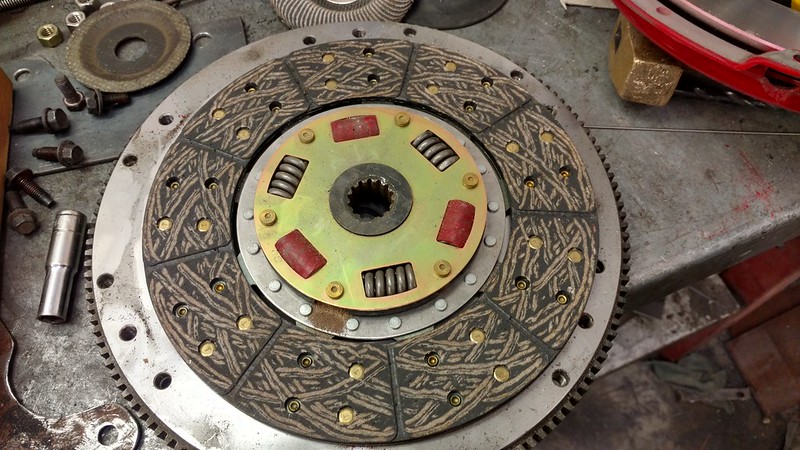
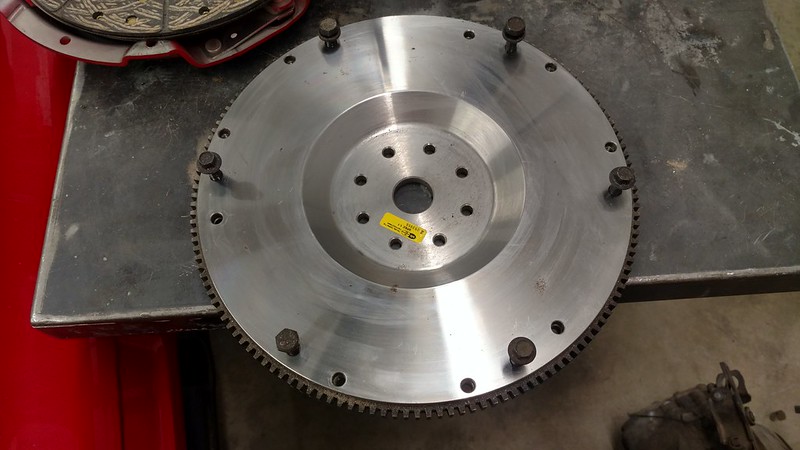
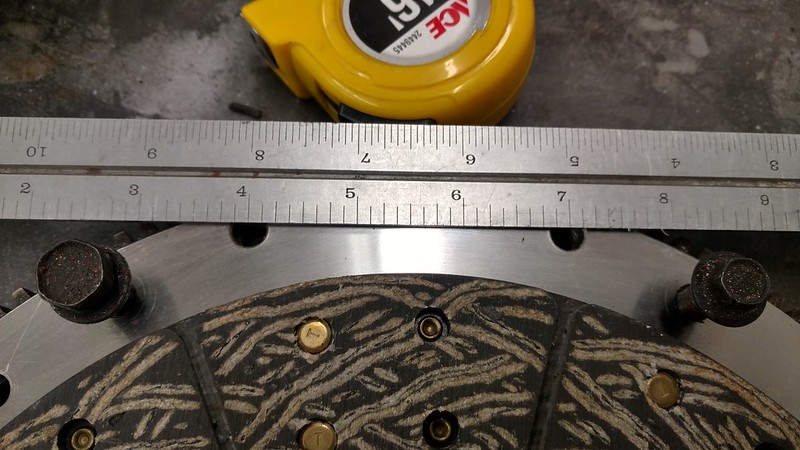
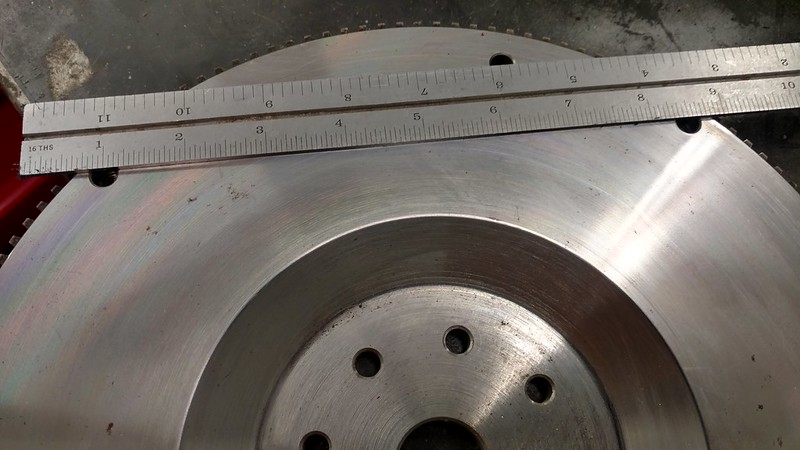
At this point I think the flywheel I have can be made to work, need to call McCleod to find out if the clutch they supplied to CHRF is up to the task, if memory serves the disc is 9 11/16", need to take a look.
Joe
[This message has been edited by motoracer838 (edited 05-28-2018).]
It is close, but might not be "exactly" right. The Ford hole centers are 3.010" for each pair and adjacent bolts are 7.578" between pairs. The Ford pressure plate also uses a dowel pin between the bolt pairs to center and align the pressure plate. Most of the GM stuff just uses the bolt shank to keep the pressure plate aligned.
The funny thing is that it has 3 holes for dowels, but they're oddly located and on a smaller circle than either of the patterns... need to get my hands on a Ranger pressure plate to check it and transfer the dowel location if needed.
The McCleod clutch I have looks to be of their super street series, rated at 550 hp, but (there's always a but...) they have no listing for this size clutch, smallest they show is 10.5" I'll know more tomorrow.
I can relate to not wanting to take the car down for mods, once I got the Indy Hauler up and running, I came up with some really cool ideas for it that would have left it sitting in the shop for years (think C5 Vette with a Blazer skin) that won't do, it's way too much fun to drive as it is, so I came up with a plan to make smaller changes to sharpen it focus, like the front end rework last November, next up this winter is an upgraded engine and rear axle. Yes, I have to many projects...
My day job has been far to busy for me to take time off and long haul the 2018 Hot Rod Power Tour... so I decided to earmark the funds for that trip on getting the LS4/F40 Fiero painted...
Last year I picked up an entire set of 88 Coupe panels so I can sand and modify the parts while still enjoying my Fiero. I also picked up a mustang convertible whale-tail wing, IMSA side scoops from Sage, TA fender vents from someone on the forum and a mustang STM front hood vent from The Driver. I was able to get the hood decklid sanded, and installed the TA fender vents into the fenders, but that is as far as I got before storing everything in the basement for the winter.
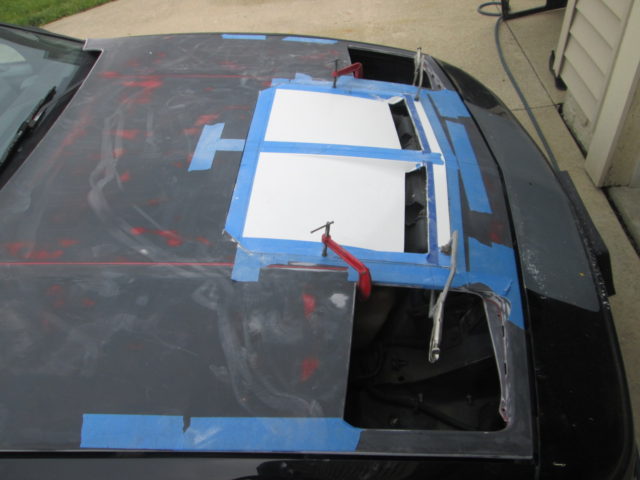
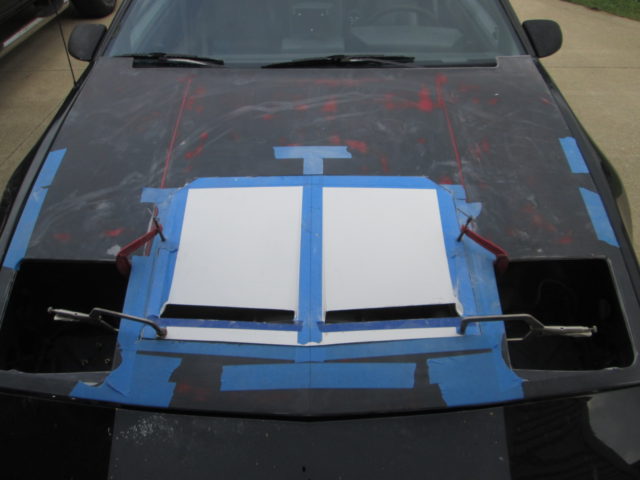
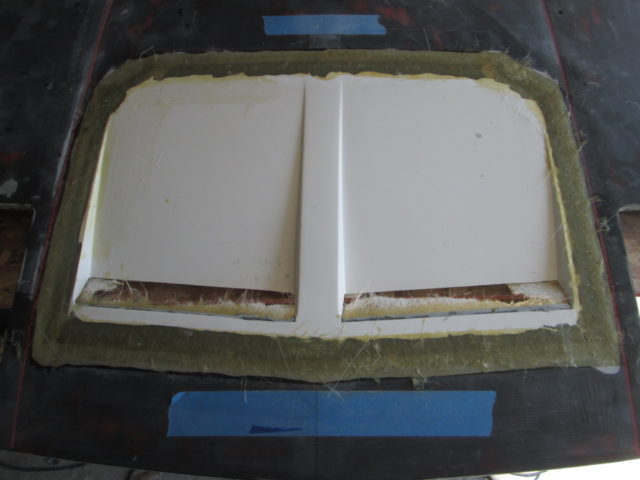
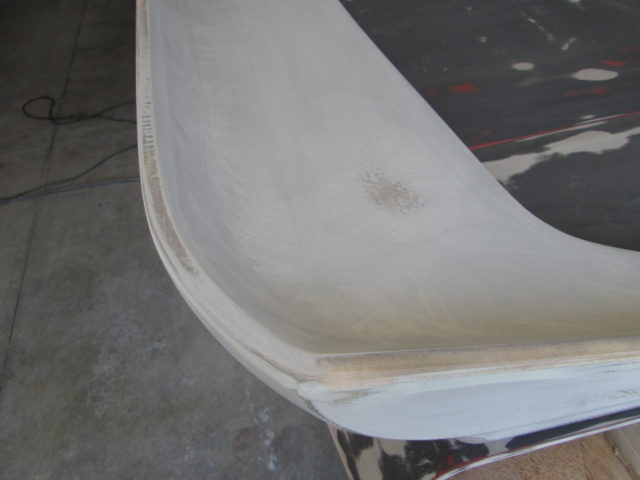
I pulled out the spare hood and STM hood vent and started cutting and fitting. Here is the test fit and final location. The sides of the hood vents start at the center of the headlight covers and flow backwards from there. The vent insert was cut to follow the body lines of the hood, but I cut the side to make them square and 26 1/4" wide to match the leading edge width (this helps with bonding strips). In this picture I have already cut the vents open to make them parallel to the face of the hood and open a little further back.
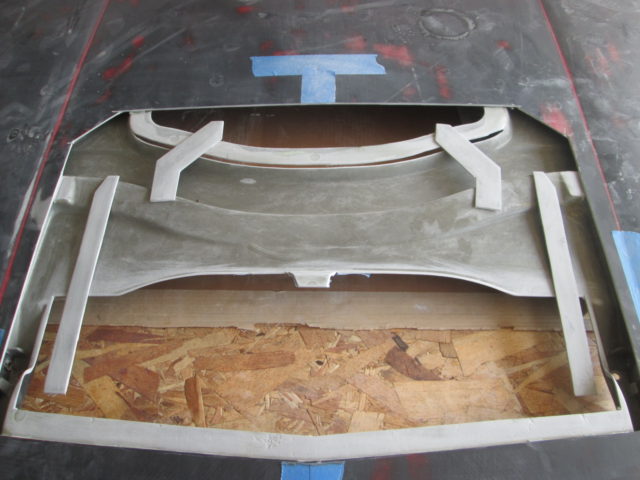
Here are all the cuts on the hood and the bonding strips (from the hood scraps of SMC). If you notice, nearly all the bonding strips will be hidden by the fiero hood structure. Hindsight 20/20, I could have made the opening in the front a little smaller (I add some pieces back in later).
Bonding strips glued in place with SMC Vette Panel Adhesive. Note, had I not trimmed down the sides of the insert to be 26 1/4" wide from front to back, then there would not have been a lip left at the rear for the bonding strip.
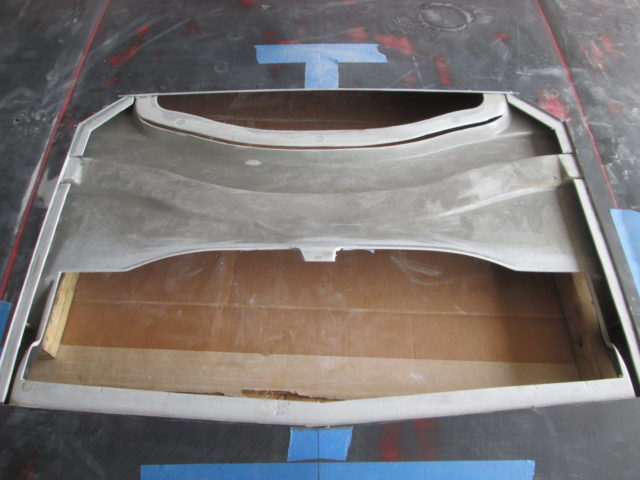
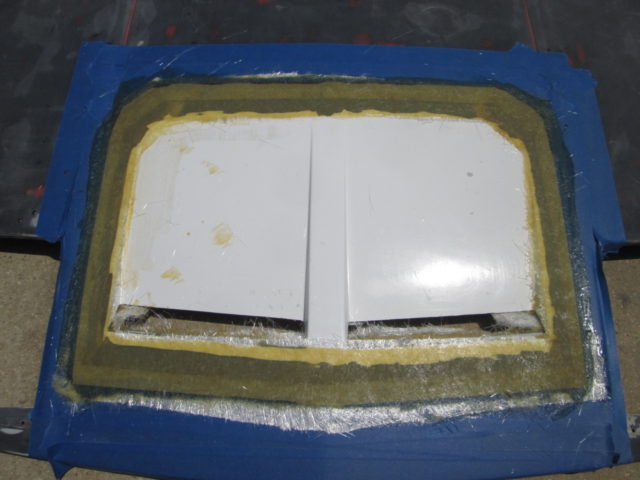
I glued the vent insert onto the bonding strips with SMC Vette Panel Adhesive and let dry. Then I came back with a flapper disk, beveled the seam, applied the first application of fiberglass with SMC resin, and 3 layers of mat with the first piece being about 1/2" wide and progressively wider.
Sanded the first application with 40 grit on the DA and then applied the top layer that is about 2" wide:
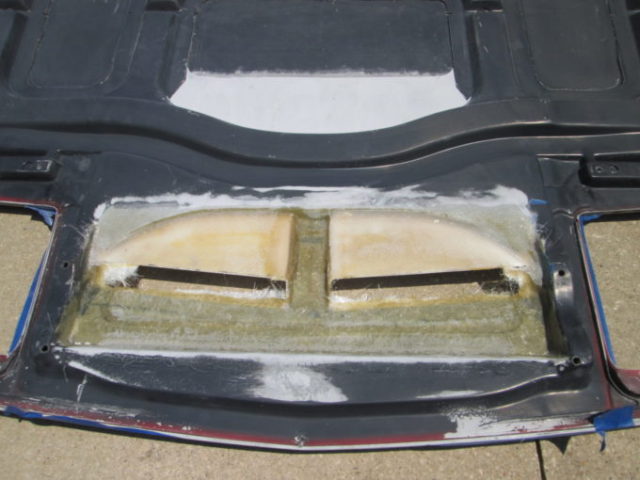
I also did some work to the bottom side. I added in a couple more sections of the original structure I cut out to help close off as many gaps and help reinforce the hood vent to the hood structure. Still more work to be done here, but it is starting to take shape.
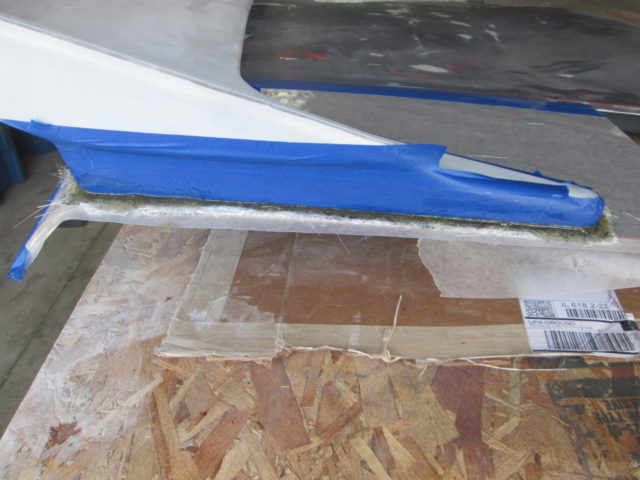
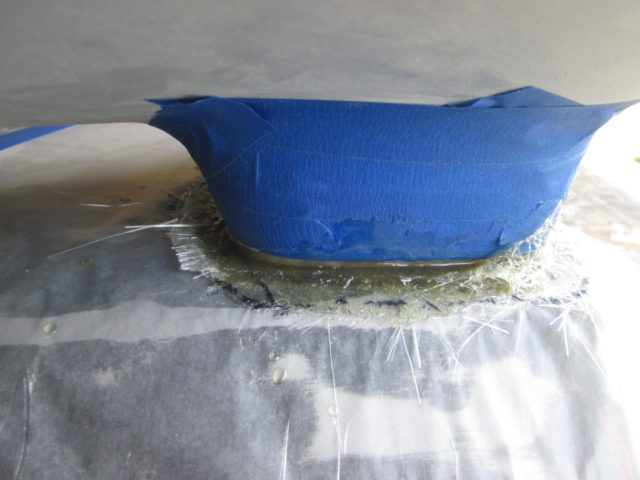
While waiting for panel adhesive or resin to dry, I jumped back and forth between the STM hood vent and mustang rear wing. The biggest issue with the rear wing was the different contour between the decklid on the mustang and Fiero - there was nearly a 1/4" gap in some areas. The Fiero one is much flatter. I used the DA to remove material from the mounting bases of the wing which got things a lot closer. Then I finished off the modification by using 2 layers of mat as the base and 2 additional layers in areas that needed more build up. Lots or resin, put some wax paper over the decklid, and quickly bolted the wing down tight to squish everything together and make a new base to the wing. I did each side separately to stay ahead of the resin cure time...
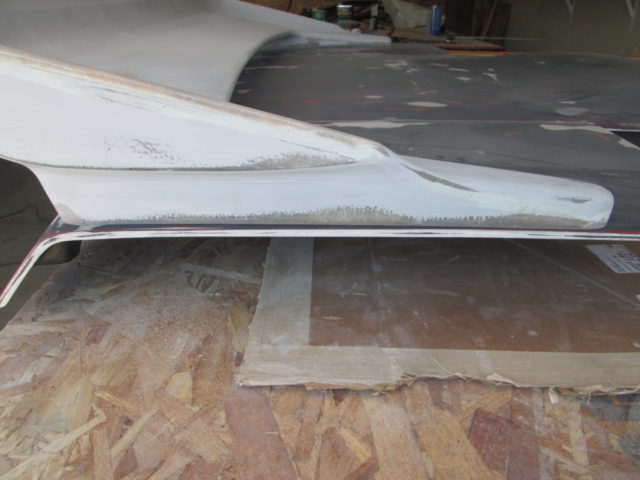
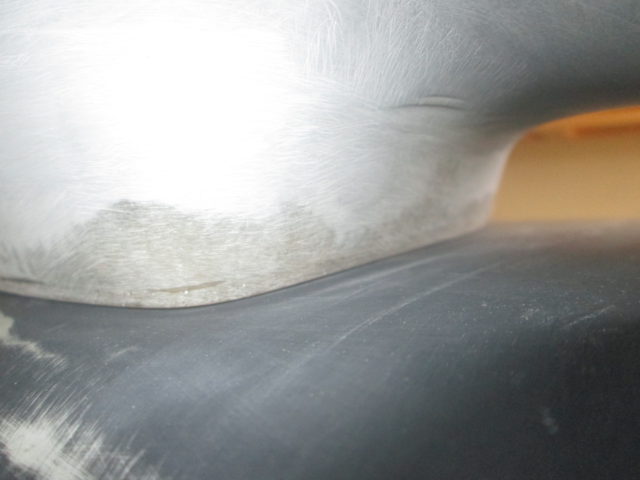
I let it cure for about an hour before doing the other side. Then let it it cure the rest of the afternoon and over night. Block of wood with some 60 grit paper and I sanded back all the excess around the base. Overall the fit is now quite good.
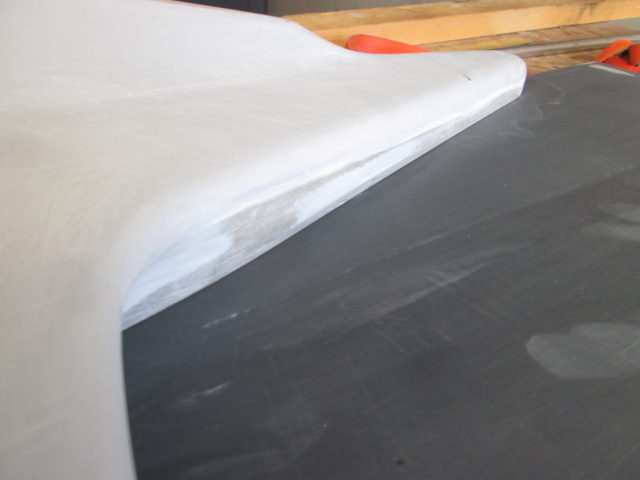
Then I used assorted methods to flatten out the side of the wing, the top lip of the wing and a couple of high spots on the top surface of the wing.
Have I mentioned one of my least favorite activities is sanding...
[This message has been edited by fieroguru (edited 06-16-2018).]
Any chance you have dimensions on your pedal mount plate/bracket? I know its quite a simple piece, but I was looking to fab something up similar ahead of time at work, and won't have the car with me.
Any chance you have dimensions on your pedal mount plate/bracket? I know its quite a simple piece, but I was looking to fab something up similar ahead of time at work, and won't have the car with me.
Sorry, it was so simple to make, I never took the time to detail it in the drawing. Next time I have it out I detail the bracket.
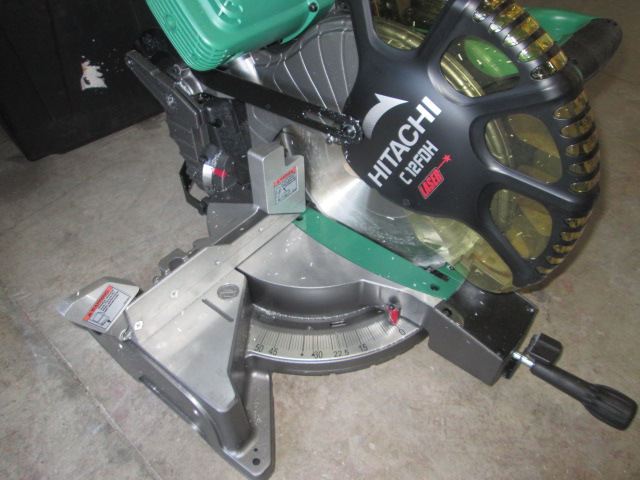
Picked up a 12" combo miter saw and aluminum and steel blades. I am rough on power tools and have had good luck with Hitachi grinders and 1/2" drill, so I figured I would give their saw a shot. It is being clearanced at Lowes and the online price is $50 cheaper than at the store (even when you buy on-line & pickup at the store), so it was $199+ tax. I think I am going to drill and tap the bed so I can use the same hold down clamps the mill uses for holding the metal bits for cutting. I did some adjustments to the stop at 90 degrees and squared up the back rests get get everything dialed in. Then I cut some PVC pipe, and put it in the lathe, pretty happy with the precision of the cut overall.
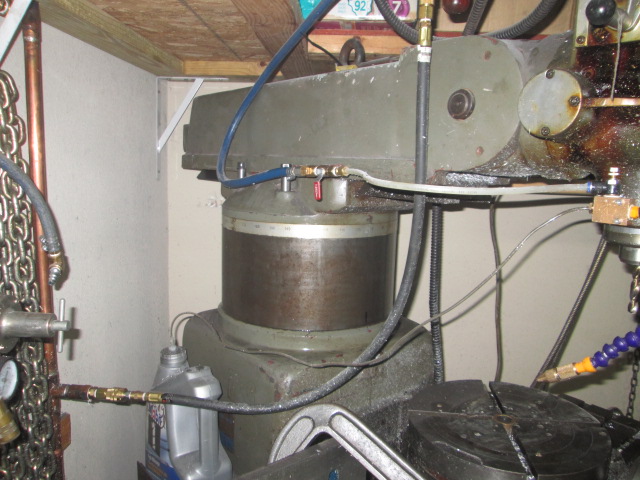
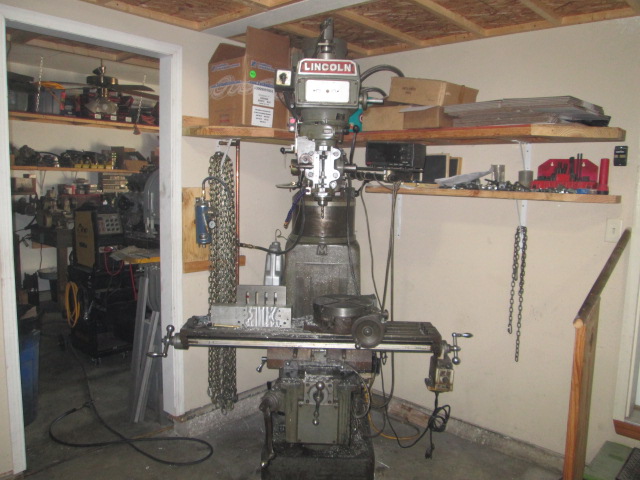
I also picked up a 7" head spacer for the mill. With this spacer, I now have 24 1/4" between the spindle and the table. To drill the coolant passages for the LS water manifold, the part is roughly 12" long and I need to drill two 10 1/2" holes, so I needed 22 1/2" clear and the 17 1/4" I had before the spacer was an issue. Now I can drill those holes entirely on the mill vs. doing the first 6" on the mill and finishing the process with the 1/2" hand drill and drill shaft bushings.
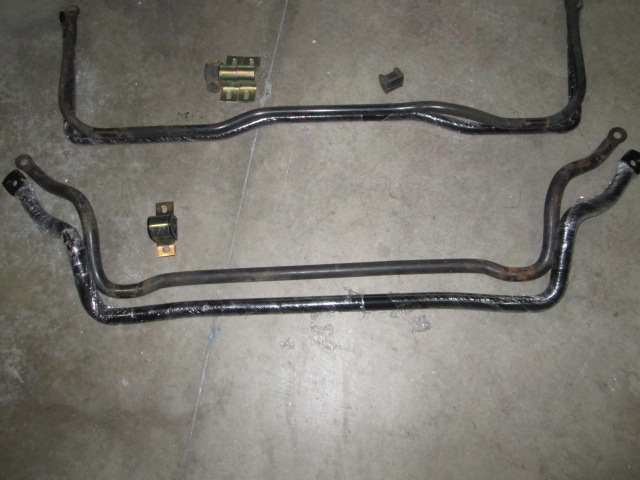
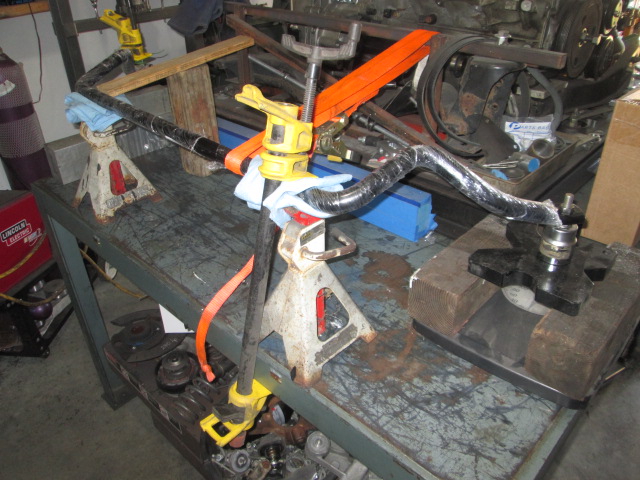
First order of business was to measure the torsional resistance of the two stock bars and then the addco ones to verify the gain. I made this crude test stand to lock the bars to the work table, used a pipe clamp to load one end while the other end pressed on the scale.
Here is what I came up with: Stock Front: 169 lb/in (Addco spec'd @ 157 lb/in) Addco Front: 243 lb/in (Addco spec'd @ 240 lb/in)
My measurements have the Addco bars 44%/81% stiffer than stock vs. their estimate of 53%/72%. Overall I think the torsional specs for the Addco bars are spot on (I was within +/- 3 lb/in with my measurements).
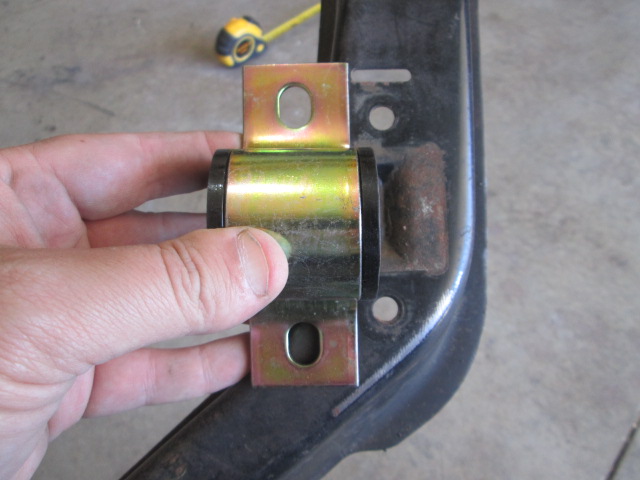
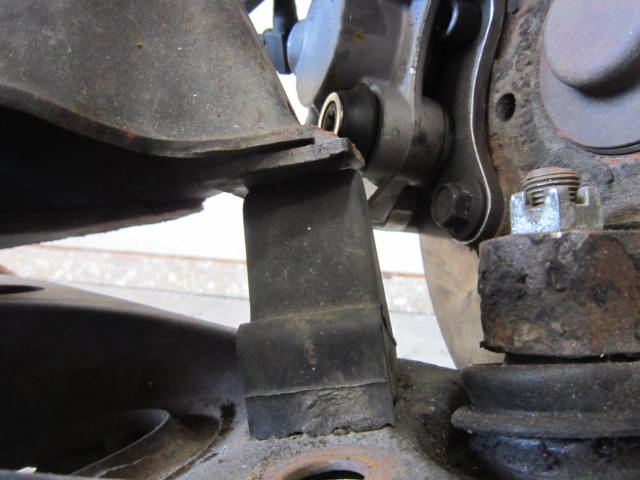
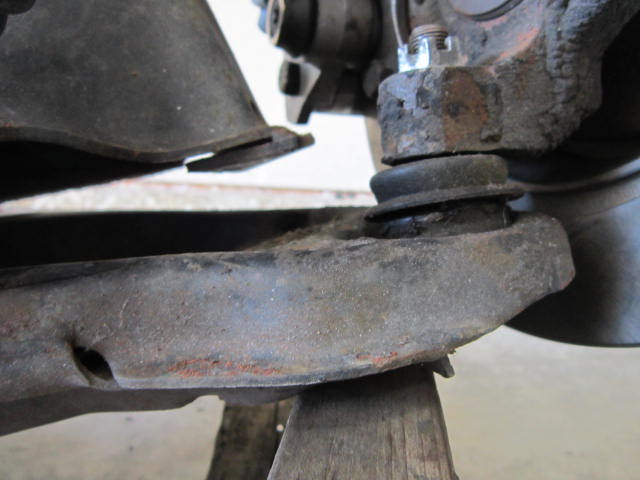
I started with mocking up the front. The supplied bushing and bracket will need to be slotted further to line up with the stock holes in the cradle:
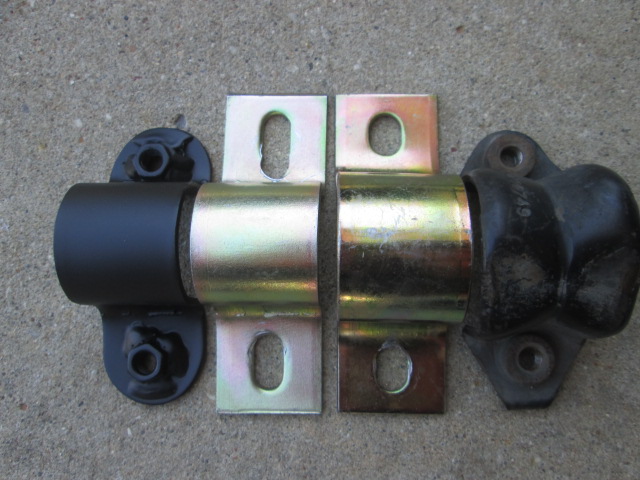
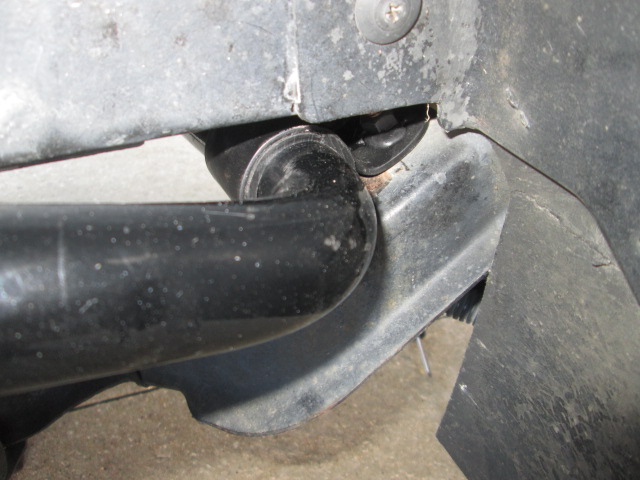
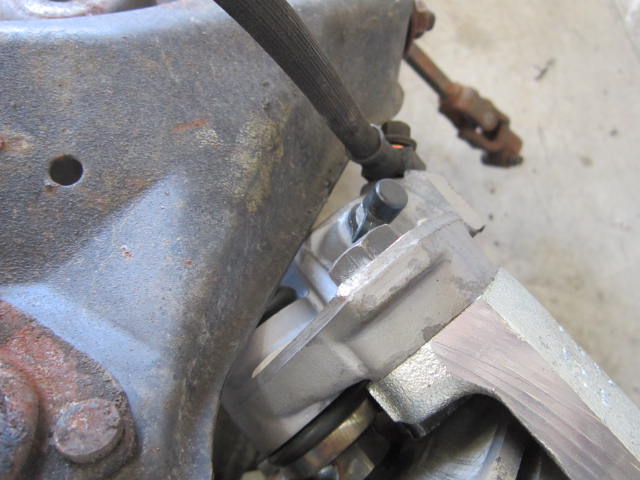
My front wheels barely clear the stock sway bar, let alone a thicker one. So I wanted to shift the sway bar as far to the rear as I could. So I ended up using the rear addco brackets (smaller), made some bushings, and then modified the bracket to accept the stock 8 mm bolts. Starting on the left in this picture: Modified Addco rear bracket, Addco rear bracket with 1 slot extended, addco front bracket, stock 88 bracket:
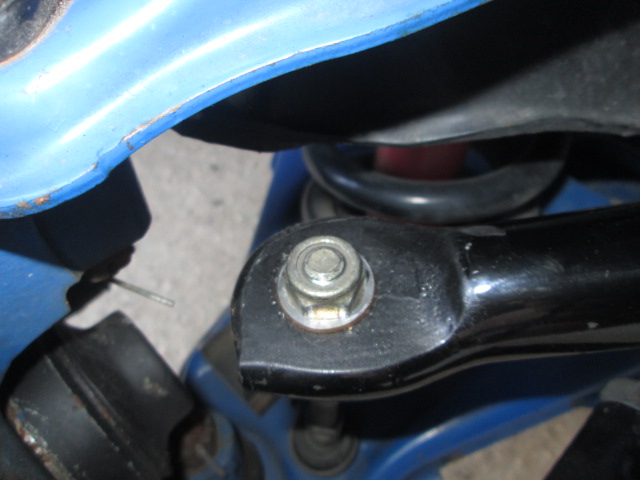
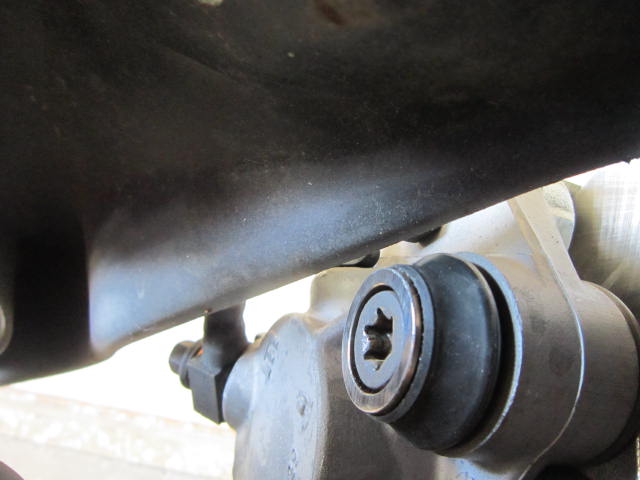
Installed with new bushings:
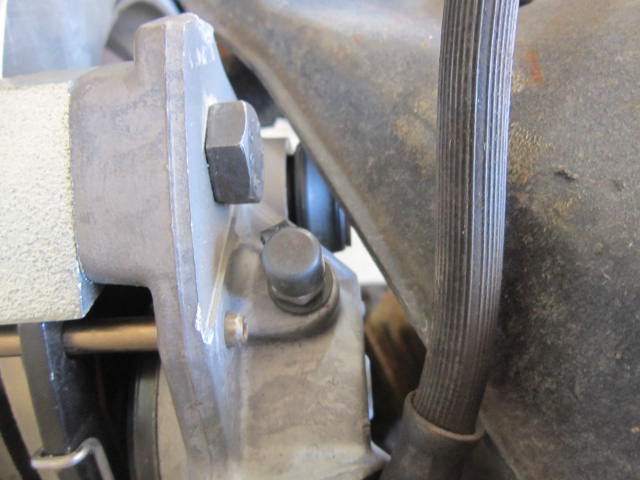
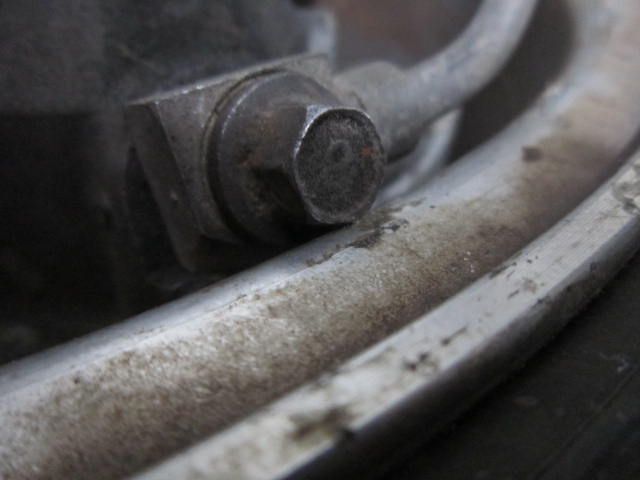
I did round the inside edge of the sway bar and ground the corner off the bump stop pad on the crossmember - there are two areas that get tight as the sway bar is shifted to the rear:
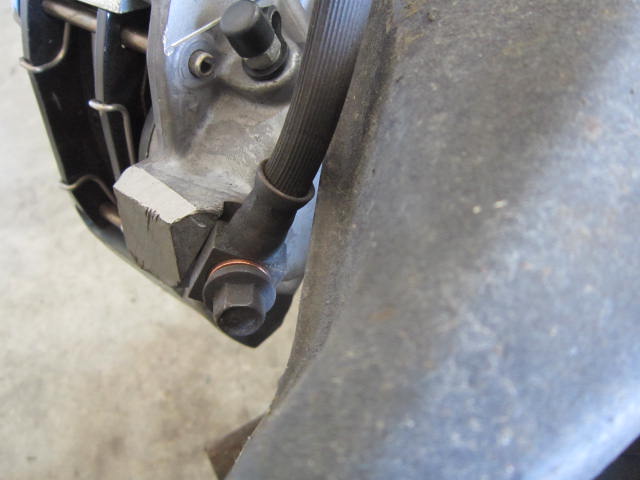
Front Installed:
The car rolls much less with just the front bar. I am hoping to get the rear bar installed on Monday.
Originally posted by KissMySSFiero: What kind of blade did you get? I'm curious how this works. I've thought about it for doing my exhaust.
I did some research and was hoping for a 1 blade fits all solution, but the teeth for aluminum are a different grade of carbide and have a different profile than steel. So I ordered one of each, but haven't taken the time to fab up a good clamp setup yet. Maybe next weekend.
The saw has a max speed of about 4000 rpm, so I picked up a router speed adjuster and can slow the saw down some. If I go too slow, it will shut the saw off.
The saw is belt drive, so one of these days I might take the side cover off and look at options for slowing the blade speed with a pulley change, which would also increase the torque at the cut interface.
The saw is belt drive, so one of these days I might take the side cover off and look at options for slowing the blade speed with a pulley change, which would also increase the torque at the cut interface.
Another trick is to use a smaller blade than the saw was designed for which will reduce the linear speed at the teeth. Of course this limits your width of cut too.
I might have to try that. I cut some 1" solid aluminum bar with the saw speed regulated down. The saw didn't have much torque, so I had to keep the cut pressure pretty light, which isn't necessarily a bad idea, but the cut wasn't as true as I would have liked. A 10" blade should flex less than a 12" one so that might be an option.
I have to say man, I admire your taste. Hoping to have pretty much the same set up, picking pieces from various LS engines. I love your work man. I can’t wait to see how fast this thing goes man! This is impressive work, please keep it going!
------------------ This signature adds .5 bhp. When in doubt, gun it. 84 2m4 —in progress to— 84 2m8sc 1984 Fiero, LS4, Procharger, F40 6speed
Hi guru - I'm finally getting around to disassembly of my LS4 donor car. Aside from obvious engine bay, engine and transmission area sensors and such, is there anything else I should be sure to not get rid of on the car? Just wondering if there is anything the LS4 computer will be looking for that is located in non-obvious places.
Hi guru - I'm finally getting around to disassembly of my LS4 donor car. Aside from obvious engine bay, engine and transmission area sensors and such, is there anything else I should be sure to not get rid of on the car? Just wondering if there is anything the LS4 computer will be looking for that is located in non-obvious places.
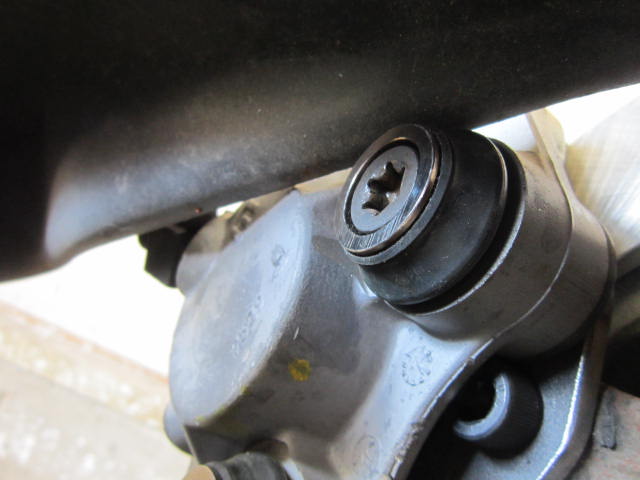
Make sure to keep the pedal and harness. There is a sensor on the brake booster as well if you want to hook it up (only needed for DoD/AFM). I would take all the harnesses out of the car so you will have lots of spare wires if needed. Also, If you want to add more features to your Fiero, you might consider keeping the BCM and related harnesses. Nearly everything not engine related can be removed from the tune, so that is another option as well.
Travel commitments for work have been insane... but I have been making slow progress on a few fronts.
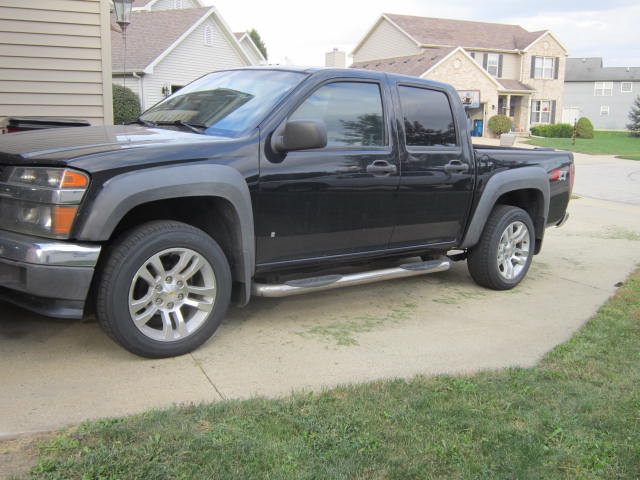
Got some new shoes for my truck... 245/55/18. The 2wd performance version of the truck came with 235/50/18 which was the look am going for, but opted to get something just a little bit taller. They are still shorter than the 265/70/18's that came with the wheels from a Silverado. Now it needs lowering and I have a 3" lowering kit for it. When I lower it, I will take off the lower door bars as well. After lowering, I plan to upgrade it to 2009+ brakes (2004-07 had to fit under 15" wheels)
After 5 years, I am getting bored with the power of the LS4/F40 car, so the easiest way to get more power is to delete DoD/AFM and install a more performance oriented camshaft. I have started to collect the needed parts for the DoD/AFM delete. These are the parts I purchased from GM Parts Direct
I picked up the Delphi brand LS7 lifters from ebay, but they were shipped in a small cardboard box with the roller ends down. The first one I pulled out has a burr of something as the roller will sometimes lock up. I am going to order some OEM LS7 lifters from GM Parts Direct.
I have had 2 custom camshafts spec'd for this car: NA camshaft: 222/226 .604”/.604” 113+3 Turbo camshaft: 221/225 .597/.600 112+4
The NA one was spec'd to reduce overlap and improve low end torque and drivability. The additional lift and the more aggressive lobes (than the lazy DoD compatible lobes) is supposed to push the combo over 400 whp. The turbo one was spec'd to match the 369SXE turbo I have for the car with a taget of 600 whp. The camshafts are virtually identical, so I am going to go with the turbo one as that is the future state for the car. I will also run some BTR platnum .660" springs. I am hoping to order the camshaft in the next month.
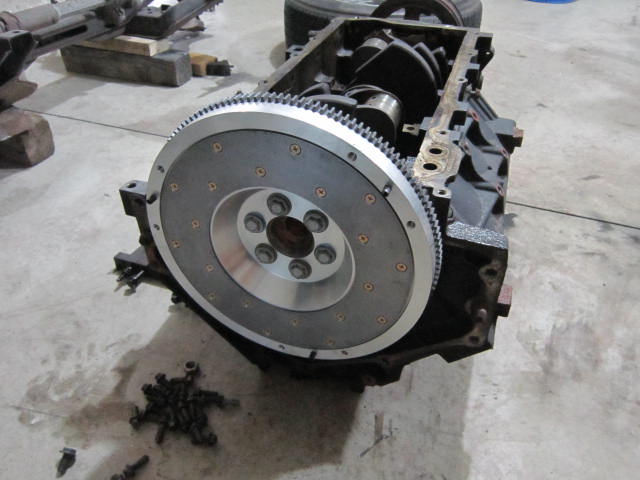
R&D Efforts: I picked up a 2004 5.3L RWD engine for mockup as well as a windowed LS3 loaner from a friend. Purpose of these two engines is to better understand the differences between the LS4 and RWD engines as well as RWD cast iron vs. RWD aluminum. The first think I determined was the difference between the crankshaft flanges and the block between the LS4 and the RWD engines. If the adapter plate is kept at this dimension (less than 3/8"), then I can use the same flywheel clutch setup on both the LS4 and RWD LS engines.
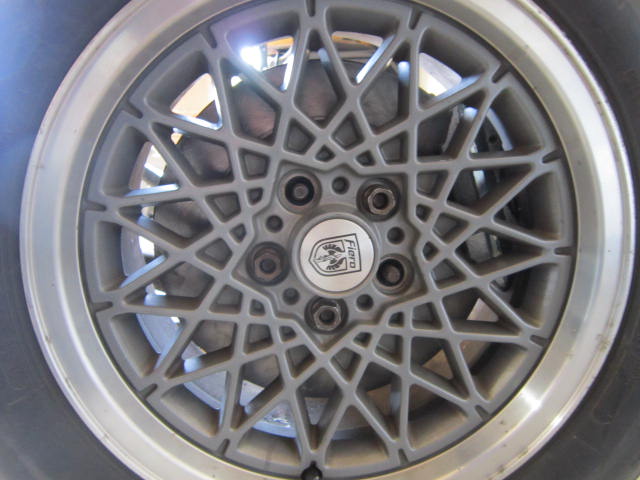
Lastly, started working on a new brake kit, which uses a rotor that has never been used before. This one is targeted at the stock 88 Formula/GT wheels group. I found a 11.7" brake rotor that clears the nose of the lower a-arm, clears the upper a-arm, and fits the rear wheel with clearance to spare. I just need to test fit in behind an 88 front formula/GT wheel. This rotor would provide a 17% improvement in brake caliper leverage, while letting people keep their stock wheel setup.
This kit is a very tight fit... You likely won't be able to see it through the wheels, but there isn't much room:
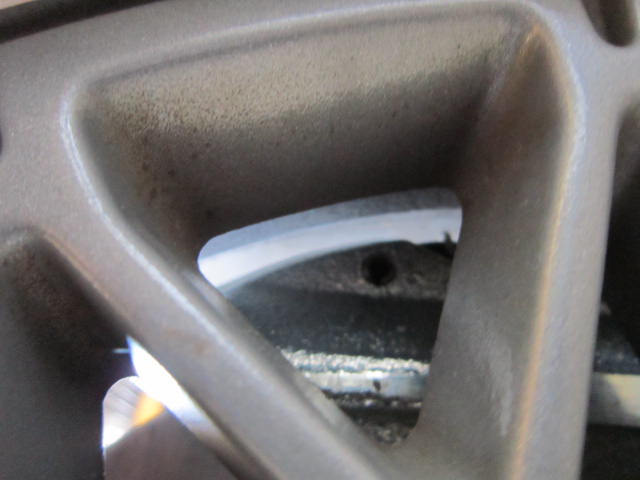
Caliper clearance to inner rib (this is where the front wheel could cause an issue). I can still pull the calipers toward the hub some to gain additional clearance):
Caliper clearance to the backside of the wheel:
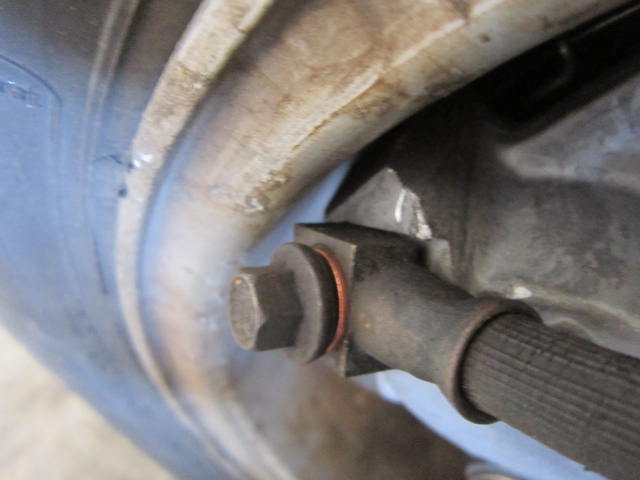
Clearance to the lower a-arm nose:
With the suspension resting on the stock bump stop and the suspension turned to full lock, everything barely clears the upper a-arm (alignment settings might change this clearance):
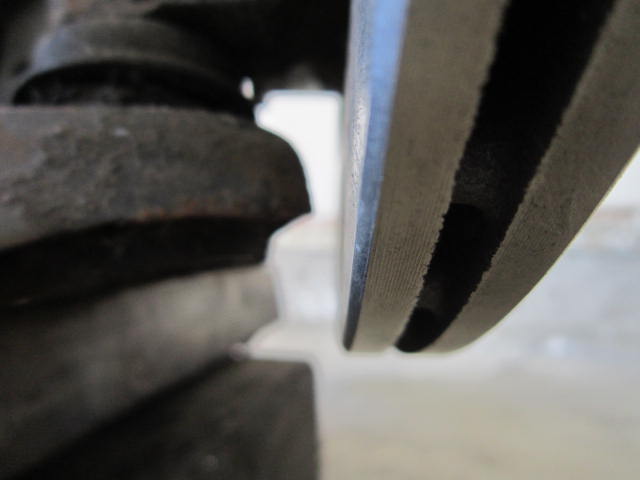
I removed the bump stop and raised the suspension even more to simulate extreme lowering. Under this condition, nothing touches, but it is very, very close. :
Any idea when you might have the 11.7" brake kit ready? That's a darn good fit.
The 11.7" solution isn't going to work for fitment under the stock 88 15" wheels. The rear is tighter than the fronts due to the slightly different location of the caliper line bolt, but moving the caliper in about .020" and running a 1/16" wheel spacer should provide clearance in the rear.
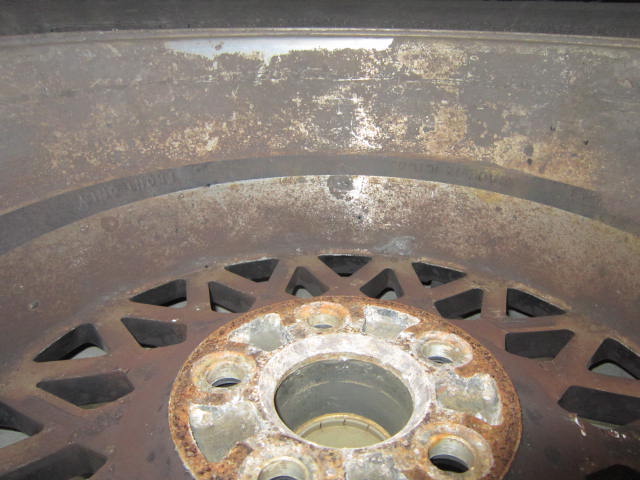
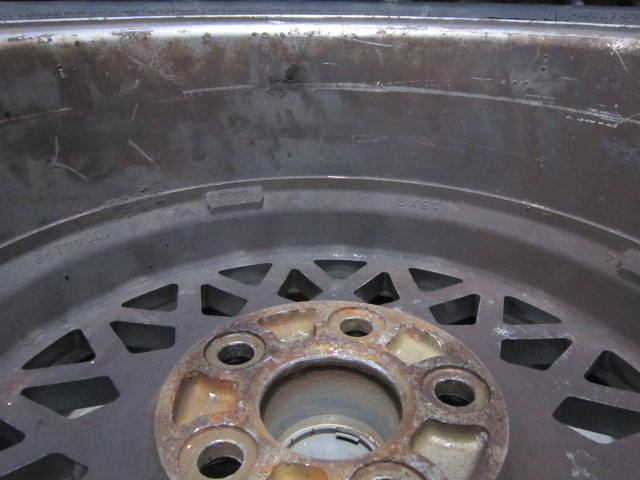
The issue is the 88 front wheel. The inside rib is much wider and hits the bridge of the caliper, way more than 0.020"... so I am on the hunt for a slightly smaller rotor... 11.5 or 11.6. 88 Front Wheel: 88 & 85-87 Rear Wheel:
The 11.7 will likely work for the 84-87s using the stock 88 calipers.
[This message has been edited by fieroguru (edited 10-29-2018).]
Originally posted by Will: I guess the LeBaron 11.25" is too small to be worthwhile...
Do you mind sharing the application for the 11.7" rotor?
I am going to hold onto the 11.7" rotor info as I might use it for an 84-87 kit.
In addition to researching more rotor applications, I have also been researching other caliper options for the 88 Fieros and found an OEM caliper that will bolt directly to the 88 knuckle, moves the CL of the piston out about 0.4", allows for a wider rotor, and is available with piston sides of 48mm (stock Fiero) or 52mm (17% increase in clamp force). So in theory, with the "right" rotor you could fit a 11.1 or 11.2" rotor, see a 9.2% increase in mechanical leverage from the caliper placement, and either run it with the stock 48mm piston or the 52mm one for a 17% increase in clamp force... all without needing a caliper adapter bracket (just concentric rings depending on rotor application).
Another option would be to use this caliper with an existing 12" kit and run a 12.8" rotor (if the appropriate rotor exists).
12.8 is getting pretty large to be as thin as the original '88 rotor.
OTOH, there's an 11" solid rotor used on a Celicas that would have been a good non-track upgrade for '84-'87 cars using the stock (aluminum!) calipers.
Of course you can also spec Wilwood rotors for a brake kit. The hats are expensive, but are a one-time purchase. The rotors themselves can be in the $80 range up to 12.2" with careful selection.
I am going to hold onto the 11.7" rotor info as I might use it for an 84-87 kit.
In addition to researching more rotor applications, I have also been researching other caliper options for the 88 Fieros and found an OEM caliper that will bolt directly to the 88 knuckle, moves the CL of the piston out about 0.4", allows for a wider rotor, and is available with piston sides of 48mm (stock Fiero) or 52mm (17% increase in clamp force). So in theory, with the "right" rotor you could fit a 11.1 or 11.2" rotor, see a 9.2% increase in mechanical leverage from the caliper placement, and either run it with the stock 48mm piston or the 52mm one for a 17% increase in clamp force... all without needing a caliper adapter bracket (just concentric rings depending on rotor application).
Another option would be to use this caliper with an existing 12" kit and run a 12.8" rotor (if the appropriate rotor exists).
Are the calipers aluminum? And is it a set of front and rear/with parking brake?
No, they are cast iron. No, this is only the front calipers. There isn't a matching rear caliper with parking brake.
There wasn't much interested in this setup, so I have put it on the back burner for now. May revisit in another year or two.
I understand. A viable replacement for the original Fiero equipment is starting to look more necessary than "performance oriented" as each year goes by. I just don't like the looks of iron, even on the new Corvettes. Honestly, I am a HUGE fan of the Camaro and CTS V "Brembo" calipers. For some reason they just look VERY good. But the weight of the rotors is a huge drawback. They are massive.
[This message has been edited by Rickady88GT (edited 01-04-2019).]
After nearly 6 years and 48K miles, I have grown bored with the meager 382 whp from my original LS4/F40 swap, so I will be pulling the drivetrain in the coming weeks for the next round of upgrades and refinements.
The current upgrade list: 1. DoD delete - all needed parts are now sitting on the shelf.
2. Camshaft upgrade/downgrade. Current one is 224/231 .564/.575 @ 113 and DoD compatible with lazy lobes. The new one is Tick Stage 2 Turbo camshaft for the 4.8/5.3L engines. Its specs are: 219/223 .617/.595 LSA114+3. So more lift, less duration and less overlap. I am hoping it gives be about 25 lb-ft more torque in the lower end and should give me a good shot of breaking 30 mpg with the 3.09 final drive. It also sets me up for the future turbo upgrade in 2020. Camshaft, BTR springs and upgraded pushrods sitting on the shelf.
3. Dorman LS2 intake manifold. This has shown to be slightly better than the LS6 version, so it should free up a few more hp vs. the current stock LS2 intake. Again, this is a supporting mod for the future turbo upgrade as my stock LS2 intake has a hole in the bottom side the clear the DoD connector, and this patch plate isn't boost friendly. Dorman intake is sitting on the shelf.
4. Flex fuel conversion. Flex fuel sensor and the Fierostore stainless steel sender are on the shelf. I will also modify my spare 88 fuel tank with a higher vent tube to further increase its capacity. Supporting mod for running E85 with the turbo, but the flex fuel sensor will also allow me to take road trips in the car without worry of finding E85 gas stations (one is about 1.5 miles from the house). Even with the negative impact to MPG, my overall cost per mile should be less when you compare the E85 price to 93 premium.
5. Rework as many brackets, mounts, and smooth firewall panel in aluminum to help shed some weight... Turbo setup will add it back.
6. Change the ECM to a RWD/6 speed manual ecm. This will allow me to remove the TCM and assorted wiring and likely remove my cruise old school cruise module (weight savings).
7. Use the chassis for further R&D efforts for the LS4/F40 swap kit. Water manifold, accessory drive, new mount setup, etc... This will require me to convert to an electric water pump setup for a year or so, but it should also free up some additional peak hp as well.
8. Determine turbo location and make a support bracket off the transmission. This will allow me to work on the hot side and cool side plumbing for the turbo setup on my mockup LS4/F40 drivetrain.
Before I pull the engine, I am trying to schedule the car for a dyno session to get a new baseline. The local dyno is a mustang version, so while the numbers on the graph will be lower that my prior dyno, it will give me a good baseline to determine if there was the expected performance increase from the upgrades. So it will be 2-3 weeks before I start tearing the car apart...
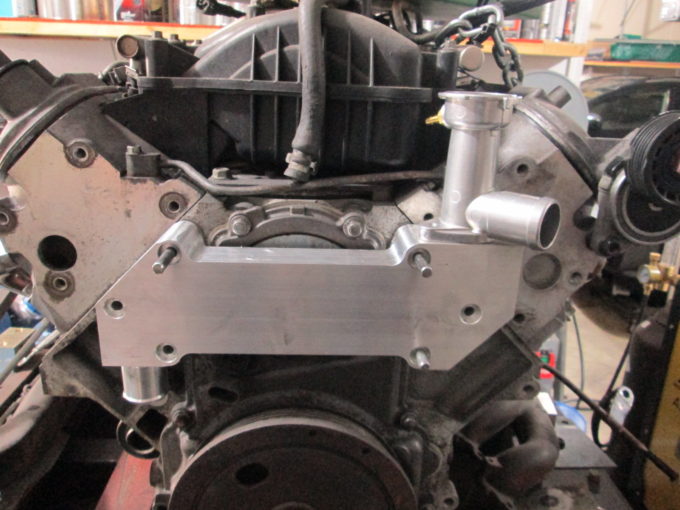
Here is the new prototype water manifold that I am planning to use:
I already have all my rooms booked for the 2019 Hot Rod Power Tour, so that will help keep me motivated to knock these upgrades out this winter and get the car back running by summer.
YES, YES, YES..... looking forward to watching you and the new mods, I'm sure that some of the new stuff will work for us AT guys too. I'm starting my LS4/AT swap soon. Got the cam/lifters/springs in a few days ago, LS6 intake and TB and latley I've been looking into exhaust. I got a set of LS7 manifolds, and they don't fit any better than the "block huggers" i got a few months ago. That HUGE trans is just in the way, may be stuck w the LS4 car headers, but I hate the merge collector on those things. Good luck and keep taking lots of pics.
Rob
[This message has been edited by qwikgta (edited 01-07-2019).]
4T80 has also been done, but only with the 24X engines and by converting to the 411 ecm and segment swapping in the 4L80 transmission controls. However, even then the PCM didn't control all the internal 4T80 transmission functions. Aftermarket controller is also an option.
6T70/75 - much more complicated. While I have seen GM drivetrain pictures of a 6T70 with the GM Metric bellhousing, I haven't figured out the actual application it was used in. The 4T65 was retained for most of the 60 degree pushrod engines until they were phased out. The 3.6 had the 6 speed auto, but it will have the high feature bellhousing and will not bolt directly to the LS4. Add to that all attempts to use a stock GM transmission controller for the 6 speed with the LS4 ecms (E40 & E67) haven't been successful, so you will also have to run an aftermarket transmission controller.
I called PCS to inquire about a controller for the 6T75 and they directed me to http://www.zerogravityperformance.com who helped with Dan86GT’s car (LS2/6T75). Zero Gravity Performance has a standalone controller for the 6T75. They also mentioned you can use a Gen 4 LS that came with the 6sp auto to control the 6T75 and you won’t have to use a standalone controller. I am currently doing a Turbo LS4/4T65, but am also keeping an eye out for a good deal on a 6T75 for a future project. It looks like the LS4 isn’t the way to go if using a 6T75, unless you plan on using a stand along controller.
Did they keep the 3800 long enough to run the 6 speed?
The 3800 ended in 2008 and the 6T70/75 hit the market in 2006. My guess is GM didn't want to get it certified for the 3800 knowing there was only 2 years of overlap.
Originally posted by fieroguru: This is the first listing to show an actual used transmission with the metric bellhousing that i have found. So it does exist, which is very good. https://www.ebay.com/itm/Au...5738.m4383.l4275.c10
Do you know what needs to be changed to use a AWD trans in a 2WD application?