You've been busy. I love it. I was loosing motivation for my interior project but I am now fired up to get it done. I like the switches - at least the idea - still not sure about the switches themselves. Reminds me of an old Caddy. The console is looking great and the new mock up is even better. Your concept drawings are crazy but when you can see it come to life in your mock up..... That takes some talent my friend.
Pat
Thanks man! I have to admit... there was a short time when I too was losing steam. But like you said, I'm now fired up! I don't want to go to work - I got stuff to do in the garage!
I'm still thinking about the switches on the console. There is definately going to be something there, I just need to find the right switch. As you know, the design is ever changing.
I gotta say man, I am really impressed! I can't believe I just sat there and read all 9 pages of this thread but I was learning the whole time and getting sucked into your vision. It's truely inspiring!
I gotta say man, I am really impressed! I can't believe I just sat there and read all 9 pages of this thread but I was learning the whole time and getting sucked into your vision. It's truely inspiring!
Thanks for the vote of confidence! I'm impressed you made it through all 9 pages... I would have poked my brain with a Q-Tip from all my boring dribble... Again, thanks so much! I should be back out to work this evening. So I'll have more updates!
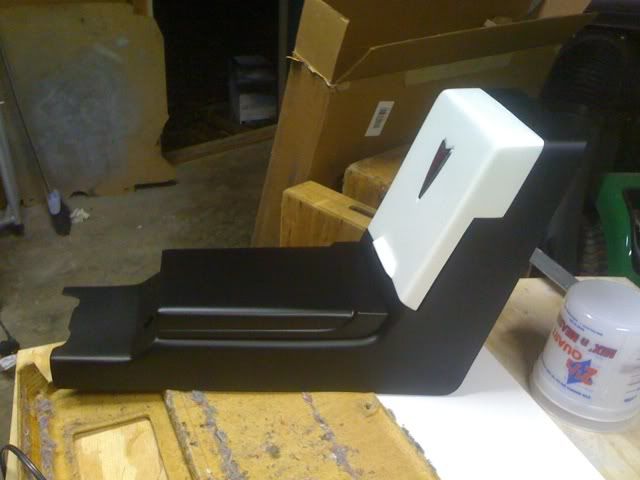
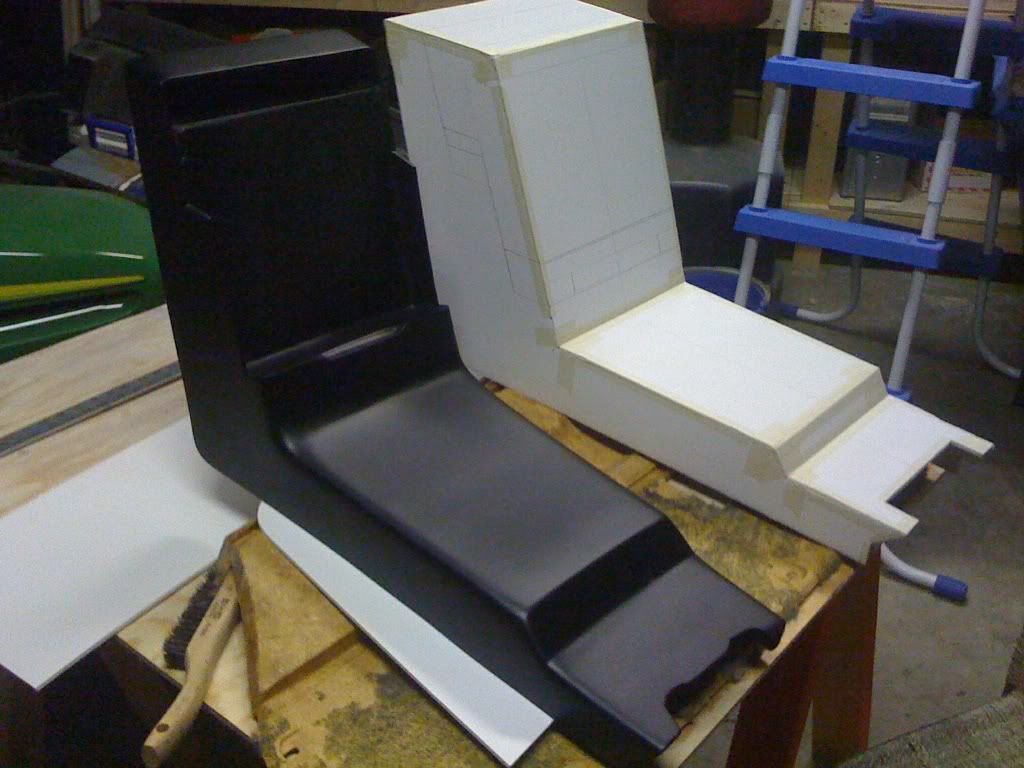
I think I like this one the best as it reminds me of the Fiero... If it were me, I would make the radio opening double-din... I would also make the center arm rest padded and hinged open (hinge along the passenders side or back) for extra storage... Duno if it would be possible to do this, but a slide-out cup holder on the pass. side of the shift console (the part you have in white in the above pic). This way, it would be out of the way of your arm/elbow while shifting...
Just my two cents of what I would do "IF" I was capable enough to do something like this
Hi A,
I like this design too. And I agree, the armrest will have a hinge openning along the back for that extra storage. The plan is still the same for the cupholder - it'll be mounted into the rear console instead of the armrest. I think I'm going to stick with a stock GM head unit that accepts the iPod / iPhone. I just like the look the stock units - call me weird. A cup holder on the shifter side of the console might be possible. I'll have to find one and see the dimensions before doing anything. Do you have any suggestions?
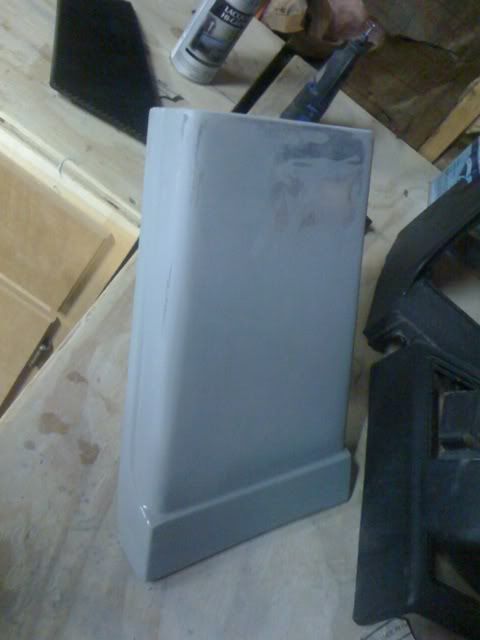
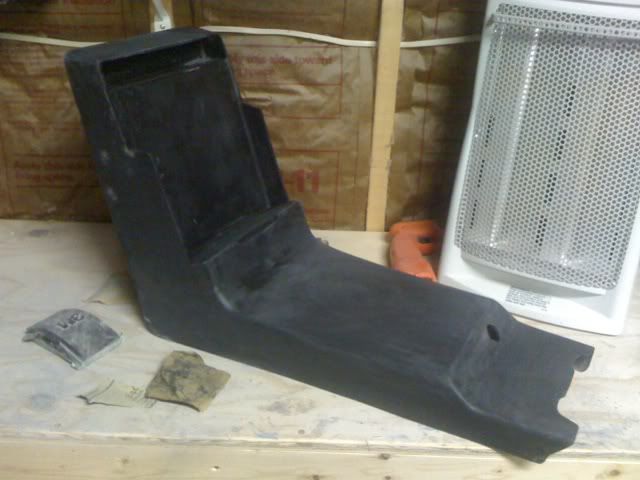
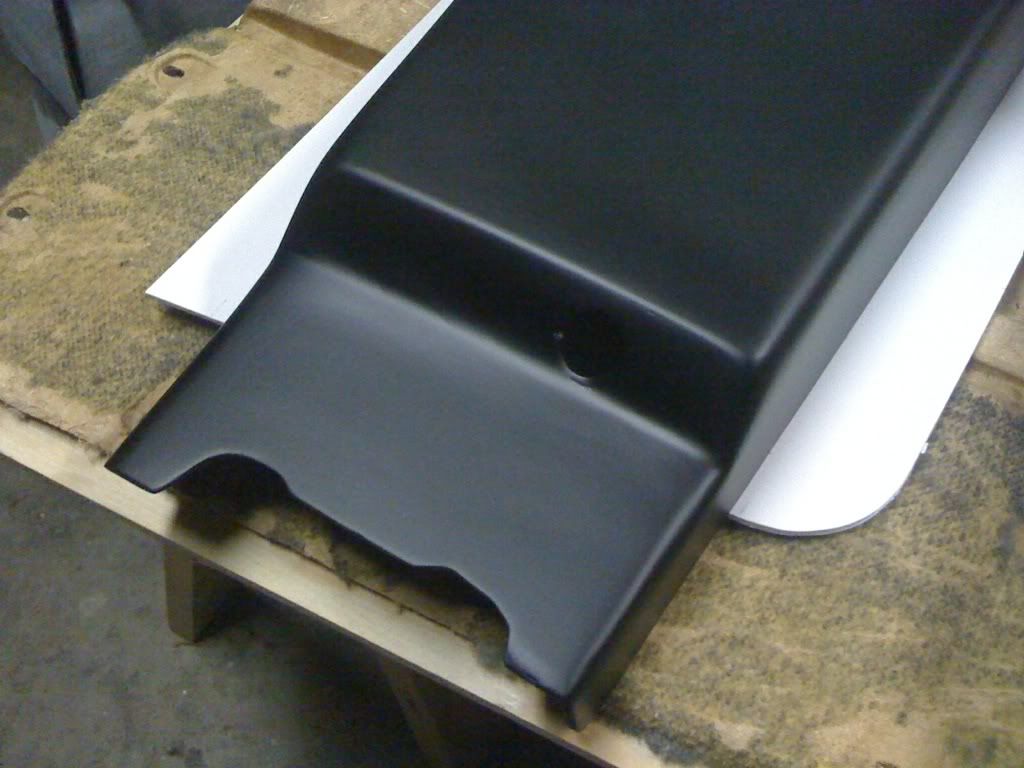
Just a minor update. I didn't have that much time last night and it was raining so I wasn't really able to paint anything. However, I did sand the console and armrest. And I was able to shoot a light coat of primer on the armrest - this piece is going to be death of me!
Just a little bit more sanding to go
Looking down the barrel
Light sand of the console
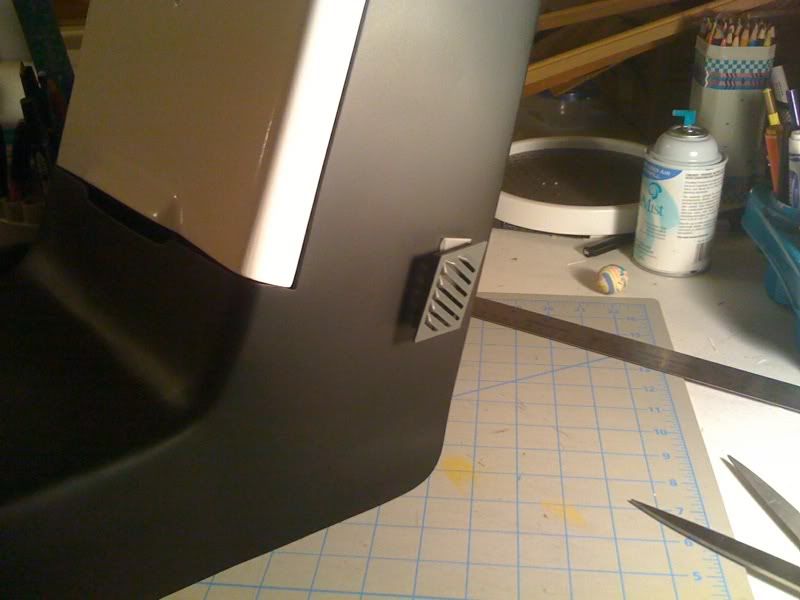
Also, I will need to create a vent on either side of the console to dicipate heat from the ECM. I'm not sure whether to create a few simple holes or try to utilize the stock vent covers. They will have to be cut and modified. I do have any extra set that came with the other console. It won't really matter how it looks because the seats hide the sides of the console. Maybe just a simple vent. I'll check out the local home improvement stores and auto parts shops and see what they have. I'll figure it out...
I'm hoping the rain will subside by this afternoon. It is supposed to be nice tomorrow so I'll be to get a lot done!
[This message has been edited by Sofa King (edited 01-21-2010).]
Will the sanding ever end!? Looks spectacular. That console cover kills me everytime that I look at it. Just so modern.
I'm looking at the vent size. Is it larger than the console? Do you have any plans for the dash vents? Maybe go with a vent that will match the rest of the dash?
Will the sanding ever end!? Looks spectacular. That console cover kills me everytime that I look at it. Just so modern.
I'm looking at the vent size. Is it larger than the console? Do you have any plans for the dash vents? Maybe go with a vent that will match the rest of the dash?
Tony
Hey Tony,
Thanks for the kind words. As for the sanding? UGH... I have no idea when it will end. But there is a lot of it when you do something like this... The vents... I'm not sure whether to cut up the existing stock vents or just create some simple holes with a screen. As I mentioned the seats will be covering that particular area so I'm not as hard pressed to find the best solution - but I am a perfectionist. I'll check around and see what i can find.
I'm just excited that I'm at the 90% point - I'd like to see it in the car!
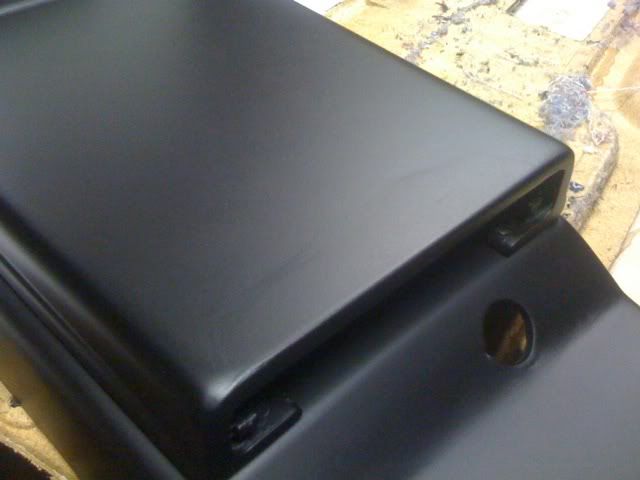
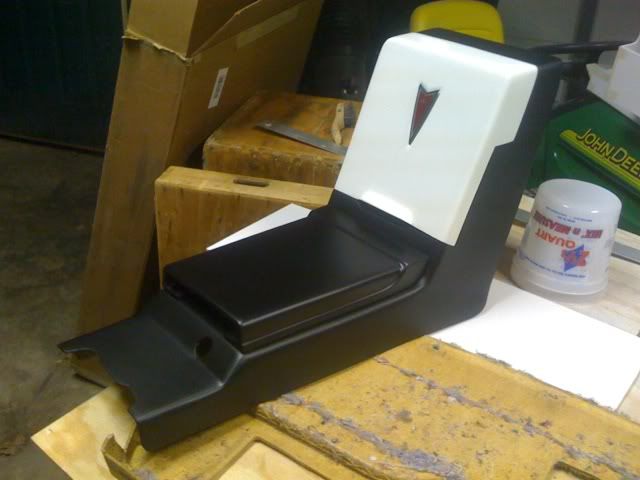
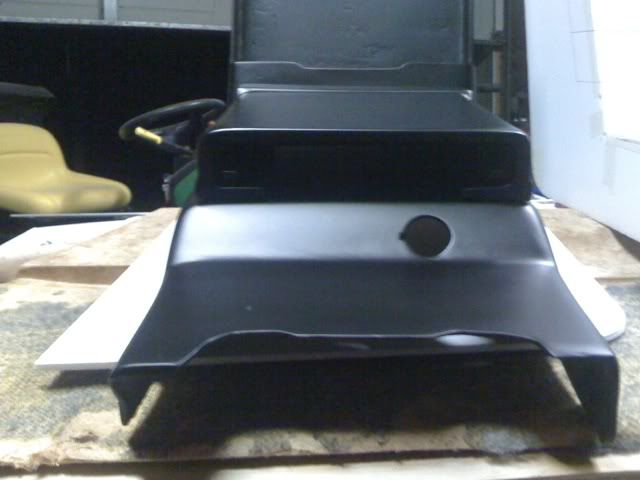
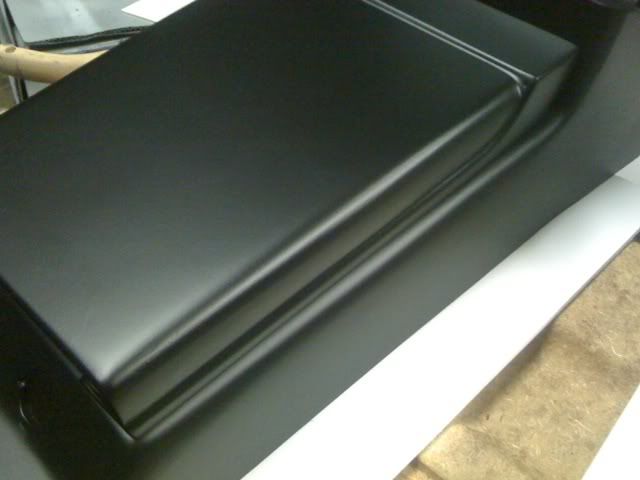
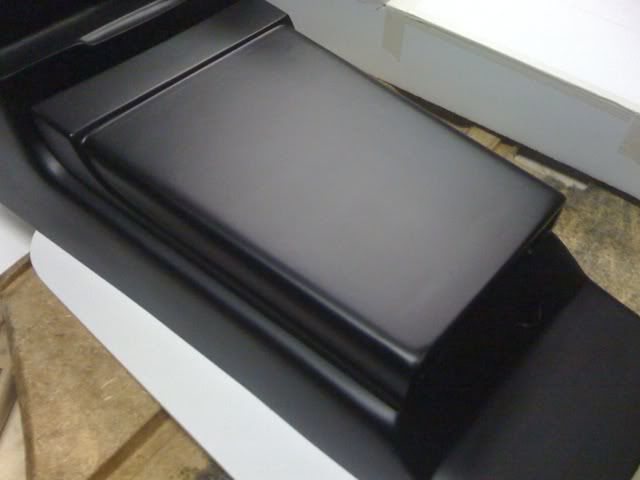
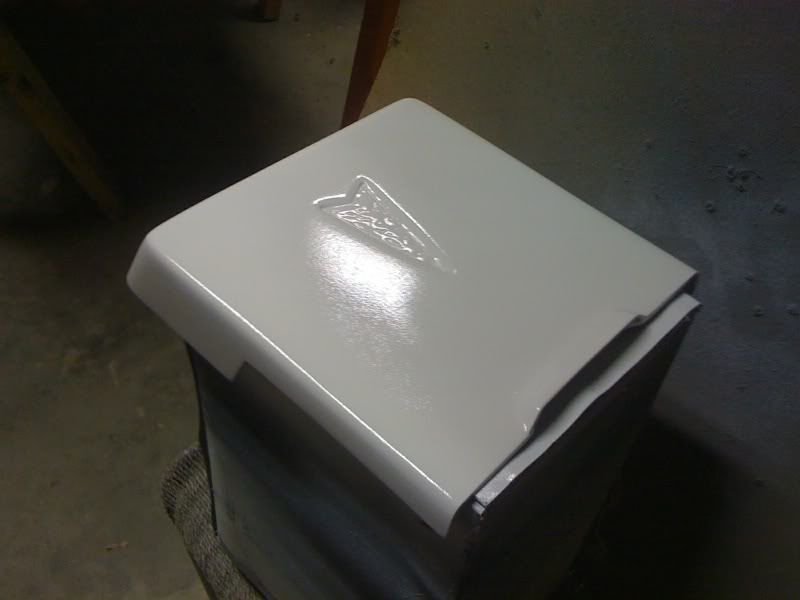
I could not be happier with the way this has turned out! I spent a few minutes sanding and the shot a layer of black. Other than a few areas to sand and repaint... The console is 95%... Check it out! The black really makes the entire console POP!
Nice and smooth
I have to get a can flat clear coat to protect all the work I've done
Another view
The black really makes ANY imperfections pop out - which is good because I only found a few - imagine that?
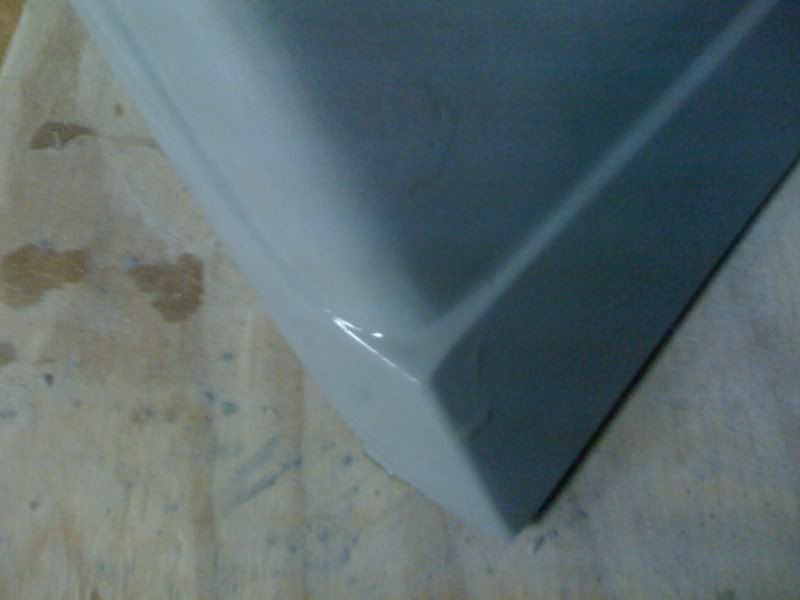
Another - you can see the slight waves at the front of the cup holder
There are a few other pics which highlight the clean lines - but Photobucket is acting up. I'll post those tomorrow. This weekend should be getting the hinge ready and the felt applied to the glove box and lid areas! The final plan is this - the main console and body of the armrest will be painted using the texture Lunitec Paint Systen from Germany - but that's a way off fron now. The decorative piece that goes around the armrest will stay the current color to add contrast to the texture. And of course the lid will be white and high gloss. As I said, I could not be happier.
Until then!
[This message has been edited by Sofa King (edited 01-21-2010).]
As I posted last night - Photobucket finally updated... Here are a few more
This image shows another area where I have to sand
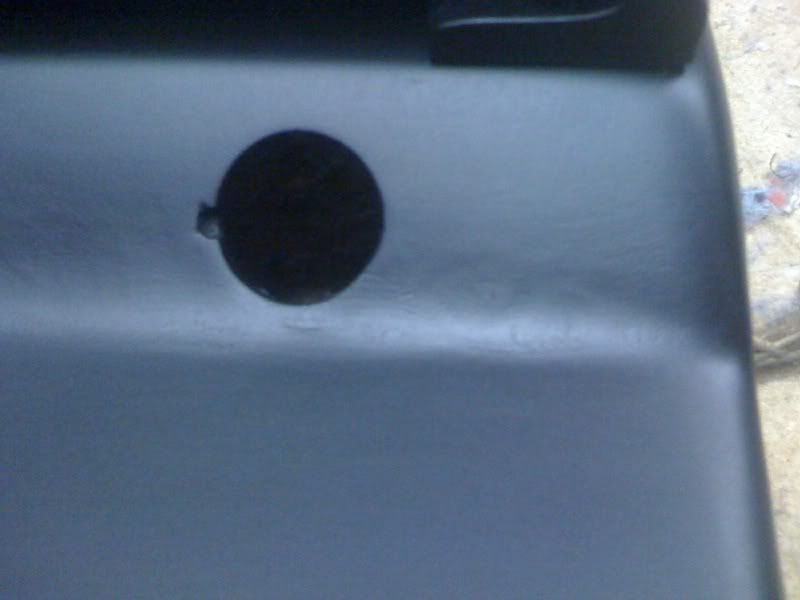
The area around the 12 volt outlet needs a little attention
One more beauty shot - it really turned out nice
OK. Question!!!!!!
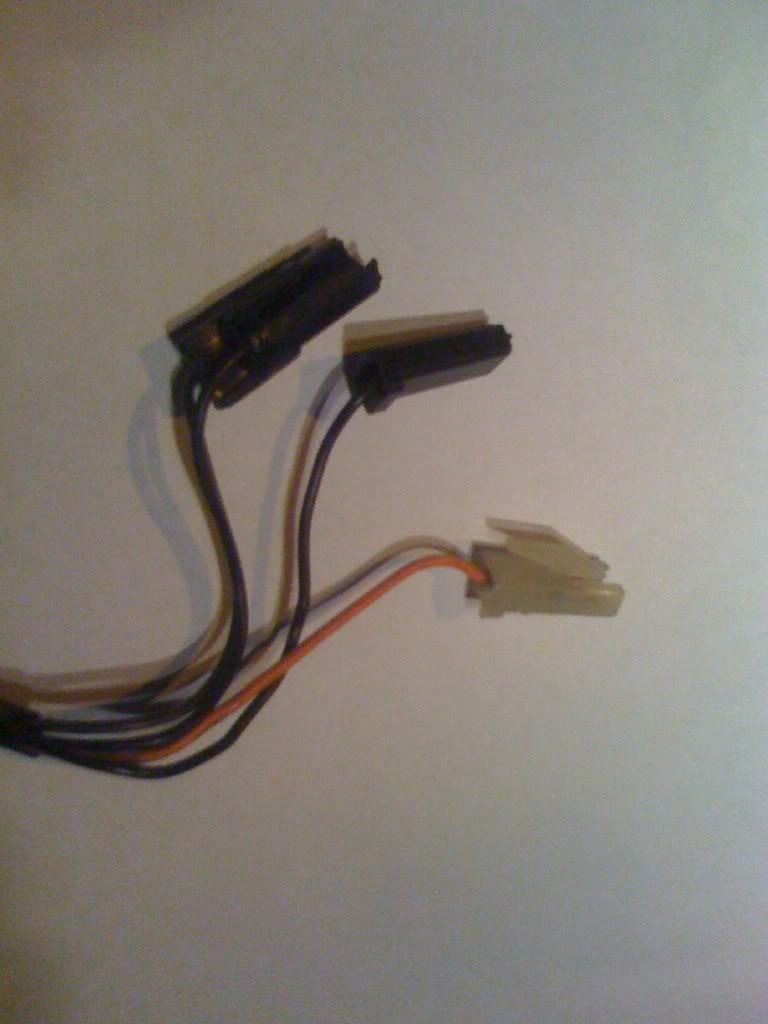
Below is a pic of 3 wires that center around the old cig lighter assembly. When I pulled the old lighter I was foolish enough NOT to label which wire goes where - my fault. The new 12 volt outlet I'm installing has 2 prongs. Which wires do I use and what is the extra wire for? Did I make a boo-boo?
Thanks guys!
[This message has been edited by Sofa King (edited 01-22-2010).]
Below is a pic of 3 wires that center around the old cig lighter assembly. When I pulled the old lighter I was foolish enough NOT to label which wire goes where - my fault. The new 12 volt outlet I'm installing has 2 prongs. Which wires do I use and what is the extra wire for? Did I make a boo-boo?
Thanks guys!
The Fiero lighter has a light in it. One of those wires is power to this light. One is ground for the whole assembly and one is power for the lighter. I am currently a few miles (3000 or so) from a Fiero so I cannot tell you which is which. If you have a volt meter or test probe you can check for 12 volts to ground. I am pretty sure the light is controled by the head light switch. One of the wires (probably the smallest) will have 12 volts when the lights are on and not when they are off. One of the other wires will have 12 volts constant. The last wire should have 0 volts and is the ground.
Your not going to cover it in leather/ vinyl? It seems like that would be a much more efficient way. You wouldn't need to fill in the imperfections, you wont need to worry about scratching the paint, etc. Just my .02. It turned out great though!
Nothing major. I had a lot of personal issues to take care of this weekend - very stressful. But I was able to spray several coats of matte clear finish on to the console. I have to admit that the black paint just makes the console pop especially when the lid is placed on. I can't get over how well it came out. All I will say is this - just when you think you've done enough sanding, there's usually more to do.
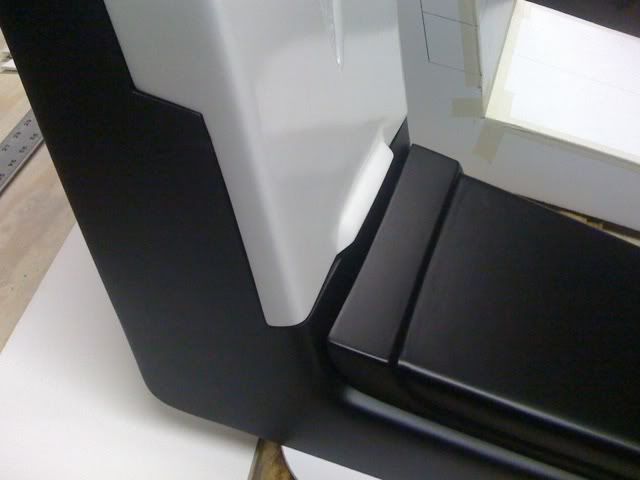
Side by Side - Console Part II
Straight On
I love this angle!
A few stray dust particles found their way on to the clear coat - no worries
Another great angle with the lid
One more - as you can see on Console Part II I'm beginning to get all the measuring done
If there is nothing going on this evening I'll be wet sanding the lid, spraying a high gloss clear and then prepping for the felt liner.
[This message has been edited by Sofa King (edited 01-25-2010).]
So there's gonna be more, right? I hope this thread isn't over!!!
Hi G,
Thanks for the interest. Not to worry. THERES LOTS MORE!!!!! I have the two door panels to work, the center bezel where the radio and A/C unit is and then on to Console Part II. Lot's of neat projects coming up. So stay tuned!
Your not going to cover it in leather/ vinyl? It seems like that would be a much more efficient way. You wouldn't need to fill in the imperfections, you wont need to worry about scratching the paint, etc. Just my .02. It turned out great though!
Hey G,
The plan is to paint the console (not the lid) and part of the armrest using the Lederoptik German Paint System. I've considered covering it but I think the paint system will work much better because I can get around compound curves and hard to reach areas without the material binding up, coming loose or looking too bulky. The spray system is a 3 part process. You spray a base coat and let it sit for 5-10 minites. Then spray the texture coating and let that sit. Finally, you spray the "leather touch" coating. It's a fantastic product but not available in the US just yet. Here's are a few examples and the website -
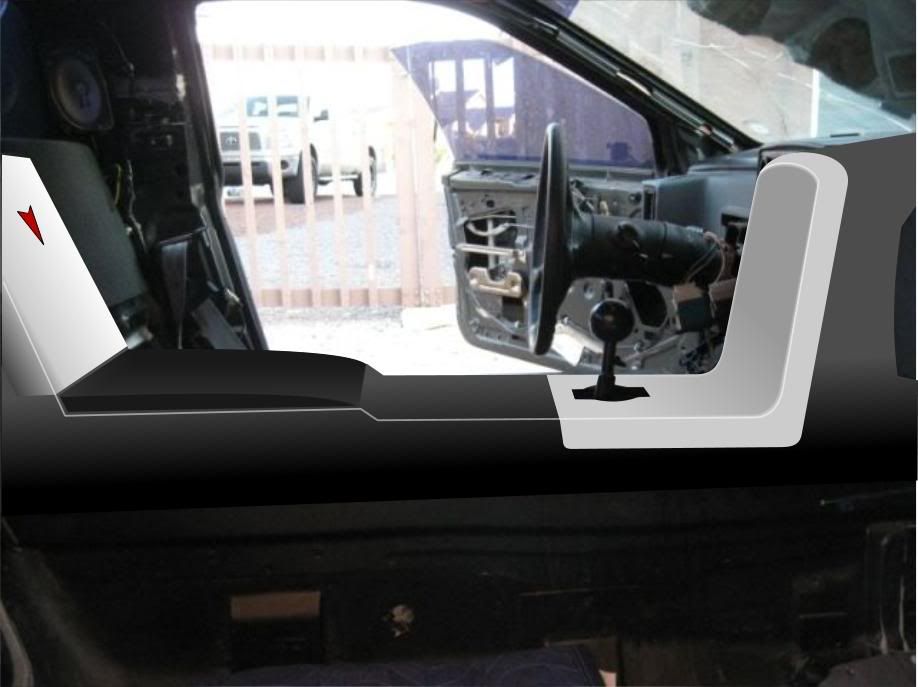
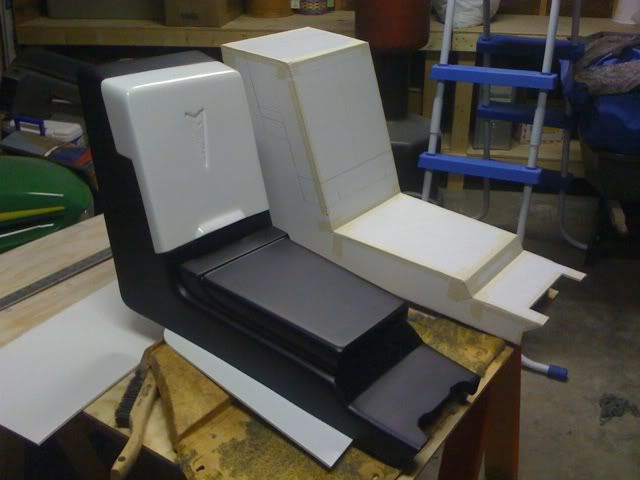
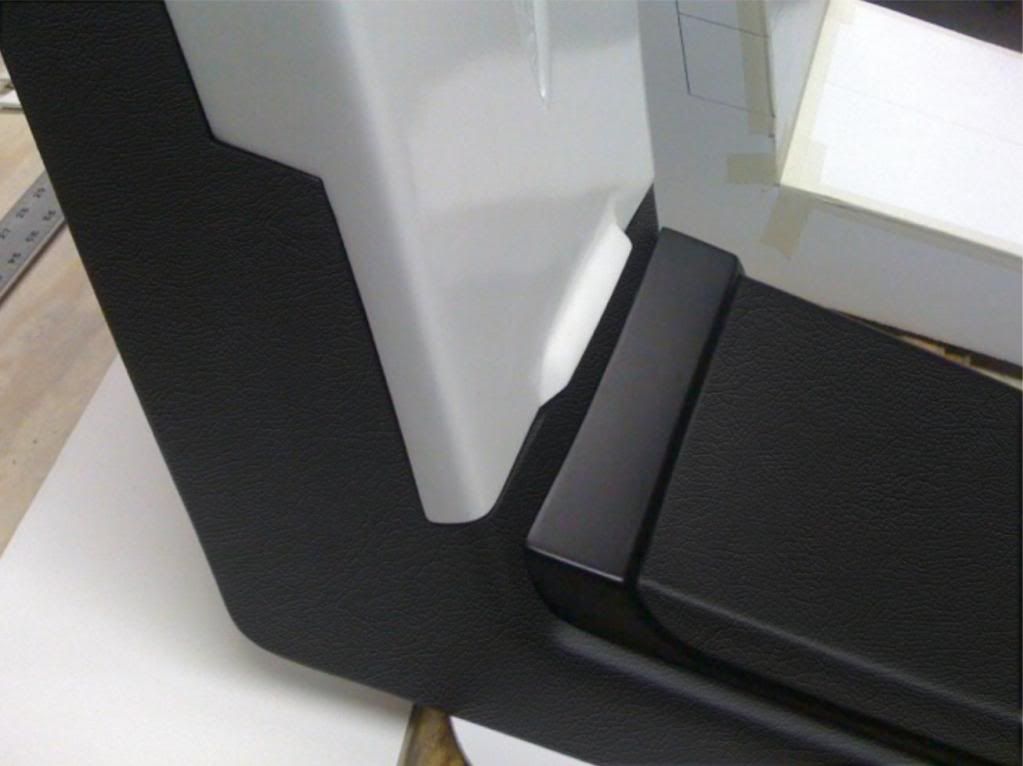
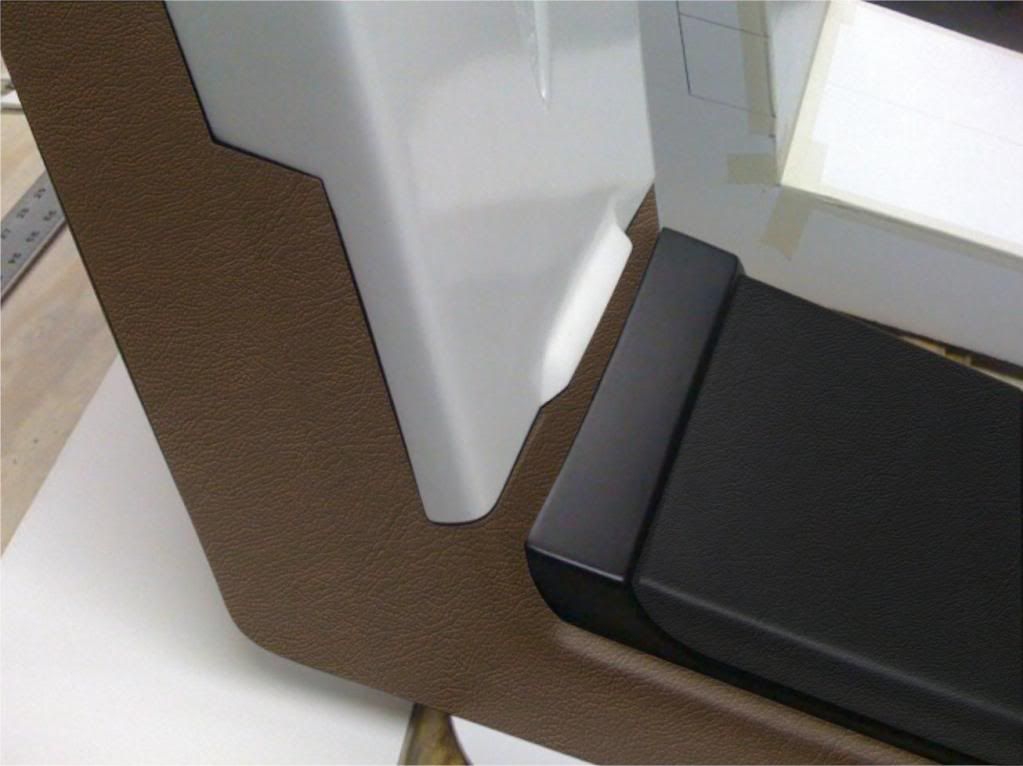
I created a quick image of how the Lunitec Paint System will look on my console.The nice thing about the texture paint is that not only is it thin but it also hide any imperfections or areas I might have missed. I will be thrilled if it turns out like this!
I created a few more to see what it would look like with the saddle interior
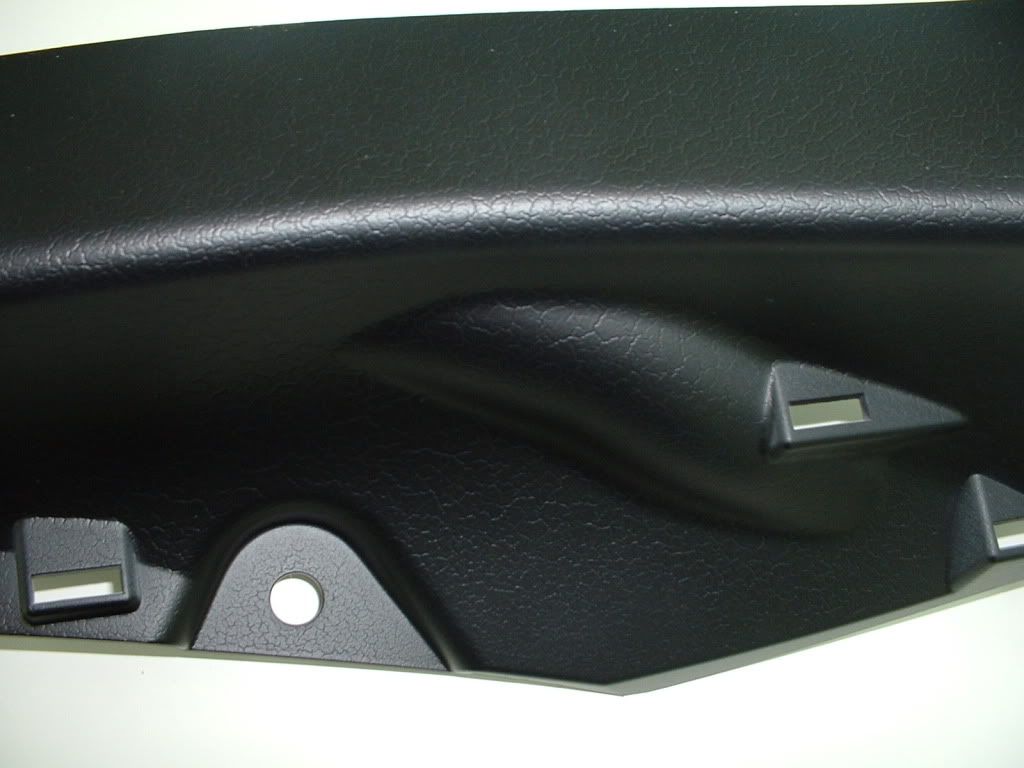
With all black armrest
Enjoy
[This message has been edited by Sofa King (edited 01-25-2010).]
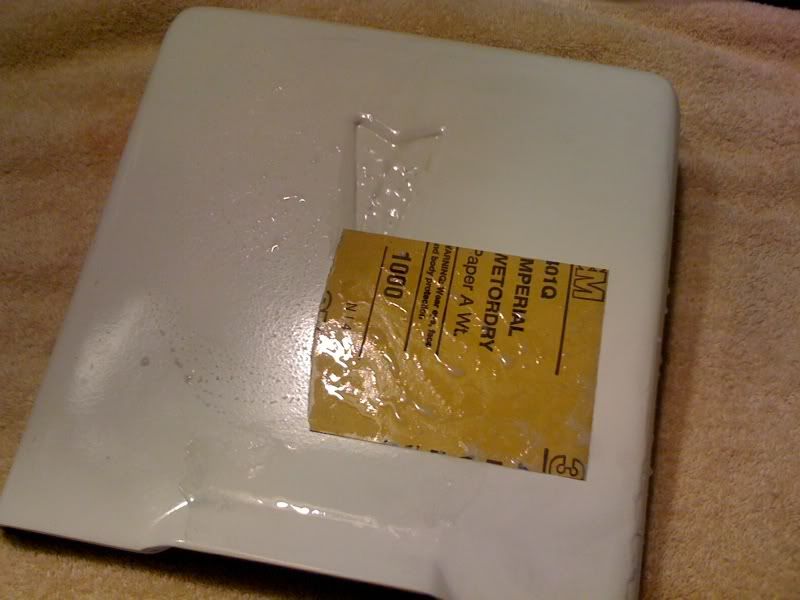
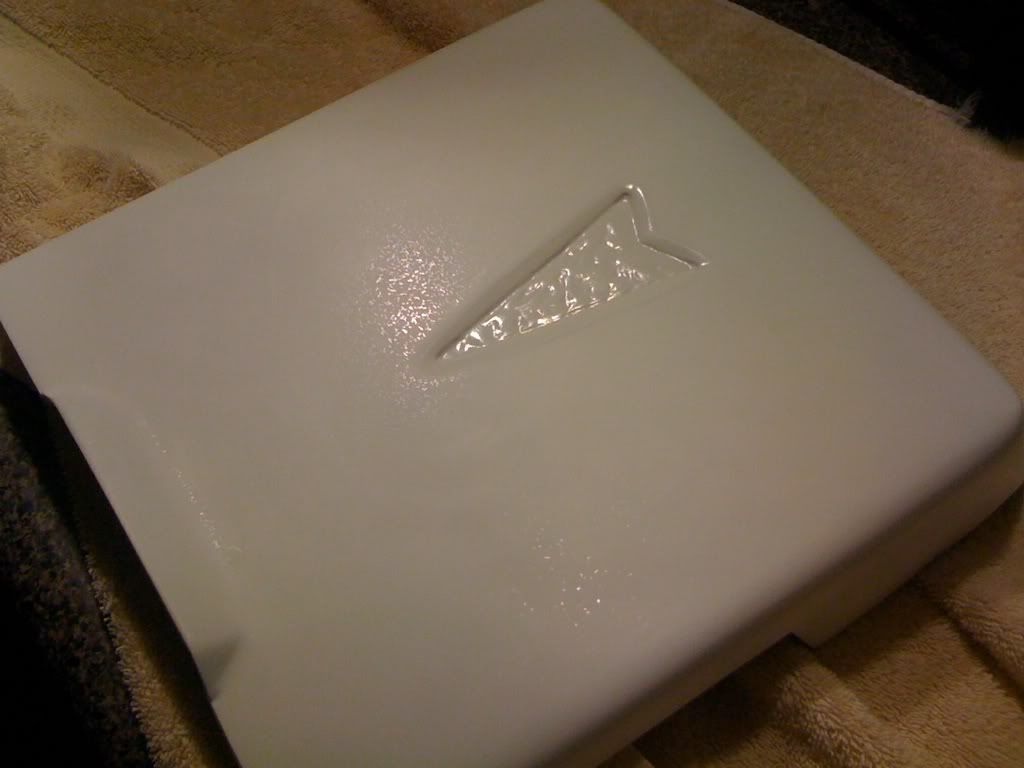
I grabbed the lid, a piece of 1000 grit sand paper and set up for some lite sanding. On the lid I used a laquer high gloss paint. I wanted to see how smooth I could get the surface using the 1000 grit paper. Check it out:
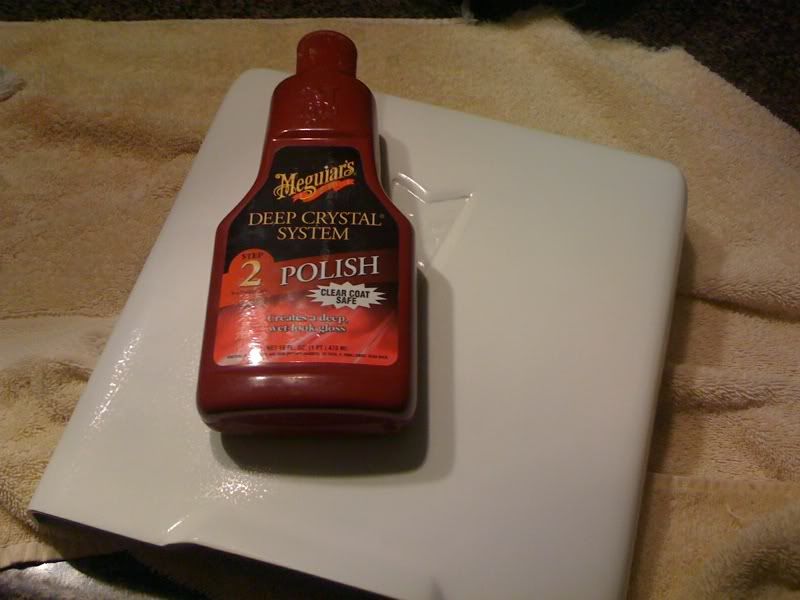
Materials
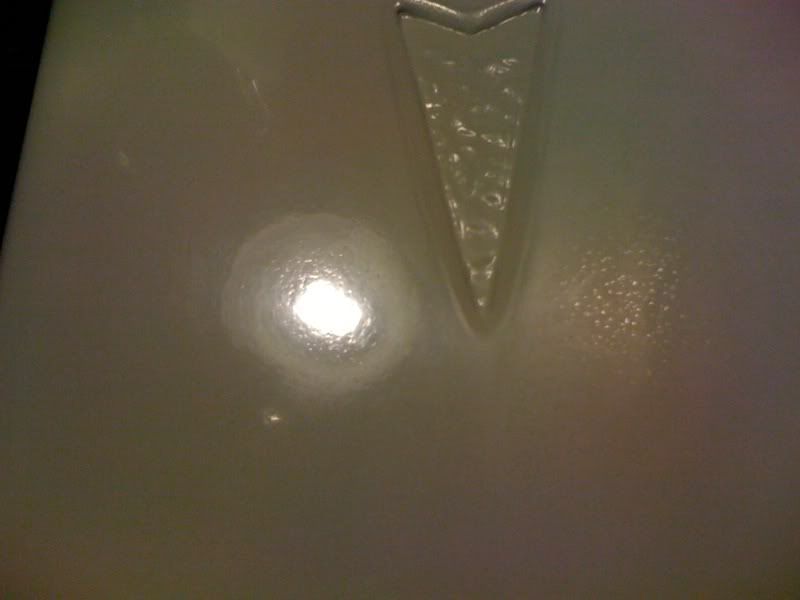
This is how the lid looked after 5 minutes of wet sanding - you can still the orange peel
I then took some regular clear coat safe polish to get that mirror finish...
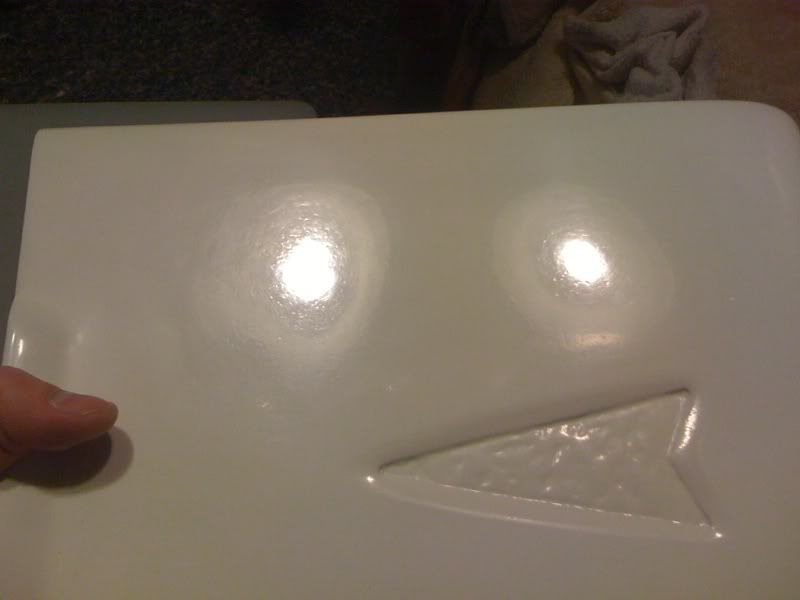
Check it out - Right Side is sanded, Left Side is after I used the polish. Nice... There is still a little "orange peel" but you get the idea
Another
After that test I went ahead and lightly sanded down the entire lid. I cleaned and washed the polish off and gave it good dry off. I then gave 3 coats of white gloss
Once this dries I will then spray 5 coats of clear with light sanding in between each coat for that mirror finish. You have to be very careful when sanding that you don't sand past the clear or color coats. If that happens it's back to the beginning. I'm probably going to use 1500 grit once the clear coat is sprayed - better safe than sorry
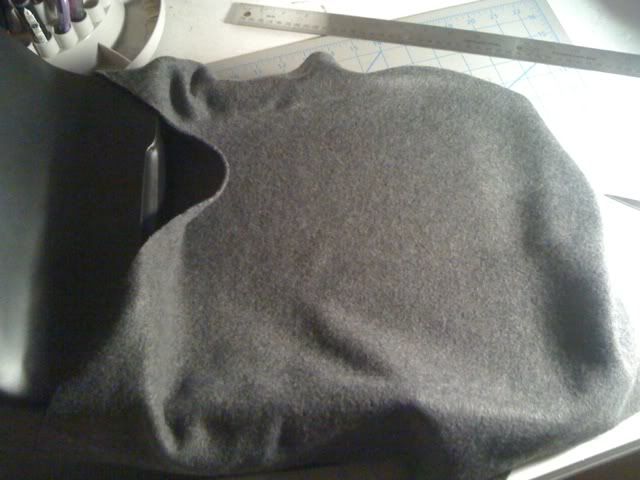
I then found the felt I had purchased at the local fabric store - talk about having to "man up"...
I'm not sure how to approach this - should I try doing one piece or several pieces? The lack of spray mount forced me to think this process a little more. I'll get some spray mount tomorrow.
[This message has been edited by Sofa King (edited 01-26-2010).]
LOL The only problem... it's really expensive paint. Katatak and I are looking at getting a group buy going. It'll be a while - we're recovering from the Christmas Holidays.
LOL The only problem... it's really expensive paint. Katatak and I are looking at getting a group buy going. It'll be a while - we're recovering from the Christmas Holidays.
And Taxes..........
Greg,
Your post above with the console and the Lunitec system is amazing. Any combination of the tan and black is bad ass - I am now thinking of a new interior for the Formula too! Thanks a lot! Like I don't have enough to do without you dreaming and scheming up new things.
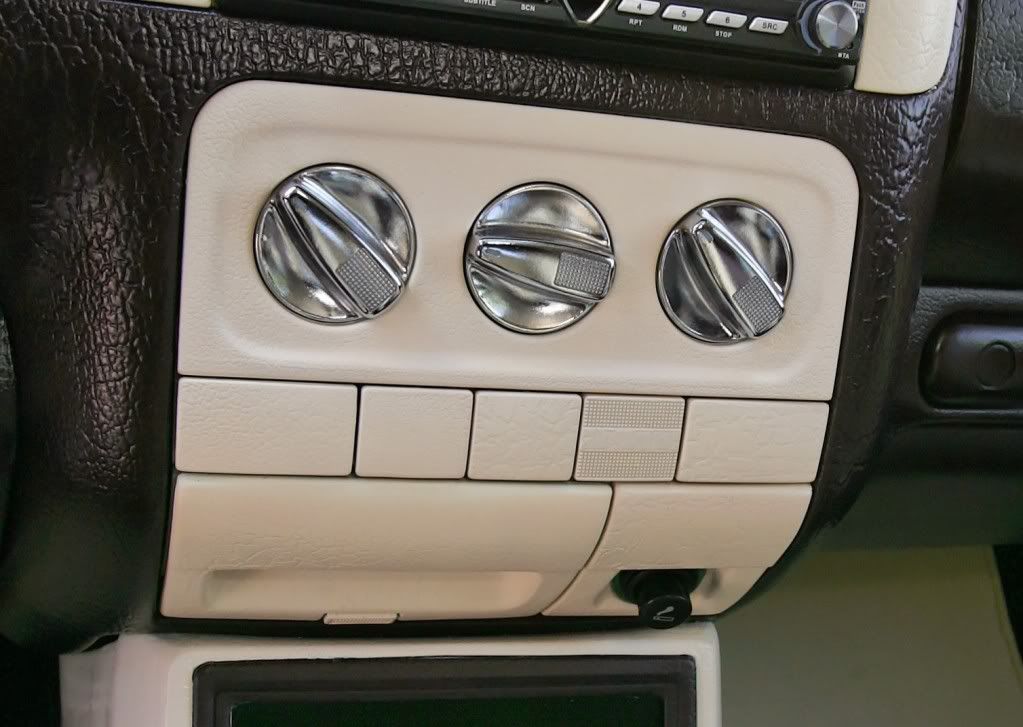
P.S. that pic you sent of the AC vent - perfect for a slanted AC surround thingie. Again - awesome work.
Your post above with the console and the Lunitec system is amazing. Any combination of the tan and black is bad ass - I am now thinking of a new interior for the Formula too! Thanks a lot! Like I don't have enough to do without you dreaming and scheming up new things.
P.S. that pic you sent of the AC vent - perfect for a slanted AC surround thingie. Again - awesome work.
Pat
Hey P,
OH YEAH! I forgot about the taxes... that's where the price killed us!
My favorite color interior has always been tan (leather in particular). There's just something about tan that gives any car a very luxurious look and feel. But that's just my opinion. I didn't mean to get your creative juices flowing. I know you've got the XTC engine to replace and a few other projects lined up. So, from now on. You are not allowed to read any more posts except your own. GOT IT?! Nah, just kidding. I need your input and your vision to keep me motivated and on the right track.
When you say "thinking" of a new interior for your car... are you considering changing the color?
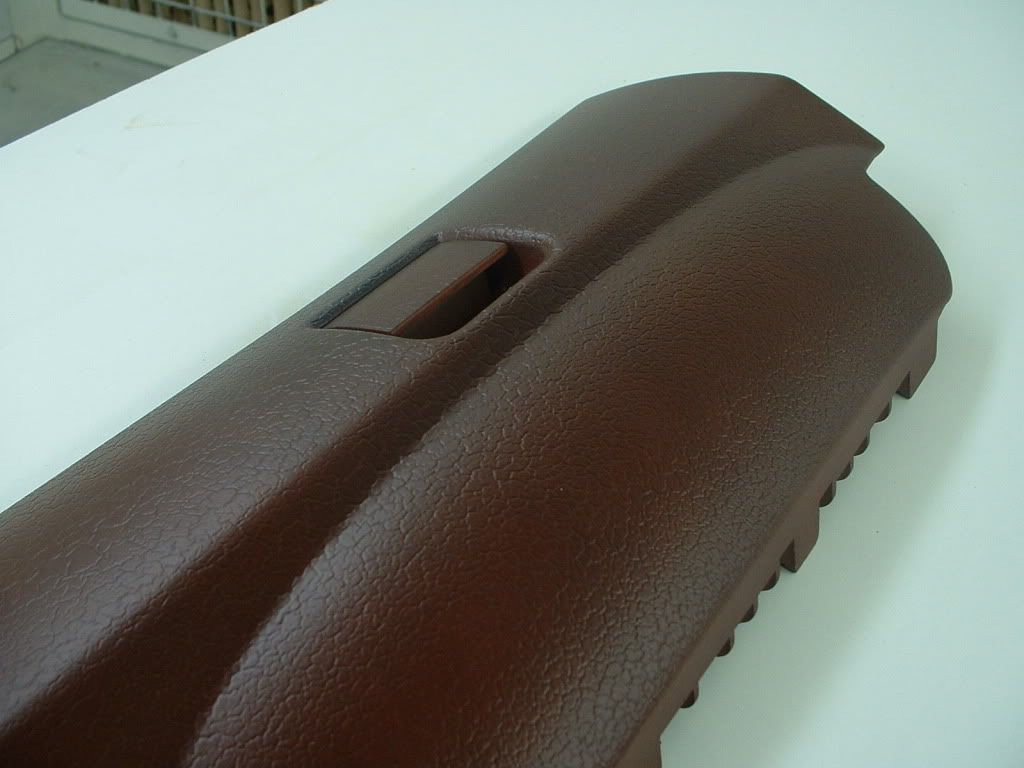
My 88 Formula has the Beechwood interior. It is getting a little rough as most Fiero interiors get. The rear console is faded badly - it's almost a pink color and the usual warping. The headliner is shot too so I am going to need to redo the interior. After drooling over your pic above of the tan with black arm rest, well - I want that for my Formula! Once I finish the mold I am building out of foam core, I will lay on the glass to make a plug that I can hopefully, produce a couple consoles from. My plan is a "base" model that I can add components too to create different looks. I'll need one for each Fiero. The shift and rear will be one piece and I will incorparate (ideas stolen form Sofa King cause I have limitied vision). To finish off each "look" I will have to fab 3 different AC surrounds or for the XTC, a complete dash that incorporates the AC Surround as close to the concept design you did awhile back. That is if I can get the rest of the crap I have to do done...... On ward and upward! Now get busy on those door panels.
Pat
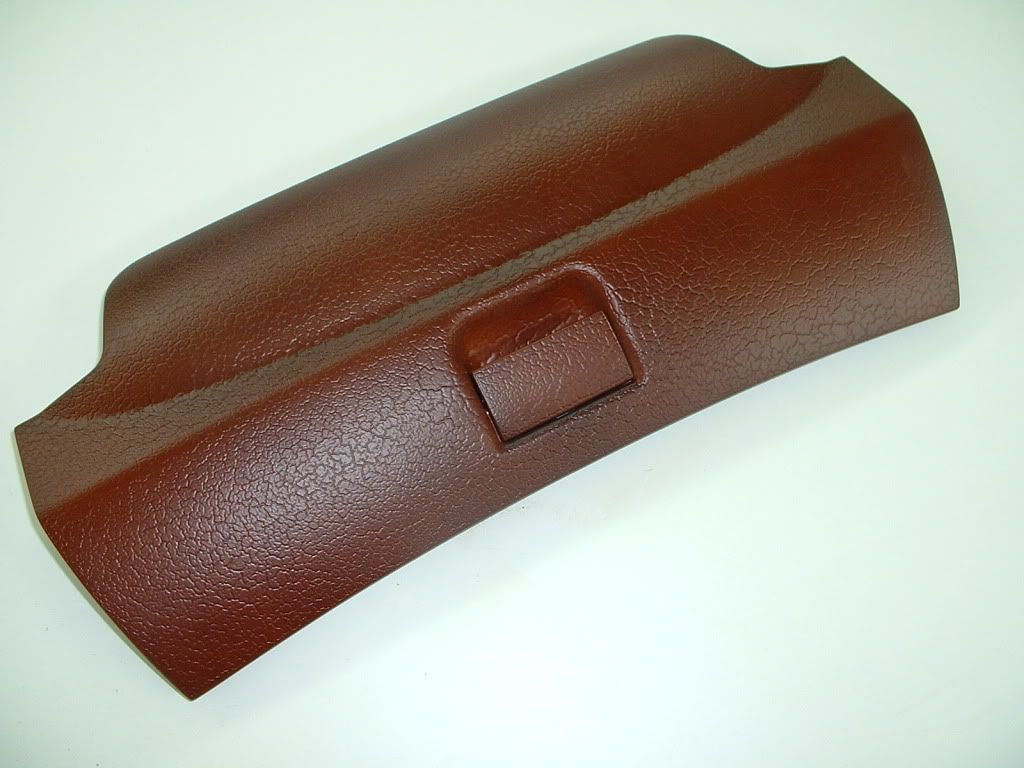
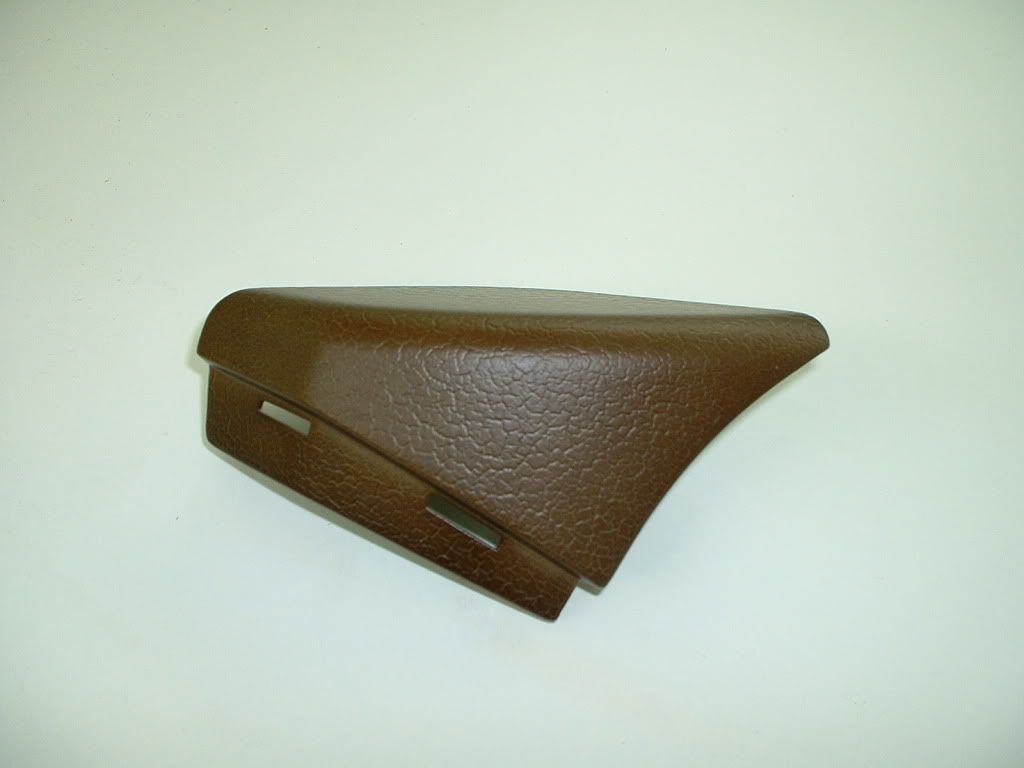
Edit to add: This is the one that I think I need for the Formula but I'm thinking either a lighter tan/brown or black for the lid!
[This message has been edited by katatak (edited 01-26-2010).]
My 88 Formula has the Beechwood interior. It is getting a little rough as most Fiero interiors get. The rear console is faded badly - it's almost a pink color and the usual warping. The headliner is shot too so I am going to need to redo the interior. After drooling over your pic above of the tan with black arm rest, well - I want that for my Formula! Once I finish the mold I am building out of foam core, I will lay on the glass to make a plug that I can hopefully, produce a couple consoles from. My plan is a "base" model that I can add components too to create different looks. I'll need one for each Fiero. The shift and rear will be one piece and I will incorparate (ideas stolen form Sofa King cause I have limitied vision). To finish off each "look" I will have to fab 3 different AC surrounds or for the XTC, a complete dash that incorporates the AC Surround as close to the concept design you did awhile back. That is if I can get the rest of the crap I have to do done...... On ward and upward! Now get busy on those door panels.
Pat
Sounds like a major overhaul! Although most of the interior pieces could probably just use a shot a paint and some clean up. But the warping kills me. I was lucky with my car - not much warping. But I have seen some consoles that are just warped beyond imagination. Thank god for popsicle sticks and super duper strong adhesive!
I'm really happy with the way that concept image turned out. Now all we need is the paint... stupid taxes and high prices of everything! LOL I know you have lots of projects going on but I'm sure I don't have to remind you to post images of all the console builds and interior overhaul? It would be a shame to deprive us of such excitement. WOW... how exciting does that make my life? LOL
I've been tinkering with the plug idea. But I always get confused because there are so many steps. Once the part / piece has been made you then have to make a second piece which is the actual plug. Once that dries, you use that to create all the other molds. It's very confusing. Have you gone to a body shop to price out what it would to cost or are you going to tackle the project yourself?
Finally, like you I'm going to redo the headliner. Mine is sagging and pathetic - I'm talking about the headliner! I'm looking at a few shops around town for some black perforated leather / vinyl. I really like the look - very classy. Depending on how that turns out I might use the same material for part of the door panels. But that's still in the R&D process. The rest of the interior will be removed and either cleaned up or repainted. I don't think I'll use the Lunitec system on most of the parts, but I can't make any decisions until I burn that bridge when I decide to go around it. You know?
About those door panels? YES, SIR!
[This message has been edited by Sofa King (edited 01-27-2010).]
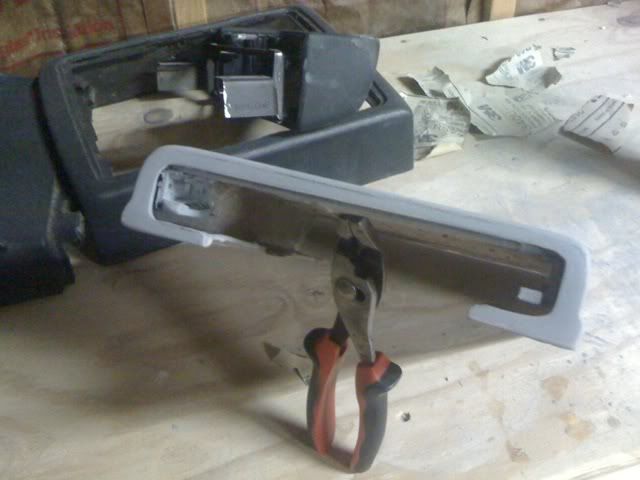
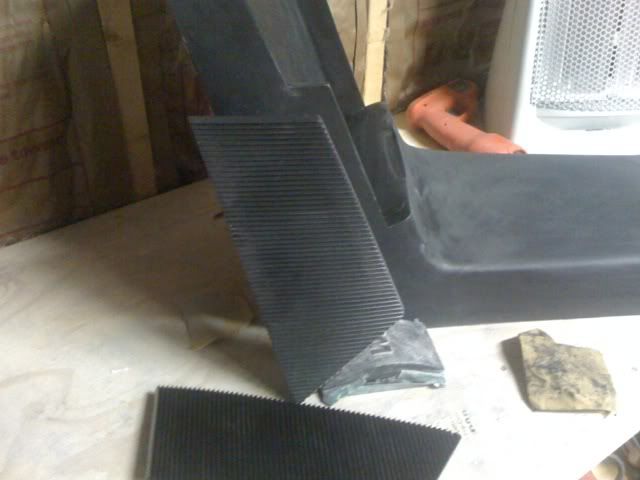
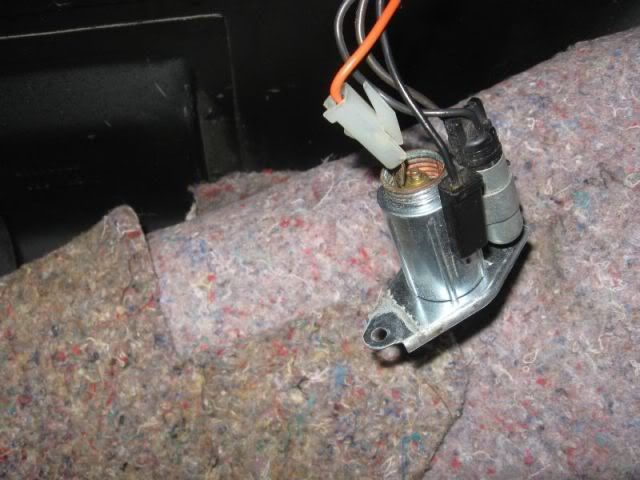
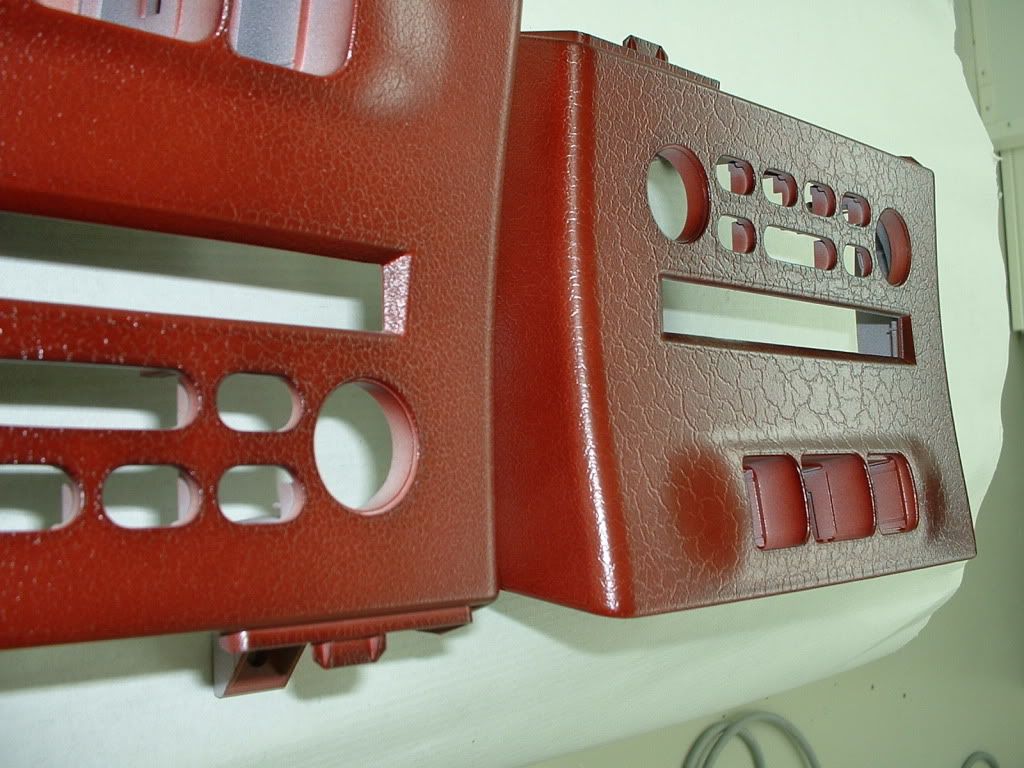
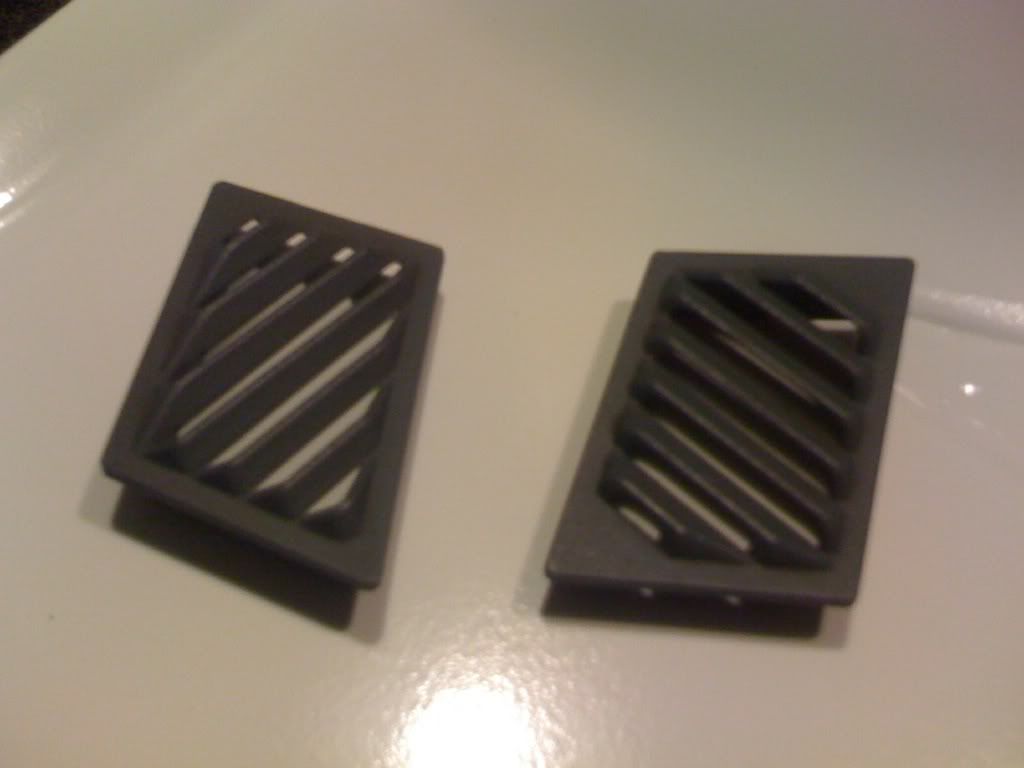
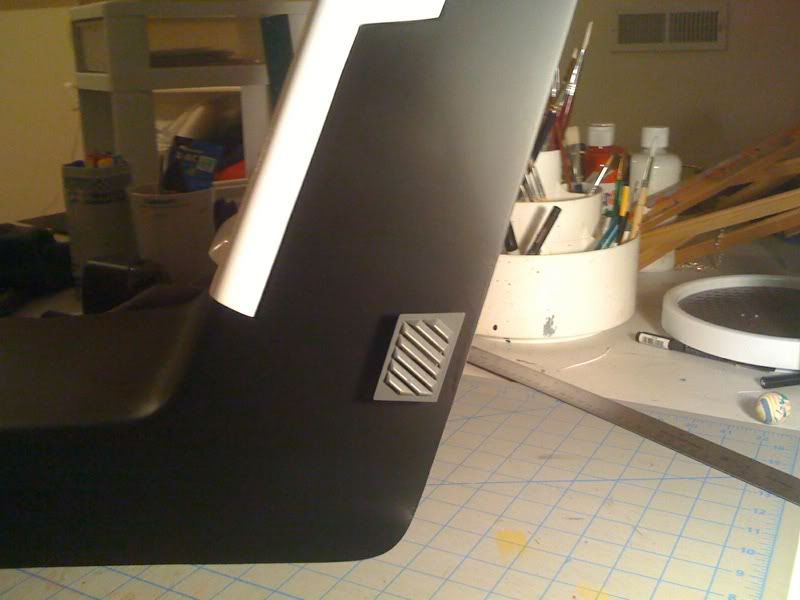
I think I found the console vents needed to cool the ECM. Believe it or not they were sitting right in front of my face... I'll check to see how much air will be circulated but I can also use the actual vents if need be? It's a working idea.
If it works, I'll pull the window vents from the dash, clean them up and incorporate them into the console. You know what this means? More cutting, sanding, painting, sanding, sanding, sanding...
[This message has been edited by Sofa King (edited 01-27-2010).]
Use the grill on your new heater!! or just add a strip of something cool.
I don't like the dash vents, you have come along way making a WAY COOL console, slow down and rethink about it. Sure it won't be seen everybody WILL be looking at the whole console when done....
Use the grill on your new heater!! or just add a strip of something cool.
I don't like the dash vents, you have come along way making a WAY COOL console, slow down and rethink about it. Sure it won't be seen everybody WILL be looking at the whole console when done....
I'm with Revin on the vent thing. Take a step back and search the net for some cool vents/grates, etc. Maybe just cut some slits in the side - maybe 3 about 1/4" wide and 4" to 6" long? Then mount some grate or metal screen on the back side?
just by looking at the tape on versoin, I would say a nice 1/2 slit by 4" type of vents there would look cool.
here is some work for ya, make several molds of those little cute vents and glass them together in a slit formation . then you have the vent style you want and a more modern look to them. you know...kinda like strech them a bit longer.
Oh and what do you have that WILL do 180MPH???? looks nice though!!
By slits I mean in this fashion: ( yea still never figured out Xara)
// // // // //
[This message has been edited by revin (edited 01-28-2010).]


 That console cover kills me everytime that I look at it. Just so modern.


.jpg)


 everybody WILL be looking at the whole console

 looks nice though!!


