"LOL! Is that wrong? Because I bought a really big hammer and those HUGE driving spikes and rebar..."
I tired that but kept hitting my thumb!
Stay positive brother..... Now that you have the place to yourself, you can move the project into the kitchen.....Solves your heating problem...just a thought. Just trying to get a grin out of ya! Talk to you later.
Just a sugestion and I am not even sure its a good one... Could you heat the foam board with a hair dryer or heat gun and form a curv around a piece of PVC pipe of the desired diamater?
ever think of using two hinges on the top? It may make it a bit more durable as your spreading the load out more. Not to mention positioning the hinges toards the corner, where the mounting points are better reinforced because of the roundness...
I like this thread Giving me ideas for future projects...
Ever think of extending that glovebox/center consol up to the dash? It would eleviate allot of shift console worpage issues...
[This message has been edited by ALJR (edited 01-10-2010).]
Just a sugestion and I am not even sure its a good one... Could you heat the foam board with a hair dryer or heat gun and form a curv around a piece of PVC pipe of the desired diamater?
ever think of using two hinges on the top? It may make it a bit more durable as your spreading the load out more. Not to mention positioning the hinges toards the corner, where the mounting points are better reinforced because of the roundness...
I agree. If that hinge is already in there, I would definitely consider putting a hinge on each side of it, to eliminate wobble.
Could you heat the foam board with a hair dryer or heat gun and form a curv around a piece of PVC pipe of the desired diamater?
Hey ALJR,
I've worked with Foamcore for years and that's very good question. I have no idea. My first thought would be yes, I don't see why it wouldn't work. But then my second thought would be - maybe not. If the the foam breaks down from the heat will it harden while in it's new shape. Again, I really dont know.
I'm BACK! It's been a rough couple of weeks but I'm slowly getting my life back in order and what better way than to jump back on the Fiero and occupy my thoughts with this project! There's been one drawback. It has been really FRIGGIN cold and I'm debating whether or not to move the "fiberglassing" inside the house. I have a HUGE room above the attached garage but there is little ventilation. Can anybody tell me if this is a good idea? I will NOT be sanding or doing anything like that - just the pouring and laying of the glass.
Also, I just received a new dash and complete center console. I'll post pics this evening!
Just want to thank everybody for the kind words and support!
I thought you knew about the smell that goes with fiberglassing? The house will smell like that for a while. Use the room abouve the garage, open the vents after you are done with a fan to push out the fumes.
Do you have a little heater? garage doors insulated?
I have both and it stays around 65* in there @ 30* outside. just get ya another pair of long johns on and tough it out!! you have been away for so long that Pat is making his whole car parts out of fiberglass!!!! EVERYTHING (it seems lol)
S, look up the thread about 3000gt dashes(sourmug's) he was using the 2 part foam to help make the buldges in the door panel. I think you can do some good with it as well . here : https://www.fiero.nl/forum/F.../HTML/071501-13.html
Wouldn't that be a good thing? You would be making the shape for a reason; wouldn't you want the part to hold its shape?! Either way, just offering another possible solution...
I am kinda like the company BASF; "We do not make allot of the products you buy, we just make them better" ... I am not very good at inital problem solving. But once I see something, I am always trying to improve it... Kinda like this thread of yours. I would never have though I could do what your doing, until I see how its done and how your doing it
[This message has been edited by ALJR (edited 01-11-2010).]
I got hung up last night taking care of a few things and was never able to unpack the dash and consoles. But tonight - I PROMISE to post pics!
I'm also taking Revin's advice. I'm insulating the garage doors with a high R value insulation. We're nearing the end of winter but better to do it now - it also keeps the heat out.
S, look up the thread about 3000gt dashes(sourmug's) he was using the 2 part foam to help make the buldges in the door panel. I think you can do some good with it as well . here : https://www.fiero.nl/forum/F.../HTML/071501-13.html
Hey R,
Nolen's build is what put the fire under my rearend to get started. I love that thread! What a shame he sold the car. I would have loved to see the finished product.
yeah insulate the garage!! also look at the Home depot or whatever and get the side weatherstrips that attach to the side of the doors and it will help keep the wind from finding a way in there as well.
Oh and a nice fan for the summer heat
nolan has some great tallent there huh! Just thought you may think like me and want to try the foam then cover with your glassing expertize!
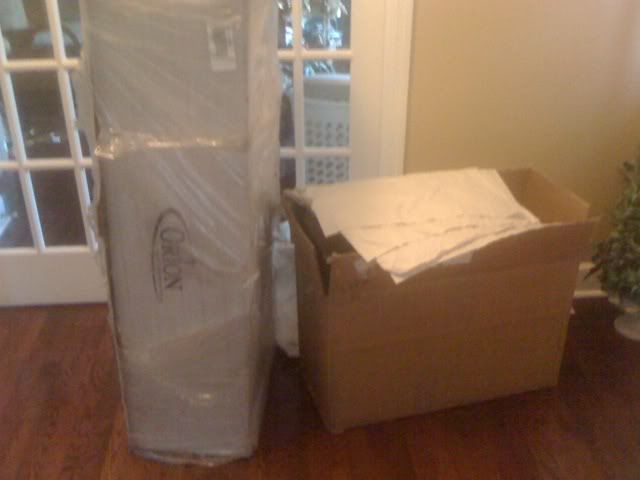
As Promised! Here is what arrived in the mail a few days ago!
Look at them boxes!
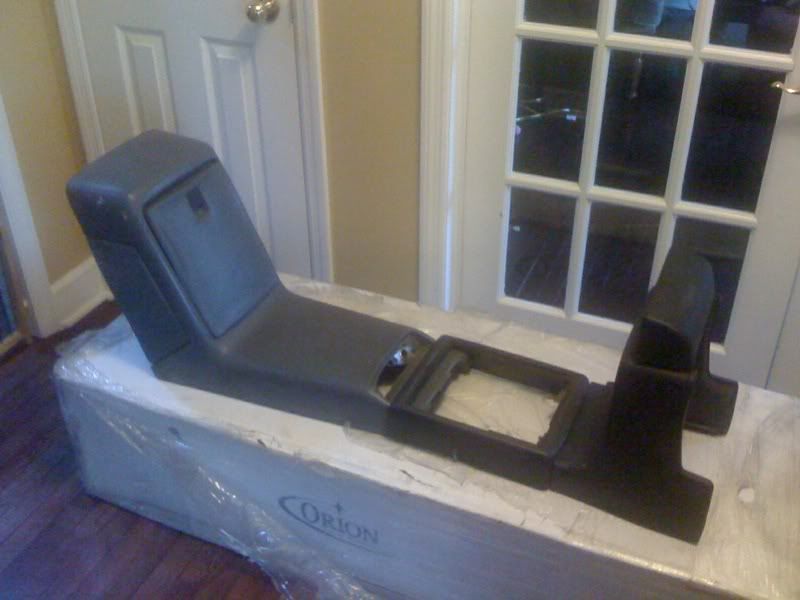
Complete center console
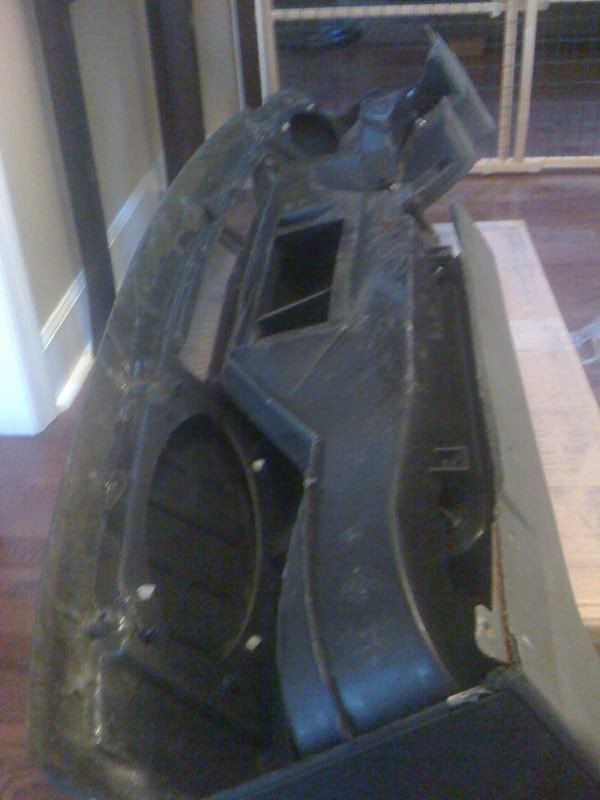
Dash out of the box
Getting all the pieces to fit
You don't realize how big the dash is until it's sitting in your house!
There were a few cracked areas - but I'm not even worried about that!
Another
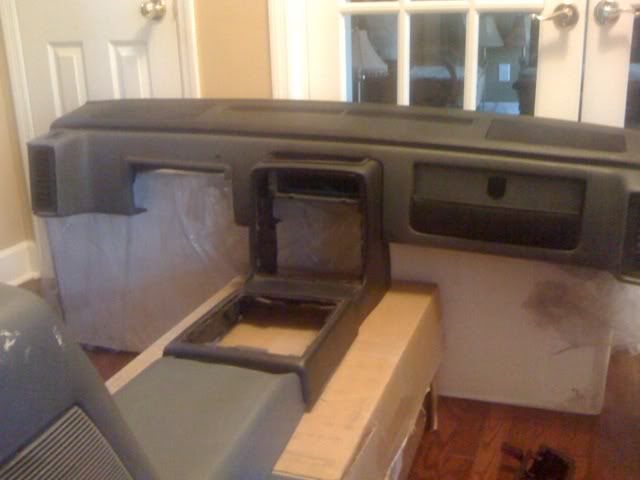
This dash is going to used as the test bed to create a new design - I do NOT want to use my original dash - it's in perfect condition. As you know Katatak and I have been bouncing ideas and "one-upping" each other (not really - I like Pat a whole lot) so it's going to be interesting to see what directions we take and how these projects pan out.
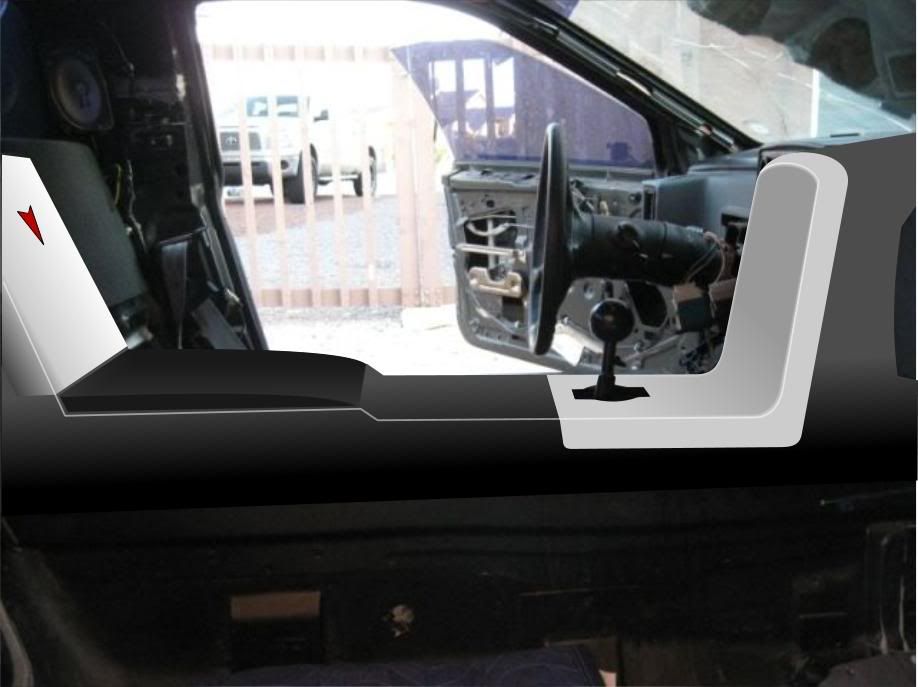
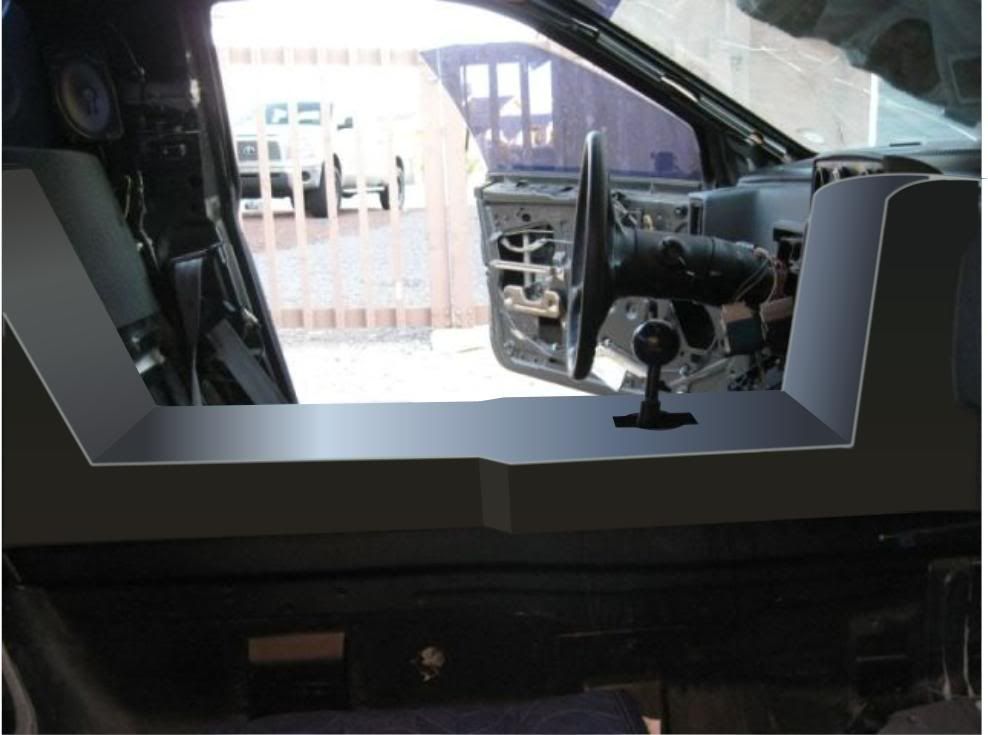
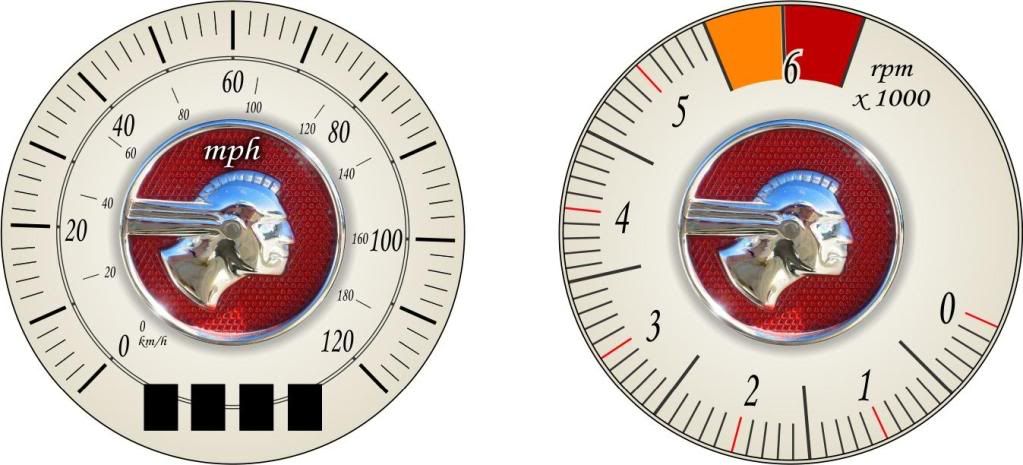
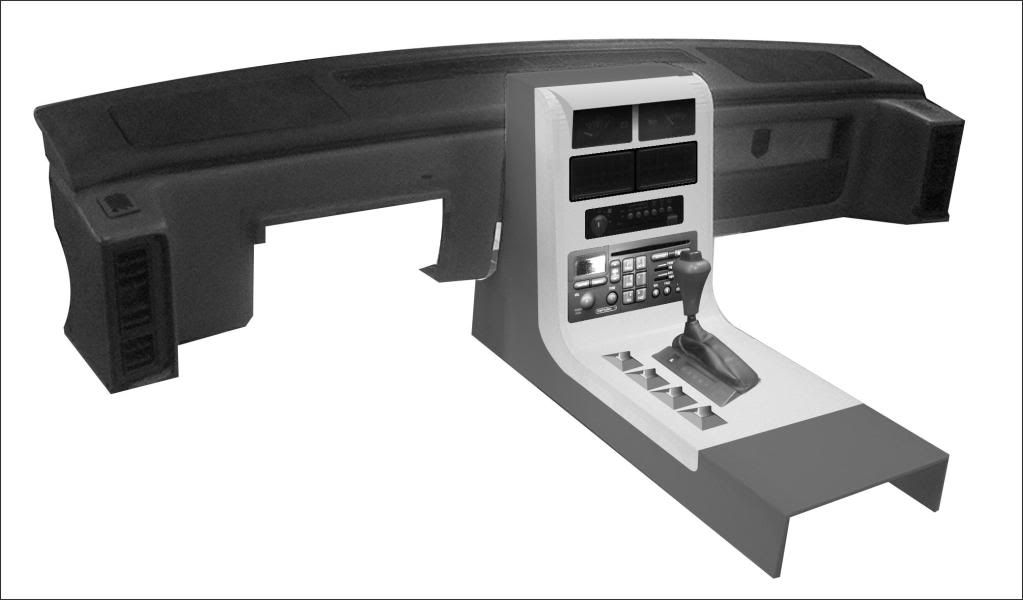
I've attached 4 designs that I did for Katatak over the last month or so (the images are of his interior). While I have no intention of taking "his" designs, there are some elements within each that I really like. So I'll be picking and choosing... but then again... I might come up with something completely different... Everybody knows that these projects are ever changing...
Enjoy
This image has a Corvette influence - my favorite thus far - it still has the Fiero look and feel to it
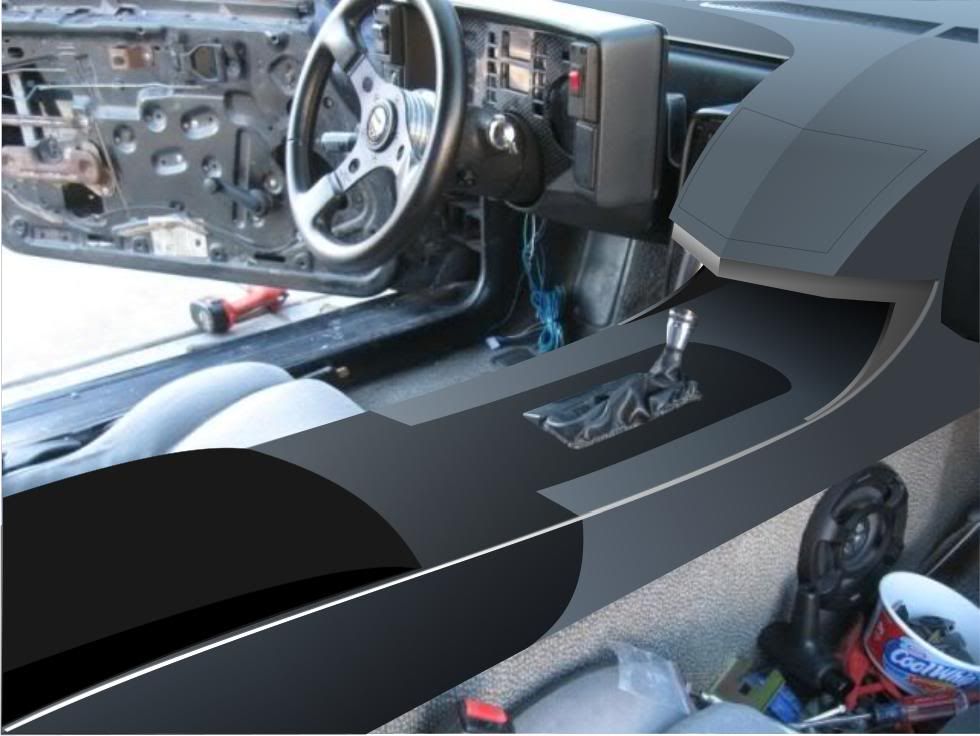
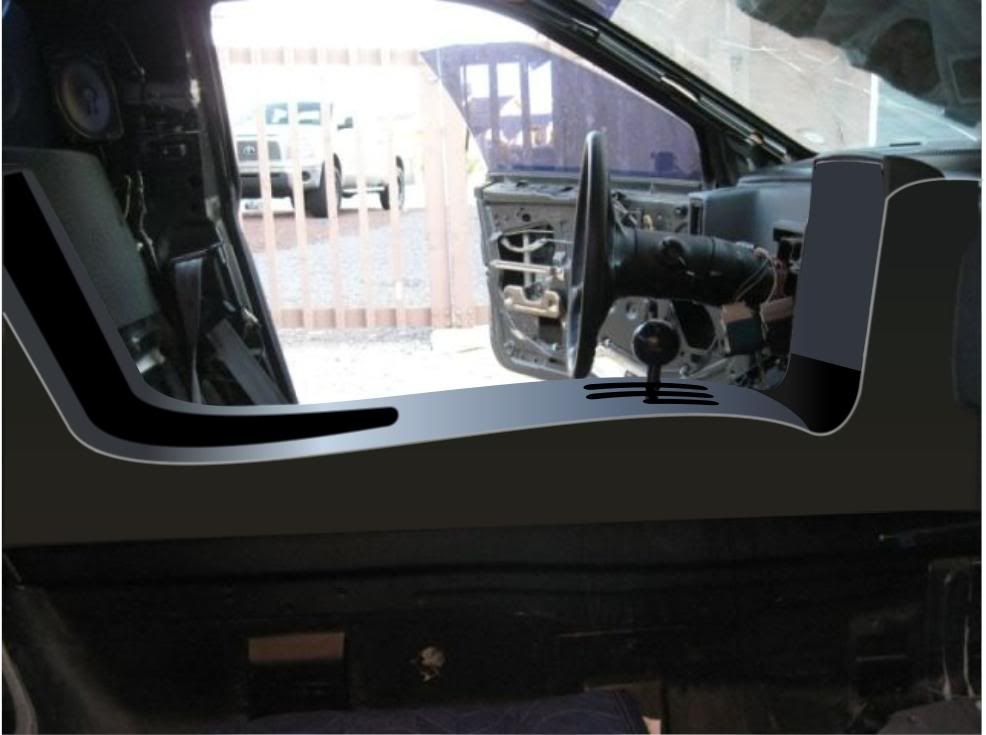
I really like this design but I'm not sure about the flow - it doesn't resemble anything about the Fiero
Side View
With lid open showing radio and A/C
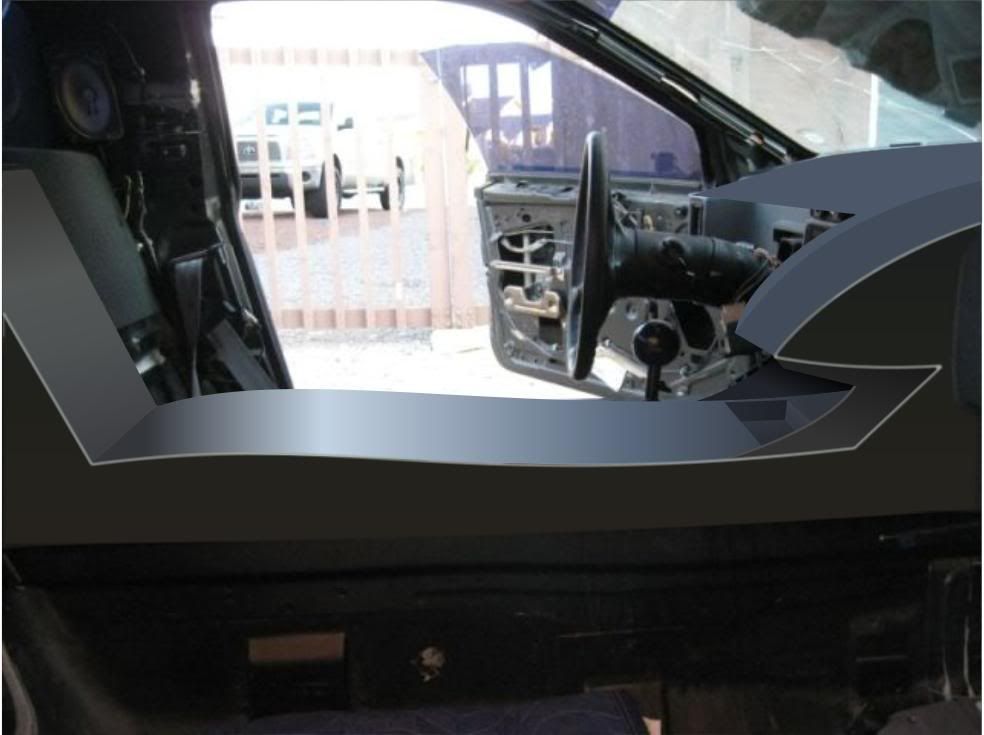
There's something about the simplicity of this design that I like
This one is REALLY curvy. I like the way radio and A/C console sticks up and over the dash
That's it for now. It's supposed to be 55 today! I'm hoping to get something done this afternoon. Knowing my luck... it'll be sanding. I hate sanding. But, I think I'm at the point where I can begin final construction. It's a very exciting time. LOL And then it's onto the door panels and Console Part II
[This message has been edited by Sofa King (edited 01-13-2010).]
I think I like this one the best as it reminds me of the Fiero... If it were me, I would make the radio opening double-din... I would also make the center arm rest padded and hinged open (hinge along the passenders side or back) for extra storage... Duno if it would be possible to do this, but a slide-out cup holder on the pass. side of the shift console (the part you have in white in the above pic). This way, it would be out of the way of your arm/elbow while shifting...
Just my two cents of what I would do "IF" I was capable enough to do something like this
Katatak sent me a link to a product called SEM Texture Spray Paint. The paint system mimics the vinyl and leather look of most interiors although it only comes in black and clear. Has anybody used this product with success? Does anybody know if it can be painted over with another color? If so, we would LOVE to see pics and you opinion(s).
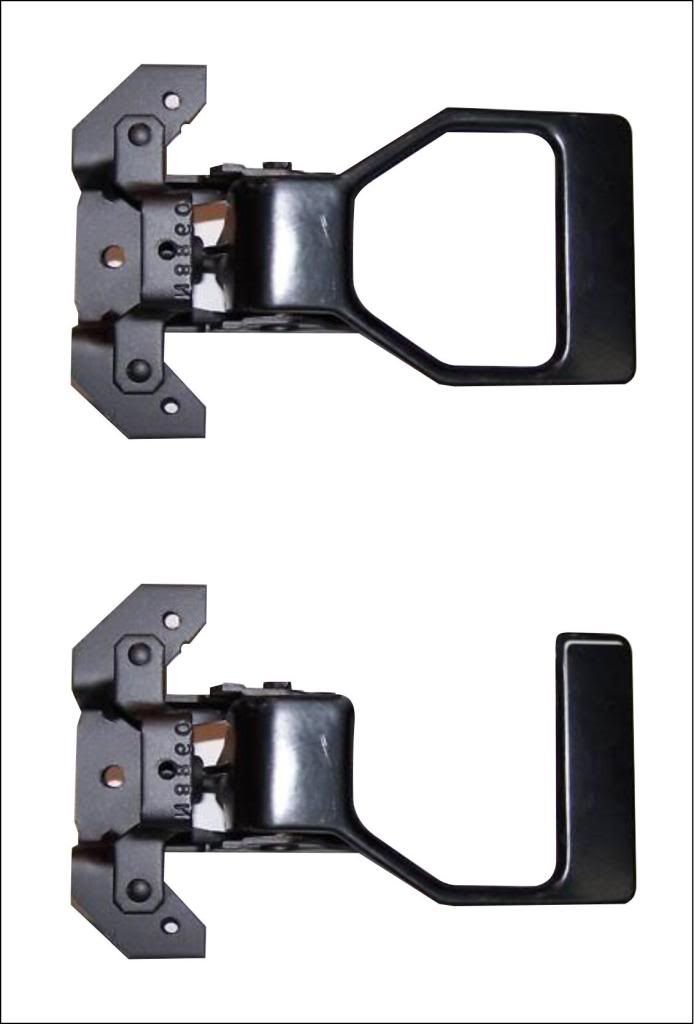
As I begin the prep work for the door panels I was looking at the door handle. I don't want to modify the door handle assembly completely so i came up with this simple design - has anybody considered or done this to the existing handle?
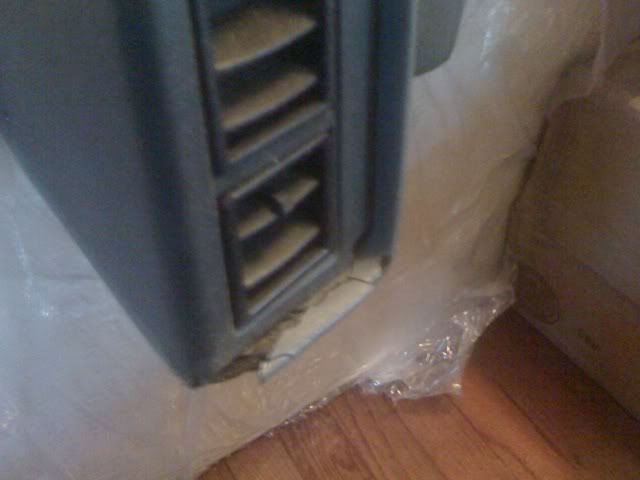
One thing to remember about your new rear center console is that the ECU behind it needs ventilation. (Note the vents in the side of the stock one)
I like your designs... They're fantastic. Looking forward to seeing it all come together.
------------------ Kendall (Icelander) Whitlatch '85 Fiero 2M4 - 5spd Isuzu '88 CJB - EcoTec - In progress '67 LeMans/GTO clone 6.5 litre TH400 - For Sale All the rest aren't Pontiacs, so what does it matter?
Thanks for the kind words! It's been since I was last out in the garage - it has been really really cold. I'm going to incorporate the vents into the new console. I might have to make some vents into the existing console - not sure how to do that just yet. Again, thanks much!
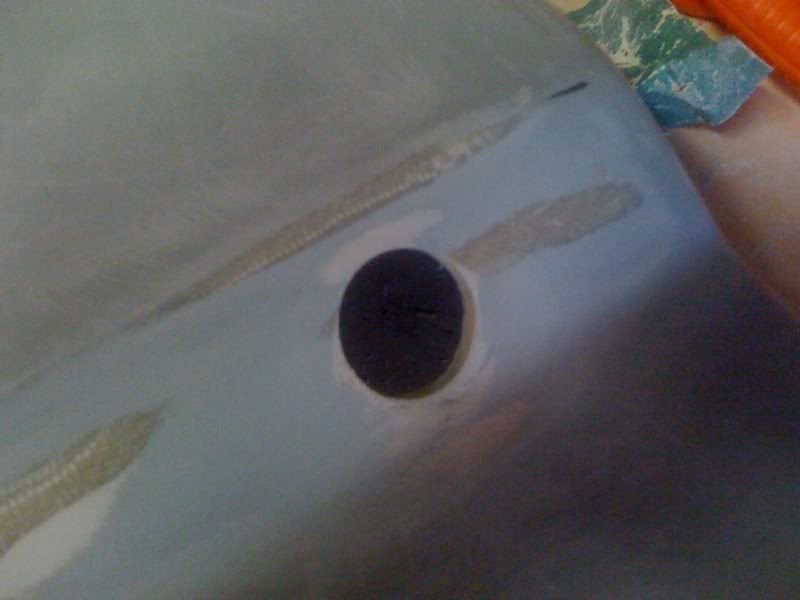
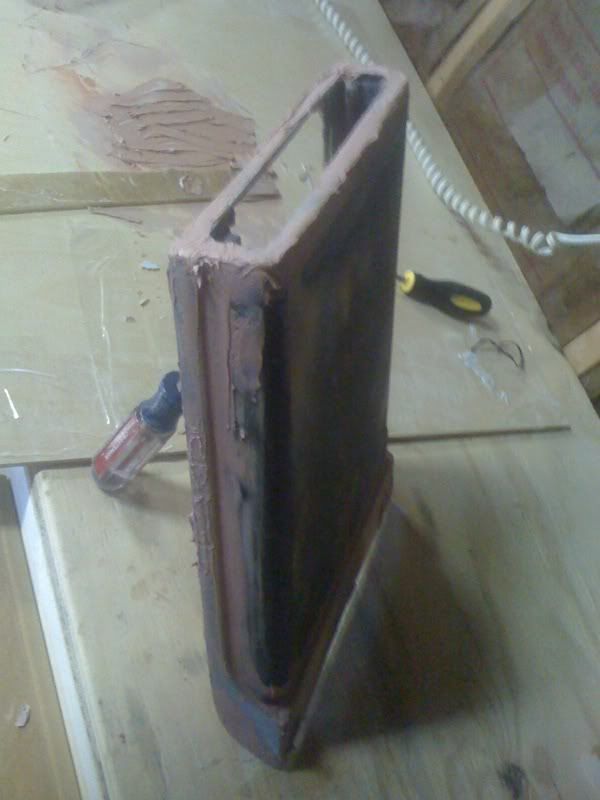
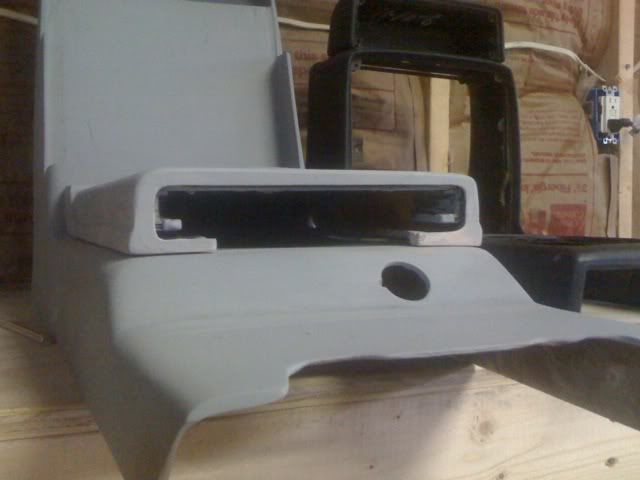
I removed all the material I used to fill the 12 volt outlet hole.
I did have to go back and create a notch for the plastic outlet cover
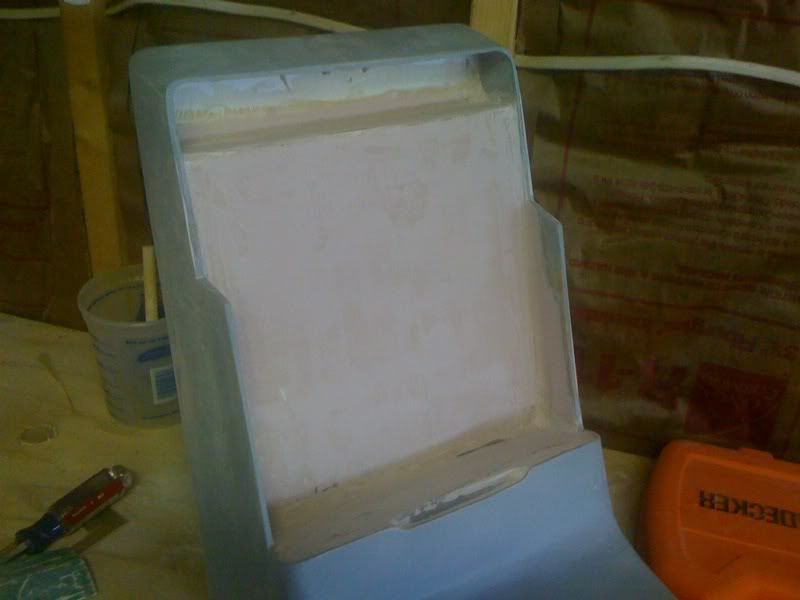
I sanded a little more of the glove box
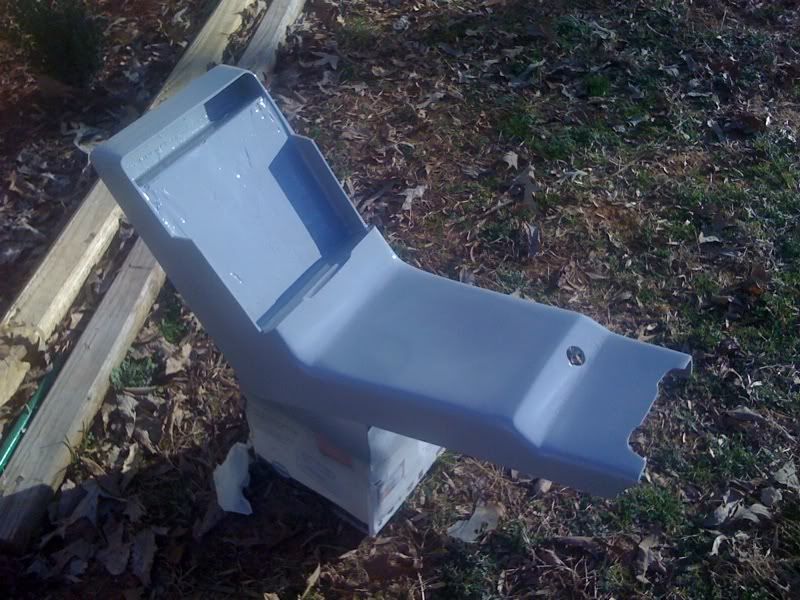
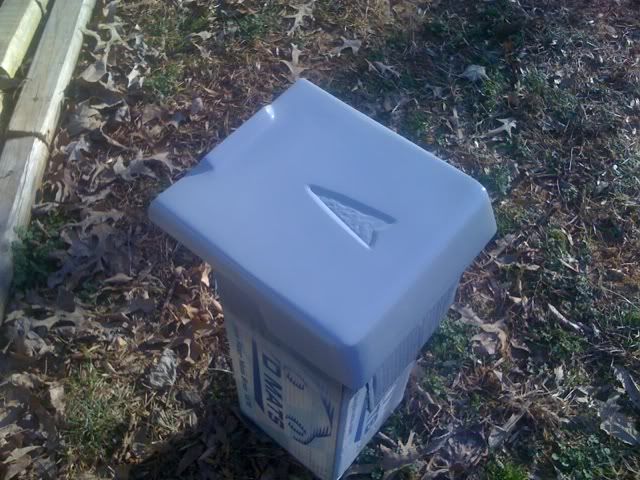
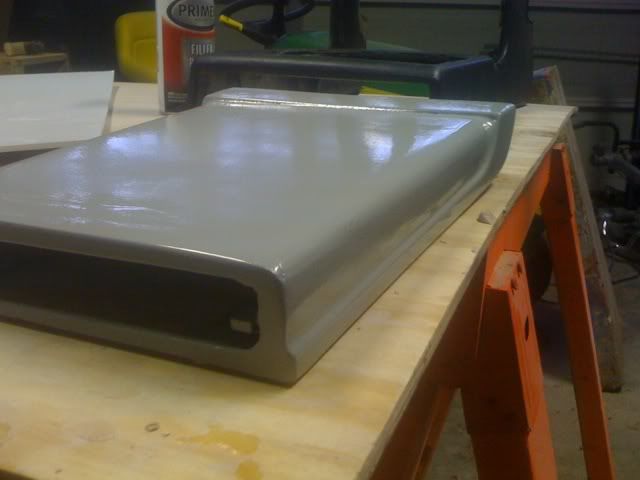
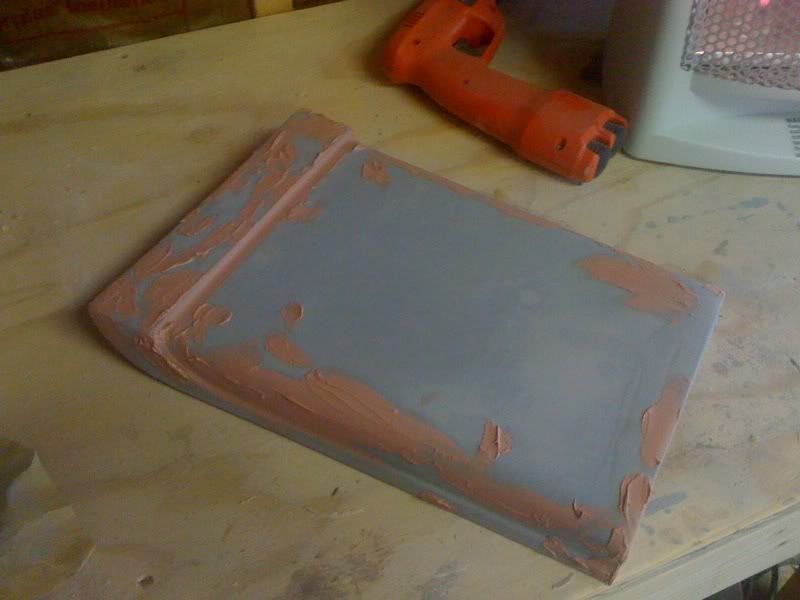
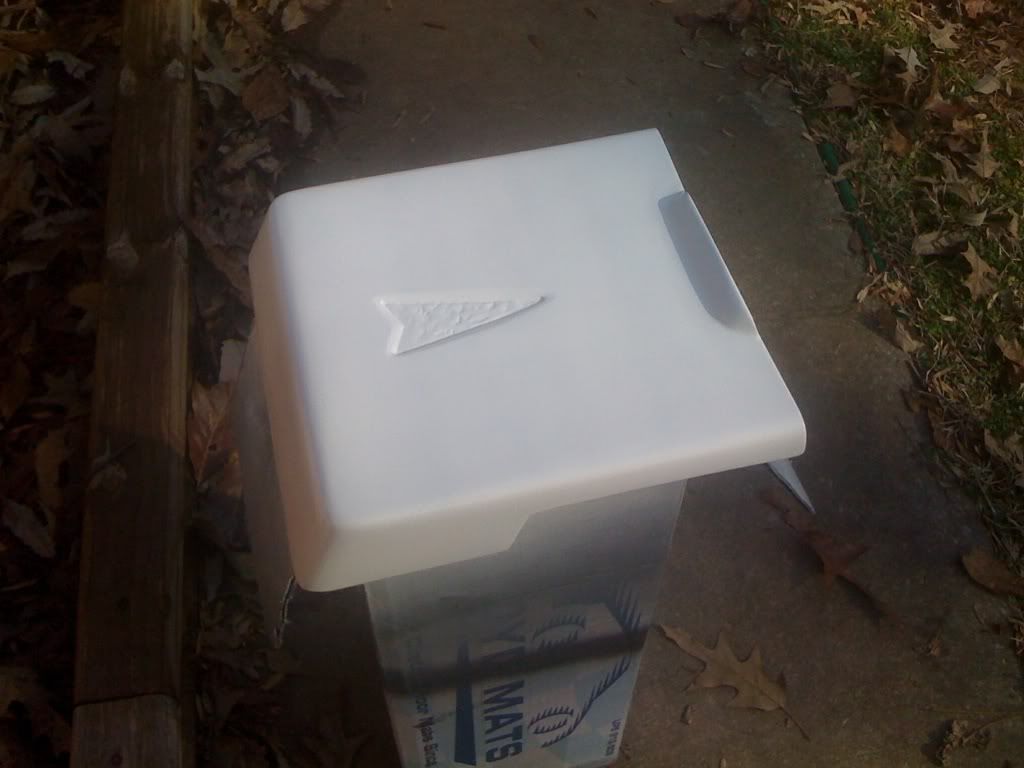
I then took both the lid and the console and shot another layer of primer
The Lid - I'm hoping to get a layer of paint and lay the felt on the inside tomorrow / Sunday
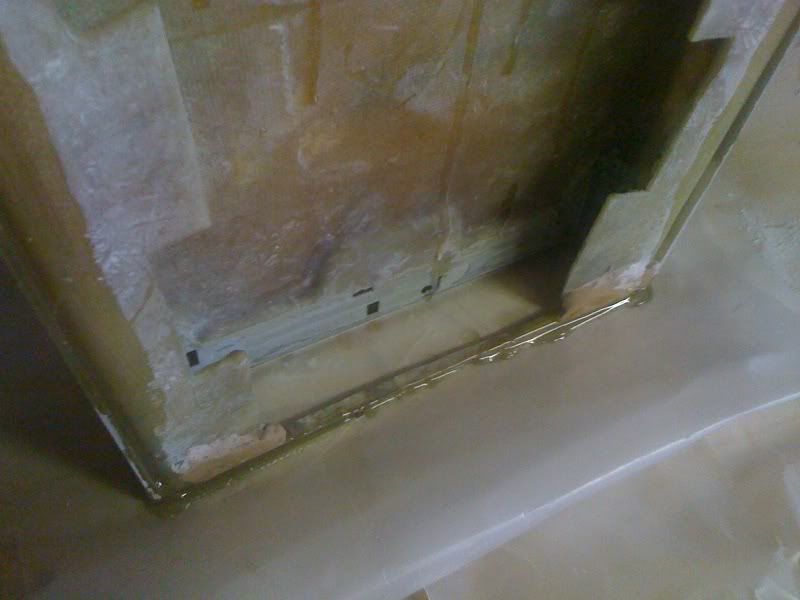
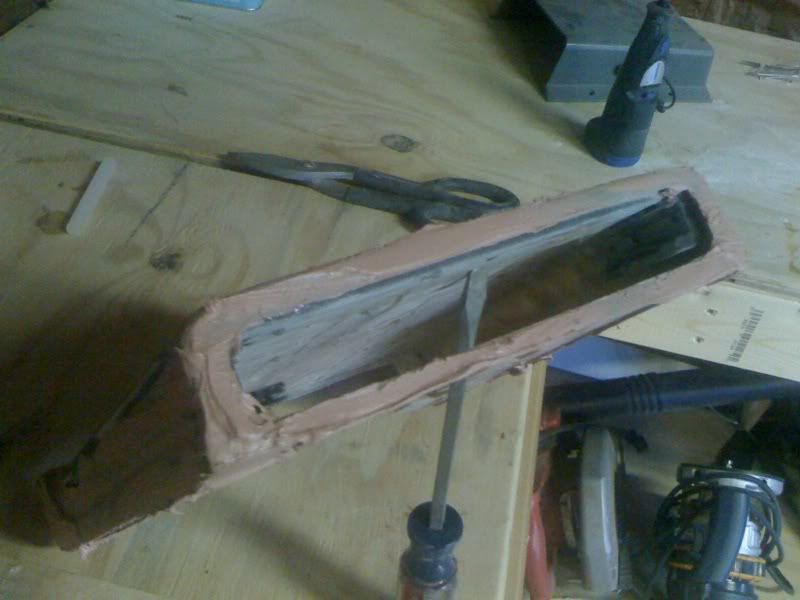
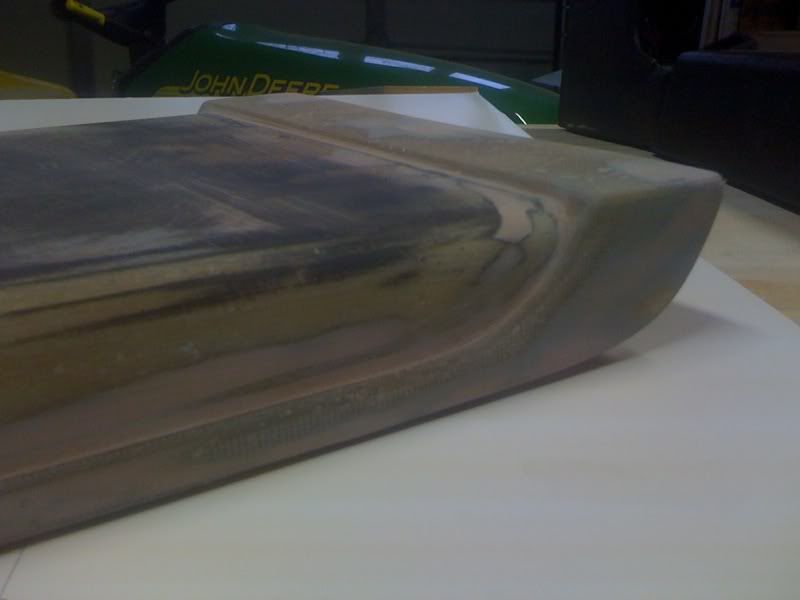
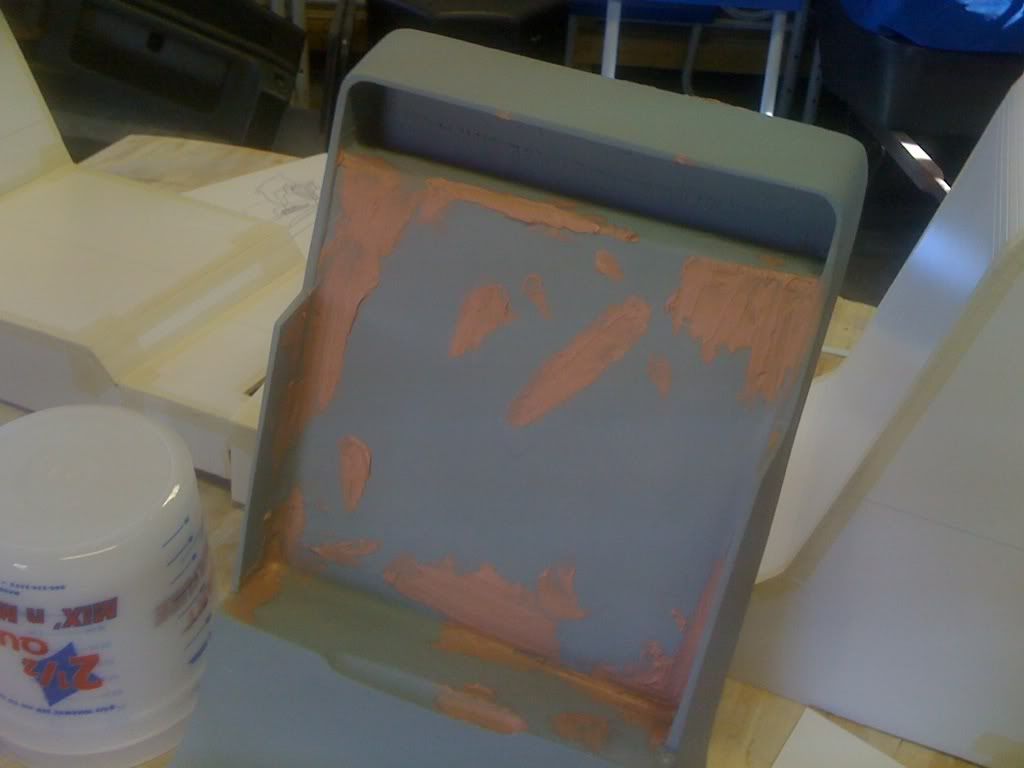
I worked on the armrest / cupholder. The front piece came loose so I applied more resin and filler
Another
More
And another
And one more...
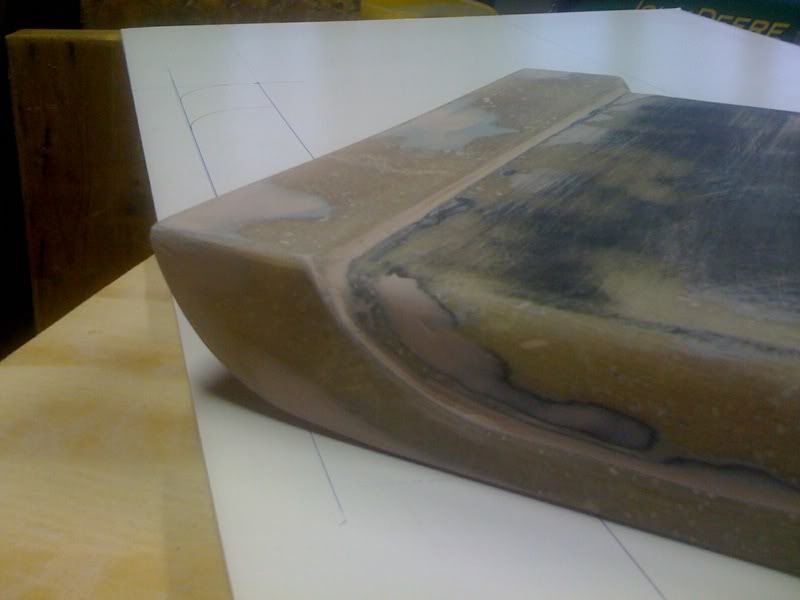
Filler added - lot's of sanding for tomorrow
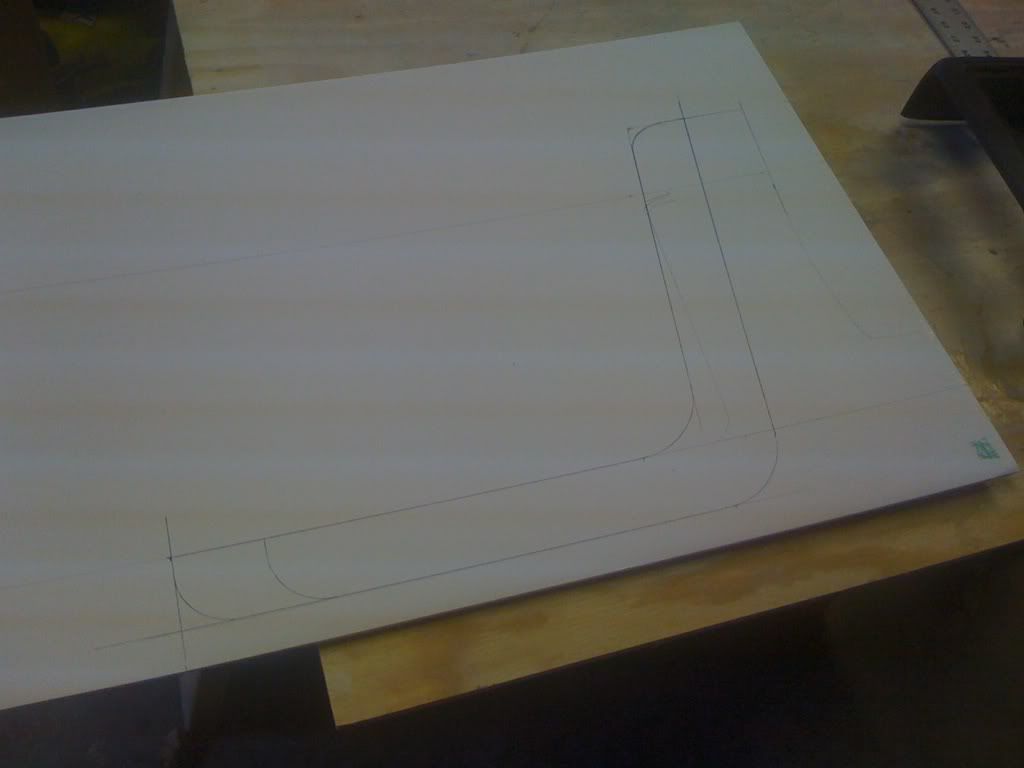
While those dried I marked out the first measurements for the new radio and A/C console
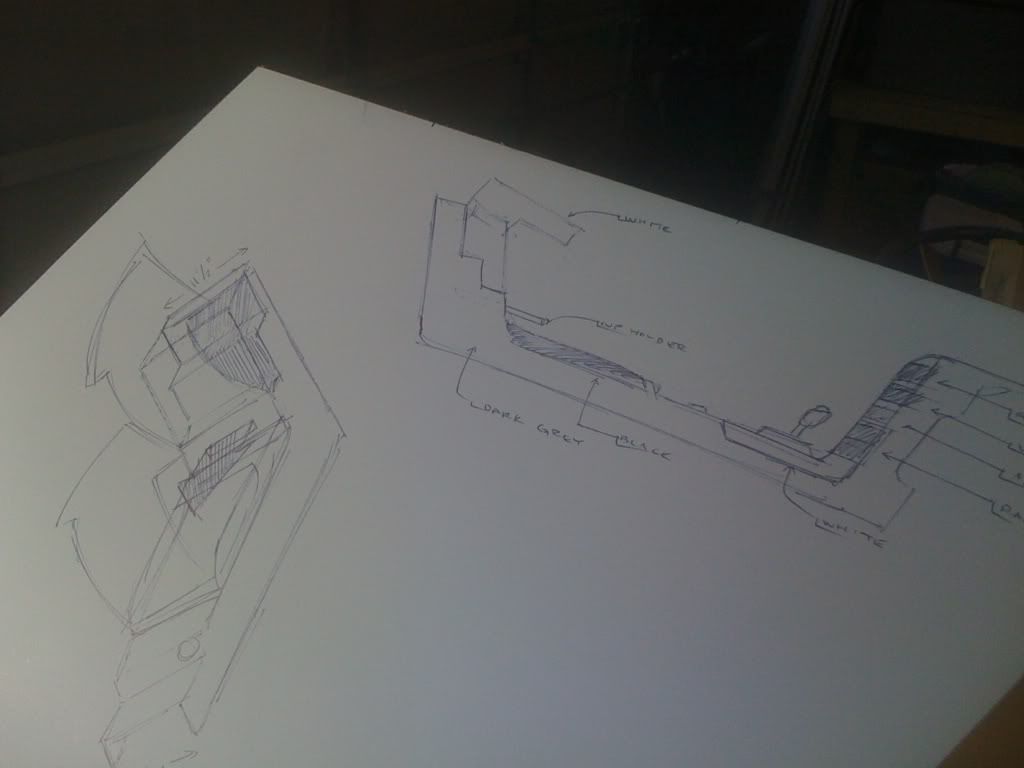
I couldn't find the X-Acto knife so I sat and sketched out the new ideas / designs
Tomorrow is supposed to rain and I have a few things to do in the house - "Ex" stuff... but I'm hoping to be 90% finished. I know I can get the lid done tomorrow!
Till then!
[This message has been edited by Sofa King (edited 01-15-2010).]
This is Sofa King Awesome. I am very impressed with your work. You actually made me consider working with fiberglass for the first time. The possibilities are endless! Keep up the great work.
I have to buy at least 5 more Fiero's - so I can try out all these cool Sofa King design's..... Maybe I'll make them all then build a quick mount system and I can change interiors in a matter of minutes.... A Fiero Transformer! Thanks Greg for sharing your "vision" - truly inspires me.
Idea for ya. I know on a lot of these custom center consoles, that they only go as high as the stock console in the back. I always thought it might look cool if you raised the top of it to flow into the top of the firewall cover, thing. This would also make a little more room inside of your glove box.
Idea for ya. I know on a lot of these custom center consoles, that they only go as high as the stock console in the back. I always thought it might look cool if you raised the top of it to flow into the top of the firewall cover, thing. This would also make a little more room inside of your glove box.
That's a really good idea! Let me work a few sketches - I like this. I really like this idea...
This is Sofa King Awesome. I am very impressed with your work. You actually made me consider working with fiberglass for the first time. The possibilities are endless! Keep up the great work.
LOL! Thanks for the kind words and "play" off the name. LOL! If you're going to jump into fiberglass - DO IT! I'll try to answer as many questions as I can. Katatak, Revin, SourMug and many others can help you - but you have to take those first steps. NOW DO IT! ; )
I have to buy at least 5 more Fiero's - so I can try out all these cool Sofa King design's..... Maybe I'll make them all then build a quick mount system and I can change interiors in a matter of minutes.... A Fiero Transformer! Thanks Greg for sharing your "vision" - truly inspires me.
Pat
Hey P,
A Fiero Transformer! Now you see? That's thinking outside of the box! But what will his name be? Or is it a her? LOL
UPDATES! Kinda. I woke up early this morning and got started around the house. When I got bored with that I wanted to see how the work I did yesterday turned out. After inspection I was able to get a little sanding and primer in. I'll head back out this afternoon.
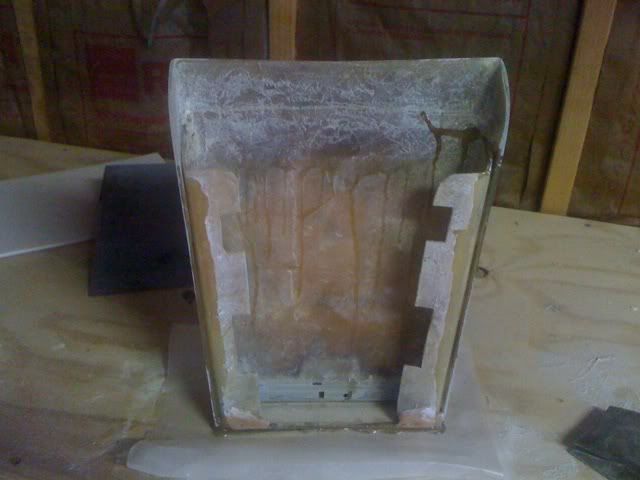
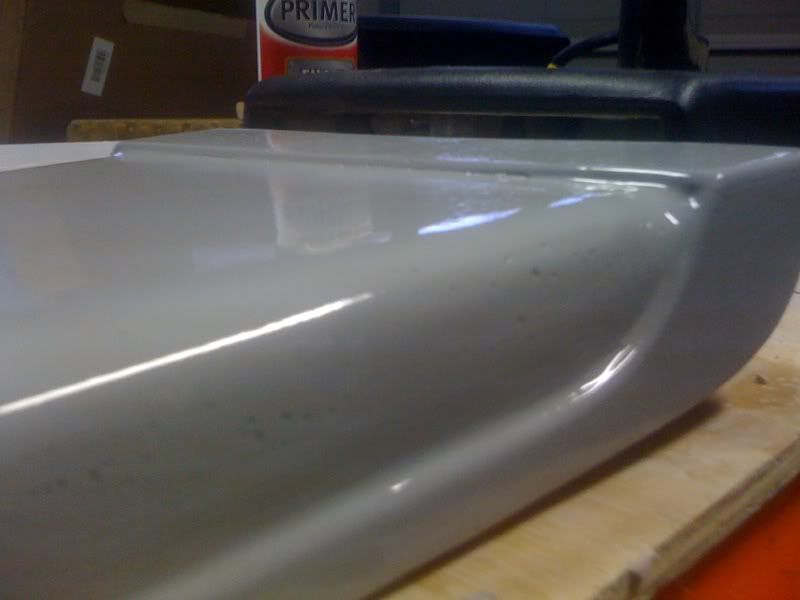
Armrest all sanded
Another - I have to admit... the shape is kinda cool looking. What this means is that anything can be fabricated if you have the time and patience - and stop forcing people to change their ideas - PAT! LOL
Shot of Primer
I HATE HOLES!!!! Do you know what this means? More filler... more sanding... more primer... grrrrrrrrr ; )
Another
I was going to abandon the armrest / cupholder but I've already started and I'm so close to finishing. I thought, what the heck, might as well finish. And I really like the shape.
That's it for now. Got to go work on the house!
[This message has been edited by Sofa King (edited 01-16-2010).]
Looking good. I hate them damn pin holes. I picked up some "glazing" putty at AZ - it's in a tube and is very thin. I found that it works great for filling in the pin holes. One trick I learned was to make sure that all the sanding dust is cleaned out of the pin holes. Other wise, the putty will come out of the holes. I picked up some "cleaner" in an aerosol can - for prepping the surface - it has a degreaser/wax cleaner. I make sure I blast the pin holes real good. So far - so good. Cuts down on the fill and sand time.
Good call! I have a bottle of mineral spirits that should work - I just forget to wipe the glass down before primer. DUHHHHH...
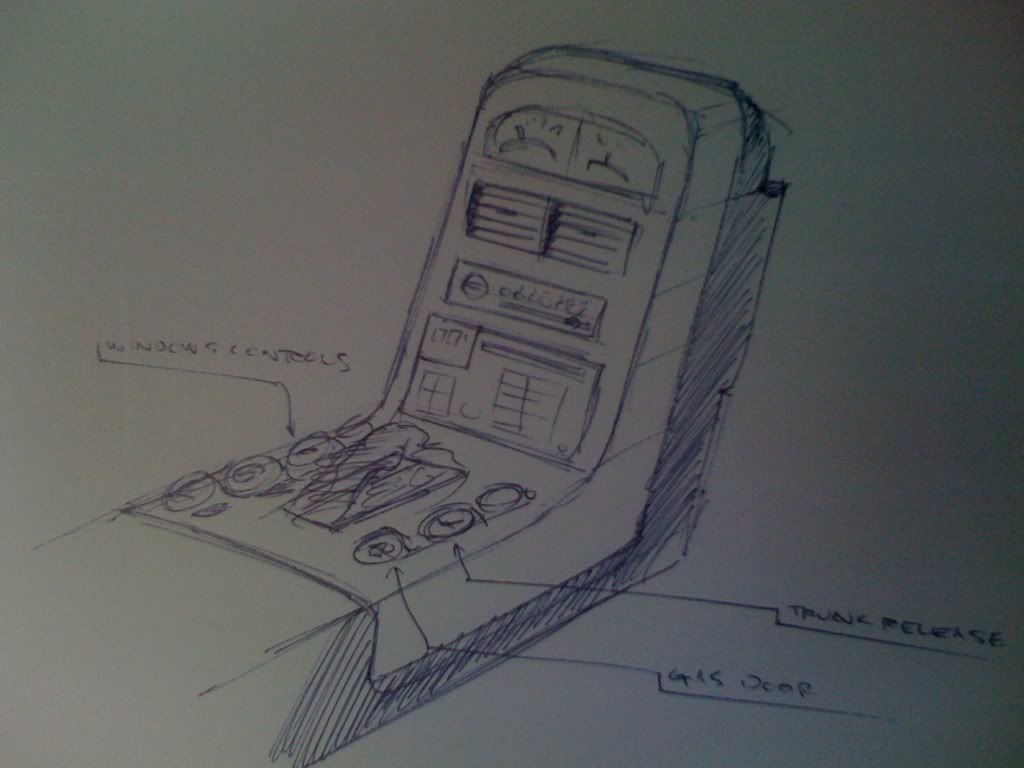
Anywho... OK, guys... what do you think of this idea? Many of you have seen this sketch with the concept window, trunk, etc buttons to the left and right of the shifter
I really like this concept but the buttons are not true to the original design of the car - I was inspired by the new Ferrari 458. So, I began to think about all the different buttons GM used in their cars since the 70's and 80's.
And then I remembered these different types of buttons - but notice the chome bevelled swicthes - HOW COOL
Now think about this for a second... The buttons would still be mounted to the left & right of the shifter but it would be a stock GM piece and bring a little bit of chrome into the cabin! I could then chrome the door handles to reflect the chrome buttons and bring balance to the design. AND, I'm still staying within the correct time period of the car.
I'm still thinking about it, but I think it's a cool idea. I'm going to have to come up with a quick sketch to see if it will work.
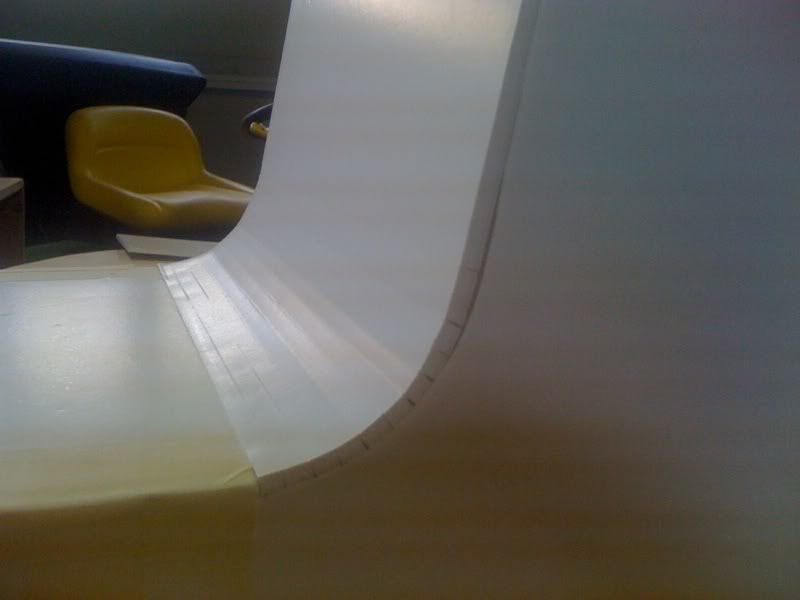
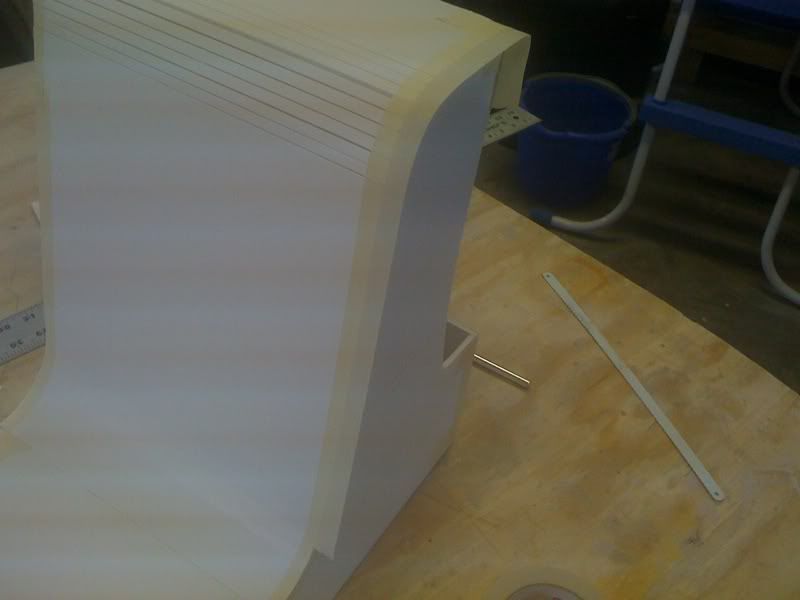
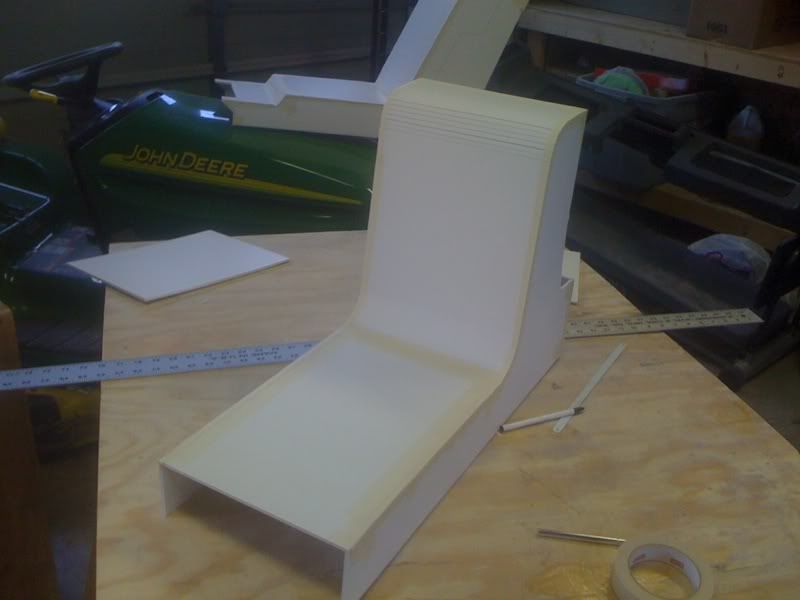
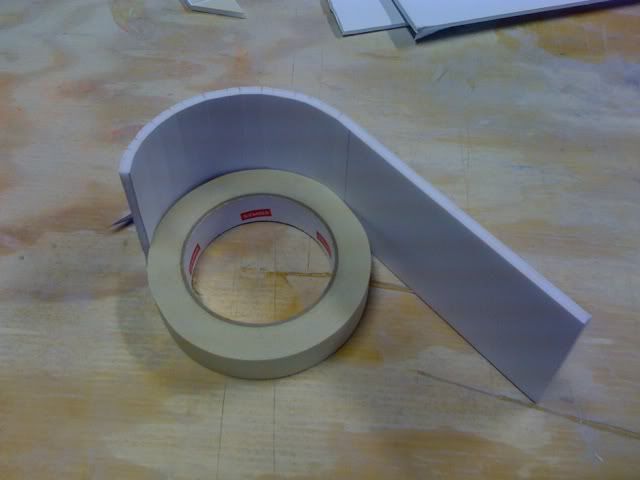
I got started on the Radio and A/C bezel of the new dash. Just a simple foam core mock up. I also worked on the armrest and cup holder. I'll post much updates before the day is through!
Cutting the foam core and beginning to tape together
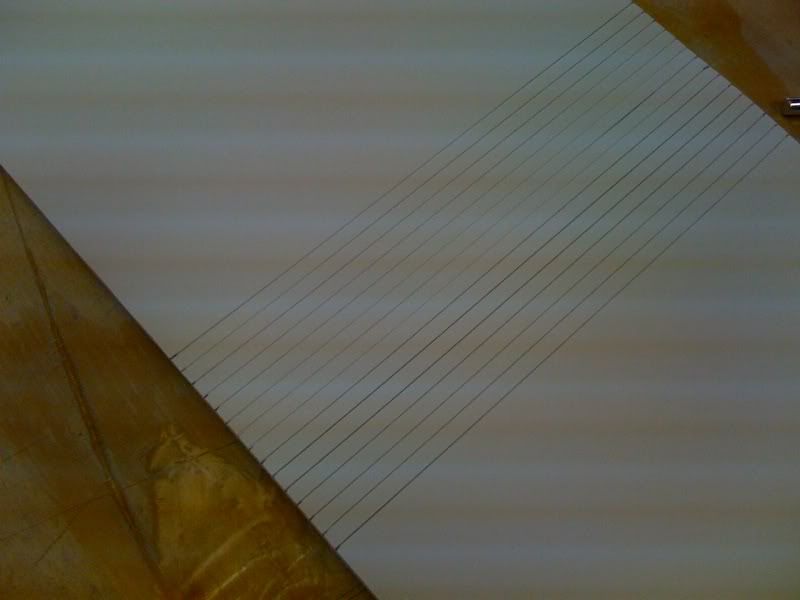
I then measured and cut the lines for the first of two curves on the bezel
Test fit
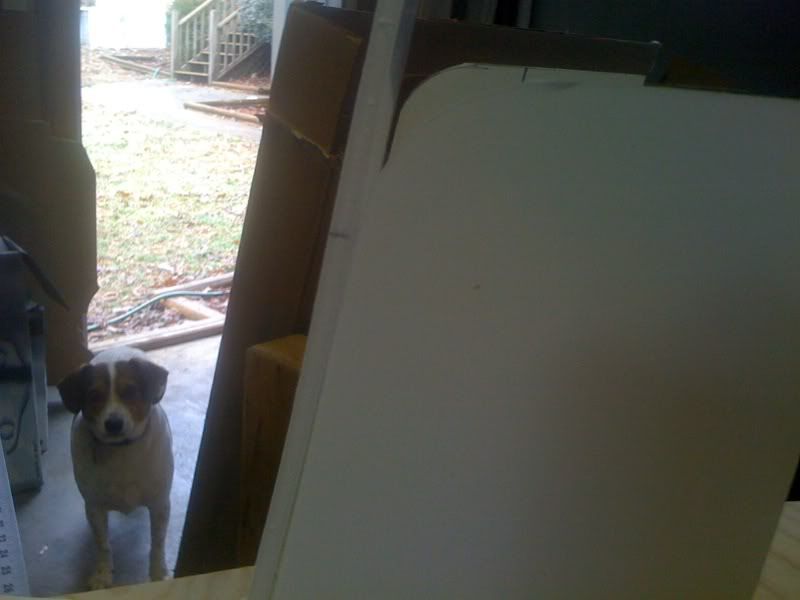
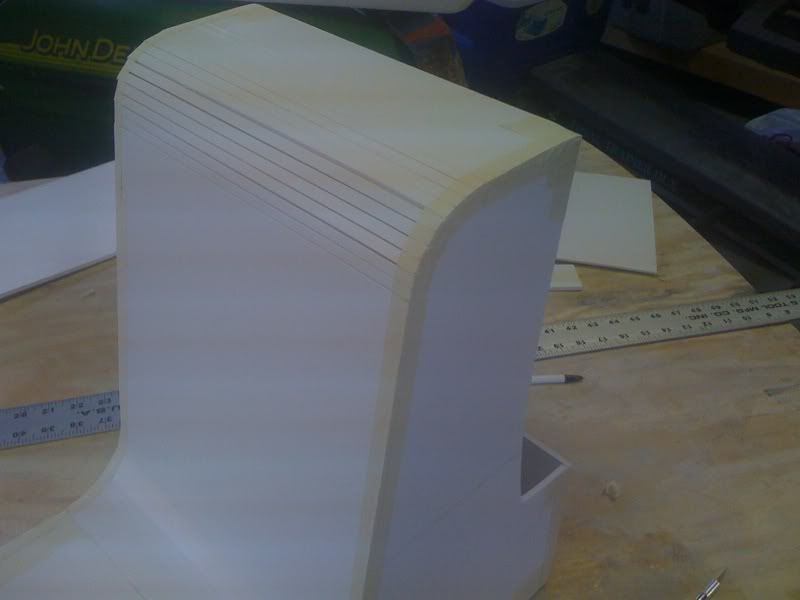
Looking where upper curve cuts begin - Hi Tucker!
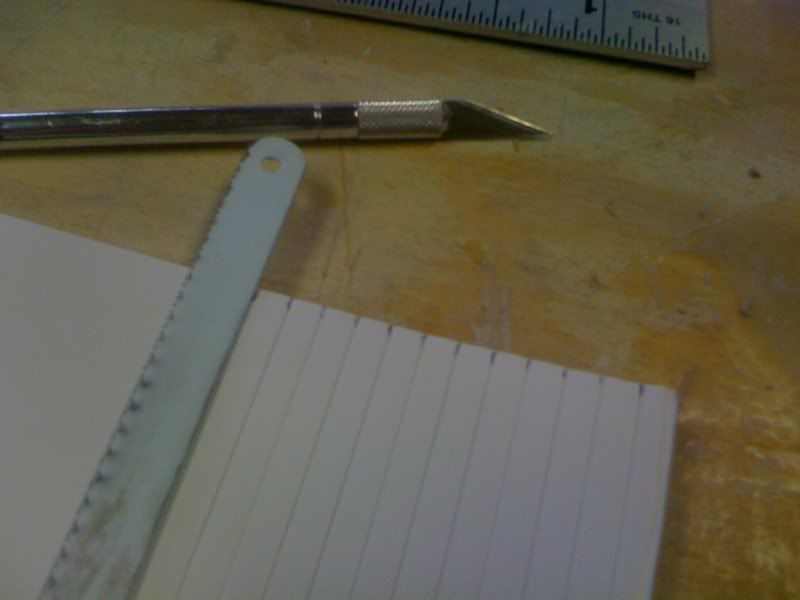
Then scribed with an X-Acto
Test Fit before tape
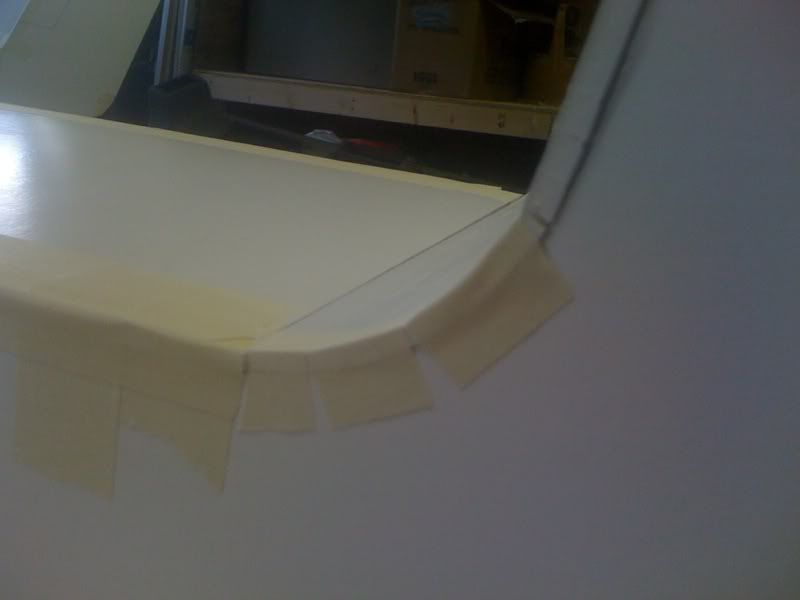
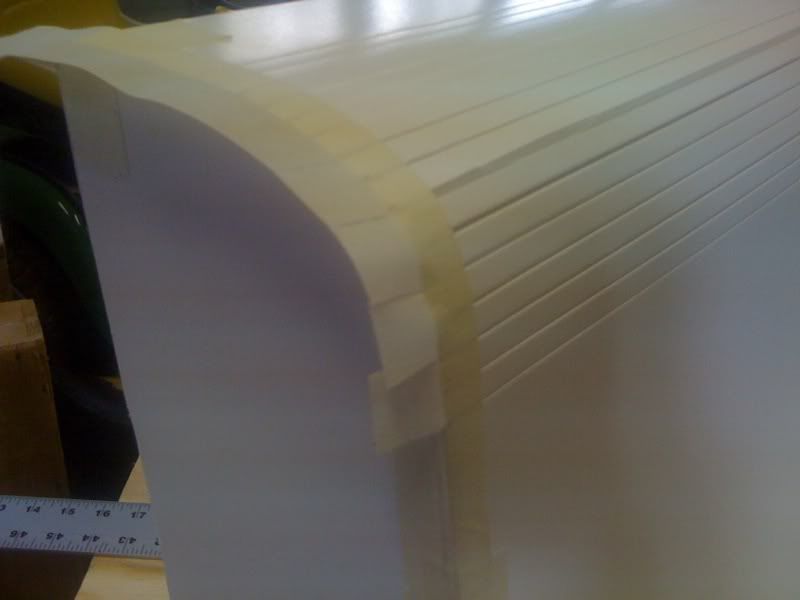
I started to tape at the bottom and then worked my way up. Knowing that the tape would not fit directly to the curve I cut the tape at 1/2 inch intervals - these cuts enabled me to fold the tape and secure
Another
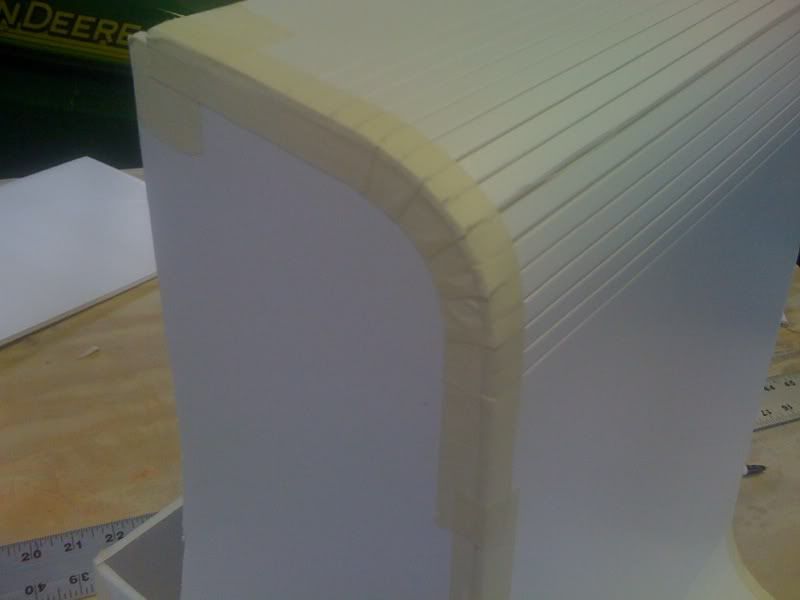
One side complete
On to the other side
Cuts made so tape would fit
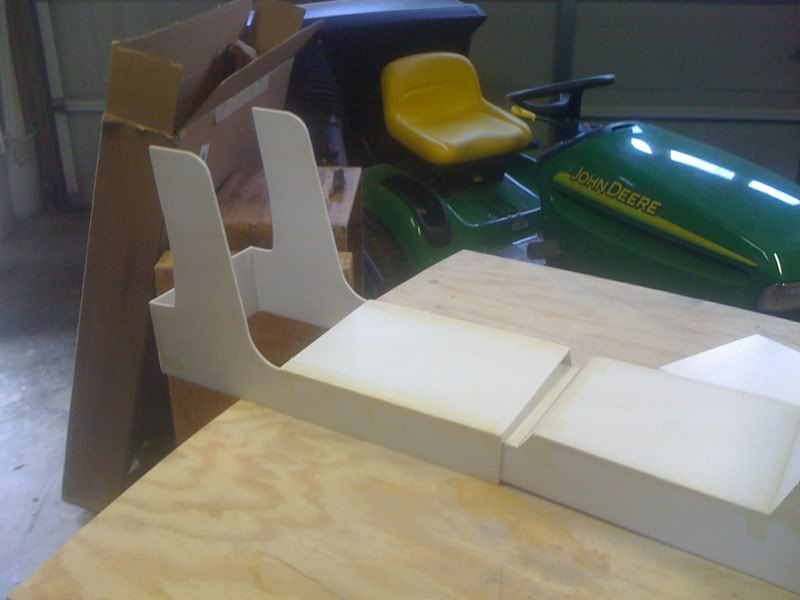
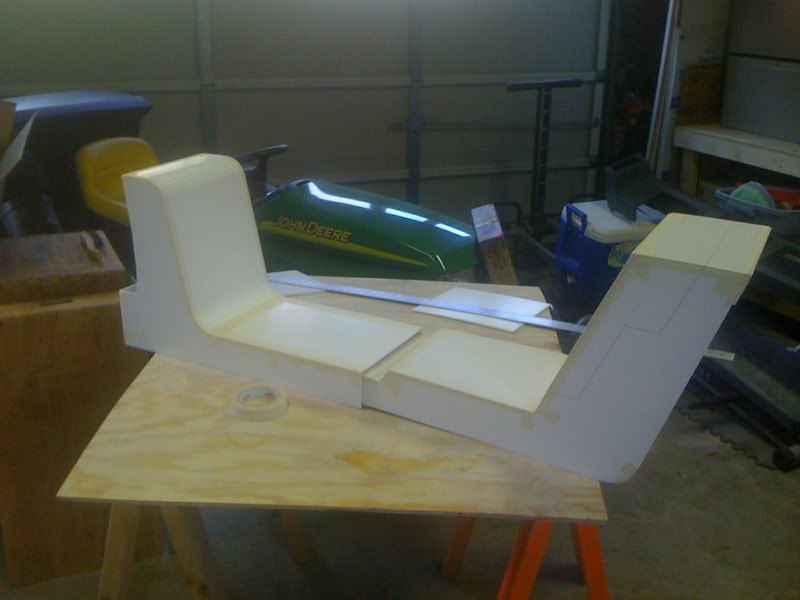
All finished with the mock up...
Putting the pieces together
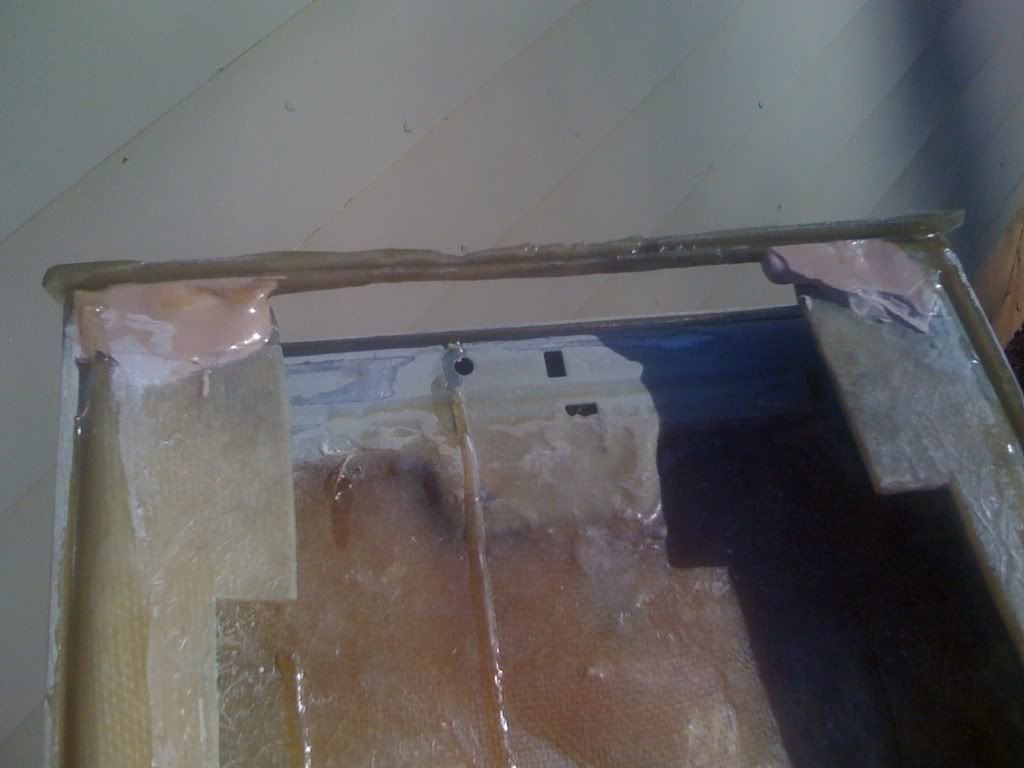
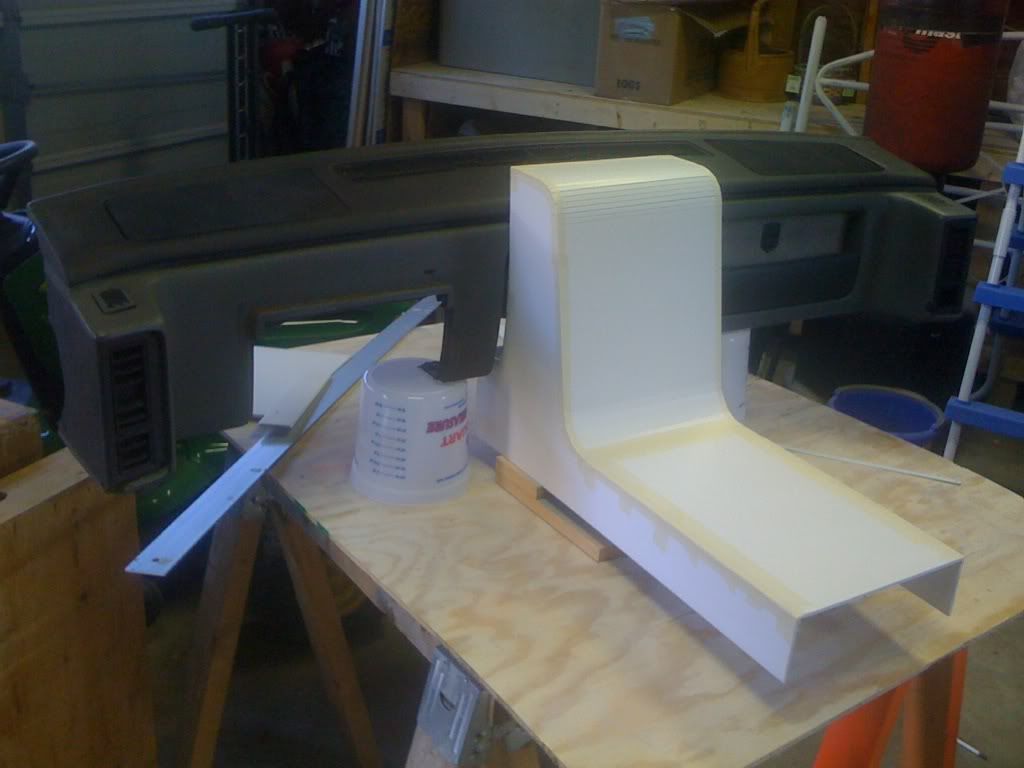
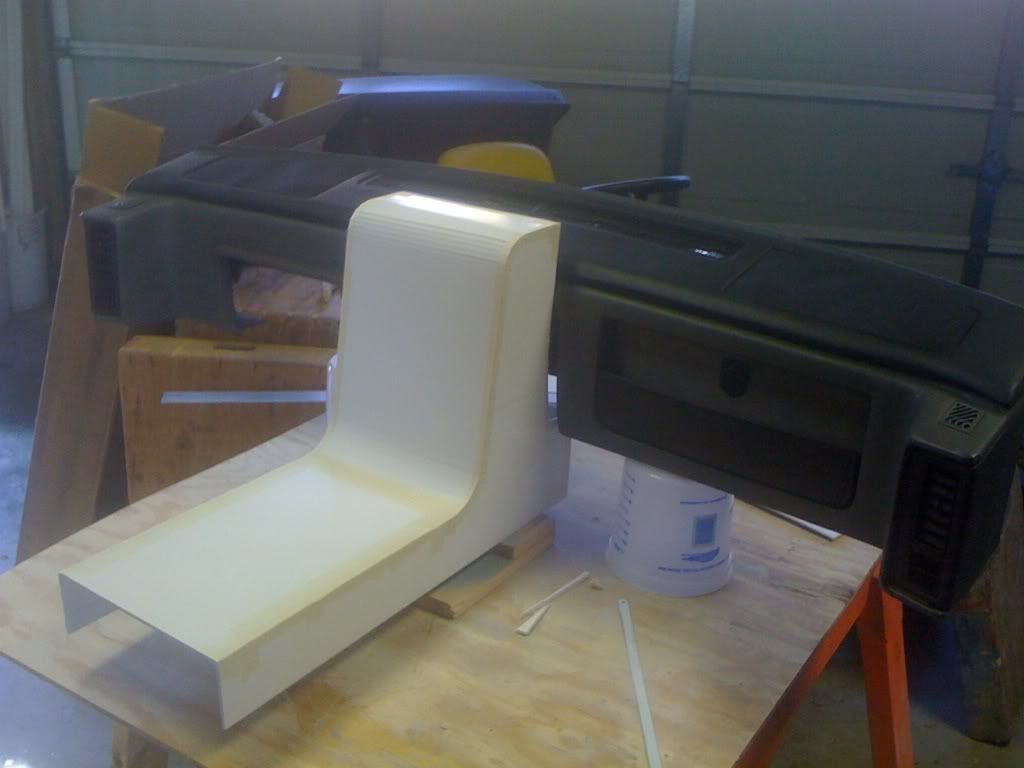
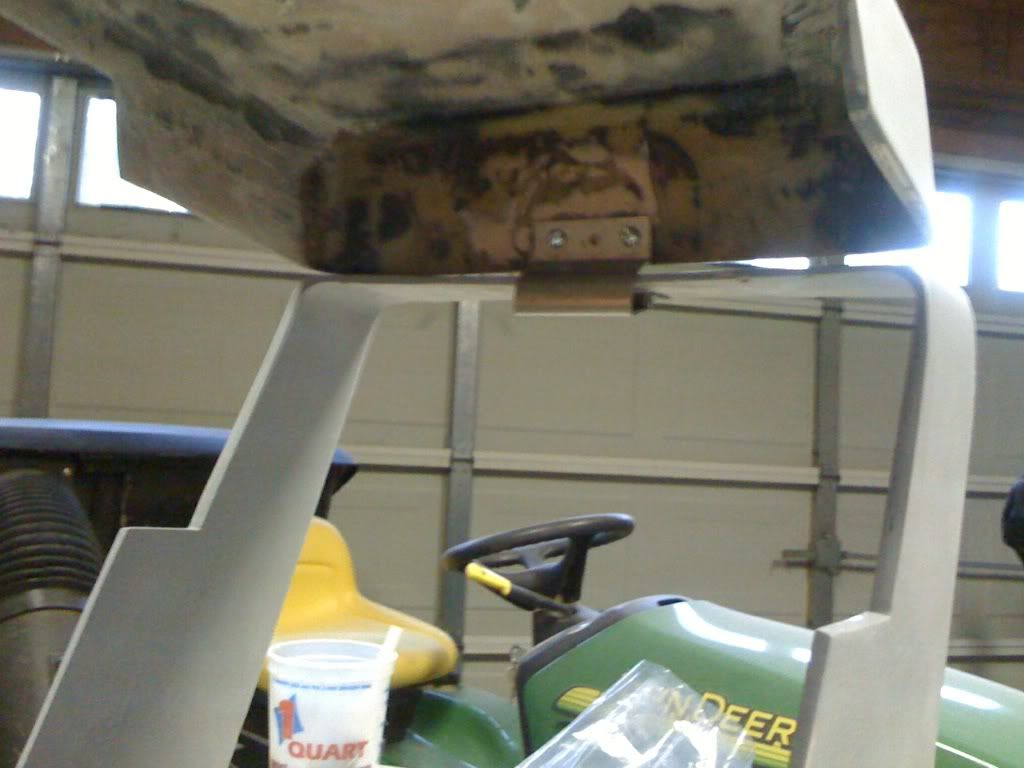
Now... where's that dash? This is nowhere near a final position. Very first thing I had to do is create a support piece for the dash where I can just slide the pieces in and out for easy viewing and modifications. As you can see there's a little too much space in between the bezel and the dash. However... so far so good!
One more - I'm wondering if the upper part is too high?
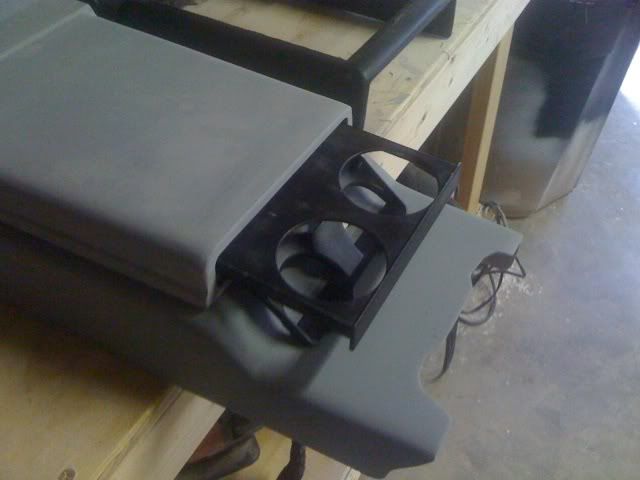
On to the armrest - I did a little more sanding and cut the lower front piece of the cupholder opening - I needed room for my fingers
Another view
Cup holder open
That's it for right now - LOTS MORE coming!
[This message has been edited by Sofa King (edited 01-18-2010).]
OK... this is a REALLY rough sketch of what the chrome window switches "might" look like along with the radio, A/C vents, etc. installed on the console. I don't have my 3D software available to me right now so... Like I said... REALLY ROUGH!!! But... what do you think?
[This message has been edited by Sofa King (edited 01-18-2010).]
I was able to fill all the holes in the armrest. I'm going to finish sanding tomorrow after work. I'll cut the holes to mount to the armrest and then finish with a layer of paint.
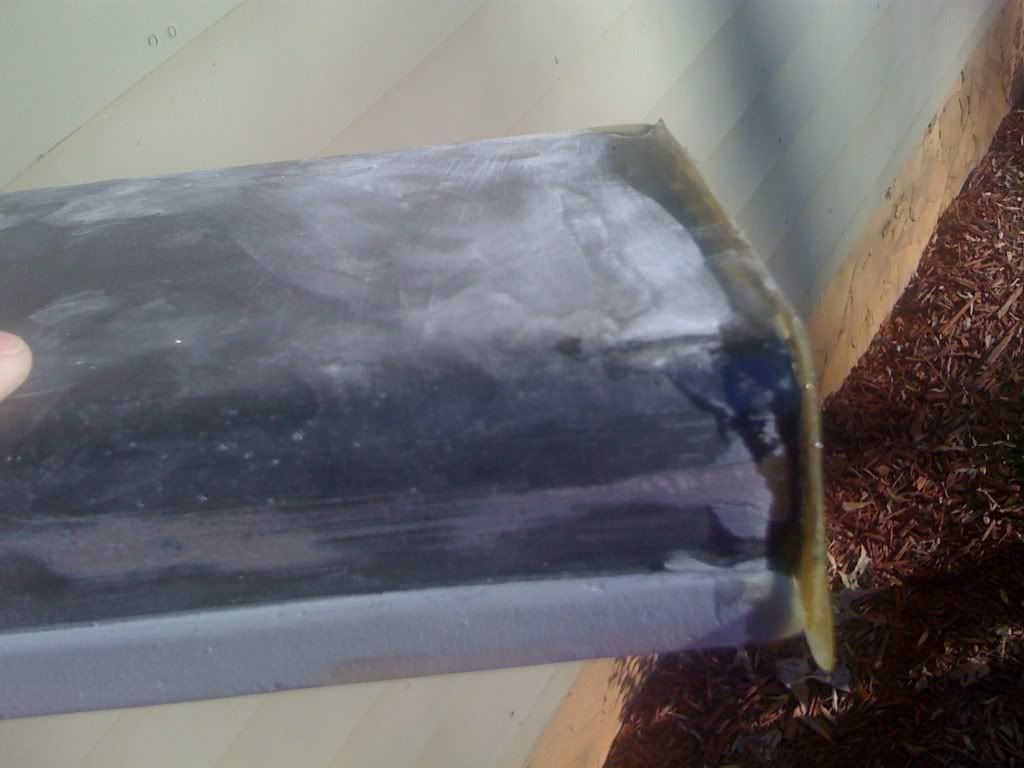
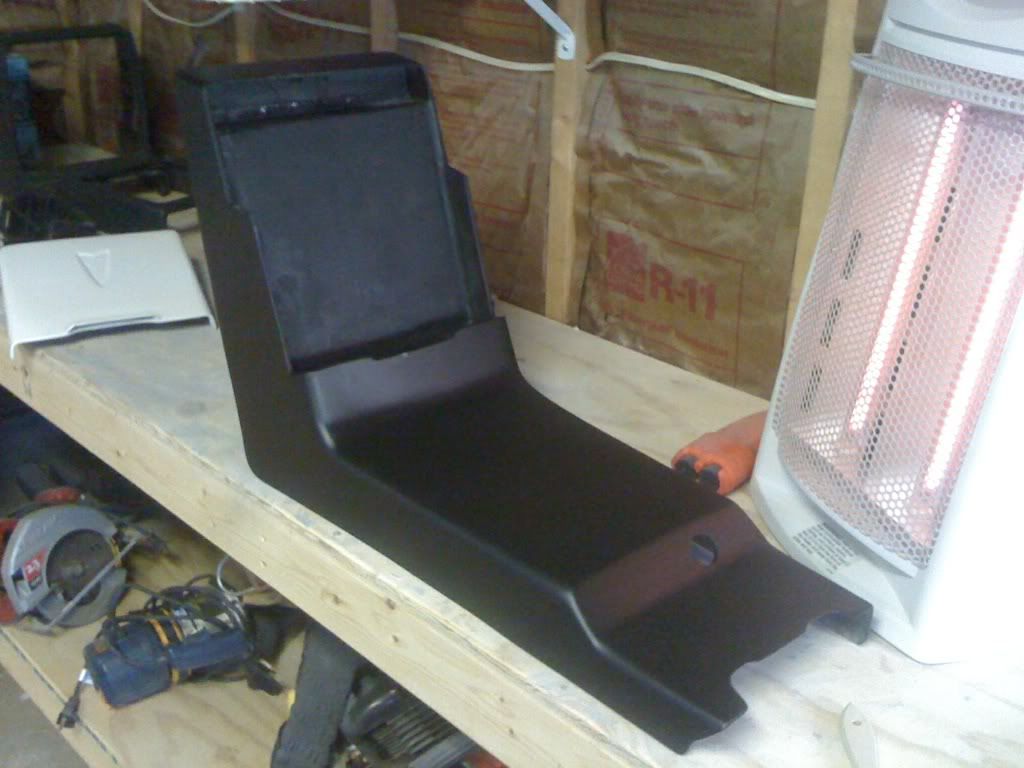
I was able to sand this and shoot a layer of black paint to the console.
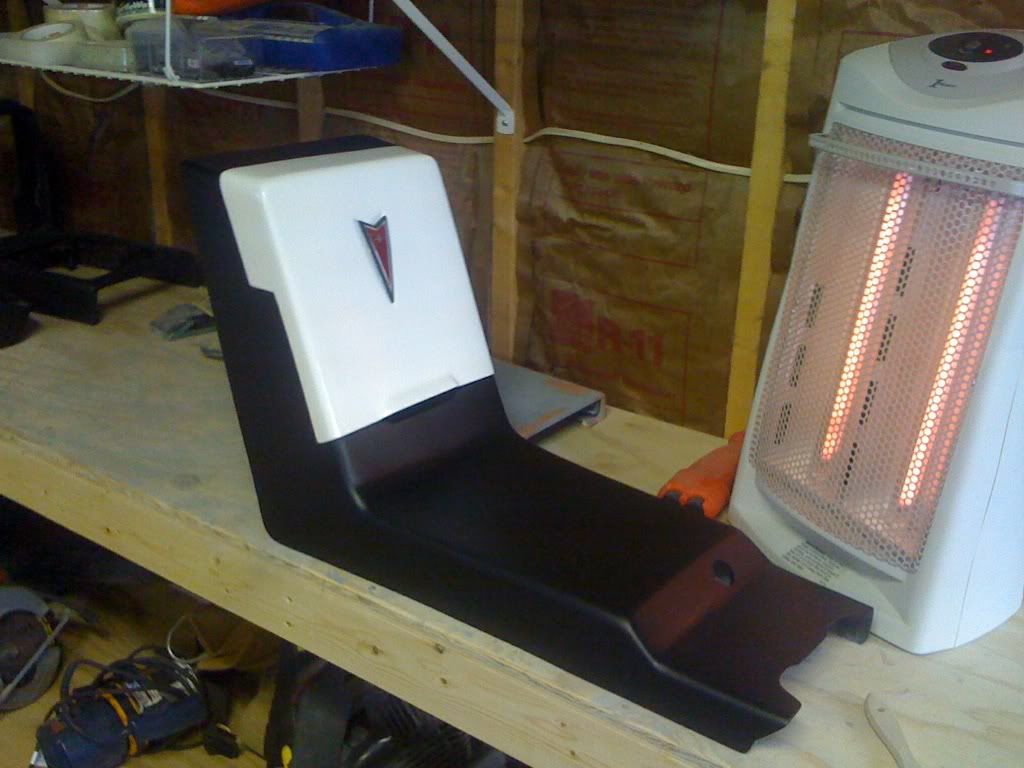
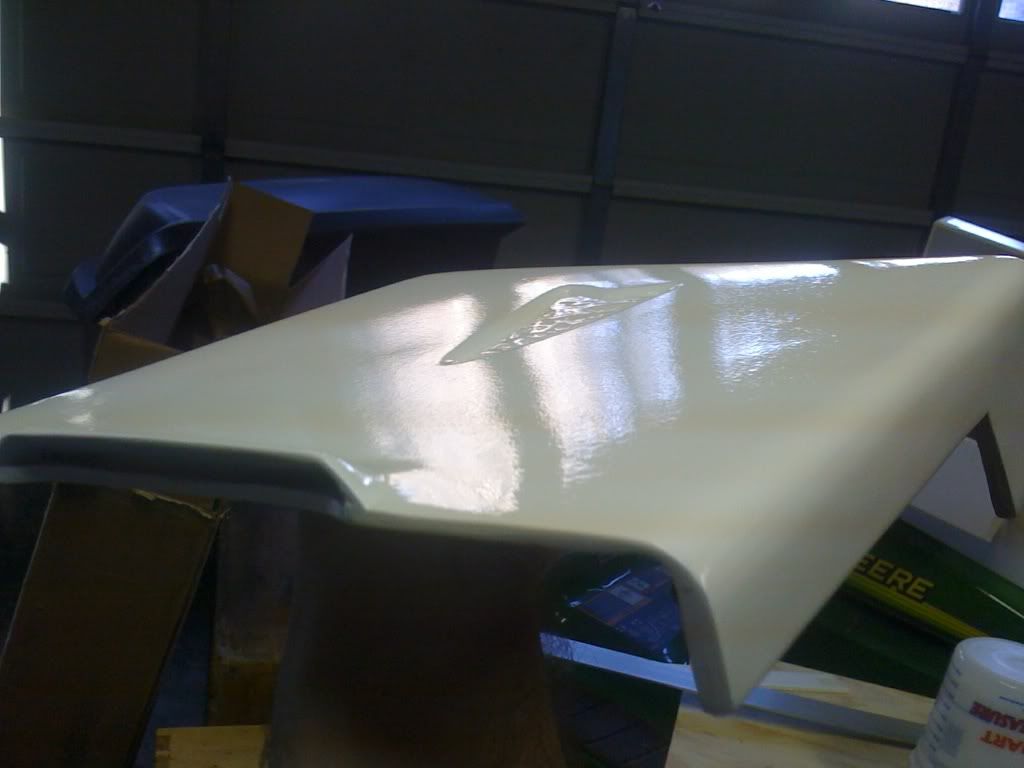
I shot a layer of paint on the lid.
WOW! A lot different from the primer I've been so used to looking at! Remember, the original plan was paint this black or dark grey. I like the black!
After an hour in the sun I mated the two back together - I still can't get used to how dark it is - I got so used to the primer!
I then shot another layer of white gloss to the lid. Check out that shine! I'm not too thrilled with the orange peel. I'm going to wet sand to a mirror like finish.
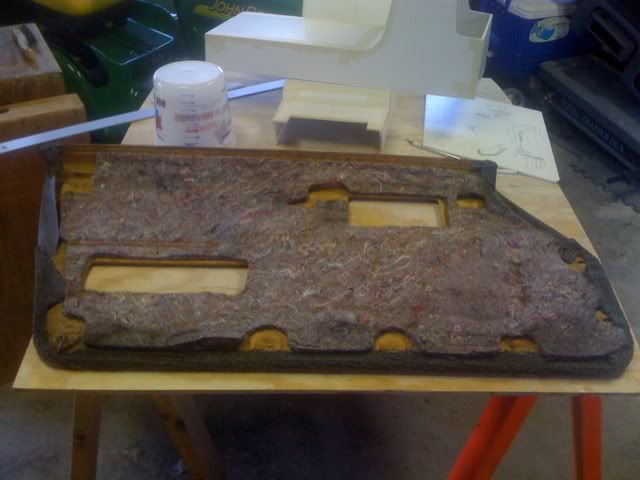
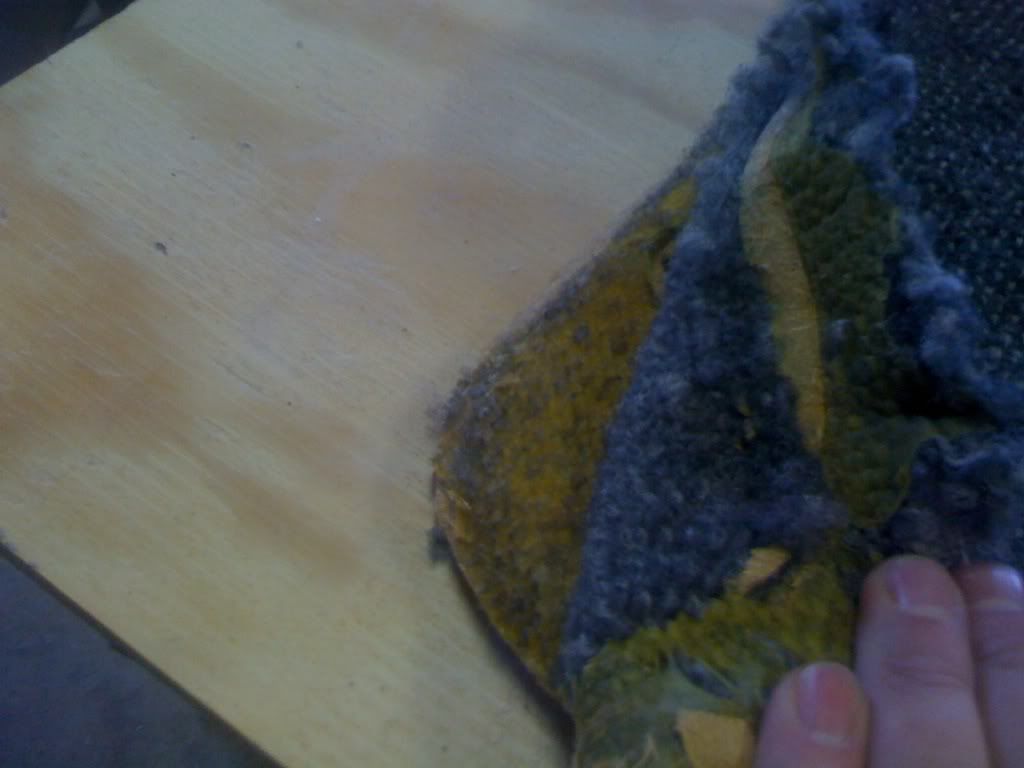
I begin disassembly of the door panel(s). I started with the passenger side. My instinct was to do the driver side first - but nope, do the passenger side first. That way I'll still be excited to do MY DOOR! LOL First step - remove the sound deadener
PFFFFT... this gonna be easy!
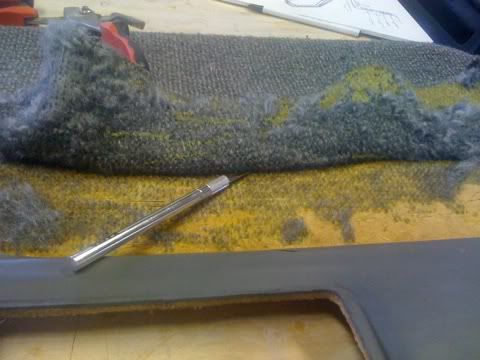
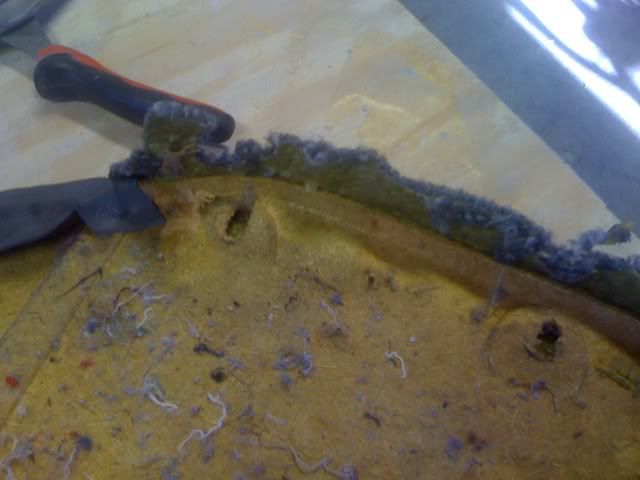
RIGHT! This process was a PITA! GM really adhered the carpet material to the thin pressed particle-board "panel". I had to use the X-Acto knife and slowly cut away at the carpet... ughhhhh... I was hoping to save this... yeah... forget about that.
I was very careful and took my time!
Another
Getting the edges
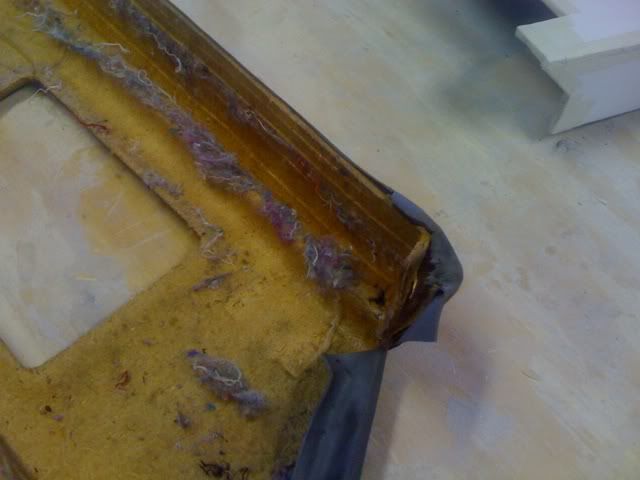
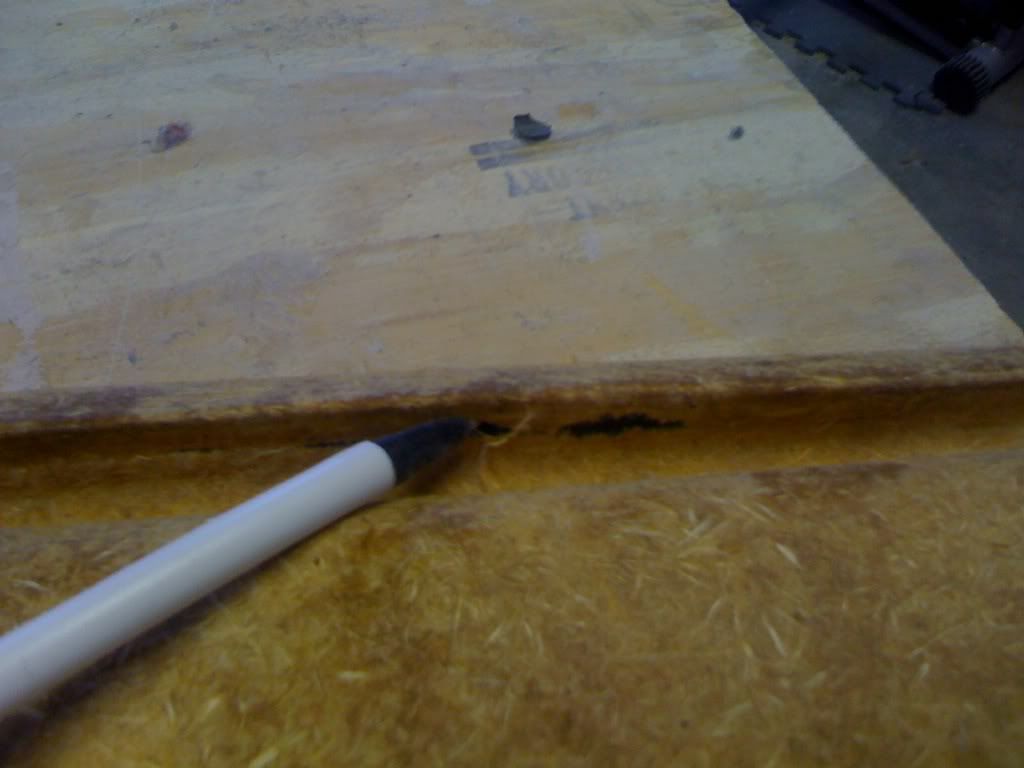
There were a few weak areas. I'm going to use Elmers wood glue and give the panel a quick coating. I'm not sure how I'm going to proceed just yet - I'm can't decide whether to take a fiberglass mold of the panel or just go forward with it and do great things...
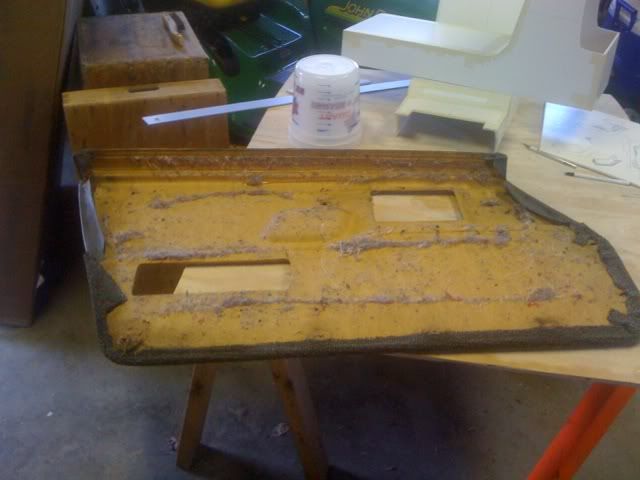
There it is in all its naked glory! Believe it not the vinyl came off fairly easily. I took a pair of plyers and gently pulled the material off the particle-board.
That's it for tonight. Gonna relax and enjoy the quiet.
[This message has been edited by Sofa King (edited 01-19-2010).]
OK. I know the front foam core bezel mock up doesn't match the sketch I created. The top of the panel I created using the foam core curves back toward the front of the dash as opposed to curving around the top as the sketched originally showed. I'm going to create a second bezel to match the sketch and see which version I like better. Remember, these plans are ever evolving, changing, morphing, etc and can become very frustrating... You have 20 ideas running through your head...
You've been busy. I love it. I was loosing motivation for my interior project but I am now fired up to get it done. I like the switches - at least the idea - still not sure about the switches themselves. Reminds me of an old Caddy. The console is looking great and the new mock up is even better. Your concept drawings are crazy but when you can see it come to life in your mock up..... That takes some talent my friend.


 Giving me ideas for future projects...