You are always thinking Greg! I like your arm rest idea. Imight have to borrow that one - then I won't have to go rummaging around the junkyard. I can just make my own.........Havve you thought about the "gas cylinder" opener thing? Iamsearching the net for them now.
More inspiration......
Pat
Pat,
I think I was in the bathroom when that idea came to me. I usually do my best thinking in there. I'm going to route all 3 top edges (sides and front) to get a nice smooth rounded edge all the way around and the bottom edges would stay as is. I think that would stay true to the cars overall design for rounded edges - especially in the dash. You know what I mean - you're tackling that right now. Also, it would be really cool to have the armrest lift up to reveal something, but that might be going overboard.
I did have another idea. Wood is a fantastic base to use for predesign and forming structures. But what about Balsa Wood? Balsa is really light and comes in a variety of sizes and shapes and can be purchased at ANY local craft store. Has anybody created a structure with Balsa and then resined / glassed over the Balsa Wood? I'm wondering what its potential might be.
You are always thinking Greg! I like your arm rest idea. Imight have to borrow that one - then I won't have to go rummaging around the junkyard. I can just make my own.........Havve you thought about the "gas cylinder" opener thing? Iamsearching the net for them now.
More inspiration......
Pat
pat, try using a electric door lock as your acutator. cheap! make a long rod to connect to the item you are trying to move.
yes the wood thing is great way to shape and the balsa, should be fine with glass on it.
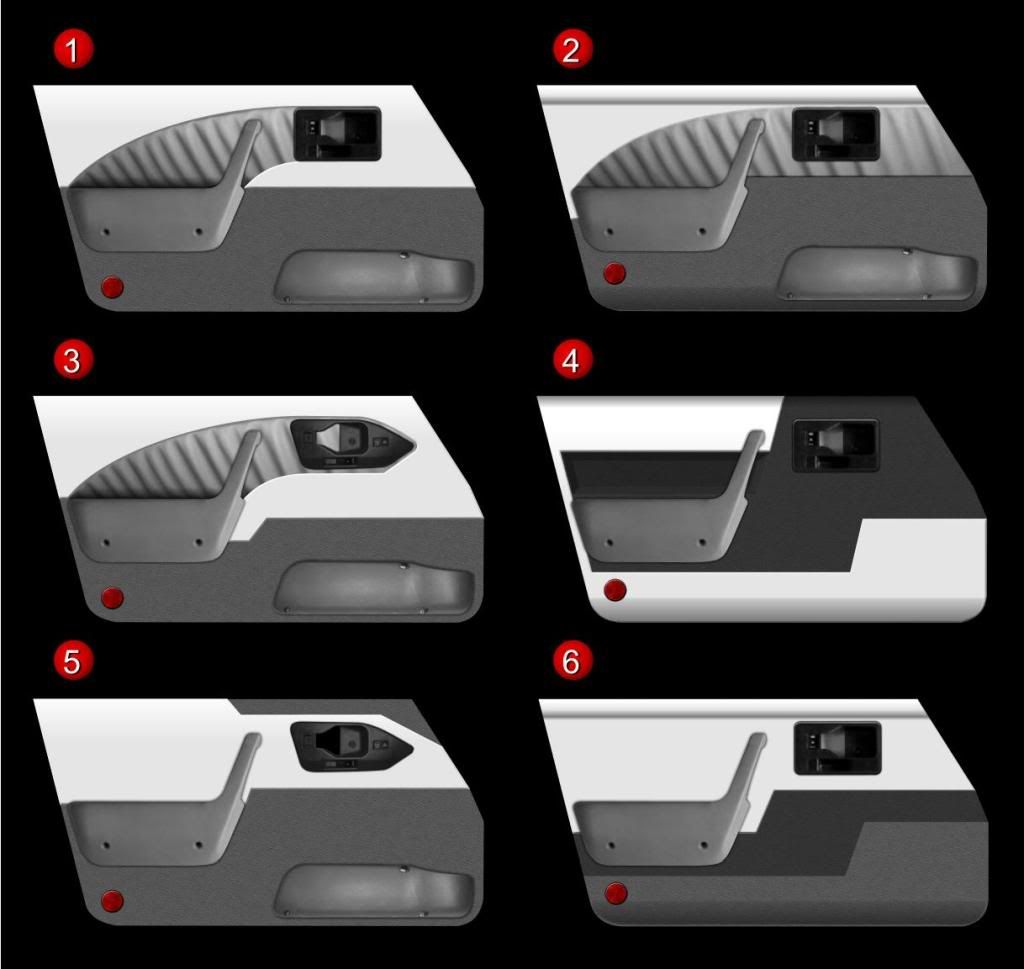
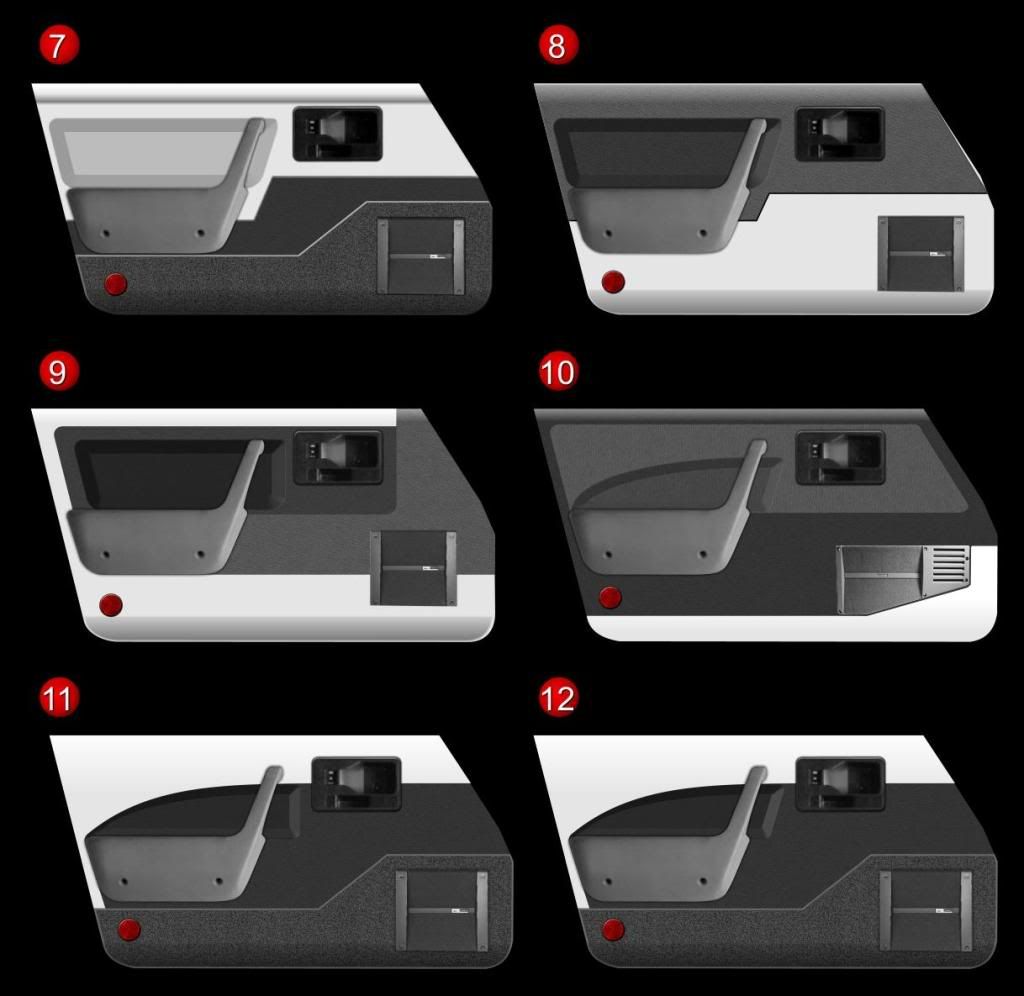
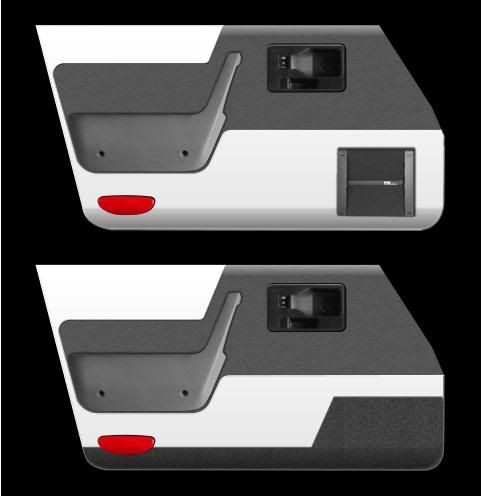
No better time than to give you a peak at what I'm planning next. I've been working different designs for the door panel. Again, I want to keep a basic stock look but just update the design to reflect the work I'm doing on the console. I'm using 3 basic elements: Vinyl (leather), carpet and a painted surface. Here are some basic designs. My favorites are #4 and #8. I still have 10+ designs that I'm working on. Let me know your thoughts.
These images have the speaker grills from the C4 Corvette
[This message has been edited by Sofa King (edited 11-24-2009).]
OK guys... I really like this design. It's simple and plays along the same design as the Fiero lines. The white is a solid painted panel which would match the exterior of the car. The grey is either vinyl or leather and then the bottom panel utilizes the carpet padding. Both could use the C4 Corvette speaker grill - to keep with the era of the car - but I did include a door reflector from a C5 Corvette. What do you think?
[This message has been edited by Sofa King (edited 11-24-2009).]
Updates! I had to come back and change a few photos
Hey All,
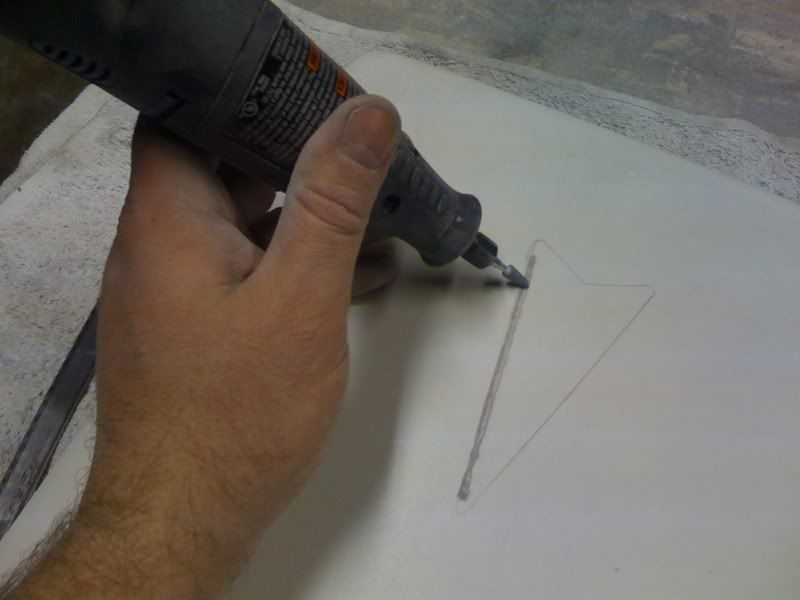
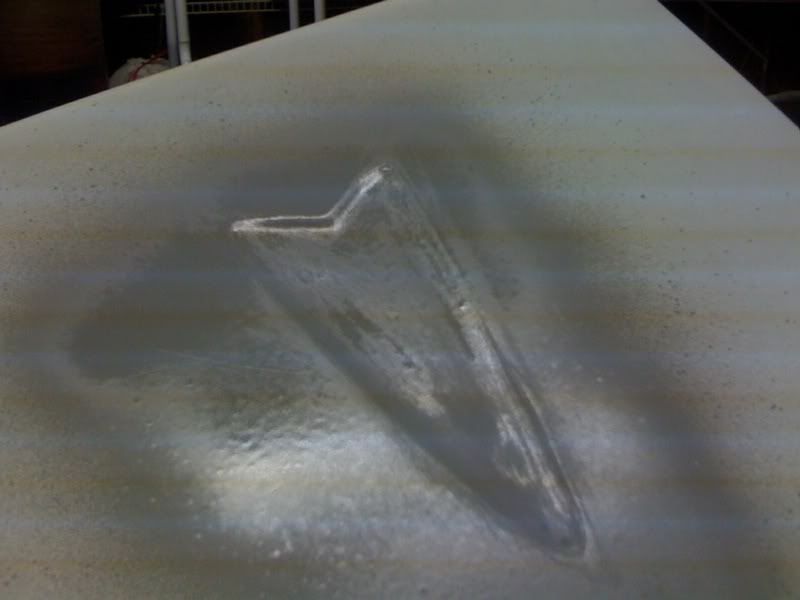
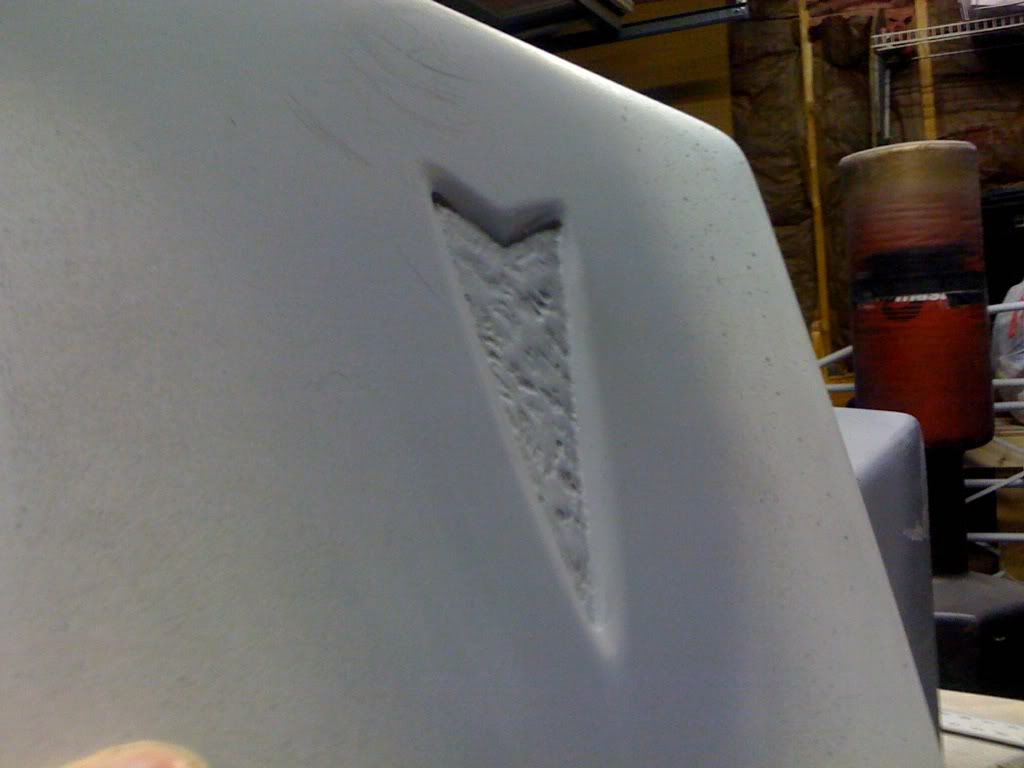
Here is the latest & greatest. After clamping two pieces of wood together to prep for the armrest, I decided to counter sink the Pontiac logo in the lid. I grabbed my trusty dremmel and a straight edge and away I went...
The first pass
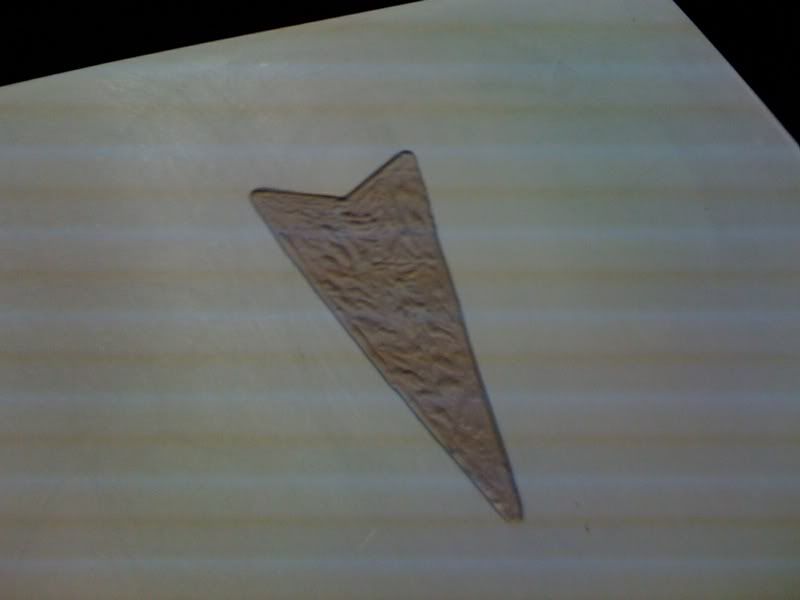
This is really a slow process. I dug out the inner portion first
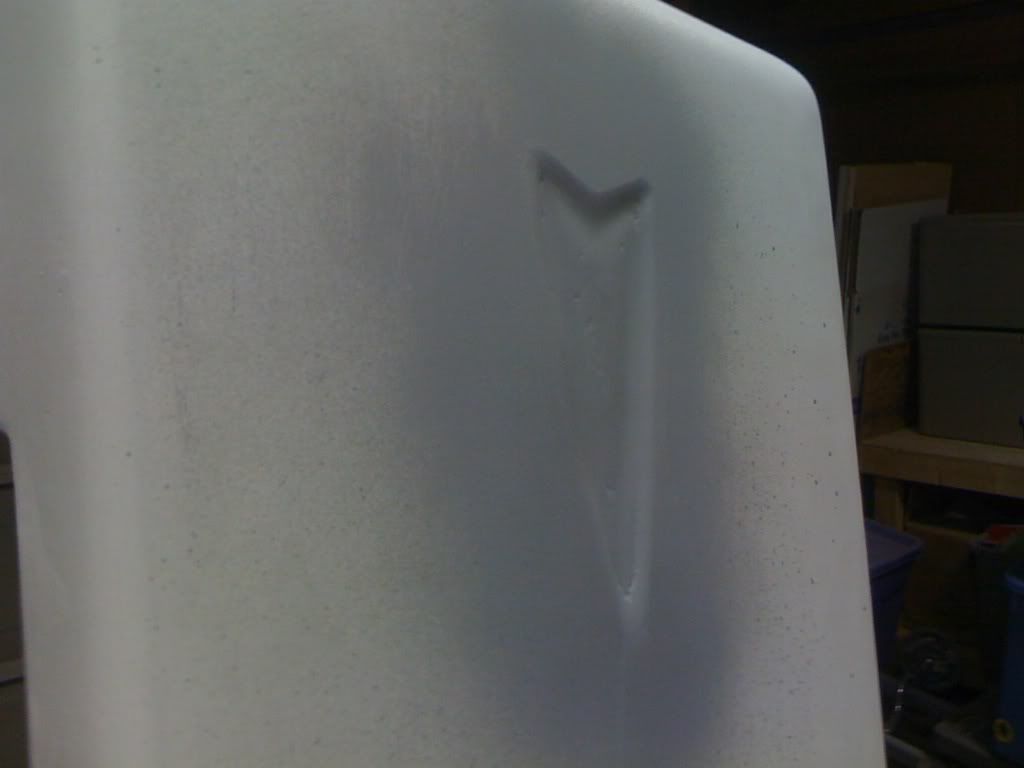
Then sanded the edges - 80-120 grit paper
Then shot a little primer into the area to get a better view of how it looked - I realized I had to go a lot further down
My two helpers Tucker (lft) and Cisco (rt) "Come on, Dad... hurry up"
More sanding and dremmeling (if that's a word)
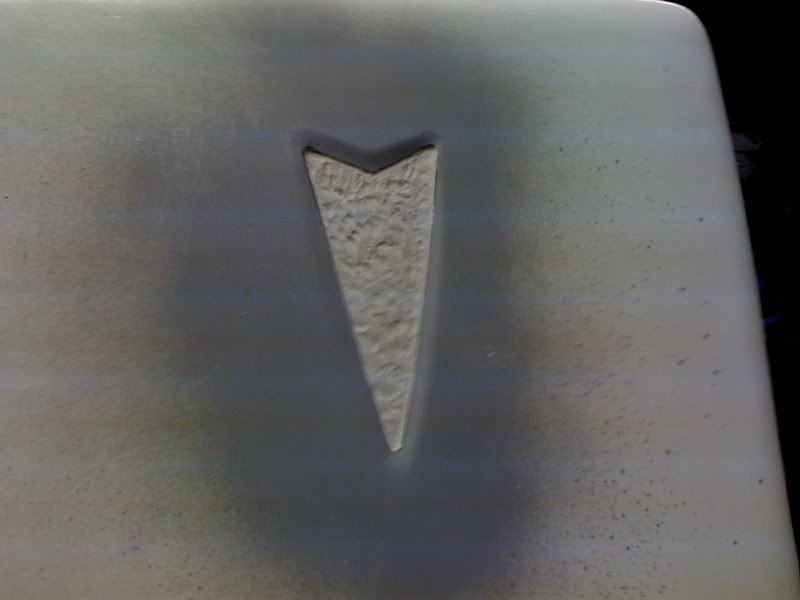
One more pass with the dremmel - this pass with the dremmel really helped
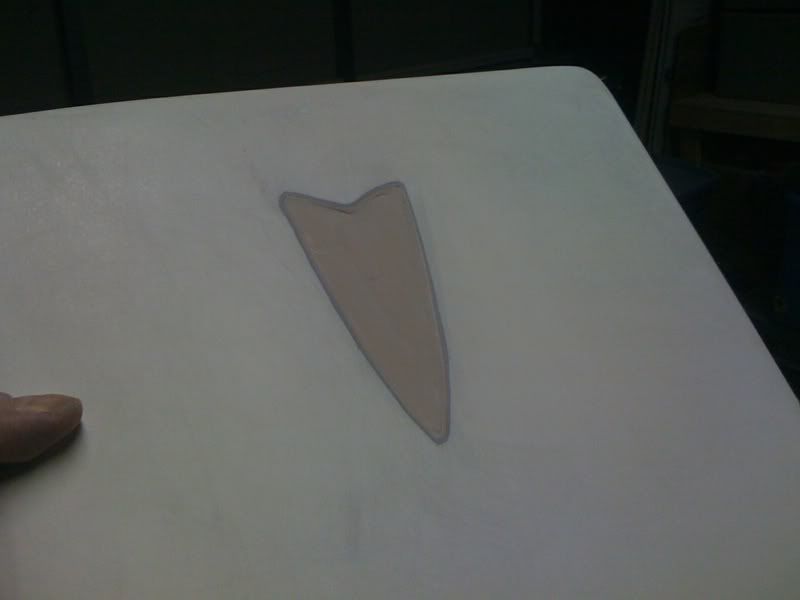
So far so good - if you look in the upper left hand corner you can see where I dropped the lid... more sanding and prepping...
Can you see the countersunk-idid-ness?
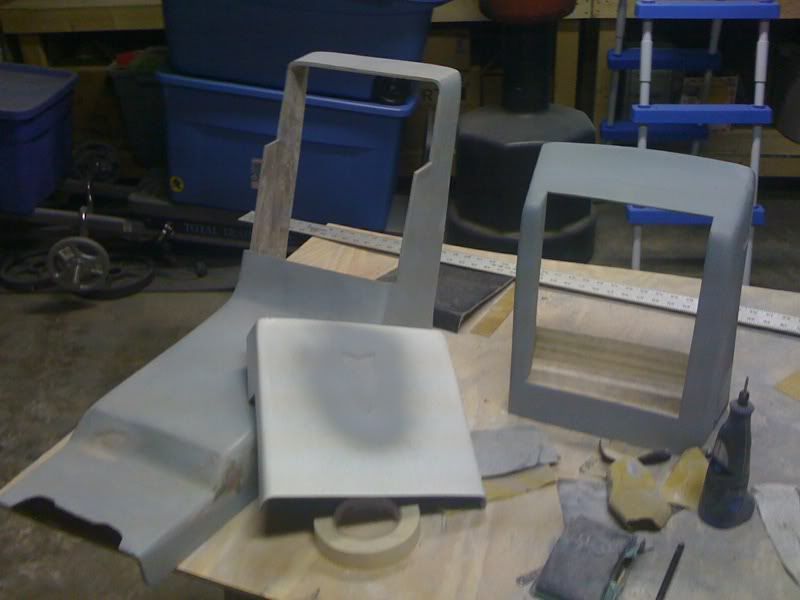
And the 3 working pieces
The dremmel was great practice for me. I now feel very confident about cutting and prepping the iTouch/iPod connector area between the power window switches. I just need to find the right connector / base that will plug into the stock GM CD radio. I should be hearing back from a few folks about door panels. Once I get close to finalizing the console, the prep work for the door panels will begin.
I also spent time filling a few more holes in the console and doing a little prep to the glove box - nothing photo worthy. Tomorrow I'm going to cut the hole for the 12 volt outlet and hopefully the dang cup holder will be here. At any rate, there will be lots of work done this weekend!
On another note: Valspar makes a new suede like spray paint. The texture is very similar to several of the trim pieces in the car. I didn't find any grey colors but there are 3 tan colors available. It might even make for interesting color change and texture. Just wanted to toss that out there.
Have a great evening!
[This message has been edited by Sofa King (edited 11-24-2009).]
That's cool. Doors 4-8 have lines that go good with the new console.
Thanks Amida. Coming from you, that means a lot! It really does. I am always so impressed by your work and your attention to detail. Please feel free to forward any comments or ideas.
Eight or Twelve........My 0.02 worth...... Working on some "texture" ideas today. I'll let you know what I find out.
Pat
P,
Did you get my email about the suede spray paint from Valspar? You know how the can top always features the texture of the paint? The suede might be just what you're looking for. The website is www.valsparspray.com - I didn't have any luck getting there - the site is all messed up. Lowe's carries the Valspar brand and probably any local crafts store. But I didn't see any at the "Depot".
Wow....You been busy! I like the last 2 panels you posted. Put the Speaker on the bottom one and you are there. What can I say about the logo recessed into the lid. I knew you were going to do it. It looks awesome. I have not been in my email yet but I'll check out the valspar - I was thinking of hitting the craft store in the am and wander the isles looking for inspiration. The suede sounds very interesting.
As usual - more outstanding work out of Sofa King's House of Glass!.......
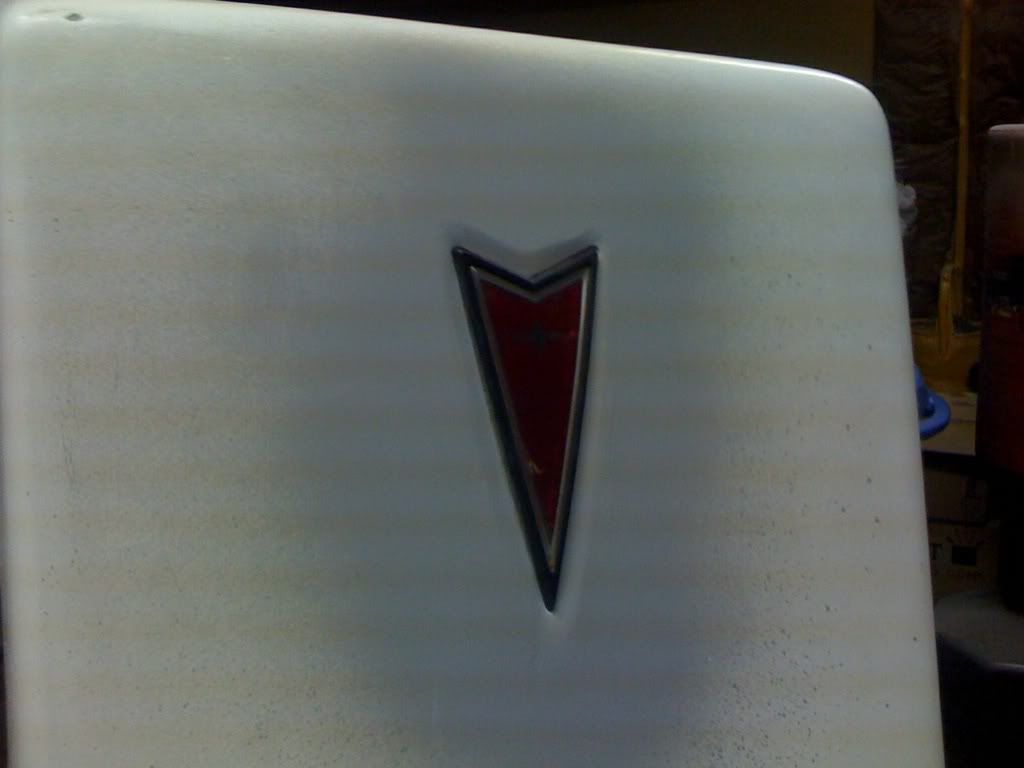
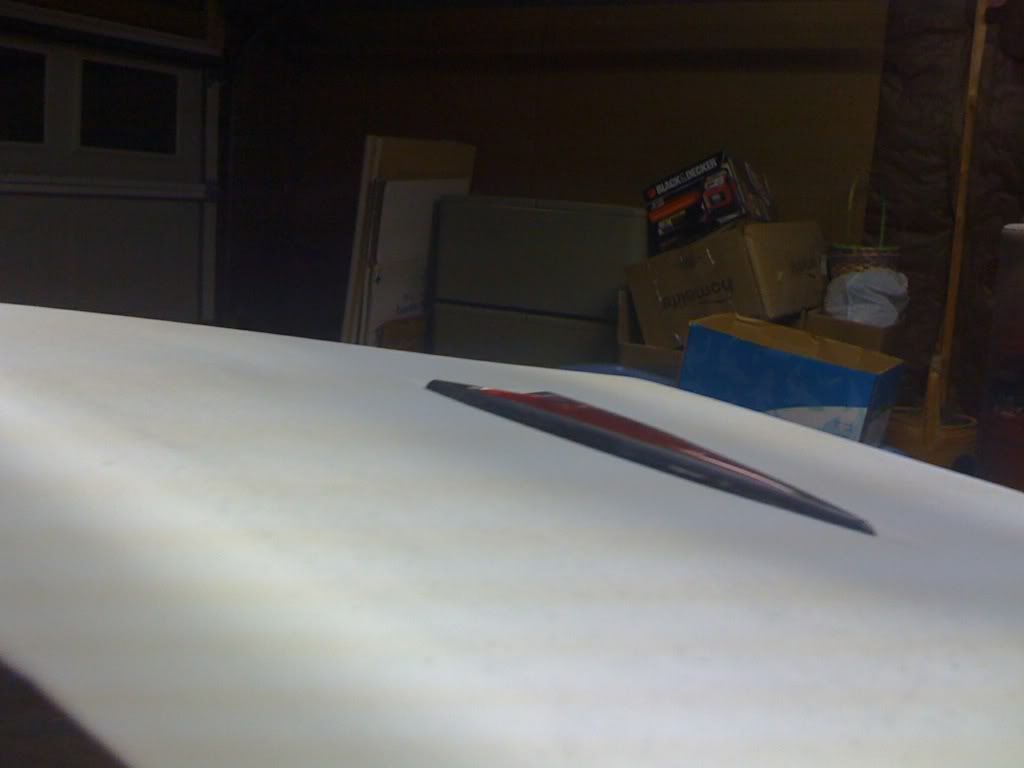
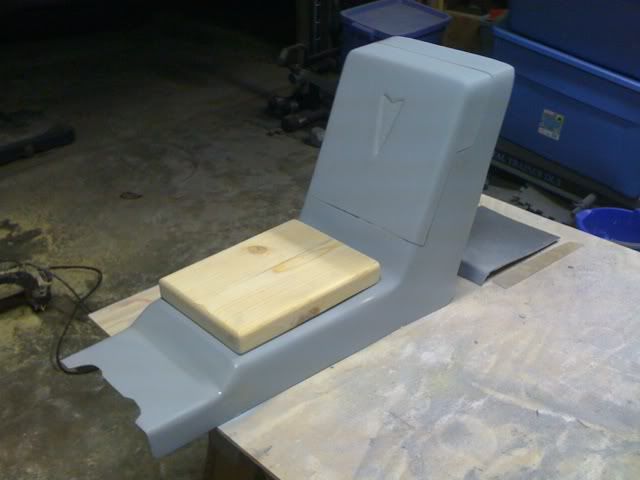
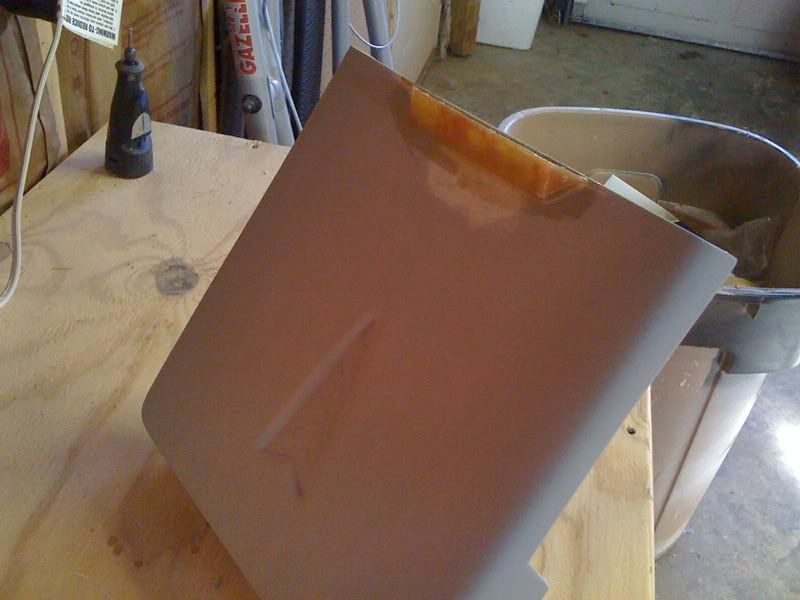
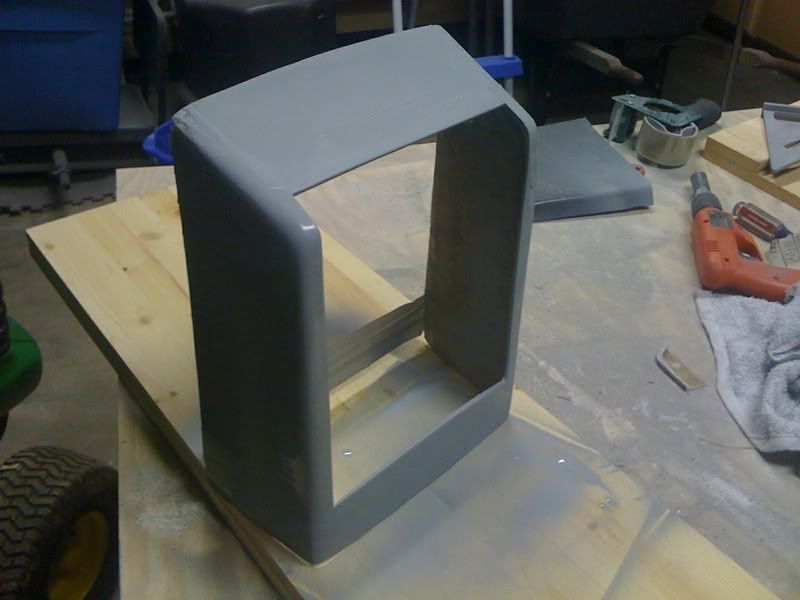
Resting on the console - there will be a second piece created that fits behind the armrest (see original concept) that will not be covered with material but instead painted black. This image also shows the depth where the Pontiac Logo will rest. I'm not completely sold on the armrest shape yet but the fiberglass glass work will play that out
Making new glass panels - piece of the tabel top glass I found in the attic - shhhhhh don't tell the "Boss"
More Dremmeling of the lid - I bought some primer/filler which fills in all the imperfections - good stuff for this type of work. I'm really happy so far
More pics coming. I'm waiting for Photobucket to update.
Another tip, FWIW: Get one of those router attachments for the Dremel. Makes countersinking the badge so much easier.
I like all of you ideas so far. Keep up the good work.
Bob
Hi B,
I have the real low end Dremmel that doesn't accept any of the attachments - just the different "bits"... And you're right, it would have made the job so much easier.
Thanks for the kind words. I'm hoping to have some major progress by the end of the weekend.
First, for those celebrating, Happy Thanksgiving and I hope you guys ate well and spent quality time with friends and family.
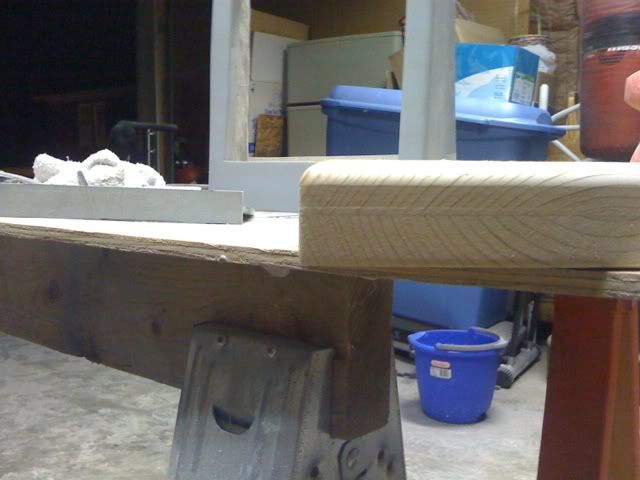
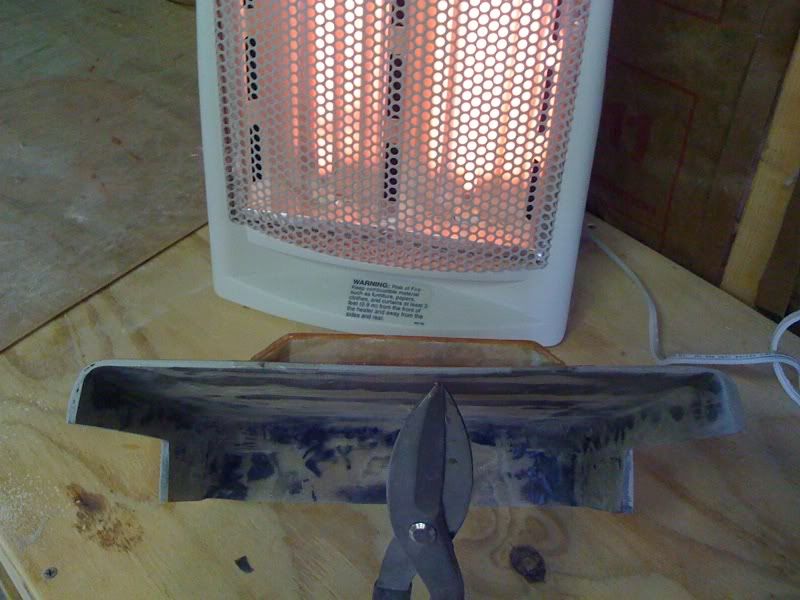
Second... I avoided near epic failure. Just as I grabbed the resin to begin mixing in prep for the armrest I realized I measured the armrest length wrong. I got too excited and got WAY ahead of myself. The dimensions and angles were correct but the over all length was too short. I NEVER would have been able to create the shape I wanted using the existing piece - the piece I cut is what the final product should look like. The idea is to wrap the fiberglass over the wood armrest (side to side) and then lay glass over the front (front to back) creating the armrest. Once it dries I can just slide the new fiberglass form off the wood buck.
Luckily, disaster averted. I have to go back to the store to get more wood, but better that than more glass, resin, etc...
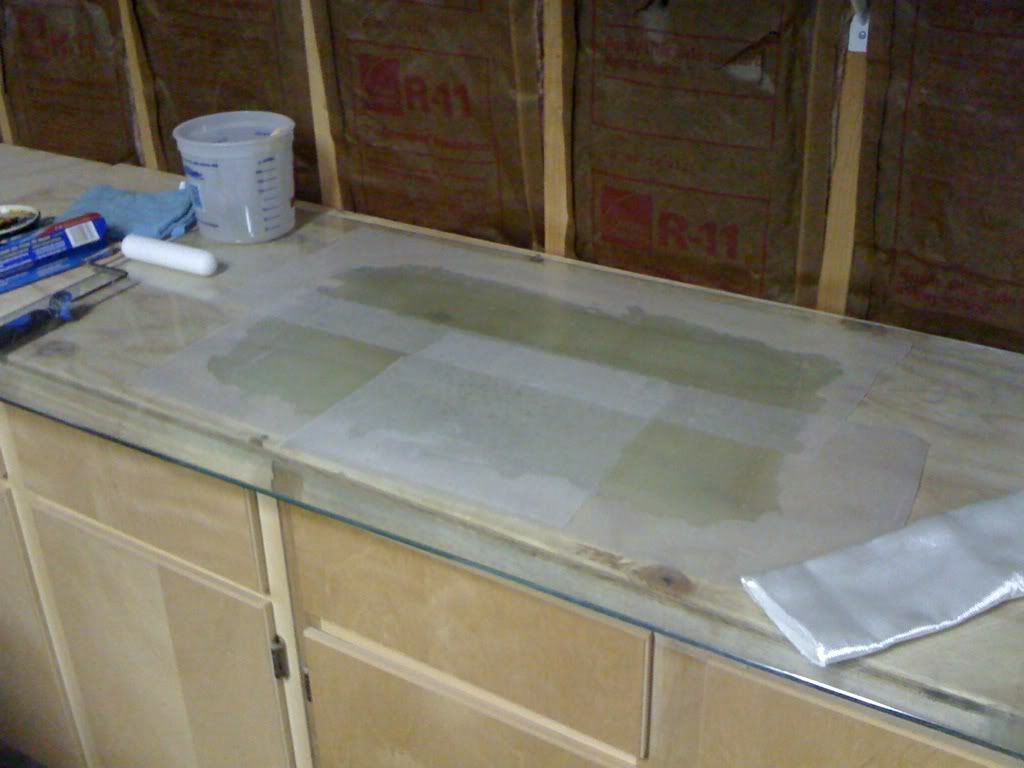
There's an issue with Photobucket - don't know why, probably the holiday season. Anywho, I did pop the fiberglass panel off the glass table top and took a couple of pics. HOLY COW! A near perfect piece (minimal airbubbles). Mirror glass like finish!!!! I took pics and I'll post them ASAP. I owe Katatak (Pat) for ALL the credit on that idea. Now if I can only incorporate lasers with non-lethal military trained fiberglass fabricating monkeys...
I don't have two large mirrors but thats a great idea! It would probably help get all the bubbles out as well.
Minor Updates
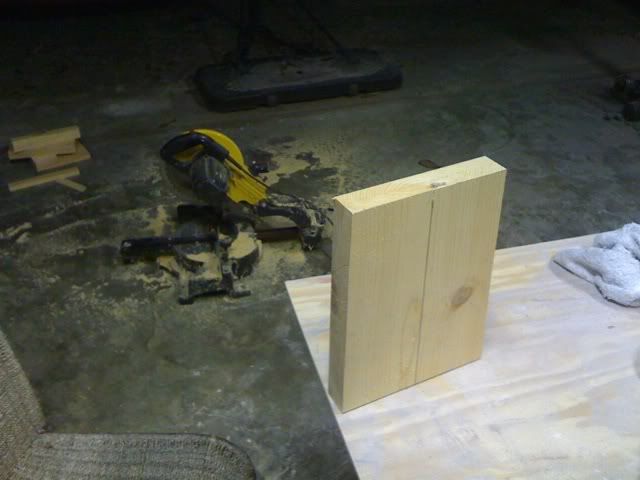
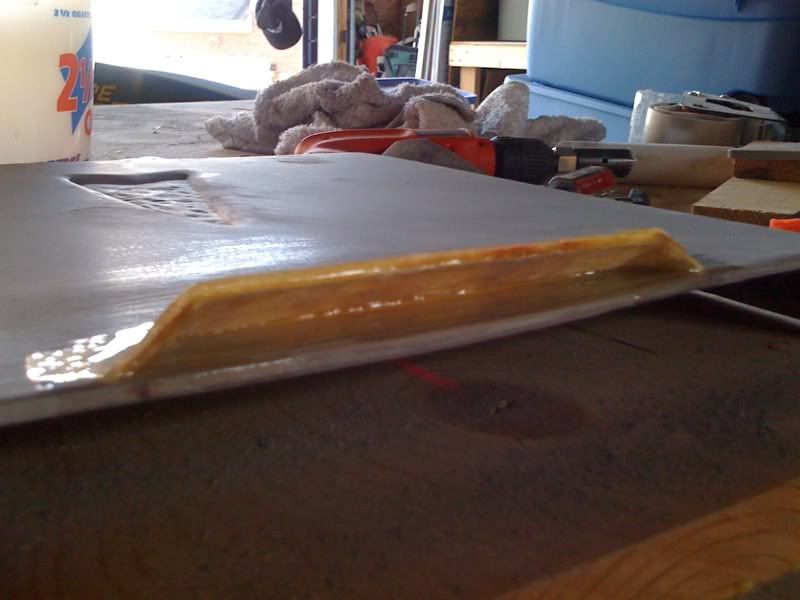
I got the two pieces of wood glued together and I made the decision to have the lid lift upward. I know I know... I put the console in the car and mocked up the lid open in the down position - it just took up too much space and kept hitting my arm. After that decision was made I went ahead and fabricated the "lift" for the lid. I created it using 3 pieces of glass and sanded them with their appropriate angles, taped them together from the bottom, and then spread resin to create a bond. After that dried I put a single layer of glass on top. When the glass cured I sanded down the lid, spread resin and placed the lift in place. Once that dries I'll spread body filler and sand.
Lift
On the lid
Its about 28 degrees so I brought a space heater into the detached garage - the lid getting a sun tan
From the bottom
And side
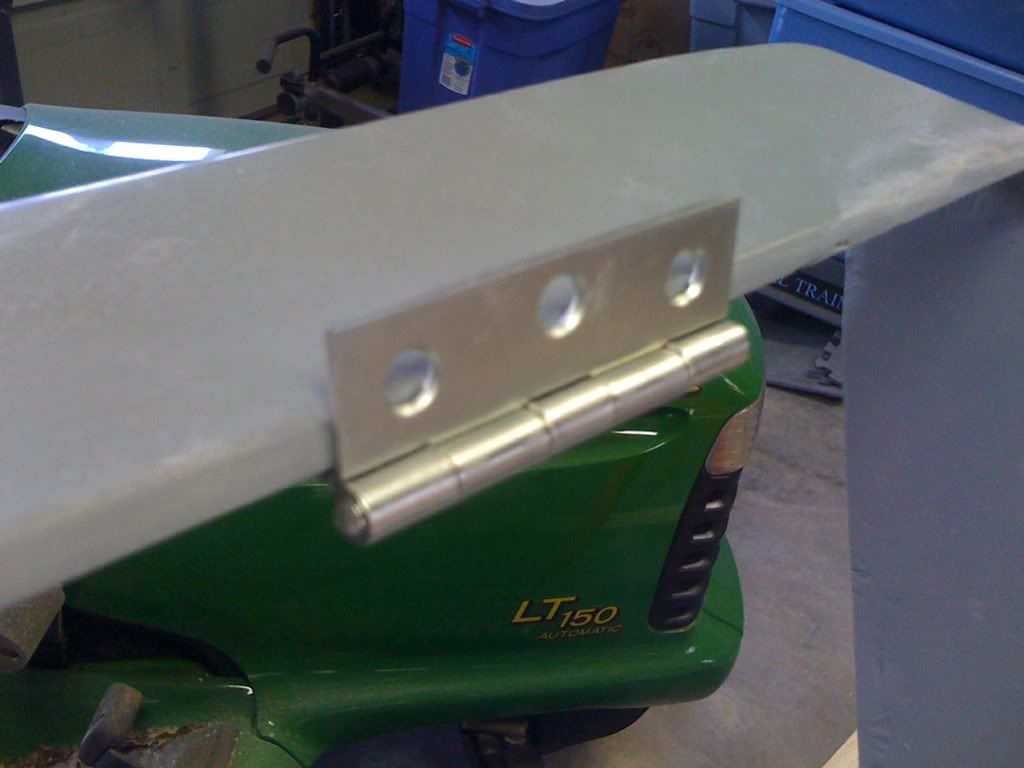
With that said, I did get a hinge for the lid. What I plan to do is fairly simple. I going to mark where the hinge bolts go and then glass the bolts to the console and lid (3 each - I think). This will allow me to continue to work on the lid and console if need be and not worry about the hinge getting on the way. I'll then use either lock washers nuts or simple lock nuts to hold the hinge in place.
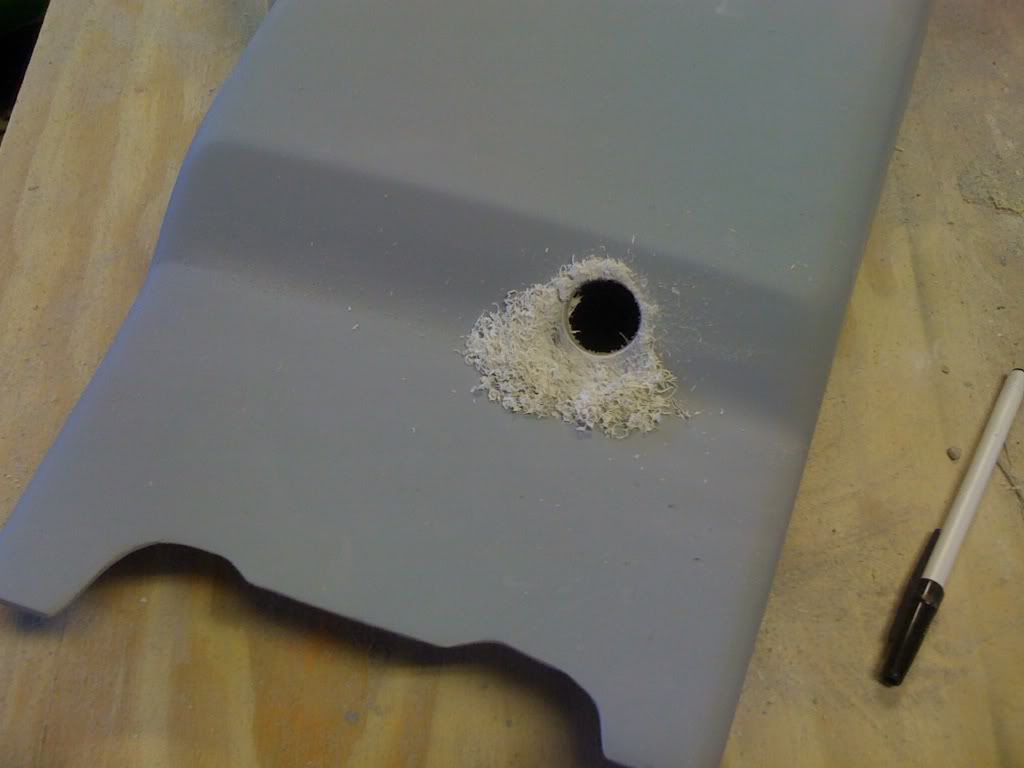
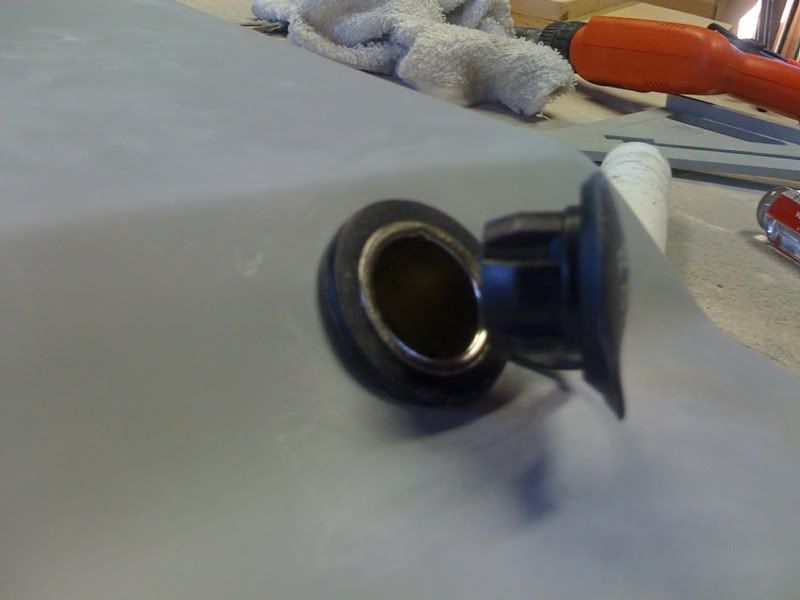
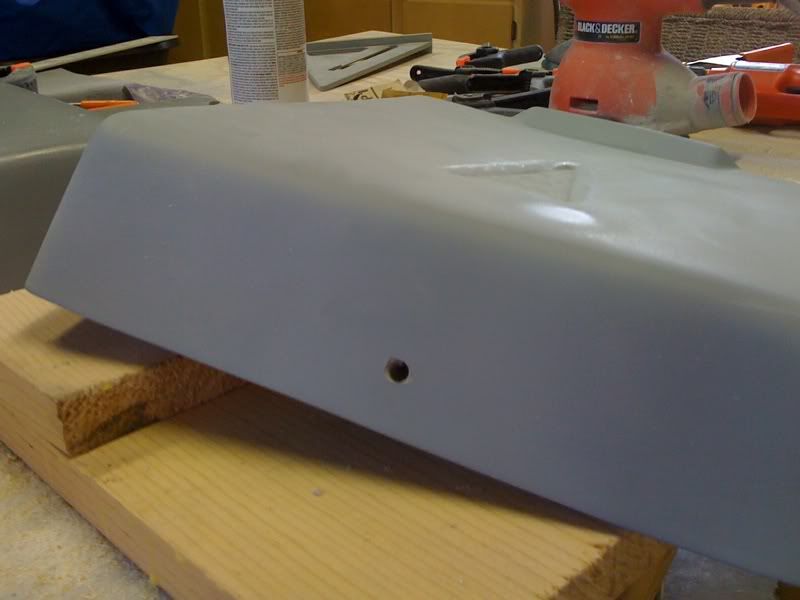
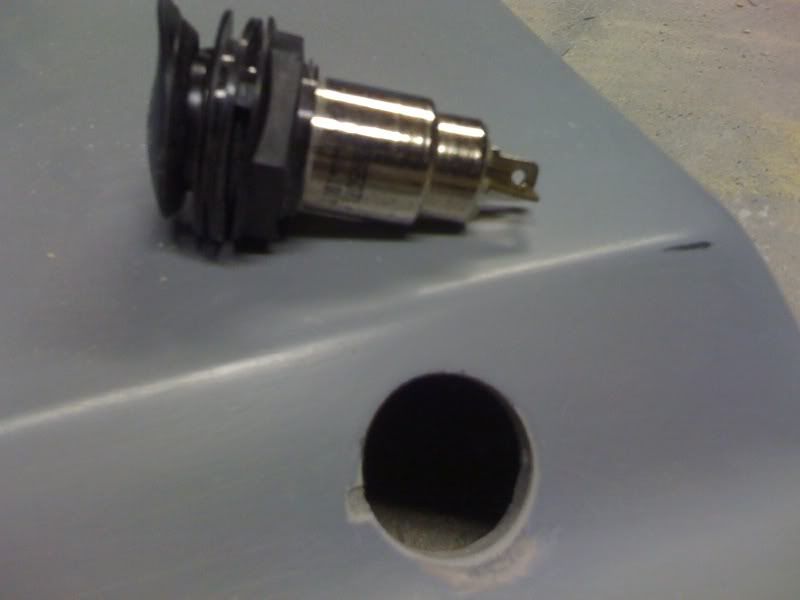
I cut the hole for the 12 Volt Outlet. It looks pretty cool!
Measuring for the cut - the hardest thing is cutting into a piece you've been working on as long as I have this piece...
TaDa
Perfect!
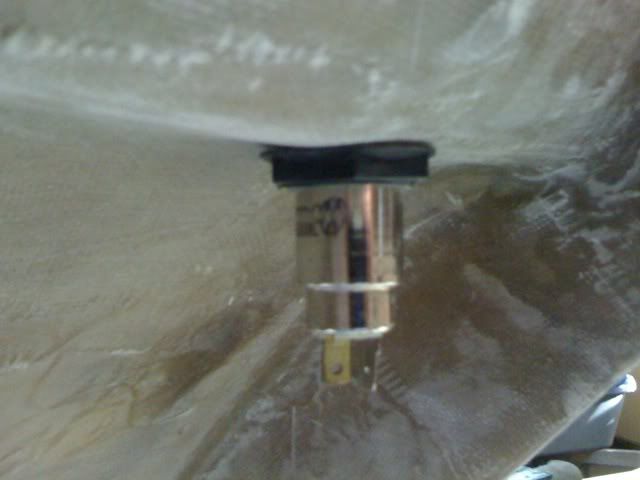
From the backside
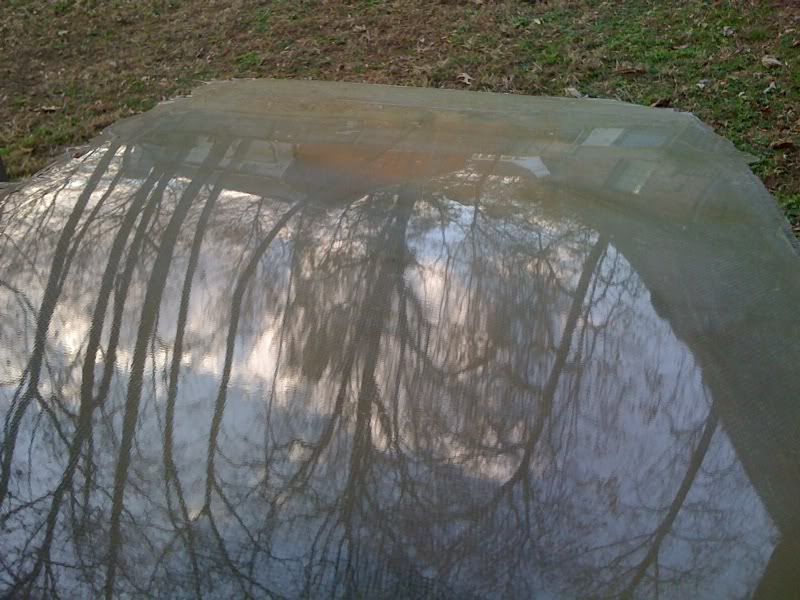
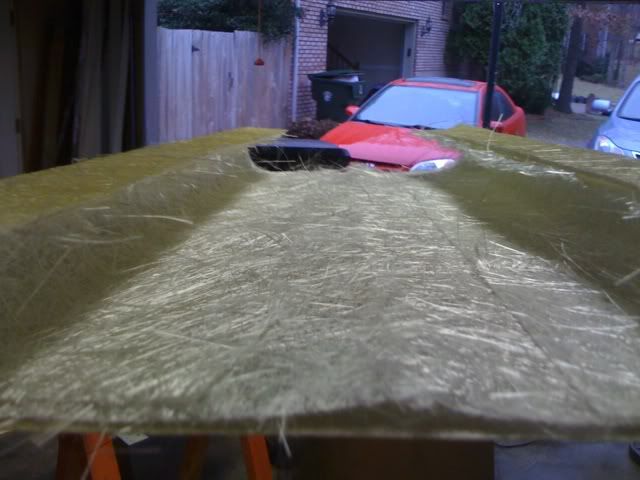
Here are the pics of the fiberglass when laid out on a piece of glass - I can only imagine how smooth it would be sandwiched between 2 pieces of glass
WOW - I counted maybe 10 air bubbles total
I'm still not sure how to proceed on the glove box. I might just attach the lid and leave the idea alone until I come up with something. Its been frustrating not being to figure out what to do. Another frustration... still no cup holder. Maybe today?
OK, back to work
[This message has been edited by Sofa King (edited 11-28-2009).]
Small update. I finished working the lift for the lid. I was to able get most of the sanding done. I also jumped back on the original glove box idea. I have something going thru my head but I won't really know what or how it will work until I begin fabrication.
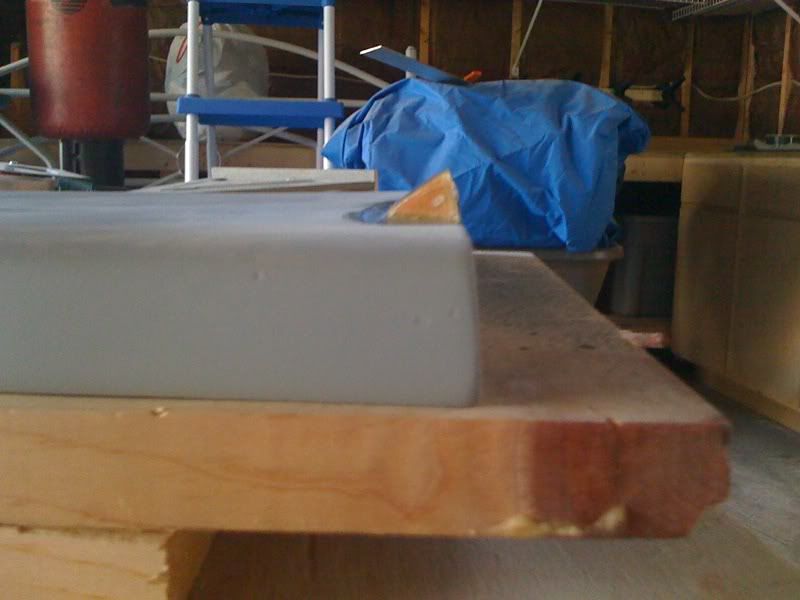
Lift for the lid - after looking at the pic I might extend the lift just a little bit - not sure
Another view
Glove box - I cut more of the edges off. One of the reasons I'm going back to this idea is becuase I like the contoured edges when the lid opens and closes. Once finished and painted a matte black, I think it will really look sharp.
Two pieces together - anybody beginning to tackle little projects like this should invest in a couple cans of Primer / Filler spray paint during the build process. The paint not only primes the area but also fills in any small holes. Once it dries you just lightly sand and respray if you miss a few areas. GOOD STUFF (you can see some of the drips)
Armrest
Tomorrow I will cut the wood for the new armrest and probably resin the bolts into the lid and console. I don't expect any issues or problems to come up at this point. Normally I would be watching the Redskins play ball this Sunday... but I'm tired of watching them looooooozzzzzzz.
CYA
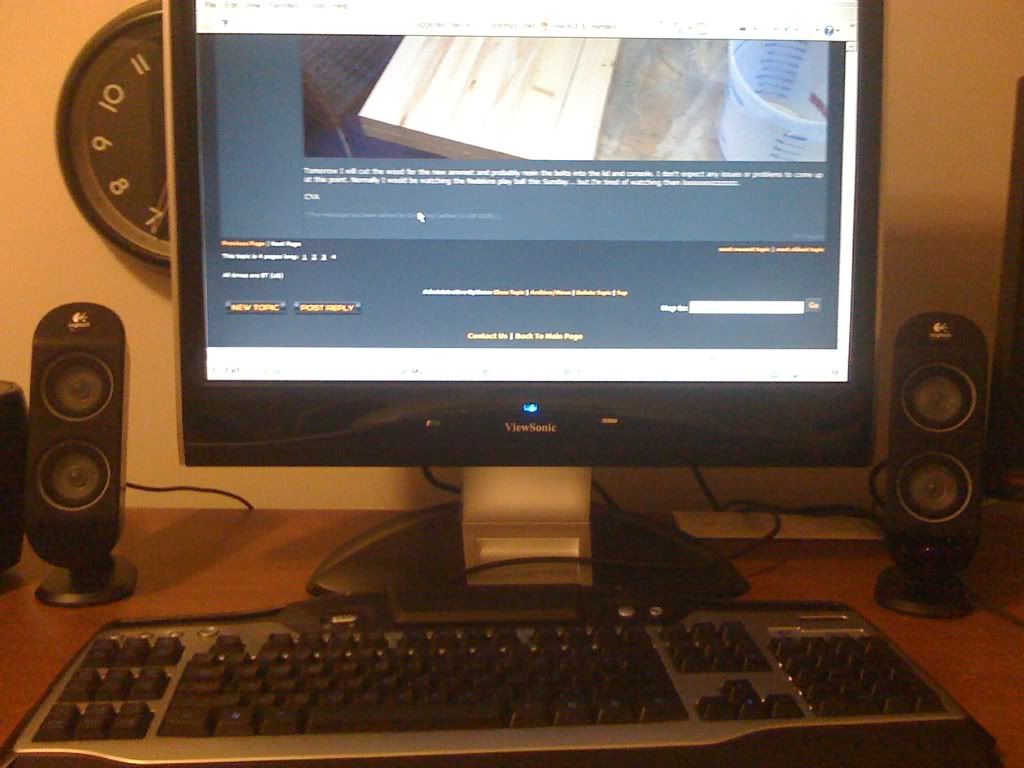
PS - Since I'm photographing everything. Here's a pic of me updating PFF - good stuff
[This message has been edited by Sofa King (edited 11-28-2009).]
Tomorrow I will cut the wood for the new armrest and probably resin the bolts into the lid and console. I don't expect any issues or problems to come up at this point. Normally I would be watching the Redskins play ball this Sunday... but I'm tired of watching them looooooozzzzzzz.
Originally posted by MileHighFiero: Hey your Redskins beat my Broncos....
Keep up the good work, it looks great
Jamison
Hi J,
That was a fluke win. Trust me. When the Skins squeak a win past the Rams, break Detriot's 86 game losing streak and are kind enough to let the Chiefs win... You don't deserve a "W" against a better team. What a sad season...
Thanks for the compliments on the console. I got a lot of work done this morning.
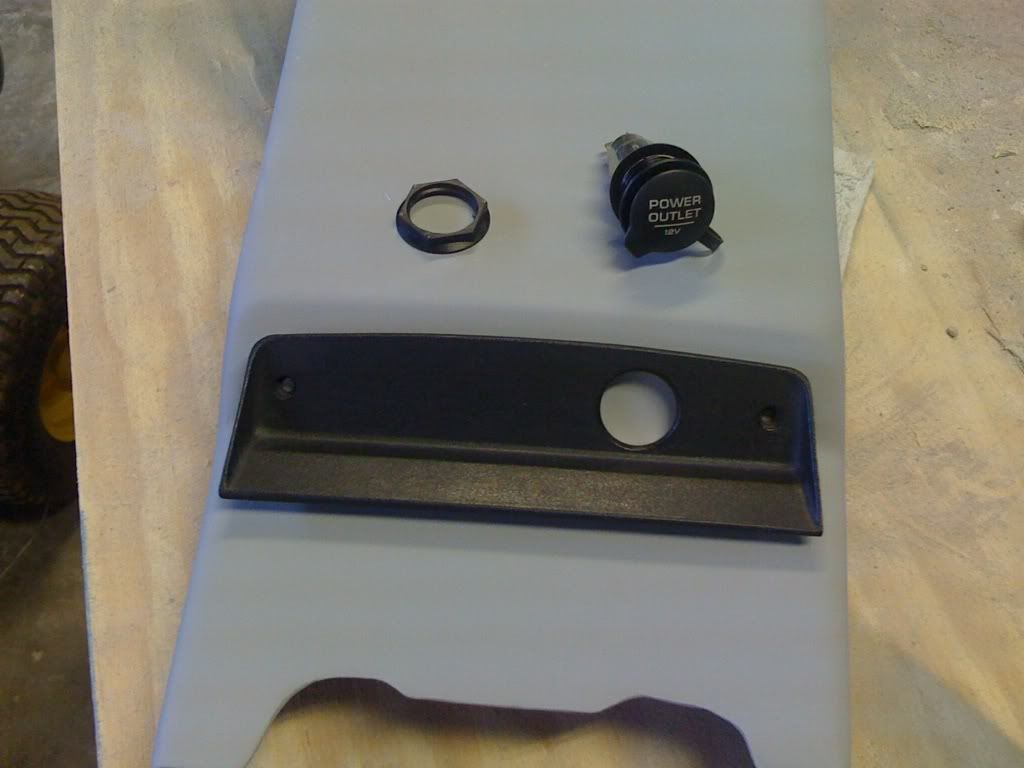
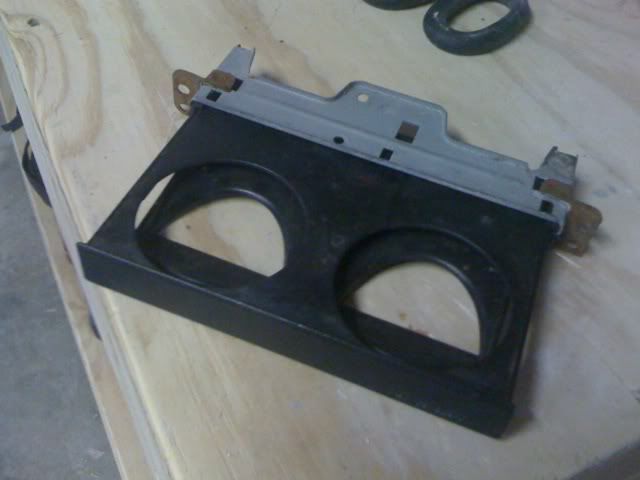
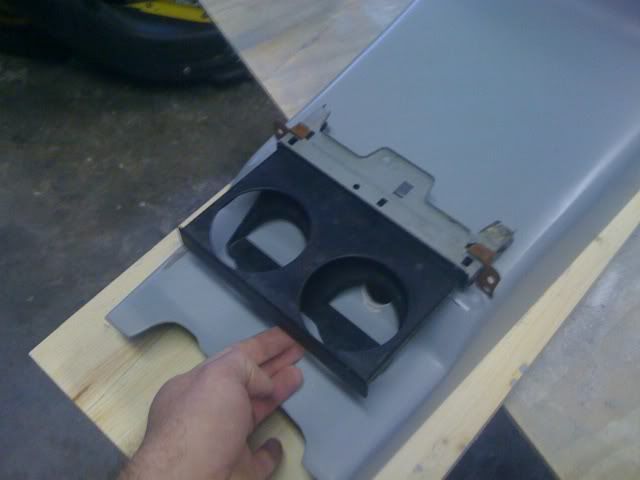
Here it is. Its out of a 95 Toyota 4Runner. I just need to clean it up and get it ready to mount - note the mounting holes. I'm hoping to utilize these brackets to make mounting EASY. I might not be able to use the existing mounting holes - I'll just drill a few new ones - I hope
Basic placement
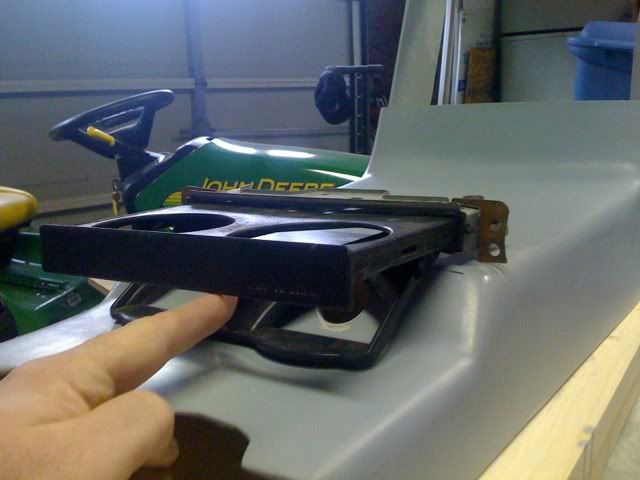
This is how far it will stick out - the 12 volt outlet doesn't get in the way at all
Front view
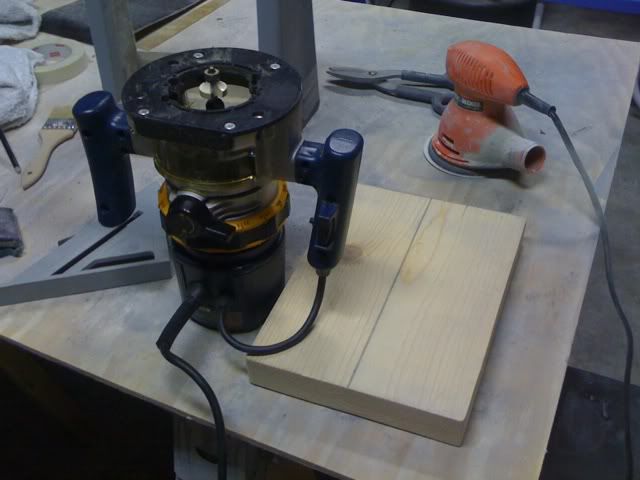
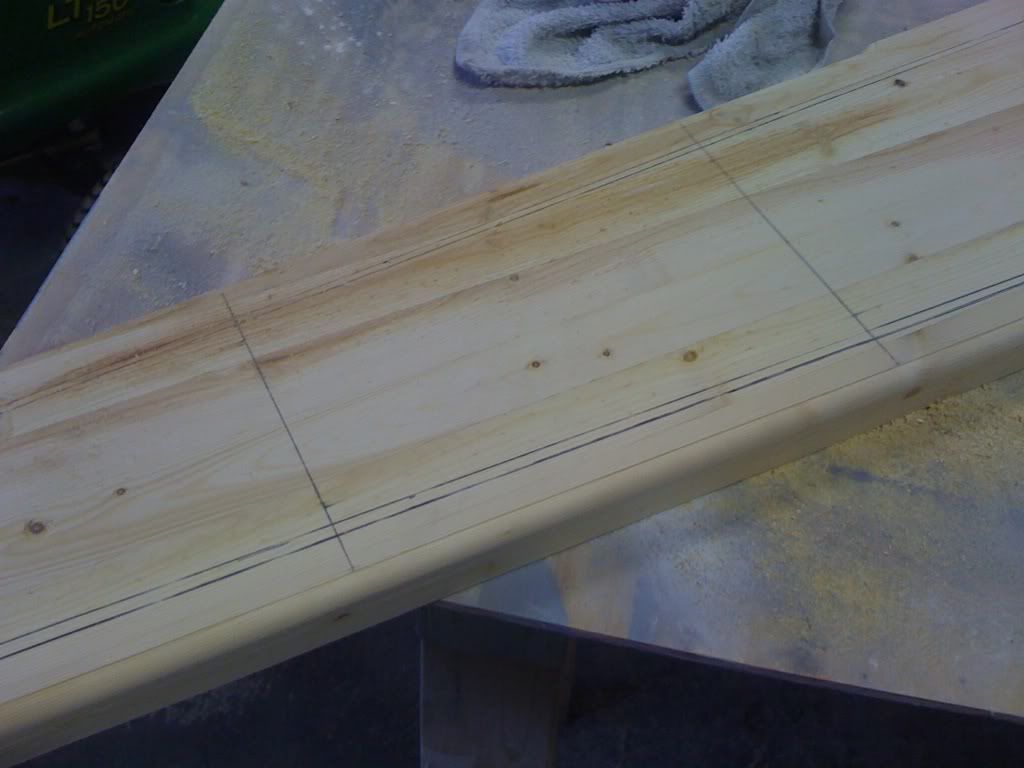
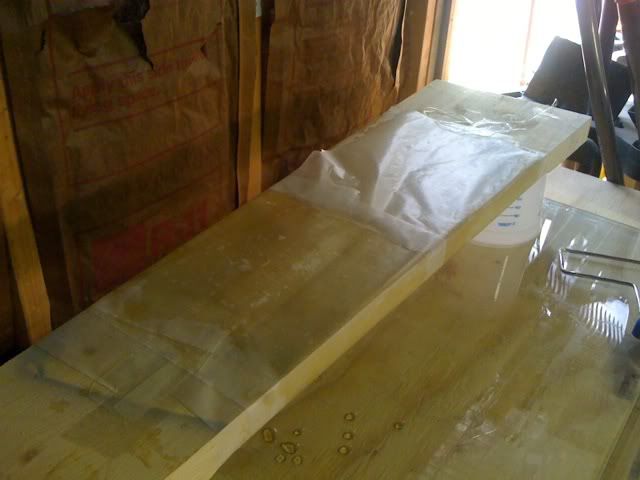
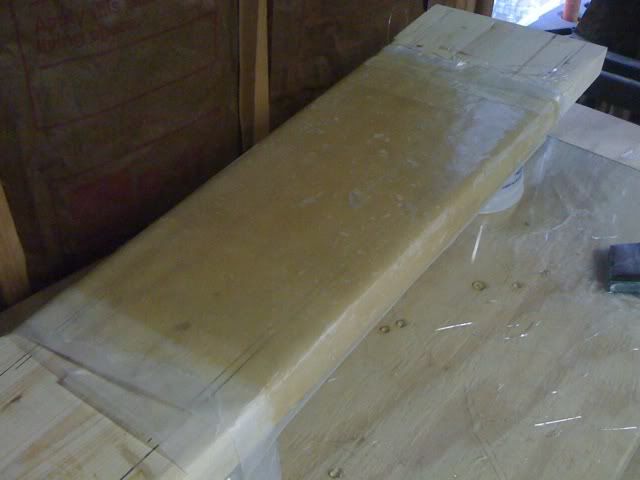
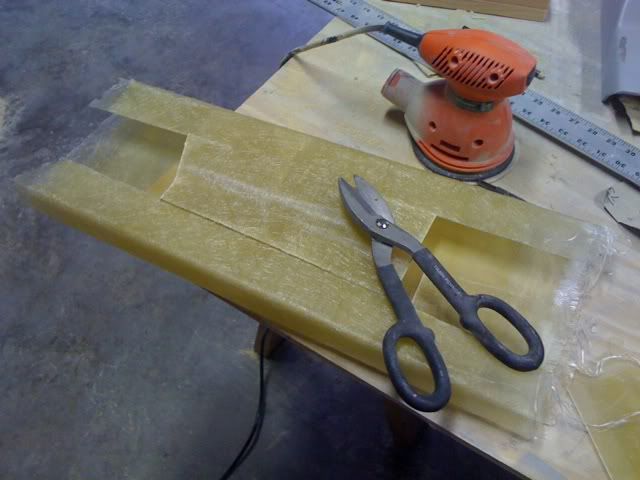
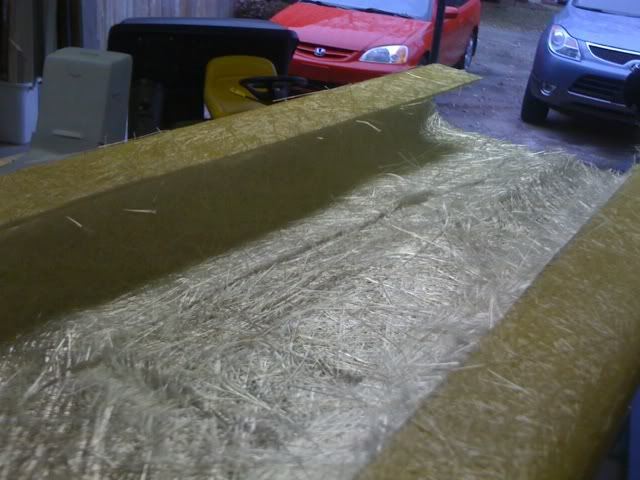
The arrival of the cup holder got me PUMPED!!!! I cut the wood, routed the edges and laid the first layer of fiberglass. This was a near nightmare. It was difficult at best. Before doing anything I wrapped the cut piece of wood with wax paper extending beyond the actual size of the armrest. I spread resin on top and sides and then carefully laid the fiberglass mat on the top making sure to be very generous with the resin. I then spread resin on the side. Then.... I flipped the wood piece over and laid the rest of the mat on the bottom. I repeated this process twice making sure that all four sides received a fair amount of resin. Then I laid more wax paper and carefully worked out any air bubbles with a roller. Once the wax paper was in place I set the wood onto the glass - top side down. I'll again repeat this process 2 more times to ensure enough strength not only to accept the cup holder but also the weight of my arm. I had to work fast so I didn't get any pics of the process
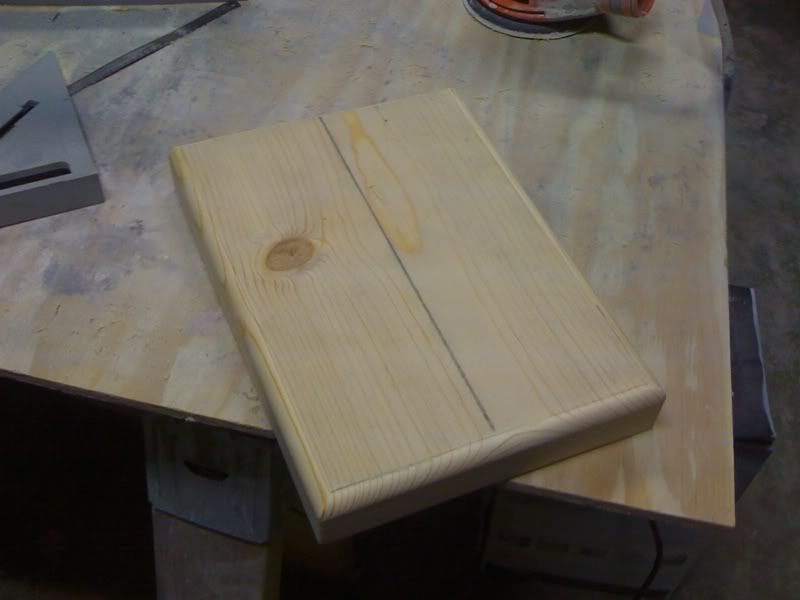
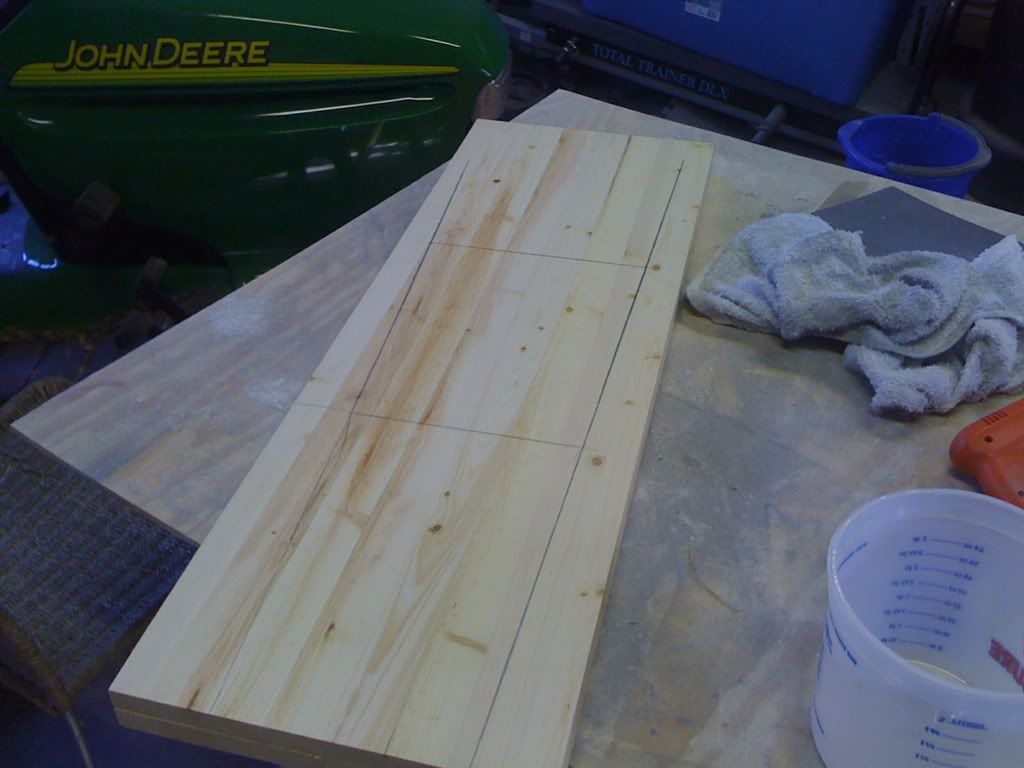
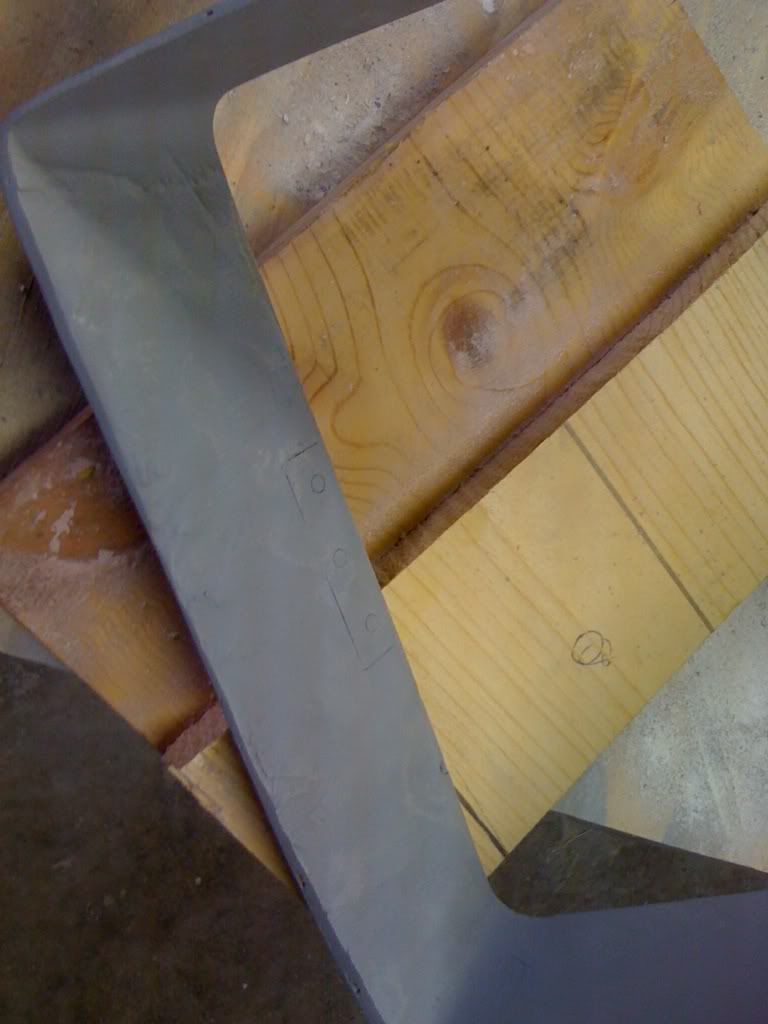
Wood cut - the lines you see are guides I used to place a straight edge before cutting
Wrapped in glass
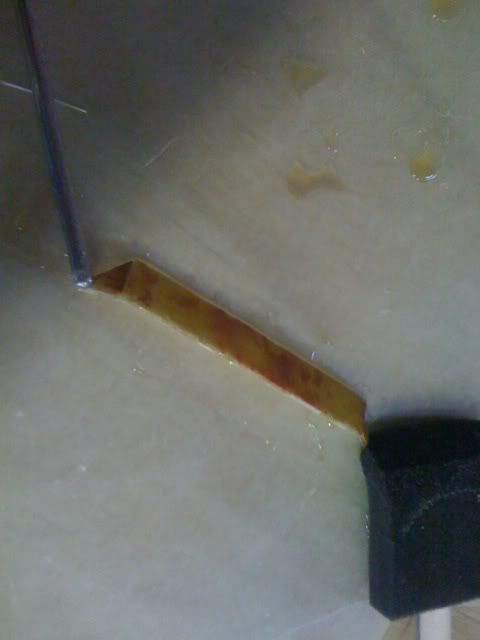
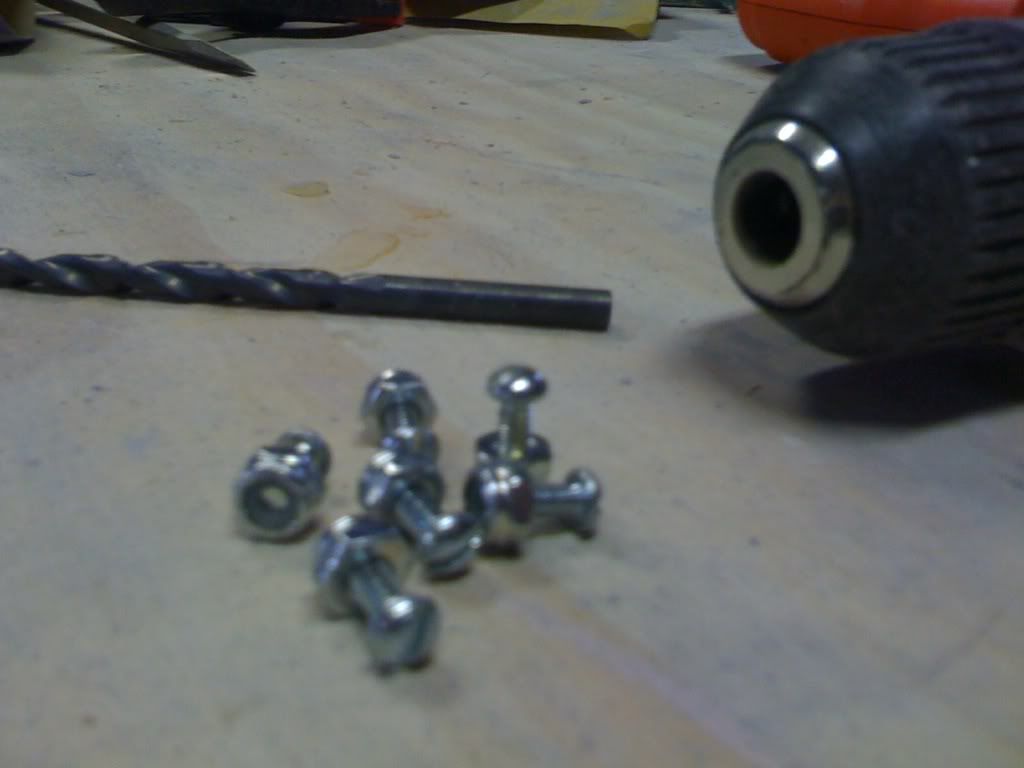
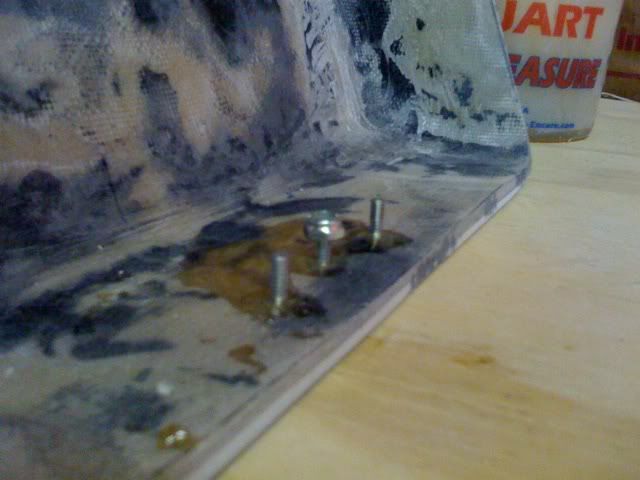
I bought a hinge to connect the lid to the console. I took a drill bit to counter sink the bolts into the fiberglass and then resins them into place
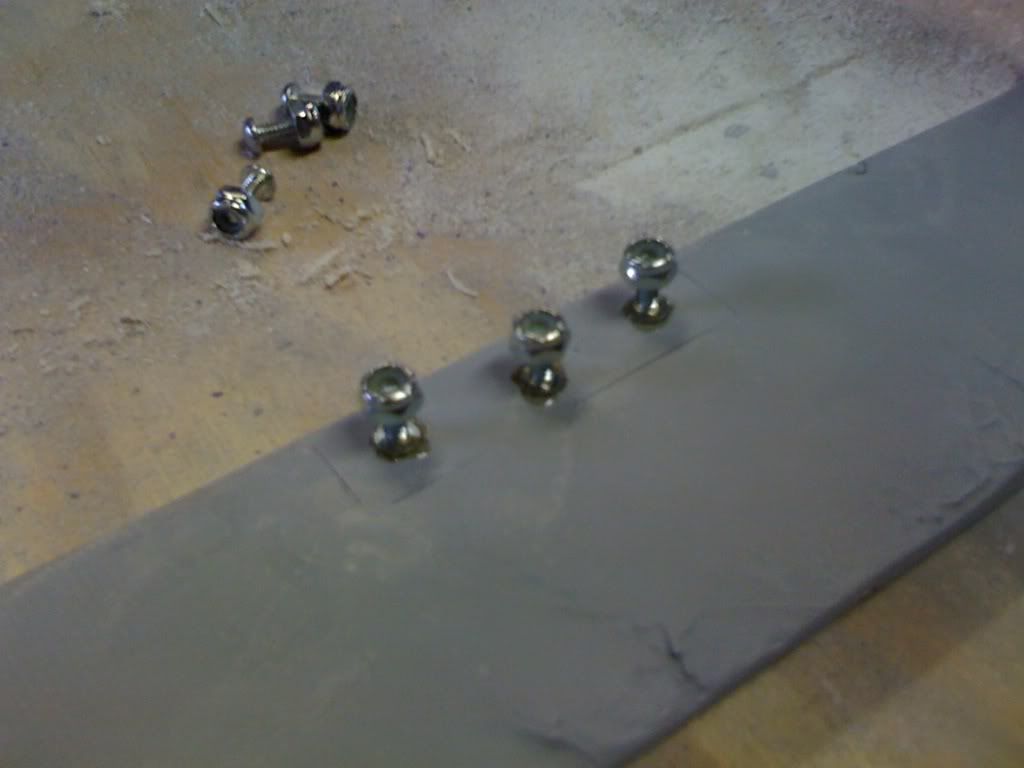
Bolts and lock nuts
Where to drill
Resined in place
Ready to accept the lid!
Onto the lid...
WHOOPS - no biggie - I'll just fill it with boddy filler
Drying
By this afternoon I will have a working lid!
[This message has been edited by Sofa King (edited 11-29-2009).]
Well... I do NOT have a working lid. The hinge, in that configuration, did not work. The lid was hitting the console 1/4 of the way up. I tried rolling the edges of both the lid and console but that still didn't do it. So... I thought and thought...
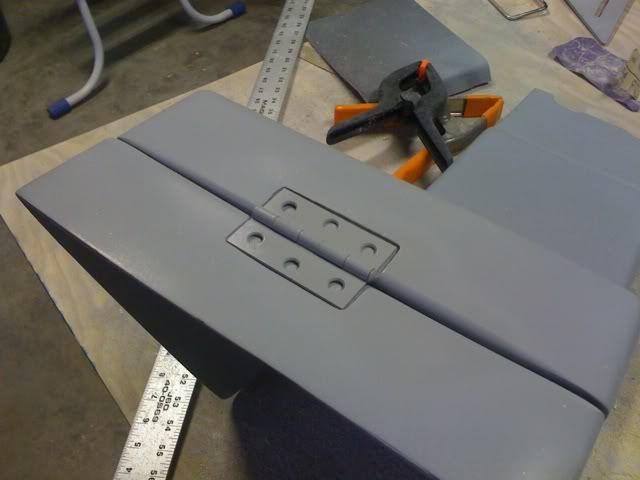
I decided to counter sink the hinge on both the lid and the console. Unless someone can come with another idea, this is the only way it will work. I'm not thrilled about it at all because I really wanted a seamless look. So now, the plan is to paint the hinge and the bolts both gloss white and grey depending on the side the hinge is on. Maybe it will compliment the countersunk Pontiac Logo? If anybody can come up with another idea please let me know!
I also laid another 2 layers of glass to the armrest. One layer of cloth and a second layer of mat. I covered with wax paper to get that smooth finish. I cleaned up the cup holder as well. It was really nasty from spilled drinks. I licked it clean.
Armrest - coming along slowly but surely
Used the Dremmel to counter sink the hinge on both the lid and console
Both sides done
Another shot
This is a slow process... I was hoping to be a little further along. I will need your advice on how the front of the armrest should look where the cupholder slides in and out of.
OK... back to work
[This message has been edited by Sofa King (edited 11-29-2009).]
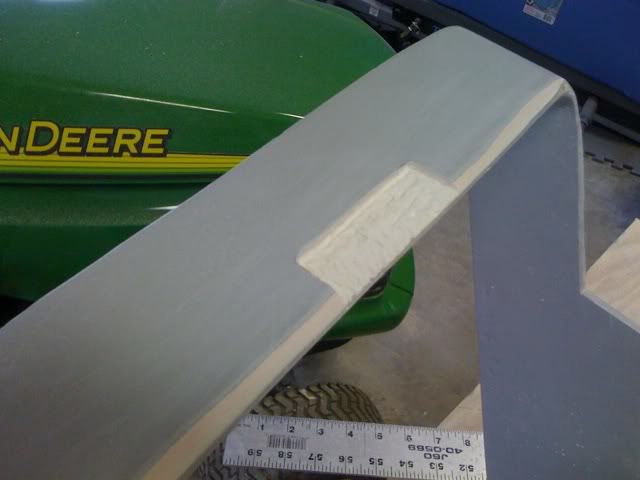
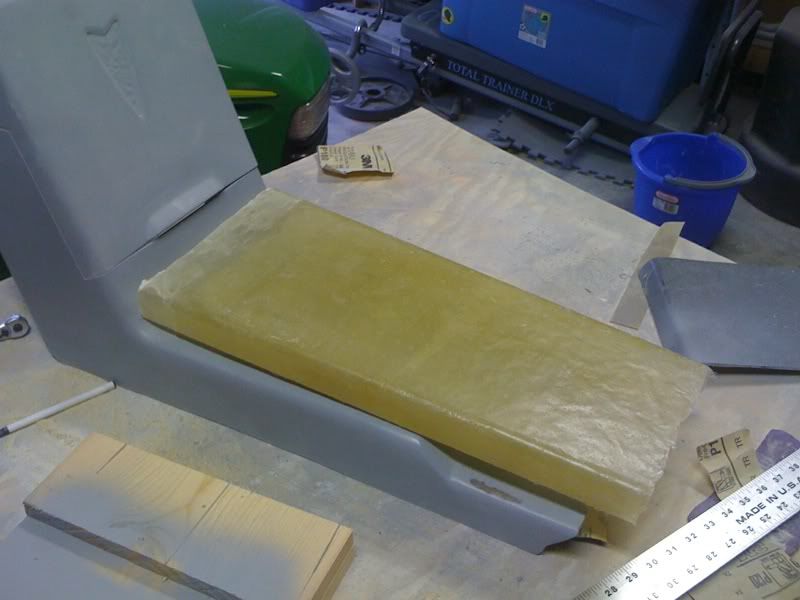
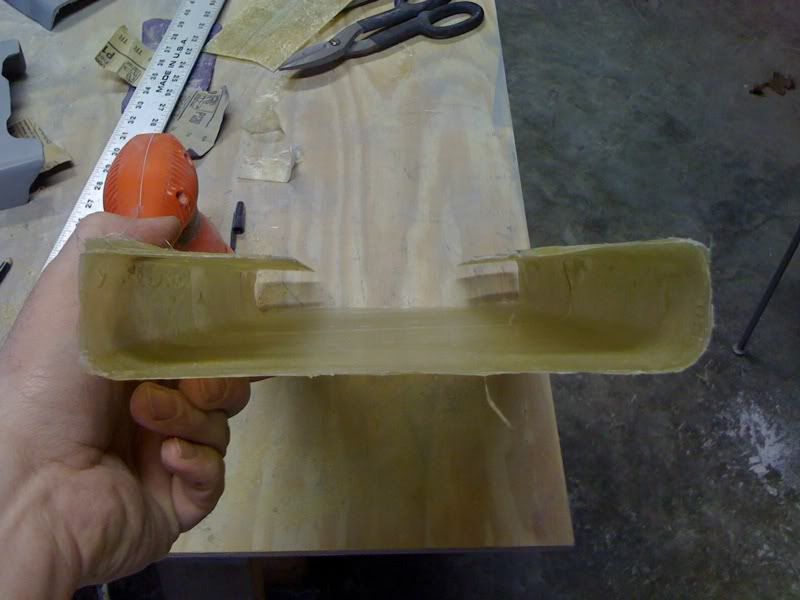
I popped the armrest mold off the wood plug and trimmed the bottom
With this length I can now trim the armrest to fit
Down the inside
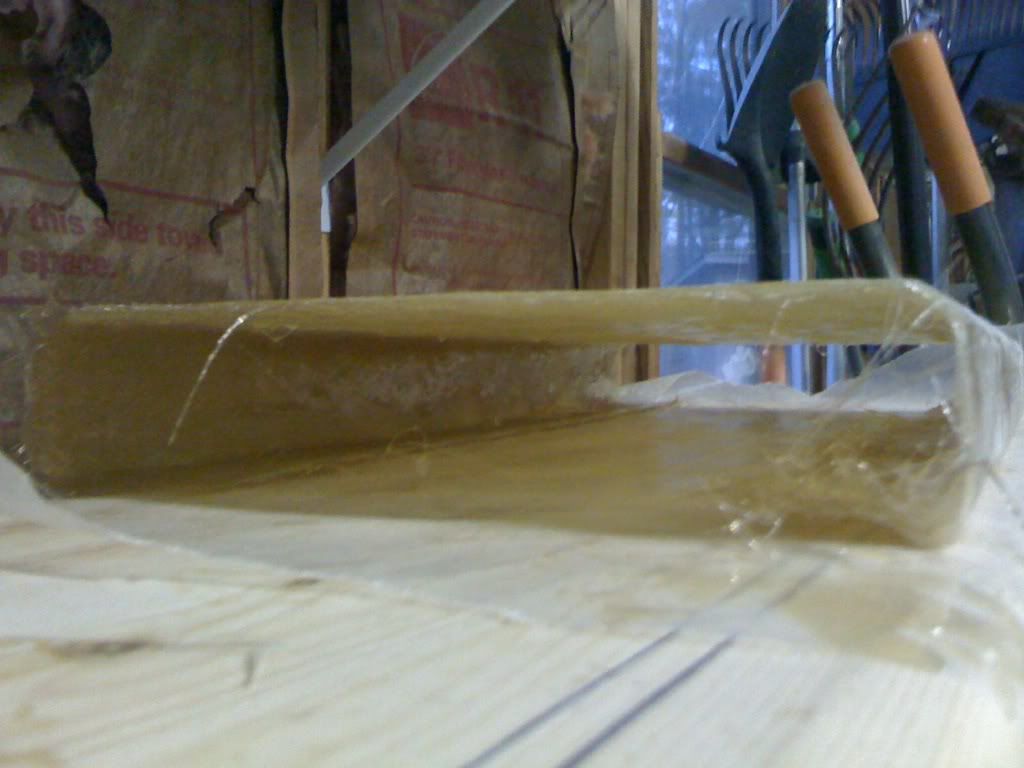
I then lined it the underside with more fiberglass mat for strength
I'll sand this down a little once it dries. I'll have to trim much more of the armrest to mount the cup holder. Again, I'll need to come up with a good design for the front part of the armrest
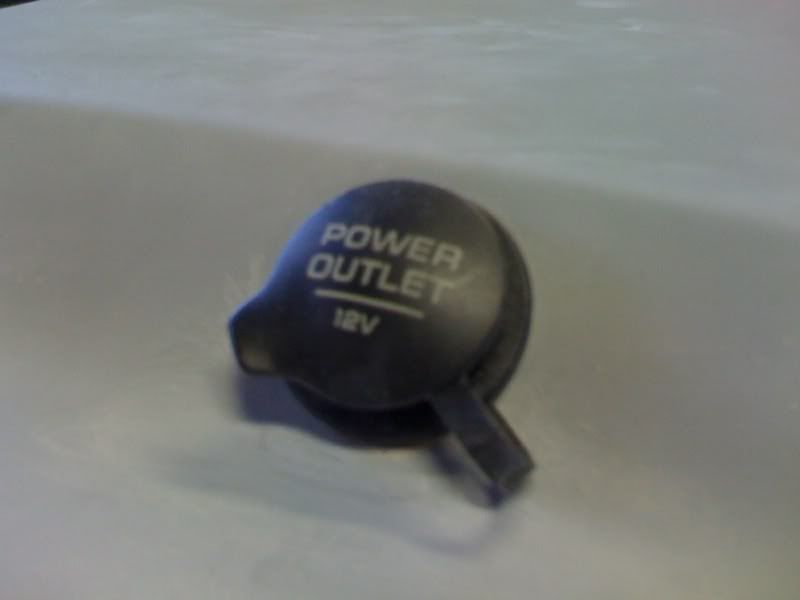
I had to cut a small indent for the 12 Volt plastic cover
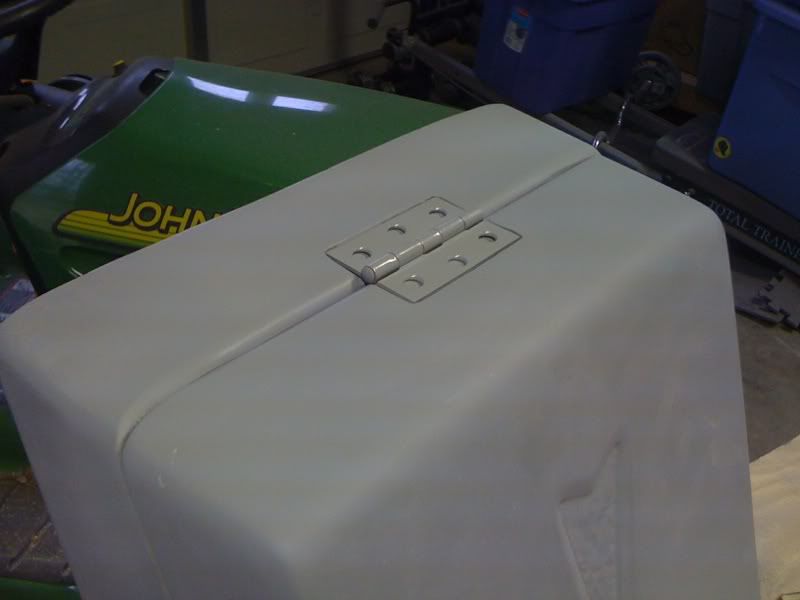
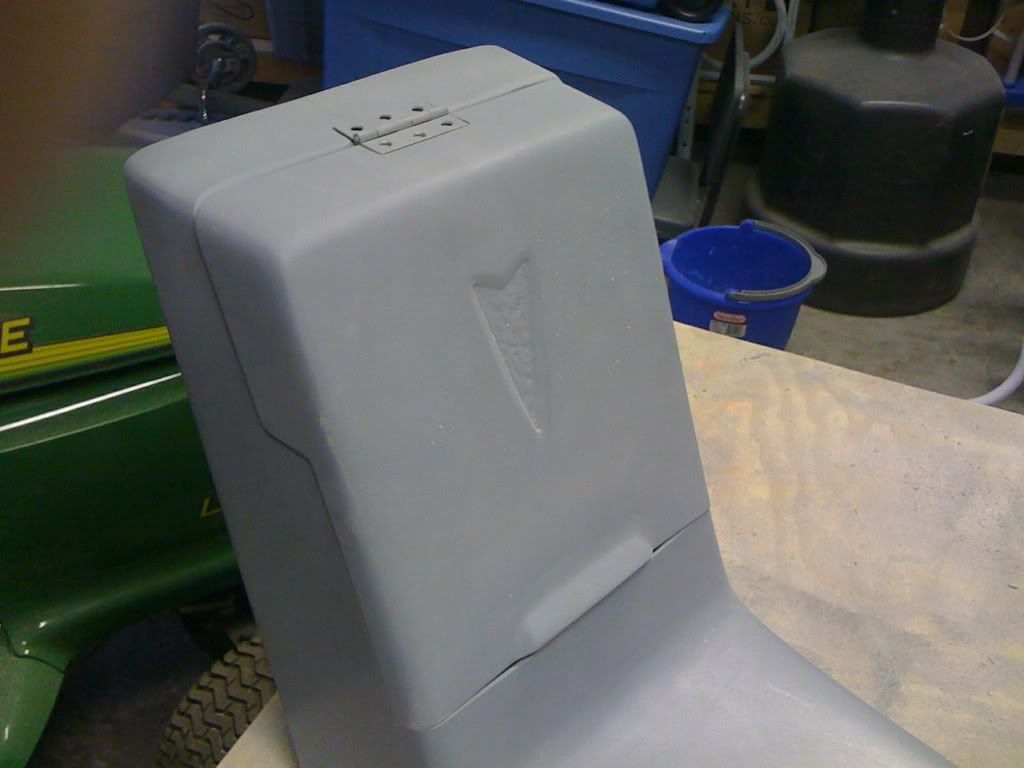
Here's the console with the lid resting on top with the new lift and the recessed area for the hinge. Again, if anybody can come up with a better hinge idea please let me know
A quick Idea for the front end of the arm rest. Cut 1 or 2 inches off the wood plug and mount it just inside the front edge of the shell. Hold it in place with a couple of wood screws from the bottom. cover it with wax paper. Then you can glass over the end say 3 of 4 layers of mat then round off the edges. Remove the plug and cut the hole for the cup holder. Just big enough for the cup holder to fit through. Then take your wood end plug and cut a hole in it for the cup holder. Mount the cupholder to the block of wood and then slide it in from behind. Put a couple wood screws back in the bottom to hold it then you can stategically lay in some glass to strengthen it. This way, the mount is hidden and solid and the only part you see in the face of the arm rest is the face of the cup holder.
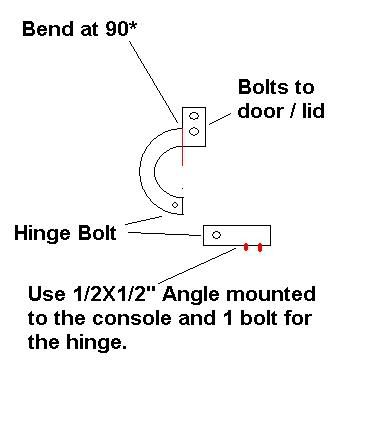
Another idea for you lid hinge. I was doing some work on the dash of my 47 Chevy truck this morning. I had to remove the glove box door. There are 2 "C" shaped hinges that allow the door to move slightly out/away from the face of the dash as you lower it. It allows for plenty of clearance between the edge of the door and the face of the dash. I know you have already set it the way you have it but you could change it. For the lid, you would not need a very heavy hinge(s).You could get a piece of aluminum flat bar - say 1/8" X 2" and some 1/2" X 1/2" aluminum angle - Lowes or Home Depot carries this stuff. Now I made a quick drawing of what I am thinking. You would have to do some measuring and design work for your application but I think it would work perfect. I still say it needs some kind of little gas cylinder lift. If you design it right, it would be hidden. A stealth hinge!
I might have found a hinge online that should do the trick. If it works I have a lot of filling to do on both the lid and console, but I'll be back on track.
Here's the console with the lid resting on top with the new lift and the recessed area for the hinge. Again, if anybody can come up with a better hinge idea please let me know
Wow... that's great stuff up until the hinge. I don't know how to help you... but is there a way to adapt a cabinet hinge into your setup?...
We've got 'hidden' hinges on all our cabinets... and from the outside, you cant tell what's keeping the cabinet door on. Now they do eat up some interior real estate, and they cost a lot more than a normal hinge... but I think that would be negligible for your console.
Look at 'European Hinges' here... they are similar to what I've got at home. Good luck.
You are absolutely correct! I don't know what I was thinking. The hinge idea I have in place is BAD... real BAD! I should be ashamed of myself for not sticking with the original idea. SHAME ON ME! I can do better than this. Thank you for knocking sense into me...
I did find a hinge that might work I'm waiting to hear back from the manufacturer for a price.
Again... thank you. I'm going to go drink to forget about this latest episode...
I think that hinge you found is going in the right direction. You'll find the right combo. That's what's so great about building your own. You can make any change you want. Now is not the time to be discouraged - forge on! I want to see what you do with the door panels.
Something to consider as the hinge goes. You might look into this kitchen cabinet type hinge.
The ones on our cabinets here are very similar and they work really good. You can't see them at all when the cabinets are closed. The only problem I can see with using them would be coming up with something sturdy enough to screw them to.
Hey Khw,
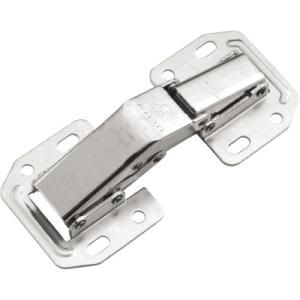
The hinge you have posted is actually in its full extended position. I was at the local home improvement store looking at that exact hinge. If the lid only went up 90 degrees that would work, but the idea is lift the lid as high as it would go. Also, the force exerted by that hinge would probably put too much stress on the fiberglass and ultimately break or fracture both pieces. I do appreciate the effort in looking. I think I found the hinge I need.
This hinge not only lifts but also pushes the lid away from the console before lifting. I think this is going to do the trick.
It was really cold last night so no forward progress.
[This message has been edited by Sofa King (edited 12-01-2009).]


 <---- did you buy Cliff a beer?