what resin you are using? I was reading some threads that say that the regular resin has a wax in it so that it will "cure" but you have to sand it between layers to remove the wax so the next layer will stick. I guess ther is a resin without the wax and the resin with the wax is what you use on the last layer? Are you using the 2 different resins?
Hey P,
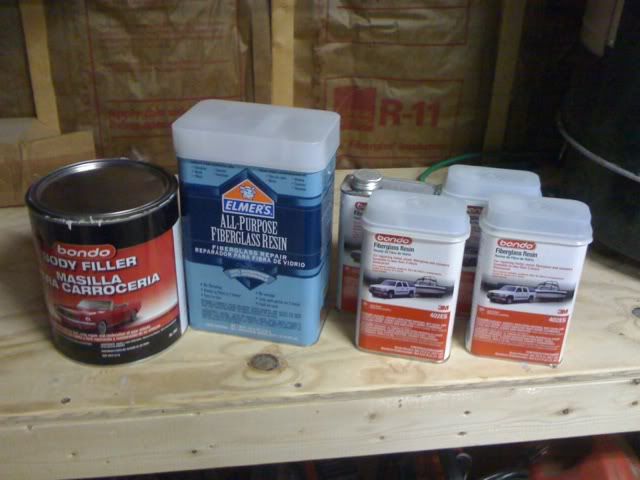
I am using 2 different resins. I have to be honest when I say I just grab supplies without reading... I am guilty about that but so far I've been successful so. Here is a pic of the supplies I'm using
Most of the supplies I'm using are the ones I found at the local (Huntsville, AL) Lowes Home Improvement store. When I depleated Lowes' supply I went to WalMart and grabbed whatever they had there. Elmer's and Bondo are fairly reputable so I didn't think there would be any real challenges.
quote
I am wondering why the filler would not "stick" in your pin holes. I wonder if it is related to the resin/wax thing. If your resin has wax in it and you are using polyester filler, it may not be "sticking" in the pin holes due to the film of wax?
When I sanded the console I made sure to sand most of the filler and primer down to the fiberglass (or where I thought it was smooth and level enough) before adding anymore new filler. To be honest, I'm not sure why the filler wasn't catching. I know there were a lot a little pits and air bubbles but it was only those areas where the filler wasn't doing its job. I'm hoping the resin solves the problem. I'm not going to use the Black & Decker sander - this will all be done by hand to ensure it is done right and to avoid any force that might have been used with the auto sander.
quote
I have my console pieces stripped down and ready to start - I just can't figure out what I need for supplies. I am not looking for a perfect surface when done as I am planning on doing some kind of textured coating (Lunitec) or something else. I may even take it across the border and get it covered in something. Iplan on glassing over and leaving the origianl pieces in the part for mounting and strength. But I have read a lot about making a mold and using relaease agents, gelcoat, etc to get a nice finish on the part. Maybe after I mess up this first one, I will have to give it a try.
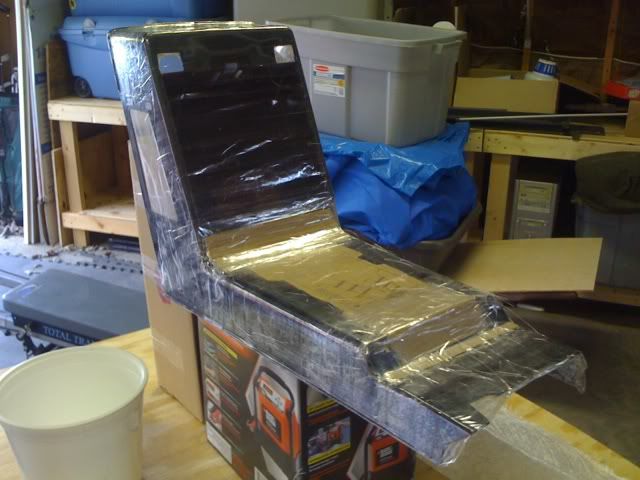
Revin has been really helpful throughout my build and has been giving me (us) all great advice. The only advice I can give it to tape off the parts you want to glass using the clear smooth packing tape making sure you get the smoothest surface and coverage possible - see below
I don't think you'll need to (should) leave the original piece in the mold - thats my opinion. I would try to save the piece in case you want to create something new or find yourself stuck during the build. There were some real challenges when I taped the console because I was covering areas that weren't otherwise there so I had to pull the tape tight and keep it smooth at the same time. I was fairly successful when I finally pulled the mold - but there lots of sanding and filling. But, if the surface of your console is going to be covered with material then no, you don't have to have it perfect, but the less work the better. I just saw your build post - looking good so far!
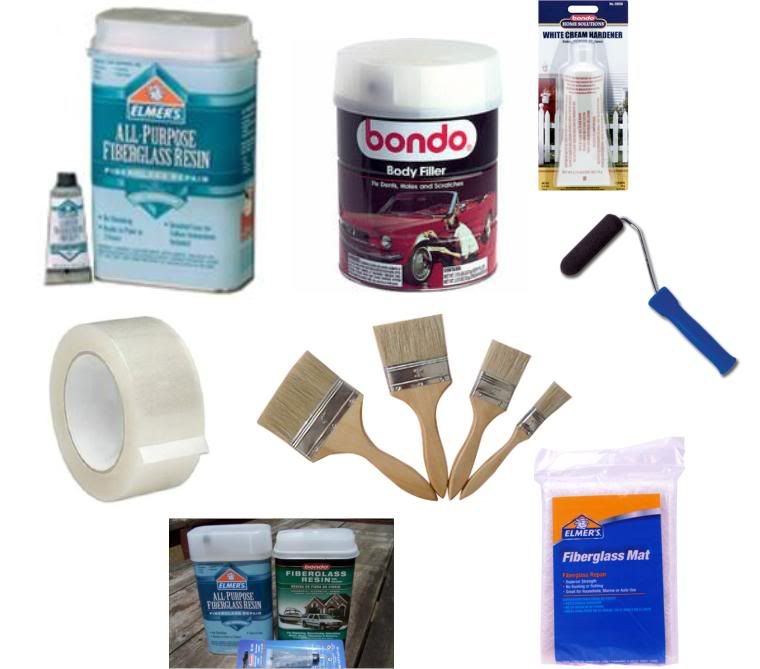
As far as supplies... I would get LOTS of crappy brushes, plastic mixing bucket, foam rollers, moving tape, wax paper (for creating flat panels), body filler, spreaders, cloth & mat fiberglass and of course resin and extra hardeners for both the filler & the resin. Mixing is really a learning process. The more you glass and body fill the better you'll get at how much hardener to mix and what the drying time is, etc...
Here's a pic of the basic supplies
If there is anything I can to help, just let me know.
G (SK)
[This message has been edited by Sofa King (edited 11-18-2009).]
I made my first attempt at the glass work today. At first I did not think I had the patience to do a good job of it. It's a learning process. I was amazed at how fast it dried. This thread was the push I needed to give it a shot. I read through a few threads last night and watched how to vids for hours prepping myself. Now that I have got a start, I won't quit. Thanks for the insperation. Pluses to you and Revin - he has some good tips.
My plan is to leave the plastic piece in the part. I will just put enough glass over it to make it uniform - cover all the nooks and cranny's so to speak then give it a coat of paint, textured coating, material. leather, etc. Not sure what I will cover it with yet. I have a connection across the border for upholstery work. Just not sure I want it to be covered in fabric or leather of vinyl. I'll have to get the shell finished then set it in the car and see what hits me.
Now get to work. I need to see more of your project - keeps me inspired to work on mine.......
I only had a little time to sand last night. I worked a 15 hour day but that didn't stop me from getting to what was most important. Family? Nope. Health? Nope. Fiero? Yup!
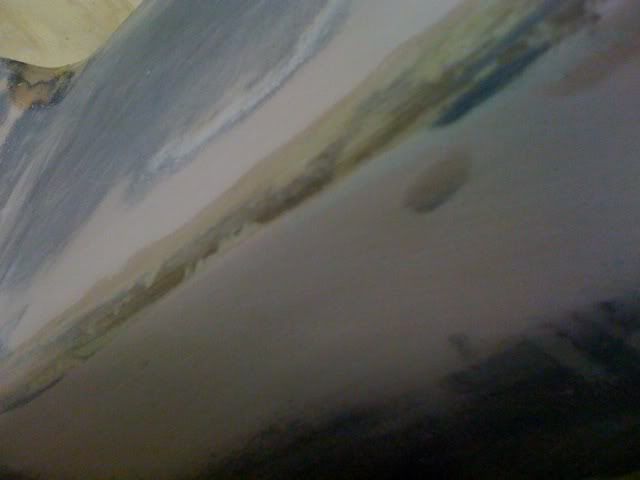
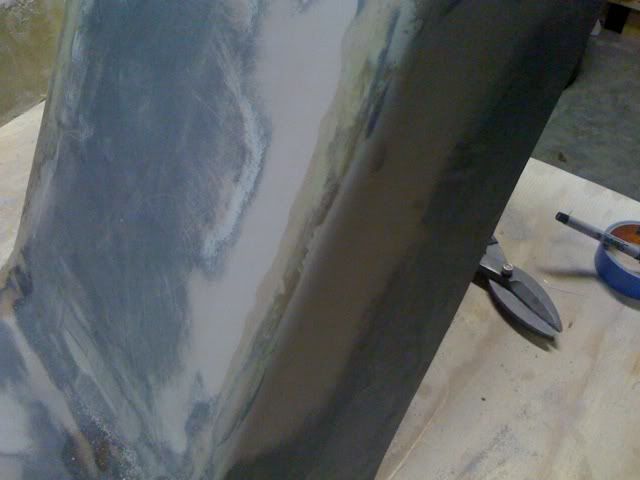
I spent about 15 minutes hand sanding one of the resined edges that was giving me the pitting problems and it was a total success. I took my time and sanded with even strokes. The results were near perfect. ZERO pits or holes. I still have a few other areas to hit. Baring any misfortune, this weekend "should" result in a near completed console minus hinge, paint, etc...
Check out the smooooothness
It doesn't seem like much, but when one area has been giving you issues its nice to be able to finally move forward
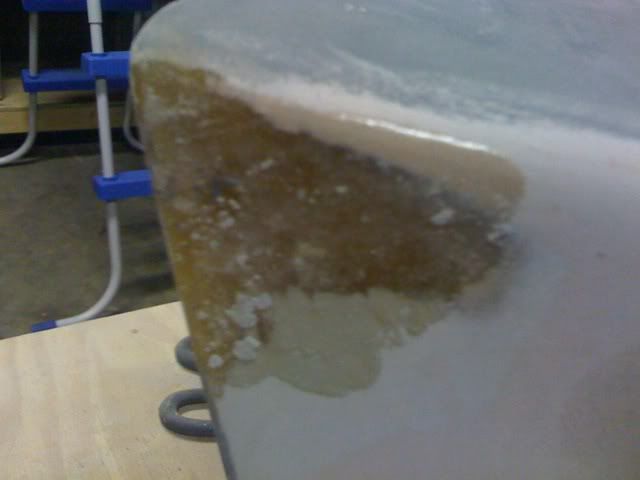
These are the other I need to sand next - hopefully tonight
These final steps will all be done by hand - no more Black & Decker sander to speed through the process - except on the 'glove box" plug. I still need to sand that piece.
I made my first attempt at the glass work today. At first I did not think I had the patience to do a good job of it. It's a learning process. I was amazed at how fast it dried. This thread was the push I needed to give it a shot. I read through a few threads last night and watched how to vids for hours prepping myself. Now that I have got a start, I won't quit. Thanks for the insperation. Pluses to you and Revin - he has some good tips.
My plan is to leave the plastic piece in the part. I will just put enough glass over it to make it uniform - cover all the nooks and cranny's so to speak then give it a coat of paint, textured coating, material. leather, etc. Not sure what I will cover it with yet. I have a connection across the border for upholstery work. Just not sure I want it to be covered in fabric or leather of vinyl. I'll have to get the shell finished then set it in the car and see what hits me.
Now get to work. I need to see more of your project - keeps me inspired to work on mine.......
Pat
Hey Pat,
Thank you so much for the kind words. That really means a lot and makes me want to jump out to the garage and start working. I think it's wonderful that we all inspire one another to press forward, dive into the unknown and have those opportunities to stand back and say "hey... I did that...". Whether its a simple sanding job or your first fiberglass project. You did it. And that's the exciting part. Revin has been a big help to me as well. Sometimes the simpliest of advice can change the direction of a project. For me... rollers and wax paper. I also have to thank Nolan and Archie - two of the biggest influences and inspirations for me.
OK... enough gushy stuff... LOL I'm really interested to see how your project is going to turn out. I'm headed to your post now. If you want more inspiration and ideas, go to Archies Miura build thread - especially page 8 forward - a lot of technical info and great pics on the Miura interior build! This should help you decide how to proceed with the interior material.
G (SK)
[This message has been edited by Sofa King (edited 11-19-2009).]
On my projects and car I stay away from the Home Depot fiberglass supplies and use either marine or autobody products, reason is they are of commercial grade and not the DIY type and it is more cost effective,have you ever tried to use a DA to do sanding it comes out way better than sanding by hand.
[This message has been edited by Boogaloo (edited 11-19-2009).]
Don't you just hate when you have a vision of what you want to do and then in mid stream something makes you change your mind? I am rethinking my plan. I tried to use the "great stuff" to fill in some voids and although it turned out OK and I think it will work, I did not like it so I tore it all out. I was wathing some youtube vids last night and went back through this thread. I am going to make some "panels" to cover/fill the areas in the console that need be. Also I was looking at the A/C suround piece and there needs to be a "lip" coming out from the face - so that trim bezel will fit flush or a little recessed. With out the Vinyl cover, there are just 4 or 5 "fingers" protruding from the face. I thought that I would make a few panels that I could glue to the plastic part that would protrude. I will build a "rounded" lip in these panels to form a nice opening for the trim plate to fit into. It's more work but I think it will be worth the trouble and will make it look better once finished.
I am no artist but I tired to draw some ideas I had today - got more frustrated trying to draw it out so I gave up on the drawing. I had big plans to get something done today but by the time I got off work and ran around getting supplies, it started getting dark. I have the next 3 days to get something done so I hope to make big progress this weekend. Like you say. Not family, not health but all Fiero.....It's a disease.....
Don't you just hate when you have a vision of what you want to do and then in mid stream something makes you change your mind?
I changed my mind for my console when I was at the junk yard after finding the center armrest/glovebox from the Grand Prix. After hacking the Fiero console up trying to make the Grand Prix idea work, I wound up changing my mind again back to the original design. It's frustrating. I can't imagine how these auto designers do it...
quote
I am going to make some "panels" to cover/fill the areas in the console that need be.
Revin pointed me in the right direction - Lay out some wax paper on a smooth flat surface, lay your pre-measured fiberglass cloth on the waxpaper and then spread the resin - as you already know how. You should get a nice smooth panel to work with to cover up the glovebox hole. Trim the piece a bit larger than the opening, spread some resin on the edges of the console and lay the panel on top. Once that dries, add glass to the back of the panel that meets the console to help further secure it in place. Once everything dries go back to the sander and smooth the edges on the front side of the panel remembering to use higher "grits" of paper to get a smooth finish. If all goes well, you will have sealed that hole perfectly.
quote
Also I was looking at the A/C suround piece and there needs to be a "lip" coming out from the face - so that trim bezel will fit flush or a little recessed. With out the Vinyl cover, there are just 4 or 5 "fingers" protruding from the face. I thought that I would make a few panels that I could glue to the plastic part that would protrude. I will build a "rounded" lip in these panels to form a nice opening for the trim plate to fit into. It's more work but I think it will be worth the trouble and will make it look better once finished.
I did work another long day yesterday... but I have to admit - I am totally confused. Can you take pics to help explain?
quote
I am no artist but I tired to draw some ideas I had today - got more frustrated trying to draw it out so I gave up on the drawing. I had big plans to get something done today but by the time I got off work and ran around getting supplies, it started getting dark. I have the next 3 days to get something done so I hope to make big progress this weekend. Like you say. Not family, not health but all Fiero.....It's a disease.....
Not to worry. Send me your ideas. Maybe I can toss together a quick sketch for you.
I got nothing done last night. I had to work a Career Fair all day yesterday / last night and I'm beat. BUT... when I get home.. oh yeah... full speed ahead!
What year Bird is that? The inner door handle looks to be the same as the Fiero. That map pocket/cup holder may be the ticket too.
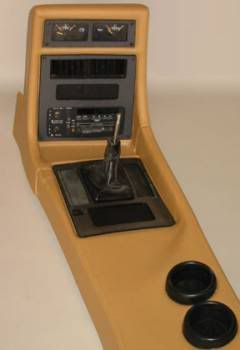
Here's a pic of something I am think of for my console: I am thinking of "angling" the radio, ac vent, ac control toward the driver slightly and expanding the passenger side "wall" a little.
But I am not sure it really "fits" with the rest of the stock interior? Probably why I am not a automotive designer. Just wondering if the console built this way would look "out of place"?
I keep going back to my plan of a simple clean, smooth, seemless "stock" console. I just hate the warping vinyl and "padded" look of the original pieces.
I like the idea of twisting the radio and cluster toward the driver. Idea: instead of twisting the radio on the left side verticle axis which pushes the radio and cluster toward the passenger - what if you twisted the radio and cluster from the center of the radio? That way you are widening both sides of the console but only half as much?
Make sense?
[This message has been edited by Sofa King (edited 11-20-2009).]
I like the idea of twisting the radio and cluster toward the driver. Idea: instead of twisting the radio on the left side verticle axis which pushes the radio and cluster toward the passenger - what if you twisted the radio and cluster from the center of the radio? That way you are widening both sides of the console but only half as much?
Make sense?
Yes, Makes perfect sense. How come you did not warn me about the Fiberglass dust creating an itch......lol. I learned another fiberglass lesson today. Wear a long sleeve shirt and sit in front of a fan to keep the dust blowing away from you.....
I'll be posting some more progress in my thread later on. I was hating this glass work the other day but you are right - once you get to see some pregress and how easy it is to work with once it's dry, I am having a ball.....Except for the itching. I saw a You tube video that suggests covering your arms with baby powder - keeps the glass from getting in your pores..... I'll try that next.
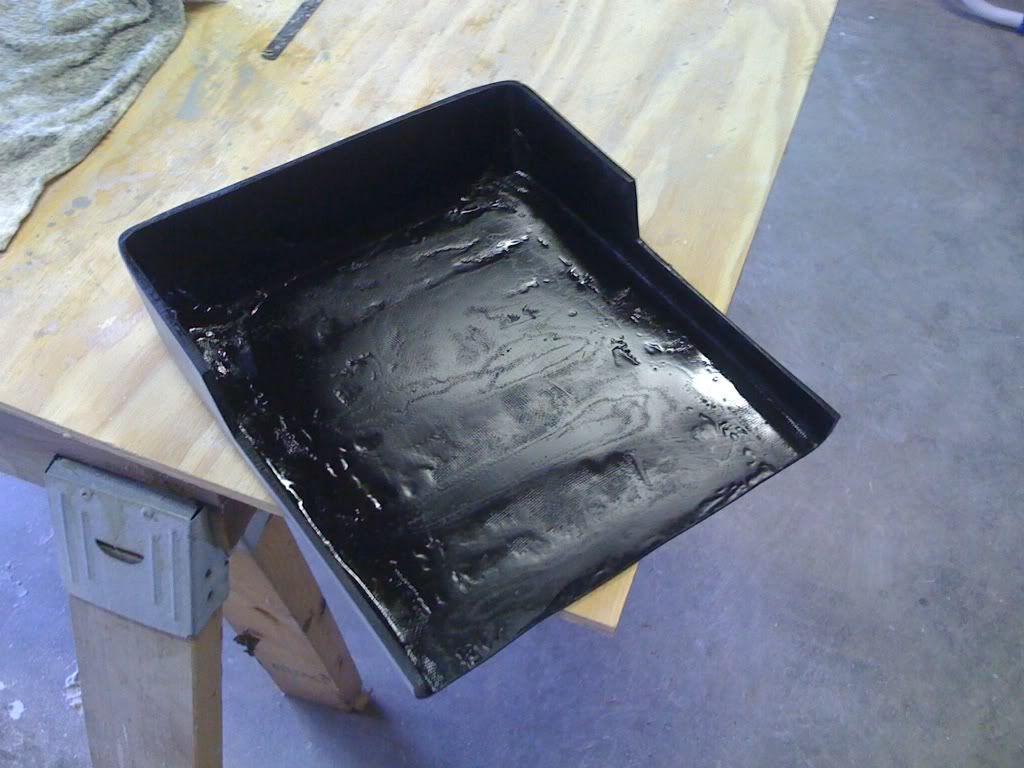
MAJOR PROGRESS!!!!! I'm not gonna bore you with any long winded diatribes, check out the pics!!!!!
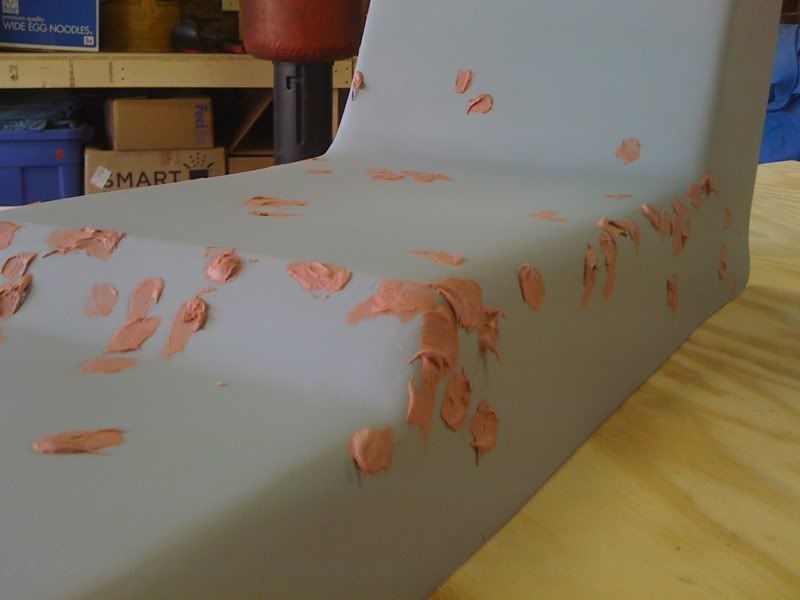
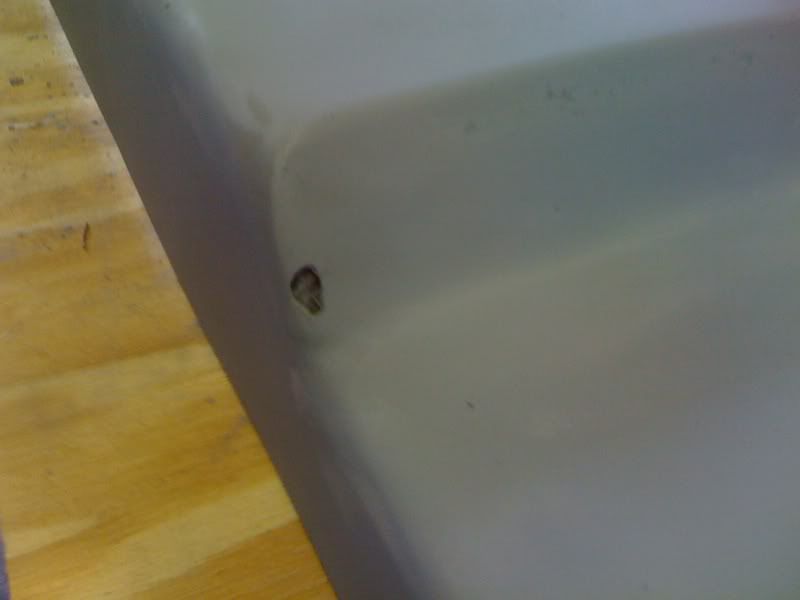
After sanding I still found lots of holes
When all the sanding was done an air bubble popped up but no biggie - I moved forward and pressed on!
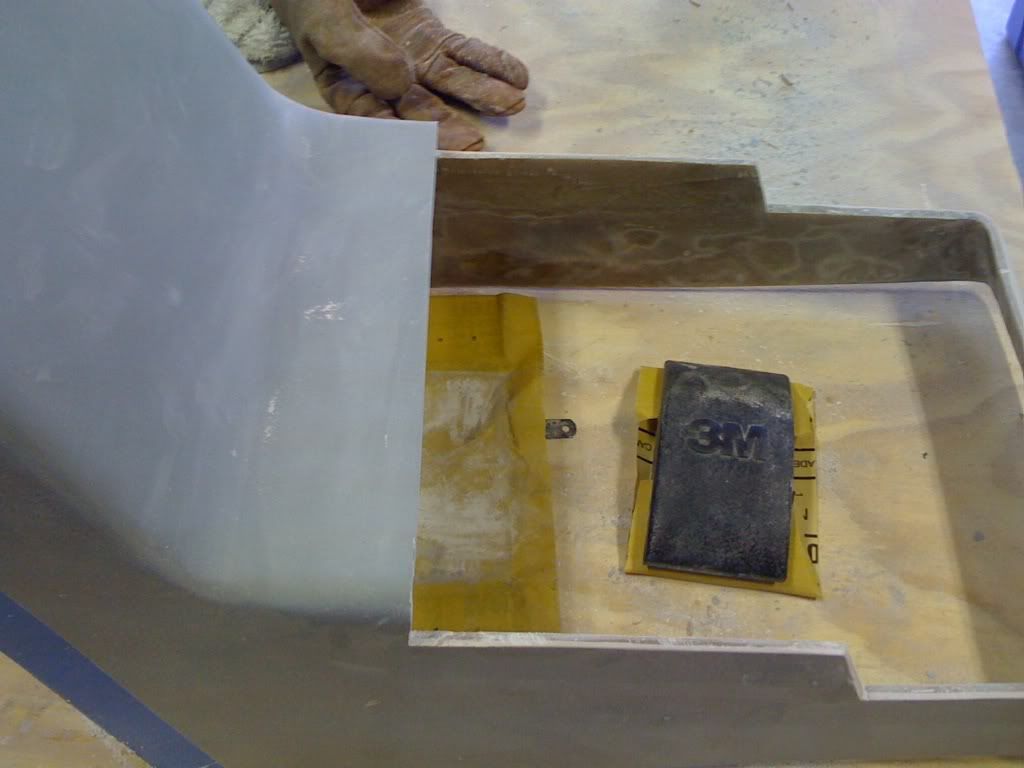
I began the taping process to prep for the lid to be cut. And I sanded down each of the bottom sides so they would line up with one another and I could measure in preparation for the lid
This was it... all the work I had done and accomplished led up to this point - DON'T F%$@ IT UP!!!!
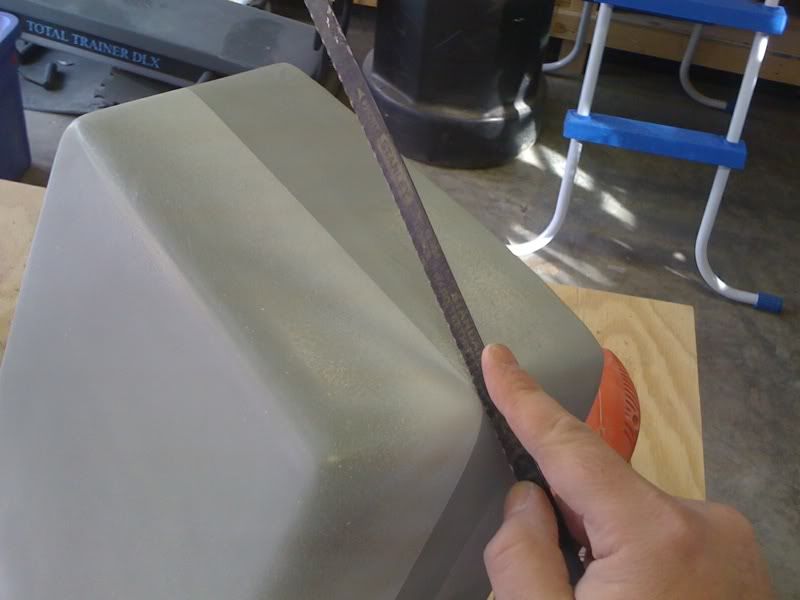
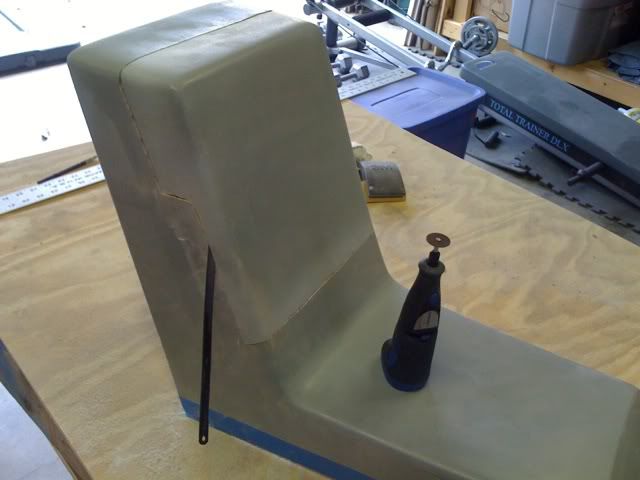
The top has been cut
The tools of the trade and the last couple of inches before the lid was cut from the console. And yes, the "Total Trainer" you see in the background has been collecting dust for some time... not just from this project
And the moment of truth!
YIPEE
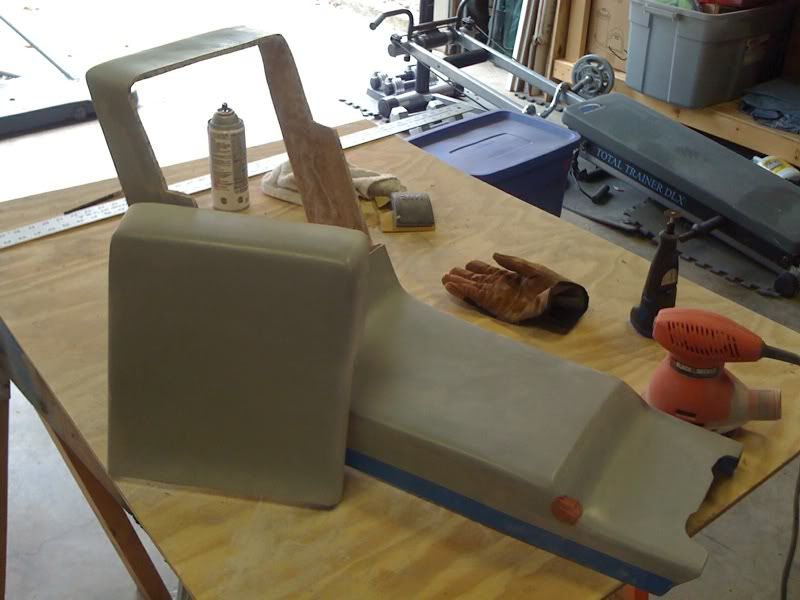
Another - hey Pat: note the long sleeves... just kidding, buddy
And another
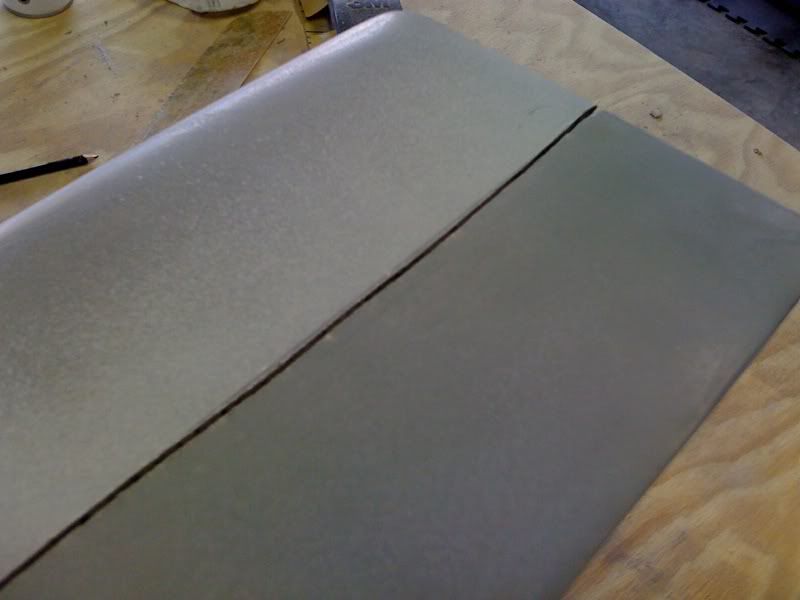
One more. I had to move the back of the lid forward a bit so there was still strength in the console.
Look at that straight line! ok... I cheated... I did sand it just a bit after it was cut
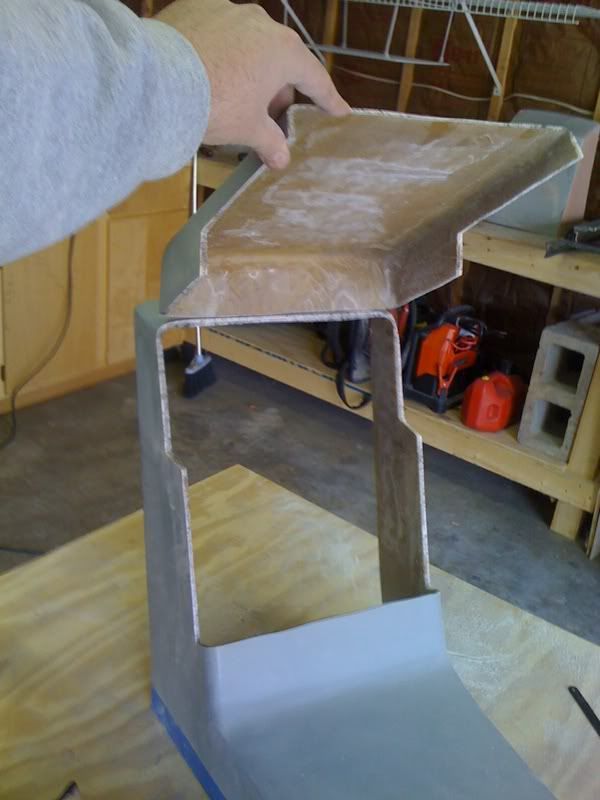
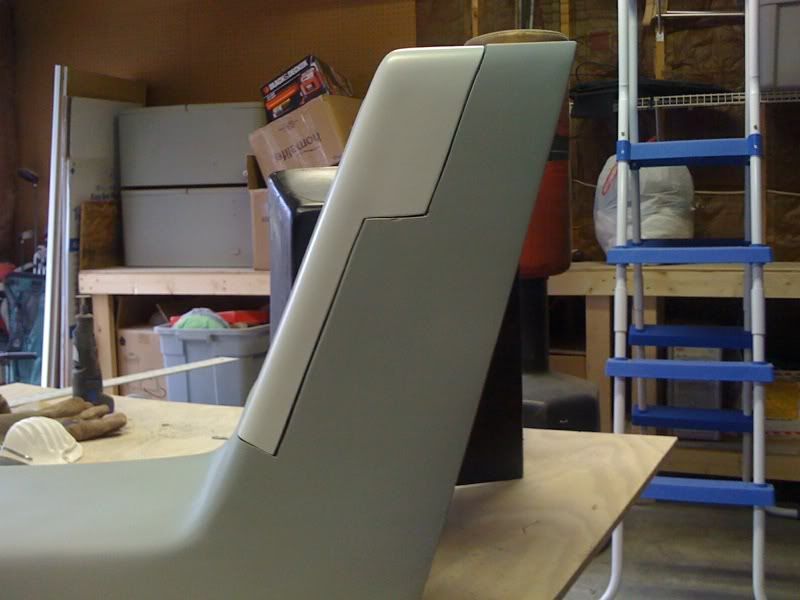
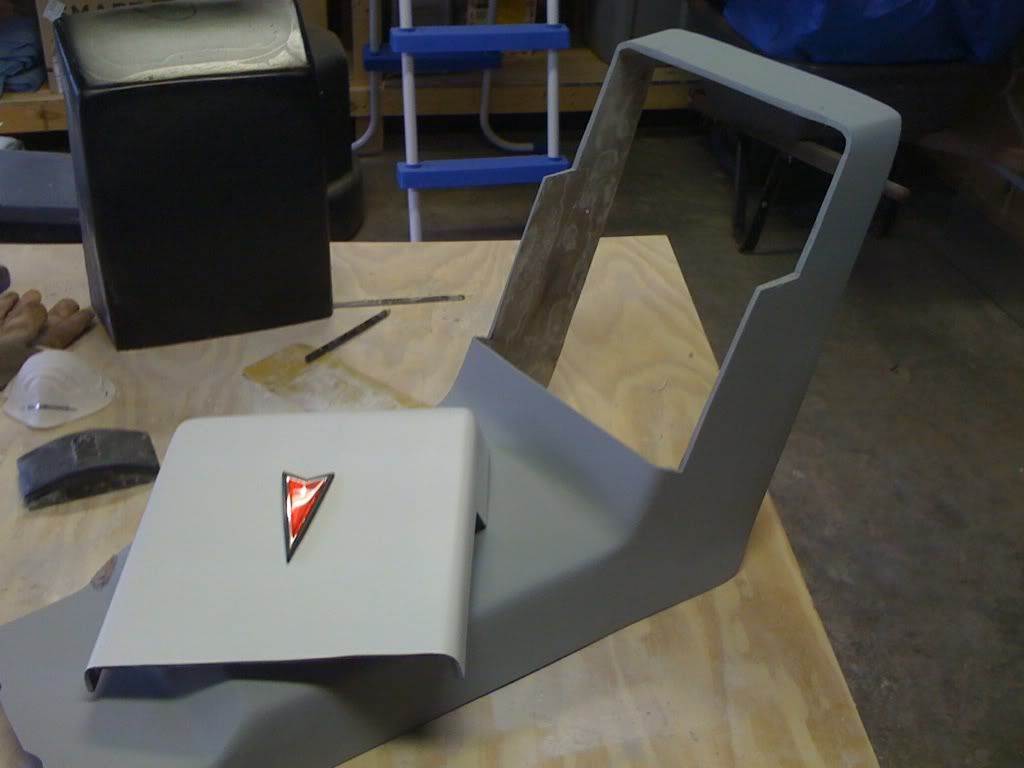
This is a shot of the "glove box" piece attached without the lid. I did position the lid while the glove box was in place and there is still more sanding to do before the lid and glovebox both fit together.
Side view - still lots of sanding to do. I want the edges to be almost perfect
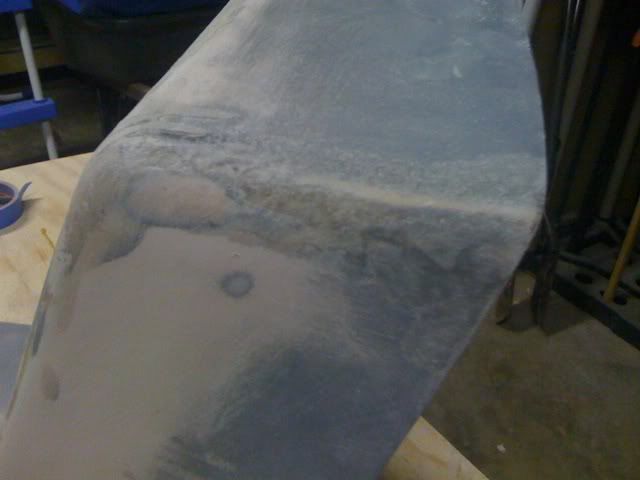
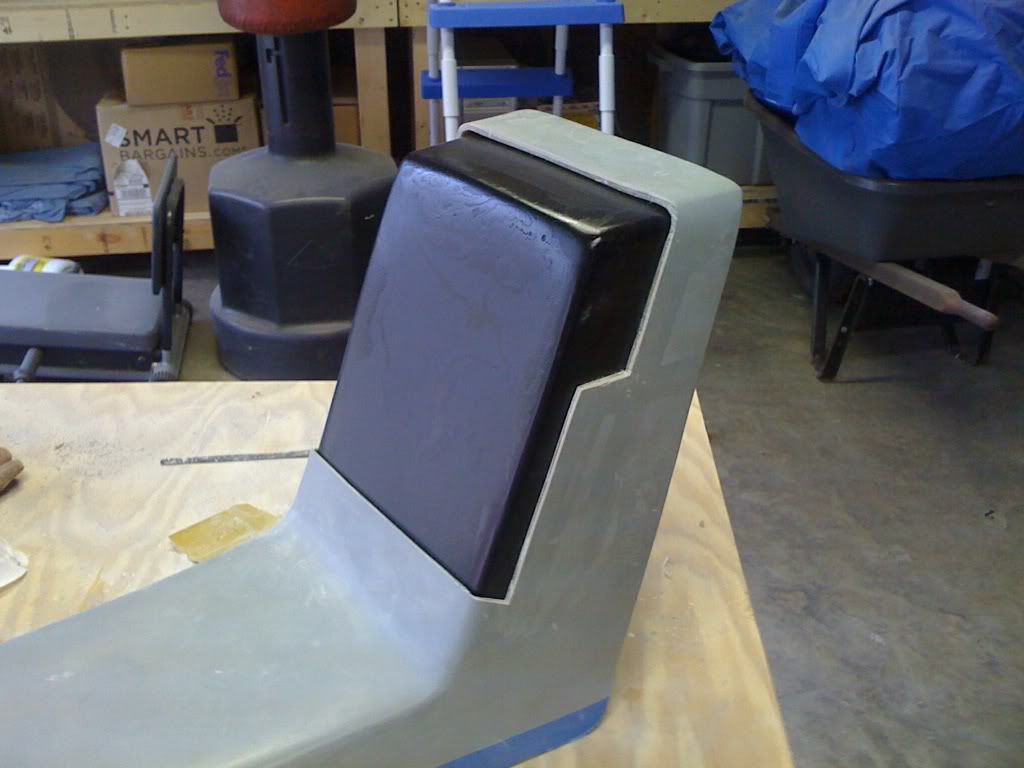
Enough "happy happy joy joys" - back to sanding and prepping for primer & paint. The black circles show the high marks where the "glove box" is hitting
I think I'm going to lay dark grey or black "felt" on the inside of the lid and on the sides of the glove box - this pic shows the lid with black paint after 30 min of sanding - I hate sanding. I really really hate it
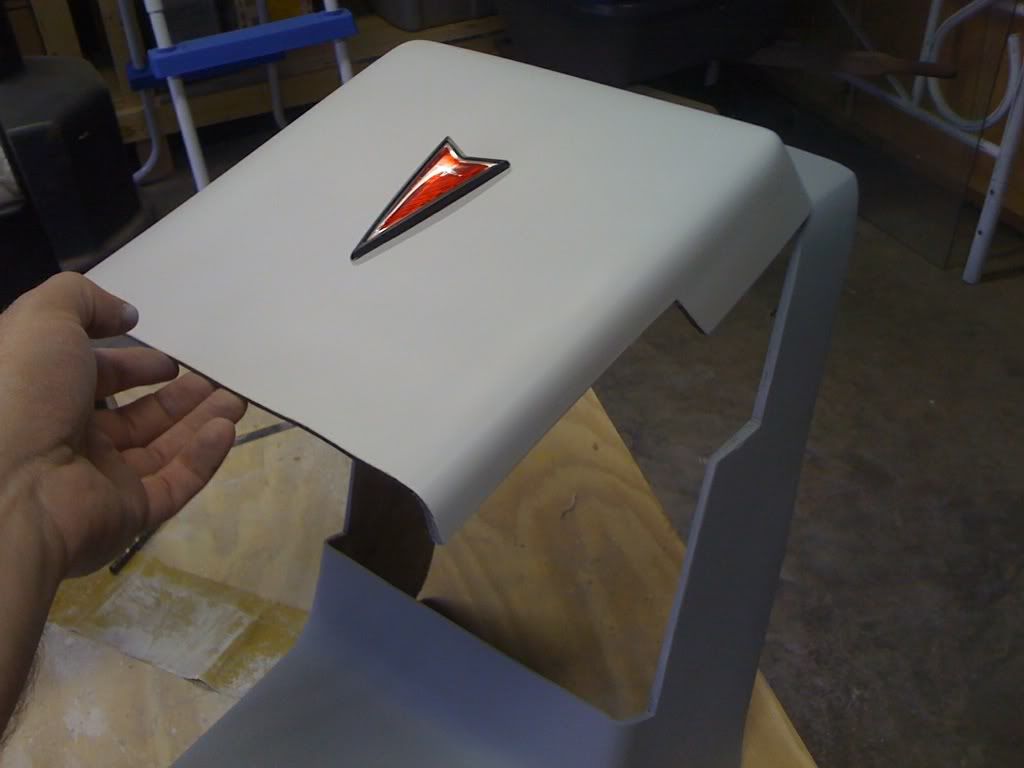
Pic of the lid up with Pontiac Logo. I think a piano style hinge is the way to go. All the hinges I have will not work.
Lid taking a rest
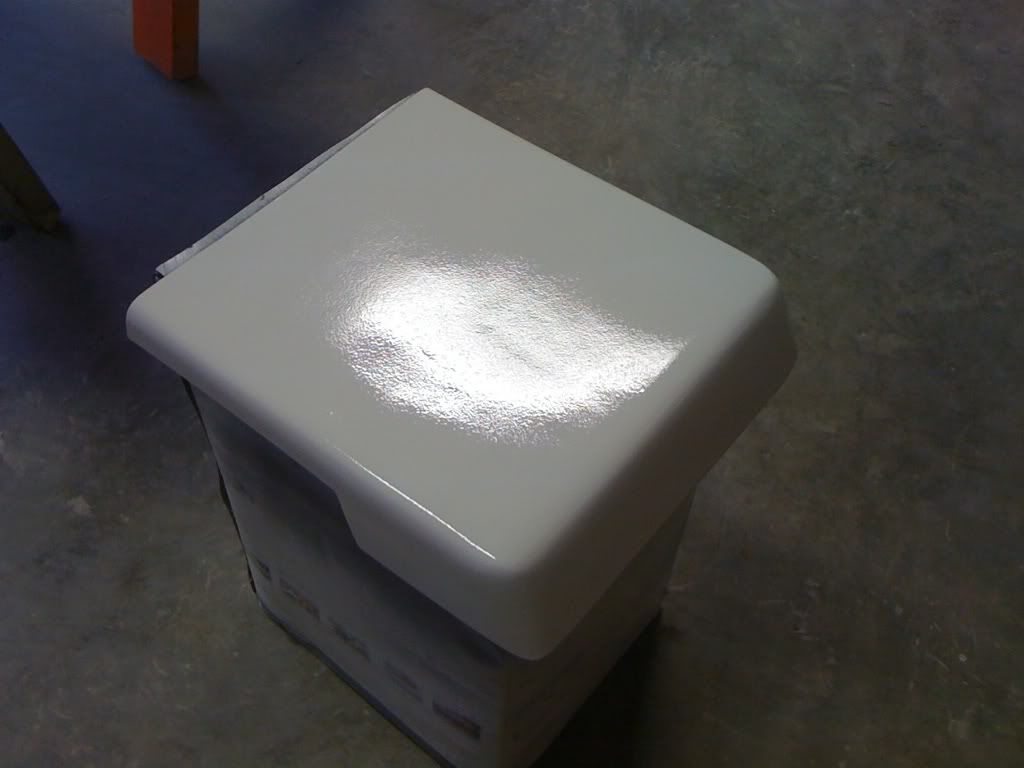
I've been wet sanding in between layers of the laquer paint with 800 grit paper. Check out that shine! I actually enjoy wet sanding. That's fun. The other? Nope.
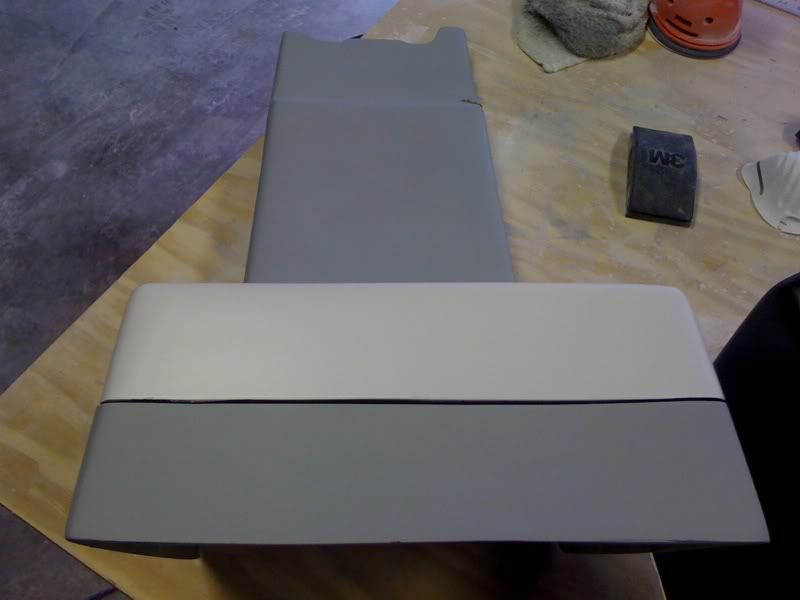
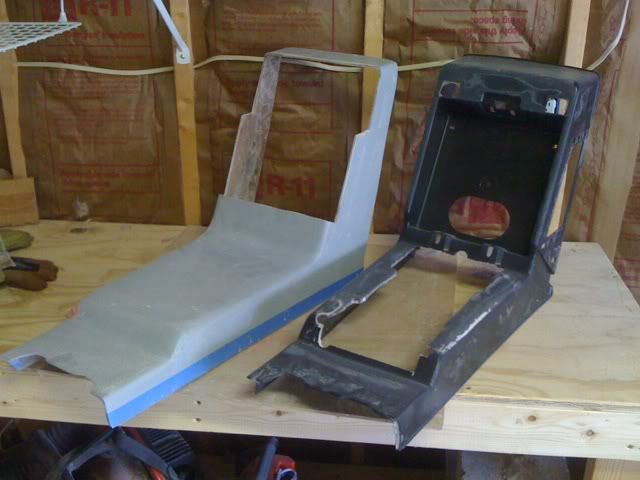
New console next to her sister aka Before & After
It's supposed to rain tomorrow so I wont really be able to paint. Still no cup holder so I can't move forward on that... I'll work on the edges and go buy some felt liner. Also, I'm not too thrilled with the glovebox. I might just add a back panel and a lower panel. I'll probably use the area for CDs. So now its off to find a good CD holder. I'm still unsure whether to paint the console the Fiero grey color, have it covered in a leather or vinyl material or go with the Lunitec leather like paint system. Decisions decisions. What do you guys think?
That's it for now. I'm really happy with the progress so far!
[This message has been edited by Sofa King (edited 11-21-2009).]
How come you did not warn me about the Fiberglass dust creating an itch......lol. I learned another fiberglass lesson today. Wear a long sleeve shirt and sit in front of a fan to keep the dust blowing away from you...
Oh yeah... LOL ummm Be sure to wear long sleeves and have a fan blowing?
[This message has been edited by Sofa King (edited 11-21-2009).]
UGH... I have to stop painting... DANG IT It just dawned on me... I need to create something to lift the lid. I was thinking of cutting an area out from the bottom of the lid and creating a small lip where the fingers catch. What do you guys think?
See what happens when you get excited?
[This message has been edited by Sofa King (edited 11-21-2009).]
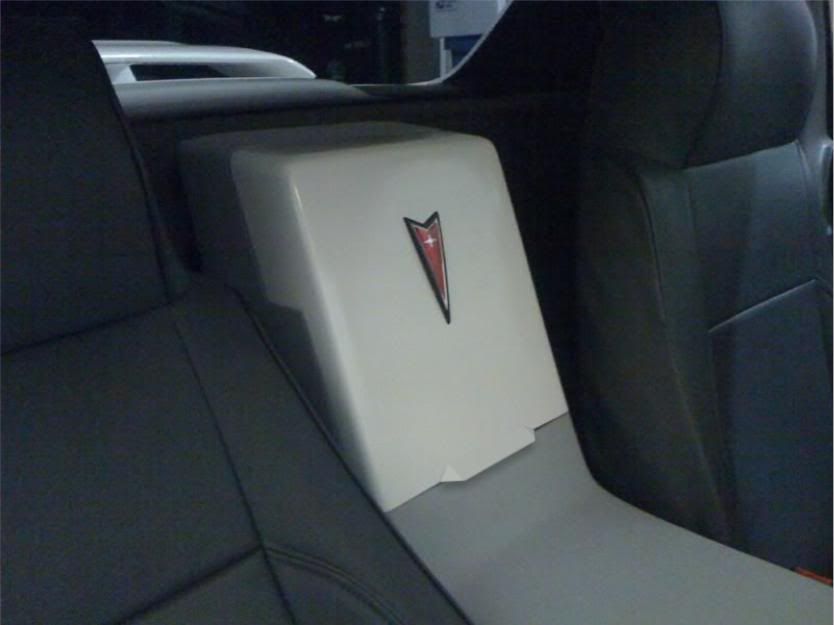
I wanted to see what the console would look like in the car - check it out
Through the windshield
What do you think about the lid opening this way? It could lay on the armrest... My god... I could have more cup holders than a MiniVan
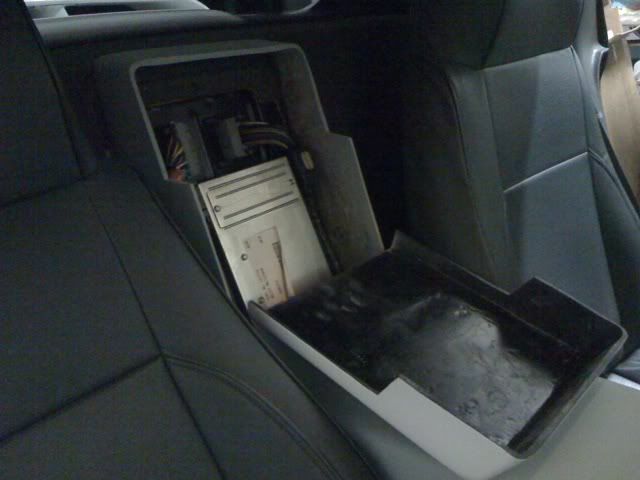
Without the lid - easy access to the ECM. Maybe a glove box isn't really needed? Now that the lid is removed, I can see there really isn't a whole lot of room back there. I would like to utilize the space. But for what?
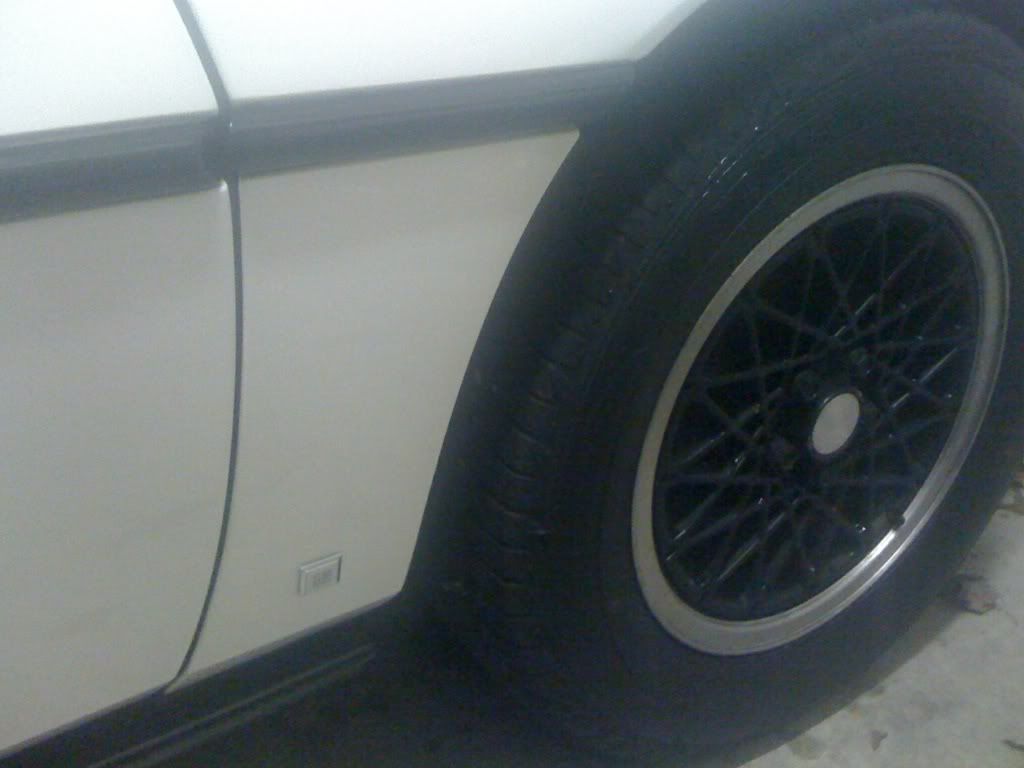
OH! I forgot to mention... I went to the local Chevrolet dealership and got a couple of the chrome GM Logos from the parts department. It took me a while to figure out the best spot for them. I came up with this - bad photo, sorry
Lower portion of the front fender
That's it for tonight! Everybody have a great evening & weekend
[This message has been edited by Sofa King (edited 11-21-2009).]
Holly Molly. You got a lot done today! That looks grea. Really coming together. Here's an idea for the glove box. It's more work but maybe worth it. Build a "tray" that clips in the space that will hold well - maps, registration, insurance, etc. Then when tyou need access to the ECM, it just pulls out?
I had big plans today too but did not get any glass work done.....spent the day looking for a long sleeve shirt....Just kidding! I worked this morning and cleaned the shop this afternoon. Maybe tomorrow I can get something done.
One more update for the evening... What do you think about the lid opening this way? It could lay on the armrest... My god... I could have more cup holders than a MiniVan
That's it for tonight! Everybody have a great evening & weekend
Definitely have it go down like in this photo...awesome job! As far as covering it I think it would look great in the same material the OEM has, just my two cents.
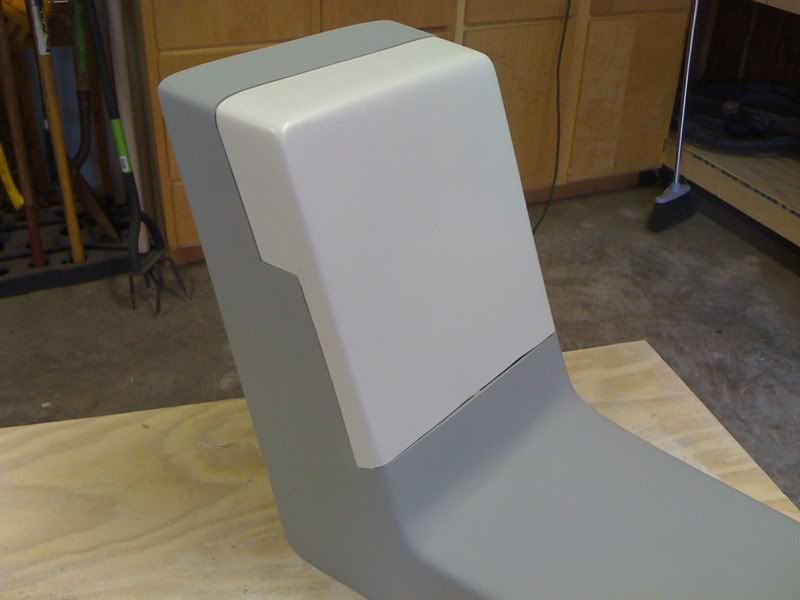
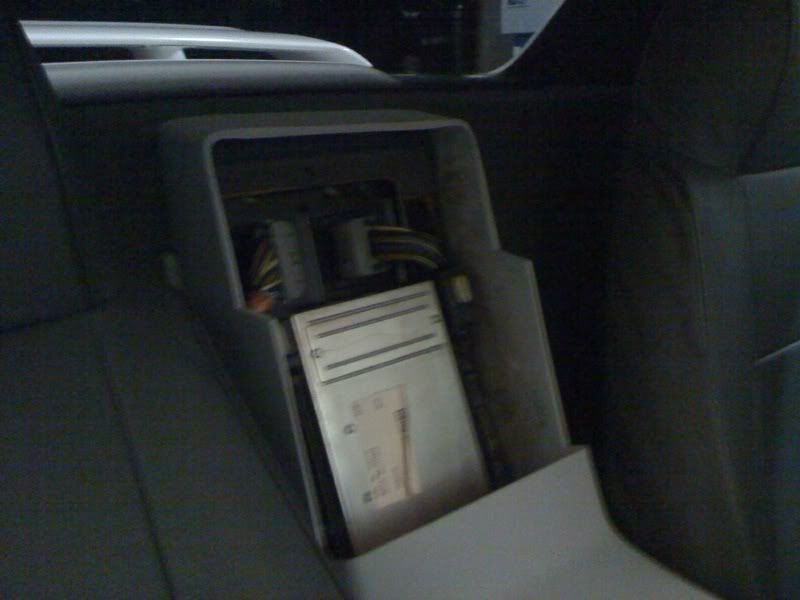
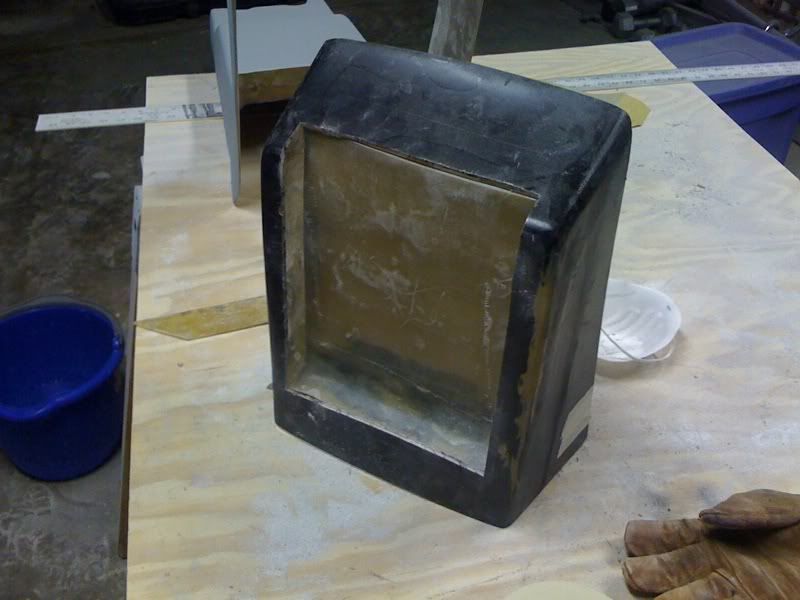
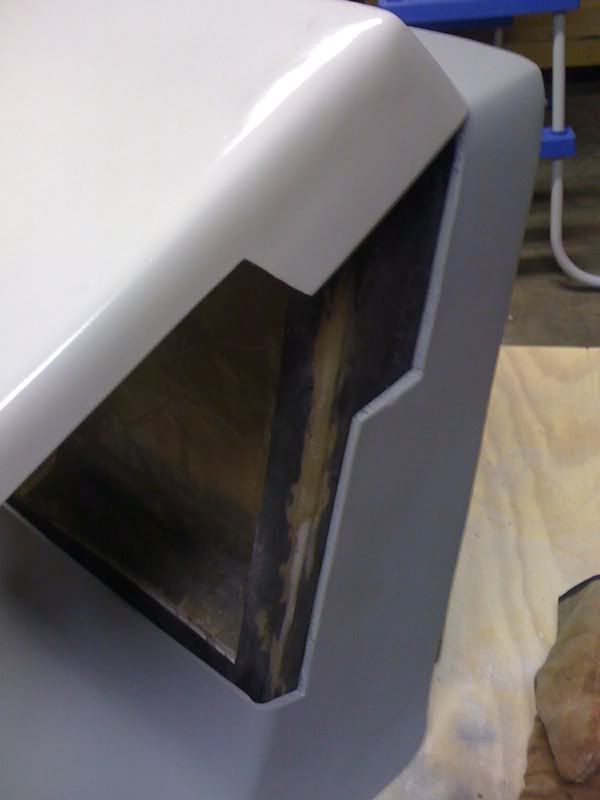
I cut the hole in the glove box this morning. I took the piece that was cut, flipped it over and turned it around to see if I could utilize the piece instead of making a new one. The depth is really shallow and I'll probably just fabricate the inside with nice flat panels
Cut & mocked up
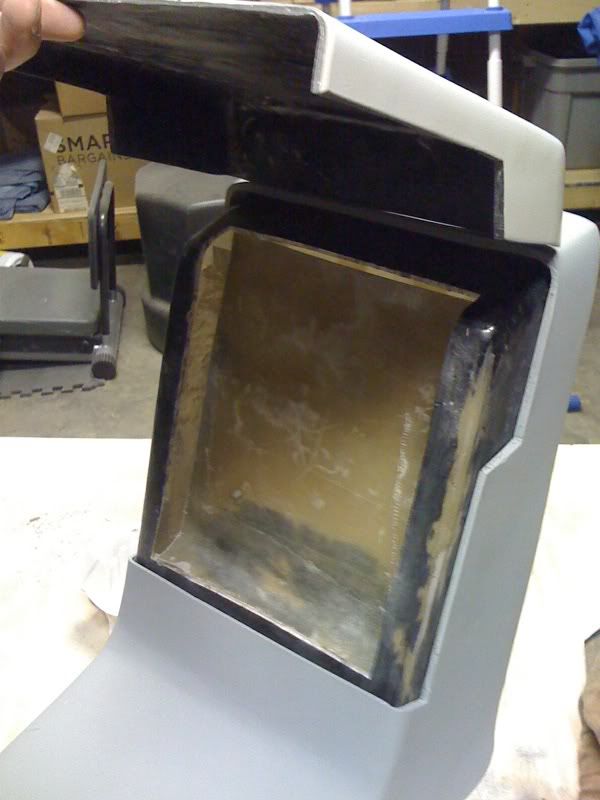
With lid
These images should give you a better understanding why I created the glove box piece. I'm still bouncing ideas in my head
Just a question/suggestion, and I know that what you posted was a mock-up, so you may already be planning this. At the bottom of the glove box section are you planning to create sort of a pocket to keep things that you put in it from sliding out? It wouldn't have to be big, maybe extended down another inch, or the surface the glove box doors seats against extendd up a inch along the bottom. The way the mock-up looks now, if you placed some papers in there (insurance card, registraion) they would slide out when it was opened. You might already have one there and it's just hard to see in the photos.
As for covering it. I wonder if there is a spray that mimics vynil. I don't think you will have the clearance between the glove box door and frame to stretch vynil or some other covering around it and it still close. I'd check into painted on finishes like that. For example, me celphone has a rubberized coating on it for better grip. Something like that maybe? Something along the lines of bedliner coating but not as thick and in different colors.
[This message has been edited by Khw (edited 11-22-2009).]
... are you planning to create sort of a pocket to keep things that you put in it from sliding out? It wouldn't have to be big, maybe extended down another inch, or the surface the glove box doors seats against extendd up a inch along the bottom. The way the mock-up looks now, if you placed some papers in there (insurance card, registraion) they would slide out when it was opened. You might already have one there and it's just hard to see in the photos.
I'm still toying with the glovebox design. I know that whatever I do I will have to create a pocket to keep things not only from shifting but from also falling out down in the actual console itself. The other idea was to create a tray table of sorts if I had the lid open down toward the front of the car. Lot's of ideas going through my head. Any and all input you guys offer, as always, is appreciated and is taken very seriously.
quote
... As for covering it. I wonder if there is a spray that mimics vynil.
Khw - Check this out!
www.lunitec.de - I stumbled across this product several months ago.
Katatak (aka Pat) and I are considering placing a few orders from Germany. Unfortunately, it's really expensive due to the currency rate but well worth the investment when you see the results. I was at a crafts store the other day and I did find a "crackle spray paint system" from Valspar. I don't think it would work as well as the Lunitec System.
I did however get some felt fabric from the local fabric store. Once everything is finished I'm going to line the inside of the glove box and lid with the felt to hide the fiberglass and give it a finished look.
More pics coming
[This message has been edited by Sofa King (edited 11-23-2009).]
Looking good Greg. All that hard work is paying off!
Pat
Hey P,
Thanks so much. This fiberglass project has been so much fun! I kick myself in the butt for not starting earlier. Once the center console is finished I have some major plans for the door panels. I might post a pic of my idea... And yes, it has been work, but tons of fun.
If there is ANYBODY out there who thinks they can't fiberglass - they're wrong. If I can do it - you can do it. The only way you're going to learn is to just jump in. Will it turn out the way you wanted? Who knows? But just do it.
I was just on Katatak's thread when I had an idea... here's what I said:
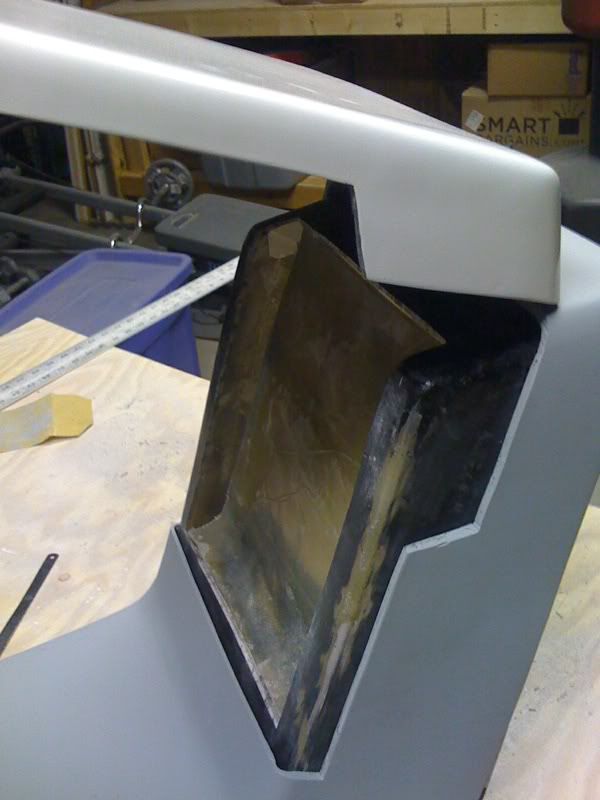
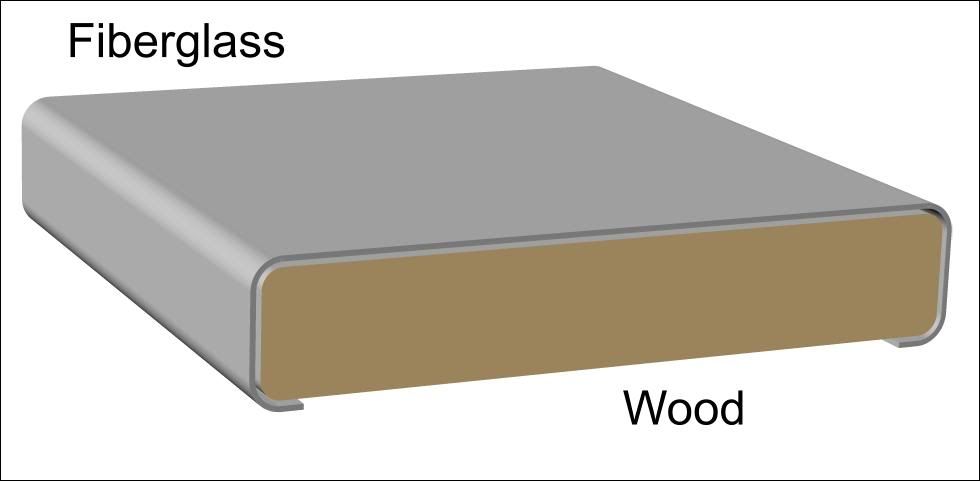
My idea for the armrest still remains the same but I think I'm going to create the armrest from wood first. I'm going to get a 2" x 8" and maybe a 1" or 1/2" panel and glue them together (the height will depend on the cup holder). I'll then cut the basic shape of the armrest to match the console and then route the edges with a roundover bit . I'll sand down smooth, cover with waxpaper and then take a mold of the armrest.
If I plan this right... I can wrap the piece of wood all the way around creating a "sleeve" where, once the glass dries, I should be able to slide the fiberglass piece off because the shape of the console tapers at one end. This shape "should" give me the edges I want and have the bottom edges curl under the armrest where I can then attach the armrest through the top of the console using bolts and lock nuts.
Does the qualify me as a "Real Man of Genius"?
[This message has been edited by Sofa King (edited 11-23-2009).]
That's the ticket! I beat they would have something like this in a craft store.
I have searched far and wide and the closest I can find to a spray paint similar to the Lunitec system is the Valspar system. But the crackle is too far apart to achieve the look we're going for. The other option is to just paint the console the interior grey color, seal with laquer and then buff to a high gloss.
I was just on Katatak's thread when I had an idea... here's what I said:
My idea for the armrest still remains the same but I think I'm going to create the armrest from wood first. I'm going to get a 2" x 8" and maybe a 1" or 1/2" panel and glue them together (the height will depend on the cup holder). I'll then cut the basic shape of the armrest to match the console and then route the edges with a roundover bit . I'll sand down smooth, cover with waxpaper and then take a mold of the armrest.
If I plan this right... I can wrap the piece of wood all the way around creating a "sleeve" where, once the glass dried, I should be able to slide the fiberglass piece off because the shape of the console tapers at one end. This shape "should" give me the edges I want and have the bottom edges curl under the armrest where I can then attach the armrest through the top of the console using bolts and lock nuts.
Does the qualify me as a "Real Man of Genius"?
that will work! I got an idea for ya, make that top part a sliding cover. add a matching slot for a "slider" section on the console, then add your cup holder under that. when you need cup holders, just slide that piece forward to access the cup holders.
add a matching slot for a "slider" section on the console, then add your cup holder under that
That's an excellent idea! I already ordered the retractable dual pop cup holders. I'm hoping they will be here today. If I can't make the retractable cup holder idea work, I'm definately looking into that design.
I had some free time and I thought I would show the idea I had for the lid - if I decide to have it lift from the bottom. Same idea if it tilted from the top.
[This message has been edited by Sofa King (edited 11-23-2009).]
What do you think about the lid opening this way? It could lay on the armrest... My god... I could have more cup holders than a MiniVan
Great thread....
I'm coming into it late, but back on Page one I was asking myself why you didn't hinge the door the other way. Unless you move the ECM you have a very shallow opening, it would hold more if you hinge it down and then jam the stuff in there and close it up.
You are always thinking Greg! I like your arm rest idea. Imight have to borrow that one - then I won't have to go rummaging around the junkyard. I can just make my own.........Havve you thought about the "gas cylinder" opener thing? Iamsearching the net for them now.
Looks like you could get one of these lockable gas springs small enough to work. You could design a hidden acuator arm inside the glove box...maybe on on side then place the "release" button in a hidden spot easy to reach from the driver seat?????? I bet they are spendy though. But high tech!!!!!!
I'm coming into it late, but back on Page one I was asking myself why you didn't hinge the door the other way. Unless you move the ECM you have a very shallow opening, it would hold more if you hinge it down and then jam the stuff in there and close it up.
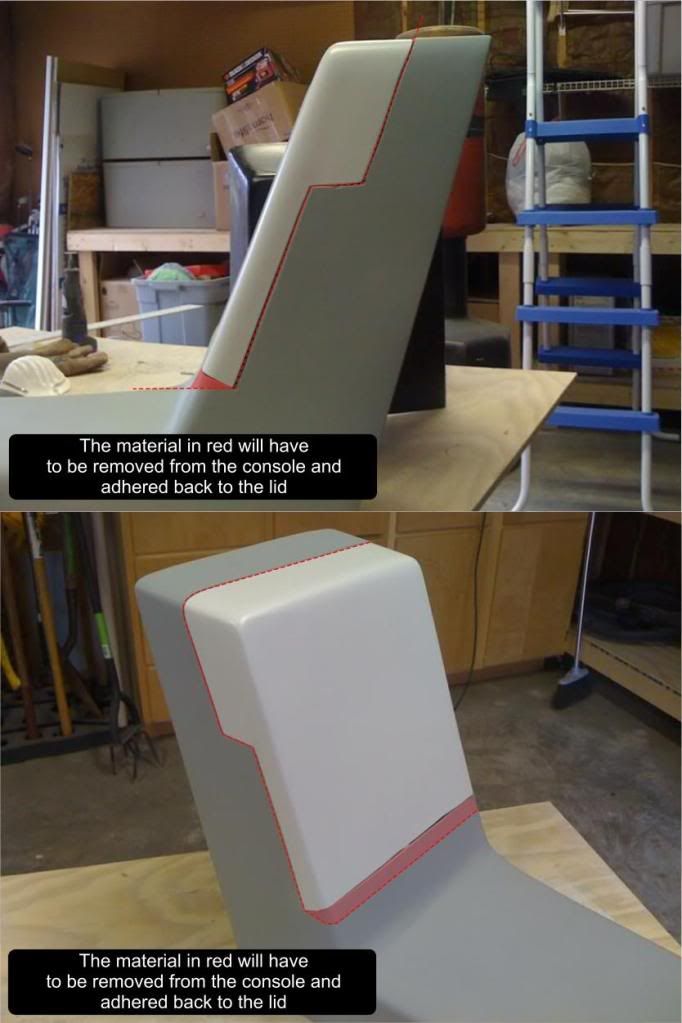
Thanks for the vote confidence and better late than never. I can always use more ideas. The more I think about the lid the closer I am to deciding the lid should open downward. Not only is it staying true to the original design, but I think it makes more sense than to lift up. Also, I can utilize the backside of the lid for something - not sure what yet... Better yet, the lid will rest atop of the armrest.
However, with that decision I will have to modify the existing lid and console. The lid was cut as if it were to open upward - not down. I will have have to cut away material from the console and adhere to the lid - see attached Which of course means more work.
As always, this is a work in progress and I'm not 100% on the lid. However, if the lid opens upward, I'm going to look into somekind of shock assembly. That would be really cool. Thanks for the great idea, Pat.
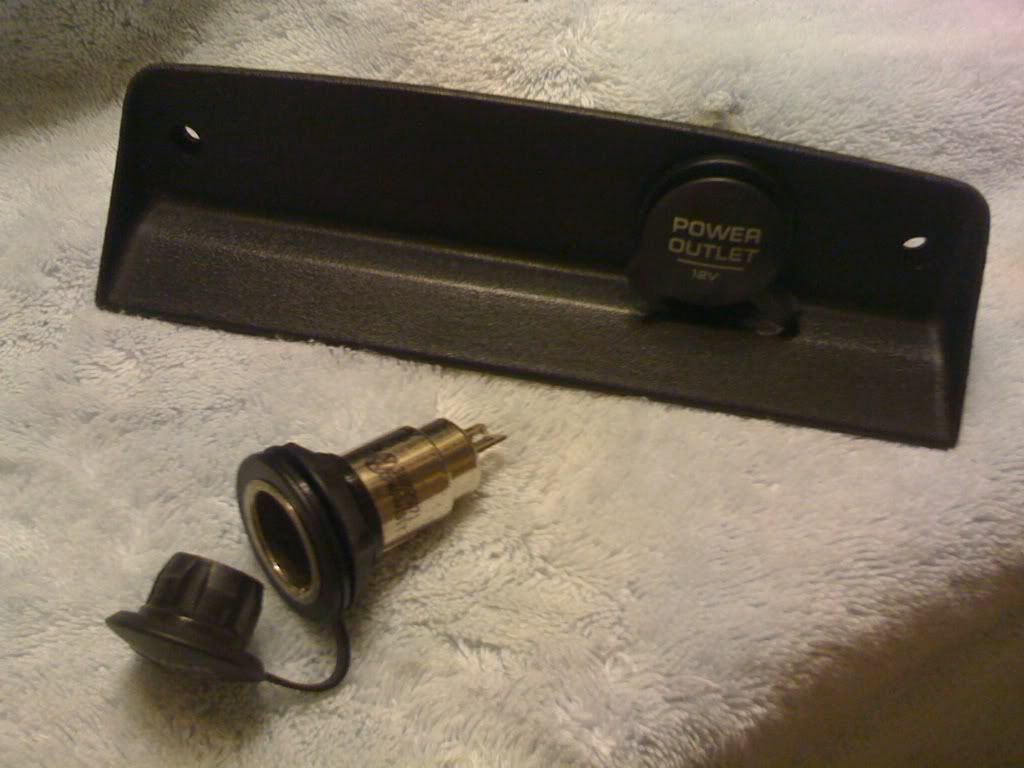
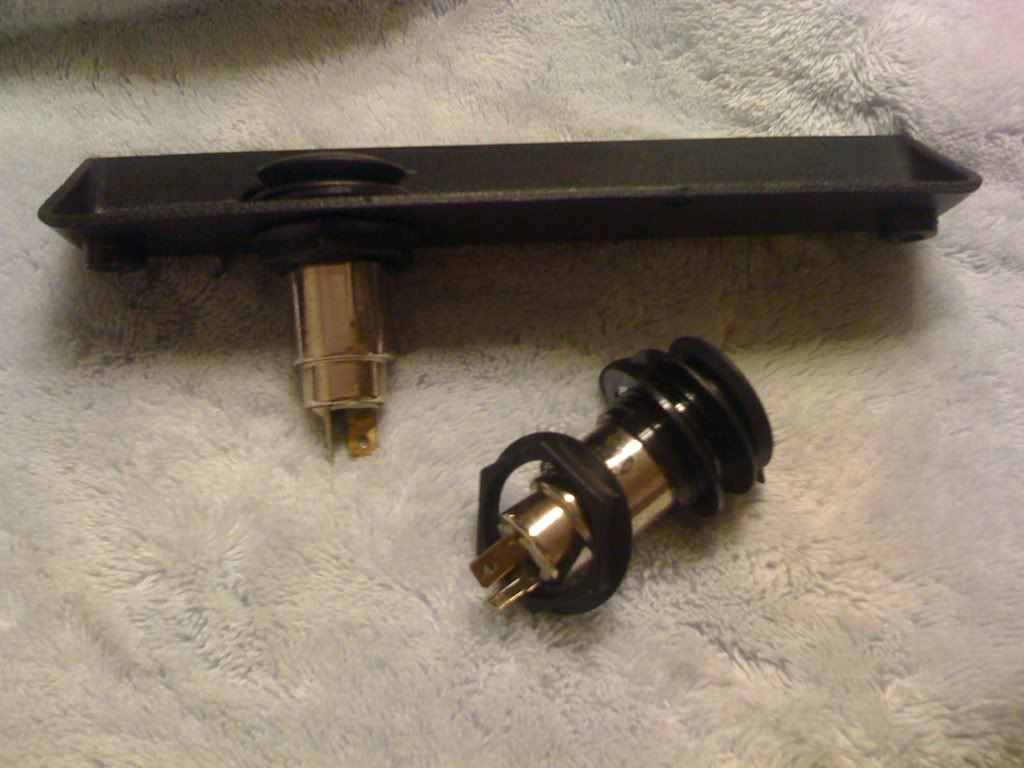
Other news... the 12 Volt power outlets arrived last night - so I have that going for me. Still no cup holder.
Attached to the stock face plate
I decided on the VW outlets because they screw into place from the back and they fit perfectly in the stock plate (they were the only ones I could find on EBay). I'm not sure whether I will use the stock plate
This afternoon I'm headed to the local home improvement store to get a few pieces of wood to prep for the armrest. I'm hoping, PLEASE, that I don't have to do anything around the house tonight. We got all our Christmas Decor out of the attic (where I found the glass) and got everything up - except the garland. It's beginning to look a lot like Christmas... So I'm hoping for a repreive from Decor Duty. Yeah, right...
OH! What do you guys think... should I counter sink the Pontiac logo into the lid or leave it as is just taped to the lid itself?
[This message has been edited by Sofa King (edited 11-24-2009).]