Pennock's Fiero Forum
  The Construction Zone
  OPIE's Fiero GTX Build (Page 7)

Post New Topic  Post A Reply
Email This Page to Someone! | Printable Version

This topic is 33 pages long:  1   2   3   4   5   6   7   8   9   10   11   12   13   14   15   16   17   18   19   20   21   22   23   24   25   26   27   28   29   30   31   32   33 
Previous Page | Next Page
next newest topic | next oldest topic
OPIE's Fiero GTX Build by TXOPIE
Started on: 01-21-2013 10:48 PM
Replies: 1282 (74022 views)
Last post by: predmeister on 12-14-2021 02:05 PM
TXOPIE
Member
Posts: 2734
From: Leonard, TX, USA
Registered: Mar 2012


Feedback score:    (13)
Leave feedback

Rate this member

Report this Post04-04-2013 04:13 PM Click Here to See the Profile for TXOPIEClick Here to visit TXOPIE's HomePageSend a Private Message to TXOPIEEdit/Delete MessageReply w/QuoteDirect Link to This Post
UPDATE: My front modified hubs from FieroGuru came in:

He took brand new Raybestos:


and created these:


They look great and now will enable me to do the 12" brake upgrade
IP: Logged
TXOPIE
Member
Posts: 2734
From: Leonard, TX, USA
Registered: Mar 2012


Feedback score:    (13)
Leave feedback

Rate this member

Report this Post04-05-2013 11:45 PM Click Here to See the Profile for TXOPIEClick Here to visit TXOPIE's HomePageSend a Private Message to TXOPIEEdit/Delete MessageReply w/QuoteDirect Link to This Post
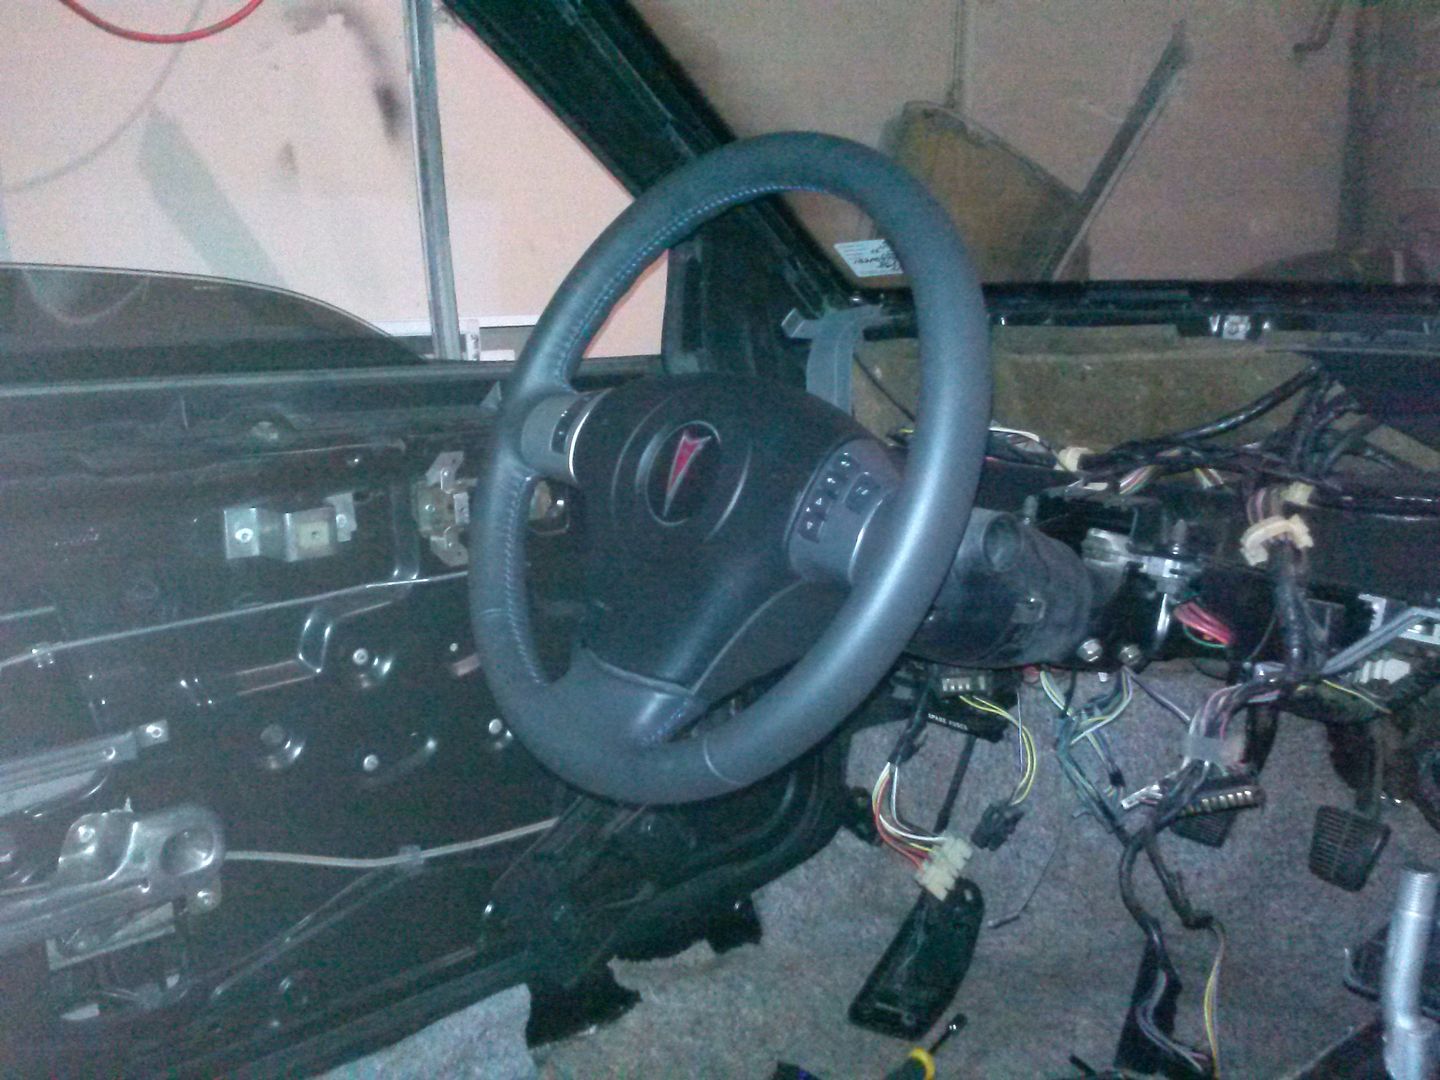
UPDATE: Installed the completed steering wheel to ensure all fits correctly...its all starting to come together


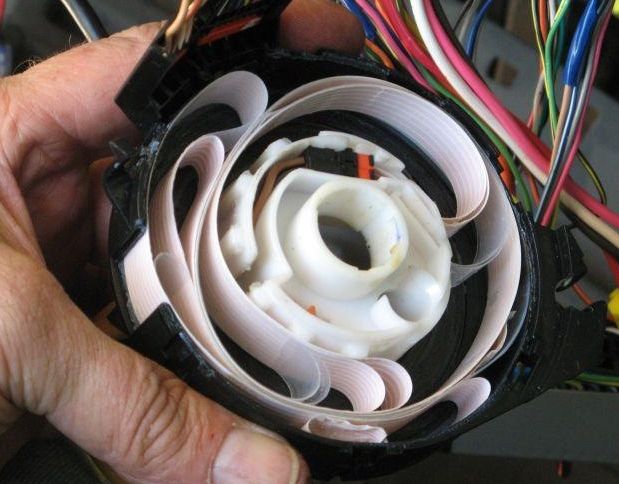
Column is 85% ready for push button start on the column...working on my custom clock spring...have sizing and fit done...just working on the rings themselves at this point.
IP: Logged
KOS
Member
Posts: 461
From: Austin, Texas
Registered: Feb 2008


Feedback score: (2)
Leave feedback

Rate this member

Report this Post04-06-2013 02:32 PM Click Here to See the Profile for KOSClick Here to visit KOS's HomePageSend a Private Message to KOSEdit/Delete MessageReply w/QuoteDirect Link to This Post
 
quote
Originally posted by fieroguru:


The original rotor surface is removed so all that is left is a hub. Then you can slide on larger rotors over the modified wheel hubs.
//www.fiero.nl/forum/Forum4/HTML/065345.html

Here is a how to thread:
//www.fiero.nl/forum/Forum2/HTML/126744.html


Thanks Guru...looks simple enough, I have a lathe so that isnt a problem.. Guess I just need to read up on the rest for the upgrade now! Lol.

IP: Logged
TXOPIE
Member
Posts: 2734
From: Leonard, TX, USA
Registered: Mar 2012


Feedback score:    (13)
Leave feedback

Rate this member

Report this Post04-07-2013 03:46 AM Click Here to See the Profile for TXOPIEClick Here to visit TXOPIE's HomePageSend a Private Message to TXOPIEEdit/Delete MessageReply w/QuoteDirect Link to This Post
Here is what a GM SIR or clock-spring looks like cracked open:


I am going to remove the ribbon and custom fix it into the area as shown below:
IP: Logged
TXOPIE
Member
Posts: 2734
From: Leonard, TX, USA
Registered: Mar 2012


Feedback score:    (13)
Leave feedback

Rate this member

Report this Post04-08-2013 01:56 AM Click Here to See the Profile for TXOPIEClick Here to visit TXOPIE's HomePageSend a Private Message to TXOPIEEdit/Delete MessageReply w/QuoteDirect Link to This Post
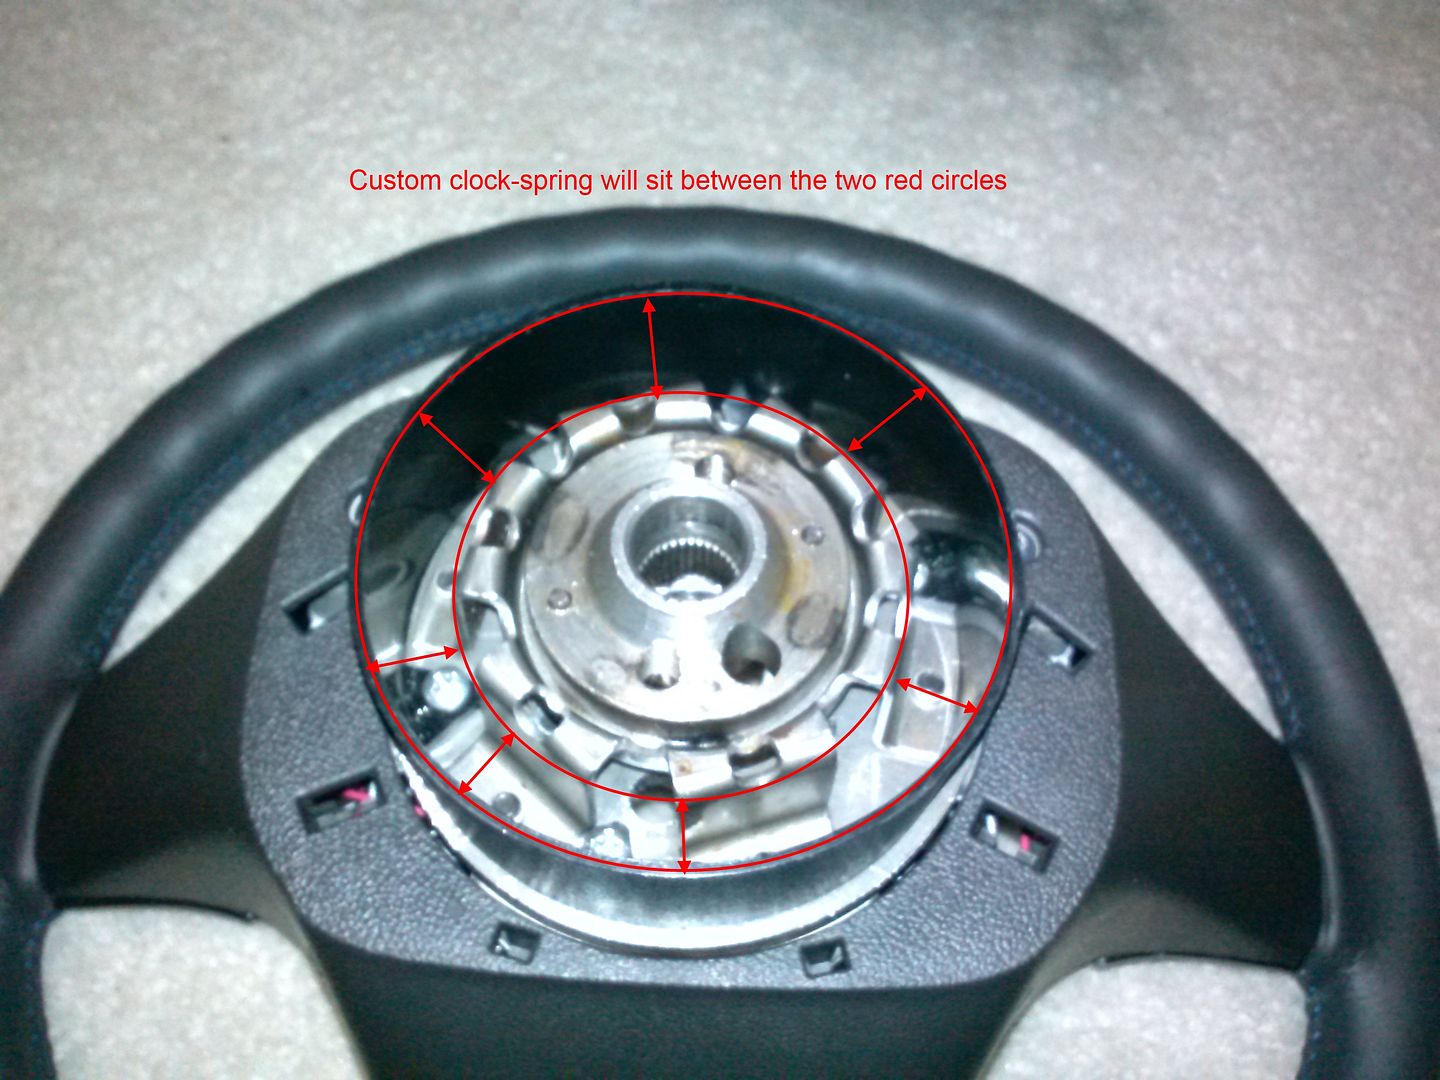
UPDATE: Stephen Poe came by this evening and we stripped down everything that had to come off the swap that was done poorly or just plan incorrectly.

Removed one sliced and mangled wiring harness in prep of installing the new wiring harness:


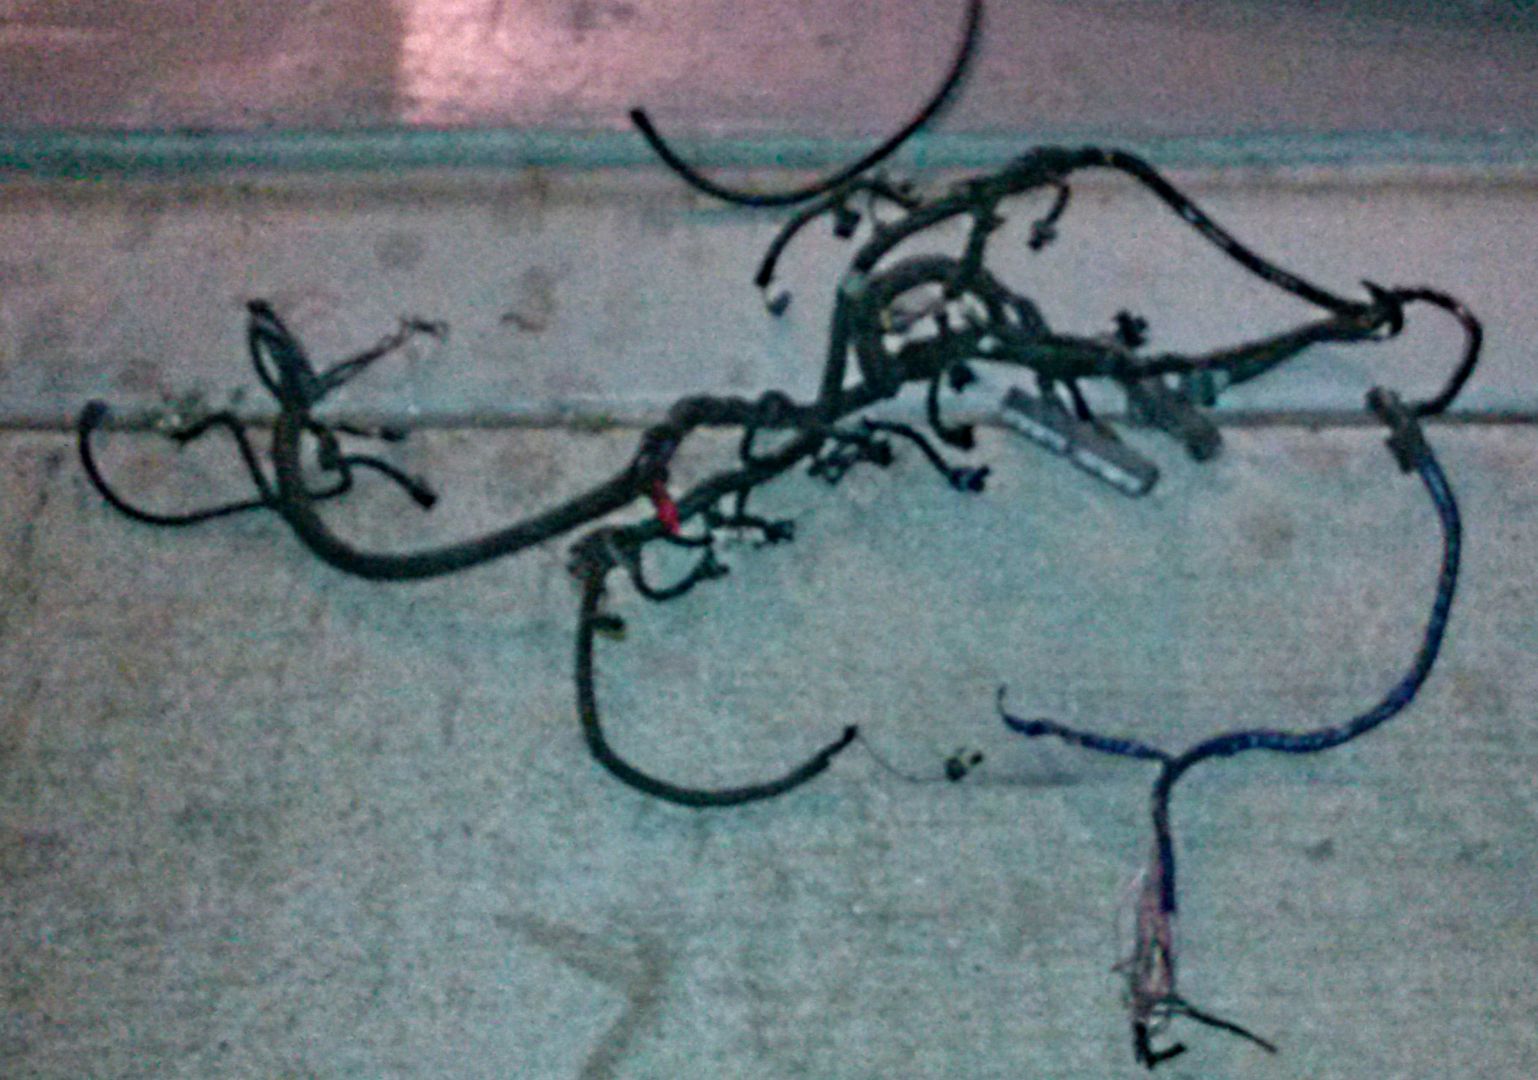
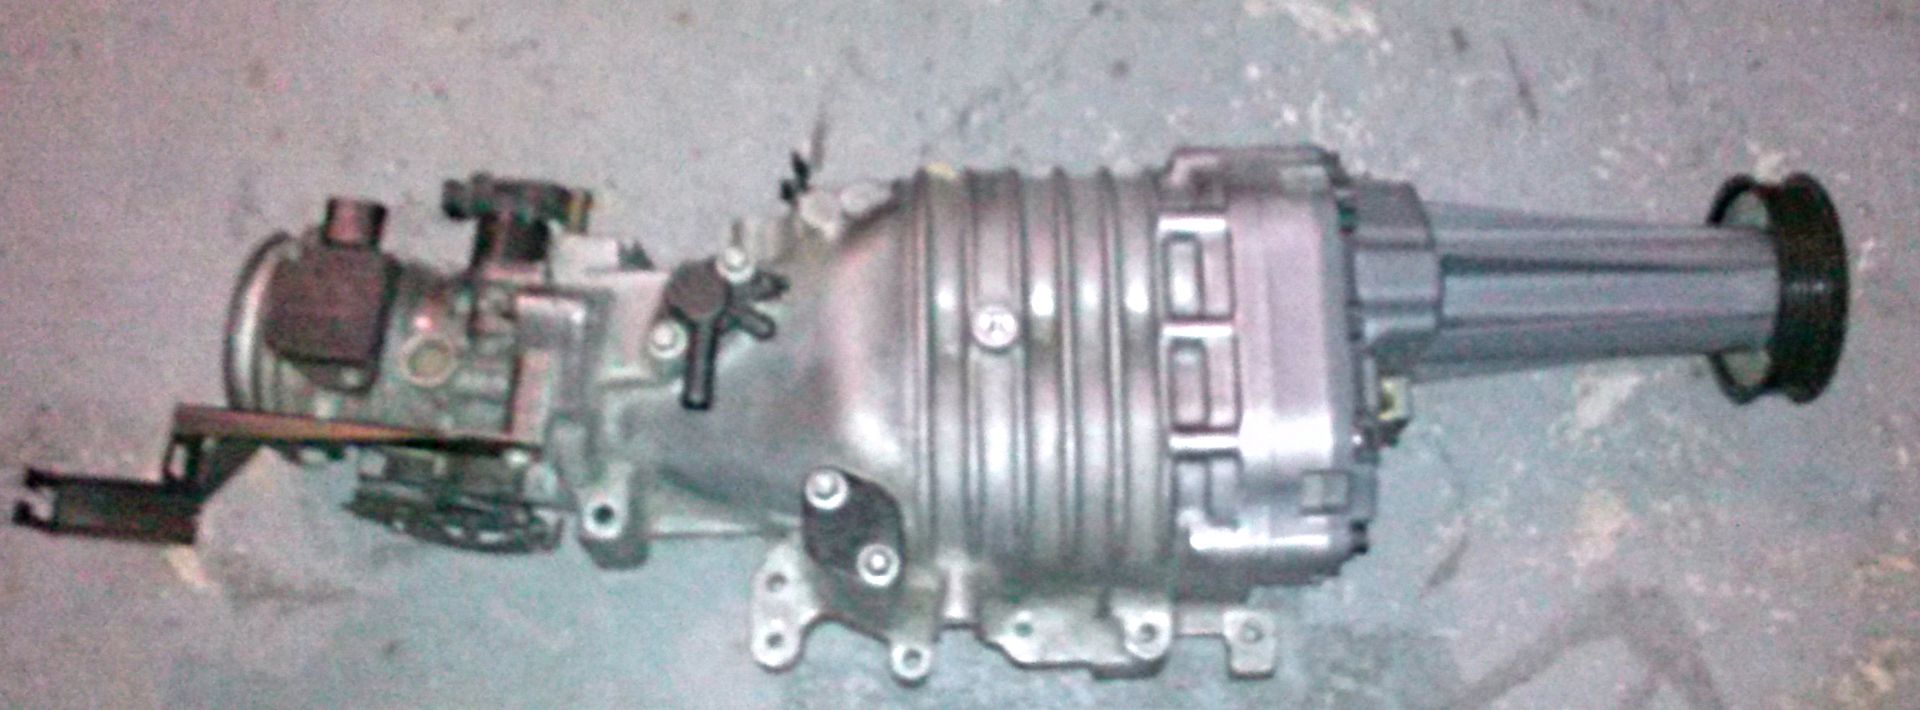
Removed the valve covers


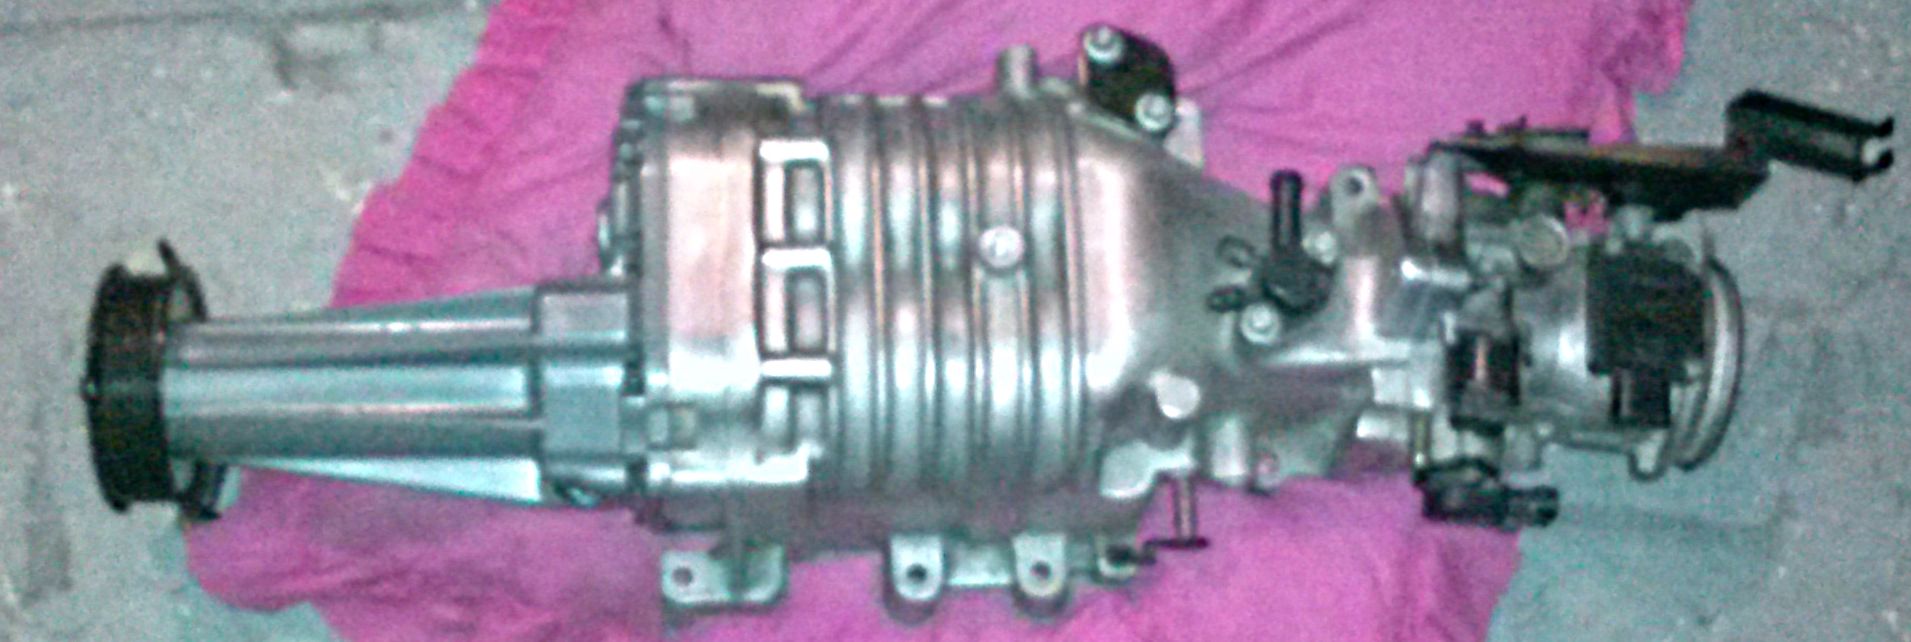
& Super Charger for painting:


* Removed the stock fuel rails,
* Pulled the belt & removed dummy pulley & prepped to put the power steering pump back in
* Removed the plastic fuel lines in prep of the stainless steel lines.
* Figured out that there is no canister.
* Removed spark-plug cables in prep for custom length cables for a much cleaner look.


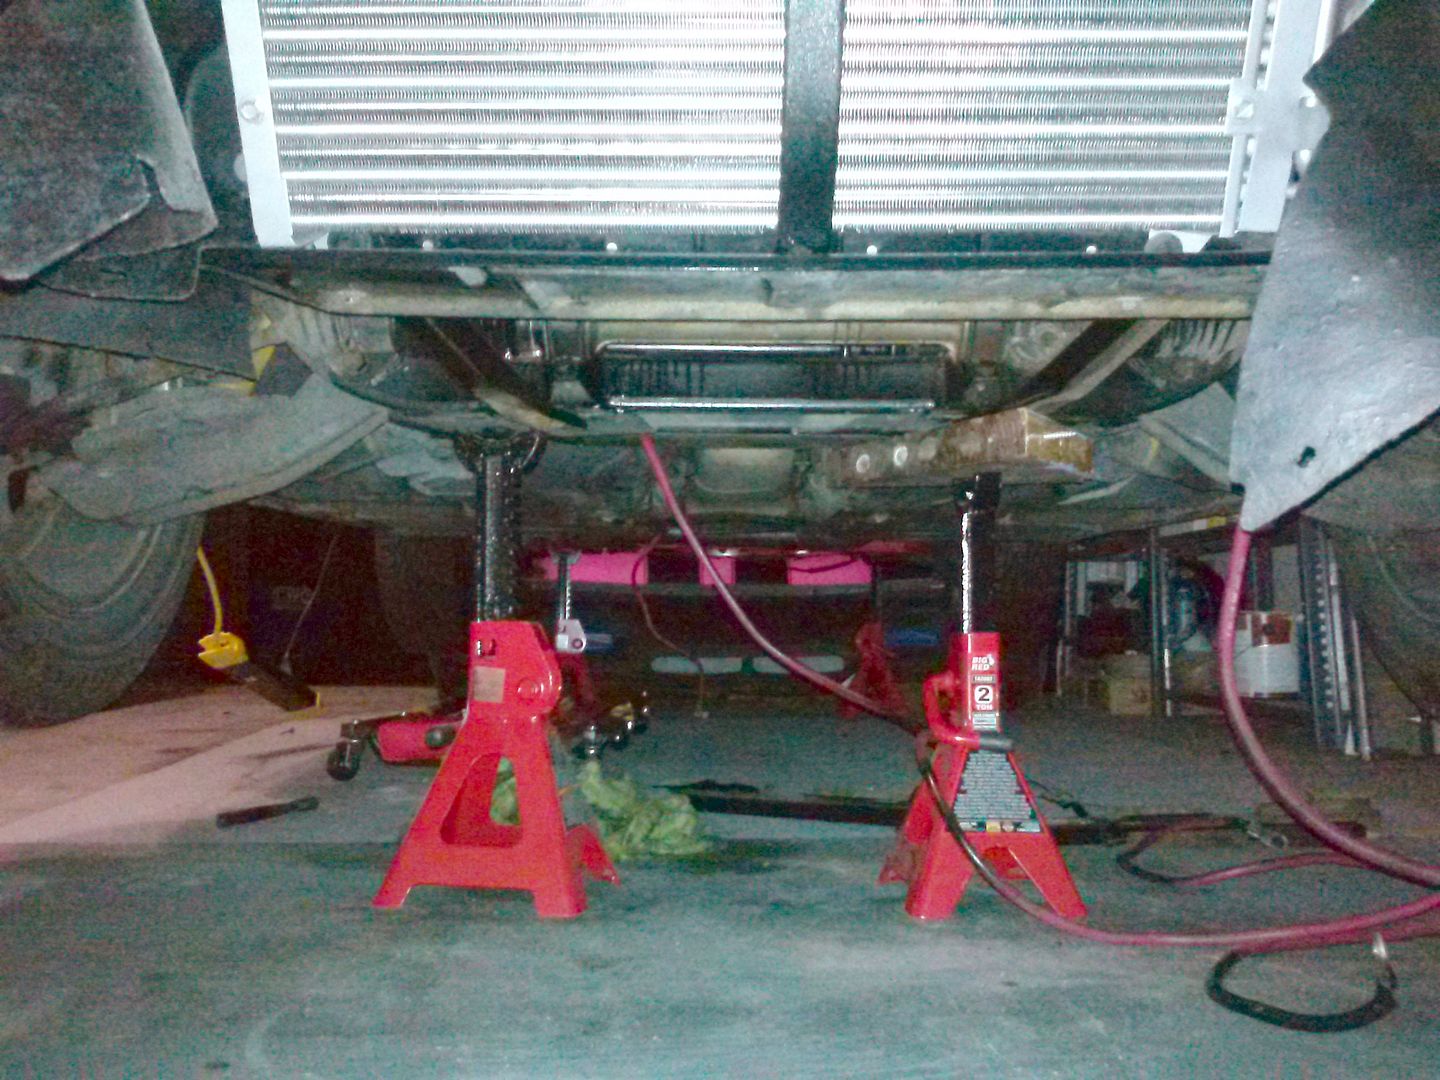
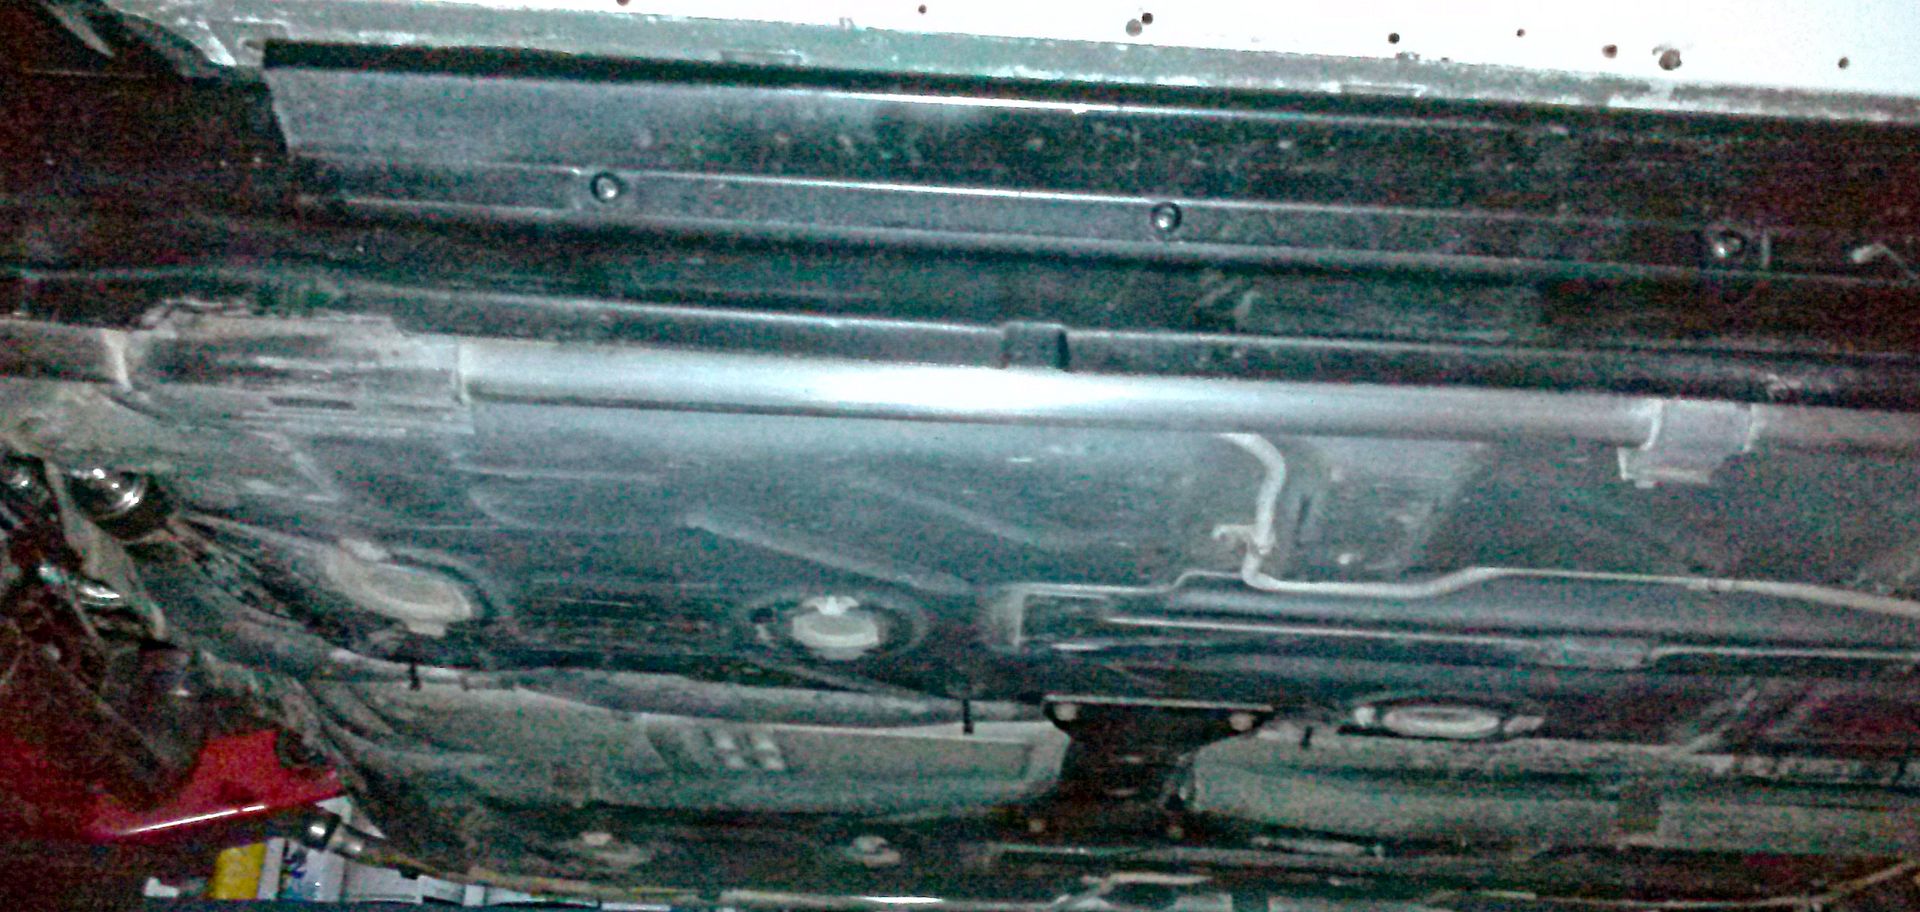
We also got her up on stands so that I can do a little clean up this week underneath her:

[This message has been edited by TXOPIE (edited 04-08-2013).]

IP: Logged
TXOPIE
Member
Posts: 2734
From: Leonard, TX, USA
Registered: Mar 2012


Feedback score:    (13)
Leave feedback

Rate this member

Report this Post04-10-2013 12:49 AM Click Here to See the Profile for TXOPIEClick Here to visit TXOPIE's HomePageSend a Private Message to TXOPIEEdit/Delete MessageReply w/QuoteDirect Link to This Post
UPDATE: With the car now up on stands I thought I would finish cleaning up the bottom.

Glad to report that there is nothing but a little surface rust and it was just on the chrome pipes for the coolant down both sides.

They are now clean and back to a nice mirror finish...will post pictures tomorrow.

Wiped her under body down with a 50/50 mix of water and vinegar.

Tomorrow I will mask her off and give the bottom a nice coat of black Rust-o-luem.

Also got my valve covers all cleaned and read for primer & paint

I only got about 90% through getting the SC cleaned up...a little more time and it too will be ready.

[This message has been edited by TXOPIE (edited 04-10-2013).]

IP: Logged
TXOPIE
Member
Posts: 2734
From: Leonard, TX, USA
Registered: Mar 2012


Feedback score:    (13)
Leave feedback

Rate this member

Report this Post04-10-2013 02:13 AM Click Here to See the Profile for TXOPIEClick Here to visit TXOPIE's HomePageSend a Private Message to TXOPIEEdit/Delete MessageReply w/QuoteDirect Link to This Post

TXOPIE

2734 posts
Member since Mar 2012


IP: Logged
TXOPIE
Member
Posts: 2734
From: Leonard, TX, USA
Registered: Mar 2012


Feedback score:    (13)
Leave feedback

Rate this member

Report this Post04-11-2013 11:14 PM Click Here to See the Profile for TXOPIEClick Here to visit TXOPIE's HomePageSend a Private Message to TXOPIEEdit/Delete MessageReply w/QuoteDirect Link to This Post
Super Charger is ready for paint now:


Re-scrub down the valve covers with a scotch pad and sprayed the primer:

IP: Logged
TXOPIE
Member
Posts: 2734
From: Leonard, TX, USA
Registered: Mar 2012


Feedback score:    (13)
Leave feedback

Rate this member

Report this Post04-13-2013 01:01 AM Click Here to See the Profile for TXOPIEClick Here to visit TXOPIE's HomePageSend a Private Message to TXOPIEEdit/Delete MessageReply w/QuoteDirect Link to This Post
UPDATE: Got a good solid coat of black rust-o-luem on the bottom and working on getting it cleaned up


Still have the control arms and a few cross supports to sand and paint tomorrow.

Maybe next weekend I will drop the gas tank...sand and paint as well

[This message has been edited by TXOPIE (edited 04-13-2013).]

IP: Logged
TXOPIE
Member
Posts: 2734
From: Leonard, TX, USA
Registered: Mar 2012


Feedback score:    (13)
Leave feedback

Rate this member

Report this Post04-13-2013 05:47 PM Click Here to See the Profile for TXOPIEClick Here to visit TXOPIE's HomePageSend a Private Message to TXOPIEEdit/Delete MessageReply w/QuoteDirect Link to This Post

TXOPIE

2734 posts
Member since Mar 2012
UPDATE: From Rob:

Main instrument panels assembled.
IP: Logged
TXOPIE
Member
Posts: 2734
From: Leonard, TX, USA
Registered: Mar 2012


Feedback score:    (13)
Leave feedback

Rate this member

Report this Post04-14-2013 08:39 PM Click Here to See the Profile for TXOPIEClick Here to visit TXOPIE's HomePageSend a Private Message to TXOPIEEdit/Delete MessageReply w/QuoteDirect Link to This Post
UPDATE:

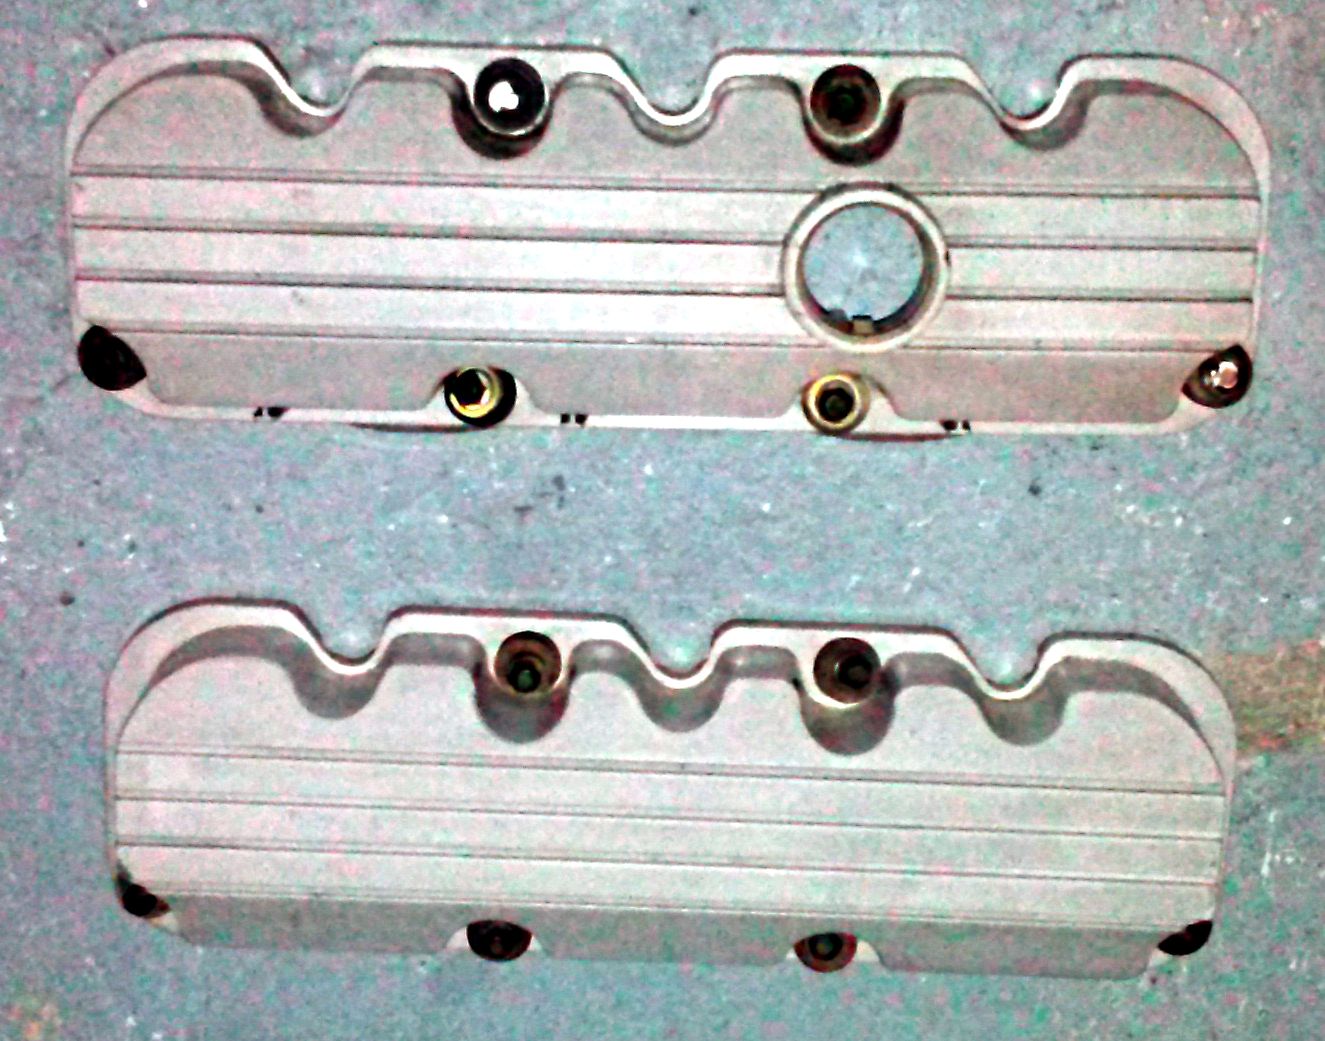
Did some more work on my valve covers. I decided to eliminate the two center grooved lines from both:


It is now sprayed in high-temp primer grey...next coat will be a high-temp silver chrome.

After that I will use vinyl lettering to mask off my lettering on the cover that faces the trunk.

Now with the vinyl lettering stuck to the silver chrome coat...I will spray it with blue anodized paint.

Once that dries, I will carefully remote the vinyl lettering and shoot a coat of high-temp clear coat.


This should leave the valve covers in a nice blue anodized color and the lettering in a nice shinny silver chrome.

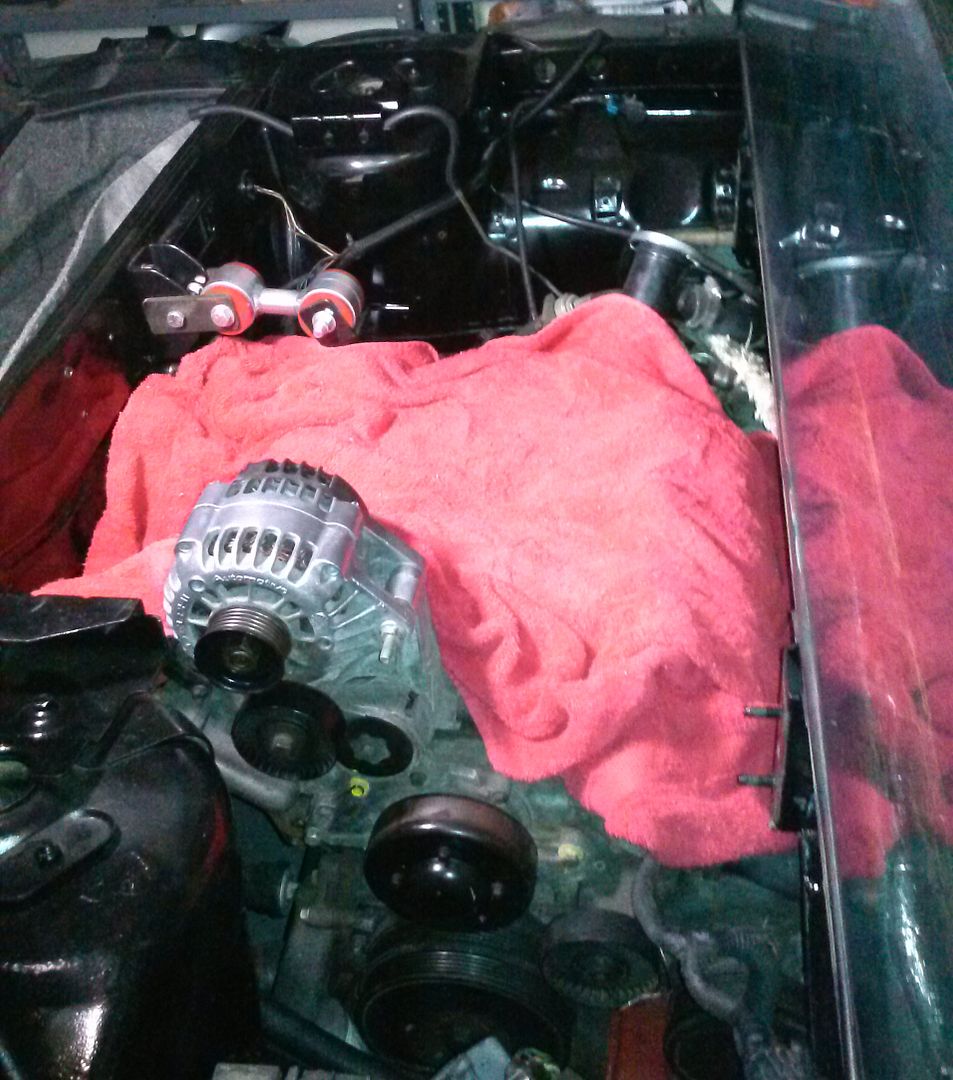
ALSO...with a bunch of the parts out of the way in the engine & engine bay,
it is giving me the room to finish cleaning up the engine bay like taking aluminum tape and securing the firewall material that has pulled up and away of the years:

I have taken a wire brush to any of the oxidized parts I can reach....need to get a few smaller brushes & some engine de-greaser to finish up...this is very slow and detail oriented work

and I also began some of the engine dressing (Mr Gasket)...what can I say, I love the classics :

[This message has been edited by TXOPIE (edited 04-14-2013).]

IP: Logged
PFF
System Bot
TXOPIE
Member
Posts: 2734
From: Leonard, TX, USA
Registered: Mar 2012


Feedback score:    (13)
Leave feedback

Rate this member

Report this Post04-20-2013 12:56 AM Click Here to See the Profile for TXOPIEClick Here to visit TXOPIE's HomePageSend a Private Message to TXOPIEEdit/Delete MessageReply w/QuoteDirect Link to This Post
UPDATE: ....had to start over on painting the supercharger ....see below

[This message has been edited by TXOPIE (edited 04-22-2013).]

IP: Logged
TXOPIE
Member
Posts: 2734
From: Leonard, TX, USA
Registered: Mar 2012


Feedback score:    (13)
Leave feedback

Rate this member

Report this Post04-21-2013 10:41 PM Click Here to See the Profile for TXOPIEClick Here to visit TXOPIE's HomePageSend a Private Message to TXOPIEEdit/Delete MessageReply w/QuoteDirect Link to This Post
UPDATE: Finished the under body...completely rust-free and a nice coat of black Rust-o-luem.


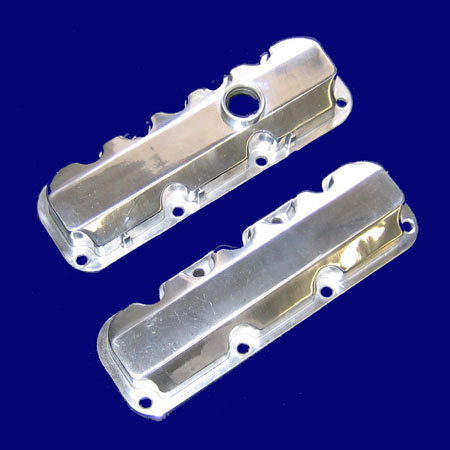
I do not like the final product while utilizing the plastic stock valve covers...

So I went ahead and ordered a set of the Aluminum Valve Covers from ZZ Perfromance:

I will then shoot them with the same blue anodized paint to have it match the Supercharger exactly

When Stephen comes over next later this week, I am going to get him to assist in dropping the gas tank.
I will then do a through cleaning, light sanding and a good solid coat of aluminum color Rust-o-luem.

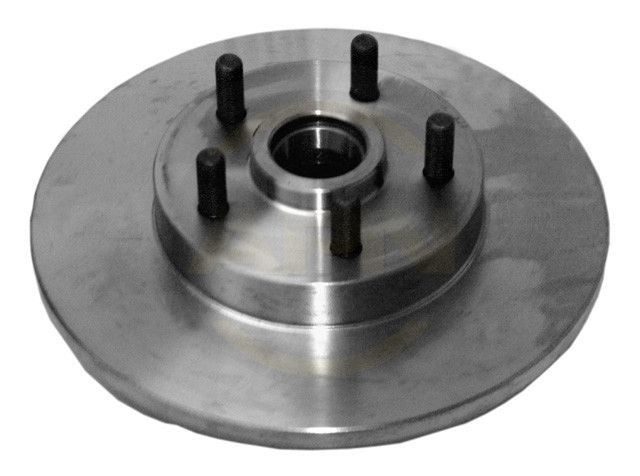
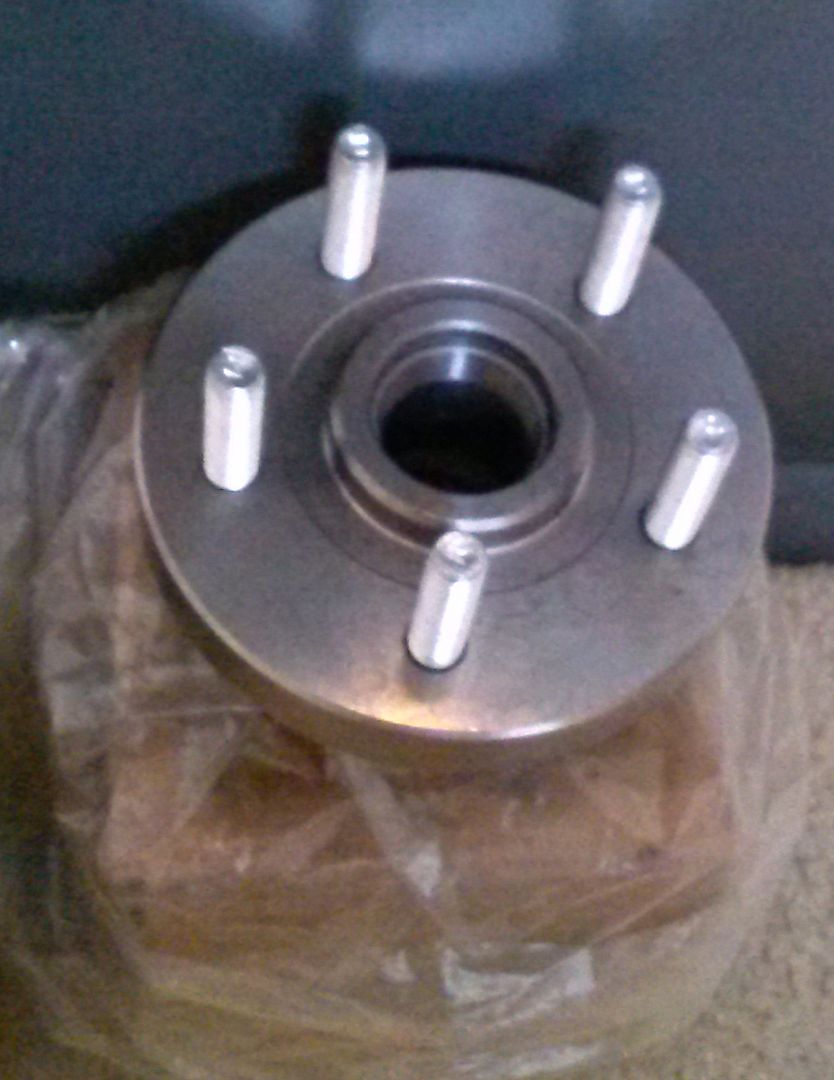
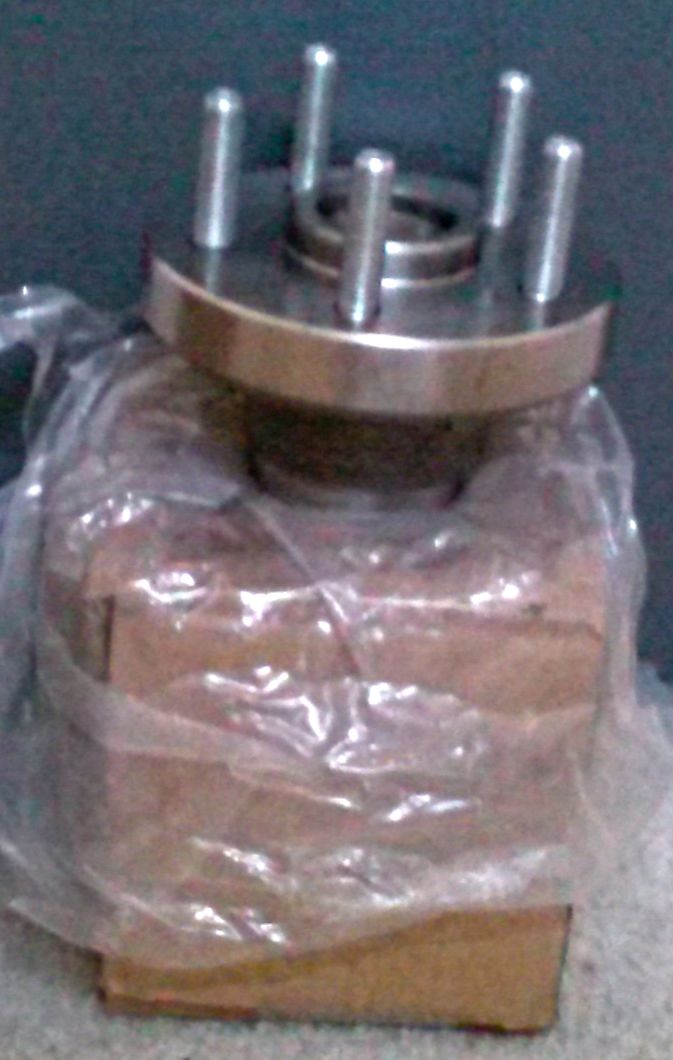
I also ordered and paid for 12" corvette drilled/slotted/zinc coated rotors drilled with the 5x100 bolt pattern & concentric rings from FieroGuru...getting close to having all the components for the brake upgrade


Just need to order my 88 CENTRIC SEMI-LOADED brand new front & back BRAKE CALIPERS:


Then in the next two weeks I will be ordering the Rear Bump-Steer Kit from now "AMS".

[This message has been edited by TXOPIE (edited 04-22-2013).]

IP: Logged
TXOPIE
Member
Posts: 2734
From: Leonard, TX, USA
Registered: Mar 2012


Feedback score:    (13)
Leave feedback

Rate this member

Report this Post04-22-2013 02:22 AM Click Here to See the Profile for TXOPIEClick Here to visit TXOPIE's HomePageSend a Private Message to TXOPIEEdit/Delete MessageReply w/QuoteDirect Link to This Post
UPDATE: ...the last coat made the entire paint orange peel on the supercharger...I wish a few of you paint experts could explain what caused it to peel

This is what the look of frustration looks like:


Will finish cleaning off all the paint and start from scratch & hopefully I will have better success round 2!

The outcome I truly want is to have the supercharger & valve covers to come out like the Mr. Gasket anodized blue used in many of their products. Have the blue anodized paint from dupli-color.

Sanded down the supercharger originally and clean it with dupli-color's cleaner/prepping spray. Then spray light coats. The color didn't want to seem to bond to some areas of the supercharger in the first coat, but in the 2nd those spots started to take color. After 4-5 coats everything balanced out, but was really darker than I would have liked...don't get wrong it was a nice dark anodized blue...just would have liked it lighter.

HELP!!! ...don't want to power coat...pain in the a@@...just high-temp paint open to all ideas and comments!

[This message has been edited by TXOPIE (edited 04-22-2013).]

IP: Logged
TXOPIE
Member
Posts: 2734
From: Leonard, TX, USA
Registered: Mar 2012


Feedback score:    (13)
Leave feedback

Rate this member

Report this Post04-22-2013 12:07 PM Click Here to See the Profile for TXOPIEClick Here to visit TXOPIE's HomePageSend a Private Message to TXOPIEEdit/Delete MessageReply w/QuoteDirect Link to This Post

TXOPIE

2734 posts
Member since Mar 2012
UPDATE: UPS man just delivered Full-Time power steering kit from Chris at West Coast Fiero:
IP: Logged
yellowstone
Member
Posts: 9299
From: Düsseldorf/Germany
Registered: Jun 2003


Feedback score: N/A
Leave feedback


Total ratings: 250
Rate this member

Report this Post04-22-2013 02:08 PM Click Here to See the Profile for yellowstoneSend a Private Message to yellowstoneEdit/Delete MessageReply w/QuoteDirect Link to This Post
Despite the small setback you seem to do a great job here!
IP: Logged
TXOPIE
Member
Posts: 2734
From: Leonard, TX, USA
Registered: Mar 2012


Feedback score:    (13)
Leave feedback

Rate this member

Report this Post04-22-2013 02:26 PM Click Here to See the Profile for TXOPIEClick Here to visit TXOPIE's HomePageSend a Private Message to TXOPIEEdit/Delete MessageReply w/QuoteDirect Link to This Post
Yellowstone...thanks! Just a difficult blow...when I thought I was done with that part...but it is what it is!

IP: Logged
TXOPIE
Member
Posts: 2734
From: Leonard, TX, USA
Registered: Mar 2012


Feedback score:    (13)
Leave feedback

Rate this member

Report this Post04-25-2013 07:32 PM Click Here to See the Profile for TXOPIEClick Here to visit TXOPIE's HomePageSend a Private Message to TXOPIEEdit/Delete MessageReply w/QuoteDirect Link to This Post
UPDATE: ZZP valve coves arrived:

IP: Logged
TXOPIE
Member
Posts: 2734
From: Leonard, TX, USA
Registered: Mar 2012


Feedback score:    (13)
Leave feedback

Rate this member

Report this Post04-27-2013 03:35 PM Click Here to See the Profile for TXOPIEClick Here to visit TXOPIE's HomePageSend a Private Message to TXOPIEEdit/Delete MessageReply w/QuoteDirect Link to This Post
UPDATE: Post man came a delivered my 12" rotors...one step closer to getting that upgrade completed:

[This message has been edited by TXOPIE (edited 04-27-2013).]

IP: Logged
TXOPIE
Member
Posts: 2734
From: Leonard, TX, USA
Registered: Mar 2012


Feedback score:    (13)
Leave feedback

Rate this member

Report this Post04-27-2013 05:52 PM Click Here to See the Profile for TXOPIEClick Here to visit TXOPIE's HomePageSend a Private Message to TXOPIEEdit/Delete MessageReply w/QuoteDirect Link to This Post

TXOPIE

2734 posts
Member since Mar 2012
UPDATE: I have gotten the Supercharger 95% clean of the dupli-color blue anodized off.


I have decided to try a different route this 2nd attempt and bring in a little assistance.

Later today, I am going to drop both my supercharger & valve covers off to a polishing shop.

They will bring my ZZP valve covers to a perfect flawless mirror finish, instead of the "B" finish that they sell and then finish cleaning up the supercharger and give it an amazing polish.

Once they all have a nice polish, its off to paint shop immediately...as in the paint shop is picking them up right after they are completed...the owner of the paint shop states...that we have a much better chance of getting a perfect outcome on the polished aluminum...the more we lessen the time between finishing the polish and spraying them...once you stop polishing...they start oxidizing!

Also the owner of the paint shop sold be on a transparent candie blue paint...that I think will look pretty awesome....time will only tell at this point
IP: Logged
TXOPIE
Member
Posts: 2734
From: Leonard, TX, USA
Registered: Mar 2012


Feedback score:    (13)
Leave feedback

Rate this member

Report this Post04-27-2013 07:11 PM Click Here to See the Profile for TXOPIEClick Here to visit TXOPIE's HomePageSend a Private Message to TXOPIEEdit/Delete MessageReply w/QuoteDirect Link to This Post

TXOPIE

2734 posts
Member since Mar 2012

[This message has been edited by TXOPIE (edited 04-27-2013).]

IP: Logged
PFF
System Bot
TXOPIE
Member
Posts: 2734
From: Leonard, TX, USA
Registered: Mar 2012


Feedback score:    (13)
Leave feedback

Rate this member

Report this Post04-27-2013 07:14 PM Click Here to See the Profile for TXOPIEClick Here to visit TXOPIE's HomePageSend a Private Message to TXOPIEEdit/Delete MessageReply w/QuoteDirect Link to This Post
UPDATE: Here is a photo with the rotors sitting on the hub...just to get an idea of what they will look like:
This images is larger than 153600 bytes. Click to view.
IP: Logged
yellowstone
Member
Posts: 9299
From: Düsseldorf/Germany
Registered: Jun 2003


Feedback score: N/A
Leave feedback


Total ratings: 250
Rate this member

Report this Post04-28-2013 09:50 AM Click Here to See the Profile for yellowstoneSend a Private Message to yellowstoneEdit/Delete MessageReply w/QuoteDirect Link to This Post
Those rotors will look great on your car!

I wish someone like you with a big garage lived around here - don't you want to be closer to your daughter...?
IP: Logged
TXOPIE
Member
Posts: 2734
From: Leonard, TX, USA
Registered: Mar 2012


Feedback score:    (13)
Leave feedback

Rate this member

Report this Post04-28-2013 05:35 PM Click Here to See the Profile for TXOPIEClick Here to visit TXOPIE's HomePageSend a Private Message to TXOPIEEdit/Delete MessageReply w/QuoteDirect Link to This Post
Yellowstone...sorry my friend...will go visit her and the Miami area, but I will never move back to SoFl. I lived in Miramar for a year. My office was seriously less than a mile from my house and it took me 45 minutes to get into my house each night....damn gated communities! Its just not for me...also everything is difficult getting in and out of...what I mean by that is...that you just can't swing into and out of a gas station on the corner in a lot of the areas......you need to pull into an entire shopping center with one drive in and out...easier to catch and arrest people that way I guess ?

My next move will be back to San Diego...missing my surfing really bad...my two homes are DFW / 469 and SD / 619 !!!

80% of my life in one or the other.

[This message has been edited by TXOPIE (edited 04-28-2013).]

IP: Logged
TXOPIE
Member
Posts: 2734
From: Leonard, TX, USA
Registered: Mar 2012


Feedback score:    (13)
Leave feedback

Rate this member

Report this Post04-28-2013 08:24 PM Click Here to See the Profile for TXOPIEClick Here to visit TXOPIE's HomePageSend a Private Message to TXOPIEEdit/Delete MessageReply w/QuoteDirect Link to This Post

TXOPIE

2734 posts
Member since Mar 2012
UPDATE: Worked on cleaning up more of the engine bay area...trying to get everything nice and clean:


...still have more to do, but a little bit closer
IP: Logged
revin
Member
Posts: 8684
From: Pville, TX
Registered: Aug 2001


Feedback score:    (10)
Leave feedback


Total ratings: 234
Rate this member

Report this Post04-28-2013 10:23 PM Click Here to See the Profile for revinSend a Private Message to revinEdit/Delete MessageReply w/QuoteDirect Link to This Post
Looking real good now!

------------------

88 GT, 3800SC, Getrag 5sp. 12" Vette Rotors,Custom stuff done

IP: Logged
TXOPIE
Member
Posts: 2734
From: Leonard, TX, USA
Registered: Mar 2012


Feedback score:    (13)
Leave feedback

Rate this member

Report this Post04-29-2013 01:11 AM Click Here to See the Profile for TXOPIEClick Here to visit TXOPIE's HomePageSend a Private Message to TXOPIEEdit/Delete MessageReply w/QuoteDirect Link to This Post
Thanks Revin!

UPDATE: While cleaning the engine bay...I took off the driver's side engine bay radiator hose...because when the engine swap was done the hose laid against are part of the exhaust pipes...the mechanic that did the swap thought it would be ok just to wrap it in fire cloth a few times...the engine had less then 3 hours of drive time on it and it was already starting to melt the rubber.

And I wanted to do my standard Mr. Gasket woven hose covers...but that would have only amplified the problem...so here is the solution I came up with:

This will allow me to route the now flex pipe away and still maintaining a polished look...will have the ends done in the Candi Blue transparent that the valve covers and SC are being done in

[This message has been edited by TXOPIE (edited 04-29-2013).]

IP: Logged
TXOPIE
Member
Posts: 2734
From: Leonard, TX, USA
Registered: Mar 2012


Feedback score:    (13)
Leave feedback

Rate this member

Report this Post05-01-2013 11:54 AM Click Here to See the Profile for TXOPIEClick Here to visit TXOPIE's HomePageSend a Private Message to TXOPIEEdit/Delete MessageReply w/QuoteDirect Link to This Post
UPDATE: UPS dropped off my air duct to properly relocated my air filter
IP: Logged
TXOPIE
Member
Posts: 2734
From: Leonard, TX, USA
Registered: Mar 2012


Feedback score:    (13)
Leave feedback

Rate this member

Report this Post05-02-2013 01:36 PM Click Here to See the Profile for TXOPIEClick Here to visit TXOPIE's HomePageSend a Private Message to TXOPIEEdit/Delete MessageReply w/QuoteDirect Link to This Post
UPDATE: UPS man just dropped off my flex hose:
IP: Logged
TXOPIE
Member
Posts: 2734
From: Leonard, TX, USA
Registered: Mar 2012


Feedback score:    (13)
Leave feedback

Rate this member

Report this Post05-02-2013 02:44 PM Click Here to See the Profile for TXOPIEClick Here to visit TXOPIE's HomePageSend a Private Message to TXOPIEEdit/Delete MessageReply w/QuoteDirect Link to This Post

TXOPIE

2734 posts
Member since Mar 2012
UPDATE: Installed Flex hose:


Now the hose does not even come close to the exhaust...pict above is deceiving...there is a 2" gap

[This message has been edited by TXOPIE (edited 05-02-2013).]

IP: Logged
TXOPIE
Member
Posts: 2734
From: Leonard, TX, USA
Registered: Mar 2012


Feedback score:    (13)
Leave feedback

Rate this member

Report this Post05-04-2013 09:15 PM Click Here to See the Profile for TXOPIEClick Here to visit TXOPIE's HomePageSend a Private Message to TXOPIEEdit/Delete MessageReply w/QuoteDirect Link to This Post
UPDATE: Took Barbie to the AER Show and she took 1st Place for her category


A few other shots from the Fiero Section:


[This message has been edited by TXOPIE (edited 05-04-2013).]

IP: Logged
PFF
System Bot
TXOPIE
Member
Posts: 2734
From: Leonard, TX, USA
Registered: Mar 2012


Feedback score:    (13)
Leave feedback

Rate this member

Report this Post05-05-2013 10:15 PM Click Here to See the Profile for TXOPIEClick Here to visit TXOPIE's HomePageSend a Private Message to TXOPIEEdit/Delete MessageReply w/QuoteDirect Link to This Post
I have the eMachineShop files for the 3 images below:

[This message has been edited by TXOPIE (edited 05-08-2013).]

IP: Logged
TXOPIE
Member
Posts: 2734
From: Leonard, TX, USA
Registered: Mar 2012


Feedback score:    (13)
Leave feedback

Rate this member

Report this Post05-08-2013 04:11 PM Click Here to See the Profile for TXOPIEClick Here to visit TXOPIE's HomePageSend a Private Message to TXOPIEEdit/Delete MessageReply w/QuoteDirect Link to This Post
UPDATE: Been working on Collar that goes on the back of the steering wheel to column for a clean finish...still have a little more work to go to get it correct...then paint
IP: Logged
Marine1981
Member
Posts: 1364
From: Austin, Texas, USA
Registered: Jan 2011


Feedback score:    (6)
Leave feedback

Rate this member

Report this Post05-08-2013 05:07 PM Click Here to See the Profile for Marine1981Click Here to visit Marine1981's HomePageSend a Private Message to Marine1981Edit/Delete MessageReply w/QuoteDirect Link to This Post
What's the status on the Zimmer door panels??
IP: Logged
TXOPIE
Member
Posts: 2734
From: Leonard, TX, USA
Registered: Mar 2012


Feedback score:    (13)
Leave feedback

Rate this member

Report this Post05-08-2013 06:31 PM Click Here to See the Profile for TXOPIEClick Here to visit TXOPIE's HomePageSend a Private Message to TXOPIEEdit/Delete MessageReply w/QuoteDirect Link to This Post
 
quote
Originally posted by Marine1981:

What's the status on the Zimmer door panels??


EVM_Rob is making them with my MERA body...so they will be here when the body is complete and ships...then off to IN for them to be upholstered and finally back to DFW for me to install

Will look something like this when completed:
IP: Logged
TXOPIE
Member
Posts: 2734
From: Leonard, TX, USA
Registered: Mar 2012


Feedback score:    (13)
Leave feedback

Rate this member

Report this Post05-09-2013 10:51 AM Click Here to See the Profile for TXOPIEClick Here to visit TXOPIE's HomePageSend a Private Message to TXOPIEEdit/Delete MessageReply w/QuoteDirect Link to This Post
UPDATE: As far as the collar I created for the steering wheel that will house my custom clockspring (SIR) and the exposed area of the steering column:


I have decided to try wrapping them in a leather grained black vinyl that used on my pwr mirror/window plate to help reduce the old school 80's look while blending the molded plastic pattern look:
IP: Logged
TXOPIE
Member
Posts: 2734
From: Leonard, TX, USA
Registered: Mar 2012


Feedback score:    (13)
Leave feedback

Rate this member

Report this Post05-09-2013 11:49 AM Click Here to See the Profile for TXOPIEClick Here to visit TXOPIE's HomePageSend a Private Message to TXOPIEEdit/Delete MessageReply w/QuoteDirect Link to This Post

TXOPIE

2734 posts
Member since Mar 2012
UPDATE: Member Tom Slick is purchasing my complete 86 GT original body since its getting the MERA body.

He is scheduled to come and pick it up tomorrow!
IP: Logged
TXOPIE
Member
Posts: 2734
From: Leonard, TX, USA
Registered: Mar 2012


Feedback score:    (13)
Leave feedback

Rate this member

Report this Post05-09-2013 04:47 PM Click Here to See the Profile for TXOPIEClick Here to visit TXOPIE's HomePageSend a Private Message to TXOPIEEdit/Delete MessageReply w/QuoteDirect Link to This Post

TXOPIE

2734 posts
Member since Mar 2012
UPDATE: YEA! Finally one from Rob (Amida):

Main dash sections curing:
IP: Logged
TXOPIE
Member
Posts: 2734
From: Leonard, TX, USA
Registered: Mar 2012


Feedback score:    (13)
Leave feedback

Rate this member

Report this Post05-10-2013 04:41 PM Click Here to See the Profile for TXOPIEClick Here to visit TXOPIE's HomePageSend a Private Message to TXOPIEEdit/Delete MessageReply w/QuoteDirect Link to This Post
UPDATE: 86 GT Body panel and tail lights are gone...Tom Slick is now the proud owner!
IP: Logged
TXOPIE
Member
Posts: 2734
From: Leonard, TX, USA
Registered: Mar 2012


Feedback score:    (13)
Leave feedback

Rate this member

Report this Post05-11-2013 03:23 PM Click Here to See the Profile for TXOPIEClick Here to visit TXOPIE's HomePageSend a Private Message to TXOPIEEdit/Delete MessageReply w/QuoteDirect Link to This Post
UPDATE: from Rob (Amida): Major components demolded. Instrument pod prep; mounting tabs added.

IP: Logged
Previous Page | Next Page

This topic is 33 pages long:  1   2   3   4   5   6   7   8   9   10   11   12   13   14   15   16   17   18   19   20   21   22   23   24   25   26   27   28   29   30   31   32   33 
next newest topic | next oldest topic

All times are ET (US)

Post New Topic  Post A Reply
Hop to:

Contact Us | Back To Main Page

Advertizing on PFF | Fiero Parts Vendors
PFF Merchandise | Fiero Gallery | Ogre's Cave
Real-Time Chat | Fiero Related Auctions on eBay


Copyright (c) 1999, C. Pennock