I know this has nothing to do with Fieros. But as I get deeper into working with fiberglass I couldn't help but post this site. This modeler is AMAZING!
That is the slickest looking design that I have ever seen! Awesome work! Marked as a favorite.
Can you put the 12v in the middle, in between the cup holder extensions?
How are you going to set up the opening compartment area? I have not read if you are going to put anything special in there or not. (I plan on reading the entire thread later.) I envision an area that would hold an LED flashlight, pen and pencil holder, cell phone holder, and Two 12voutlets like the one that you have in the pics. Just what I envision, in your creation.
I like the leather idea also. Just the whole design is great! And then you go ahead and throw in a couple of functional cup holders! Awesome project! Good luck.
I know this has nothing to do with Fieros. But as I get deeper into working with fiberglass I couldn't help but post this site. This modeler is AMAZING!
I wonder what that guy would charge to build a skeleton out of aluminum? That would be very custom. You would have to build a clear console so that the skeleton could be seen. Or what about an exoskeleton built on the outside of the console? Now quit sitting at the computer and get back to work!
That is the slickest looking design that I have ever seen! Awesome work! Marked as a favorite.
Can you put the 12v in the middle, in between the cup holder extensions?
How are you going to set up the opening compartment area? I have not read if you are going to put anything special in there or not. (I plan on reading the entire thread later.) I envision an area that would hold an LED flashlight, pen and pencil holder, cell phone holder, and Two 12voutlets like the one that you have in the pics. Just what I envision, in your creation.
I like the leather idea also. Just the whole design is great! And then you go ahead and throw in a couple of functional cup holders! Awesome project! Good luck.
Tony
Hi T,
Thanks for the kind words! I really appreciate it. I haven't figured out what I'm going to do about the 12v outlet. I haven't had much time these past few days to do anything at all. I'm also fighting a bug or something... lot's of aches, pains, etc...
Anywho, I was thinking of repositioning the 12v outlet into the armrest storage bin / glove box - most new cars are that way - but it's dependent upon how much room there is.
Again, thanks for the kind words. I should be back on the console tomorrow or Friday
I wonder what that guy would charge to build a skeleton out of aluminum? That would be very custom. You would have to build a clear console so that the skeleton could be seen. Or what about an exoskeleton built on the outside of the console? Now quit sitting at the computer and get back to work!
Hello Sofa King fantastic job so far. When are you going to post the latest updates? And how much longer do you calculate for it to be completely done.
And don't forget to post how much it would be to reproduce for those who want to buy one...
I'm feeling 1000 times better than I was yesterday. It's amazing what 12 hours of sleep for 4 nights in a row will do for ya! I have to clean the garage first before I do anything... you saw the messages... LOL But then it's full speed ahead!
I have decided to move the 12v outlet. So I'll fill the existing hole and probably put the outlet either in the armrest glove box or someplace else. I will need it... just have to figure out where. I think I'm in the final stretches now. I have to glass the back of the main glove box and resin the front and then it's just minor touch up work before the first layer of final paint gets sprayed!
Don't forget the ADL(whatever) connector under there!!!
Luckily the ALDL doesn't interfere with the console. I might have to make an access panel - which would be fairly easy. I can use the torque screws similar to the dash. hmmmmmmmm
much it would be to reproduce for those who want to buy one...
Hey 87,
I'm actually going to rebuild an all new console using the same steps Archie takes to building his fiberglass projects. That way I can get everything to measure evenly, clean lines, straight edges and there's no guessing. Right now, I'm figuring 3 pieces to start - the lid, glove box and main console. The armrest will come later. Once I have those masters made, I'll look into what it would cost to use that as a plug to create more.
Cost? 1 billion dollars! muhuhuhahahahaha... Actually... I have no idea... maybe 200 - 300 dollars. But that also depends on sanding, prepping, etc... and the cost of the molds.
I hope this helps?
[This message has been edited by Sofa King (edited 12-18-2009).]
There are updates! I spent the better part of yesterday cleaning the garage before doing anything. I woke up early this morning, did some Christmas shopping and was able to get a few layers of glass laid. I'm just waiting for photobucket to update!
Once the resin dries I'll be doing some light sanding and filling those hard to reach areas. I'm also going to finish up the armrest, fill the 12v outlet and prepare for final paint!!!
Photos coming!
Just got an email - door panels are on their way!
[This message has been edited by Sofa King (edited 12-19-2009).]
Did you use the foam in the glove box with some mat layed on it? Or just the foam board and resin? I'm rethinking my shft cover and might use the foam board. I'm thinking about using the foam and resin to make a mold, cover it with packing tape or wax paper then laying a few layers of mat over the top to make a shell for the shfit over. I want to take some of the "block" look out of it.
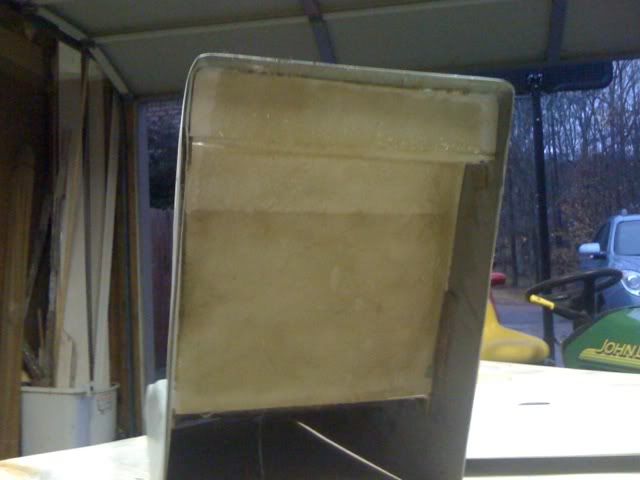
I used all 3 - foam, resin and glass. I quickly realized that the resin, while strong, is only a very thin layer and will not keep the foam core from snapping - it is after all just paper and foam. It needed a little bit of glass to give it the strength required.
Now - UPDATES!!!!
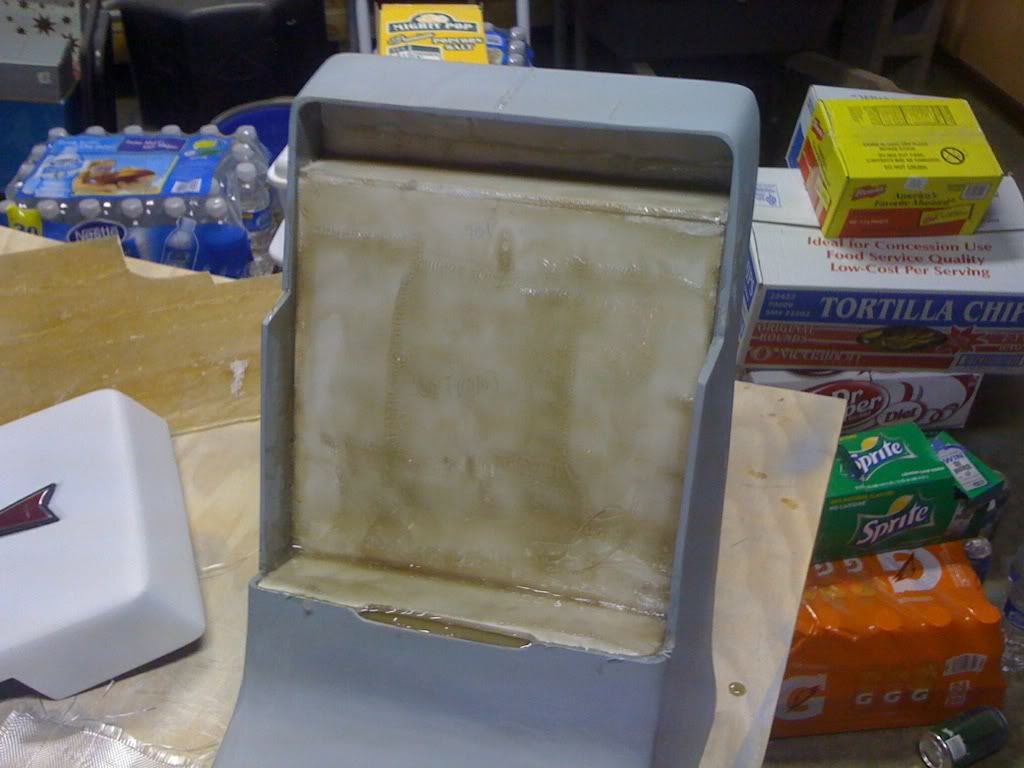
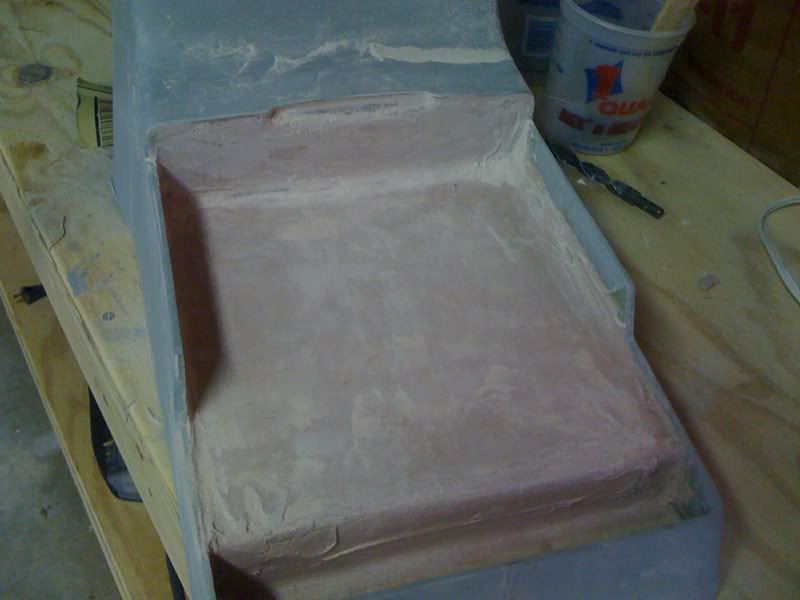
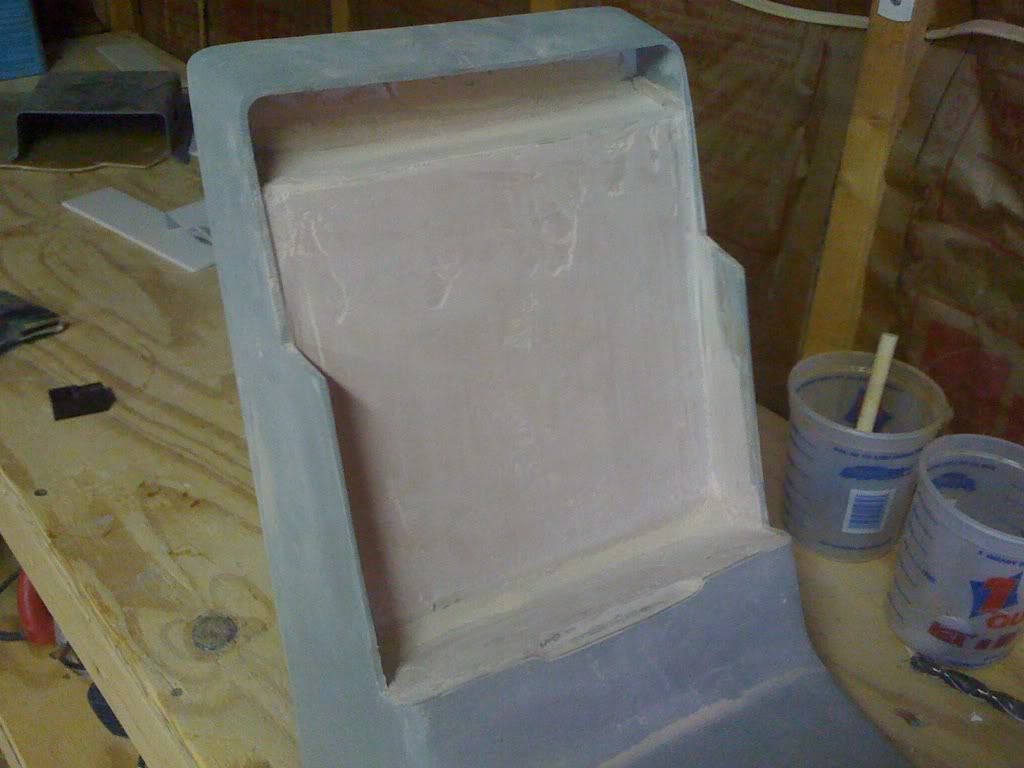
I went ahead and began to sand the inside of the glove box and added lot's of body filler. Since this is going to be laid in felt - it doesn't have to be perfect!
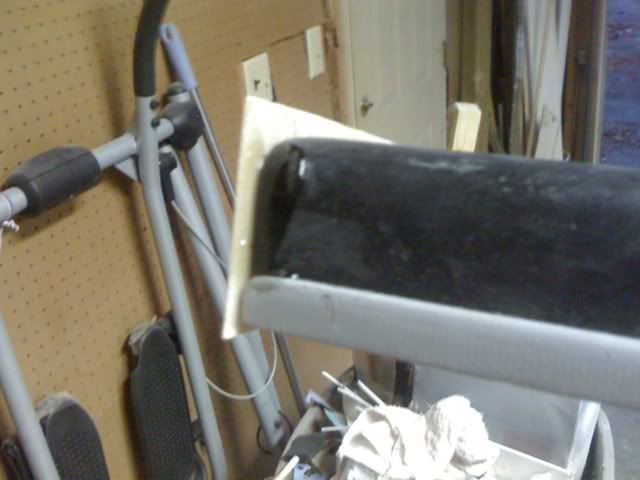
Another - catching some rays
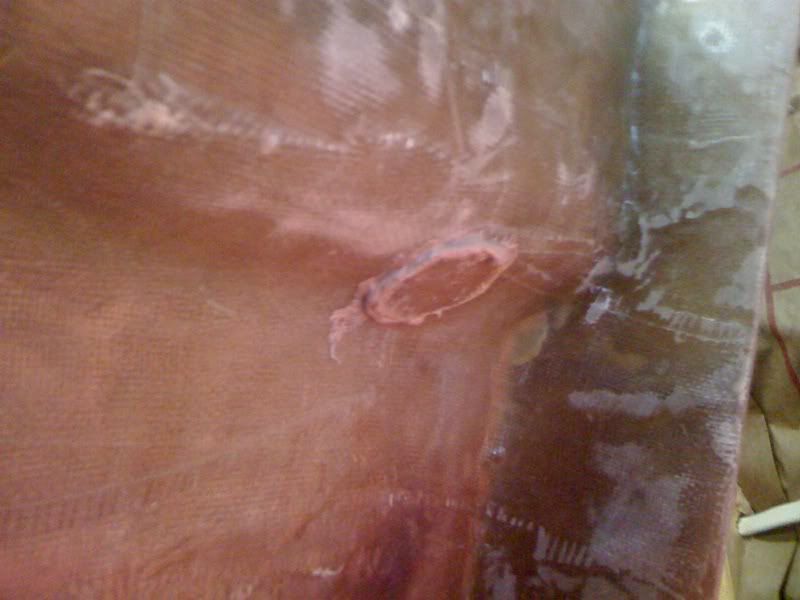
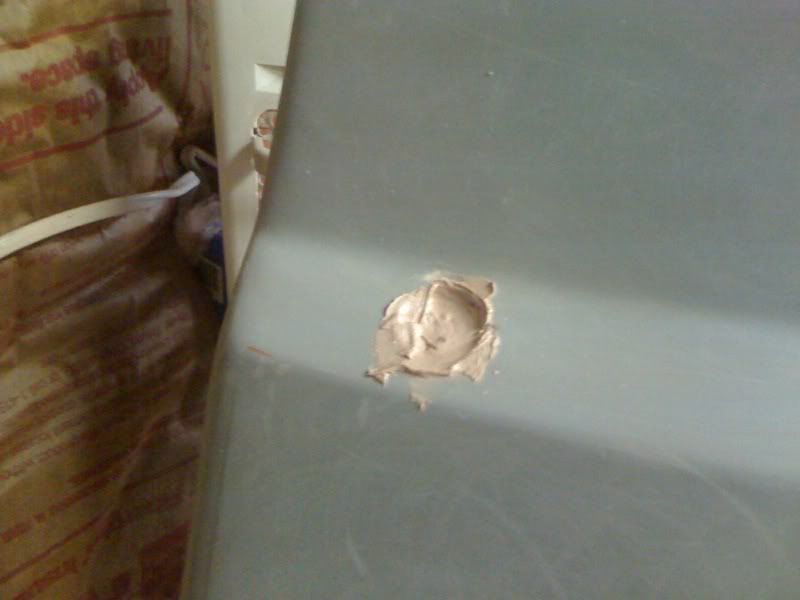
I also filled the 12v outlet hole
Believe it or not... this little area has required the most sanding I've ever done. Although it's going to be covered I still need to knock down the high areas - total pain!
And more sanding
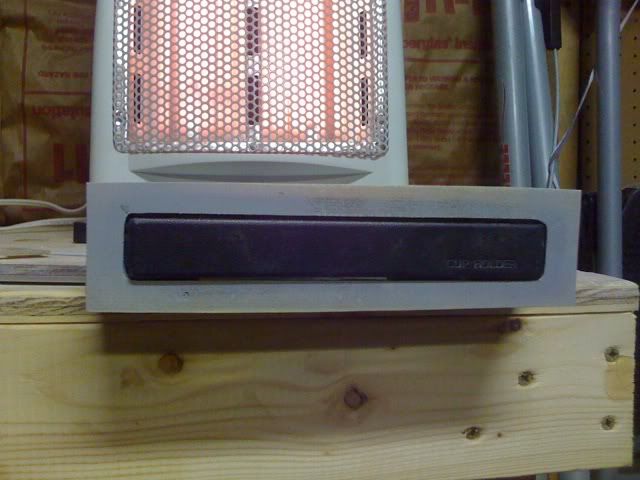
AHHH... I shall call him... MiniResin
Slight set back. While sanding the armrest, the front plate that I attached popped off. I'm now adding more resin - it has been really cold and I'm wondering if that's having anything to do with it?
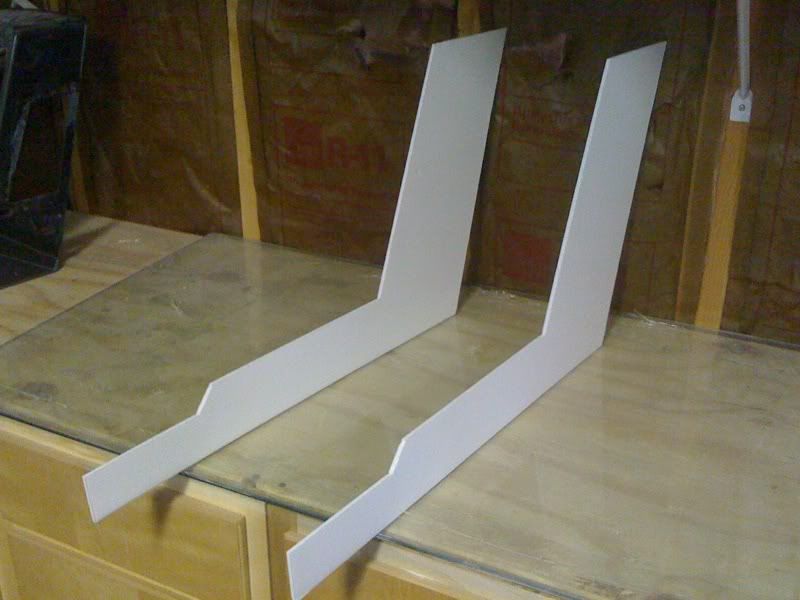
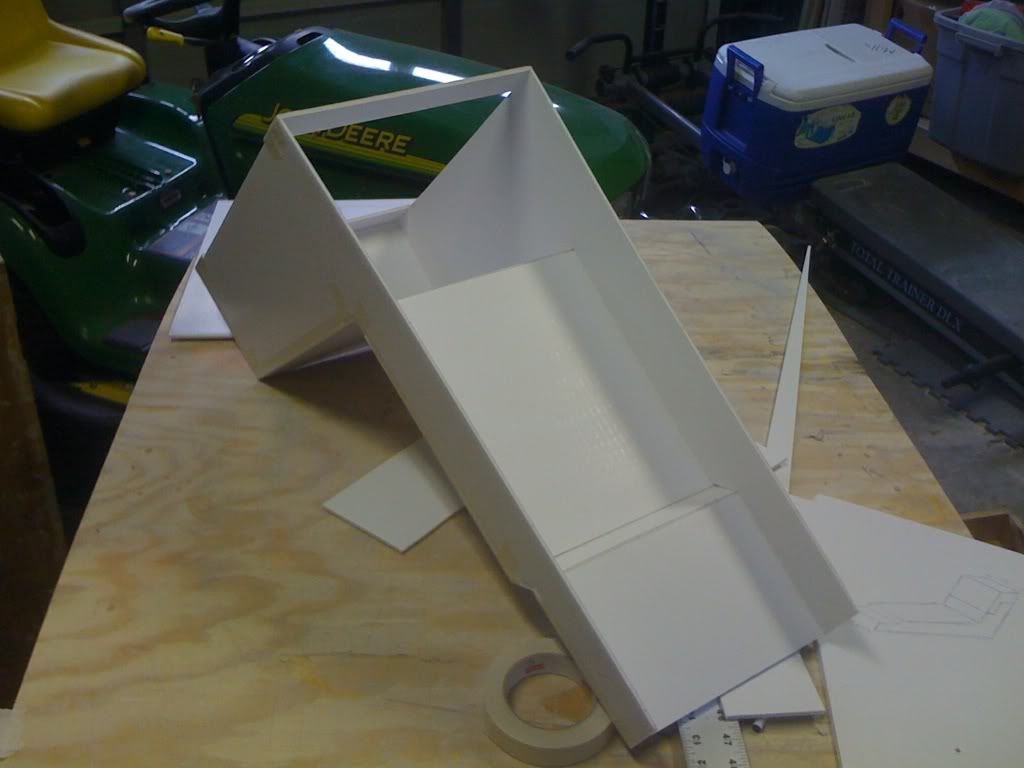
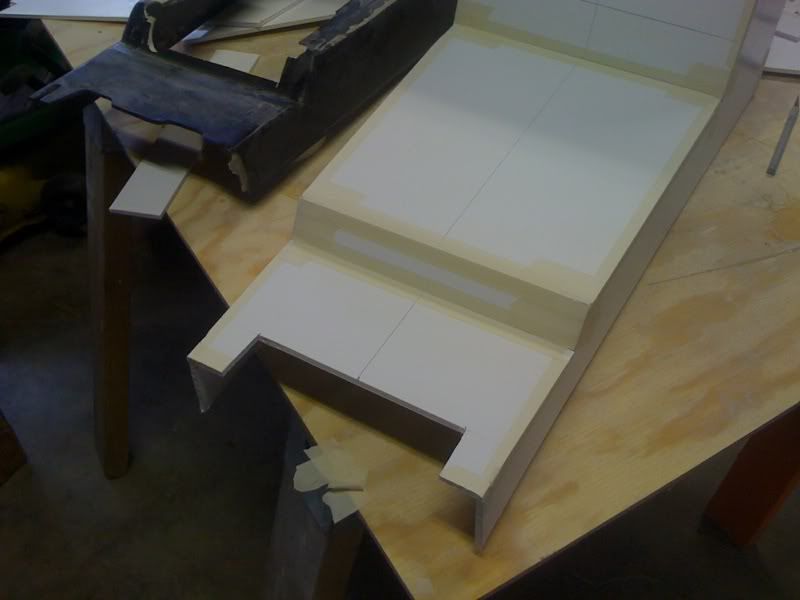
Now... on to the good stuff... Remember all that foam core I purchased? Check it out! Armed only with a ruler, X-Acto Knife and VERY little common sense... I have begun work on Console Part II. The first thing I did was trace an outline on the foam core using the original console. This console is slightly bigger than my first console but should still fit snug
This was the fastest console I've ever built! Other than taping together - it took about 15 minutes
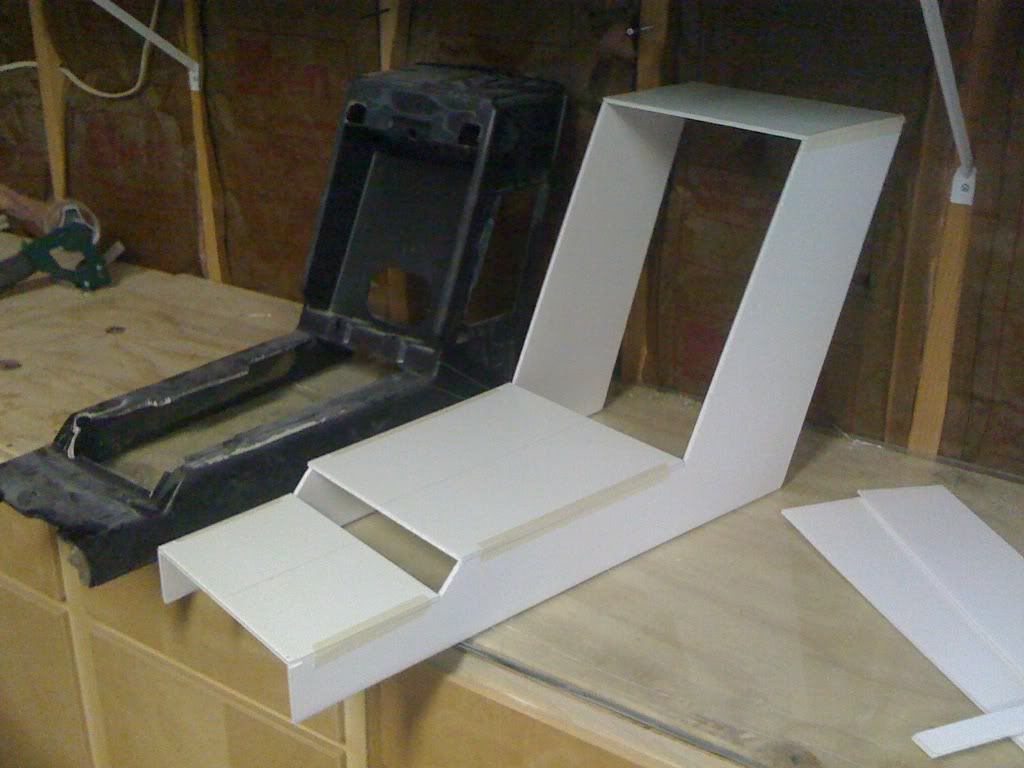
Inside shot - you can see how perfectly straight the lines are. This makes it easy to create the new glove box
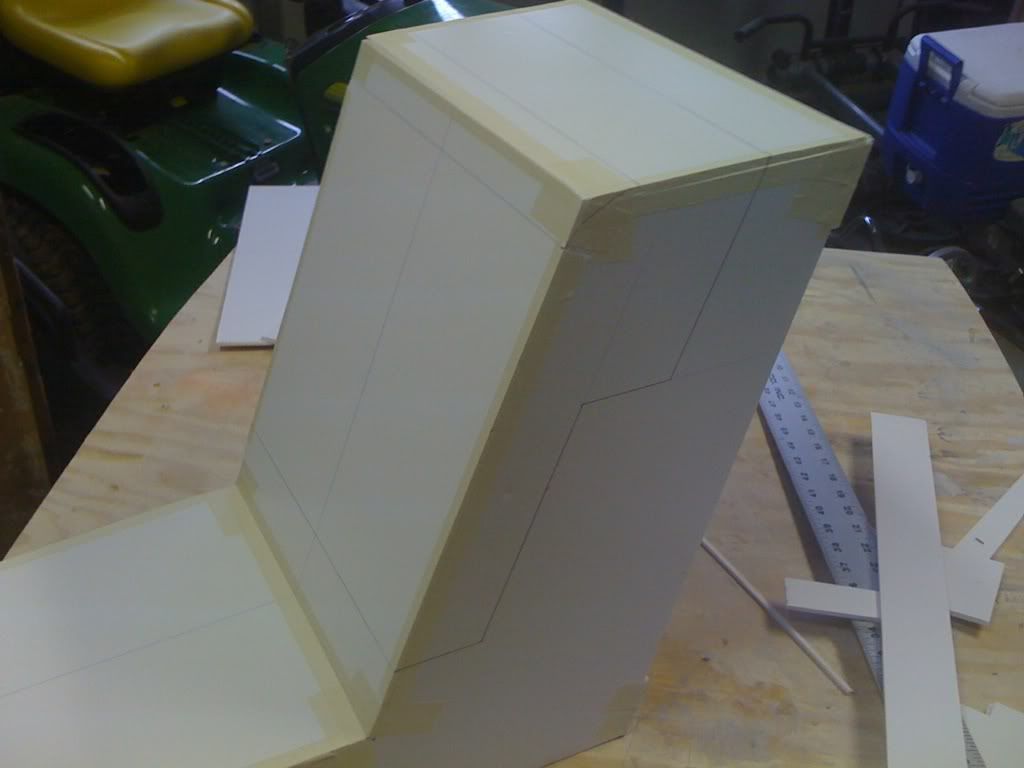
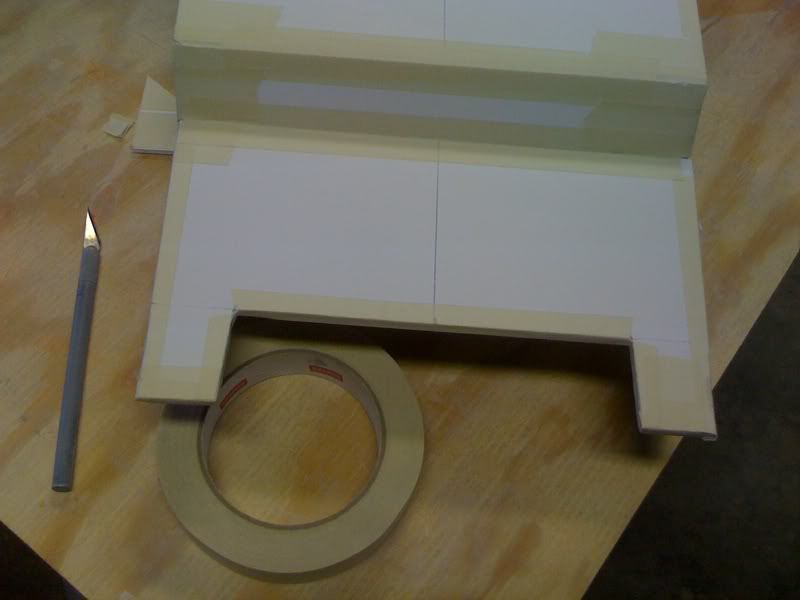
Marking the new glove box lid - the nice thing about foam core is that it's cheap and if you make mistake - it cost 50 cents - not 35 dollars
Following the same lines as the original console I cut the edges to ensure it fits in the car
Another
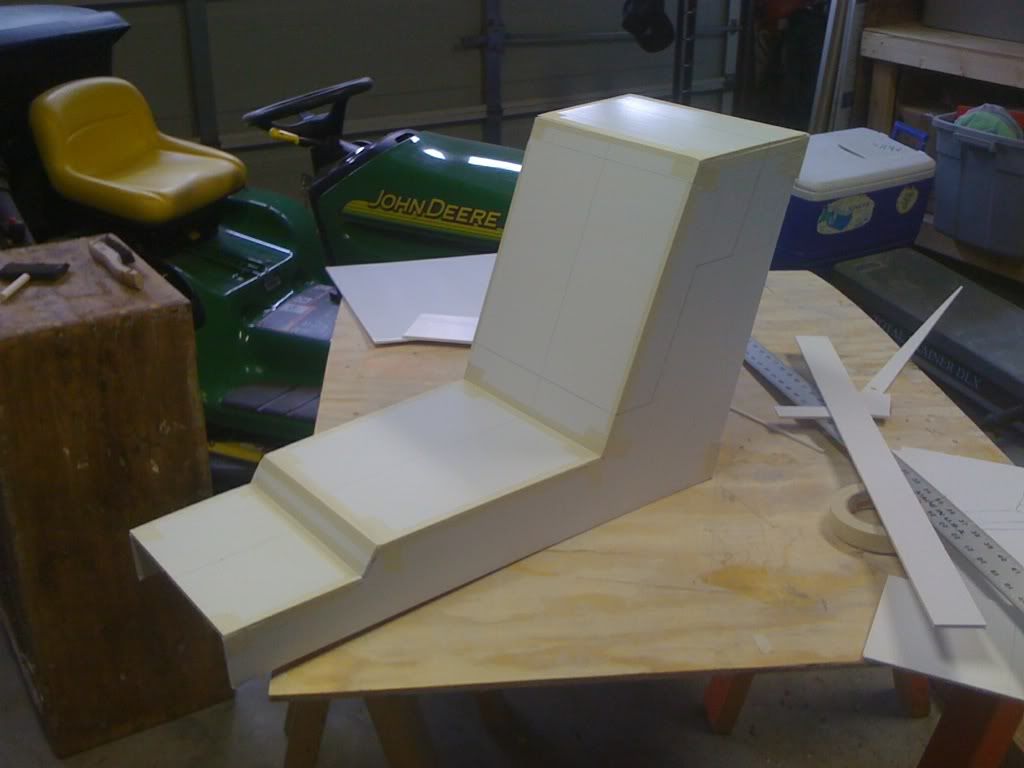
I then tapes the edges
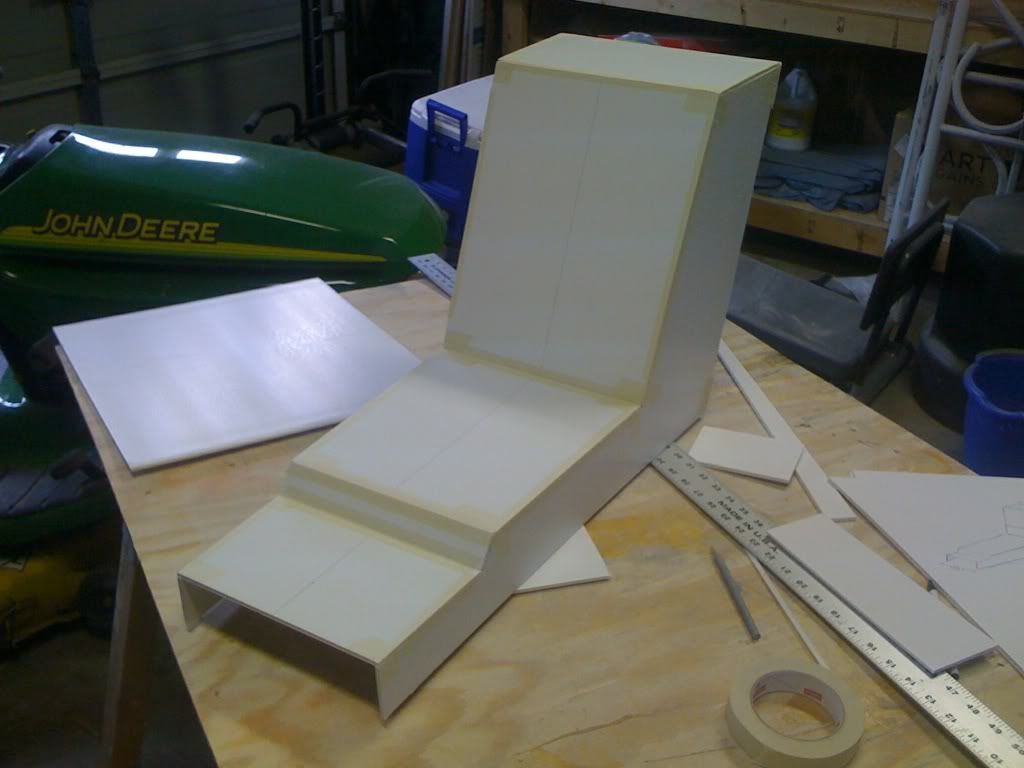
I rounded out the back part of the console
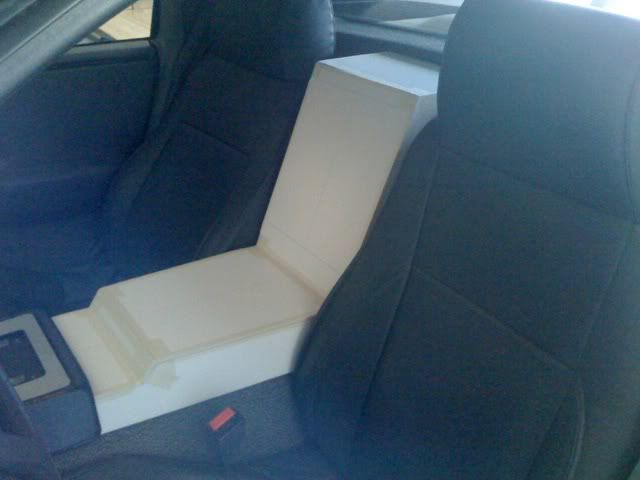
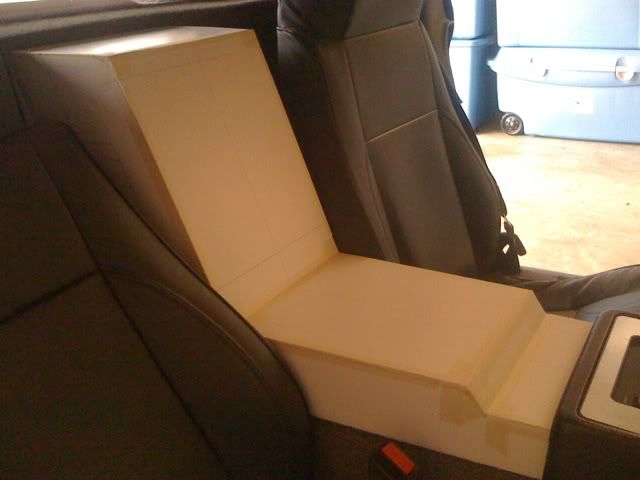
Here it is in the car - notice I added more space in what will become the glove box.
Front - FIT PERFECTLY!
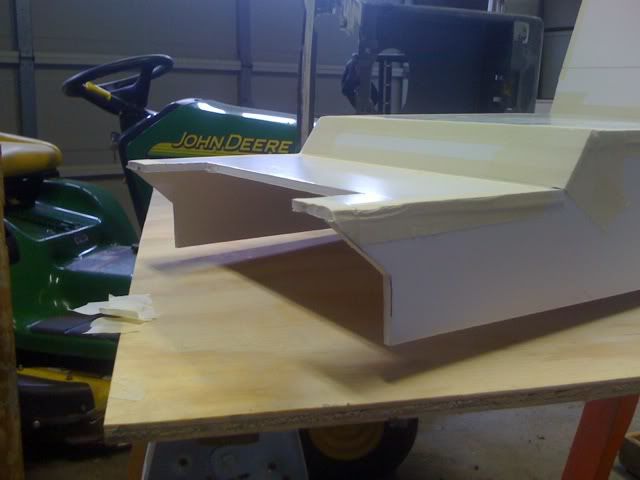
One more - this new console will also be used to create more consoles should I decide to go "global" LOL
I spent about 1/2 hour to 45 minutes total on this new console. Why? I'm not ending at the console, like Katatak, I'm going to continue moving forward all the way through the radio / ac housing to the dash - I might even make a new dash - not sure yet. BUT! The foam core works wonders and allows me to see exactly what I want to do and what direction I want to head. I can also paint the foam core to get a better idea of color schemes, textures, etc... Can I use just the foam core to create a new dash? Yes and no. I have two directions:
1) Once I get everything in place and all the measurements made I take apart the console, create fiberglass panels and transfer those measurements to the fiberglass - that's a lot of glass work and a lot of fabricating but there's very little guess work.
or
2) With the foam core in place and using more masking tape than I know what to do with... I glass both sides of the console similar to what I'm doing to the glove box on the original console. I don't have to be as forgiving on the inside but I would need to work smart on the outside to ensure straight edges blah blah blah...
From here... the next steps for the new "foam core" console are to cut the lid and create a perfect glove box along with a new style armrest and mini glove box. This will also allow me to begin to design a new shifter plate and radio a/c housing.
Not to worry - I'm still moving forward with the original console build. Once the glove box is sanded smooth I will begin to put the final pieces together for the armrest (to include the mini glove box), lay the felt lining inside the glove box and lid and get to paint.
P (and everybody else of course),
Go back to Hobby Lobby and get a bunch of foam core! I promise this will help with any idea or direction you might have. And yes, you can cut curves - not compound courves, but you can do simple curves. I'll post a pic in a few. (JUST SAW YOUR THREAD! YOU GOT THE FOAM CORE! How funny is that! - Great minds!!!)
[This message has been edited by Sofa King (edited 12-20-2009).]
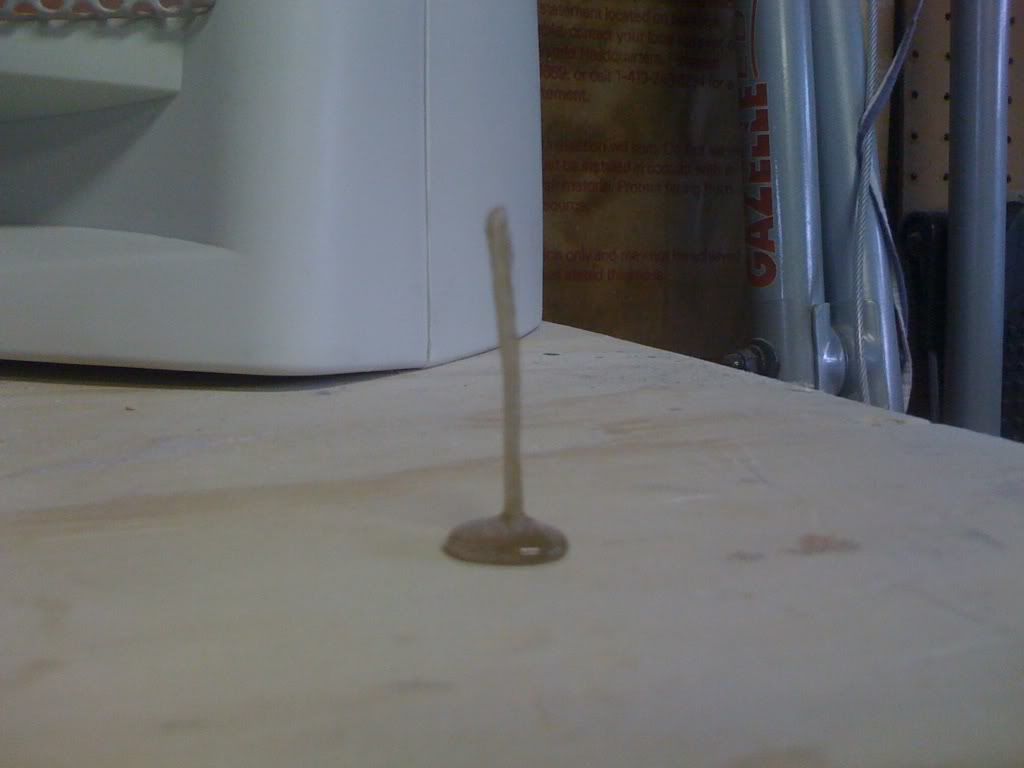
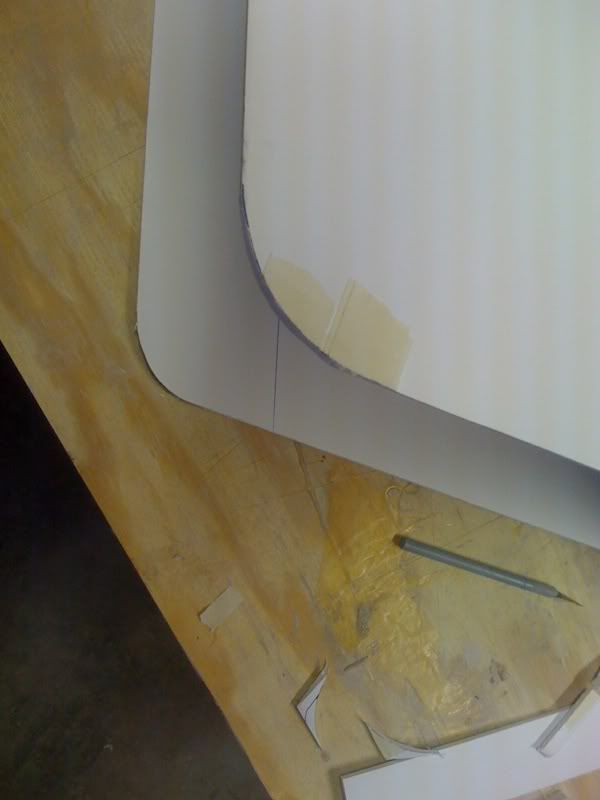
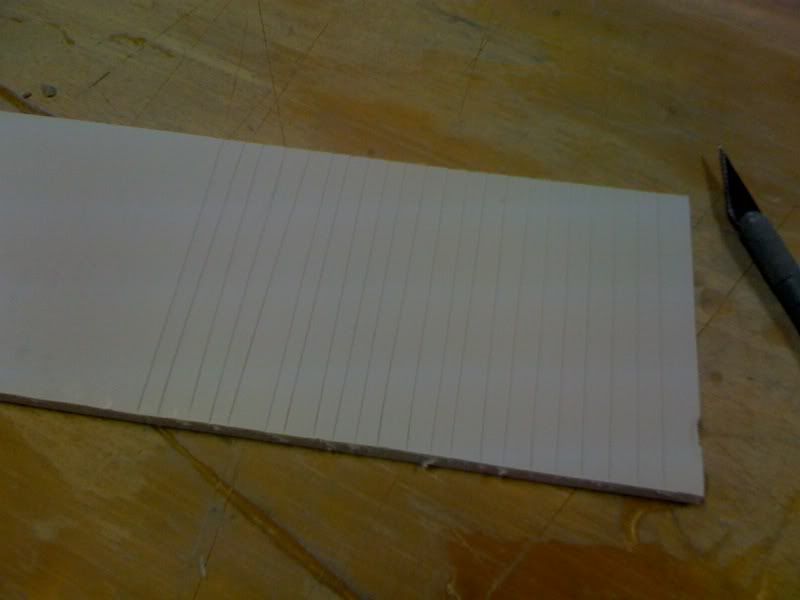
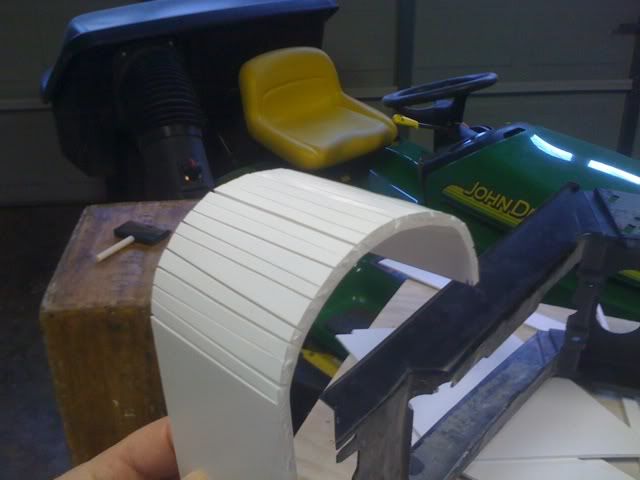
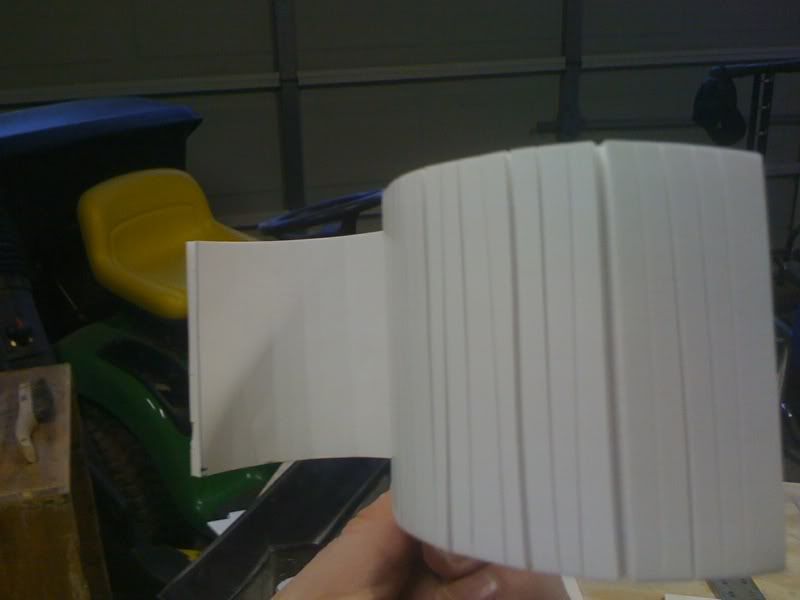
Creating curves using foam core - I'm using a scrap piece of core for demonstration purposes only
Using your X-Acto kinfe and a metal straight edge you score the foam core through the top paper layer and through the middle foam being careful NOT to go through the bottom paper layer - a few practice swipes will help you determine how much pressure to apply. You create multiple score lines depending on your curve. The more score lines the more smooth your curve will be.
Score lines
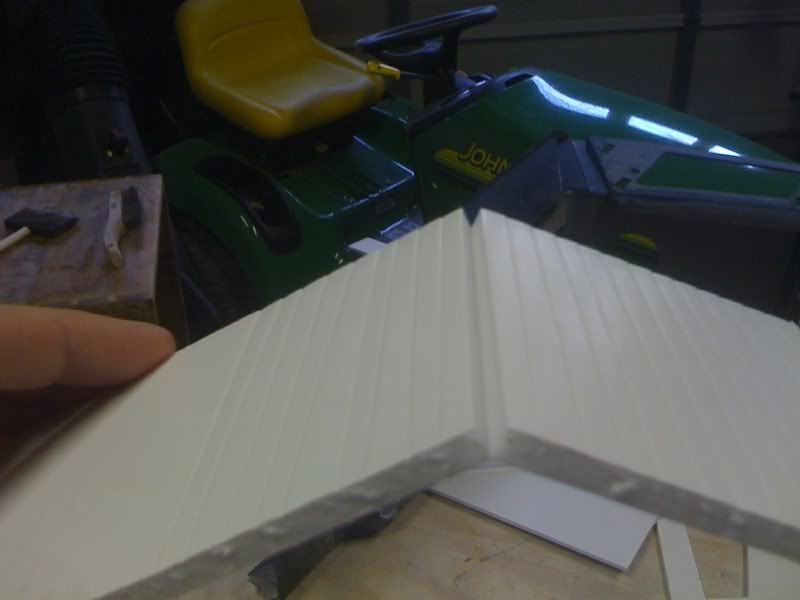
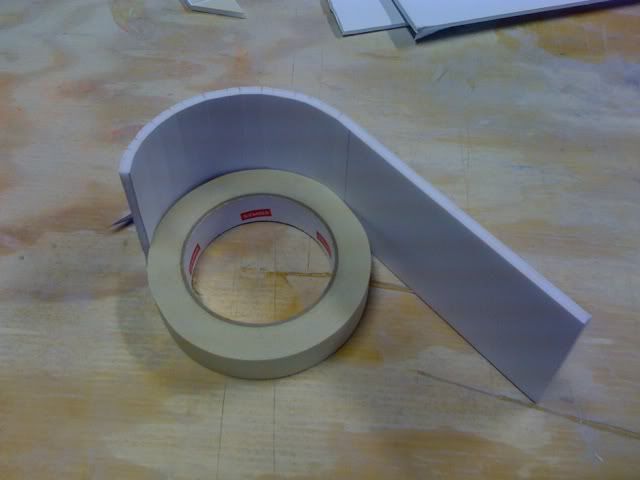
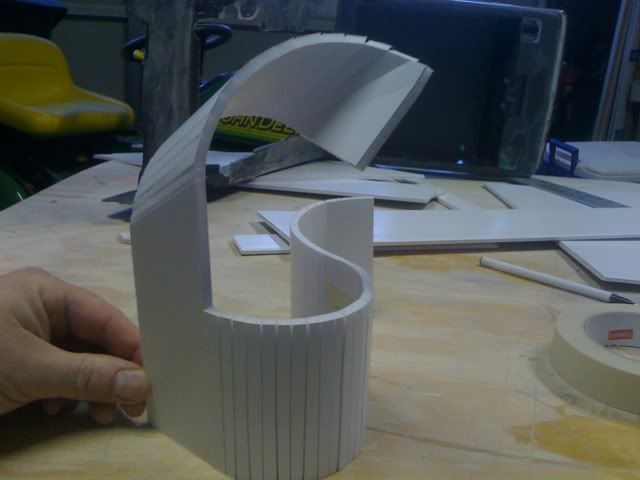
Then use your fingers to spread the foam core apart being careful not to tear through the bottom paper layer - remember, the more score lines the smoother it will be. However, you may need to use your straight edge to help spread the foam core apart
You do this to all the score lines until a simple curve is achieved
As you can see I used the masking tape as a reference for the curve.
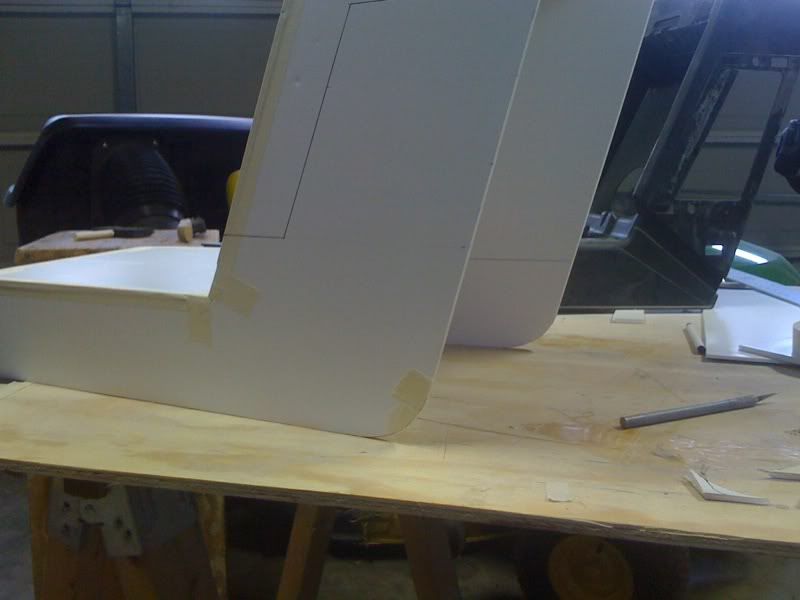
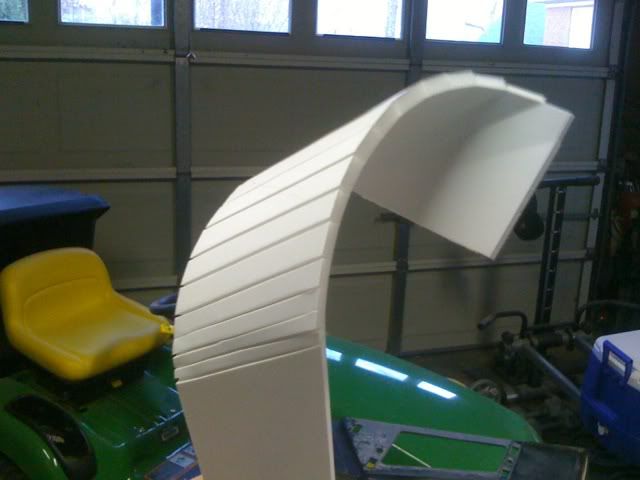
You can create different angled curves and mutli-directional curves
Angled score lines
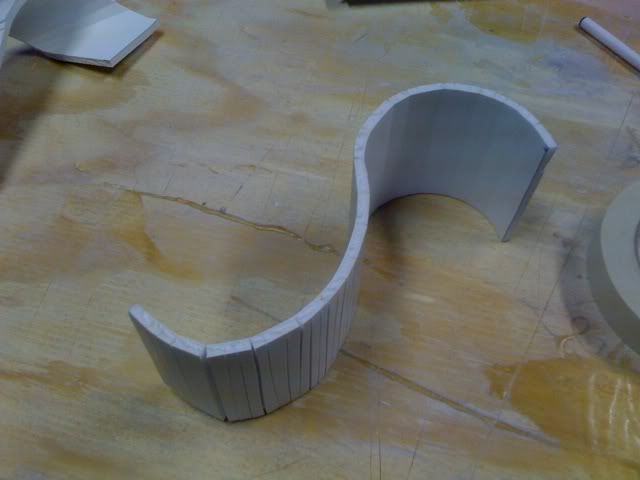
Figure eight - score lines on both sides of the foam core
All this creates Super Happy Fun Time!
The next question: How do I keep the curve in it's desired position? Assuming you alreay know what the measurements are and the shape you want you can do one of two things. First, simply lay the curved piece of foam core over the area and tape into place. The other - use a piece of scrap foam core and trace the outline of the curve you want. Then use the X-Acto knife to cut out the curve and use as the template in which to tape your curve. Once you get the curve you want carefully add masking tape to the inside and/or outside of the curve. The tape will both push and pull the foam core keeping it's desired position.
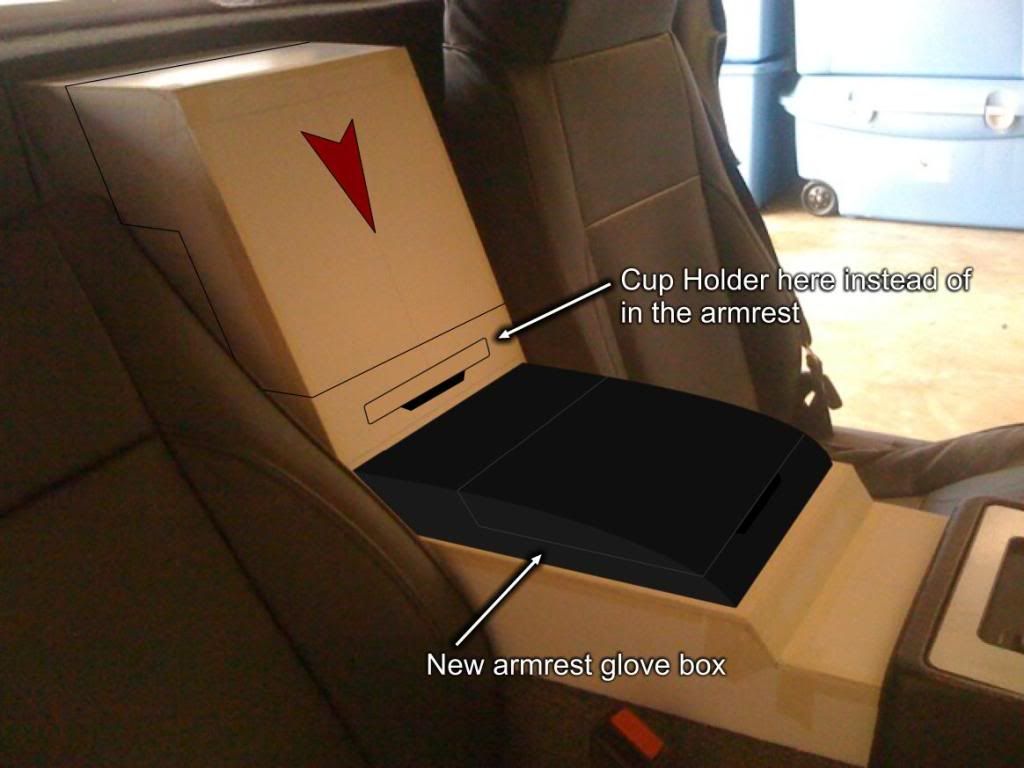
Depending how deep the new console is (I can always change it) - I might be able to place a cup holder below the lid in the main console and NOT in the armrest. This would free up space in the armrest for a new mini glove box and allow a tapered look instead of the sudden "chopped" off look. This would also allow for the return of the 12v outlet.
I kinda like this new direction... what do you think?
That's it for today.
[This message has been edited by Sofa King (edited 12-20-2009).]
Wow Greg!. What is really weird is that I thought you were using just foam board. Not foam core. When I went to the hobby store the other day to get some foam board, I had a pile of it in my cart and wandered through the foam core isle. I thought it would work better so I dumped the foam board and picked up the foam core. It was way cheaper too. And all the while, it's what you were using....Great minds think a like. Or you were sending me telepathic signals while I was roaming around the hobby store - but I do not want to go there....lol. I here I thought I had one up on you............I also found that the old hot glue works really good to holt it together.
Anyway, I found that if I wax the foam core paper with auto wax and instead of buffing the wax off, leave the film of wax on the paper, you can lay glass and resin right on the mold and when it's setup, it peels off real easy. Just make sure to cover the exposed edges of foam with packing tape.
Now who's raising the bar....... You got me thinking again. I was just going to extend what I had already done. Now I'm thinking a complete rebuild! I hate you..........
Wow! Definitely like the new concept you just came up with. I'd say go for that!
Thanks for the positive feedback. I'm with you. I really like this new direction. The nice thing is that I can create the entire console in foam core, paint it (if I want to) and install it to see which one I like best with minimal cost and very little time.
As I move forward I'm looking at different designs for the shifter plate and radio - a/c housing. I've got tons of ideas running through my head but I'm headed for the same "wall" Katatak just hit - How do you design an interior keeping with the original design of the car but updating it with today's / future design elements - very tricky.
My head hurts from banging it against the wall. Your way is the best way. Build models to you get the one you want then go to glassing. If I had waited a few weeks longer to start mine, all the work I already did would not have been wasted. Well I don't really think it was a waste. I did learn a lot. Now I'm ready for the next phase with a clearer picture of what it is I am tryoing to accomplish. Could not have done it without your hel[p and advice Greg! Thanks again for sharing what you are doing. Keep sme going forward.
My head hurts from banging it against the wall. Your way is the best way. Build models to you get the one you want then go to glassing. If I had waited a few weeks longer to start mine, all the work I already did would not have been wasted. Well I don't really think it was a waste. I did learn a lot. Now I'm ready for the next phase with a clearer picture of what it is I am tryoing to accomplish. Could not have done it without your hel[p and advice Greg! Thanks again for sharing what you are doing. Keep sme going forward.
Pat
UH-GREED!!!! I think I'm more frustrated with myself for not even thinking of the foam core - what a dope! But like you said - we've both learned a LOT! And we're both learning from each other and that keeps us moving forward. Thank you for the kind words. But it's you who keeps raising the bar and making me rethink my own decisions and processes - you bum. Maybe we should open a shop - nah... we'd never sell anything. We'd just improve on the previous design. LOL
NOW! Check this out. I discussed this in an earlier thread and you're probably going to be able to do this before I will - Christmas Vacation is coming and I'll be out of town for a week and then its back to work!
Here's the plan: I'll be doing this on my next console When you create a new fiberglass panel make sure you have your "foam core" parts already laid out, cut, measured, etc... This is really tricky becuase you can't walk away after you lay the resin! When the panel is still curing but just dry to the touch, remove the wax paper, lay the foam core pieces on top of the panel and shoot a light layer of primer making sure you hit ALL the edges. Remove the foam core to reveal the outline. Take your trusty X-Acto blade and straight edge and begin to cut out the shapes from the fiberglass panel being VERY carfeul around the edges - the idea is to get a perfect cut. The resin will not have cured all the way and cutting should be easy - make sure you use a NEW blade. When you make all the cuts peel away the excess leaving only the prefabricated shapes to dry. Reapply the waxpaper and a flat board until the resin has fully cured.
I tried this process on a huge panel and it worked PERFECTLY! All I did was cut the edges and remove the flash - but it worked. There was MINIMAL sanding and cutting to do. It was AWESOME! The build process should go by MUCH quicker!
The light bulb just clicked on. I understand what you are doing now. Let's see if I have this straight.
You build the part with the foam board. Then check it in the car for fit. Once you have the design you want, you deconstruct the part (foam board) then make a fiberglass panel. As the resin cures, you lay the pieces of the deconstructed part on the panel and cut the pieces out with a razor knife. Once the pieces are fully cured, your assemble the fiberglass pieces to make the final part using tips learned from Archie (hot glue on one side) to hold the piece together while you glass the other side. I get it.......... It's excellent!
My plan was to build the part out of foam core and then use the part as a "plug" to lay glass over. Once sured, I would peall the fiberglass part off the plug.
Your plan will reduce the amount of sanding and finishing a bunch! I told you that I was banging my head on the wall too much. Also have some brain damage from all the resin.........
During my plane flight today, I was working all these "parts" in my head - all the things I was going to with my "new" console. I guess I have to toss all that out now and rethink it. Thanks again Buddy!
BINGO! You got it! I think the plan has some merit to it. Try doing it on a small piece first - maybe the emblem???? Anything to avoid unnecessary sanding, right? And about your brain damage... Welcome to the club. I'm not just a member... I'm the founder.
I do the same thing when I have down time - just think about all the different possibilities, lines, designs, creature comforts, etc... What can I do to make the fantastic car just a little better.
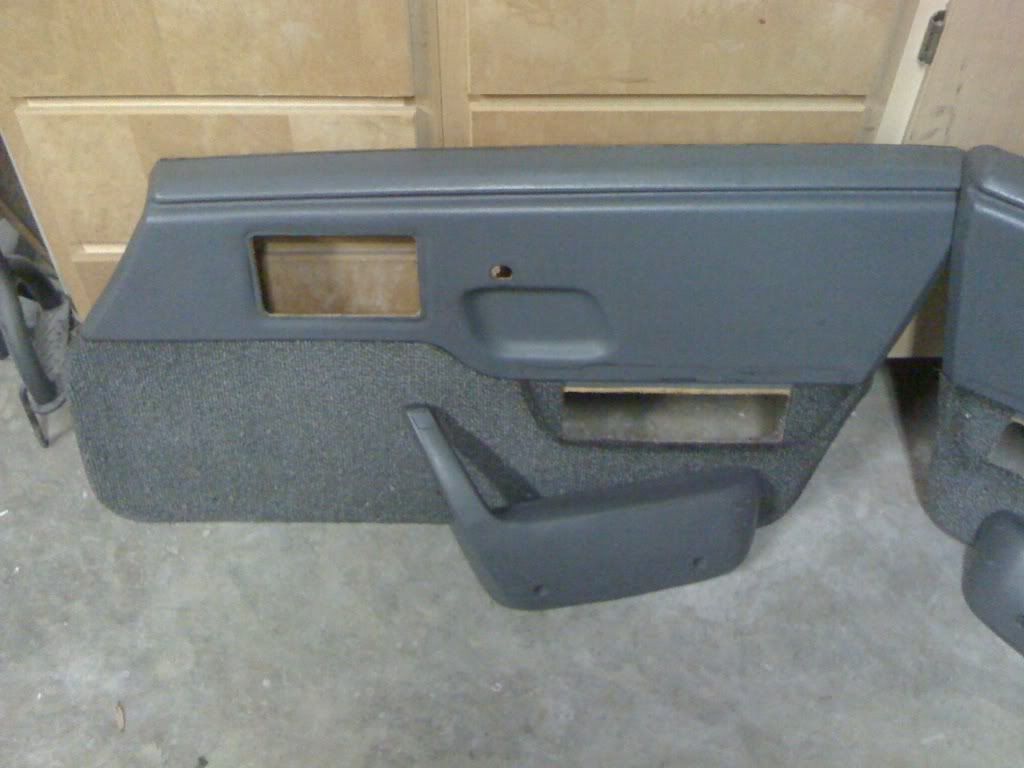
Santa came early this year! Looks like I know what other project will begin!
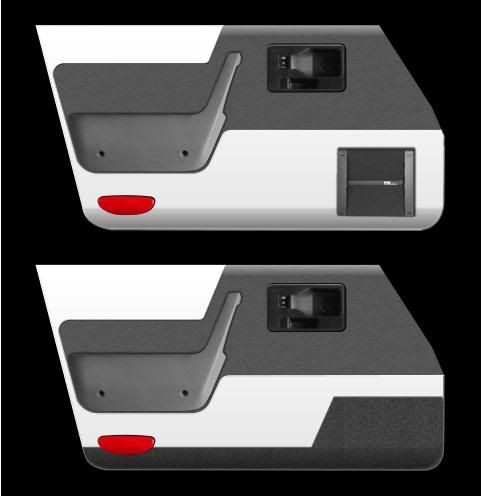
Now if you remember, this is the basic plan for the door panels. The final design is still being worked in my head.
THANKS SANTA!
I'm leaving for Vegas tomorrow morning for Christmas (I know I know...) so there will be no working on the project until I get back next Monday. So, in the meantime...
Happy Holidays to all and have a very Merry Christmas!
Now quit fooling around in Vegas and get back to work.....
Hope you had a great day and Santa brought you lot's of Fiberglass supplies.
Pat
Hey P,
Merry Christmas, buddy! I'm BACK! I flew in late yesterday afternoon and I am ready to get back to it! I've got my mental list of ideas and I am ready! However...
There are going to be a few changes. I am abandoning the armrest idea for the first console. I still want to finish this console, get it all sanded, primed and painted and everything installed so I can stand back, admire it for 10 seconds - oooooo, ahhhhhh, and then move forward to Console Part II and the door panels. I'm going to try to remove the cup holder from the armrest so I can place it in the new console - that's going to be tough. I love the first console but with as much I've learned over the last few months, I know I can do better, be much more efficient about it and have everything finally come together. I may even sell the first console?
They only funny thing... I have to recut the hole that I just filled for the 12v outlet.
Also, I have a complete dash, radio bezel and shifter plate coming. Do the math... he he he
I feel your pain brother. Everytime I get close, I change something. I am on track to "finish" what I started but already have new plans. I can't wait to see what you do with the door panels - I may be inspired to tackle that too! And now you are flirting with a dash....I hate you! My future plan is a complete interior redo for the XTC. I spent the last 3 days working on it and have come to the realization that it needs your "concept" interior.
I know I know... again... I've been slacking and I'm sorry. Some personal things have come up that I have had to take of. Things should be balanced out in the next few weeks but I should be able to get out to the garage this weekend.
I feel your pain brother. Everytime I get close, I change something. I am on track to "finish" what I started but already have new plans. I can't wait to see what you do with the door panels - I may be inspired to tackle that too! And now you are flirting with a dash....I hate you! My future plan is a complete interior redo for the XTC. I spent the last 3 days working on it and have come to the realization that it needs your "concept" interior.
Happy New Year, buddy! I have seen this thread. Amazing build. The attention to the details is not only boggeling but also very inspiring - the side window frames for example. It's the type of build where you want to tell the guy to hurry up so we can see it finished.
I think the XTC needs an interior to compliment the exterior lines of the car. I'm glad you like the design I did. Just let me know if you need any thing at all.
Are you ladies done with your holidays YET?!?!?!? Come on.........get to work!! (like I have been doing )
I did not notice how either one of ya'll are going to secure the console down? I was thinking about a countersunk hole on the sides and then getting some covers( like on the lower door trim, by the carpet. not sold on that idea just yet but the only thing I came up with so far...
I have ordered led strips for several cool projects!! heh heh Still looking for that "just right " steering wheel.
For me, I am using the original skeleton and the AC surround mounts the same. The rear console mounts to the skeleton in front stock and I am building a bracket for the firewall to olt the back too. The shifter cover will fasten to the AC surround and the rear console through the sides with 10X24 screws, well nuts and "snap caps" - black plastic caps that sanp over the screw to cover it. Look likes a little black button. I think Greg is using some big finish nails.....lol j/k....
I think Greg is using some big finish nails.....lol j/k....
Pat
LOL! Is that wrong? Because I bought a really big hammer and those HUGE driving spikes and rebar...
Sorry for no updates guys. These past few weeks have been pretty horrible. My fiance and I called it quits after 4 years. Without going into any gory details the last week or so has been spent dividing everything up and helping her and her two kids moved into a new home. To say the least, it's been very stressful. Not a great way to start the new year... oh well...
Also, it's been REALLY COLD and I don't have a heater big enough to warm the garage. I can't paint and the resin is really thick because of the cold... It was 15 when I went out to the car this morning with a high of ohhhh.... 20? But not to worry. I'll get back out there!


 Yeah take care of YOUR life right now. Don't worry, Pat and I will keep this out of the archives


