I took your advice and used both a roller and waxpaper with the fiberglass cloth. What a difference! There's little sanding to do. Thanks for the great info!
I used the Rustoleum "Textured Plastic" paint in flat black. I cleaned the pieces with hot soapy water rinsed well then after they were dry, I scuffed them with a red scotch brite pad then I wiped them down with some thinner then applied 2 coats. I'll get some close ups in the daylight.
After looking at that ZR1 today, I think you are right about the glossy clear coat. The pieces on the Vette look like they are an inch deep. I won't be doing any of this on this project but I have some more parts to do for the XTC. I might have to "re do" the ones I have already done. Practice practice practice....... I just hate doing things twice....
Tip - if you haven't fiberglassed, remember these few tips:
1) Wear gloves and old clothes 2) Be sure to have a clean work area 3) Cut ALL your fiberglass before applying because you only have so long to work the resin before it begins to harden 4) Make sure you have all the necessary tools (since I'm a beginner - old paint brush, foam roller and gloves) 5) Make sure you use packing tape or waxpaper to help remove the fiberglass from the shape / surface 6) apply a thin layer of resin to the entire working surface of the object 7) USE fiberglass cloth 8) gently lay the fiberglass down it the appropriate position using the brush to help guide the glass 9) tap the fiberglass into place and then coat with resin - then use the roller to help spread 10) make sure the fiberglass receives a solid coating
I am sure there are other steps, but since I'm a novice, I hope this helps anybody trying it for the first time.
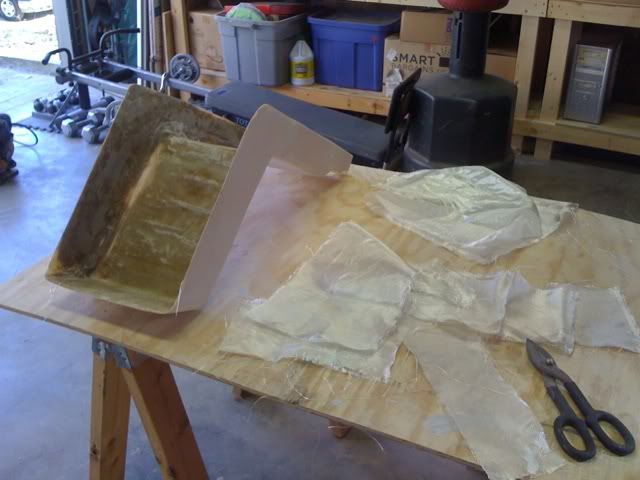
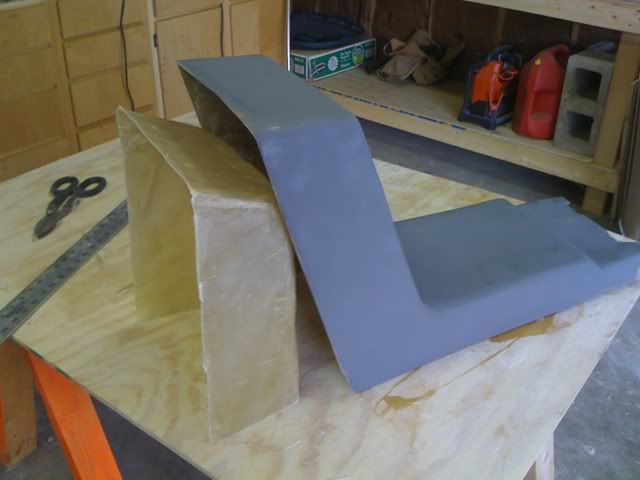
Here are some updates. I spent the morning reinforcing the inside and then sanding down to prep for the glovebox.
Starting to reinforce the inside one last time
Another shot
You can see how the resin just soaks into the glass
After sanding down the inside I taped the inside to prep for the glovebox
Another
I applied a thin layer of glass and let it sit in the sun to dry - this piece will become the part of the glovebox that is seen when the lid is lifted. I still have a long way to go - lots of cutting and fabricating to do
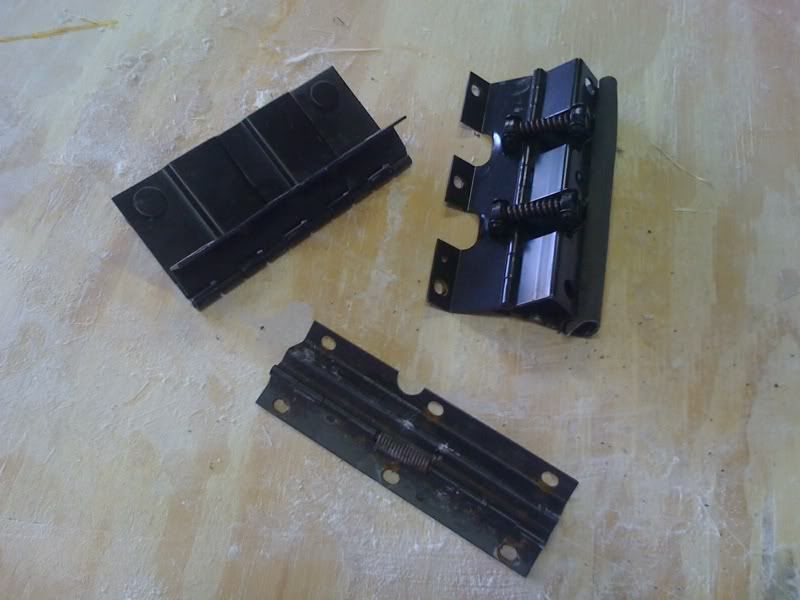
I have 3 hinges to choose from. One from the original glove box and the other 2 are from the Grand Prix center console I found at the junk yard. Which ever I choose I need to make sure the glass is strong enough to support the flex from opening and closing the lid
I'm off the begin work on the glovebox - enjoy
[This message has been edited by Sofa King (edited 11-14-2009).]
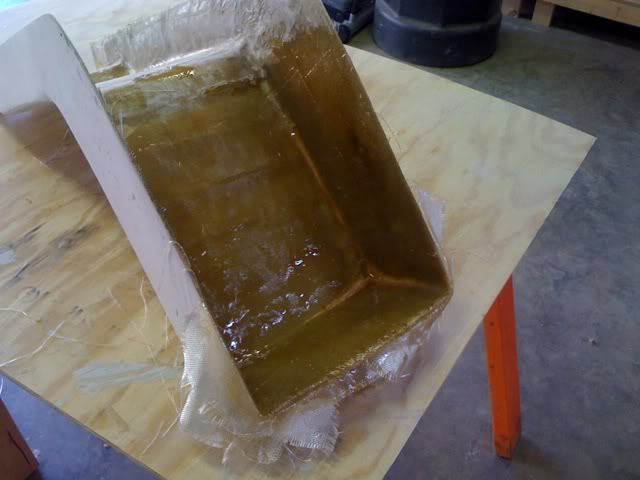
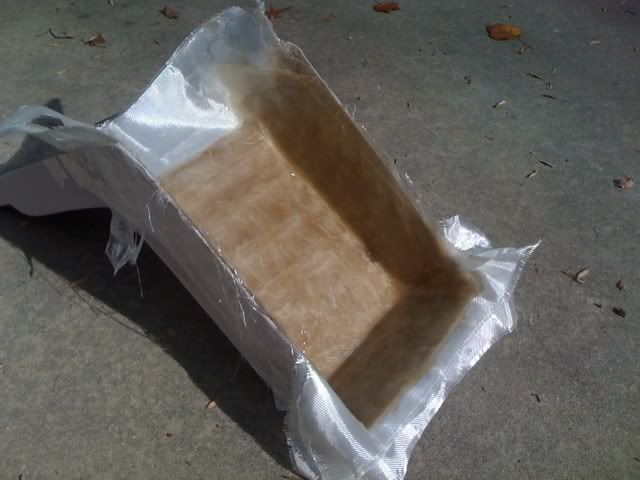
I realized after trying to pull the plug from the mold that 1 layer of glass will not be enough to safely pull away without cracking or warping the piece. The mat was a little firmer when I first used it on the console. So I laid 2 more layers and it's sitting in the sun now. I also put an extra layer of resin on the armrest pieces - there were a few white strands of glass showing through. I'm going to have to hold off on the armrest until the cup holder arrives - frustrating.
More layers
Extra resin
I might throw a layer of primer on the console this afternoon
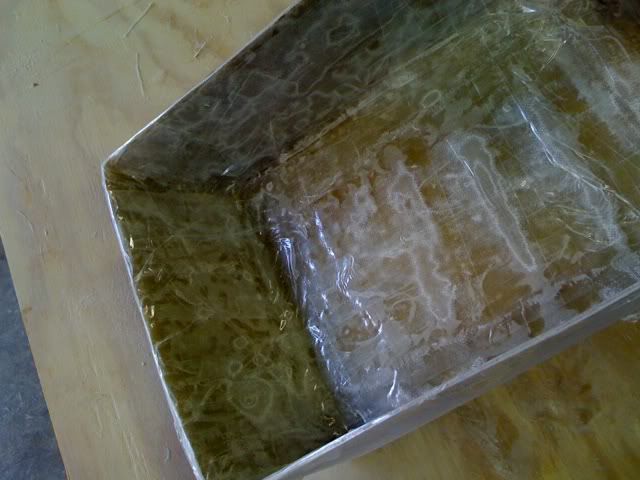
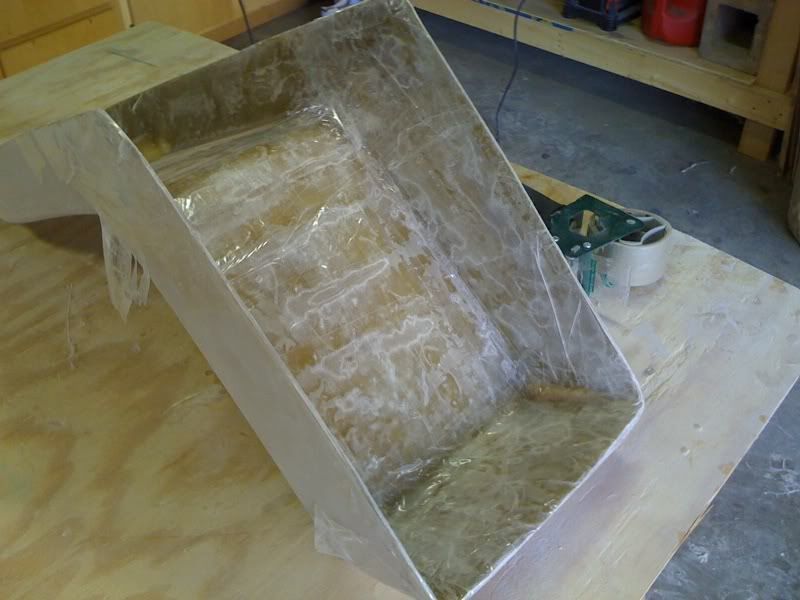
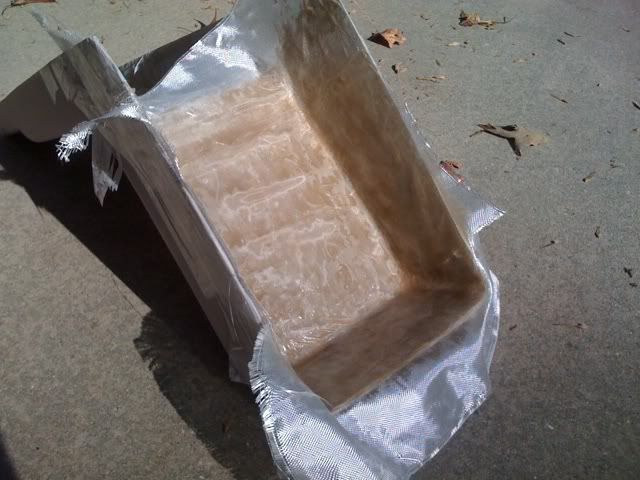
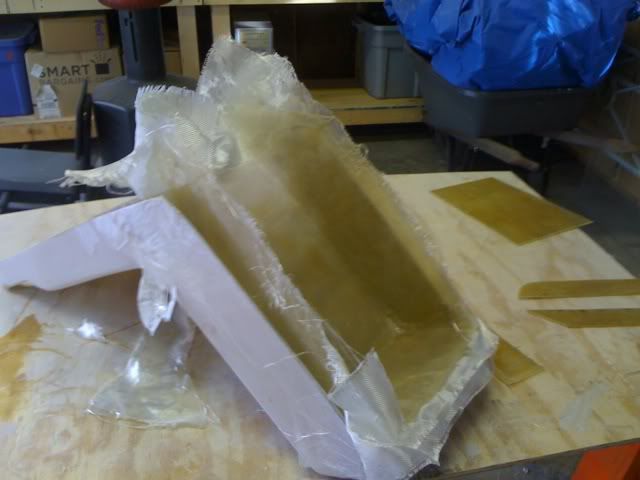
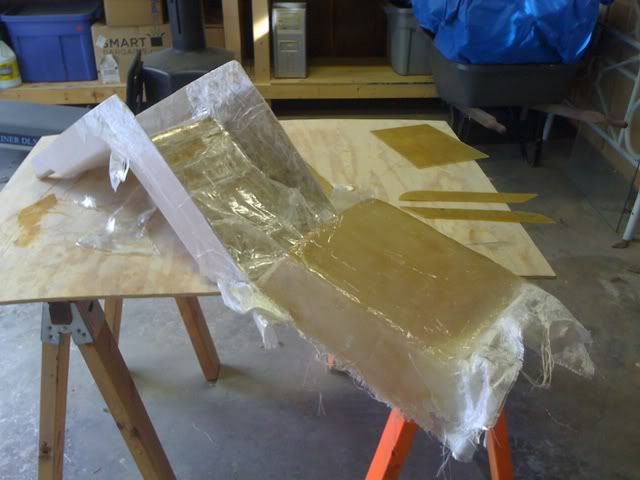
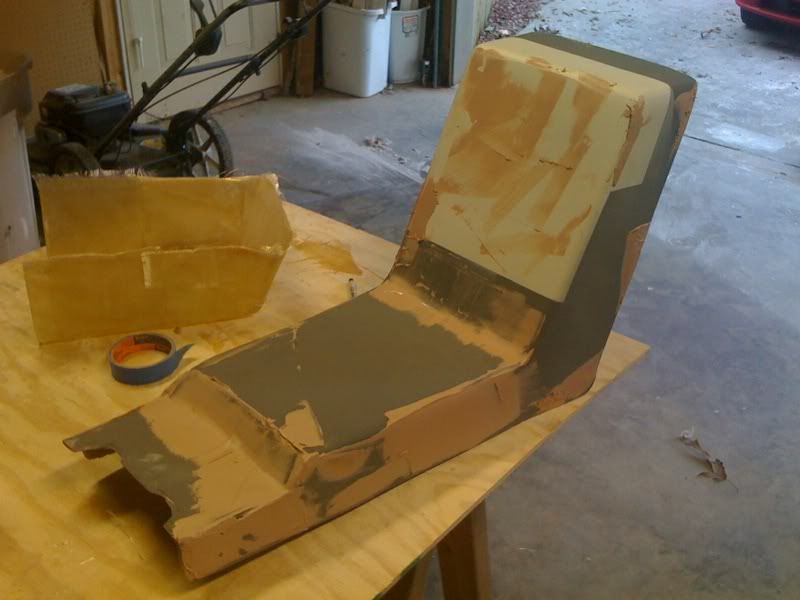
Here's an update. I popped the glovebox mold and I am now beginning to reinforce the inside of the box. Once the glovebox is durable I will begin sanding and filling the structure. I'm still unsure whether to paint or upholster the console. Whatever I decide I will have a shop take care of the final steps. I want it done right.
Peeling it from the mold
Almost there...
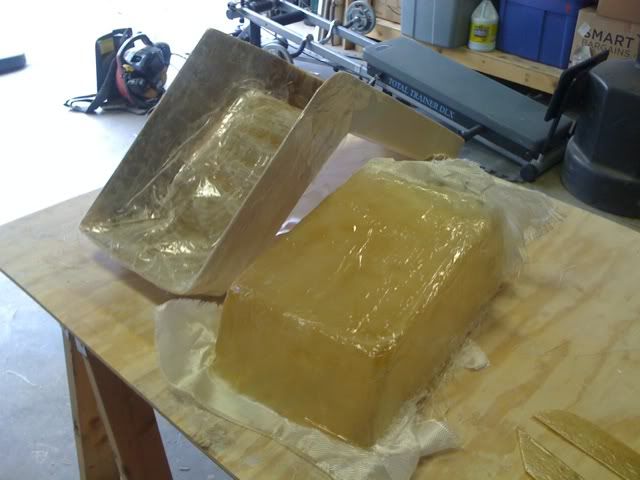
Out of the mold and ready to be trimmed
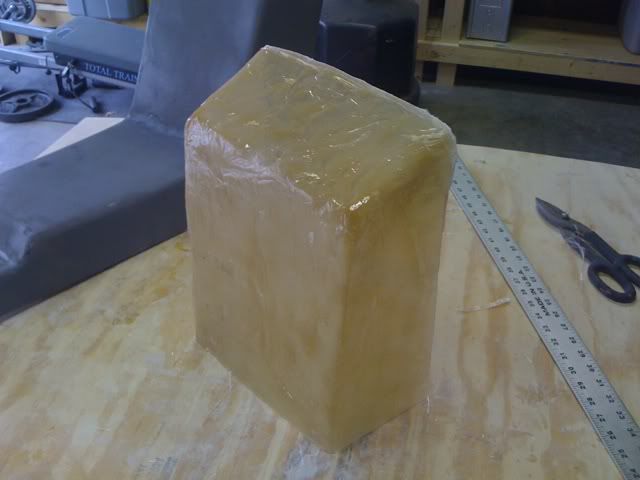
Trimmed and ready to be strengthened and sanded
An almost perfect fit
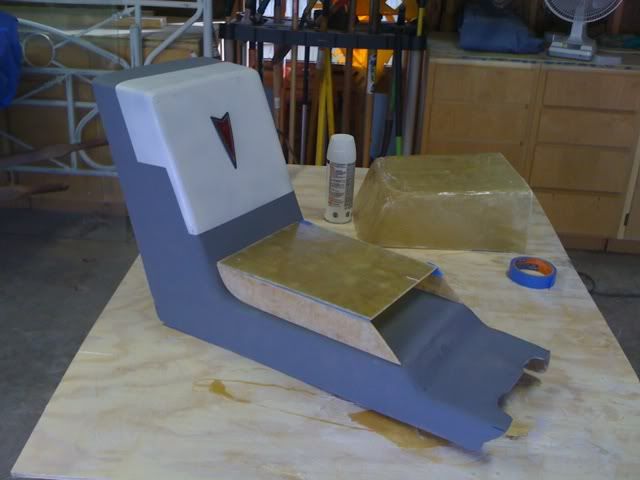
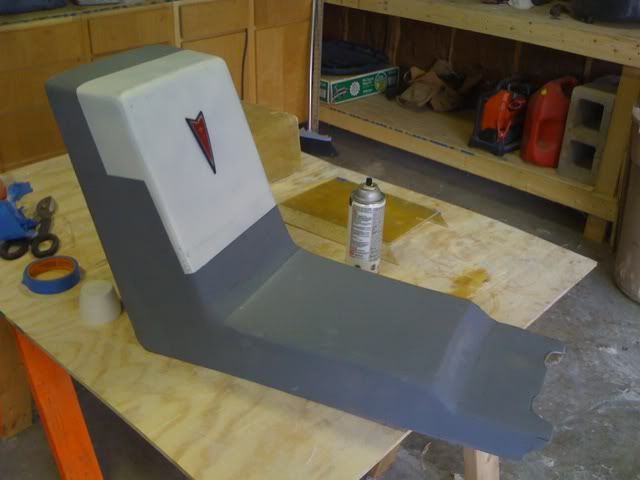
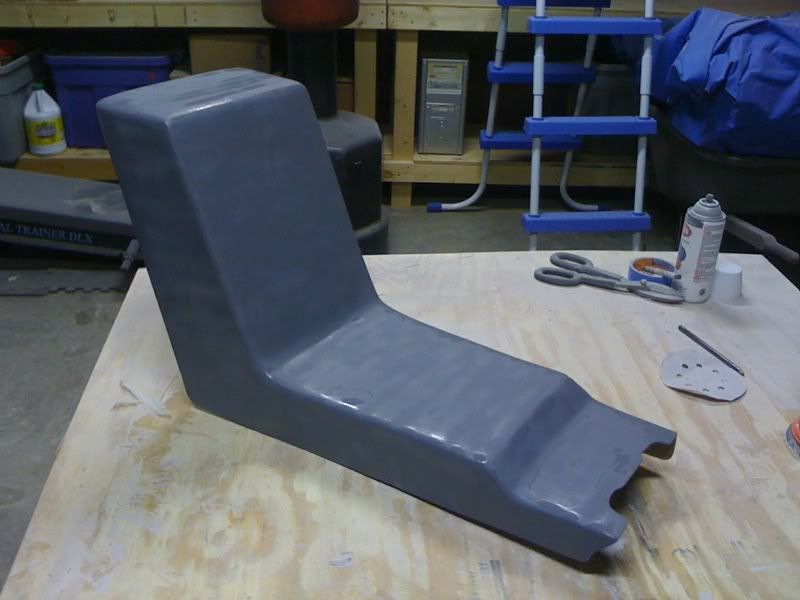
As you can see from the above image I went ahead and primed the center console. I then painted the "glovebox lid" to help me better visualize what it will look like. The first paint job looked really nice. I even put the logo on the front for maximum effect
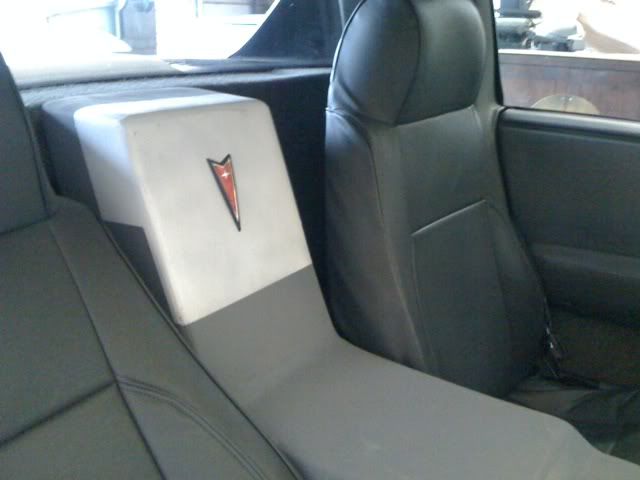
This image shows the console in the car. The lid bottom lines up with the seat covers - the horizontal line.
But the lid looked too short so I lowered the paint line. I like this much better. I will use the paint line as a guide to help me cut the lid
So far so good...
[This message has been edited by Sofa King (edited 11-14-2009).]
Man I love progress. I can't believe how close it is to the concept. Pretty impressive! I am till having a little trouble understanding what the "plug" is for. I guess I'll have to wait to see how the puzzle comes together. I feel bad. I did not manage to get anything done on my interior today except for removing the driver sde door panel - whoppee! Nice work!
I took your advice and used both a roller and waxpaper with the fiberglass cloth. What a difference! There's little sanding to do. Thanks for the great info!
man I bet that thing is getting heavy!
Just remember to switch hands when sanding or people will think you were hard at work on something else
Switch hands? I'm not that talented! I'd probably wind up falling down, rendering myself unconscience in some kind of compromising position... wait... what are we talking about?
To answer your question, you can fiberglass almost anything together. Unless I'm mistaken (smebody please correct me if I'm wrong), you pour a little resin on the area you want the piece to lay and let it dry. This is only temporary as you would then lay additional glass on top of the same piece (whether metal, plastic, wood, etc) helping it become more durable . The resin hardens and keeps anything / everything in place. With that said, depending on which hinge I use I'm going to glass the original hinge bolting areas (after cutting them out) to both pieces. Hopefully this add strength but also look good - hopefully. I'll be sure to get detailed images when I get to that point.
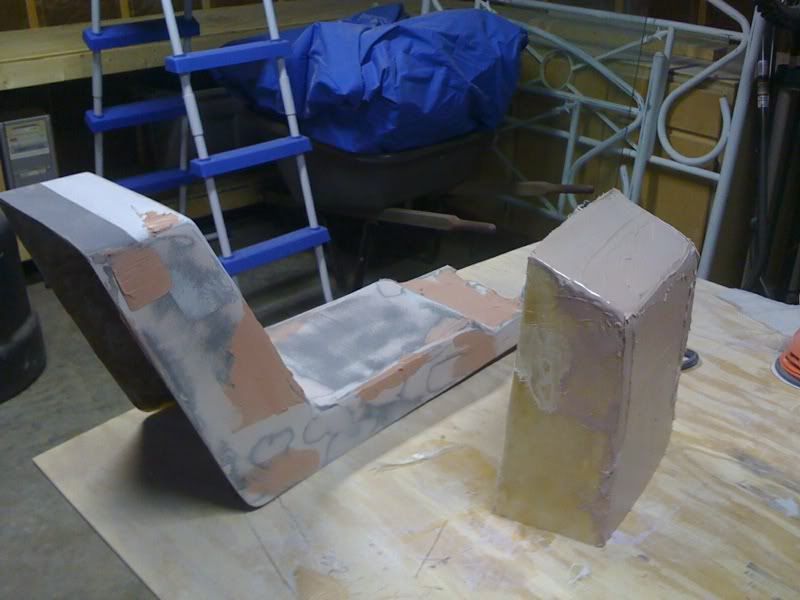
Here are some updates. I had to go back and fill some holes in the console. I want it to be absolutely perfect. I'm still unsure whether I am going to cover with material or paint it either with the Lunitec Paint System or the same color as the interior plus the white lid - either way the lid will be high gloss white. I also reinforced the "glove box" fiberglass piece with more glass.
Going over with more body filler
After the resin cured I sanded the top side of the "glovebox" and then covered it with body filler
More filler was added to help with the sanding process. When adding filler, be generous and let it dry for several hours. Again, I used 40 grit paper to take down the high points and the 80 grit to smooth out to a nice a smooth finish. Once I go final, I'll probably use a 150 or 250 grit
I went ahead and gave it a quick primer coat
The frustrating part about filling and sanding is that you always find areas you missed
Another area to redo
quote
I am till having a little trouble understanding what the "plug" is for. I guess I'll have to wait to see how the puzzle comes together.
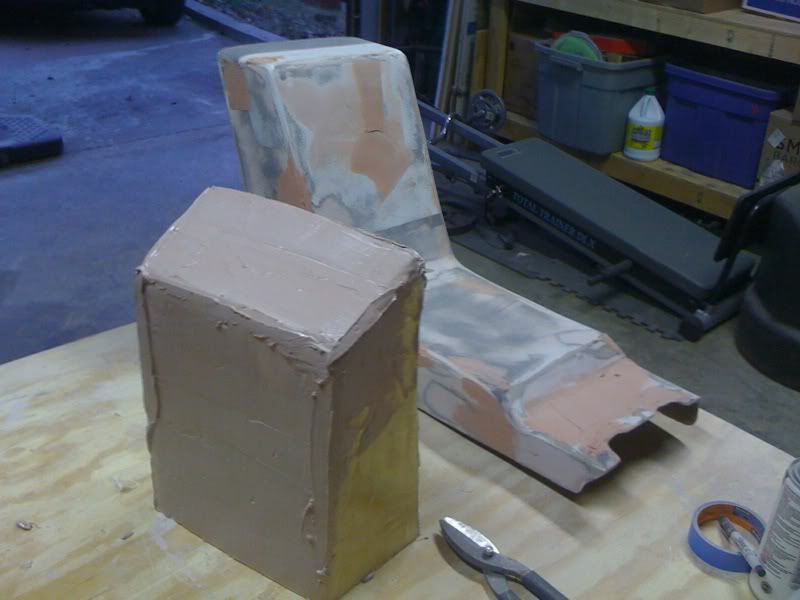
If you're confused... just imagine how i feel. Let me see if I can explain this - believe it or not, this helps me too... Imagine the lid has already been cut but is now attached and functional. If the lid was opened, there would be nothing there but a view of the cars computer and firewall. I could leave it like that but I would like to have a working "glove box" when the lid is opened. So, I am going to use the piece (glove box plug) I just made and temporarily place it back into where it was originally formed - behind the top of the console. Work with me because this gets confusing... Now, if you lift the lid, there would be a solid piece of fiberglass (glove box plug), where the hole used to be, that matches the same contours of the lid. However, this piece is counter sunk so the lid can still open and close. Make sense? With the "glove box" plug now in place I can sketch out how I want the inside of the glovebox to look. There will be lots more cutting and fabricating to do. But I do have an idea that might save me from doing a lot of work. More on that later. I hope this helps... If not, I owe ya a drink.
I also have to measure the depth of the box as to not interfere with the cars computer. I'm debating whether or not in making an access panel that can be removed if I ever needed to get to the computer.
Thats it for now. I'm getting really excited! I'm hoping the cup holder will be here tomorrow. I really want to begin fabricating the armrest.
[This message has been edited by Sofa King (edited 11-15-2009).]
Man I love progress. I can't believe how close it is to the concept. Pretty impressive! I am till having a little trouble understanding what the "plug" is for. I guess I'll have to wait to see how the puzzle comes together. I feel bad. I did not manage to get anything done on my interior today except for removing the driver sde door panel - whoppee! Nice work!
Pat
My guess. The plug will be put in once the lid area is cut out. Then he will have a solid console to work with with a recess for the lid. The face of the plug will most likely be mostly cut away for the glove box portion to be built into. Really I don't think a solid plug was needed. He could have just done one that covered the sides, top and lower portion of where the lid will be cut, but a solid one was probably easier.
Either way the concept looks awesome and I prefer the concept model he is using for the construction. The one where the lid doesn't completely cover the top. It is actually really nest to see it coming together.
The face of the plug will most likely be mostly cut away for the glove box portion to be built into. Really I don't think a solid plug was needed. He could have just done one that covered the sides, top and lower portion of where the lid will be cut, but a solid one was probably easier.
Either way the concept looks awesome and I prefer the concept model he is using for the construction. The one where the lid doesn't completely cover the top. It is actually really nest to see it coming together.
Hi KHW,
Thanks for the compliments. I'm really happy with the way it's turning out. I've been really patient as I go. Like you, I like the lid that doesn't completely cover the top - there was a two fold reason. One, it just looked better - LOL. And the second, and MOST important, was that if the lid covered the entire top I might not have been able to open the lid without hitting the back of the firewall. So, I redesigned it and moved it forward.
The solid plug idea was, in my opinion, the better way to go. I could have created all the sides and top but that was too much work. Also, getting a plug of that area ensures a near perfect fit and saves the contours when the lid is open - make sense? Once I get the lid cut it should all begin to come together.
Again, thanks for the compliments. Its the compliments that keep me going. And I need cup holders.
I finally got my feeble mind around what you are doing with the plug. It makes perfect sense to me now. After I read your post and Khw's post, I went back and looked at your first concept pic and the light bulb came on. You need to work harder - I was expceting more progress today! Just kidding. I'm just impatient.
Well done although i have done a fair bit of fibreglass work now but i am just not neat and tidy like you i make a mess then shape it you have done very well it looks good with quaility work congrats i am sure your proud of it and will enjoy your labor each drive.
Well done although i have done a fair bit of fibreglass work now but i am just not neat and tidy like you i make a mess then shape it you have done very well it looks good with quaility work congrats i am sure your proud of it and will enjoy your labor each drive.
Thanks for the kind words. My years of building models conditioned me into getting it done right.
I see some really clean and interesting lines in these pics. They keep the essence of the original design while improving on the asthetics and function imo. Being on dialup, I haven't seen them all yet (pics) but will try to little by little.
One of the things I have come to almost disdain, are the 2 outside a/c vents next to the doors. Has anyone ever just whacked them off about 80%, leaving enough fabric to fold back under and making the vents more of a flush mount--maybe a 1-2" protrusion instead of sticking so far out where your knees hit them?
That's an interesting idea. I was looking at that very same thing the other day when I was working on my dash. I was wondering what the dash would look like if it were flush all the way across - cut the vents off flush then do a little glass work to mold it in, texture and paint. Then add some other style AC vents in each corner. It's a good thing I have a spare dash that the vents are beat up on. I'll have to give it a try. Just to see aht it would look like. Great - another project!
You guys are on to something original. My only issue is the driver side would not be getting a a direct blast of cold / hot air from the vents. If you push the vent all the way to the dash, you would wind up hitting the steering wheel and part of the gauge cluster...
Just a thought, but I like where you guys are headed. Are you seriously going to start chopping the dash?
OK. I think you guys are going to hate me... I was drinking a lot last night when I got to throwing up and then I started thinking about the console... Not really, but I was thinking...
I might start over. I've been reading through several posts, to include this post, (the Miura build post is one of my favorites) and I was looking, in detail, how Archie built all his dash pieces and thinking about the advice many of you have given me - which is greatly appreciated. When Archie built the interior pieces to his project they were all single pieces of fiberglass that were glassed together creating a single structure. My method was to glass over the entire console in a single swoop. While this is easier, it leaves room for uneven sides and it's getting bulky. Building the console piece by piece guarantees each side is a near perfect mirror image and is very light.
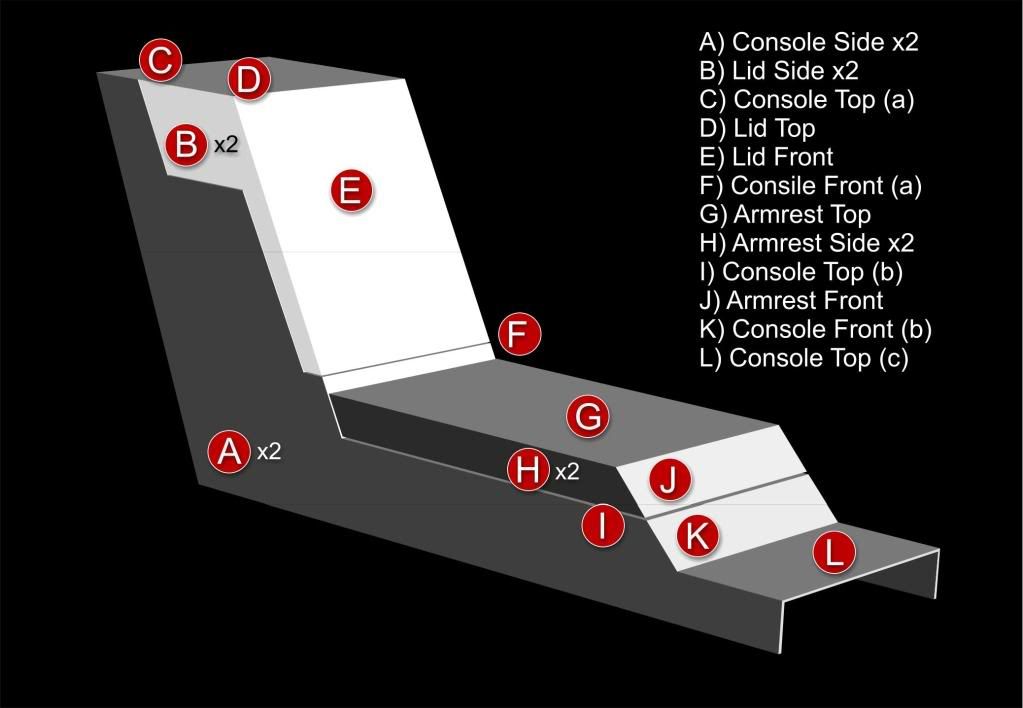
If I rebuild the console it will consist of 15 basic pieces - not including the glovebox. I have enough supplies to do the job and it wouldn't take but half a day to create all the pieces necessary to rebuild the basic console. It's just a thought. What do you think?
Basic structure rebuild (3D image)
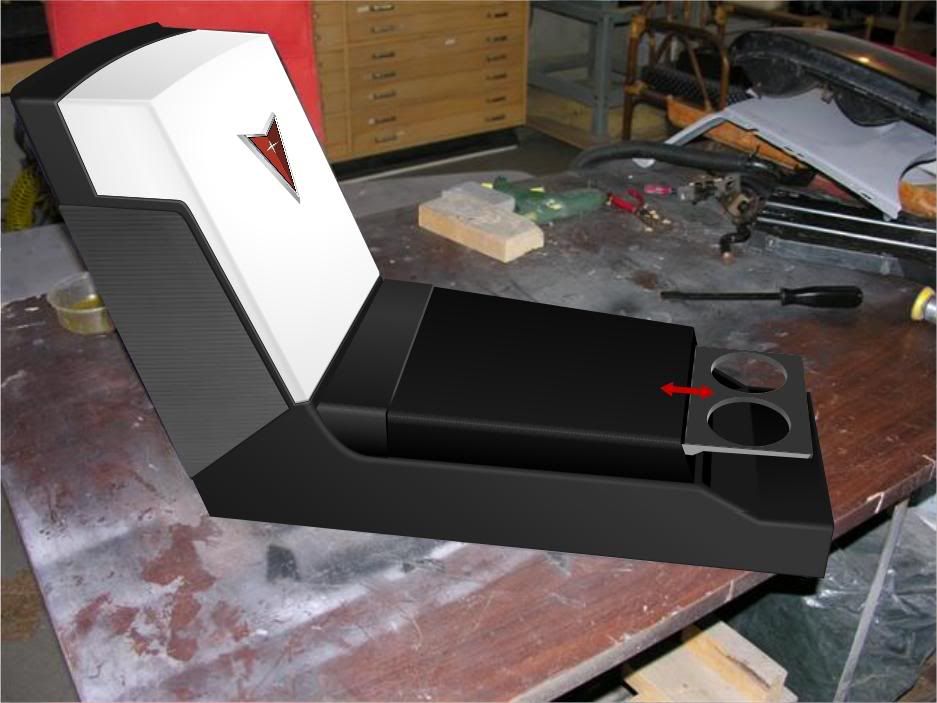
Concept image with cupholder
Like I said, it's just a thought. If I do go ahead with the rebuild, and this is kinda funny... how do I properly attach separate pieces of fiberglass to each other without using too much glass or body filler? Does anybody have any suggestions?
Just had a thought... I was reading through the Miura build when Archie mentioned hot glue. Maybe hot glue could be used to temporarily hold the pieces in place? HMMMM... that might work.
[This message has been edited by Sofa King (edited 11-17-2009).]
Use the "old one" as a mold and add a release agent to it and start laying down the glass on it! Go by a boat store and see if they have larger fiberglass cloth. (OR get some flannel material and then brush on the resin.works teh same and is how they make the speaker boxes look so custom) drape it over the mold and add resin to it. use the wax paper often and not so much bondo. the bondo should be only for the small imperfections. Even then it should be only a thin spread.
Use those pieces yu have and build off of them. Fiberglass will stick to its self, rough it up and add the resin to it (instead of the hot glue) Just keep ALL air bubbles out of the process!
The bondo I slap on is to ensure I fill any holes not just in the console but any pits left by the bondo itself. I would say I sand away 90-95% of the bondo. The reason its so heavy is because the number of layers of glass I applied.
The reason I mentioned the hot glue was it is very diffcult glassing together two separate pieces - especially at a 90 degree angle and considering I've never done it before. I'm trying to figure out the easiest way for example (looking at the above image with all the pieces labeled) adhere pieces A, C, I and L. Piece A is one of the console sides and C,I, and L are the console tops. What is the best way to temporarily fix them in place before I glass them? That's why I mentioned the glue gun. Make sense?
Again, thanks for the great advice.
[This message has been edited by Sofa King (edited 11-17-2009).]
well you could make a cool little 90* angled piece of resin only. Put a nice fat "line" of resin down on your wax paper, that is draped over a cardboard box.in a 90* or whatever angle you need, when that dries you have a base for glassing it all together. kinda like a little angled fiberglassbracket. Then just mix up some more resin and use that for your gluewait till it starts to get gooey, then slap the angled piece on there andlet it all dry.
When you lay the glass down make sure the surface it smooth and NO BUBBLES! if a bubble appears, pop it and add a little bit of resain to fill in that hole, lay wax overthat and pressit out smooth. less sanding on a smooth surface the bondo will be a nice "filler" only after the glass work is done. have you heard of a "skim coat" that is all the bondo should be and yep sand most off. that is why a skim coat and not a thick pass.
do get me wrong, you are doing a great job! don't give up. remember it is only sanding and spreading not rocket science
use the wax paper as a palete for making panels and then put the panels together how ever. Wrap wax around a tube for a round tube shape, a square box..same thing.
You can even get some stiff cardboard, make it into the shape you are looking for and glass over the cardboard! cover that with the wax and it will lift off in that shape and make things easier for ya!
crap now I want to go glass something up in my garage! lol
If I rebuild the console it will consist of 15 basic pieces - not including the glovebox. I have enough supplies to do the job and it wouldn't take but half a day to create all the pieces necessary to rebuild the basic console. It's just a thought. What do you think?
Concept image with cupholder
I love this concept. If the final piece is going to weight less and look factory made (meaning one side won't be highter than the other ect) then by all means do that.
Not sure how you would get all those pieces stuck together and square? Also, do you think it would be strong enough at the joints? I guess you could "build" up the joints underneath for strength.
Instead of making resin angle's, Could you use drywall corner metal? or get some coil stock aluminum and make your own angle's. If you had a small metal break, you could make all the angle's at the correct angles using your original as a template. Then just glass these angles in place? Just thinking here. The coil stock aluminum would be lighter than several layers of glass in the corners and would add strength to the joints. I was looking around in Home Depot getting some ideas and they have the perforated or mesh aluminum grate things for rain gutters. You could use this to make your angles and the mesh would allow the resin to flow all around it - maybe make it even lighter but still be strong?
I have a small metal break and bent up some angles to give you an example but for some reason, Photobucket is FUBAR and I can't get any pictures off of there.
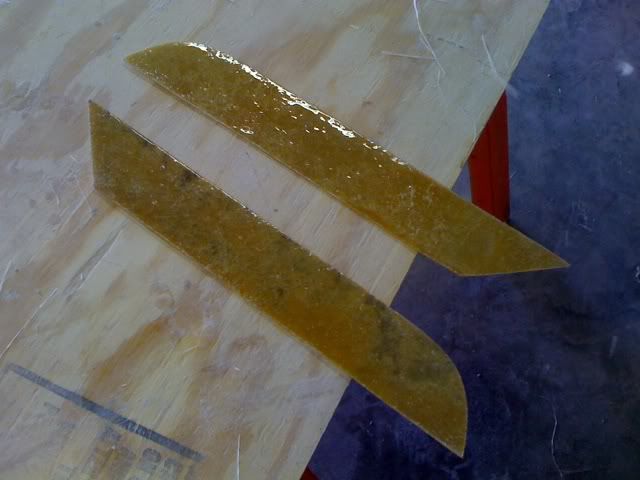
I'm still not sure what to do. It's funny, I was in Lowes the other day looking for the same things - angle braces and brackets, etc. I'm going to try something simple at first. As you know I still have to create the armrest. So before I go off and rebuild the entire console I'm going to use the armrest as the test bed. To make it simple, I'm going to tape the outside edges and then the tops running across the length of the armrest - I'll have to send a pic. I'll then resin the inside. Wait for it dry and then add a thin layer to the inside.
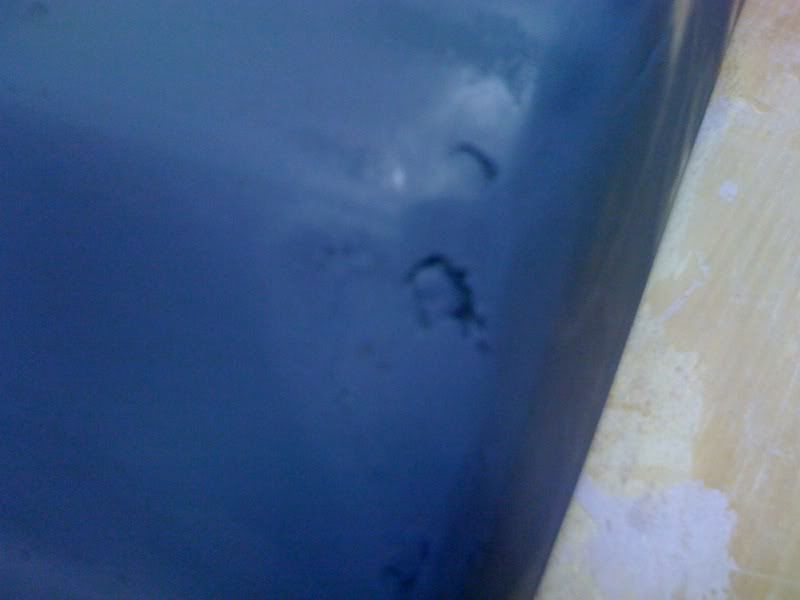
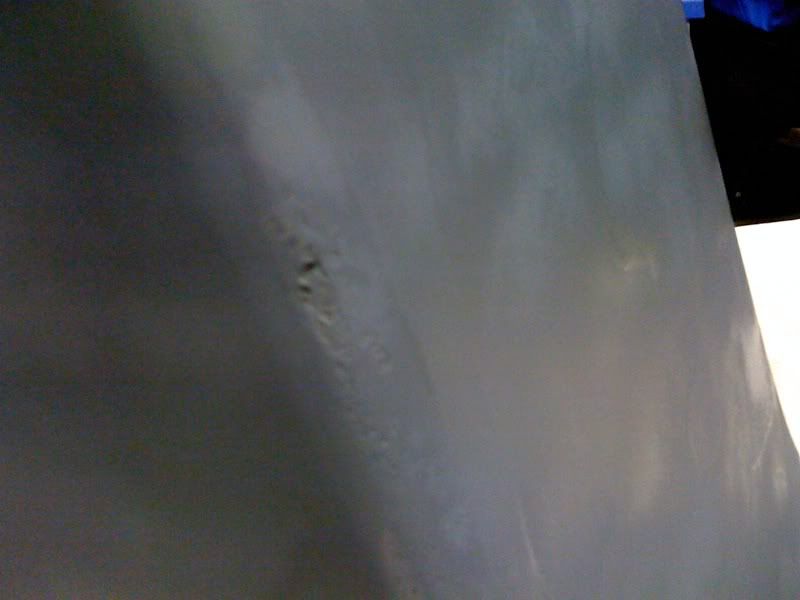
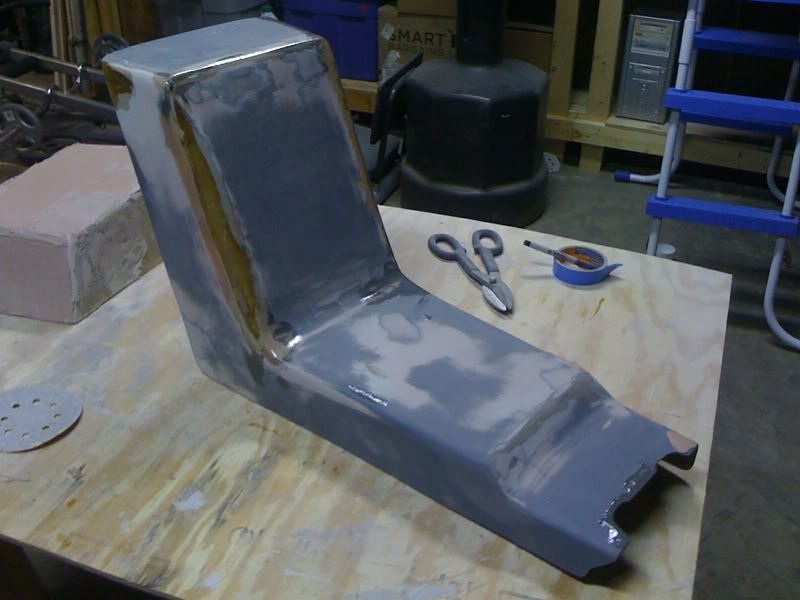
Well... I'm really friggin frustrated. The edges of the console are driving me nuts! The fiberglass was really pitted on the edges so I've tried putting body filler in these areas 5 times. Everytime I sanded, all the filler came out of the pits. So tonight I tried a couple layers of resin - no glass just resin. It's a little cold out tonight so i won't be able to do anything until tomorrow.
Resin added to the edges
Close up
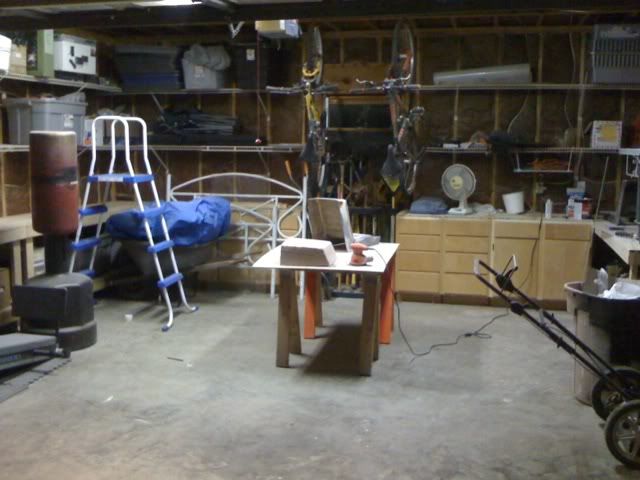
Here's the ol workspace. It's tough to tell in this pic but there is so much dust!
I've made the decision (95%) not to recreate the console. I'm hoping the resin will solve the pitting problem. If it does then its full speed ahead and I can begin cutting the lid out and getting the "glove box" plug ready for fabrication
I love this concept. If the final piece is going to weight less and look factory made (meaning one side won't be highter than the other ect) then by all means do that.
Thanks for the kind words. The "pats" on the back really inspire me. I might try recreating the console just for the heck of it. I definately have some long term plans for the interior but I'm trying really hard to keep it under wraps until the console is finished. Plus I have a few tweaks to do to the final design.
you are doing a great job! don't give up. remember it is only sanding and spreading not rocket science
crap now I want to go glass something up in my garage! lol
Revin,
Thanks for all the great advice. Not to worry. I'm not giving up on this project. I'm much farther than I thought I ever would be. The toughest parts are still ahead. Cutting the lid will be the most challenging - not hard - just a real challenge. There are 4 cuts that will require a Dremel before I can get a blade in between to make the cuts. Again, not to worry... a steady hand, lot's of sanding and filler will rule the day.
It might not be rocket science, but it's definitely rocket surgery...
I have been looking around for supplies and was wnodering what resin you are using? I was reading some threads that say that the regular resin has a wax in it so that it will "cure" but you have to sand it between layers to remove the wax so the next layer will stick. I guess ther is a resin without the wax and the resin with the wax is what you use on the last layer? Are you using the 2 different resins?
I have my console pieces stripped down and ready to start - I just can't figure out what I need for supplies. I am not looking for a perfect surface when done as I am planning on doing some kind of textured coating (Lunitec) or something else. I may even take it across the border and get it covered in something. Iplan on glassing over and leaving the origianl pieces in the part for mounting and strength. But I have read a lot about making a mold and using relaease agents, gelcoat, etc to get a nice finish on the part. Maybe after I mess up this first one, I will have to give it a try.
I am wondering why the filler would not "stick" in your pin holes. I wonder if it is related to the resin/wax thing. If your resin has wax in it and you are using polyester filler, it may not be "sticking" in the pin holes due to the film of wax? I have read so much about glass work that my eyes are bleeding and it all seems to be running together now. Tomorrow I glass......or fail!