Here it is! My 88 Formula interior redesign. Why the interior? OK... I love the Fiero interior. I don't know why, but I do. However, in my opinion, it lacks the basic of necessities. One of them being cup holders. As time goes by, technology around us changes, but our cars remain stuck in the years between 1984 and 1988. There are several basic necessities and creature comforts we've grown to love and would like to have. One of those, other than cup holders, is an iPod connection - not the kind that screws into the side of the dash, but something that looks and feels integrated - as it would or should be 20+ years ago.
Other changes will include a redesigned center armrest console, painted trim pieces and other "neat" little things I can think of.
The biggest goal will be to keep the interior as STOCK looking as possible.
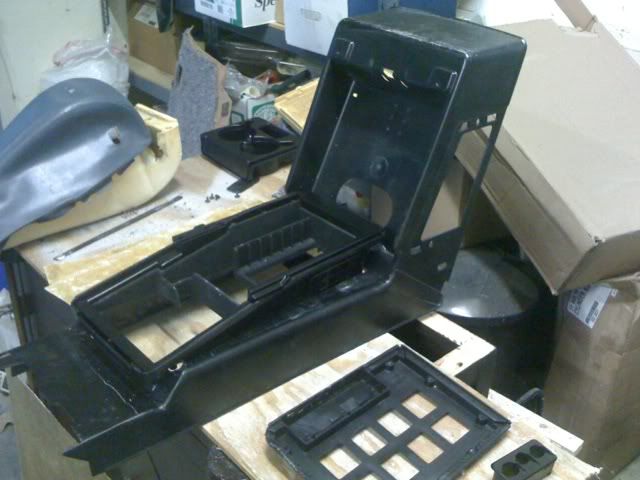
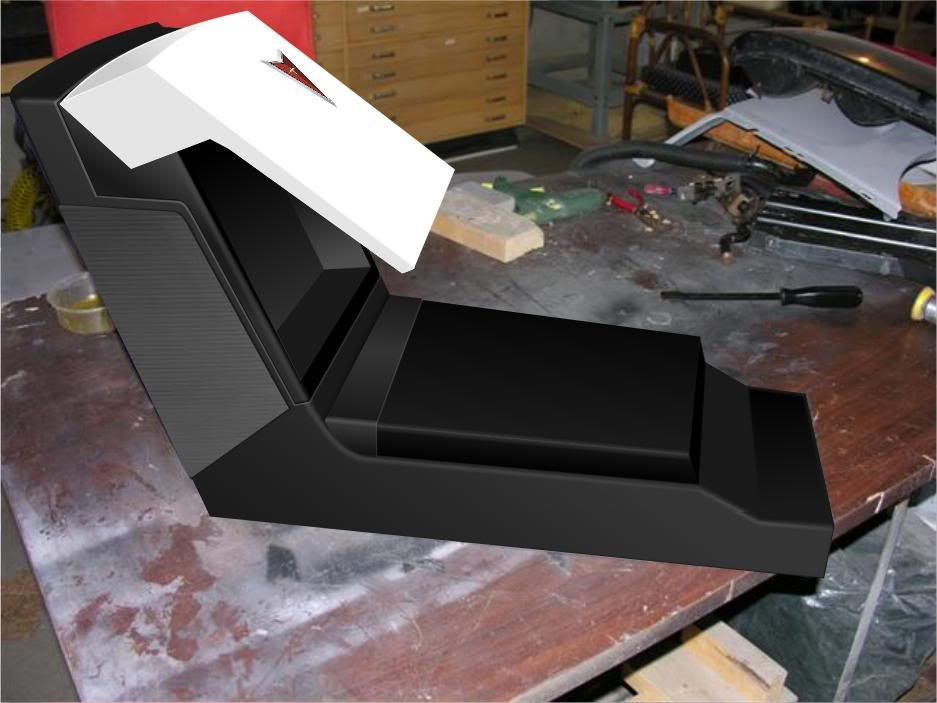
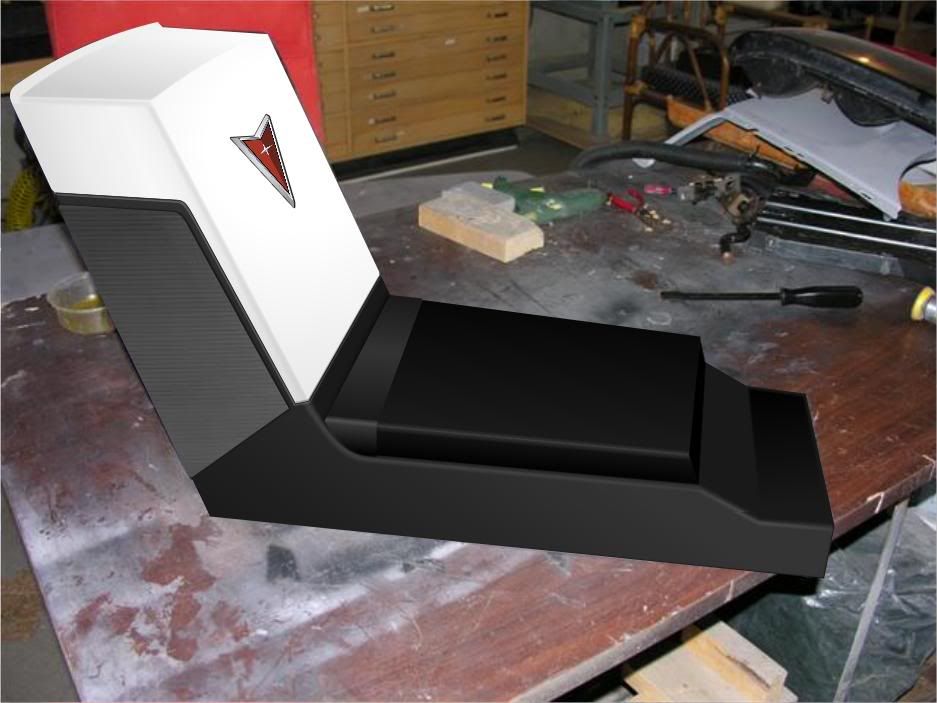
I tinkered with the center console design for a few weeks and finally came up with something I really liked. (I used Nolan's console pic as a starting point - thanks Nolan!)
and
The hard part was over. Now it was time to begin the build... more later
G
[This message has been edited by Sofa King (edited 11-09-2009).]
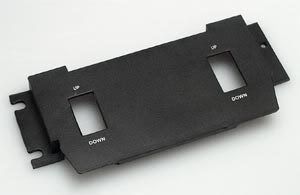
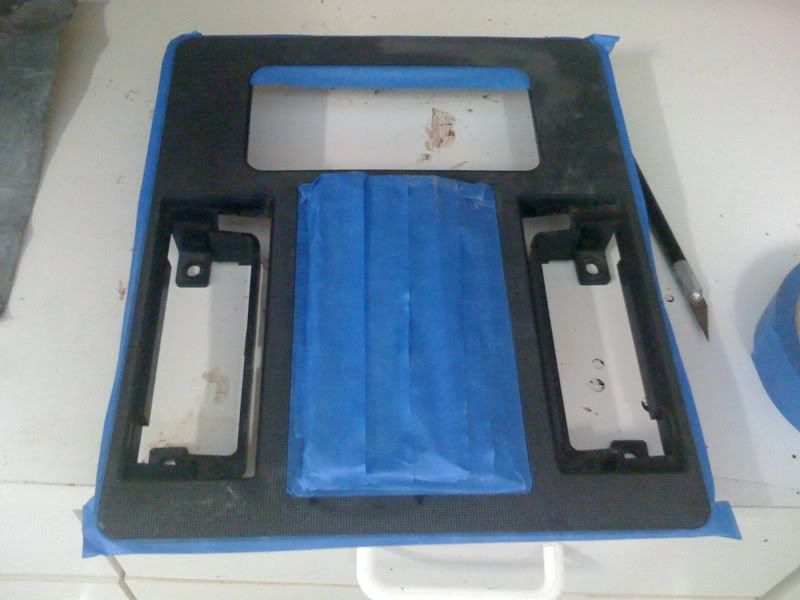
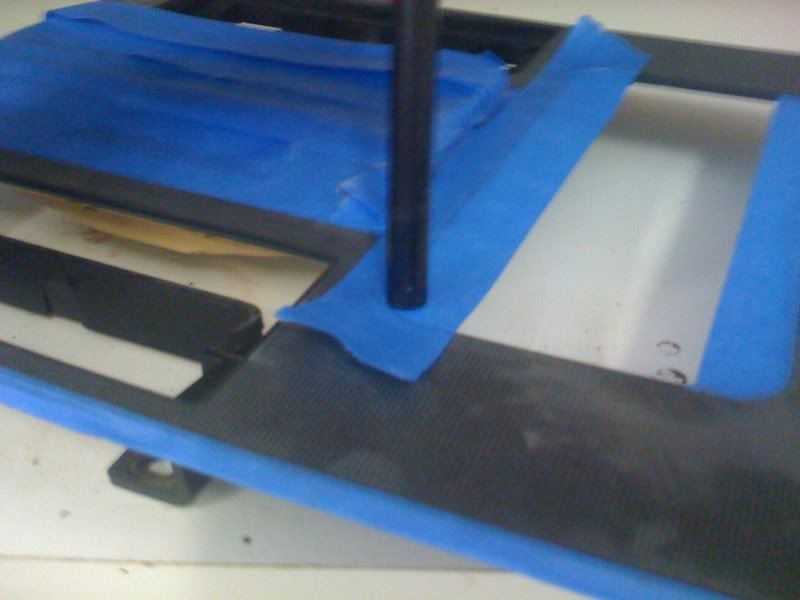
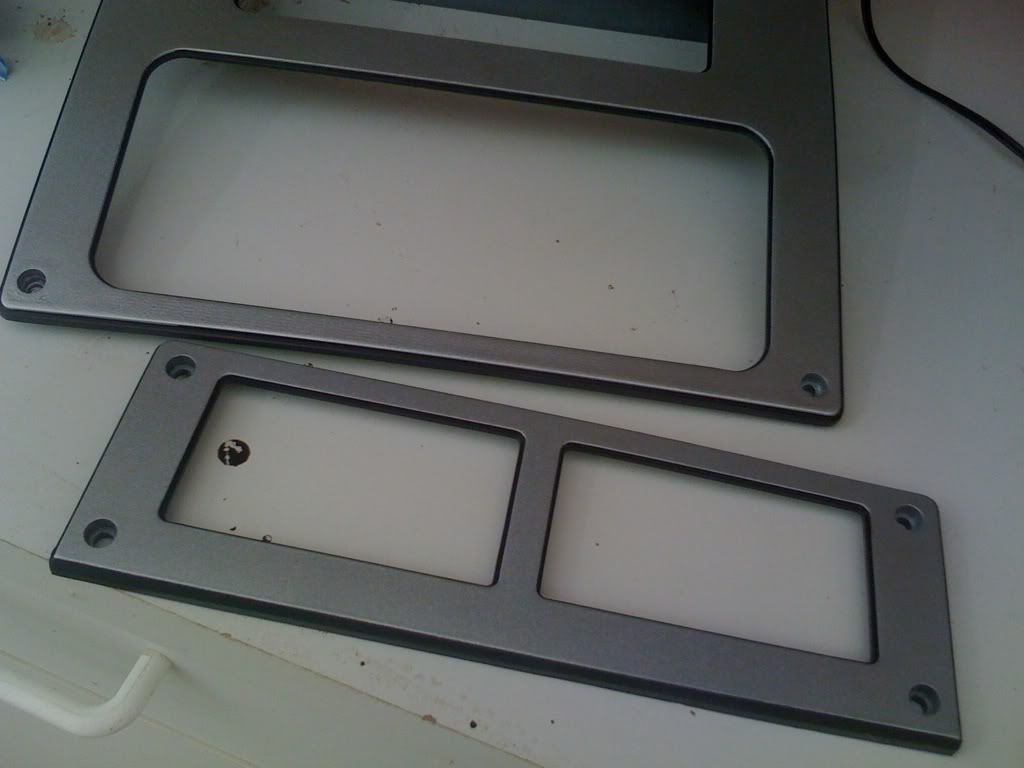
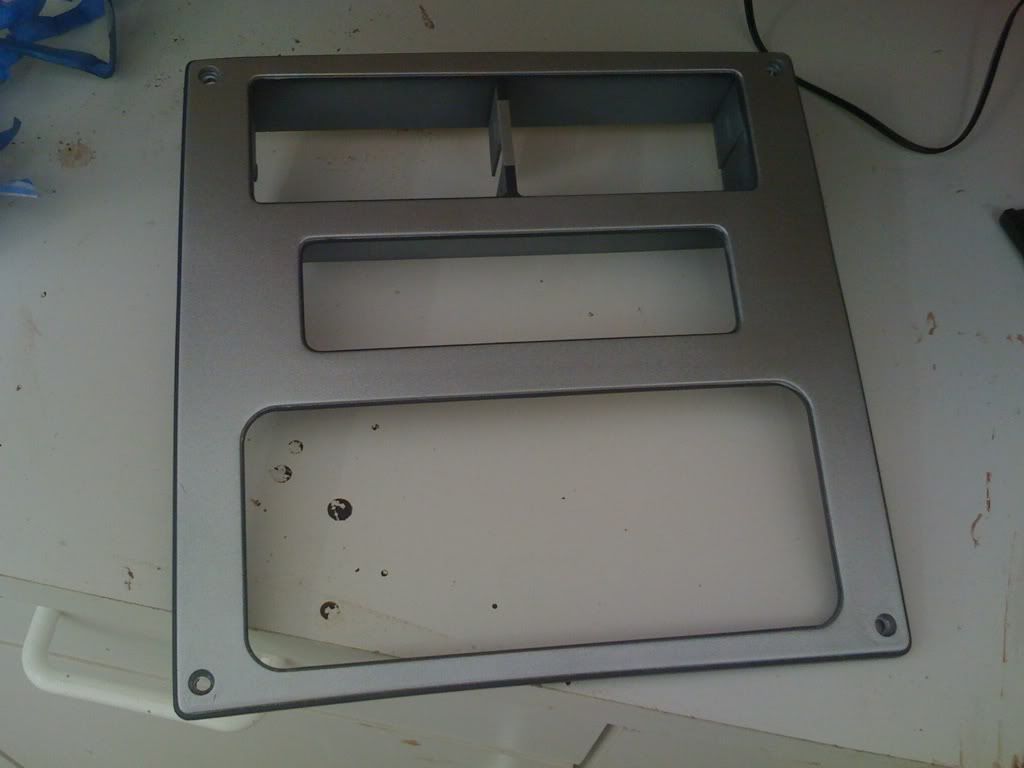
About a month ago I decided to change the look of the trim pieces. I've been particularly fond of the silver / brushed aluminum look so I decided to go with that. The console and dash plates are very easy to remove. I lightly sanded them down with 400 grit paper, washed them off with soap and water and then let them completely dry before painting. As dopey as I am... I decided to mask off the edges so I could keep the "black" outline... During the paint process I realized that black fine tip magic marker would make things go by SO MUCH EASIER!
Below are the results...
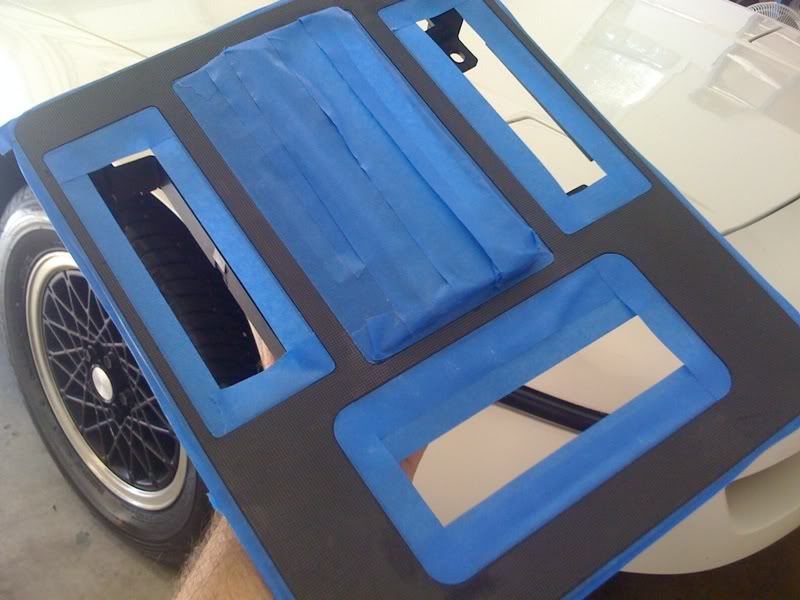
Masking Off
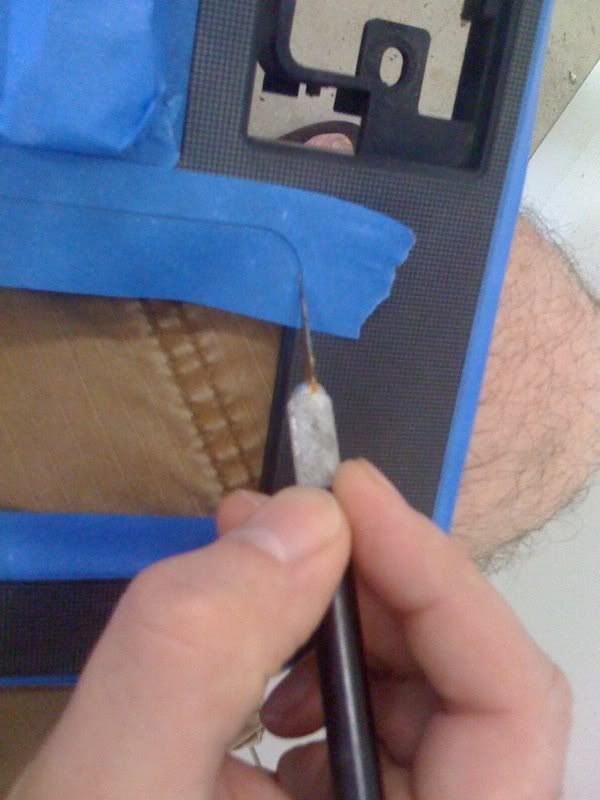
The end of the X-Acto knife was perfect for pushing the tape into place
Slowly cutting along the edge
Hello Mr. Happy Face!
All primed and ready
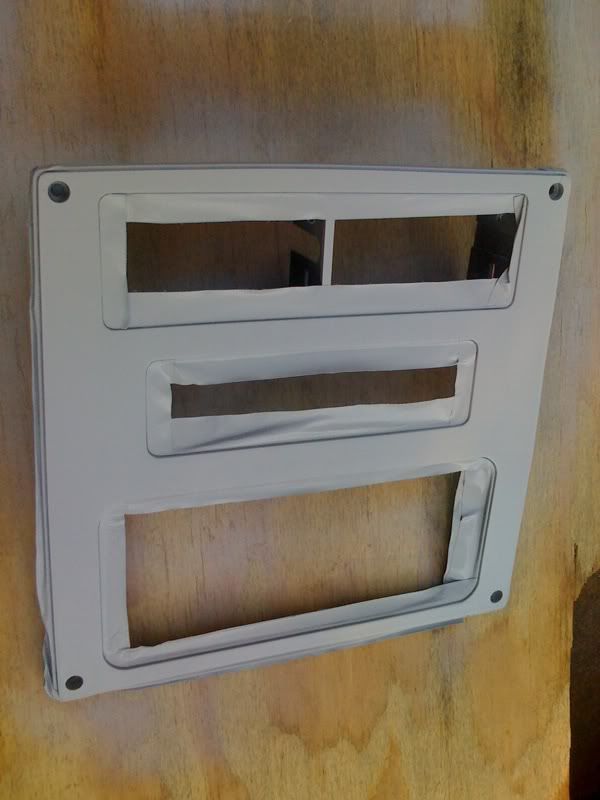
The silver was done in several little steps. I first sprayed a "tack layer" - this sets up the initial layers of silver paint. After the tack layer dries completely, it was 3 layers of paint and 2 layers of clear for protection
Removing the tape
I then used the black magic marker to really accentuate the edges
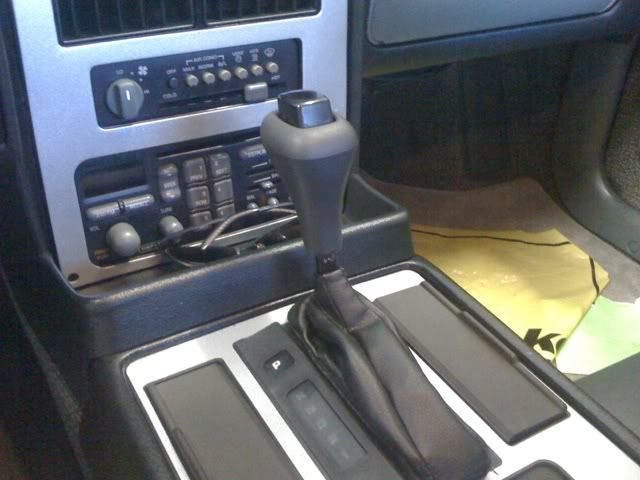
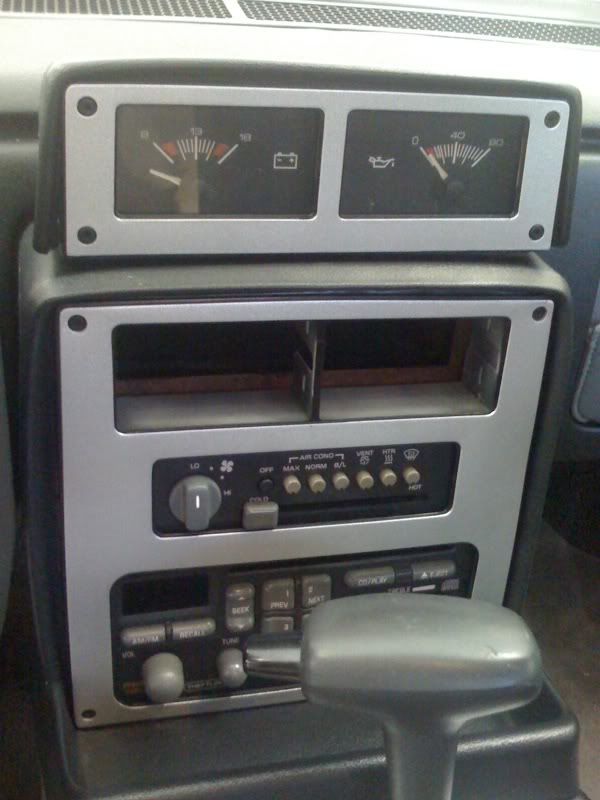
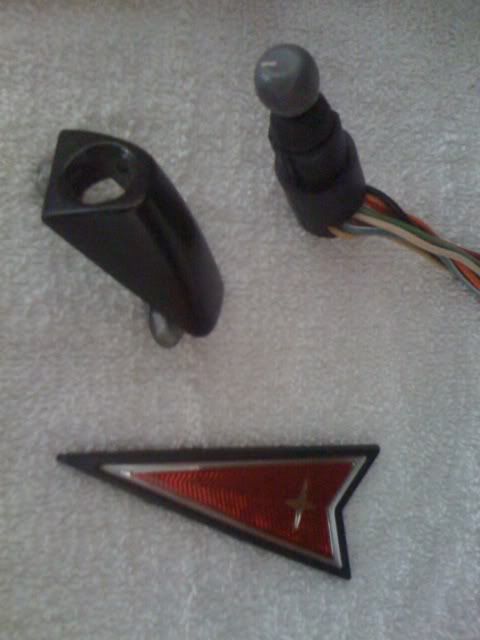
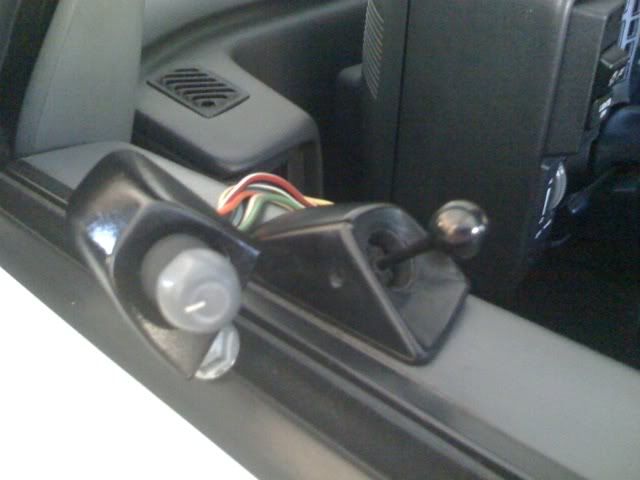
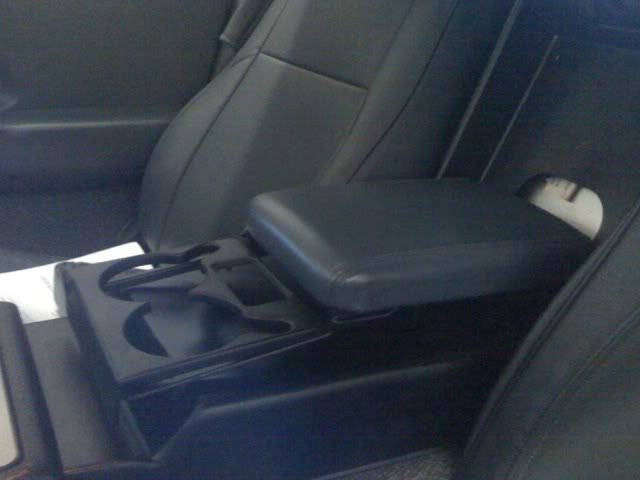
Installed in all its glory with a new shifter i "just" got from a local junk yard along with a few other "Pontiac" related goodies
Another (prior to new shifter)
As I mentioned... I went to a local junk yard Friday after work - one of the those last minute ideas. What I didn't know was that this yard specializes in Pontiacs, Buicks, and Olds cars - I was in HEAVEN! The first car I went o, a 200??? Grand Am had something I was looking for. It was a great find!
I think you can see where I'm headed with this idea!
A few other cars netted me a great idea for the center console...
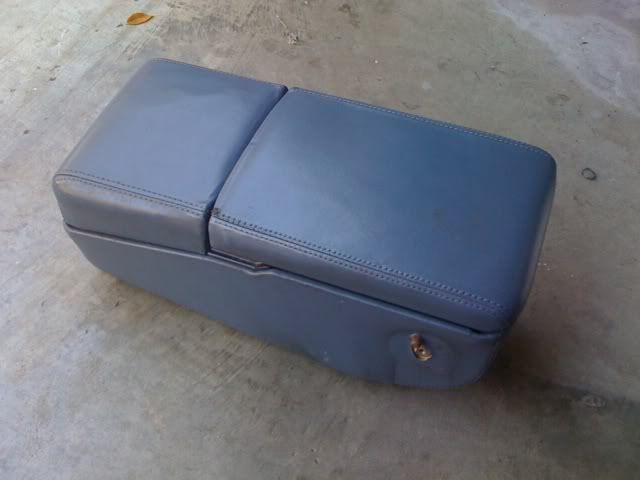
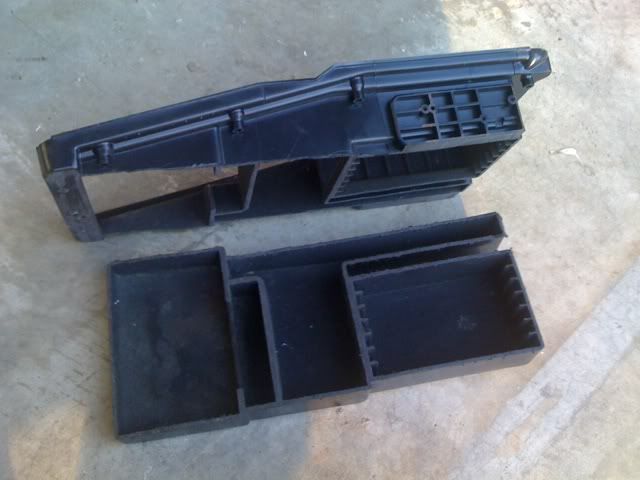
After dismantling the console I retrieved from a 90's Pontiac - I'm not sure what it was - It was funny, the bumpers and door skins were gone. I was lucky to find this. I think it was a Grand Prix but I'm not sure
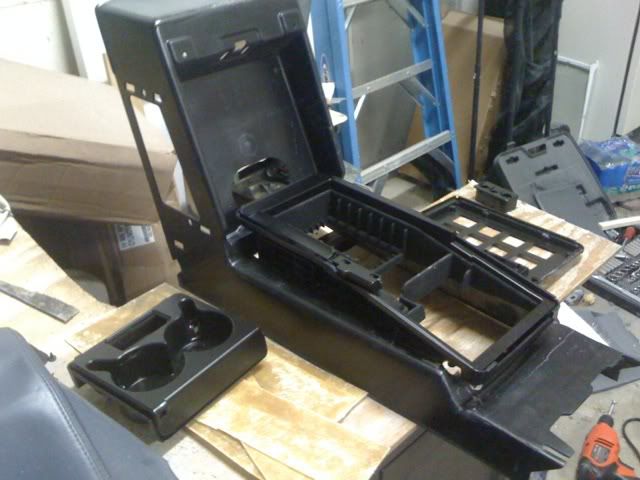
I cut the Grand Prix console in half to fit the Fiero console
Quite the mess and 2 blisters later
I positioned the parts on the stock Fiero console
What's ahead? Lots of fiberglassing and trying to stick to the original design. I've already prepped a few pieces of glass.
More to come!
[This message has been edited by Sofa King (edited 11-09-2009).]
It looks really nice. I'm just honestly shocked that you did that to a set of '88 'Dot Matrix' trim pieces. You could have probably sold those in the mall and looked or found normal brushed pieces that you could have worked with and still had pocket change.
Keep up the good work though. Interested to see how this all comes out.
The "Dot Matrix" style plates were pretty banged up. I didn't take any detailed pics - I should have. Normally, I wouldn't have done something like that to a rare, hard to find part, but the radio plate was also cracked in several places which I did manage to fix. The shifter plate had/has several areas that are also broken and cracked. In my opinion, whatever that means, they weren't worth saving - they were just too banged up.
The "Dot Matrix" style plates were pretty banged up. I didn't take any detailed pics - I should have. Normally, I wouldn't have done something like that to a rare, hard to find part, but the radio plate was also cracked in several places which I did manage to fix. The shifter plate had/has several areas that are also broken and cracked. In my opinion, whatever that means, they weren't worth saving - they were just too banged up.
I am glad you explained that! I'd hate to see 'rare' trim destroyed ... you're work looks really good and innovative.
Can you tell me a little bit about that shift boot?... where'd you get that?
-edit- and what about that lip piece that extends from your radio surround?... where you're sunglasses are?... That looks stock!
[This message has been edited by blakeinspace (edited 11-09-2009).]
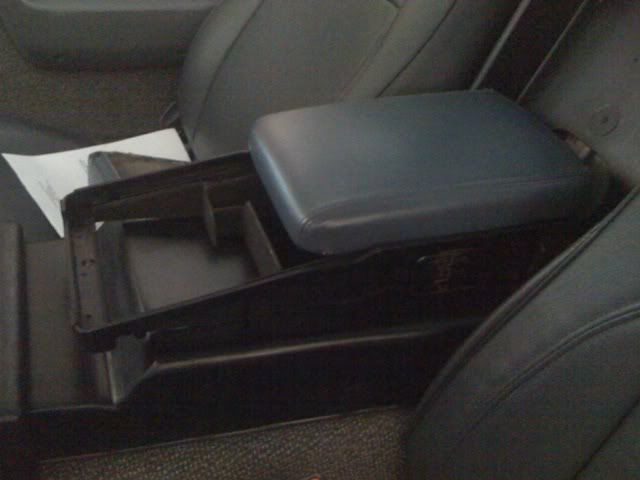
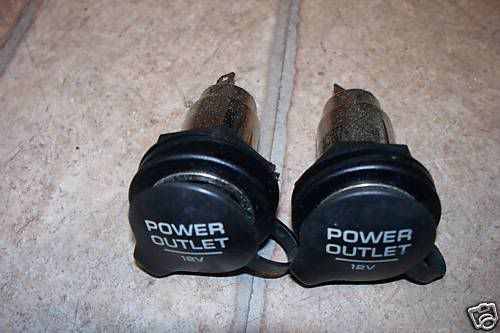
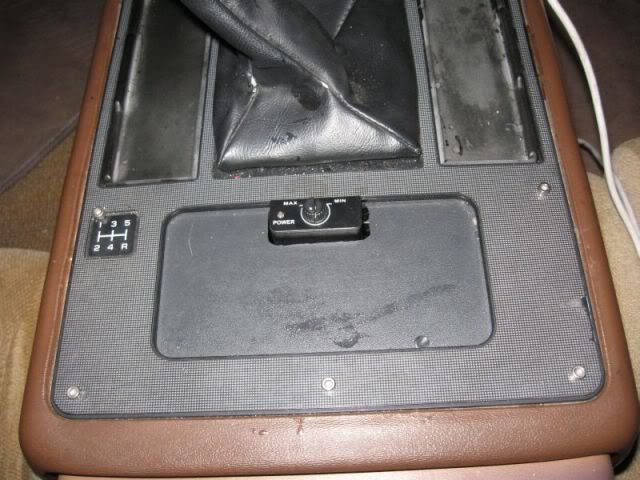
My concerns right now are the ALDL link (I believe) under the center console and I really want to install a 12 volt aux jack. So, I have a few wiring and structural hurdles. But I'm feeling pretty good about it...
The cupholder had one of the those integrated coin holders. I'm thinking about taking advantage of this spot for the IPhone/iPod connection
In the car
Updates Soon
[This message has been edited by Sofa King (edited 11-09-2009).]
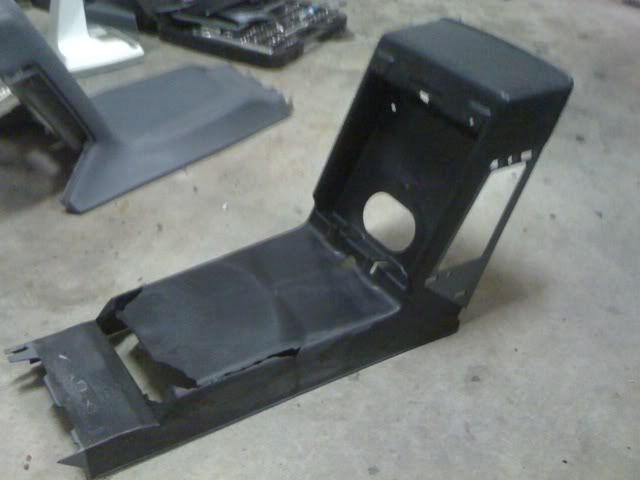
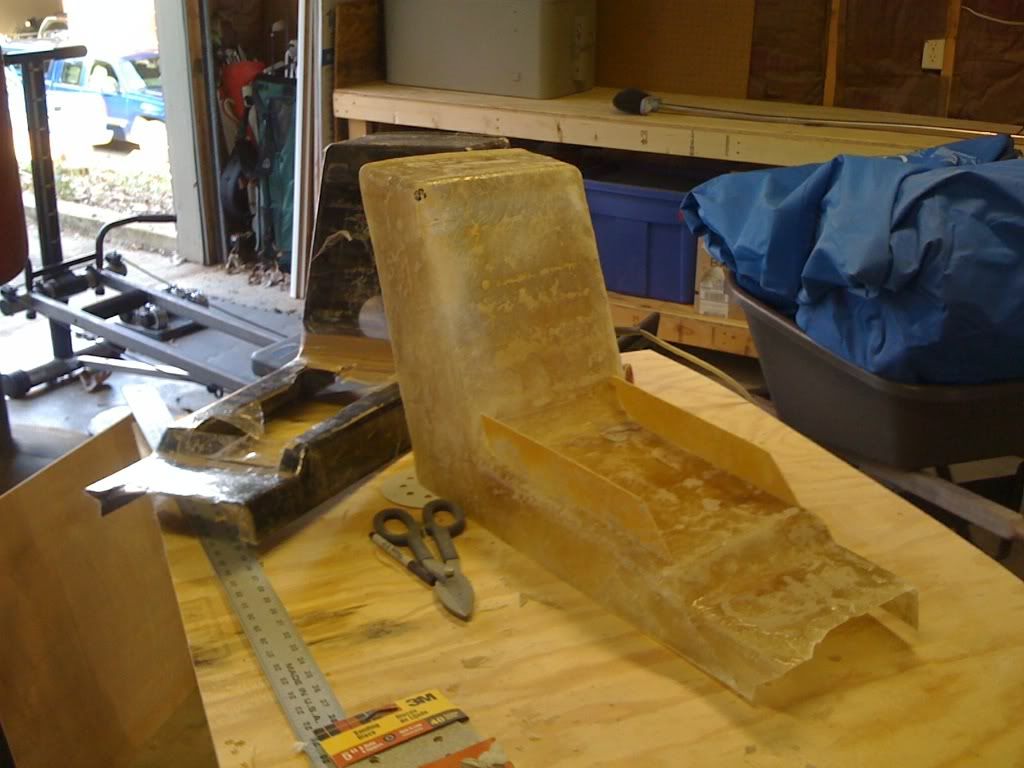
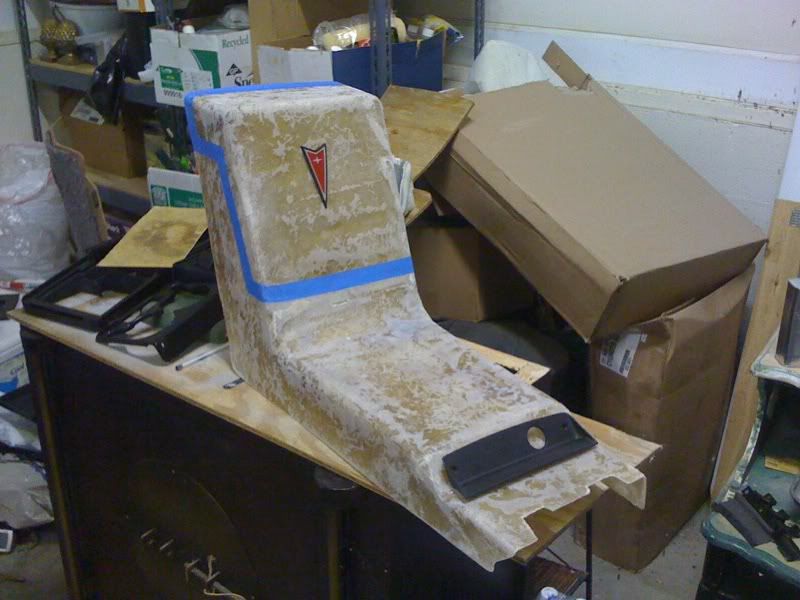
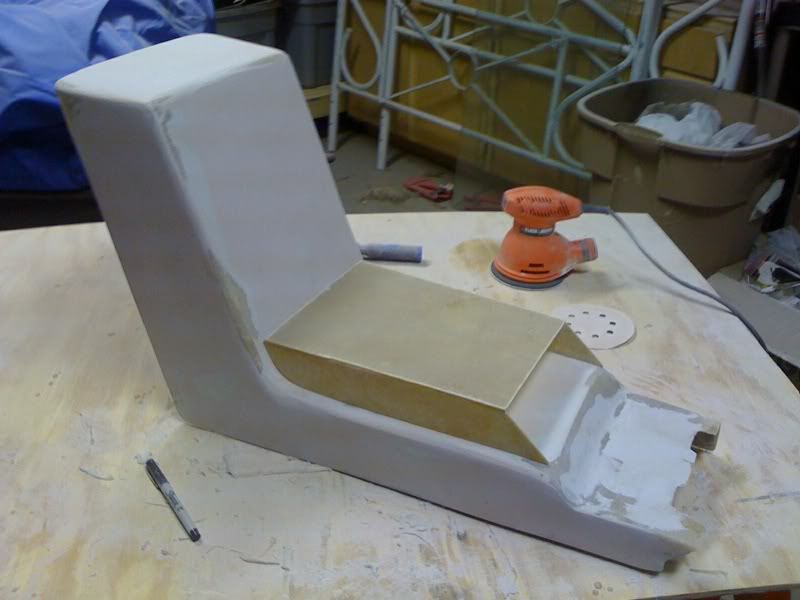
Before I did anything I had to reinforce the original center console. It was badly damaged and very weak. This was my first attempt at fiberglassing but I've been building models for years so it wasn't much of a stretch to work with to include the body filler - sanding wasn't a big deal
More to come
[This message has been edited by Sofa King (edited 11-09-2009).]
excellent stuff. I was thinking of updating the fieros interior as well. i like the way its laid out it just needs updating and even though its a bit dated its got a unique look to it that makes it a fiero interior. There is no reason why it can't be restyled and modernized but still keep to its heritage.
i like it! but i dont see how the new glove box (over the ECU) would work? i would keep the design for when its closed, but have it open the same way as it already does. but thats just me.
I was freaking out when I saw the "Dot Matrix". So may 100,000 of stock silver trim out there and he paints over 88 only Dot Matrix. But if it was banged up then I guess its ok...... (Still crying)
OK... I've hit a stumbling block. Although the center console I pulled from the Grand Prix is functional, I've run into two problems. First, the length is causing me a bit of a headache. The back of the console fits perfect but it nestles into the existing vertical glovebox space. The second and more important, is the depth. There is no room to move downward into the console, I can only work upward.
I sat for about an hour looking at this thing trying to figure out how to incorporate the cup holders and glovebox into the existing console without adding too much height and without interfering with the ALDL. I could relocate the ALDL but that doesn't solve the depth problem that still exists.
If I was to move forward as it is right now, I'm adding approx 2 - 5 1/2 inches of height. I don't think I like that idea... But I'm rendering a graphic image to see how it would look - I'll post when it's finished.
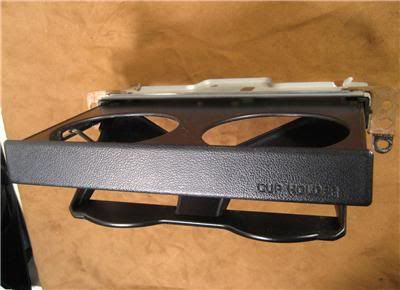
However... I've been looking online and I did find this Toyota 4Runner CUP HOLDER - I really like this dual cup holder idea. The unit is completely self contained, it doesn't take up a lot of space and it's thin enough to work. If I'm smart enough (HA) I can incorporate this idea into the console without adding too much height
Now I have to find a place for the 12volt outlet
This still leaves me with the iPhone/iPod connection - again, I have to deal with the depth of the cord and wires. UGH... very frustrating... But I shall press forward...
[This message has been edited by Sofa King (edited 11-10-2009).]
Looking great! There is a lot that can be done on the Fiero interiror. I am on my second redesign of modified Bonneville door panels and the first redesign of a custom console, to mate to my 94 Camaro dash. Here are a few sources for things that I found which may be of use to you:
Rvinyl.com offers a wide variety of stretchable and non stretchable vinyl. I bought the carbon fiber look alike, it is pretty tough and easy to apply. I am using it in the center of my console.
Allsport is a stretchable upholstery material that can be glued down over consoles, dashes etc. I spoke with the Director of QA and the stuff will stretch 100% around very complex curves. I bought mine at Rochford supply and have used it on a few cars.
I can't wait to see your finished product. Jim
------------------ 87 T-top 2.8 5sp Camaro Dash Bonneville door panels; 86 355 body & interior kits 3.1 Auto; 85 SE 2.5 5sp, 86 SE 2.8 auto parts car
Here are a few updates from earlier this morning (Wed). After paying tribute to our veterans, I decided to do a little work on the ol girl.
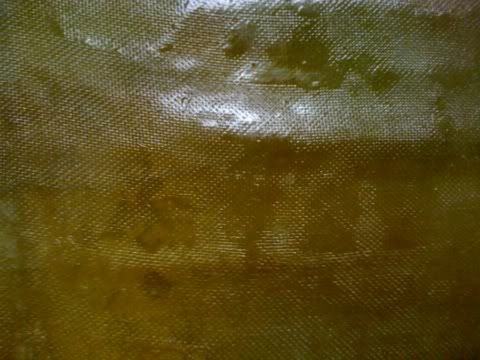
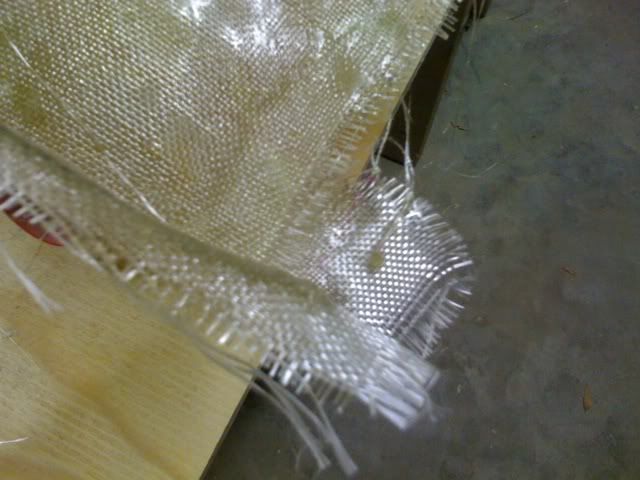
First... please know that this is the first time I've ever worked with fiberglass. I just found out that the fiberglass cloth is MUCH better to work with than the mat. The weave pattern makes it much easier to spread the resin, it conforms to whatever shape you're working with, and doesn't break the glass up into big globs as the mat tends to do. Note - if you're thinking about glassing for the first time... use the cloth. It's a bit more expensive but well worth it.
Ok. Here are the pics
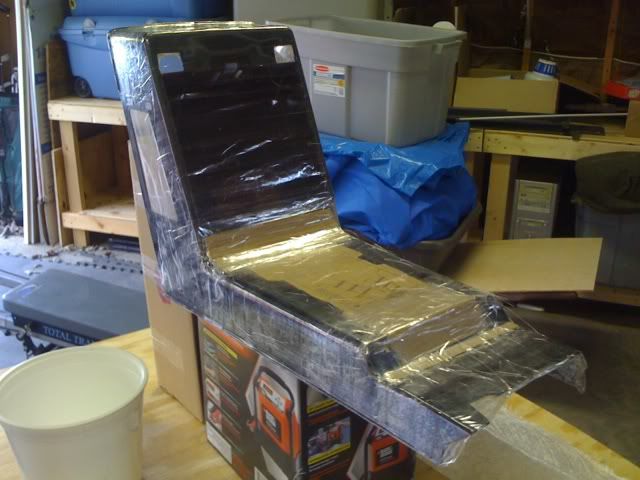
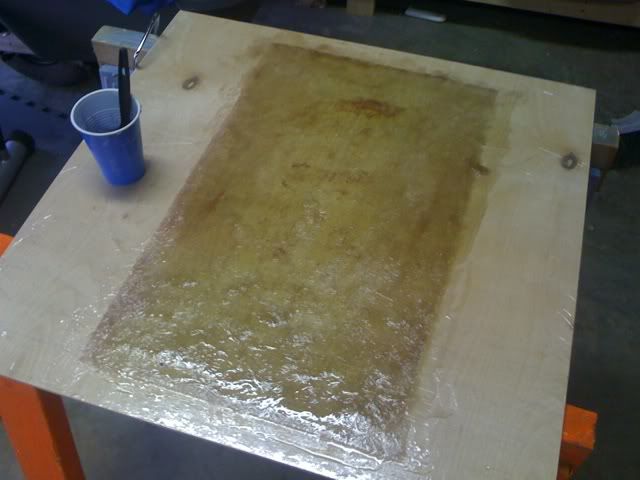
I spent about 45 minutes taping over the entire console - use packing tape - the fiberglass doesn't stick when you remove it
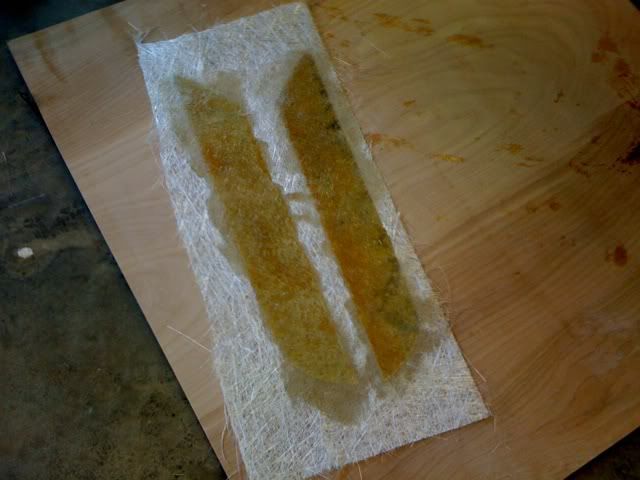
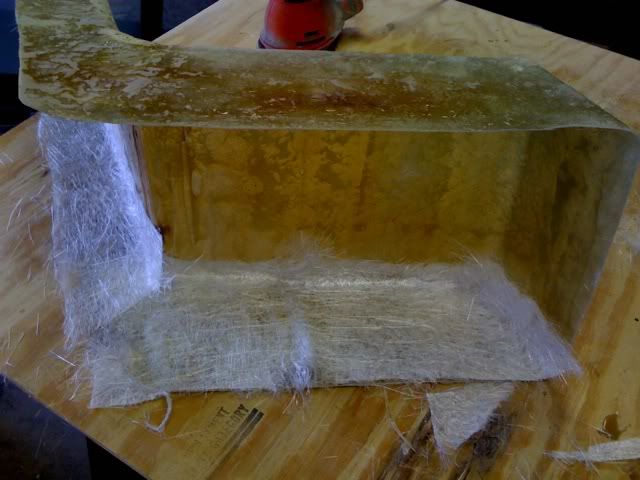
Fitting the fiberglass mat - before I used the cloth
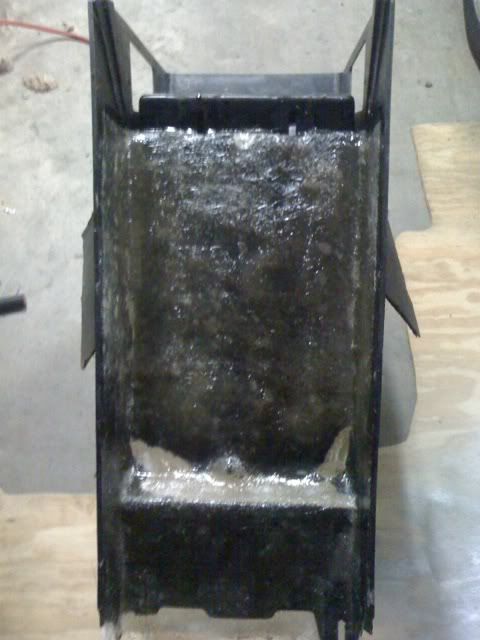
First layer of glass - this would have been much easier with the cloth
I trimed the edges to make it easier to remove from the mold
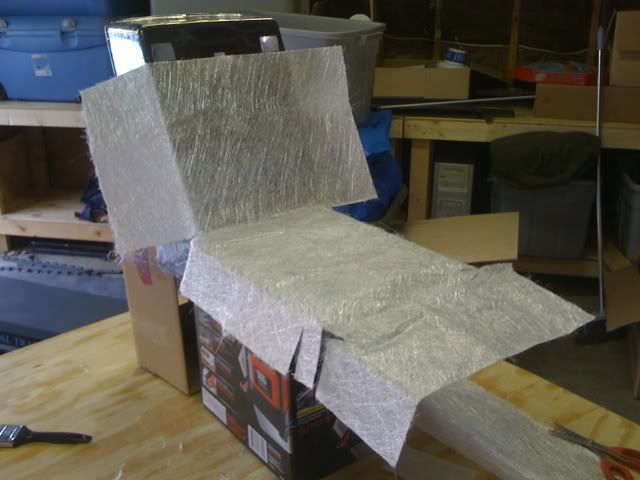
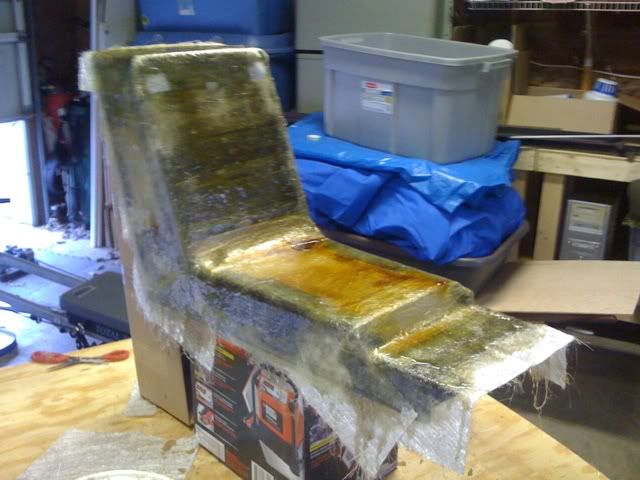
I created the sides of the arm rest while the glass dried on the console. Total dry time was about 2 hours.
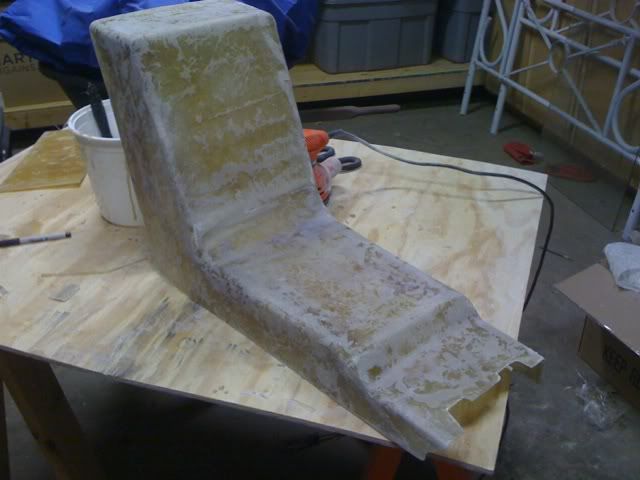
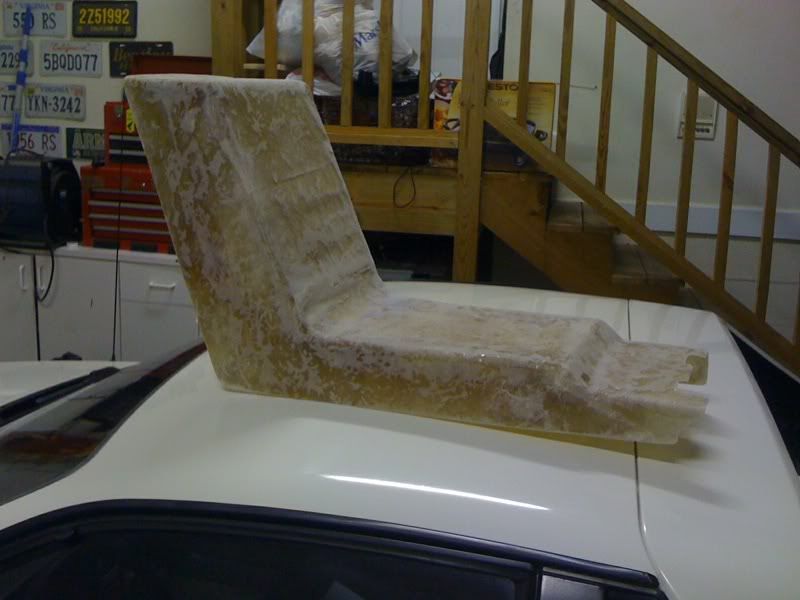
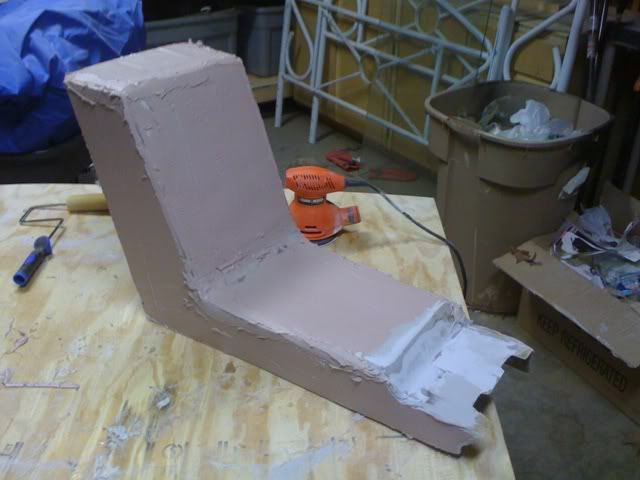
Out of the mold and lightly sanded. Fiberglass is awesome. I was sanding and applying a new layer with 1/2 hour after drying. I did find a few low spots.
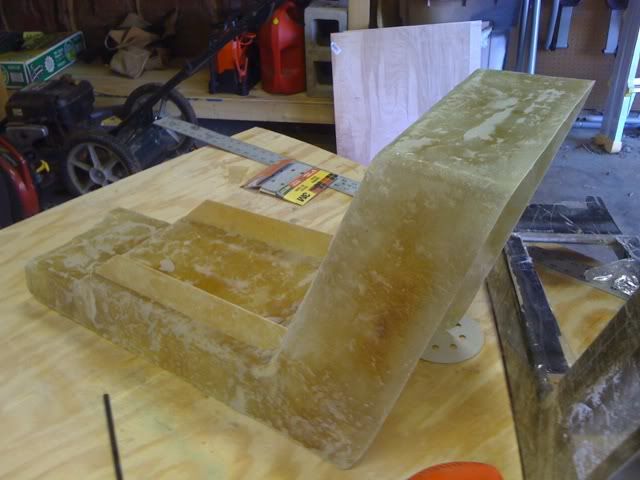
Here you can see the stock console in the background. The new console has been sanded down and the new armrest sides are positioned. I only put one layer of glass on the console because I had a feeling it would be tough to pop out of the mold - I was right. I used big tin snips to cut the glass for the armrest sides
Another
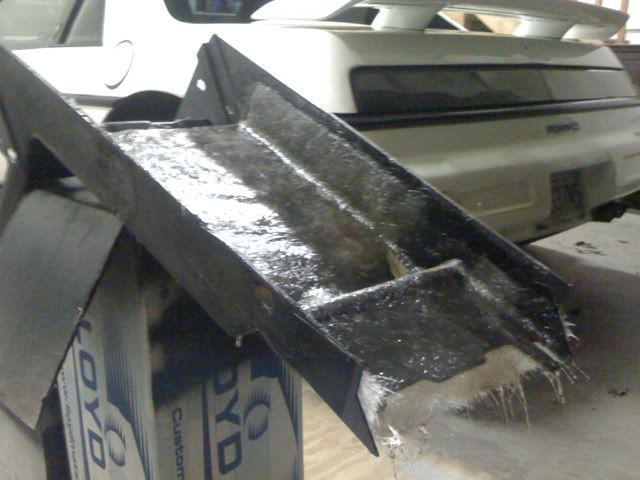
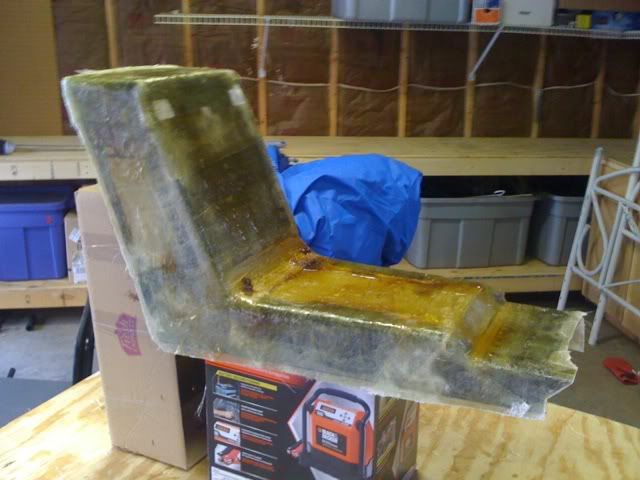
Side view showing the armrest curve
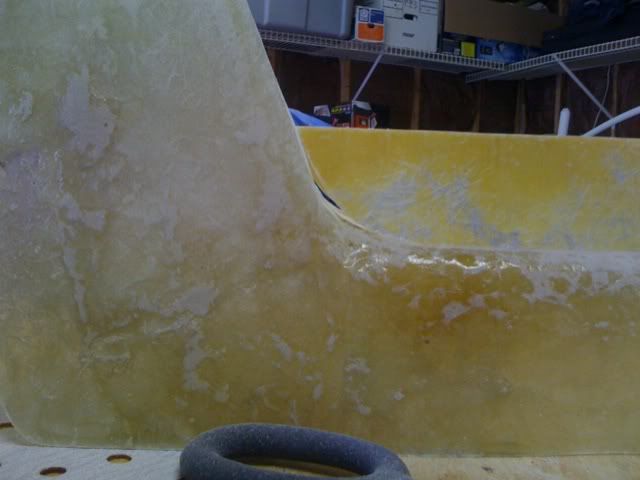
Because I only applied one layer I reinforced the sides with more glass. I used the fiberglass cloth on the rest of the console - what a breeze. It's out in the garage drying as I type. I'll use 80 grit sand paper to knock down the high spots. Once the console is strong enough I'll begin to add body filler. I'm still looking at how to create the lid as seen in the very beginning of this post. This image really shows how thin the sides are.
Until tomorrow or tonight...
[This message has been edited by Sofa King (edited 11-11-2009).]
Very nice work! I want to be able to do that myself but not sure I have the skill or paitience to do it. I really like the direction you are going in. Do you have a source on that leather look paint system? Any idea what the "instant" kit costs? That stuff is way trick. You can do a lot of custom things with that. Keep up the great work.
Pat
Edit to add: I was just reading through the thread again and have a question. Could you have left the original console inside your glass work to add strength and aid in mounting?
[This message has been edited by katatak (edited 11-11-2009).]
Thanks for the compliments. I didn't think could do it either, but the secret... just do it. Just jump in and do it.
To answer your questions. There is no stateside distributor for the paint but I do have contact information if you are interested. They told me they will ship to the states. So good news there!
To answer your other question: Yes, I could have left the original console attached to the new fiberglass because the original vinyl coverings and padding was SO thick. But I didn't want to completely destroy the original console at the same time. Also, I wanted to push myself to see how far I could go with the fiberglass and so far so good. Finally, I just test fitted the console and its perfect - I haven't even bolted it in...
I hope this helps.
Speaking of which... I have some new pics ready...
[This message has been edited by Sofa King (edited 11-11-2009).]
Here are some updated pics of the center console...
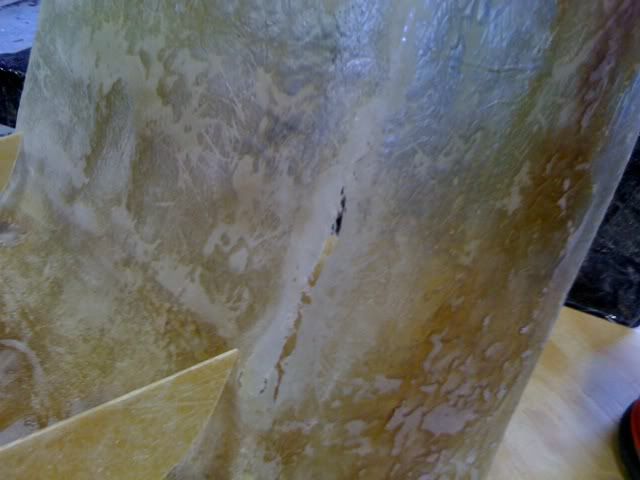
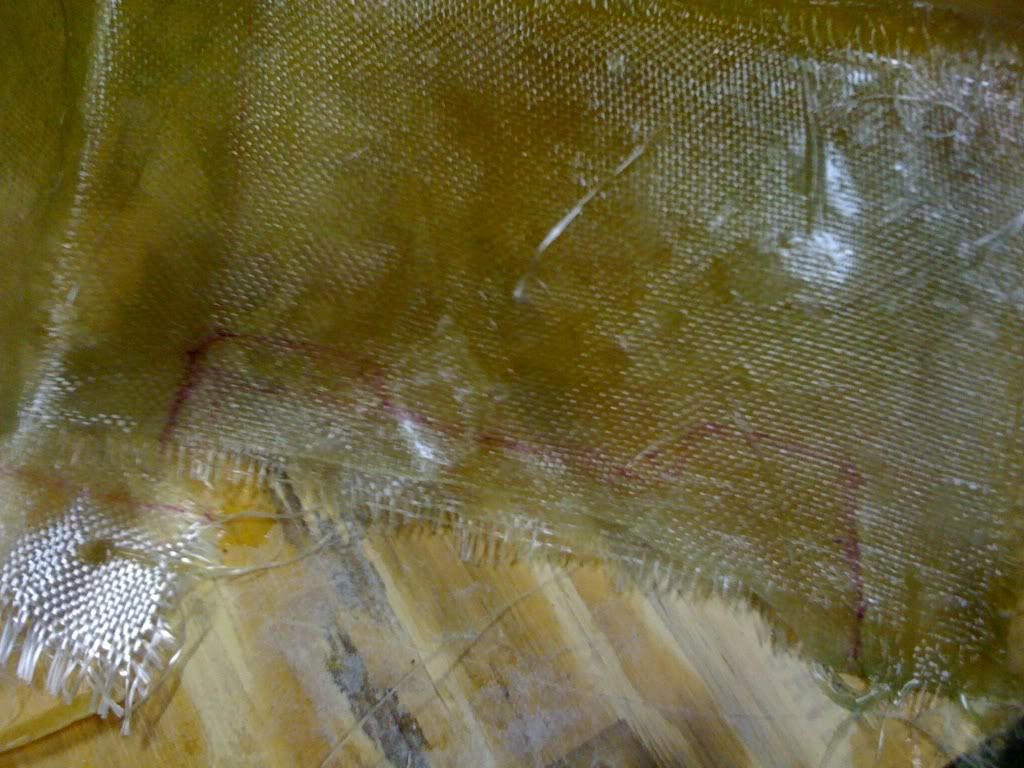
Here ia a close up of the fiberglass cloth - you can definately see the pattern. The results are a very smooth finish.
Another shot of the cloth
Getting the cut line ready
All the fine cutting finished (for right now) and LOADS of sanding done
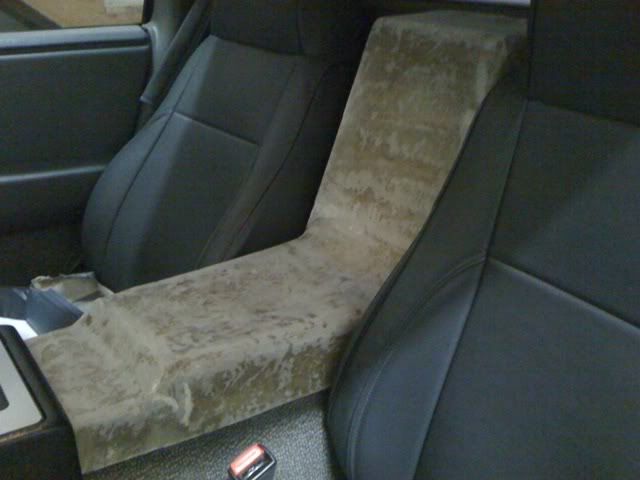
The beauty shot
On the car. But the big question is... will it fit? I have to admit... I was really nervous.
It fits, it fits... that's what she said.
Ealier this morning I had a bunch a fiberglass mat, cloth and a couple tubs of resin. Tonight... with a little common sense (the ability to read and follow directions) and lot's of elbow grease I now have a new center console...
If I can do it... you can do it.
This week/end I'm going to finish building the armrest (I have to wait for the cup holder), begin plans / designs for the iPod connection and then jump into creating the white body colored flip up lid (with Pontiac Logo). I'm still up in the air about the lid. What do you guys think?
I was just thinking... I might take a fiberglass mold of the inside part of the "glovebox". This will give me a solid base to work from and I can get the proper depth and size. I may try to use the existing "cubby" that was mounted on the original glovebox lid. I'm still thinking this idea through. The other is to just create a new glovebox the same way as I am the armrest/cupholder piece. I'm going to look online and see if I can find anything or ideas.
Until then...
[This message has been edited by Sofa King (edited 11-11-2009).]
Again....I like what you are doing here. It's modern yet still looks like it belongs in the Fiero. You have inspired me to try my hand at glass work. I have a V8 Coupe project that I need to build an extractor scoop in the hood and right now the interior is stripped and is a "blank" canvas to work with. I really like that paint system. Any info you have would be appreciated. I imagine that it is pretty spendy to have it shipped.
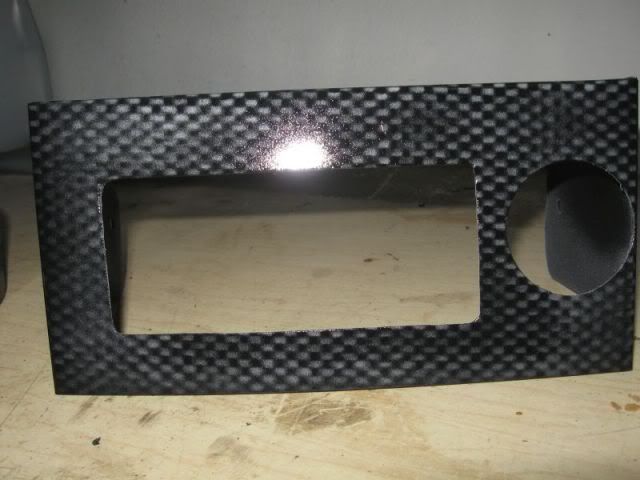
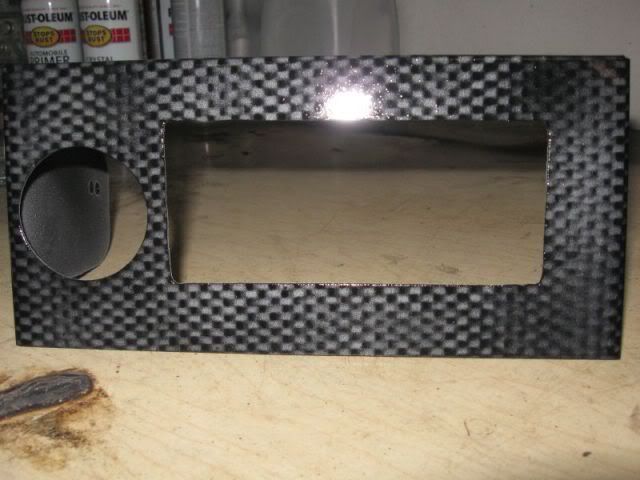
On another note, I was just surfing around Ebay and there is a post for a complete custom interior for a Fiero. Looks like the guy used "speckled" paint - looks kind of like granite. Hard to tell by the pics but it looks textured too. It's different. I was also thinking of using "bed liner" on the trim pieces then paint for color. It would give a different texture to the interior - it may be a little rough though? I bought a can of Rustoleum spray on bed liner in an aerosil can that I will be trying out on a test piece. I have also attempted to do the "paint" carbon fibre thing too. Although it is a first attempt, I was pleased with the outcome and will be playing with it a little more. It works pretty well on flat surfaces but I have yet to figure out how to do a piece with multiple side/curves/angle etc.
These are some custom covers I made for a lo pro head light setup I made for my XTC: Ac vent covers - you can see I had a hard time getting it to line up square on the corners:
The power mirror joystick idea was mine from years ago except I used one out of a Ford Escort. If you look in Ogres Cave (link is at the bottom of every page), you'll see my write up on it. Might help you a bit with the wiring.
Again....I like what you are doing here. It's modern yet still looks like it belongs in the Fiero. You have inspired me to try my hand at glass work. I have a V8 Coupe project that I need to build an extractor scoop in the hood and right now the interior is stripped and is a "blank" canvas to work with. I really like that paint system. Any info you have would be appreciated. I imagine that it is pretty spendy to have it shipped.
Hi P,
Thanks for the compliments. It's been really fun getting my hand dirty. I'm like a little kid, I don't want to do anything else but work on the car. I think its great you're going to jump in and give it a shot. I went to the local "Lowes" home improvement and got everything I needed. Hopefully you have a home improvement or auto super store near you.
I love the CF teatment you gave to the vents, it looks really nice. I've never worked with CF, but can you (did you) add a glossy top layer /clear coat? Really sharp! Are there plans for more CF treatments around the interior? I have no doubt you've inspired a lot of folks to do the same thing. That's why I love this forum, everybody bouncing ideas back and forth.
quote
On another note, I was just surfing around Ebay and there is a post for a complete custom interior for a Fiero. Looks like the guy used "speckled" paint - looks kind of like granite. Hard to tell by the pics but it looks textured too. It's different. I was also thinking of using "bed liner" on the trim pieces then paint for color. It would give a different texture to the interior - it may be a little rough though? I bought a can of Rustoleum spray on bed liner in an aerosil can that I will be trying out on a test piece. I have also attempted to do the "paint" carbon fibre thing too. Although it is a first attempt, I was pleased with the outcome and will be playing with it a little more. It works pretty well on flat surfaces but I have yet to figure out how to do a piece with multiple side/curves/angle etc.
I think the paint used on the interior is a textured paint. If I'm not mistaken, it's very similar to what GM was doing to a few of their last generation cars - ie the HHR. I'm no professional but I would stay away from the textured paints and the bed liner paint as well. Unless you have extra pieces you can test on you don't want to spray the interior parts and then come to the decision you don't like it. You could always sand, but that's a LOT of work. I would stick with the paint idea from Lunitec - send me a PM with your personal email and I'll forward all the images they sent including a PDF and contact info. That's the direction I think you should head. But, whatever you do, post images and let us know the who's, what's, when's, where's, why's and especially how's!
I think your work fantastic. Please let me know of any more additions to your car and especially the Lunitec Paint System - I'm very interested.
[This message has been edited by Sofa King (edited 11-13-2009).]
The power mirror joystick idea was mine from years ago except I used one out of a Ford Escort. If you look in Ogres Cave (link is at the bottom of every page), you'll see my write up on it. Might help you a bit with the wiring.
Hi M,
Hey, great minds think alike, huh? My inspiration came from sitting in a parking lot waiting for something... I'm not sure what it was exactly, when I happen to look over at a Pontiac Grand Am. I saw the power mirror switch and then the little light turned on in my head. It was a very dim light... but it did turn on. Needless to say I got very excited. I'll have to wait on the power mirrors though. I don't have all the necessary parts yet... like the power mirrors. That'll wait till next year.
I'll definately look at the post to see how everything wired up - thanks for the info.
put your fiberglass mat on a piece of wax paper. it won't stick to it and makes a smooth finish = less sanding
when the wax paper is on there use a roller to roll out the bubbles!
the console looks a little thin<? maybe another round of glass???
looks good so far!
Hi R,
Thanks for the great info. It never even dawned on me to use wax paper - good call. What a difference between the fiberglass cloth and fiberglass mat. It's worlds aparts. The cloth is great for patch work, but the cloth is just so much better for larger pieces.
You are correct. The console is still a bit thin is most areas. I'm going to lay one more layer down, 2 more in some areas. I hope to have the console bondo'd, sanded and the lid cut before the weekend is over - that's the goal...
I wasn't able to really do anything on the console yesterday. I had my nephew over to the house and we hung out. We played HALO 3 and he wiped me out. Do you have any idea how humiliating it is to sit and watch a 9 year old beat up on a 40 year old? It was fun and we had a great time. The best part was giving him candy, cookies and soda and then sending him home to my sister-in-law. Muhuhuhahahahaha
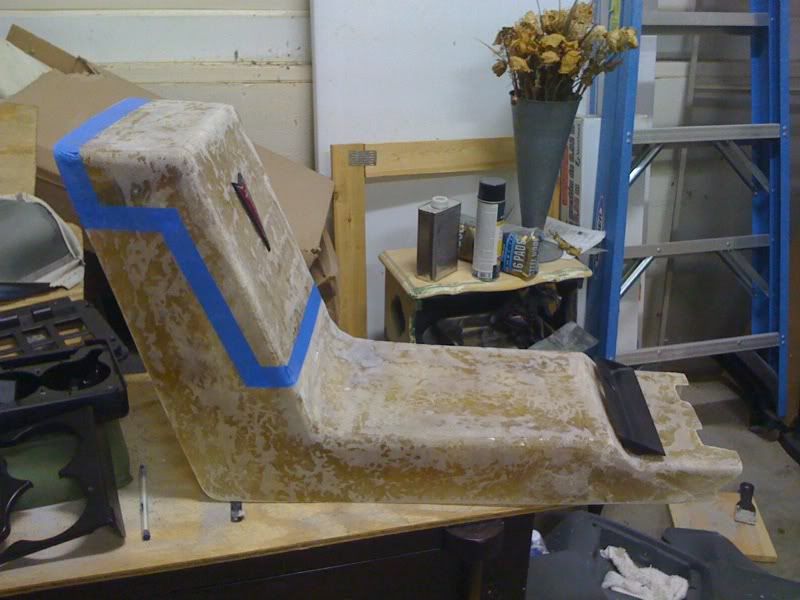
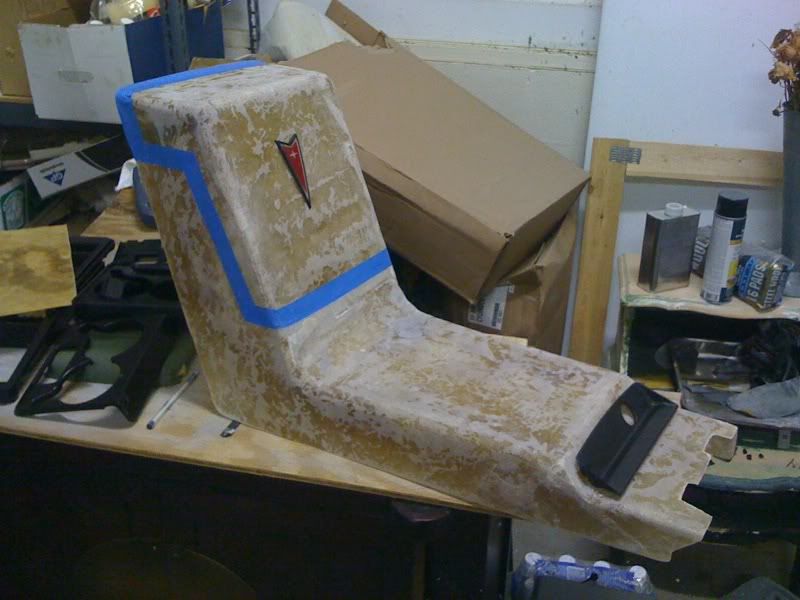
However... Before I went to bed, I did manage to put some guide tape and the Pontiac logo on the console to help me a get a better feel for the console.
Another
One more
The hardest part will be to create the "hinge" for the lid. I'm not sure whether to use a mechanical hinge or create something more simple. Does anybody have any ideas?
Also, I'm going to start cutting into the plastic trim piece where the window switches mount to prep for the IPod docking station. Does anybody have any good advice on how to cut the thick plastic? A CNC shop came to mind... any idea?
[This message has been edited by Sofa King (edited 11-13-2009).]
how about using the "stock" console hinge? or go get a "piano" hinge cut it to where you want and tada. build up the area the hinge will go, so you won't rip it out someday.
Right after work today I am going to Lowes to buy tons of fiberglass cloth, resin and hardener. The Mrs won't be happy but I always say...
"Its easier to ask for forgiveness than it is to ask for permission"
The nice thing... the kids are going away for the entire weekend and the Mrs is out of town until tomorrow night. I have the next 36 hours all to myself.
Like I said, I'm still unsure how the hinge will work. Without being right in front of the console and looking at the hinge I can't really form an opinion. I'll also have to cut the lid to get a better idea on how exactly this is going to work. But I think the piano hinge might be a good idea. But I would like to reuse as many stock pieces as possible
I also need to think very carfully how everything will look under the lid. Not only does the lid have to be functional but it has to fit (not perfectly) over the opening. When I cut the lid off the console, I have to create a whole new substructure that essentially fits under the lid - to include either a locking mechanism or magnet. The structure has to be smooth and look good. I also have to think about structural ridigidy. Once I cut the lid from the rest of the console it essentially becomes a stand alone piece... it's all very confusing...
Suggestions?
[This message has been edited by Sofa King (edited 11-13-2009).]
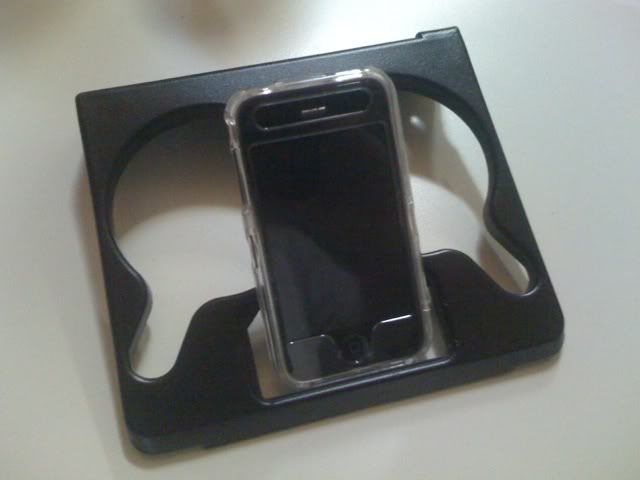
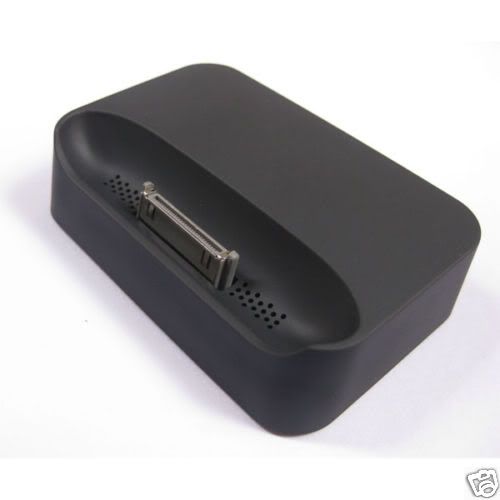
I found the iPod/Phone docking station I'm going to use - if I can get everything connected to the radio
Im going to attempt to mount the docking station under the power window plate. I still need to figure out to properly cut the plastic. Does anybody have any ideas?
I think the paint used on the interior is a textured paint. If I'm not mistaken, it's very similar to what GM was doing to a few of their last generation cars - ie the HHR. I'm no professional but I would stay away from the textured paints and the bed liner paint as well. Unless you have extra pieces you can test on you don't want to spray the interior parts and then come to the decision you don't like it. You could always sand, but that's a LOT of work. I would stick with the paint idea from Lunitec - send me a PM with your personal email and I'll forward all the images they sent including a PDF and contact info. That's the direction I think you should head. But, whatever you do, post images and let us know the who's, what's, when's, where's, why's and especially how's!
I think your work fantastic. Please let me know of any more additions to your car and especially the Lunitec Paint System - I'm very interested.
King,
I did use a satin clear on top of the paint to give it a little gloss. I was looking at a ZR1 Vette today at the dealership. I did not realize that they had some much carbon fibre on that car. Beautiful stuff. I sent an email to Lunitec and they replied with a cost for one kit. They said that to ship to the US I would have to order 4 sets minimum. I am waiting now for a shipping quote? I really like that system and if it is not to ridiculous to ship, I will be ordering 4 sets. I had some broken trim pieces to experimnet with so I tried a few different things. I tried the spray on bed liner - it was too rough and the texture was not right. I ended up using the flat textured plastic spray paint. I think it turned out good. The pieces I used were old and the origianl grainy texture was nearly non existent. After the paint, it has a nice feel to it and it looks even.
I'll be picking up some glass supplies tomorrow and will be heading into the unknown.
It's pretty simple. After I prepped the piece, I primed it, sanded smooth and the laid down a coat of silver. You can use what ever color you want for different effects. Once the silver was dry, I took a piece of the non skid shelf liner - the stuff that has the square holes. You can get it at any dollar store for cheap. Lay the shelf liner over the part and give it a quick light coat of black. Let it dry a little so when you lift the shelf liner, it does not smear but not long enough to stick to the piece. You should have a nice checkerboard look. To get it a little closer to the right look, fog the black over the piece diagonaly to the squares. A real light fog will give it a silvery look while a heavier fog will give it a darker charcoal look. I did a few pieces with out the satin clear and it looks good to but I prefer the satin clear to give it some gloss. If you are talented enough, you can use a base coat of silver, then cover with the shelf liner and spary the black - wait a minute then lift the liner. Let it dry. Take a new clean piece of shelf liner and place it over the piece and offset it on an angle so that 1/4 of a black square and 1/4 of a silver square is covered then spray a grey metalic or charcoal. It gives it a deeper 3D look. I have yet to be sucessful with this method. You can see some videos of different processes on youtube - search for carbon fibre paint.
Those painted pieces look great! Can you take some close up pics that show more detail? Also, exactly what brand and color did you use?
I had no idea the carbon fiber look was achieved that way. What a great idea. I understand now what you meant by it being difficult to keep the material in one place while painting. For a first attempt, bravo. Kudo's for your excellent work. I would apply several coats of high gloss clear coat to achieve the final look.
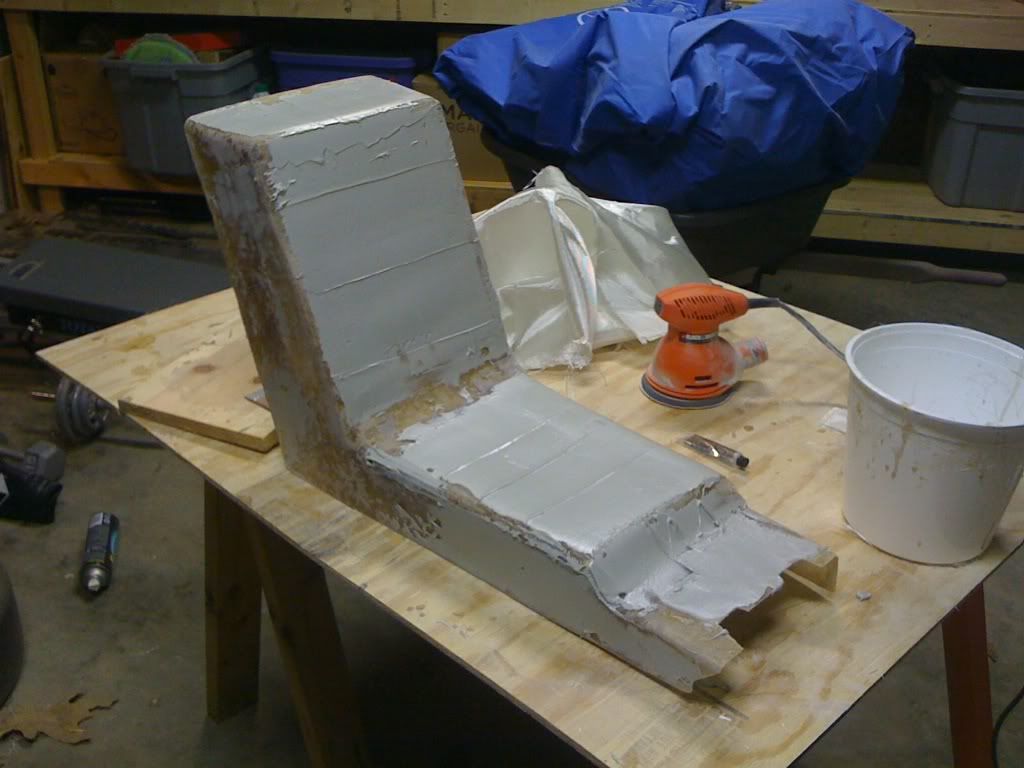
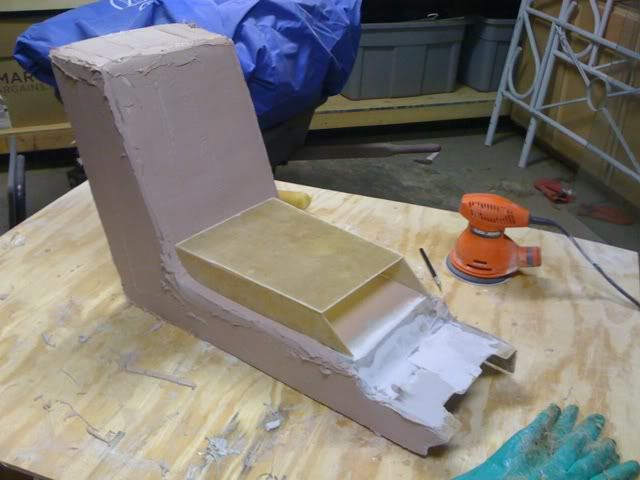
Speaking of work... I just cleaned up. I got home around 5 this afternoon with supplies in hand and started the process of applying the body filler to the console. I applied 2 layers with a light sanding in between to take down the high points. While that dried I created the top panel to the armrest. All the pics are below.
Here is the first layer of bondo - this used the white hardener
Second layer of bondo with the red hardener - the red dye made it easier to know when you've mixed the bondo enough. When applying the bondo, you want to use generous amounts and apply using a standard plastic applicator. Try not to go over the same area twice because the bondo begins to harden - you do NOT want to pull chunks and clumps of bondo across the work area leaving a huge scrape - if that makes sense.
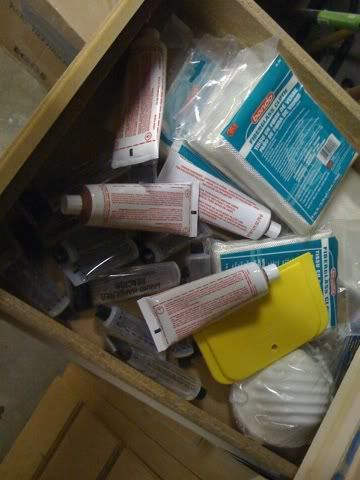
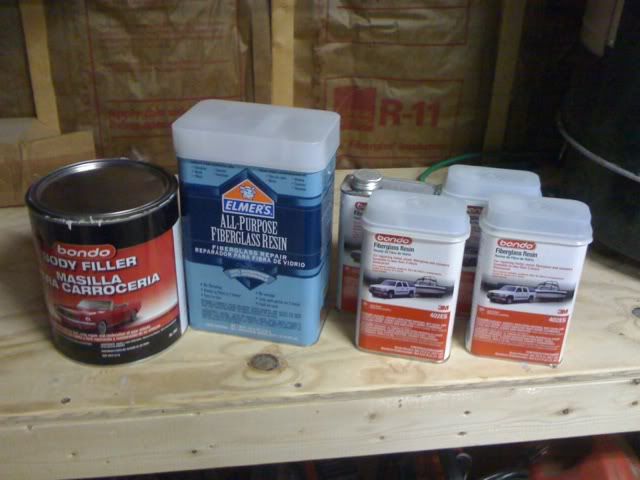
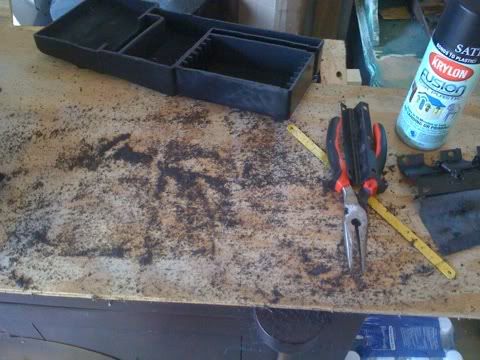
Supplies, Supplies, Supplies
And more supplies... why so many? I have another project in mind that includes the door panels... more on that later
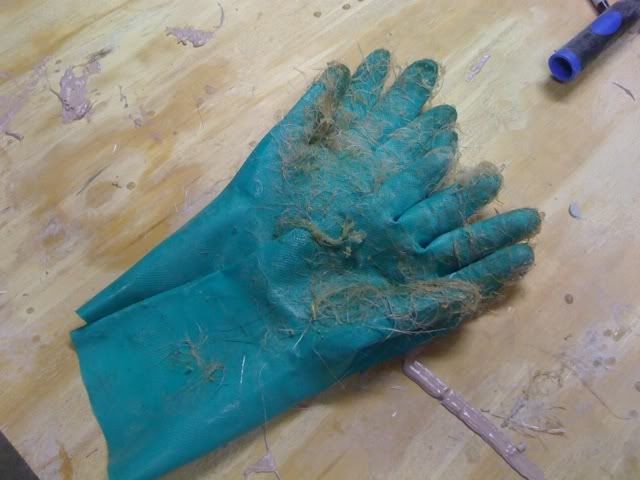
Check out the tools of the trade... these are a must! And where long sleeves. Do you know how much hair I've ripped off my arms because of resin?
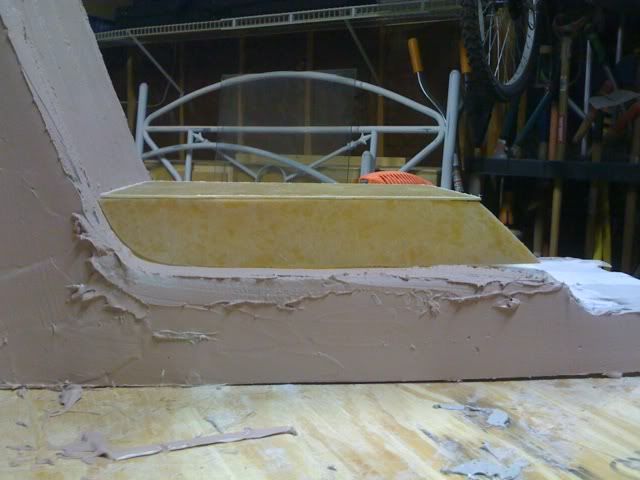
In this picture you can see the build up of bondo. Also visible is the new armrest top. Tomorrow I will glass the 3 pieces together in preparation for the Toyota 4Runner dual cup holder I found on ebay. That's gonna be cool - I'm really looking forward to getting that piece mounted and functional
OK. It might not be the most professional looking bondo job but just wait...
Lots of space for the cup holder
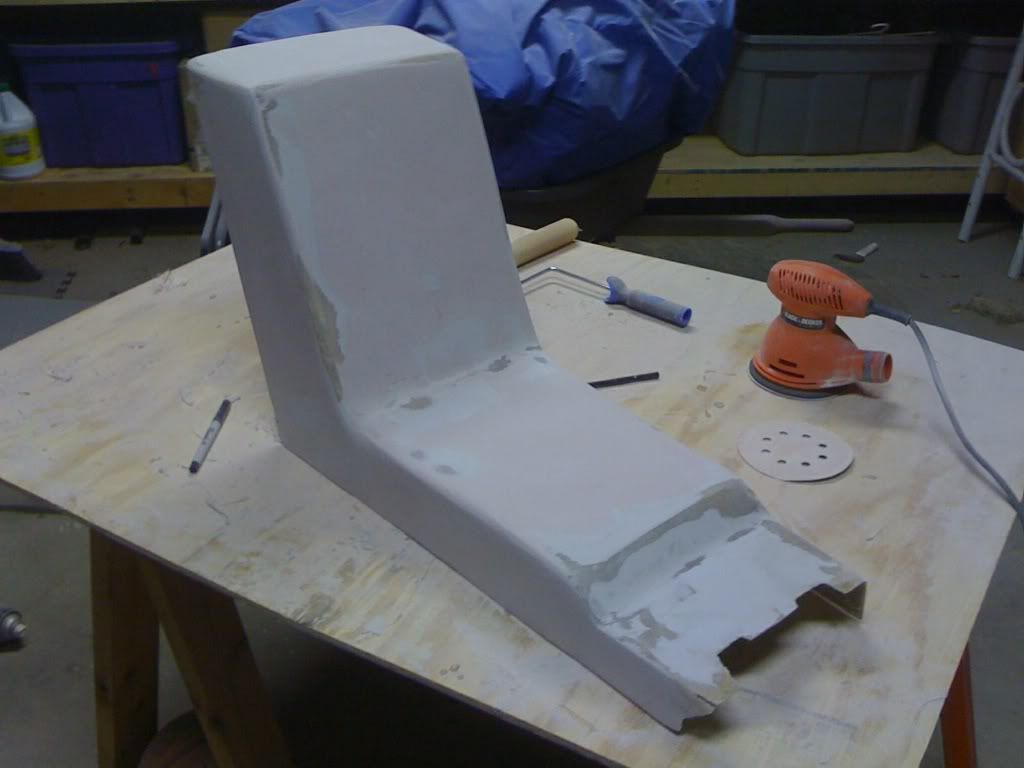
Check it out - all sanded. I had to use a mask when sanding. The dust was amazing and everywhere. I used a 40 and 80 grit paper on the little "Black & Decker" sander. It did a great job... especially blowing dust in my face.
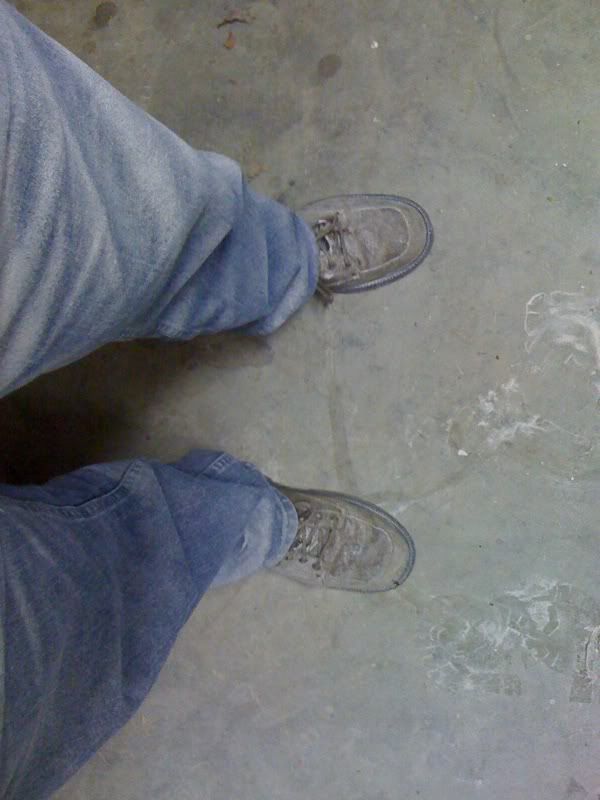
These are blue jeans... not silver jeans. I was covered head to toe! Thank god for the detached garage
One more beauty shot with the armrest. Looking more like the original design image at the beginning of the post
There are still a few little holes which I'll fill tomorrow and I need to reinforce the inside with more glass. With the armrest in place, I can now begin to measure for the lid. I will also begin to plan out the "glovebox".
On to the Power Window Switch Plate. I have a Dremel but I'm not confident enough with my ability to get a nice clean cut. My goal is to make this as stock and professional looking as possible. One option is to fiberglass a whole new switch plate. If i mess up, no big deal. The hardest part is getting all the mounting points for the screws lined up and functional.
Just wanted to thank everybody for the words of encouragement. See ya tomorrow
[This message has been edited by Sofa King (edited 11-13-2009).]


 ... you're work looks really good and innovative.