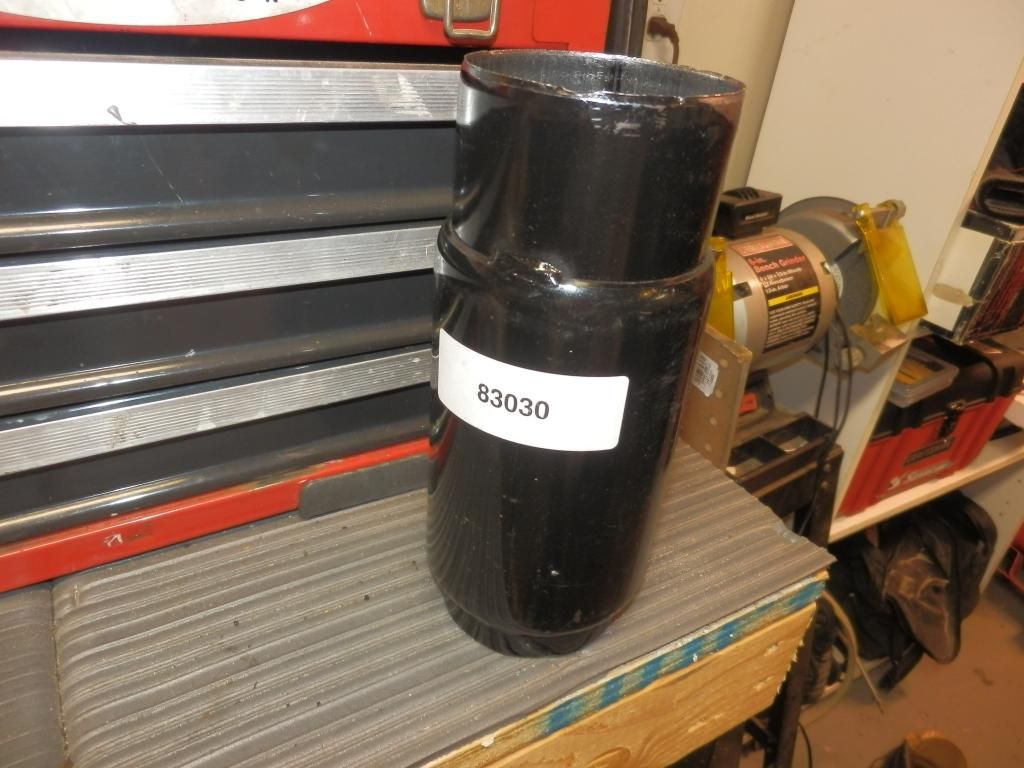
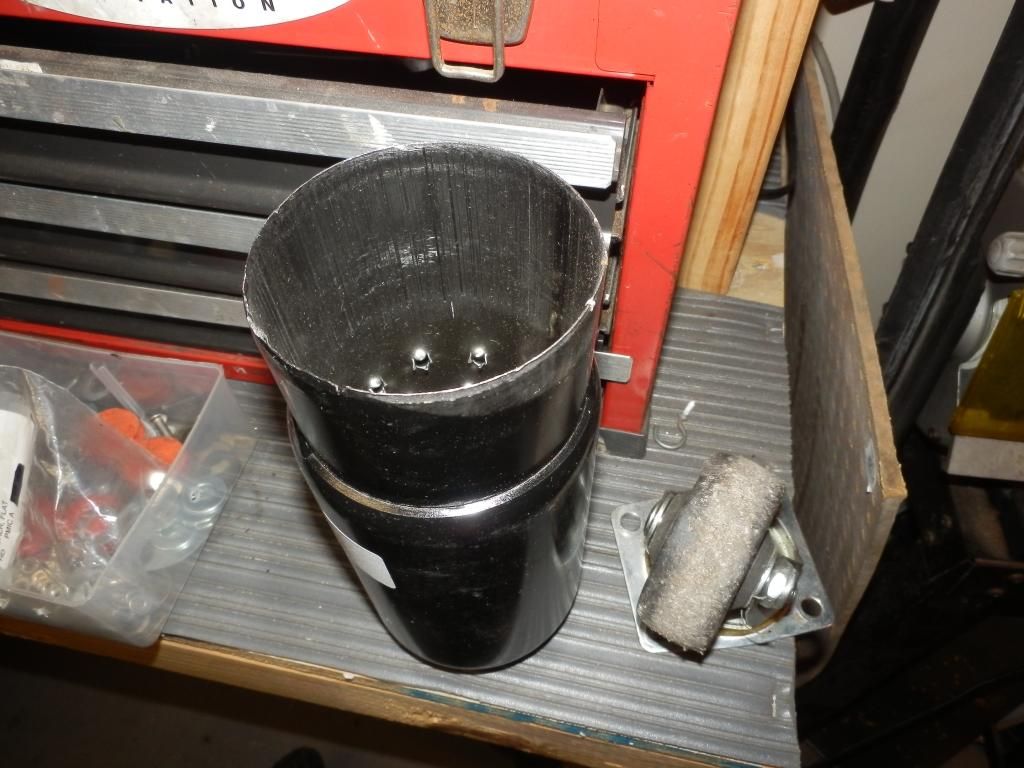
Package arrived from Summit Racing today. Among many items, I asked for the smallest 3" muffler they had. We were looking at the Borla 40085 then the guy found this thing. Well... just wait till I post pics.... LOL I got what I asked for....
Man that is looking nice. How tough is the crinkle paint to do? Thinking it may look nice on the GBCTs valve covers. I know it will look better than the current rusty chrome colored ones it has!
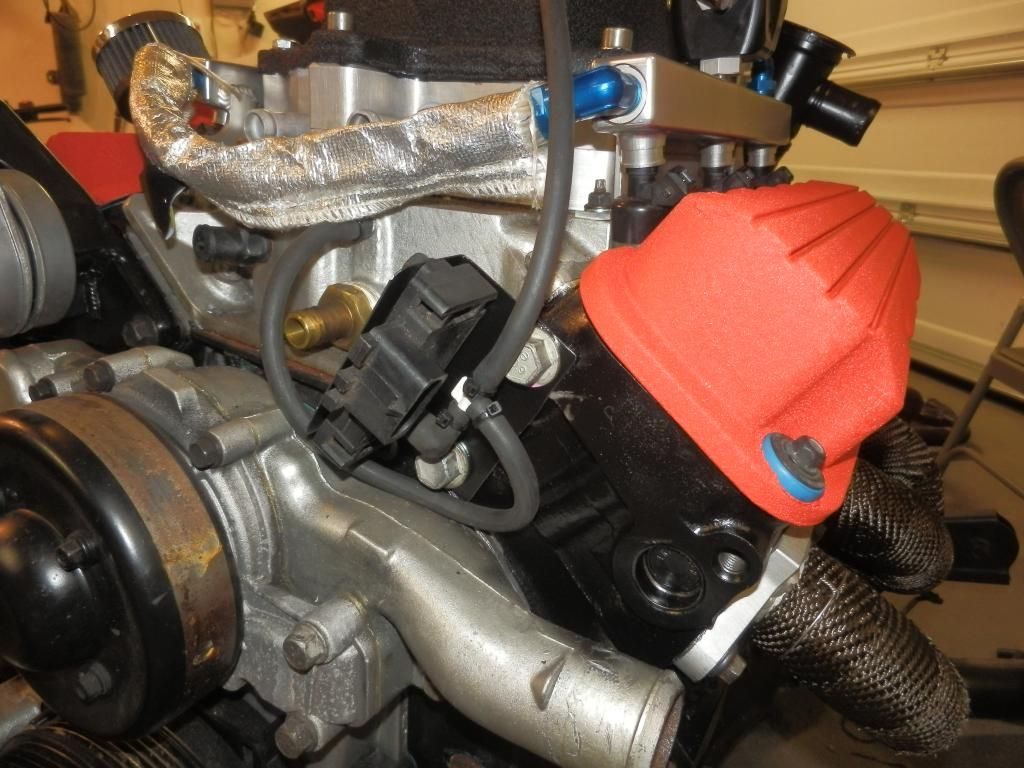
Its easy to do, but it takes forever to dry. It will remain soft for several days. If helps to put the painted part in an oven to speed the curing. Well, provided you have a VERY understanding wife..... otherwise, let it set outside in the sun for as long as you can then put it away to dry. You dont want to handle it while the paint is soft.
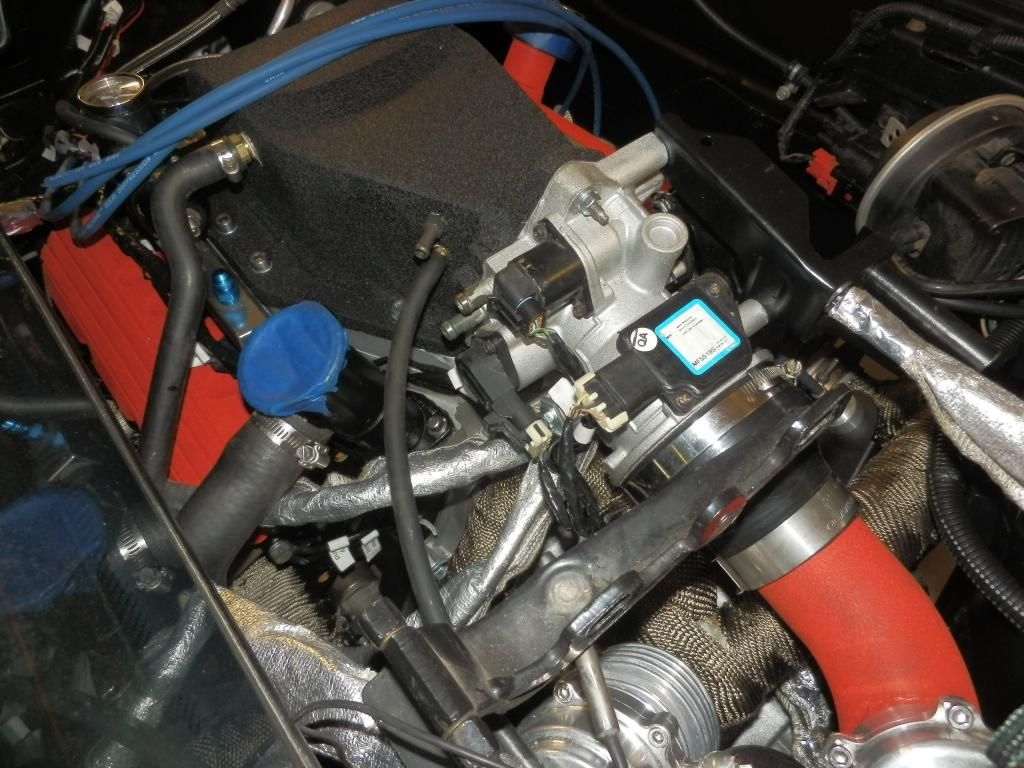
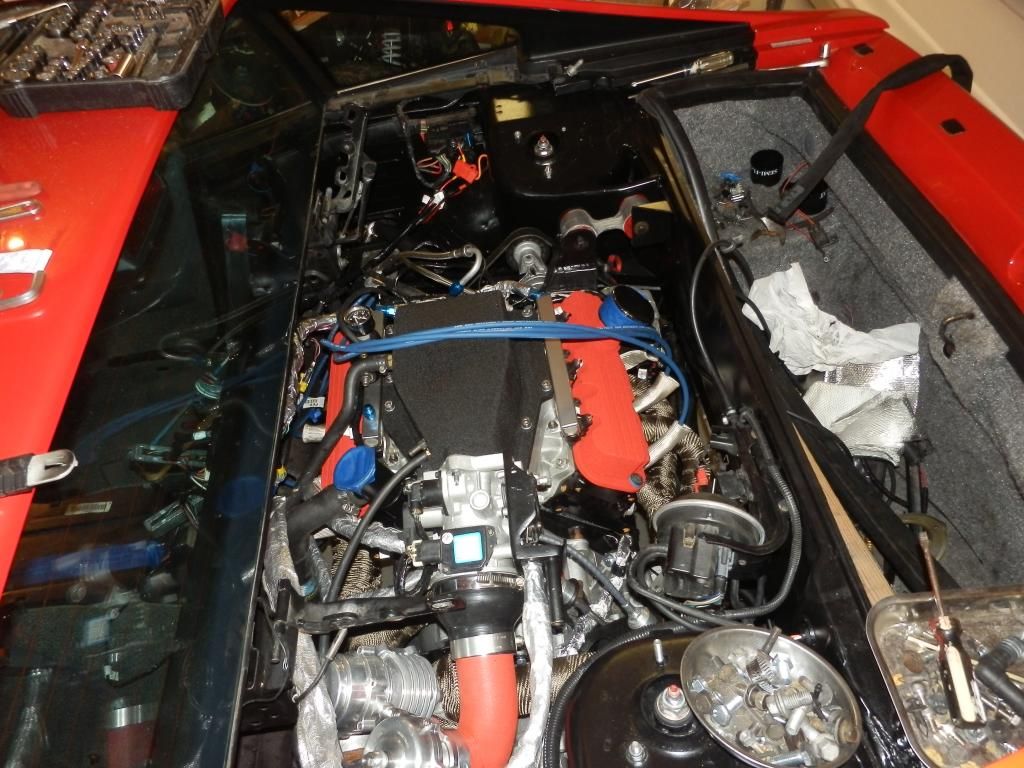
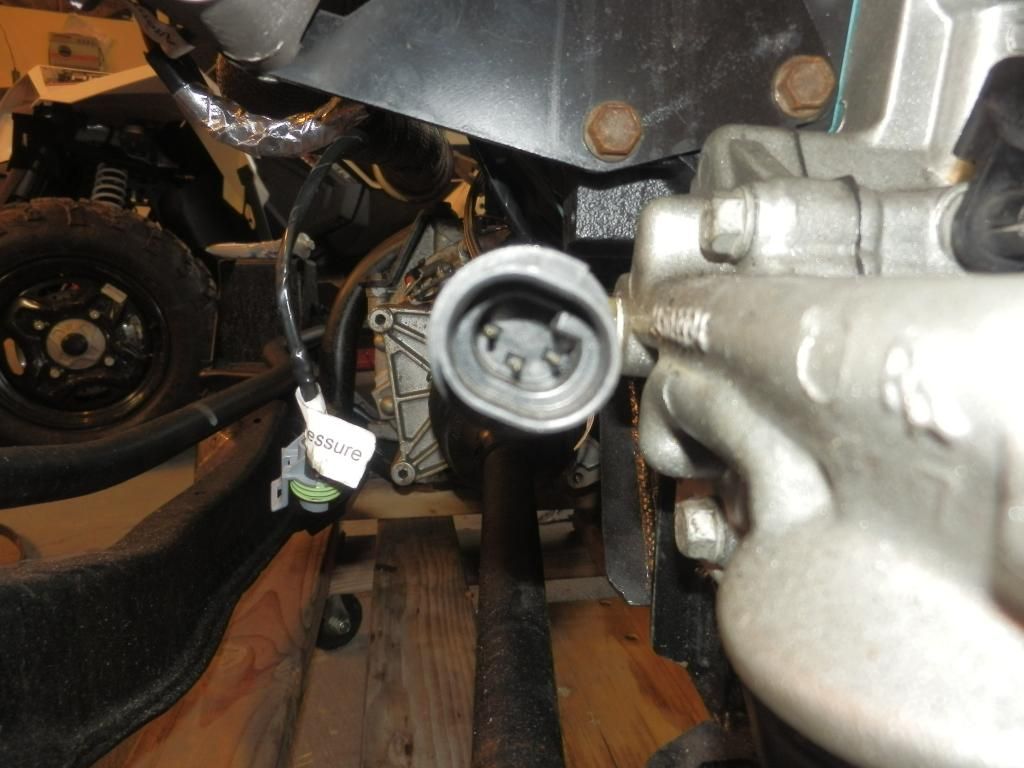
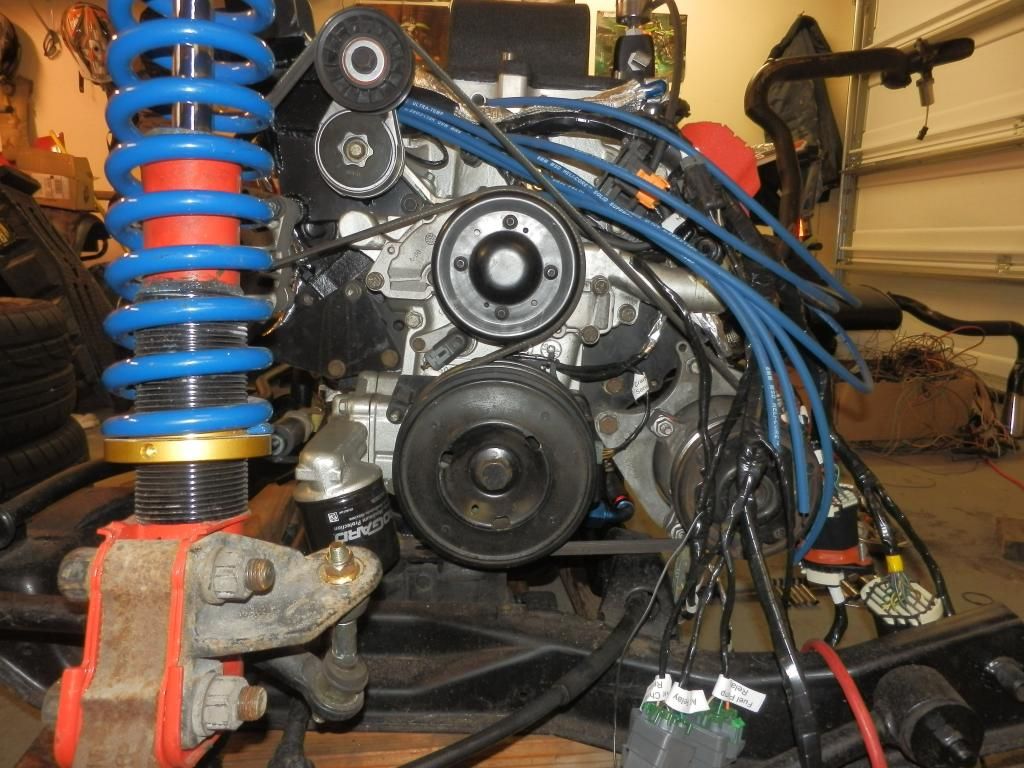
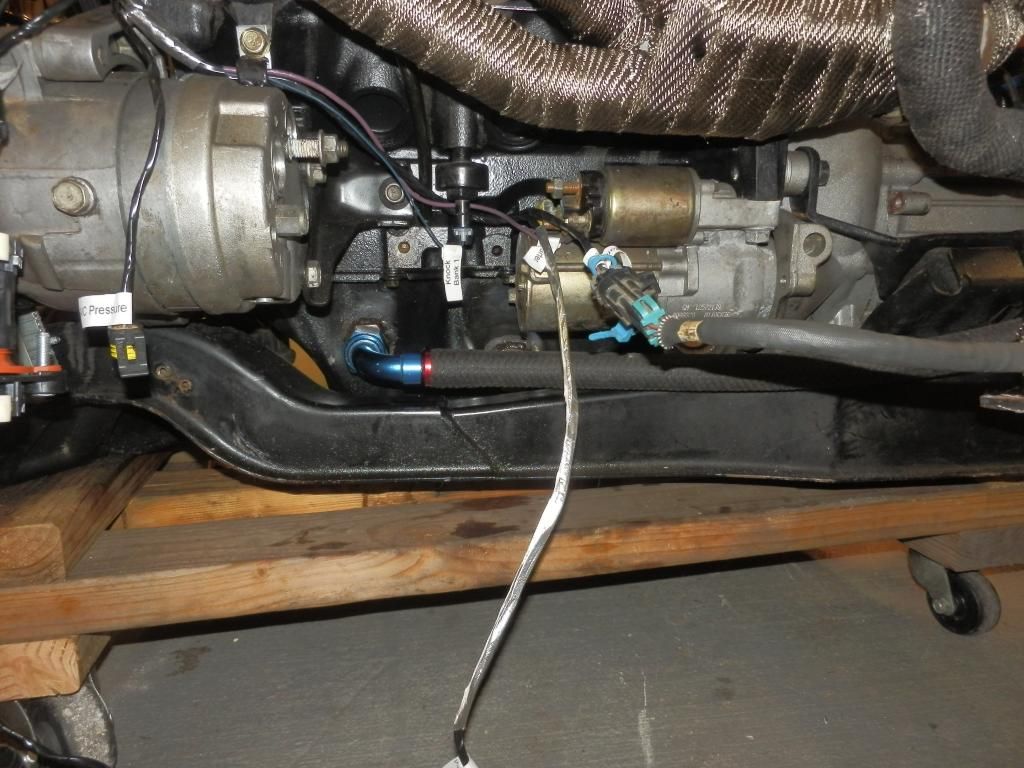
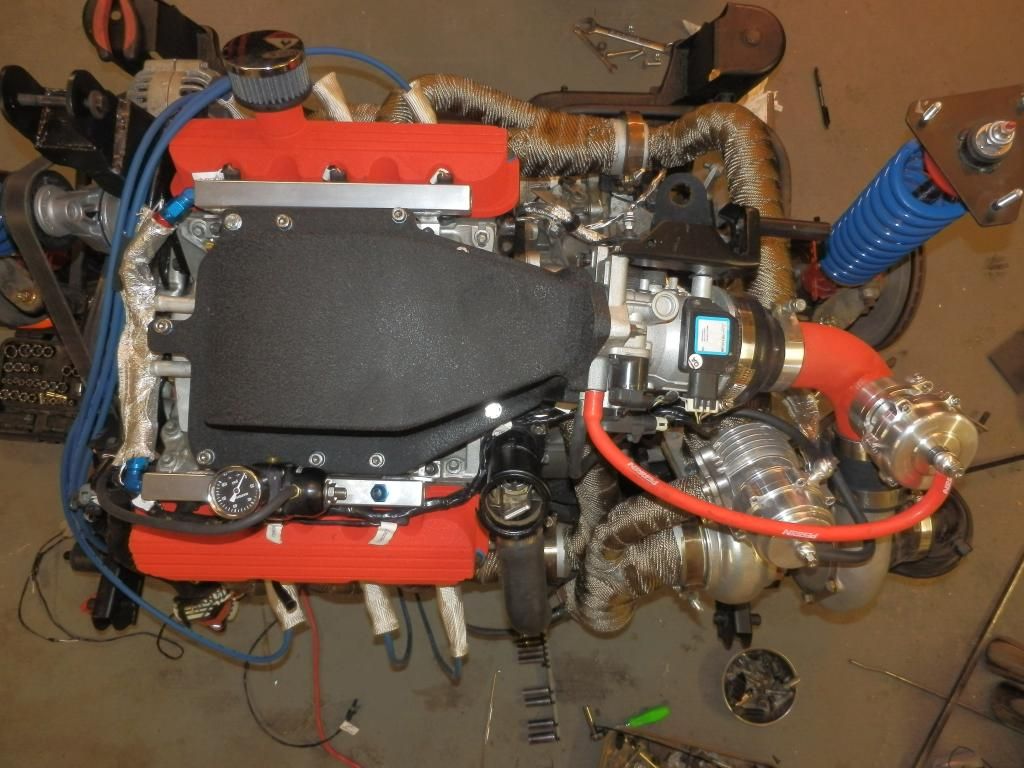
To me, it looks like the wrong oil pressure sender, you can see the side view of it in the picture above the last one. The correct sender is longer, and provides a variable reading in ohms, while the shorter one is basically an on/off switch, which is why the factory gauge will peg if the wrong sender is used.
I got the oil pressure SU sorted. I also stayed up and extended the wiring for all the sensors on the TB. With my custom setup, the wiring was just a little too short. Totally NOT Timm's fault. Slow but steady progress. If it stops raining today I plan on starting the sheetmetal work to install the bulkhead fittings. I also need to go to the jyard or hardware store and get a bunch of adel clamps. I don't like loose wiring!
Did your sensor work before or was it pegged? I hear some ppl's sensors actually work as mine is pegged to the right.
Mine was originally pegged to the right when I got the car back from the place where money and dreams disappear like magic. The solution was posted in this thread. LOL good luck finding it!
Mine was originally pegged to the right when I got the car back from the place where money and dreams disappear like magic. The solution was posted in this thread. LOL good luck finding it!
Err, I guess a different sender and/or connector to match?
Err, I guess a different sender and/or connector to match?
According to Timm (phonedawgz) there are two senders we can use. Once will read correctly, and near the end of the graph due to the 3800's high oil pressure, or a different one but you will need to rescale (mentally) your gauge. PM Timm for more info.
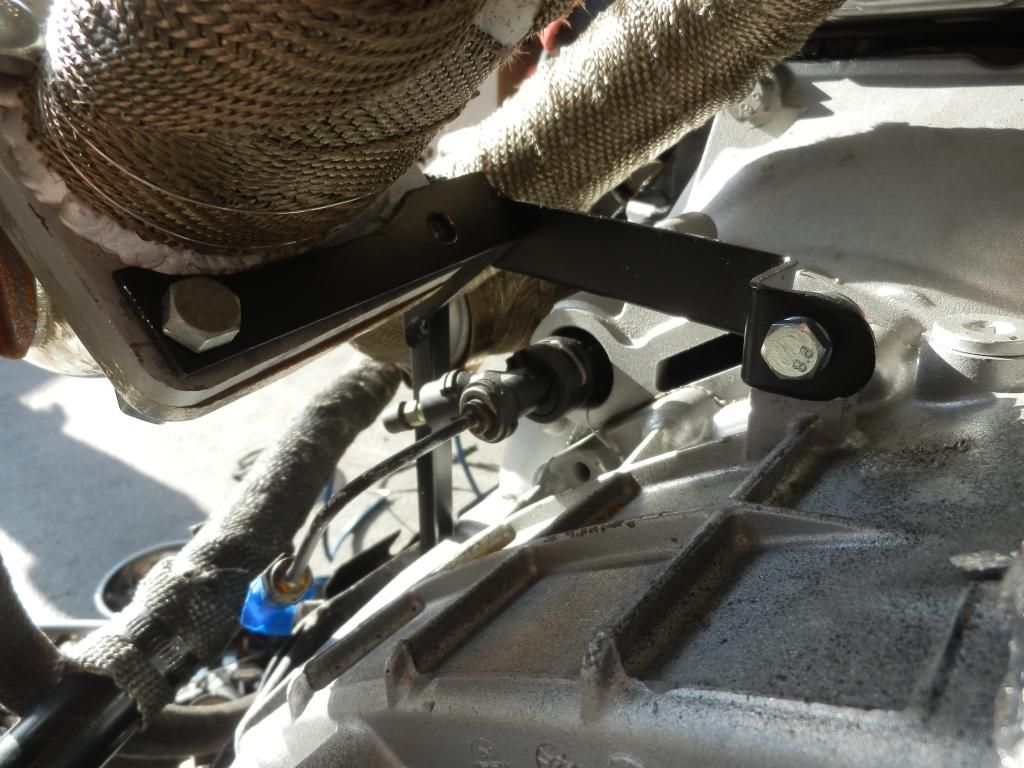
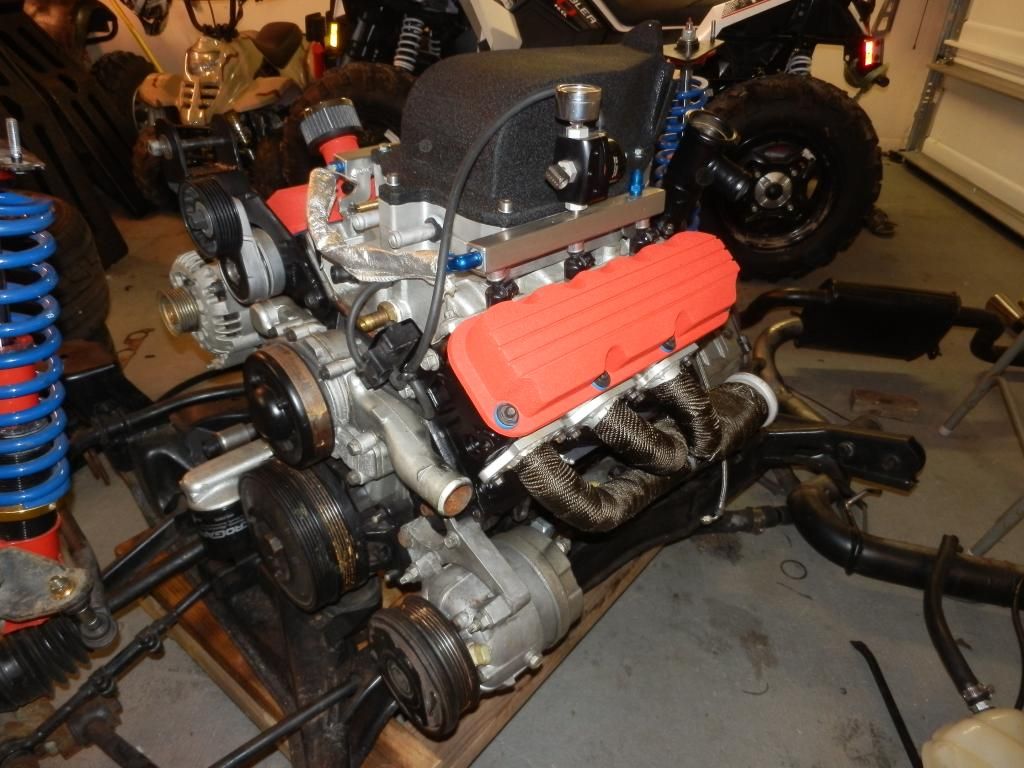
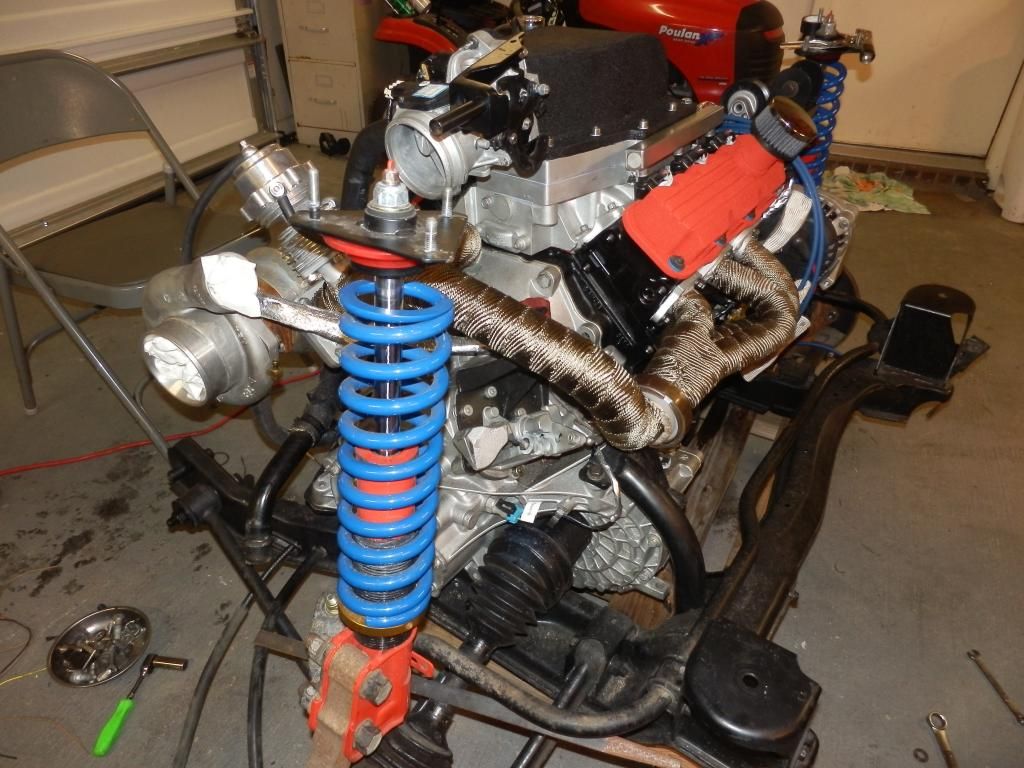
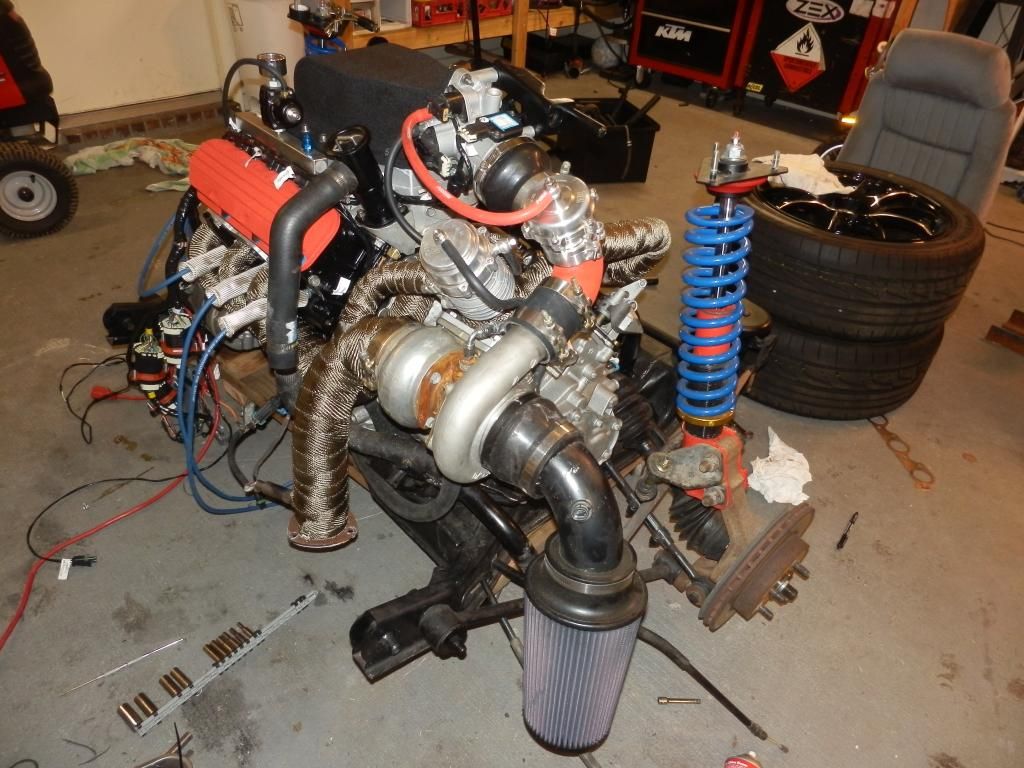
So I haven't done much the last two days. I did get the vac canister mounted in the cavity behind the RR tire. I still need to mount the coil packs on the RR strut tower and do some sheet metal work to mount the quick disconnect wiring bulkhead fittings. Furthermore, I am going to mock up the entire engine where it sets, turbo and all. I need to change a few things, so its easier to do it while its still out of the car. I noticed on the top rear trans mount, Dean cut down the bolt head to almost nothing. Now I know why, there is an interference between that bolt and the v-band clamp for the trunk side header to crossover connection. I'll have to make yet another run to Fastenal for a button head bolt. LOL I also need to get new nuts and bolts for the turbo mount since Dean used nylon lock nuts!!!!! WTH? Needless to say, they melted.
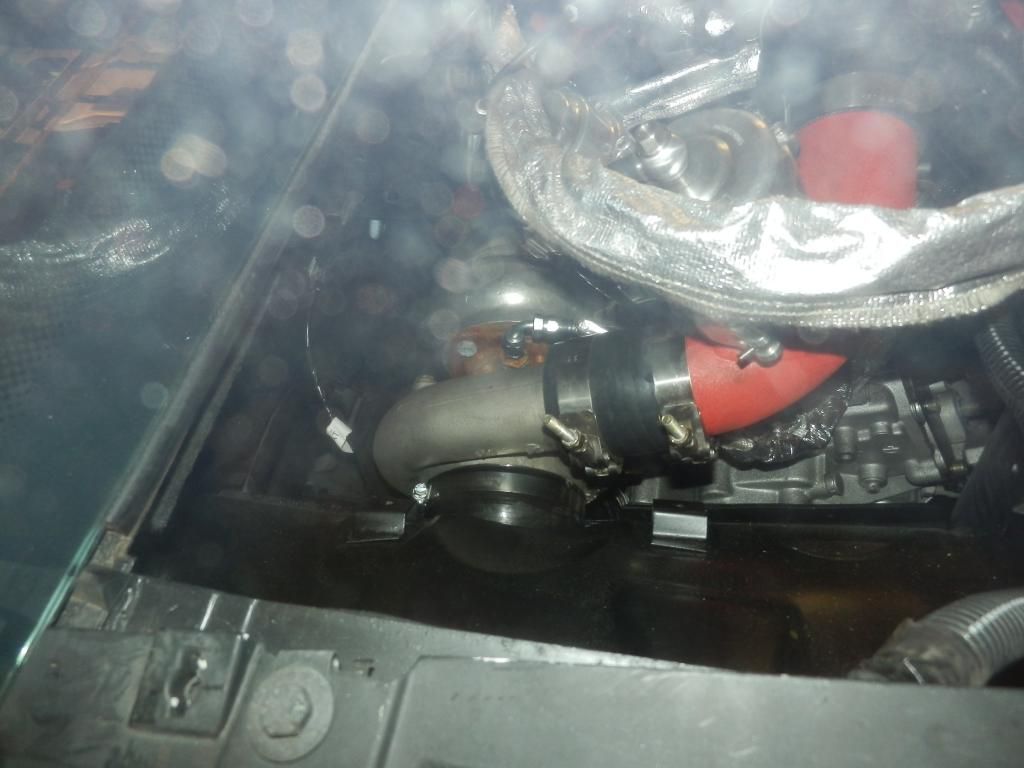
Well, I decided to make a brace to help support the turbo. Nothing fancy, I'll post some pics after my neighbor welds it up. Damn I need to learn how to weld!
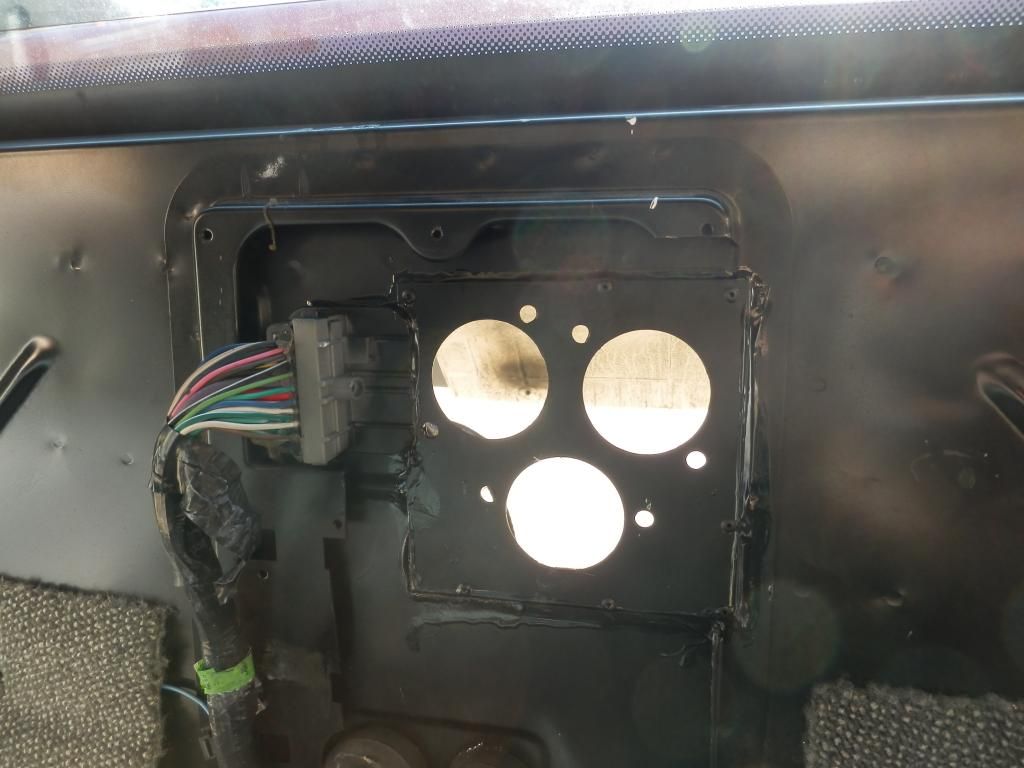
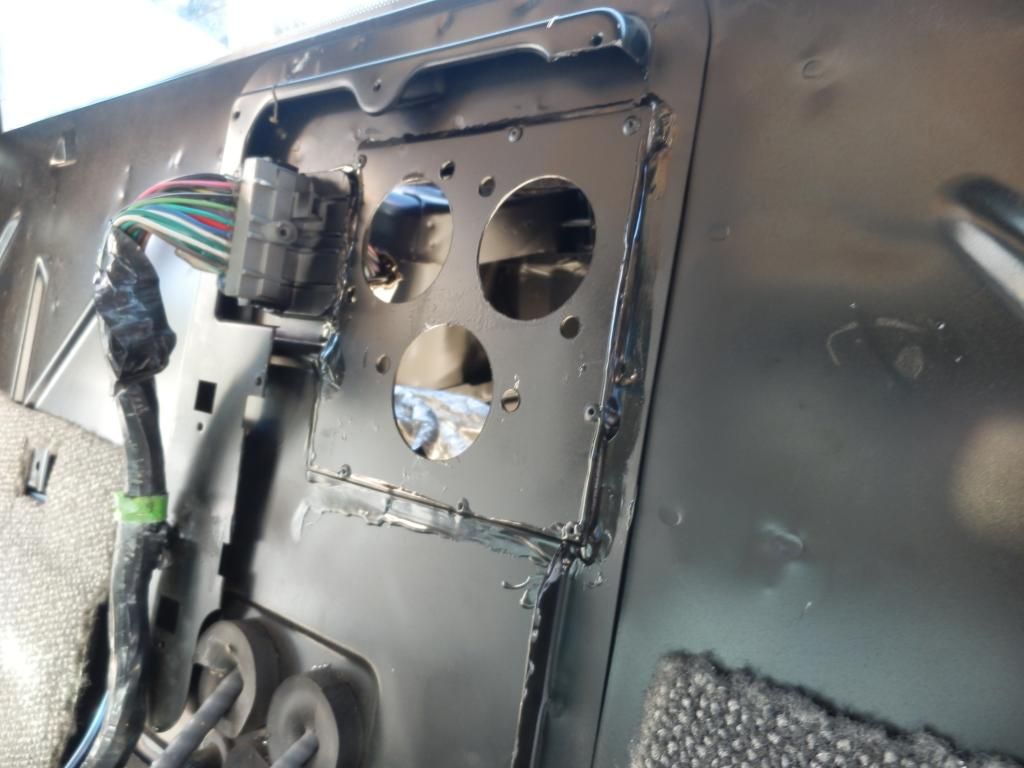
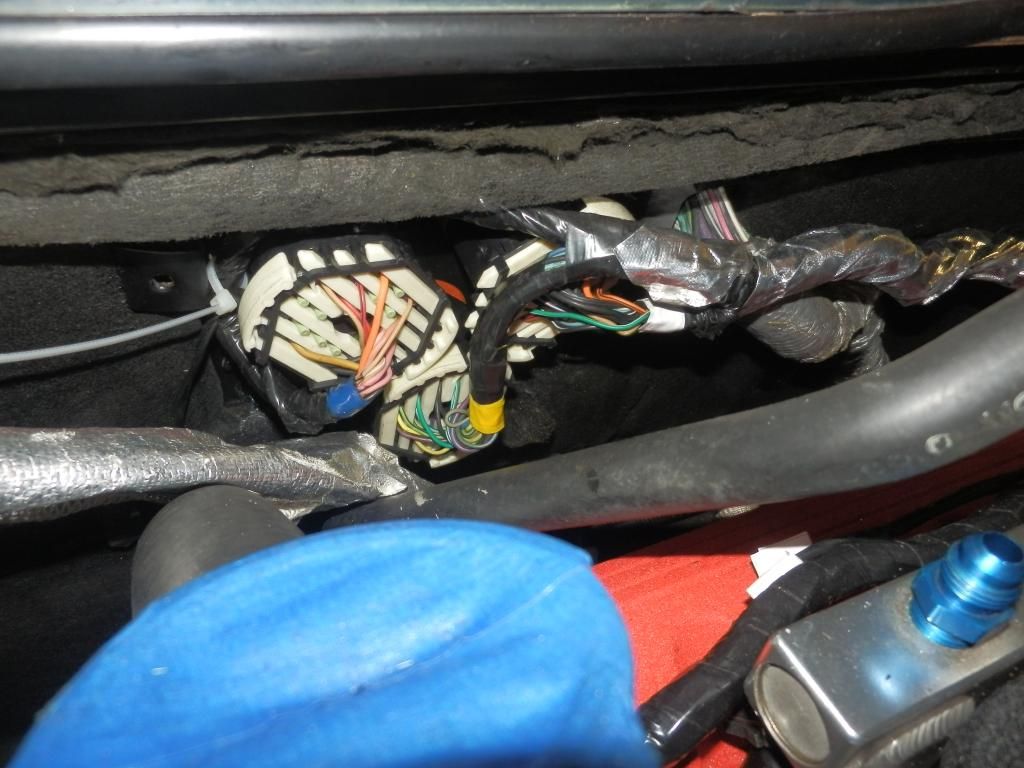
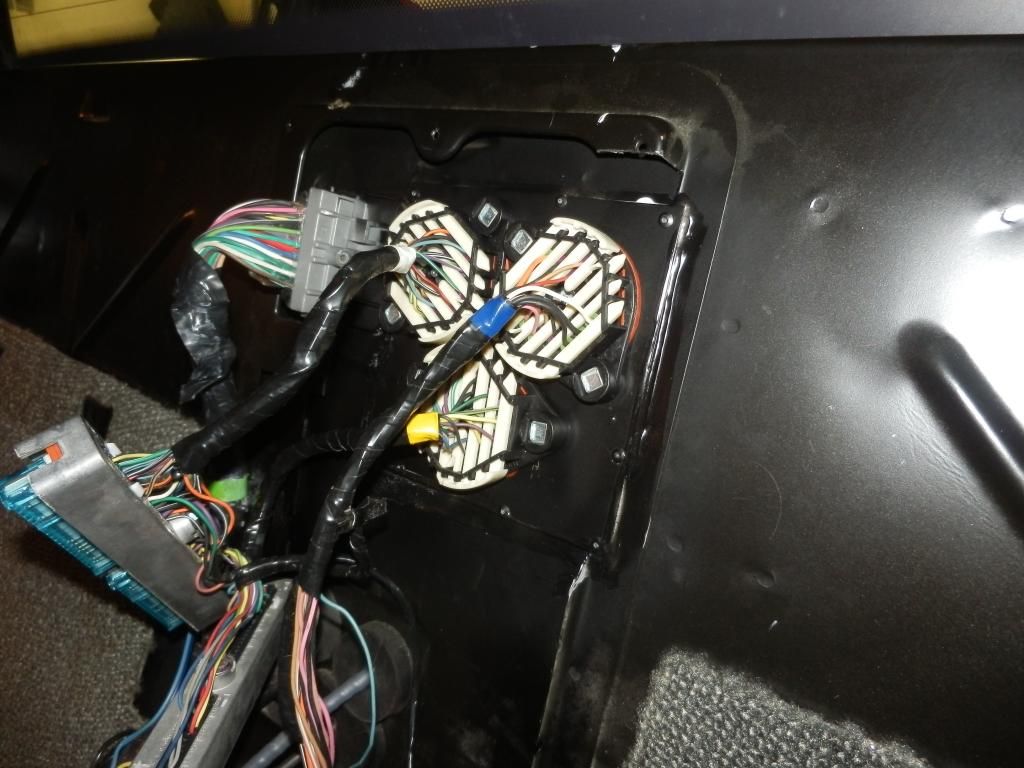
Turbo support bracket is done and the paint is drying. I have everything taped up and I am going to pressure wash the cradle and powertrain tomorrow. I should be able to get started on the sheetmetal fabrication to facilitate the use of the wiring bulkhead fittings. My plan is to trim the original pass-thru and install a new piece of sheetmetal with a triangle pattern for the fittings. HOPEFULLY the ecu will still fit in the OE location. If not, I have spoken with Timm and the plan is to remove the interior side of the bulkhead fittings and have him extend the wiring so I can mount the ecu down & behind the pass seat. Granted, that will be after we know if the damn thing is FINALLY going to run properly. If all goes well, the engine will be back in the car next weekend...well provided I can get a buddy to come give a hand again!
3" ID 14" long with a 10" long body, 6" in diameter The AR30 is the perfect resonator to be coupled with the AT3030xl for those who want performance with just a little more sound. If you want your vehicle really loud but don't want the rasp It works great in place of factory mufflers as a rasp eliminator.
I got the turbo support bracket finished and the powertrain pressure washed. I was also able to talk Fierobsessed into duplicating his awesome 3" catback for me! Now lets hope the rest of this (re)build goes nicely. I'll start on the firewall mods tomorrow. I dont know why I am not looking forward to that part. It seems easy enough.
Good to know nosrac. Hopefully I have the exhaust bit figured out with Fierobsessed. If its too loud. I may be able to fit that muffler where the stock cat resides. Or use my super awesome summit muffler! LOL I may put that on anyway.
[This message has been edited by BV MotorSports (edited 04-08-2013).]
That drain is nearly perfectly identical to the one I had on my fwd, it will work fine.
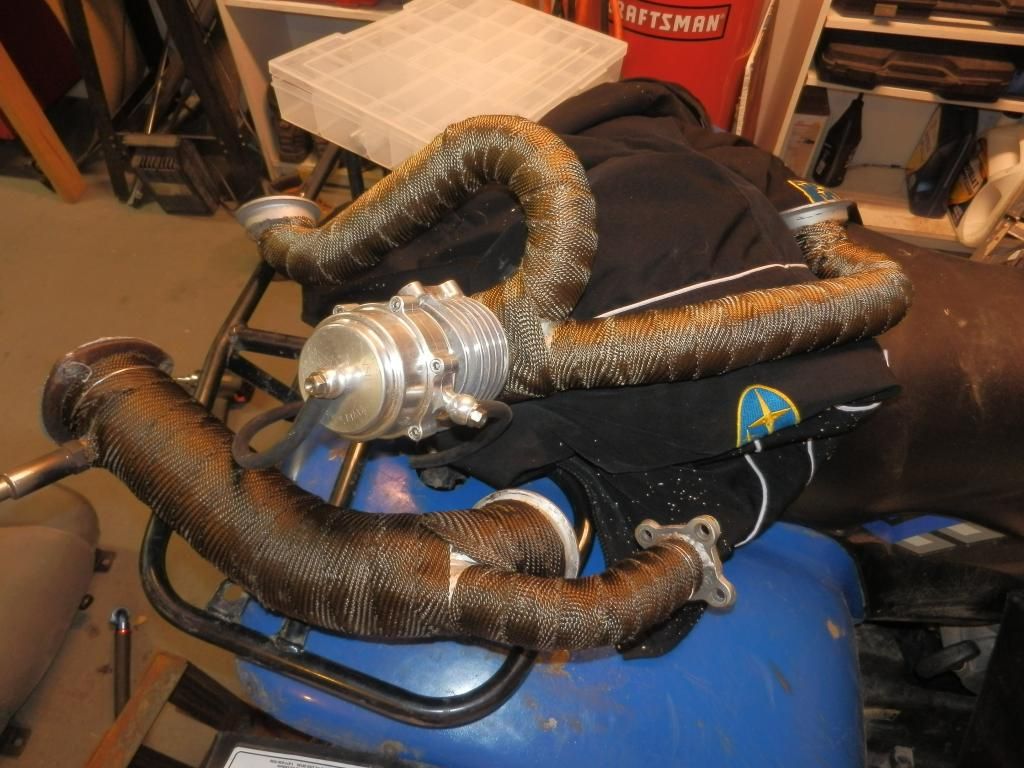
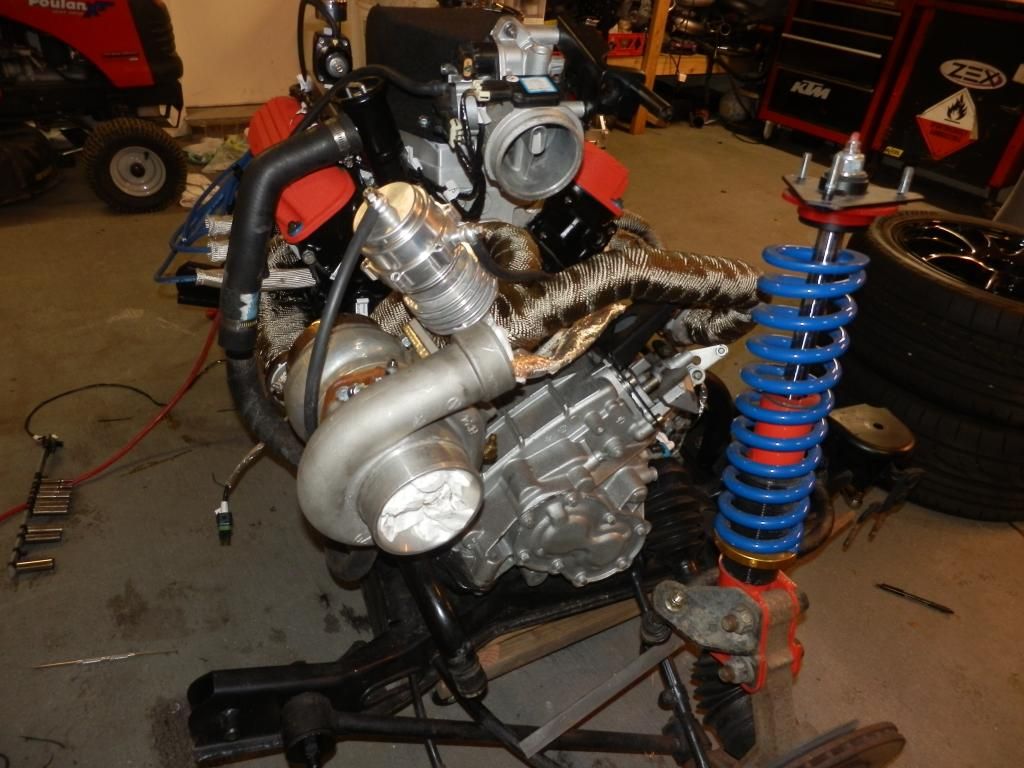
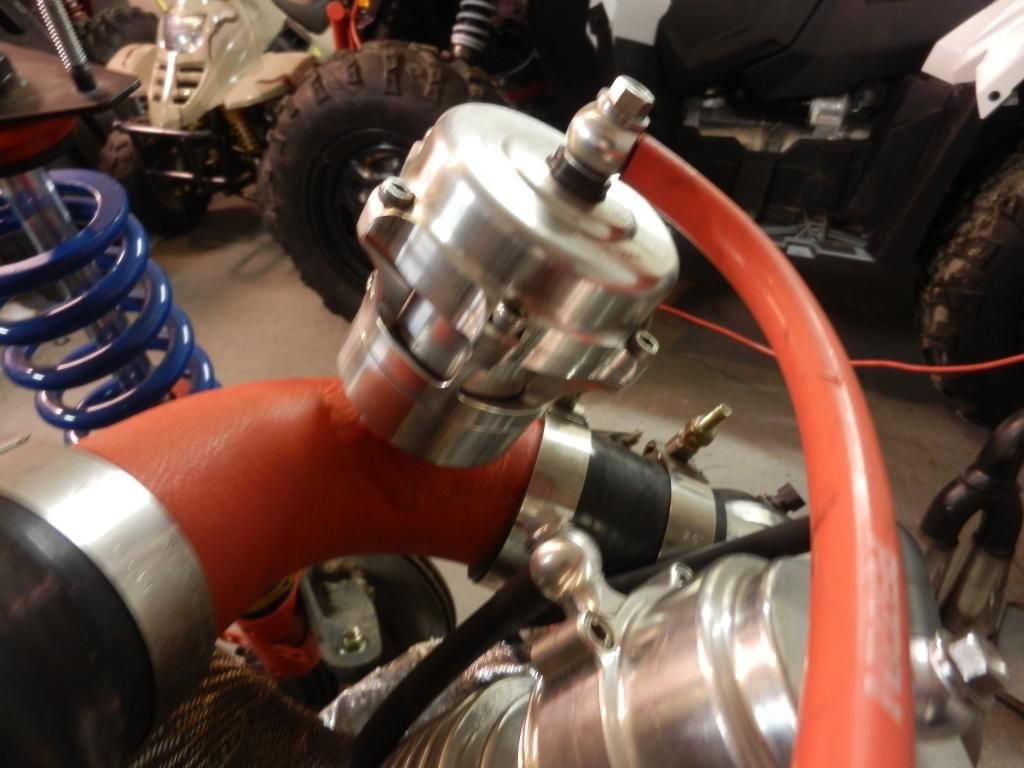
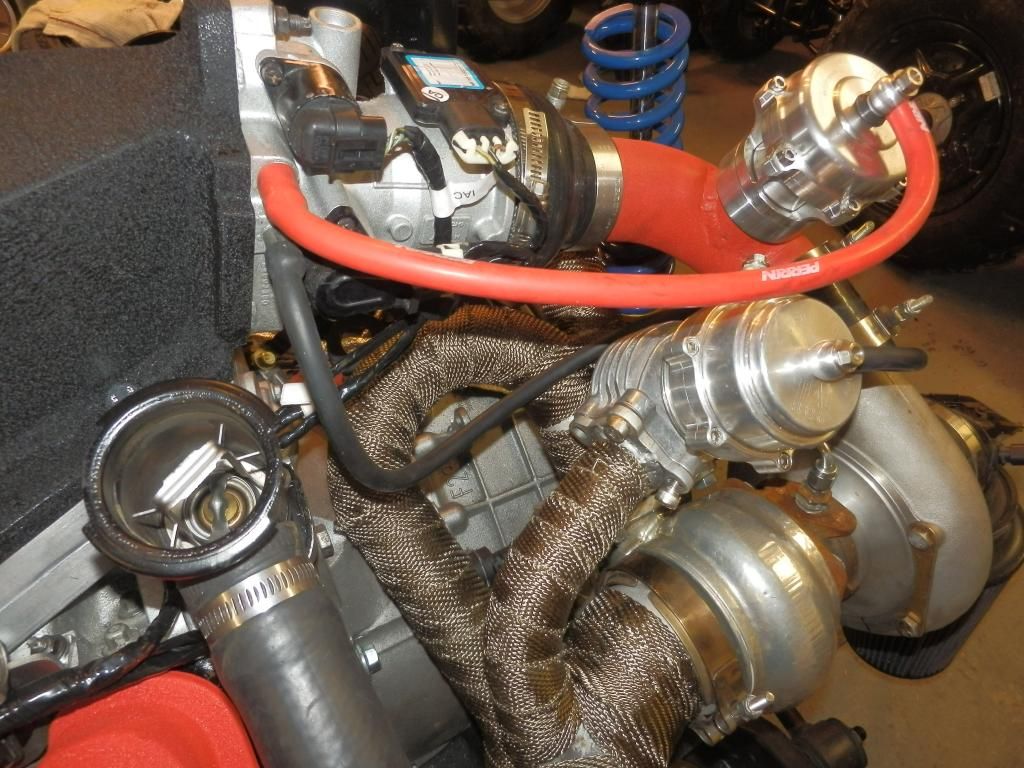
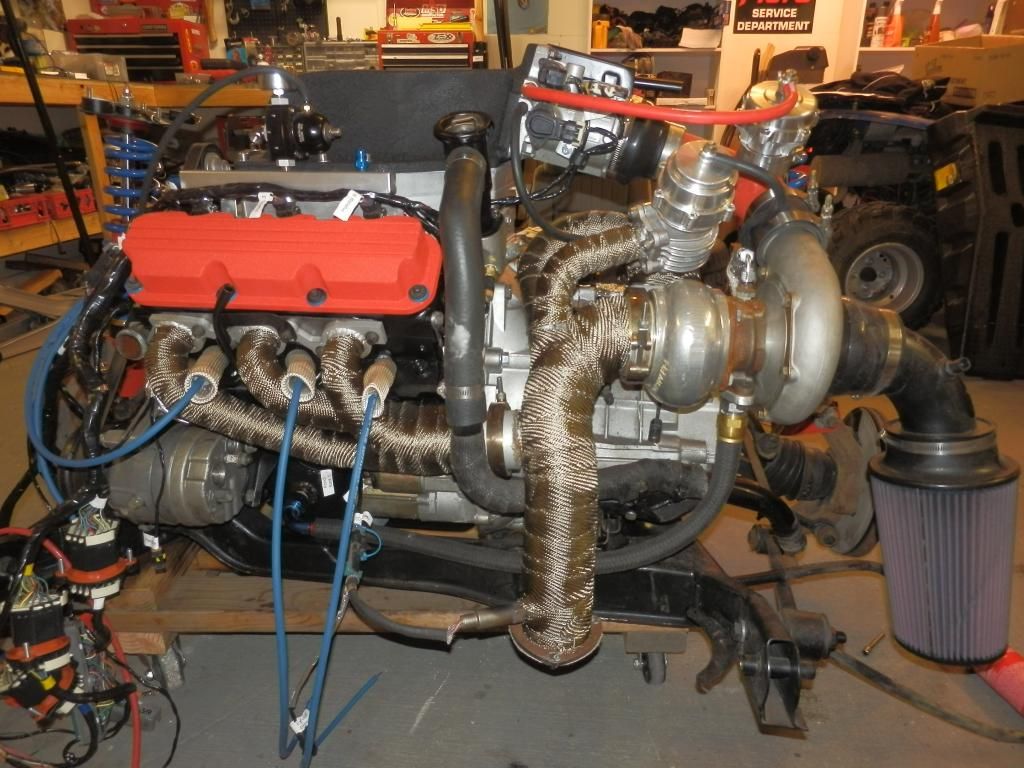
The wastegate looks hooked up completely wrong. You have unregulated boost going to the top and nothing to the bottom?
Your old catback while it had some questionable bends was probably going to work very well as you had the cutout anyway. The bigger pipe you get the more impossible it will be to make it quiet.
That drain is nearly perfectly identical to the one I had on my fwd, it will work fine.
The wastegate looks hooked up completely wrong. You have unregulated boost going to the top and nothing to the bottom?
Your old catback while it had some questionable bends was probably going to work very well as you had the cutout anyway. The bigger pipe you get the more impossible it will be to make it quiet.
I asked before, what goes where. Its easier to ask here for specific info than go on TiAL's website and look up the generic instructions. By all means have at it.
Boost reference goes to the bottom of the gate. You can leave the top hat barb open and you will get whatever boost your wastegate spring choice is. If you have a bleeder type boost controller it needs to Tee into the reference line between the intake and bottom of the gate. If you have a regulator type boost controller it needs to go between the intake and top of the gate along with the boost reference still connected to the bottom. (ex: you'll send 3 psi to the top, holding the wastegate spring down raising total boost by 3psi) I like this style the best.
Boost reference goes to the bottom of the gate. You can leave the top hat barb open and you will get whatever boost your wastegate spring choice is. If you have a bleeder type boost controller it needs to Tee into the reference line between the intake and bottom of the gate. If you have a regulator type boost controller it needs to go between the intake and top of the gate along with the boost reference still connected to the bottom. (ex: you'll send 3 psi to the top, holding the wastegate spring down raising total boost by 3psi) I like this style the best.
Thanks Justin. I think I am running out of ports (boost ref). I only have the two on the TB. The one on the LIM (below where the SC snout would be) is used for the FPR and MAP only.
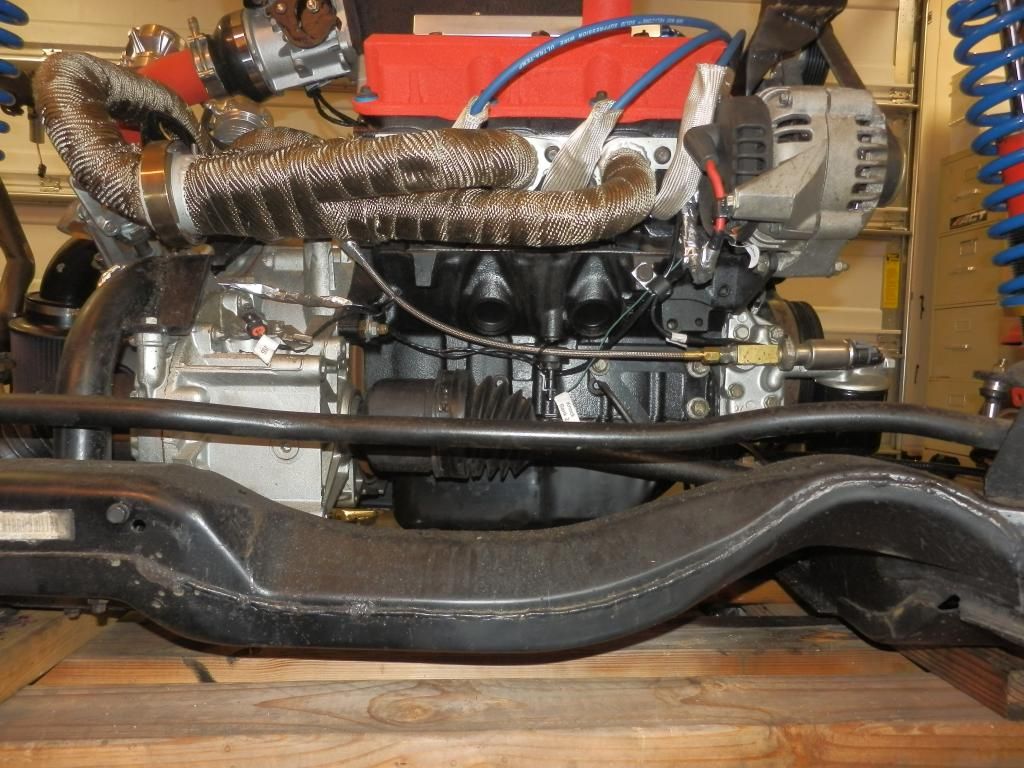
I was just out there looking at the engine trying to figure out the vacuum routing. I only have 2 vacuum ports left. Both are on the TB, behind the throttle plate. Thats it. I need to connect the BOV, EWG, Brake booster, Cruise & EVAP stuff.
The port on the LIM just below where the SC snout would be, is used for the MAP & FPR. I know, thats pretty much all I should have on that line.
Charlie modded the LIM by cutting a chamber for the PCV circuit. Kinda like ZZP does. So I have that port used just for the PCV.
I think I am going to have to drill the firewall side of the UIM and add a two ports there one big, one small. One will have to be for the brake booster for sure. Then that will leave 1 on the UIM and two on the TB.
Then its just a matter of connecting: Turbo port EWG port (2) BOV Cruise EVAP I also need to connect the charcoal canister & fuel expansion tank.
Why NOT use a vacuum block?
I have one that I was going to use for a cleaner look but I have enough vacuum ports on my UIM.
[This message has been edited by nosrac (edited 04-08-2013).]
Thanks Justin. I think I am running out of ports (boost ref). I only have the two on the TB. The one on the LIM (below where the SC snout would be) is used for the FPR and MAP only.
all ports do the same thing, except stuff before the throttle blade will not see vac... Nothing really needs to go pre throttle blade.
Heading to the hardware store to get a few things and then the engine is going back in the car TODAY! But first, I need to add a few vac ports to the back of the UIM.
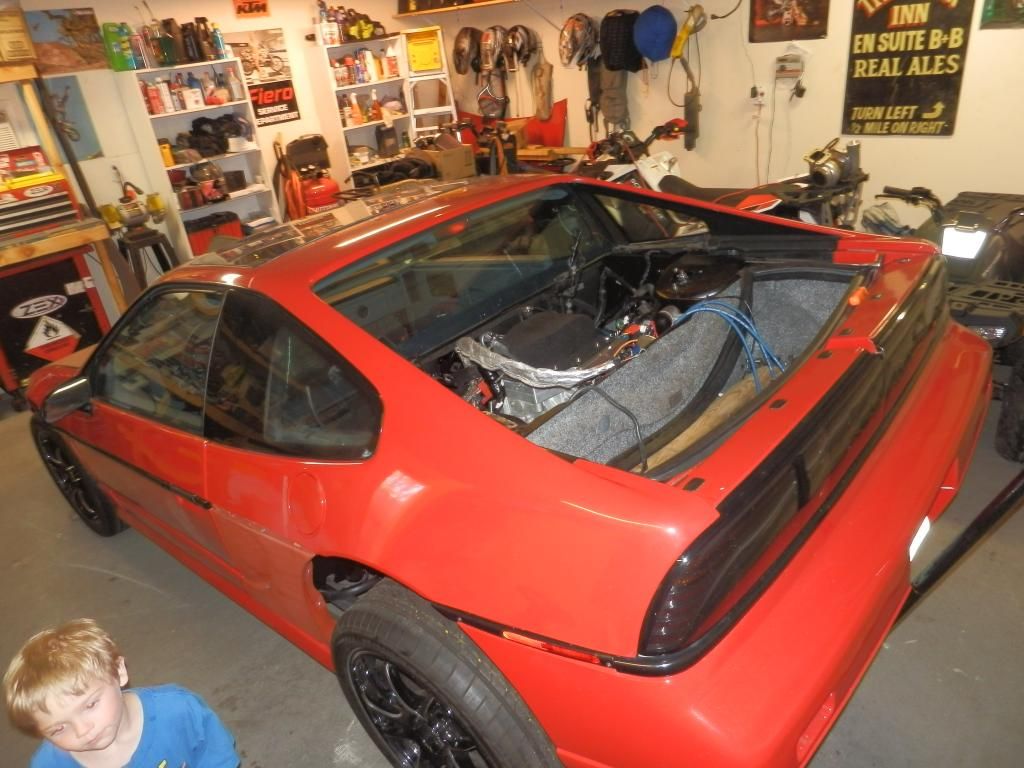
80% finished getting the Fiero back up and running. Its taking forever. We all know the snowball effect yeah? Well think AVALANCHE! I keep finding things I don't like, so I have to fix 'em!
You'll be happy you went through it. I didn't really have any issues with my engine swap that Ed did, but I was never really completely satisfied with it until I pulled it out myself to see what made it tick. (Had to fix a few things. Easier with the engine on the ground.)
You're right Steve. I feel much better (piece of mind) knowing I went thru the car. Its been alot of time & money, but its well spent.
I need to get dust my FSM off and figure out how to run all the vacuum lines properly. I need to get the cruise & EVAP lines sorted. I cant remember where all this stuff goes. Man, the amount of Fiero stuff I have forgot over the years is scary. Use it or loose it I guess.
Looking good! You're gonna be happy with it when you are done. I'm excited to see videos of it when is done. I'm going to pull my engine out next winter to go through everything again.
My son Chase (7) has been helping me finish up the Fiero.
Last stuff to do: Bleed the brakes Bleed the clutch Oil change Fill coolant and w2a system Bolt on the decklid Install the center console Install ZZP's base map with HPTuners Install the back wheels Clean the car and the garage!
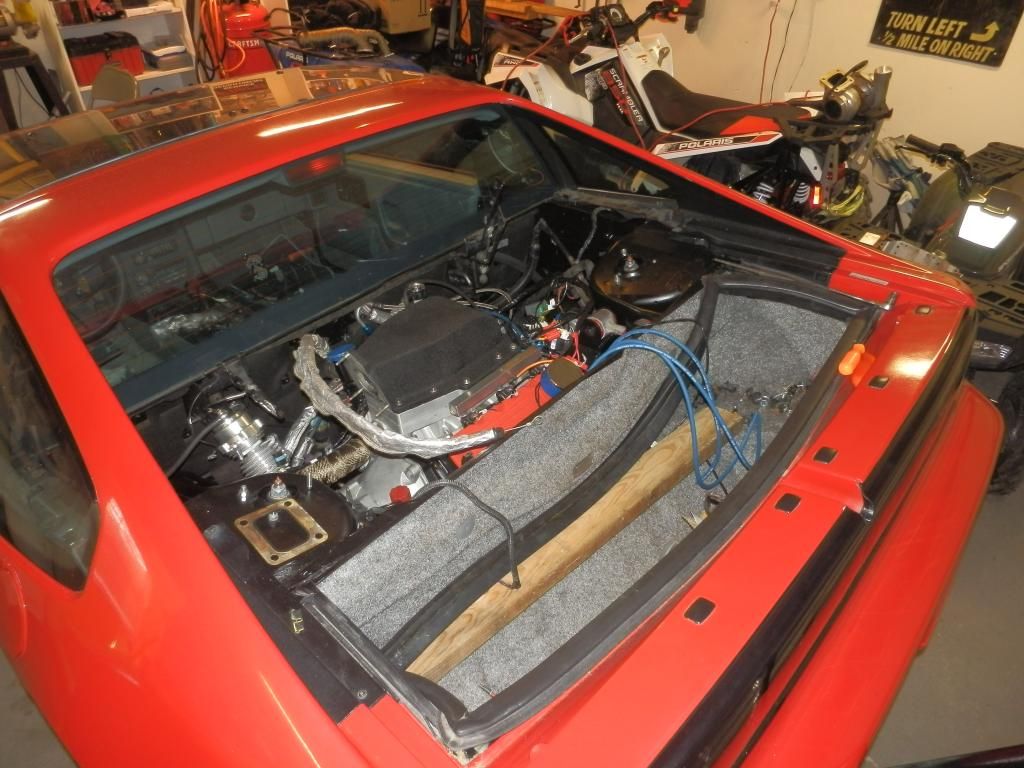
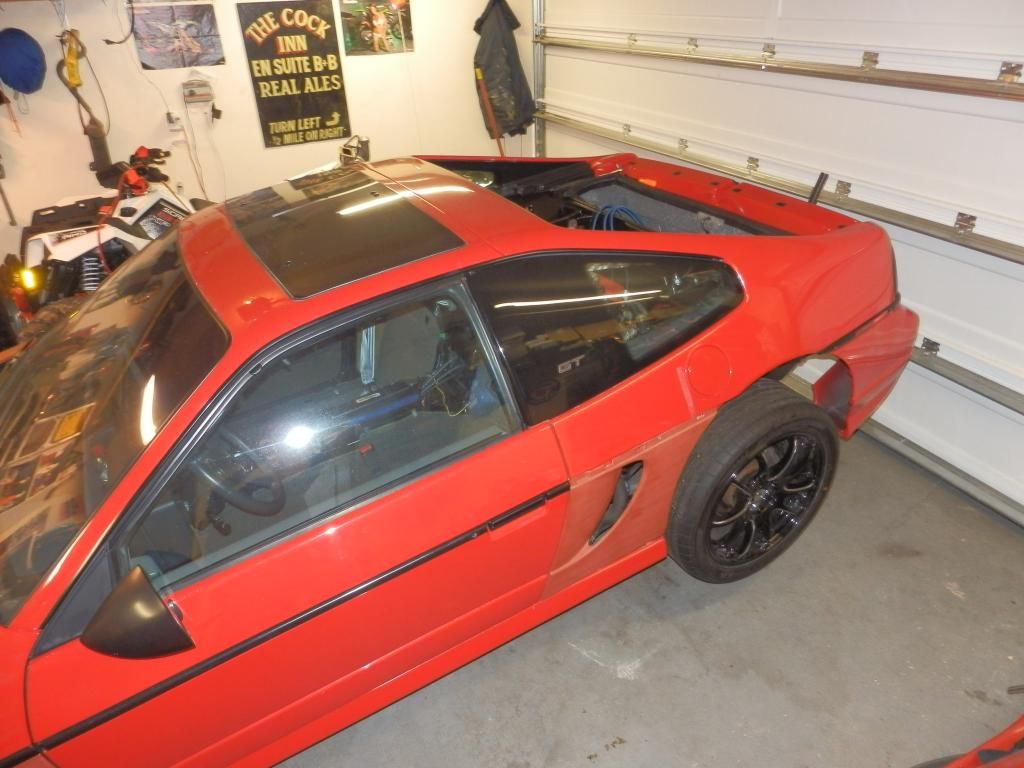
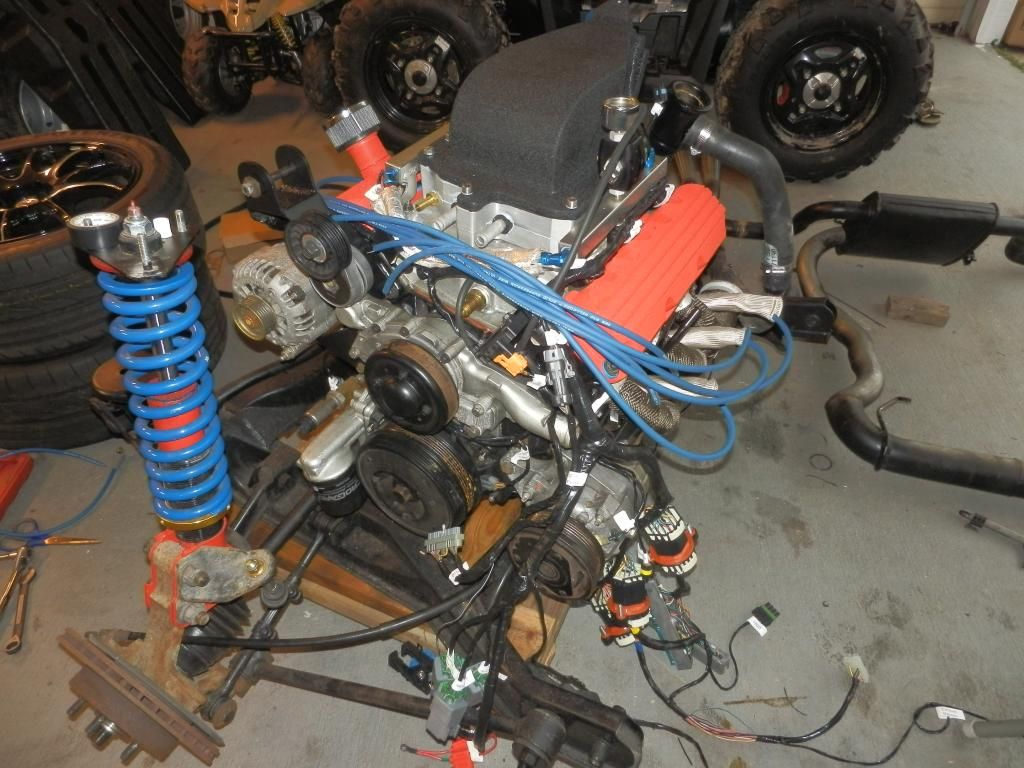
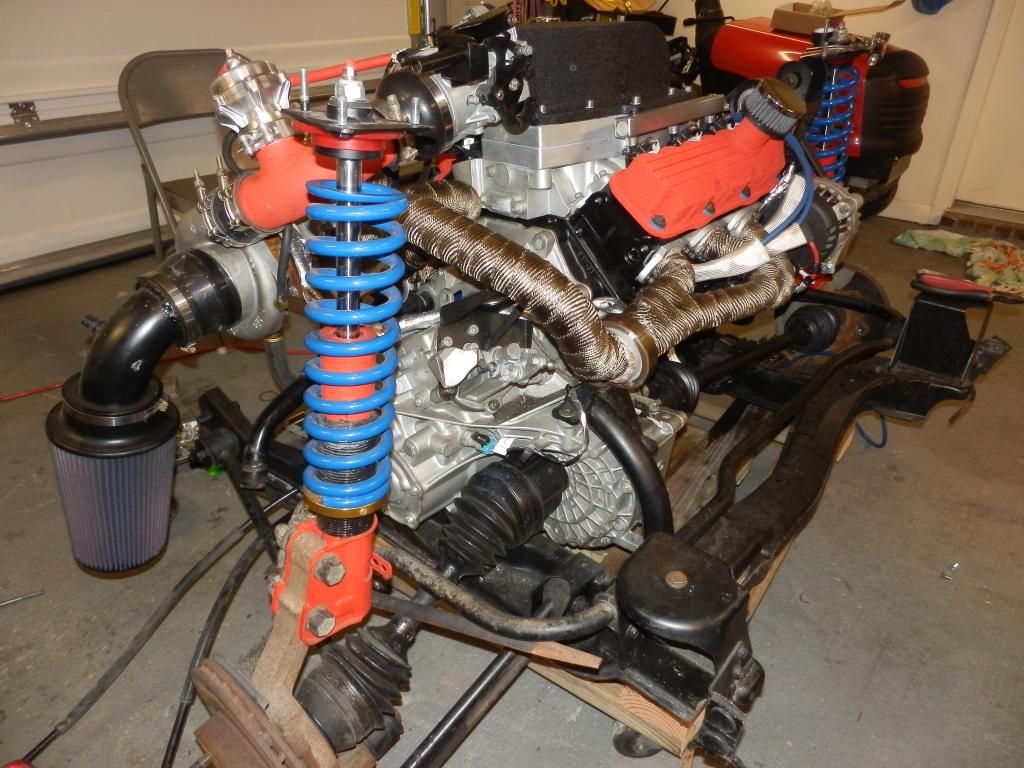
Before (as delivered from WhoDumbass)
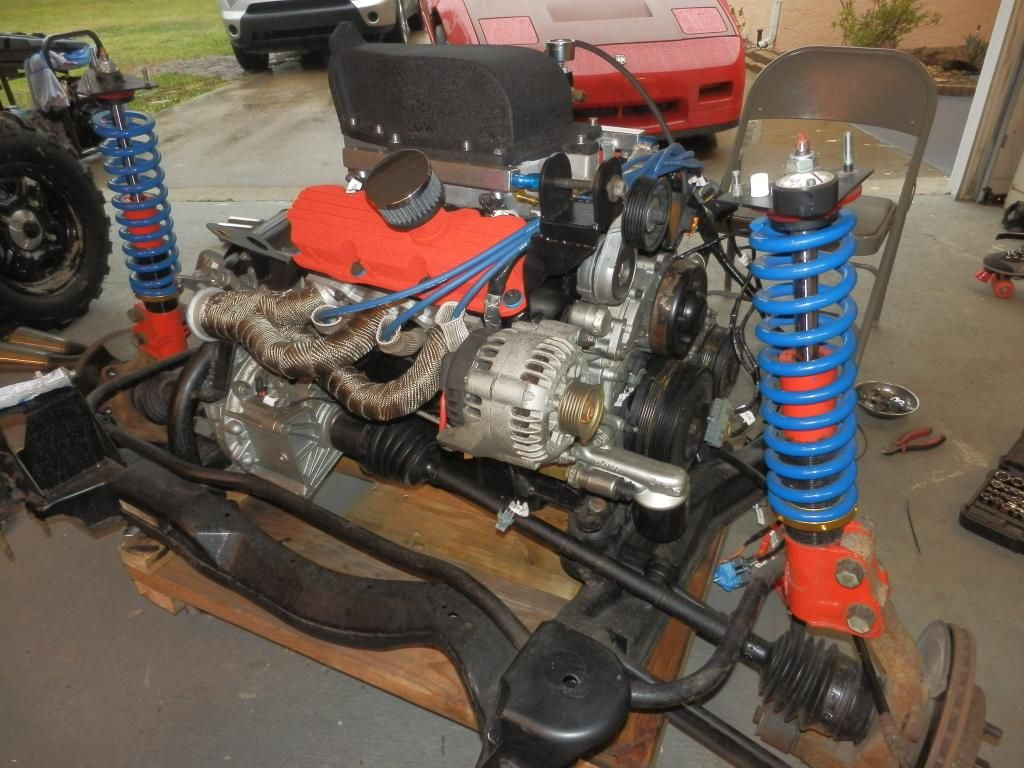
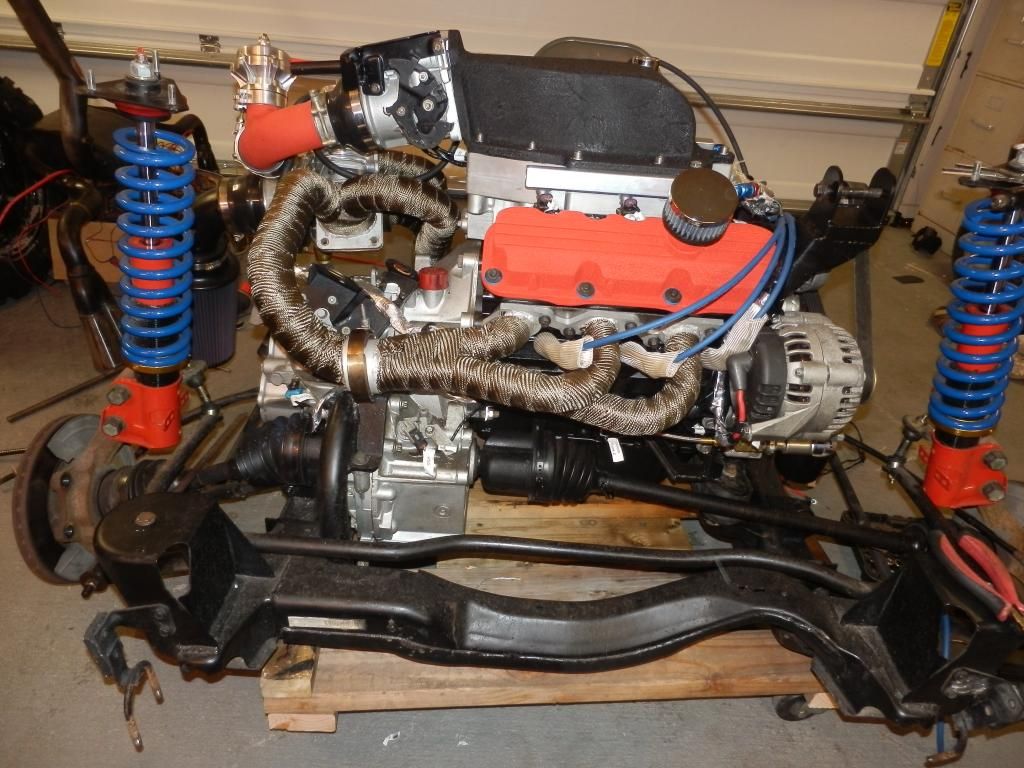
After (notice all the little changes and additions)


 Now lets hope the rest of this (re)build goes nicely. I'll start on the firewall mods tomorrow. I dont know why I am not looking forward to that part. It seems easy enough.
 I think I am running out of ports (boost ref). I only have the two on the TB. The one on the LIM (below where the SC snout would be) is used for the FPR and MAP only.