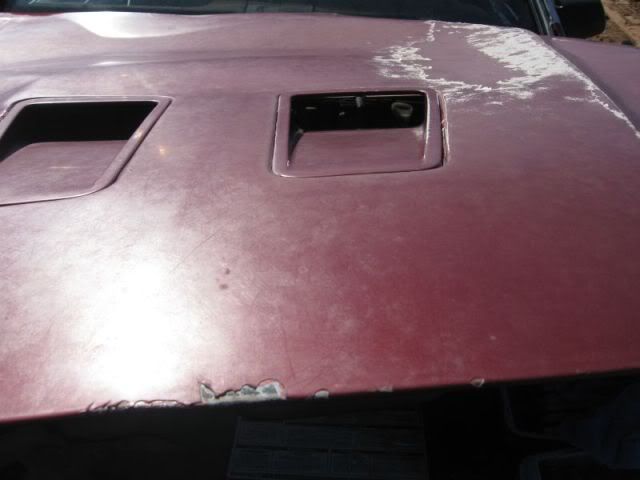
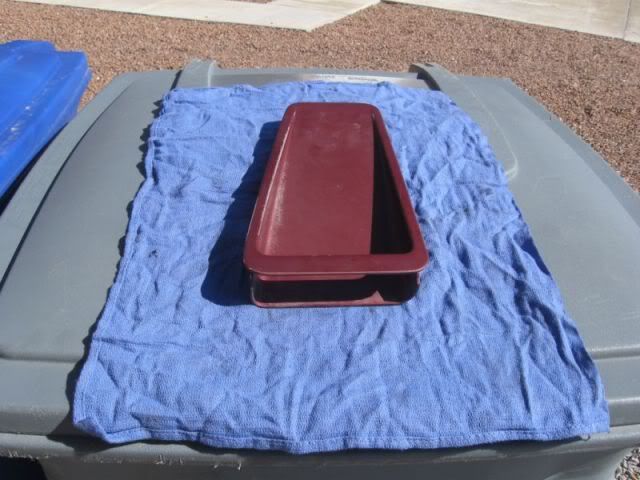
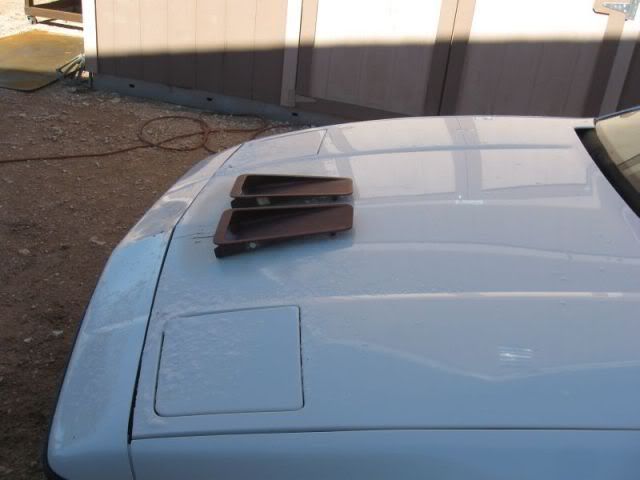
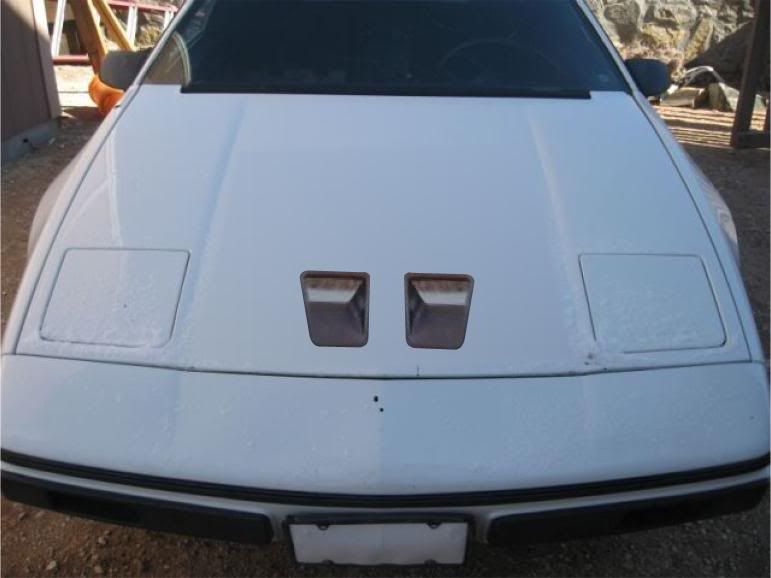
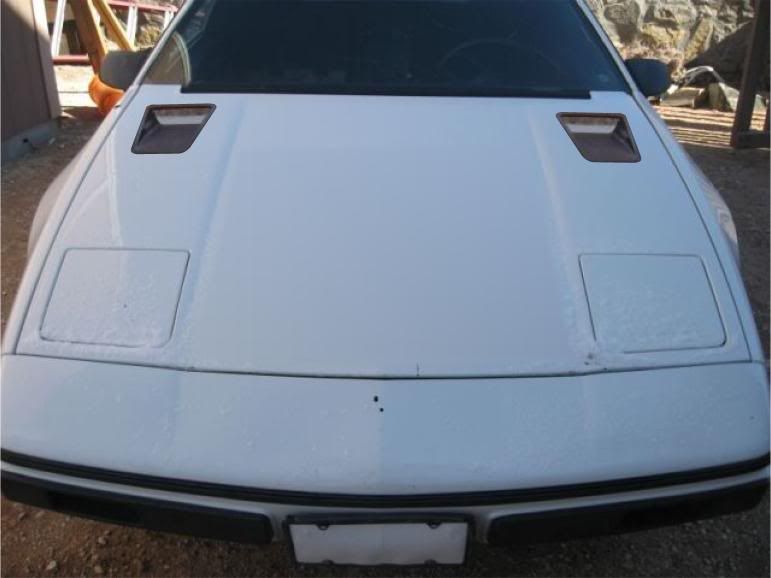
Today was my Birthday so I decided to take the day off. My plan was to go to the junk yard and snag some axles for the XTC swap and get some hood scoops I've had my eye on for a few weeks. I got lucky and the driver side of the van I was getting the axles off of was already taken apart and just the axle was hanging in the trans. It was easy to pop out so all I had to do was tear down the passenger isde. It went easy too - took about a 1/2 an hour start to finish. The I went and got these Trubo T Brid hood soops for the V8 Coupe.
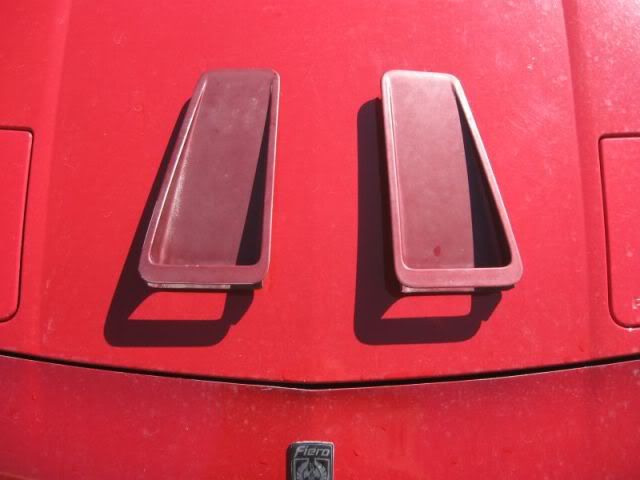
The Donor: There are four other Turbo coupes in this yard - they are all missing the scoops.
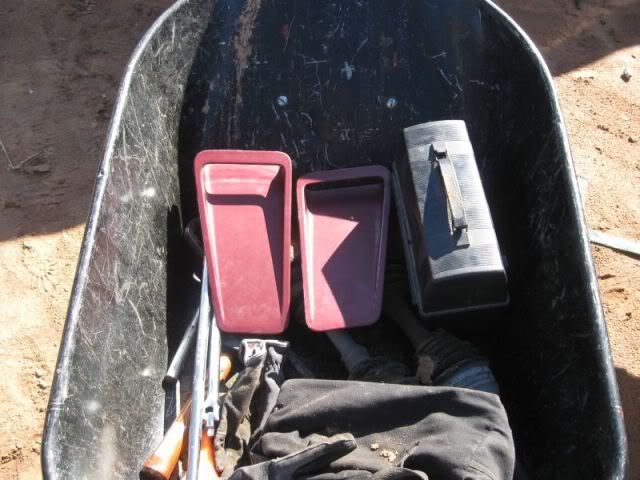
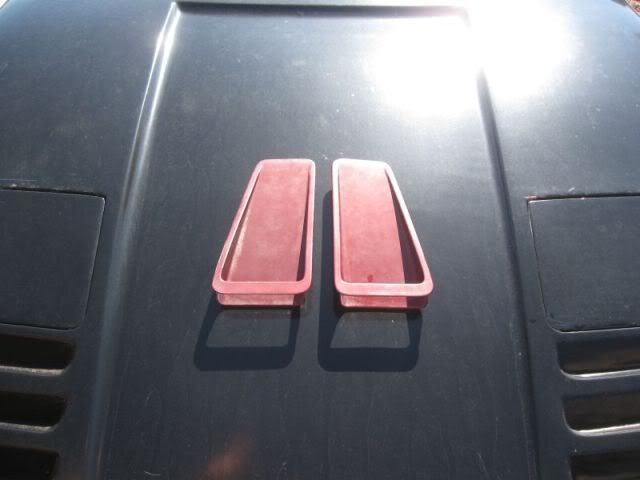
In the bucket:
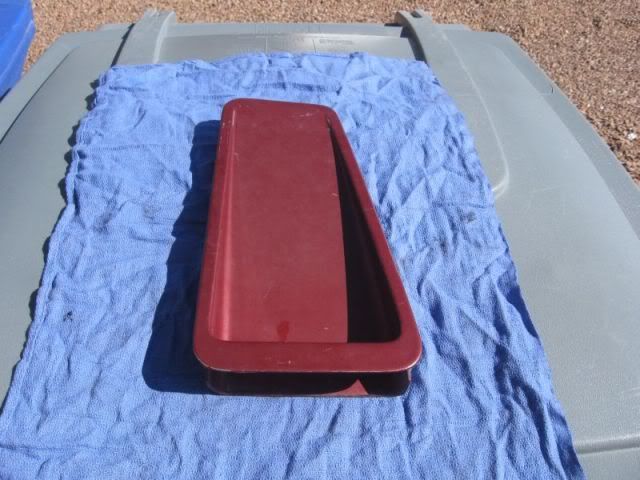
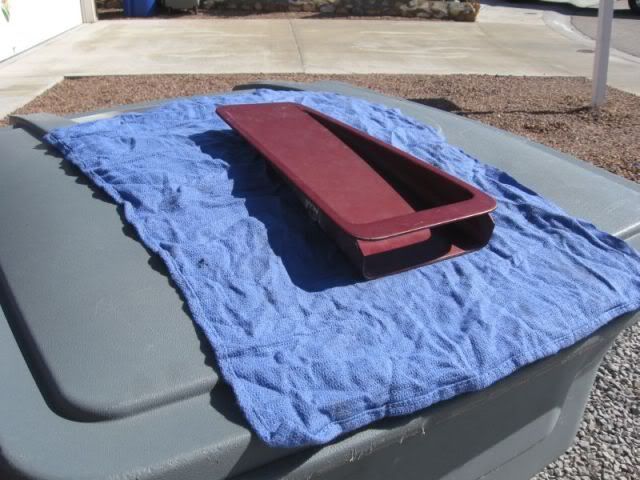
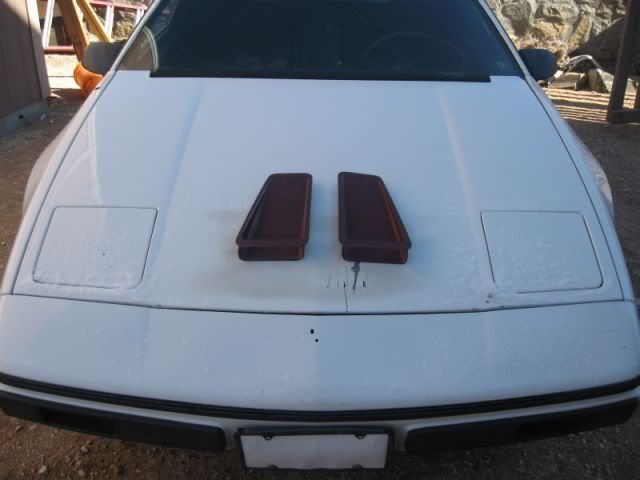
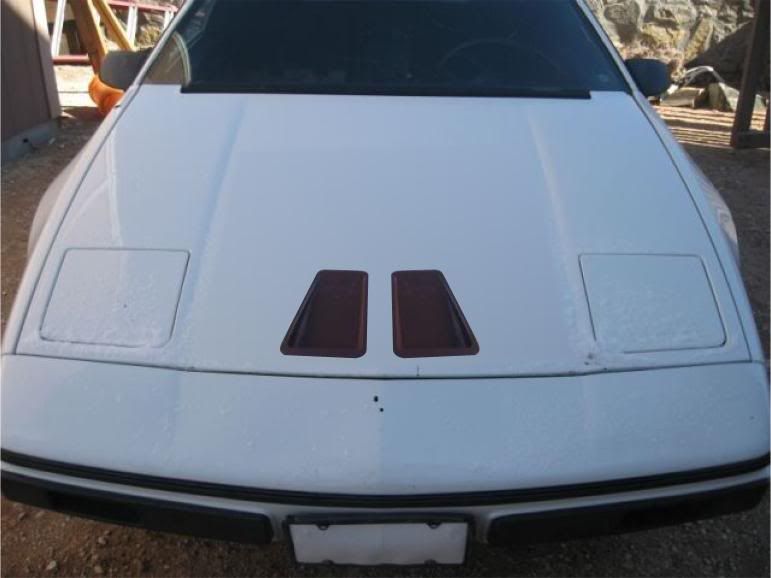
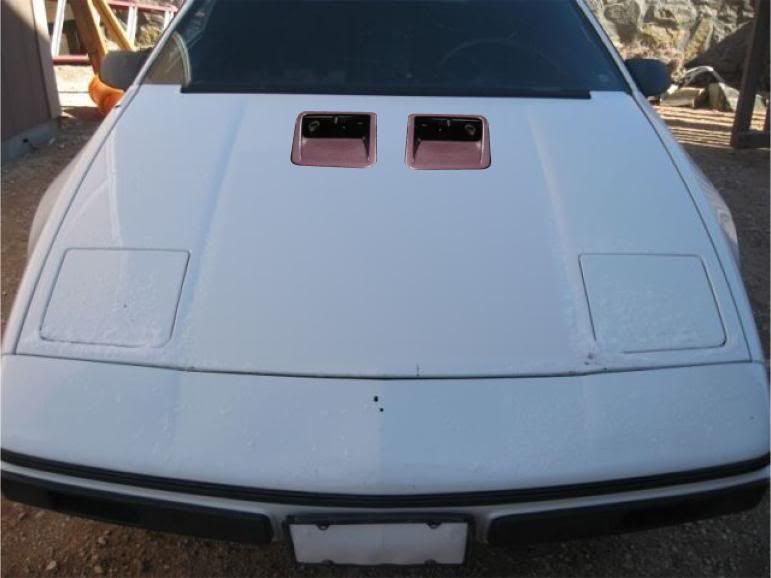
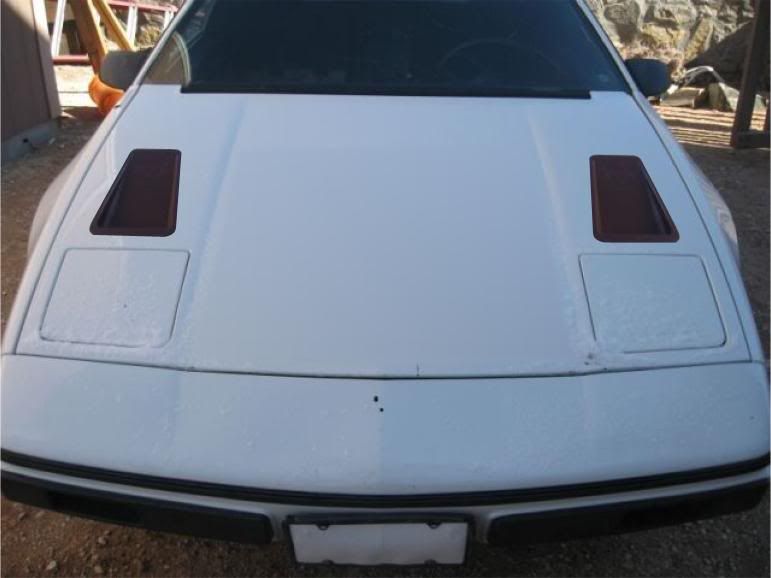
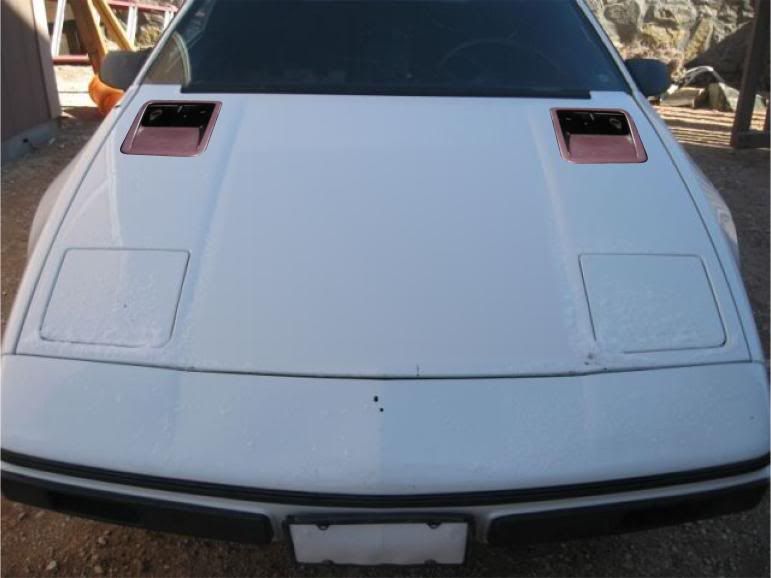
Now I just got to figure out how to mount em - Should I just cut holes and fasten them in like on the T Bird hood or should I mold them in?
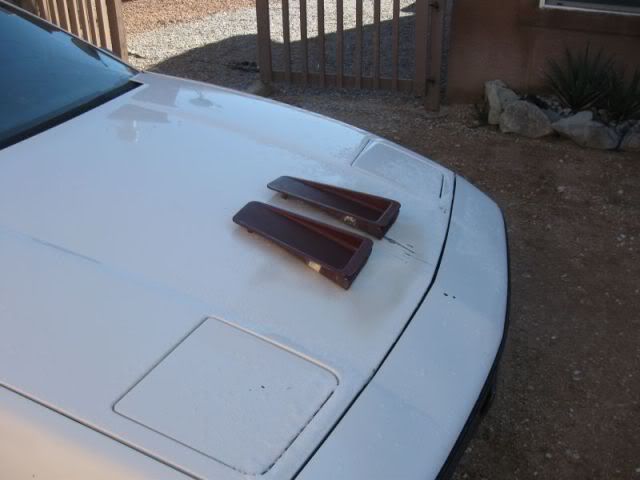
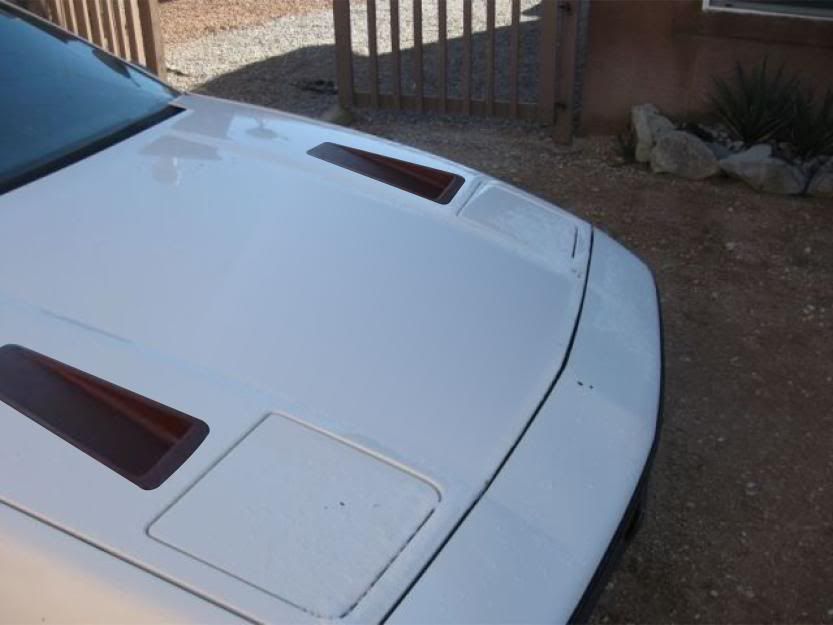
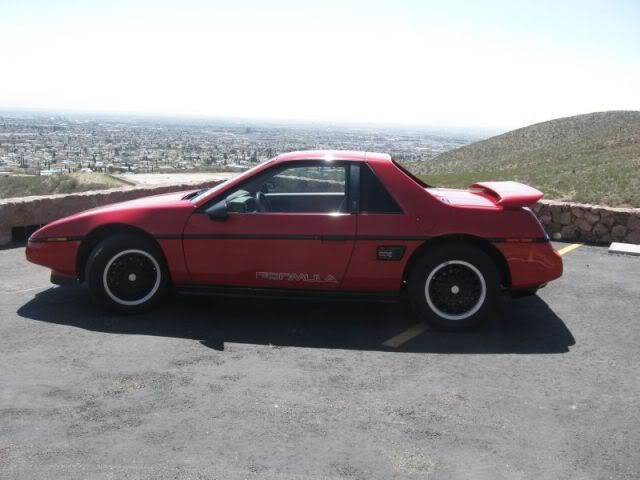
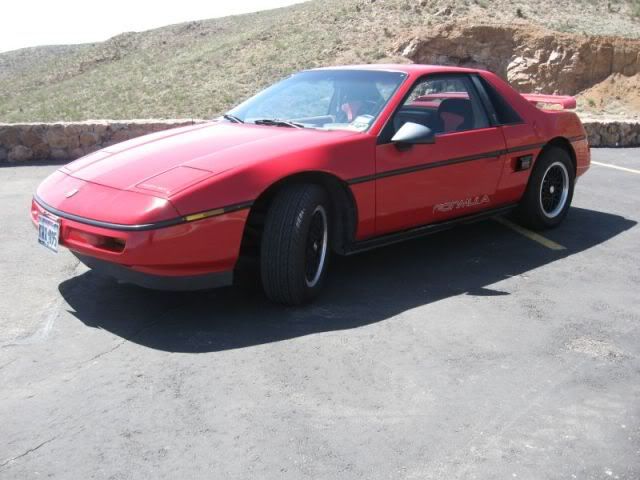
Setting on the hood of the Formula:
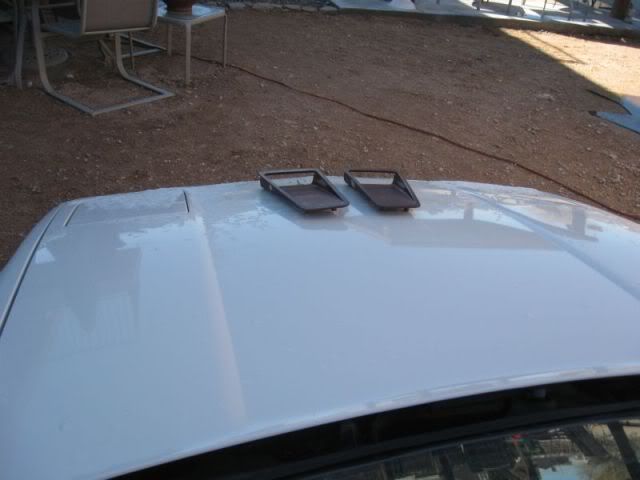
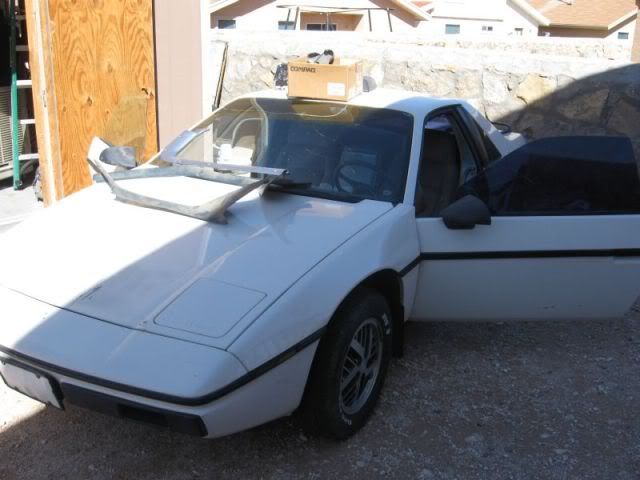
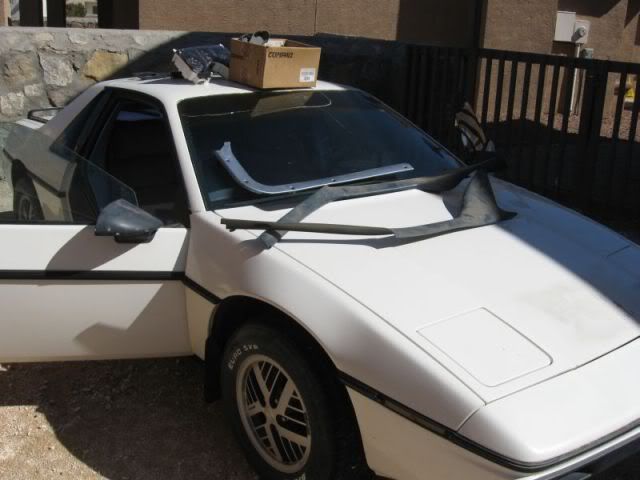
And on the hod of the XTC:
More later!
Pat
It's my Birthday - Page 9 Ownership.....
[This message has been edited by katatak (edited 01-29-2010).]
I think the T-Bird parts would make better side scoops for the XTC. How about some pics taped to the side of the car or even the Fiero. Also, you might try switching the scoops side to side on the hood and take a pic. Have the straight side of the scoop parallel the hood accent line. The angles should look better.
[This message has been edited by Rick 88 (edited 01-30-2010).]
Happy Birthday my friend. Be sure to celebrate and take some time for you.
Second... Mounting the scoops similar to the TBird is the way to go. You can mount them flush but the hood scoops will look more stock if you bolt them in and retain the groove around the edges. And, you can always remove them for new ones in case they break... just a thought
Also, move the scoops around the entire hood for ideas and take pics of every idea and every placement. Think out of the box. I've attached a few ideas I came up with using the images you posted - they may not look exactly right becuase of the angles, perspective and I had to skew the images.
Happy Birthday, my friend.
What do you think?
Placement similar to your original idea
Same placement but scoops turned around
Near the windshield
Behind the head lamps
I really like this - don't ask me why. Reminds me of the Viper in a way
Another
One more angle
[This message has been edited by Sofa King (edited 01-30-2010).]
There are some interesting concepts Greg. I'm still not sure I like them due to the angled side - Not sure that angle fits the lines of the Fiero - Maybe rRick is on to something here - Maybe a side scoop for the rear quarter? I'll have to do some tweaking. Good thing they were free!
Pat
[This message has been edited by katatak (edited 01-30-2010).]
You have a lot of room on the XTC rear quarters for those scoops. I think a rear brake scoop might look good. I can't remember if you have any air intakes molded into the rear quarters either. Gotta quit working so much........
I have not give up on the Coupe. Just busy with the XTC 4.9 swap right now. I did try to start it yesterday but the battery was dead. Been on the charger all day today. I'll spin her up this evening - maybe take it for a spin arounfd the block.
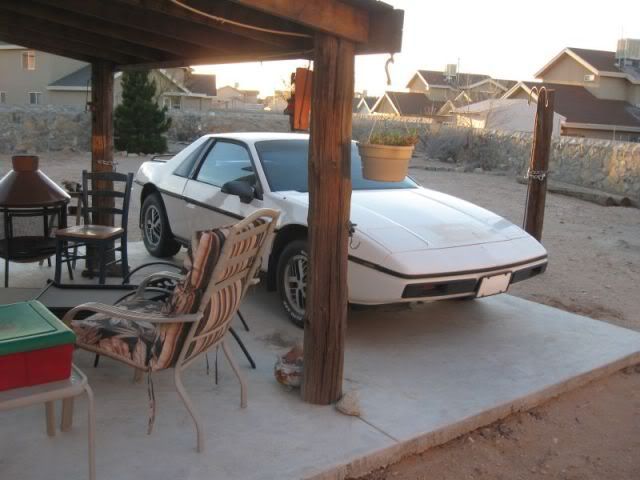
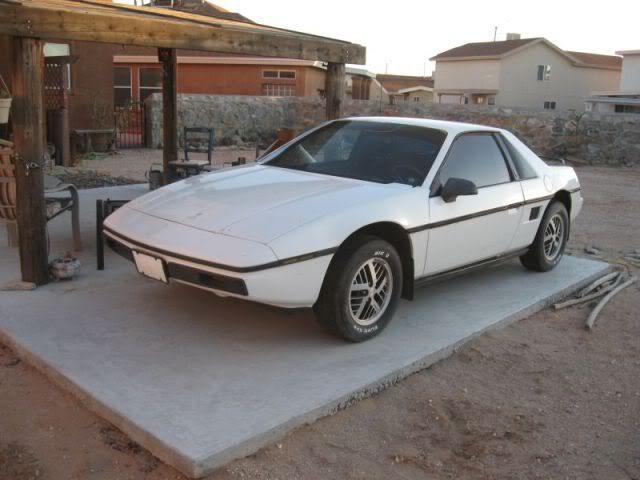
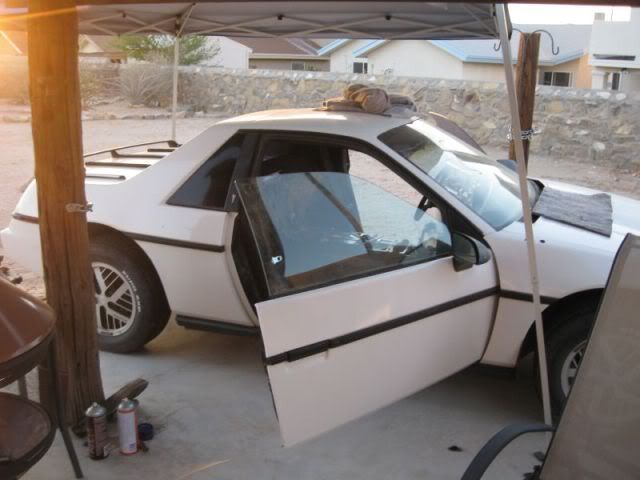
I charged the battery and fired the V8 Coupe up today. I had to move it from where it was parked - the Compliance Nazi's said I could not park it in the dirt - it had to be on concreter or pavement. So I moved it up on the patio slab. I'll be looking for a shop to lease next weekend.
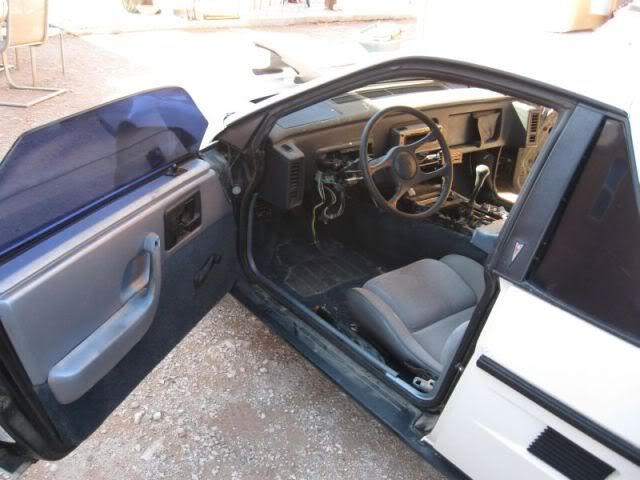
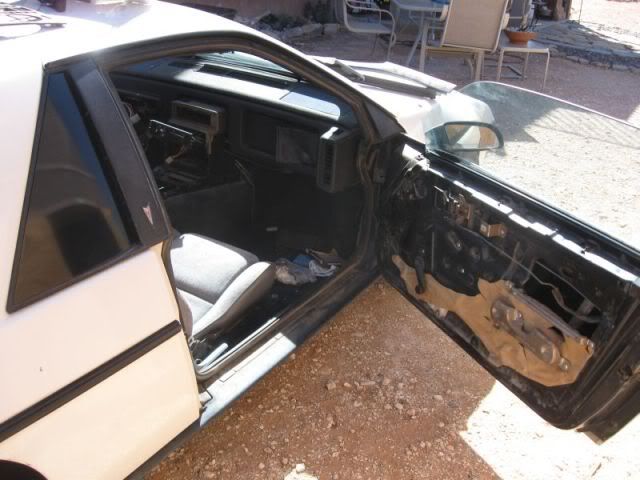
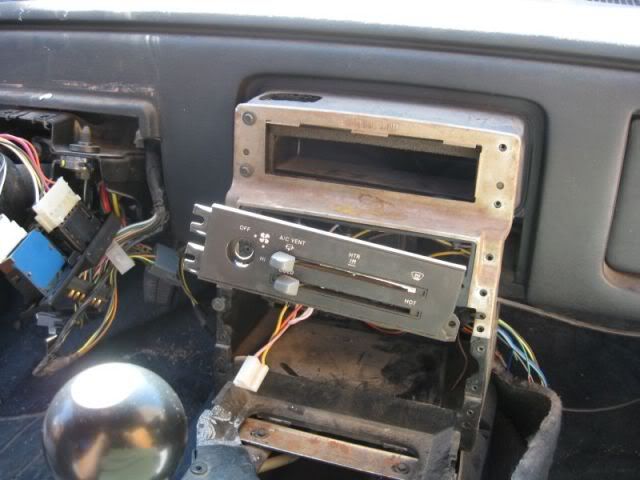
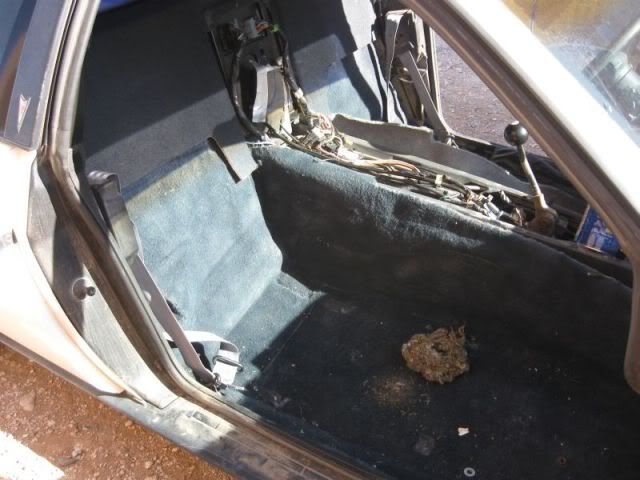
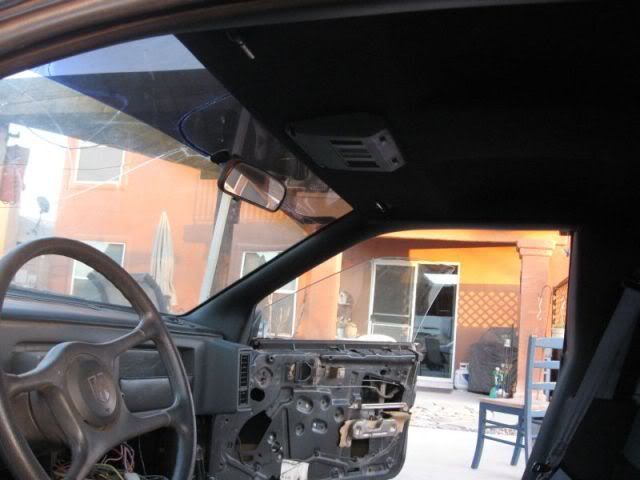
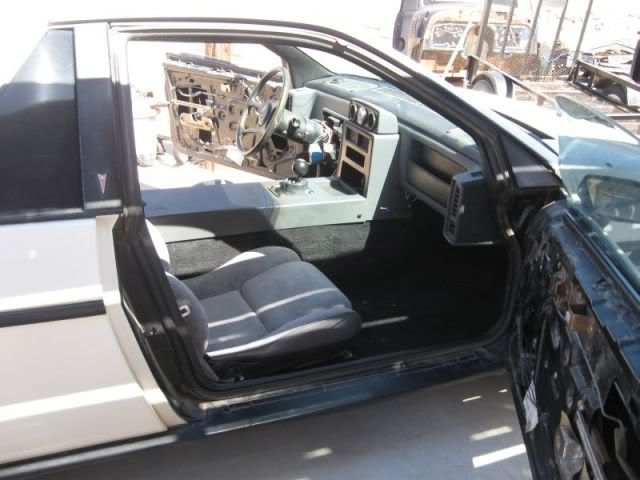
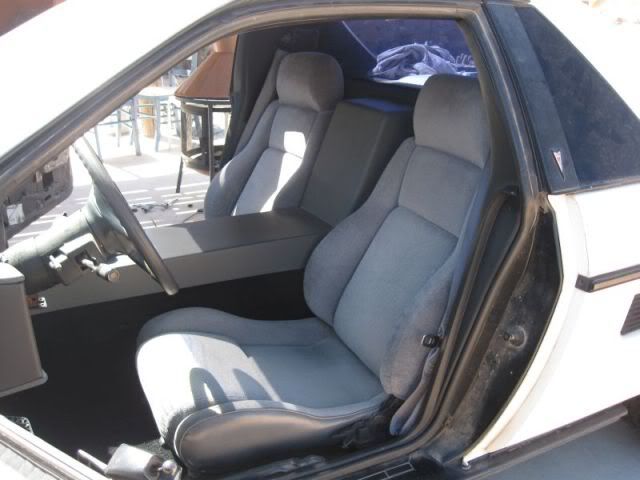
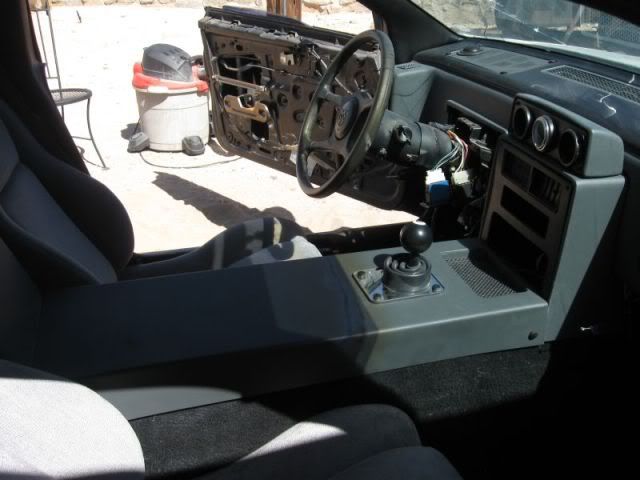
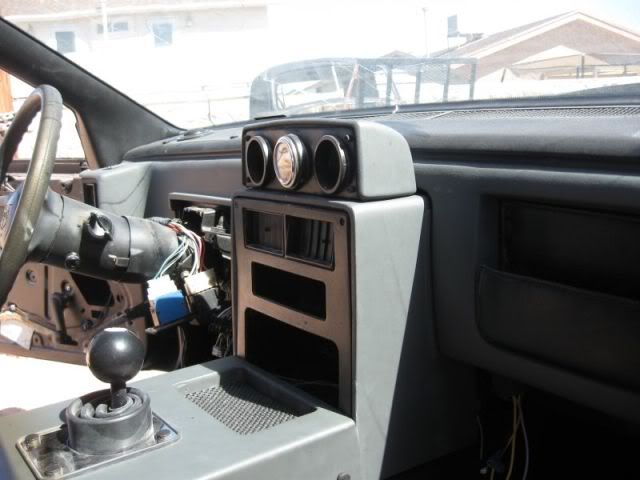
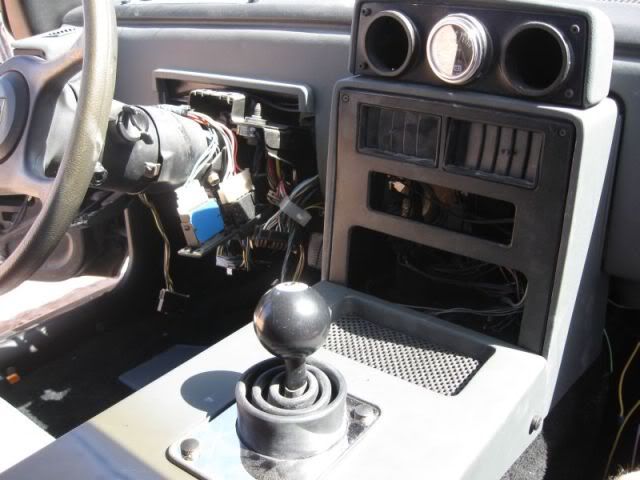
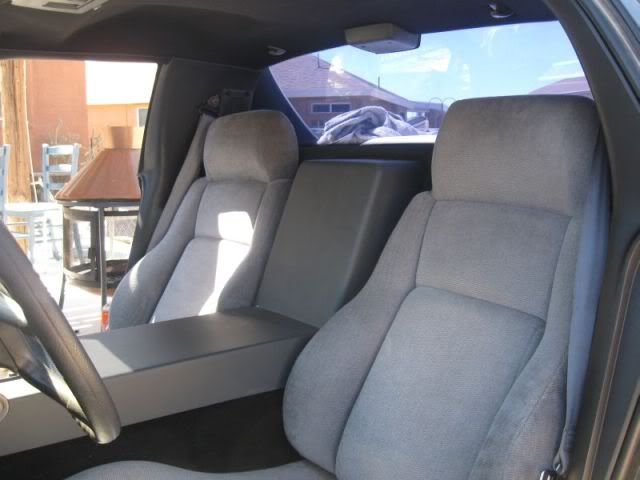
After I shoveled the snow off then chipped away all the ice off the car, I decided to tear into the interior. At first I was just going to put it all together and then focus on the exterior but after sitting in it for about 2 hours today, I could not take it. I had to rip it all out and start fresh. I guess the first major project will be an interior rehab. I maybe entertaining the idea of a custom dash, center console setup. I'll have to read a bunch of "dash" threads. Here's some progress pics:
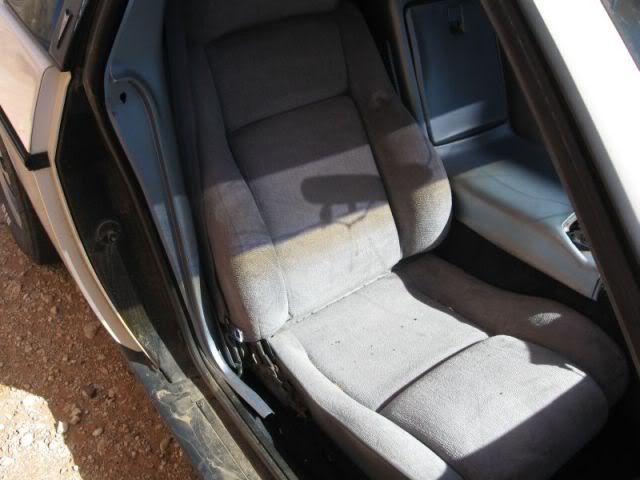
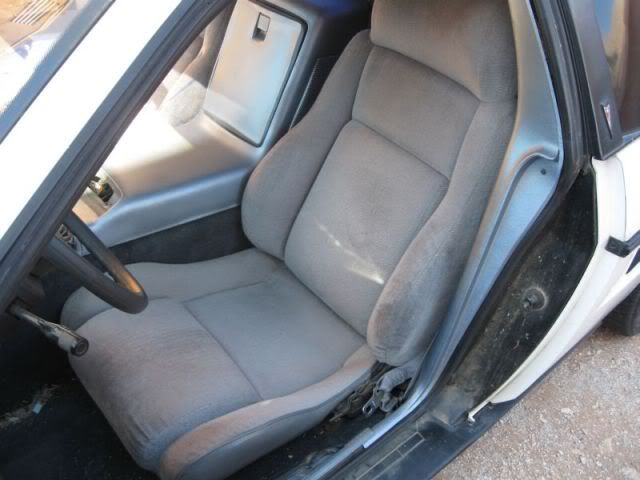
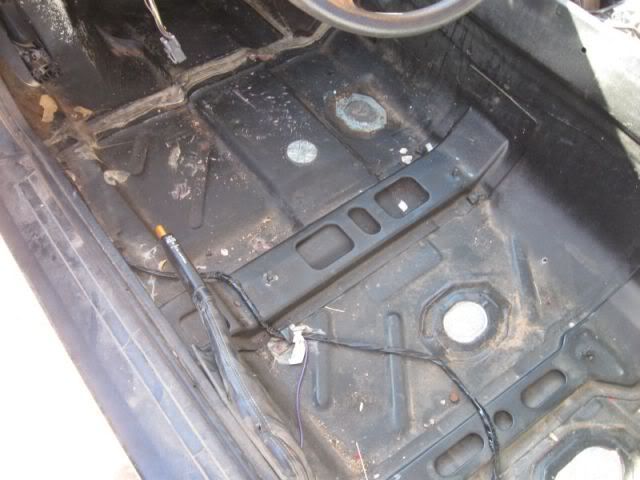
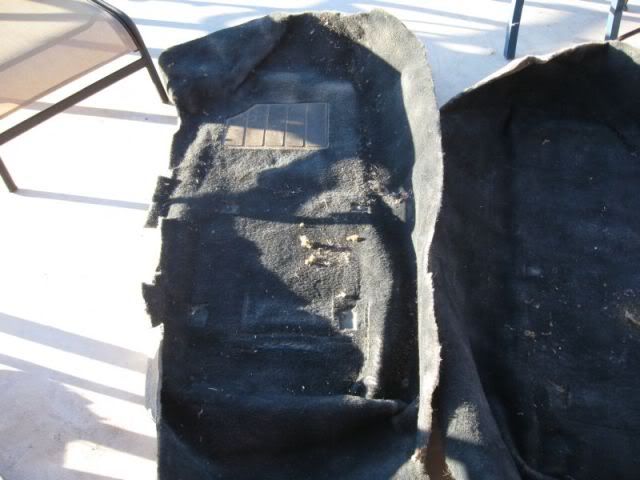
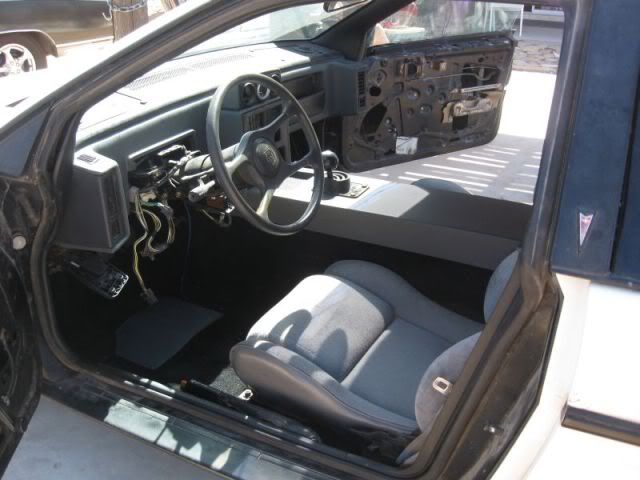
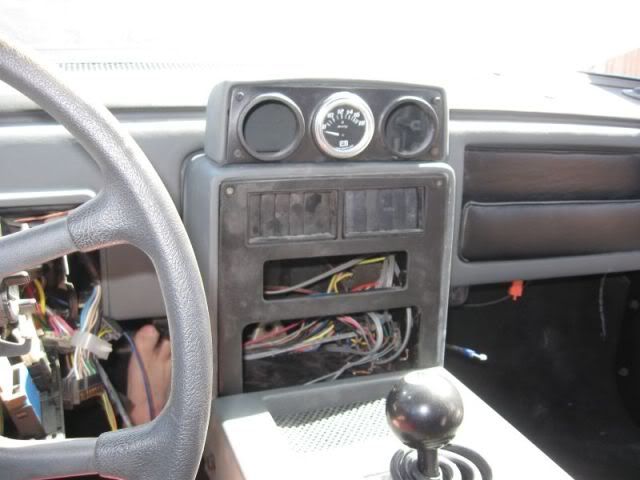
Cleaning it out: Some before shots: I do not think that these are 86 Coupe Seats - They are pretty clean! As is condition: Tearing it apart: Some creative wiring! Bonus: Got a new pet mouse in the deal - too bad he was dead! Had another one under the drivers seat. Pretty clean under the carpet!
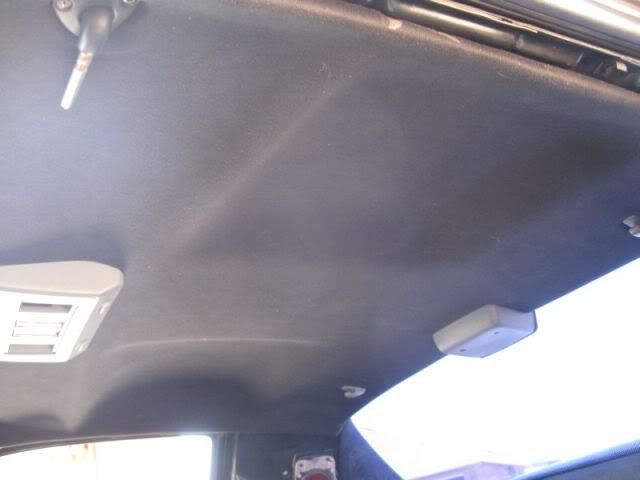
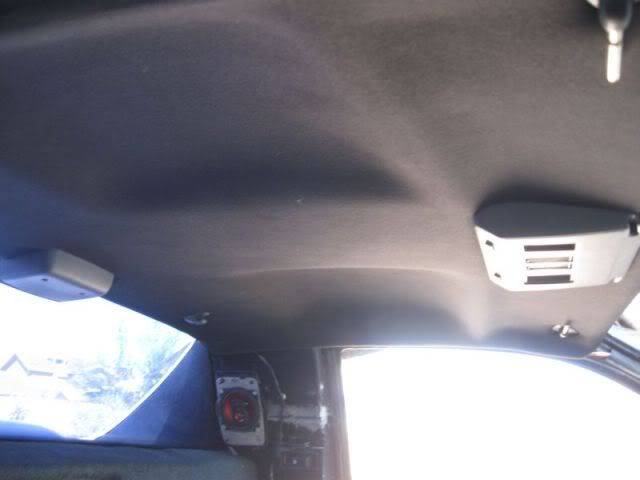
All the trim peices have been painted a slivery-blue color. I'll have to find a quality "plastic" paint and clean them up. I think the carpet is factory that was painted? Not sure that it can be done but it looks like it. I'll just get some new carpet for it. The headliner was sagging in several places plus it's worn thin in the front near the windshield. The board is in good shape so I think I can recover it. I do not think that the dash is the original Coupe dash. It's an all black AC dash and there is a hole in it for the wiring harnes for the aux gauges. It's in fair shape - has a small crack near the defrost vent and the typical AC vent "knee" strikes. I have a perfect 2 tone brown dash out of a low mileage 85. I'll either fix and paint the one that was in it, paint the 85 dash and use it or go with something completely different? The nice thing about this car is that it is a blank canvas just waiting for whatever mods I can throw at it. It also had a complete set of factory speakers that are not dry rotted, ripped or torn. More to come.
I have a "thing" about snakes.... If I would have found a snake, someone would have got a heck of a deal on a V8 Fiero...... I would not be able to get in it! Makes me nervous just thinking about it.....
Not much to report - had to move it the other day to keep the Code Compliance Nazi's at bay. They say it has to be parked on concrete or pavement - Alrighty then!
I noticed that when I moved it, my new headliner material was coming loose. I fear I did not get the backer board cleaned well enough. Looks like I'll be pulling it out and re gluing it. I may get to it this weekend.
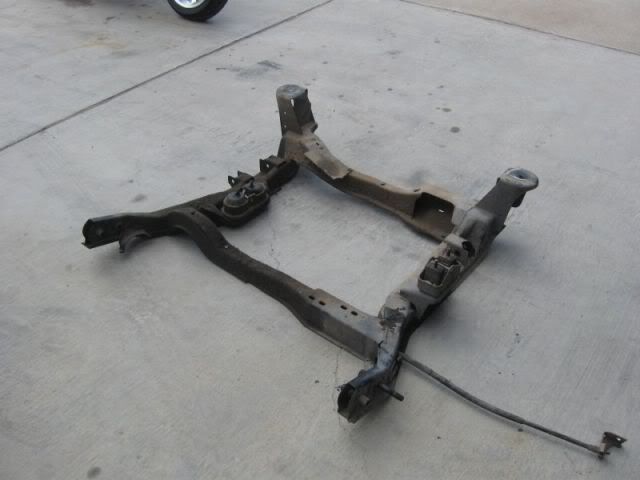
I now have an 88 Cradle to swap into the V8 Coupe. As soon as the XTC is out of the garage, I will be moving the Coupe in and dropping the 350/4spd out. In the next few weeks I will be picking up an F40 6 spd. I already have a fresh - ready to go 383 and will be going through the hoops to mate the two. Then I'll mount them on the 88 cradle and install it back in the coupe. I need to dig up some 88 suspension arms and rear spindles to finish it up. Still don't have a good handle on what I need for the axles but I will figure it out. Since the weather is warming up, I am getting motivated to finish up these projects - I want to spend the summer enjoying them versus wrenching on them.
Originally posted by katatak: I noticed that ... my new headliner material was coming loose. I fear I did not get the backer board cleaned well enough. Looks like I'll be pulling it out and re gluing it. I may get to it this weekend.
Pat
P,
Be sure to use the 3M 77 or 80 spray adhesive. It'll run about 20 bucks for a large can but the stuff really works!
Be sure to use the 3M 77 or 80 spray adhesive. It'll run about 20 bucks for a large can but the stuff really works!
I pulled the headliner out of the Coupe this afternoon. I went to the fabric store looking for the same material I used the first time - none to be found! I did not find anything I liked. I talked to the lady at the counter and she told me about a huge fabric and foam store downtown. She gave me directions and much to my amazement, it's right across the street from my office! Never even noticed it before. I'll hit it hard tomorrow and hopefully I can find the "right" stuff for my headliner. I have 3 to do so I need the practice. I'll give the #M stuff a try on the next one. While I am taking a break from the XTC - waiting on the fuel injectors and the wiring harness - I will get the interior finished up on the Coupe - I really would like to have it done by Sunday. Then it will be in line for some garage time as sson as the XTC is out, it will go in for a heart transplant! I really wanted to do an F40 behind this new 383 but I just need to get it done and driveable for now. The F40 will have to wait. I did look at a Holley Pro Injection setup for the 383 last night - found it on CL but it's pretty rough looking and the guy wants a lot for it. If I were to go this way, I think I'd just buy it new.......$$$$$$ Not sure I want to put that much money in it! With any luck, I'll find some material and get the ehadliner recoverd tomorrow evening. Now that it's light out till 7:30........ Time to get something done!
No updates - been in New York for the last few days - I needed a boat to get around in. I was going to try and make it out o Kickhill farms and rummage around through the Fiero stuff but a lot of roads in New England were closed due to high water this week. I'll be working on the headliner tomorrow - I still have not found the material I want yet. I have one more place to try in the AM.
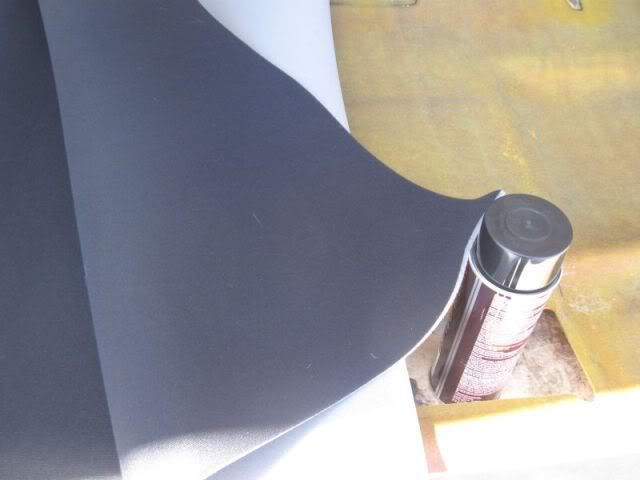
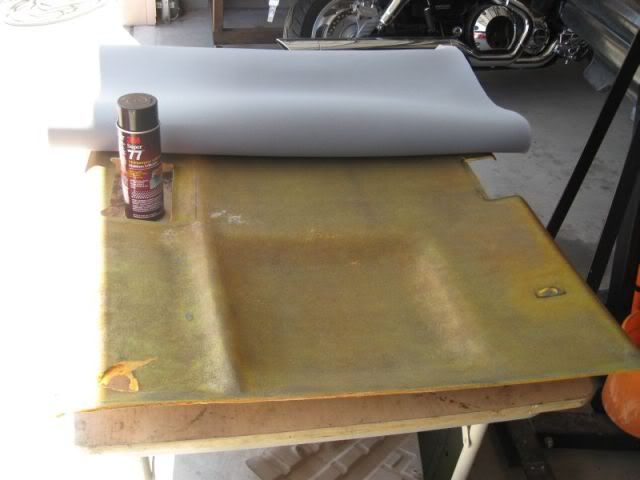
Made some progress today. Spent most the morning running around looking for some headliner material. The last one did not stick. Not sure if it was lack of glue or bad glue - most likely operator error. I was able to find the exact same material but I was afraid that it may not be "headliner" material. Meaning that if it gets hot, it may pull and not stay where it is supposed to stay. I ended up down at the big Foam and Fabric store and picked up some regular headliner material that has the foam backing. It was fairly cheap too so I bought enough to do the Formula as well. 10.00 a yard.
I was impressed at how easy it was to put on.
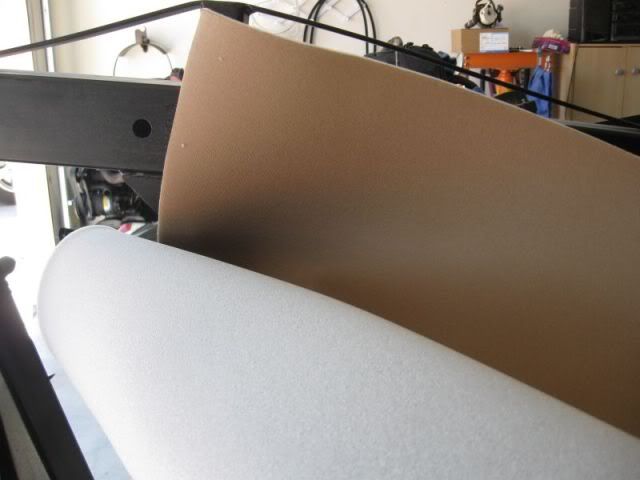
Here's the "buckskin" I got for the Formula - it's a little on the darker side compared to the stock color but I think the contrast is cool.
A little 3M 77, a solid headliner board and new material. Here we go!
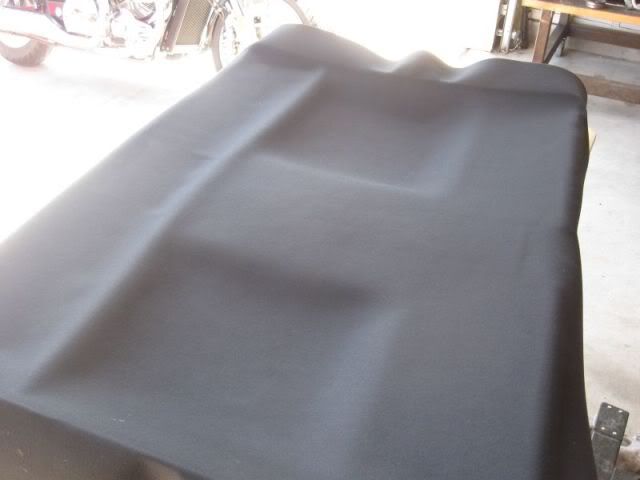
Laid out 1/2 at a time.
Sprayed the board and the material and let it set for a minute then started from the center out on each side.
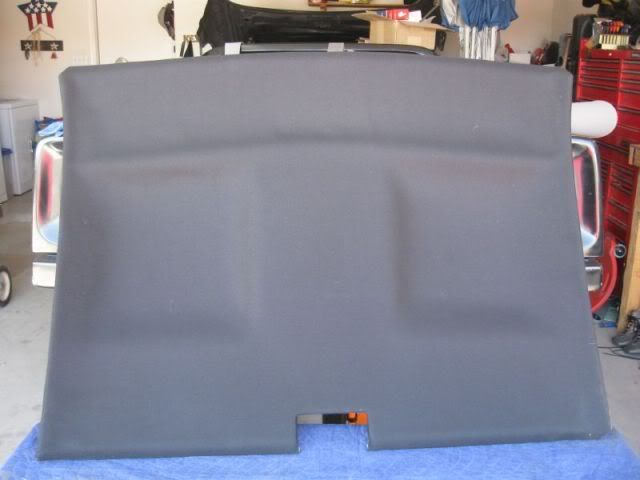
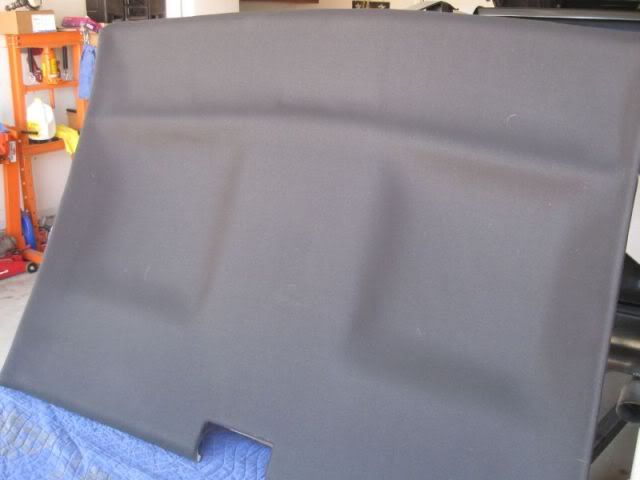
After smoothing out the wrinkles, trimming off the extra and gluing the edges down.
After it sets and cures, I will reinstall - then I can start putting the interior back together - I'd like to have it all done by Sunday. I just need to keep my head down and get it done.
More later!
Pat
[This message has been edited by katatak (edited 04-03-2010).]
Hey Greg, you are 100% correct. I felt like I have been neglecting this project and after following your thread the last few weeks, I have been motivated to get back on it. Thanks for the kick in the butt.
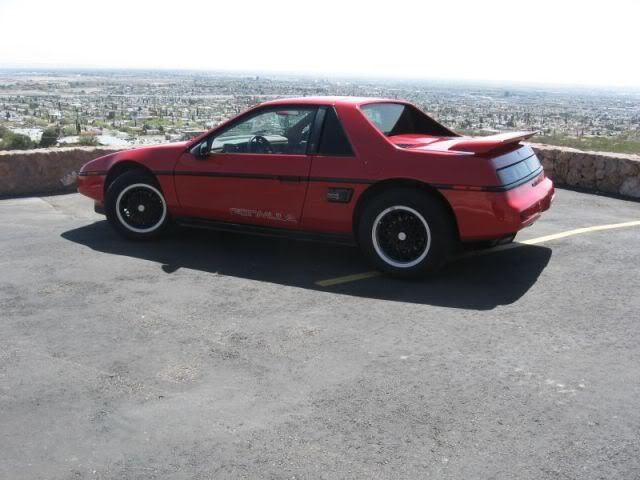
I got a little side tracked today. Went to lunch with the Fiero bunch to celabrate one of the guy's B Day. As usual, we burned up a lot of day light BSing....... While I was out, I took an opportunity for a photo op with the Formula. Here's a brief intermission while I wait for my afternoon progress pics to load.
Looking South East over El Paso:
I'll have some more progress pics here in a minute.
After lunch today I was feeling like a nap - had some great Fish Tacos and spent a lot of time BSing with the guys about Fiero's and Corvettes. Anyway, when I got home I got a wild hair and decided to get after the interior in the Coupe. I got so wound up in is that I did not get many pics of the process but I think most folks know how to install an interior.
Once I figured out where all the carpet pad went, I installed the carpet on both sides. This is aftermarket carpet that was in the car when I got it. If you look back in this thread you will see that it was grey that was dyed blue. I shampooed out the dye and used some fabric spray to color it black. It turned out good but not exactly the way I wanted. It will do for now. I had to do some trimming along the door side so that all the screw bosses where the trim screwed to was not covered by the carpet. Once I got each side fitted the way I liked, I sprayed some 3M adheasive on the carpet pad layed out in the pan and a coat on the back side of the carpet. I wanted to make sure that the carpet pad did not move under the carpet and ball up under the pedals so I glued them together.
Once the carpet was in, I put the A pillar trim in. I was pretty happy with how easy these snapped in place. I have had epic battles with these in other cars n the past. Next was the B pillar trim. These were a little tricky due to the new headliner - it's a little thicker than the factory stuff and I had to be careful not to snag or tear a hole in the new material. All in all, they went in pretty easy. Last was the door sill/kick panel trim. These were easy except for the usual "stripped" hole here and there. I just used a slightly larger screws for the bad ones. Last thing I did was snap all the screw covers in and then it was getting dark.
Tomorrow I will get the console side of the carpet clipped into place and then install the console. I had to make a bracket on the rear firewall for the rear console to rest on and fasten too. I'll take close pics of that tomorrow. Once I get the console in I have to work on mounting my MP3 amp. I've had it in the car already so it's just a matter of finish work. After that, it's the seats. I hope to get that far tomorrow. That will leave the gauge pod over the AC surround and the Insrument cluster - it will be getting a slight tweak with some glass work so it may be awhile to get that done. Here's a few pics - some are not good - I think my camera is getting ready to give up on me.
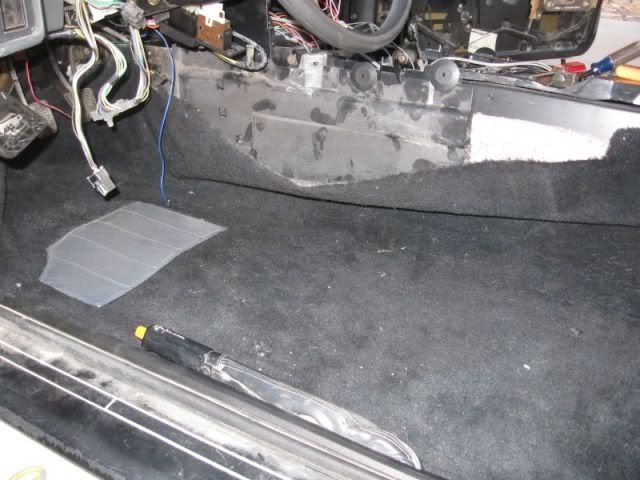
Carpet Before:
Carpet After - it needs a good vacuuming to clean it up after sitting in the shed for so long.
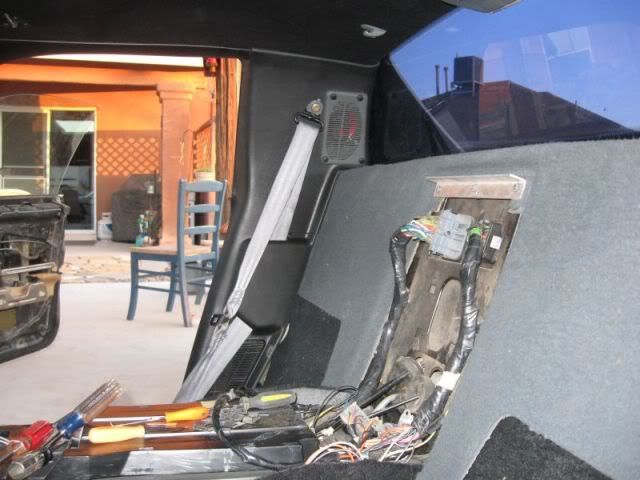
I really like how the B pillar trim turned out:
A pillar:
It was a beautiful day here in Far West Texas - as the sun was going down:
More tomorrow!
Pat
[This message has been edited by katatak (edited 04-03-2010).]
Looks good. I love it when things start falling into place. What about the console? Any thought on how to move forward? Also, you had mentioned a larger gauge in the middle? How are you going to incorporate this into the overall design?
Well I spent most the day so far working on the Coupe interior. I wanted to get most of it complete so I could sit back and contemplate what was next.
I put the console in as is and then the seats. Now I can step back and think:
This will pretty much be close to the finished product - at least for this version. I am planning something quite a bit different for the future but that's a ways off - I have a lot of other projects to finsh up first. This will do for this summers thrashing of the car as I plan to make as many passes down the quarter as I can till either the motor or the trans goes South. Then it will be time for version 2. I have a few little things left to finish.
1. Mount the MP3 Amp and finish the AC surround. 2. Install the instrument pod and finish the gauge pod. 3. Dew wipes and door panels. 4. Tires and wheels 5. Some exterior clean up and freshen up the paint on the rear grills, luggage rack and bumper pads.
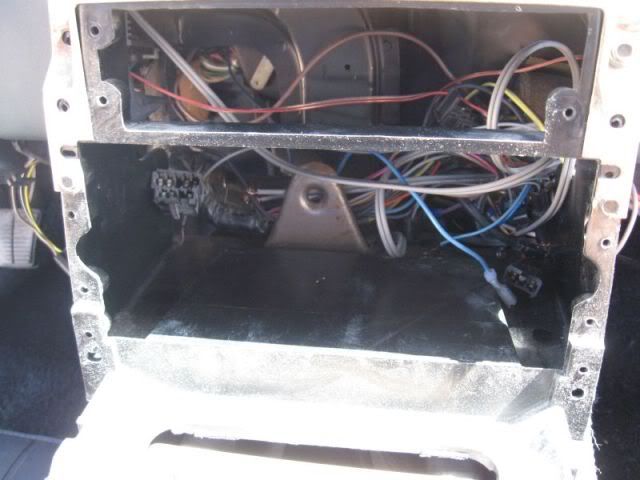
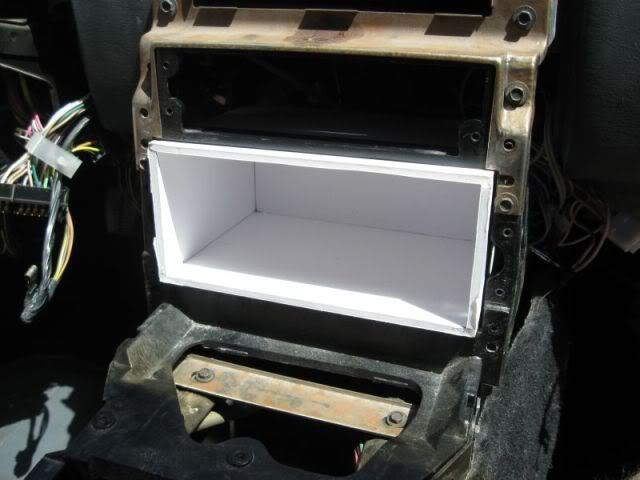
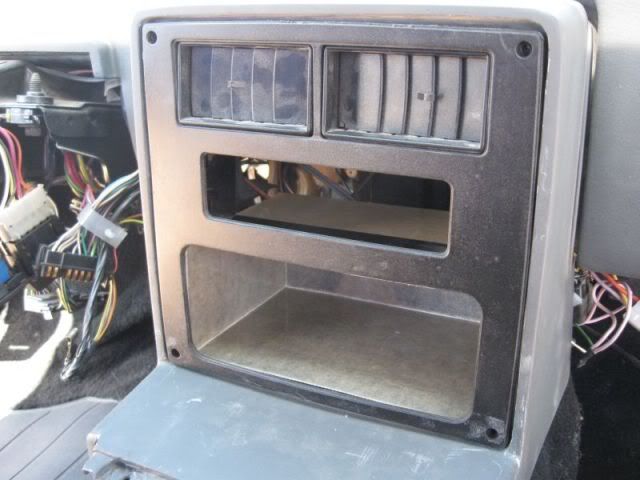
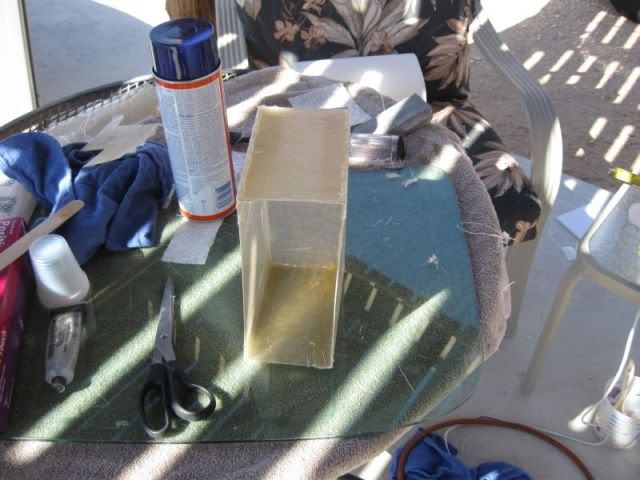
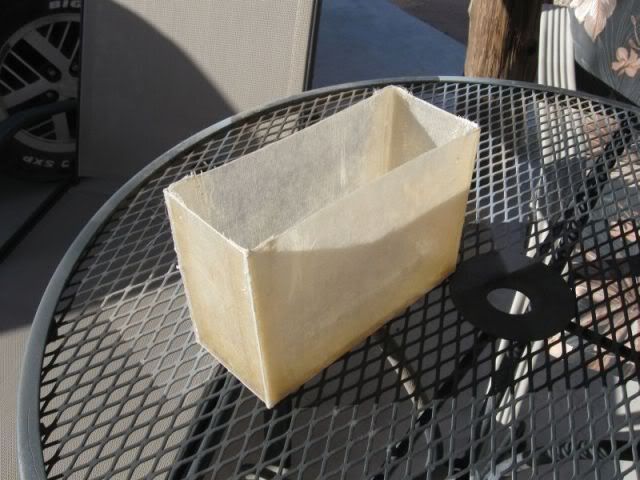
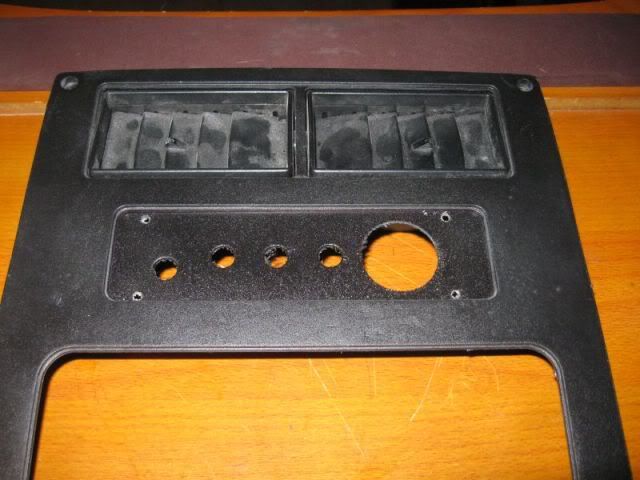
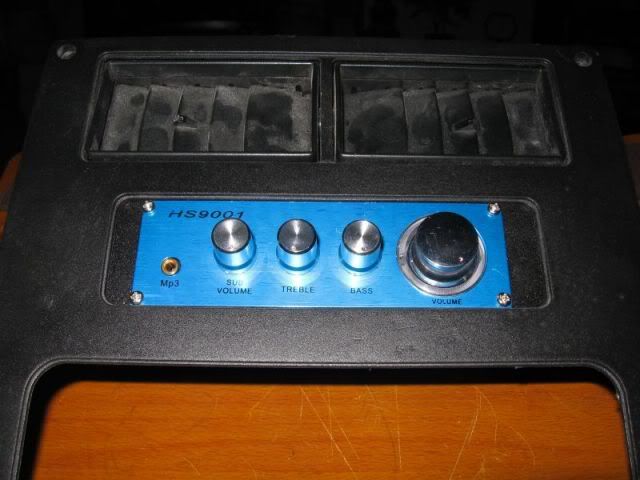
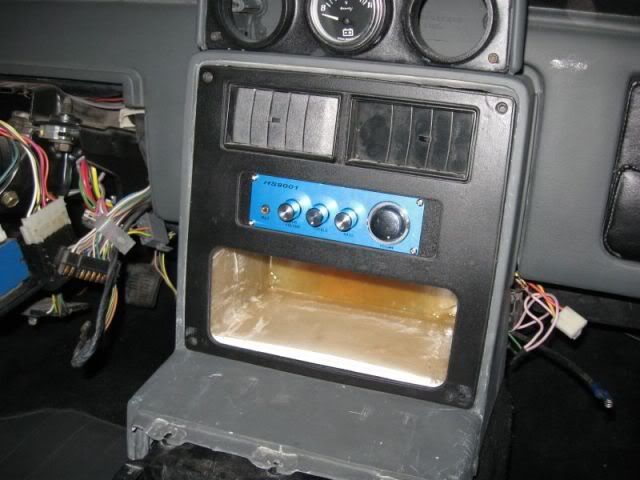
Now that the pics have loaded, on with today's fun and games. I have to build a box for the lower part of the AC surround - where the stock radio goes will be a "covey hole" kind of thing. The MP3 amp will be mounted in the slot where the AC/Heater control box would normally be.
Here's the holes I have to fill:
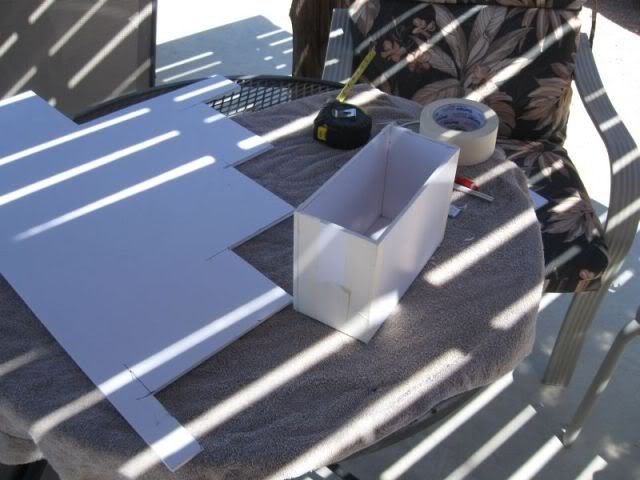
Taking my que from my old buddy Greg (Sofa King), I decided to build the box out of foam core.
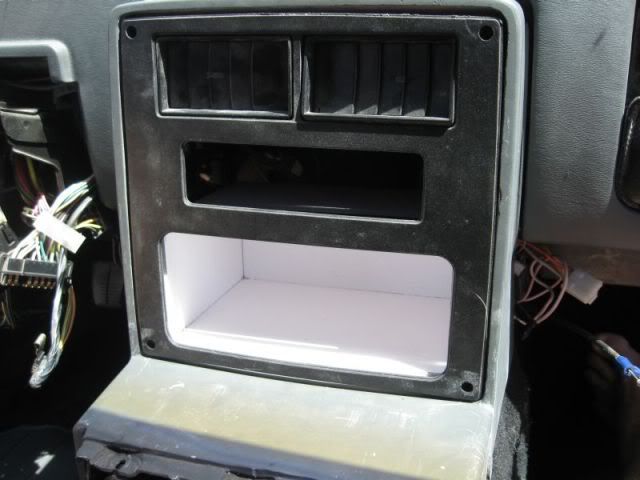
Then I had to test fit it:
With the surround and face plate on:
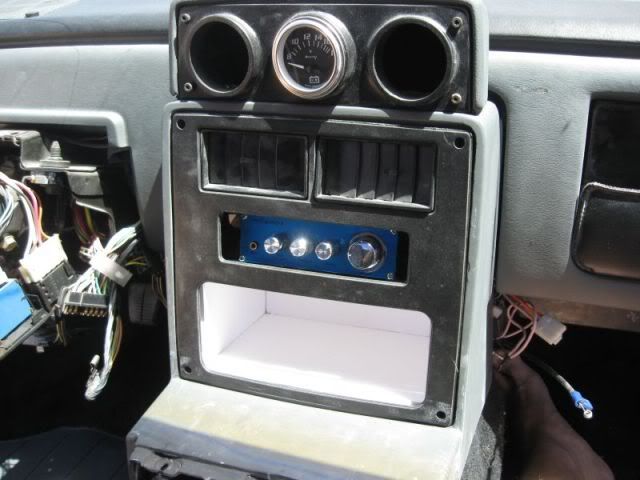
With the MP3 amp kind of in place and the gauge pod:
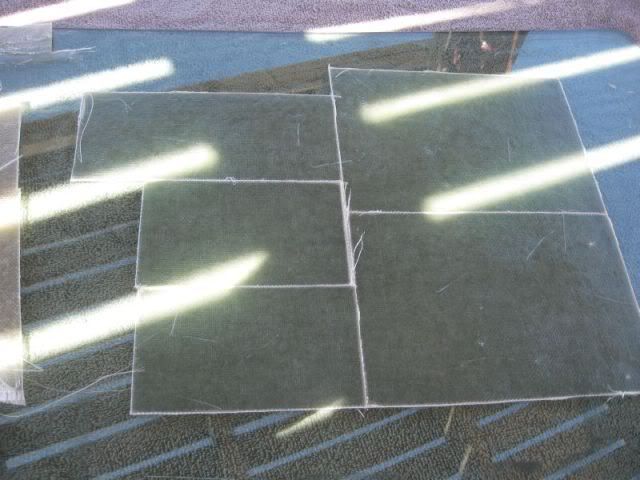
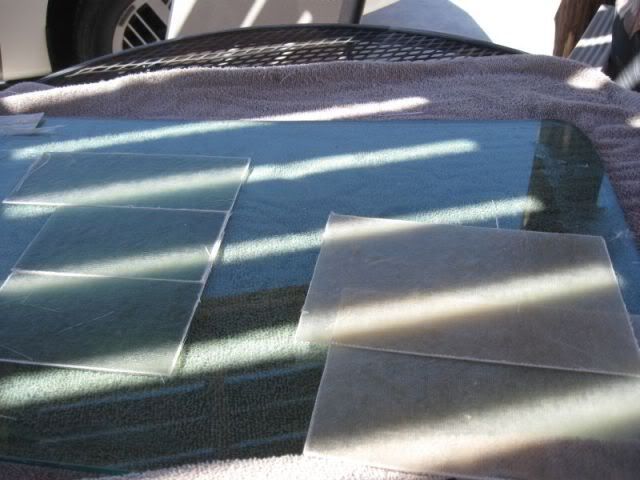
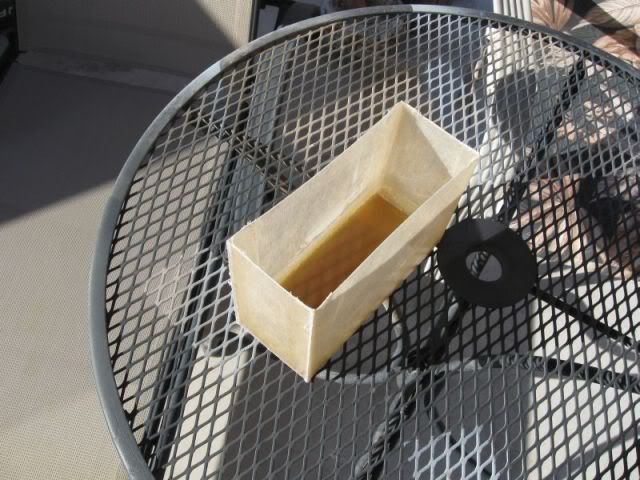
The next step is to cut the box apart so I can use the flat pieces for templates. Next I made a flat piece of fiberglass (Yeah - I'm playing with glass again!). Again, following Greg's lead, once the glass was set, I laid the tmeplates down and cut them out with my exacto knife. I then pulled the excess off the and will have to let the pieces completely cure. Oncetheya are cure, I will build the box with the glass parts and hot glue the outer edges of the corners. Next I will add glass and resin to the inside of the corners and lay one more layer of cloth on the inside. Once it's set. I will trim off the hot glus and add some resin and glas strand to the outer corners for added strength. A littl sanding and trimming and it should slide into place. Not sure how I will fasten it to the skeleton yet but I'll figure that out when it's done. The box will also give me a nice platform to mount the MP3 Amp too. Some shimming will be needed and I'll have to make a face plate to fill the voids on each side of the Amp.
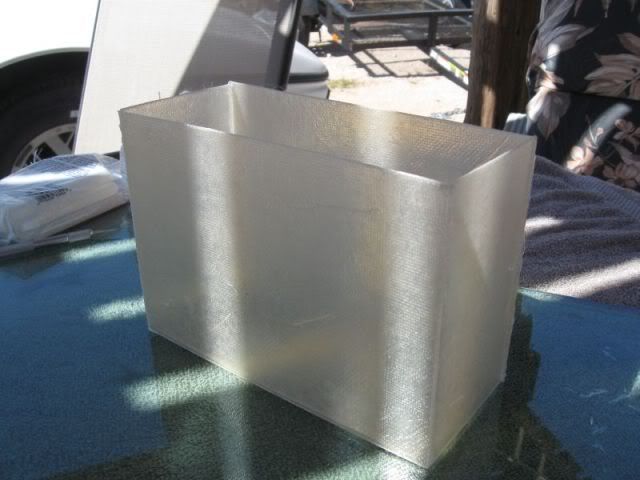
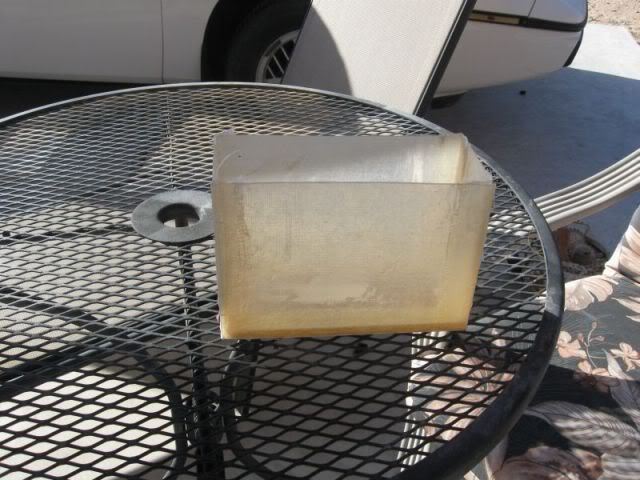
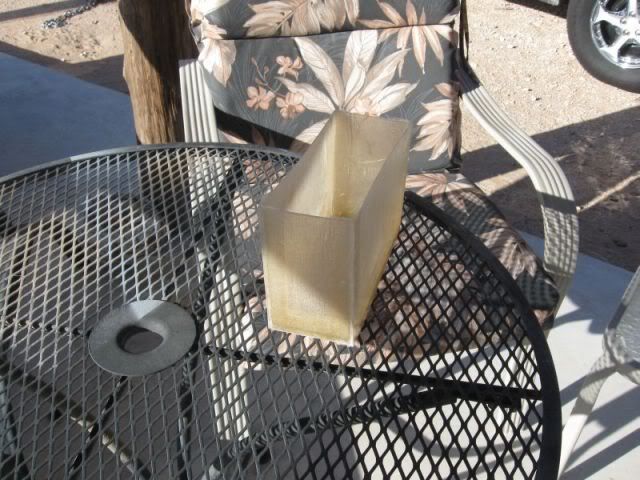
After letting the parts cure, I pulled them from the glass and started to build the box:
Using hot glue on the outside to hold it together:
Once I had it all glued together it was time for a test fit:
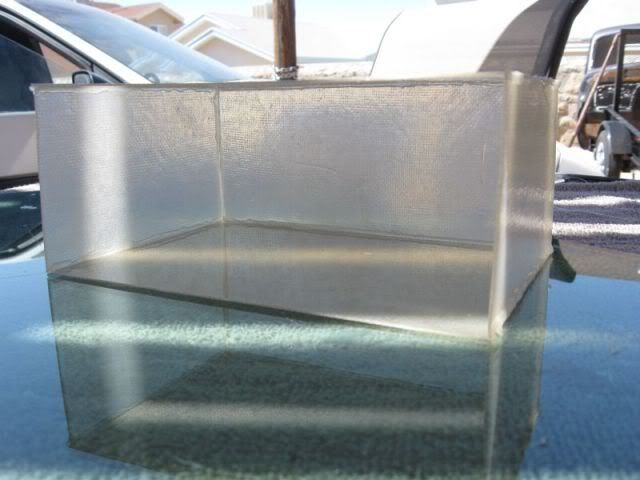
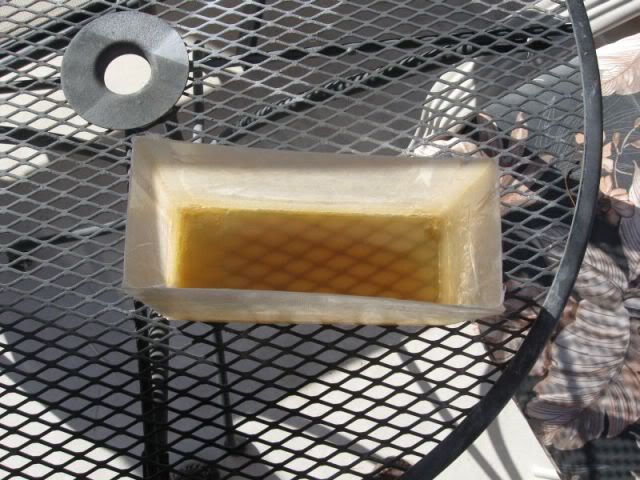
I layed in a couple of layers of cloth on the inside corners:
And I poured what was left of my resin in the bottom to seal it:
Once it's sets over night, I will lightly sand the insode and outside and give it some proimer and charcoal paint. The inside of the box - at least the bottom and side's will be lined with the snti skid shelf stuff so that anything I throw in there will not rattle around to much when I launch it from the line at 6k! That's it for this week - I hope to be stuffing the 4.9 in the XTC next weekend so it may be a few weeks before I get back to work on the V8 Coupe.
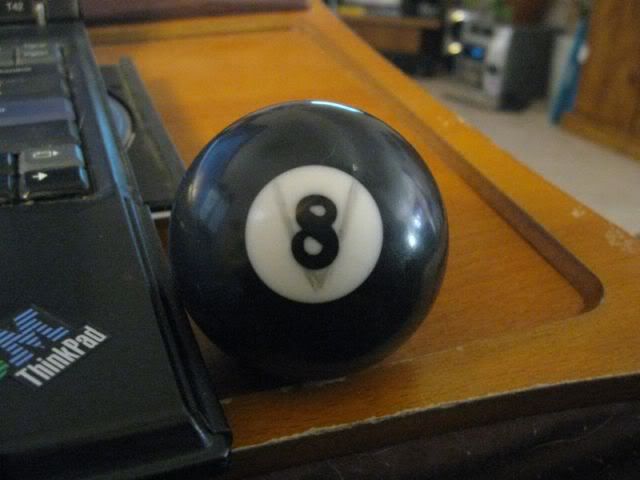
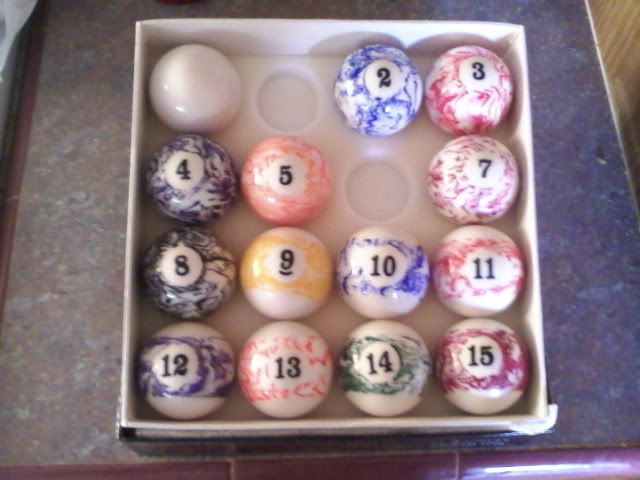
One more thing - something I have been thinking about. I want to keep the V8 theme going inside the car with some emblems or something. I have an idea for my shifter ball. It's an 8 Ball - pool ball that Carver1 made. I want to use my dremel with a fine carbide bit and form a "V" under the "8". I am thinking I can "router" out the shape of the V and then put red paint in the groove. I penciled in what I am thinking of. I have a couple of old pool balls I can practice on. I thnk it will look good if I can keep the lines straight. I may have to buy another one after I screw this one up?
The radio bezel looks great. Was it easier cutting the fiberglass during the curing process? It had made such a difference for me. When I tackle the glovebox I'll be using the same method. The ol X-Acto and straight edge will be getting another workout.
LOL - what better way to use the remainder of the resin than pour it into the bottom - genius!
It is fun stuff isn't it?
Ha Greg! I really like your method! It makes things so easy. It will be the only way I build things from now on. I tried another little trick just for fun. Back when I made the gauge pod, I used PVC pipe, epoxy and then glass. Mainly cuase I was fighting making a "tupe" out of glass. When I trimmed off the excess, it was still a little sticky and flexible. I wrapped a piece of PVC with packing tape then took the scrap - still curing glass and wrapped it around the pipe. I use my exacto knife to trim it so the edges would butt up then took a little resin and some fiber and glassed the seam. It was a little tough to get it off but I figured it would be. Something colapseable or easy ti cut a slit in would be an easy way to make round tubes. Why is this important to me? ---- Not yet...it's something new I'm playing with but I'll give you a hint. Think (which I know you already are) about the instrument cluster. What is round and needs to fit in round holes?
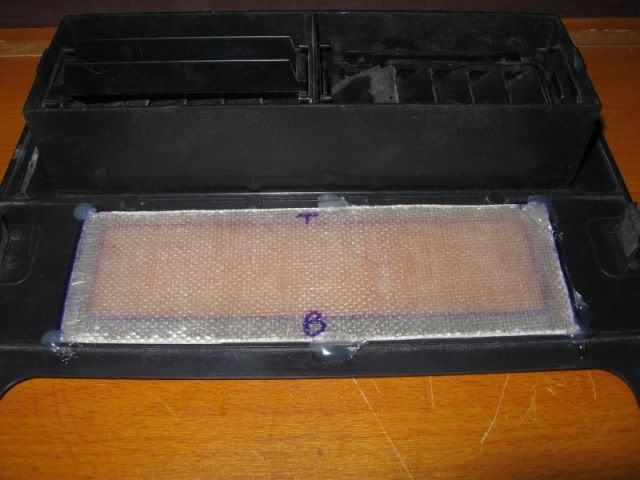
I was trying to figure out how I was going to mount the el cheapo MP3 Amp. I thought I would build a platform inside the skeleton and then put a couple small screws through the unit to hold it in place. The thing does not weigh anything and I could not see building some elaborate thing just to hold it in place. While flipping back and forth between the Amazing Race and The Apprentice, I figured out how I was going to mount the little doodad.
I went out to the shop and scrounged up a piece of fiberglass then trimmed it to fit in the back of the AC suround face plate. Once I got it to fit the way I wanted it, I hot glued it to the back side.
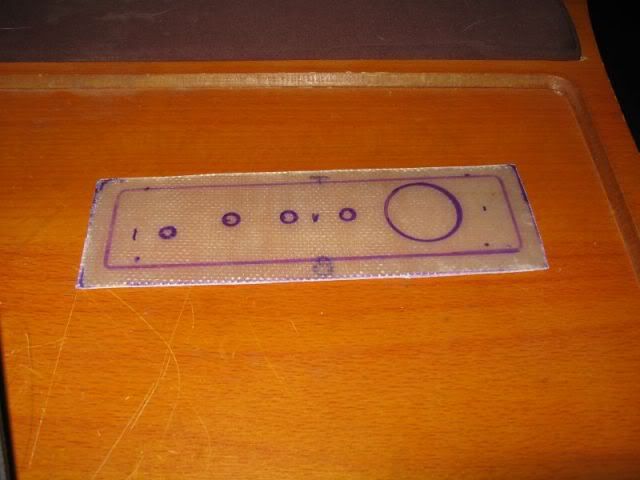
Then I removed the face plate off the doodad and placed on the front side of the AC face plate. Then I traced the holes:
I was a little off but I could compensate once I went to the drill press:
Once it was drilled out, I test fit it with the doodad face plate to the doodad:
Then I set it in place on the AC face plate for a quick look:
Tomorrow I will sand and paint the new cover/filler/mount plate and then I will epoxy it to the AC face plate. There will be a small gap between the bottom of the doo dad and the top of the covey hole box I made earlier. I will make some "shims" and epxoy those to the top of the box for the doodad to set solid on. I have to do a little trimming of the skeleton but nothing the dremel can't take care of in a few minutes. With any luck, I should have the doodad all hooked up and working by tomoorw evening. I have to travel for work Tuesday so Maybe I'll take a half day off tomorrow.
Later!
Pat
[This message has been edited by katatak (edited 04-05-2010).]
Question. Do you need to have the blue faceplate or can you use a new fiberglass panel? Might be something to think about it.
Also... check out the center console on the 89 Fiero Prototype - I've always seen the gauge cluster but never the console. What about something like this? Had I seen this, I probably would have gone for this design!
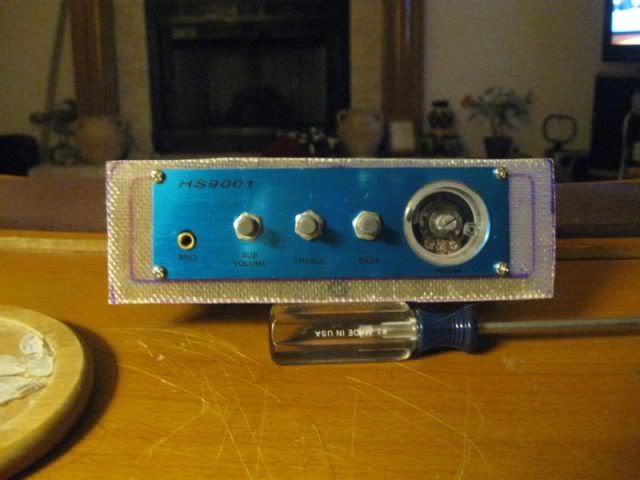
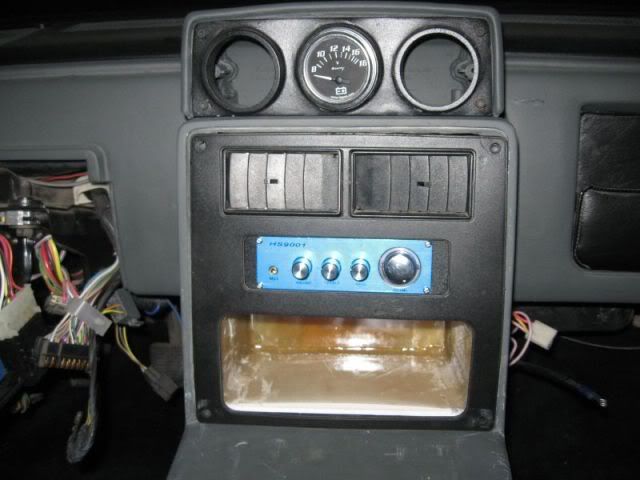
Sanded and painted then epoxied the plate and the AC face plate together:
Mounted the doodad:
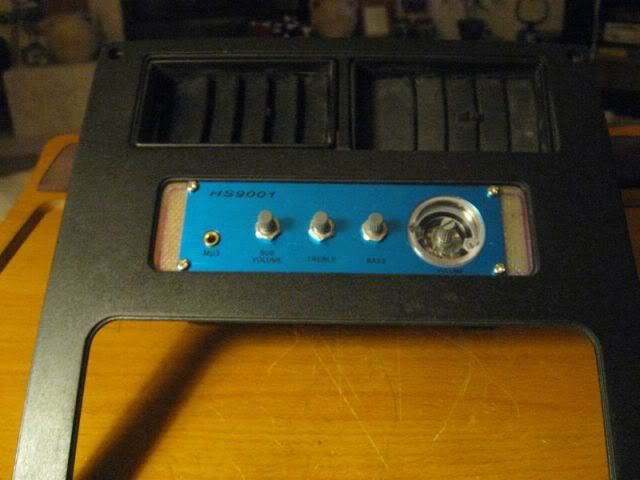
Then set it in the car:
I just have to do some trimming of the skeleton and finis the covey hole box, fasten it in and hook up the power and speakers and it's done.
Later.
Pat
P.S.
Yes Greg, I plan n replacing the blue face plate with a brushed aluminum one that has the control labels engraved under each knob! I wish I had the rest of the week to just tinker with it.
Man, I just spent the last few hours going back through this thread - No wonder I am tired - there has been a lot of work done to this car since October! I can;t believe how many times I changed directions.
Just wanted to say thanks to all that have contributed so far.
One more thing - something I have been thinking about. I want to keep the V8 theme going inside the car with some emblems or something. I have an idea for my shifter ball. It's an 8 Ball - pool ball that Carver1 made. I want to use my dremel with a fine carbide bit and form a "V" under the "8". I am thinking I can "router" out the shape of the V and then put red paint in the groove. I penciled in what I am thinking of. I have a couple of old pool balls I can practice on. I thnk it will look good if I can keep the lines straight. I may have to buy another one after I screw this one up?
I don't know?
Pat
If you mess that one up, I got you covered. How about this? Also, when you make the cut, use something sharp and straight to score the V, or else you will slip off the ball. Scuffs don't come out very easy. I've got some ball experience....I mean I play with......nevermind. You know what I mean.
[This message has been edited by Carver1 (edited 04-06-2010).]
Ha Greg! I really like your method! It makes things so easy. It will be the only way I build things from now on. I tried another little trick just for fun. Back when I made the gauge pod, I used PVC pipe, epoxy and then glass. Mainly cuase I was fighting making a "tupe" out of glass. When I trimmed off the excess, it was still a little sticky and flexible. I wrapped a piece of PVC with packing tape then took the scrap - still curing glass and wrapped it around the pipe. I use my exacto knife to trim it so the edges would butt up then took a little resin and some fiber and glassed the seam. It was a little tough to get it off but I figured it would be. Something colapseable or easy ti cut a slit in would be an easy way to make round tubes. Why is this important to me? ---- Not yet...it's something new I'm playing with but I'll give you a hint. Think (which I know you already are) about the instrument cluster. What is round and needs to fit in round holes?
I hate leaving resin in the cup!
Pat
The process of cutting the glass as it cures makes all the difference in the world. There is so little cutting to do afterwards. I've been tinkering with ideas for making tubes - one of the ideas I had was using wrapping, toilet and paper towel rolls - of course you're limited by the size unless you cut them in half and rolled the edges into itself? I understand your dilemma with the PVC. I think you would have to create two halves and then join them together with glass and filler.
A riddle, huh? It is early in the morning. What's round and needs to fit in round holes? OMG... Since I can't say the obvious... LOL I'm braindead. My first guess would be the gauges themselves? But also the lip that goes around the dash cluster from top to bottom. You got me wondering now. OK... what's the plan? I've suffered long enough.
[This message has been edited by Sofa King (edited 04-06-2010).]
If you mess that one up, I got you covered. How about this? Also, when you make the cut, use something sharp and straight to score the V, or else you will slip off the ball. Scuffs don't come out very easy. I've got some ball experience....I mean I play with......nevermind. You know what I mean.