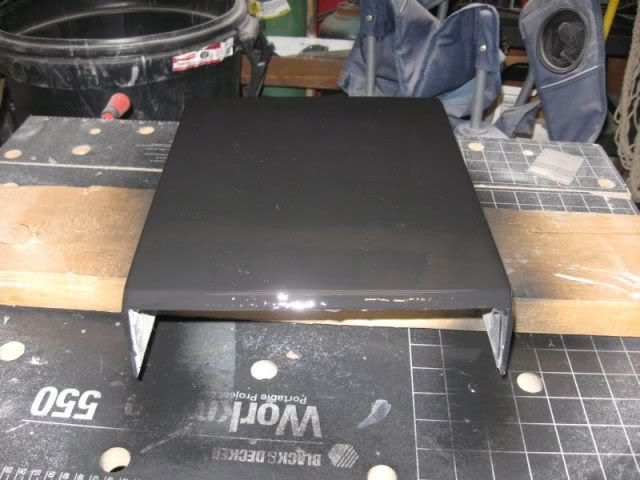
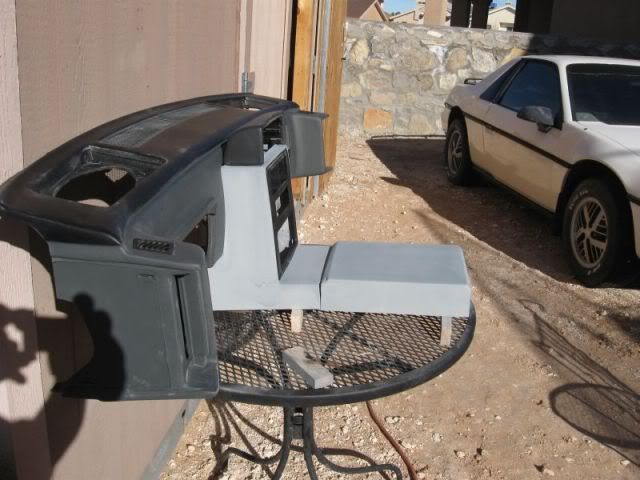
Those panels look fantastic! Nice and smooth. Great work
Aw man Greg, you own page 4..... I knew it was going to roll anytime......I was busy in the shop making parts and missed it.
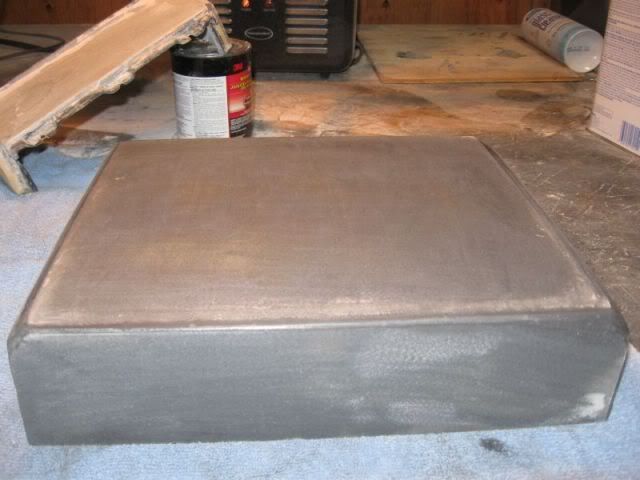
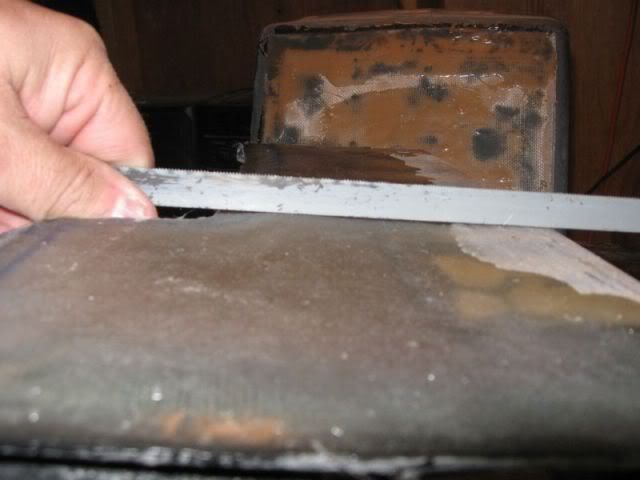
I'm learning to use that roller to squeeze out the air. I think it's a lot harder to get the air ot of the cloth versus the mat but the mat tends to start "wading" up if you brush it too much. It's a balance.
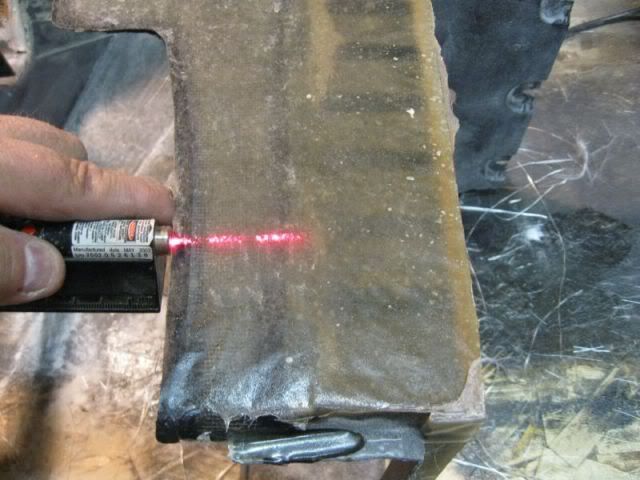
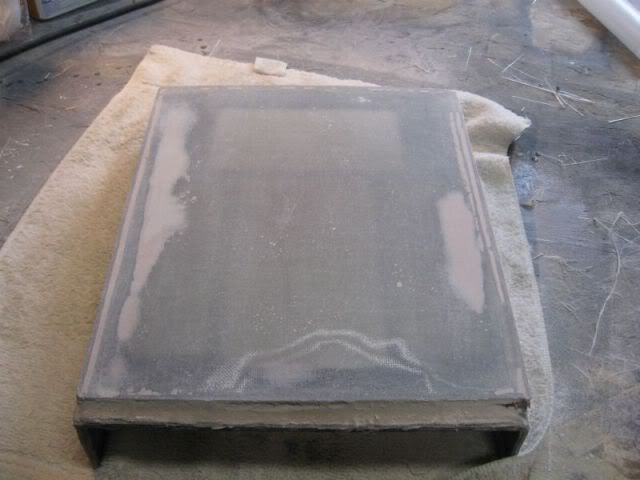
A little more progress this afternoon. After working on the AC suround, I had a low spoton each side so I decided it needed to be built up some more. I cut two pieces of mat that would fit in the low spot on each side then glassed them in.
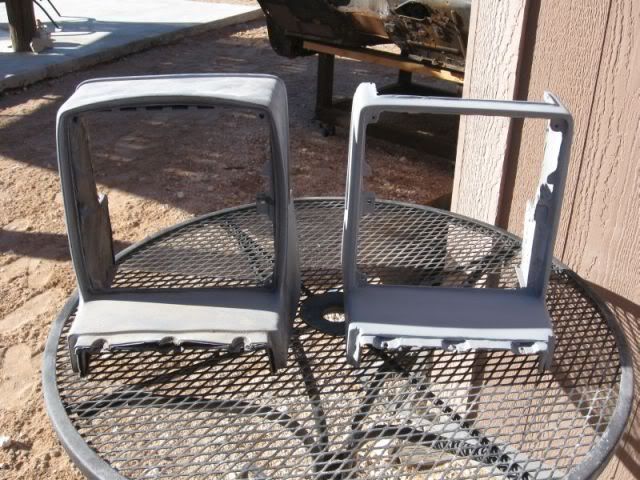
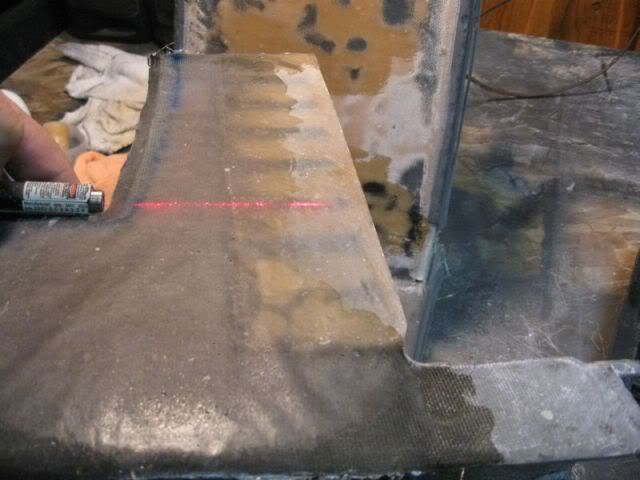
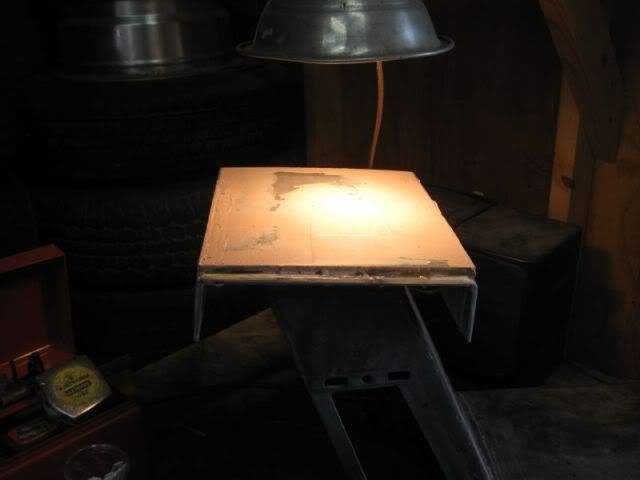
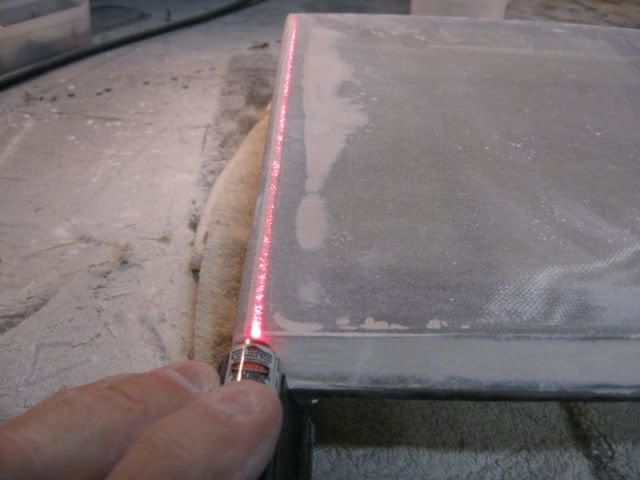
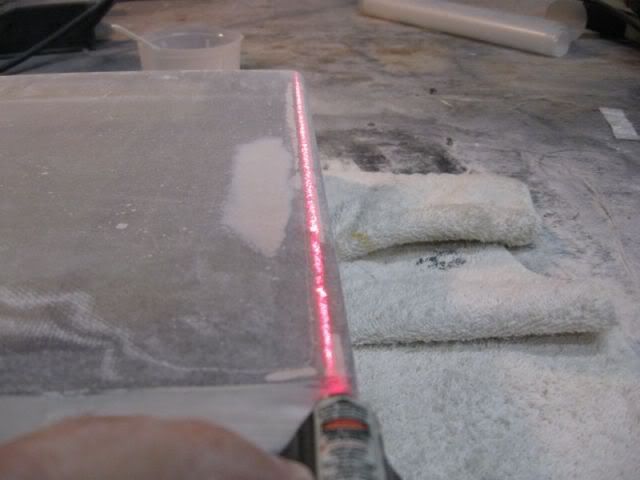
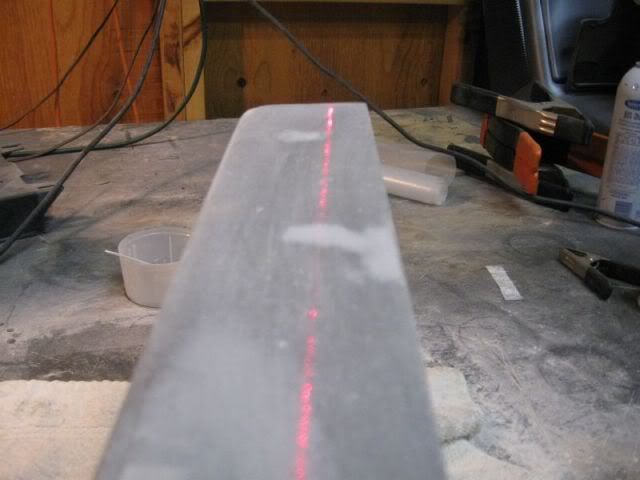
The low spot - it's hard to see in the pic: Cutting the mat to fit: one layer! Two layers: Rolled out the air bubbles: Tada: Now it is a little high: I can work with this! Let's see what the laser says: Now it's out under the heat lamp cause it's cold here in El Paso tonight.
To help with air bubbles in the fiberglass you'll need something like this fiberglass roller - they come in various sizes. I just bought a couple from ebay
UH OH! Pat just uped the ante... He's now using lasers? Oh man!
The glass looks great! Now get back to work
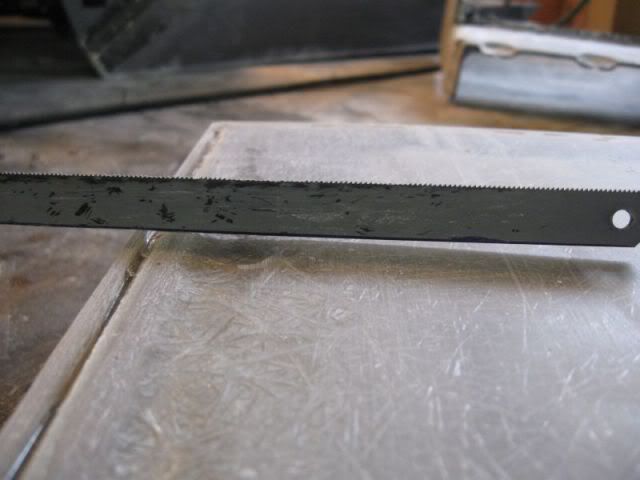
I guess that's where we get "Laser" straight from....lol Actually, I could not find my straight edge and the laser was laying right there so...... Now I found a new toy. It really shows where all my mistakes are.
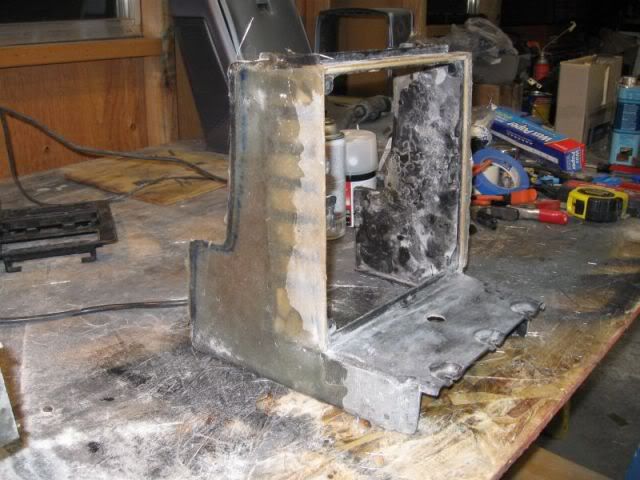
A little more progress this evening. Got the sides of the AC surround leveled out. Now I need to sand smooth and lay a couple more layers of glass to finish it. I also staterd working on the "lip" for the shifter surround. Not sure this is going to work. I may have to burn up the dremel to fix it? That's the swwet thing about glass work, you can always grind it back off!
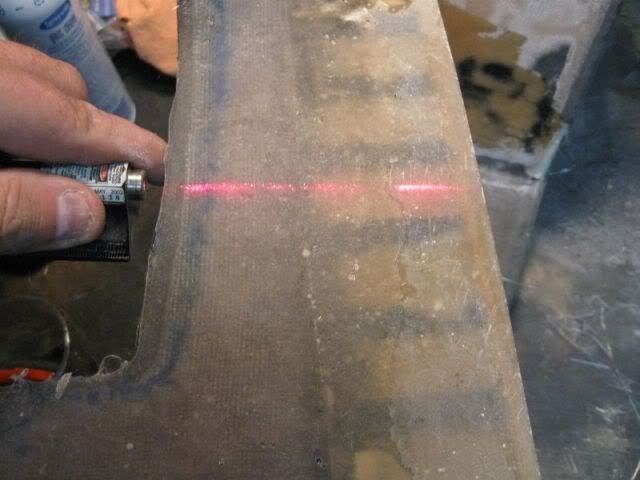
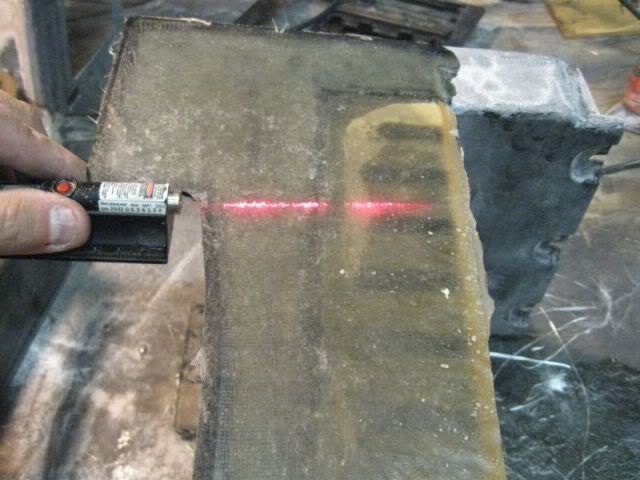
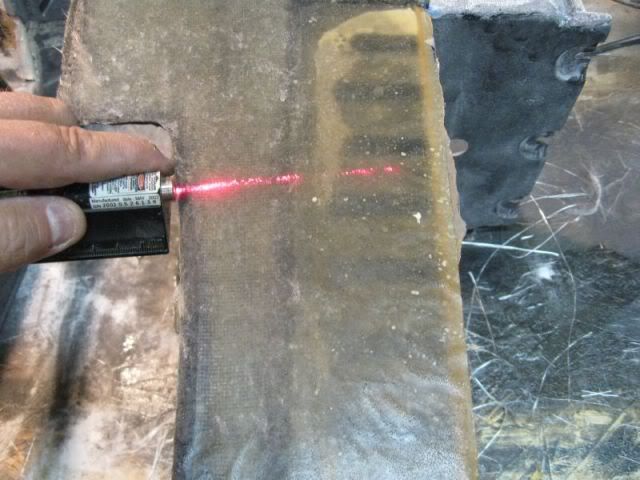
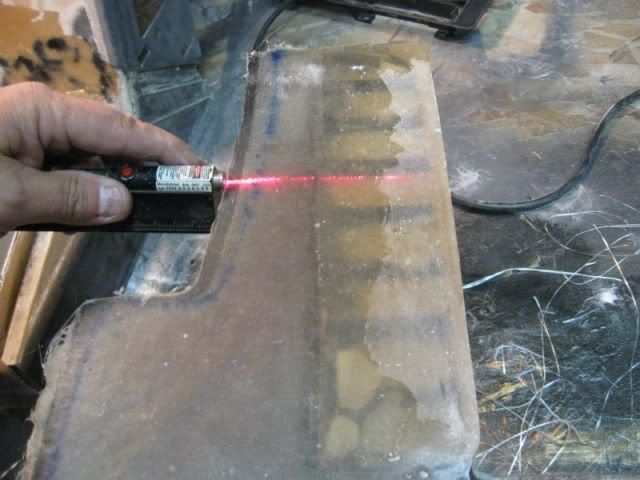
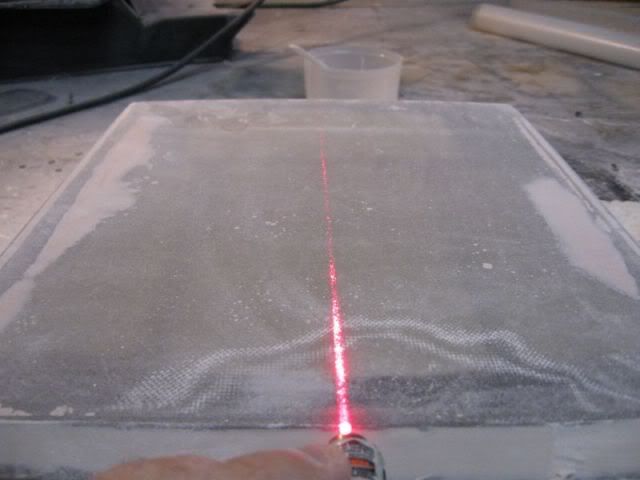
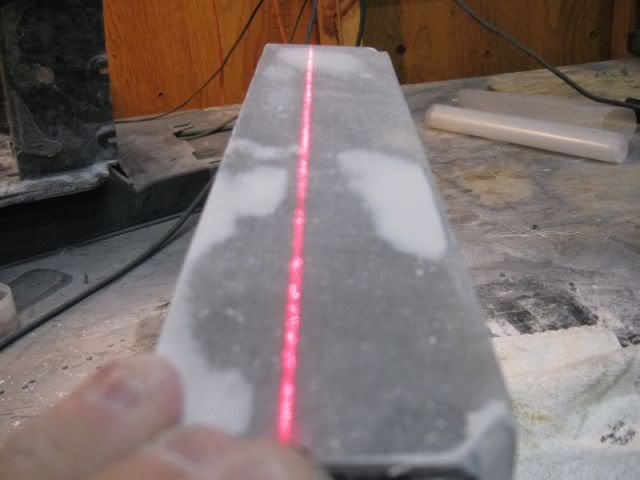
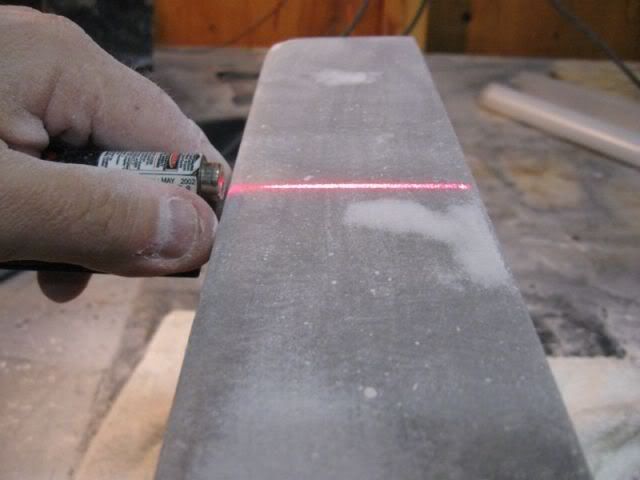
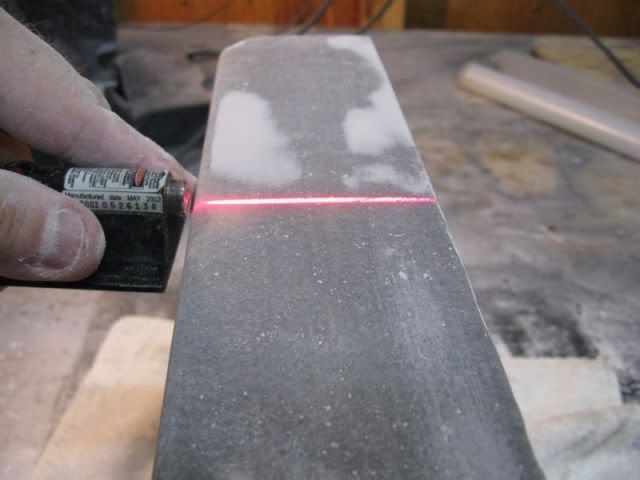
Some more "laser" level for you Greg........ The low spot is now the high spot Getting better This is more what I'm looking for Side to side view And some shots of the "lip" build up:
There will be no Fiero project work tomorrow - Eat a lot of Turkey tomorrow. Happy Thanksgiving!
Some more progress this morning before the honey do list kicked in. I am still trying to level out and even up the AC surround. It's tedious work but I can start to see the end product. After I leveled up the side panels, I had to sand till I choked to get it actually level and I still had some low spots. I also had to build up some areas so that I could round off corners and make it look symetricel. I layed 3 layers of mat and 1 layer of cloth on the bottom to smooth it out and then built up the edges of the lip area. It does not look like much yet but it's getting there. After looking at it for a few hours, I am sure there was an easier way to get to where I want it to go but I'm learning.
Sanding, sanding, snading: Taking shape: Adding some more for build up: Building up the lip area:
At this point, I had to make a run to the Machine Shop to pick up my block for my Monte project. Now my time will be split between the V8 Coupe interior and the Monte motor rebuild. Yippee...... More work.
Pat
[This message has been edited by katatak (edited 11-28-2009).]
After I got back from the machine shop, I decided to do some work on the shifter cover. Lots of sanding and trimming here but it's strating to look better. I have a ways to go on this part too. I will be making a shifter cover plate ou of glass once I get this part finished. There will be not ashtray's - just a smooth cover with a nice shifter boot attached. I still want this to be revovable so I can service the shifter. The more I look at it, I may end up making this all one piece. Just have to figure out a way to fasten it to the skeleton. It's a work in progress.
Forming the lip with lots of sanding: Getting there: More later!
Those edges look great! You're putting good work time into the project. If you haven't already figured it out... Sanding is a blast! And it only gets worse from here! Be sure to invest in a few dozen spray cans of primer / filler for the the little holes.
Again, looks great! I never would have tackled rounded edges my first time out of the gate. Kudos!
I was able to finish the honey do list so I got back on the glass work. Again I changed dierction. My plan on the shift console was to make the cover plate removeable just like the factory setup but after looking at my Formula, I realized that originally, the cover plate and the shifter console was one piece. The plate is glued to the console. So, I decided to make mine all one piece. So here we go.
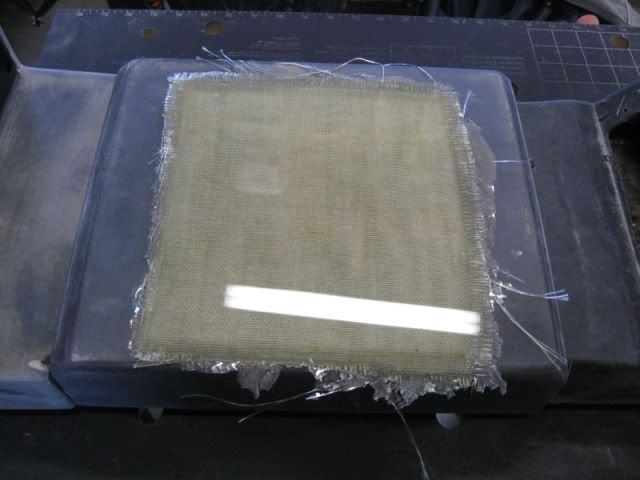
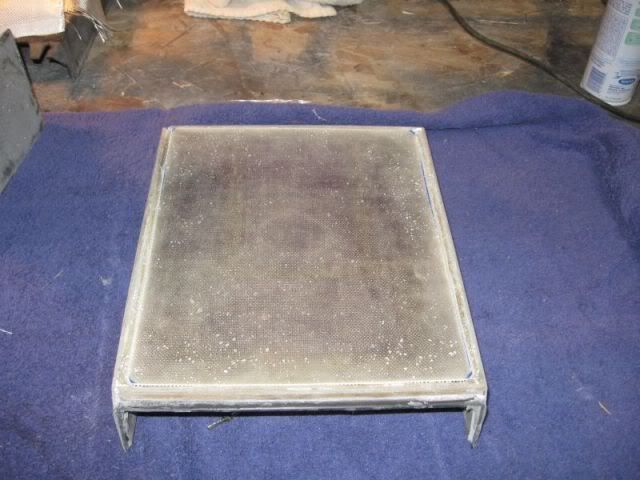
The first thing I did was cut the "auto" selector center out of the plate - Don't flame me - it is a broke up piece that I glued back together: Then I made a panel on my glass lay up table - 1 layer of mat on the glass then a layer of cloth for strength: Then some more trimming on the console: Once tha panel cured, I peeled it off the glass and cut a piece to fit the shifter plate: Sanded and fit to the console: Then Ilayed 3 layers - 1 cloth and 2 mat:
I had to spend a lot of time dabbing the brush in the corners to get it to lay in there nice. It was a time consumoing PITA. Once it is cured, I will file/sand/grind down the "lip" flush with the top. Then I will cut the shifter hole and find a nice low profile boot to fasten to the top of the cover. Sofa King has made a suggestion of fabricating a set of grab handles and I may - just for fun, mock some up to see what it looks like. When finished, there will be no ashtrays. Just a smooth top with a custom shifter boot. I have to design a way to fasten it to the skeleton or fab some brakets that attach to the metal tunnel. More to come!
Pat
[This message has been edited by katatak (edited 11-28-2009).]
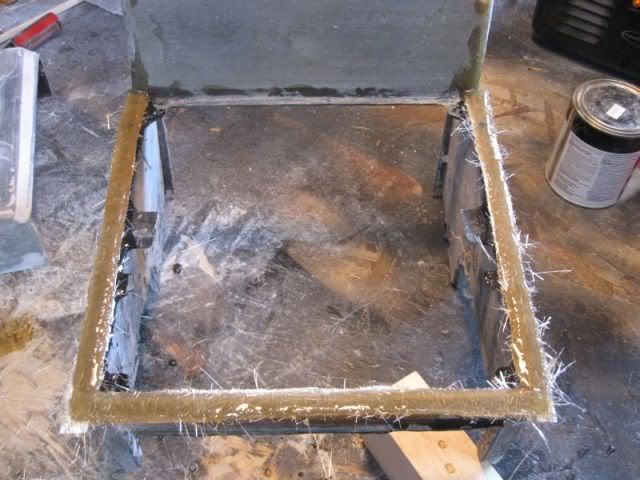
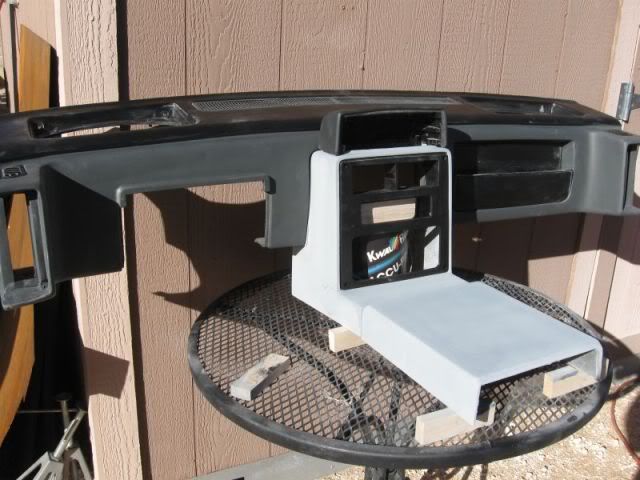
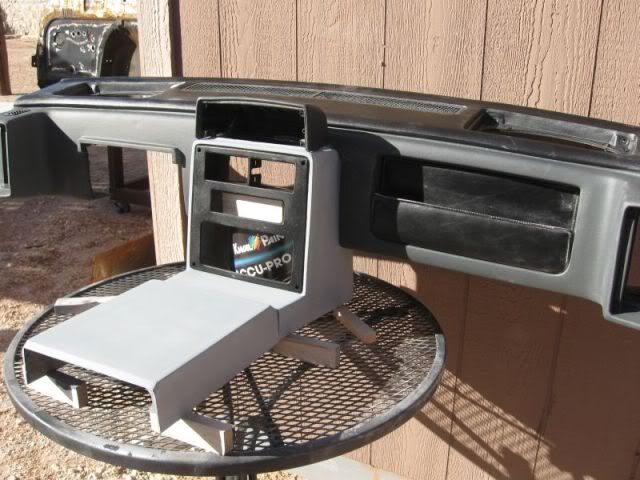
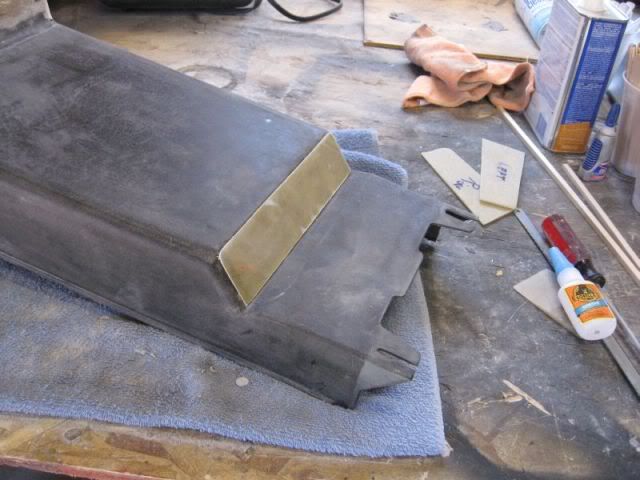
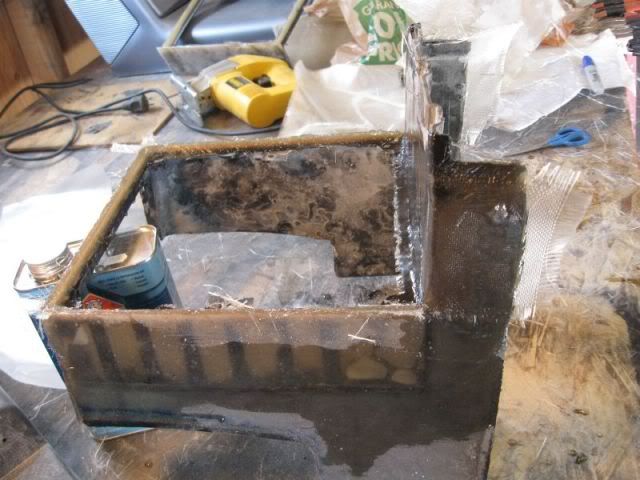
While I was waiting for he panel for the shifter console to cure, I worked on the AC surround some more. I fit it up to the dash and realied the the original has a "lip" around the back edge where it fits up to the dash. It fills the gap between the dash and the surround. When I placed my new one in there, the gap looked terrible. So, I fabbed up some "lip" pieces that I will glass in on the back edge of the surround to fill the gap. I also set the gauge pod on top to see what it looked like. I was thinking of building a pod out of glass and then mating it to the surround. I have yet to decide what to do here.
Sitting in the dash: Here's the "lip": And the Guage Pod:
Have you considered putting anything in its place? Grab handles?????
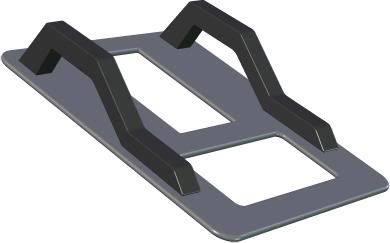
I forgot to post this VERY CRUDE 3D image of the grab handle idea I mentioned. The console looks really sharp! Can't wait to see it with a shot or primer. If I may, I would suggest sticking with your original plan to have a removable plate with chrome or silver hex bolts keeping them in place. And then replace / paint the rest of the bolts to match. You should be able to fabricate mounting holes in the glass. Just a thought. Pat, keep up the great work!
Grab Handle
[This message has been edited by Sofa King (edited 11-29-2009).]
It was raining and cold here all day. A perfect day to close myself up in the shop and work on the console. I spent the whole day out there and nobody bothered me all day. It was very nice! My focus today was to get the shifter console closer to the finished product. Between the glass curing and the filler curing, I even found time to do some work on my 47 Chevy Rat Truck project. Since I was working with filler, I needed to do some "smoothing" on the dash in the truck so it was mix a batch for the console, spread it on, mix a batch for the truck, spread it on, sand on the console, sand on the truck and that's pretty much how it went all day. I also squeezed in some work on the AC surround and cleaned up the shop some.
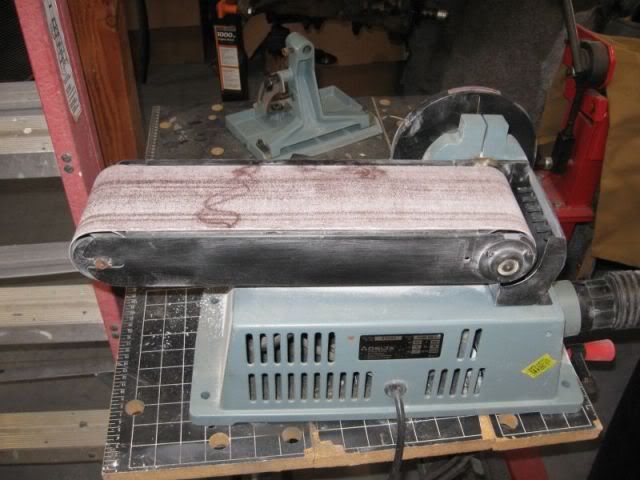
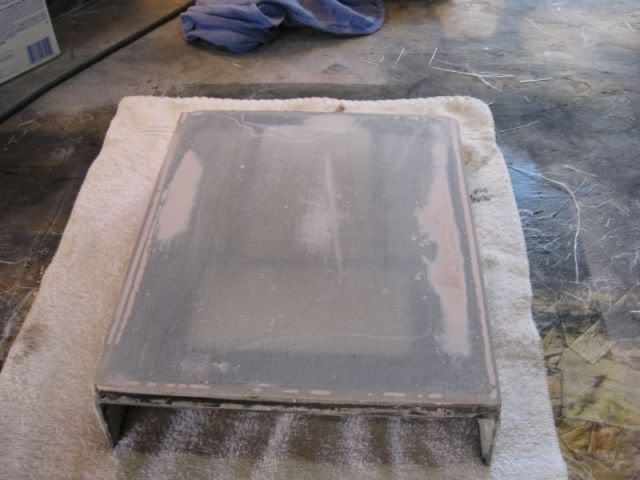
Last night, I layed in some cloth and mat on the shift console and this morning I took the sander to it. I had a little "hump" in the center so I used my bench belt sander to flatten it out. You can see that I had a few low spots. Time for filler! First skim coat of filler - along with the low spots, there were several air bubbles to fill. It was cold here today so I put the heat lamp on it to help it cure. After the filler cured, I gave it a rough sanding - a little more filler needed. Second fill coat. And lots of sanding. Getting fairly flat and square. Still have a little hump on one end. Also worked the sides After alot more sanding and smoothing.
I did some fit up of the AC surround/shft cover today and realized that I need to build up the lower front edge of the surround quite a bit. Even though the AC surround is tappered in from the dash to the shift console, the taper is very subtle. With the vinyl covering removed, it did not occur to me until I put the shift console on the old original AC surround. When I set the shift console on the AC surround that I am working on, there is a big gap. When the AC surround and the shift console fit together, I want the seam to be very tight. It will take a lot more glass work to get it right. And I thought I was getting close.........
I forgot to post this VERY CRUDE 3D image of the grab handle idea I mentioned. The console looks really sharp! Can't wait to see it with a shot or primer. If I may, I would suggest sticking with your original plan to have a removable plate with chrome or silver hex bolts keeping them in place. And then replace / paint the rest of the bolts to match. You should be able to fabricate mounting holes in the glass. Just a thought. Pat, keep up the great work!
Grab Handle
Thanks for the idea Greg. I started mocking up some grab handles this afternoon but did not get anywhere close to having a handle to set on the console for a visual. I really like this idea and will most likely incorporate it into the shift console. I was looking at your thread this evening and think that your arm rest concept is the way to go. I really like the idea of a retractable cup holder. I posted a couple ideas for you in your thread for the hinge and the mounting of the cup holder. I want to incorporate some cup holders in the V8 Coupe. Just not sure where to put them. I am thinking of 2 different ways. First is to follow your lead and build an arm rest with the retractable cup holder or, because the V8 Coupe will not have AC/heat/defrost, I was thinking of putting a similar retractable cup holder in the spot where the AC control is in the AC surround.
Now this has it's draw backs as sometime in the future, I will put an AC/Heat/ Defrost unit in. Right now it has an aftermarket unit in place that is kind of funky and the wiring is sketchy at best. The V8 has the compressor mounted and the belt installed. There are no lines run. So for now, the aftermarket unit is coming out. I will be getting the AC/heater box unit out of another Fiero at the junk yard later on. For now, it is just a hot rod that will spend more time at the Friday night drags than cruising down the Interstate. Maybe later if I get around to a 6 spd swap, I may set up the AC so I can take it on some runs but that's a ways off.
After a lot of thought, I went forward with making the shift console one piece. Mainly because it was easier but it also made it stronger and it will have that smooth - seamless look I am after. Once it is all done, if I dont like the look, I can take my router and put a shallow groove around the top, add some "faux" stainless screws and paint the center panel silver to give it the appearance of a removeable cover. There are just too many different ways to go. I have decided to go with the simple plain direction and if it does not look right installed, I can adjust for it.
Thanks for the idea Greg. I started mocking up some grab handles this afternoon but did not get anywhere close to having a handle to set on the console for a visual. I really like this idea and will most likely incorporate it into the shift console.
You're very welcome. I'm looking forward to seeing the mocked up version. More so once you splash some primer - hint hint
quote
Originally posted by katatak:
I really like the idea of a retractable cup holder... First is to follow your lead and build an arm rest with the retractable cup holder or, because the V8 Coupe will not have AC/heat/defrost, I was thinking of putting a similar retractable cup holder in the spot where the AC control is in the AC surround.
Remember, the 91 Firebird has the door mounted cup holders with integrated map pockets. I found those on EBay last week and they stay true to original design of the car. I lost out on a bid for 25 bucks for the pair. This might be an easier solution if you choose not to build the integrated cup holder. However, putting the cup holder into the dash console might be the best option. If this was a short term plan I would say go with the door mounted cup holder / map pockets. But it sounds like this is more of a long term plan. I can give you all the dimensions for the Toyota 4Runner cup holder if you like that particular unit. It was perfect for what I wanted. There are others on EBay.
quote
Originally posted by katatak:
There are just too many different ways to go. I have decided to go with the simple plain direction and if it does not look right installed, I can adjust for it.
UGH... Tell me about it. The lid hinge has been driving me crazy and I have tons of ideas for the glovebox. There are too many directions... We just gotta nail down a design and move forward... or sideways...
As always, the console is looking really nice. Your attention to detail - especially the flat panels - is driving me crazy! LOL Your use of the laser has made me look at my console and go "...hmmmmmm..." THANKS! LOL
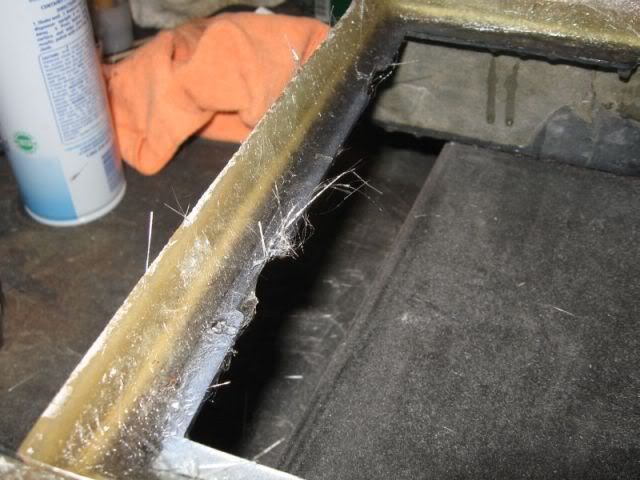
OH! I did run into another problem. When I cut the lid from the console, the console itself lost a lot of structural integrity. When the bottom of the lid meets up the console when in the closed position, the console is beginning to bow inward. There is a gap forming and I'm not sure how to fix it at this point.
[This message has been edited by Sofa King (edited 11-30-2009).]
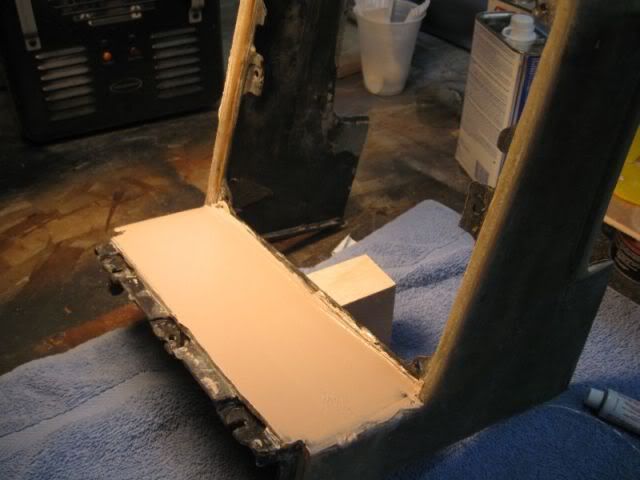
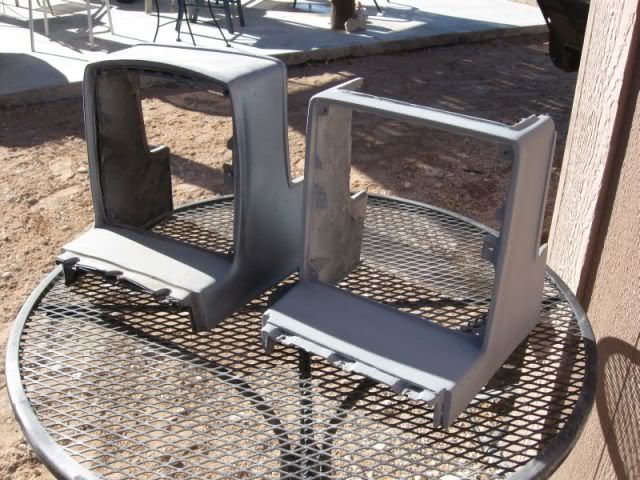
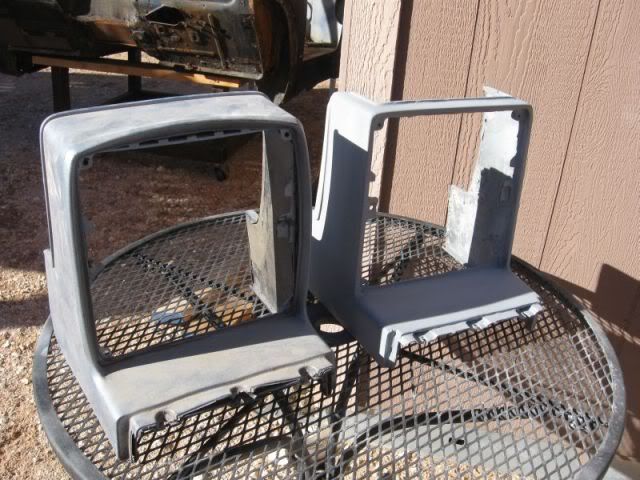
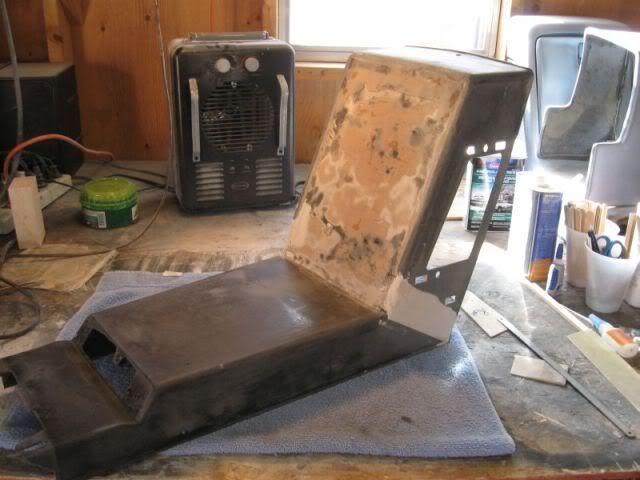
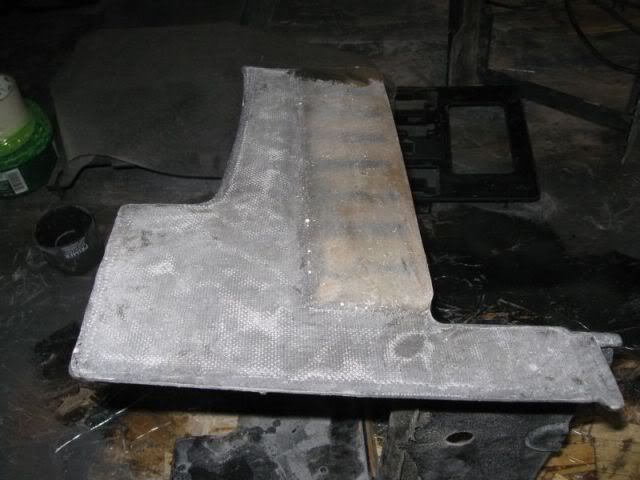
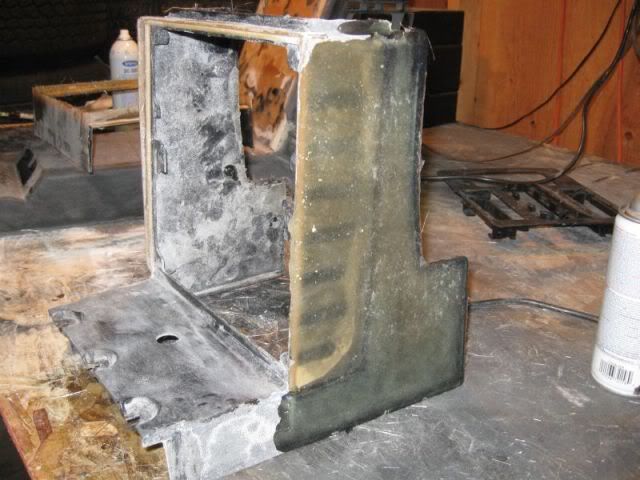
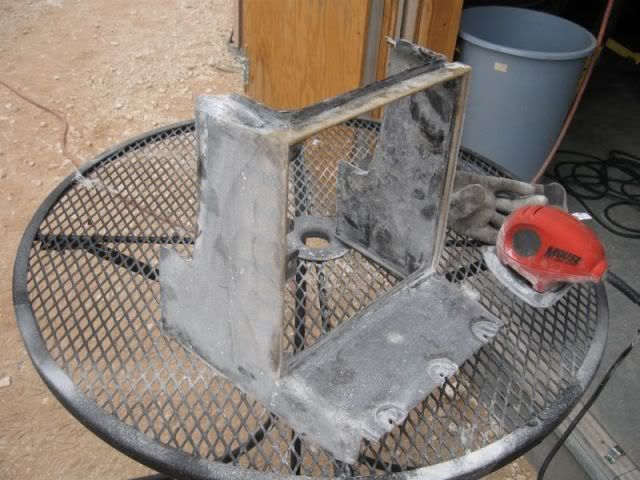
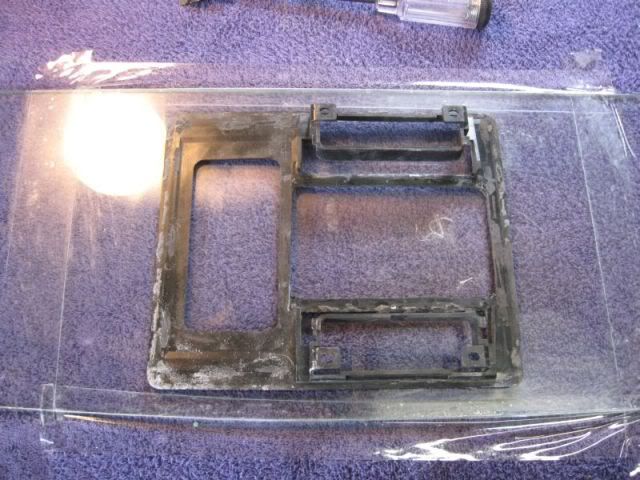
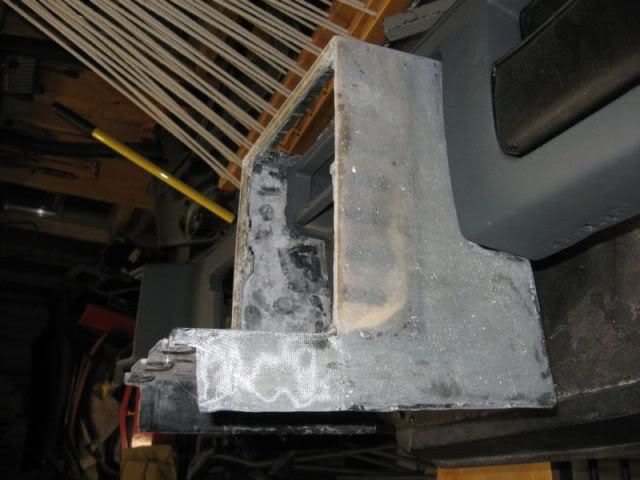
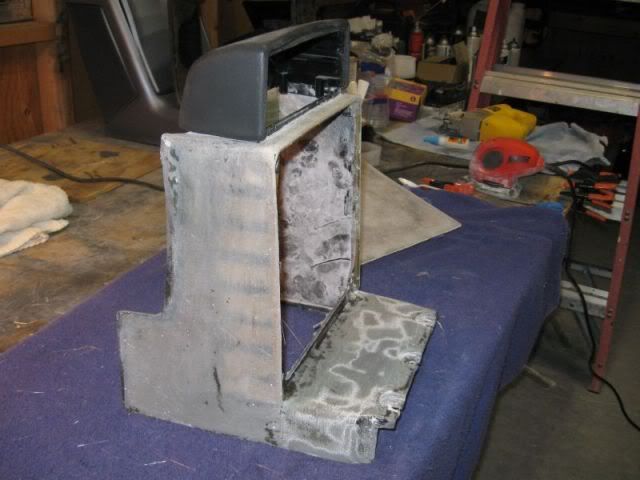
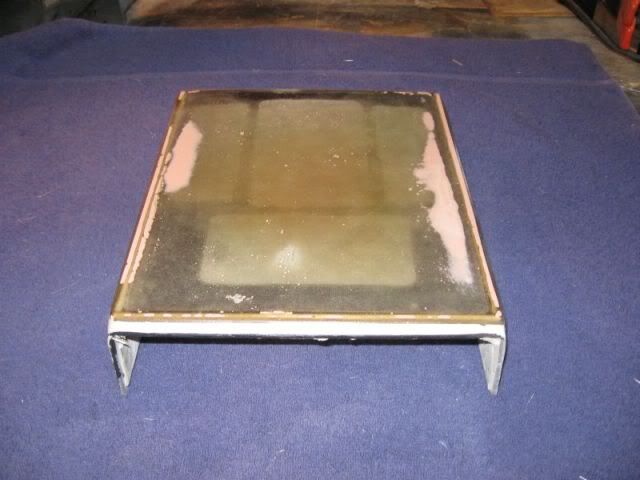
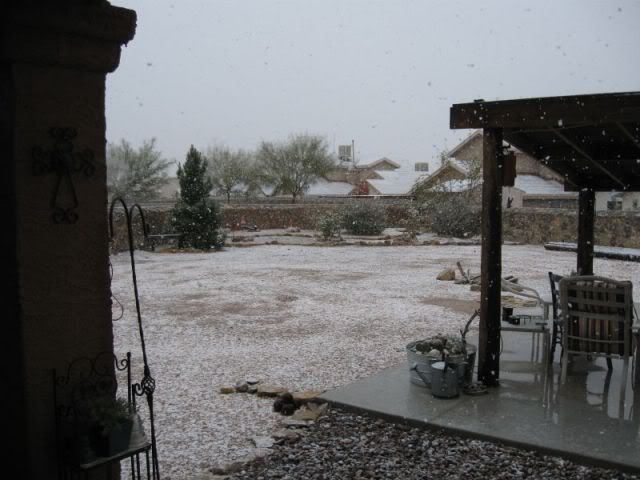
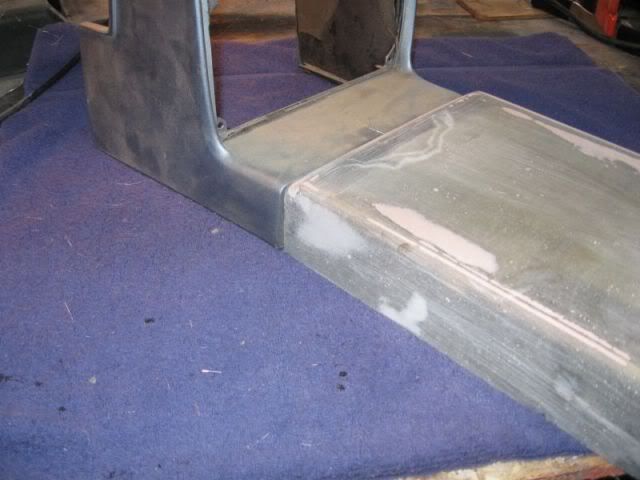
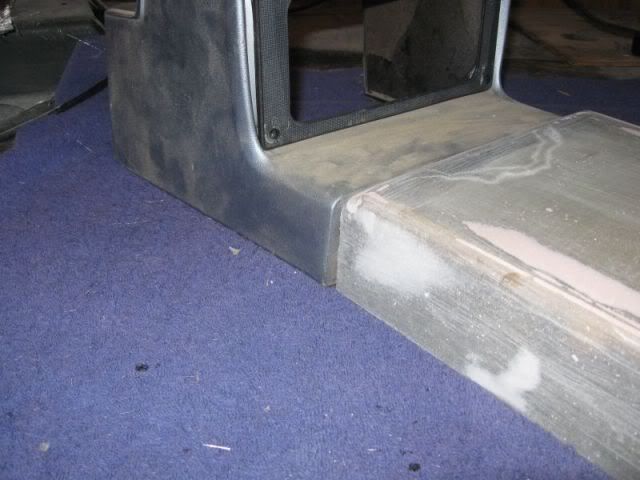
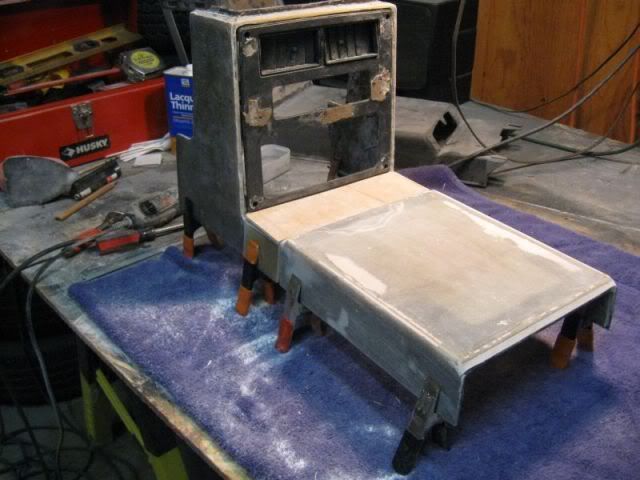
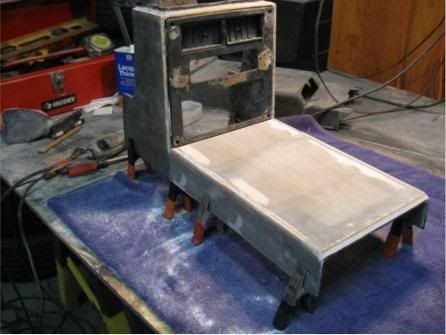
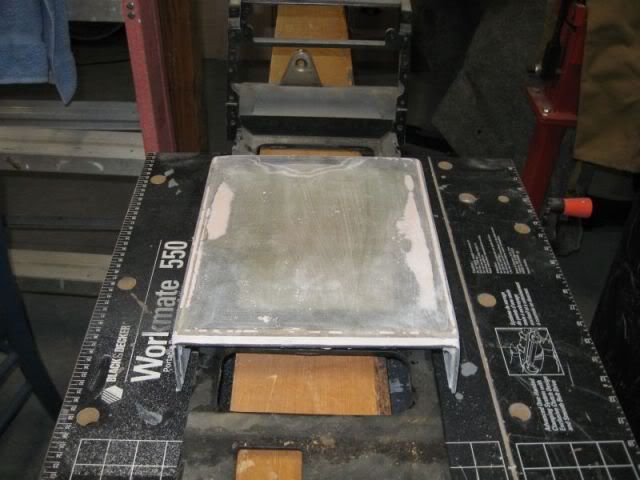
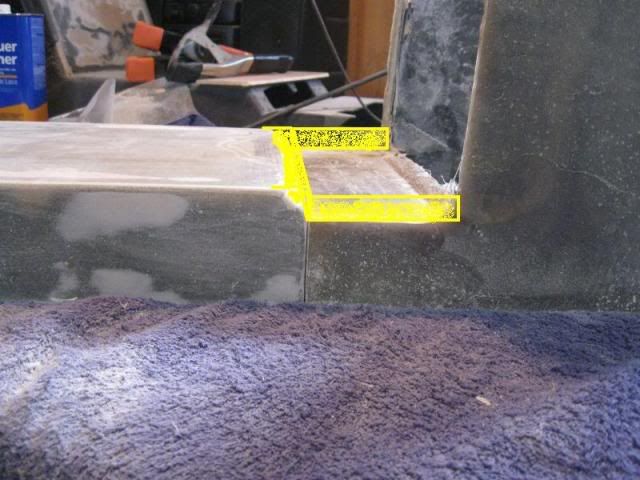
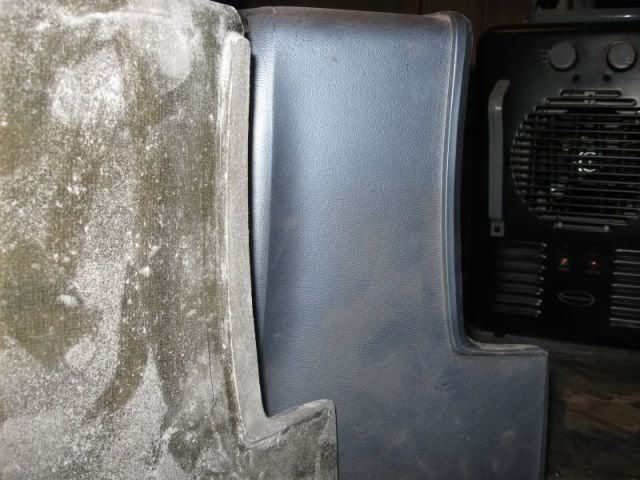
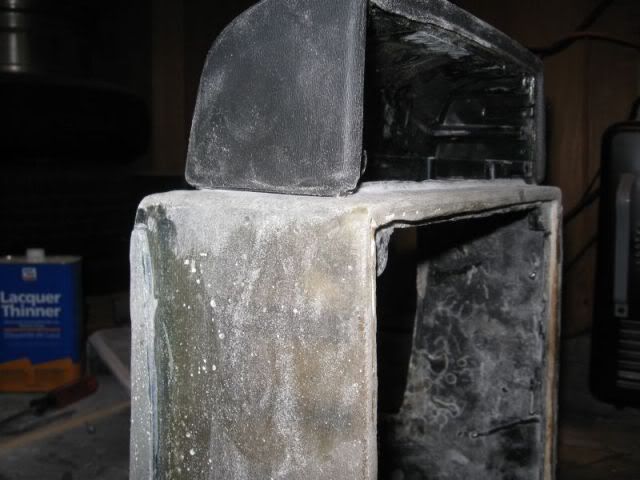
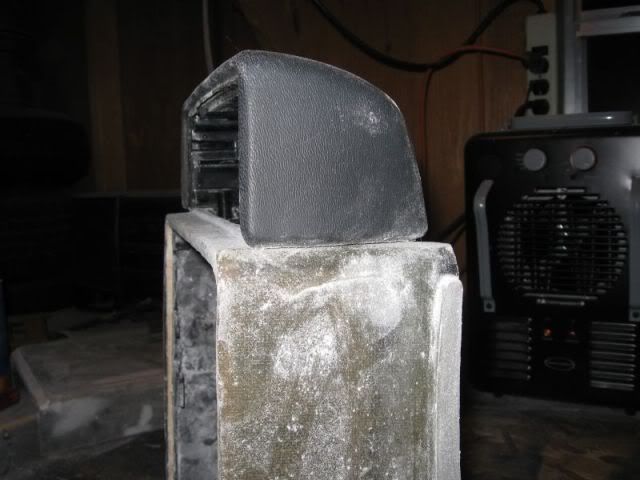
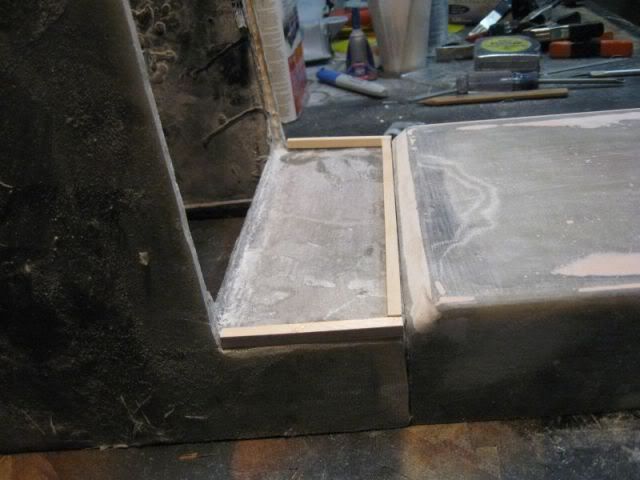
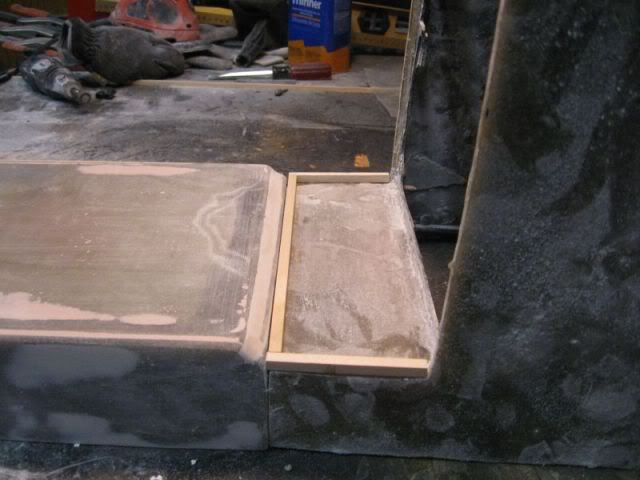
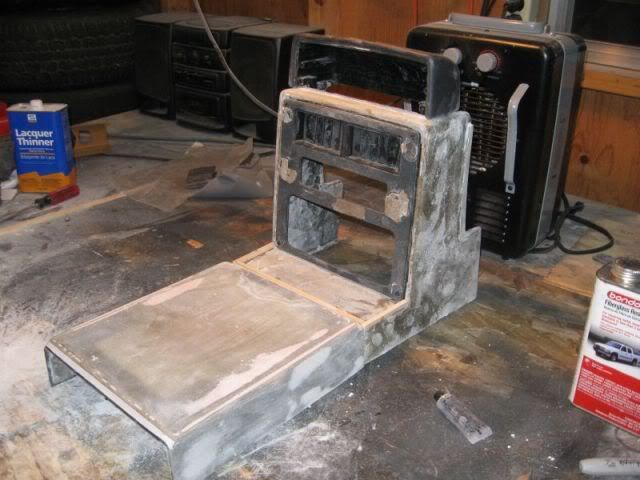
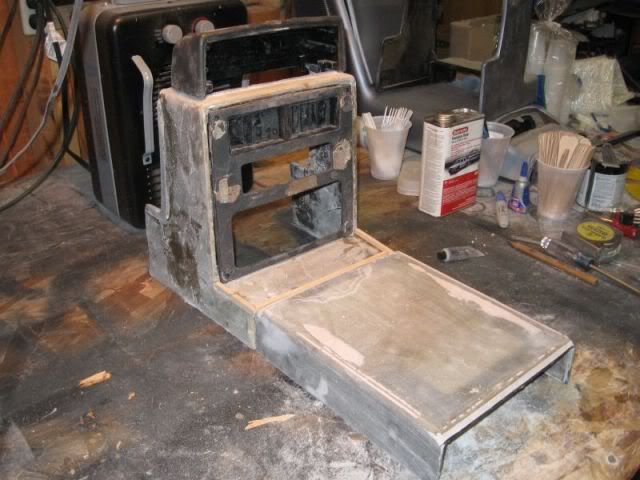
Not much to report today. I had a ton of work and when I thought I was done for the day, the boss called and piled more on. I went out to the shop around 4pm but we are having some unusual weather here in El Paso. Yes folks, that is snow sticking on the ground! Needless to say, it was too cold for any glass work. So I decided to do some trimming on the AC surround and see if I could figure out how to get the shift console and the AC surround to match up.
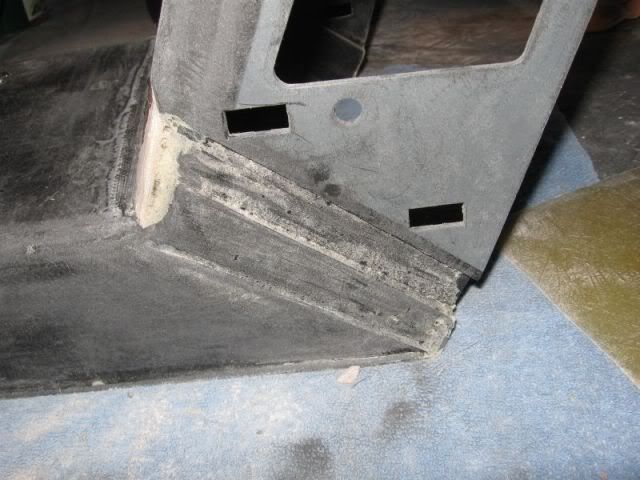
Here is the new shift console mated to the origianl AC surround. Note how they meet. I want to get the same kind of match up but a lot tighter and evenly matched.
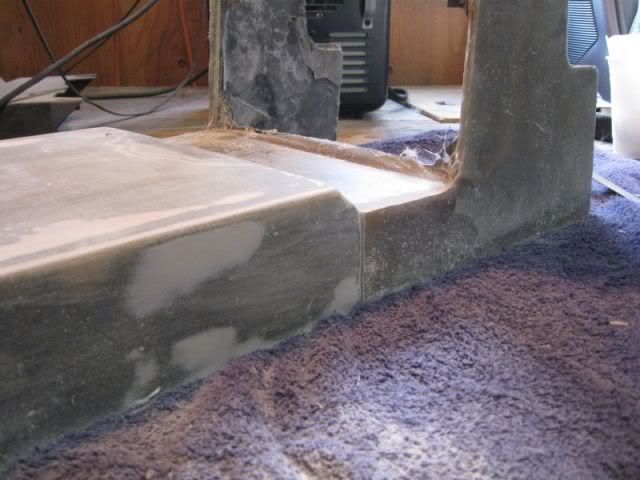
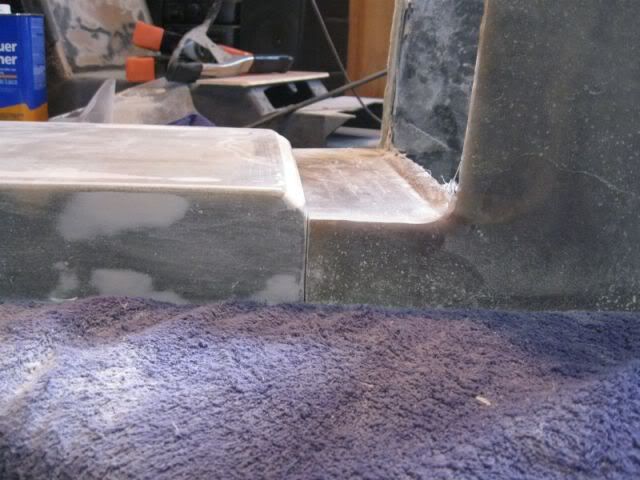
So I did a bunch of trimming - this is the part about glass work that I hate - there is no clean way of doing it!
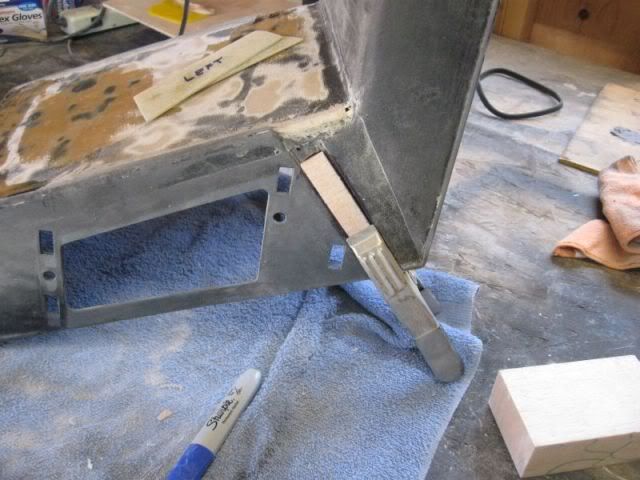
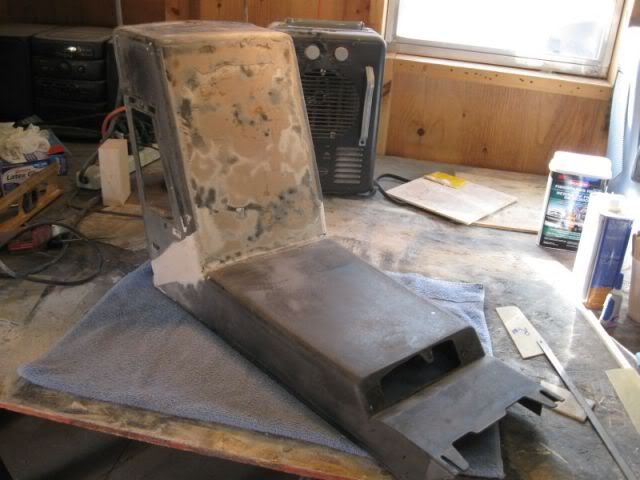
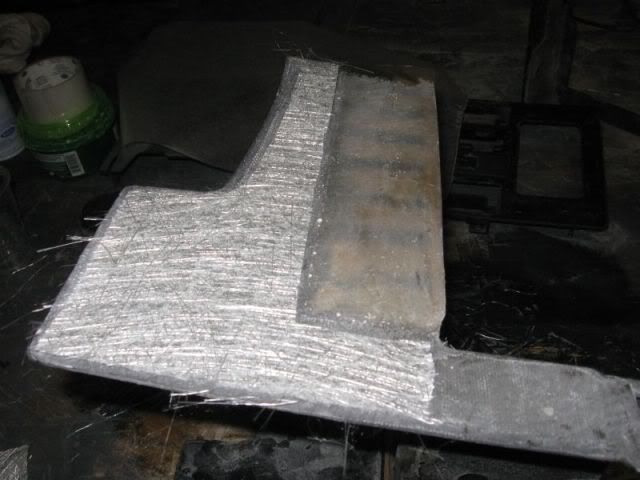
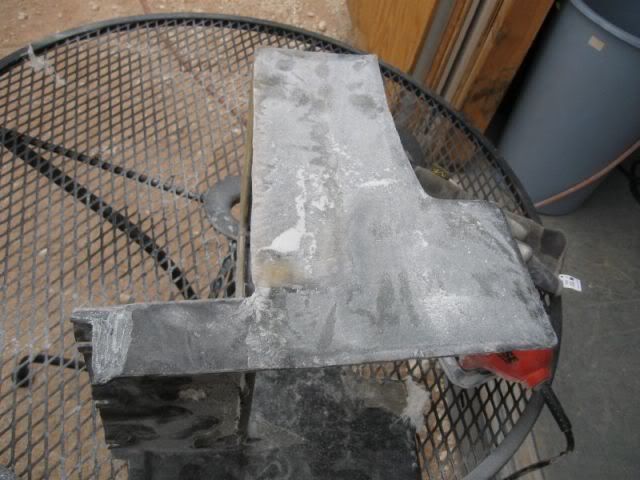
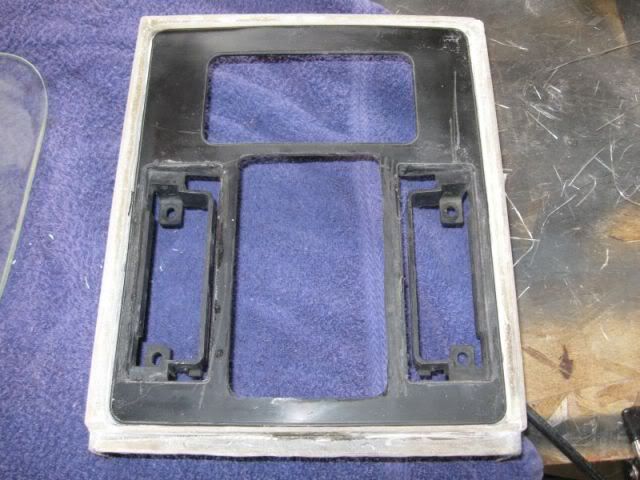
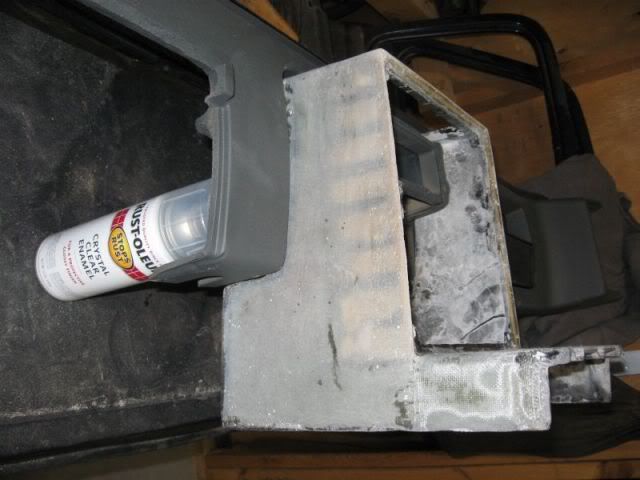
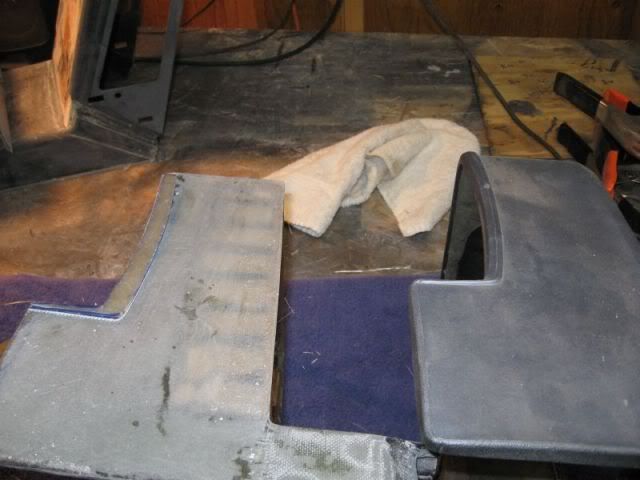
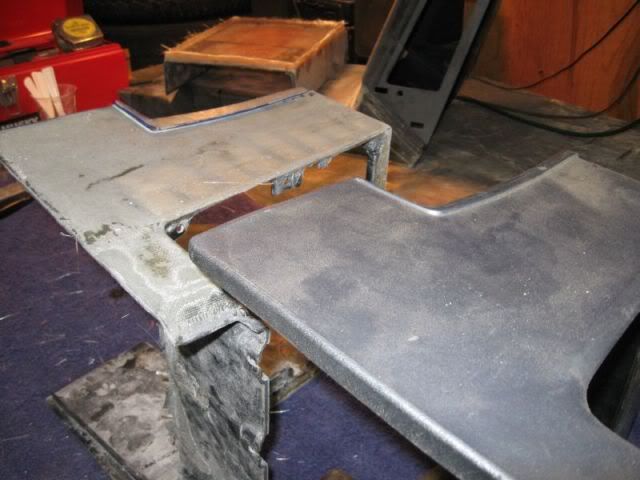
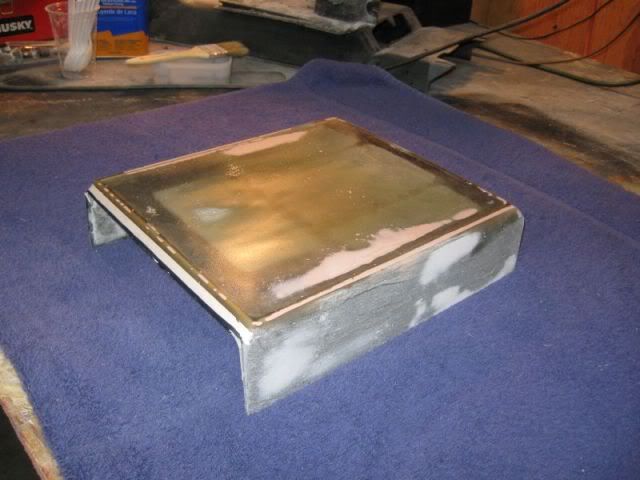
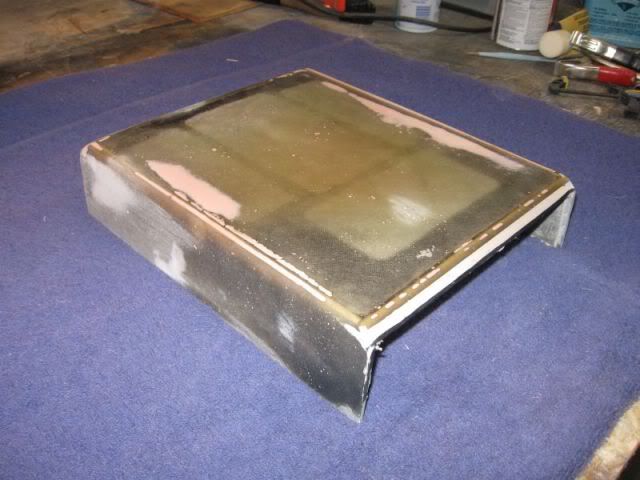
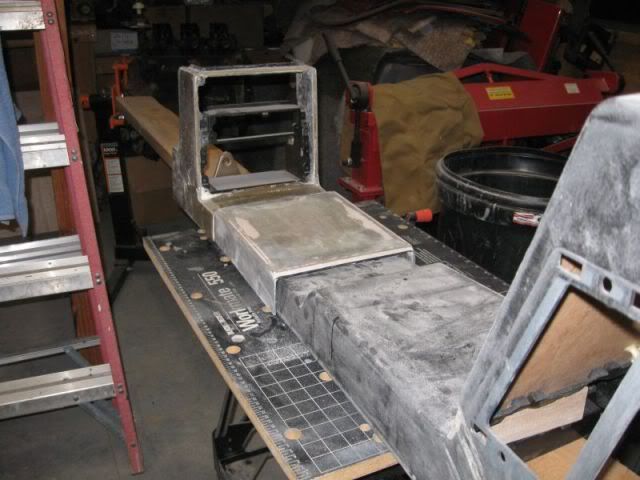
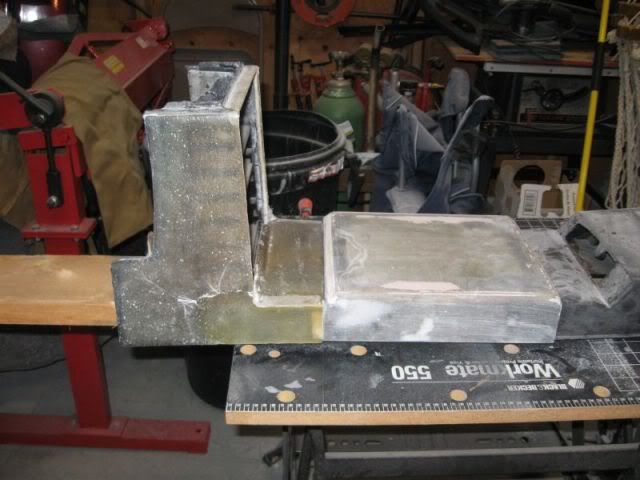
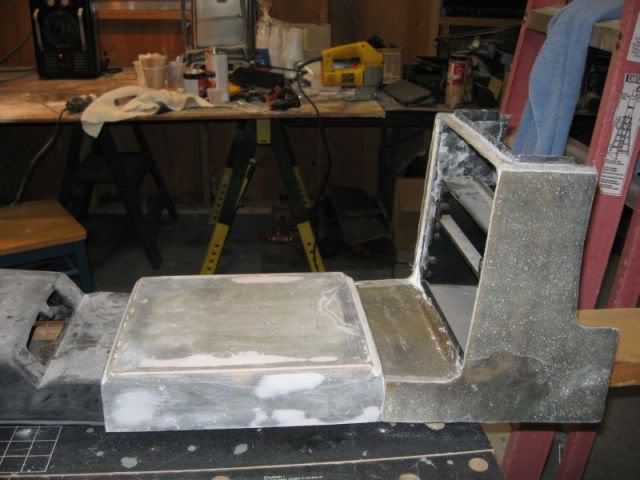
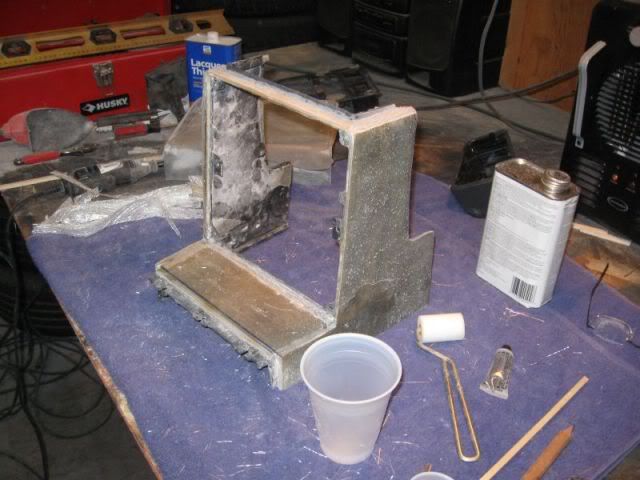
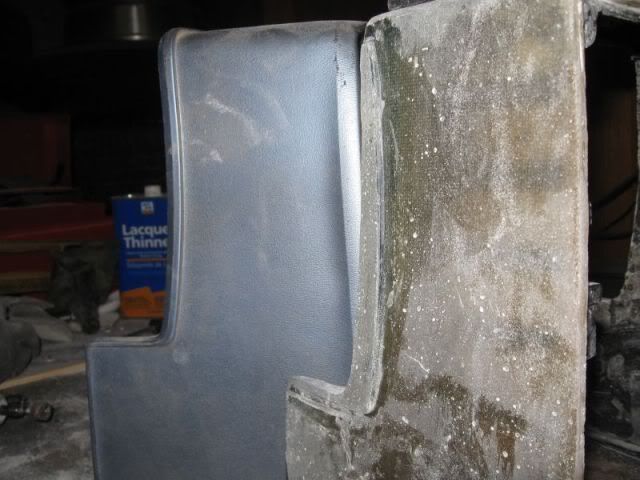
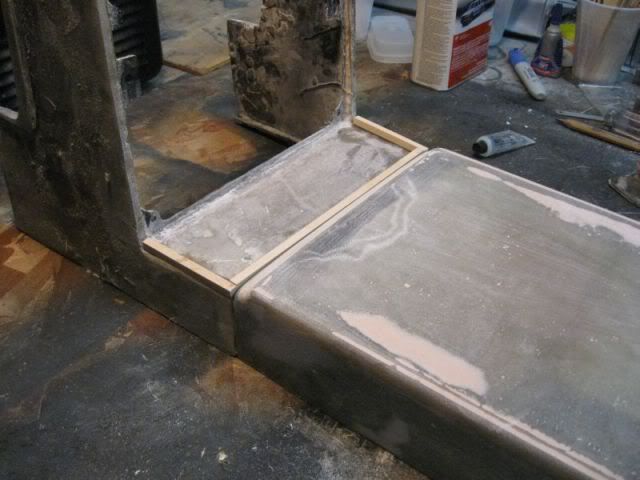
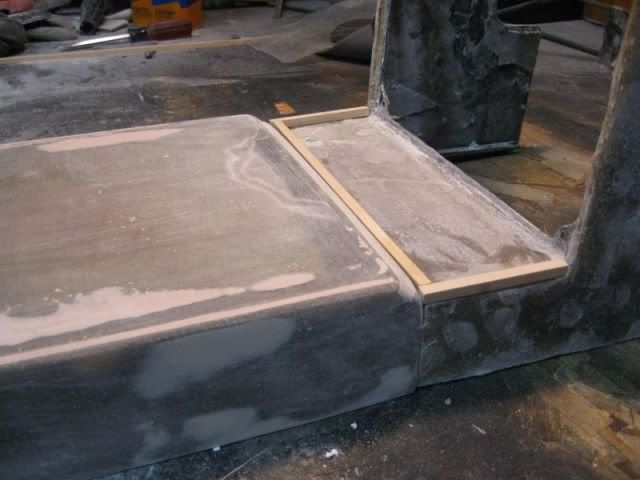
The bottom forward part of the AC surround is tappered. With the vinyl cover, it is nearly square - it has a slight taper to meet the shift surround. To get the fit I want, I need to build up this lower part of the AC surround. So I took a couple pieces of the fiberglass panel I made earlier and sanded them into a "wedge" shape to fit the taper and tried to square up the side a little. I had no more fiberglass panel left so for mock up I cut a piece of 1/8" ply.
When the weather warms up a bit, I will make a form out of wood and lay a couple layers of glass over the form. When it's cured, I will remove it from the form and glass it to the AC surround. Then I will lay up a few more layers of mat and sand an file and fill till I get the fit I am looking for. Here's a "rough" look:
If anyone has a better idea, I'd sure like to hear it. More later!
Pat
[This message has been edited by katatak (edited 11-30-2009).]
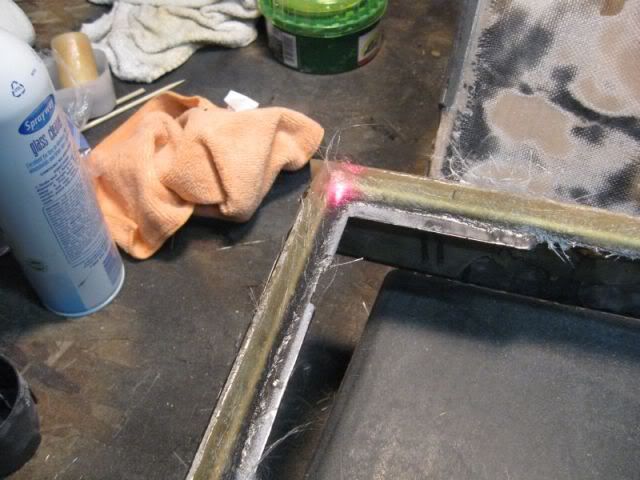
There are 2 possible solutions... The idea is to extend the shifter plate level all the way to the radio "plate". What do you think of these ideas:
1) Tightly wrap the shifter console in waxpaper / packing tape (whatever you think is best) and then lay glass over the center of the shifter console going side to side. You'll want to lay several layers of glass to build up the structural integrity. Once the resin cures pop this mold off and then wrap the inside of the mold you just took with either waxpaper or a mold release in prep to accept the fiberglass. The idea is to get an exact "plug" of the shifter plate. Again, when the resin cures, you pop out out the plug and then trim and sand to fit.
2) The other and more simple - take the appropriate measurements and create a top and 2 sides that will be glassed together and adhere to the shifter console. Then you'll have sand, sand, sand to ensure an even smooth fit and finish (but you probably already knew that).
I think this is what you're ultimately going for?
I'm working a few other ideas for the console plate
[This message has been edited by Sofa King (edited 12-01-2009).]
Greg, I hate you! I was not even thinking in that direction. Crap! Now I have to change directions again. Or, maybe, I could screw the shift console and the AC surround together, fill and smooth out all the gaps and holes then make a mold of the entire piece, then build a complete glass piece. This would take the console from 3 pieces to 2 with the seam being between the seats and less noticeable. If I were to go ths route, I would have to make the shifter cover plate removable again - it would not be too hard to do - the structure is still there. Just means more sanding and grinding. It's a good thing it's snowing today. Gives me some time to think about my next move............... I'll never get this done! Anyone got a decent stock grey console setup - front to back? J/K, I can't quit now.
First... LOL!!! Sorry to complicate things. I tend to do that. Look at my project
Second... no no no... just extend the shifter plate so it rests over top of the center stack console. That way you keep two pieces but a nice tight fit between the center console and the stack console. Make sense?
I follow you Greg. I like that idea too. I'll have to go out to the shop and do some visualization excercizes....... I was just outside and it's warming up - may get to do some more glass work this afternoon! Yipee.....
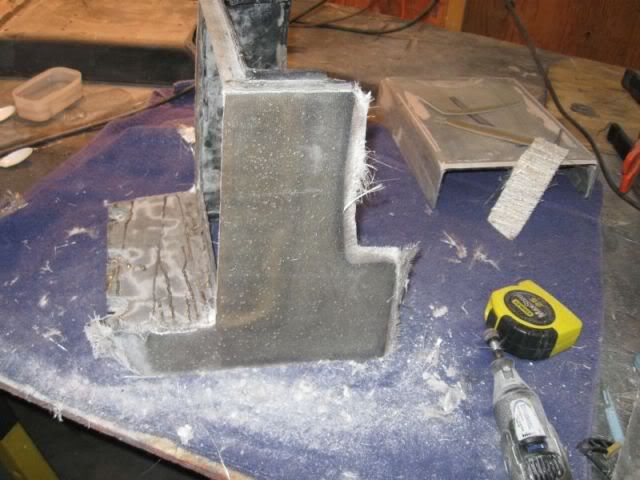
A little more progress this afternoon. I was really making progress till my oldest son called me to tell me there was "green stuff" running out of his Formula. I had to go check it out - water pump is gone. I know what I'll be doing this weekend. I just love putting a water pump on a Fiero! Great fun!
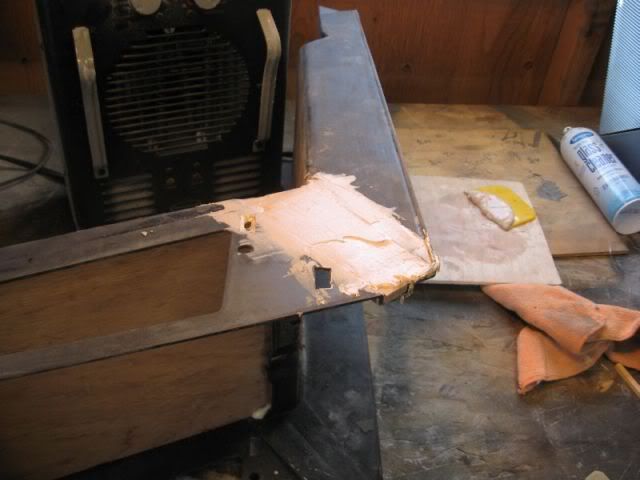
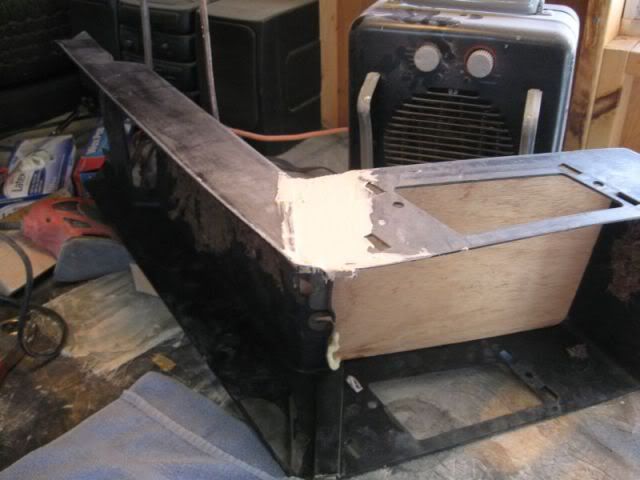
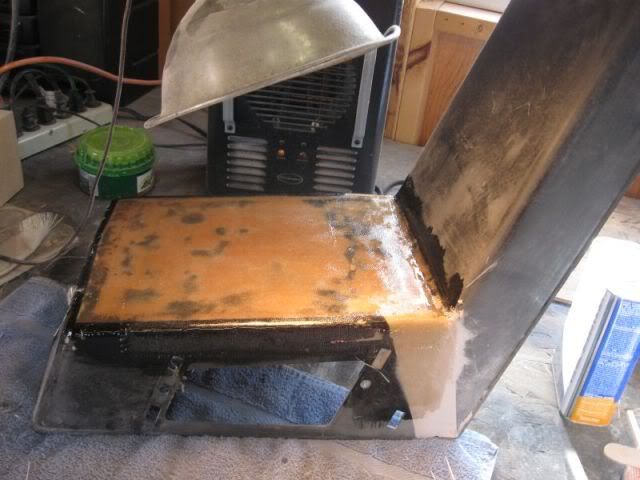
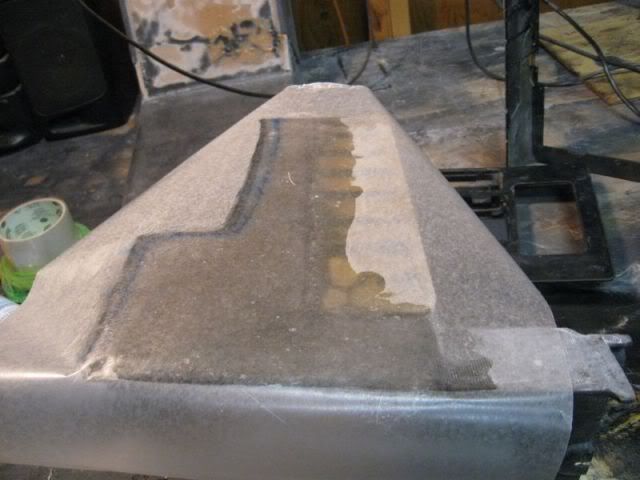
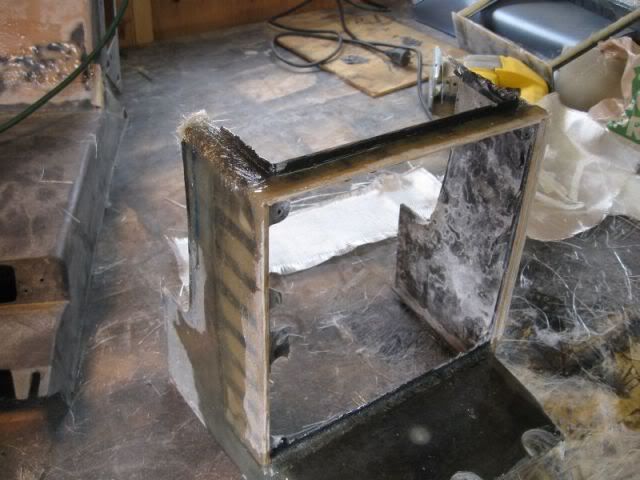
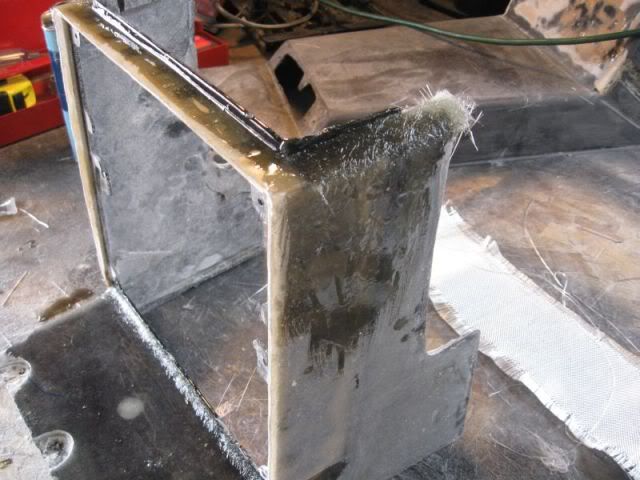
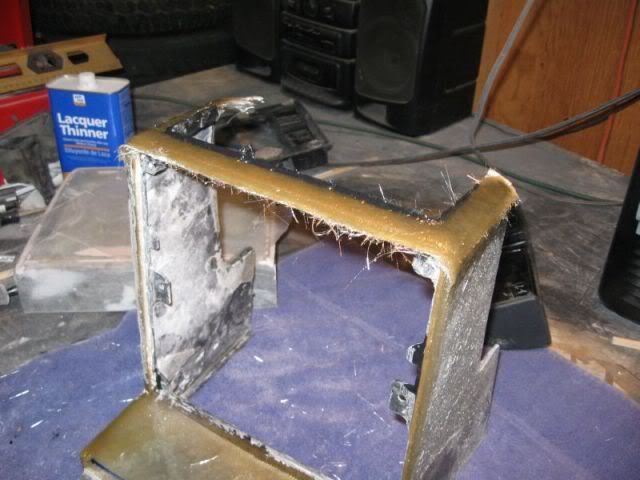
So anyway, last night and this afternoon, I did some more build up of the AC surround so I could get it to match up to the shift console. It was an experiment that turned out good. The bottom sides of the AC surround are tappered in and I needed to square it up to fit up to the shift console. So I went to the Hobby store and got some balsa wood and shaped up a couple of wedges to fill in the taper. I glued these to the surround and then layed several layers of "staggered" mat basically making a "wedged" shaped glass section on the lower part of the surround. I managed to get the top and one side layed last night and today I got the other side layed up. Once it was cured, I went after it with the Dremel and trimmed it up. I looked like a snow man when I was done - covered in fiberglass dust.
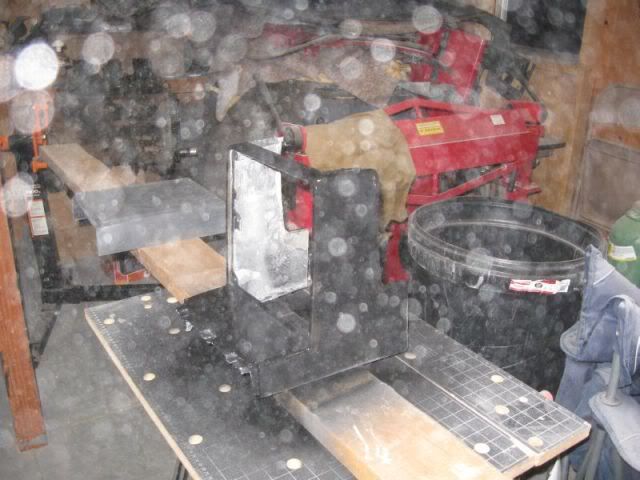
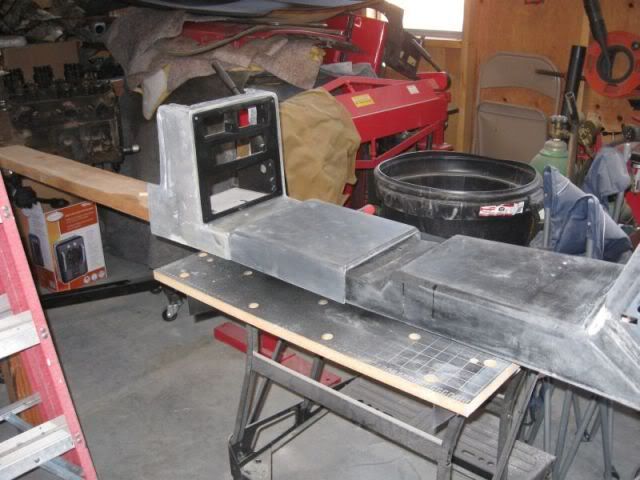
After I got the Surround trimmed up, I mounted the skeleton to a 2X6 so I could start mocking up the entire console. It's starting to come together but I still have a lot of work to do to the surround and the arm rest piece.
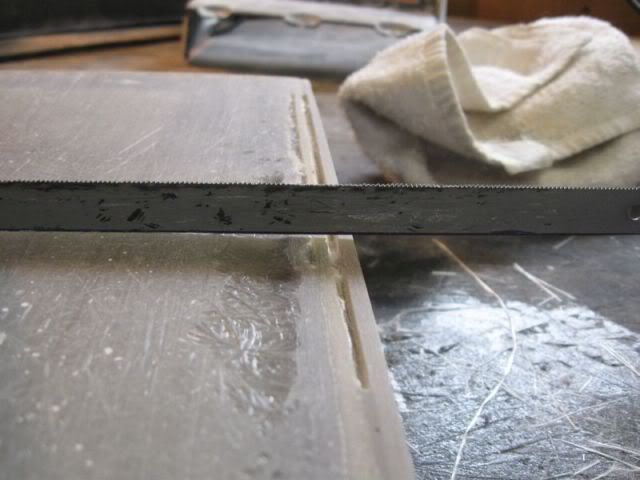
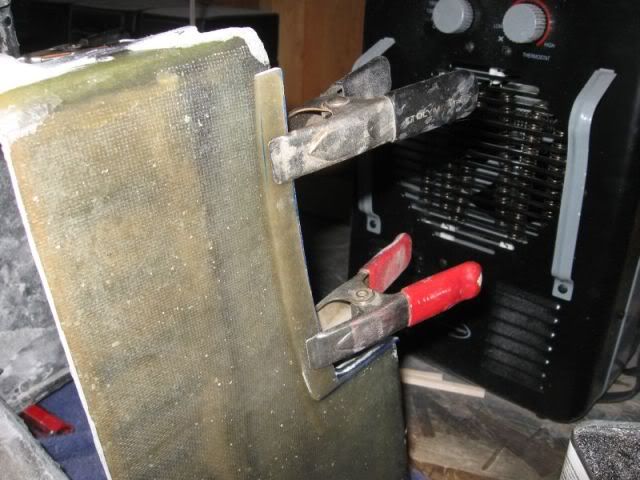
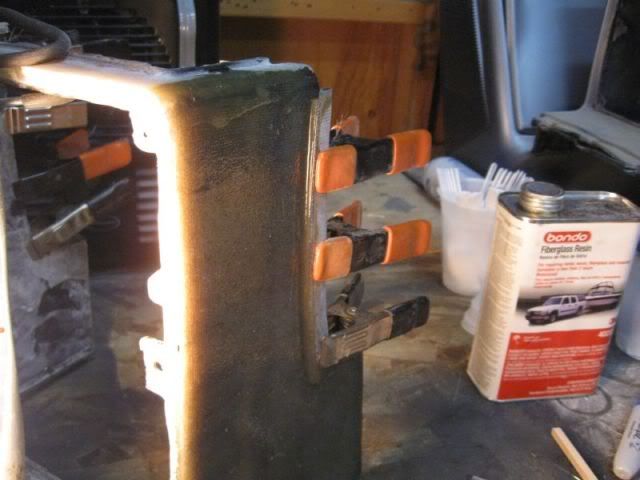
I did not get any pics from last night but here's one of the side I did today. Once I had the glass layed, I placed wax paper on top and rolled the air bubbles out. Then I put a piece of harwood veneered plywood on top of the wax paper and clamped it down with some spring clamps. After it sat for 15 minutes, I removed the clamps, wood and wax paper - the result is wonderful. Nice flat smooth with no air bubbes to fill.
Need an opinion. I am thinking of building a lip around the bottom of the AC surround to create a recessed area. Then I woud "square" off the shift console to match it. I think it would give it a better - finished look? What do you think?
I'm no phot shop guy and I can barley use Paint but this may give you an idea of what I am thinking of:
Need an opinion. I am thinking of building a lip around the bottom of the AC surround to create a recessed area. Then I woud "square" off the shift console to match it. I think it would give it a better - finished look? What do you think?
Yes. Do it. I bought the little "cubby" holder from the Fiero Store and its wonderful. You have a place to put your glasses, spare change, etc...
Pat, your glass work is getting better and better - you sicken me. The console is looking really good - very clean and very professional - you sicken me.
Yes. Do it. I bought the little "cubby" holder from the Fiero Store and its wonderful. You have a place to put your glasses, spare change, etc...
Pat, your glass work is getting better and better - you sicken me. The console is looking really good - very clean and very professional - you sicken me.
Heehee...Not bad for a tired old fat man huh?.....ROFLMAO.....Crap now I can't get up off the floor..... Thanks Greg for the positive comments. I put off messing with fiberglass because I was scared to screw something up. I really needed to get after it though so I could do the body work needed on the XTC project. I figured I could screw up this console as much as possible and it would all be a learning experience. If it turned out bad, I could always put a socker in and not worry about it. there is no way a stocker is going in that car now. I'll lay glass and sand til the dust is neck deep but it will get done. There is so much that can be done with this stuff and it is very easy to work with - messy but easy. I've finally got to the point where I mix just enough resin for the work I'm going to do instead of wasting 2 or 3 ounces each time. I agree, it takes too long - I am not very patient and thats when I run into trouble. Right now with the weather being cold, it is forcing me to "pace" things out and it makes a big difference in quality. I just have to keep telling myself to go slow. I am really looking forward to starting the body work on the XTC now.......But first, I have to finish this console and build and extractor hood scoop! Now back to work!
I know, I know.....More boring "look what I did" fiberglass pictures! I apologize but it's part of my Fiero therapy. I had big plans to get alot done to day. Took half the day off, had all my stuff laid out...etc, etc. I met the local Fiero guys for lunch and pretty much shot the afternoon. It was a great time though - lots of Fiero discussions took place and we got to see "pics" of "Rick 88's" new Mera. It's a beautiful car and it's all there and correct. Very nice car and now I want one too! But that's another thread.
Anyway, after the excursion for lunch, I came home and helped my son get the 88 Formula up on jacks so we can tackle a water pump in the morning. After that, I finally got to work on the console some. I did not get a lot done becasue it is so cold here. Fiberglass takes forever to cure when it's cold. I have a small space heater and a heat lamp so small areas work out OK.
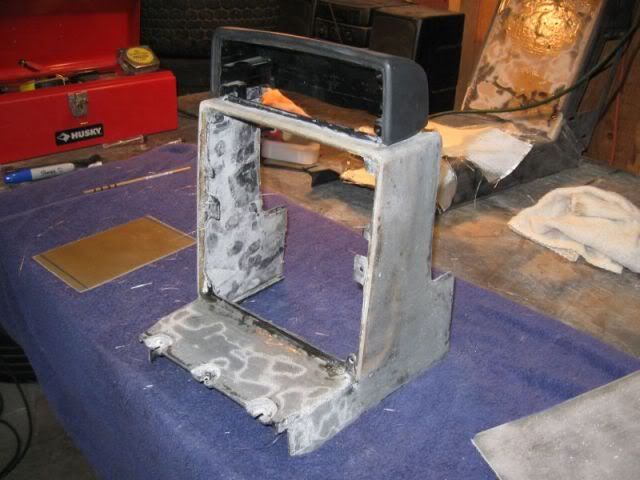
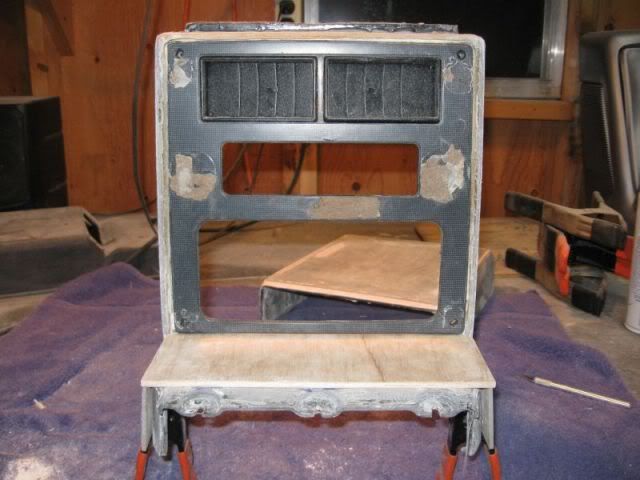
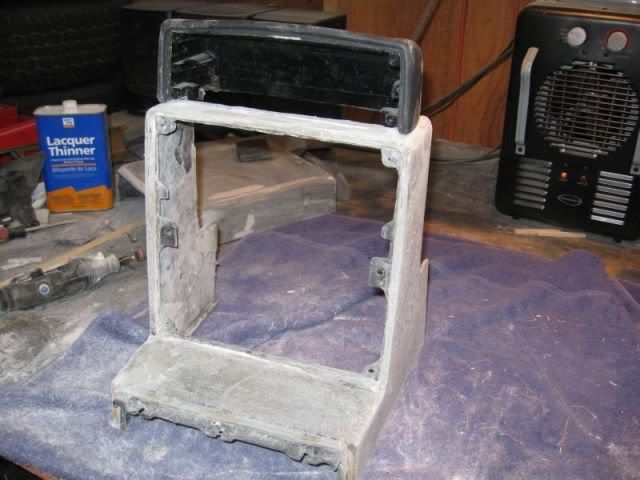
My goal is to get the AC surround finished before I start on the back piece. The shifter cover is nearly done but I need the front and rear piece finished before I can finish it. I needed to build up the top of the AC surround to get the gauge pod to fit right. I do not want any gap between the pod and the top of the surround. After I layed about 6 layers of mat and let it cure under the heat lamp, I filled the shop with dust again and roughed it out. The pod fits close to how I want it now. I am still trying to decide if I want to just mount the original pod on top or if I am going to fab a new one and glass it all into one piece. I will add my own aftermarket gauges in the pod - H20 temp, oil pressure and Voltage - and I want to fab up a guage face / mount that slightly angles each guage towards the driver. I have a few ideas how to accomplish this but I'll have to do some experiments first.
Rough sanded and ready to start work:
Several layers for the build up on top:
Pod on top before the build up:
And after:
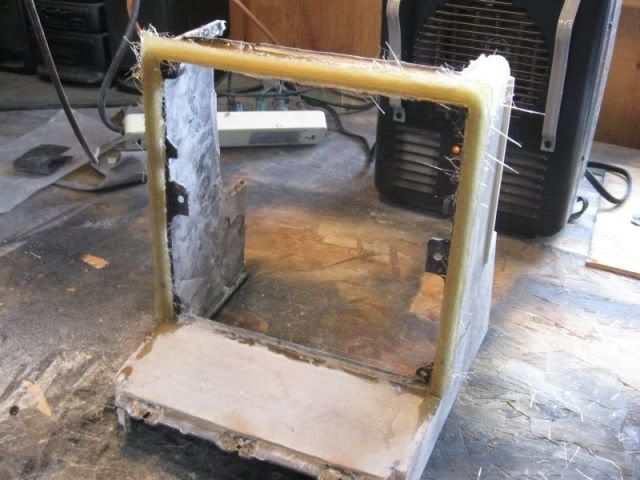
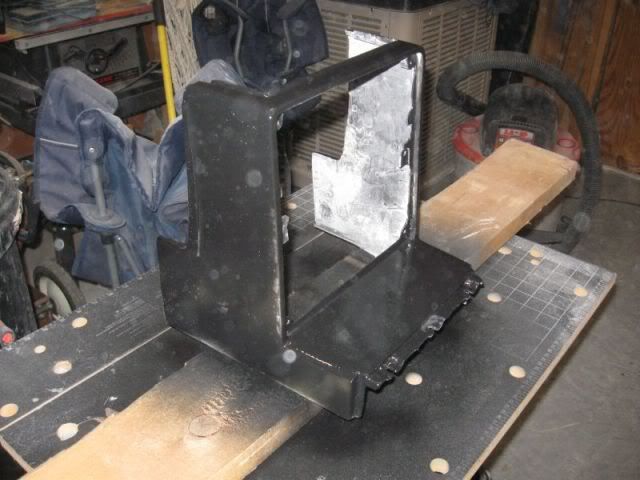
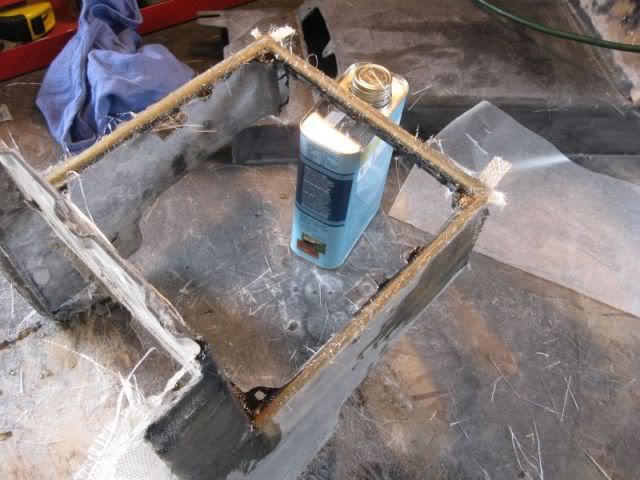
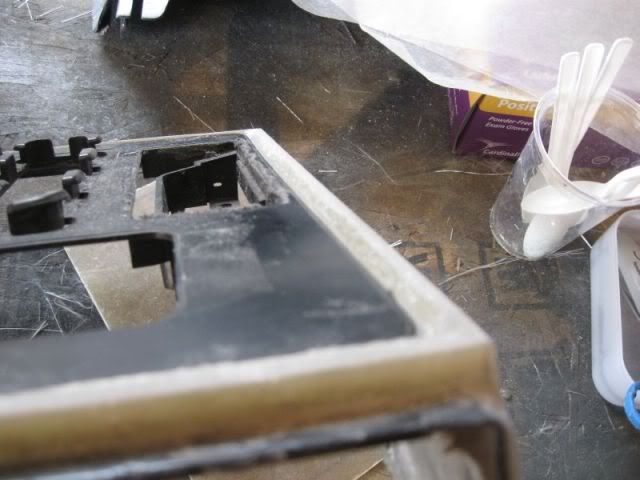
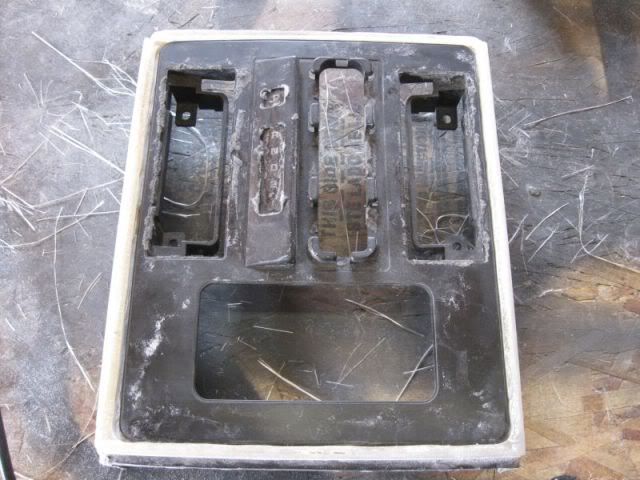
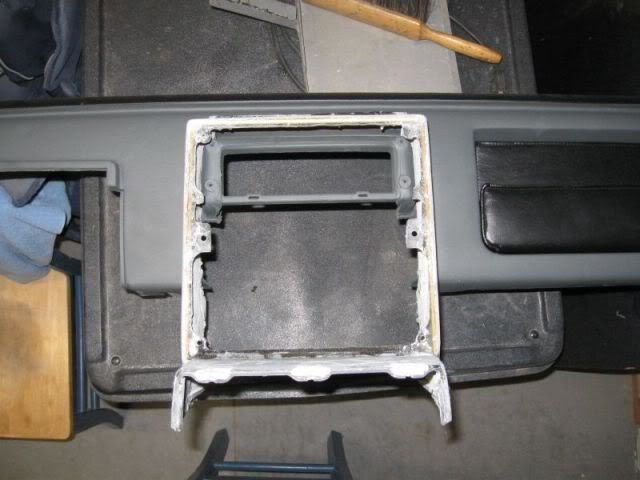
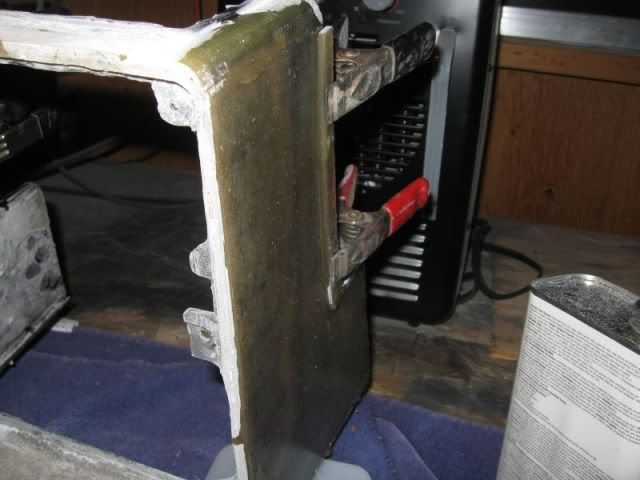
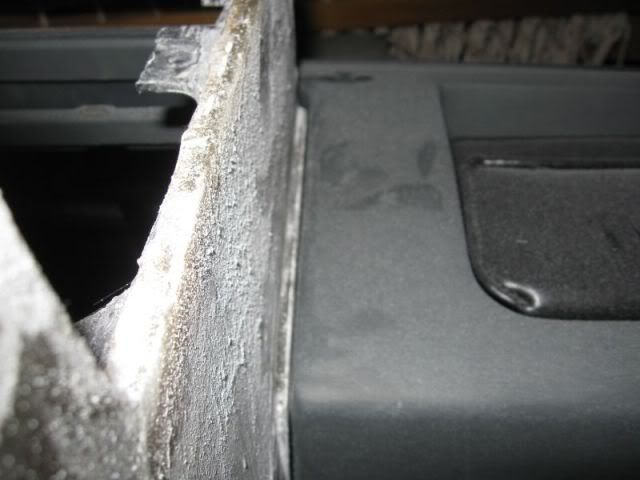
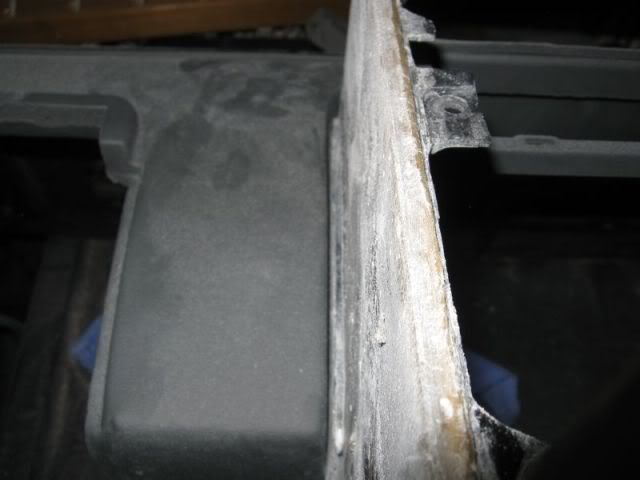
I also needed to add a flange on the front edges where the surround fits into the dash. The original has this flange to fill the gap between the surround and the dash and I am attempting to get the same look. I cut some parts out of a panel I had made and tonight I glassed them to the surround. I am not sure this will workout but I am going to try it. Once the resin cures, I will add a few layers of mat over top to give it some strength then sand it to fit.
Here's the flange on the original surround:
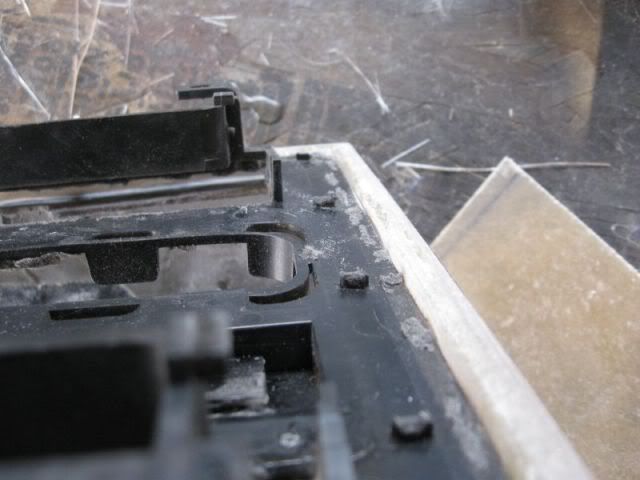
I had to add the parts in layers. Here is the start of the flange:
It's too cold out there for me now so I am done for the evening.
Ok, I lied! I could not stand it. I was sitting in the house all warm and comfortable watching the Mecam Auction on HD Theatre and all those wonderful cars going across the block prompted me to give it one more push tonight. I went back out and checked the glass work and ended up making some more dust clouds and some more fit up and some more mock up. I wish this thing was done.
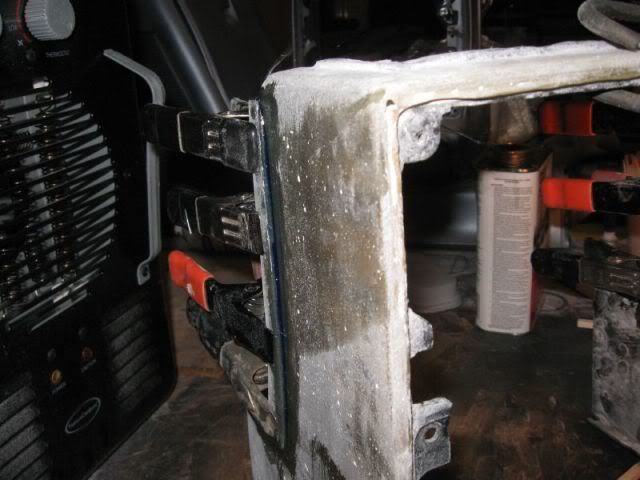
After some triming and sanding you can start to see the flange taking shape:
And fit into the dash - getting closer. a few more layers of mat and some serious sanding and I'll be where I want to be:
Here is a better shot of the pod in place. Note that the flange does not go up over the top. I will "build this in once I decide what direction to go with the pod. If I fab one out of glass, I will incorporate the flange into the pod housing. I know it does not look like it but I am trying to plan it out ahead of building. Next time I will do a better job of the pre planning though as there are quite a few things that I could have done quicker and easier. Still learning tricks!
Here are some "mock up" shots of what I am thinking for the recessed area on the bottom of the AC surround.
Now I'm done!
Pat
[This message has been edited by katatak (edited 12-05-2009).]
Why do you keep raising the bar? Why? Your attention to details is making me mad and forcing me to work harder. STOP IT!
The console is really coming along. I have to admit I started to chuckle when you were all toasty warm and then just had to head out to the workshop. Cracked me up! The flange is an excellent touch. Bravo. After seeing what you've done, I'm considering putting something very similar on the sides on my console near the firewall. What you'll realize, as I did, when you begin work on your back console, was how thick the vinyl piece of the armrest was. There is an indent in the firewall carpet. The console I made is snug, but there is still that little play. A flange, similar to what you did, would fill in the gap perfectly.
I'm really excited for you. May I suggest raising the "walls" to the cubby area a little higher? If not... that's ok... LOL
Now get back out there!
[This message has been edited by Sofa King (edited 12-05-2009).]
Why do you keep raising the bar? Why? Your attention to details is making me mad and forcing me to work harder. STOP IT!
The console is really coming along. I have to admit I started to chuckle when you were all toasty warm and then just had to head out to the workshop. Cracked me up! The flange is an excellent touch. Bravo. After seeing what you've done, I'm considering putting something very similar on the sides on my console near the firewall. What you'll realize, as I did, when you begin work on your back console, was how thick the vinyl piece of the armrest was. There is an indent in the firewall carpet. The console I made is snug, but there is still that little play. A flange, similar to what you did, would fill in the gap perfectly.
I'm really excited for you. May I suggest raising the "walls" to the cubby area a little higher? If not... that's ok... LOL
Now get back out there!
It's a sickness Greg. I agree on the taller walls! I am going to make a "tray" that will fit in there but will be removeable so it can be cleaned out on ocaision. I have some extra front speaker covers and I will use the compression pins/rubber gromets to secure the tray to the console. It will mean some more work but hey, what else do I have to do? I did not get much done again today. Spent most the day changing a water pump on my 88 Formula. It was a major pain to get all the old gasket material off the block. We got it done though.
Thanks for the heads up on the rear console. I was not even paying any attention to that. More work at hand now I suppose. I did get some done this afternoon. I'll have pics up in a bit - I'm not done for the day yet..........Or night!
Not much to report today. I had a ton of work and when I thought I was done for the day, the boss called and piled more on. I went out to the shop around 4pm but we are having some unusual weather here in El Paso.
hahaha you guys probabley thought the sky was falling appart this morning dident you J/K dude.
[This message has been edited by pontiackid86 (edited 12-05-2009).]
It's a sickness Greg. I agree on the taller walls! I am going to make a "tray" that will fit in there but will be removeable so it can be cleaned out on ocaision. I have some extra front speaker covers and I will use the compression pins/rubber gromets to secure the tray to the console. It will mean some more work but hey, what else do I have to do? I did not get much done again today. Spent most the day changing a water pump on my 88 Formula. It was a major pain to get all the old gasket material off the block. We got it done though.
Thanks for the heads up on the rear console. I was not even paying any attention to that. More work at hand now I suppose. I did get some done this afternoon. I'll have pics up in a bit - I'm not done for the day yet..........Or night!
Pat
And I'm stuck here at work......when I could be playing with my Fiero.
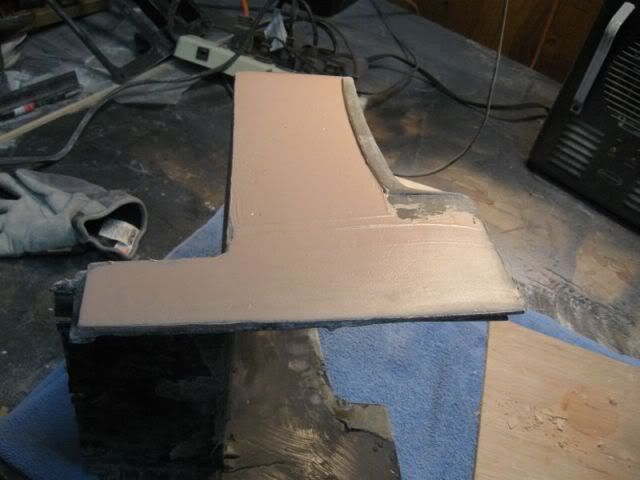
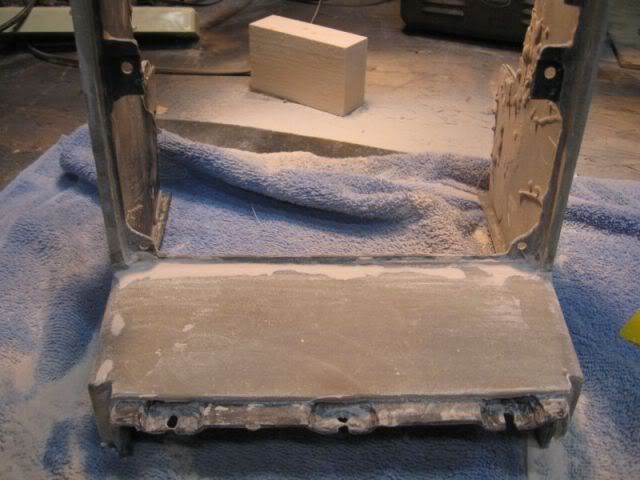
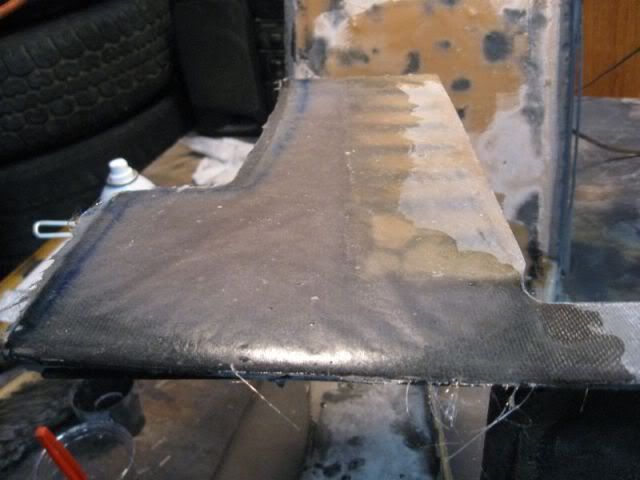
Alrighty then..... Made good progress today despite having to install a water pump on the Formula. Again, my focus is on the AC surround. I had to build up the lip for the vent cover and then I wanted to get some filler on it to see where I was. Lots of sanding took place and there was a little beer drinking but I managed to get some primer on it.
Building up the lip:
A little filler....Ok a lot of filler!
And lots of sanding:
This does not mix with beer to well!
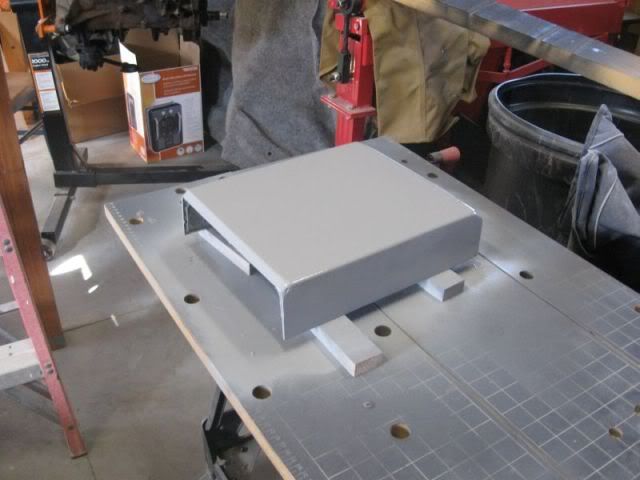
Then I put some primer on the shifter console and the AC surround.
And there was a little dust on the camera:
Now I had some problems with my primer. I'm thinking it is due to just cheap primer but it is rustoleum automotive primer. I had a few "fish eyes" in the shift console but the AC surround was really bad. Could it be cheap primer, something on the fiberglass? I sanded the crap out of it and wiped it down with thinner then let it dry real good before spraying. It was about 60* in the shop. It just irks me to do all that work and still have problems with the primer. I'll figure it out!
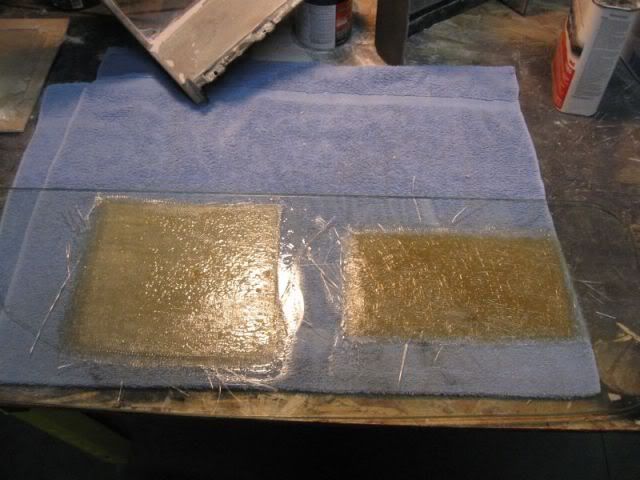
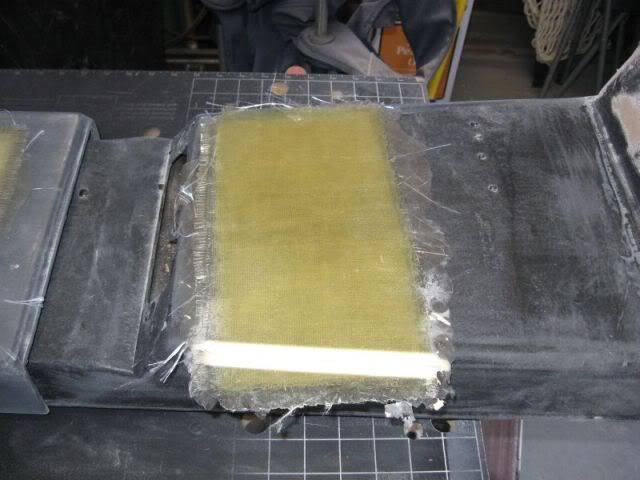
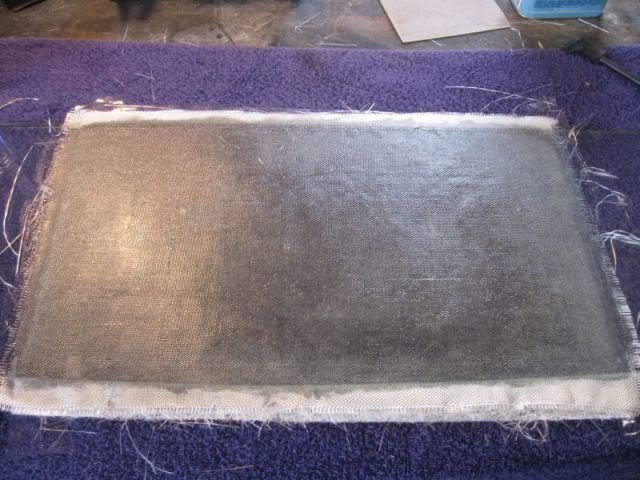
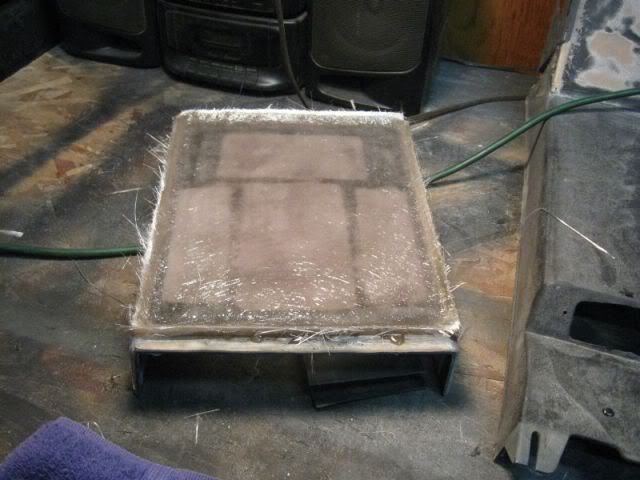
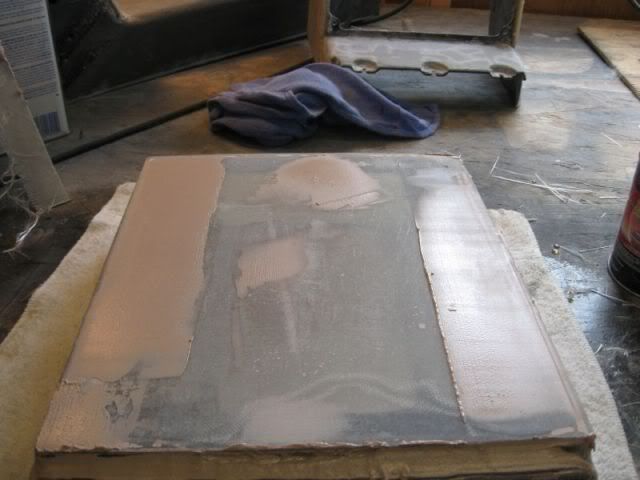
I also made a few "panels" for some parts I will be making tomorrow. The panel on the right has 2 layers of mat, 1 layer of cloth and 2 more layers of mat. The panel on the left has 3 layers of cloth.
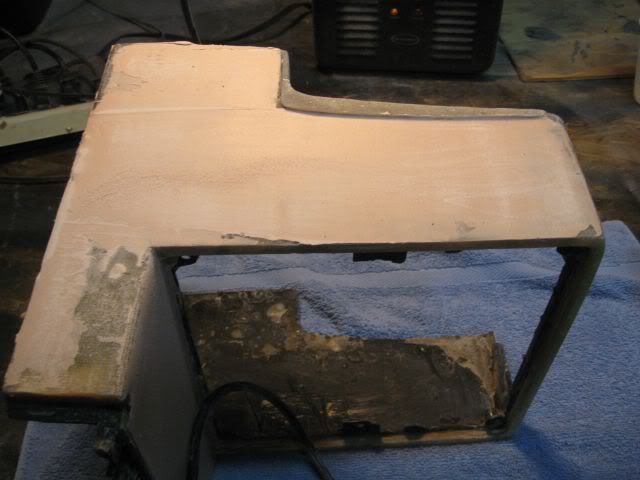
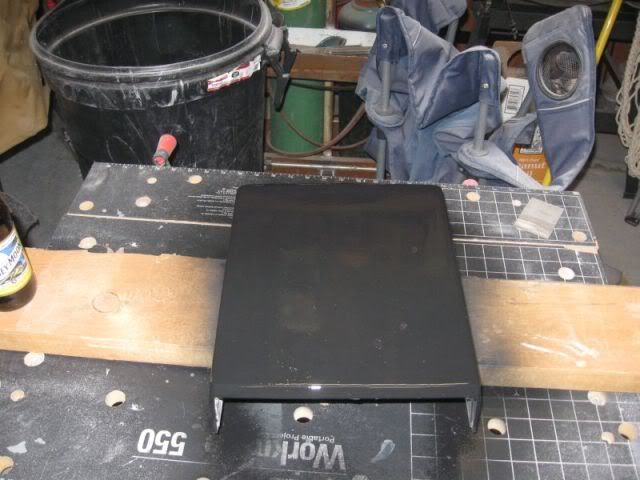
Lots of fun today. Went to AZ and got some filler primer and some wax & grease remover. Did some more filling and sanding and sanding and filling and then some more sanding. After a last coat of filler primer, I can see how many more little holes and low spots left to fix. It is coming together nicely though. I will set the AC surround and the shift console aside now and work on the back piece. I have a lot of work to do on it so here we go.
Here's some of what I got accomplshed today.
After sanding all the fish eye's out:
Setup on the skeleton to check fit:
Last coat of filler primer:
Old versus New:
Mocked up with the dash:
Time to work on the back console for awhile now!
Pat
[This message has been edited by katatak (edited 12-06-2009).]
Forgot to add the rest of my work today. I had some things to "smooth" out on the rear console. So I cut some balsa wood fillers and then I was going to use some of the "panels" I made last night to fill in the rest but after cutting the pieces and fitting them in, I did not like the look of it so I changed directions. I ended up using body filler to smooth it out and it turned out better than I was expecting. It's still all experimental but I learn something everyday.
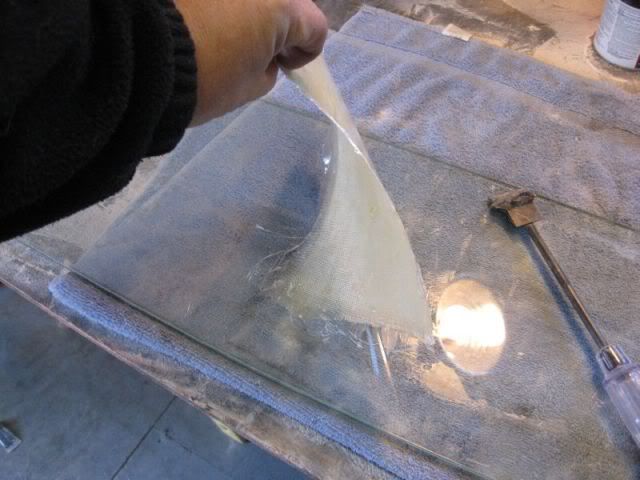
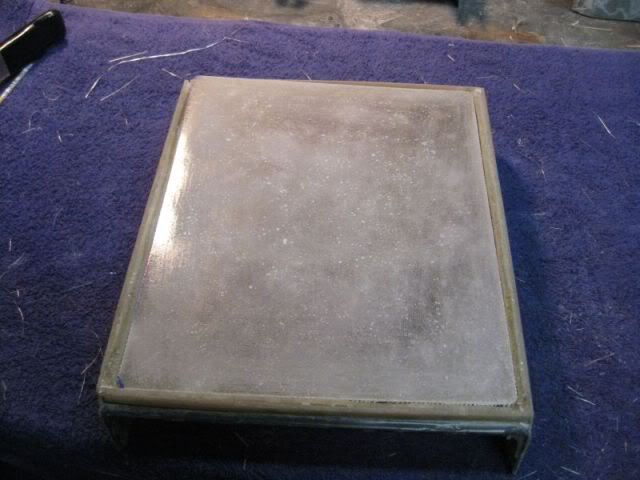
Here's the panels I made last night - peeled off the glass. I made 2 different panels. I ridgid and one flexible.
Flexiible!
Here's the areas I need to "smooth" out.
Filling in some with balsa wood:
Throw on some filler:
The lighter area will be no more:
After some sanding and shaping, it's time for some glass:
And some glass curing:
More later after the glass cures.
Pat
[This message has been edited by katatak (edited 12-06-2009).]
The mock up was outstanding! The side by side comparo shows the time and effort you're putting into this project. Absolutely wonderful work!
There you go again.. raising the bar...
Quick question / advice: If you haven't, resin a layer of glass to the underside of the armrest to give it strength. With the amount of handling and flipping, sanding, etc... you'll want that console pretty durable.
Again, just fantastic work. Keep moving!
[This message has been edited by Sofa King (edited 12-07-2009).]
The mock up was outstanding! The side by side comparo shows the time and effort you're putting into this project. Absolutely wonderful work!
There you go again.. raising the bar...
Quick question / advice: If you haven't, resin a layer of glass to the underside of the armrest to give it strength. With the amount of handling and flipping, sanding, etc... you'll want that console pretty durable.
Again, just fantastic work. Keep moving!
Thanks Greg. It's a lot of work but I am finally seeing what I want to see. It's all your fault anyway. Your console build inspried me to take the fiberglass leap. It would not be where it is without your help (I have to put a plug in for Archie too - the Miura build is a work of fiberglass art. Those guys make it look so easy).


 J/K dude.