Thanks fierofool, also, I want the deck lid and spoiler you have. Did they offer it on many notchie's? Or do I have to get it from and 85 GT?
I believe the spoiler was standard with 85 GTs, though I've seen some (not many) 85 GTs with luggage racks on the decklid. The spolier was an option for 86 SEs and 87 SEs. My 87 SE was ordered with a rear spoiler on the decklid. - kv
------------------ 88 GT T-Top 5-spd #338 of 1252 87 SE 4-cyl 5-spd sunroof, spoiler, performance sound 85 2M4 base coupe T-Top 5-spd, rackless decklid, 15-in 88 GT rims, aero-conversion
IP: Logged
07:56 PM
86FIFI Member
Posts: 749 From: Statesboro, GA Registered: Aug 2010
Well I knew the 85 GT came with them, cause its the only Notchie GT, but is the 85 GT the only place to get the smooth deck lid and spoiler you guys have? I want to get rid of the grandpa luggage rack, and spoiler and get the GT deck lid and spoiler.
IP: Logged
08:00 PM
Kelvin Vivian Member
Posts: 1233 From: San Jose, CA, USA Registered: Jan 2001
Well I knew the 85 GT came with them, cause its the only Notchie GT, but is the 85 GT the only place to get the smooth deck lid and spoiler you guys have? I want to get rid of the grandpa luggage rack, and spoiler and get the GT deck lid and spoiler.
You can find a smooth notchie decklid on any year Fiero, and drill holes into the decklid for a spoiler. I currently have a wingless, luggage rackless decklid on my 87 SE right now - I picked up the decklid in a parts yard. I believe your best bet will be 84s and 88s - I've seen more 84s and 88s than any other year that have wingless, luggage rackless decklids. - kv
------------------ 88 GT T-Top 5-spd #338 of 1252 87 SE 4-cyl 5-spd sunroof, spoiler, performance sound 85 2M4 base coupe T-Top 5-spd, rackless decklid, 15-in 88 GT rims, aero-conversion
IP: Logged
08:38 PM
phonedawgz Member
Posts: 17108 From: Green Bay, WI USA Registered: Dec 2009
Fiero's with wings have stronger springs for the deck lids. Don't put in the stronger springs and the decklid will hit you in the head even more than it does stock.
F#(&!ng deck lid.
IP: Logged
08:59 PM
86FIFI Member
Posts: 749 From: Statesboro, GA Registered: Aug 2010
Your hilarious phonedawgz, always lightening things up, Ok, well I do want the spoiler on the smooth deck lid. Guess I need to look locallly, shipping can be expensive.
IP: Logged
09:27 PM
phonedawgz Member
Posts: 17108 From: Green Bay, WI USA Registered: Dec 2009
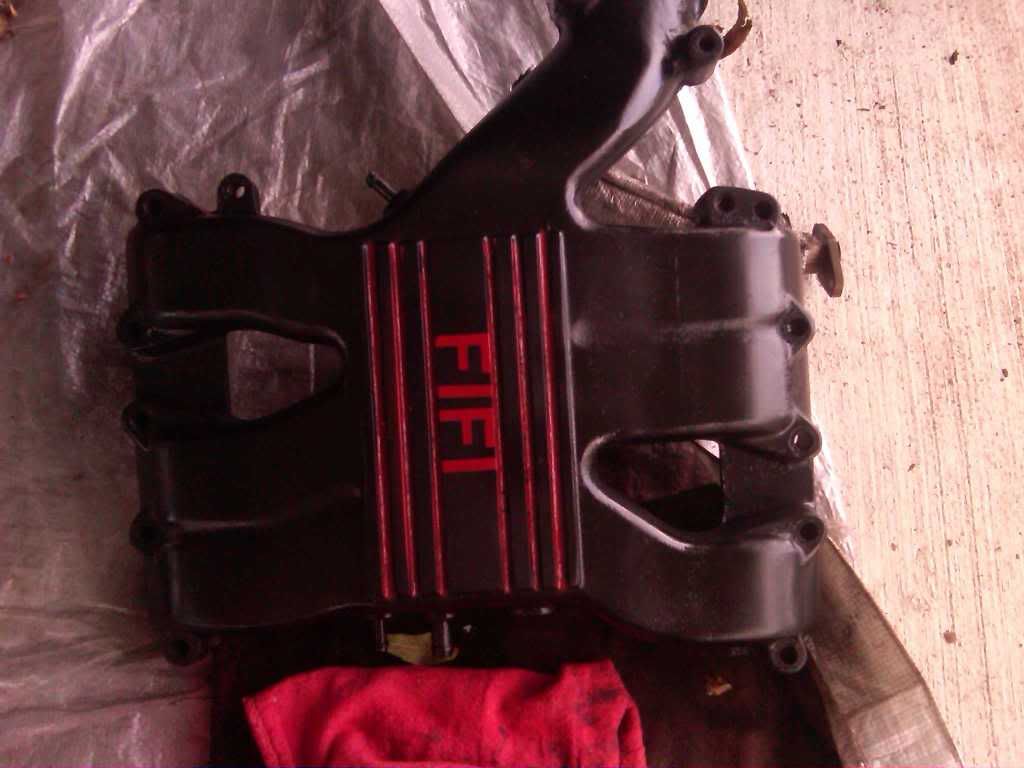
Haha, I noticed that. That topped the whole thing off! I think I got my suspension setup figured out today, I will go with KYB shocks and struts all around with ground control coilovers in the rear. I'm gonna go with a magnaflow muffler, I want to get the local exhaust shop to see if my idea is possible before I share it. If so it will be a surprise, and also my plenum paint job design is going to be a surprise to you guys, Hopefully I get a laugh out of it. Ha
IP: Logged
10:37 PM
fierofool Member
Posts: 13014 From: Auburn, Georgia USA Registered: Jan 2002
The spoiler was available to all Fieros. It was standard and couldn't be deleted only on the Indy and the Formula. All the spoilers are the same, but there's a difference in the mounting stud spacing for the notchback and the fastback decklids. The stands have 3 sets of holes so the rear stud can be relocated for either decklid. I've heard that the 88 fastback wing stands were slightly different, but I don't know what that difference is, if there is any.
The decklid springs are also the same on all Fieros. They are just located in the different holes on the hinge mount to give them extra torsion for luggage rack or spoiler. Before relocating the torsion springs, be sure to study up on how to do it. You can be seriously injured as well as breaking out your rear glass.
I like how it knocks the camera over to one side when it blows. Fifi: let me guess: you're going to paint flames on the intake... BTW, I have an aftermarket reproduction wing if you're interested. I think I sent you my phone # in the PM. ~ Paul aka "Tha Driver"
NBA player in an interview (real) talking about how he can dribble with either hand: "Yeah, I be amphibious all my life".
IP: Logged
11:17 PM
Oct 18th, 2010
86FIFI Member
Posts: 749 From: Statesboro, GA Registered: Aug 2010
Driver, I hate flames, lol and could you send me a pic of the decklid? I won't just be getting a spoiler fierofool, I would like the entire decklid and spoiler combo. So its just a matter of relocating shock and installing the 4 bolts again.
IP: Logged
12:02 AM
phonedawgz Member
Posts: 17108 From: Green Bay, WI USA Registered: Dec 2009
That's interesting. I've never seen any color other than metal or black. I just checked 3 of my cars and they're all the same. Most people just relocate them to increase or decrease tension. There are a variety of decklid weights, even within a year or model.
The 86-88 model years have the Notchback which could be plain, rack, or spoiler and the Fastback which could be plain, rack, or spoiler, so that would call for 6 different tension levels because of the difference in the base weights of the Notchback and Fastback lids.
I just checked my 85 Notchback, 87 Fastback, and 88 Notchback and here's what I found.
The 85 GT with spoiler: Left spring set at 3rd hole from the front. Right spring set at 2nd hole from the front.
87 GT with spoiler: Both set at 2nd hole from the front.
88 Notchback with plain deck: Both set at 2nd hole from the front.
So, with positioning the same in the 87 GT and the 88 Coupe and the 87 GT with spoiler and the 88 Coupe without puts their weight on opposite ends of the spectrum, so I went back to check them. The diameter of the torsion bars on the 87 GT with spoiler are much larger than the bars on the 88 Coupe with nothing.
Non-the-less, the job can still be done by relocating what you have. Moving the rods further to the rear of the vehicle increases tension.
IP: Logged
09:53 AM
86FIFI Member
Posts: 749 From: Statesboro, GA Registered: Aug 2010
Driver, I hate flames, lol and could you send me a pic of the decklid? I won't just be getting a spoiler fierofool, I would like the entire decklid and spoiler combo. So its just a matter of relocating shock and installing the 4 bolts again.
Another PM sent.
IP: Logged
12:59 PM
PFF
System Bot
86FIFI Member
Posts: 749 From: Statesboro, GA Registered: Aug 2010
Well, all my parts came in today. So the assembling, and reinstallation begins. Still have a little porting of the exhaust left and some painting left but other than that we are tryin to get the motor back in from here on out. Cross your fingers. Fierofool I'm tryin to get it running before the ride to the coast, wish you could make it. Would be nice to meet who's been giving me advice.
IP: Logged
07:39 PM
fierofool Member
Posts: 13014 From: Auburn, Georgia USA Registered: Jan 2002
Fierofool I'm tryin to get it running before the ride to the coast, wish you could make it. Would be nice to meet who's been giving me advice.
I've been promoting the Road Atlanta thing, so if nobody else shows, I should at least be there. Can't afford 2 events 2 weekends in a row. Besides, I'm staying out of sight until we find out if our advise worked. I may take a ride down that way to pick up some Claxton fruitcake later this year. IF our advise was beneficial and your car actually works, take a trip up this way and meet the rest of the gang. Bring ZXmaster with you.
IP: Logged
11:16 PM
Oct 19th, 2010
86FIFI Member
Posts: 749 From: Statesboro, GA Registered: Aug 2010
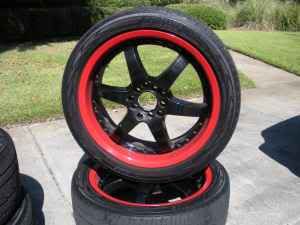
Haha, well I hope your advice works too. If that spark plug wouldn't have broken I would have taken the car to the tranny shop to do all the work, but I am glad I didn't. Got to clean everything up good, port exhaust manifolds and y pipe, and replace some motor and transmission mounts. Let me know when you head this way to get some fruit cake. I'm 20 min. From claxton. But once I do my suspenson upgrade I would think the car would be pretty reliable, so I just might make an Atl trip. Got an idea of the rims I want. They are 6 spoke tuner rims, powder coated black in the middle with a red lip around the outside. They are 17's
IP: Logged
09:43 AM
86FIFI Member
Posts: 749 From: Statesboro, GA Registered: Aug 2010
Got the clutch fork, bearing, and seal installed in a couple minutes I had free this afternoon. And while the shaft was off it made the throughout bearing easy to install. Tomorrow we reinstall everything.
IP: Logged
07:09 PM
Oct 20th, 2010
86FIFI Member
Posts: 749 From: Statesboro, GA Registered: Aug 2010
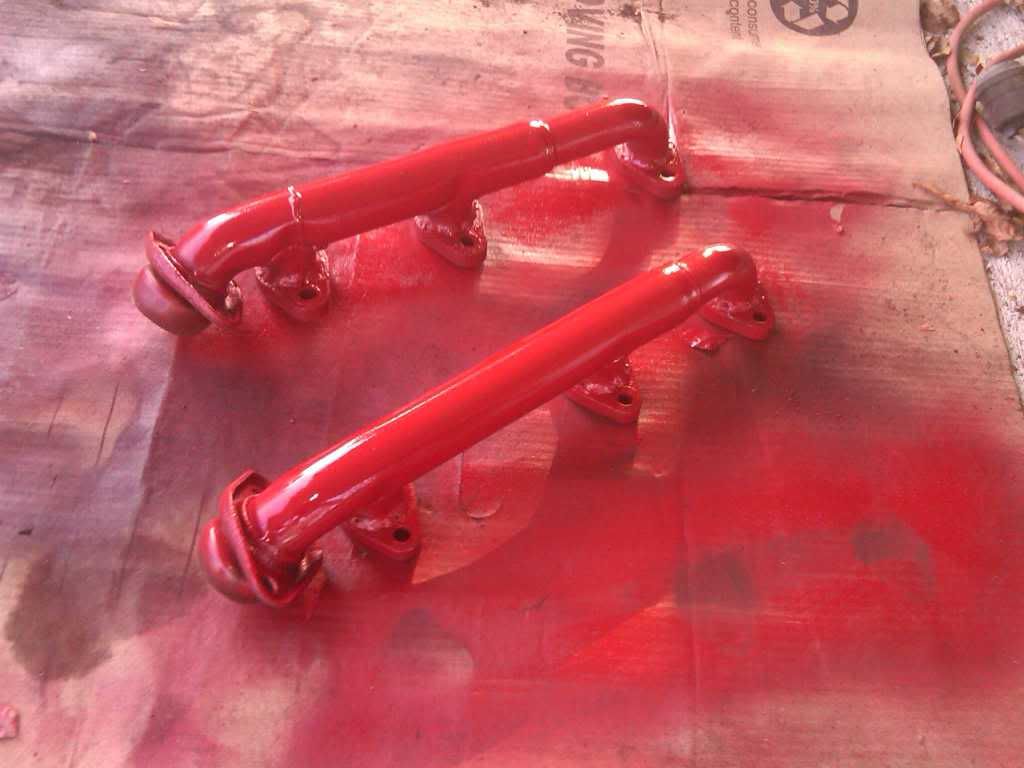
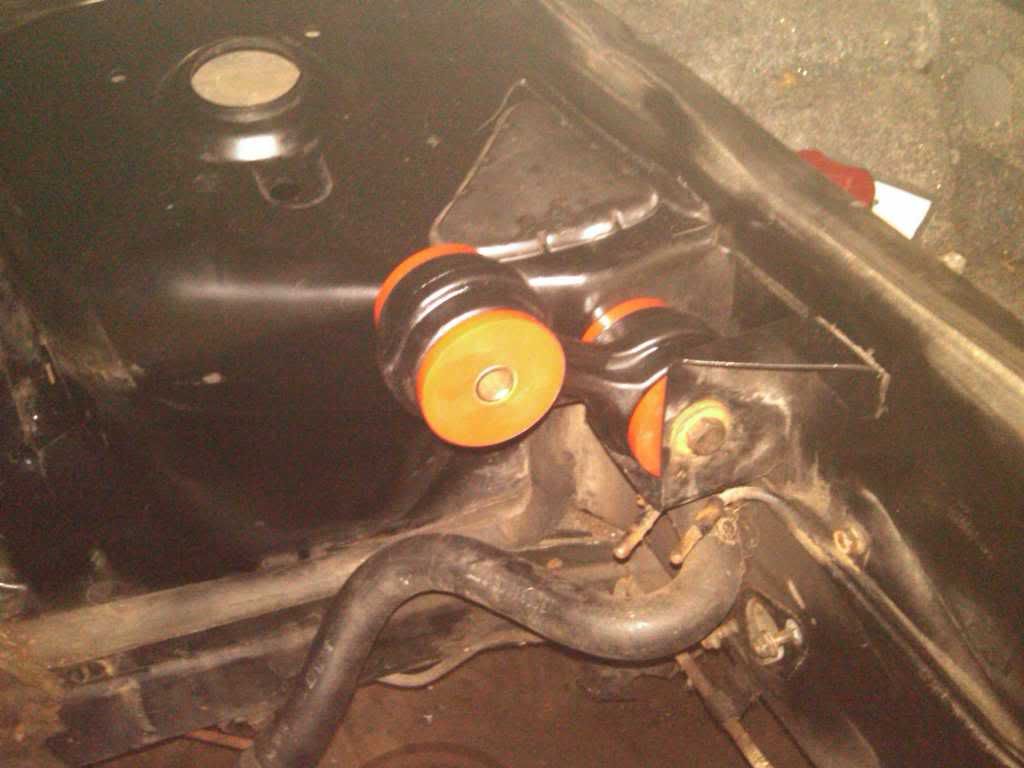
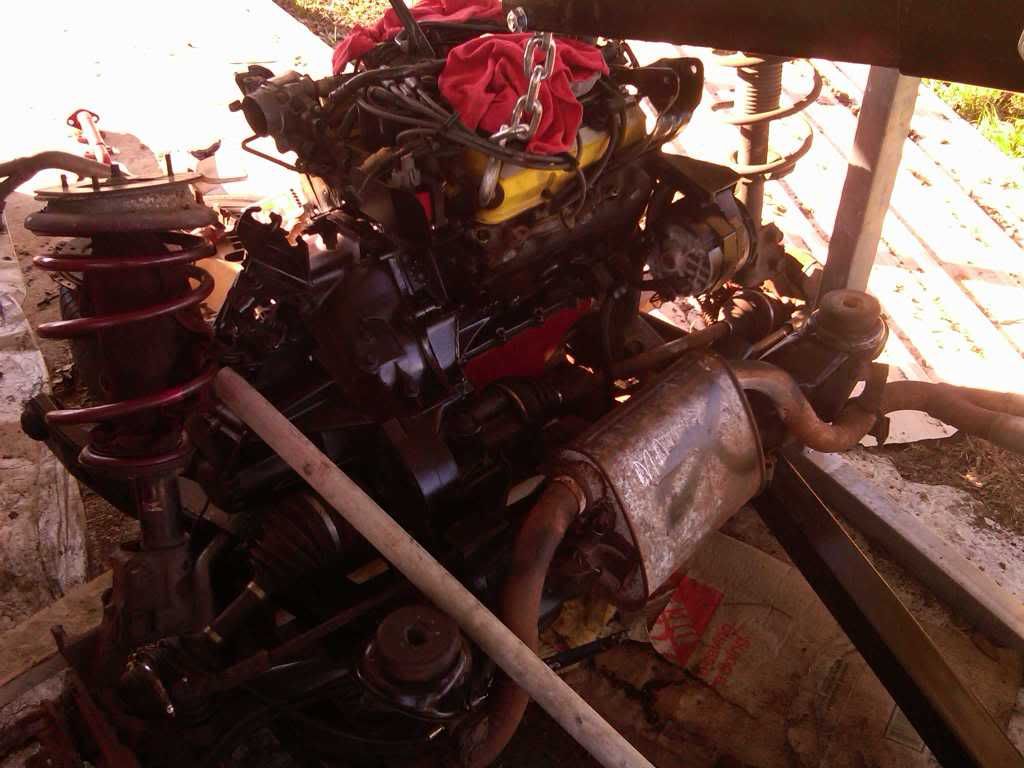
Made decent progress today, got the transmission back on, and just about finished porting the exhaust manifolds. Mainly got a lot of stuff painted, and had trouble getting the tie rod end back in place. still have to fix that. Here are a couple pics.
I personally LOVE how the dog bone came out. The paint finish is amazing, and the red bushings look amazing.
What do you guys thin of these? They are Ruff Racing universal 5 lug Thought the color scheme weent well.
IP: Logged
09:41 PM
the300zxmaster Member
Posts: 66 From: Statesboro, ga Registered: Aug 2010
Well today was good. Got thhe engine under the car and the car lowered down. Nothing is hooked up yet, but we are moving forward. Decided to leave valve covers alone, so it throws the color scheme off, but it will be ok. I can do it later when the car runs.
IP: Logged
04:39 PM
Oct 25th, 2010
86FIFI Member
Posts: 749 From: Statesboro, GA Registered: Aug 2010
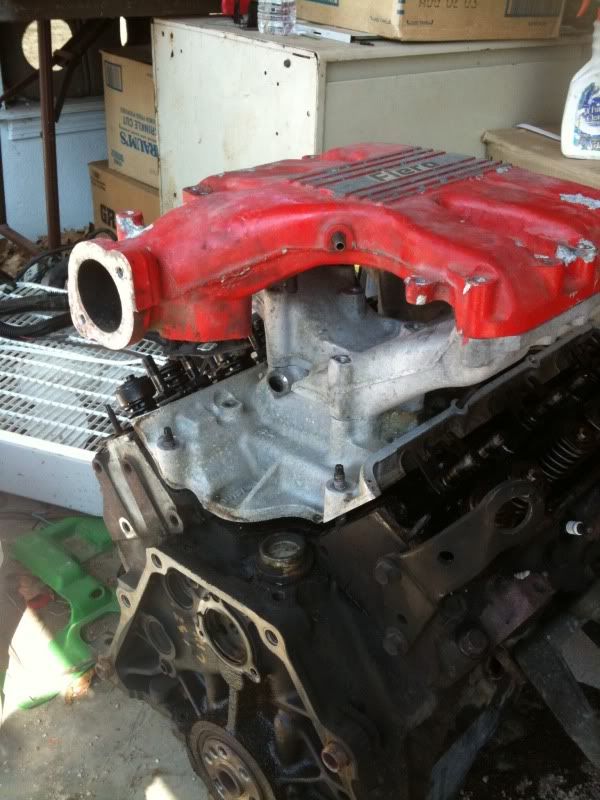
The exhaust is all hooked up. That pic was right before we hooked it up. The intake is still in the painting stages which is why it isn't hooked up yet.
IP: Logged
11:58 AM
PFF
System Bot
phonedawgz Member
Posts: 17108 From: Green Bay, WI USA Registered: Dec 2009
fyi - when it comes time to do the valve covers, you DO have to remove the upper and middle intake plenums. You do not, of course, have to remove the lower intake plenum. The valve covers actually rest on top of the lower plenum.
The valve covers use a nice rubber gasket. If the parts store tries to give you a cork gasket don't use it. Don't listen to the manual if they tell you to use RTV sealant. You want to use the rubber gasket only, and a dab of RTV where the lower intake and head crack is.
IP: Logged
12:41 PM
86FIFI Member
Posts: 749 From: Statesboro, GA Registered: Aug 2010
Oh ok, good to know. I'm sure the valve cover job isn't far down the line. Also how do you recommend getting the tie rod end back in. When we put the nut on it, the nut and threads spin.
IP: Logged
12:58 PM
phonedawgz Member
Posts: 17108 From: Green Bay, WI USA Registered: Dec 2009
Take the tie rod end out, and clean the threads good with a wire brush on a drill. If somehow someone nasty hit it with a hammer in places for some god unknown reason, file those parts of the messed up stud with a file so they are below the threads surface. I assume you don't have a tap set, but if you did that would be a great suggestion. Not sure if those are metric or standard. Might be either considering replacements. Worst case - put a jack under the tie rod and gently push it in tight enough so it doesn't spin.
IP: Logged
01:02 PM
phonedawgz Member
Posts: 17108 From: Green Bay, WI USA Registered: Dec 2009
And if the tie rod end is floppy in any position, your tie rod end is bad and will make your car handle like a turd. It doesn't have to be super tight but if it's floppy loose its bad for sure. If there is rust in the joint itself it's bad for sure. Even if it feels tight but is rusty, it will be loose as soon as you start driving it. If you don't have a good seal covering the tie rod end's top it will be bad in months.
In my estimation loose rear tie rod ends are the #1 thing that makes the back end feel sloppy
IP: Logged
01:06 PM
Oct 27th, 2010
86FIFI Member
Posts: 749 From: Statesboro, GA Registered: Aug 2010
Mine seems good, not floppy, but not extremely stiff. I just cant get the dang nut to tighten. Well, today is the day we try and hook everything back up and see how she runs. Wont be able to drive until tie rod is fixed, (I got one ordered just in case) but I will be able to see If the idling has changed, and if the clutch kit helped the squealing clutch pedal. Also we will see if changing the gear will be aby smoother, although it wasnt that rough before. Wish us luck, hopefully we can get this Fiero back on the road real soon. I will be needing some interior parts after we get it on the road, because I think my center console is warped and wont fit together correctly.
IP: Logged
07:46 AM
phonedawgz Member
Posts: 17108 From: Green Bay, WI USA Registered: Dec 2009
I cant really say what was wrong with the idle, It just didnt sound right. I will adress it again once the car is running, but it may have had something to do with the sparkplugs being rusted in on the firewall side. We will see how it does with the new plugs, wires, and ignition coil. Anyway, headed to take a teat real quick, then to work on the car. Ill update my status about 9 tonight.
IP: Logged
12:39 PM
phonedawgz Member
Posts: 17108 From: Green Bay, WI USA Registered: Dec 2009
Well, it ran tonight, Still have to get the dogbone lined up. Its in the bracket, but needs to go back a little more. It took a little while to get the plugs lined up rightm but we got it. It runs, but wont stay running. It shuts off if you stop giving it gas. We used every nut and bolt we took off the car, and everything is connected im pretty sure. I will post a video of her running. Clamps that attach the y-pipe to the pipe the cat is on came un done, so the exhaust is kind of loud, but I will fix that once it is running.


.jpg)