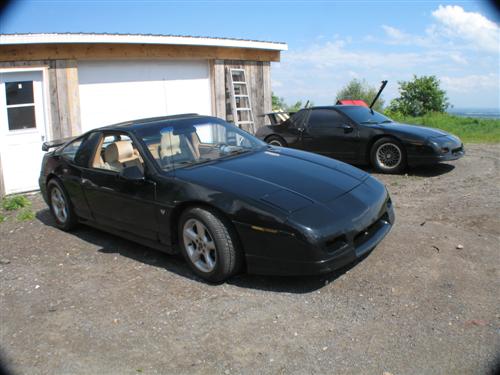
Well Fiero season is almost over here in Lévis (Lay Vee) Quebec and I am preparing the garage for the Black Widow's make over. She is a 1986 GT, 5 litres V8 with a Archie master kit and a 4 speed manual tranny. I will post in this thread the whole process and here is the main menu ;
01. Disassembly for rust inspection and repair. DONE 02. If needed find a USA Fiero rolling chassis with manual shift. Still looking Might of found one 03. Disassembly of 85 GT parts car ...already started see pics. DONE 04. Gen II Headlights Done 05. Disassembly of Black 87 GT Done 06. Install air extractor. (Werber style) Done 07. Replace sunroof rails Done 08. Replaced 5.0L to a fully rebuilt 1995-96, 5.7 litres V8 (Carbed LT1 form) DONE 09. LED Tail Lights (DoubleC4) DONE 10. Dynamat Delayed 11. Sound system upgrade. Delayed 12. Lambo doors...Done 13. LED side markers Done 14. New set of rims 18 inch Spyn, Syder Evos Done (255/45/18 rr -- 225/30/18 fr) 15. Custom paint job with airbrushed spider web. (a buddy's paintshop)Delayed 16. Hoping won't get laid off again !!! So far so good 17. Chin Spoiler add on Done 18. Short shifter and TT ring Done 19. Battery relocated to the front DONE 20. Change manual mirrors with electric mirrors from a GTP Done 21. Quarter panel side scoops Done 22. 4 x 6 HID low profile headlights,,.Done 23. LED lighted sill logos In Progress 25. Disassembly of 87 GT Blue parts car In Progress 26. Fiero logo under car projectors In Progress 27. Drop front spindles In Progress 28. F40 G6 6 Speed transmission In Progress Still assembling needed parts 29. Corvette 13in Brakes on all 4 corners In Progress
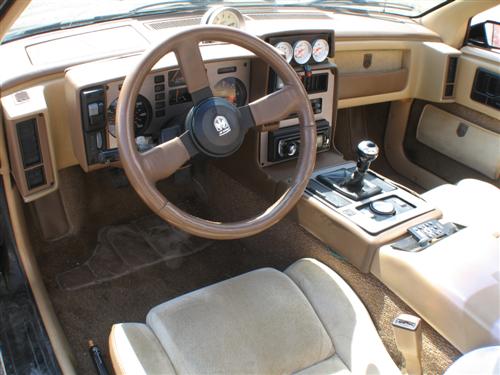
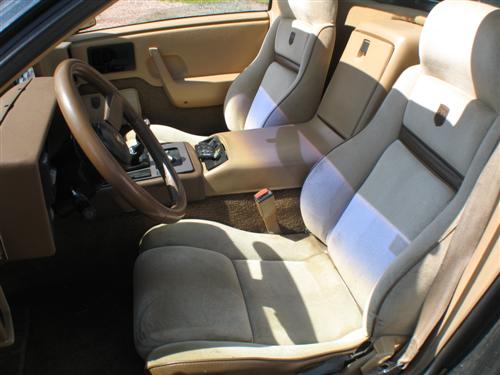
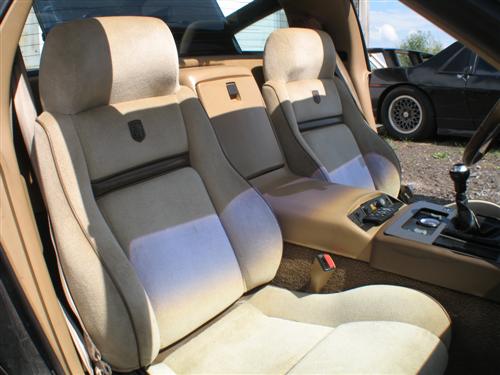
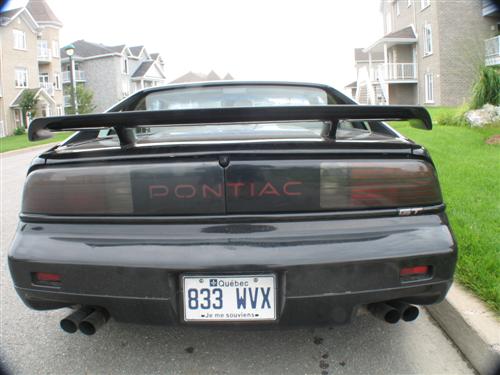
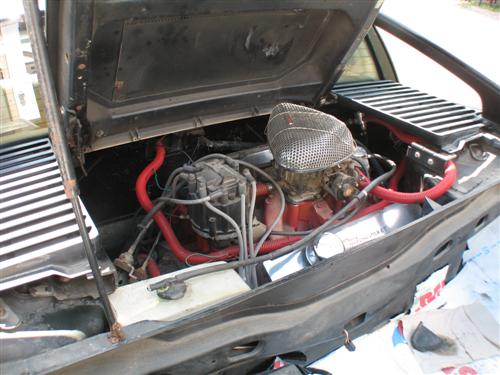
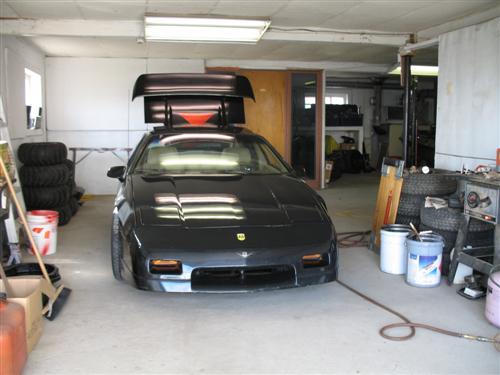
Here are some before pics of the Black Widow at the beginning..
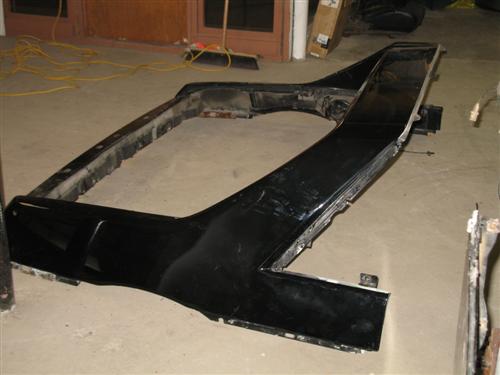
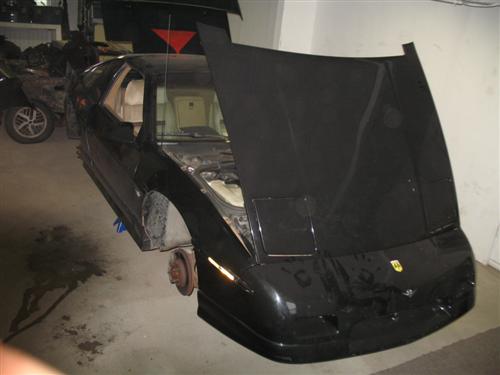
Well today got a couple of thing done to the parts car (85 GT) some of the parts will be used to modify the Black Widow... other part will be sold on PFF and on Ebay. Here are a couple of pics to the disassembly
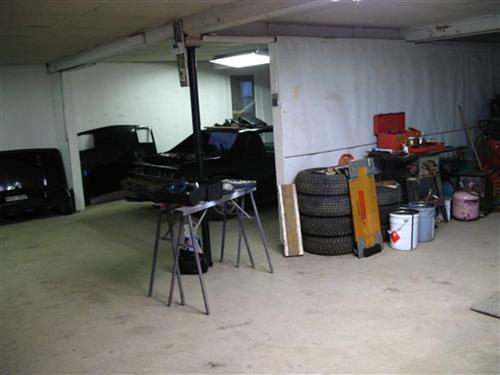
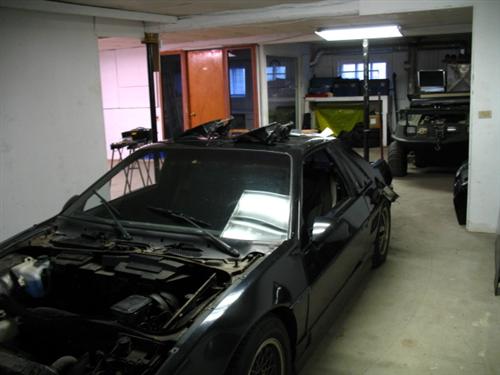
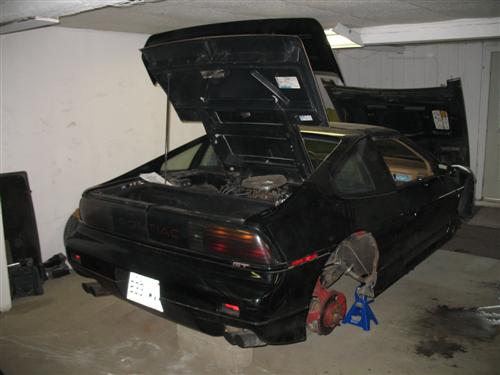
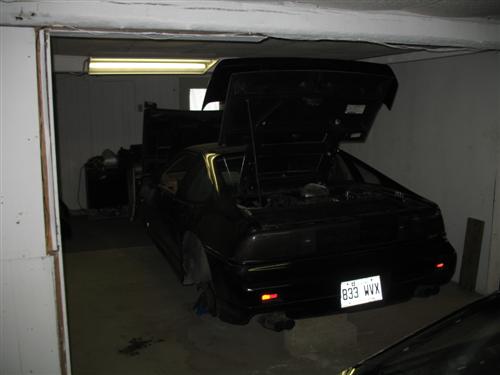
Black Widow in the main section of the garage The Black Widow in foreground Parts car in the back , disassembly area
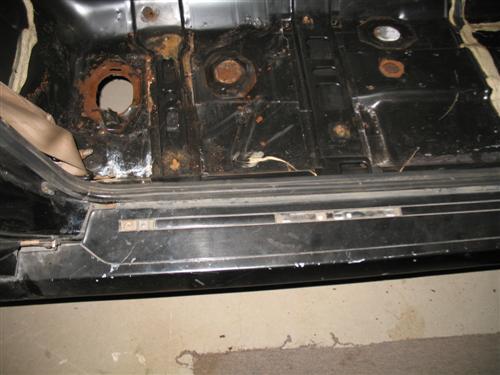
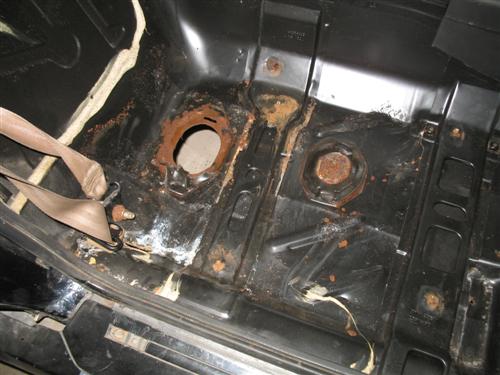
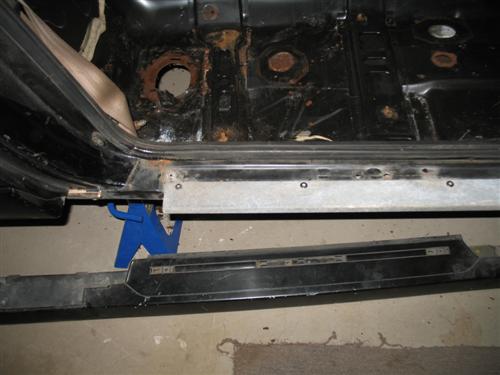
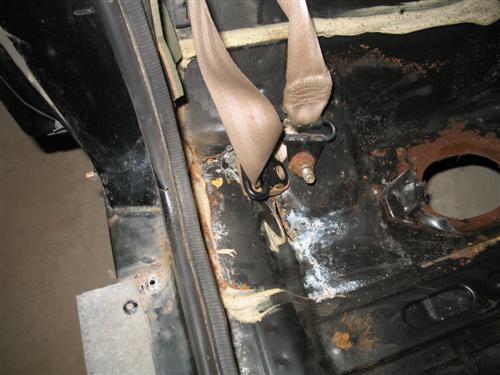
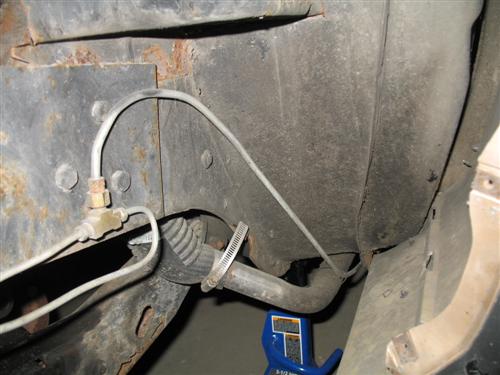
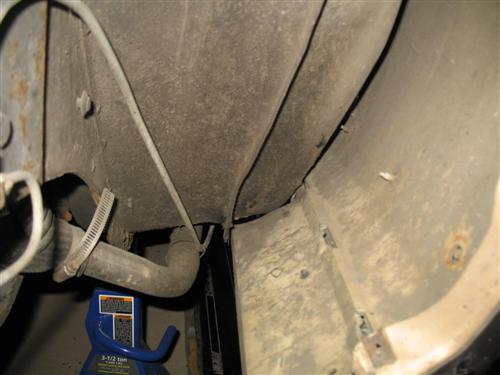
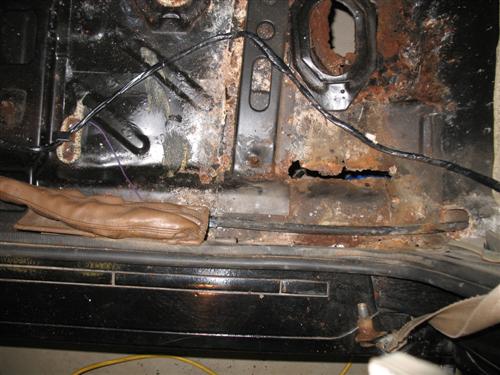
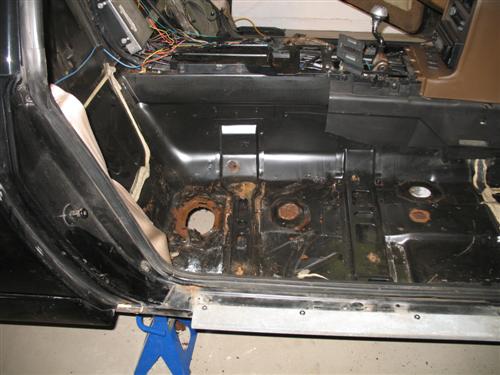
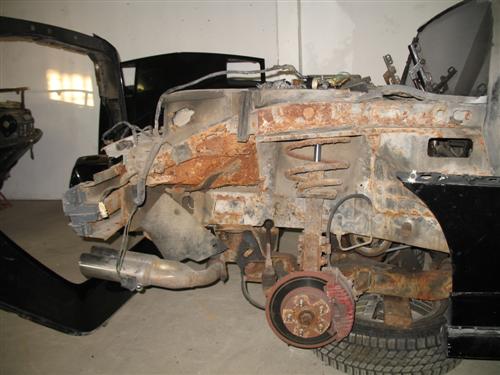
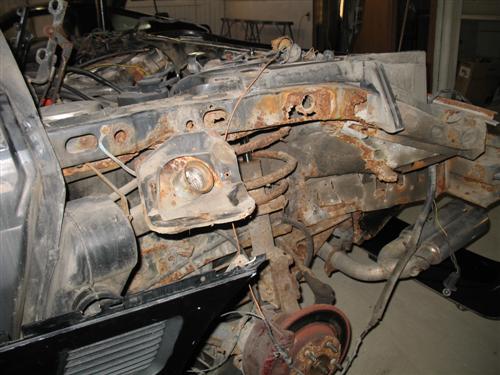
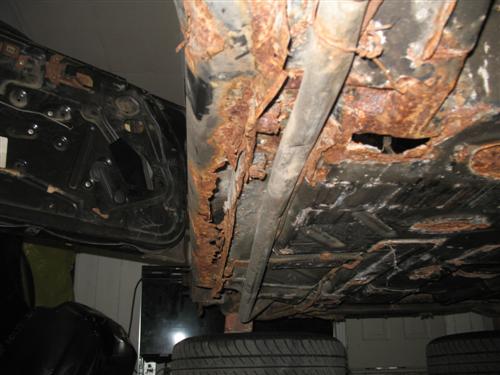
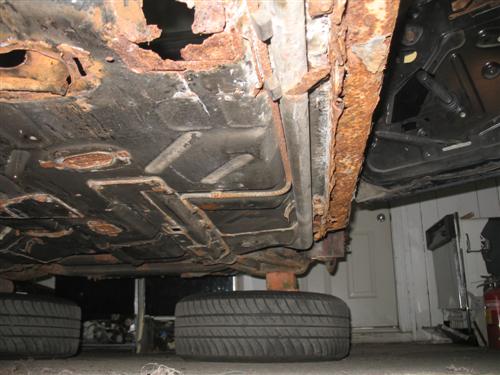
R/H side lots of cancer there but mostly surface rust L/H side lots of cancer there grrr
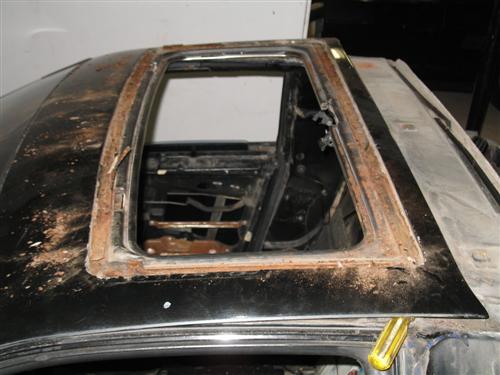
Sunroof the rails are completely rusted all is fine powder I'm wondering how the weatherstrip held on ???
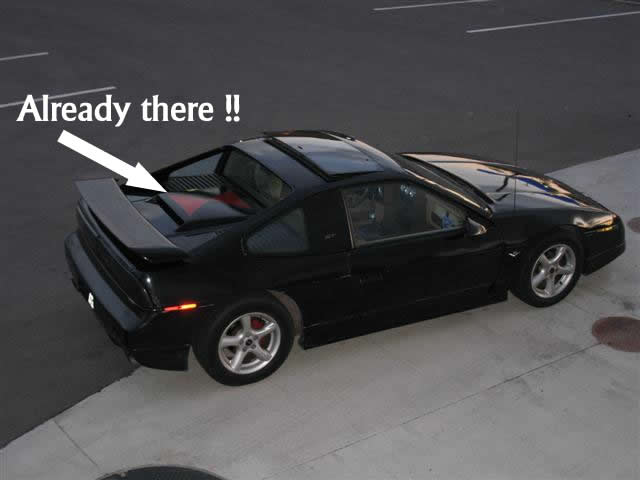
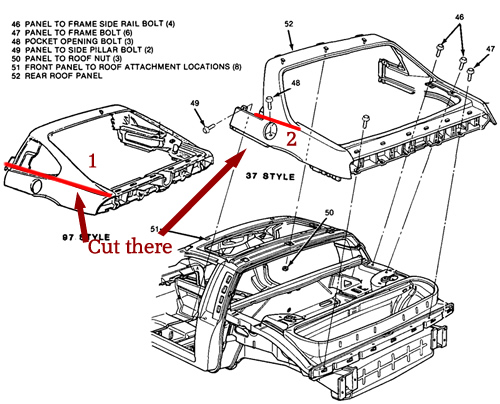
Finally got the clip off... will start measuring to see where the best place to cut for the Notchie back with Fastback taillights. Can anyone give me their thoughts or ideas on that ... the Black Widow is fastback... Reality did this modification first but I am unsure of where I should start. What should I consider before chopping everything up... .. THANKS for any help.
Reality's modification.... Pretty cool I think !!!
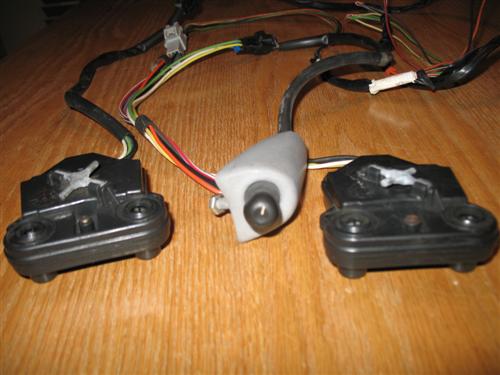
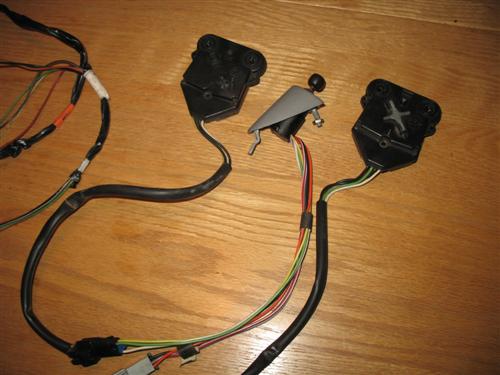
Well today I did not work on disassembly of the 85 GT but went in a PAP here in Pintendre and found this !!!
It is from a 1997 Pontiac Grand Am and I think will be the best way to swap in Power mirrors on my GT that had manual ones. The issue I was having with swapping in stardard Fiero PM was that it would leave a large hole on the top of the door where the Manual Mirror adjustement lever was.. With this find it resolves having to get the door panel redone... it is in excellent shape as you can see in the above pic.... I found the schematics (below) to wire in the mirrors..
I will post when this is done to the Black Widow ... Right now I am busy with total disassembly of the 85 GT
I think you need to remove the seat covers and send them to me. You can put some Mr Mike's in there. Ya really need some . Just tell your wife how happy they will make her. Edit to add: Didn't work for me either
[This message has been edited by josef644 (edited 09-28-2009).]
Well today spent a couple of hours removing the front end skins and tubs. The Black Widow is coming in for the winter and also for disassembly .... hope she is in better condition than this 85 GT parts car.. Here are a couple of pics of the ongoing disassembly of the 85 GT...
This week end I'm dropping the craddle and cutting out the windshield for the black widow. Any suggestions on how should I cut it out without cracking it ??? THX !!
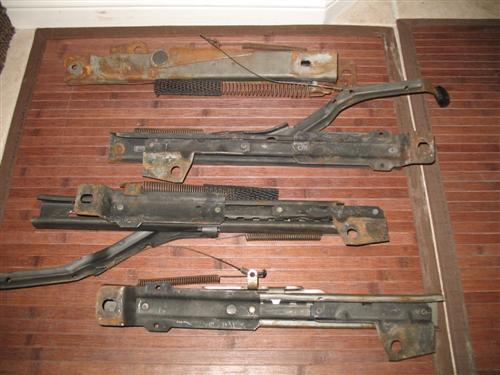
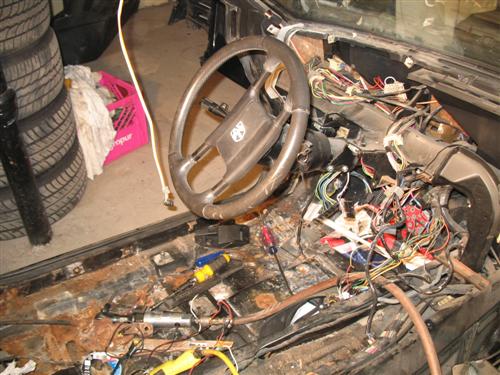
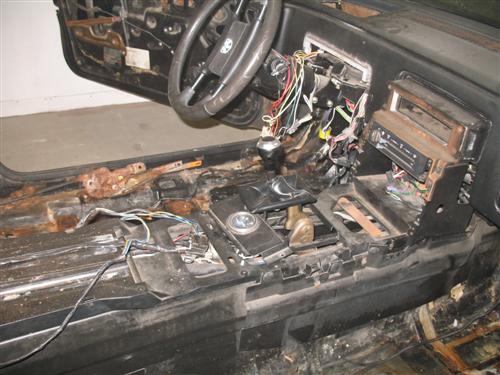
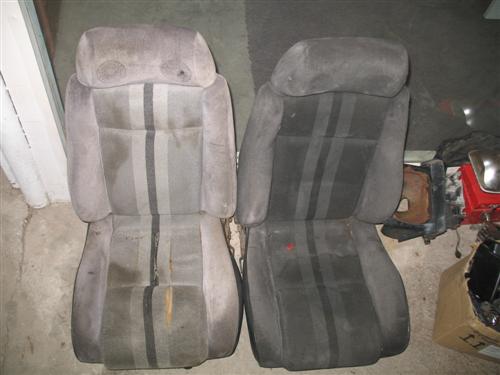
Well has been another very productive couple of hours.... The interior is almost all out. seats and carpet, rocker panels and side scoops are removed. Windshield ready for the saw all !!!
Carpets and seats removed
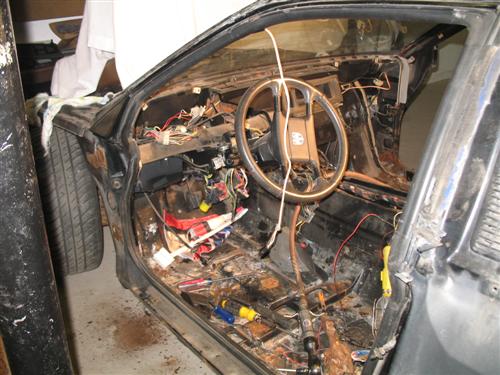
Shot of the Northen Cancer talking it's toll
The Black Widow is coming in Saturday for disassembly hummm wonder what condition she's in ?? Stay tuned !!!
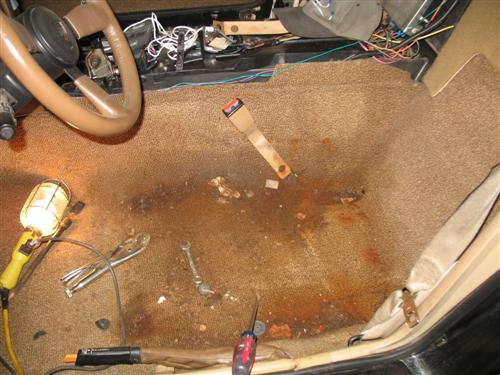
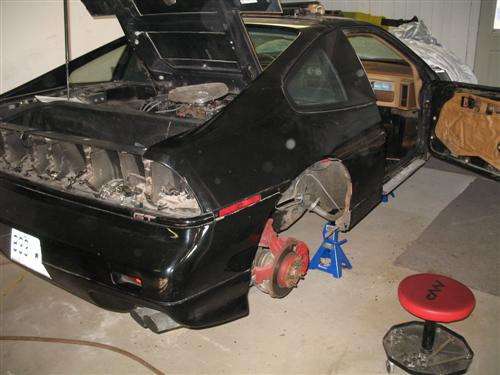
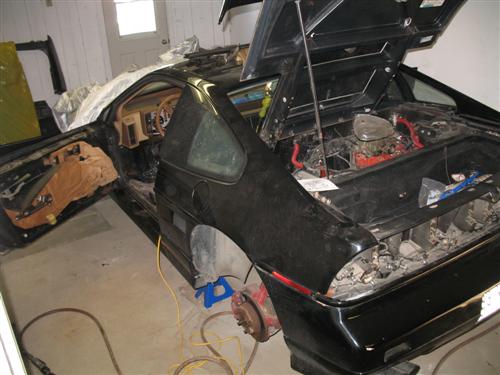
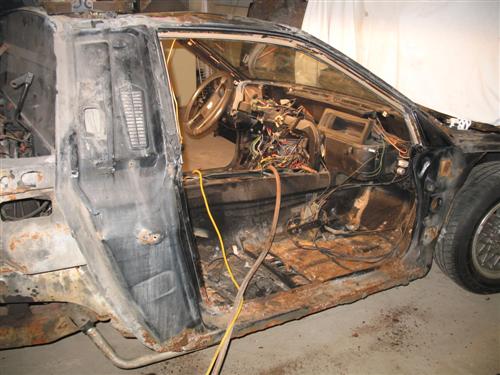
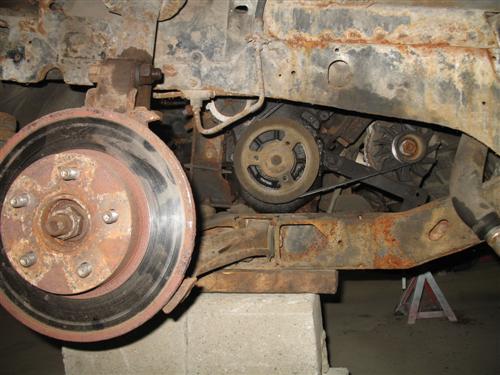
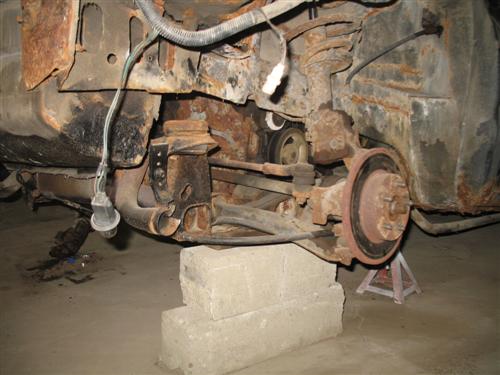
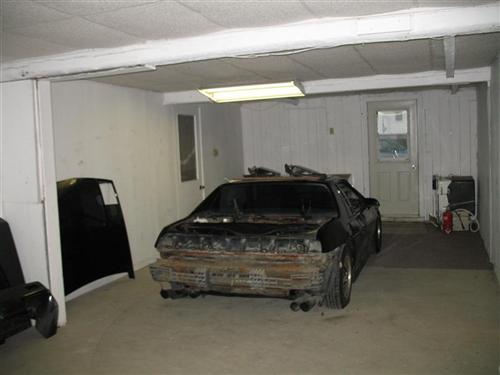
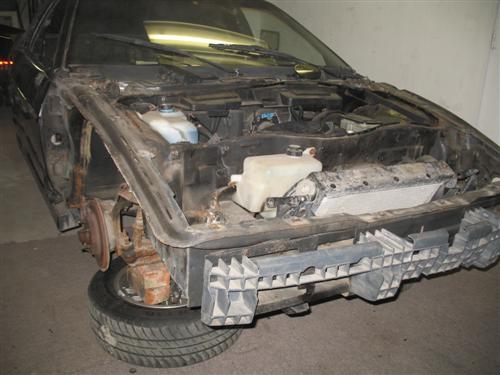
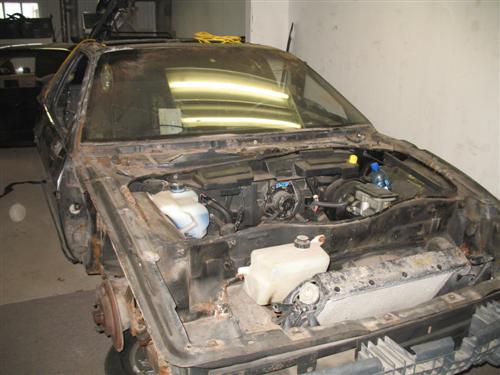
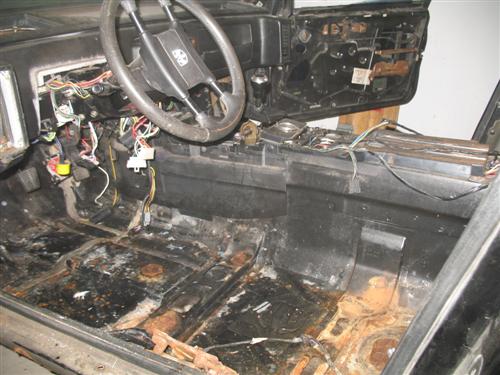
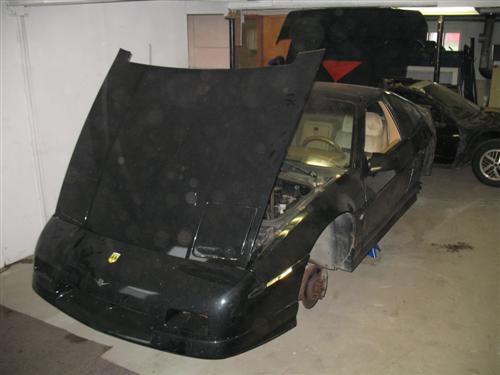
Well today is a sad day.... The Black Widow is in for the winter no more V8 purring till next summer. It is time for disassembly to see if she is salvageable or will she require a new space frame? Here are the first pics of her on jack stands getting ready to shed her skin... wonder what she has underneath? Here is the list of things she will be undergoing throughout the winter.
01. Disassembly for rust inspection and repair. (May swap in space frame 88 t-top) 02. Modify the fastback clip to a notchie keeping the fastback tail lights. (Reality style) 03. Install low profile projector head lights. 04. Install air extractor. 05. Swap in a 350 V8 she has a 305 presently 06. 500 LEDs Tail Lights 07. Dynamat 08. Sound system upgrade. 09. Lambo doors. 10. Custom paint job with airbrushed spider web. 11. New windshield 12. Replace sunroof rails 13. New set of rims (18 inch model ..will see) Here are the pics which will become the "Before pictures"
R/H rear side Rear center L/H rear R/H Front L/H Front
[This message has been edited by Danyel (edited 10-16-2009).]
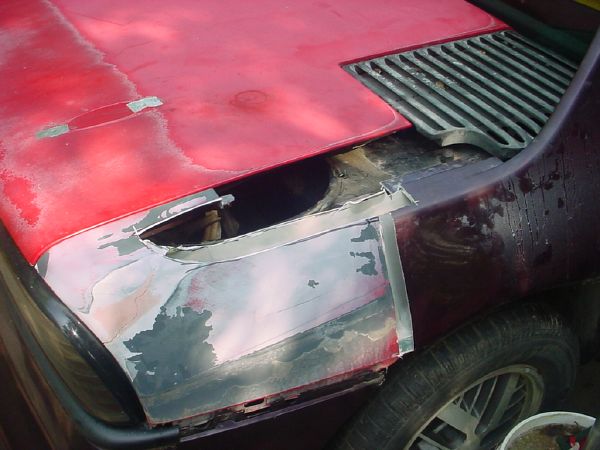
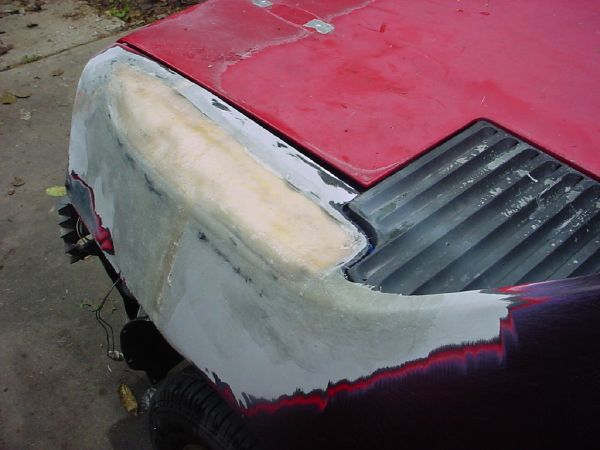
I cut mine just behind the top of the wheel well on the outside, there was reasoning behind why I did it this way when I did it, but I don't honestly remember what it was I think it had something to do with mounting locations, but without a car and or clip in-front of me, I don't know.
Okay found my pics it had to do with the mounting locations.
I do know you will have a 1 inch height difference that you will have to make up. I filled mine with expanding foam, then glassed over that.
Hello Wison thanks for the quick response... I was blown away by the mod you came up with... my question is this... you started with a notchie and added de fastback taillights, lid and rear fender section ... mine is already fastback couldn't I just cut at Lines 1,2,3 on the fastback and on notchie lines 4 and 5 and glass it all together ?? Do you foresee any issues that I dont see or missed? Thanks for any insight..... all others are also welcomed to give their view ....
When I worked on my project all I had was the taillight section of the fastback. I had already worked out that I wouldn't need anything in-front of the wheel well. Looking at the provided diagram I don't see any reasons why you couldn't do what you are saying. I just wanted to be able to glass the inner clips back together as well, so the less sections there were the easier it was to work with. I managed the height difference by building up layers of glass to smooth out the notch to make it flow with the taillights. The other thing I did was to glass the the inner quarter window piece to the read clip as well, instead of having it be removable.
I don't understand why you would want to cut the 1 and 4 locations. Seems like you are just adding two more areas that need to be glassed when you could just use the upper section of the notchie.
CowsPatoot -- I think you are right it's just I'm not sure of the height of the notchie clip compared to the fastback ...but I could try it first without cutting at 1 and 4 ....
wow, count me into the group watching this thread closely. you ideas sound awsome, your car was pretty sick (sick as in good) to begin with now I cant wait to see the end result.
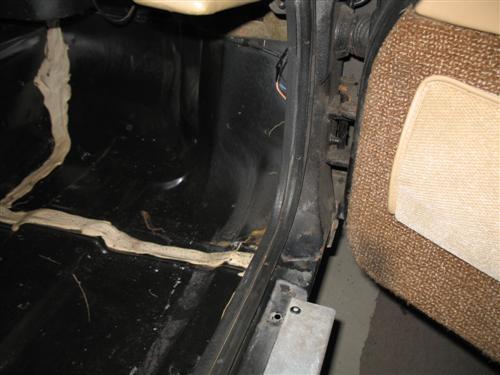
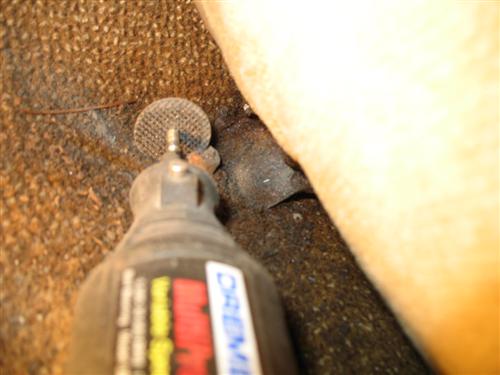
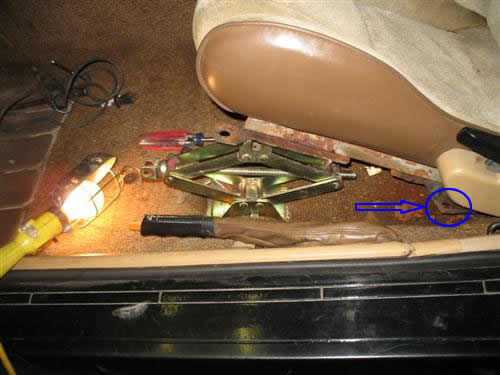
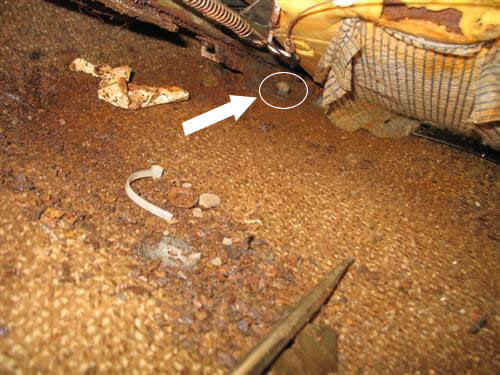
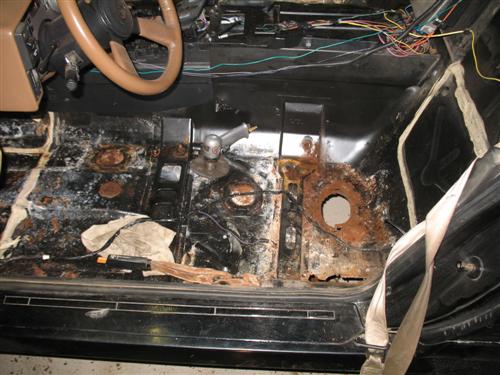
Disassembly of the Black Widow is very slow today got the Passenger side seat and carpet removed much LESS rust than I expected.. Going to use a steel brush grinder and remove that cancer and plug the drip holes than POR15 the whole inside. Paint and Dynamat... Have to weld in new seat bolts .. I had to use a dremel to cut the nuts off they were too rusted. Here are a couple of pictures of the R/H side ... also I bought new seat rails for L/H and R/H should come in the mail soon Looking in the rear right wheel well forward 1 Looking in the rear right wheel well forward 1
[This message has been edited by Danyel (edited 10-13-2009).]
After reading a couple of threads asking how to remove their seats because they are stuck or rusted in I decided to show you how I removed them to change the seat rails. Since the seat does NOT move forward or back you will see it is IMPOSSIBLE to get a good grip on the nut with a 13mm socket wrench or key . Most of the nuts are so rusted, even if you could grip them they will surely strip. So instead of getting frustrated with them here is how I remove these.. Tools required; 1 dremel with cutting disks 1 hammer 1 very large flat tip screwdriver 1 car jack
Step # 1
Front Bolts are the easy ones... using the dremel disk cut through the fronts of both nuts. Just make a front cut where you can insert the large flat tip screwdriver. Once the cut is done insert the screwdriver in the cut and give it a good wack with a hammer... the nut WILL snap after a couple of good hits.
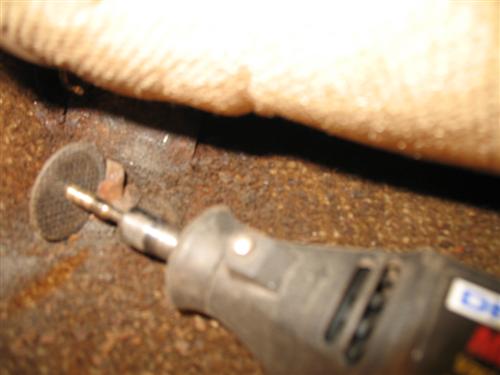
Step # 2 Once both front nuts are snapped off use a car jack to lift the front of the seat very high in the air. this will give you dremel acces to the outer nut. Do the same.. cut a line in the side of this nut so you can insert the screwdriver to give it a hit. You can see that once the seat in jacked up you also have good dremel access to the hardest one to reach in the back. Make sure you cut in the side of this nut to insert the screwdriver. I have done 8 seats with this method and the bolts can be reused to hold down new seat rails down. Try not to go through too much of the bolt with the dremel as you cut through the nut .....for you will have to re-weld new ones if you do.
Once cut just tug on the seats and Voila !!!
[This message has been edited by Danyel (edited 10-16-2009).]
Well this afternoon spent a couple of hours on the parts car disassembling it. I've included a couple of pics in case anyone sees anything they would need or want to buy. Still got the craddle to drop and the front end to remove and this Fiero will be history ... My schematics for the LED rear is all done Using 500 Superflux 25,000 mcd. PWM and 9 segment sequential turn signals... more to come on this build ...
Well has been a very busy week. Got the Parts Car engine craddle almost out then I will remove some other useable parts then send it to the scrap yard. Here are the pics from this week-end. Will follow up on my LED tail lights build very very soon. Lambo doors will be ordered this week Engine almost out side view
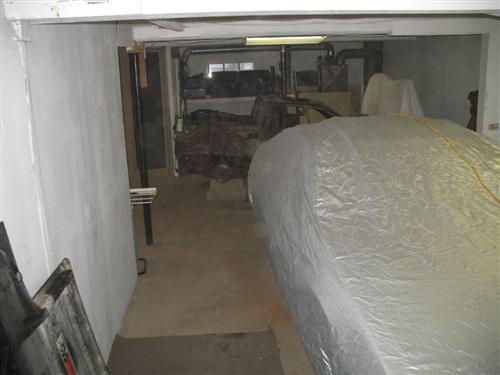
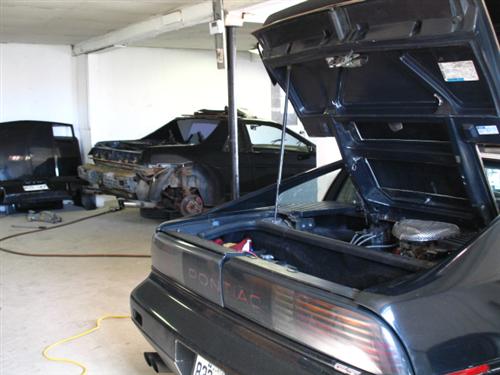
Rear side view Black Widow under cover Foreground Parts Car in the back
Found this on the forum I'm redoing it in high resolution
Just Got news from Jesse ... say my hinges got delayed a couple of days missing parts ... that's OK He gave me a heads up ...very Professional. Cant wait though to get them on.
Patiently waiting for your lambo door install. I am thinking of doing this on my 86 V8 Coupe. Also thinking about Suicide doors. Keep up the grat work.
Man you're really going all out aren't ya? Awaiting the hinges pics too. Only a select few cars I've seen pull it off in a fashion I like. Such as Hardpact's car, I want to make babies with it(I'm pretty sure I stalked it hardcore at the last meet). I think it'll look great on your car too!


.jpg)

.jpg)
.jpg)
.jpg)


 I think it had something to do with mounting locations, but without a car and or clip in-front of me, I don't know.
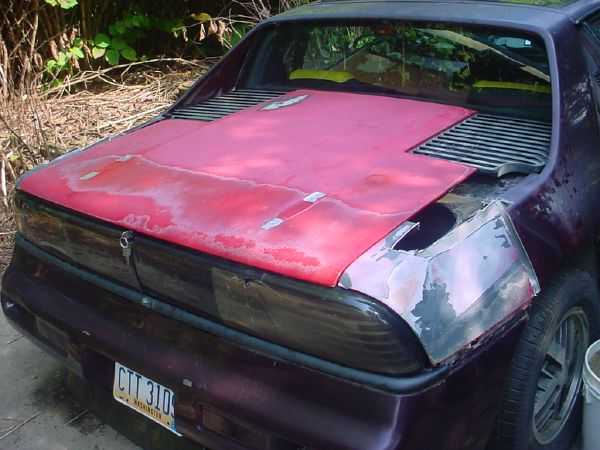


 will keep you posted here THX again..

 Going to use a steel brush grinder and remove that cancer and plug the drip holes than POR15 the whole inside. Paint and Dynamat... Have to weld in new seat bolts .. I had to use a dremel to cut the nuts off they were too rusted. Here are a couple of pictures of the R/H side ... also I bought new seat rails for L/H and R/H should come in the mail soon