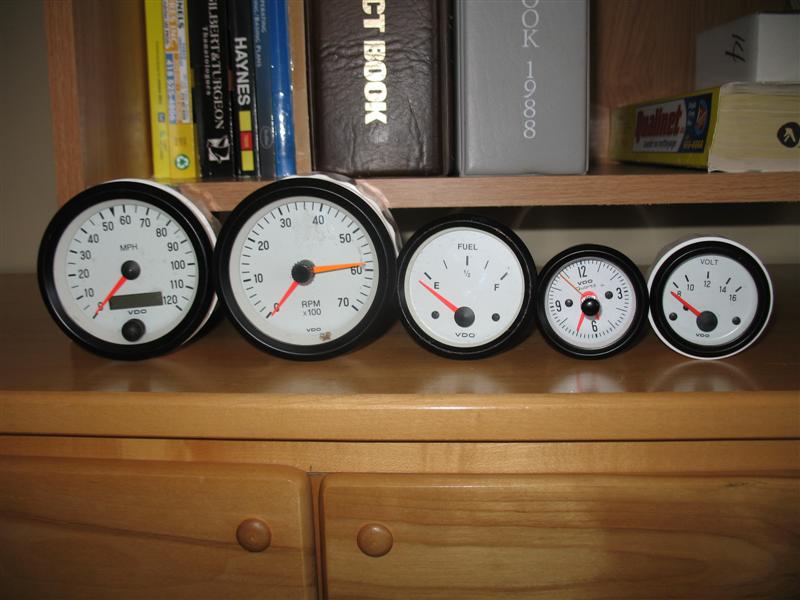
yeahh today I received my ICs so that I can complete my rear LED tail lights control units ... these are Maxim IC circuits ... they will control the 2 modes (parking and brake) for LED intensity ... here are the ICs
Perty huh ............. but now I gotta find a way to solder them onto the IC board ....
I guess I got to start by finding a socket for them !! They are pretty small !!!!
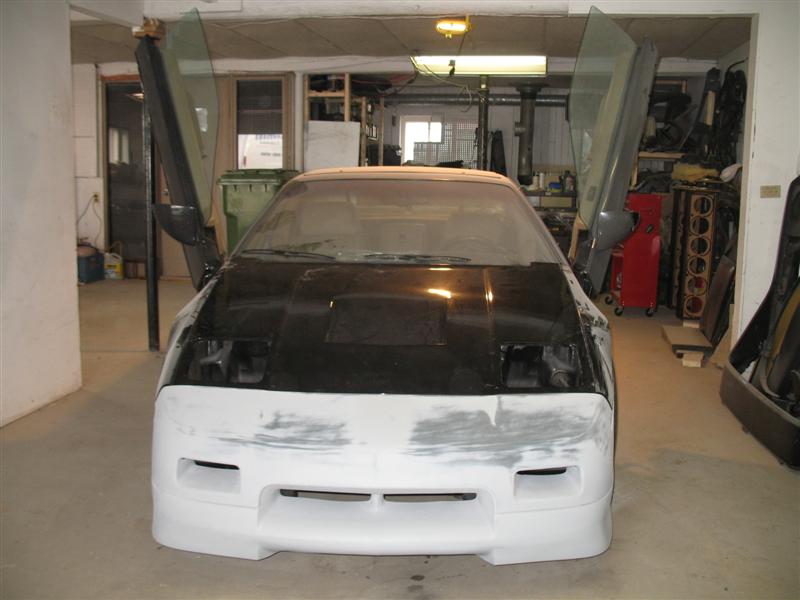
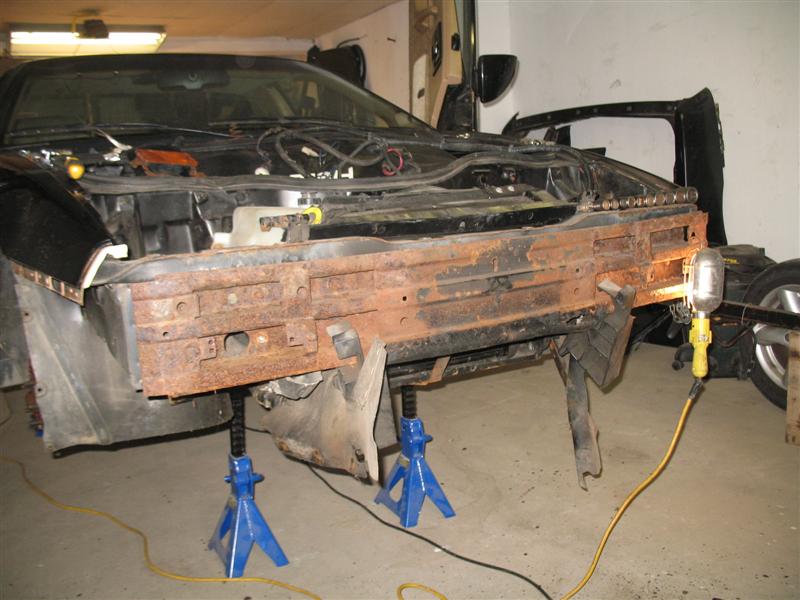
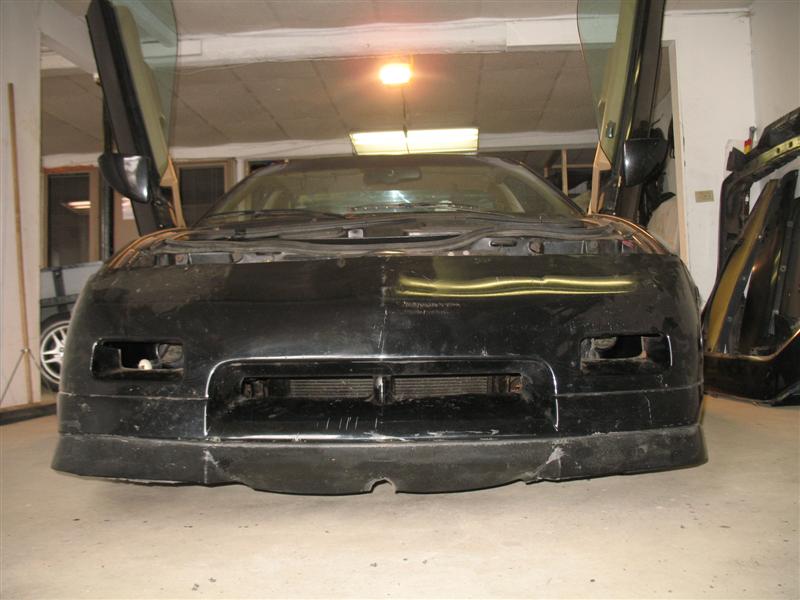
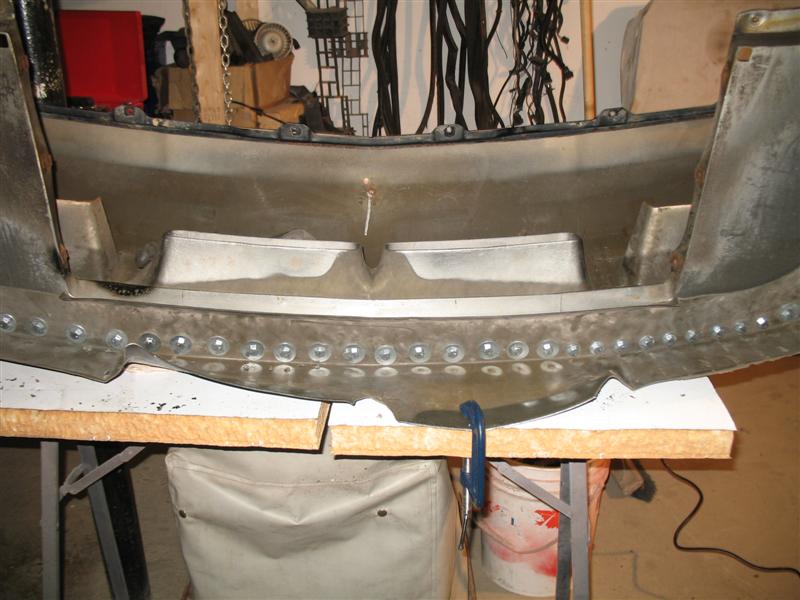
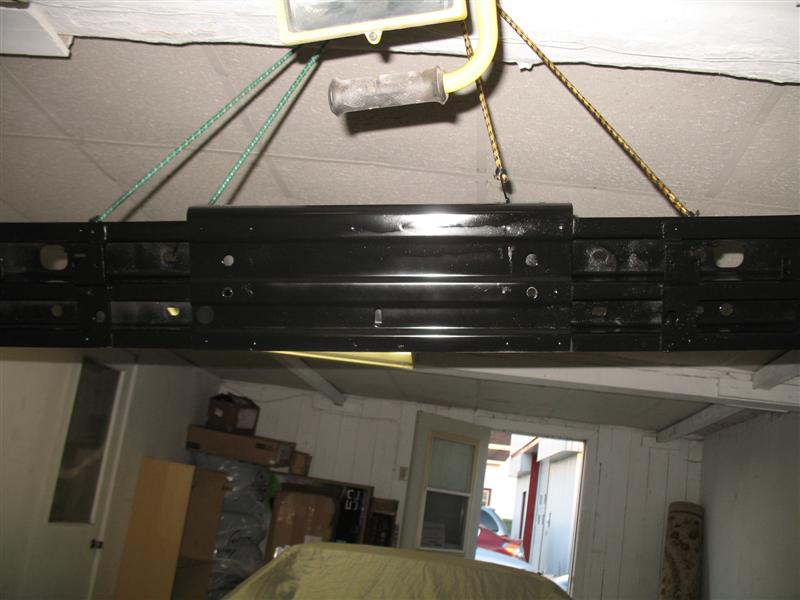
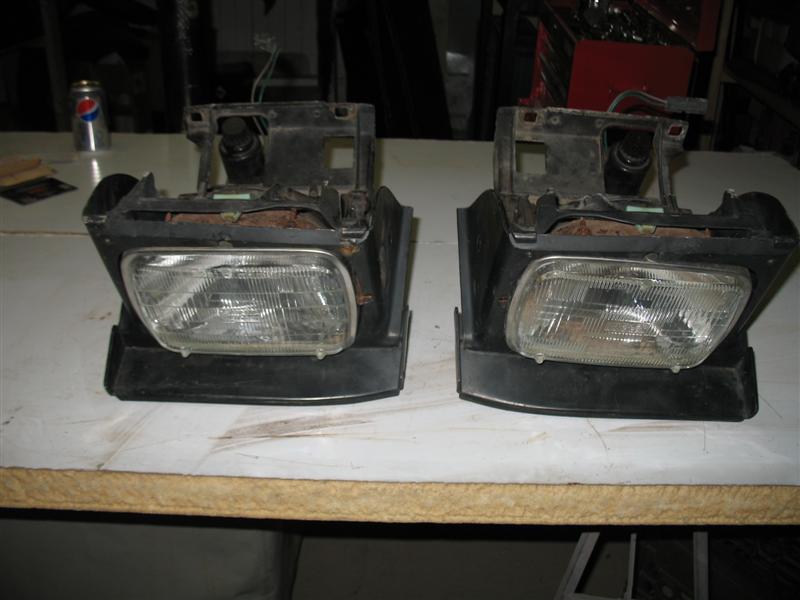
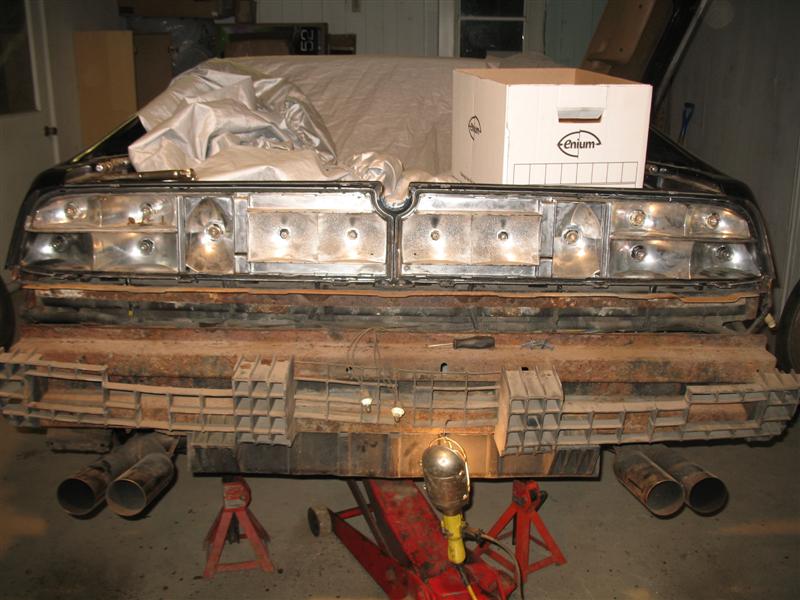
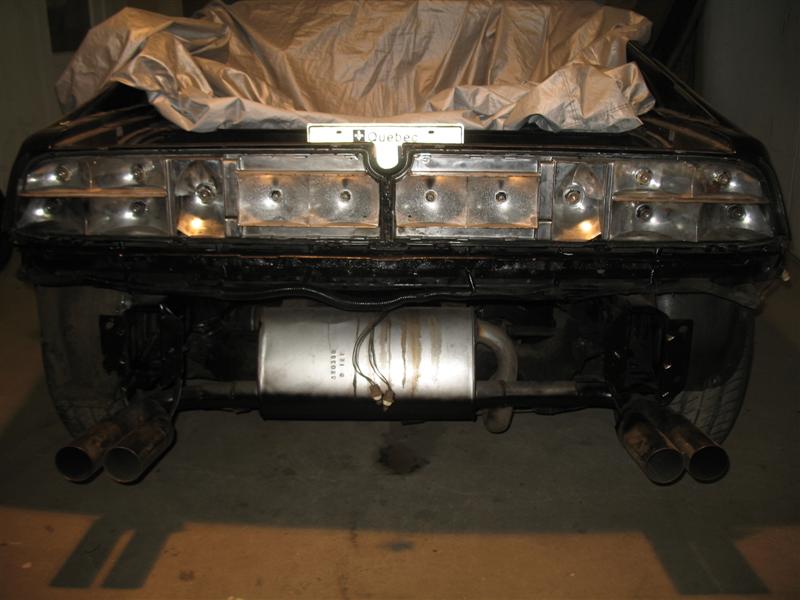
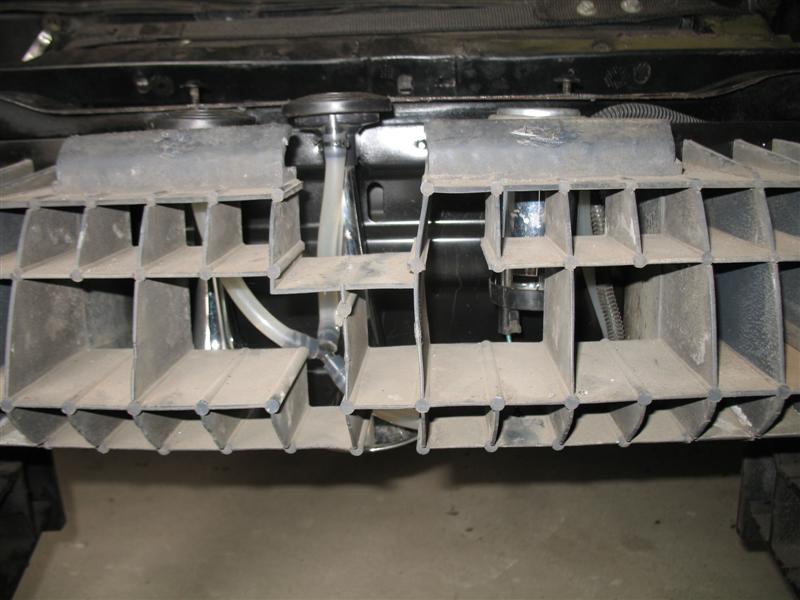
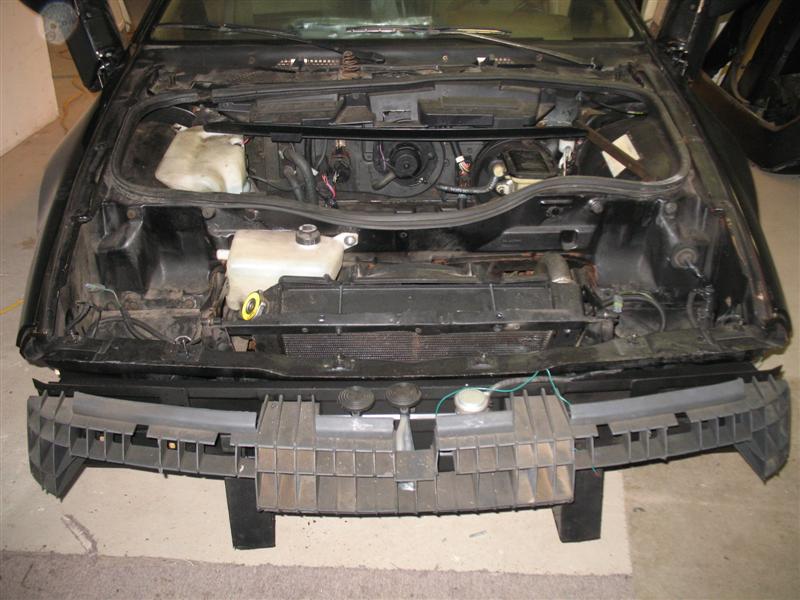
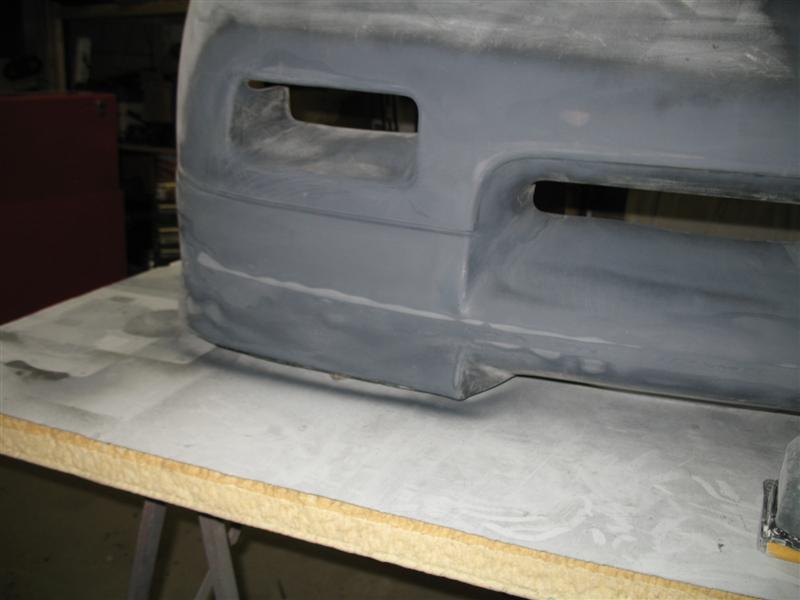
Started tearing down the front end to remove all the rusty stuff and also start putting in the Gen II headlights that I bought from a PFF member. As soon as the front facia came off I was NOT surprised ... northern belt cancer was present.... so removed the crappy stuff and tomorrow buff prime and paint !!! Started also on the facia modifications... more to come...... the tail light panel will soon be istalled for all to see .... I'm makin it purty right now .... stay tuned .. here are the pics.
yep rusted like hell .... the turn lamps fell on the ground when I pulled off the front facia !!!
This is still something I want to do. I haven't been able to find a nose piece that is damaged so I am not messing up a good one and the cost to ship these things is aweful. Wish I had bone yards closer to me that had a couple of Fieros in them. I think they crush them right away. Looking good by the way. Can't wait to see the LED tail lights in action.
yepp been very busy assembling LED markers and working out the kinks for the LED front turn signals ... but they are coming along fine ... its a LONG weekend and I will spend it in the garage .... lots of work to do ... also the TRIP SCHEDULE to Frazee is all completed I will start a new thread in july so you can track my whereabouts on the way. (Thread = "Frazee here we come" Will also have LIVE FEEDS ... Ok so here is what came in today ... I also bought a front impact bar from PFF member " toomanyfieros " Should get it for next weekend ... I got lucky on Ebay this week ...
Gonna be very busy this week-end finishing up the rear tail light panels I will post pics !!! and also cleaning up the engine bay !!
[This message has been edited by Danyel (edited 04-24-2011).]
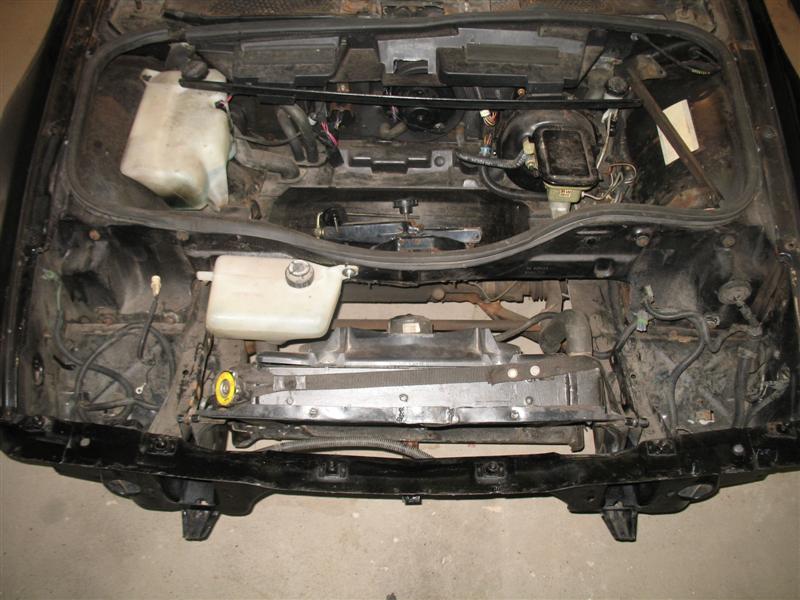
Yesterday got the front end all cleaned up ...I'm working on the engine bay cleanup and doing the battery relocation to the front.. The wires are going through the inside of the cab.... Got a long ways done on the front end facia mod .... pics to come ............ here are yesterdays work pics
Yesterday got the front end all cleaned up ...I'm working on the engine bay cleanup and doing the battery relocation to the front.. The wires are going through the inside of the cab.... Got a long ways done on the front end facia mod .... pics to come ............ here are yesterdays work pics
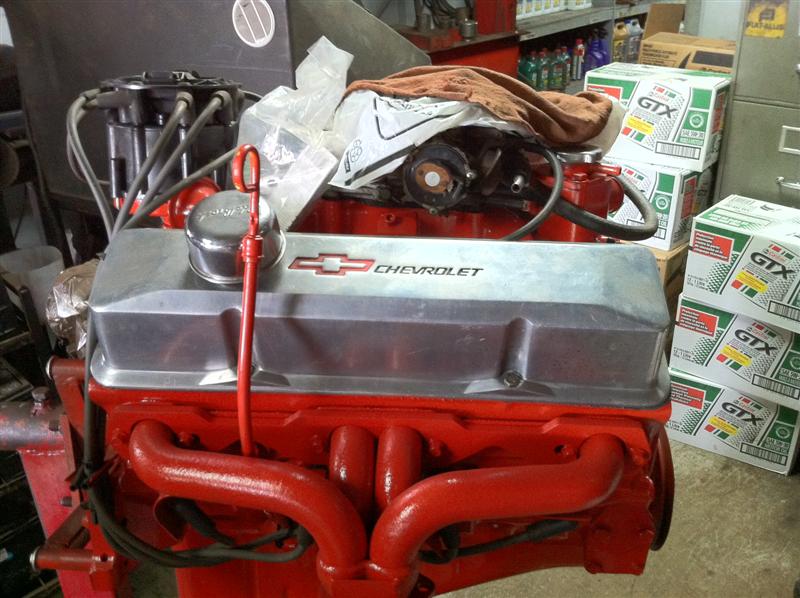
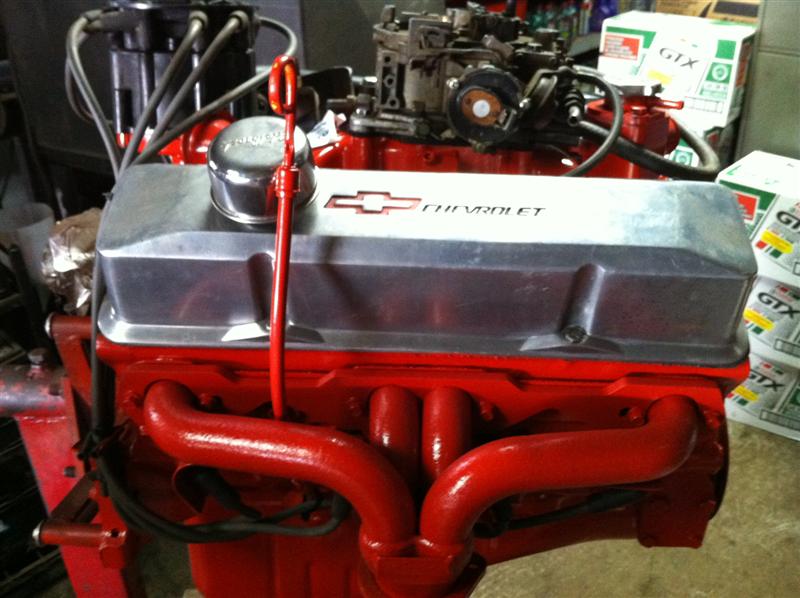
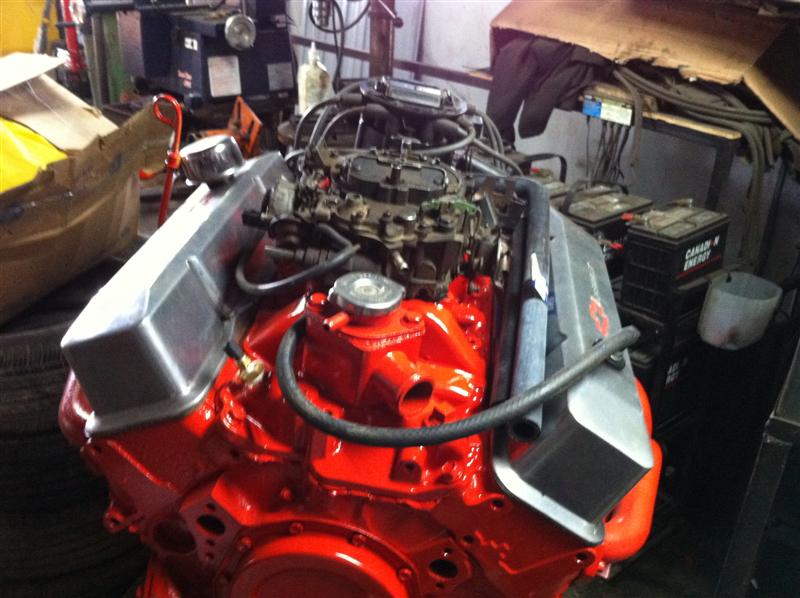
Well the week end has been VERY productive .... I went over to my mechanic shop to look at my new engine ... WOWWWW she's reallly nice lookin the PO had painted it all orange and had bolted it to a electric generator ... it looked like crap before ... so my mechanic Carl redone it ... had a racing cam, roller rockers and it was bored 30 over ... She is repainted Flame red ... looks orange on the pics though ...
[This message has been edited by Danyel (edited 10-10-2012).]
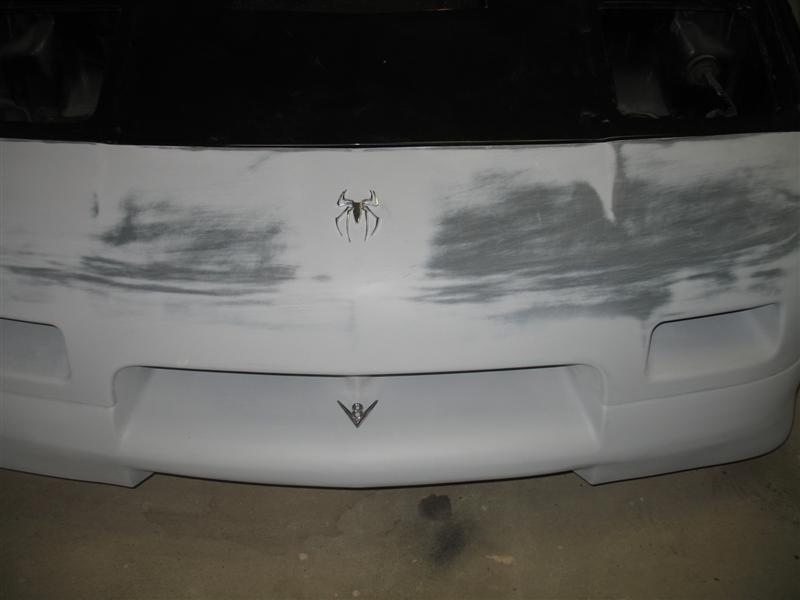
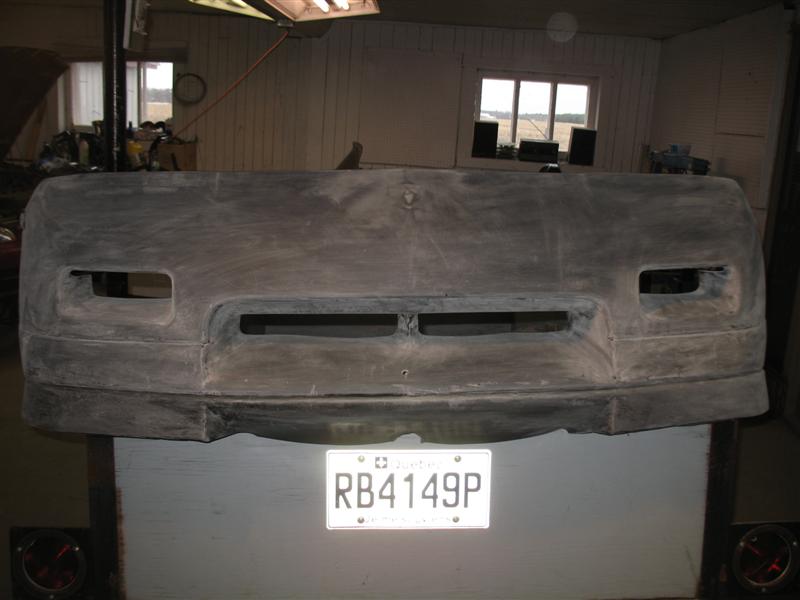
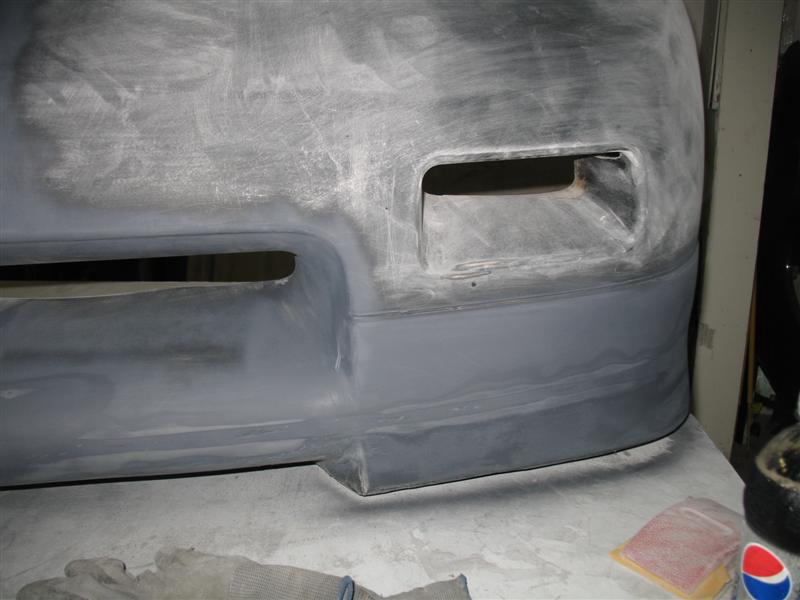
Also got along ways done on the front facia ...and took pics but I am not all done .... will fill in the line and sand and repaint ... got the Widow logo to install also its gonna be recessed ....
Well had the afternoon off so I went to my garage to finish up a couple of things ....
Got the GEN II wiring in and the motors swapped also.
The facias are now bolted together ....
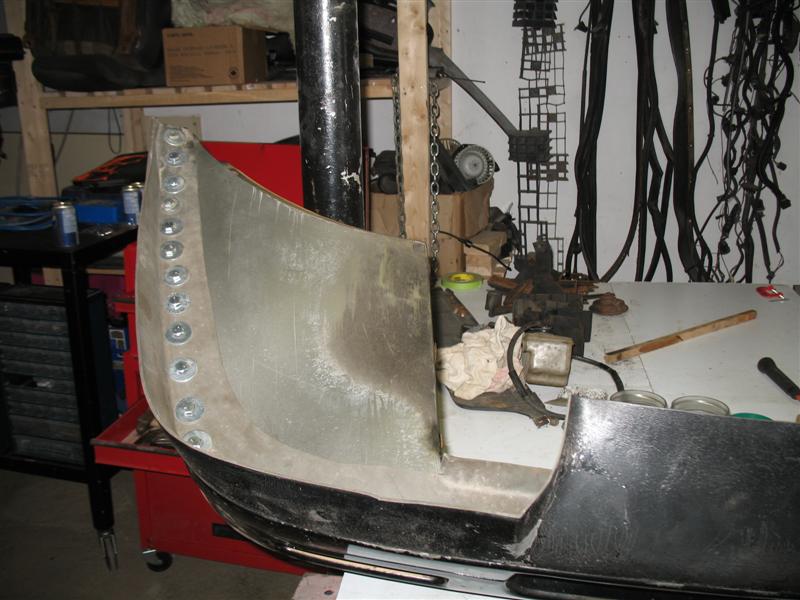
Started sanding but I got an issue the center of the upside down facia is drooping (just over the licence plat of my trailer)... humm at what length did you cut that lip ... did you fasten it up?? I really dont know what should I do ... any suggestions ??
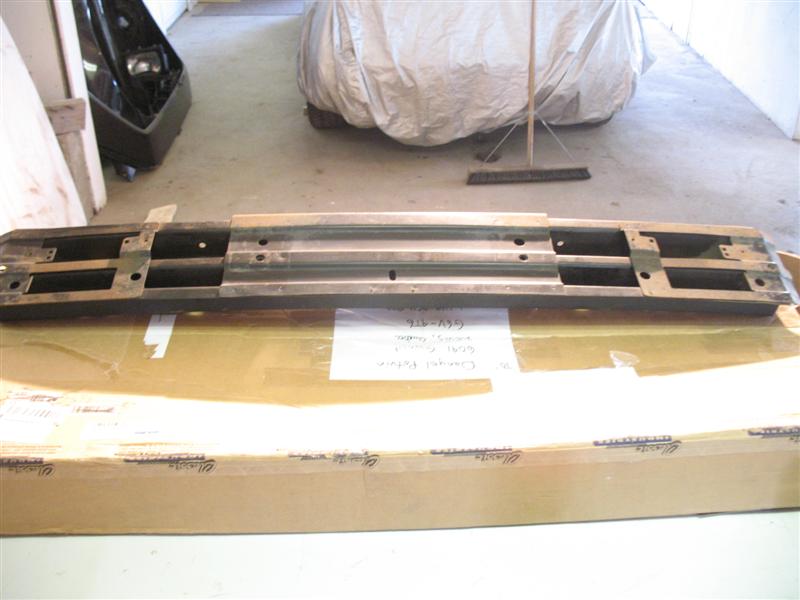
Got some goddies today ... I will give you a little hint on what the tail lights will look like when done... I also received "toomanyfieros" front impact bar today THANKS TIM brought it to my garage and started cleaning it up ....
This is how it looked like when I received it ...... and with a little elbow grease and some TREMCLAD Black Gloss Paint .....
TADA !!!! ...... one new front Impact bar ready to install
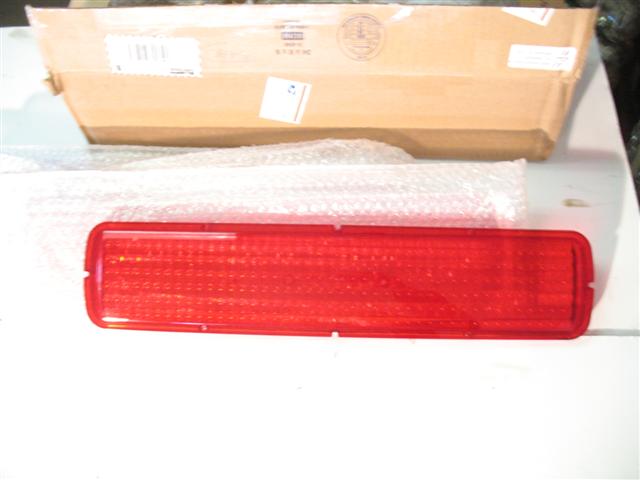
Tonight I also finished up the GEN II swap but I'm going to do the 6 x 4 "doublec4" mod to them this weekend . . OK now for a little reveal ... I finally got these in the mail TODAY after 4 months of tracking ..... These will not look like this when I done modifying them to install into JPH87 one piece tail light panel but ...... drummm rolll
hehehehehe HOLD ON not just yet............ STAY TUNED !!!!
[This message has been edited by Danyel (edited 04-28-2011).]
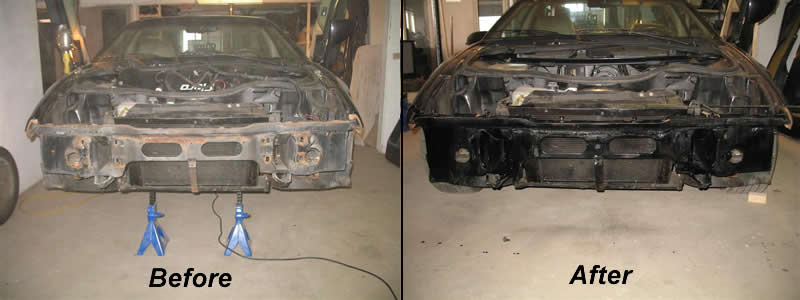
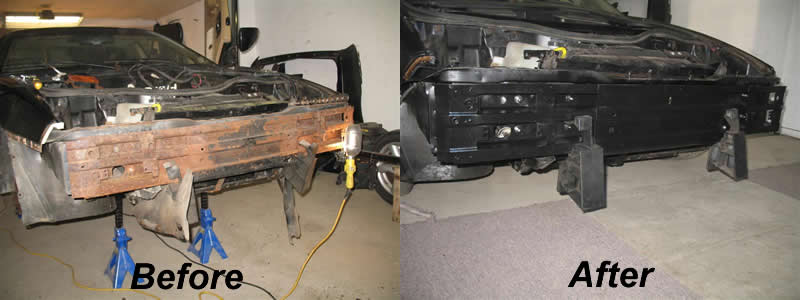
I was working this weekend with my student on a school project ..... I was able to put 1/2 a day in the garage to work on the Widow. Here is a Before & After pic for you to see....
very nice! i always wanted to see a 350 build thread. a few questions. why a 350? there heave as heck and would hurt the handling. also what trans can you sue for the 350? i have built some crazy little 350s about 8 to 10 years ago and had lots of power. im just wondering what trans would work best for a 400+ HP motor.
Ruffy --- I have a OEM fiero 4 speed in it with a Centerforce clutch .. I still have not had any issues tranny wise ... must be I do not over do my 0 - 50 accelarations .. I do have a couple of drag strip runs but usually I drive like an oldie I'm never in a rush and love to hear the Widow's V8 growl at low speeds ....
NICE! i didnt think them old 4 speeds would handle that kind of stress. i am however not as nice some times with my cars at times lol. i love to feel my back as is pushes against the seat when smashing down the throttle. as for that V8 rumble i love it to! i have a v8 in mine but not a 350.
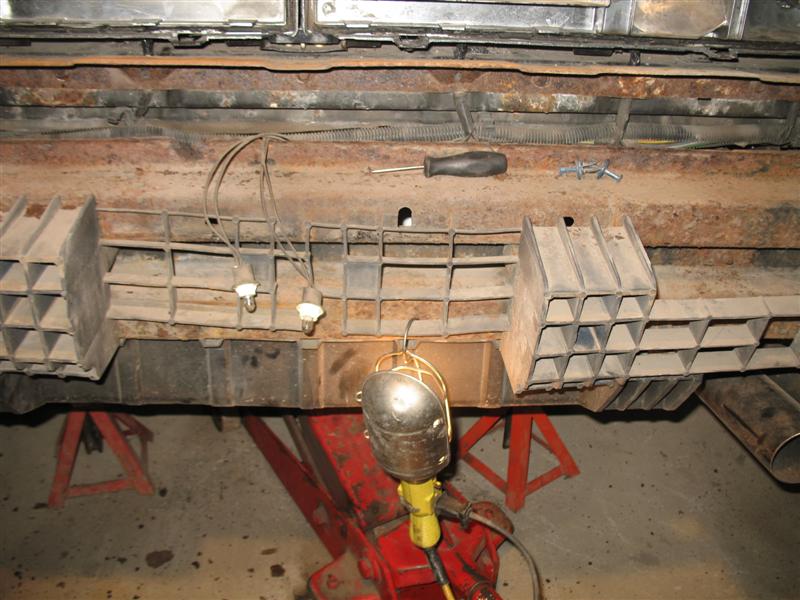
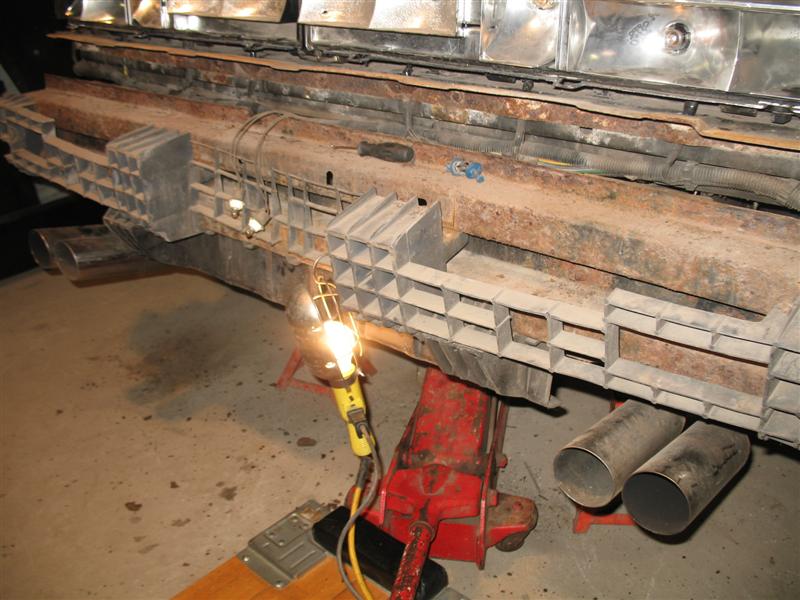
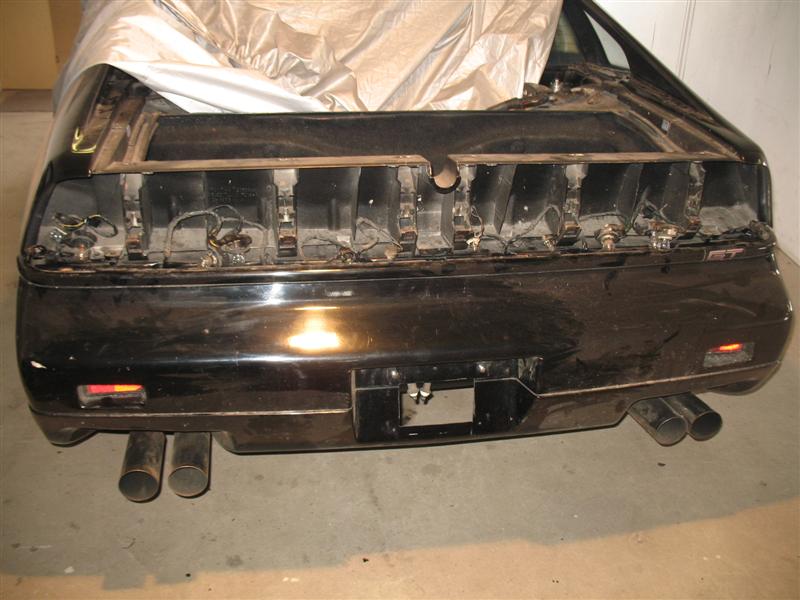
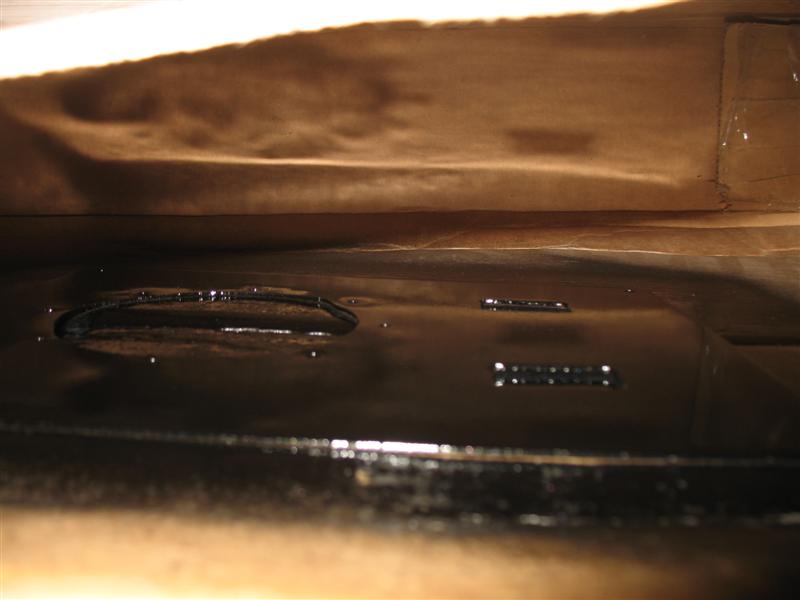
Tonight got to working on the rear hidden hitch install ... but first got to clean up the rust ... boy let me tell ya there is alot more back there than I thought .. so I removed the rear bumper and to no surprise .... RUST .. gonna post on the mall to buy a Rear Impact Bar .... here are todays pics ... Tomorrow I'm gonna start on measuring my hidden hitch I had on my Sunfire GTX and mod it to weld up to the Widow frame.... Here are tonights pics ... lots of work to do ...
As you can see lots of work to do gotta find myself a Impact Bar
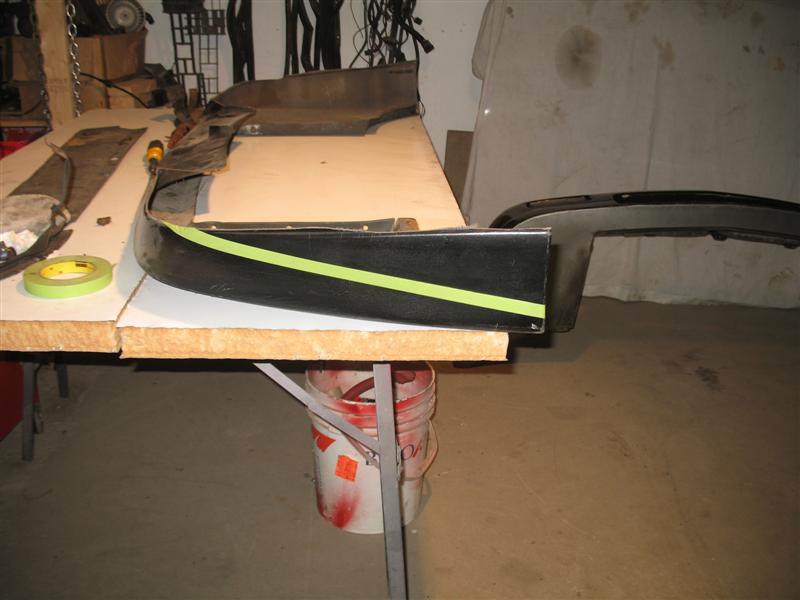
Ive decided to not put in a OEM Impact bar instead I will weld on a square tube so it will support the hitch reciever. I took measurements cut out the hole and will bring my old hidden hitch to my welder so he can weld it in properly. I got time to also patch up my front fascia and get it ready for sanding and paint. My tail lights also are fiberglassed together ready to receive JHP87 one piece tail light panel .... here are todays pics
About your front Fascia. I have an idea. I'm not sure if it will work but here goes. You could take that one that you have there and take the whole center out so you just have those 2 side pieces left right? Then take your fascia from the widow and cut along that line on either side, drop it the 3 or so inches, put in those pieces of the other fascia and glass over it. Should come out looking something like this...
Well had the afternoon off so I went to my garage to finish up a couple of things ....
The facias are now bolted together ....
Started sanding but I got an issue the center of the upside down facia is drooping (just over the licence plat of my trailer)... humm at what length did you cut that lip ... did you fasten it up?? I really dont know what should I do ... any suggestions ??
That C-clamp in the top photo is one of the reasons you have the "perma-droops"
Flip the nose upside down and hit the center section with a heat gun and try reshaping the center back to normal. If that doesn't work you will likely have to glass in some aluminum reinforcement on the inside of the droopy section...a couple of sharp "V" shaped strips approx. 1-2 inches wide with the small end of the "V" pointing forward, (one on each side), should do it.
I also don't think you used enough bolts to hold the chin spoiler on!!
Randye ---- I think you are right about the clamp ... I,m gonna try your method to reshape and will also fasten it up .... I did run out of nuts & bolts
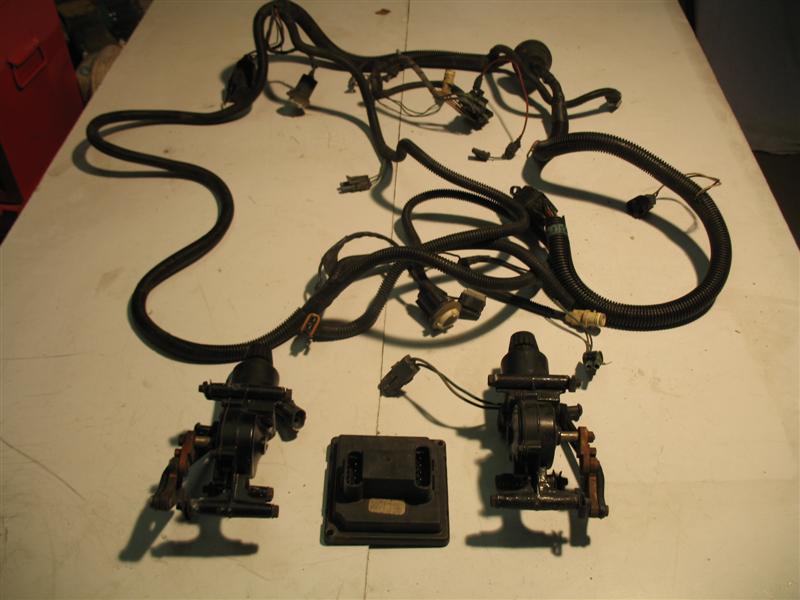
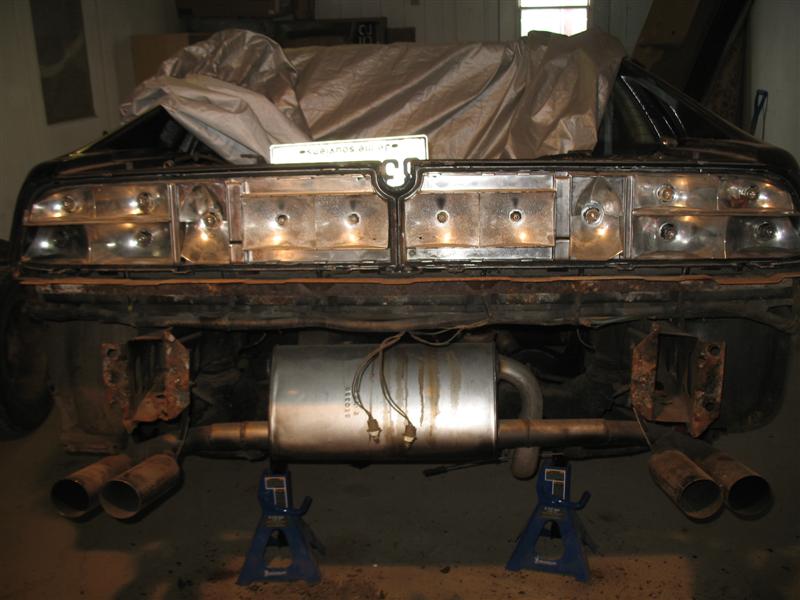
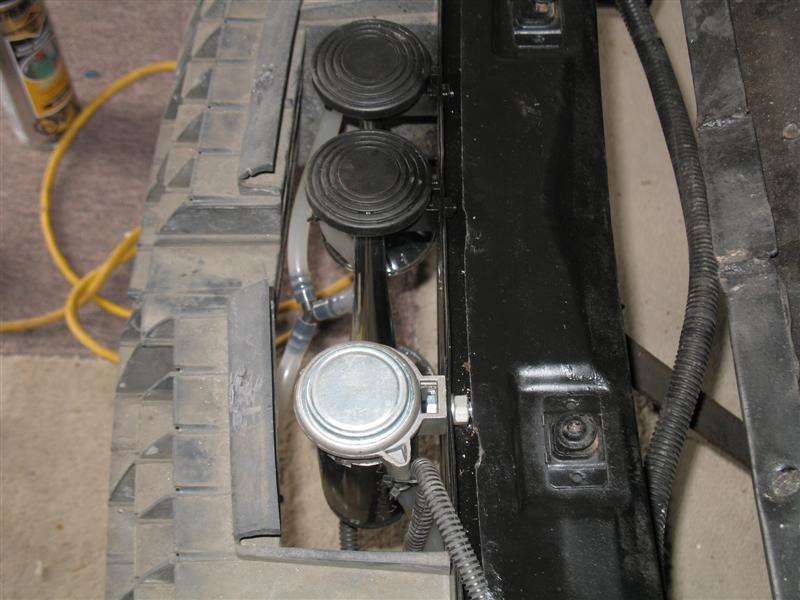
It's been a very short weekend.. had to work Friday night and Saturday but I got to put some time in today. There were a couple of odds and ends I wanted to complete because they were really bugging me so I did those. I installed my air horns between the impact bar and the honeycomb. Painted the shift console cover black to see what it would look like... but I find it is TOO black will have to do some kind of color scheme and put one of my metal spiders in between the power window buttons. I also started to redo the wiring in the engine compartement.. the LT1 is getting re-inserted 24th of May. The PO did a crappy job on the wiring so I started separating these so I can look in the service manual what their uses are .... I still have alot of work in the engine bay to do like clean up and put in a heat shield..... huuum long way to go still but we will be ready for Frazee ... we are heading out there 18th of Jjuly .... more on road trip soon .... here are todays pics.
Close up of the air horns
They are located between the impact bar and the honeycomb
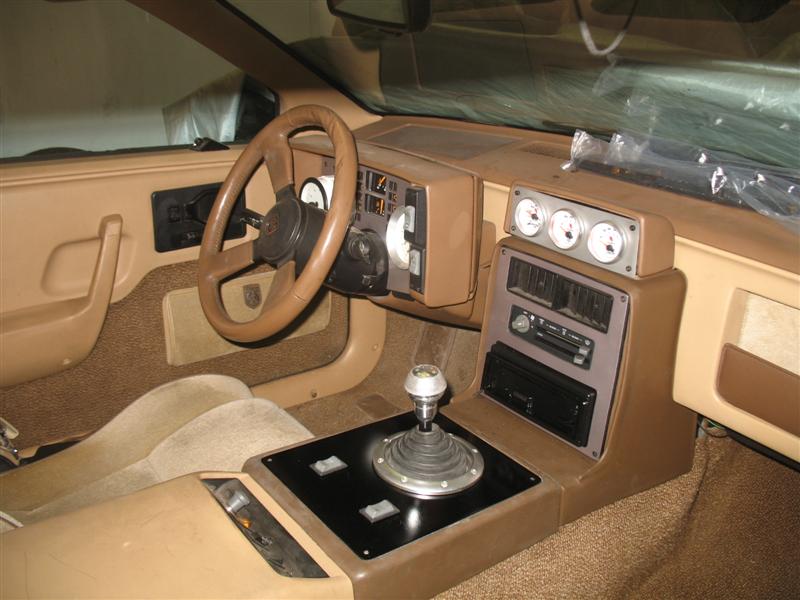
Center console test painted ... looks way to much black gotta figure out a paint scheme
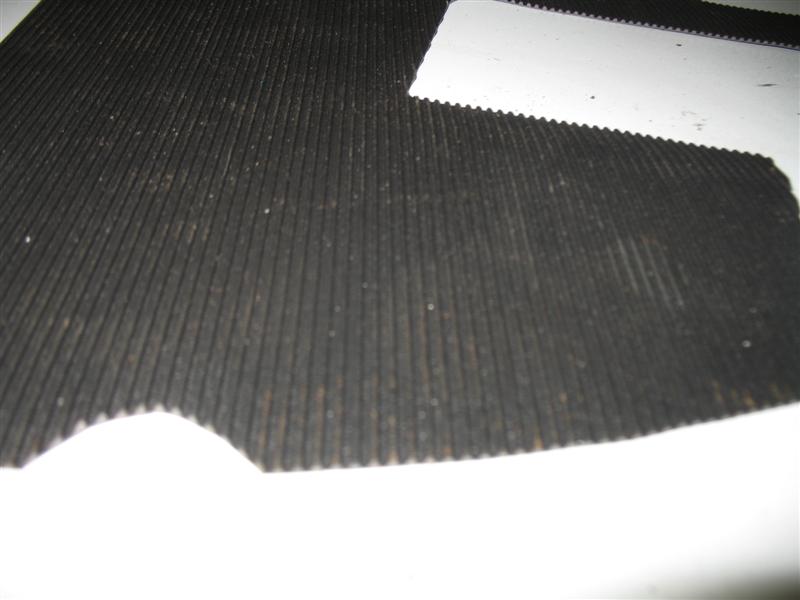
Tonight was able to get some work done. I went to Home Hardware and bought a rubber carpet 36 in x 36 inches cost me $4.75 and did some modifying to it...
Close up of the carpet
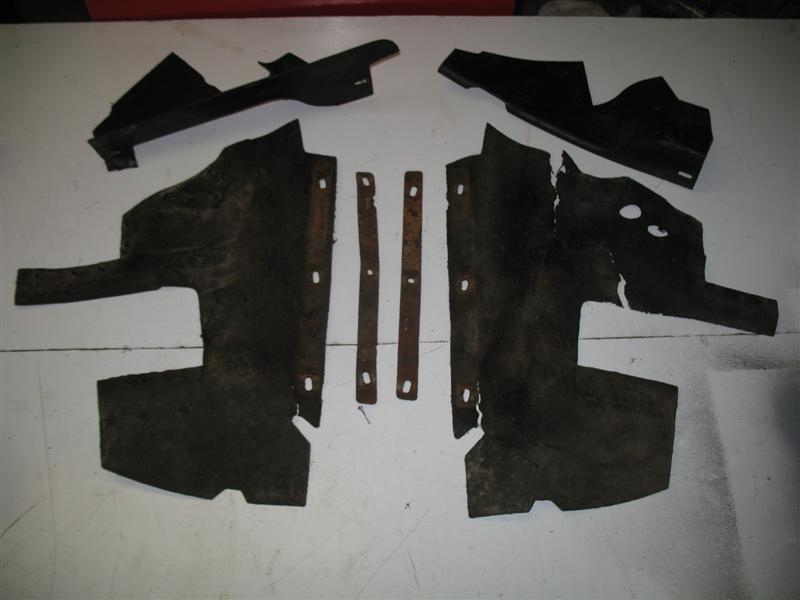
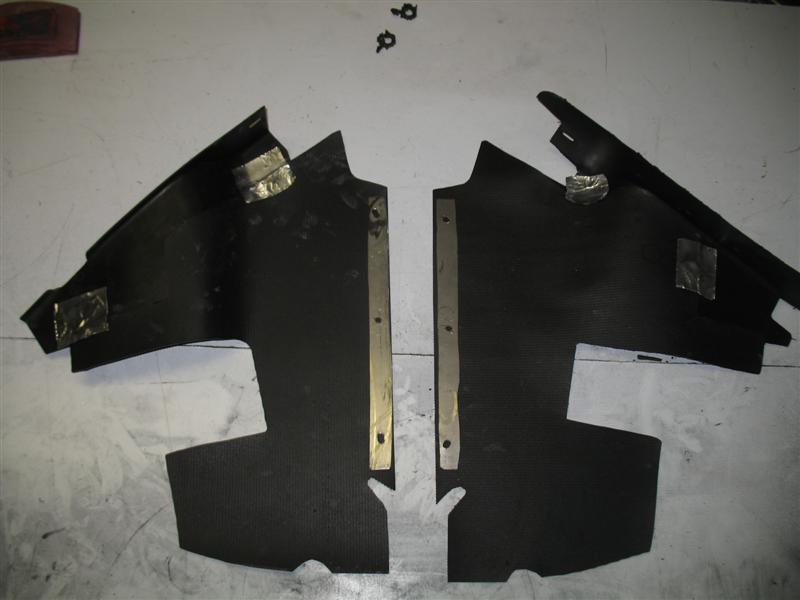
Then I took apart my front fascia radiator left and right shrouds apart
trace the pattern onto the rubber carpet and cut them out and VOILA !!! New shrouds cost me $4.75
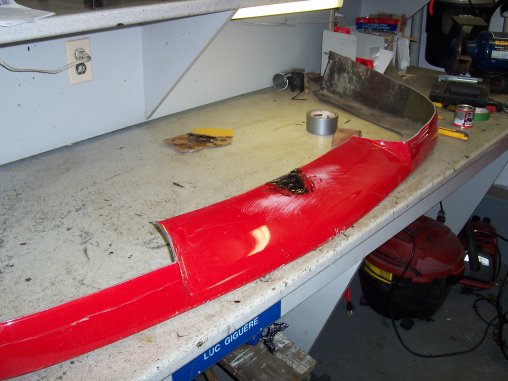
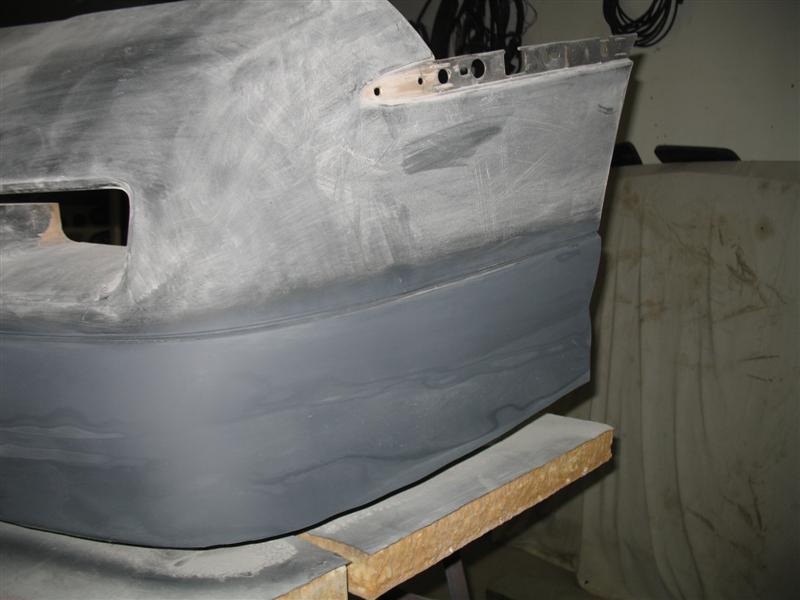
I also did more sanding on the front fascia and heated up the chin spoiler to try to remove the droop ... nnahh didn't work gonna build an aluminium support for it..
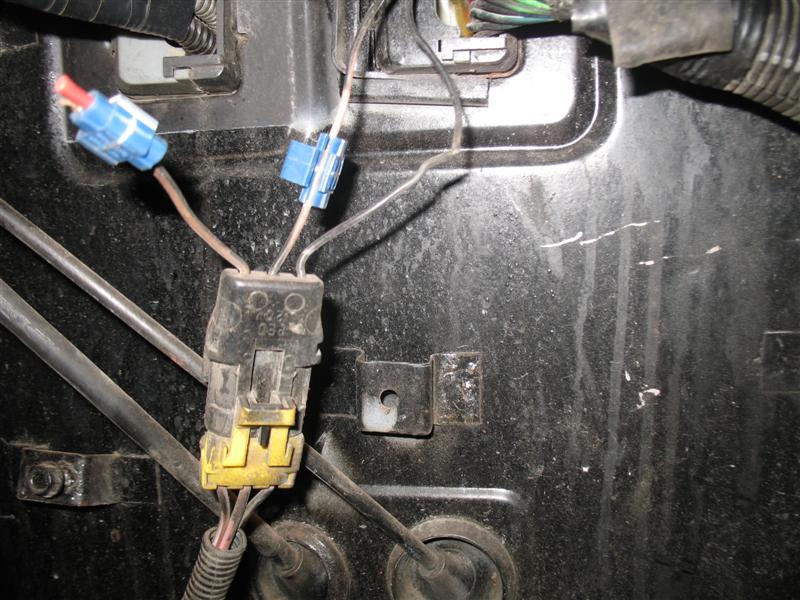
Now I have a problem !!!! one of the wires from the gas tank is cut .. any of you guys know where these plug into ?? Cant seem to find the schematic for that plug !!!
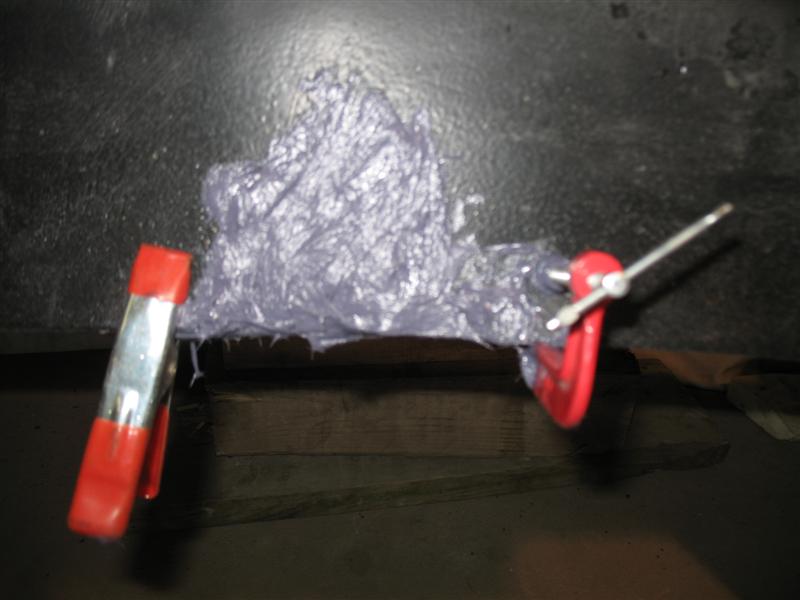
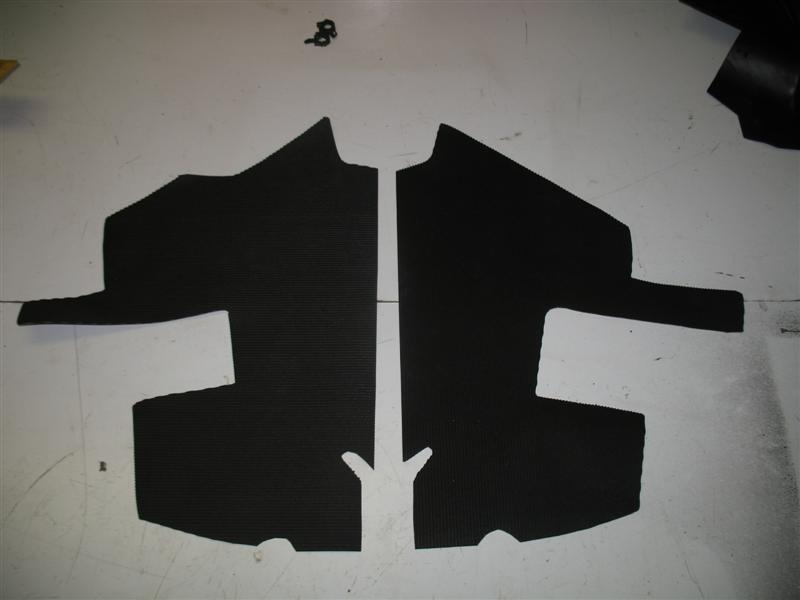
Got another couple of hours in ... almost done with the radiator side shrouds ... I'm going to bolt the parts together I glued and taped them so It will be easier to drill holes and use nuts & bolts. Here is a pic of them glued and taped together .
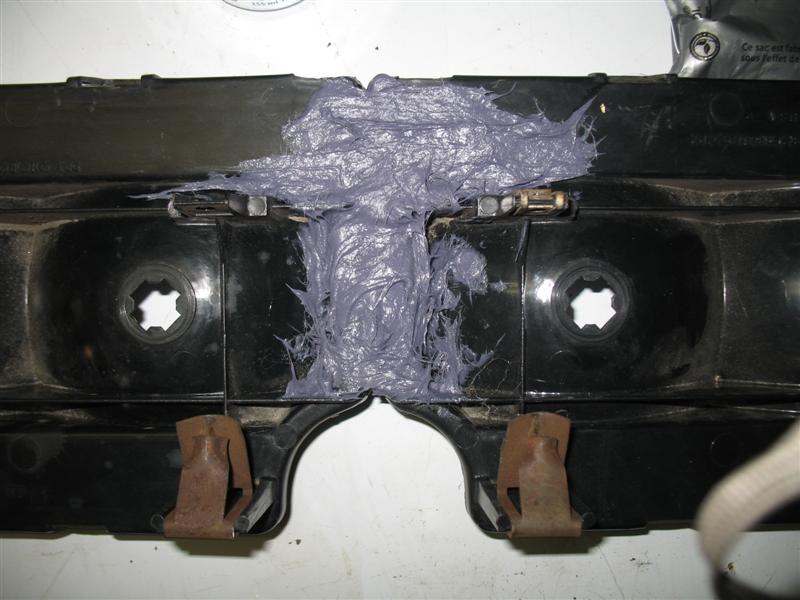
I prepped the front facia and glassed the chin spoiler to the fascia ... thats why there are tons of nuts & bolts to hold them together. started sanding the spider cracks would of kept them to go with the theme ... but really doesnt look good... I sanded to the previous color ... GOLD hummm yep color code says it was originally GOLD..
Sanded and pâinted the console faceplate ... gonna look perty
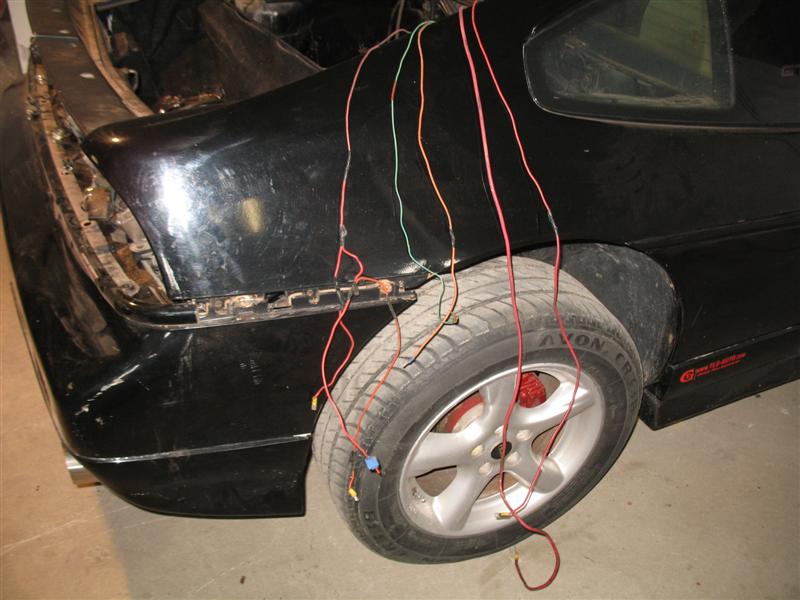
The front end is almost complete its ready to start the battery relocation mod ... lots of sanding this weeked also gotta start tie-rap my battery relocation cables .. wanted to pass them through the cabin but not easy ... went the lazy way underside it is
She will be going to my friends garage Tuesday to get the new 5.7L SBC installed Love the GROWL of a V8.... I wonder is a Fiero with a V8 falls in the category of ''Heavy Chevy'' ?? ... oooh boy Shauna's gonna rip me apart on this too ahh oh well cant win them all ... Does anyone know which wire I must GROUND for the radiator fan to turn on ??? PIC is worth a thousand words ... I have a GEN II wiring set-up now .. Thanks for any help
[This message has been edited by Danyel (edited 05-19-2011).]
My front splitter drooped worse than yours. I just took a chunk of stock metal that was 2 inches wide and put a slight bow in it. Drilled it then slapped a couple rivets. Rivets can look good if done uniformly. Example.
Can't answer any of your questions right now, but man, your car is coming along nicely. I bet the weather has been at least a little better recently. It makes it much nicer to get things done.
Well spent the afternoon sanding and sanding and ... still more to come .. I also put a support for my chin spoiler to stop it from drooping... so tomorrow .... more sanding and the start of the battery relocation wiring Here are todays pics
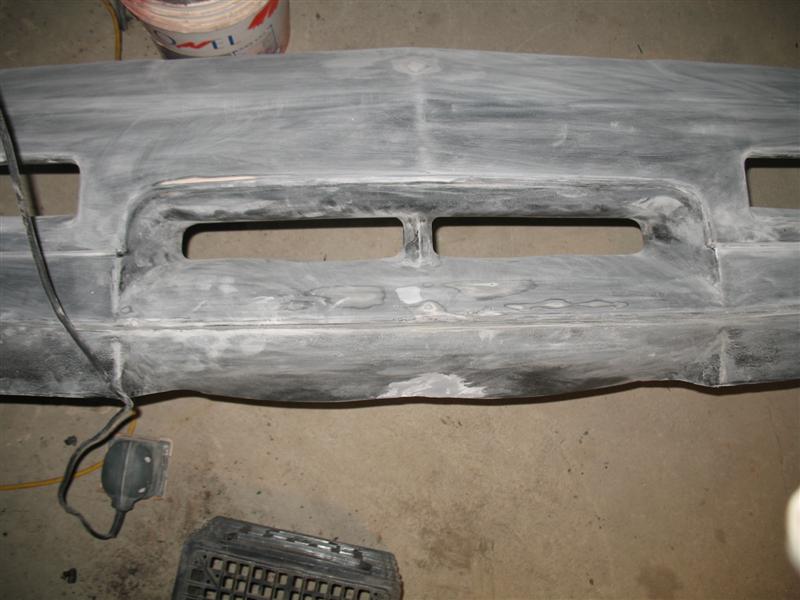
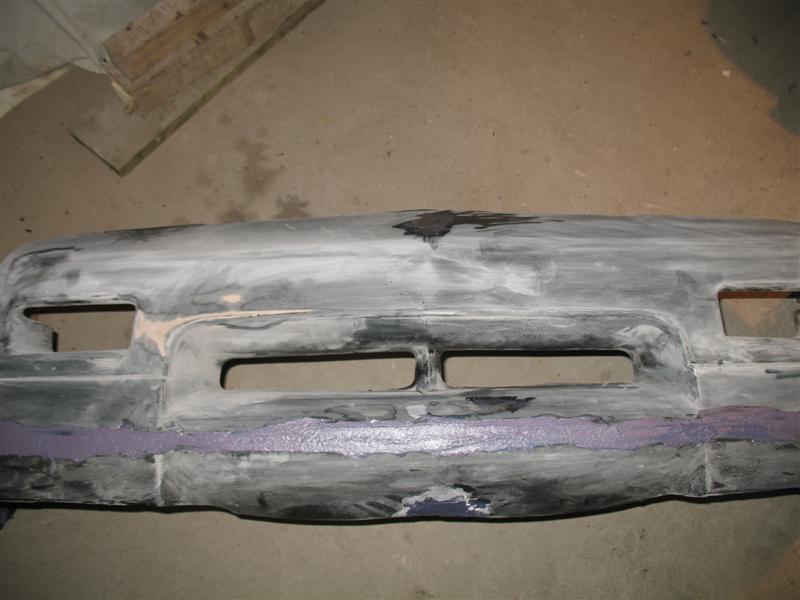
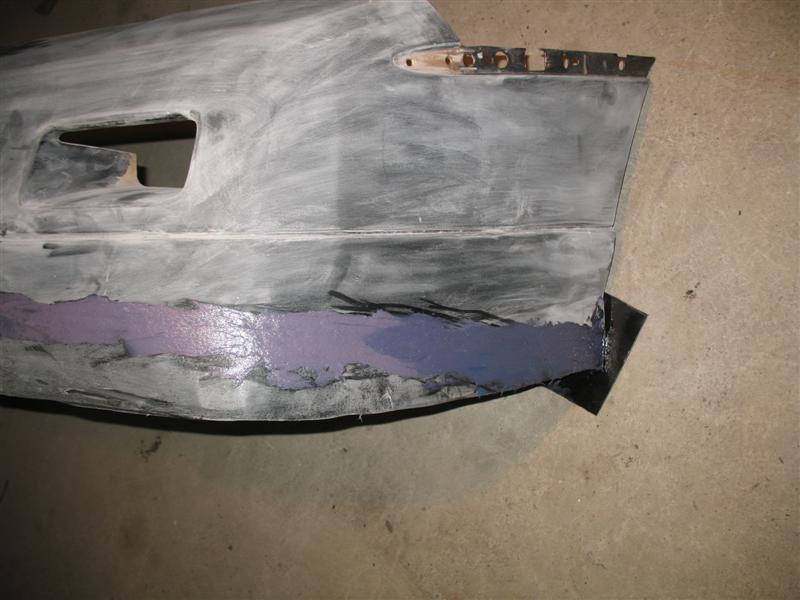
Sandable primer .... shows the imperfections I need to sand
***EDIT*** I'm going to need your make model year etc for those wiring diagrams. Need something to go off in the computer system. Cheers mate - Cody I don't have a schematic on hand for your fuel pump. I'll grab one from class on Wednesday. For now I took these pics for you! ^_^
------------------ 1987 Pontiac Fiero GT Notchback - dropped 2.5 inches - cold air intake - no cat - cherry bomb equipped If my calculations are correct, when this baby hits 88MPH your gonna see some serious sh*t.
[This message has been edited by G_Reaper (edited 05-22-2011).]
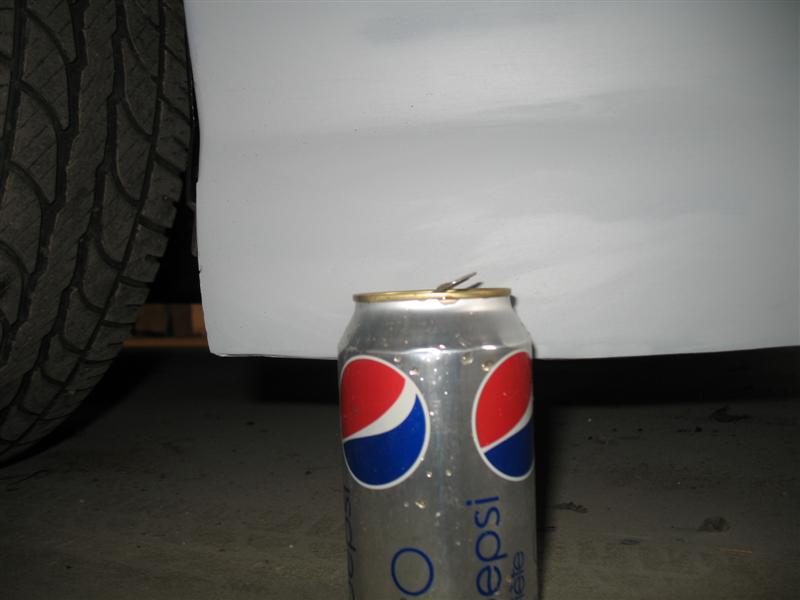
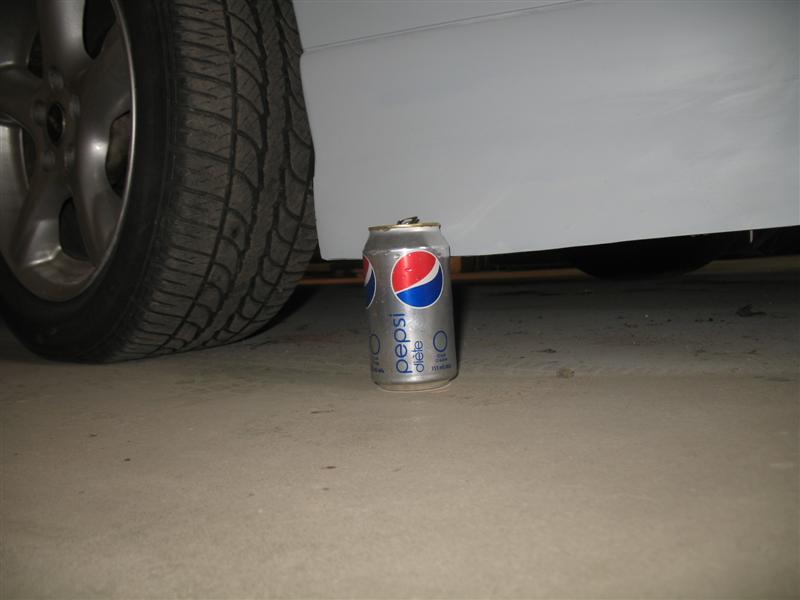
Anoher day at the garage sanding and more sanding but this time its completed yeah !!!!! Spent more than 15 hours on it just minor things to get done .. I couldn't wait to take pics ... I opologize for the dust and all ... still have a couple of little things to correct .... here are todays pics including the old pop can picture
She's really taking shape
Once painted black her ID tags will be put on D
The two next pics are with the pop can fascia clearence ...
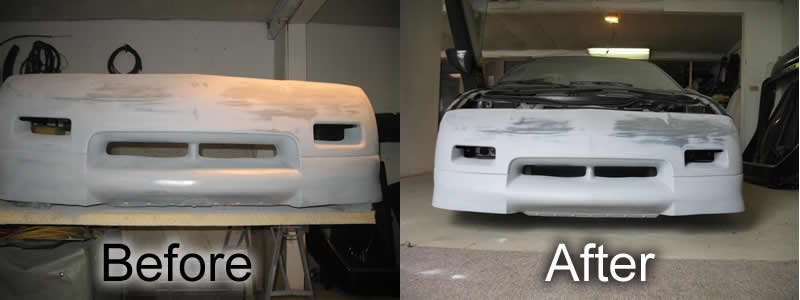
Three day weekend got some work done also today fixed up the chin spoiler droop I had going on. here is a before and after pic.. just got to raise the lip by and inch or so ... look alot cleaner .... she (facsia) will be going in for paint this week... also redid the headlight covers ... this week will be doing the 4 x 6 headlight swap ... and waitng on the parts I bought from michfiero which cam-a-lot had the friendly gesture to pic them up for me in the USA. Thanks CAM


.jpg)
 ............. but now I gotta find a way to solder them onto the IC board ....
.jpg)


 Lookin good!


 I bet the weather has been at least a little better recently. It makes it much nicer to get things done.
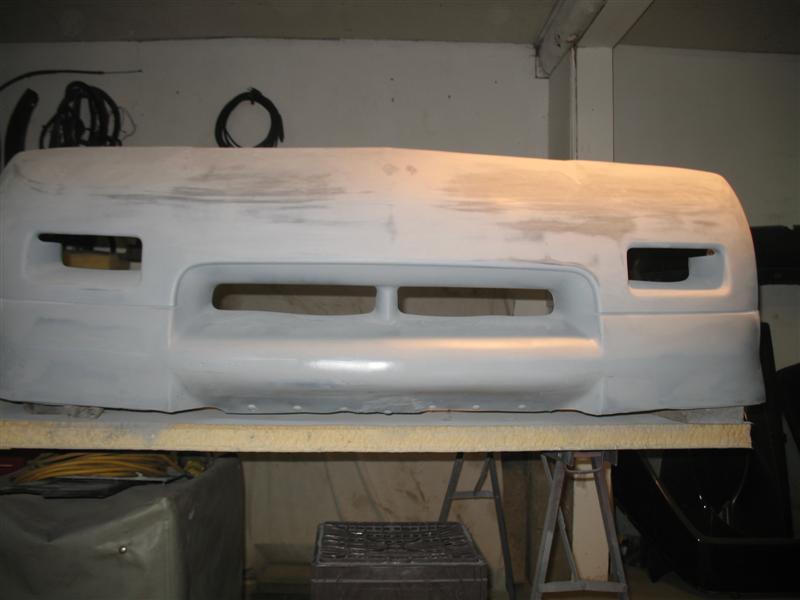

.jpg)