Contrary to popular belief the Northstar head bolts are really not torque to yield fasteners..... The bolts will stretch very slightly (permanently) but they are good for probably 10 rundowns before any perceptable yield would occur that would render them unusable.
In fact, new bolts are run down and then loosened in the plant in the normal operation tensioning the head bolts. The pre-tensioning step actuall subjects the bolts to more tension then the final tightening step.... This is done to burnish the threads in the block as they have never seen bolts in them before the heads are installed and the head bolts tensioned. The aluminum threads need to be "worked" once before the final tensioning step so the head bolts are run down, loosened and then re-tensioned. If you started with new bolts on your reassembly then you have only done the equivalent of the first pre-tensioning step on the bolts. Use them, they will be fine. Re-using a new bolt that has been run down one time is not the same as re-using a bolt that was in the engine for 100K.......
The instructions to not reuse old head bolts is primarily because the bolts when new have a special microencapsulated coating on the threads and under the head of the bolt. The coatings act as a high pressure lubricant during tensioning and then a thread locker once installed. On a simple run down and loosening without running the engine the bolts can be "used" several times. Once the bolts see a lot of time and thermal cycling in the engine the coatings are rendered unusable again so the bolts have to be replaced as there is no repeatable means or reapplying the special coatings in the field.
If you simply installed the head with a new gasket and new bolts and pulled a timesert out and dissassembled the head the bolts are fine to use again and so is the gasket. If the head gasket was not used in the running engine and subjected to any thermal cycles it is fine. The gasket will compress permanently somewhat when torqued into place....that does not ruin it. I have seen LOTS of head gaskets run down and loosened and re-run down and continued on test fine. As long as the gasket did not stick and tear when dissassembly the gasket is perfectly fine to re-use. It has just been "pre-compressed" much as it is done in the above mentioned pre-tensioning step to condition the head bolt holes. That is done with the gasket in place so the gasket sees the compression and then relaxation in production.
With the compacted graphite gaskets it is sometimes necessary to pre-compress the gasket and even heat it during compression prior to installing it into the engine. So, simply compressing the gasket to the installed load does not hurt or ruin it. If, however, the gasket is held under load and thermal cycled in the engine it will not be reusable. That is because the thermal cycling subjects the gasket to even more load that would cause it to be deformed beyond recovery if relaxed.
At least you can reuse the new gasket and bolts with no concerns.
I know I can reuse the bolts and that the stuff is lubricant/locker. Already had that conversation with Allen Cline. Thanks for the additional info, though. As I was tightening the head bolts, the coating under the heads squished out between the head and the washer. When I tore the engine down I found shreds of it in the oil pickup screen. I was not a happy camper One more thing to be careful of on reassembly... pick all the shreds of coating off the bolt heads as I tighten them down...
This engine has been run, just not very much. A total of about 100 miles in 15-20 minute test drives. How does that affect the bolt coatings?
The head gaskets did tear when I tore them down. They also had some oil creep in with them, so I wouldn't have wanted to reuse them anyway.
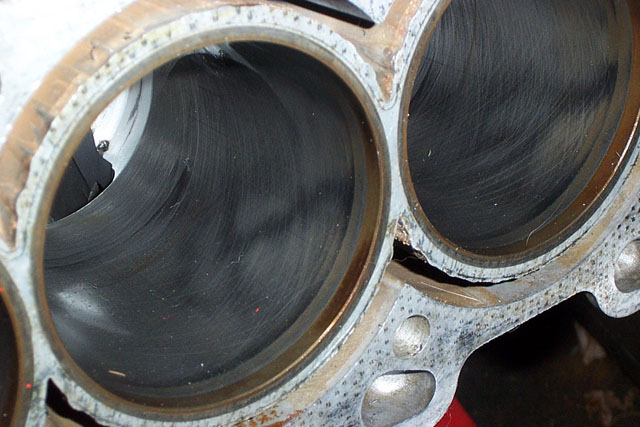
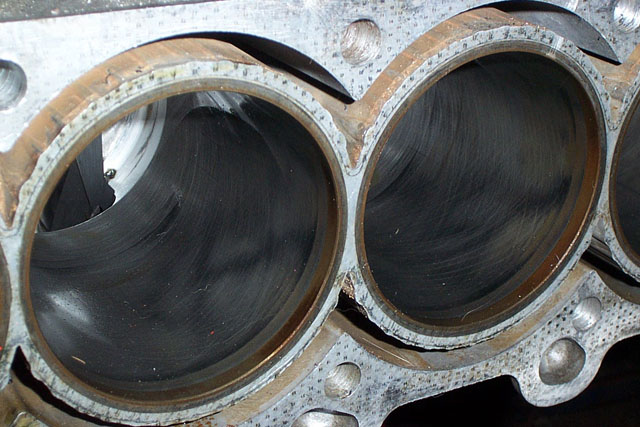
Images of the piss poor hone job that the first shop did... Don't take your Northstars to 9 Mile Machine in Pensacola, FL Now that I know what I'm looking at, I'm amazed that he let this block out the door. Certainly not the way to give himself a good reputation...
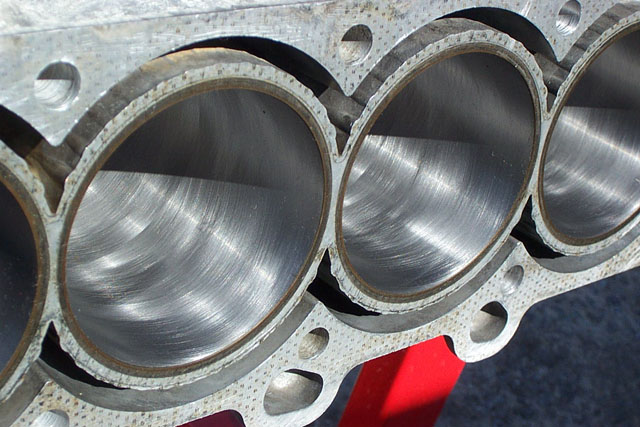
Now it's at a GOOD shop. Paul Mauzy Engines in Timberville, VA. Mauzy's shop was a hell of a lot better than Clint's in FL... Mauzy had 15K-35K engines sitting on palettes waiting... Aluminum big block with Enderle tunnel ram, pair of BIG quads, lots of nitrous, dizzy driven by cog belt off the front of the cam, dry sump lubrication... Aluminum Hemi with a giant blower on top... the teflon strips on the rotors were so snug you could barely turn it by hand... Aluminum BBC block on the stand with less than 3/8" between cylinders...
Gonna go on a ship for two weeks and the block should be done when I get back. Paul is pretty busy this time of year as everyone's building their engines for the upcoming season.
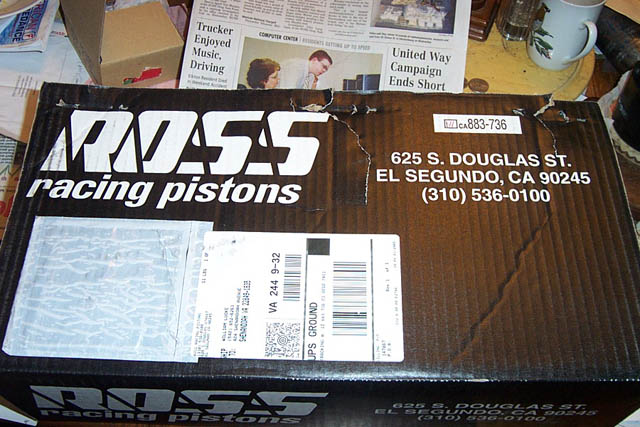
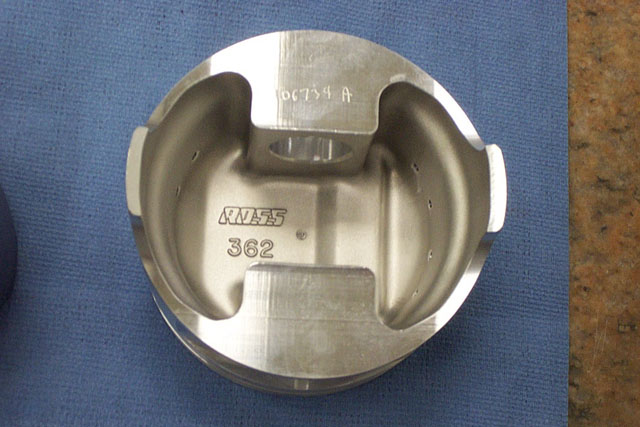
Since the block's gonna have two hone jobs done on it, the bores will be out of spec for the stock pistons I was planning to use. I'm shipping one of my stockers to Ross for them to use as a model to make a set of custom pistons for me. When the block is done, I'll email them the final bore spec and they'll cut the pistons to suit. After that, yet another set of pistons will ship off to Swain... Once the pistons are back from Swain, I'll go back to Paul for rebalancing the assembly. I have fresh crank to use because I'd like to try something.... Conventional balancing technique is to drill radially into the counterweights to remove material. However, grinding or turning material from the OD of the counterweight will remove less material, but have a greater effect on moment of inertia of the crankshaft. Paul Vanderley did this for Wcapman's crank, and I'm going to see if Paul Mauzy can do it for my crank. He doesn't normally balance this way but he's willing to try it. Maybe we'll both learn something.
Send them a registered letter showing your documentation of the problems, explain that you will be filing a small claims action against them, that you are giving them this one, limited time only, offer to reimburse you for what you paid them.
Total cost? A couple of bucks postage plus an hour to type up a letter. Upside is they cut you a check for the full amount, worst case is you get nothing and you're only out a cuople of bucks and an hour of your time.
guess you are about a 2-3 hour drive from MIR then.. would be a blast to have a northstar fiero join the maryland group at MIR sometime this summer - we'll have some 3.8sc atleast one 3.4tdc but i don't think any v8's
I need to give some more credit. As I may have mentioned before, I've been talking regularly with Kevin at Total Seal. Our conversations led me to the research and body of knowledge I have now. Paul Mauzy also spoke with him regularly when honing blocks, and of course more when honing my block.
So I need to give Kevin and Total Seal a shout out. If you ever have problems with TS rings, give him a call.
Originally posted by Will: I'm near Harrisonburg/JMU. I make it down to Norfolk at least once a month. Shouldn't be any problem to meet up.
Small world. My sister was valedictorian there when it was known as James Madison College. I've gone skiing a few times at Mass-o-nuthin'. I work across the river from Norfolk building flat-tops and submarines at NGNN (formerly NNS).
BTW, I'll be contacting you soon about the 4.6L PCM. I've started studying the factory service manuals, and there are obviously several input circuits which can be ignored (like cruise control), but there are others for which I'll have questions.
Originally posted by WAWUZAT: BTW, I'll be contacting you soon about the 4.6L PCM. I've started studying the factory service manuals, and there are obviously several input circuits which can be ignored (like cruise control), but there are others for which I'll have questions.
When I said the cruise control (CC) input feeds could be ignored, I failed to mention the reason why. I do not currently have CC, and do not intend to have it after the swap. I imagine someone who has already CC would be quite interested in maintaining those input feeds to the Caddy's PCM.
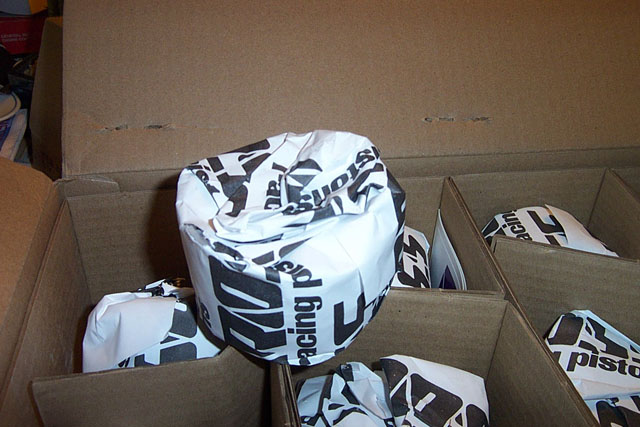
Have pictures of crown and comparison, but they were blurry and I already shipped the pistons to bryson for coating, so I can't take more until the middle of next week.
Originally posted by WAWUZAT: When I said the cruise control (CC) input feeds could be ignored, I failed to mention the reason why. I do not currently have CC, and do not intend to have it after the swap. I imagine someone who has already CC would be quite interested in maintaining those input feeds to the Caddy's PCM.
Stock Fiero cruise control can drive the vaccum Caddy cruise servo. Not sure when the Caddies went to electric cruise.
This is the second time tonight I've written this. WTF, Cliff? I'm doing it in notepad first so it doesn't get eaten by the post monster. I clicked submit a couple of times and even got the "can't submit a post les than 60 seconds after your last" screen.... which I WOULD THINK would mean that the post went through with the first click... but IT'S NOT THERE. I'm PISSED. This has happened a couple of times before... and then when I retyped my post, the old one showed up. That doesn't seem to have happened this time.
Anyway...
Been a busy week and a long day.
When the Northstar was being designed, GM found that holes in the main bearing bulkheads to allow each bay to exchange air with its neighbors were practically a necessity. Because of the Northstar's lower crank case design, each main bearing bulkhead comes down almost to, if not touching the surface of the oil, essentially sealing off each bay from its neighbors, dramatically increasing pumping losses. In testing otherwise identical prototype engines, it was found that engines without windows gave up something like 30+ HP to engines with windows.
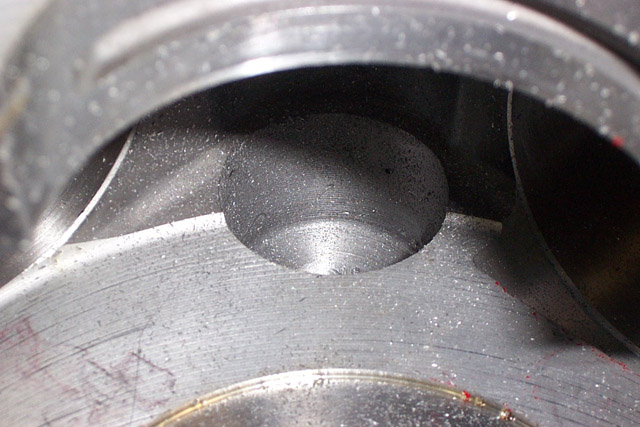
The conventional Northstar uses a die cast, open deck dry liner block. Because it's die cast, the holes can't be cast in place. GM machines them with a boring bar from the front of the engine. They are in approximately the location the cam would occupy, were the Northstar a pushrod engine. An expension plug is inserted in the back of the hole in the forward bulkhead (separates the 1-2 bay from the timing drive). The shaft for the intermediate timing sprocket covers the forward side of the hole, which is then used as a small plenum for oil from the front main bearing on its way to the cylinder heads and secondary timing chain tensioners. Since the holes are machined with no subsequent operations, they have sharp edges.
The supercharged Northstar block is a sand cast closed deck dry liner design with thicker liners (smaller bore) than the die cast blocks. Because the block is sand cast the windows can be cast in place, and since they can be cast in place, they can be cast with radiused edges. In development testing, the rounded edges were found to be worth about 5 horsepower.
Since it would only take a couple of hours and pretty much no money, I went ahead and did this to my block.
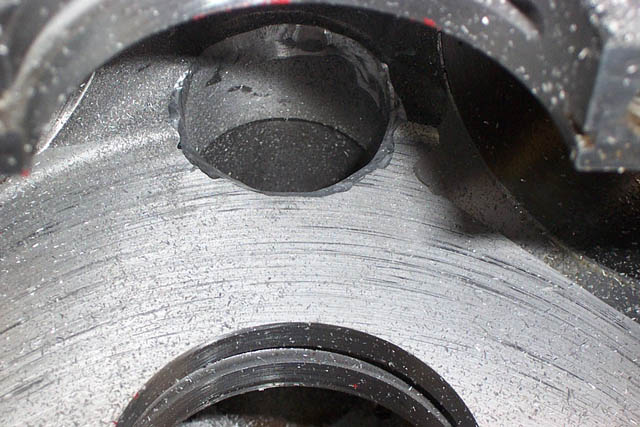
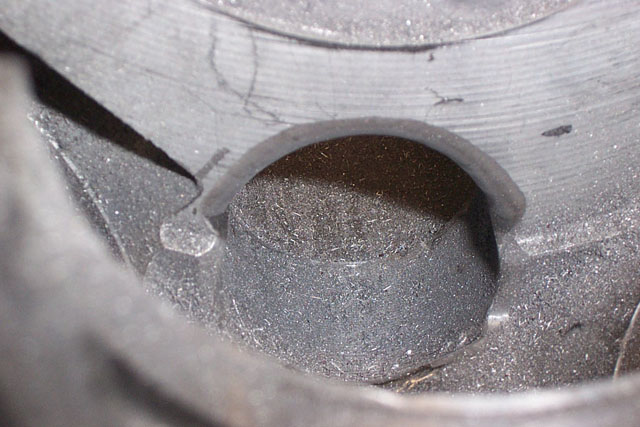
This is what the windows looked like stock--sharp enough to cut yourself on:
This is what I could do with a die grinder:
A machinist frined suggested that I take a long strip of sandpaper and see-saww it back and forth through the window. I tried that and it worked much better than the die grinder. This is the finished product:
It may not look like much in the picture, but that's a bad angle. If you could feel the difference between the two, you'd be amazed.
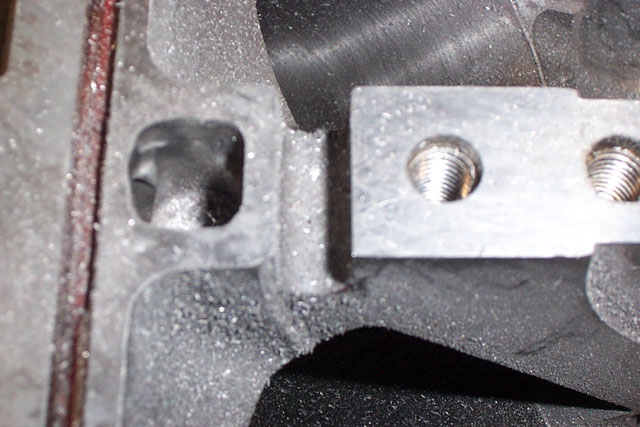
There are other sets of bay-to-bay breathing windows on either side of the main bearing bores. They are 1/2" wide and 1" tall and straddle the block split. They would be great candidates for porting with a relatively simple CNC mill program, but since I didn't have that and did have a die grinder, I used the die grinder.
Before:
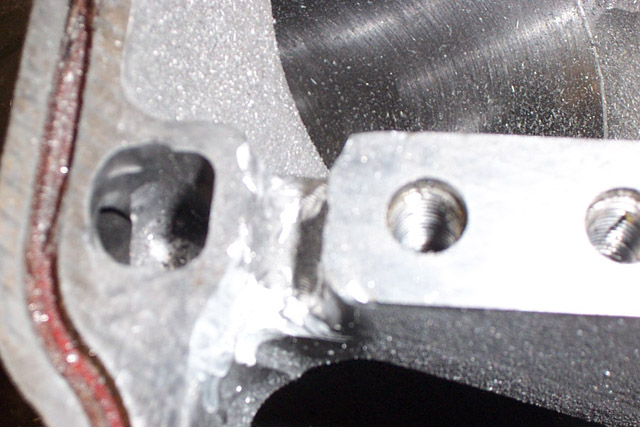
After:
Alan Johnson has told me that his engines experience oil drain back problems when they spend a lot of time "up at high C", as he puts it, and tipped at odd angles because a sand car can't keep its front wheels on the ground. The oil drain back passages in the side of the block are cast in place for most of their length, but are finished using a mill. This leaves sharp corners and such in the flow path. I used the same technique to smooth them as I used for the main b2b windows:
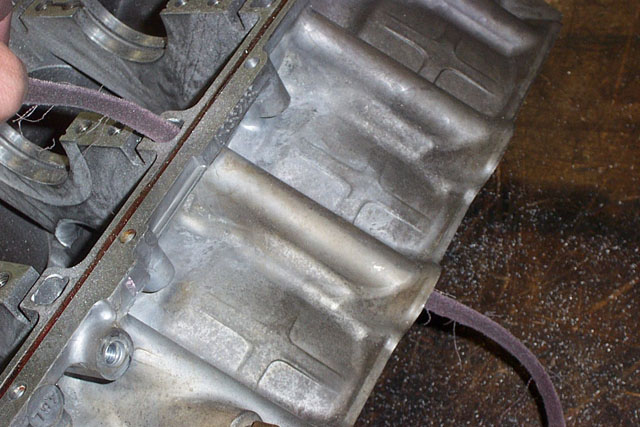
The oil drain back holes also go through the lower crank case, oil manifold, and are cast into the sides of the oil pan. They ultimately empty out below the surface of the oil in the pan. The holes in the lower crank case are cast most of the way and finished by a mill as are the holes in the block. However, the diameter is not consistent between the milled and cast portion of the holes, and the location is frequently off. There is room in the lower crank case to enlarge these holes to a consistent diameter via milling or drilling on a press.
The oil manifold is the next step. For those of you unfamiliar with the Northstar's oil system, the oil galleries that feed the mains are cast into the underside of the lower crank case as troughs. They are turned into passages by the oil manifold, which is similar to the valve body in an automatic transmission... it is a flat aluminum plate with holes in it at the right locations, and a linear seal inlaid into it to seal the troughs in the bottom of the lower crank case. From these troughs, the oil goes around the shanks of the main bolts on the left side of the engine and into the main bearings. The troughs would be another interesting CNC porting project. The oil mainifold could in theory be drilled out to a larger size in the oil drain back holes, however this comes very close to the groove in which the aforementioned seal resides. In a max effort engine, I would have a new piece of aluminum laser cut with the appropriate holes, and then have a groove for o-ring stock milled in to it, then have the plate milled or ground flat.
I have not looked at the drain back passages in the oil pan yet.
Also in a max effort engine, I might see if I could install pressure regulators in the cylinder heads in the passage where each head gets oil from the block. This would help reduce one of the causes of oil drain back problems... excessive top end oiling.
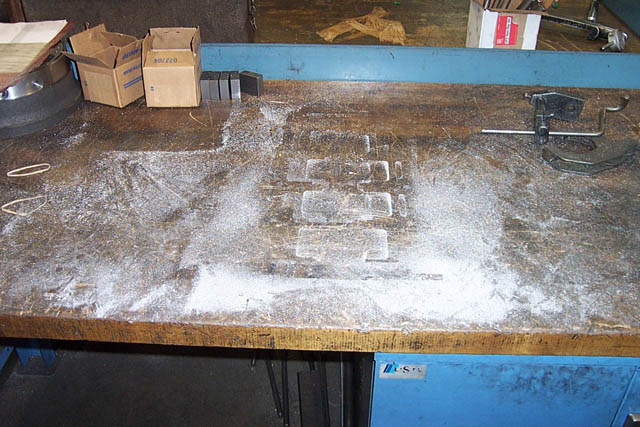
This is what the workbench looked like when I was done:
[This message has been edited by Will (edited 06-04-2005).]
Lower left bellhousing bolt hole had stripped the first time I was putting the new engine in. I got around to helicoiling it last night. The block is back on the stand in my garage, although I will be going back to the shop with the lower crank case to drill out the drain back holes in it.
Need to balance the crank and one other big task before I have everything in line to reassemble.
Have access to a balancer and borrowed bob weights from the machine shop. I'll be turning or grinding material from the OD of the counterweights, instead of drilling it as is standard practice.
I'll be turning or grinding material from the OD of the counterweights, instead of drilling it as is standard practice.
I'm curious as to why you are doing it that way instead of drilling. I would think drilling would be easier to balance. I would think grinding the OD would end changing the shape and result in worse balance. I might be wrong though. But if I were to touch the OD, I think I would turn it rather than grind it just to be a bit smoother.
I'm doing it that way to get the maximum reduction of moment of inertia from the balance.
Ummm, in simple terms that means you want to remove more weight from the outside so you have less rotating mass, or something to that effect? Lowering rotating mass=higher revs? If I'm correct is my thinking, I now understand why you are doing it that way....
the crank will have more mass than drill balanced crank, but because the mass will be closer to the axis, it will have lower rotational inertia. It won't rev any higher, but it will accelerate faster.
I had a an ebay crank drill-balanced to run Eagle rods with stock pistons. The Ross pistons are a few grams heavier than stock, making the crank slightly underbalanced. I have the crank that was in the engine that I originally swapped into the car. It is pristine and all the journals are within 0.0002 of spec, even after 100K miles. I'm going to be lathe balancing that crank. I have a third crank which will remain stock for comparison.
Both of the balanced cranks will be lighter than stock obviously, but I predict that the lathe balanced crank will be heavier than the drill balanced crank. HOWEVER, I can show through physics that it will have a smaller moment of inertia, despite being heavier.
[This message has been edited by Will (edited 06-09-2005).]
This is the second time tonight I've written this. WTF, Cliff?
FYI, this is a bug that is a result of very long posts. I had the same thing happen before when I wrote a very long post; when I redid it, I cut/paste it, the problem was repeatable. I then paste half of the post at a time and it worked fine...I'm not sure if it's a function of number of characters, or if the computer gets really confused by so much useful information.
Thanks for all the info Will, this is great documentation.
Piston ring issues. For future reference, when ordering Total Seal rings for use with custom pistons, get the rings FIRST, measure how thick they are, then communicate that info to the piston MFG so that the piston grooves may be cut to the right width. Ross cut the piston grooves in my pistons to 0.0605, which is exactly on spec for 1.5mm piston rings. The Total Seal rings came out a bit under spec in thickness, giving me 0.0034 side clearance on the top rings and 0.0038 on the second rings. This clearance should be down around 0.0015 for top rings and 0.001 for 2nd rings.
To the credit of the company, Kevin took the rings back and gave me credit for them, even though it's been a year since I bought them.
I just ordered a plasma moly set of stock replacement rings 0.25mm oversize from Sealed Power through Summit. Federal Mogul part number E943K-25mm. My bores are 0.005 over, so the 0.25mm oversize (0.010) rings will give me a bit of extra room to file-fit the gaps, since the stock replacement rings are supposed to be pre-gapped.
I'm also considering making a ring lapping fixture. Rings are cast in a certain diameter, and are flat in that diameter only. When squeezed down to bore diameter, they are no longer as flat on the sealing surface (bottom surface for top ring and top surface for second ring). So take a piece of bar stock bigger than the bore and face a shallow dish into one end at the finished bore diameter and about 2/3 - 3/4 the depth of the ring. Squeeze a ring into that and lap it flat at bore diameter to get a better seal than unlapped rings. Pain in the tail, but worth a couple of ponies.
Drilled out the oil drain back holes in the lower crank case today.
The tops of the ones opposite the crank sensor are slightly over 9/16, but the bottoms of those same holes are smaller than 1/2"! Ran a 9/16 drill all the way through those to open them up. The holes on the same side as the crank sensor are all 15/32 or so at the top, but larger than that at the bottom (which is kinda strange since oil flows downhill...). I drilled one of those out to 9/16, but the other two took a little more attention. They are not centered on the main webbing, so I had to use a 0.550" end mill to center on the main webbing adn plunge as far as possible before sending the drill all the way through. The result is that all 6 holes have now been enlarged to 9/16". The next step will be to do the same to the oil manifold, BUT I will need to look at it very closely as drilling the holes in it out will put the edges of the holes VERY close to the edges of the seal groove that holds the seal that maintains pressurized oil to the main bearings. Would not be good to have that seal fail!
Getting closer...
The Sealed Power rings arrived. They are not as thick as I'd like, averaging 0.0579" for the top rings and 0.0581 for the nd rings, but they are overall about 0.001 (top) and 0.0015 (2nd) thicker than the TS rings. They are also more consistent than the Total Seal rings. The SP rings have a thickness variance of 0.0002 across all 8 top rings and 0.0002 across all 8 2nd rings. No single ring had more than 0.0001" variation in thickness across the 4 points I measured.
The TS rings had as much as 0.0003 thickness variation in one ring and 0.0007 across the set.
The Sealed Power rings are still too thin for my tastes... I will call on Monday to see if they have a set of 1/16" rings for a 262 Chevy. My bore is 3.667 (3.662 stock) and the 262 bore is 3.671. I will then use a surface grinder to thin the rings to 0.0590 top and 0.0595 2nd.
I also have access to a plater, so if nothing else can work, I can plate the non sealing surfaces of the rings up by about 0.001 or a bit more and touch them with the grinder to maintain consistent thickness.
[This message has been edited by Will (edited 07-22-2005).]


 One more thing to be careful of on reassembly... pick all the shreds of coating off the bolt heads as I tighten them down...