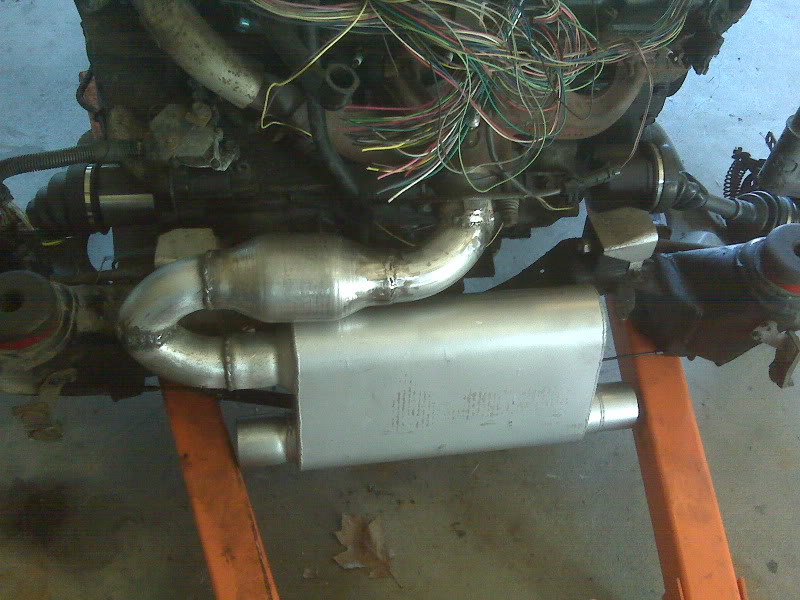
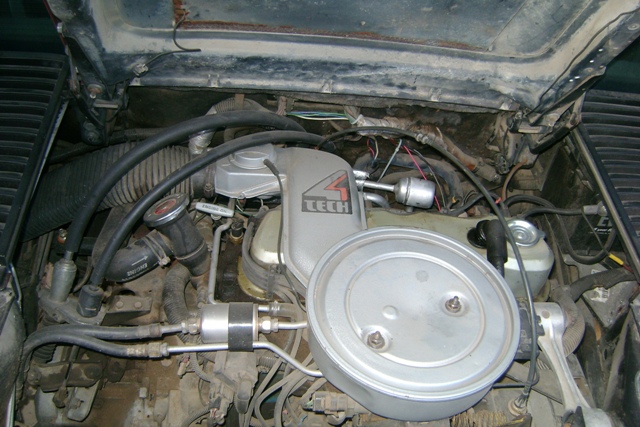
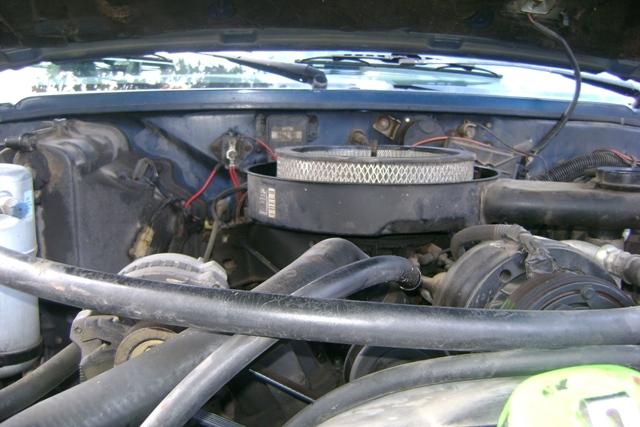
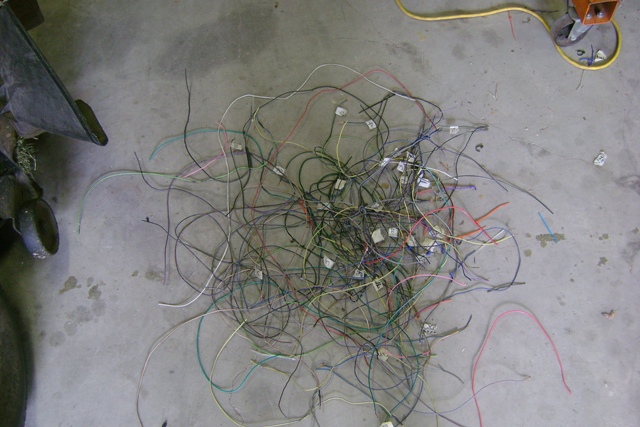
I do not plan on an oil cooler right now. I was reading a post by Ed Parks, ( Fiero Factory), a while back and he was stating that he did not prefer to use them. From his posting "we use 2 Dorman #090-040 20mm-1.5 drain plugs with a liberal amount of Permatex on the threads" Less problems with leaks I think he said. I am planning on running my exhaust out the rear with a round spun catalitic converter. Borrowed photo:
The front part of the cradle will not be heated by a converter and exhaust pipe like a 2.8 V6 is. I can add the oil cooler there later if I think I will need it. I did save the two metal lines that follow the shape of the rear of the block for the oil cooler if I installed one later. I plan on facrtory AC so this should be better for the compressor and AC hoses.
[This message has been edited by josef644 (edited 09-13-2009).]
I was on vacation last week. Glad to see that it is coming along so quickly for you. You know CopperBender is also working on a 4.9L 88, right? He has some good ideas also. I can see that with all the "local" 4.9L installs, mine should be a breeze.
------------------ Why fight to be accepted by people you don't actually want to be like?
For the injector harness, it can be removed from the fuel rail and the clips can be put back in from the bottom side. It makes it much cleaner looking without loom running accross the top of the fuel rail. Just a thought.
[This message has been edited by Fieroseverywhere (edited 09-14-2009).]
For the injector harness, it can be removed from the fuel rail and the clips can be put back in from the bottom side. It makes it much cleaner looking without loom running accross the top of the fuel rail. Just a thought.
That photo was a borrowed one to show how I plan on doing my exhaust. Mine is an 88.
No , but I will mount the altenator today and sit my S-15 breather on it. I can get a good look at the fit and take a picture. I will post the picture of it this afternoon.
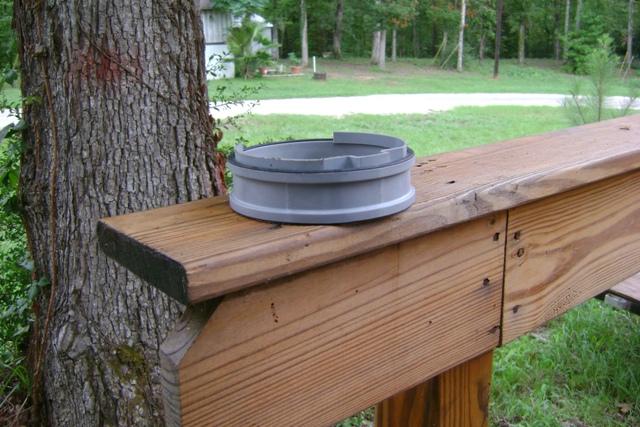
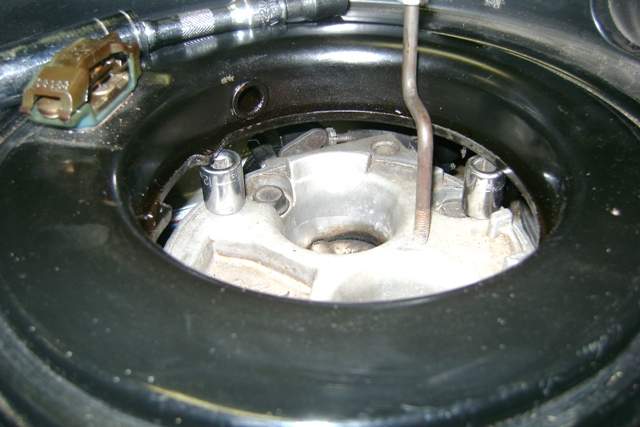
First is the spacer. It has a black soft plastic seal on the top and bottom. It measures 1 3/8" on the contact to contact surfaces.
There is a indexing area that extends into the air breather to keep it from turning:
This shot is taken from above the breather. Notice that the hole in the center is not exactly in the center the "encentric ring". It measures from 1" to 2" depending on where you are measuring from:
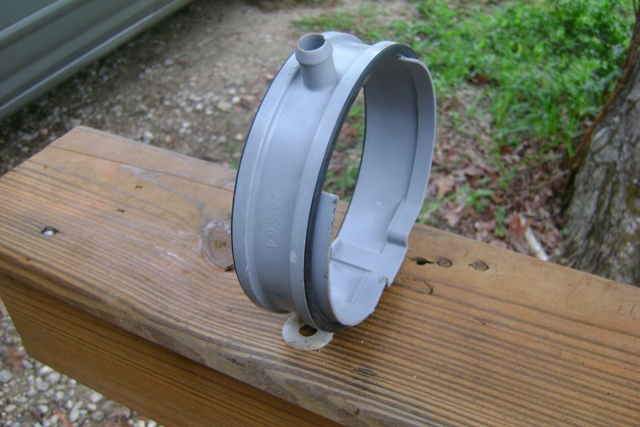
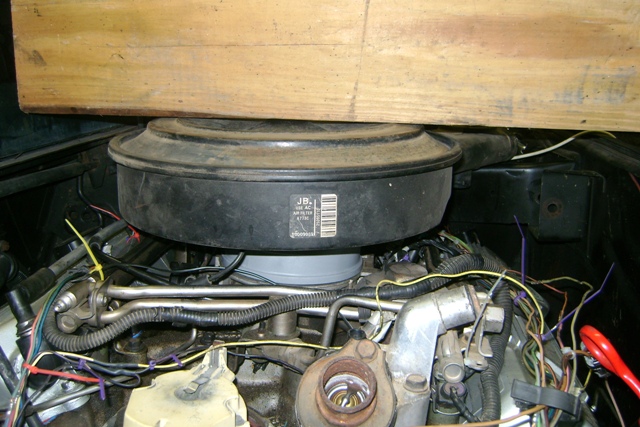
With the smallest part of the TB hole to outside edge behind the altenator it will sit flat on the spacer. There is about 1/4" space between the breather and the altenator body: A shot of a stock 2.5 set up. Notice the breather duct and the breather snout meet just south of the strain relief and the bulkhead. Just about where my 4.9 dipstick handle is. That is the area I am looking for: Of course the "Snout" is pointed in the wrong direction. I plan on adding the snout off of a 2.5 so the air duct tube is lined up.
I am not sure if the deck lid will close with this configuration. The breather housing is about 4" thick. TBI base to the top of the breather with the lid on. I also have the 1 3/8" spacer on it. Here is a shot with the lid on and a 2X6 on top so you can see how tall this is:
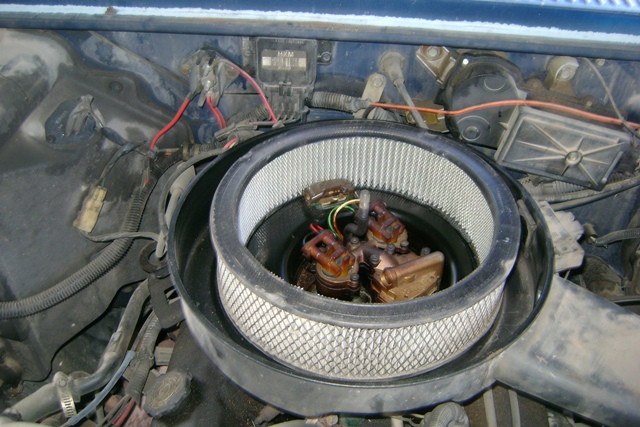
In order for this to work, a 2" element and a flat lid could be used. The spacer only needs to be about 3/4" tall so the bottom does not rub on the fuel rails. And of course the snout intake would need to be relocated. The filter element is 3" X 10":
That said, the GM TBI hole is the same for the V8 and the V6 cars. I found this information on the Fel Pro wrapper my TBI gasket was in. So 2.8, 4.3, and 5.0, and 5.7 breathers 's all have the same size hole for the TBI. This one I am playing with here is off of my 89 GMC S-15 P/U.I am pretty sure the larger engines use a large breather body. I would think this is the smallest breathe of the bunch. Anybody else have a smaller one off of anything, lets here it. I am open to any and all ideas. Joe
Edit ot add: I just looked at the pictures again. It appears that the breather is over the dist and rotor. The cap is not on , so this might not work out. Raining again here, so I cant take the breather off of my truck right now . I need to aslo see how much room there is between the breather body and the battery lug on the altenator. Maybe later today.
Well I took another looka a while ago. I removed the spacer and added a few 1/4" sockets of about 3/4" tall on top of the throttle body. I sat the breather on top, and turned the smaller side towards the distributor:
I think what I need is a 12" TBI air breather, that is 10" element, and an inch all the way aoround for air flow. Maybe I am beating a dead horse here.
[This message has been edited by josef644 (edited 09-14-2009).]
Originally posted by josef644: I do not plan on an oil cooler right now. I was reading a post by Ed Parks, ( Fiero Factory), a while back and he was stating that he did not prefer to use them. From his posting "we use 2 Dorman #090-040 20mm-1.5 drain plugs with a liberal amount of Permatex on the threads" Less problems with leaks I think he said. I am planning on running my exhaust out the rear with a round spun catalitic converter.
I am under the impression that you have to modify the oil filter housing as well (remove/drill something out) - I have not seen any specifics, so can't say for sure.
Originally posted by Mickey_Moose: I am under the impression that you have to modify the oil filter housing as well (remove/drill something out) - I have not seen any specifics, so can't say for sure.
You can cut the base from the air filter housing and then use it on another lower profile air cleaner housing (like taking the truck TBI base and using it on the bottom of the 4cyl fiero housing). Here is the one I used to make the custom air intake housing on my last 4.9 swap:
Also, many speed shops sell TBI spacer rings in various thicknesses so you do not have to use the stock tall one from the truck (I have a 1/2" on on the shelf at home).
[This message has been edited by fieroguru (edited 09-14-2009).]
You can cut the base from the air filter housing and then use it on another lower profile air cleaner housing (like taking the truck TBI base and using it on the bottom of the 4cyl fiero housing). Here is the one I used to make the custom air intake housing on my last 4.9 swap:
Also, many speed shops sell TBI spacer rings in various thicknesses so you do not have to use the stock tall one from the truck (I have a 1/2" on on the shelf at home).
Do you have a picture of the 4.9 with the 2.5 breather on top?
I am under the impression that you have to modify the oil filter housing as well (remove/drill something out) - I have not seen any specifics, so can't say for sure.
I didn't know that. But I will think real hard before I drill out the bypass. I will either add the oil cooler, or drill out the bypass as suggested. Thanks for the tip to you both. Joe
[This message has been edited by josef644 (edited 09-14-2009).]
Why wouldn't you want to use an oil cooler? These caddy's all came with them from the factory. I'm not one for removing parts that the factory felt was necissary, even if it "can" work without it. This is the one I used. They are quite in-expensive as oil coolers go.... http://www.summitracing.com/parts/PRM-691/
Why wouldn't you want to use an oil cooler? These caddy's all came with them from the factory. I'm not one for removing parts that the factory felt was necissary, even if it "can" work without it. This is the one I used. They are quite in-expensive as oil coolers go.... http://www.summitracing.com/parts/PRM-691/
The biggest problem I had was where to put it, so it wasn't next to an exhaust pipe, or a catalitic converter. Both could heat the oil rather than cool it. If I am gonna have an oil cooler, it will have to be one working correctly. I also want to run my AC lines in the factory position. Oil cooler has gotta be in a good spot. I didn't want to move it up front, or in the right side quarter panel.
The biggest problem I had was where to put it, so it wasn't next to an exhaust pipe, or a catalitic converter. Both could heat the oil rather than cool it. If I am gonna have an oil cooler, it will have to be one working correctly. I also want to run my AC lines in the factory position. Oil cooler has gotta be in a good spot. I didn't want to move it up front, or in the right side quarter panel.
OH. Right. I forget that can be a problem with some installs. My car is setup differently then most. My intake comes directly through the decklid. That left the side scoop open for the oil cooler. It works extremely well there. At hwy speeds temp stays steady at 200 degrees. The radiator fan only comes on during stop and go traffic and even then only for 10-15 seconds.
How about the front of the cradle? Since your not running the factory cat it could get plenty of air there.
How about the front of the cradle? Since your not running the factory cat it could get plenty of air there.
This (cradle front side) was my thought after the tip about the internal oil bypass.
I have about 98% of the Cadillac injector harness finished as of this afternoon. Every wire that goes out to the engine is fitted and tied off for first fireoff. Tomorrow I will start adding the C203/C500. I hooked a battery charger to my fuseable links this afternoon. I had hand cranked up the headlights, and they both came on. The Blue Dingy thingie started singing to me. I couldn't see any dashlights on in the dash pod. Both dome lights were dead. I'll do more power ups after I have the next stage wired in.
This is how much excess wiring was in the Cadillac 4.9 injector harness:
[This message has been edited by josef644 (edited 09-14-2009).]
Do you have a picture of the 4.9 with the 2.5 breather on top?
Nope, that was just a sugestion on something that could be tried. I am not sure it would clear the front valve cover, but it would be kinda funny to keep the tech 4 air filter housing.
I couldn't see any dashlights on in the dash pod. [/IMG]
Is your dash bolted down? There are two 10mm bolts that go through the metal plate behind the speedo/tach. If their not tightened down it wont light. Came accross this on mine.
On your build how did you run your VSS sensor wire? Did you lay your wires along the intake, down the passenger side of the engine, then to the VSS plug, or distrubitor end underneath the exhaust manifold to the VSS plug. I don't want to fry these two wires. Joe Crawford
You can get some good wire loom that is very good for reflecting heat. I got some from Jegs. It looks like chrome loom but is a rolled up aluminized heat shield fabric. I ran it under the exhaust manifold on top of the tranny. BTW I changed the manifolds. I did not keep those.
If I sent you a fuel rail would you modify it like this for me? I really hate having the fuel lines running accross the rocker covers. I'll pay you well for you time.
Sorry, one off custom. I cut it into a bunch of pieces and mocked them up where I wanted them. Then had a machine shop weld (braze) them together.
I went ahead and ran the VSS wires under the manifold, on the outside of the transmission dipstick, outside if the shift switch then merged into the rest of the wiring around the center of the left transmnission side. I wanted to stay away from the area where the rear manifold/crossover pipe, and the transmission all 3 were very close.
I am not worried about the dash lights yet. I only had the battery charger hooked to one of the fuseable links. It wasn't mounted on the threaded hold down block. Just a down the road item for de bugging if they don't worl later.
[This message has been edited by josef644 (edited 09-15-2009).]
Today I managed to merge the C203 into the Cadillac harness today. I also mounted the AC and Fuel Pump relays. I ran most of those wires that operate them both. I switched out the temperature sensor for the new one, and located those three wires for soldering. Plugged in the C500 and untangeled all of those wires so I can merge them one at a time into the harness. The temperature one isready to be soldered in.
No rain here today, looks like tomorrow will be a mowing day
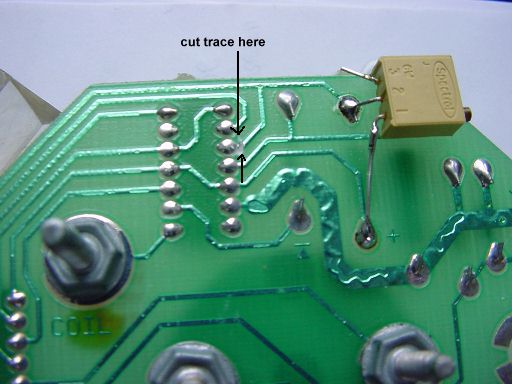
I searched to find out how to mod my tach for my V8. There was a thread where I saw that Capt Fiero had used "10x turn high precession pot" to mod his tach. I used google to find one of these. There are thousands of different ones 3W 10K, and on and on etc. Anybody know what the W and K value needs to be for modding my tach? Joe
[This message has been edited by josef644 (edited 09-17-2009).]
Doing it this way, you only need to cut the trace and install the proper resistor value - Radio Shack sells packs of 100K and 10K resistors - just put them in series to get the 210K value.
I prefer the V6 tach with the 6K redline and for the 2.8 tach to the V8 you need to install a 210K ohm resistor (or a variable resistor with that range). For the 88 4 cyl tach with DIS, I "think" the current resistor value in your tach needs to be reduced by 75%.
[This message has been edited by fieroguru (edited 09-15-2009).]
Doing it this way, you only need to cut the trace and install the proper resistor value - Radio Shack sells packs of 100K and 10K resistors - just put them in series to get the 210K value.
I prefer the V6 tach with the 6K redline and for the 2.8 tach to the V8 you need to install a 210K ohm resistor (or a variable resistor with that range). For the 88 4 cyl tach with DIS, I "think" the current resistor value in your tach needs to be reduced by 75%.
I removed a 85 4 cy tach spare I had, and cut the trace. Using the 200K range I got a measurement of 12.9 Measuring where he soldered the Pot in this picture I lifted from him
If I flip it over and measure again from the other side of the resister I get 5.6, again using the 200K range. I don't understand why. I will remove the DIS tach form my car and add this one if I can get it ready to go.
So what resisters do I need to solder in to get this working correctly. What about a tach filter? WIll I need to add one to the system?
All that makes it more complicated then it actually is. Get a 200k trimming potentiometer (trim pot). Multi-turn (10 turn) is better for fine tuning the adjustment but a single turn one will work also. The 200k is the important part here.
Cut trace and solder in 2 of the 3 pins. Doesn't matter which 2. Put on a scanner and adjust the trim pot til the tach matches what the scanner reads for RPM. Done.
I didn't bother to measure anything. I just dialed it in. I believe the exact resistance value is close to 187k. This is why you use the 200k pot. If you don't have a scanner you can measure the resistance between two pins amd set ot tp 187k to get it very close til you get to a scanner and dial it in perfectly. You don't need any other parts. Any fiero tach will work. Cutting the trace removes the ceramic resistor from the equation. The trim pot acts as a variable resistor. Hope this helps.
EDIT: Forgot to mention. Solder it in with a couple of lead wires and let it hang under the dash. That way it can be dialed while installed into the car, engine running.
[This message has been edited by Fieroseverywhere (edited 09-16-2009).]
Since we are all answering questions and don't seem to mind ( I hope)
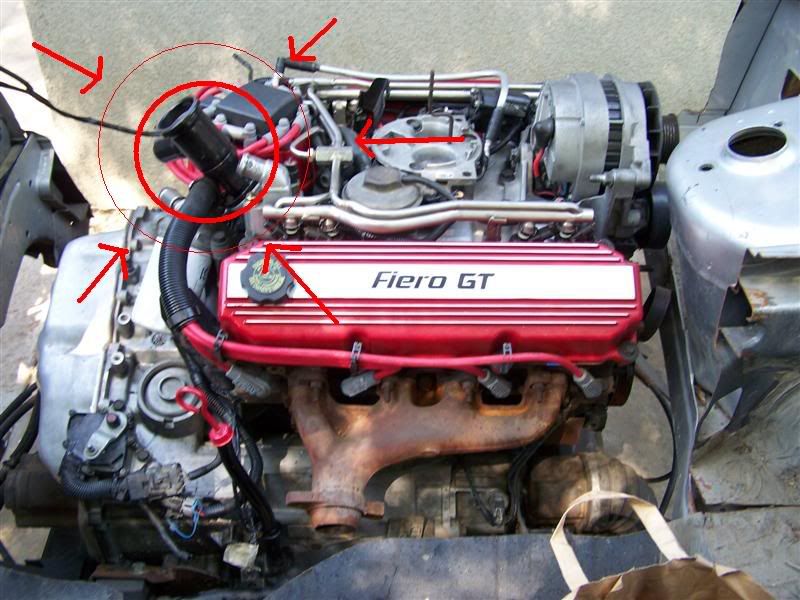
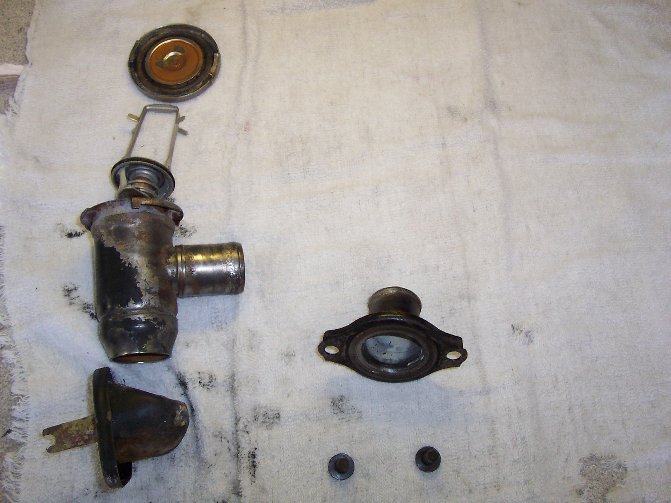
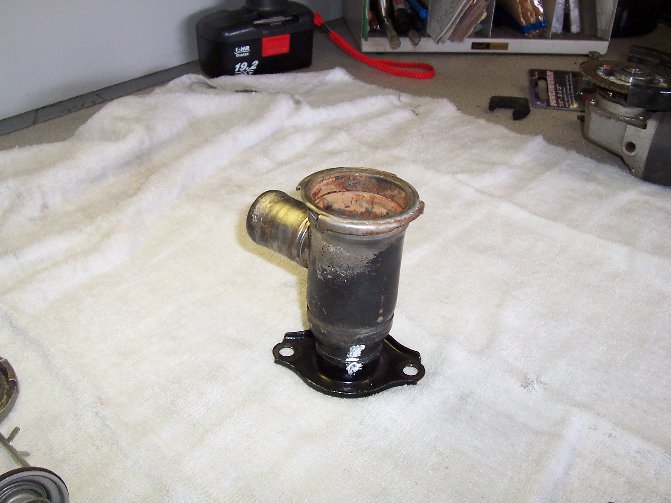
Can someone explain what exactly is used to make the radiator fill tube? It looks like Stock Fiero, but I figure that is too good to hope for.
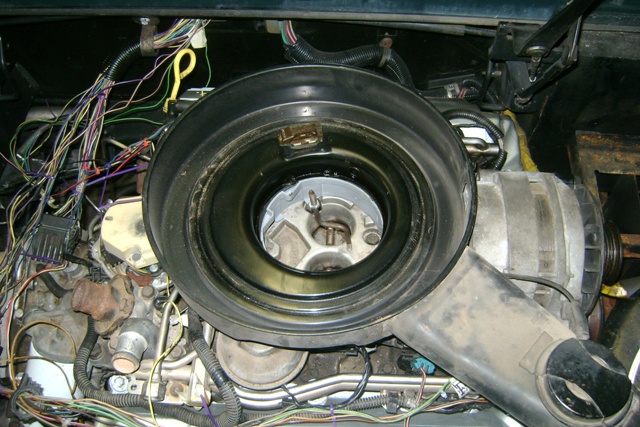
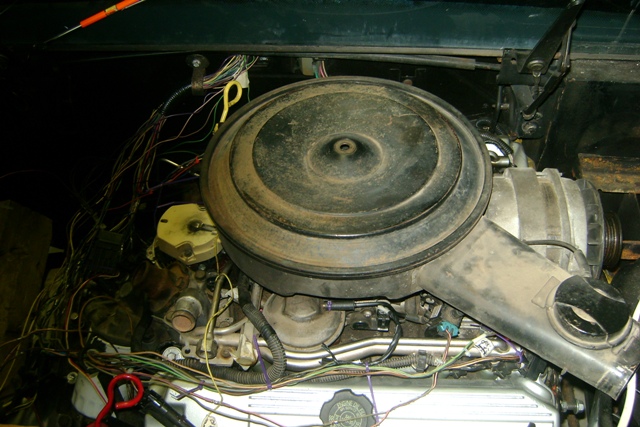
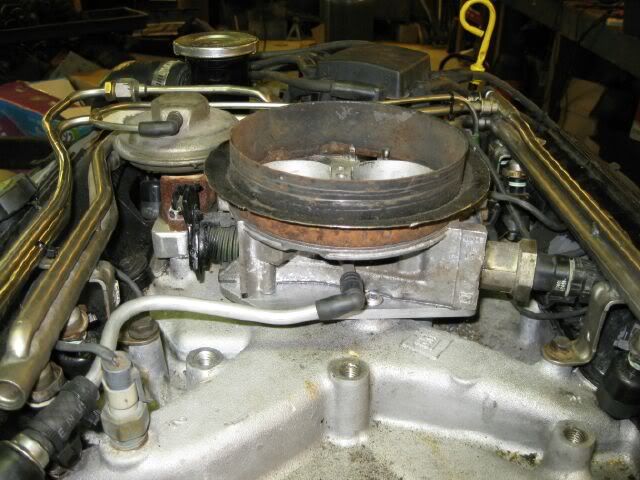
Man what a beautiful engine there.
Brad
Thanks, I never thought the 4.9 was a good looking engine. So I had to do a lot of custom work to make it a little more palatable (for my style). Some of the custom work is obvious, but most is subtle. In my opinion the Valve covers are the best looking thing the 4.9 has going for it. So I had to uncover it from the fuel lines and coolant lines. What is not in that pic is the power steering pump. I like power steering so I had to reroute the belt system to accommodate a new pump location.


 and don't seem to mind ( I hope)