Pennock's Fiero Forum
  Technical Discussion & Questions
  87 FIERO GT 3800 SUPERCHARGED BUILD (Page 8)

Post New Topic  Post A Reply
Email This Page to Someone! | Printable Version

This topic is 11 pages long:  1   2   3   4   5   6   7   8   9   10   11 
Previous Page | Next Page
next newest topic | next oldest topic
87 FIERO GT 3800 SUPERCHARGED BUILD by fieroaddicted
Started on: 12-20-2012 06:25 PM
Replies: 417 (26302 views)
Last post by: deezil on 01-20-2017 10:31 AM
fieroaddicted
Member
Posts: 662
From: aylesford, nova scotia canada
Registered: Dec 2012


Feedback score: N/A
Leave feedback

Rate this member

Report this Post07-02-2014 05:55 PM Click Here to See the Profile for fieroaddictedSend a Private Message to fieroaddictedEdit/Delete MessageReply w/QuoteDirect Link to This Post
Had a friend make a spacer up on the lathe for me. Turned out pretty good

[This message has been edited by fieroaddicted (edited 07-03-2014).]

IP: Logged
fieroaddicted
Member
Posts: 662
From: aylesford, nova scotia canada
Registered: Dec 2012


Feedback score: N/A
Leave feedback

Rate this member

Report this Post07-03-2014 03:59 PM Click Here to See the Profile for fieroaddictedSend a Private Message to fieroaddictedEdit/Delete MessageReply w/QuoteDirect Link to This Post
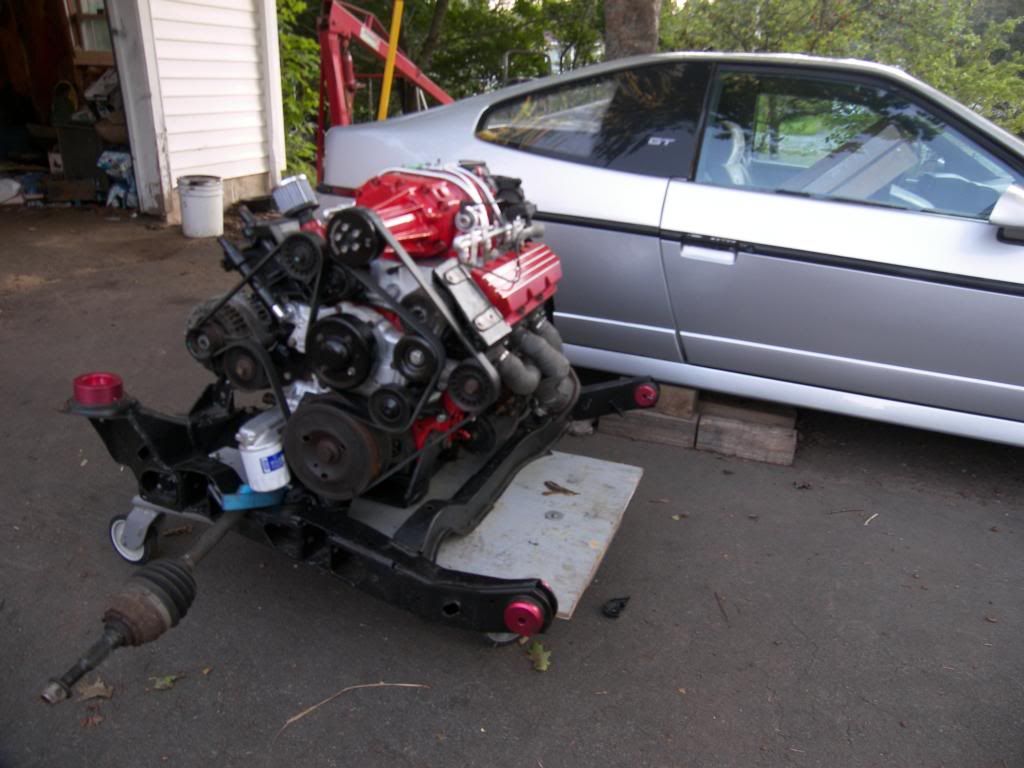
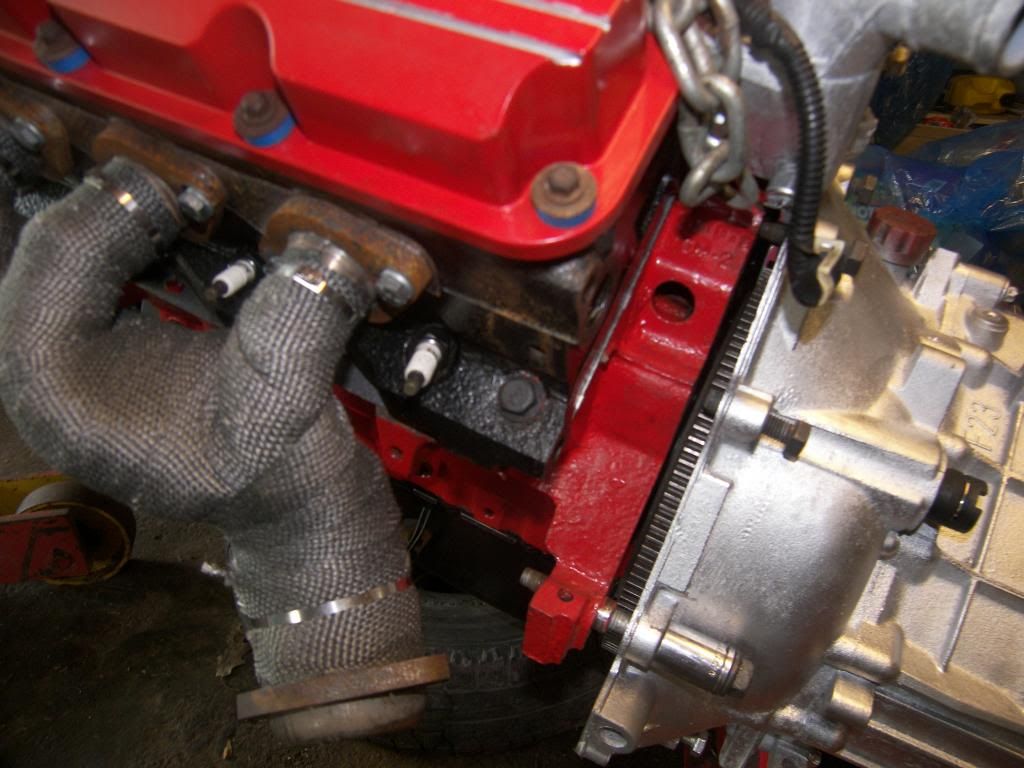
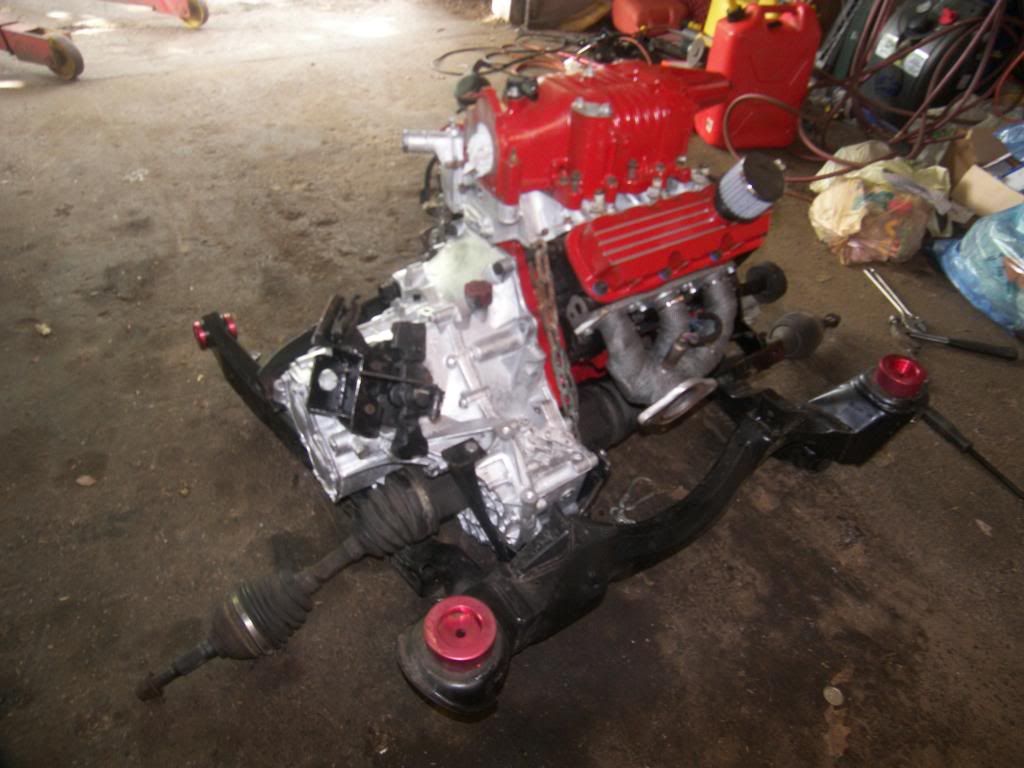
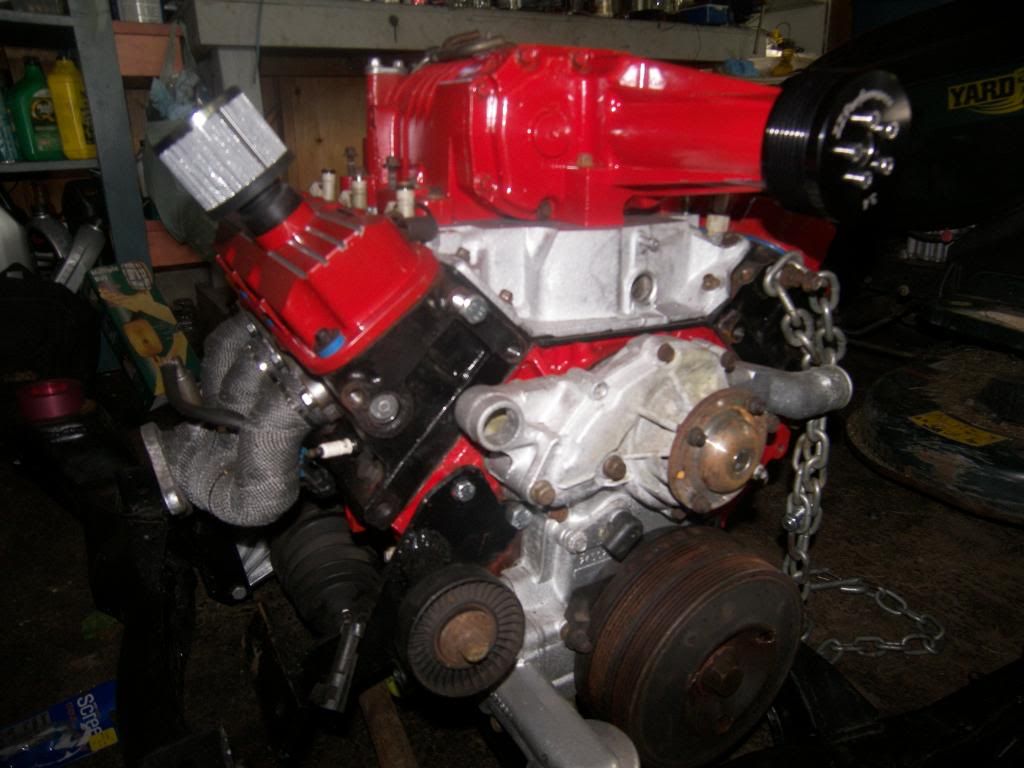
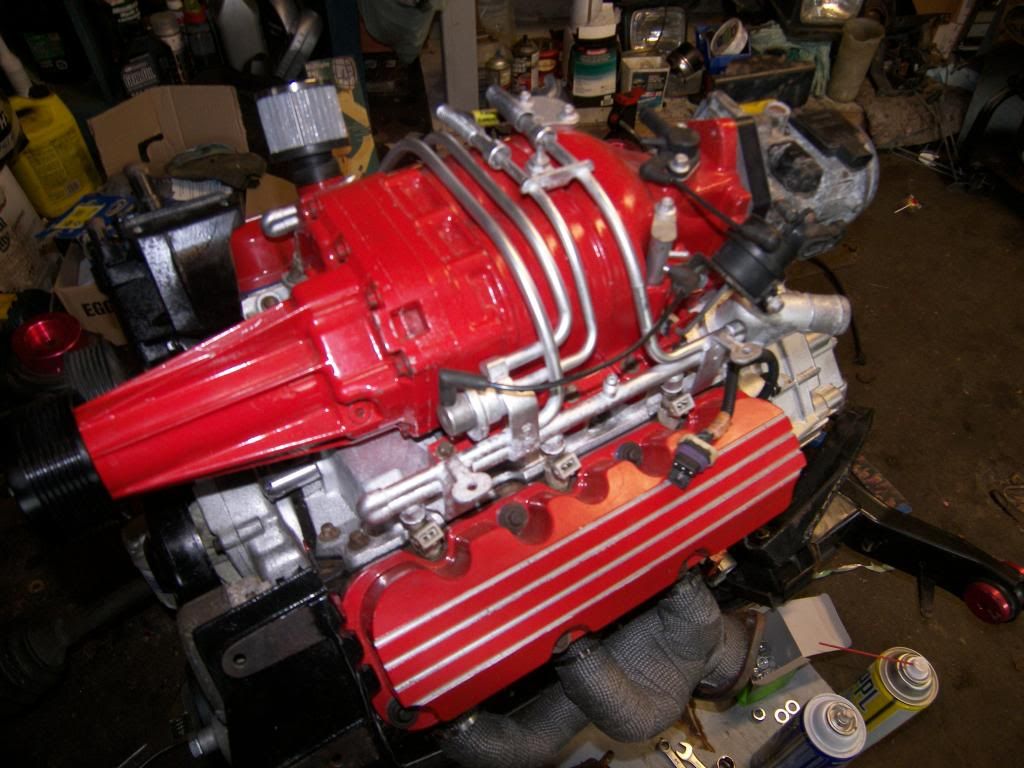
After much cursing cuz my brain wasn't working properly, I managed to get the engine and trans all buttoned up for good! Just have to get my poly engine and tranny mounts before finally tighening it down on the cradle. I have to notch the cradle out in one spot due to a rib on the tranny hitting on it.


IP: Logged
fieroaddicted
Member
Posts: 662
From: aylesford, nova scotia canada
Registered: Dec 2012


Feedback score: N/A
Leave feedback

Rate this member

Report this Post07-12-2014 07:11 PM Click Here to See the Profile for fieroaddictedSend a Private Message to fieroaddictedEdit/Delete MessageReply w/QuoteDirect Link to This Post
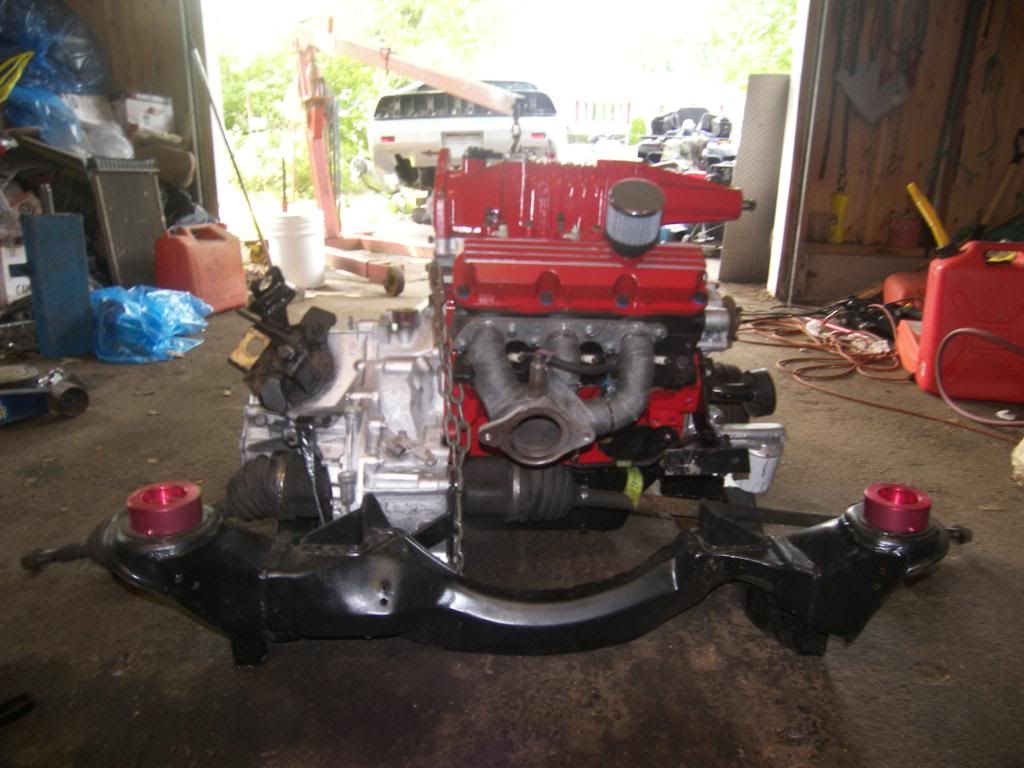
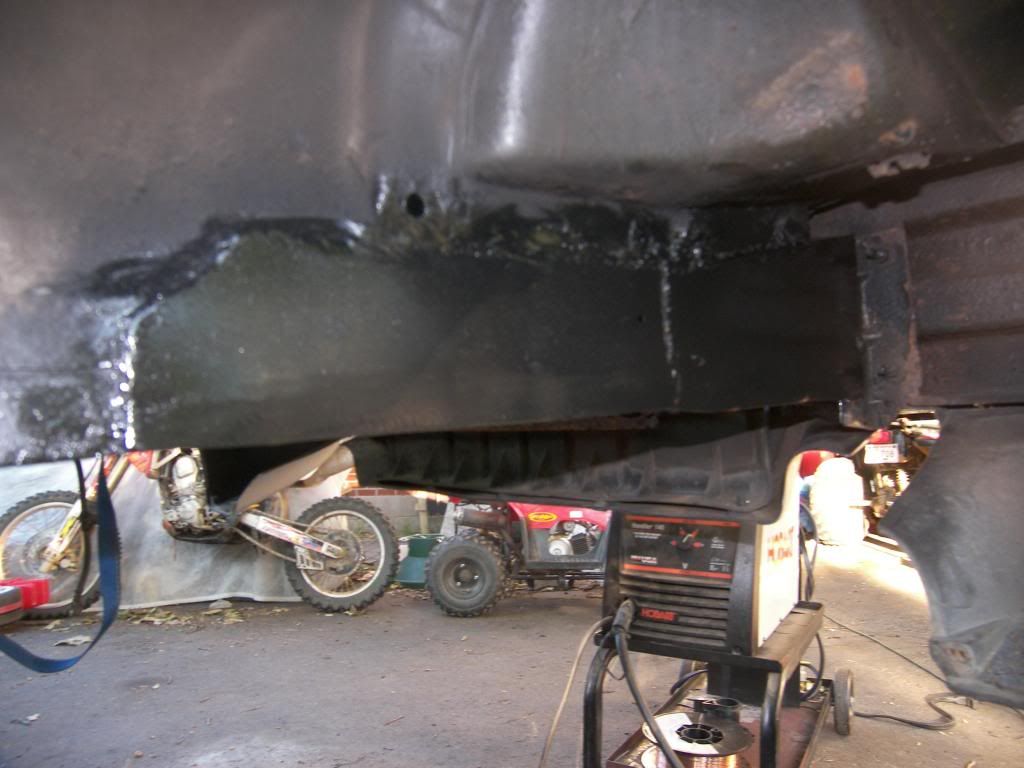
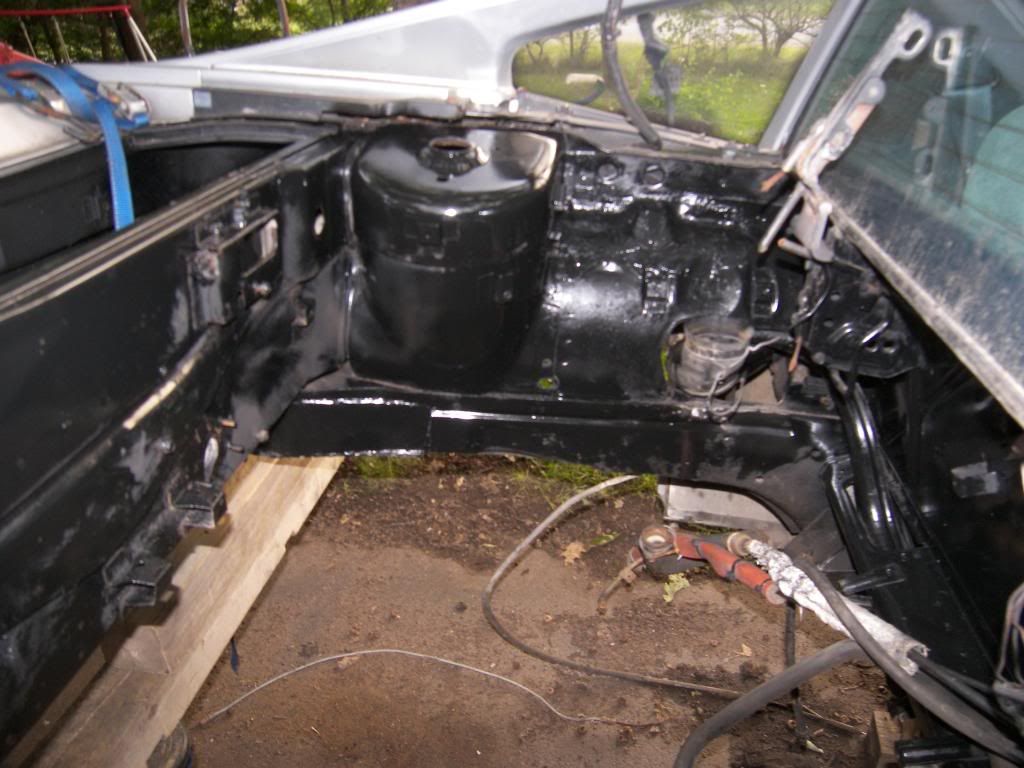
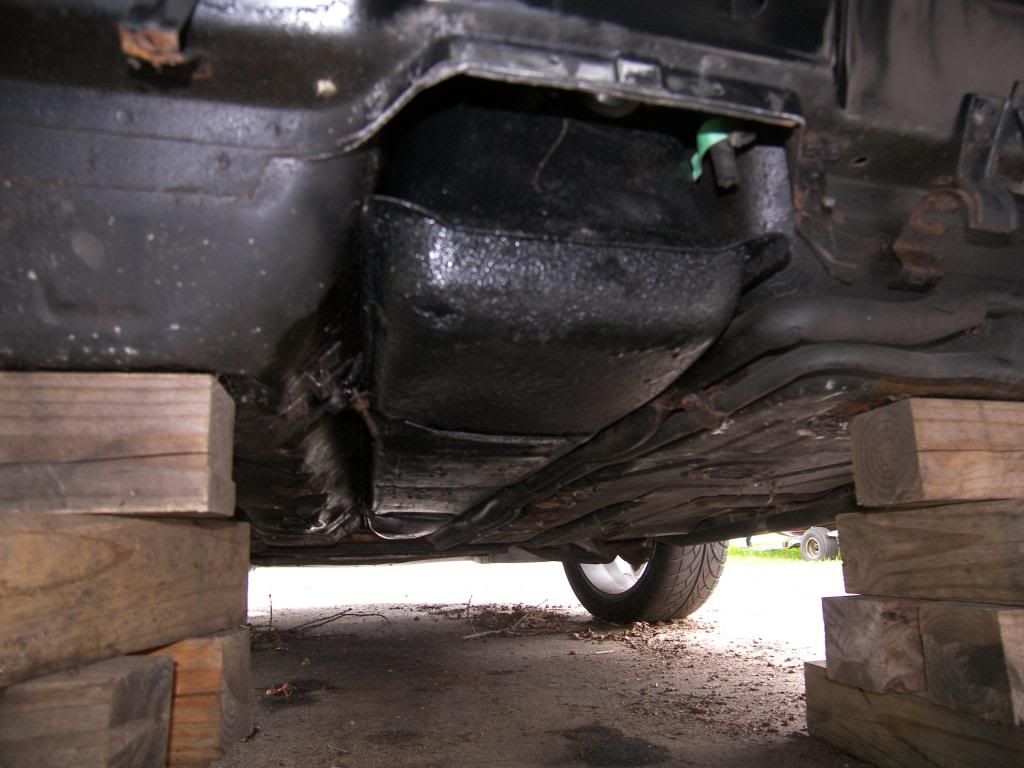
getting close to finishing up the frame Not the greatest looking repair that's for sure, but it's effective lol I've got a couple more little spots up higher on the inner fender to do and then the engine bay should be ready for cleaning and some paint


IP: Logged
fieroaddicted
Member
Posts: 662
From: aylesford, nova scotia canada
Registered: Dec 2012


Feedback score: N/A
Leave feedback

Rate this member

Report this Post07-13-2014 06:45 PM Click Here to See the Profile for fieroaddictedSend a Private Message to fieroaddictedEdit/Delete MessageReply w/QuoteDirect Link to This Post
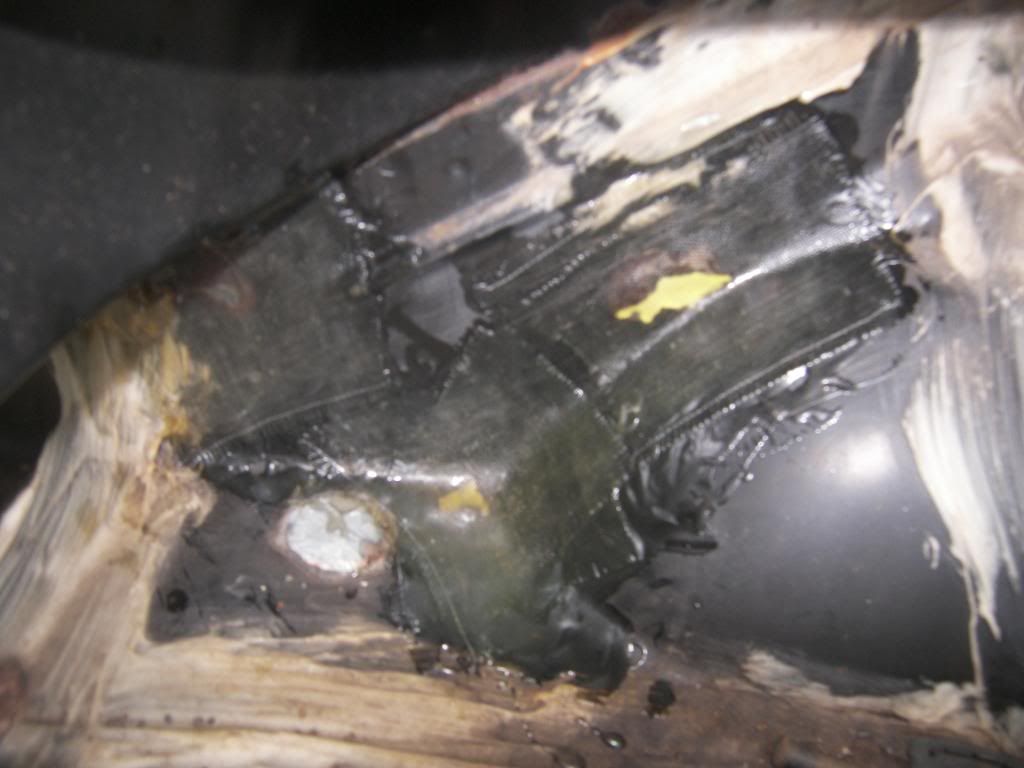
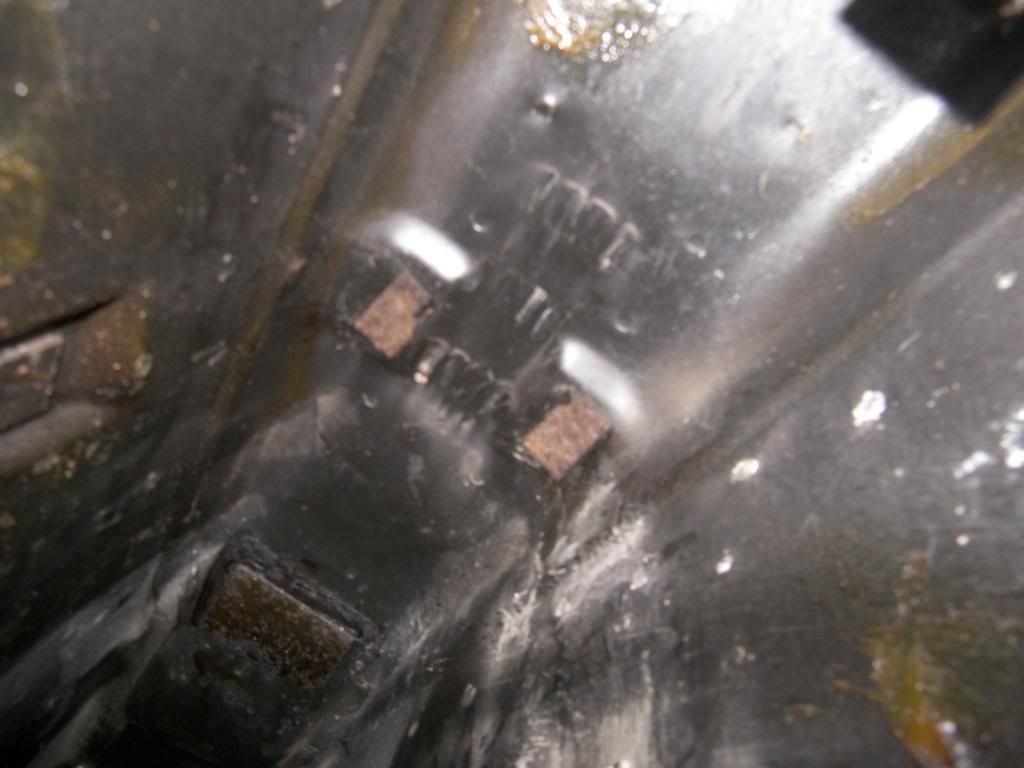
I had a couple small holes to fix in the rear left "inner fender". I decided to clean them up and then just glass them over. Once everything dries up good, I'll hit it with a light coat of filler to clean it up a bit. Then it will get some paint, and done.


IP: Logged
fieroaddicted
Member
Posts: 662
From: aylesford, nova scotia canada
Registered: Dec 2012


Feedback score: N/A
Leave feedback

Rate this member

Report this Post07-16-2014 08:21 PM Click Here to See the Profile for fieroaddictedSend a Private Message to fieroaddictedEdit/Delete MessageReply w/QuoteDirect Link to This Post
got my modular pulley setup from zzp yesterday.


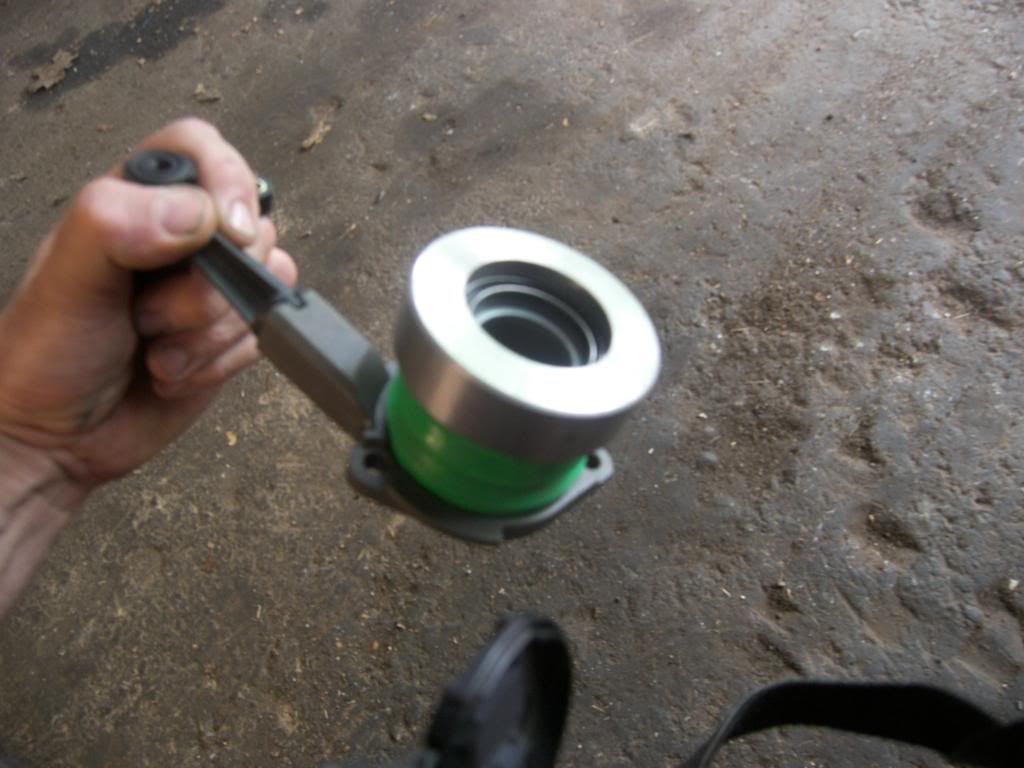
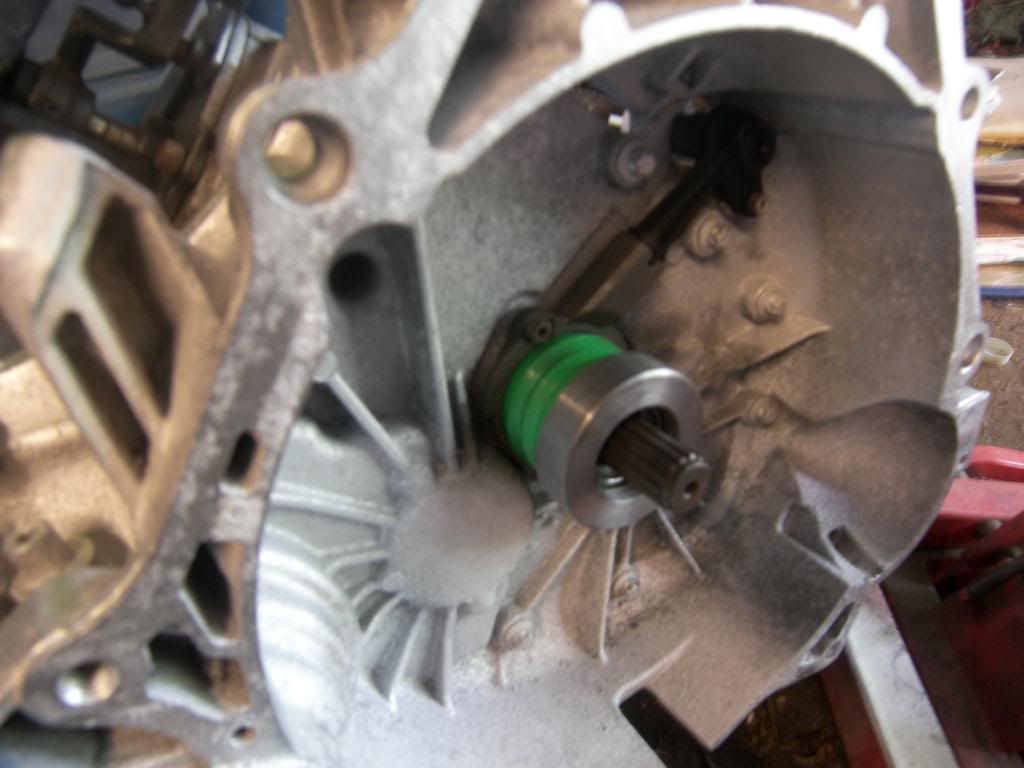
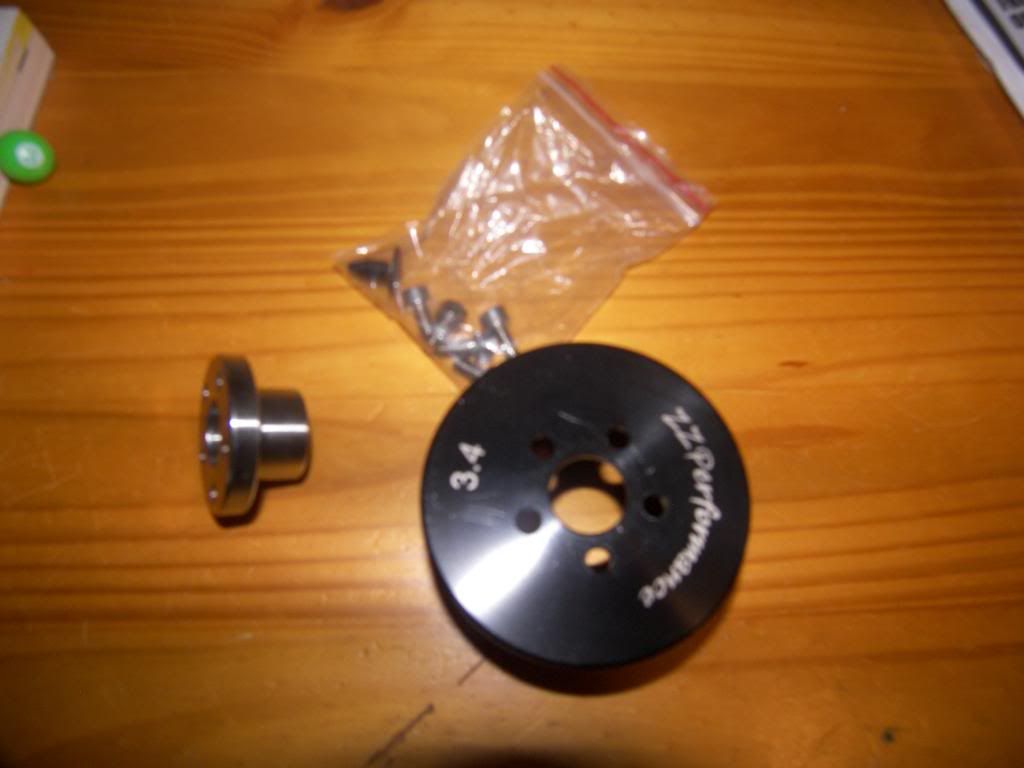
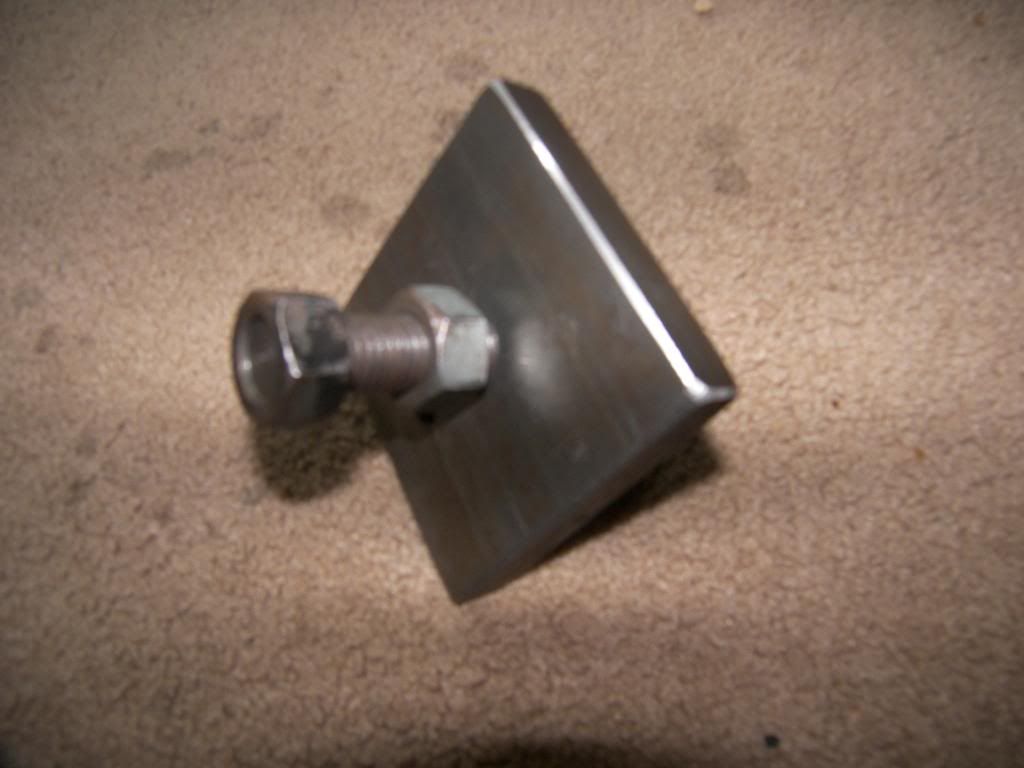
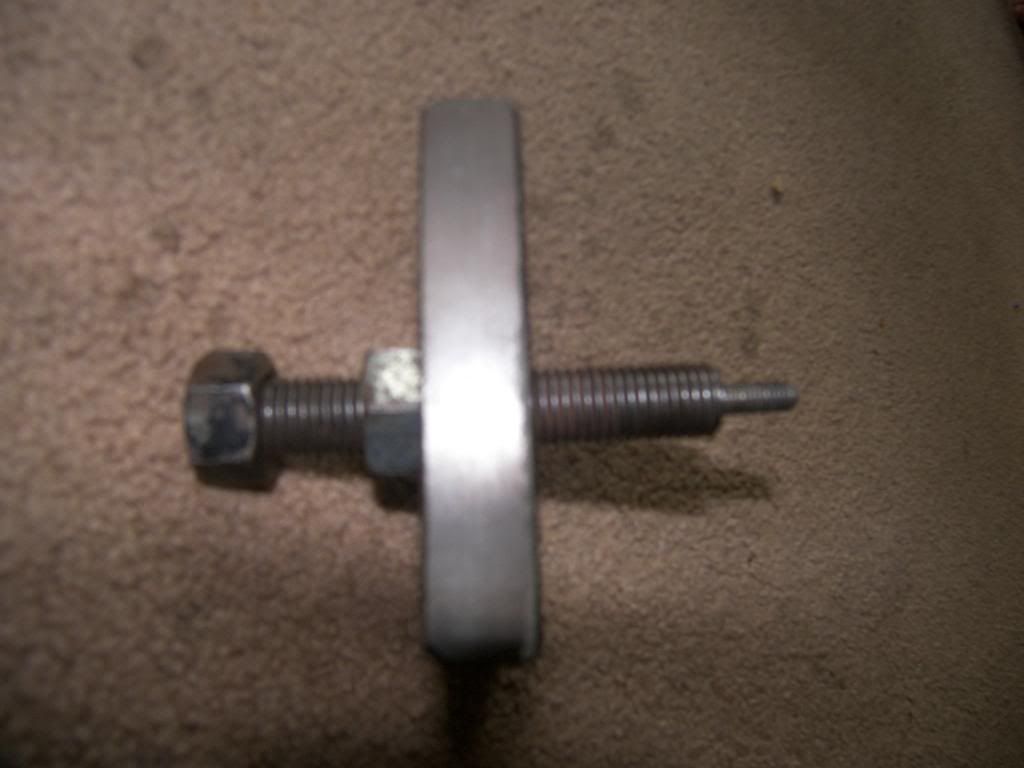
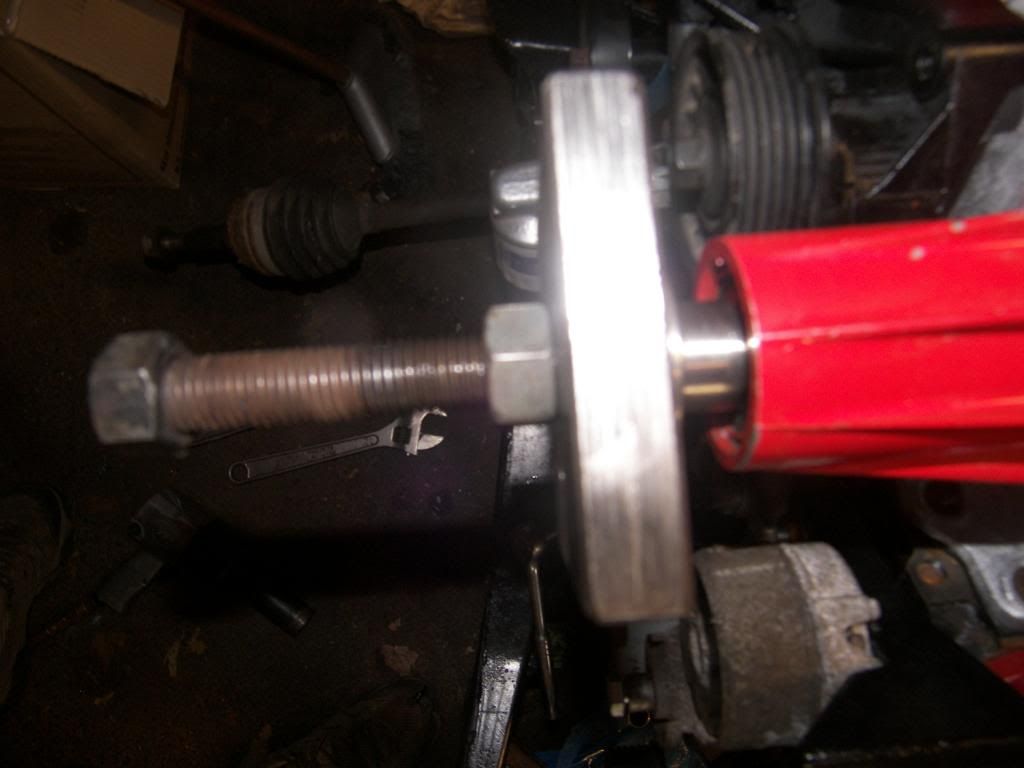
Pulley is just started on the shaft for now. I have to get a puller geared up to push the hub on.


This is the last hurtle I have to overcome with respect to the engine and tranny fitment on the cradle. The tranny hits the cradle a bit right in line with where the a arm bolts up. Probably have to notch the cradle out in that area a bit. I really want to avoid this, but the other option is to grind down the rib on the tranny...which is a no no. I guess the a arm bushing is round after all, and therefore there is a bit of unused space that i can use

[This message has been edited by fieroaddicted (edited 07-16-2014).]

IP: Logged
fieroaddicted
Member
Posts: 662
From: aylesford, nova scotia canada
Registered: Dec 2012


Feedback score: N/A
Leave feedback

Rate this member

Report this Post07-20-2014 06:27 PM Click Here to See the Profile for fieroaddictedSend a Private Message to fieroaddictedEdit/Delete MessageReply w/QuoteDirect Link to This Post
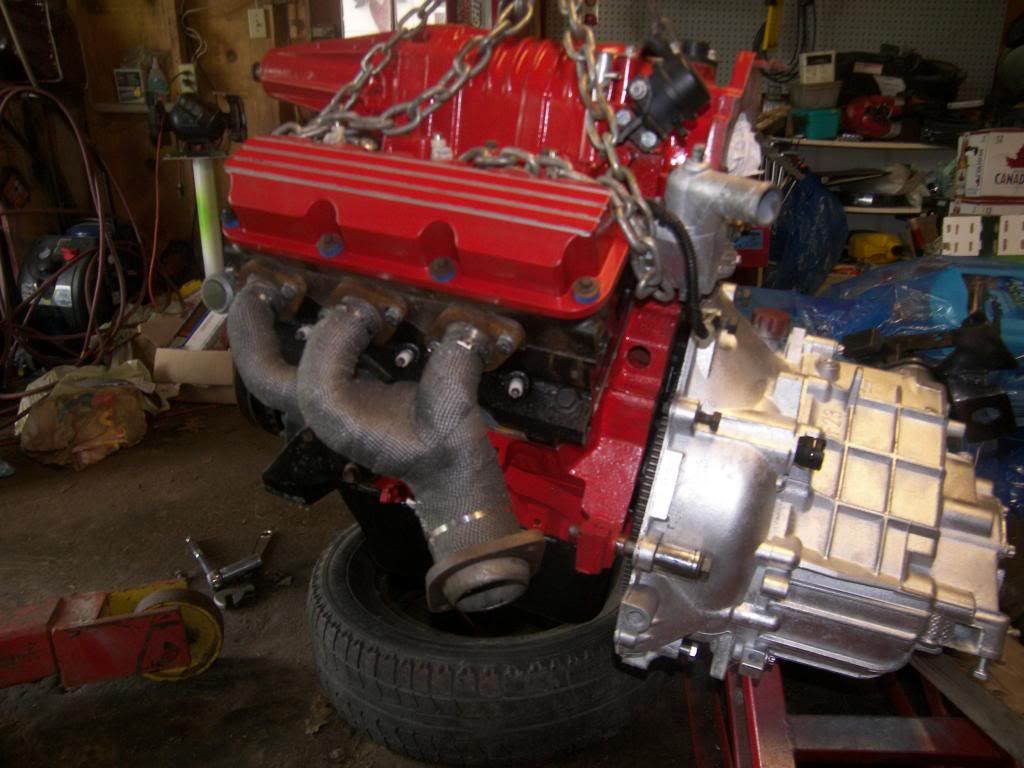
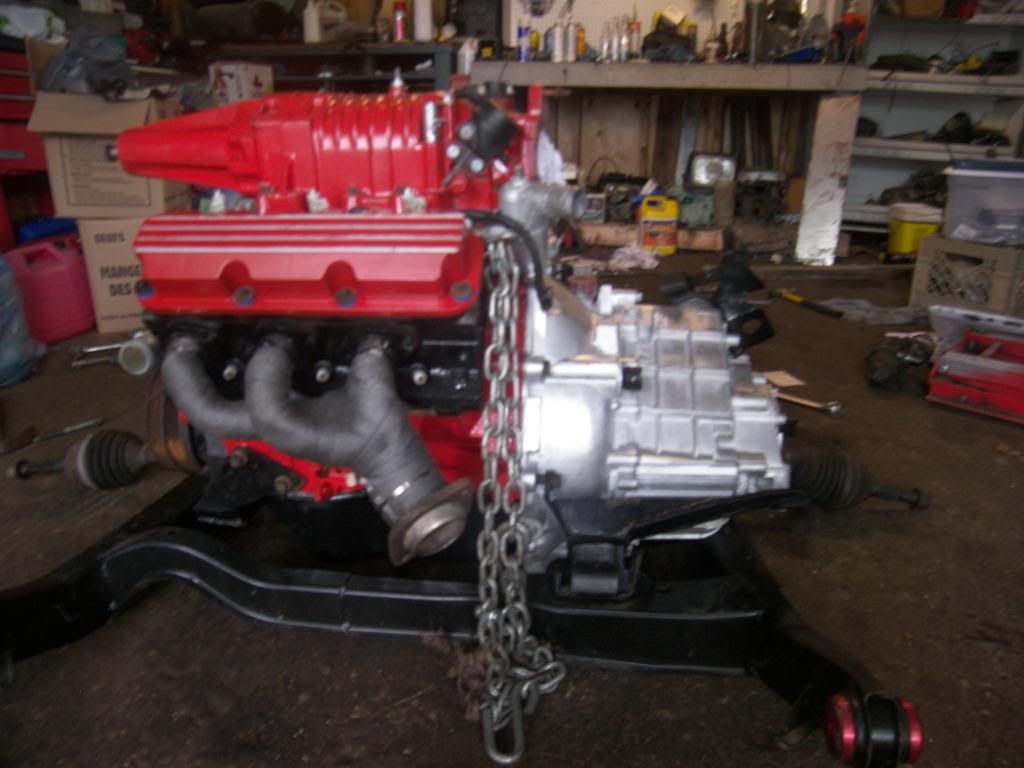
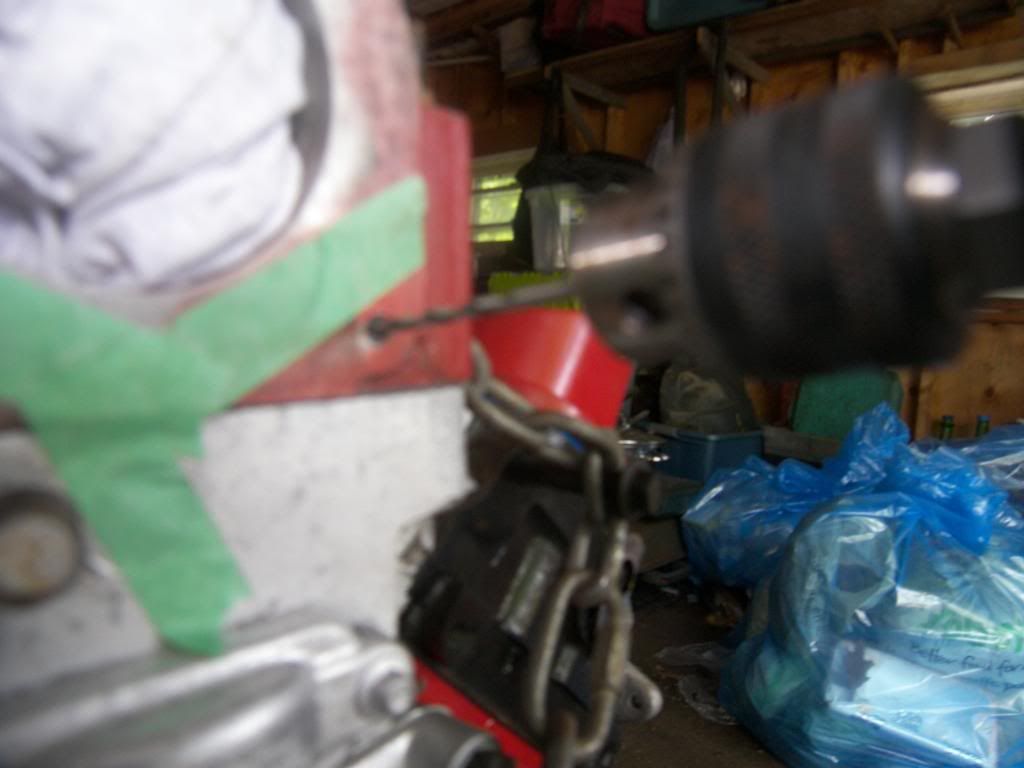
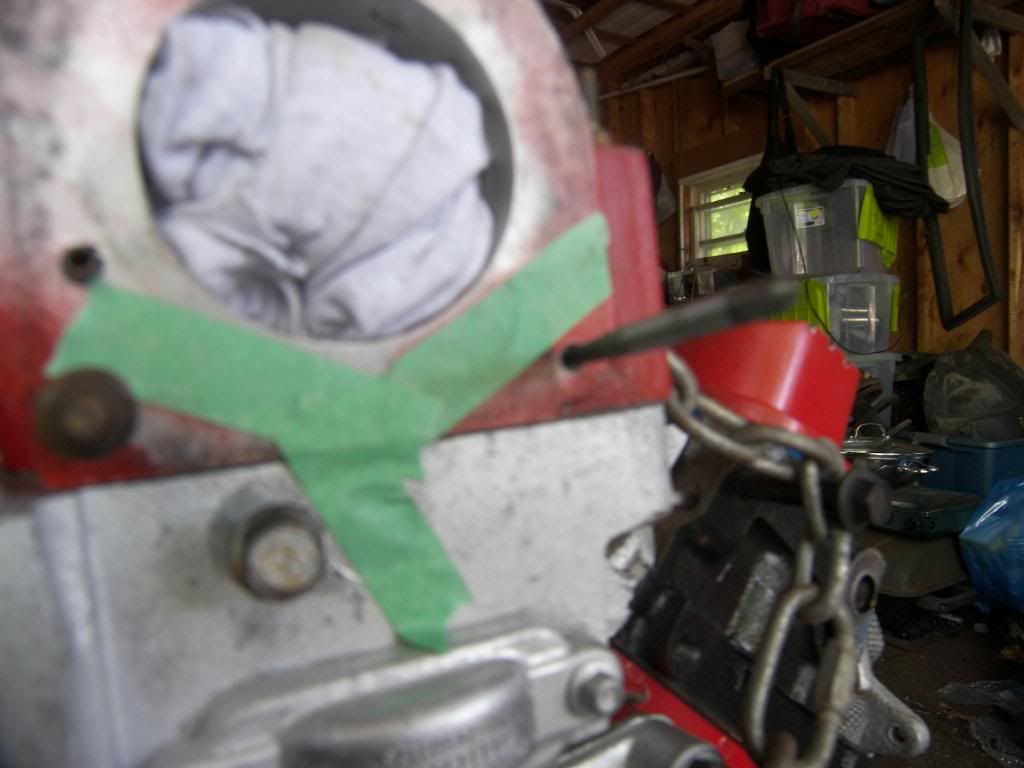
so i noticed that at some point while raising the engine and trans with the lift, i managed to catch one of the chains on a tb mounting stud.


I decided that I would try my luck at center punching it and drilling. I always hate trying to drill a bolt this small because it is very easy to drill off to one side.


managed to drill in far enough to get a small easyout in. Gave it a couple light taps with a hammer to set it in good


Clamped a set of vise grips on the end of the easy out and gave it a turn and out it came! The broken stud is not much of a deal since i will be getting 3 new longer ones with my tb spacer plate from zzp anyways.


IP: Logged
Lou6t4gto
Member
Posts: 8436
From: sarasota
Registered: May 2008


Feedback score:    (7)
Leave feedback

Rate this member

Report this Post07-21-2014 12:44 PM Click Here to See the Profile for Lou6t4gtoSend a Private Message to Lou6t4gtoEdit/Delete MessageReply w/QuoteDirect Link to This Post
Troy, Is the BODY "Ready" to accept the cradle yet ? (your rust repairs) any chance of it being driven before your" Winter time" sets in ?
IP: Logged
fieroaddicted
Member
Posts: 662
From: aylesford, nova scotia canada
Registered: Dec 2012


Feedback score: N/A
Leave feedback

Rate this member

Report this Post07-21-2014 04:52 PM Click Here to See the Profile for fieroaddictedSend a Private Message to fieroaddictedEdit/Delete MessageReply w/QuoteDirect Link to This Post
 
quote
Originally posted by Lou6t4gto:

Troy, Is the BODY "Ready" to accept the cradle yet ? (your rust repairs) any chance of it being driven before your" Winter time" sets in ?


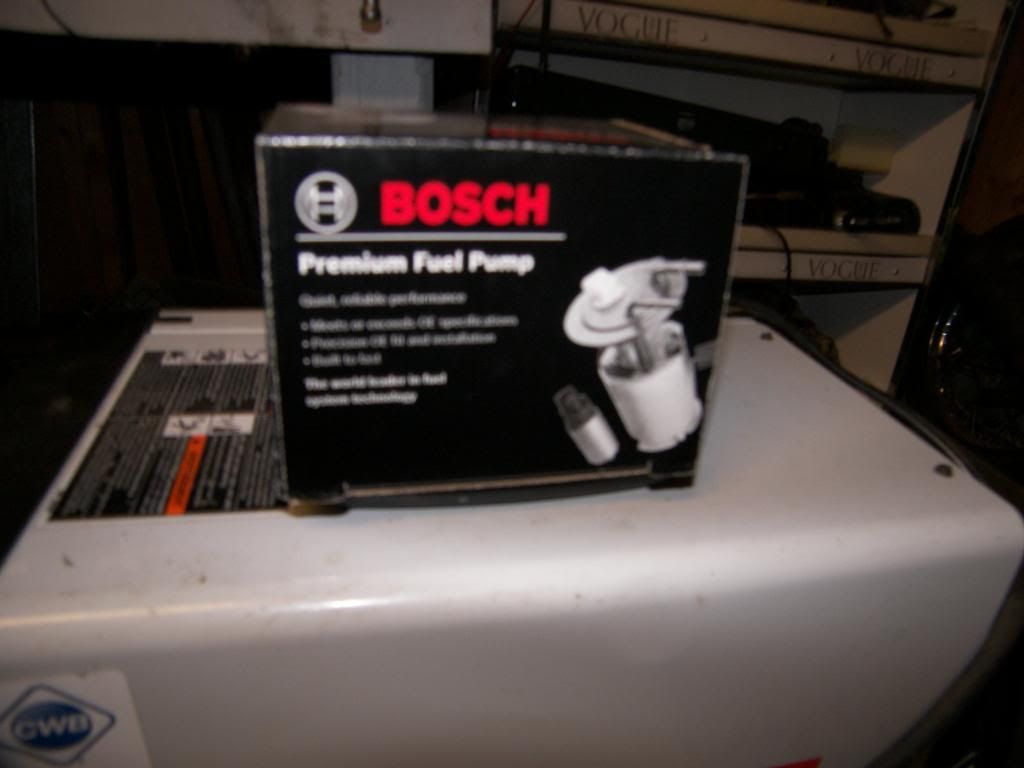
no it won't be driveable by the fall unfortunately. The frame repair is basically done and the cradle could be installed now technically, but i have a couple other things to do before it goes in....for example, the s/c modular pulley hub needs to be installed before it goes in cuz i don't think i have enough clearance to put it on while it is in the car. Also, i should remove the tank and do the fuel pump while it is easier to get at.
IP: Logged
fieroaddicted
Member
Posts: 662
From: aylesford, nova scotia canada
Registered: Dec 2012


Feedback score: N/A
Leave feedback

Rate this member

Report this Post07-21-2014 10:02 PM Click Here to See the Profile for fieroaddictedSend a Private Message to fieroaddictedEdit/Delete MessageReply w/QuoteDirect Link to This Post

fieroaddicted

662 posts
Member since Dec 2012
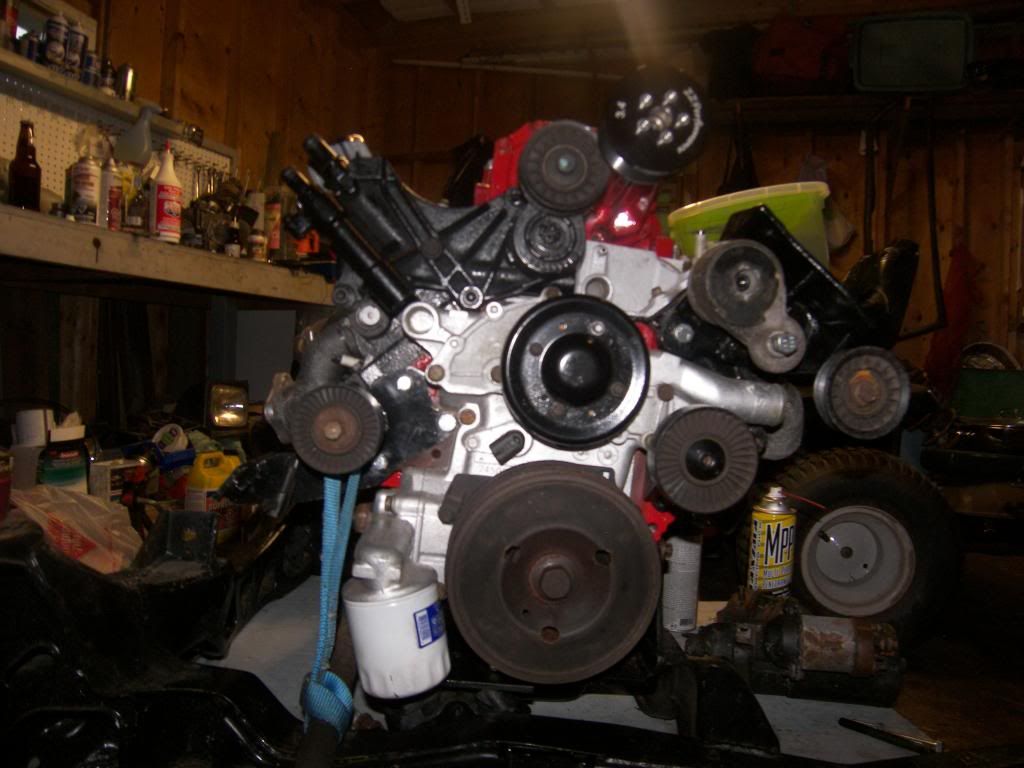
worked at tightening up some loose brackets and mounts this evening. Things are coming together. Still gotta get an alternator and a couple tensioner pulleys before finally putting the belts on. Also waiting on my coolant elbows before finally bolting up the stock alt bracket.


IP: Logged
Lou6t4gto
Member
Posts: 8436
From: sarasota
Registered: May 2008


Feedback score:    (7)
Leave feedback

Rate this member

Report this Post07-24-2014 02:05 PM Click Here to See the Profile for Lou6t4gtoSend a Private Message to Lou6t4gtoEdit/Delete MessageReply w/QuoteDirect Link to This Post
Yea, I need to install my new Fuel pump also (Bought it a year ago, buy never installed), "seems" to run fine with the stock 2.8 pump.
IP: Logged
fieroaddicted
Member
Posts: 662
From: aylesford, nova scotia canada
Registered: Dec 2012


Feedback score: N/A
Leave feedback

Rate this member

Report this Post07-24-2014 06:51 PM Click Here to See the Profile for fieroaddictedSend a Private Message to fieroaddictedEdit/Delete MessageReply w/QuoteDirect Link to This Post
You should definitely install the new pump you bought. From what i understand, the stock pump will not support the needs of the 3800. It would suck if something happened to it because of it.
IP: Logged
PFF
System Bot
fieroaddicted
Member
Posts: 662
From: aylesford, nova scotia canada
Registered: Dec 2012


Feedback score: N/A
Leave feedback

Rate this member

Report this Post07-24-2014 06:57 PM Click Here to See the Profile for fieroaddictedSend a Private Message to fieroaddictedEdit/Delete MessageReply w/QuoteDirect Link to This Post

fieroaddicted

662 posts
Member since Dec 2012
I went up to the local Fastenal and got a few more bolts to bolt up some of the pulleys and such on the front of the engine. The owner told me to take them and run lol I haven't paid for a single new bolt I have needed so far for this swap. He told me to just bring the car by when I have it finished so he can see it. Guess I have a "bolt" sponsor lol


Just waiting for my coolant elbows to come and I need to pick up an alt. and a s/c tensioner pulley. Then I can finally measure out my belts and get them on.

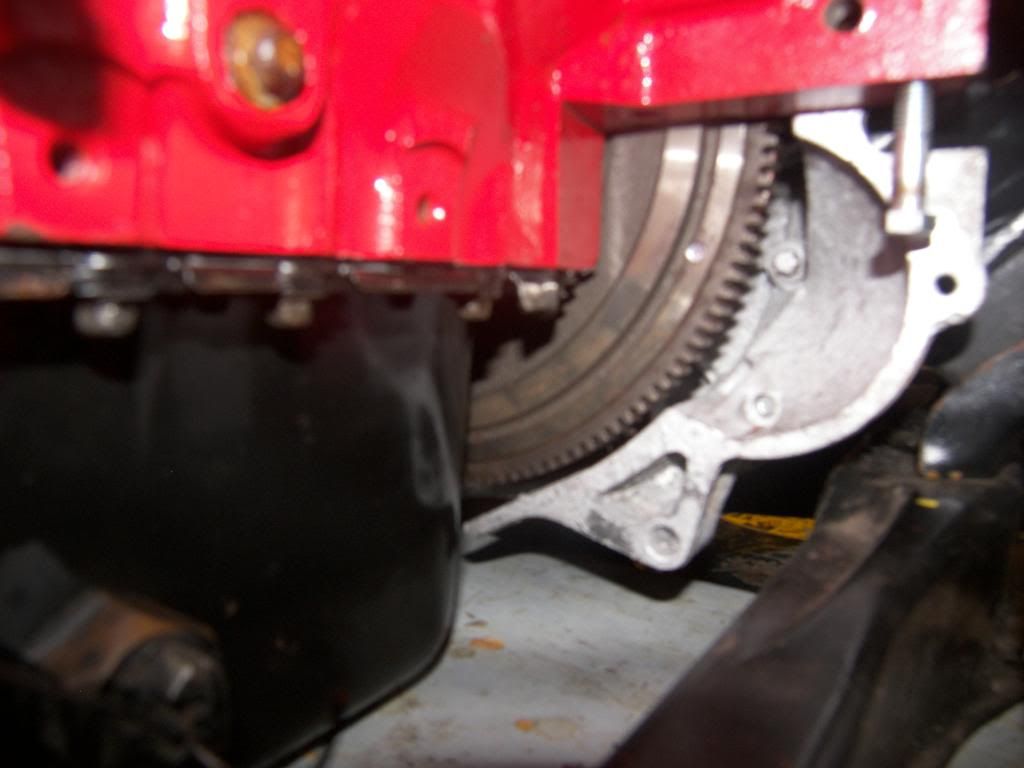
What have some of you done for a cover for the lower part of the bell housing on the f23? I was thinking a piece of 1/8 plate. Do some of you leave it exposed?

[This message has been edited by fieroaddicted (edited 07-24-2014).]

IP: Logged
Lou6t4gto
Member
Posts: 8436
From: sarasota
Registered: May 2008


Feedback score:    (7)
Leave feedback

Rate this member

Report this Post07-25-2014 08:45 PM Click Here to See the Profile for Lou6t4gtoSend a Private Message to Lou6t4gtoEdit/Delete MessageReply w/QuoteDirect Link to This Post
boy, I wish I coulda got a deal like that when I needed rod bolts, main bolts, head bolts, etc. ! those suckers are expensive.
IP: Logged
fieroaddicted
Member
Posts: 662
From: aylesford, nova scotia canada
Registered: Dec 2012


Feedback score: N/A
Leave feedback

Rate this member

Report this Post07-28-2014 08:20 PM Click Here to See the Profile for fieroaddictedSend a Private Message to fieroaddictedEdit/Delete MessageReply w/QuoteDirect Link to This Post
 
quote
Originally posted by Lou6t4gto:

boy, I wish I coulda got a deal like that when I needed rod bolts, main bolts, head bolts, etc. ! those suckers are expensive.


yeah, i suppose i did pay for those lol


I got my coolant tubes and tb spacer from zzp. Got them installed tonight


ready for tb


IP: Logged
fieroaddicted
Member
Posts: 662
From: aylesford, nova scotia canada
Registered: Dec 2012


Feedback score: N/A
Leave feedback

Rate this member

Report this Post08-01-2014 06:42 PM Click Here to See the Profile for fieroaddictedSend a Private Message to fieroaddictedEdit/Delete MessageReply w/QuoteDirect Link to This Post
got a puller pretty much geared up to put on my s/c pulley hub. Just have to weld the nut to the end


IP: Logged
fieroaddicted
Member
Posts: 662
From: aylesford, nova scotia canada
Registered: Dec 2012


Feedback score: N/A
Leave feedback

Rate this member

Report this Post08-01-2014 08:50 PM Click Here to See the Profile for fieroaddictedSend a Private Message to fieroaddictedEdit/Delete MessageReply w/QuoteDirect Link to This Post

fieroaddicted

662 posts
Member since Dec 2012
set the miller up on #4 power and welded the nut to the end of the 3/4 threaded rod. Welded not too bad for a smaller welder


all ready to start pressing it on. Had to give the puller a bit of a zap with the impact gun to tighten it on the shaft.


all pressed on!!


flush with the snout


All finished!


IP: Logged
fieroaddicted
Member
Posts: 662
From: aylesford, nova scotia canada
Registered: Dec 2012


Feedback score: N/A
Leave feedback

Rate this member

Report this Post08-02-2014 05:27 PM Click Here to See the Profile for fieroaddictedSend a Private Message to fieroaddictedEdit/Delete MessageReply w/QuoteDirect Link to This Post
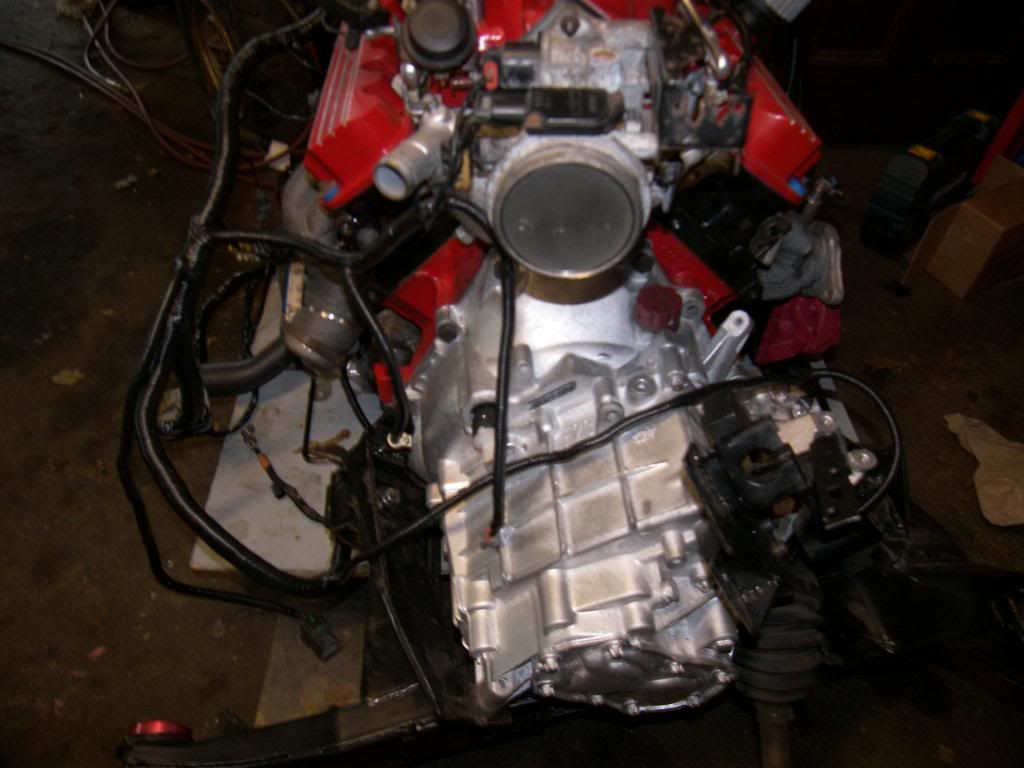
worked a bit more today. Painted the fuel rail and installed it...installed the tb as well. Also welded a bolt over the hole in the egr tube end to seal it off so i can bolt it up to the intake.

[This message has been edited by fieroaddicted (edited 08-02-2014).]

IP: Logged
fieroaddicted
Member
Posts: 662
From: aylesford, nova scotia canada
Registered: Dec 2012


Feedback score: N/A
Leave feedback

Rate this member

Report this Post08-03-2014 02:29 PM Click Here to See the Profile for fieroaddictedSend a Private Message to fieroaddictedEdit/Delete MessageReply w/QuoteDirect Link to This Post
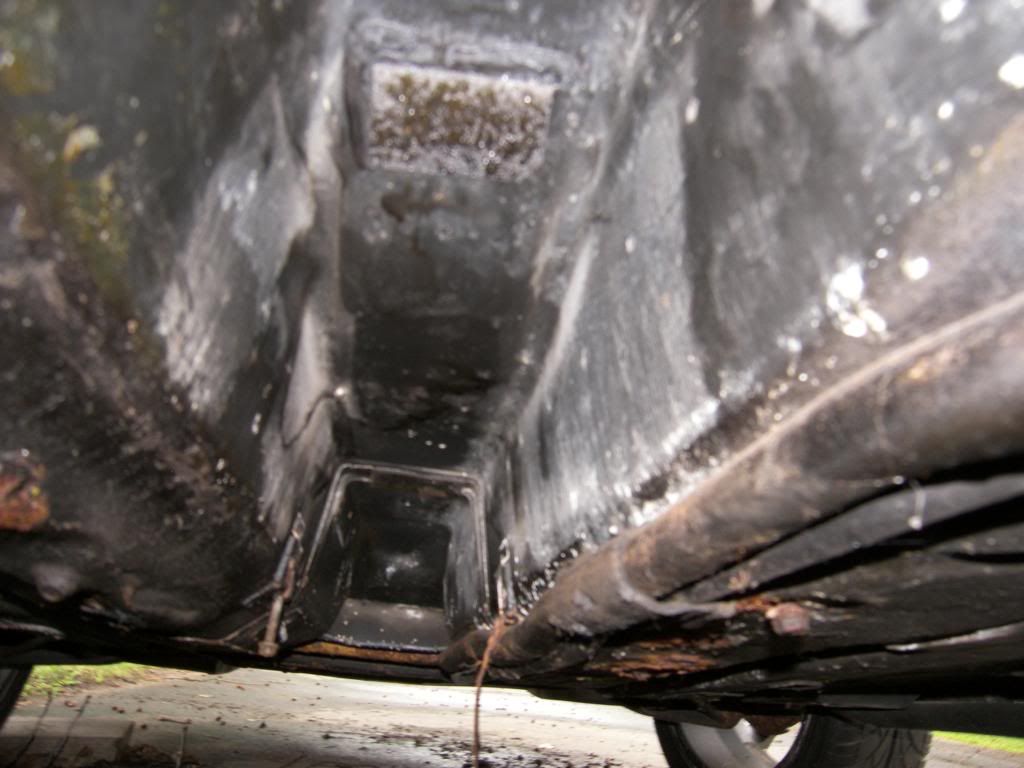
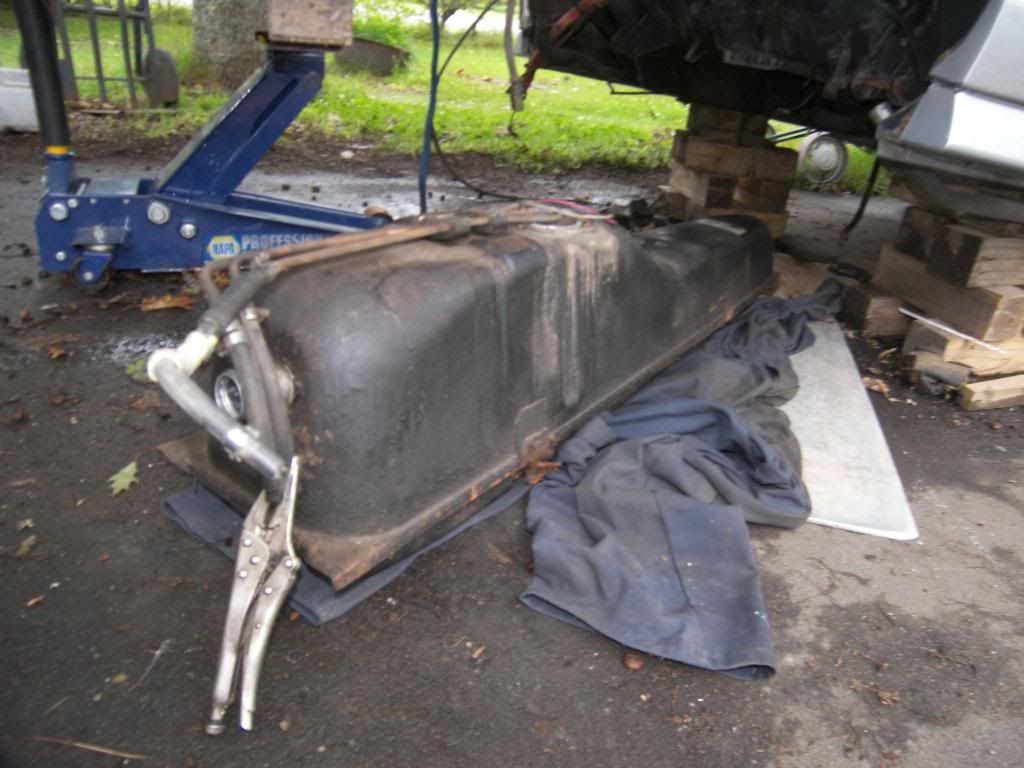
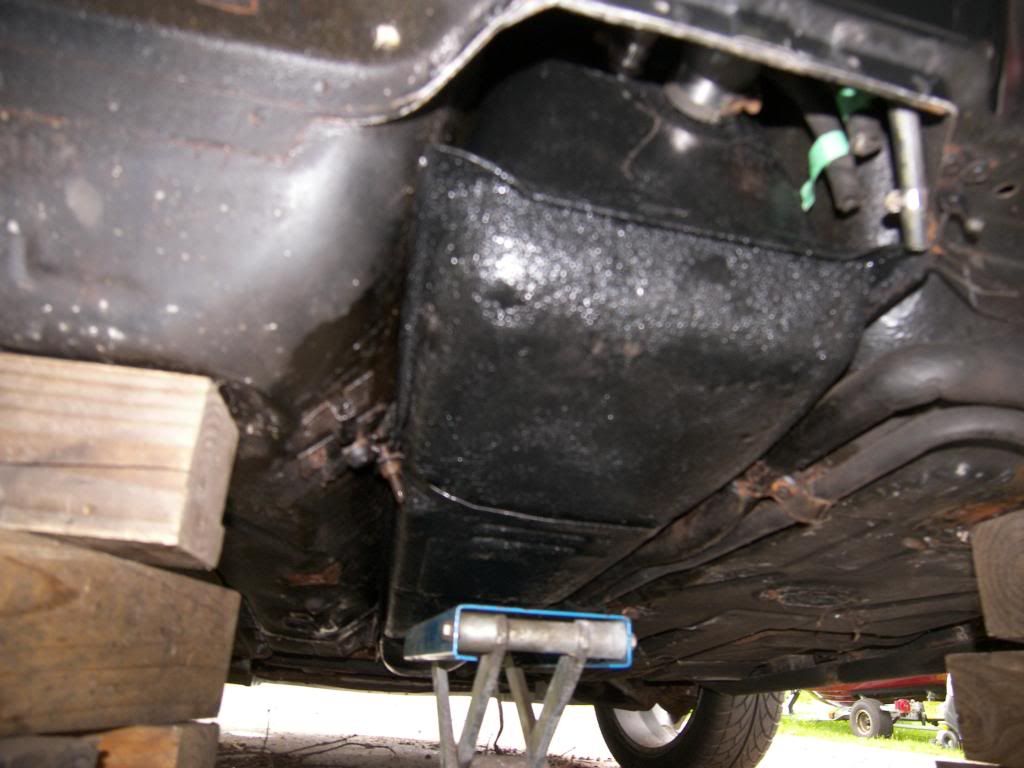
so far today, i have finally tackled dropping the fuel tank from the car. looks like we are in good shape body wise above where the tank was. I had visions of loads of crap sitting up on top of the tank rotting out both the tank and the body, but it is actually quite clean up in there


tank overall is in pretty good shape. needs a good cleaning and a shot of paint.


IP: Logged
fieroaddicted
Member
Posts: 662
From: aylesford, nova scotia canada
Registered: Dec 2012


Feedback score: N/A
Leave feedback

Rate this member

Report this Post08-03-2014 03:17 PM Click Here to See the Profile for fieroaddictedSend a Private Message to fieroaddictedEdit/Delete MessageReply w/QuoteDirect Link to This Post

fieroaddicted

662 posts
Member since Dec 2012
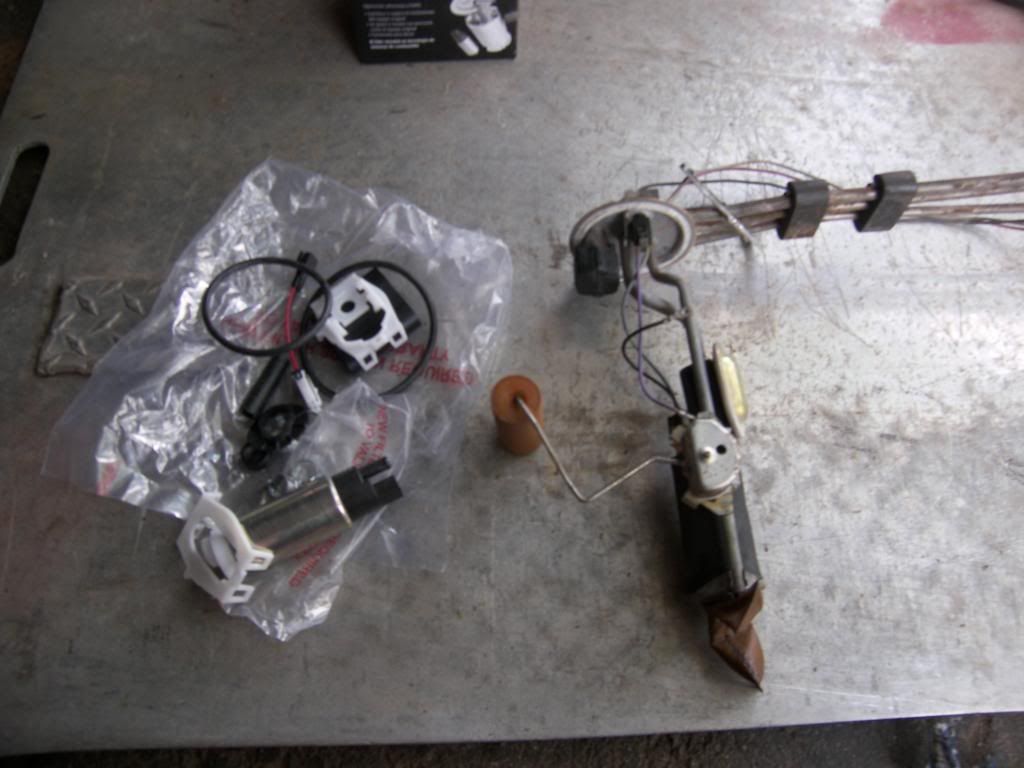
I pulled the pump and was very surprised at the condition of the inside of the tank. Sent my inspection cam down inside of the tank to check it all out and everything looks good.


hard to get a good pic of the inside of the tank since my camera is too big to fit in the hole


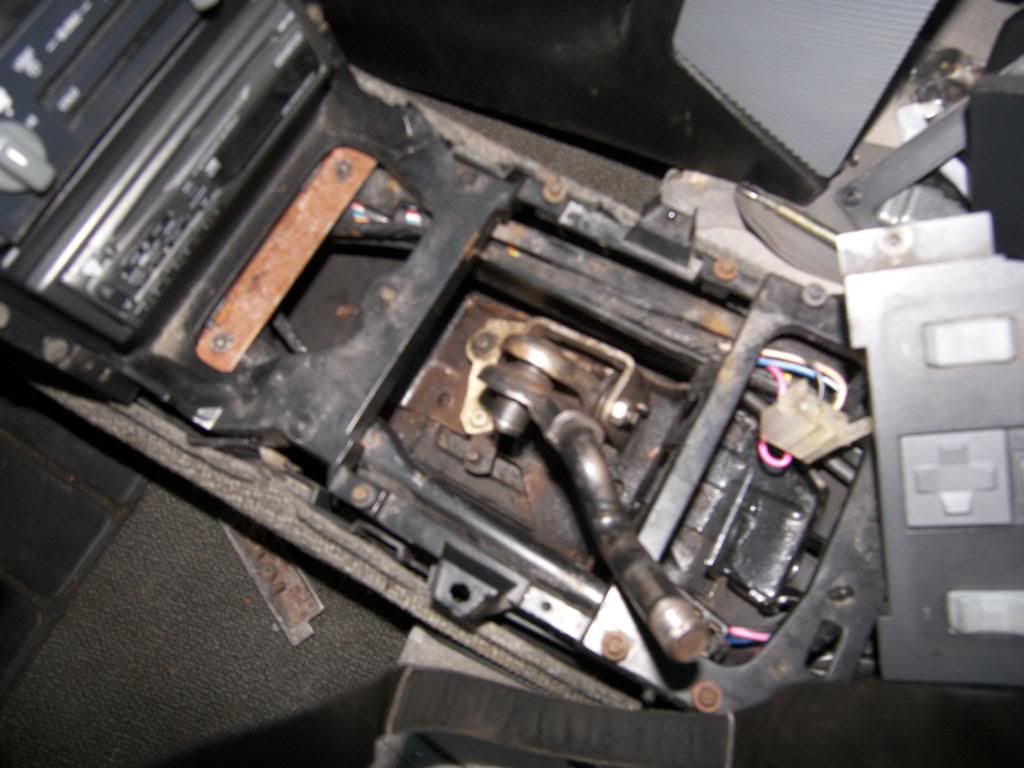
Also moved my MAP to a location over by the boost valve to clean things up a bit.


IP: Logged
Dennis LaGrua
Member
Posts: 15145
From: Hillsborough, NJ U.S.A.
Registered: May 2000


Feedback score:    (13)
Leave feedback


Total ratings: 328
Rate this member

Report this Post08-03-2014 03:48 PM Click Here to See the Profile for Dennis LaGruaSend a Private Message to Dennis LaGruaEdit/Delete MessageReply w/QuoteDirect Link to This Post
Congratulations on a nice job. This thread only goes to prove that engine swaps can be costly and take 100 or more hours to complete. The auto swaps add extra expense and fabrication time
I notice that your headers are wrapped. IMO, this is a good idea. If you didn't do it already, I would recommend to paint them with high temp clearcoat or paint. This will prevent the wrap from absorbing moisture that will shorten the life of the exhaust.

------------------
" THE BLACK PARALYZER" -87GT 3800SC Series III engine, custom ZZP /Frozen Boost Intercooler setup, 3.4" Pulley, Powerlog manifold, Northstar TB, LS1 MAF, 3" Flotech Afterburner Exhaust, Autolite 104's, MSD wires, Custom CAI, 4T65eHD w. custom axles, HP Tuners VCM Suite.
"THE COLUSSUS"
87GT - ALL OUT 3.4L Turbocharged engine, Garrett Hybrid Turbo, MSD ign., modified TH125H
" ON THE LOOSE WITHOUT THE JUICE "

IP: Logged
fieroaddicted
Member
Posts: 662
From: aylesford, nova scotia canada
Registered: Dec 2012


Feedback score: N/A
Leave feedback

Rate this member

Report this Post08-03-2014 05:53 PM Click Here to See the Profile for fieroaddictedSend a Private Message to fieroaddictedEdit/Delete MessageReply w/QuoteDirect Link to This Post
 
quote
Originally posted by Dennis LaGrua:

Congratulations on a nice job. This thread only goes to prove that engine swaps can be costly and take 100 or more hours to complete. The auto swaps add extra expense and fabrication time
I notice that your headers are wrapped. IMO, this is a good idea. If you didn't do it already, I would recommend to paint them with high temp clearcoat or paint. This will prevent the wrap from absorbing moisture that will shorten the life of the exhaust.


thanks dennis! I definitely appreciate the compliment. I have been doing the best i can with a lot of advice and help from members on here. It is slowly coming together and i definitely cannot wait till i can turn the key and hear some loud obnoxious noise come from this thing! All in due time. It most definitely has been pricey, with a ways to go yet before it is finished. The stock modded rear manifold was painted with high heat paint before wrapping and the front mustang header was stainless and i didn't bother to paint it. I do have some silicone spray that came with the wrap kit, but it has not yet been sprayed on

troy


IP: Logged
PFF
System Bot
fieroaddicted
Member
Posts: 662
From: aylesford, nova scotia canada
Registered: Dec 2012


Feedback score: N/A
Leave feedback

Rate this member

Report this Post08-04-2014 05:25 PM Click Here to See the Profile for fieroaddictedSend a Private Message to fieroaddictedEdit/Delete MessageReply w/QuoteDirect Link to This Post
while at work today, i was sent out to a local salvage yard to fill out an accident report on a yamaha road star 1700 motorcycle. While there, i asked about a alternator for a 99 gp. He asked how many i wanted..lol I said 1 would prob do and he dug one out, gave it to me, and said thanks for coming out to fill out the report. Gotta love free stuff when ya can get it!


IP: Logged
fieroaddicted
Member
Posts: 662
From: aylesford, nova scotia canada
Registered: Dec 2012


Feedback score: N/A
Leave feedback

Rate this member

Report this Post08-08-2014 08:39 PM Click Here to See the Profile for fieroaddictedSend a Private Message to fieroaddictedEdit/Delete MessageReply w/QuoteDirect Link to This Post
car was looking pretty grimy from sitting so long, so i gave it a bit of a bath


picked up a fuel pump for the swap today. It was for a 91 syclone 4.3 turbo truck. Got some work ahead of me mounting it.


IP: Logged
fieroaddicted
Member
Posts: 662
From: aylesford, nova scotia canada
Registered: Dec 2012


Feedback score: N/A
Leave feedback

Rate this member

Report this Post08-09-2014 03:14 PM Click Here to See the Profile for fieroaddictedSend a Private Message to fieroaddictedEdit/Delete MessageReply w/QuoteDirect Link to This Post
swapped out the fuel pump this afternoon. Even gave the tank a splash of paint. Gonna spray rust check up in the body where the tank goes and then she can go back up in.


IP: Logged
fieroaddicted
Member
Posts: 662
From: aylesford, nova scotia canada
Registered: Dec 2012


Feedback score: N/A
Leave feedback

Rate this member

Report this Post08-09-2014 07:32 PM Click Here to See the Profile for fieroaddictedSend a Private Message to fieroaddictedEdit/Delete MessageReply w/QuoteDirect Link to This Post

fieroaddicted

662 posts
Member since Dec 2012
Almost done prepping the engine bay. Still needs more paint though


hopefully get the tank re-installed tomorrow

[This message has been edited by fieroaddicted (edited 08-09-2014).]

IP: Logged
fieroaddicted
Member
Posts: 662
From: aylesford, nova scotia canada
Registered: Dec 2012


Feedback score: N/A
Leave feedback

Rate this member

Report this Post08-10-2014 02:34 PM Click Here to See the Profile for fieroaddictedSend a Private Message to fieroaddictedEdit/Delete MessageReply w/QuoteDirect Link to This Post
Put the fuel tank back in the car today. My motorcycle jack came in handy for lifting the tank in place.


hoses all hooked back up


all strapped up and finished


I removed the wing from the rear deck, so I lowered the car down, set the deck on, and threw a wheel under the rear so i could get an idea what it will look like


IP: Logged
fieroaddicted
Member
Posts: 662
From: aylesford, nova scotia canada
Registered: Dec 2012


Feedback score: N/A
Leave feedback

Rate this member

Report this Post08-14-2014 07:12 PM Click Here to See the Profile for fieroaddictedSend a Private Message to fieroaddictedEdit/Delete MessageReply w/QuoteDirect Link to This Post
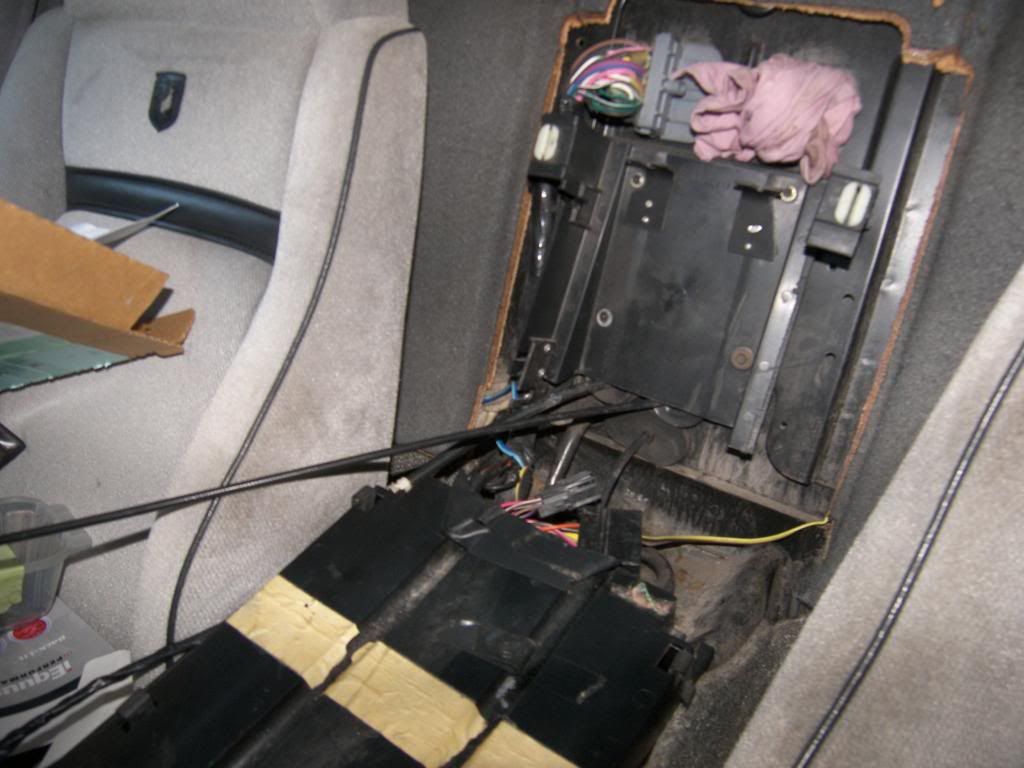
Harness and pcm are ready and on the way soon!! Once i get the harness run on the engine and trans, i will be able to put the engine in the car. I went out for a little bit tonight and worked at the interior some. Wrangled the shifter back down in place and started to sort out the wiring connectors. Still need a set of Rodney's shift cables yet. Still lots to do....


lol work ahead of me here


IP: Logged
fieroaddicted
Member
Posts: 662
From: aylesford, nova scotia canada
Registered: Dec 2012


Feedback score: N/A
Leave feedback

Rate this member

Report this Post08-18-2014 05:16 PM Click Here to See the Profile for fieroaddictedSend a Private Message to fieroaddictedEdit/Delete MessageReply w/QuoteDirect Link to This Post
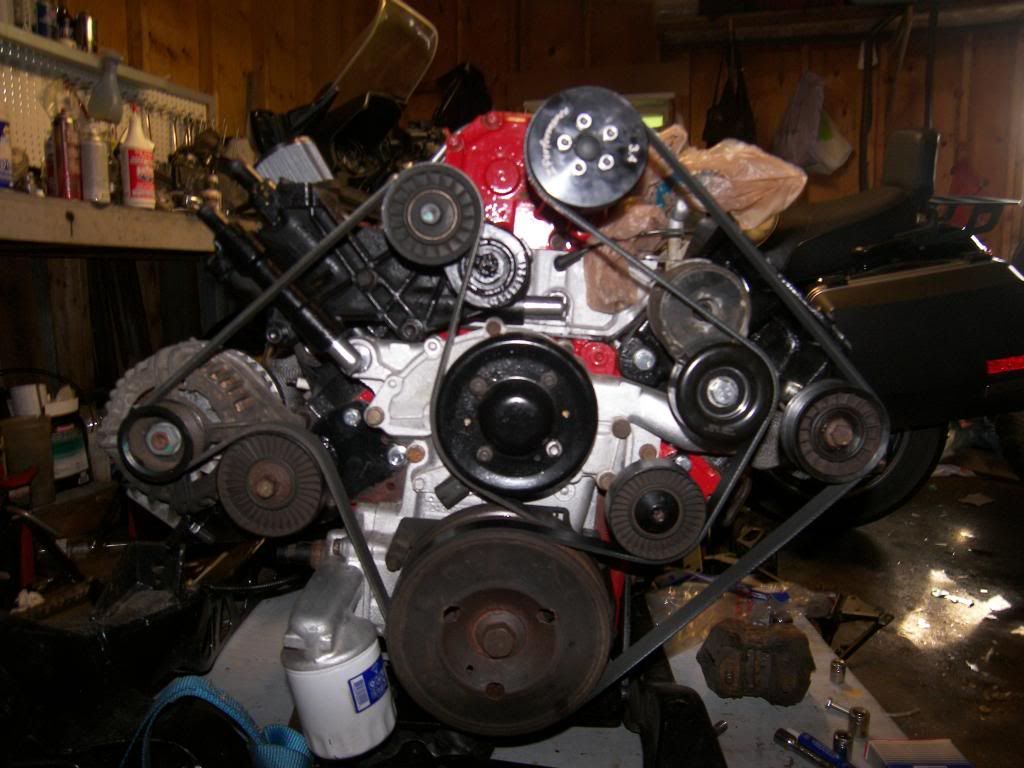
Wrapped a length of wire around the pulley setup on the engine to get an idea of the proper length i needed for the two belts. Only had to bring 5 belts home to get the proper length ones


IP: Logged
fieroaddicted
Member
Posts: 662
From: aylesford, nova scotia canada
Registered: Dec 2012


Feedback score: N/A
Leave feedback

Rate this member

Report this Post08-19-2014 06:35 AM Click Here to See the Profile for fieroaddictedSend a Private Message to fieroaddictedEdit/Delete MessageReply w/QuoteDirect Link to This Post
so i was informed that belt was on the wrong side of my water pump, thus turning it the wrong direction...grr Have to run an ac delete pulley to make it right, but there doesn't really seem to be room for one to mount properly...
IP: Logged
ericjon262
Member
Posts: 3082
From: everywhere.
Registered: Jan 2010


Feedback score:    (10)
Leave feedback


Total ratings: 66
Rate this member

Report this Post08-19-2014 07:48 AM Click Here to See the Profile for ericjon262Send a Private Message to ericjon262Edit/Delete MessageReply w/QuoteDirect Link to This Post
belt won't matter as long as it's smooth to smooth or ribbed to ribbed. you're good like that.
IP: Logged
fieroaddicted
Member
Posts: 662
From: aylesford, nova scotia canada
Registered: Dec 2012


Feedback score: N/A
Leave feedback

Rate this member

Report this Post08-19-2014 09:18 AM Click Here to See the Profile for fieroaddictedSend a Private Message to fieroaddictedEdit/Delete MessageReply w/QuoteDirect Link to This Post
 
quote
Originally posted by ericjon262:

belt won't matter as long as it's smooth to smooth or ribbed to ribbed. you're good like that.


lol i'm stupid i was just looking at the pic a little earlier and noticed that. thanks for the heads up lol
IP: Logged
PFF
System Bot
ericjon262
Member
Posts: 3082
From: everywhere.
Registered: Jan 2010


Feedback score:    (10)
Leave feedback


Total ratings: 66
Rate this member

Report this Post08-19-2014 03:31 PM Click Here to See the Profile for ericjon262Send a Private Message to ericjon262Edit/Delete MessageReply w/QuoteDirect Link to This Post
 
quote
Originally posted by fieroaddicted:


lol i'm stupid i was just looking at the pic a little earlier and noticed that. thanks for the heads up lol


all good, we all make mistakes.

IP: Logged
fieroaddicted
Member
Posts: 662
From: aylesford, nova scotia canada
Registered: Dec 2012


Feedback score: N/A
Leave feedback

Rate this member

Report this Post08-20-2014 07:32 PM Click Here to See the Profile for fieroaddictedSend a Private Message to fieroaddictedEdit/Delete MessageReply w/QuoteDirect Link to This Post
 
quote
Originally posted by ericjon262:


all good, we all make mistakes.


ya i've made plenty during this swap....definitely a learning experience.


a few more pics...


IP: Logged
fieroaddicted
Member
Posts: 662
From: aylesford, nova scotia canada
Registered: Dec 2012


Feedback score: N/A
Leave feedback

Rate this member

Report this Post08-23-2014 05:44 PM Click Here to See the Profile for fieroaddictedSend a Private Message to fieroaddictedEdit/Delete MessageReply w/QuoteDirect Link to This Post
Picked up a couple liters of mobil 1 atf synthetic so i can change the oil in the tranny.


IP: Logged
fieroaddicted
Member
Posts: 662
From: aylesford, nova scotia canada
Registered: Dec 2012


Feedback score: N/A
Leave feedback

Rate this member

Report this Post08-25-2014 05:57 PM Click Here to See the Profile for fieroaddictedSend a Private Message to fieroaddictedEdit/Delete MessageReply w/QuoteDirect Link to This Post
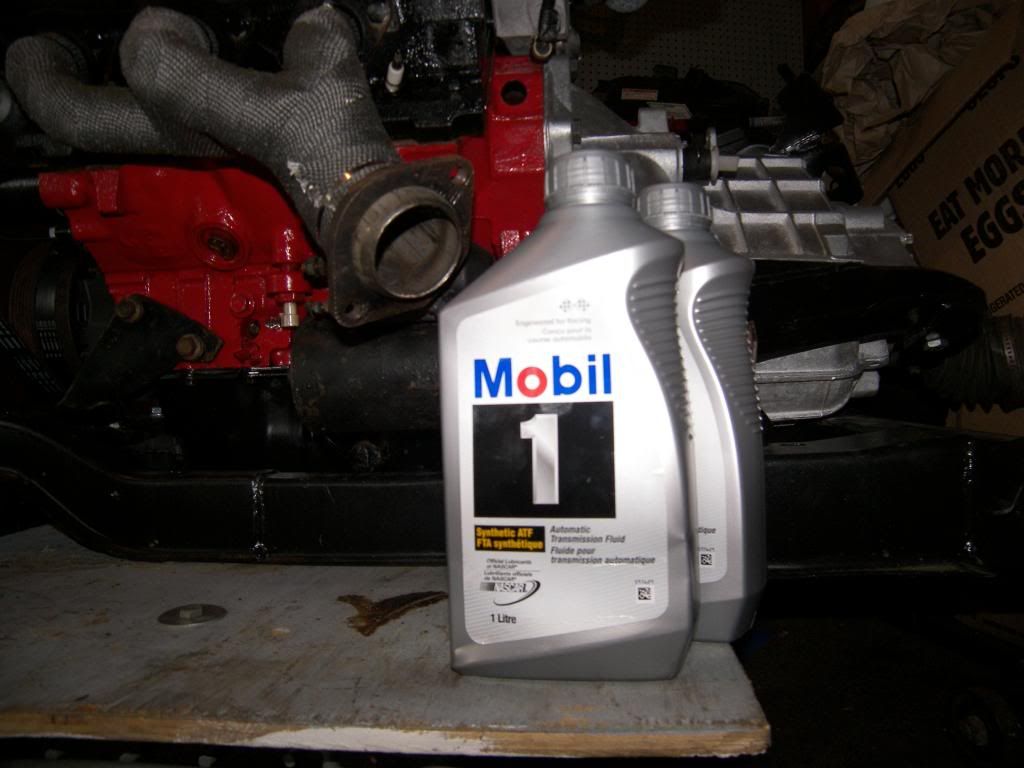
Changed the oil in the F23 tonight. Man was the drain plug on there. It was just close enough to the left side cradle rail, that i had to use a allen wrench instead of a bit and 3/8 ratchet like i wanted.


I went to fill the tranny with 2 liters of fluid by removing the red fill cap at the top. I pulled it out and looked inside, to find out that there was only a small hole to the inside (that i could see) about the size of a needle or so. I figued it would take forever to fill through there, so i took the other cap off beside it that looked like the drain plug and filled through it instead.


IP: Logged
fieroaddicted
Member
Posts: 662
From: aylesford, nova scotia canada
Registered: Dec 2012


Feedback score: N/A
Leave feedback

Rate this member

Report this Post08-26-2014 07:19 PM Click Here to See the Profile for fieroaddictedSend a Private Message to fieroaddictedEdit/Delete MessageReply w/QuoteDirect Link to This Post
Got my swap harness and pcm today from Fieroflyer. I laid it out over the engine to get an idea where everything plugged in. It looks like it is gonna fit great once i get it fitted properly.


IP: Logged
Csjag
Member
Posts: 3170
From: Ocklawaha,Fl, USA
Registered: Dec 2013


Feedback score: N/A
Leave feedback

Rate this member

Report this Post08-26-2014 07:57 PM Click Here to See the Profile for CsjagSend a Private Message to CsjagEdit/Delete MessageReply w/QuoteDirect Link to This Post
How much do you think you will have spent by the time the swap is done? I was wondering in case I decided to do one. Thanks
IP: Logged
fieroaddicted
Member
Posts: 662
From: aylesford, nova scotia canada
Registered: Dec 2012


Feedback score: N/A
Leave feedback

Rate this member

Report this Post08-26-2014 08:16 PM Click Here to See the Profile for fieroaddictedSend a Private Message to fieroaddictedEdit/Delete MessageReply w/QuoteDirect Link to This Post
 
quote
Originally posted by Csjag:

How much do you think you will have spent by the time the swap is done? I was wondering in case I decided to do one. Thanks


I think it could have been done for about 2500$ if I would have just dropped the engine in the car without tearing it down and adding a cam and other exrtas, but to date I have spent that alone on the engine. I figure the swap will cost me somewhere in the neighbourhood of about 5k or so.
troy
IP: Logged
Csjag
Member
Posts: 3170
From: Ocklawaha,Fl, USA
Registered: Dec 2013


Feedback score: N/A
Leave feedback

Rate this member

Report this Post08-26-2014 08:30 PM Click Here to See the Profile for CsjagSend a Private Message to CsjagEdit/Delete MessageReply w/QuoteDirect Link to This Post
Okay thanks Troy. that includes the cost of the engine and tranny?
IP: Logged
fieroaddicted
Member
Posts: 662
From: aylesford, nova scotia canada
Registered: Dec 2012


Feedback score: N/A
Leave feedback

Rate this member

Report this Post08-26-2014 08:38 PM Click Here to See the Profile for fieroaddictedSend a Private Message to fieroaddictedEdit/Delete MessageReply w/QuoteDirect Link to This Post
 
quote
Originally posted by Csjag:

Okay thanks Troy. that includes the cost of the engine and tranny?


Yes, I paid 500$ for my engine and 120$ for the f23 tranny. Whether you are able/have time to make your own harness and mount brackets and do your own work or not, will make quite a difference in the final cost. If you can do the harness, brackets, etc yourself, the swap can be done fairly cheap.
IP: Logged
Previous Page | Next Page

This topic is 11 pages long:  1   2   3   4   5   6   7   8   9   10   11 
next newest topic | next oldest topic

All times are ET (US)

Post New Topic  Post A Reply
Hop to:

Contact Us | Back To Main Page

Advertizing on PFF | Fiero Parts Vendors
PFF Merchandise | Fiero Gallery | Ogre's Cave
Real-Time Chat | Fiero Related Auctions on eBay


Copyright (c) 1999, C. Pennock