in reality, the muffler could be tucked up higher, but I wanted to leave a bit of room for insulation between the exhaust and my intercooler tank.
Ya I see your point. I am hoping it will leave me with a lot more room to hide the dual mufflers this way. Not sure what i will pick up yet, but i was limited to only a couple choices with the trunk left stock. They would pretty much have to sit right at the exit out through the bumper that way....Basically 2 mufflers with tips on the end. lol
Ya I see your point. I am hoping it will leave me with a lot more room to hide the dual mufflers this way. Not sure what i will pick up yet, but i was limited to only a couple choices with the trunk left stock. They would pretty much have to sit right at the exit out through the bumper that way....Basically 2 mufflers with tips on the end. lol
that sounds a little harder then my big single, good luck.
------------------ 1st class A**hole.
we're in desperate need of a little more religion to nurse your god-like point of view...
Ya thanks. Once the car is done except exhaust, I am basically going to load it up and take it to the exhaust shop. I have no pipe bender here, so I just plan on taking the two mufflers and tips i intend on using, along with me when i go. Basically I am gonna tell them what i want and let him go at it.
If you did the headers, I would think you could manage the exhaust. I cut and welded Mine. although it surely would be "Easier" to just let them do it.
Yes Lou, I could definitely do that. Just don't want to have to bother with it really. The "Bus Boys" muffler shop up the road has all the tools and they do awesome work and are cheap. The best thing is that it will go in the garage and back out the same day. I have so little time here to work on it that i don't want to prolong it any more than I have to. I want to be driving it this year if at all possible.
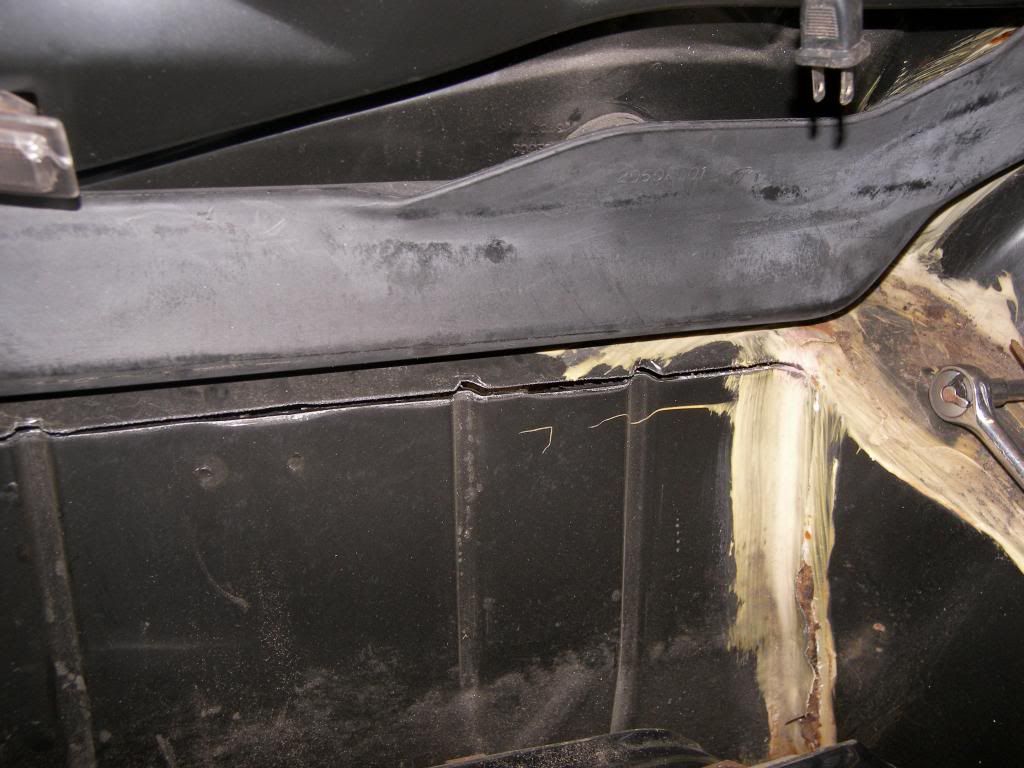
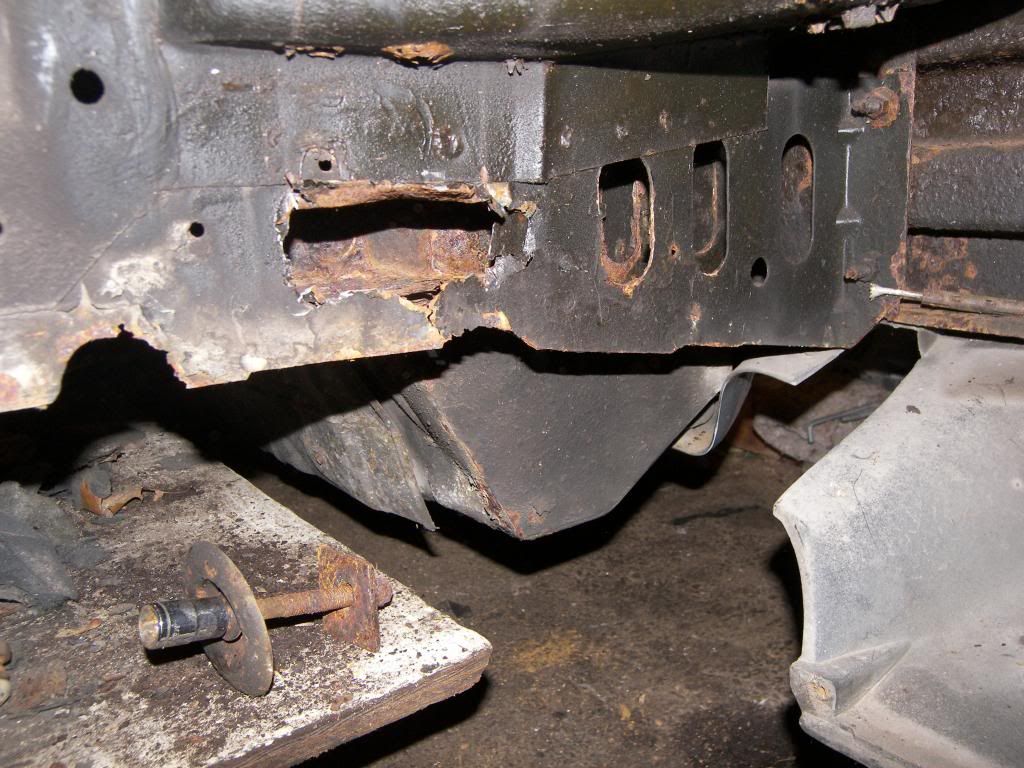
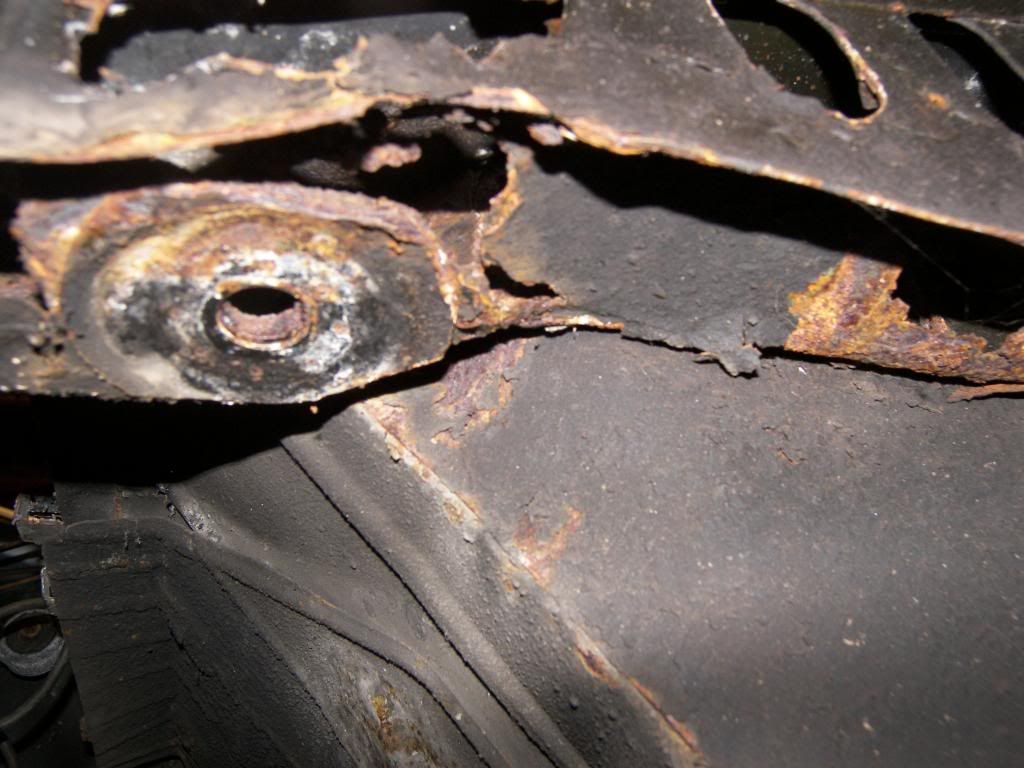
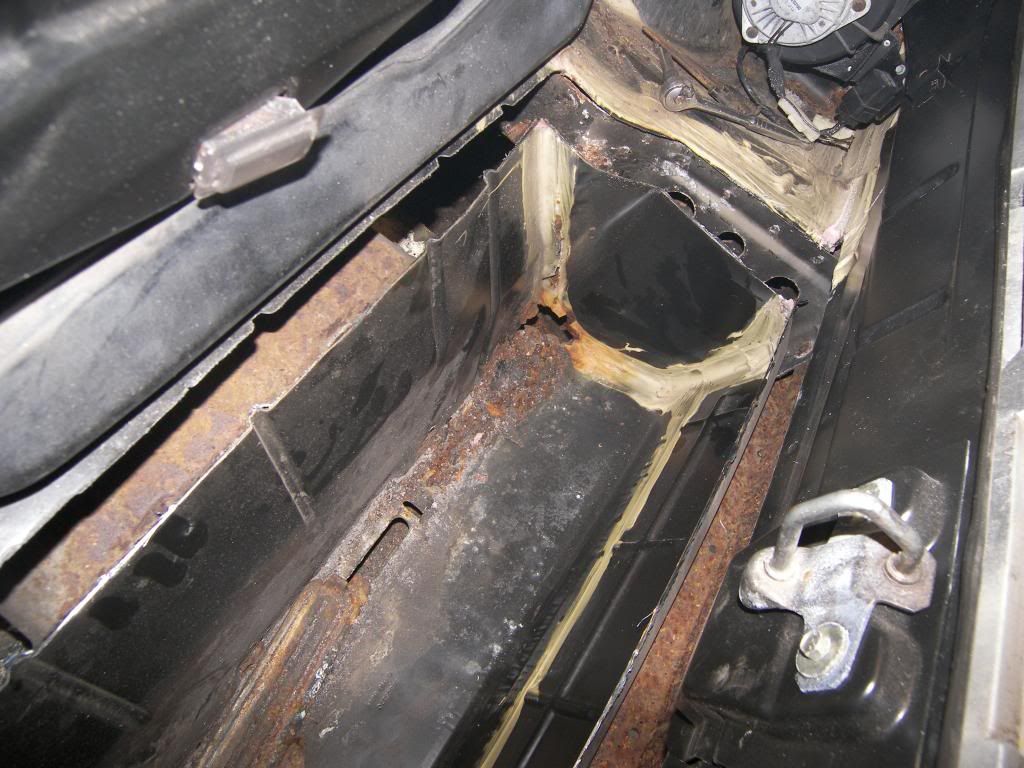
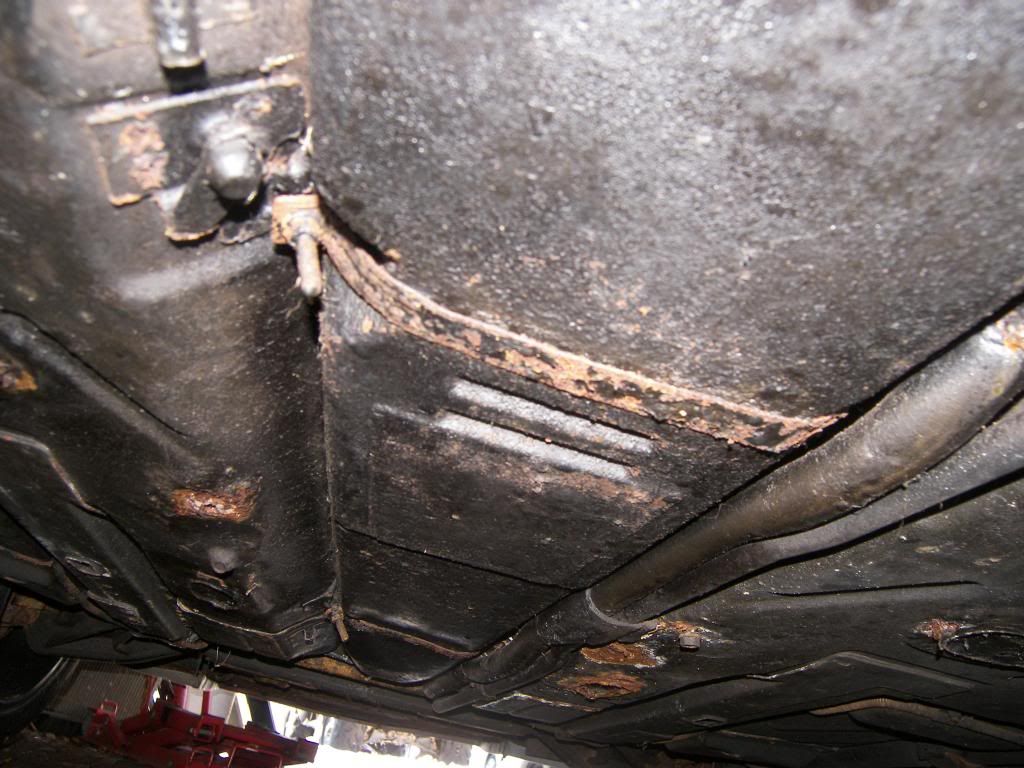
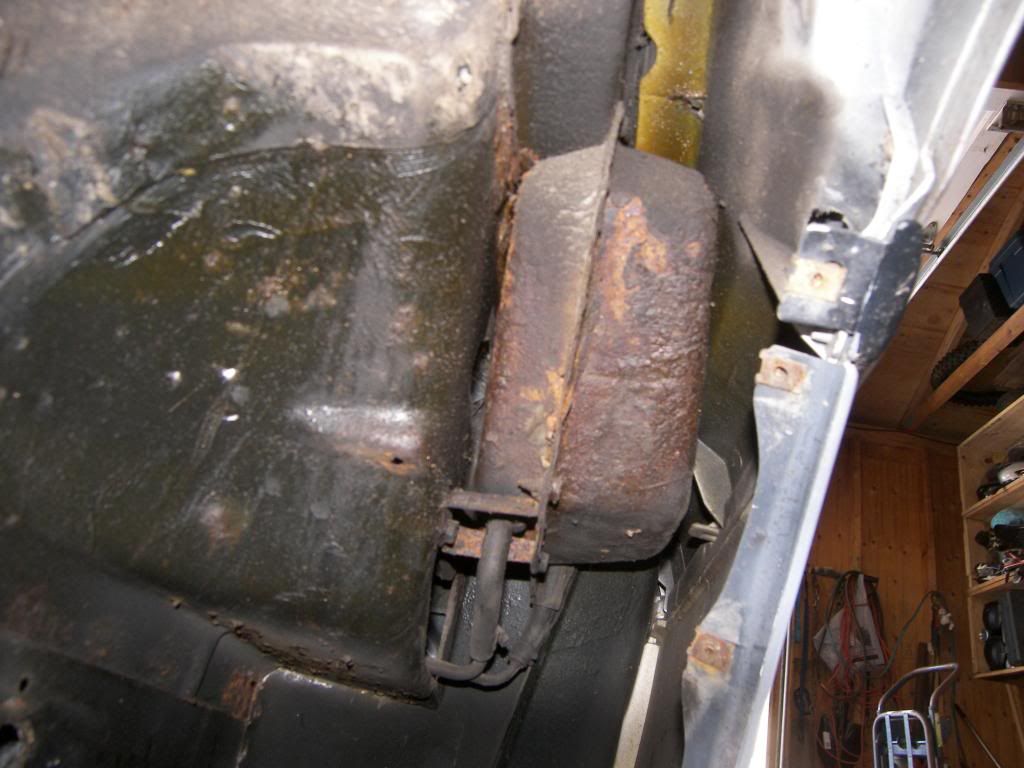
worked for a bit in the garage after i came home from work today. Got the tail lights removed Trying to get some stuff out of the way so that i can work at cutting the trunk and fixing the rear left frame. Still have to remove the rear bumper yet Kinda surprised at the bolts when i removed them...bet they would be easy to find if ya break one lol Started with the front wall of the trunk and cut that first. I'll have to finish removing the rear plastic before i do the rest. So this is what i'm up against with the frame repair. Had to cut that hole in the side of the frame (in the first pic) in order to get the rear cradle bolt to start. Should i use like 3/16" metal to fix the frame?
Darn that looks pretty bad I would see about getting another good rear clip to weld on or at the least you will need to cut back quite a ways to hit solid enough steel to safely weld to. In this case good thick metal at least on the flat part for a fair ways so the cradle has a good solid bolting point and I would do the last of it with the cradle some what in place to make sure every thing lines up after wards.
Darn that looks pretty bad I would see about getting another good rear clip to weld on or at the least you will need to cut back quite a ways to hit solid enough steel to safely weld to. In this case good thick metal at least on the flat part for a fair ways so the cradle has a good solid bolting point and I would do the last of it with the cradle some what in place to make sure every thing lines up after wards.
Ya it is kinda crappy. I am confident i can fix it though. I'll take your advice and make sure i do what i have to to get some good metal to weld to. I am gonna delete the windows originally in the frame to help make it more solid. I think i will leave a window in the frame where the rear of the cradle bolts up though to make it easier on myself. I think once i have the cradle bushings, i will go at it and then put the cradle up in place and finish it like you said. I don't think it really matters if it is exactly like the old frame (shape i mean) as long as it is strong, clears everything, and I can get the cradle up in place. Am I right?
Yes strong metal to make every thing hold up. only draw back is if you are ever rear ended in an accident the rear was designed to some what crumple and collapse absorbing a lot of the energy where with it all reinforced nice and strong you could get hurt pretty bad but again that is in a read end accident.
Yes strong metal to make every thing hold up. only draw back is if you are ever rear ended in an accident the rear was designed to some what crumple and collapse absorbing a lot of the energy where with it all reinforced nice and strong you could get hurt pretty bad but again that is in a read end accident.
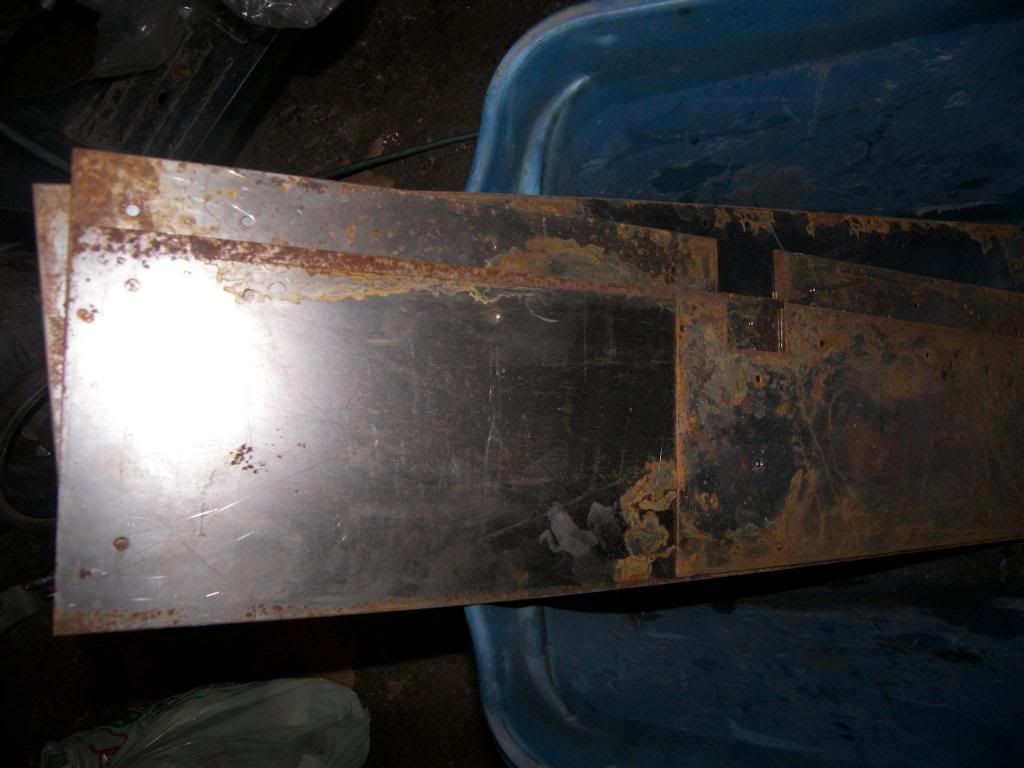
ya i hear what you're saying. Think i will go with a piece of 3/16 metal and fix it out of that. It is basically from the rear corner of the engine bay to the bumper that needs fixing. Weird, cuz it is solid and no rust a couple inches ahead of this area. Once the trunk is cut out, it will be a lot easier to fix.
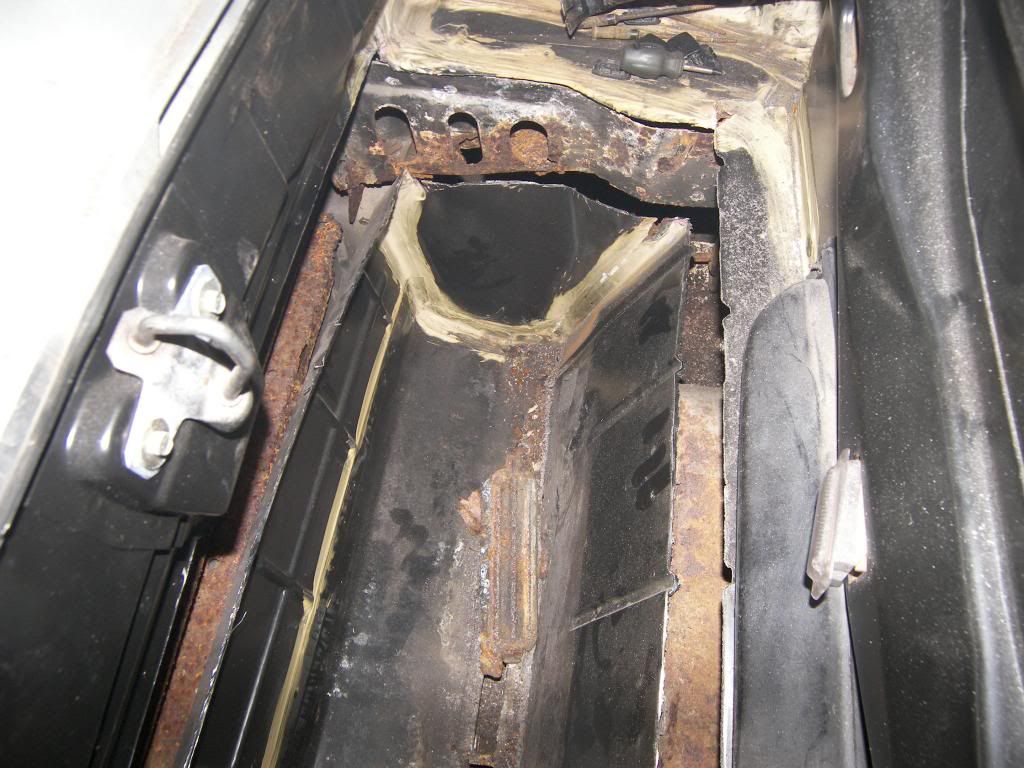
did some work on the car this afternoon. Finished cutting out the bottom of the trunk and it is ready to drop out! Somehow managed not to cut the wire harness in the process. Will make it much easier to fix this...
I usually remove the tail lights and that steel plate the wiring feeds through to pull the wiring back when cutting out the trunk to be safe. Some do not like cutting the trunk but I always have on my own cars to run a better exhaust plus I find the trunk more use full that way but i also do not use my Fieros as daily drivers or grocery getter they are strictly for fun
I usually remove the tail lights and that steel plate the wiring feeds through to pull the wiring back when cutting out the trunk to be safe. Some do not like cutting the trunk but I always have on my own cars to run a better exhaust plus I find the trunk more use full that way but i also do not use my Fieros as daily drivers or grocery getter they are strictly for fun
Yeah i was planning to remove the rear bumper and tail light harness to make things easier, but there is a serious lack of room in my garage and I really have no room to put any more parts off the car. I basically have enough room to walk around it and that's about it. I decided i would take my chances and be very careful while cutting. It ended up working out good for me though.
It's not like i am trying to restore the car to original, so i have no problem with cutting the trunk either. With the dual exhaust i want to run, it would be hard to do without cutting it, and it will make it much nicer and easier to do a good job.
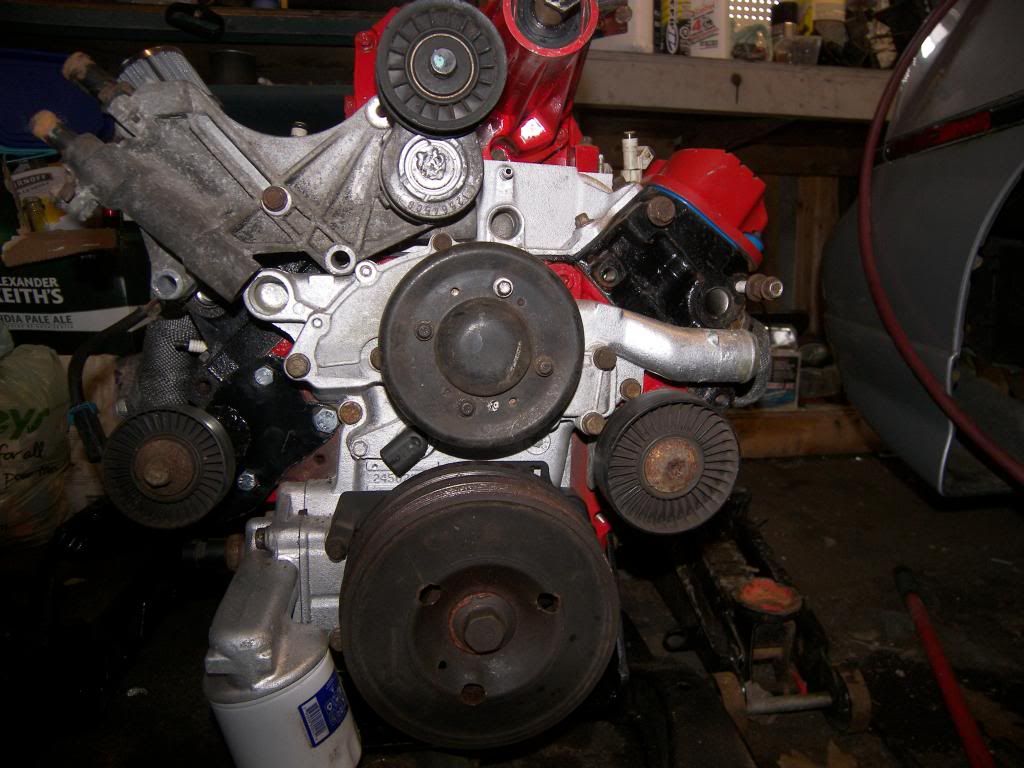
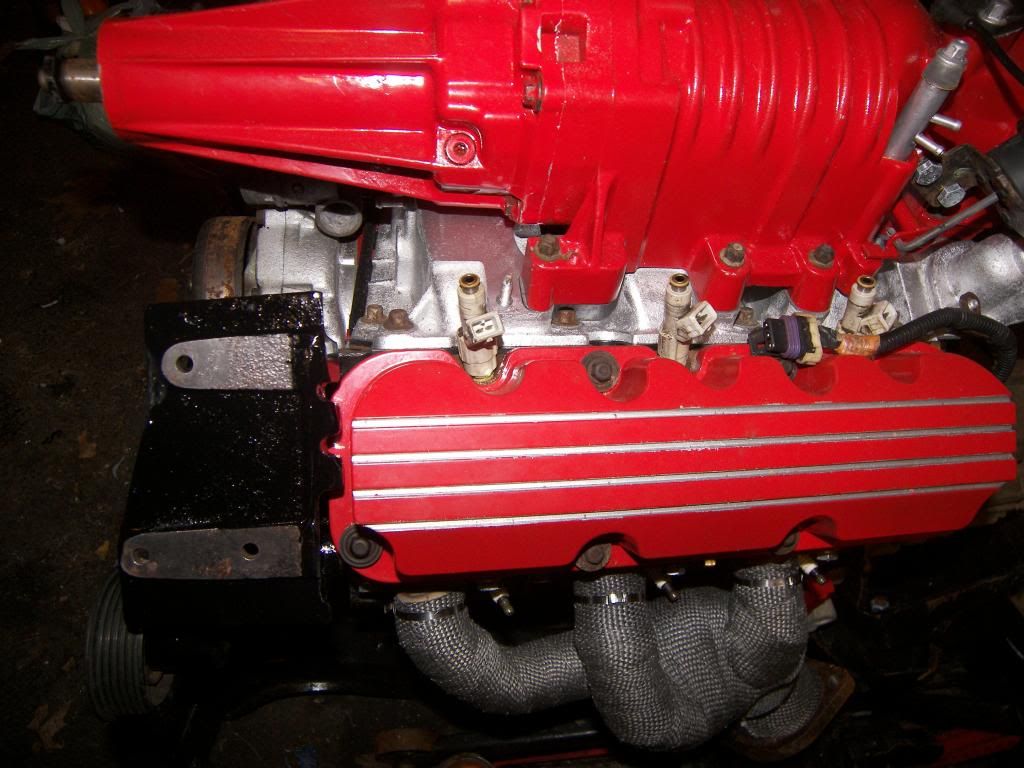
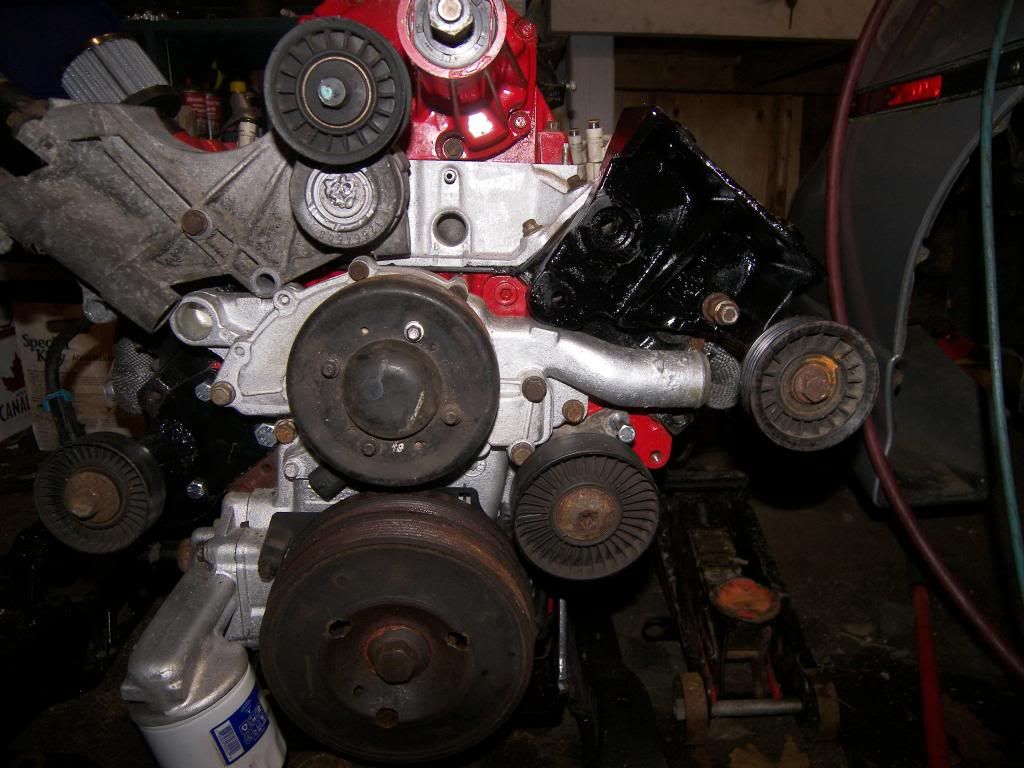
I am running a low alt setup to the left of the front of the engine with no ac. I wanted to try and delete that ignition coil bracket, but i guess I got my answer, and i wll have to keep it. I'll just leave it as it is, or cut it down and move the coils elsewhere.
[This message has been edited by fieroaddicted (edited 02-16-2014).]
got my coil mount cut down today and painted. Got it semi-bolted on. I hadn't planned on keeping the coils in this stock location, but since i can't do without the ugly mount, i figure i might as well leave them where they were originally
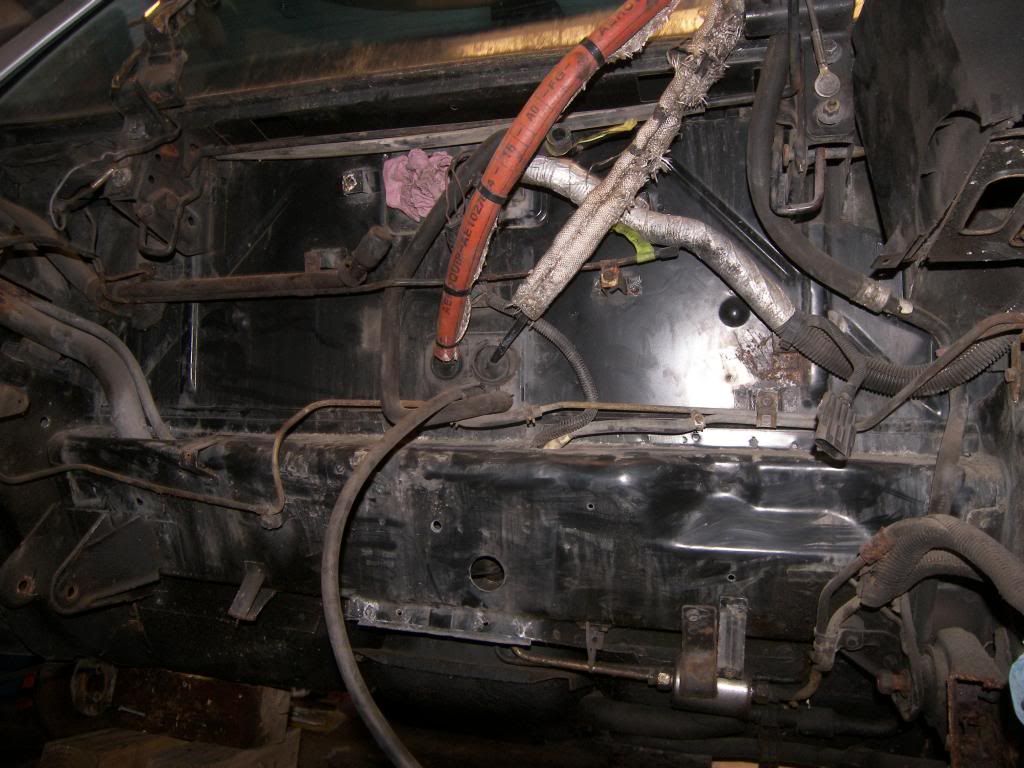
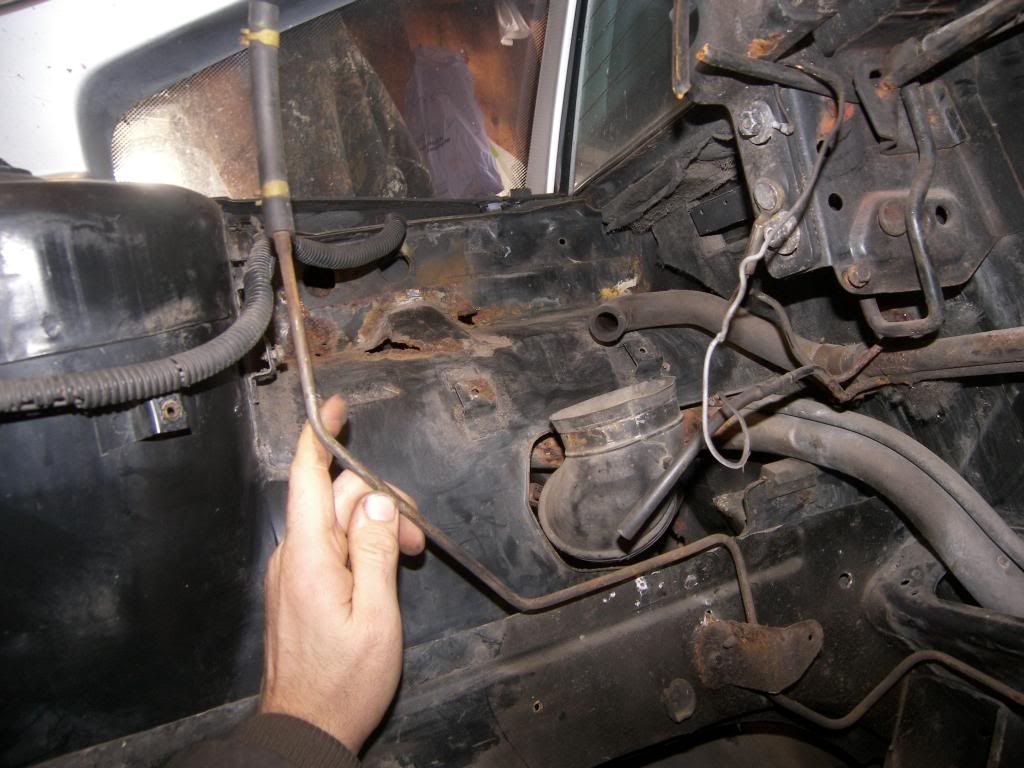
worked aa the car a little more this afternoon. Tore all the old ratty insulation off the firewall. Also removed the lower heat panel so i could get to the fuel tank. geez, they definitely didn't leave any more room than they had to to get the hose and lines off I am running no evap system on the car, so can this can be deleted? I assume this will be of no use to me either? or this?
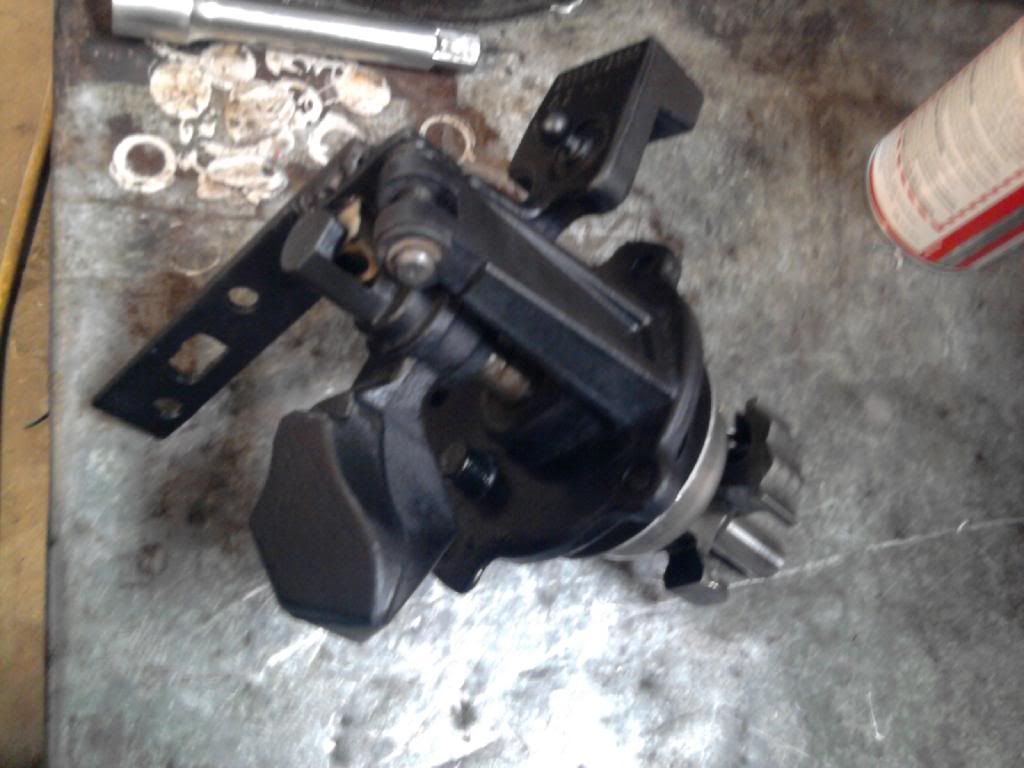
Taking advice from a few fellow PFF members, I managed to get the shifter mechanism out of the tranny! I plan to take it to work with me tomorrow and clean it up. Gotta switch out part of the linkage also to make it work properly and paint it.
Pulled my shifter assembly out of the F23 last night and took it to work with me today. Got it painted up and modified for use with the fiero select cables. Just have to mount a "ball" on the end of the arm
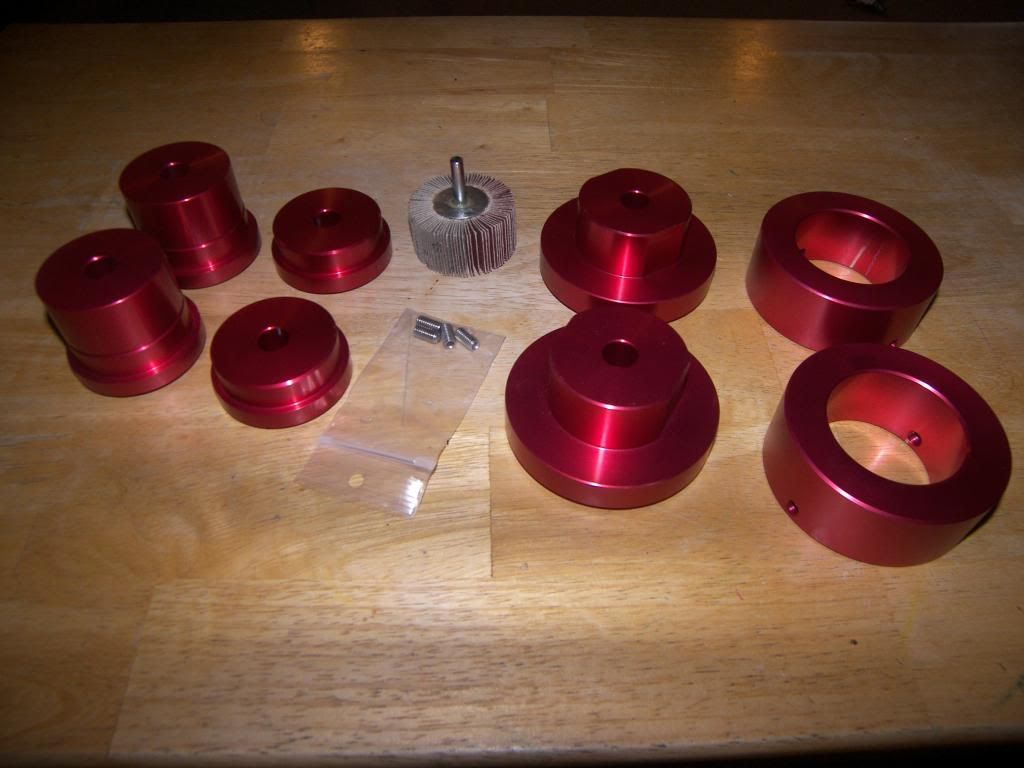
I have the same bushings! To get the front cradle bushings out, I heated the sleeves around the bushings and whacked the bushings hard with a hammer, they each popped out (and flew pretty far) in under 3 minutes. I think it is the best way to get them out, and much better than burning them out.
I have the same bushings! To get the front cradle bushings out, I heated the sleeves around the bushings and whacked the bushings hard with a hammer, they each popped out (and flew pretty far) in under 3 minutes. I think it is the best way to get them out, and much better than burning them out.
Zach
yeah i basically did the same thing. I didn't have much trouble at all. I was not looking forward to it at all, and was surprised how easy they came out. Mine popped right out and only flew a couple feet.
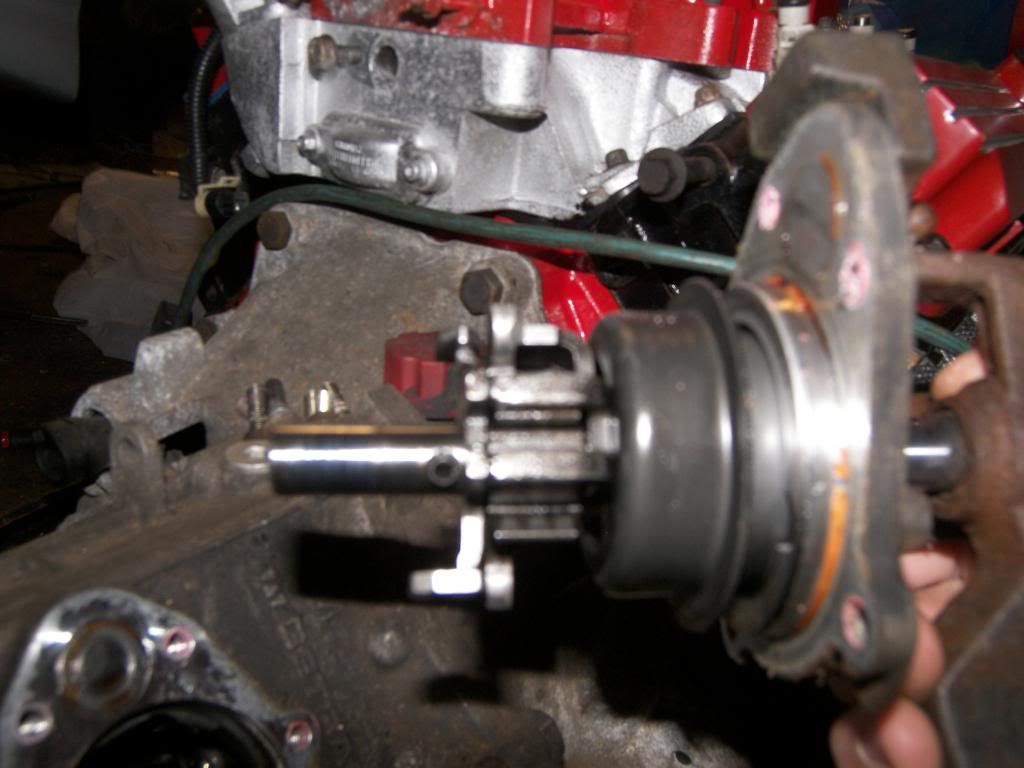
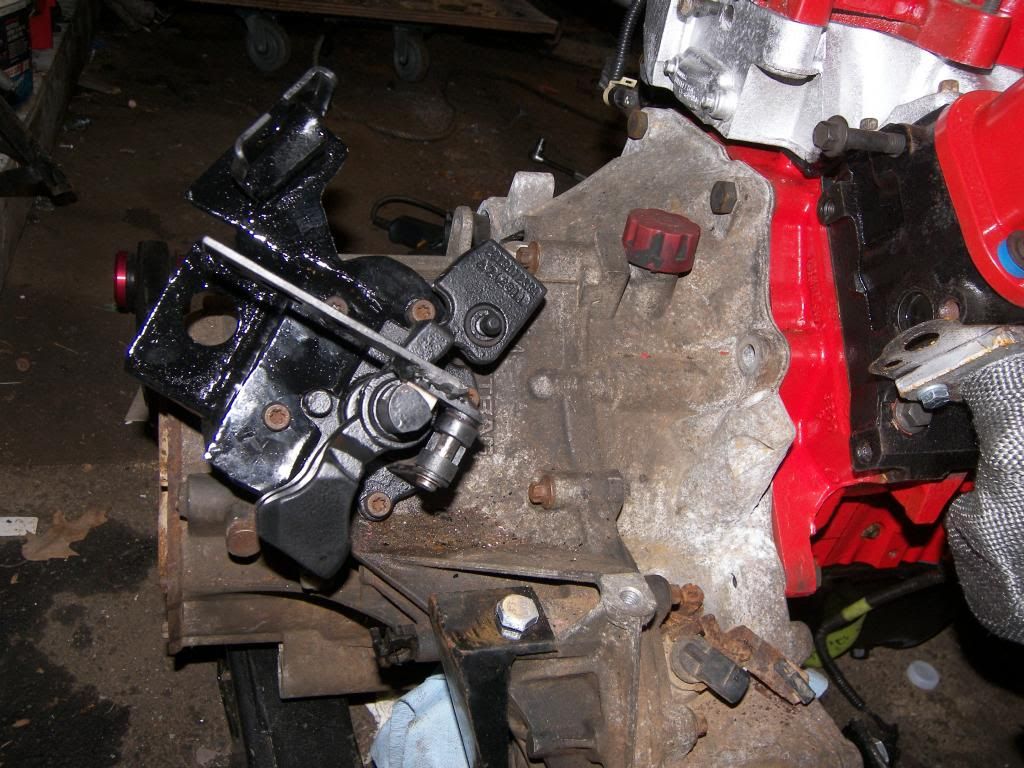
I re-installed the shifter mechanism in the tranny. This required me holding my tongue just right in order to get it in and shifting properly. Only one problem though...the shifter cable bracket won't bolt on in place. I need to cut a relief in the bracket due to the round raised spot on the cover plate being in the way. I'll have to take the bracket to work tomorrow and do a little grinding....It's a lot warmer in the shop at work!
Also took the opportunity to install the new aluminum cradle bushings. Man these things are sweet!
Now next step is to get the engine/trans back off the cradle and get the cradle up in the car bolted in place, so i can get some measurements and fix the rear portion of the frame!
Some of the F23's have that little button on the shifter plate and some do not. I usually use a 90 degree elbow on the oil pressure sensor so the larger 88 V6 style sensor will clear the alt bracket ok.
Some of the F23's have that little button on the shifter plate and some do not. I usually use a 90 degree elbow on the oil pressure sensor so the larger 88 V6 style sensor will clear the alt bracket ok.
Cool thanks, any idea of the size of the 90 deg elbow?
Got the shift cable mount (thanks to fieroflyer) finally on in place and looking pretty good. Time to pull the tranny and clean it up and get it ready for some paint.
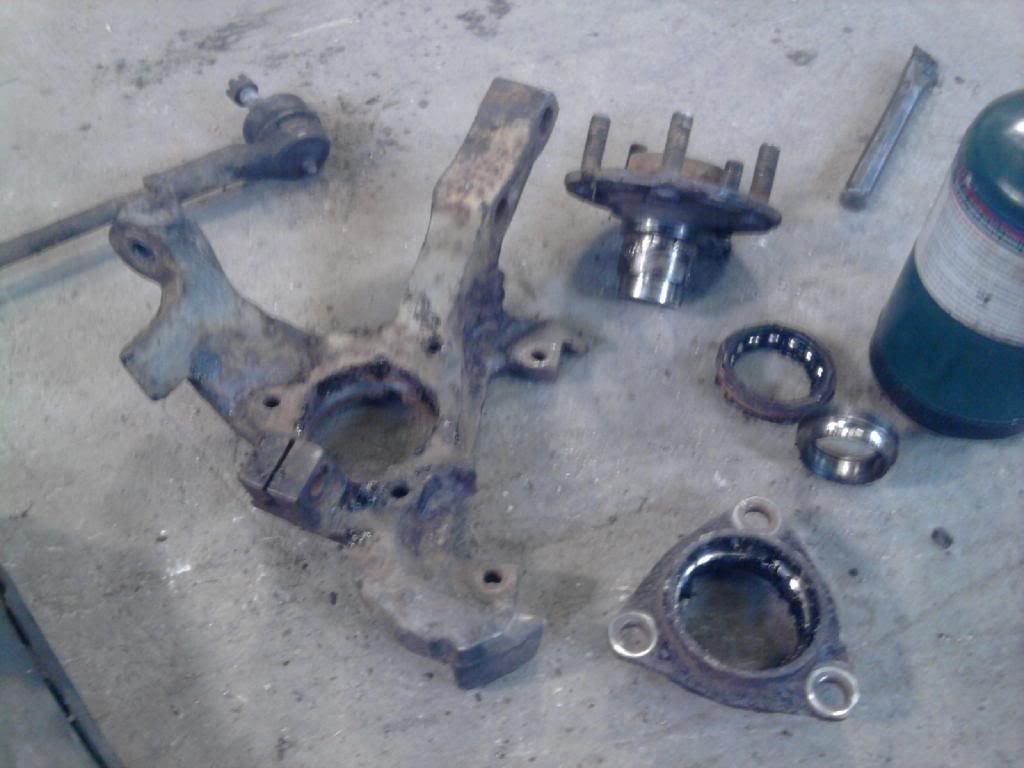
took one side of the rear suspension to work with me today to get it apart so i can clean it up and throw some paint at it. The wheel bearing seemed good until I looked at the rear side and noticed that the bearing seal had rusted out. The other side is the same of course. Looks like it's new hub assemblies...another 280$ I guess the money spending really is never done on these cars anyway lol After much cursing, i got all the parts separated and ready to clean up.
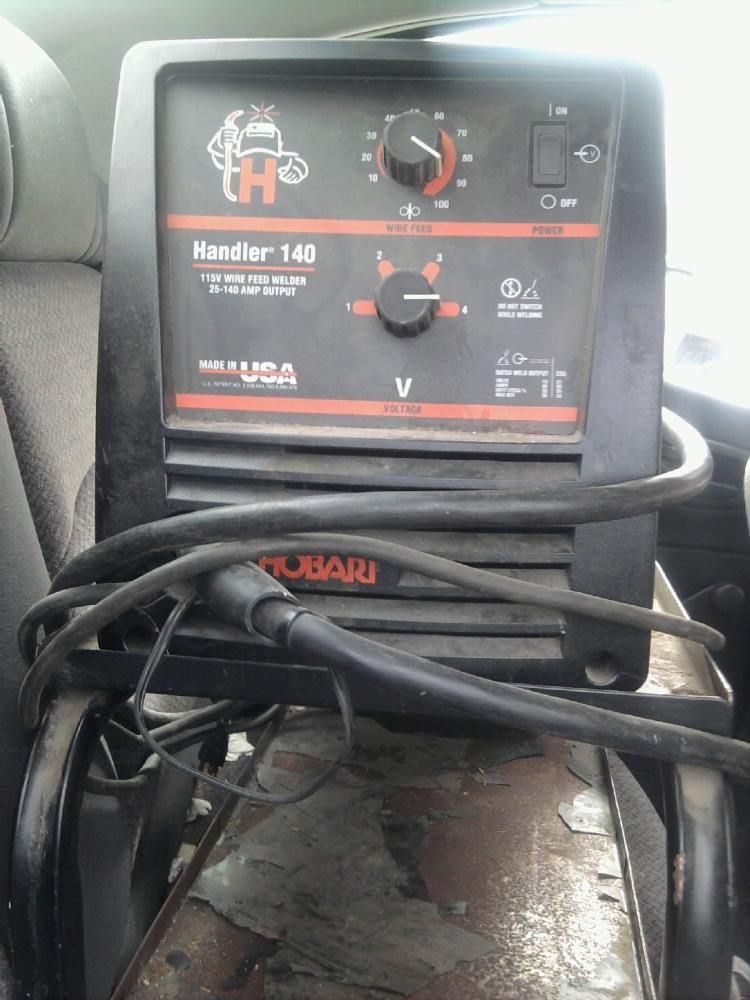
Also scored a used Hobart welder complete with cart, gauges, tanks, hoses and torch!! This should come in handy fixing the frame
Originally posted by fieroaddicted: I am running no evap system on the car, so can this can be deleted? I assume this will be of no use to me either? or this?
Not sure what that thing in the first pic is, if someone could chime in.
Second pic, right, you don't need that.
Third pic, I believe that is the evap line if I'm not mistaken.
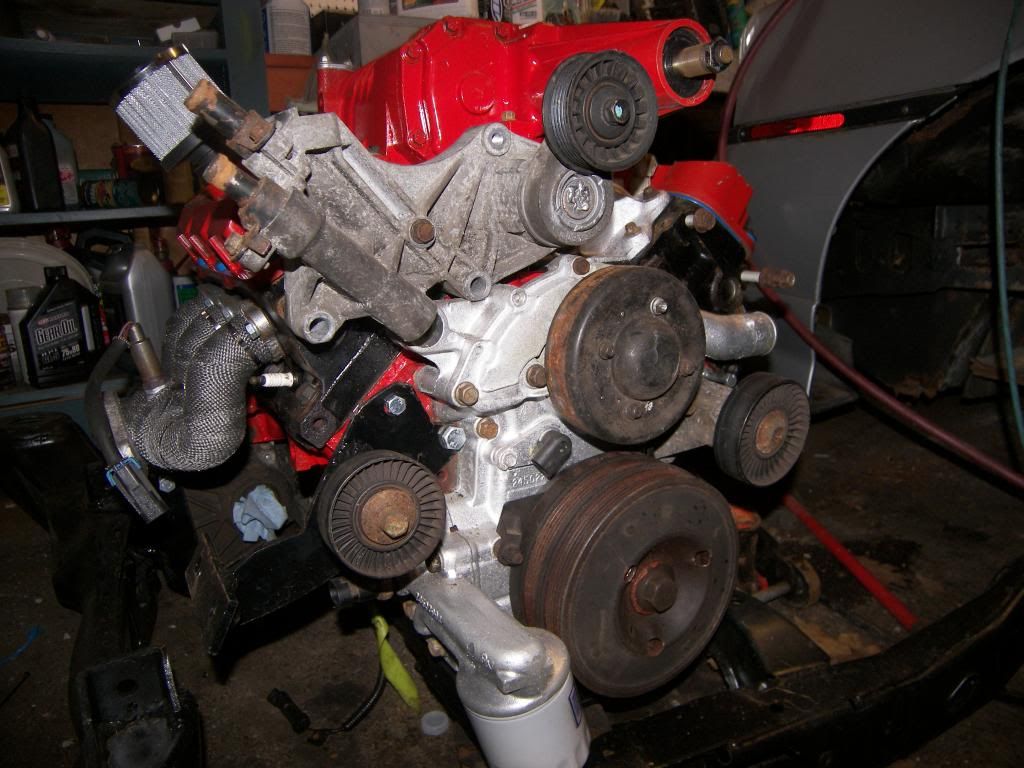
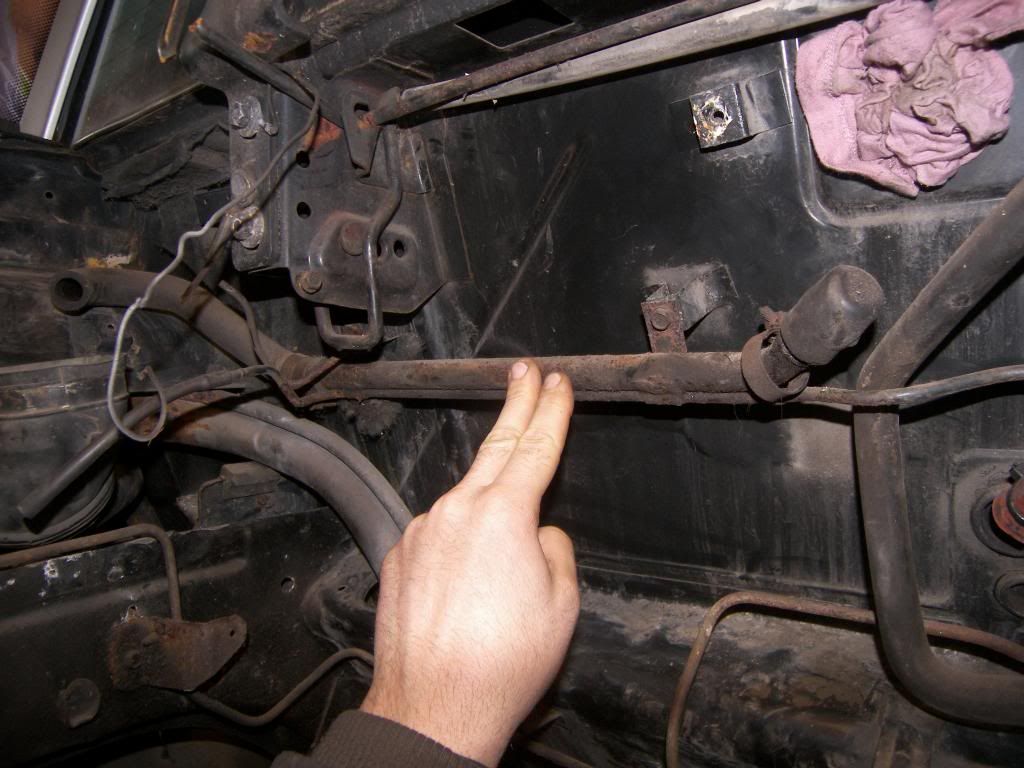
Yeah, lose all that "Plumbing" and You're going to need to "Lose" both of those torque rods that hold up the trunk, once you install the engine it is clear Why. (I'm in the process of installing the Struts on mine now.) With the Low mount Alt, you Won't need to notch the deck lid. The COIL Pack CAN be left in it's "original place".
Yeah, lose all that "Plumbing" and You're going to need to "Lose" both of those torque rods that hold up the trunk, once you install the engine it is clear Why. (I'm in the process of installing the Struts on mine now.) With the Low mount Alt, you Won't need to notch the deck lid. The COIL Pack CAN be left in it's "original place".
By "torque rod" do you mean the torsion bars found at the top of this picture?
Where were you able to find the struts to open the trunk?
By "torque rod" do you mean the torsion bars found at the top of this picture?
Yes DKcustoms, those are the ones he is talking about. I believe they end up hitting the coil packs if the coils are left in the stock position. Not sure where he got the struts from, or what length the struts are he is using
15" universal hood struts from advanced or autozone. (that have a HOLE in each end, not a ball "pocket") when you're looking at them, you'll see what I mean. I have used them on 2 other fiero's. you put the hinge bolt (that bolts into the deck) into 1 end, and the other end, you need to make a little bracket and weld it to the bracket that you screw down the 'Vents" next to the deck lid.
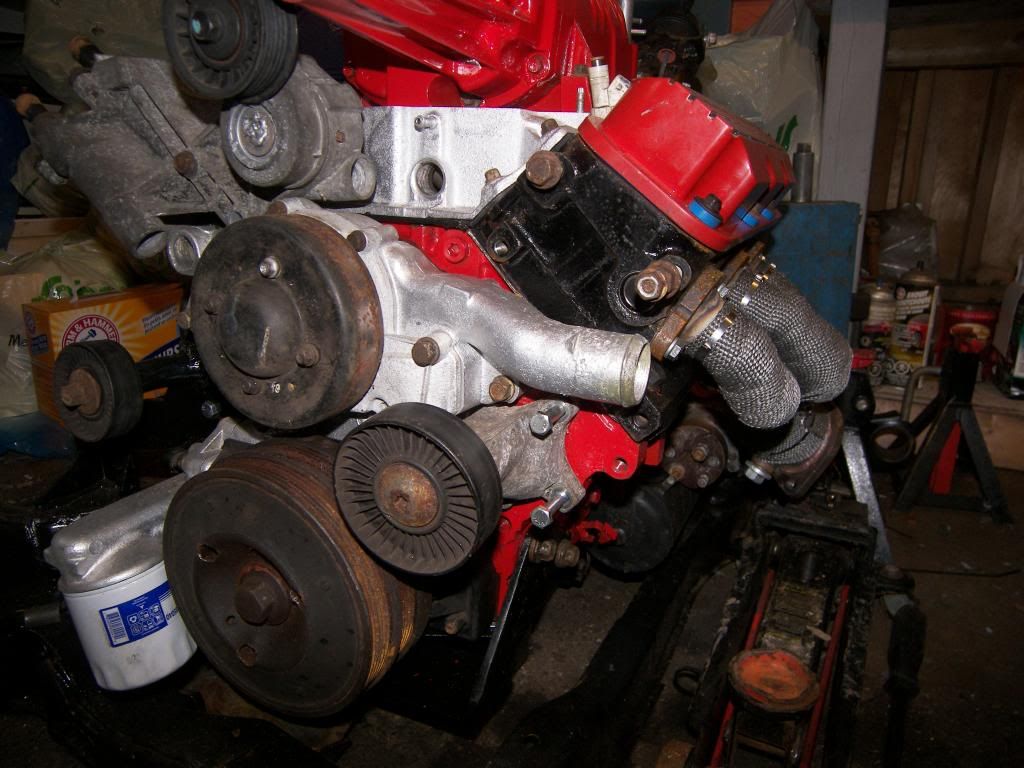
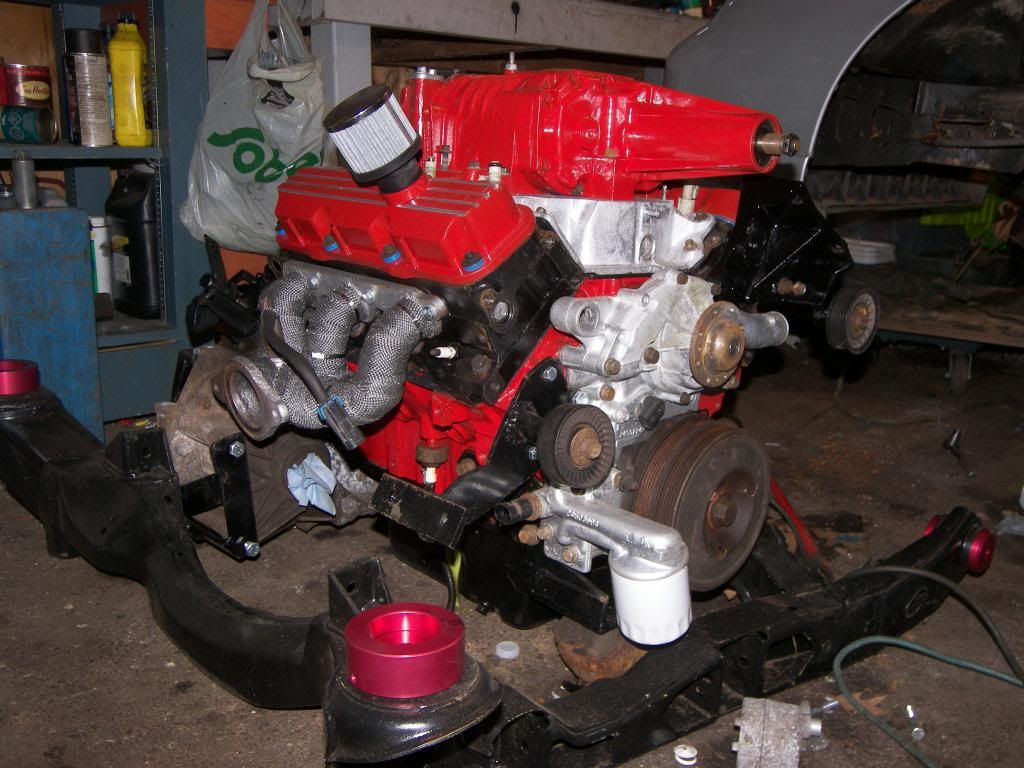
Wow! im impressed, that engine looks as clean as can be. Haven't seen anything in a bit from you so I wanted to make sure you aren't procrastinating Keep at it bud, it's almost finished.
Wow! im impressed, that engine looks as clean as can be. Haven't seen anything in a bit from you so I wanted to make sure you aren't procrastinating Keep at it bud, it's almost finished.
Thanks zzzhuh, definitely having fun with it...slowly picking away at it. Long road yet, but it's coming along. Looking at buying a house with 2 bay barn style garage in the next couple months. This would make things a lot better....actually would have some room to do work on the car, although it will delay progress a few months.


 Trying to get some stuff out of the way so that i can work at cutting the trunk and fixing the rear left frame. Still have to remove the rear bumper yet
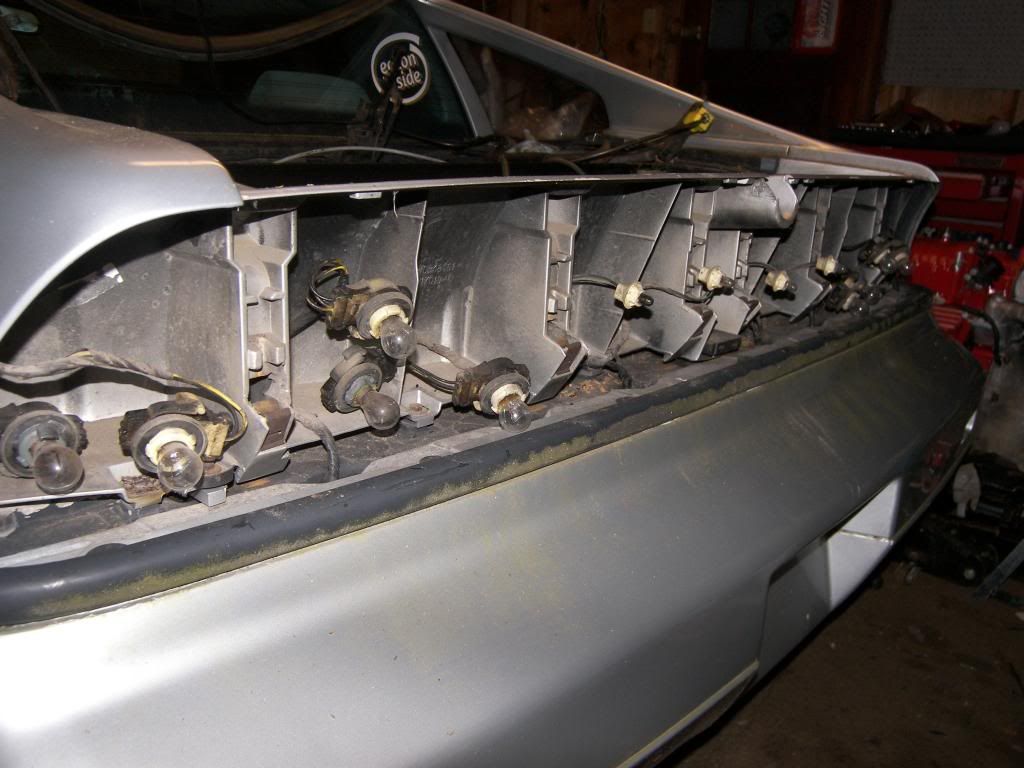


 I plan to take it to work with me tomorrow and clean it up. Gotta switch out part of the linkage also to make it work properly and paint it.
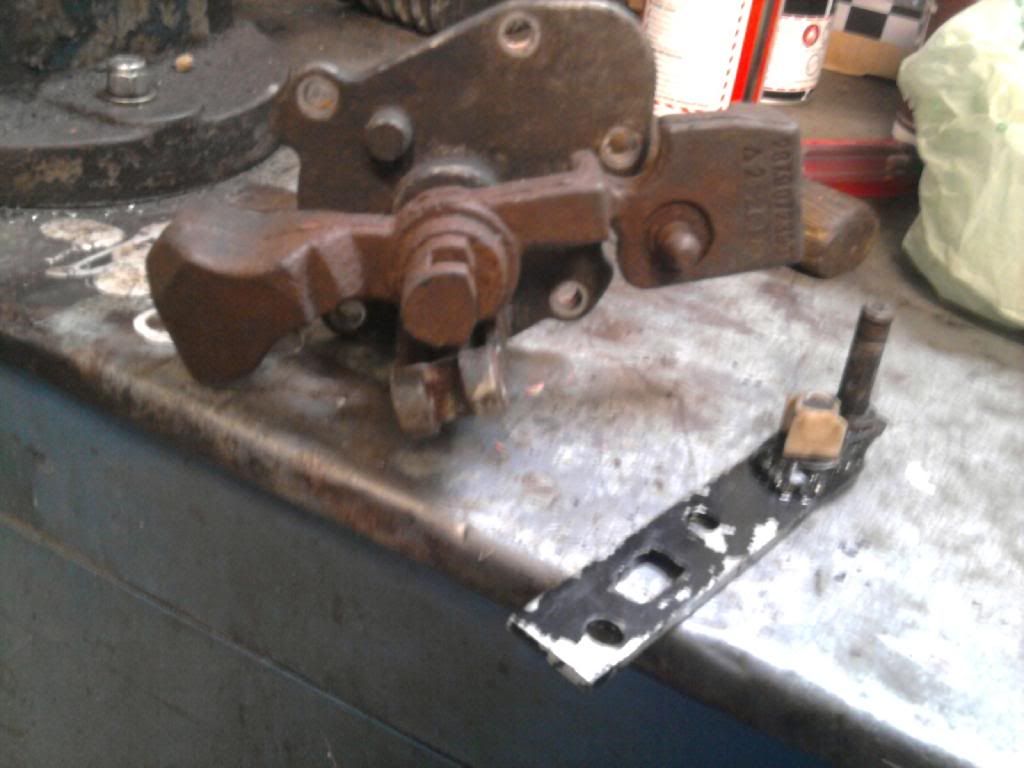


 The other side is the same of course. Looks like it's new hub assemblies...another 280$ I guess the money spending really is never done on these cars anyway lol After much cursing, i got all the parts separated and ready to clean up.