Cylinder head goes on today, along with the timing chain and its cover. The hope is to start getting things onto the cradle before the end of the coming week. Once I'm sure everything fits, then the old motor is coming out, and the new one goes in. As far as the first start-up... who knows. I doubt the stock ECM would run it with the new bottom end. The compression is lower, and so is the rotating mass. Both are things that I doubt the stock ECM would like.
Pics to follow with my progress today.
------------------ Petty Officer Michael C Casaceli Aircraft Electronics Technician Second Class Patrol Squadron Ten United States Navy
IP: Logged
09:26 AM
fieroturbo Member
Posts: 1085 From: Orefield, PA Registered: Jan 2003
The contact surface of the pressure plate is very thick (I think thicker than stock). I test fit the assembly (I was stupid and didn't take pics though) and it fits together perfect.
Also, my buddy, Fast Eddie, brought me this:
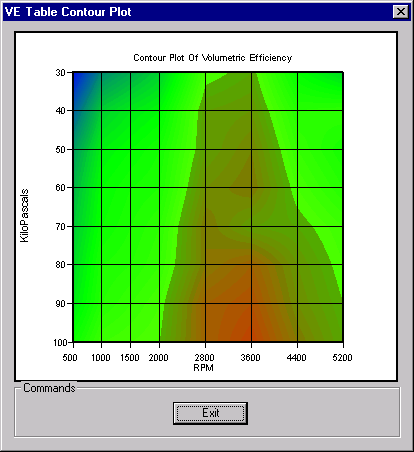
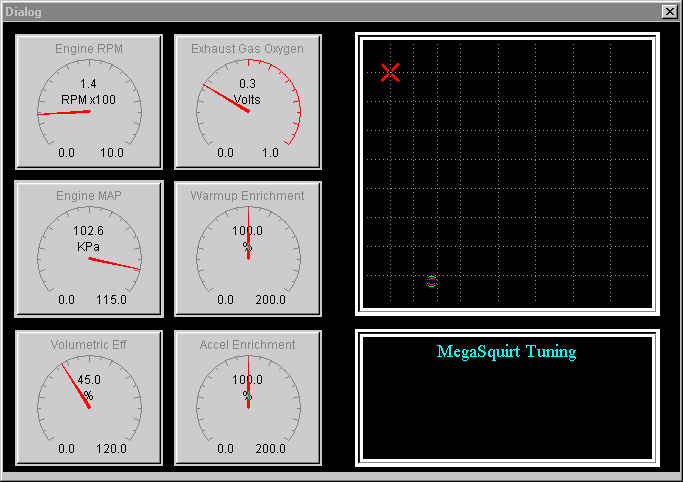
Megasquirt I, Megasquirt Relay Assembly, and the Megasquirt Simulator
aka: my stand alone fuel management system
Here's a few screenshots of the software:
More to come soon!
------------------ Petty Officer Michael C Casaceli Aircraft Electronics Technician Second Class Patrol Squadron Ten United States Navy
IP: Logged
06:08 PM
Icelander Member
Posts: 302 From: Snohomish, WA, USA Registered: Aug 2006
Still... Very nice set up you've got. When do you think you'll have the ening assembled?
Kendall
BTW: What are you using as assembly lube in the pictures above? -kw-
Very good questions Icelander! (BTW, are you really Icelandic? I was there once.)
I was going to go with MS II, you are right, but I did some EXTENSIVE research (which I will post soon), leading me to MS I as the better... and cheaper choice... and the right things happened at the right time, and I went with the V2.2 MS I setup Fast Eddie had for sale. You can't beat $100 for an MS I processor, on a V2.2 board, with the low impedance injector daughterboard, and the stimulator board, and the relay board, and a used, but salvageable harness. Plus the chameleon paint on the ECM looks cool (lol) --- As far as the engine lube, it's white lithium engine assembly grease. The same stuff I used on my first engine build back in the 90's. Worked great then, and I see no reason not to use it now. With that first build, I had it sitting for 4 months before the first post-rebuild start, but the thing ran with no bearing squeal at all (which I've had happen before), so it's definitely good stuff. --- As far as current status of the build, when I tried turning the crank today, the pulley key in the crankshaft bent 45 degress! Something that shouldn't happen. I think it was due to the fact that this engine was in an accident, and given that there was a broken bolt on that same side of the block, what's to say that the impact didn't damage the key? I looked over all internal areas of the engine... but go figure, I miss something on the outside (lol). Napa and Carquest carry those. It's a common part. --- The turbo manifold needs some minor grinding on the top for some minor bolt clearance issues, and the flange I have for the turbo oil inlet is no good, so I'll just insert it direct for now (just as good), and the 90 degree downward bend I need for extra clearance between the head and the trunk seems like it will also be needed to clear some of the coolant components (the T4 compressor is large), but it will work out ok. I thought I'd have the compressor facing the driver side, but more clearance issues means the other way around. This works out better because it gives me more room for the exhaust and allows me to reduce the sharp bends, and it will be a shorter path from the compressor to the intercooler as well, thus increasing efficiency (a good thing).
To be honest, the 4" (or so) lower height that the turbo assembly will be will further aid oiling of the turbo. --- And finally, it looks like my theory about the lower engine mount was right! It seems that a 2.8 V6 lower mount, with a metal plate bolted to the top, with a metal tube welded to the plate, then a bolt going through the tube into the mount bracket on the Ecotec will work. I'll double check my measurements but it seems ok. I'll get pics up ASAP!
------------------ Petty Officer Michael C Casaceli Aircraft Electronics Technician Second Class Patrol Squadron Ten United States Navy
IP: Logged
11:58 PM
Aug 19th, 2006
Icelander Member
Posts: 302 From: Snohomish, WA, USA Registered: Aug 2006
Thanks for the info! I was toying with the idea of using the MS II on my eventual Ecotec install... (I'm a couple of grand away from that at the moment.)
I look forward to the pictures!
Kendall My great grandfather came to the Seattle area from Iceland via Canada. I've never been there but I'd like to.
IP: Logged
02:44 AM
Aug 20th, 2006
fieroturbo Member
Posts: 1085 From: Orefield, PA Registered: Jan 2003
Thanks for the info! I was toying with the idea of using the MS II on my eventual Ecotec install... (I'm a couple of grand away from that at the moment.)
I look forward to the pictures!
Kendall My great grandfather came to the Seattle area from Iceland via Canada. I've never been there but I'd like to.
The reason I'm using MS I instead of MS II is because of support for the MSnS upgrade. Apparently, it doesn't work with MS II. (not sure why yet). I can tell you this. With the daughterboard upgrade that's out there, you can use the stock coil packs built into the CoP module on the Ecotec's, but the ignition module comes off of the pack. If you have the Ver 3.0 board, you don't need the daughterboard. Ver 2.2 and below need it. --- Also, I forgot to mention above, I don't just use the white lithium grease alone, I pour oil on the parts as well, just before assembly. It's a slippery, yet consistant cocktail. --- As far as Iceland goes... GO THERE! It's so beautiful, but so barren and harsh at the same time. It's like I always say, "Iceland is like a supermodel on a harley!" --- Pics... gimmie a sec. Having issues at the moment, but be patient... it's worth the wait.
------------------ Petty Officer Michael C Casaceli Aircraft Electronics Technician Second Class Patrol Squadron Ten United States Navy
IP: Logged
04:55 PM
fieroturbo Member
Posts: 1085 From: Orefield, PA Registered: Jan 2003
If you don't have anything to drool in... get something before scrolling down.
Ok, enough drooling. It took some work to make the manifold bolt on. I had to grind two spots to make two of the upper nuts turn.
As far as clearance, I used the transmission in the car right now as a guide point to measure from. It's actually right in line with the part of the head that the exhaust manifold mounts too... odd!
Clearance is 11 1/2"... I hit 10 1/2"! It's close. It's a good thing I'm using polyurethane tranny mounts. I don't need to worry as much about engine shift.
Also, this post hit 30,000 views... that's insane. I didn't think I visited this post that much. I need a life! ( lol )
------------------ Petty Officer Michael C Casaceli Aircraft Electronics Technician Second Class Patrol Squadron Ten United States Navy
IP: Logged
09:11 PM
Aug 21st, 2006
fieroturbo Member
Posts: 1085 From: Orefield, PA Registered: Jan 2003
Well, to make the turbo work without doing a 90 degree drop, and to get the exhaust going where I want it to go, the flange on the manifold needs to come to the right 1 1/4". Not too difficult. I've got a list of stainless steel tig welder guys in the area. I could go el cheapo and just mig weld it myself, but I'd like it to look good. My welds hold, but don't look good doing it.
The big issue with having the compressor on the left (which I'd prefer) is that it hits the thermostat/coolant sensor/heater pipe housing. The manifold's original design was for a pure T3. It was supposed to work with a hybrid, but the company has gone under, so complaning does no good.
No biggie. I like customizing. A spacer would work, but there's the clearance between the compressor and the trunk wall to think about. I can't sacrifice any of the clearance there.
------------------ Petty Officer Michael C Casaceli Aircraft Electronics Technician Second Class Patrol Squadron Ten United States Navy
IP: Logged
08:17 PM
PFF
System Bot
Aug 22nd, 2006
wftb Member
Posts: 3692 From: kincardine,ontario,canada Registered: Jun 2005
you are going to have interference problems withe the turbo in that position .i tilted my ecotec to the rear of my fiero and the stock manifold still almost hits the firewall .before you you spend any more money on this turbo locate ,put your engine in the cradle and see if everything fits.time well spent.engine looks really nice ,good job.
IP: Logged
12:37 AM
fieroturbo Member
Posts: 1085 From: Orefield, PA Registered: Jan 2003
you are going to have interference problems withe the turbo in that position .i tilted my ecotec to the rear of my fiero and the stock manifold still almost hits the firewall .before you you spend any more money on this turbo locate ,put your engine in the cradle and see if everything fits.time well spent.engine looks really nice ,good job.
Tilted to the rear? Wow! What was the reason? Anything to do with the transmission you used? I'd be concerned about oil starvation if I were you. I can't recall for certain, but I think the sump is in the front of the oil pan.
The measurments I made were using the stock Fiero tranny as a reference (as it's location isn't changing), and I'm not doing any drastic fabrication related to the turbo until the motor is in. --- Thanks for the compliments WFTB! I appreciate the support that all of you guys have given me... even the criticism as well! It keeps my standards high and keeps me from slacking off
------------------ Petty Officer Michael C Casaceli Aircraft Electronics Technician Second Class Patrol Squadron Ten United States Navy
IP: Logged
06:22 PM
Aug 23rd, 2006
wftb Member
Posts: 3692 From: kincardine,ontario,canada Registered: Jun 2005
my engine is from a stock 2004 cavalier.i tilted the motor to the rear of the car because that is the way they sit in the cavalier.except the cavalier tilts to the rear at about 15* and my setup is about 5*.if the pickup is positioned to work best at a tilt then you may run into problems if you are running vertical.but i have never had this engine apart so i dont know what the oil pickup looks like on a cavalier ecotec.i am using the 5 speed from the cavalier because it is a lot stronger than any fiero tranny and the stock fiero axles fit right in to the cavalier tranny. needed a little tilt to give more axle clearance .so far everything fits great and i should be able to test run next week
IP: Logged
12:35 AM
Aug 25th, 2006
Primaris Member
Posts: 550 From: Oak Grove, KY USA Registered: Aug 2001
Hey guys! Sorry about the silence. Up until this morning, I had a bad sinus infection, so I was kinda bedridden, but I worked out some wiring diagrams while I was down, and it seems I may be able to use the ENTIRE stock Ecotec ignition unit (module and coil pack) with Megasquirt. This means being able to simply run two jumpers in the new ECM, and reflashing the EEPROM with the "Megasquirt n' spark" ignition software. VERY easy... if it actually works.
Might I note, no one has tried this yet with an Ecotec, so this will be a first across all Ecotec platforms. Everyone who's done a stand-alone ECM with the Ecotecs all went to the MSD distributor. --- As far as the tilt, the race teams, even with the stock oil setup, have the engine tilted --forward--! I think the excellent design of the windage tray is what makes the motor able to be tilted so much in either direction. The oil centralizes to the pickup no matter what. --- WFTB, I'm curious. I saw Capt_Fiero's post about the Canadian who has a similar setup as yours, and he said that the shift pattern was a backwards standard H... are you going to have the same issue, and if so, what is the solution? I'd love to see the Ecotec 5-speed as the final solution to the Fiero transmission issues.
------------------ Petty Officer Michael C Casaceli Aircraft Electronics Technician Second Class Patrol Squadron Ten United States Navy
IP: Logged
06:40 AM
p8ntman442 Member
Posts: 1747 From: portsmouth RI Registered: Sep 2003
Before Its too late, check with your ring provider. It looks like you put a ton of assembly lube on your pistons, and your rings. This will prevent proper break in of the rings in many instances. Typical procedure is motor oil on the sleeves and rings. Do you have information supporting the use of moly lube on the cyl walls.
My brother and I had a big argument over this and when he rebuilt a sbc in his truck he had SEVERE blow by on start up, and for the first 500 miles. While another rebuild of the same motor I did for my fathers truck had no issues with using just motor oil. Also His tolerances were better (more $$$$ rebuild). My rebuild was done for $250 including the valve job.
IP: Logged
02:53 PM
Steven Snyder Member
Posts: 3326 From: Los Angeles, CA Registered: Mar 2004
Assembly lube on the rings/cylinder walls is indeed a no-no. Oil only. The lube is too thick and will be trapped between the rings and can even trap debris or ring break-in metal causing excessive initial cylinder bore wear. If you are concerned you can wash away the assembly lube on the rings by spraying solvent into the cylinders (with the head off or through the spark plug holes). Spray it until it comes out into the pan, then pour oil into each cylinder and turn the motor over by hand.
IP: Logged
03:05 PM
wftb Member
Posts: 3692 From: kincardine,ontario,canada Registered: Jun 2005
my shift pattern is standard cavalier 5 speed manual.what i did was mount a cavalier shifter with the cables going foreward in to the central tunnell and then i looped the cables back to the rear of the car and joined the stock fiero cables to the cav cables and modded the cav tranny bracket to accept the fiero cables in the stock cavalier position.this kept the shift pattern normal .i also utilzed the the entire cavalier hydraulic system by using the fiero slave cylinder to push in the cavalier master.i drove the car around the yard today and up a cottage road and the shifter works well but the clutch is much smoother than a stock fiero.so far i am pleased and the insurance goes back on tomorrow.two months and 3 days since i received the drivetrain.
IP: Logged
07:51 PM
Aug 29th, 2006
fieroturbo Member
Posts: 1085 From: Orefield, PA Registered: Jan 2003
You guys certainly know your stuff, and I personally hold you guys up there as experts of this forum, along with WFTB, Archie, and Bryson. You guys made some outstanding points! Thanks for sharing those tips!
But worry not, I did use insane amounts of oil in once I got the compressor around the rings. I doused the sleeves with tons of oil (which is why they look brownish in the photos). I literally drowned a rag in a bucket of oil, and wiped it all over everything several times, including the pistons themselves before insertion into the compressor. Plus, as I turned the crank with the oil pan off, I had poured ALOT of oil into the cylinders from the bottom, just to make sure things were well lubed, then again into the top of the cylinders before putting the head on.
In other words... I used ALOT of oil in the process, but I used assembly lube too. As I said earlier, the oil/lube formula worked well in the other builds I did. It evenly coated everything, and stuck to the surfaces that needed lubrication most, even with the one that was sitting for over 4 months. Basically, the assembly lube mixed with the oil helps hold lubrication in place until startup, helps keep things lubed during first startup, and then burns off shortly thereafter, leaving just oil.
If it doesn't work well with this particular motor, no biggie! I follow a simple theory with my Fiero... "If it breaks, don't sweat it! It's just a reason to upgrade the darn thing!" --- Things will get back in motion on Thursday of next week. I have some things going on this weekend, and my crank guy is working on the spacer for the flexplate/flywheel assembly (the way the motor will be able to start). In the meantime, with the weather here being so crappy, it's a good time to work on wiring details.
Have a great Labor Day weekend everyone! Stay safe!
------------------ Petty Officer Michael C Casaceli Aircraft Electronics Technician Second Class Patrol Squadron Ten United States Navy
IP: Logged
06:42 PM
Sep 10th, 2006
fieroturbo Member
Posts: 1085 From: Orefield, PA Registered: Jan 2003
Originally posted by fieroturbo: But worry not, I did use insane amounts of oil in once I got the compressor around the rings. I doused the sleeves with tons of oil (which is why they look brownish in the photos). I literally drowned a rag in a bucket of oil, and wiped it all over everything several times, including the pistons themselves before insertion into the compressor. Plus, as I turned the crank with the oil pan off, I had poured ALOT of oil into the cylinders from the bottom, just to make sure things were well lubed, then again into the top of the cylinders before putting the head on.
In other words... I used ALOT of oil in the process, but I used assembly lube too. As I said earlier, the oil/lube formula worked well in the other builds I did. It evenly coated everything, and stuck to the surfaces that needed lubrication most, even with the one that was sitting for over 4 months. Basically, the assembly lube mixed with the oil helps hold lubrication in place until startup, helps keep things lubed during first startup, and then burns off shortly thereafter, leaving just oil.
That ought to be fine. The oil will dilute the assembly lube and let it run off of the pistons and cylinder walls. You really only need to use it sparingly when installing the pistons. Put it on your fingers and work it into the ring grooves by hand. Wipe it on the cylinder walls the same way. It's best to not trap too much oil between the rings or behind them because it can cause carbon deposits during breakin if it doesn't run out, in addition to . In your case the excess will probably flow off the pistons and not be an issue at all since I don't think you're going to start the motor for at least a few weeks ;-) The motor is looking great so far. I can hardly wait to see this thing run. Weigh the complete motor before its in the car if you can. I'm curious as to what kind of weight distribution we can get with a turbo ecotec.. they certainly can make enough power!
I'm glad to hear that everything's coming together with this badass little engine. It's looking great!
I might have commented on this before, but might I just say that I'm jealous of how beefy everything on that 4 cylinder is? Even the freaking heads and oilpan are reinforced.
IP: Logged
10:20 PM
fieroturbo Member
Posts: 1085 From: Orefield, PA Registered: Jan 2003
I'm concerned about your clutch. I would compare the spec clutch to your old one if I were you. Pay particular attention to the center hub.
Your concern is well placed my friend. Many people in the J-body forums were skeptical about the Spec setups when they first came out. But they seem to be working ok with other Ecotec owners. If any problems arise, I have plenty of sources to check out.
quote
Originally posted by Steven Snyder: That ought to be fine. The oil will dilute the assembly lube and let it run off of the pistons and cylinder walls. --- In your case the excess will probably flow off the pistons and not be an issue at all since I don't think you're going to start the motor for at least a few weeks ;-) --- The motor is looking great so far. I can hardly wait to see this thing run. Weigh the complete motor before its in the car if you can. I'm curious as to what kind of weight distribution we can get with a turbo ecotec.. they certainly can make enough power!
That is what happened with the lube in my first rebuild, and my second one as well. --- That is exactly why I used so much oil. There's alot of wiring being custom built in this setup, and that will take time. There's zero chance of it starting this month, and a 50% chance of it starting in October... the other 50% being November. --- I have all intentions of getting a spring-type scale to put on the hoist so I can figure out the weight difference between the two motors. It's cheaper than getting individual wheel scales.
quote
Originally posted by Fiero Brick:
I'm glad to hear that everything's coming together with this badass little engine. It's looking great!
I might have commented on this before, but might I just say that I'm jealous of how beefy everything on that 4 cylinder is? Even the freaking heads and oilpan are reinforced.
That is part of why I chose this over the Quad 4 (my original plan to turbo my Fiero). Even though it's aluminum, its design makes it stronger than most iron block 4-bangers out there. --- Thanks again everyone for all of your compliments. They really mean a great deal to me and help keep me going when the going gets tough with this project. Though insulters and naysayers help keep me in check as well, so keep a few of them coming too
------------------ Petty Officer Michael C Casaceli Aircraft Electronics Technician Second Class Patrol Squadron Ten United States Navy
IP: Logged
10:54 PM
Sep 11th, 2006
ambfiero Member
Posts: 386 From: In here its like living in goonville Registered: Jan 2003
bookmarking, this ia a great thread. I wanted to do a V8 but there is something to be said for a 4banger that weighs half as much and puts out just as much HP. Now I just need to figure out where I need to begin.... =)
------------------ In loving memory of Harold Hummel (PFF 4WHEEL) 1936-2004
IP: Logged
12:55 PM
Sep 17th, 2006
fieroturbo Member
Posts: 1085 From: Orefield, PA Registered: Jan 2003
uhhh, your tranny is missing a piece. Not a necessary part though.
Lol, well aware of that. The parts are en-route. Once I get the lower 88 V6 engine mount, and the tranny brackets I need, things can get back into motion. And not a moment too soon. My Duke's ECM is on its last leg.
------------------ Petty Officer Michael C Casaceli Aircraft Electronics Technician Second Class Patrol Squadron Ten United States Navy
IP: Logged
08:16 PM
Oct 7th, 2006
p8ntman442 Member
Posts: 1747 From: portsmouth RI Registered: Sep 2003
You might have already covered this at some point but I just skim most of these waiting for installed pics :P but why didnt you use the cavalier or sunfire 5 speed? going by the track record of fiero manuals not enjoying power, I would think the J-Body trannys that have no issues with around 400whp would be ideal?
IP: Logged
01:38 PM
Oct 11th, 2006
Flyguyeddy Member
Posts: 568 From: Delavan, Il USA Registered: Dec 2003
depending on how much power you plan to push that 84 4speed tranny is going to have issues and possibly split the case on a hard launch.. why not use the ecotec 5speed?
but with 310cc injectors (only 4 of em) you'll be maxing out at about 260 crank hp -- the ion redline guys are going to 440cc and 600cc injectors
IP: Logged
08:38 AM
ryan.hess Member
Posts: 20784 From: Orlando, FL Registered: Dec 2002


 )
)


