Looking good joe. That upper mount bolt on the expansion tank is a fun one huh! I had to tackle that one on the XTC when i first got it. I still have scars to show for it (mostly mental scars) - lol. I like the cold air setup too. I did not realize how much difference fresh air makes till I changed over to the decklid scoop/intake on the XTC. It runs so much better and the fuel mileage is up as well. Keep up the great work.
Pat
If you are talking about the one I have pictured, I just used a 10mm socket on a swivel with a 1/4" ratchet to brreak it loose. Then a 10mm open end wrench to walk it out of the body. Wasn't bad at all. I slotted the tank there and started the bolt from underneath before putting in the tank. Slipped the bolt in the slot, and tightened from the top side as pictured. The rear fastner is simple.
And The Lord said 'Let there be Cold Air' and he was pleased !!!!
I was able to get a good fuel filler pipe and a few other small items I needed from MstangsBeware yesterday. He's hard to beat, and a real nice guy. I'll get this in my car over the weekend.
This morning I spent some "Quality time" with my Fiero fishing the fuel filler pipe into the hole in the frame, and up into the rear body. I loved this job !!! I had purchased new hose to replace the old ones that connect the expansion tank in to the rest of the car. All new hoses and clamps. I had a Direct TV tech coming this morning and had to quit and clean up to wait for him. At 1:00pm I was finished with the Direct TV tech. To hot in the garage now so I will wit until the am and finish up this little job.
I have discovered a 'wet' spot on my right rear brake where the hose attaches to the caliper. MC was a bit low. Cleaned this with lacquer thinner. I will hit the brake a few times and watch for a return of the wet.
Finished up the fuel filler hose and pipe install this mornng before work.
Welded up the nice hole I had cut into the air filter mount/brace. I had made rthe hole so I could mount the air filter for my State inspection. Fit the piece of metal into the area lerft out by the PO for the speaker boxes.
[This message has been edited by josef644 (edited 09-15-2010).]
I finished mounting the sheet metal that was missing around the fuel filler pipe this morning. painted all, and remounted the air breather. and
I have the firewall heat shield off of the car. I am gonna add some metal to the part that looks like someone took a pair of metal shears to, the upper right corner.
I am gonna remove the forward parking brake cable to switch it out with a nice one I got from MstangsBeware. I also scored a parking brake handle in real good condition. Mine has the plastic cracked and busted up.
[This message has been edited by josef644 (edited 09-16-2010).]
I had to go to Houston today, and located this at O'Riley's Auto Parts. It is 3" and fit perfect into both rubber ends. I removed the metal exhaust pipe I had installed: It keeps its shape.
I was unhappy with the exhaust pipe rubbing the fuel filler pipe.
I am finished here with this now
[This message has been edited by josef644 (edited 09-18-2010).]
Wheels look good so far. Did you prep sand them at all or just spray them down? And are you going to refinish the lip at all or just polish the hell out of it?
I used liquid sandpaper from Lowe's. It's hard to get into all of those holes with sand paper. I am gonna just keep the edges like they are for now. I want to get about a hundred miles on this swap before I start wrapping up the wiring harness. I have only driven it around 30 miles since it had been drivable. I am then gonna remove all of the body pieces for an off body paint job.
[This message has been edited by josef644 (edited 09-19-2010).]
Had the rear tires mounted on the rims. Disconnected the parking brake cables from the forward cable. I am gonna remove and replace the forward cable and the handle first up in the morning.
[This message has been edited by josef644 (edited 09-23-2010).]
Removed the drivers seat, foot trim piece and removed the parking brake handle and cable. Replaced the handle and cable. This cable is real nice , and the adjustment needed to work the parking brake is about half of the amount needed for the old cable. I stopped at about half way, and checked the handle. I had it to tight and need to add some slack. Pads were dragging the rotors.
Had a bit of lunch and went back out to install the foot trim piece and the drivers seat. Removed the lock parts off of the deck lid. I will be taking it to Greenville to swap out with a smooth one from MstangsBeware tomorrow.
Went back out and installed the passenger side quarter panel. Put the battery back in the car and reconnected the cables. Turned the key and she fired right up. I'll add water in the morning and purge the coolant system.
[This message has been edited by josef644 (edited 09-22-2010).]
Plunder from yesterdays trip to see MstangsBeware. All bolt hole threads are nice. Good shape, just faded Fiero red. Got back home last night at 8:00pm
[This message has been edited by josef644 (edited 09-23-2010).]
84-86 cars do not have the extra fuel lines that the 87-88's have because of the expansion tank. But the connector for the fuel tank harness is in this proximity.
When I got my 4.9 up in the car and had it running , I had gotten underneath the car for some reason. I saw how close the forward exhaust manifold was the the fuel lines and electrical connectors from around the center of the car to the passenger side. The factory made a heat shield for the lower parts of the car and upwards a bit on the drivers side. The metal lines that run to the expansion tank on the right side of the car are only a few inches from the exhaust manifold.
There is also one metal fuel vapor line that runs from the expansion tank to the left side of the car to the charcoal canister. This line has a rubber hose joining the two halves togeather. I was not real happy with this and thought of a way to block the heat from these lines and areas. Along side and bent to the 'Z' shape:
What I did was take a piece of scrap metal I had cut from the trunk when I cut it out of the car. About 9" X 14" . I used a pair of vice grips to bend a lip over, then a hammer to flatten it out. I had a nice edge all the way around now. After installing the factory heat shield again I bent the fabbed piece like a 'Z'. I raised it underneath the car and marked where I wanted it to be mounted. Dropped the heat shield once more and set the new piece where I had marked. Drilled two holes. Raised up on the firewall. I needed to locate a few extra bolts: pretty good shot mounted up: Painted and bent to the shape I wanted it when mounted up: I thought about just using pop rivets, but this way I have access to the fuel tank harness connector behind it by just removing a few fasteners. This all would be super easy to do before the engine is raised up in the engine bay
I am gonna pull the factory piece back off of the car and add one more fastener above the left side mounting bolt. I'll get a shot of it after I have it all back on the car.
Bolted togeather and all painted: mounted on the firewall: and
[This message has been edited by josef644 (edited 09-24-2010).]
I removed the two power window switches today and took them apart for cleaning. I need to get some dielectric grease before I put them all the way back togeather. I painted the rockers Matt black, but I don't like the way they look. I am gonna remove the rockers and add the flat black.
I had a set out of an 84 that I took apart first for experience. After cleaning the right side one I put it back in the car to test it out. My passenger side glass moves under its own power now. Super slow, but it is working.
This car has around 200K miles on it that I know about. Last mileage on carfax is 197K, the speedometer I replaced had over 300K on it. I am thinking that I need to get new morors for both doors. Even 200K is a lot of miles on the car, and trips up and down for the windows.
Just ordered two new window motors from RockAuto, $50 shipped. Dorman kits
[This message has been edited by josef644 (edited 09-26-2010).]
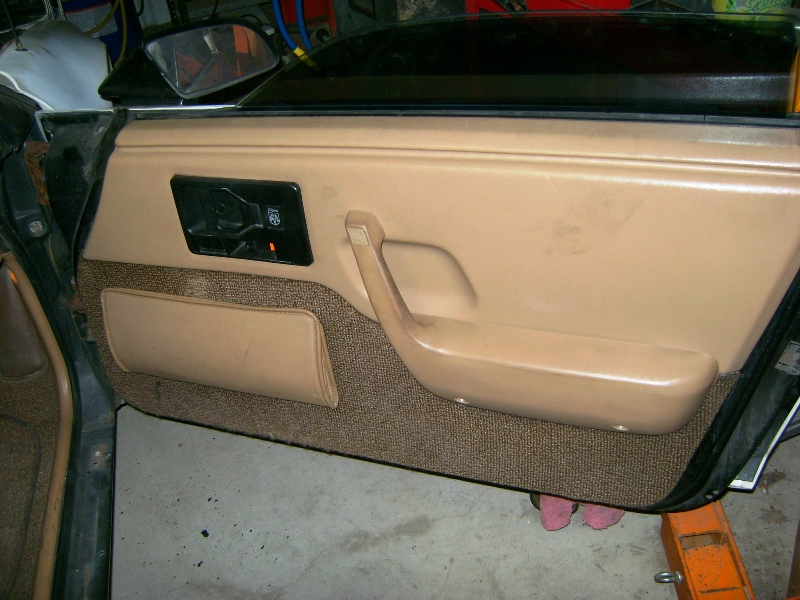
I removed the inner door panel to access the drivers door power window motor. After cleaning and lubing the window switches, they still move in a very slow manor. I have ordered two new power window motors from Rock Auto yesterday.
After removing the inner panned I removed the plastic that a PO had used instead of the paper barrier that is supposed to be here. I removed the small chanel piece that is bolted to the inside of the door frame. and some of the parts of the power door locks. I wasn't aware that I had power door locks until today. And they work, well sorta, as the drivers side will unlock. The right door works both lock and unlock.
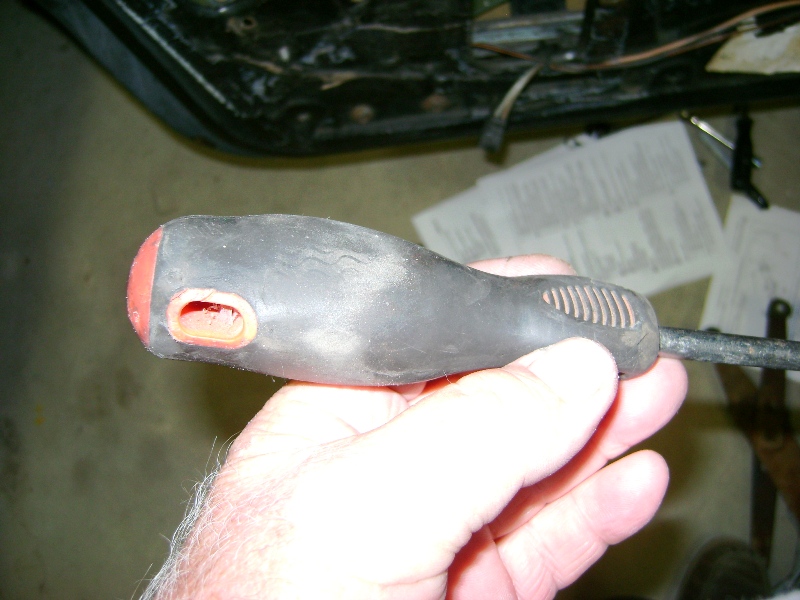
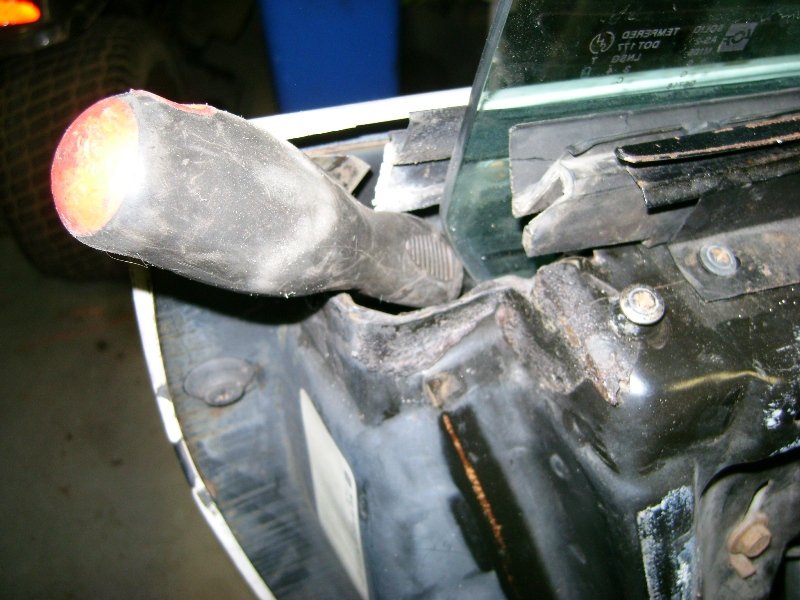
After disconnecting every thing as explained in the book, I needed to raise the glass up all the way and block it in the up position. The handle of my largest Phillips screw driver inserted at the bevel of the glass: inserted at the rear of the door: If you have power door locks, you will need to remove the lock solenoid first as it is in the way big time. In these two spaces: Lower hole and upper hole.:After removing the rivets remove the motor with the scissor assembly threw this hole. And out:
This was fun, NOT.
Got this today:
[This message has been edited by josef644 (edited 09-27-2010).]
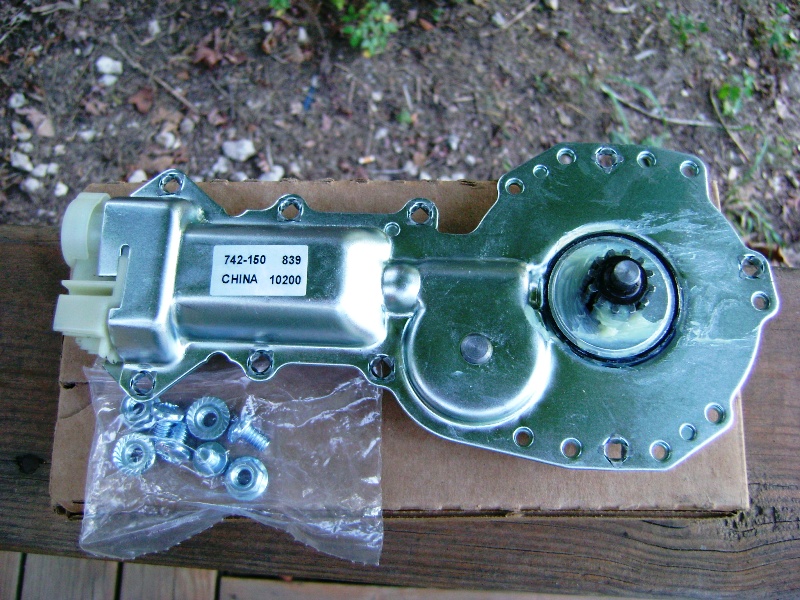
Window motors arrived. I'll be installing one tomorrow morning. Dorman distributes "Made in China". I wouldn't have bought these if i had known they were Chinese made. It did come with a nice set of mounting hardware, all nuts and bolts and the mounting plate.
I installed the drivers side motor this morning. It wasn't to bad. I learned the ins and outs of doing these. I am gonna do the passenger side door in the AM. It was pretty neat to see the glass move up and down quickly, as it has always been in slow motion before.
The 5 of white circles indicate where the bolts are needed to replace drilled out rivets. The left two are bolts that are removed for removal of the channel.
Thinking about doing a step by step power window motor replacement guide. I took pictures as I was putting it back togeather. I wish I had been able to find one before I did this.
.. Thinking about doing a step by step power window motor replacement guide. I took pictures as I was putting it back togeather. I wish I had been able to find one before I did this.
Would appreciate a lot! I may need to do this too. Just started troubleshooting a window that doesn't go up and goes down VERY slowly
Ok, I'll put a 'How to Replace a Power Window Motor' up in Tech tomorrow after I finish doing my other door. I have some suggestions to make this a bit easier for others who are needing to do this.
I printed me a diagram of the power door locks on my car. I went out and did a test on the lock 'motor'. It works fine in lock and unlock. The drivers side lock switch is bad. That was good news as the 'motor cost around $50.00 new. The lock switch was just $6.00
[This message has been edited by josef644 (edited 09-29-2010).]
Did the passenger door window motor. Purchased some 1/4" bolts with plastic lock nuts for the power door lock hardware. Got some plastic sheeting to replace the trash bag moisture barrier installed by a PO
[This message has been edited by josef644 (edited 10-01-2010).]
I finished the passenger side door this morning. Waiting on a new power door lock switch and the round white plastic up stop for the drivers side door.
White plastic up stop arrived in this afternoons mail. Installed already. I will replace the inner door panel tomorrow after I get home from mowing.
Installed the drivers door inner panel. Still waiting on the power door lock switch.
[This message has been edited by josef644 (edited 10-02-2010).]
Went out in the garage during half time and removed this piece. The nipple for the heater return is leaking: the leak Gonna find me a shop that can weld stainless steel one day this week.
Ordered some clear coat.
[This message has been edited by josef644 (edited 10-04-2010).]
I am having a problem with the wires that connect to the EMC. I was gonna install the console part that covers the ECM. Once in place the engine would not run. Cranks but will not start. Removed the piece again and all is well again. Starts right up. Replaced it and once again and No Go situation. Started wiggling the connectors with the engine running, and sometimes it will stop the engine. Nothing I have been able to pin point as the "Evil Gremlin" yet.
Ran a scan, and found: Intermittent MAT Problem Park/Neutral Problem Low Fuel Pump Voltage
Bumped the wiring with my elbow just now when running the scan. The engine started to die, then recovered as I moved my elbow away from the wiring.
Looks to me like the green 16 pin connector E/F would be the culprit here. It has Transmission pins C and A at F 7 & 8, Fuel pump relay power at F 1 and the MAT signal at F16. I removed the green plug and re connected it back in. No change. These codes were not here before today. This is the only place that the MAT is connected.
Any thoughts?
My interior looked real nice with the console installed. Mr Mike seats look wonderful with the interior complete.
Got this in the mail today. Gentex 177 auto dimming and compass, $17.00 on E Bay:
If you decide to get a Gentex 177 on E Bay, the plug in connector is nice, But no necessary. You can remove any old pin out of a computer Motherboard plug in, remove the plastic and connect it to the mirror. They are the perfect size for the Gentex pins. Looking from the back side of the mirror top side up, number one is first on the left, and the numbers get larger from there. Ignore the wire colors, as the are never the same. The auto manufacturers often build the connector into their harness and used which ever color they wanted to. My # 1 wire was yellow. Here is a plug in connector for a Compaq that had died an untimely death: PIN 1 = PINK = POWER = +12 volts* PIN 2 = BLACK = CHASSIS, GROUND* PIN 3 = LIGHT GREEN = BACKUP LIGHTS* If not using the backup feature, connect this to ground otherwise auto dim will not function properly. PIN 4 = GRAY = TO AUTO DIM OUTSIDE MIRROR PIN 5 = PINK = TO AUTO DIM OUTSIDE MIRROR PIN 6 = DARK GREEN/WHITE = TEMP SENSOR**
PIN 7 = BLACK/WHITE = TEMP SENSOR: (*required; **required if you have a temp display)
----- Original Message -----
[This message has been edited by josef644 (edited 10-18-2010).]
I purchased a 3M kit for polishing the headlights on the Elantra. $18.00 at Wal-Mart I did both headlight today, and have enough of the kit left to do the tail lights on my 88 in the morning. This 3M kit works real good and is easy as pie. A before and after shot of the wife's car: and after This headlight is so clean you can't see the front layer in the bottom photo. This took about 10 minuets using my electric drill.
[This message has been edited by josef644 (edited 10-09-2010).]
I did my tail lights this morning. About 10 minuets each side. The came out great. First pass with the P500 pad. Right side finished. You can see the trees outside in the reflection. and the left side:
I have done two headlights that were real bad, and two ugly tail lights. I have enough left in the package to do four more easy. This 3M product will do ten lenses easy.
Neighbor came by while I was doing then last one. He advised to add a coat of good wax to prevent further UV clouding and oxidation.
[This message has been edited by josef644 (edited 10-10-2010).]
Trying to fix the electrical problem I discovered on the 8th, in the ECM connector area. This has been real fun. I will post the fix when I find the evil one.
[This message has been edited by josef644 (edited 10-14-2010).]
Hey Joe - just spent the last half hour catching up. You are maknig a lot of progress! First, I am impressed with your Power Window Motor work. I have yet to tackle that project! I want to put power windows in my Formula - I have all the parts to do it - just been "scared" to do it. I thin I'll try and tackle it. I am also impressed with your head light tail light restoration - I always blew those kits off as a bunch of hooey. They look great - another project I need to tackle on my V8 Coupe. The car is looking better and better.
P.S. I recieved those "Formula" decals today - they look great - thanks again!
Thanks for the purchase. The funds will disappear into my 88 here. If I was close I would get those power window motors in for you. You could watch and take photos.
I need to go to town one day this week and get some heat shrink. I have used the last of what I had here re-routing some of the wires. I don't use butt crimp connectors on anything.
I haven't touched the car in two days. I did put some the black plastic covering on, 50%, of the engine harness to make it a bit more attractive.
My biggest obstruction now is funds. We have 8 grandchildren, and have to look out for Santa before there is any excess funds for the Coupe. I got one of those automated camera tickets, and it couldn't have come at a worse time of the year. $100.00 in the toilet.
[This message has been edited by josef644 (edited 10-18-2010).]
I think I have located the electrical problem. I am loosing power at C 203 "B". This is the power supply for the fuel pump. it is supposed to be hot at all times. I left the dome lights on yesterday, and have the charger on the battery right now.
Went out in the garage during half time and removed this piece. The nipple for the heater return is leaking: the leak Gonna find me a shop that can weld stainless steel one day this week.
I removed all of the above again after having it welded up. Still leaks. I got a 24 inch piece of 88 return side pipe, with the nipple for the heater return, in the mail from Mstangsbeware a few days ago. I cut off the leaking part, and used a small ball peen hammer to put a small amount of flair on the extreme ends. New piece Flaired ends: Old leaking piece:
I'll get all of these back on the car tomorrow and burp the cooling system once more.
When I was working on the car a few days ago I tried the headdlights to make sure that they still worked OK. This started a cycle of dead battery, and low to almost a dead battery . After unplugging the two headdlights motors, I don't hear any more of the clickety clicking that I hadn't noticed before. So I hooked the battery back up, and will get a reading tomorrow AM.
Lots to do tomorrow.
[This message has been edited by josef644 (edited 10-24-2010).]
I am really frustrated with this car. I was trying to find the reason that the engine would not run when the console was in the car. Thought I had it located. BUT now I am having a problem with the battery going dead.
I do not know if this is related or not. Traced some of this to the headlight motors. I get a click from both light when I connect the neg battery cable. Unplug these and the drain is still at .50 amp. The battery looses about one half volt overnight when the cables are connected. Unplugged the head light switch to test it, and the roller knob for the instrument light brightness detached it self from the mounting bezel. Glue just cut loose.
My meter would not work in the 10 amp protected mode. So I borrowed one from a neighbor. Blew the fuse this evening in this borrowed one one. I am gonna go to Livingston tomorrow to try and get some new small 10 amp fuses. I was able to get a new 10 amp auto type fuse in mine, but it reads 4.25amps draw not even hooked up to anything. I think mine is just old and undependable.
I just wanted the console installed and got all of this to boot.
Burned the meat on the Q pit this evening. Whole day has turned to Ship!
Enjoyed a nice baked potato, mushrooms and salad though. Might just quit eating meat !!!!!!
[This message has been edited by josef644 (edited 10-25-2010).]
I have narrowed the battery drain down to the BAT fuse circuits. This is the radio memory, courtesy lights, lighter and horn relay feed. I have a suspicion that the Vibe radio is mashing and causing a problem where it touches the harness at its rear.
[This message has been edited by josef644 (edited 10-28-2010).]
I found that my Vibe Radio is causing the battery drain. I removed it from the car. Back to work on the car.
Ordered 4 sections of 48" pieces of clear 1/8" heat shrink. I am gonna remove my harness and make a new one that looks like it wasn't made by a kindergarden student.
[This message has been edited by josef644 (edited 10-30-2010).]
I removed the wiring harness out of the car this morning for re building in a clean logical manner. I have decided to clean up the mess at the ECM before I go any further on anything else. I ordered 16 foot of heat shrink from McMaster-Carr, about $10.00 shipped I want mine to look like this picture I stole from M_M's wiring thread
I am going down the line on each ECM connector marking the loose ends for reconnecting. If a wire stays inside the cabin , like speedo or VATS bypass, I am pulling them all to the dash side of the connector. I am gonna insert the green first, lay out the wires, then the top black, then the lower black one.
Removed the Deville radio from my S-15 GMC this morning, and have put the Delco that came in it back in the dash. I had used an adapter to fit the Deville radio, and one for the Vibe radio. Unplugged it from my GMC. I just need to remove the pins from the two and insert them into the proper holes in the connector. All the wires are marked on the connectors.
I finished my two black ECM connnectors during the Cowboys Football Game, and did the C203 connector. I am ready as soon as my heat shrink gets here.
Pinned the Radio connectors, and hooked up my radio. I will do a amperage draw test on it tomorrow.
Amp draw is so small that it does not even register on my meter. I trashed the Deville radio in favor of a Chevy truck one that I had . It sounded much better and the RF spearker would not work with the Deville radio in the car.
[This message has been edited by josef644 (edited 11-12-2010).]
I have the whole harness on my kitchen table, making it neat and removing excess wire from sensor connections. I hope to be finished up with this tomorrow. I have about 1/2 of this now: Picture stolen from M_M's wiring thread. This harness does not include the C500. I am thinking his is a stick shift also. I will have extra wires for the transmission, neutral safety switch and connectors I am gonna post a picture here of my progress tomorrow.
[This message has been edited by josef644 (edited 11-03-2010).]


 .
.


qZSu-hhBMkm)38GQQ~~_12.jpg)


 It is so very gratifying to do it yourself.


