No I was just saying that the gauges were all cooperating, and working as they were supposed to. I'll have to check into the 'Temp" light and see what the deal is, and watch my coolant gauge to see if it is dancing while cranking or not.. Were the 88's miswired also?
As far as I know all fieros were mis-wired. If you temp gauge pegs on start then all it working as it should. Seeing a temp light is entirely up to, if you decide to do the fix.
Sounds to me like everything is working as it should. Congrats Joe! Now get that car together and blow the dust out of thte engine!!
I am gonna start on the brakes and see if they will bleed and work. I need to finish up the coolant system. I have every thing I need to have on hand, just need to get motivated again. Brakes will get the car down on all four wheels and off of the jack stands.
My exhaust system sounded pretty good, except it made the 'miss' more noticeable.
Originally posted by josef644: Not sure if this is what you were looking for? Group Ref.: Engine
Bulletin No.: 316006A
Date: November, 1993
SUBJECT: SLOW DECELERATION WITH CLOSED THROTTLE ABOVE 5 MPH (READJUST AIR RATE)
MODELS: 1990-93 CADILLAC DEVILLES, ELDORADOS, FLEETWOODS, SEVILLES, AND SIXTY SPECIALS (EQUIPPED WITH 4.5L OR 4.9L ENGINES)
THIS BULLETIN IS BEING REVISED TO CORRECT THE WARRANTY STATEMENT, AND CANCELS AND SUPERSEDES BULLETIN 316006 PUBLISHED OCTOBER, 1993.
Some owners may comment about slow deceleration with closed throttle above 5 mph. This may be particularly noticeable after performing bulletin T-93-44 (Corporate bulletin 016540R) even though all engine adjustments have been set according to published service information.
To correct this condition readjust the minimum air rate to between 400 and 450 rpm, the TP Sensor setting to .55 volts, and reset TP Sensor/idle learns using the procedures listed in the appropriate Service Information Manual.
For warranty purposes use:
Labor Operation: J6358
Labor Time: Use published labor time .
Copied this from another thread, quoted it so I can save it.
[This message has been edited by josef644 (edited 06-13-2010).]
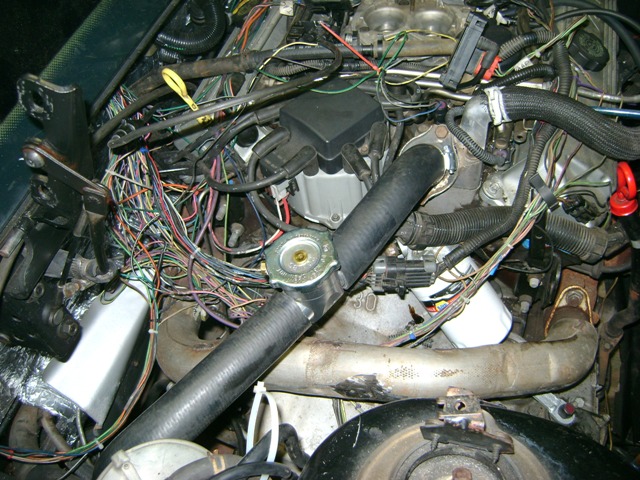
Routed the coolant hoses today. You can not tell it by looking at he pictures, but there is 5" space between the crossover pipe and the inline filler and its hoses. I only had one hose clamp. I'll get four more tomorrow, and a 55 Torx socket so I can remove the two rear calipers for rebuilding. I have the kits and all here now.
Added 3 quarts of Dexron III.
I ran a wire from the starter solenoid to the battery so I can by pass the key switch to engage the starter.
[This message has been edited by josef644 (edited 06-13-2010).]
Spent 4 hours this am removing the two rear calipers, and taking them all apart. Wasn't to bad I have most of it cleaned up and ready for the rebuild with new seals. I have two slider boots that have holes in them . Looks like they were done that way last rebuild. I want to get these finished so I can put the rear wheels back on the car and get back on the ground all the way around.
It was 81* at 7:15 am this morning. Humidity is 55%.
Bought four new hose clamps for the coolant hoses. Just to hot and sticky out side to mess with it right now.
I have made a WTB request in the Mall for two used slider boots.
[This message has been edited by josef644 (edited 06-14-2010).]
I remember rebuilding my 88 rear calipers also. It was a fun time.
I've had worse jobs for sure. Like this weekend. Had to replace an oil pump on a 91 Duke S10. Remove exhaust, starter, flywheel cover, 2 engine torque struts, fan schroud, power steering resovoir, and remove motor mounts so the engine can be raised. All this just to get an oil pan off. Replacing the oil pump was easy. Getting to it was rediculous!
Kinda gives you a new respect for most fiero jobs. They are easy by comparison.
FEW, can you post me a picture of the parking brake cable going into the cradle on your 88 so I can get mine in the right place?
Been a few days since I was in here! You are getting a lot done in short time now Joe. I can't get to my pics right now to post for the park brake - do you have an 88 cradle in there. 88's are different from earlier. They route throught the forward crossmeber of the cradle where earlier models route behind the back crossmember. I bet you can't wait to drive it!
A note about the fuel injectors - not sure about the ones for the 4.6/Mustang - I used the ones out of the Crown Vic.I beleive the Mustang ones are the series 3 and the Crown Vics are series 2. The ones I used are working great - no miss or bobble. Once I got the fuel pump problem sorted, it runs very smooth now. If FEW has not done so - I will post pics of the ebrake routing when I get home this evening. Glad to hear she fired up. Even though you had it running before, it is still a big step toward out the door. Congrats!
The exhaust tone is a bit louder than I was hoping for. I will post a video maybe Thursday. I am gonna trim the 90* exit pipes and put the new stainless steel tips on and mark them all. I want to get this all removed and welded Thursday so I am finally finished with the exhaust. Just one more time.
I have to work tomorrow, and spend the day at the VA clinic Wednesday.
After dinner I cleaned the two rear caliper bridges and used some red caliper paint I had on them. This is the only part that can be seen threw the wheel anyway.
[This message has been edited by josef644 (edited 06-14-2010).]
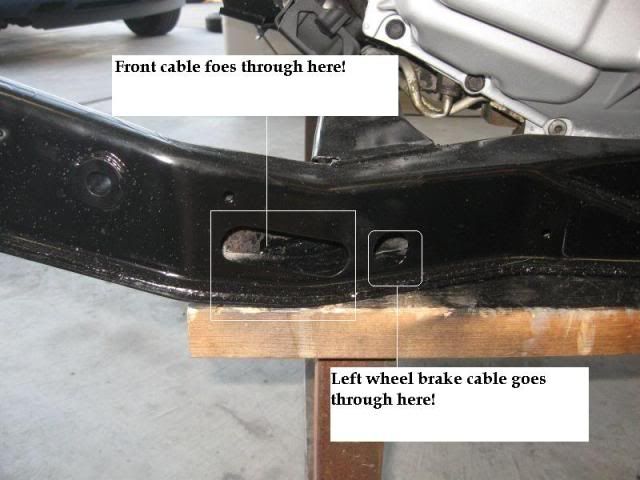
I can't find pics of the cable together but here's some pics of an 88 cradle:
This is the left side - front cable goes through the slotted hole and the wheel cable goes through the smaller round hole:
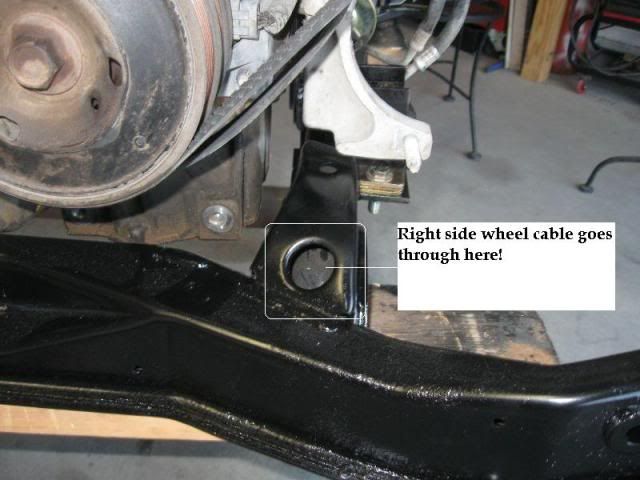
This is the right side - right side wheel cable goes through this hole:
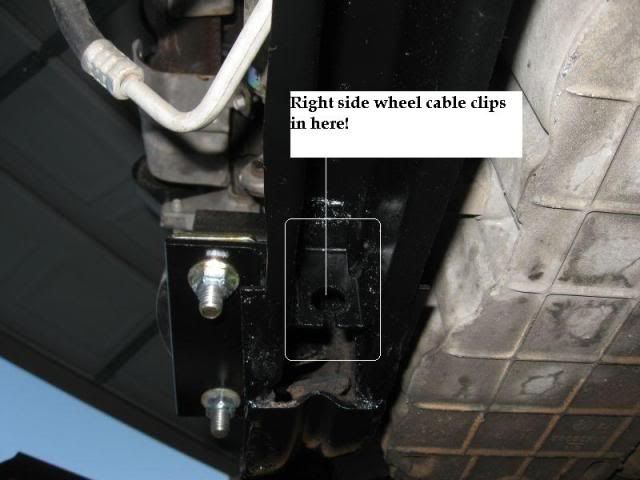
Right side cable clips into this hole:
Left side wheel cable clips in this hole. The front cable comes in over the top of the left cable:
Fiero store map:
I can't remember which cable has the threaded end that goes to the adjuster - I think it's the left side wheel cable! If you need pics of the adjuster and how the cables hook up, I will go out and get them off the Formula.
Pat
[This message has been edited by katatak (edited 06-14-2010).]
My driver side cable is still on the cradle the front was not hooked to anything. I removed the right side one for welding the piece of angle iron for the mount welding. I think I can get it all together now.
Thanks for the pictures Pat
Joe
[This message has been edited by josef644 (edited 06-14-2010).]
Installed the last two clamps for the coolant system. I added about two gallons of water and was surprised that I could not see water in the radiator neck. It was all on the floor. I had failed to tighten the drain plug.
Removed the over flow tank and tightened the drain plug. About 1/2 gallon later I had water up top. Capped it off and continued to fill.
Once I had the fill hose full I went to turn the key for a 5 second run to purge air. Nada, nothing.
Used the meter to check voltage. 2 Volts ain't enough. The battery had gone down over night. I had left the dome lights on since??? Hooked up the battery charger.
Removed the passenger side headlight for rebuild, then the drivers side also. I have the Rodney Dickman rebuild kits for 88's here already. Something to do later after supper time is over.
Installed the overflow tank. Removed the overflow tank
Added the radiator fan, then added the overflow tank again.
Battery is coming back up real nice. I'll remove the charger around 3:00 or so, and give her a spin.
Rebuilt drivers side headlight, pretty easy as I have done 84-86's before.
[This message has been edited by josef644 (edited 06-15-2010).]
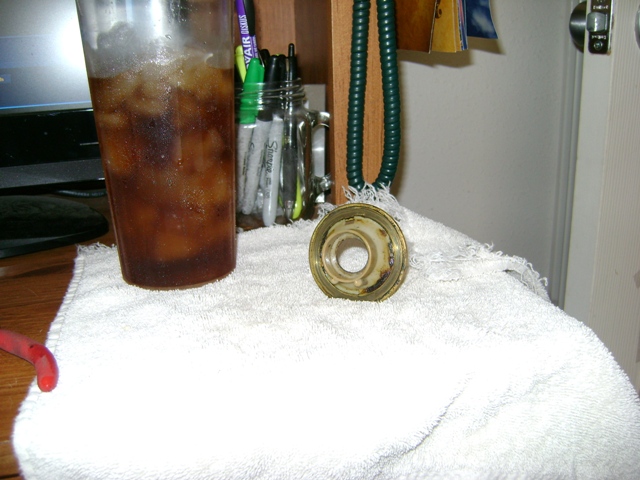
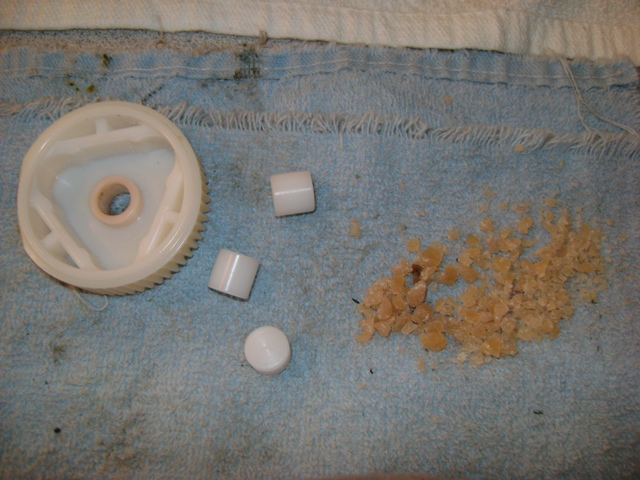
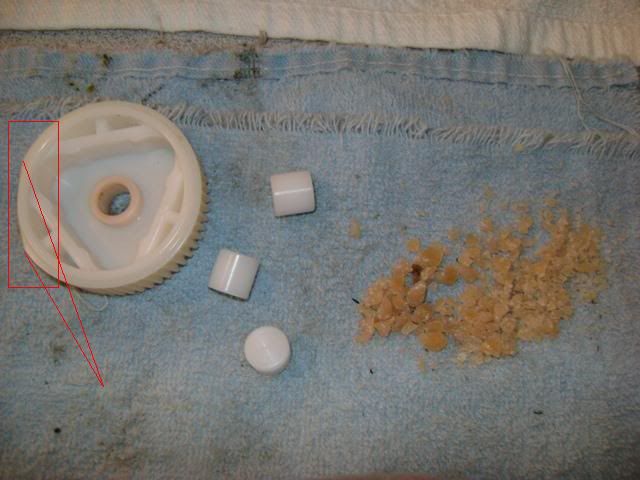
Here is a picture of the three white 'plastic' bumpers that disintegrate beside a pile of crumbled up wasted pieces. The passenger side motor was a bit harder than the driver side, but after rebuilding two 84-86 motors this was a piece of cake. Rodney's instructions were very good. I used the Vice Grip method of removing the gear.
Are my eyes playing tricks on me or is that a flat spot on the gear? Is that a "mod" for installing the side that fits under the drive shaft? Or maybe I had one too many beer's this evening.
Are my eyes playing tricks on me or is that a flat spot on the gear? Is that a "mod" for installing the side that fits under the drive shaft? Or maybe I had one too many beer's this evening.
Pat
Sharp eye Pat. I had already trimmed the gear and it was ready to go back in the housing before I took the picture
[This message has been edited by josef644 (edited 06-16-2010).]
Spent the whole day at the VA Clinic in Lufkin,Tx today. All was well. I had lost 26 lbs since my last visit April 10th.
Its an oven in the grange after been locked up all day. I'll get back on it man-ya-na.
Gonna finish up the coolant filling and burping first, then let it idle for a while and watch for leaks and watch the temp gauge to see if it is working. Remount both headlights after looking for leaks.
Got the two headlight remounted and tested out. They work great. Sorta fast compared to my 86 Coupe.
Finished up the coolant fill. I am gonna hook up my AutoXray 5000 and watch the temperature come up for the first time. This will be the first time I have ran the engine with coolant in it, or for more than 20 seconds at a time. It appears that my temp gauge is not cooperating. It goes all the way to the far right with the engine running. Far left with just the ignition on. I'll have to work on straightening that out later.
I plugged in the Code reader , and set it to monitor the engine. Tach was right on the nose by the gauge. J Gunsett here on the forum did the modification for me. When the water temp reached 155* the engine threw the belt. I had been running it about two minuets. Dis ani't gonna be fun. Close but no cookie!
I am getting a code 52 also. It is something about memeory reset.
[This message has been edited by josef644 (edited 06-17-2010).]
Got the two headlight remounted and tested out. They work great. Sorta fast compared to my 86 Coupe.
Finished up the coolant fill. I am gonna hook up my AutoXray 5000 and watch the temperature come up for the first time. This will be the first time I have ran the engine with coolant in it, or for more than 20 seconds at a time. It appears that my temp gauge is not cooperating. It goes all the way to the far right with the engine running. Far left with just the ignition on. I'll have to work on straightening that out later.
I plugged in the Code reader , and set it to monitor the engine. Tach was right on the nose by the gauge. J Gunsett here on the forum did the modification for me. When the water temp reached 155* the engine threw the belt. I had been running it about two minuets. Dis ani't gonna be fun. Close but no cookie!
I am getting a code 52 also. It is something about memeory reset.
Code 52 just means the battery has been disconnected. It goes away on its own and doesn't set the light.
Did you switch to the 3 wire temp sender? If not your gauge will not work right. The caddy has a switch and can only control a light. If you did then double check the wiring. Could have mixed up the light and gauge wires.
Any idea why it threw the belt? Hows your tensioner holding?
[This message has been edited by Fieroseverywhere (edited 06-17-2010).]
Code 52 just means the battery has been disconnected. It goes away on its own and doesn't set the light.
Did you switch to the 3 wire temp sender? If not your gauge will not work right. The caddy has a switch and can only control a light. If you did then double check the wiring. Could have mixed up the light and gauge wires.
Any idea why it threw the belt? Hows your tensioner holding?
Not sure, fixing to go back out and look at it. Could be right about the two wires on the the sensor and a new connector. I did install the three wire sensor.
Might have to get you to make me a working tensioner set up. So I can move forward!!! Two minuets is not enough running time.
Belt is destroyed. $18.00 flushed down the drain. I found that I only have one bolt in the water pump pulley now. I found one in the floor, and the third one has eluded me. I was hearing a sound like a Ford power steering pump going out just before the belt was destroyed. I was out of the car and looking at the engine when it happened. I noticed the alternator wasn't running any longer.
Don't forget to tighten the three water pump pulley bolts before installing the engine in the car.
This is gonna be fun!!!
Here is the destroyed belt:
I located a replacement bolt for the missing one and put these back on the water pump. Getting the first one started was fun as I couldn't find the threaded hole from underneath. I used a 90* screwdriver to find the hole and started the bolt in the remaining one. The third one was easy as there were now two of the three bolts threaded into the water pump.
I'll get a new belt this evening.
Joe
[This message has been edited by josef644 (edited 06-17-2010).]
I did the same thing on my first start. The waterpump pully bolts were not tight. I caught it before it fell off and shredded the belt. What a racket that made though! For me its usually easier to install the pully from the top. Mine takes 3x13mm bolts. Get the three bolts started first then put the new belt on so you can tighten them down. EDIT: Oops. I forgot you have the battery in the stock position. This would make it very difficult to install that pully. Might be easier for you to just pull the battery out.
Do you have a bench grinder? If so I can give you another design for a tensioner bracket. I just use a piece of 3/8" plate cut/ground down to the right shape and a spacer for the lower bolt. It works well but yours should work good also.
Getting close Joe. Now you get to start working out the bugs! Don't worry though it will only take the next few years to get them all. Just kidding....... or am I?
[This message has been edited by Fieroseverywhere (edited 06-17-2010).]
I am hoping that mine will be OK with the water pump pulley tightened down.
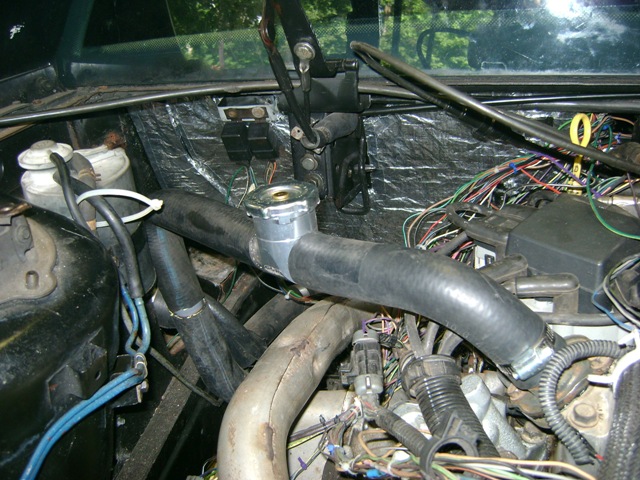
I went back out and put new rubber mounts on the chassis AC line where they mount to the frame behind the drivers seat. They are the same rubber mounts that are used on the AC condenser up front. I had two new ones I had left from my 86 Coupe build a while back.
I will connect the lines to the compressor tomorrow morning, and see if it will pull a vacuum.
New belt installed, $18.00 more in the pot. Pretty easy with this tensioner system we all have been using. Hardest part was the belt isn't shaped for the pulleys. It's shaped for storage in the cardboard surround package. Doesn't want to stay on the pulleys for routing. Started her up for 5 seconds. No strange noises.
Man-ya-na
[This message has been edited by josef644 (edited 06-17-2010).]
With the belt on the engine I was able to tighten down all three bolts on the water pump pulley this morning. Ran it for about 5 seconds.
I removed the radio and removed the black tape wrapping on the part of the harness behind the radio. Got some slack in it now and it will flatten out a bit. Afterwards the radio slid all the way into its cavity. Mounter the HVAC/Radio surround and the bezel face plate. Upper right hand corner cracked out. Shiest
My horns do not work. I used a jumper to short across the solenoid to check the horn circuit. The horn is just barely sounding. I tapped on them a bit , it improved their function a bit. I think they are just about deceased. I need to figure out why there is not current going to the horn button to close the solenoid. I know why the PO had air horns mounter behind the radiator now.
Took a look at my notes for the temperature gauge wiring. I still need to work that out before to long.
Decided to take a day off from any and all labor of any kind for the rest of the day.
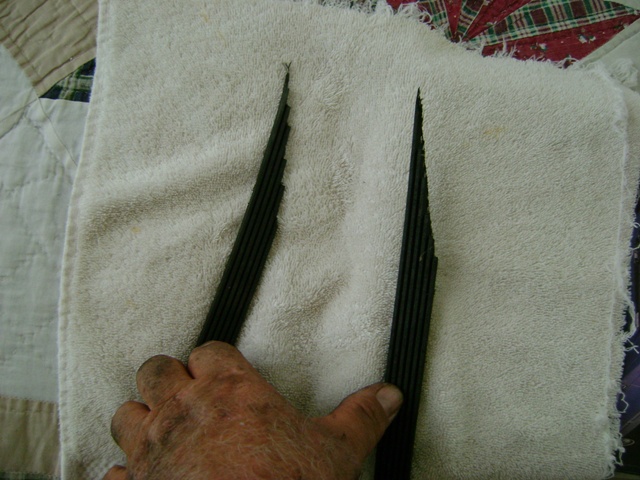
Tired of watching TV, went outside and cut some of my exhaust pipe with the hack saw. They are ready to be welded up now, maybe sometime Monday.
[This message has been edited by josef644 (edited 06-18-2010).]
have spent the morning attempting to rebuild two of my rear calipers. I have them back together, but I am sure that they will work as they are supposed to.
I don't see a need to send the sliders with the calipers either. They were not an issue to install. These were original slider boots , not The Fiero Store boots.
Joe
I just took another stab at these two calipers. I have been able to do it all correctly except for getting the parking brake screw bolt and it's seal back in the hole at the rear of the caliper. You will not know if it is in correctly until it is seated all the way in the back of the caliper. It is difficult to insert the piston past the piston seal.
[This message has been edited by josef644 (edited 06-21-2010).]
Went to Conroe, TX to have brunch with my daughter and my grandchildren today. It was great to see them. I have lost 27 lbs since they saw me last and were amazed.
When I got home I put the fasteners in the mouldings that go beside the inside door jams.
Remove the speedo pod and replaced the temperature gauge and the fuel gauge.
Performed the 'Temp Gauge Pegging Fix' on my car, then replaced the speedo pod. Tested all out before fastening it all back down tight. All appears to be well at this time.
Worked on getting the horn working correctly. I think the horn is shot and the white plastic turn signal canceling cam with the horn ring on the back side are both in need of cleaning or replacement. The horn ring needs cleaning and re greased. I need to locate a new horn.
Got the horn going this morning. I had to remove the mounting bolt clean the metal, then tighten it back down. I have horns.
I called Calipers on line and talked to them about the 25.00 R & R charge. That is plus the $75.0 each to rebuild your cores. He doesn't really want to rebuild my cores he told me. Just to build them from his parts bins. So forget that. I can use any parts house and get a guaranteed rebuilt regardless what my cores look like.
I just spent two more hours working on the two rear calipers again. I have figured out how to get the parking lever bolt and its seal back in the bore on the drivers side caliper. It is ready to be put back on the car. The passenger side is together but I am nor real sure about its working correctly or not. It just didn't fell right as the piston went in the bore. I removed the piston and placed it back in a second time. All appeared well, but who knows.
I ran the engine for about ten minuets this morning, and watched the temperature gauge. That appears to match the temperature reading on my AutoXray 5000. When it all got to 199* it just sorta stayed there for a while. I let it run there for about 4 minuets or so, just watching the gauges.
It has dropped the ALDL Code 52, or memory reset code, but I picked up a code 62, something to do with the cruise control. I don't have cruise control. Might have to get stickpony to delete this from my chip.
Something isn't right in the serpentine belt department. It appears that something is out of alignment. The belt looks like it has been sanded with sand paper on the flat side. I don't even have a clue on where to look to fix this.
Located one small leak. It is where the heater return line enters the return coolant pipe. It's clamp is tight, so I don't know what the deal is here. I will drain the system and remove the hose . I can then look for a dirty barb, or a crack in the weld there. I really hope it is just dirty there preventing a good seal. I will loose about 1 1/2 gallons of water by taking off that hose. I'll just have to use a couple of drain pans to catch the water.
I drained the water at the heater hose return here in the picture and when I went to pull the hose off of the nipple the coolant hose moved. Yep it was loose as a goose. I cleaned the return line nipple anyway and put it all back together. Tightened all clamps back down good.
I'll add water and check it out tomorrow.
Heat index is 108* here
[This message has been edited by josef644 (edited 06-21-2010).]
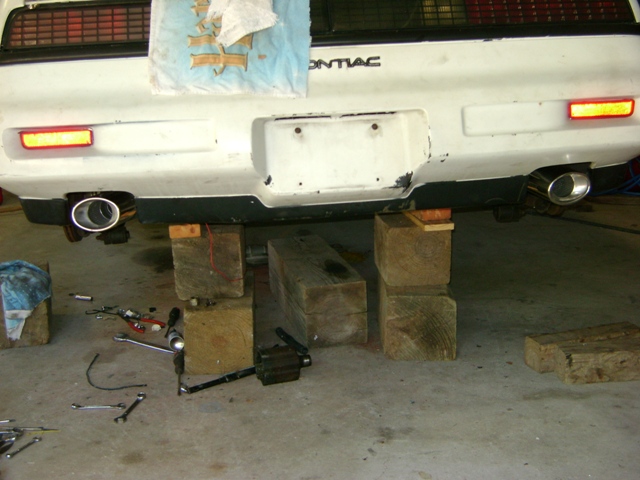
My welder friend came over this morning and we tacked the tips to the pipes. I dropped the exhaust from the car so we could weld everything up good. After a good cool down period I put it all back on the car. I like it, sounds pretty good too.
I ordered a 84-87 rear caliper rebuild kit form O'Rileys Auto Parts yesterday. I went to town to get it this morning before playing with the exhaust. $ 9.00 more in the pot. I looked at a 10 " chrome air breather while I was there. About $25.00, maybe soon !
I took the passenger side caliper apart and replaced the one seal I was unhappy with. It went together right the first time and was seated and sealed perfect. I put the rest of the parts on it. I now have two fresh rebuilt 88 rear calipers ready to go back on the car. Tom Slick donated me two 88 slider boots last week, and was kind enough to send me one more so I can get this car back on the ground.
[This message has been edited by josef644 (edited 06-22-2010).]
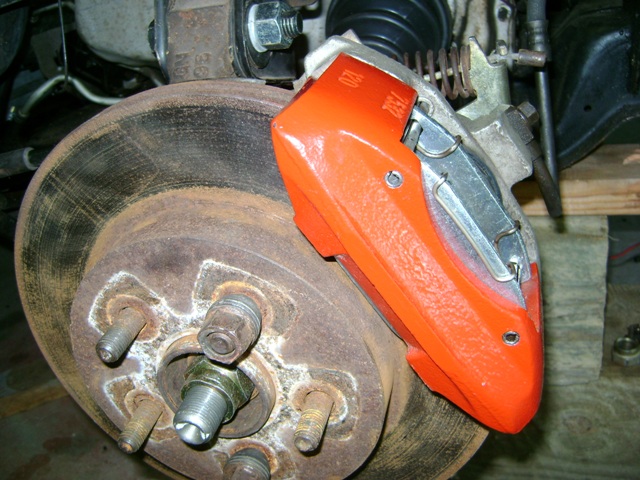
I got one caliper on the ride today. Opted for a set of new pads for the rears. Ordered them from my local NAPA, will be here in the AM. I had painted my bridges a few days ago, and had them out in the hot sunshine 'baking' since. On the drivers side rear:
I filled it back up today with coolant, and was surprised to find the leak was still there. I will drain again in the am, I am gonna get a new piece of hose and put some yellow 3M on the end before I clamp it down. some um gotta give here.
Found my vacuum modulator hose unplugged. It was to hot there to reconnect it back up. I had been running it for 15 minuets or so.
Ordered a set of RayBestos pads for the front today. They were on sale for $14.86 at RockAuto.com I also used the discount code offered here somewhere. Ordered a set of caliper rebuild kits for the fronts also. Might as well put kits in those while I am at it. The fronts will be a joke compared to doing the rears. I will have to lube the sliders anyway. Might as well put a new seal and piston boot on at the same time.
[This message has been edited by josef644 (edited 06-23-2010).]
Looking good Joe. The tips look great - we need a sound clip!
Pat
I will put one up tomorrow after I finish playing with the rear brakes and trying to stop that danged leak:
I am gonna try to use a mirror morning to see where exactly the leak is at before I drain it out again. I am not sure if it is the coolant hose leaking, or the heater return hose or the nipple weld has let loose.
I have e mailed the injector bunch inquiring about a set of Bosche type III's for my engine. I want to get those coming pretty soon, My idle has smoothed out quite a bit after I have about 30 minuets on the engine now.
Pat what hose did you use for the passenger side to the water pump? Was yours an 88 V6 car or 88 4 clyl car? I have not been able to find a listing for a new 88 4 cyl coolant pipe to water pump hose.
Just went out with a small mirror and a flash light. It looks to me to be leaking from the heater return hose. I am gonna put a new on tomorrow.
[This message has been edited by josef644 (edited 06-23-2010).]
I tried to put new pads in the drivers side caliper this morning. They are about 1/16" to thick. I can get the old outboard pad to go in. It is almost as thick as the new one. There is about 1/16" difference, enough for the old one to work. I loosened up the caliper bridge bolts a bit, inserted the new outboard pads, then tightened them back down. That wheel was then locked up. No turnie turnie turn at all !! Took out the new outer, inserted the old outer pad tightened it back down and all is well again in the land of Oz. Removed Caliper and tried to get the piston to go in a bit more. Ain't happening. Just gave up !
I had been wanting to attach the AC lines from the chassis to the AC compressor so there is no contamination the lines. The fuel fill hoses have been modified and were right on top of the connector there. I loosened the filler hoses and put the AC hoses on the connector. And of course there was a fight to get the fuel hoses back on the fuel filler pipe ends. Nothing has been smooth and easy today
Installed the new vacuum modulator hose I picked up this morning. While putting that on the car I found a transmission cooler line leak. Very small, but there and needing attention.
I stopped and closed up the shop. You know I have good AC in the house !!
I'll post a video this afternoon so you can heat the exhaust tone. I want to start it up so I can look for the heater hose leak while the coolant is under pressure and hot. Maybe I can discover that evil Gremlin living in my Coupe.
I purchased a set of the Bosch III's for my 4.9 They were listed as replacements for the Caddie 4.5 and 4.9's. $80.00 delivered. Here is the application guide from their listing:
Were those the rear calipers you had the pad problem on? Just wanted to be sure you knew the pistons twist in. Unlike the front they can't be compressed back in. Its an ebrake thing.
Were those the rear calipers you had the pad problem on? Just wanted to be sure you knew the pistons twist in. Unlike the front they can't be compressed back in. Its an ebrake thing.
Yep I know. They are turned all the way in. I have checked it.
Here is the video and audio clip The engine doesn't start until about 10 seconds in the clip:
I'll do another one after I switch out the injectors next week.
I went back out and looked at the caliper one more time. I removed the parking brake lever from it. I used a wrench to turn the actuator bolt in the retraction direction. After a few turns I bumped the caliper with my hand, then used a screw driver that fit between the piston and the new brake pad, inboard. She moved about 1/16" The new outboard pad dropped right in. Go figure !!! Going back out now to re attach the parking brake lever.
All's well on the drivers side caliper now. I took a good look at the other side caliper. It was out just a bit also. I took it back apart, and re assembled it. This time I made sure the piston was bottomed down all the way and the holes in the piston face were in the correct position for matching up with the inboard brake pad. I am getting pretty good at these 88 rears now. I ain't scared of em no more.
[This message has been edited by josef644 (edited 06-24-2010).]
I used the stock passenger side hose and it was a 4cylinder car. I'll see if there are some numbers on it.
Pat
Edit to add - sounds good!
1988? The Fiero Store doesn't even have a listing for an 88 4 cyl passenger side to water pump hose. I don't really want to use a flex hose.
I took a mirror and used it to try to find the leak this afternoon. I think it is the weld ,heater return nipple to coolant pipe. I am gonna move the hose back a bit and re tighten. I'll be able to see a little better. Then get it up to 170* or so again and take a good look again. My temperature gauge pretty well agrees with my code scanner on the coolant temperature. First mark from the left is 190*. About the same place as on my 86 Coupe.
I am gonna finish the rear brakes first, then do the parking brake cables before starting on the leak again. I would like to remeove the front wheels and prepare to start on the front brakes if it doesn't get to hot to quick.
Rained here till 1:30pm today. It will be sticky fast tomorrow.
Joe
[This message has been edited by josef644 (edited 06-24-2010).]
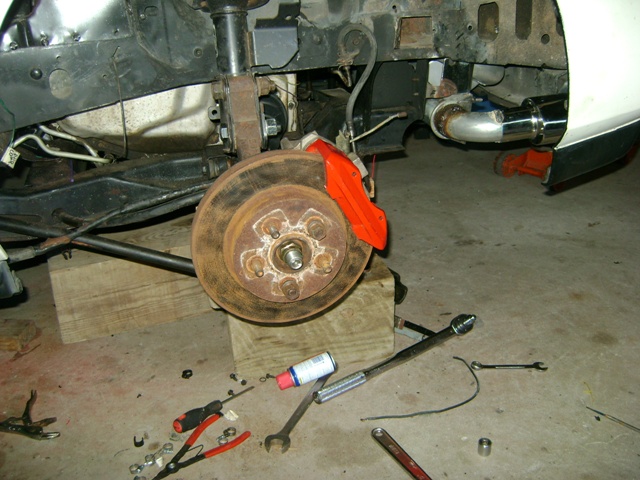
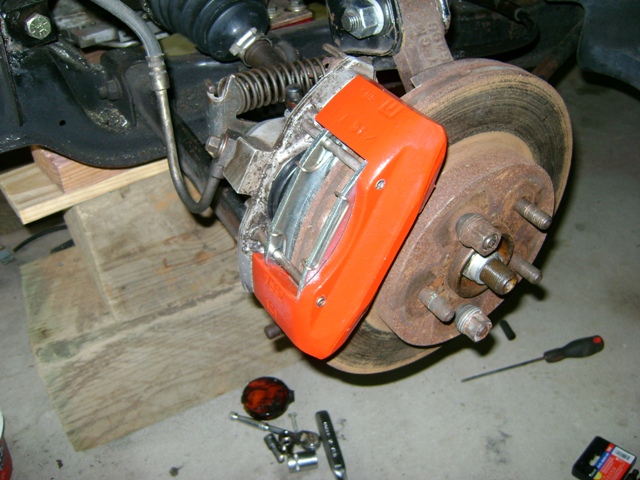
Both rear calipers and pads on and torqued down to specs. I have found that my parking brake cables are wasted so I just have the ends in its holes to keep the springs in place. I'll have to order all three new .$80.00 more shot to hell.
One side:
and the other side:
The rotors look better than they appear. The camera flash paints it, and lites it up for capture. I used a air sander to remove the surface rust on both sides before mounting them on the hubs.
Going out to drain my return coolant line and get a good look for the leak before lunch time.
More later
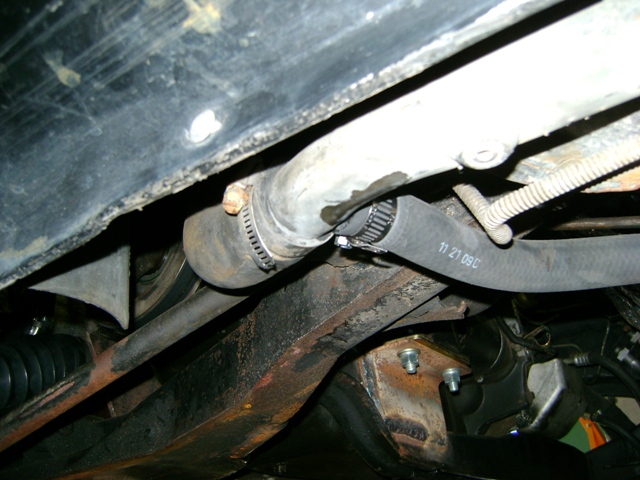
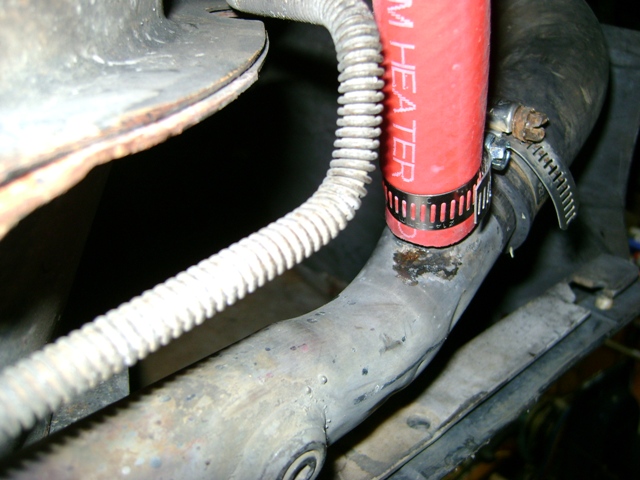
Drained, cleaned up , then installed a new hose. I tightened the hose with it away from the weld so I could see better. Refilled, and started it up to build pressure. Found the leaks. There are two. One from 12 to 3, and the second from 6 to 9 facing the pipe as it is mounted on the car. I can only get a picture of the one leak as the second one is on top and not accessible with the camera.
and
[This message has been edited by josef644 (edited 06-25-2010).]
Is your VSS signal getting to the PCM? Your RPM's seem to be dropping really fast. Thats usually the problem. Could also be the ISC disconneced or TPS slightly out of adjustment. Anyway.. That exhaust sounds great!! Well done Joe!
Is your VSS signal getting to the PCM? Your RPM's seem to be dropping really fast. That's usually the problem. Could also be the ISC disconnected or TPS slightly out of adjustment. Anyway.. That exhaust sounds great!! Well done Joe!
Yep it's hooked up. The car hasn't move at all so I don't think there is a VSS signal ? You know now that you mention it I haven't noticed the IAC motor making it's noises before and after killing the ignition. I'll take a look at those items. I don't have but the one code for the cruise control stored.
I was watching the throttle plates move up and down, so I know the IAC is moving things.
I just ordered a new Raybestos passenger side parking brake cable from RockAuto, $13.26 + shipping. This will get it going for now. I'll replace the other two later. The right side was wasted, the other two were just ruff condition.
How hard is it to remove the drivers side pipe for a re-weld ?
[This message has been edited by josef644 (edited 06-25-2010).]
Yep it's hooked up. The car hasn't move at all so I don't think there is a VSS signal ? You know now that you mention it I haven't noticed the IAC motor making it's noises before and after killing the ignition. I'll take a look at those items. I don't have but the one code for the cruise control stored.
Thats probably it. Since the car is not moving there is no reason the ISC would set your coast idle. So I'm just hearing the RPM's dropping to idle speed. Since mine is a manual its set higher then yours. Just sounded odd to me.
The movement you see when the ignition is turned off is the PCM performing the "TPS learn". Its perfectly normal and wanted. As long as the TPS and ISC are adjusted properly.... It compensates for carbon buildup on the throttle body butterflies by substituting a new closed throttle TPS value in the PCM programming. It should do that almost everytime the engine is shut off. In short, it keeps the engine idling at the correct RPM even if you never clean your throttle body. Most cadillac owners don't.
Closer by the day Joe!
[This message has been edited by Fieroseverywhere (edited 06-25-2010).]


 Replacing the oil pump was easy. Getting to it was rediculous!


 Just kidding....... or am I?