WOW hey. I finally own a page ------------------ Robb. ----------------------------------------------------------------------------- It's A Pontiac thing What else Can I say?????? 1985 Fiero GT 1998 Sunfire Turbocharged 1996 Grand Prix
[This message has been edited by Rck152 (edited 05-18-2010).]
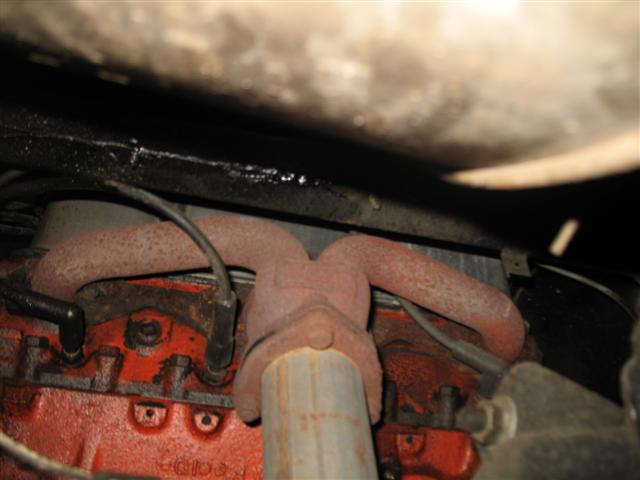
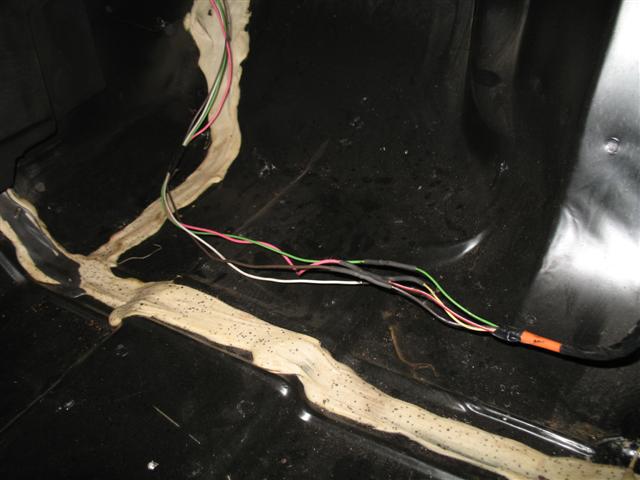
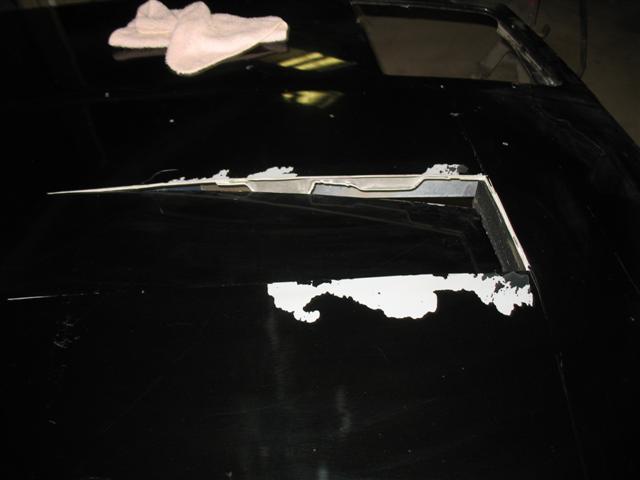
Well today I did some odds and ends.. I was waiting for an answer on my lambo door hinge issue ... but I did manage to get some work done on the Widow. I sanded the areas of the old wingstands so I could touch up a little. The TLG 8 inch raked wing stands are thinner so when I took off the OEM stands decklid paint came with them. I also found some plugs to solder on the wires of 3rd brake light LEDs so It could be removed completely and easily. I passed all the wiring of this brake light beside the trunk release seloid wires. All is now hidden and working .. but forgot to take pics of this. I did a visual inspection of my exhaust ... well wasn't a surprise the PO did a sloppy job with this. MORE WORK FOR ME I GUESS !!! take a look ...
I will be redoing this and installing true dual exhaust using cherry bombs ... but I really dont know where to pass the rear header pipe ... will have to take a closer look tomorrow...
Today I soldered wiring and cleaned up the engine compartment. I removed the old RED plastic wire looms and replaced with black ones .. looks alot cleaner. I re-installed the rear wing and checked all the wiring and done a brake test to see if all LEDS and bulbs lite up. I did not get around to the drivers side lambo door hinge to do some adjusting like Jesse said. I will do this tomorrow. Here are todays pics ...
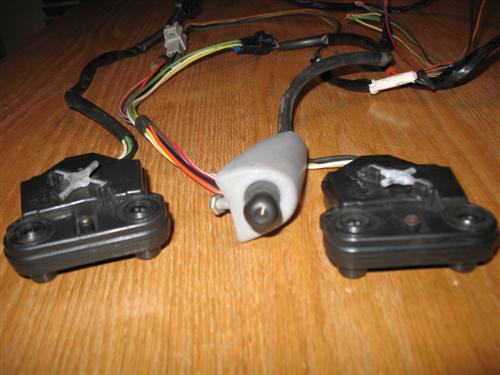
The beautiful weather is coming back yeeaah!! Today I re-assembled my electric mirrors with the motors from an 98 Grand Prix and installed the passenger side one. When I went to the pick and pull last week I found a Gentex-120 auto-dim and compass mirror on a 4.9 cadillac ... took it out and tried it on the Black Widow.... thats an excellent swap that cost me $10.... I remove the GP mirror controller and inserted it into a OEM Fiero manual mirror flange that I bought from Newbfiero, thanks by the way . The driver door mirror flange houses the GP controller just great and looks stock... So here are todays pics of the progress.
The Gentex GNTX-120 ... will wire it in soon (tested works great)
Passenger mirror
Passenger mirror with door up
The GP mirrors guts and controller ... I removed it from the plastic flange and inserted it into the fiero OEM manual mirror flange.. fits just great
GP Controller with the plastic flange removed
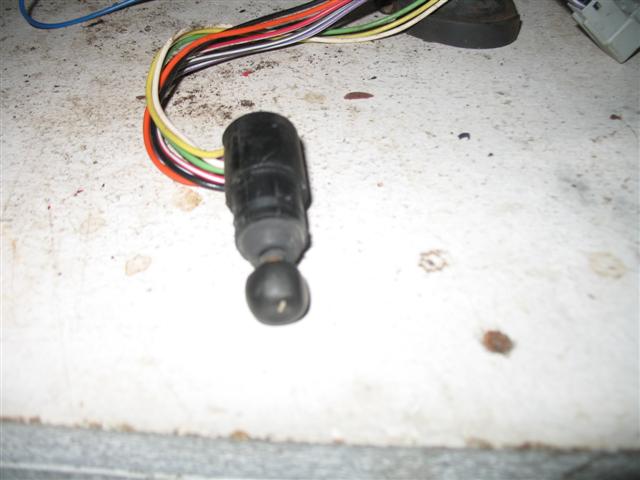
GP Controller inserted into the Fiero OEM flange (Side view)
GP Controller inserted into the Fiero OEM flange (Front view)
[This message has been edited by Danyel (edited 05-22-2010).]
Hummmm gettting closer to putting the Widow back on her feet ... Next week will be the front facia modification and cutting the hood to make an EXTRACTOR. Well today got the rear LED markers installed and transfered from my parts car the passenger wheel well. I had to replace all the female T-10 sockets because they were too corroded. So did some soldering and attached the NEW LED rear markers Looks pretty sharp ... I also included a video rear walk around here are todays pics
Walk around with rear markers on.
[This message has been edited by Danyel (edited 05-22-2010).]
Didn't get a chance to work on the Widow in last three days... me and wifey spent some quality time on the beach, its very rare to have hot sunny days around here!! Anyways, today had to install a MAC SERVER "Snow Leopard" we are going FULL MAC at work woo heee!!! Got my front markers done ....also all four LED markers are ready to ship out to you RULOOKIN. I'm presently soldering the GM mirror wiring for my passenger side mirror ... gonna have to wait a little for the digicam rear view mirrors .... Here is today's pics.
[This message has been edited by Danyel (edited 05-26-2010).]
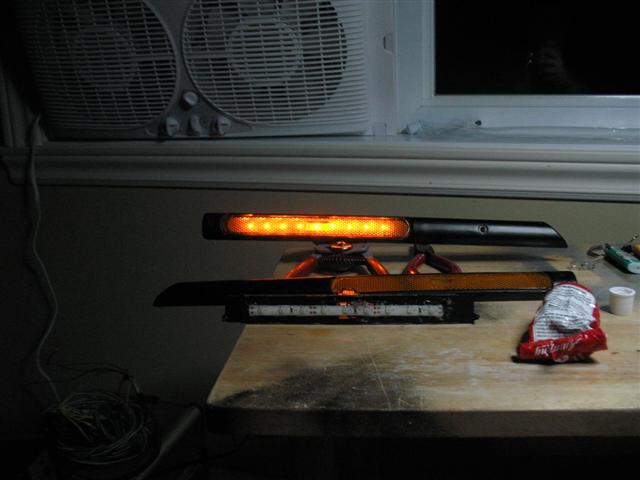
Spent the whole day on the Widow. I completed the passenger side including LED markers. Been struggling with the driver side lambo door hinge and still isn't completed. I took off the door 3 times to do some adjusting of the hinge support plate. Had to lengthen the hole of the rivet bolt so it could move out more towards the front. I also added two washers in the top of the door supports so that the door would straighten out... It worked great... I just got to slide the whole thing towards the front. I still have alot of adjusting to do but will continue tomorrow. Here are todays pics including shots of the LED markers lit up.....
This is the rivet bolt bottom slot lengthened
Added 2 washers to the top support bolts
The gap is almost perfect now
Just need to slide the whole thing forward 1/2 inch
This also needs to be corrected ..... door sticking out 3/4 inch
Rear L/H LED Marker
Rear R/H LED Marker
Passenger side LED markers front and back.
R/H front LED Marker
L/H front LED Marker
[This message has been edited by Danyel (edited 05-26-2010).]
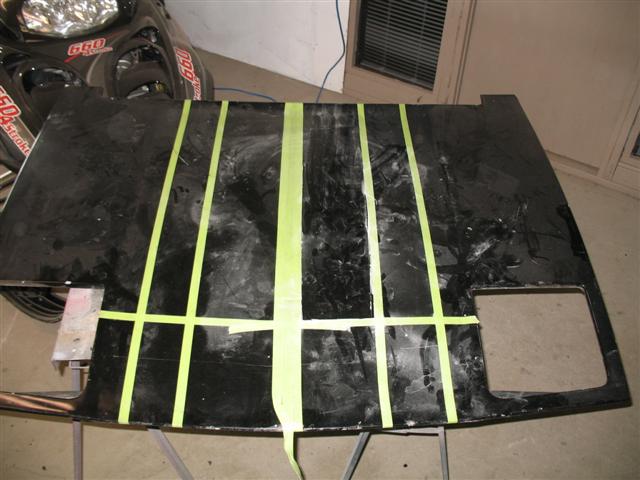
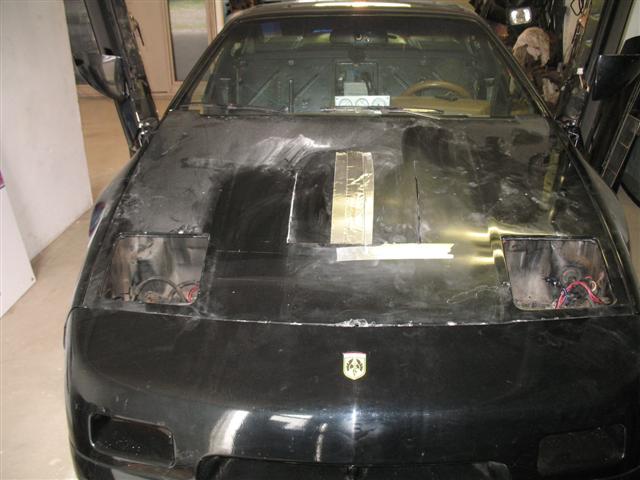
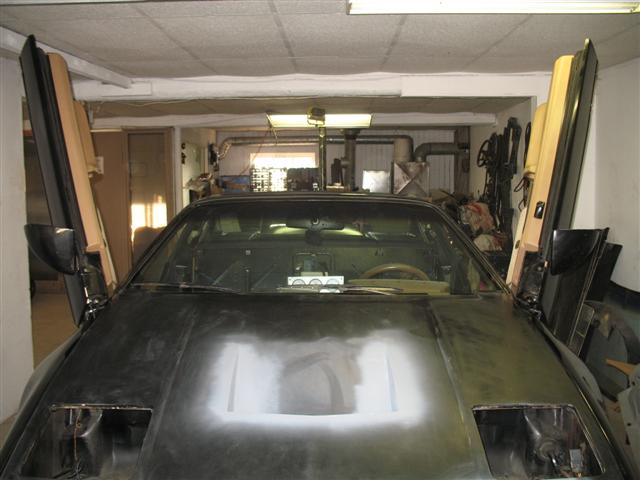
Finally got some work done on the Widow... I'm really really behind... my work has me away alot!! Today I got the mirror harness done and soldered. I also spent some time on the test hood to see how hard it will be to do... turns out to be easier than I thought ... here are todays pics
Mirror harness soldered and ready... taken from an Grand Am
Test hood from parts car all taped up
Cuts were done with a dremel and cut off wheel
View from the compartement
Side view
Bottom view
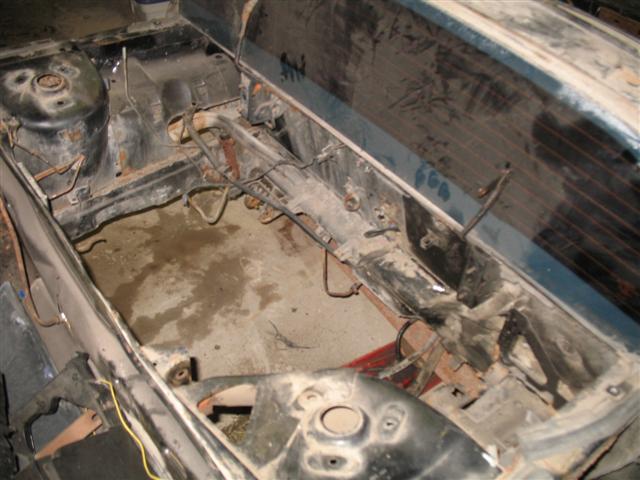
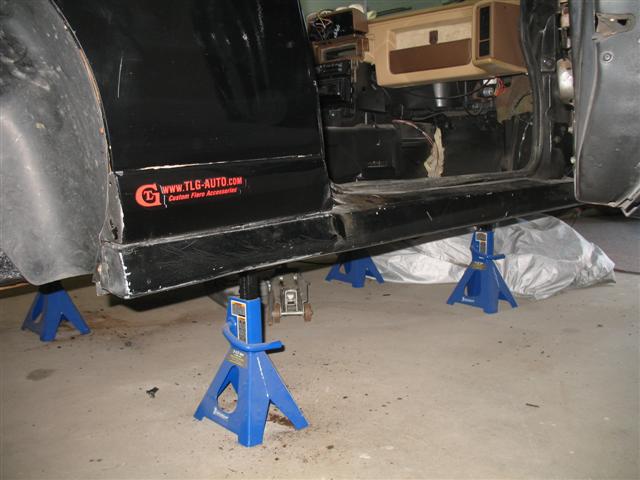
Still have lots to do but must take the car to the welders for the floor pan ...
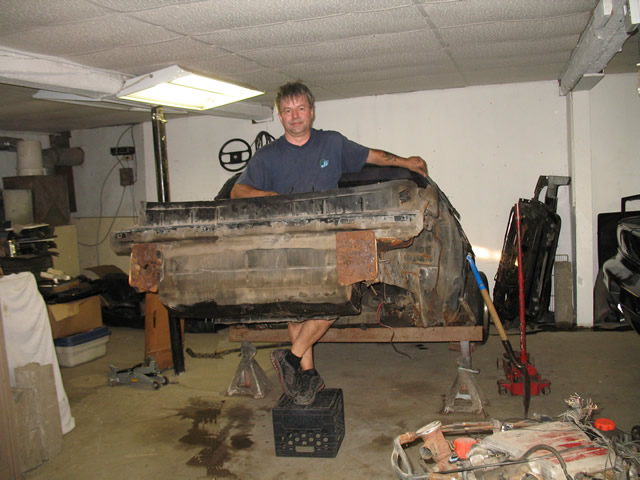
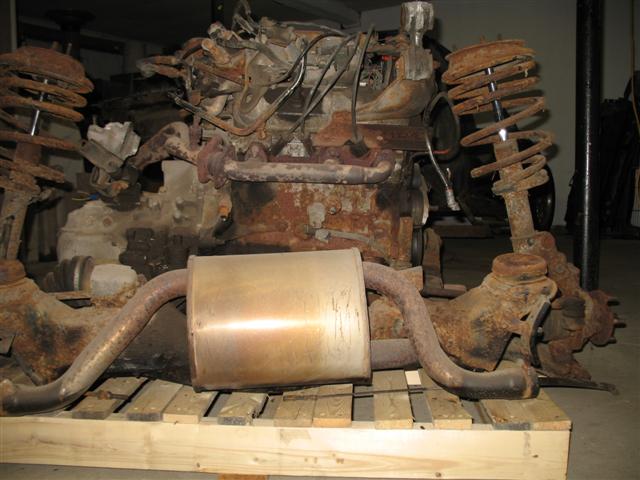
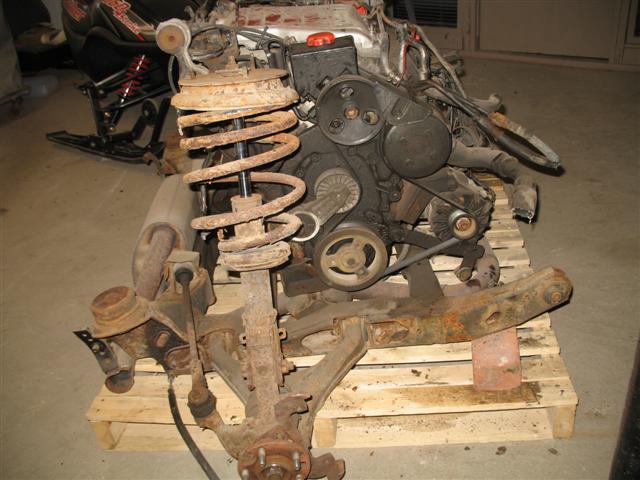
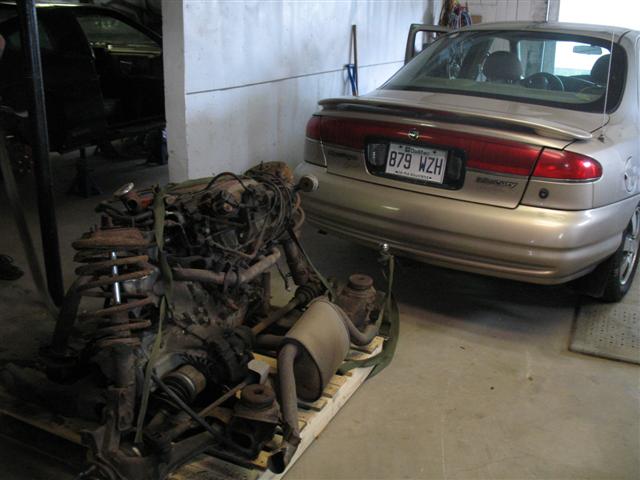
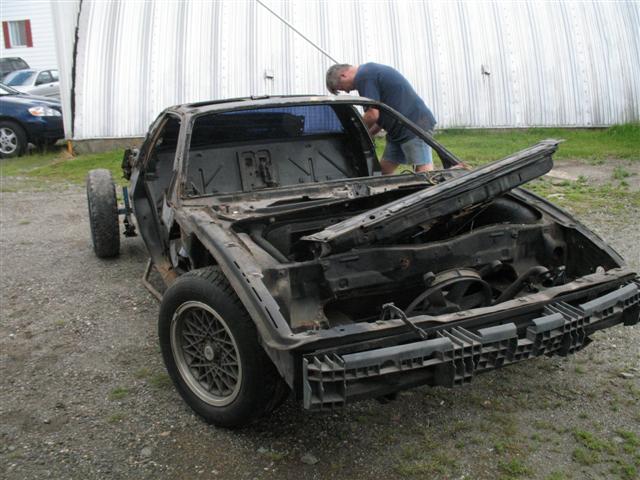
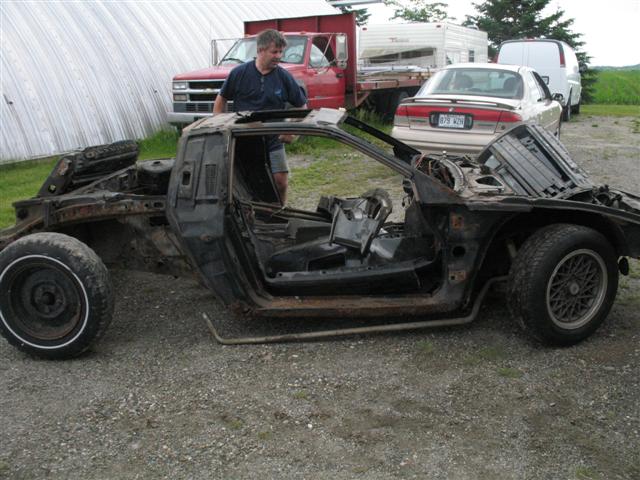
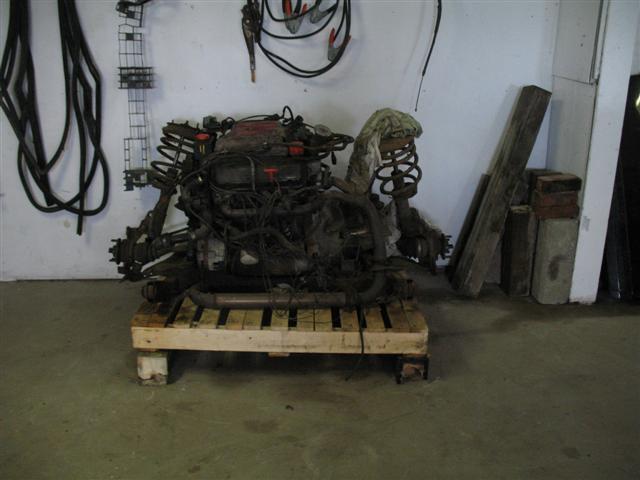
Finally got some work done on the parts car removed the 3.1L Beretta engine and took the "stand in the engine bay" picture for prosperity...
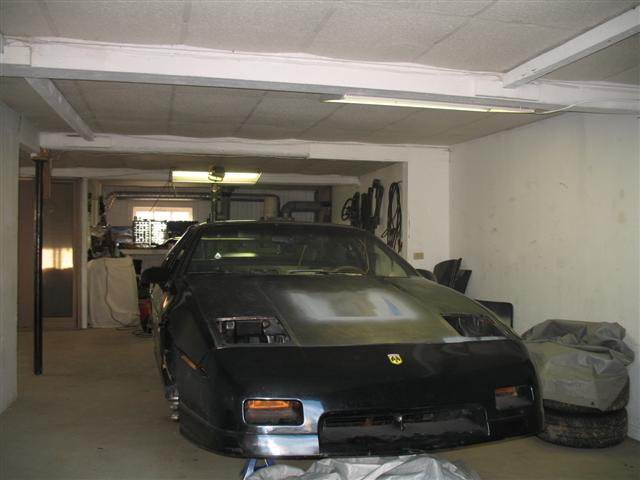
Was a hot evening tonight and at 5 foot 8 I had to use a plastic milk carton carry case to stand on after removing the engine from the rear !!! The Black Widow started right up after being 8 months on the floor stands. Boy its nice to hear that V8 purr like a feline !!! Many parts ordered and 2 new autometer C2 gauges on the way....also bought a low profile air cleaner bowl and filter. Just needing some rockers panels ...and install the coil-overs... sunday I will start cutting into the Widows hood for extractors... I finally decide to go with dual slots ... here are some pics of tonight's work accomplished .... if you see anything anyone needs let me know... the engine will be parted out...
[This message has been edited by Danyel (edited 06-18-2010).]
------------------ Robb. ----------------------------------------------------------------------------- It's A Pontiac thing What else Can I say?????? 1985 Fiero GT 1998 Sunfire Turbocharged 1996 Grand Prix now1987 fiero cp
Those markers are dead sexy, love the entire build your car is similar in the direction I am taking with my Black Fastback 4.9 V8 5spd. Its currently a fastback and I am really, really thinking about making it a Notchback. I had an 85GT that I loved, but had frame problems moved the entire drive train into an 87GT using as much of my 85 parts as I could, interior, suspension, wheels, tires, even the 85 Steering coulomb got moved and all the locks and door skins were moved over to make it easier to keep all the 85 car keys. I thought building a fastback would be cool, but frankly I much prefer the look of the Notchback.
------------------ 85GT Soon to be 87GT,93 Eldorado 4.9, 5spd Dual O2 Custom Chip, Custom Exhaust. MSD Everything Capt Fiero --- My Over View Cadero Pics Yellow 88GT 5spd Full Poly Suspension, Lowered 1/2" in front, Corner Carver.
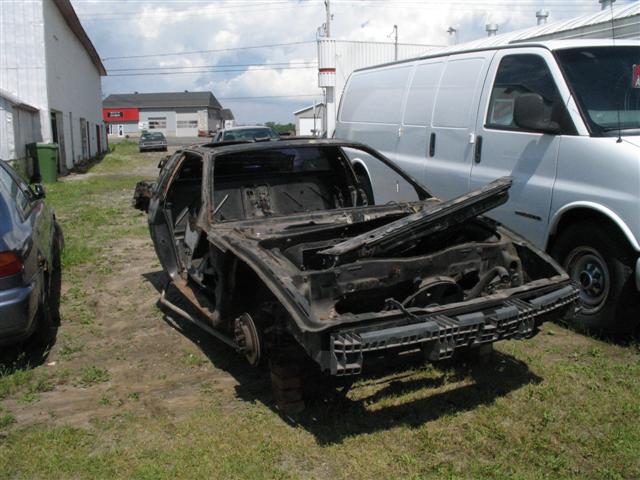
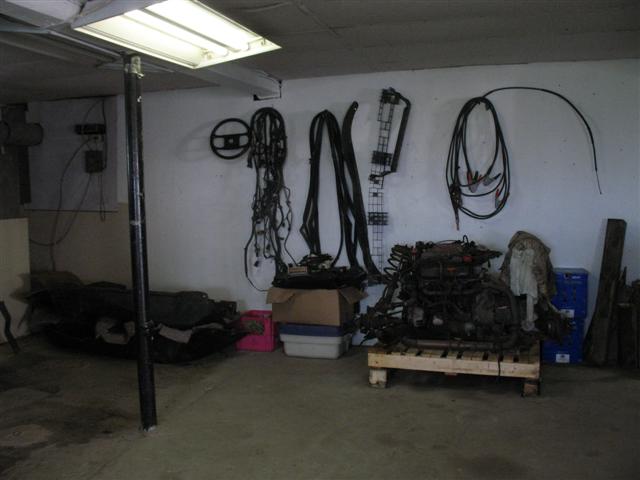
On this fathers day it was time for a thorough cleaning of the shop. The parts car has been disassembled of all the items I wanted then taken outside for the recycler to pick up... $150 worth of rotting metal
Here I am moving the 3.1L engine to the side to make room to exit the parts car.
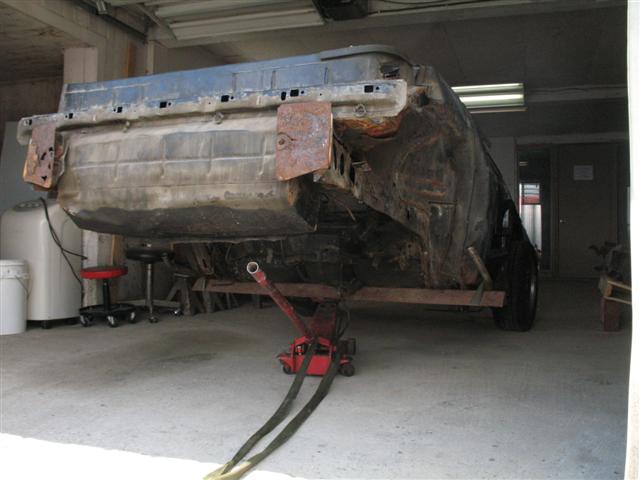
The parts car ready to be dropped on a temporary axel which is from my scaffolding.
Looks pretty funny but in an odd way sharp
The final resting place before the recycler carries it away
Shop is all cleaned up ready to do the Extractor hood
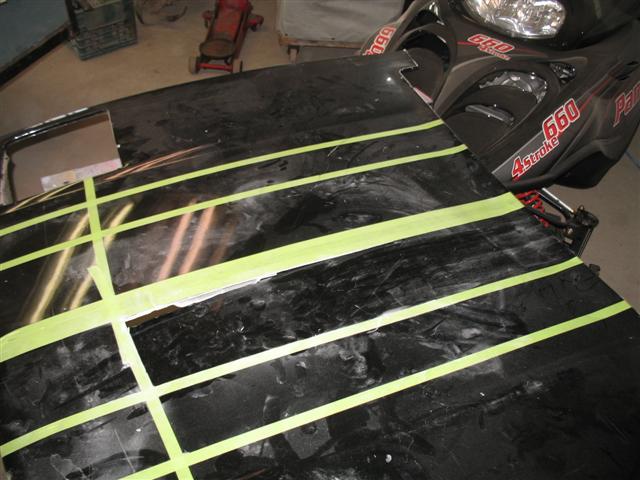
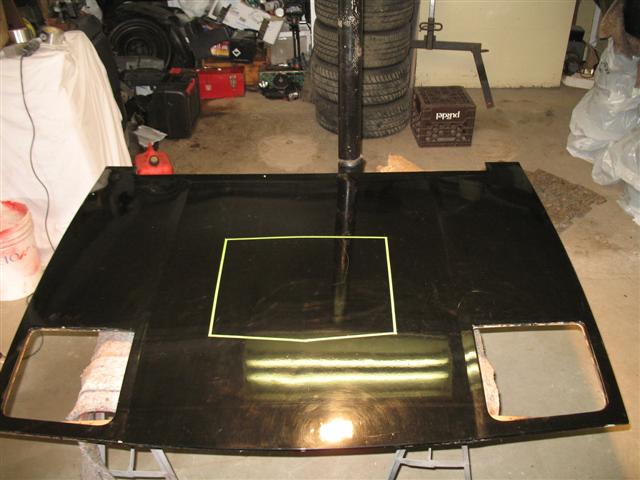
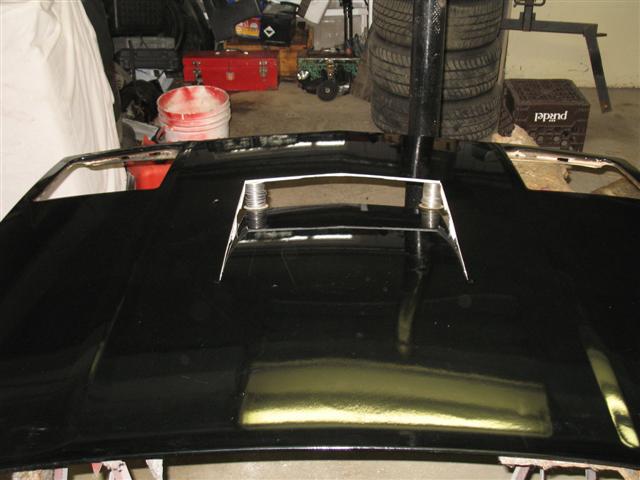
Started the extractor hood today .... It really helped that I practiced on the parts car hood..... did a couple of cuts and installed it on the Widow ... once I got it right I took the measurements and outlined it on the Widow's hood. Measured 50 time again ... and then cut into it with a dremel and a cutting disk .... here are todays picks.
Parts car hood cut for trial fitting...I have a 3 core radiator so I must checked the clearence and fit.
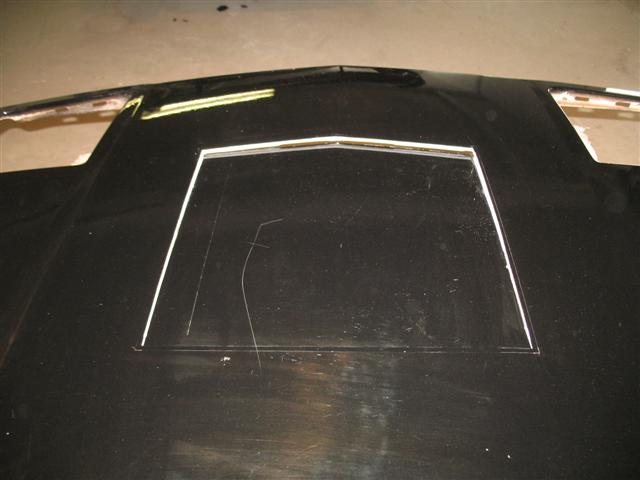
Here is the Widow's hood all taped and ready to cut along the inside lines ... ooooufff hope Its straight ....
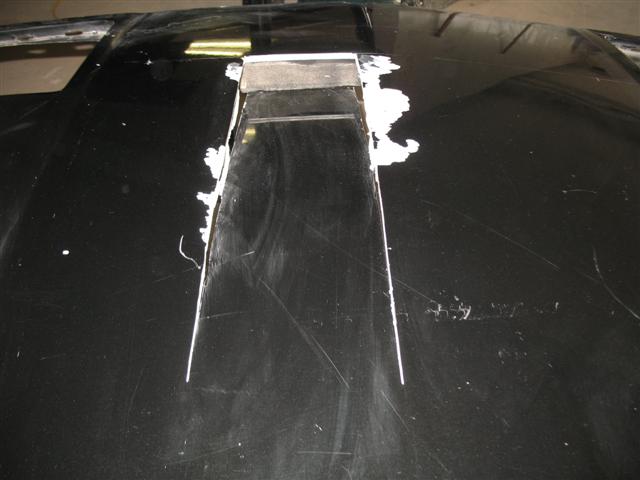
Tape removed looking towards the front .... I think I got it right measure 50 times cut once !!!
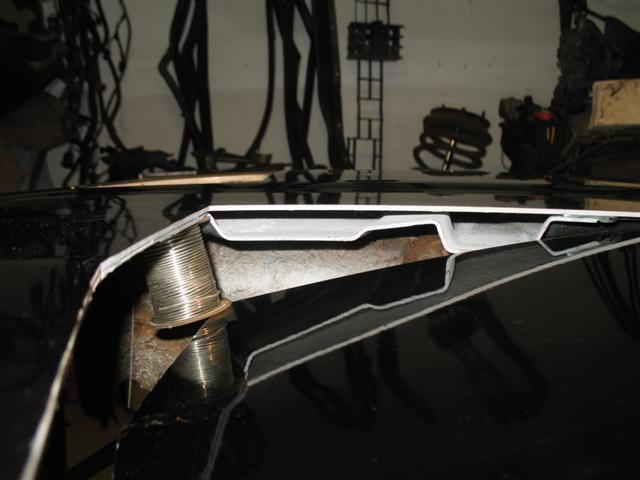
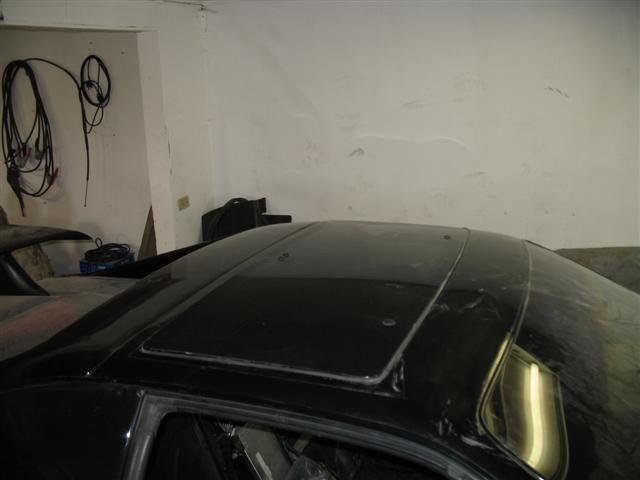
Side view This is with the opening at 2 inches ... Something tells me I'm going to have issues with my moonroof window storage area grrrr
I would think that you would have more issues with the two roles of mechanics twine stuck in the opening. Won't they restrict airflow? Or maybe, the vorticies created by the dual roles, will help to escape a greater amount of air? (Back to my bridge I go. )
Actually, nice vid of the start up. Shop is looking pretty spiffy also. The Black Widow lives!
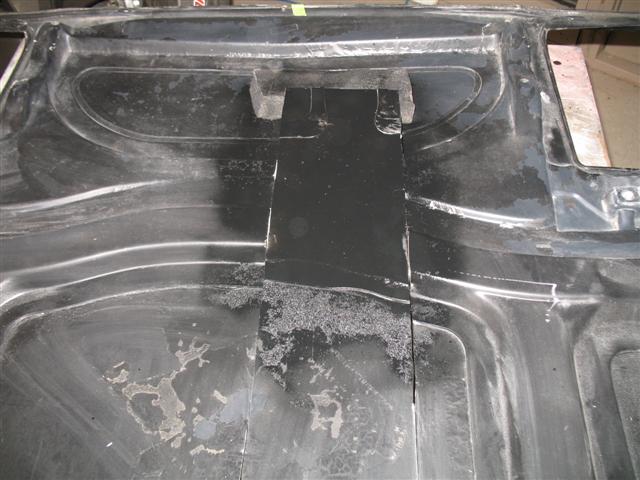
Thanks Tony .... but I'm not to good with aerodynamic physics I'll see if I can finish it without the rolls of wire.... Well Best Buy was closed so I couldn't get the SMC Evercoat resin so I decide to change the moonroof rails and weather strip .... When I remove the old one from the Widow they were almost non existant (Fine Rust Powder) The pics below show how bad the old rails were .... the last pic is the front frame area I had to remove so that the extractor hood will close properly .... gonna have to figure a way to make a good seal .... here are todays pics ....
Removal of the moonroof rails and weather stripping...
Rails have turned to dust and little chunks...
All cleaned out gonna have to do some body work and reseal the new rails ... will have to wait till monday to order from the fiero store the needed parts (gasket and screws.
Removed some metal so that the extractor will close .... ganna have to find a way to seal that area.....
Those markers are dead sexy, love the entire build your car is similar in the direction I am taking with my Black Fastback 4.9 V8 5spd. Its currently a fastback and I am really, really thinking about making it a Notchback. I had an 85GT that I loved, but had frame problems moved the entire drive train into an 87GT using as much of my 85 parts as I could, interior, suspension, wheels, tires, even the 85 Steering coulomb got moved and all the locks and door skins were moved over to make it easier to keep all the 85 car keys. I thought building a fastback would be cool, but frankly I much prefer the look of the Notchback.
You should take a look at my work. I have a build thread but it is in french so I believe you will preffer to have a look at the pictures.
Not much done today... got the moonroof rail slot ready.... sanded and painted.... gonna order the bolts for the rails and the roof gasket from TFS monday.... also trimmed the extractor hood area down a bit and painted .... Here are todays pics ... more tomorrow
Well I've been working 11 straight days and now I finally get a week end off .... I went directly to the garage to get some more work done on the Widow. I also received these this week so I can get the extractor hood completed but still no sign of my Autometer gauges grrr.... Let me tell ya the stuff is great !! all I did was to put a strip of aluminium tape like the pic below and laid the SMC filler on the under side stuff dried in 20 minutes I removed the tape and laid the filler on the other side... Aluminium tape as a former ... works great Ater 2 hours of sanding I finally called it quit for the night ....tomorrow will do more sanding and glasing and more sanding .... here are some pics before I left ... well I will work on her all week end and post .....
[This message has been edited by Danyel (edited 07-09-2010).]
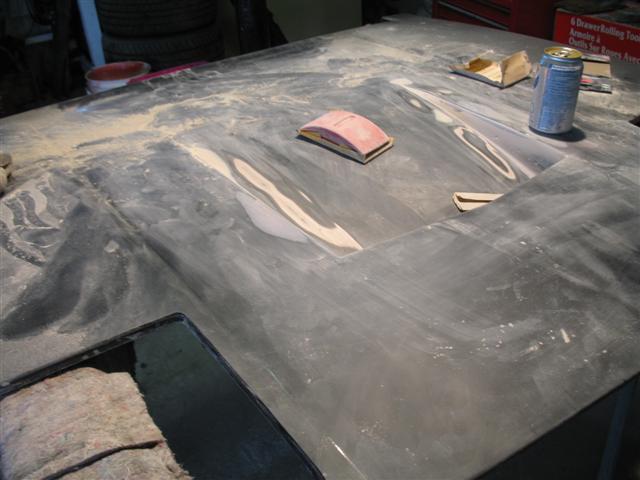
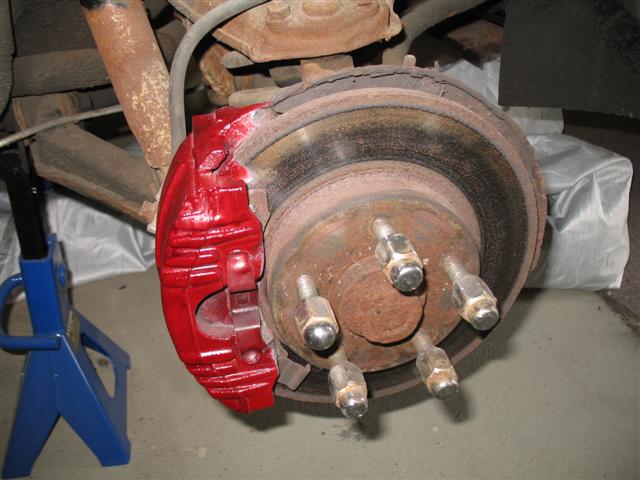
Spent the whole day sanding and sanding and sanding..... got the bottom of the extractor done and the top needs just glazing .. will do that tomorrow. Also installed the new moonroof weatherstrip that I got from TFS. I touched up the brake shoes (red). I will be completing the extractor tomorrow so I can prime and paint the whole thing. Here are todays pics.
Lots of sanding.....
Almost done .. put some sanding primer...
Weatherstrip is in but the glass doesn't fit in it properly ... more adjusting to do ...
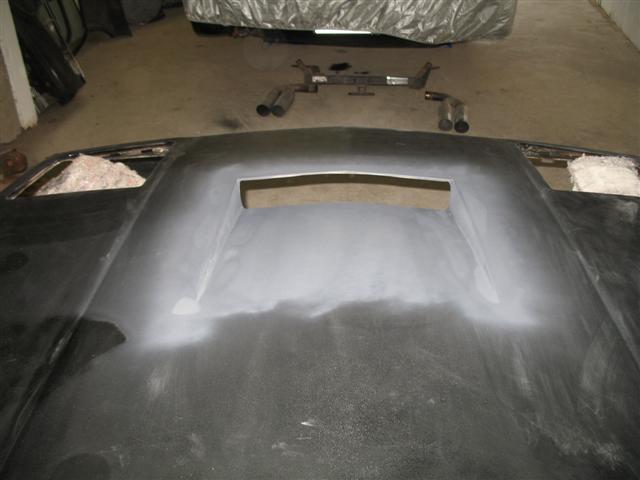
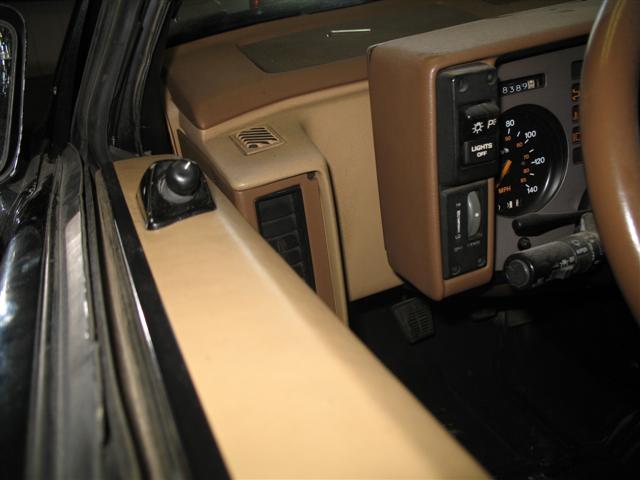
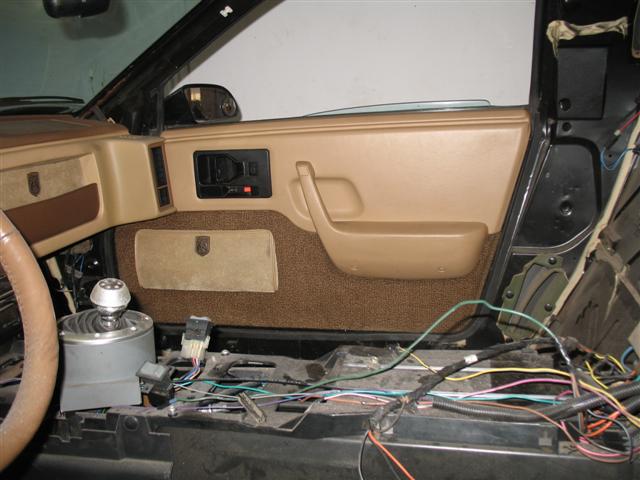
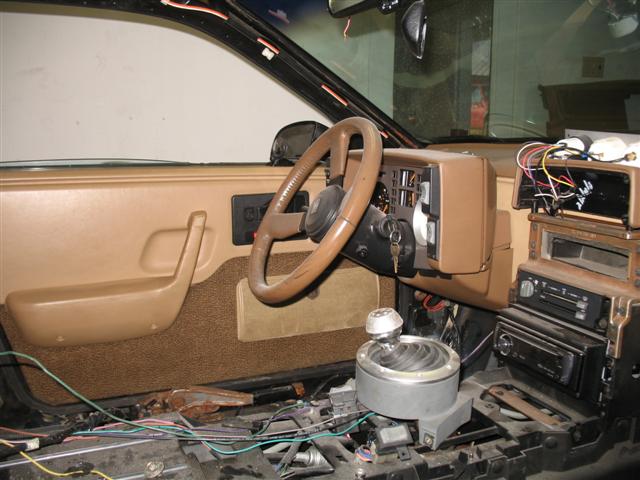
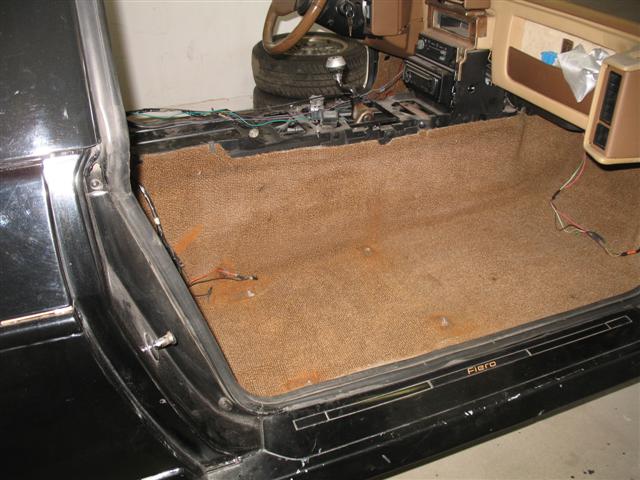
Lots of work done today... I finished sanding both side of the extractor hood. Sanded and patched the holes in the floors with the filler, installed the rocker panels, installed the door interiors, Plugged and validated the power mirrors they work just great I got the motors and switch from a 1999 Grand Am. This will leave me more room on my center console for my Audi TT shifter ring and boot. Here are todays pics ....
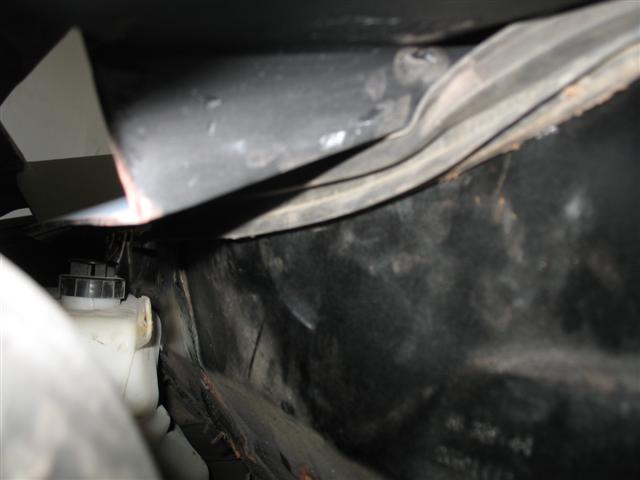
Pic taken from inside the driver side head light opening looking towards the radiator. You can see the weatherstrip makes a good seal against the extractor opening.
The power mirrors control switch is located in the Fiero OEM manual mirror location.. looks discrete and will make more room in the center console for my Audi TT shifter ring and boot.
Passenger door interior installed
Driver side door interiors installed
Rockers installed ... they will need prep and paint but that will be next year (FULL PAINT JOB)
Extractor positioned and ready to be painted
Doors up... looks perty sharp with the door interiors installed
Falcon_ca ......been working my a$$ off on her alot ....got the coli-overs, the interior and chin spoiler to install.... paint the hood, put the 2 new gauges in and my TT shifter ring. and also get my flowmaster muffler on............ then I should be taking her out !!!! man can wait to feel and hear that V8 !!!! We should go out for a ride together my friend .... take care ... is that V8 of yours ready to install ... let me know when I'll come down and give you a hand !!!
Synthesis ...Yes I will be there ... the car is almost completed for this year ....couple of odds and ends still to do... work will continue in the winter of 2010 - 2011... will be departing from here tuesday before the week end of the show.... can't wait to meet up with you all !!!!
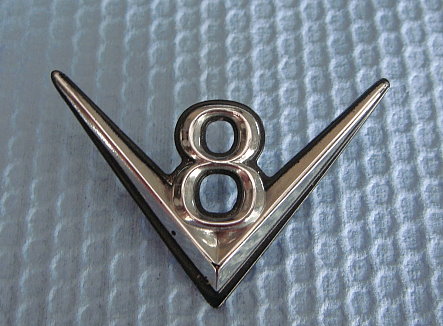
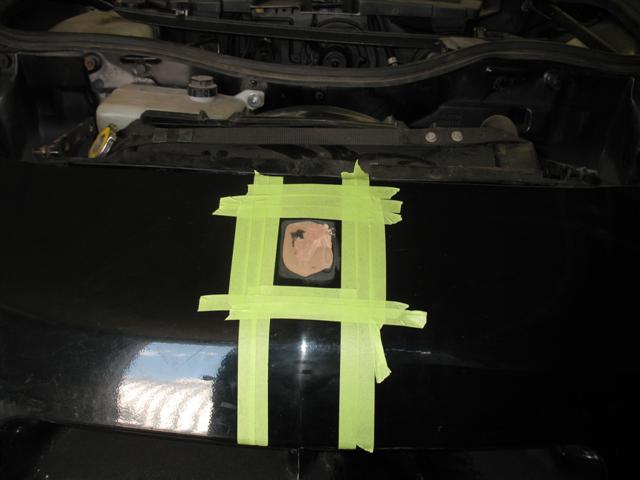
A little more work done today .. the carpets are back in and I fiber resined my roof interior to give it more strengh. Gonna re-upholster it tomorrow night. The hood is at the paint shop getting all perty up......Prep and sanded my front facia where the emblem goes, the PO had done a crappy paint job trying to make it look good. I bought a metal V8 emblem that I will be placing there instead. Here is a pic of it measures 2 3/4 inches tip to tip of the V
Carpets back in !!!
Emblem location prepped and sanded
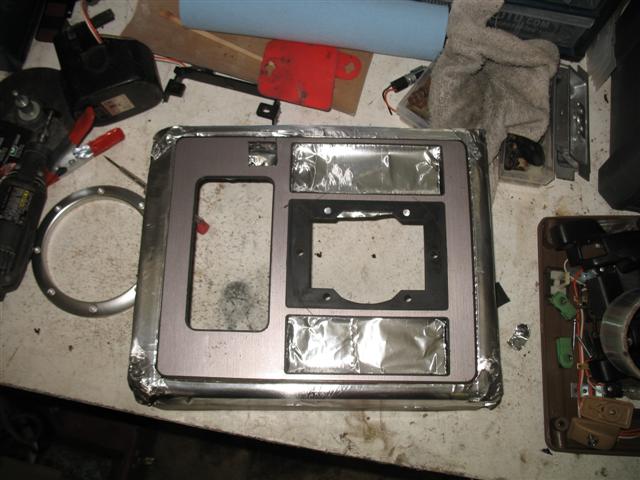
Preparing the panel so I can install the TT ring... more pics of that later this... panel for the Audi TT ring is only temporary I will be redoing the whole console when I'm back from Frazee Mn. More pics tomorrow got to takre some of my exhaust for Jon350
[This message has been edited by Danyel (edited 07-12-2010).]
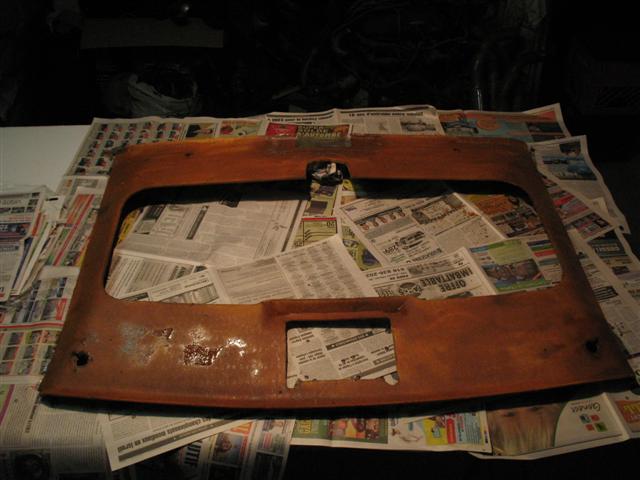
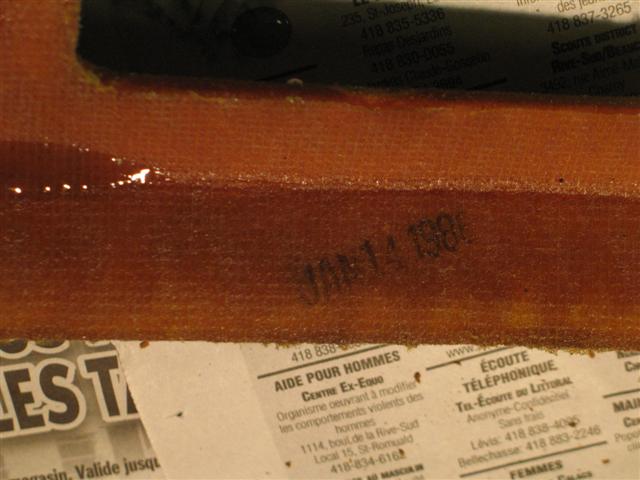
Got the headliner ready I applied 3 coats of resin... also found that my car was assembled Jan 14 1986 as the pic indicates .... also installed my new Autometer gauges (Oil pressure and voltage ) now all three match Painted my plastic seat mechanism covers... and painted some spots on the Widow that were gold ...(her original color) .... well we are getting ready for Frazee MN yeeahh .... more to come ... todays pics
Just got back from the hospital, my wife is now home...and slowly getting better... we had to cancel our road trip to Frazee and we were very sad to do so.... I didnt work on the Widow at all very busy caring for Helene ..... so I put the Widow back up on jack stands to finish what needed to be done once we got back from Frazee which we had to cancel . Here are the pics from last week with the extractor completed and painted... I will post more in a couple of days...time to go care for my sweetie !!


.jpg)
.jpg)
.jpg)
.jpg)
.jpg)
.jpg)
.jpg)
.jpg)

.jpg)
.jpg)
.jpg)
.jpg)
.jpg)
.jpg)
.jpg)
.jpg)
.jpg)
.jpg)
.jpg)
.jpg)
.jpg)
.jpg)
.jpg)
.jpg)
.jpg)


 The Black Widow lives!
.jpg)
.jpg)
.jpg)
.jpg)
_1.jpg)
.jpg)
.jpg)
_1.jpg)
_1.jpg)
.jpg)
.jpg)
.jpg)


_1.jpg)
.jpg)
_2.jpg)
_1.jpg)
.JPG)
.JPG)


