I did a major cleanup in the shop last Sunday as I prepare to remove one of the spare Quads from the Fiero. Stumbled across this in the process. Can’t remember if I’ve ever posted about it.
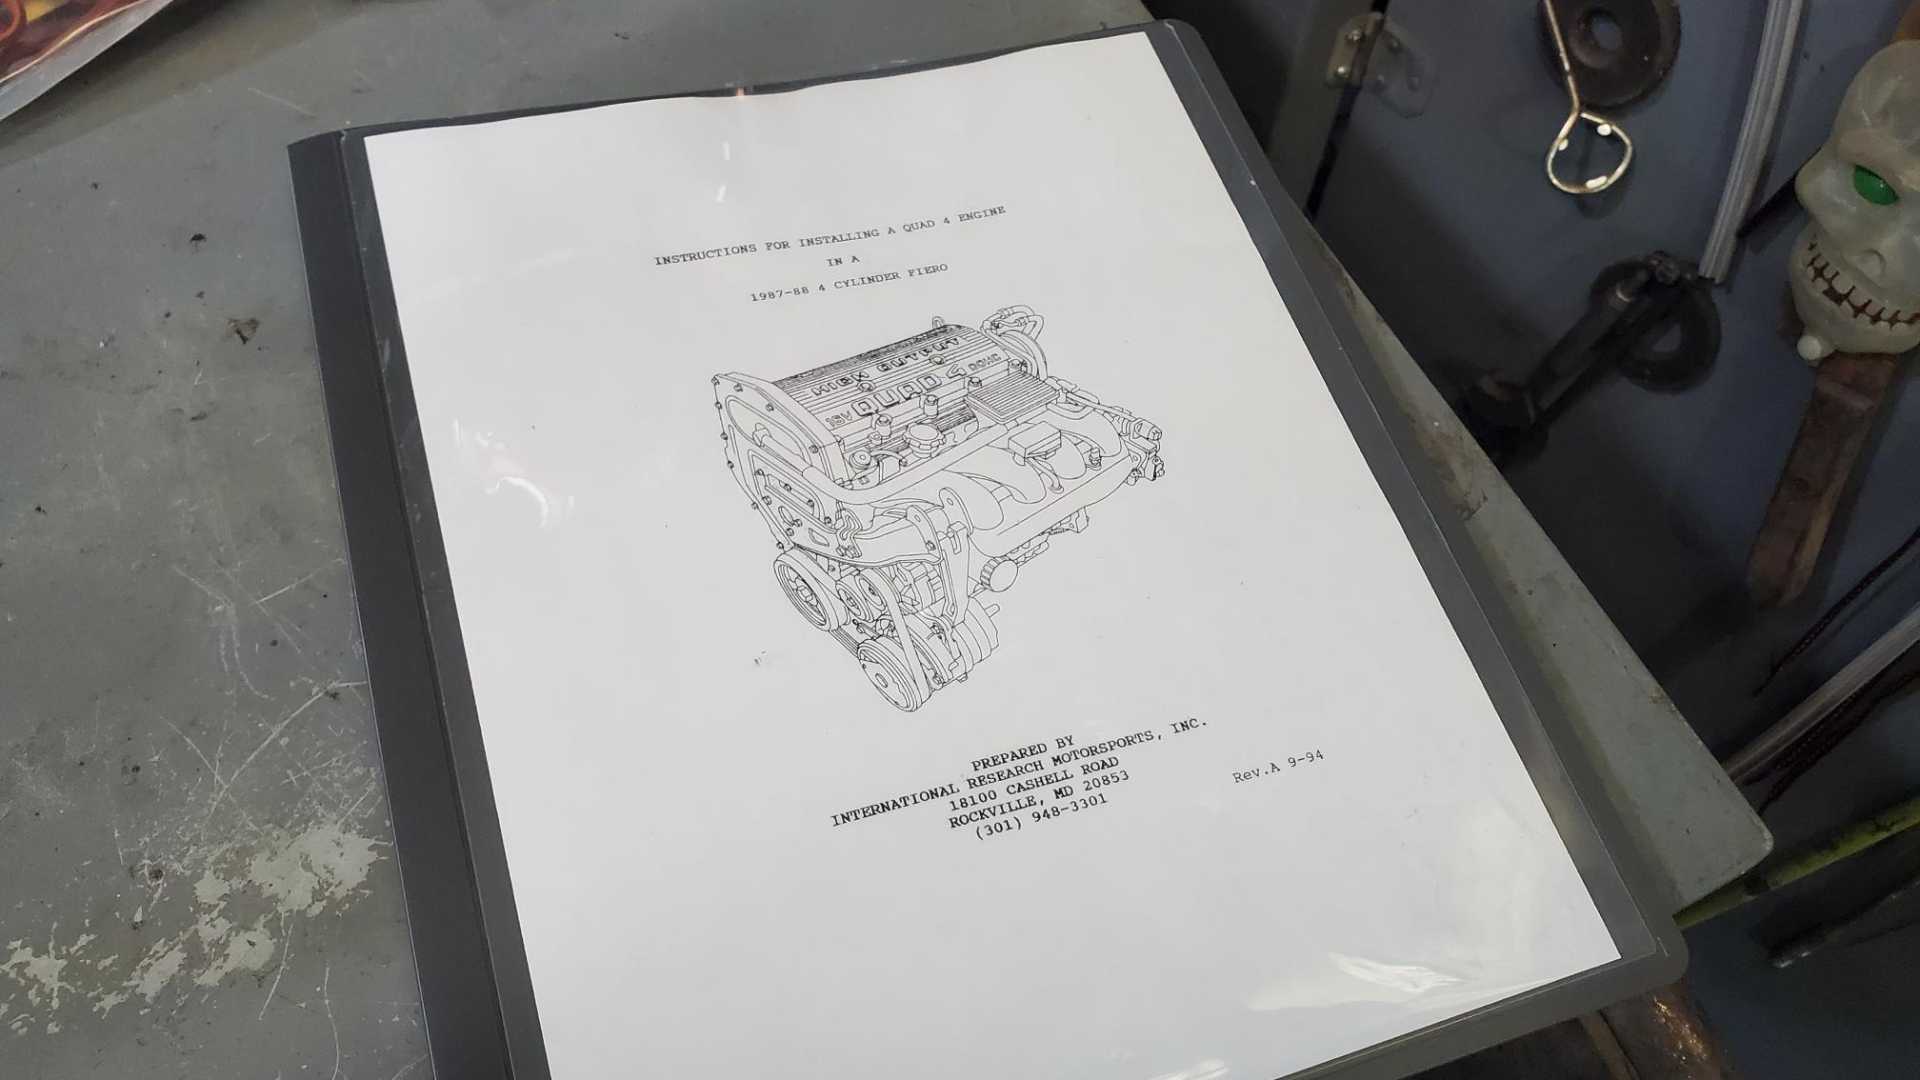
I believe I first saw it posted by GA Fiero Club or something similar. It says “Instructions for Installing a Quad 4 Engine in a 1987-88 4 Cylinder Fiero.” It was prepared by International Research Motorsports in Rockville, MD and this version is from September 1994!
The manual includes drawings of all the modifications that need to be done to the car so I’ll be sharing those pages in the coming weeks. It’s very helpful, but it focuses a little too much on the mechanics of preparing the engine, which other manuals already cover, and some of the key instructions don’t have enough detail.
[This message has been edited by Quadfather (edited 12-11-2021).]
Haven’t done much work to the engine today, aside from cleaning the thermostat housing and AC compressor bracket. I need to buy a water pump and get it installed.
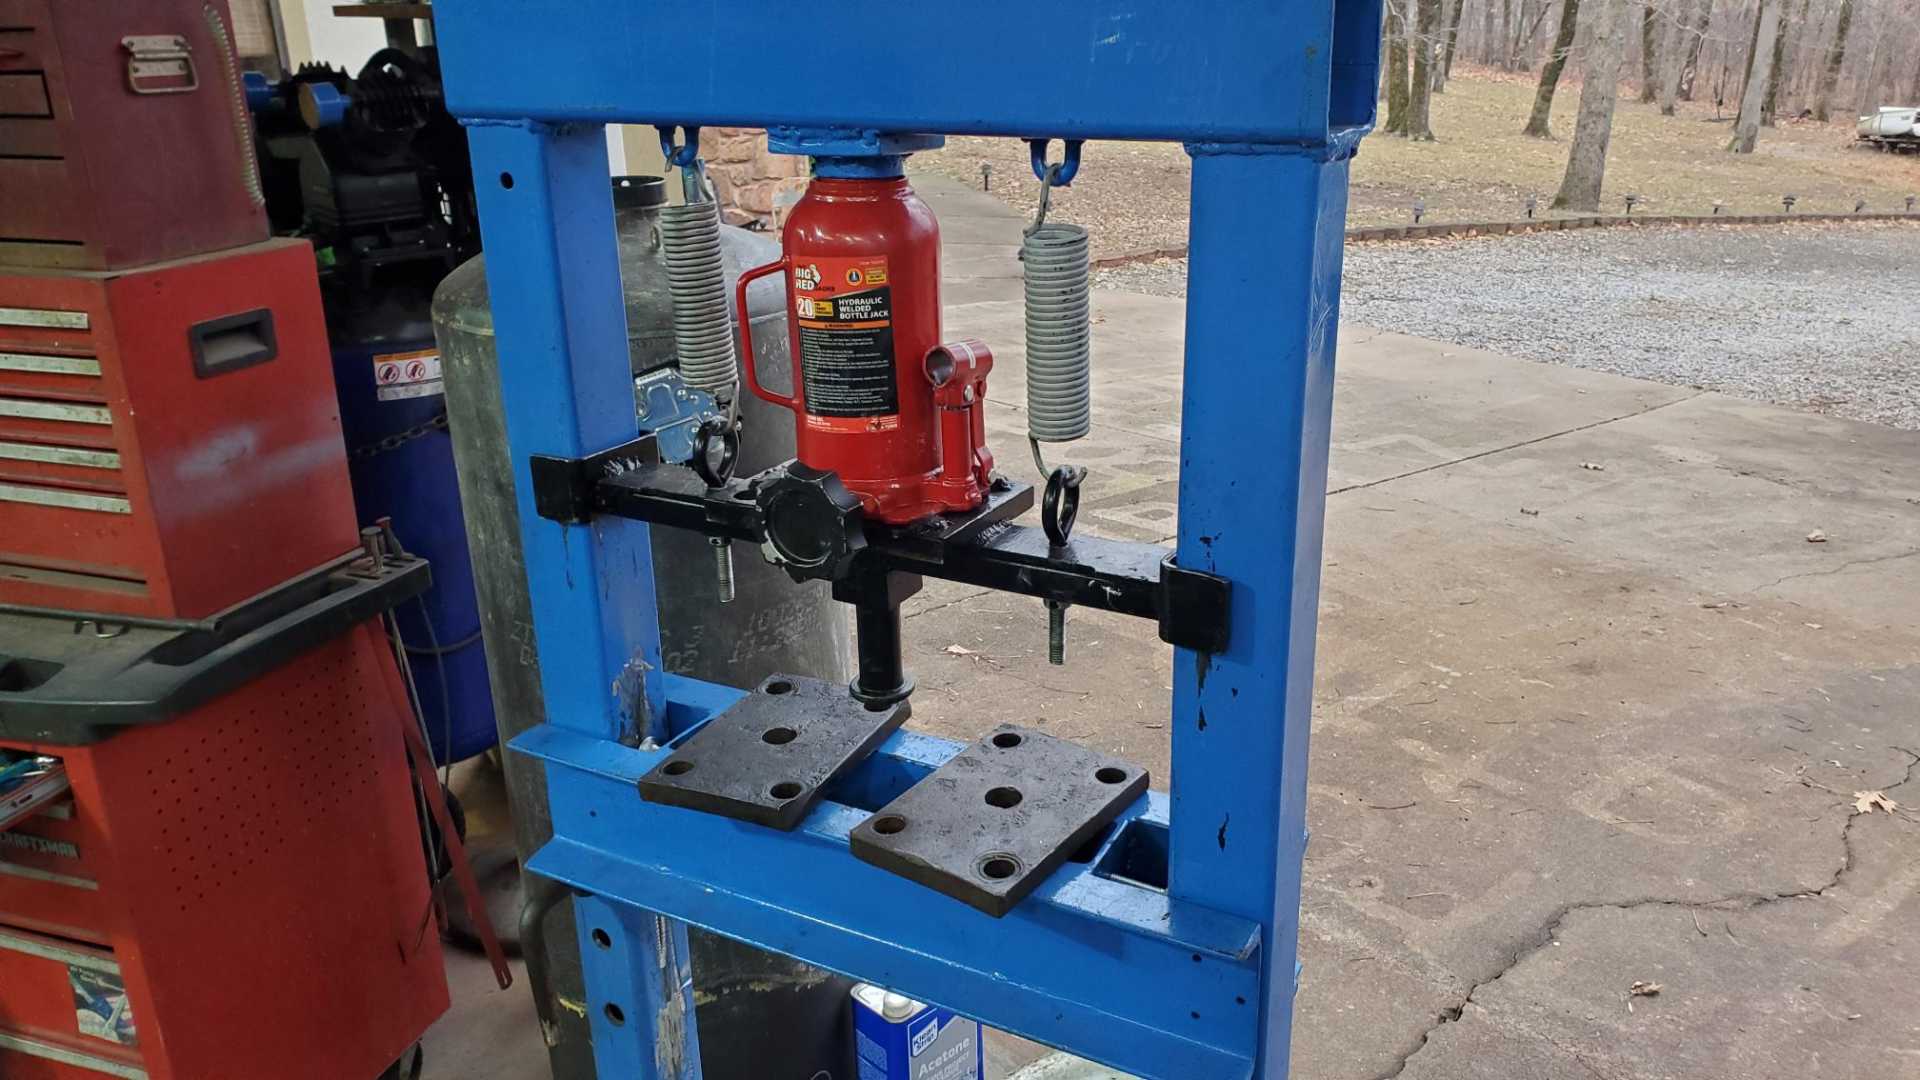
A few weeks ago a friend borrowed my press to install all the new front end suspension parts on his ‘68 Chevy C10 project. He had some suggestions for tweaks to the press when he returned it. I made most of those today, including more holes for the platform and a handle for the valve on the jack.
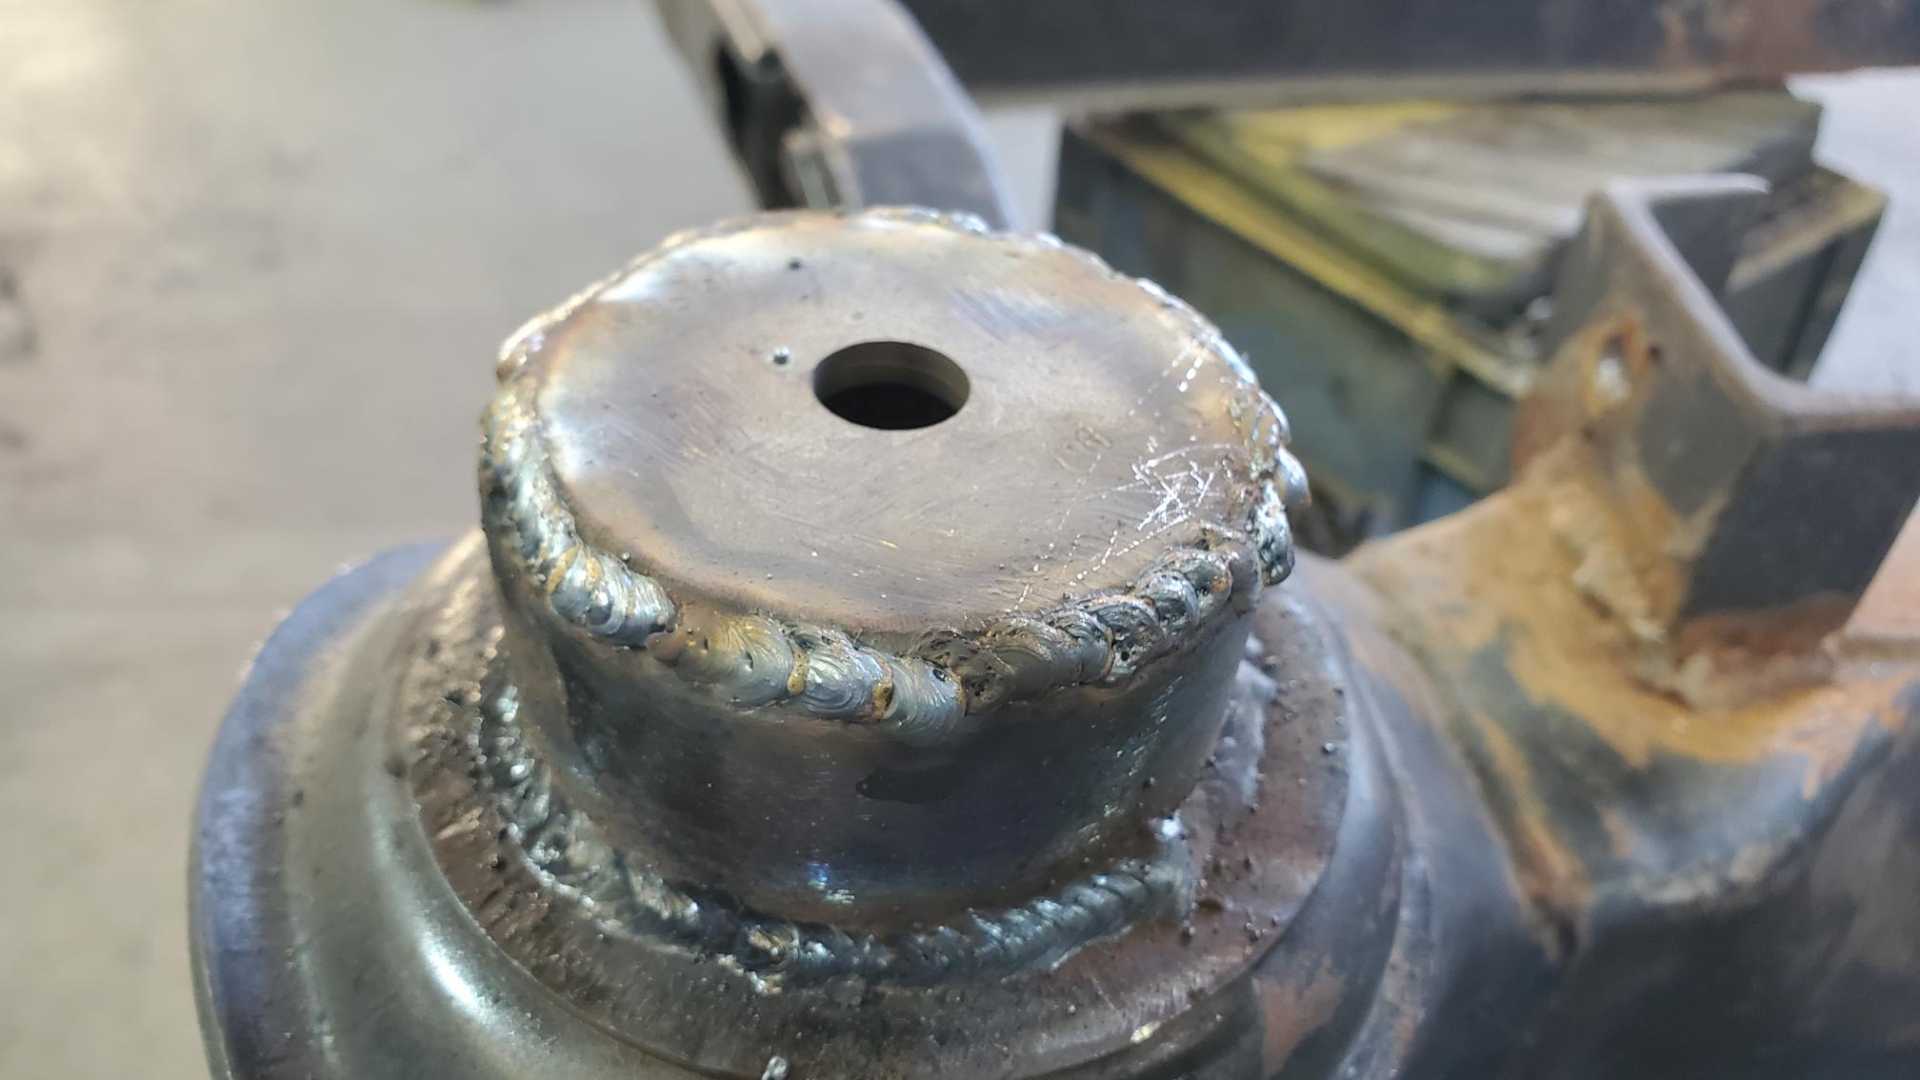
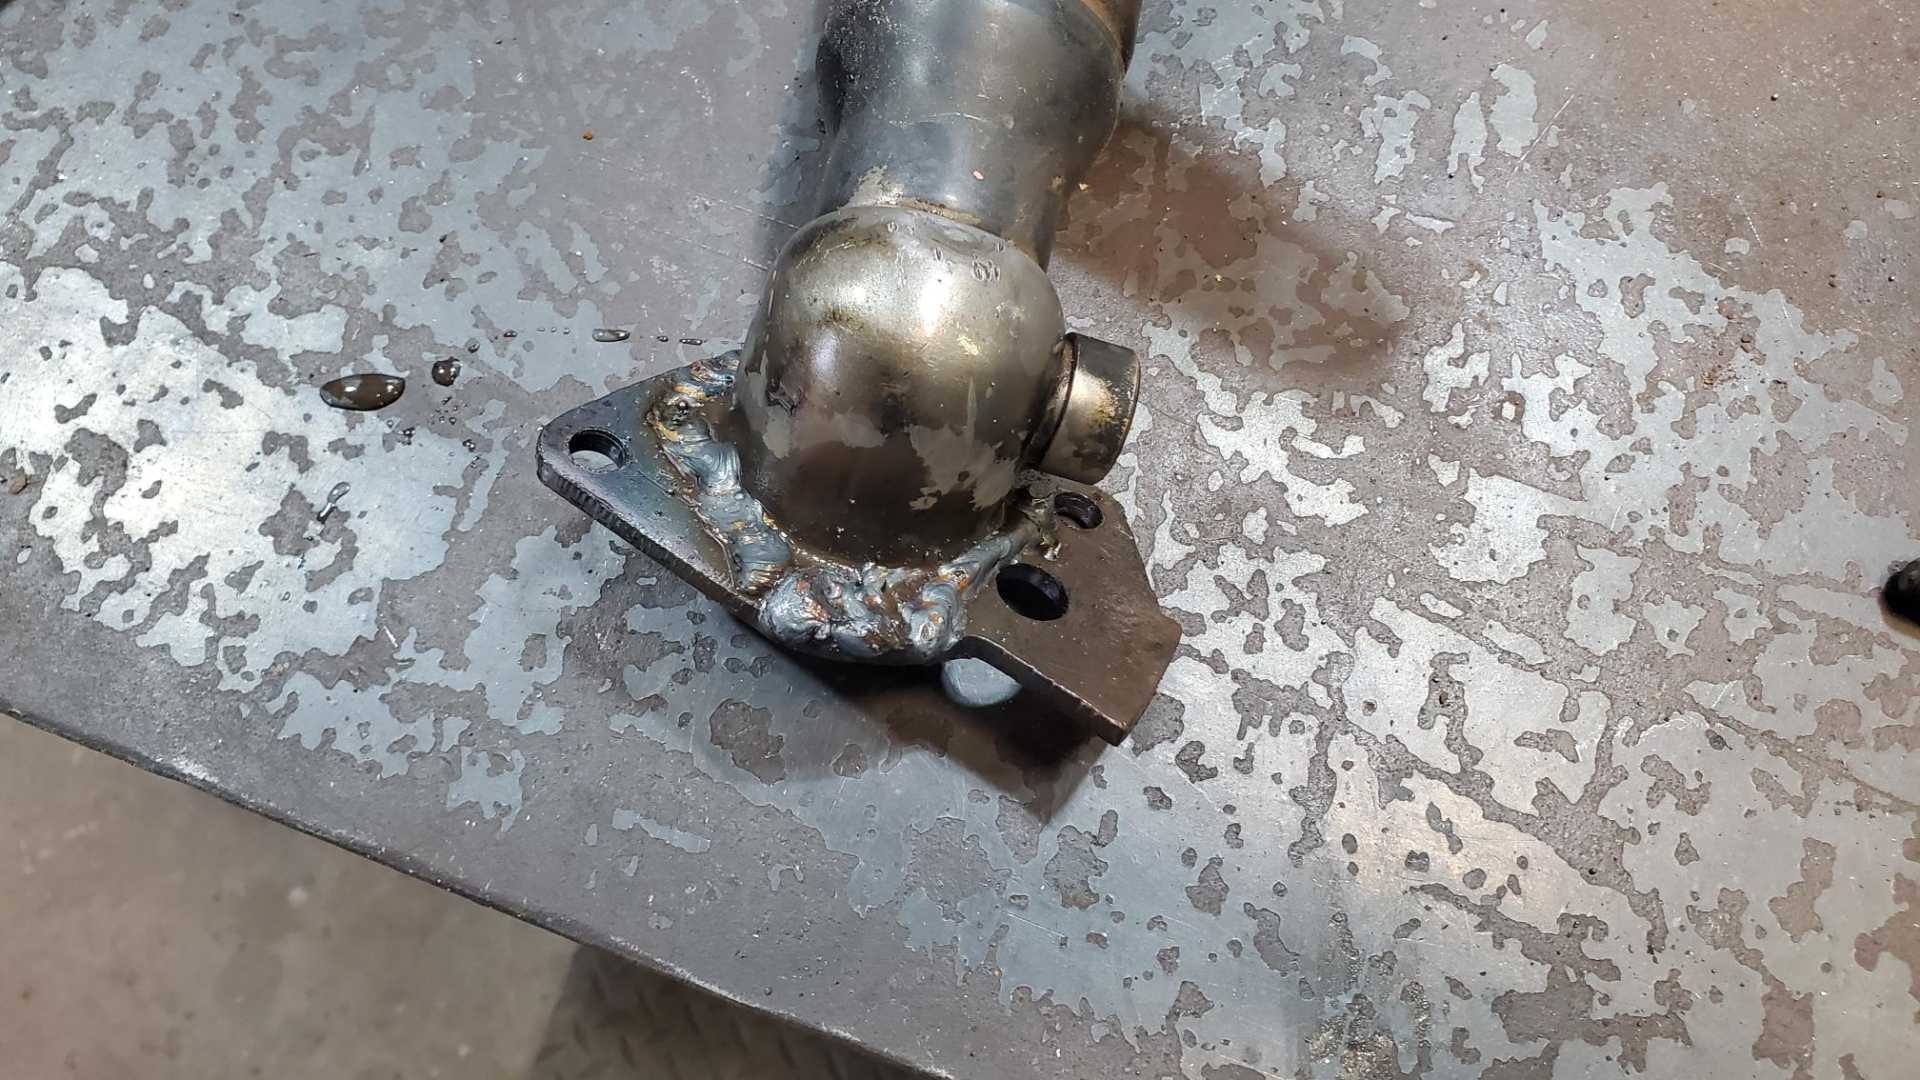
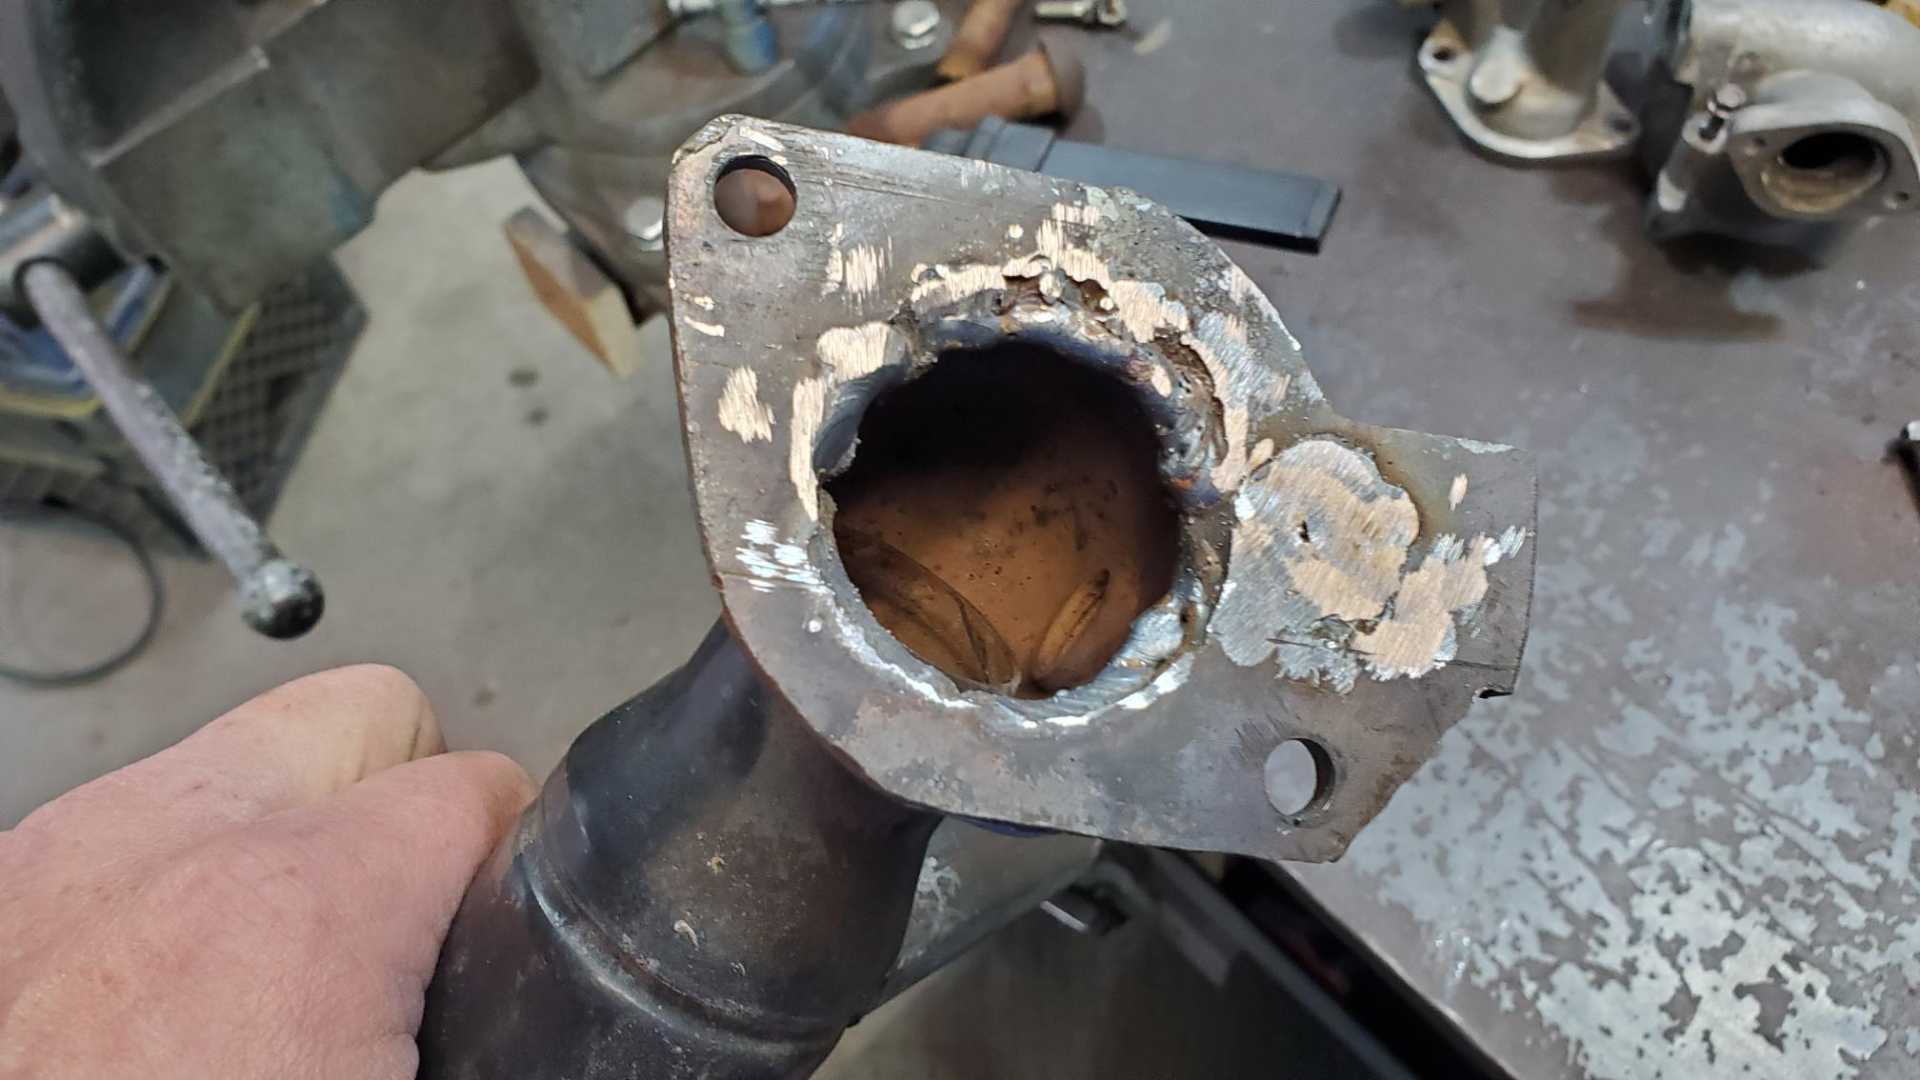
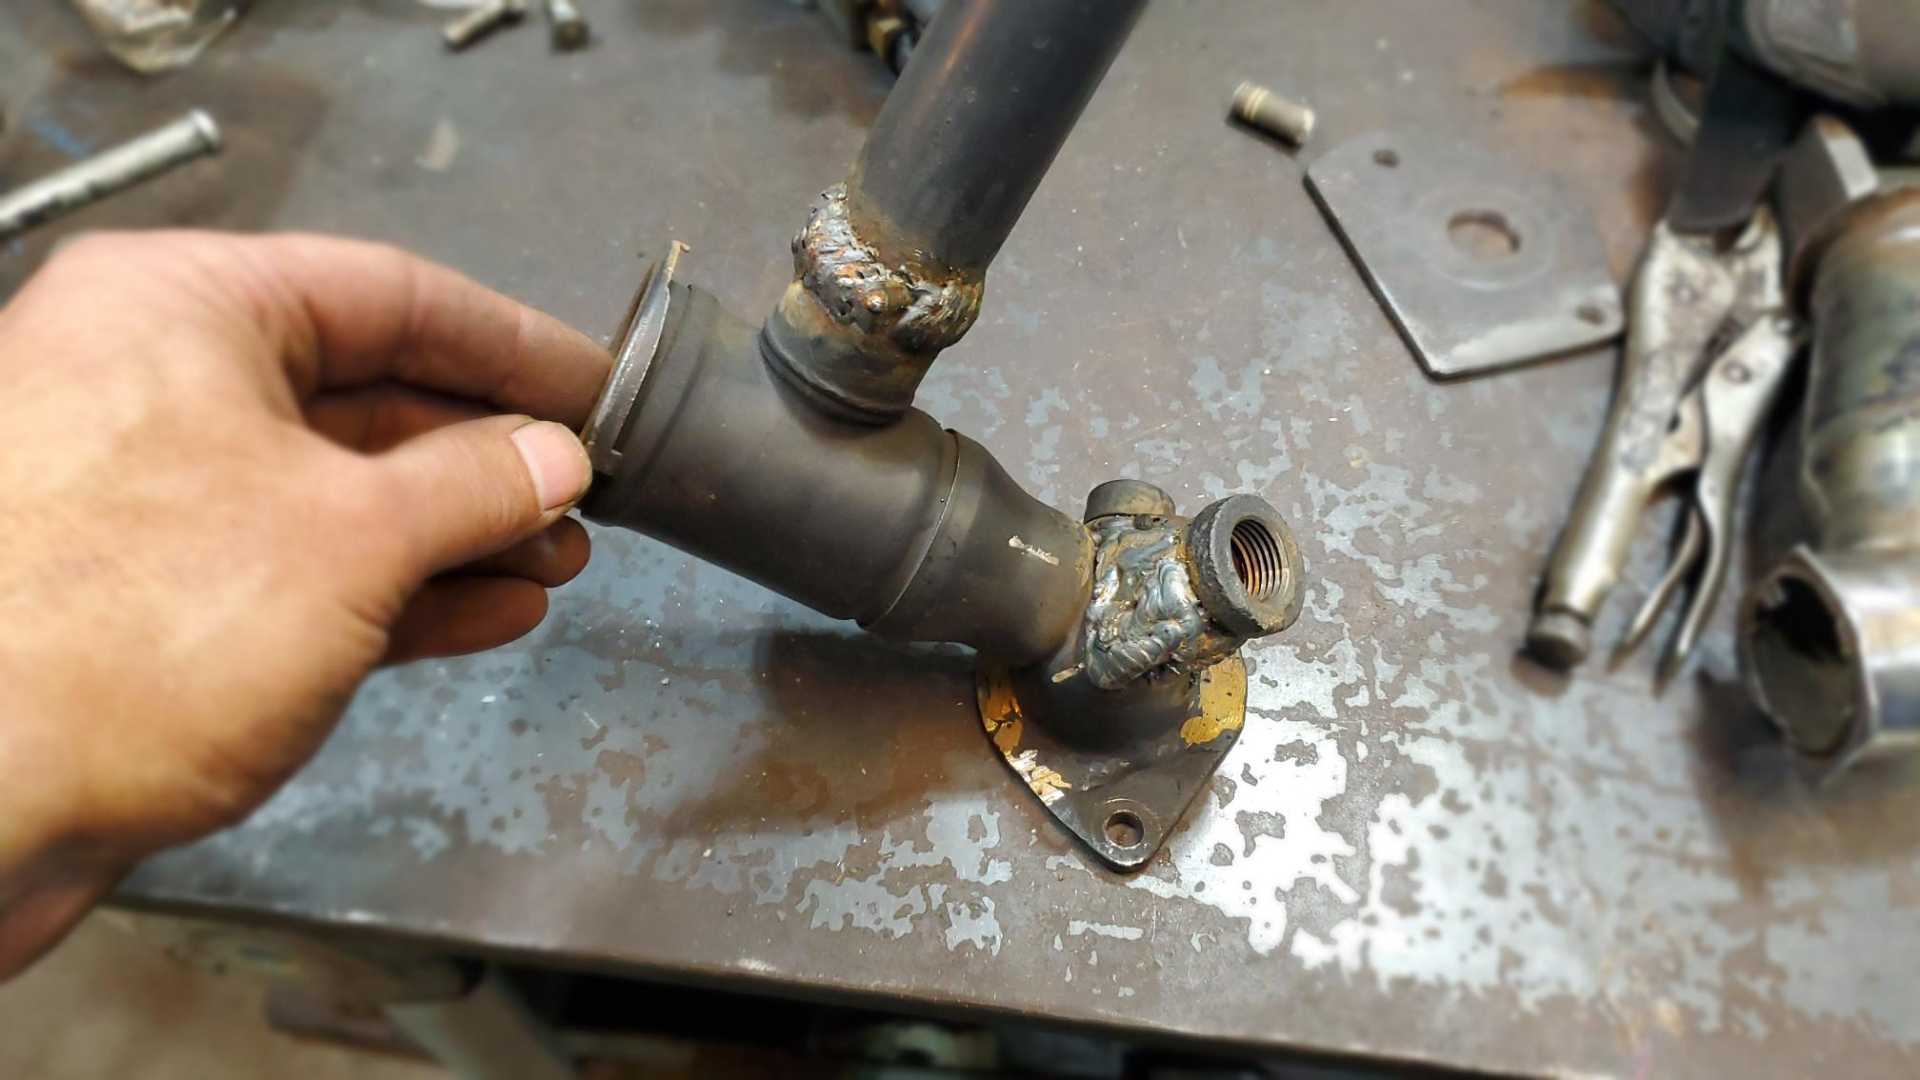
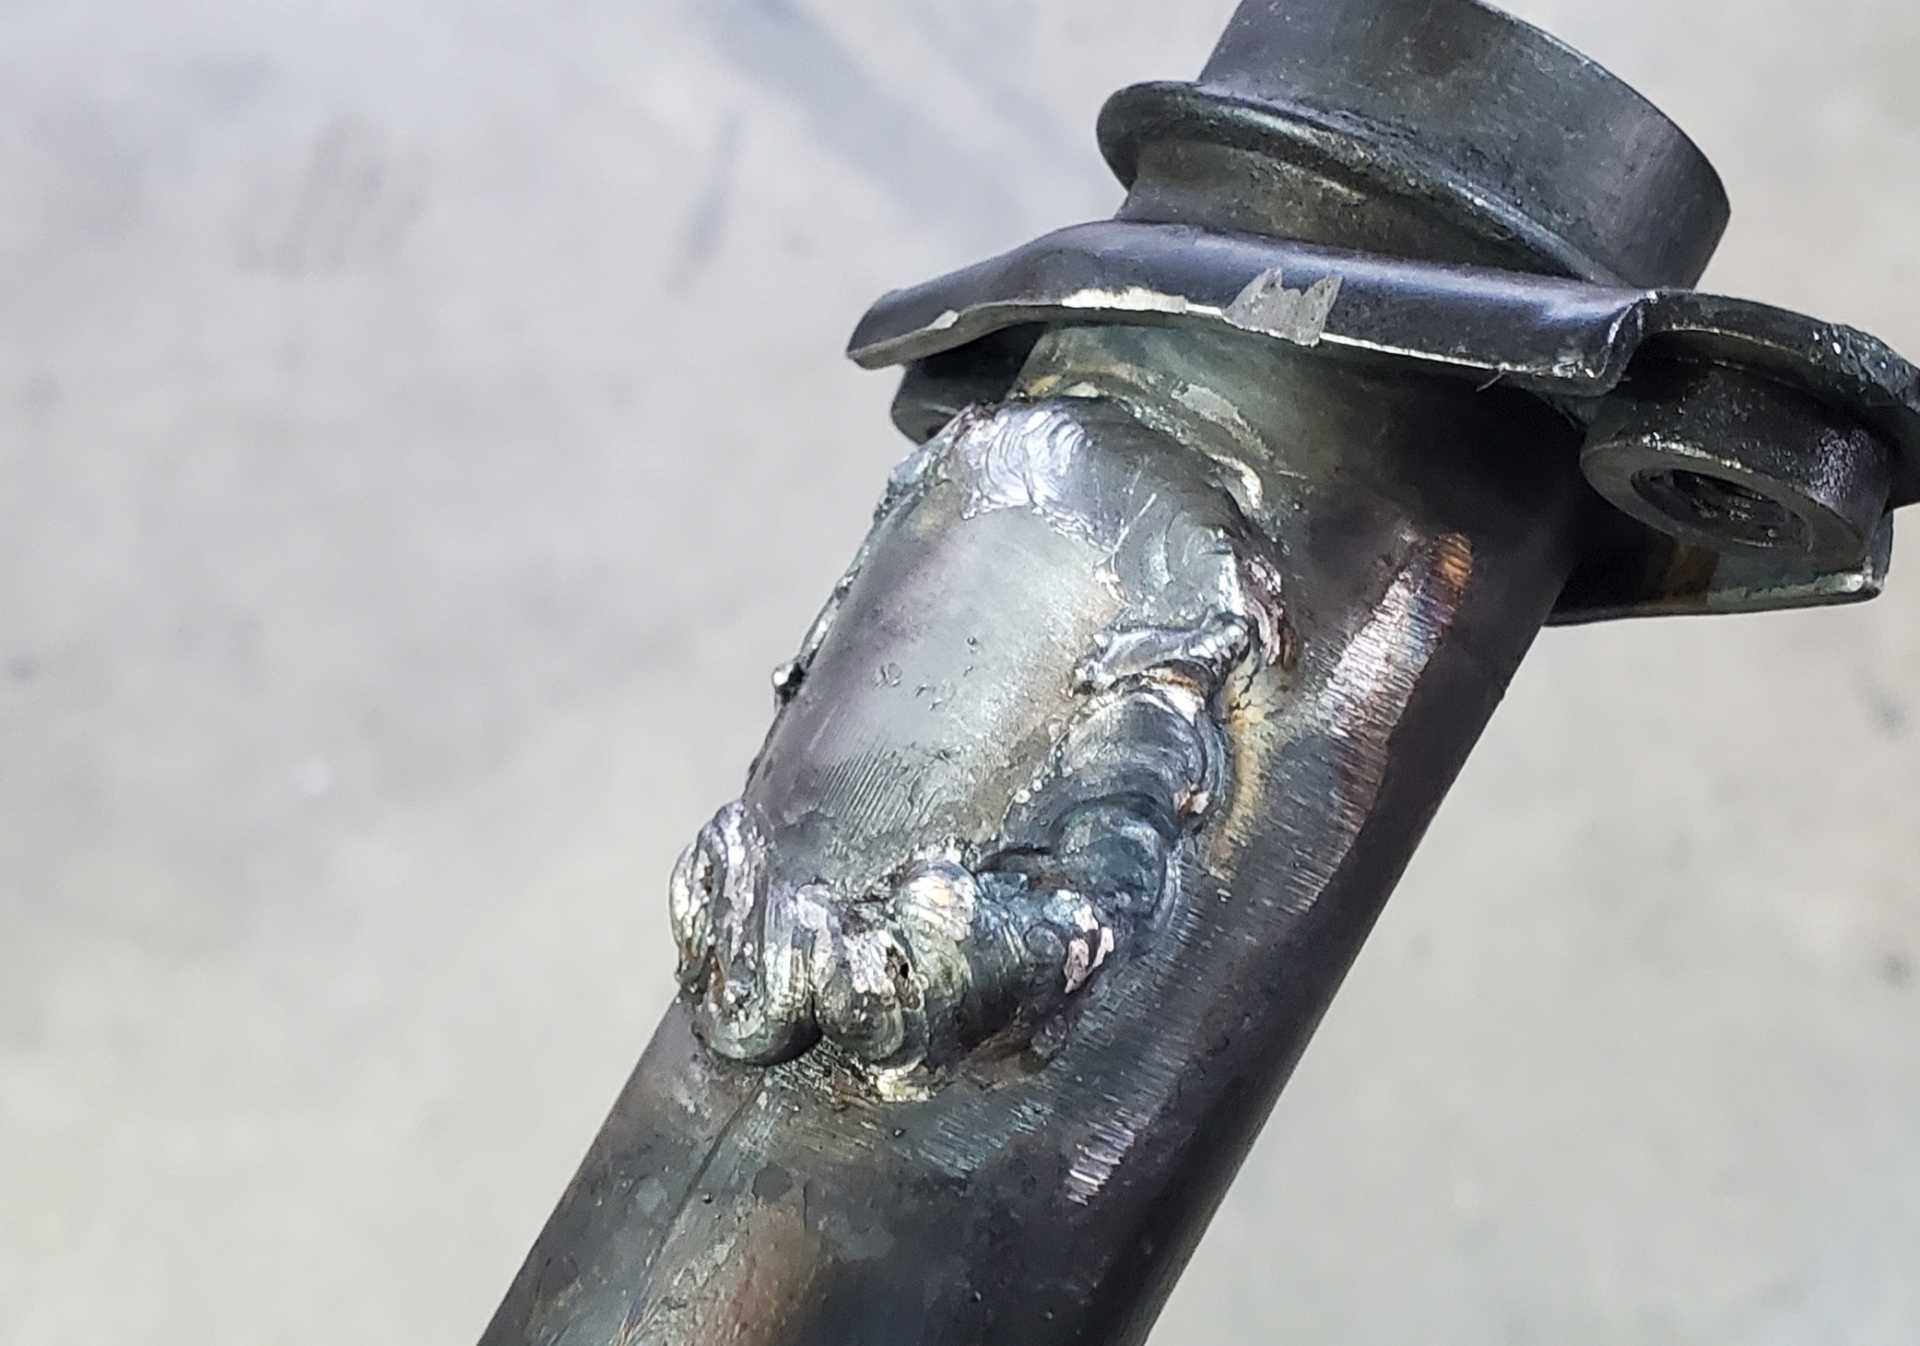
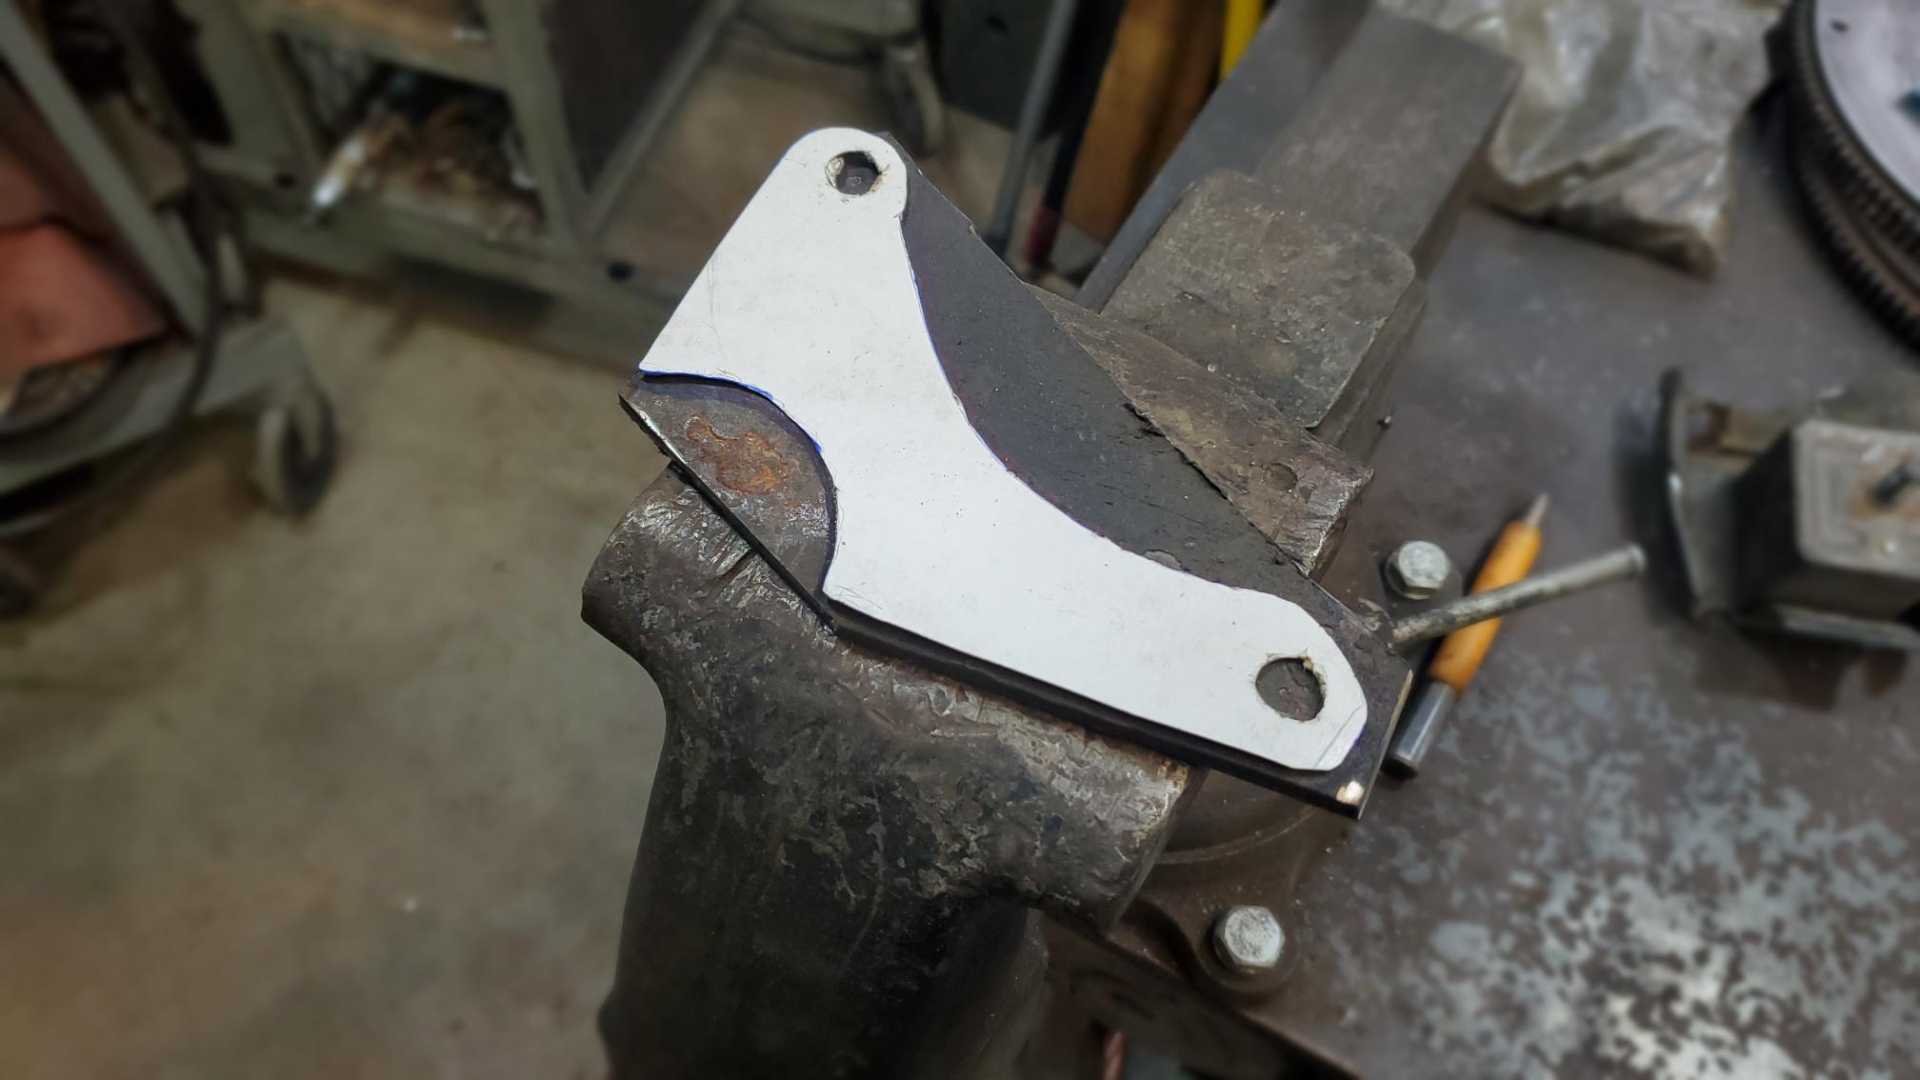
Worked on the hybrid thermostat housing today. Years ago I cut a plate to fit the opening on the Quad’s head. Today I welded it to one of my Fiero t-stat housings, from which I’d removed the mounting plate. Realized I didn’t need that half-inch hole in the plate so I closed it up.
I haven’t mastered welding a continuous bead around a circular object in one shot and as you can see the stop-and-go approach makes for uneven welds.
To eliminate the risk of leaks I ran a bead around the inside, too. This was before I smoothed it all out with a die grinder.
I used a 1/2” pipe coupler to make a bung for the Quad’s heater hose fitting/restrictor.
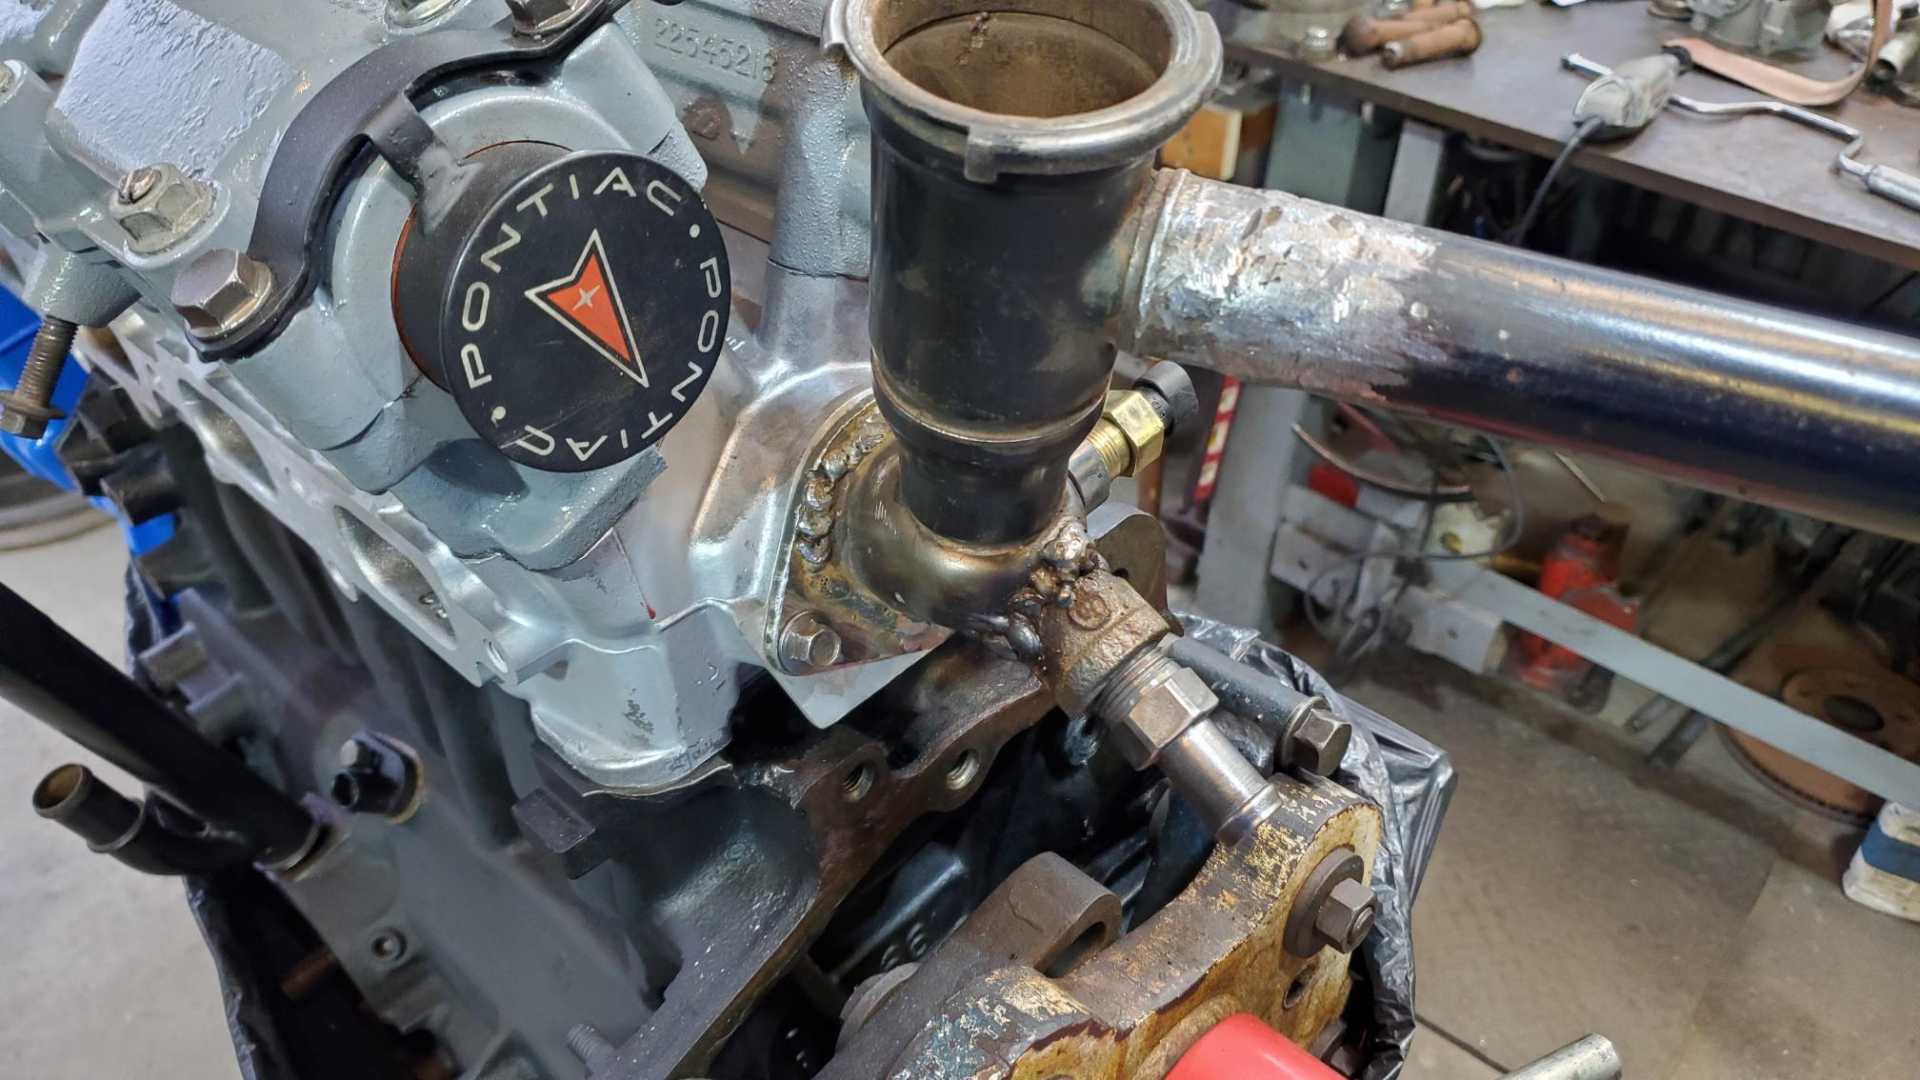
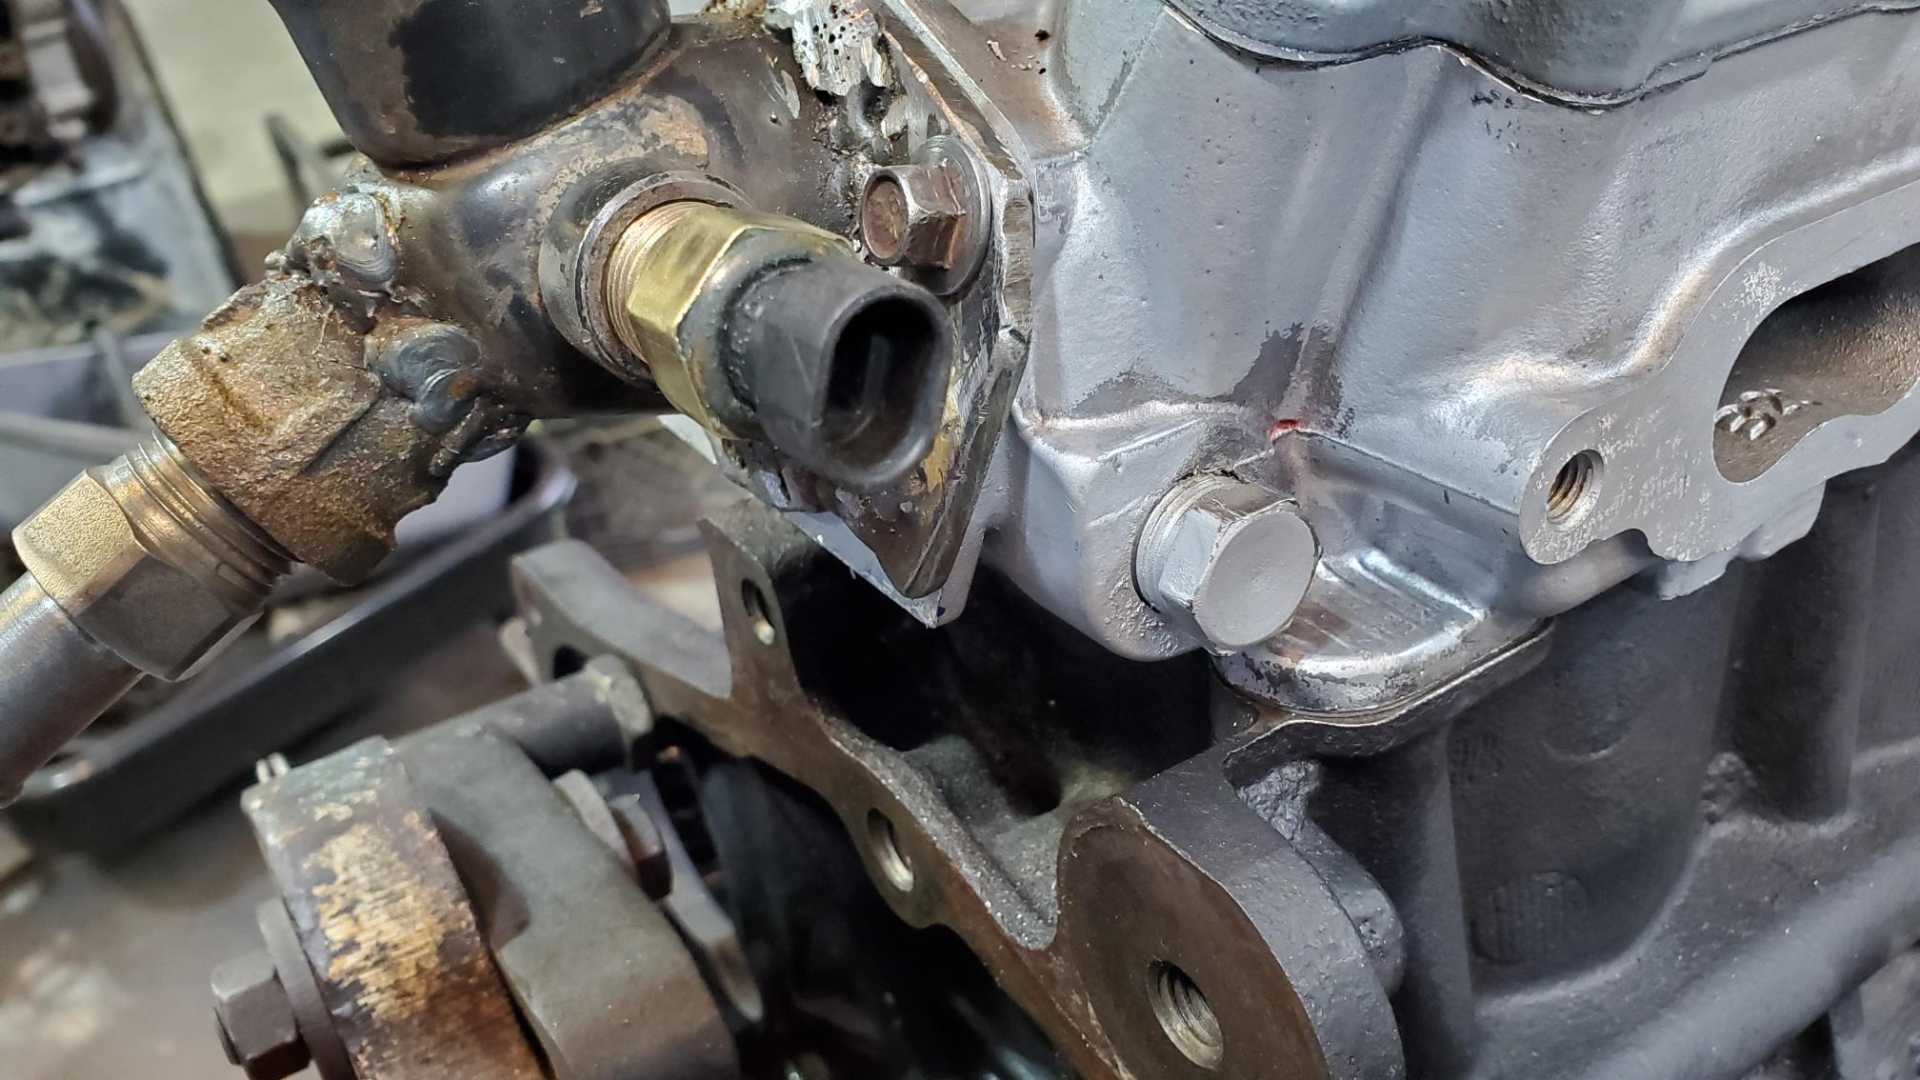
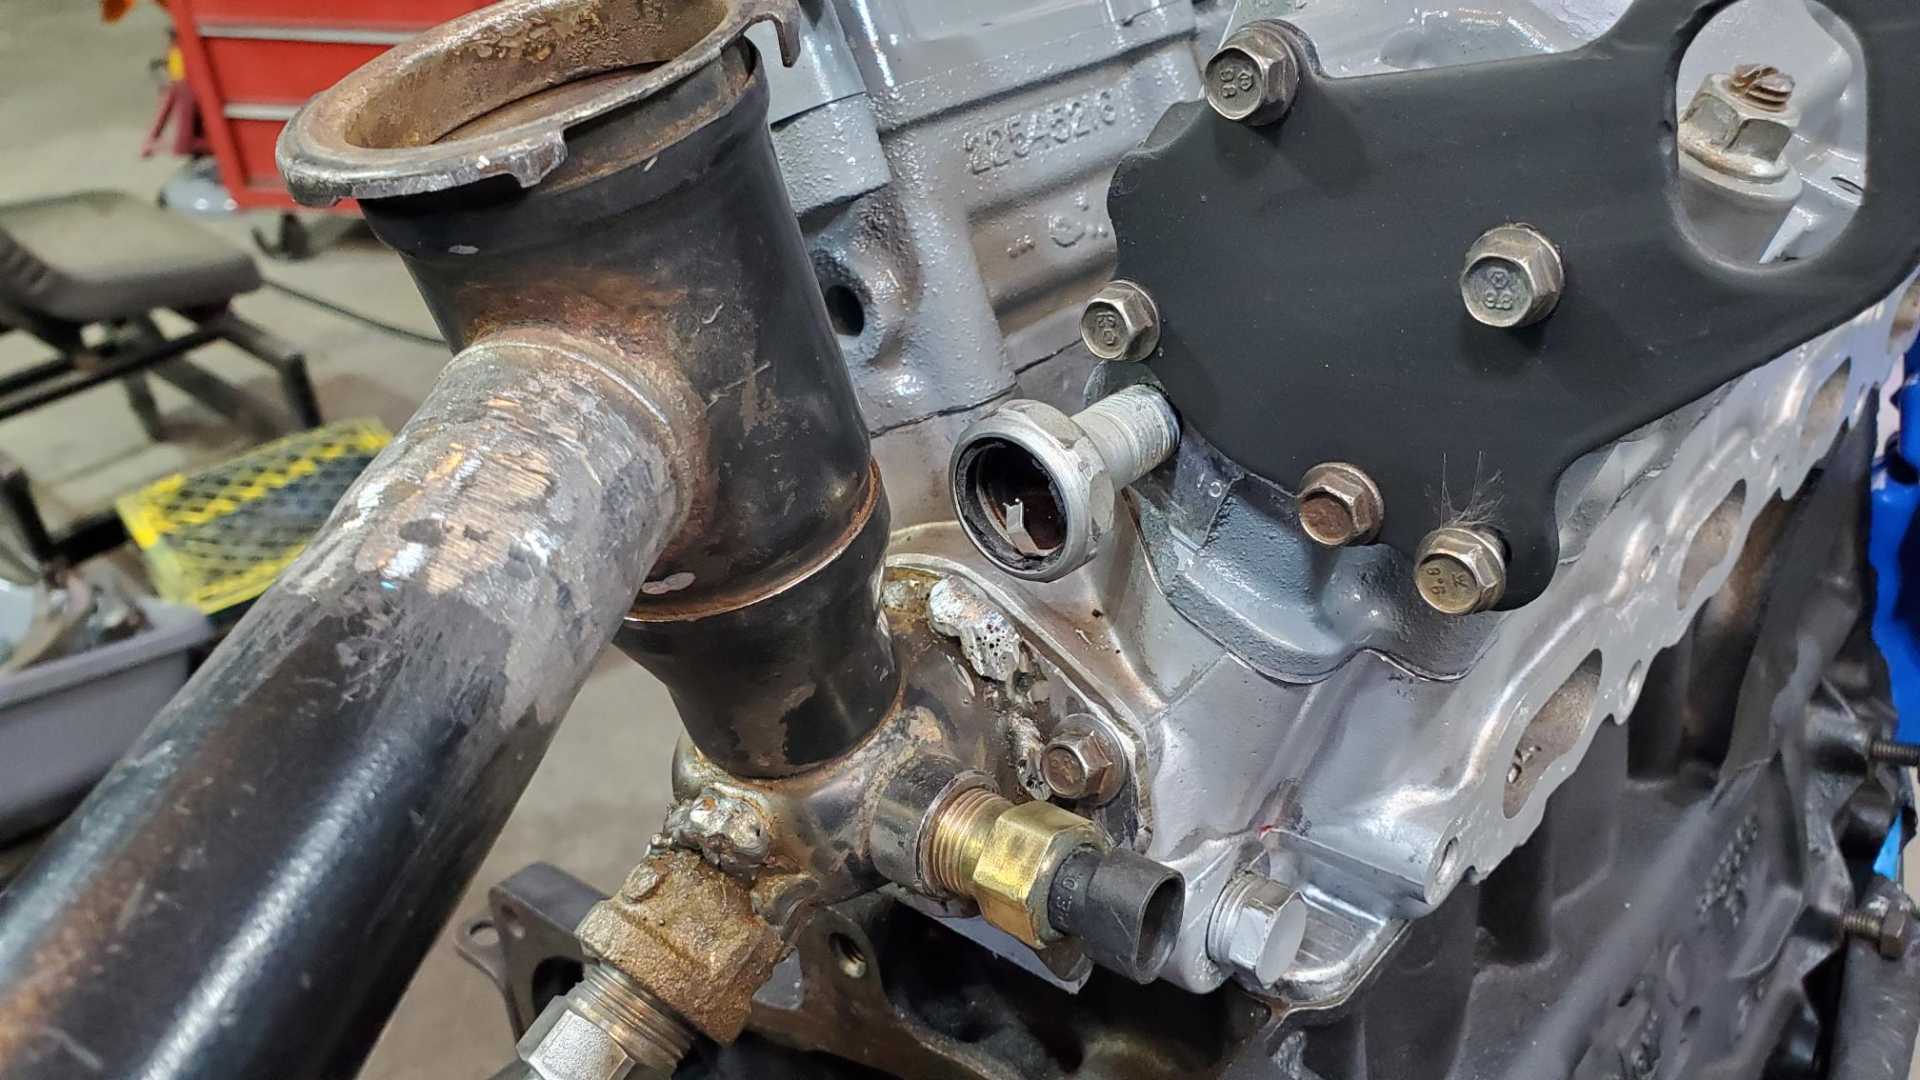
The Quad’s t-stat housing has four holes: One for the heater hose fitting, one for the radiator fan switch, one for the temp gauge in the dash cluster and one for circulating coolant to the throttle body. The other line for the throttle body goes to a fitting in the head just past the t-stat mount. I removed the throttle body loop years ago and won’t use it now. That means I only needed two holes in this housing, one for the heater hose and one for the fan switch. I can use the hole in the head, seen here with the plug in it, for the temp gauge sensor (or vice versa).
I’m worried that the steel I cut the mounting plate out of isn’t thick enough. I also need to figure out a way to test this thing for leaks. Sardonyx used an old bike tube so I’ll probably try that.
I’ll also have to get a 90-degree fitting to turn the oil pressure sensor so it’s perpendicular to the engine so it’ll clear this housing. This one is broken but used to be about four inches long.
[This message has been edited by Quadfather (edited 12-17-2021).]
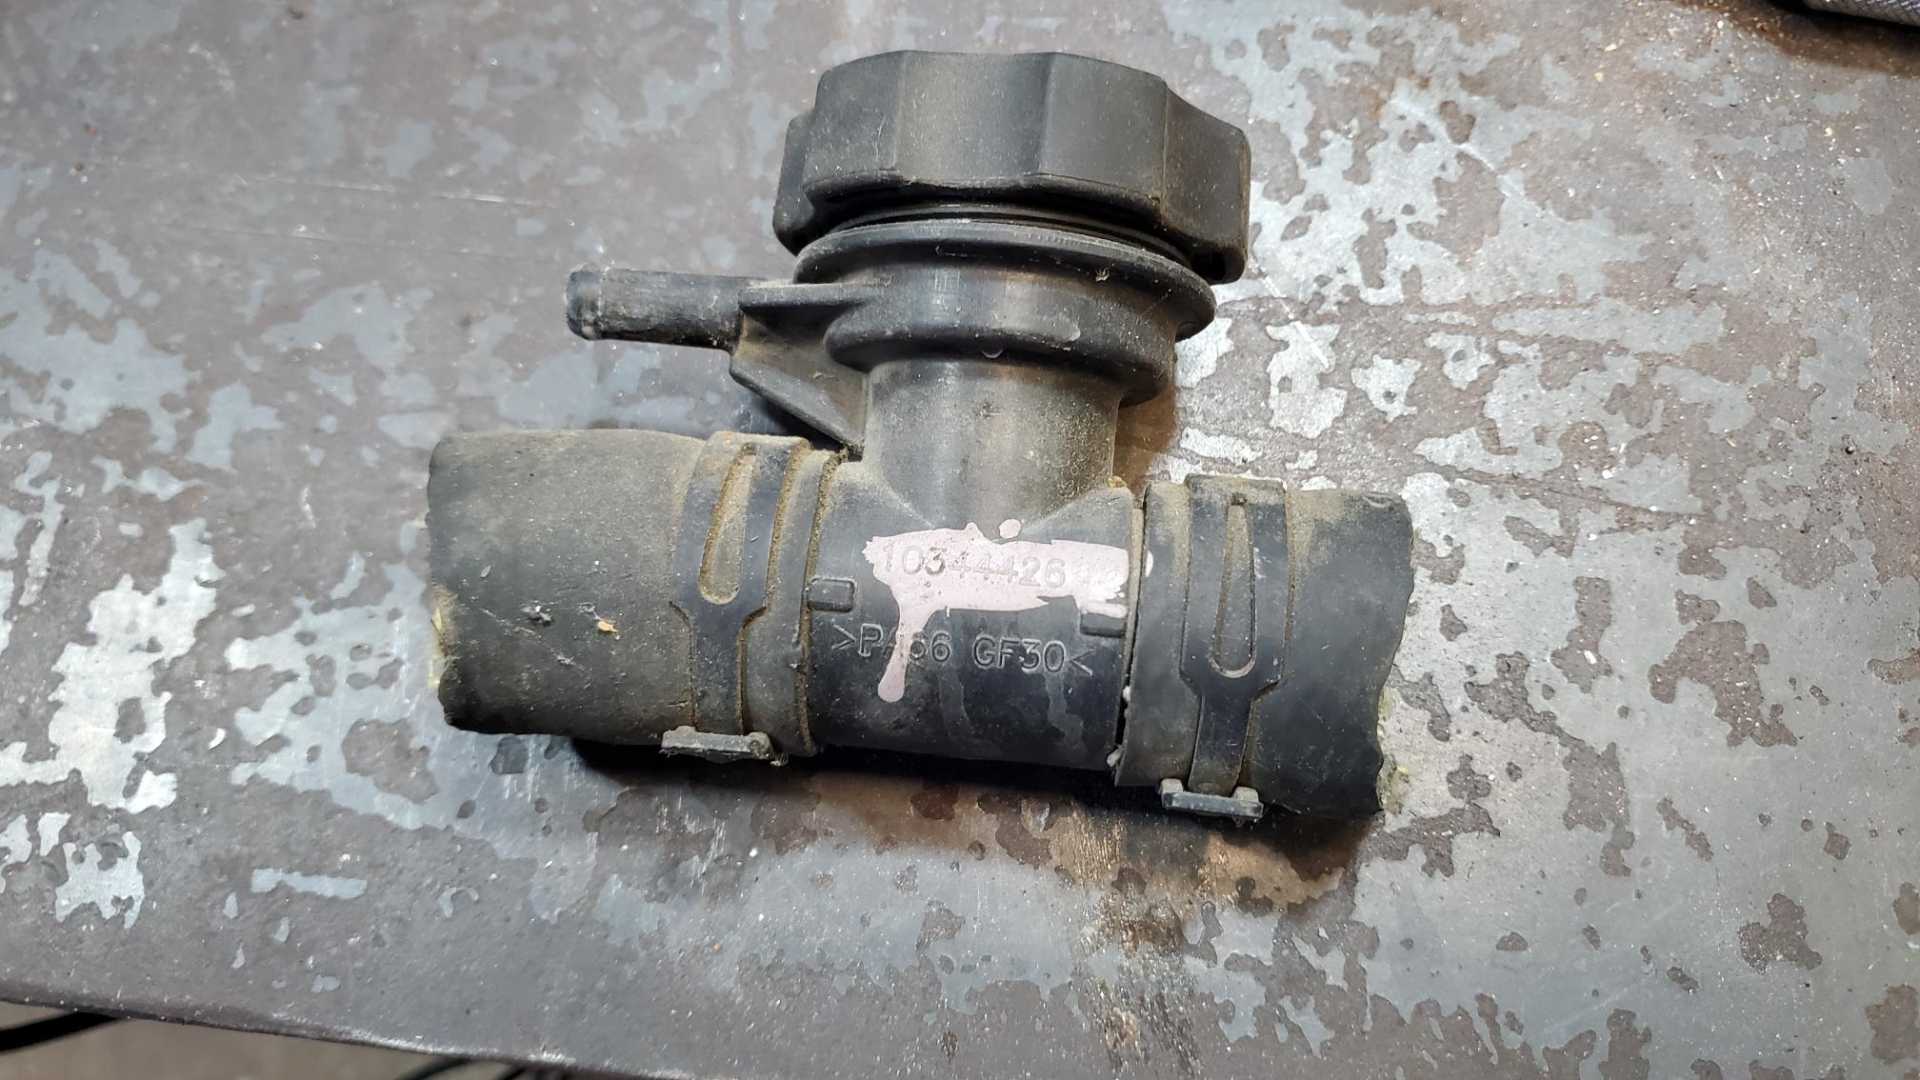
Somewhere in this garage are the two radiator caps that go to these two Fiero t-stat housings. As I was looking for them, I found this.
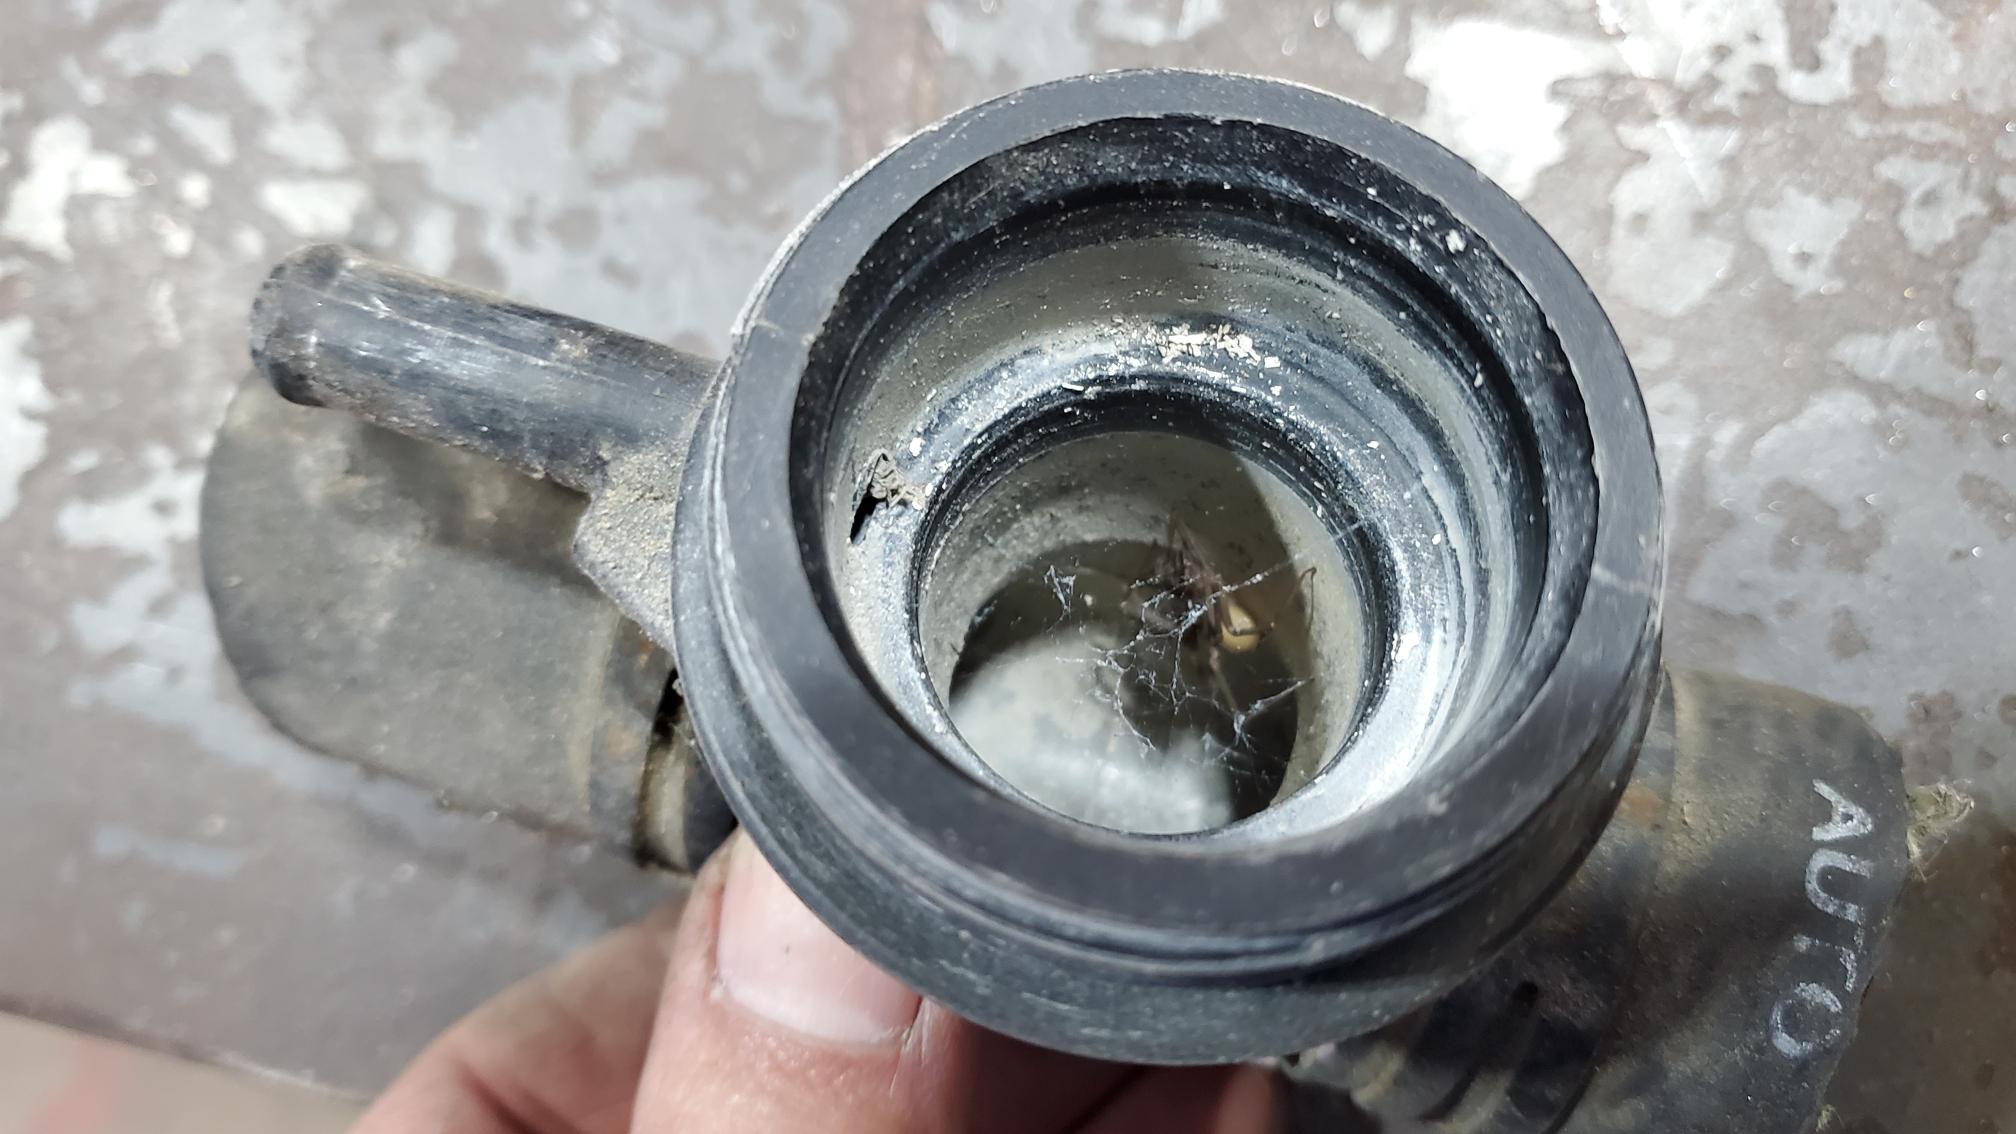
I have a dim memory of pulling this off a vehicle at the salvage yard years ago. I was laughing because it turned up right after I did all the work to make a hybrid t-stat cover instead of using the stock one from the Quad, then I took the lid off and found another surprise.
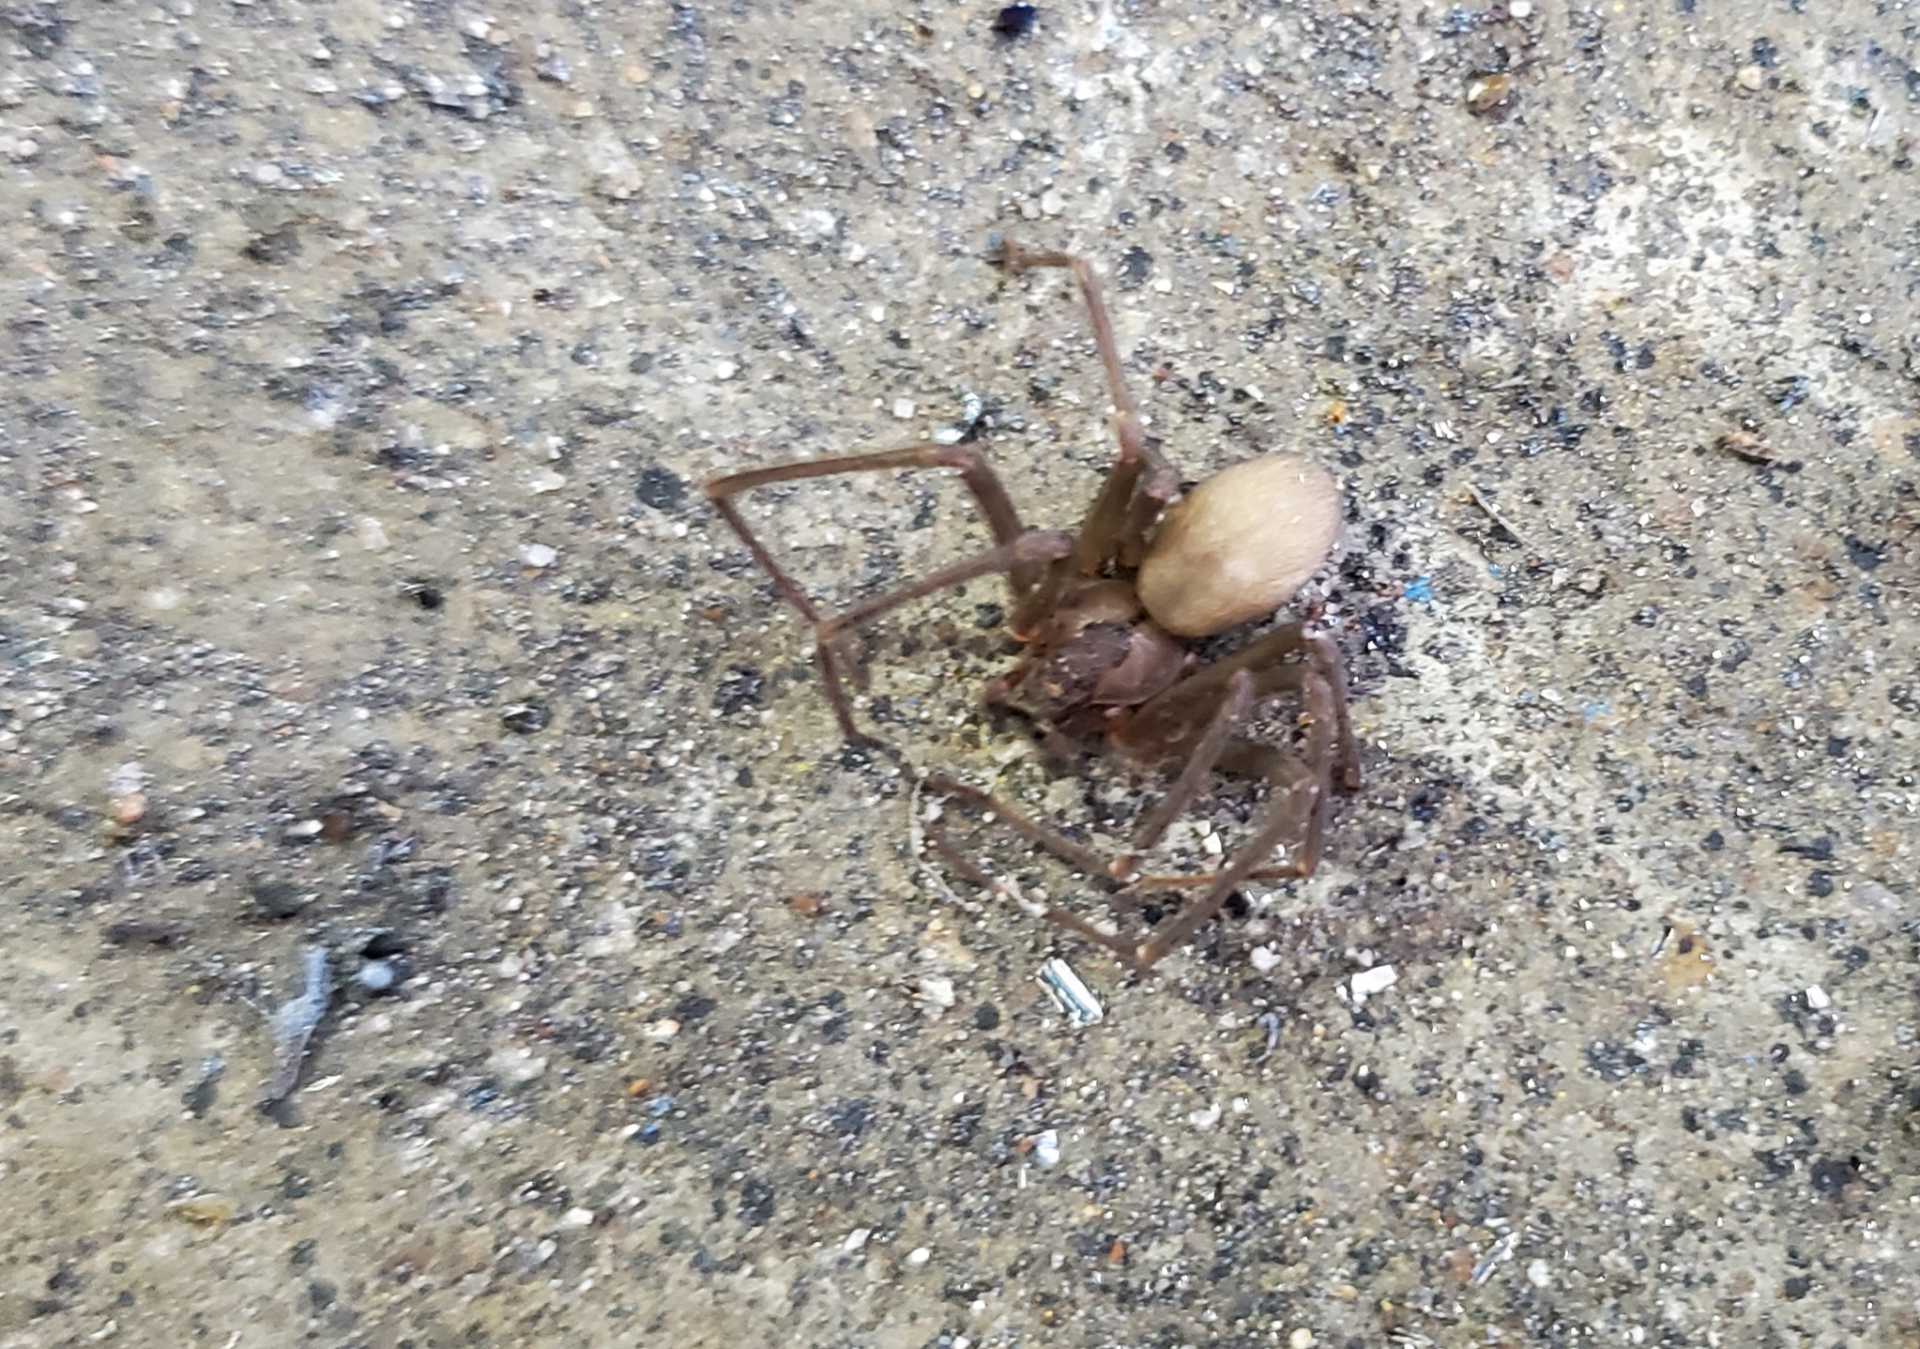
That’s a big brown recluse spider, aka fiddleback. Looks like a female getting ready to lay eggs.
See the fiddle on the thorax?
Fiddlebacks are common in Oklahoma and we learned to deal with them as kids. I used to call this garage the fiddleback breeding facility because of the way my dad had it set up. Fiddlebacks love to hang out between lumber or other organic materials left undisturbed for long periods. After my dad died we moved out his scrap lumber and wooden workbench and that cut the population of spiders dramatically. However, we’re still very careful when moving things. I’ll have to take particular care when it comes time to start sitting in the Fiero. Probably remove the whole interior again and spray the car.
[This message has been edited by Quadfather (edited 12-17-2021).]
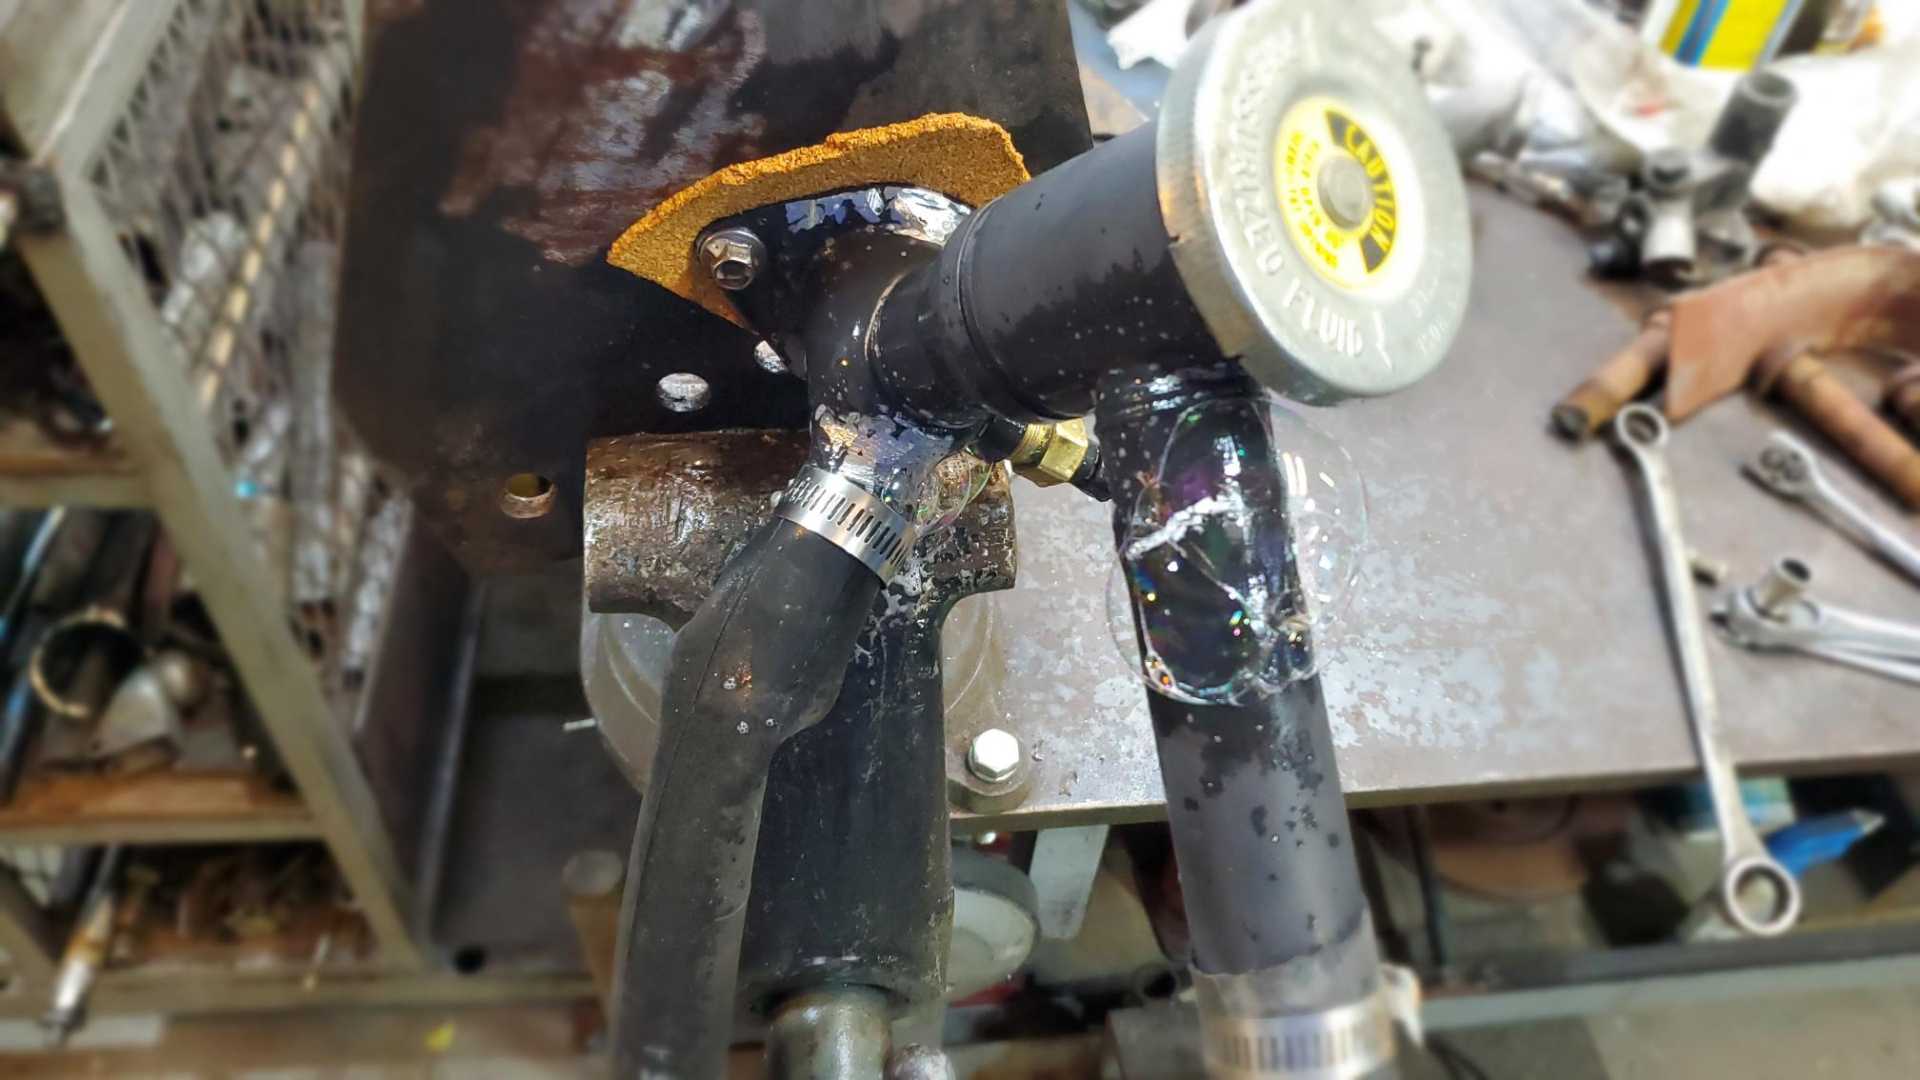
Built a rig (a la Sardonyx’s thread) so I could test this hybrid t-stat housing and I’m glad I did because it had many leaks. I drilled two holes in a piece of 3/8” plate and used some old gasket material to bolt the housing to it. A bicycle tire tube clamped to the two outlets and a little air pressure and some soapy water made the leaks obvious. Kinda hard to see in the photo but there were bubbles showing up in many places.
I wasn’t sure if the leaks were the result of poor welds or getting carried away with the die grinder. Maybe both. I tried re-welding all the joints and eliminated all but two leaks, but then ended up with slaggy mcslagface.
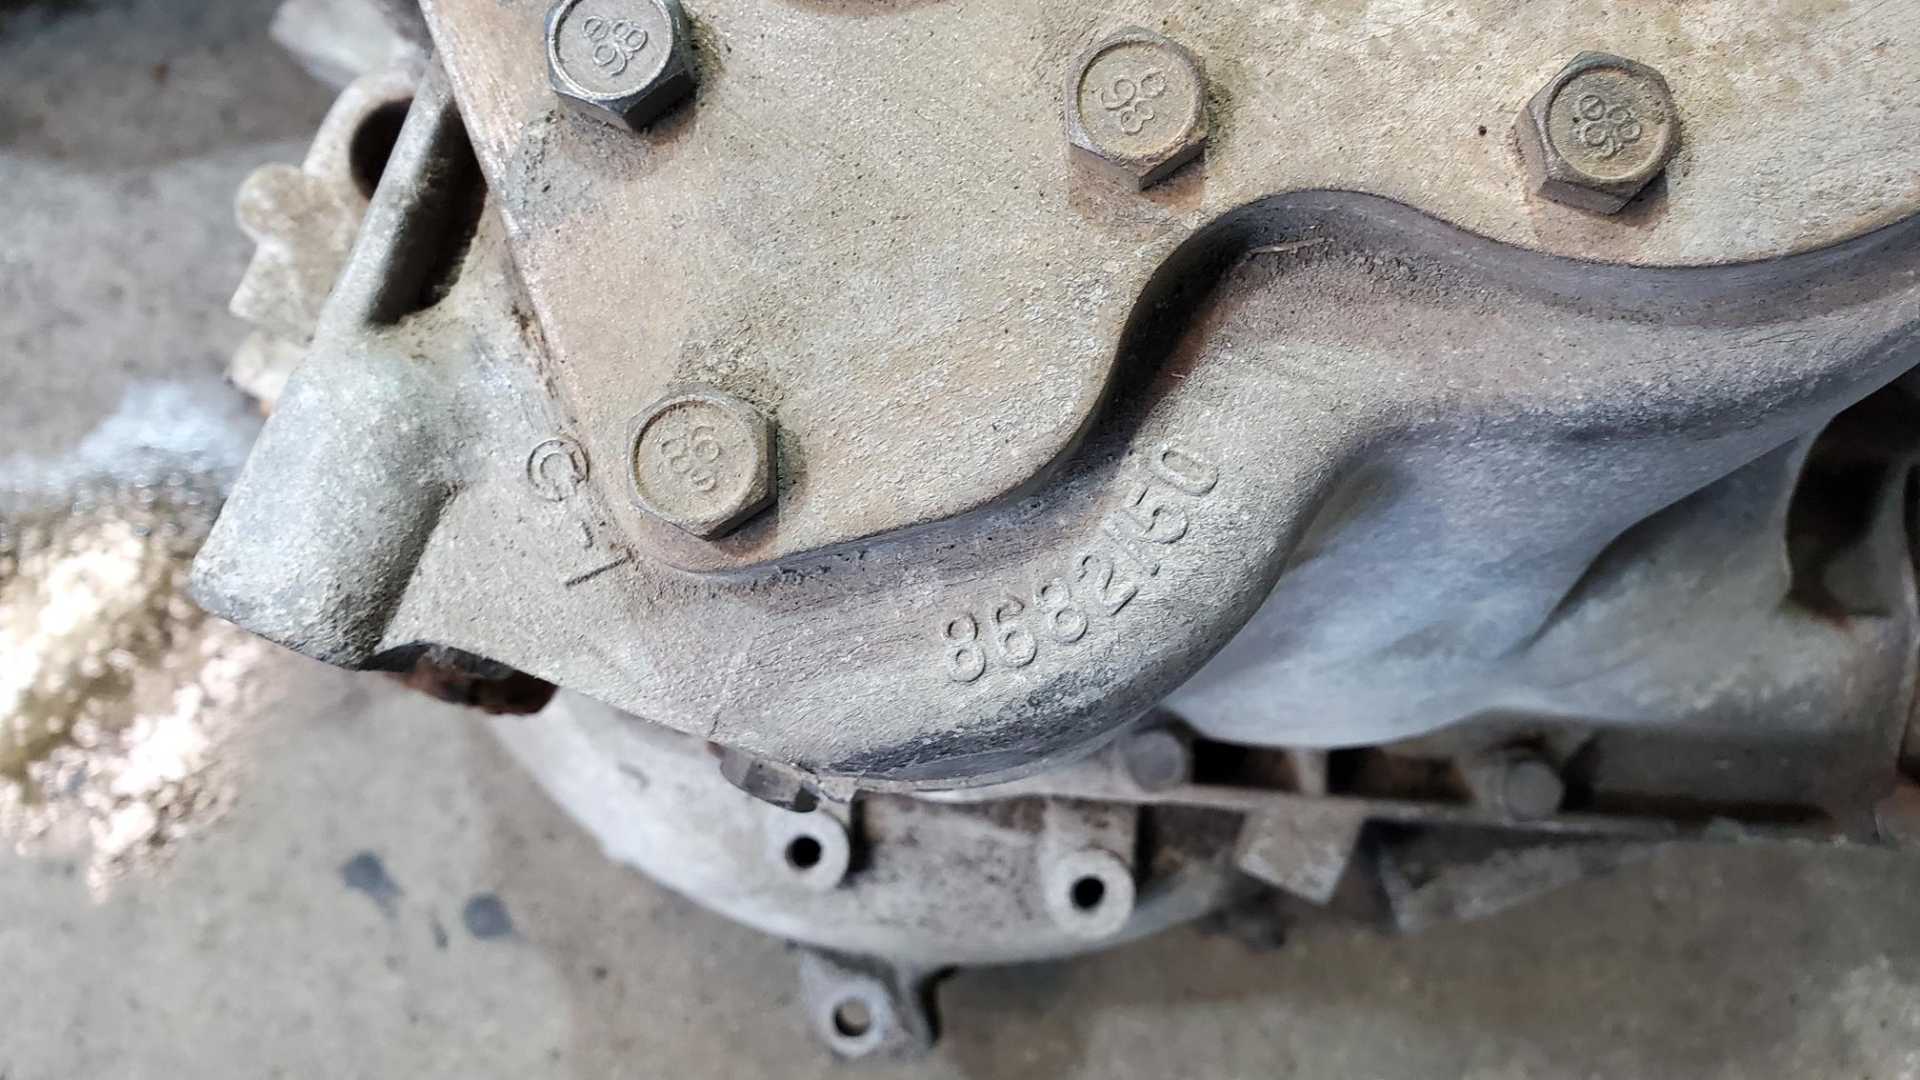
Earlier in this thread I think I said this neck was from a V6, but since then I’ve realized one of them was from my original Iron Duke. The other one came from a salvage yard car but I don’t remember which engine. Are the Iron Duke and V6 filler necks the same?
Anyway, part of the problem is how I cut the flanges off both of these Fiero necks. I don’t remember why I did it this way, but I cut way too much material off.
I’ll cut another flange out of scrap plate and try again. If I fail again I’ll have to either get another Fiero neck or just use a Quad one with the filler/junction I found the other day.
[This message has been edited by Quadfather (edited 12-19-2021).]
This process also showed me I need to clock the neck on the mounting flange about 5 degrees clockwise. That way the temp sensor won’t interfere with the mounting bolt. Fierobsessed mentioned he did the same thing for the neck Sardonyx used in his build.
quote
Originally posted by Quadfather:
[This message has been edited by Quadfather (edited 12-19-2021).]
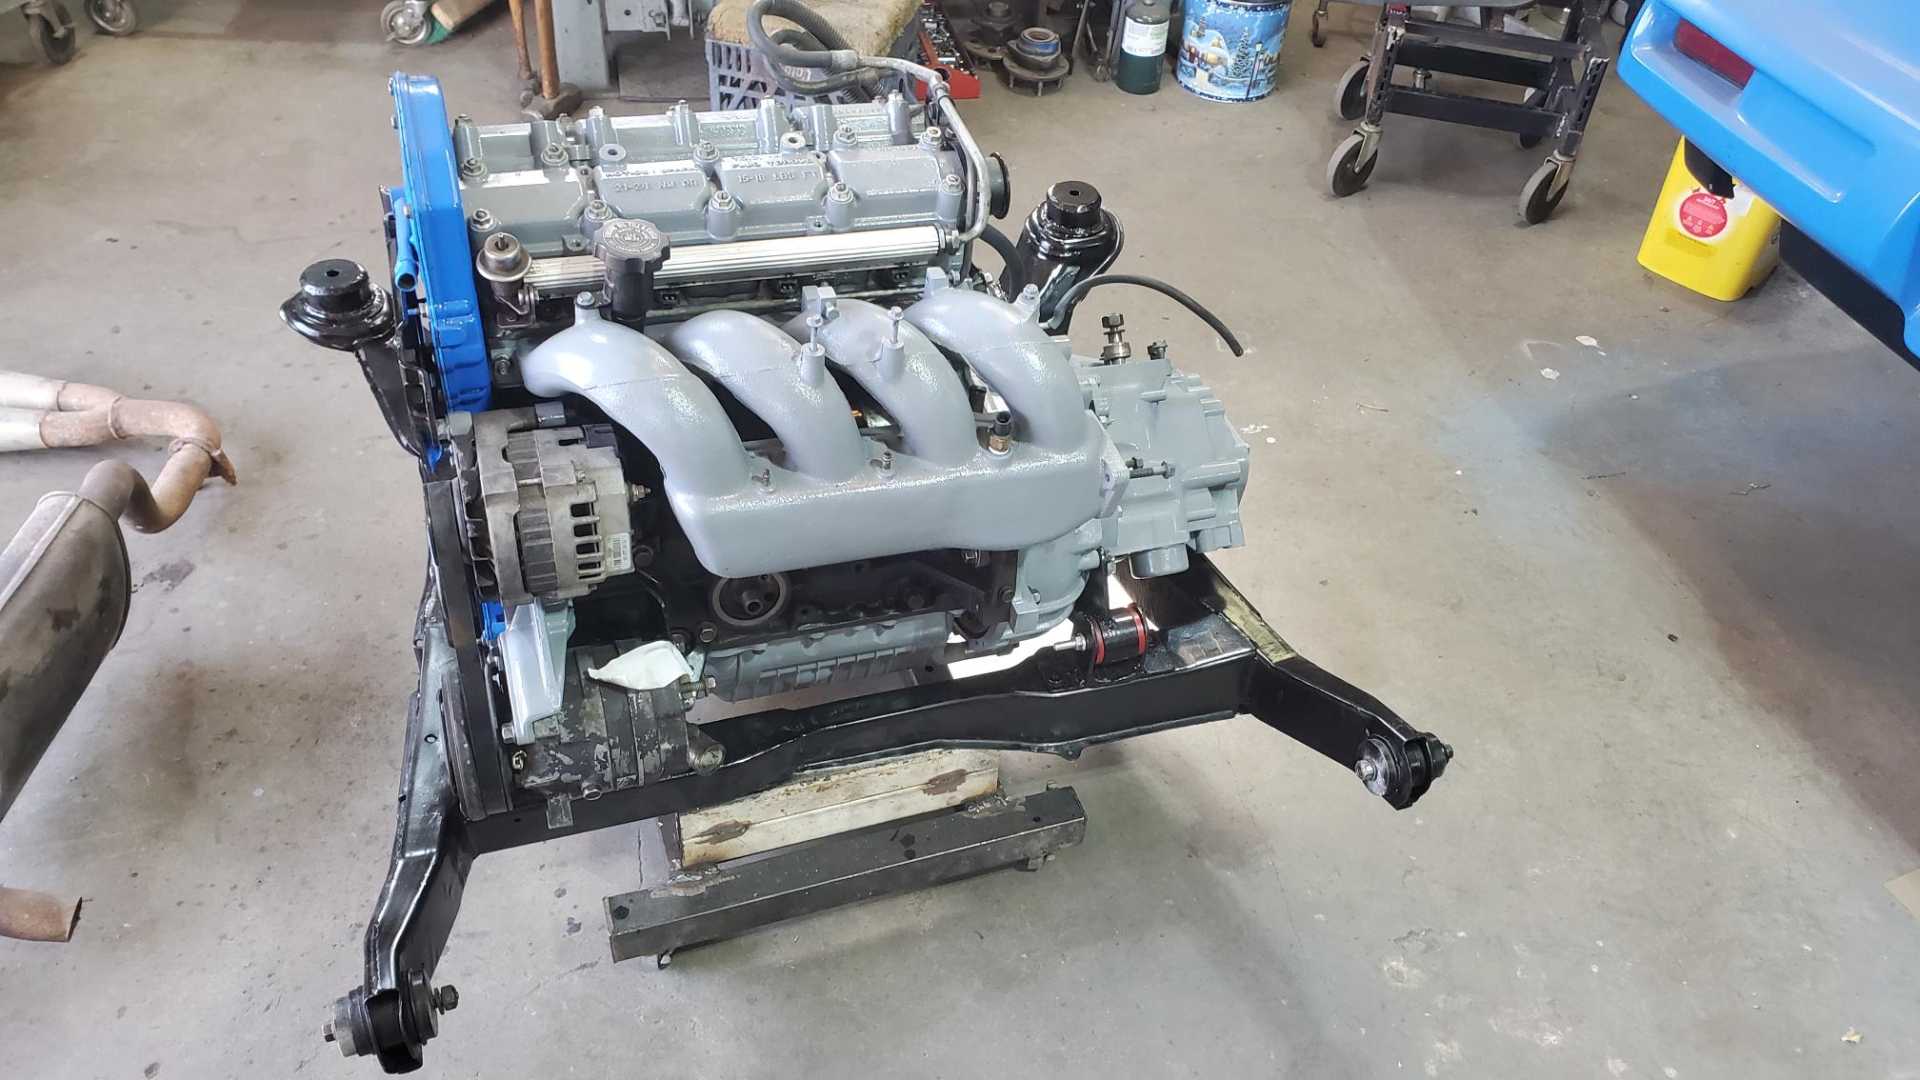
Who knew cleaning and painting accessory brackets could be so time consuming? I got the AC compressor and alternator mounted, now I’m working on the intake and exhaust manifolds to get them ready to be installed.
I also tried welding up another hybrid t-stat housing and failed again. I might try oxy-acetylene welding next time.
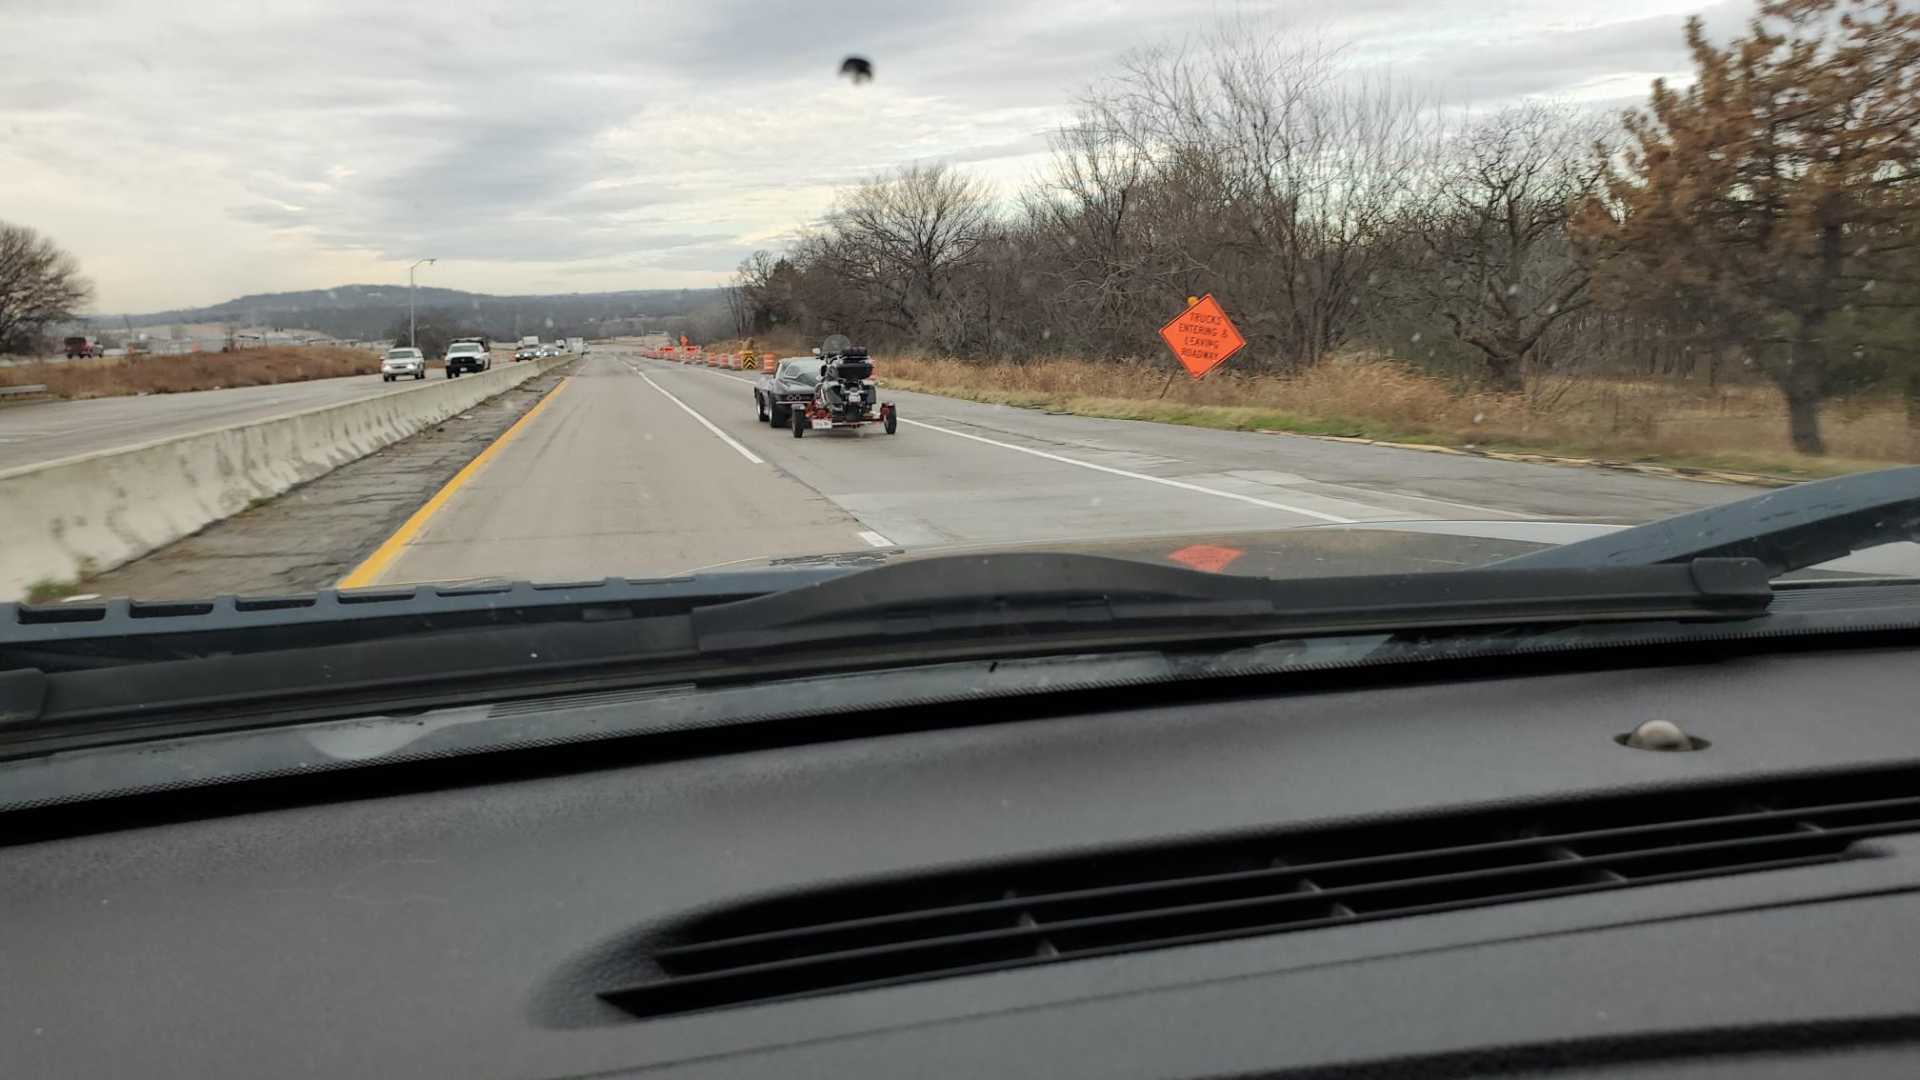
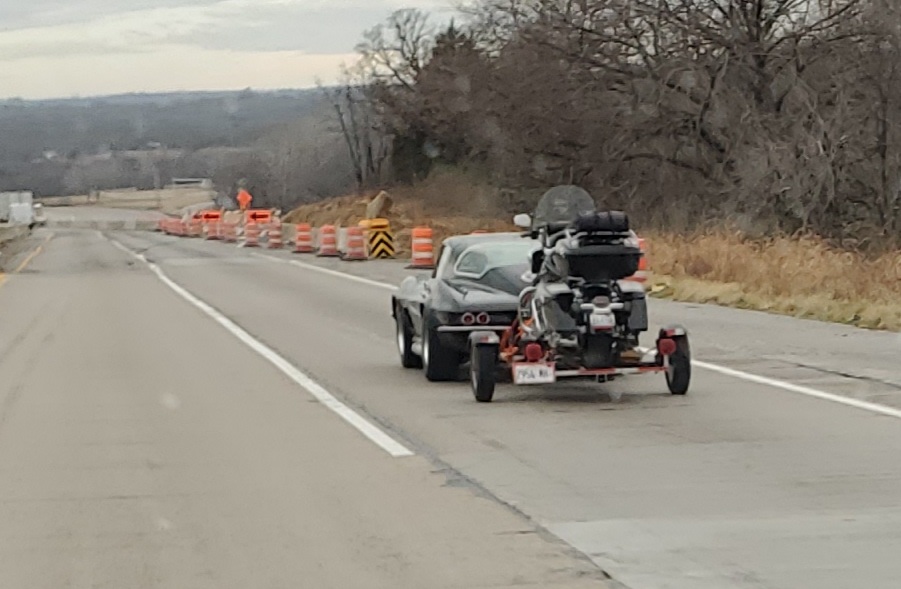
Today I took a trip to a salvage yard and the experience was almost magical. It started on the drive, when I saw a mid-60s Corvette pulling a Harley.
The tag on the car said METSVET.
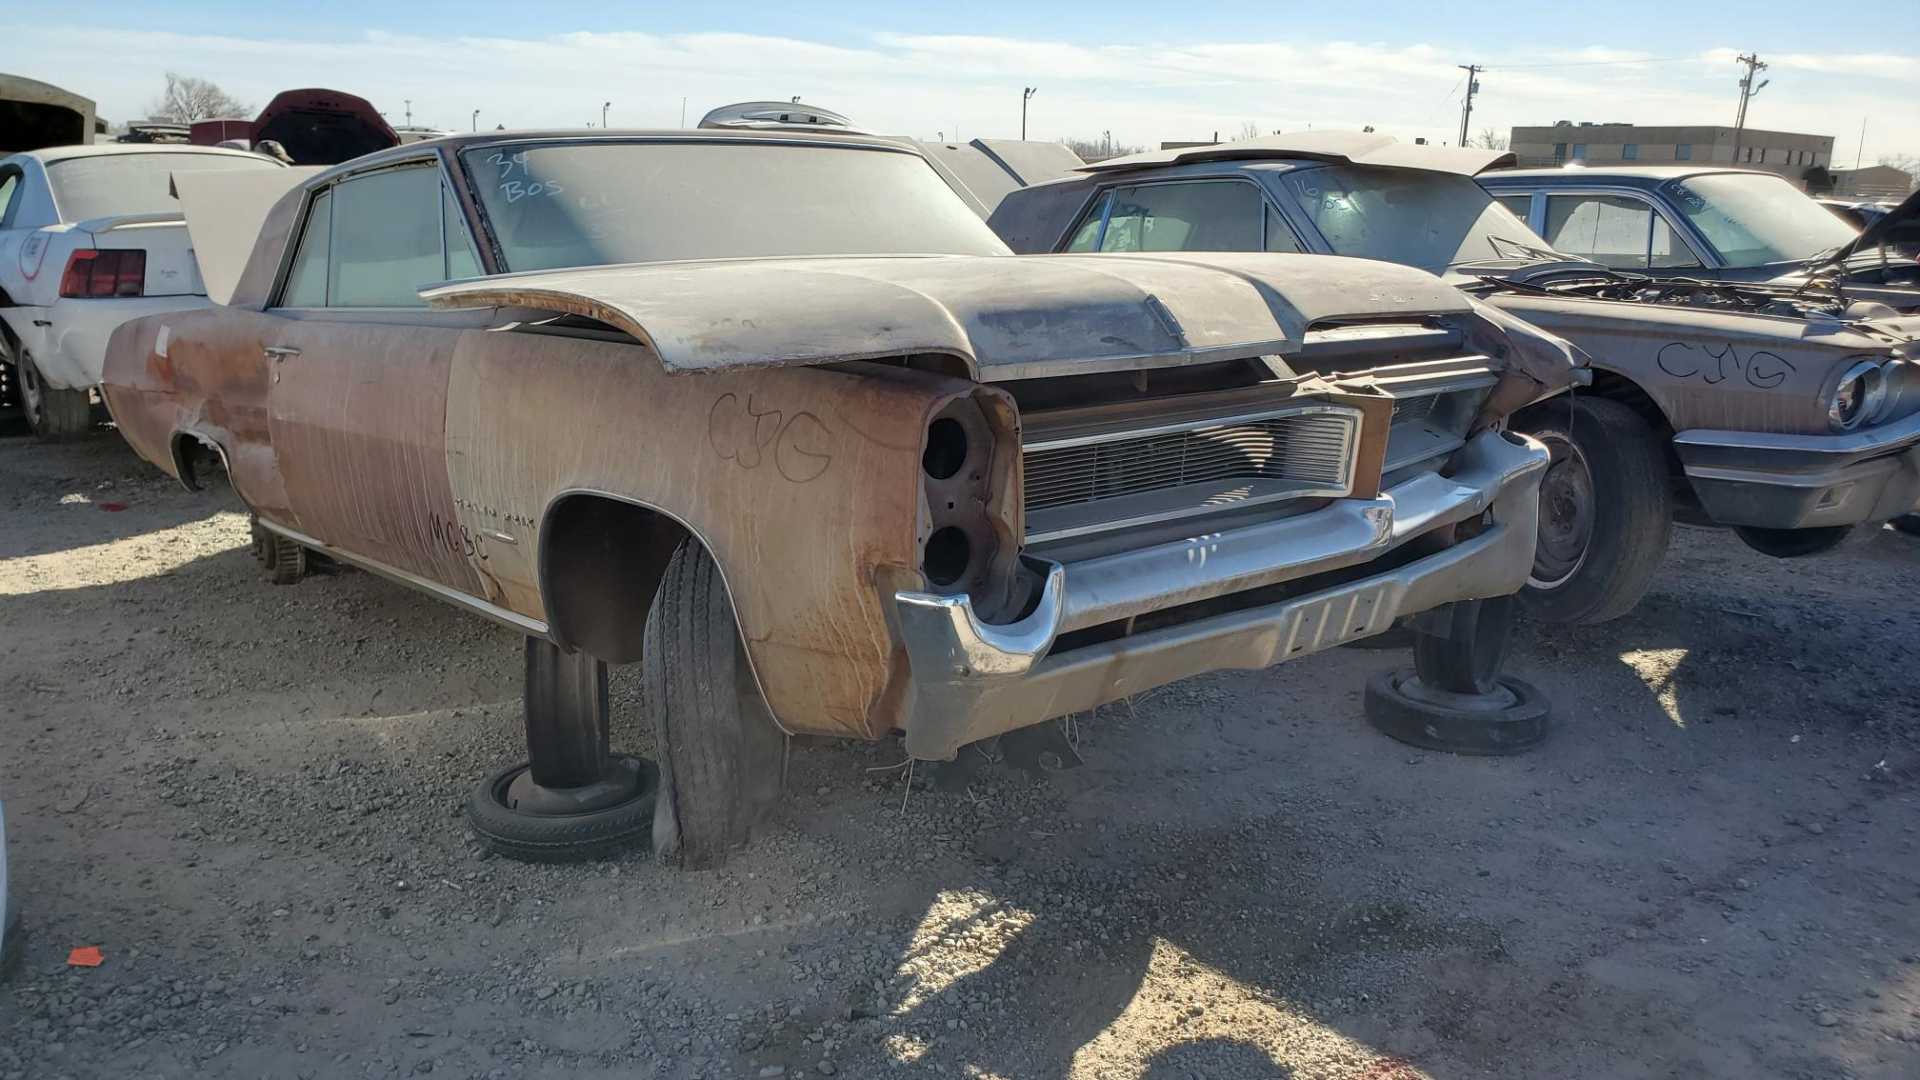
The salvage yard was full of old cars. Not just 90s or even 80s cars, but some classic Detroit iron.
1965 Grand Prix.
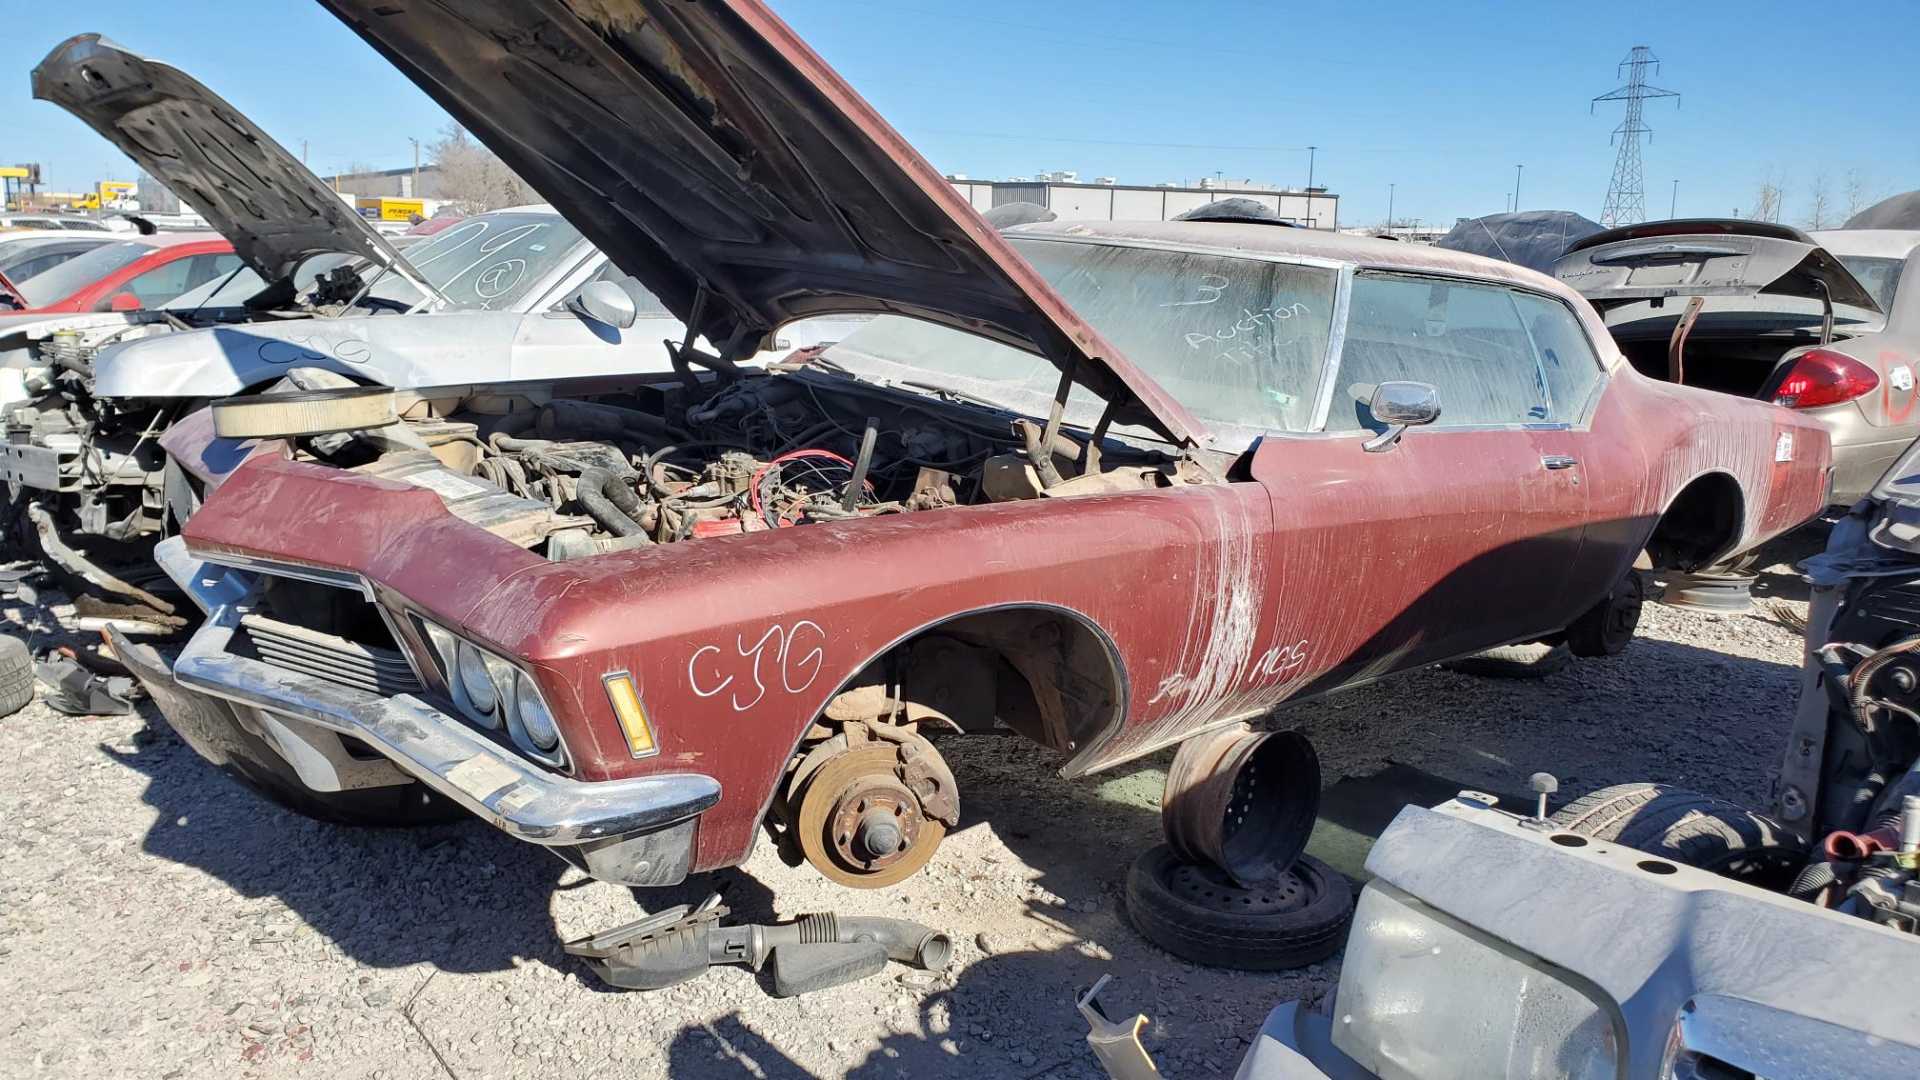
1971 Riviera, with a straight body, a gutted interior and a 455.
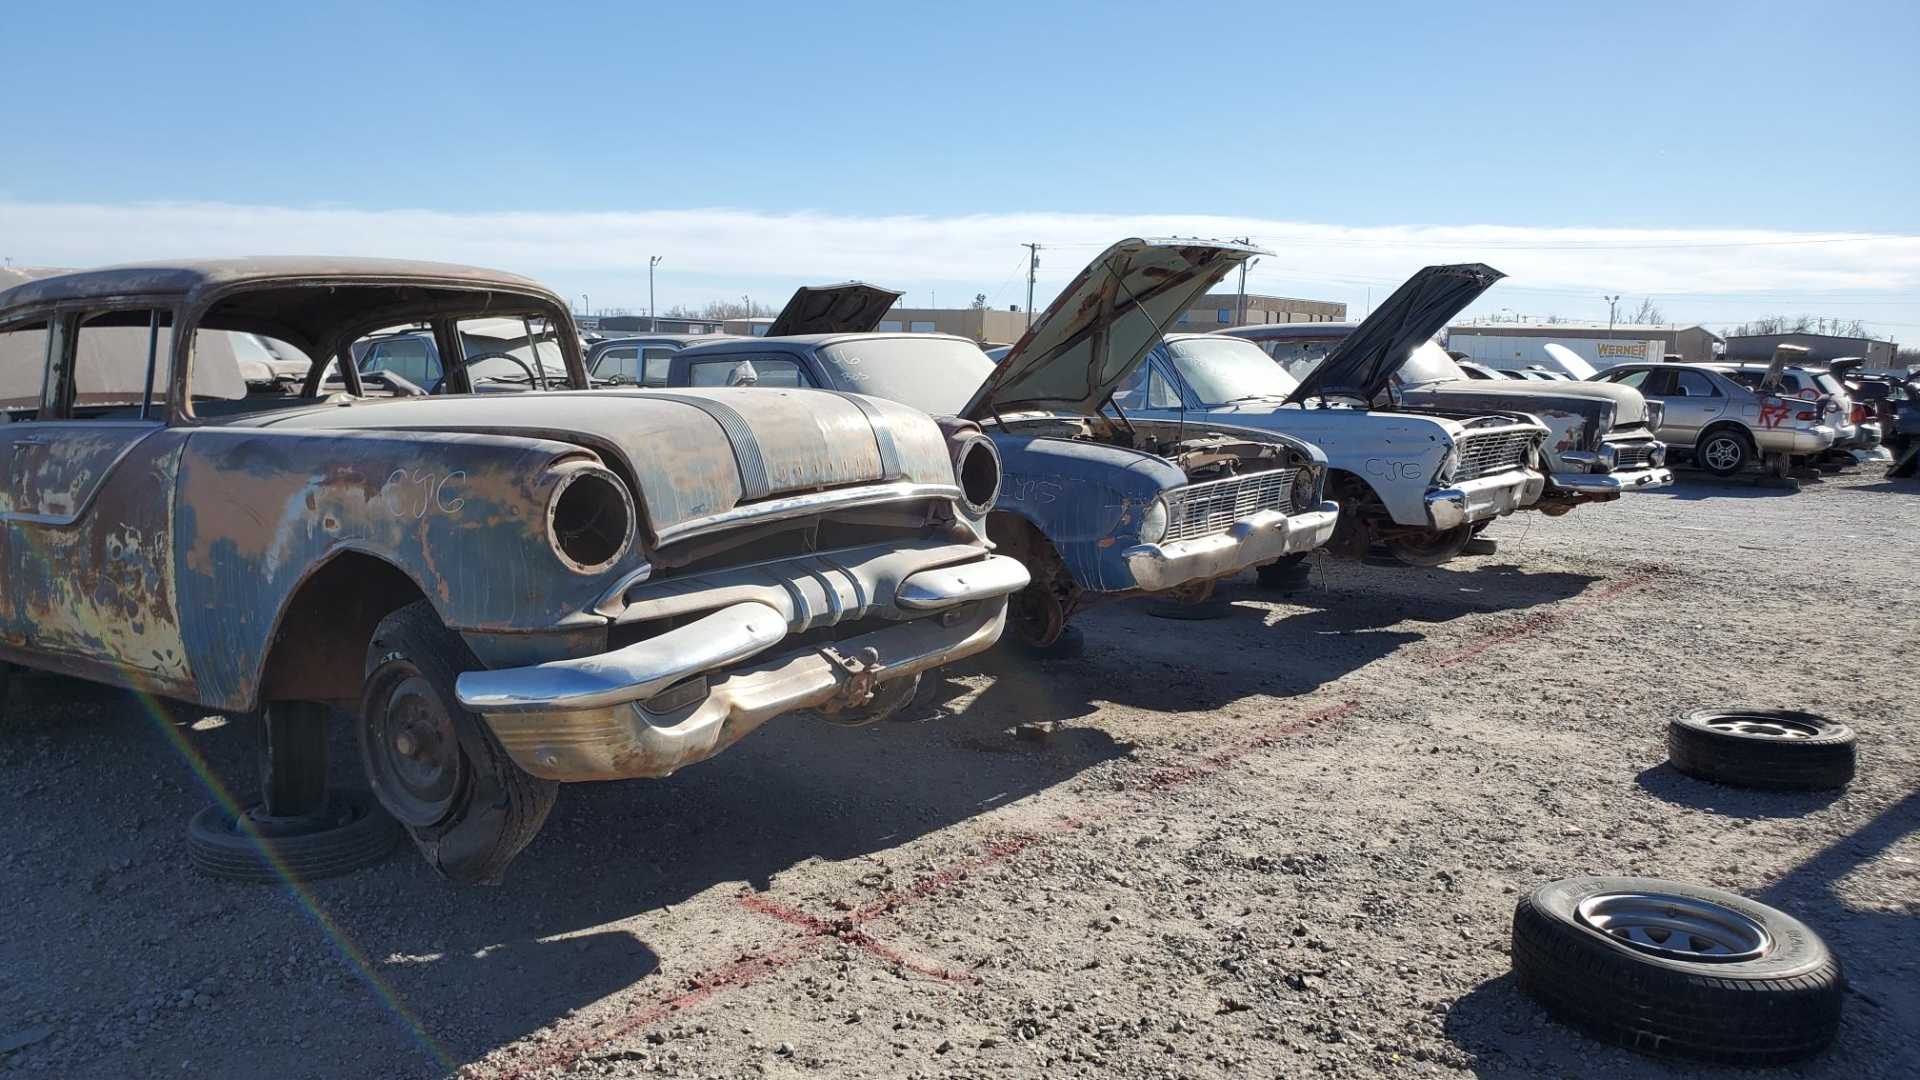
A 1955 Pontiac Chieftain flanked by a collection of old Fords.
[This message has been edited by Quadfather (edited 12-29-2021).]
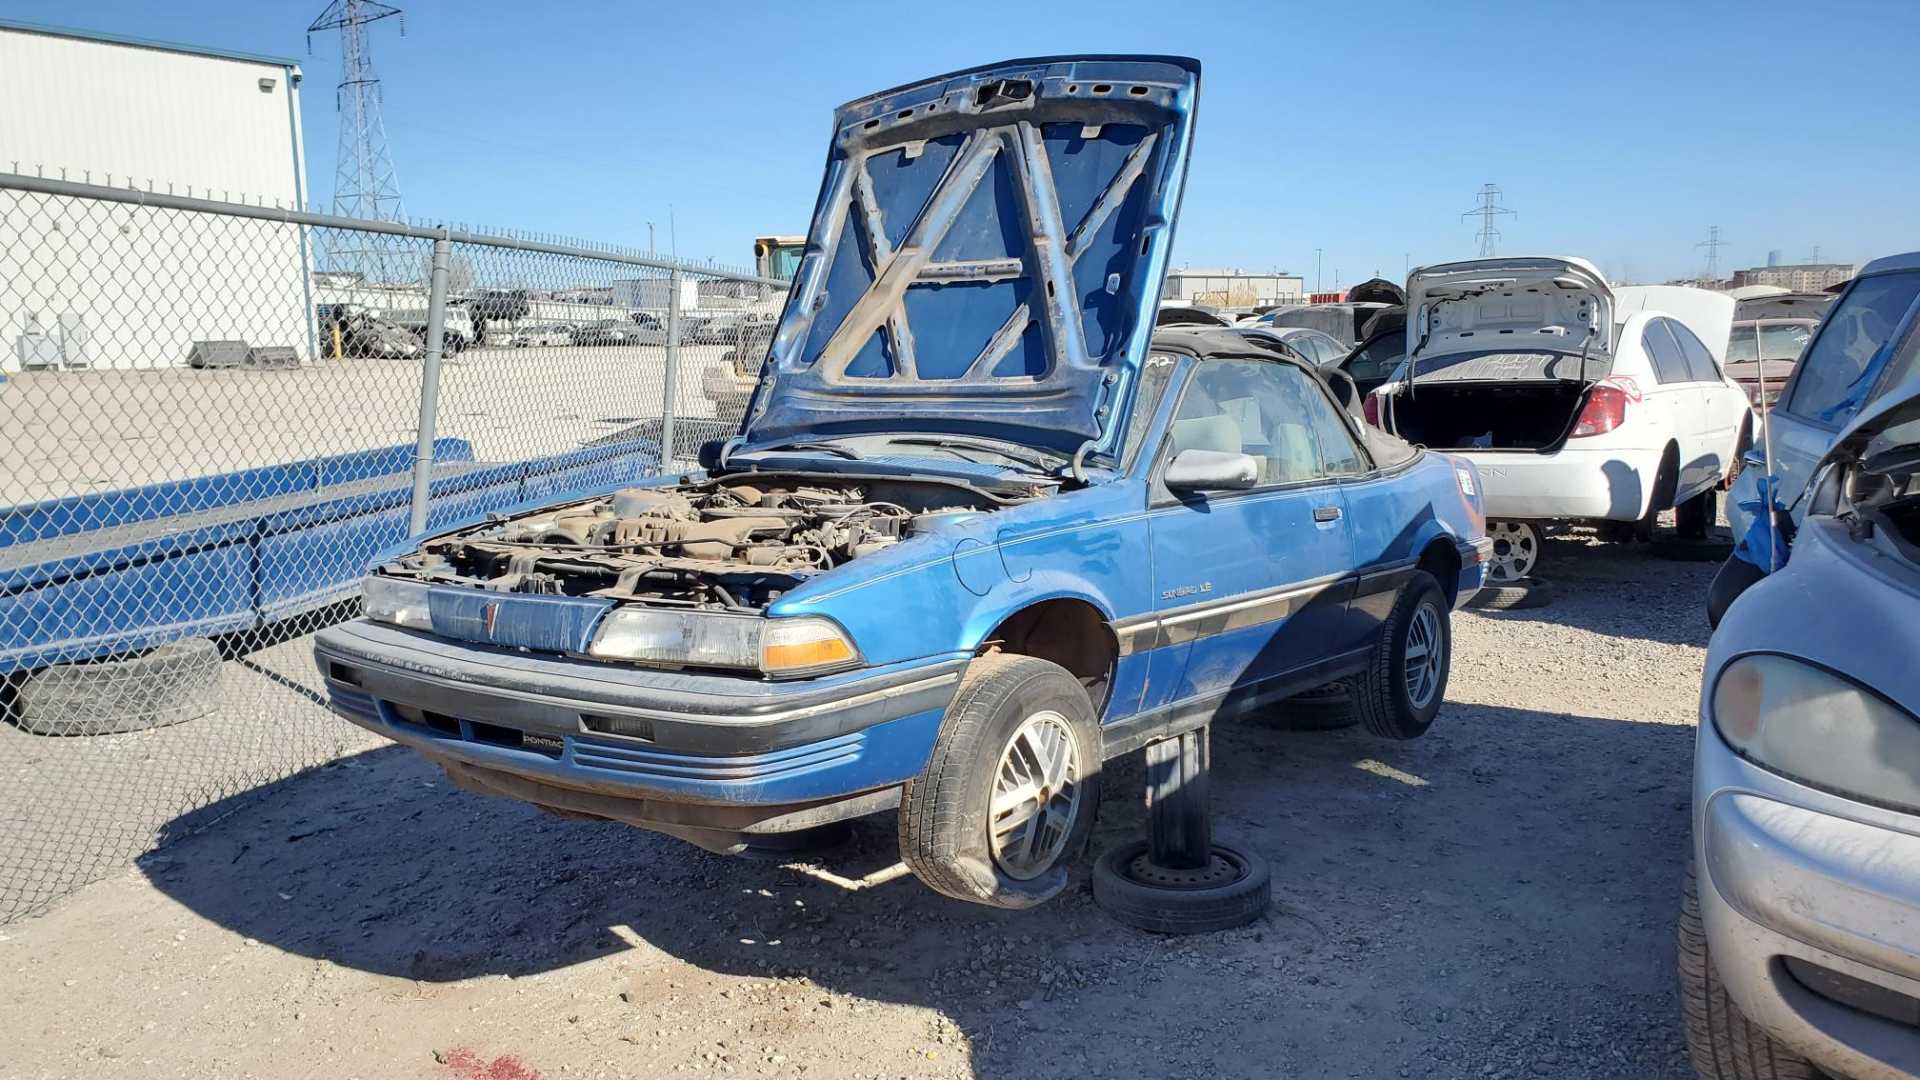
This 1990 Sunbird brought back memories. The first new car I ever had was a 1989 Sunbird that was the same color as this one. It was the car my wife and I drove on our honeymoon.
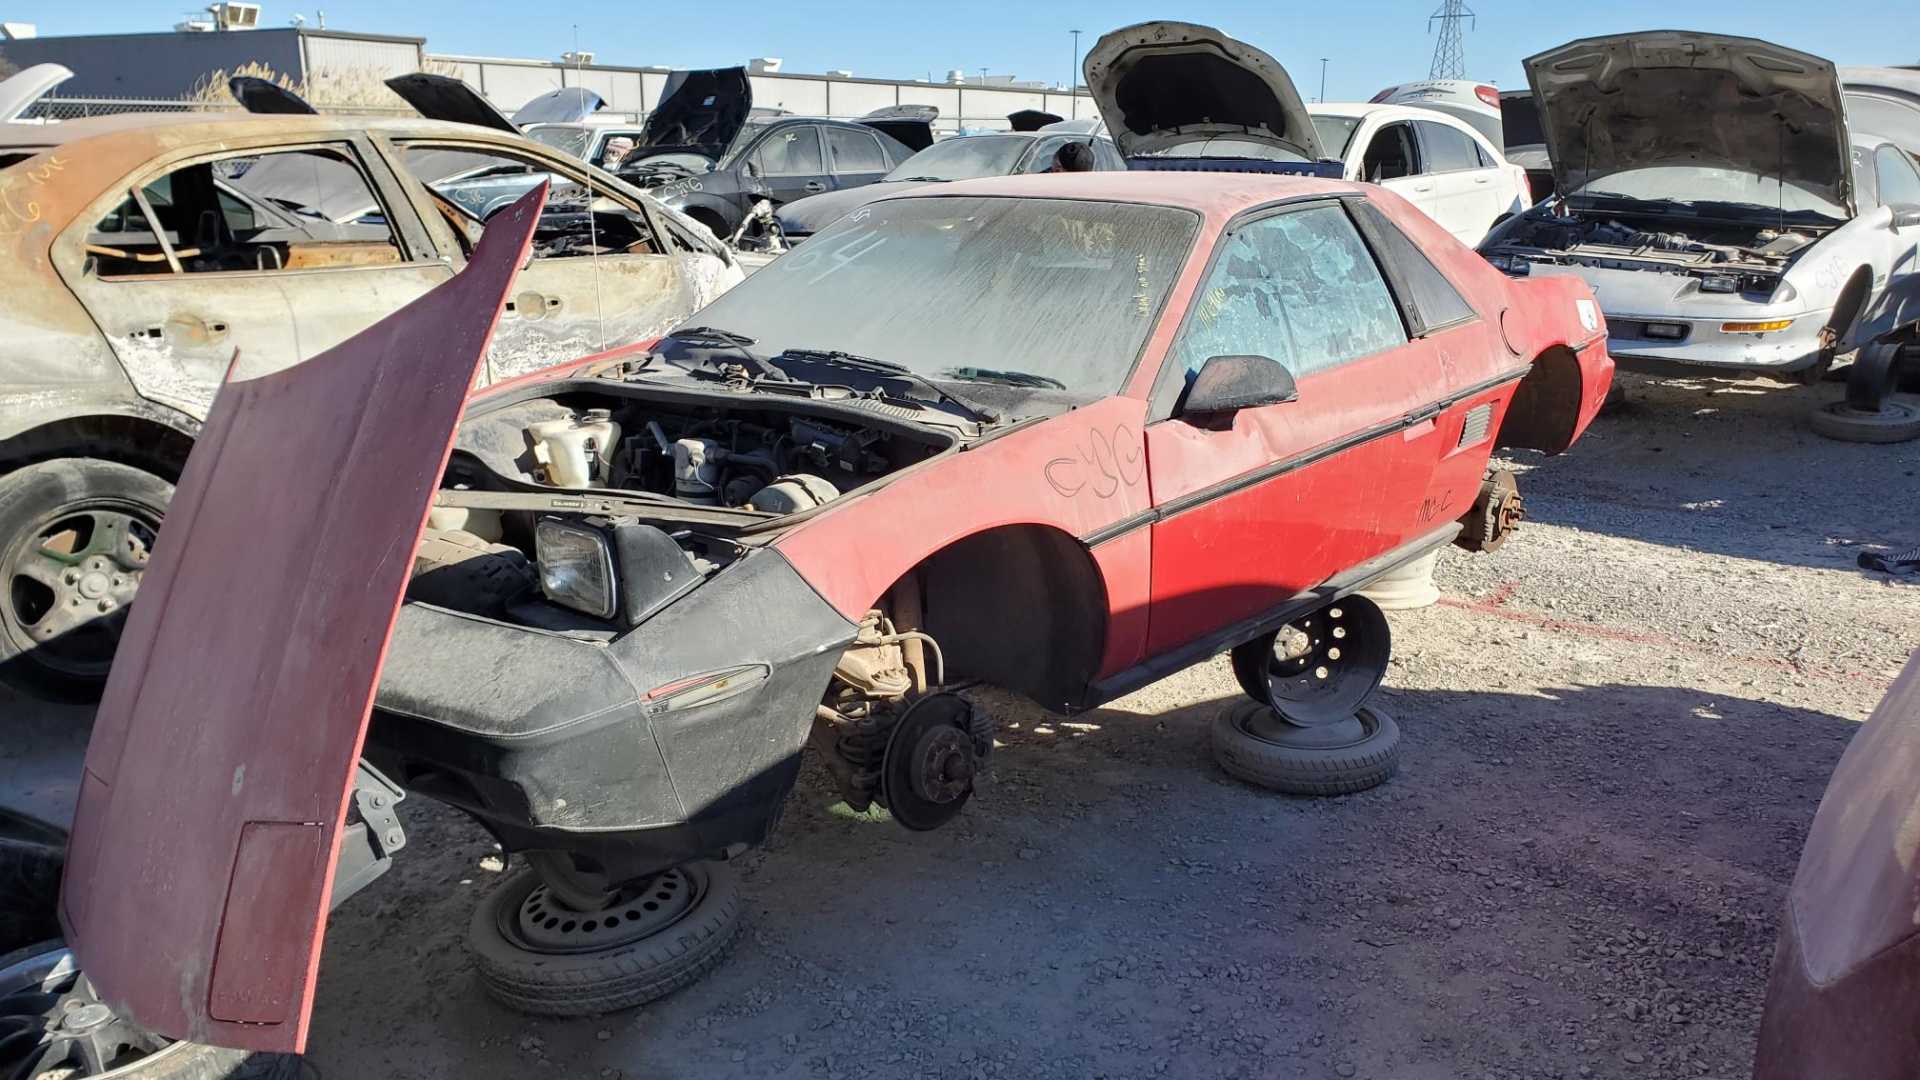
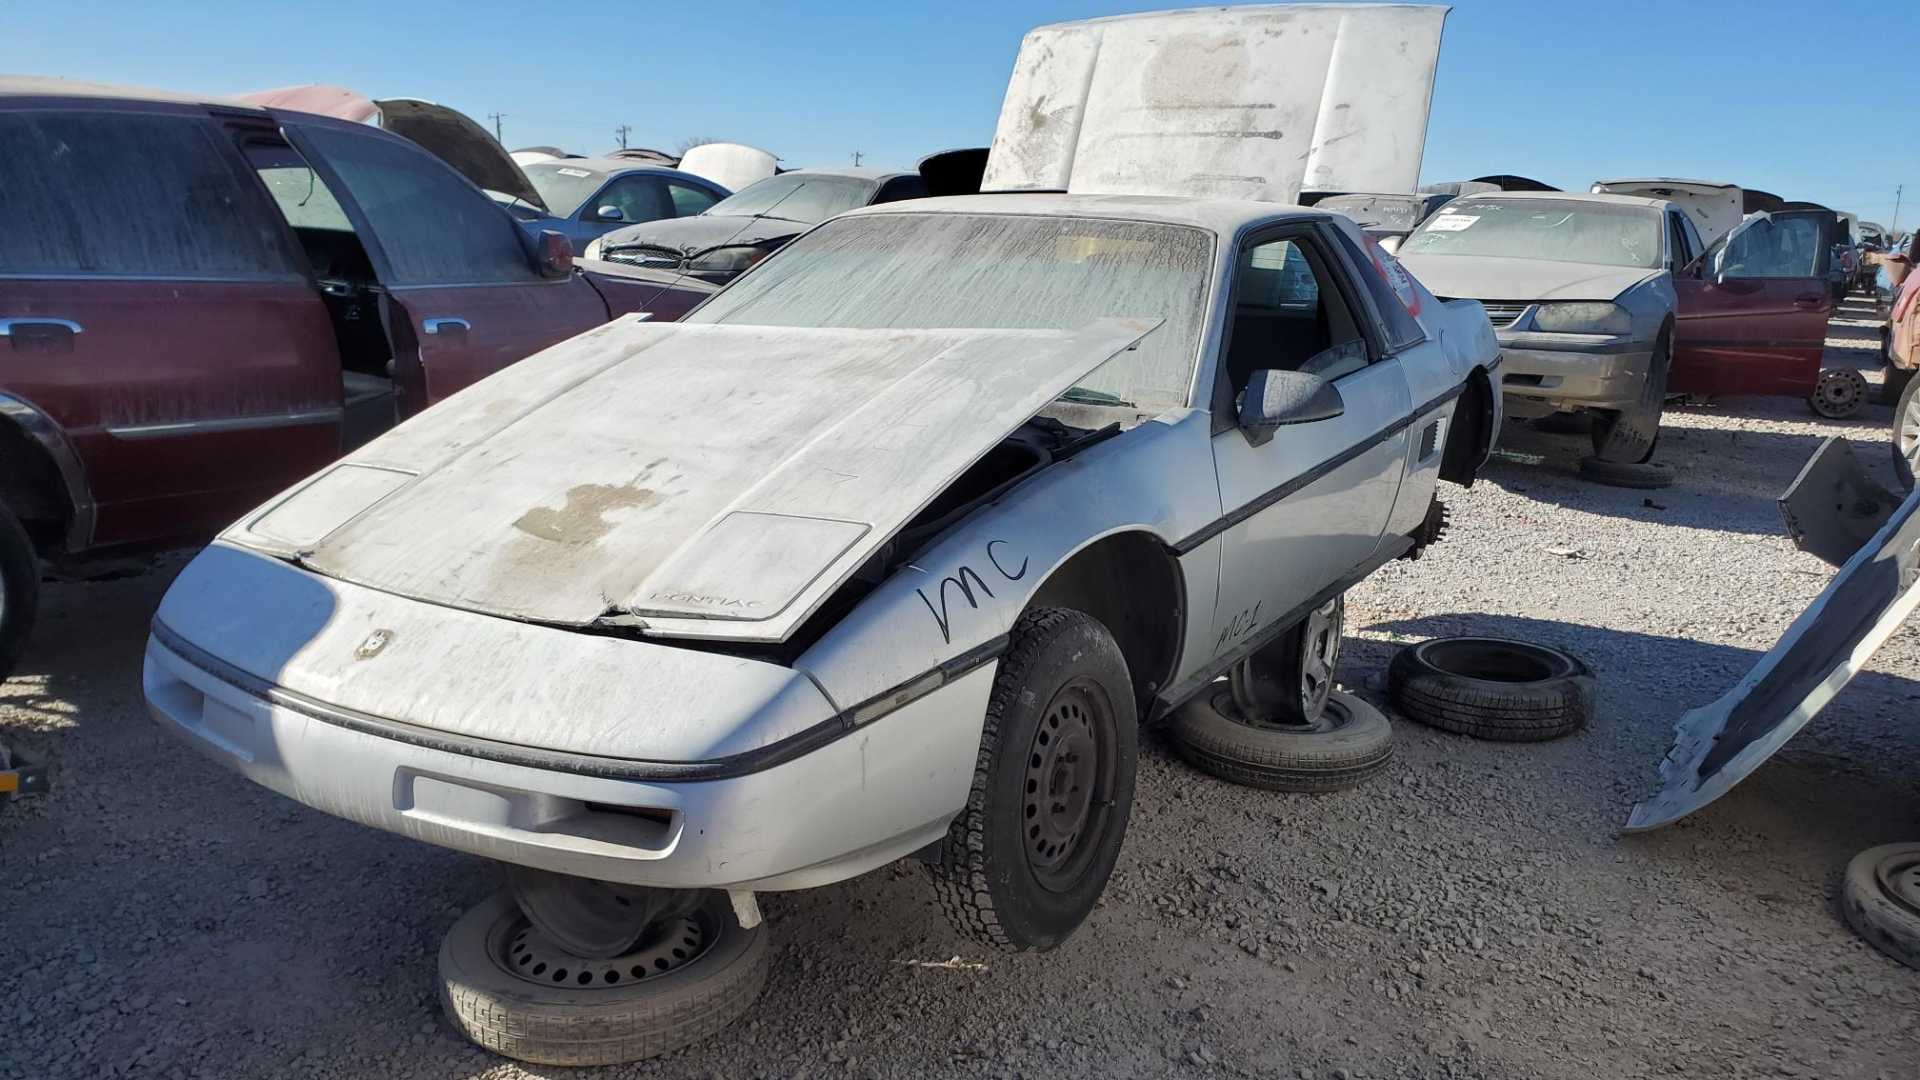
The real magic happened when I found the ‘84 Fiero which had lured me to the yard.
Just as I was about to start removing the t-stat housing and the right front lower control arm, I turned around and saw this.
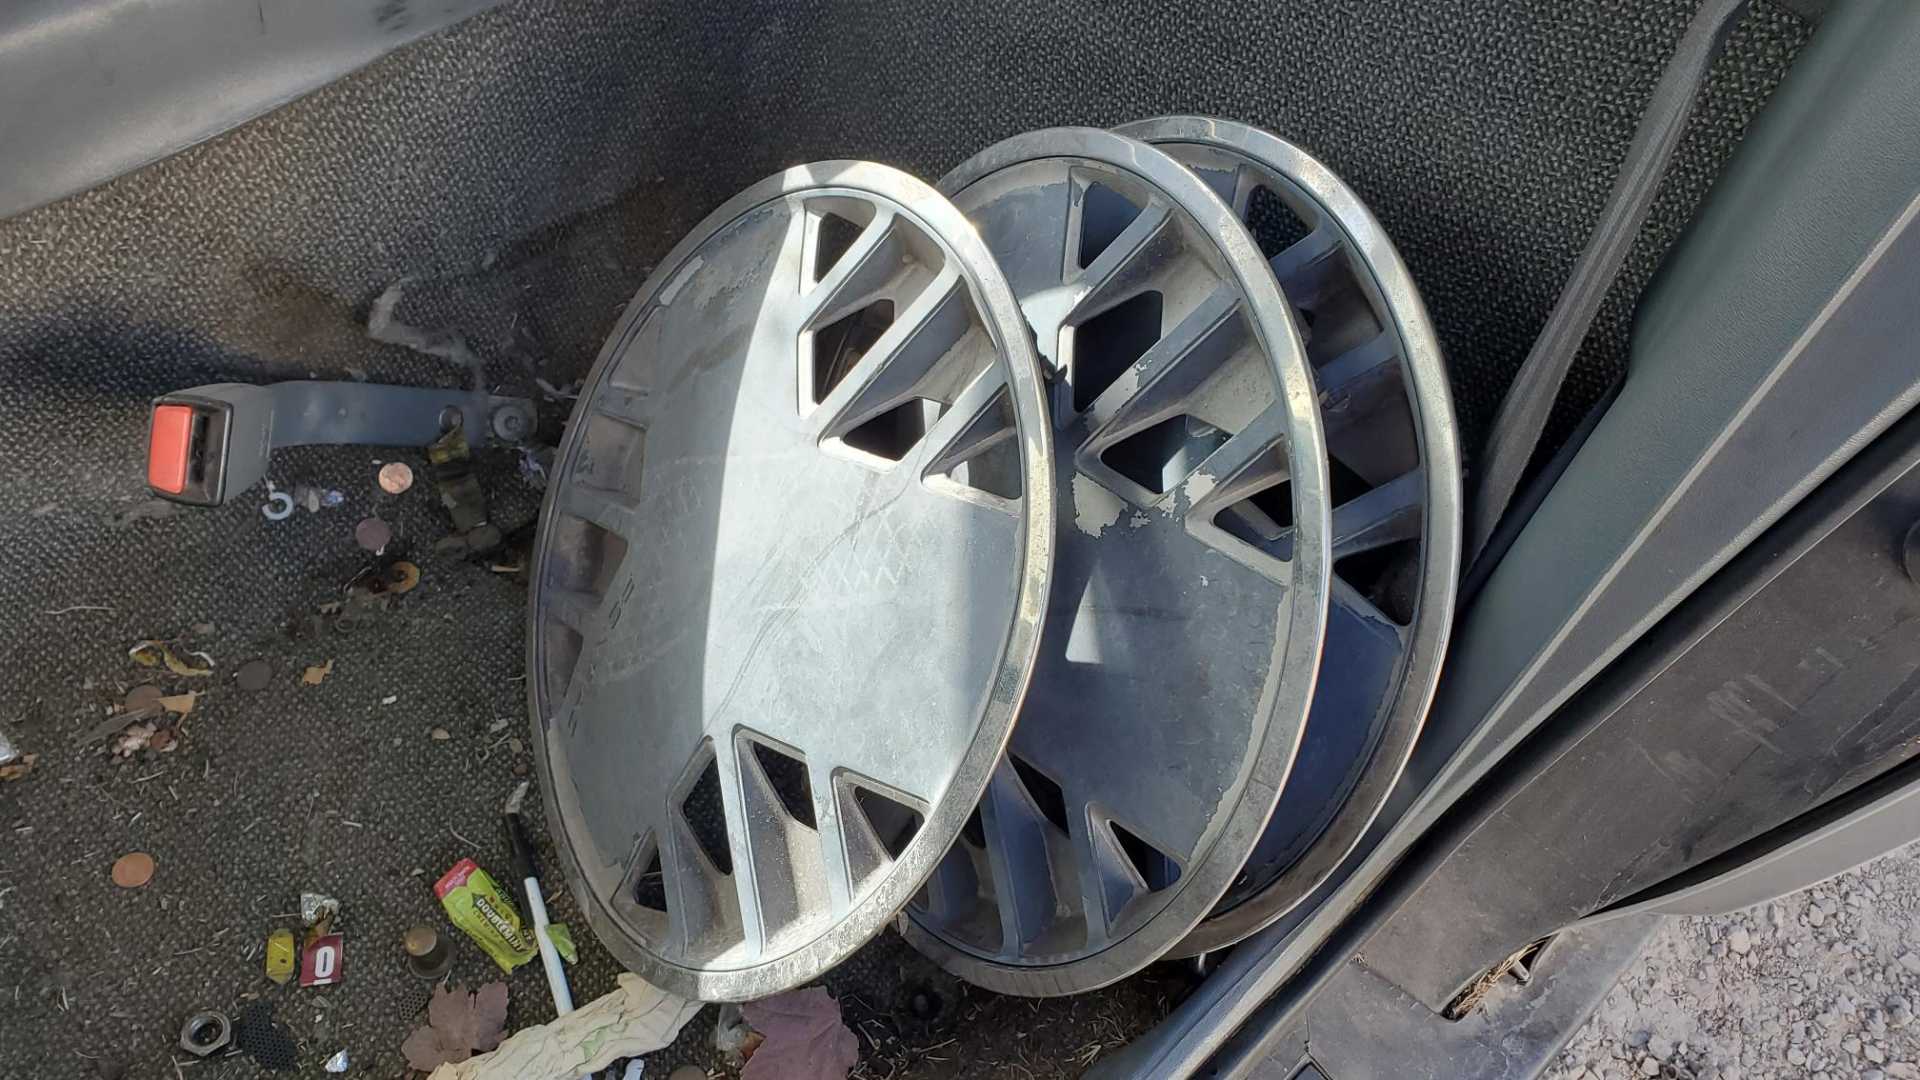
It’s an ‘87 that’s almost a clone of what mine was. It was a surprise because it’s not on the salvage yard’s official online roster. It has cruise control and an automatic, but other than that it’s a zero-option coupe. It even had the same hubcaps mine did.
‘
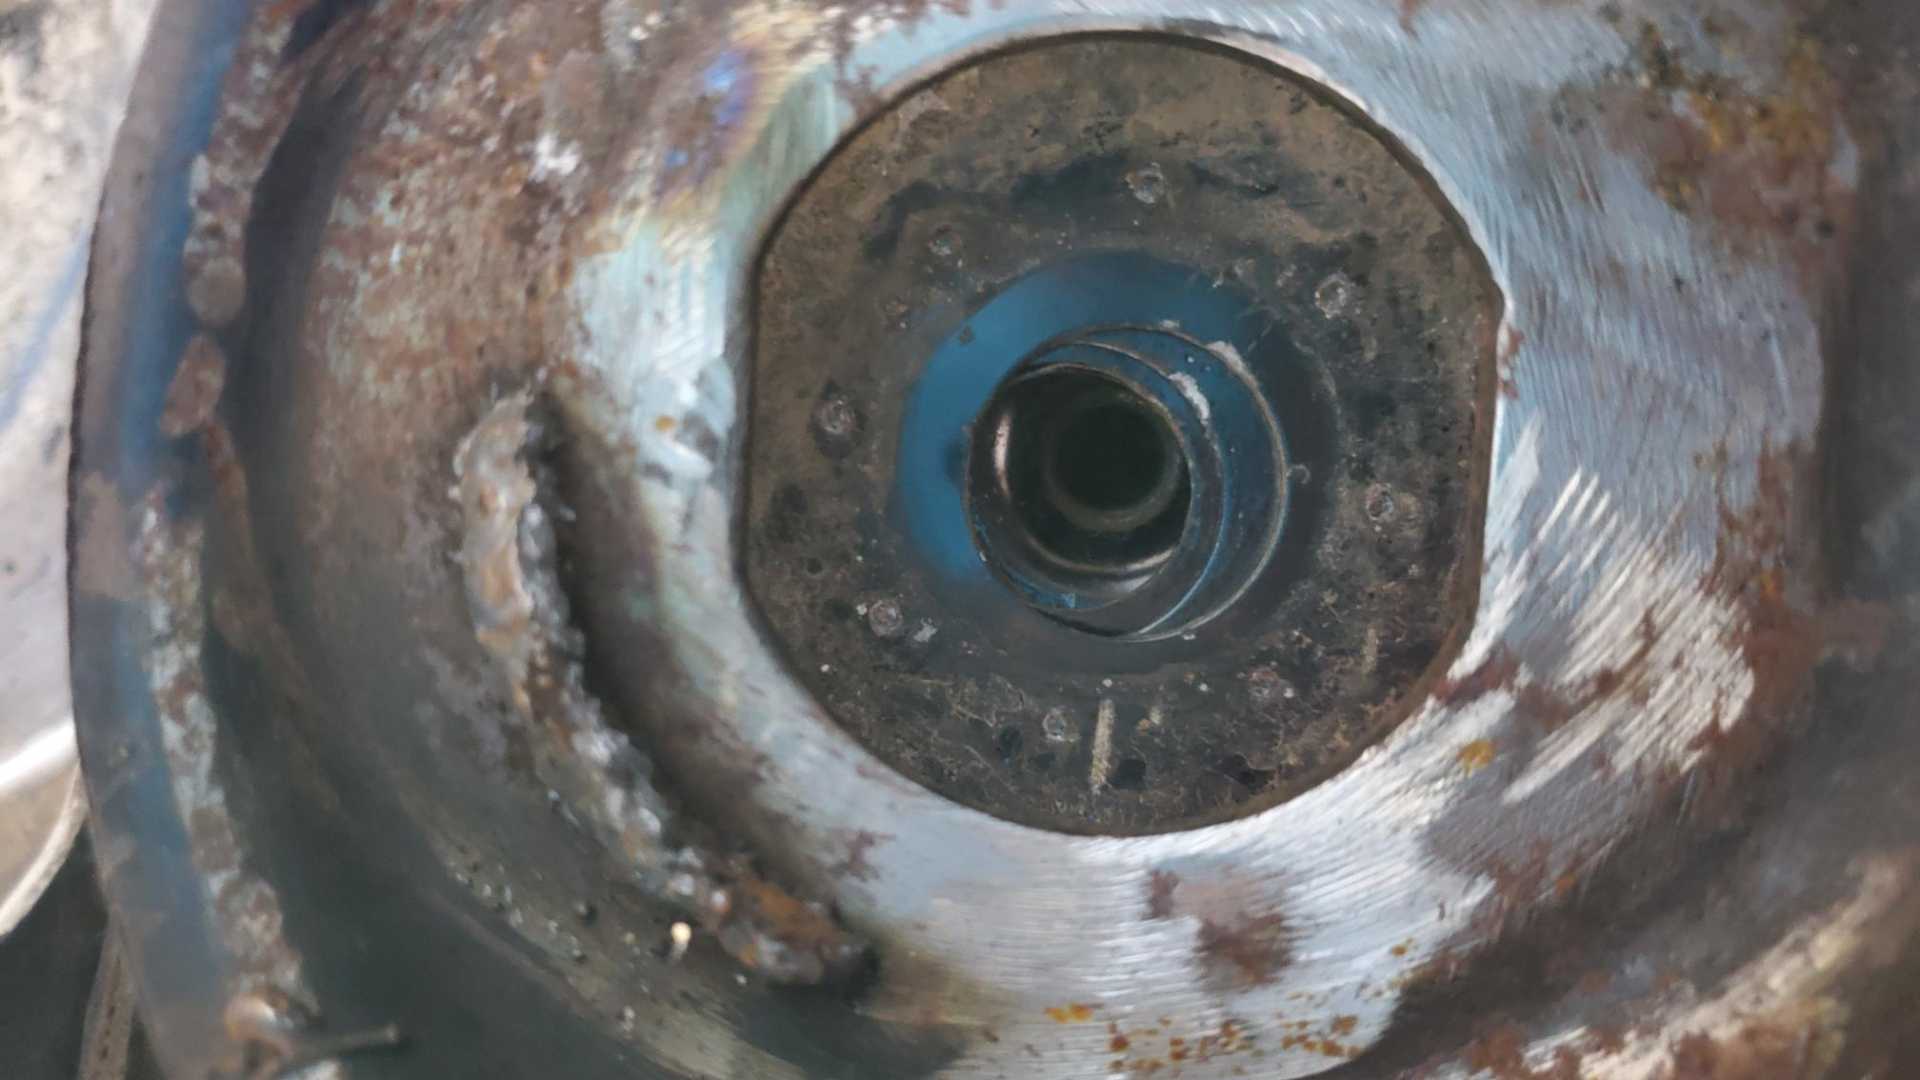
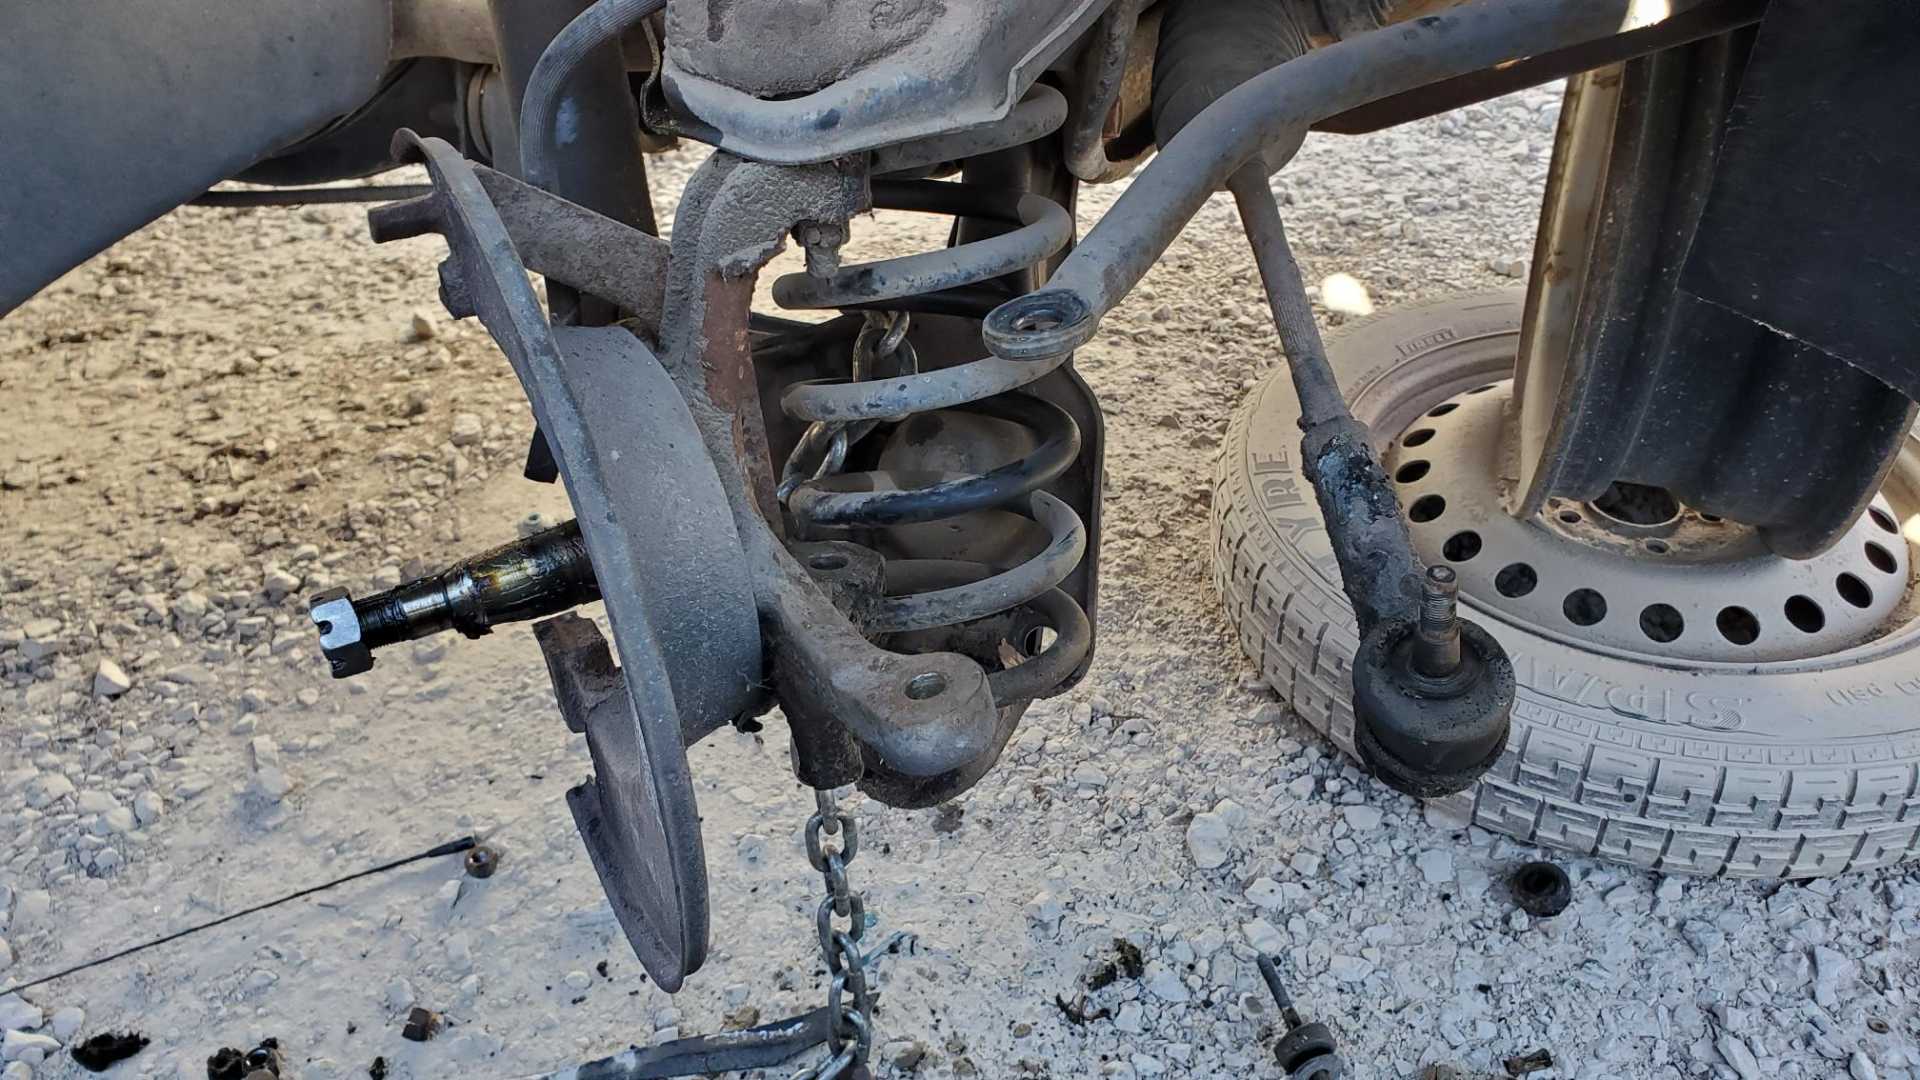
A hunch tells me the car had been well cared for while it was being driven, and then was stored inside for quite some time. The t-stat housing came off quickly, and removing the lower control arm was one of the easiest salvage yard jobs I’ve ever completed.
I wrapped a chain through the spring and around the control arm, but when the spring jumped out of the control arm it was stopped by the upper perch.
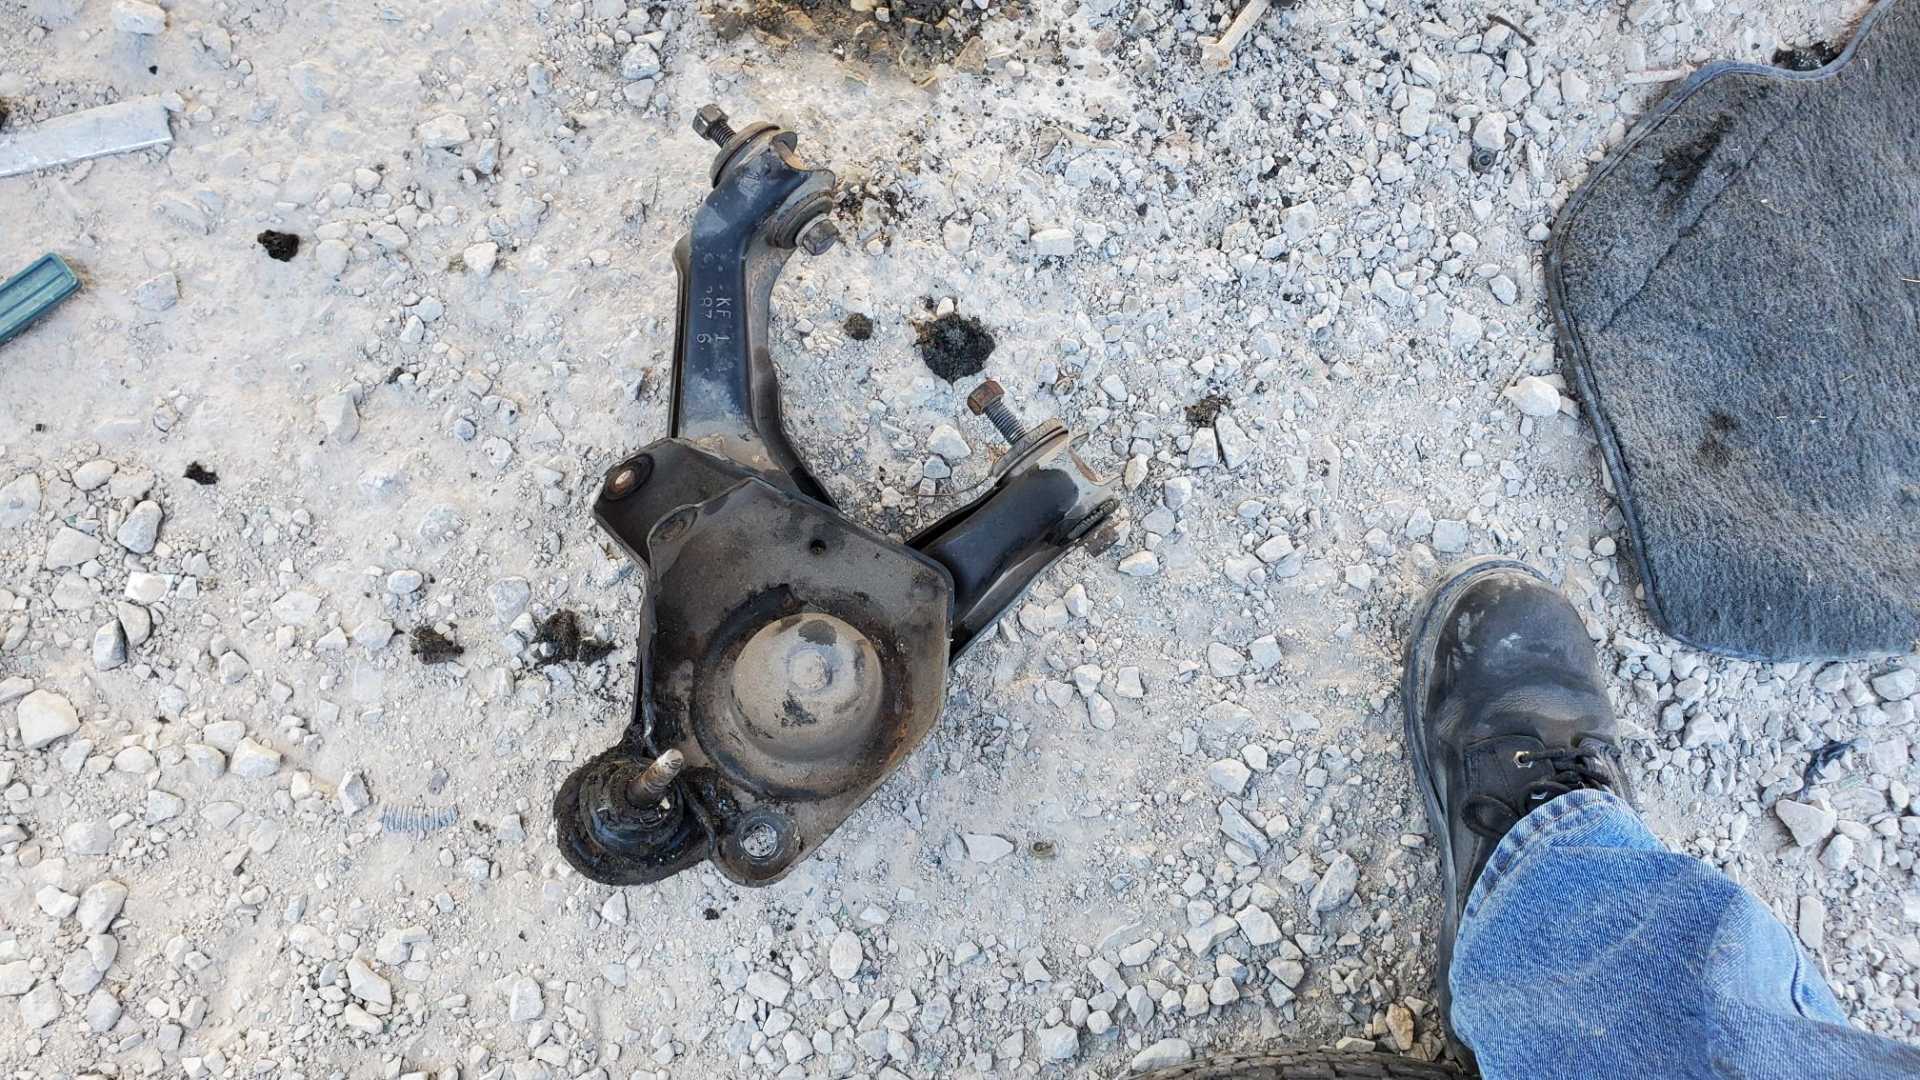
When I got the control arm out I lay there on the ground holding it in the air like Jeremiah Johnson after killing a grizzly.
Tomorrow I’ll get back to work on the engine, installing the flywheel, clutch and pressure plate, then the starter and the manifolds. After that it will be time to remove the spare engine from the car to put this engine on the cradle. Fun, fun.
[This message has been edited by Quadfather (edited 12-28-2021).]
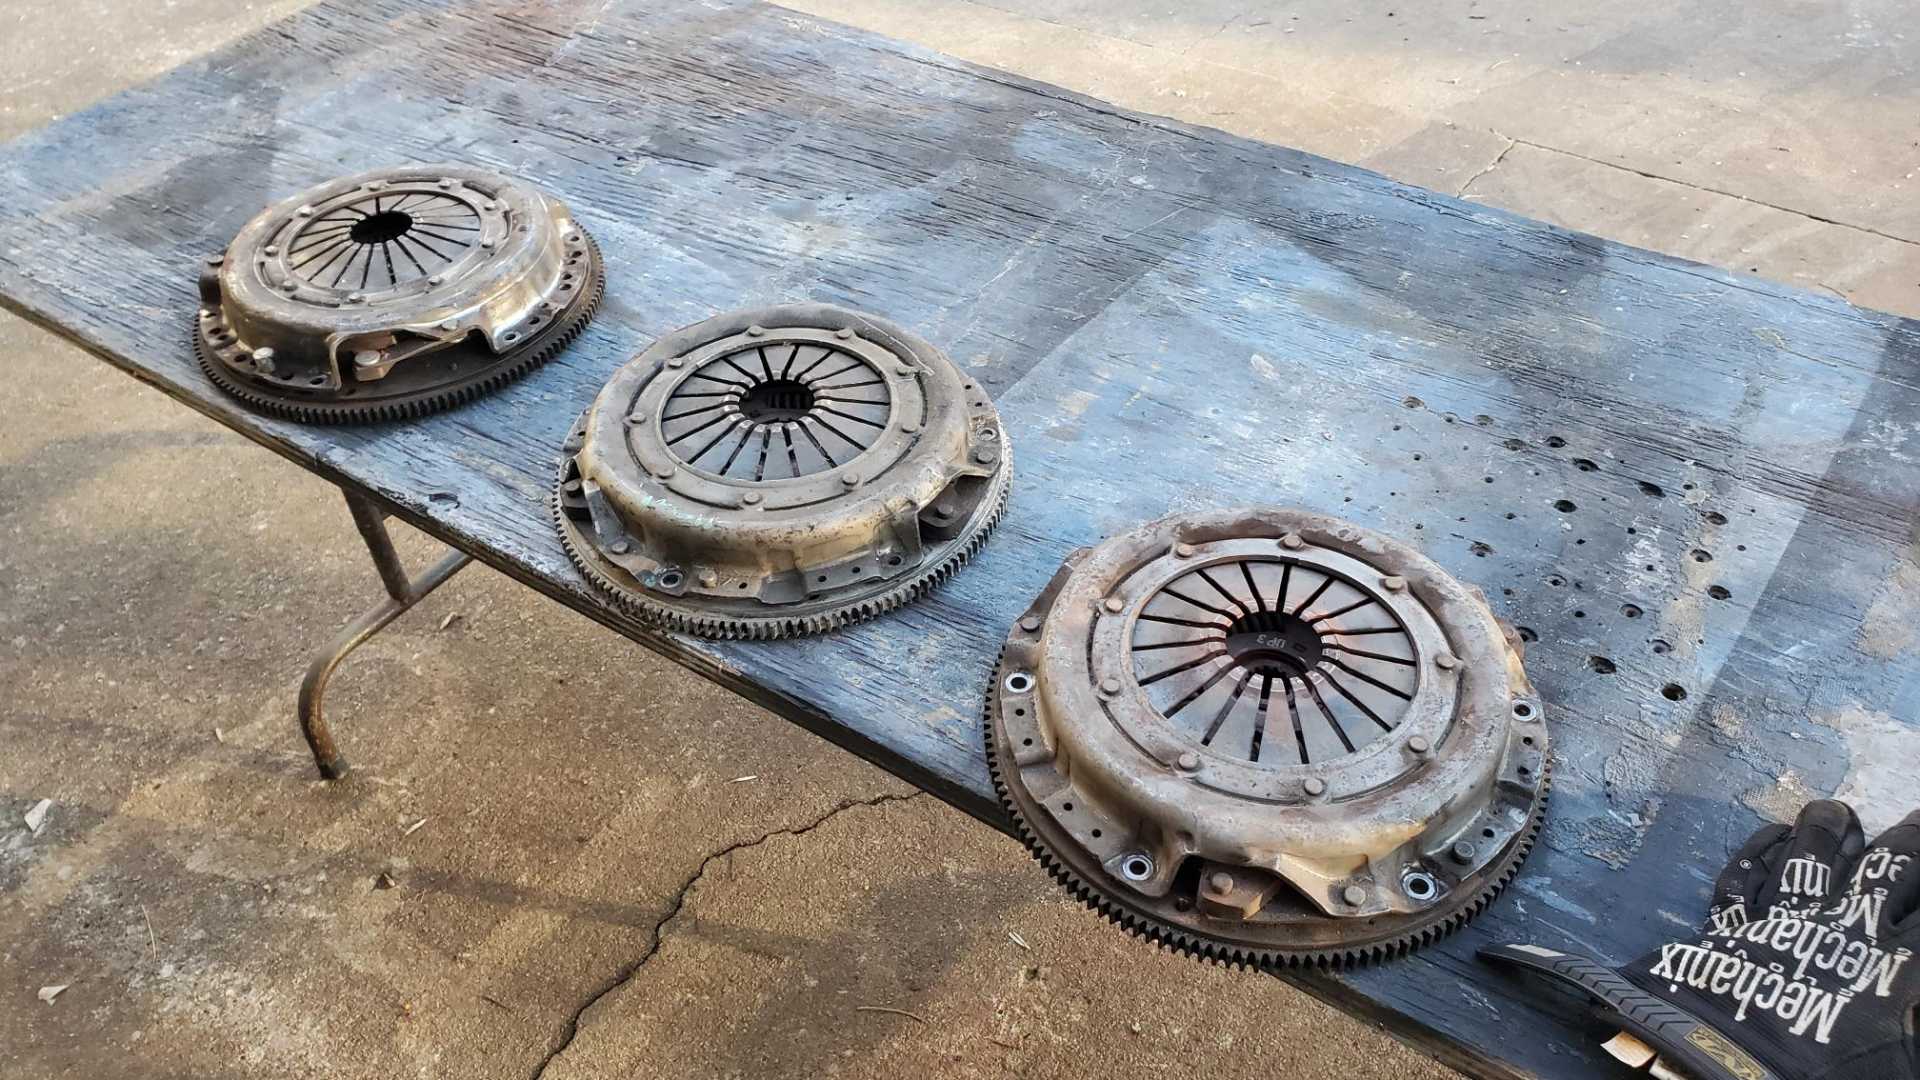
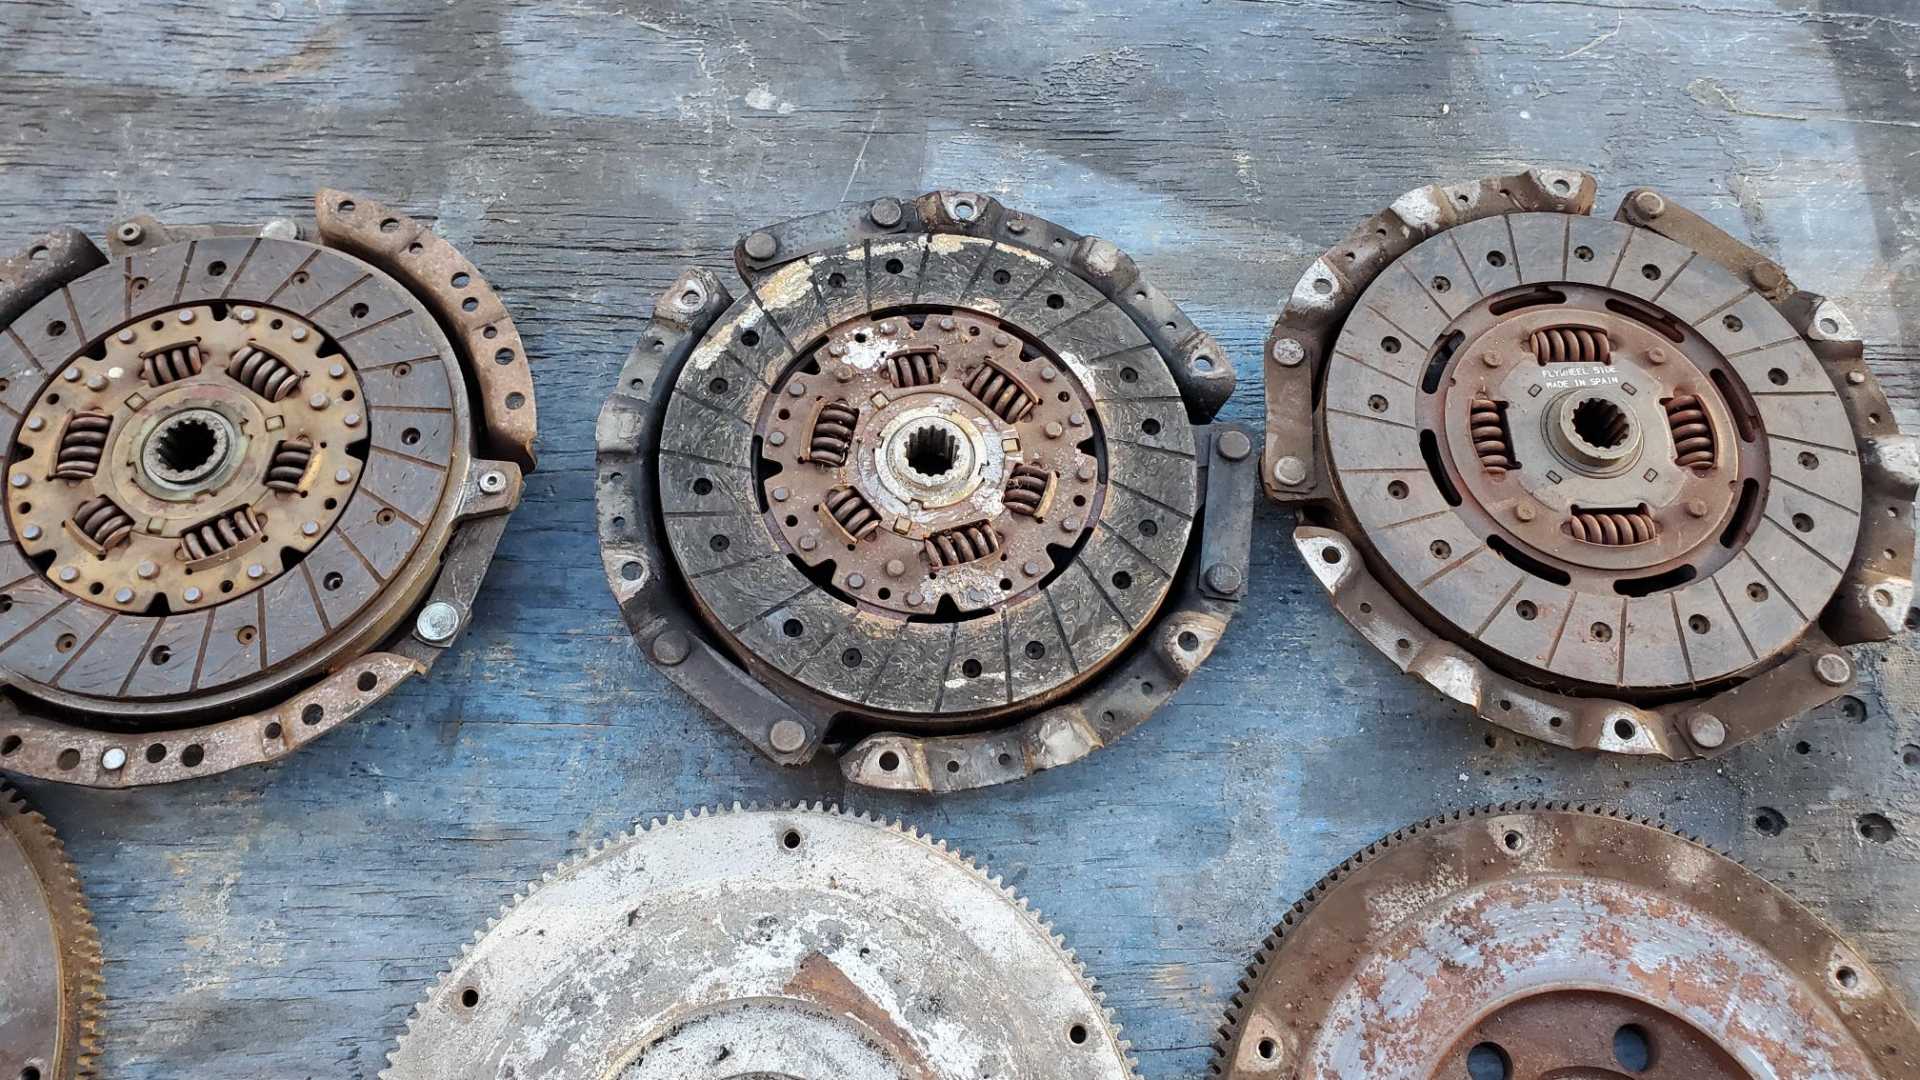
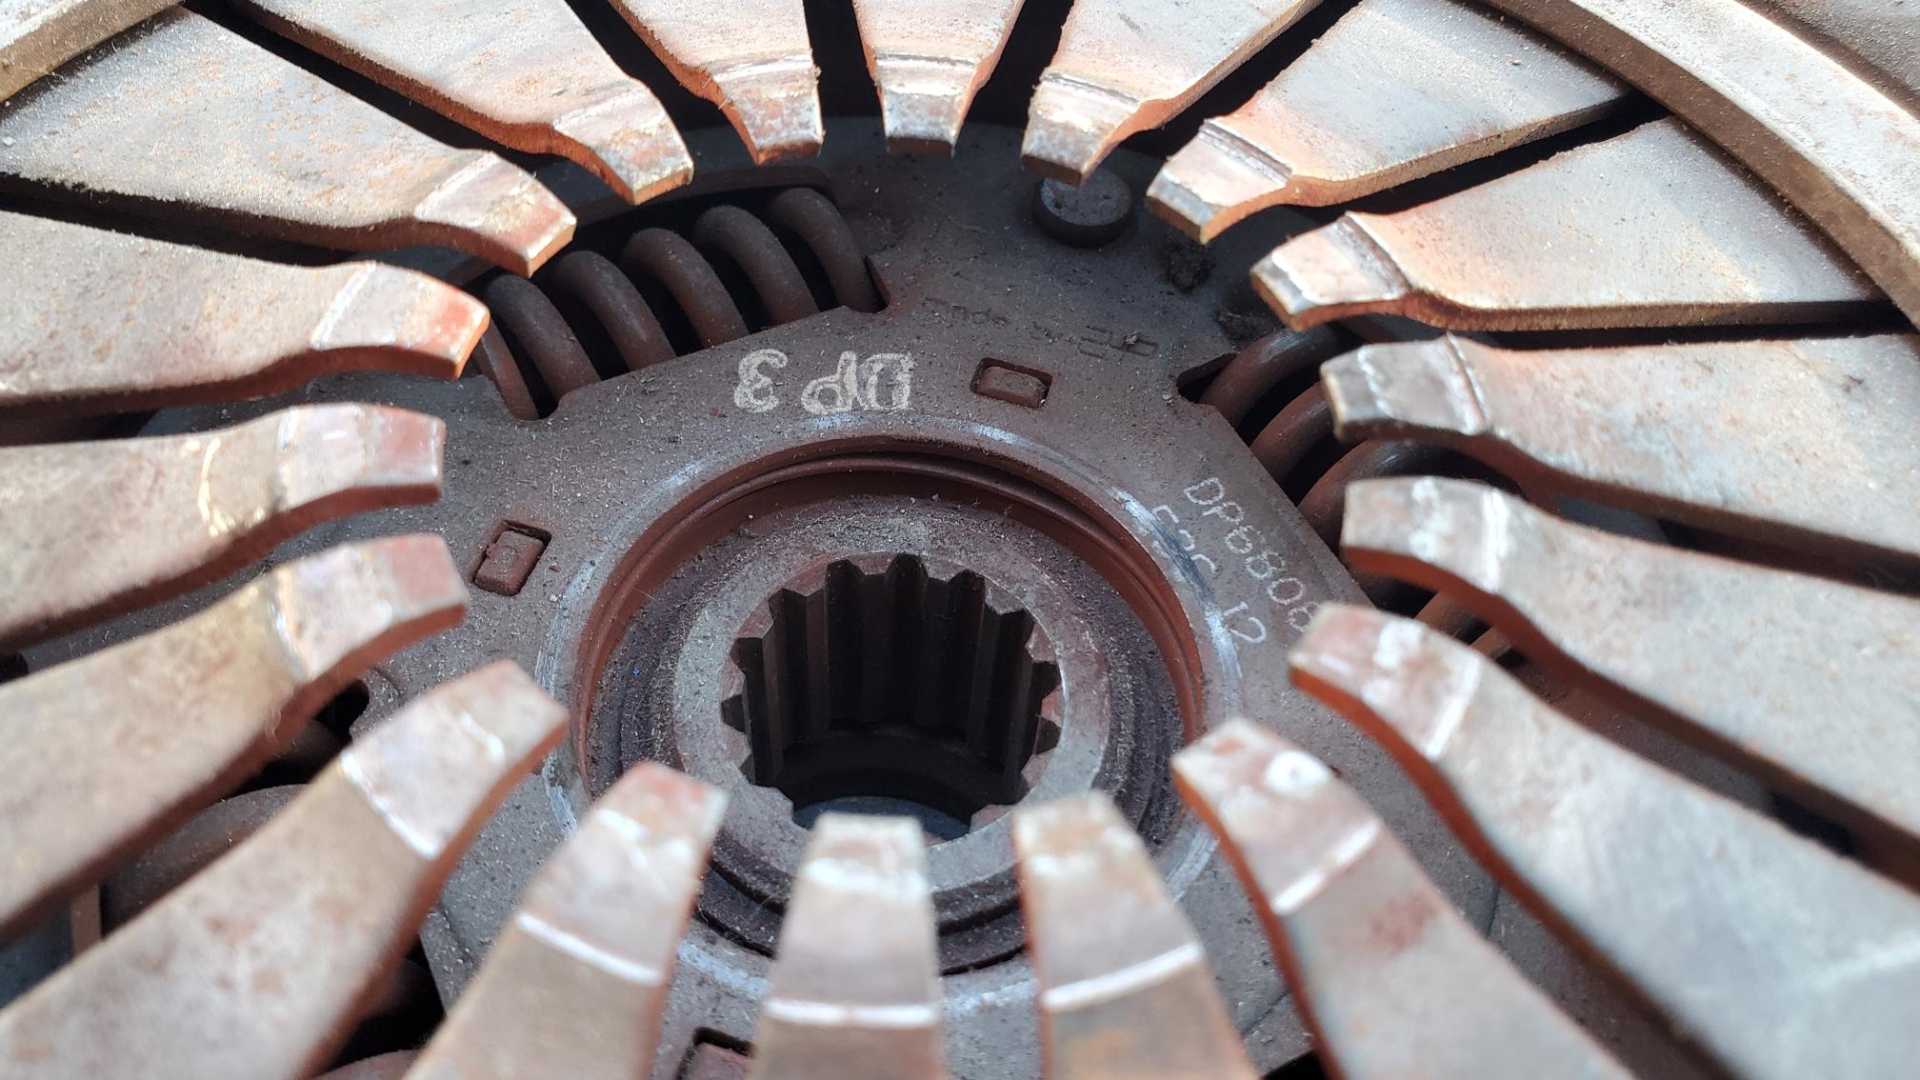
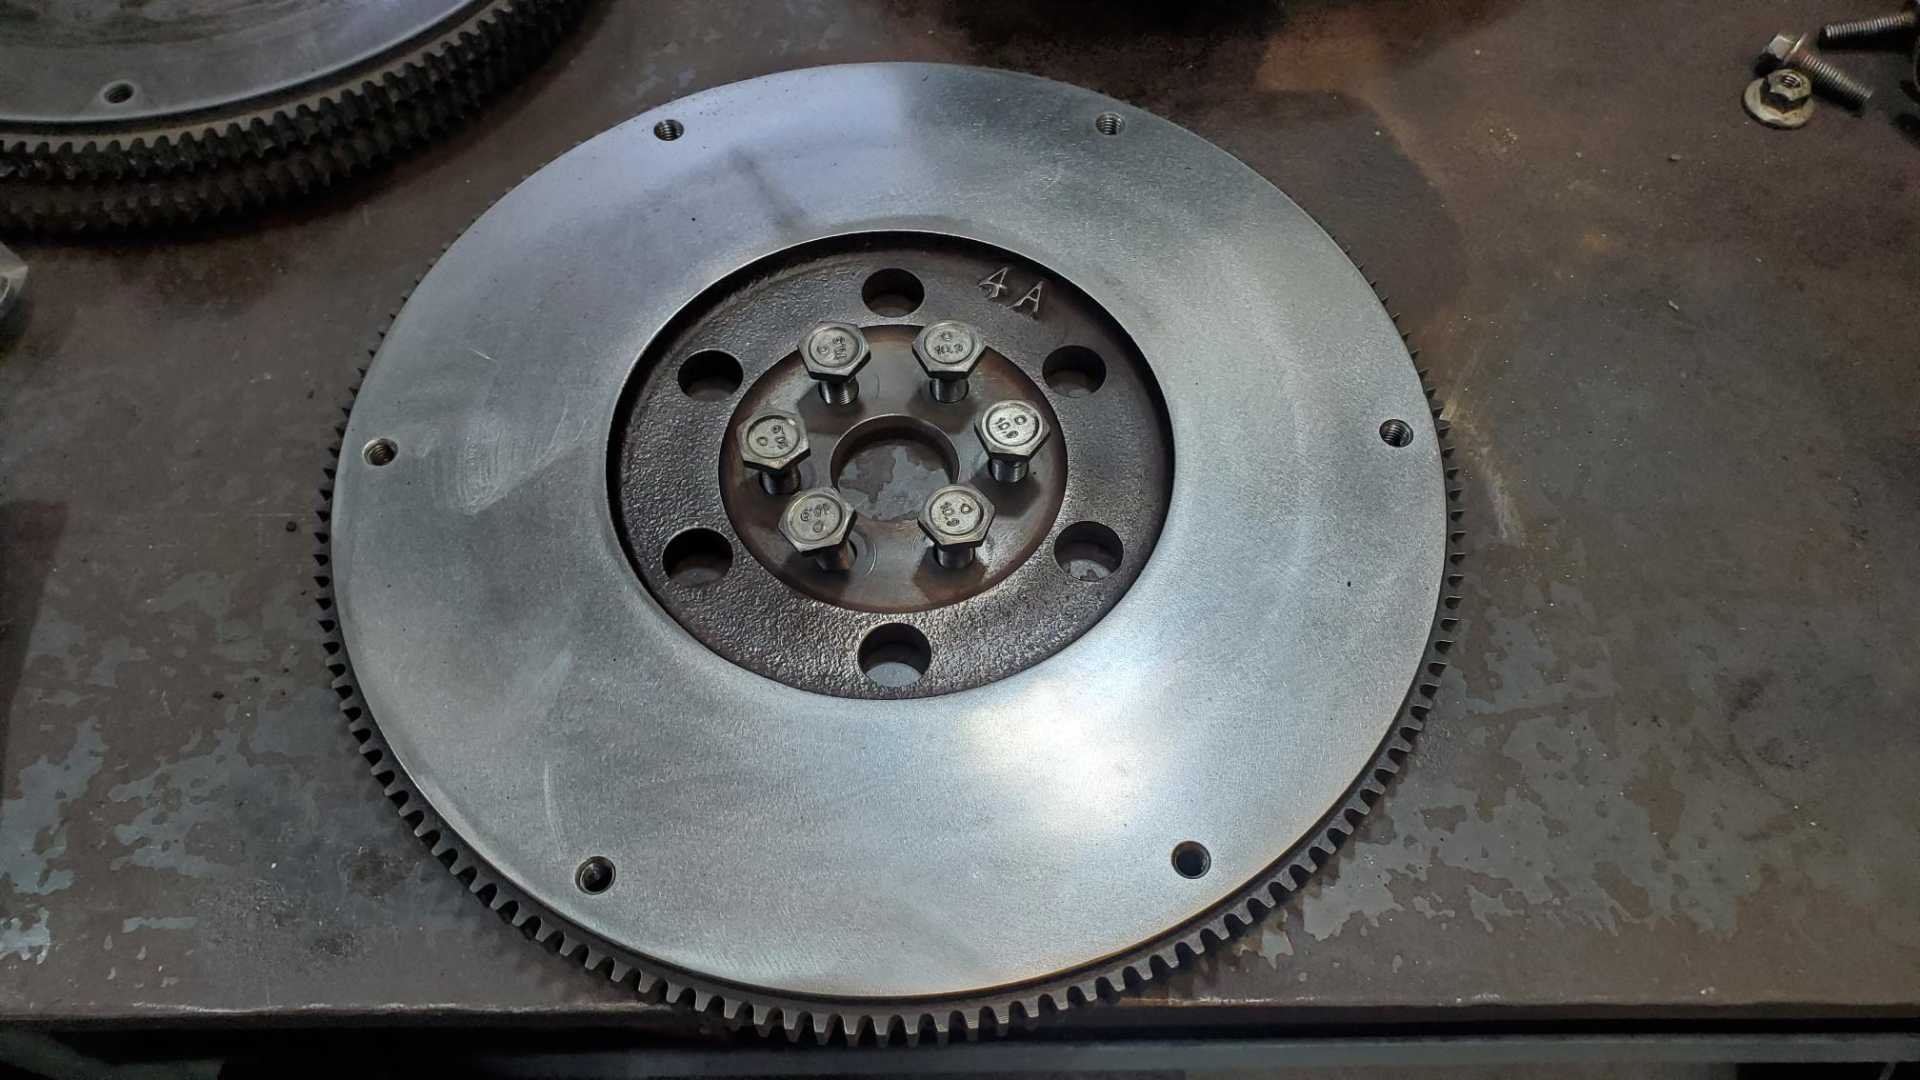
Fun with flywheels. On the left is the flywheel, clutch and pressure plate from my non-HO Quad. Middle is the one from the ‘93 Grand Am and the right is from my GTZ.
The non-HO clutch disk is a quarter inch smaller diameter than the other two, so even though it’s in the best condition I won’t use it. Next best is the disk from my GTZ. I bought it new in 2008 when I replaced the head. Even after 100,000 miles it’s still in good shape.
The pressure plate, though, has a lot of wear. I know I should just buy a new kit but that would have to wait a couple of months so the GTZ clutch with the ‘93 Grand Am pressure plate will have to do for now.
I spent an hour sanding the GTZ flywheel to get it clean and smooth but forgot to take any photos.
[This message has been edited by Quadfather (edited 12-31-2021).]
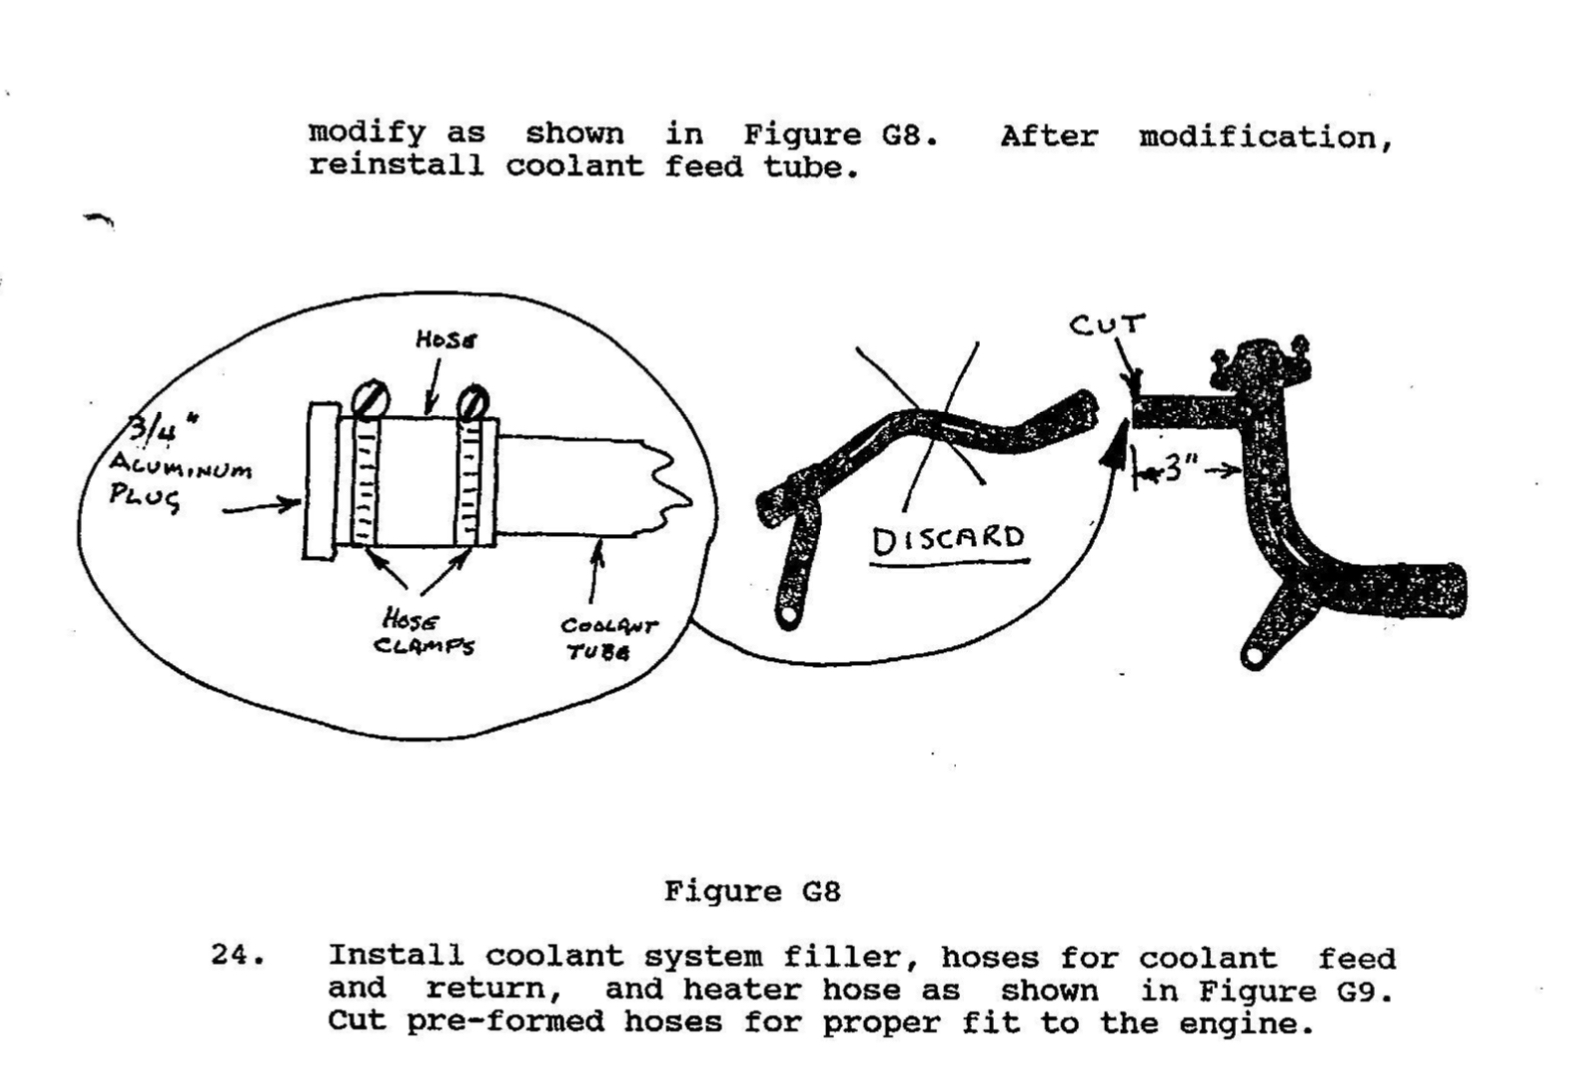
Got an auto-darkening welding helmet for Christmas. Armed with that and a pair of cheap reading glasses, I tried modifying the coolant outlet pipe. The swap instructions call for cutting off the heater pipe and using a clamp to close the stub, but I prefer cutting off the heater pipe flush and welding a patch panel over the hole.
I experimented with turning the voltage and line speed way down. After a couple small adjustments, it worked. No leaks.
Came across a photo from ten years ago. On New Years Eve, 2011, I replaced the fuel pump and hoses.
Hope to get back over to the shop this afternoon to install the flywheel and related parts. Then it will be time to pull the spare Quad out of the Fiero. We’re expecting bitter cold weather tomorrow and Sunday with some winter precipitation so it will be a good time to be working inside.
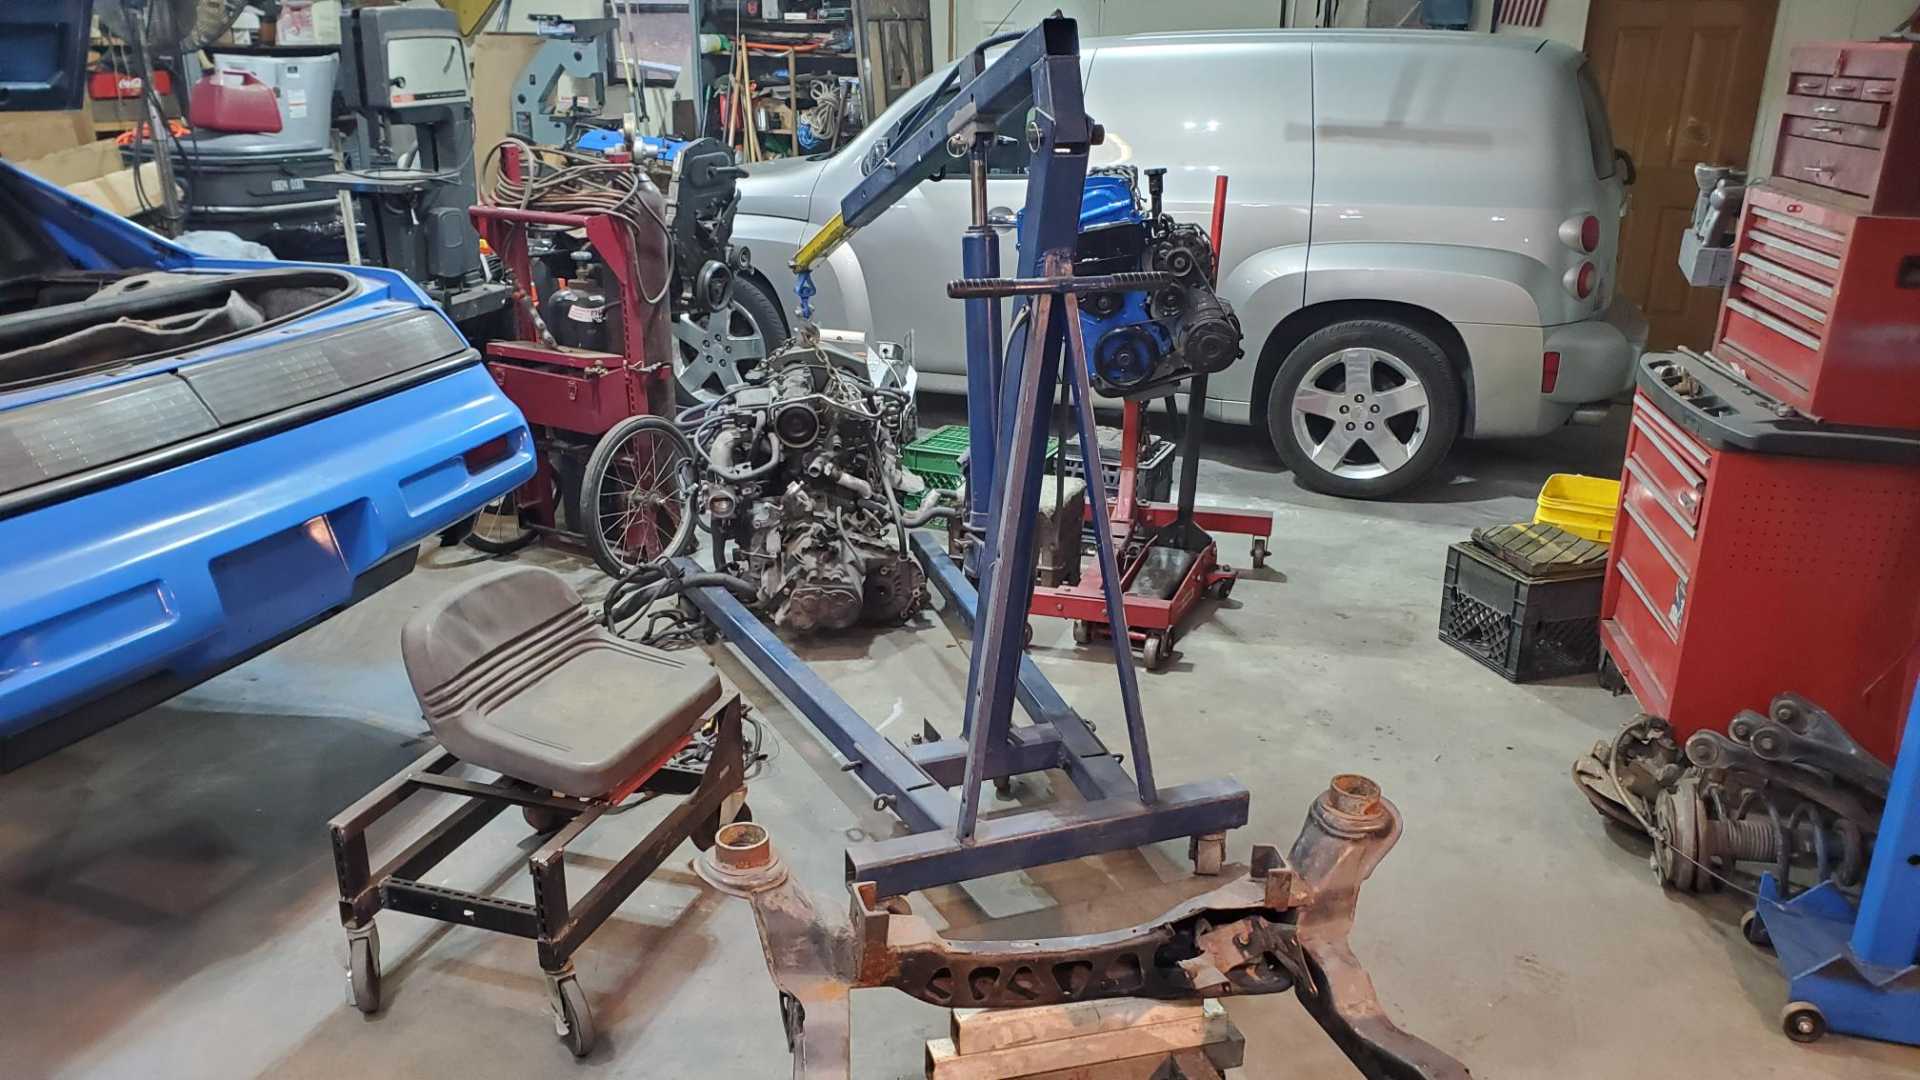
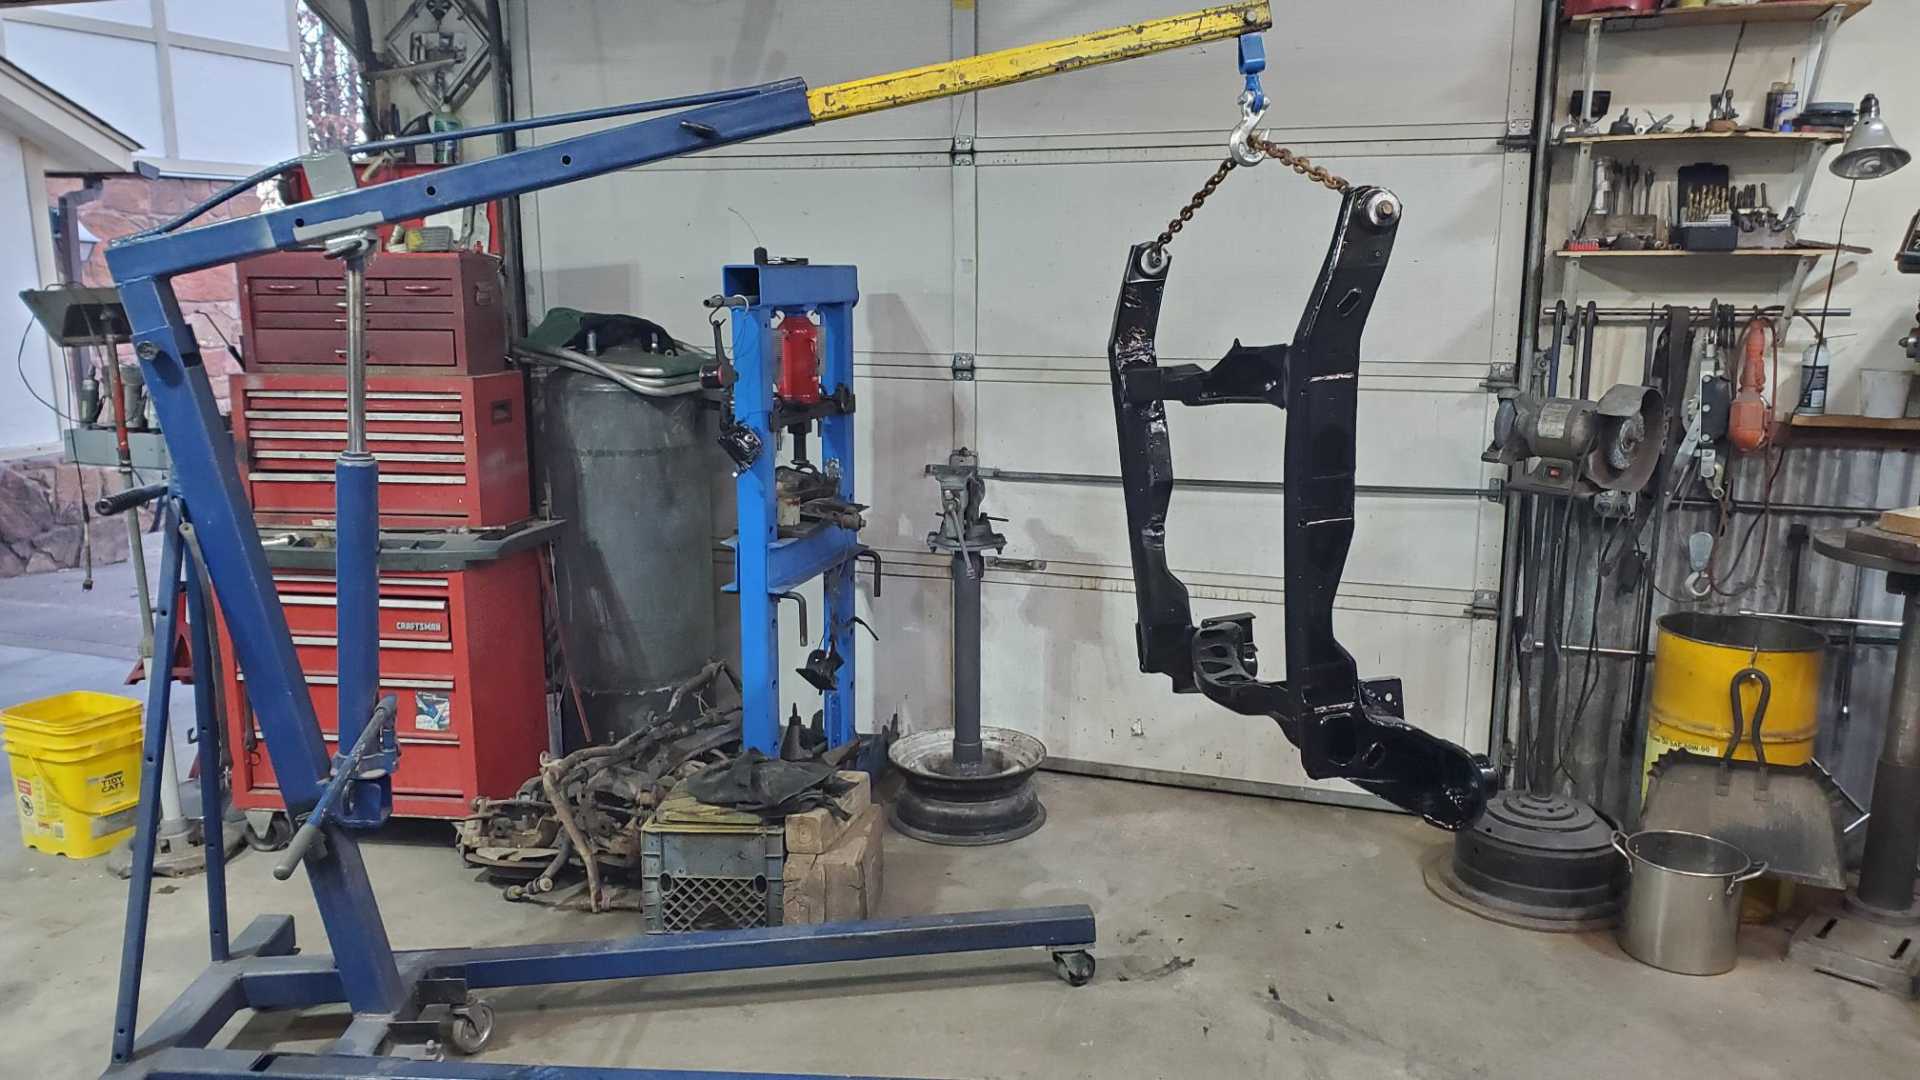
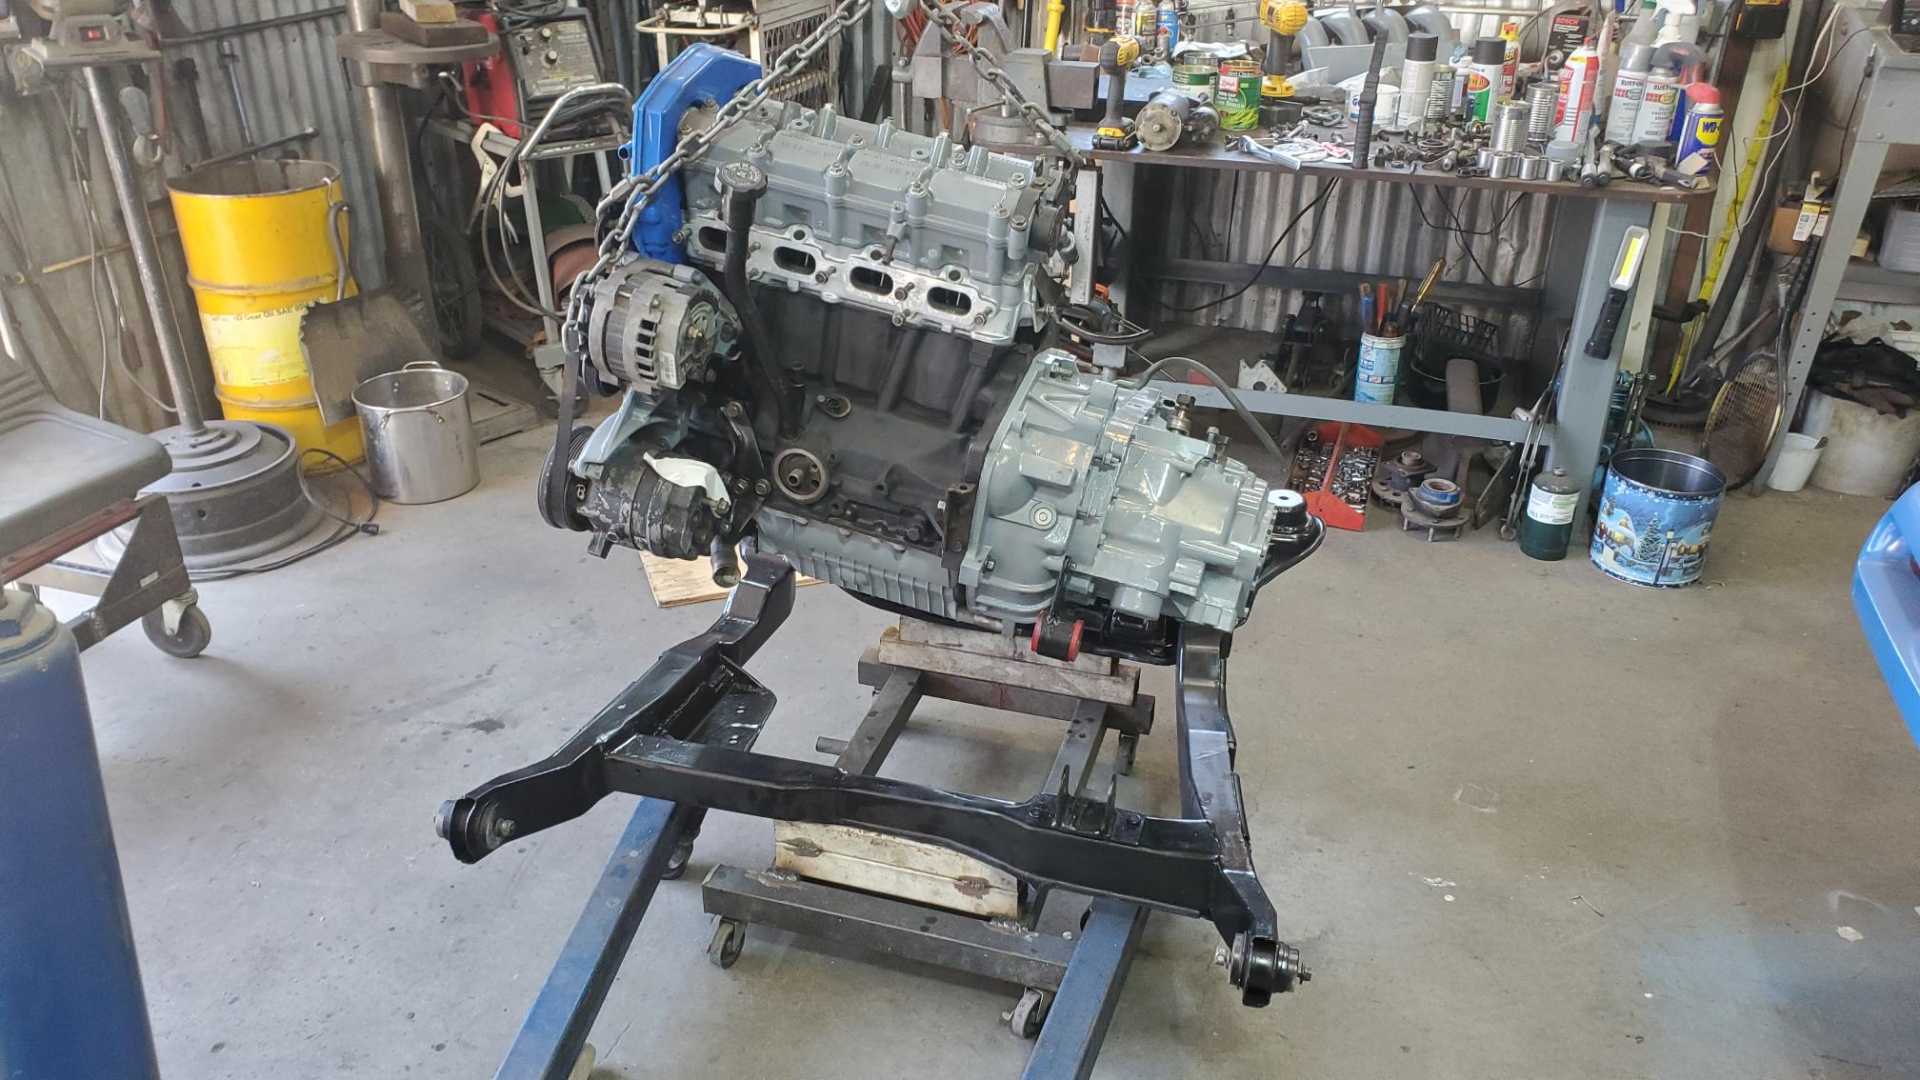
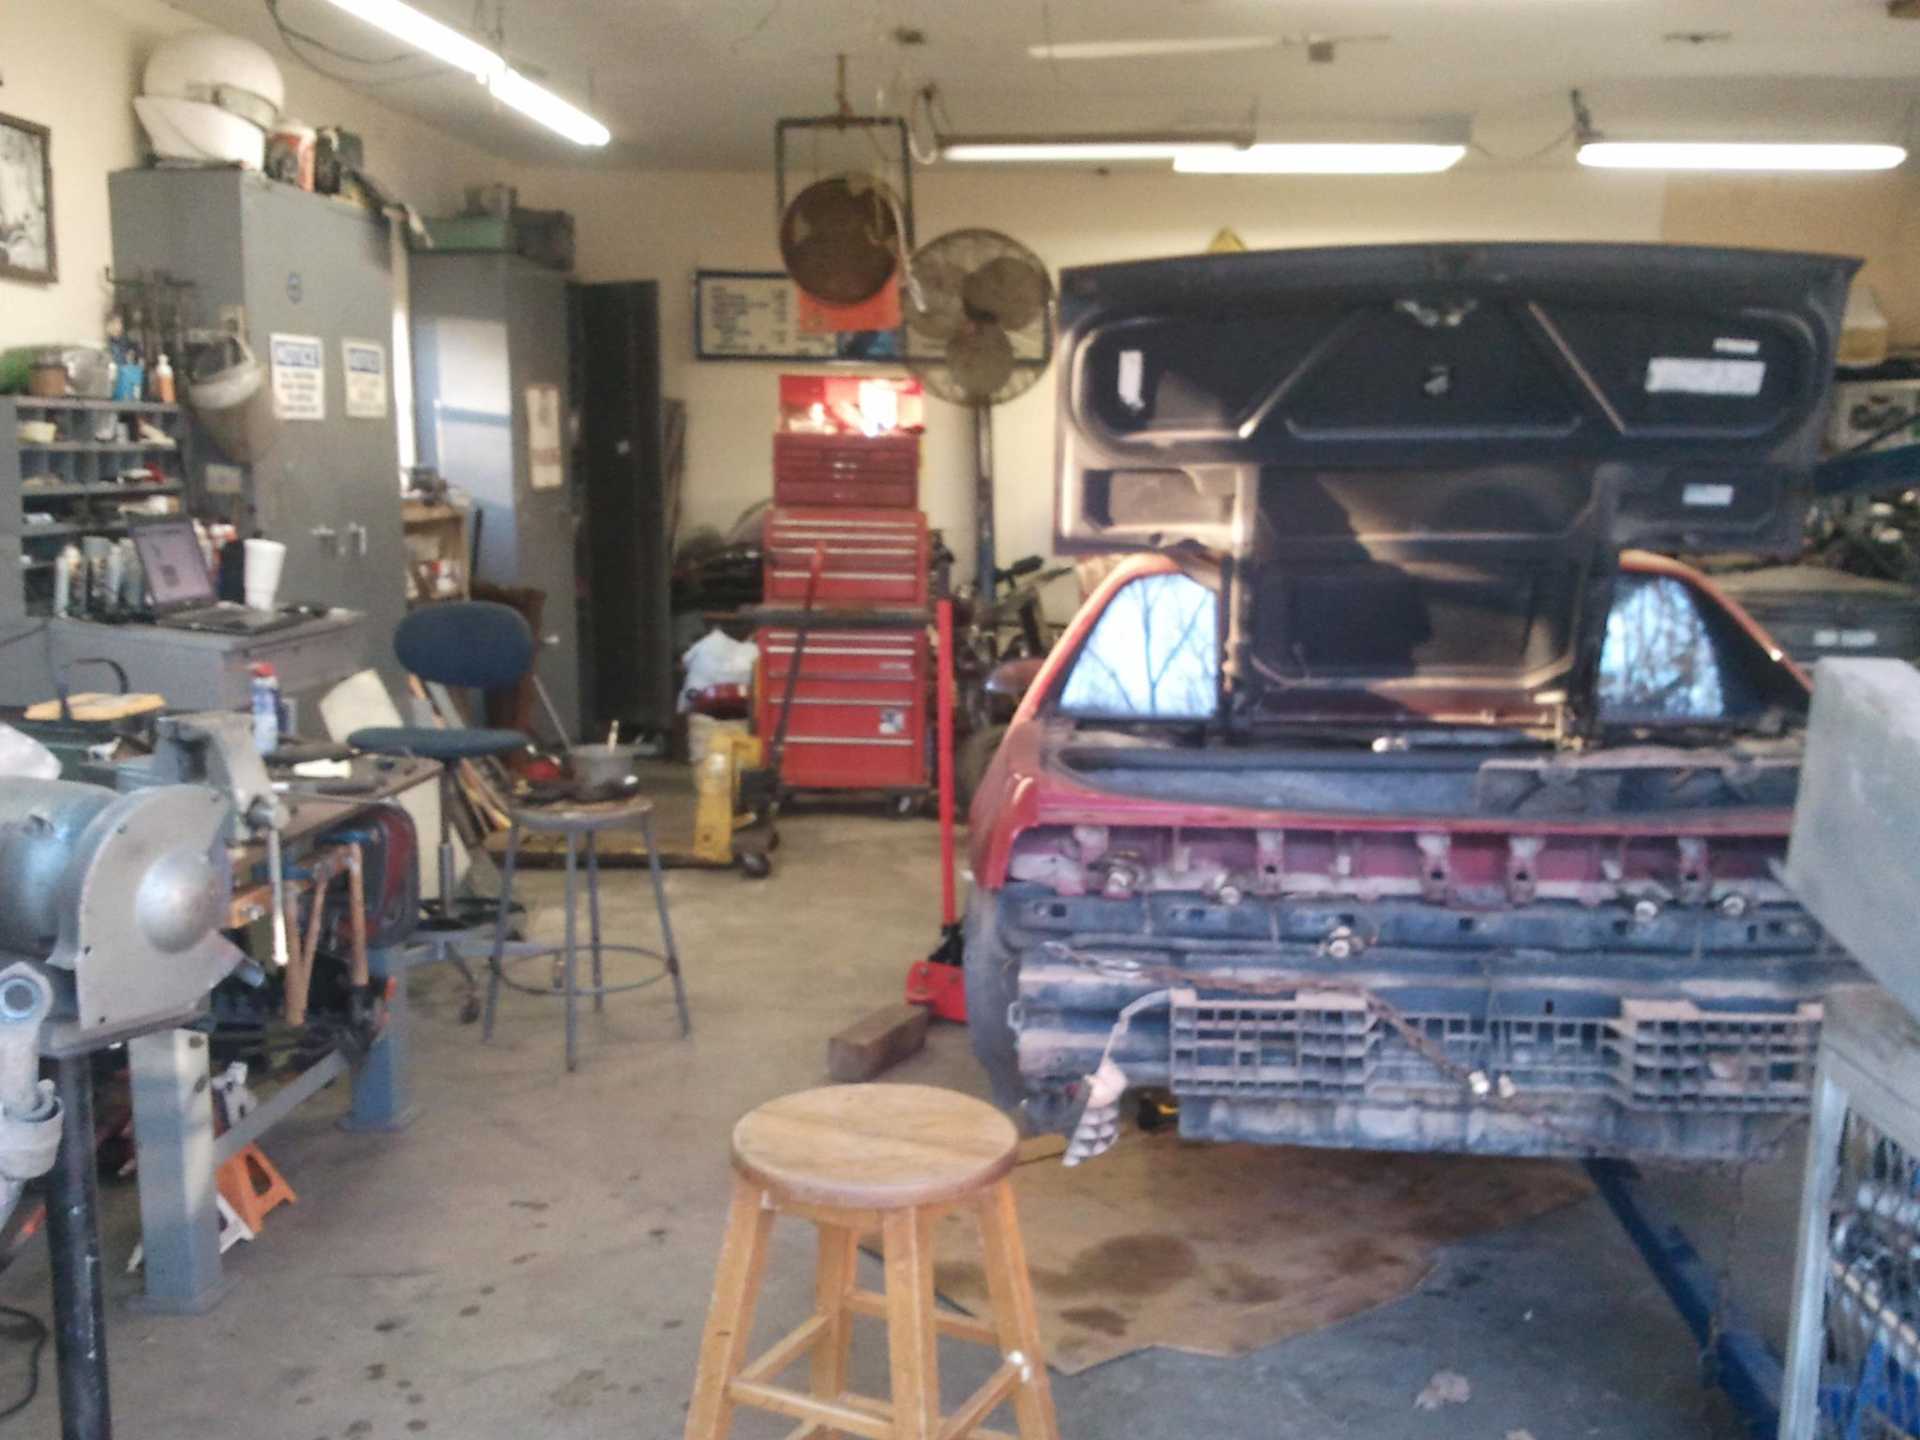
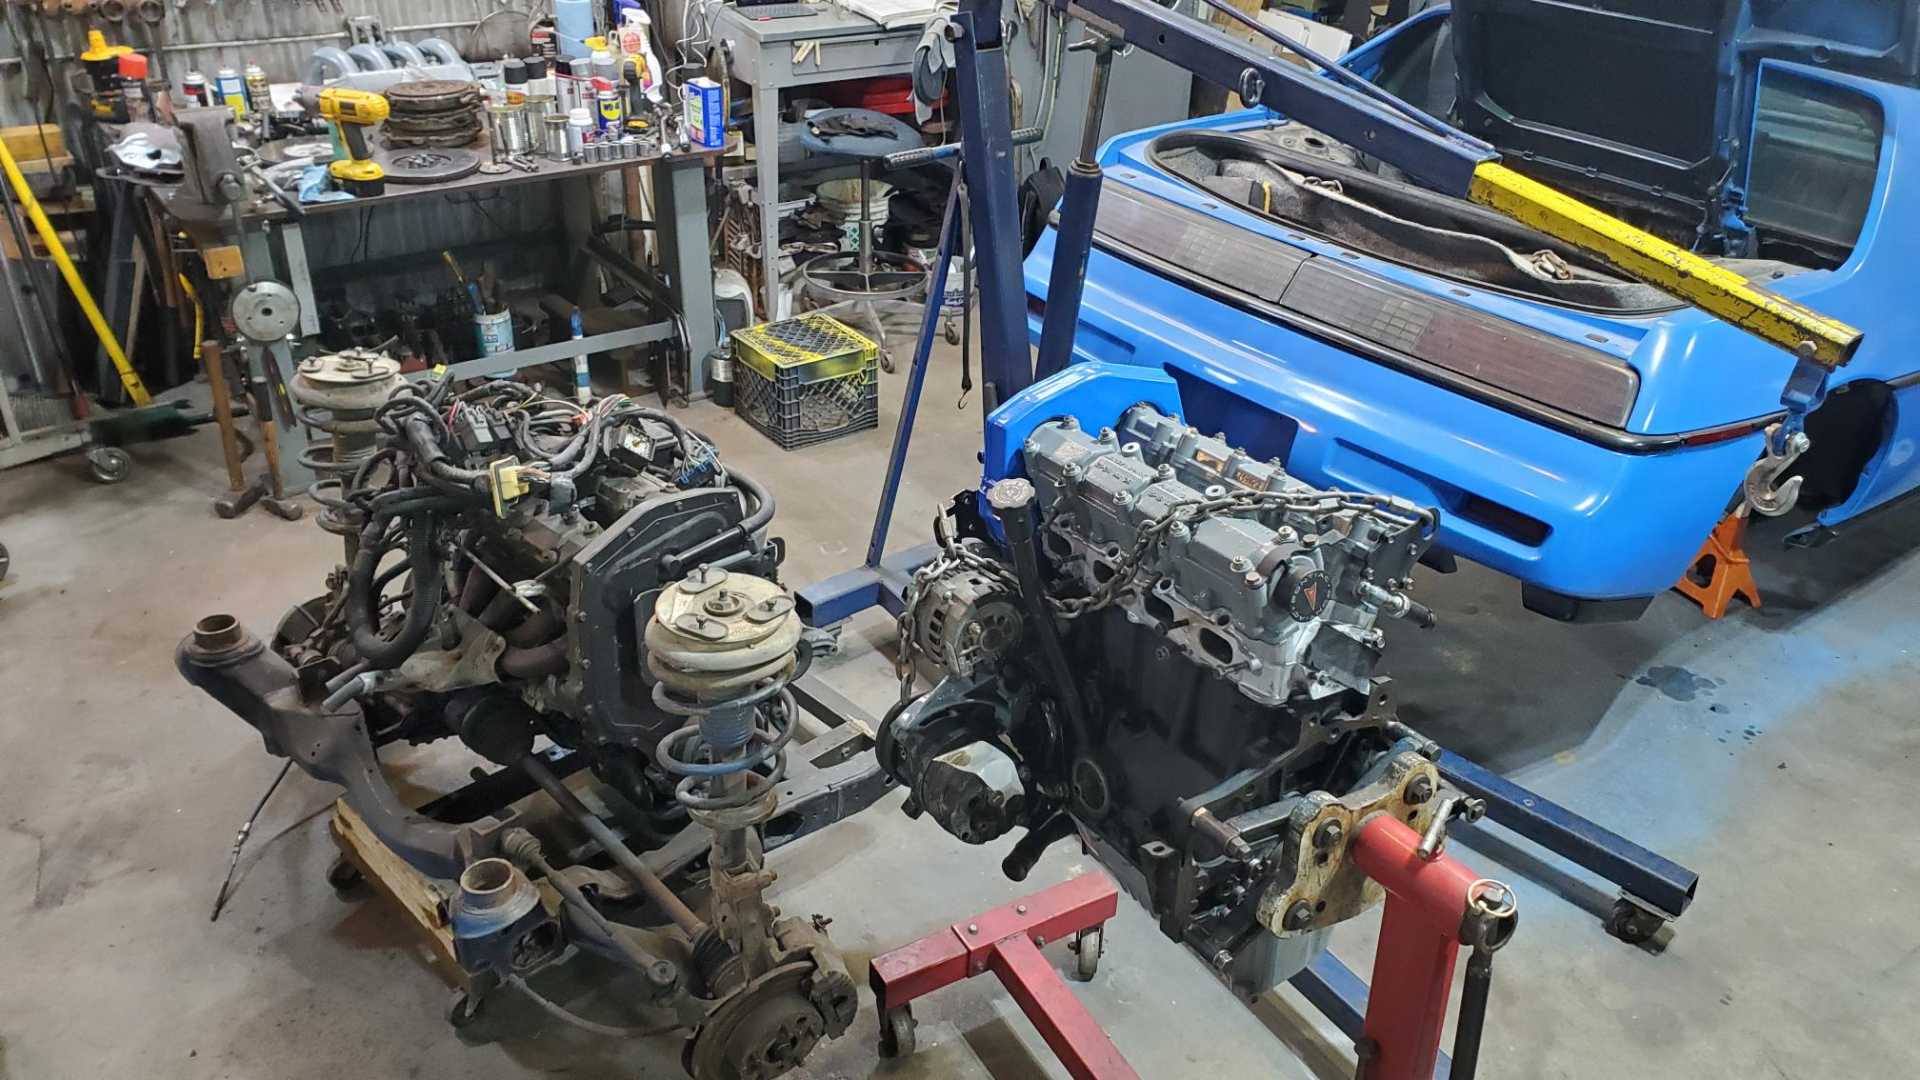
I had just about finished unbolting the engine from the engine stand to install the flywheel when I realized I didn’t have any place to put the engine while I used the hoist to pull the spare engine out of the Fiero. Bolted the engine back on the stand then pulled the spare engine and cradle out of the Fiero. Boy, was I out of practice.
Another engine and a cradle sure fill up the garage in a hurry. Also it’s amazing how dusty the engine and cradle were after just sitting in the car for a few years.
Getting to this point is a big step forward, but it also shows how much work is still needed, like finishing the engine/transmission mounts, stripping and painting the cradle, cleaning up the suspension, etc.
The engine compartment also needs major attention.
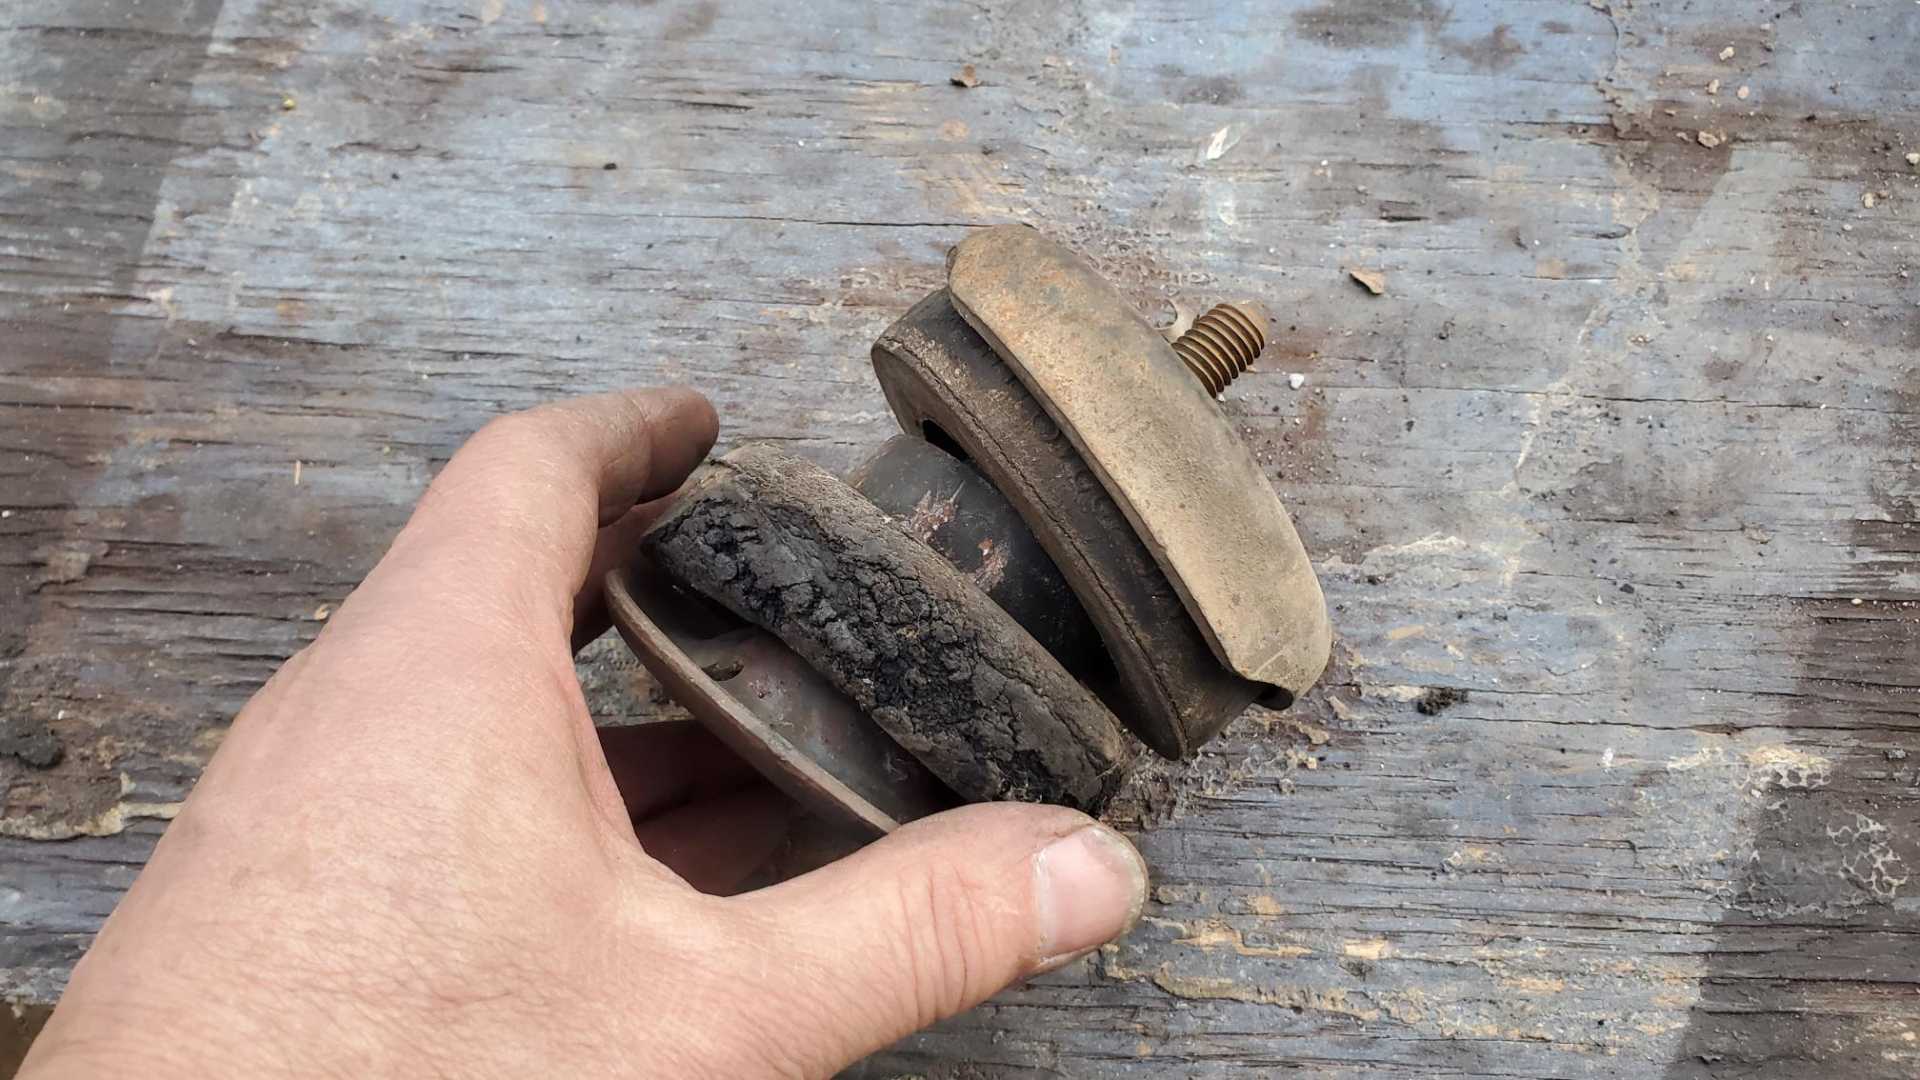
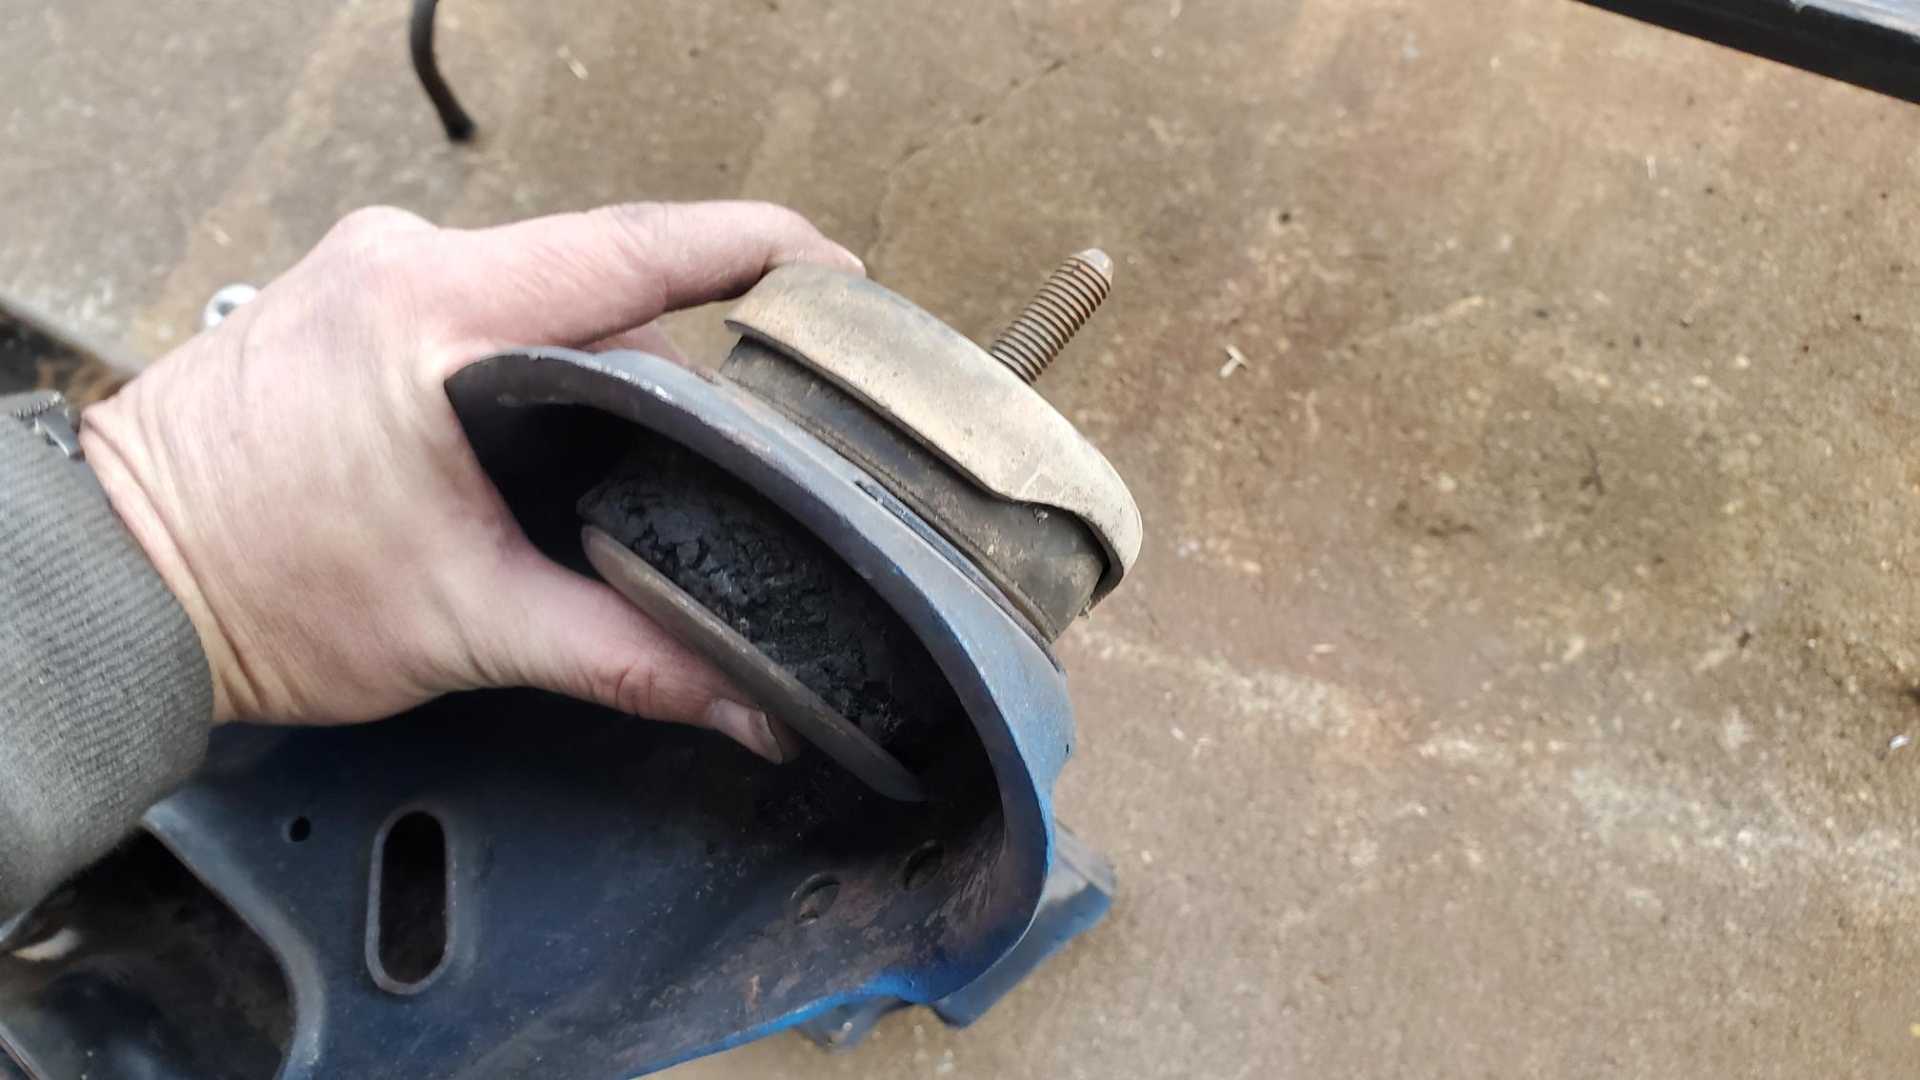
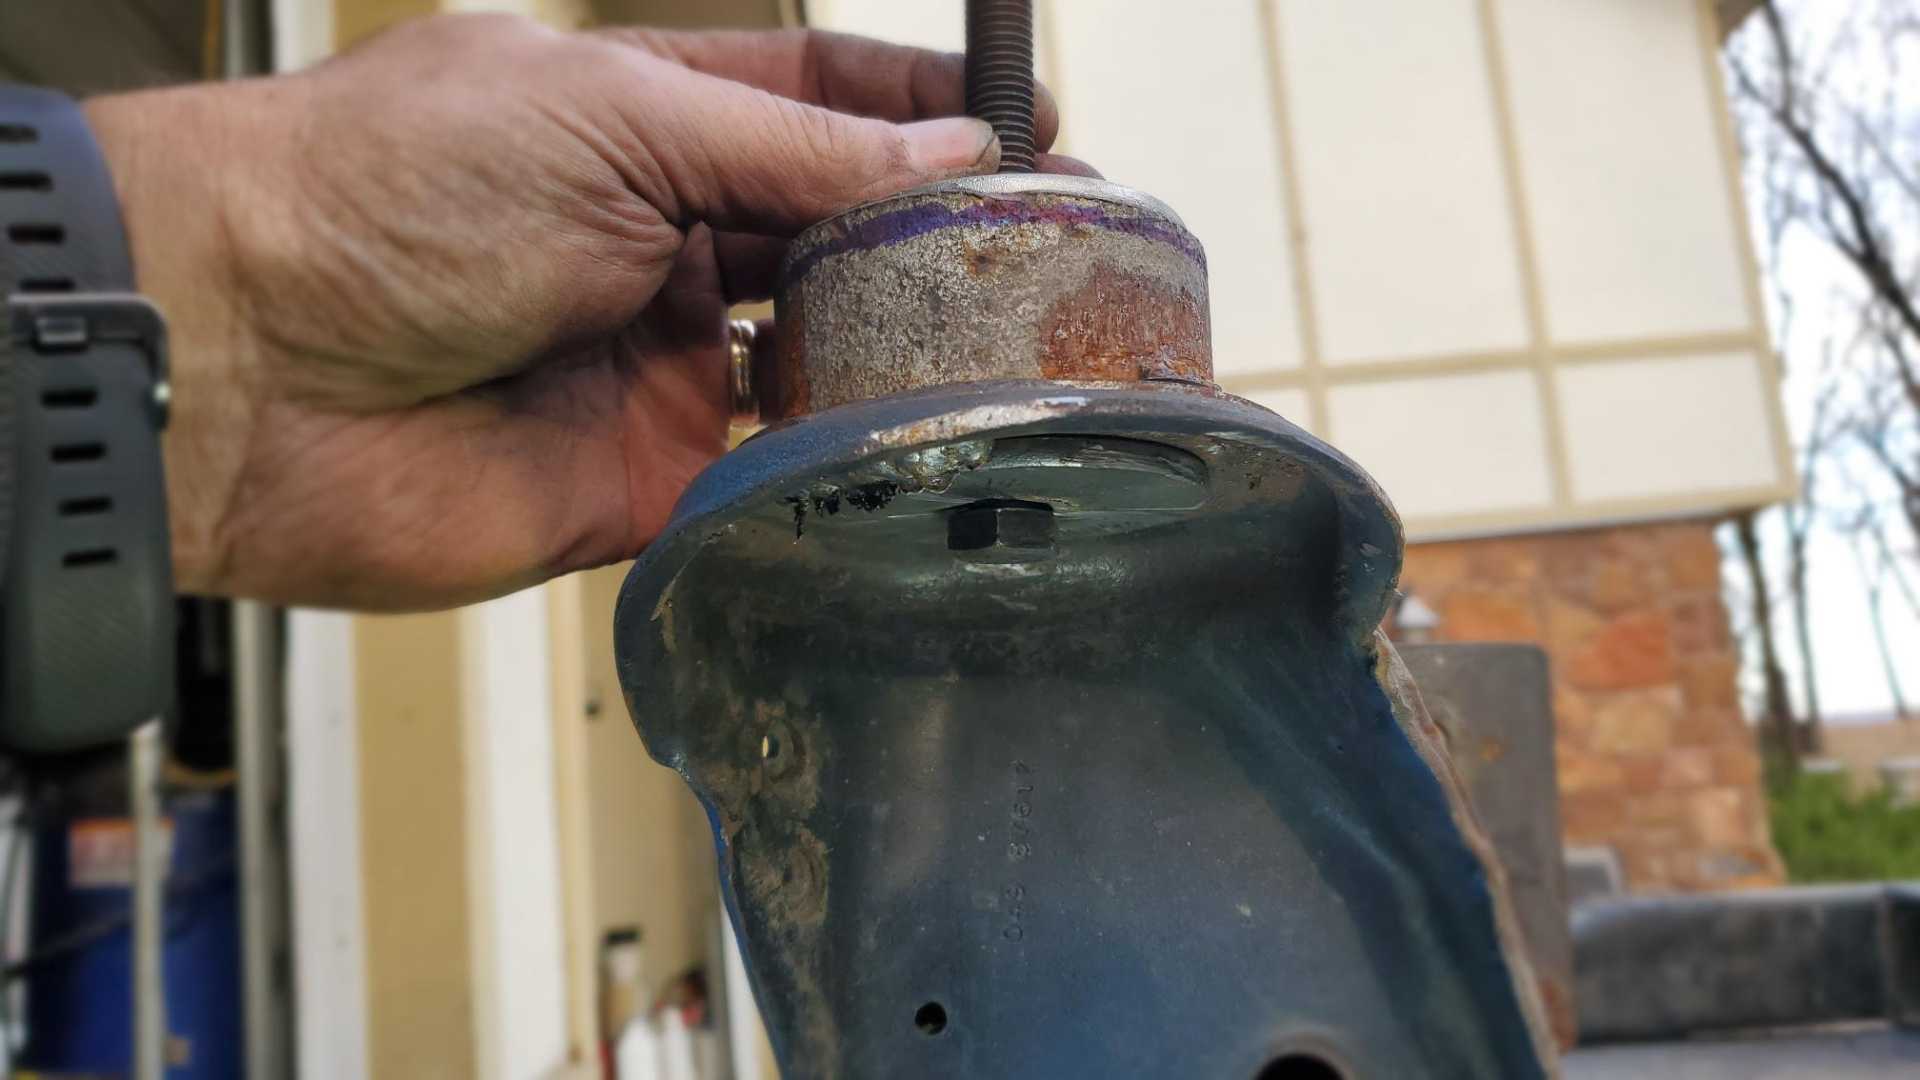
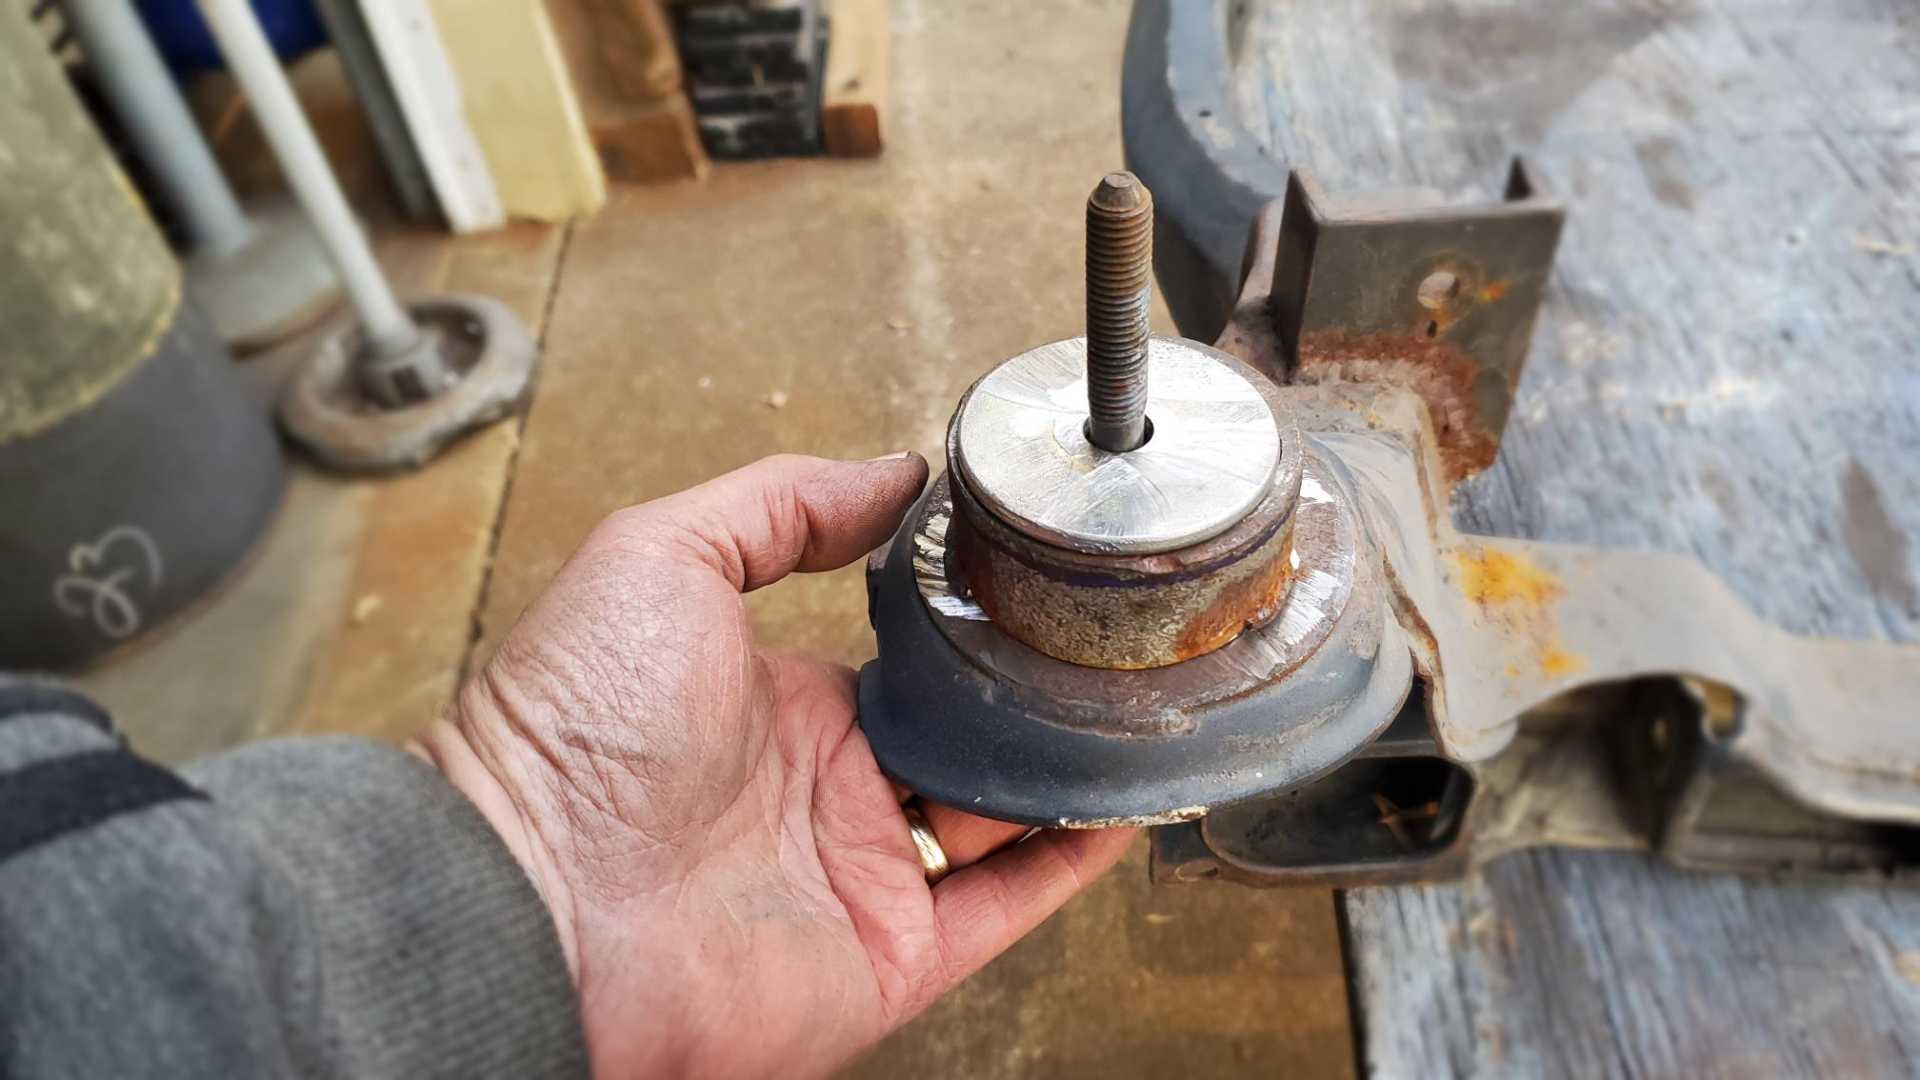
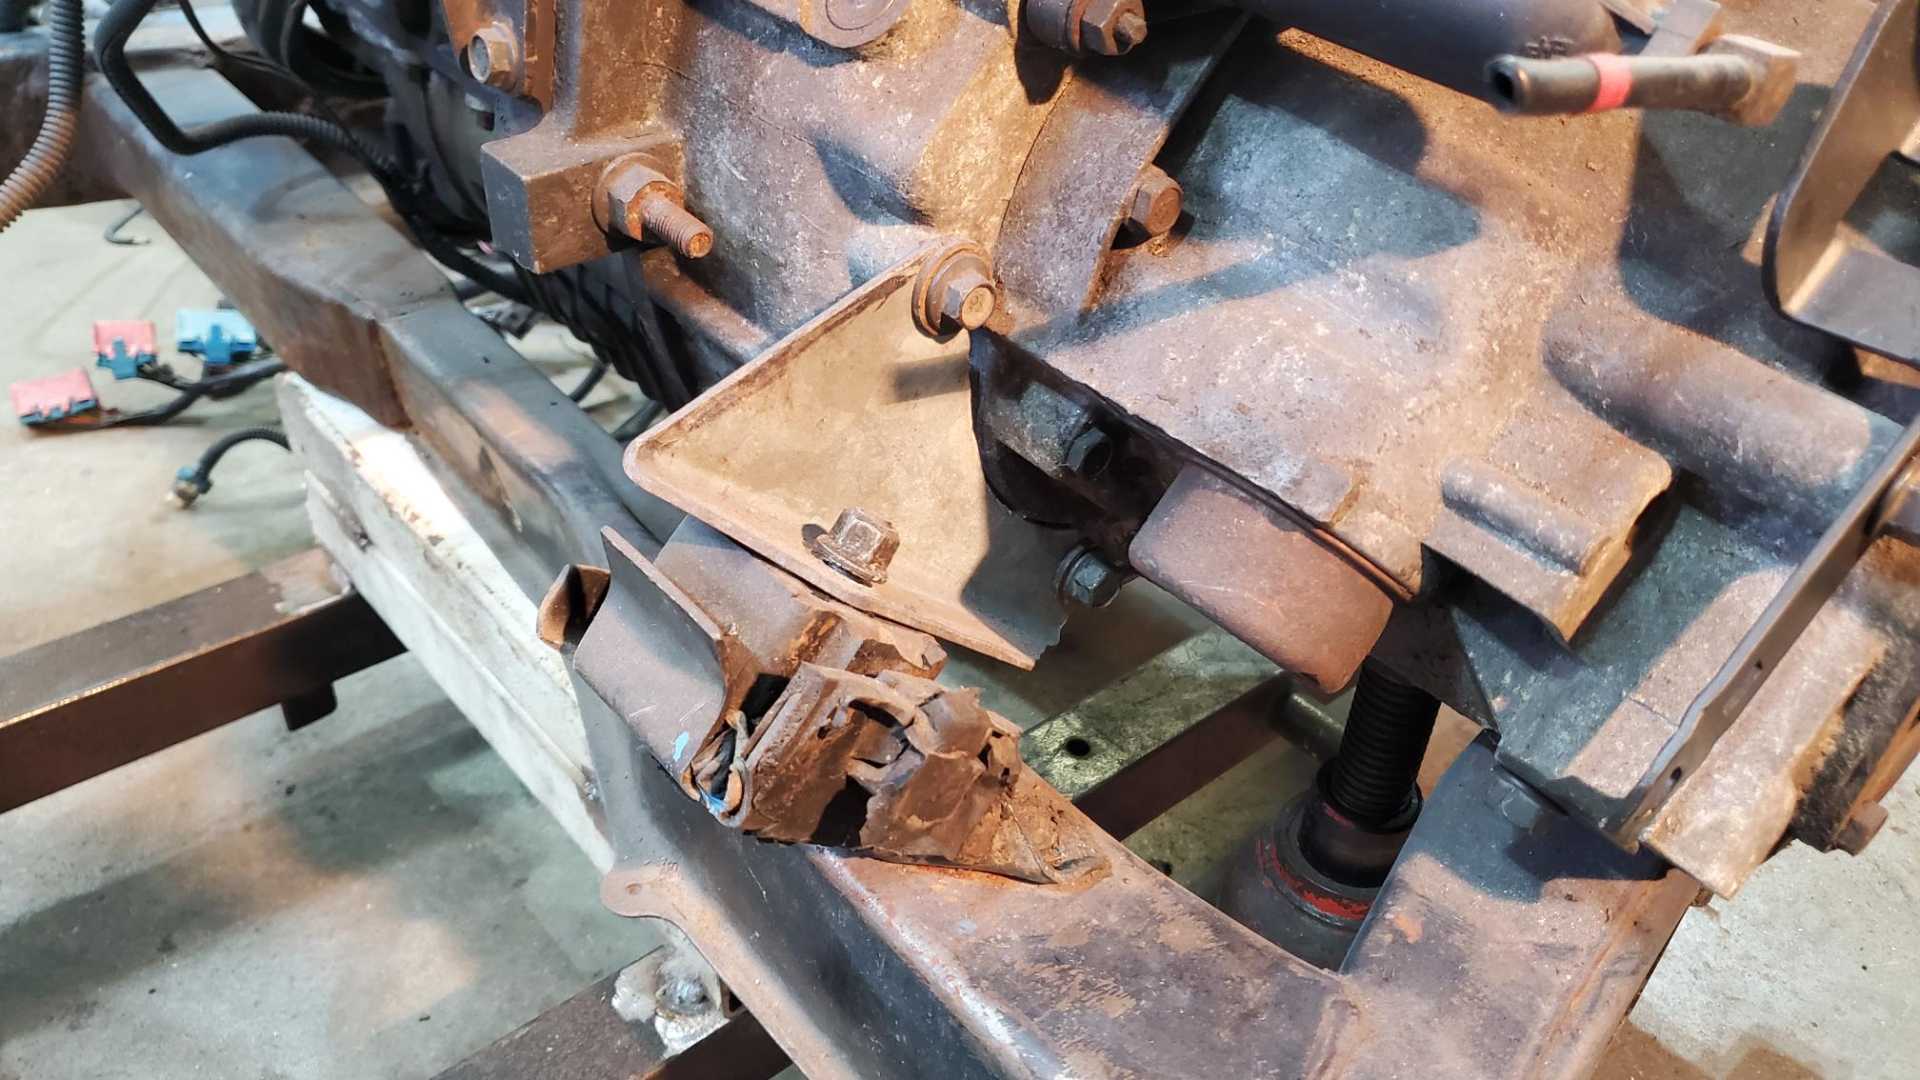
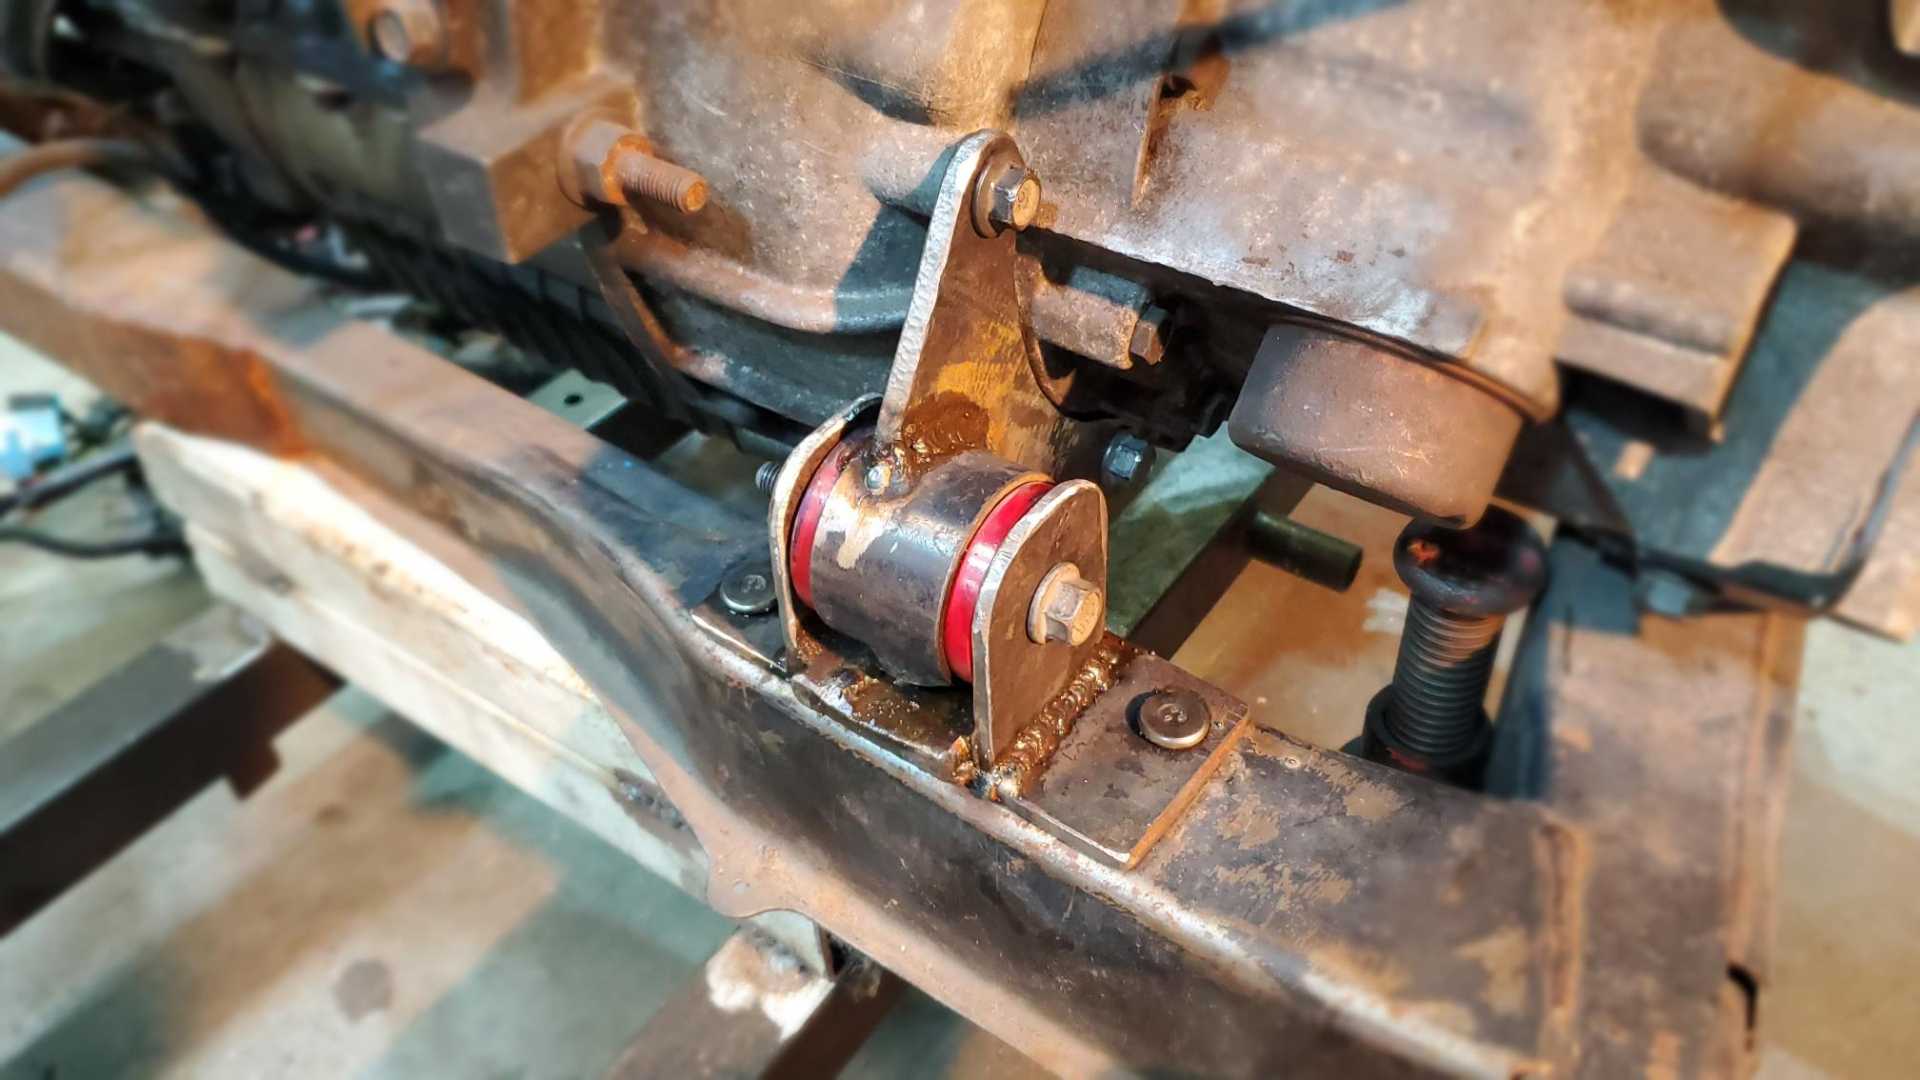
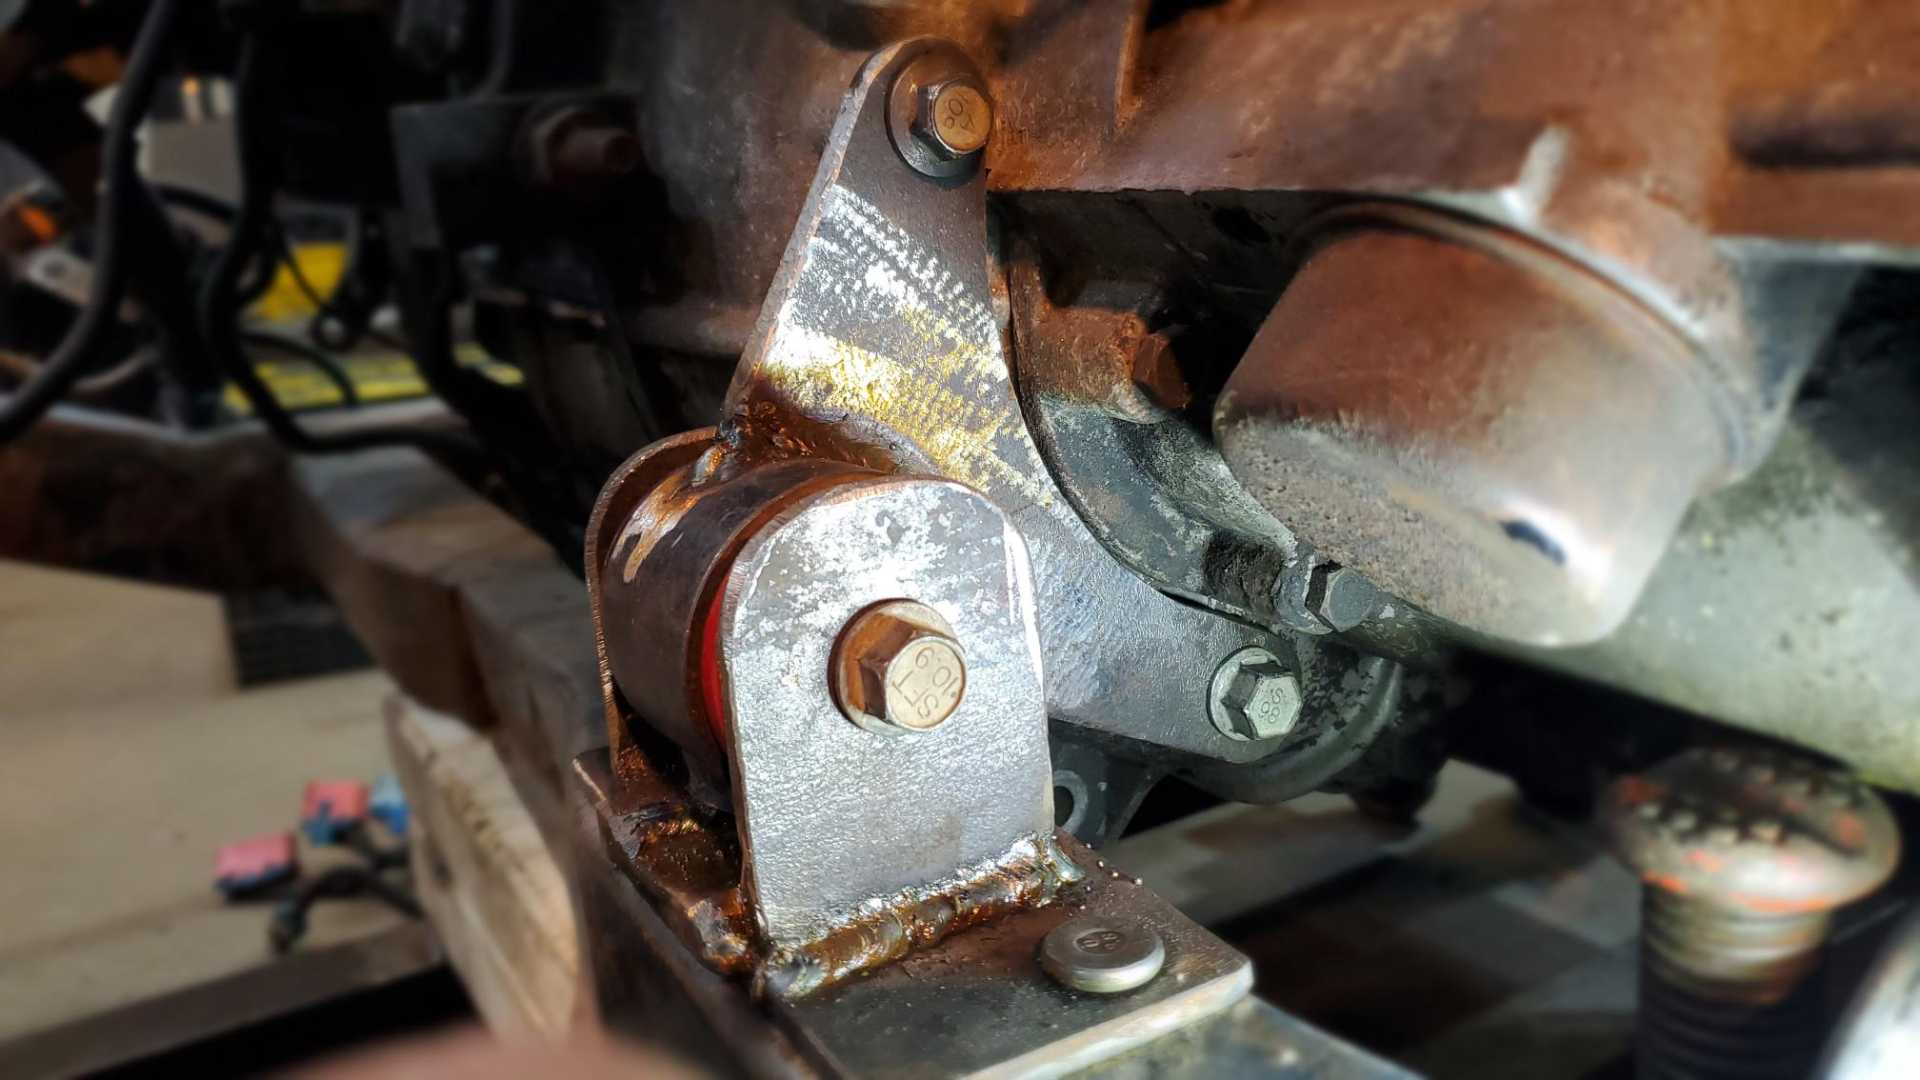
Made some progress this afternoon. First up was re-engineering the front transmission mount. I didn’t like the look of the one I fabricated years ago, using the bottom half of the stock Fiero mount. It’s ugly and the angle iron wasn’t thick enough.
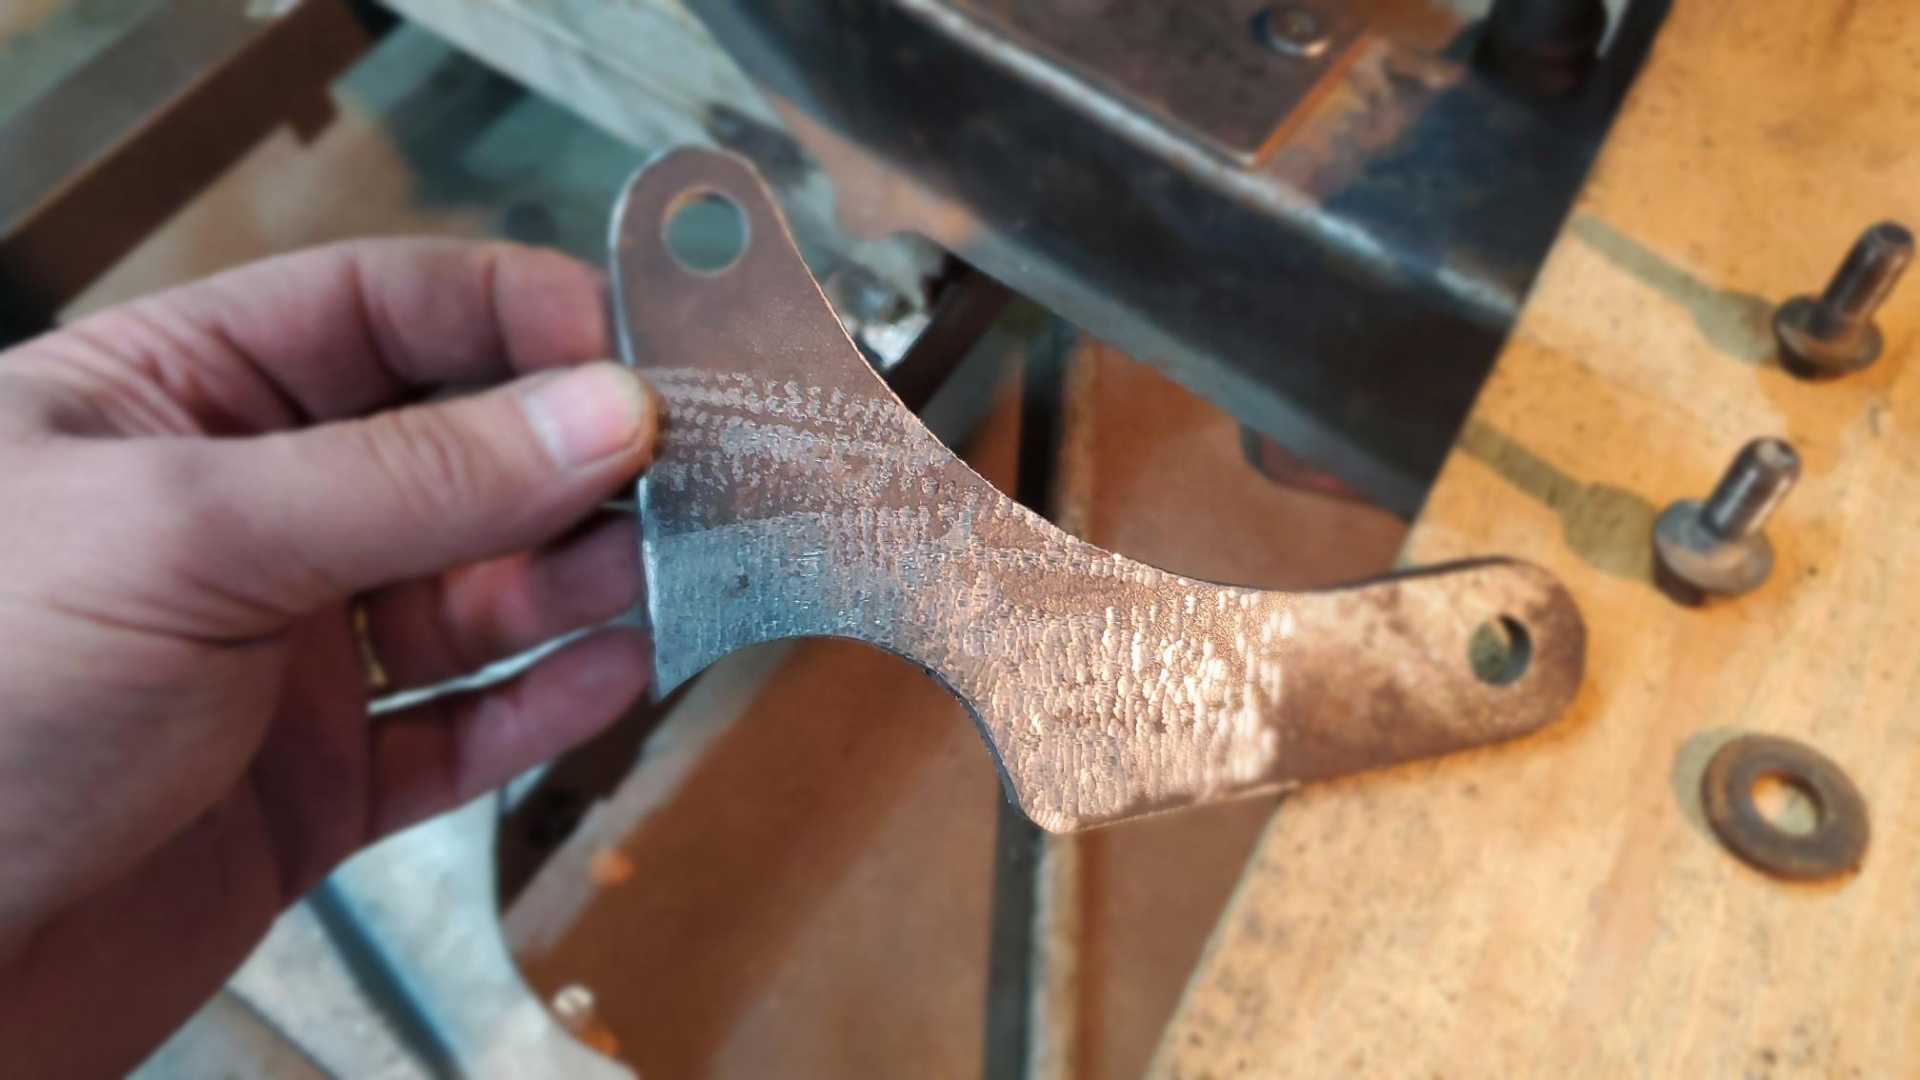
I had the other half of a poly dog bone from a trip to the salvage yard years ago, so I decided to use that. I cut a piece of plate to cover the holes on the cradle, and used some angle iron to make a u-shaped flange to hold the dog bone end, kind of like an engine mount.
The mounting studs are the studs from the Fiero mount. I used a piece of cardboard to make a pattern then cut out the flange from some quarter-inch plate.
The poly got a little melty while I welded the flange to the dog bone end, but it will still work.
]
[This message has been edited by Quadfather (edited 01-08-2022).]
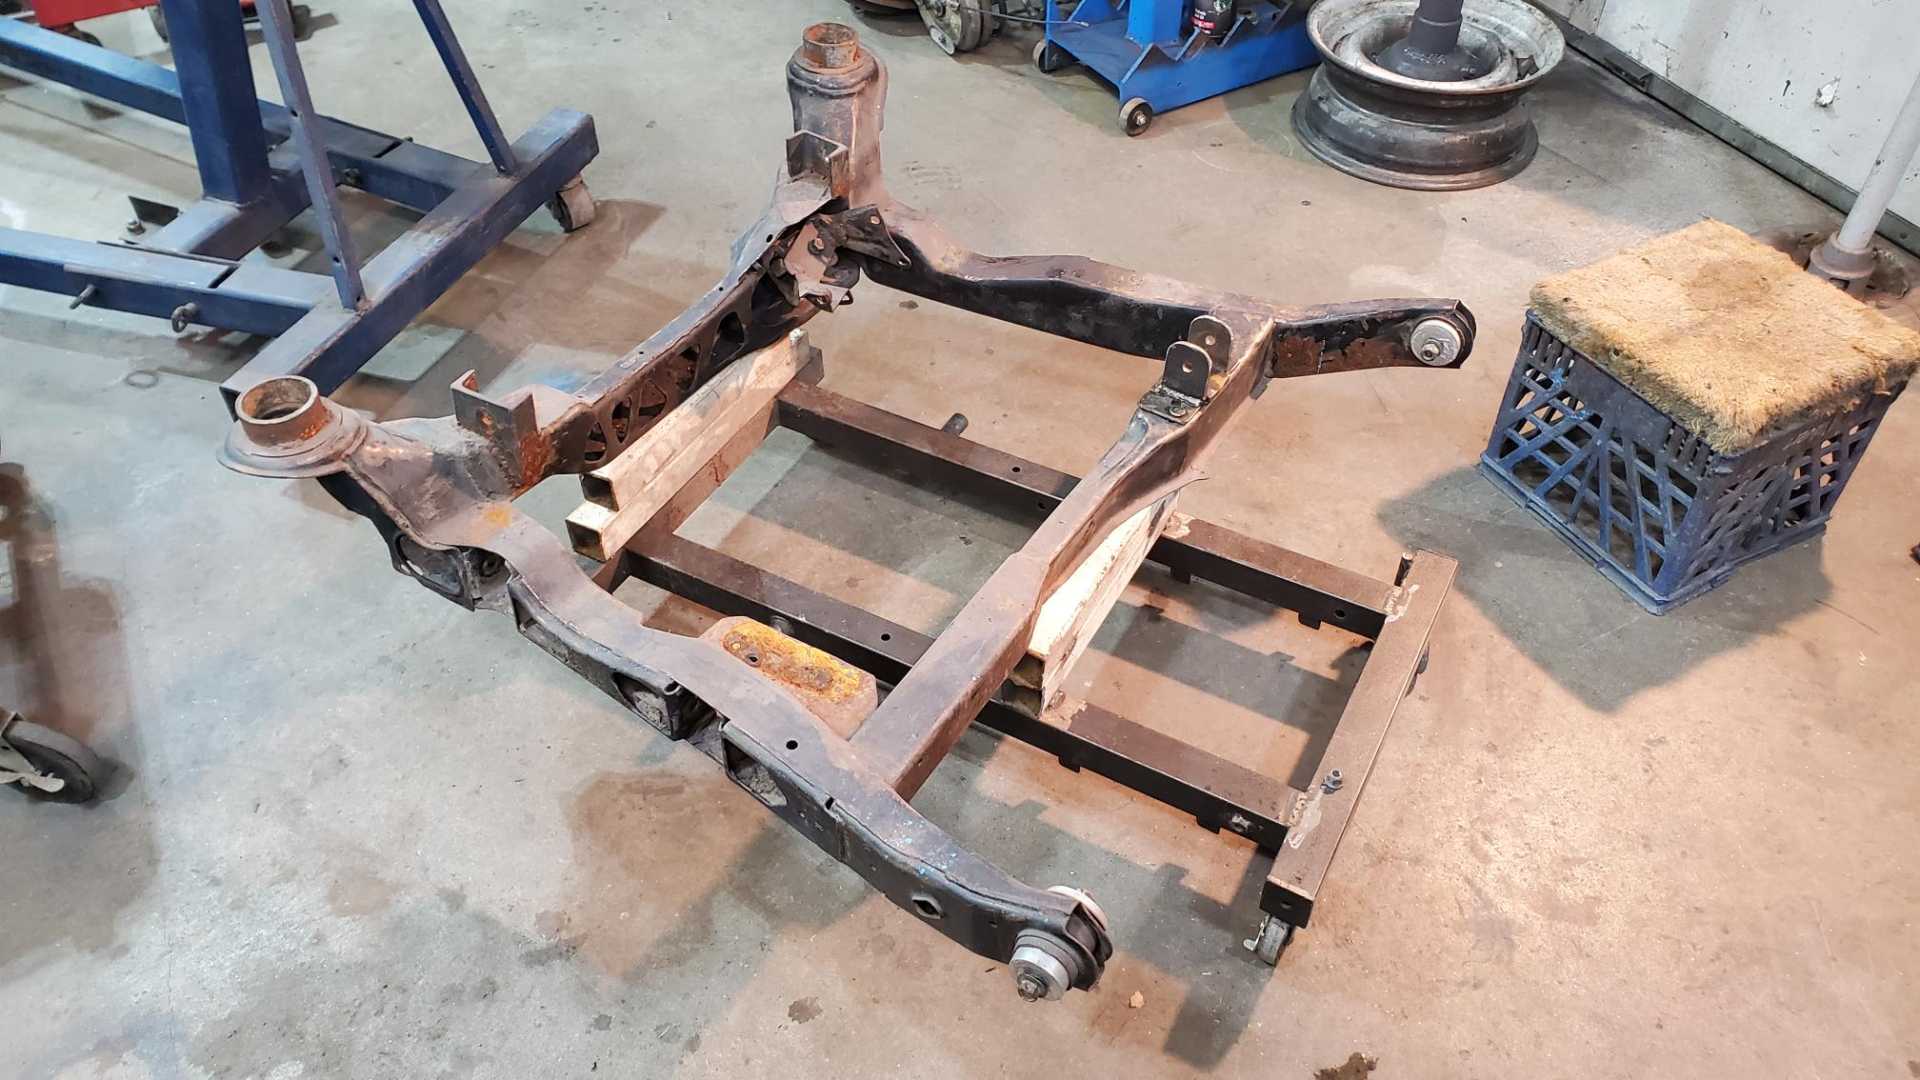
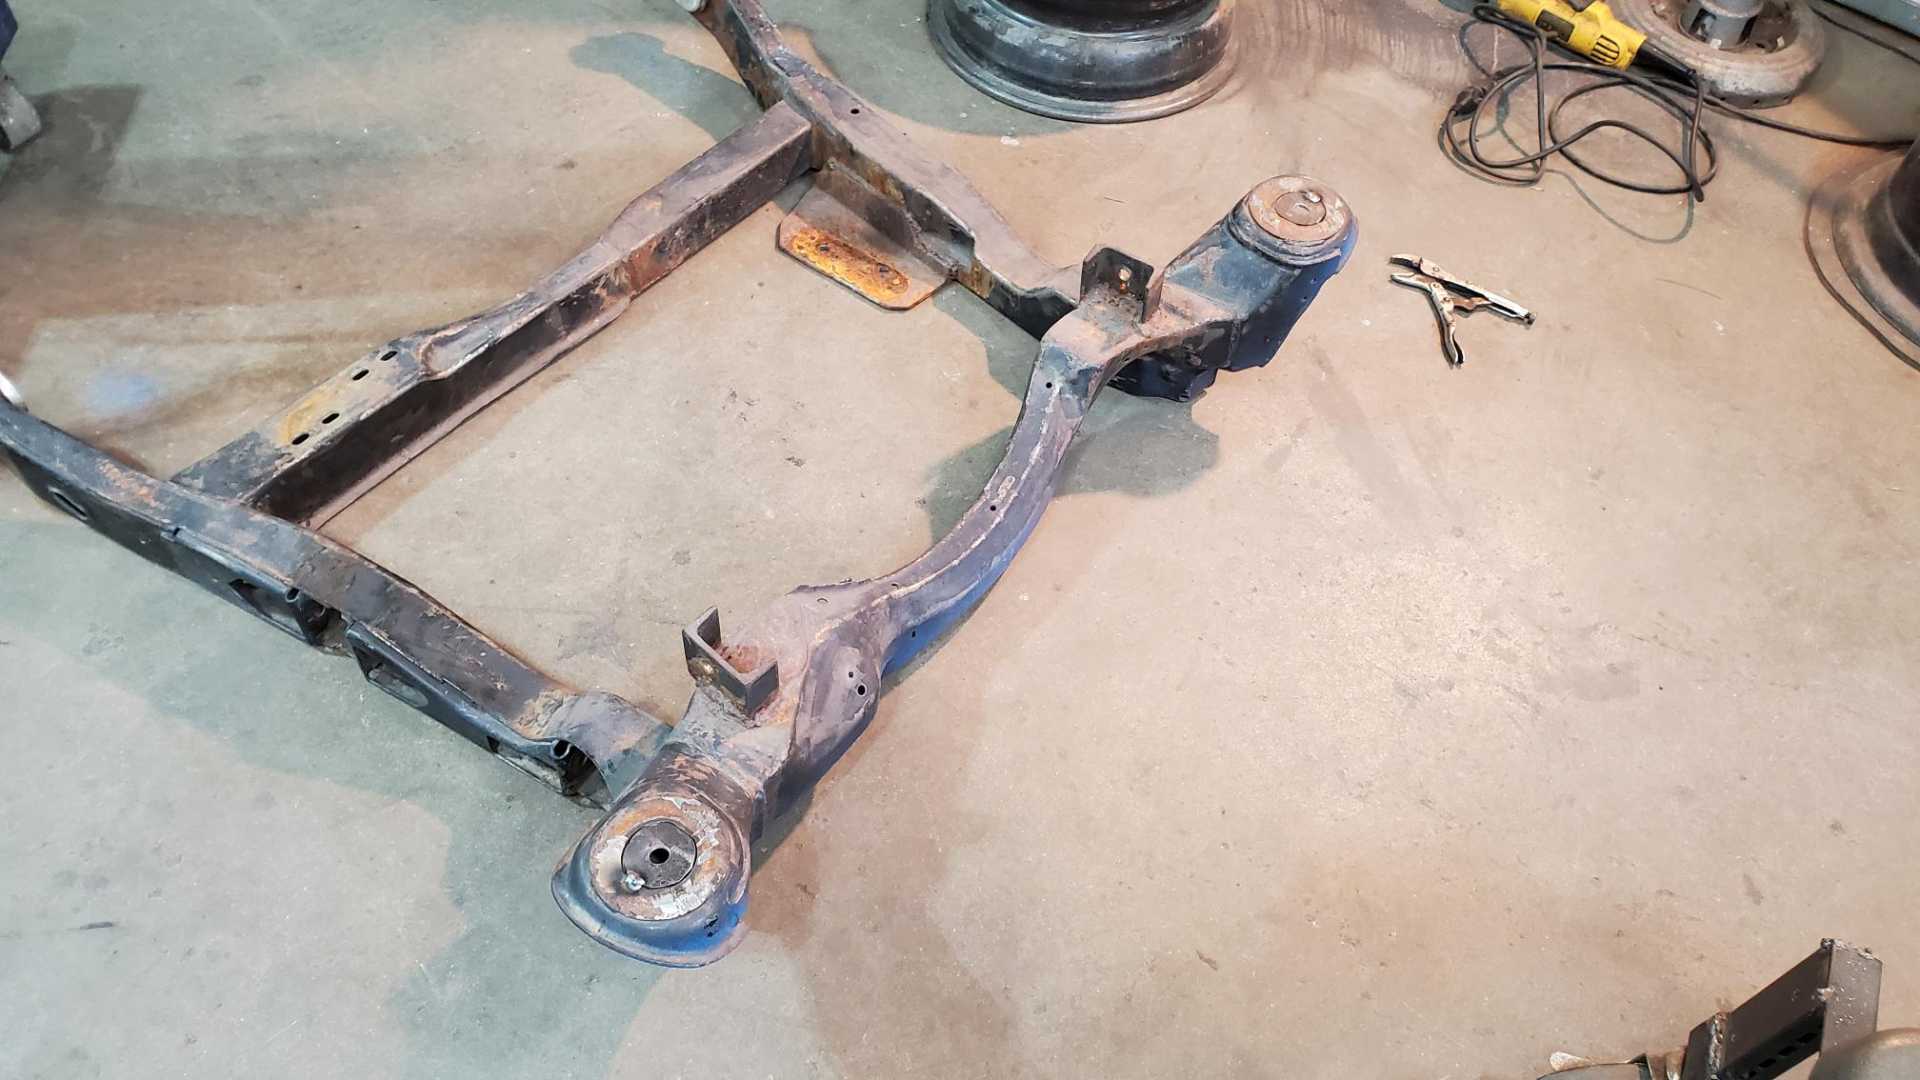
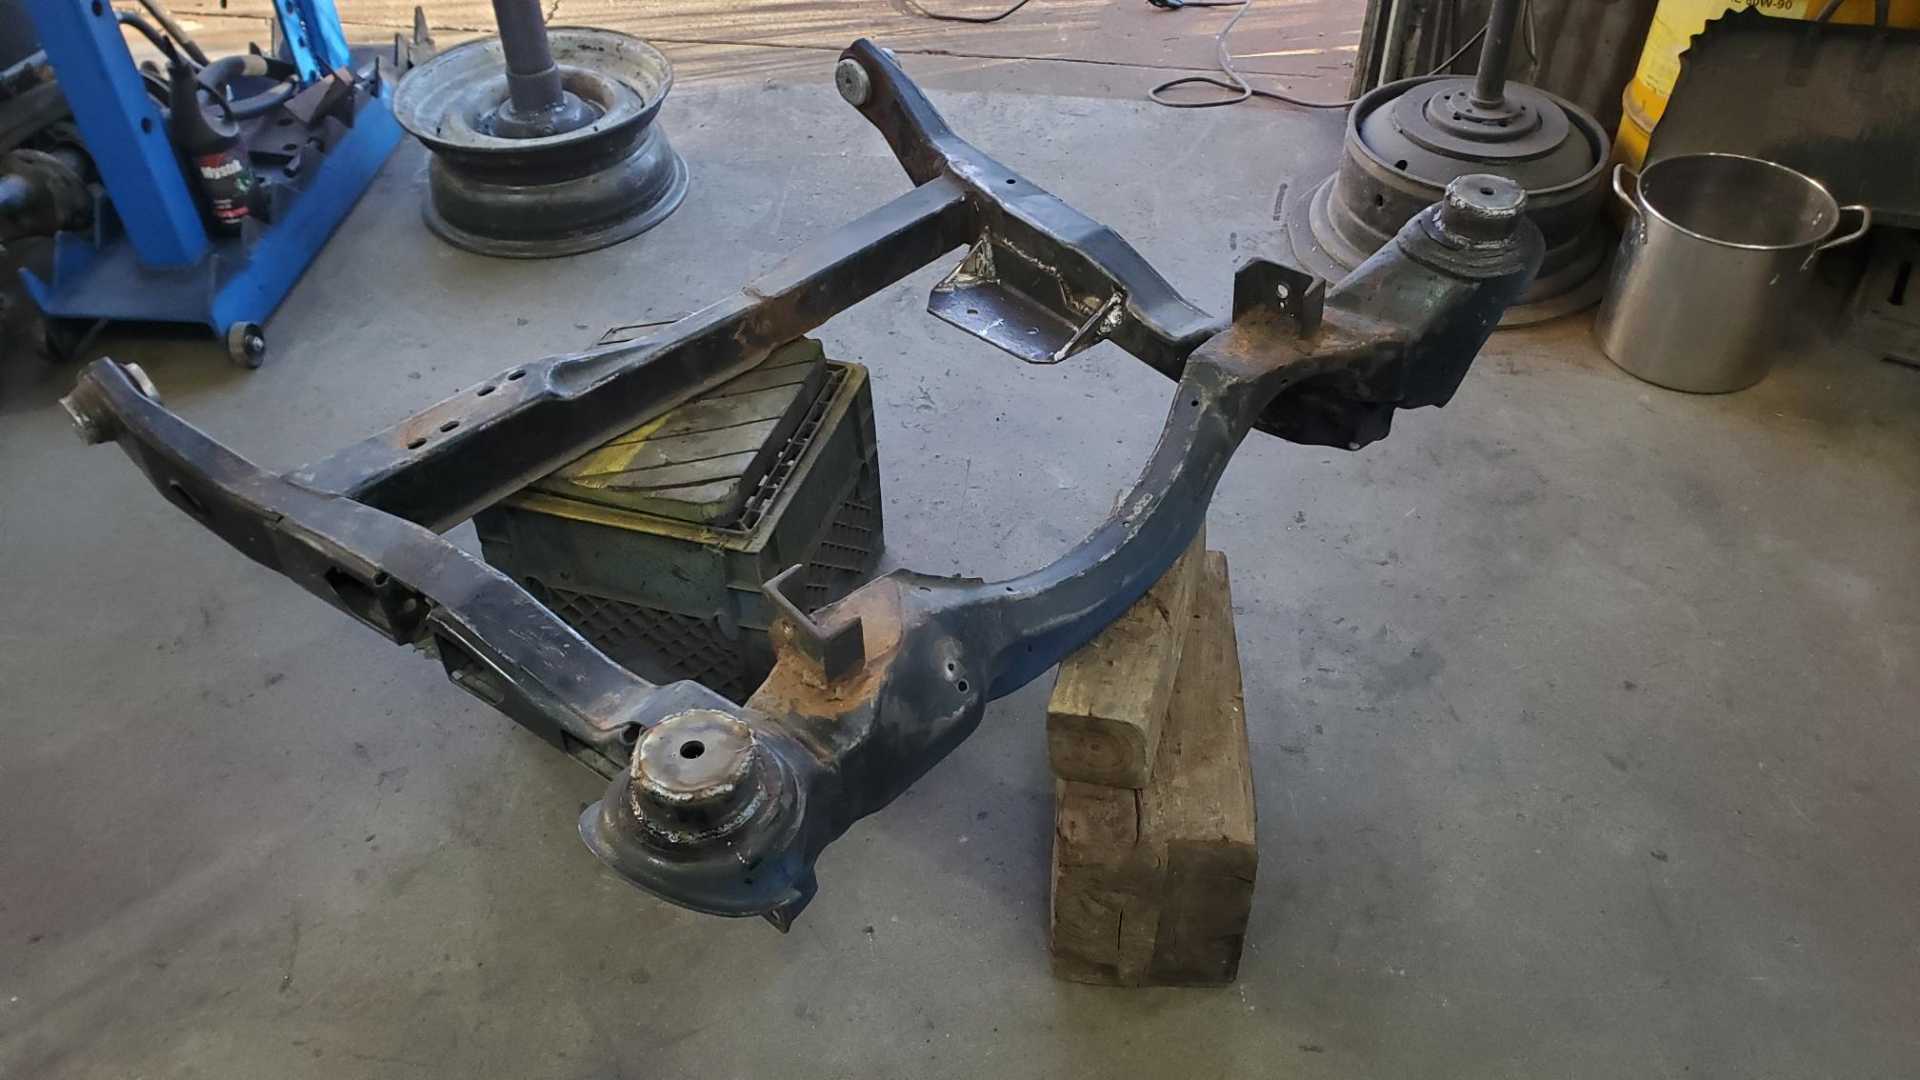
Lifted the spare Quad and the transmission off the cradle and set them aside for now. The cradle is dirty and rusty from the previous work I did to it.
Lots of wire brushing and sanding in store for the cradle. Also thinking about adding steel plates on the ends of the pipes where the vertical bolts attach to the space frame. I’d been using the stock Fiero washers and bolts, but I noticed in Sardonyx’s thread that he welded plates onto the pipes.
[This message has been edited by Quadfather (edited 01-08-2022).]
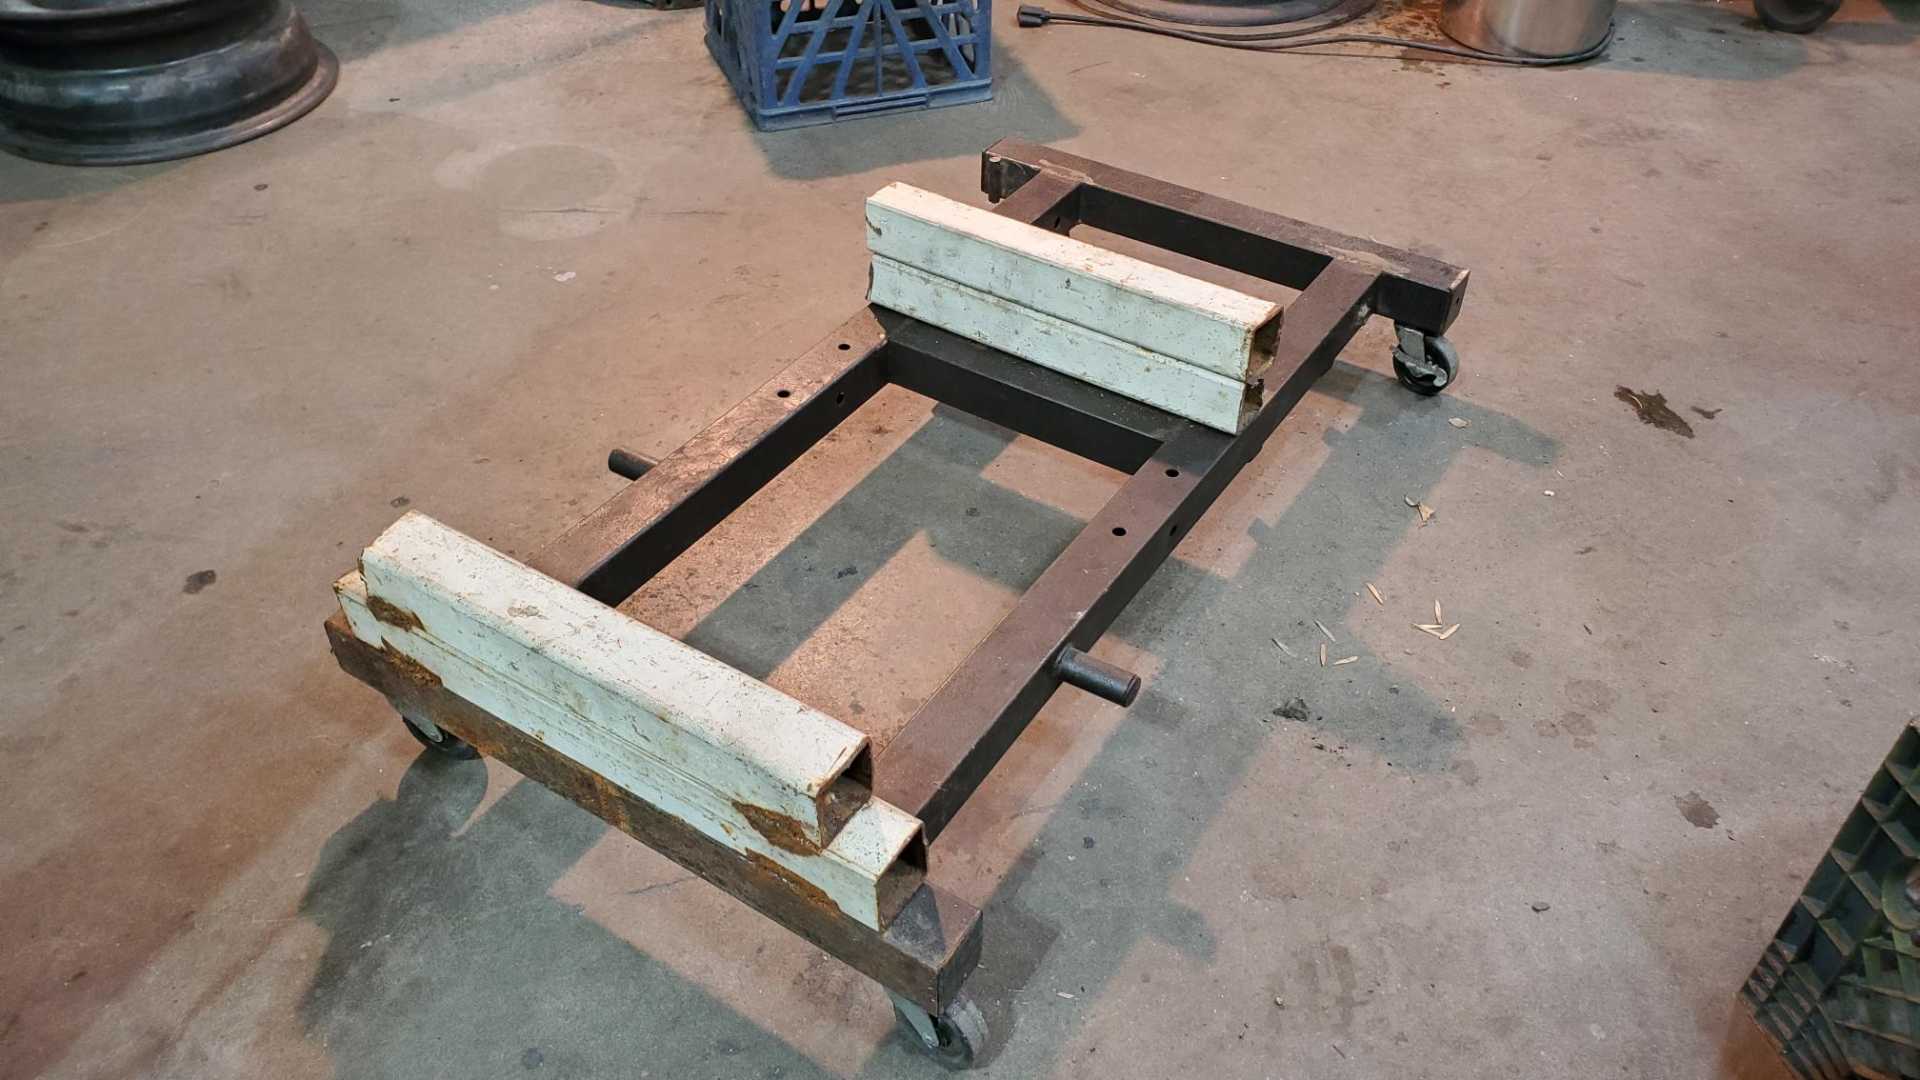
I need to spend some time on the engine cart. I slapped this together years ago when I first started working on the Fiero. It works but I’d like to dress it up a bit and add some flanges to keep the cradle centered on the supports.
Also, I’m considering cutting off part of the shift cable mount. I had to drill a new hole in order to fit the mount to the Quad/Getrag and since the Getrag’s slave cylinder is in a different location the slave cylinder mount isn’t needed.
[This message has been edited by Quadfather (edited 01-08-2022).]
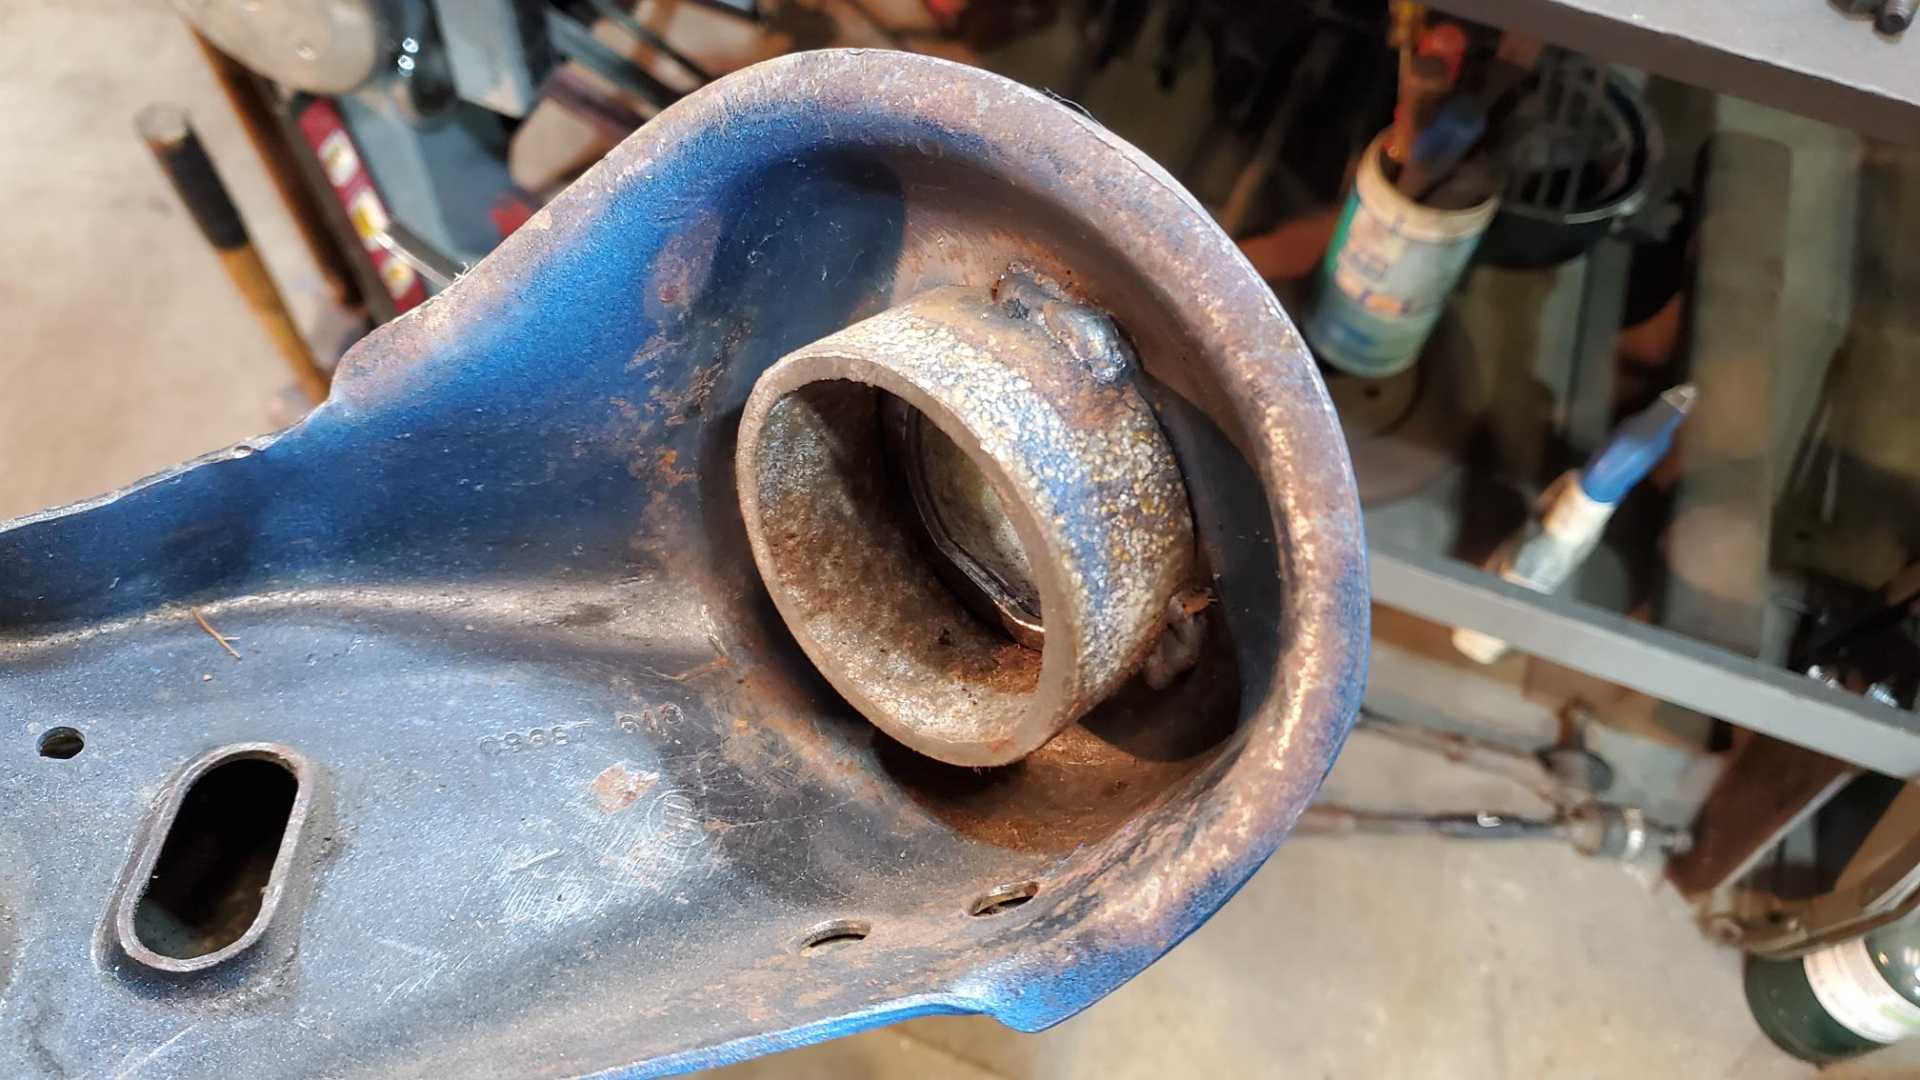
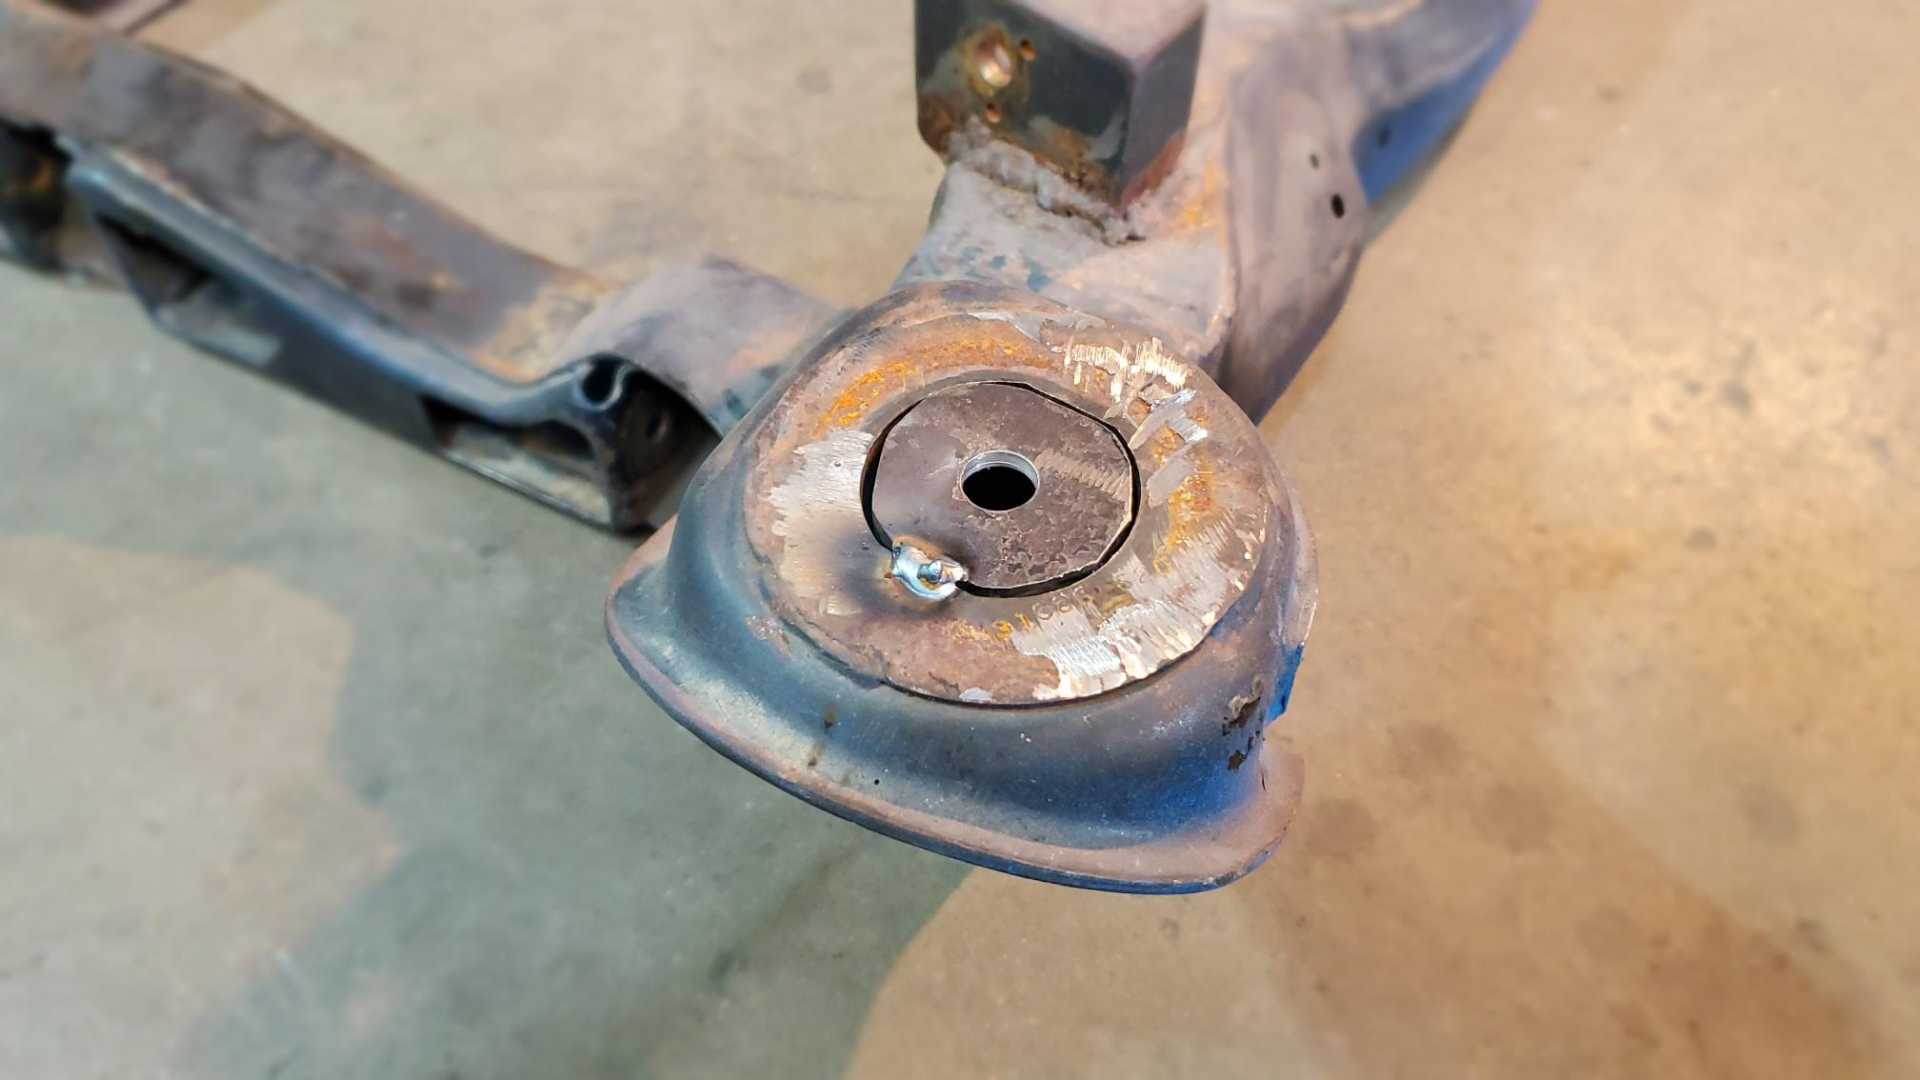
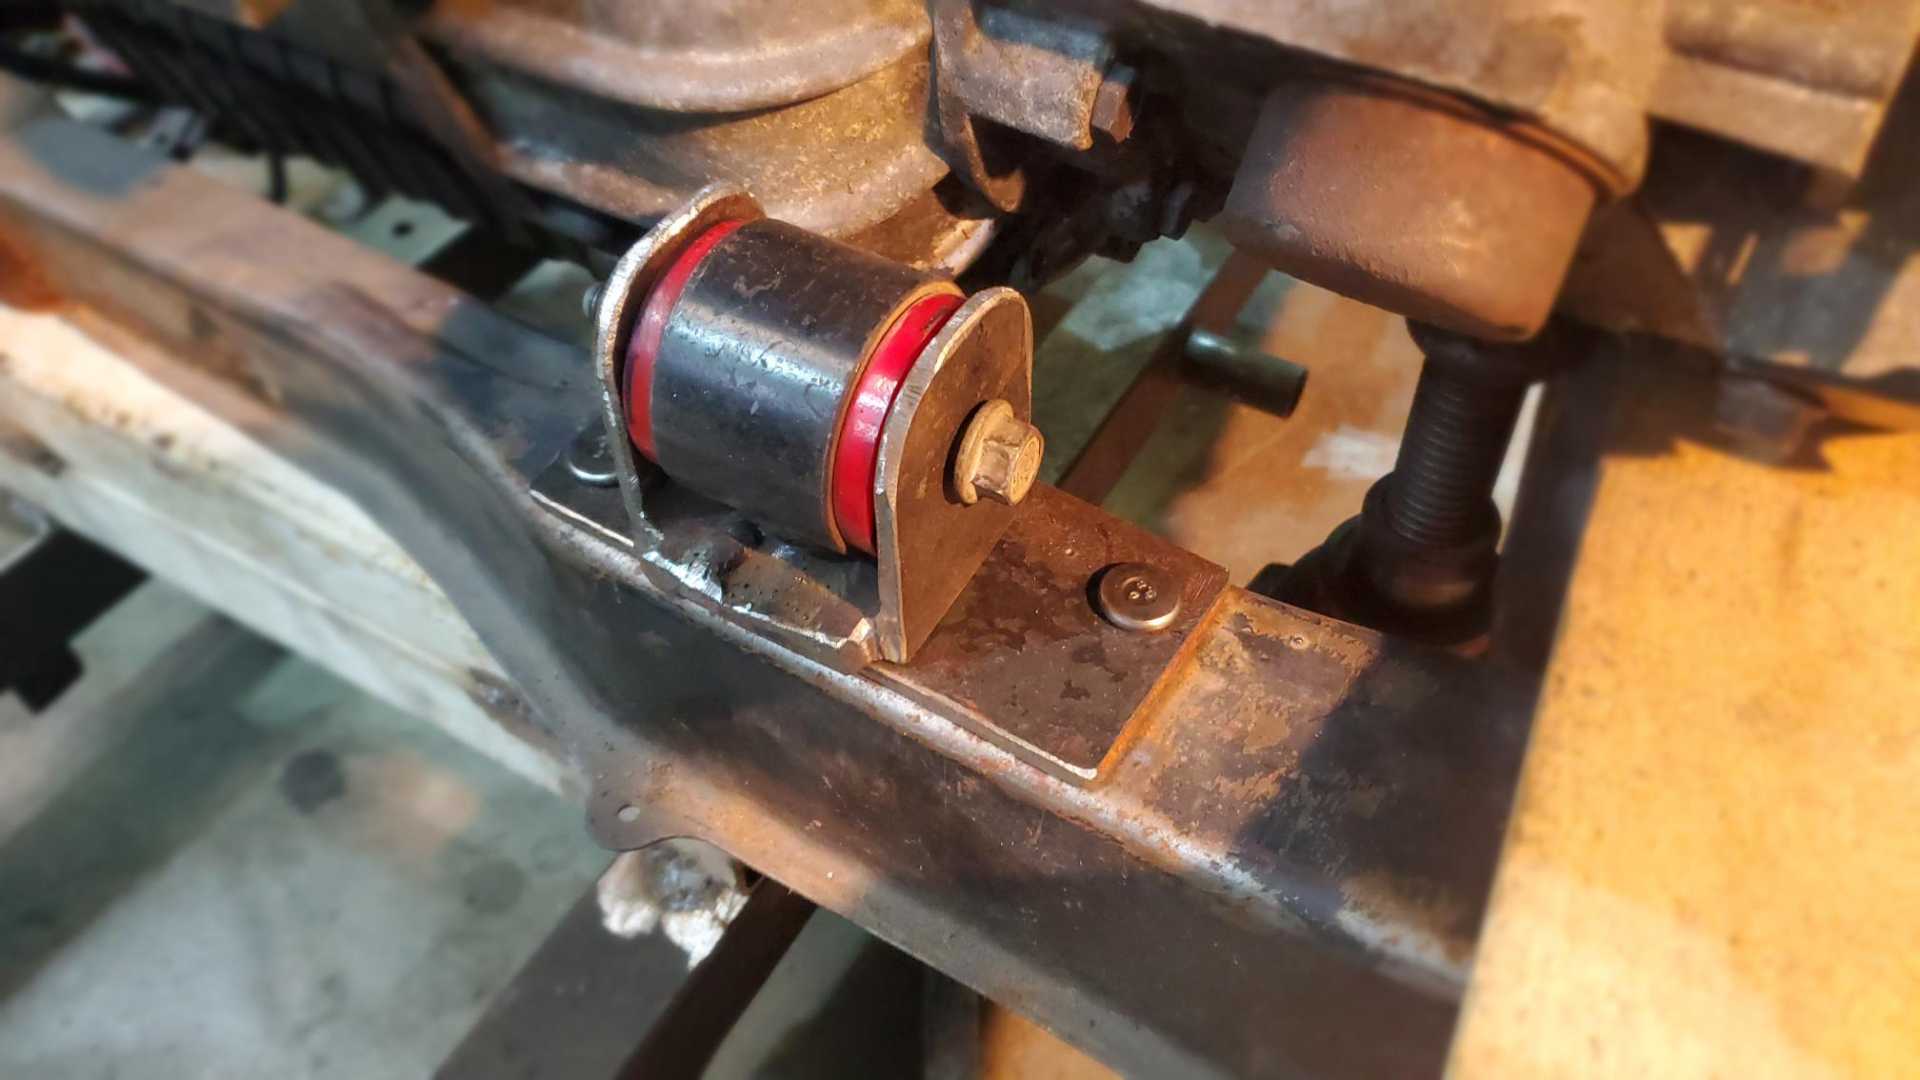
Worked on the engine cradle today. I decided years ago to switch to solid mounts. At the time one of my nephews was working at a machine shop so he turned me a set of aluminum bushings for the front mounts. I used the stock rear mounts as guides to cut and weld sections of pipes to the perches.
Over the last few weeks I’ve realized I didn’t need the piece of pipe on the bottom of the cradle perch. I can weld a plate over the opening on the bottom and then just use a shorter bolt.
Still have to use a section of pipe on top of the perch in order to keep the cradle at the same angle as OEM, right?
Tempted to dig my ‘88 cradle out of storage to compare and contrast.
[This message has been edited by Quadfather (edited 01-09-2022).]
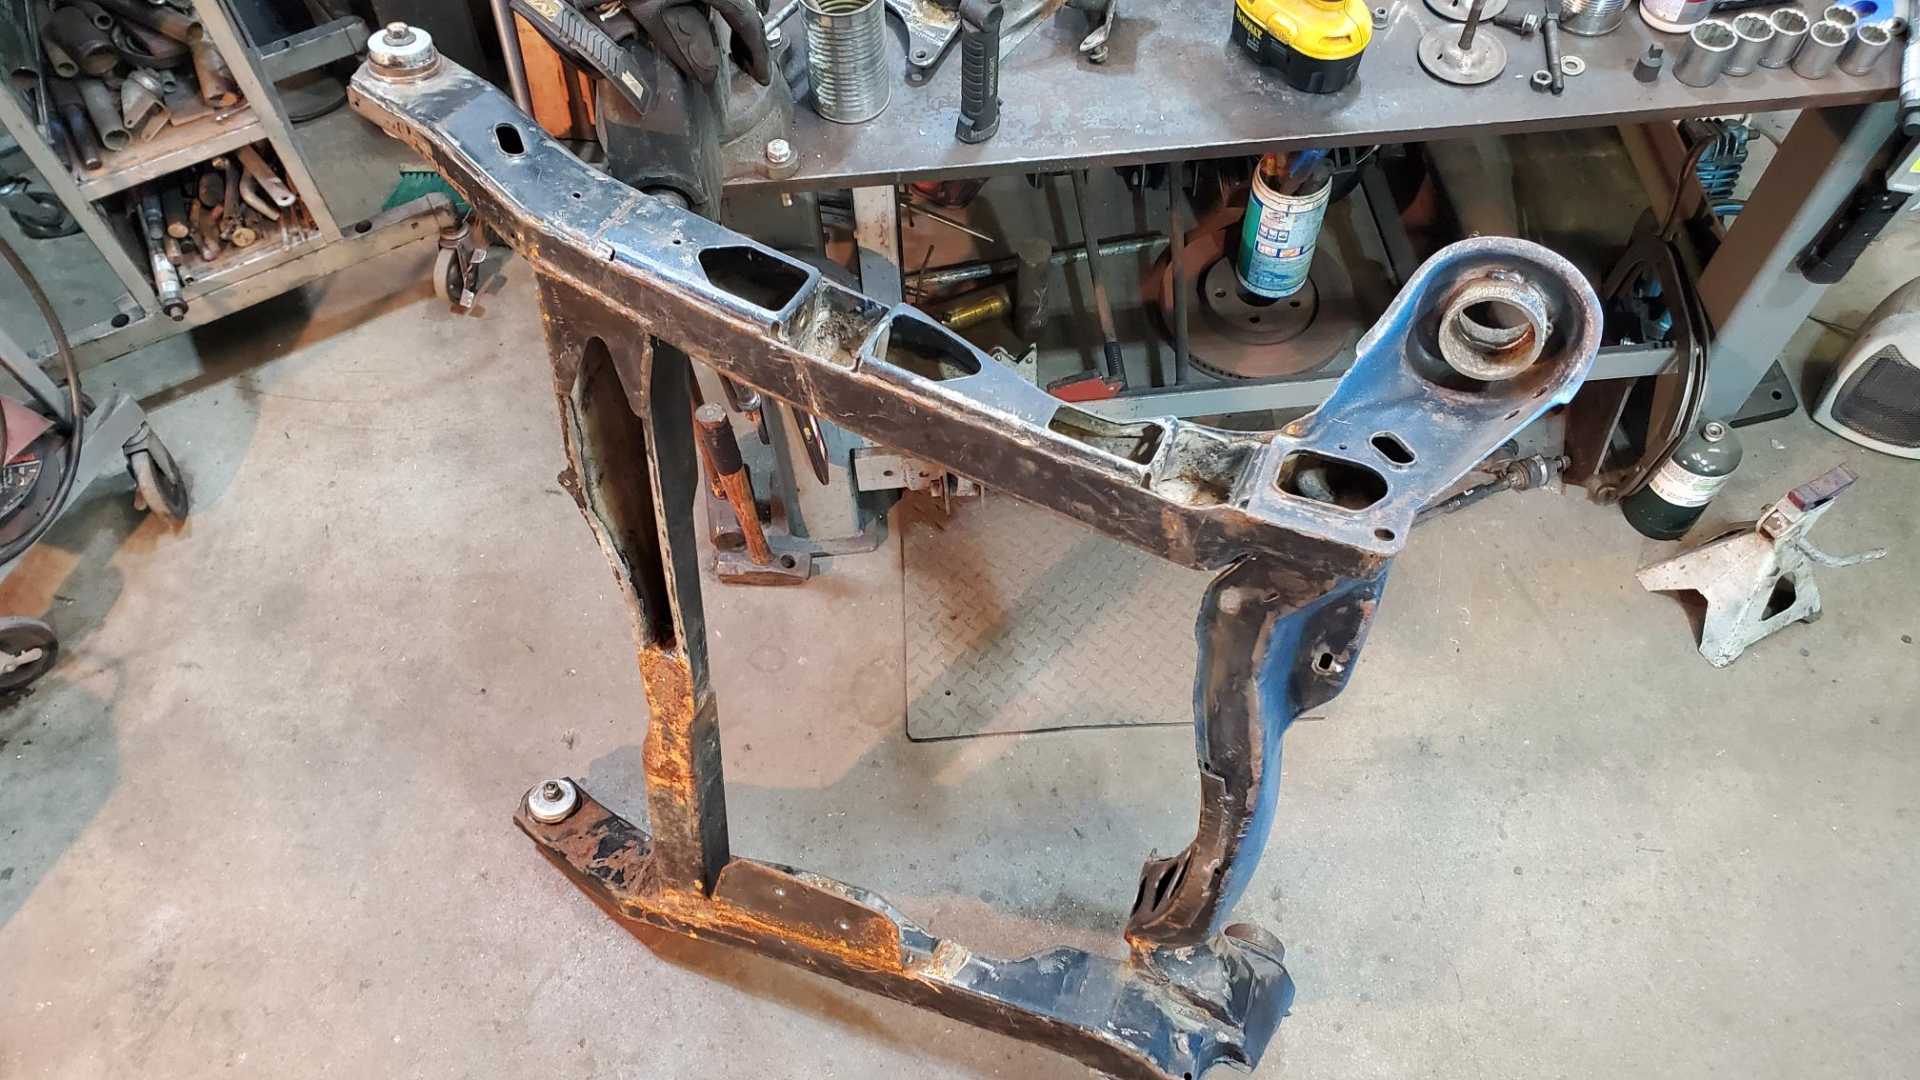
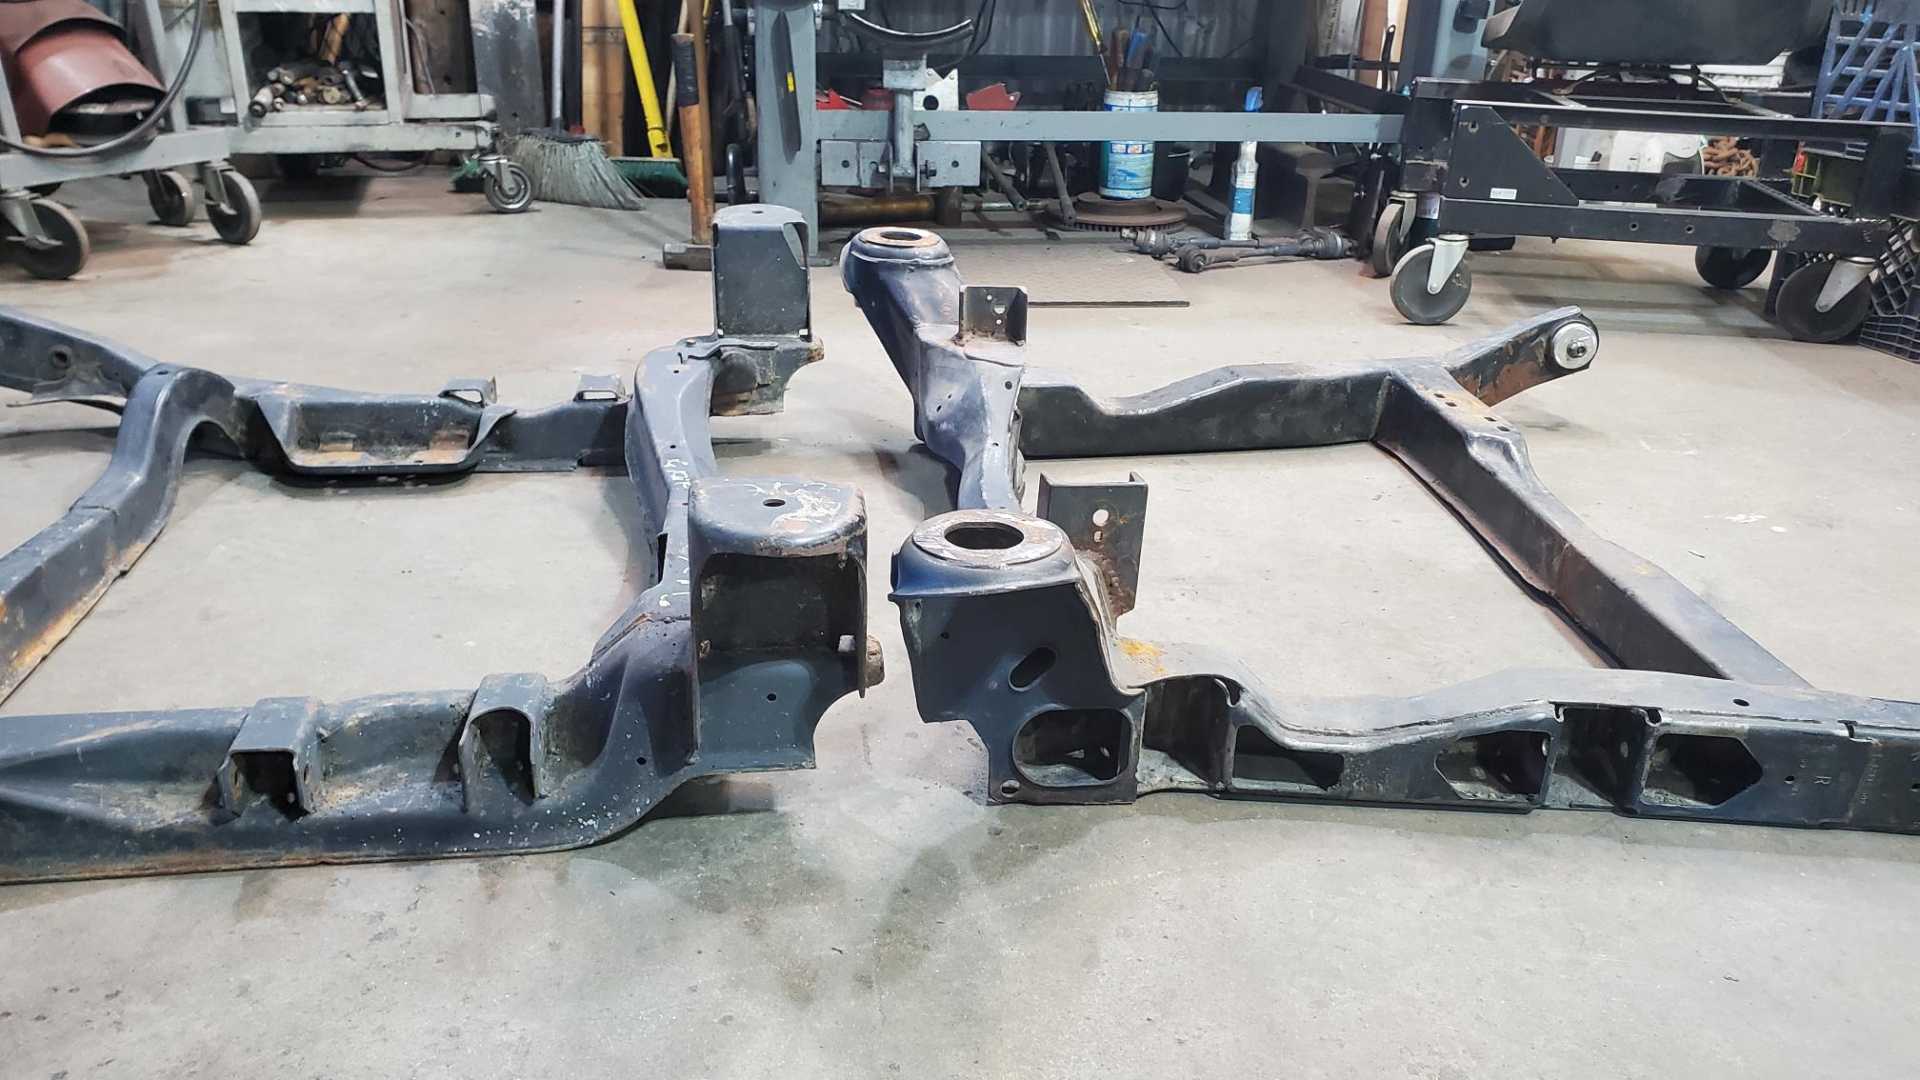
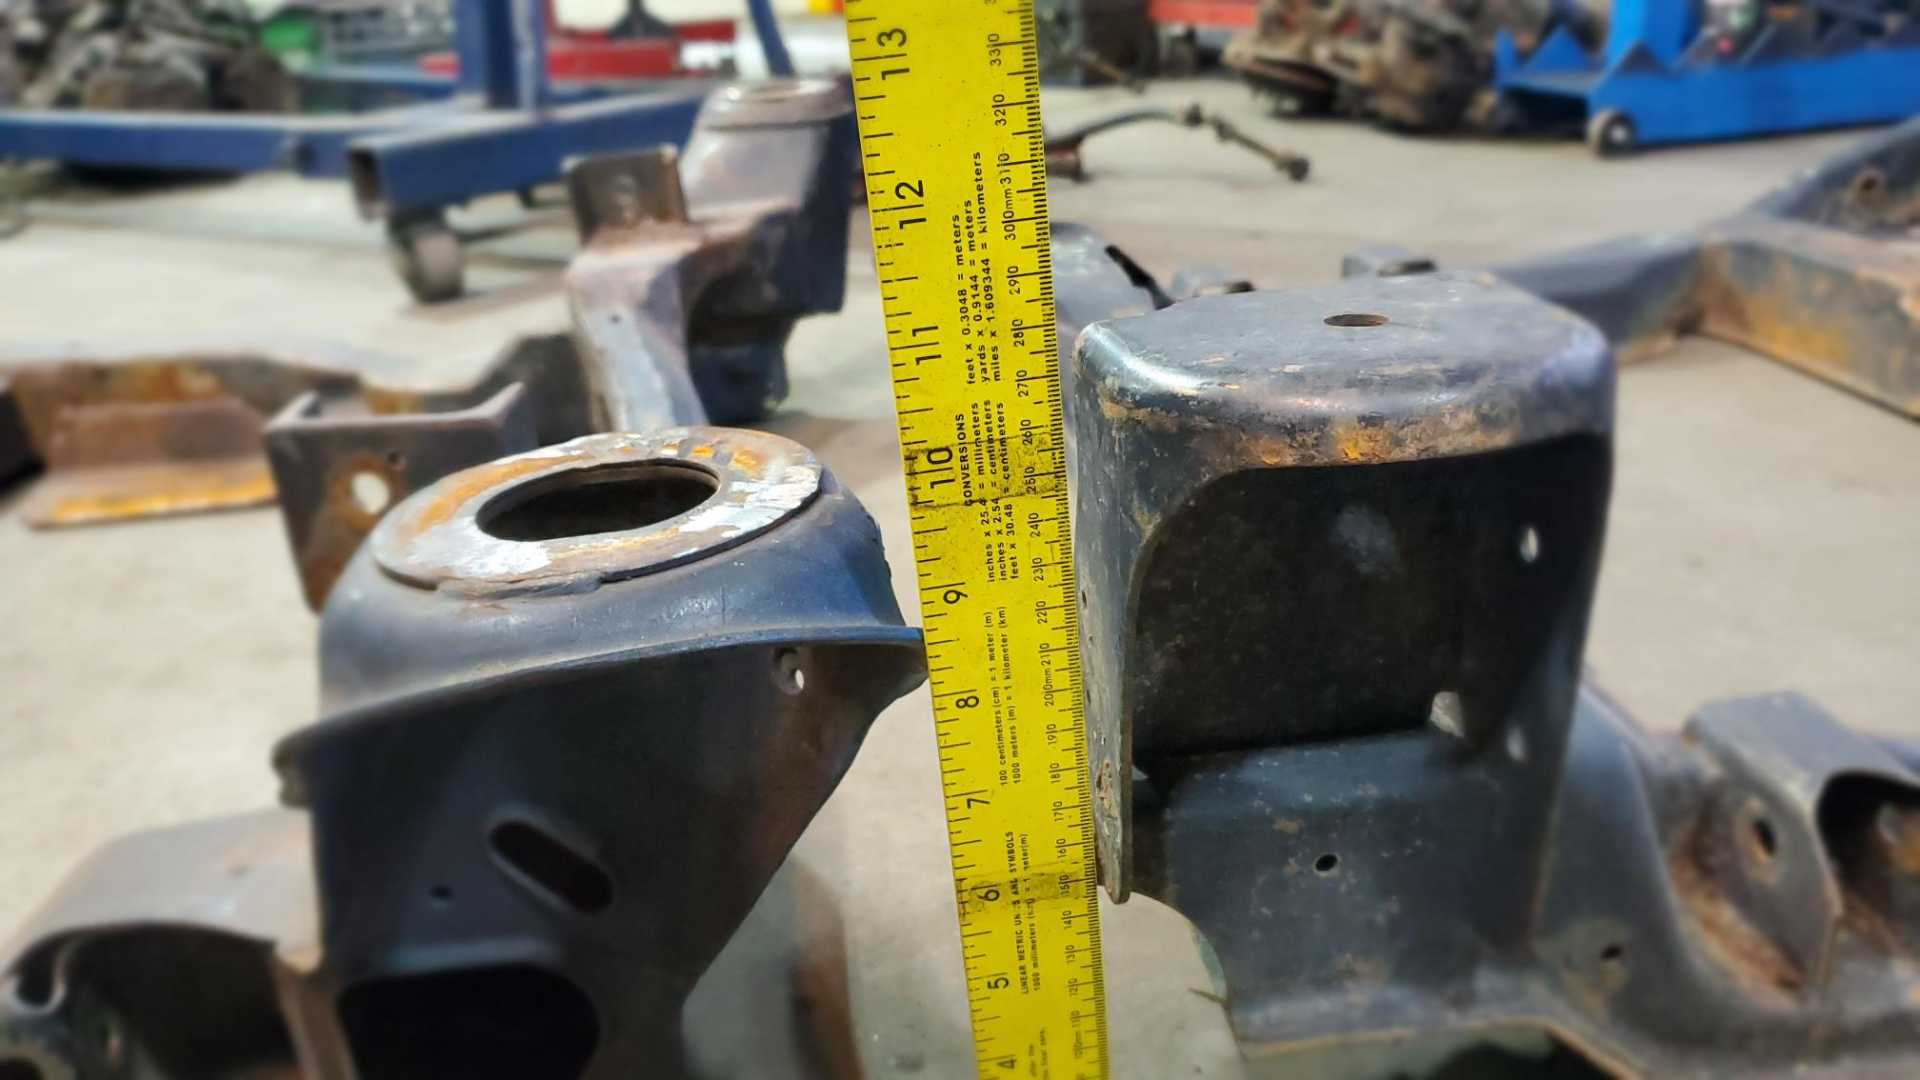
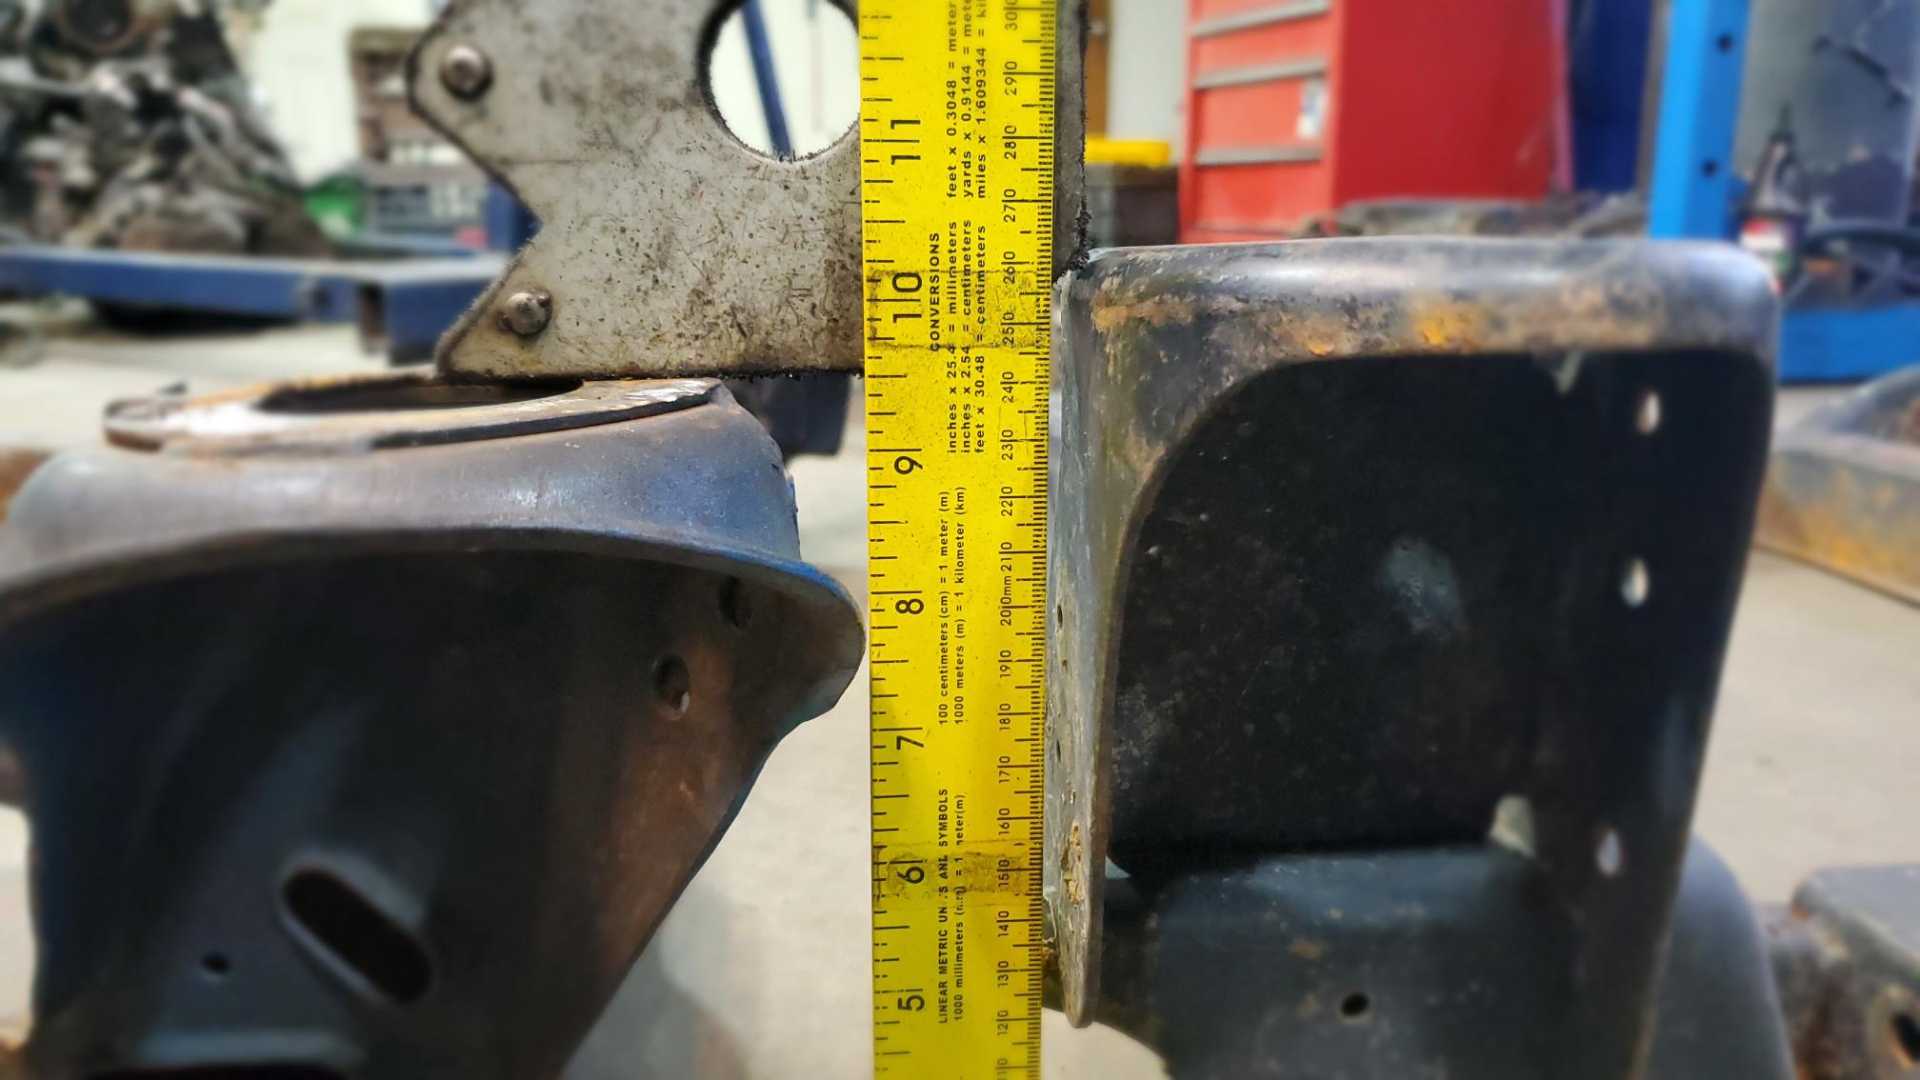
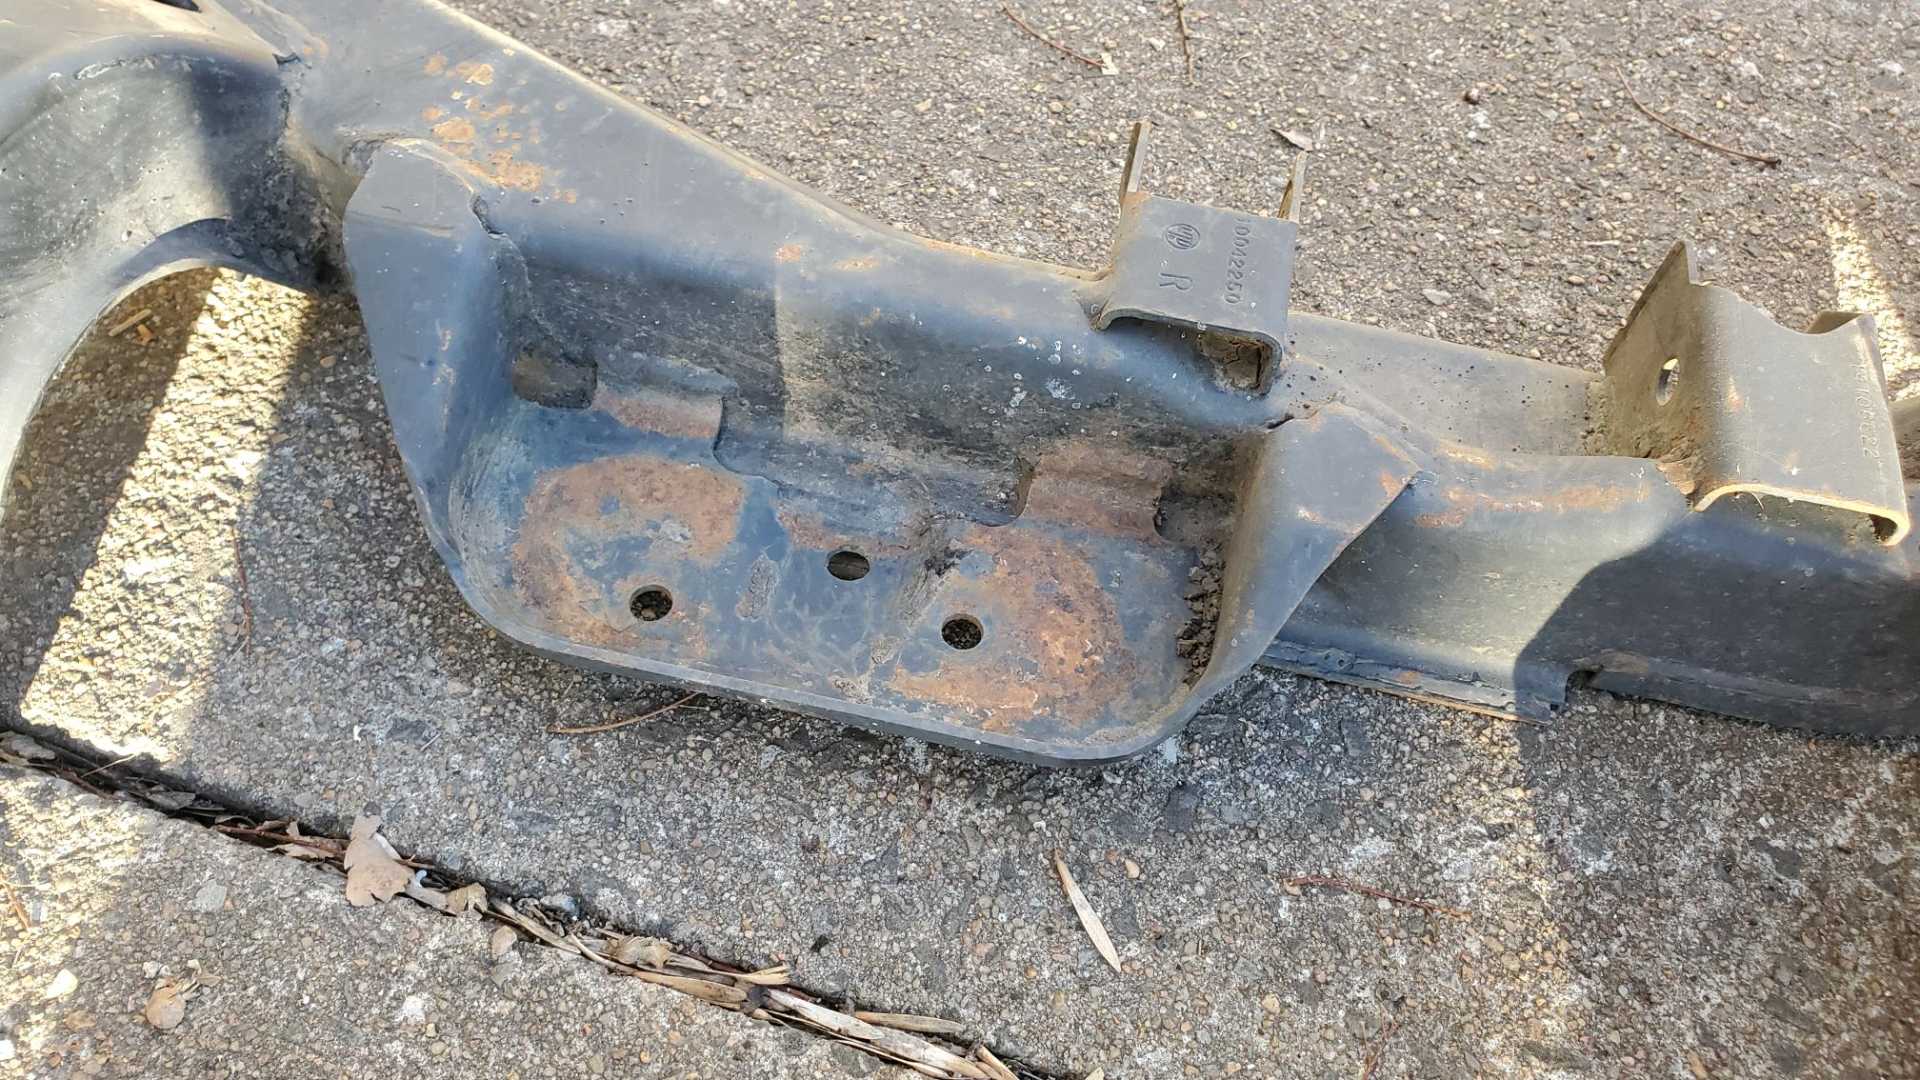
Dug my '88 cradle out of the storage unit yesterday and made a quick stop at the shop this morning. Obviously, the rear mounts on the '88 cradle are taller than the ones on the '87.
The '87 is 9 and a half inches, the '88 is 10 and a quarter.
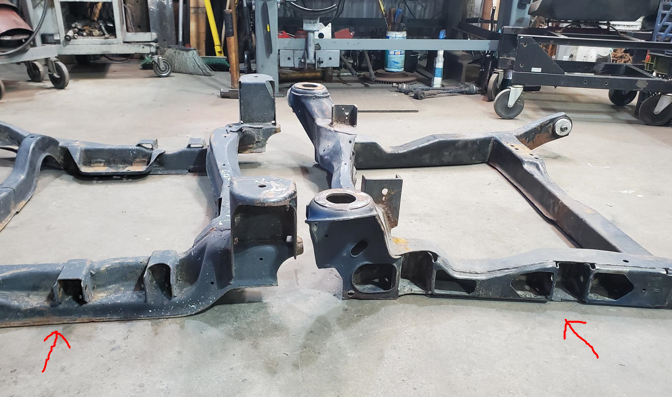
After looking at the photos, I noticed the attachment points for the control arms are about an inch higher on the '88 cradle than they are on the '87.
When I get back over to the shop I'll measure from the plane of the rear mounting plate to the bottom of the control arm attachment points. If the measurement is the same on both cradles, then I can just weld a flat plate onto the rear mounting points of the '87 cradle and get two correspondingly shorter bolts, right?
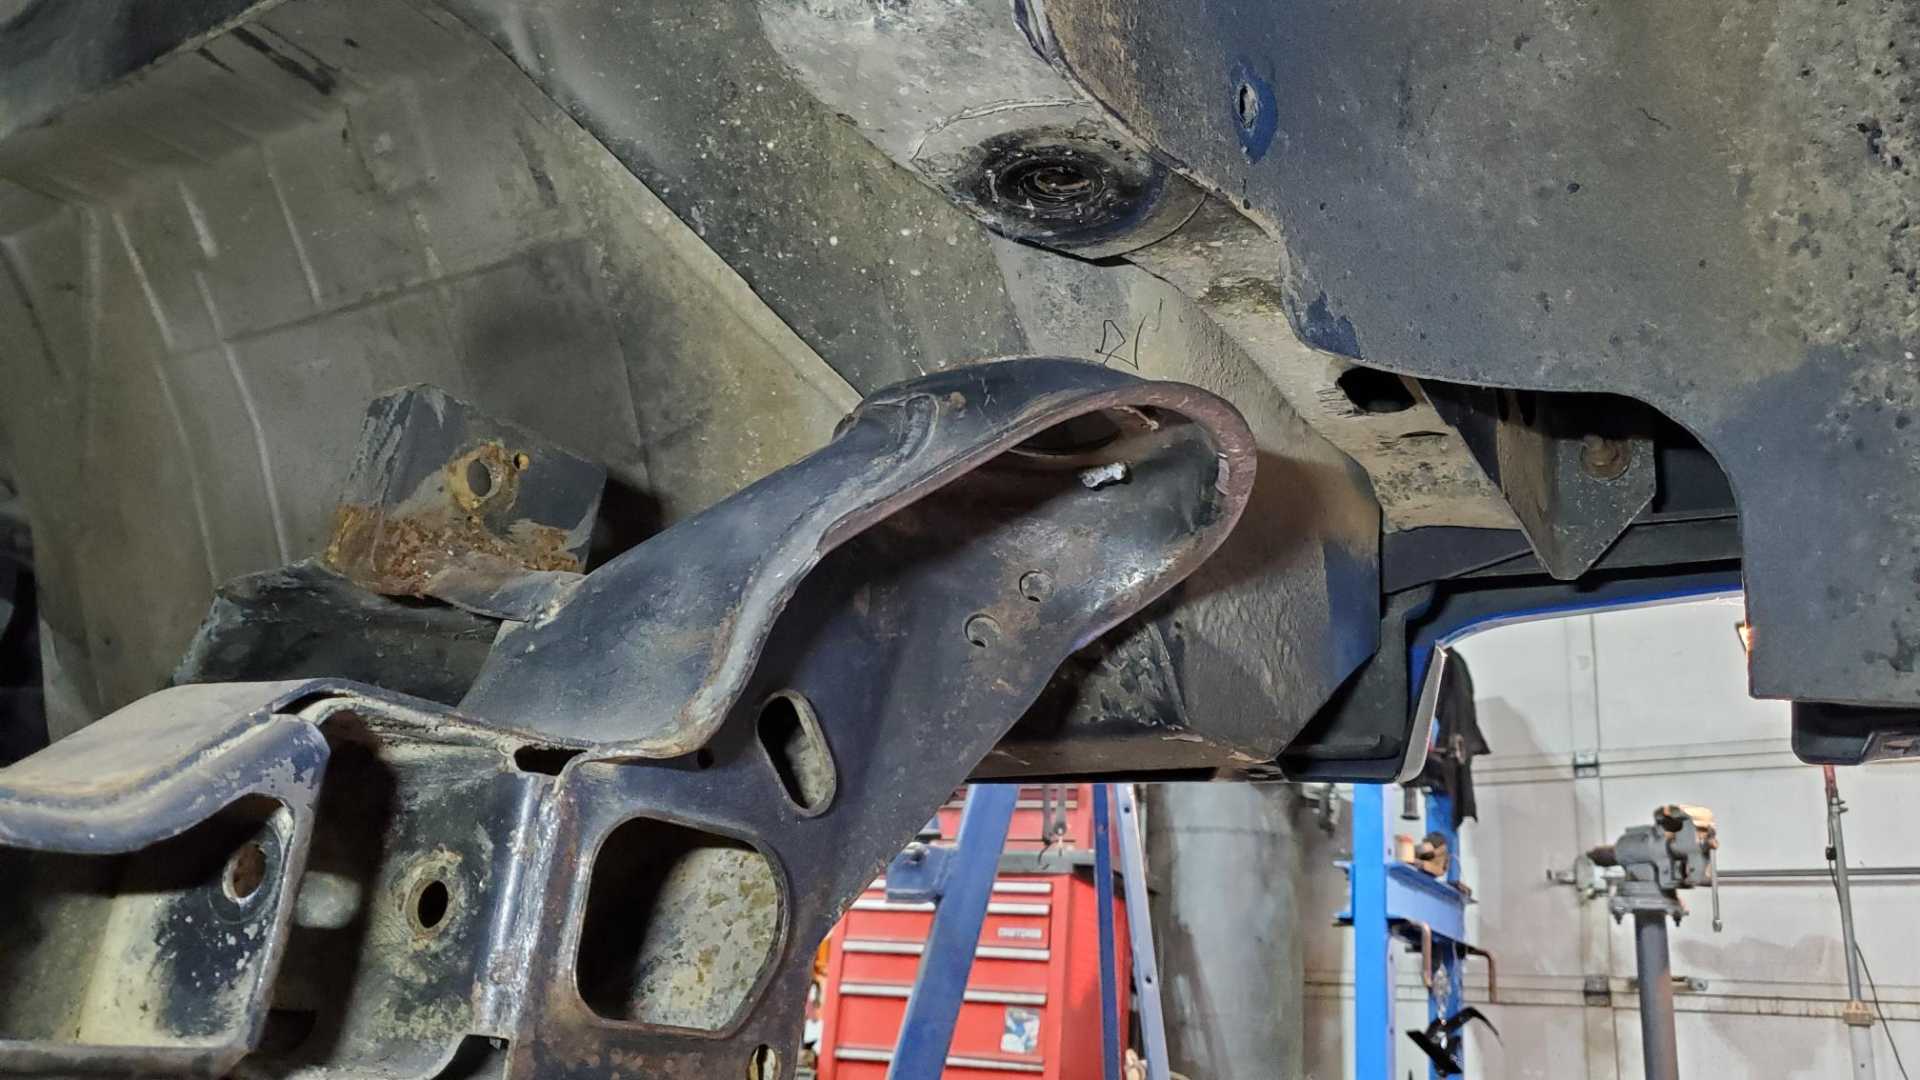
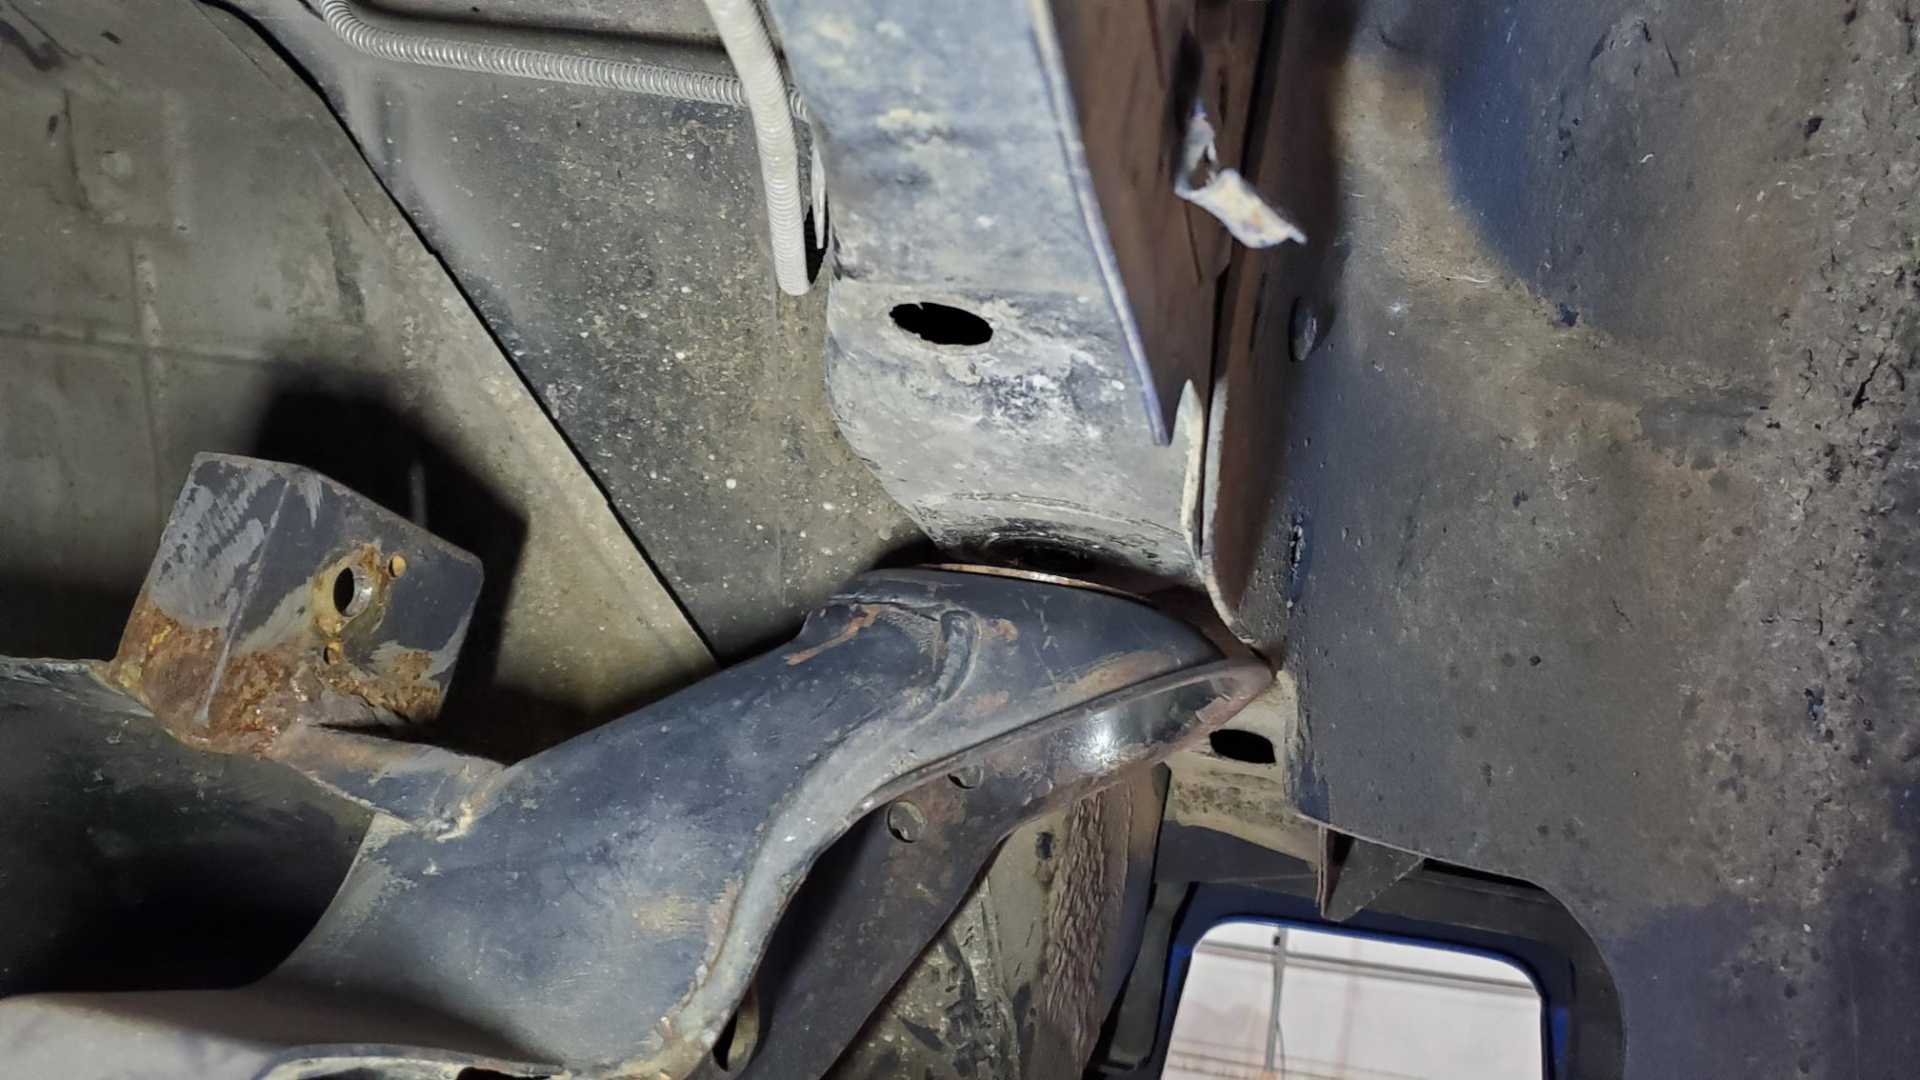
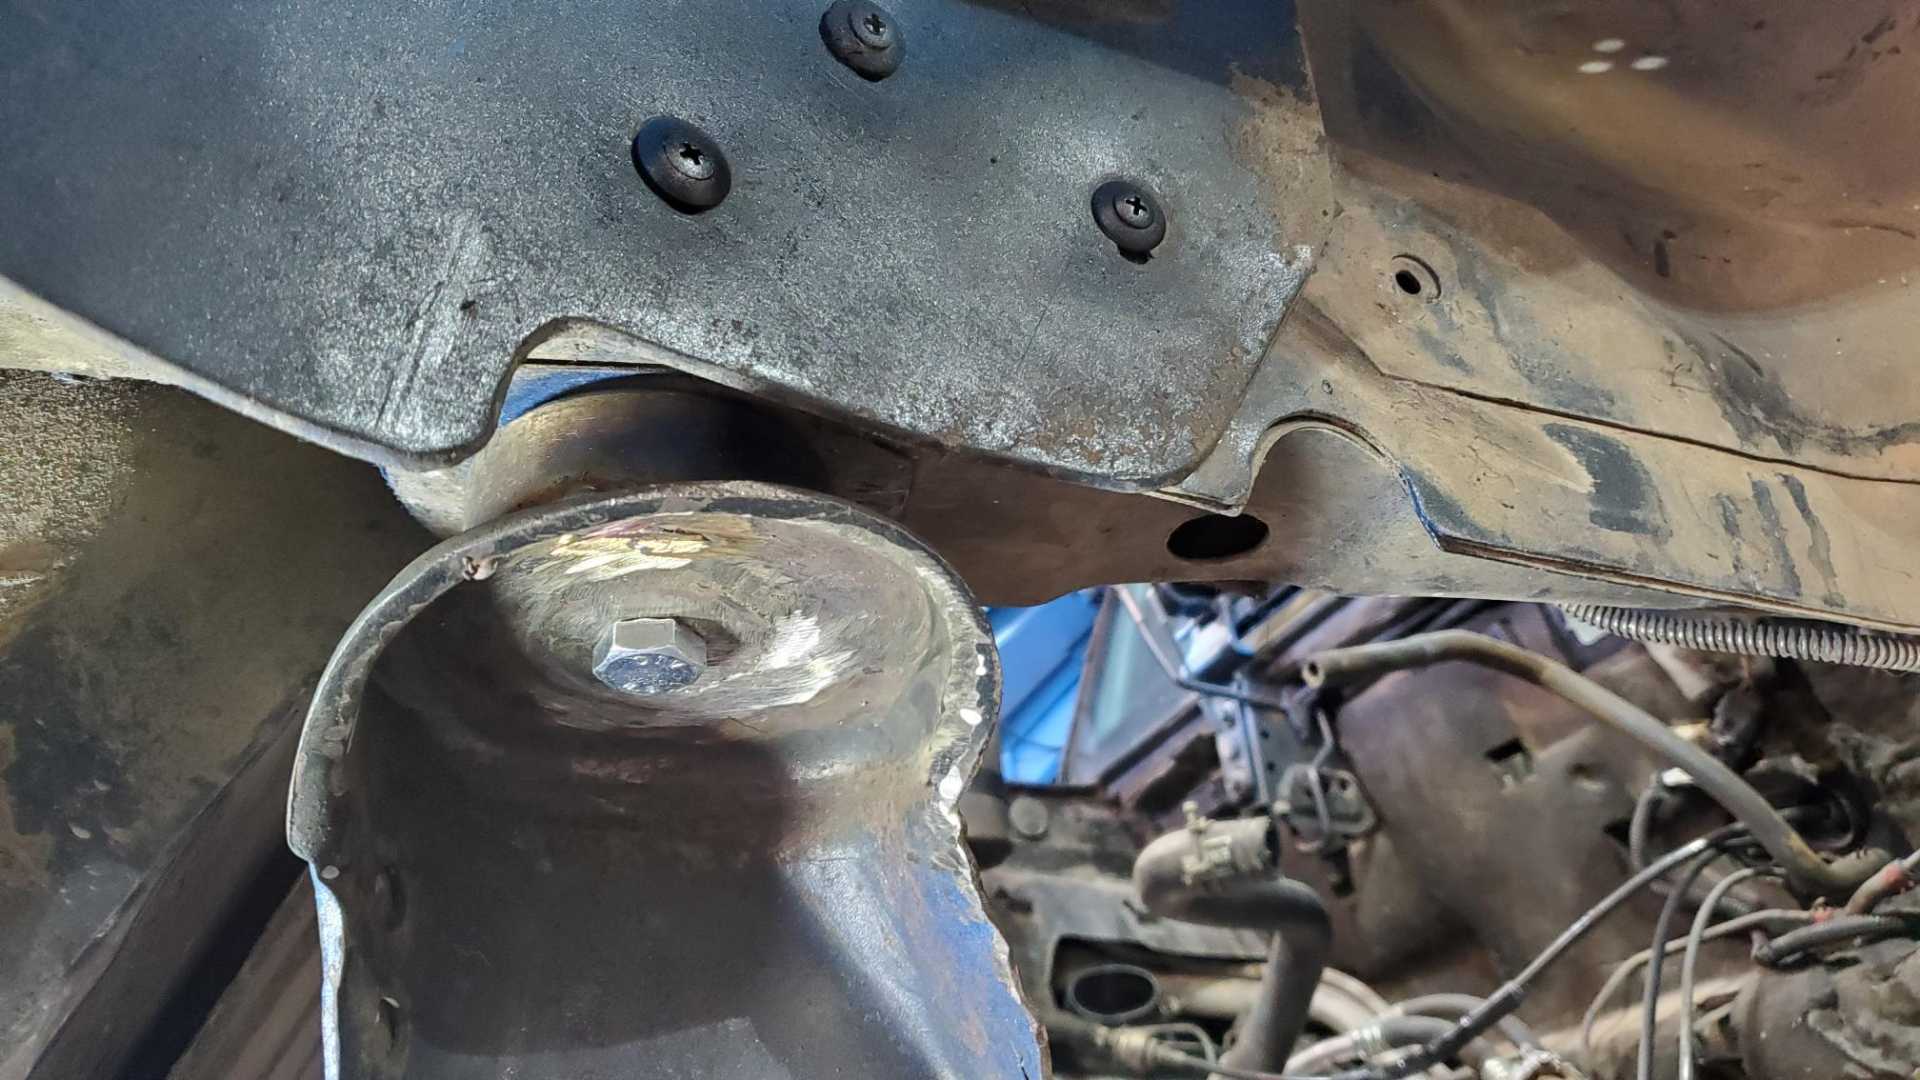
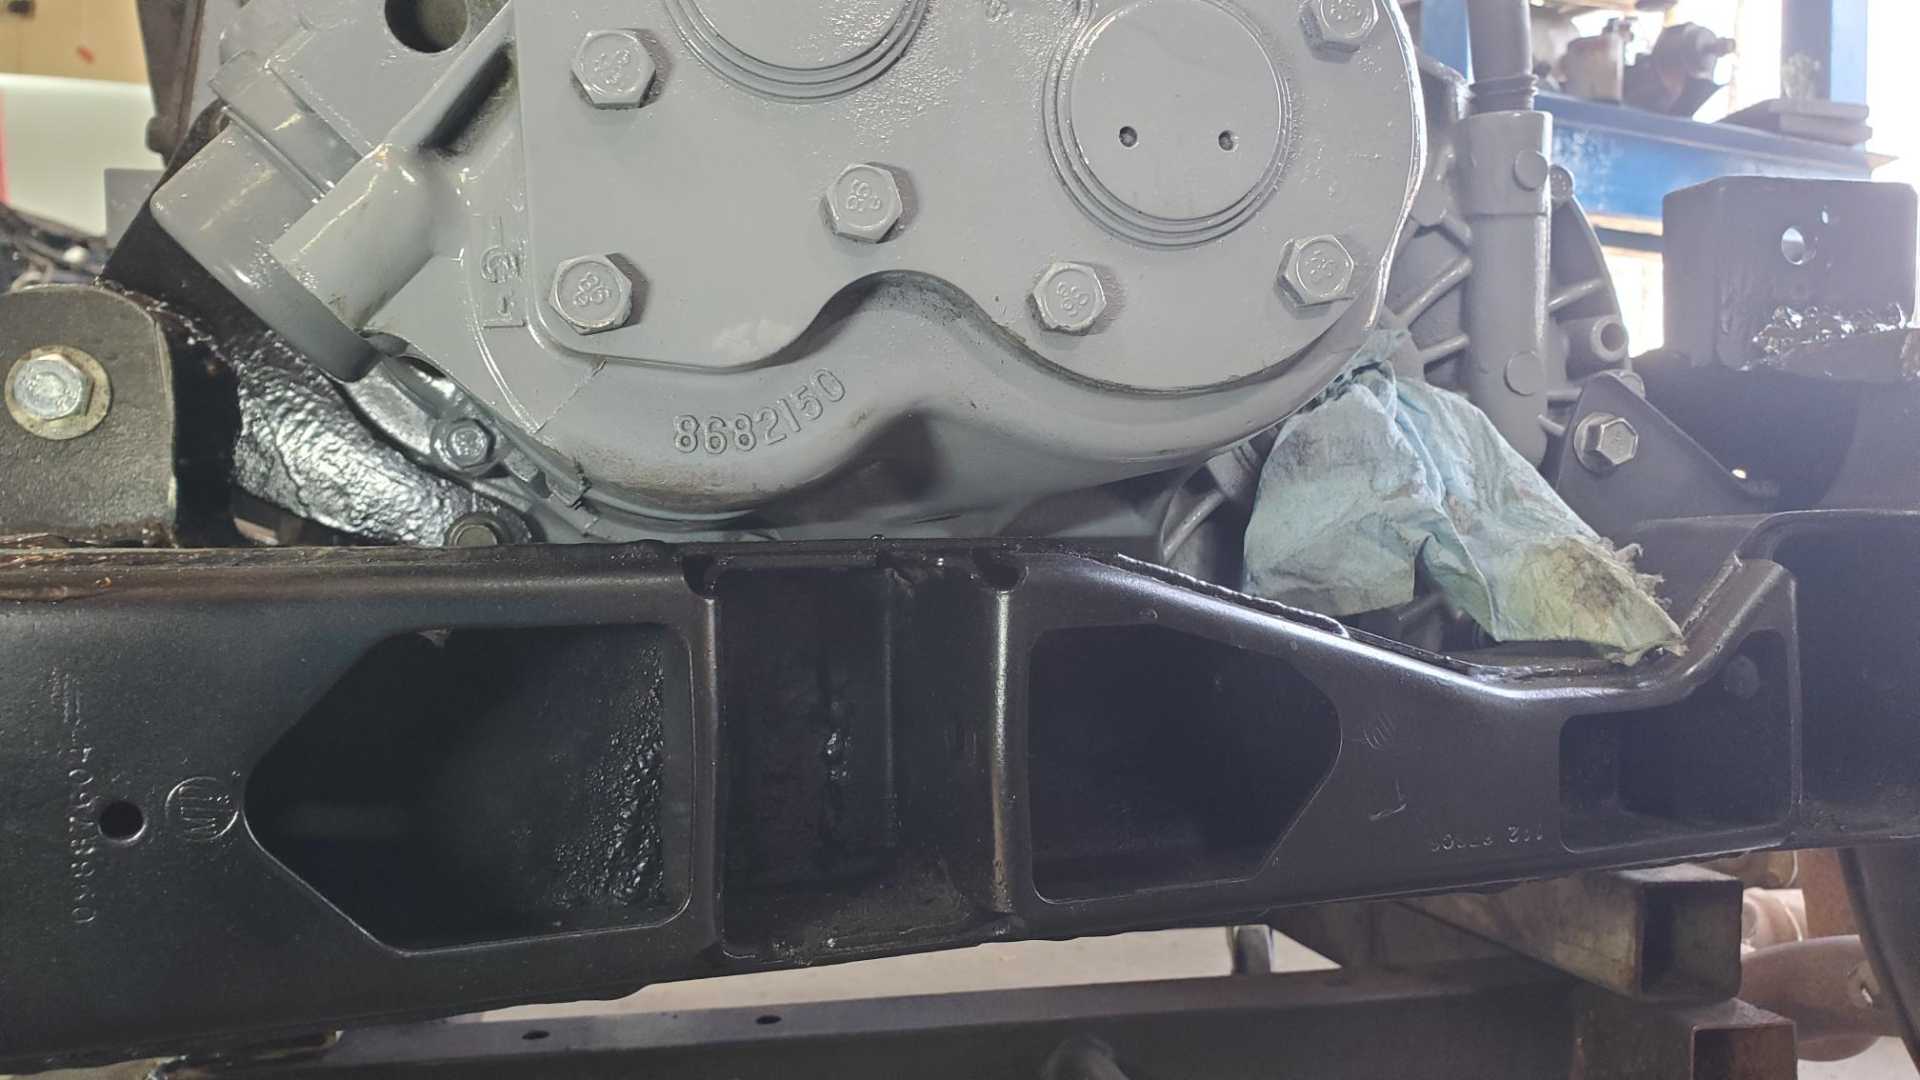
Did an experiment with the cradle and tried bolting it to the car with no spacers on the rear mounts. The mounting flanges are too wide to fit, they conflict with the sheet metal and fender liner.
In order to make this work, I’d have to either cut off the end of the mounting flange or notch the sheet metal and fender liner. Neither would be a big deal, but while I was lying under the car I realized that mounting the cradle this way would cost me 3/4” worth of clearance for the muffler and exhaust pipes.
[This message has been edited by Quadfather (edited 01-15-2022).]
That tips the cradle with more of a forwards lean.
Do note that this leaning the cradle forwards will also add the same forwards lean to the rear control arms.
During launch, the road applies a forward force to the tire. The forward force from the tire is transferred to the wheel bearing. The forward force from the wheel bearing is transferred to the knuckle.
From there, how the knuckle moves (in response to the tire force) depends its path, as defined by the suspension.
The more the control arm is tipped forwards, the more the knuckle will rise into the body during launch.
The more the control arm is tipped forwards, the more the knuckle will rise into the body during launch.
Good point. I was hoping that since the tail end of the cradle would be raised only 3/4” to 1” the axis of the control arm’s up and down motion probably wouldn’t be affected very much. Wouldn’t be the first time I was misguided.
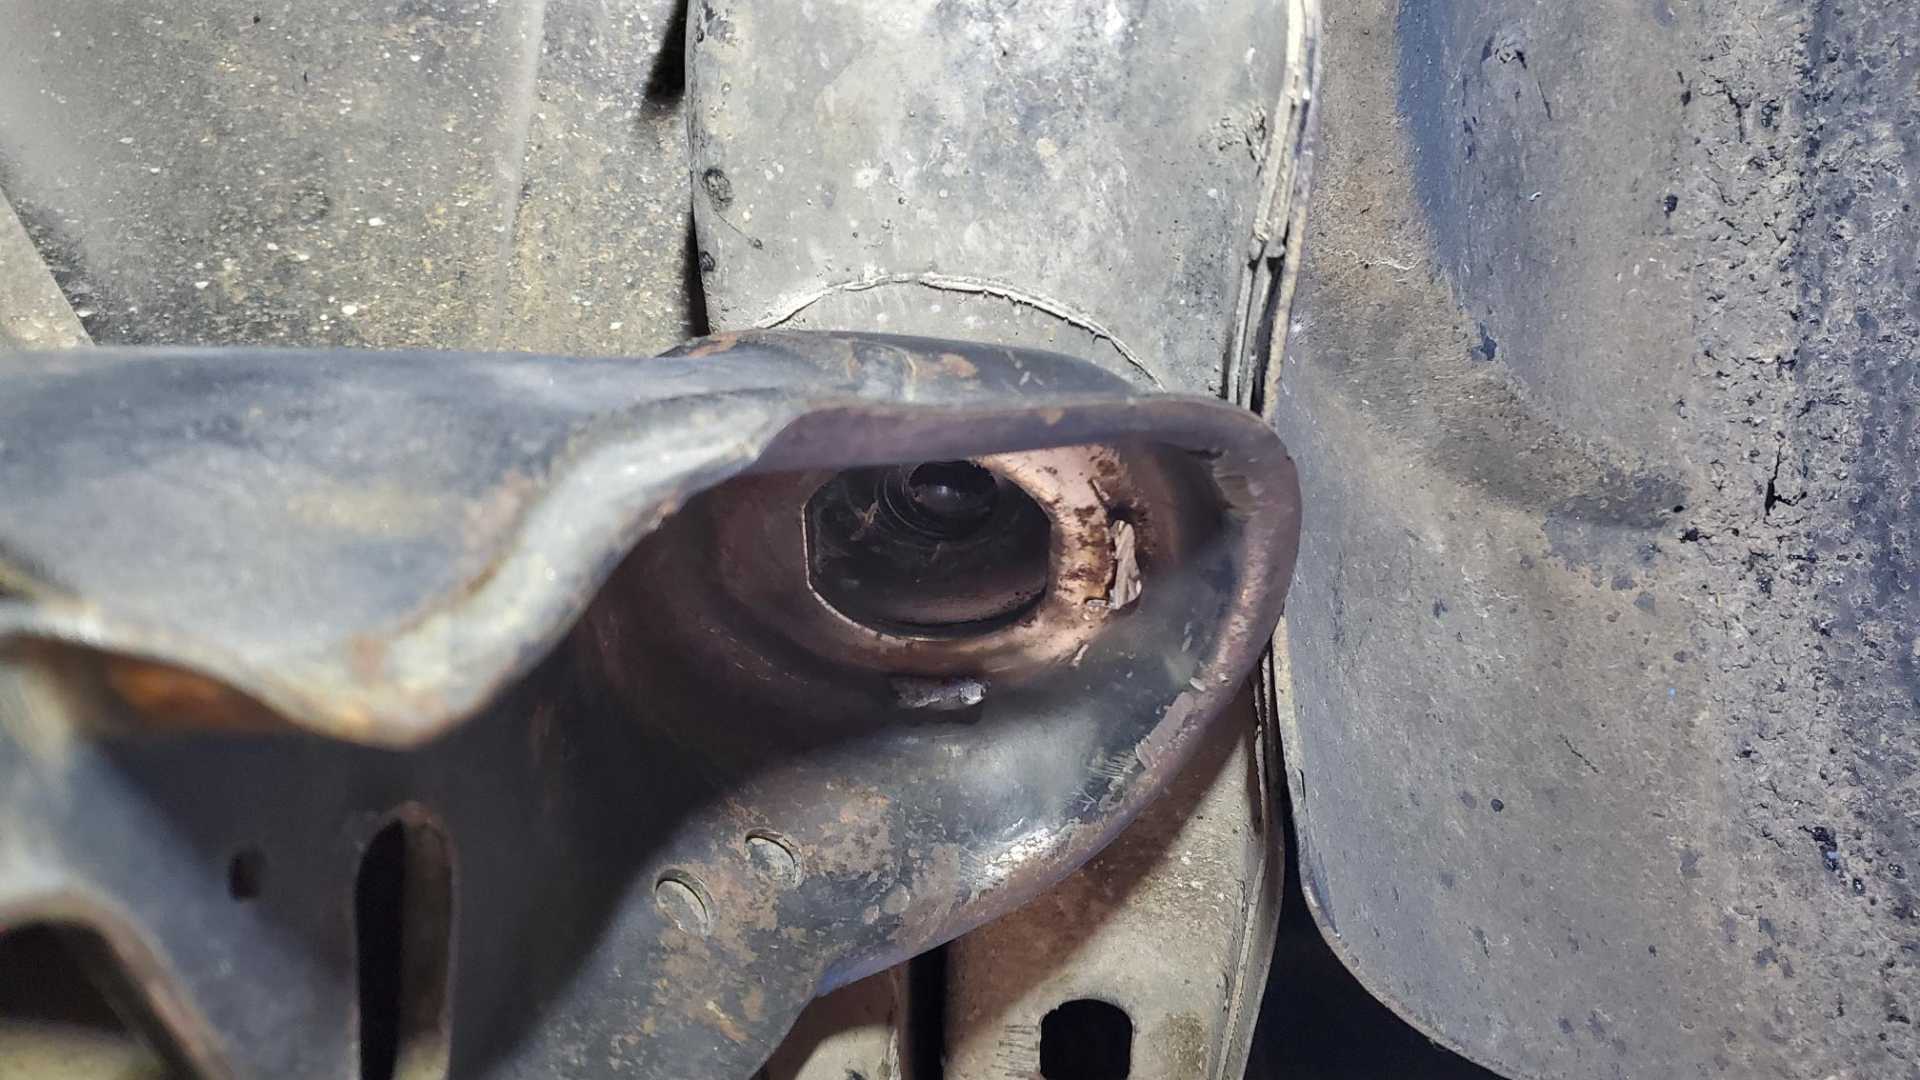
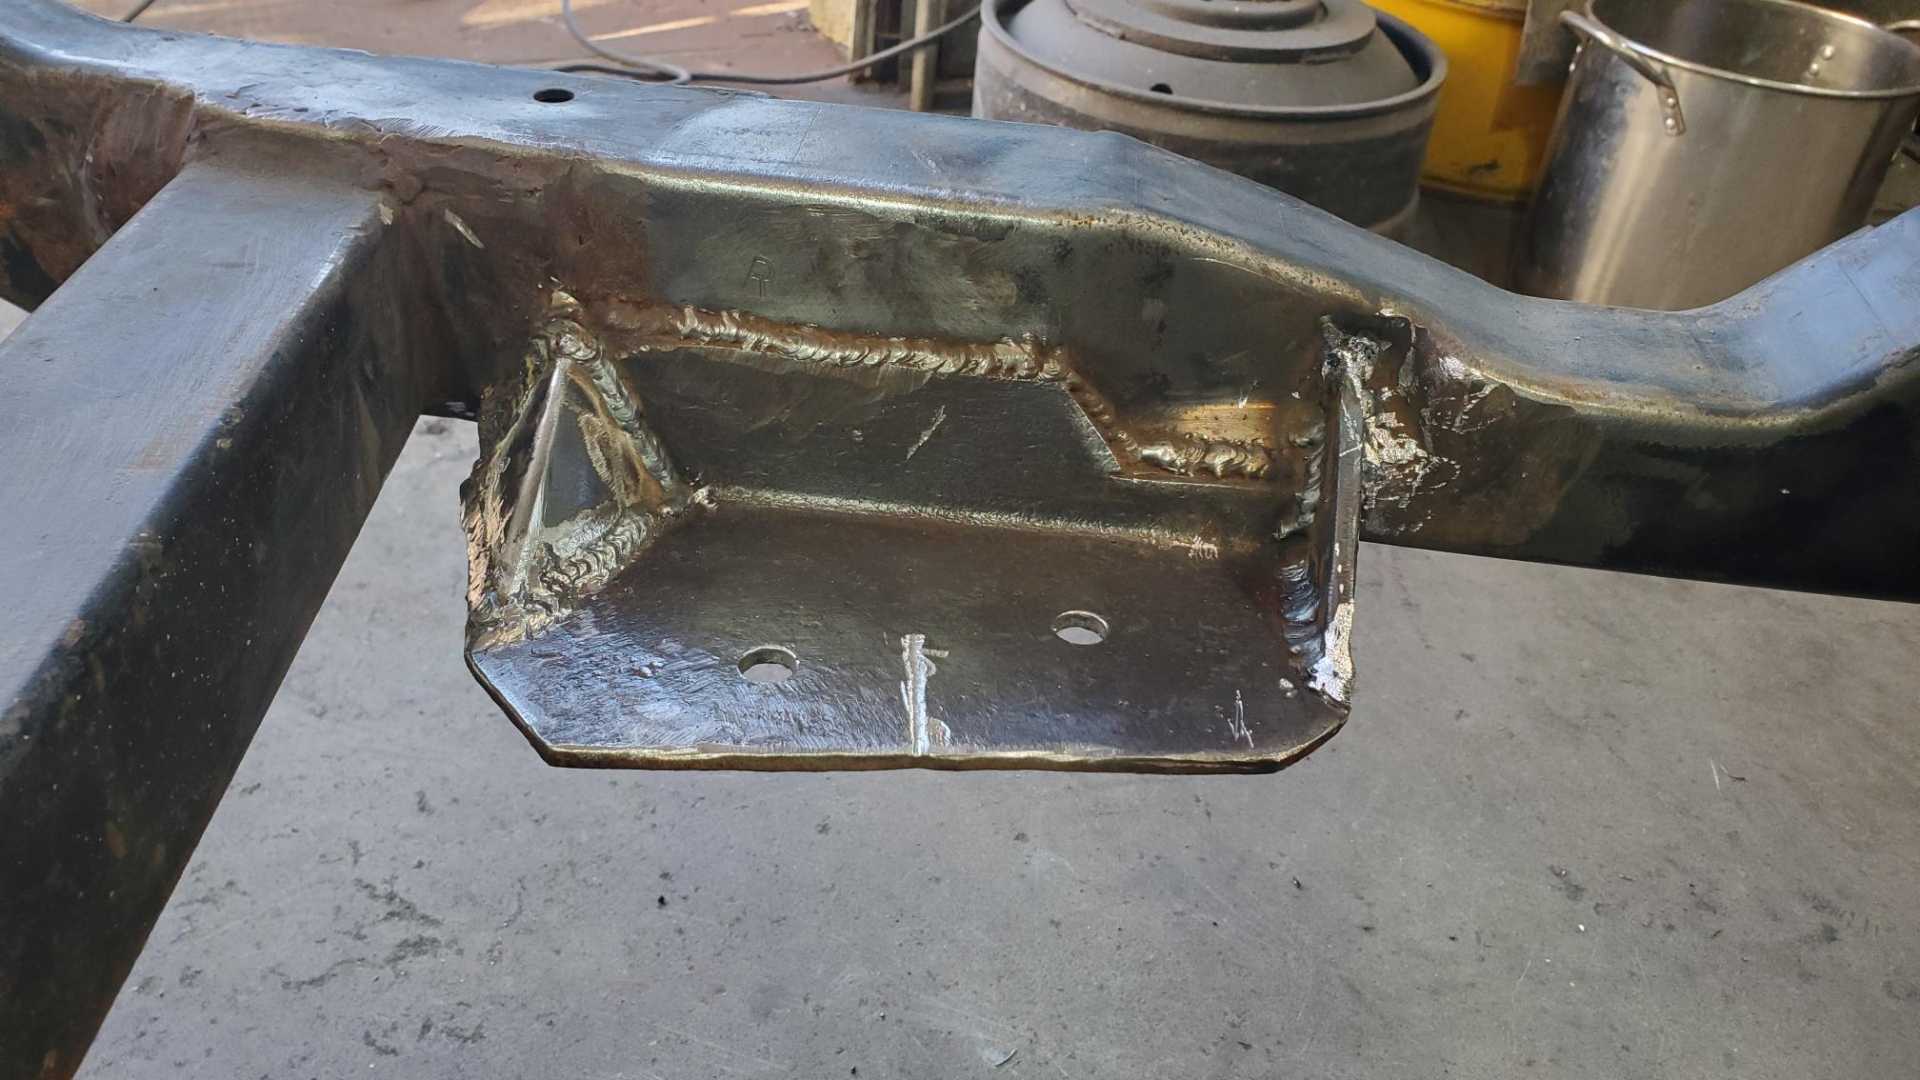
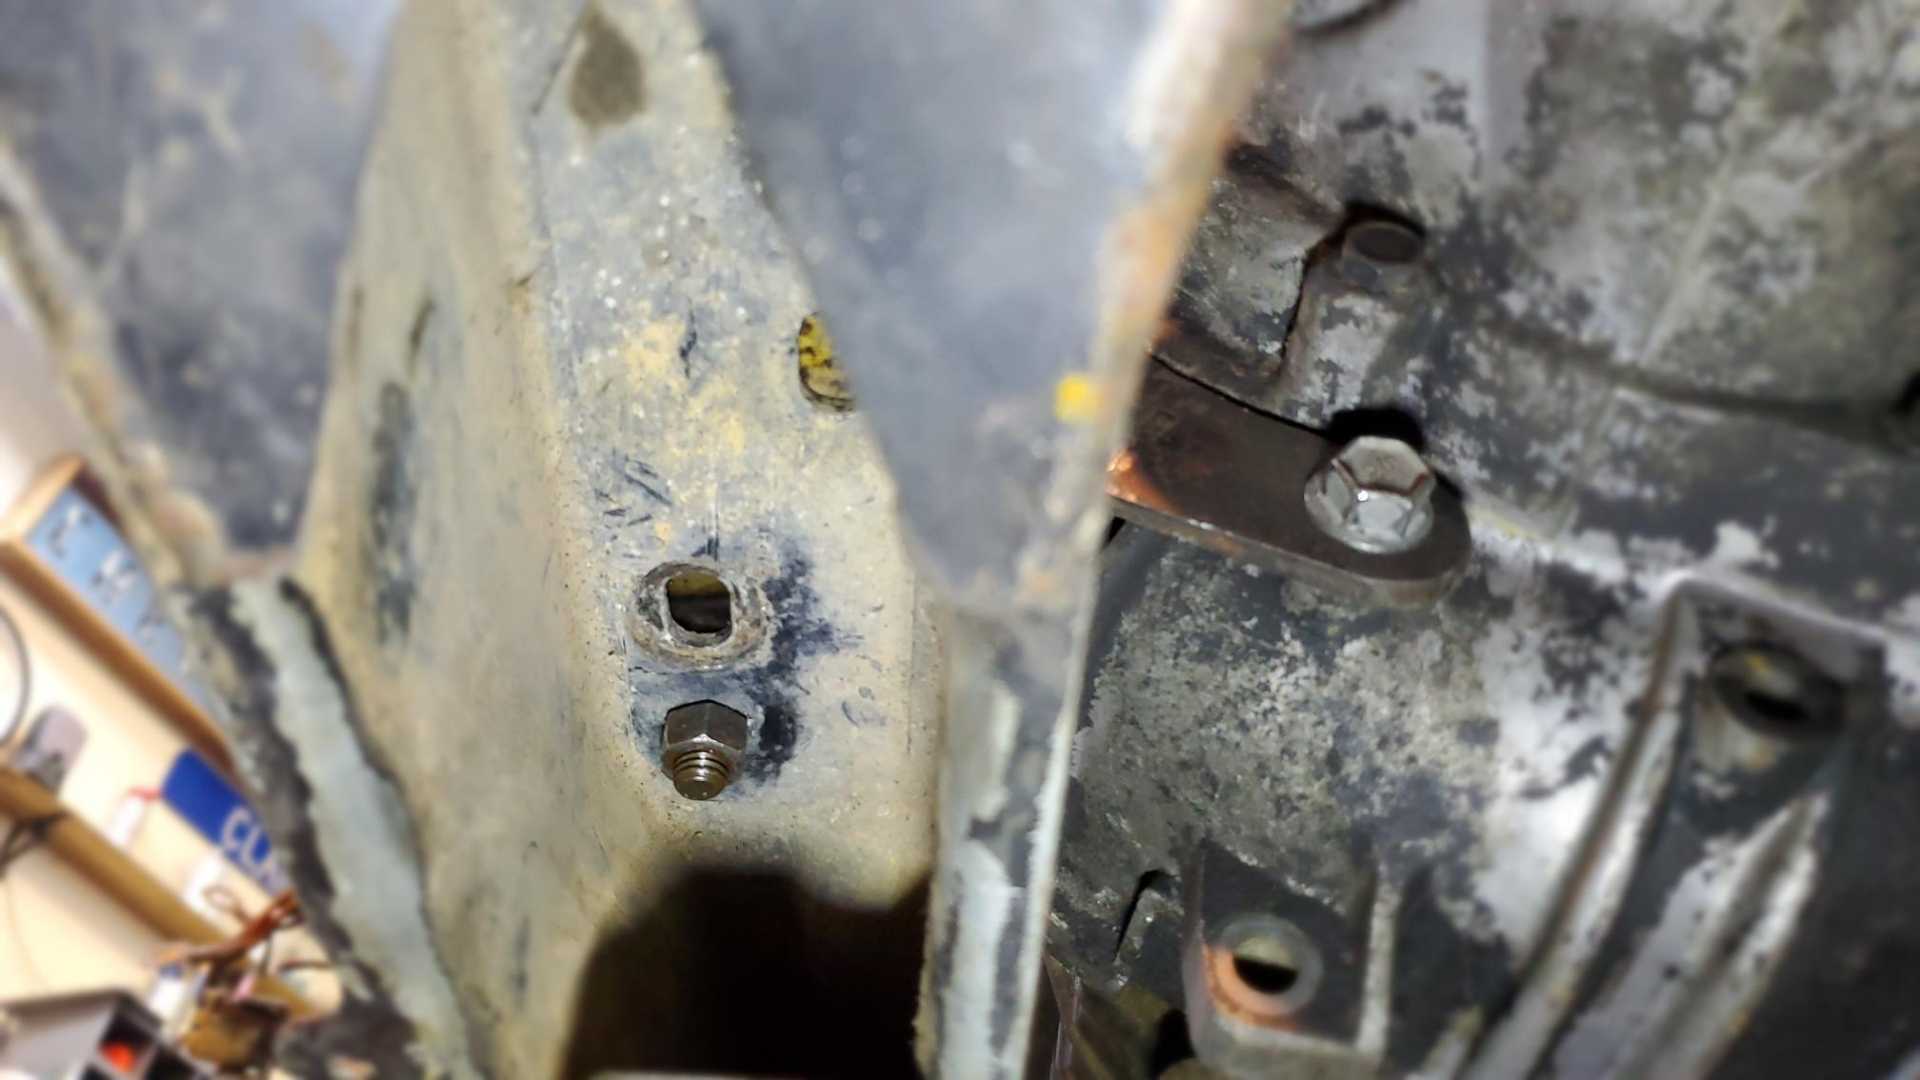
Today I used some steel plate to fill in the openings on the rear cradle mounts. But first I checked to see how the bolt holes lined up with the openings.
Driver’s side.
Passenger side. Looks like the factory didn’t get all the layers of sheet metal lined up before spot welding them together.
Maybe I should hit that with the die grinder. The captured nuts can still line up in the center of the openings. I made some fillers, tacked them in then reinstalled the cradle to make sure the bolts would fit through them.
The bolts fit so I welded the fillers into place. I then cut a couple of pieces of pipe to weld to the top of the mounts, but didn’t take any pictures and ran out of time. Hope to get over to the shop again next weekend, if not sooner.
[This message has been edited by Quadfather (edited 01-16-2022).]
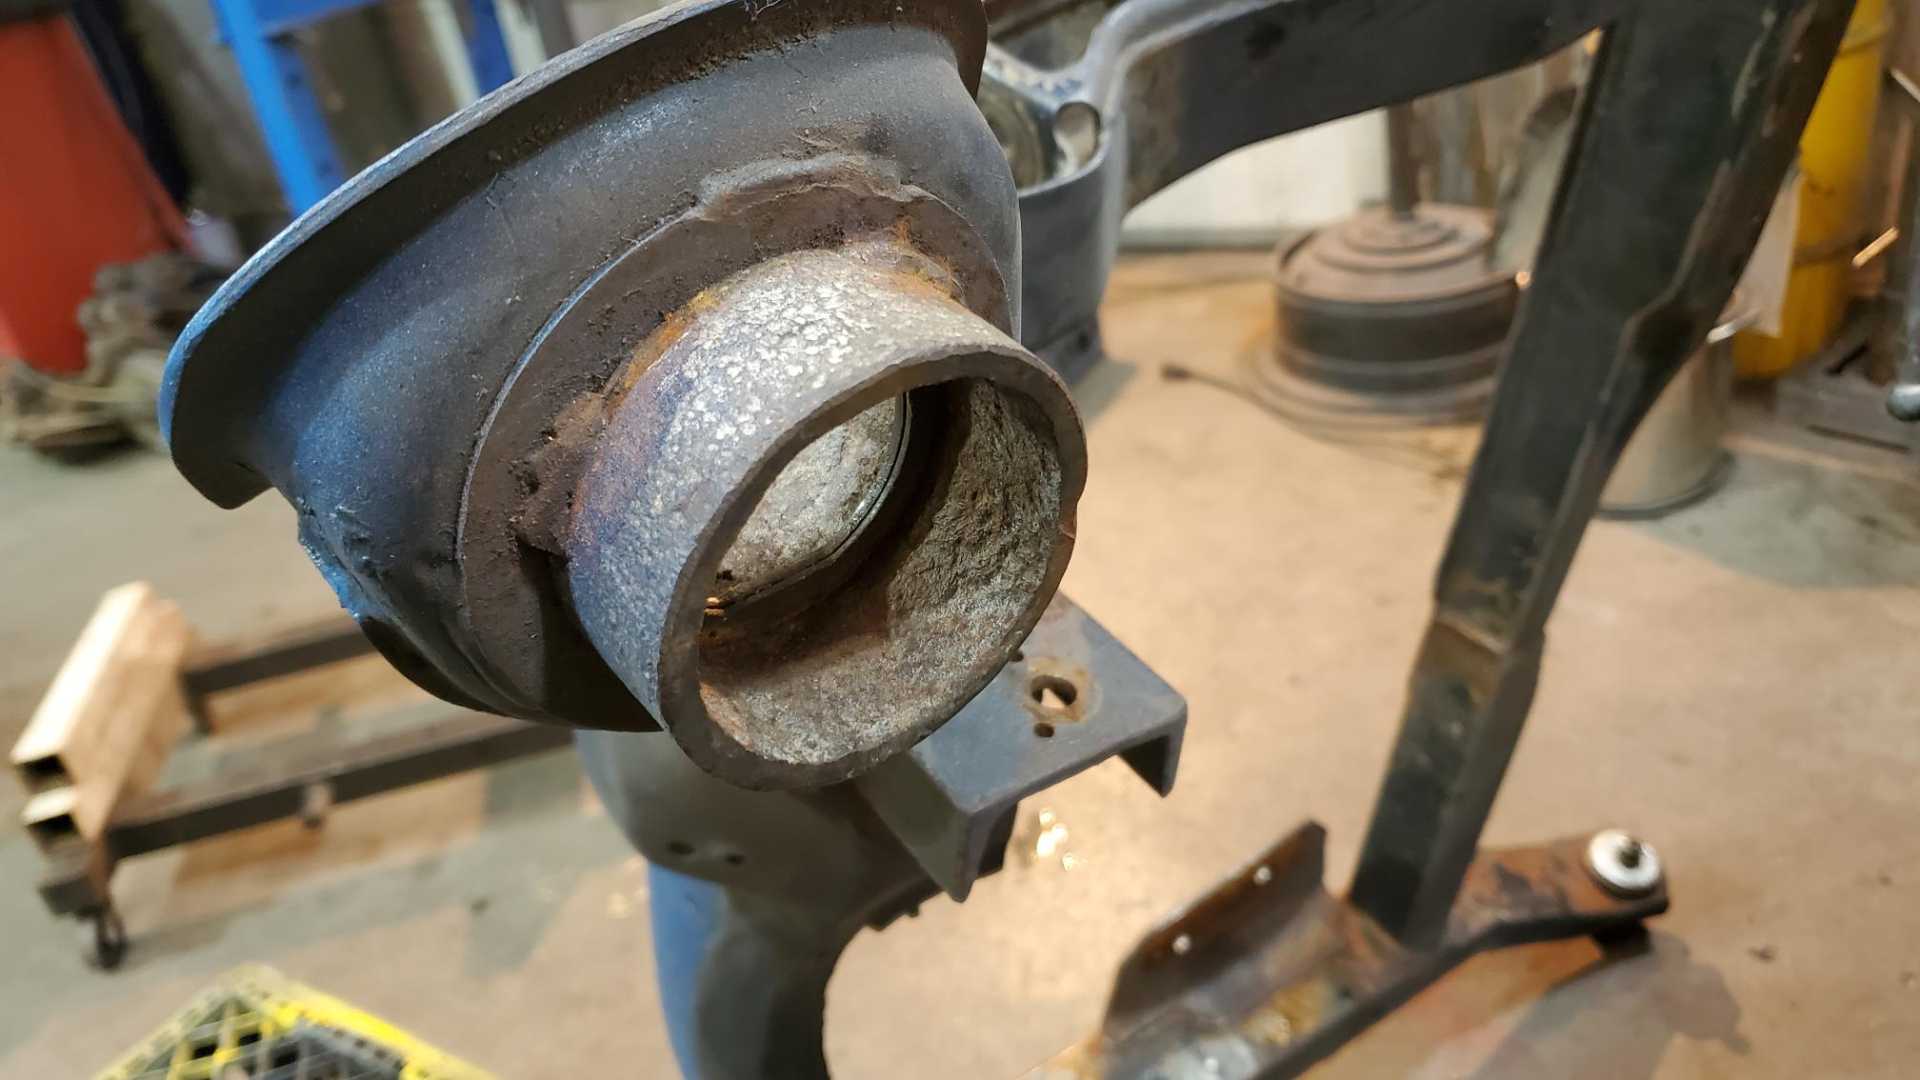
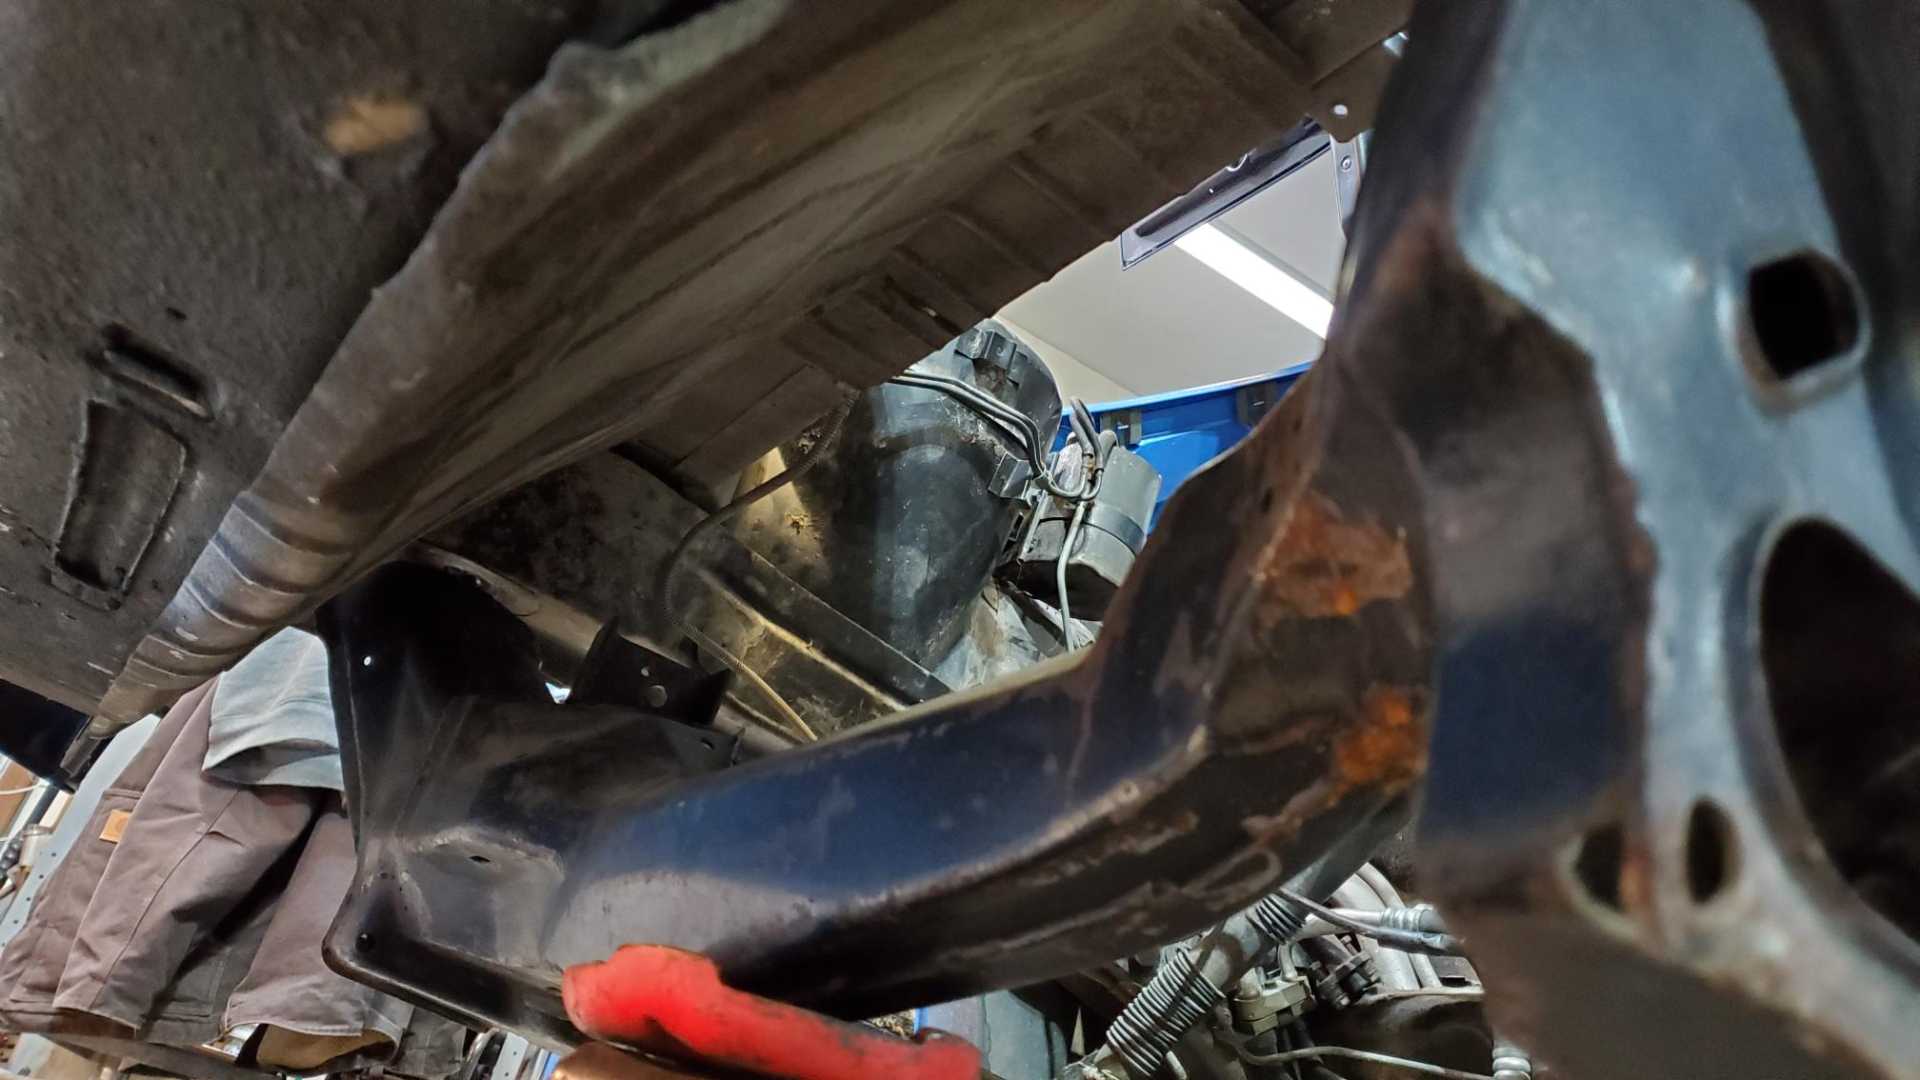
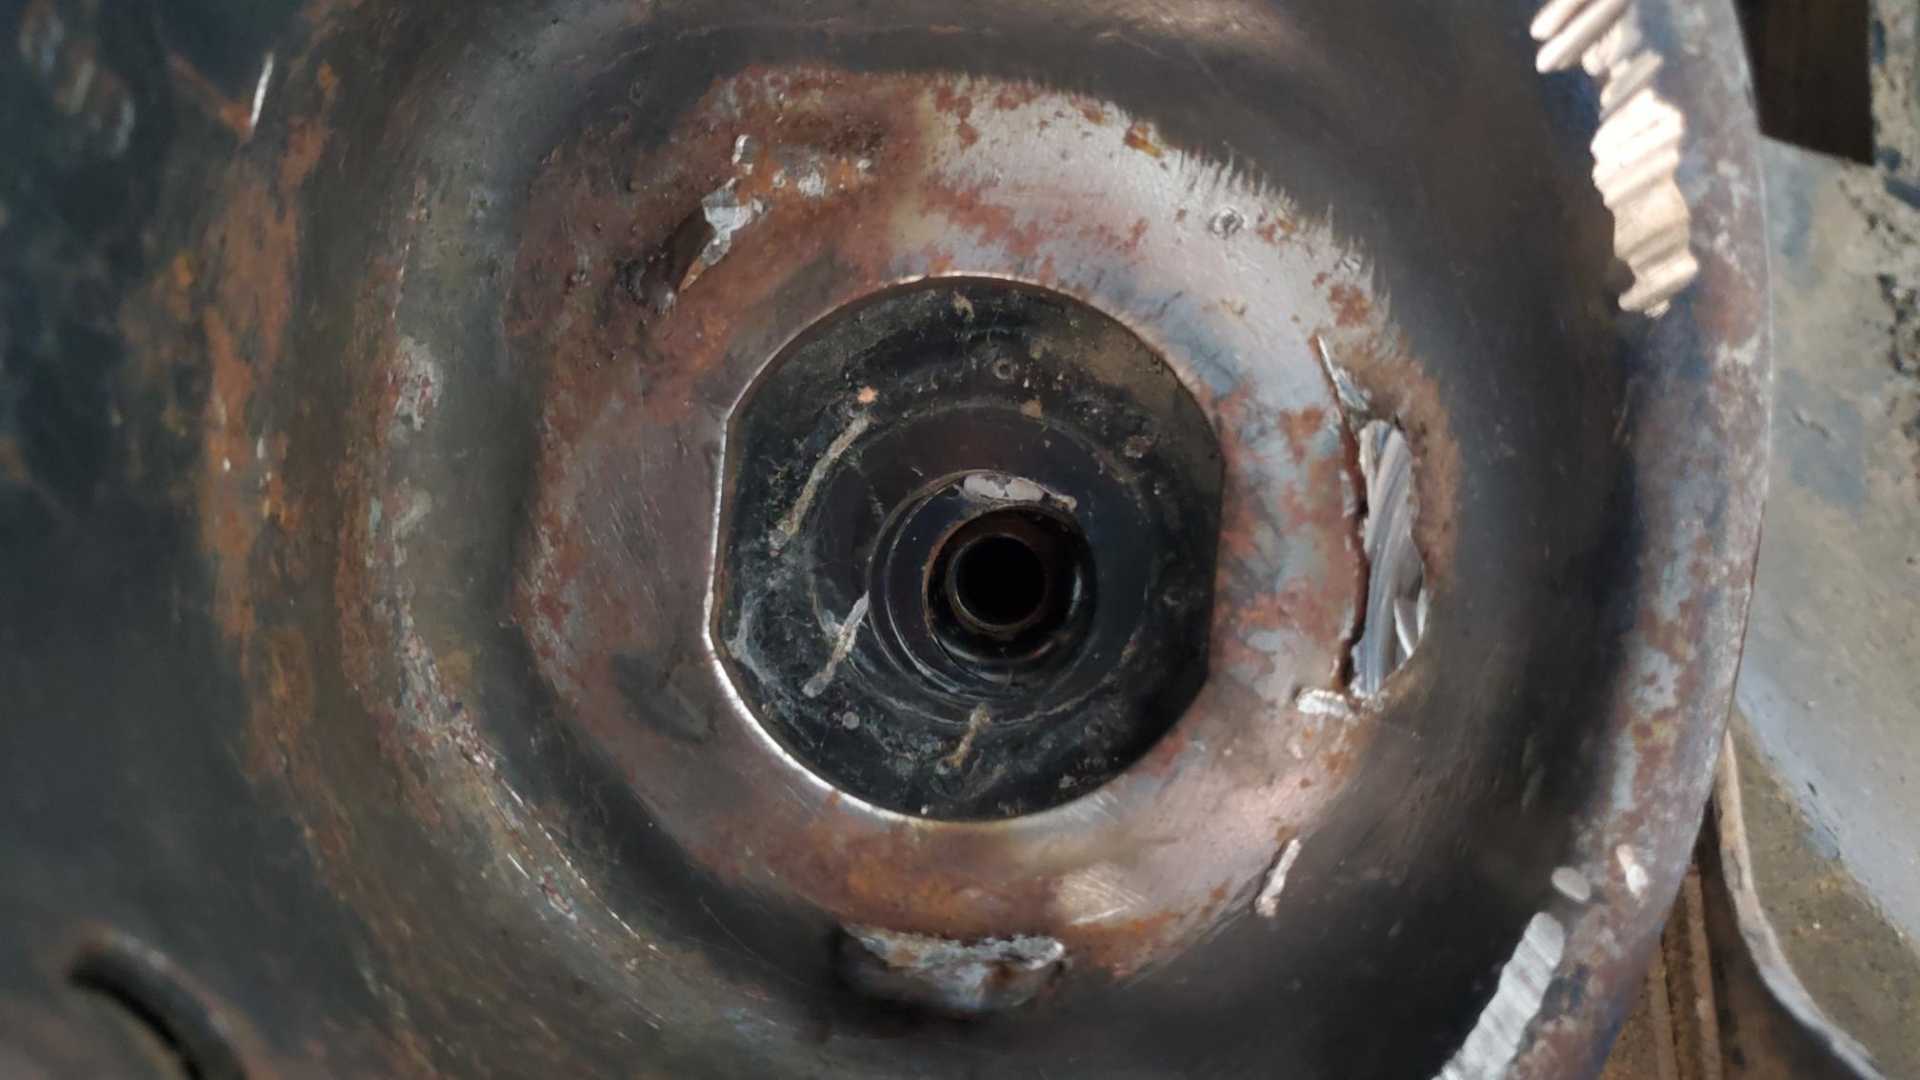
Just about got the cradle ready for the engine. Took me all weekend to finish the perches for the rear cradle mounts. I ended up using the pieces of oil field pipe I had cut years ago.
I test fit the cradle every step of the way.
[This message has been edited by Quadfather (edited 01-23-2022).]
After that the last thing to fix was the main engine mount. I always planned to add some more metal, but especially after looking at the mount on my ‘88 cradle..
Then it was time to paint.
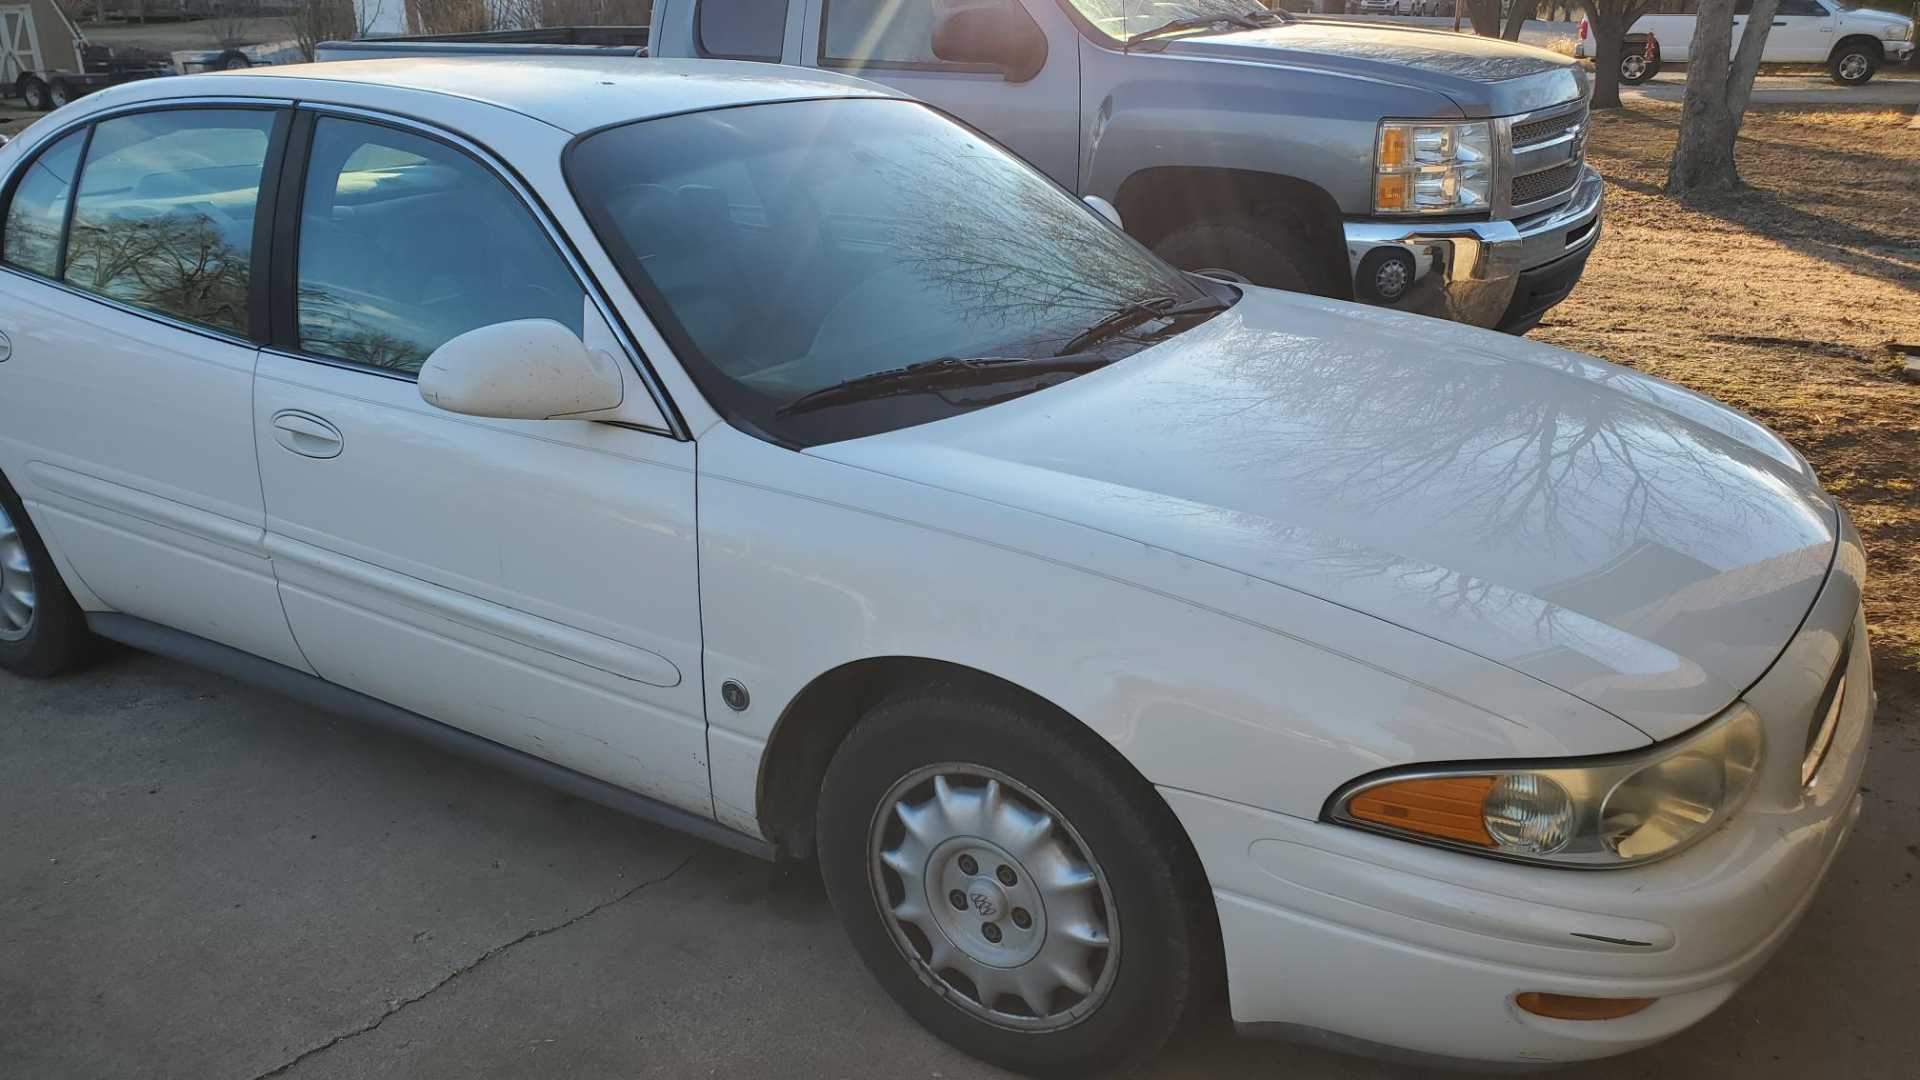
Then my wife texted me and said her car wouldn’t start. Should’ve known as soon as I make significant progress something goes wrong with another car in the family.
Not much progress this week. Spent a lot of time trying to solve the no crank situation with my wife’s LeSabre. The starter works, the battery is brand new, the ignition switch is new. I suspect the neutral safety switch is bad, because the digital indicator for which gear is selected has disappeared and the symptoms act like the computer thinks the car is in gear.
We were planning to replace this car in May 2023 but may have to do it now. It has 233k on it, needs front lower control arms and new intake manifold and valve cover gaskets. The neutral safety switch is INSIDE the transmission and I’m not thrilled about pulling the engine and transmission and then being wrong about what’s causing the no crank.
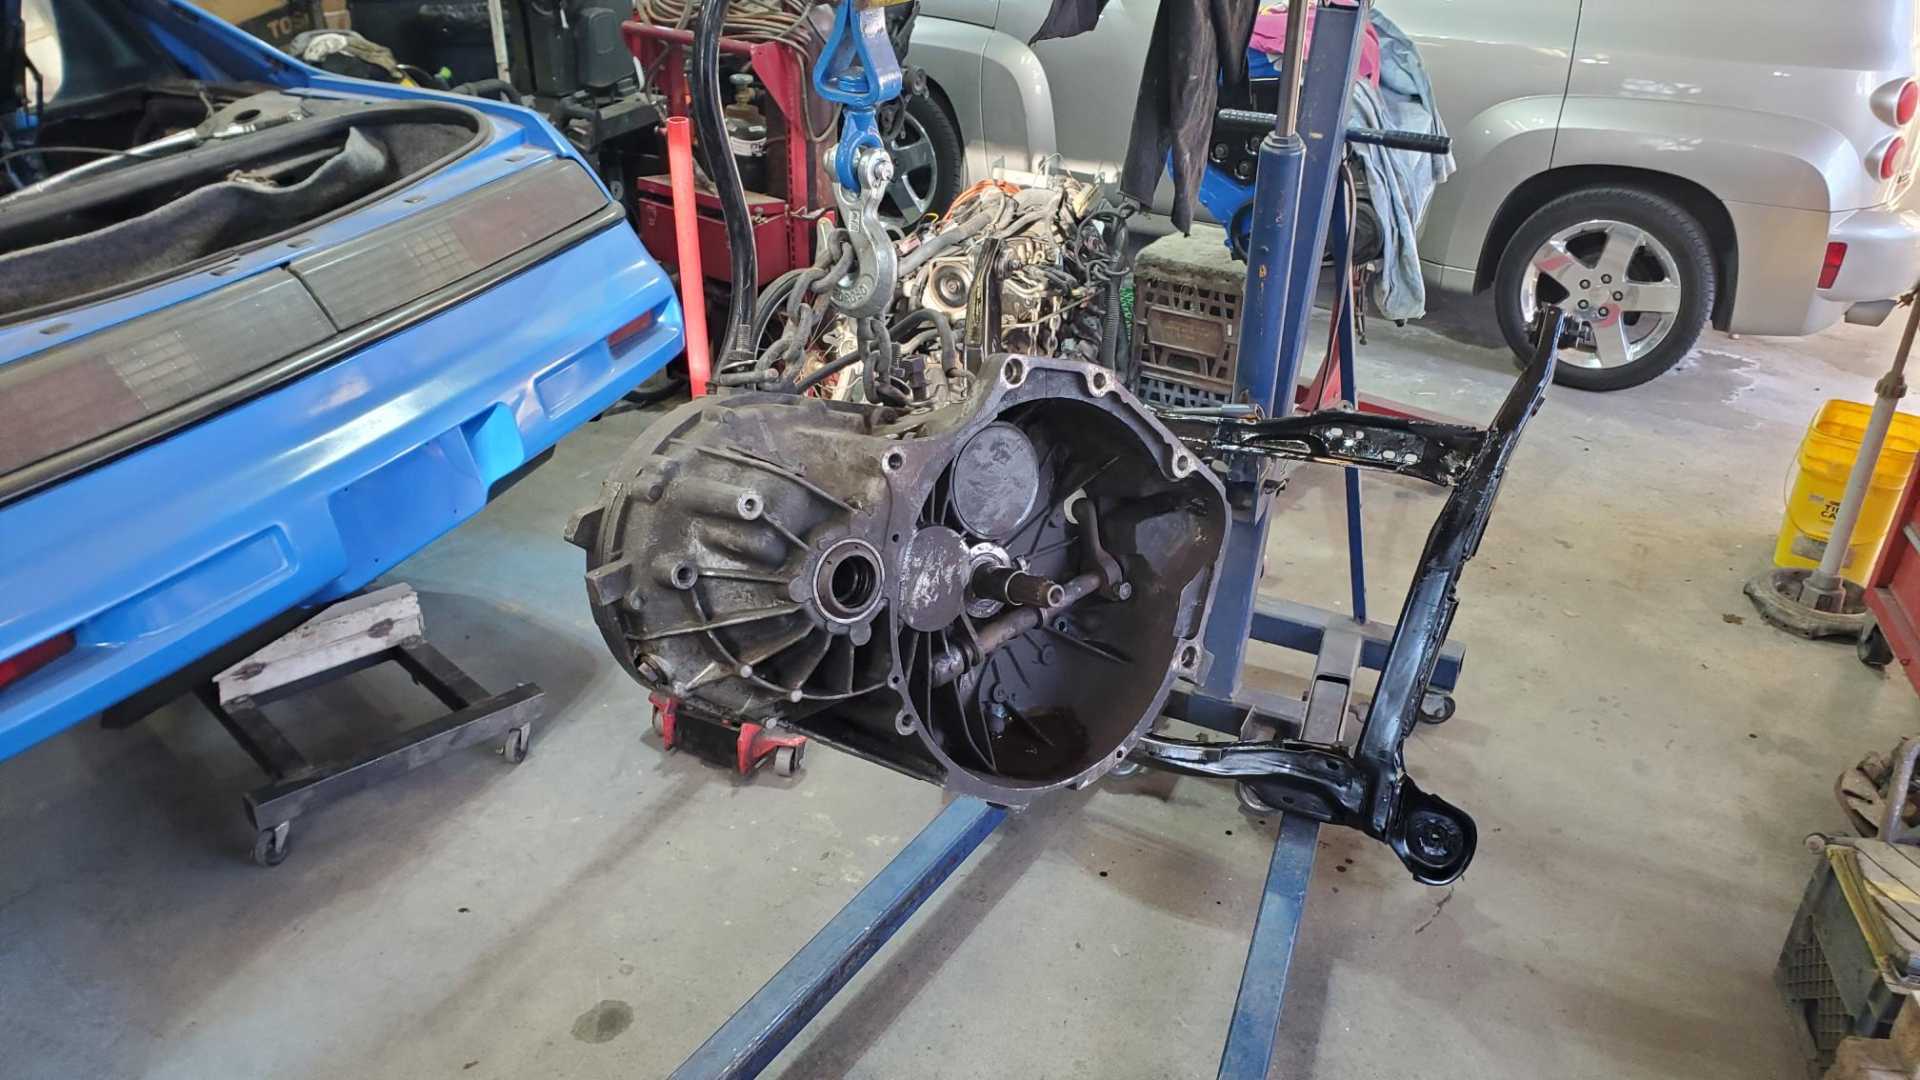
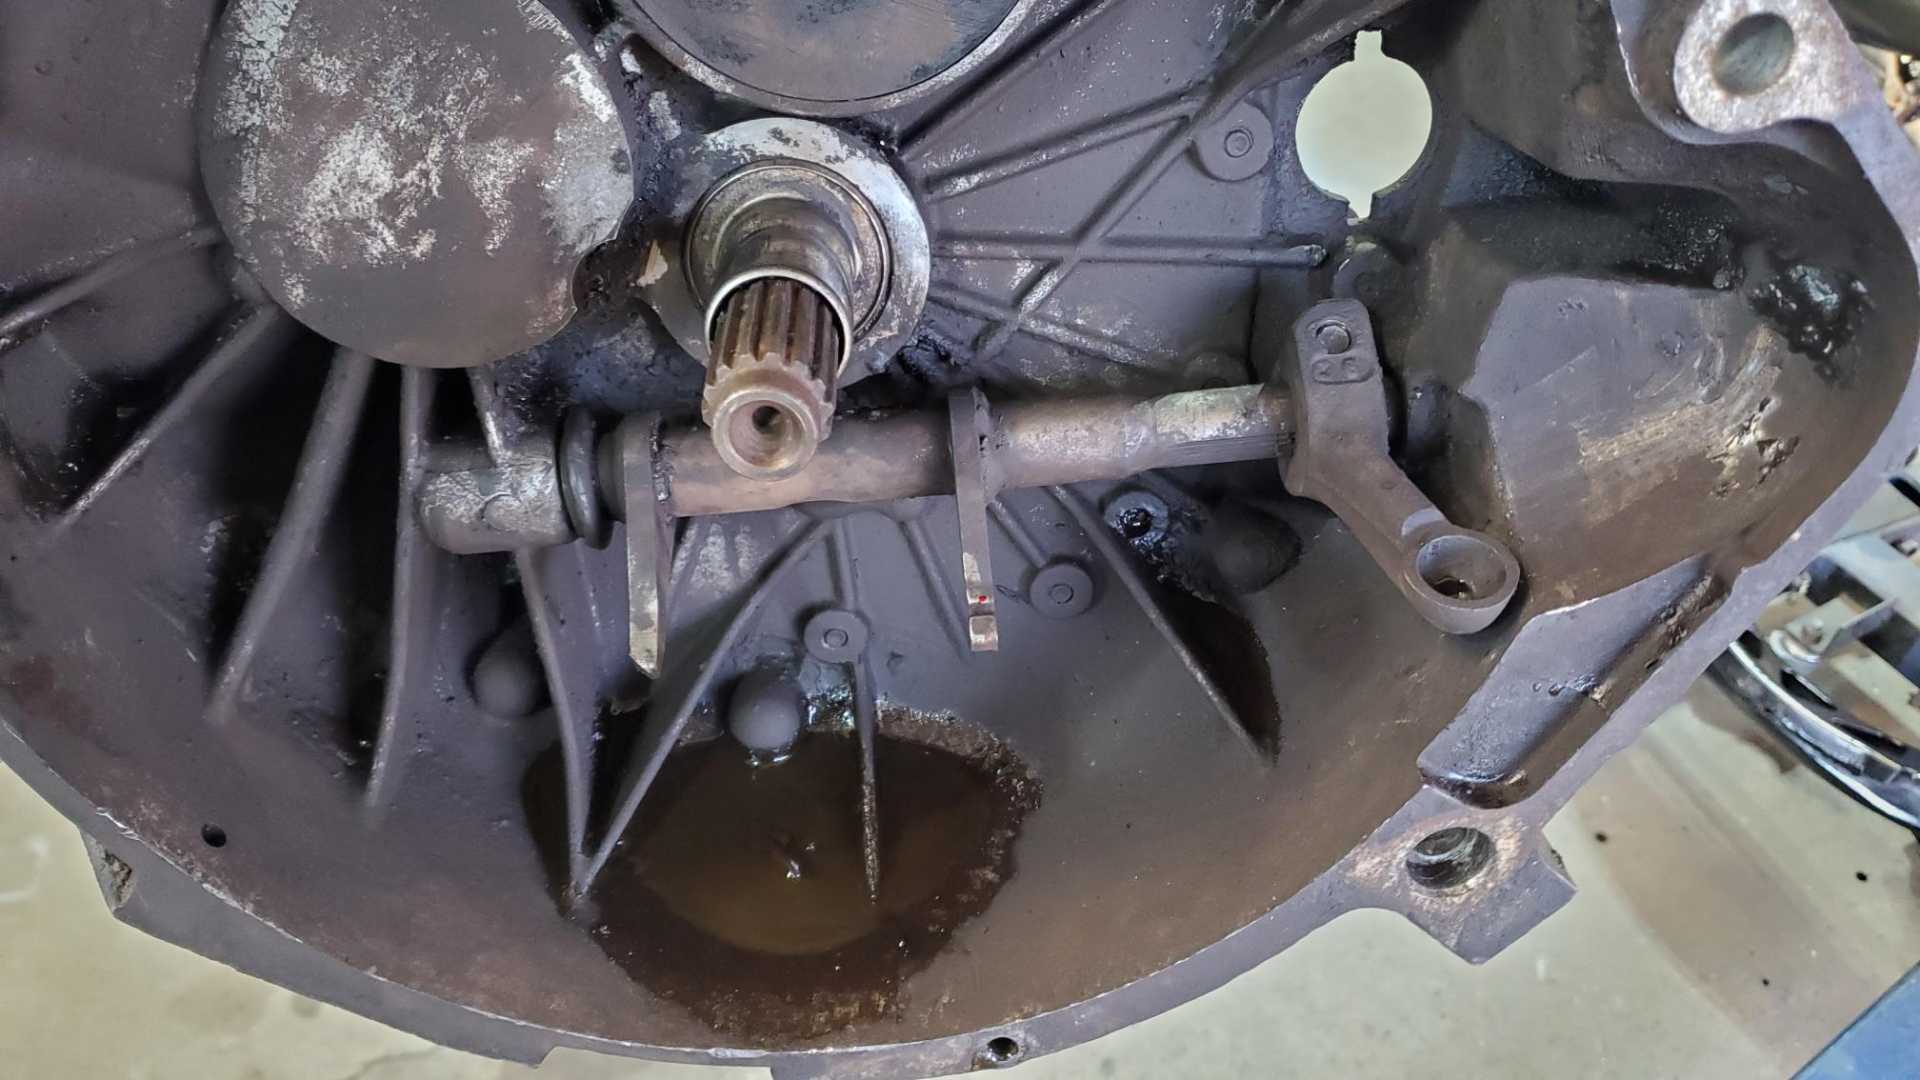
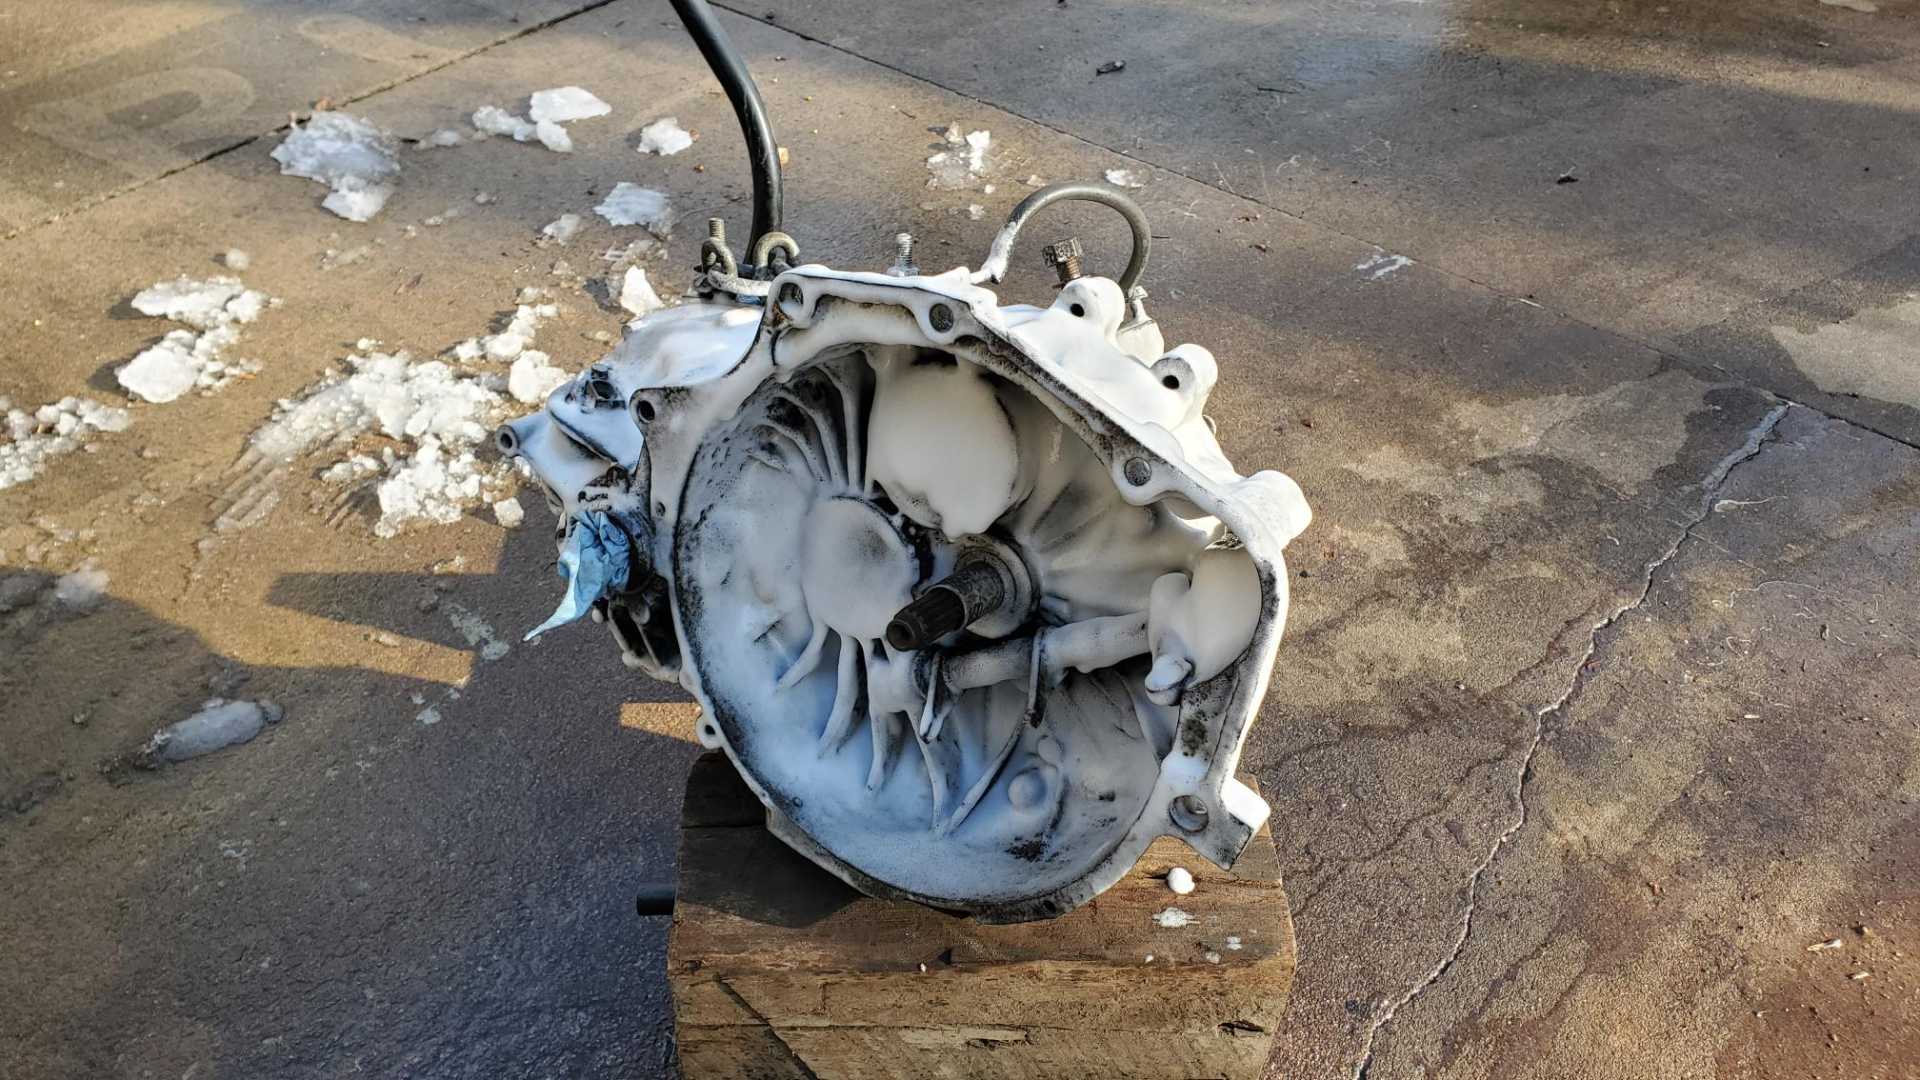
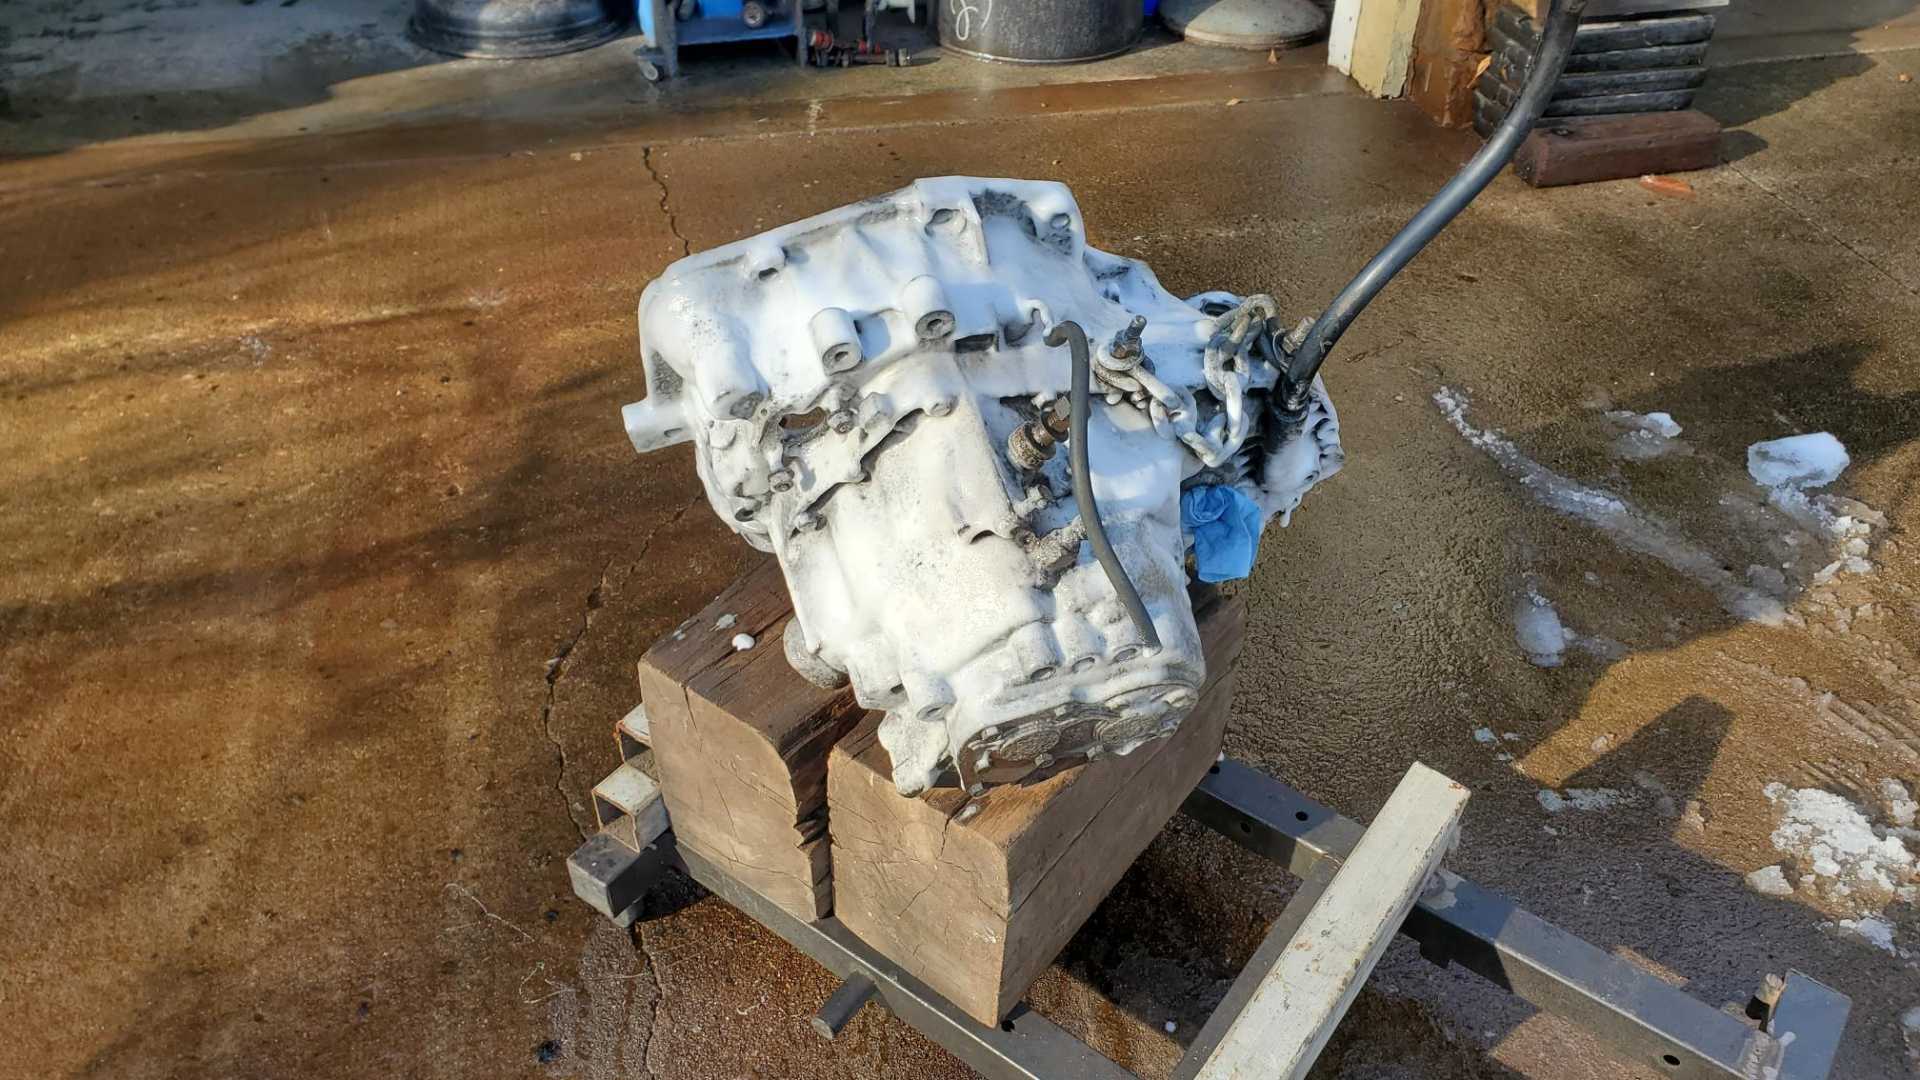
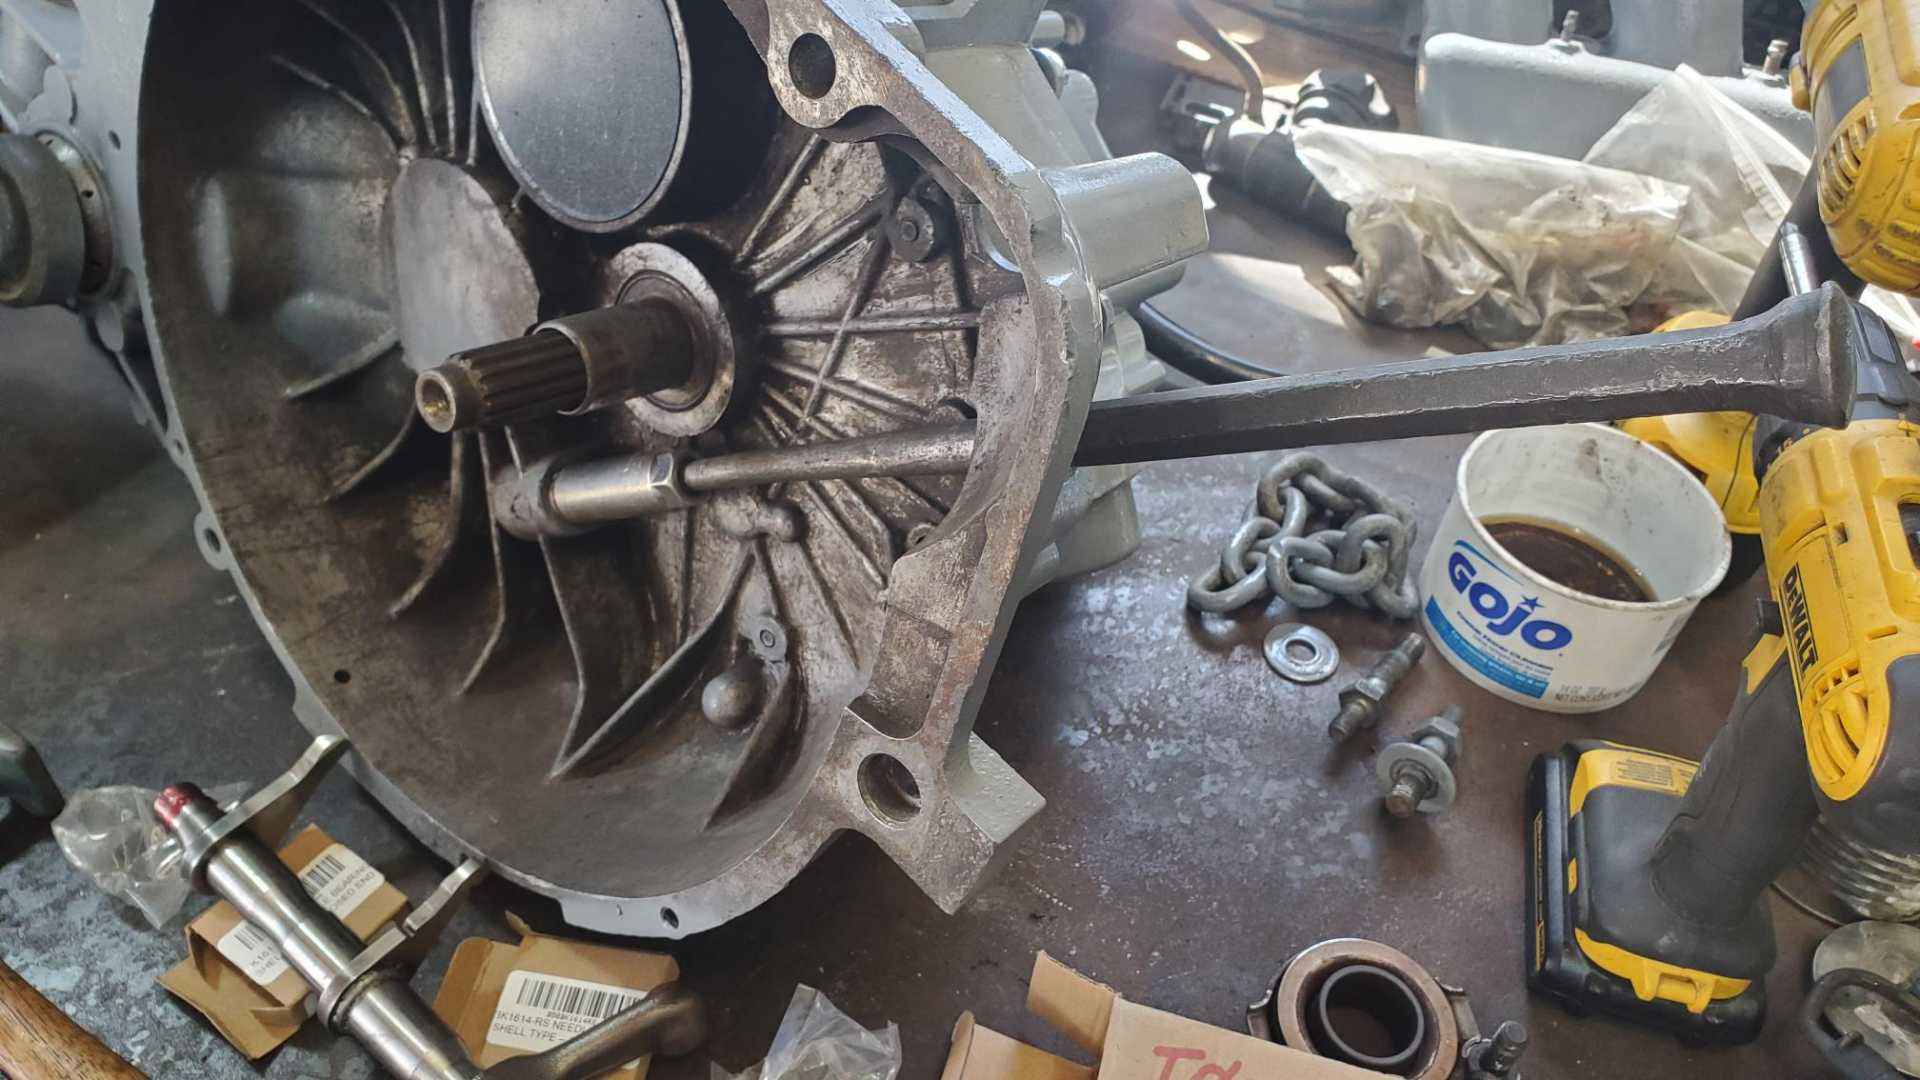
On the Fiero, still painting the cradle, but also started cleaning up the transmission.
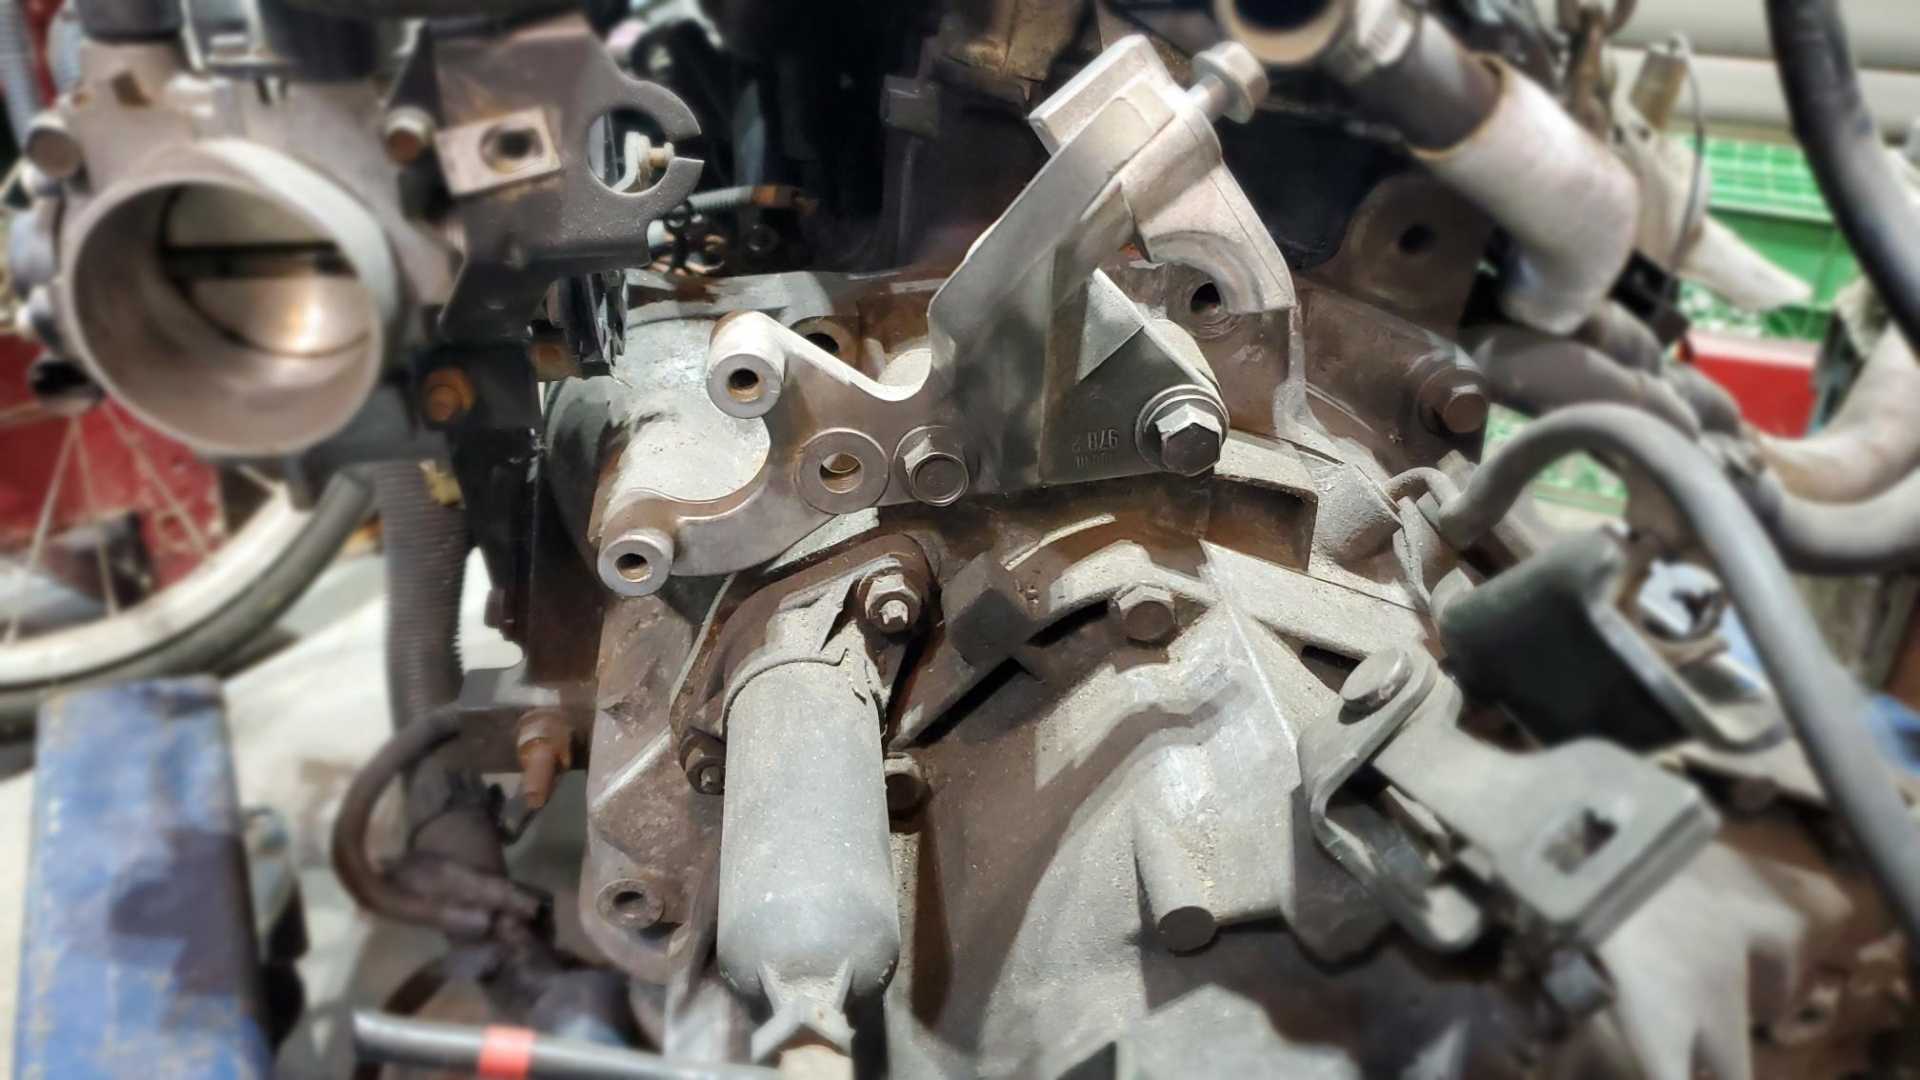
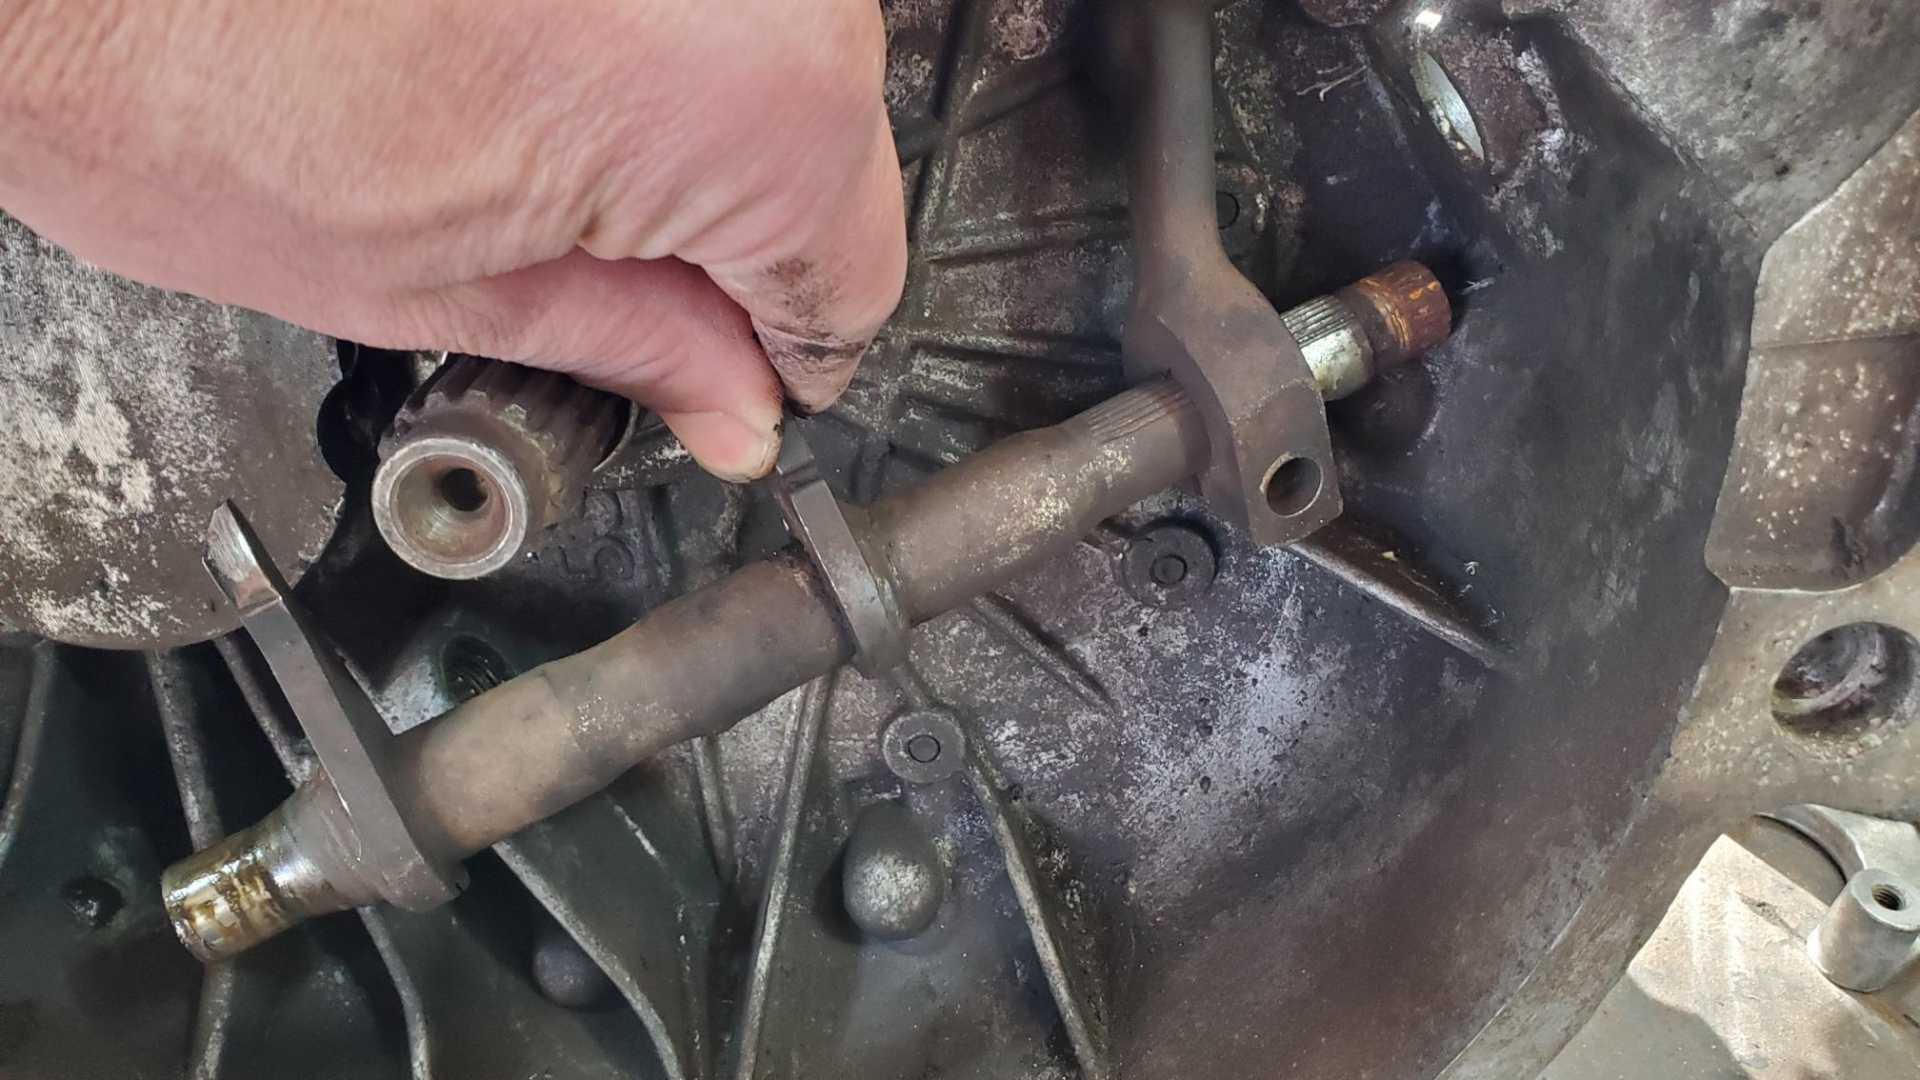
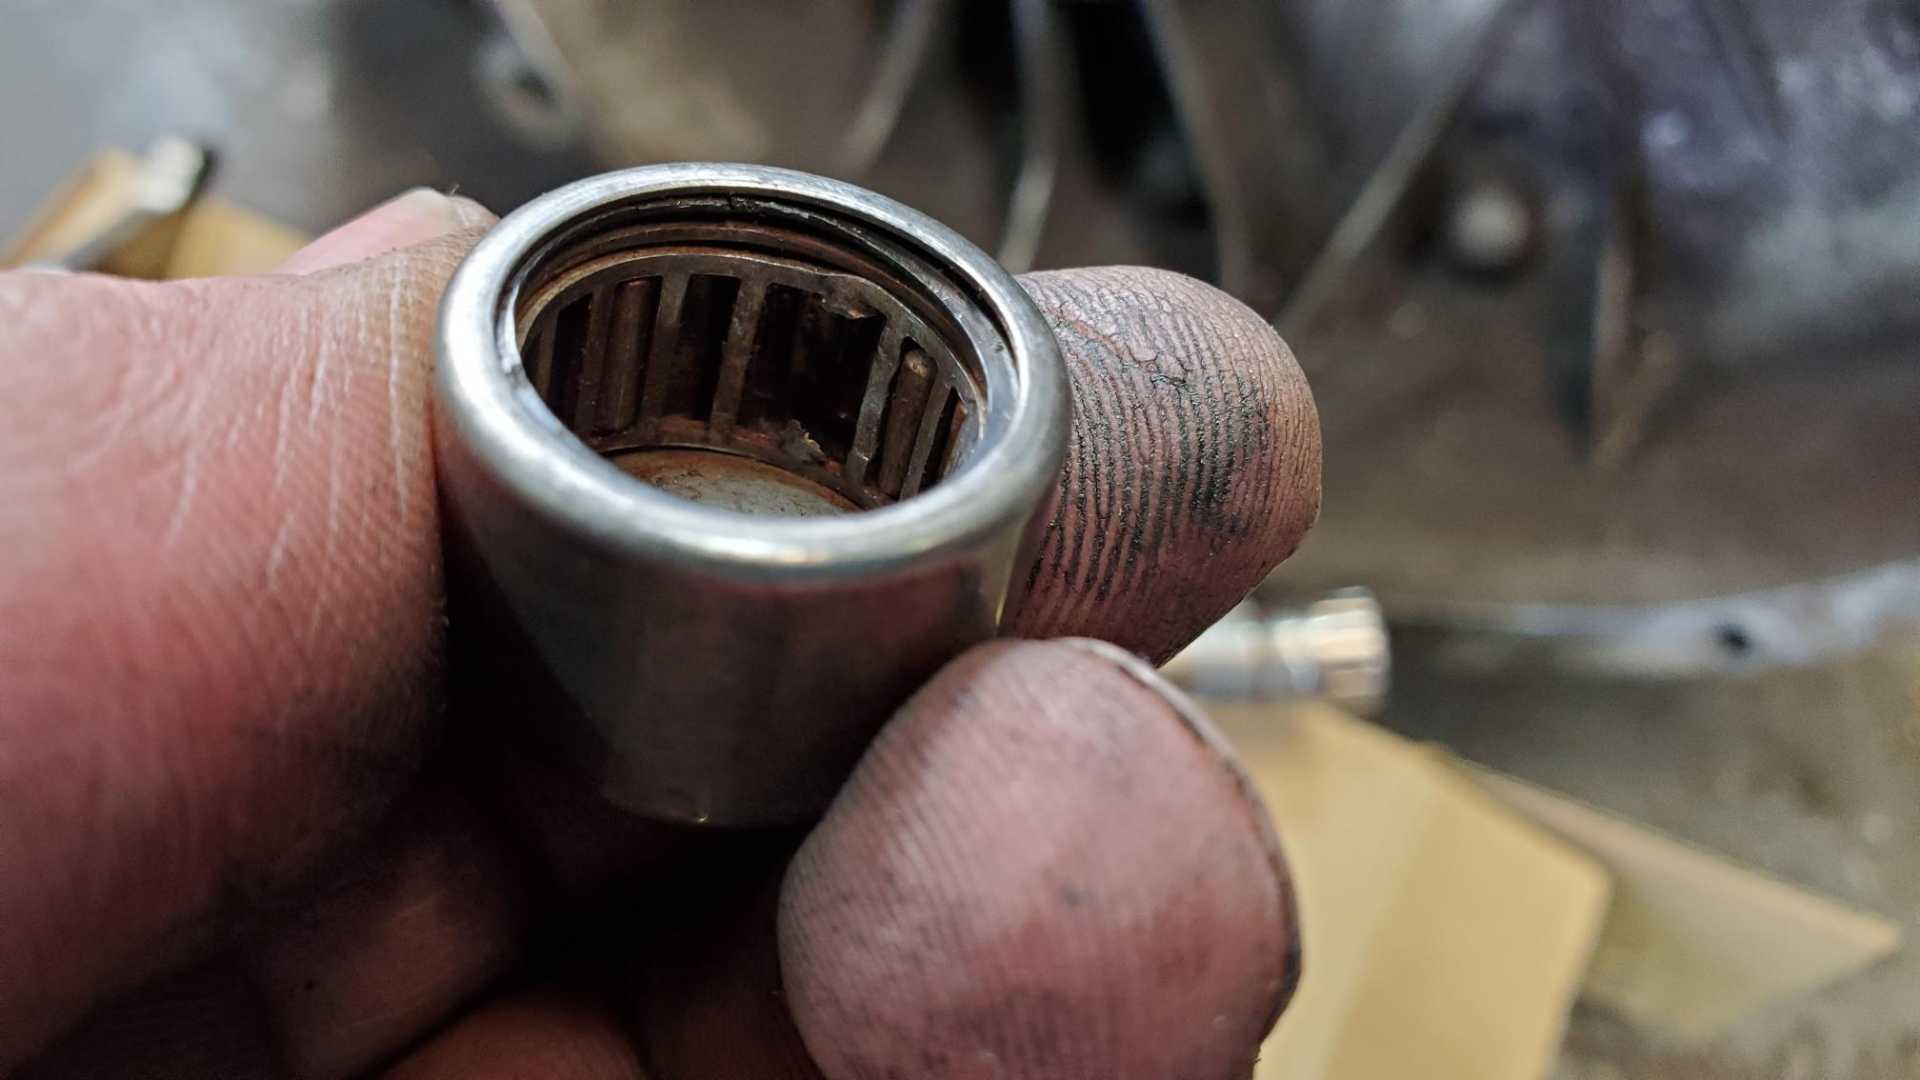
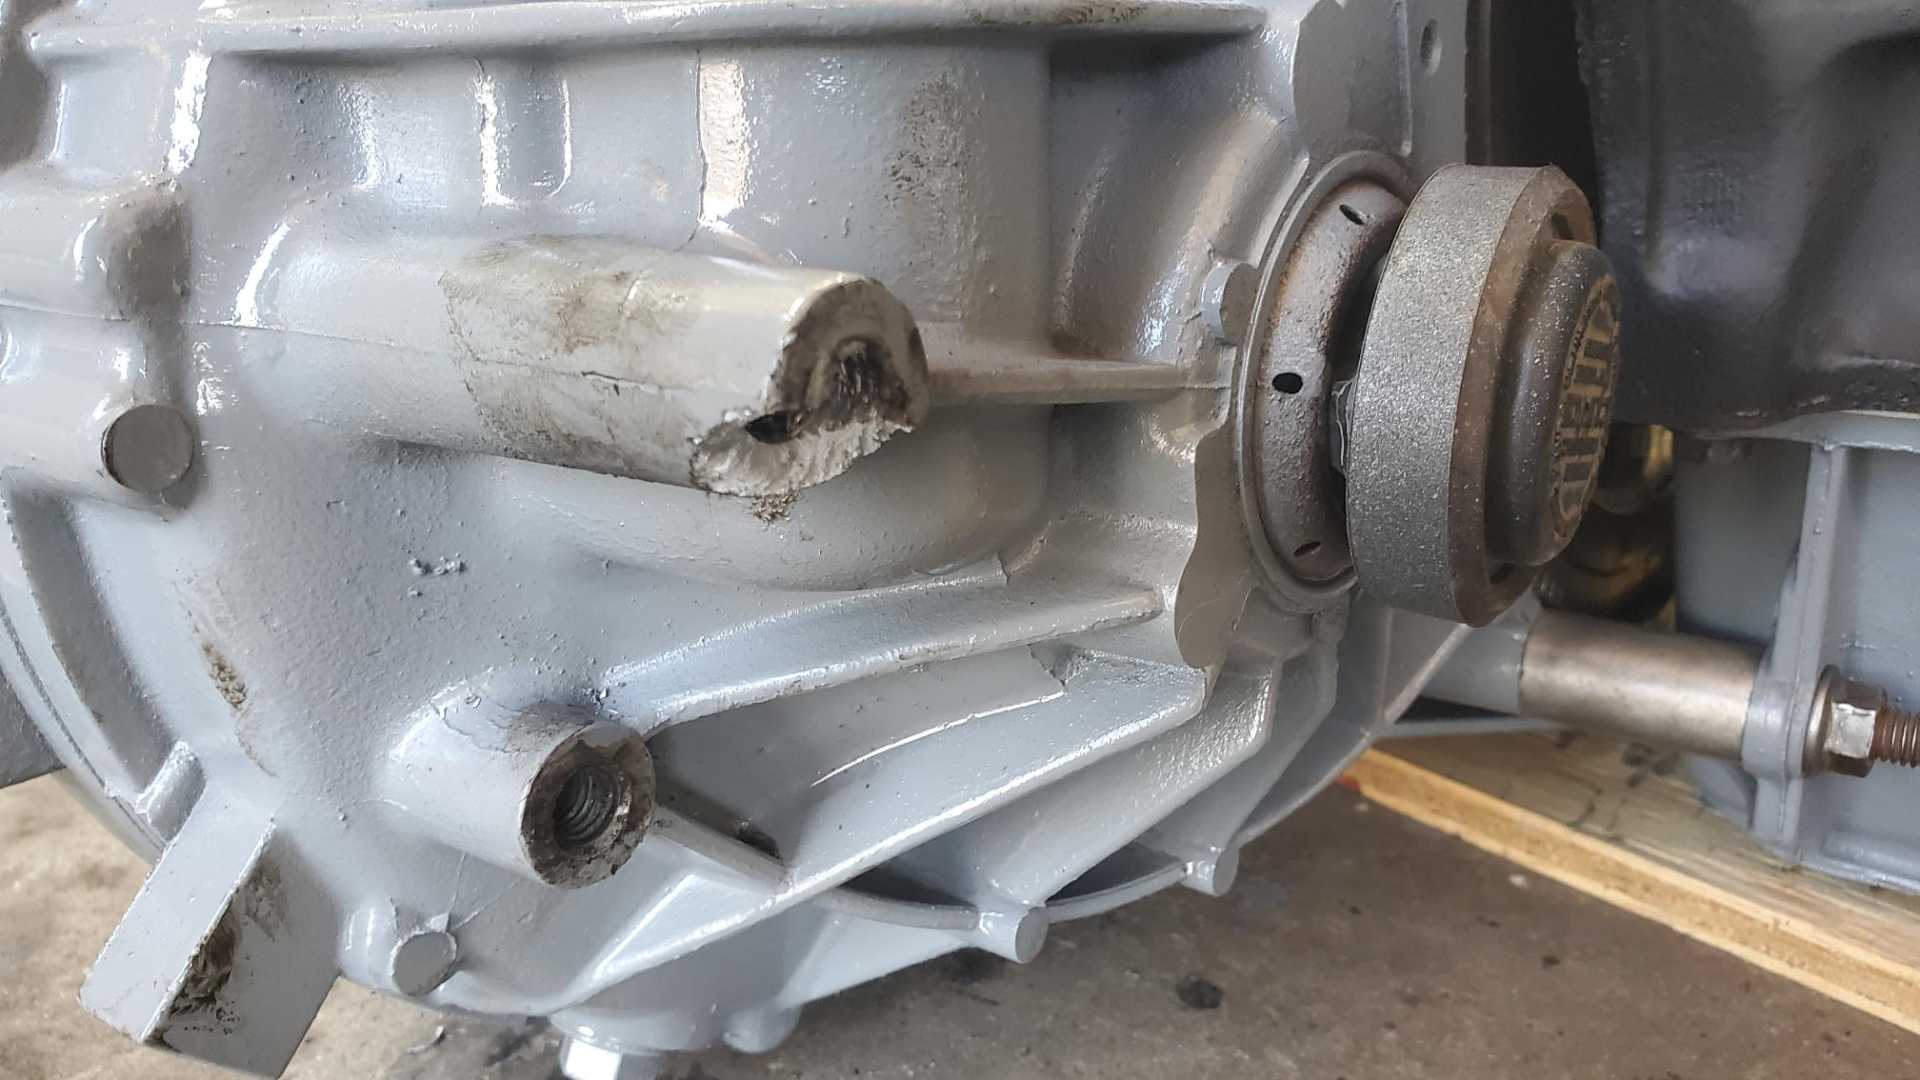
Looks like the bearings are worn out on the throw out bearing shaft. Can’t figure out how to get the shaft out.
[This message has been edited by Quadfather (edited 01-31-2022).]
More slow progress. We had a major winter storm in Oklahoma this week, which means very long days at work. We also decided to replace my wife’s car instead of trying to fix it, so we spent yesterday car shopping and made the mistake of visiting one of the big dealers in the area.
Today I’m trying to clean up the Getrag so I can figure out how to get the clutch arm out. Trying a different type of Dollar General oven cleaner.
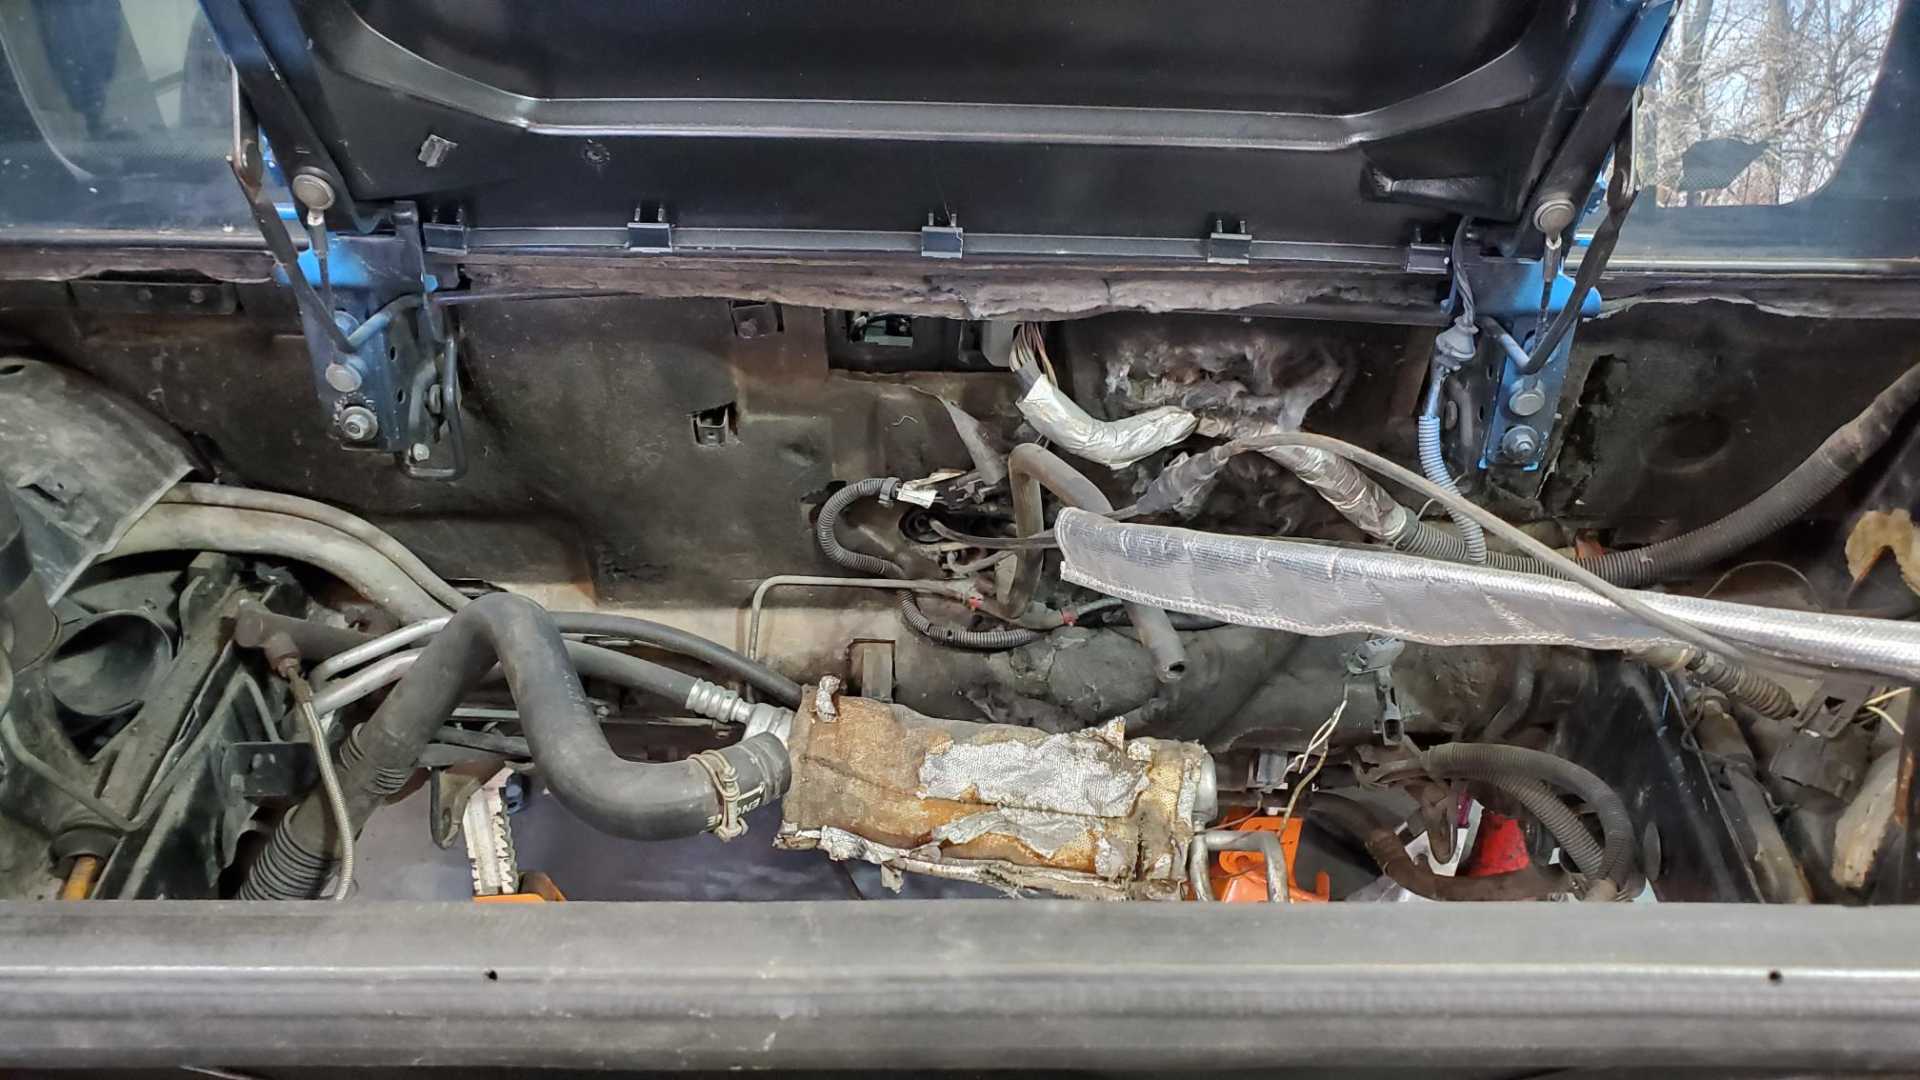
Tough not to be discouraged while looking over the engine compartment and firewall. Thirty five years of dirt and age.
The week began on a high note, when my son and I went to our first Tool concert.
What a show. I was a casual fan for years, but with the loss of Neil Peart and Rush no longer able to release new music, I’m loving this music.
[This message has been edited by Quadfather (edited 02-06-2022).]
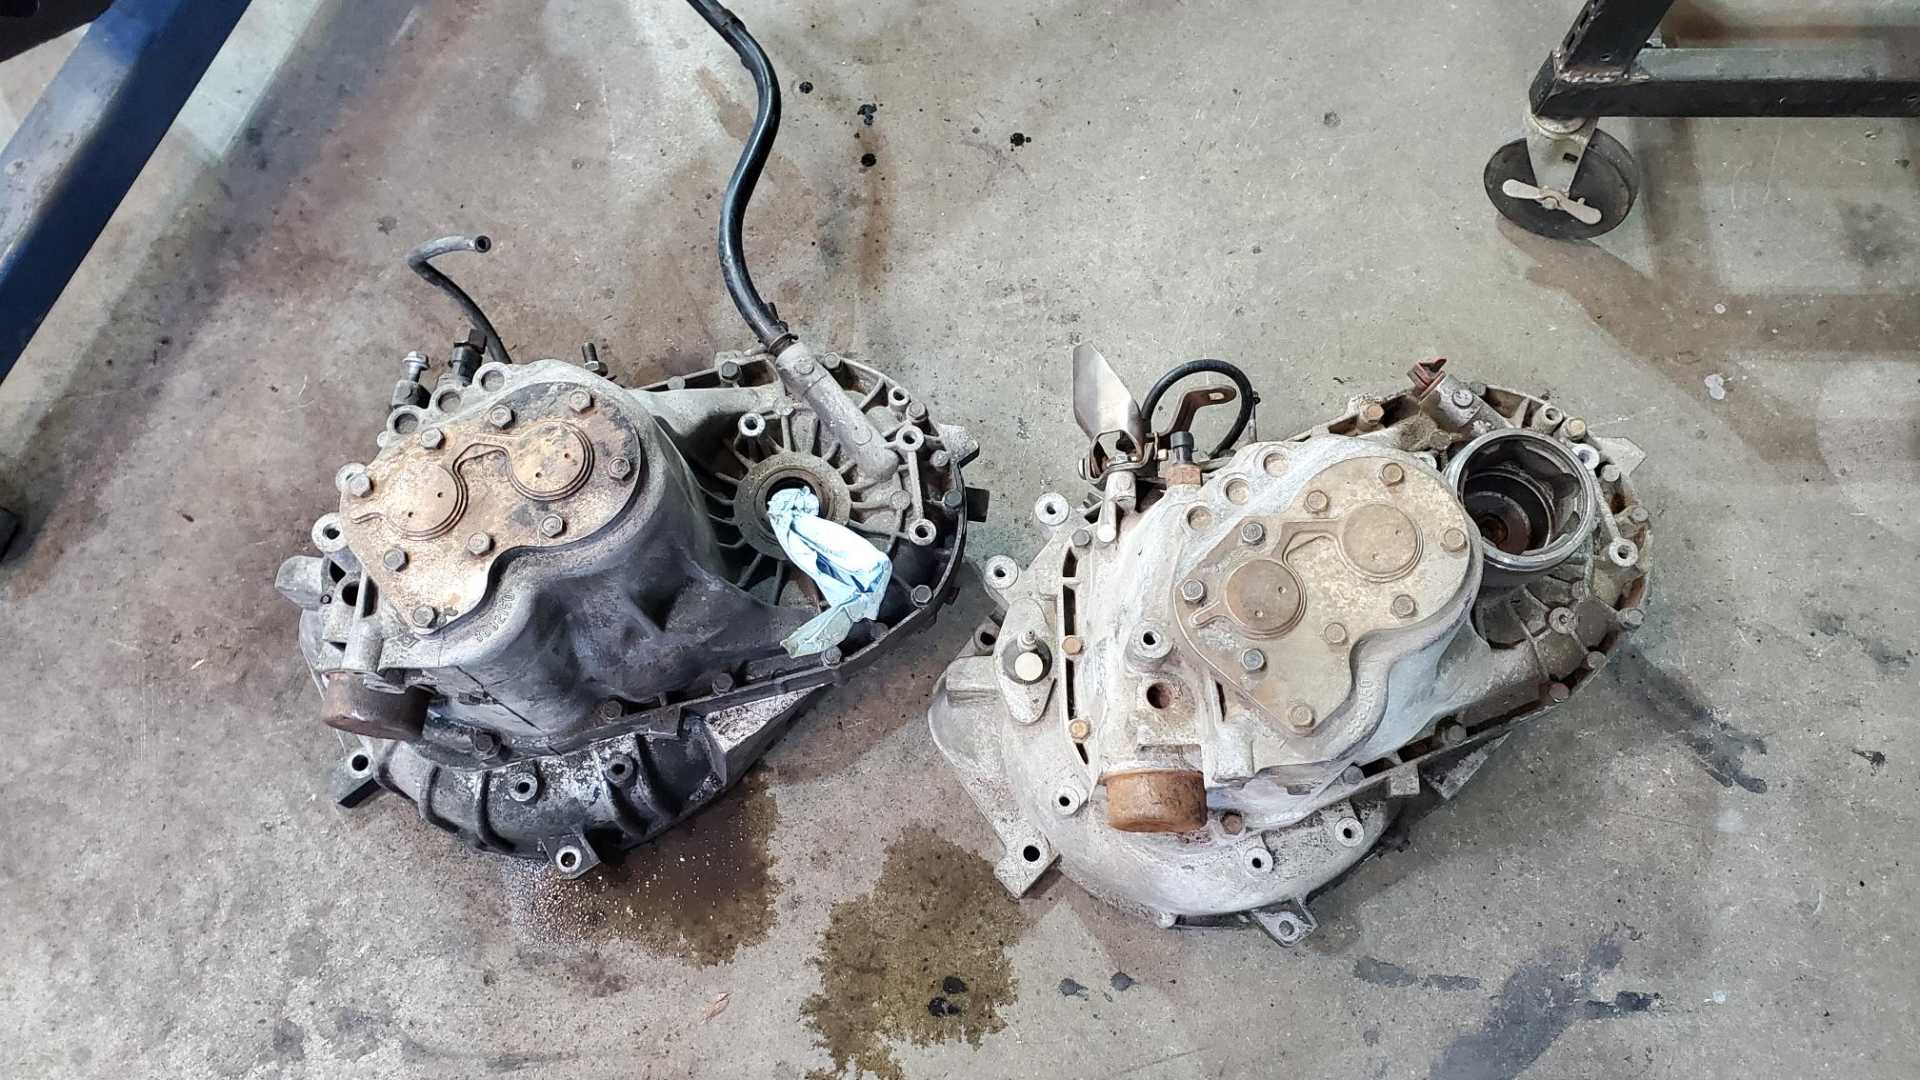
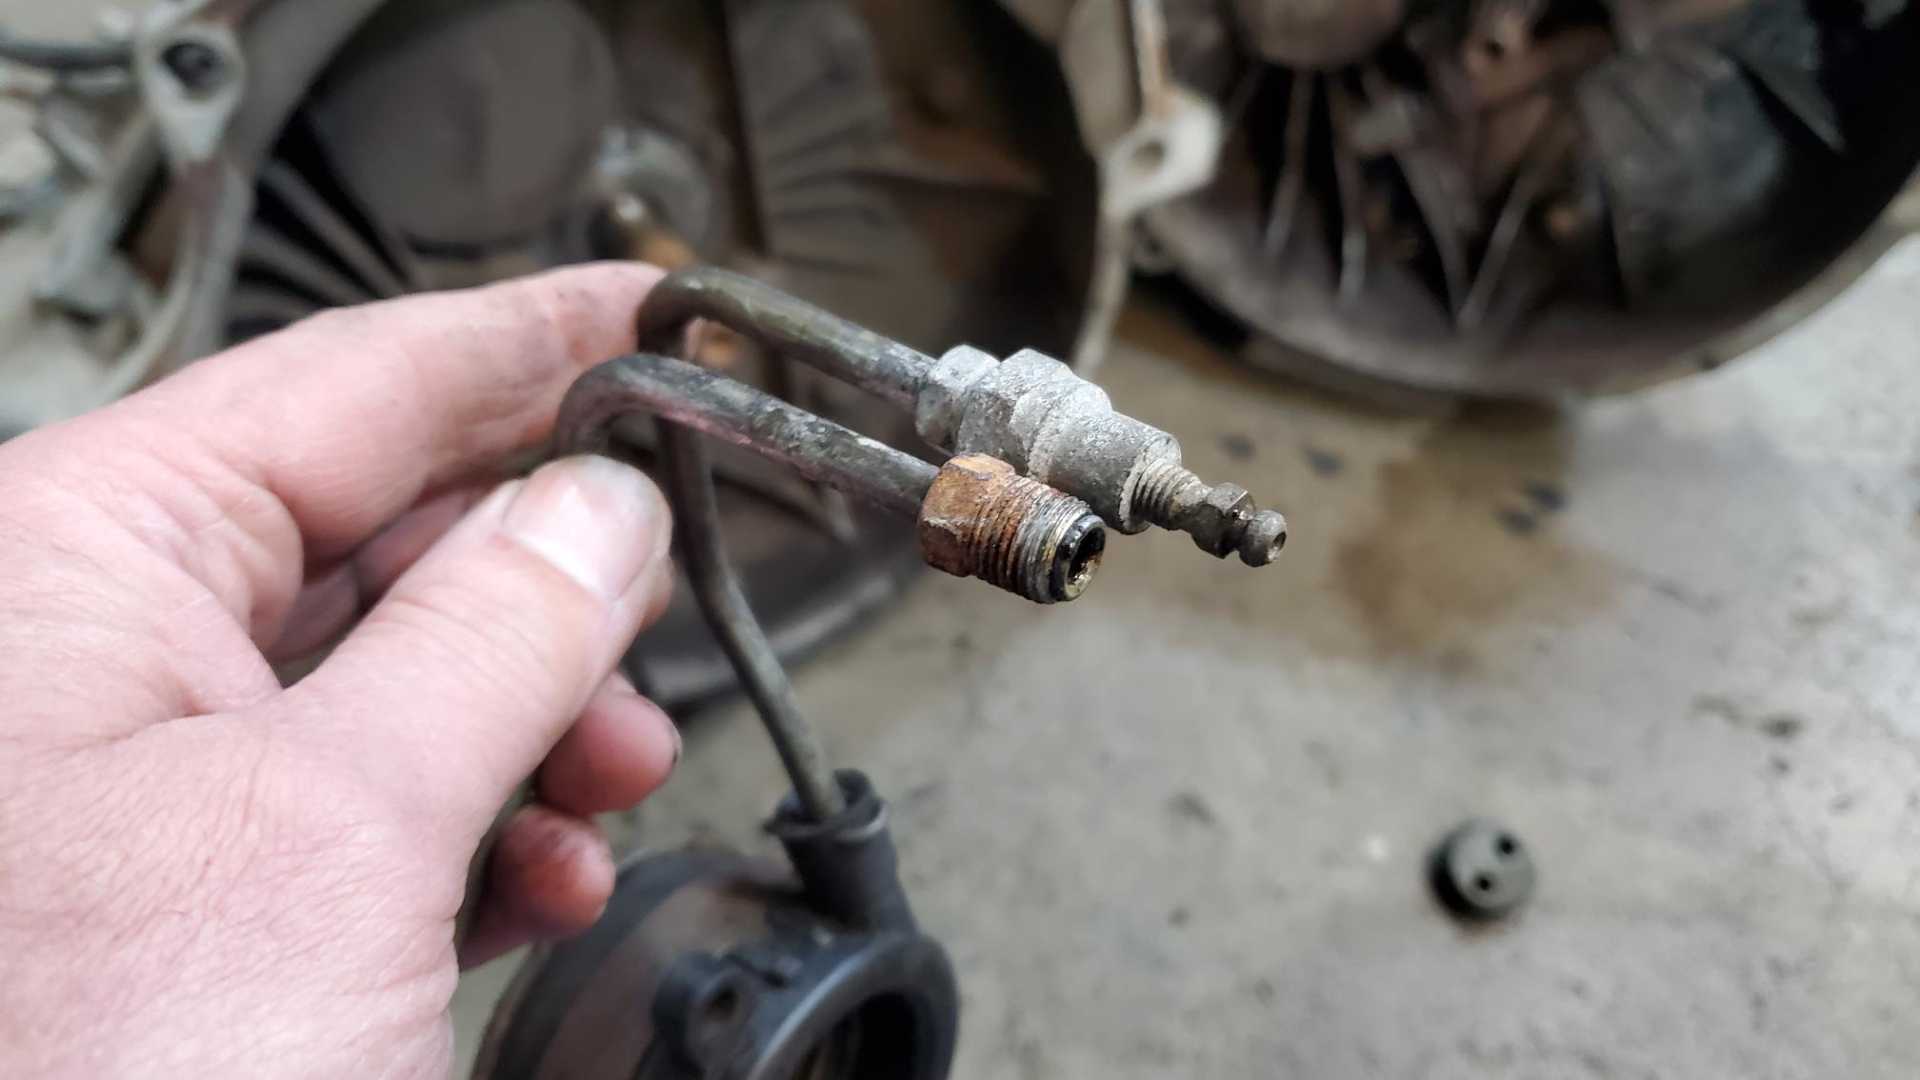
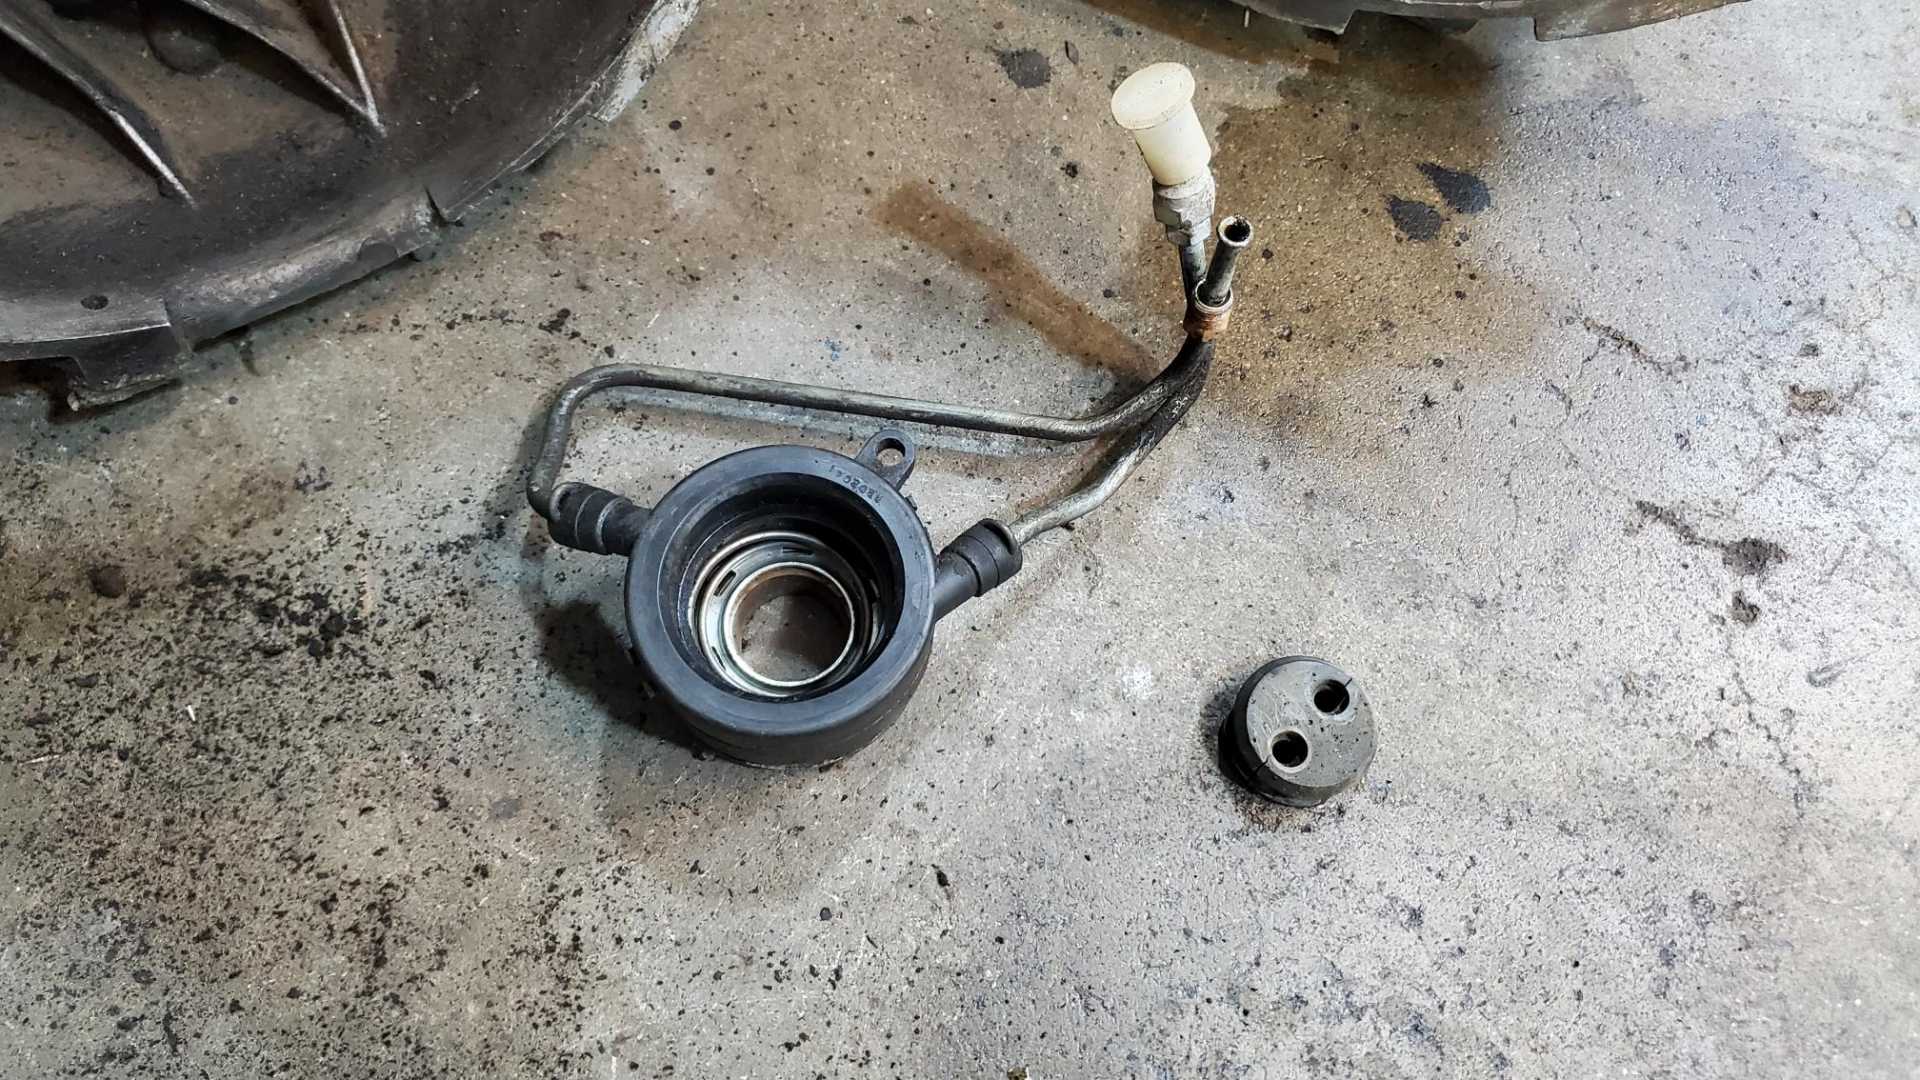
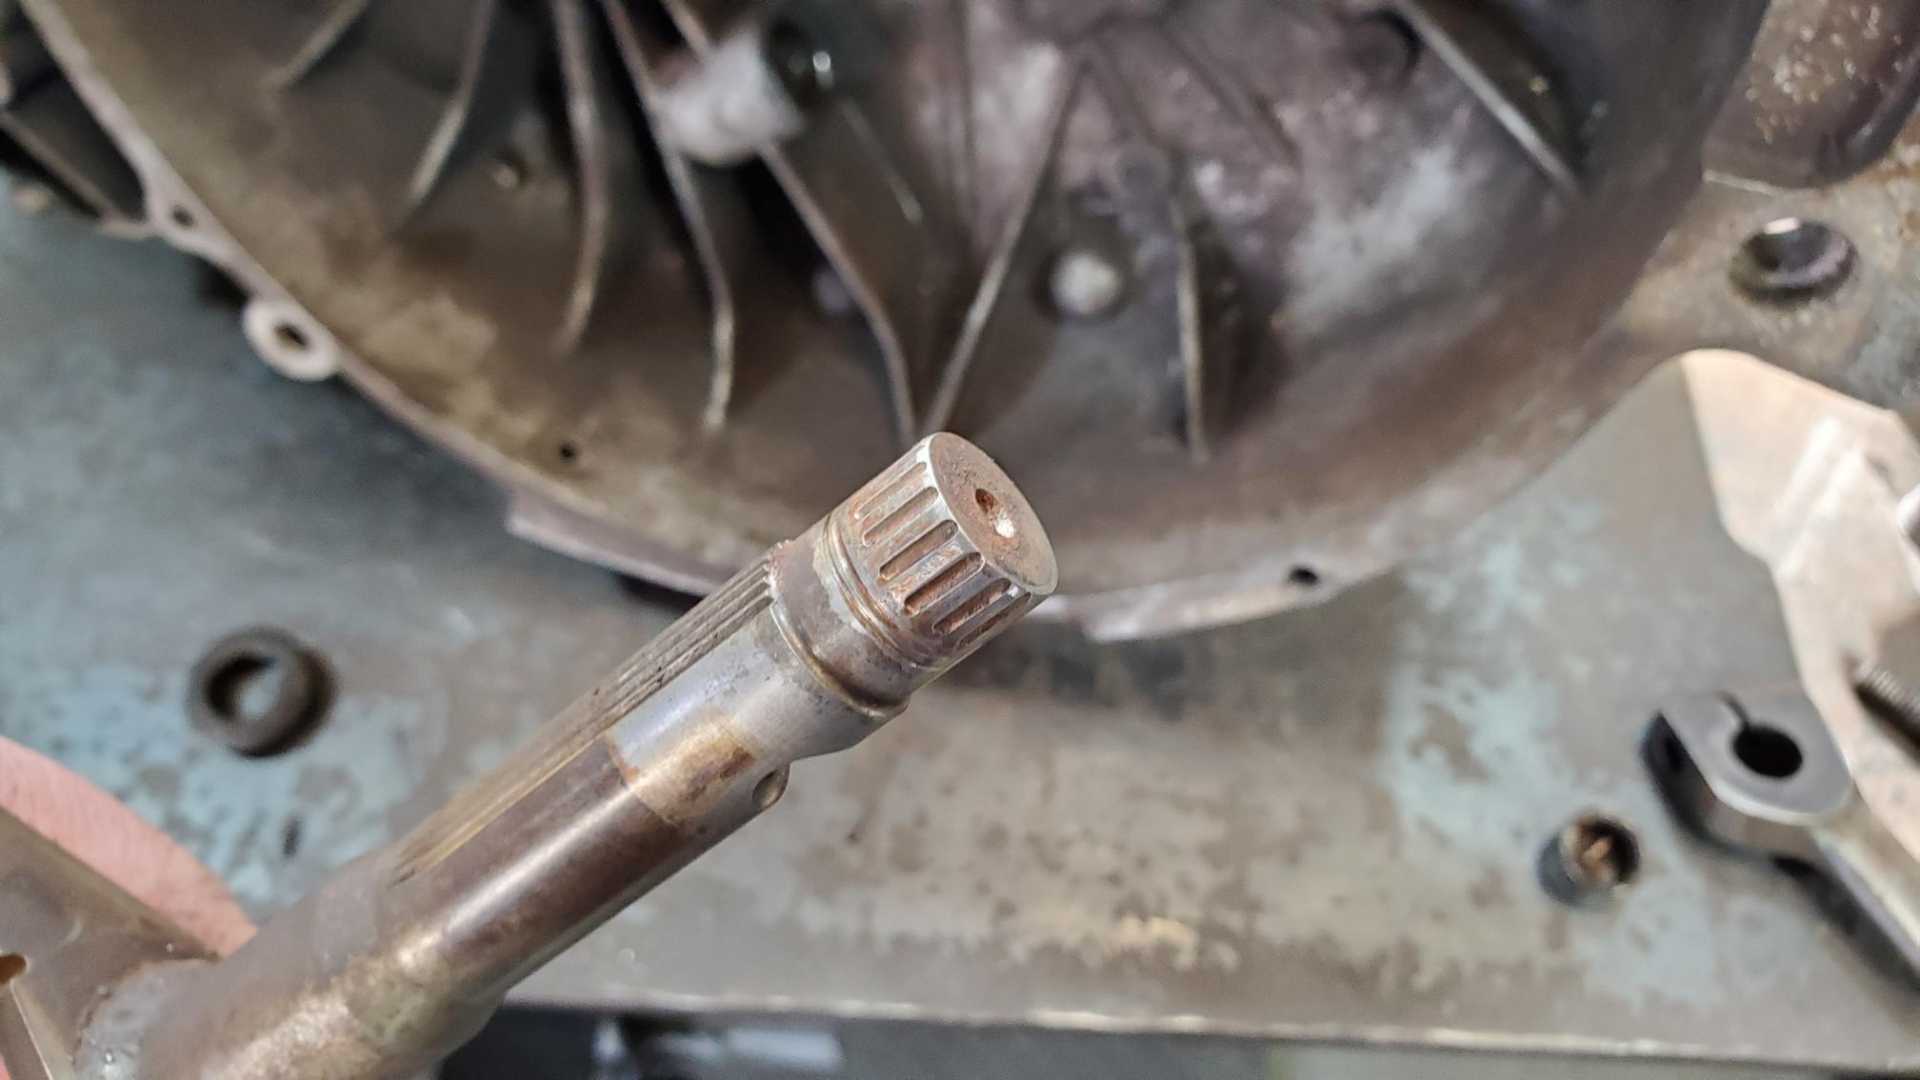
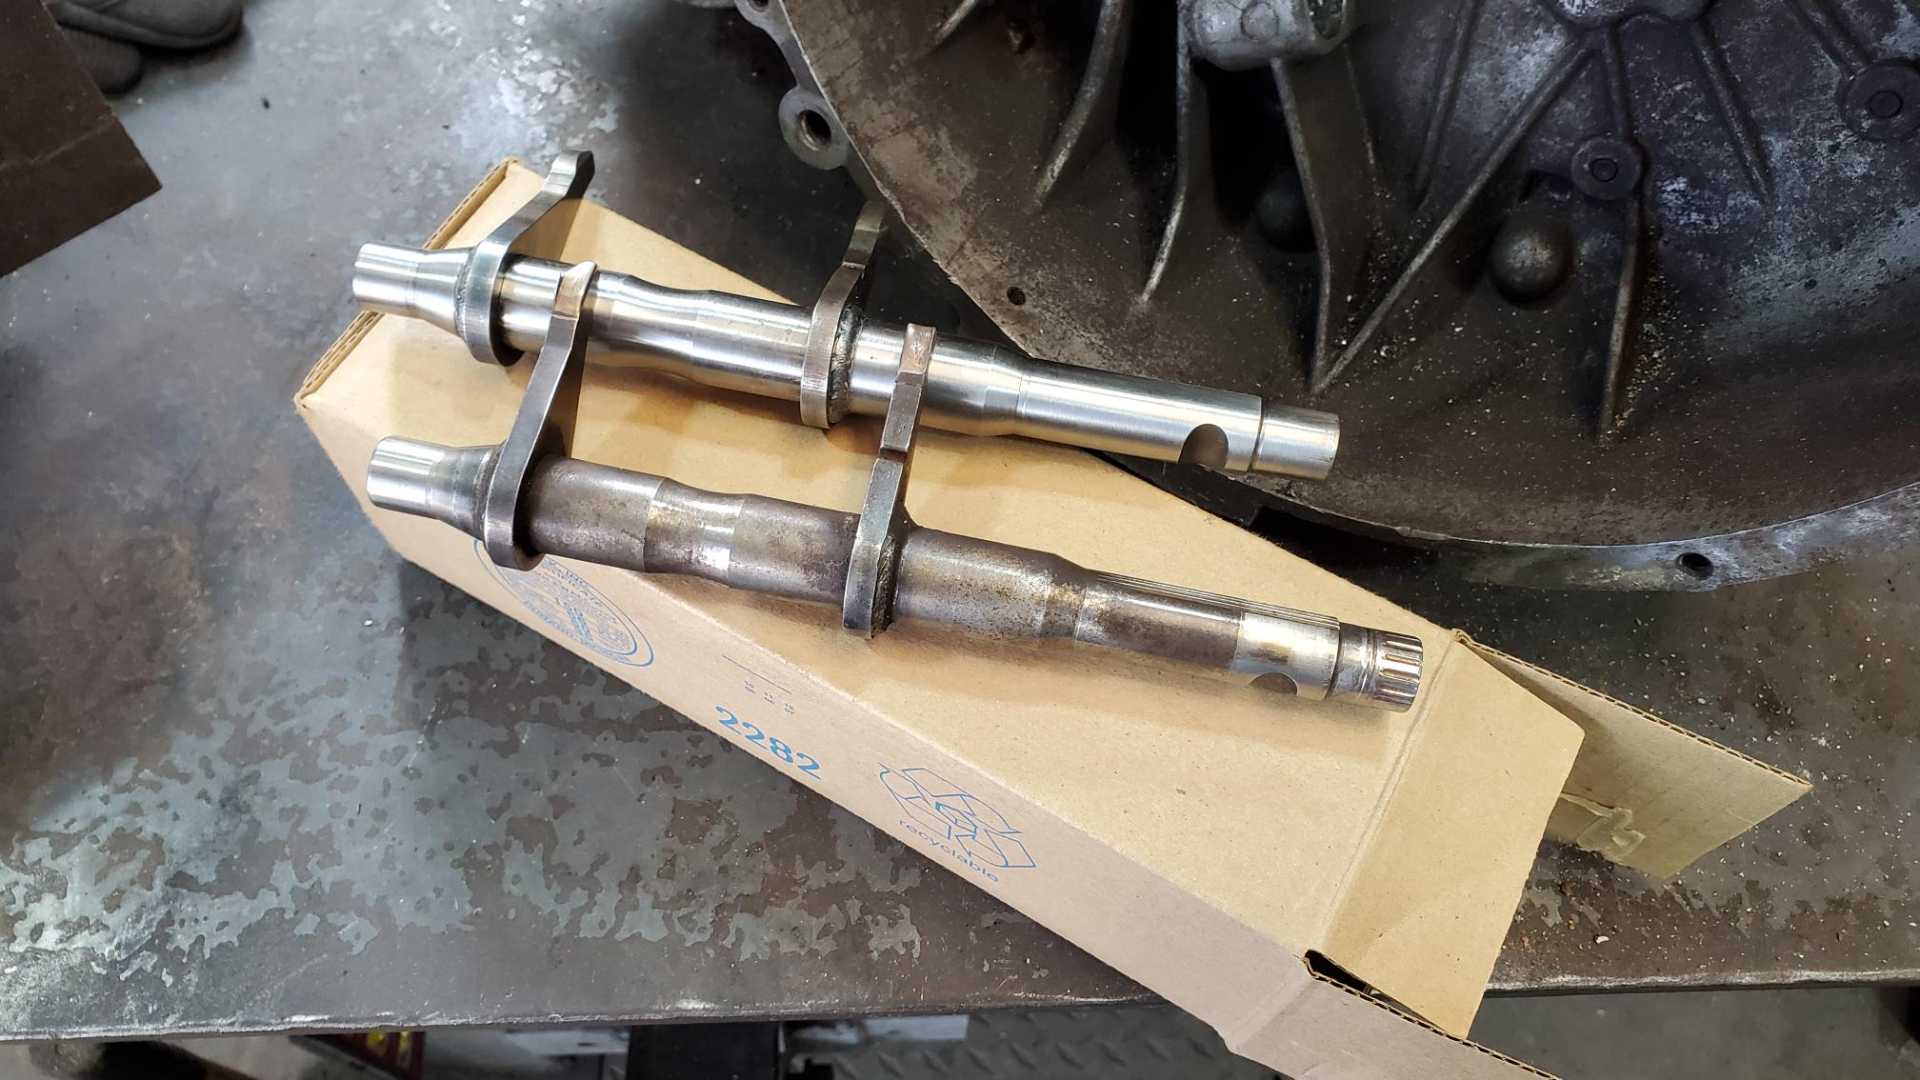
Dug my spare Getrag out of the storage unit only to be disappointed. I remembered that it has a hydraulic throw-out bearing, so I was thinking instead of worrying about the bearings in the shift arm on my GTZ unit, I could convert it to an HTOB. No such luck.
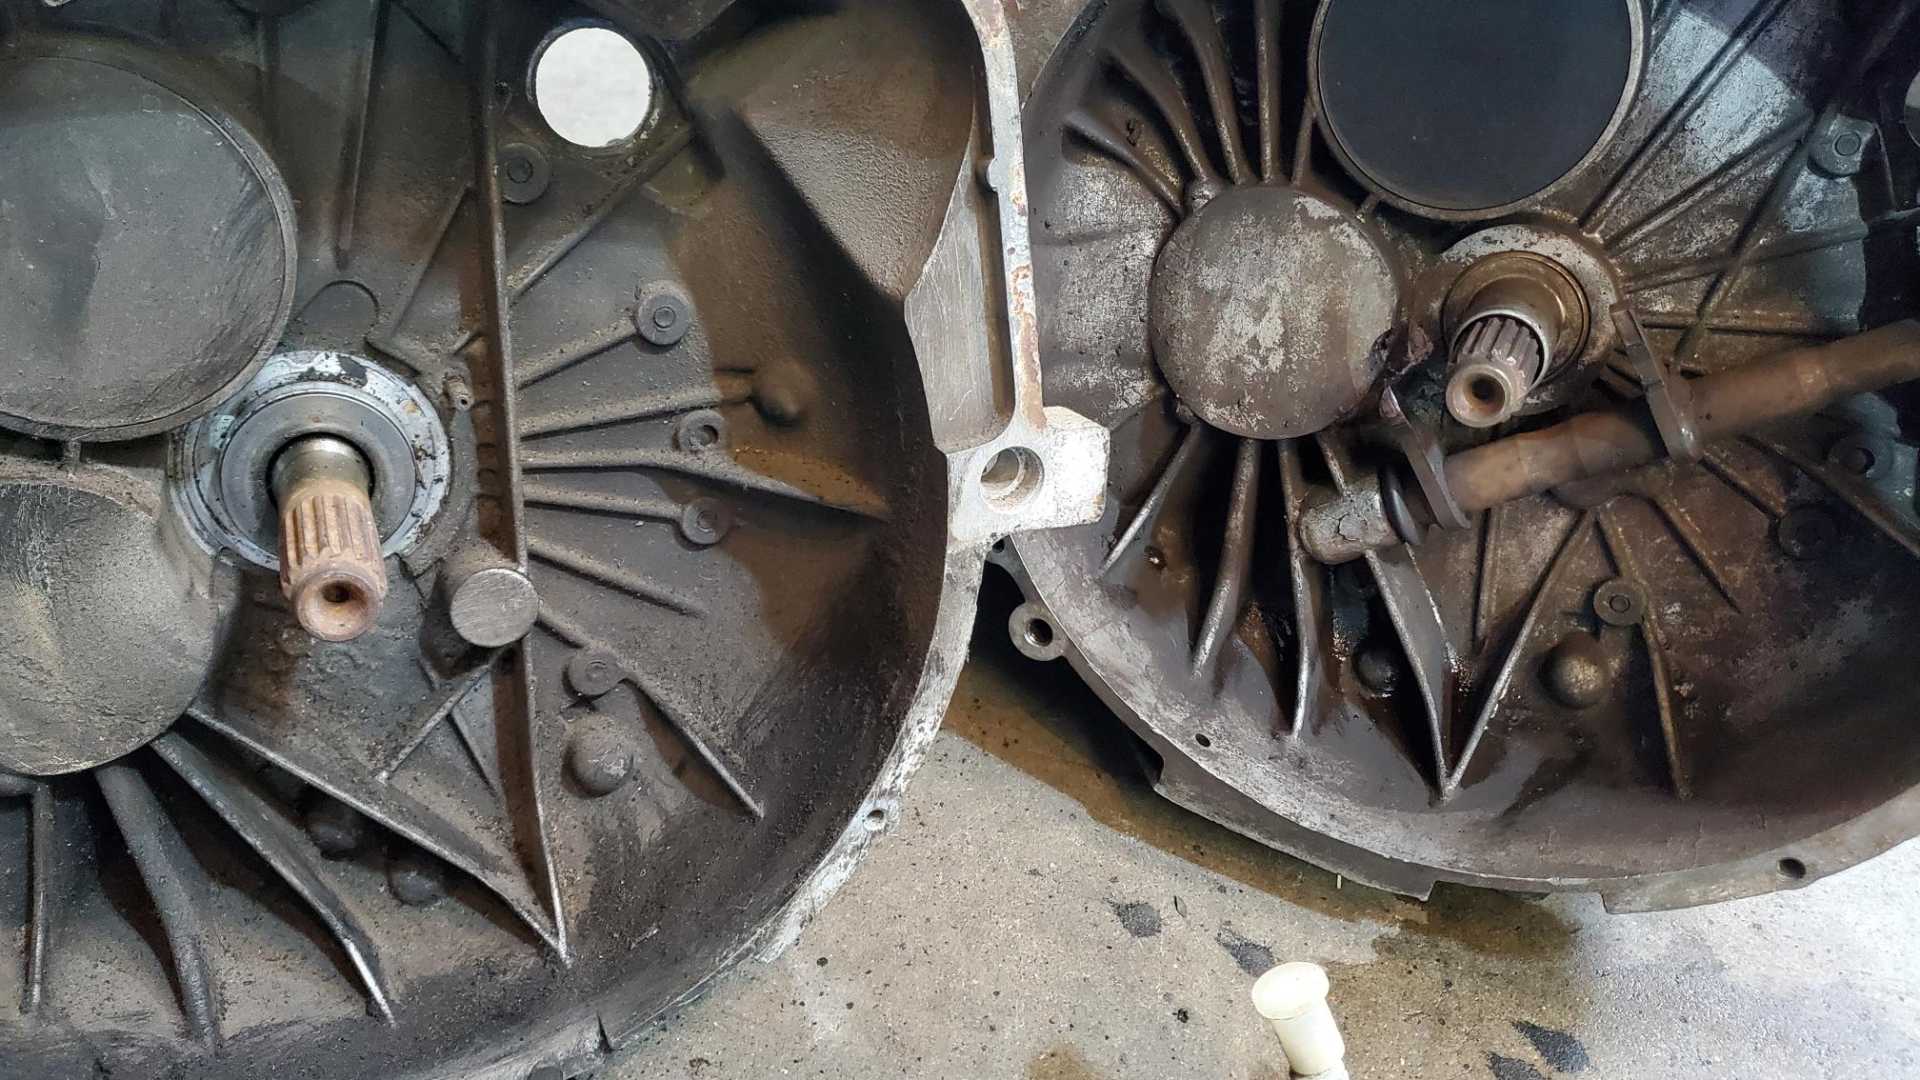
It appears the transmissions are the same model. GTZ on the left:
Unfortunately, the flange around the input shaft is different on the spare unit and the GTZ transmission has a sleeve that’s not present on the other one.
I know other people have had trouble getting the length of the throw correct when using a Quad4 transmission in a Fiero, so I was thinking a HTOB would solve that issue. I also noticed that the HTOB has a bleeder.
I got this spare transmission for free off the old Quad 4 forum. It came from a fellow Quad enthusiast in New Mexico and my brother picked it up while on vacation. Unfortunately, all my communication with the enthusiast was via the Quad 4 forum so I lost all the details when that site went down.
I think he told me it came out of a ‘92 or ‘93 Olds Achieva SCX, which would mean different 2nd and 5th gears and a different final drive, according to Wikipedia. All I know for sure is that it fits a Quad and it was free.
[This message has been edited by Quadfather (edited 02-12-2022).]
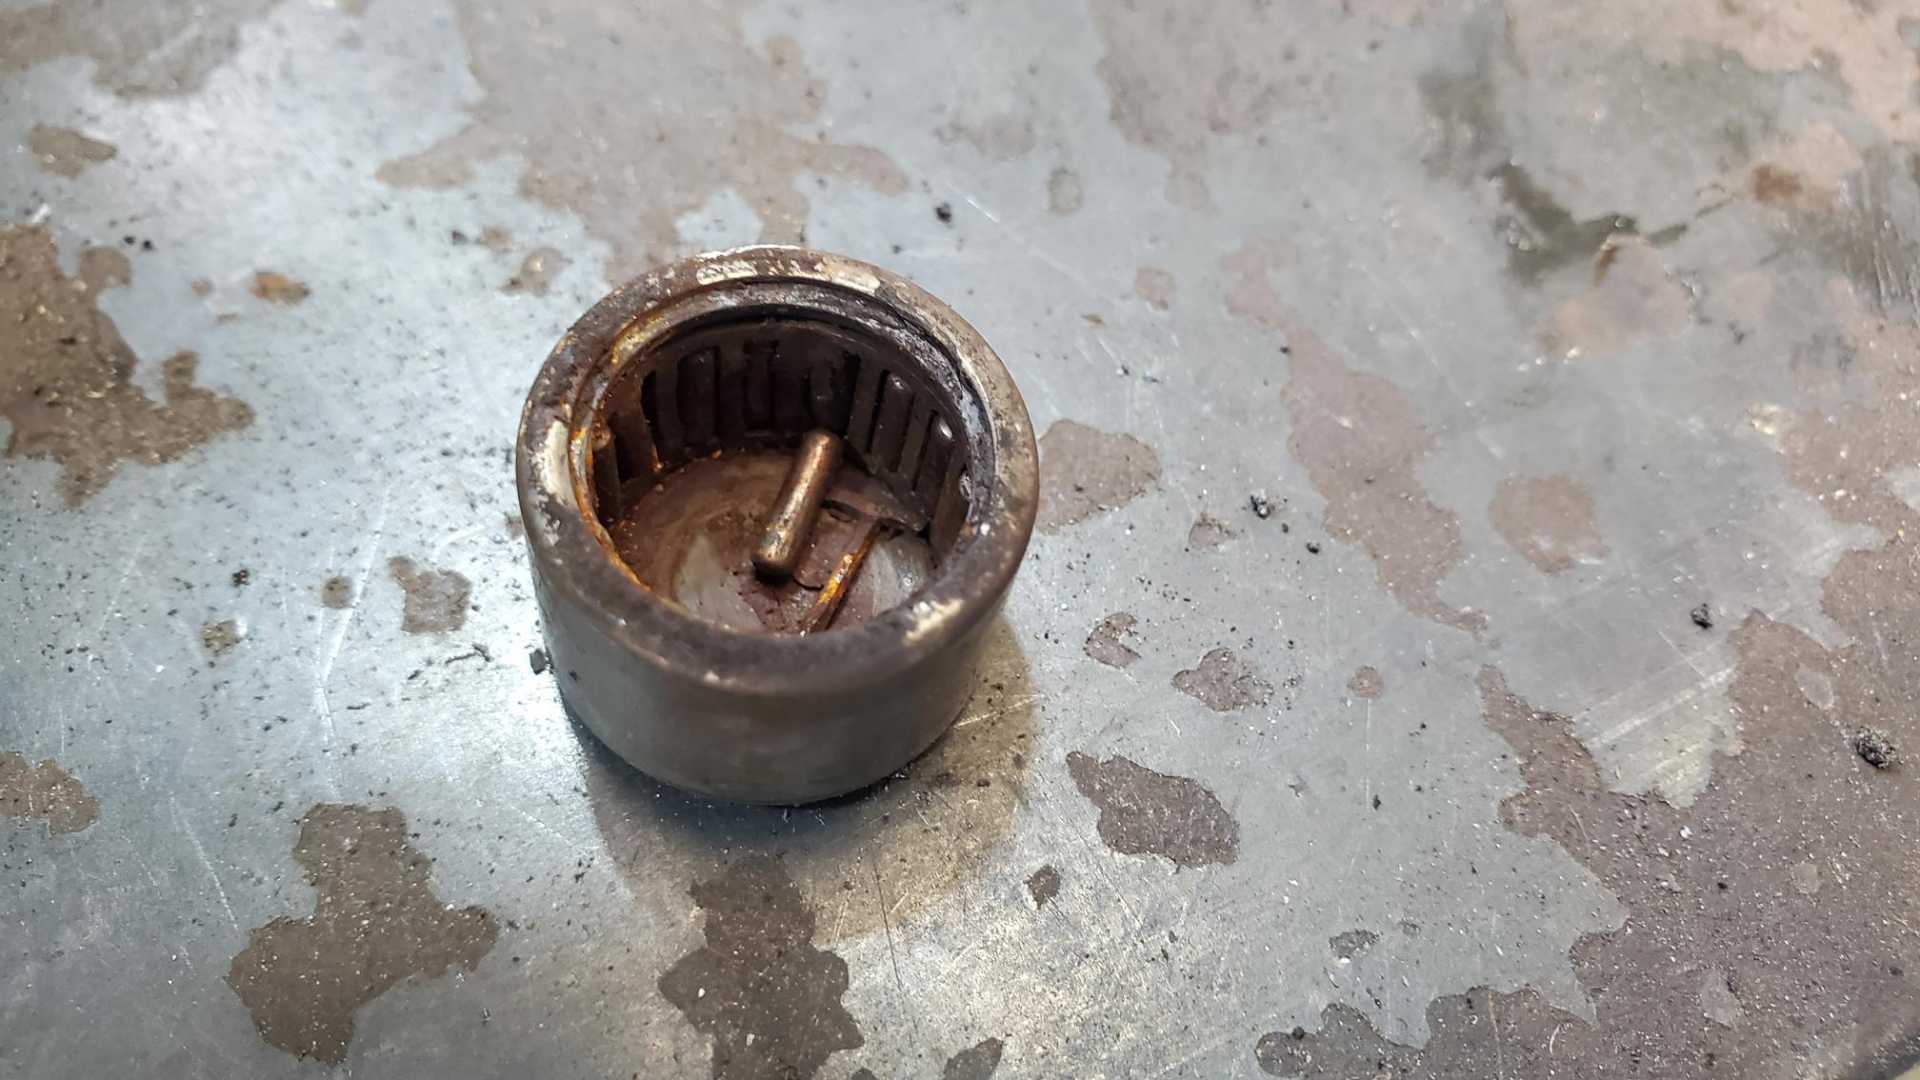
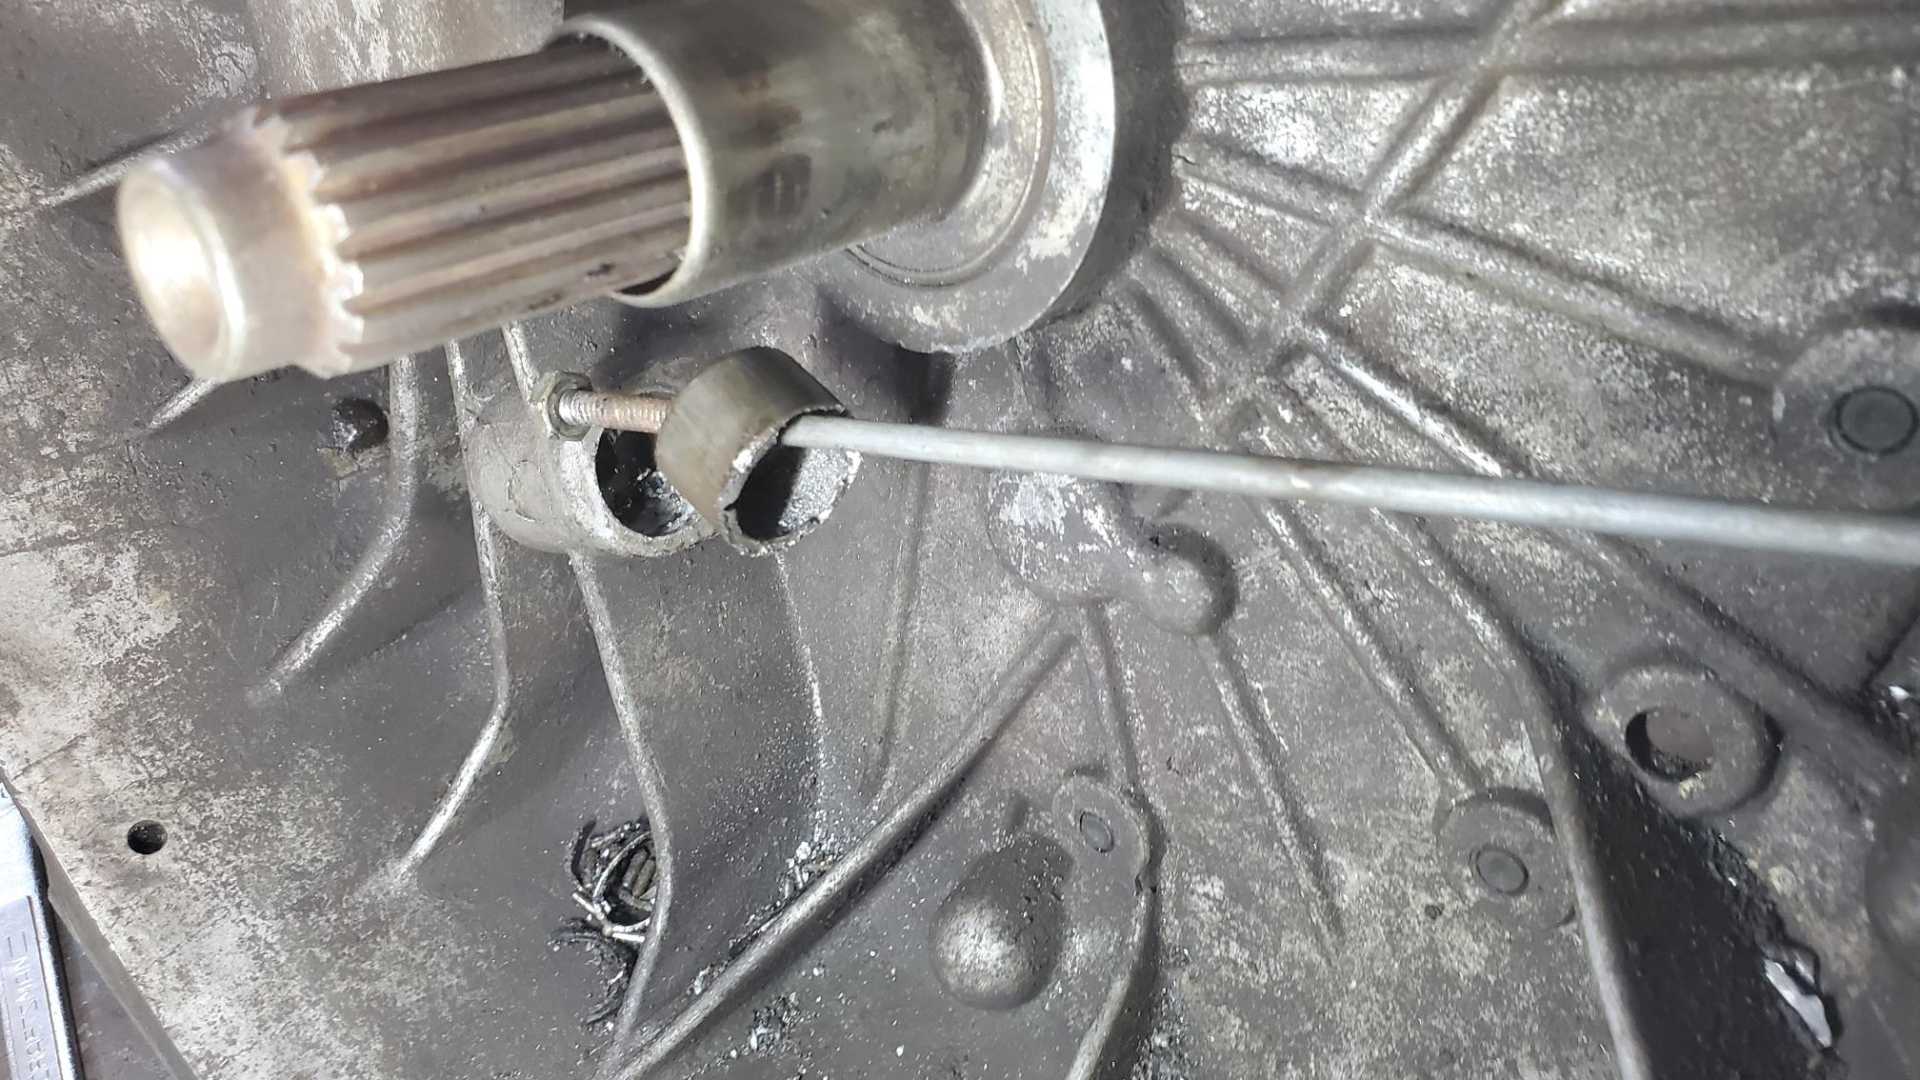
Success. I removed the lower bearing from the transmission.
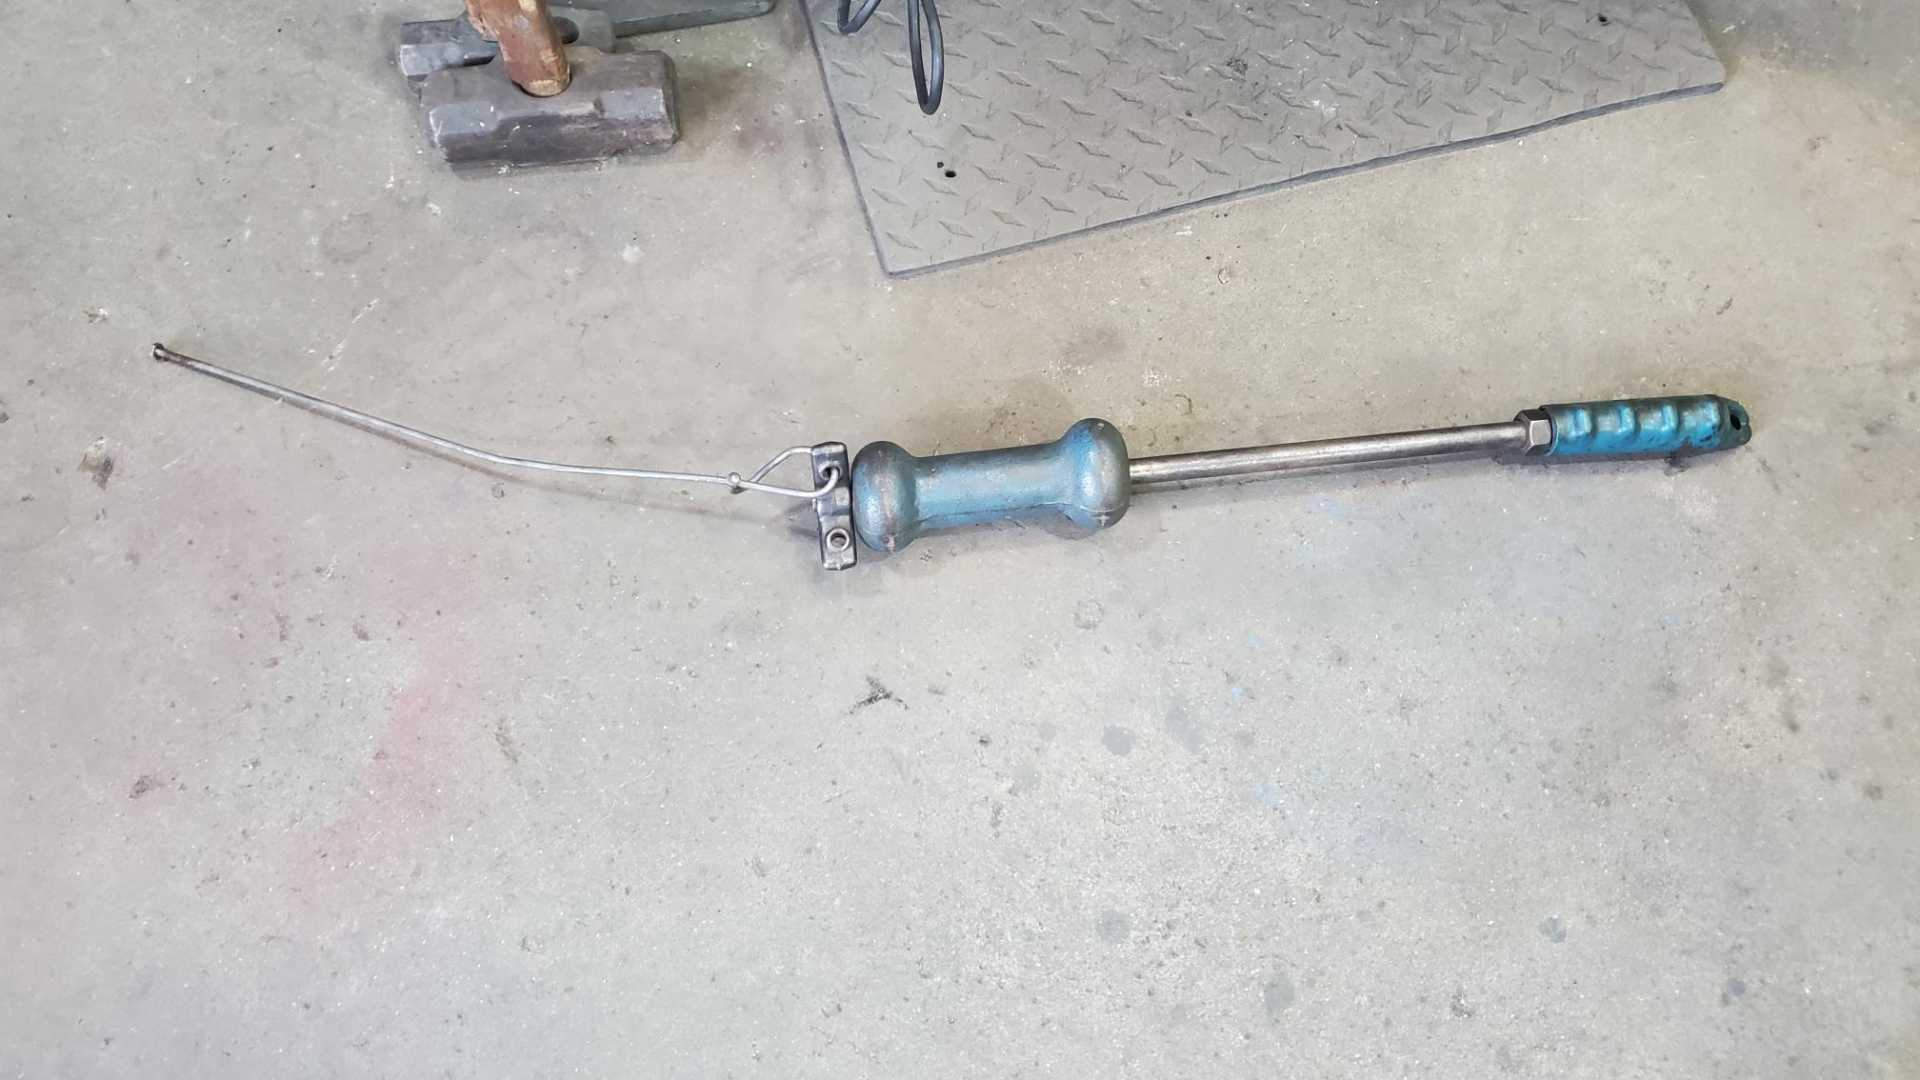
The FSM calls for using a special tool to screw into the bearing then using a slide hammer to pull it out. I didn’t have the special tool so I improvised with a long bolt I found in my stash.
It would not come out, so I used the Dremel to grind a slot in one side and then drove a screw driver underneath the edge. Finally it slid out.
[This message has been edited by Quadfather (edited 02-20-2022).]
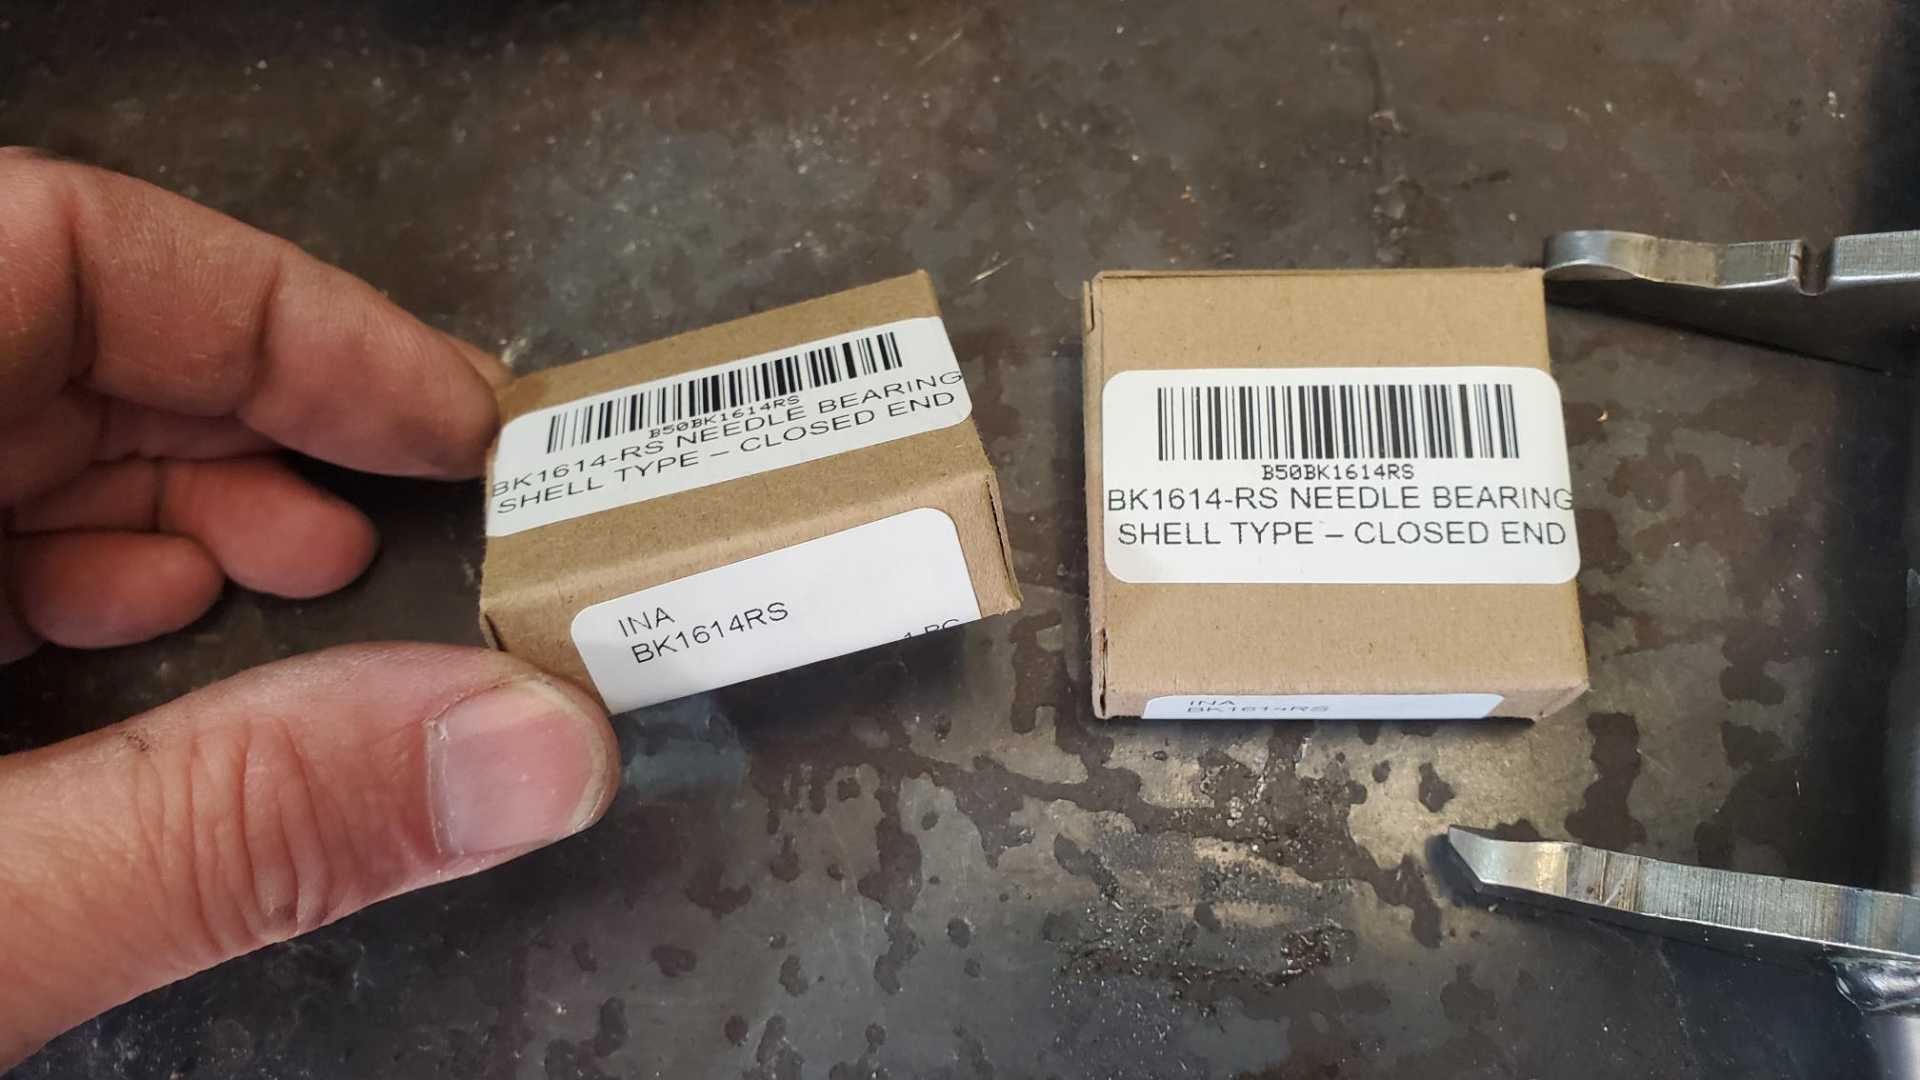
The replace clutch release fork arrived on Friday and it’s a perfect match. I ordered it from GMPartsGiant.com.
Unfortunately, that site doesn’t have the needle bearings anymore. A Tulsa bearing dealer can get them for me but I wanted to wait until the fork arrived to make sure it was the correct one.
[This message has been edited by Quadfather (edited 03-20-2022).]
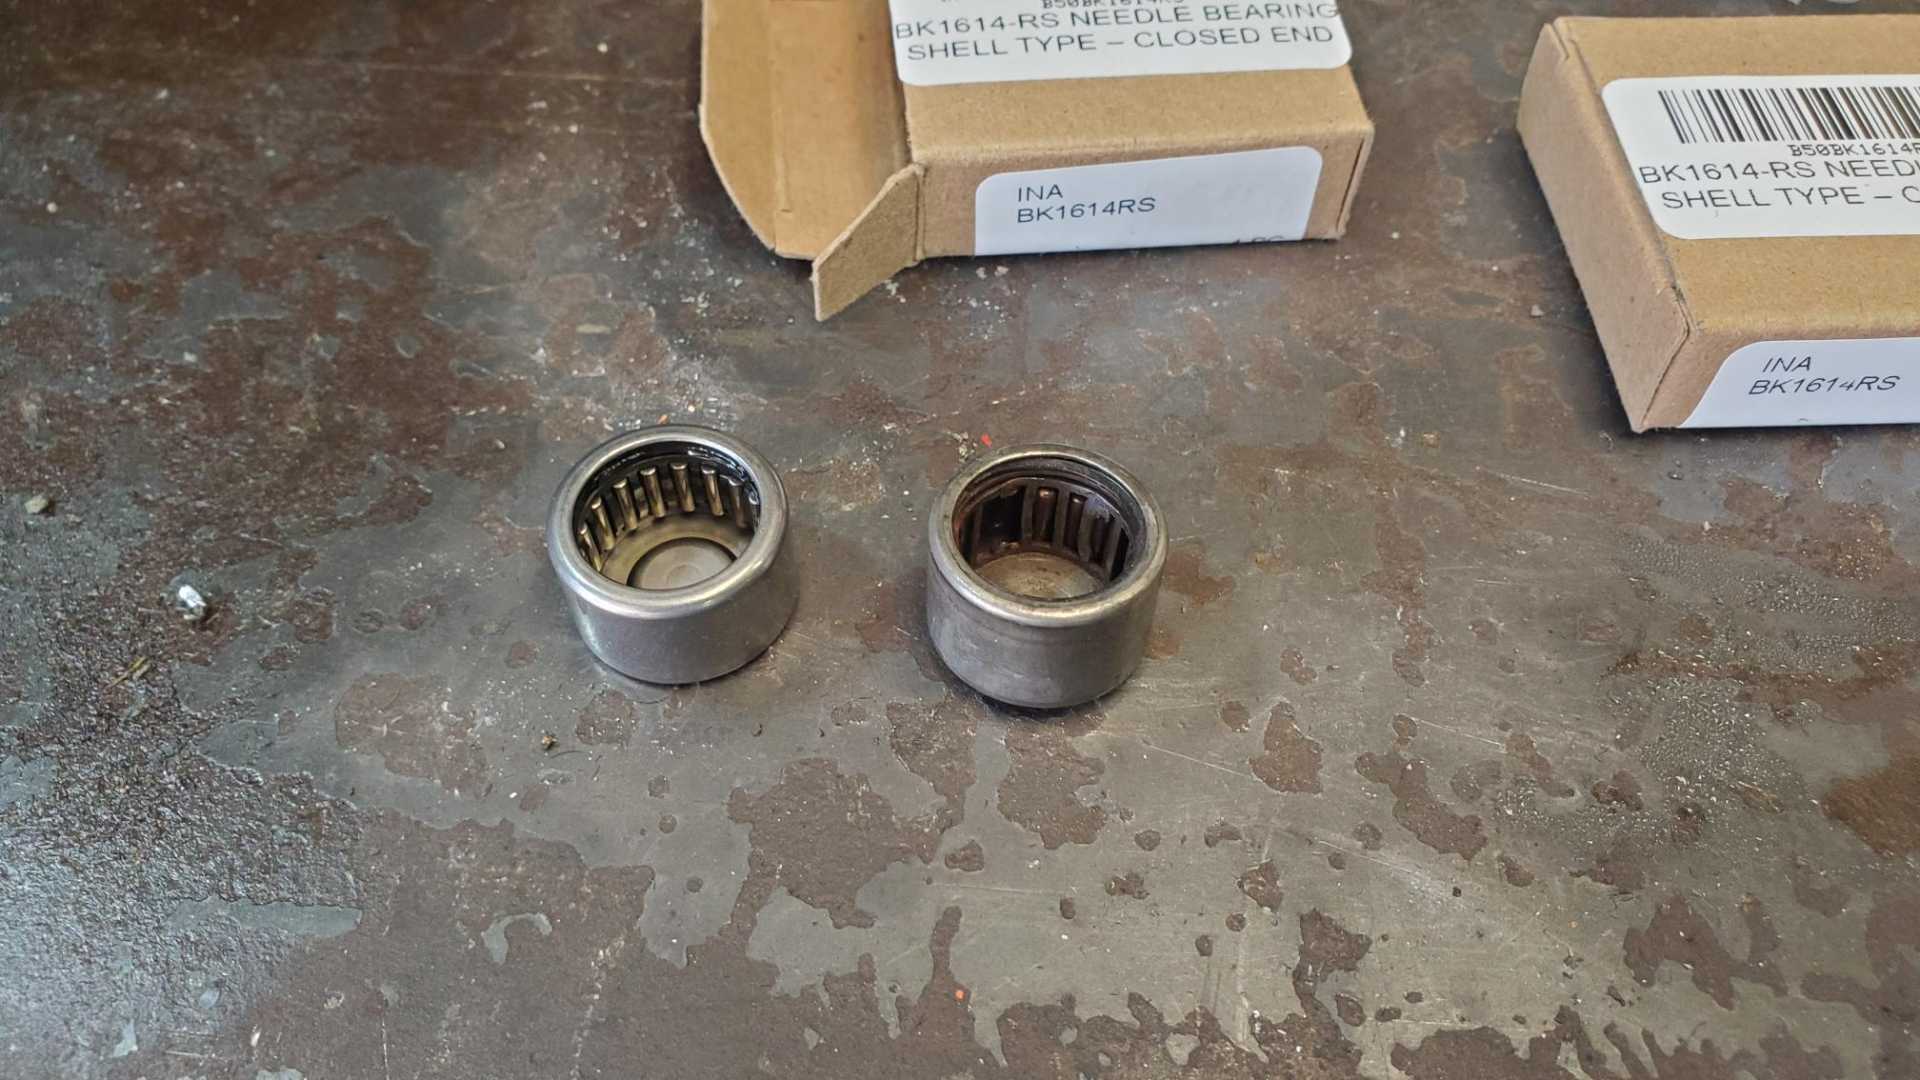
Finally got the new bearings for the clutch fork. Chinese bearings were the only type I could find.
They’re not identical, but they’re close enough.
An old spark plug socket worked great as an installation tool.
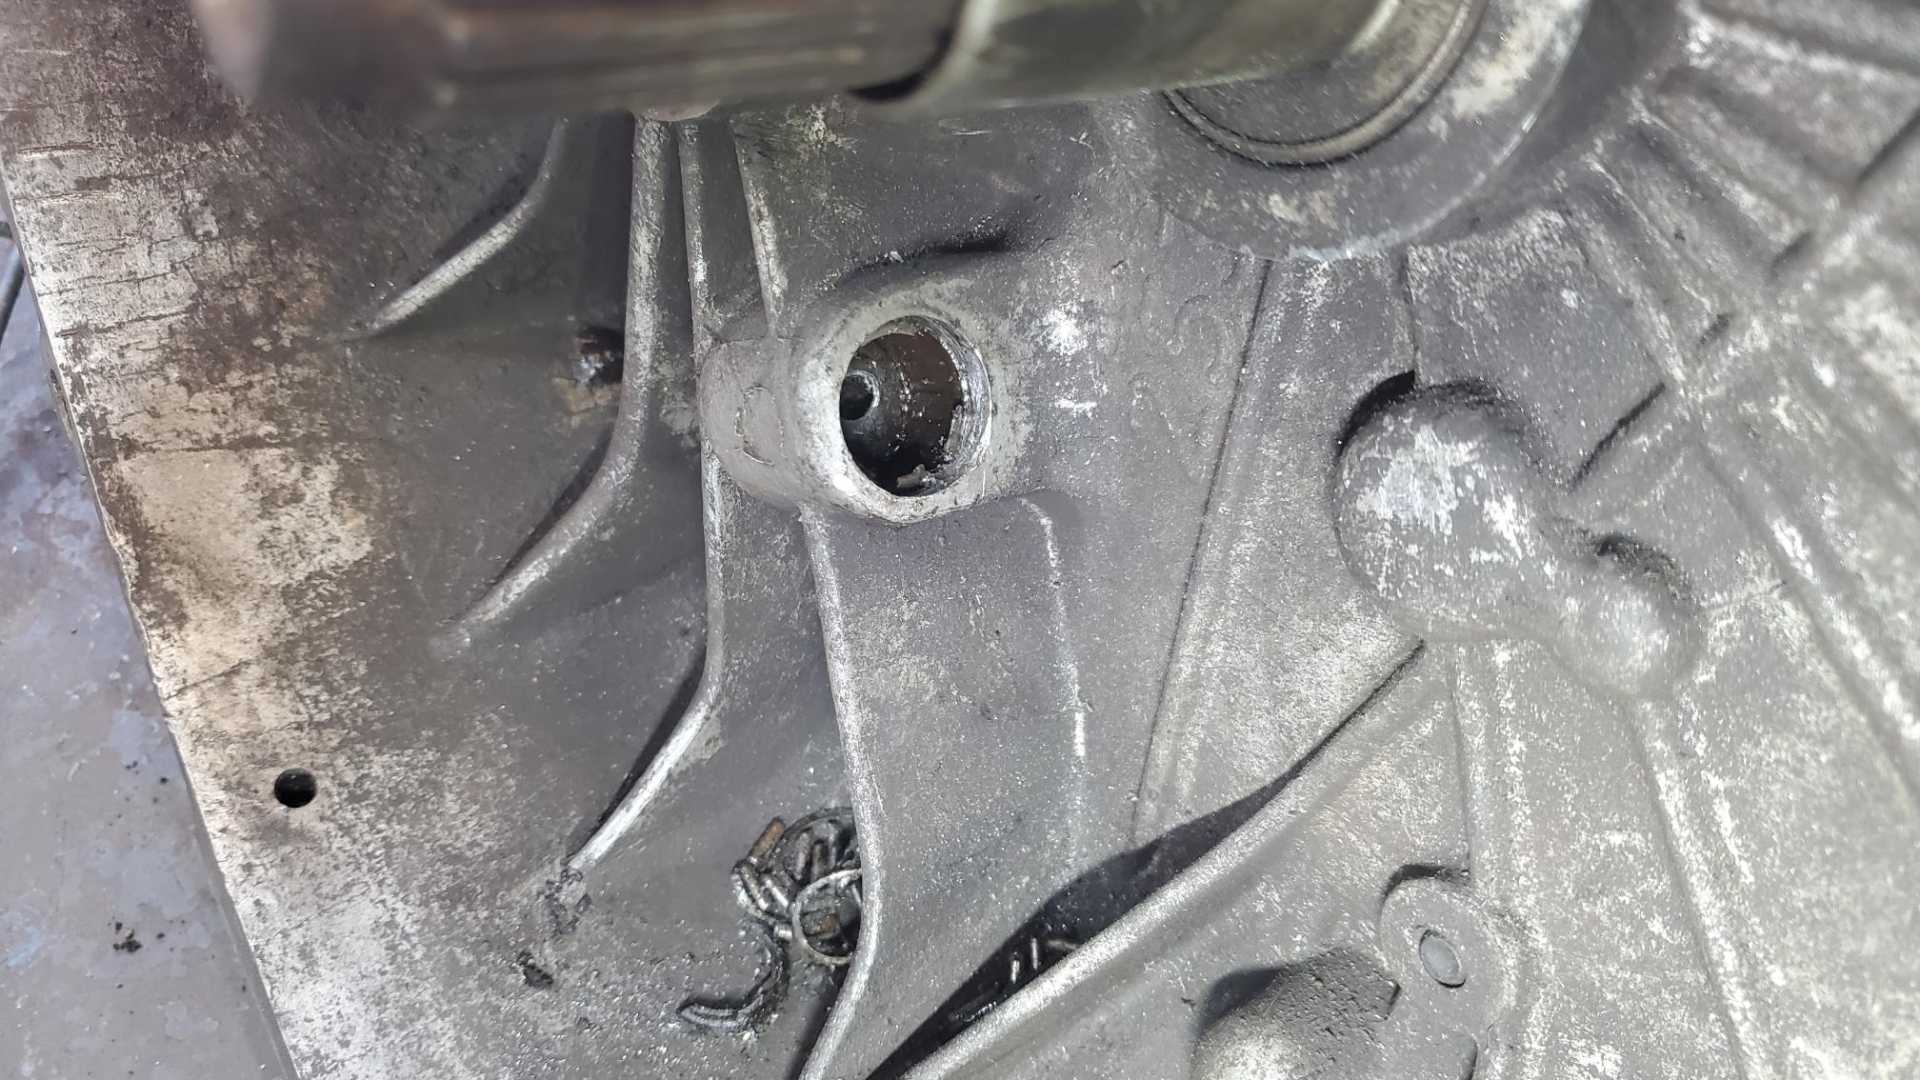
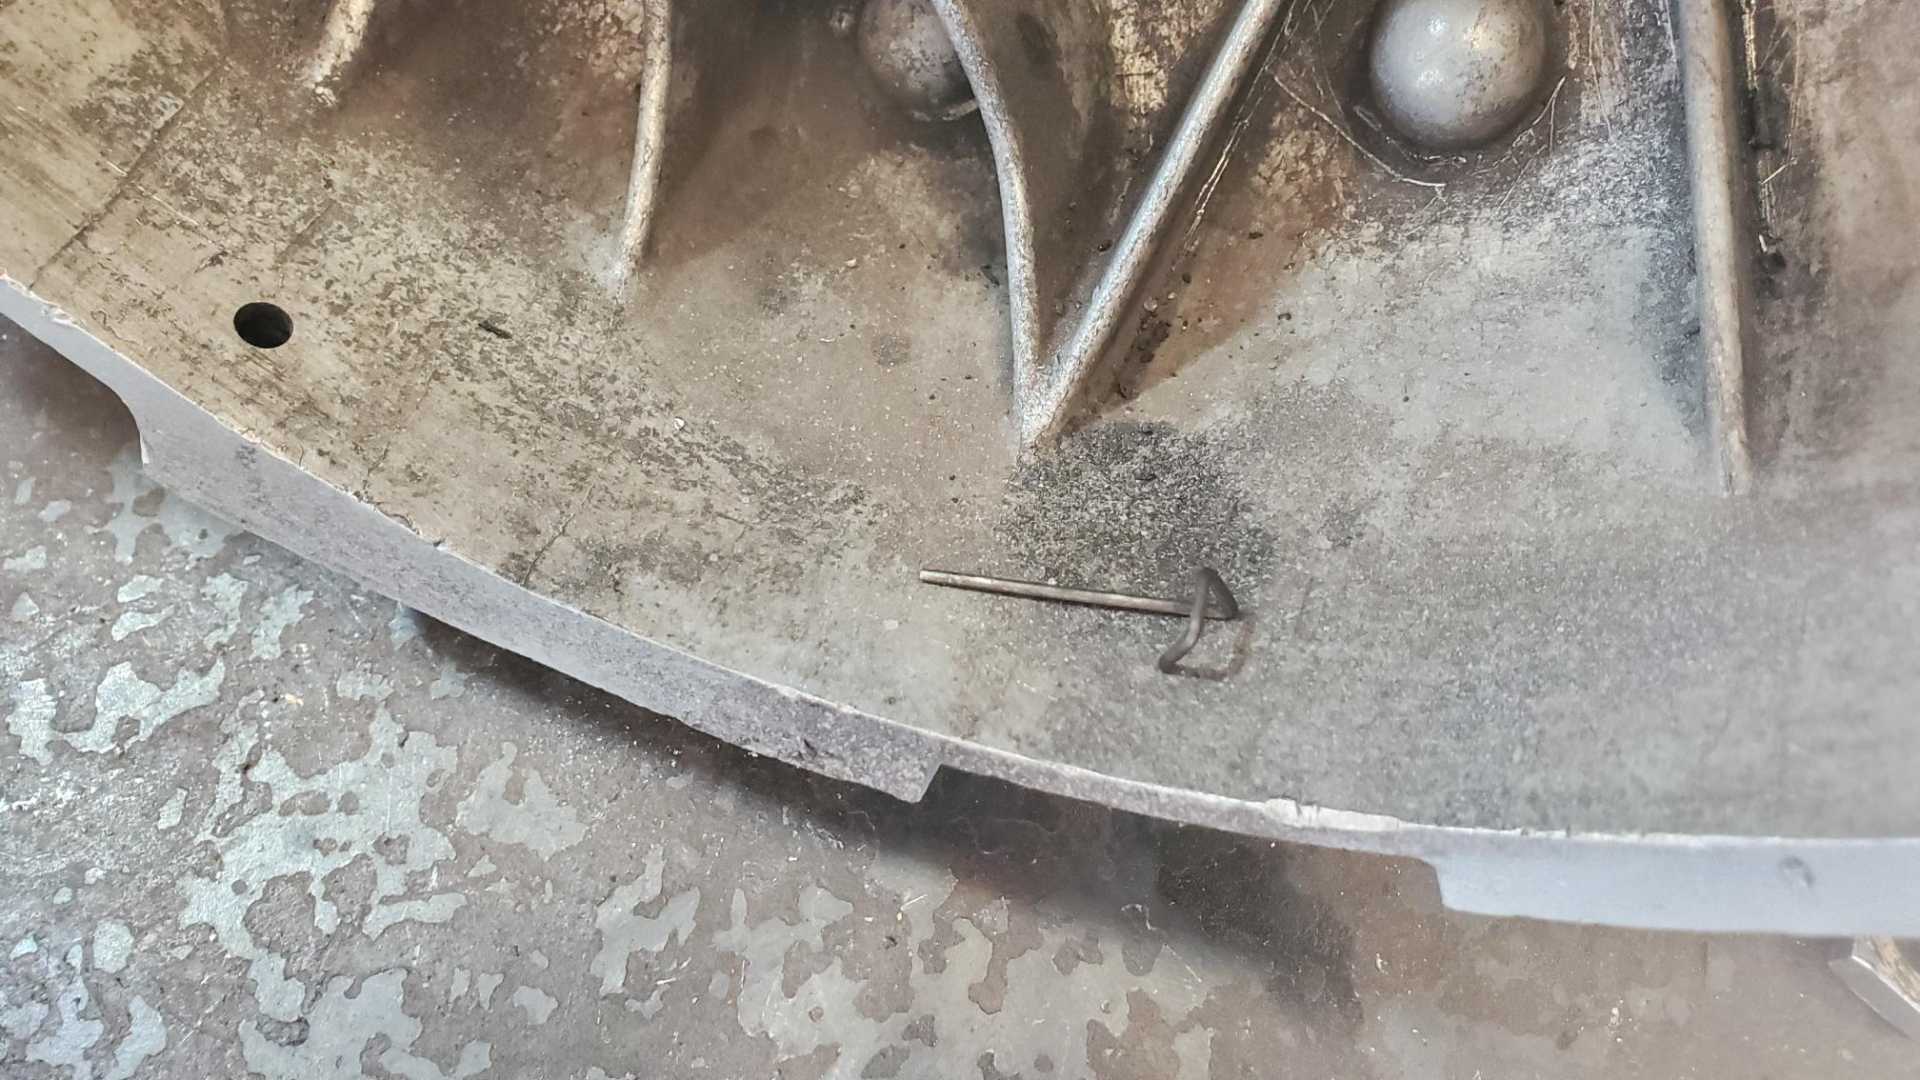
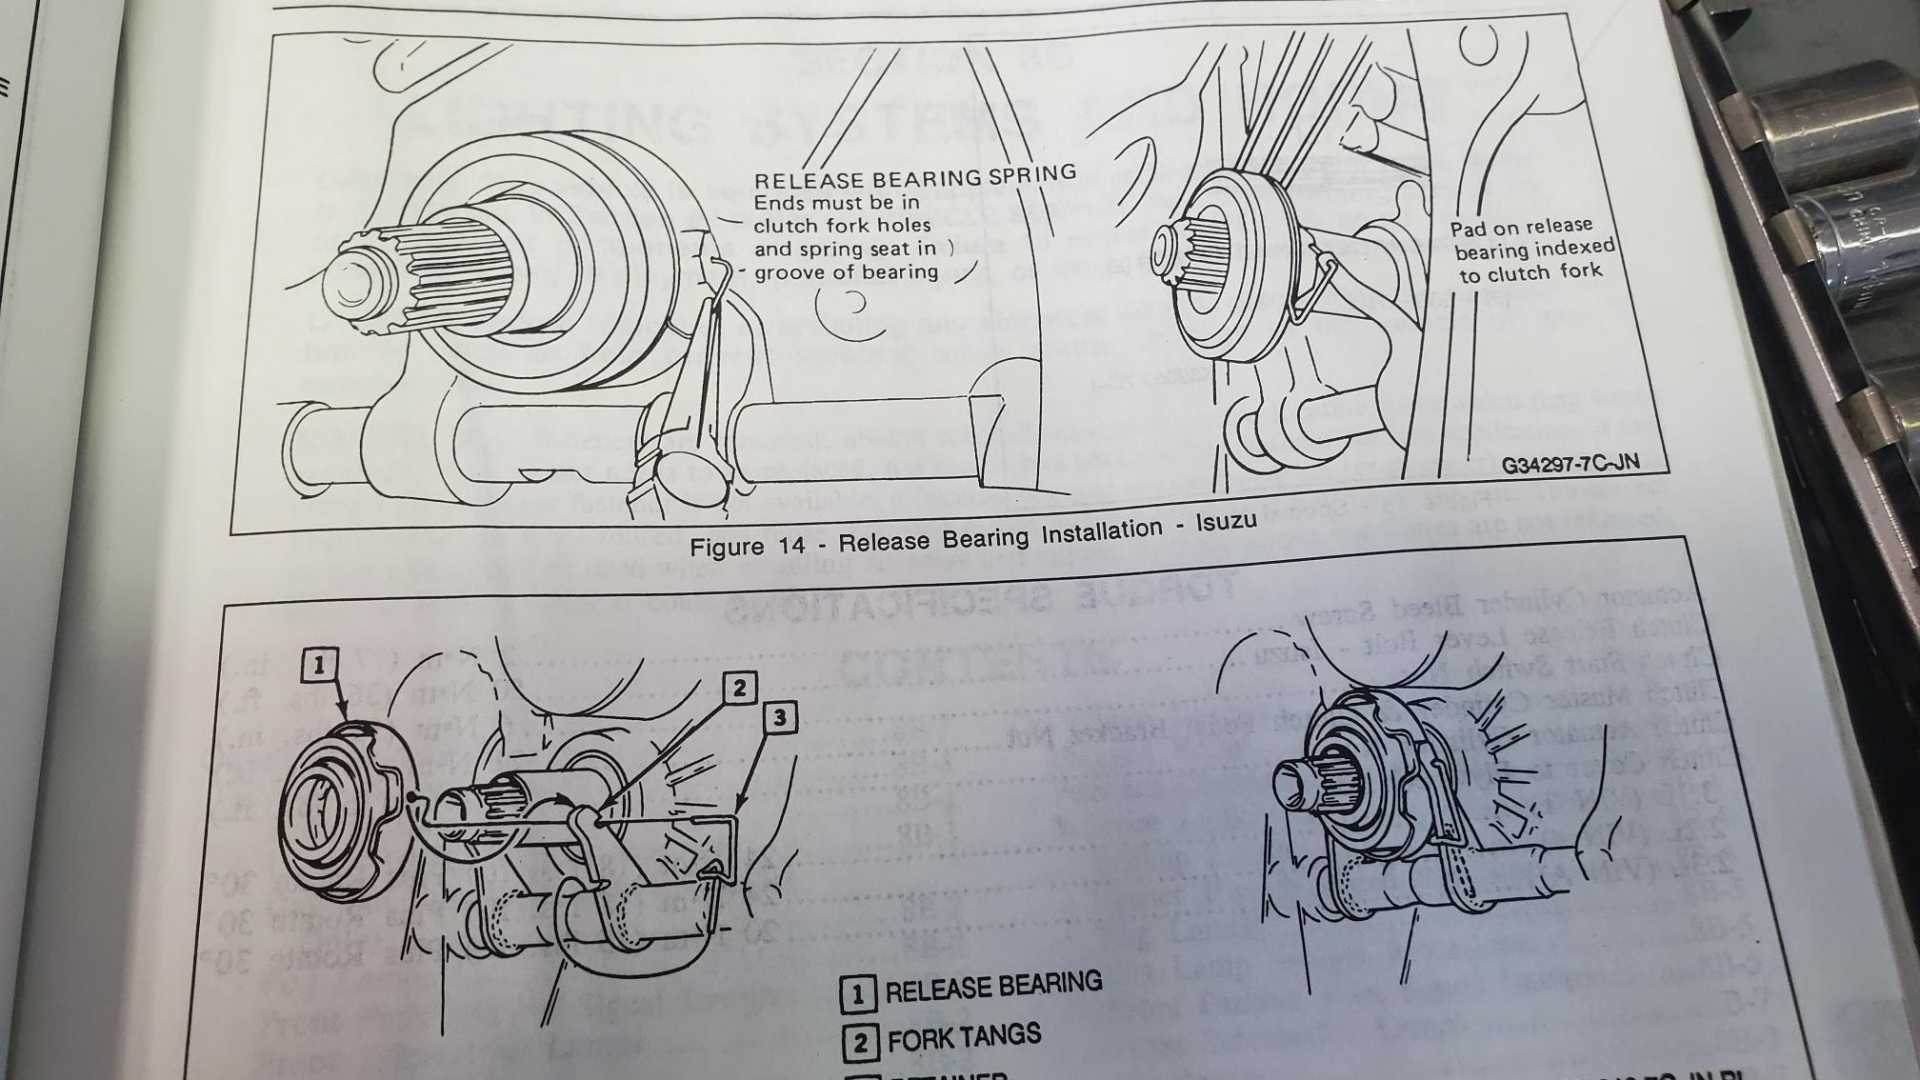
Next up was figuring out what to do about the retainer clip for the throw out bearing. Half of it was gone and the remaining half was lying at the bottom of the bell housing.
I was about to bolt the transmission to the engine without it, when I decided to check the factory service manual. Sure enough, there’s a good drawing of it.
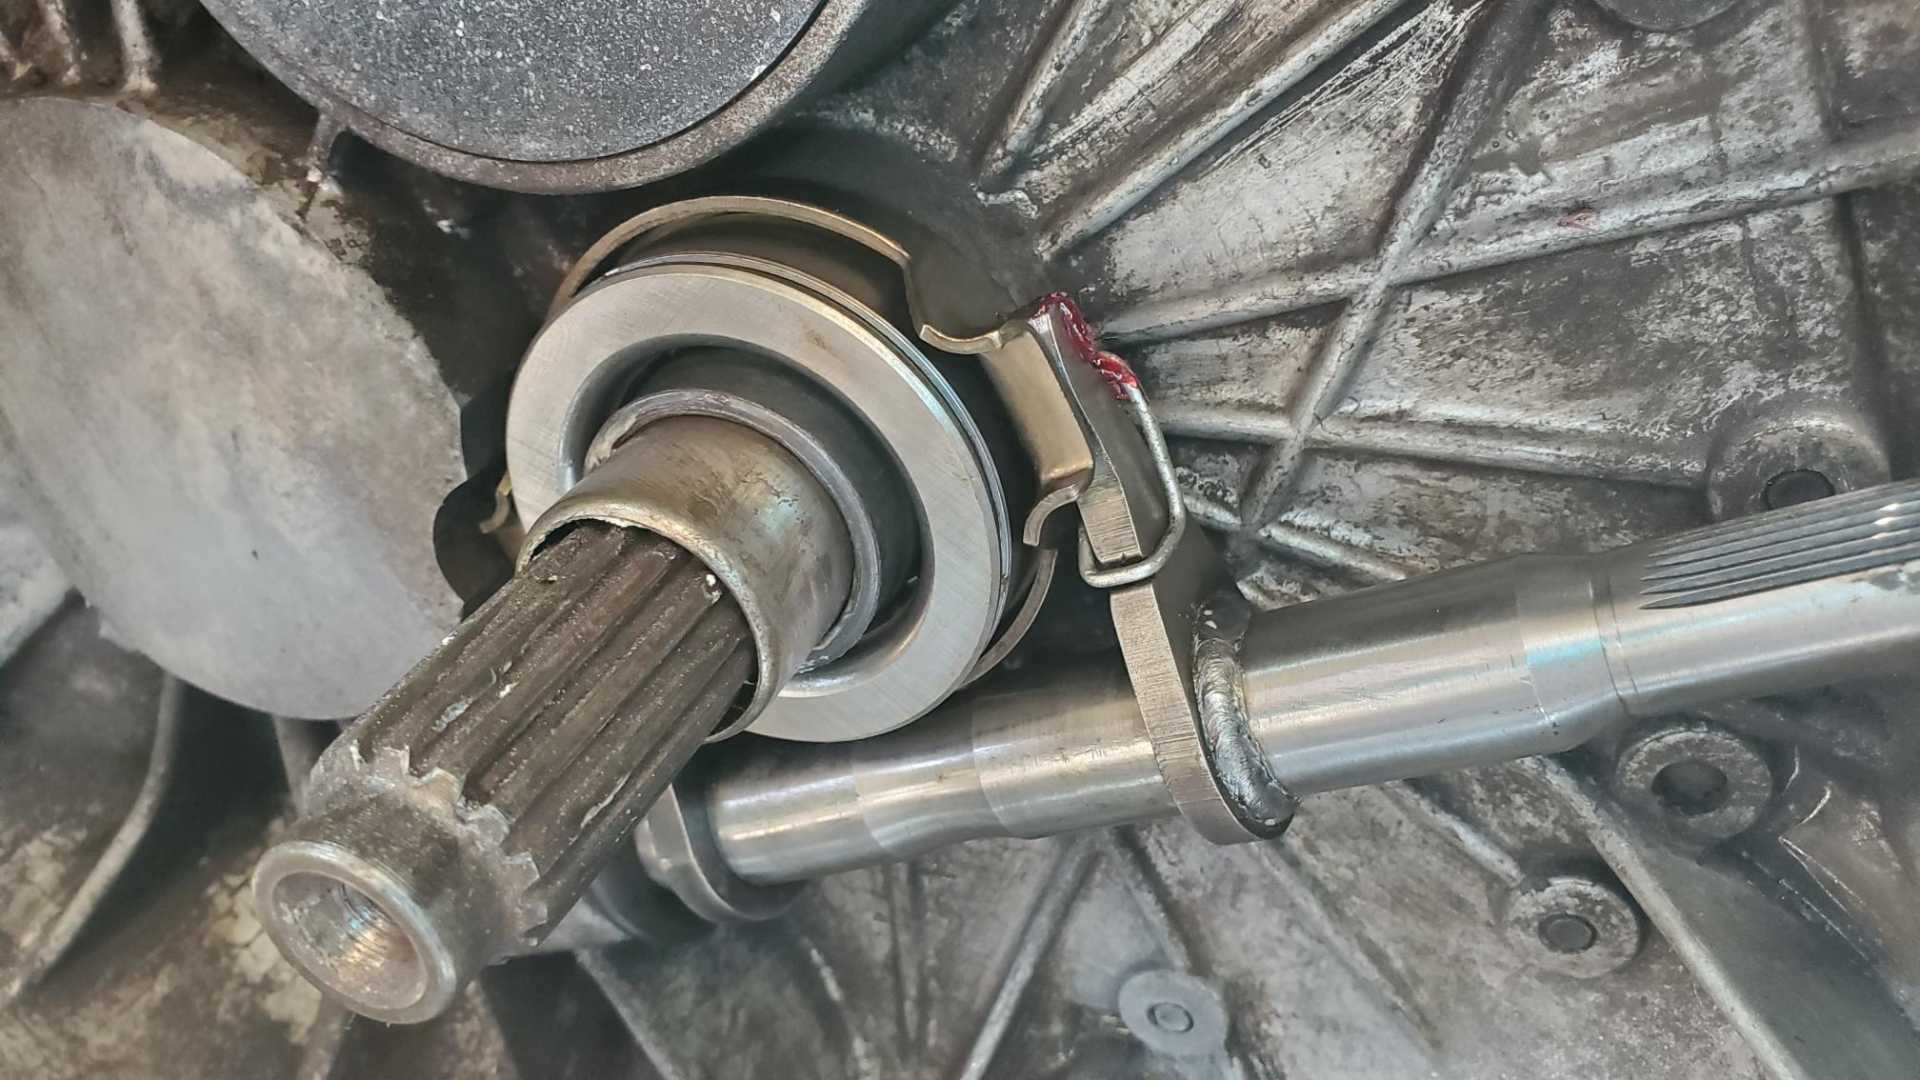
Took me half an hour to make a replacement.
[This message has been edited by Quadfather (edited 03-19-2022).]
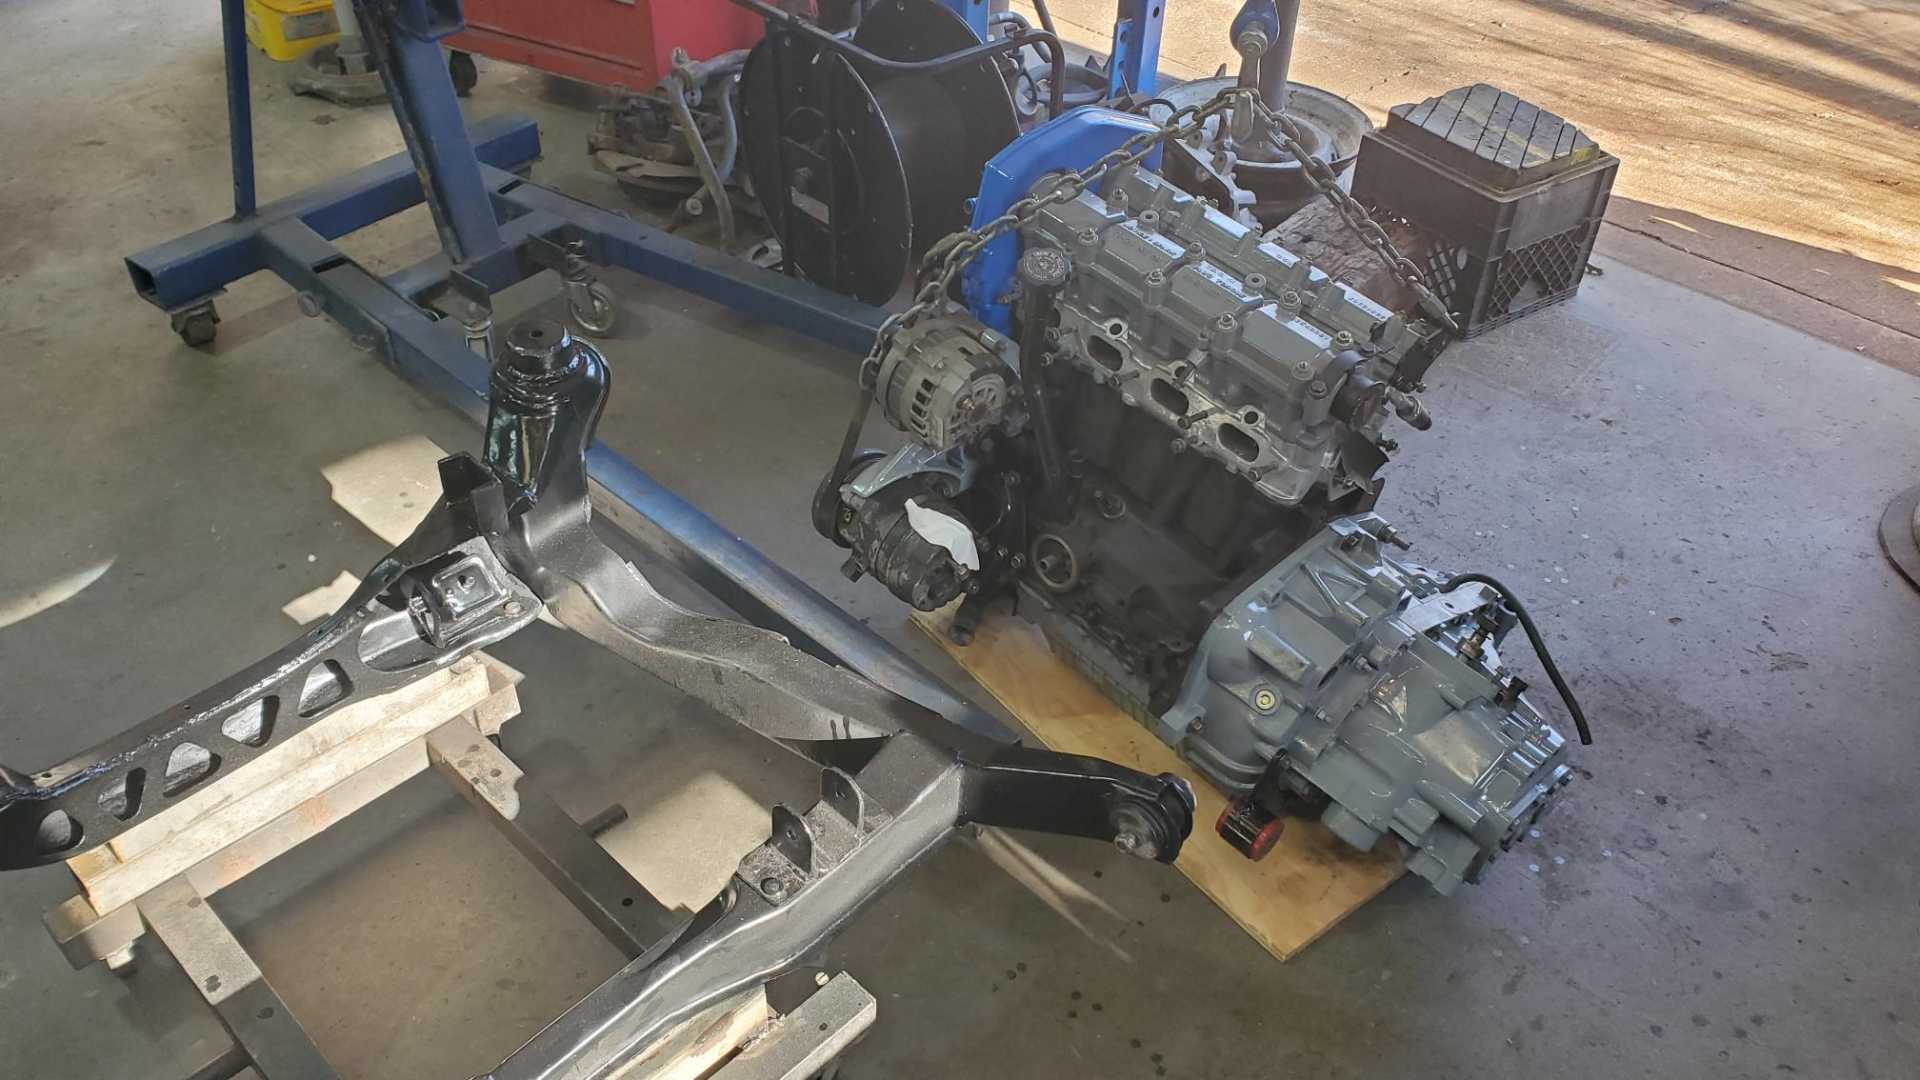
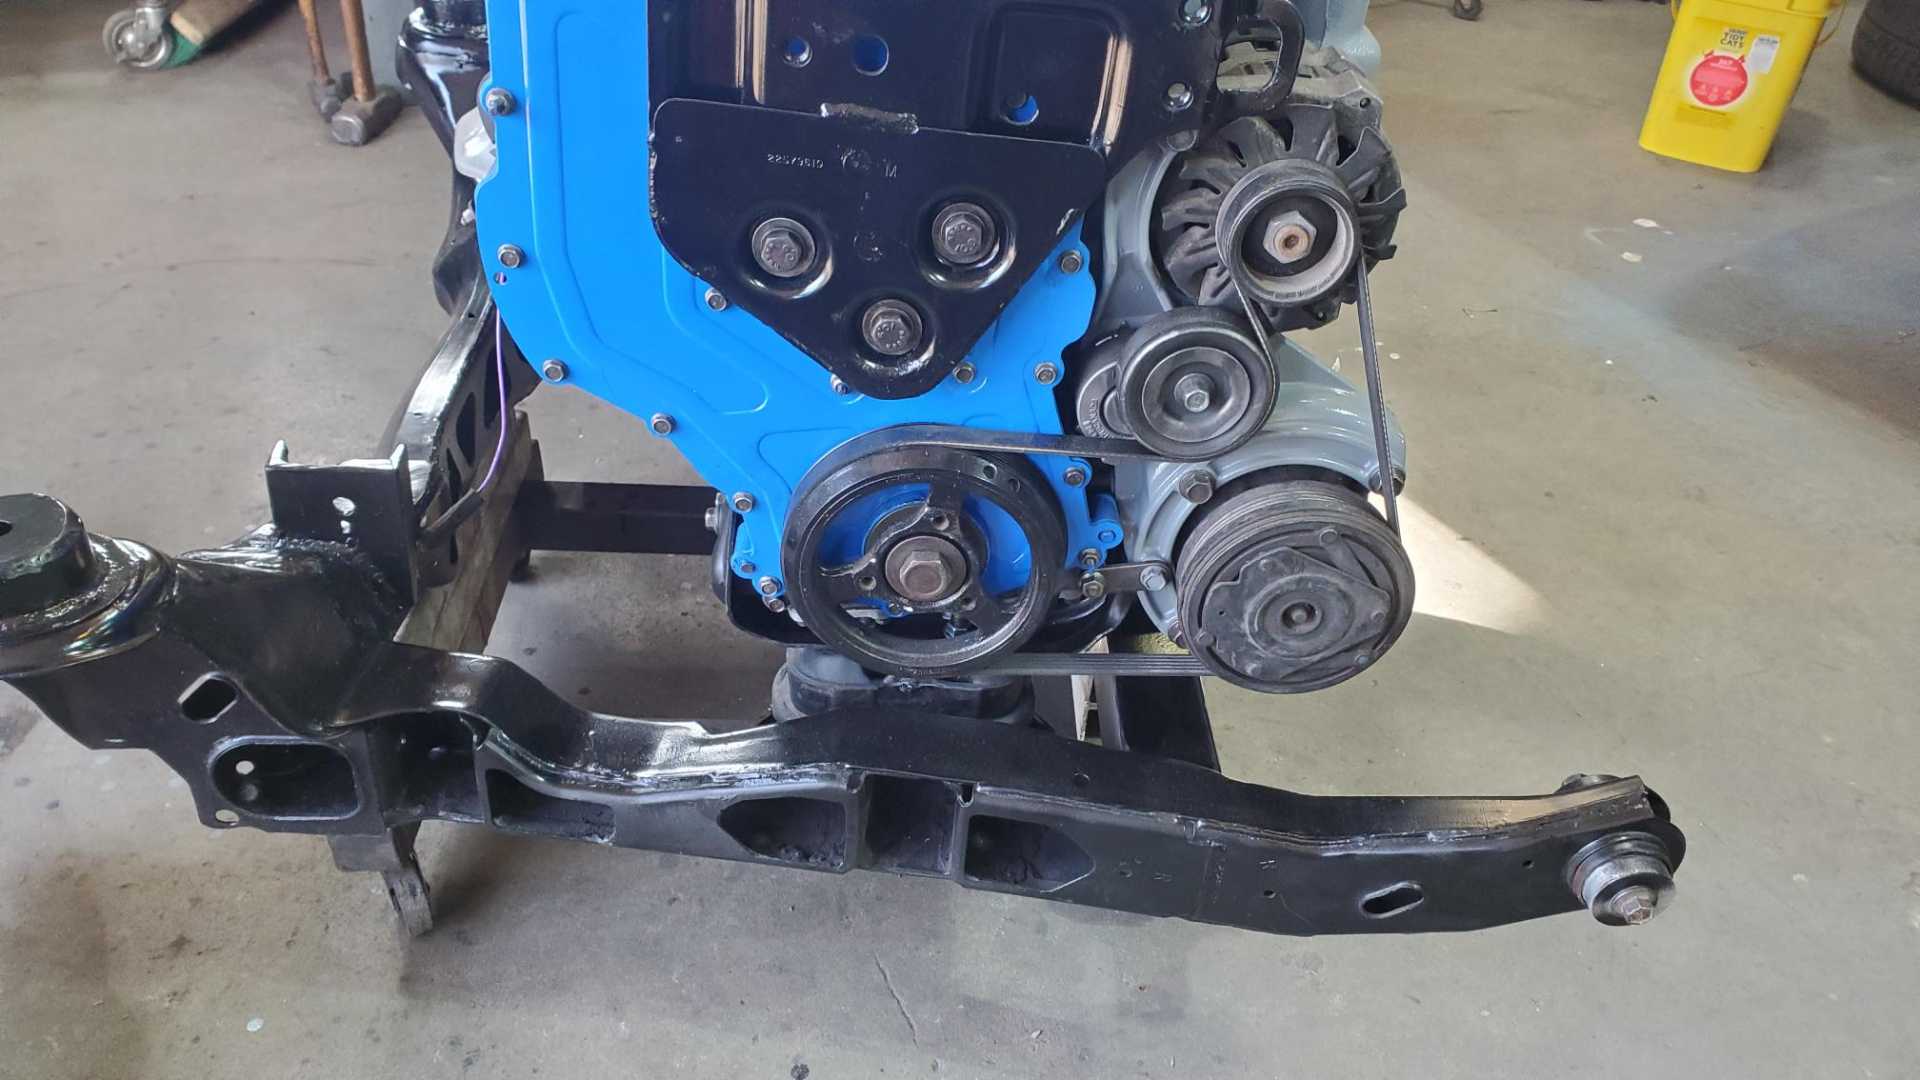
Got the engine and transmission mounted on the cradle today, AFTER working on the steering rack on my son’s Grand Prix. One of the mounting flanges broke, less than a year after we installed the replacement rack on the car.
Anyway, pictures tell the story.
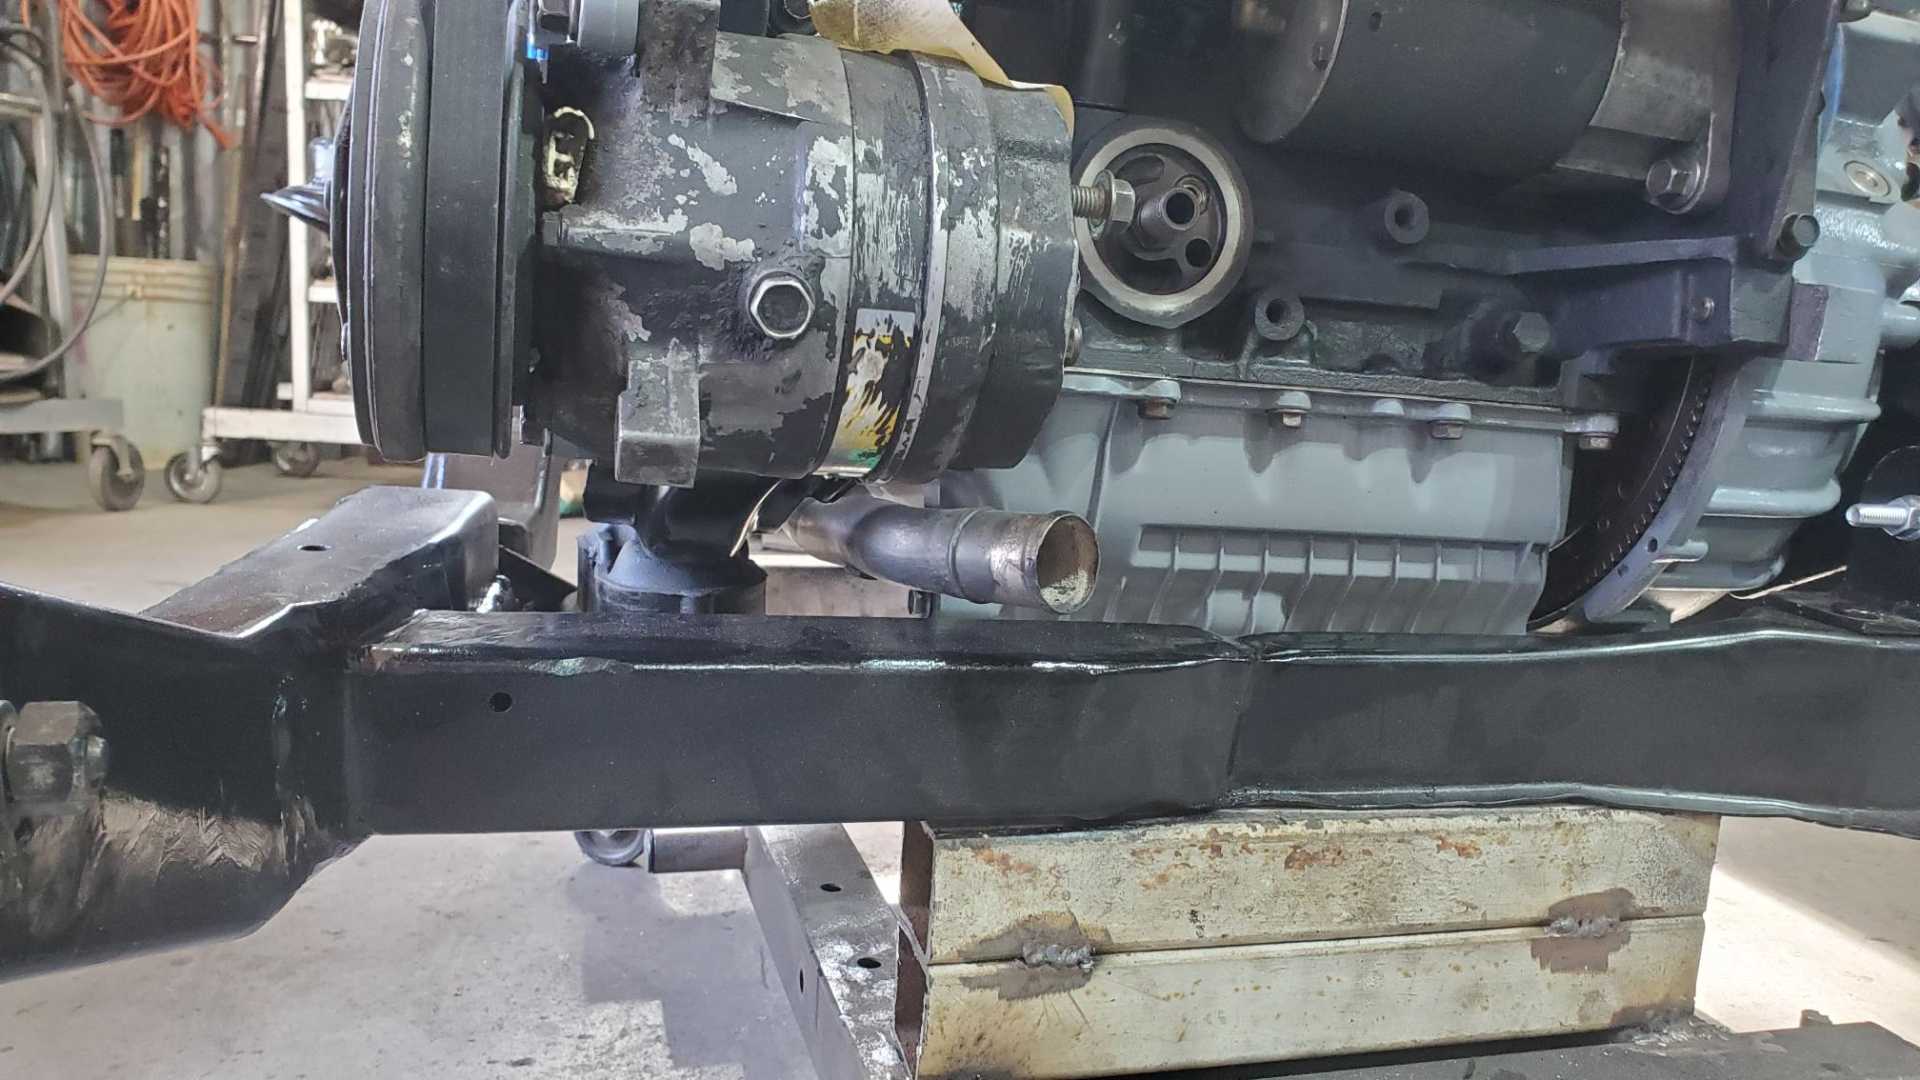
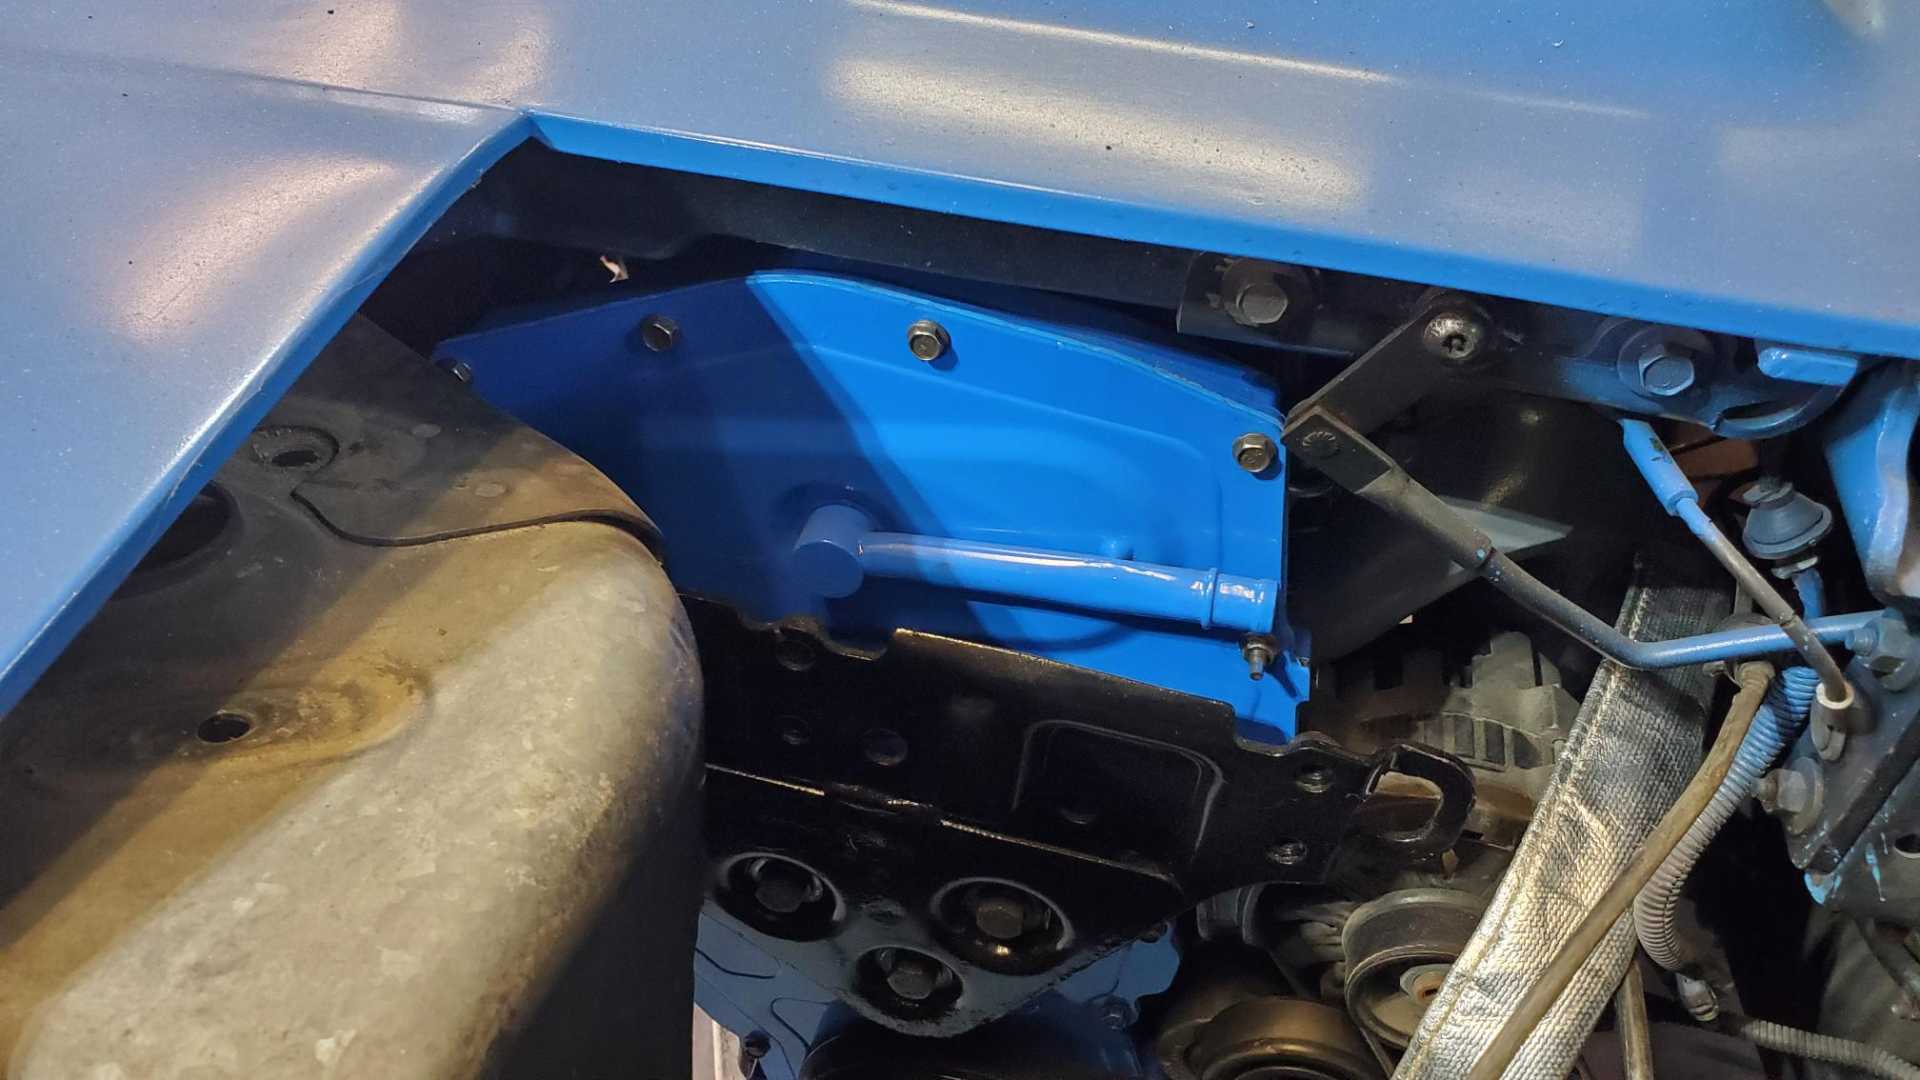
It’s possible to mount the Quad on the cradle so that it has enough clearance from the cradle itself as well as fitting under the deck lid WITHOUT modification.
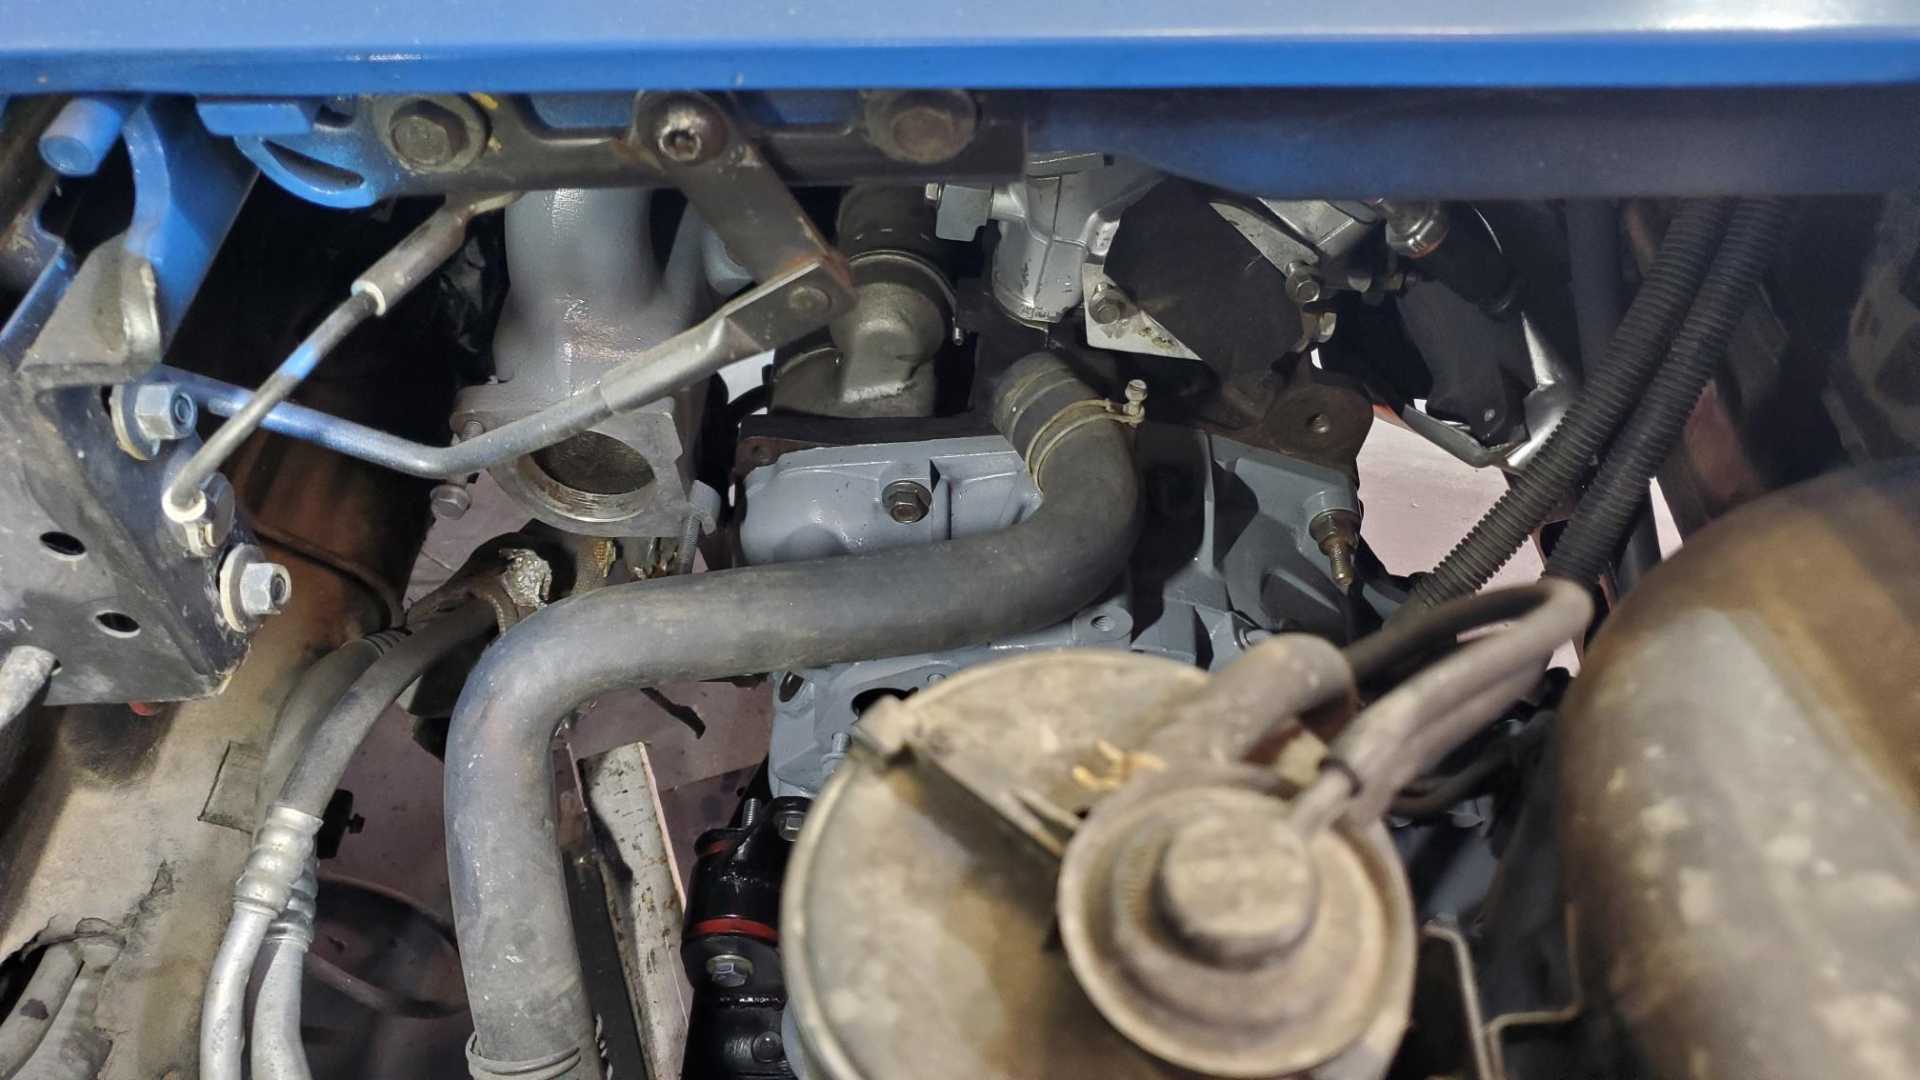
This is why cutting out the forward exhaust hump and replacing it with a straight piece of tubing is important. Makes clearance for the AC compressor and the coolant tube off the water pump.
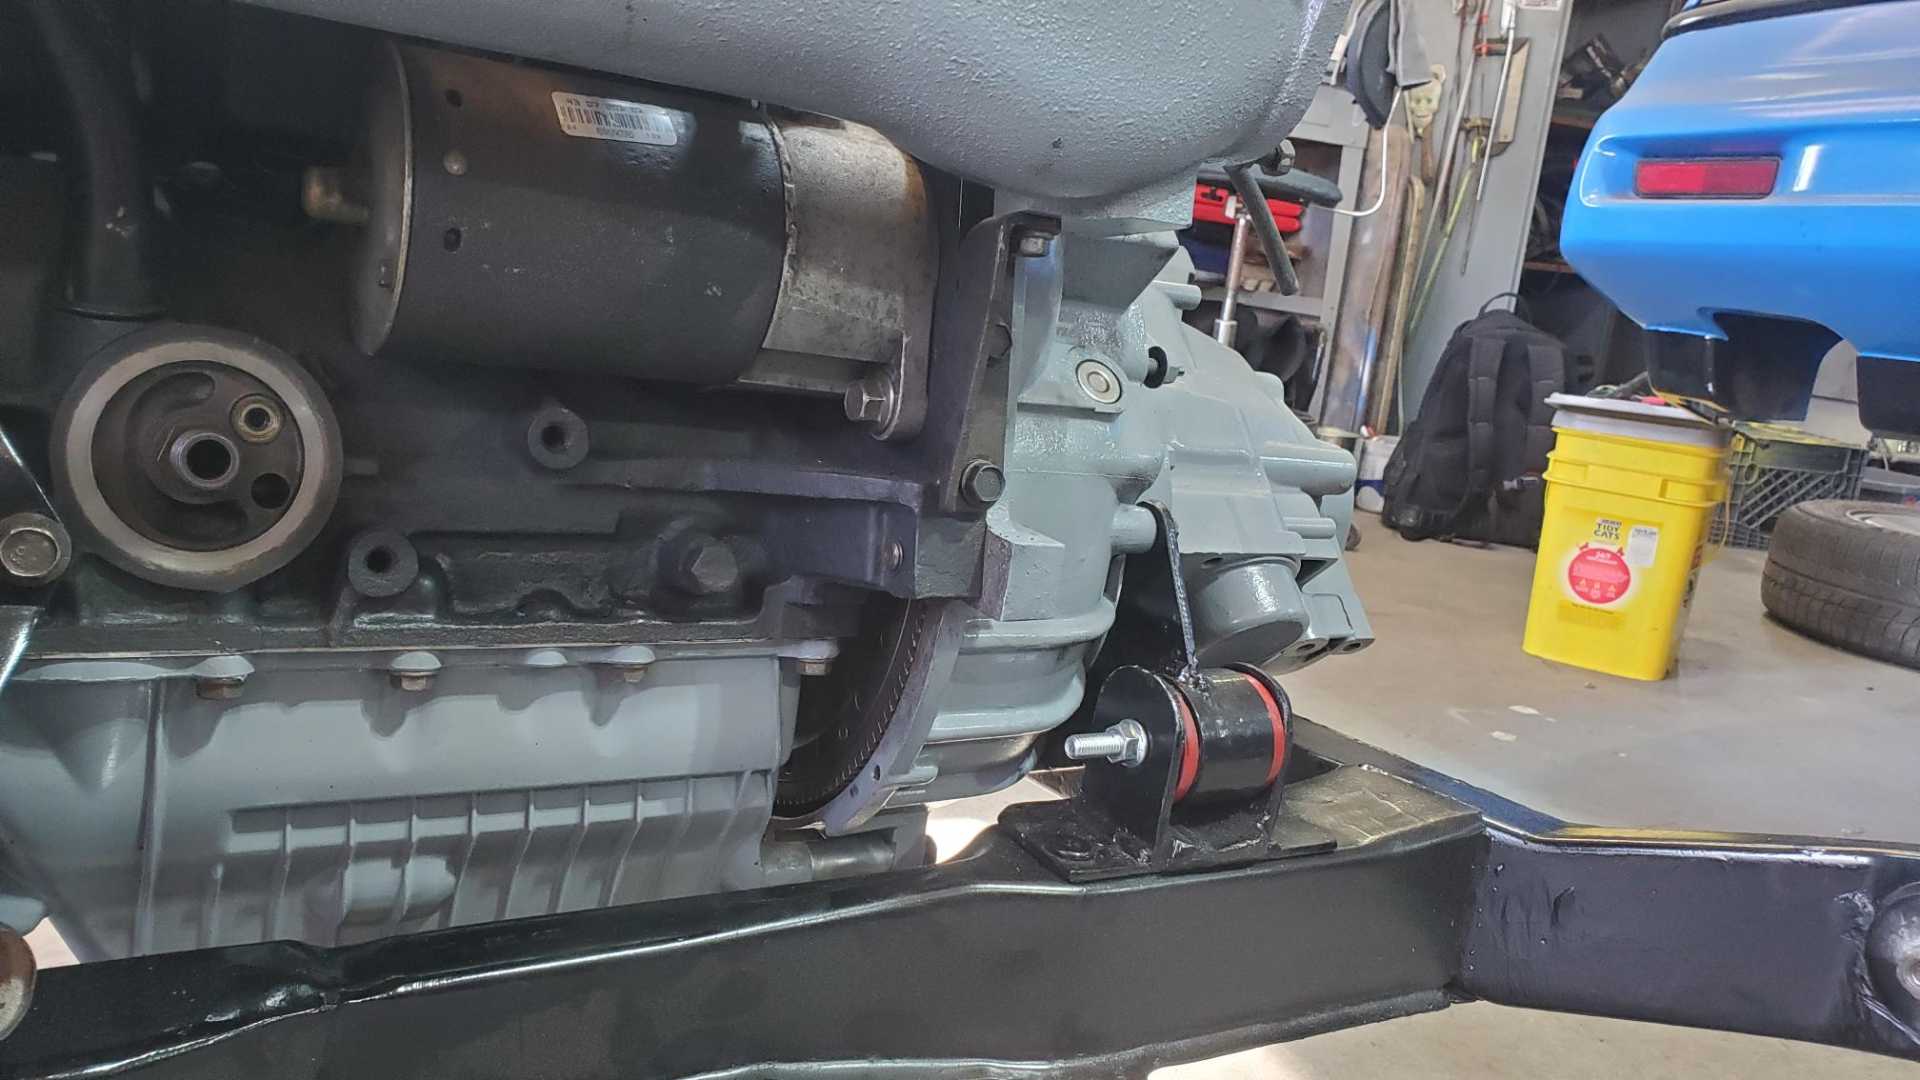
My homemade mounts seem to work well.
[This message has been edited by Quadfather (edited 03-27-2022).]
Still a lot of work to do. I never cleaned the throttle body after removing if from the GTZ 10 years ago. I also need to buy all new hoses, including vacuum and the preformed ones for the oil separator.
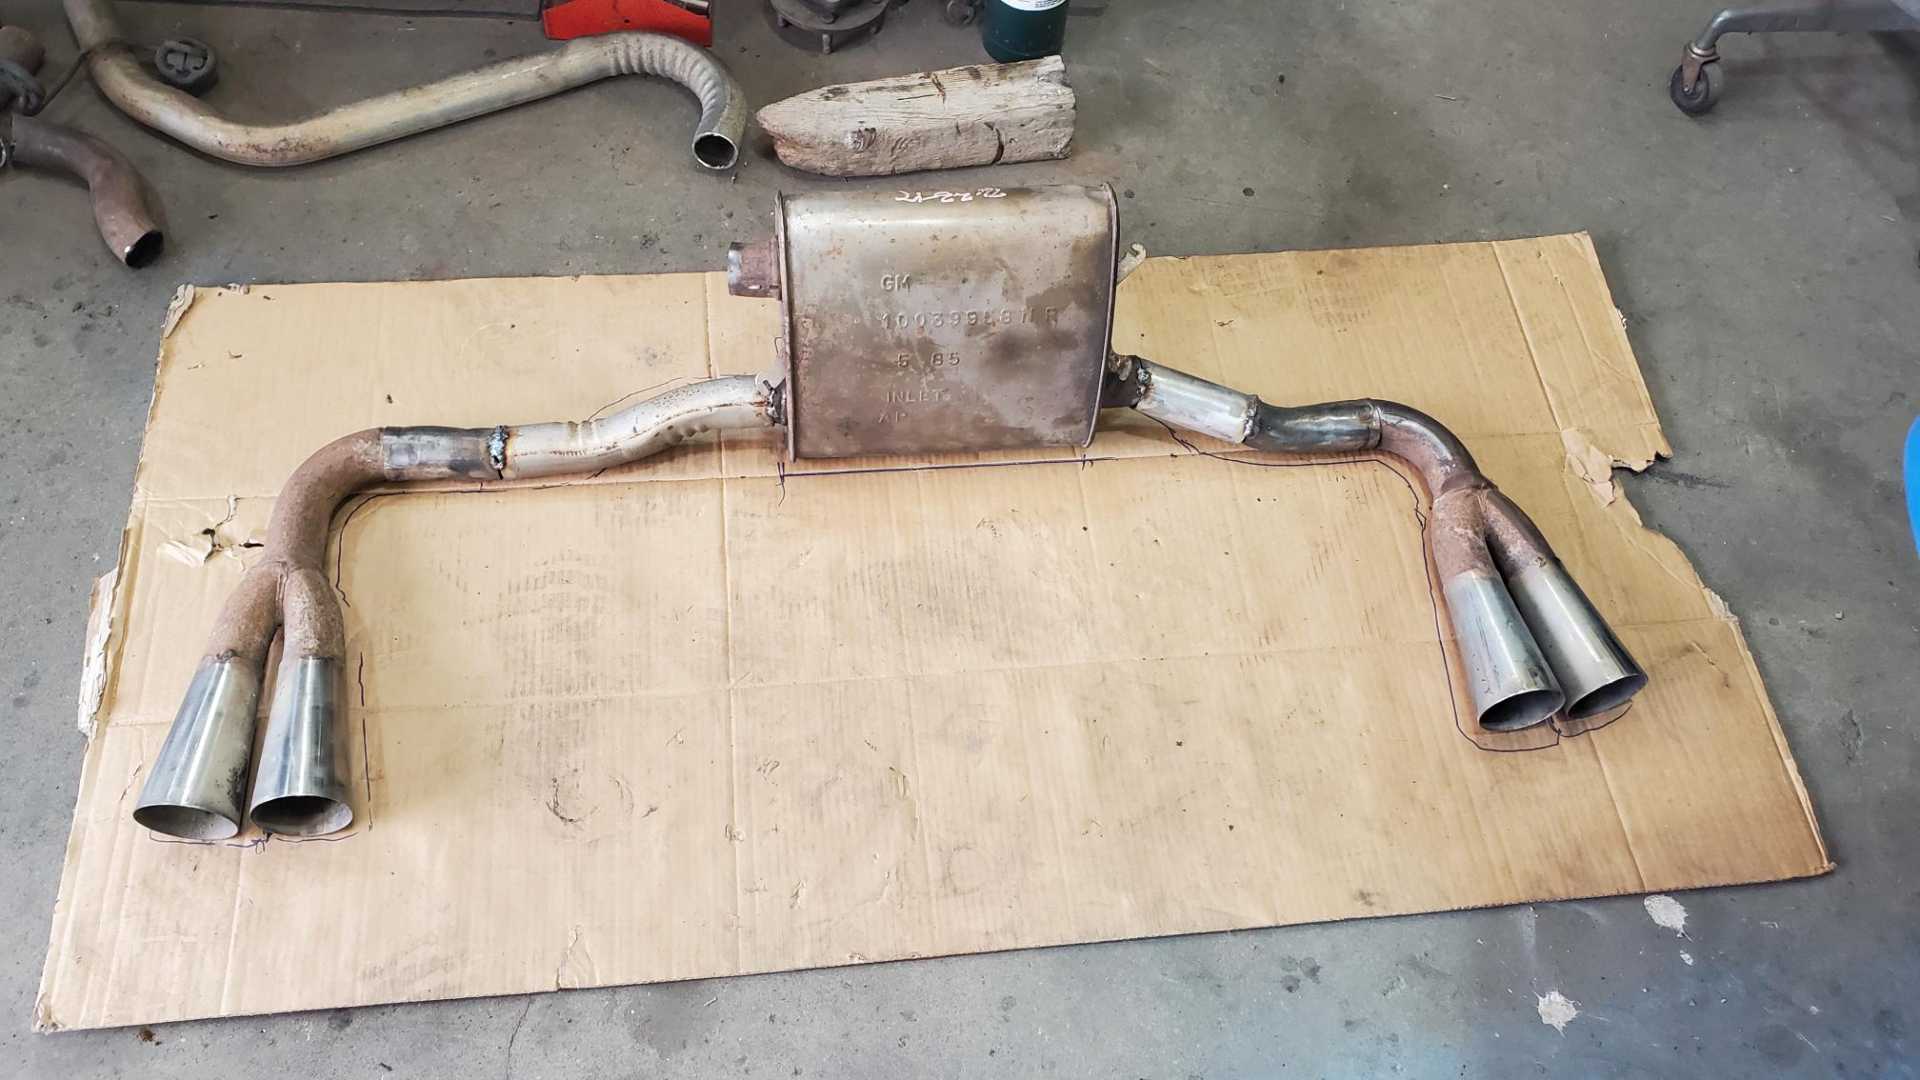
Also have to figure out the fuel lines, since the Quad’s are on the back of the engine. Years ago I bought a muffler from a V6 Fiero in the salvage, so I’ll have to fabricate the pipe to mate it to the Quad’s down pipe.
Of course, after getting all these items squared away, I won’t be able to avoid having to dig into the wiring harness.
[This message has been edited by Quadfather (edited 03-27-2022).]
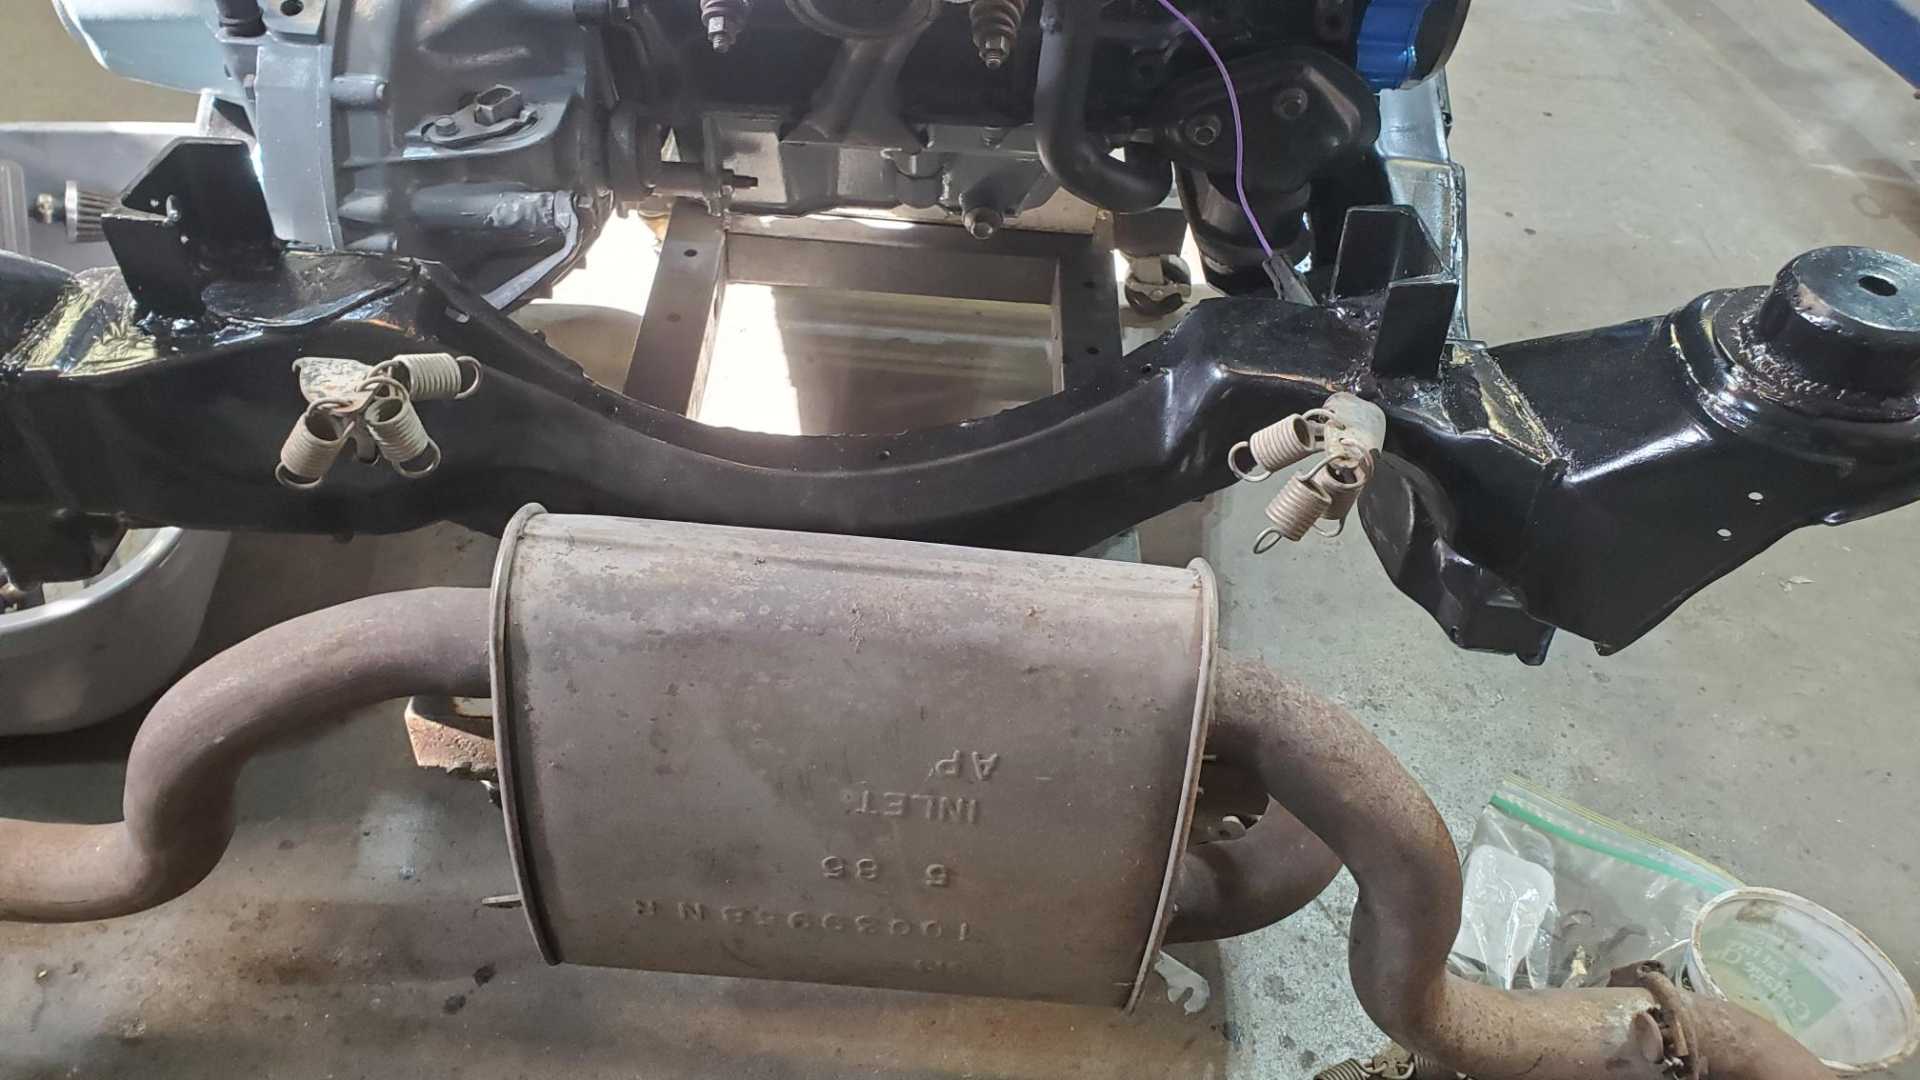
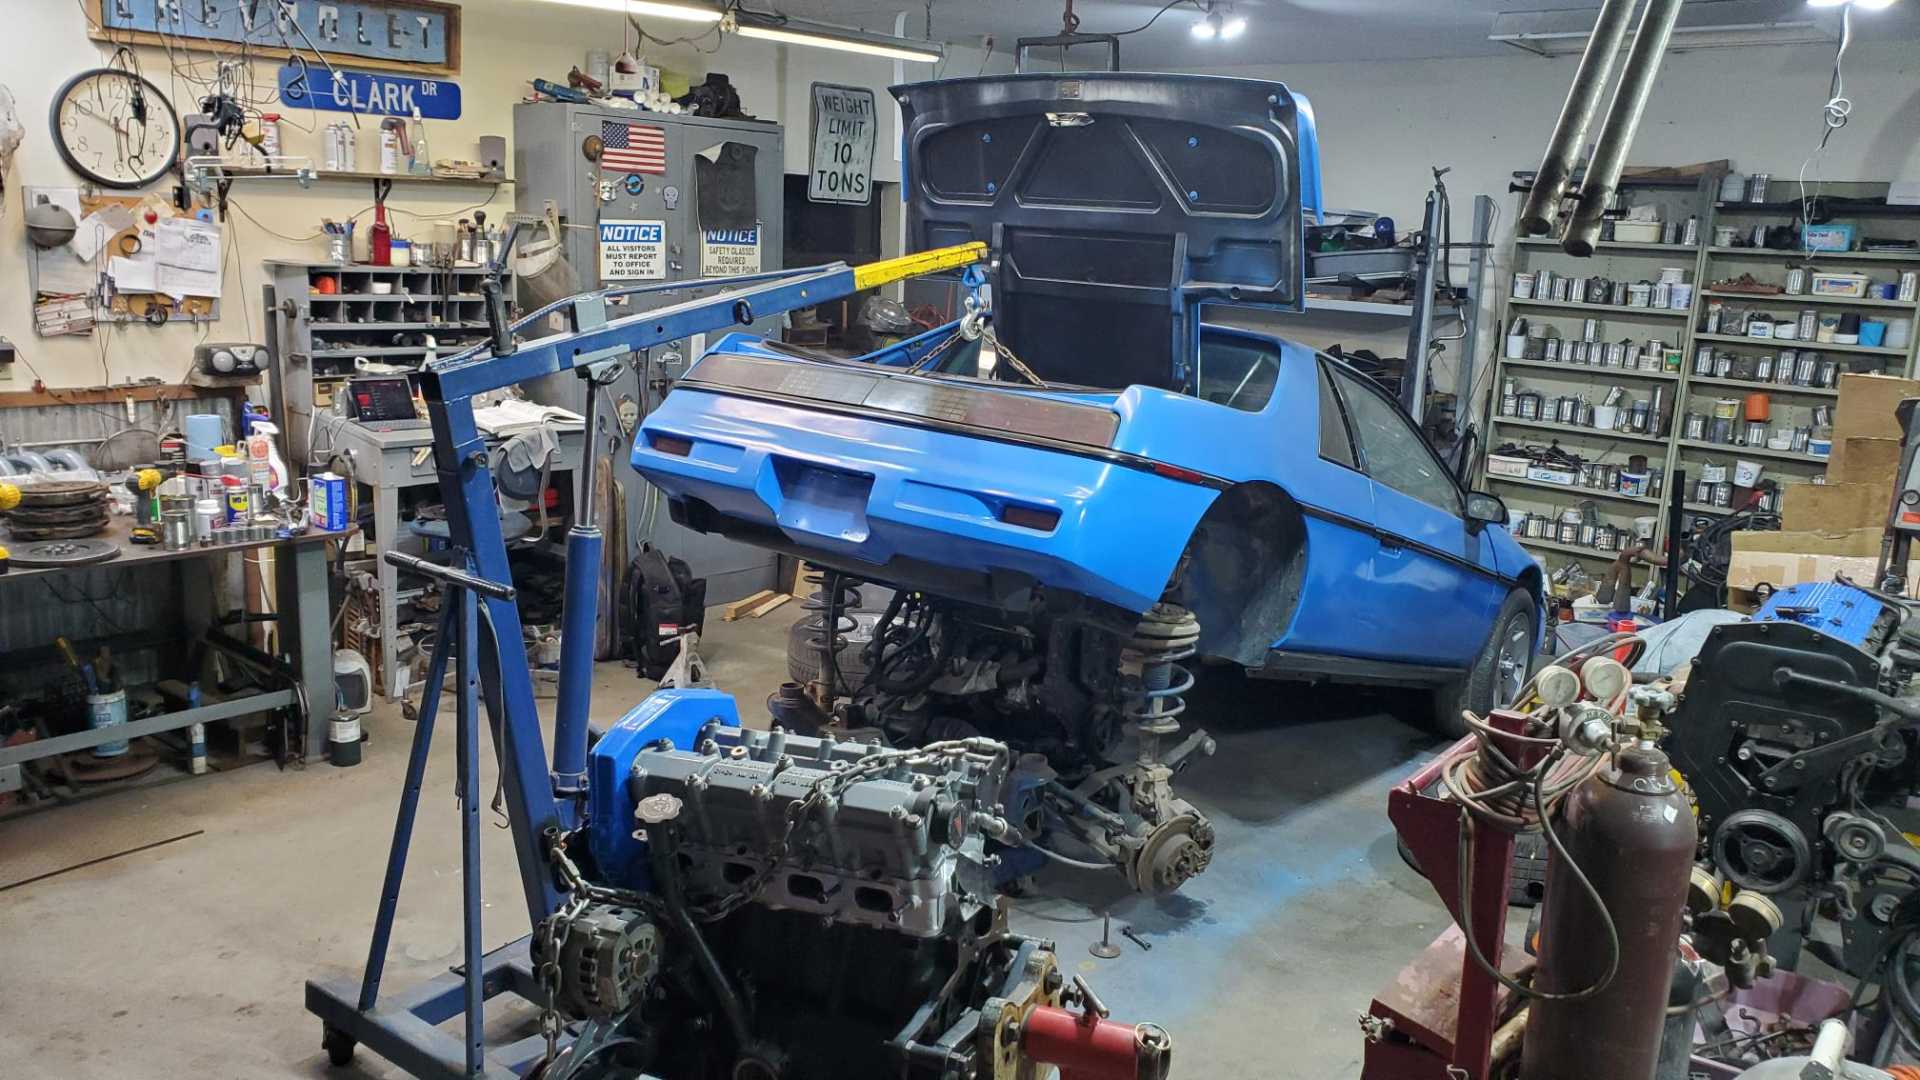
More progress on the exhaust system. It took some wrestling but we got the V6 muffler and exhaust pipes to hang on the springs on the engine cradle. I bought some universal hangers from NAPA, but then decided I needed to put the engine and cradle in the car in order to properly fit the exhaust system.
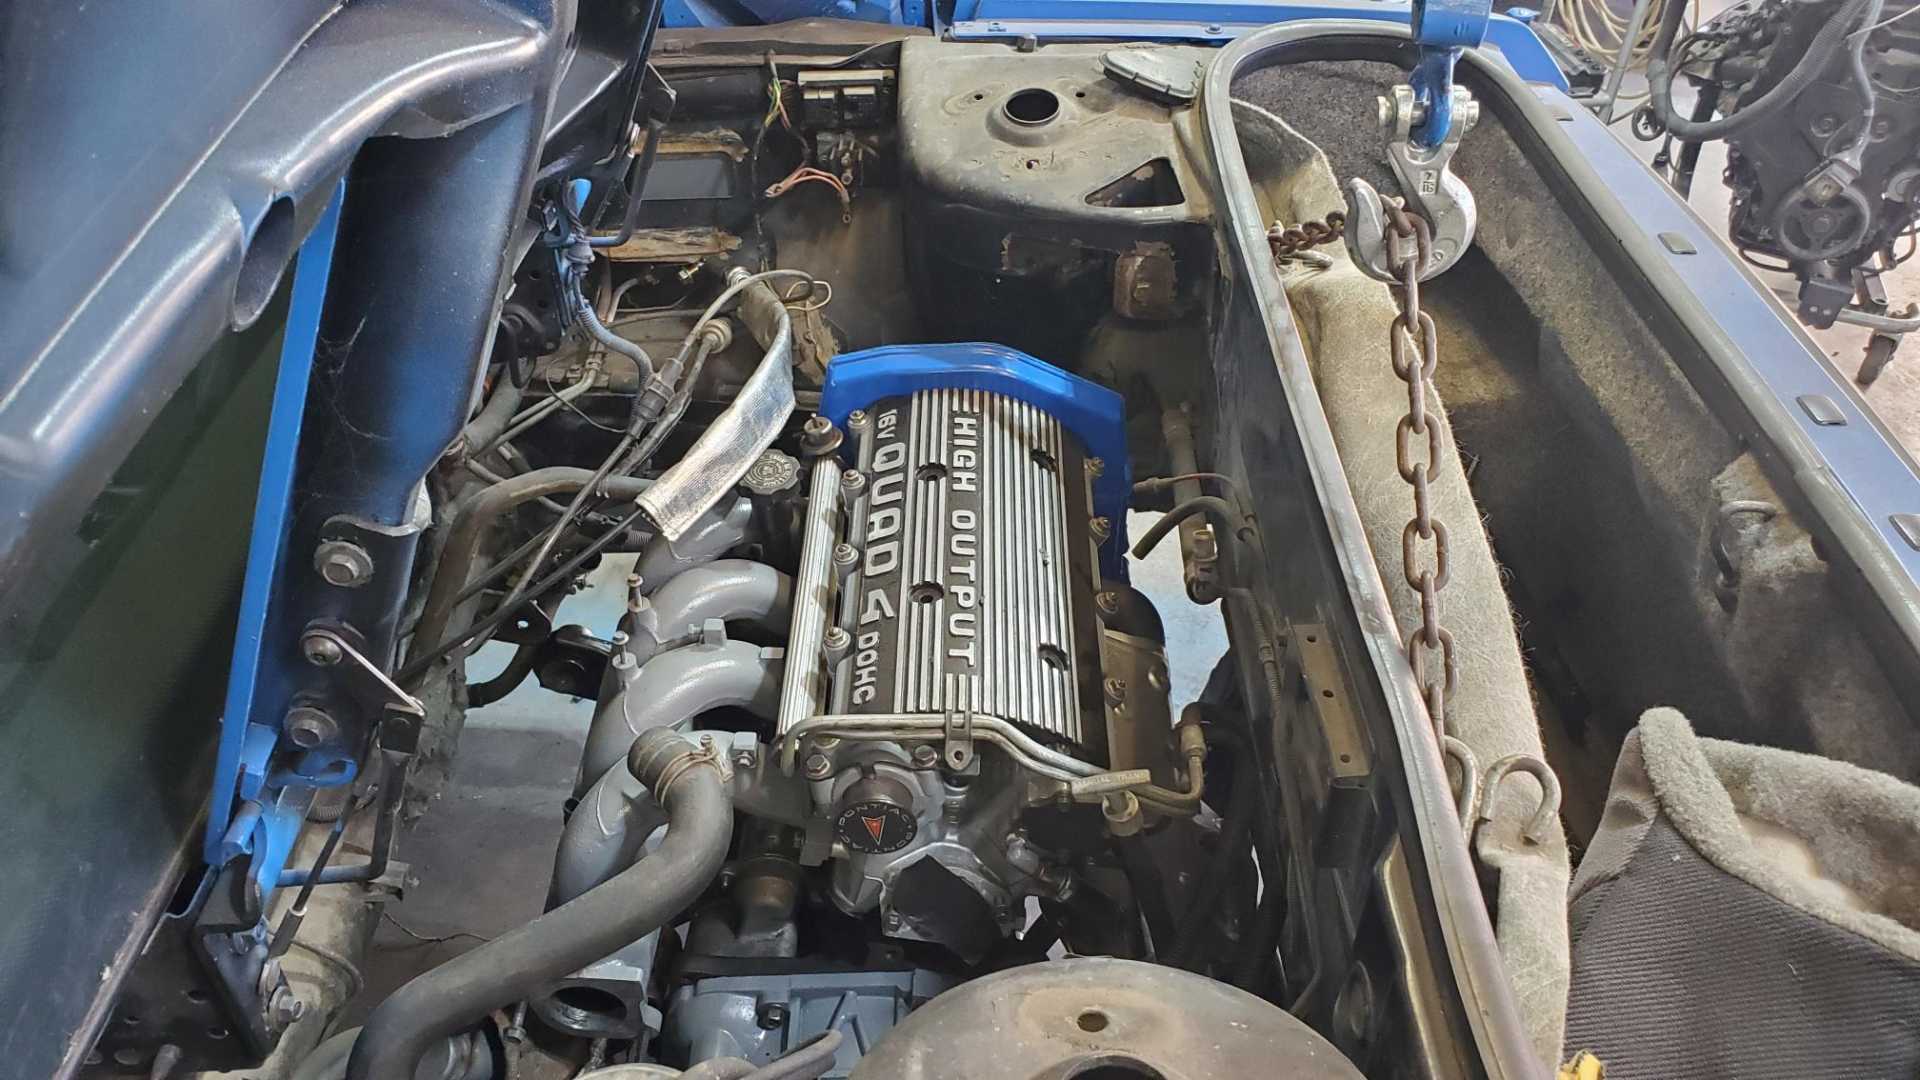
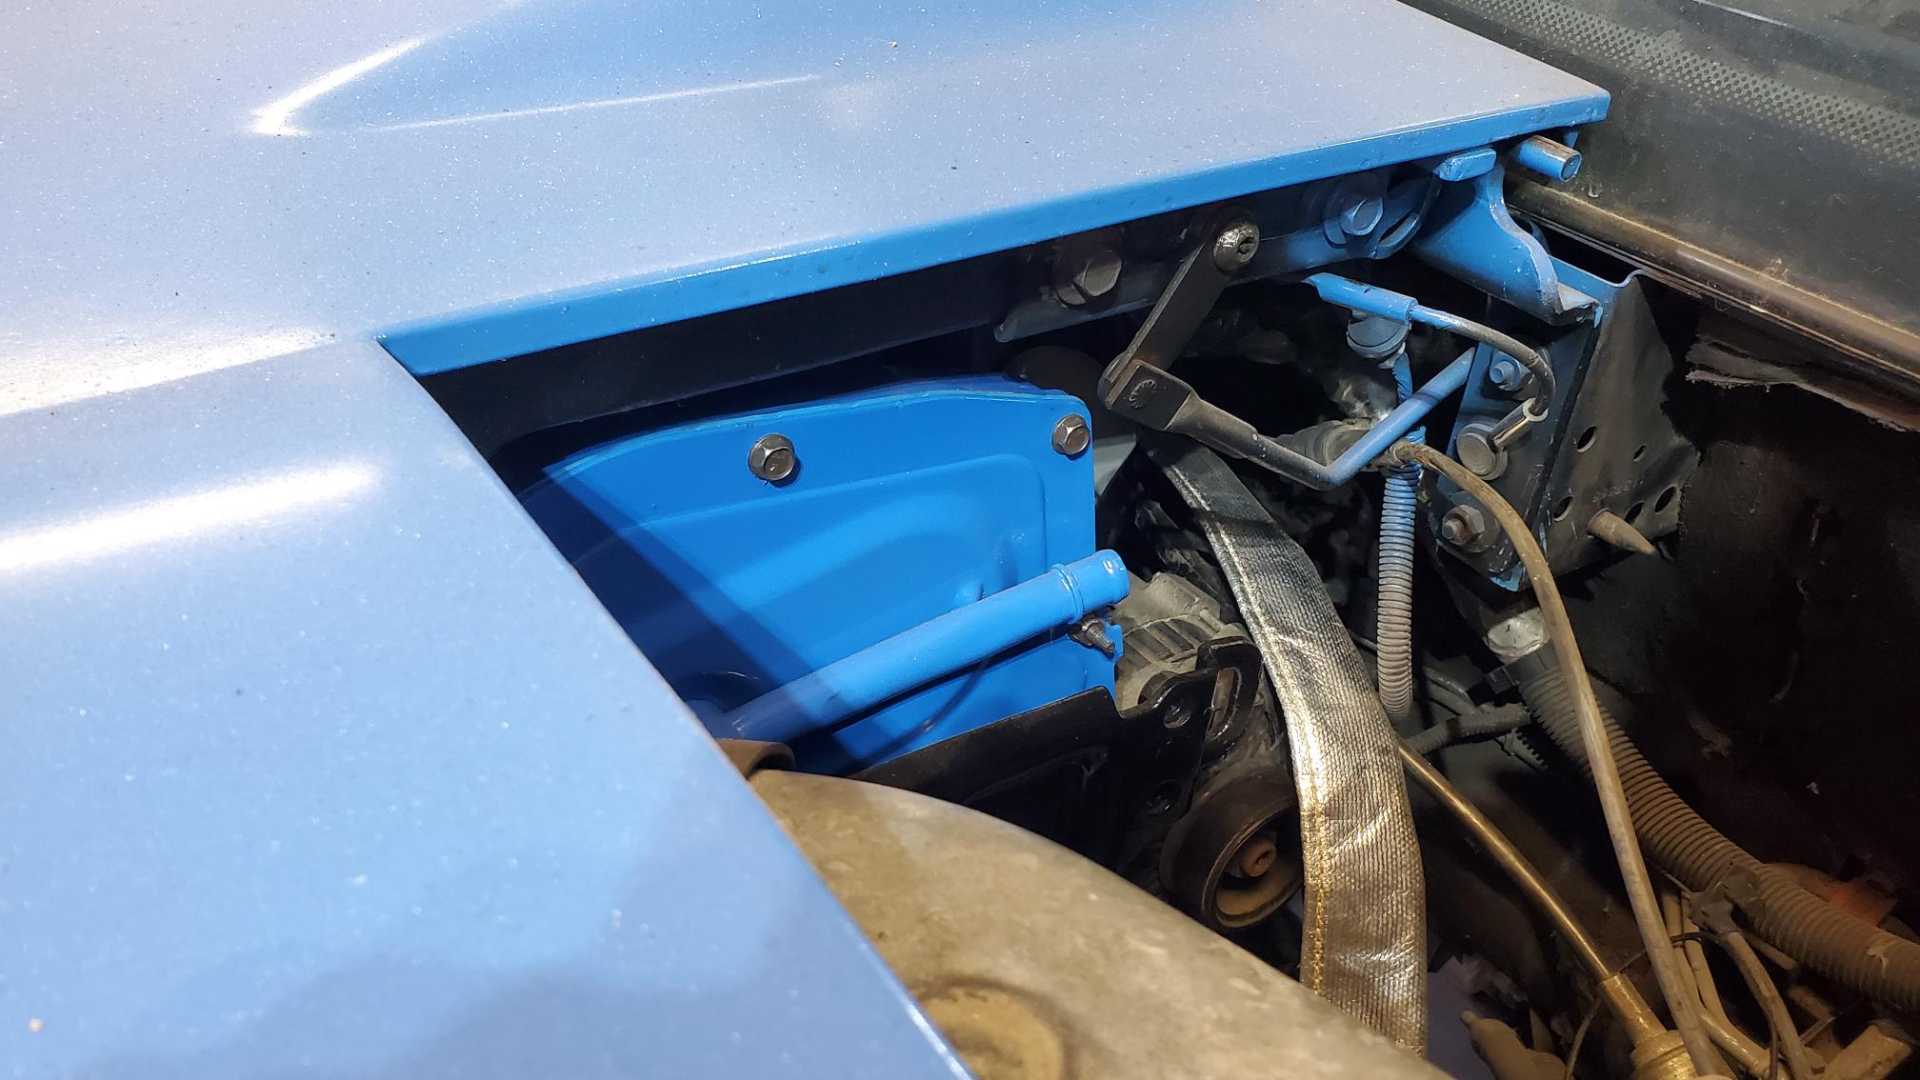
That caused me to pause for a few minutes to admire how well the Quad fits in its new home.
Hard to tell from this shot but it confirms the stock radiator hose will fit on the Quad’s thermostat housing.
[This message has been edited by Quadfather (edited 04-10-2022).]
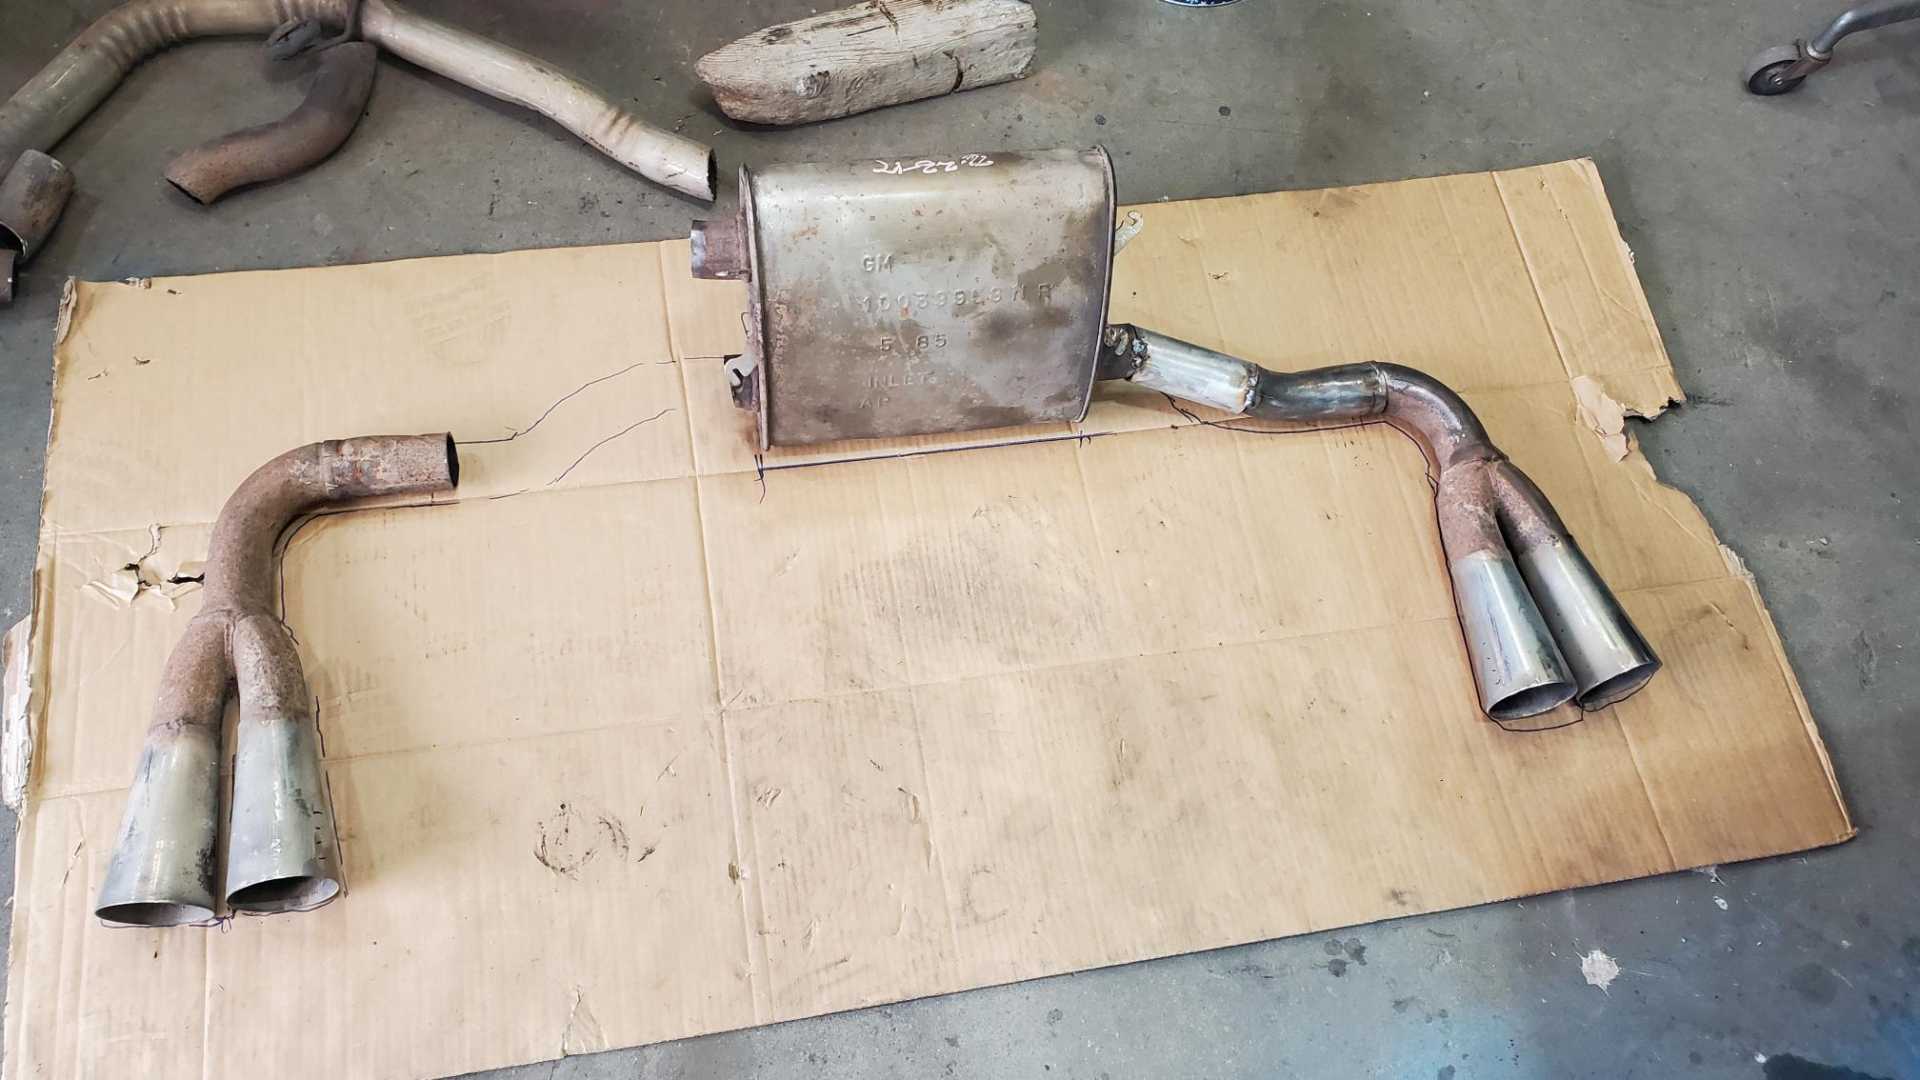
Then, back to the exhaust. Working on the exhaust system is, well, exhausting. After rolling around on the ground underneath the car it became apparent that the only way this V6 setup will work is by flipping the muffler 180 degrees.
I set the contraption on a piece of cardboard, traced it and checked the angle of the muffler, then started cutting.
I had a length of exhaust pipe whose origins I don’t remember and it was the perfect diameter and even had the precise bend I needed. The MIG welder forgives a lot of sins at a time like this.
It’s only temporary if it doesn’t work, according to Watch Wes Work on YouTube.


 ]
]