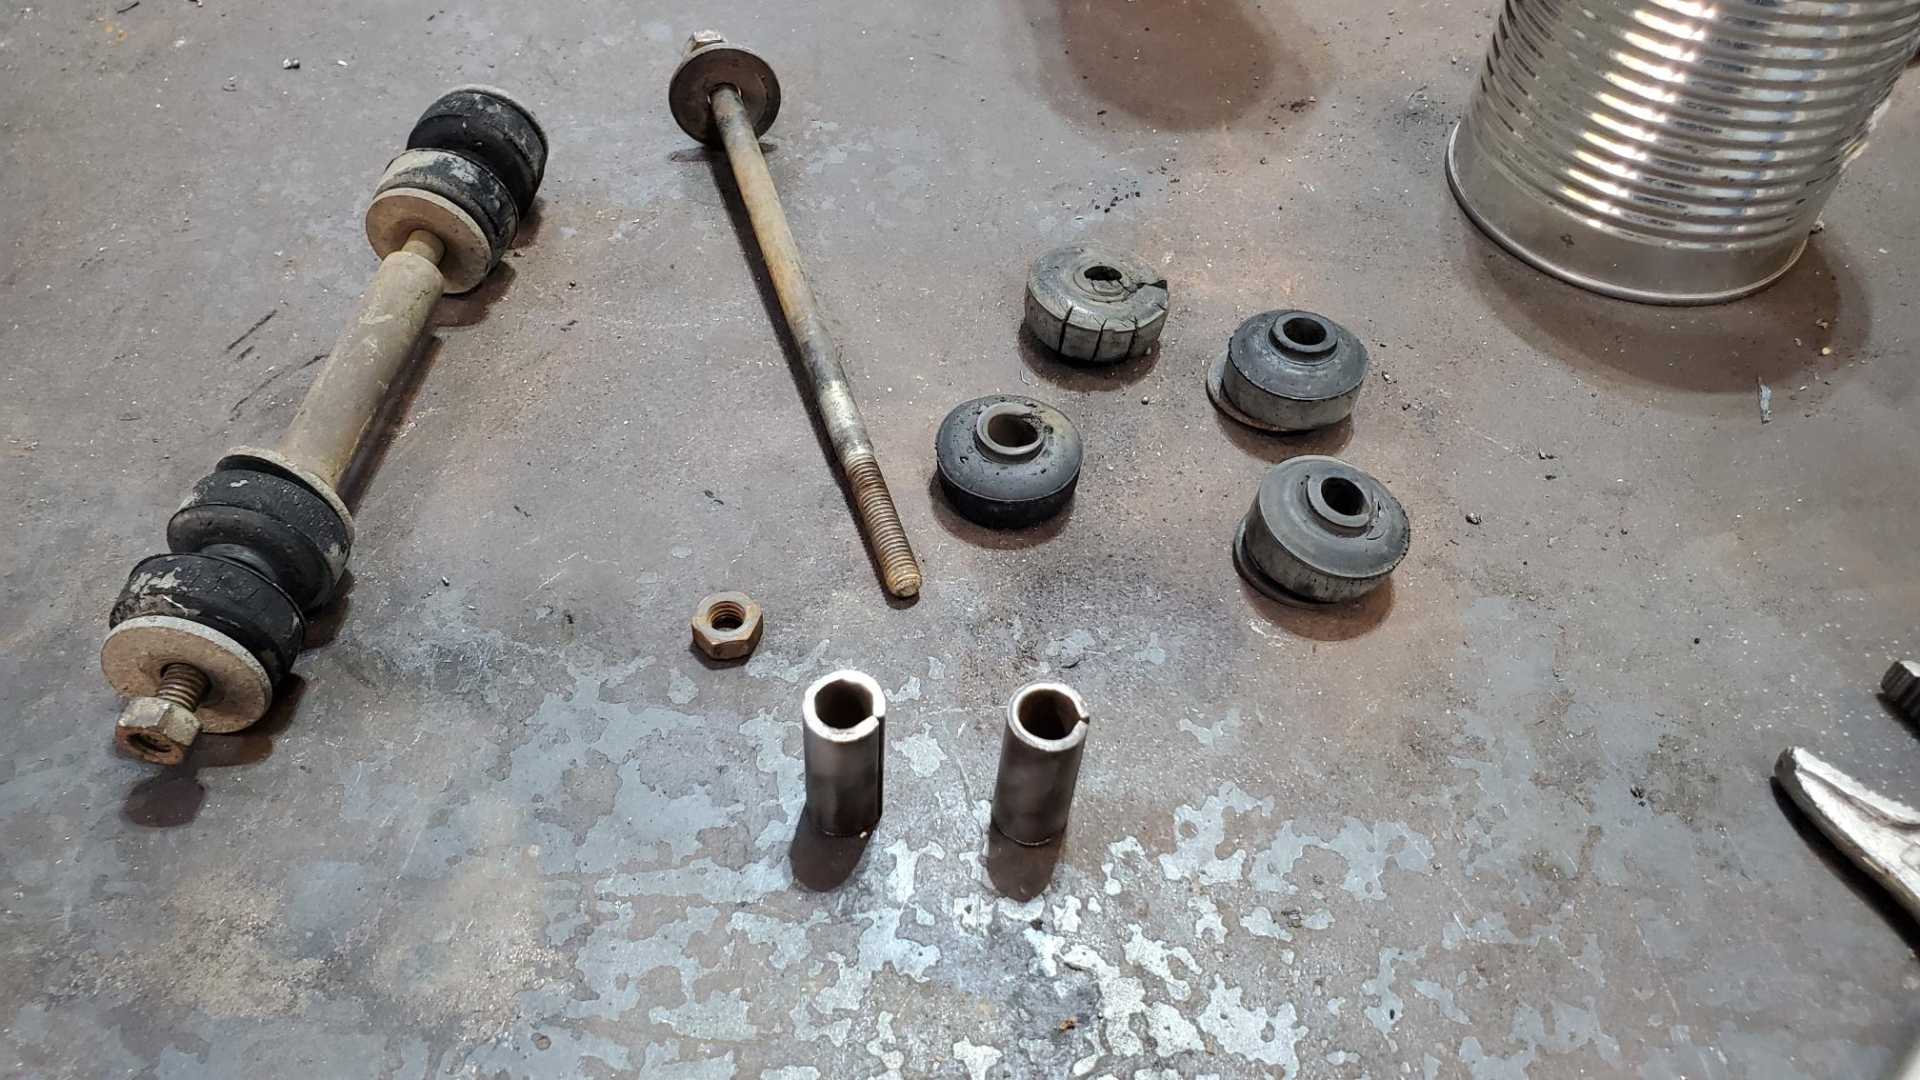
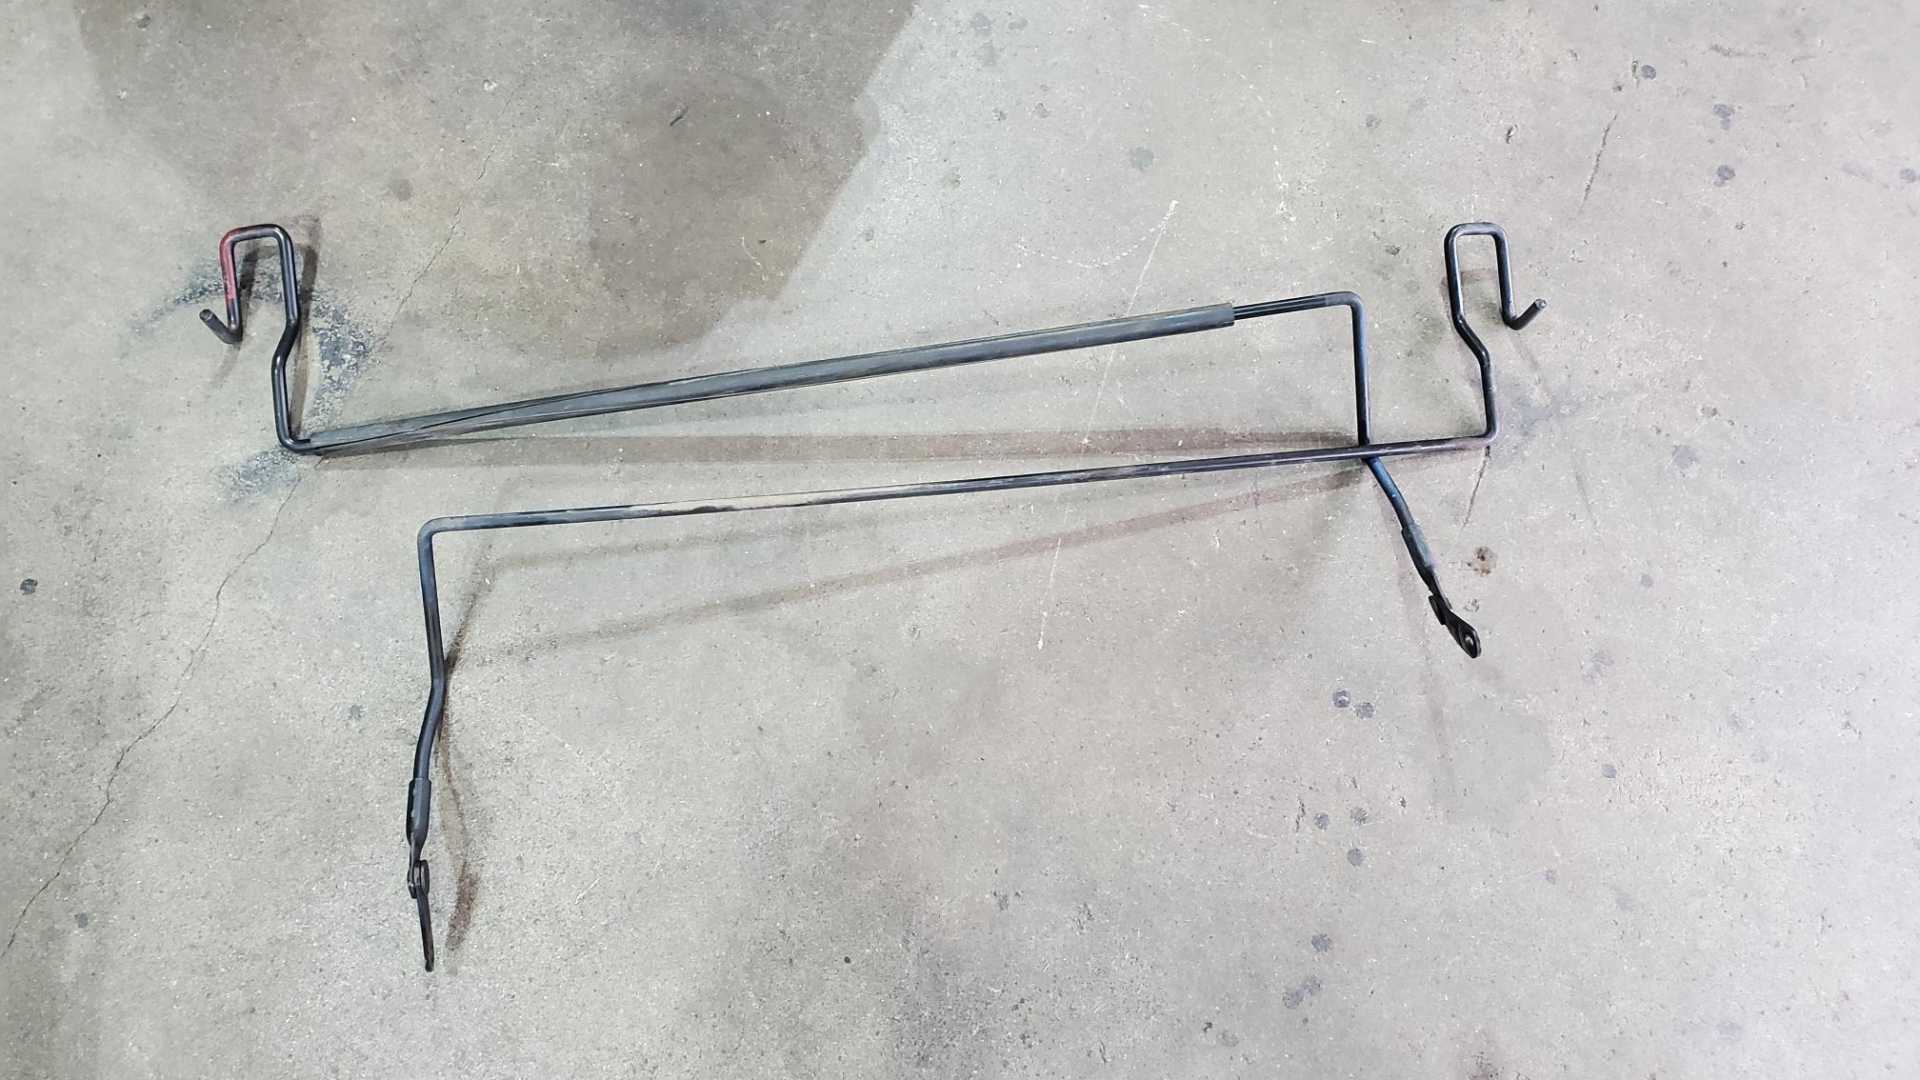
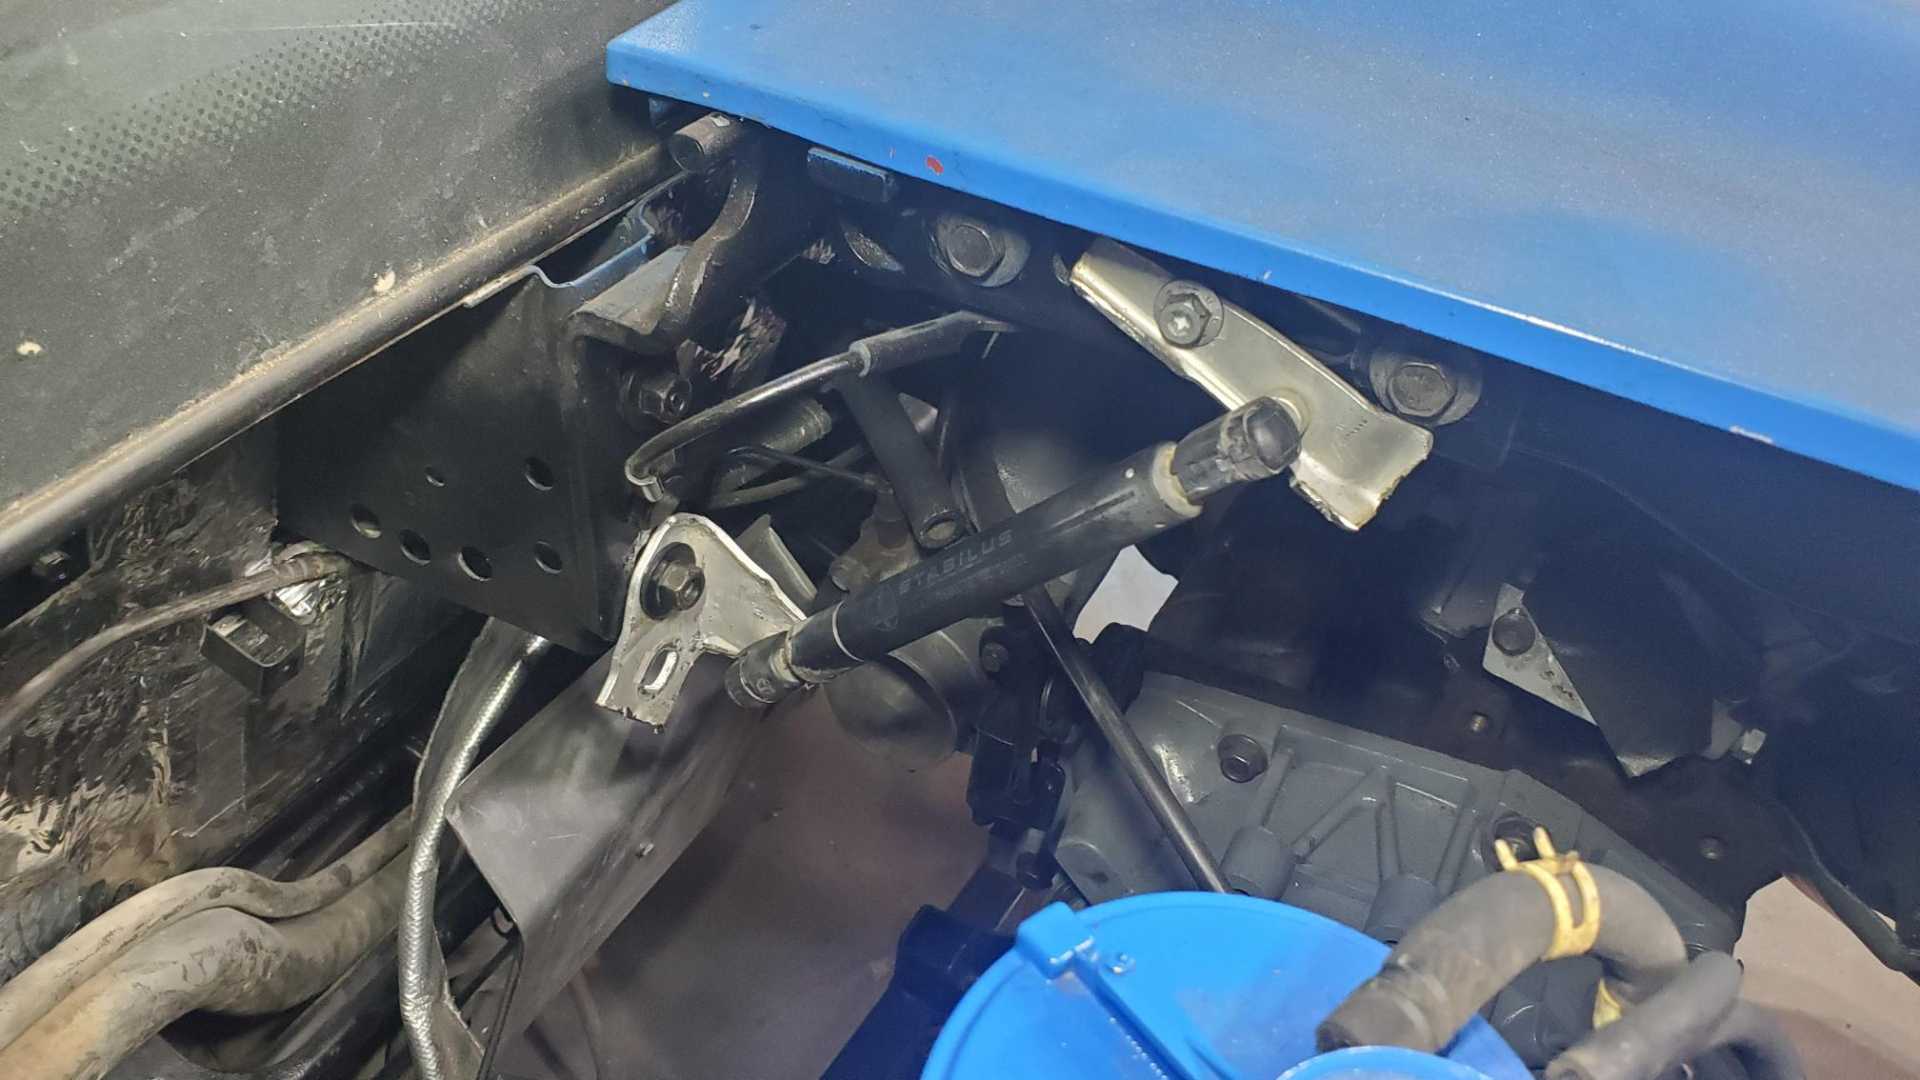
Still can’t decide how to mount the sway bar on the cradle. I’ve looked at a lot of pictures on the forum but the bar I have doesn’t fit well, whether it’s pointed backwards or forward.
The rubber bushings that were on this one when I pulled it at the salvage yard were shot, so I ordered polyurethane replacements with new brackets. I’ll wait until they arrive before making the final decision on where to mount the bar. O’Reilly had poly end link bushings in stock, so once I get the bar mounted I’ll just buy bolts to fit.
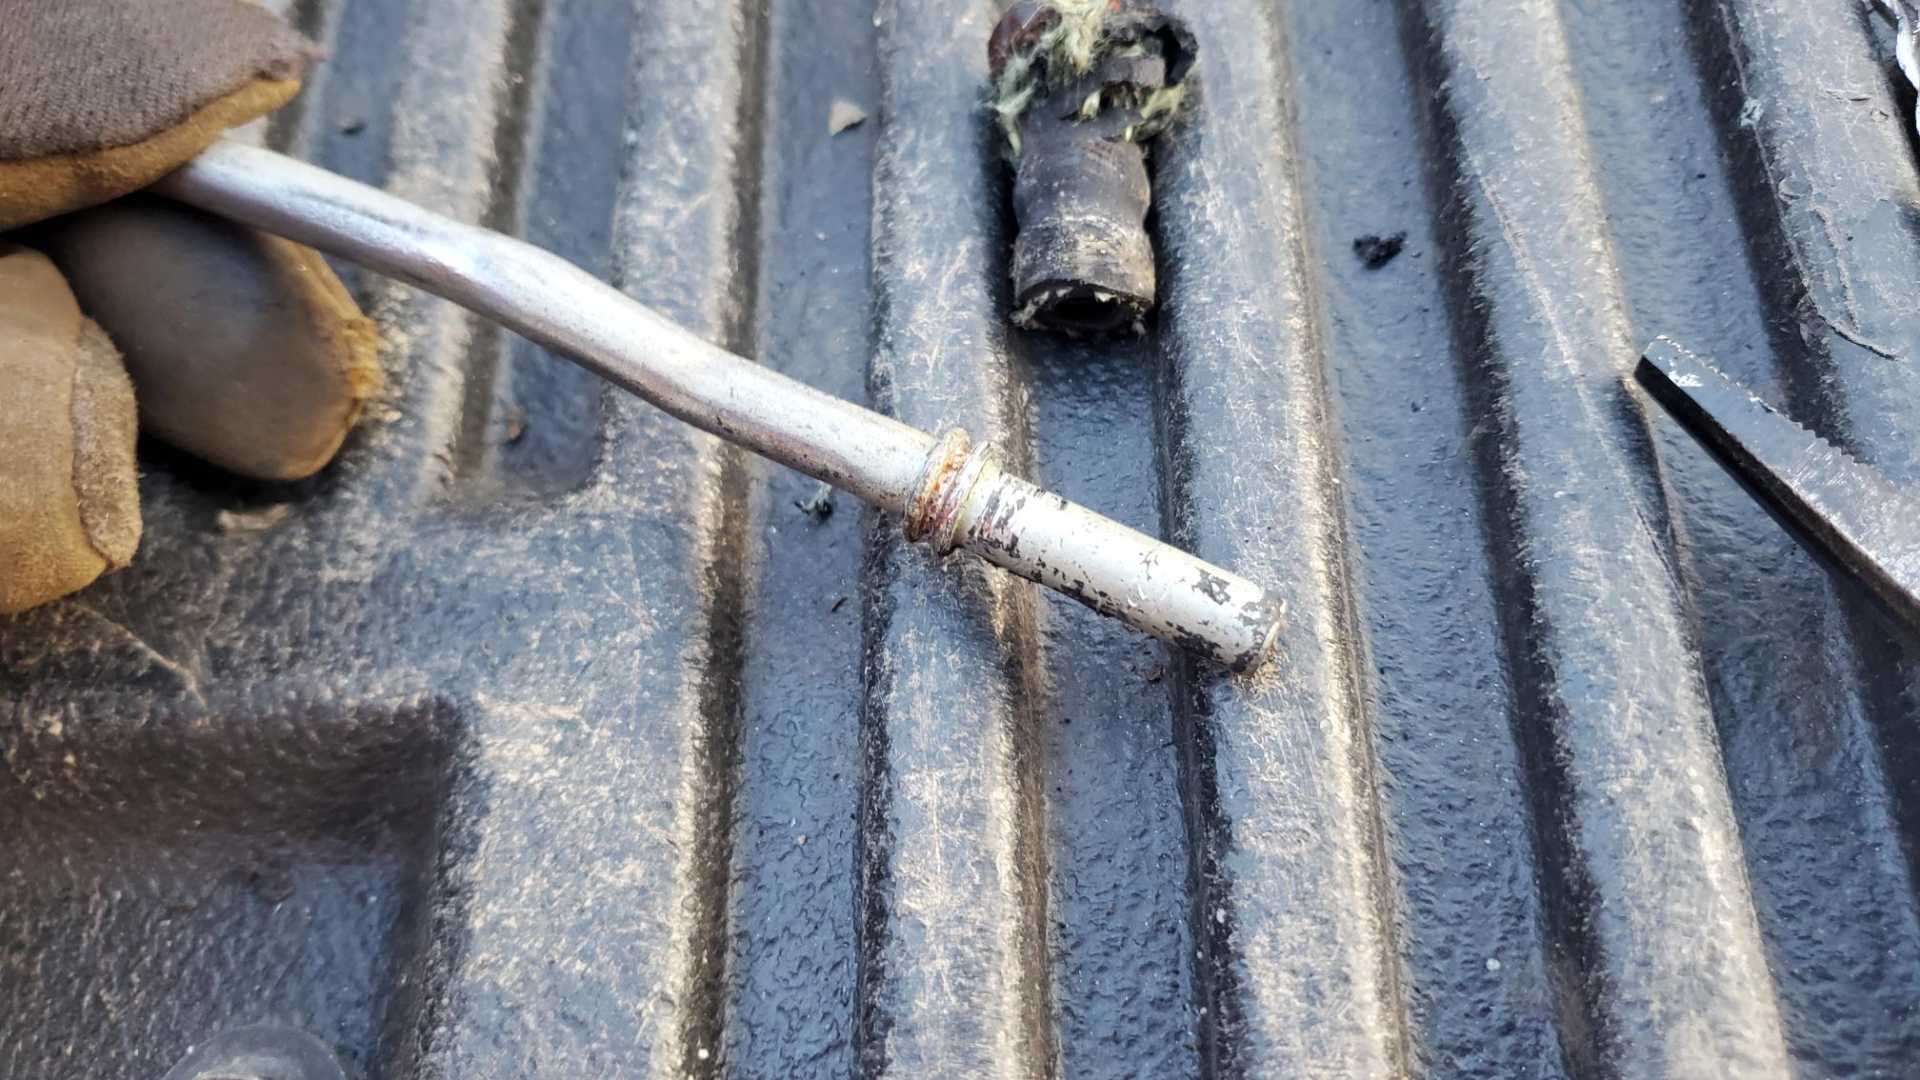
One of the links that came with the bar sacrificed its spacer for the project.
[This message has been edited by Quadfather (edited 10-20-2022).]
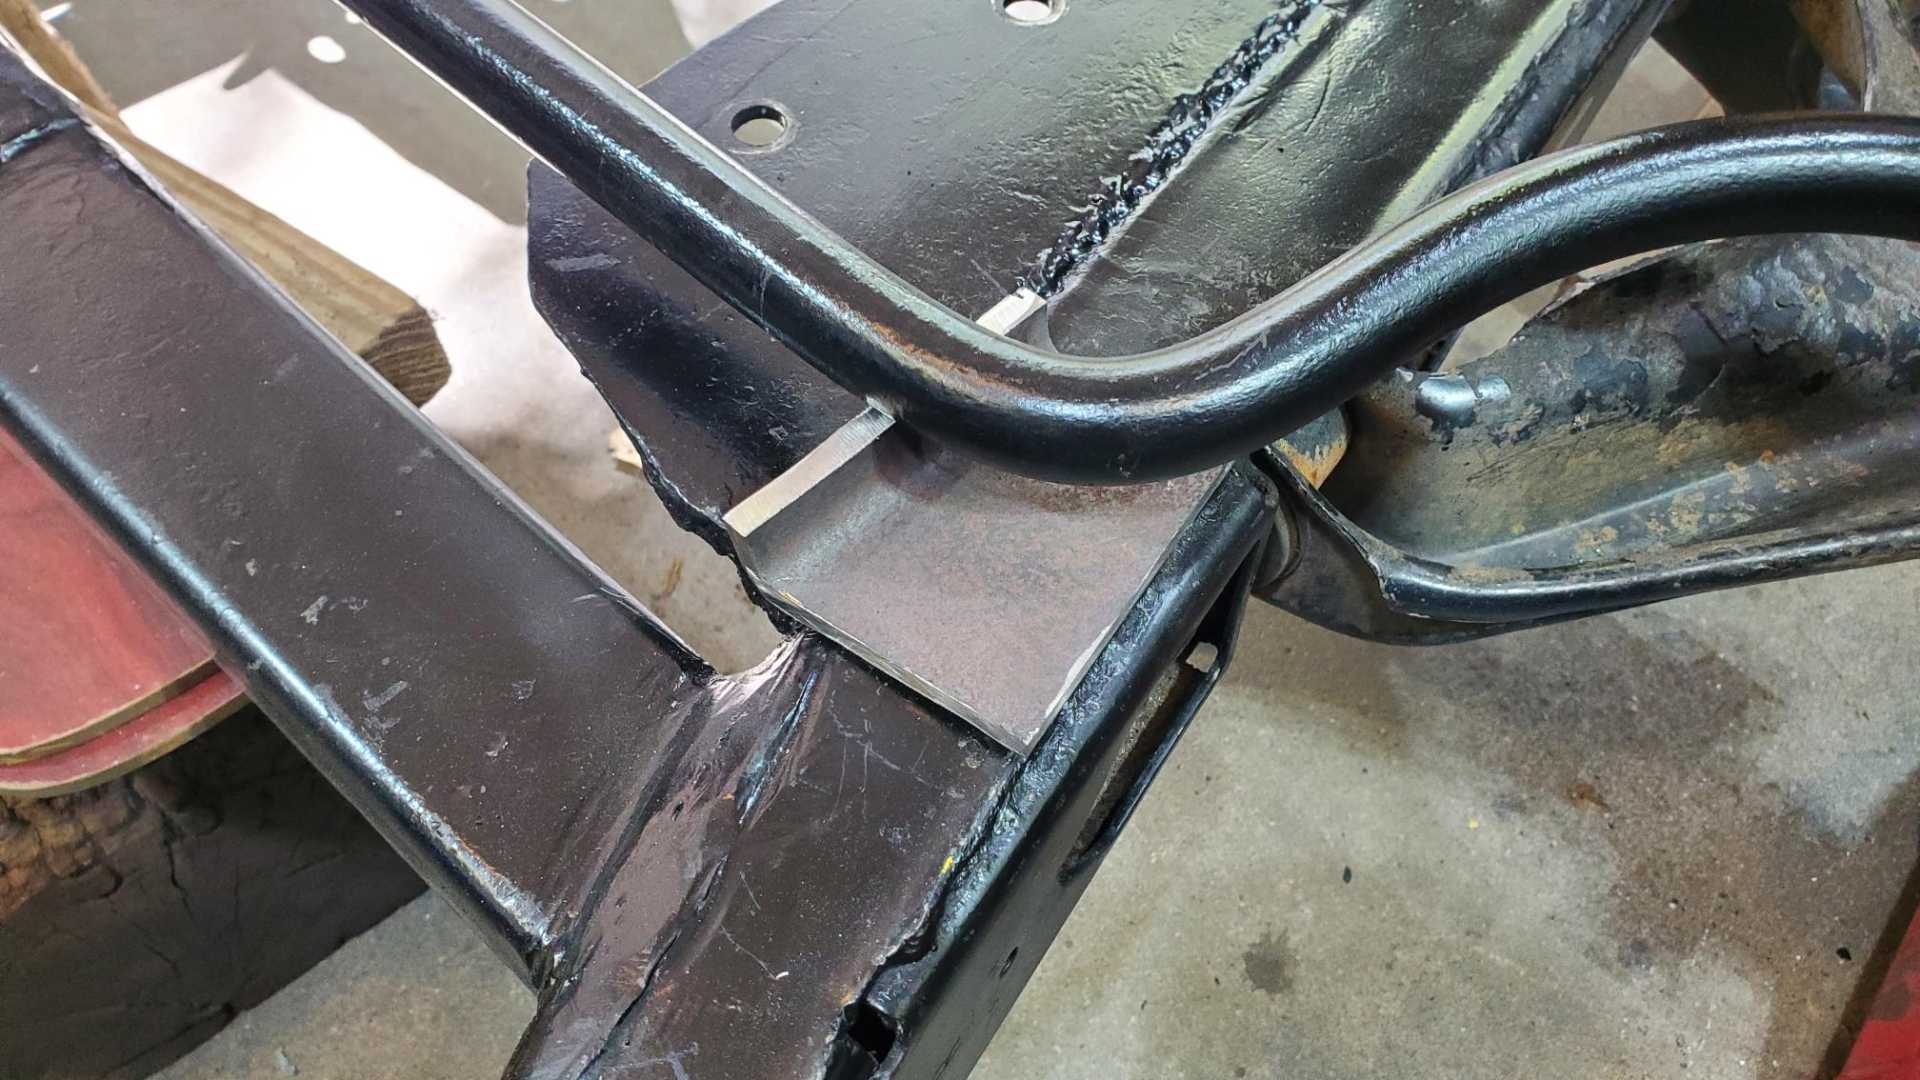
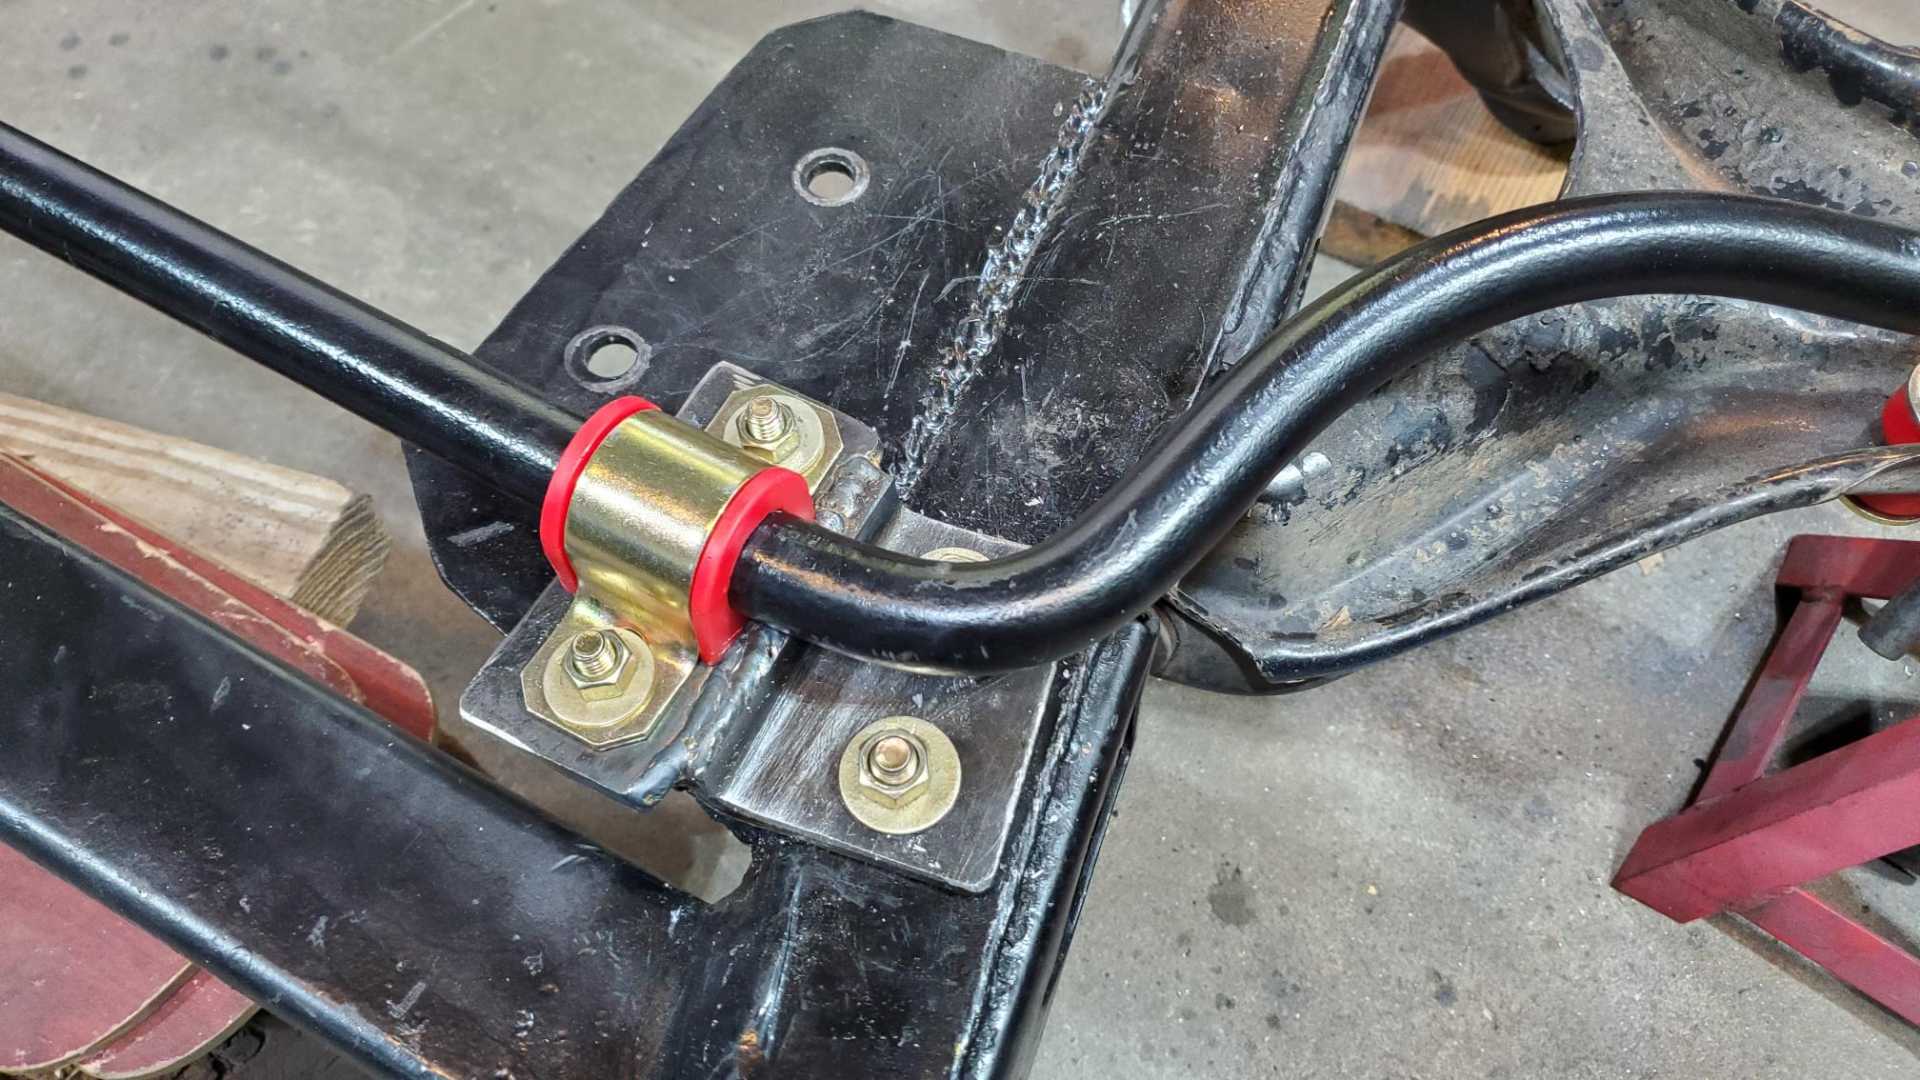
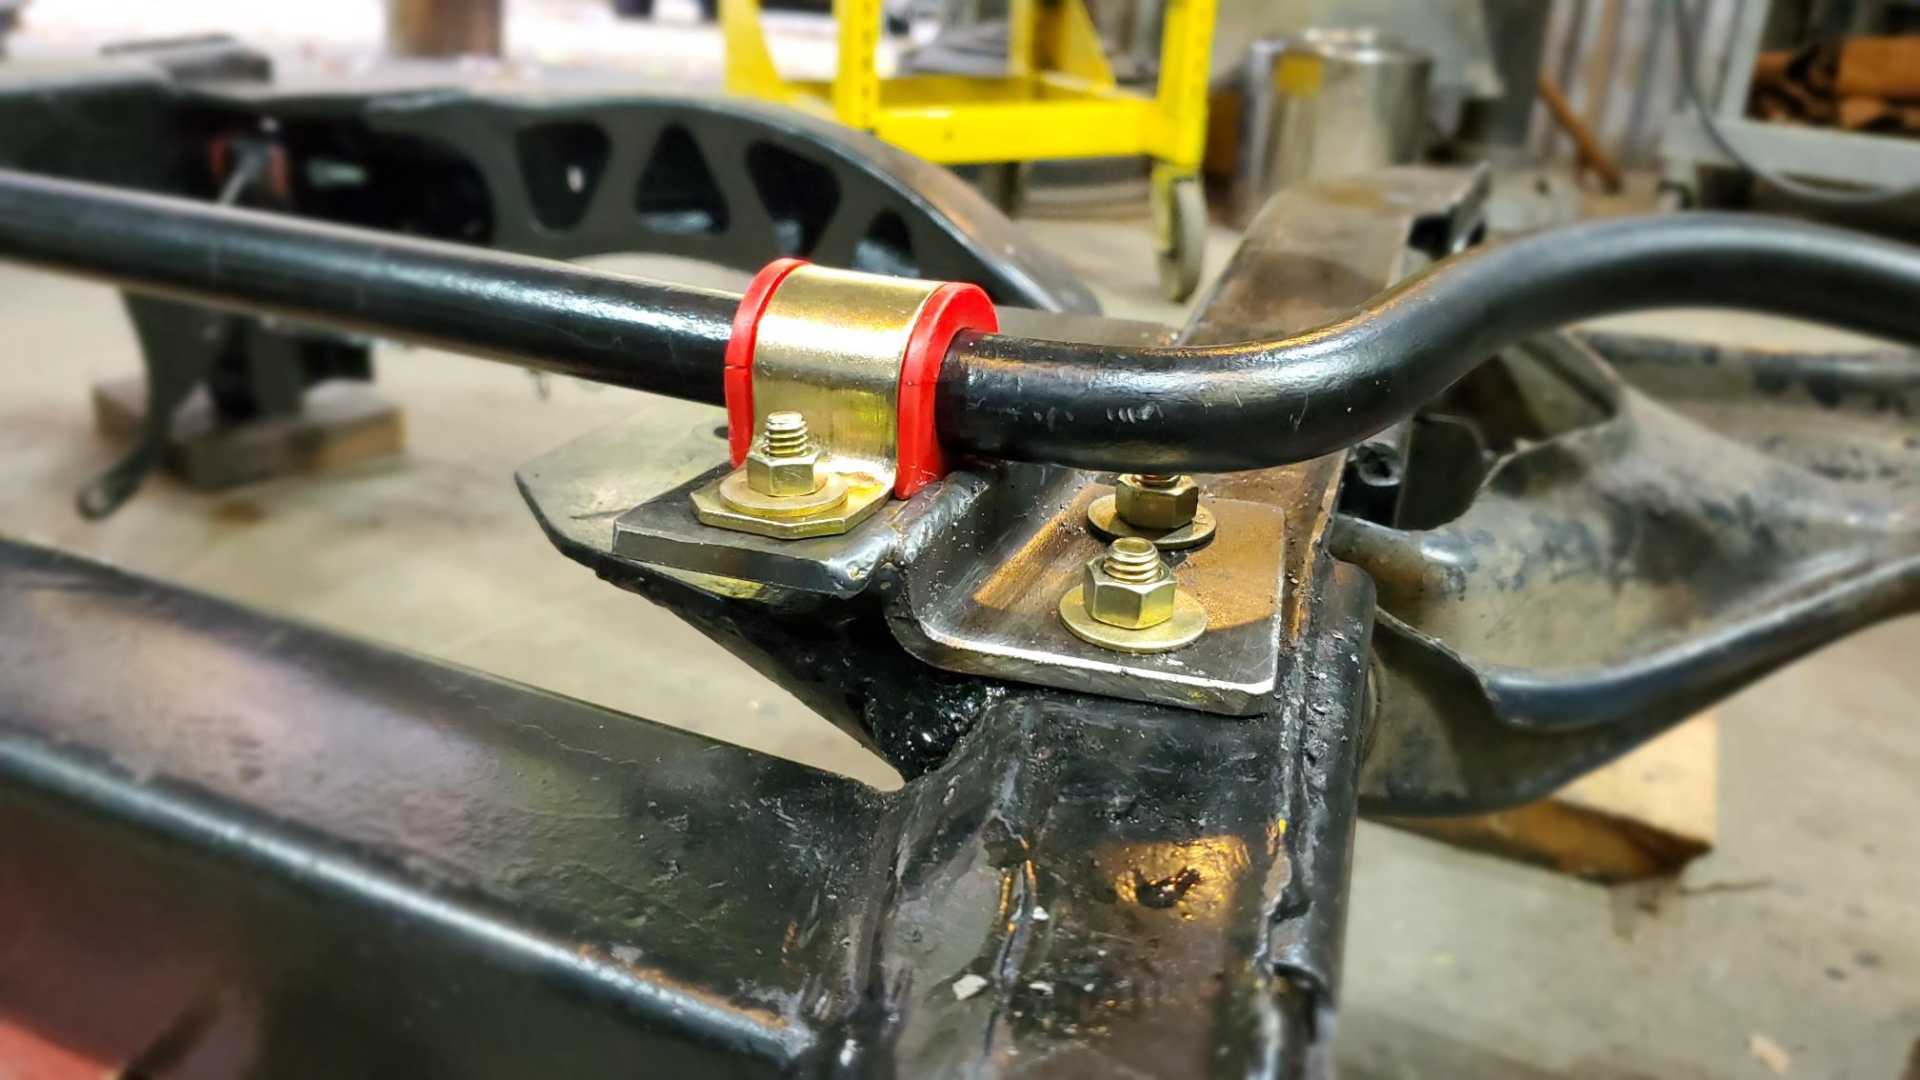
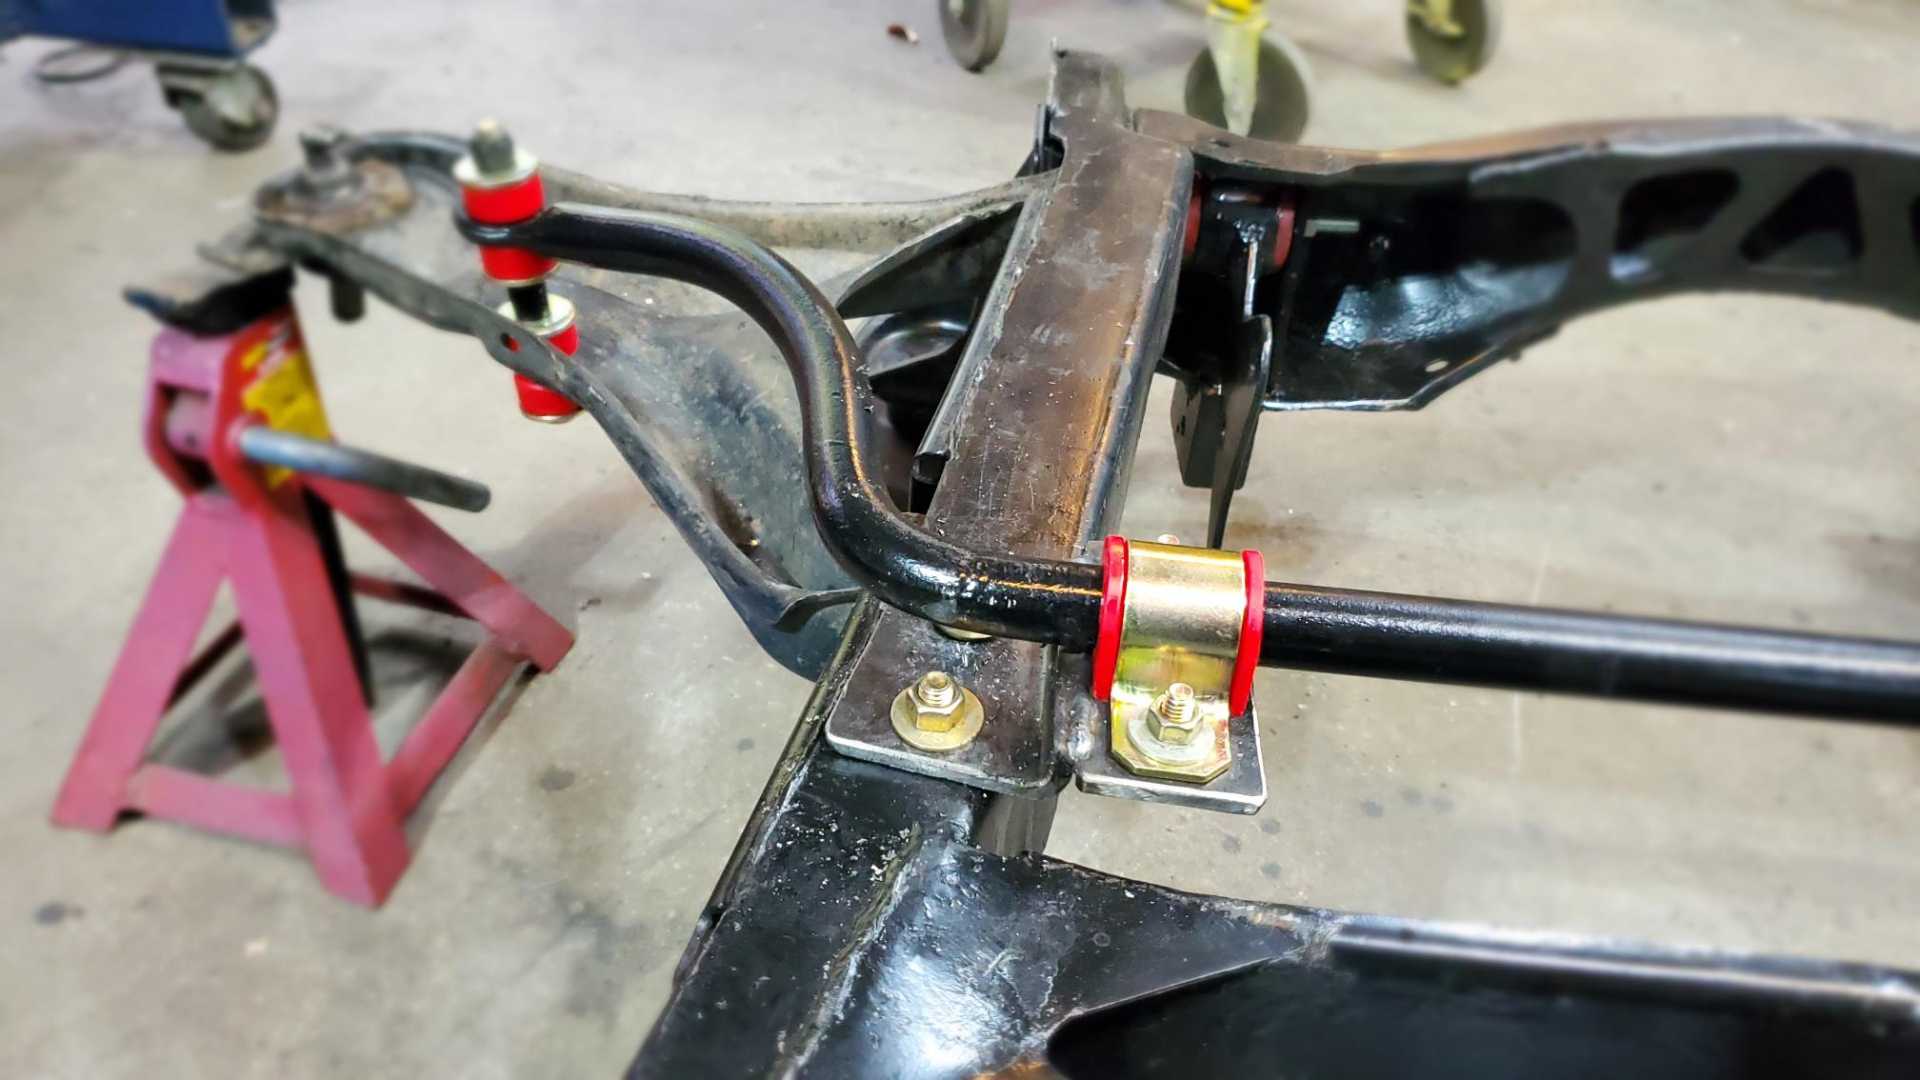
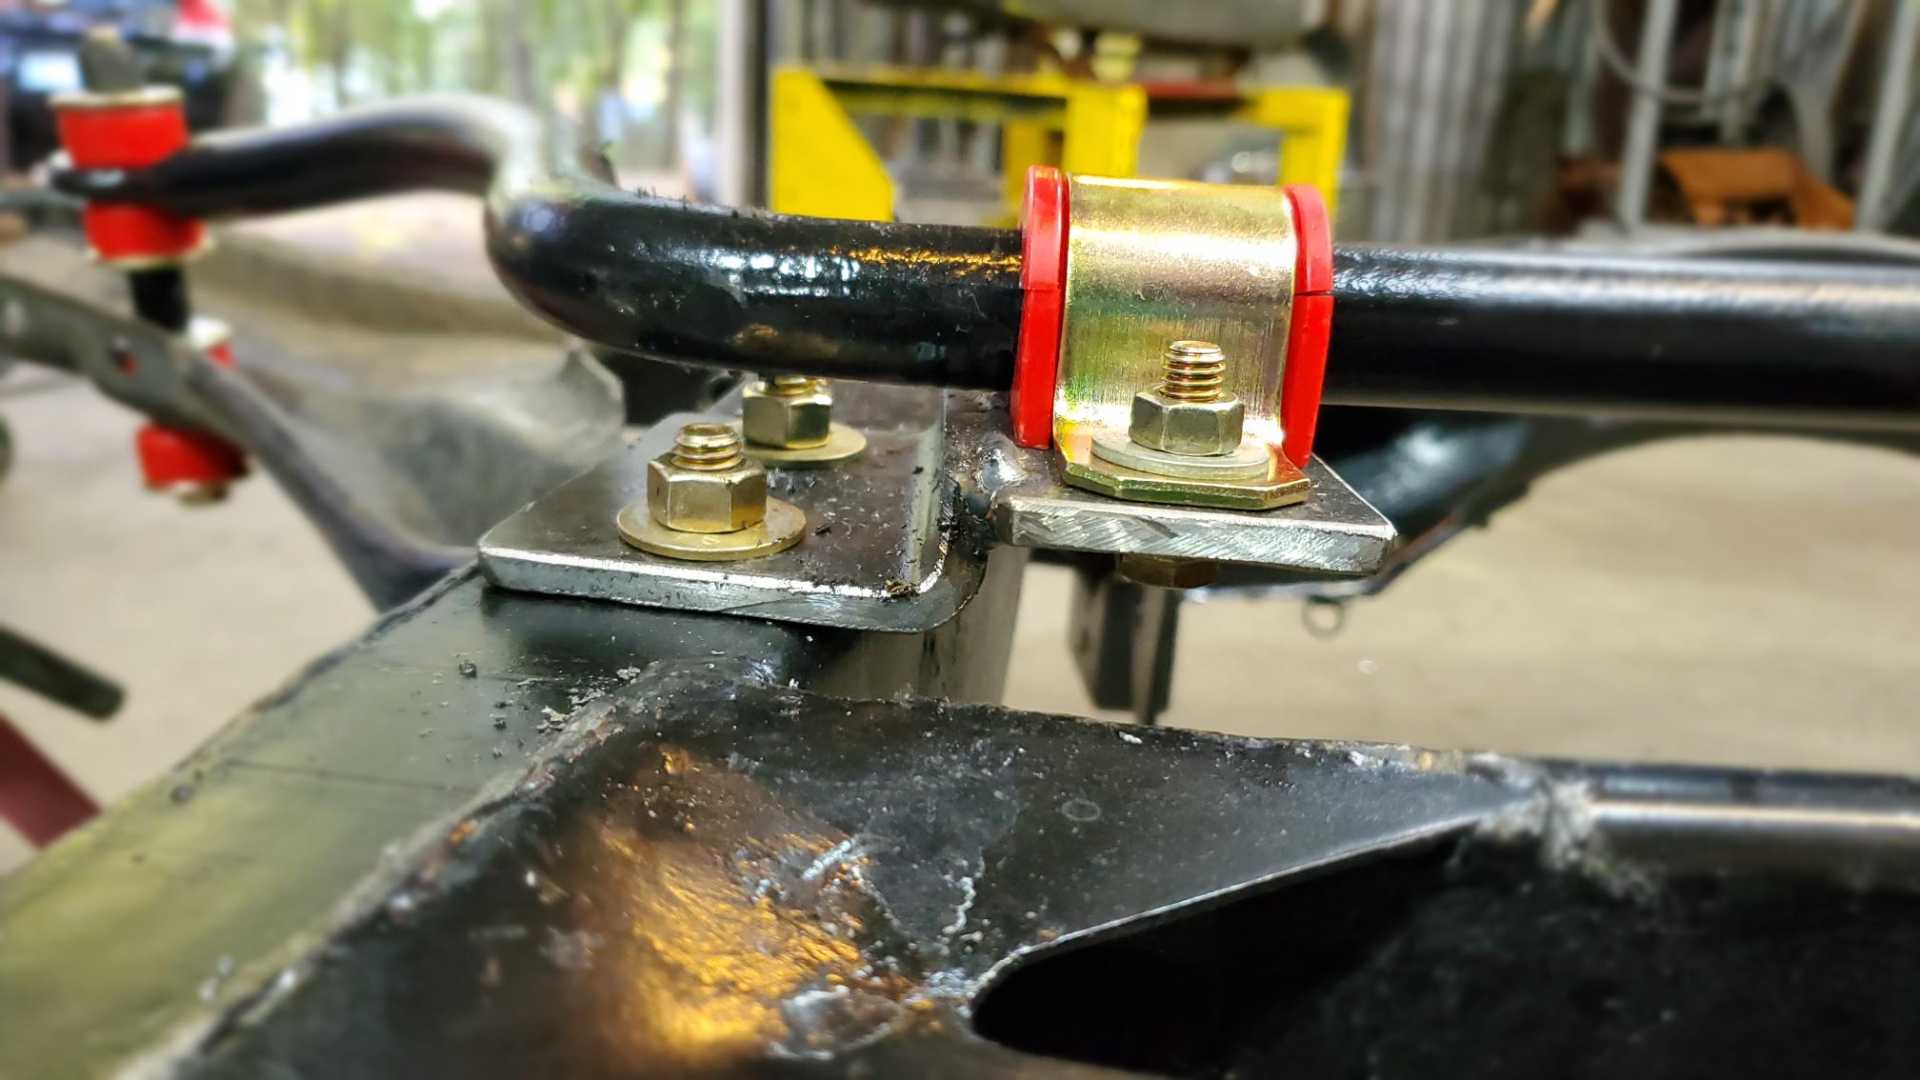
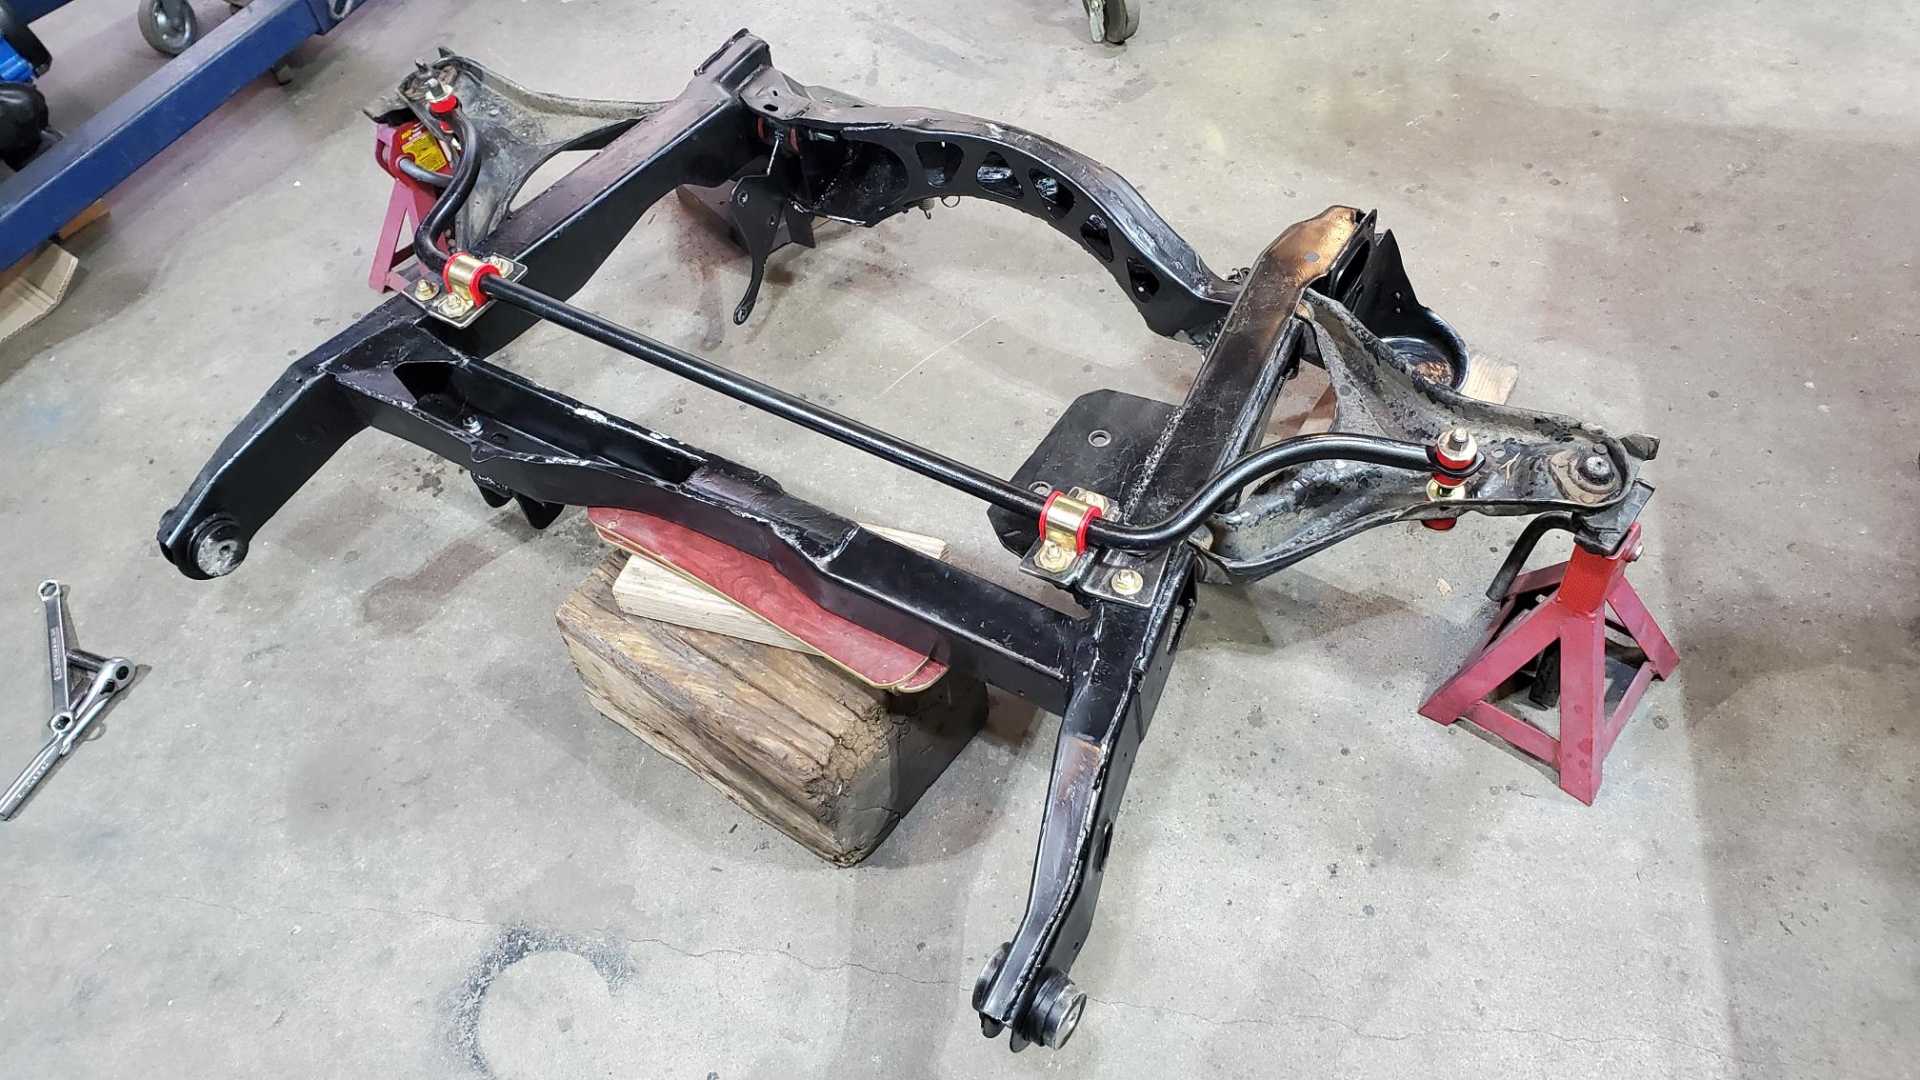
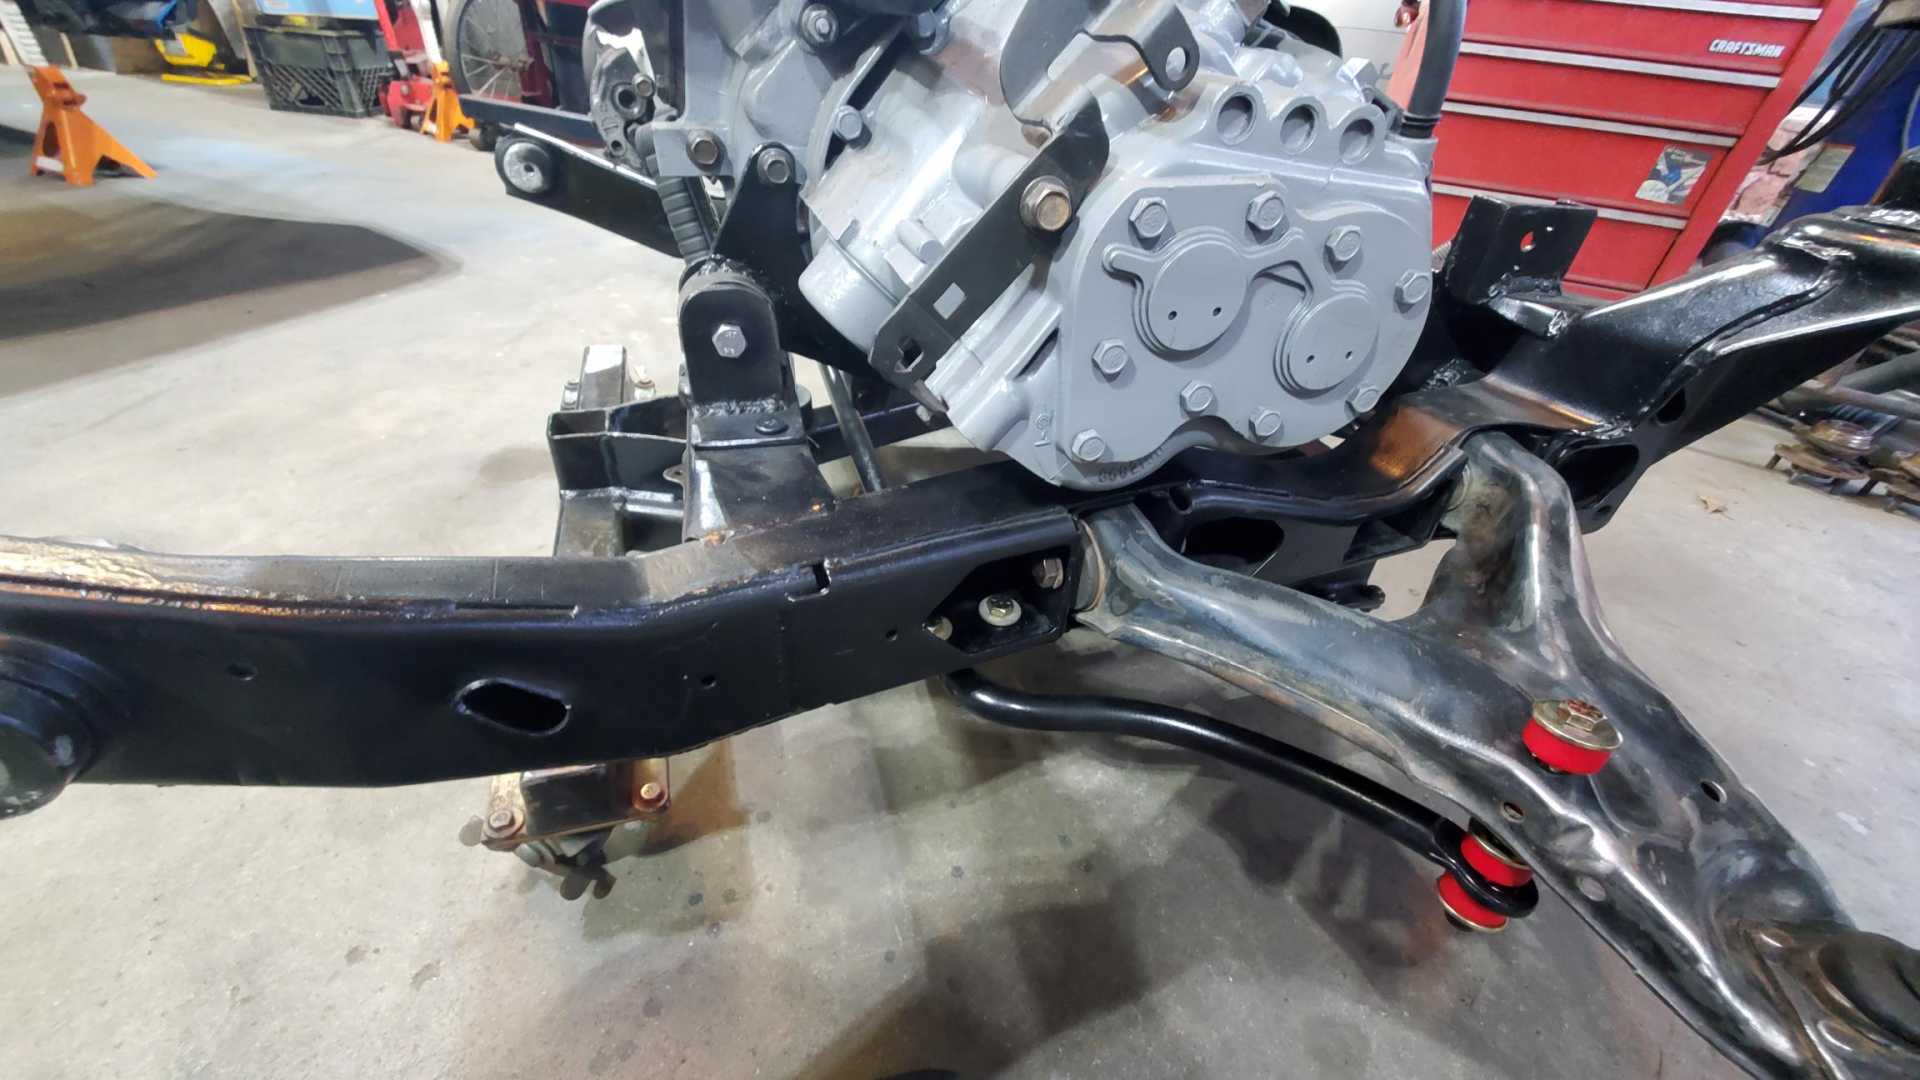
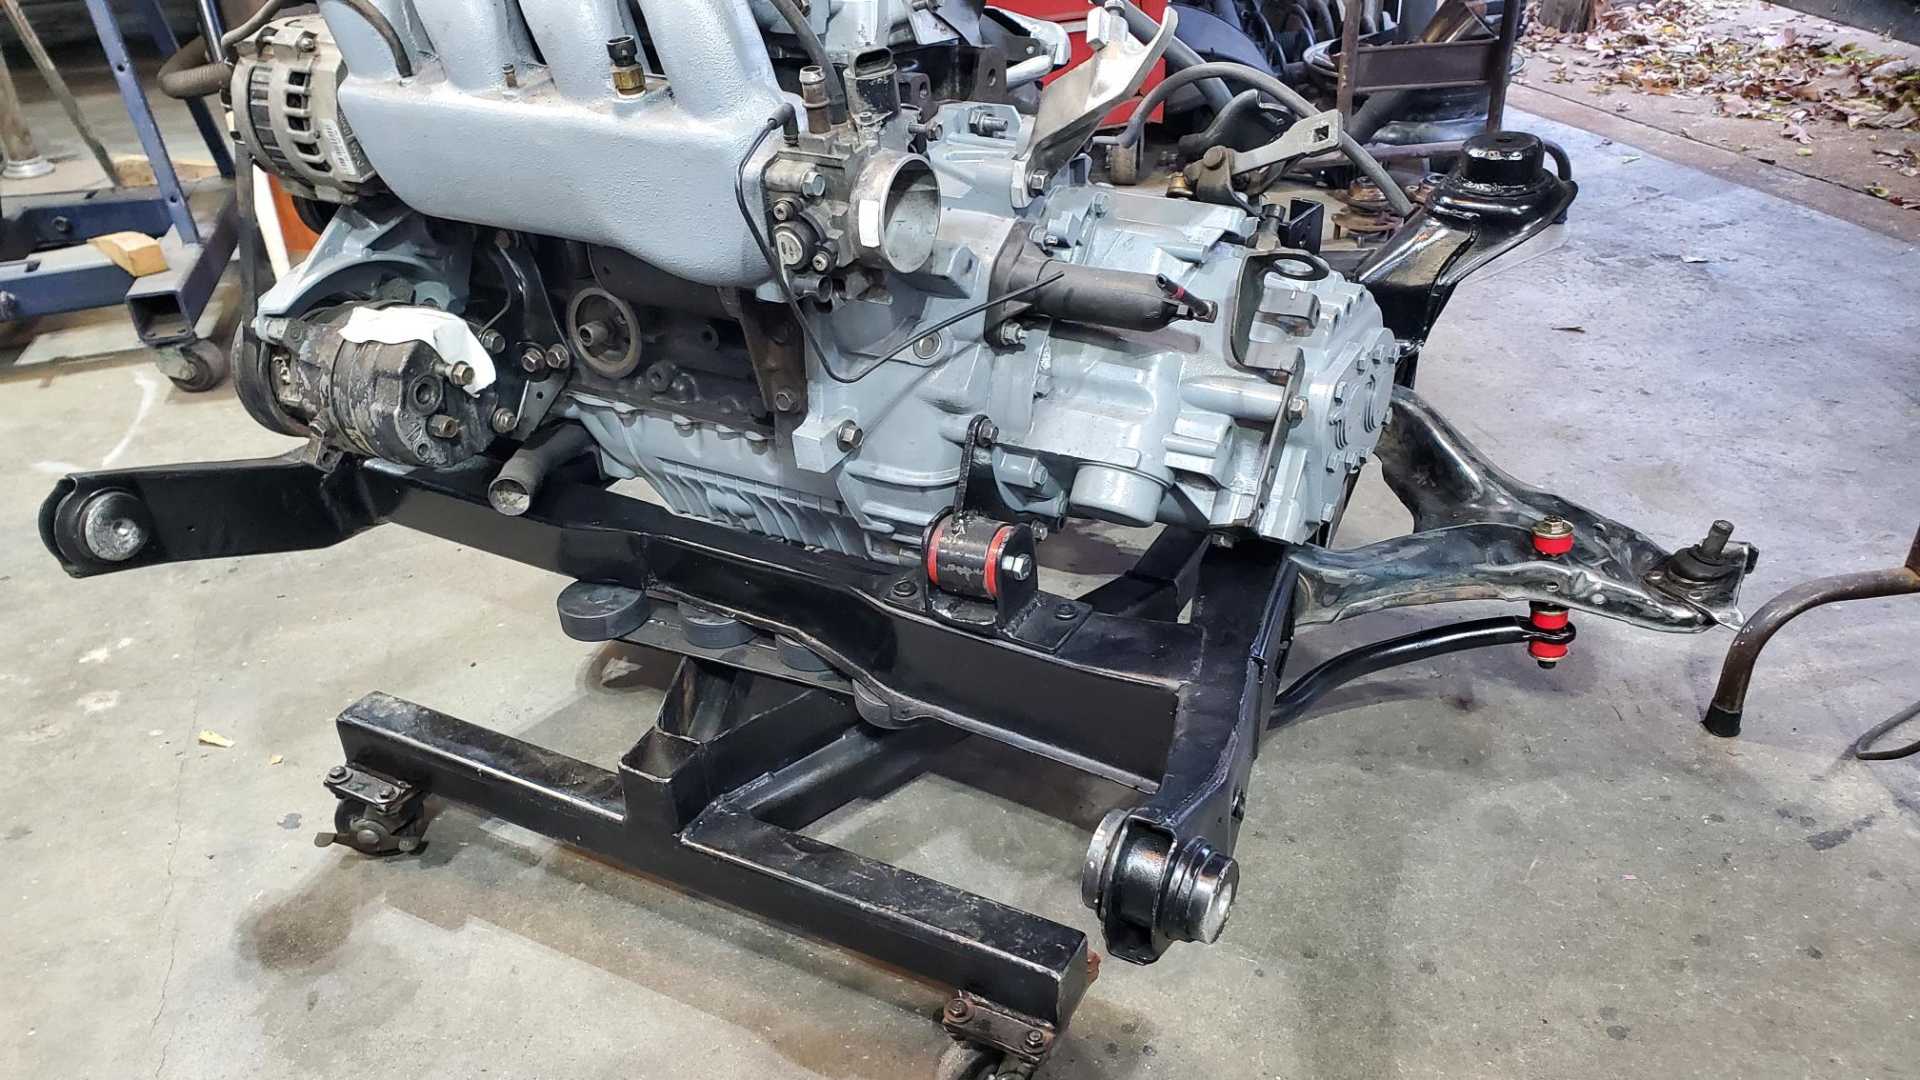
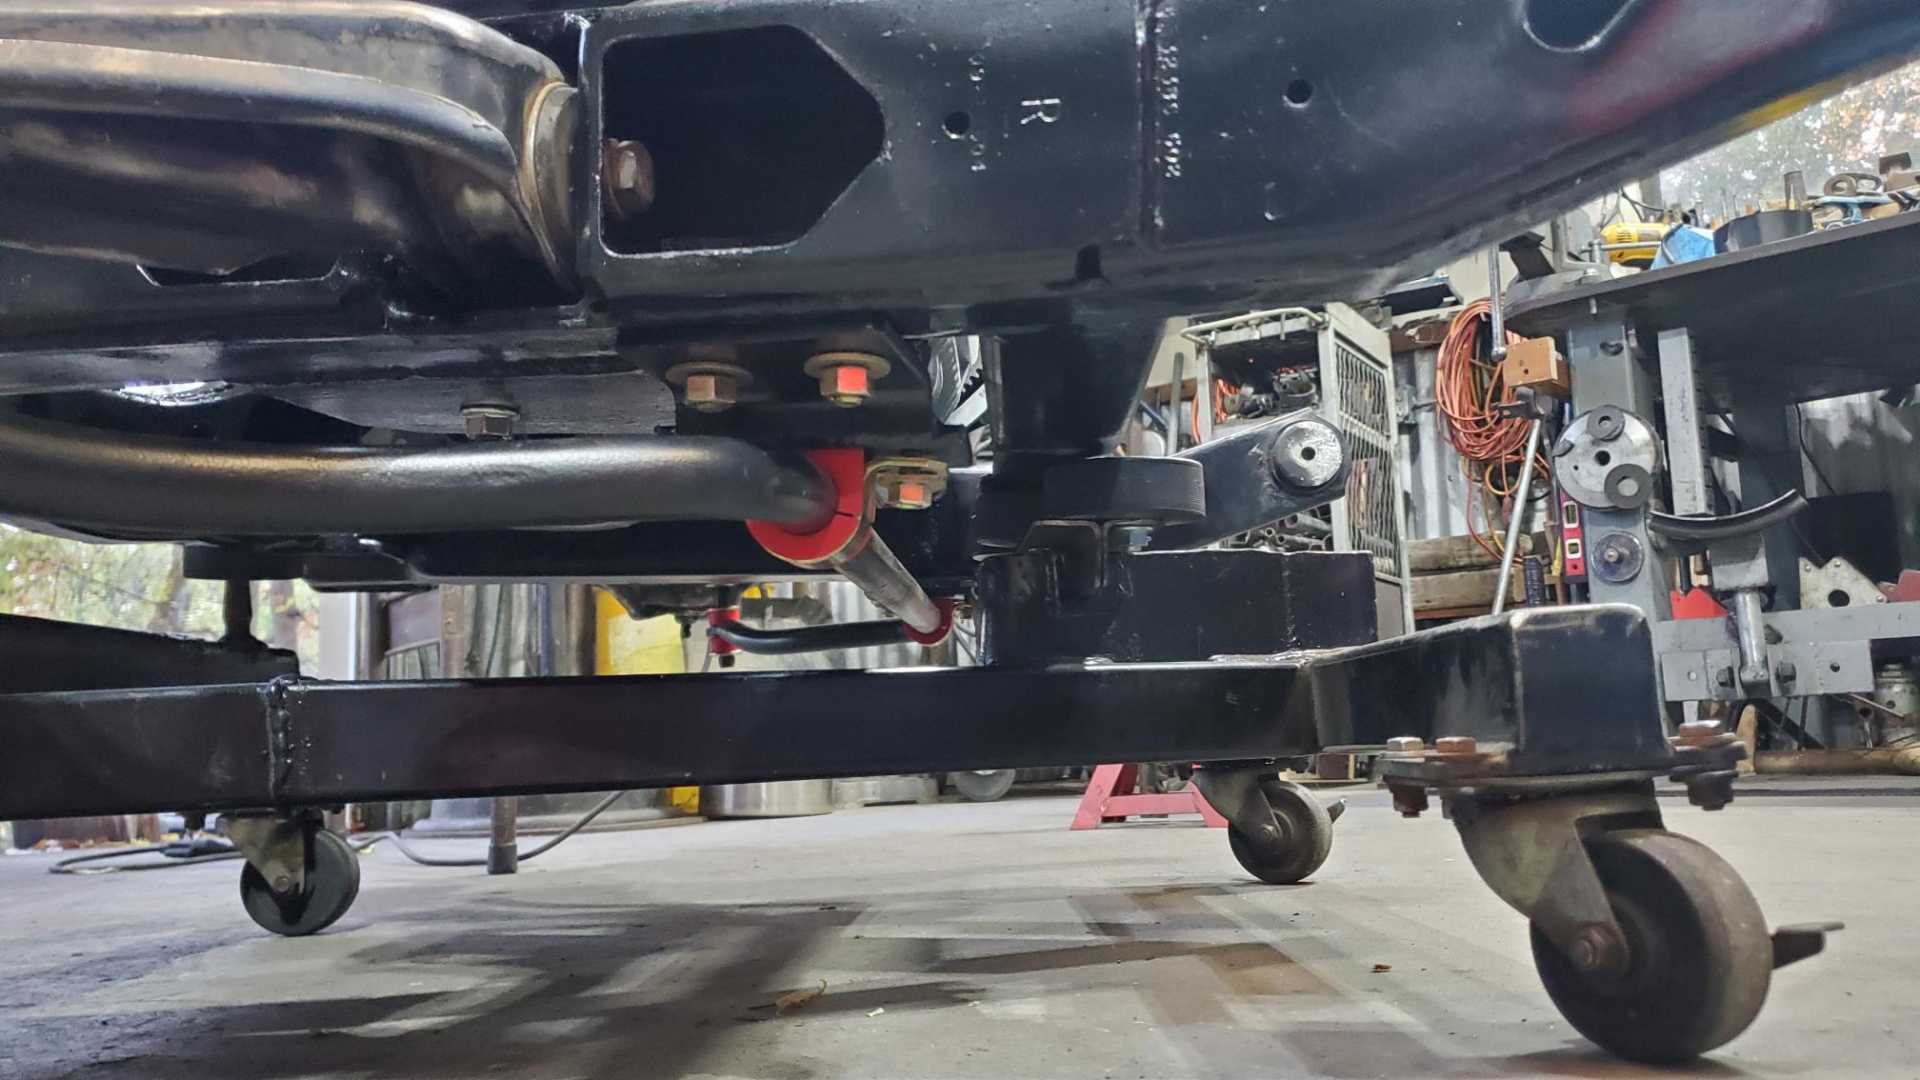
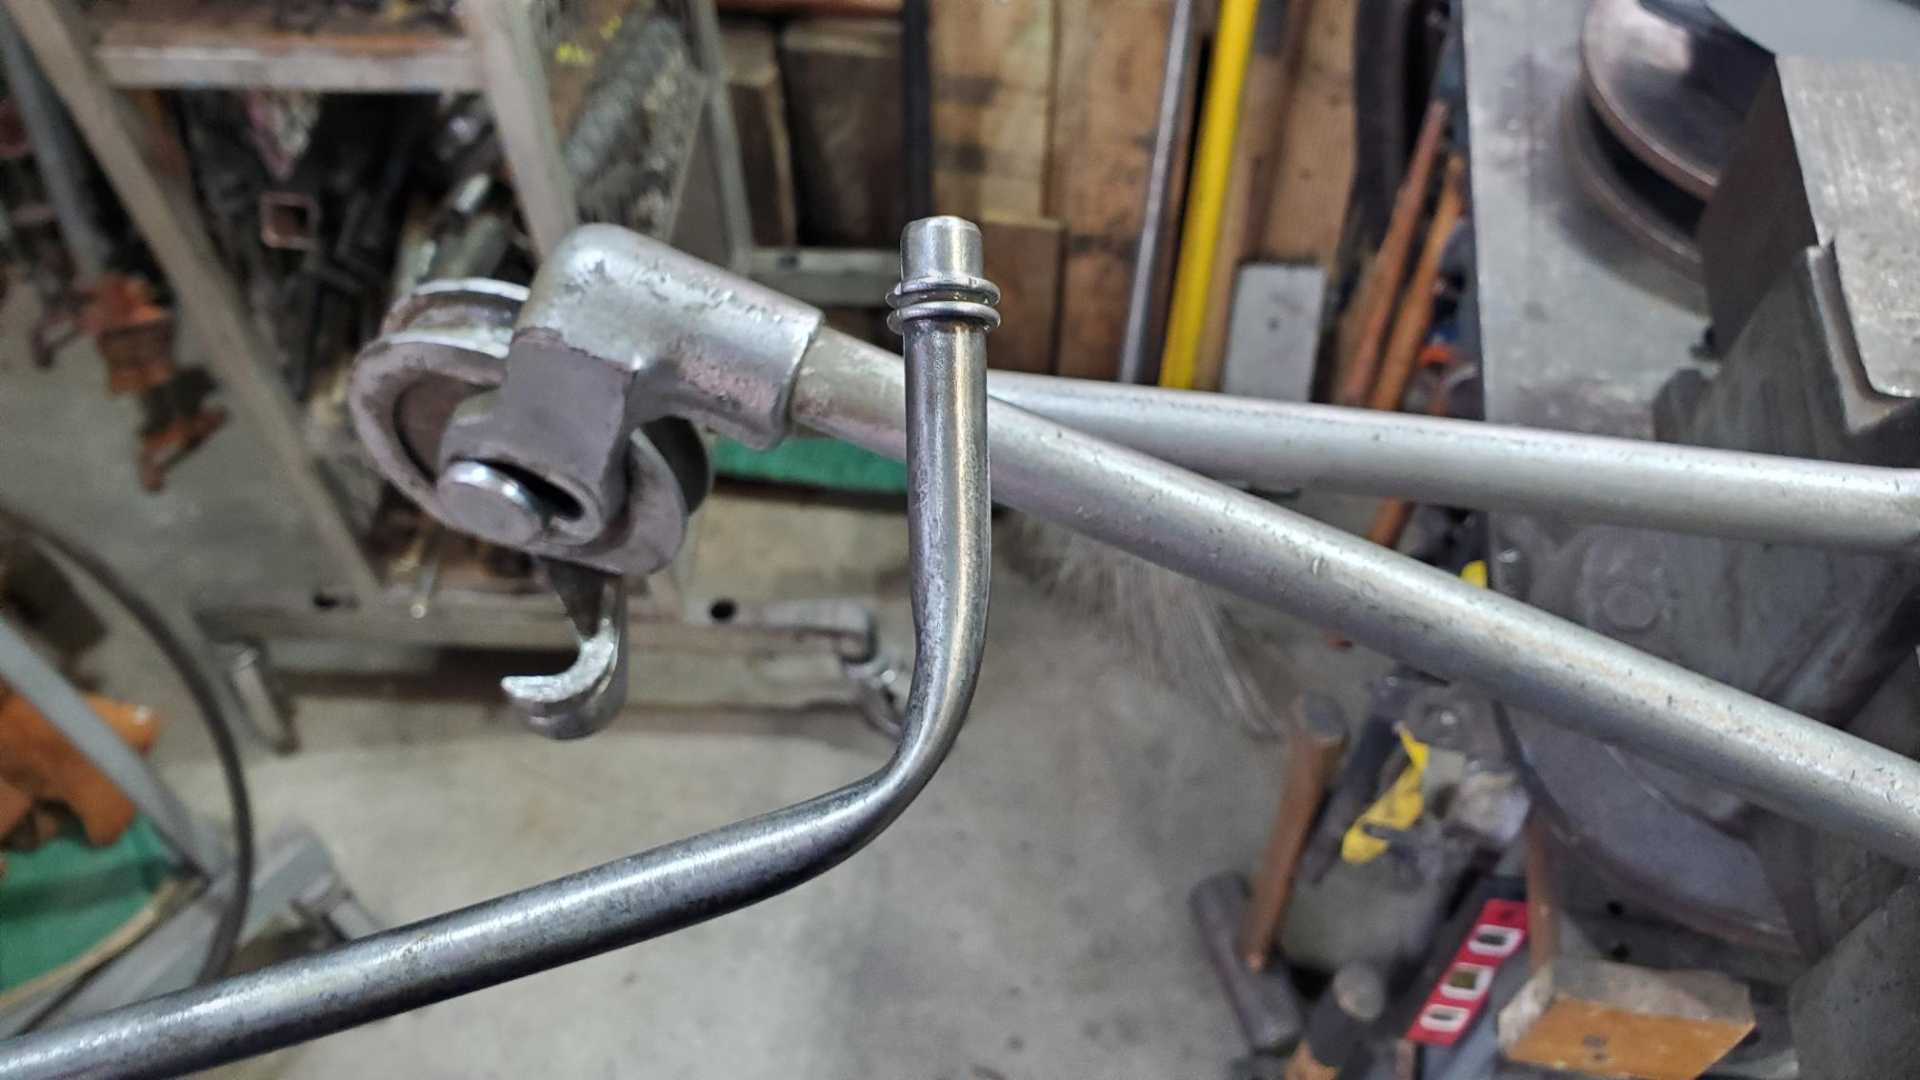
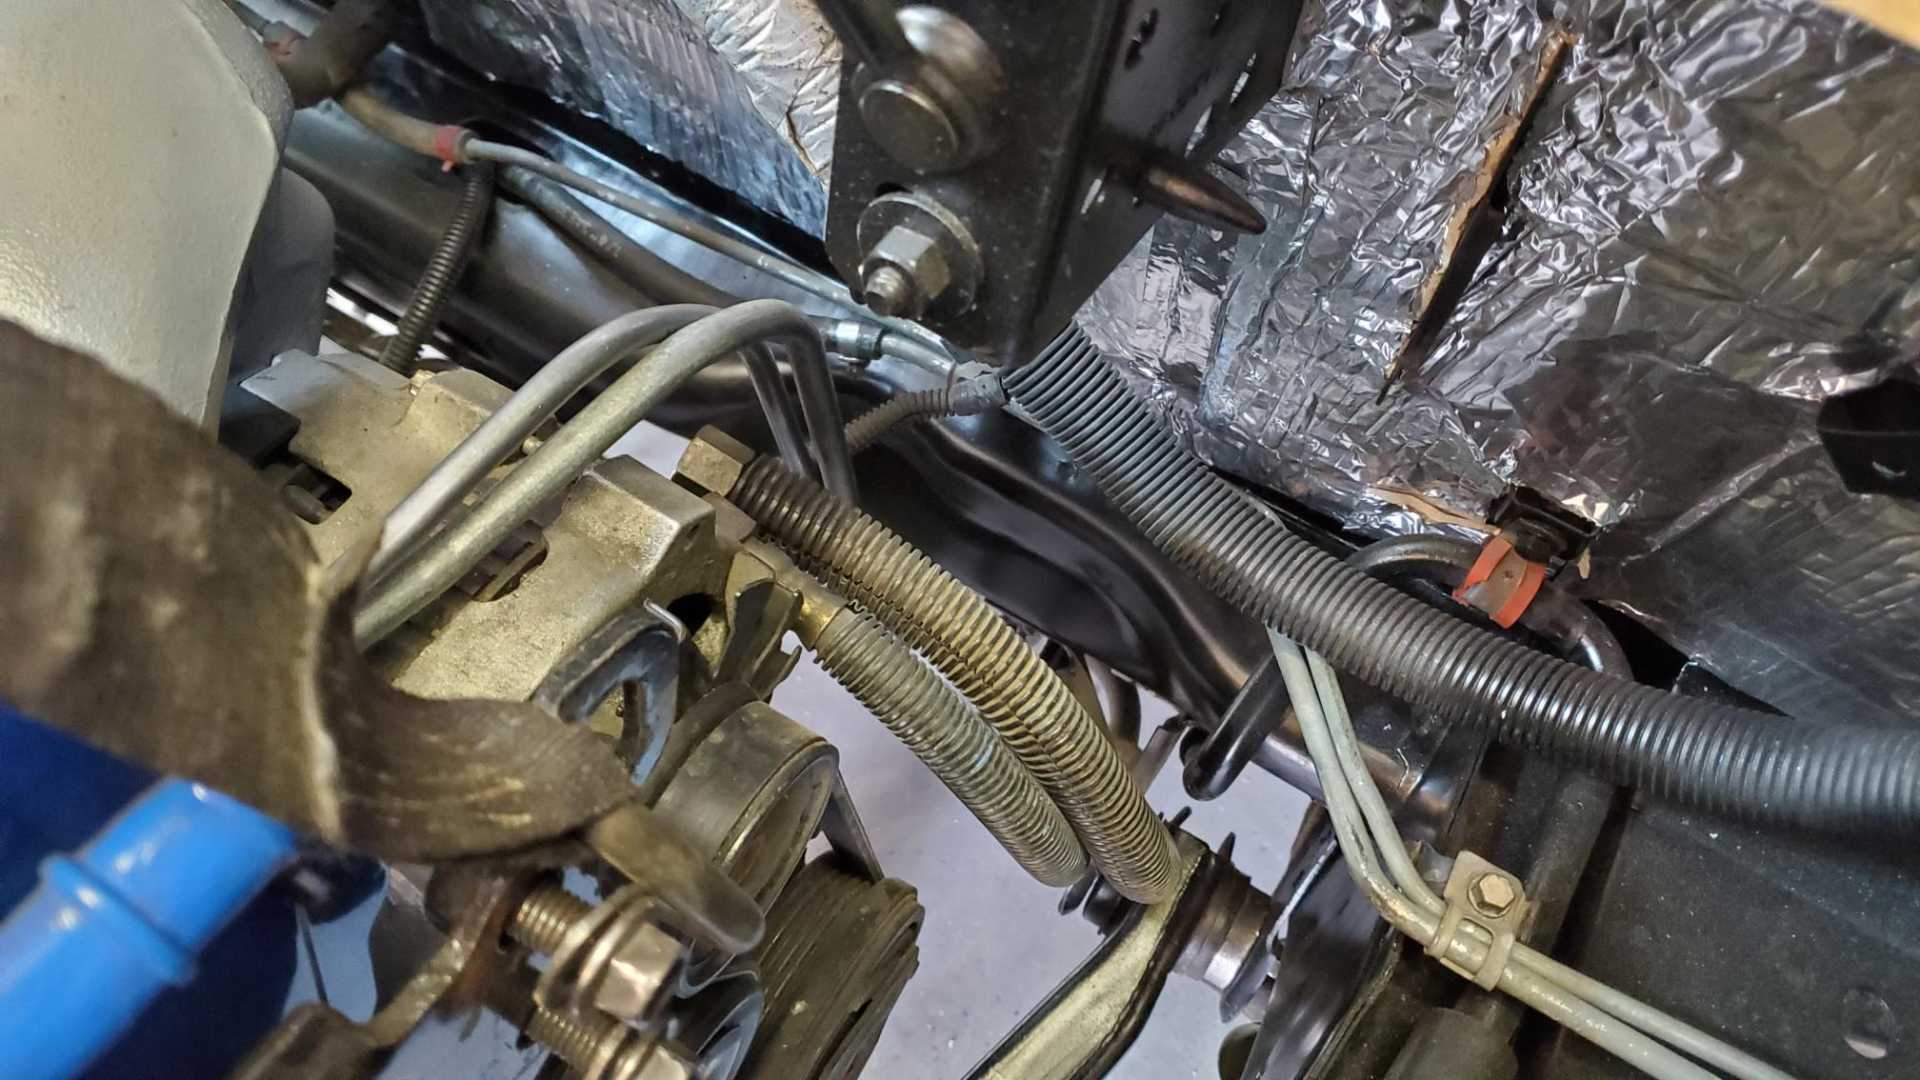
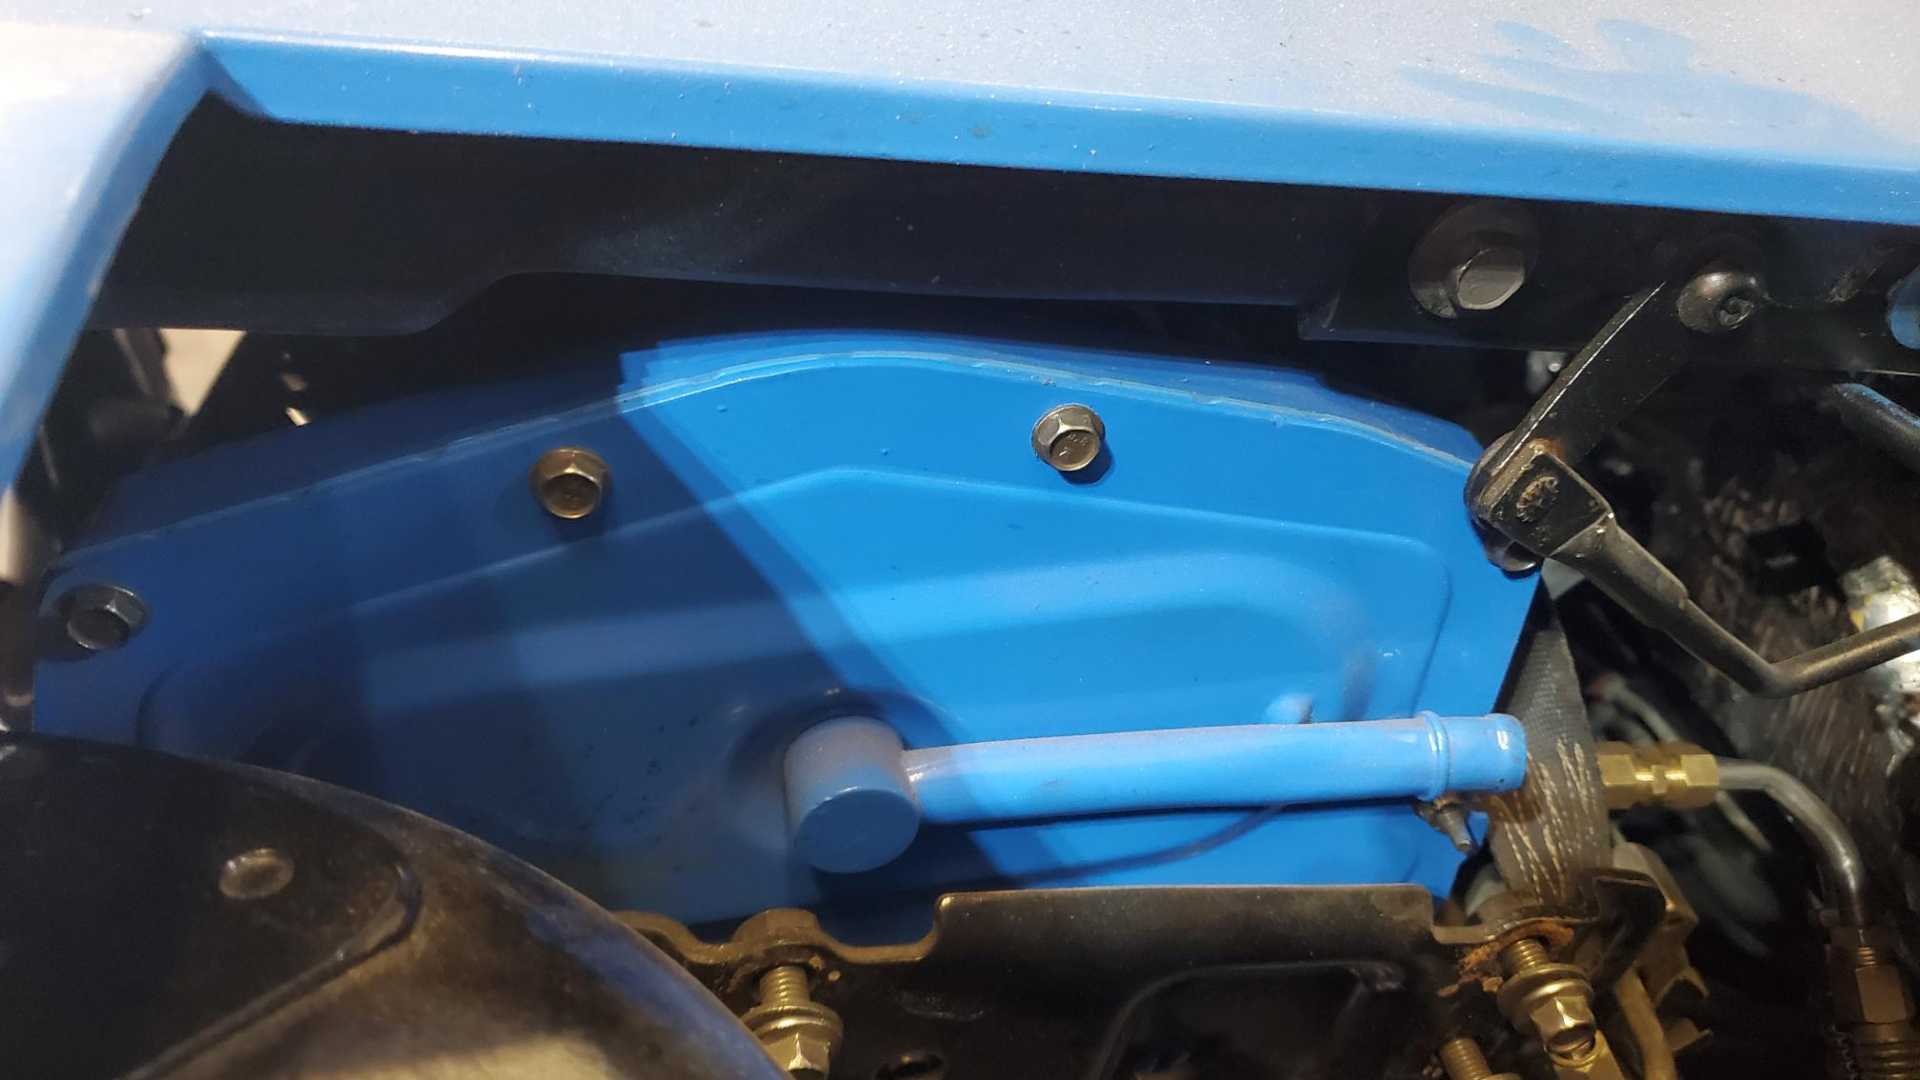
Here’s what I came up with to mount a front sway bar on the engine cradle. Decided to mount the bar with the ends pointing to the back.
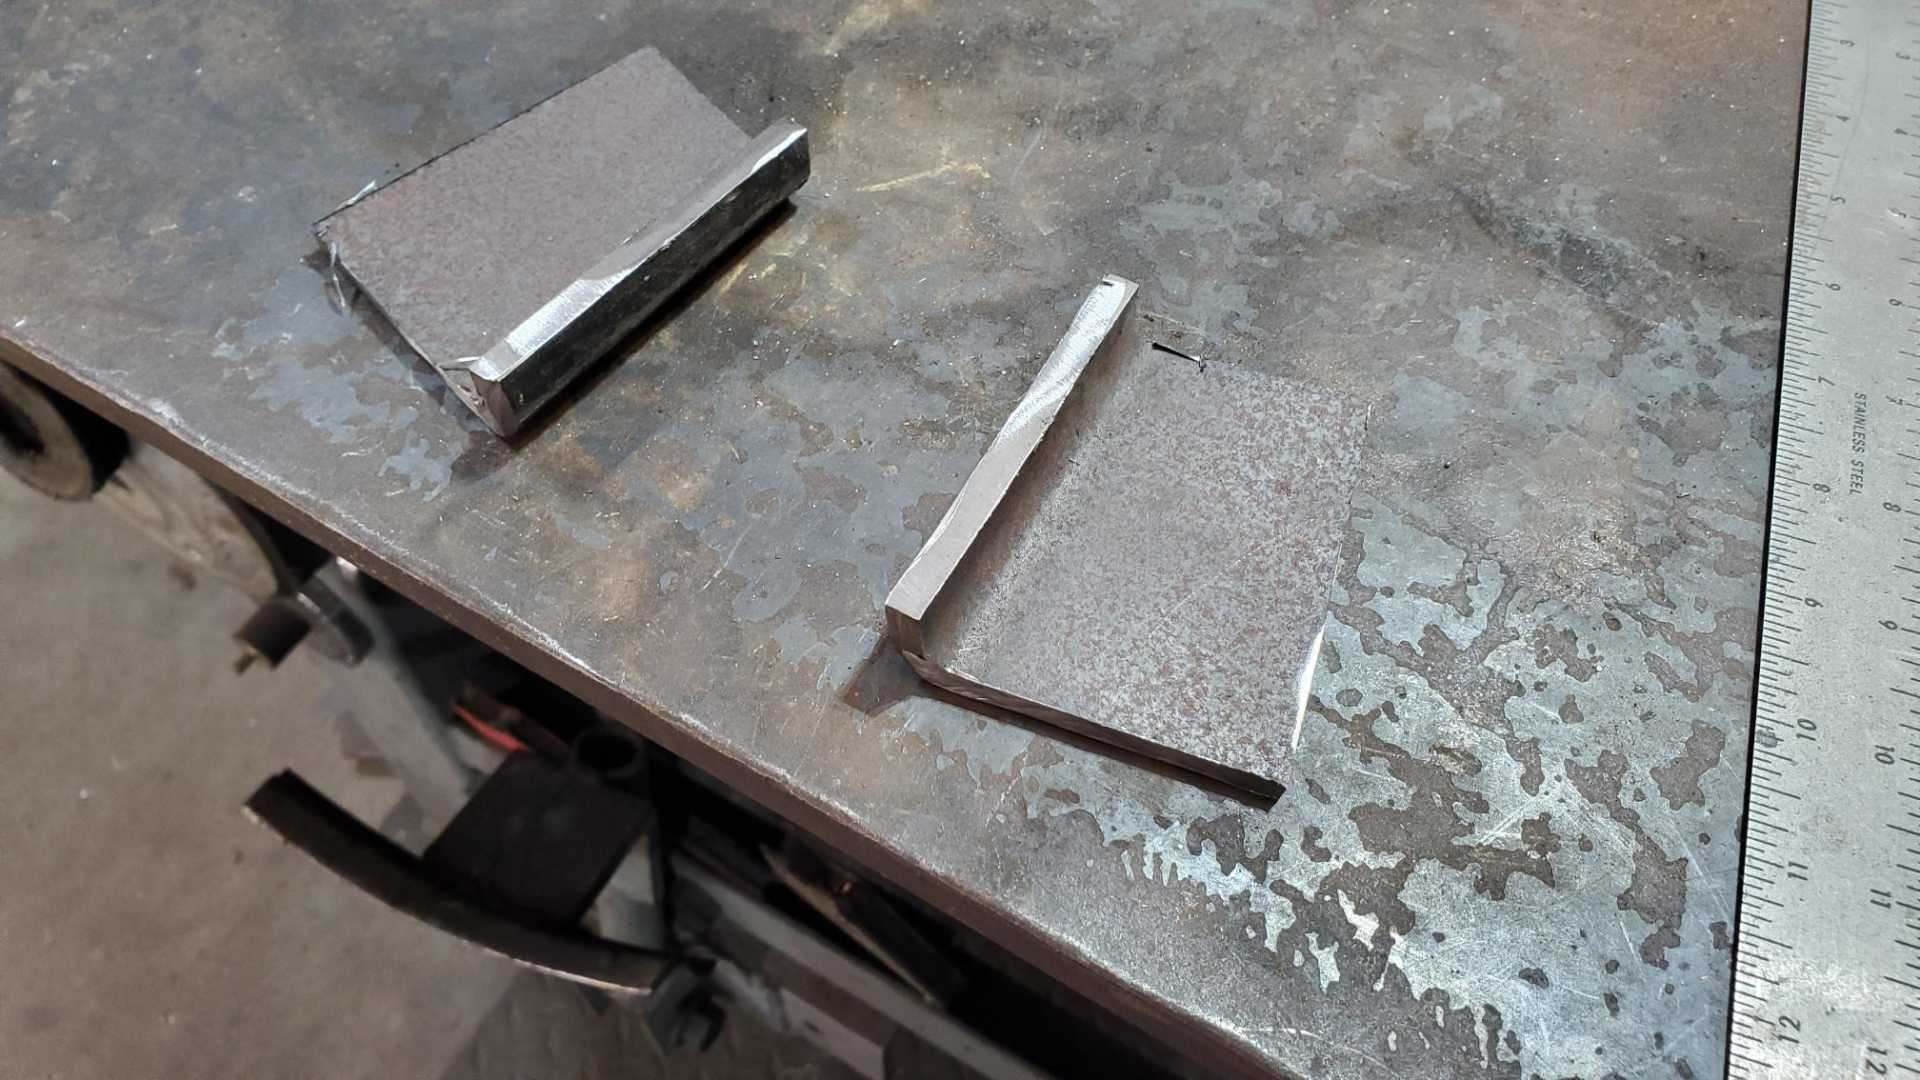
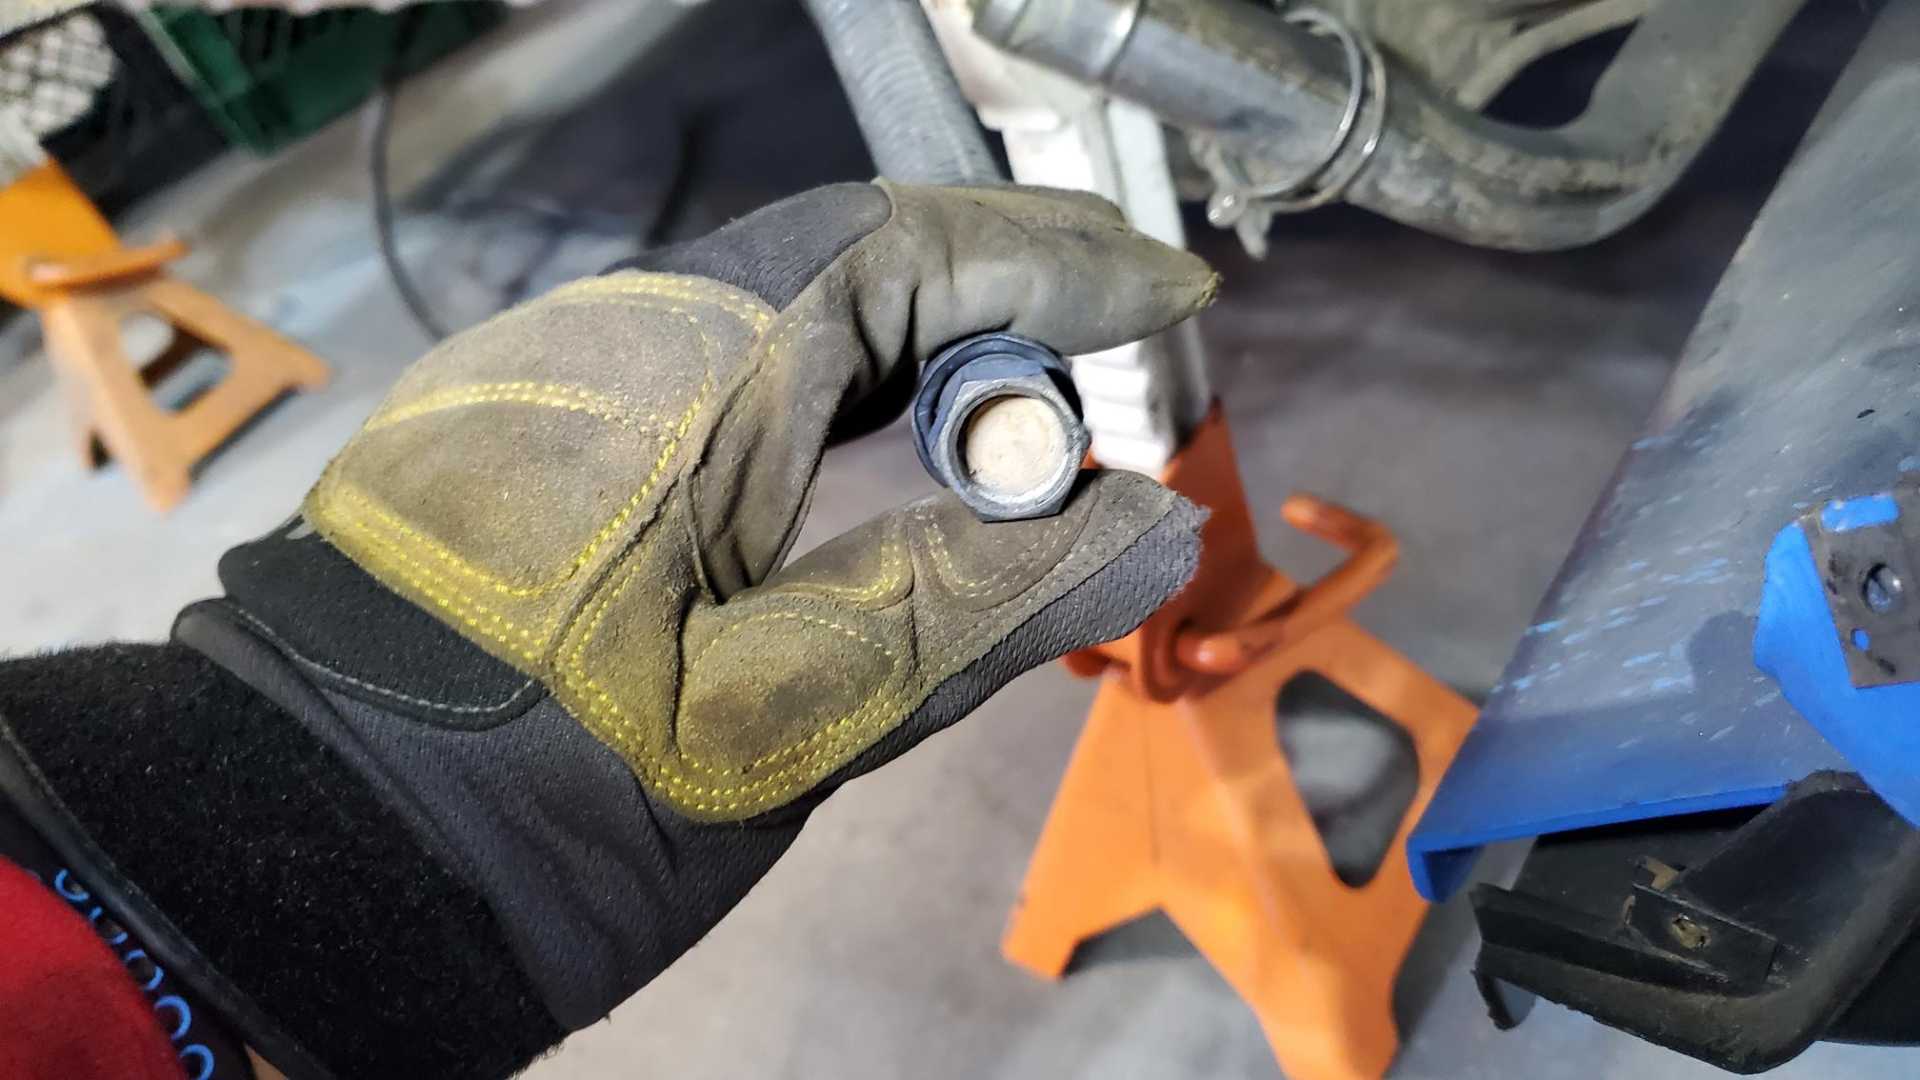
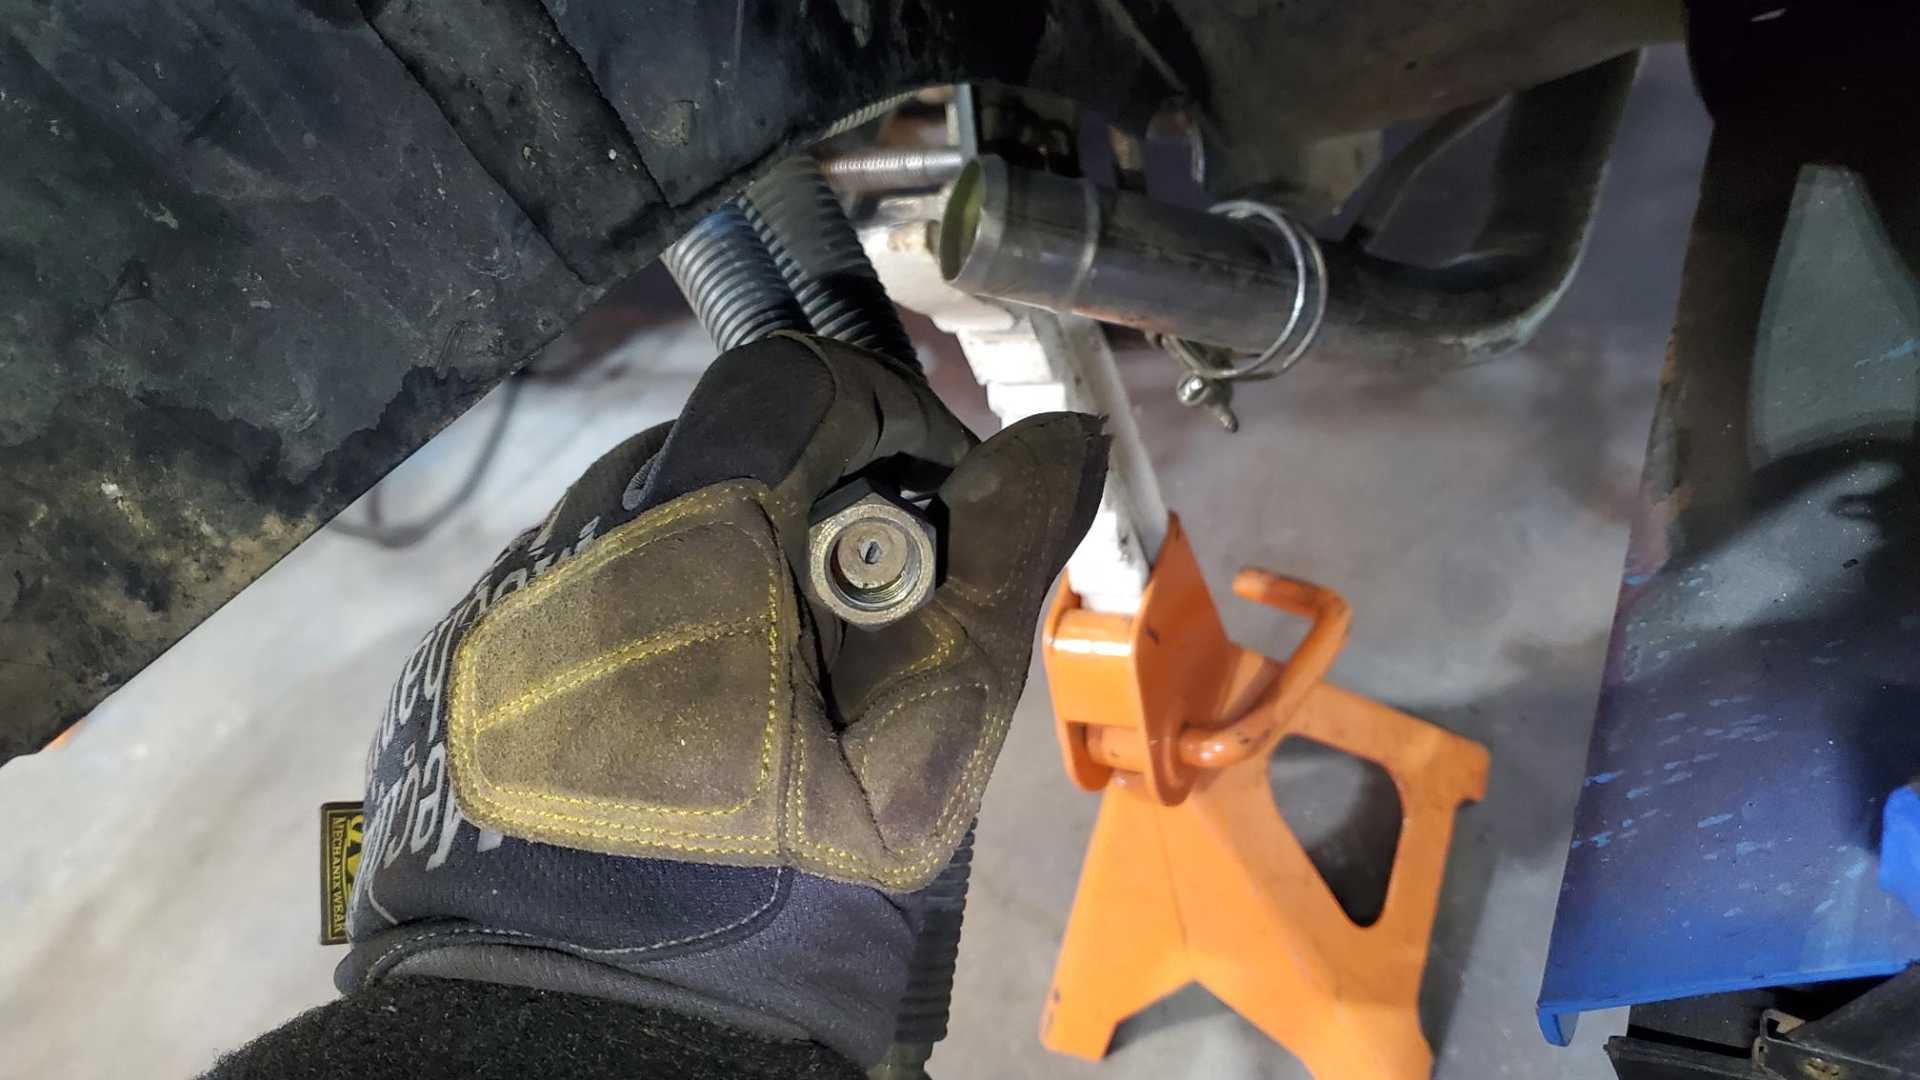
I couldn’t mount the bushing brackets directly to the cradle because of the curves in the bar. I couldn’t use flat spacers because of the plate I used for the primary engine mount. I used some heavy-walled square tubing to cut out a couple of plates with an offset to align the bushing mount so it’s perpendicular to the bar.
I thought about welding the plates to the cradle but figured I should make them removable in case there’s a problem I haven’t anticipated.
I’m very happy with how they came out, which makes me worry that I’ve missed some obvious reason for NOT doing it this way. Oh well. We’ll burn that bridge when we come to it, as my brother used to say.
[This message has been edited by Quadfather (edited 10-20-2022).]
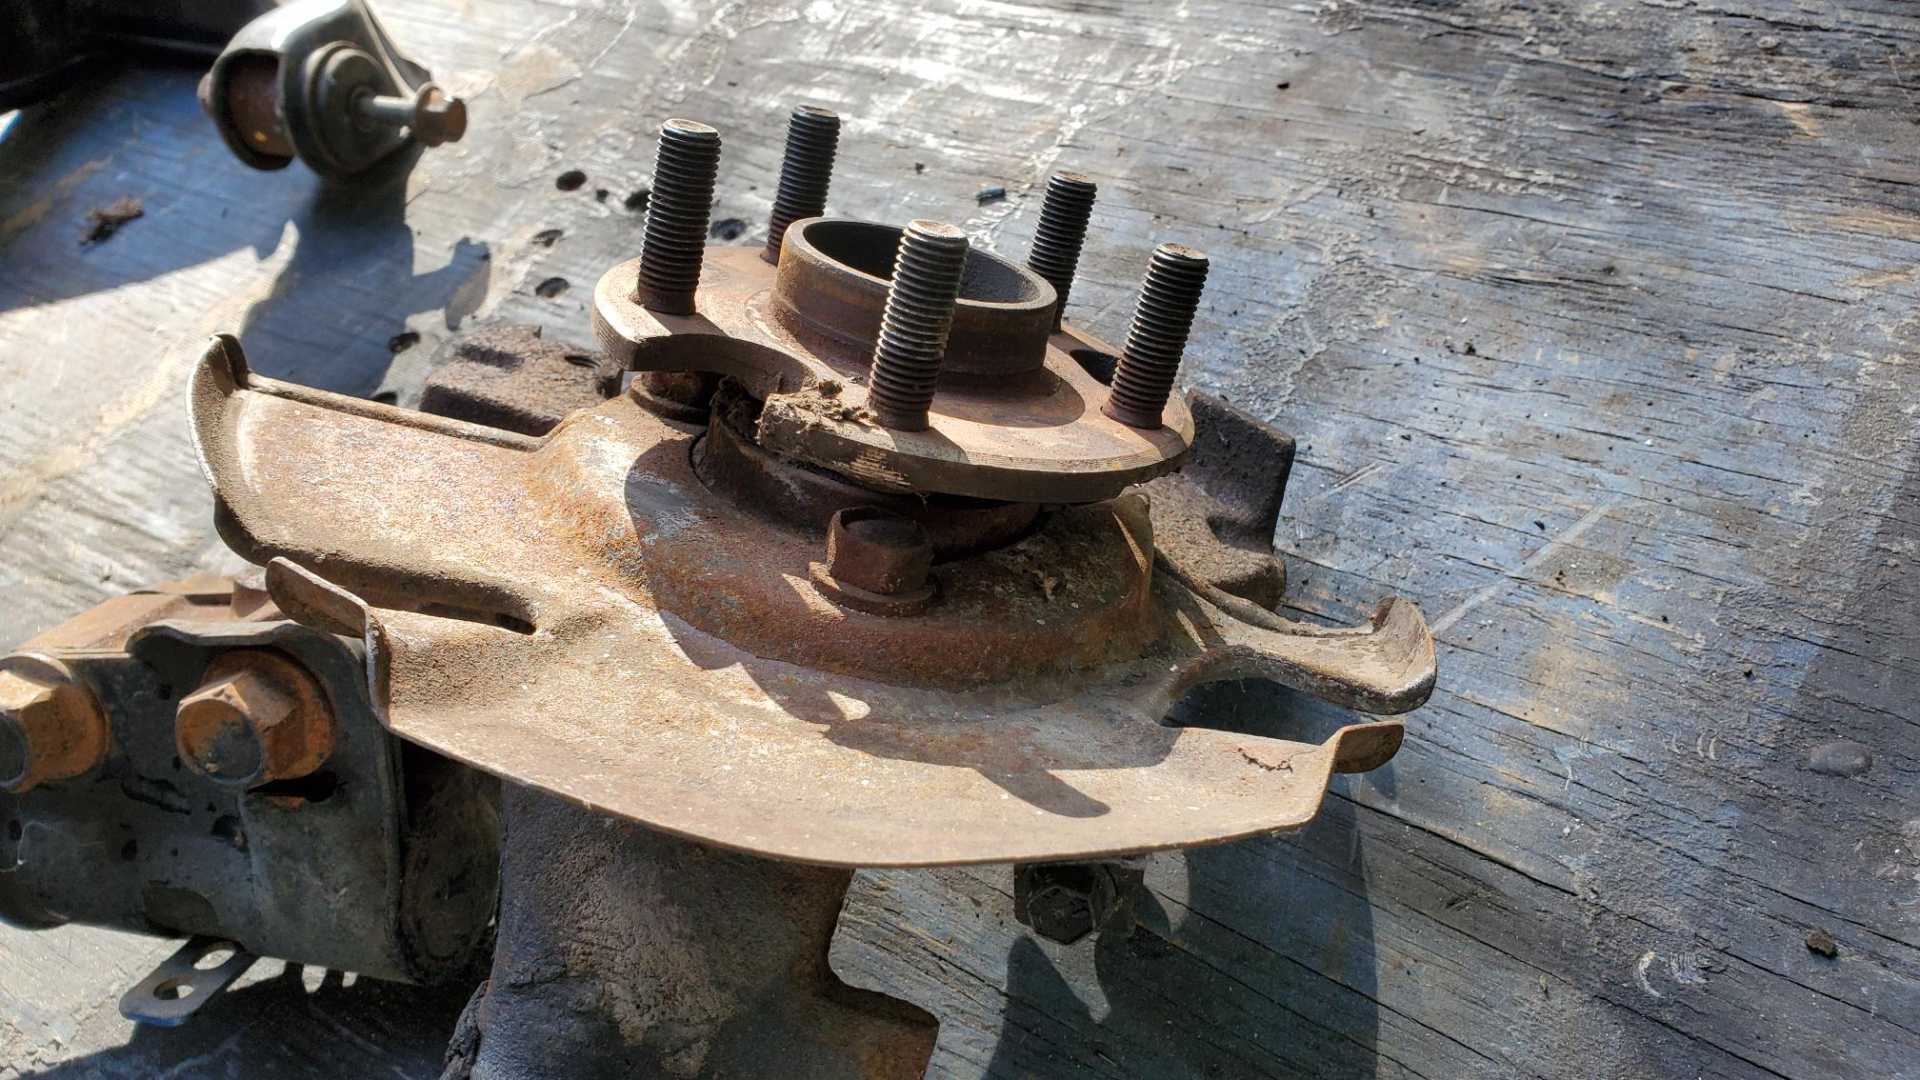
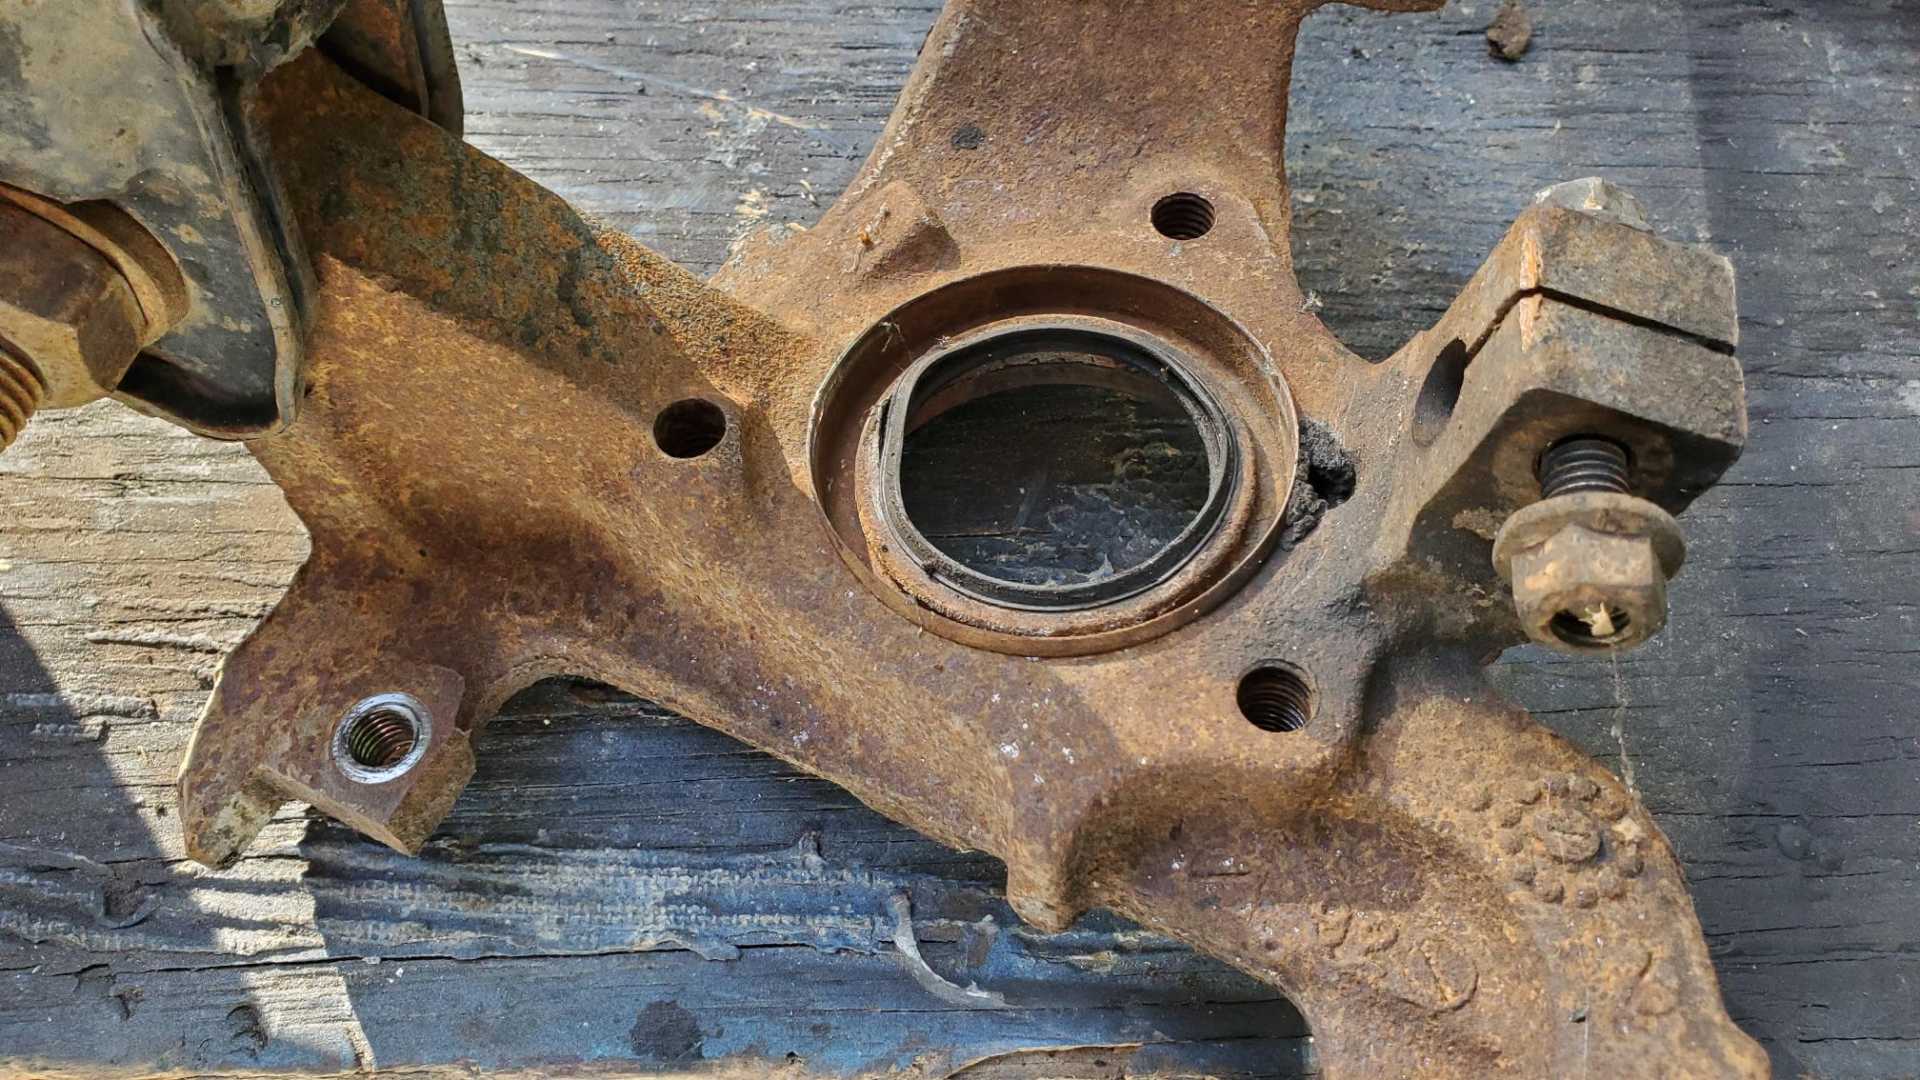
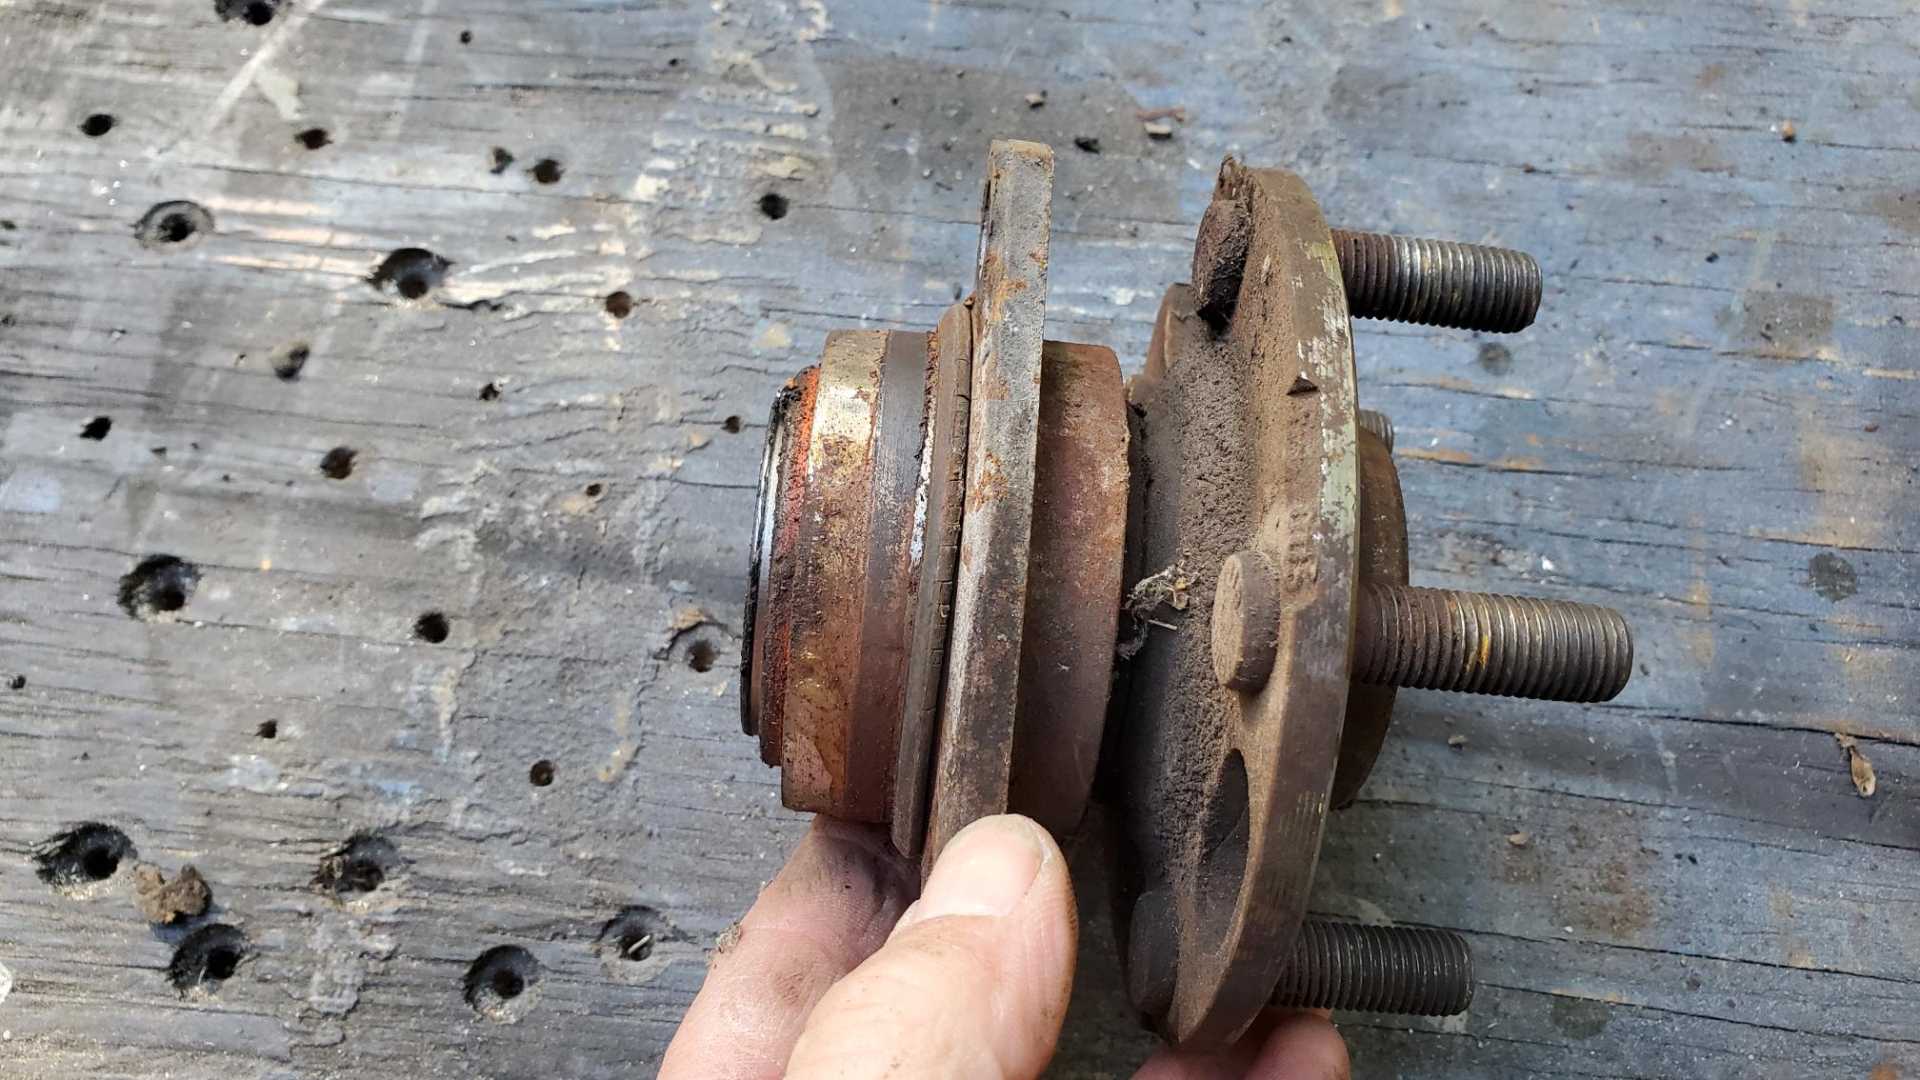
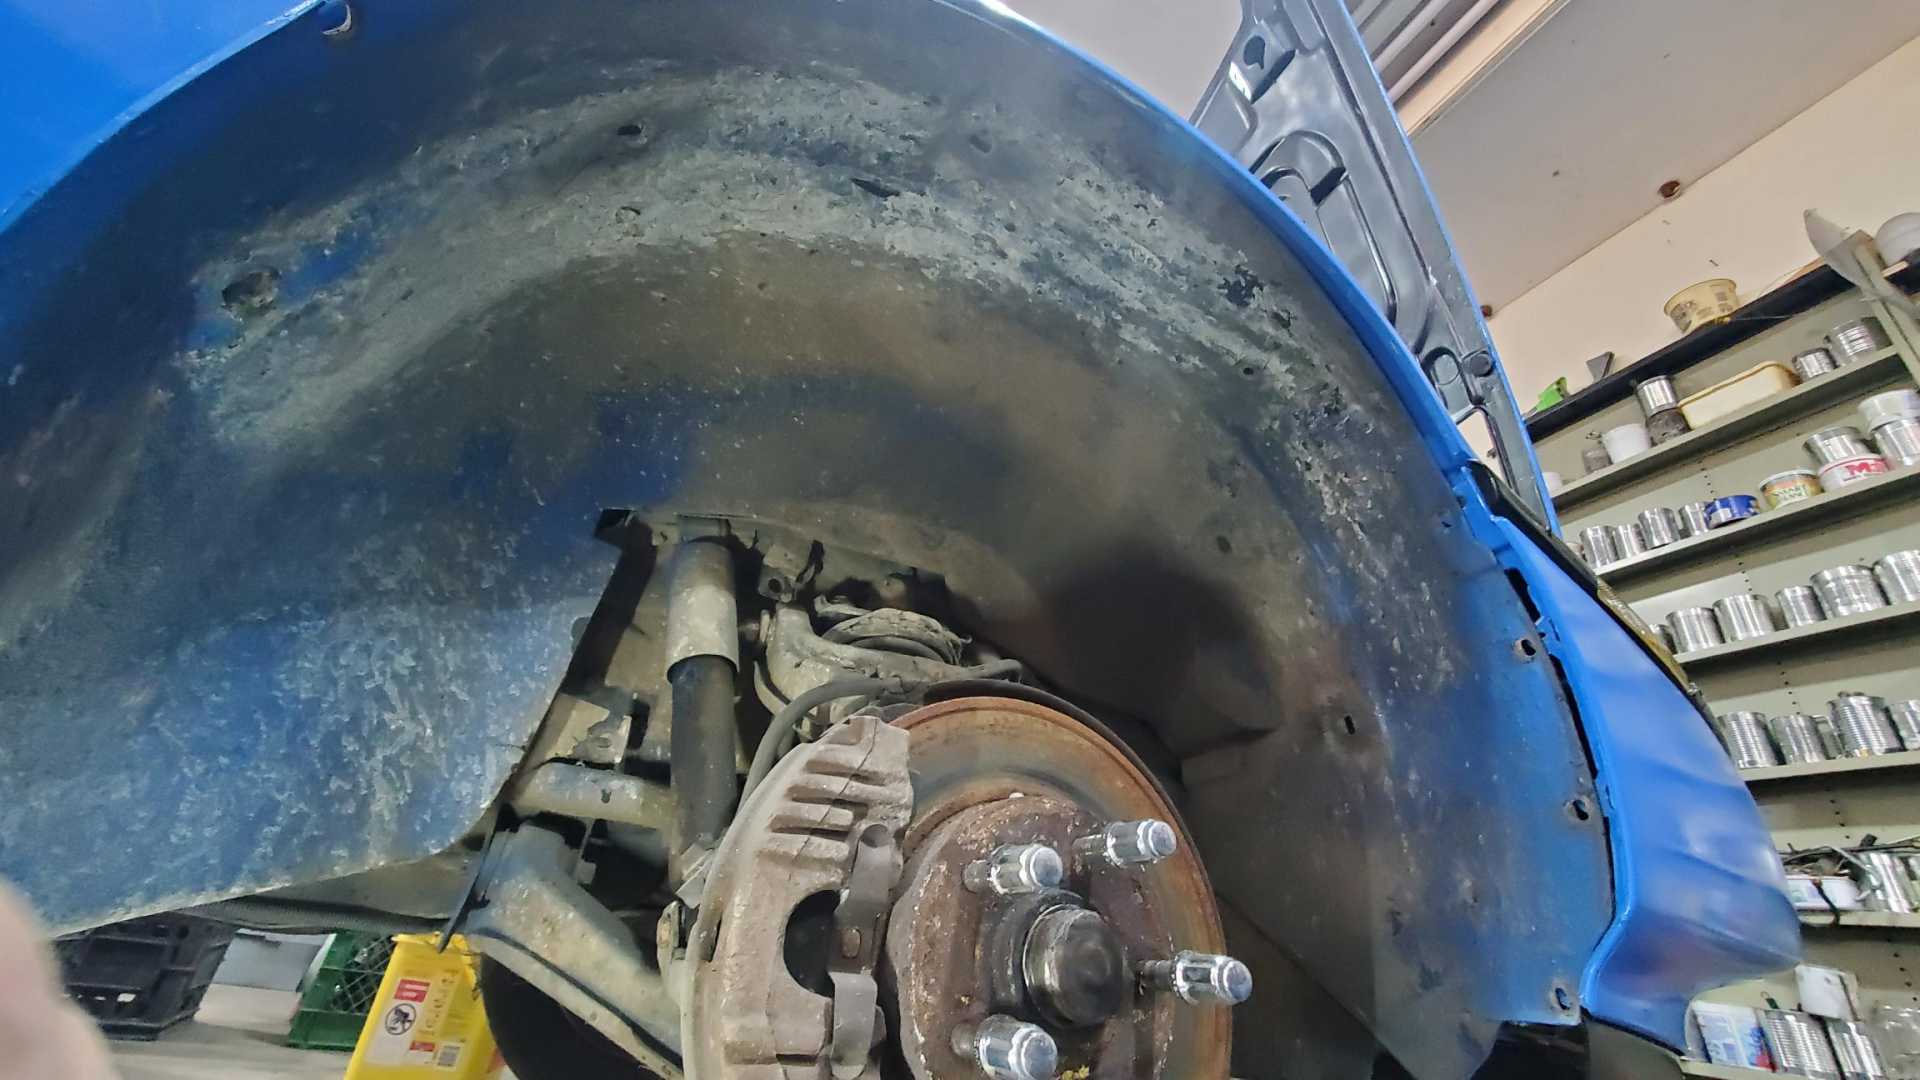
While I was waiting for the sway bar bushings to arrive, I disassembled one of the rear knuckle/hub/caliper assemblies. First time I’ve had one of these apart since I bought the car in 2011.
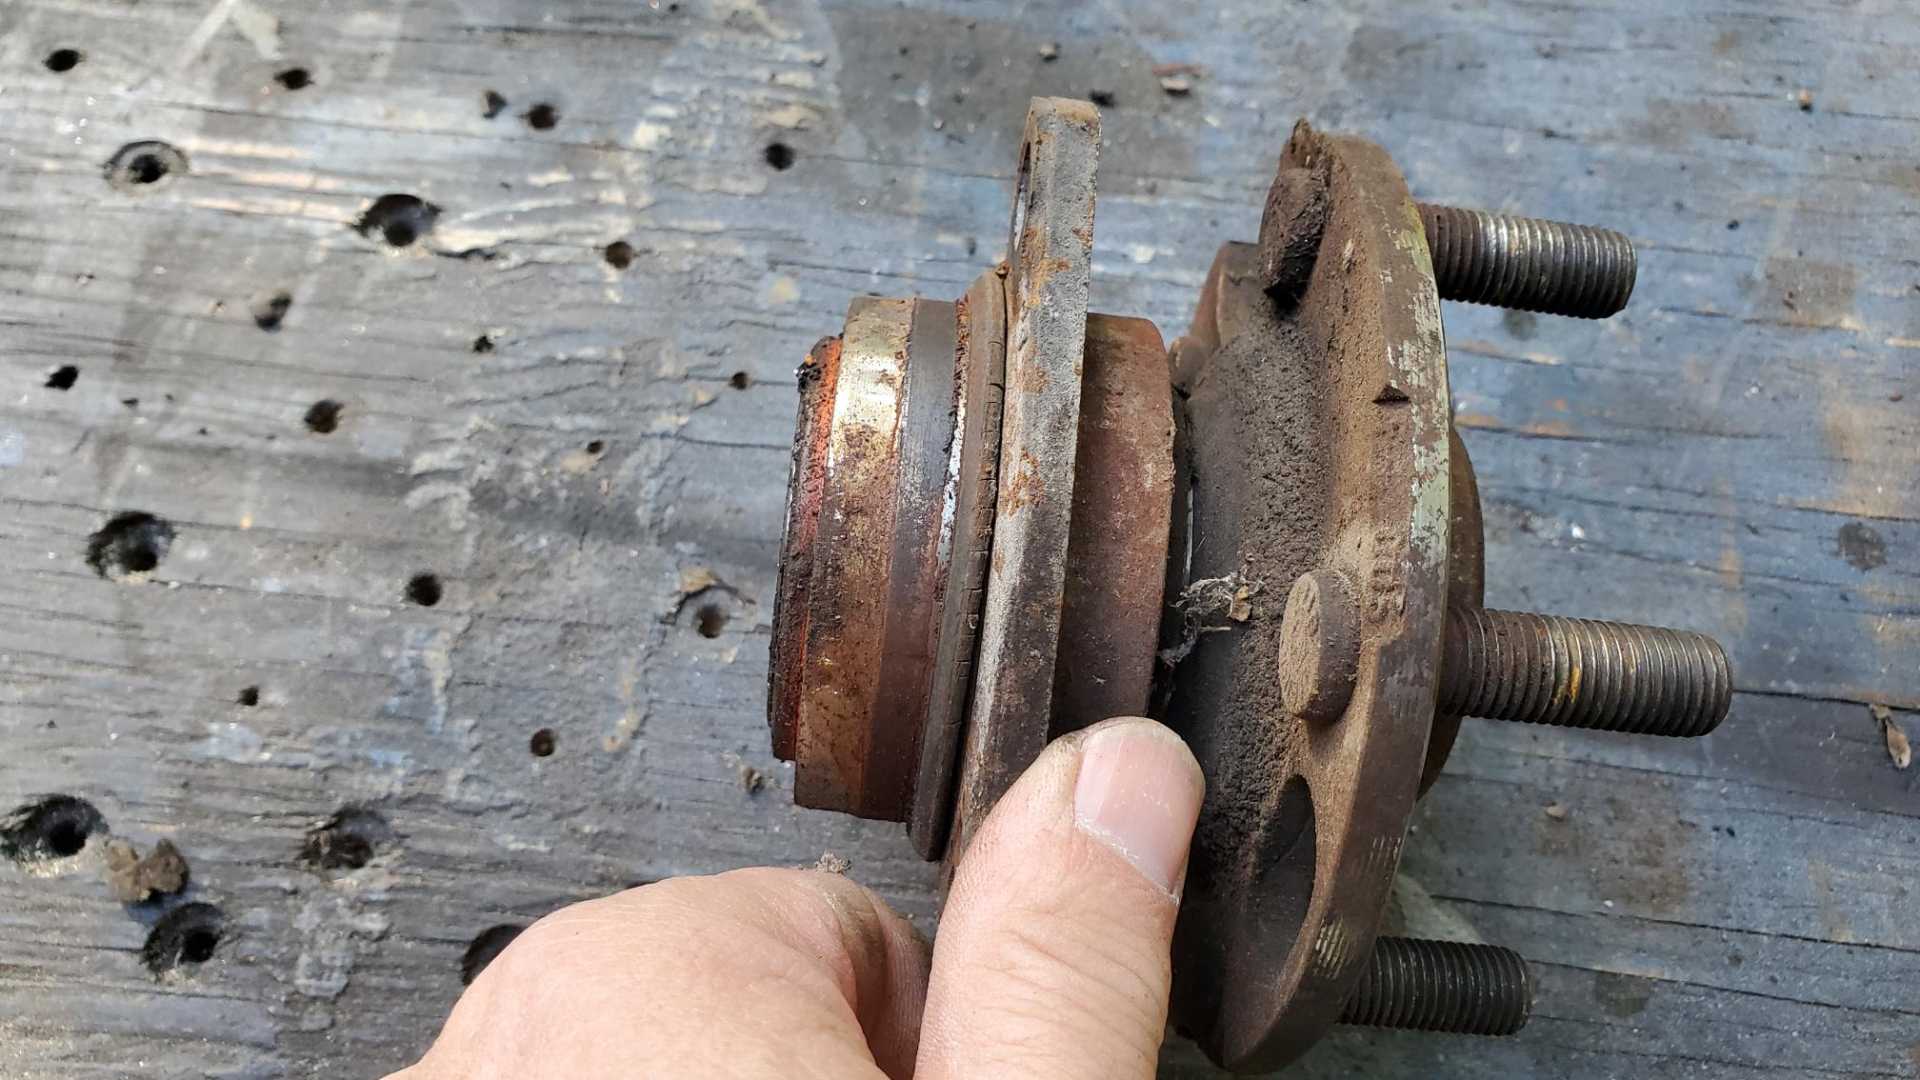
Wouldn’t be surprised if these are the factory hubs. Everything is worn.
The hub has an 1/8th-inch of slop in it. Might be hard to tell in the photos, but look at the left edge.
Rock Auto has replacements for about $65 a pop, but the budget is tapped out at the moment.
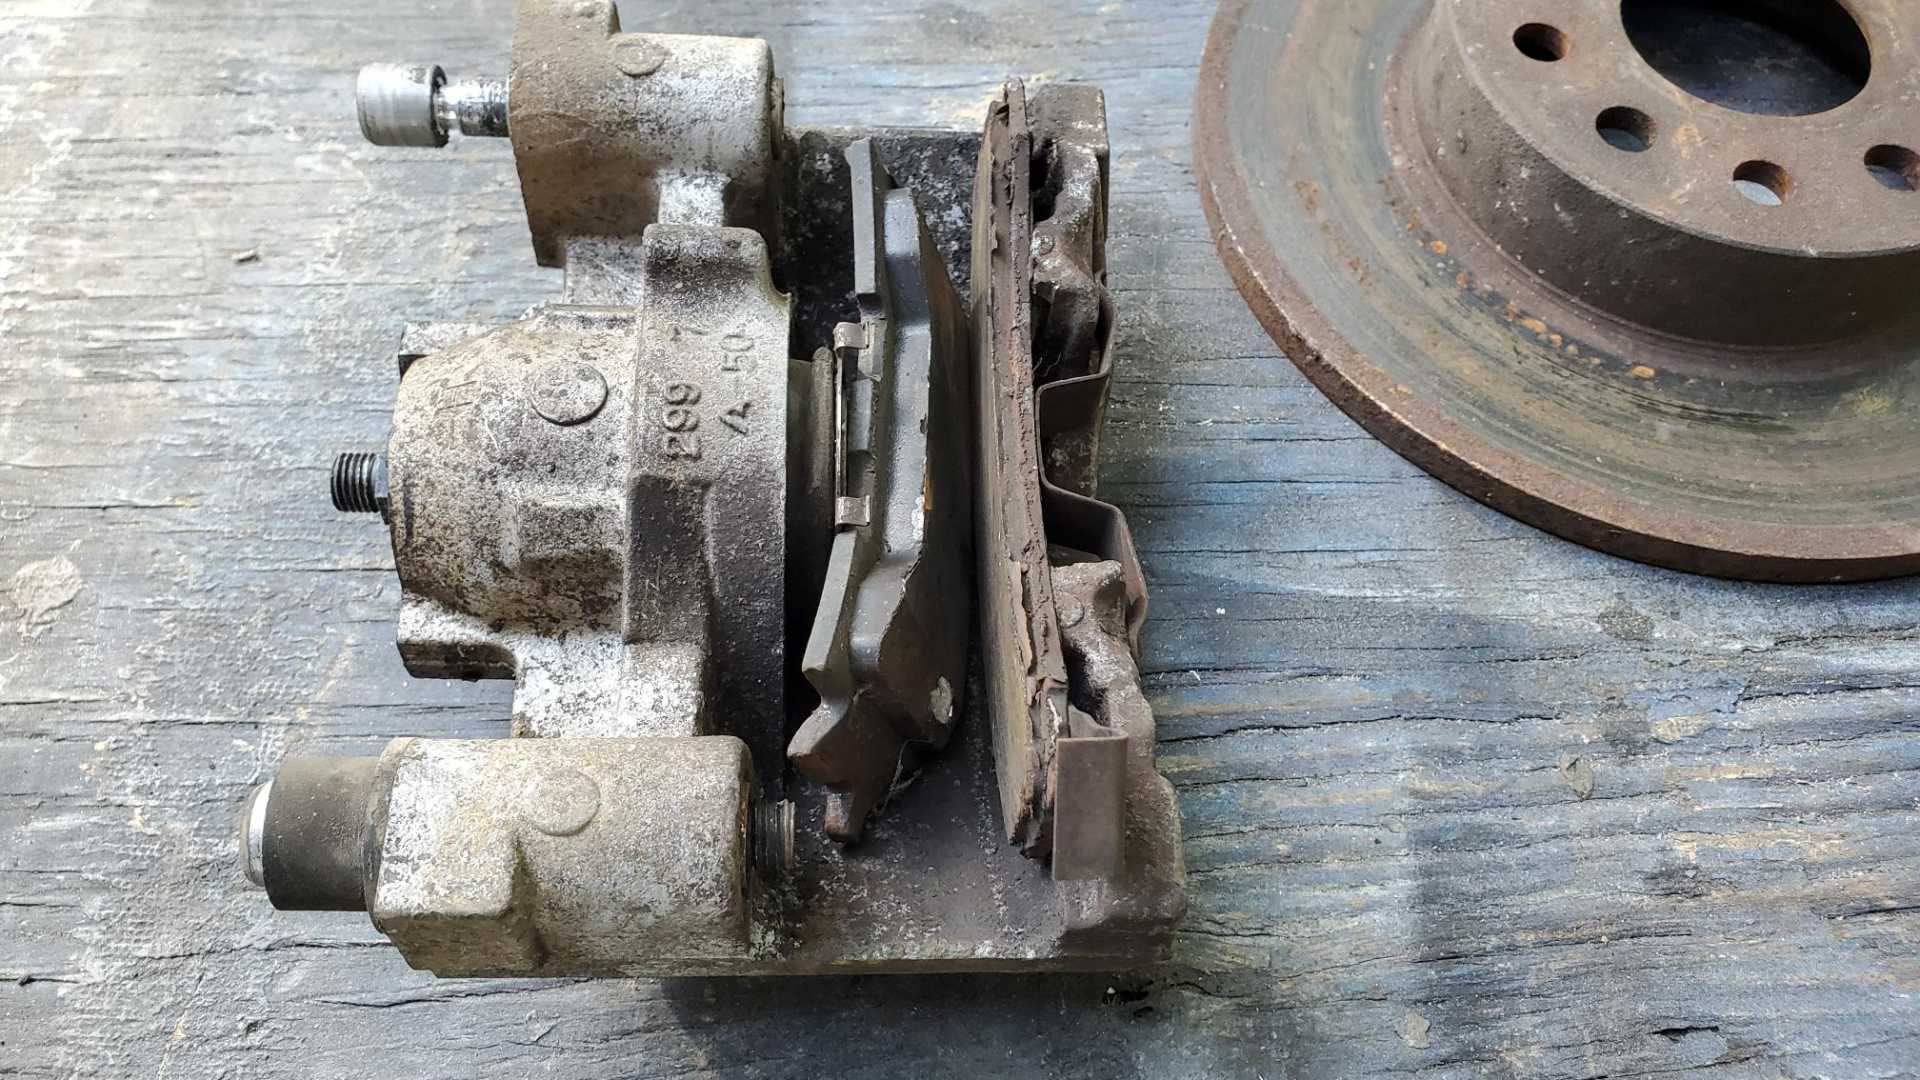
Are the brake pads on the rear of an ‘87 supposed to be different sizes and shapes?
I’d like to paint the rear calipers and if I’m going to do that I should probably rebuild them, too, but I haven’t researched that process yet.
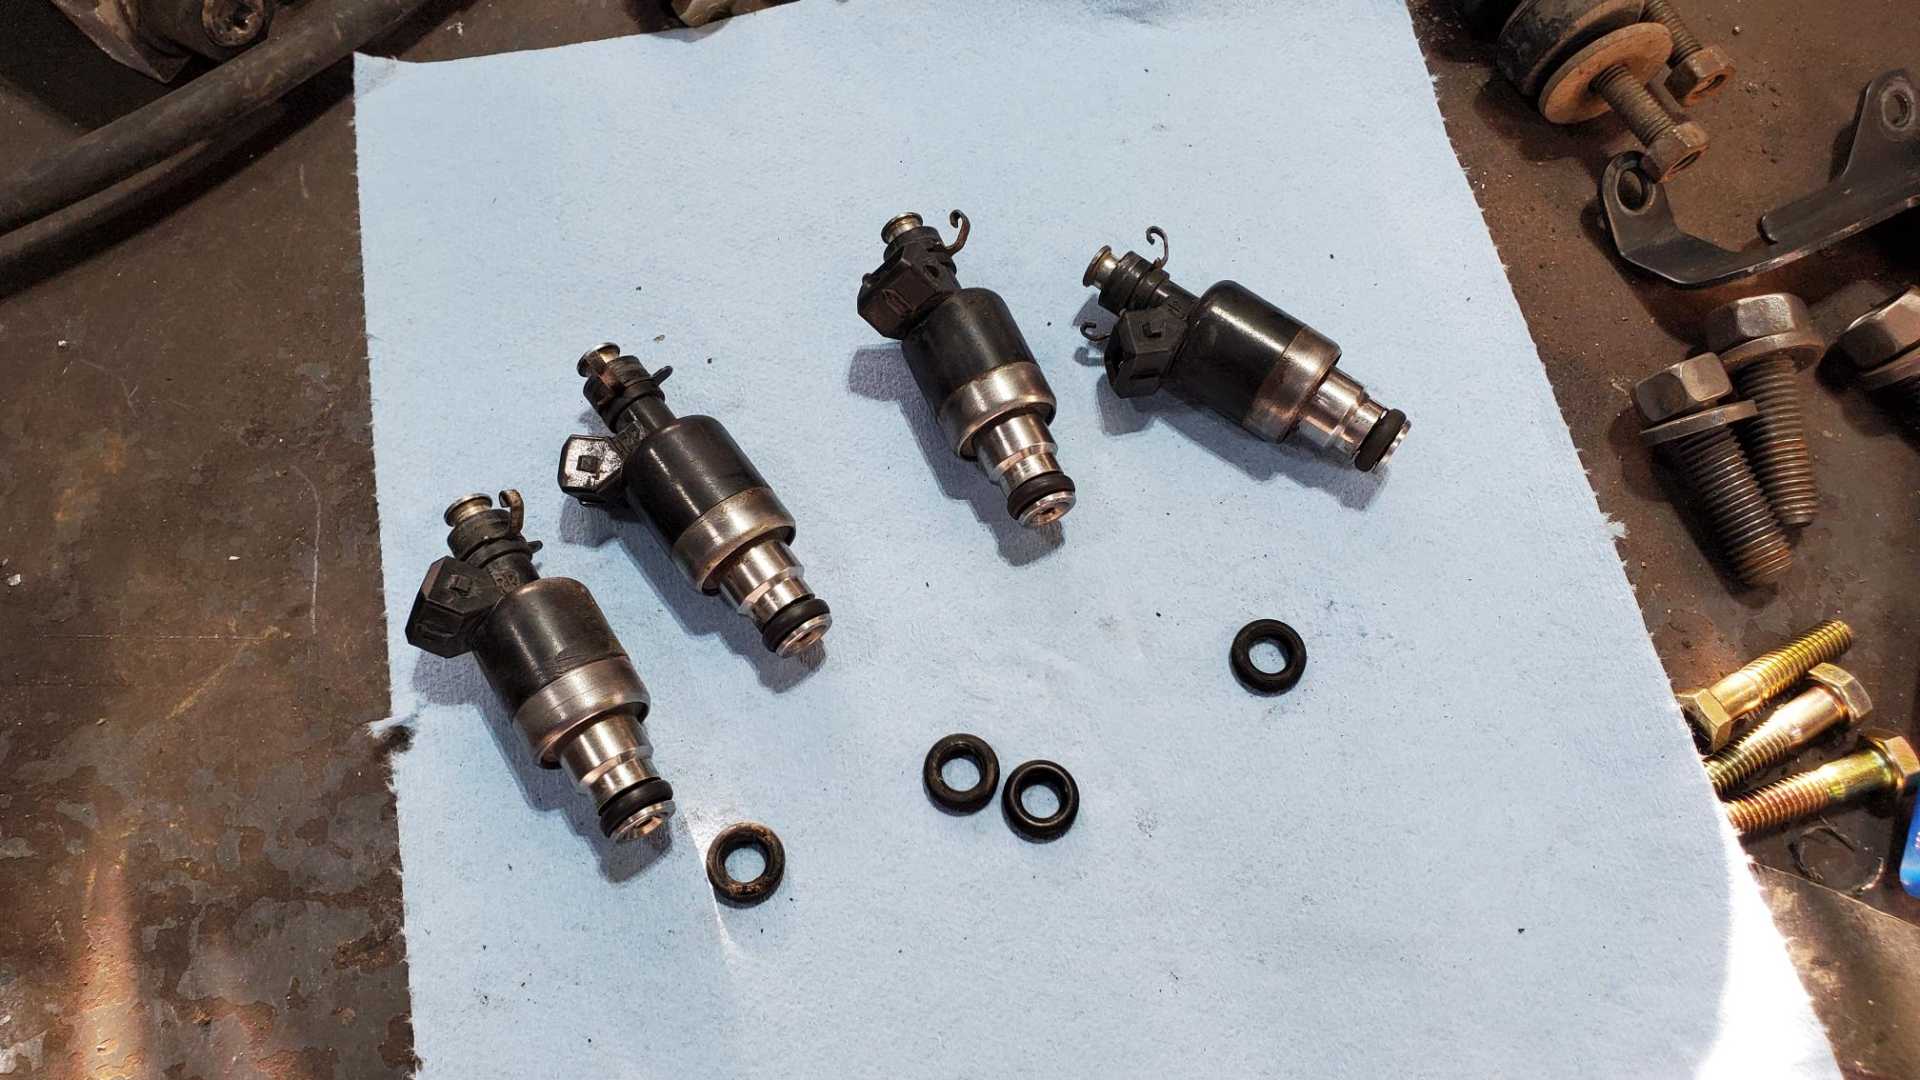
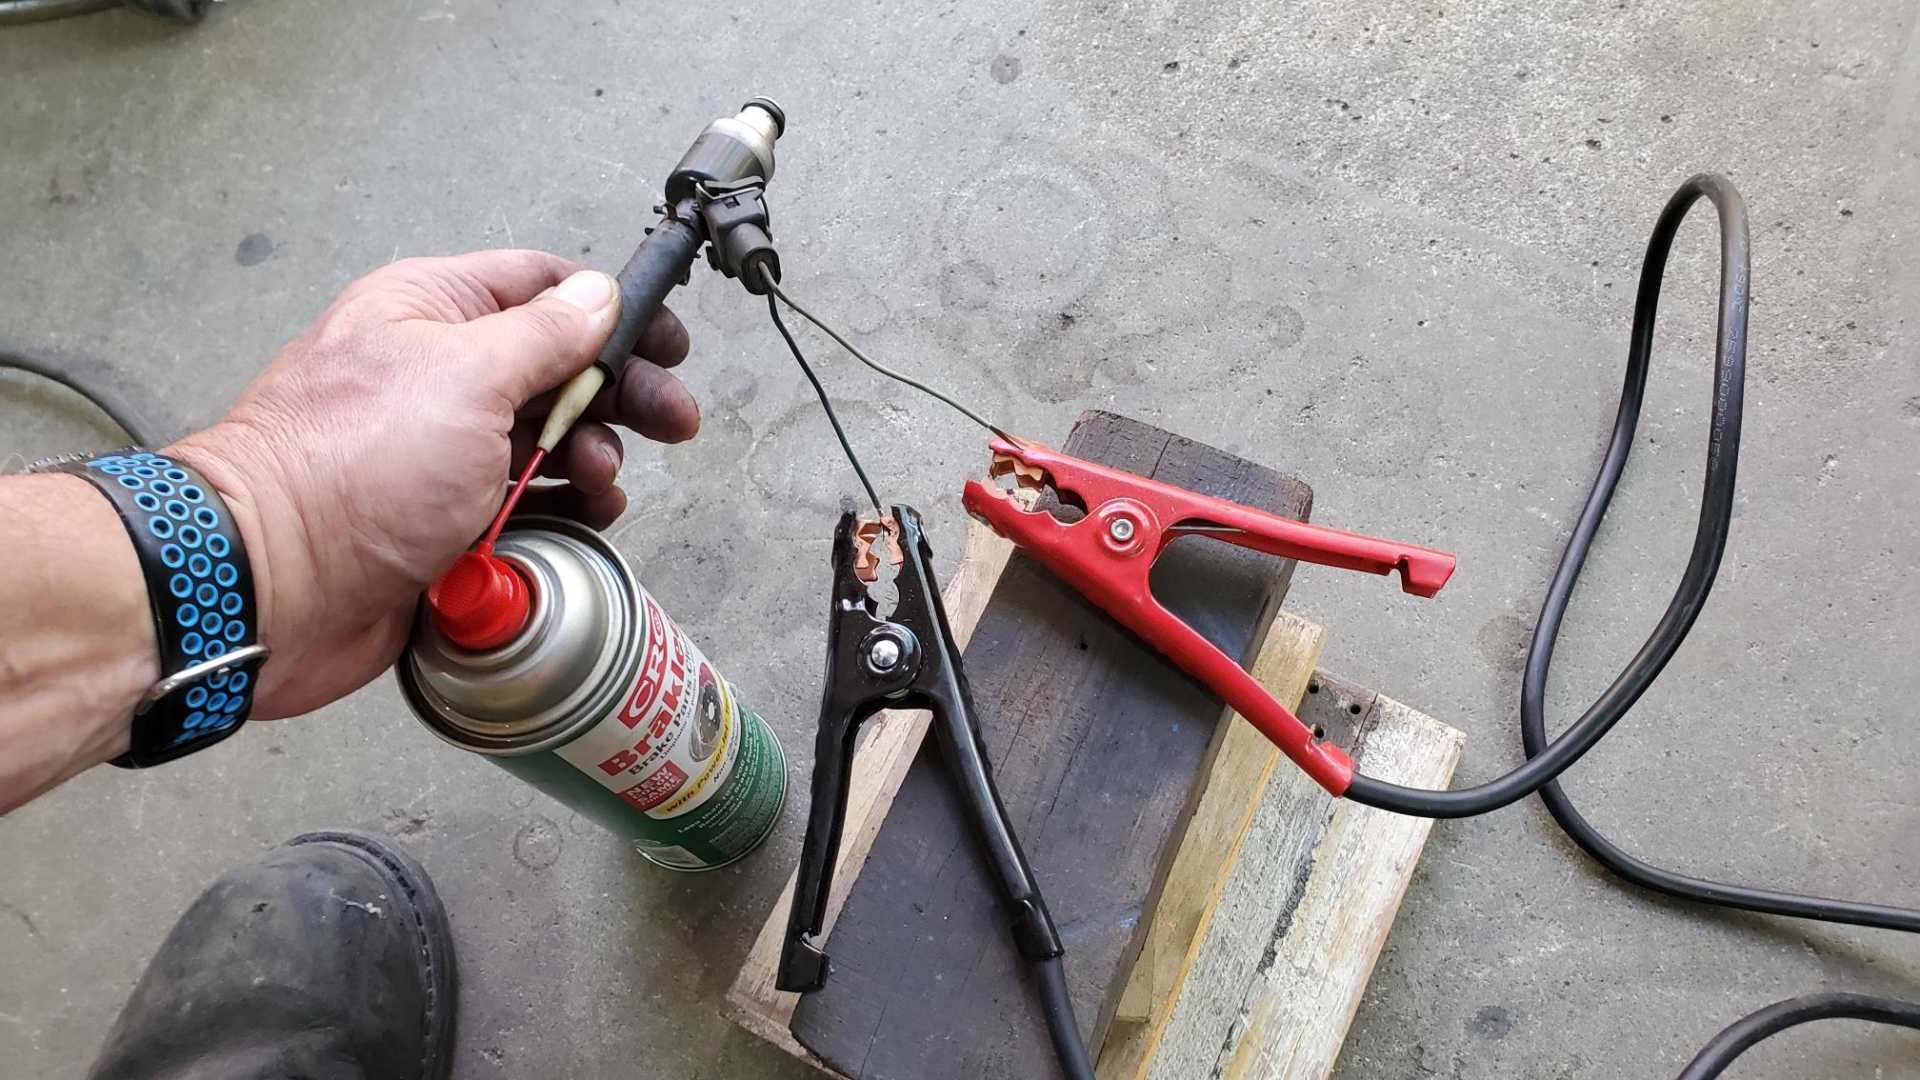
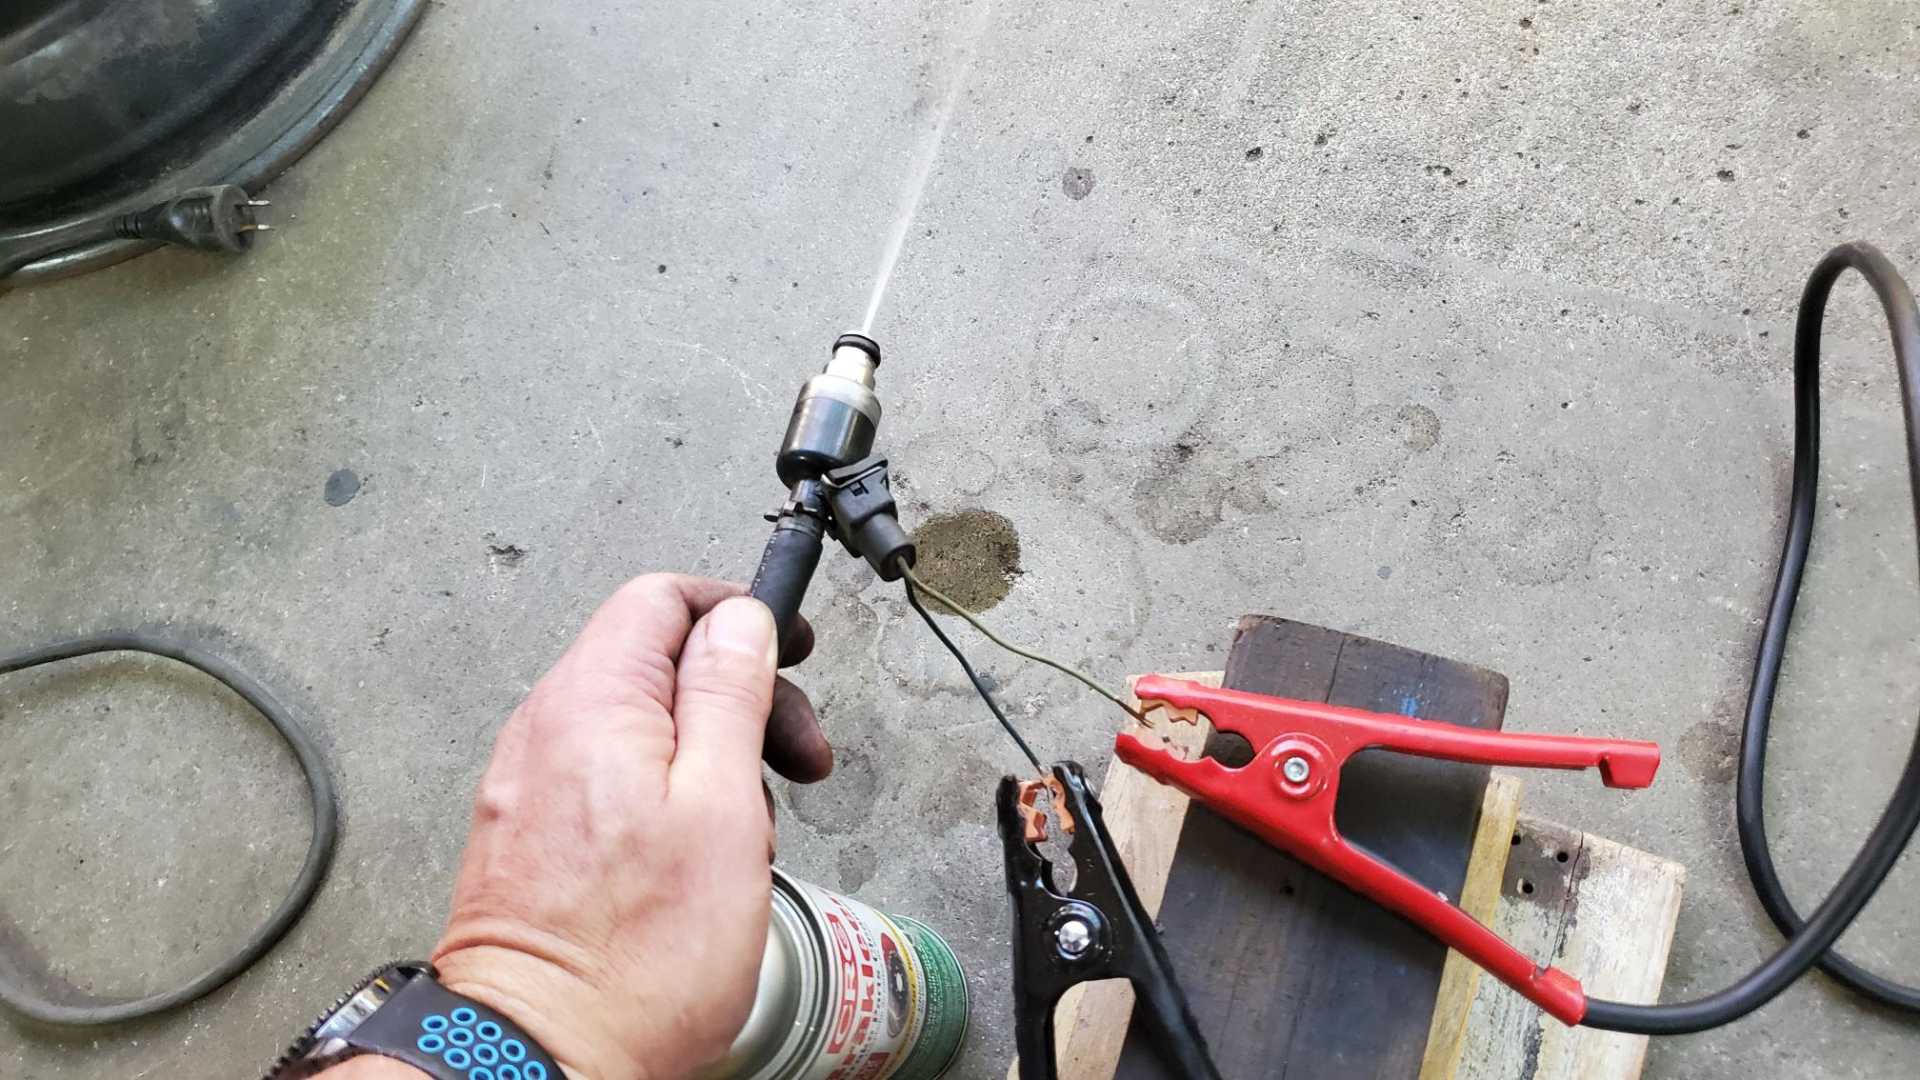
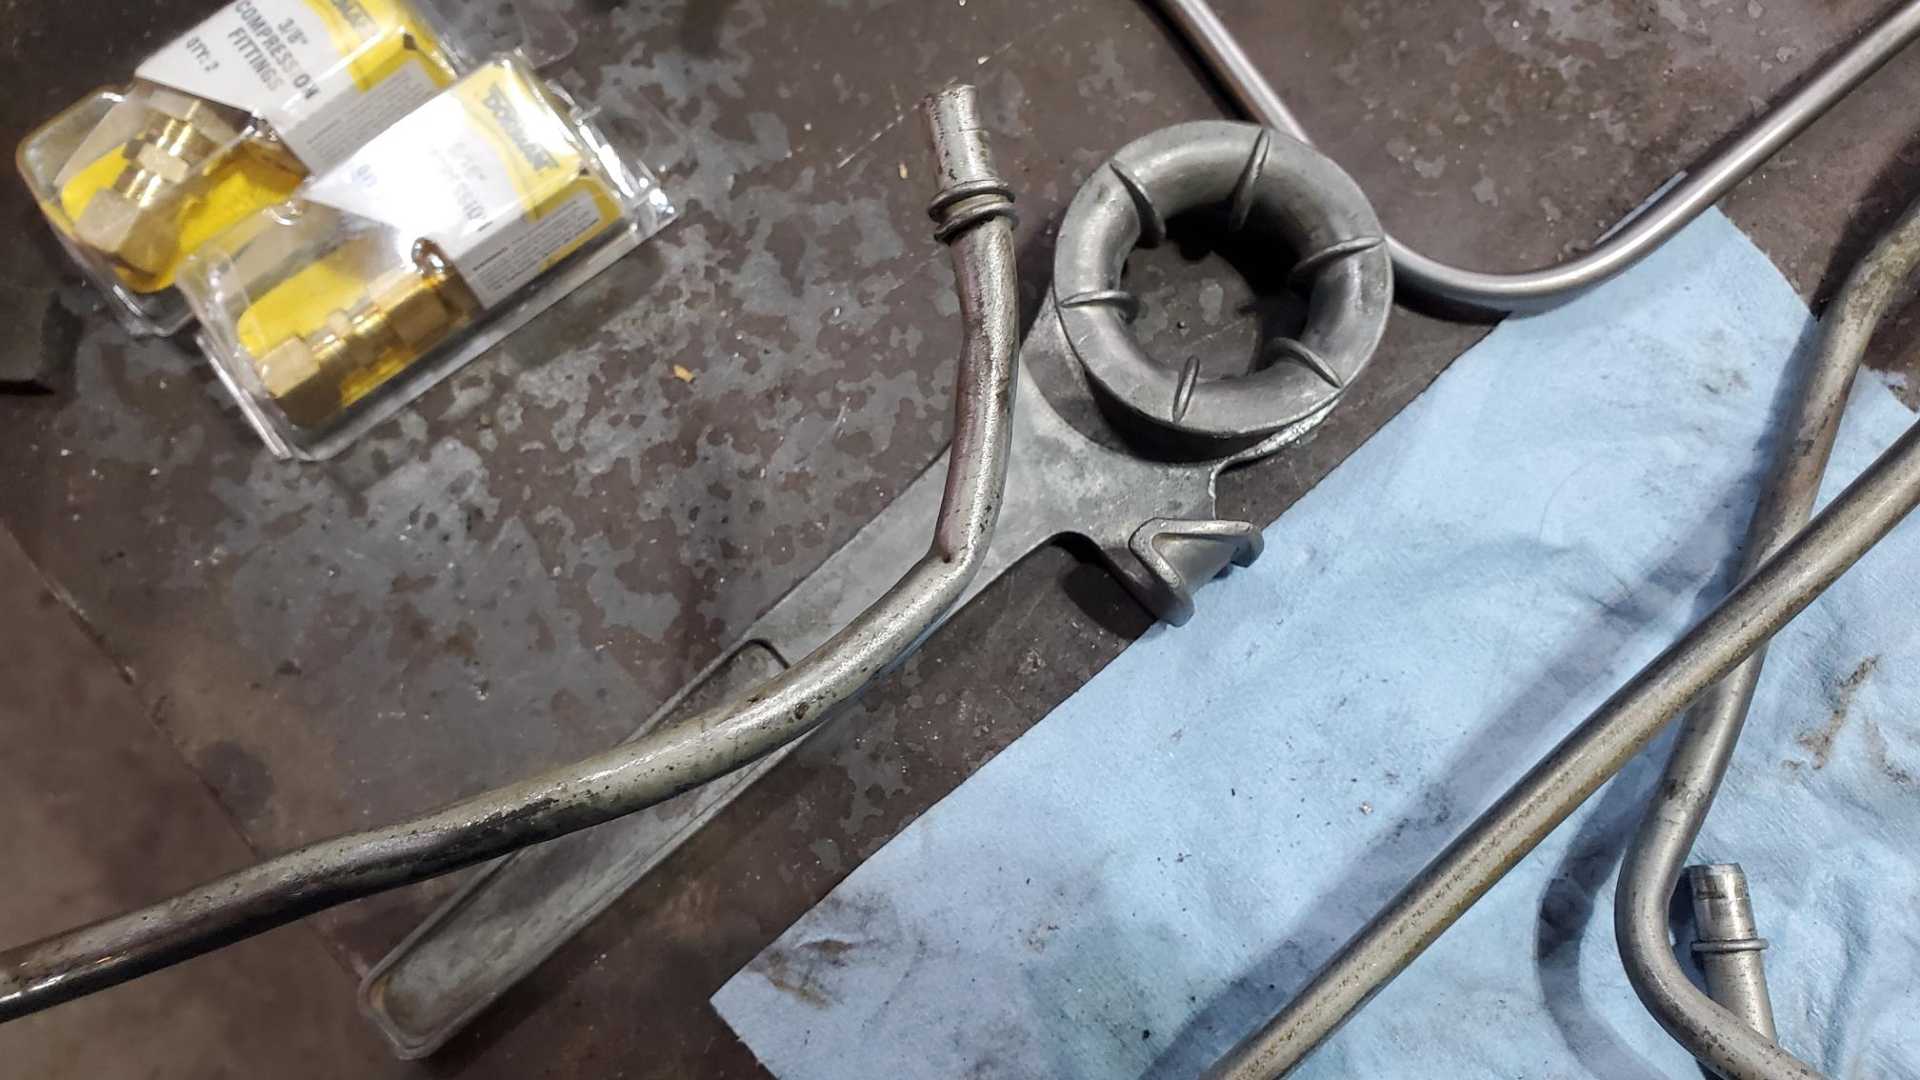
Got some time to fiddle with the fuel injectors this week. These were working when I pulled the engine 10 years ago but what little gas still in them smelled awful.
I found some videos on YouTube that show how to use brake cleaner and a tire stem to clean and test fuel injectors. I didn’t have a tire stem that was the right size, so I used a plastic air compressor tip and rubber hose. Really needed a third hand to do it but it worked.
Still need to find steel tubing to plumb from the fuel rail to the Fiero fuel lines. Maybe this weekend.
[This message has been edited by Quadfather (edited 11-13-2022).]
For cleaning I like to attach a longer tube to the injector and hose clamp a compressor fitting on the other side, then I fill the tube with carb cleaner and hook it up to compressor at 45 psi, then just need to tap leads from 12v source to injector. Just another way to do it. I use a clear vinyl tubing so I can see how much carb cleaner is in there.
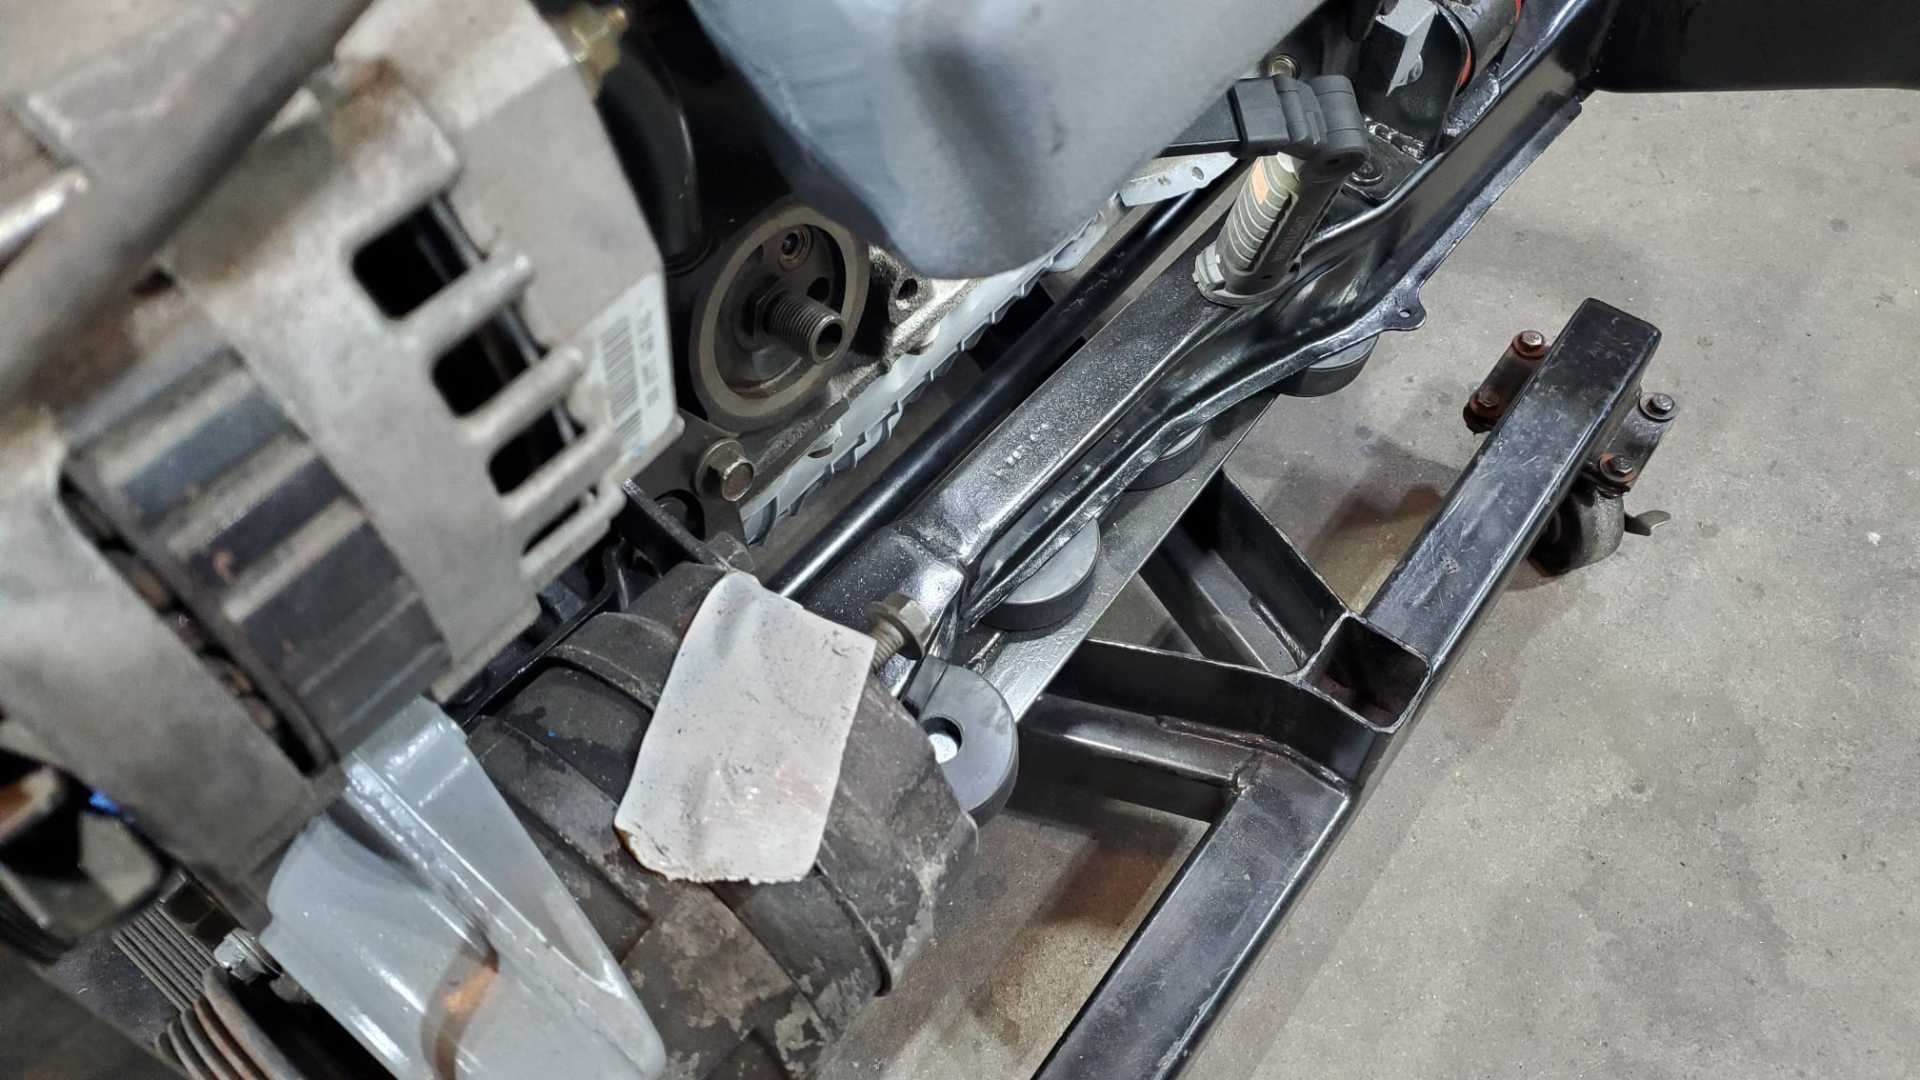
Looking good! Nice sway bar mounting solution, I think you picked a fine spot to put them, will maybe slightly complicate getting to the starter and possibly oil filter but not sure where quad 4 filter is located.
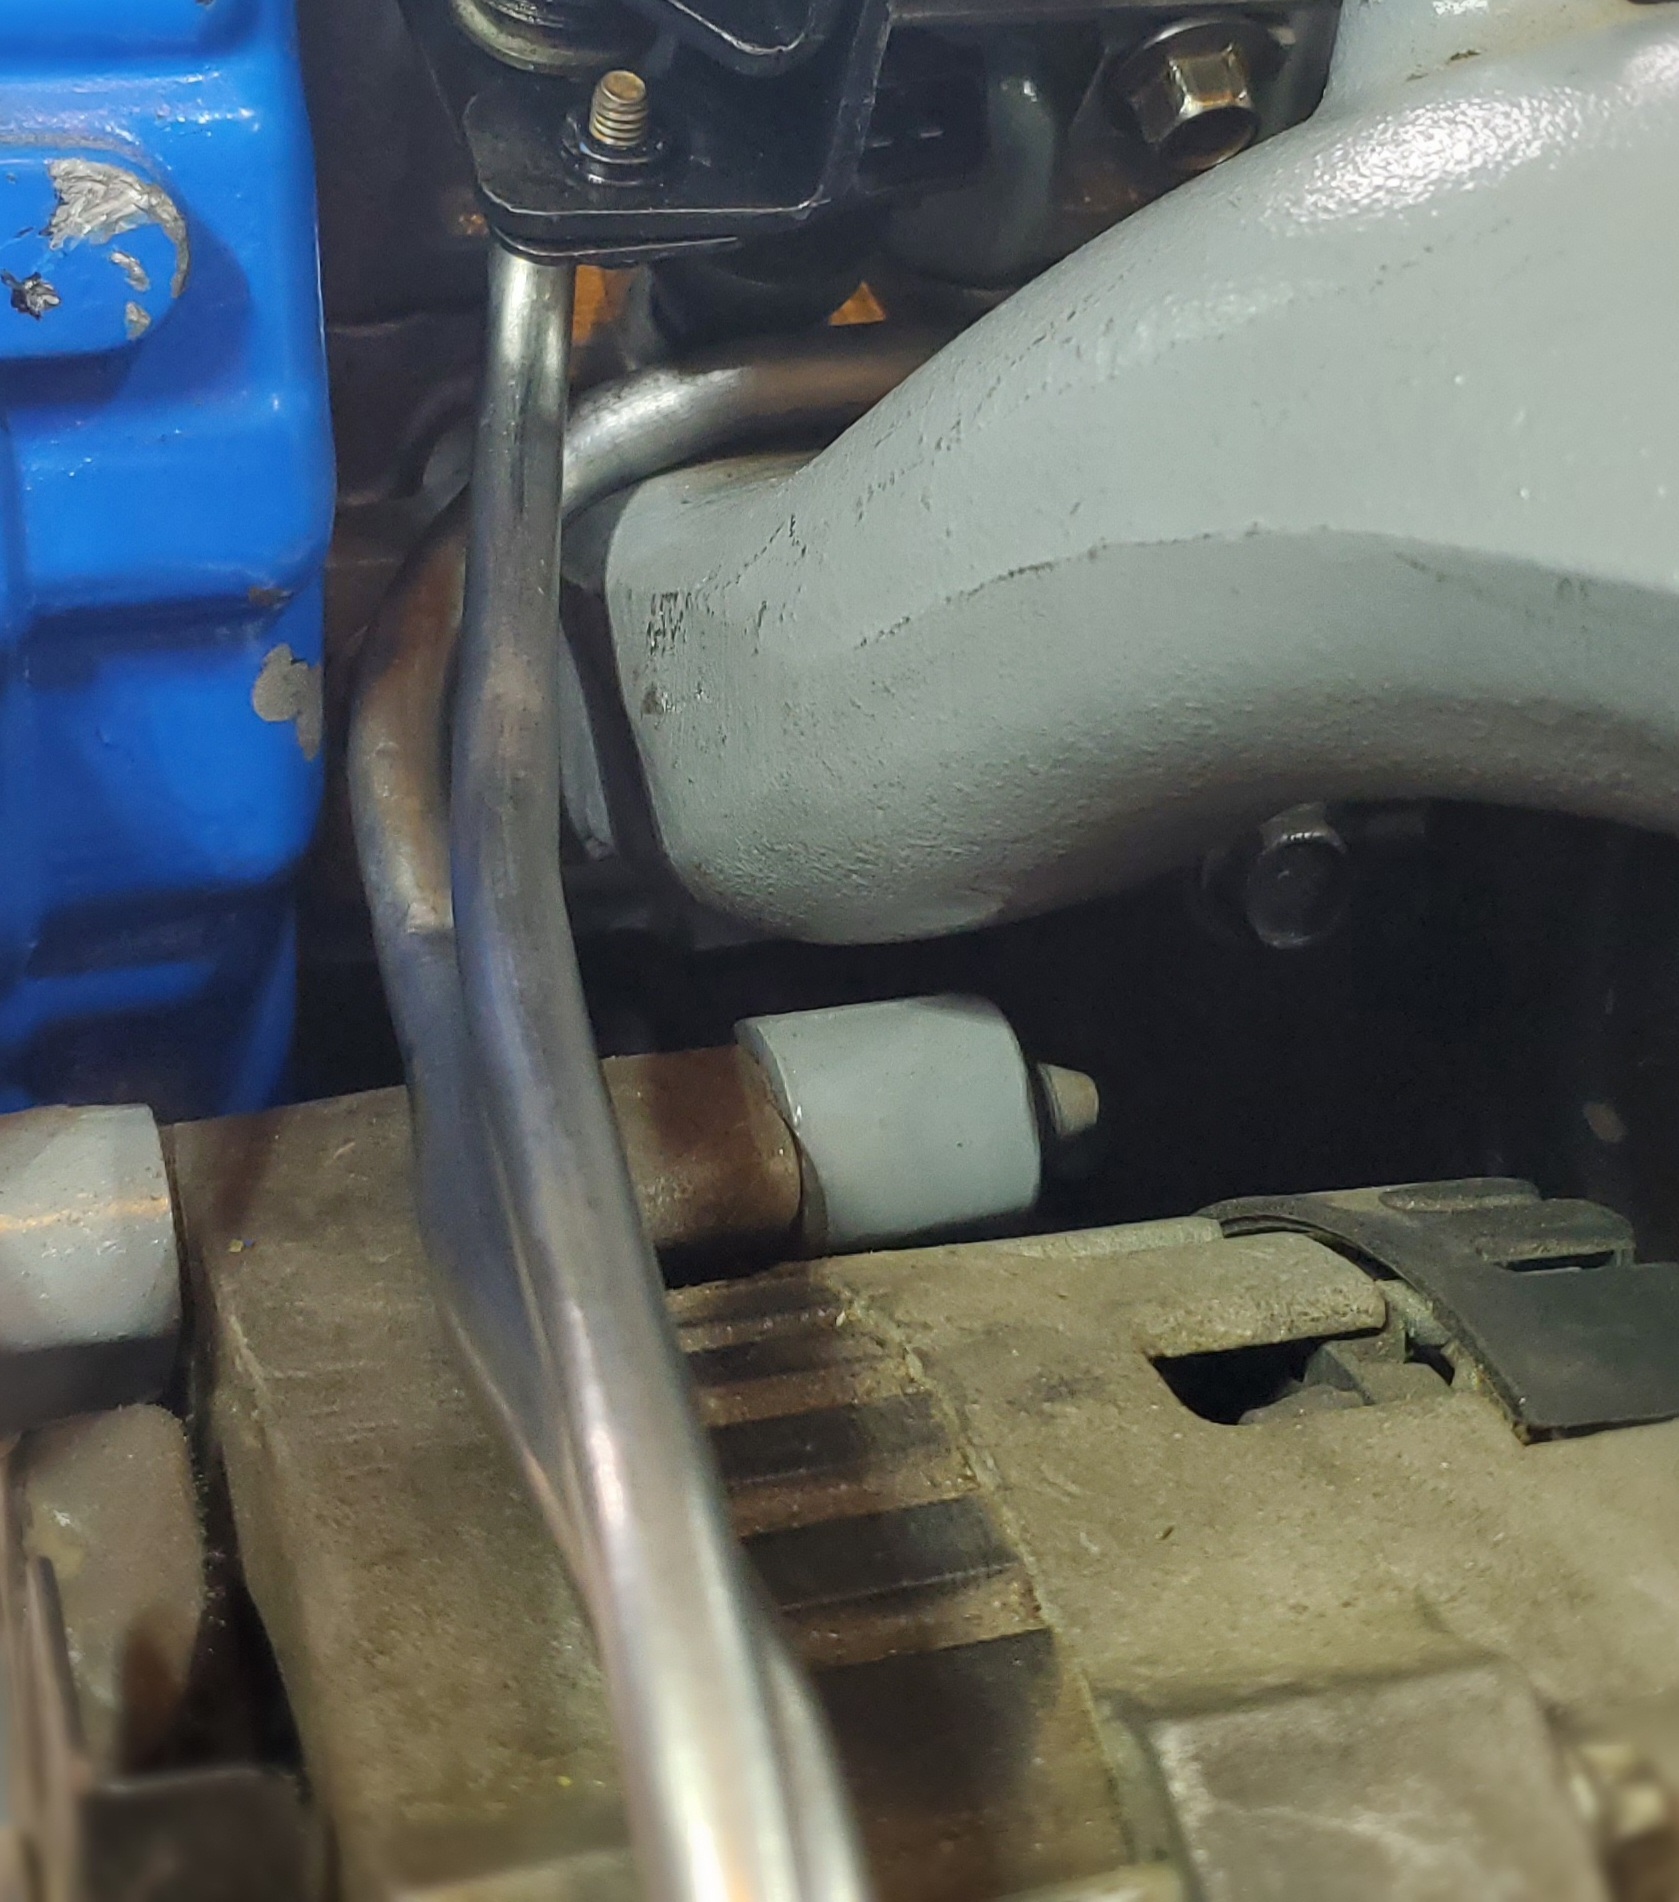
The starter on the Quad is up underneath the intake manifold. It’s kind of a pain to deal with, even when the engine is out of the car. The oil filter is on the front of the engine and is easy to reach on the Fiero.
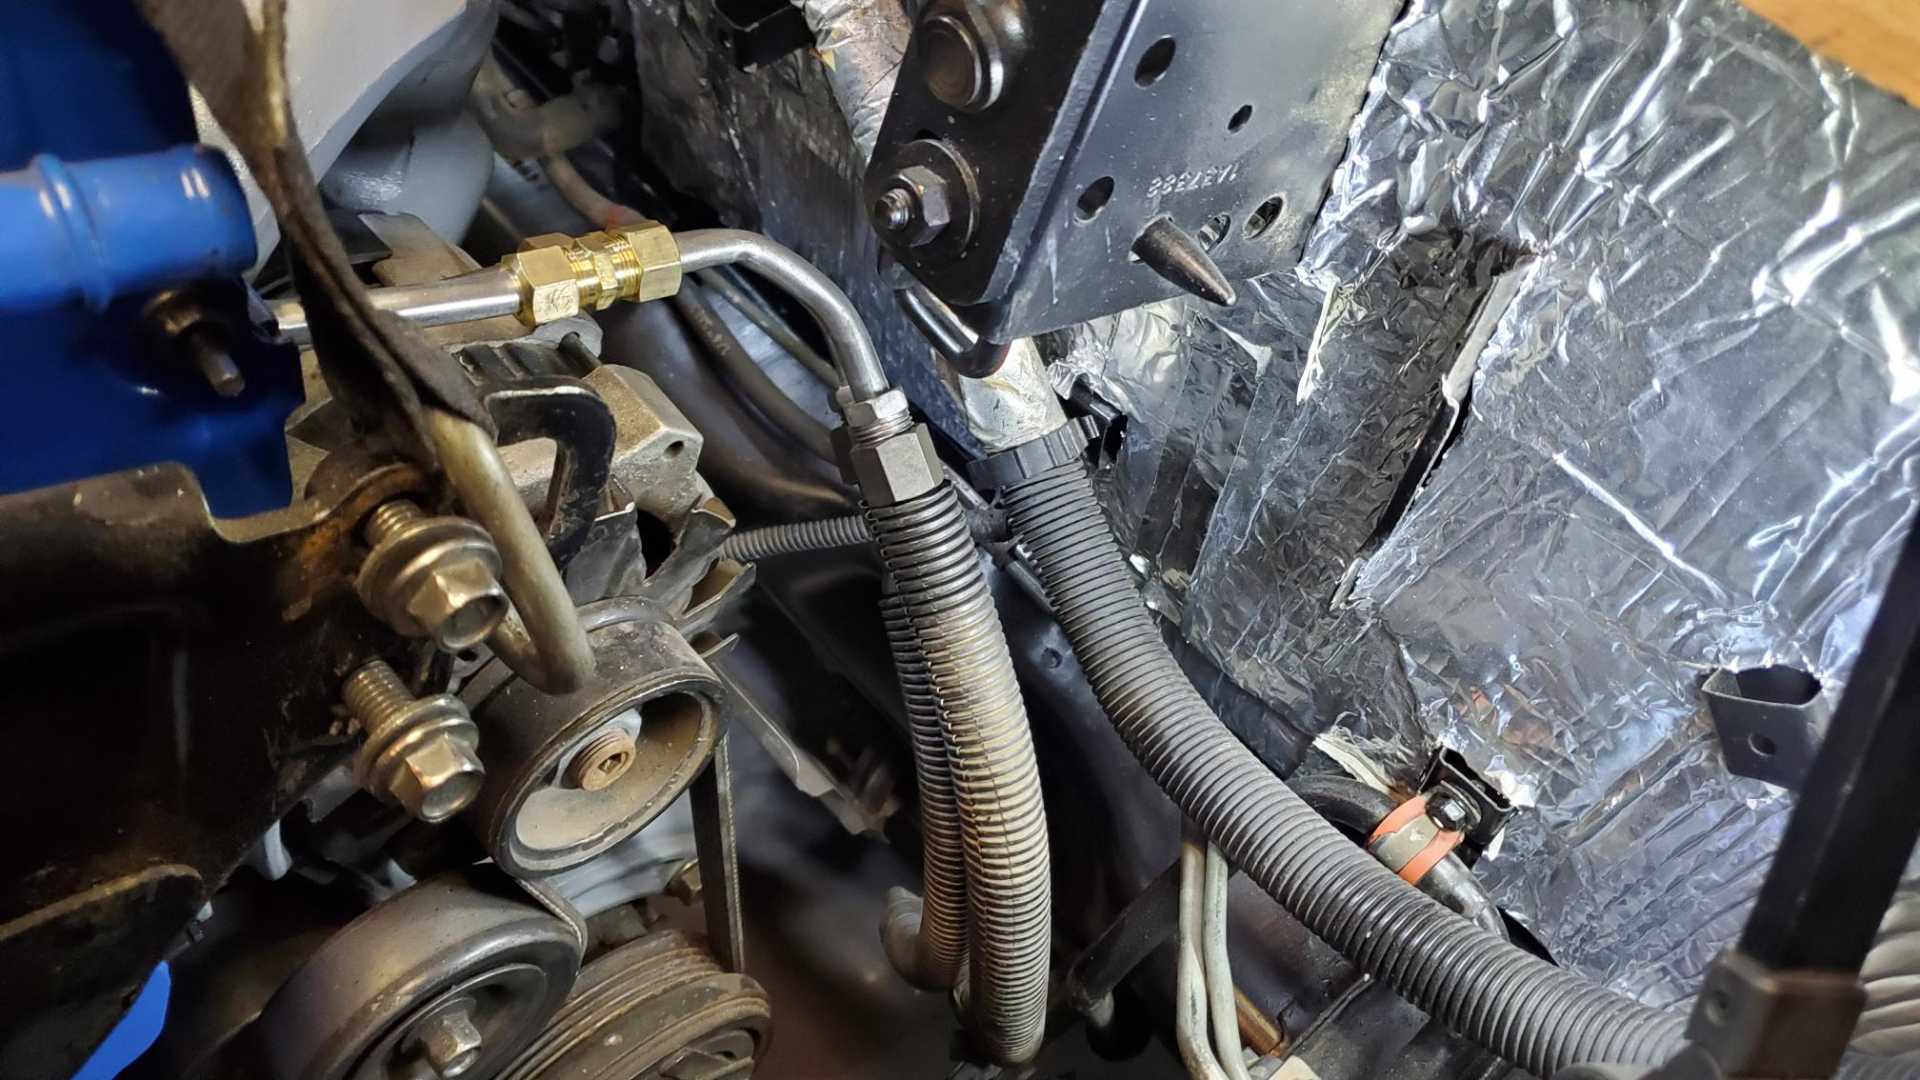
The sway bar mounted where I have it practically disappears when viewed from above.
About the only concern is how much lower the bar and mounts are than the rest of the suspension and cradle.
[This message has been edited by Quadfather (edited 11-13-2022).]
I couldn’t find new fuel line to fit all the way from the fuel rail to the Fiero fuel lines so I bought a set of universal straight 12-inch lines with the correct shoulder on the ends, which I’ll bend to fit. I’ll use regular straight line with compression fittings to run from there to the Fiero lines. The 12-inch lines will be here on Thursday.
Since I have the rear suspension disassembled I’d like to replace all the bushings and ball joints, but haven’t bitten the bullet and ordered them yet.
[This message has been edited by Quadfather (edited 11-19-2022).]
FWIW poly rear control arm bushings make a significant difference in the handling of the pre-88s. Both the ball joints and bushings are very easy to replace also.
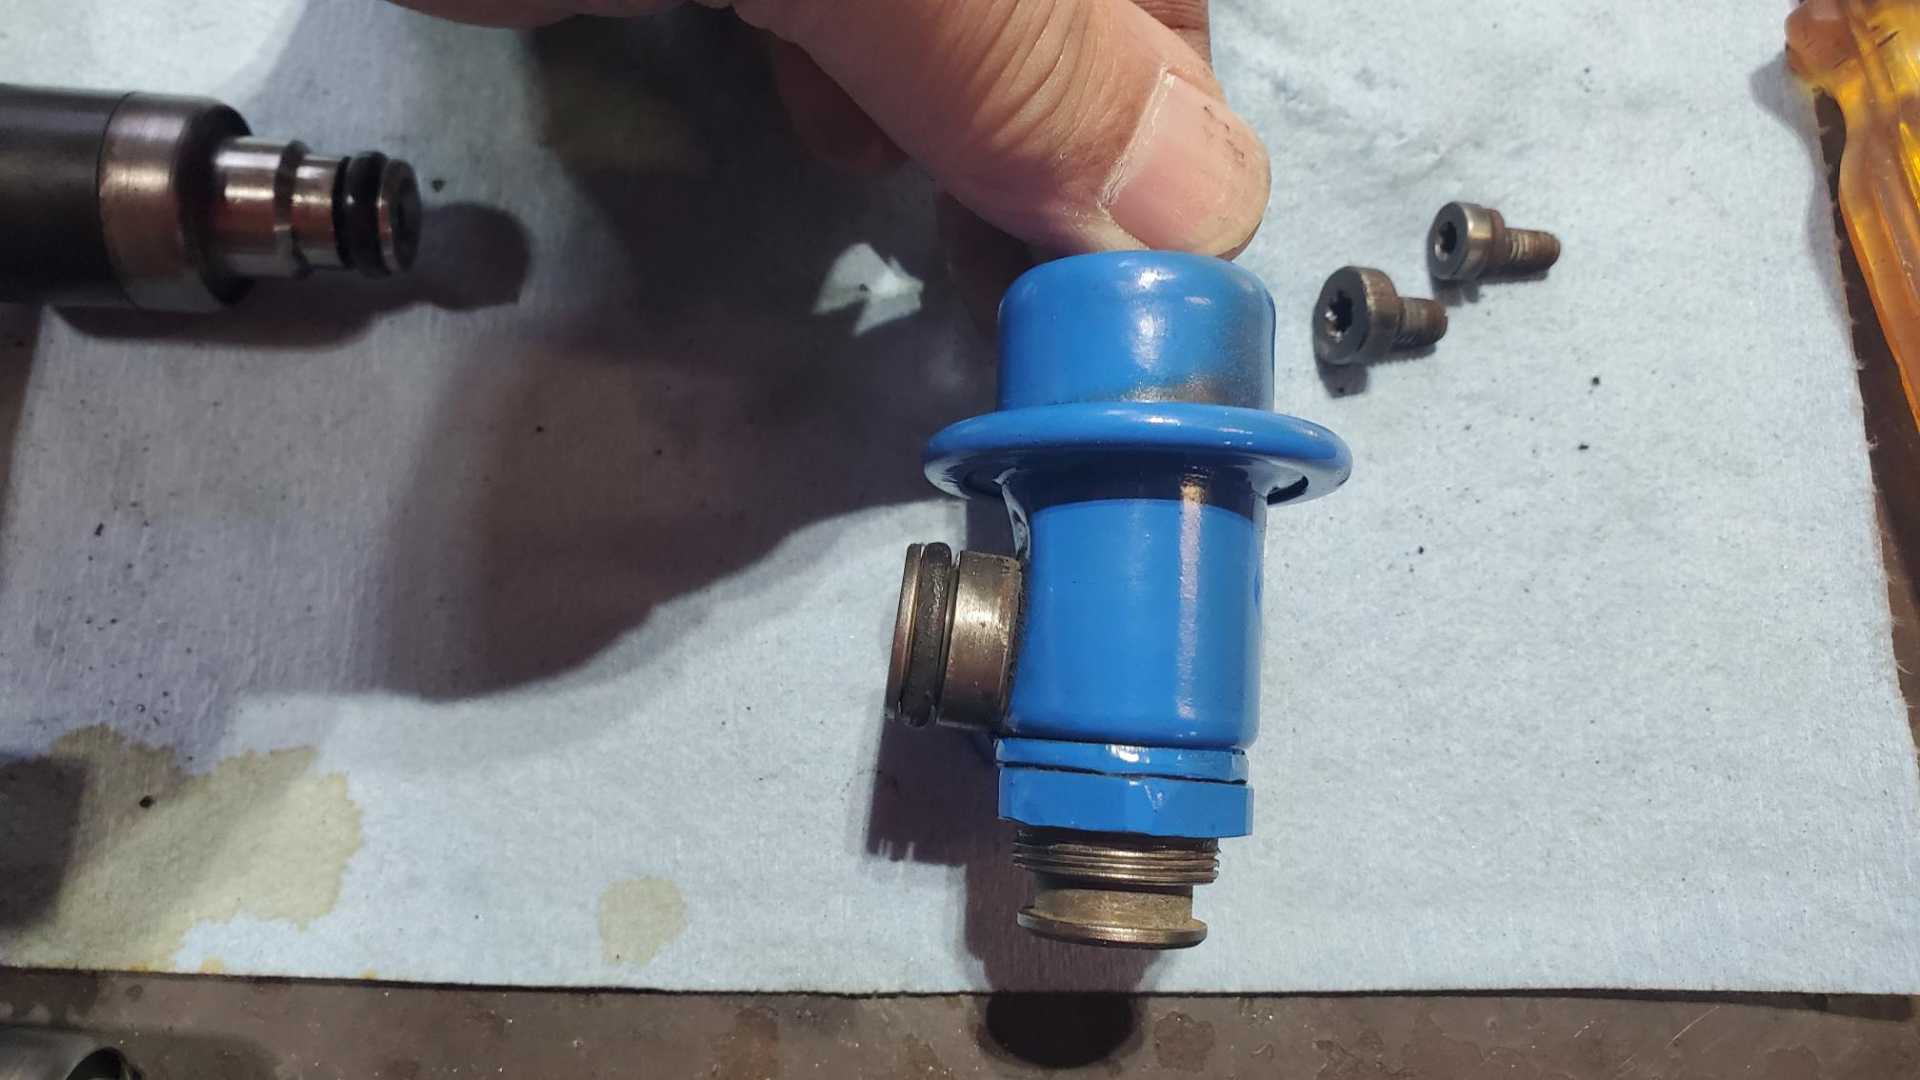
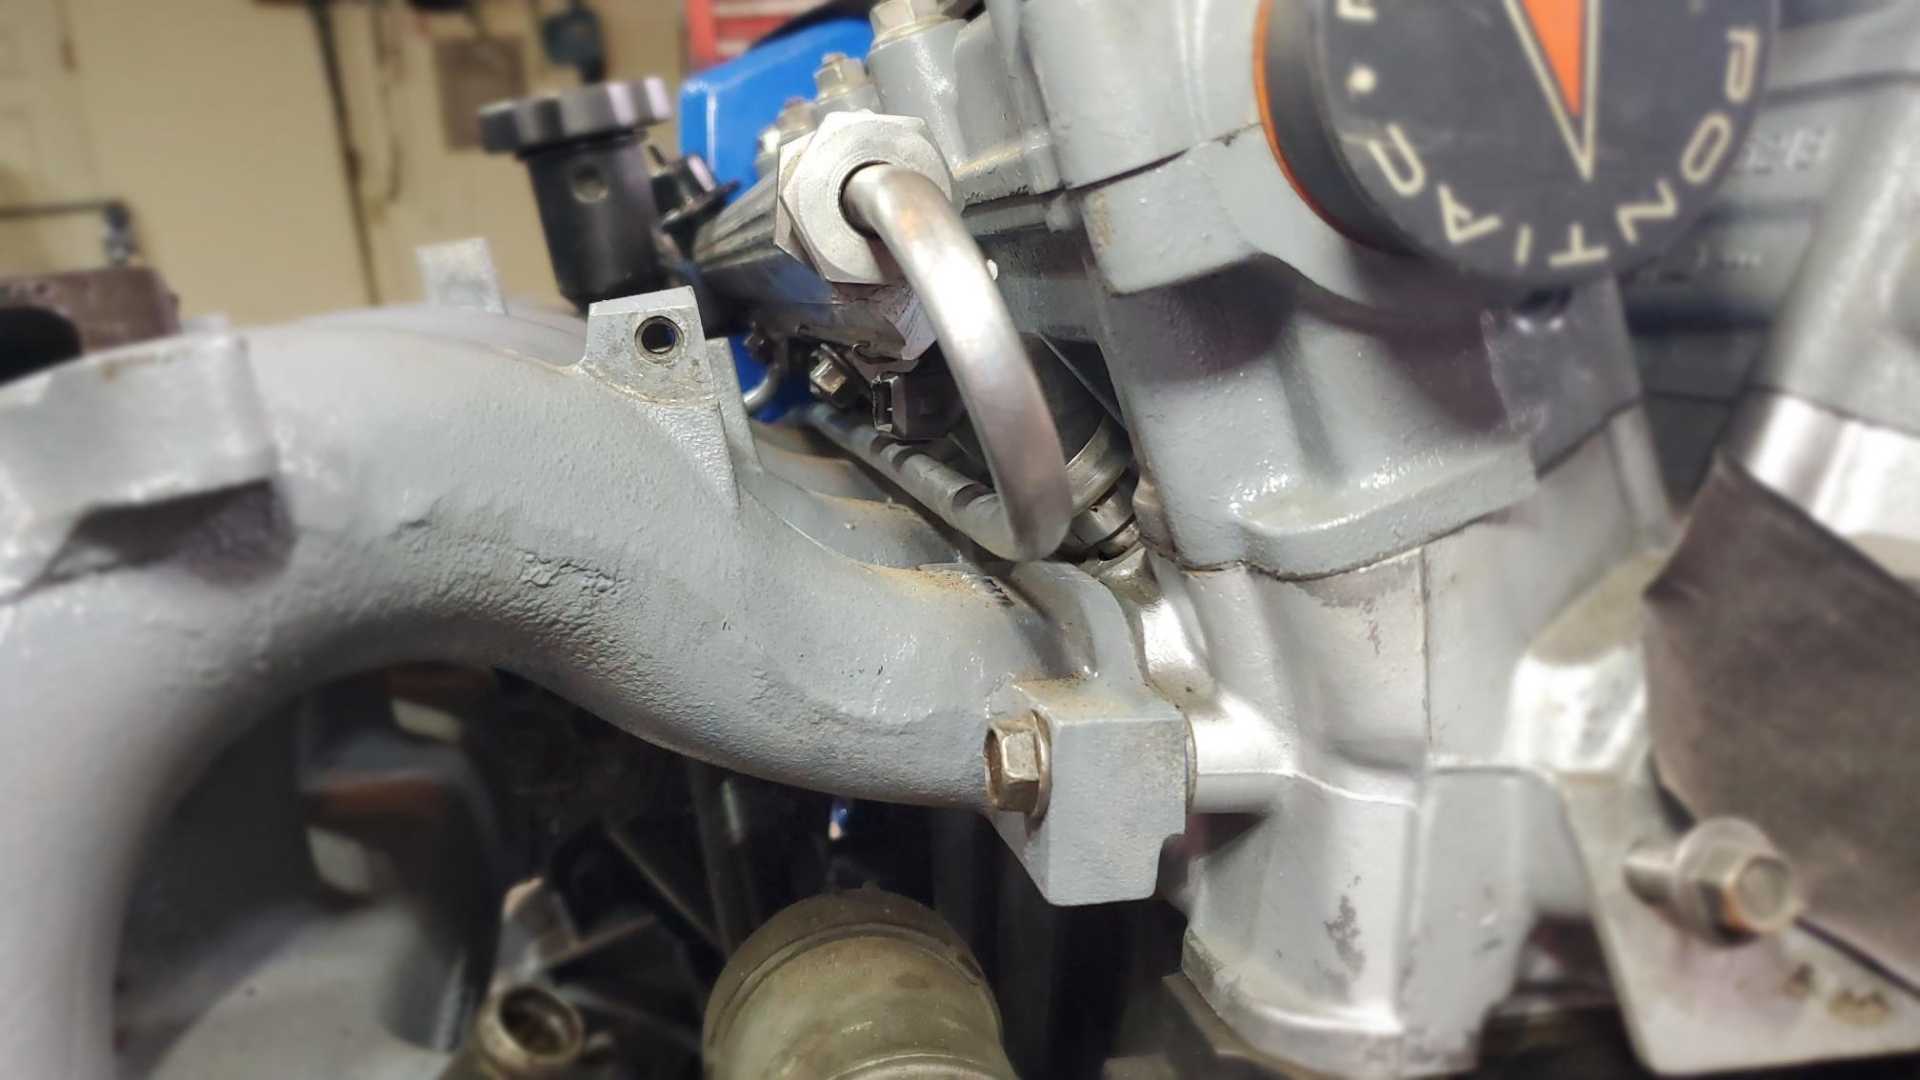
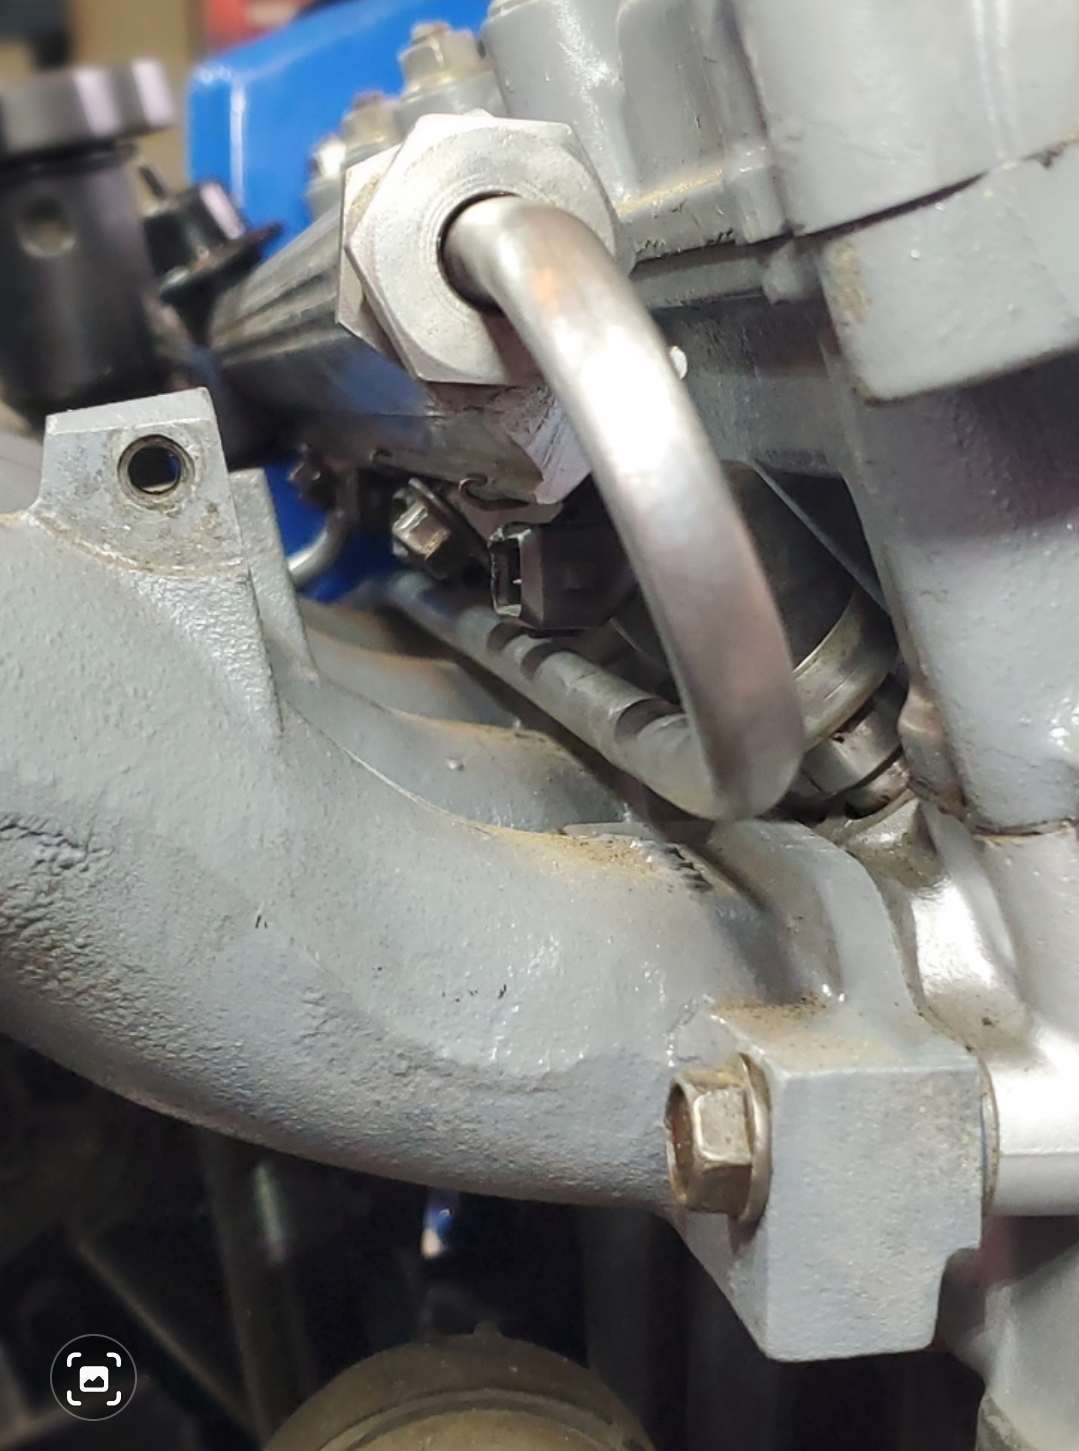
Here’s some progress on the fuel lines. I noticed a couple of things about the fuel pressure regulator. One, my spray can painting skills are lacking and two, this one is bent.
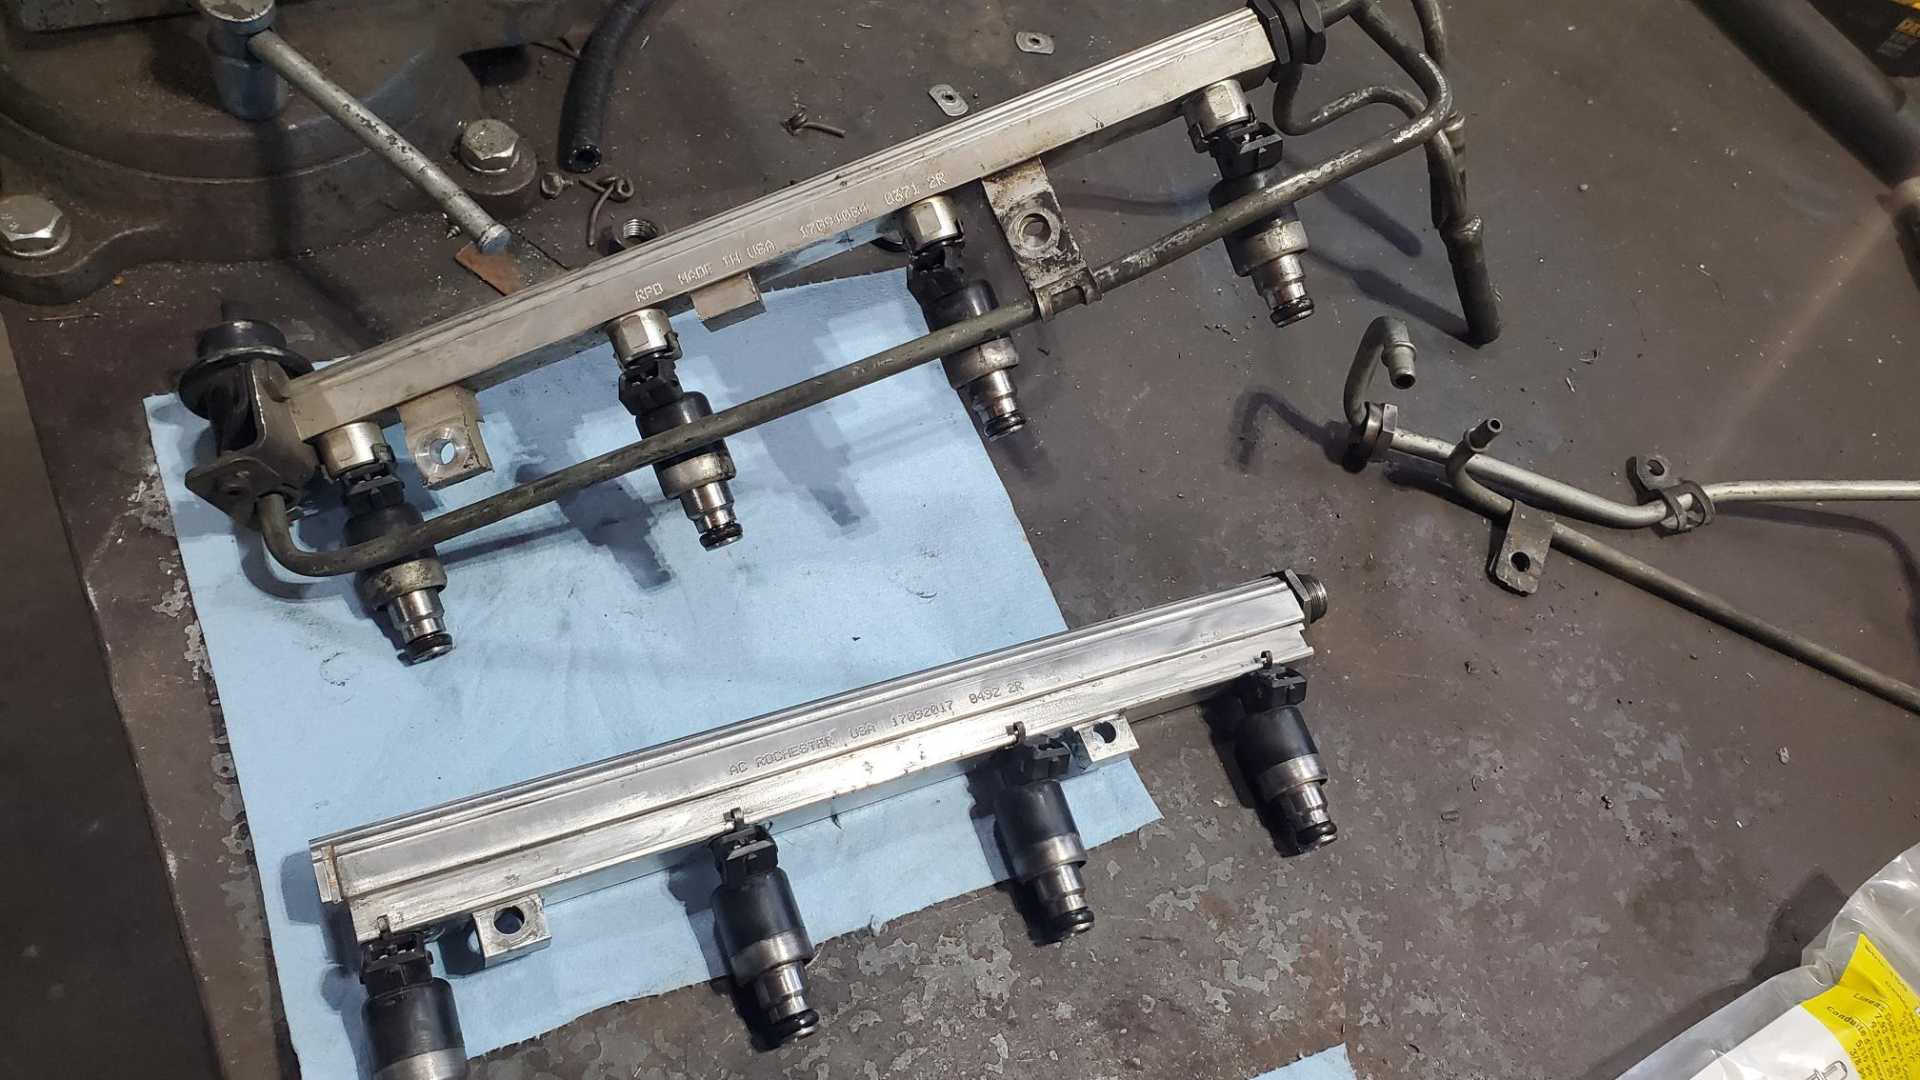
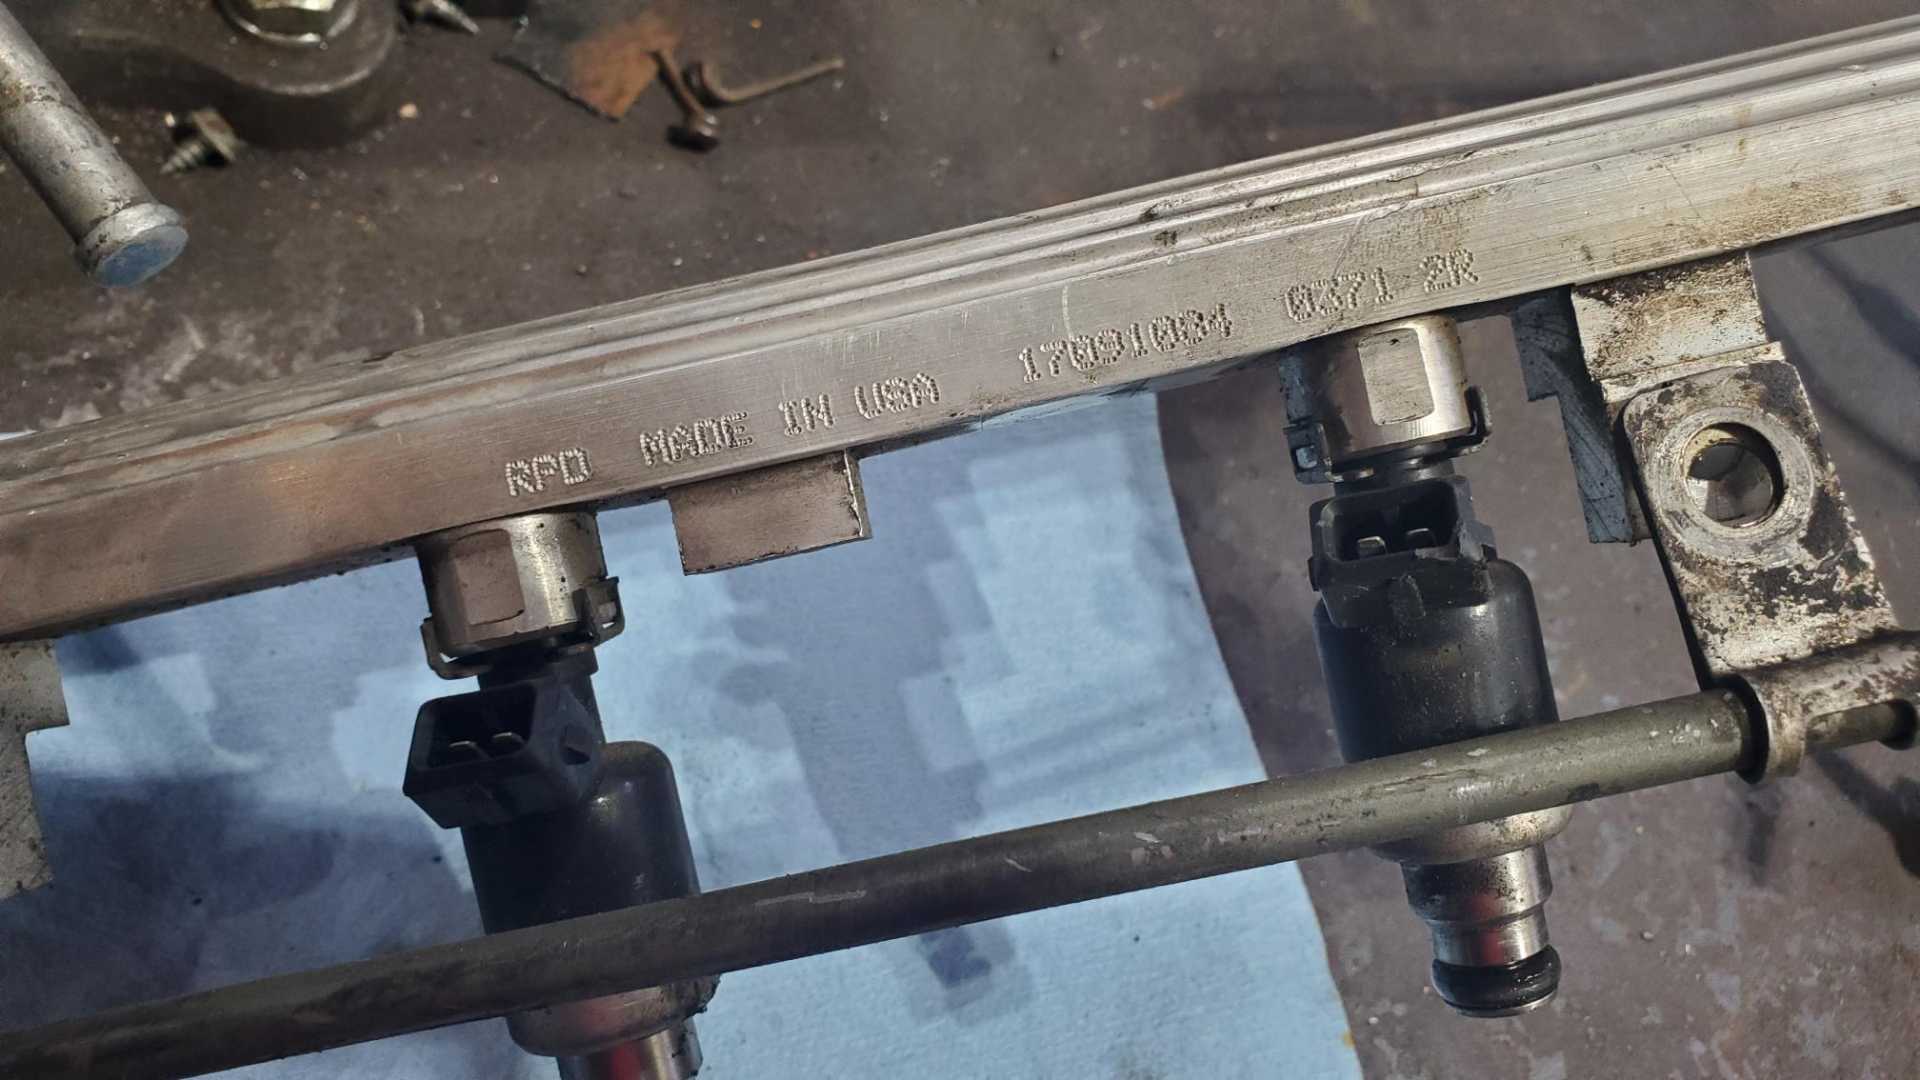
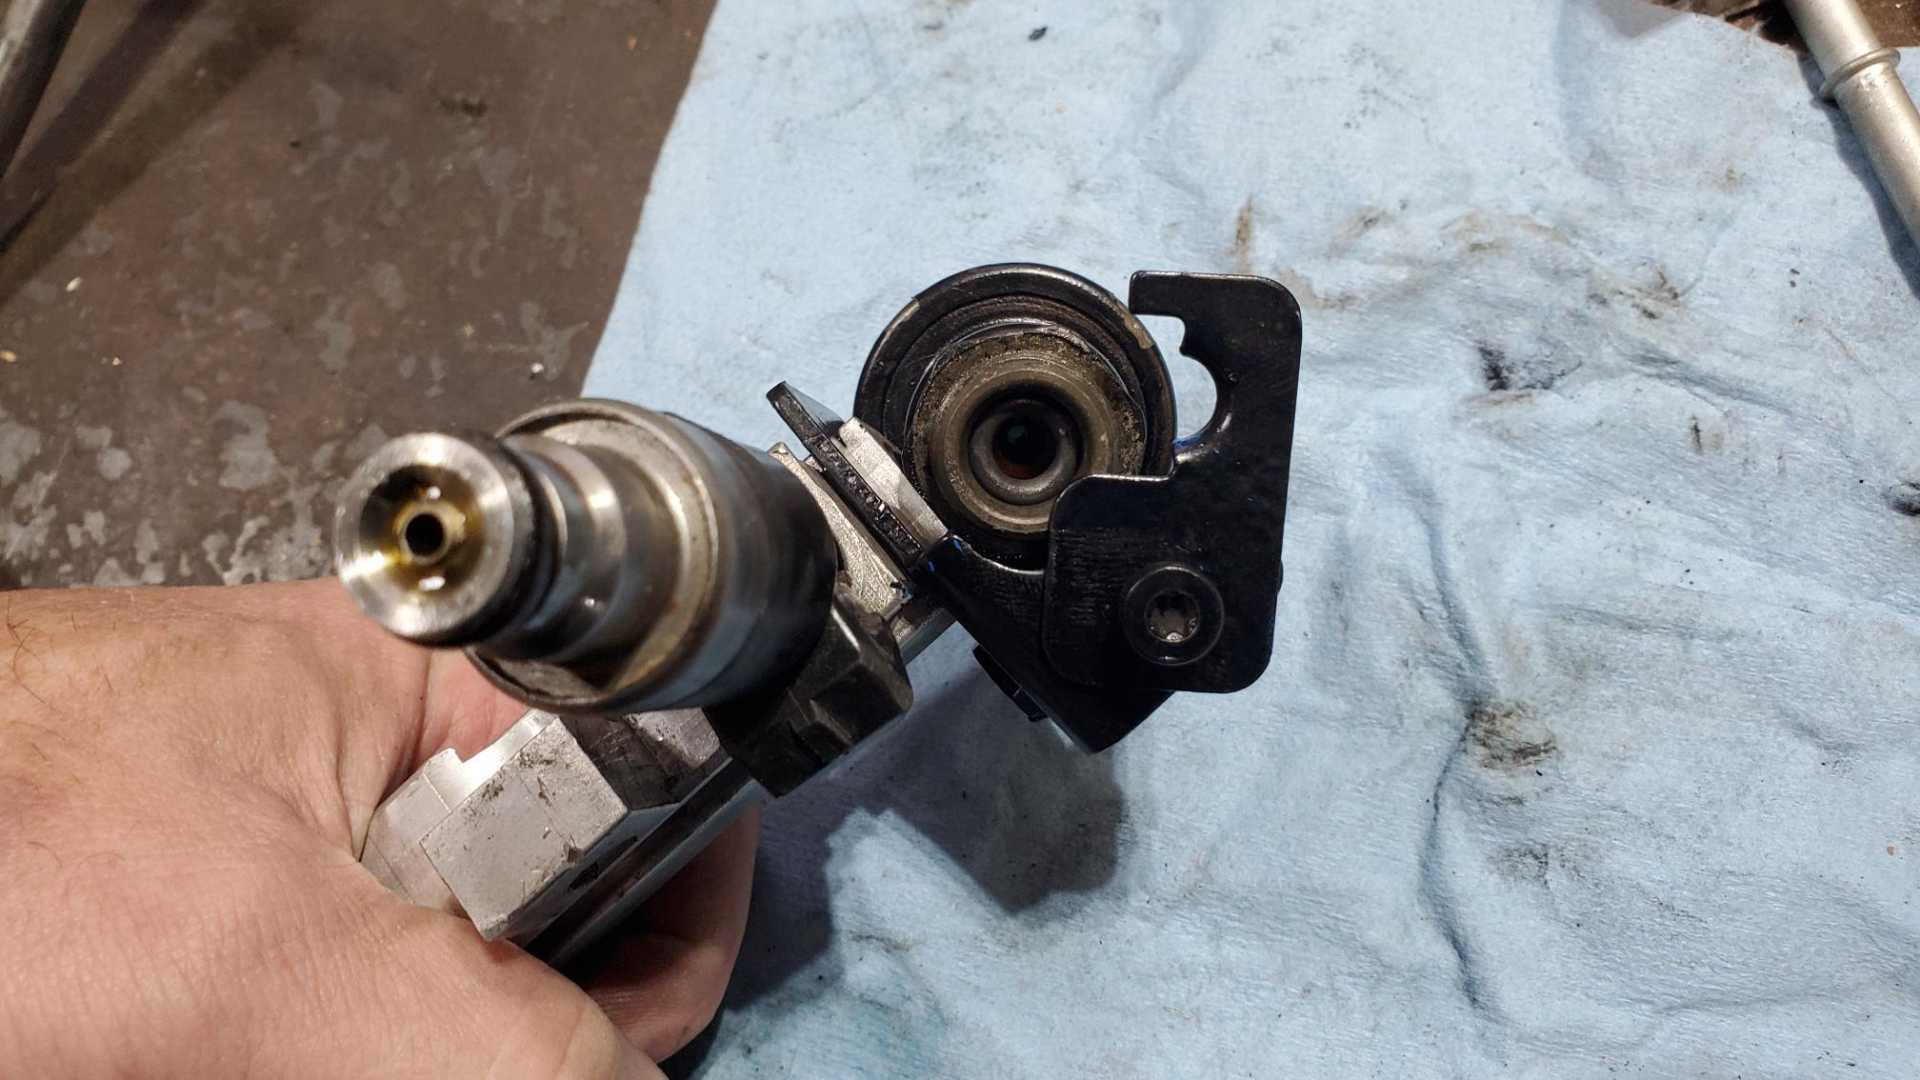
I pulled the fuel rail off one of my spare Quads and noticed the fuel rails are a little different. At the top of this photo is the rail from the spare, a ‘93 Grand Am Quad. Bottom is the one from my ‘92 GTZ. The GTZ is a Rochester, don’t know what the other one is.
Does RPD mean Rochester Parts Division?
Since the Grand Am rail is physically smaller and doesn’t have the ridges that run along the spline, the injector clips are different. Other than that they look the same.
[This message has been edited by Quadfather (edited 01-02-2023).]
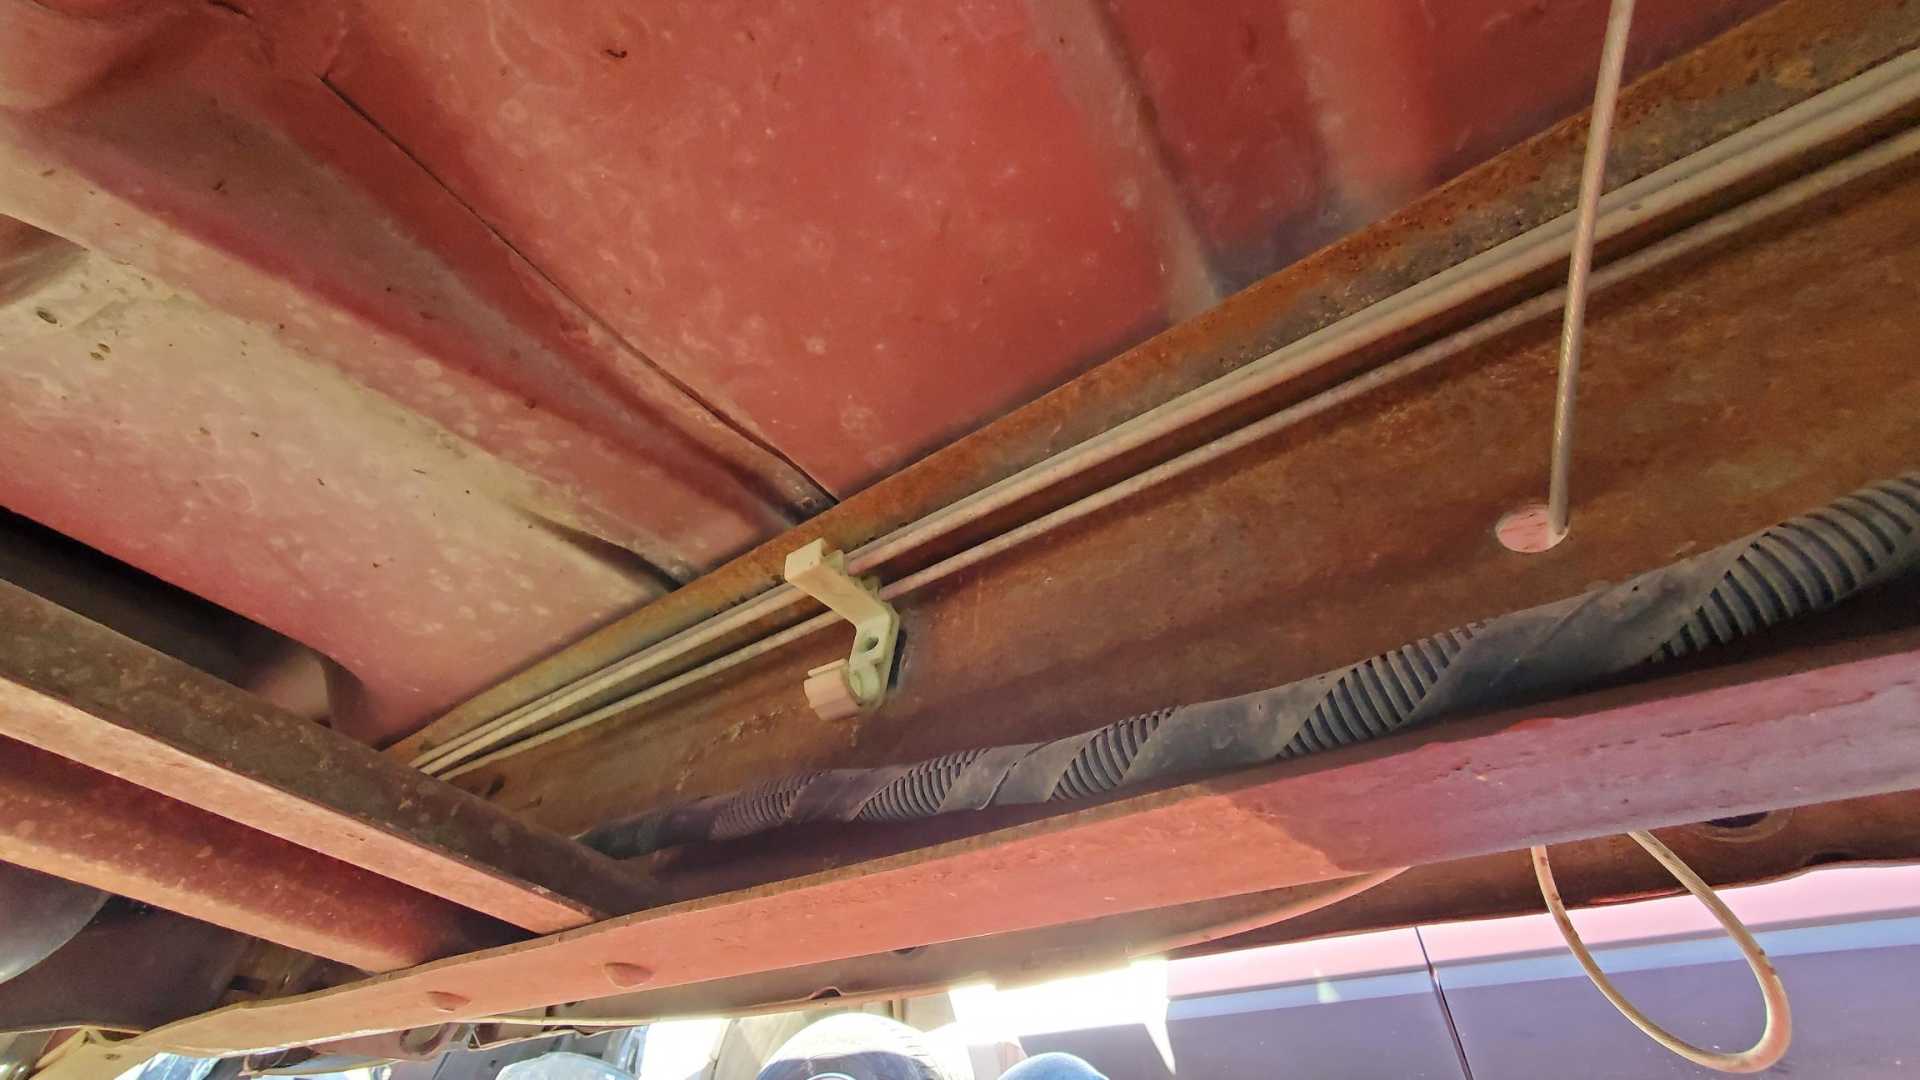
Never got clarification about what year K5 Blazer to pull fuel lines from, so after looking at new lines for various 80s and 90s model GM vehicles, I went to the salvage and started checking mid-90s GM pickups. Sure enough, they have steel fuel lines of varying lengths. This was an extended cab.
There are two sets on either side of the fuel filter, so I grabbed both. One set was about 4’ long, which would be too long, so I found a single cab pickup and the longer set was about 3’, which I thought would be perfect.
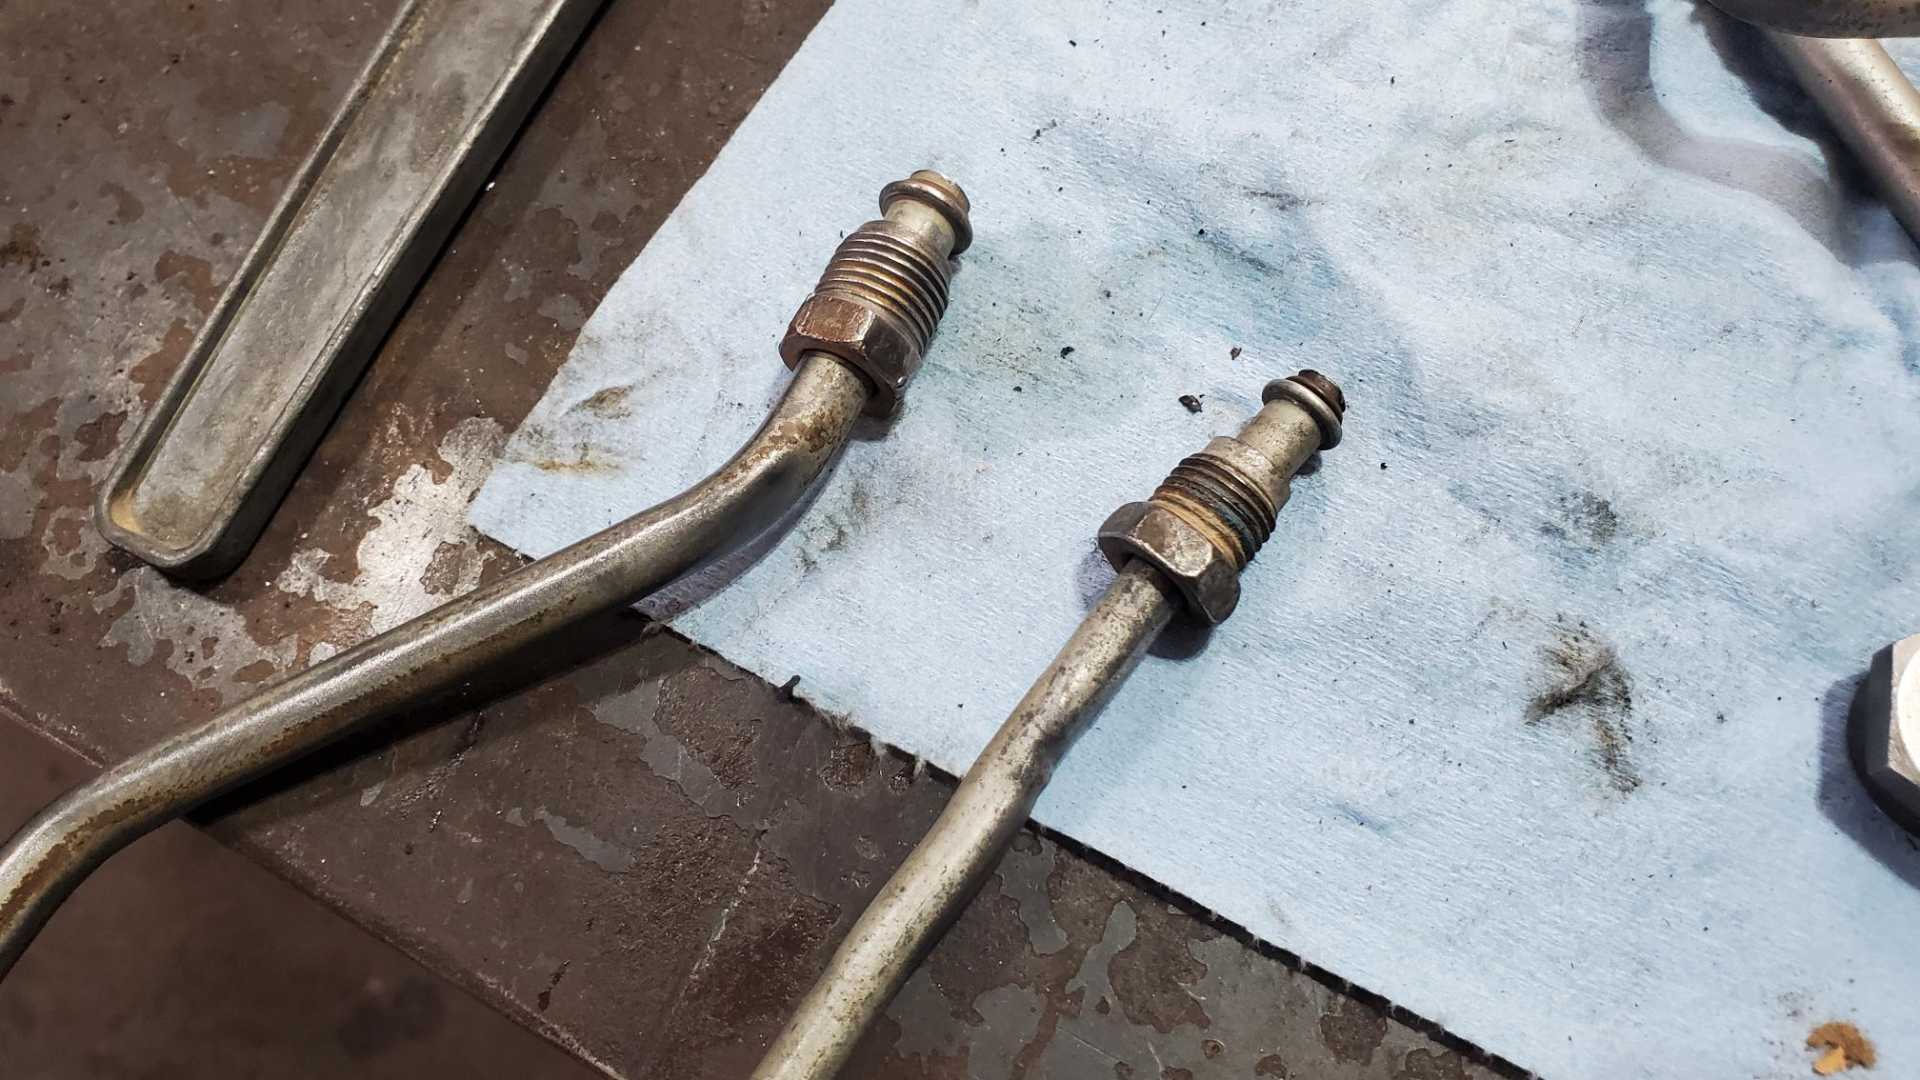
I figured these lines would have the right fittings on BOTH ends: the raised shoulder on one end to attach to the Quad and the threaded fitting on the other to attach to the Fiero. I was right, but there’s a problem with the 3/8” lines I’ll get to in a minute.
These actually have two shoulders, but that doesn’t matter.
The four lines cost me $18, and who doesn’t like the threat of old gas dripping on you while you work?
[This message has been edited by Quadfather (edited 12-02-2022).]
Here’s another pro tip. If you’re going to be working on your Fiero for years and the garage will be open to insects, probably ought to tape off the fuel lines, and any other small orifices.
I ran into trouble trying to bend both tubes. I don’t know if it was because I had straightened these lines first, or I’m just a newb.
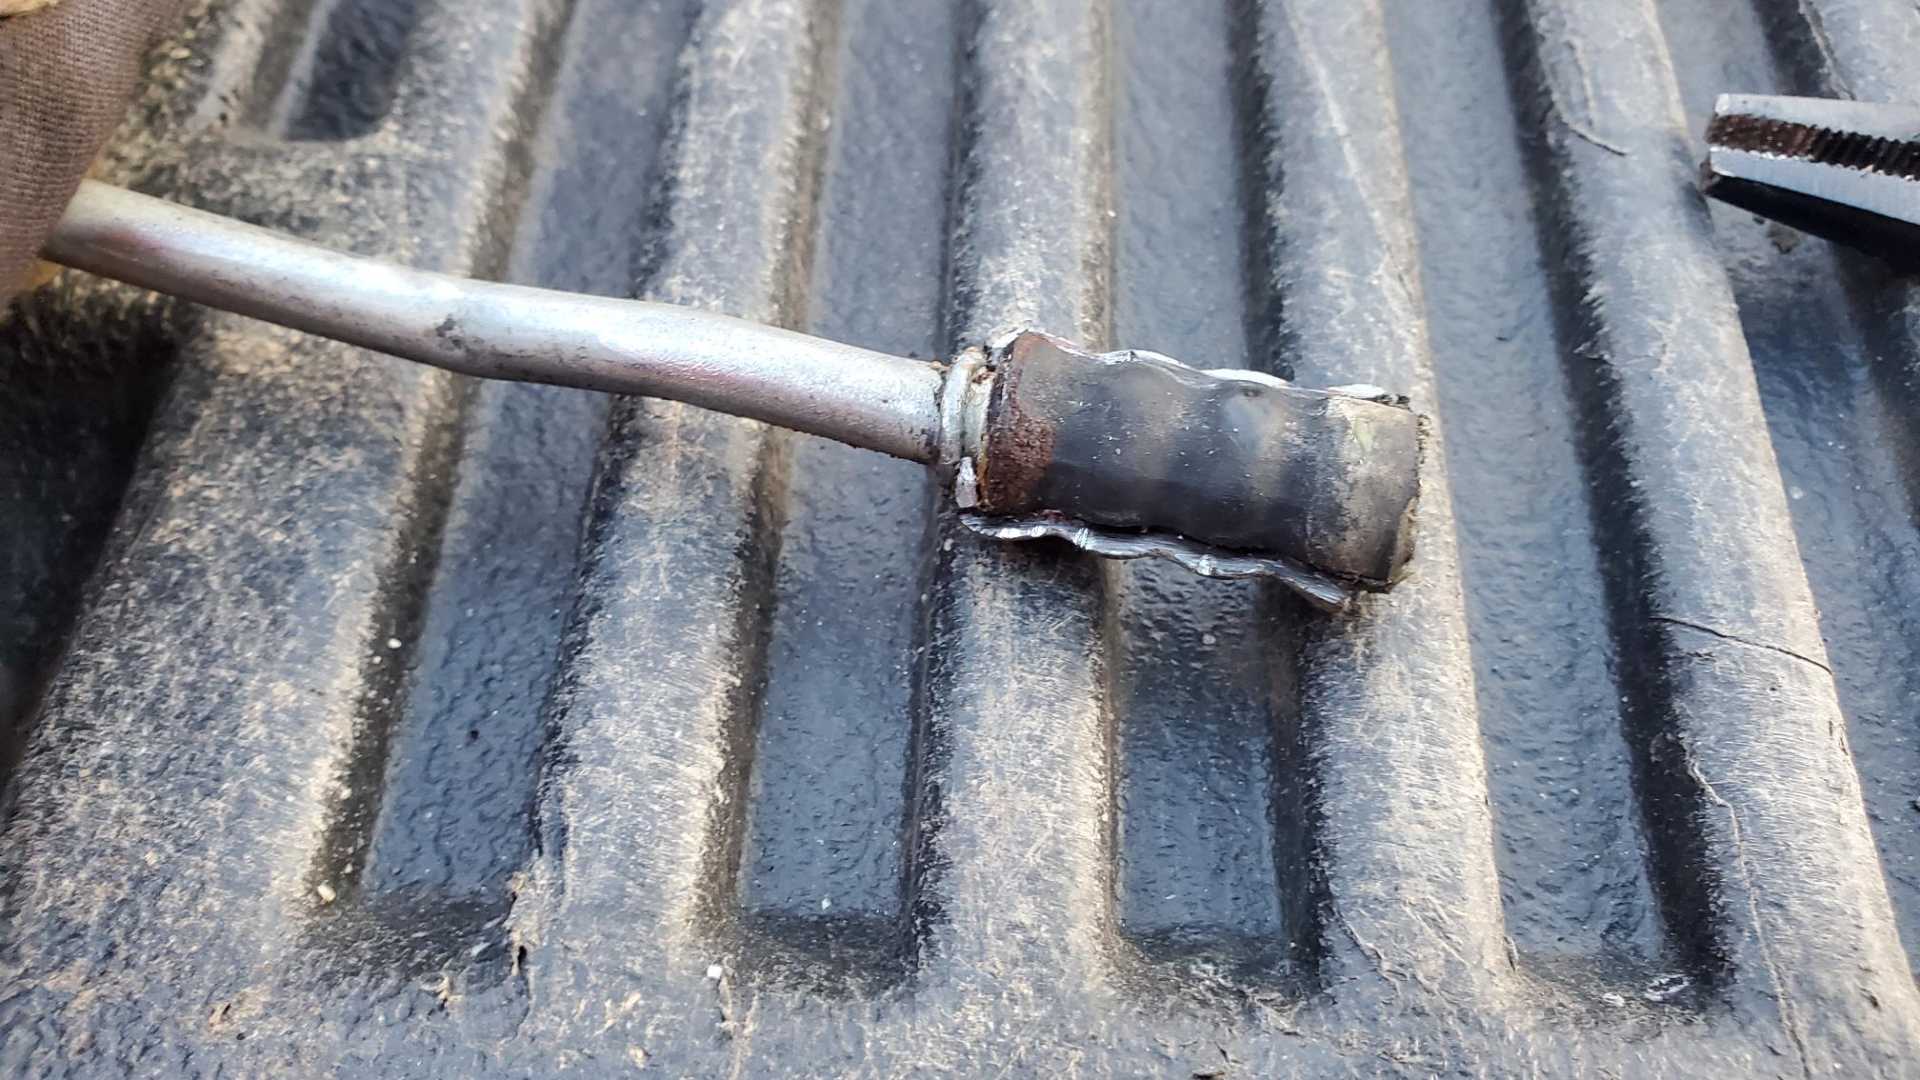
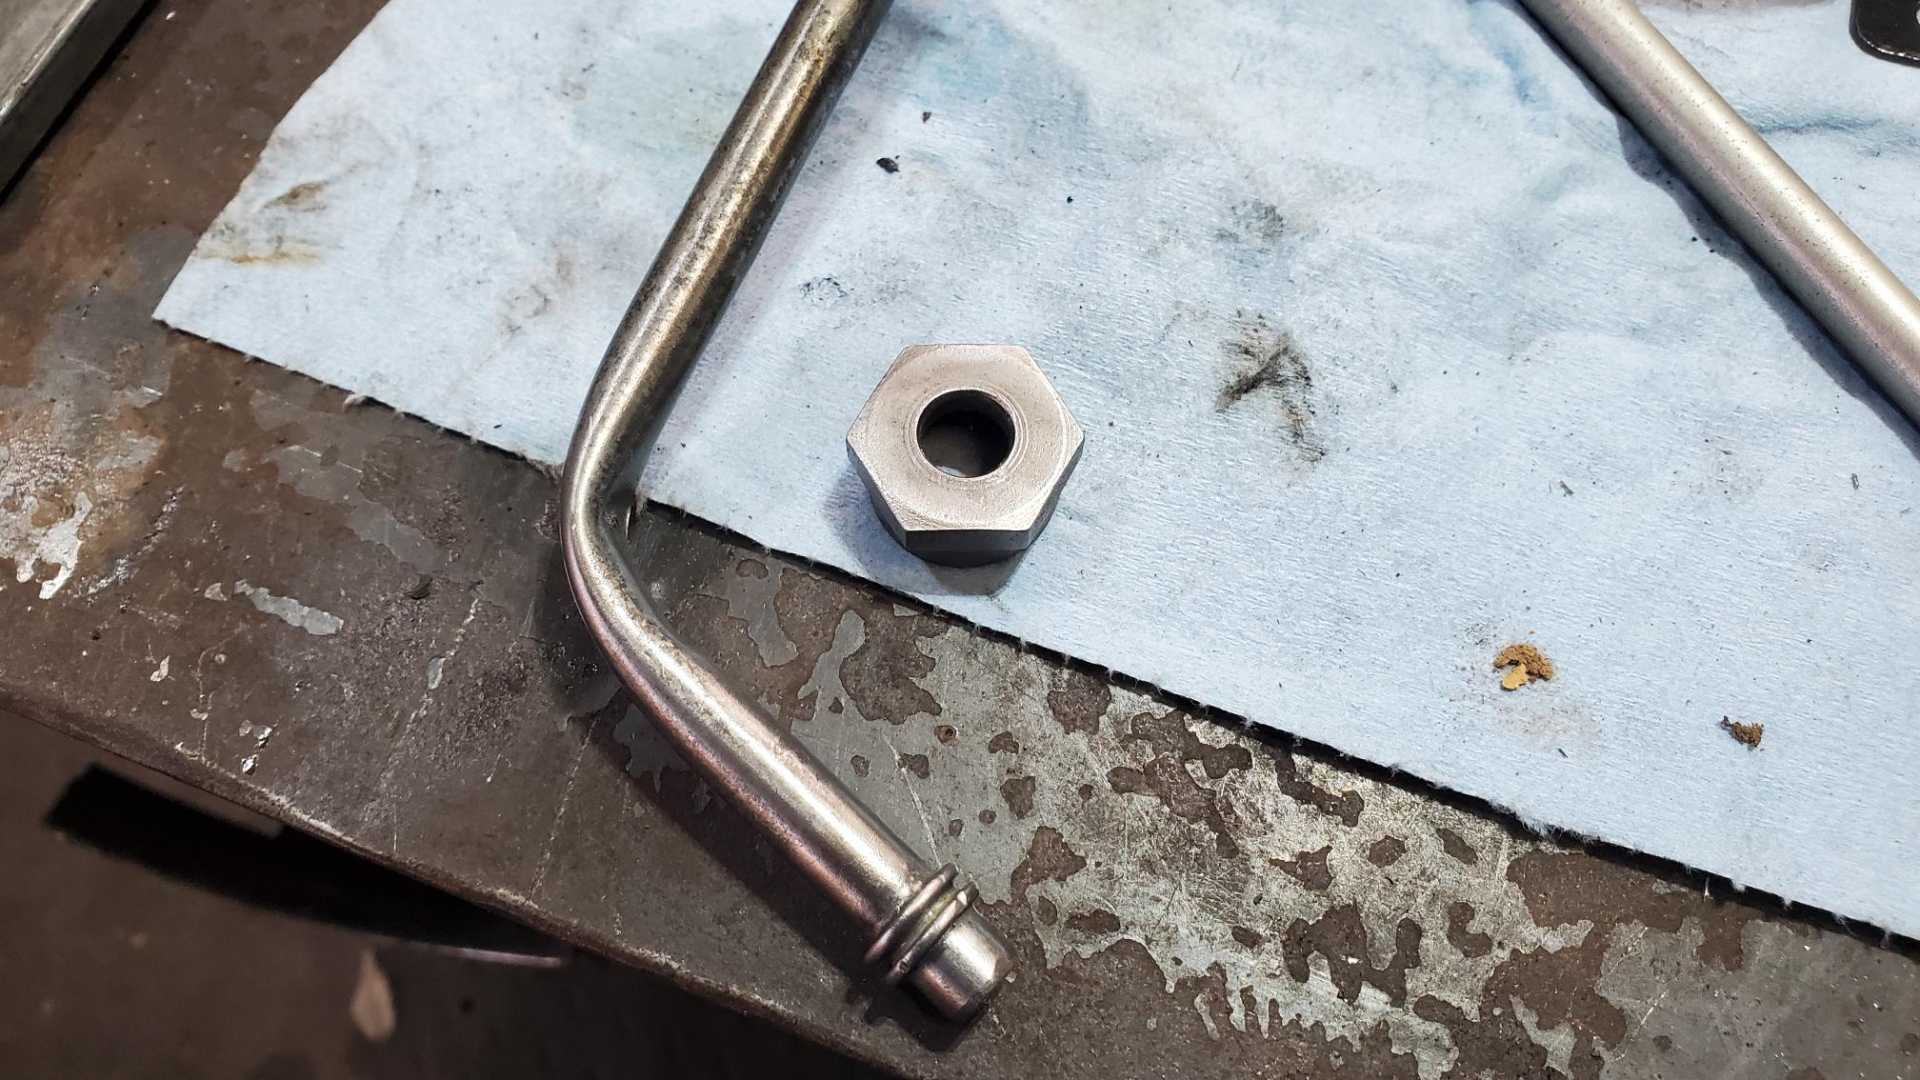
I used a tubing cutter to adjust the length of the tubes so they’d fit into the rail. I don’t think the double shoulder makes a difference as long as the length of the tube is correct and the O ring seals.
If I could bend it without kinking it, the 5/16” return line would not even have to be cut in order to fit. It’s because it attaches to the fuel rail with a flange that slides around it.
The feed line, though, is attached to the rail with a big nut, so that means the line has to be cut.
If I’m going to have to cut one line, I may as well cut both so they’re consistent. That means I can use the GTZ’s original return line because it’s long enough and only requires a little re-bending to fit the Fiero.
Looks like I’ll have to make another trip to the salvage to get some more 3/8” lines.
[This message has been edited by Quadfather (edited 12-02-2022).]
Still wrestling with the fuel lines, but here’s a cool story.
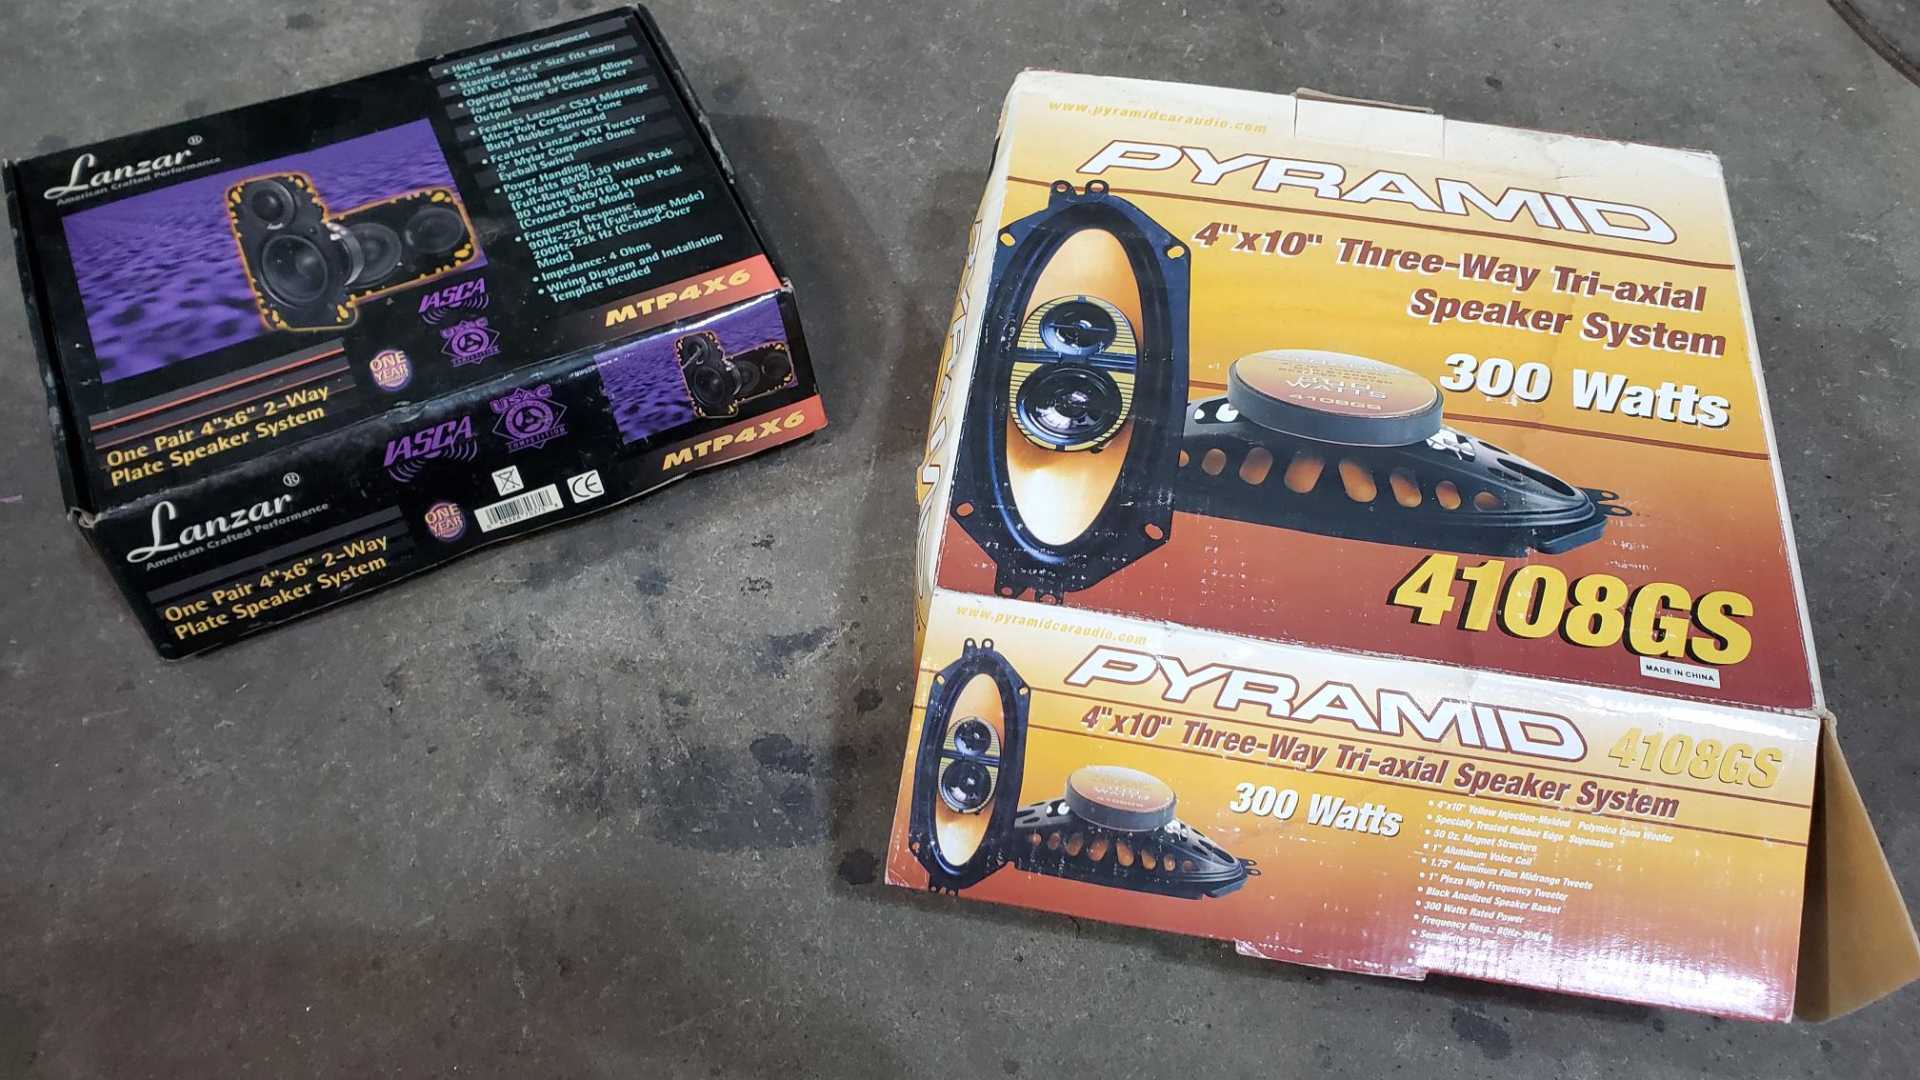
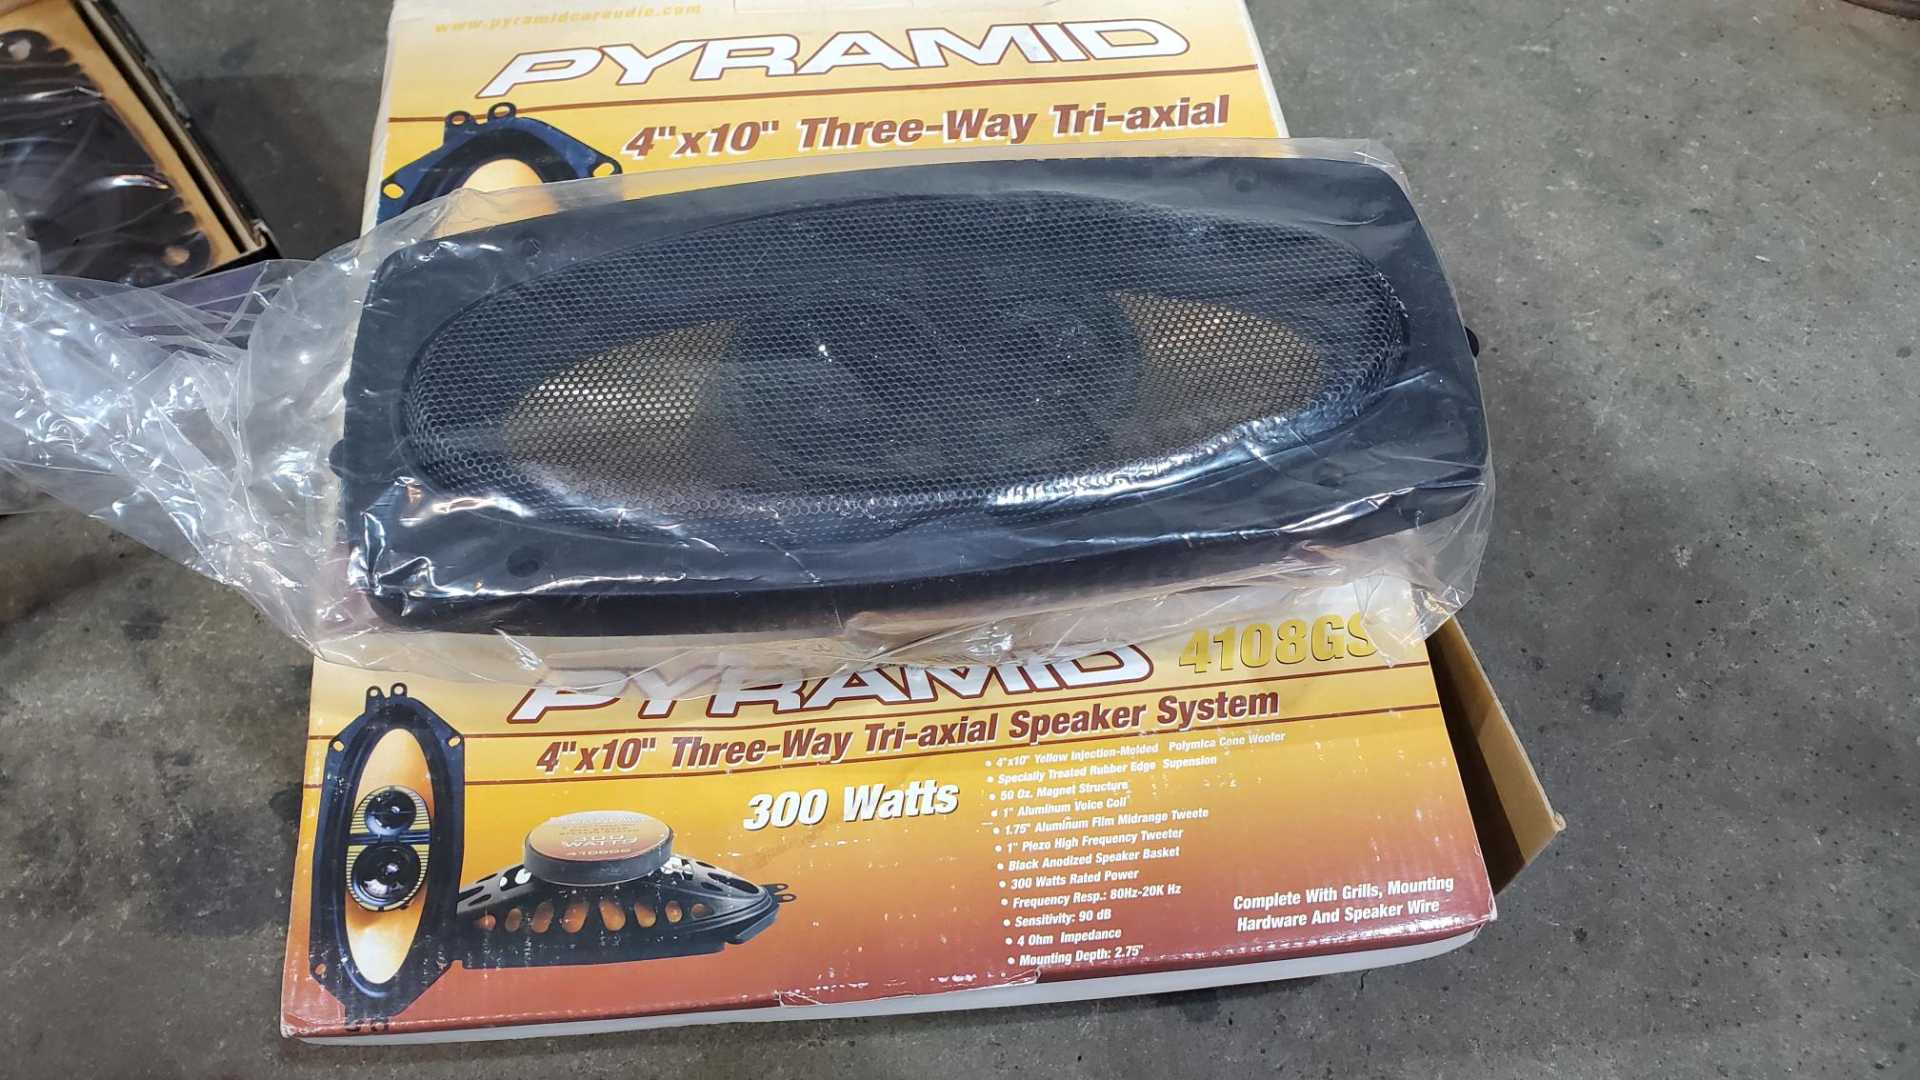
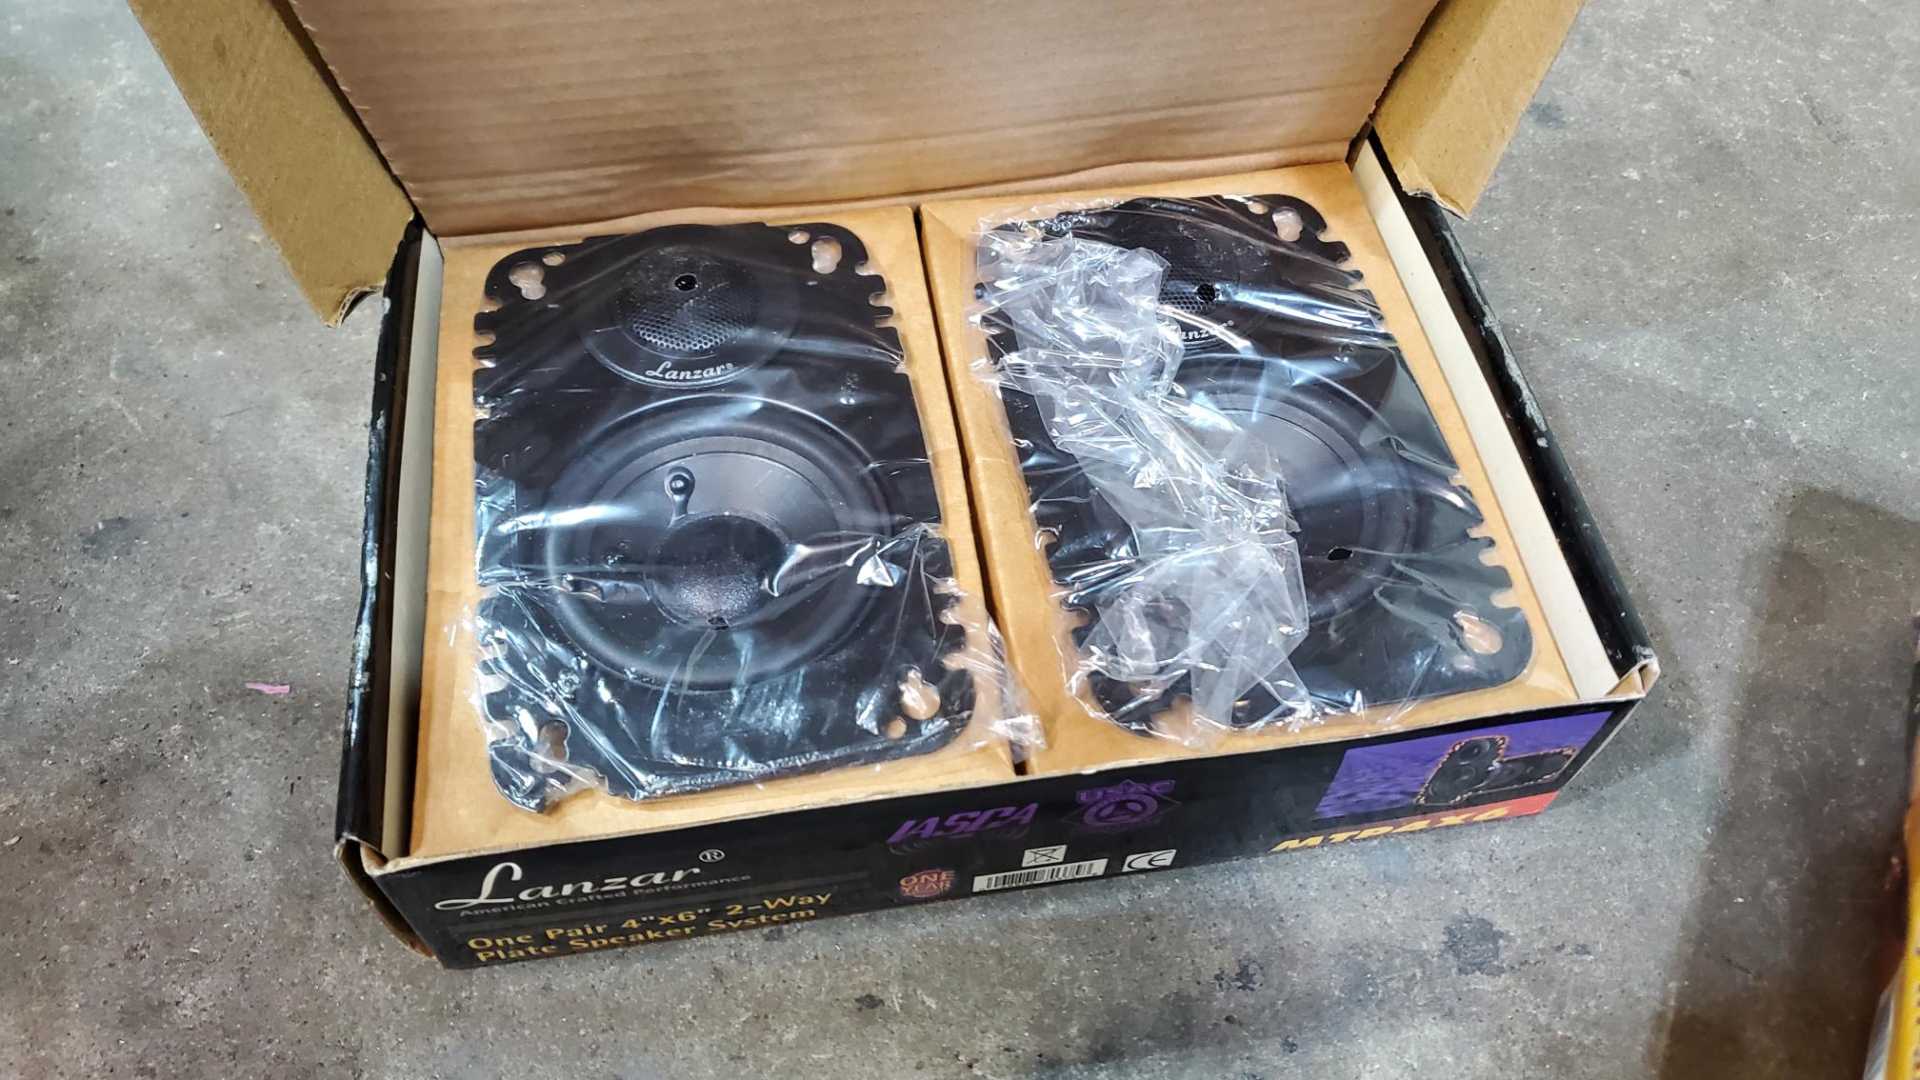
A co-worker who’s significantly younger than me texted me while he was on vacation last week to ask if I was interested in four speakers for my Fiero. Of course I said yes.
His first car was an ‘87 Fiero that he got when he was in college 12 or 13 years ago. The car had several problems and he never got to drive it regularly or make the improvements he was hoping to complete. After it sat at a shop for a few months he finally sold it and bought an ‘86 Corvette which he still has.
When he was home last week his dad had been cleaning out the garage and handed him these two boxes. He’d bought them for his Fiero and forgotten all about them. He said he was just going to toss them because he knew they were Fiero-specific, then remembered me. I told him I’d be honored to take them.
I don’t know if they’re any good, but I think the speakers in my car are the factory originals so in the very least they’re 20+ years younger.
[This message has been edited by Quadfather (edited 12-11-2022).]
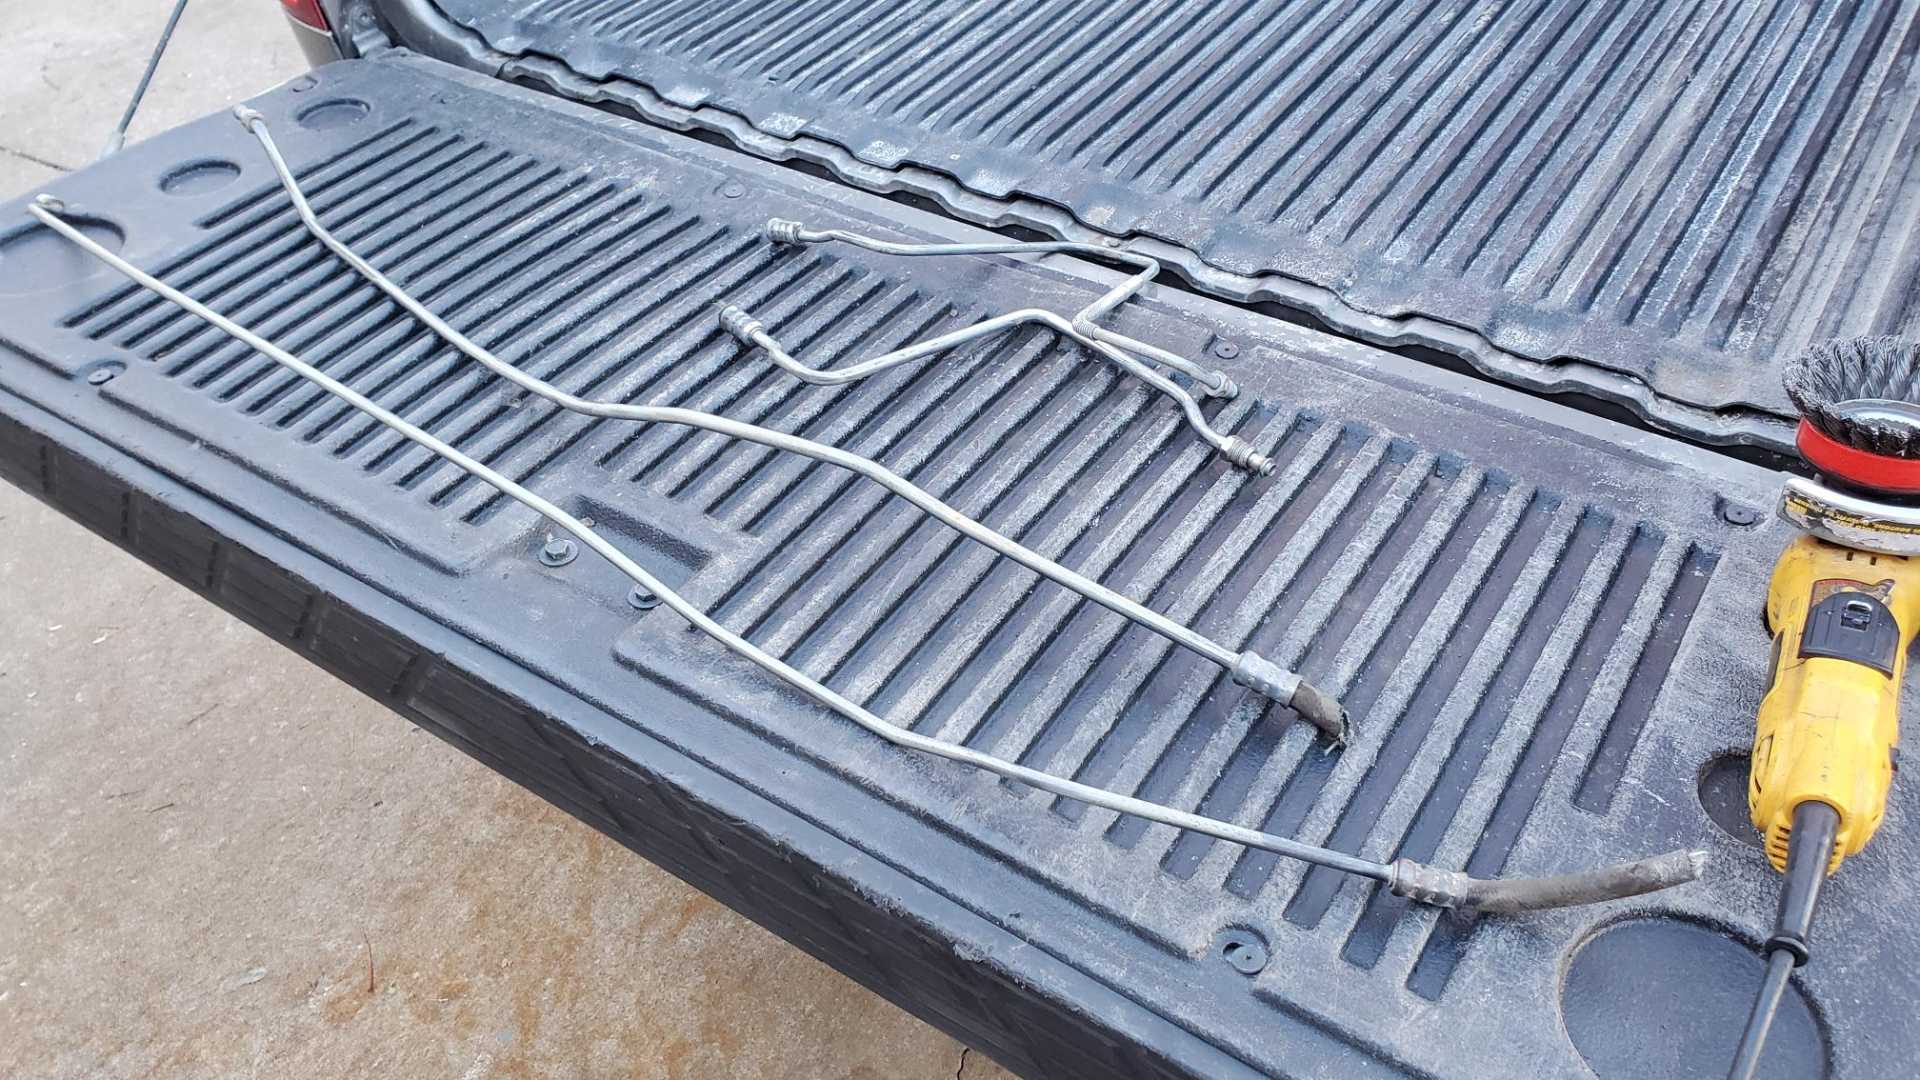
Finally finished the rough draft of the fuel lines.
I followed the same process Sardonyx247 did, which was to straighten out the return line and reroute it from under the fuel rail to straight out the front of the engine over the alternator.
That frees up the space under the fuel rail and injectors for the feed line. I made a 180-degree bend at the end, then a 90 so it paralleled the return line over the alternator.
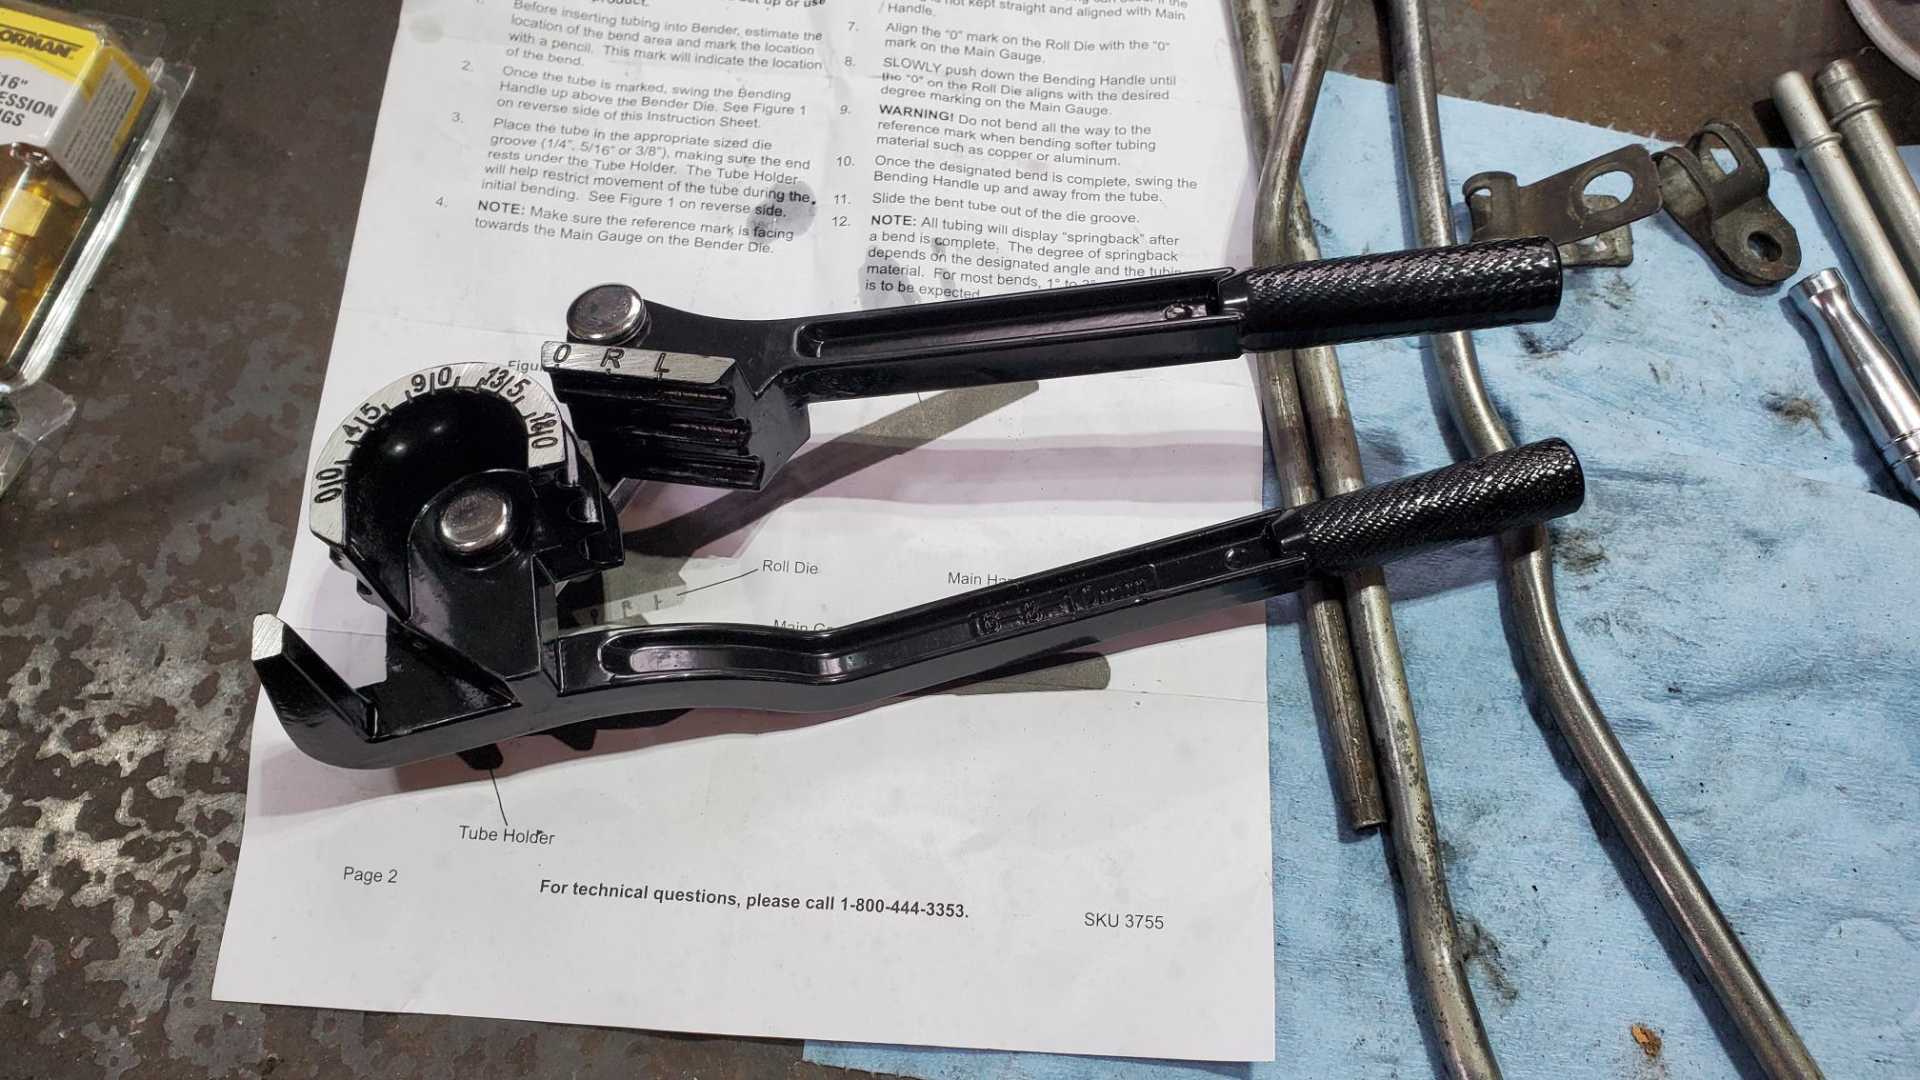
In this process I realized my eBay tubing bender is just too big, so I bought a $10 Harbor Freight version, practiced on several scrap pieces of tubing, then tried the real deal.
The stuff I bent looks pretty good but has some dimples from where I straightened the factory bends. I may swing by the salvage this week and grab another Silverado/Sierra fuel line to give it another try. After doing more Googling I think the 2003-2005 trucks have lines with only the single shoulder on one end. Not sure it matters because this one seems to be seated well.
[This message has been edited by Quadfather (edited 12-11-2022).]
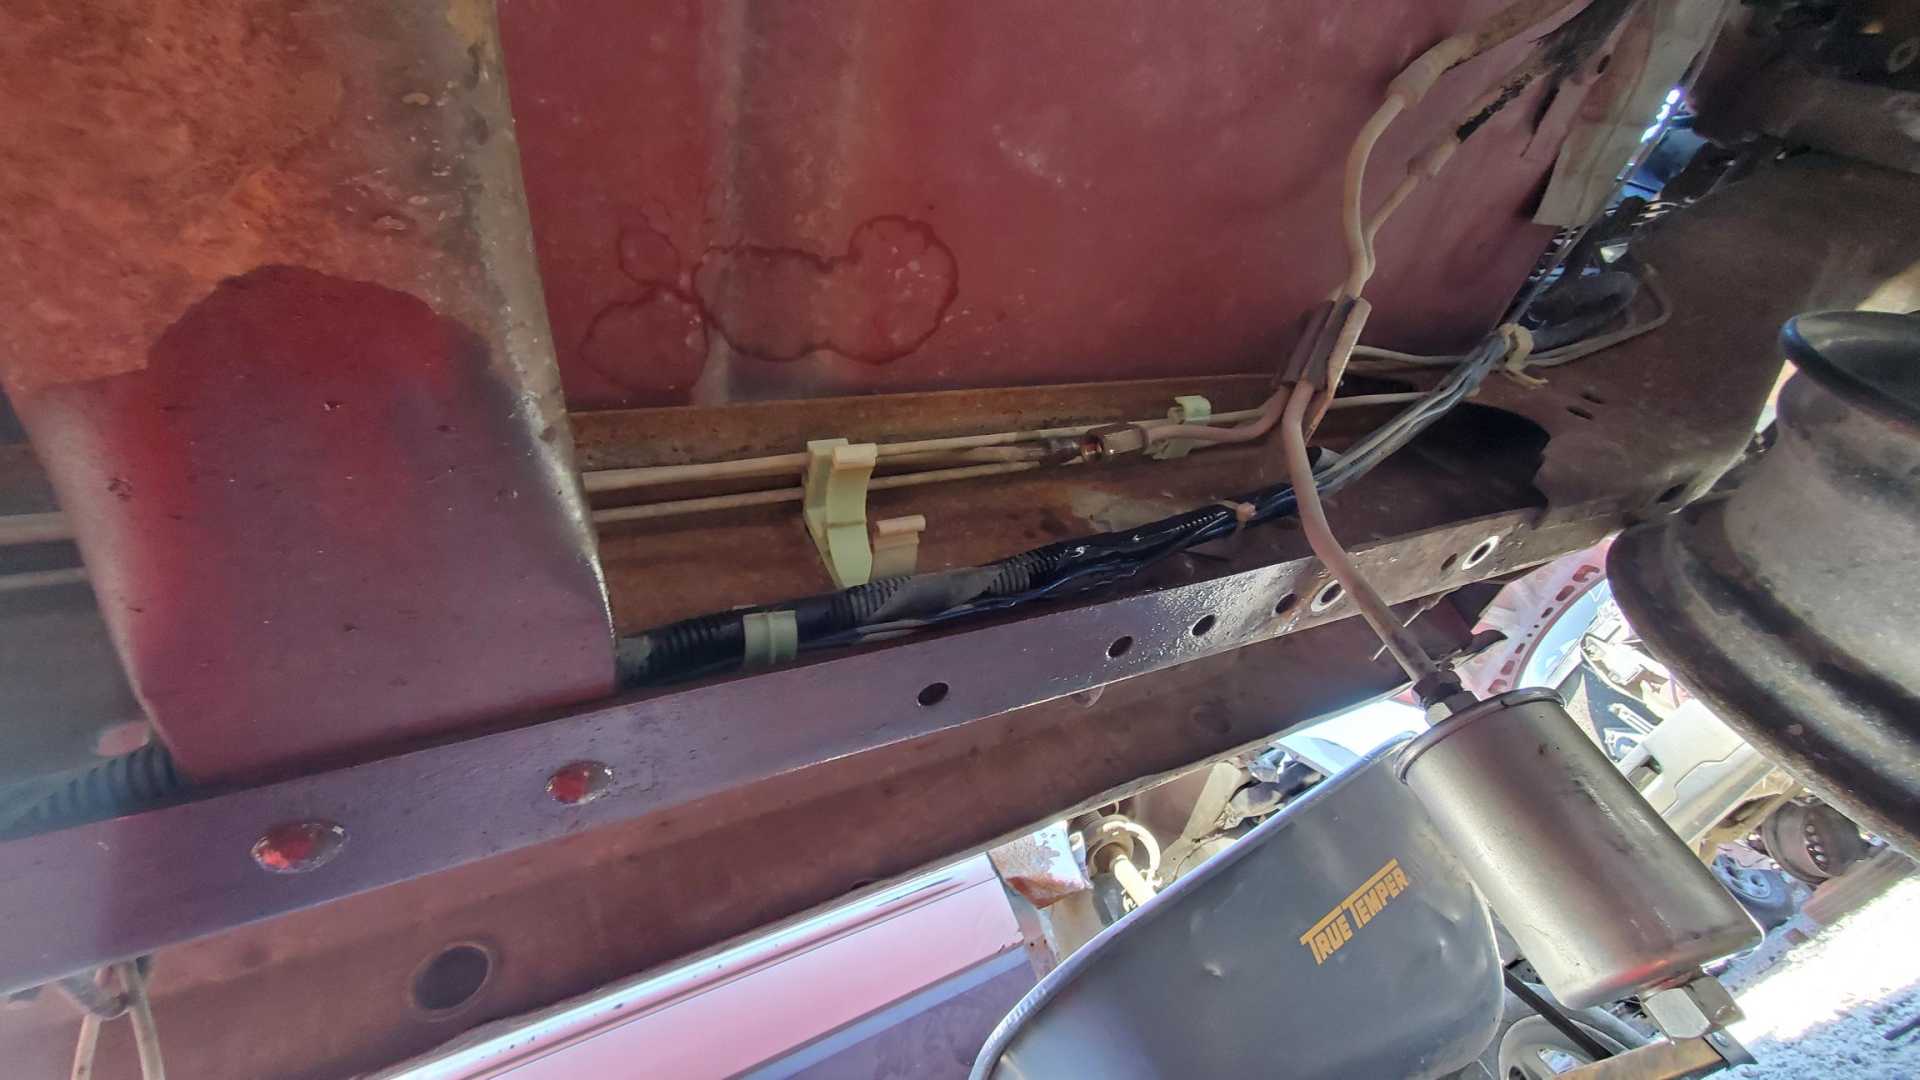
Finally got the fuel lines sorted out. I did end up going back to the salvage and getting lines from a 2005 Silverado. Both the feed and purge lines are 3/8” on those trucks. One end has the quick connect flexible hose and the other has the bonded flexible hose, so you don’t even need wrenches to remove them, just some cutters and a screw driver to pop them out of the plastic clips on the frame rail.
I put the engine back in the car to make sure I got the lines just right. The lines on the engine were way too long.
Needed an angle in order to get the Fiero’s flexible lines to meet the engine’s steel lines without kinking.
The ends with the fittings came from the lines from the late-90s Silverado I got on the previous salvage yard trip. I thought a 45-degree angle would work, but it ended up being 90.
Looks a little kinky but I think it will work.
I cut the engine lines so that the compression fittings would be staggered, but after I got everything hooked up both lines fit better with their positions swapped. Unfortunately that means the fittings are closer to each other.
[This message has been edited by Quadfather (edited 12-19-2022).]
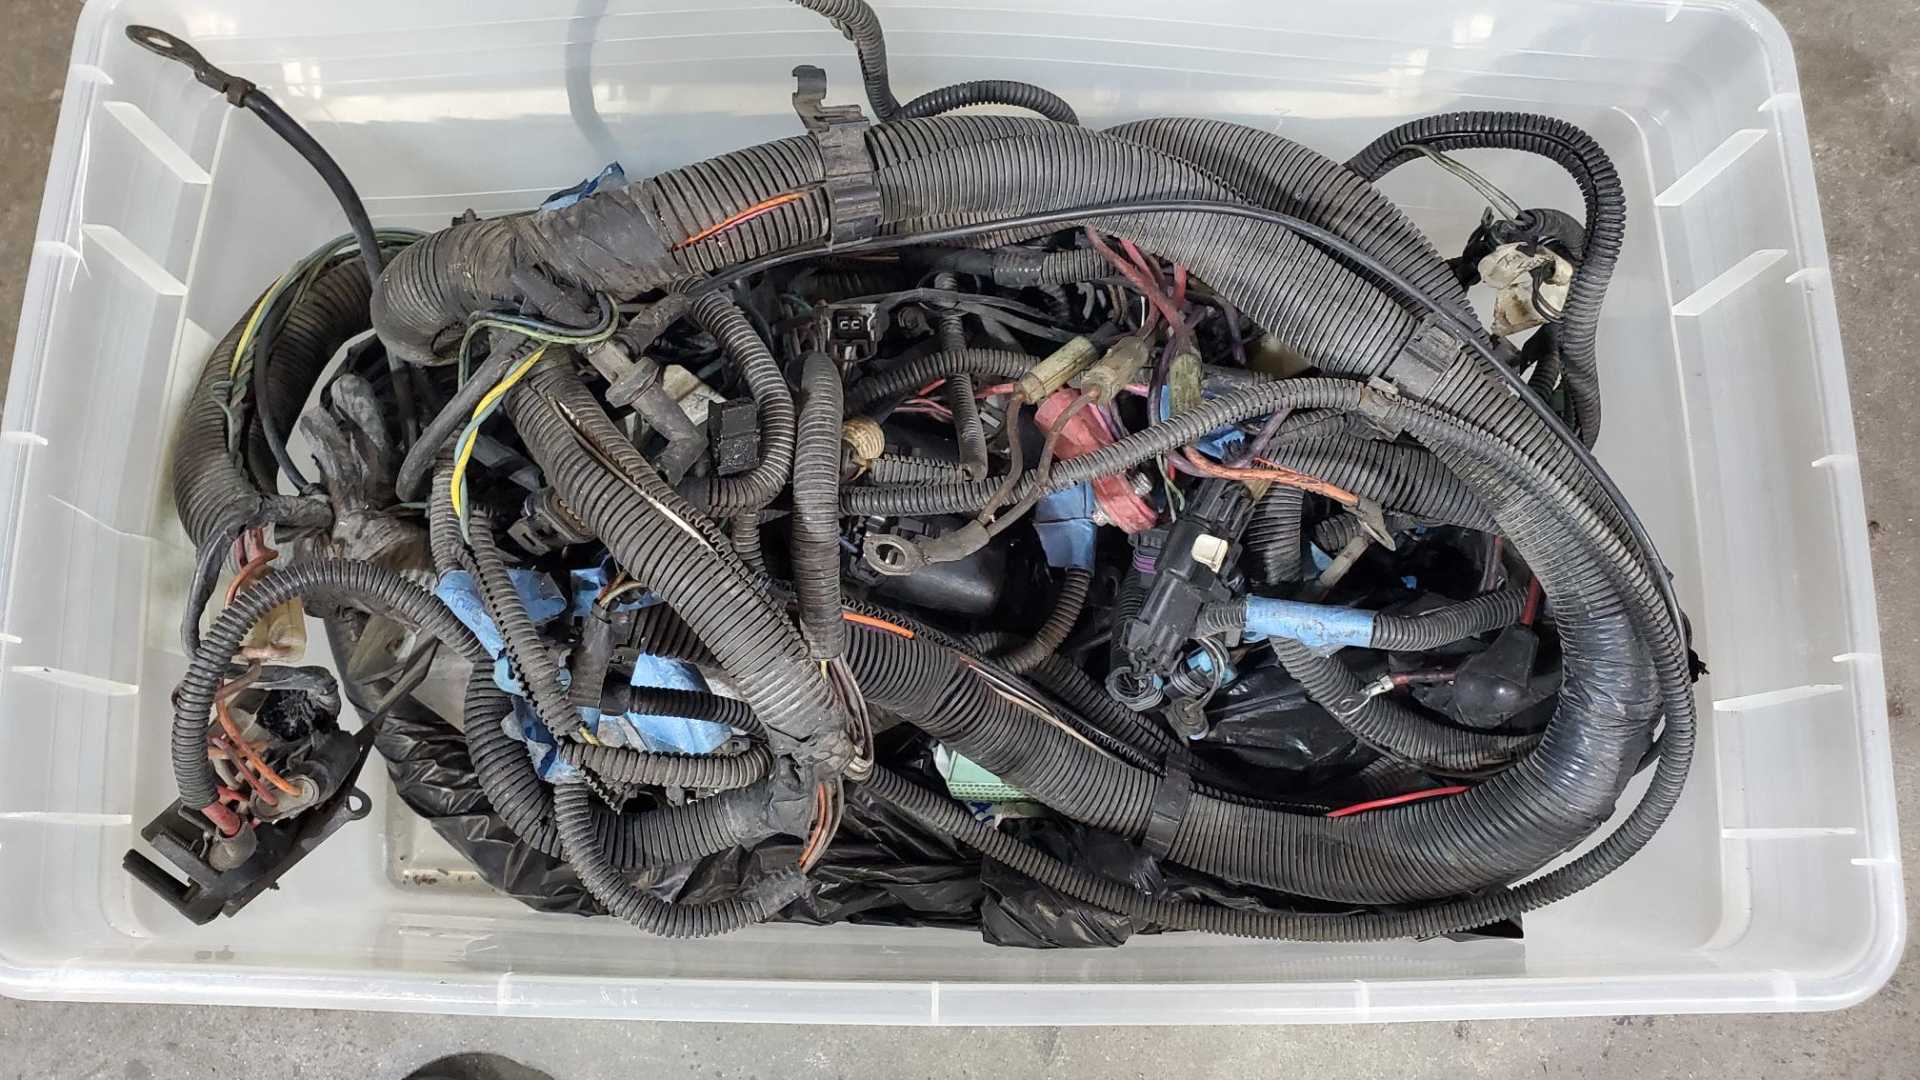
This means it’s just about time to start working on the wiring harness.
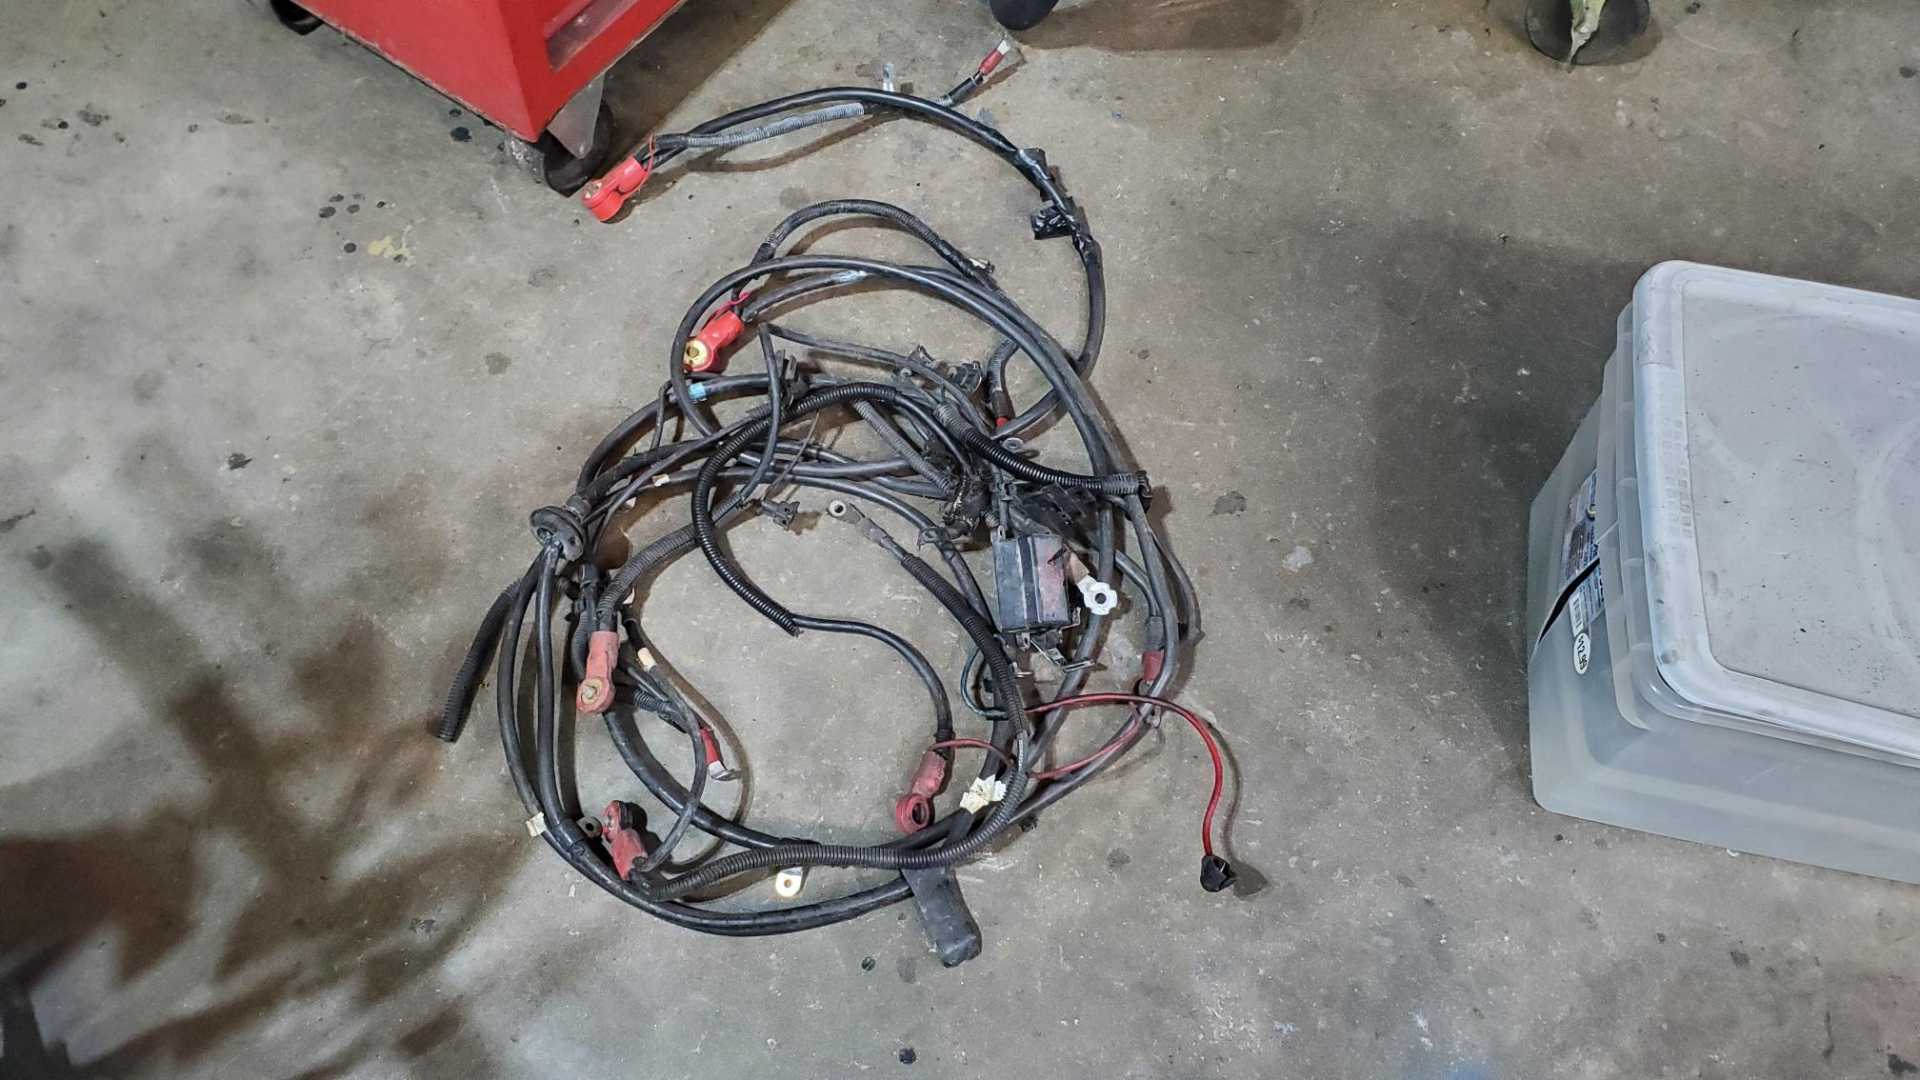
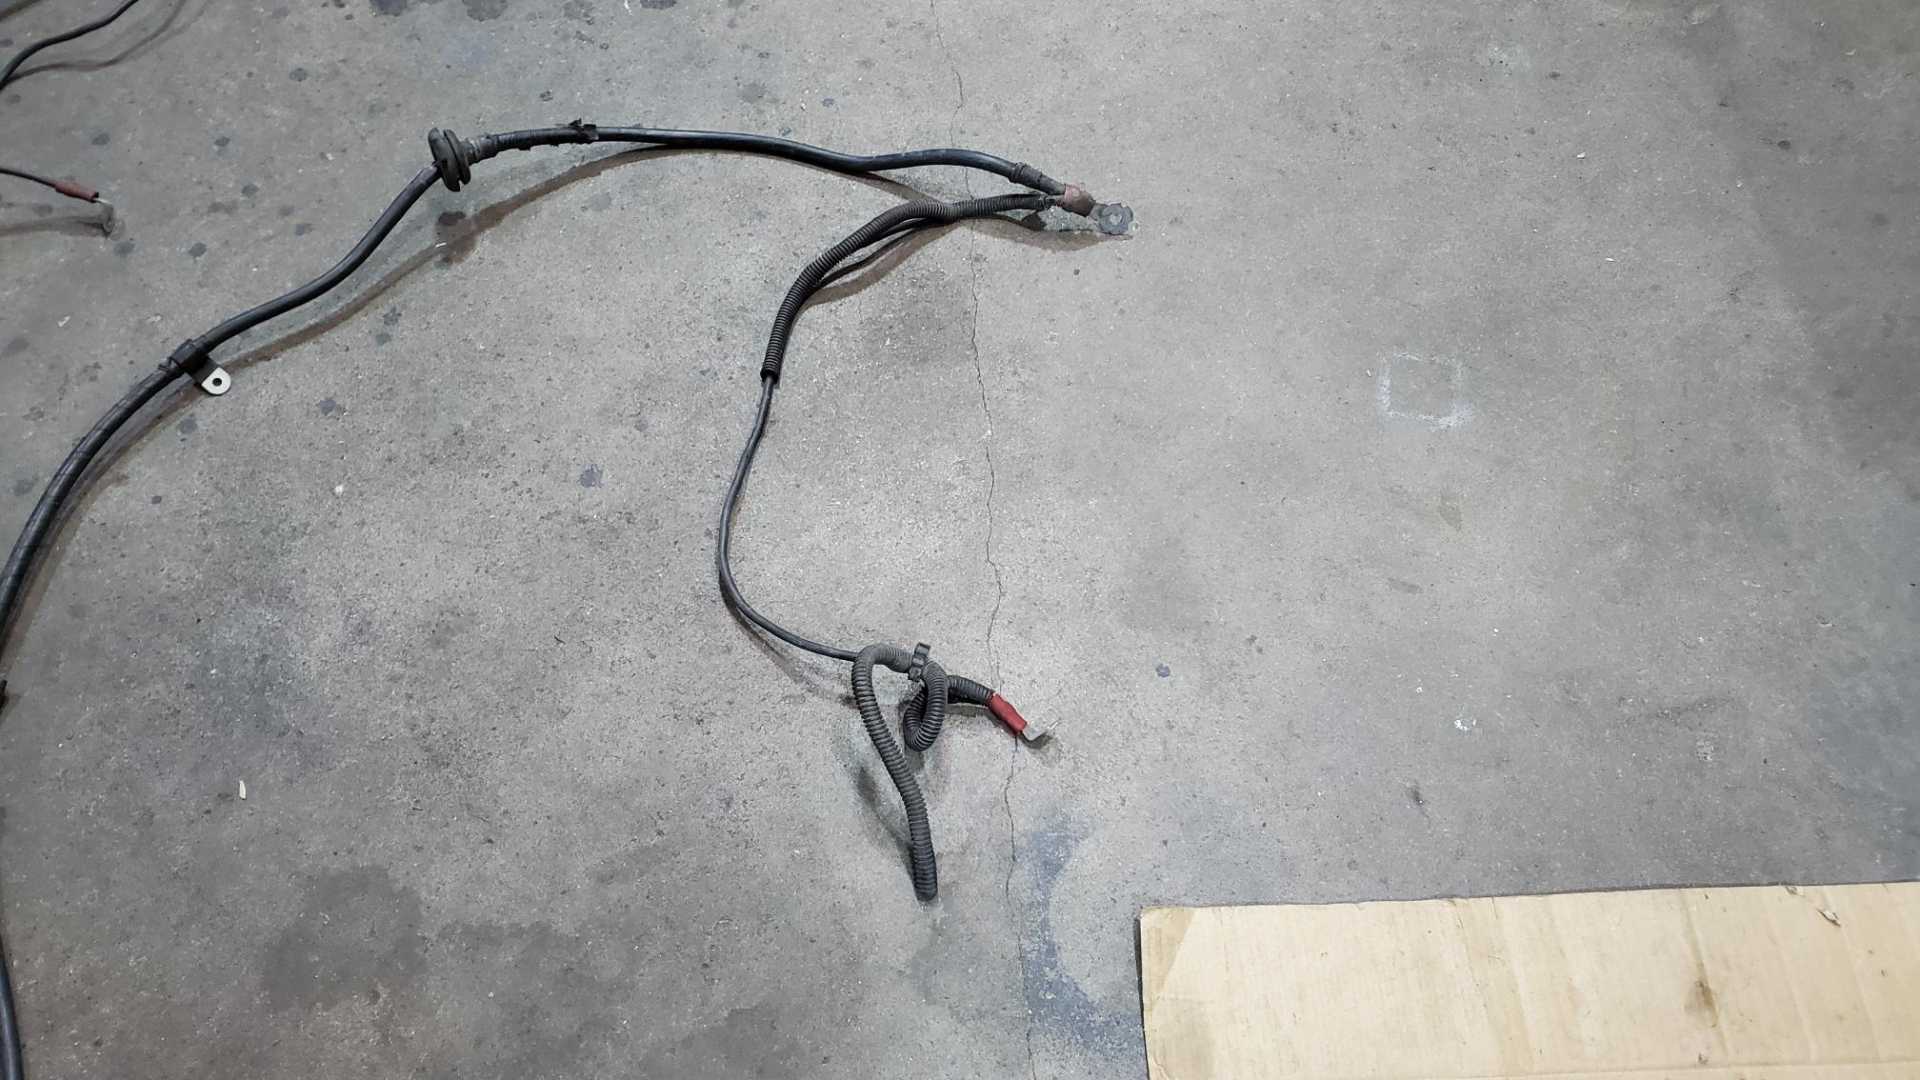
Can’t remember if I’ve ever posted about these battery cables. They’re from late-90s Buick Rivieras. Should be perfect for the Fiero because those Rivieras had the battery under the back seat, so the cables are about 16’ long.
The battery terminals are corroded on these, but the other ends have the eyelet for a junction box and the starter.
Probably ought to rebuild the rear suspension and figure out the clutch slave cylinder connection to the car’s system. Also need a new clutch master cylinder. And the throttle cable bracket, while the engine is in the car.
[This message has been edited by Quadfather (edited 12-19-2022).]
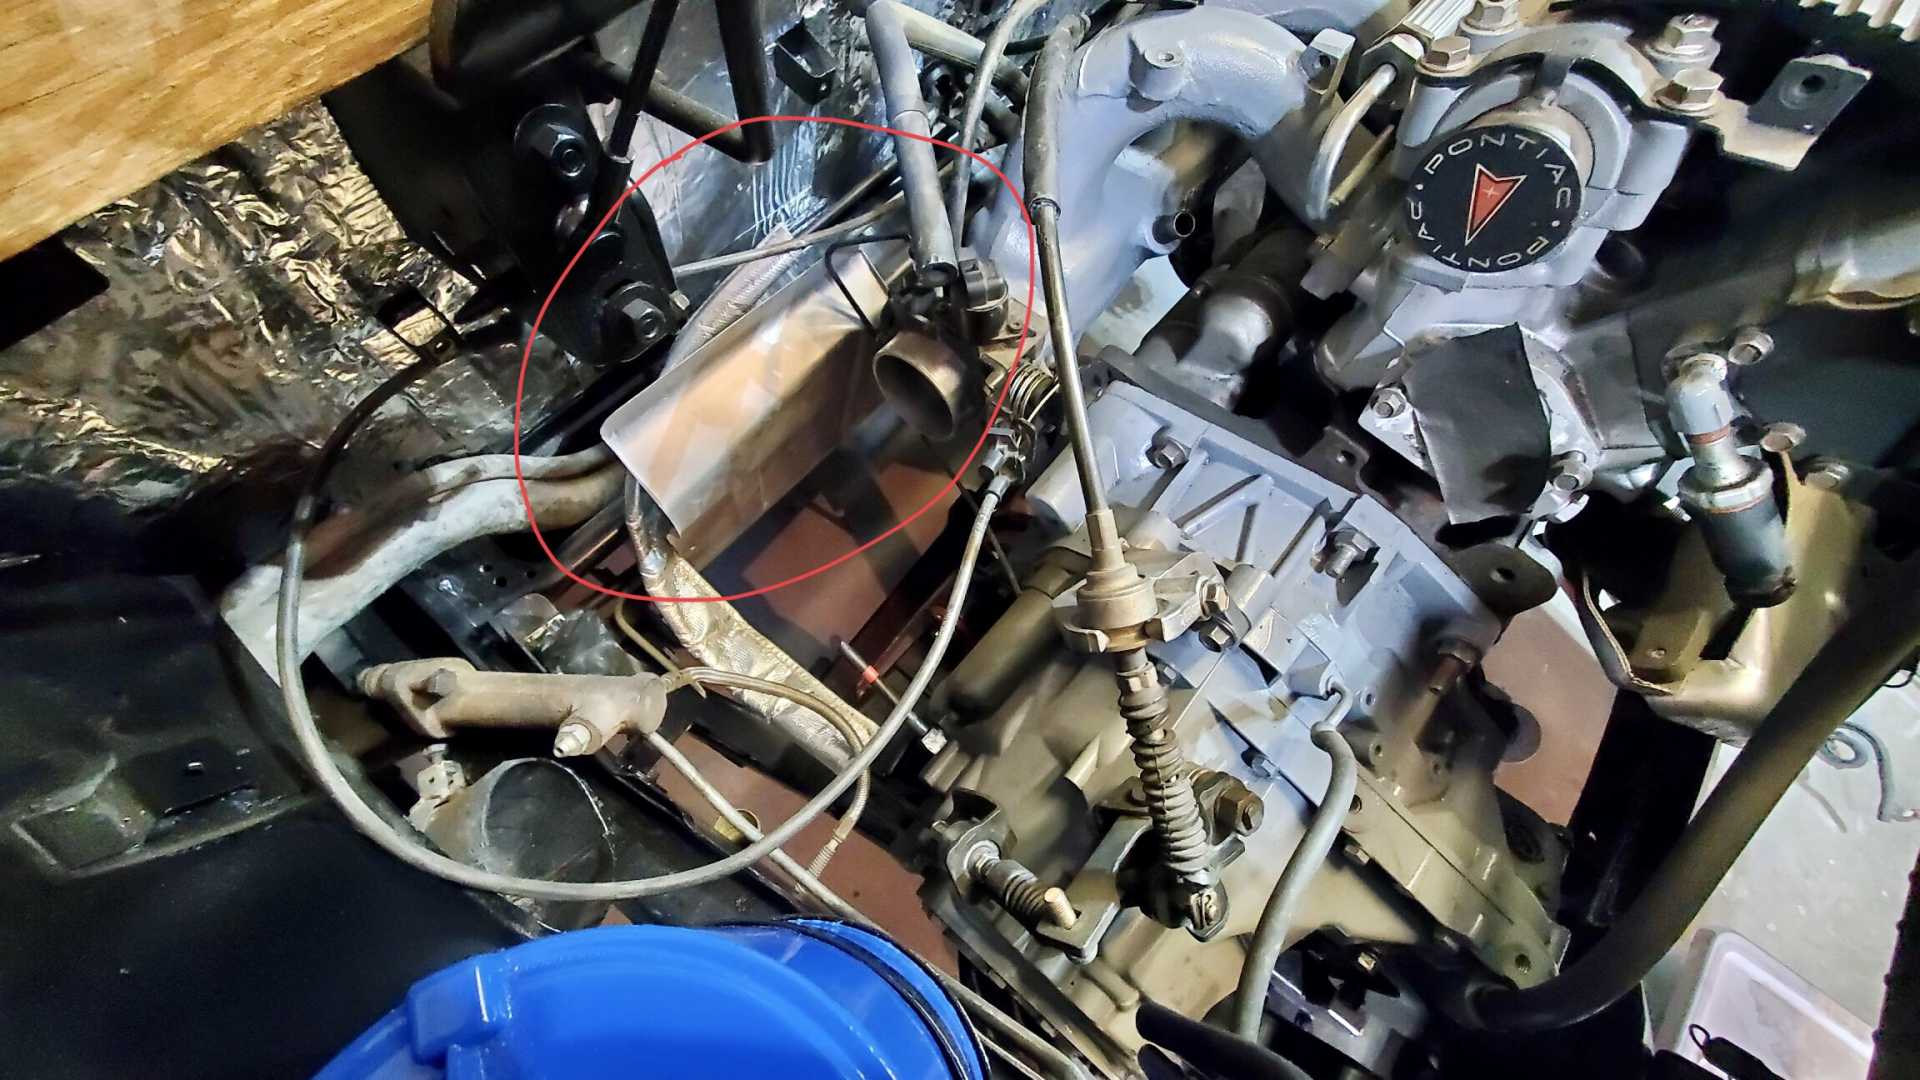
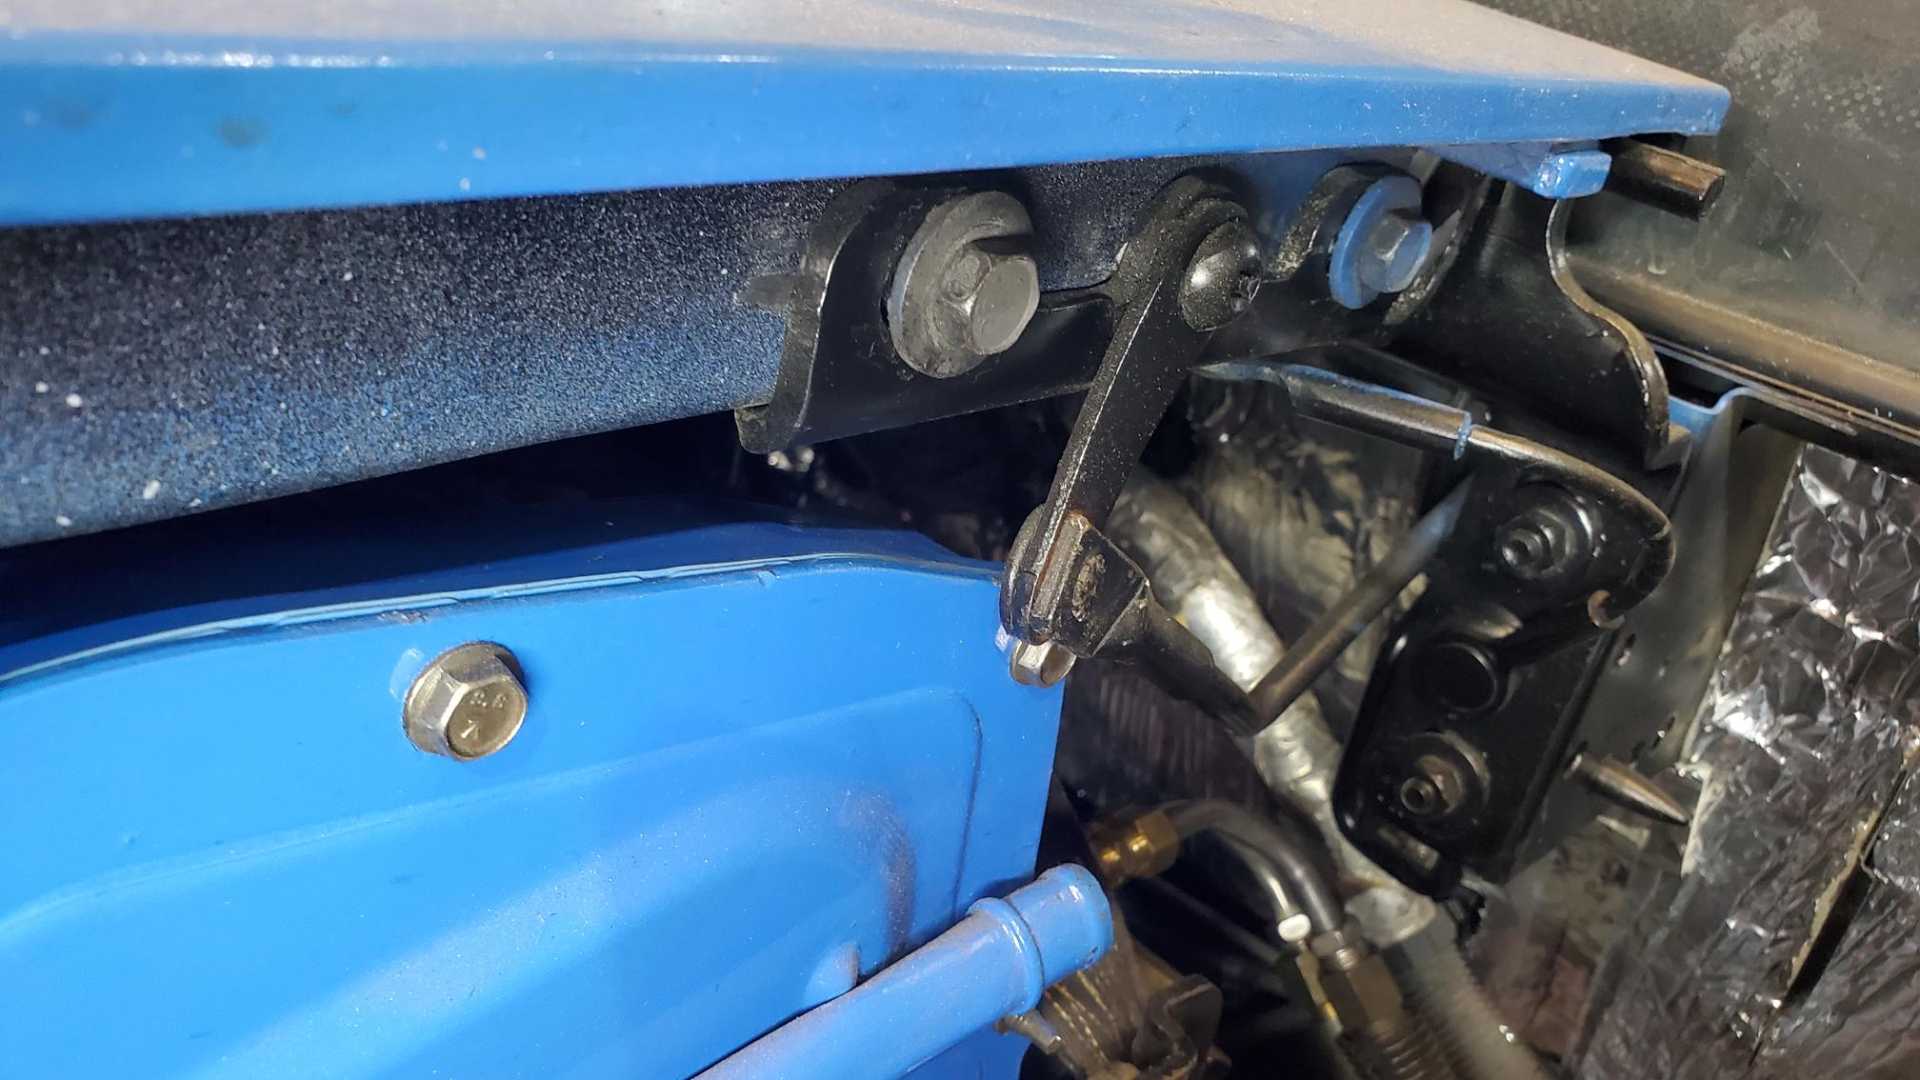
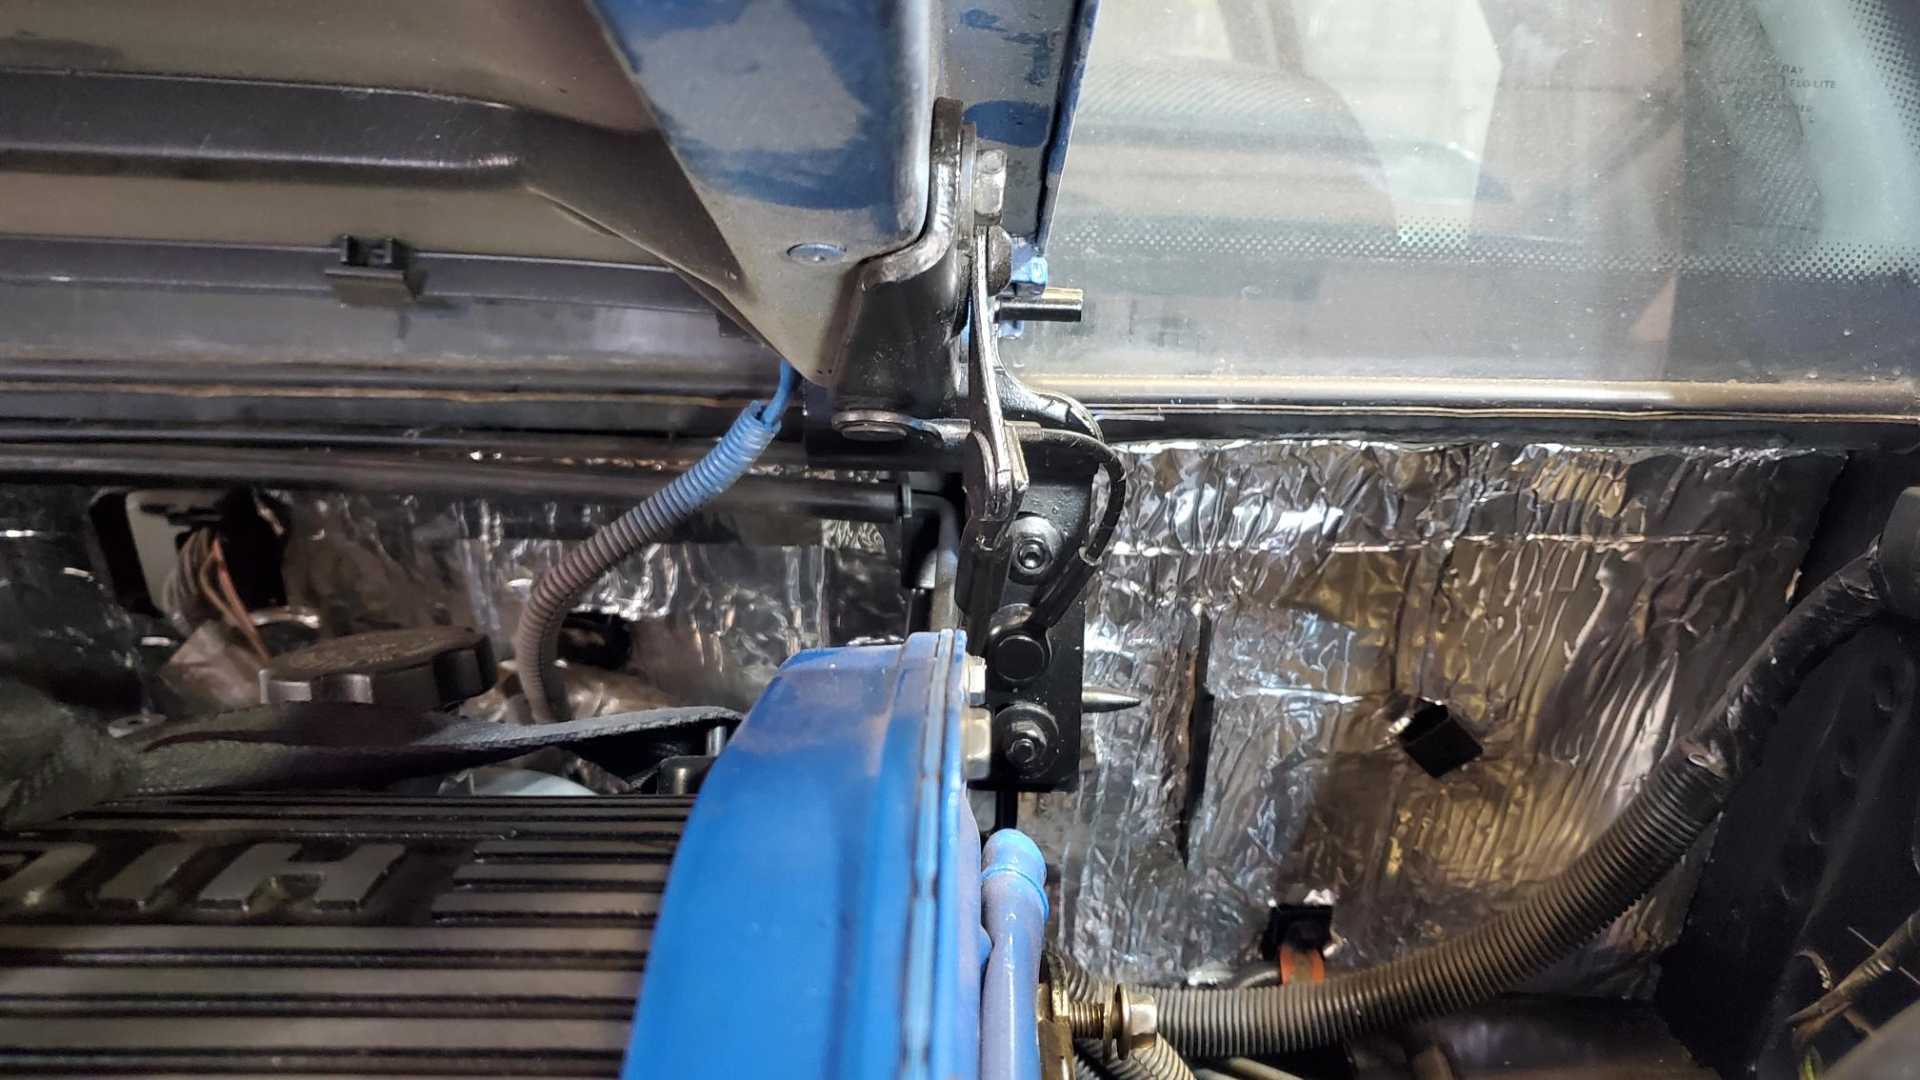
This is the first time I’ve had the engine in the car with the firewall heat shield installed, at least in a long time. It’s in the way. Since the Quad’s exhaust is on the other side of the engine, I don’t need this heat shield anymore, right?
It’s in the way of the shift select cable and conflicts with the throttle body.
[This message has been edited by Quadfather (edited 12-23-2022).]
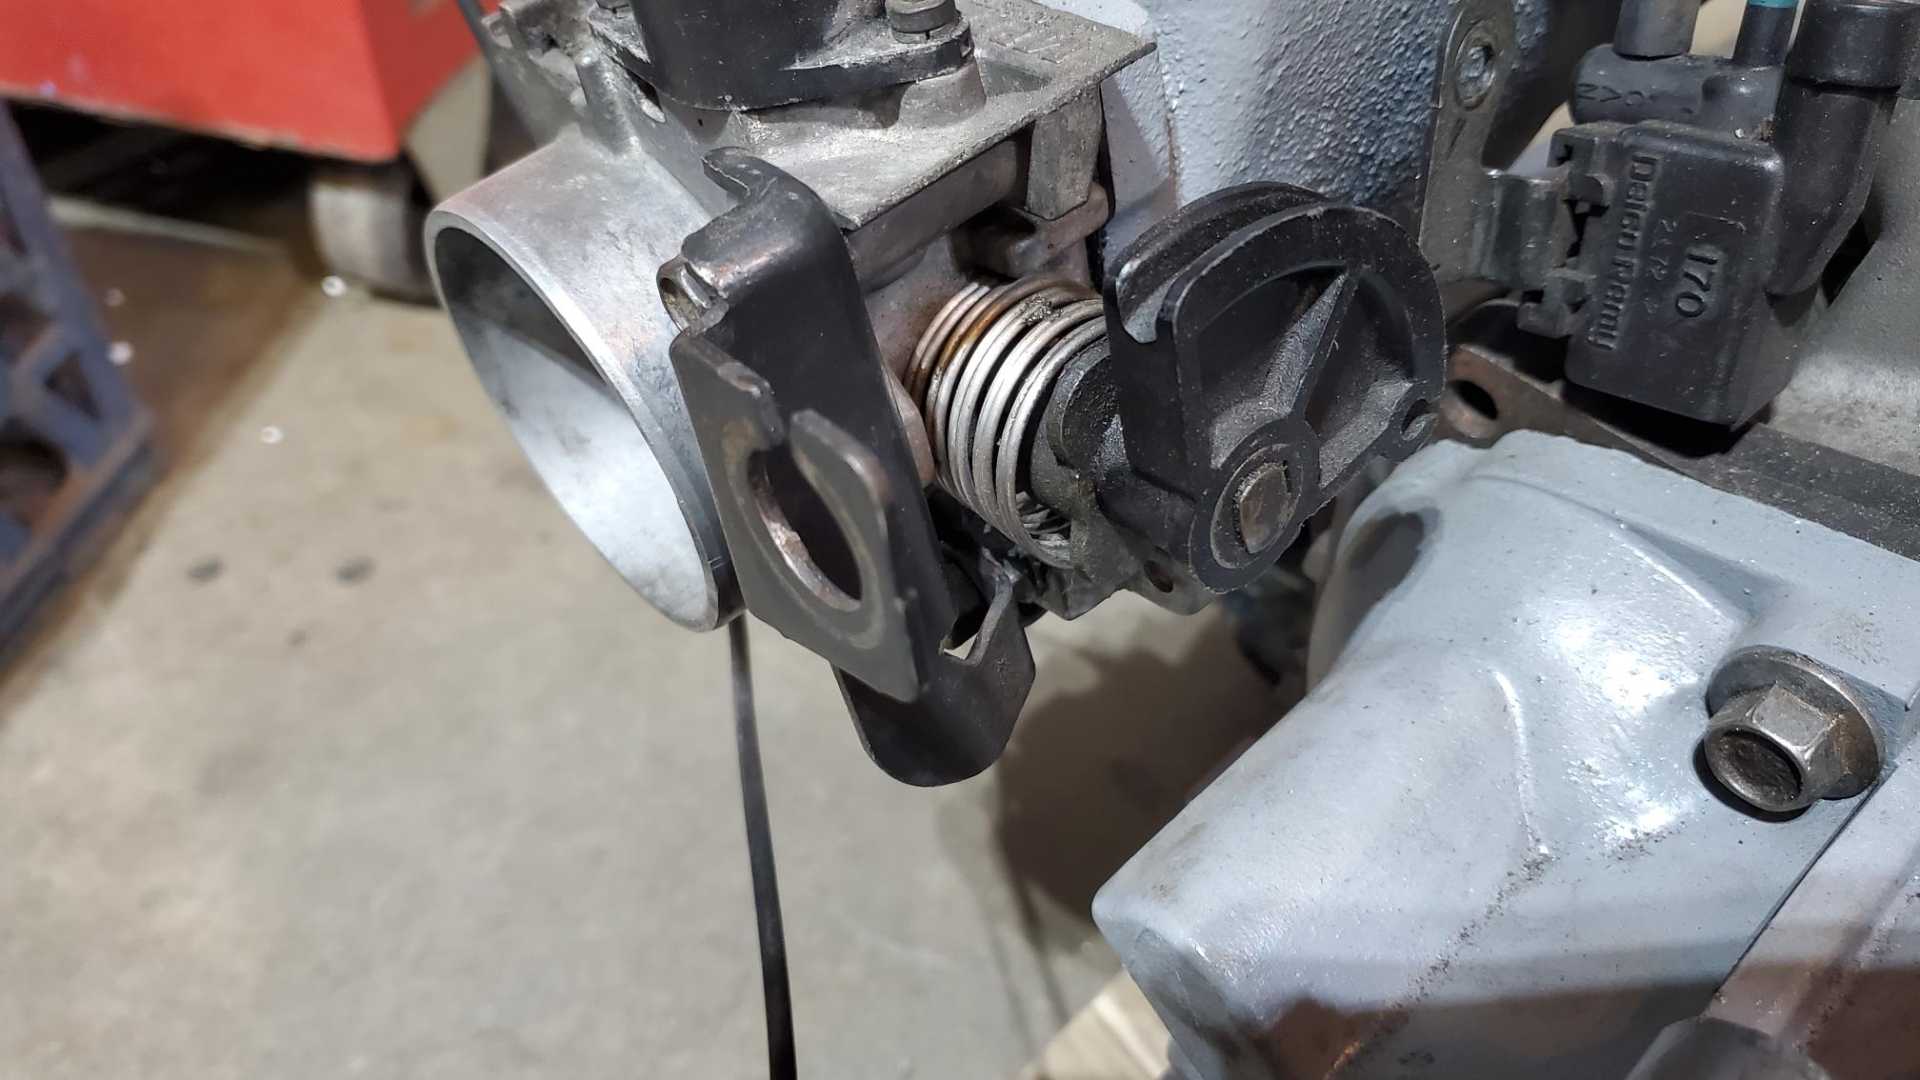
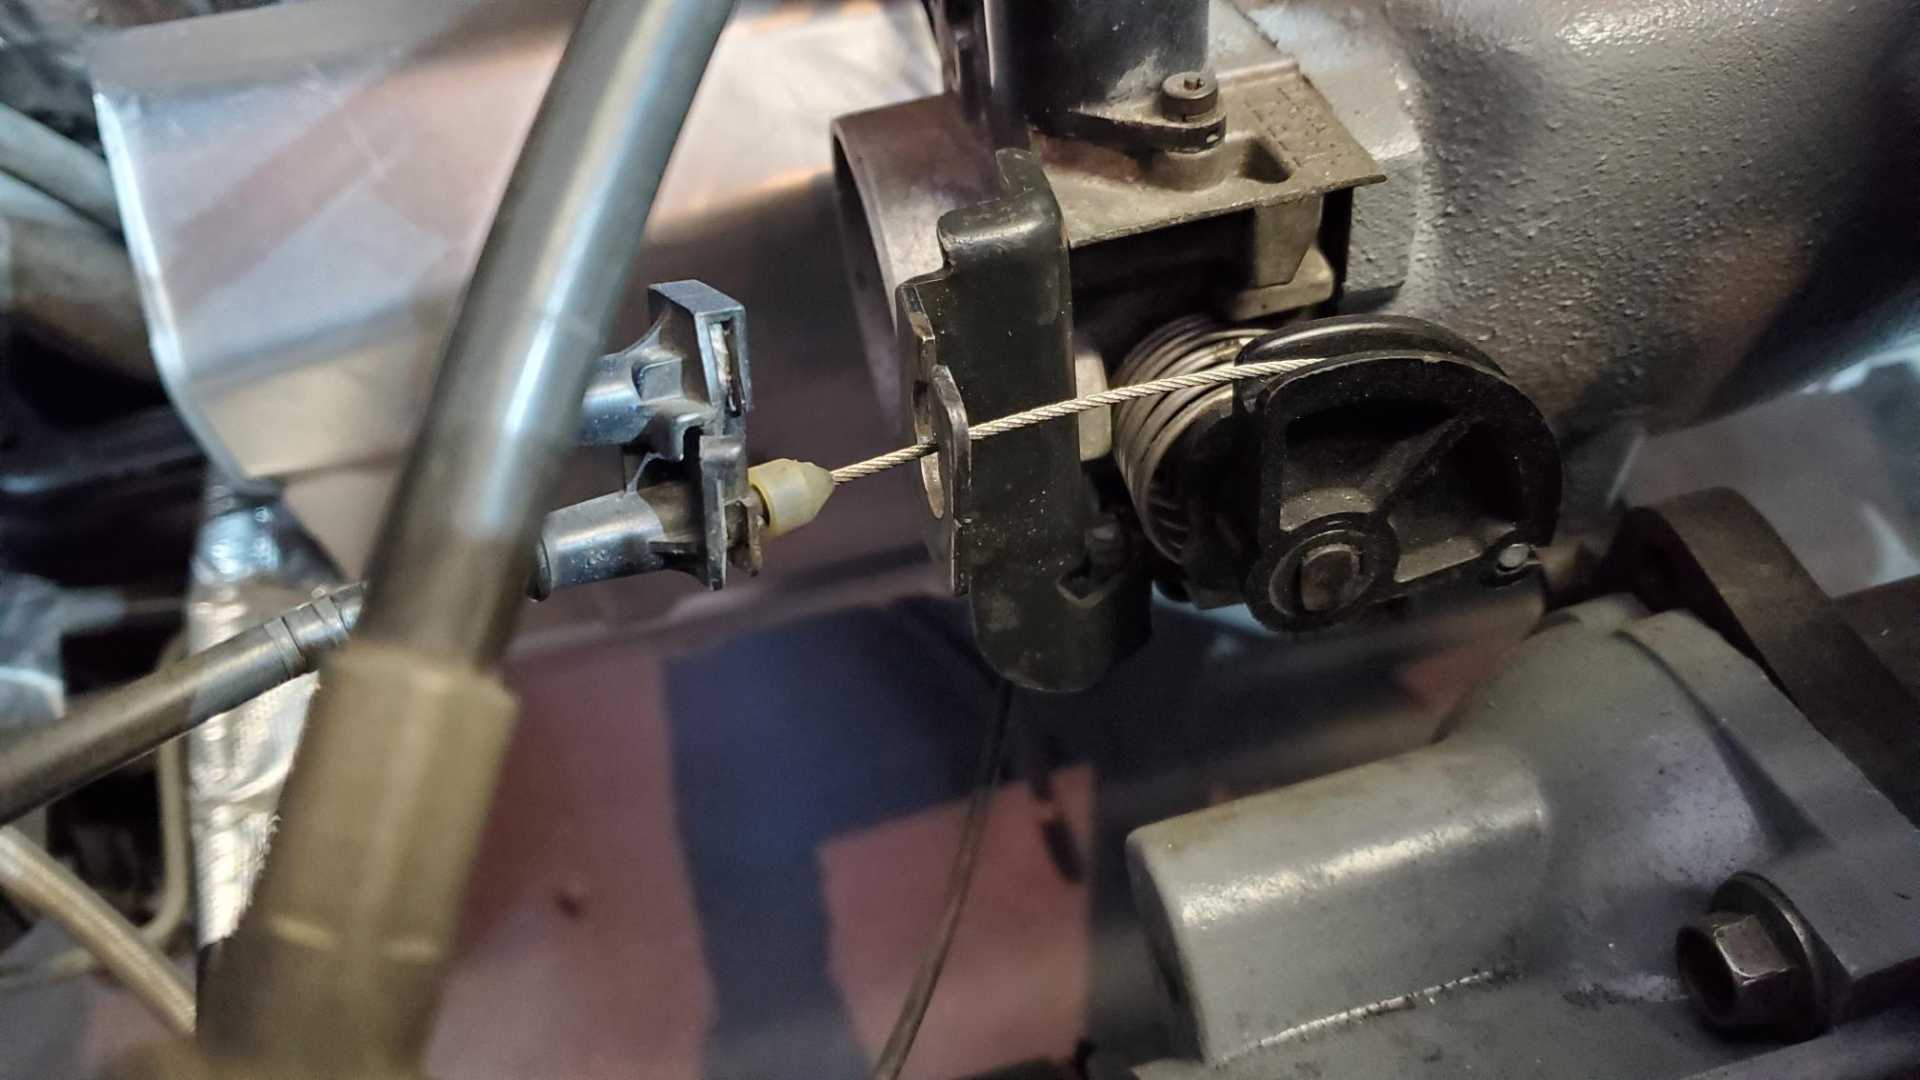
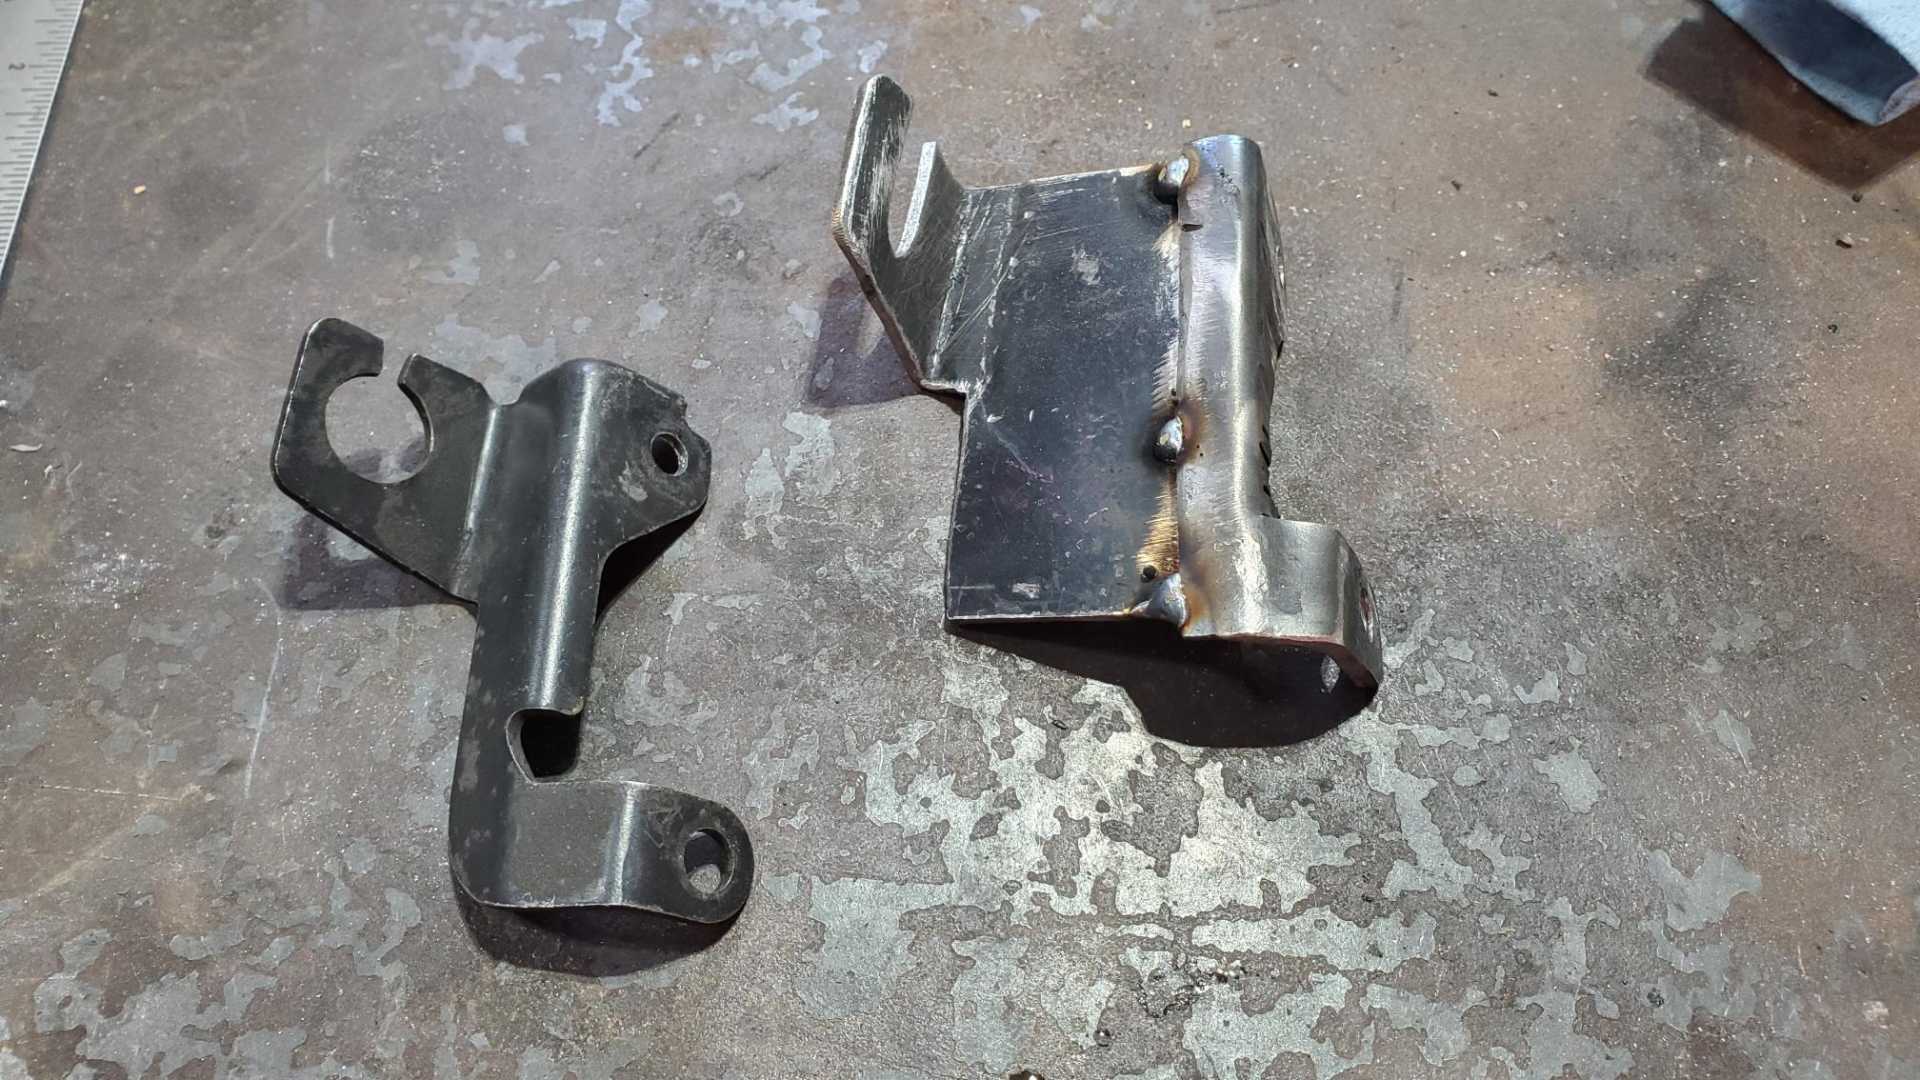
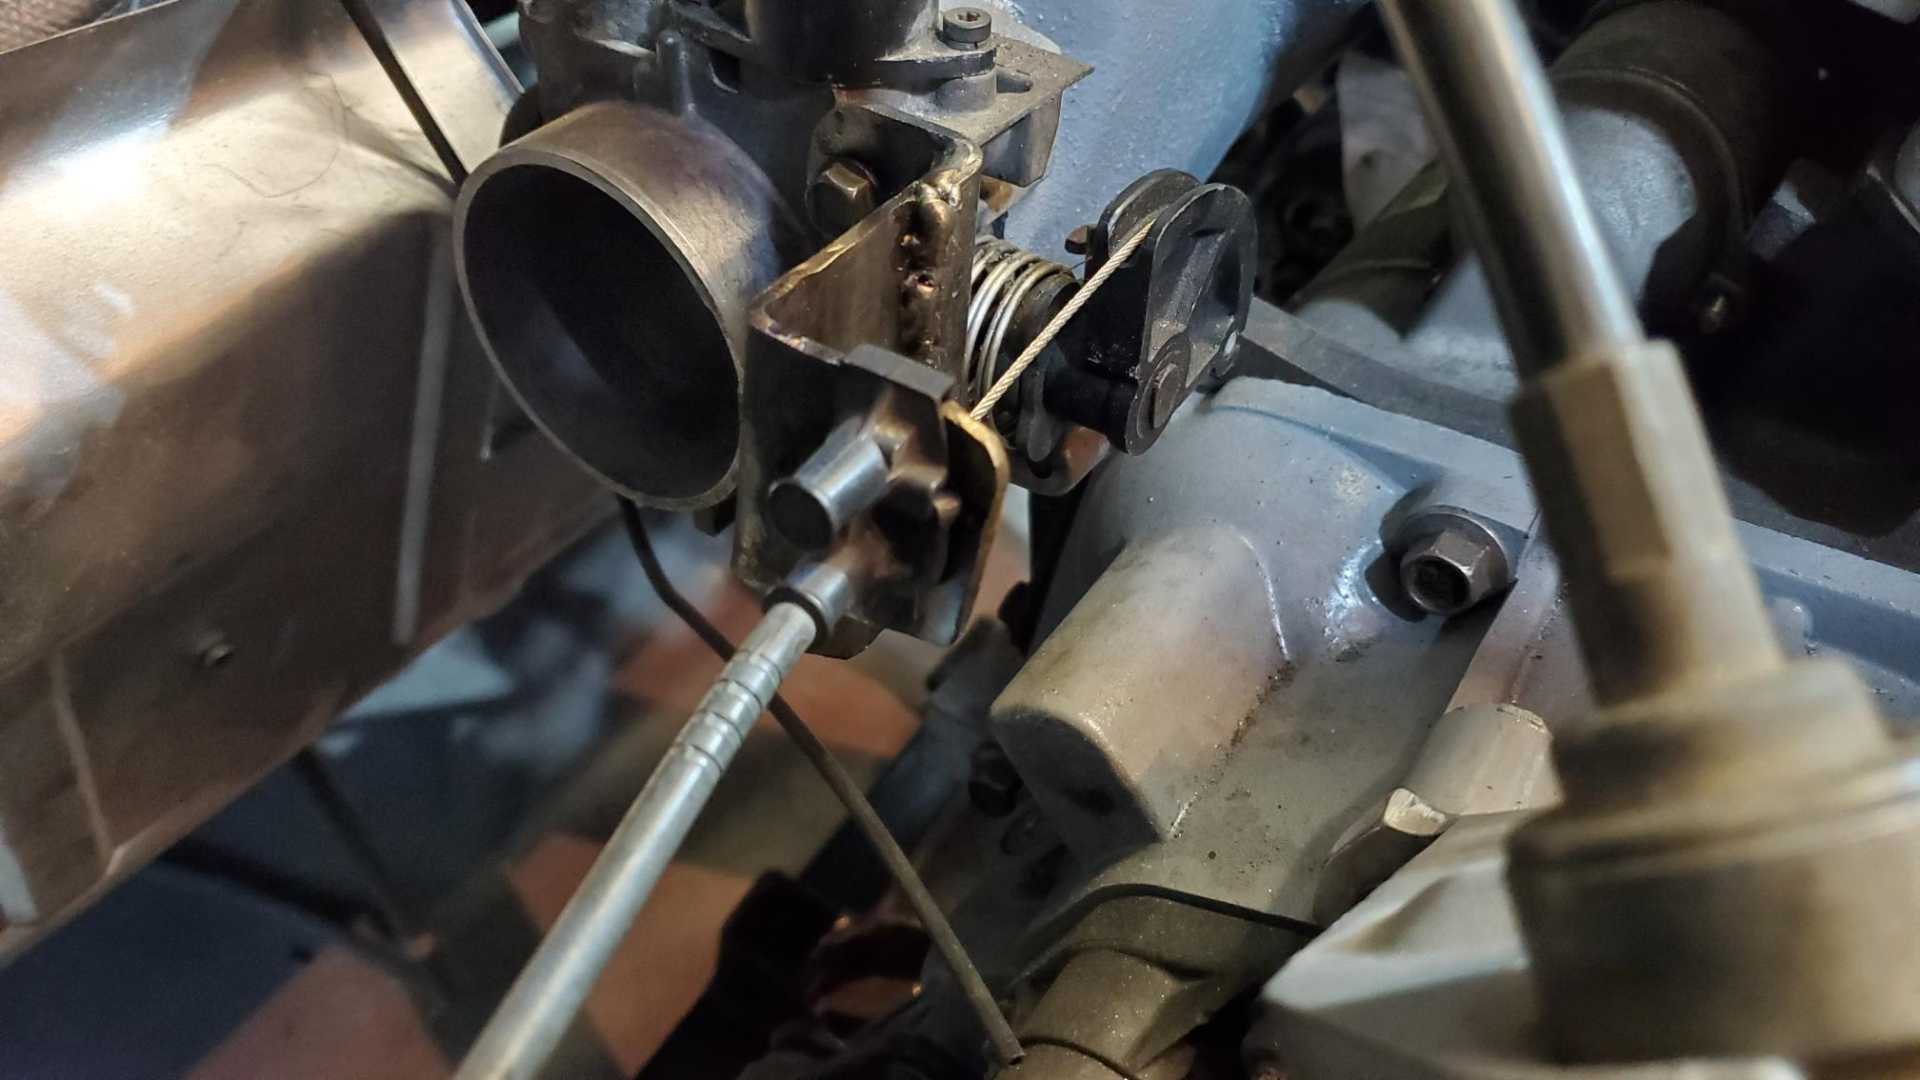
I fabricated a throttle cable bracket today. On the Quad’s bracket, the throttle cable mount is about 1 1/4” too close to the butterfly.
Using the Quad’s bracket as a pattern, I made the new one in two pieces.
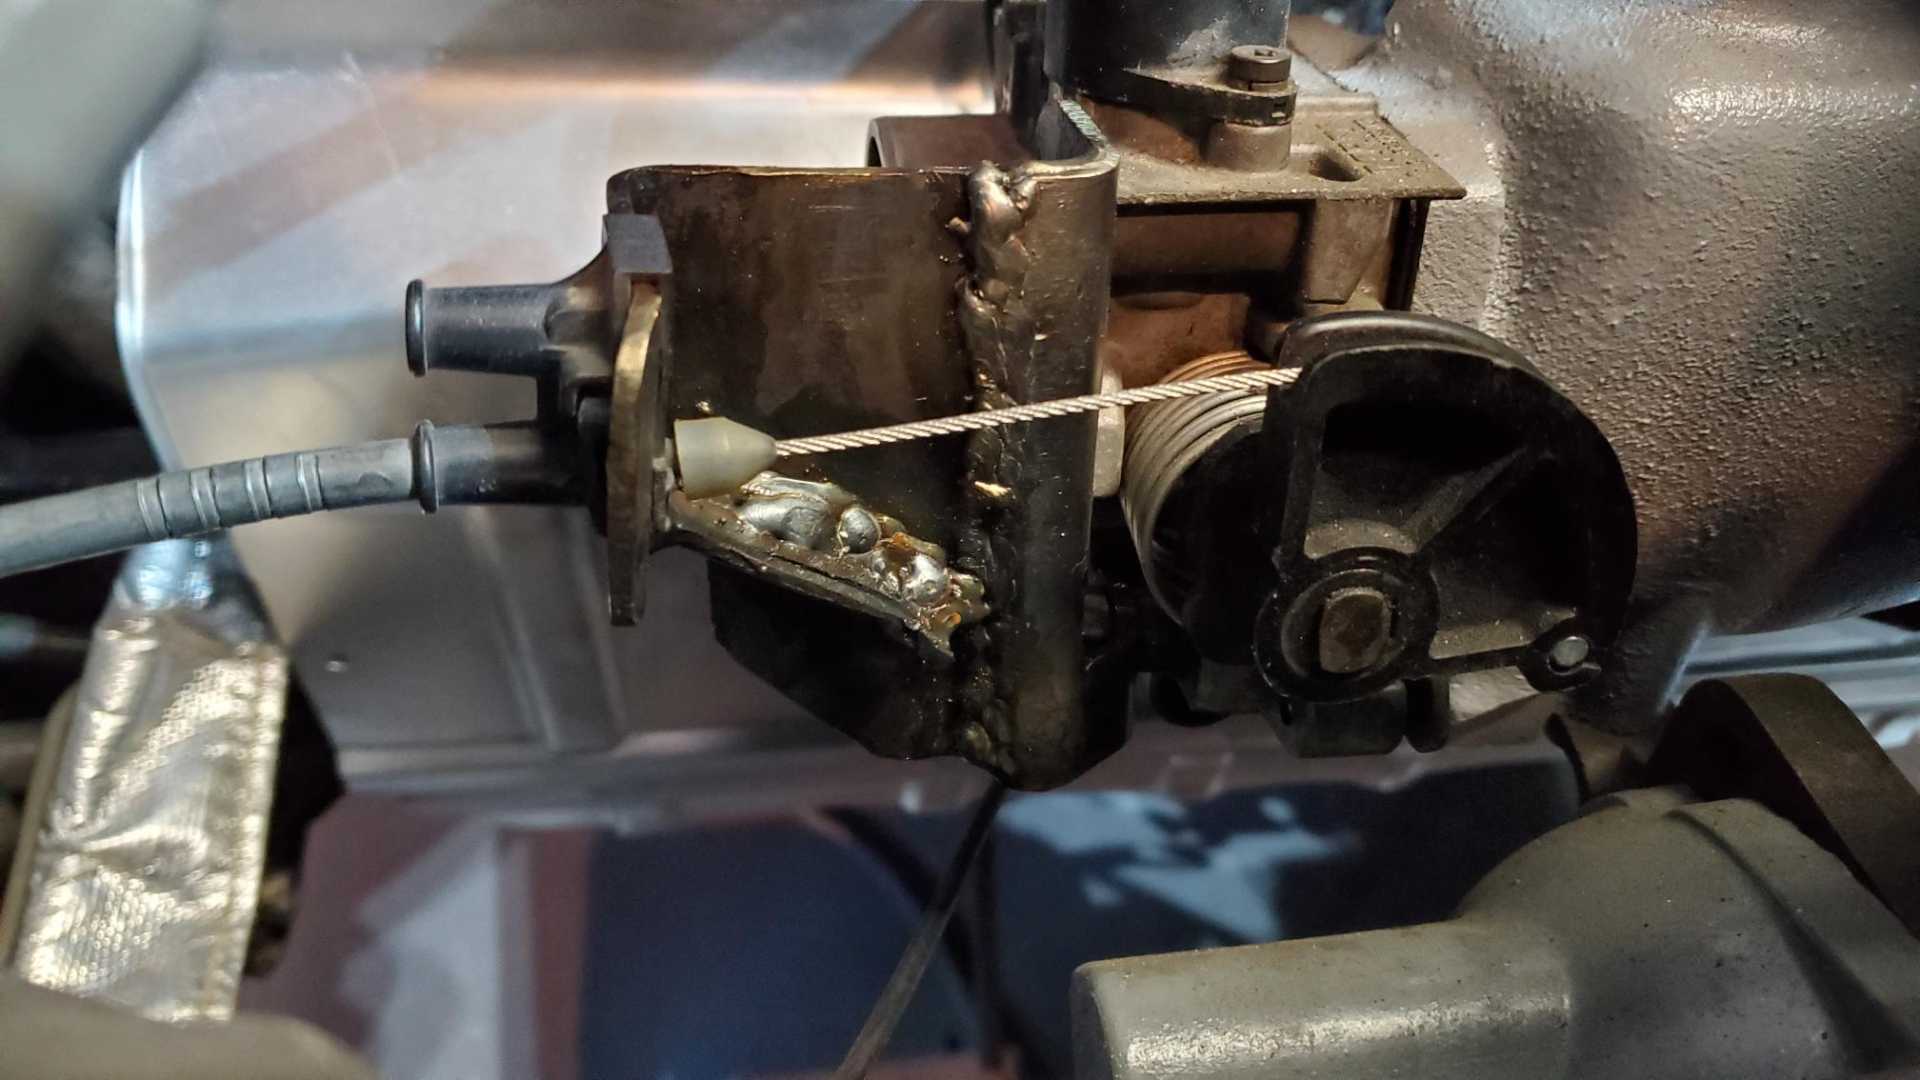
Ignore the welds. I’ll smooth them down before I paint the bracket black.
This is what it looked like after a dozen or so pushes of the gas pedal, all the way to the floor.
I would’ve ground down the welds and painted the bracket today but Oklahoma is dealing with the big dose of global warming hitting half the country so the shop was really cold. Hopefully more progress tomorrow.
[This message has been edited by Quadfather (edited 12-23-2022).]
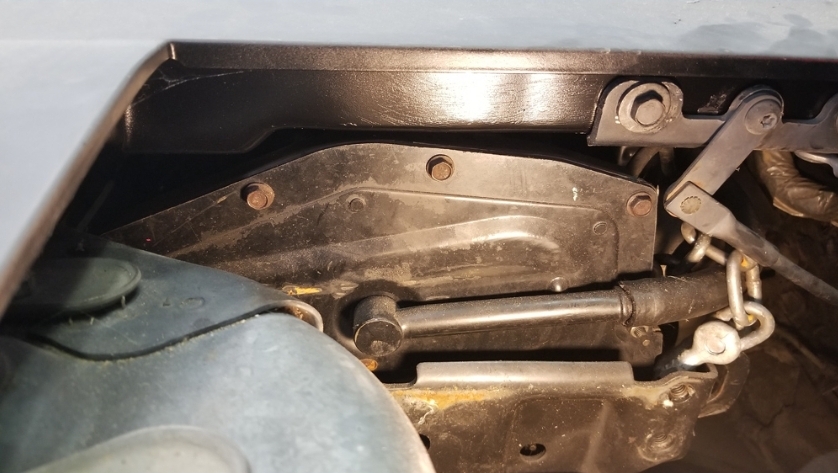
Here’s today’s disappointment. For the first time since redoing the transmission mounts I put the deck lid on to check the fitment with the engine.
All that work on the new transmission mounts turned the assembly about 1 1/4” forward, so now the timing cover conflicts with the passenger deck lid spring.
Try to ignore all the overspray.
At first the deck would not close, so I used a big pipe wrench to bend the linkage to the side.
Here’s how well the engine fit with the old transmission mounts.
I’ve always planned to remove the torsion springs and switch to a strut, this just means it’s no longer a choice.
[This message has been edited by Quadfather (edited 01-02-2023).]
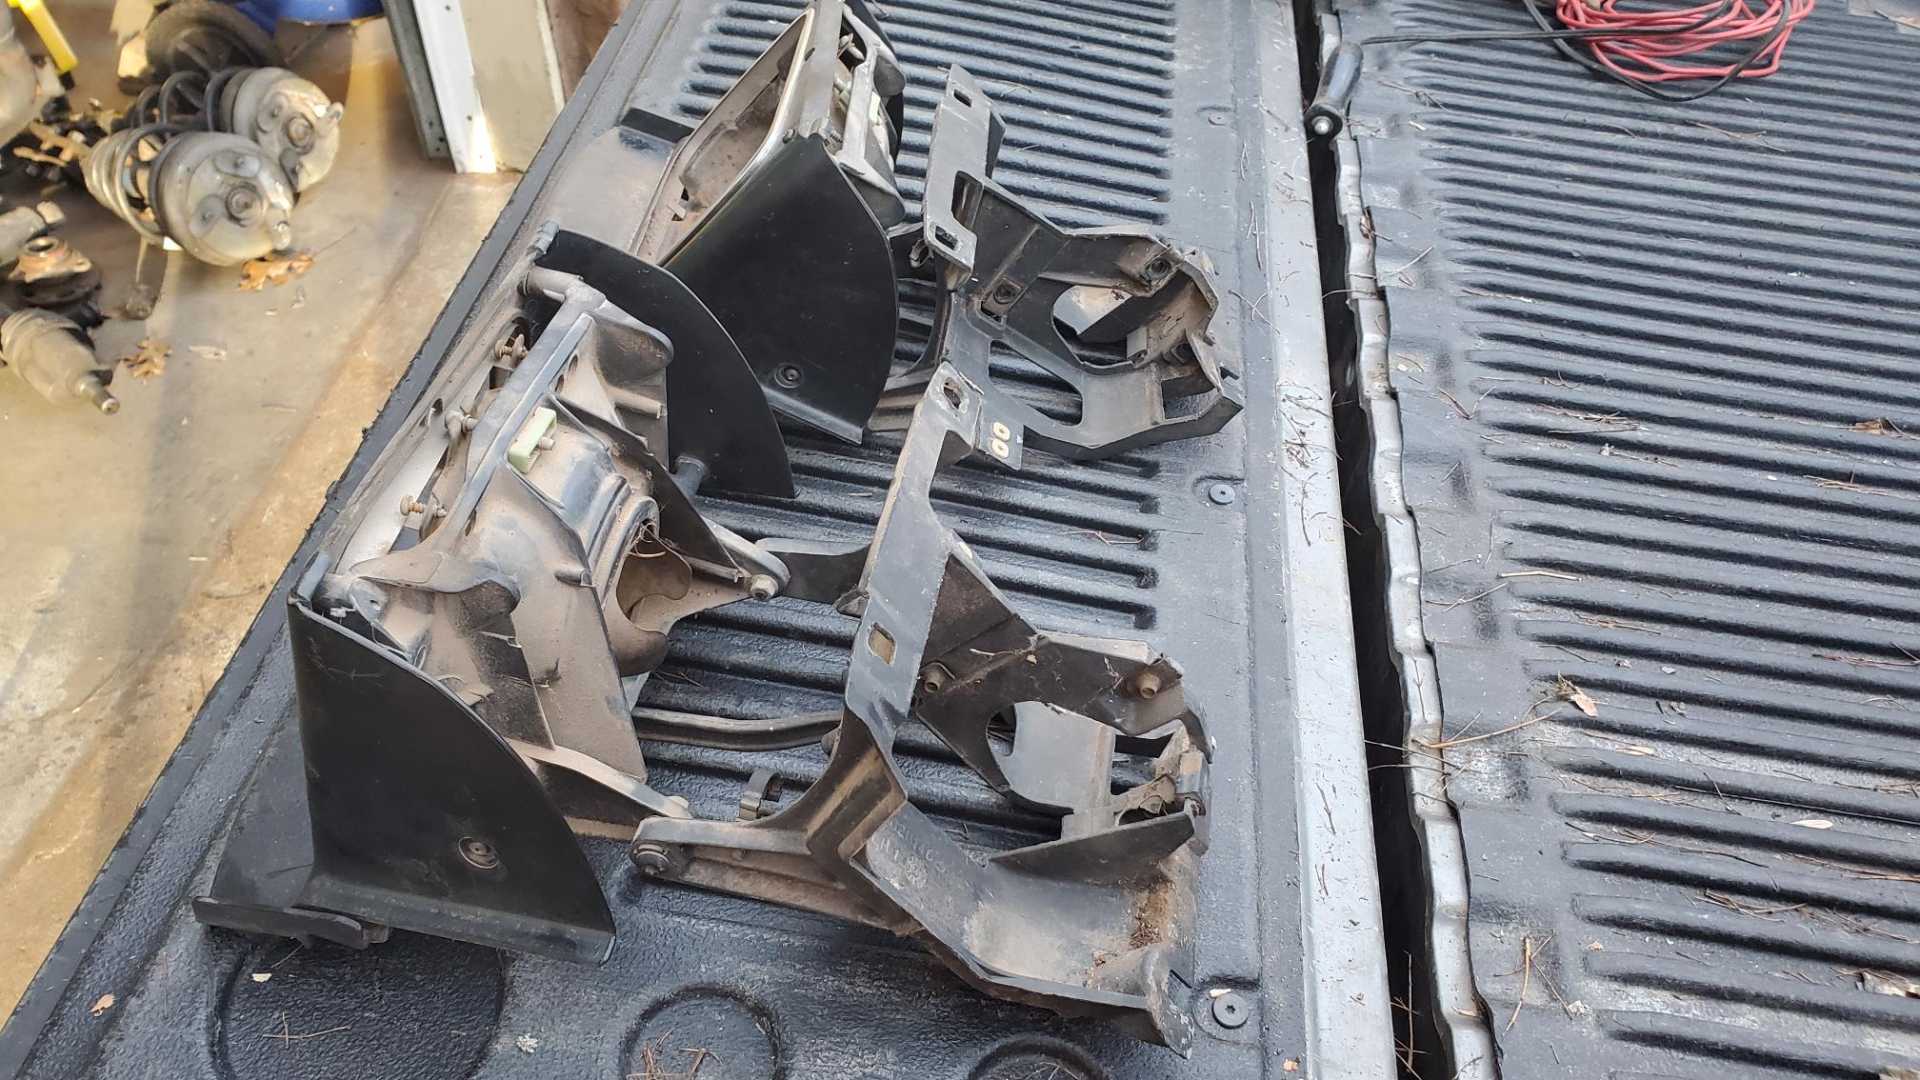
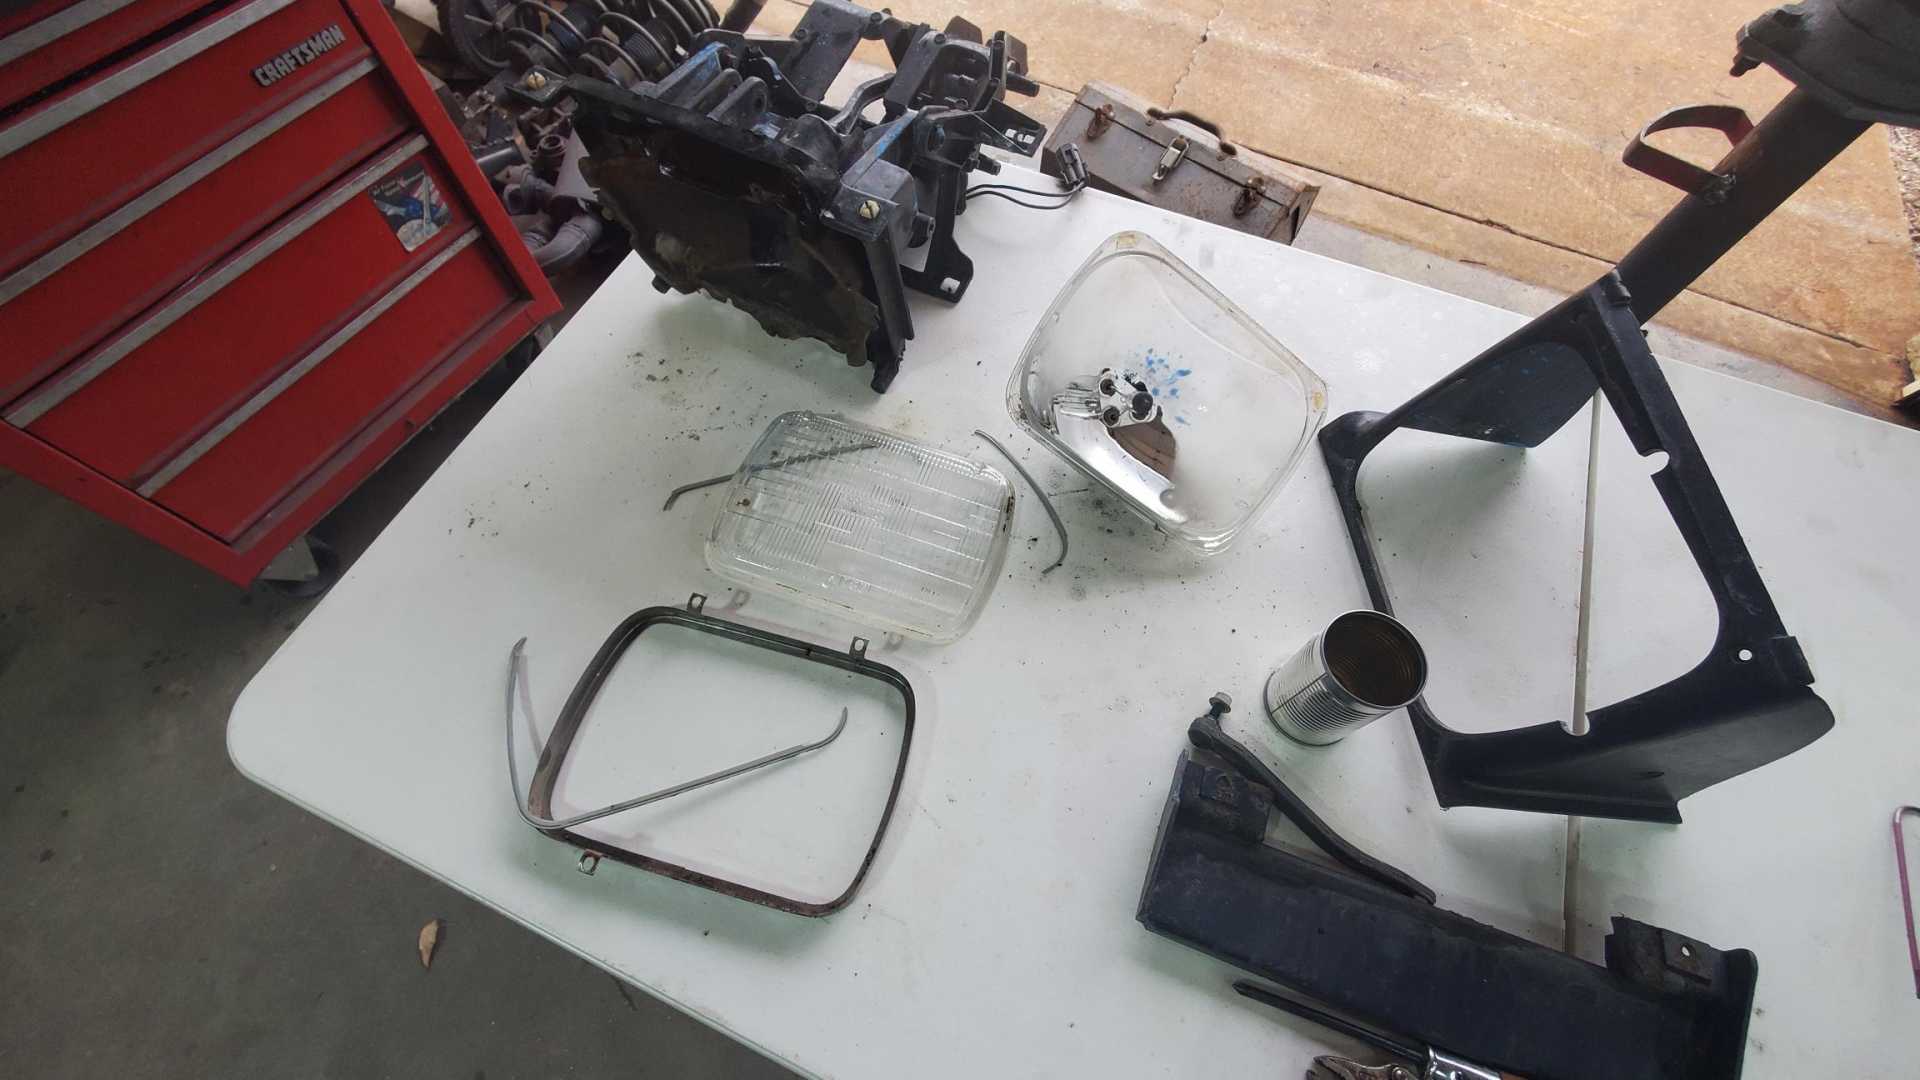
Also this weekend, I got a spare set of headlight frames from the salvage yard.
The set I have in my car now is a spare set, because my original frames were broken. I may clean these up and paint them, then swap them with the ones in the car.
It’s also time to look over the battery box I installed under the spare tire. This was one of the first big projects I did on the car and I think I went through two or three spare tire panels before I got everything right. That was back when Fieros would show up in the salvage all the time.
The box was an old metal shelf that I cut to shape and MIG welded together. I may remove it and make a fiberglass one, instead. I kinda like the idea of a box that isn’t conductive.
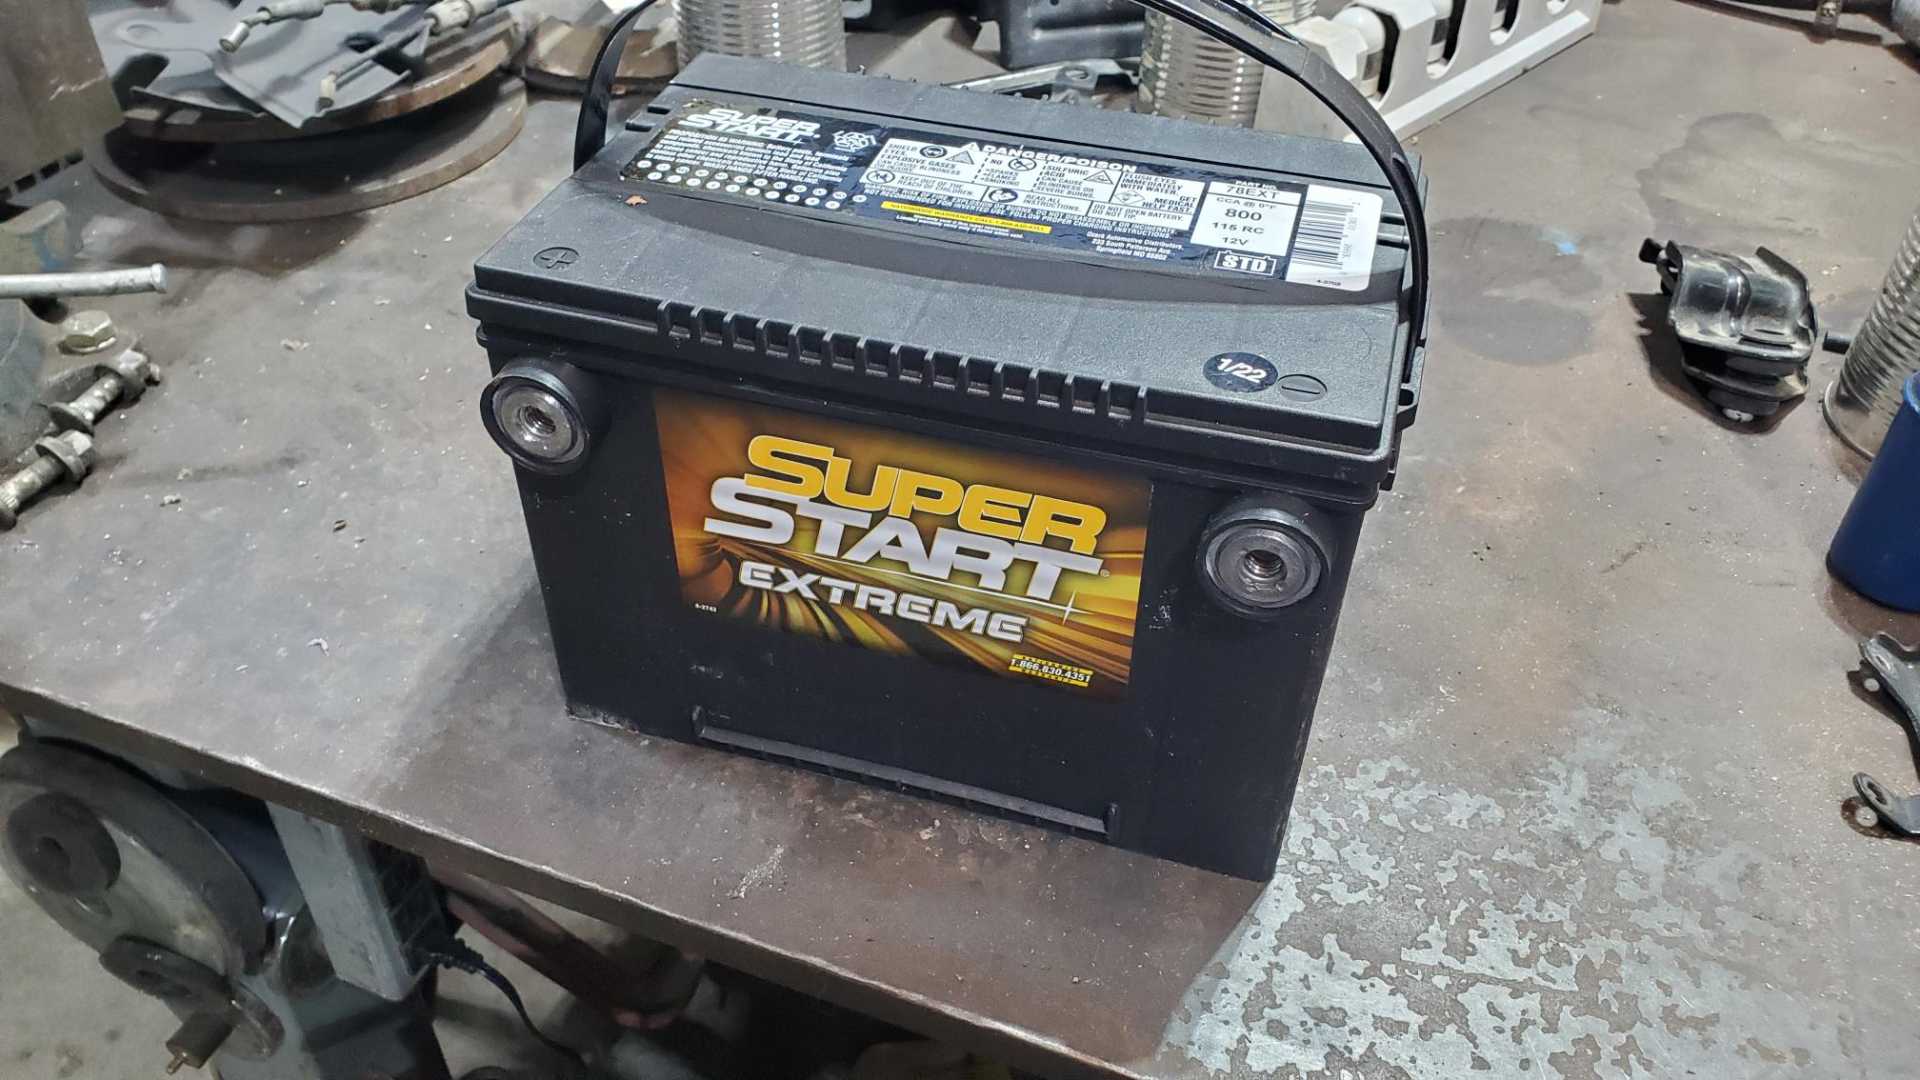
I couldn’t decide if I wanted to use a top or side post battery, but my wife’s old LeSabre went to the big parking lot in the sky last week so I kept the brand new battery, which made the decision for me.
[This message has been edited by Quadfather (edited 01-07-2023).]
Ran into some delays for a couple of reasons. The company where my welding cylinders were rented from was bought out so I had to turn in my leased tanks and am waiting for the new MIG tank to arrive.
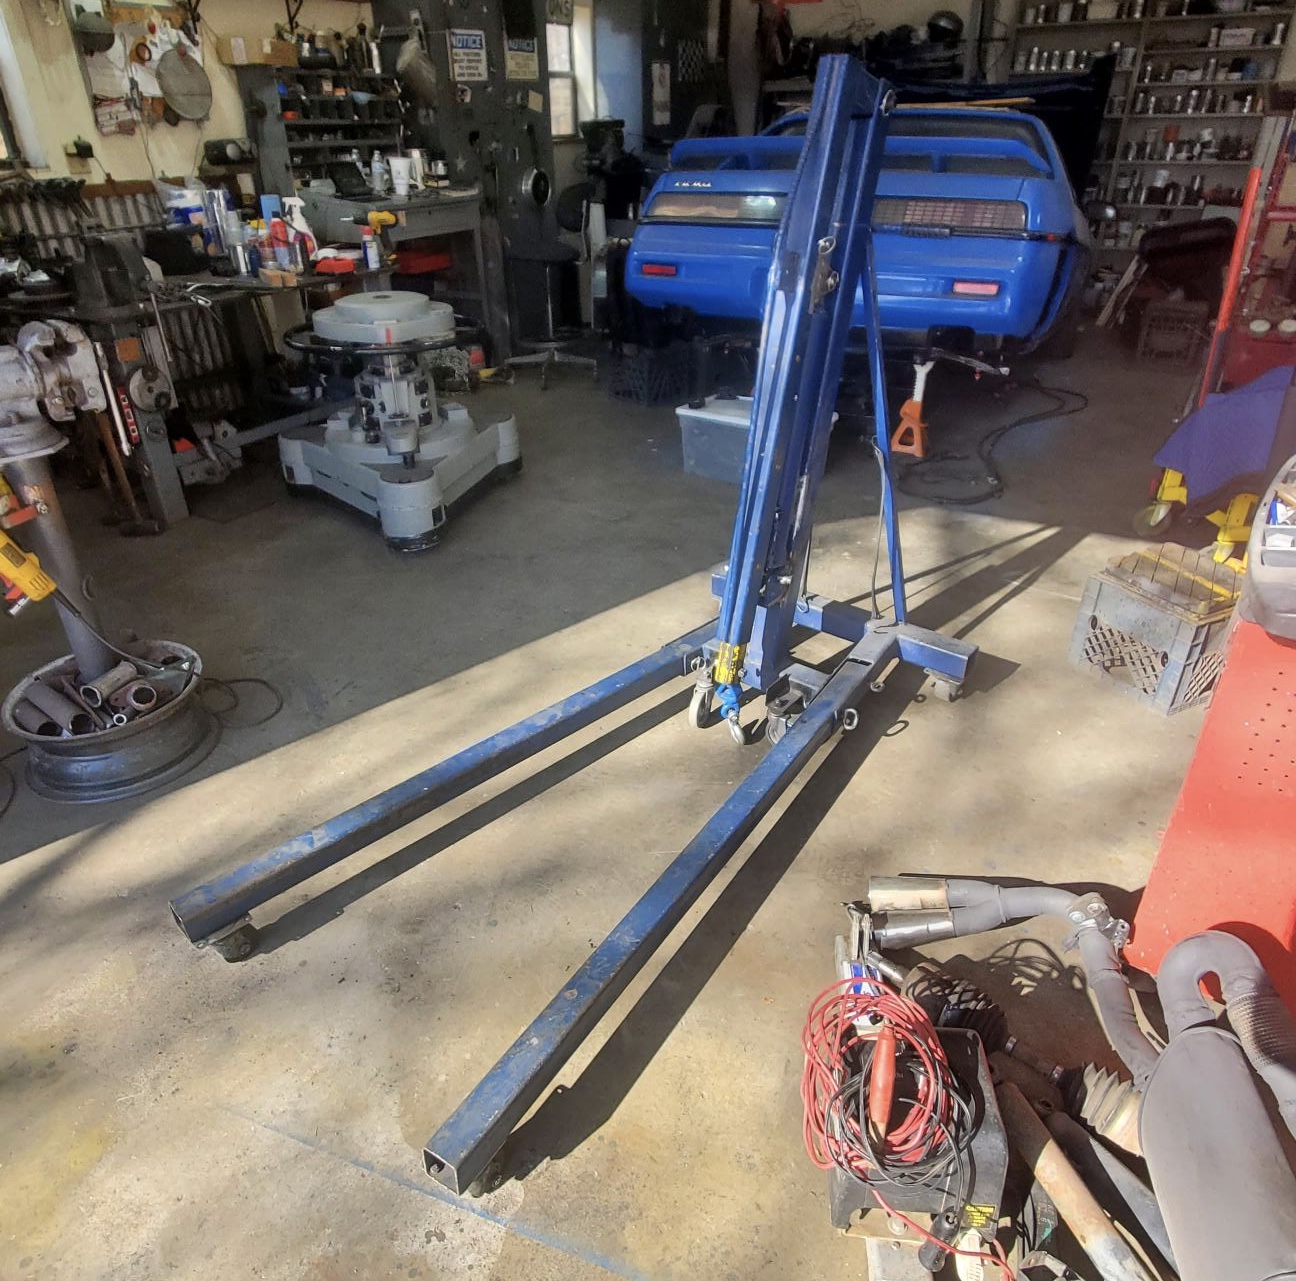
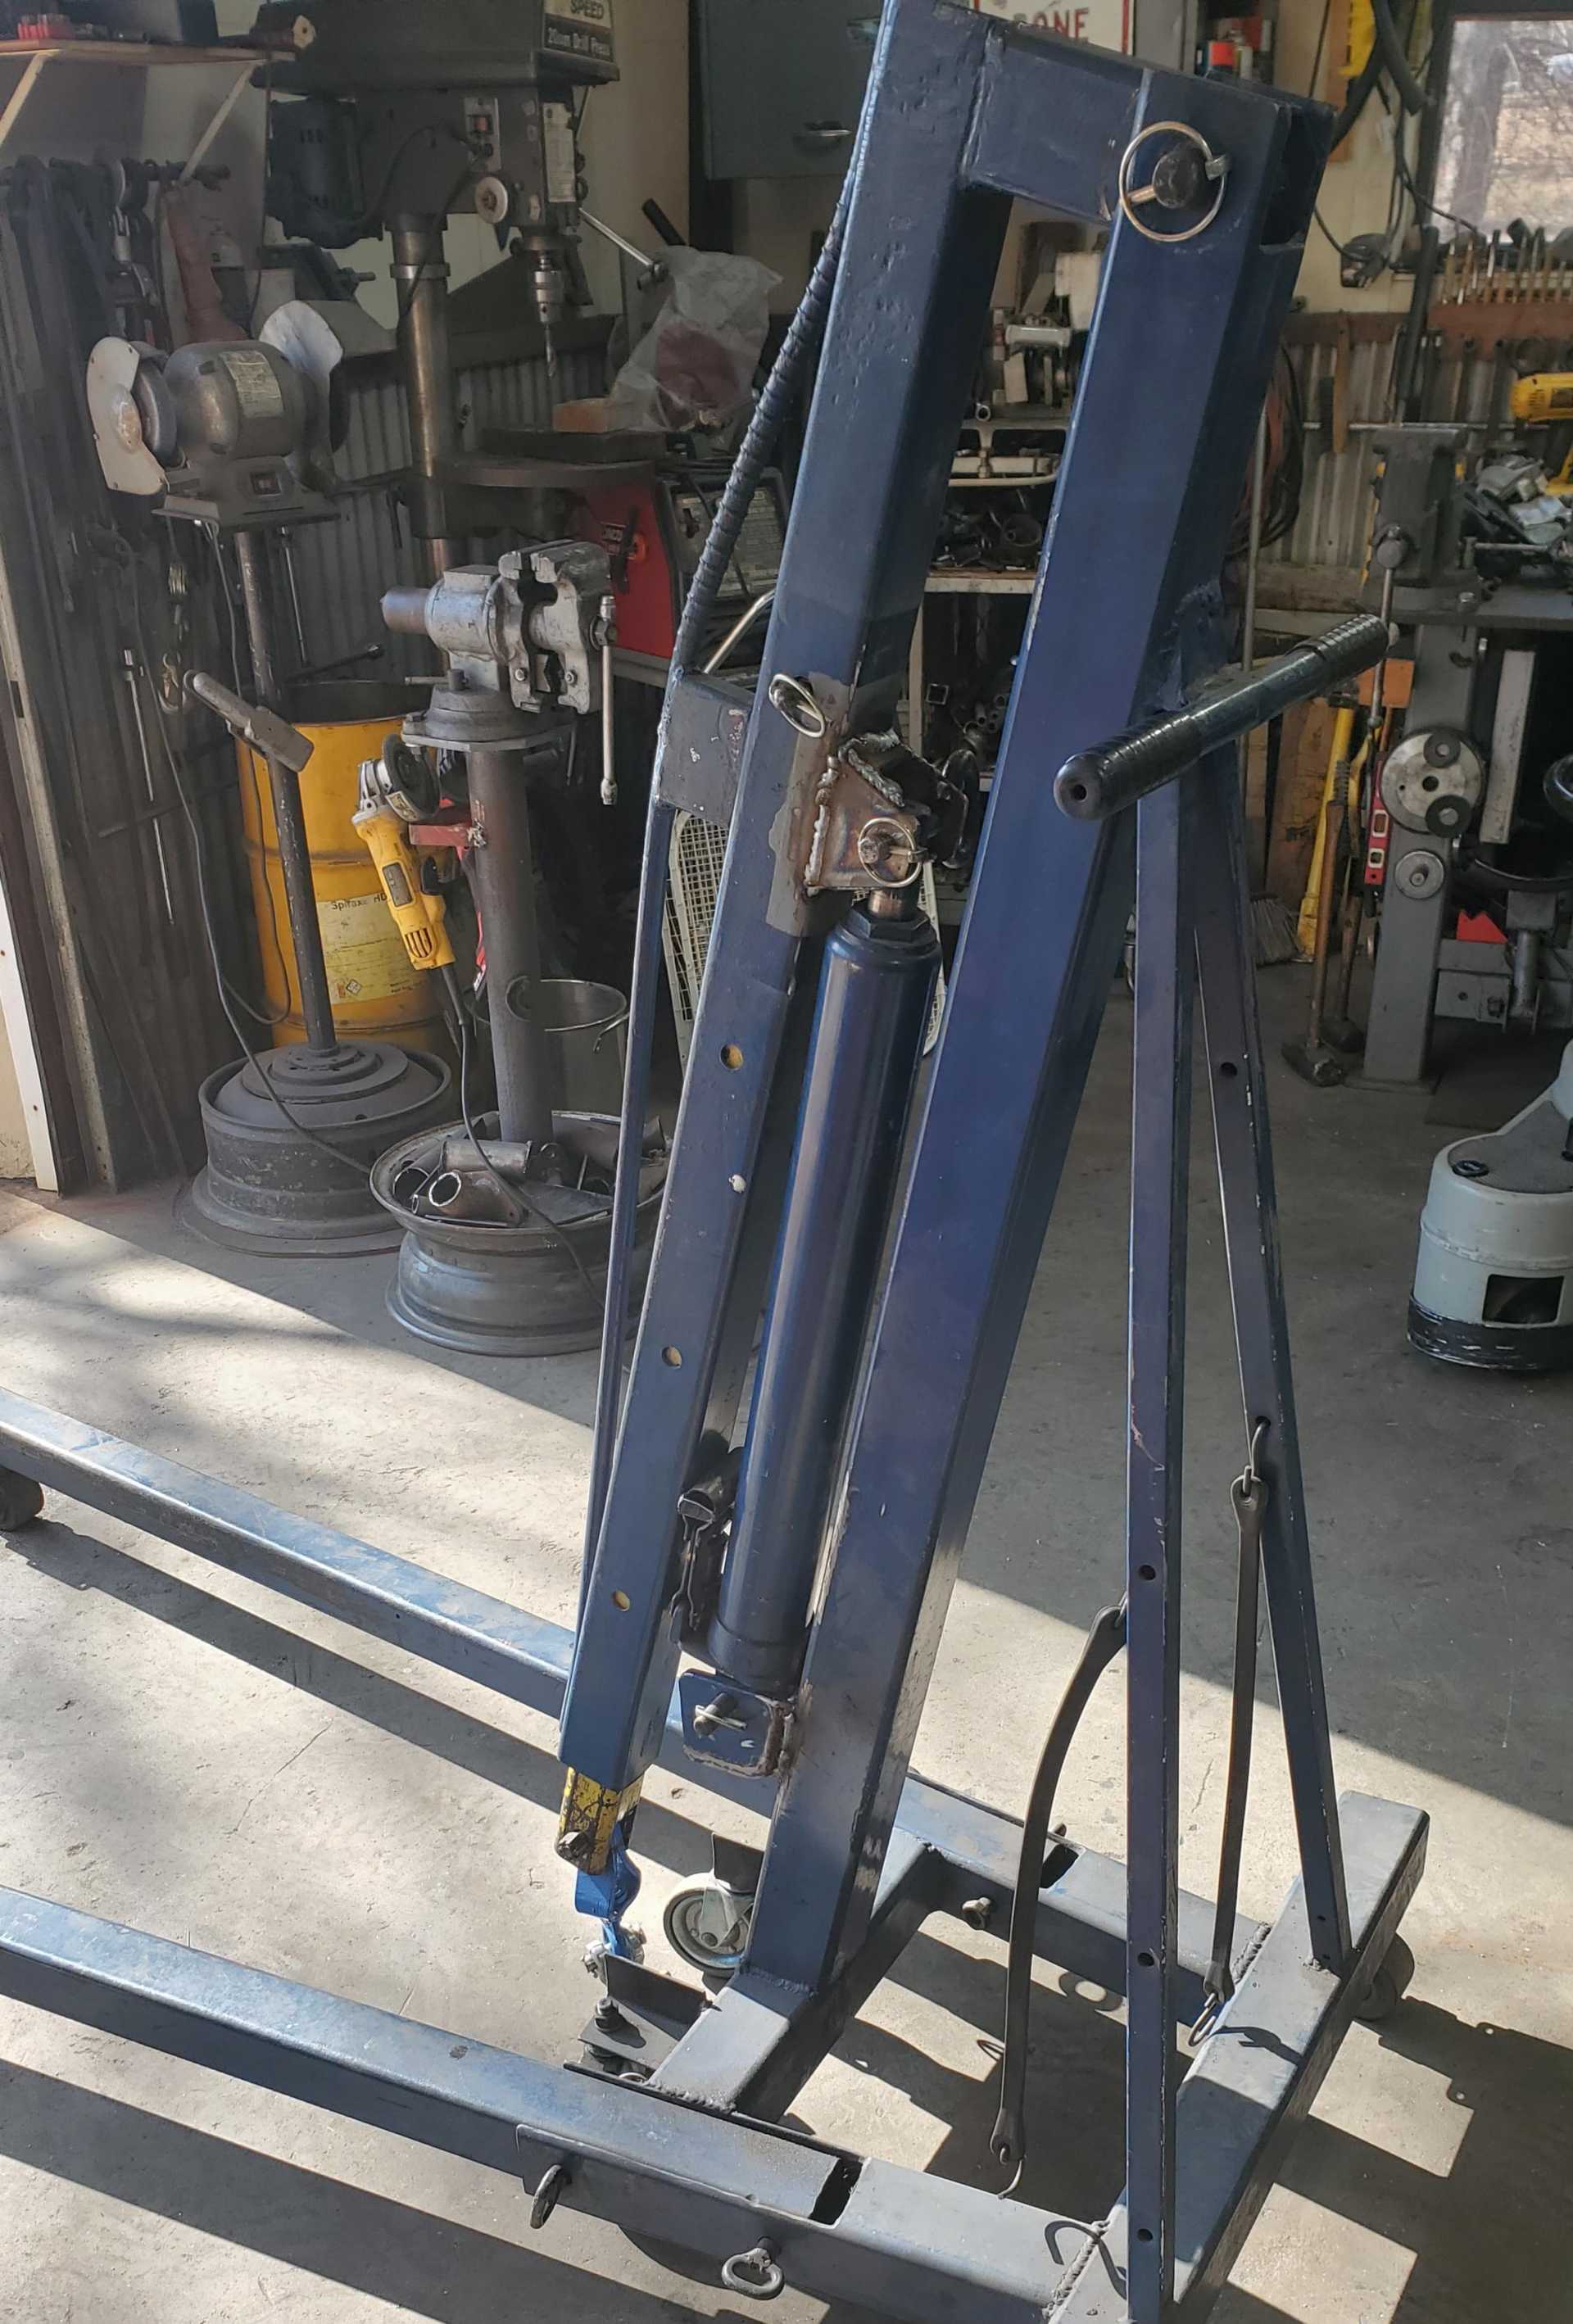
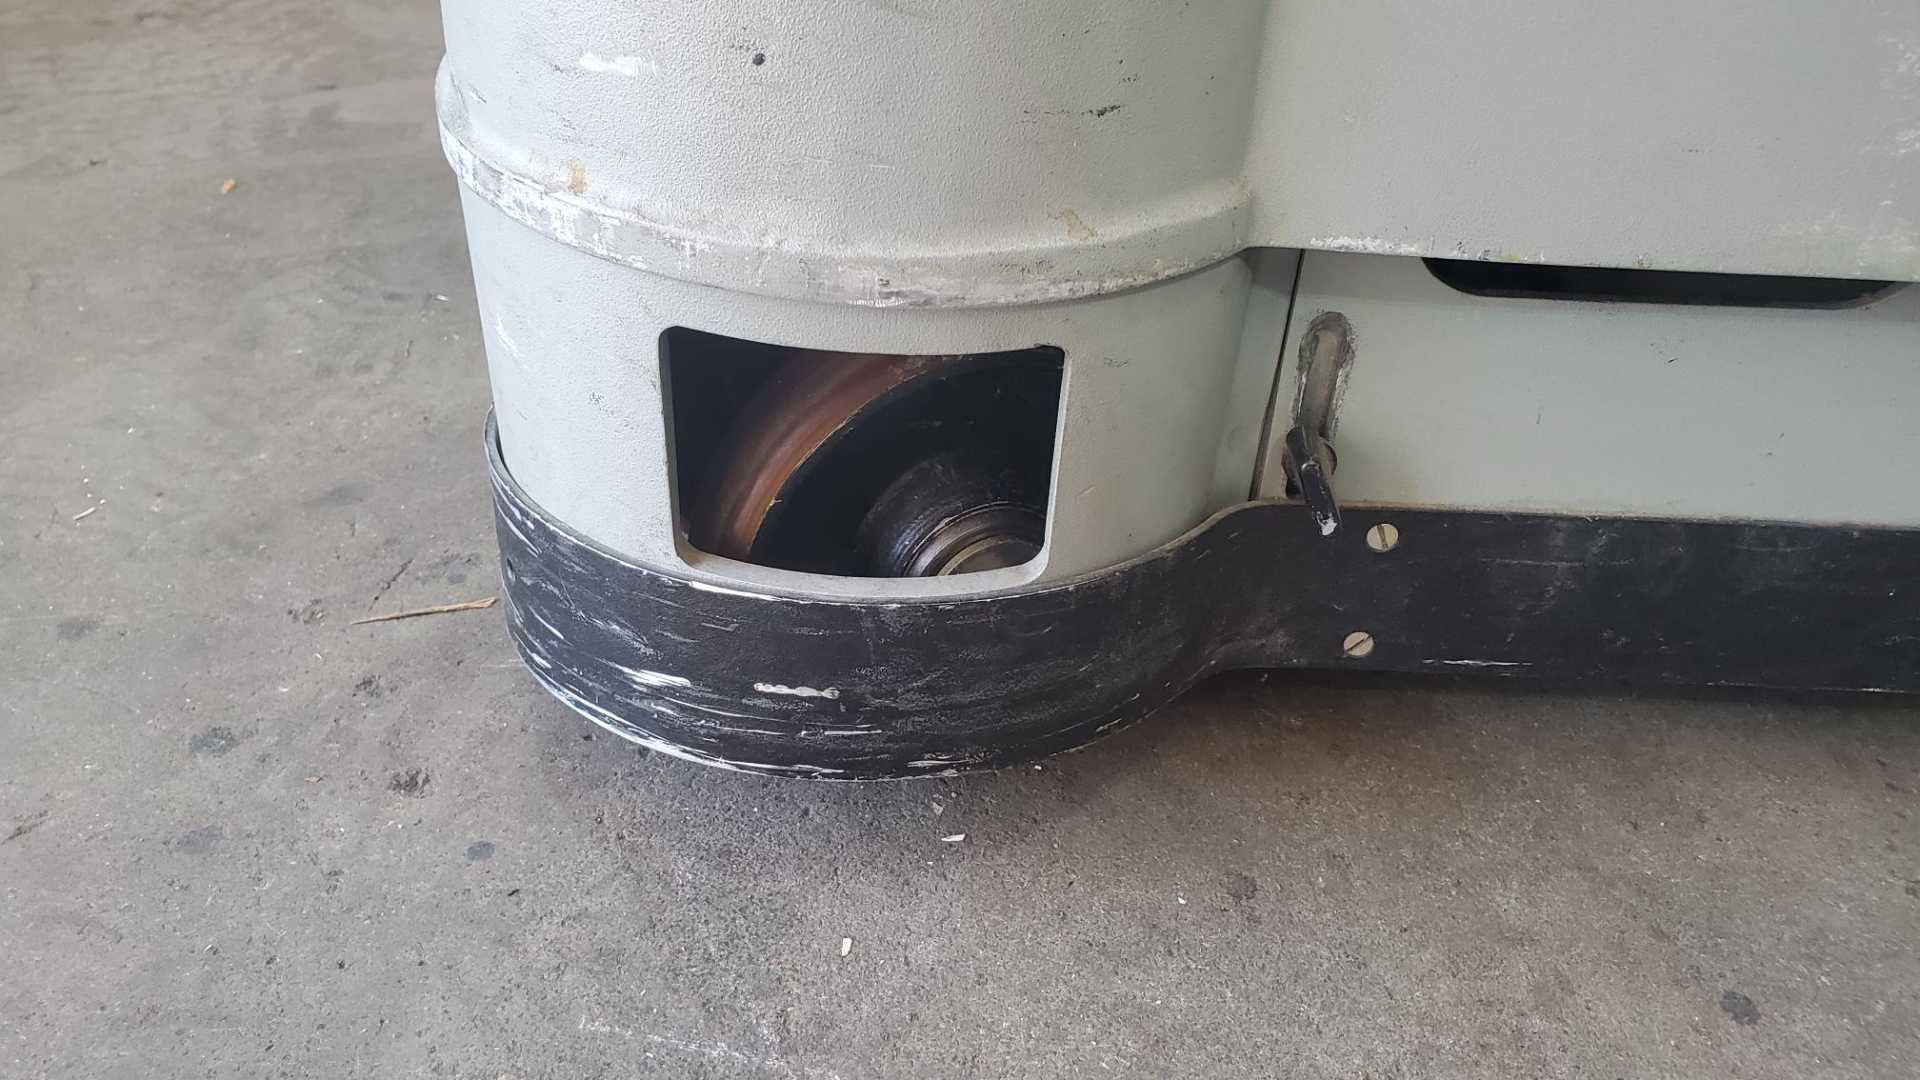
This happened right after I decided to upgrade my engine hoist. I built this hoist about 20 years ago by looking at pictures on the internet and at floor models at the car parts store. It works fine, but the boom would not fold all the way down while attached to the jack cylinder, so I finally changed them around to fix that.
As usual, I built this thing with parts I had on hand. The tubing was from a door frame from a house my brother was remodeling and the casters were in a box on the shelf in the shop. I was satisfied with them, until I came into possession of some much, much better casters.
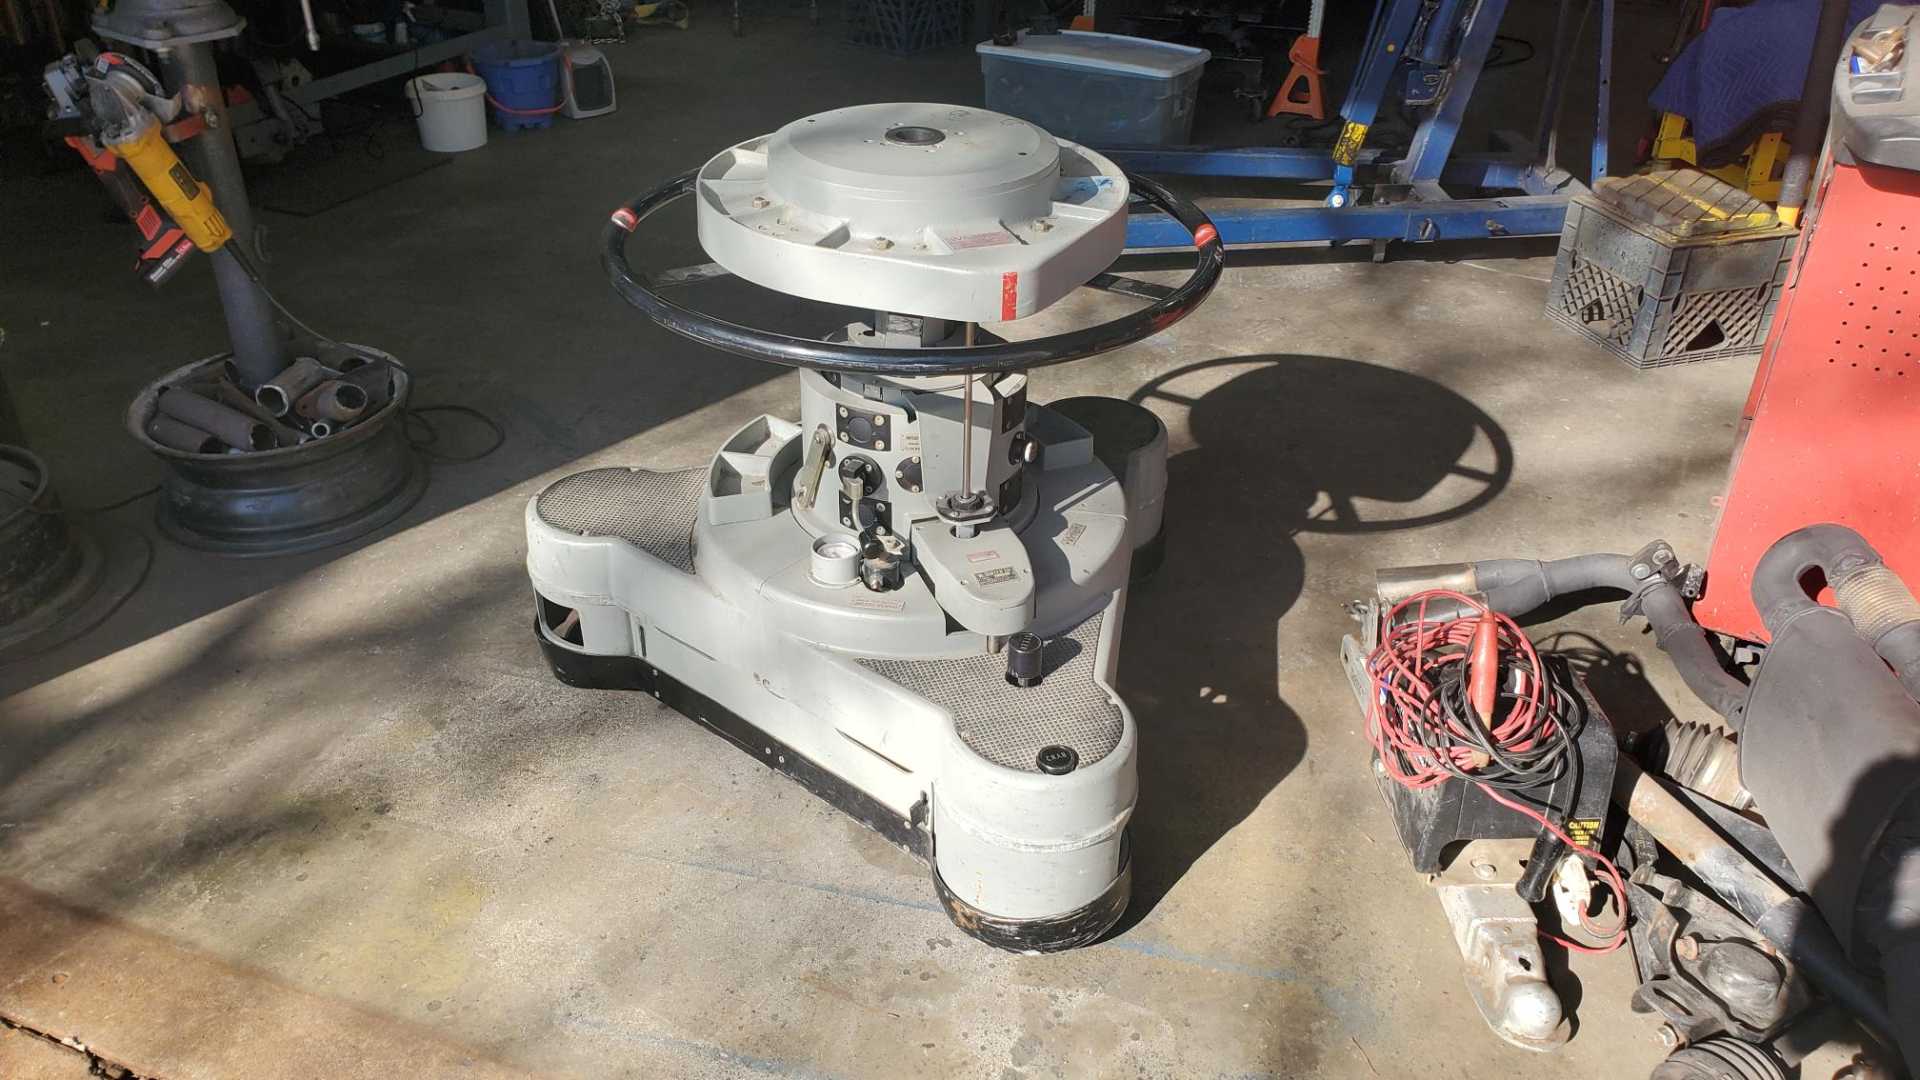
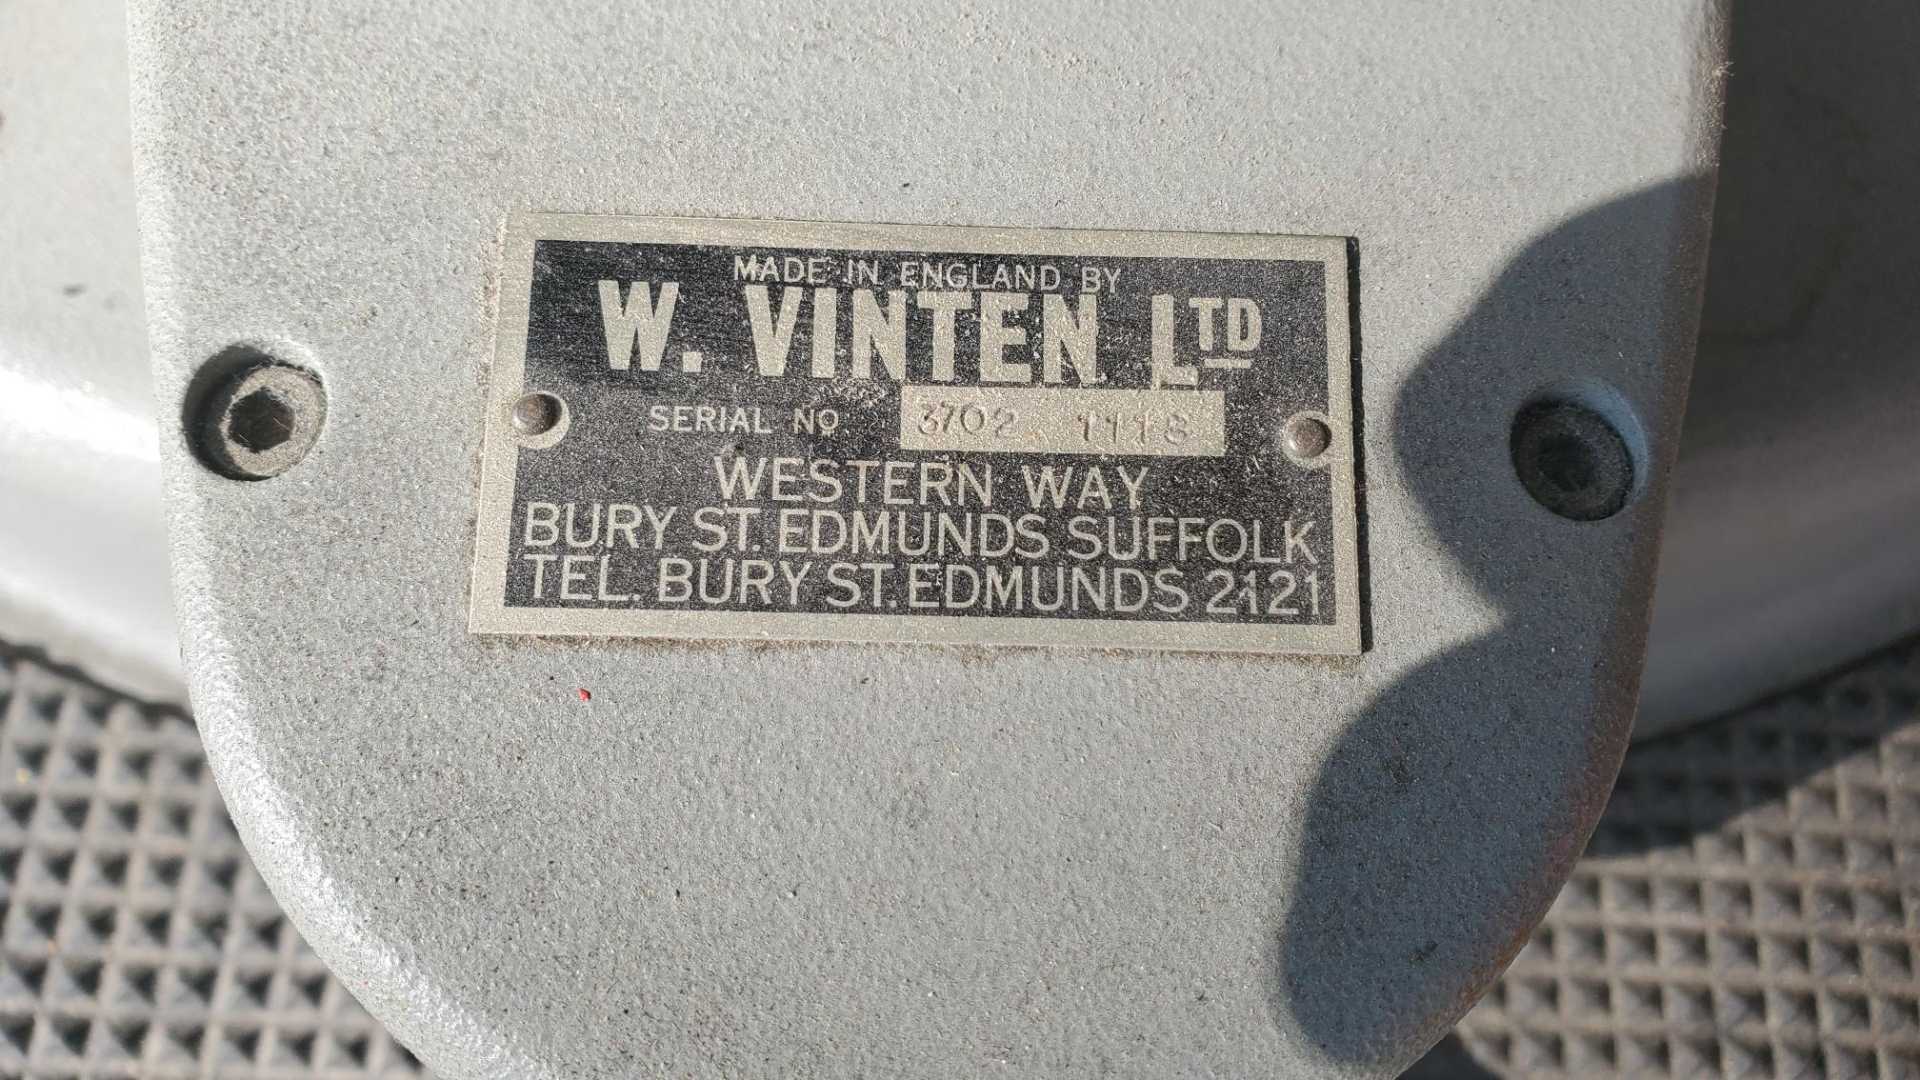
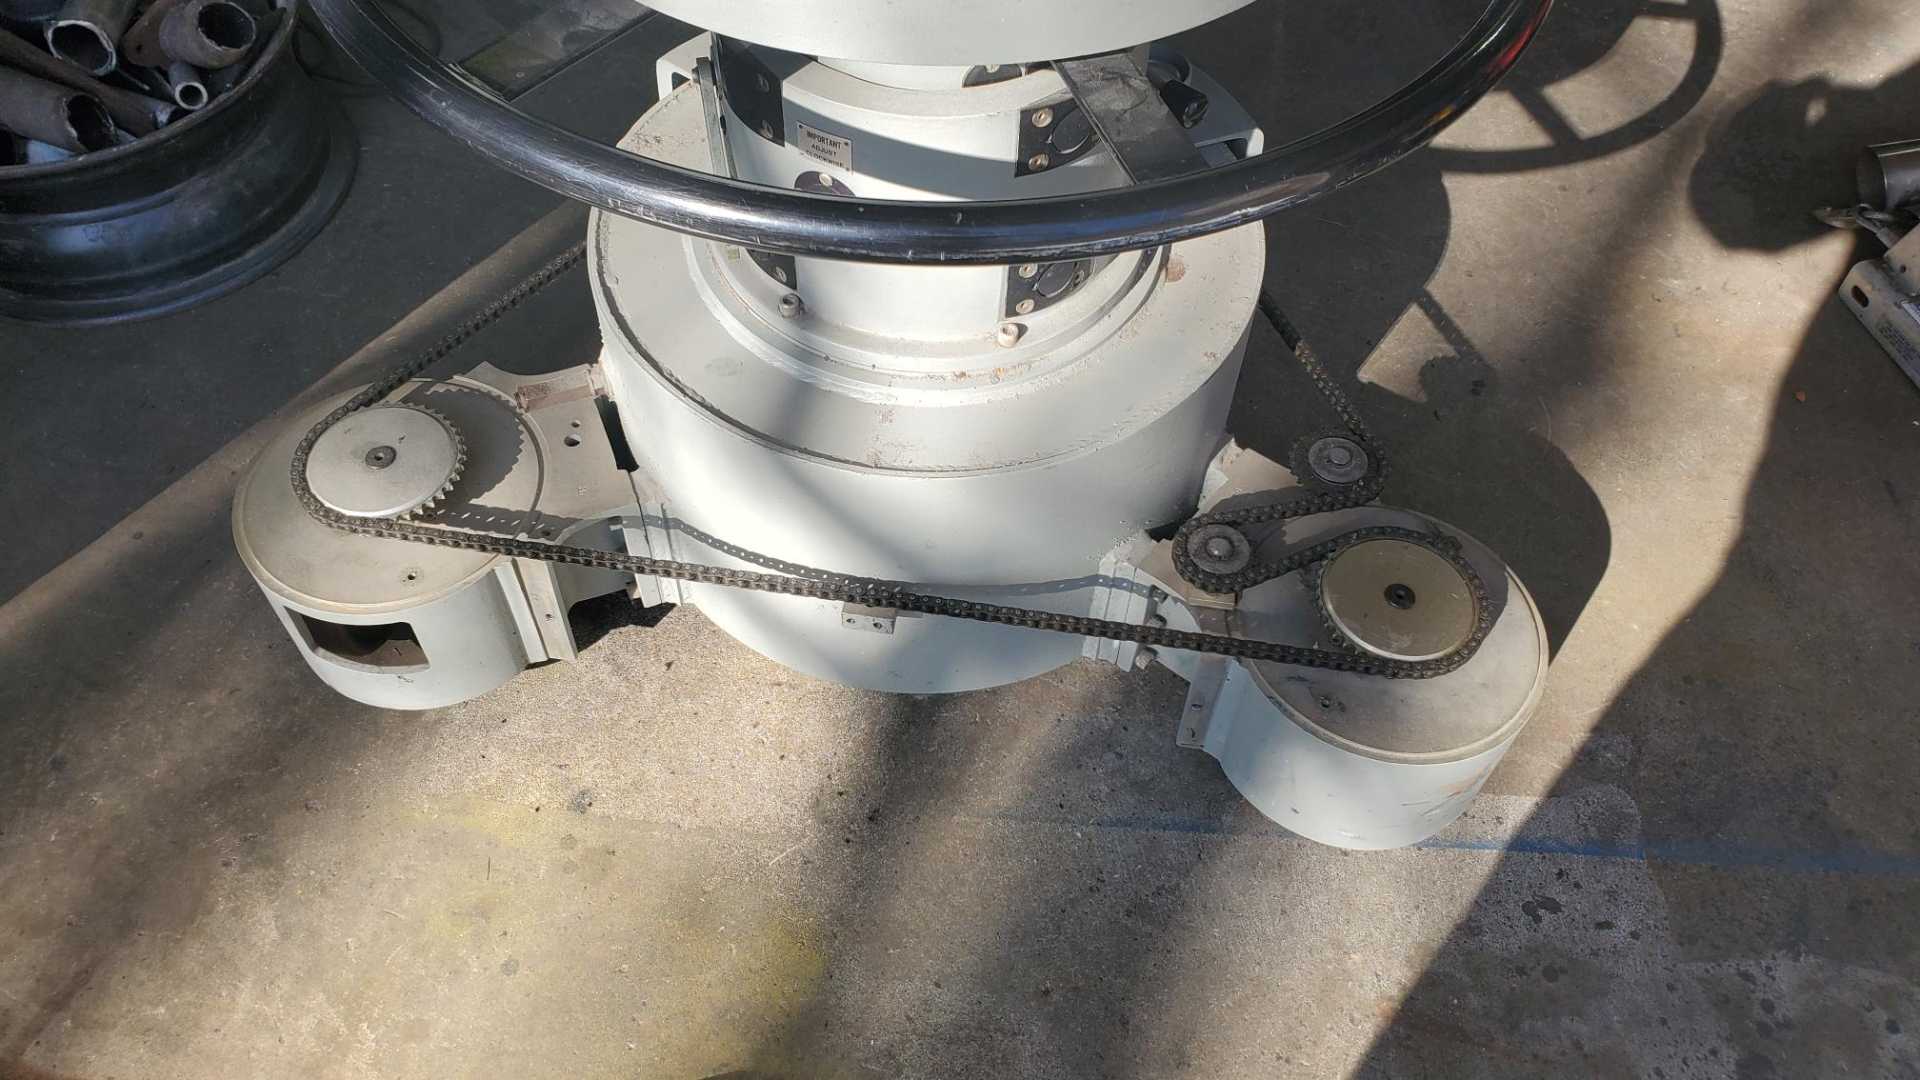
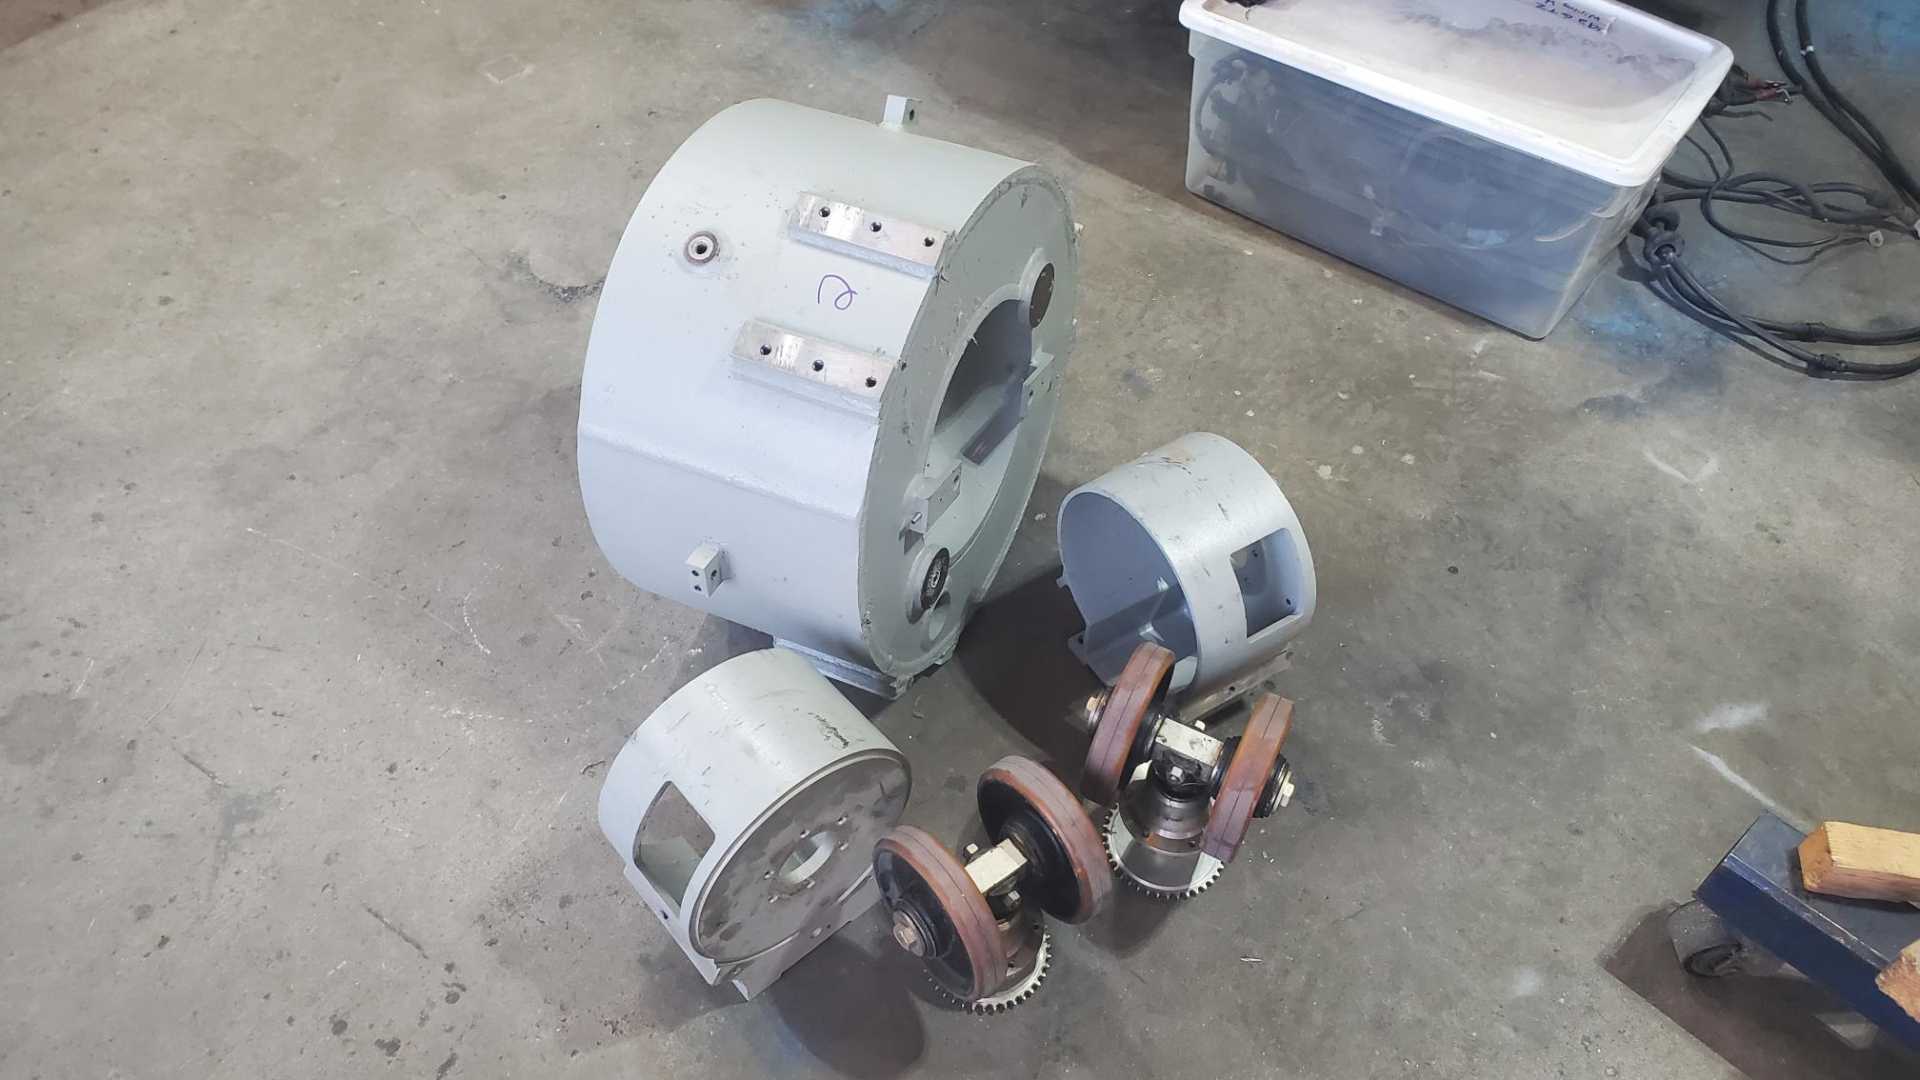
This is a Vinten Fulmar television camera pedestal I got from work. My company just upgraded its equipment, so this pedestal, which dates from the 1970s, was declared surplus. In other words, free.
It weighed more than 400 pounds and was rated to carry another 350 pounds, so I figure the casters would work for my hoist. The thing had chain steering and was built like a tank.
The casters look like landing gear from an airplane.
The main body of the pedestal is a circular tank made out of 1/4” steel plate, which held the gas that allowed the pedestal to travel up and down easily. Everything else is aluminum, so I’ll have to get creative when I mount these to the hoist.
Next up for the Fiero:
-mounting Fiero clutch line to a Fiero Getrag slave cylinder, bolted to the Beretta Getrag with an adapter from Rodney Dickman -redoing the battery tray and cables -rear suspension rebuild -engine harness
[This message has been edited by Quadfather (edited 01-10-2023).]
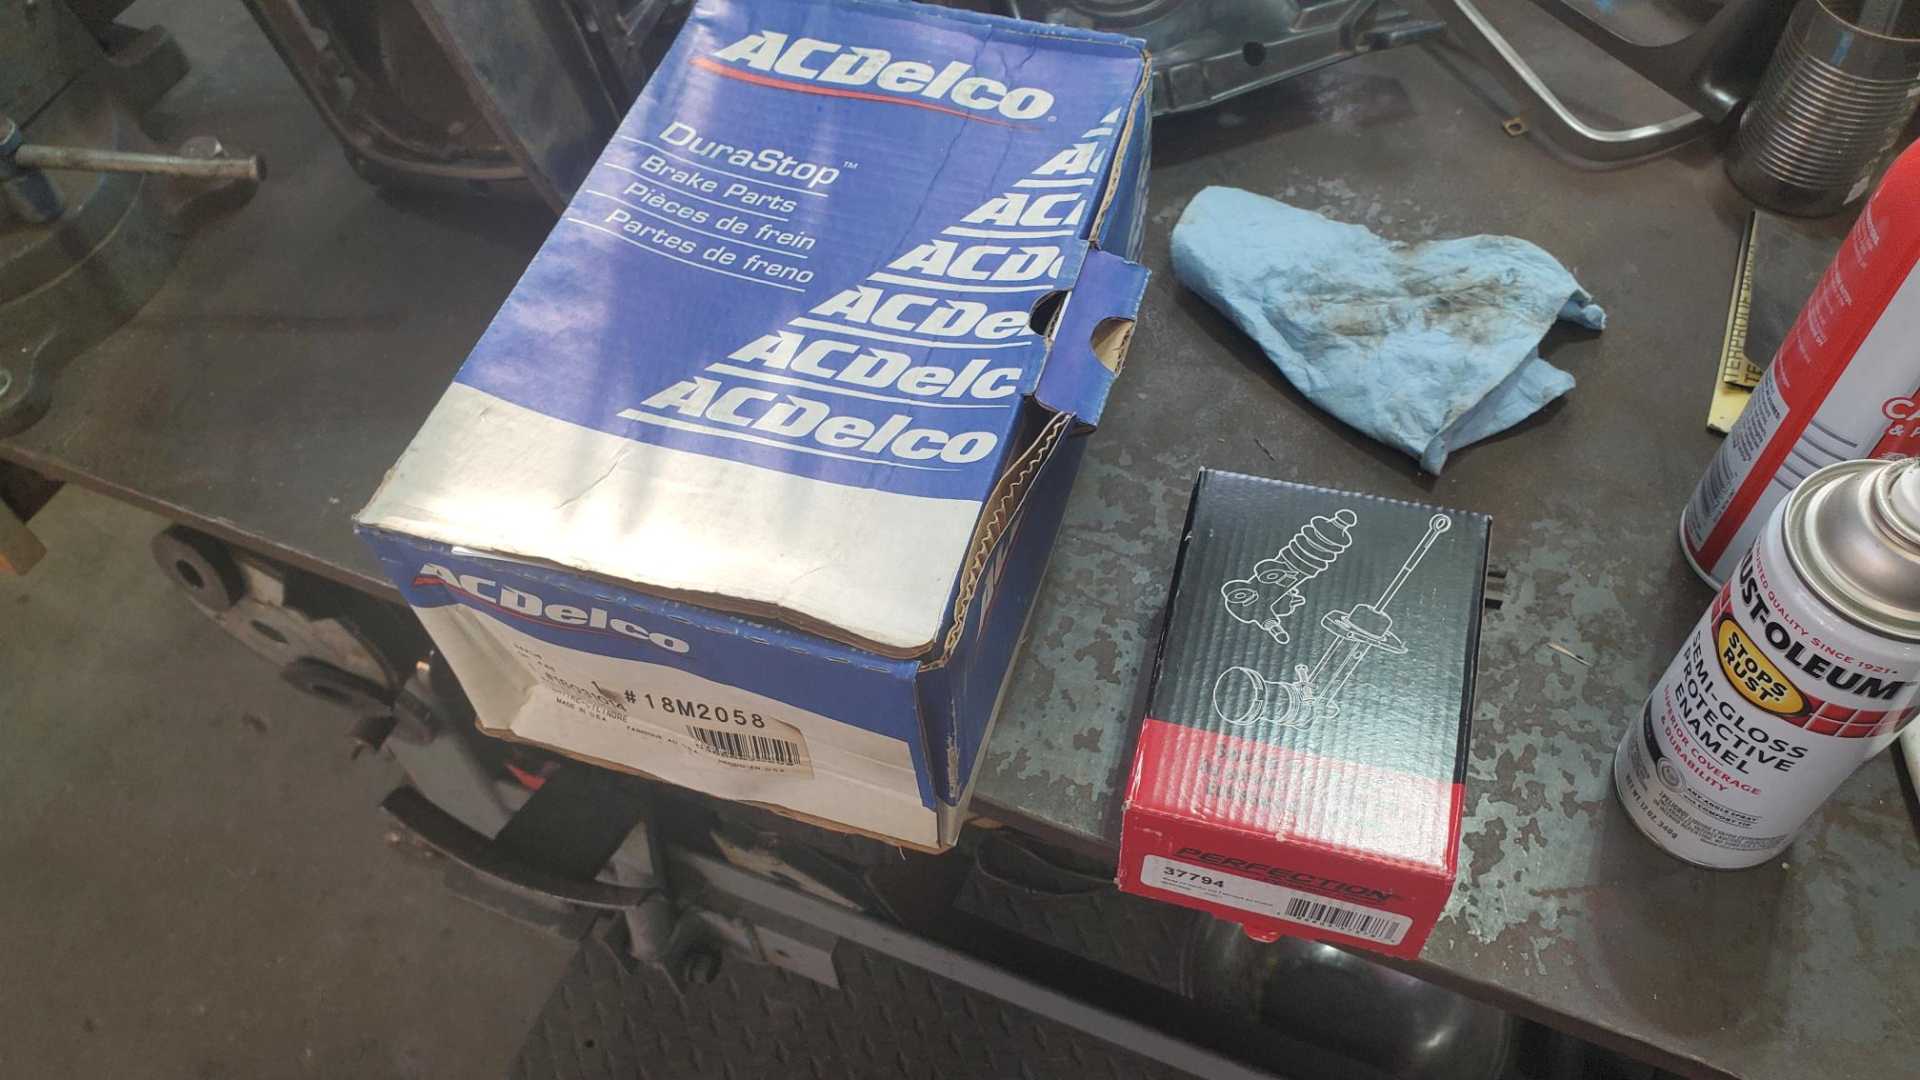
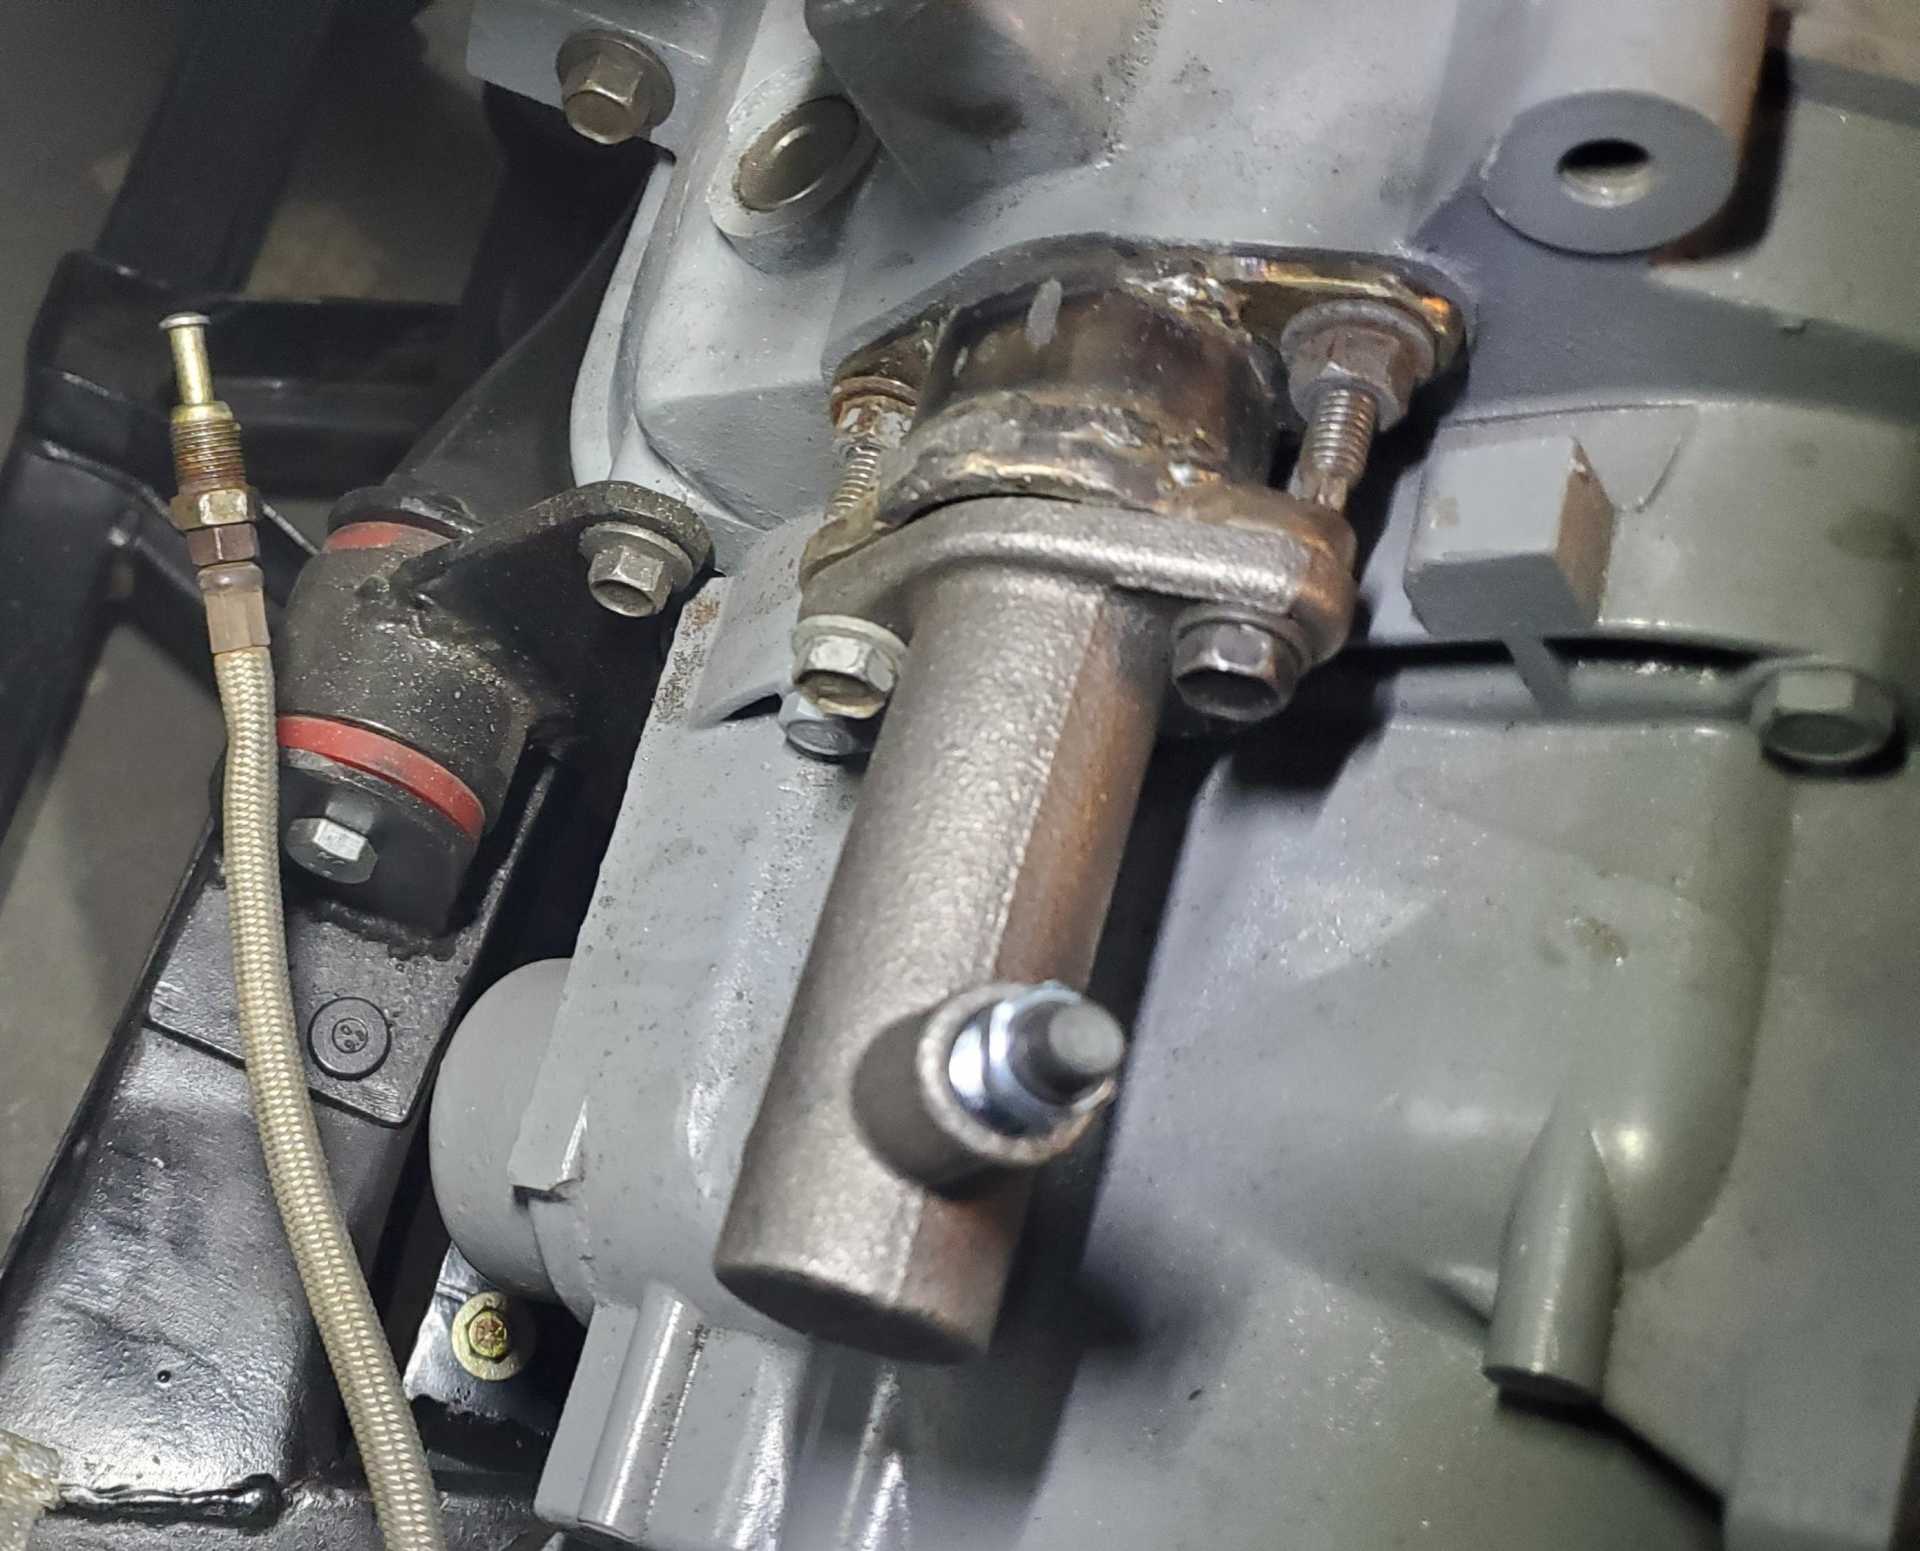
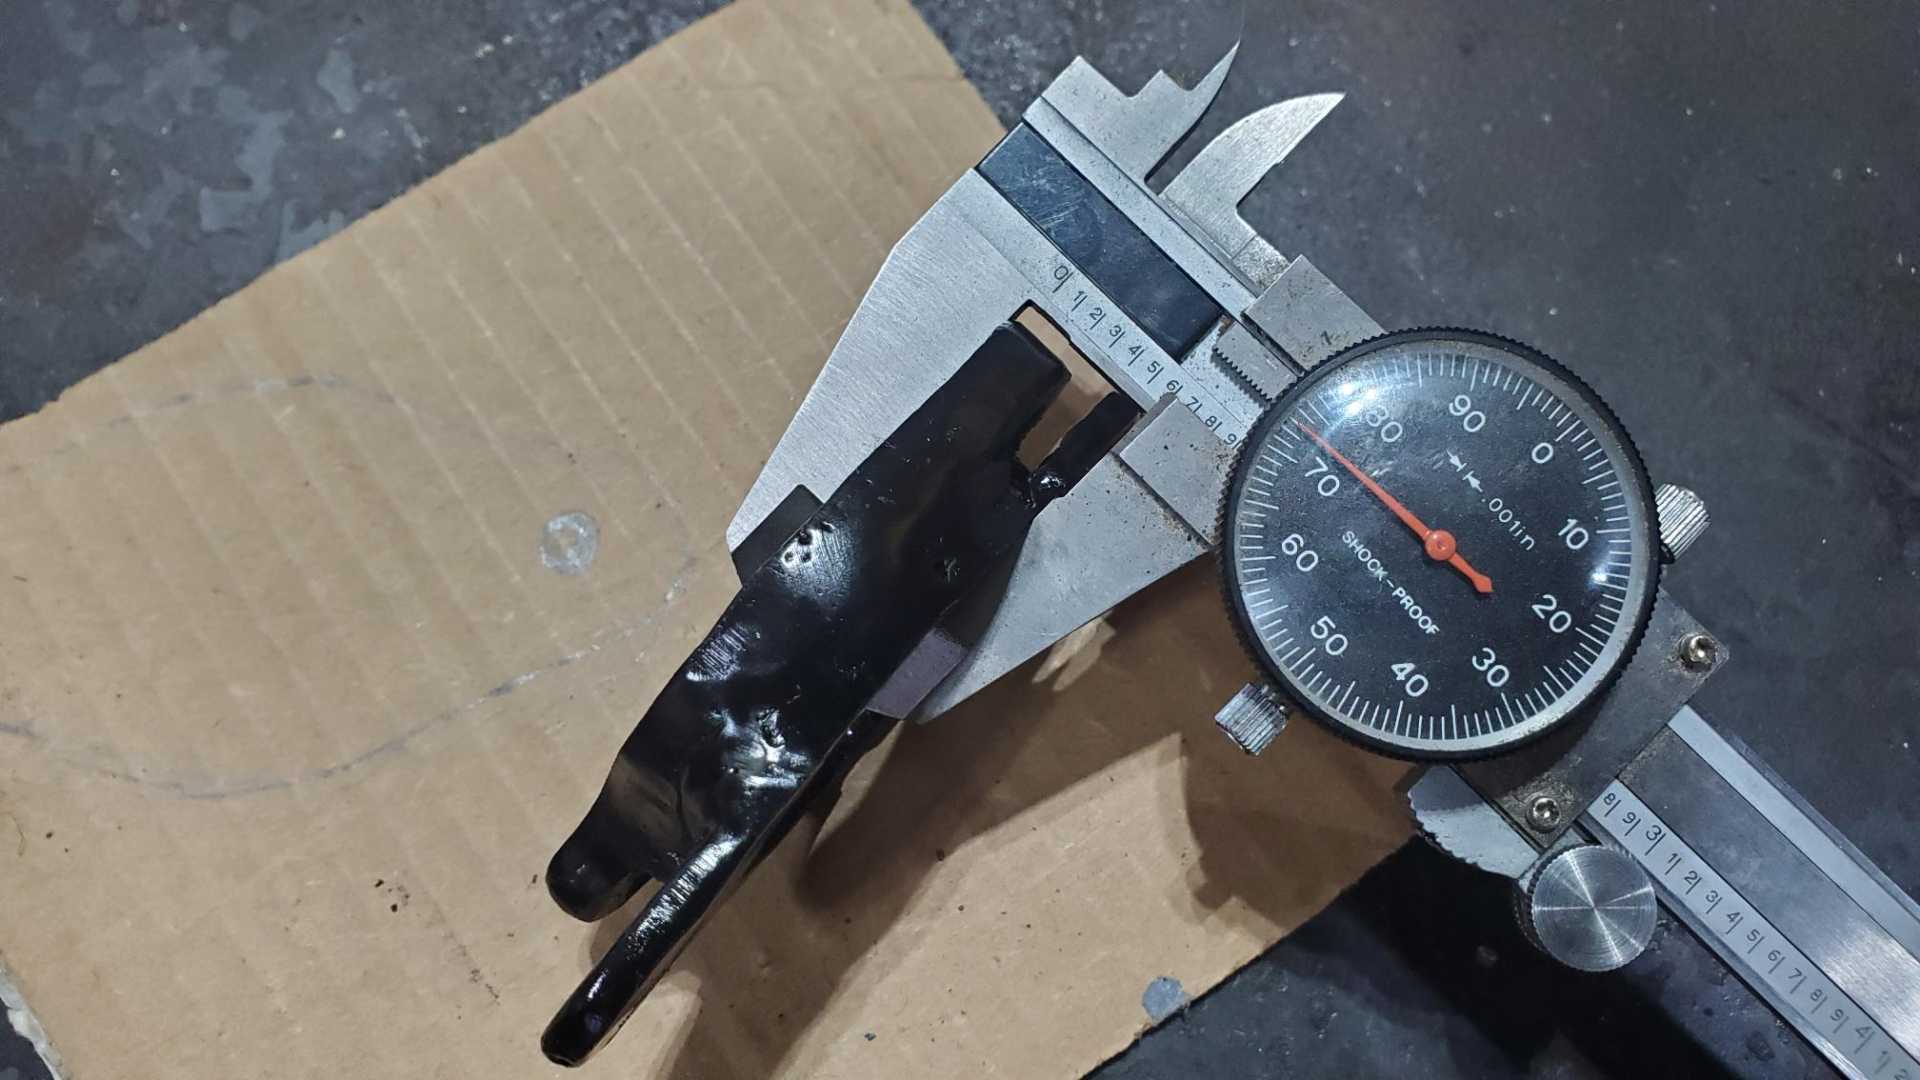
Getting organized to figure out the clutch system. I emailed Rodney Dickman and he recommends using a Fiero Getrag slave cylinder mounted to an adapter, and an adjustable banjo on the master cylinder. Unfortunately he’s out of his Fiero Getrag slave cylinders so I’ll have to find another one.
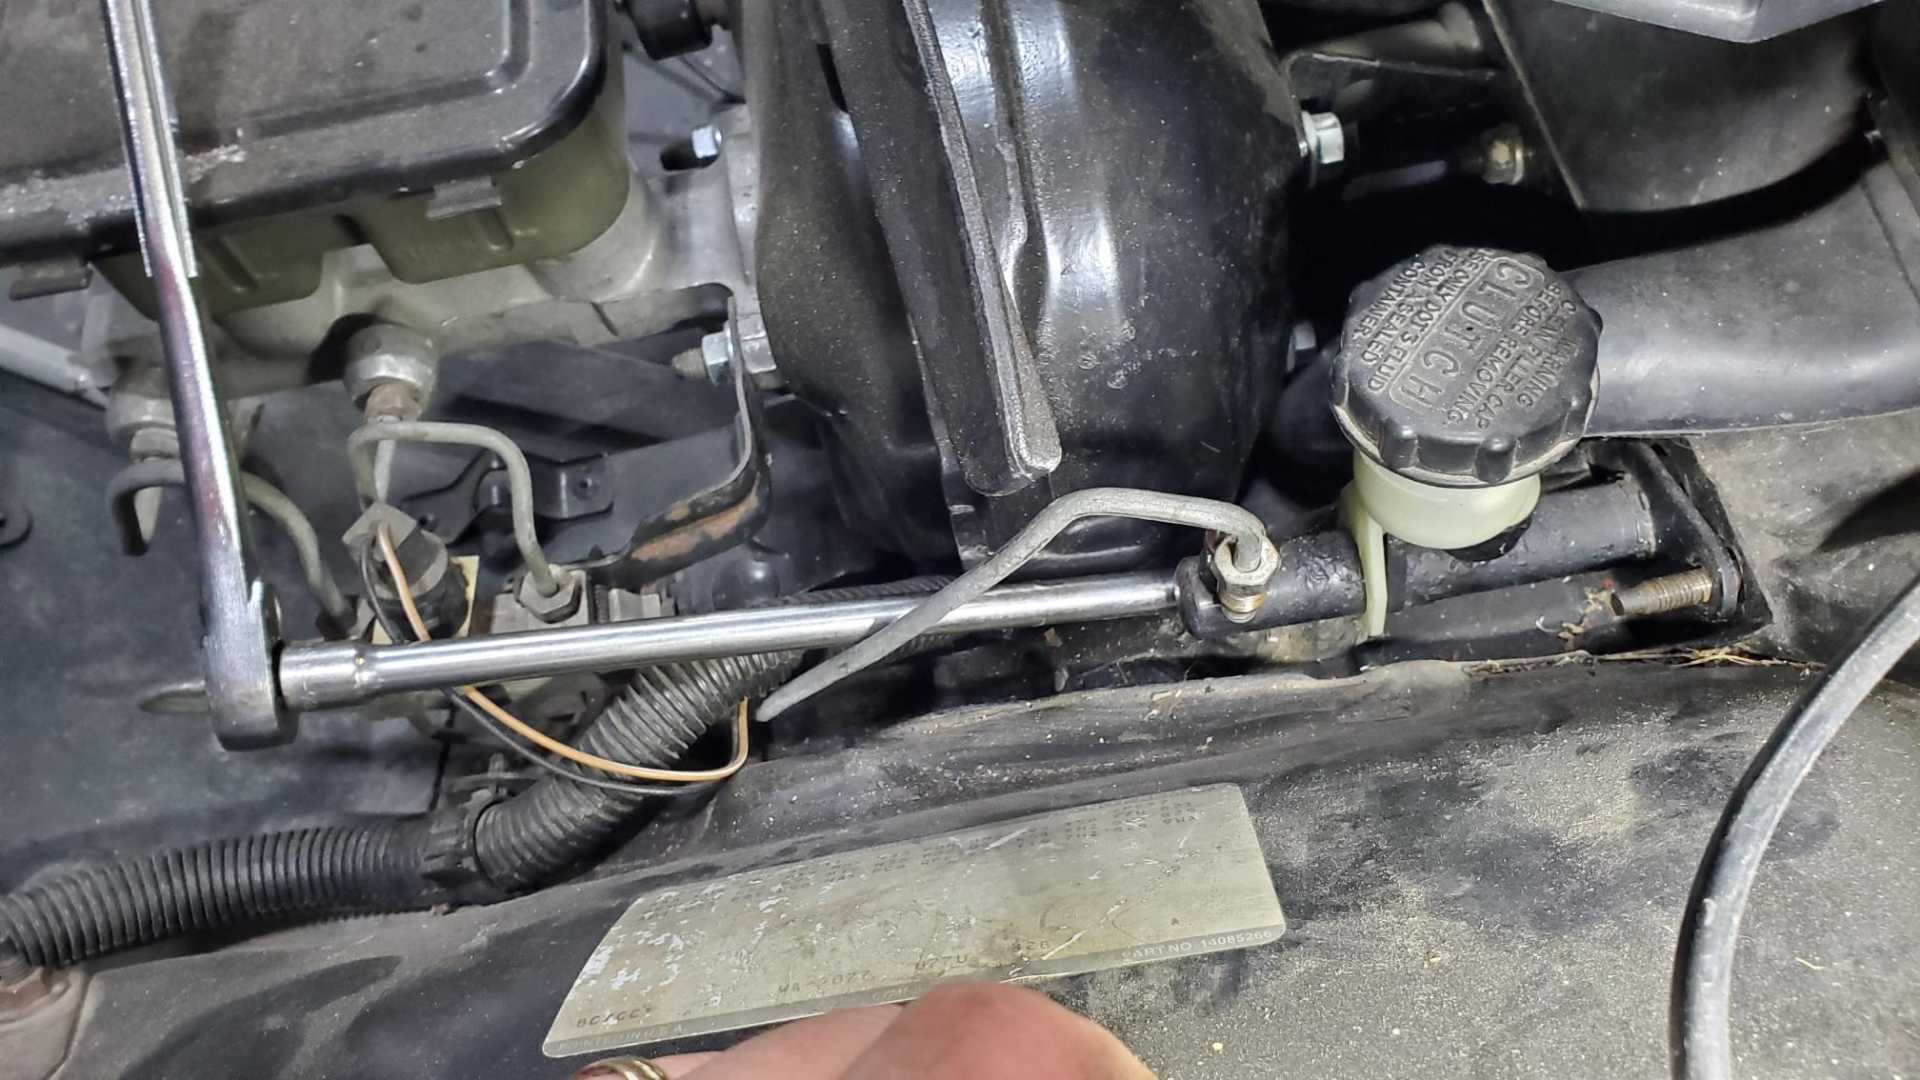
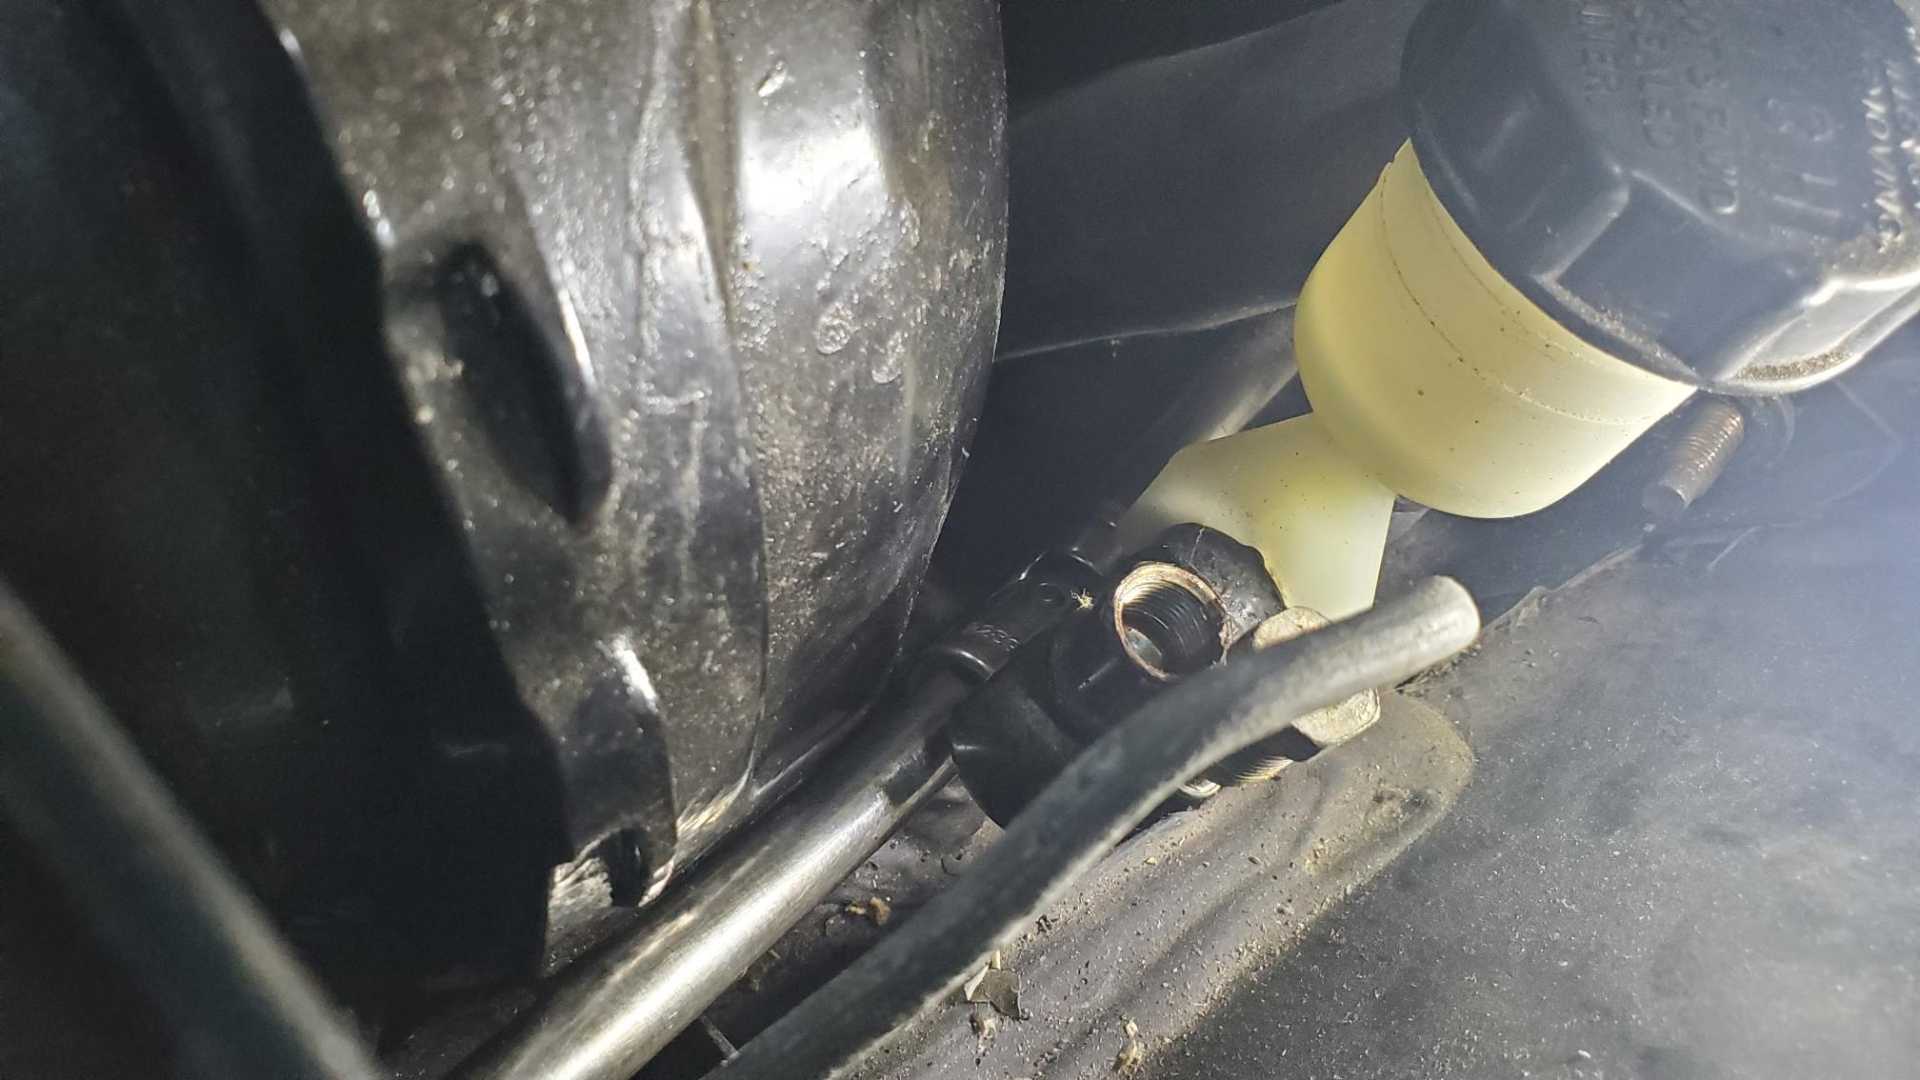
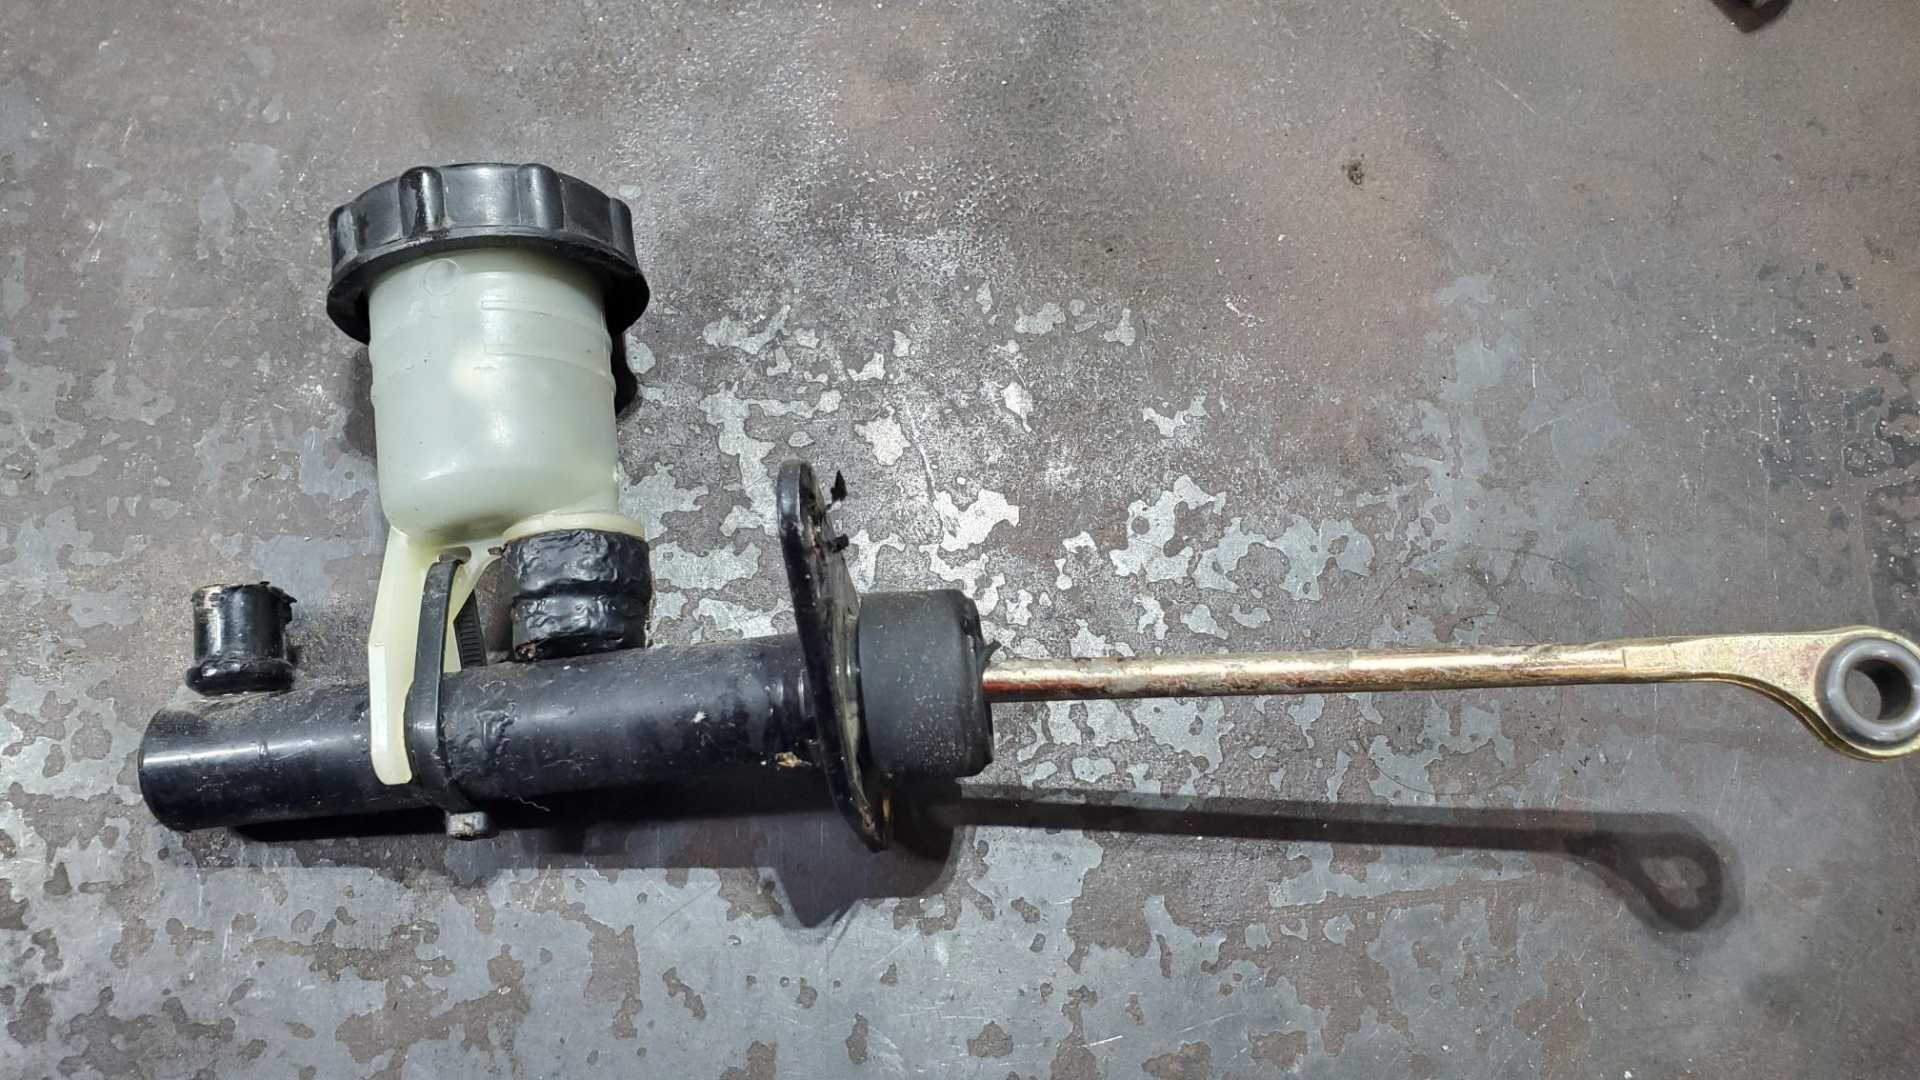
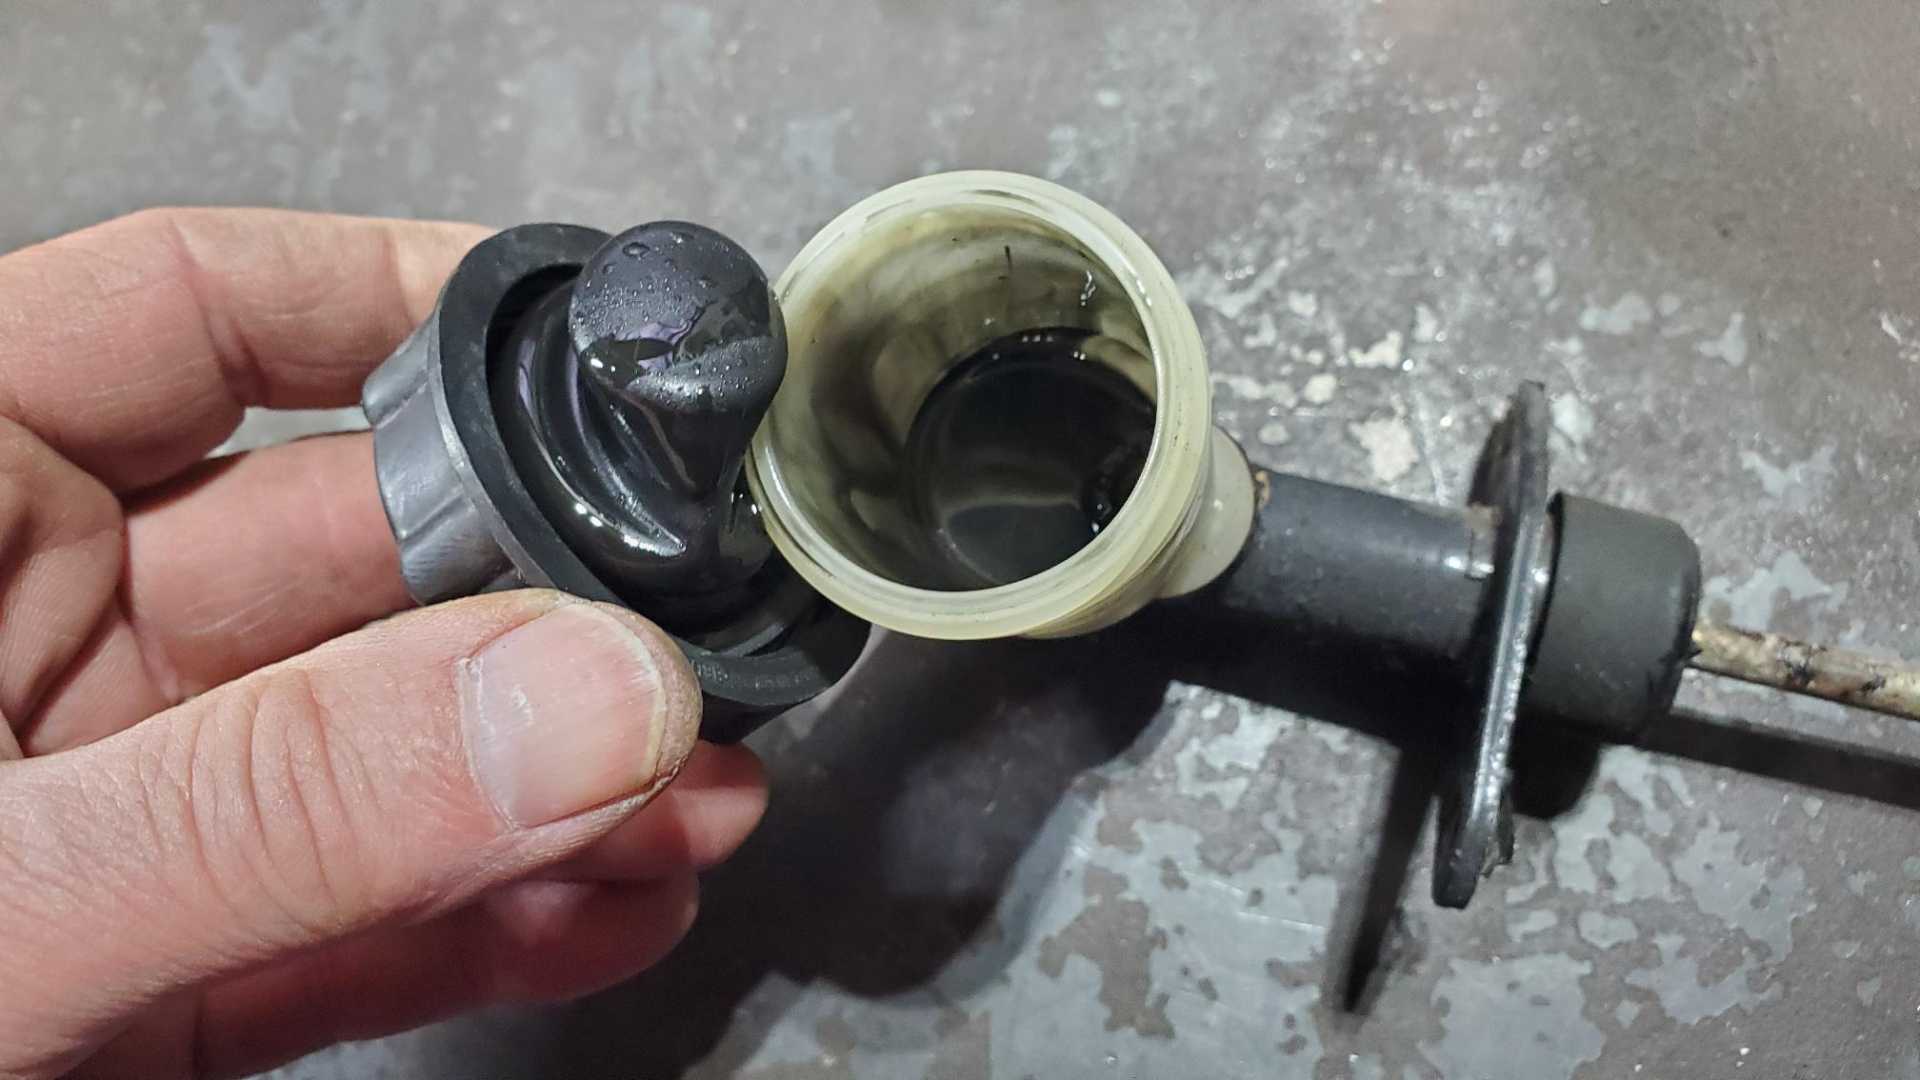
I was checking to see what kind of pin my pedal has and saw what I thought was fresh fluid, so out came the master cylinder. Would’ve been easier before I switched out the booster.
Pretty tired looking master cylinder. Wonder if it’s the original.
To do list: -clutch system -coolant system (hoses, thermostat & housing) -vacuum hoses -Quad oil separator hoses -engine harness
[This message has been edited by Quadfather (edited 01-15-2023).]
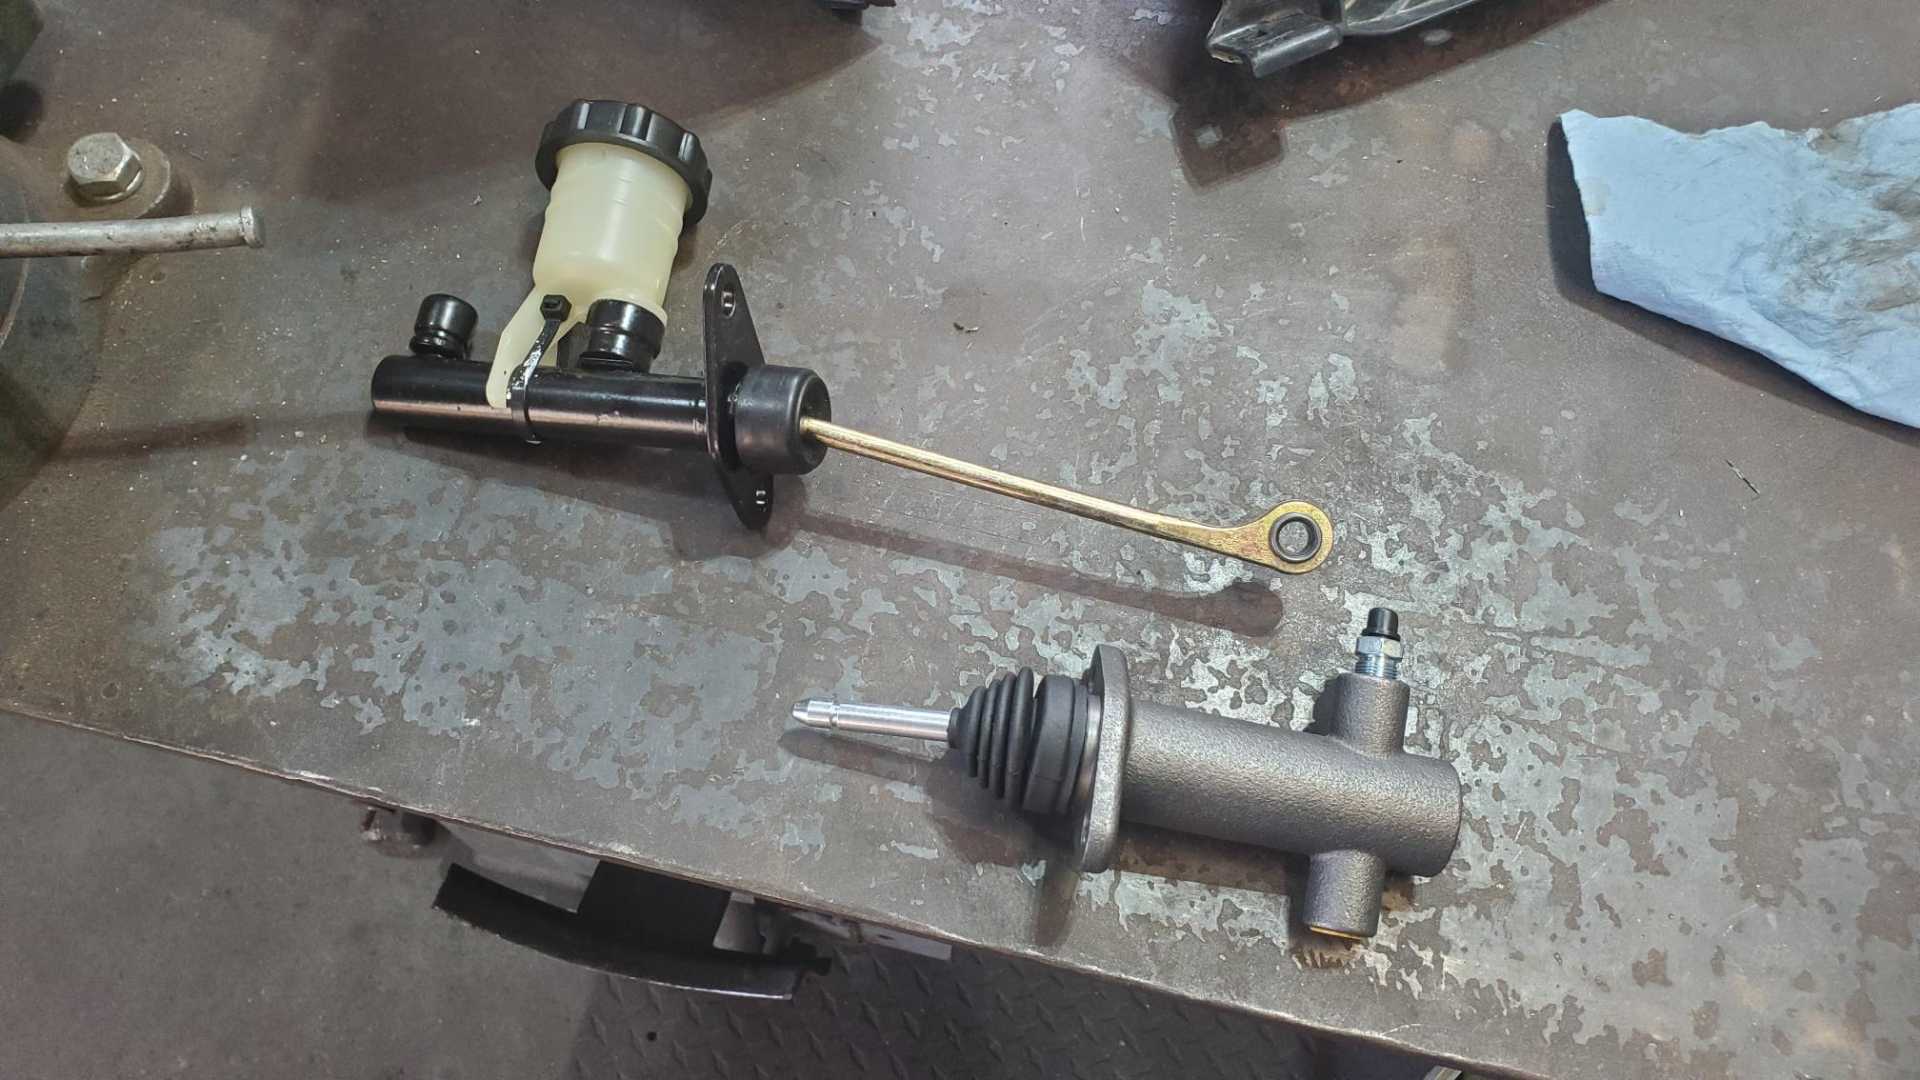
Meant to post a couple more photos last night but got distracted.
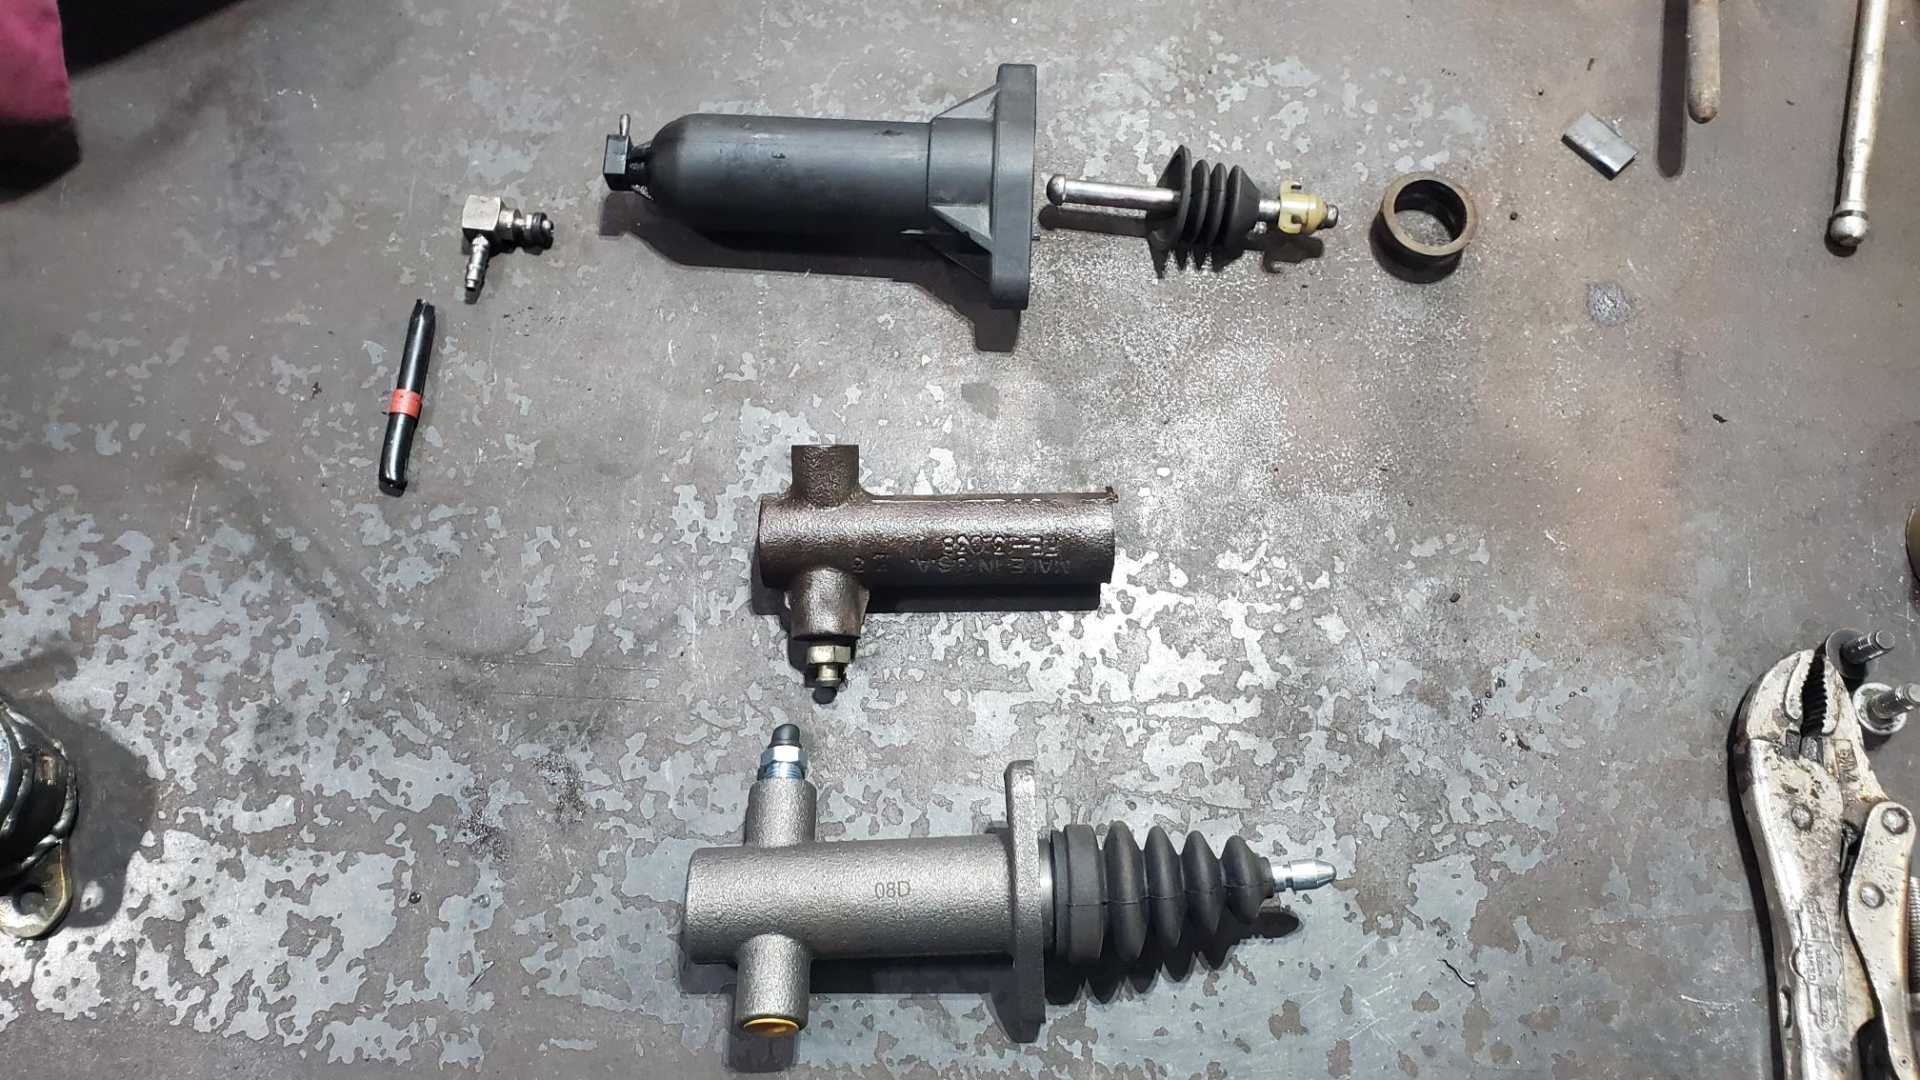
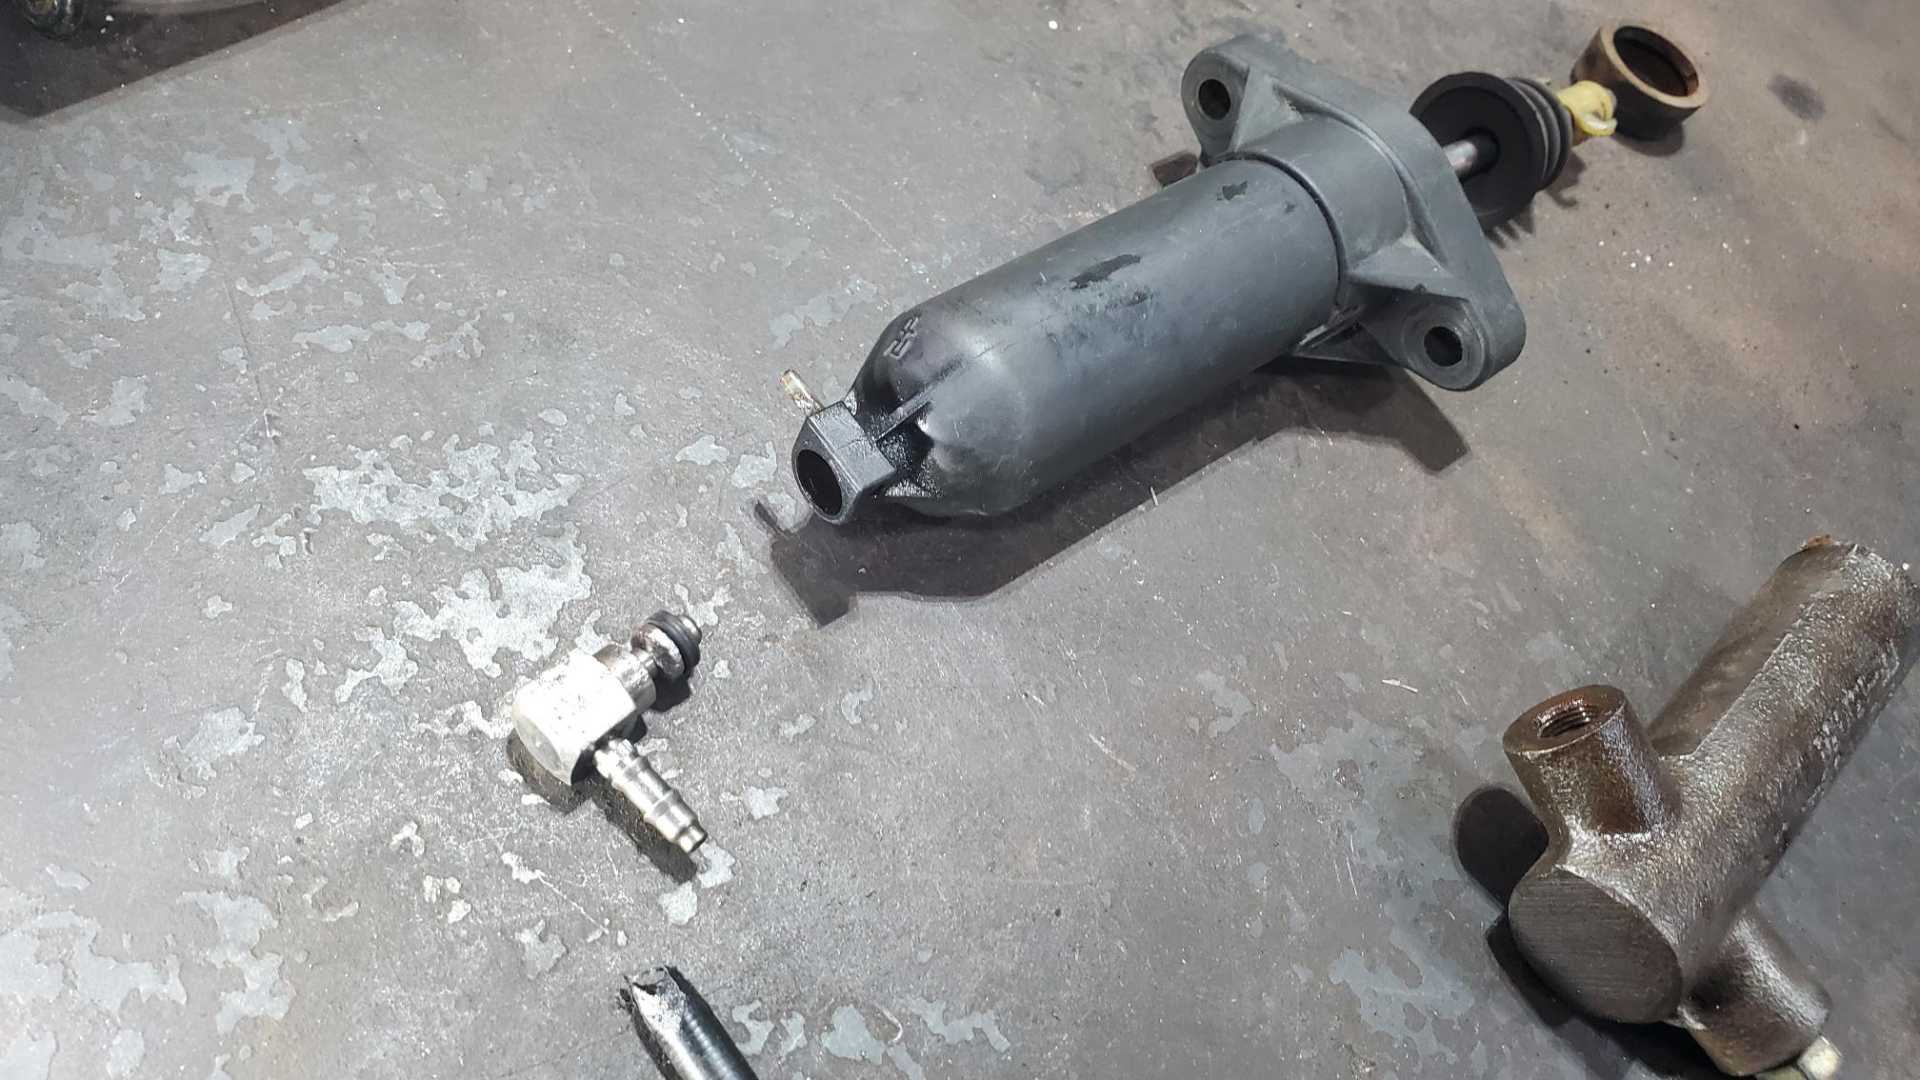
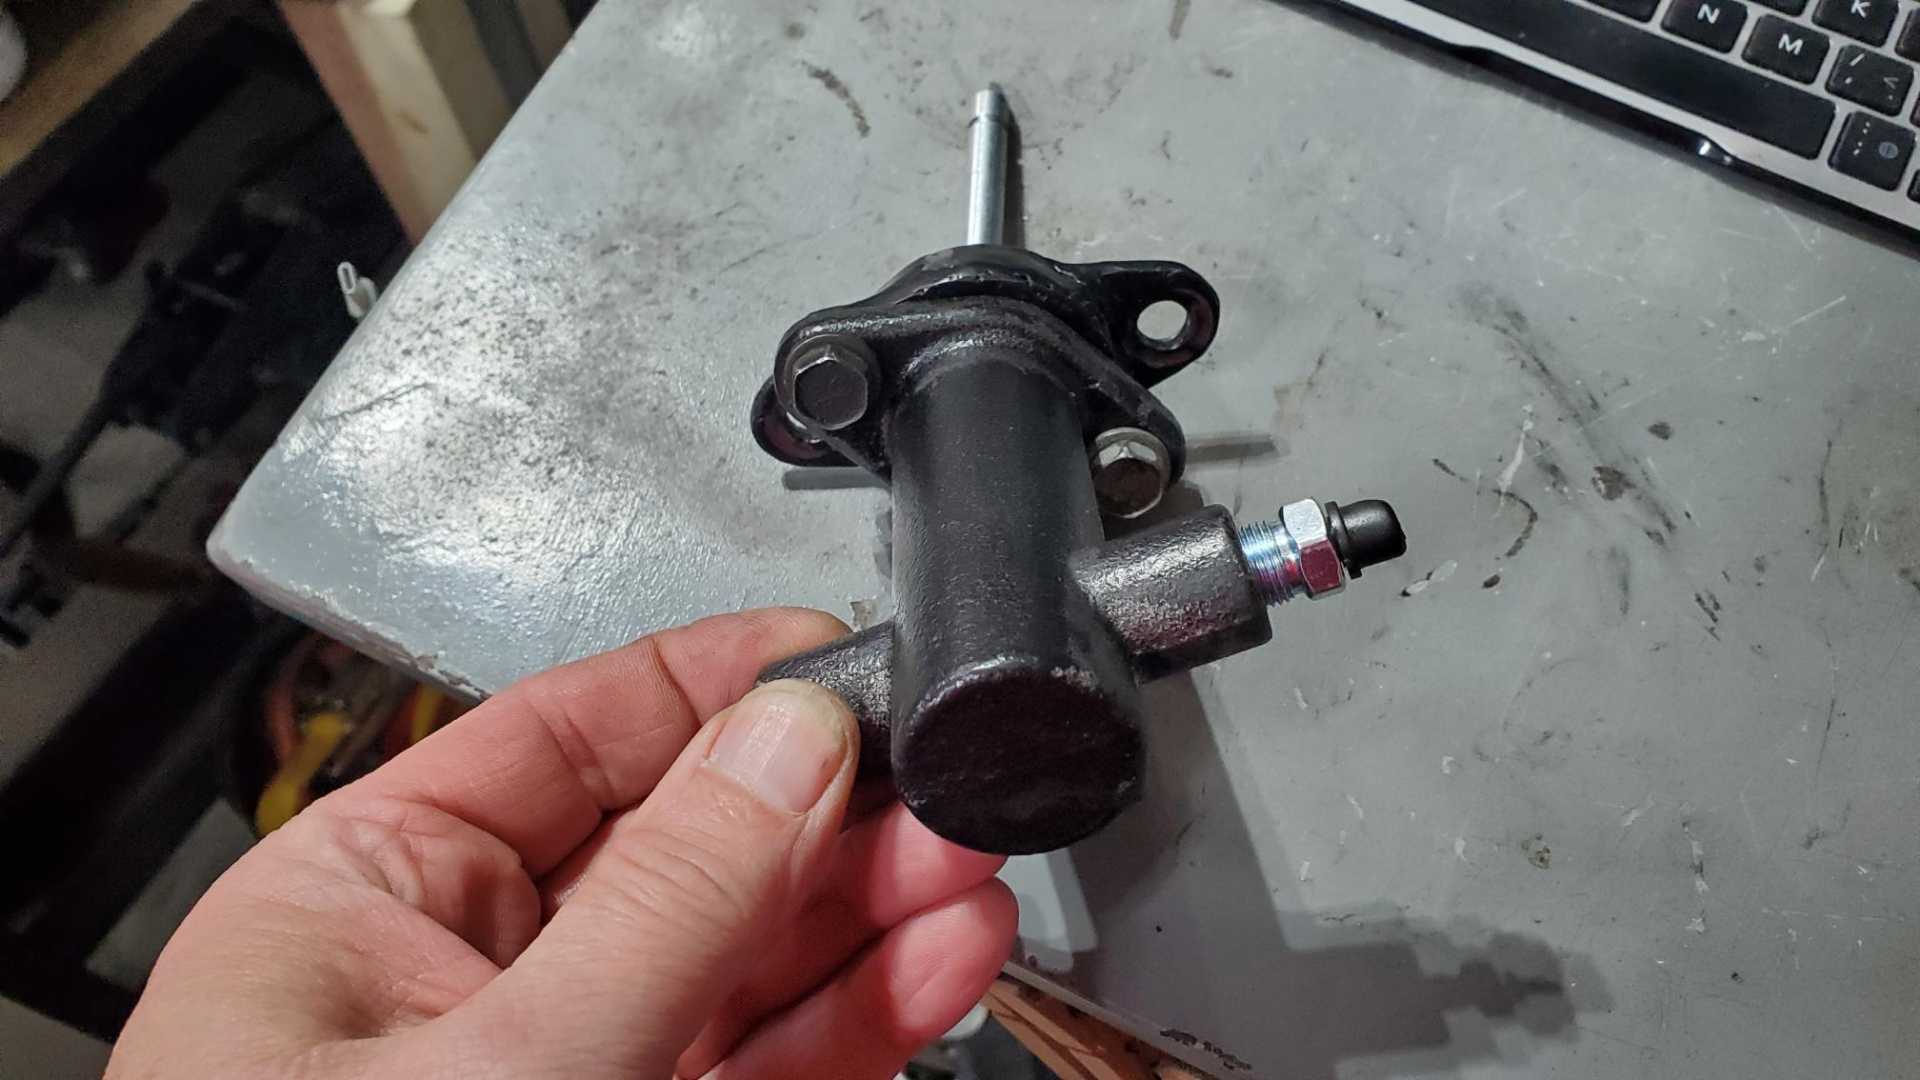
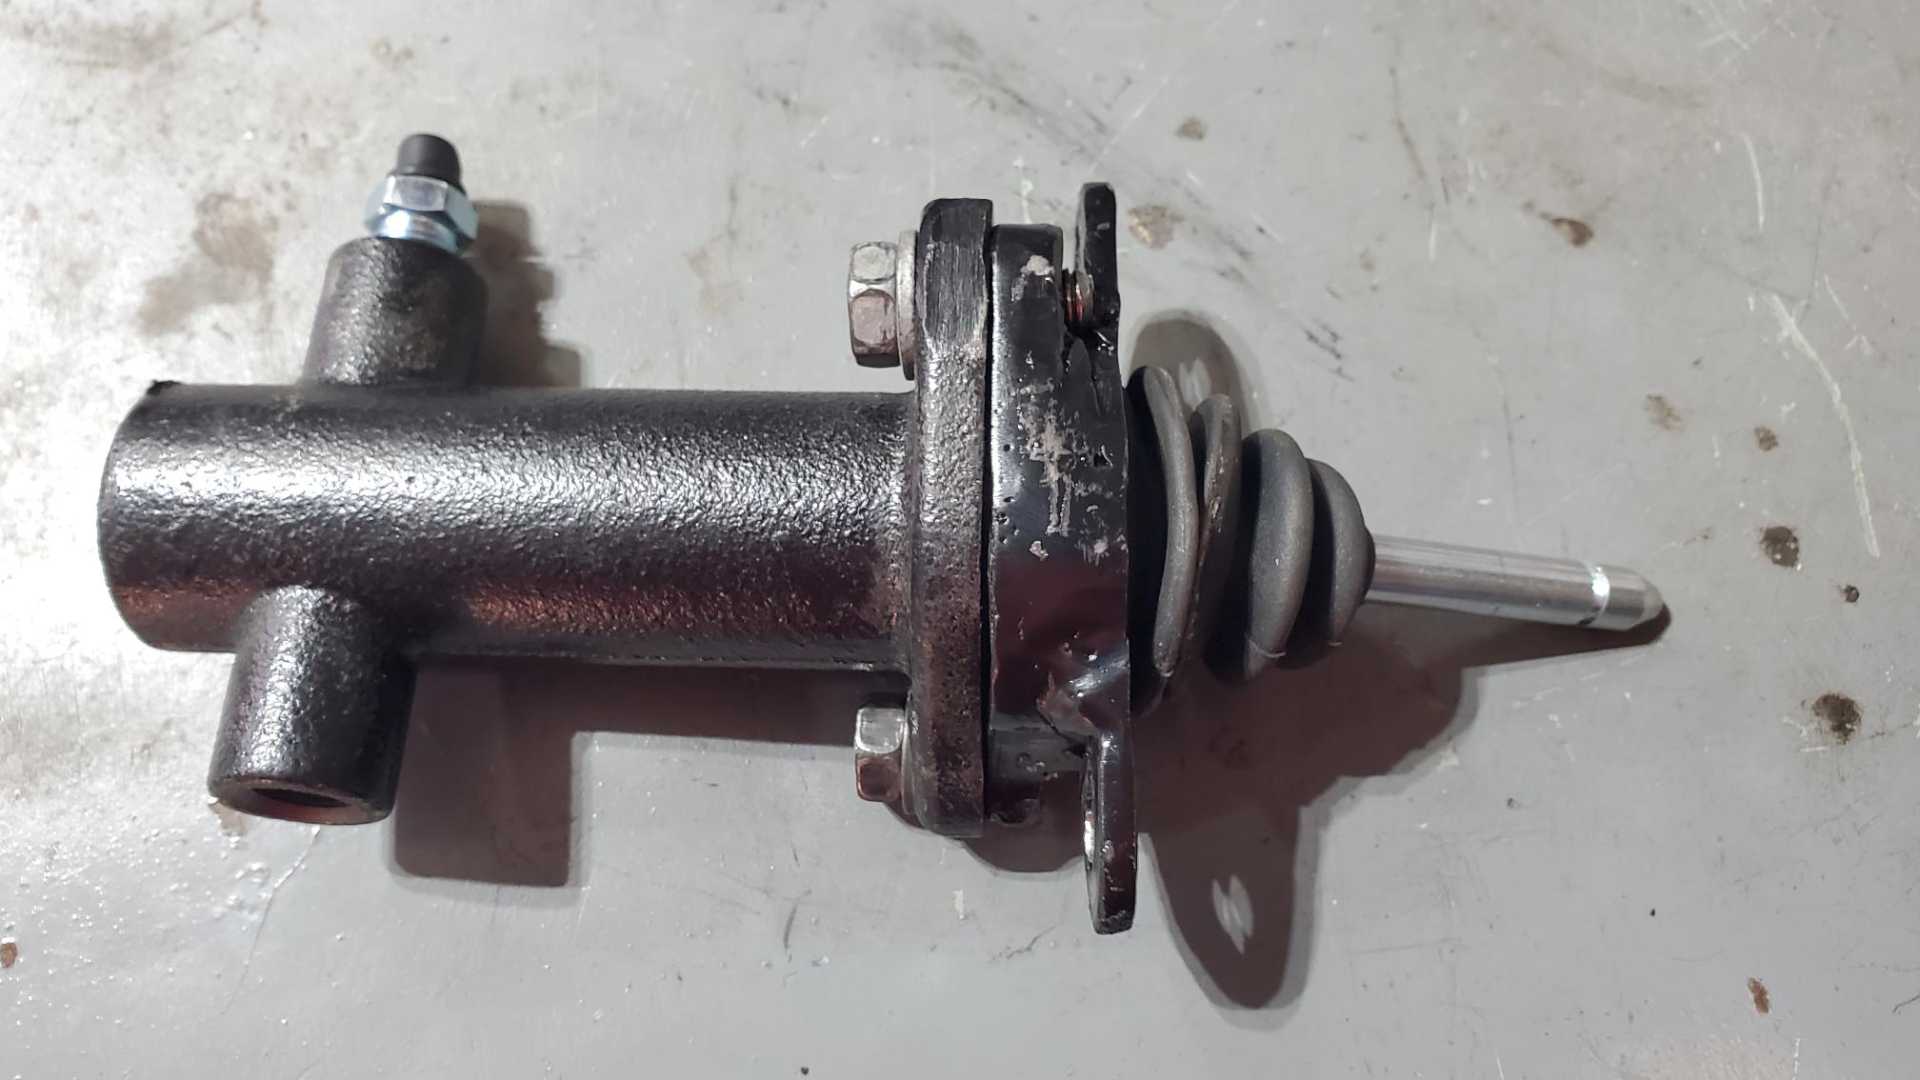
These are the three types of slave cylinders. Top is the stock Quad 4 one out of my Beretta. Middle is the one from my Fiero's Isuzu, and bottom is the V6 5-speed one:
I've found conflicting guidance on how to mate the Fiero clutch system to the Quad's Getrag. Some people have managed to use the stock Quad slave while others have used completely different systems (like one from BMW). Rodney Dickman recommended the V6 Getrag version, with his adapter and then probably an adjustable banjo. I'm going to try fabbing my own adapter.
[This message has been edited by Quadfather (edited 02-04-2023).]
Not much. Been busy with work and other aspects of life.
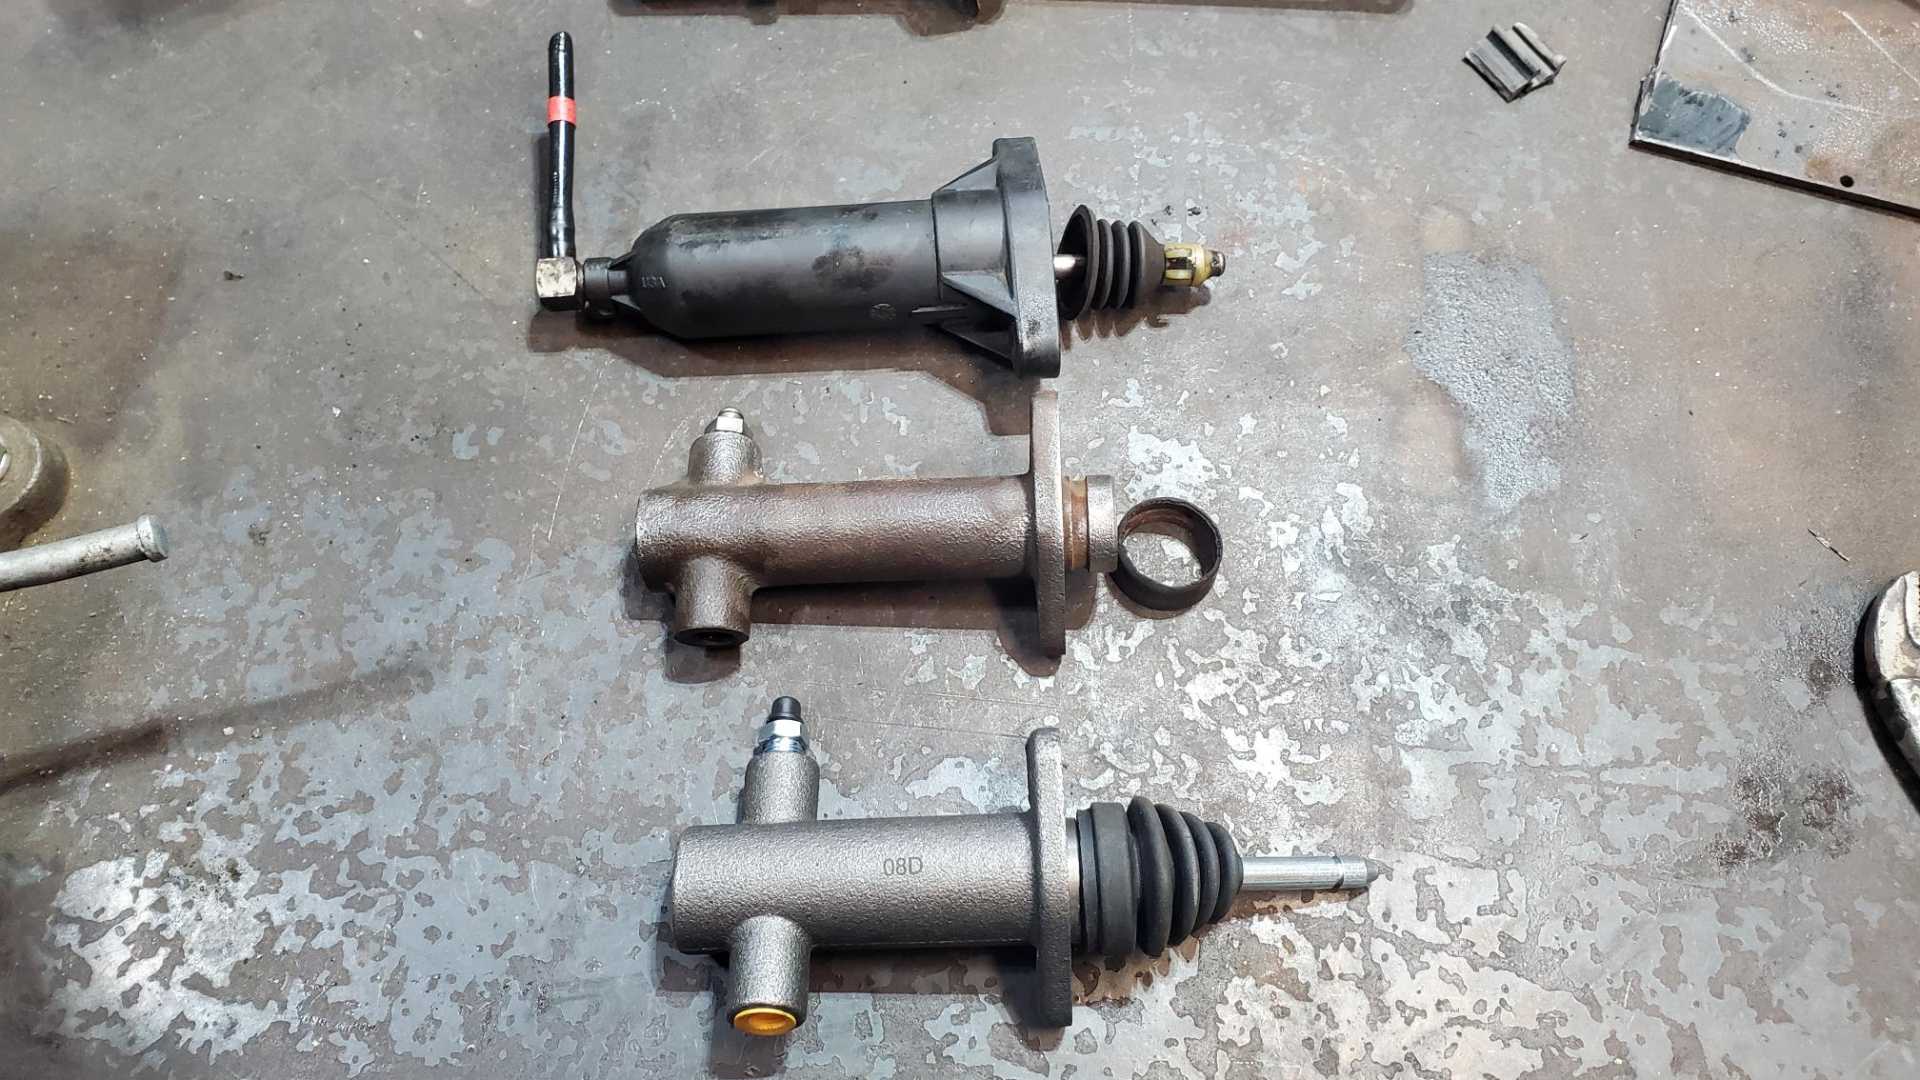
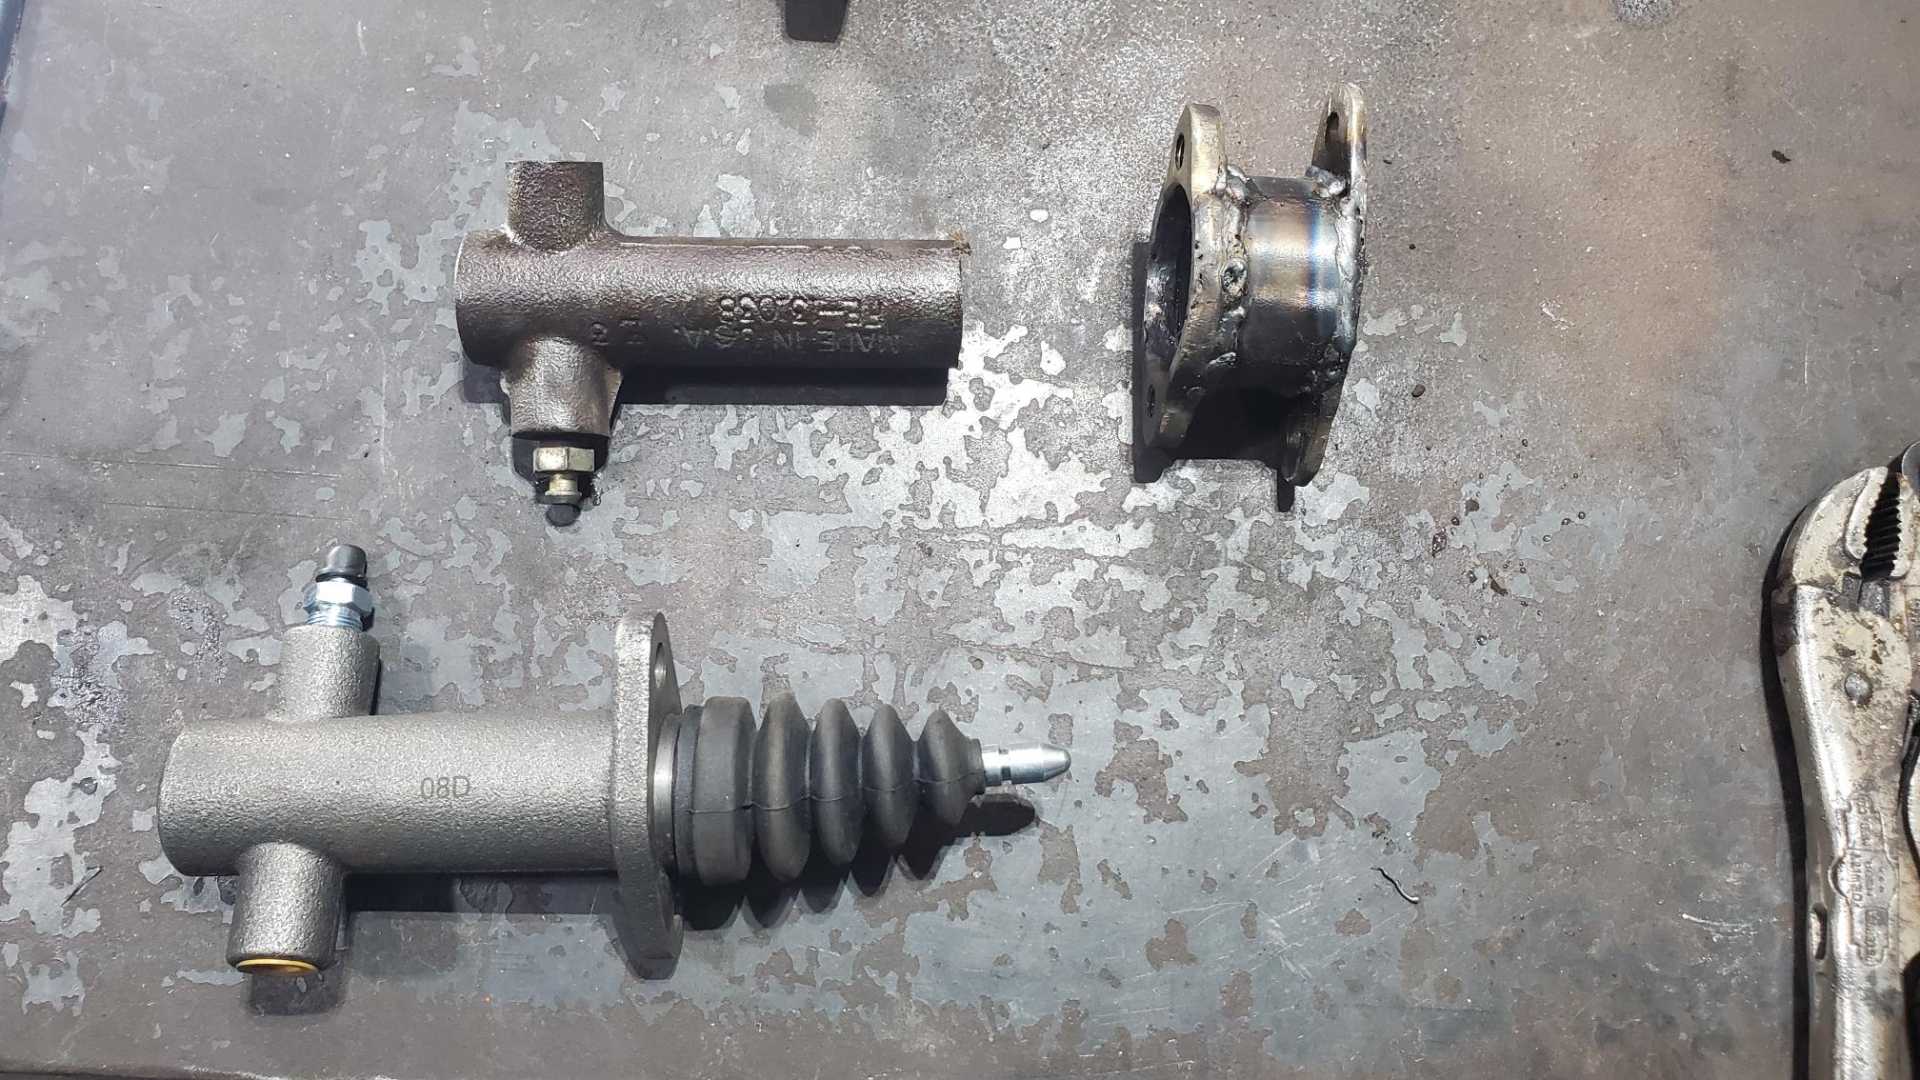
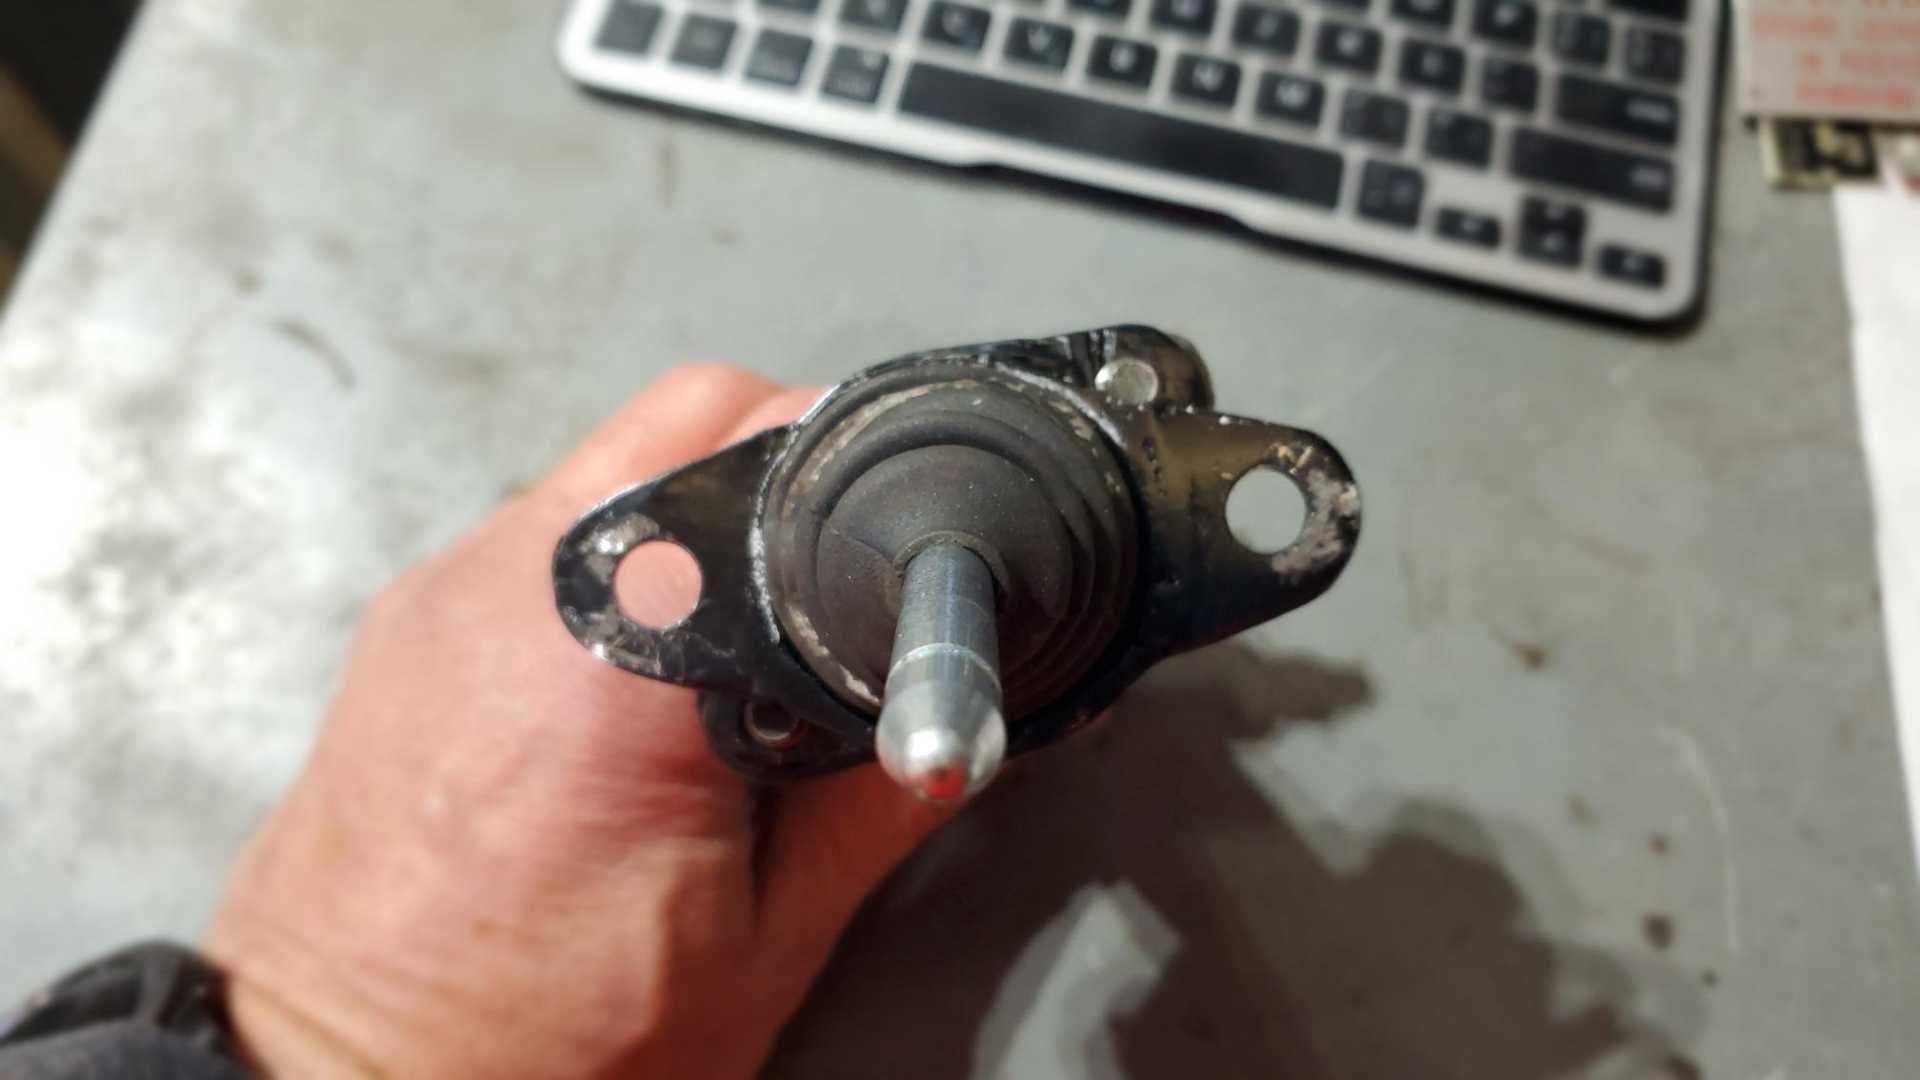
I tried to make my own adapter to use the V6 slave cylinder. The first one I came up with was an abomination so I won’t even show it. The second is better but I don’t think it will work.
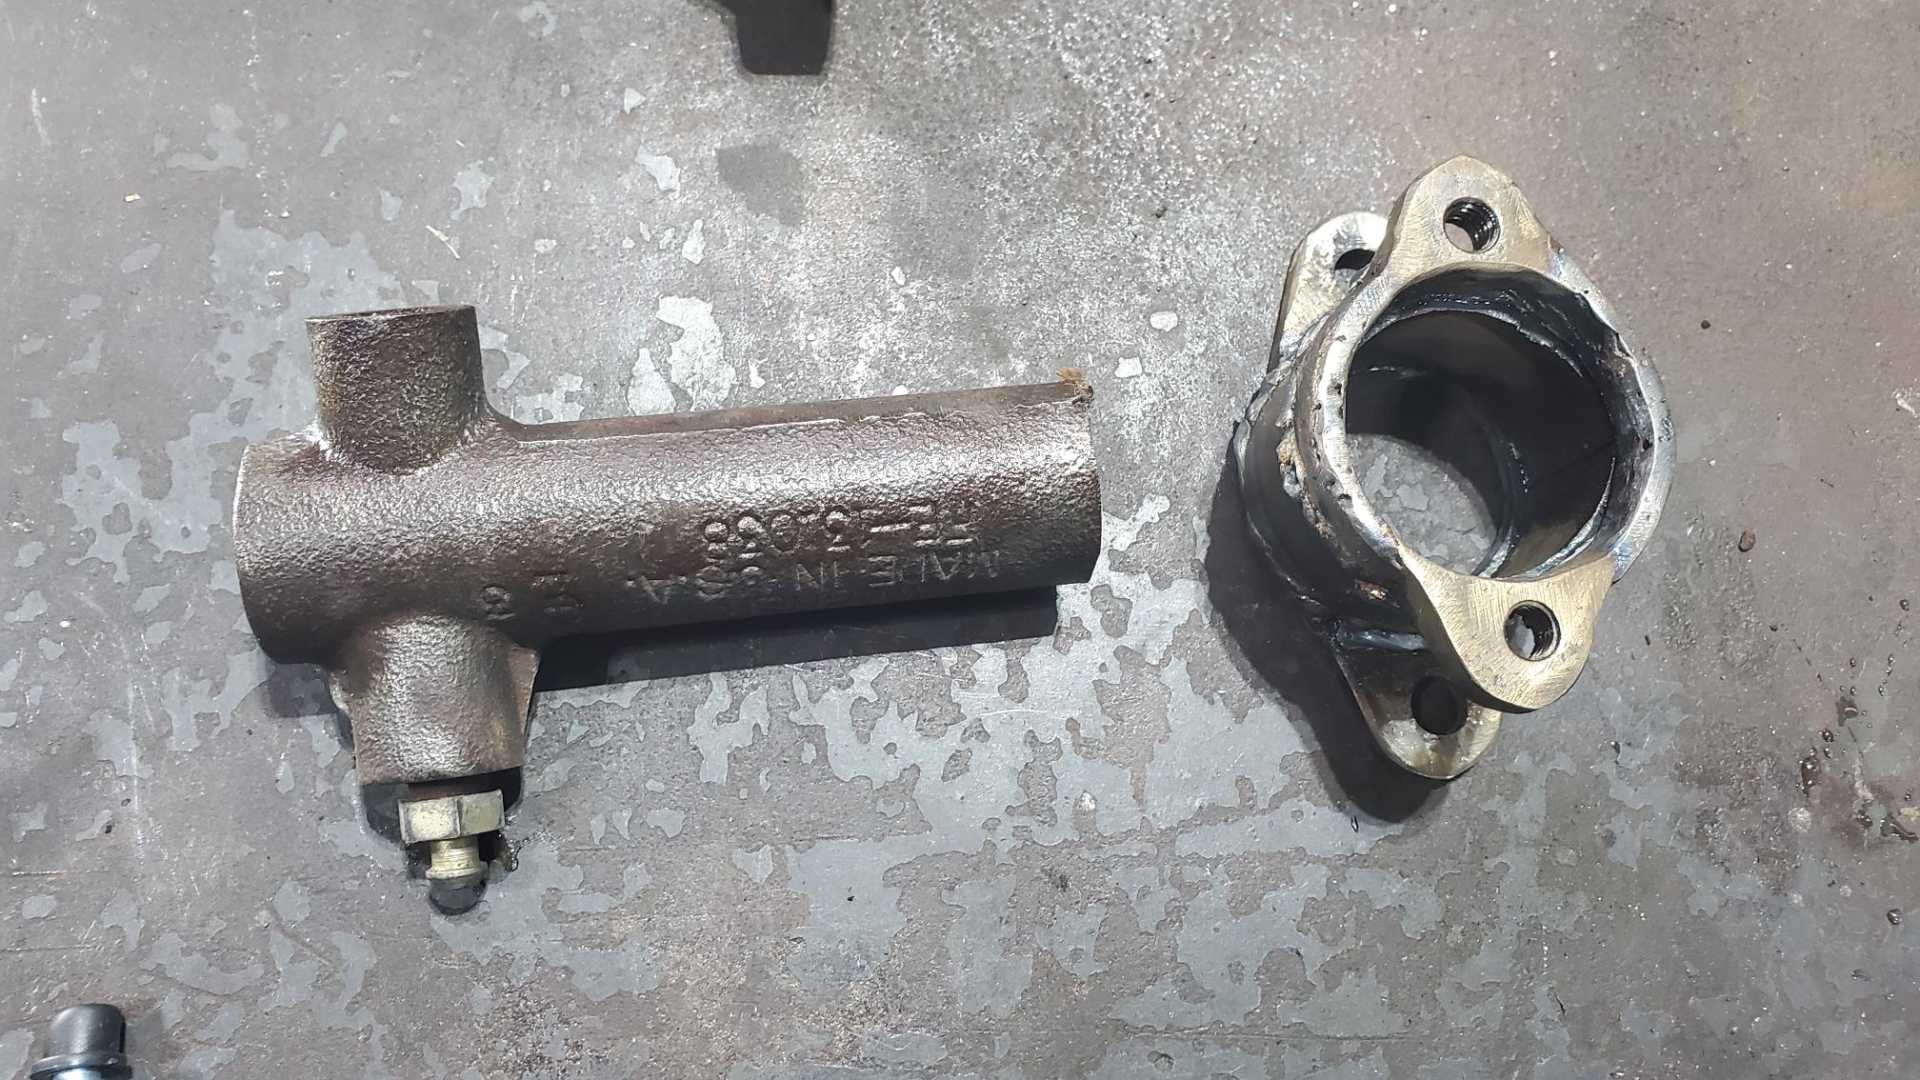
I cut the mounting flange off of my original Isuzu slave then used some pipe and plate to make the rest.
The challenge is making the adapter big enough so that the slave’s rubber boot fits inside but narrow enough to fit alongside the housing on the Getrag.
I couldn’t tell how long to make the adapter judging from the photo on Rodney Dickman’s website, but it had to be at least one inch in order to clear the studs on the Getrag. I don’t know why those studs are so long.
With this setup it’s practically impossible to make sure the rod is seated in the clutch lever. I also think the adapter is too long. All this is complicated by the fact that the engine doesn’t run yet so I have no sure way to check.
I finally got the fitting off the stock Quad Getrag slave. Years ago I saw pictures from someone who used a part from a BMW clutch system that had a bleeder. If memory serves it used the Quad Getrag slave, too. I can’t find those photos/build thread now.
[This message has been edited by Quadfather (edited 02-18-2023).]
While I ponder the clutch situation, I spent some time on other areas of the car.
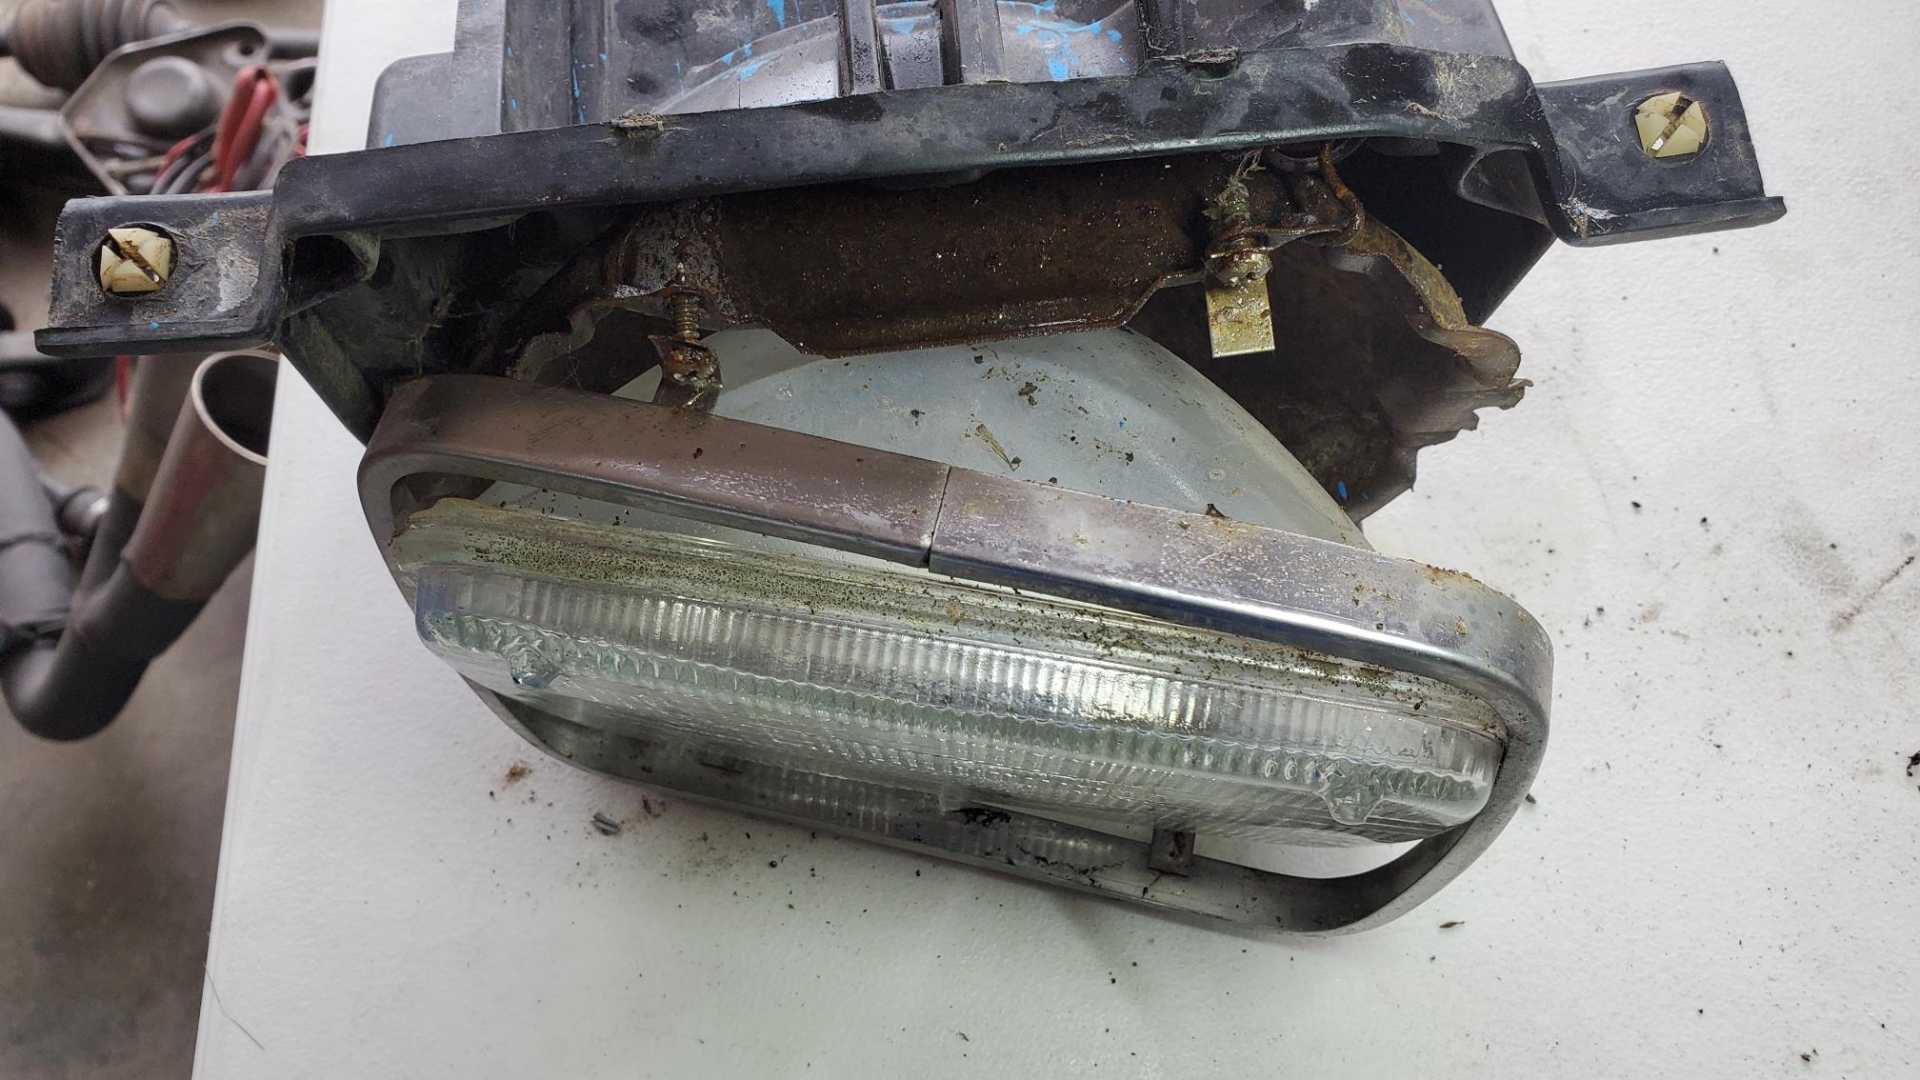
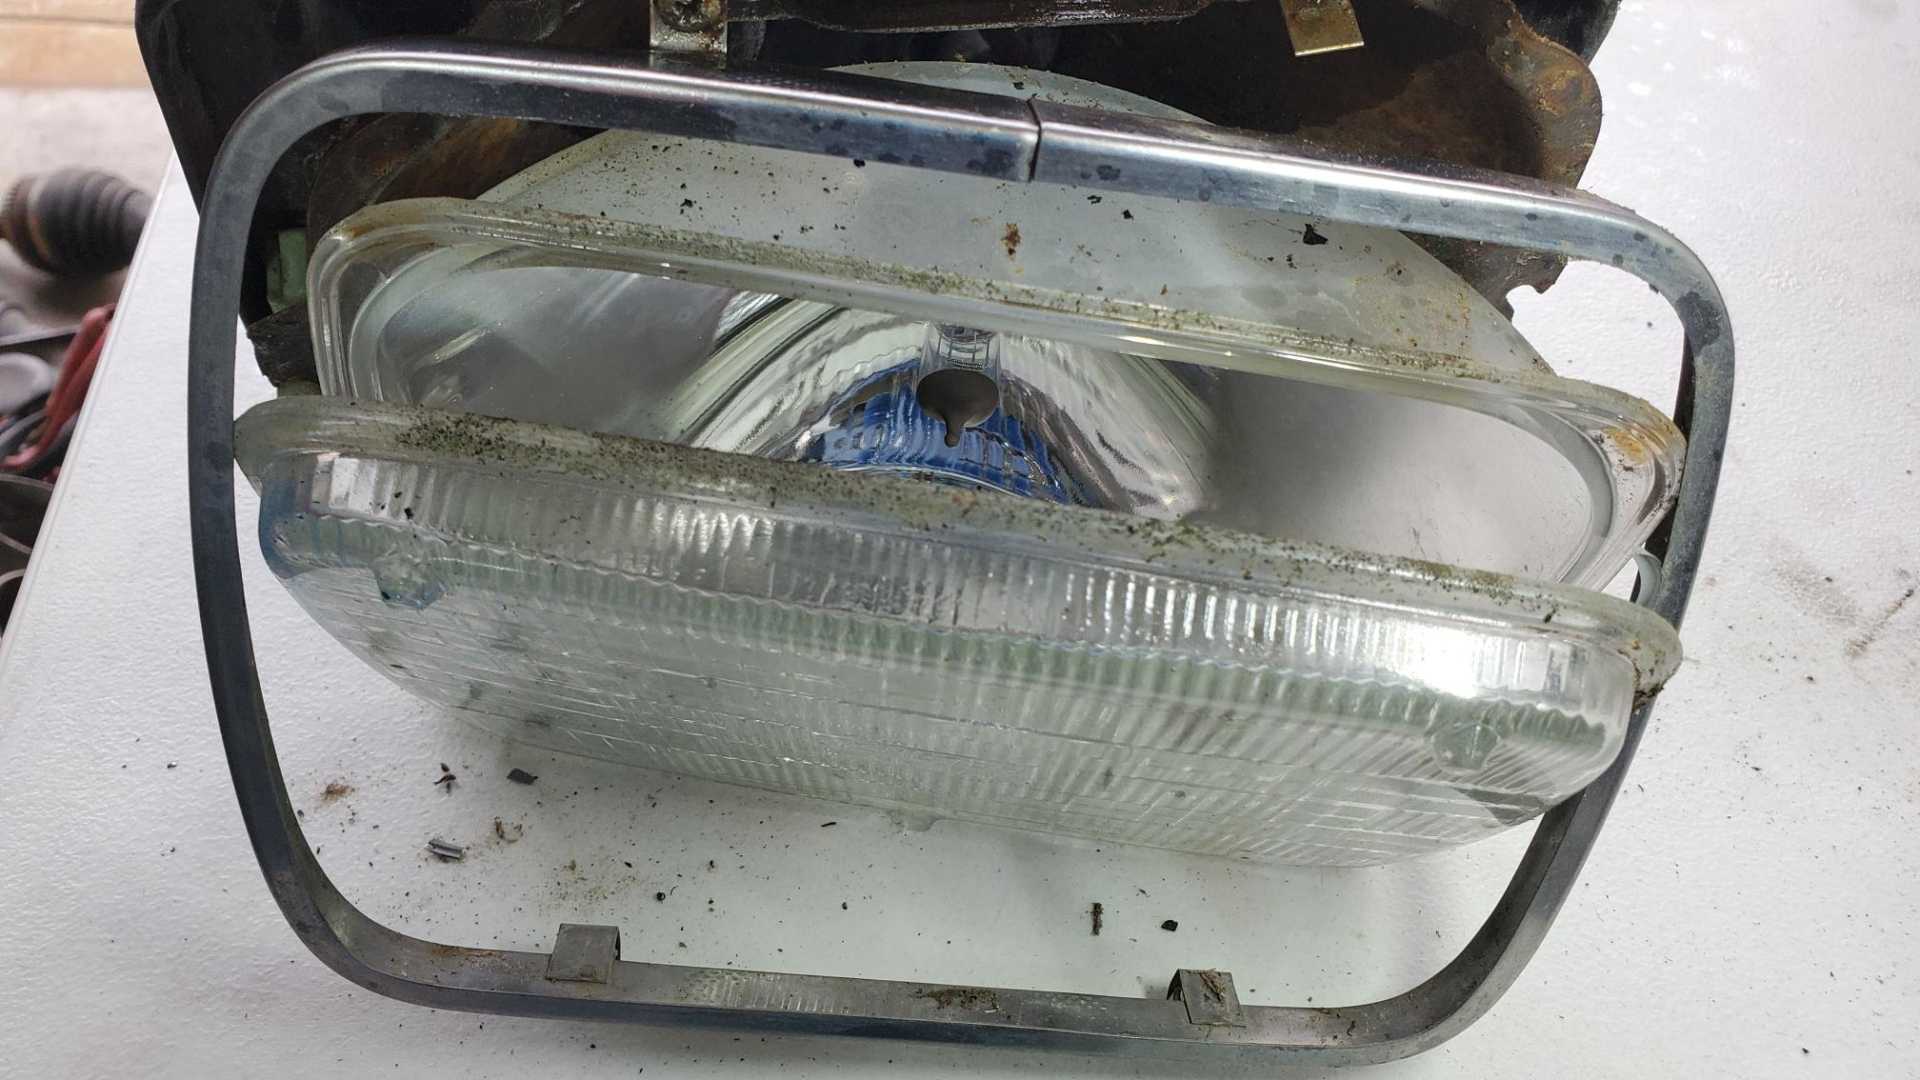
I removed the driver’s side headlight assembly and discovered that the headlight isn’t a sealed beam headlight anymore.
I had both headlights on the work bench a decade ago and they looked fine. Oh well.
I also removed the torsion springs from the deck lid. I used the ratchet strap method, putting tension on the springs to pull the pins out. The straps pulled off of the springs as I released the tension, which was kind of exciting, but it didn’t cause any damage.
[This message has been edited by Quadfather (edited 02-19-2023).]
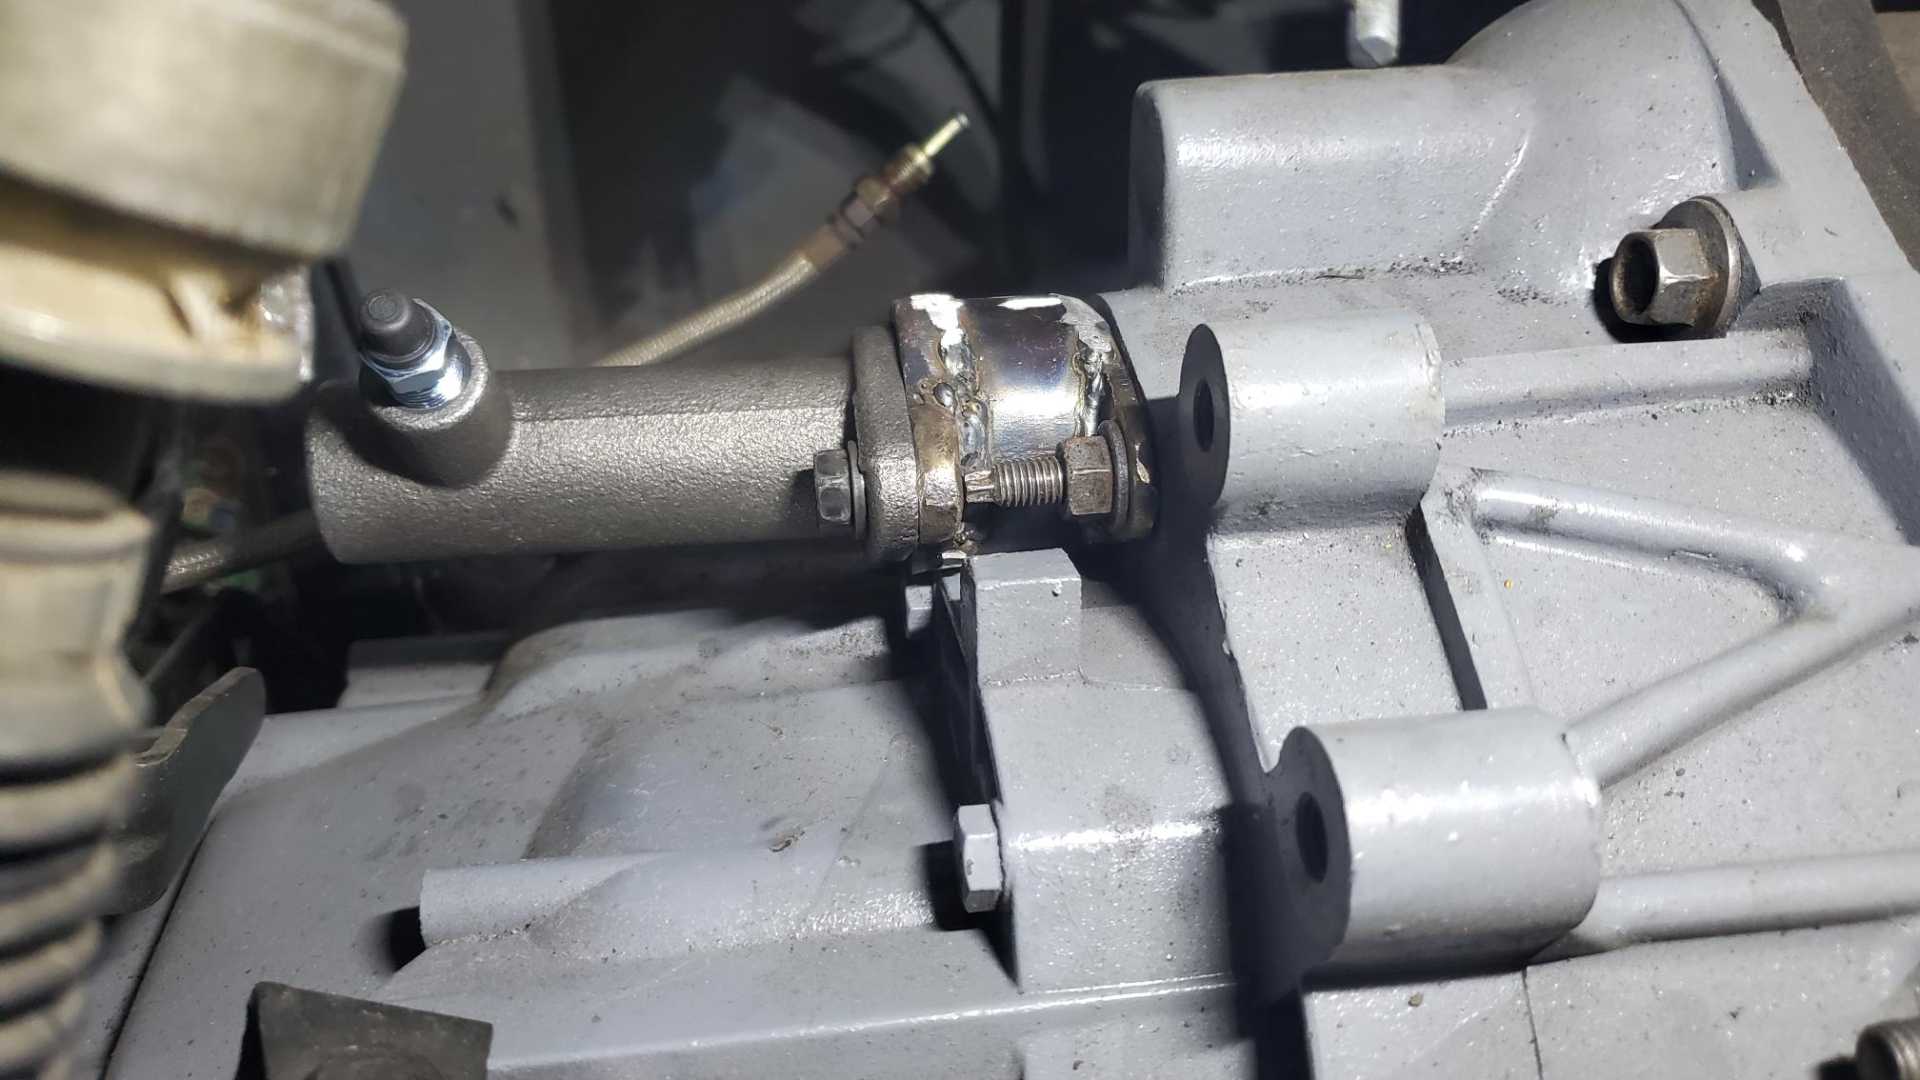
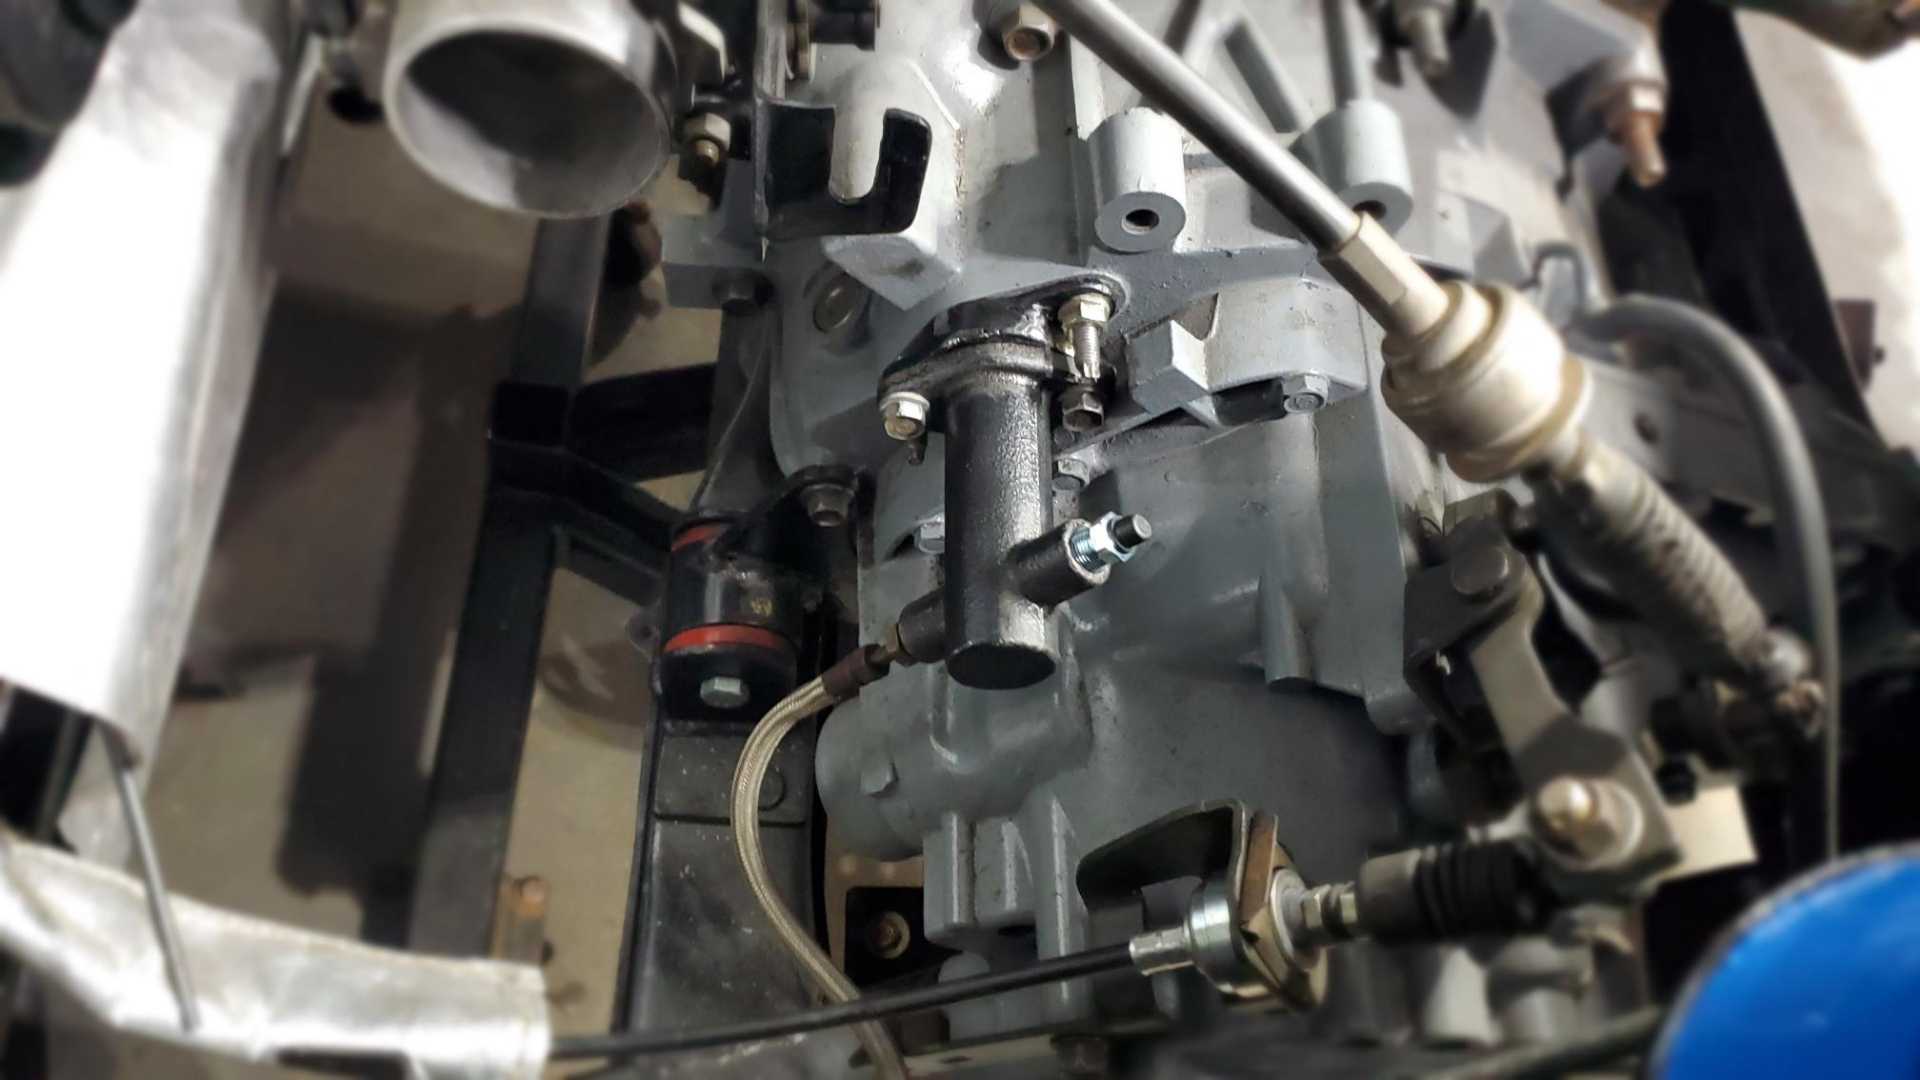
Maybe I’ve got the clutch slave sorted out. Realized the second attempt at an adapter was way too big. It would space the slave piston so far away from the clutch fork lever that the lever would not move far enough to release the clutch.
On Sardonyx’s build, he used a machined spacer that looks like it’s a half inch thick. I cut mine up and started over. The mounting holes have to be clocked because of the studs on the transmission.
I was aiming for exactly a half an inch in depth, but it’s just a bit deeper than that.
The problem is the adapter has to be narrow enough to fit in the space next to the transmission case, but wide enough for the rubber boot on the slave cylinder rod. When I first mounted the setup, the adapter pinched the boot, so I used a die grinder to open up the hole even more.
-Engine harness/battery cables -Engine coolant hoses/expansion tank -Ignition coils (not sure if the parts from my Beretta still work) -Thermostat housing -Rear hubs & brake pads -Reassemble rear suspension -Coolant/engine oil & filter/transmission oil
I’m probably missing something obvious.
That would be to try to get it running. Before driving it I really need to buy tires. The tires that are on it came from the salvage yard’s $11 tire sale eight or nine years ago just to be able to move it around.
I find it more difficult to stay focused these days. Maybe it’s a side effect of getting older, maybe it’s just being busy with work and other parts of life. Physically it’s much harder, too. Weekend before last I had to replace the oil cooler lines on my Silverado. Without access to a lift, getting up and down from the floor and lying on my back to work on something is just hard. Anyway, aging isn’t for wimps.
I will likely take a week of vacation in the next few weeks to get as much done on the car as possible. My son has decided not to take a job out of state and his new knowledge of circuitry and solder will be a big help.
[This message has been edited by Quadfather (edited 03-26-2023).]
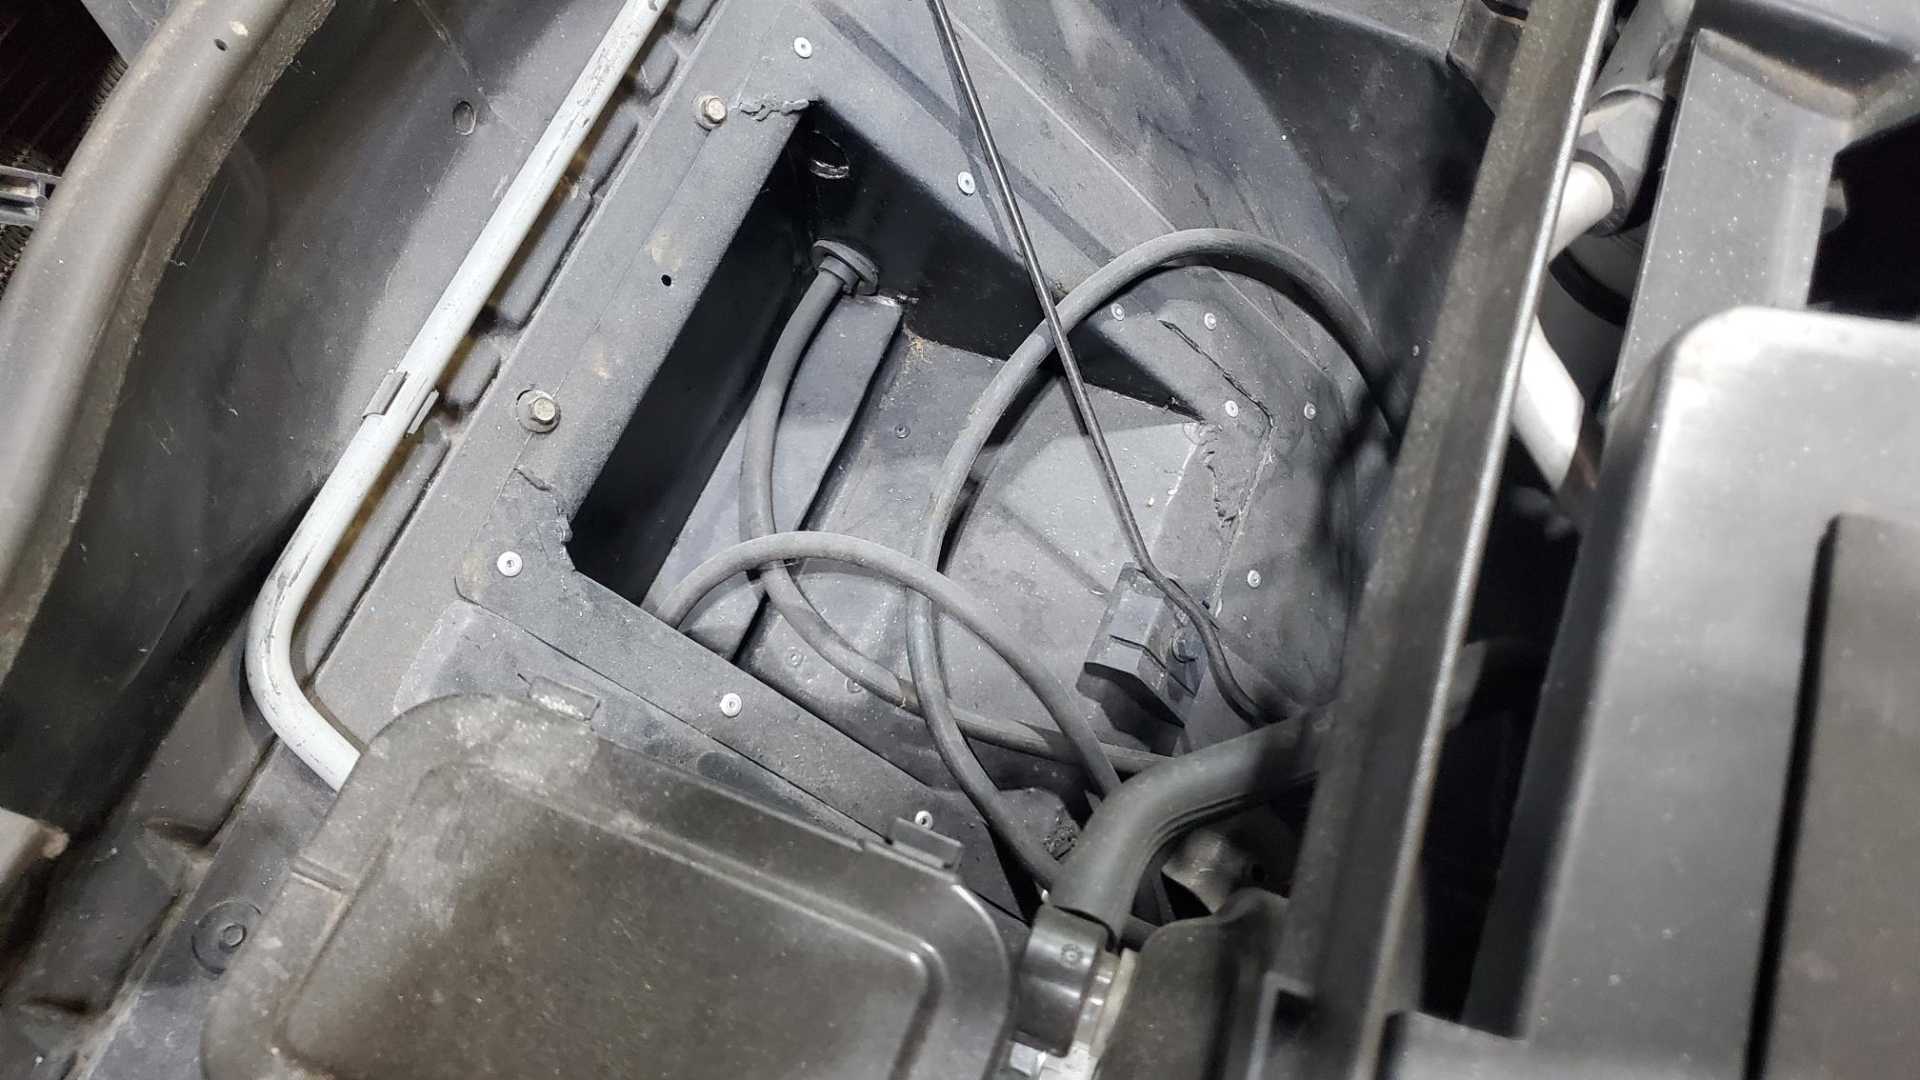
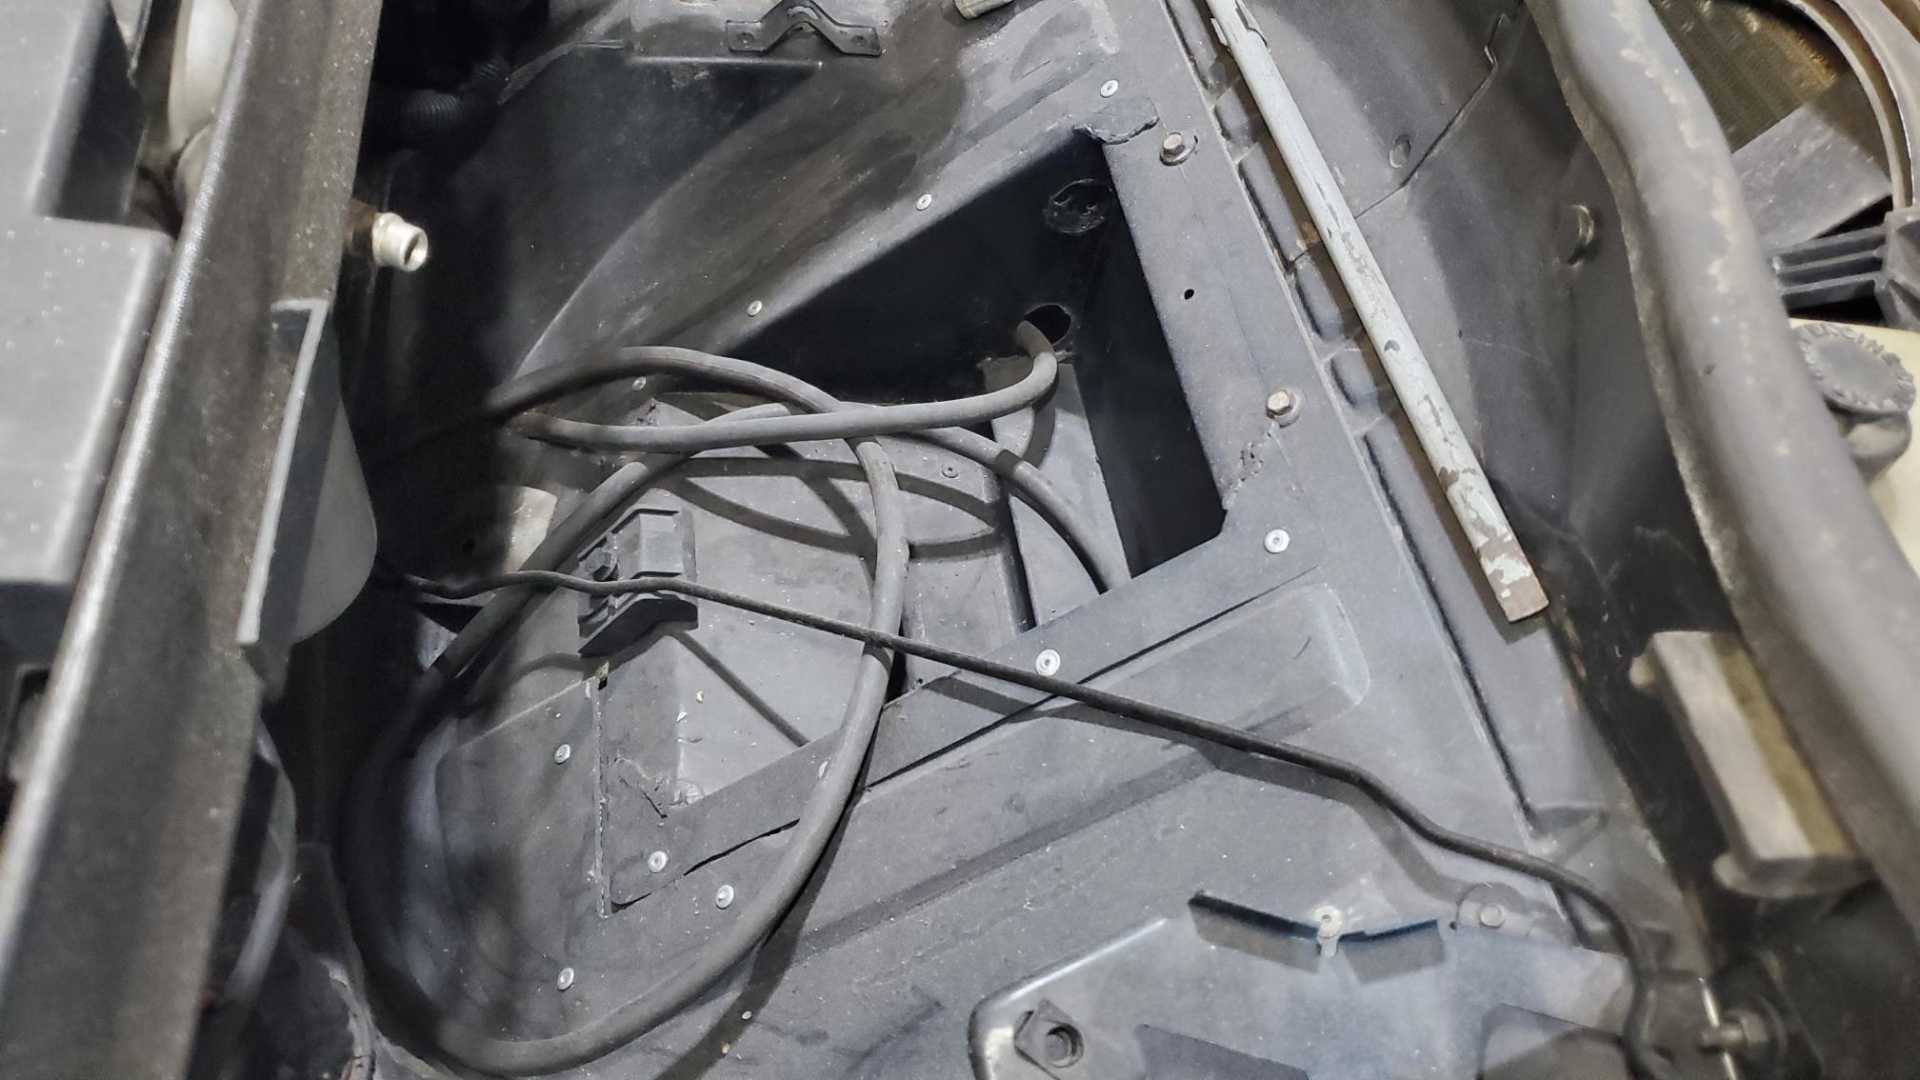
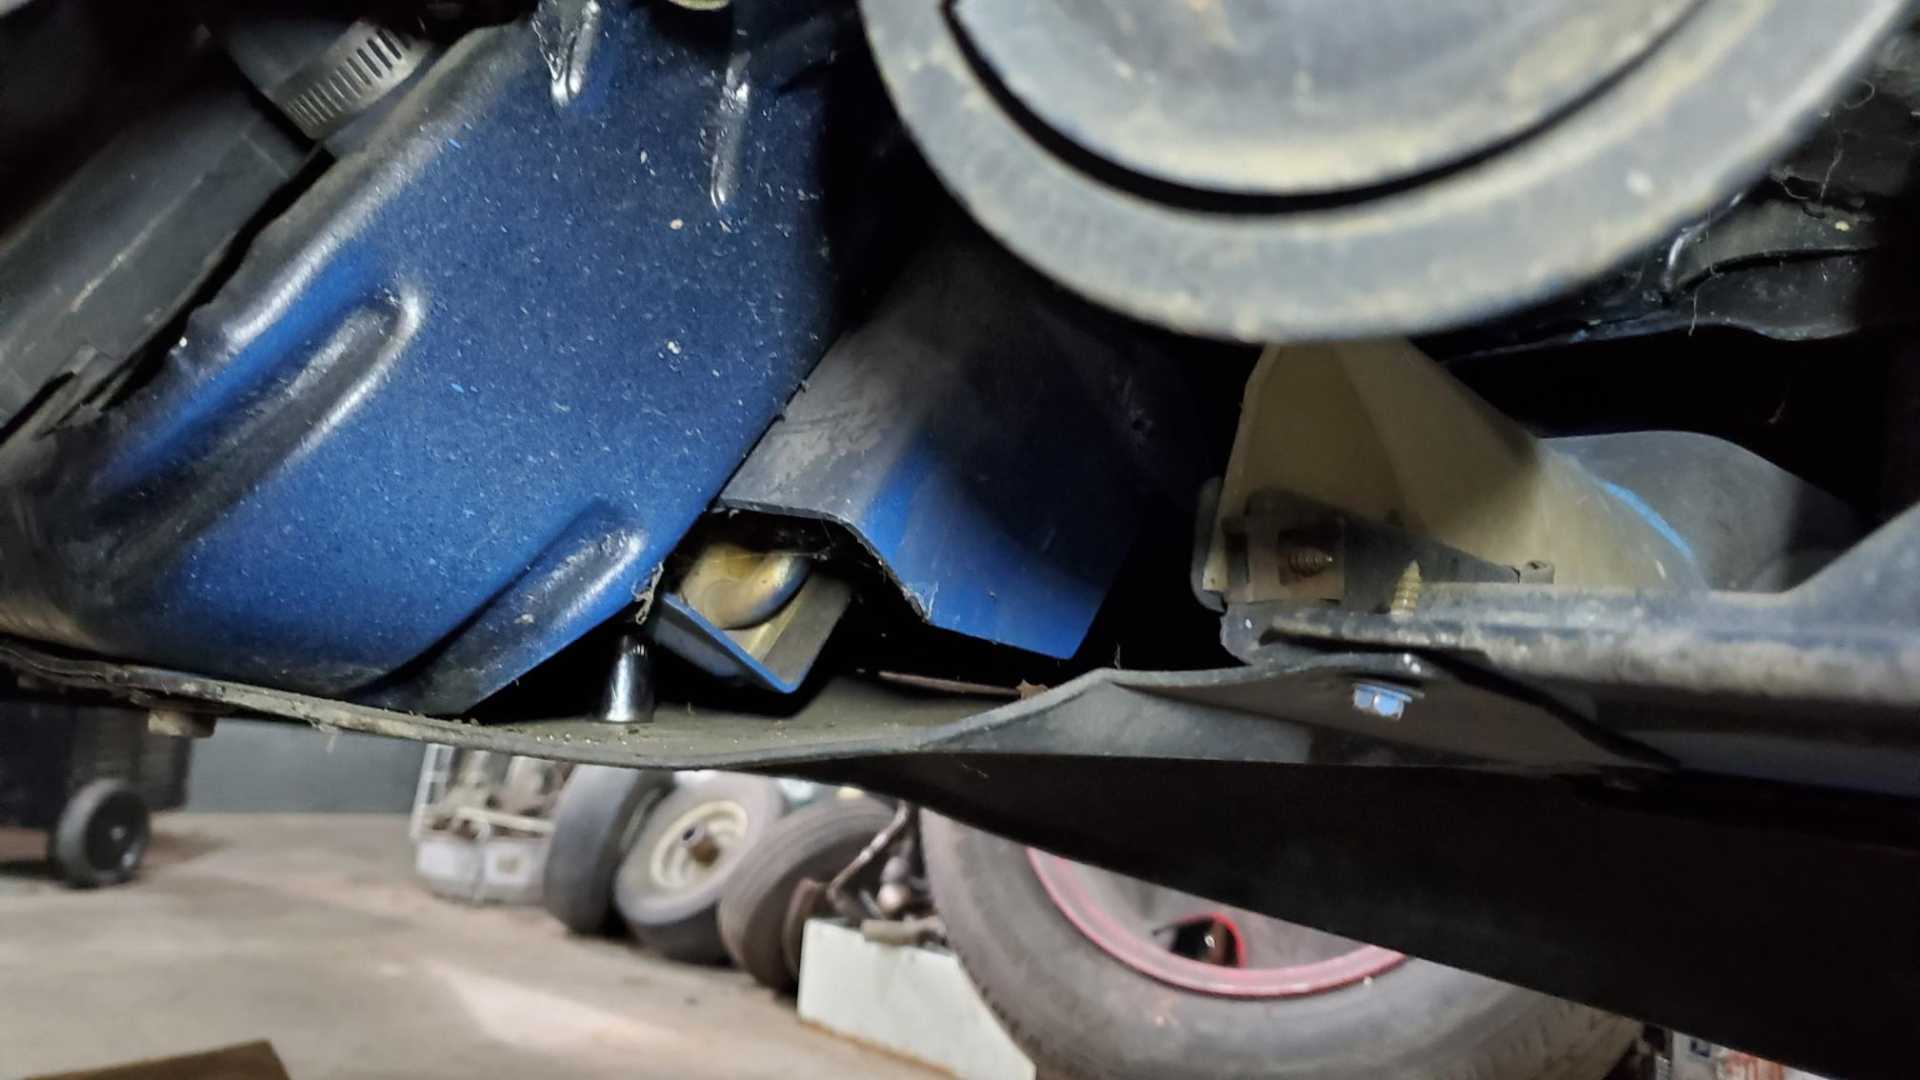
While removing the passenger headlight assembly last weekend, I dropped a 10mm socket into the front fascia. Didn't get back to the shop until today.
Decided to remove the fender liner so I could see into the fascia and find that socket.
Somehow the socket ended up way over underneath the radiator support. How the heck did overspray get all the way inside there?
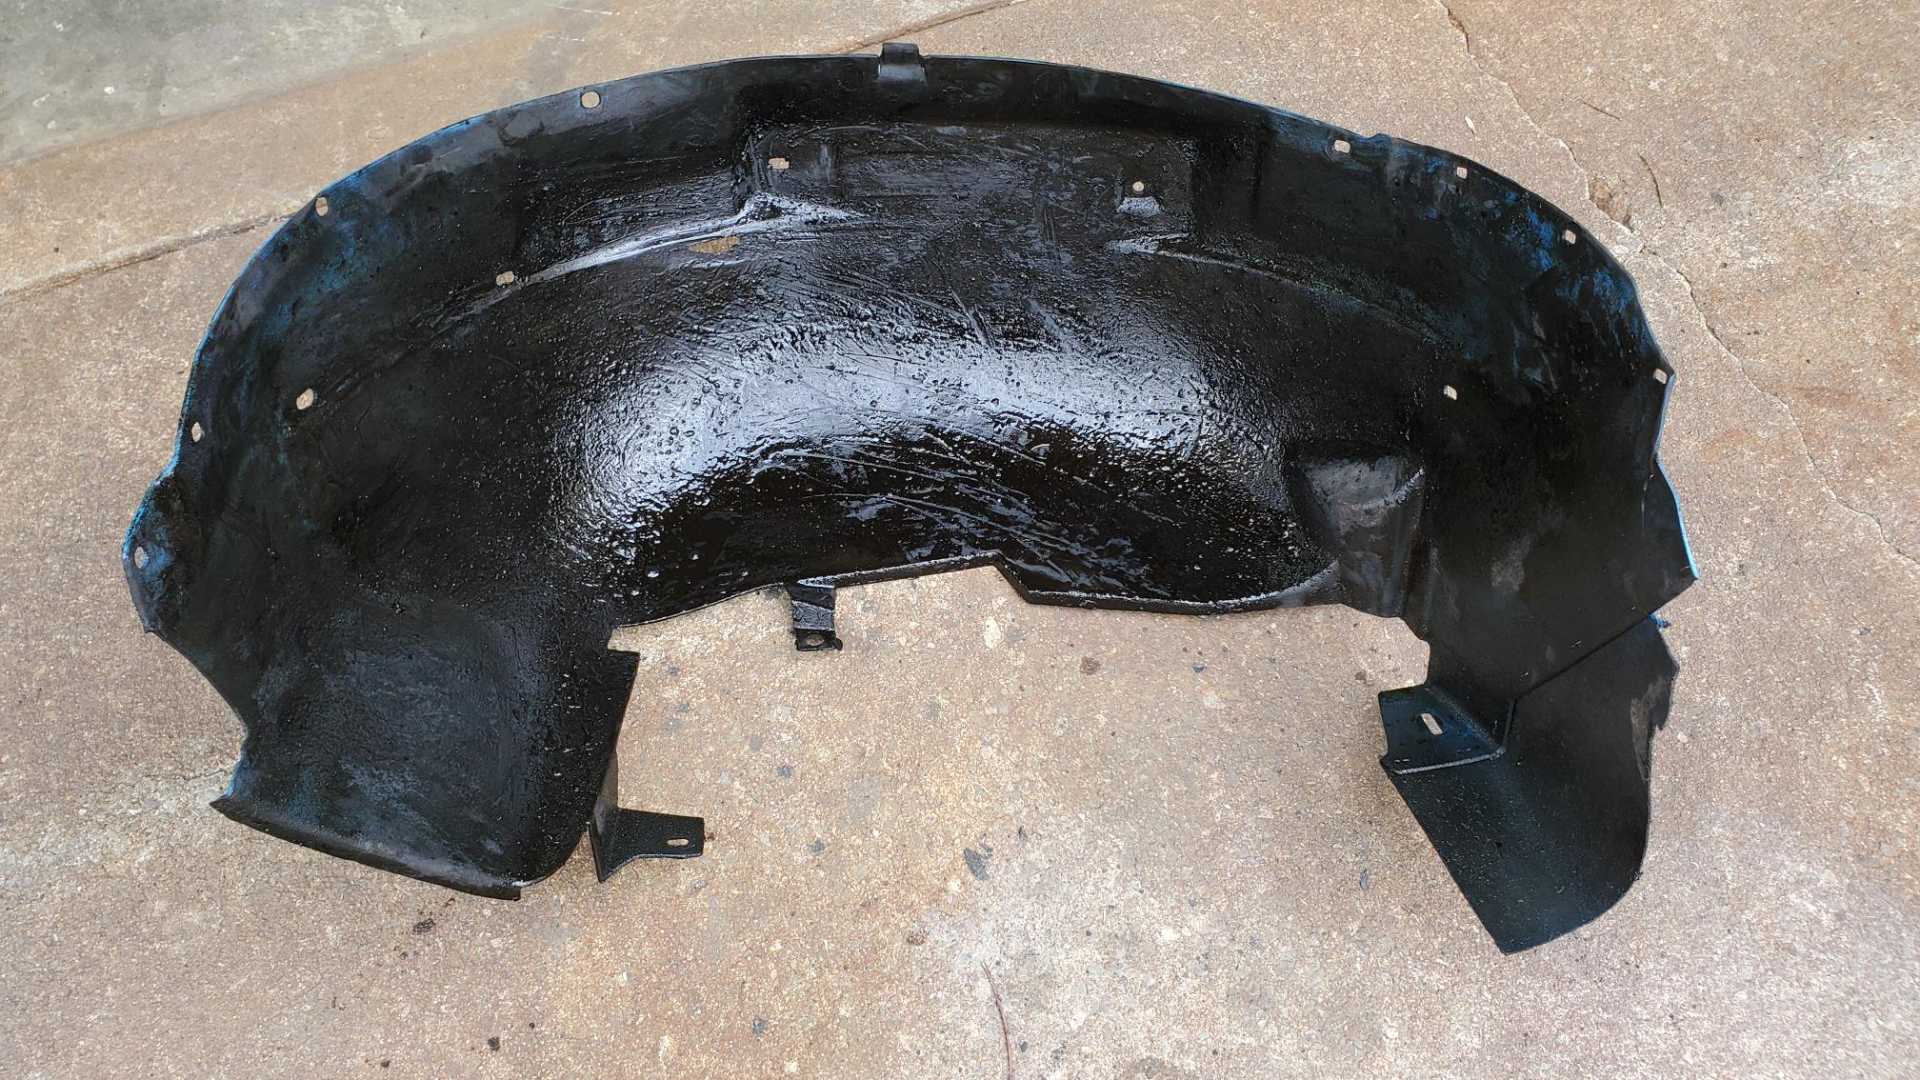
The fender liners on this car are covered with tar and concrete dust, in addition to the regular dirt you'd expect to see on an old car. Must've been constant road construction where the original owner lived. To clean it up I tried using a wire brush and a scraper but neither did much good so I added some kerosene/Jet A. It seemed to help but it appears the liner would need to soak in the fluid for a while for the best result. Might try to some engine degreaser.
[This message has been edited by Quadfather (edited 03-26-2023).]
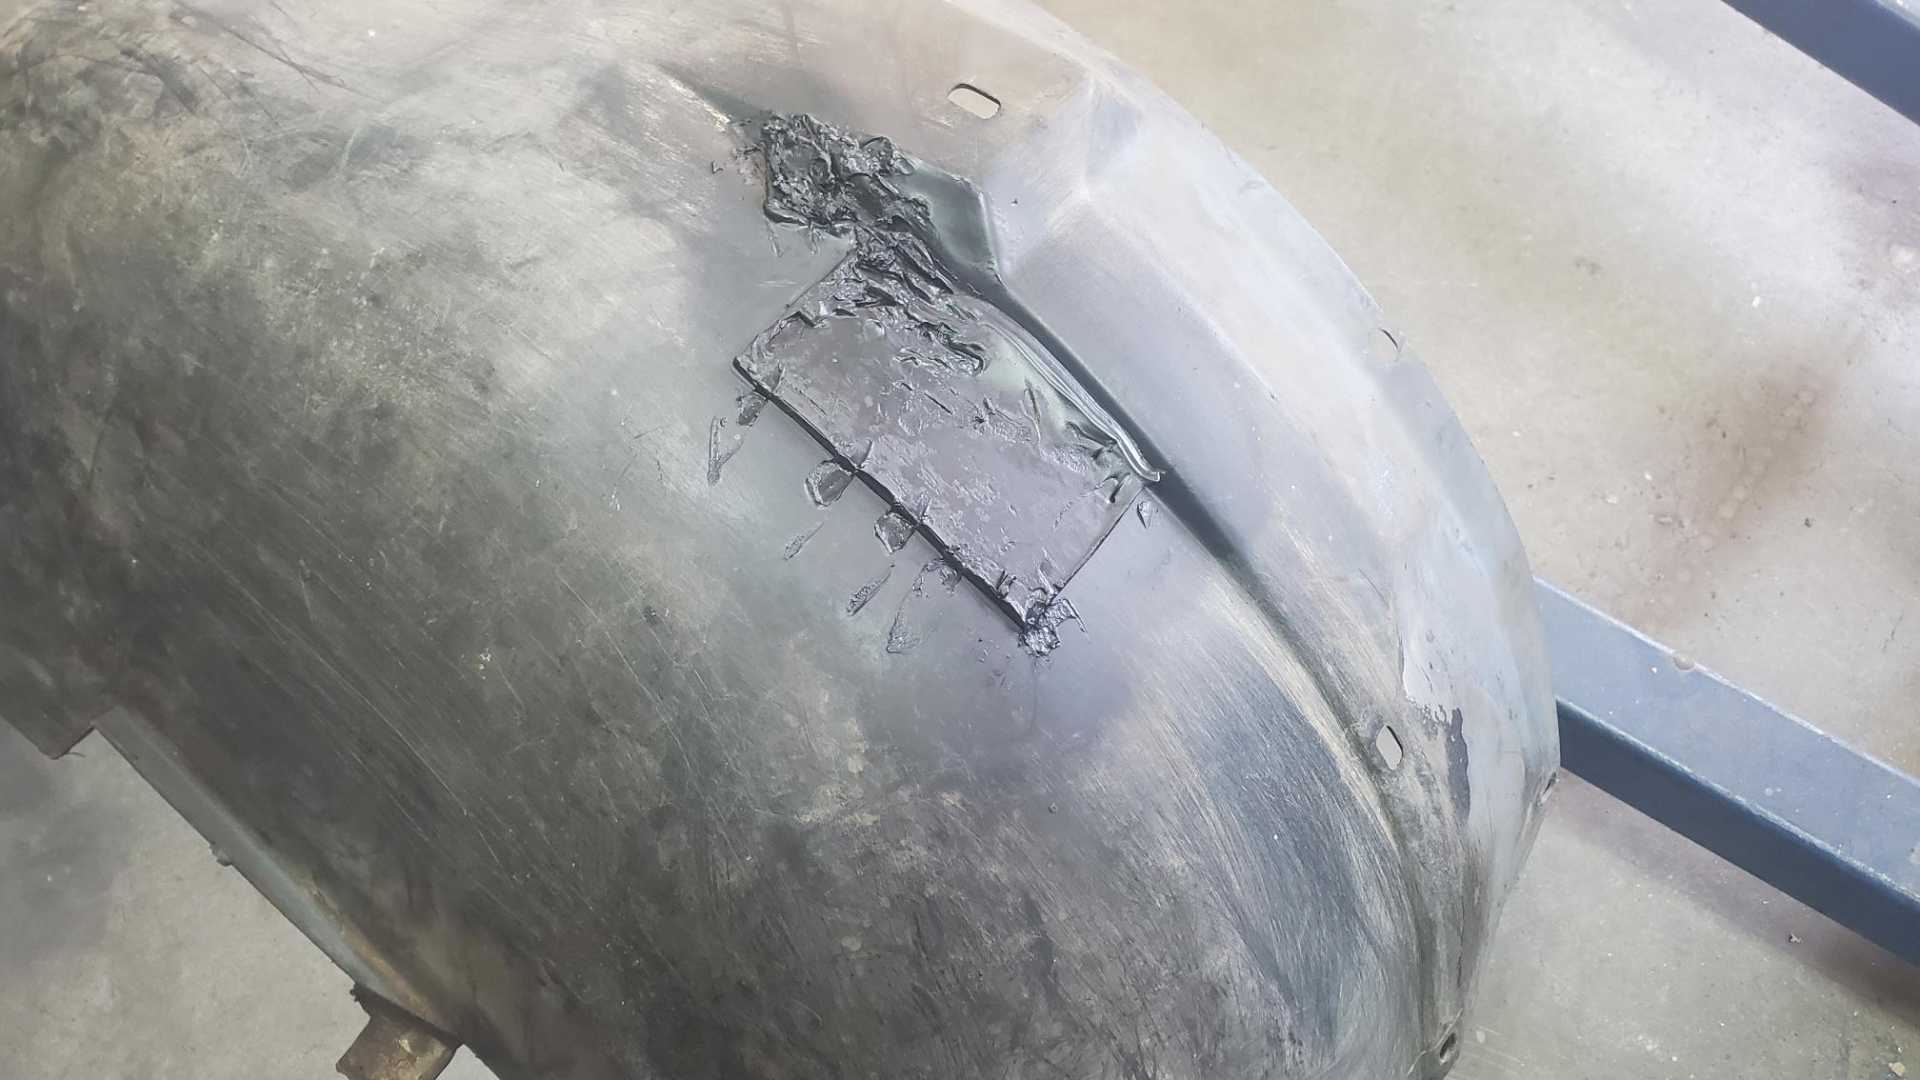
More progress, but few photos. Discovered a hole in the passenger fender liner so I used plastic from the original bottom support from the front fascia to make a patch and melted it on with a heat gun.
I’ve been working on the passenger headlight assembly, the other fender liner and repainting the underside of the deck lid. I’m waiting for new rear hubs to arrive to reassemble the rear suspension.
I’m hoping to modify the deck lid hinges this weekend to accept struts, then will remove the hood and repaint its underside. Lots of minor jobs to complete, then will be ready to pull the engine and cradle out and work on the wiring harness.
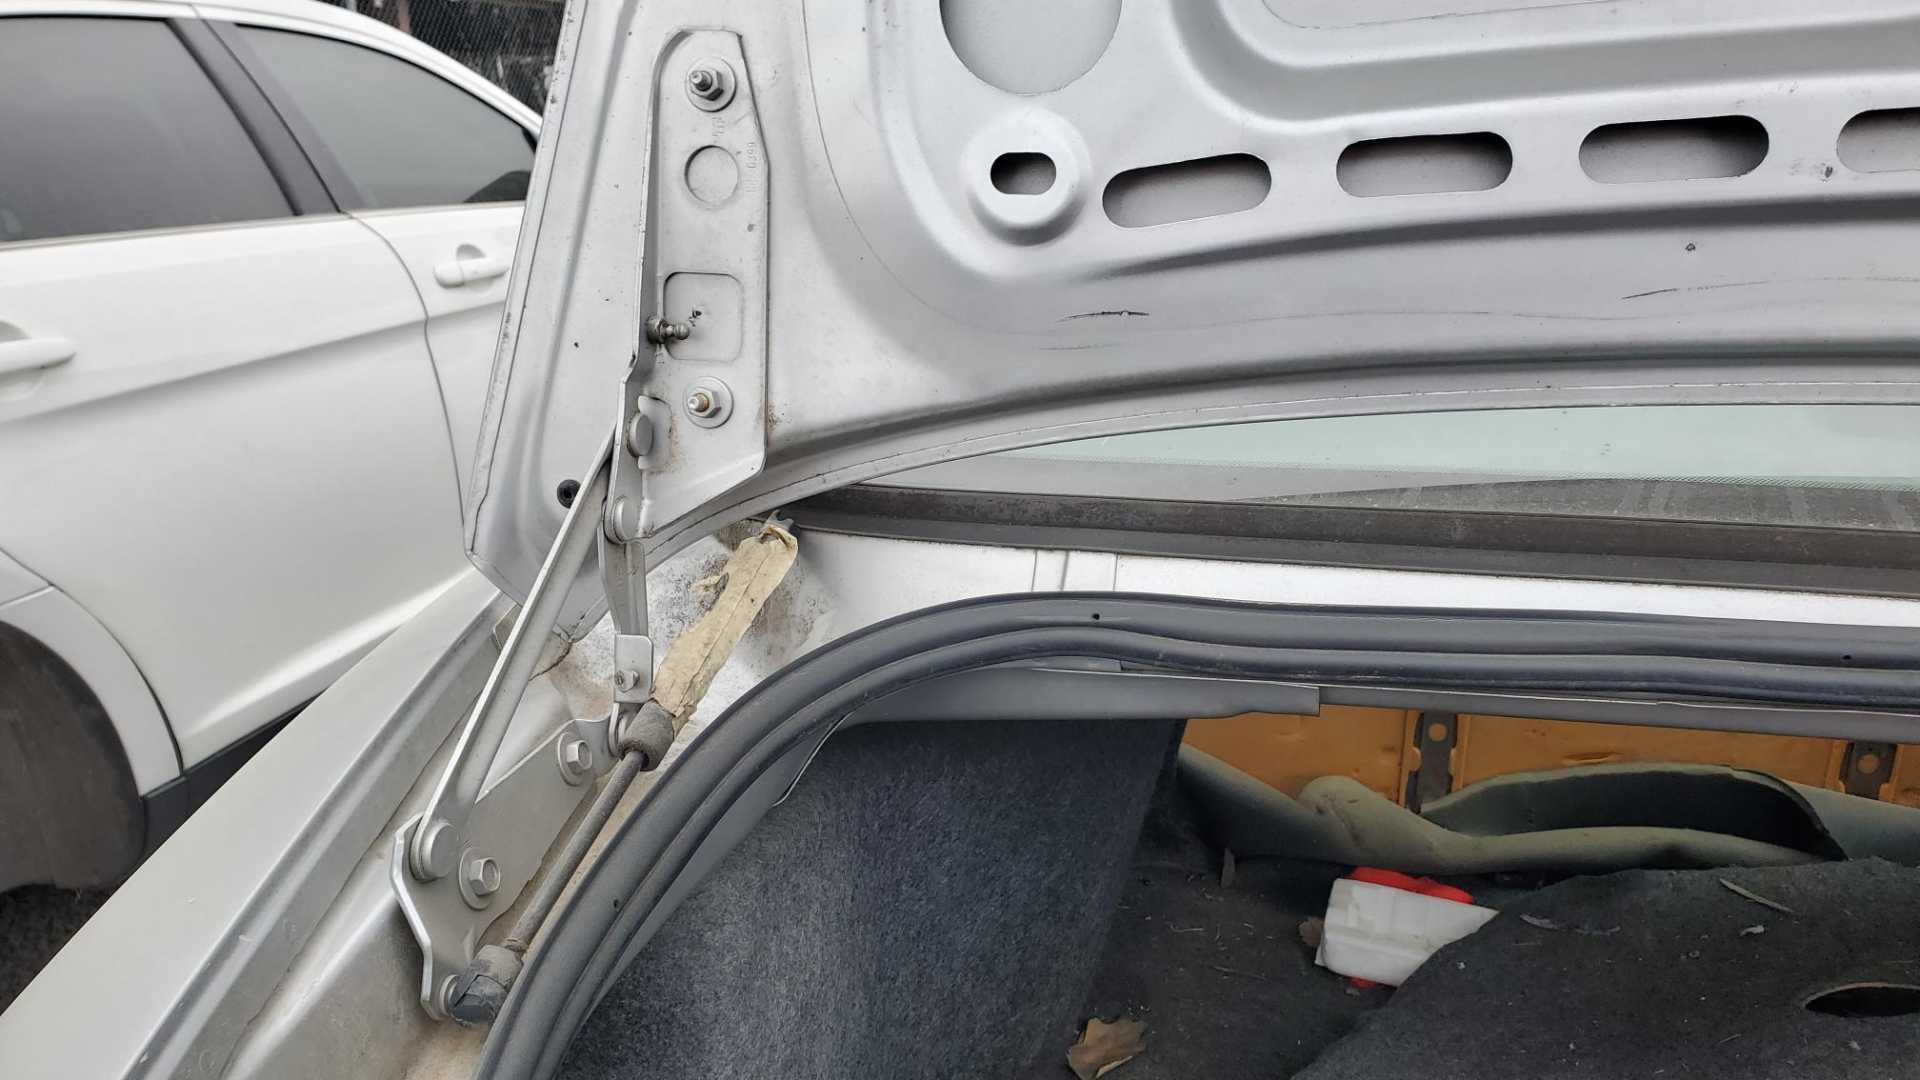
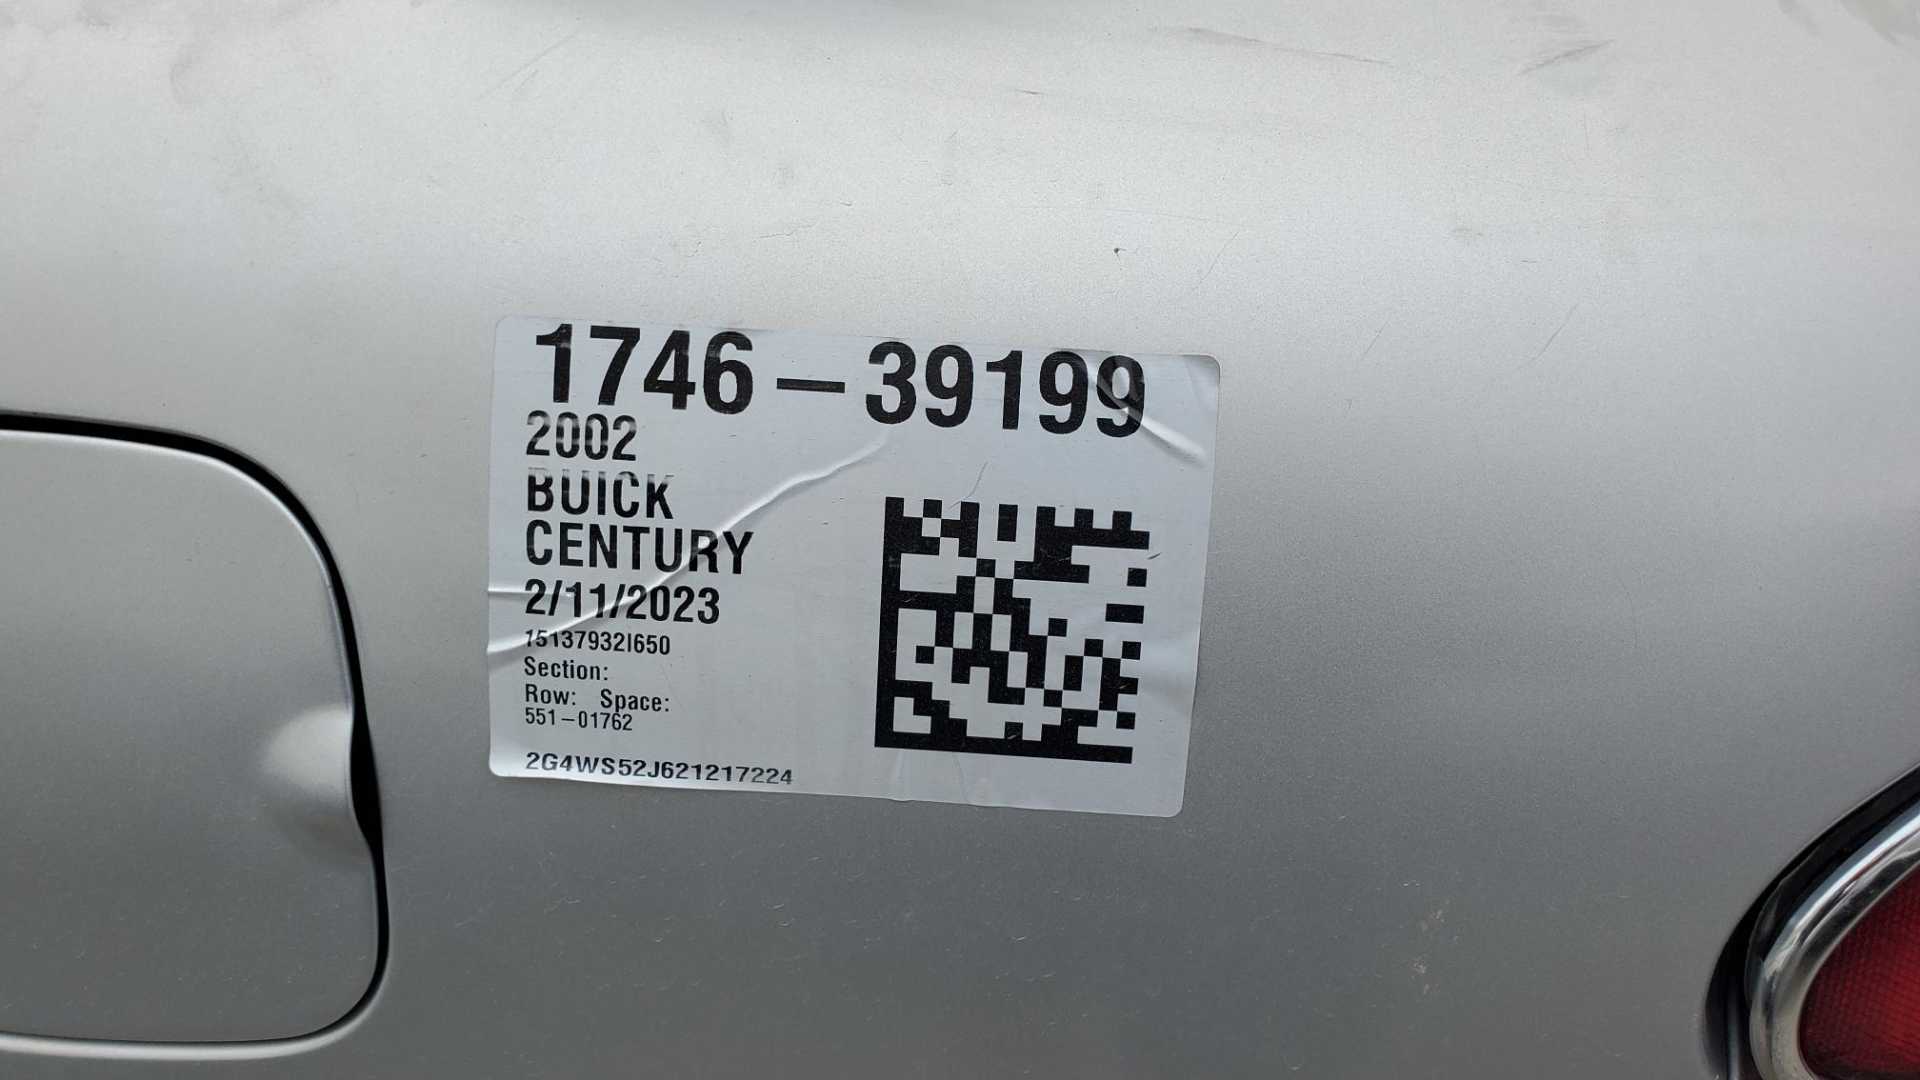
Repainted the underside of the deck lid. Also figured out how to mount struts. I noticed the deck lid struts on my wife’s 2014 Impala were just about the perfect length to fit from the bottom of the Fiero deck lid hing to the hole where the torsion spring used to mount on the flange that mounts to the lid. That meant a trip to the salvage.
Many GM cars have similar deck lid struts. I chose the hinges and struts from a 2002 Buick Century.
I bought the whole hinges, planning to cut them up to get the balls where I needed them. Here’s a rough draft.
For the upper mount, I’ll weld the ball to a flat plate that uses the outer hinge bolt as well as the torsion spring mount hole. That will keep the piece from turning. These struts are worn out, so the test will be if new ones are strong enough to push up the deck lid and wing.
I had a family commitment this afternoon and ran out of time.
[This message has been edited by Quadfather (edited 04-16-2023).]
Honestly, the Quad-4 is one of my favorite swaps. One day, I'd like to do a TwinCam LD9 swap into a Fiero... but it's possible that time has come and gone (fewer Fieros, fewer LD9s available). I was thinking I could use an ECM / harness from a 1995 vehicle (pre-OBD2), just for the ease of it. Do the "secret cam swap" as they say, and enjoy the car. I know the performance of a relatively stock LD9 wouldn't be amazing, but I like the smoothness of the LD9 (with the counter-balance shafts), the fuel economy, and the better performance than the V6 with the ~100 less pounds using the 5-Speed than a V6/60 + automatic.