Were you trying to save money by not buying Rodney Dickman or WCF transmission mounts/brackets?
I've bought some parts from Rodney over the years and they've been great. WCF, on the other hand, doesn't have a very good reputation, in my opinion.
I am trying to save money wherever I can, but this is also the part of the project I like the most. Fabricating mounts is fun.
EDIT: With all due respect, if someone needs to buy mounts in order to move his project along, great. But this is one part of the project that helps make this car mine.
[This message has been edited by Quadfather (edited 08-16-2022).]
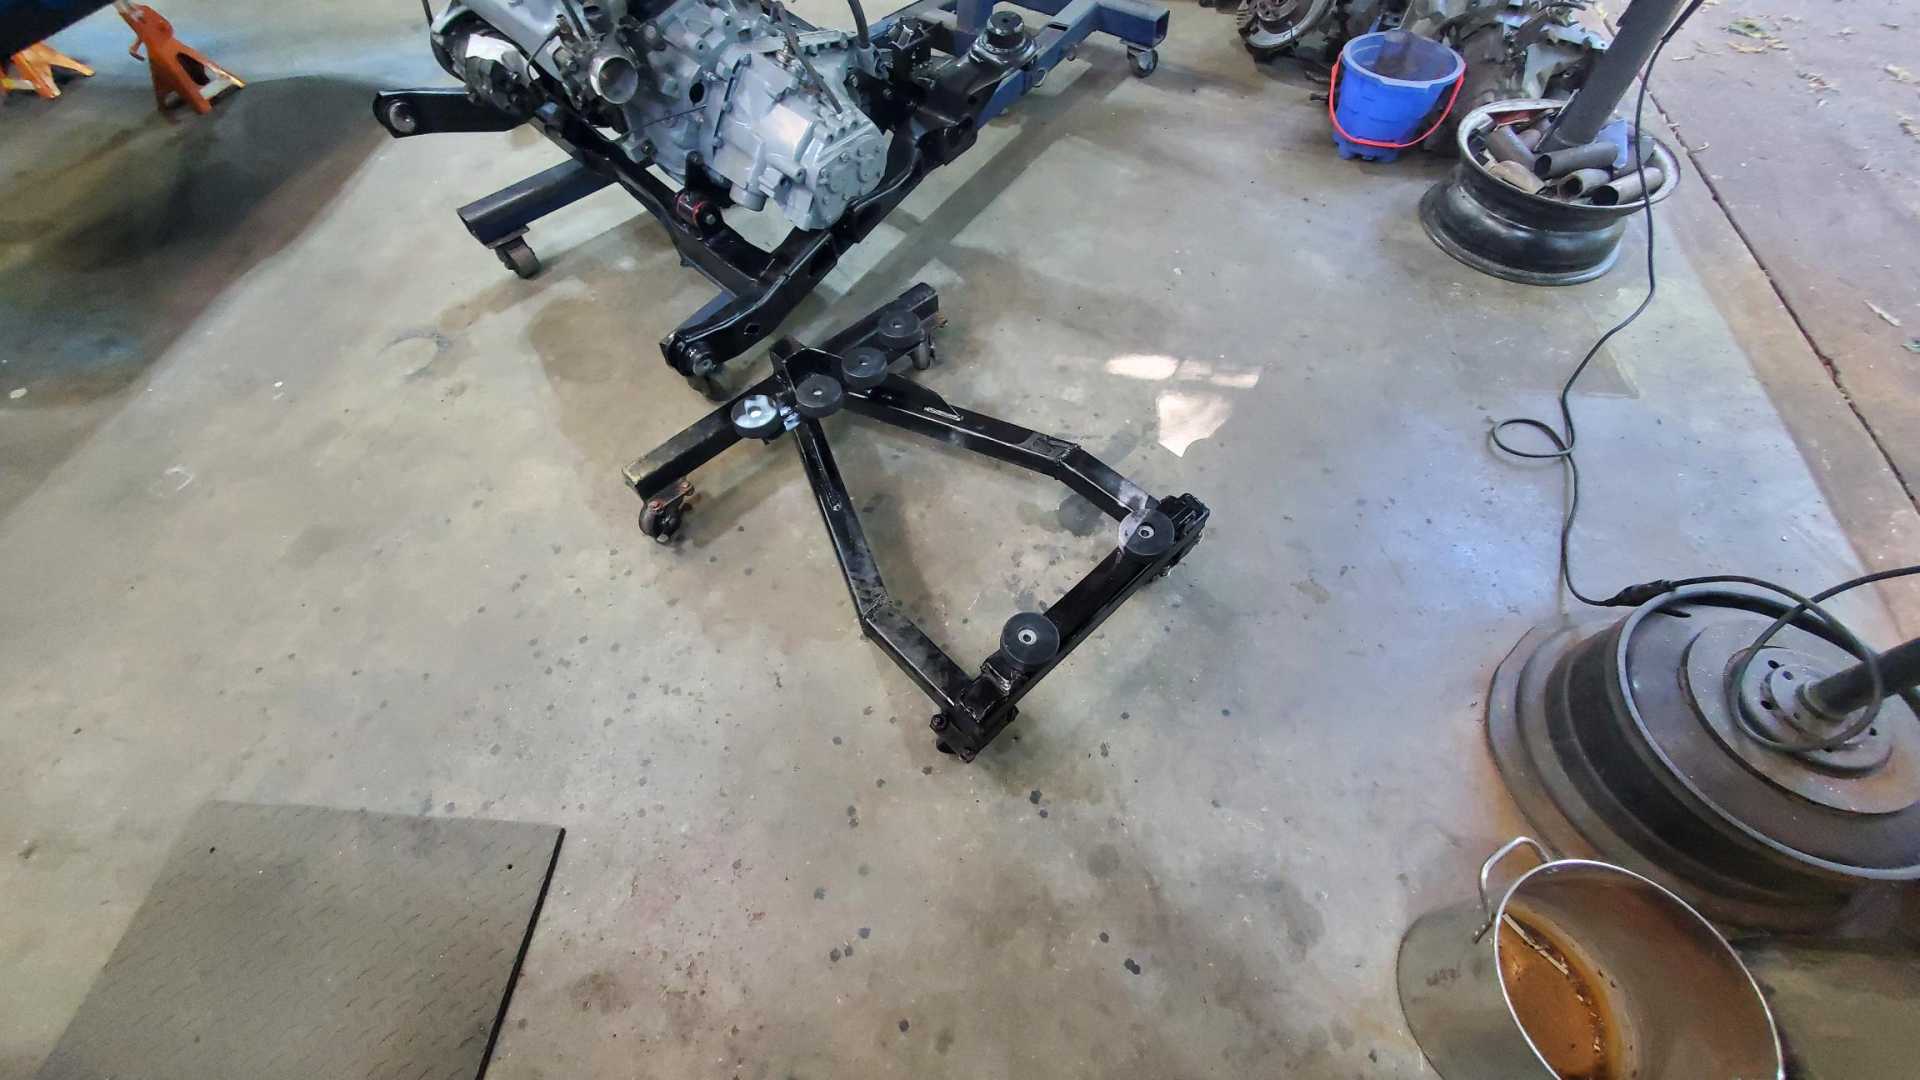
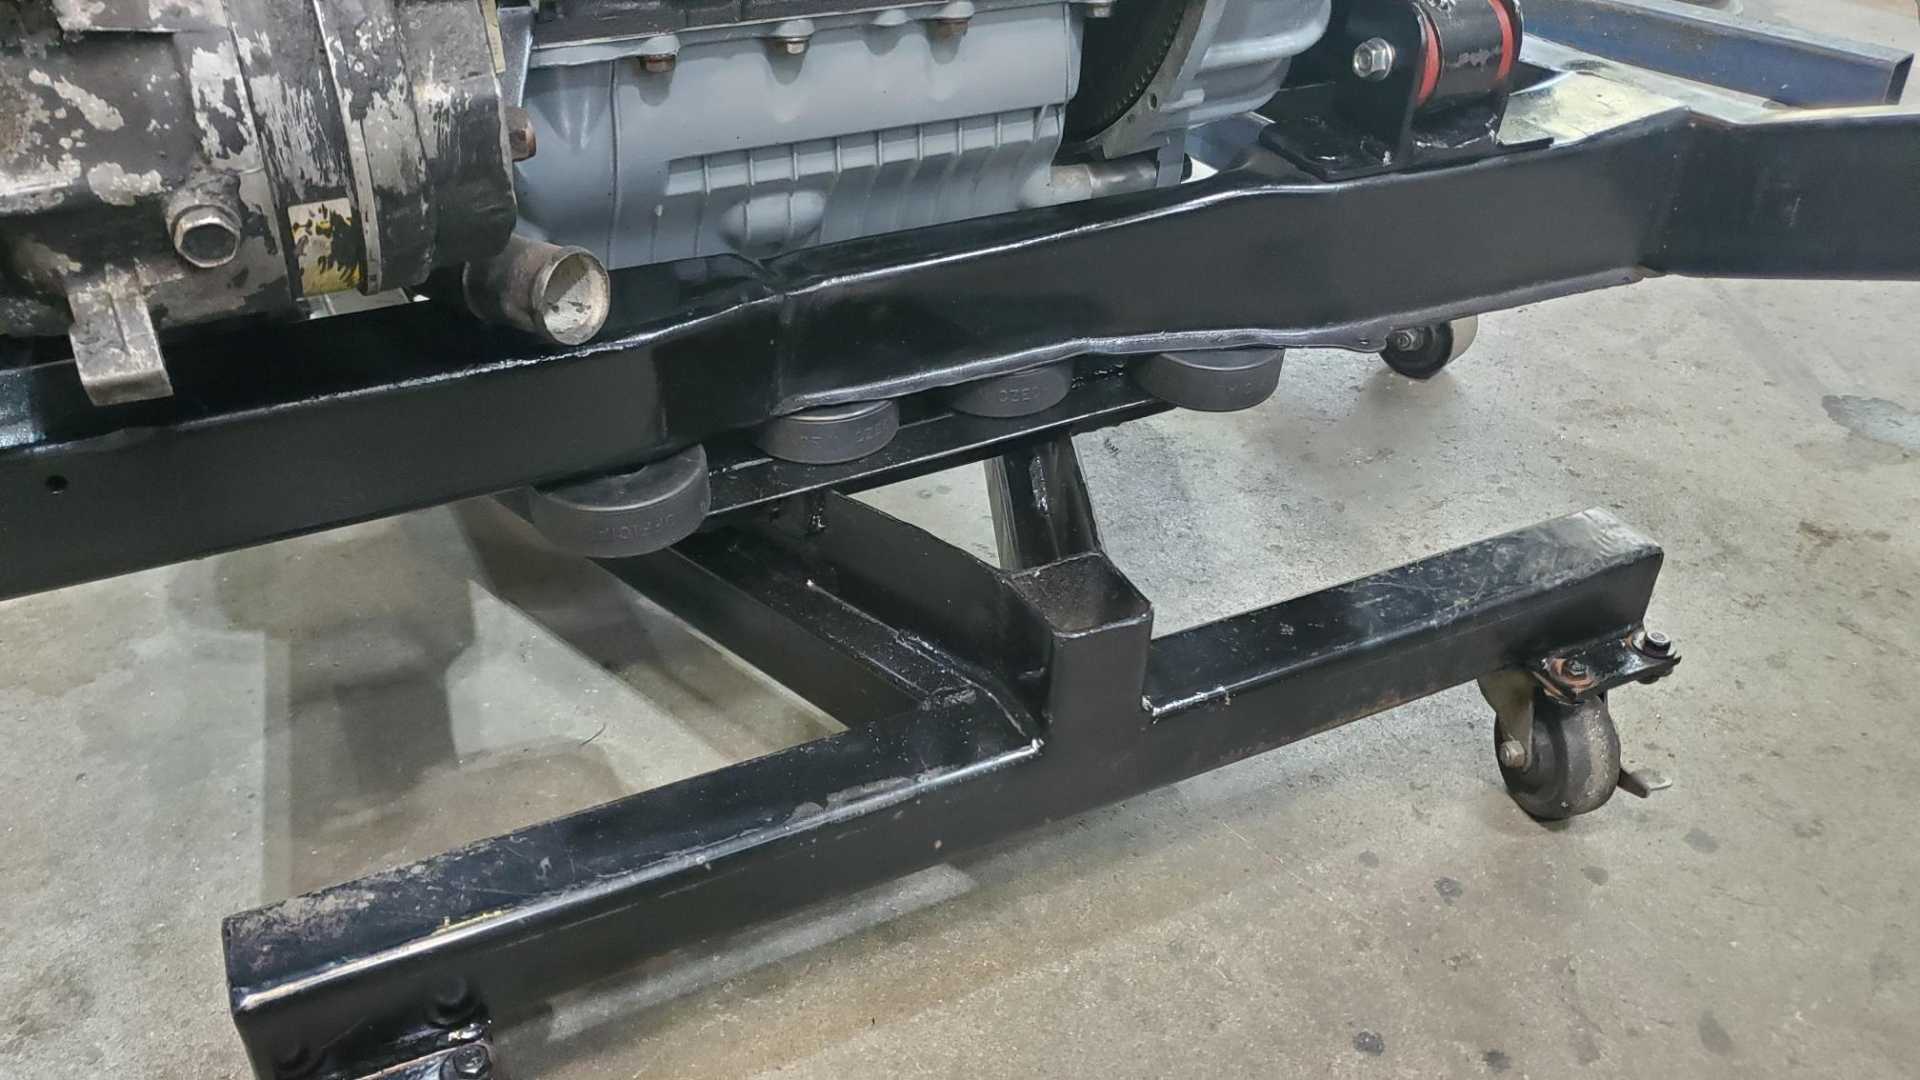
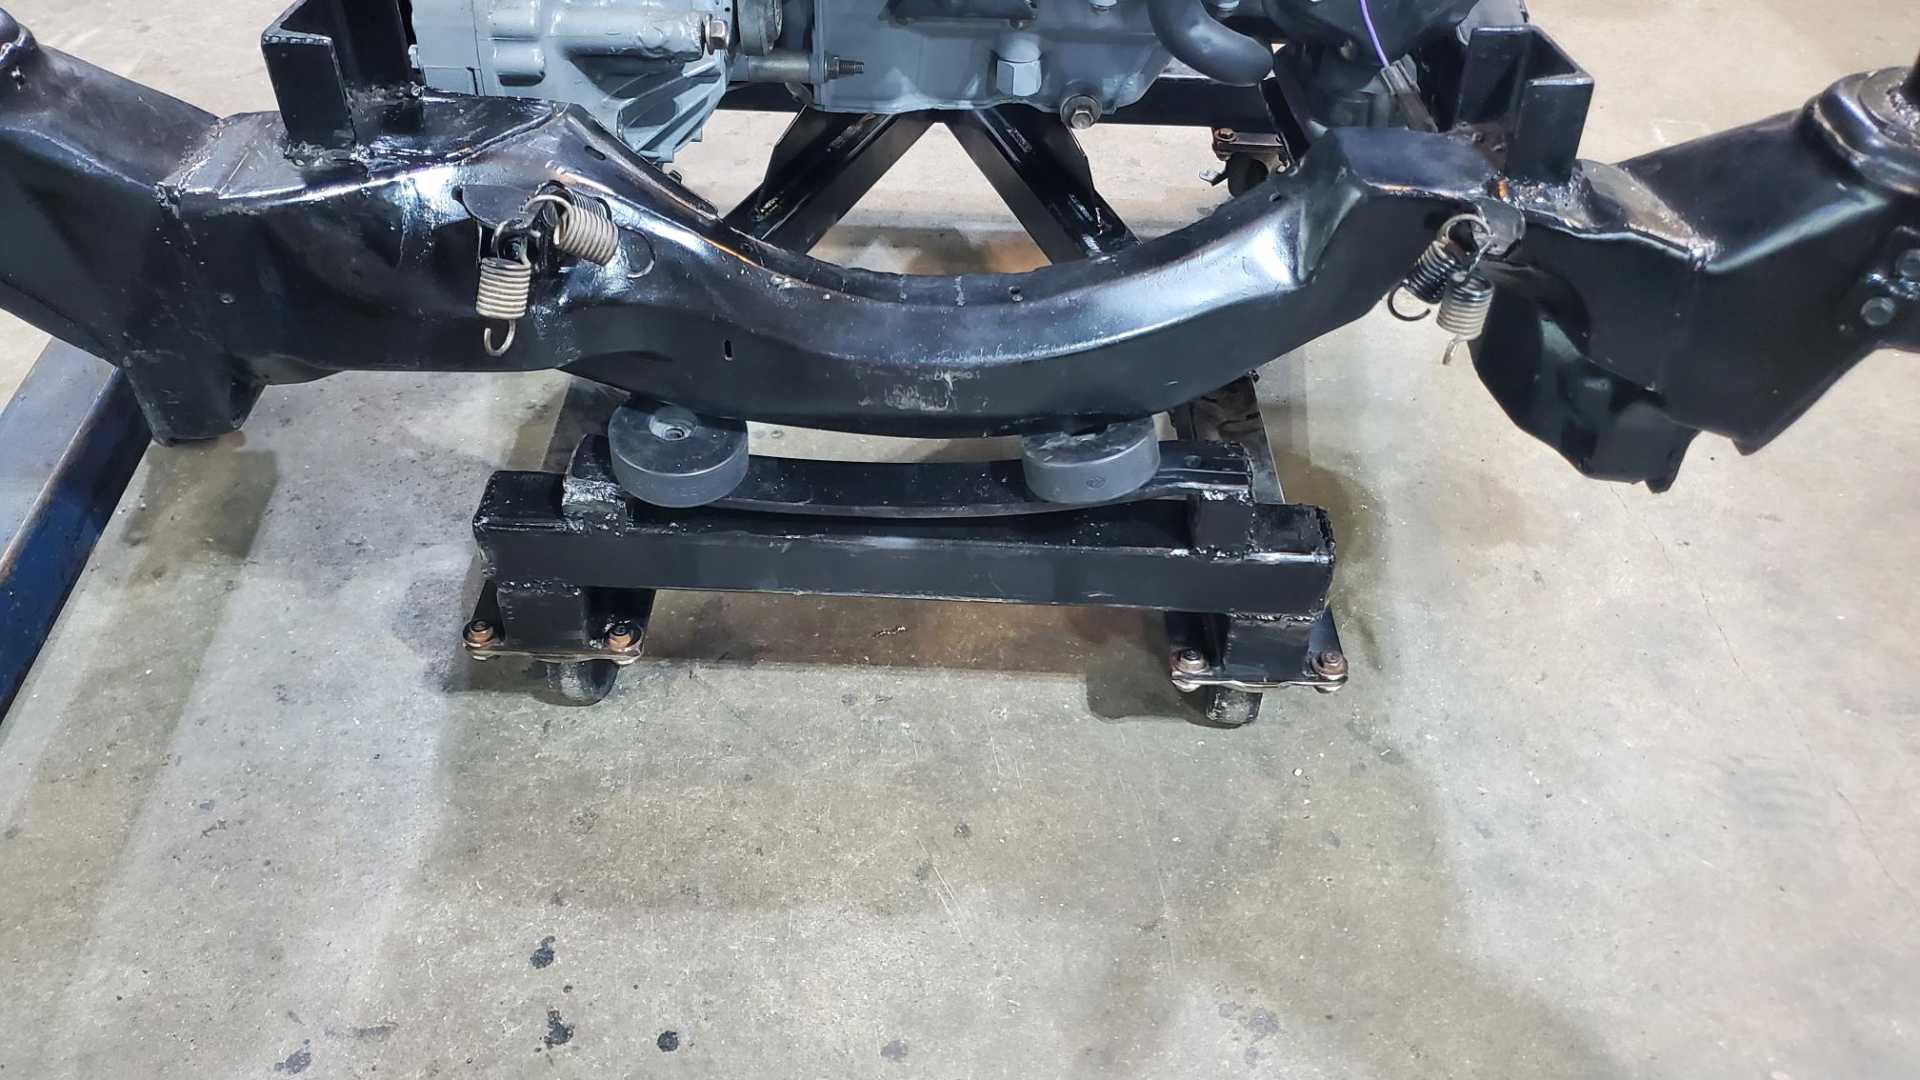
The cradle kept sliding around on the cart so I started looking for some rubber to attach to the cart. Then I remembered the hockey pucks. When I first started on the swap I was planning to use the Grand Am style engine mounts. One of the coolest ways to do that is to make a tall mount out of three or four pucks. My sister sent me a bag from Pennsylvania, but then I changed my mind and used the GTZ style, under-engine mount instead.
Turns out it’s very difficult to drill a hole in the precise center of a hockey puck.
By the time this swap is done I will have the greatest cradle cart in the history of engine swaps — and hopefully no need to take the engine out of the car for decades.
[This message has been edited by Quadfather (edited 07-28-2022).]
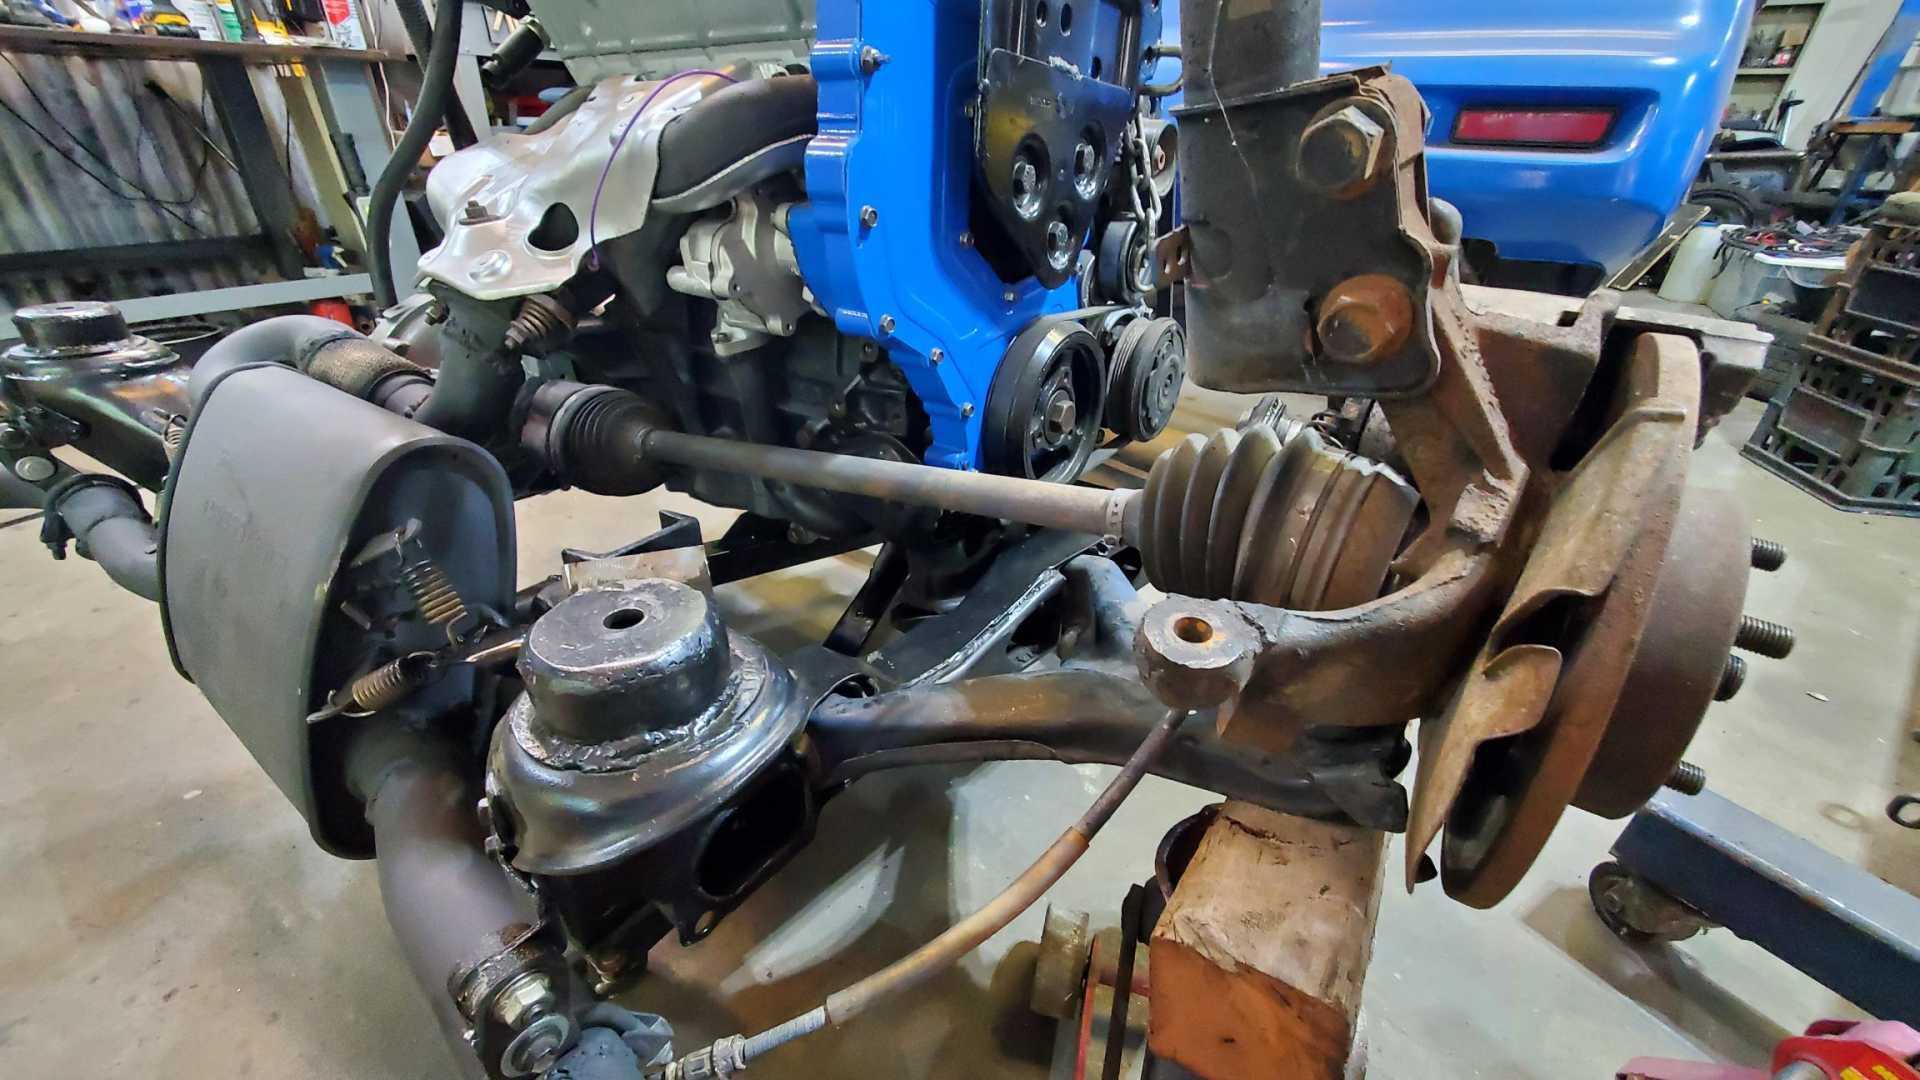
Next up is figuring out how to replace the dog bone. When I first set a Quad in the cradle and put it in the car, I fabbed up an adjustable mount using one end of an aftermarket dog bone with a big nut welded in the tube and a tie rod end threaded into the nut. I welded a flange on the other end to attach to the big fender mount that the GTZ used.
Other swappers cut up the stock dog bone mount on the front of the trunk. I tried that but made a hash of it and have always wanted to do something different.
I looked at a bunch of different swaps to see what other people have done. I liked Lunatic’s approach with the Ecotec, which was a long bar attached from the engine to the cradle, not the body.
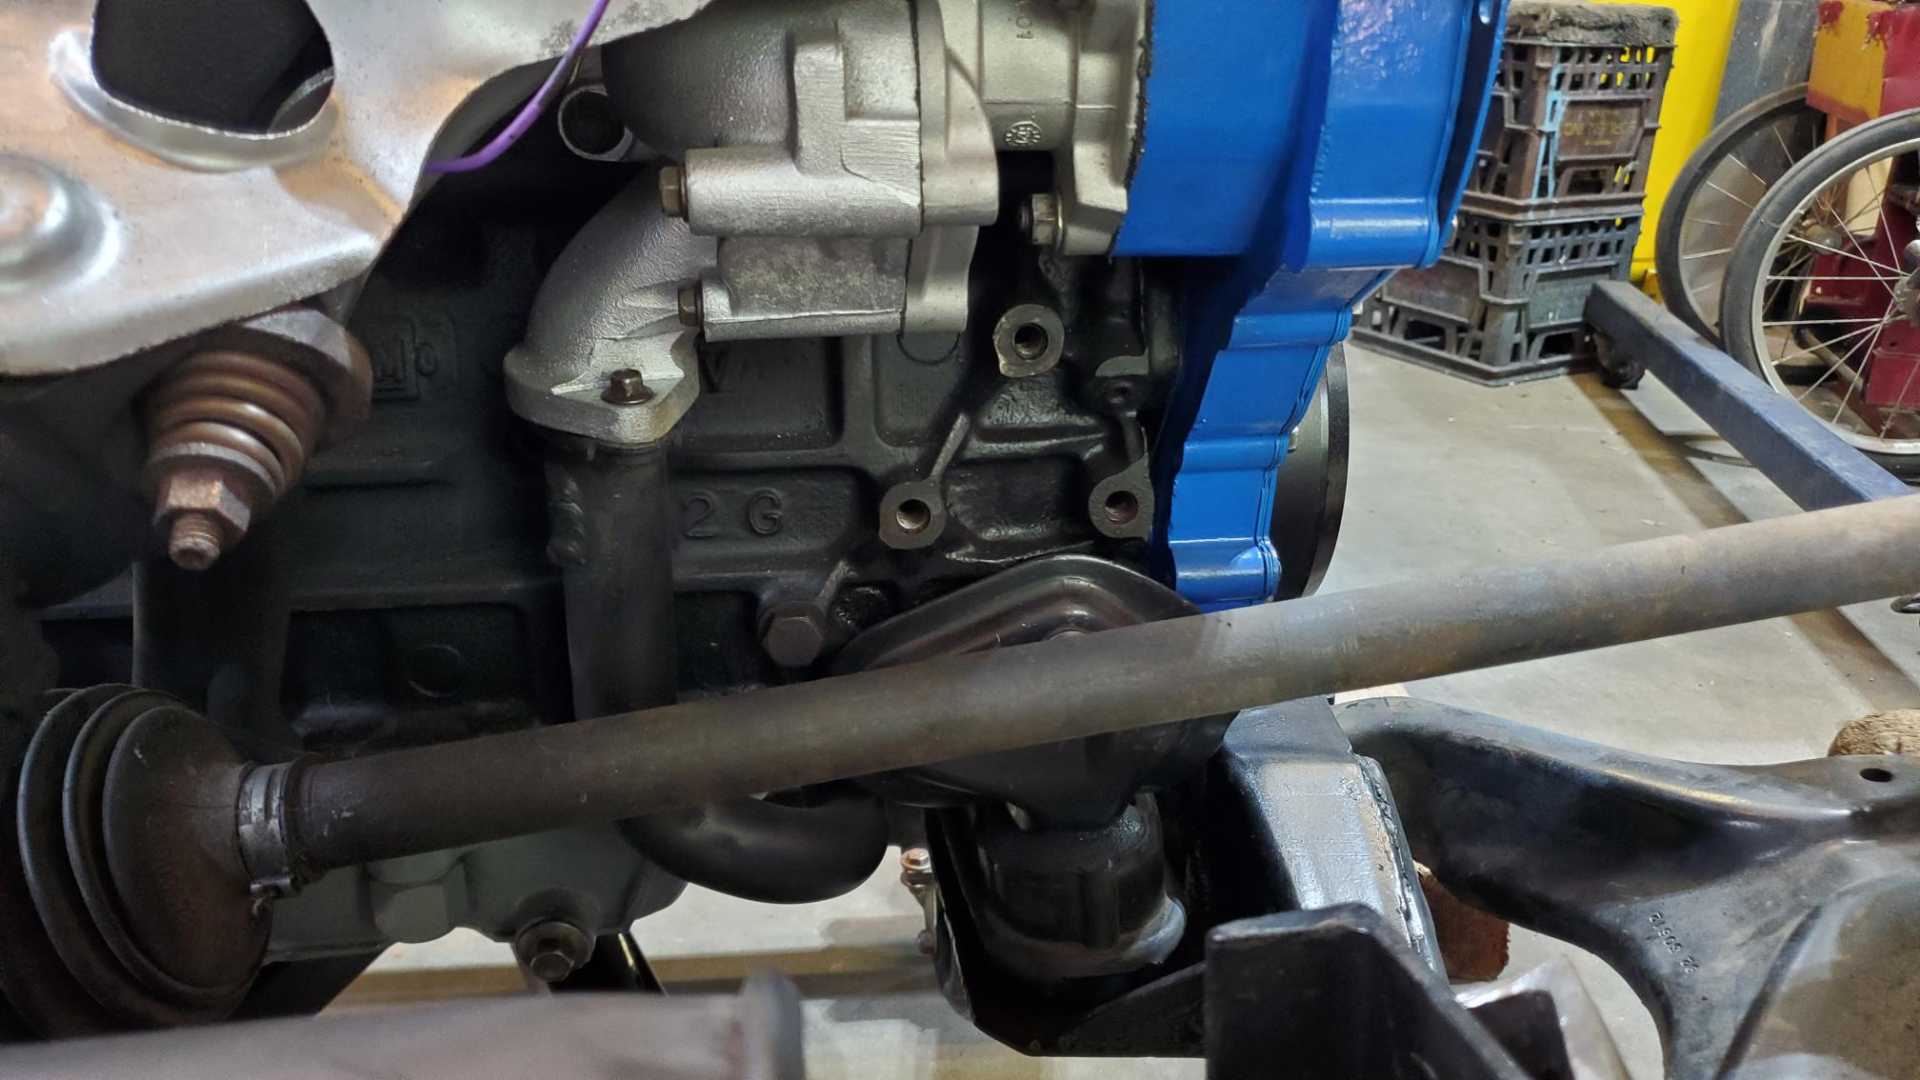
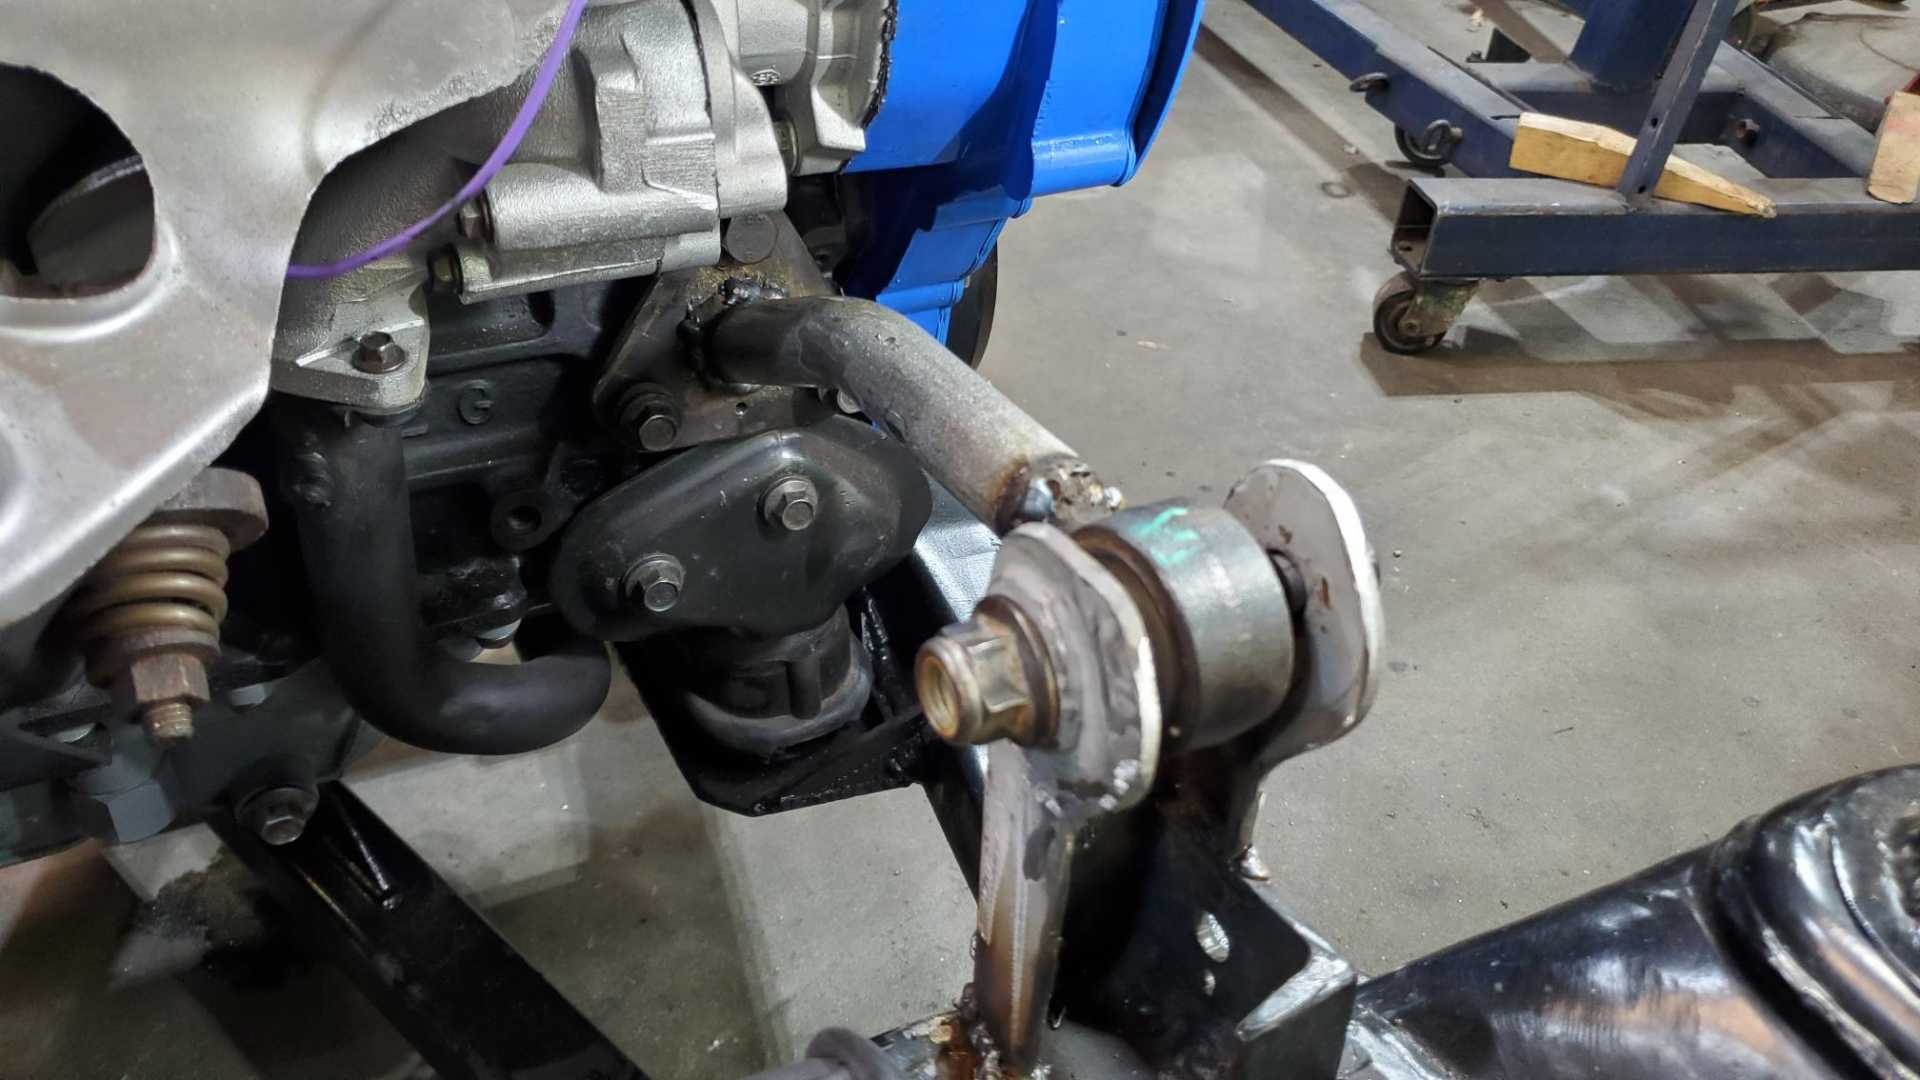
The front of the engine is very close to lining up with the custom tie rod mount I welded to the cradle. I can use the same C channel to mount some kind of bushing, attached to a bent rod or pipe, with another bushing attached to the engine. Where to find something like that?
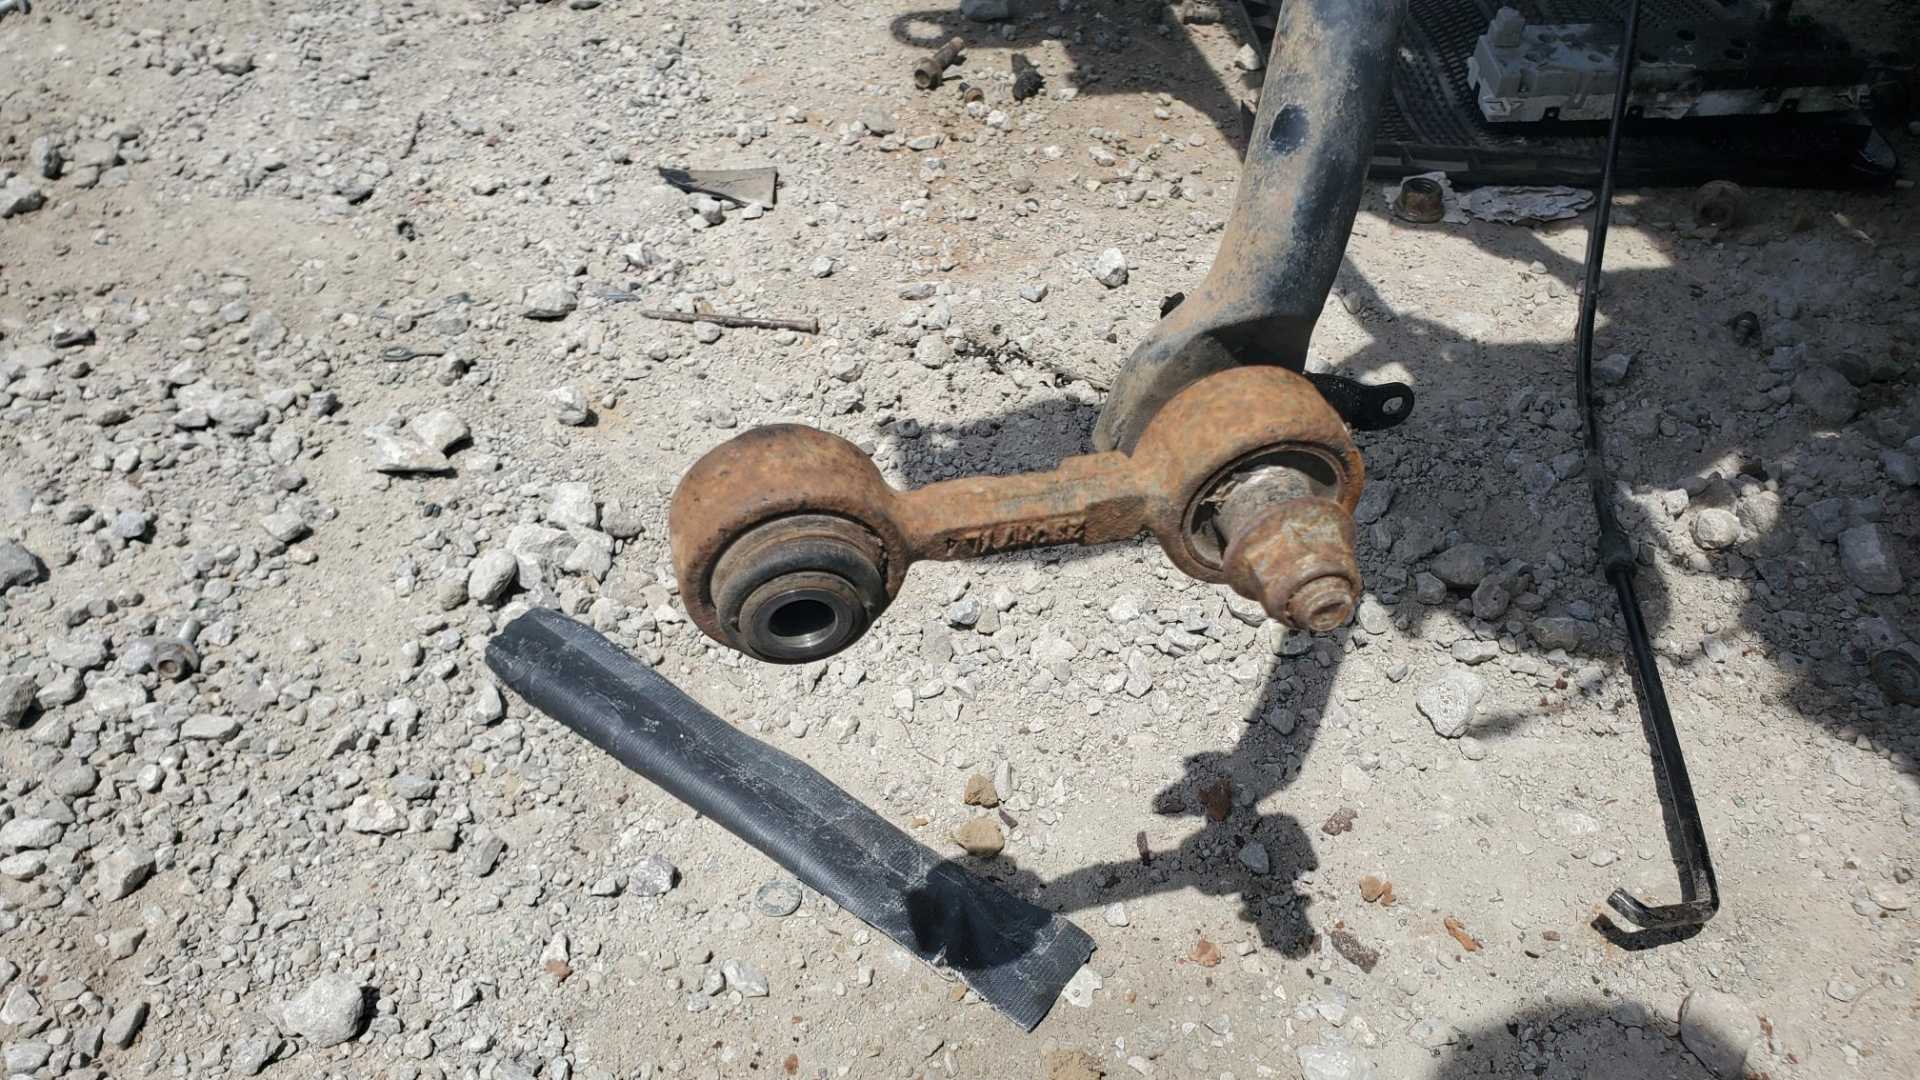
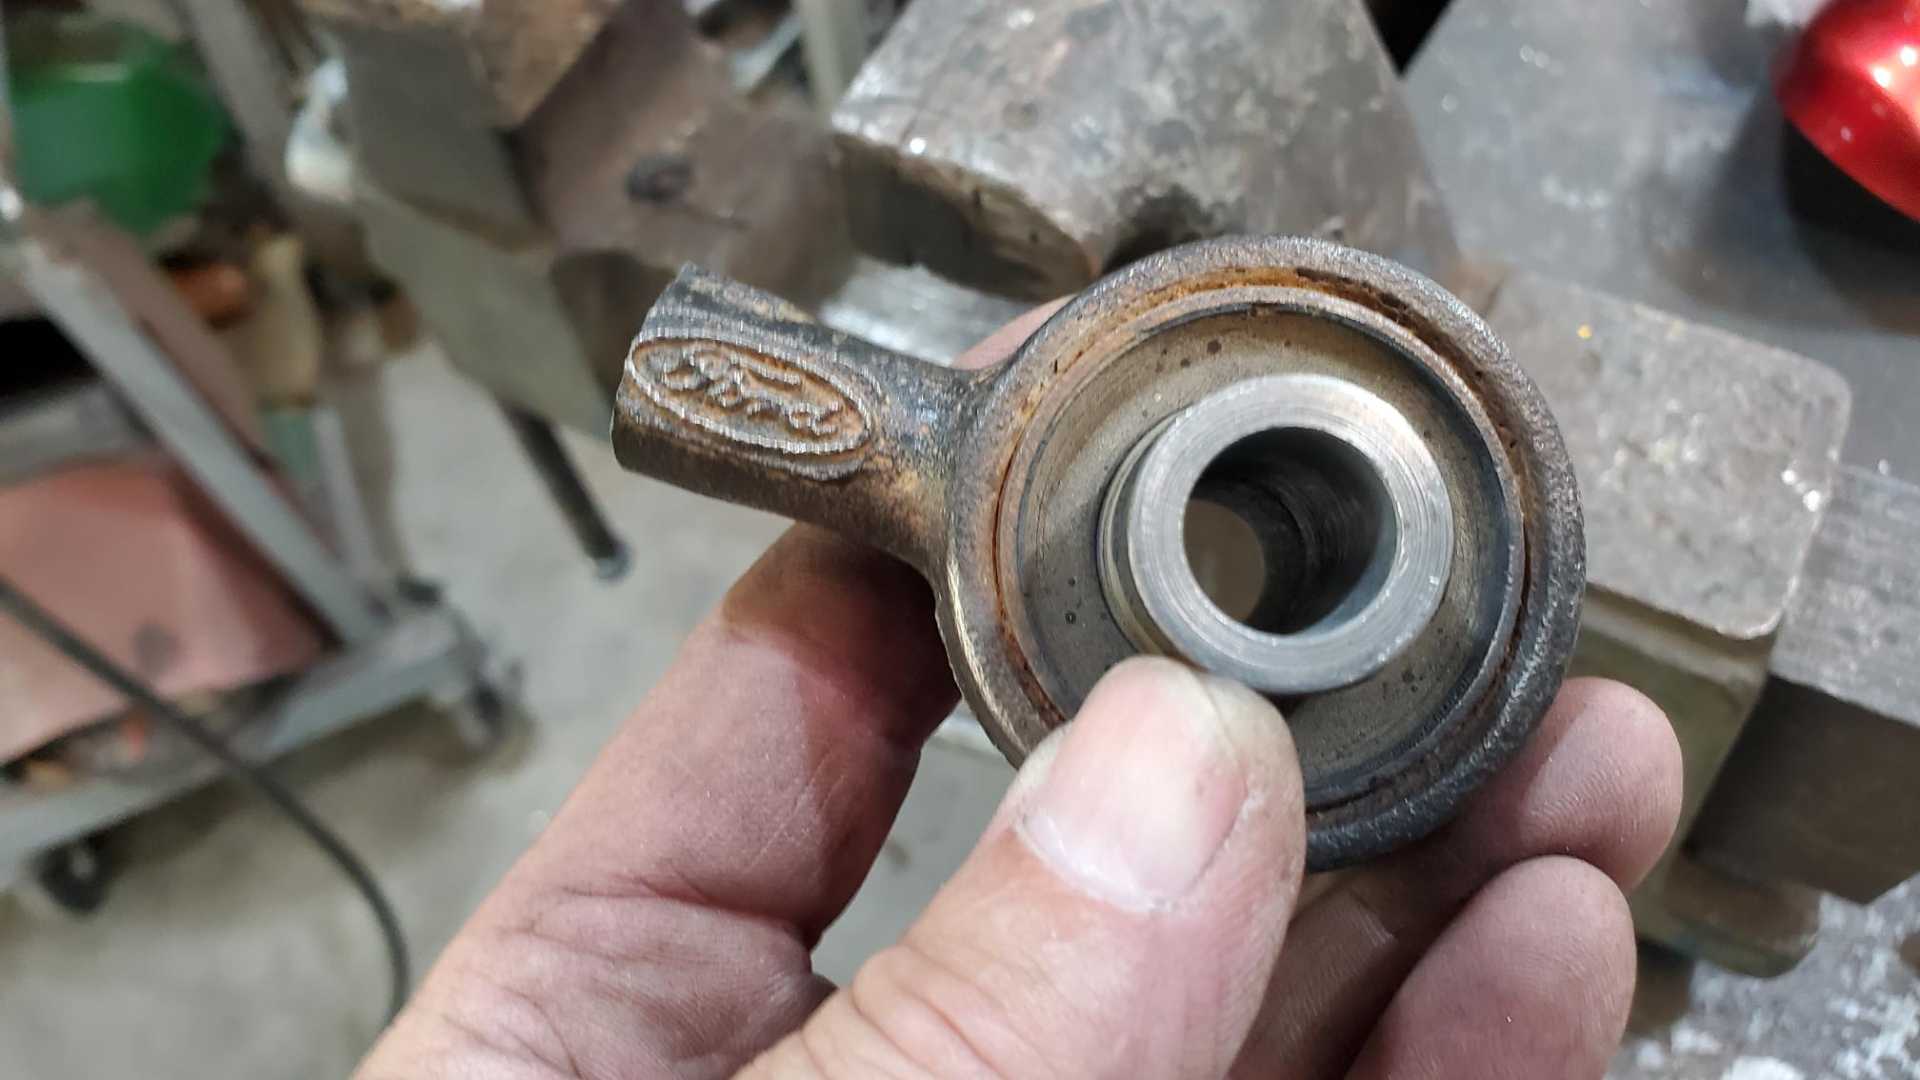
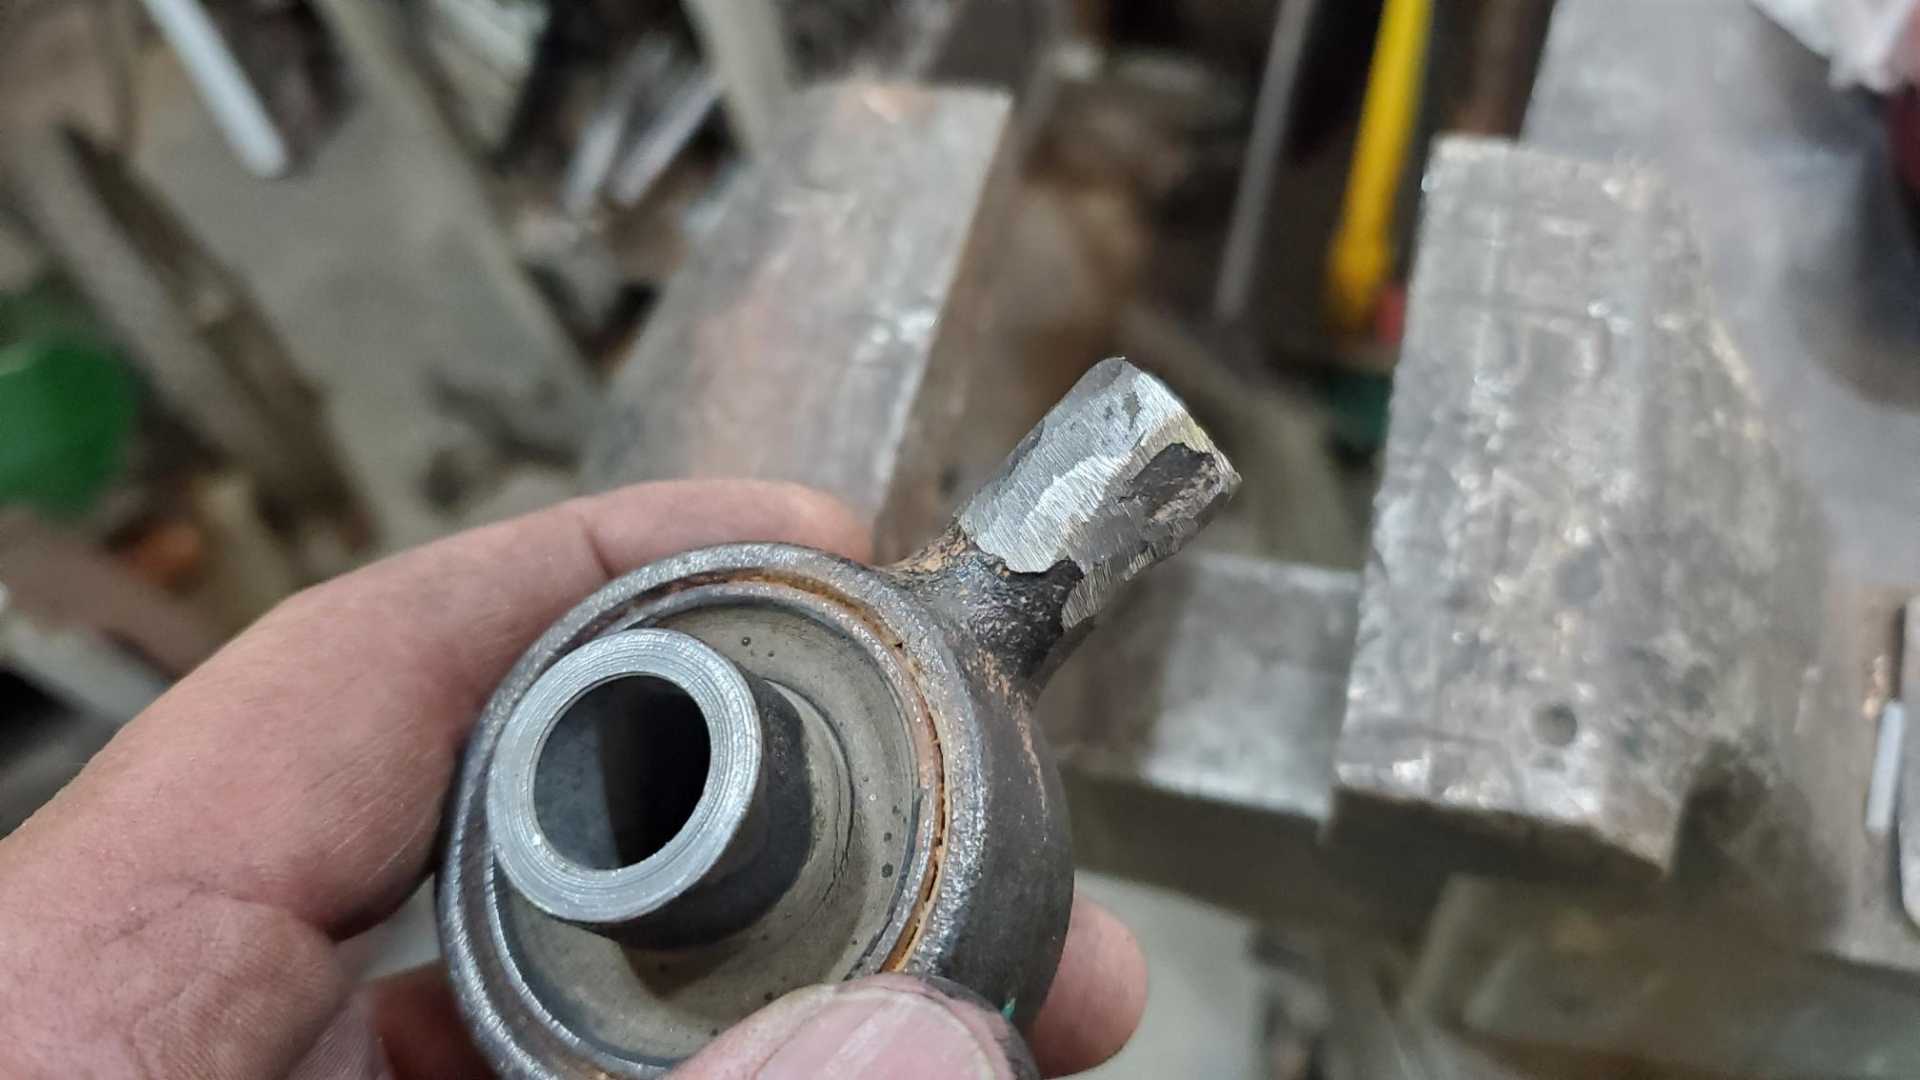
My favorite salvage didn’t disappoint. After 20 minutes of walking, in 107-degree heat, I found a 2008 Super Duty Ford pickup with the precise parts I needed. Someone was kind enough to have already removed the entire front clip and engine, giving easy access to the front anti-sway bar links. They’re cast iron so they’re weldable.
Found a section of pipe in my stash left over from a shopping cart, and it’s almost perfect.
Leaving for vacation tomorrow so no progress for a couple of weeks.
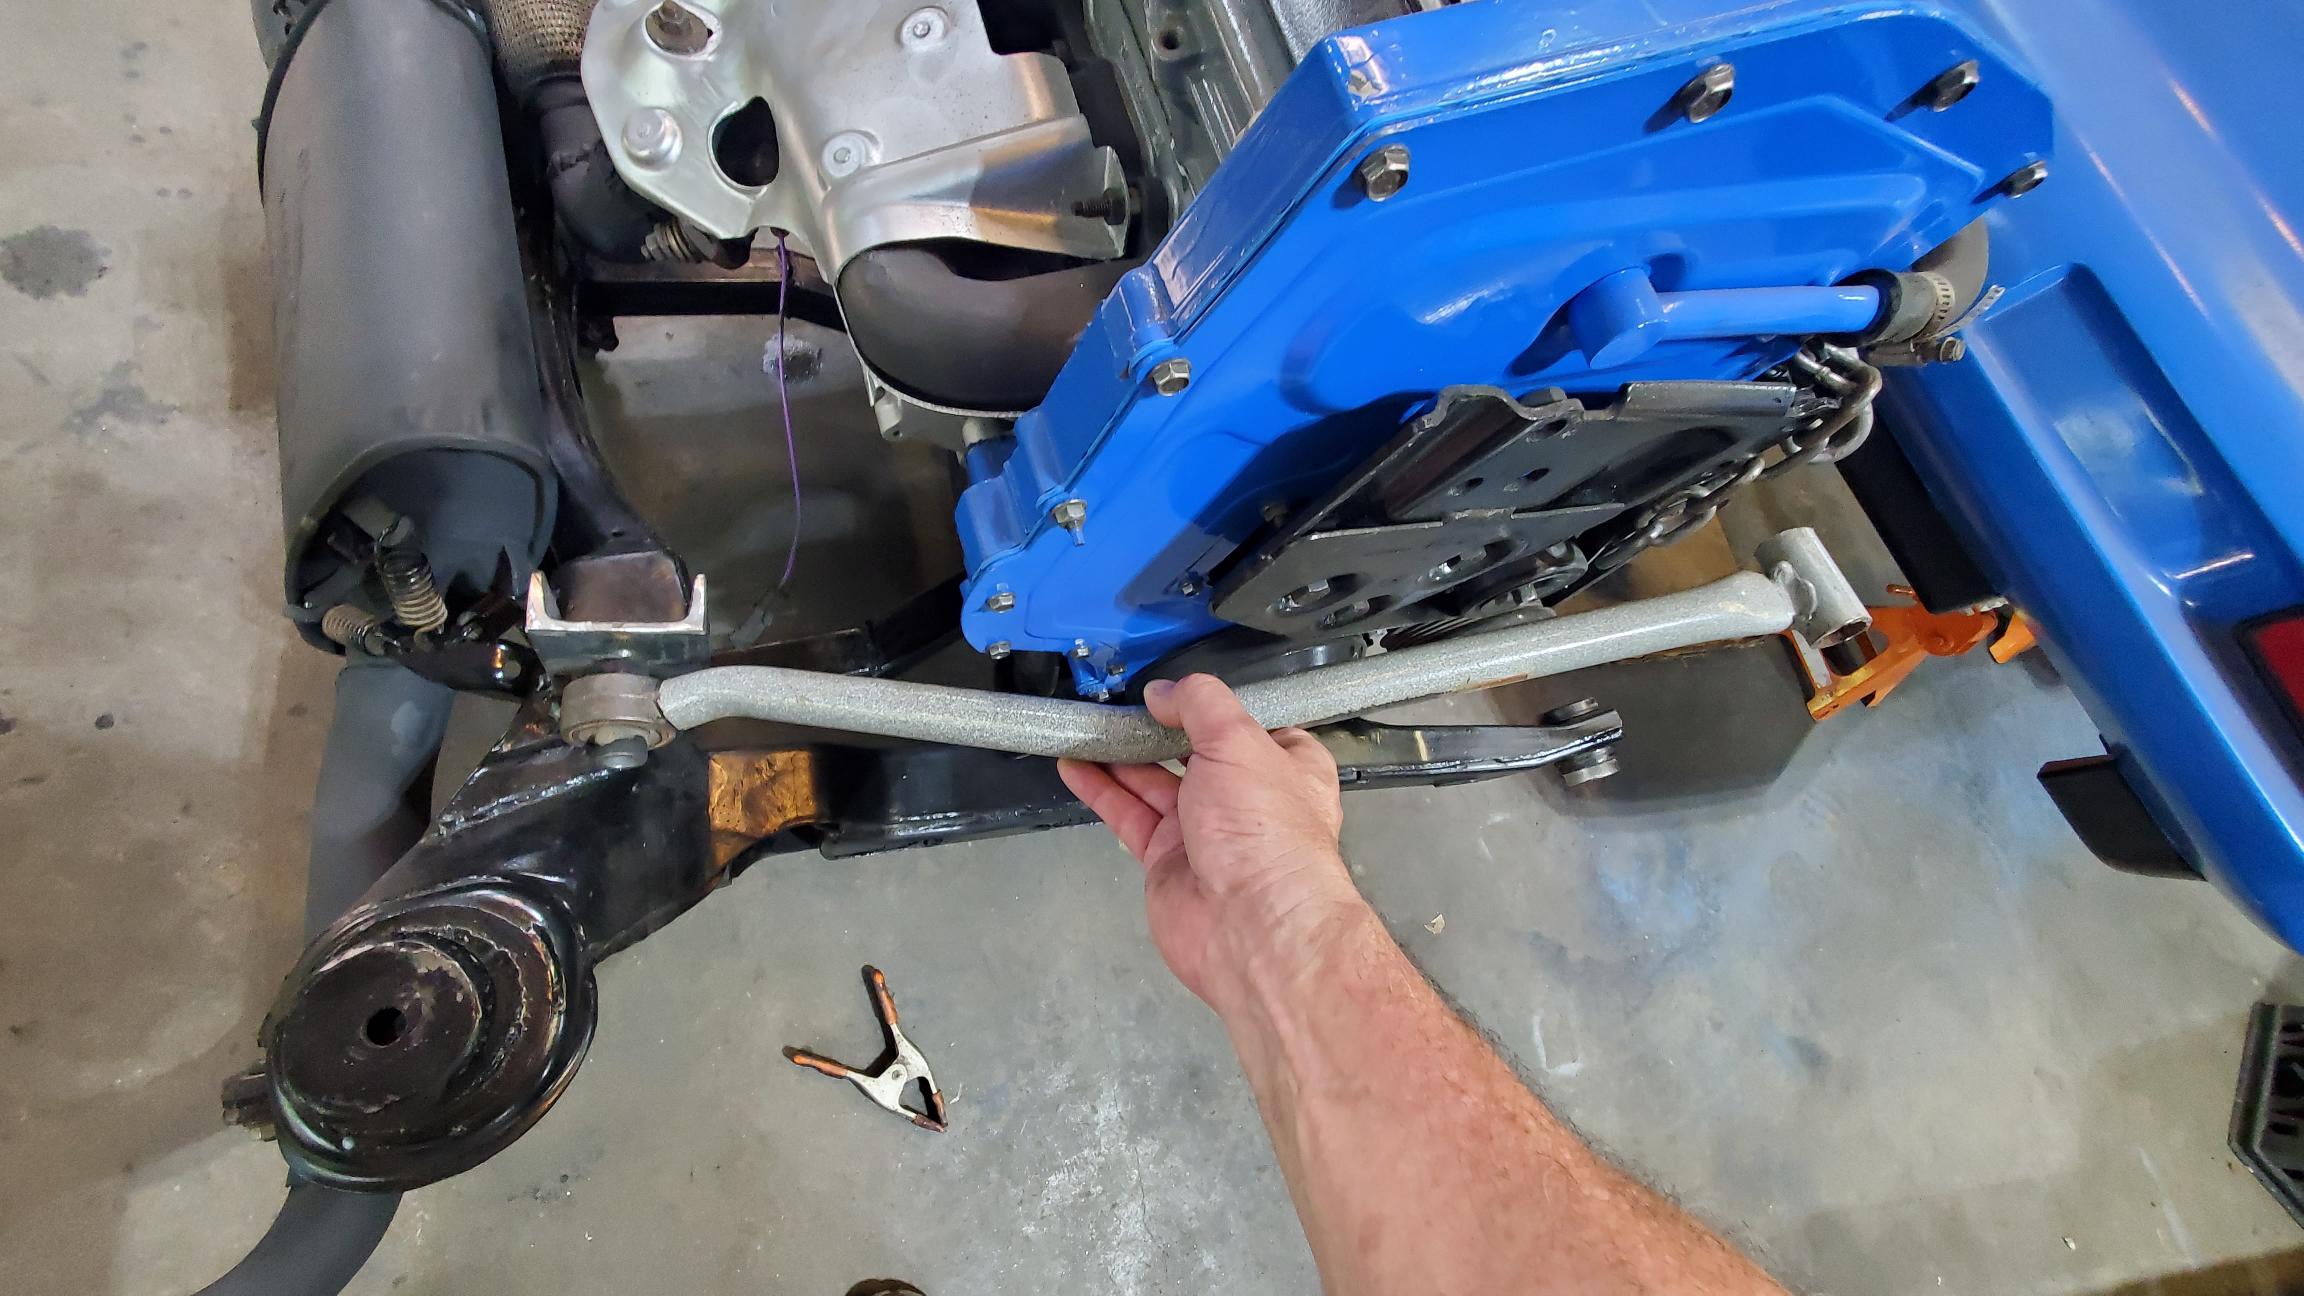
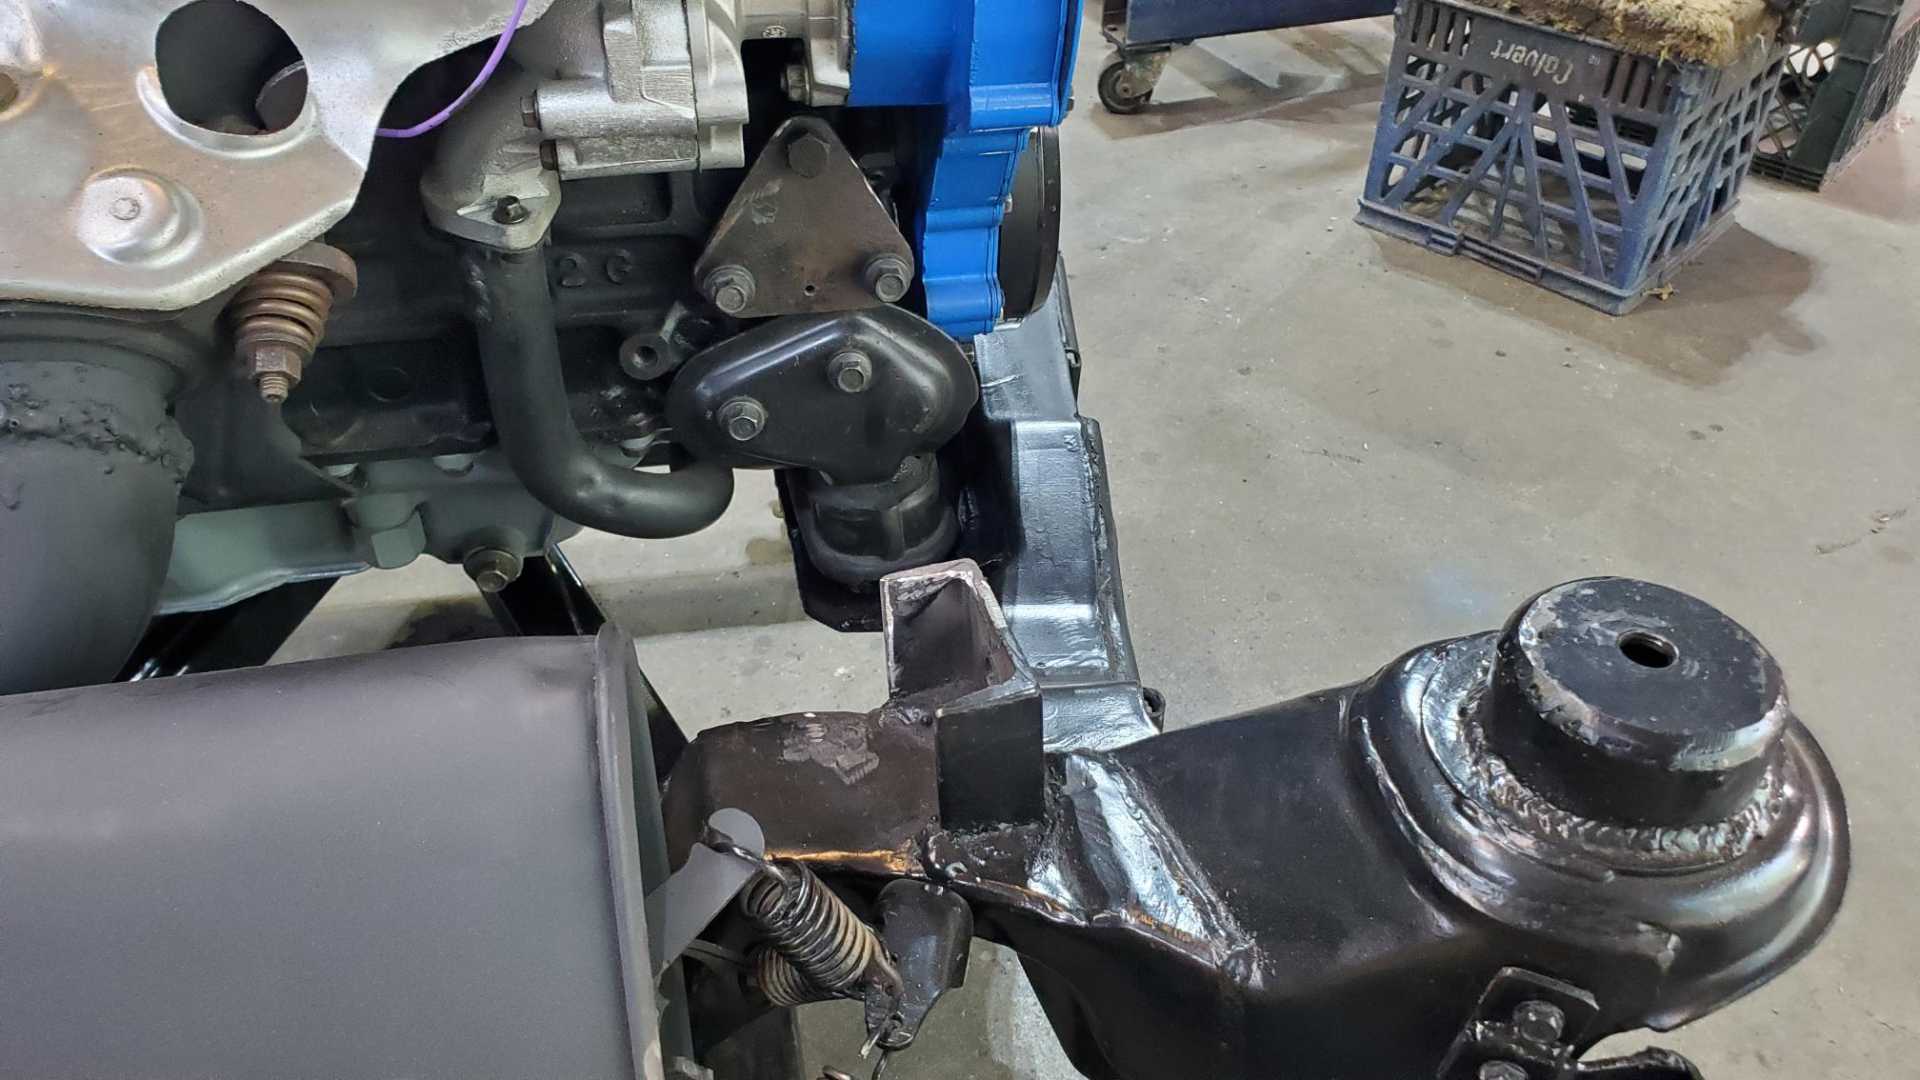
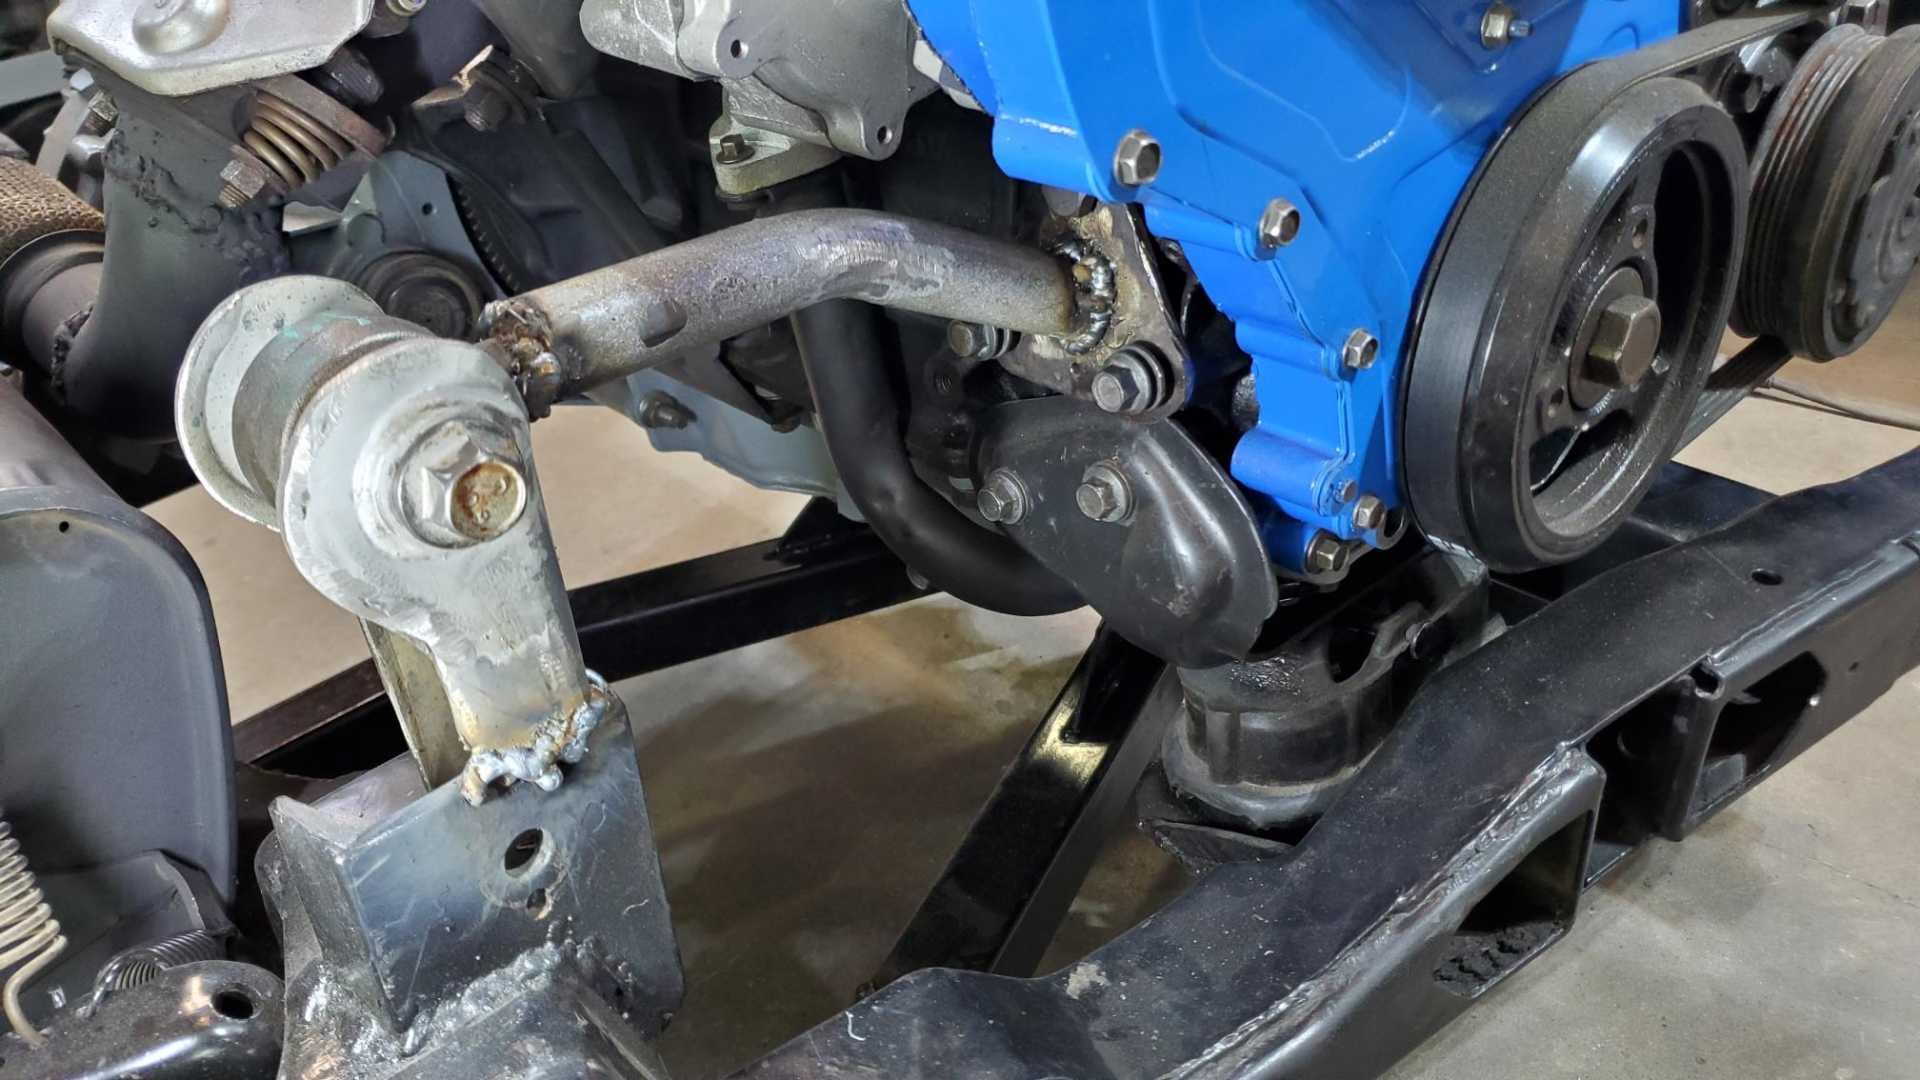
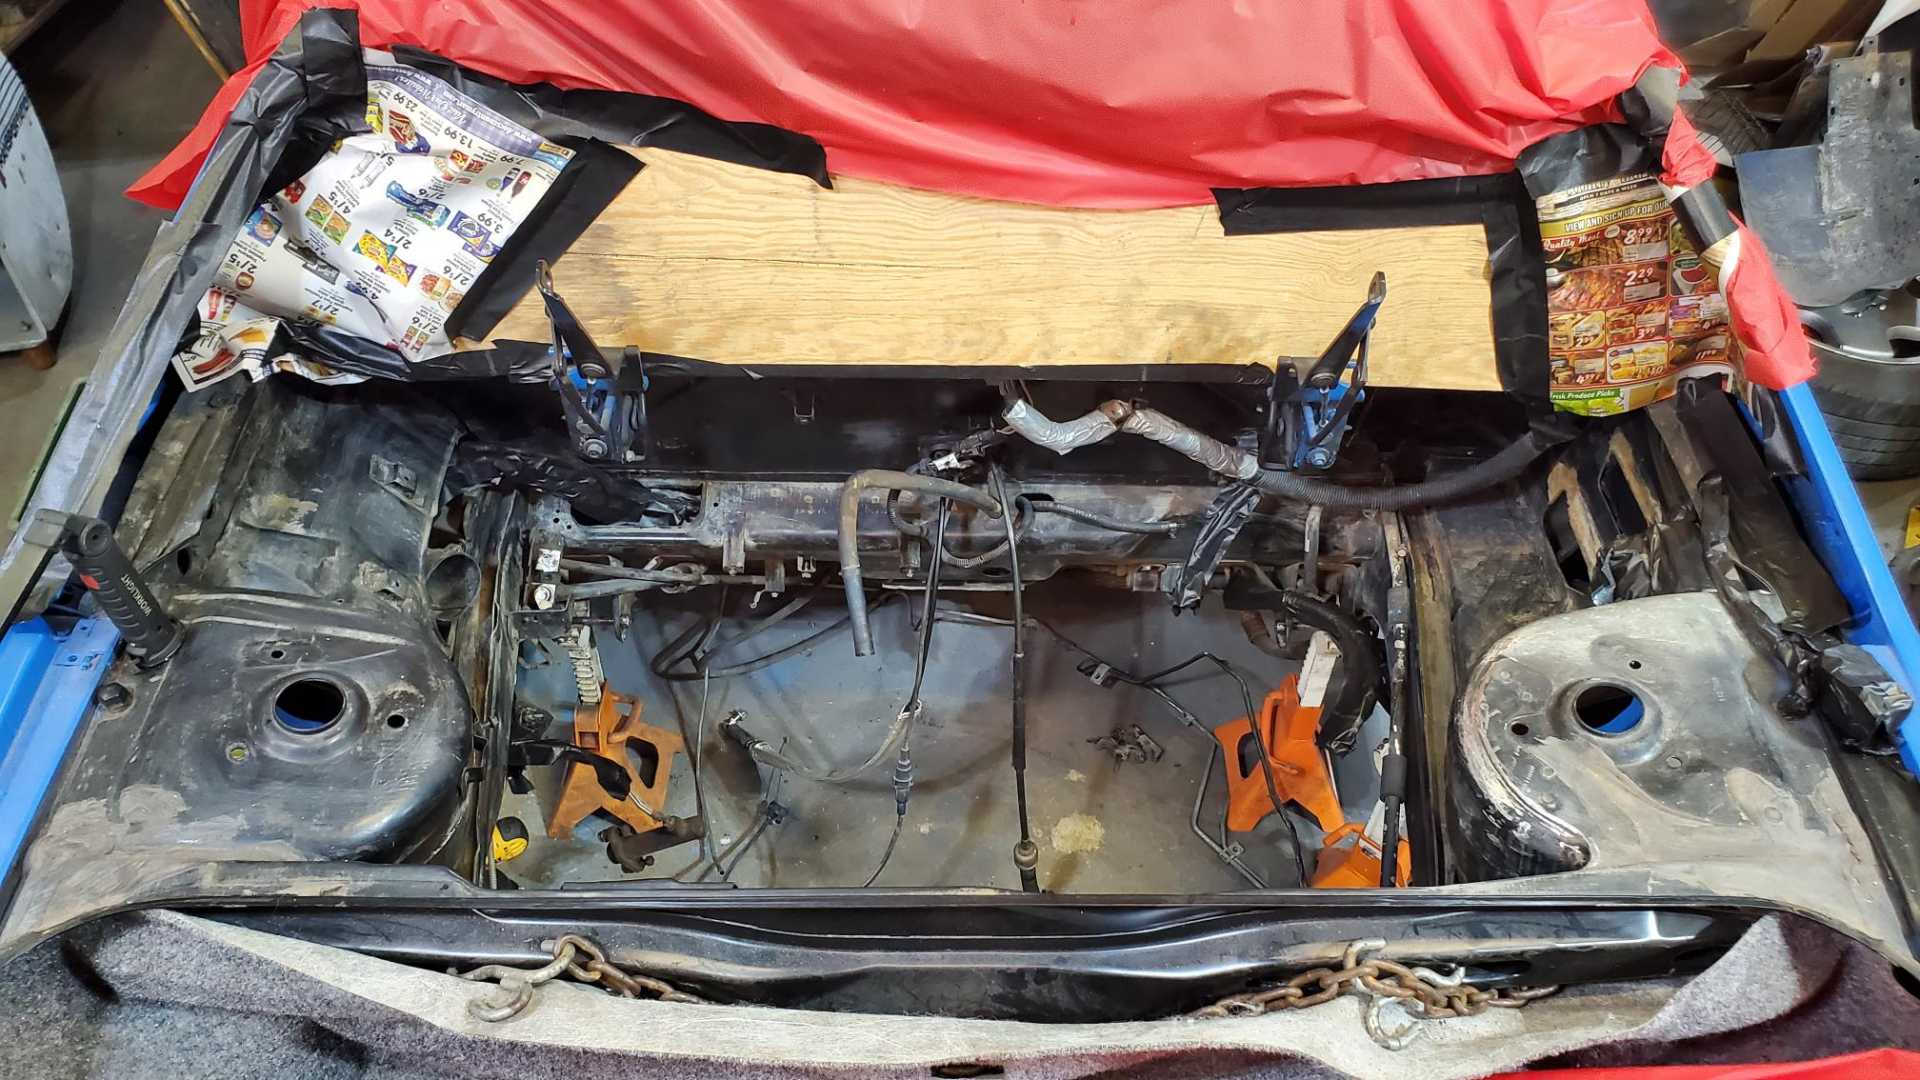
Thought a lot while on vacation about how to fab a mount to keep the engine from rocking. I noticed Oldsmobile was nice enough to provide four bolt holes on the side of the block.
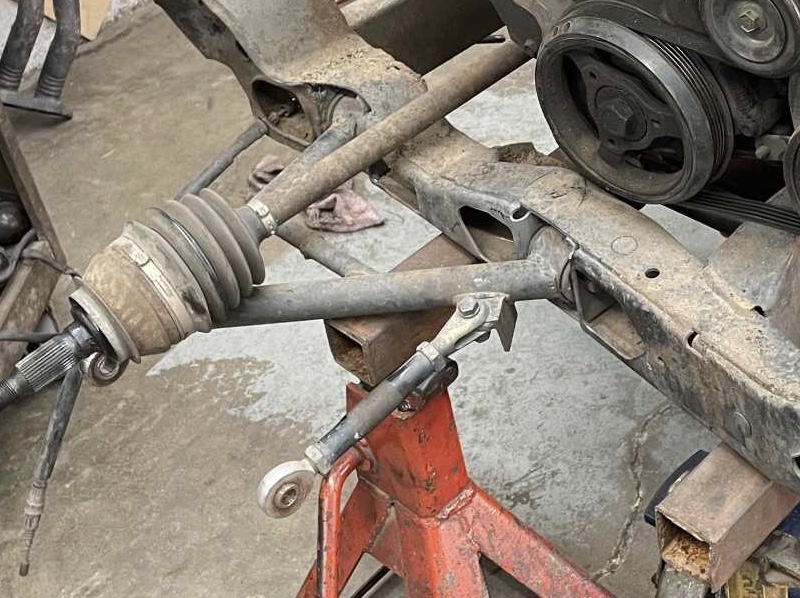
I put the passenger side axle into the transmission to see how high it travels.
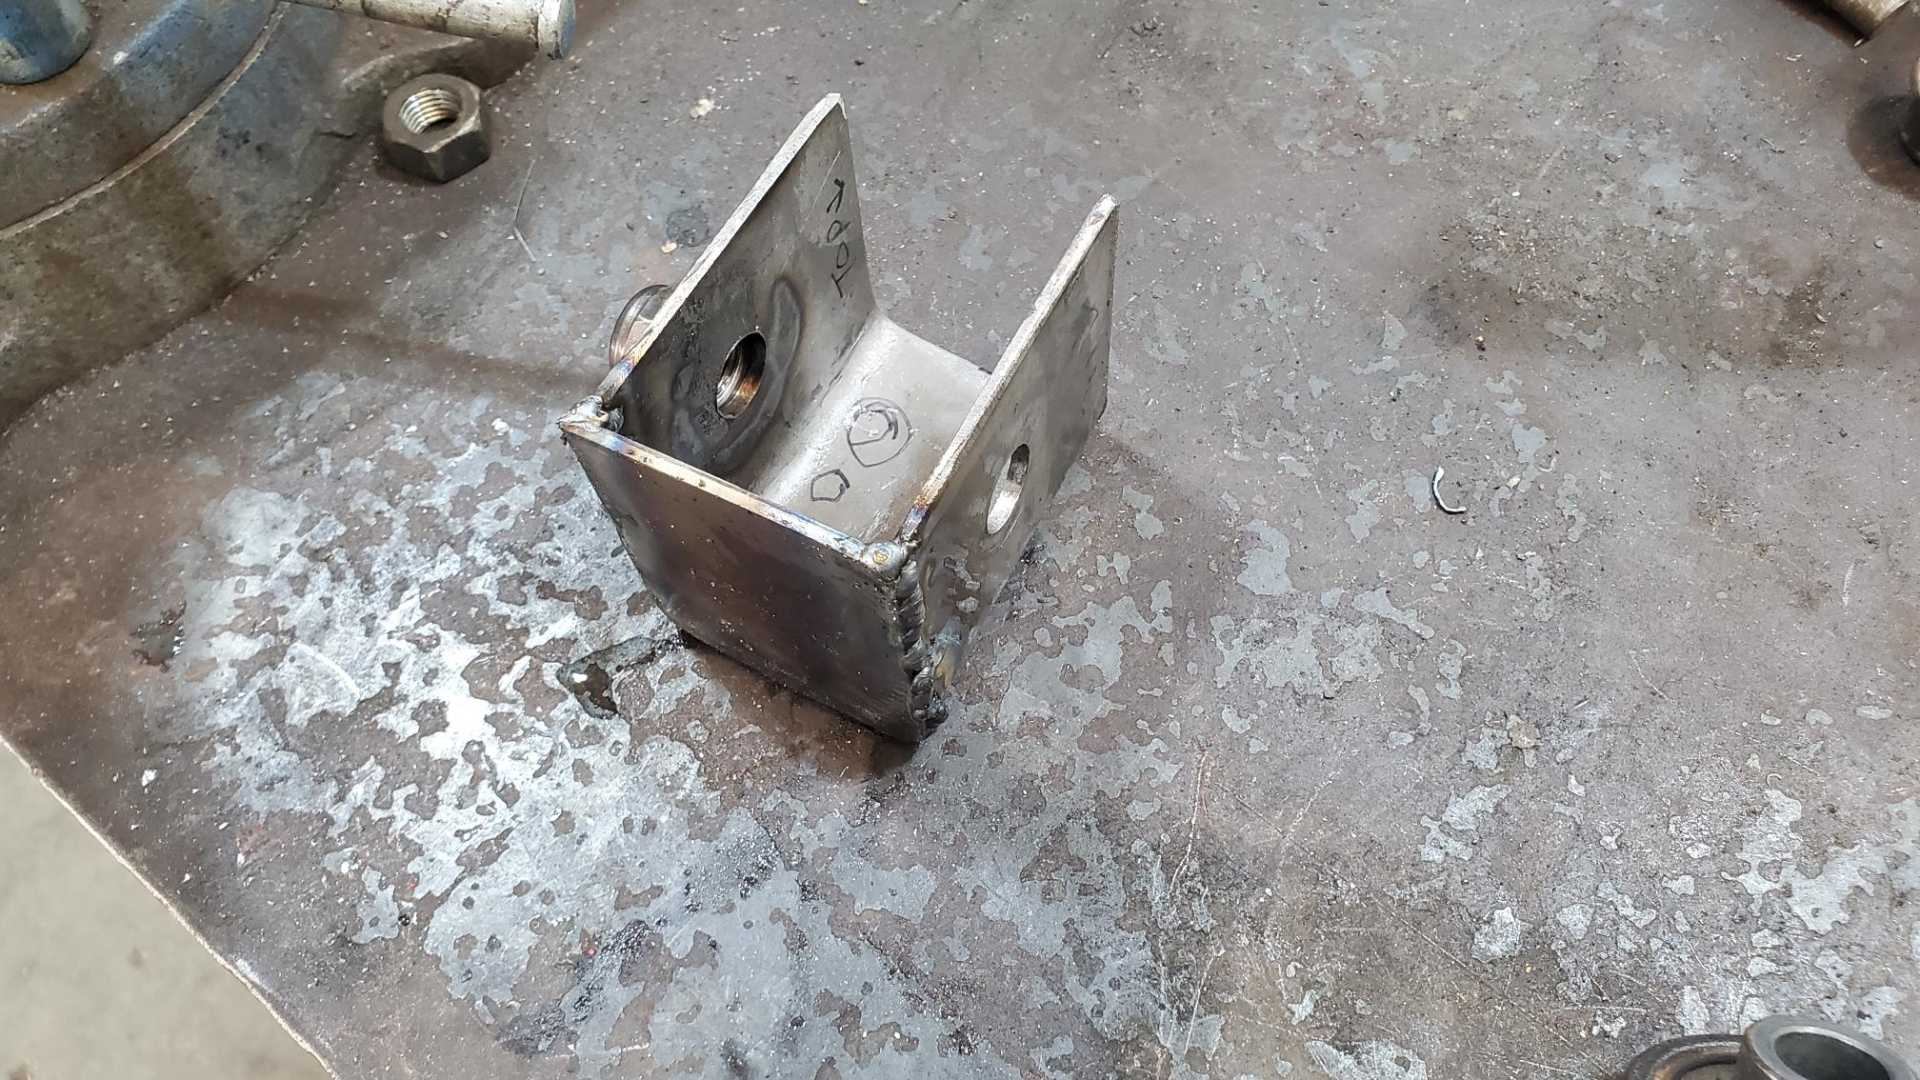
Plenty of room for a slender mount, so I started fabricating. First, a plate for the engine side.
Then some kind of bracket to hold the anti-sway bar end from the salvage yard pickup. Two halves of an old floor jack were perfect.
The altered inner tie rod mount on the passenger side was a perfect spot for locating the bracket.
[This message has been edited by Quadfather (edited 08-15-2022).]
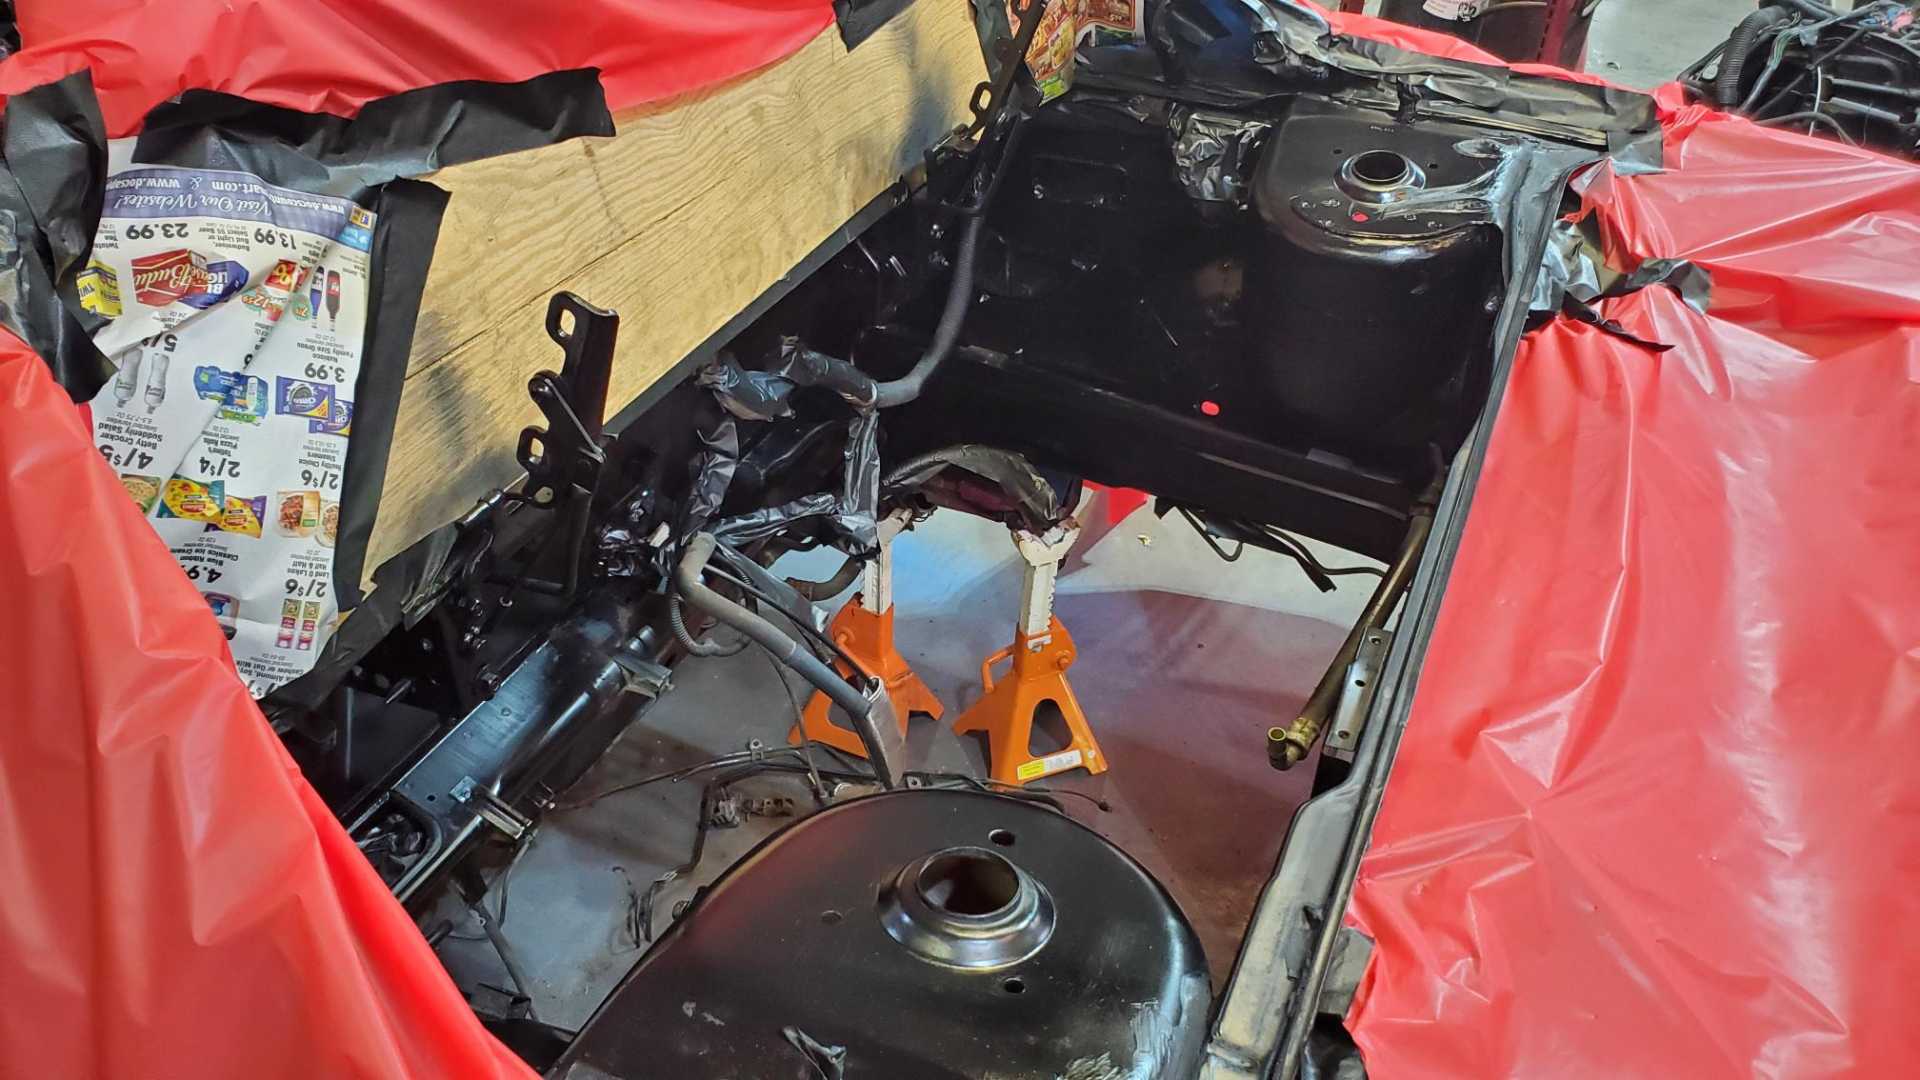
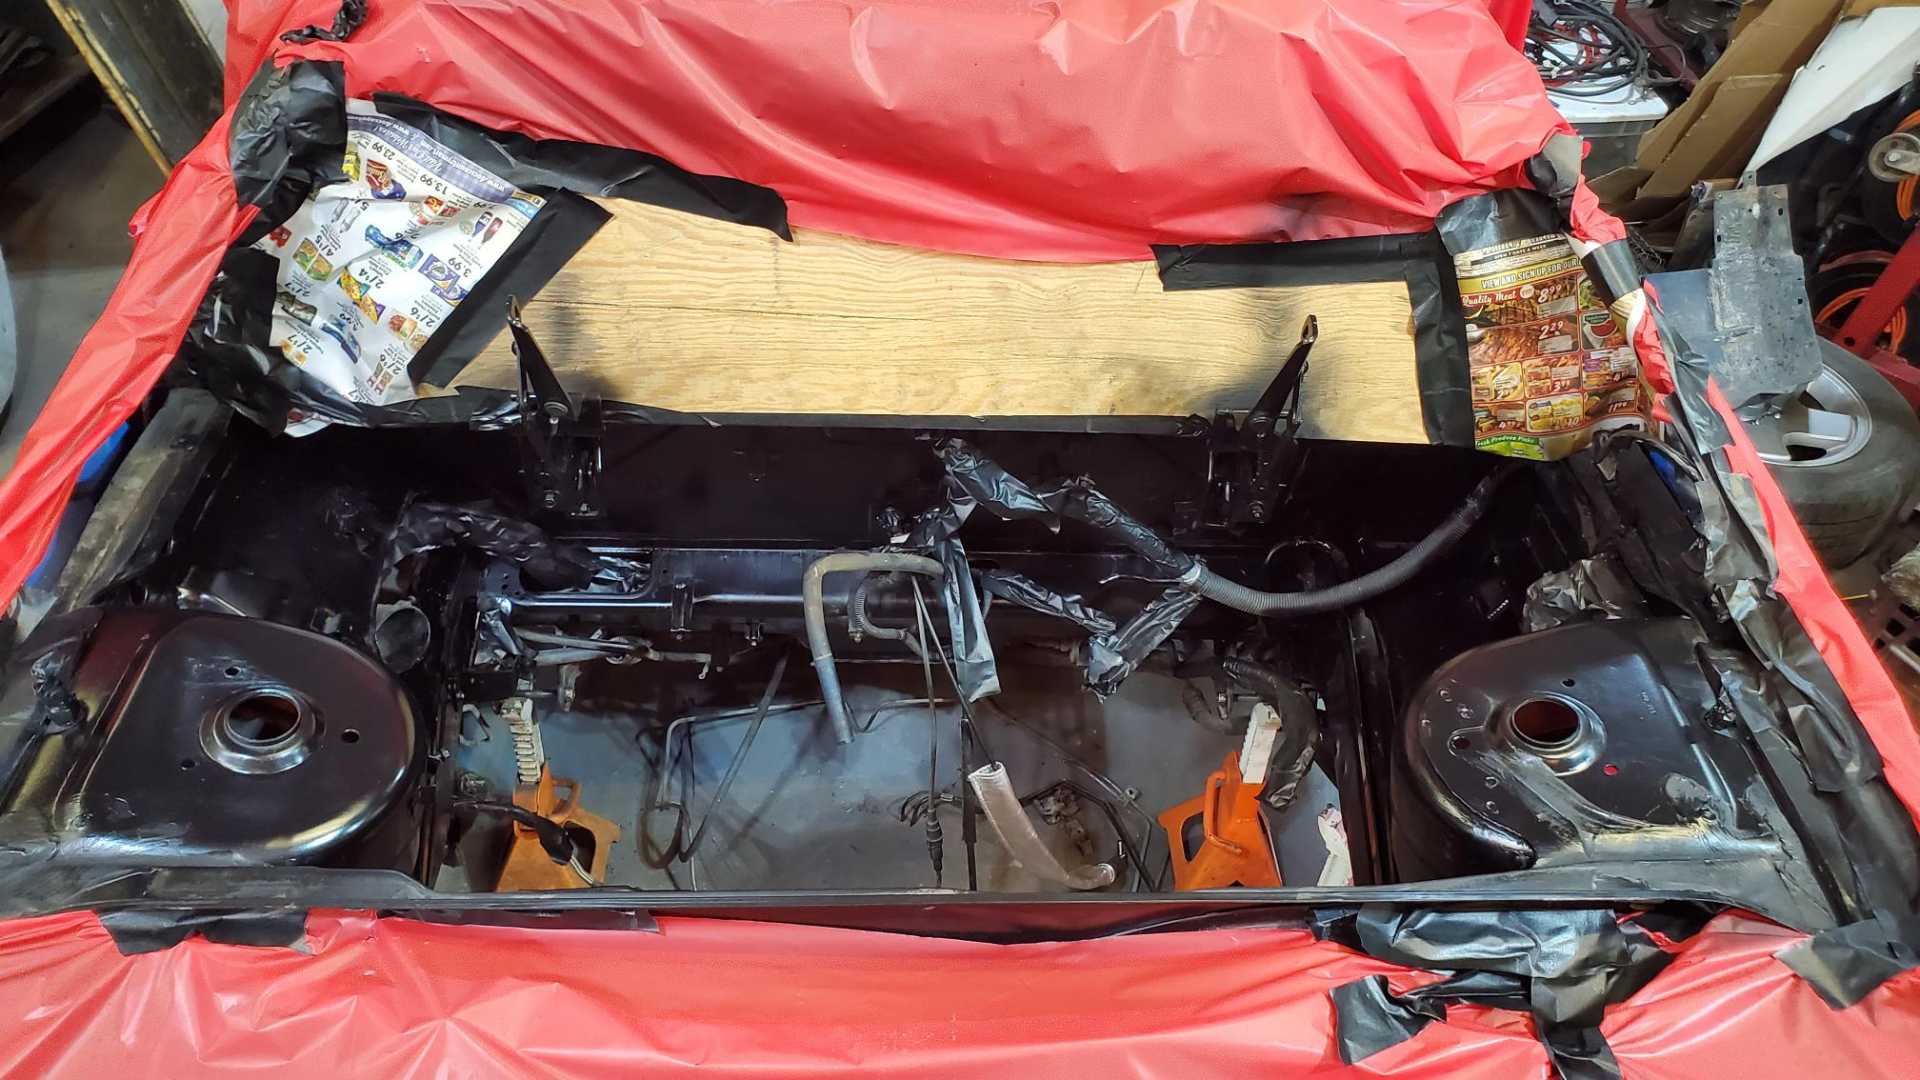
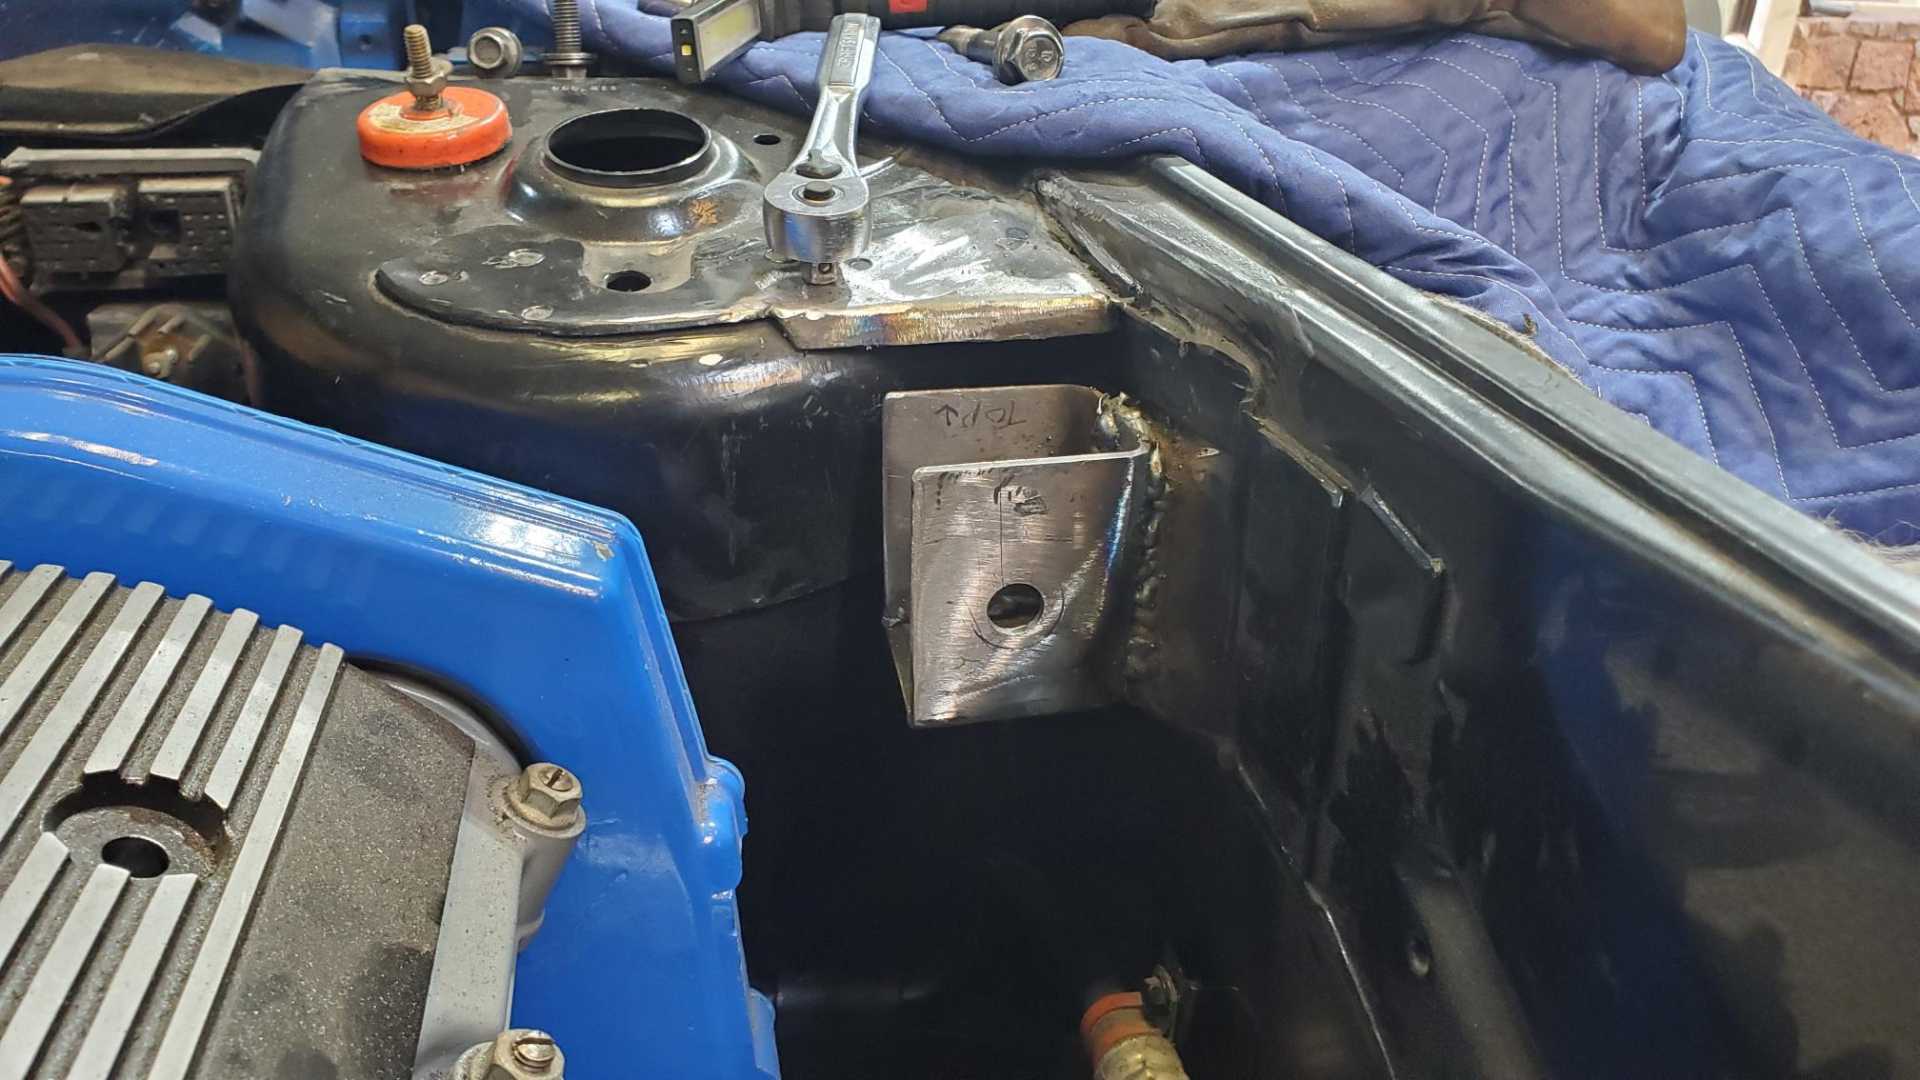
In order to finish welding the bracket to the cradle I'll have to lift the engine off and turn the cradle on its side. Then I'll sand and paint and reinstall everything.
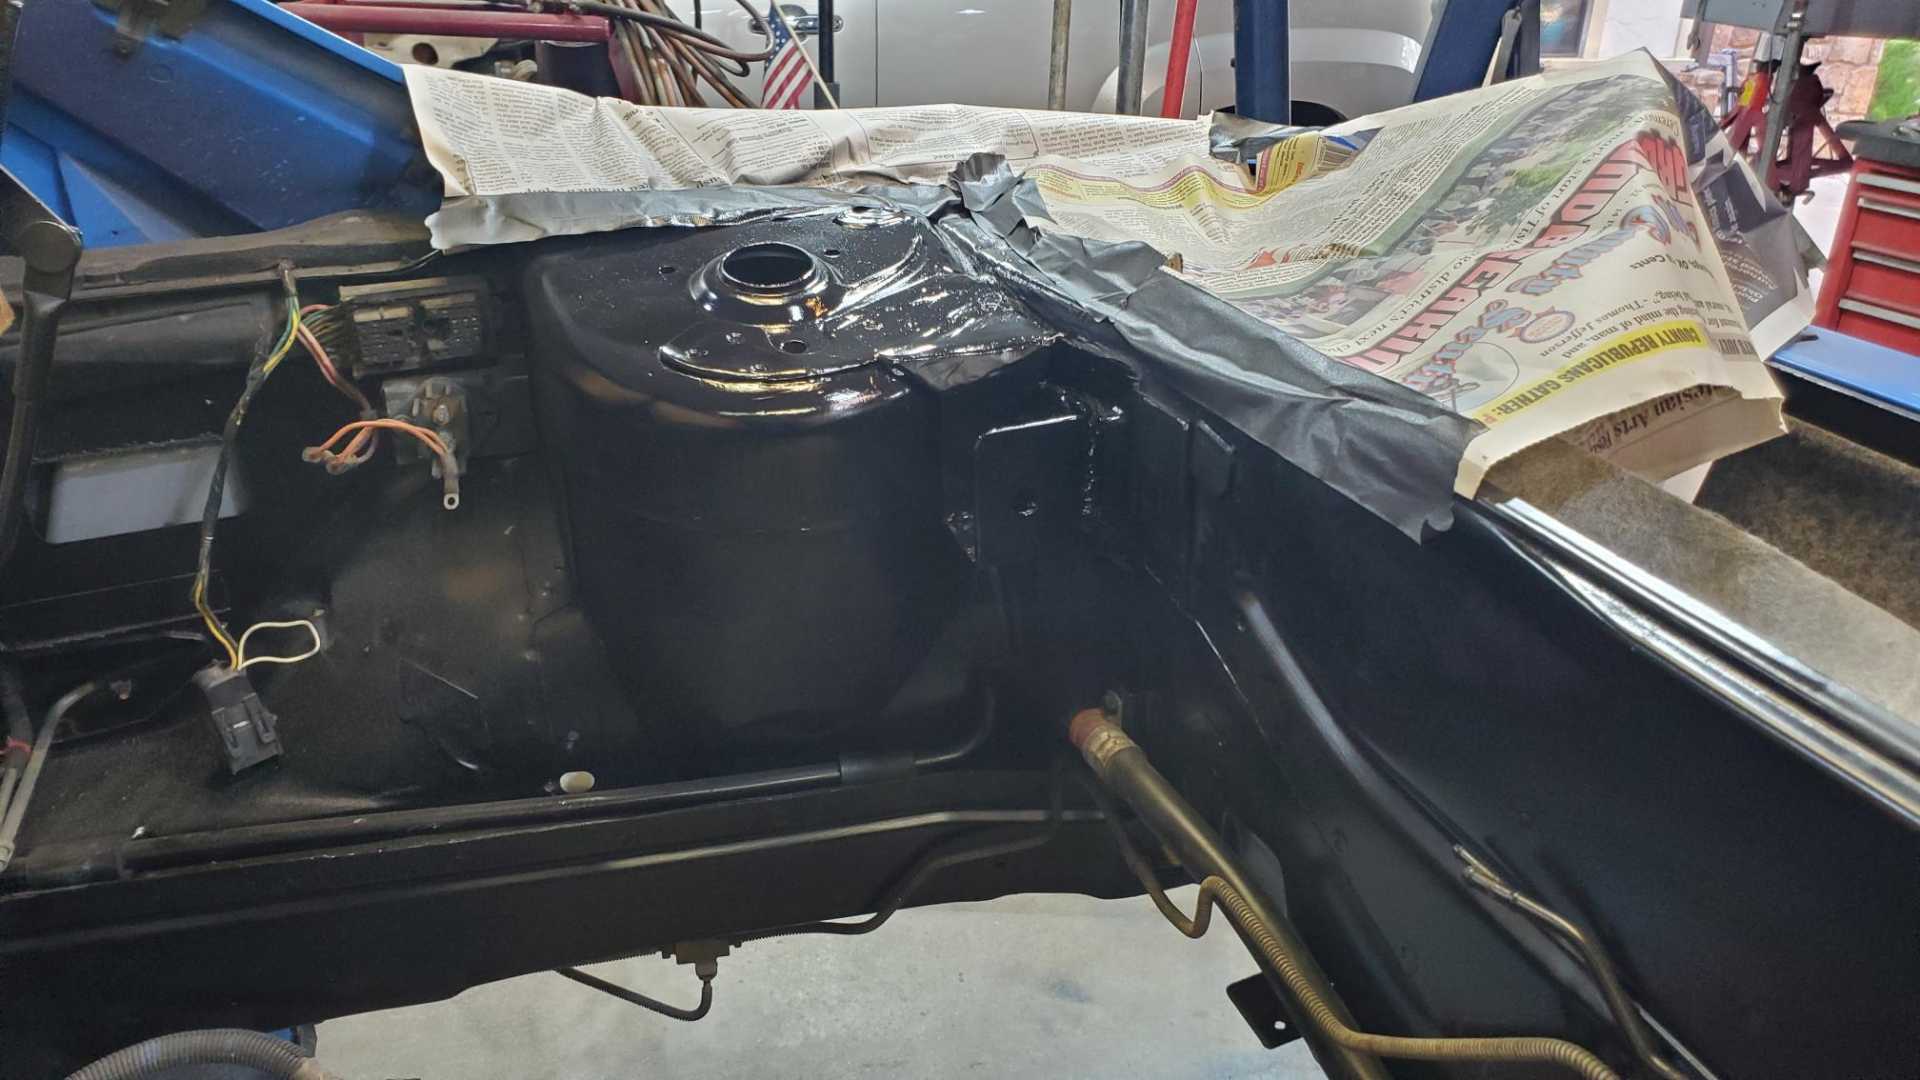
While waiting for the welds to cool down I made progress on cleaning up the engine bay. We're due for a big cool down this week so I'm hoping to make significant progress over the coming days and weeks. We'll see.
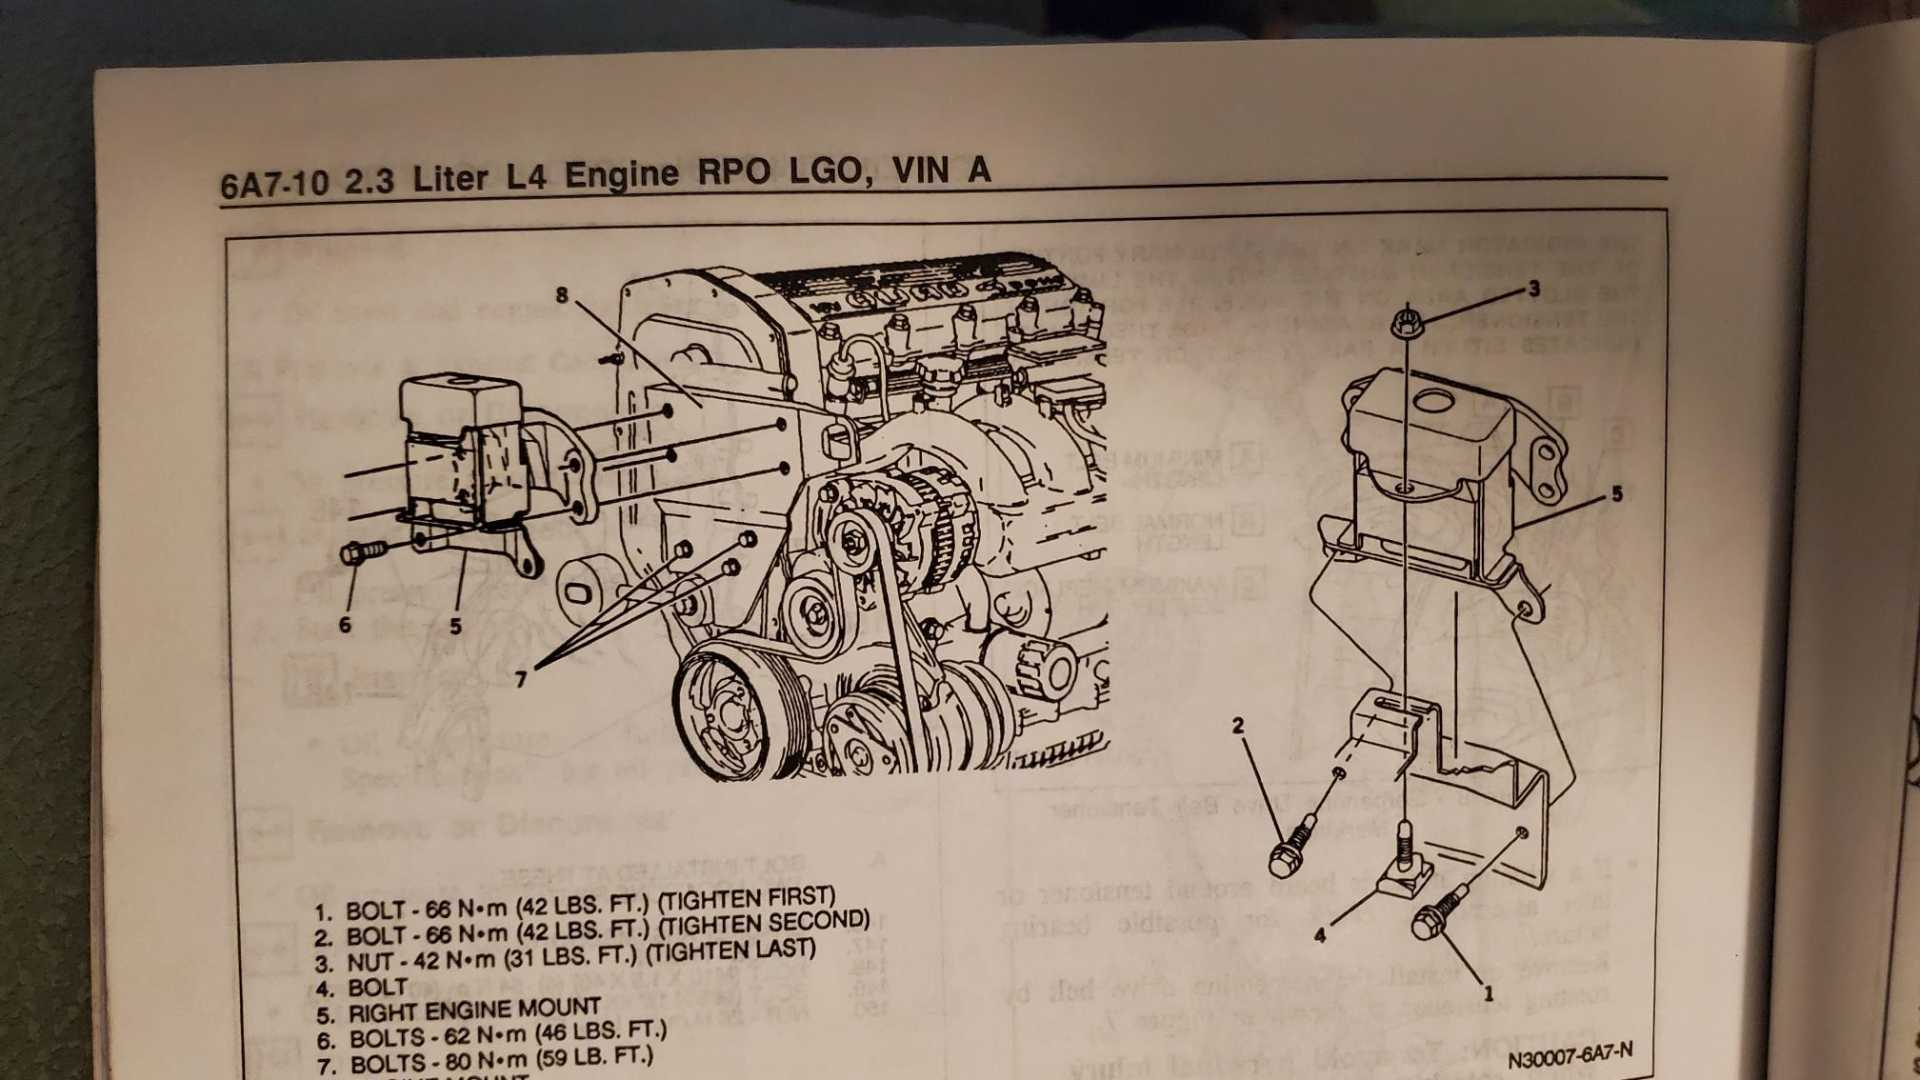
Torque is applied at the wheels and through the axles to the trans, which then applies force to the respective engine and transmission mounts. The original dogbone is up so high so that it can counter this moment from a position of good mechanical advantage.
Your new mount is almost inline with where the torque is being applied to the engine/transmission assembly, and you may find that it does not do as much as you want and may bend the mounting brackets as a lot of force will be going through it due to the small moment arm. I think it is worth trying, but if you have issues with motor movement you may want to relocate to a more stock location, or make a really long motor mount with a mounting location at the extreme ends and not run a dogbone/torque mount at all. See ericjon262s build for a really good example, though he extended his mount both directions and you probably only need to extend it in one direction.
Great progress though, take advantage of the nice weather!
[This message has been edited by zkhennings (edited 08-16-2022).]
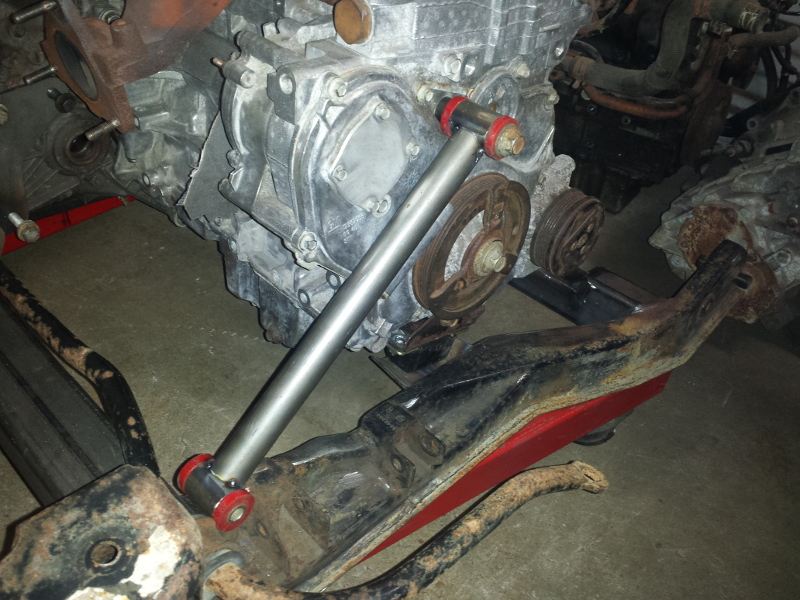
That’s a valid point. As I mentioned earlier in the thread, I had planned for years to attach the dog bone to the passenger side of the engine and modify the stock body dog bone mount to accept it. Then I saw Lunatic’s design for his Ecotec swap and really liked it.
This is his photo:
Now that I’ve cut out the stock body dog bone mount and seen how much space there is between the body and the passenger side of the engine, I may try something like Lunatic’s.
The cold front is moving through Oklahoma even as we speak and I have a day off tomorrow, so let’s see how inspired I feel when I get to the shop.
[This message has been edited by Quadfather (edited 08-16-2022).]
That would give you a much better moment arm, but it will see a lot of force due to the angle, so make sure to make it beefy! I'd maybe recommend bolting it with multiple bolts to the motor and just using a bushing on the cradle mount side to remove a degree of freedom.
Well, I’d argue that the dog bone was put where it was on the Fiero because that was the easiest, and therefore cheapest, place to put it. Putting it on the cradle, especially the ‘84-‘87, would’ve required some engineering. It’s the same reason the Fiero ended up with a barely modified X-body cradle in the first place.
Anyway, I like fabricating stuff like this so I’ll experiment with a dog bone that bolts to the lift plate on the end of the engine.
I can’t remember why I decided that the torque mount HAD to be attached to the cradle, but I set that notion aside and started thinking about just doing it the best way. So why not adapt the torque mount from the Beretta? Hmmmm.
Here’s what it looked like in my GTZ.
Half of the mount bolted to the fender/fender well. Hopefully I saved that half of the mount and it’s sitting in the shop somewhere. I do have the engine half.
To make this work I’d have to fabricate a plate that attaches to the strut tower. I got to thinking about this while doing a little side project, cleaning and painting the engine compartment.
[This message has been edited by Quadfather (edited 08-21-2022).]
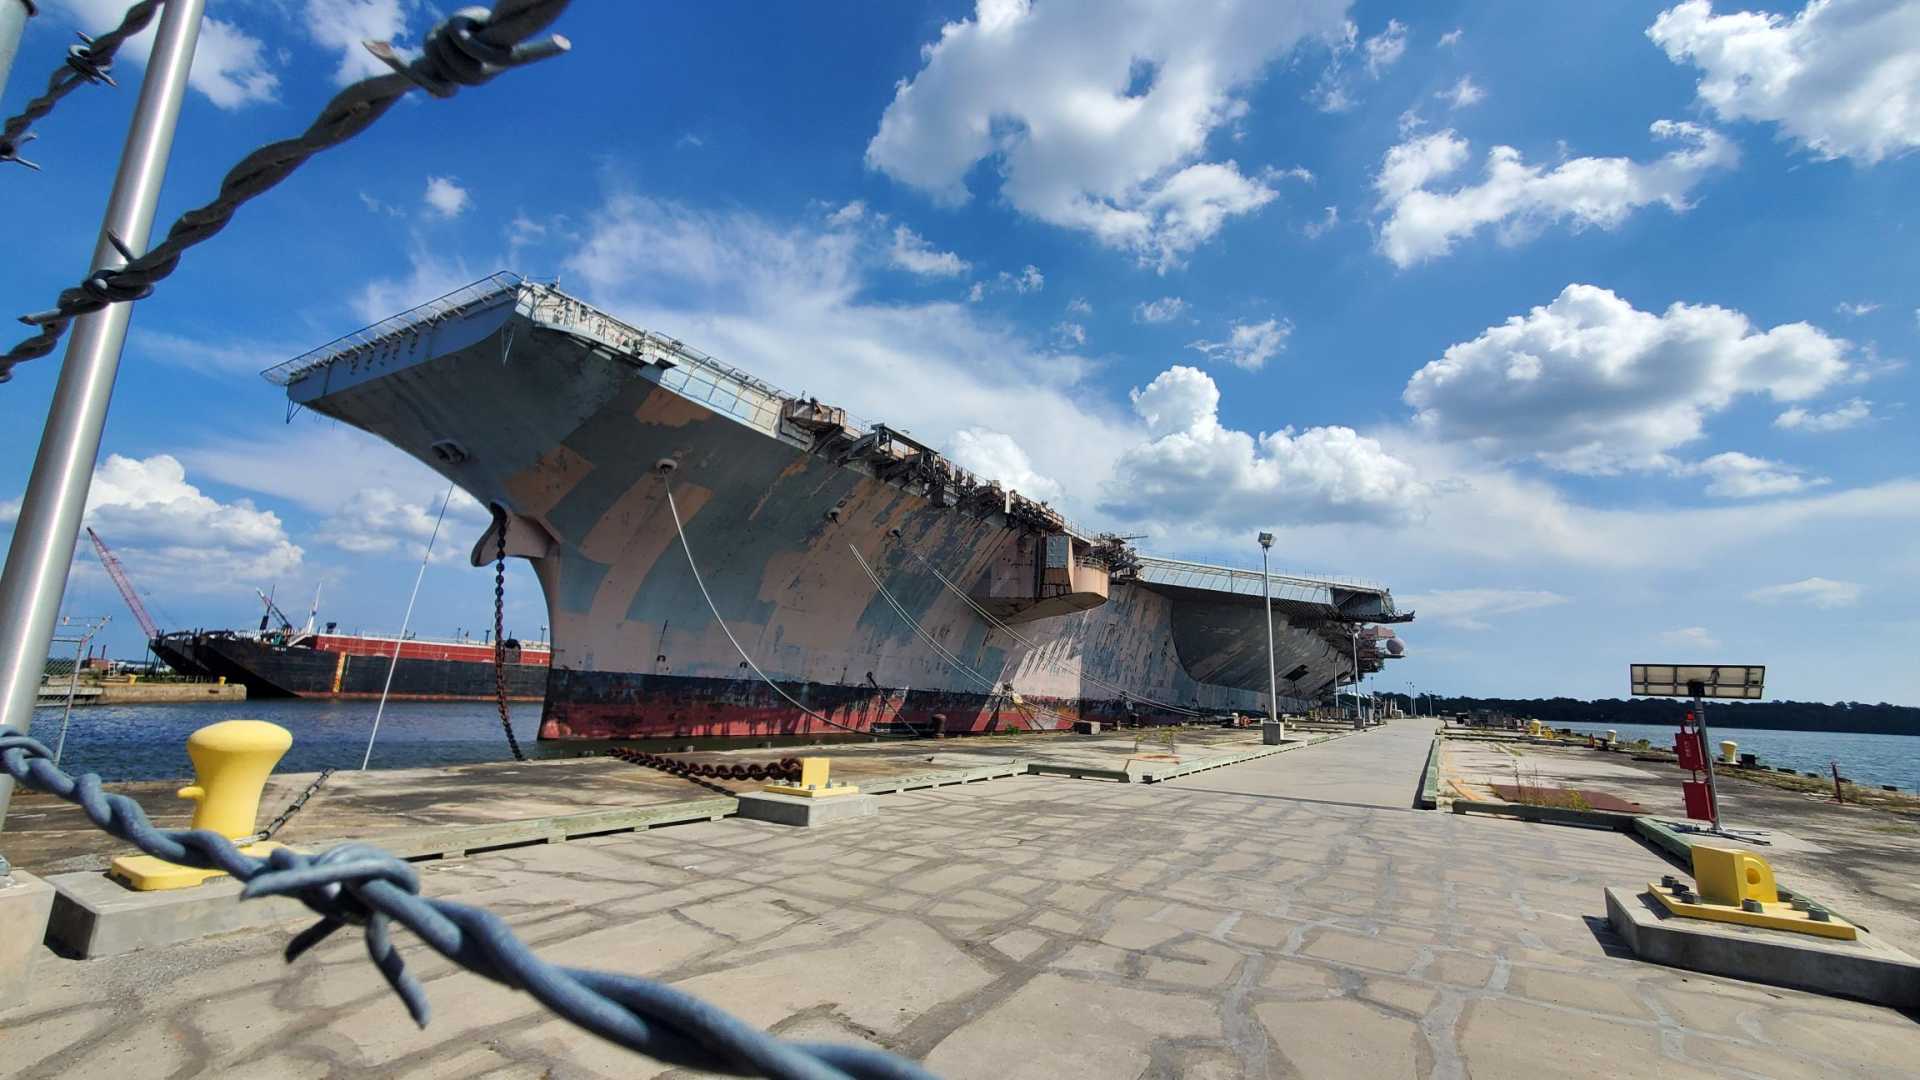
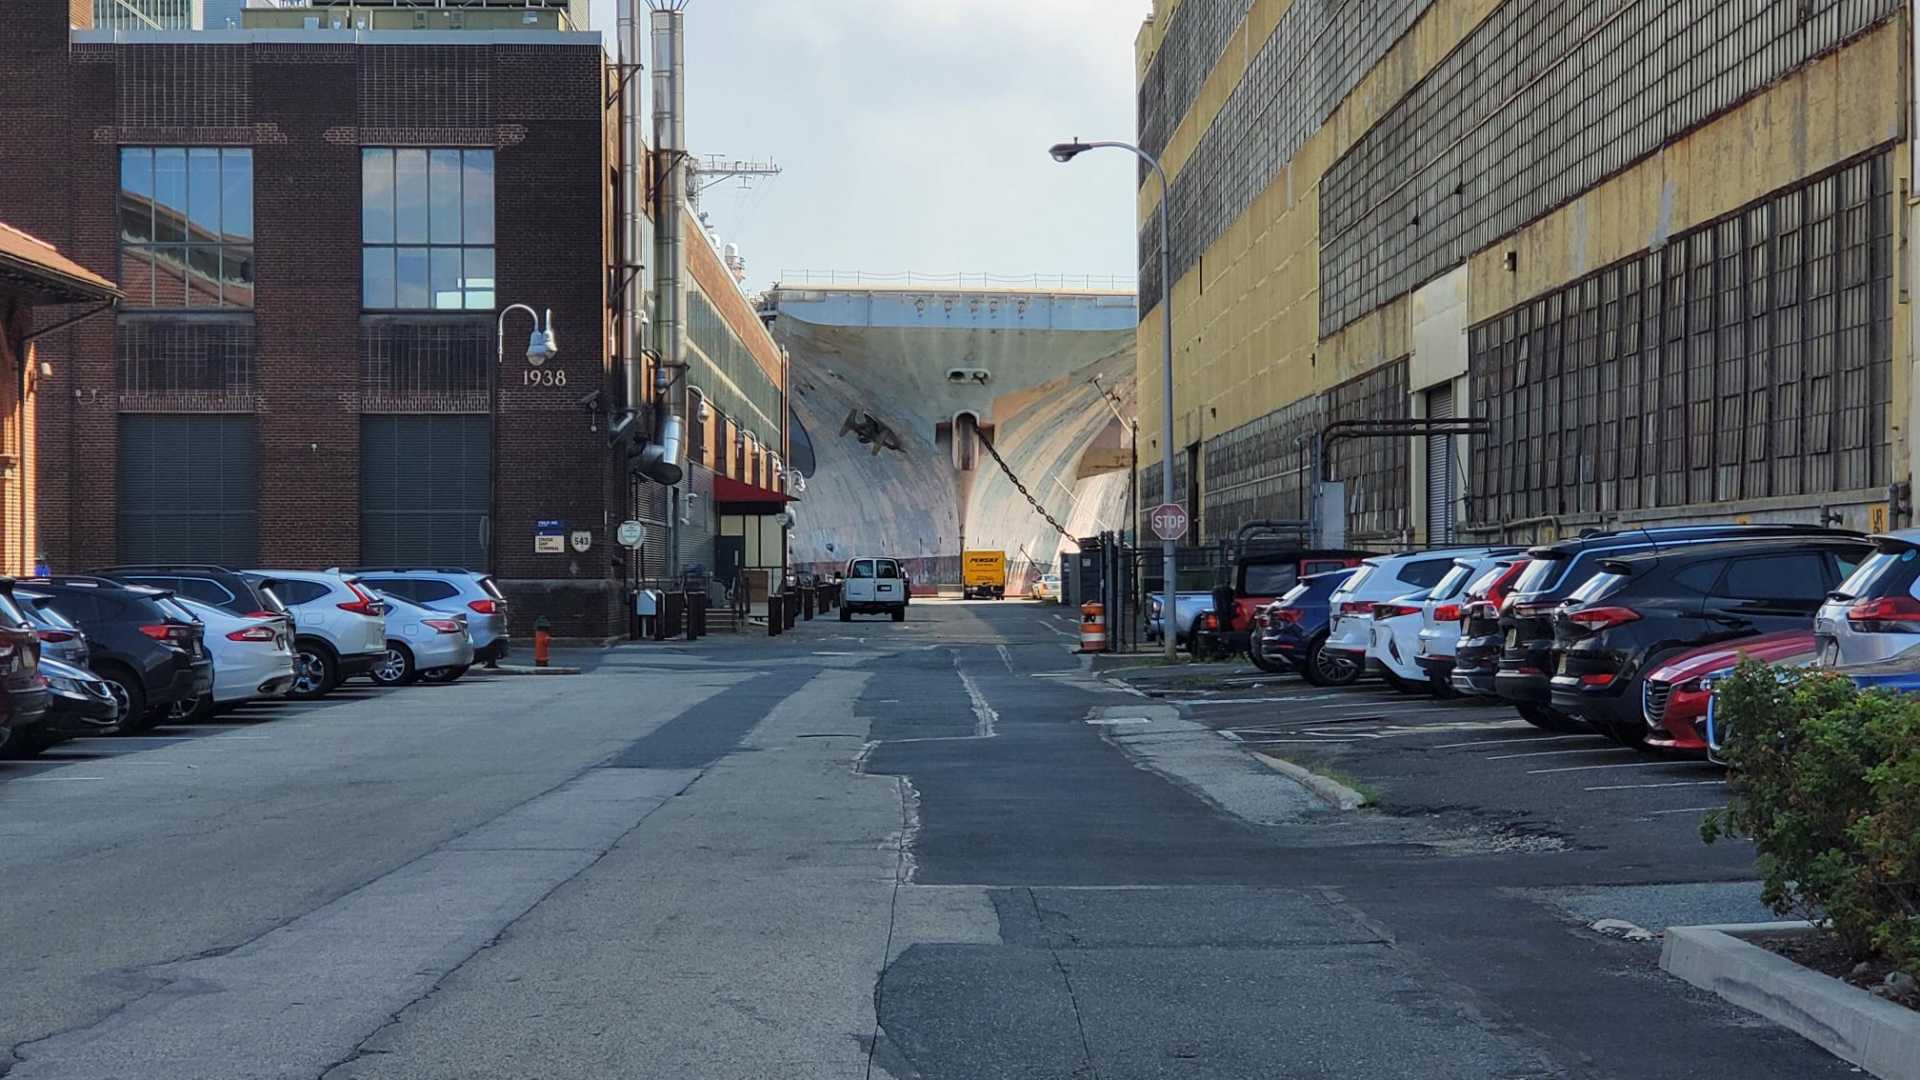
As I mentioned, my wife and I spent a week in Pennsylvania. We did a day trip to the Battleship New Jersey, which was excellent, but we also did a little side trip.
The John F. Kennedy, CV-67, is docked at the Philadelphia Navy Yard. Only a couple small Navy operations are still using the Yard, and the rest is being redeveloped. The Kennedy is docked there as it waits to be scrapped, so I figured we’d be able to drive right up to it.
It was decommissioned in 2007 after 38 years of service. Sat here for 10 years while the Navy waited for someone to step forward and turn it into a museum. When that didn’t happen, it was sold for scrap for $1.
Well, I’d argue that the dog bone was put where it was on the Fiero because that was the easiest, and therefore cheapest, place to put it. Putting it on the cradle, especially the ‘84-‘87, would’ve required some engineering. It’s the same reason the Fiero ended up with a barely modified X-body cradle in the first place.
Anyway, I like fabricating stuff like this so I’ll experiment with a dog bone that bolts to the lift plate on the end of the engine.
It was put where it was because it was a best combo of the best location and relatively easy to put there. Any mounting of the dogbone to the cradle would reduce the perpendicular distance from the dogbone's "line of action" to the axle centerline. Reducing that distance increases the load on the dogbone and mounts. That's why GM put it as far away from the axle as they reasonably could.
You'll see the same thing on FWD cars. Dogbone(s) going from the top of the engine to the radiator header panel. Don't you think GM would like to skip the extra main-line step of bolting those dogbones in place? Why would they include that step in the main line if it weren't necessary for the dogbones to go there?
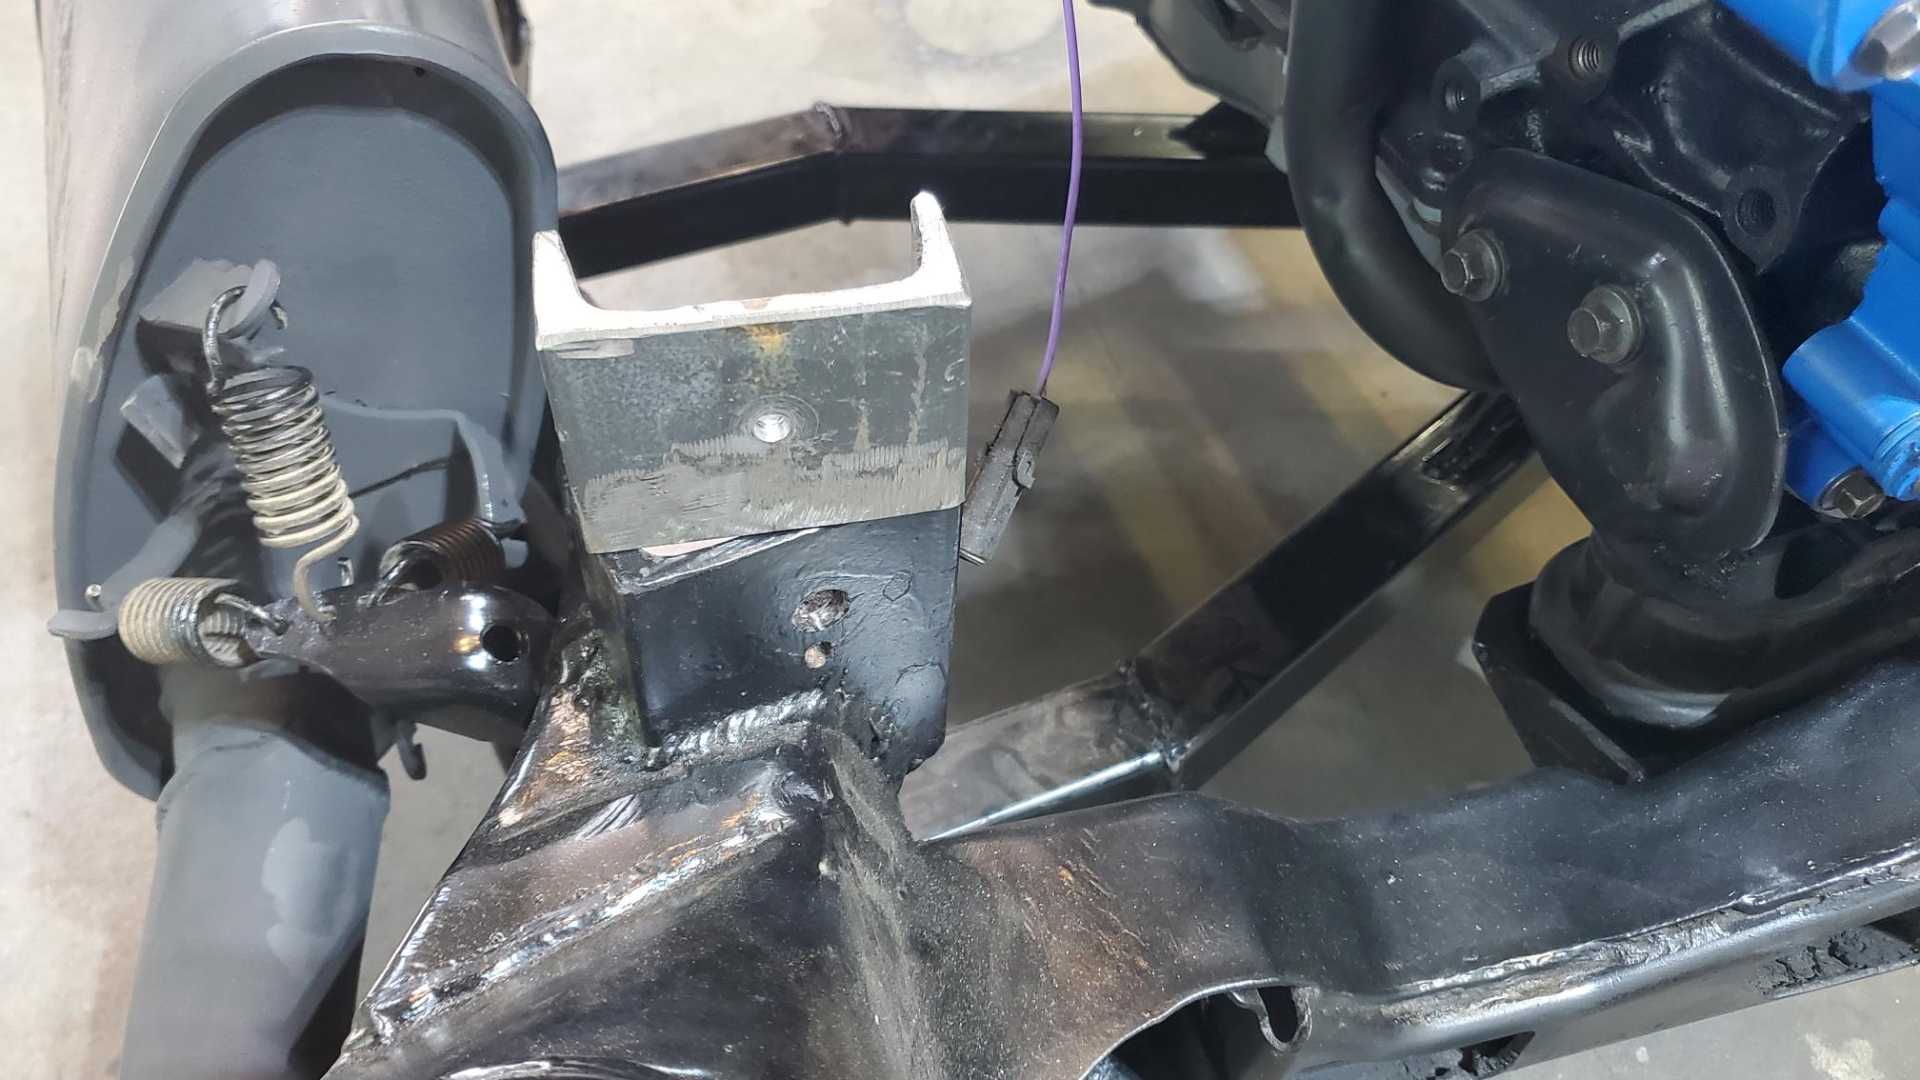
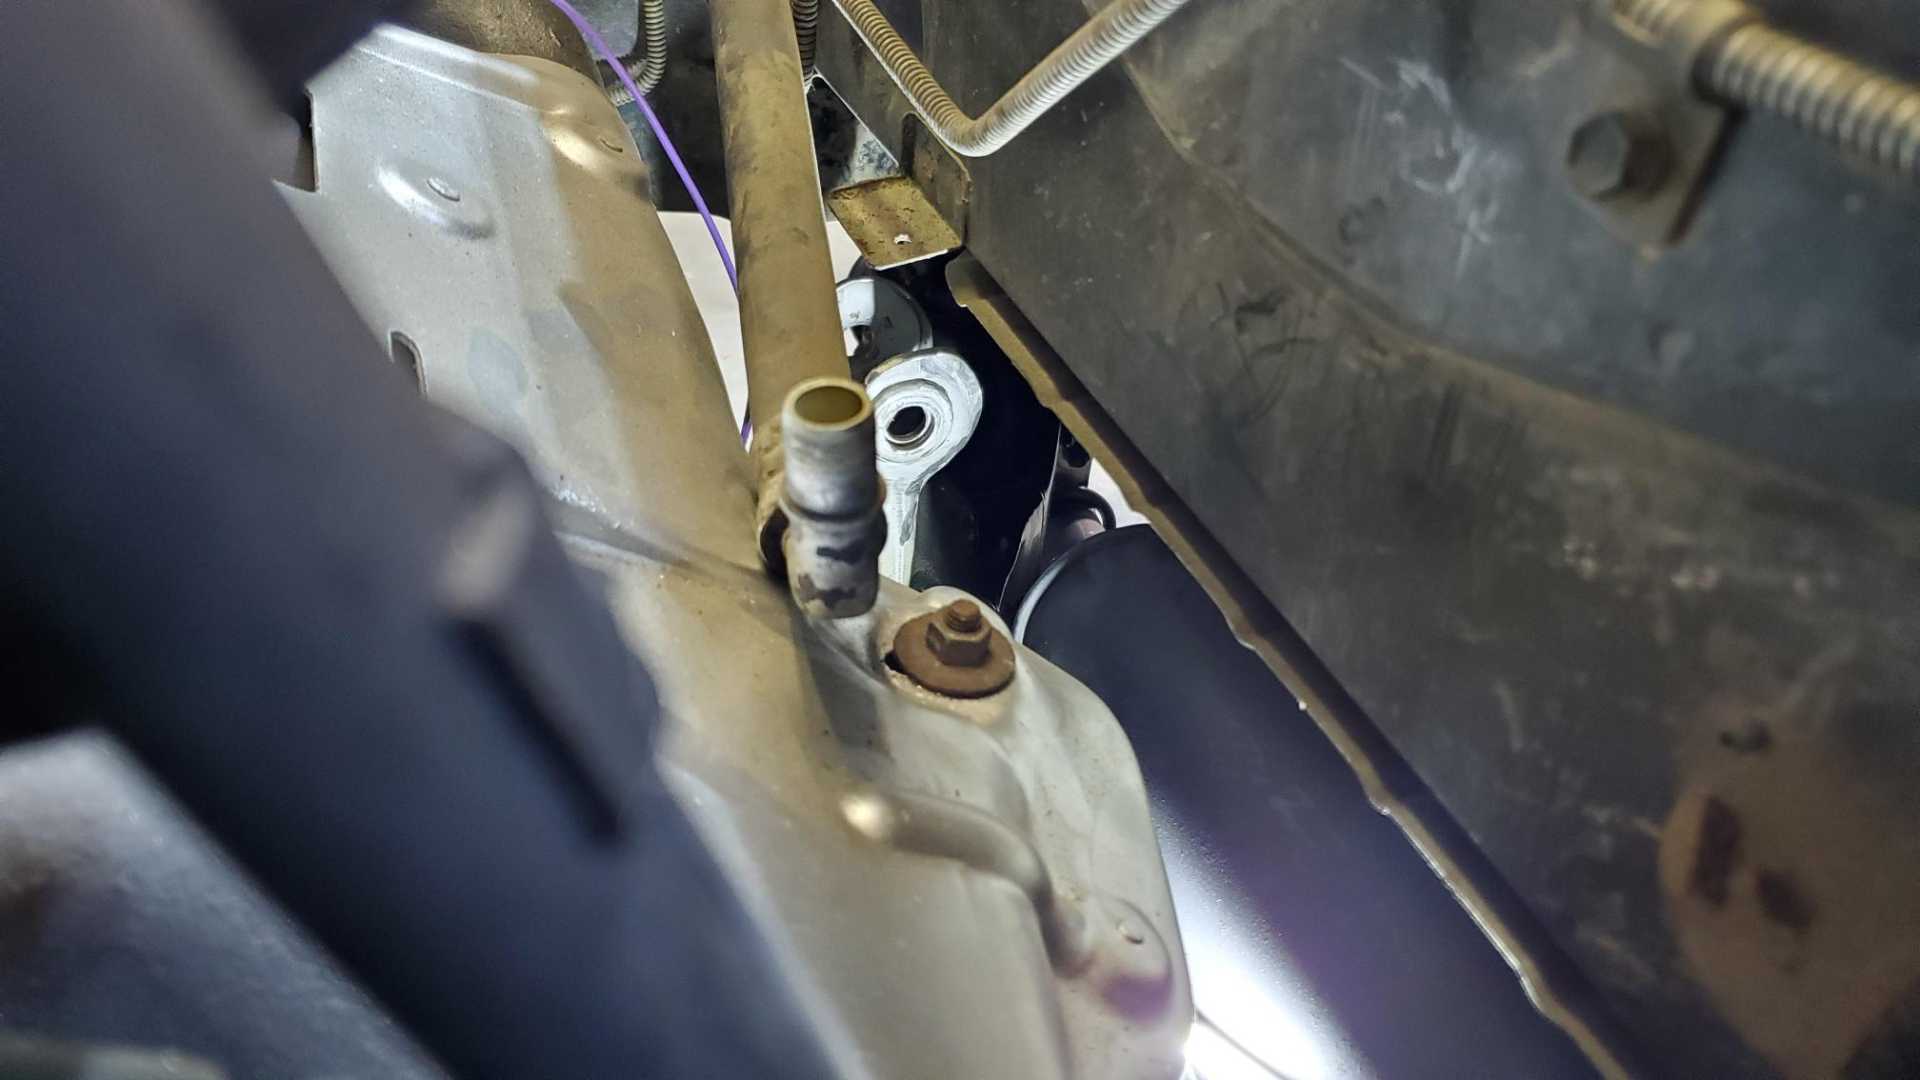
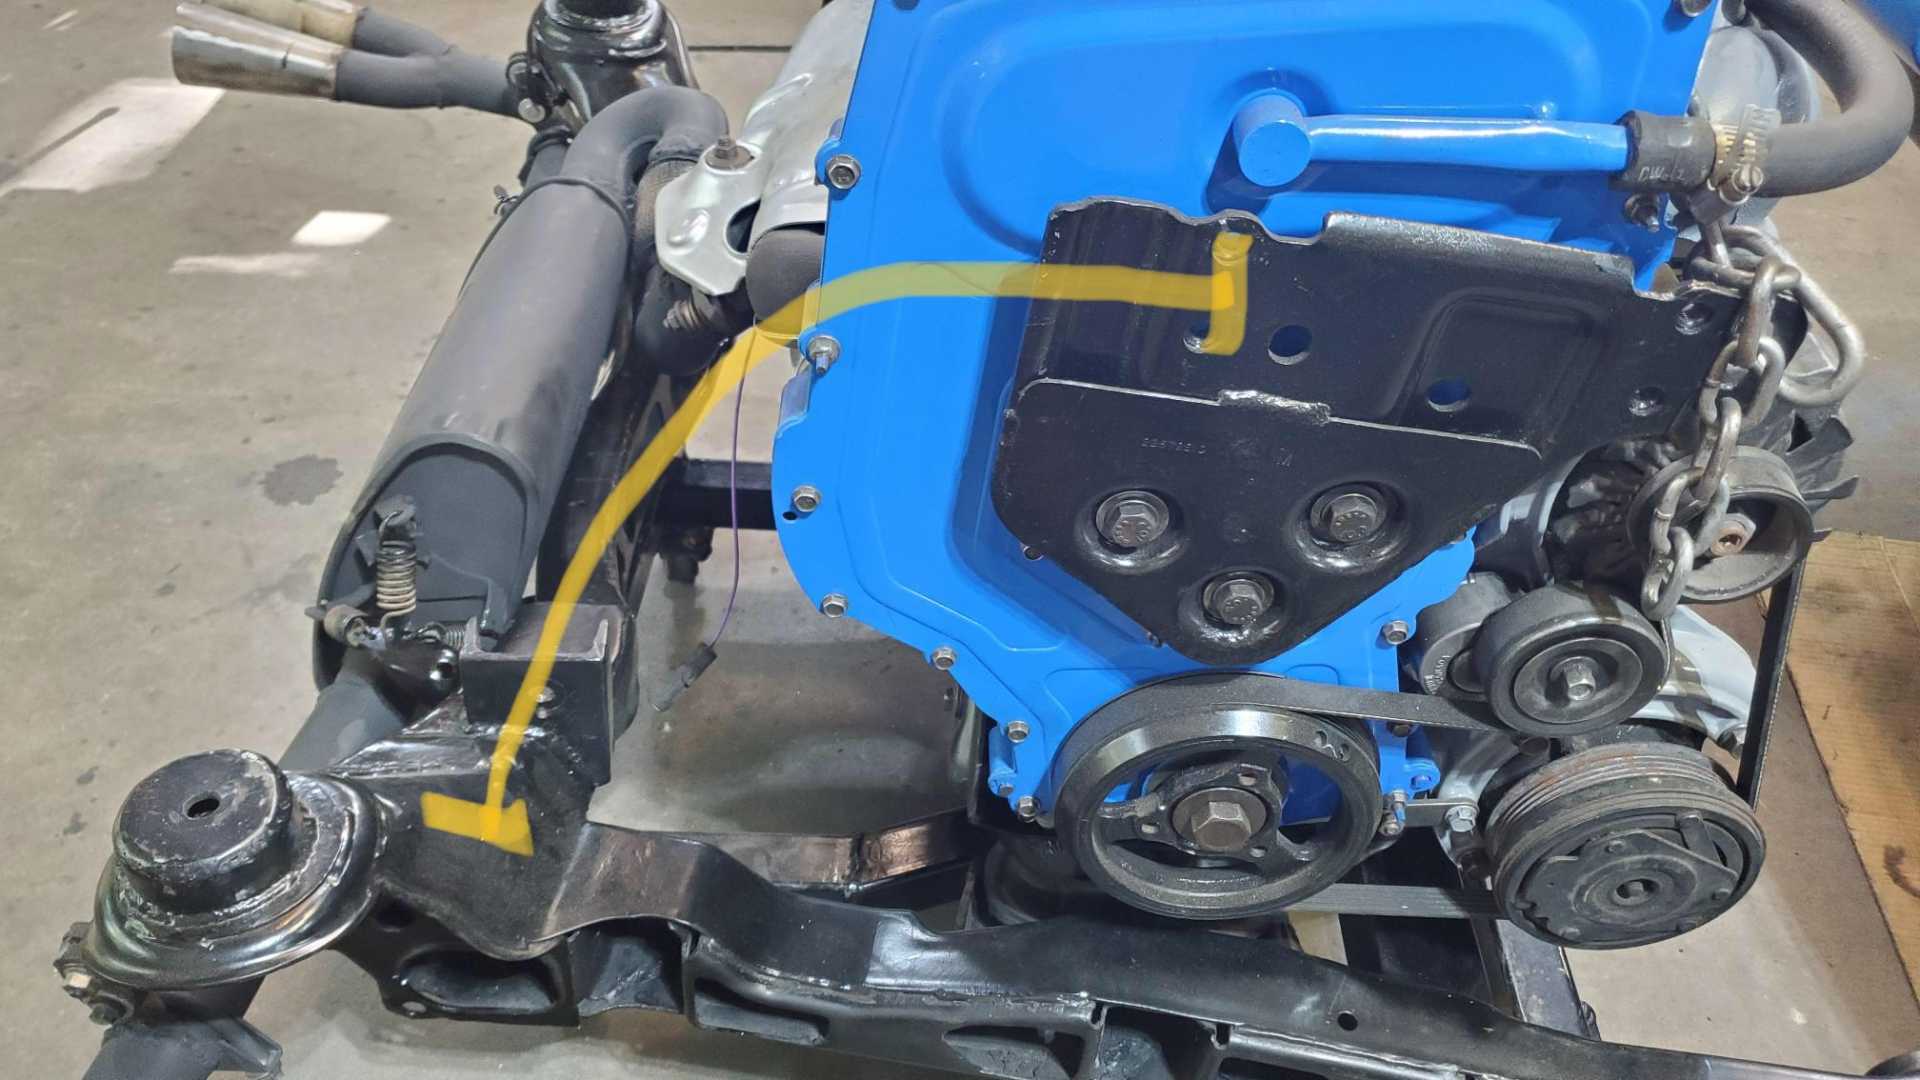
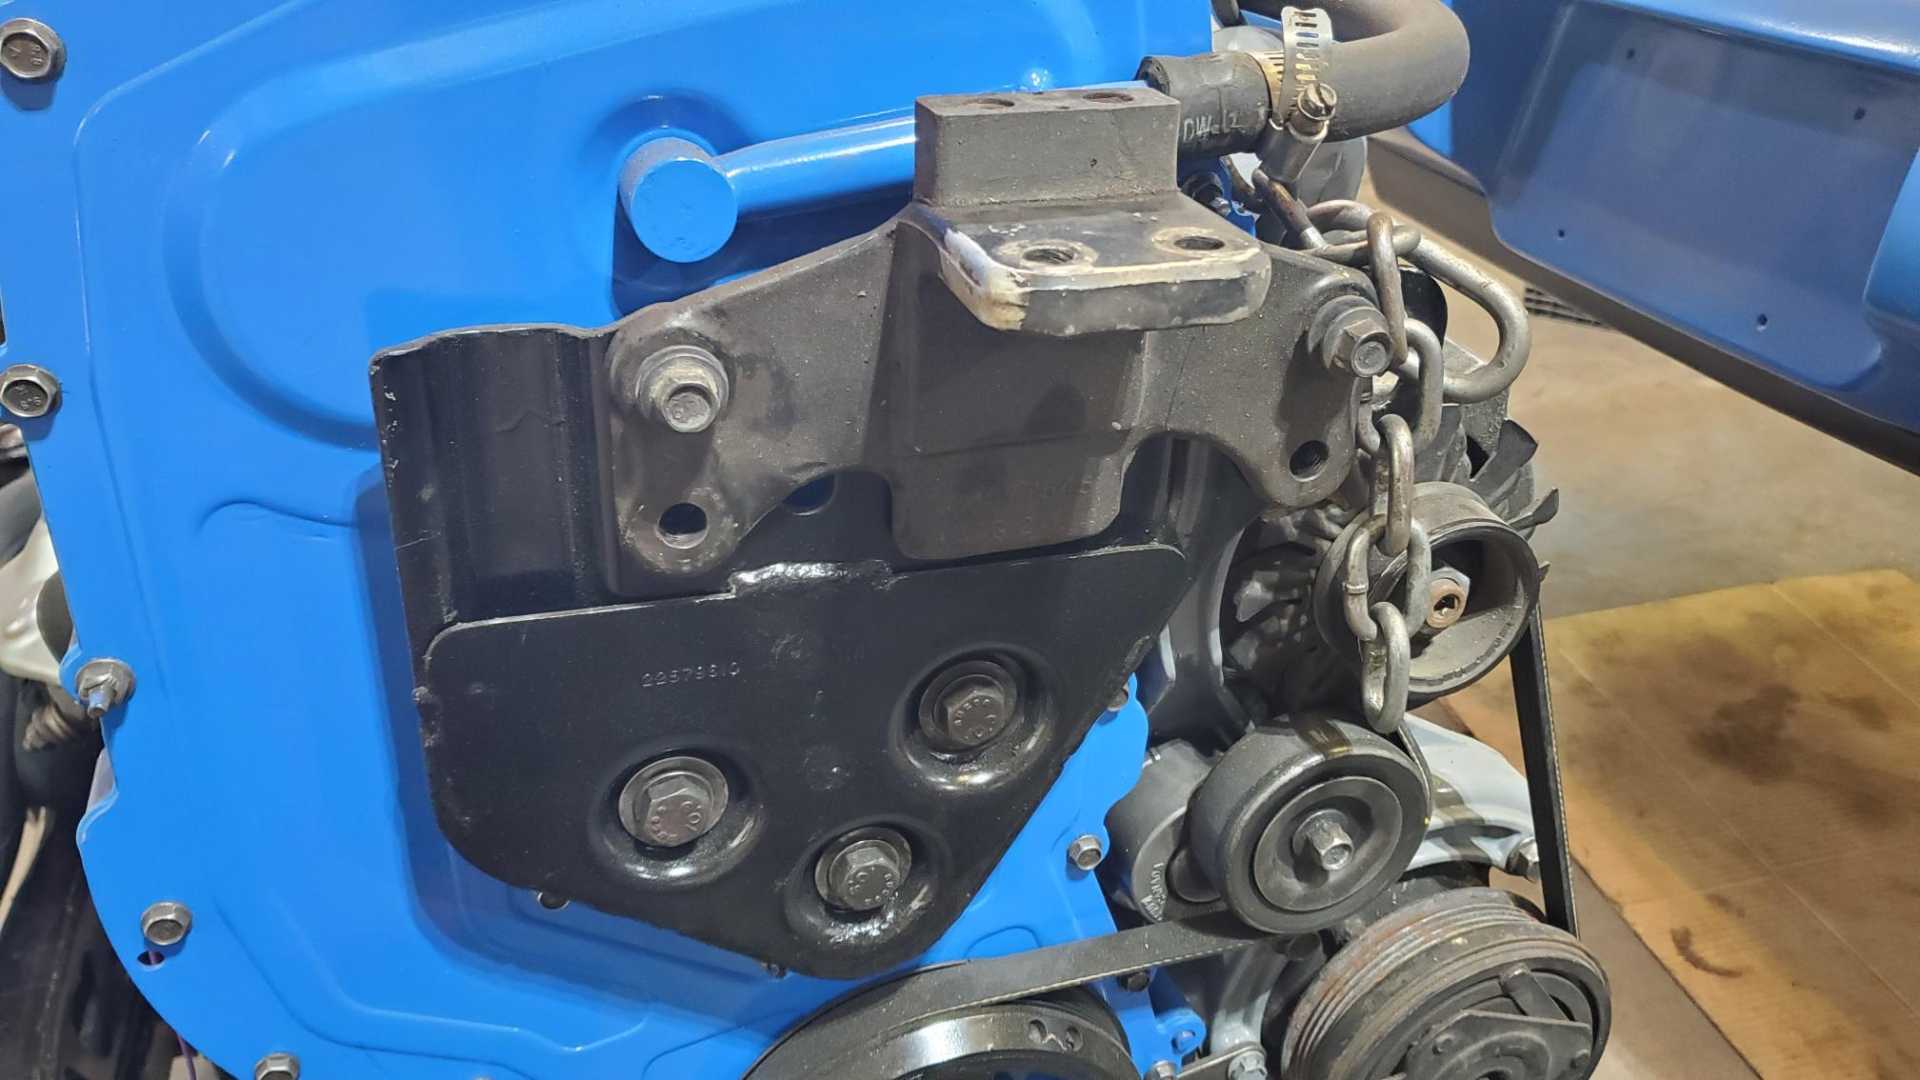
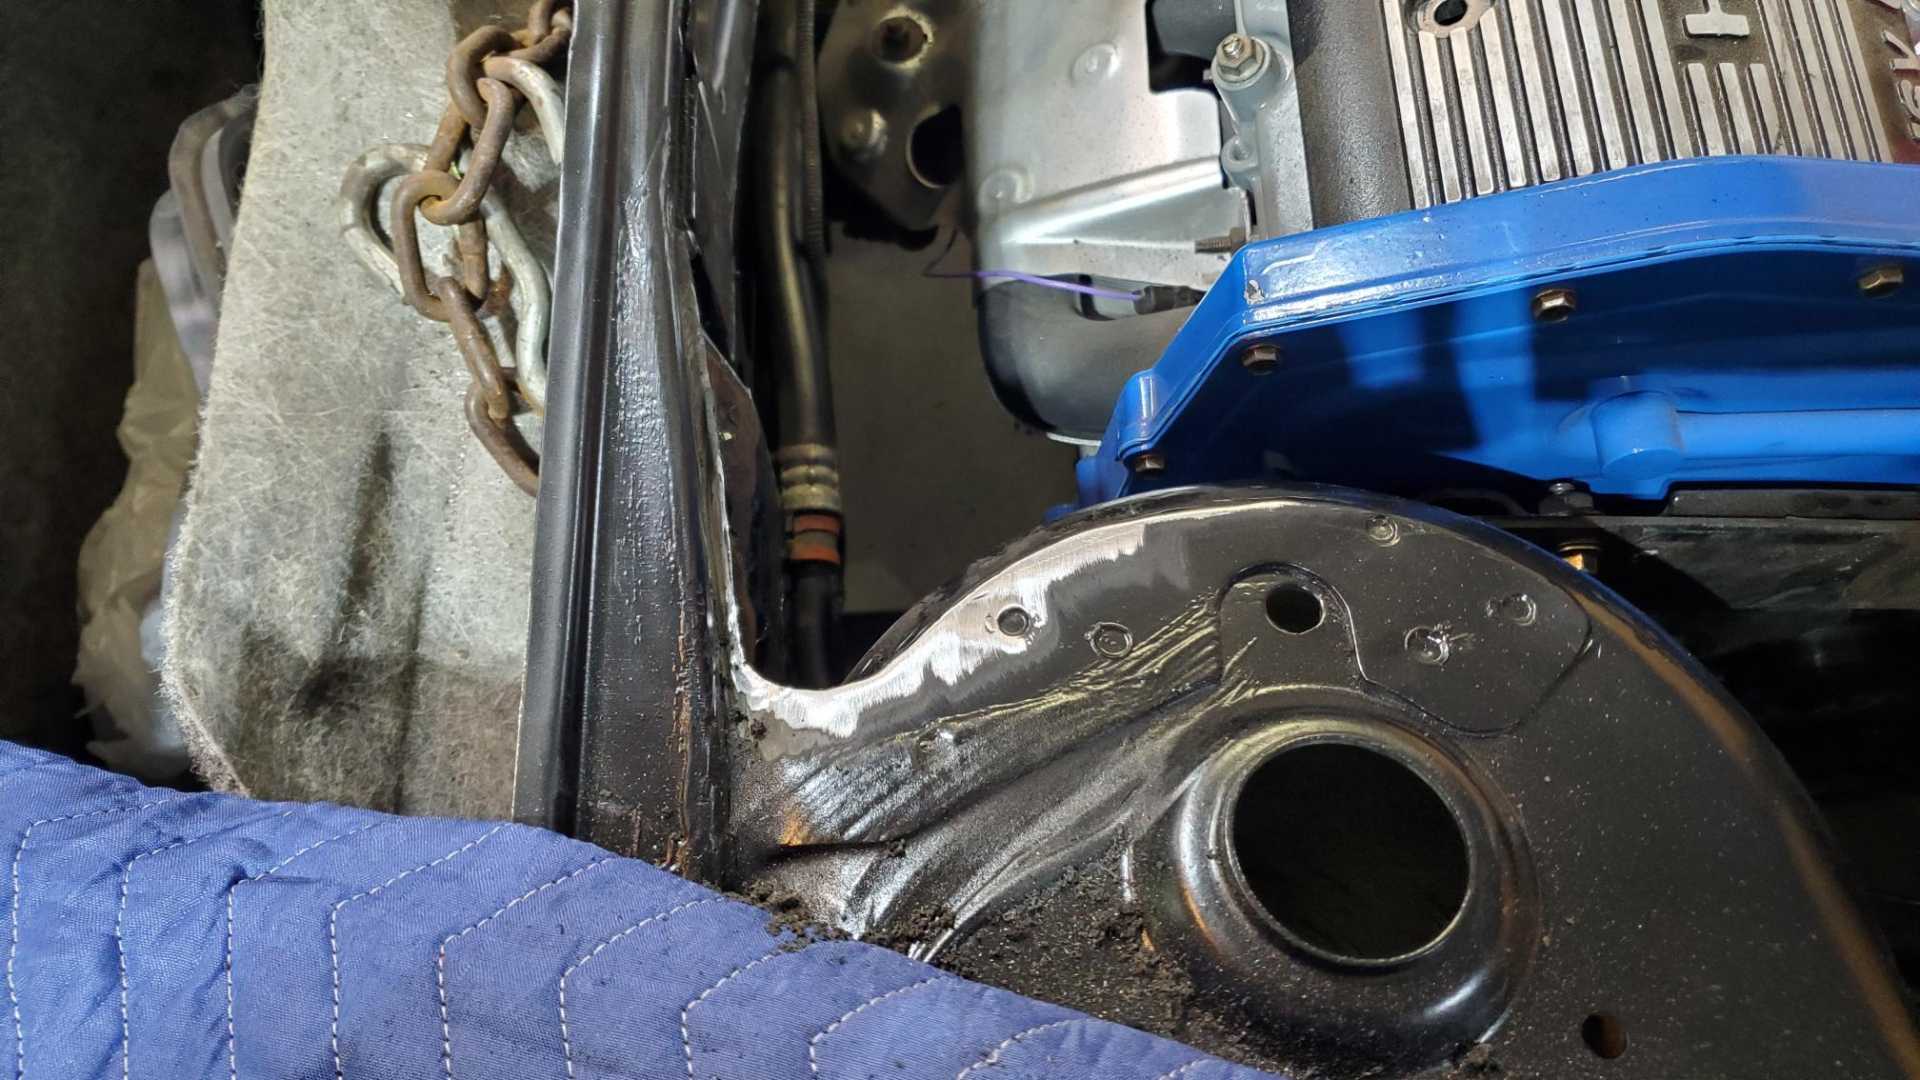
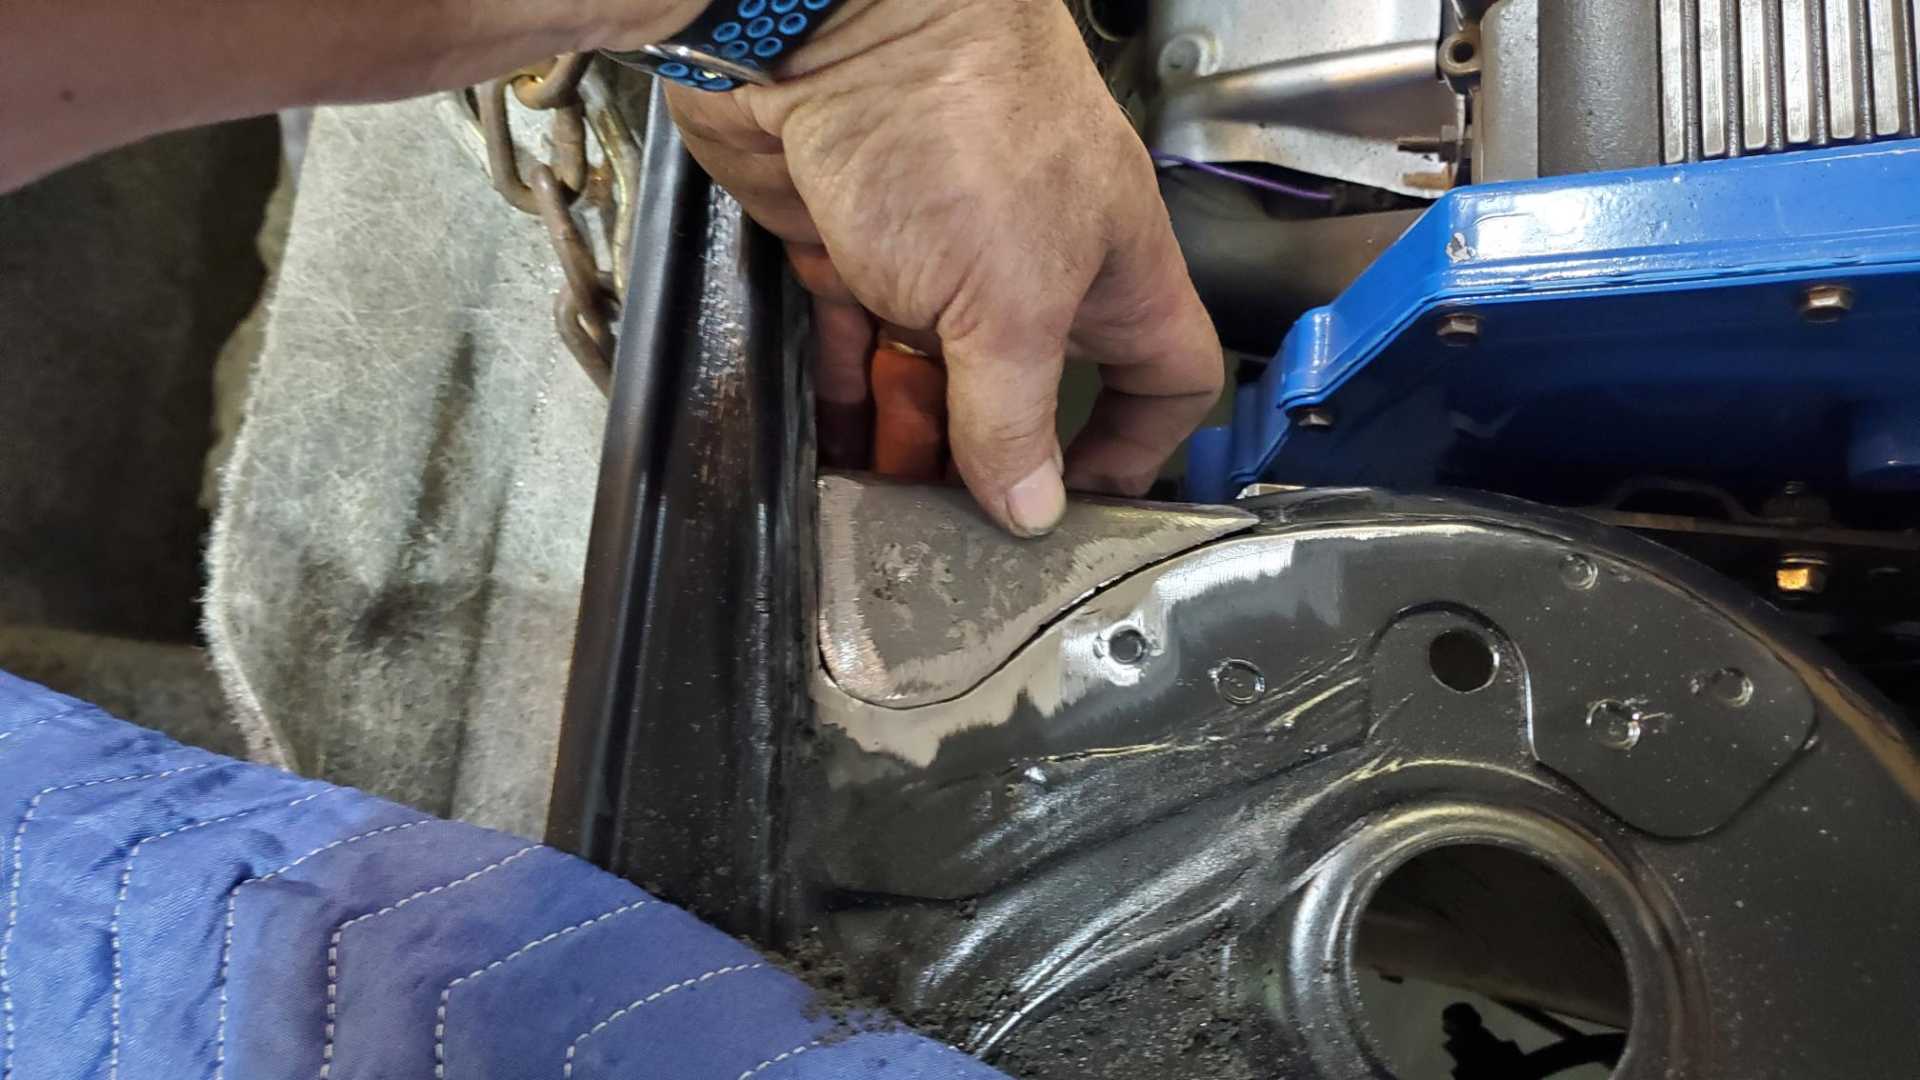
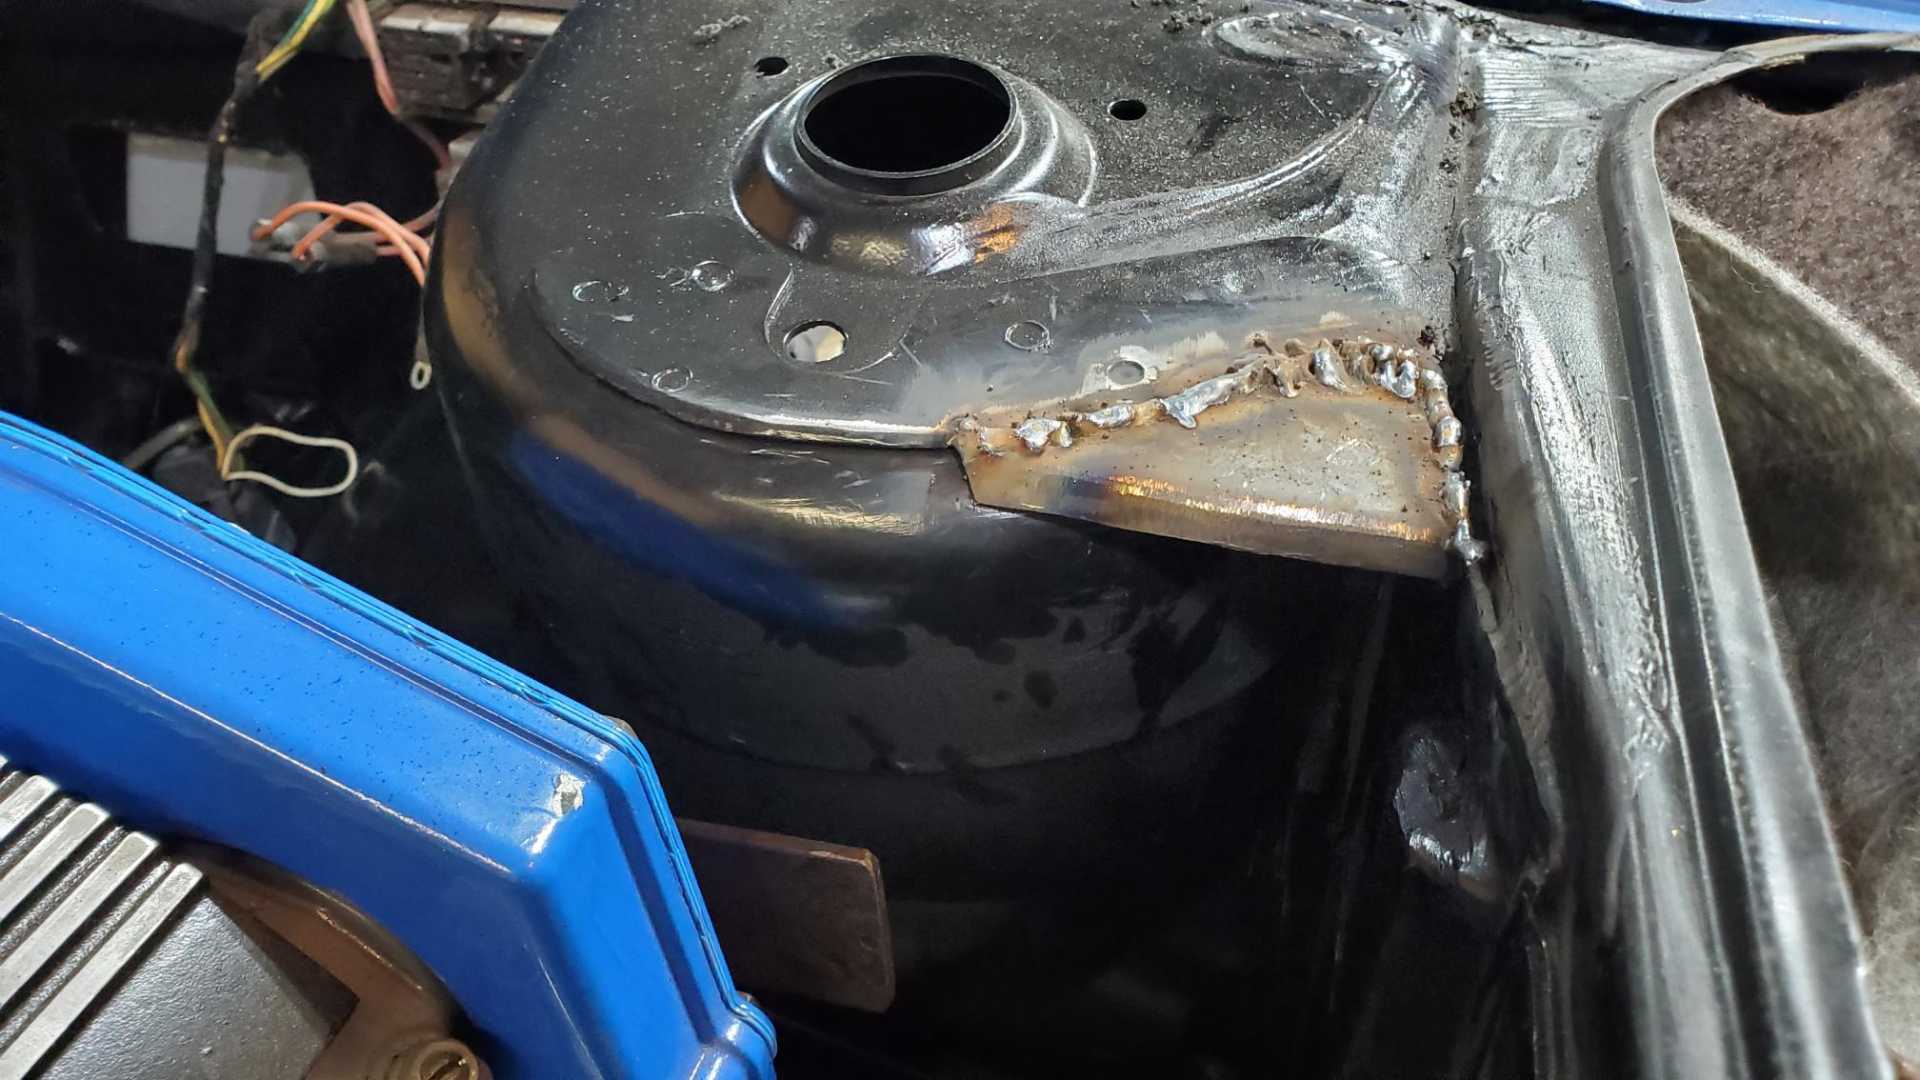
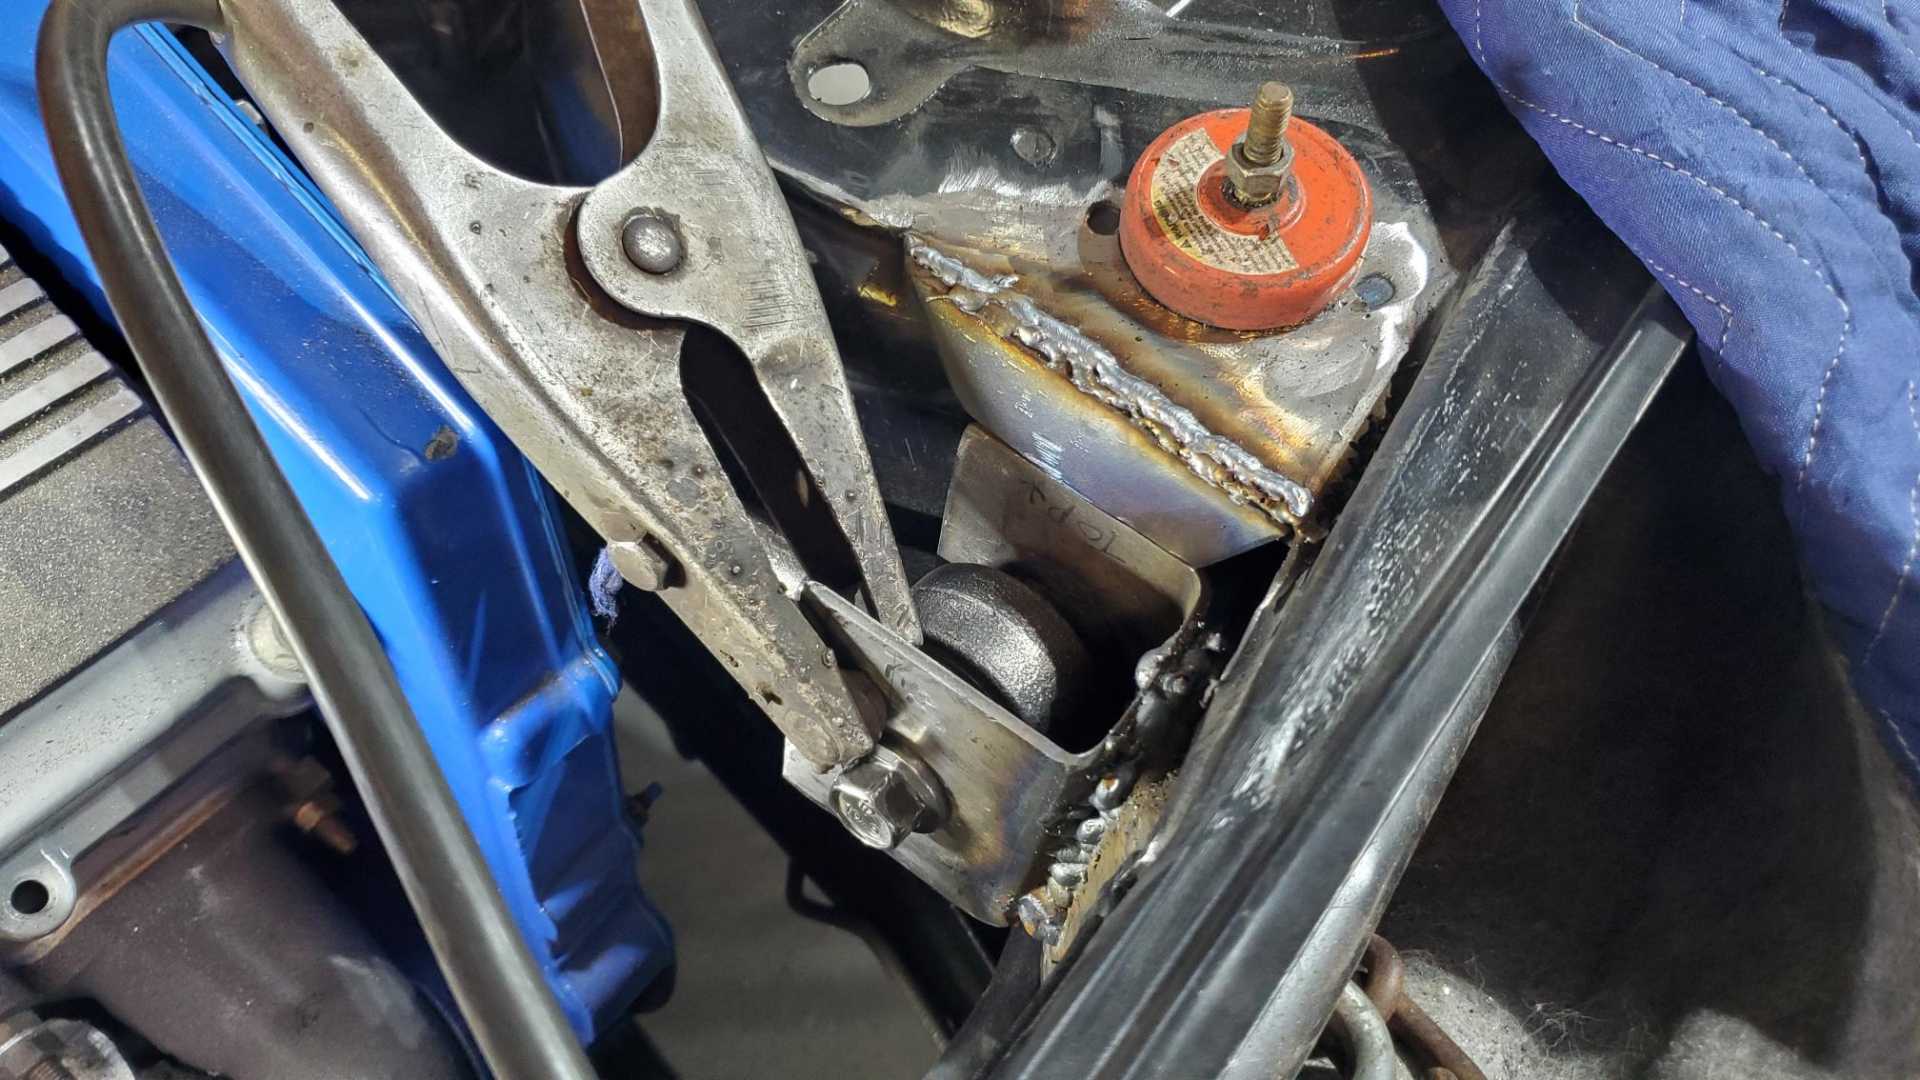
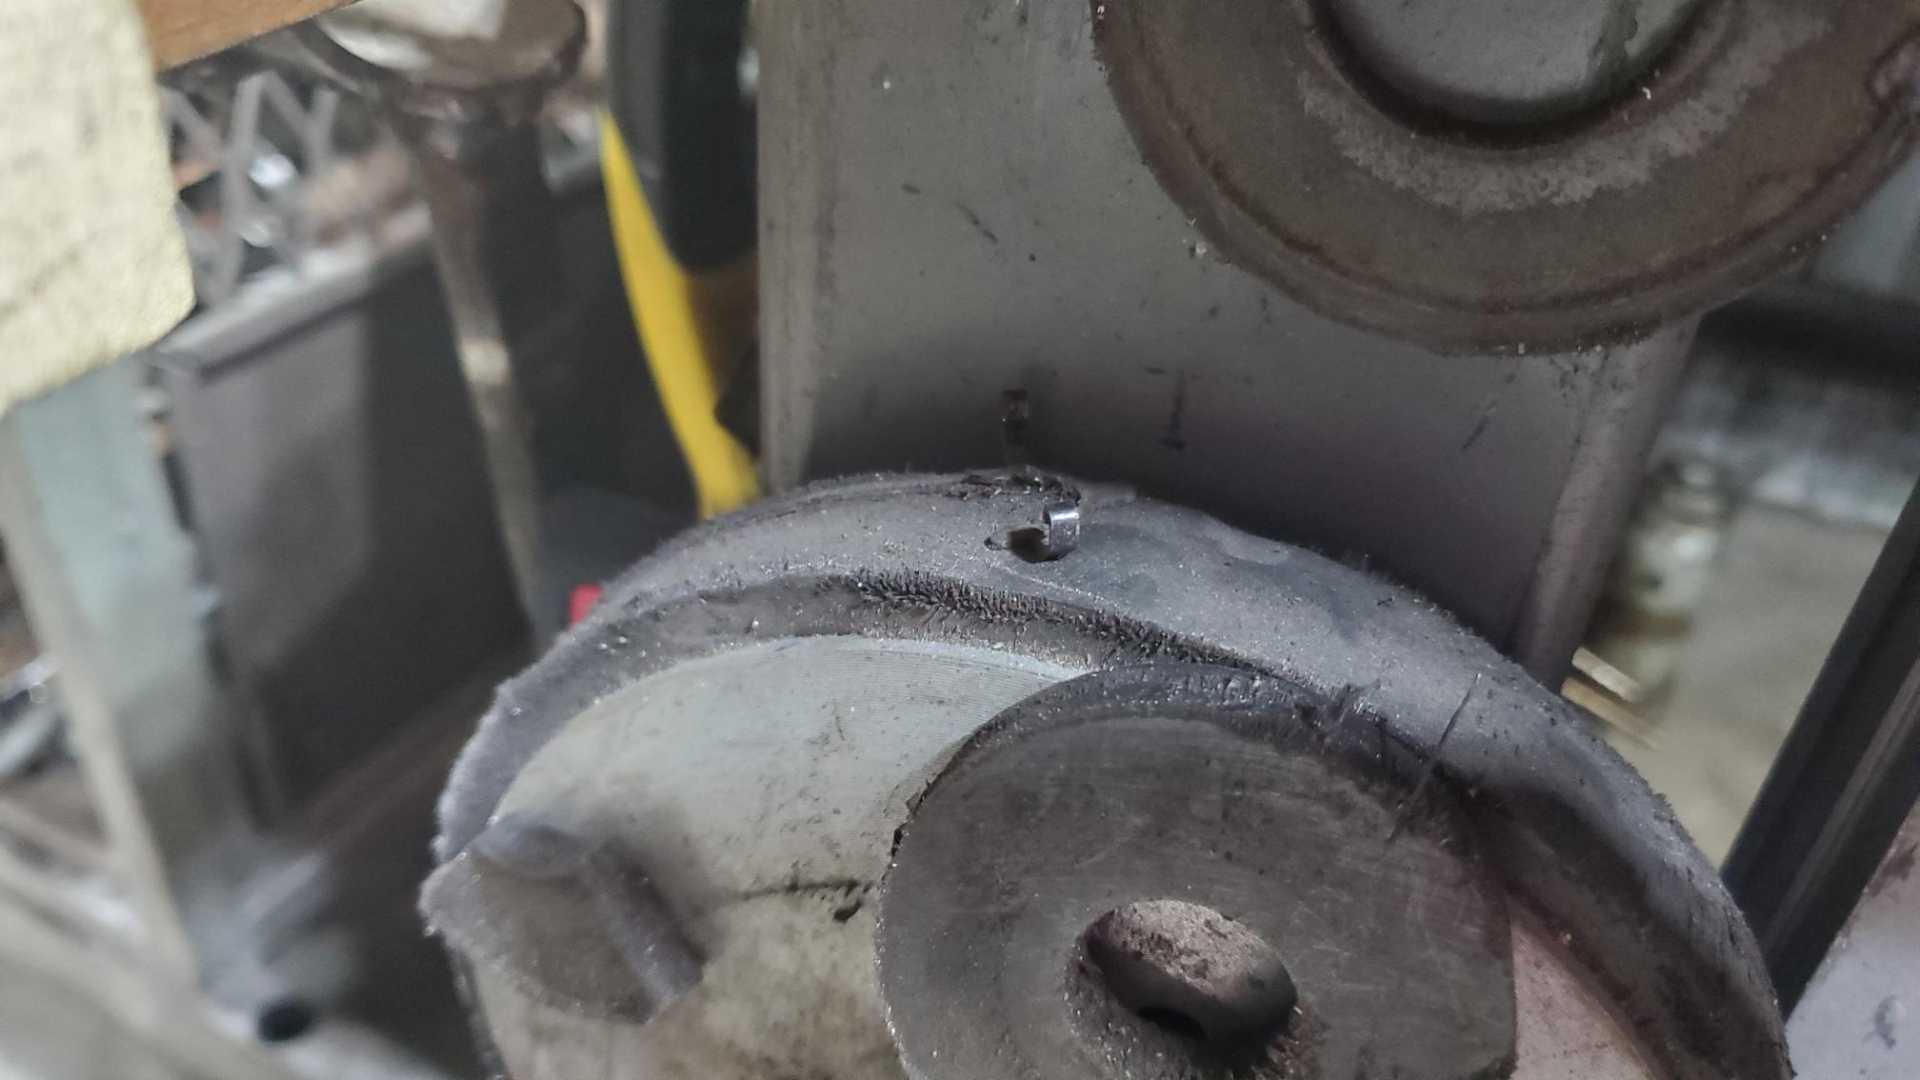
Back to the torque strut mount. I spent a lot of time looking at the engine and the engine bay and finally decided to go back to the original plan I had for mounting the torque strut. I used the mounting plate/lifting eye on the end of the Quad by fabricating a bracket that uses the same four holes with captured nuts, welded to a modified tie rod end housing.
I used the eye from the Ford anti-sway bar link I got from the salvage, welded to the threaded end of the same tie rod.
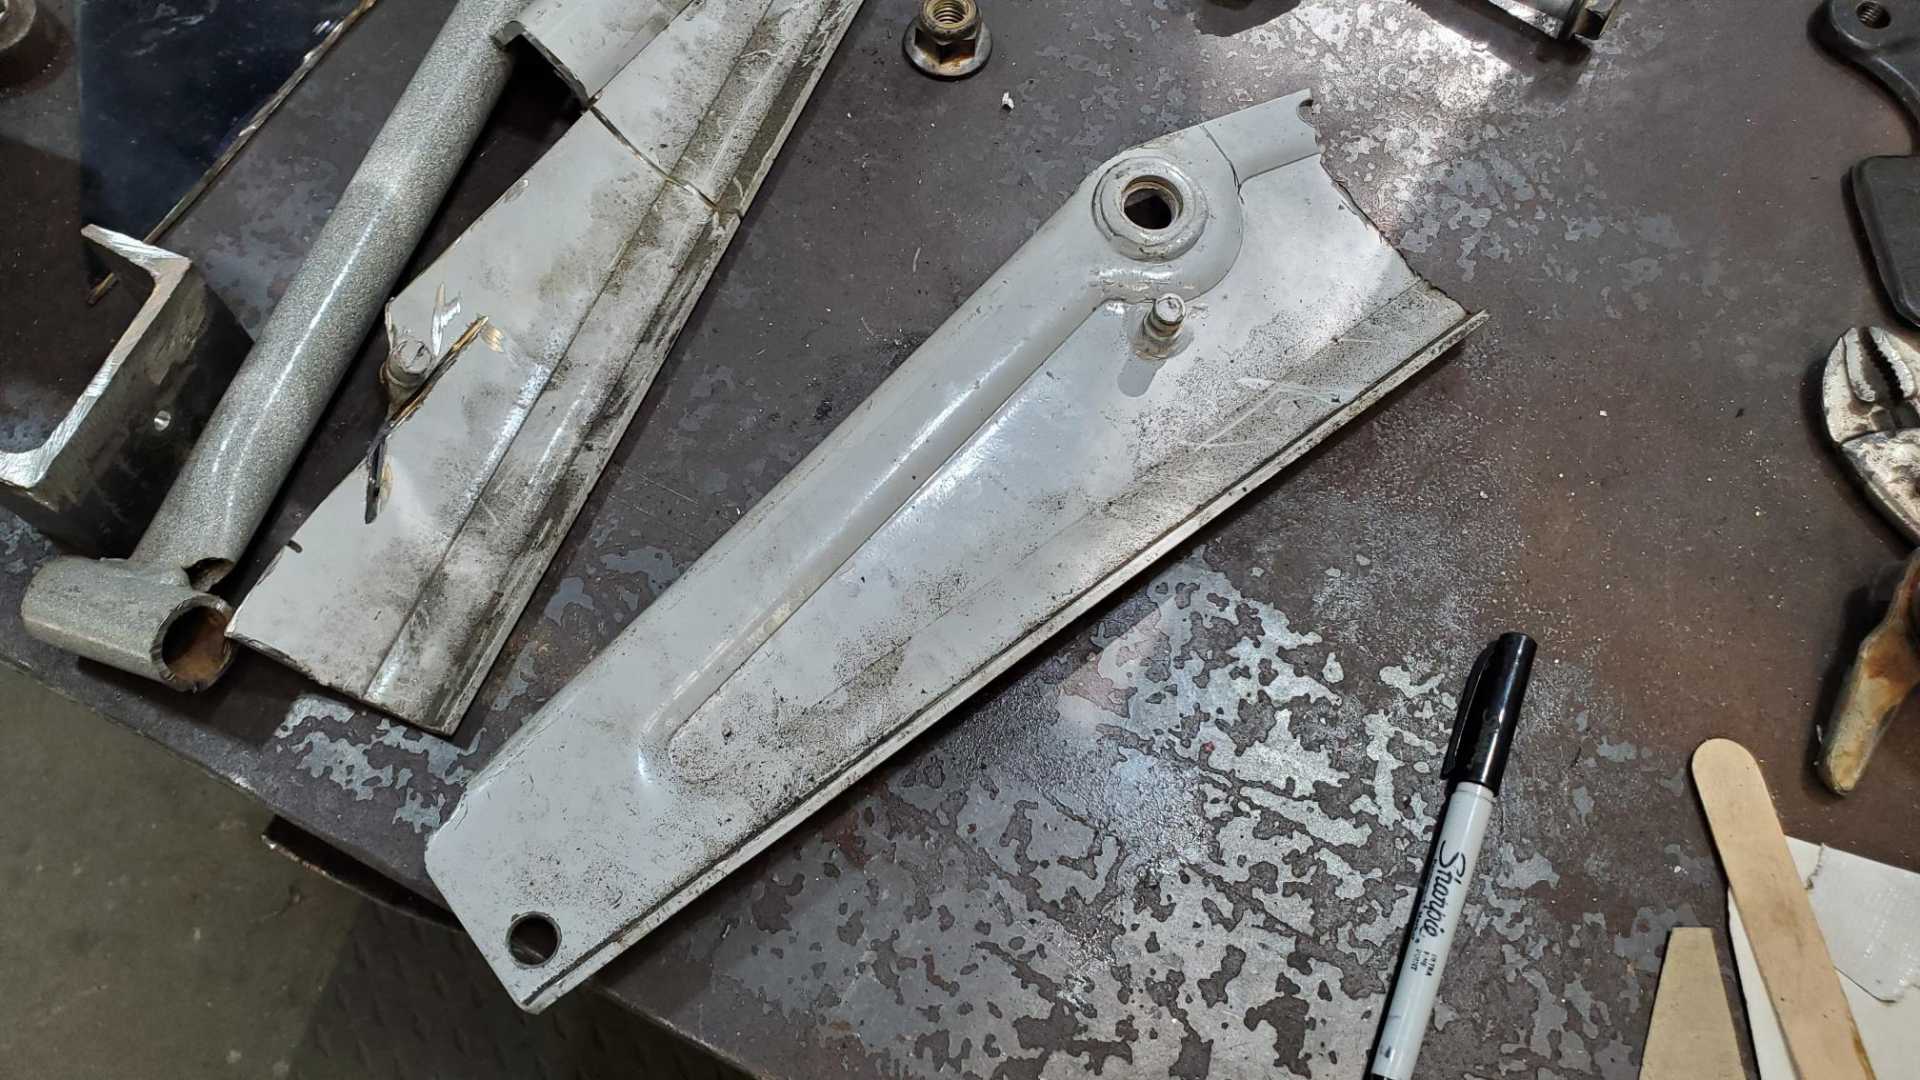
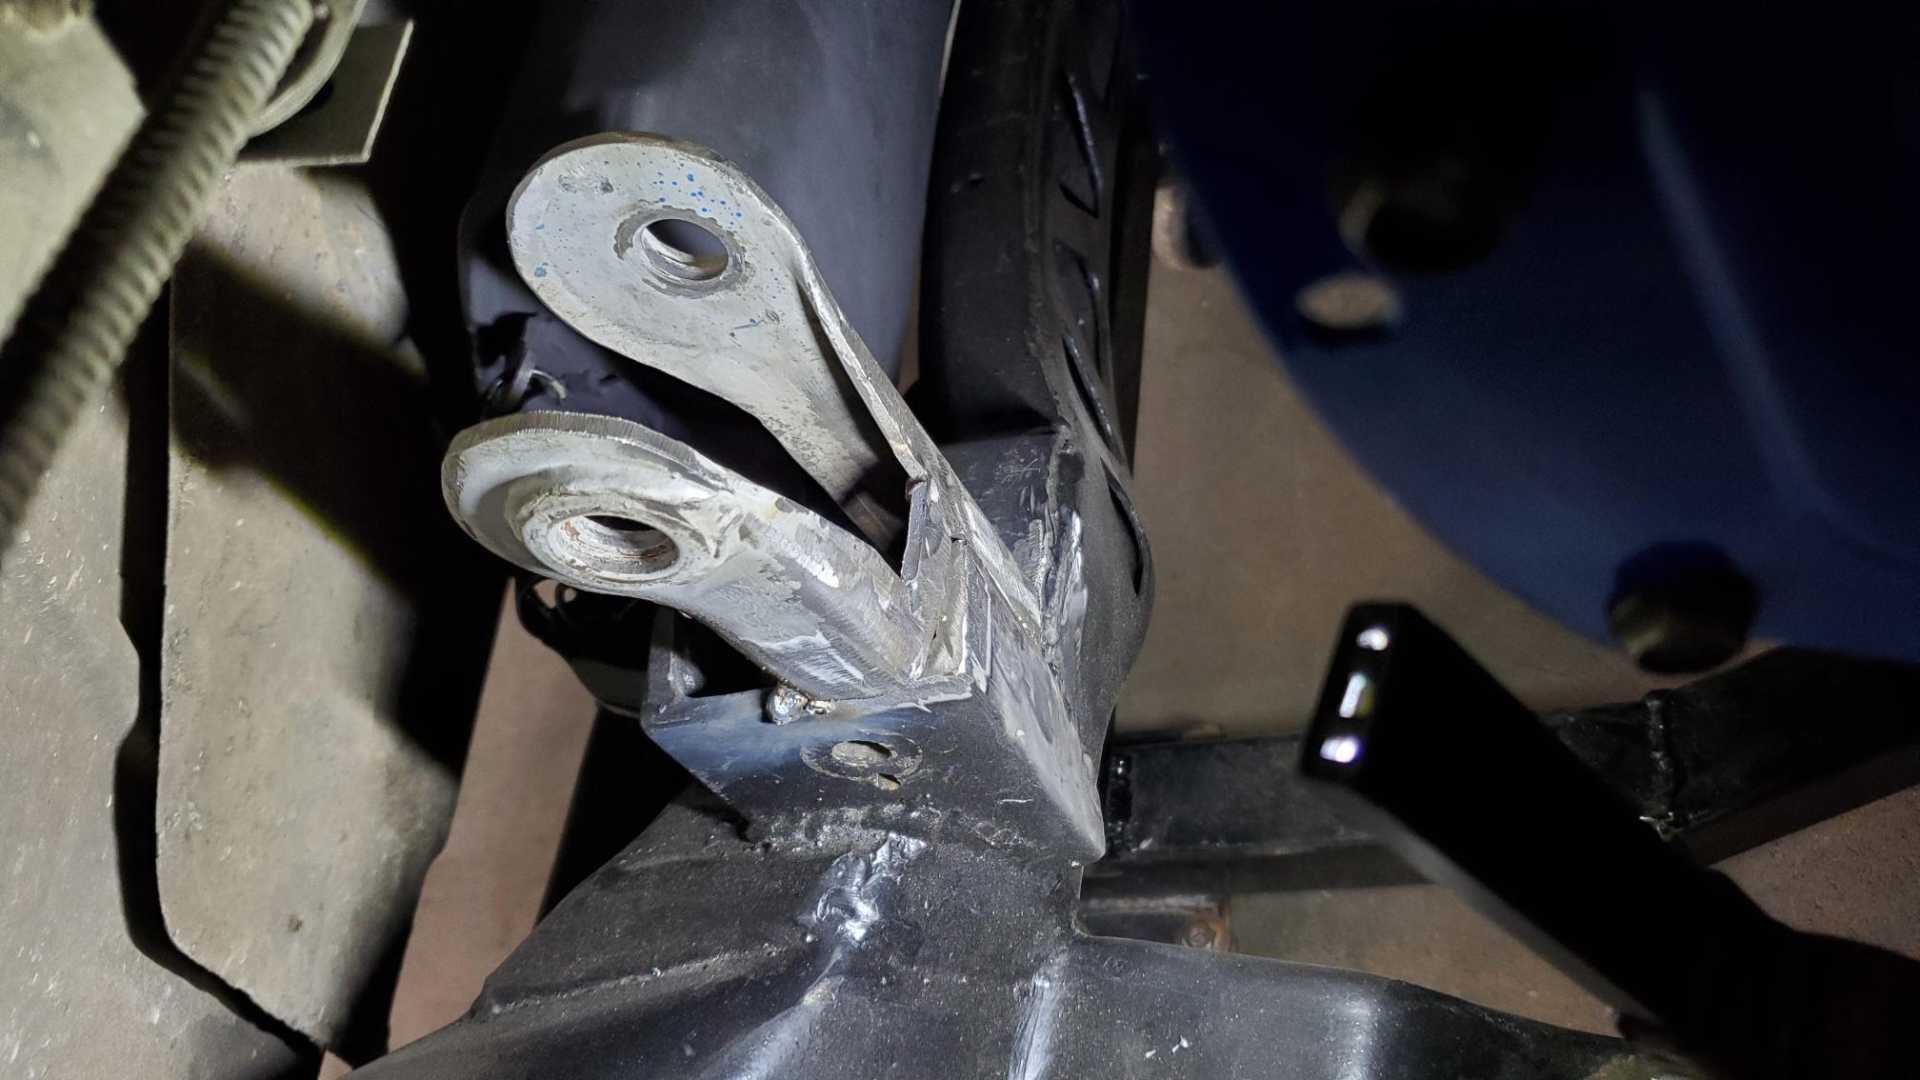
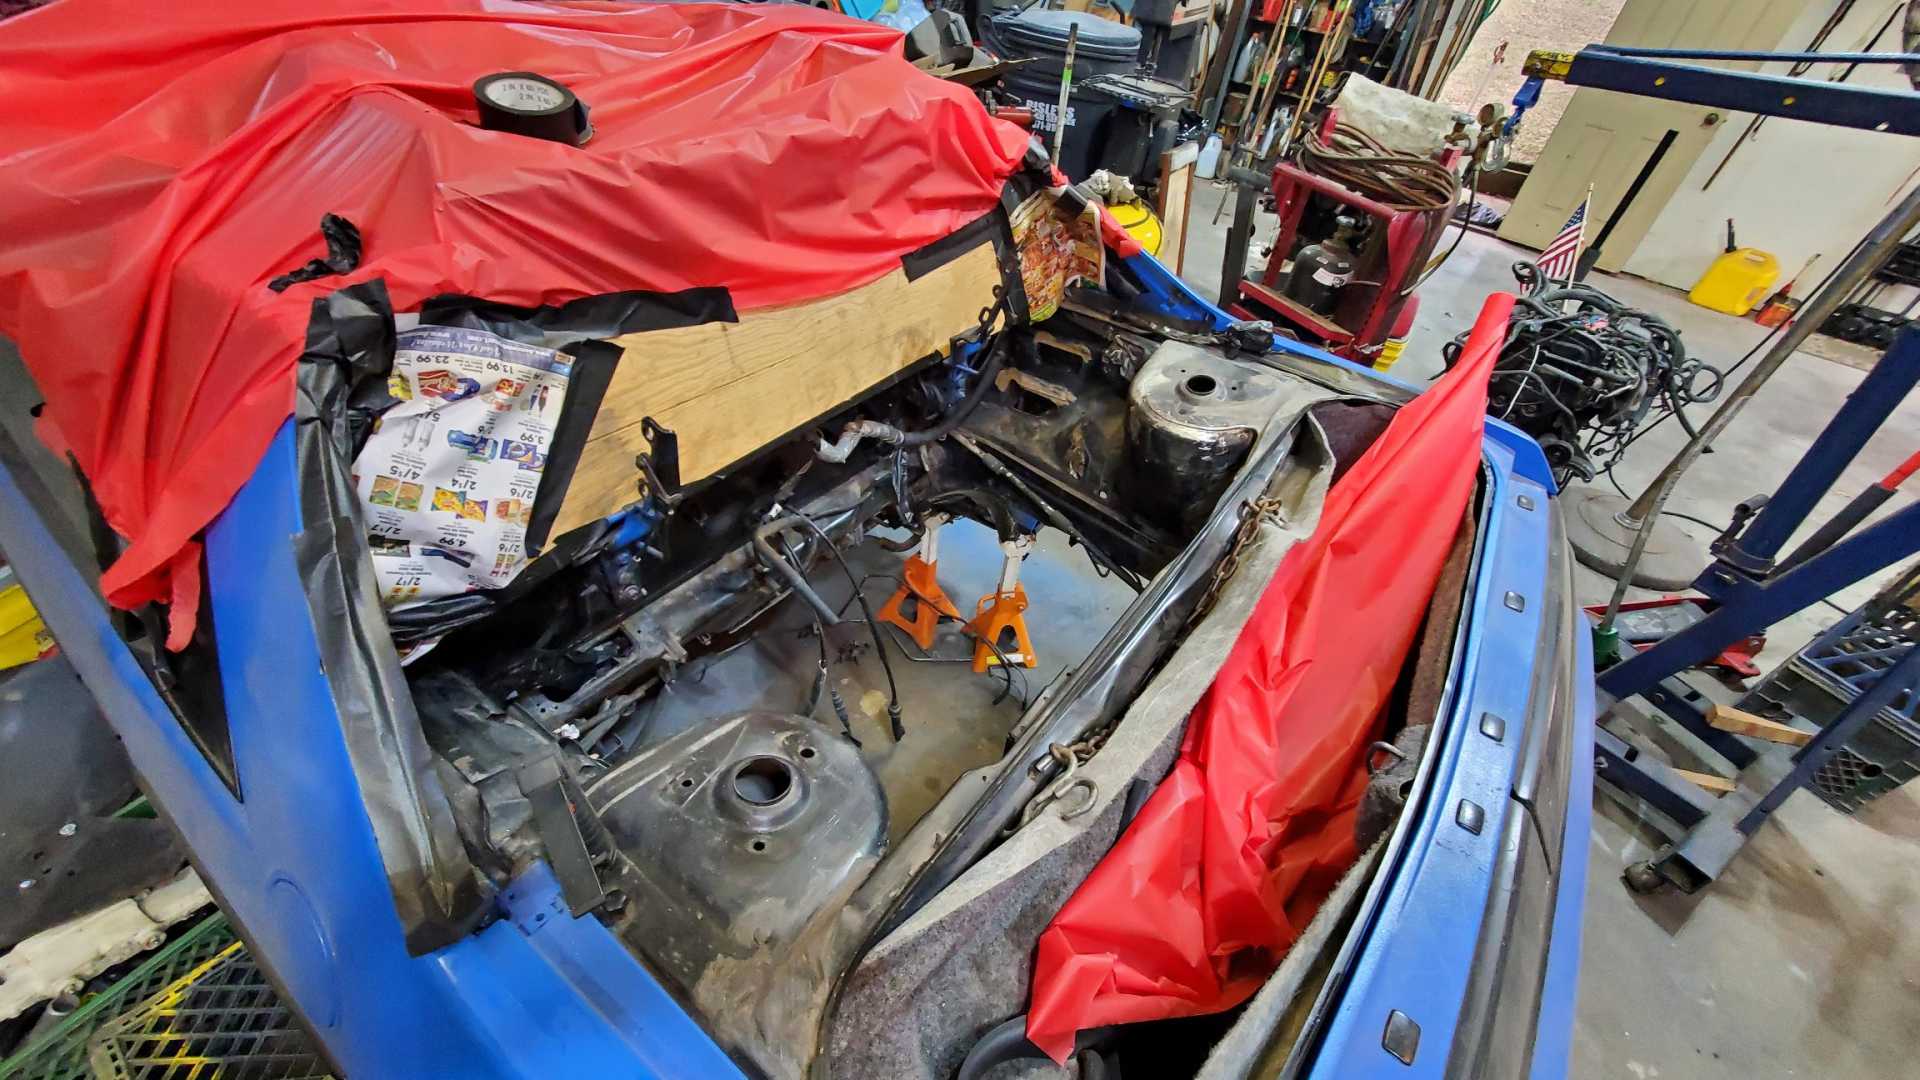
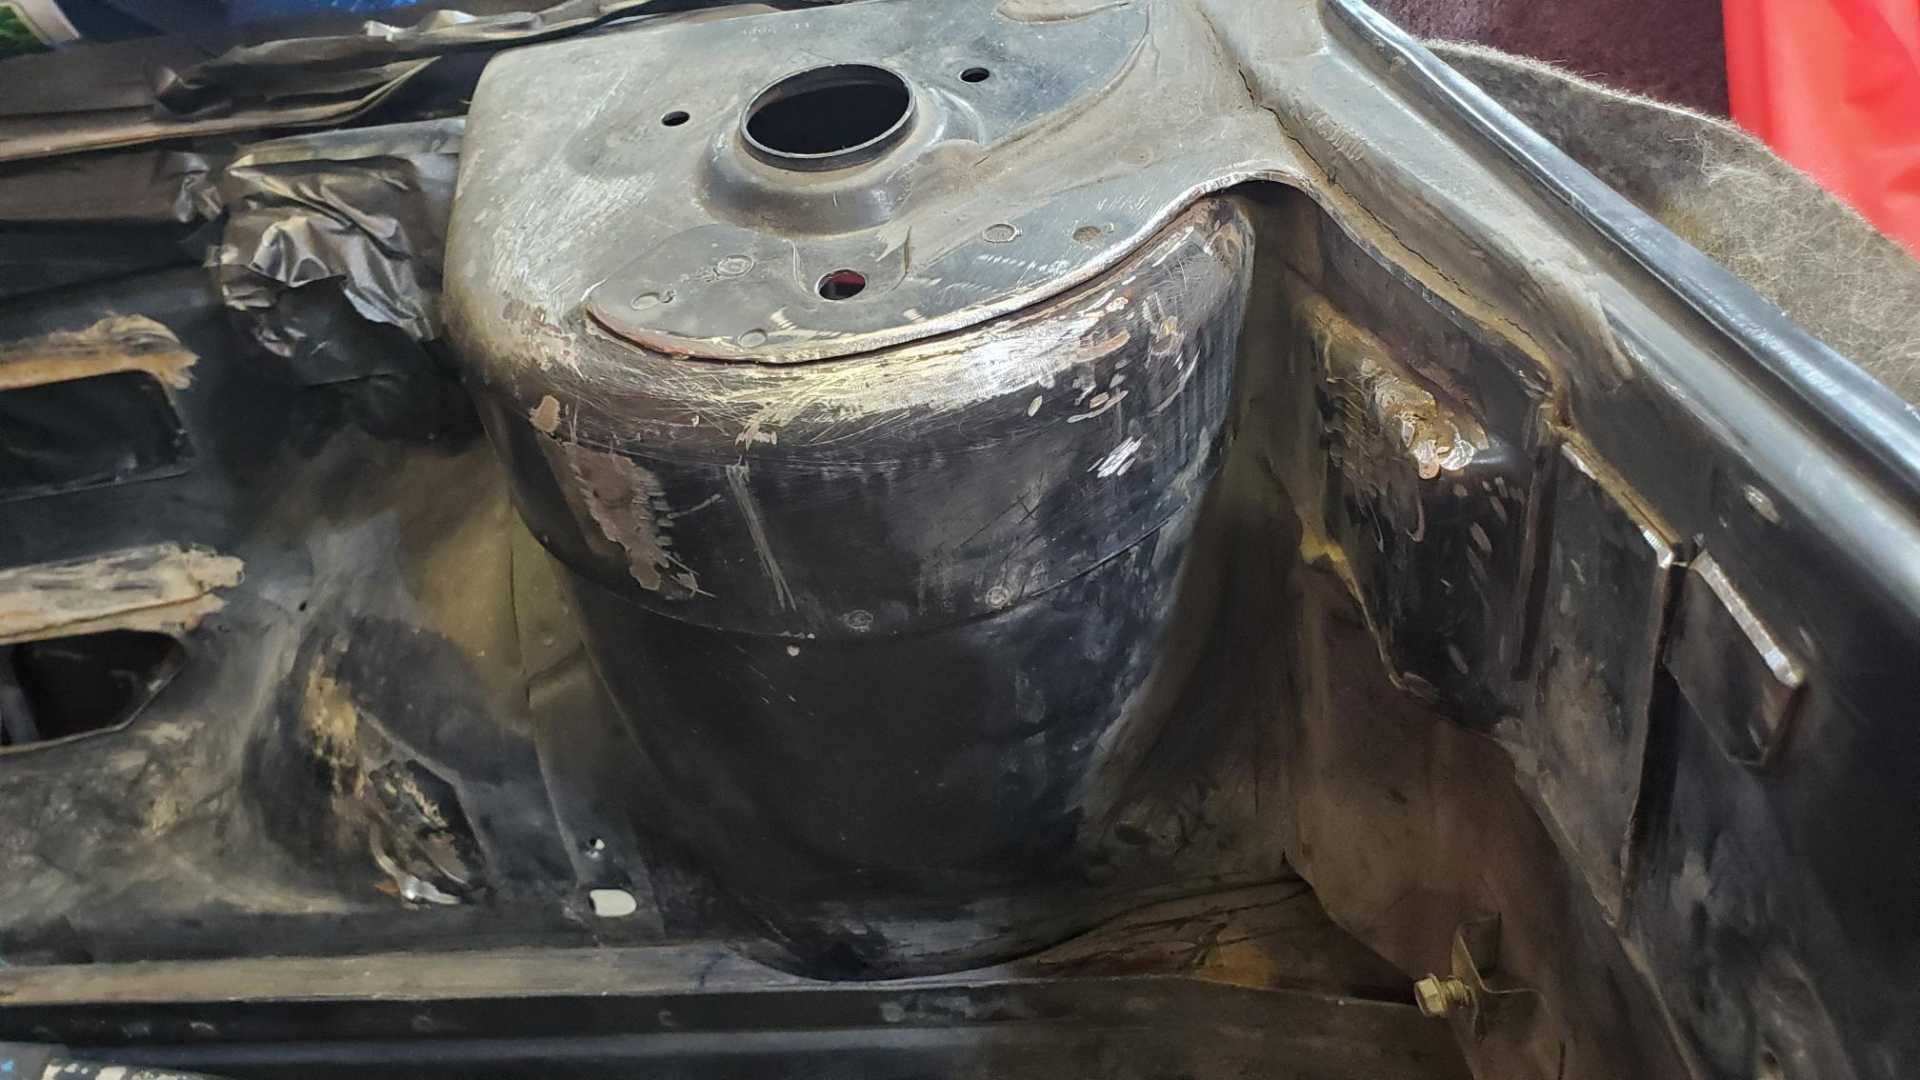
First up was rebuilding the factory mounting point on the Fiero.
I took my time welding around the new piece of sheet metal but still got some warpage. It made for some rough looking welds, but they ground down just fine.
I bought a piece of sheet metal from Lowe's to speed up the process. Hunting around in my stash and then modifying whatever I could find was just going to take too long.
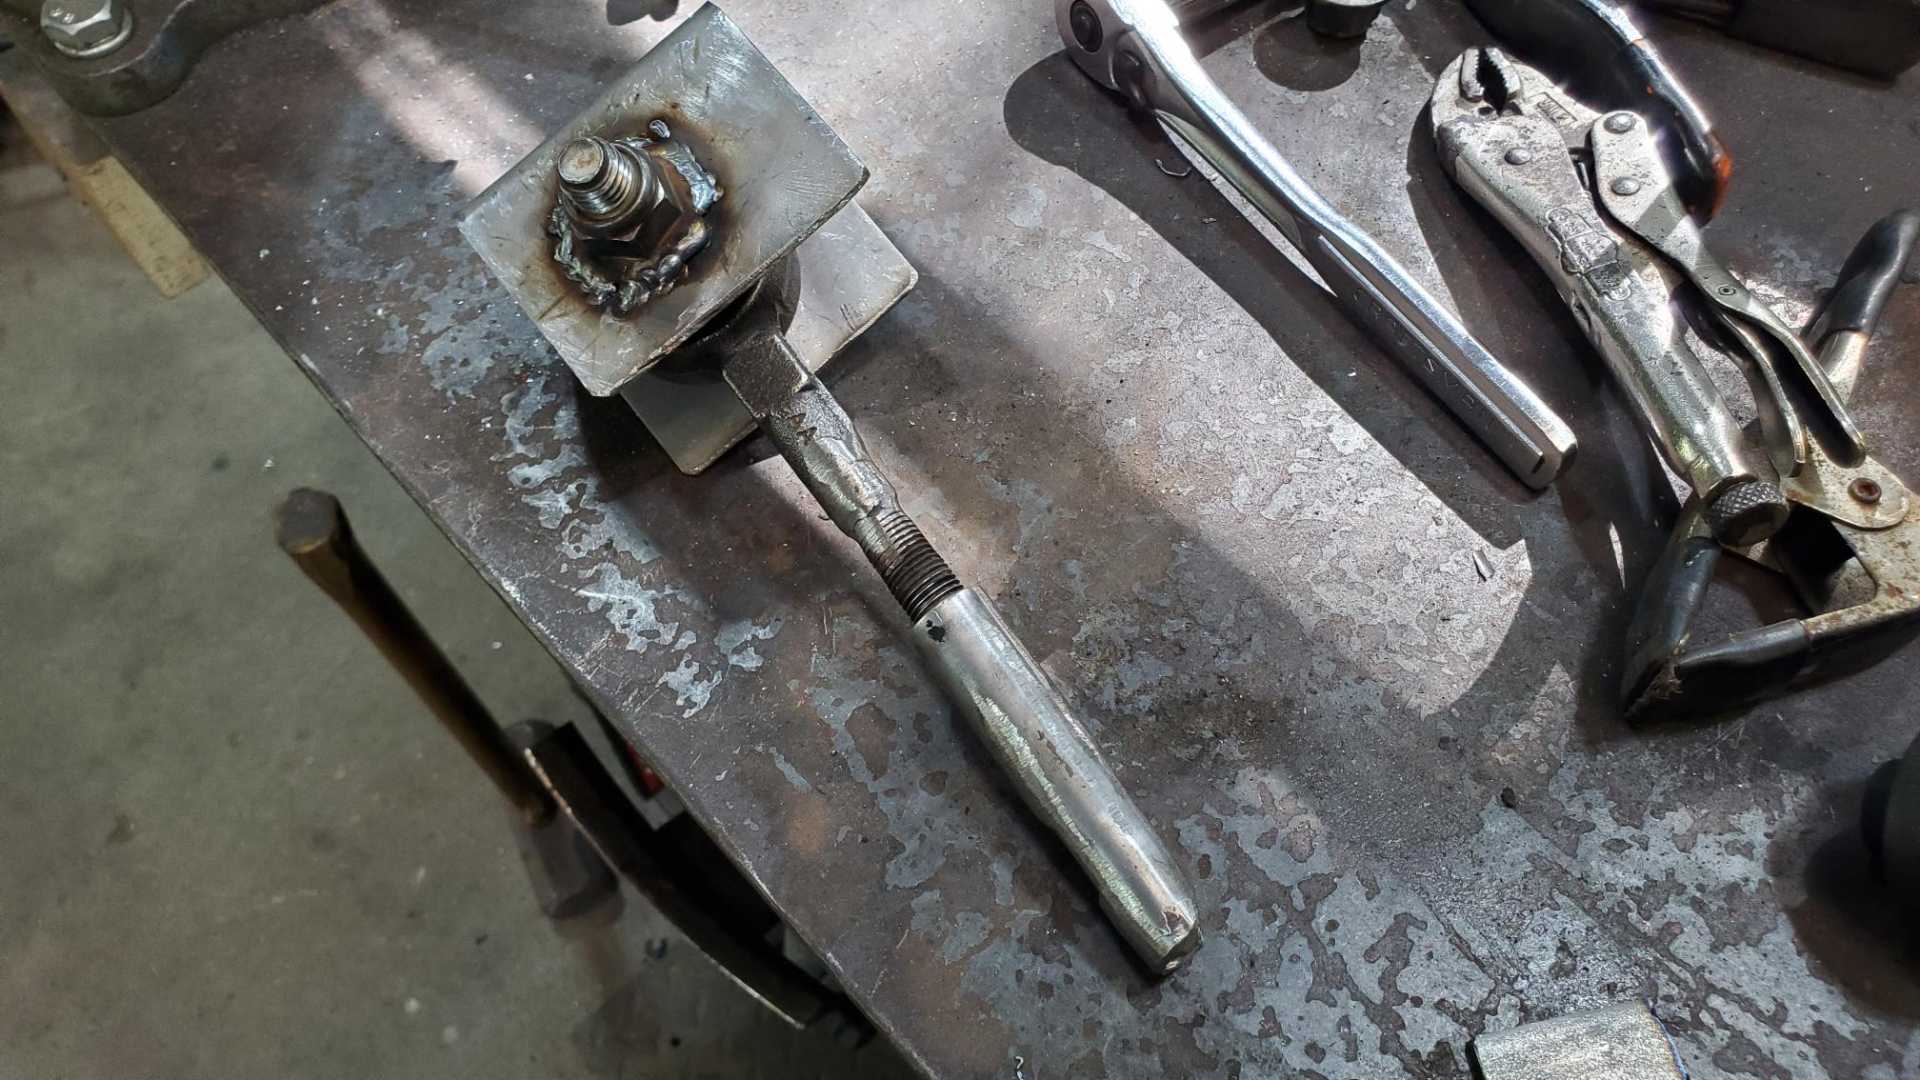
That allowed me to quickly fabricate the bracket to hold the sway bar link eye and I welded the big nut that came with the link to the bracket.
[This message has been edited by Quadfather (edited 09-06-2022).]
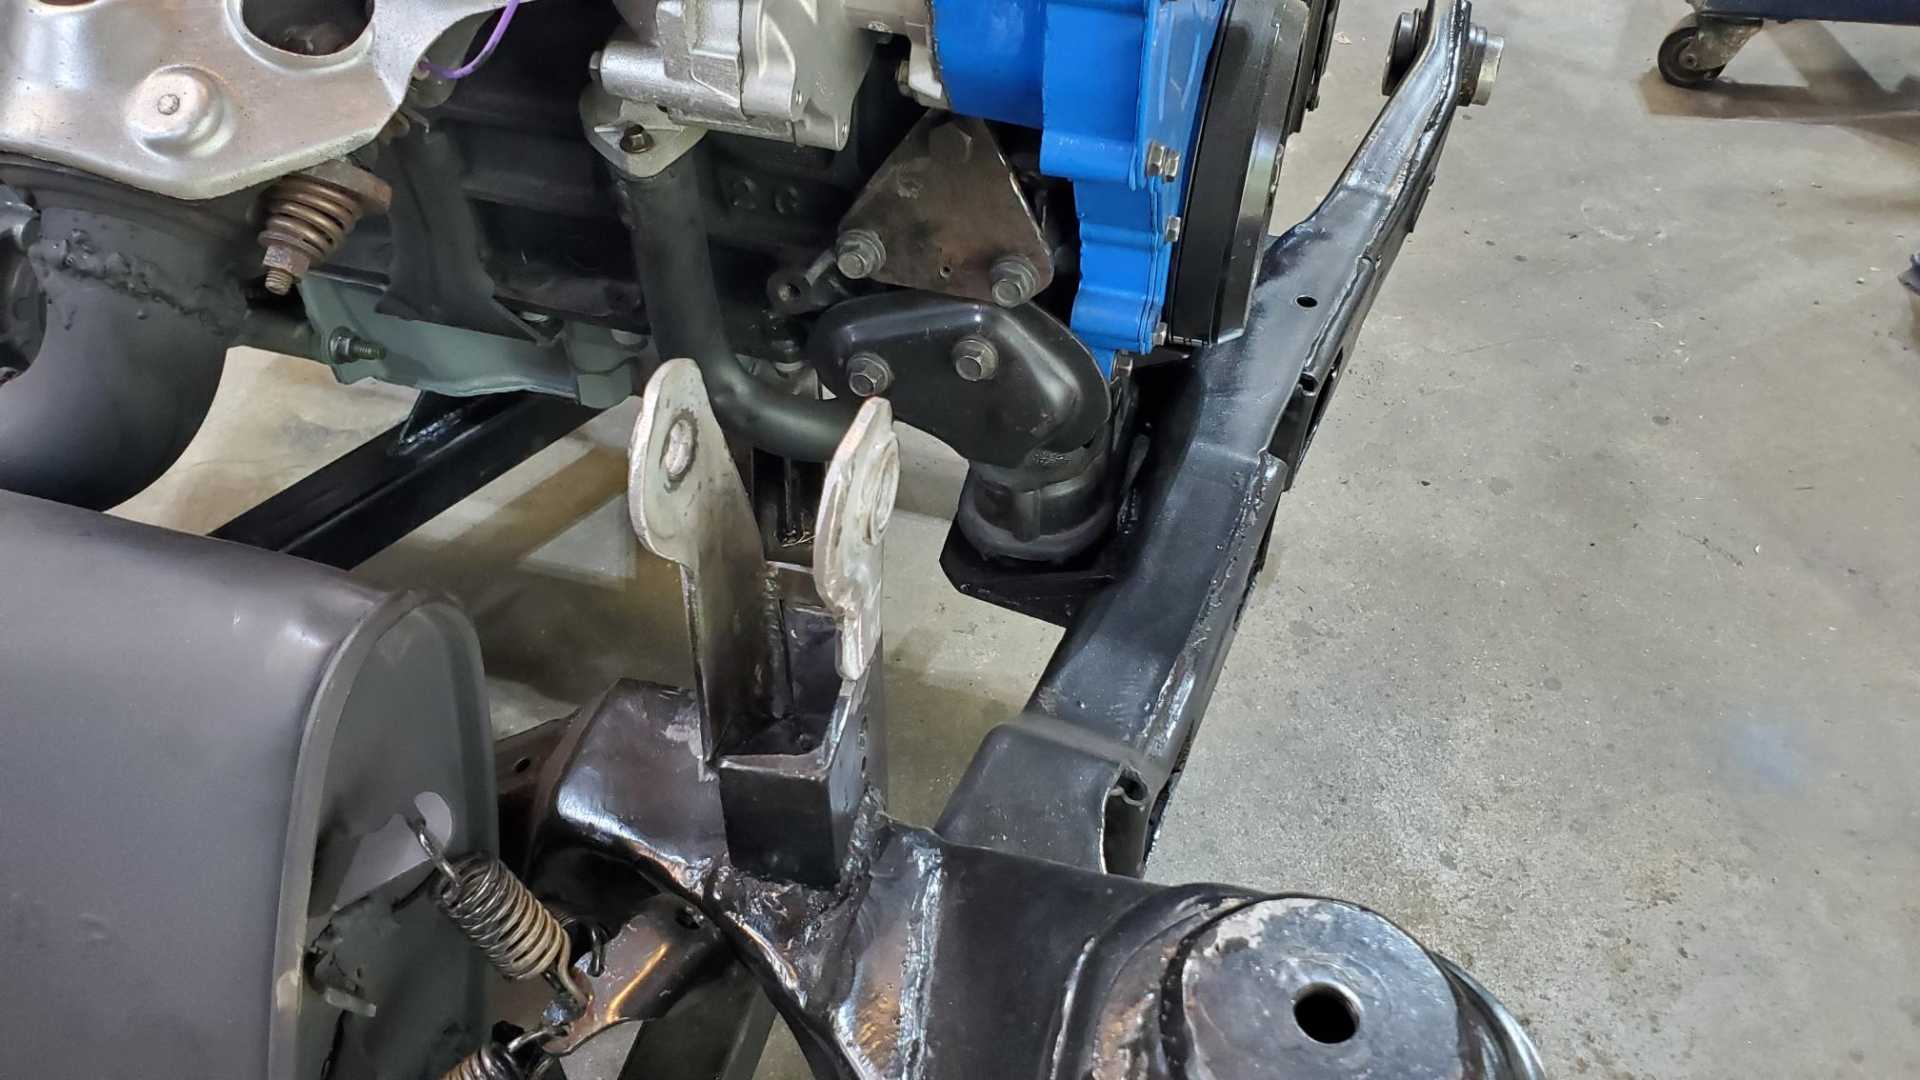
The holder for the strut ended up being four pieces: the curved piece welded back into the top of the strut mount, the three-sided bracket for the eye, a piece for the bottom of the bracket to give it strength, then a flat piece to weld from the curved piece to the bracket.
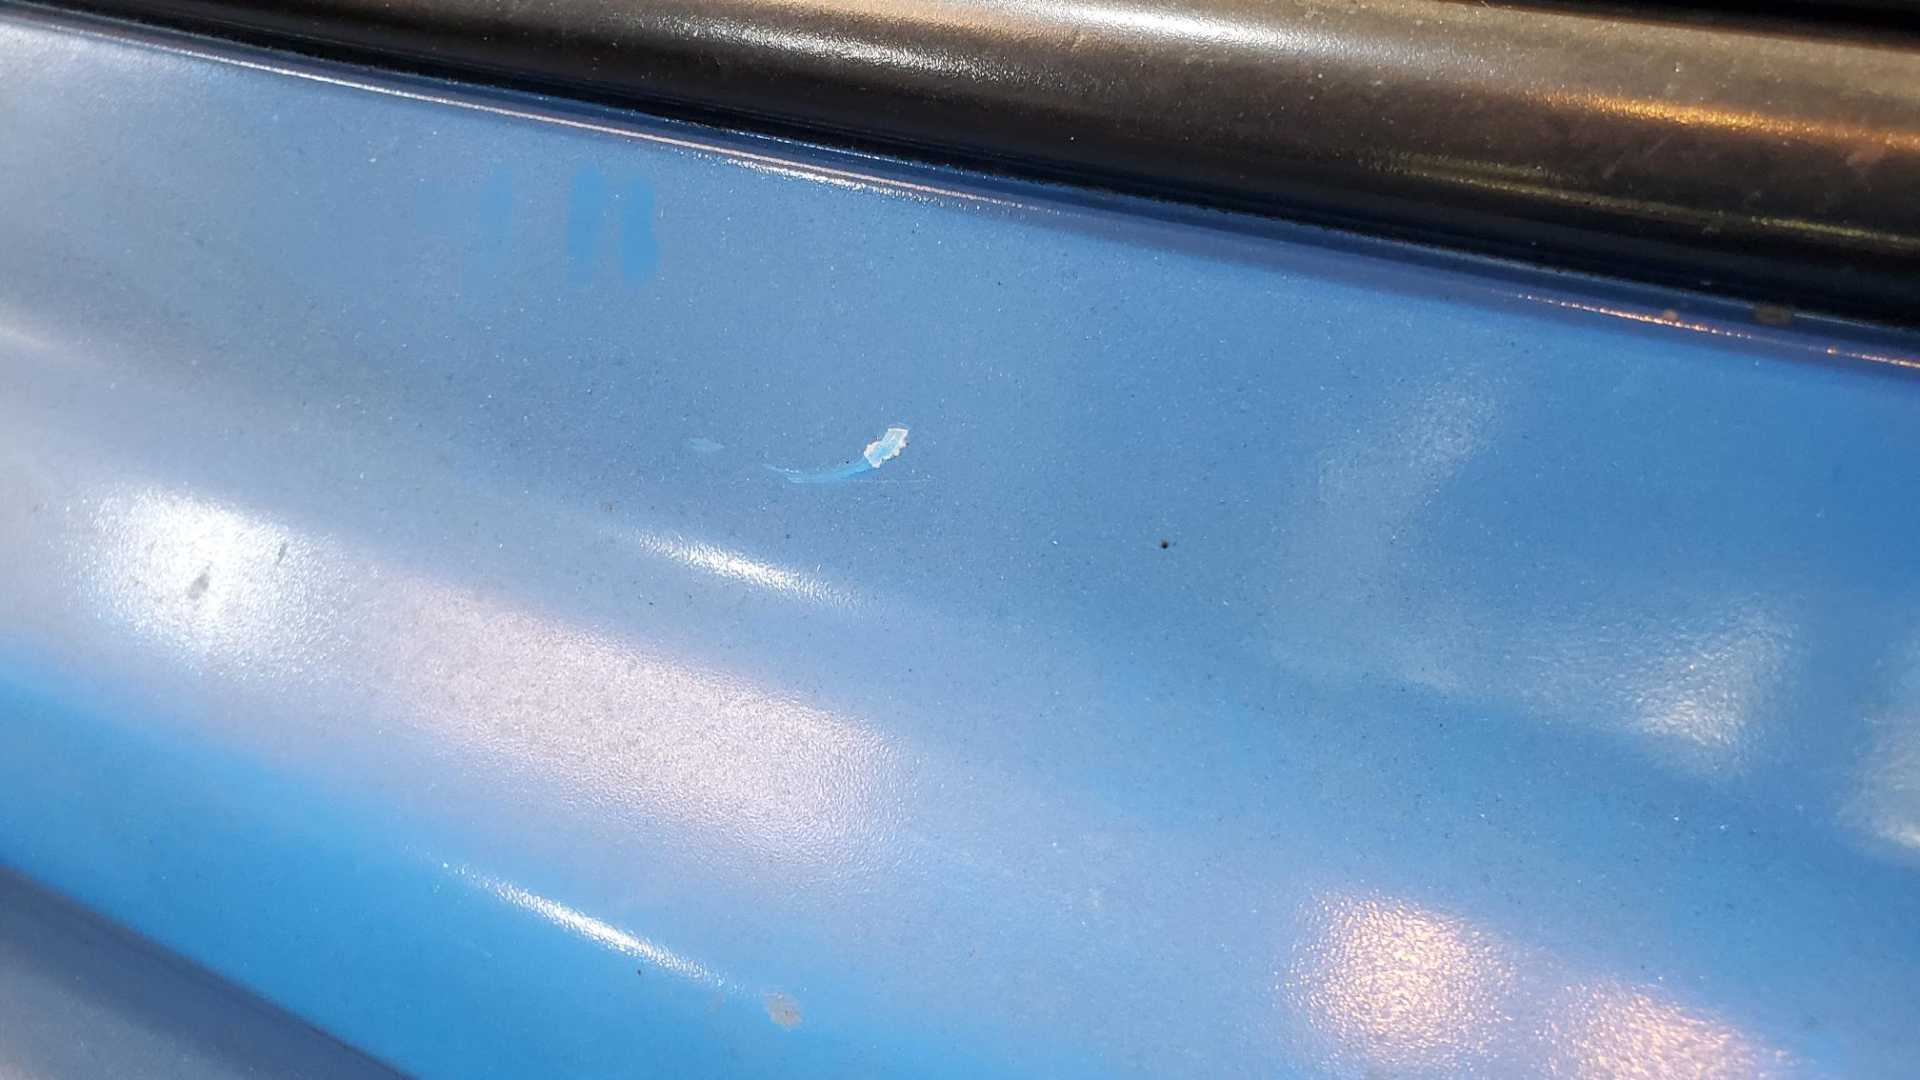
I was feeling pretty good about things until I started lifting the car up to take the engine and cradle out. I wasn't paying attention and the prop rod fell forward and put a big scratch on the rear fascia.
Wish I'd gotten the swap finished and the engine running, THEN done paint and body. On the other hand, this is one of the reasons I picked Rust-Oleum instead of regular automotive paint.
[This message has been edited by Quadfather (edited 10-07-2022).]
Looking good! Is your welder running full duty right now? It looks like if you turned the heat up a little it would help get a little better penetration. I think your new torque strut is going to work great!
Looking good! Is your welder running full duty right now? It looks like if you turned the heat up a little it would help get a little better penetration.
Sometimes I have trouble with the panendermic semi-boloid slots of the stator. This is a known fault with these welders, because every seventh conductor is connected by a non-reversible tremie pipe to the differential girdle spring on the “up” end of the grammeters.
Originally posted by Quadfather: Sometimes I have trouble with the panendermic semi-boloid slots of the stator. This is a known fault with these welders, because every seventh conductor is connected by a non-reversible tremie pipe to the differential girdle spring on the “up” end of the grammeters.
Lol classic.
I just see this behavior on my own welder if I am welding on 120 vs 240, on 120 the welds like to sit on top more. Was mostly curious what machine you are running.
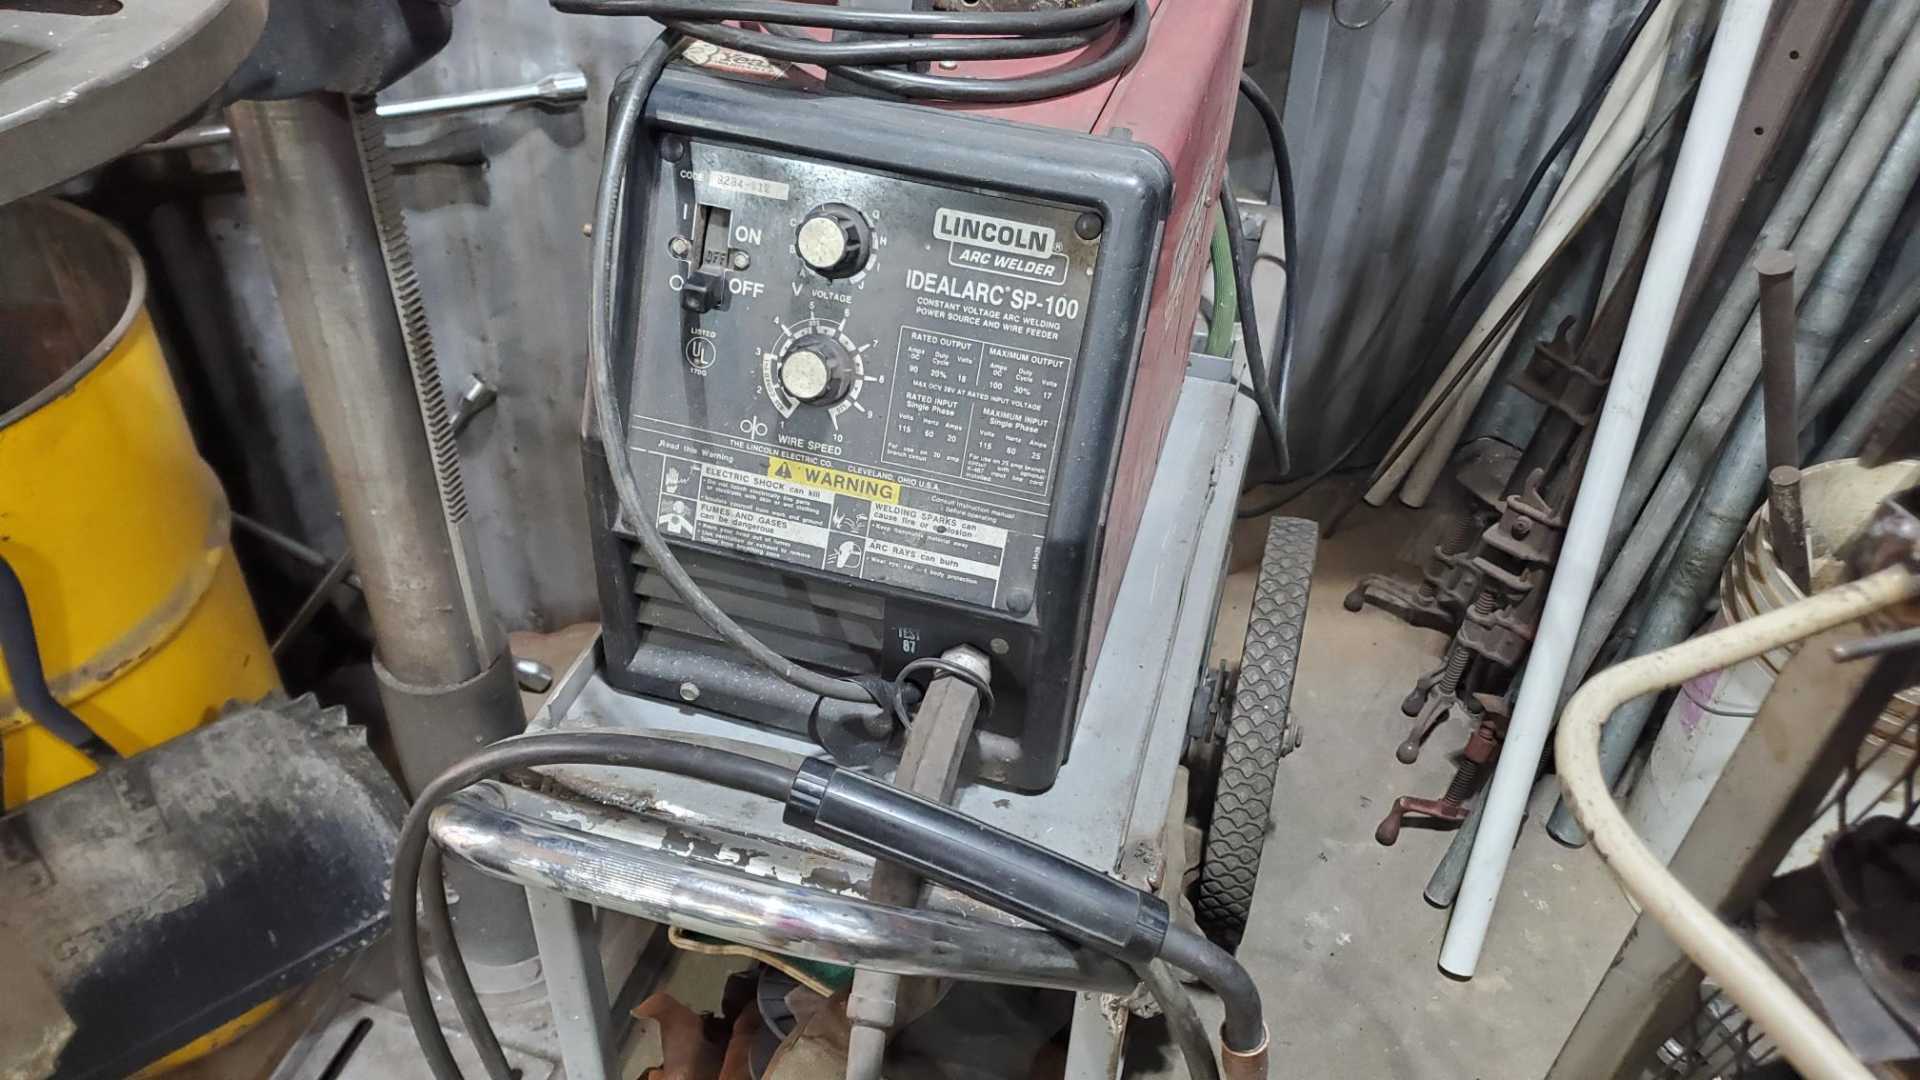
I use the little Lincoln MIG welder my dad bought 30+ years ago. It’s very user friendly. When my welds look poor it’s usually because I’ve failed to prepare the metal, failed to set up the welder or even forgotten to turn off the fan.
This welder is 110v. It would be nice to have it on a dedicated circuit, but as long as I’m not using a lot of juice for other things simultaneously it seems to do fine.
[This message has been edited by Quadfather (edited 09-21-2022).]
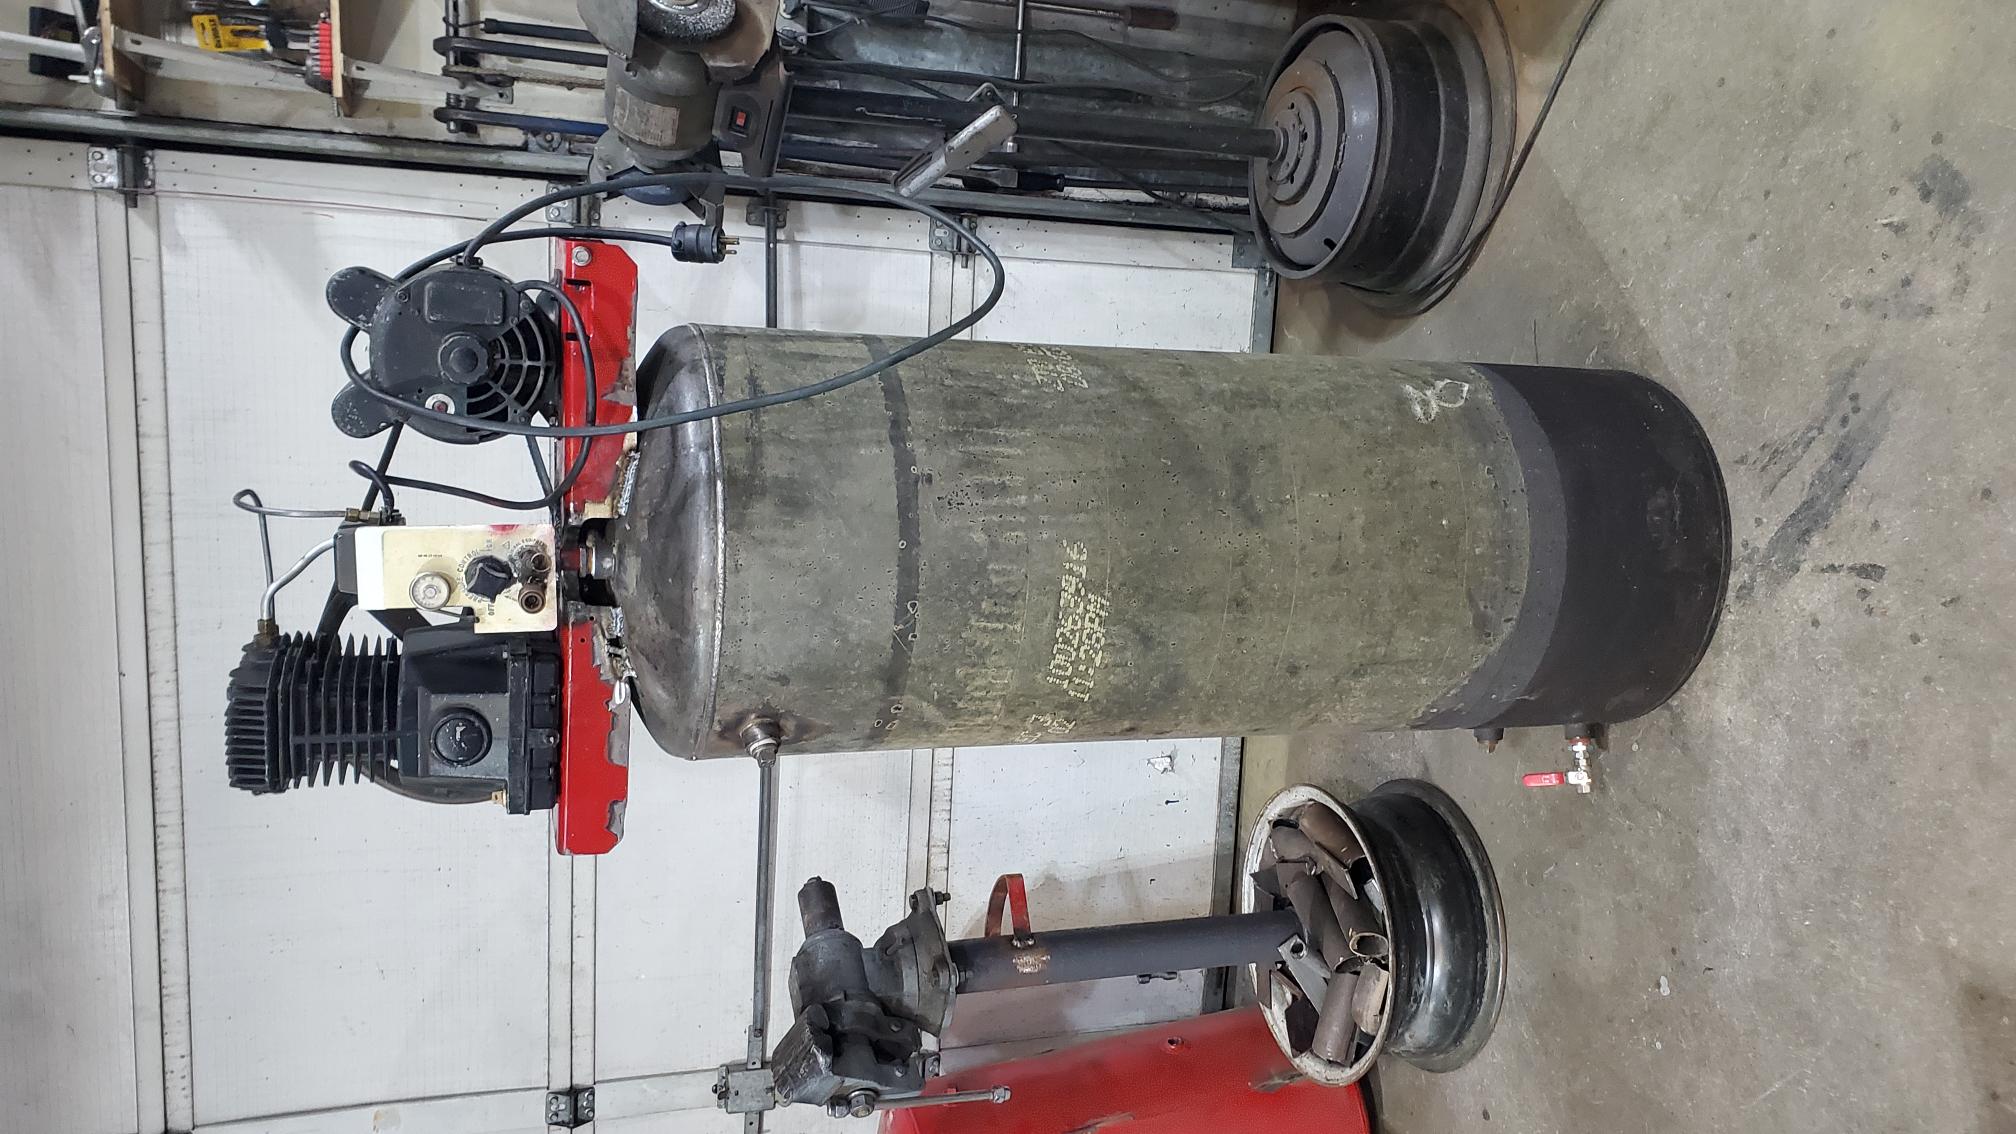
I haven’t done any work on the car for the last week because I focused on another air compressor project. Last November our gas water heater quit working. The problem was with the electronics, not the tank itself. I’d heard about people using water tanks as air compressor tanks so I did some research. They’re factory tested to 300 psi, but I watched some YouTube videos on how to use water and a pressure washer to test one myself. I tested this one to about 275 psi so it’s fine for an air compressor.
The 20-gallon tank in the compressor I had in my own garage had started leaking. Like the welder, it was one my dad bought after a house fire in 1989. Finally got tired of working around the water tank in the shop. Pretty straightforward to mount the pump and motor on the water tank, with less than $40 in fittings and tubing. It’s amazing how quiet it is. Not sure if it’s 40 or 50 gallons. Just about finished, so I’m ready to get back to work on the car.
I like those old Lincolns, my friend has a very similar one and it is a great machine. I was not trying to make any kind of negative comment about your welds, I have just been rebuilding a bus and have been doing such a ridiculous amount of welding compared to ever before, did a bunch of it on 120, got sick of that and made an adapter for the drier plug at my apartment to weld on 240, and have been doing a lot of experimenting in general. I am no expert by any means, just a curious hobbyist, sorry if I offended. I think your build is coming along very nicely and it is one of the few I check in on regularly for updates!
Whoa, a BUS? Now THAT'S a project. I'll have to read your thread more carefully when I have some time this weekend.
No worries about your comments, I wasn't offended. As an amateur welder, I appreciate the feedback. Most of my welds look pretty good, some look rough and some come out so perfect I want to show the world. The ones that look really bad get cut apart and redone. I've found the biggest cause of inconsistency is haste, usually when I'm nearing the end of my allotted shop time for the day and want to feel the rush of having welded something.
Now that the compressor tangent is done, I'll be working on the car this weekend. Next step is to pull the engine and transmission off the cradle, cut off the unneeded torque mount, repaint then re-attach the engine/transmission. After THAT, it's engine wiring harness time.
Spent some time yesterday cleaning up the shop and moving stuff around. Probably need to load up some of my scrap/spare metal and make a trip to the recycler.
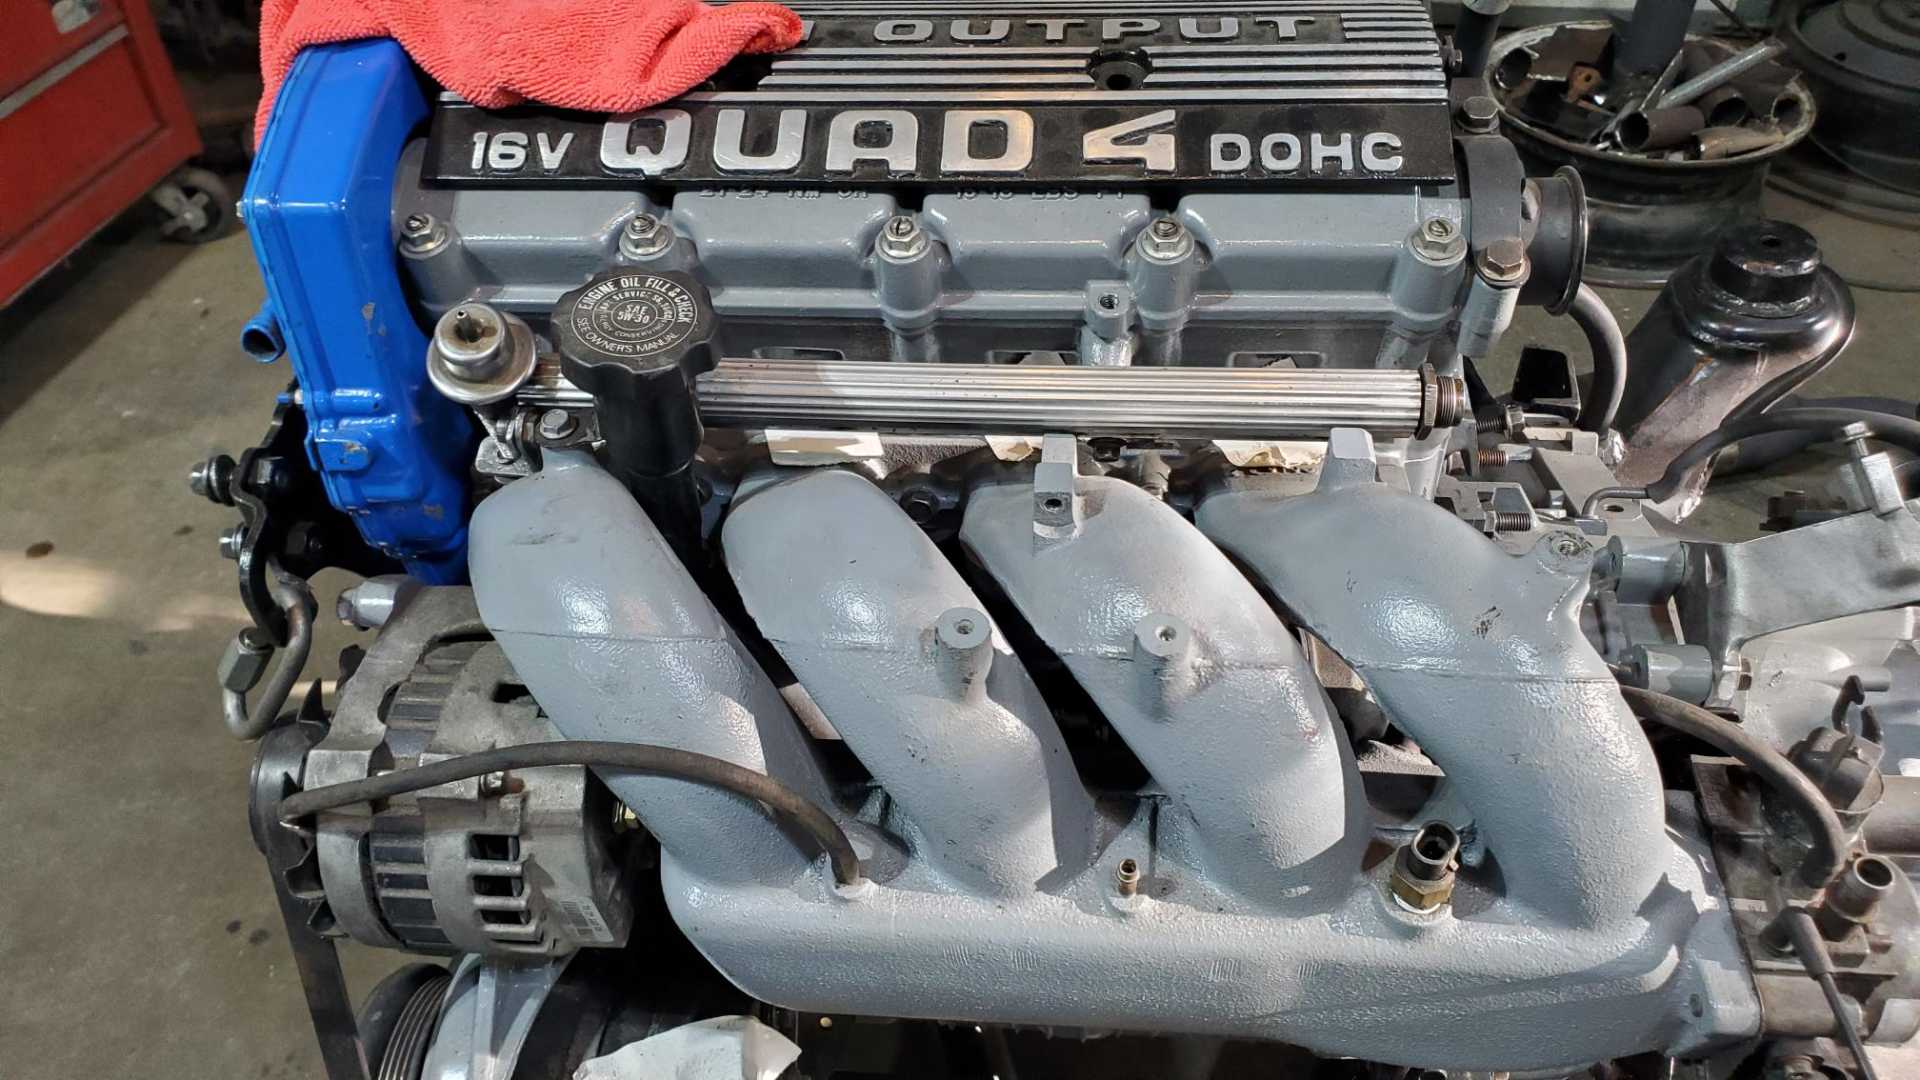
Not quite ready to dive into the engine harness, because I realized I need to solve the fuel line problem first. The factory setup for the Quad has the fuel lines leaving the fuel rail on the driver’s side of the engine, then curving around to the exhaust side, which is now the back side of the engine. I need the fuel lines to meet up with the Fiero lines which are on the front passenger side of the engine bay. Hope to get some time today to work on that.
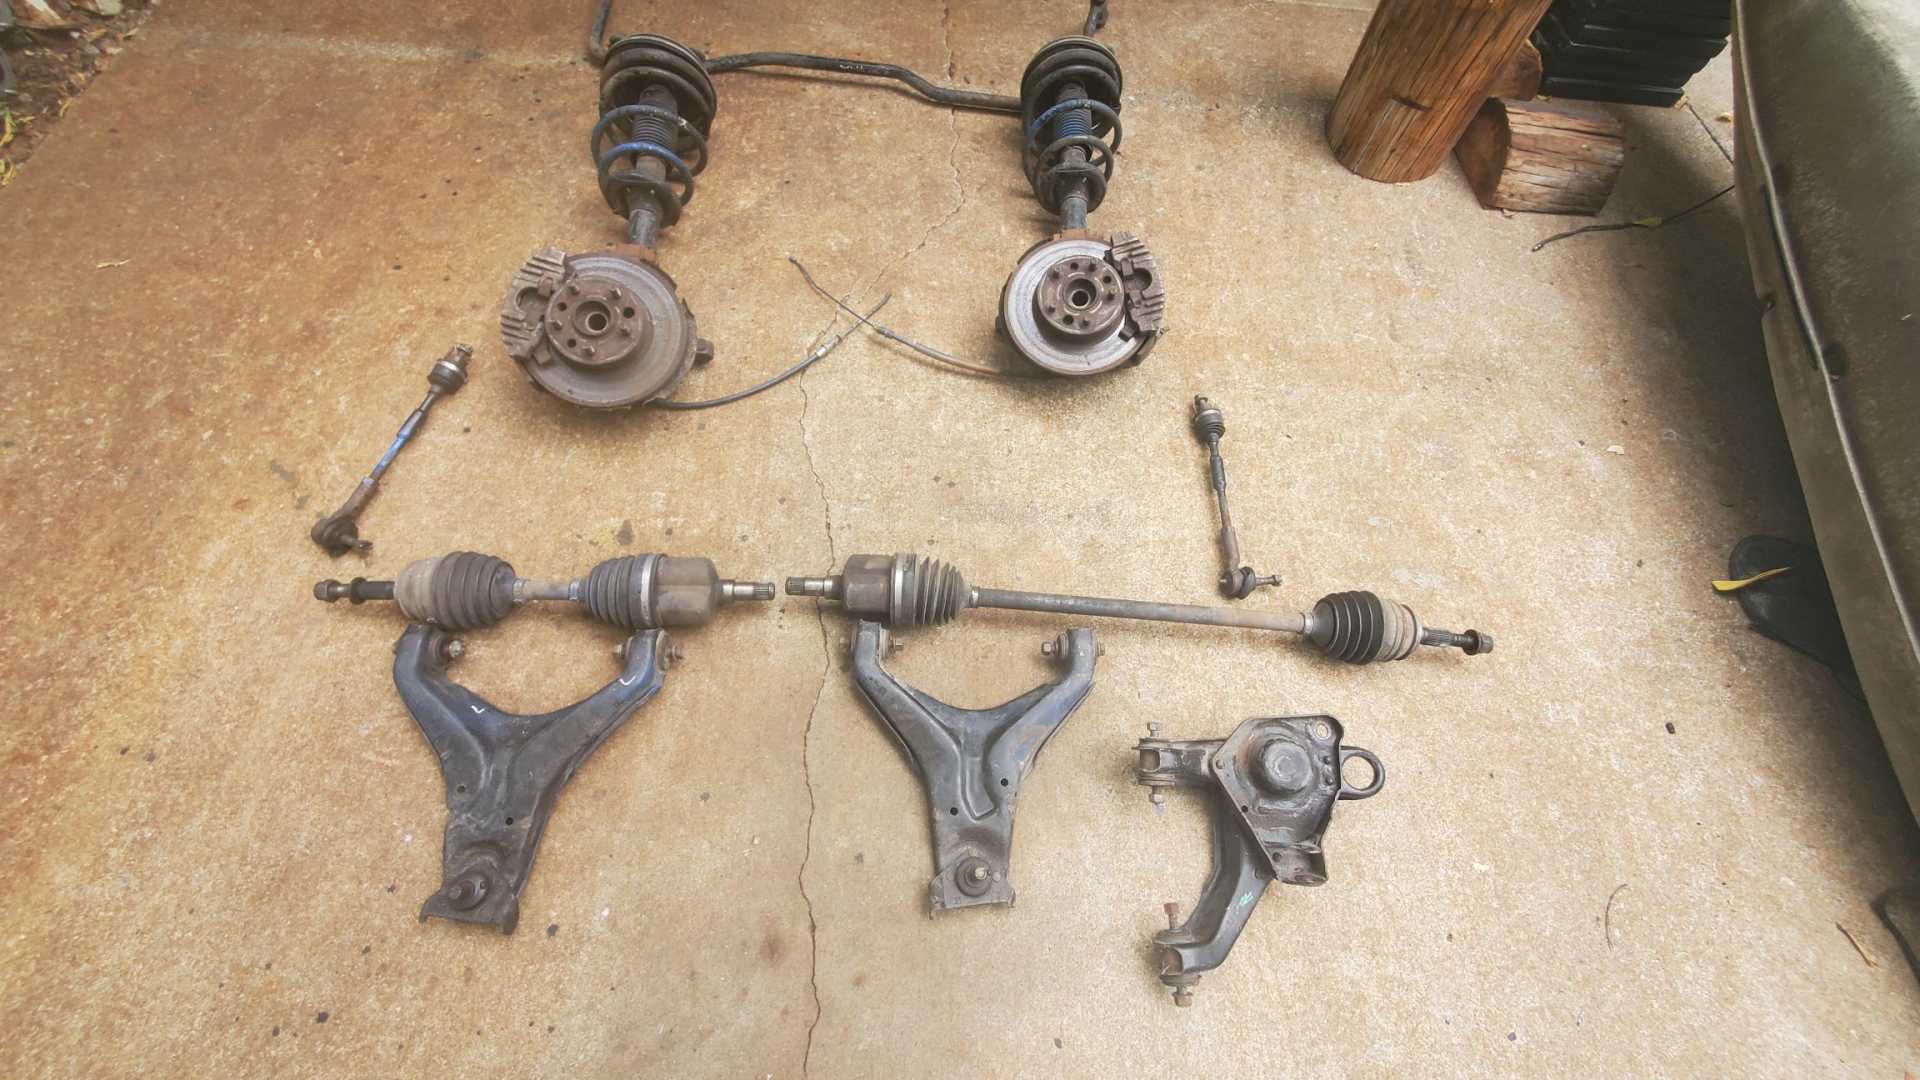
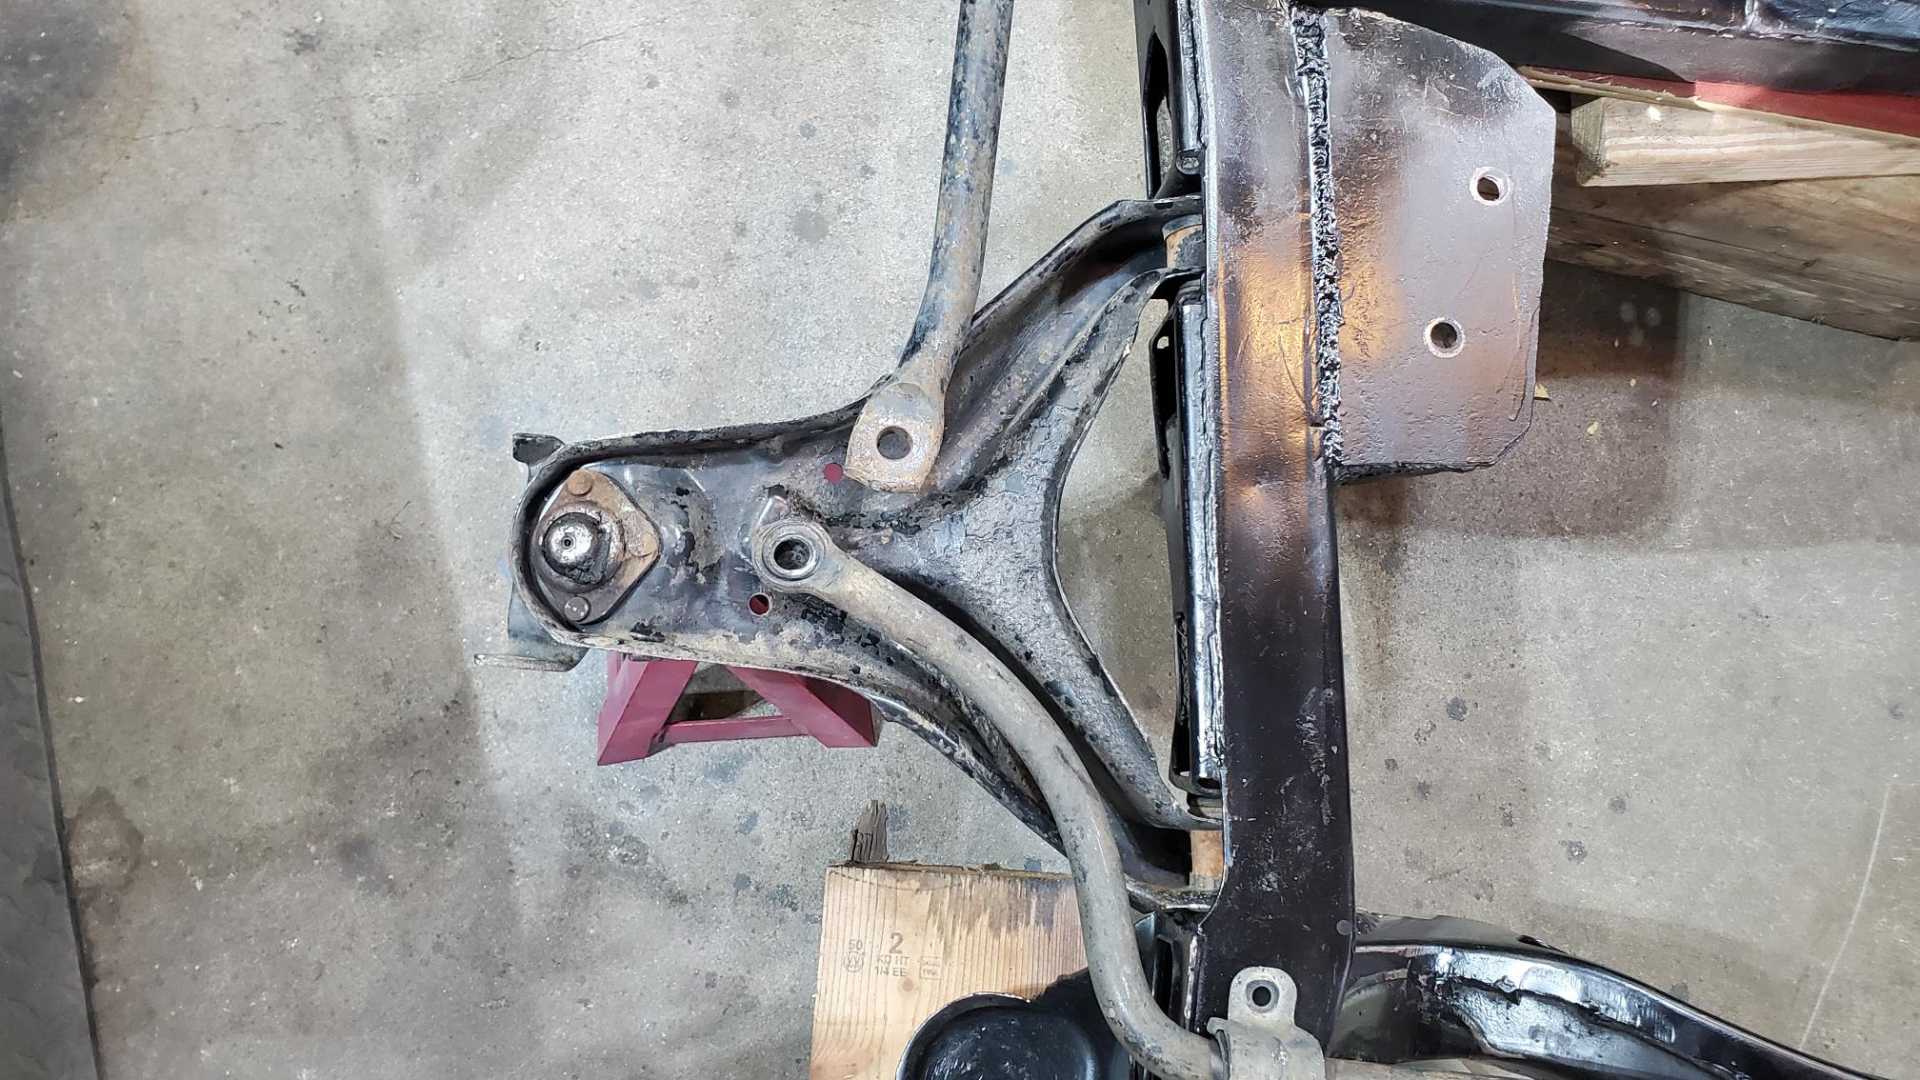
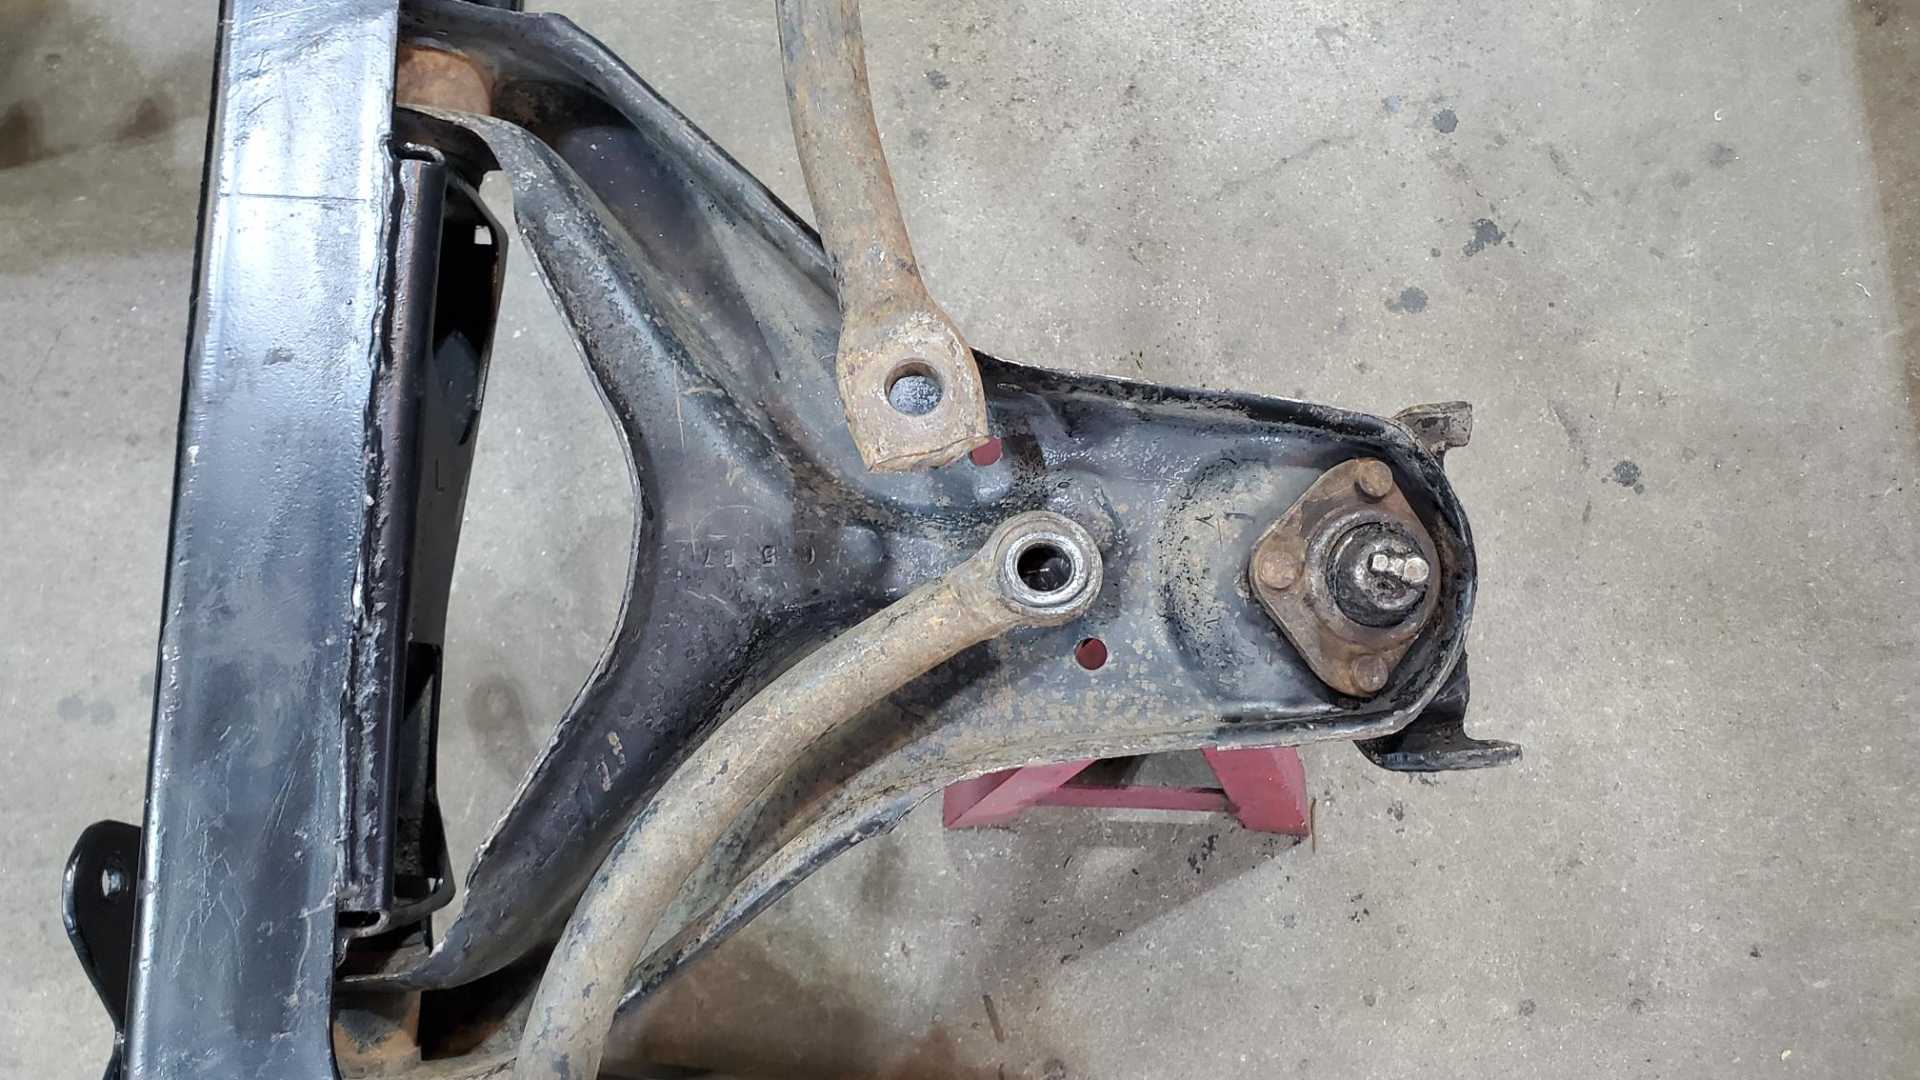
Checked over the rear suspension parts, as well as the replacement passenger side front lower control arm. The bushings on the rear control arms look really good, but I should probably replace them. Probably ought to replace the struts, too.
[This message has been edited by Quadfather (edited 10-06-2022).]
The rear outer tie rod ends are shot, but instead of replacing them, I’d really like to fabricate tie rods that are mounted to the control arm.
ABanks78 started a thread in Technical Discussions about his Quad 4 swap. He’s been driving his swap for years but has a cracked head. I’m obviously interested in his whole swap, but his rear suspension really caught my eye.
Why can’t I make my own version of this, using the stock control arm?
Began the process of rerouting the fuel lines. The stock FWD location has the fuel lines running toward the transmission end of the engine, then making a 90 toward the exhaust side of the engine. I need the fuel lines to meet the fuel lines toward the timing chain end of the engine, turning toward the Fiero fuel lines which would put them over the alternator.
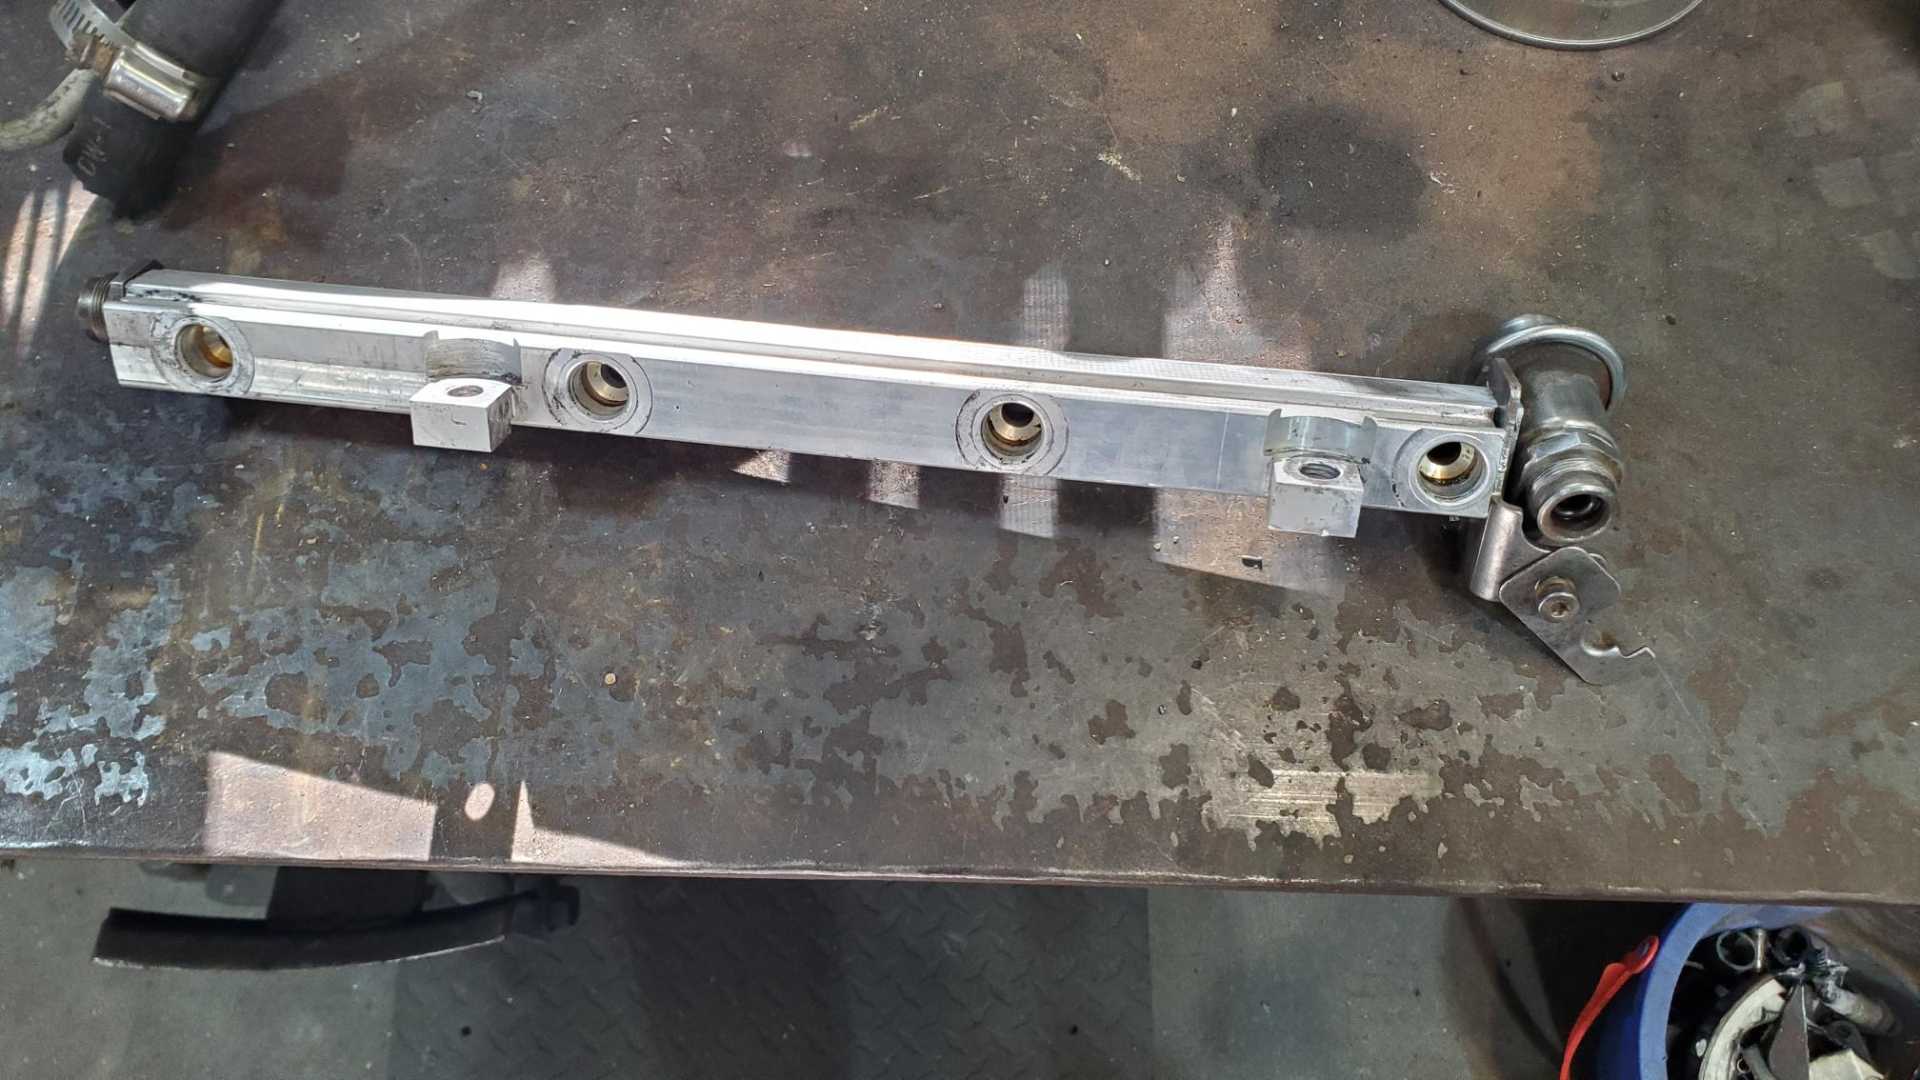
Here's a shot of the disassembled fuel rail just sitting where it would be mounted.
The fuel rail on the Quad has a very large bore.
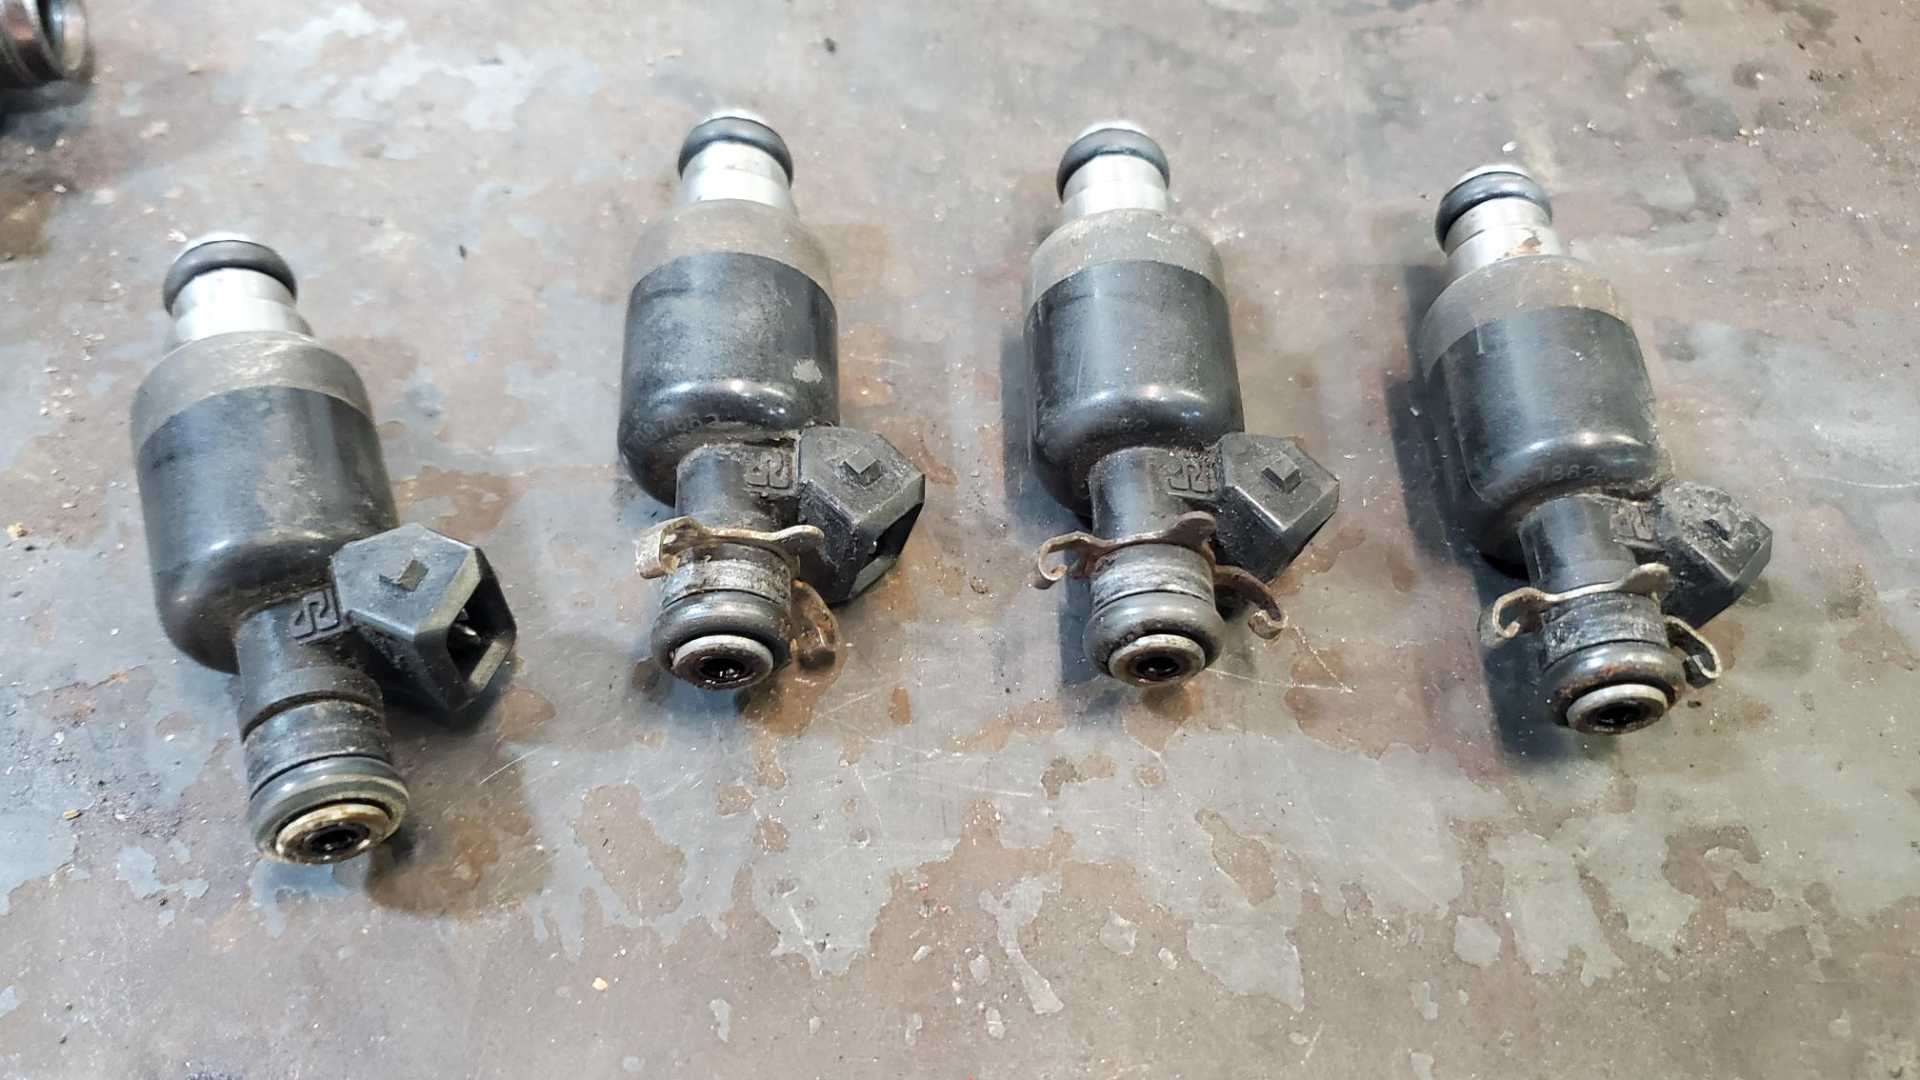
This is the first time I've ever disassembled a Quad fuel rail in 14+ years of Quad ownership. Good thing I did because the injectors are filthy and covered in slimy, foul-smelling old gas.
The infamous black hole opened in up the shop, as I was removing the injectors from the rail. You'll notice one of the injectors is missing the clip that holds it to the rail.
I was holding the injector, not even putting pressure on the clip, when the clip suddenly exited this dimension. I have an image of it moving quickly diagonally away from me to the left, but I looked all over that corner of the shop for it and didn't see any sign.
The only logical explanation is that there's a black hole in the part of the shop.
[This message has been edited by Quadfather (edited 10-07-2022).]
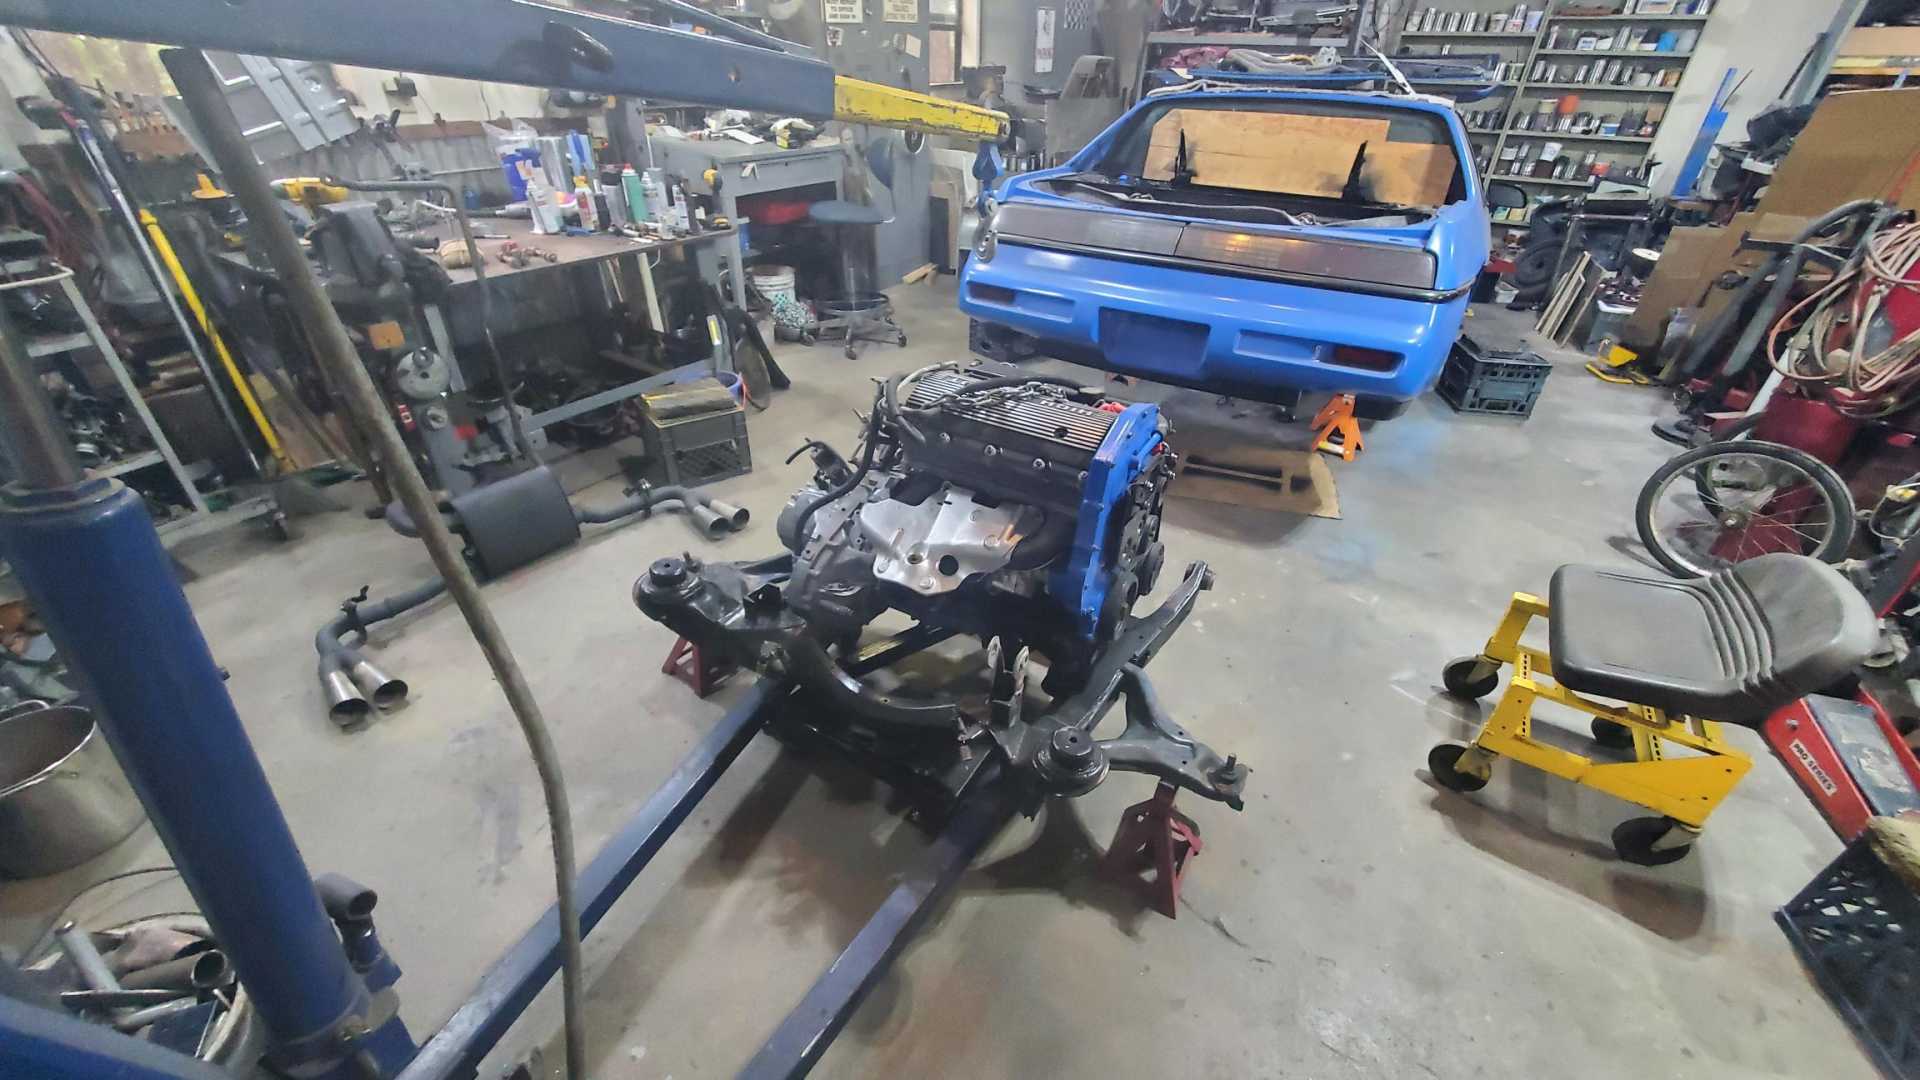
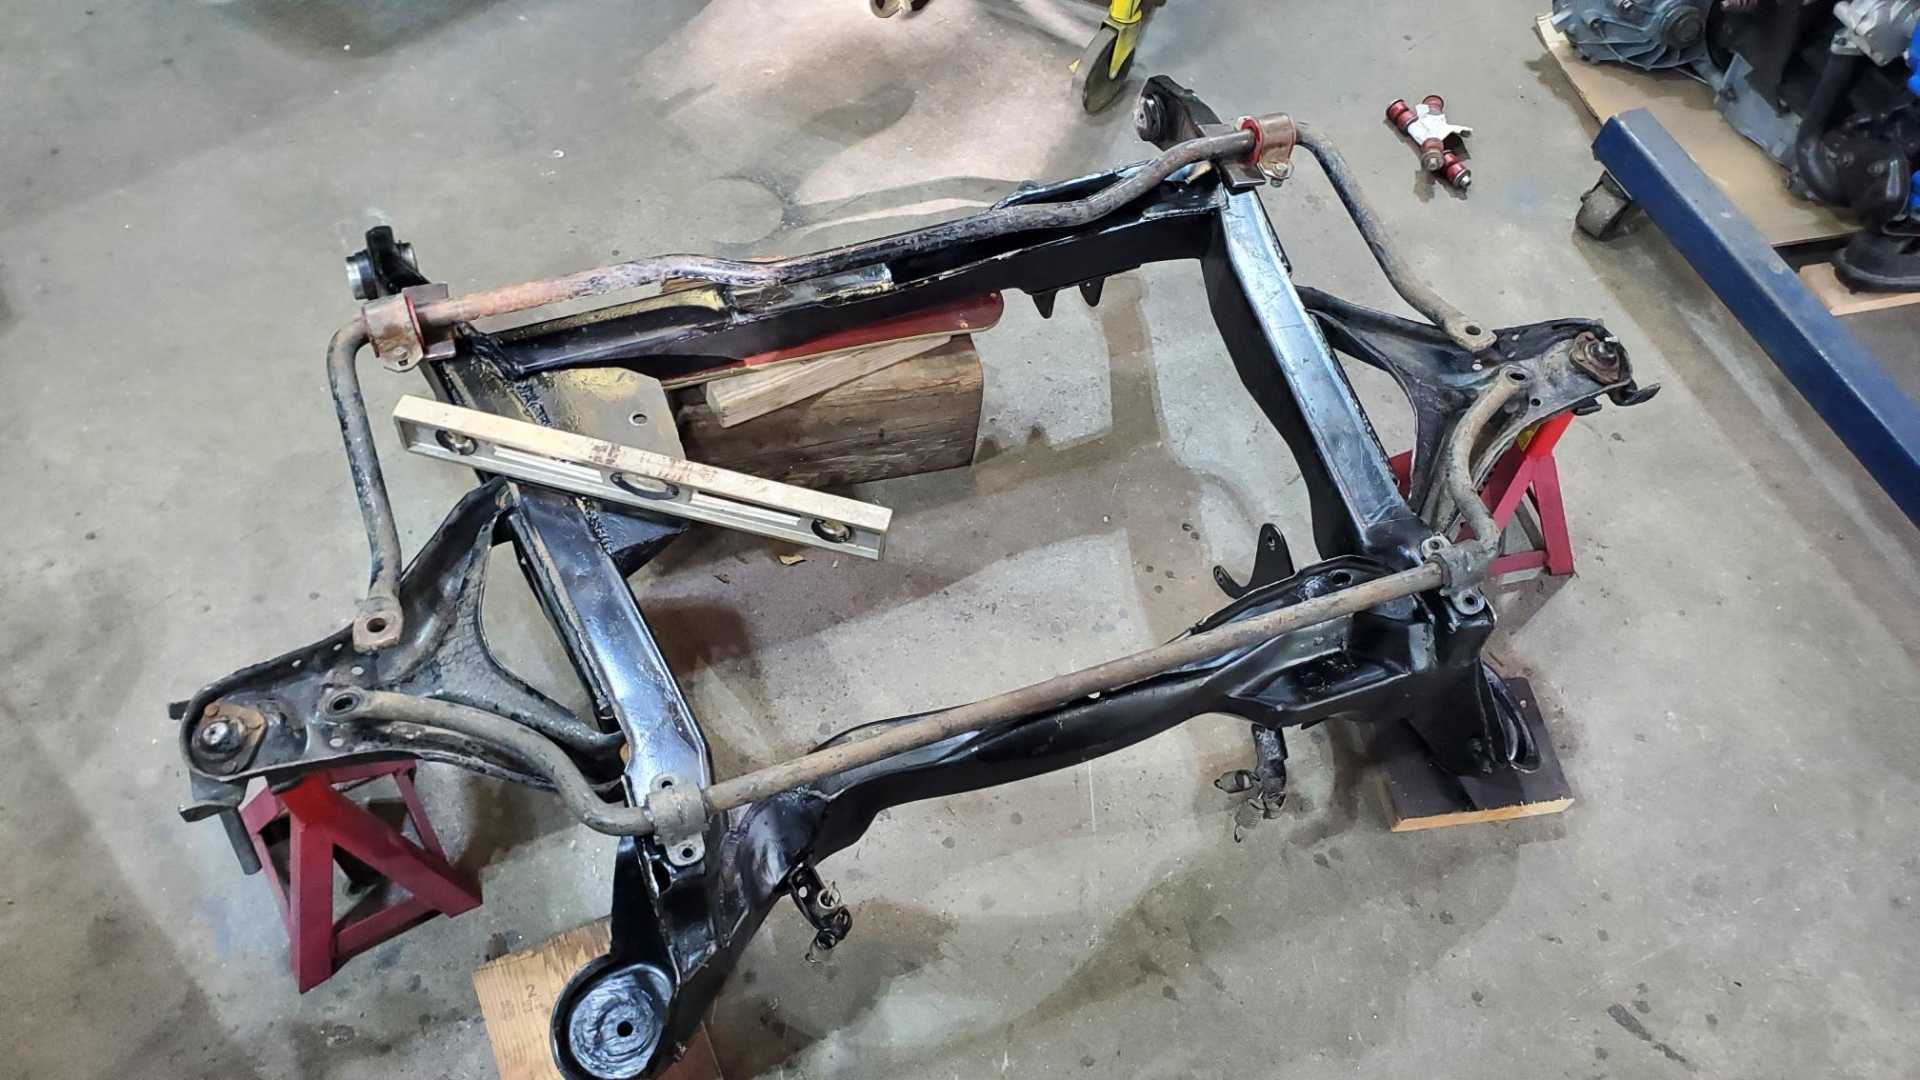
I pulled the engine and transmission off the cradle to remove the torque strut mount that I decided not to use, and to clean up and repaint the cradle.
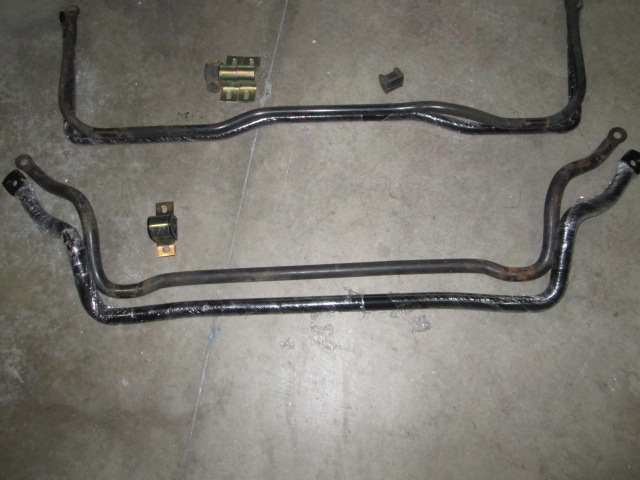
So now I’m thinking about adding an anti-sway bar. I have a front bar from an 84-87 Fiero, as well as a rear bar that I think is aftermarket. I don’t remember what car it was on when I found it at the salvage yard a few years ago. I just sat and looked at the two bars lying on the bottom of the cradle today and couldn’t make up my mind on which one to use and how to mount it.
When I was a wee lad, I bought a suspension upgrade kit for my ‘70 LeMans. It included polyurethane bushings for all the joints, some other odds & ends, and a huge 1 3/8” rear anti-sway bar. That car was amazing to drive after the upgrade. I read the Fiero debate about the size of the rear bar compared to the front one, but based on my experience I don’t think it’ll be an issue. If it is, I can just take the rear one off.
[This message has been edited by Quadfather (edited 10-07-2022).]
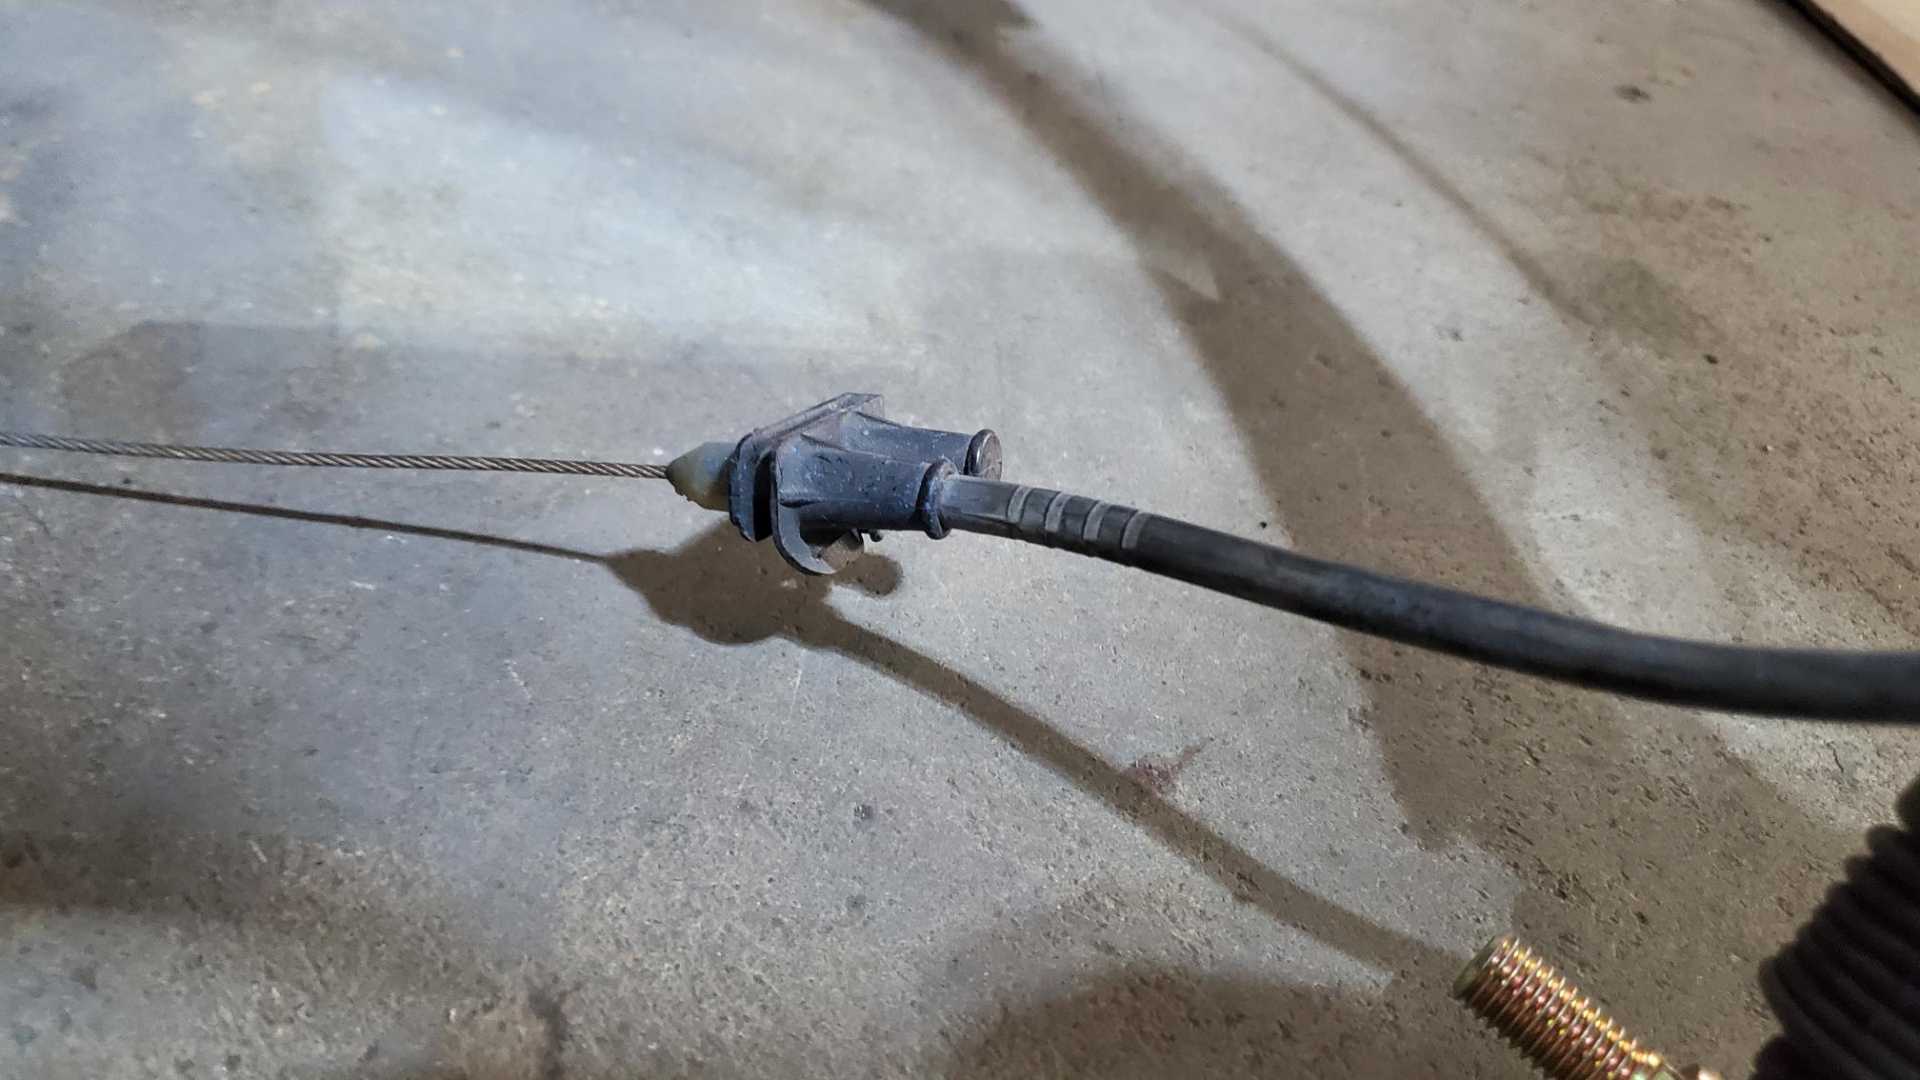
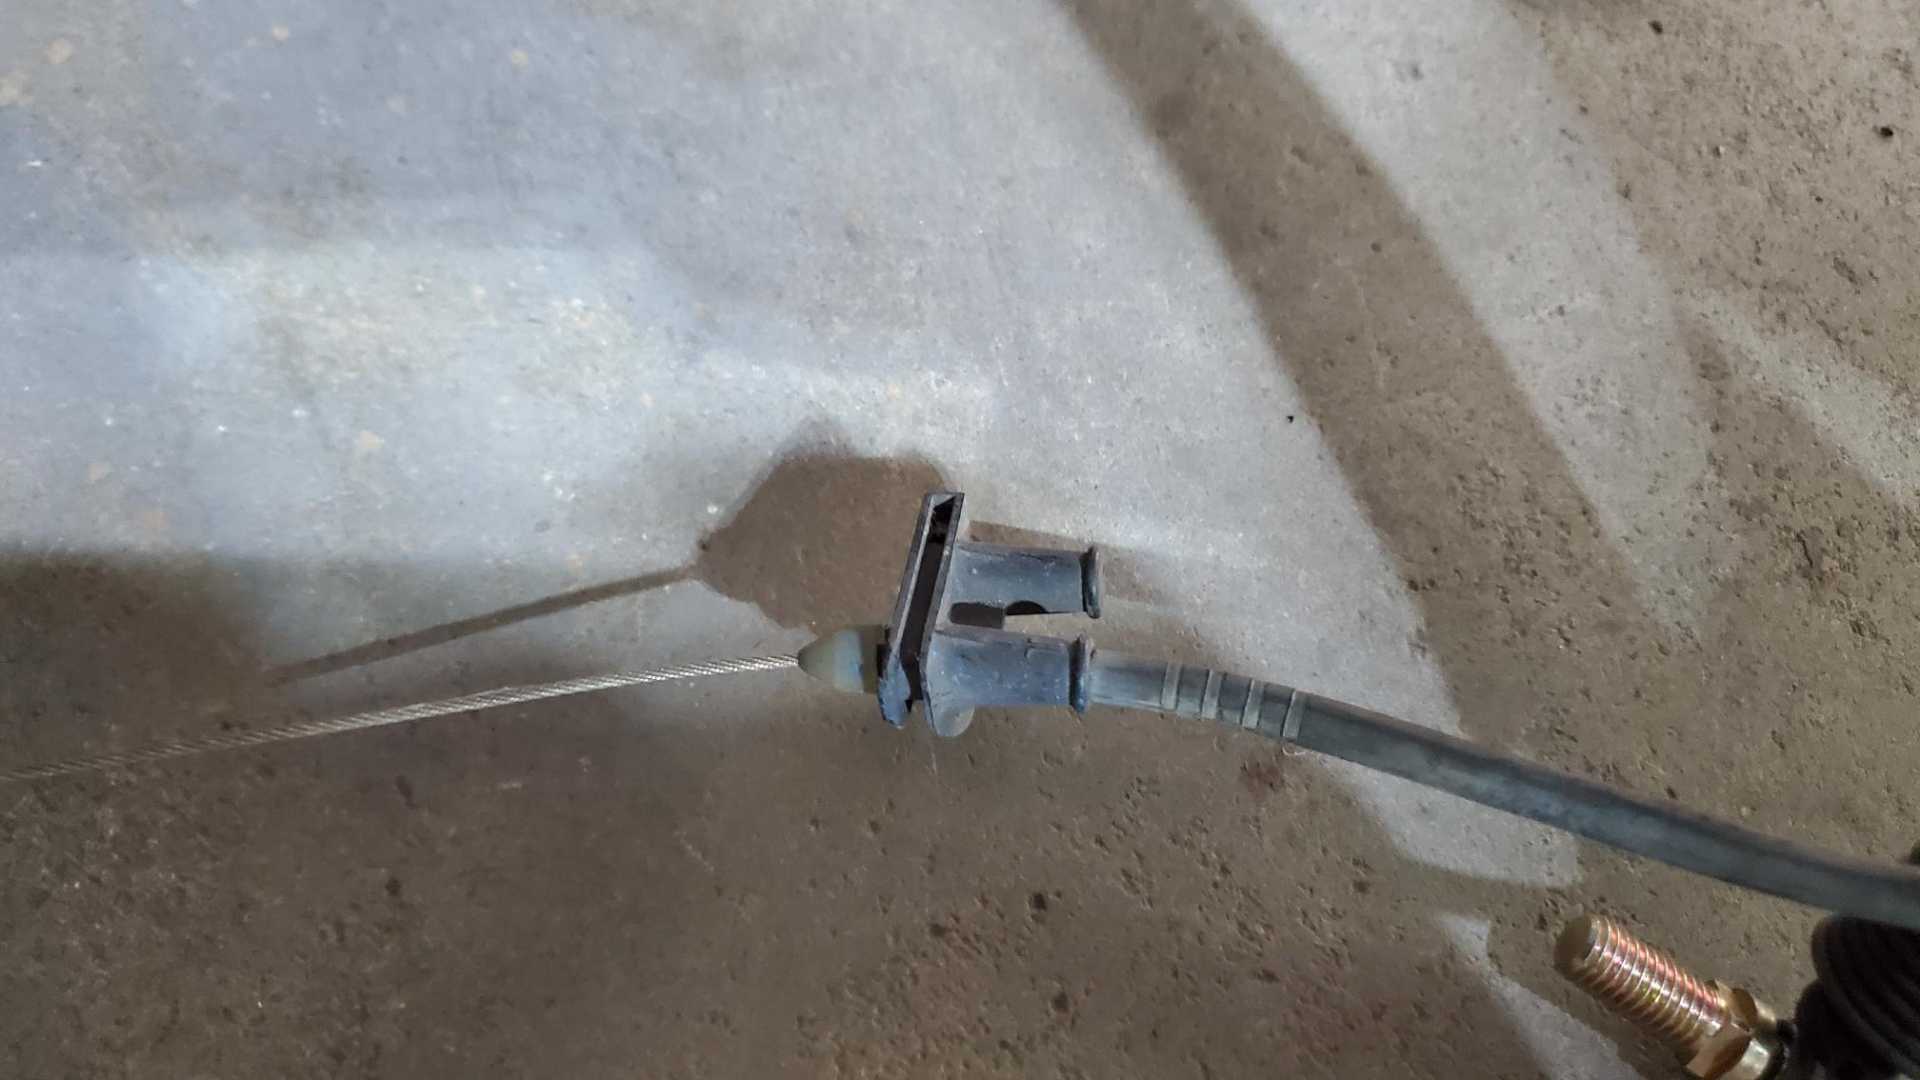
I’m still trying to find steel fuel line, but haven’t really been looking too hard because I’ve been busy with life. I’m also thinking about how to mount the throttle cable on the Quad. Sure wish I’d held onto the bracket that was on the Iron Duke.
When I was in the salvage the other day I looked at some other 80s GM cars, but nothing had throttle cables like the Fiero’s.
I may just fabricate one from scratch.
[This message has been edited by Quadfather (edited 10-06-2022).]
I was at the salvage Monday afternoon getting some spares from a Fiero. As I worked, a man walked up to me and commented that we don’t see Fieros in the yard anymore. We talked for about 20 minutes. Turns out he’s the original owner of a 1984 Fiero which has been parked and covered since it quit running in 1993!
He was in the yard looking for parts for another car and didn’t know there was a Fiero there. I also could tell he didn’t know much about Fieros.
Haven’t had much luck tracking down fuel line. I went to a speed shop in Tulsa and they told me no one is manufacturing that kind of fuel line anymore. They suggested looking in a salvage yard (duh) or buying NOS for a specific vehicle. I found 12” sections of it on Amazon, so I may get some of that and then use compression fittings to get the right length.
[This message has been edited by Quadfather (edited 10-16-2022).]