Friday the surgeon cleared me to lift up to 40 pounds. Won't be fully released for another five weeks.
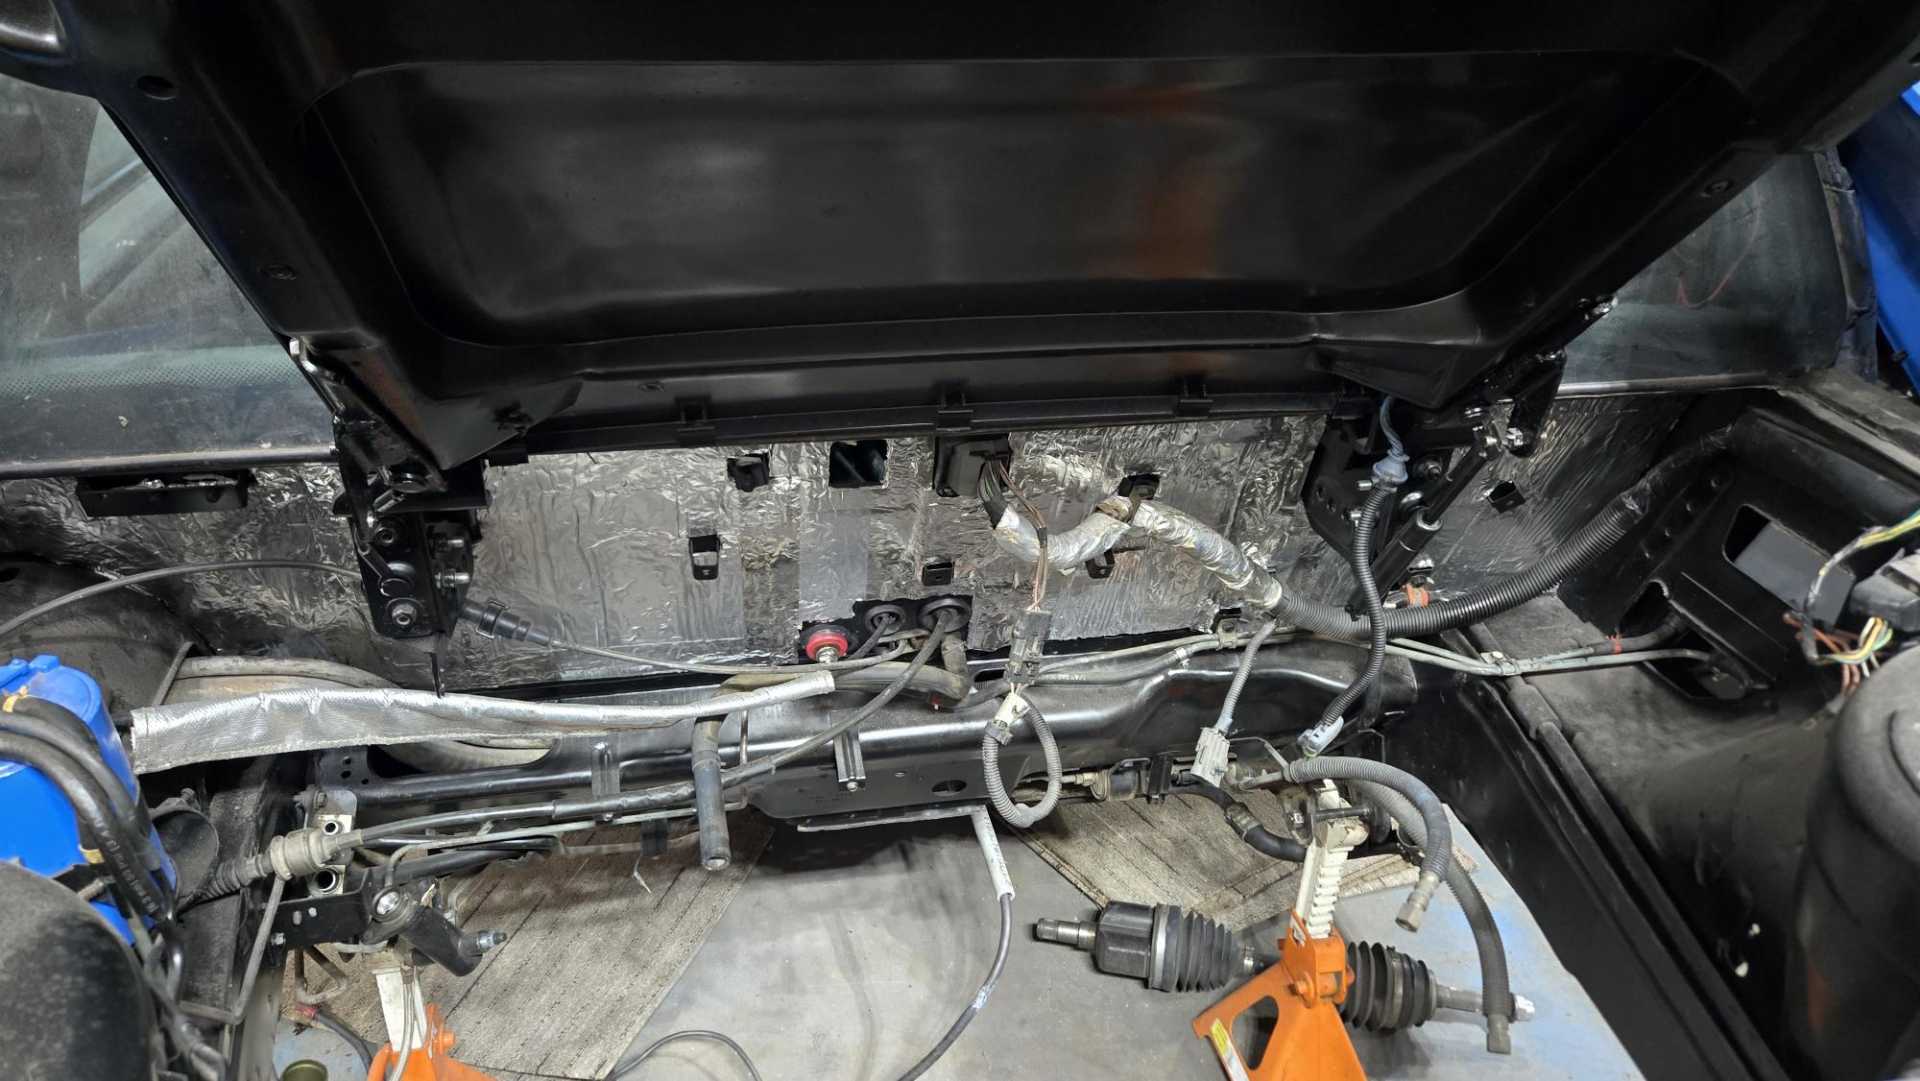
Today I tried to get back into finishing the wiring harness. That included putting the front of the car on blocks so I could look underneath. I got to thinking that if I sort out the battery cables, box and circuit breaker it will force me to make decisions about the wiring harness and get it done.
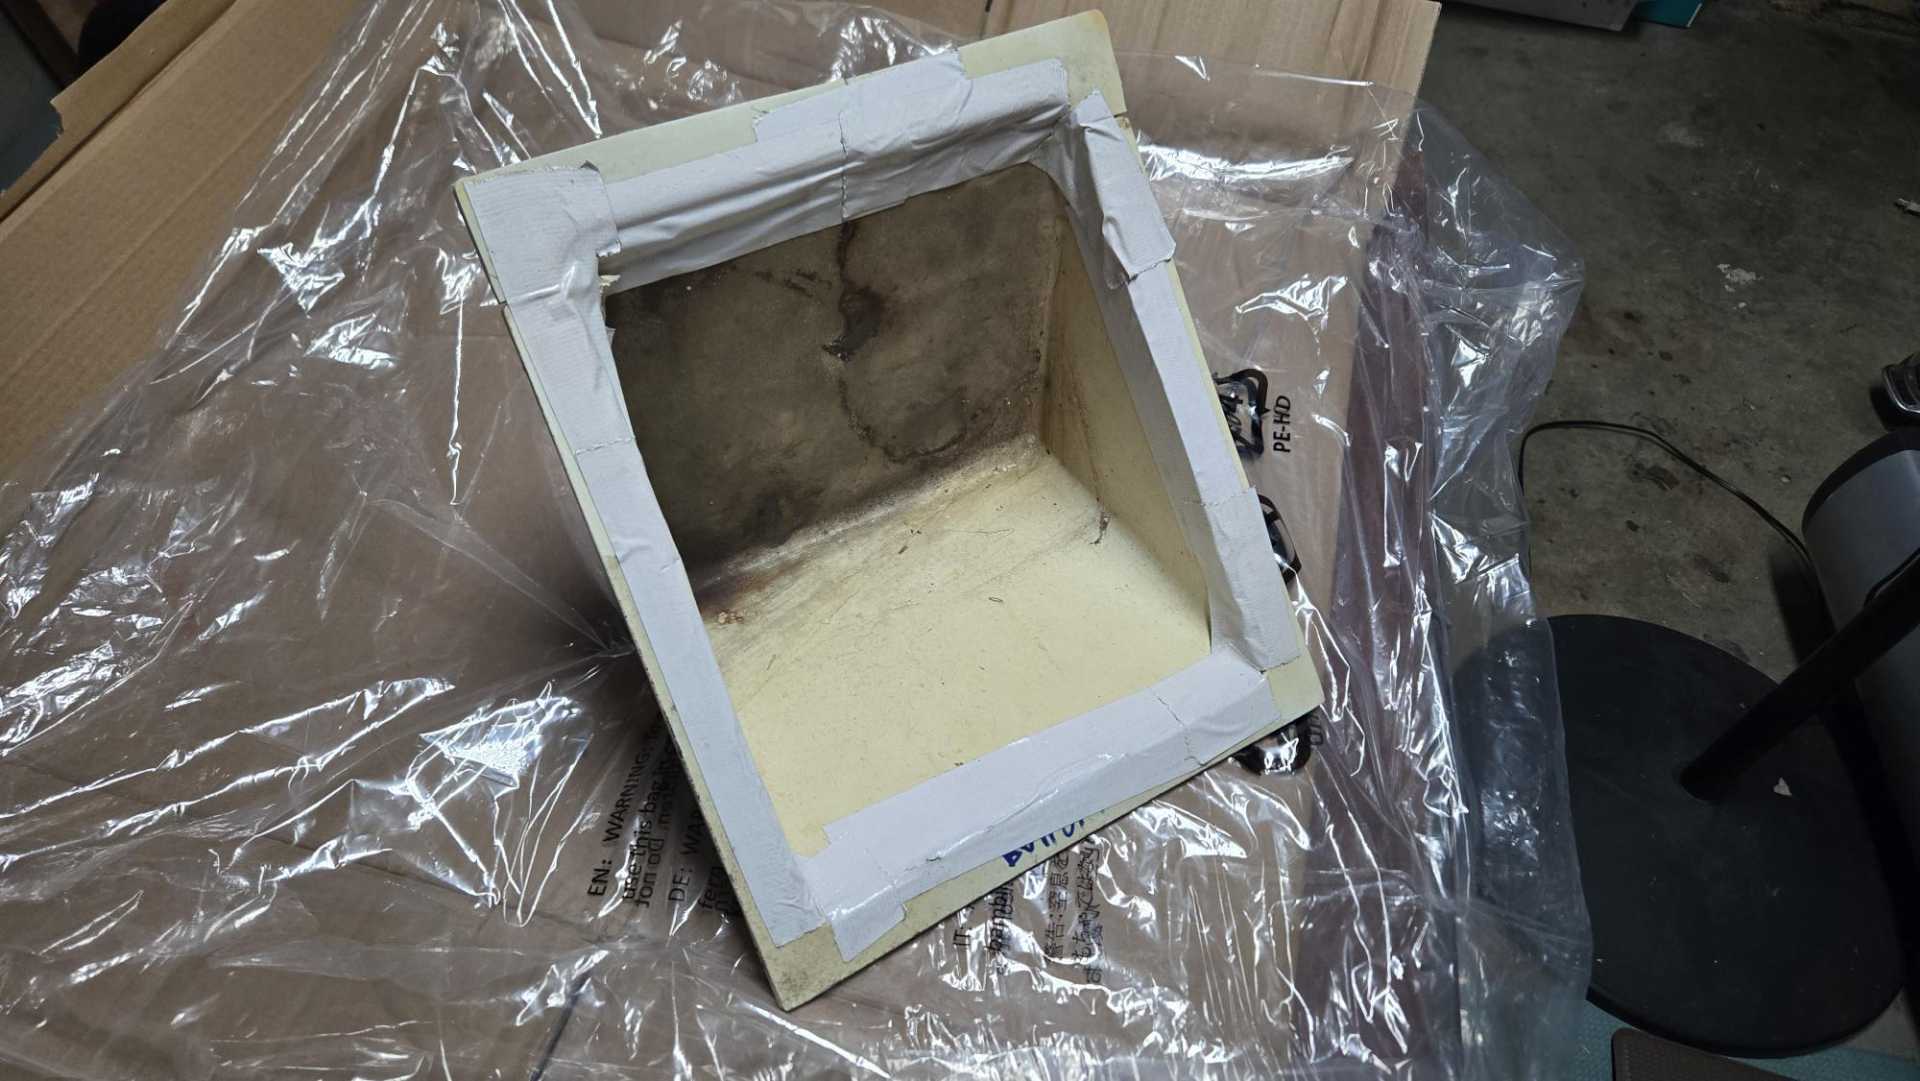
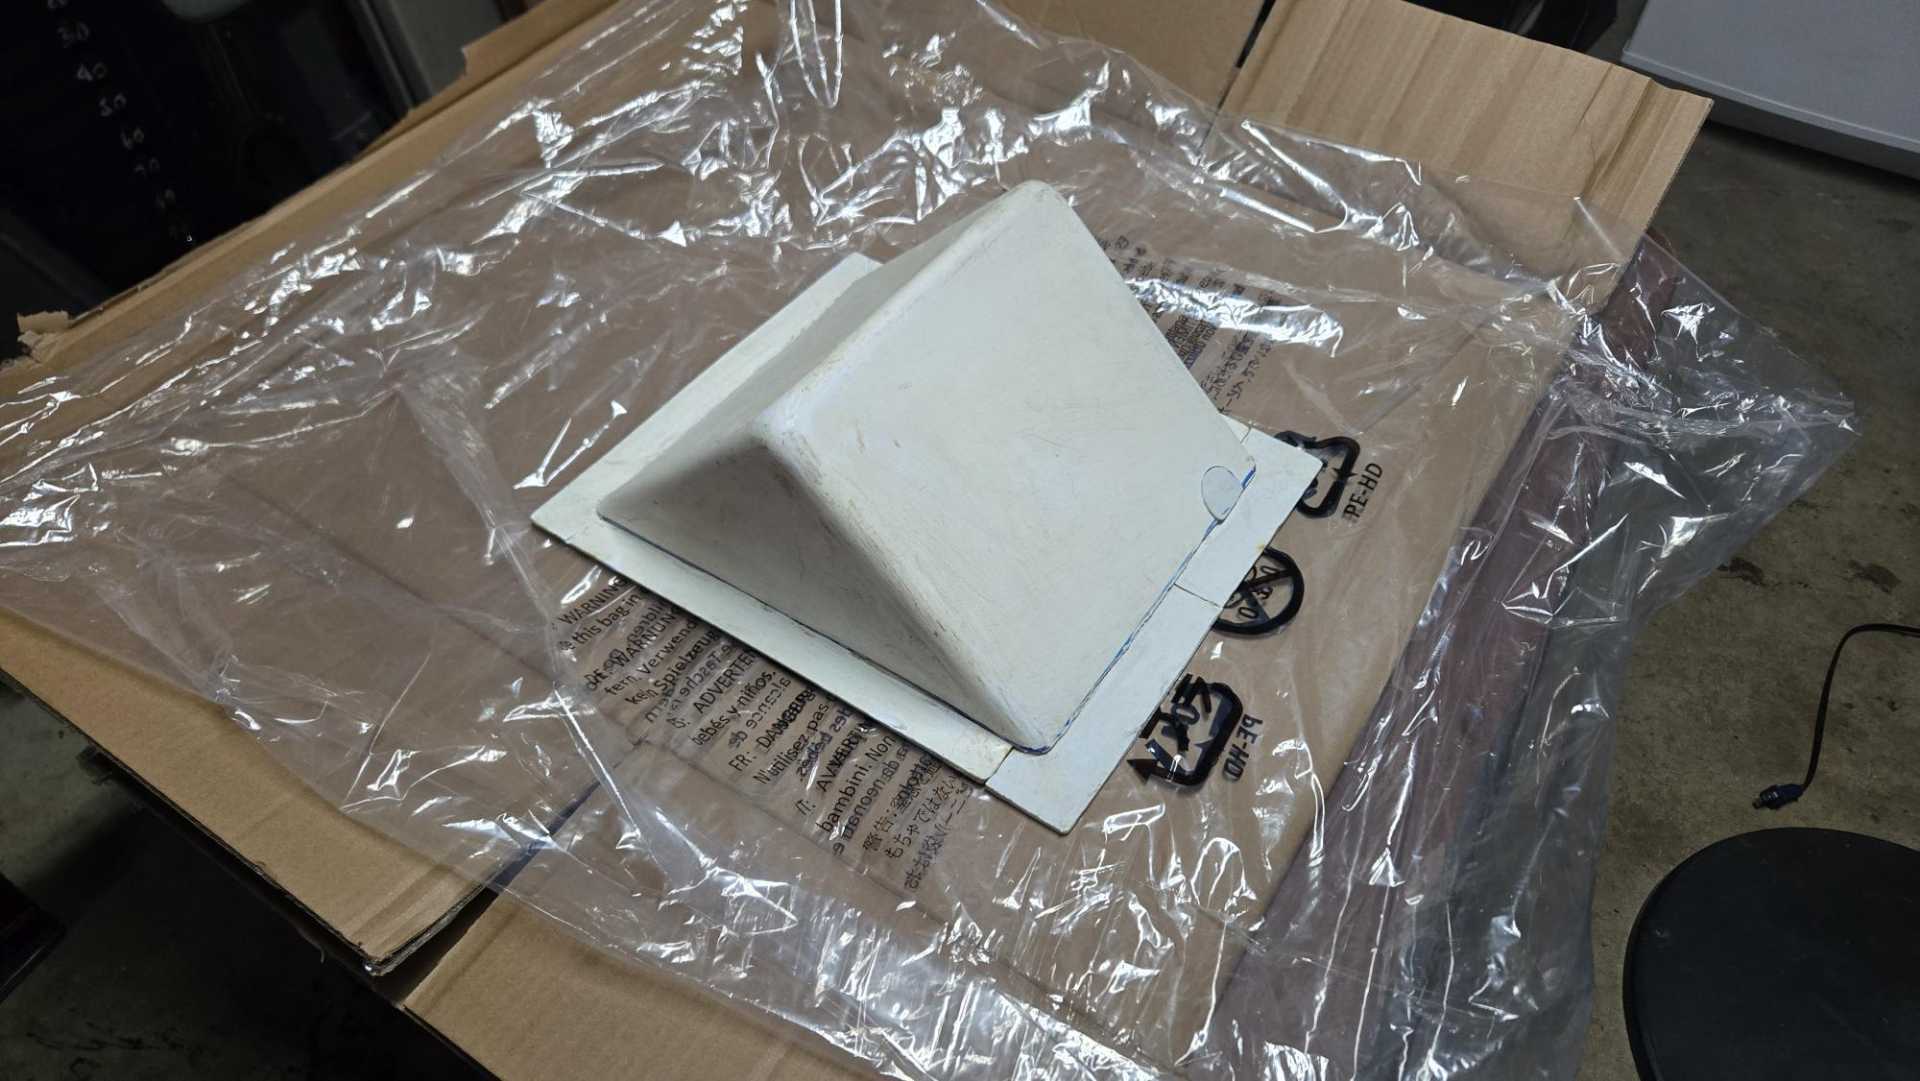
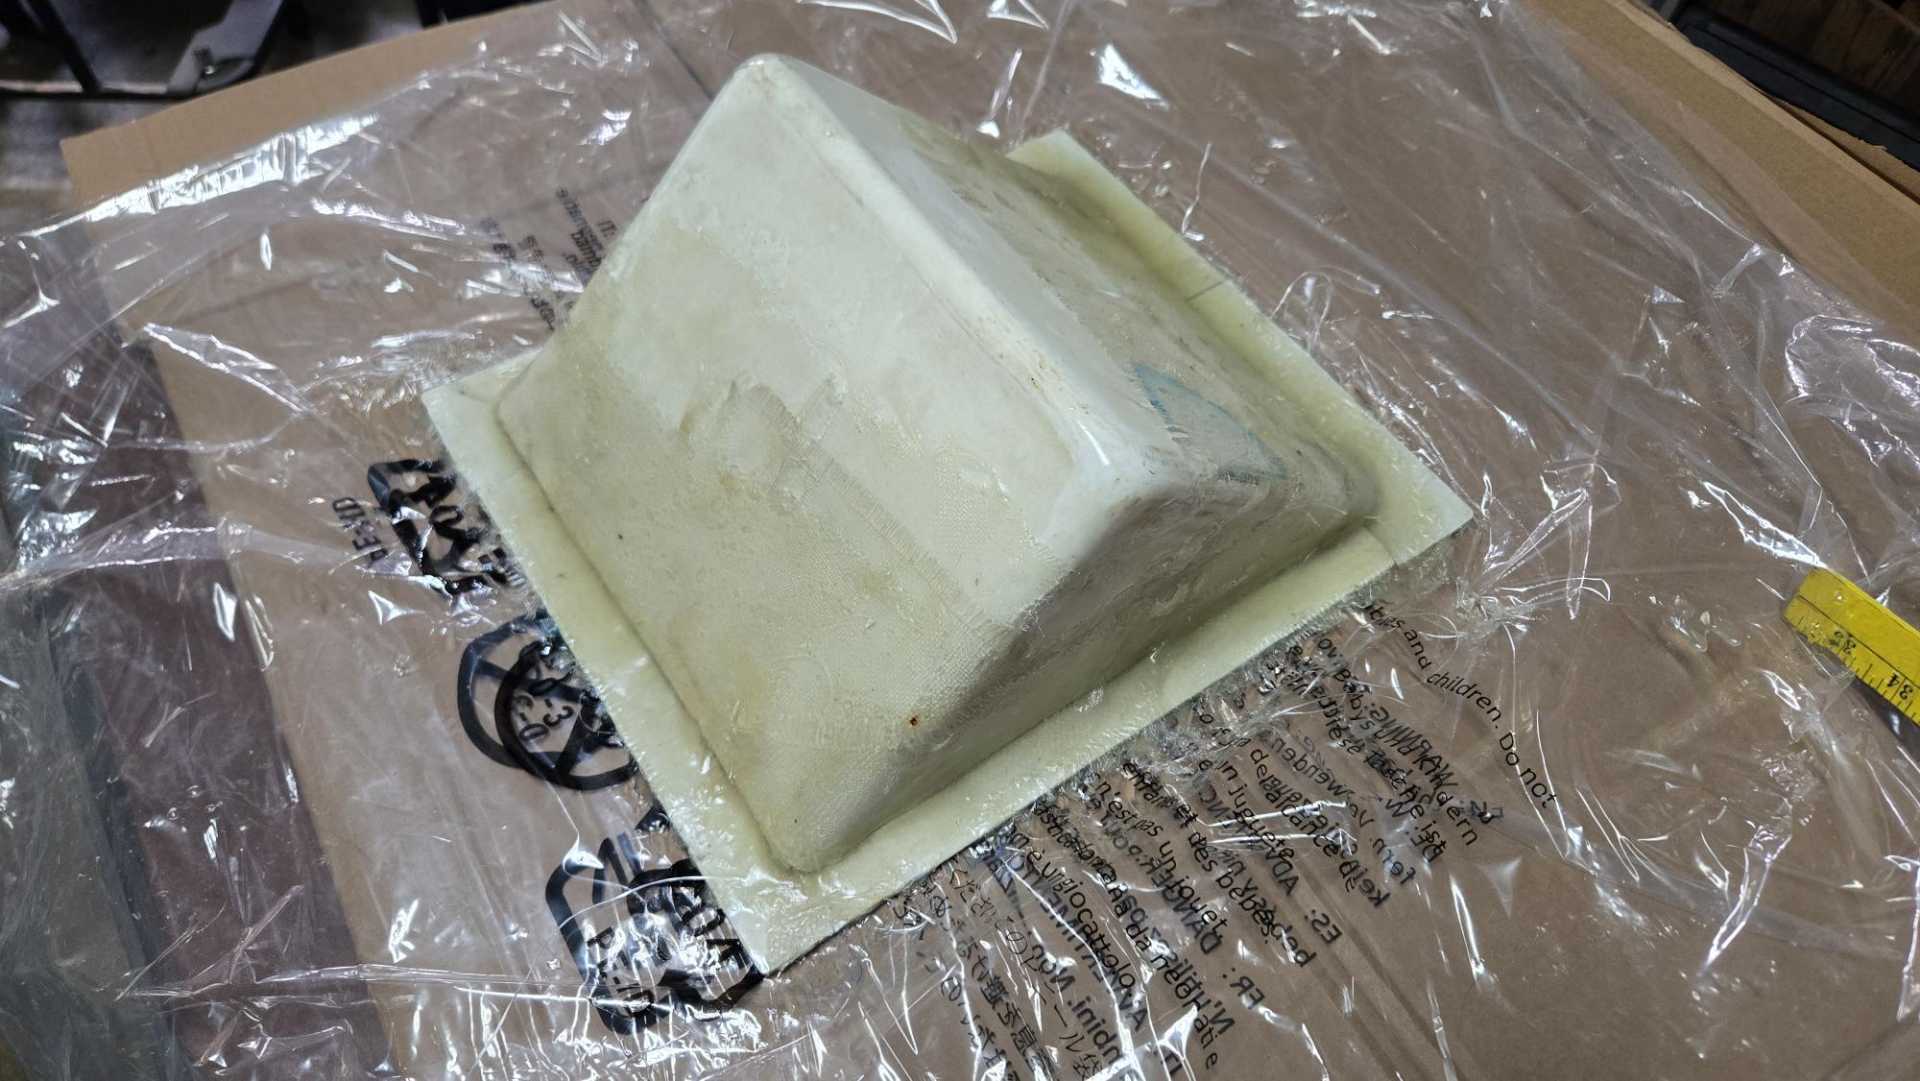
As I mentioned before, I may replace the metal battery box I made years ago with a fiberglass one.
The front suspension/front end is the only part of the car I haven't done much work to yet.
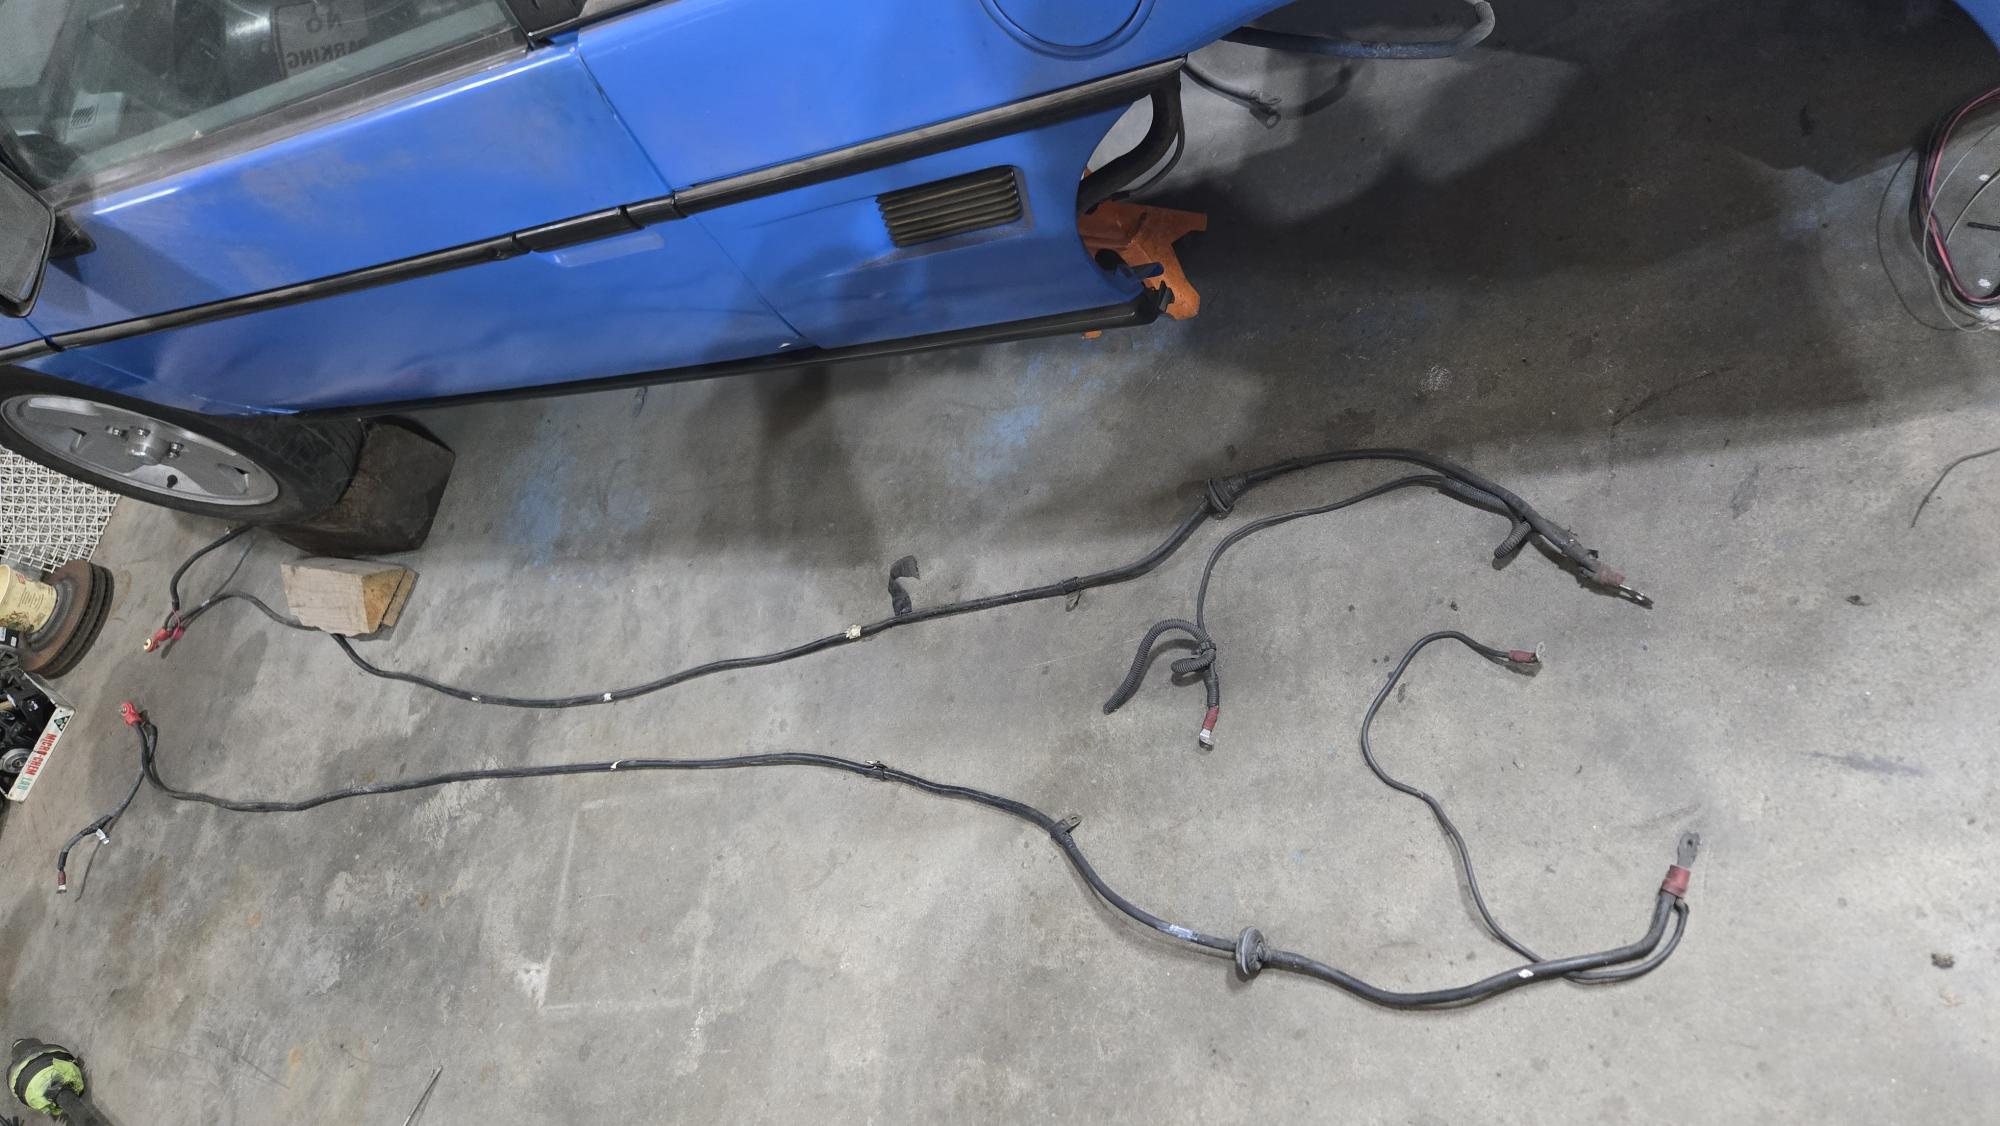
I forget where I got the heavy gauge cables that I ran under the car as battery cables. I'm not happy with how they look, plus I'm kinda partial to using the cool Riviera battery cables I got from the salvage years ago.
I'll have to check the forum to see how other owners have run battery cables under the car.
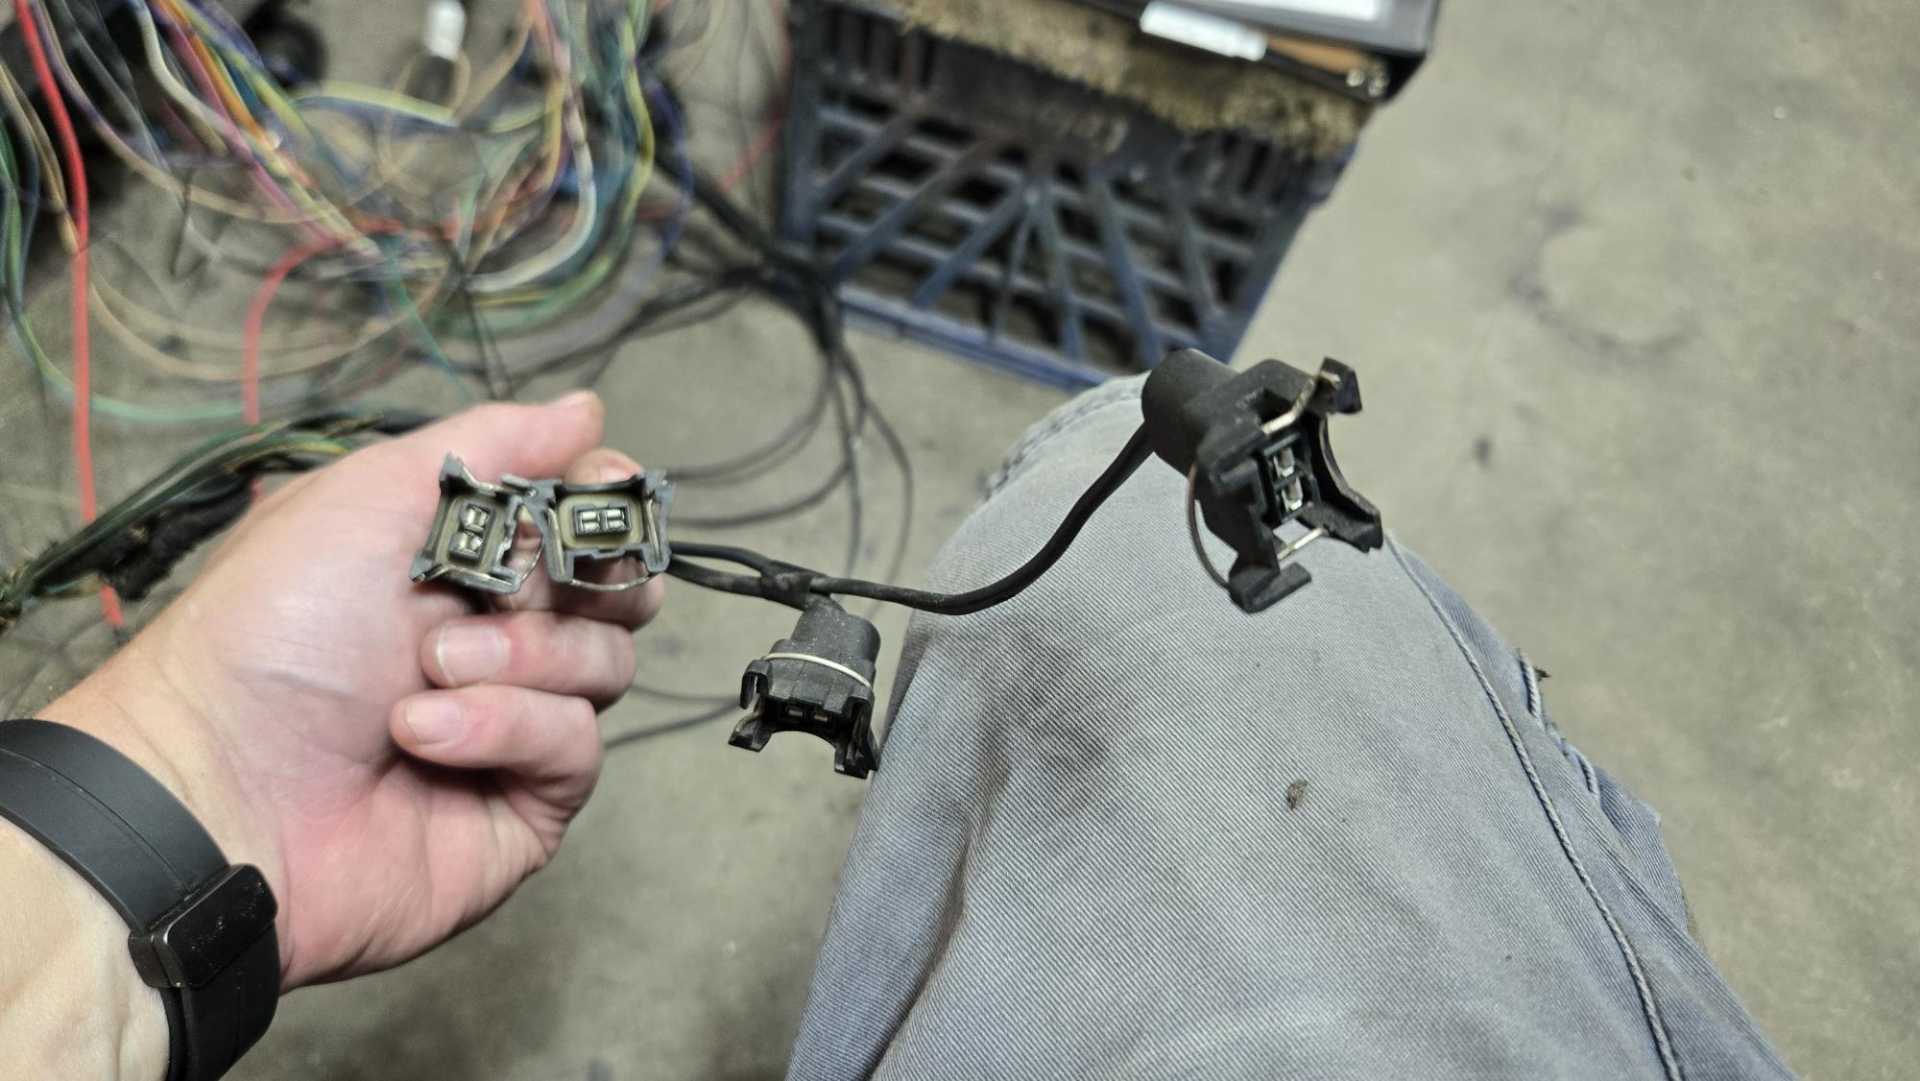
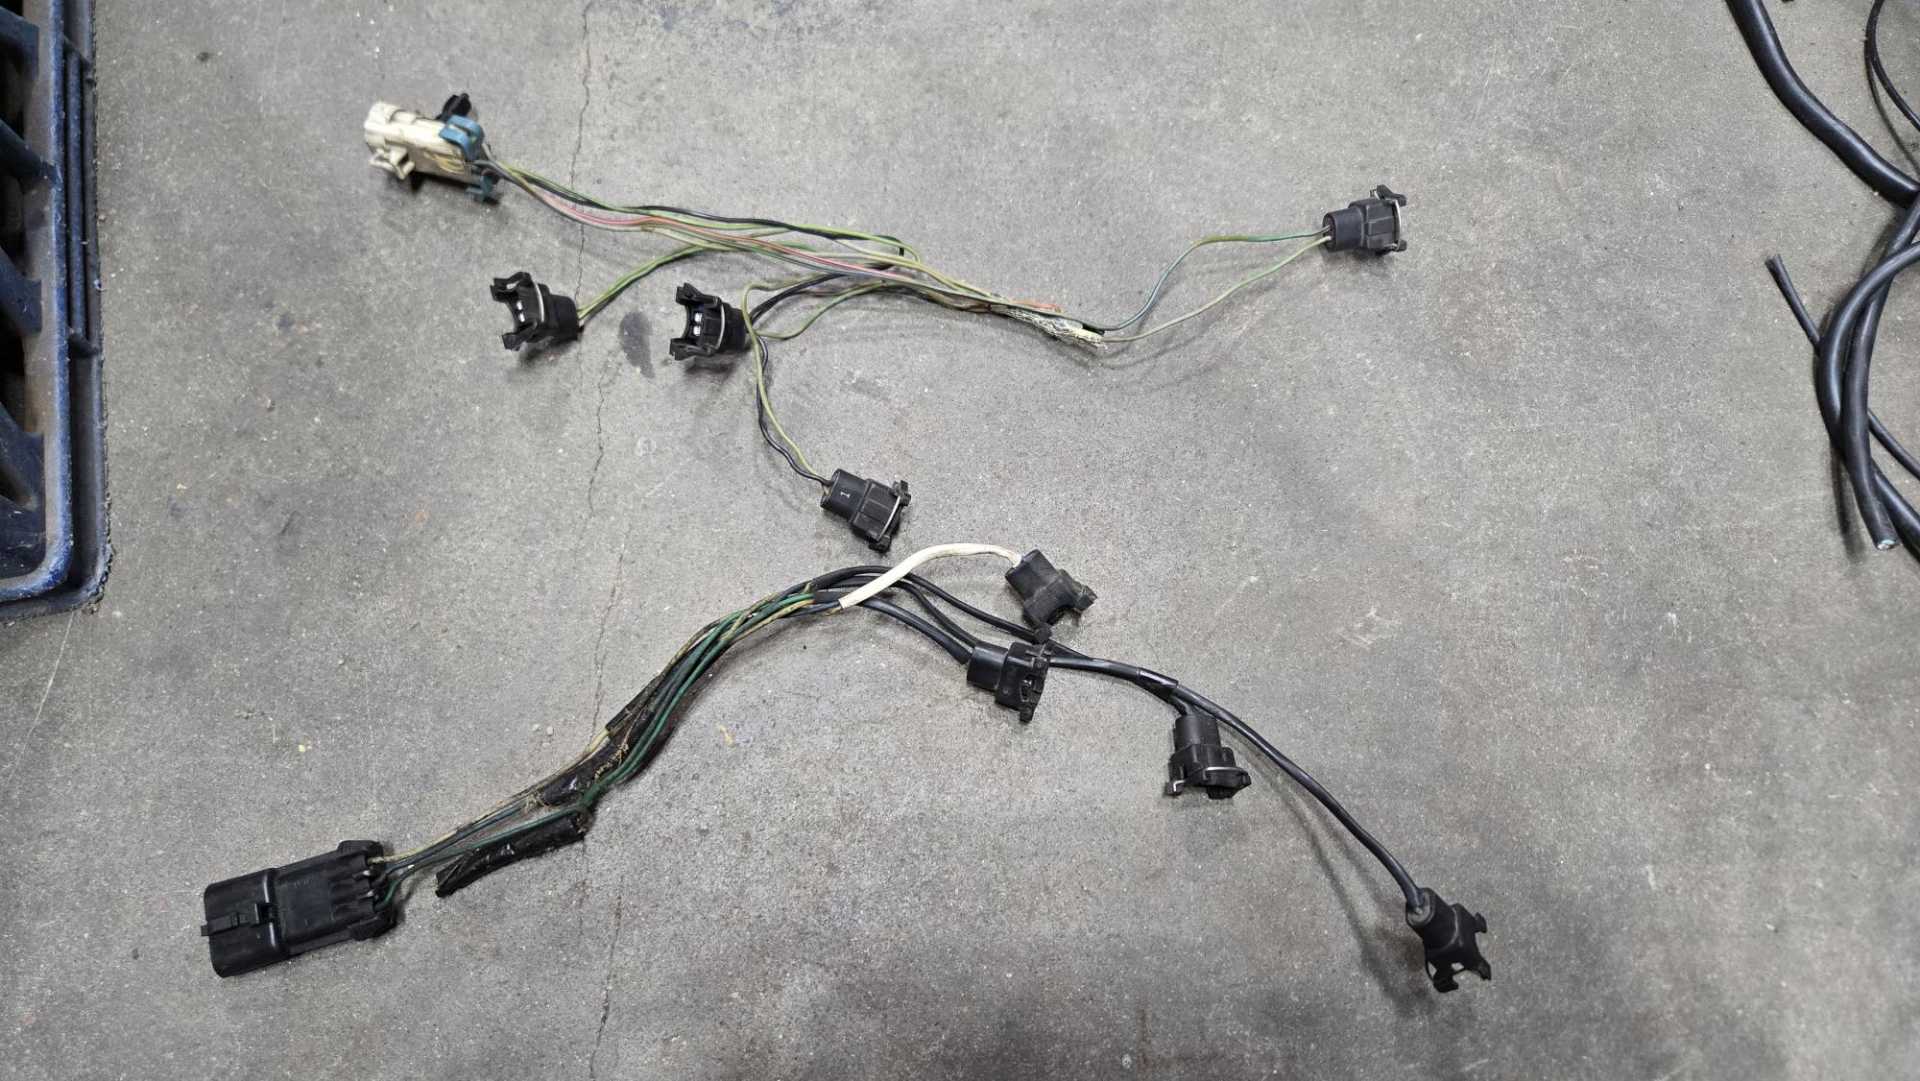
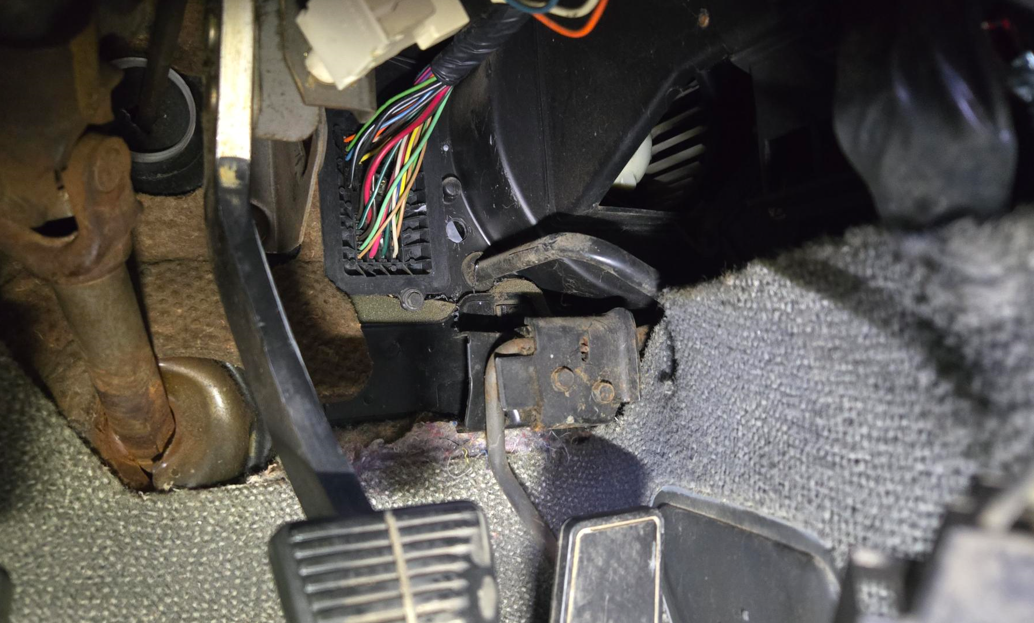
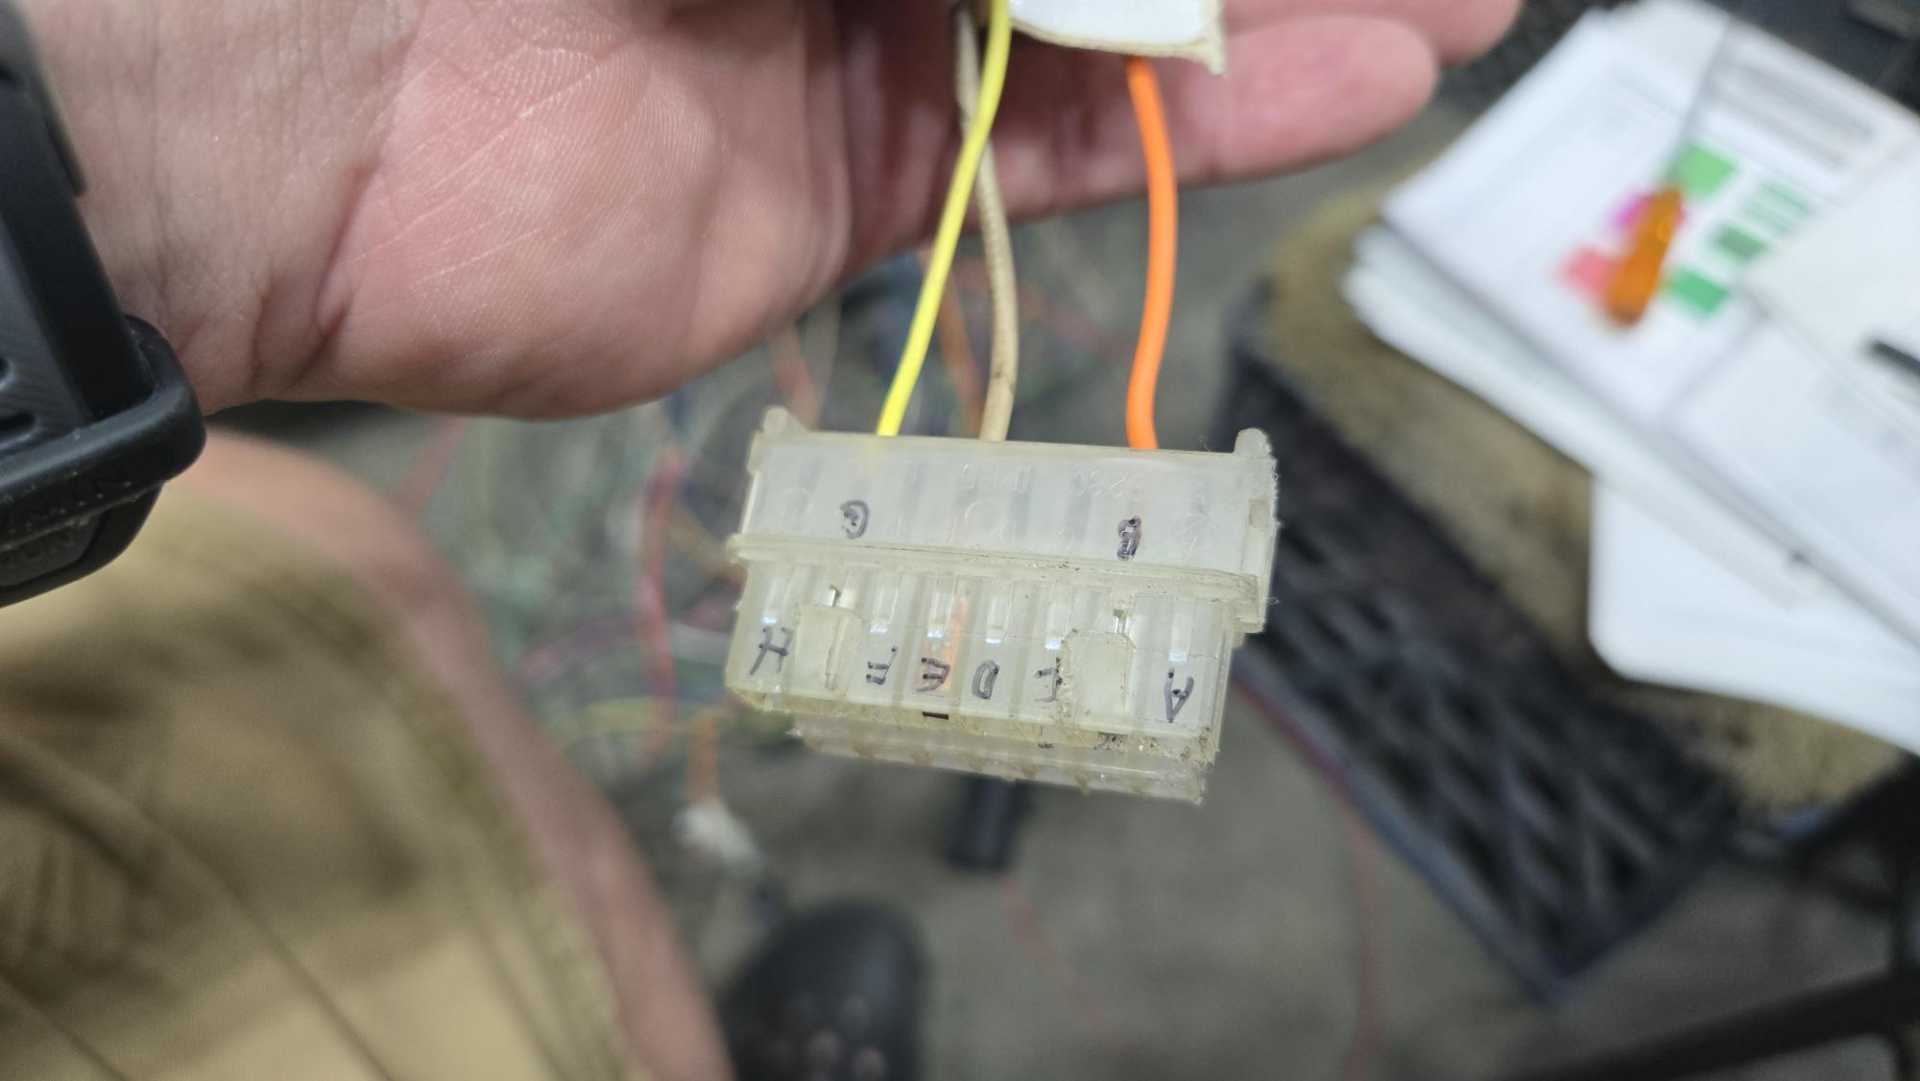
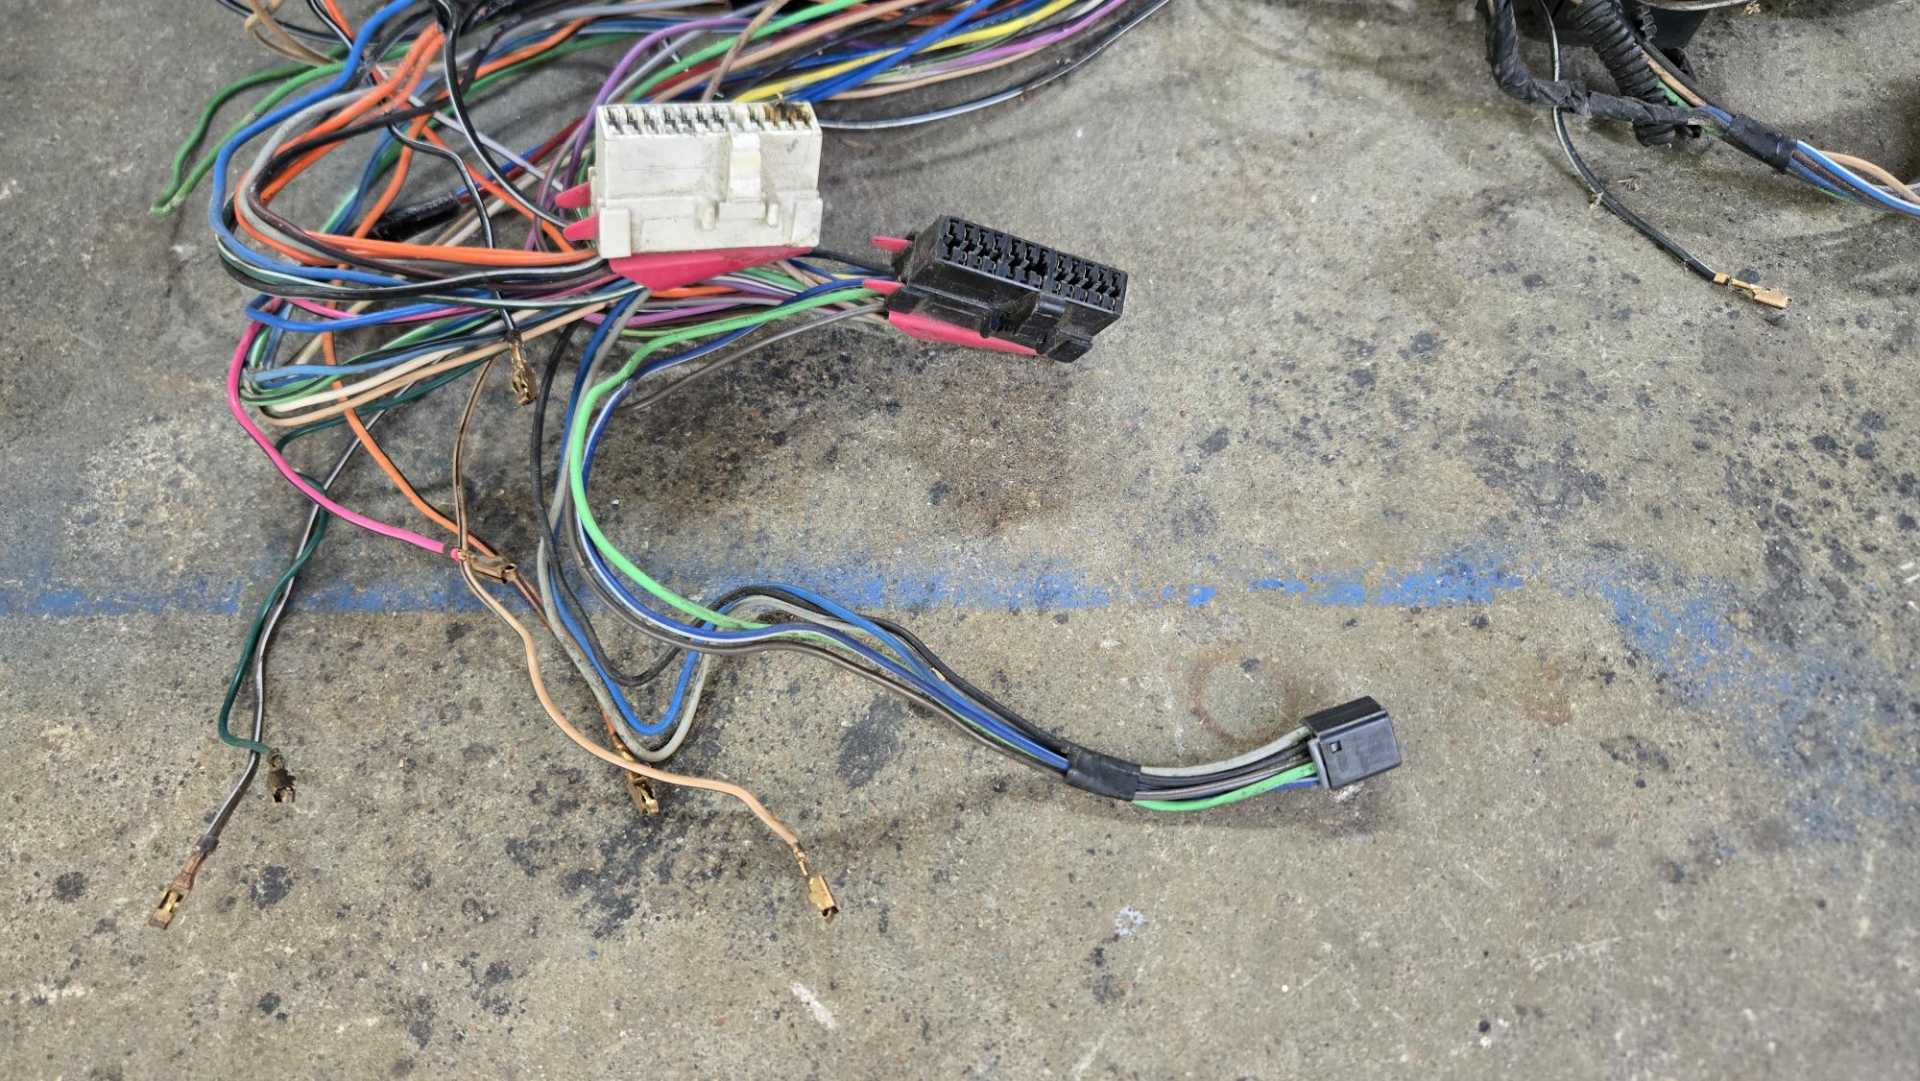
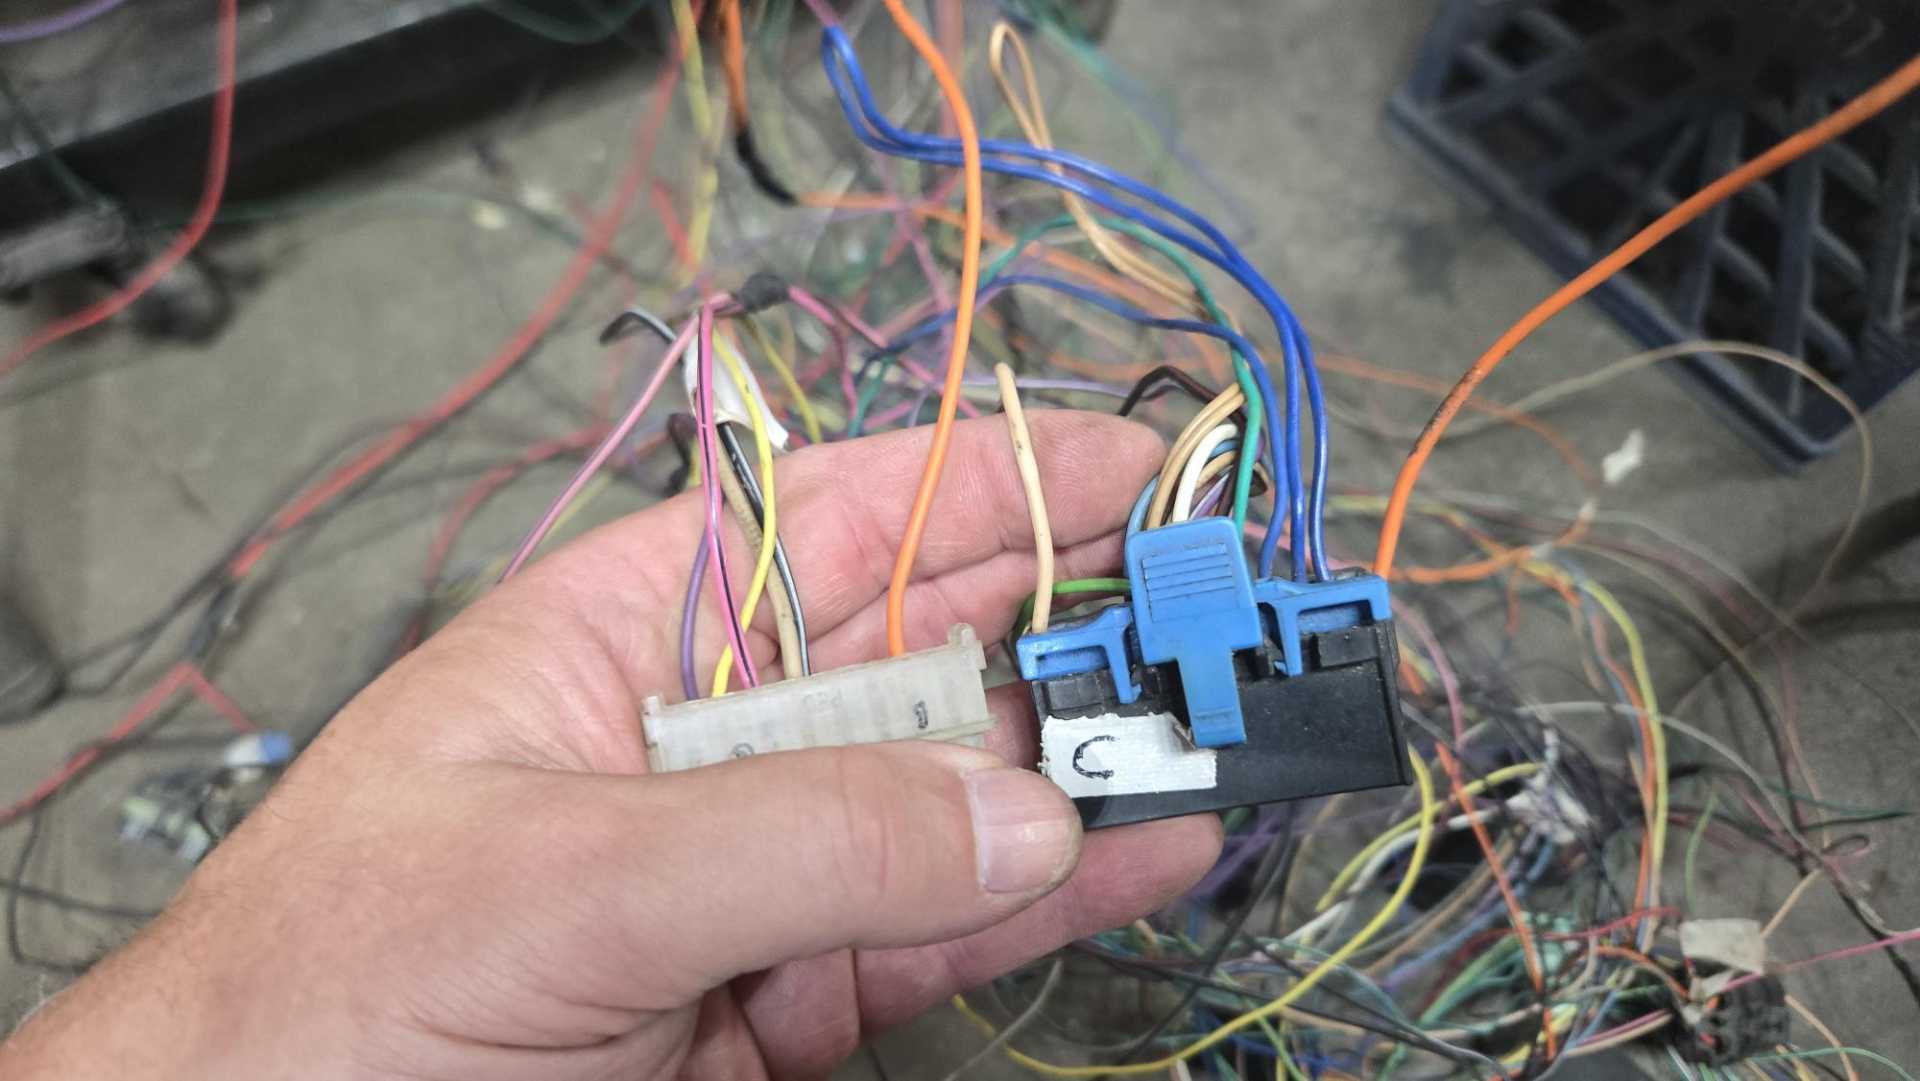
Also today, I checked the replacement injector plugs I got from the salvage. Three of my plugs are broken. They'll probably still work but I should change them out right now while I'm here.
The plugs are the same, but of course the wiring is different. The GTZ injector harness has only three wires, the Twin Cam version has five.
I'll have to see if I can unpin each plug.
The weather is finally cooling off so as my stamina comes back maybe I can finally get this thing on the road.
[This message has been edited by Quadfather (edited 09-22-2024).]
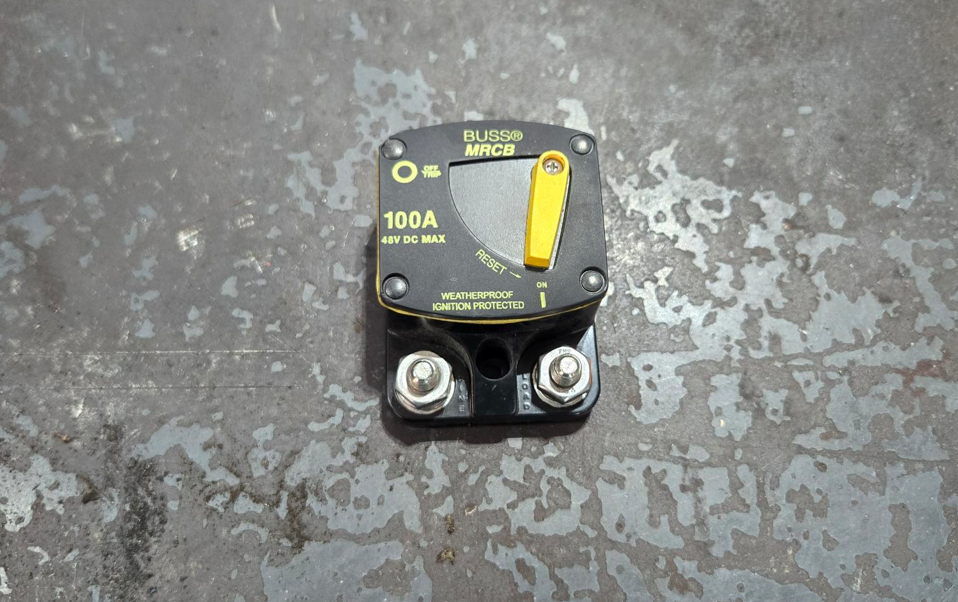
Getting back into the groove to get this thing finished and on the road. I'd like to install a circuit breaker or a junction block or two in the frunk. I got this one from work.
This is the same unit we use on all our company vehicles and we've never had a problem with any of them. I see a couple fairly flat spots in the frunk that might work for mounting.
Instead, I could use a couple junction blocks, one for the positive and one for the negative. I need to draw up a diagram and figure it out.
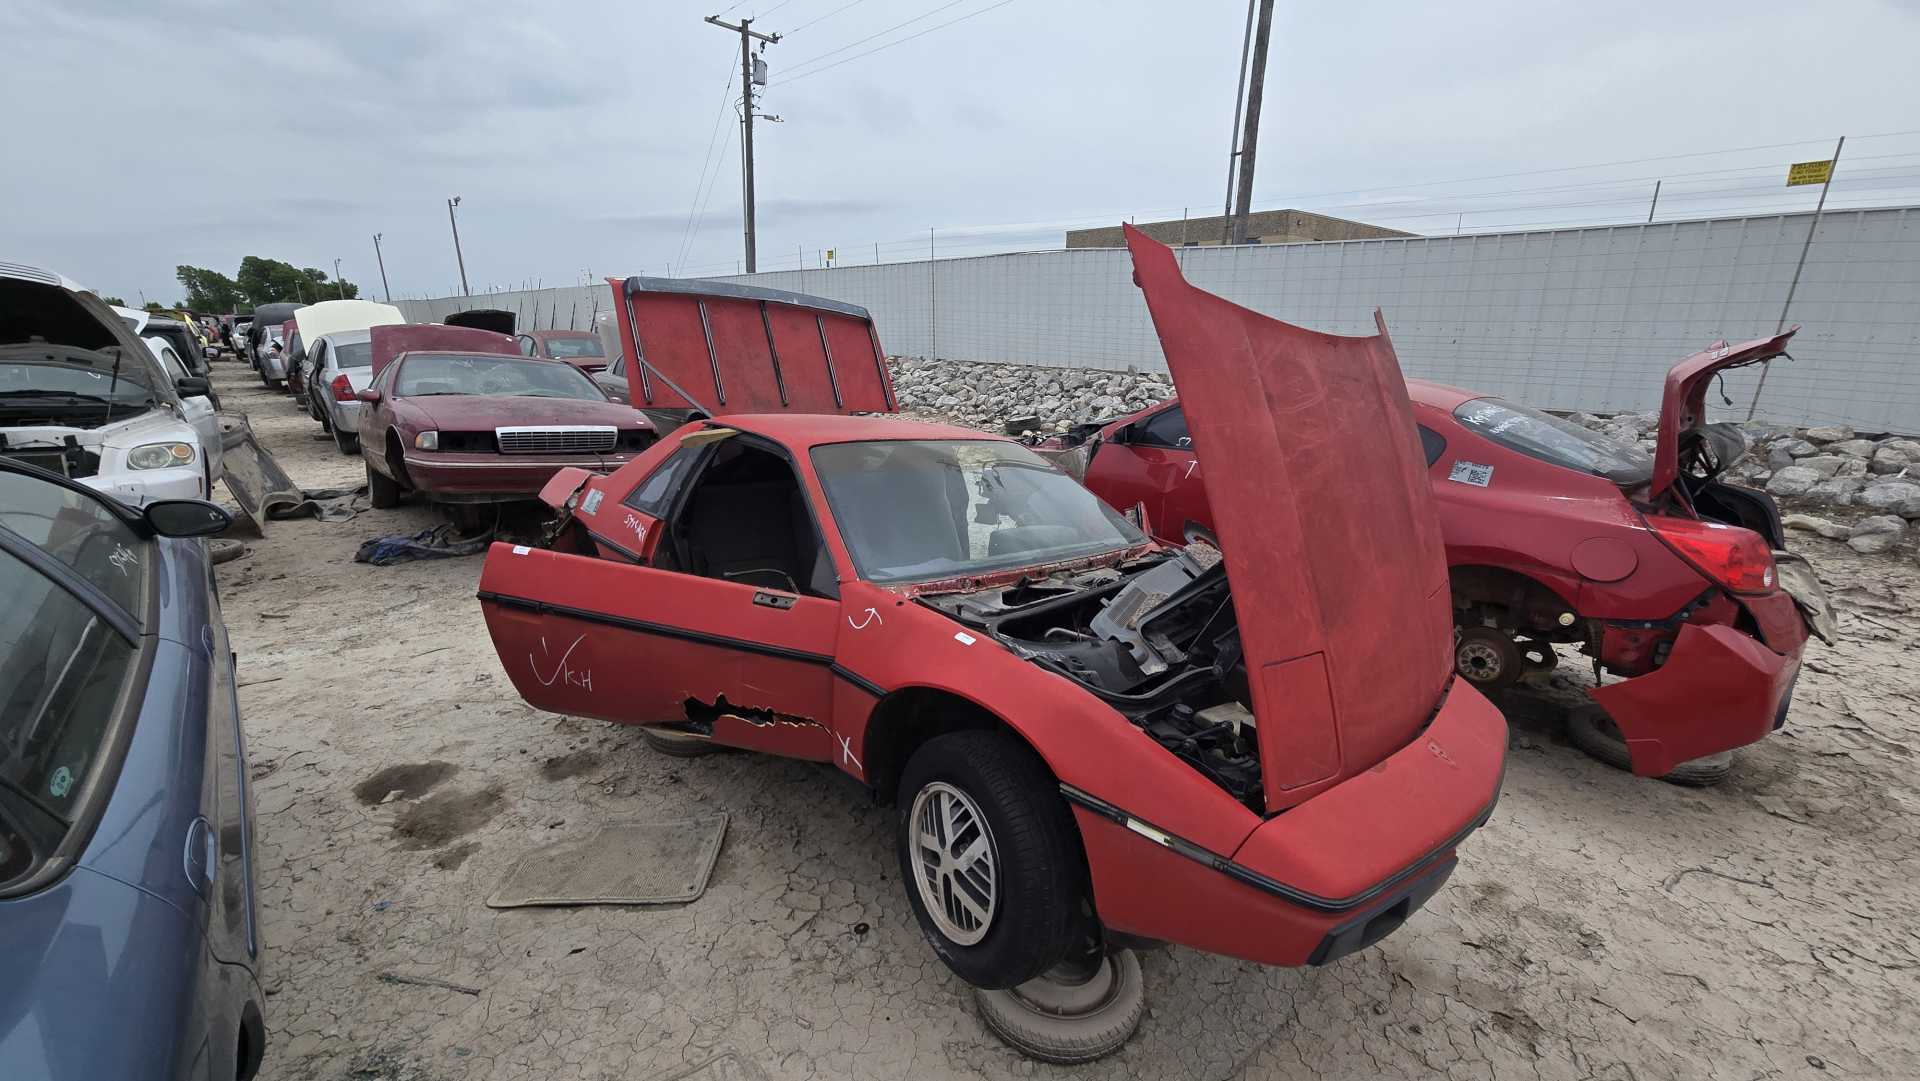
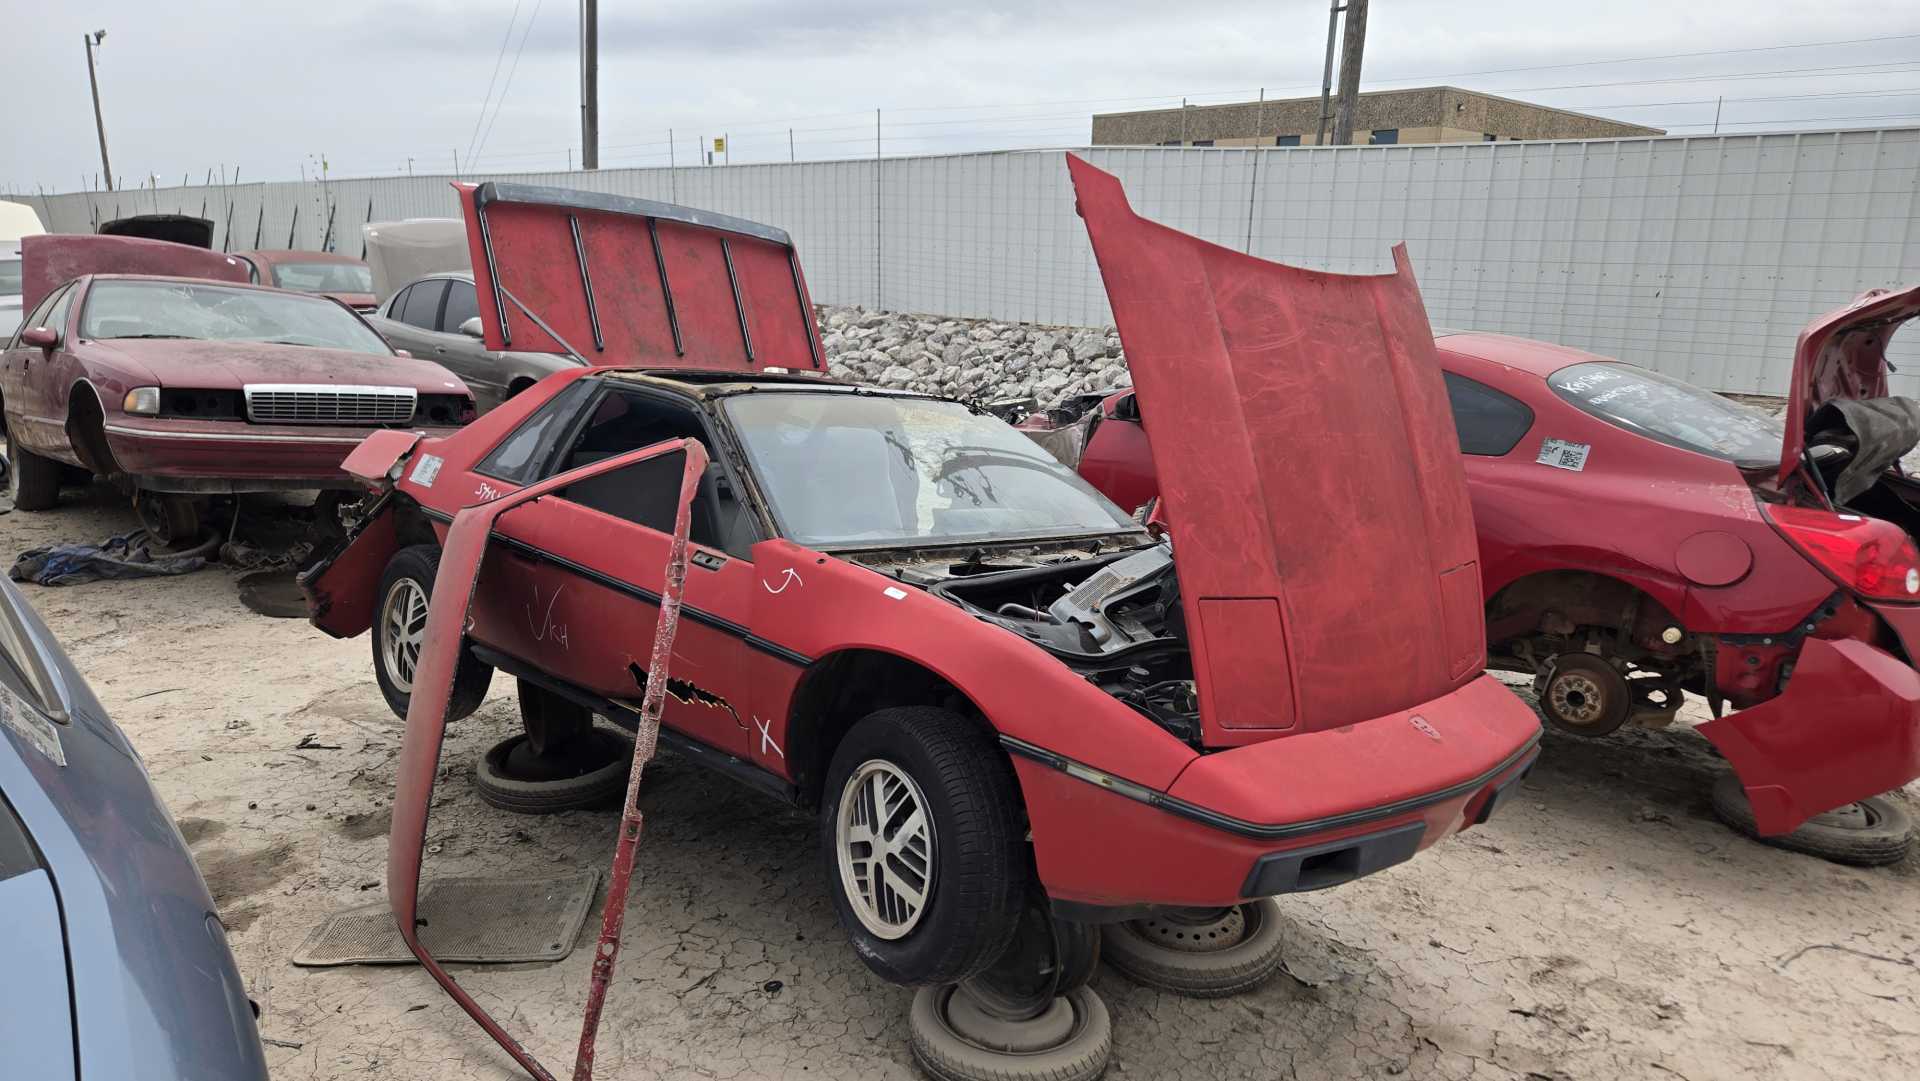
My wife and I were garage sale-ing down the highway in Owasso yesterday when I saw this.
In this part of the country garage sale signs often don't reflect reality, so I've learned to keep my head on a swivel while looking for active sales. I saw about one foot of the front end of that Fiero from about 150 yards away while passing the street it was on.
And this was at our grocery store today. Studebaker. Followed the owner out of the store and he said he did some of the fabrication work and the paint. Looked and sounded great, especially when he pumped up the air bags just a bit in order to leave
I've been so busy at work I just haven't had time to get much done on this project but I have been collecting more tools and supplies. I have PTO the week of Christmas so I'm hoping to move forward then, including installing the battery cables and finalizing the engine harness.
I've been so busy at work I just haven't had time to get much done on this project but I have been collecting more tools and supplies. I have PTO the week of Christmas so I'm hoping to move forward then, including installing the battery cables and finalizing the engine harness.
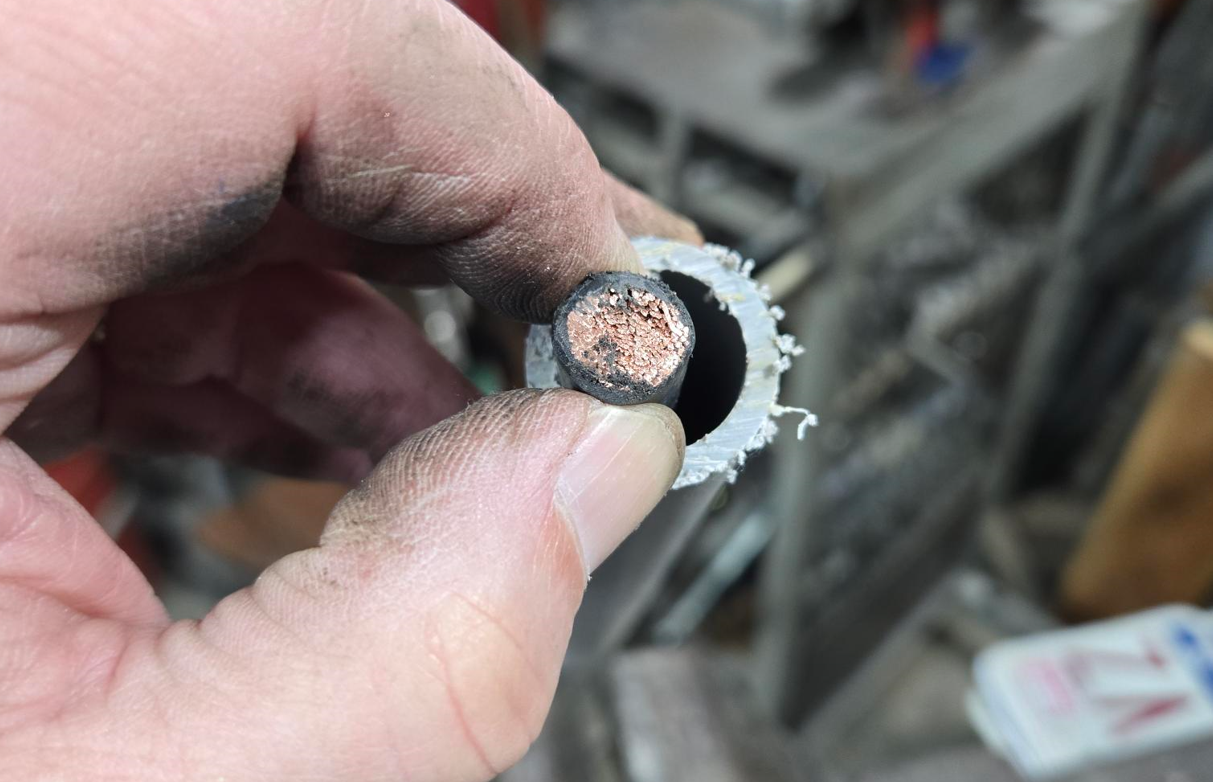
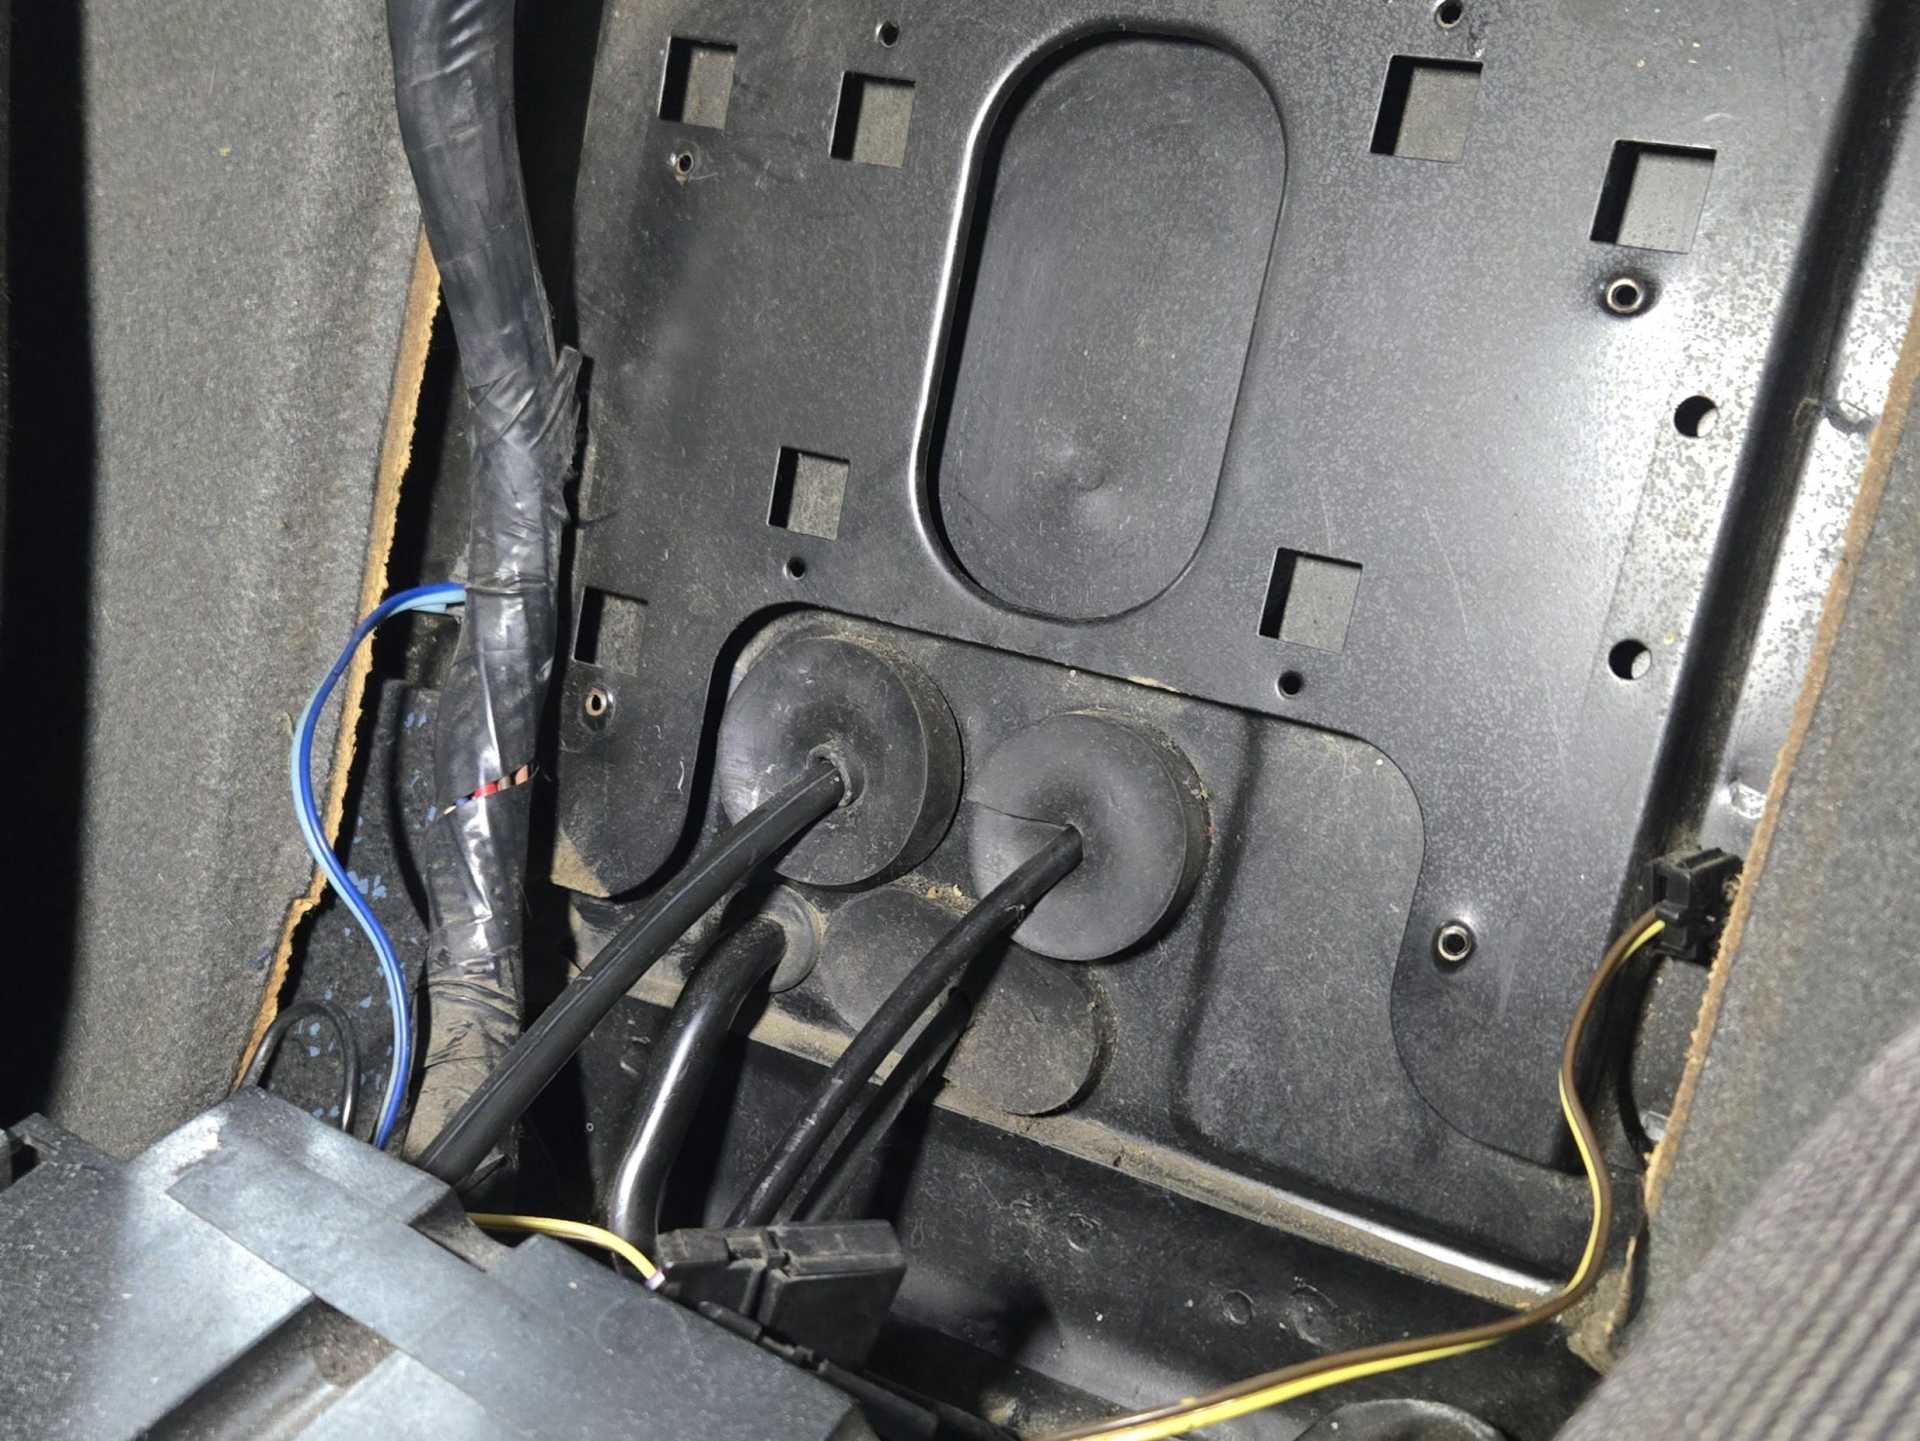
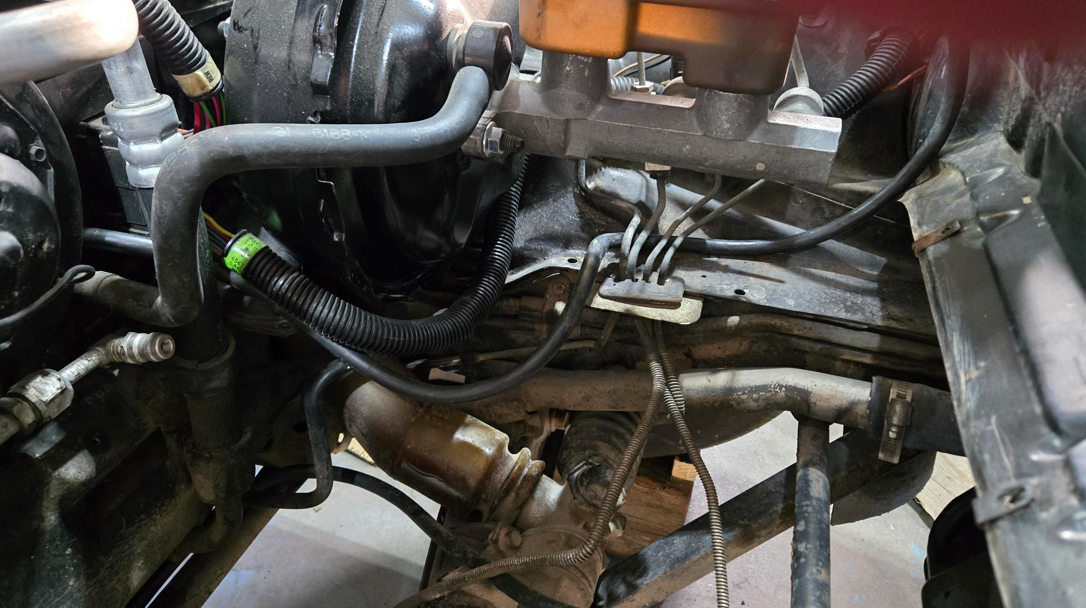
I bought a piece of PVC conduit to run the positive battery cable through underneath the car. It was a pretty tight fit under the flange that holds the gas tank, so much so that the ends bend down.
This conduit is listed as 3/4", with an OD of 1". I'll try 1/2". I cut a short section of battery cable and it looks as though it would fit in a 1/2" conduit.
[This message has been edited by Quadfather (edited 12-15-2024).]
These turned out to be much bigger than I was expecting.
I won't get time to get back to the shop until next weekend. That's when I'll try to install the positive battery cable, circuit breaker and bulkhead connector. I may also buy a used battery from the salvage yard to make sure one will fit and to fabricate the terminals and cables.
[This message has been edited by Quadfather (edited 02-09-2025).]
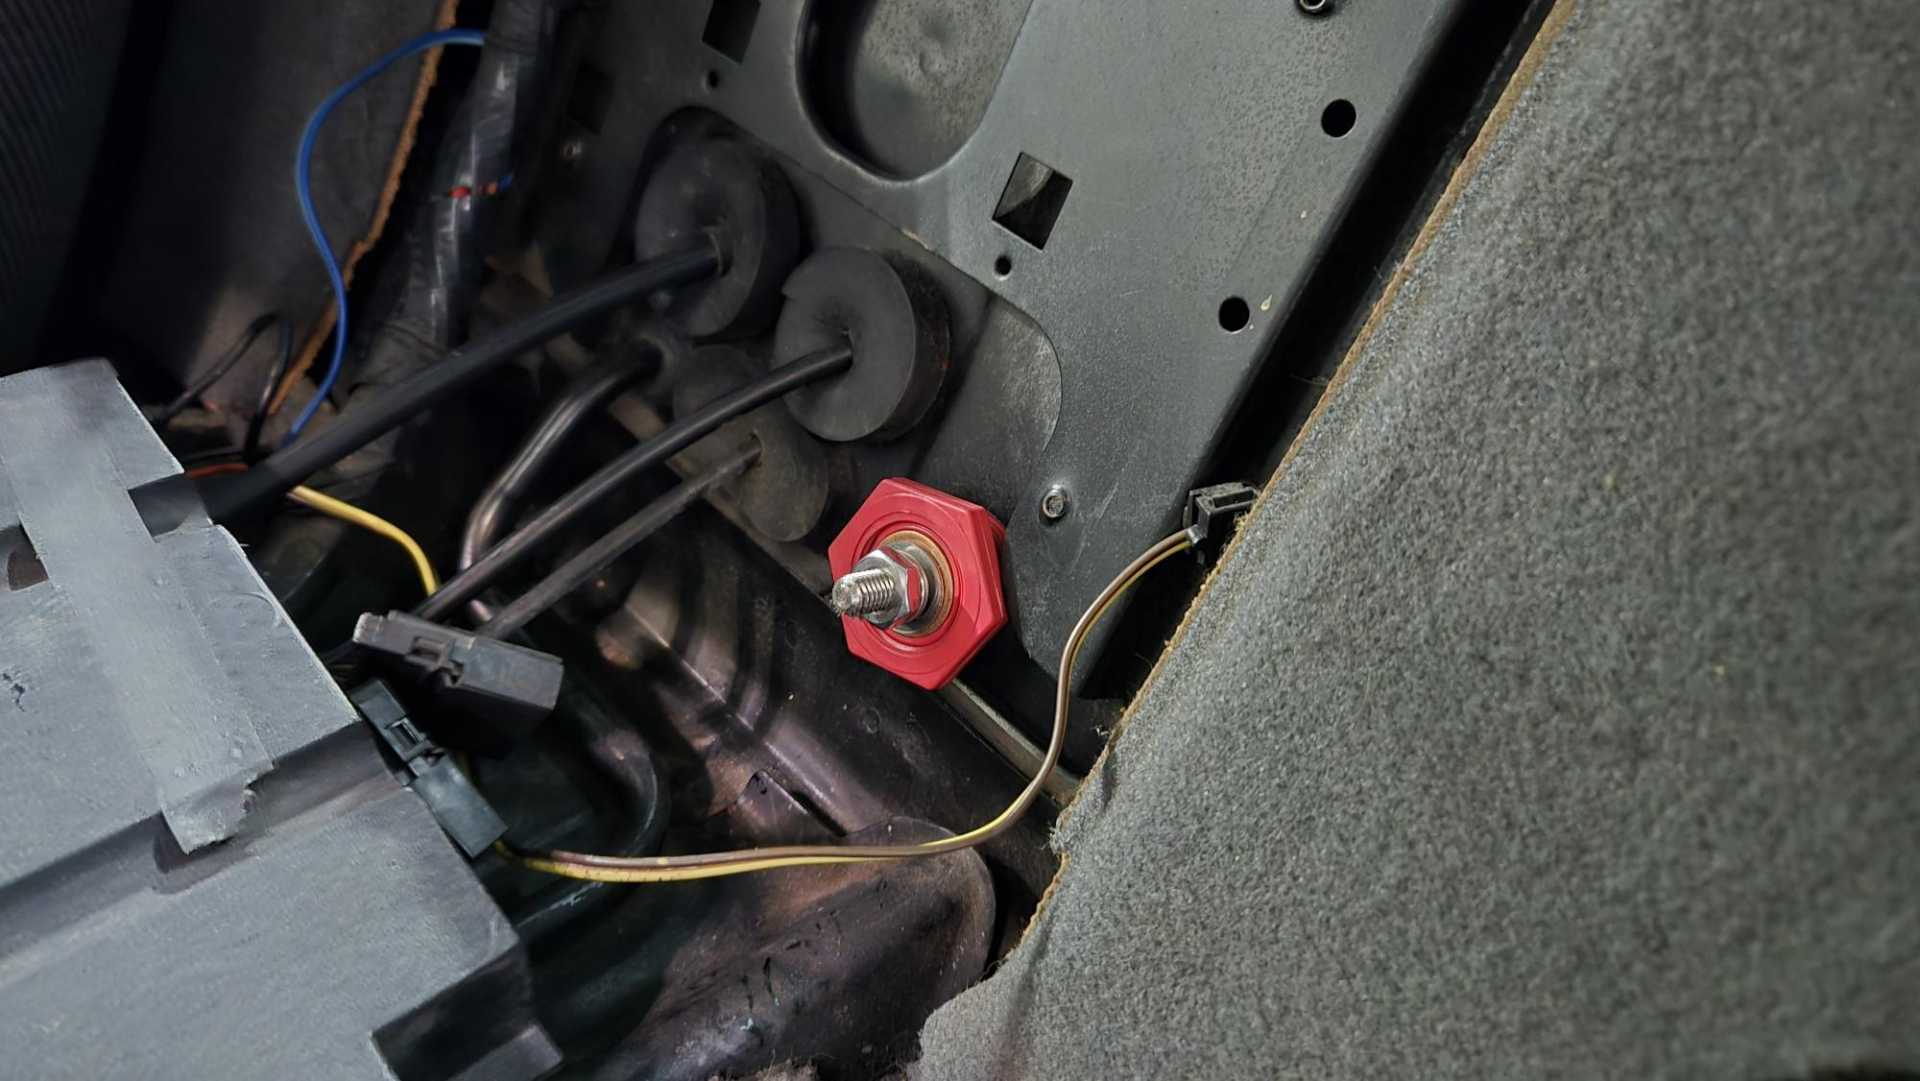
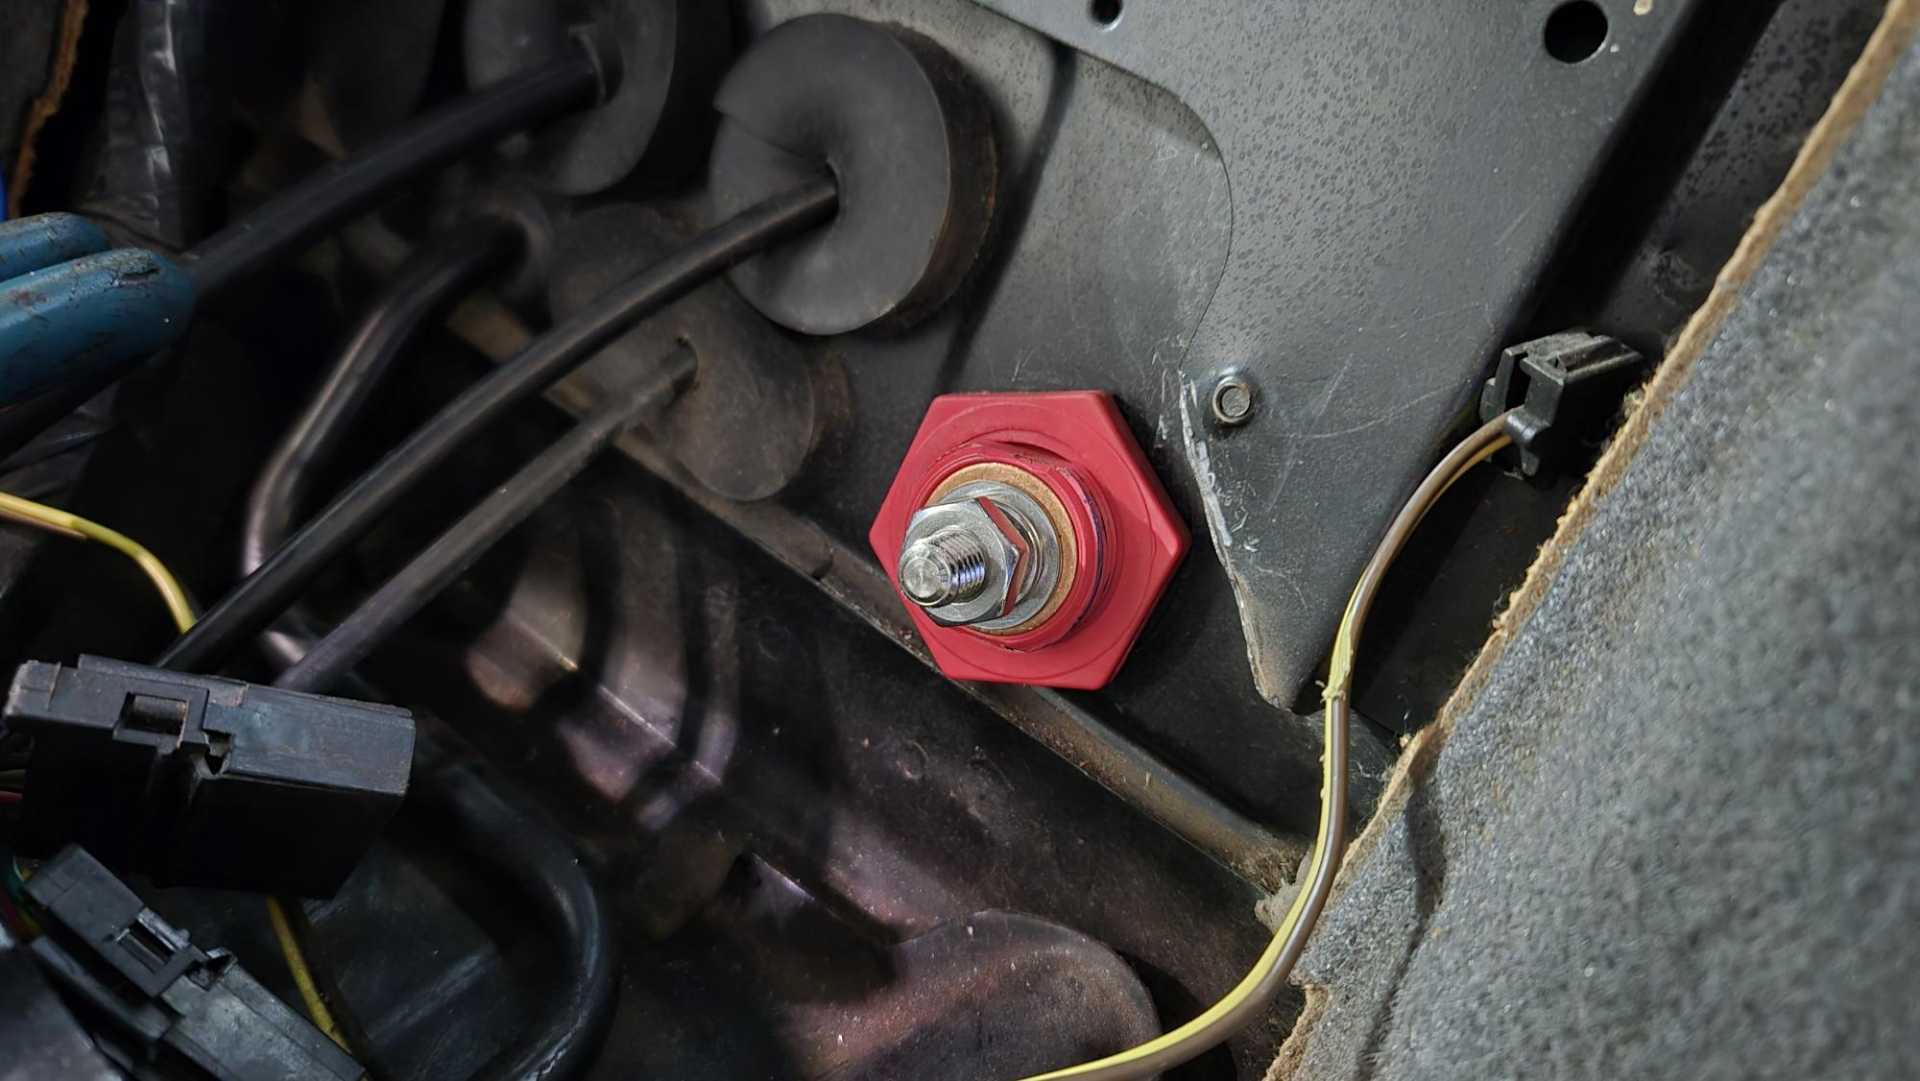
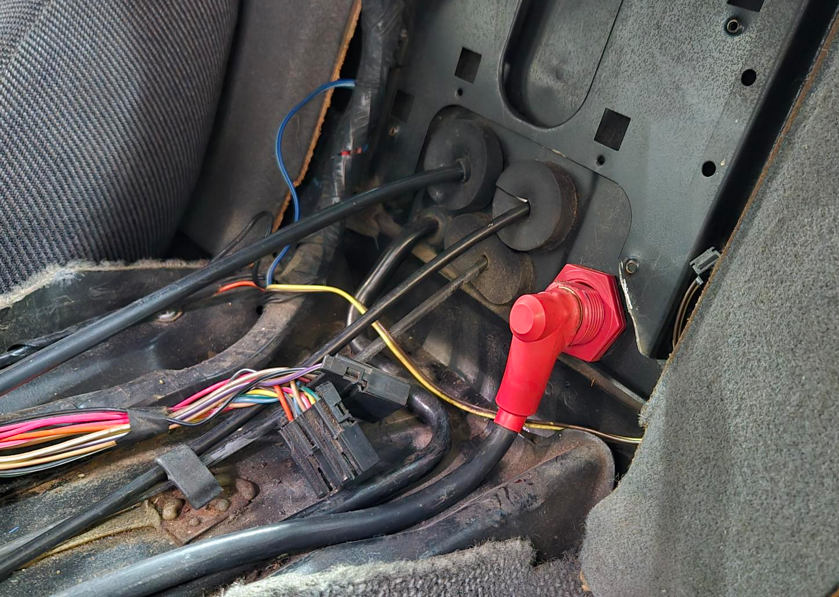
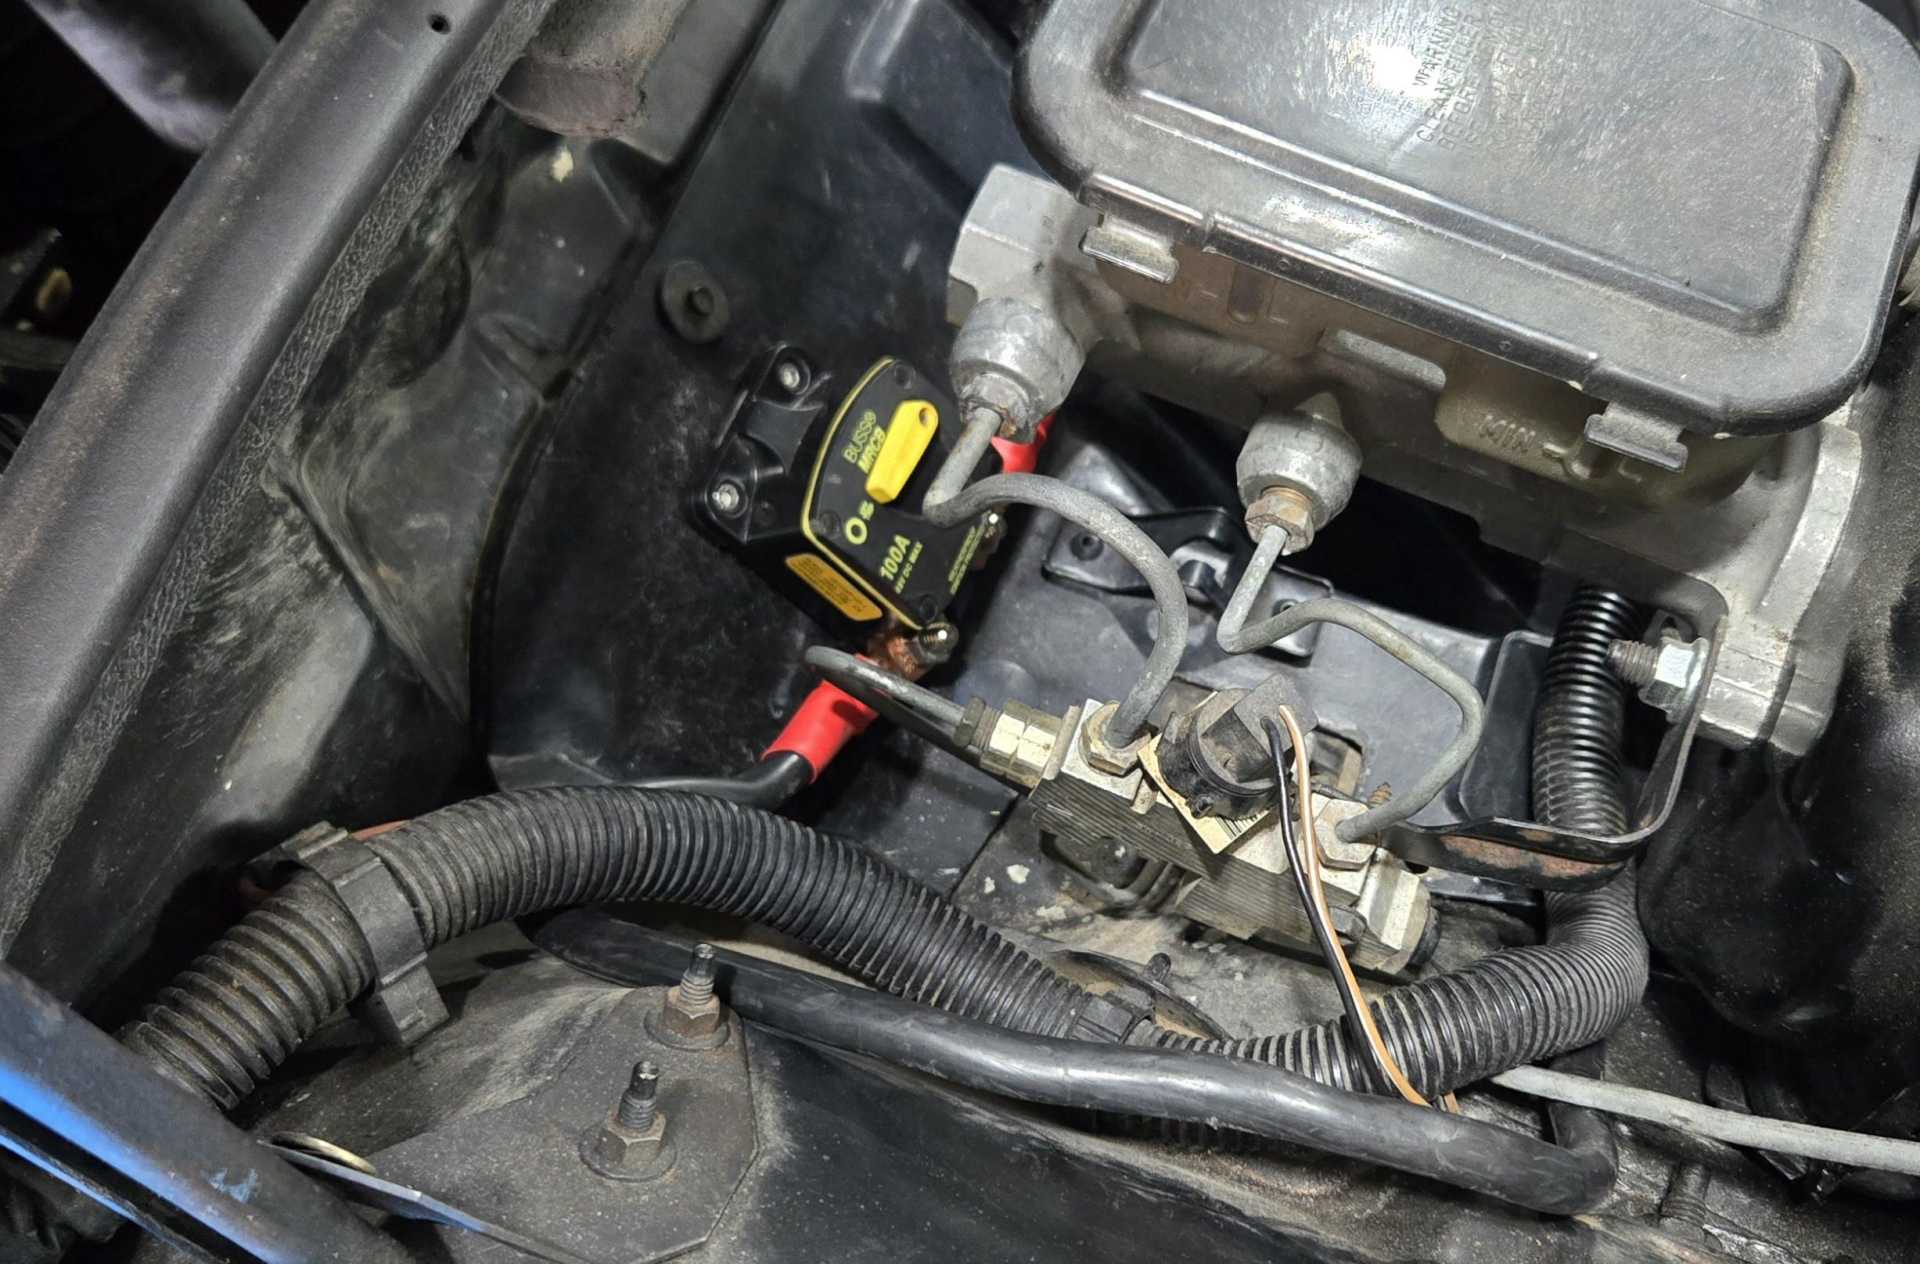
Here's how and where I decided to mount the bulkhead connector.
I had to trim the sheet metal to be able to turn the big nut on the connector.
It's just finger tight for now because I want to put a bead of silicone on the engine side of the connector. I believe the connector would seal well enough on its own but a little sealant would make sure.
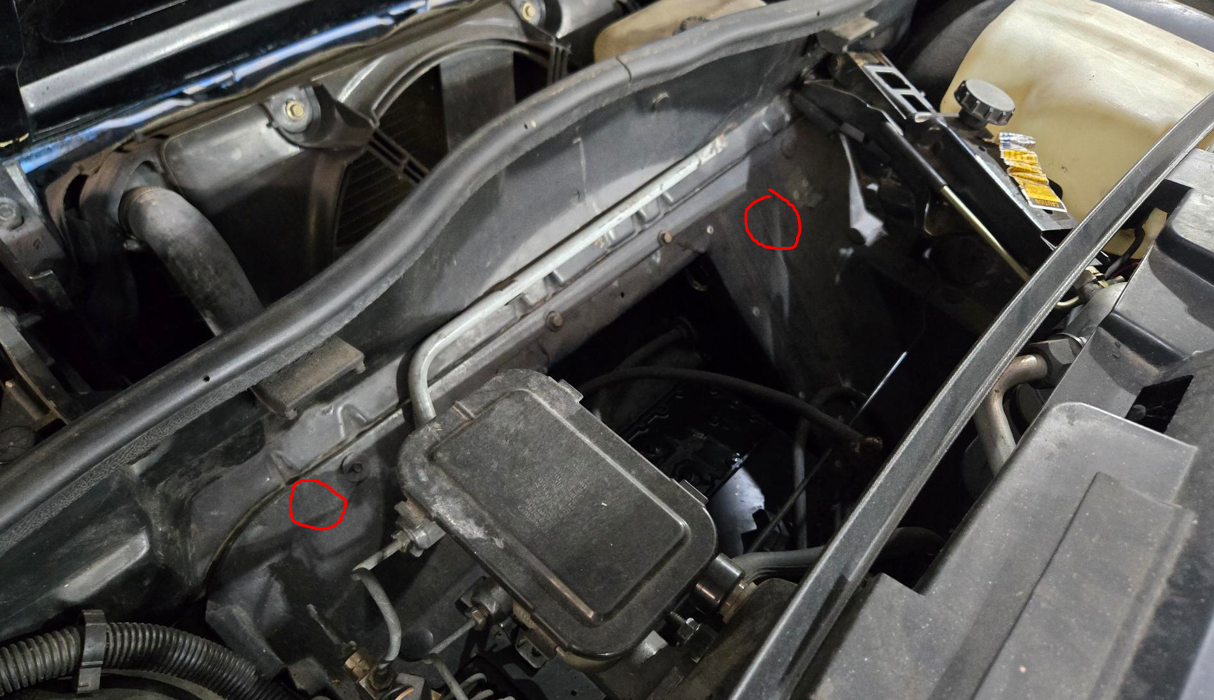
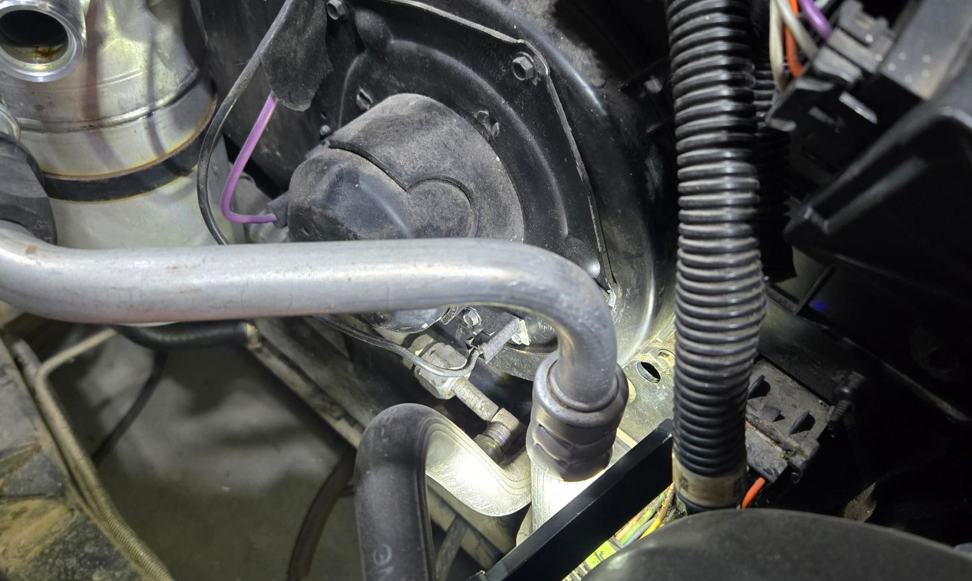
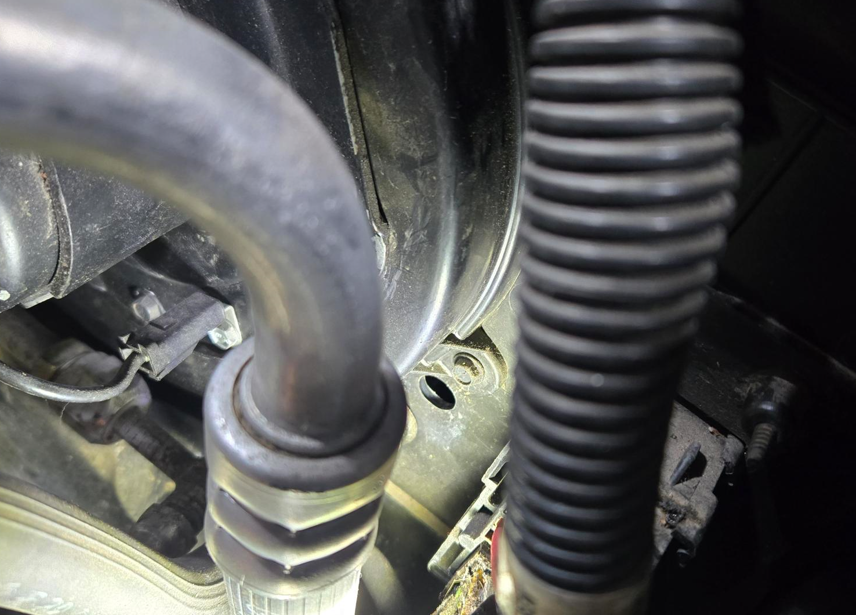
This might work. First, I had to find a place near the fan to drill a hole for the cable. I chose a spot just above the vacuum pipe.
I tried to put a grommet in the hole from the cabin side but after 10 minutes of tinkering decided to move on because the material is plastic. I may try again from the frunk side.
I ran the cable on the driver side of the shifter and it fit well. I don't remember if this is one of the Riviera cables I got years ago or the LeSabre cable I bought a few weeks ago. Doesn't really matter.
This is as far as I wanted to go before putting the spare tire panel back in.
Here's what the cable looks like connected to the bulkhead. Hopefully there's enough room under the console/ECM for it. I used my Harbor Freight hydraulic crimper to put the copper lug on the cable. Worked great. I had to buy the lugs and the red rubber boot separately and now wish I'd bought more boots.
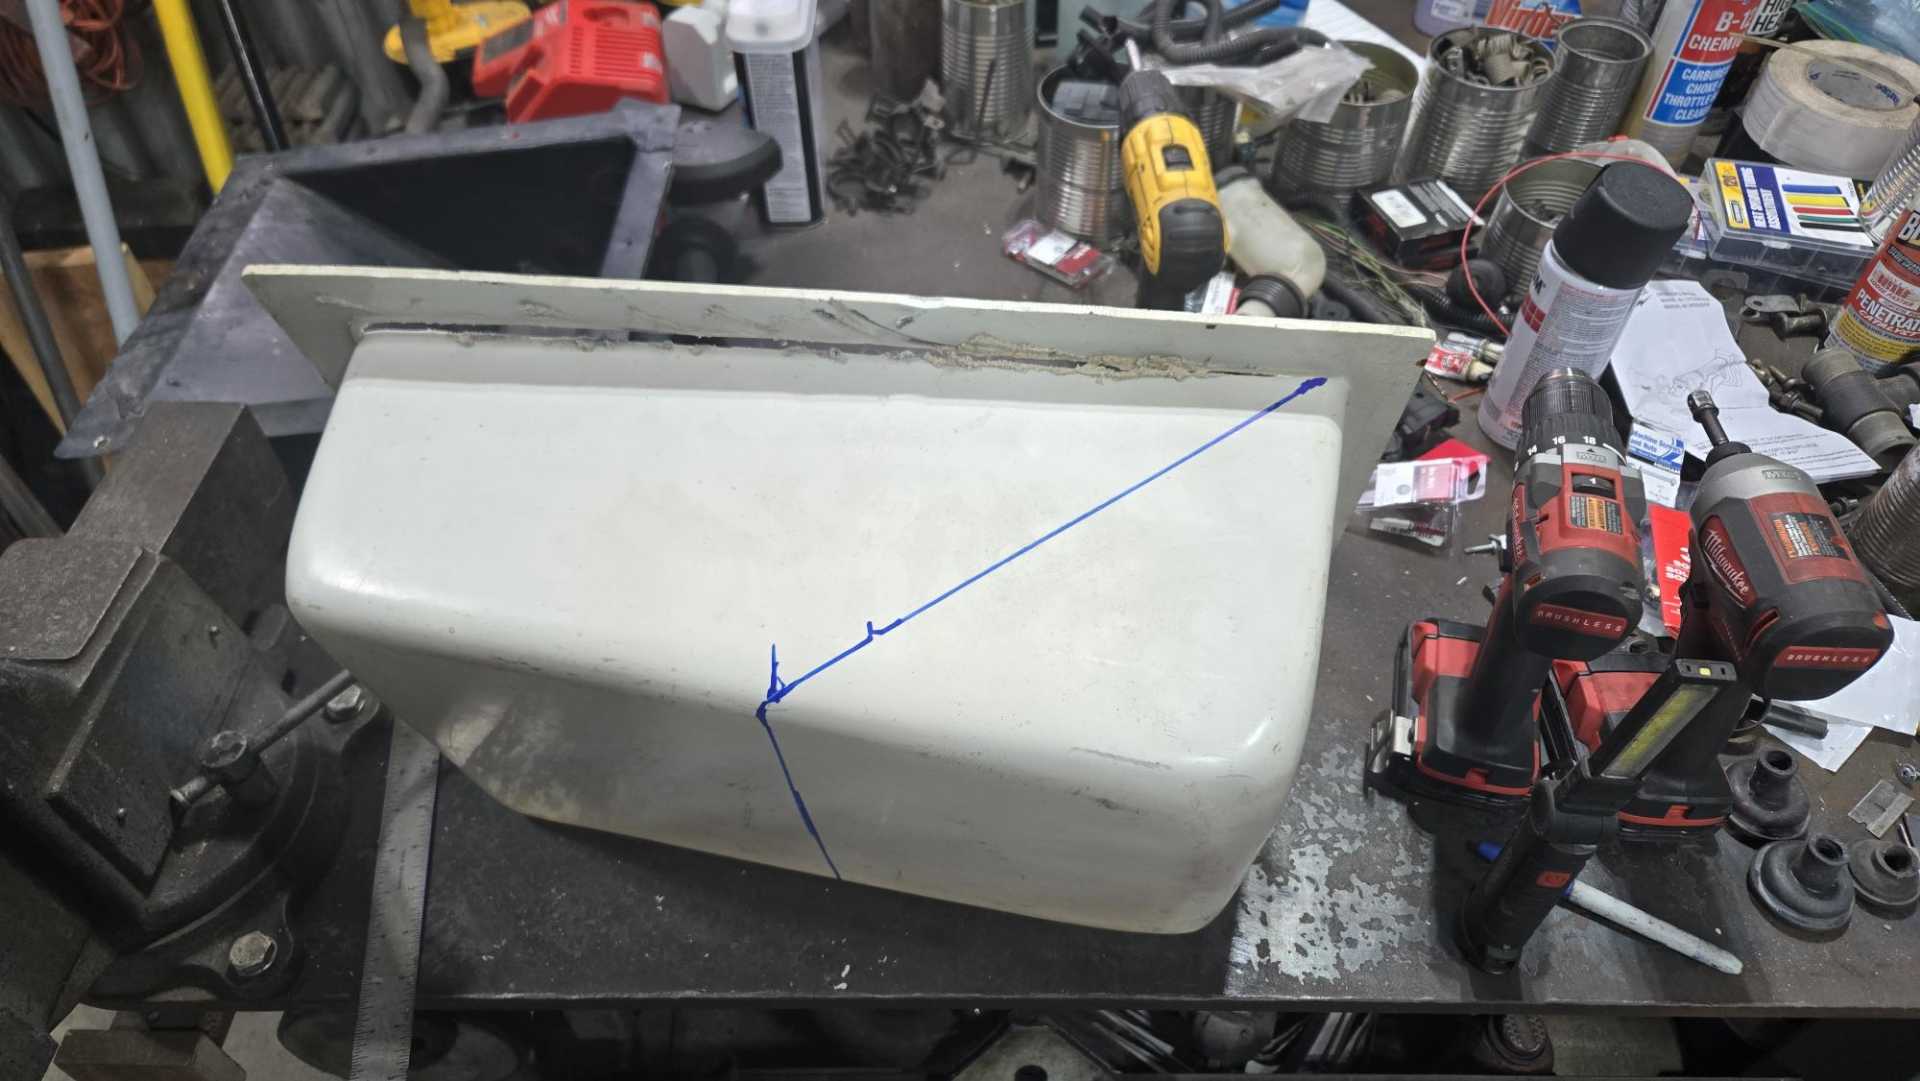
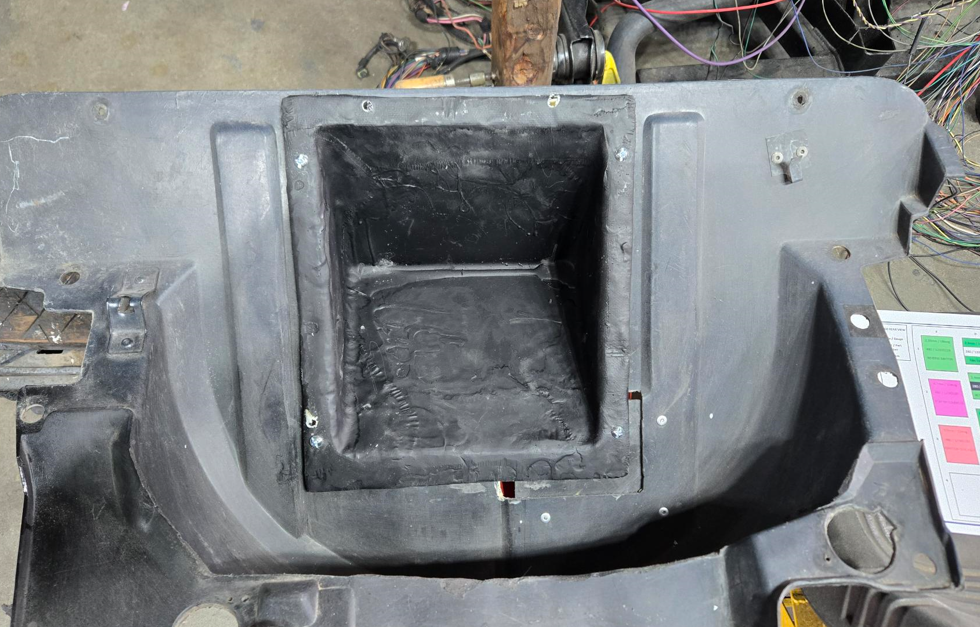
I bolted the plastic/fiberglass battery box to the spare tire panel. For a battery hold down, I might just install a couple eye bolts and use a short bungee cord.
Today I installed the circuit breaker and finished the positive battery cable. I don't remember where I got this cable, probably at a garage sale. It's welding cable and is probably too big.
I wish I'd made the box wider, but I think it will still work. I couldn't get the battery cable bolt to thread into the battery, so I'll have to get some longer ones.
In spite of the setbacks, I have a pretty good feeling of accomplishment for today. I also spent some time on the wiring harness. Hopefully next weekend I can finish up the battery box and cables and then concentrate on finishing the harness.
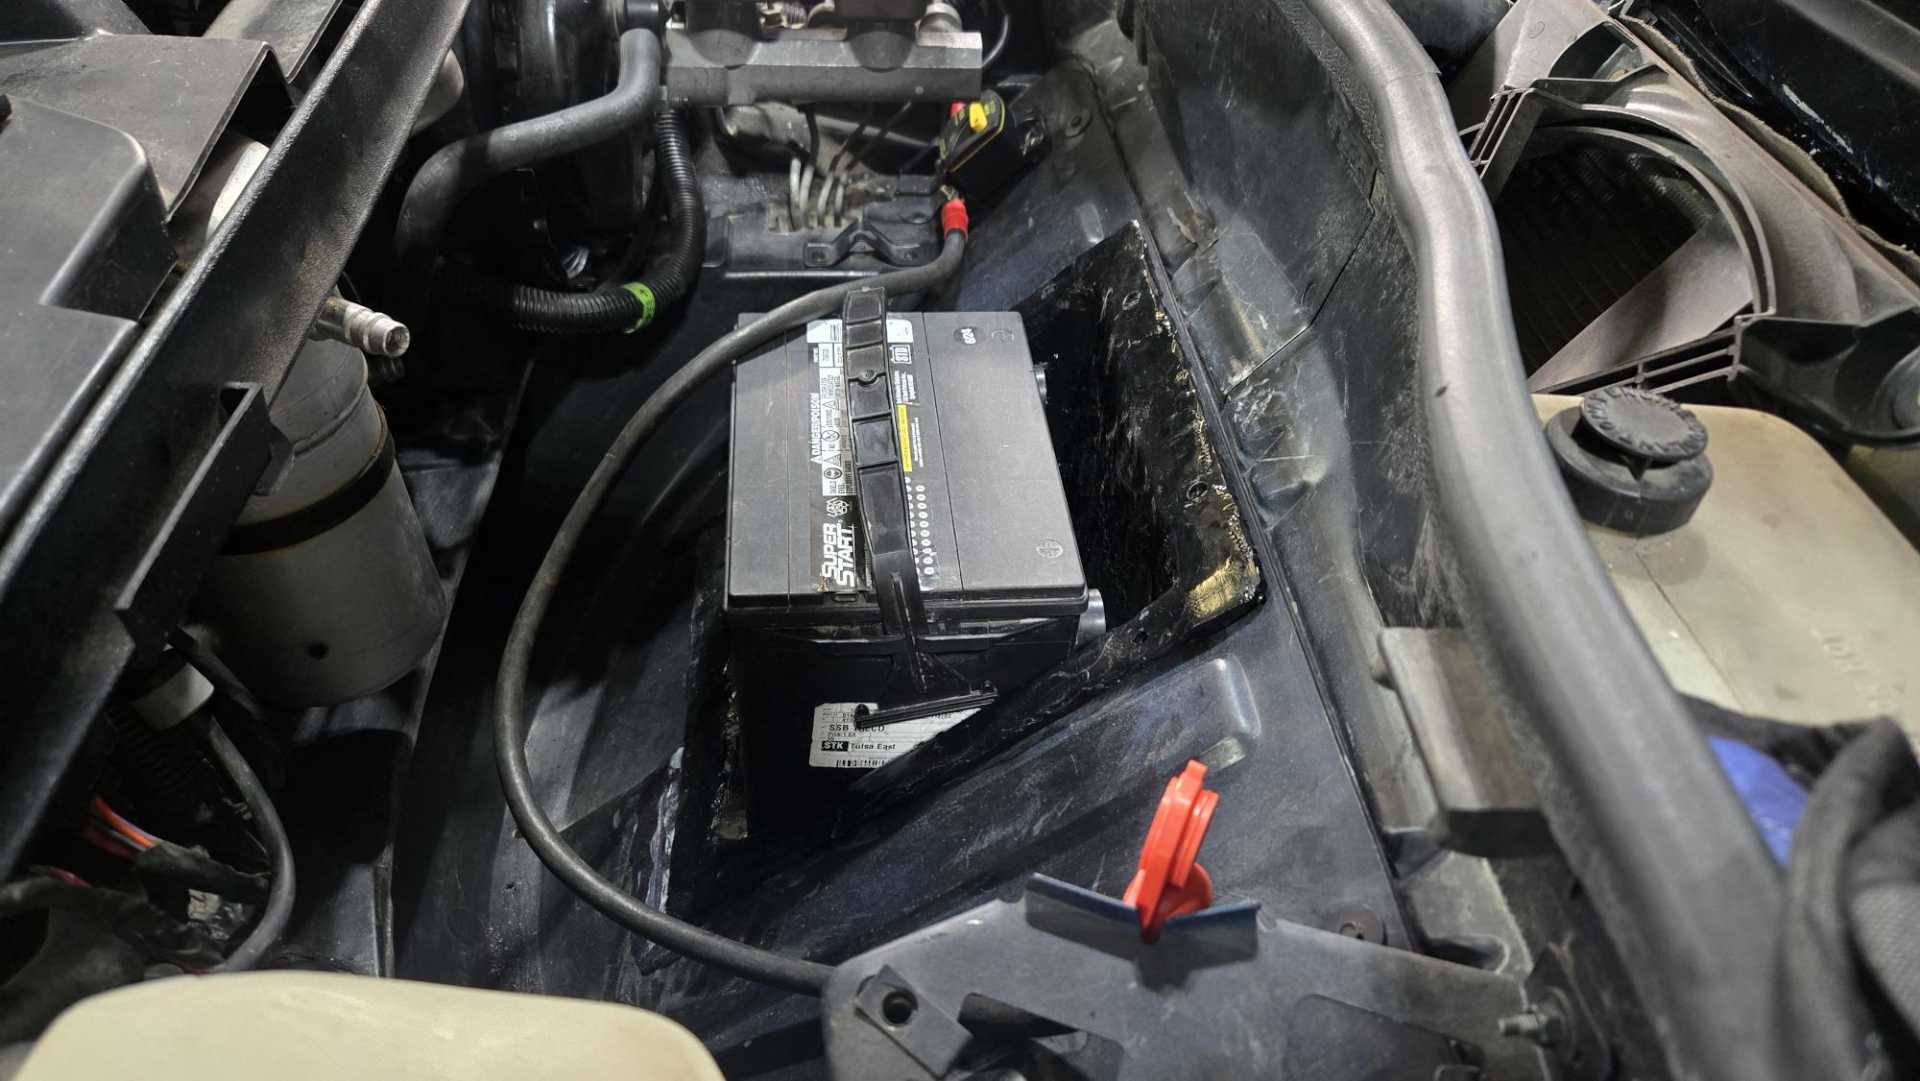
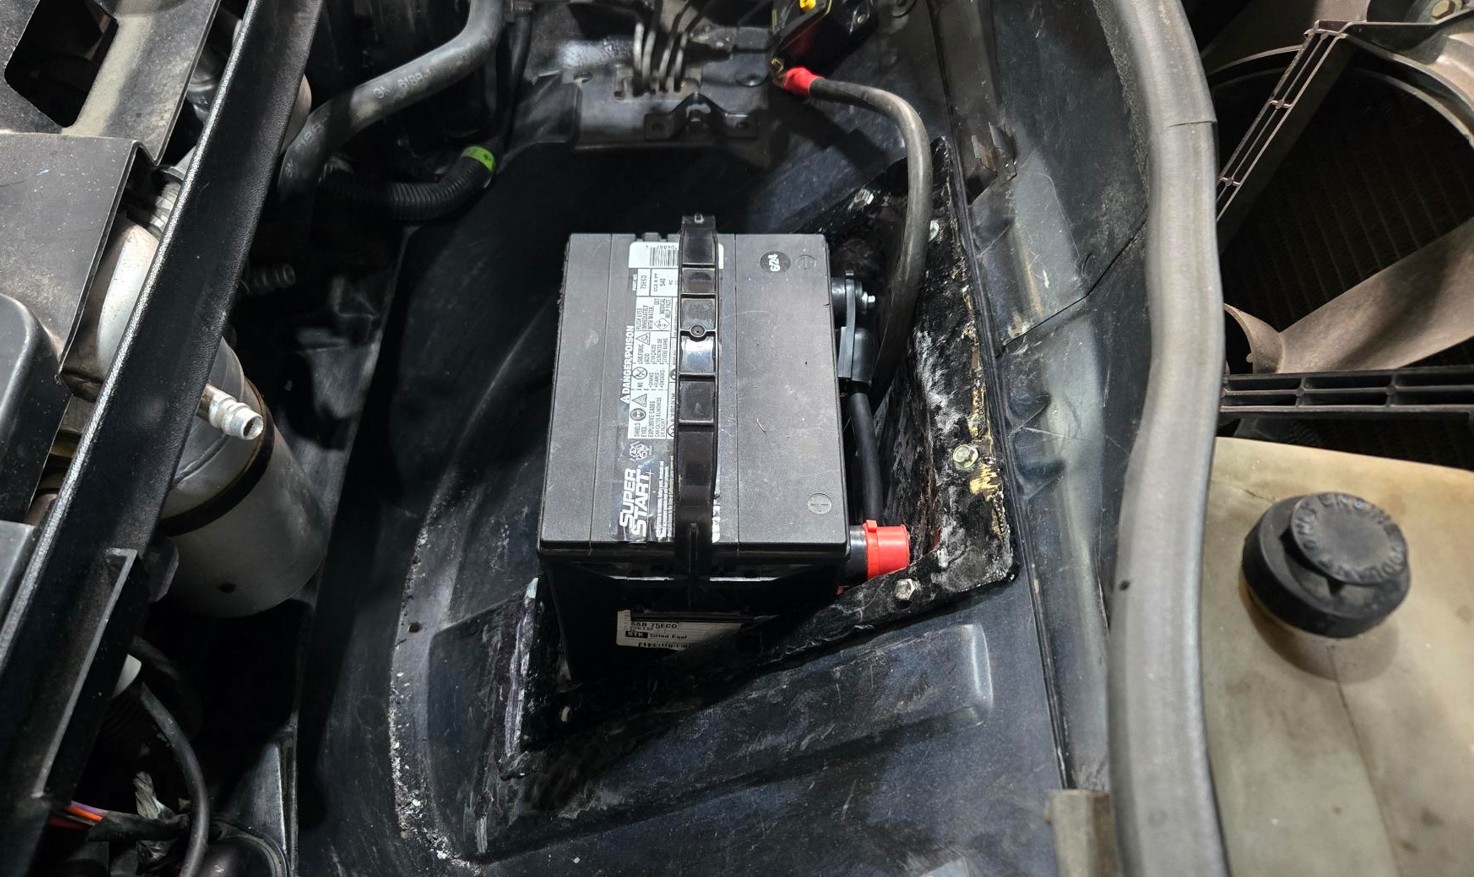
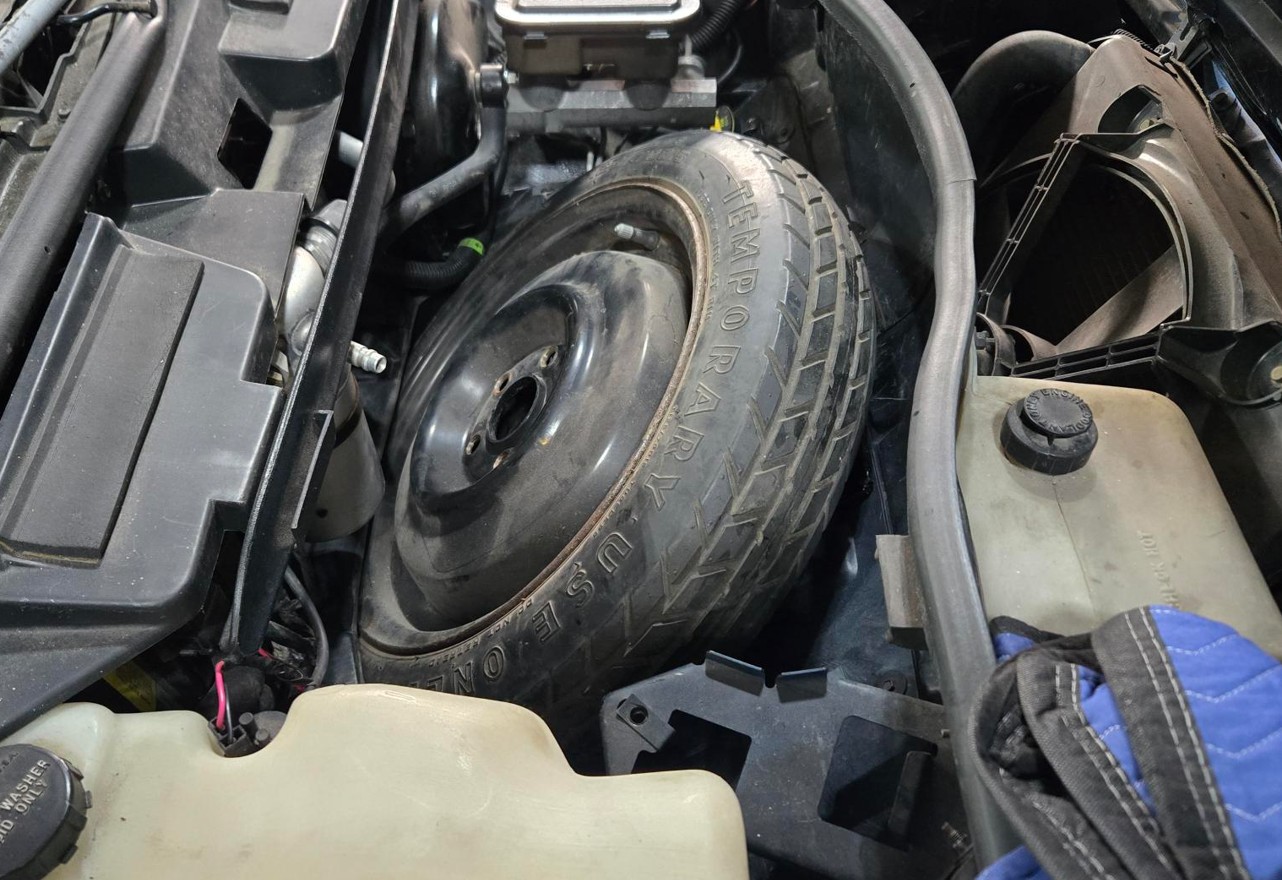
Finished the battery cables today. The negative cable runs through a PVC pipe under the fuel tank, then through a hole in the side of the battery box.
The battery is not anchored, which allowed me to jiggle the spare into place. It just barely fits past the battery, then the brake booster vacuum hose and a wiring harness.
I could just leave it like this, using the spare as the hold down for the battery. The longer I worked on this, the more convinced I became that a better idea is to get a Dyna-Batt. I'll fab a smaller fiberglass box that will mount it in such a way that it sits flush with the spare tire tray.
[This message has been edited by Quadfather (edited 07-19-2025).]
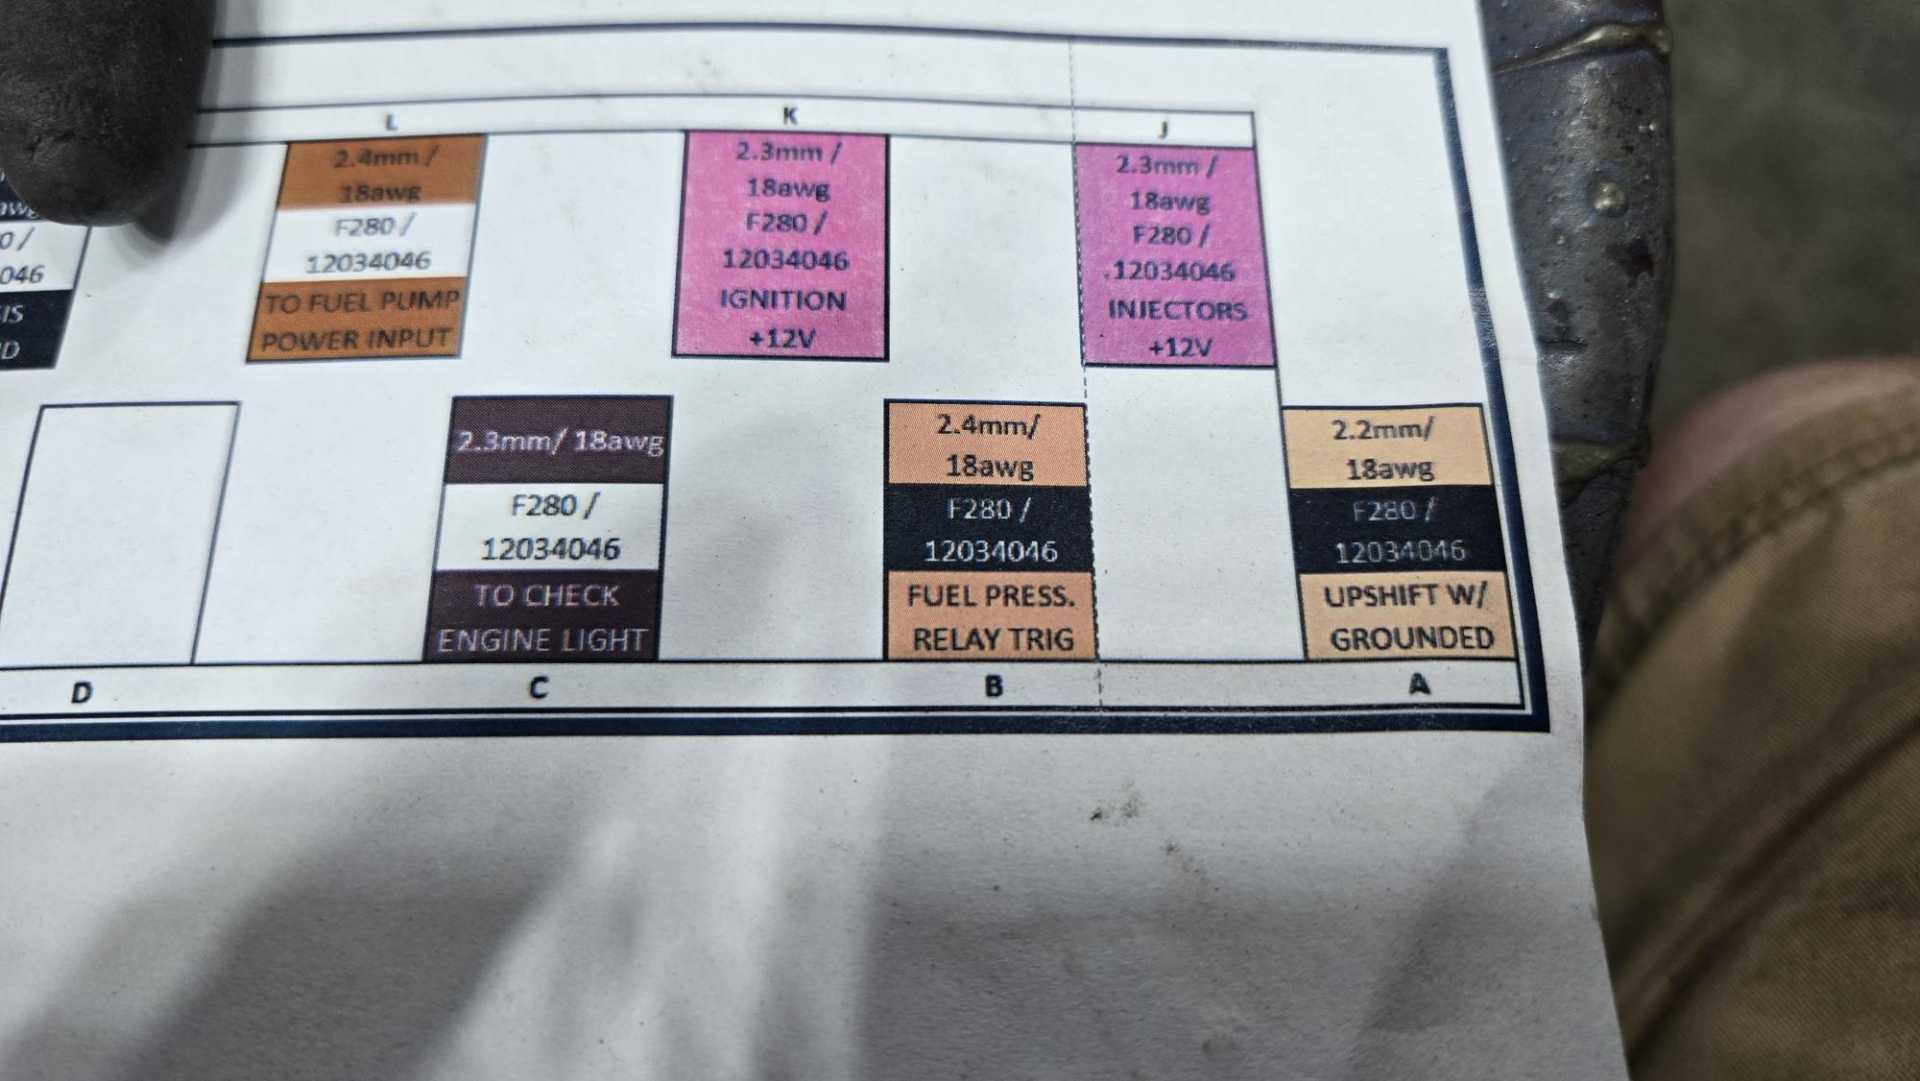
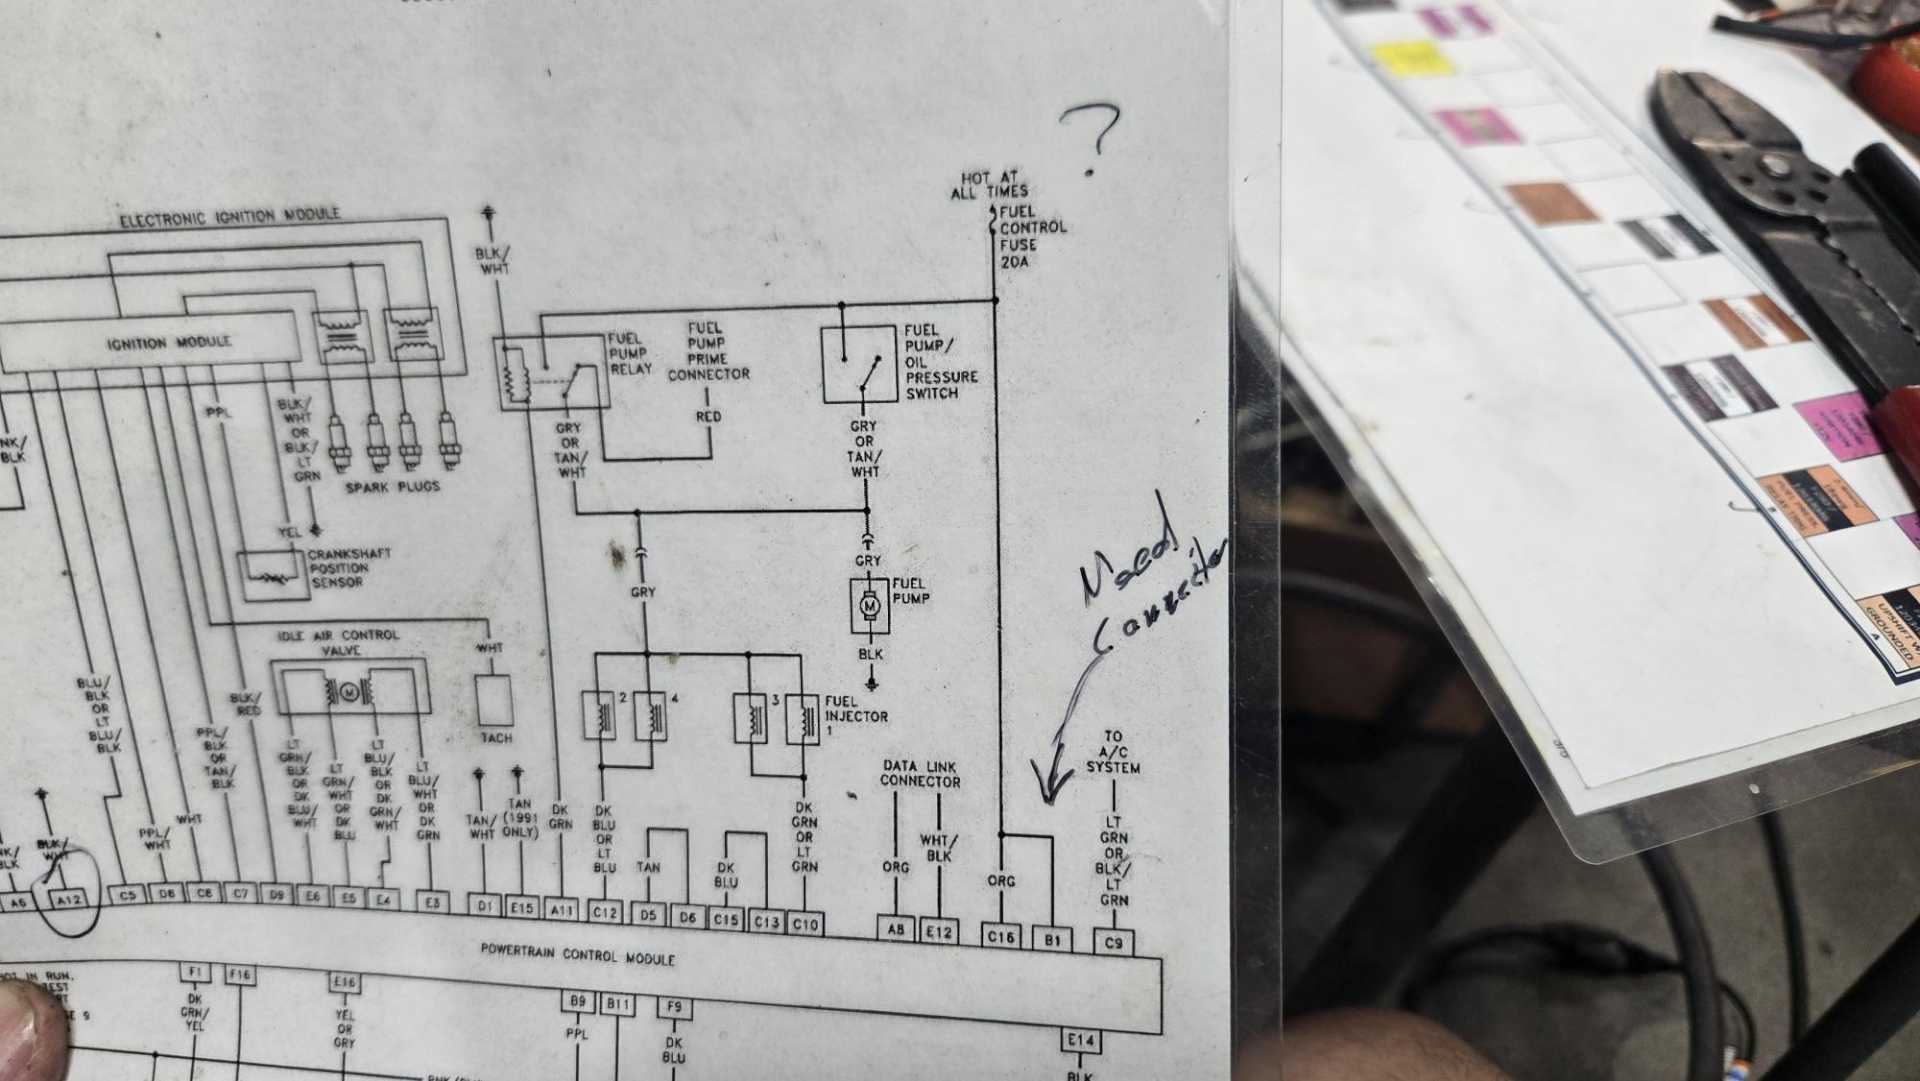
Made some progress on the harness today. I decided to focus on adding Beretta wires to the C203 connector and while studying the Beretta wiring diagram I saw the orange wire that runs to C16 and B1.
I removed the orange wires from C16 and B1 on the Beretta connectors.
Thanks to the color chart zkhennings shared with me, I saw that that orange wire needed to go to the B socket in the 203.
This may seem simple to many of you, but I've never done any wiring harness work like this before so this feels like a major accomplishment. I only had a couple hours to spend in the shop today, so when I get back over there I'll focus on the next step for finishing the C203 connections.
Then it will be time to cut out the remaining Beretta wiring that isn't needed.
i'm rooting for you. it'll be worth it when you are "done"
------------------ Astronomy says we will find a coded signal from outer space. Then we'll KNOW that life exists there, for coded signals aren't by chance.
Biology says there are coded genetic signals in every cell, but we KNOW that no intelligence created life.
I'm the original owner of a white ' 84 2M4 purchased Dec 10, 1983 from Pontiac. Always garaged, no rust, 3800SC, 4-wheel drifts are fun!
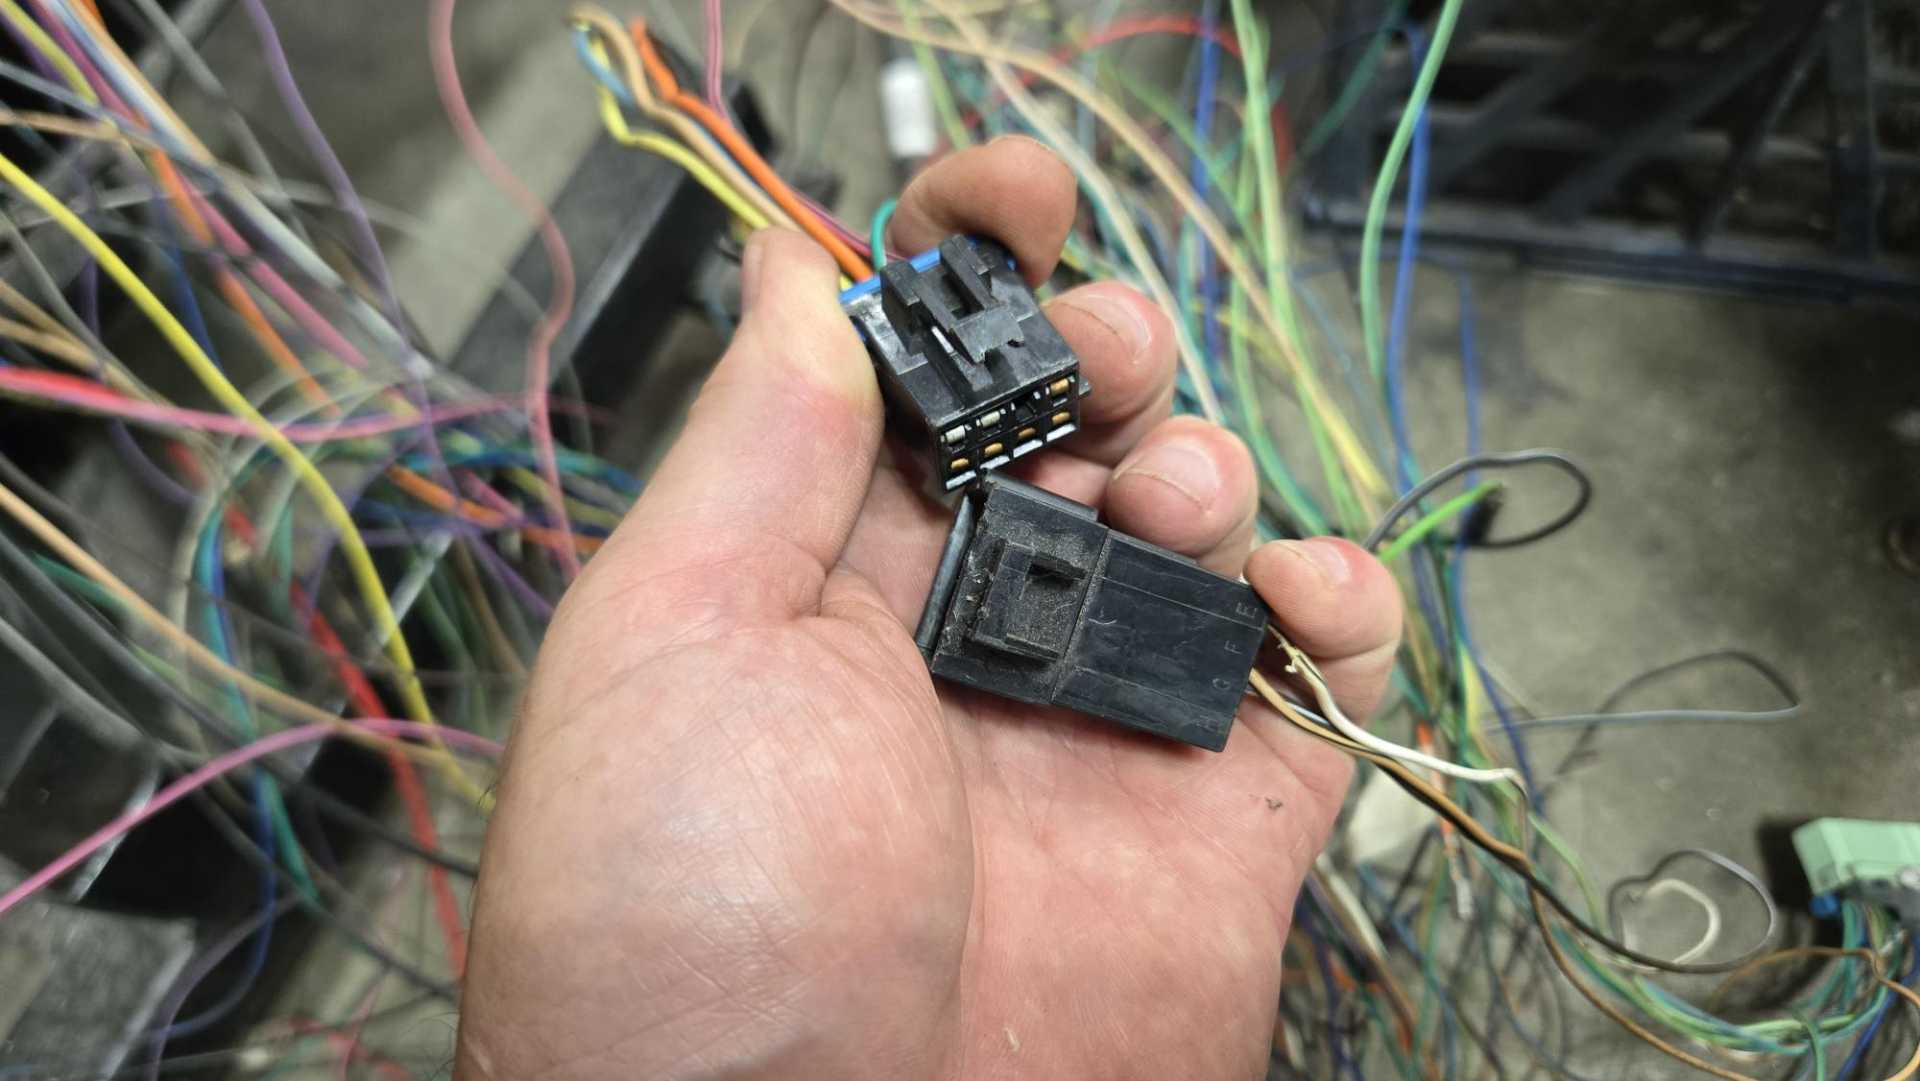
I think I made a stupid mistake. I shouldn't be unpinning the plugs that attach to the computer, right? I should be splicing wires into the circuits and the pinning the splice into the 203. That means I need to buy some pins to replace the ones I mistakenly cut or damaged.
I think I made a stupid mistake. I shouldn't be unpinning the plugs that attach to the computer, right? I should be splicing wires into the circuits and the pinning the splice into the 203. That means I need to buy some pins to replace the ones I mistakenly cut or damaged.
Do you want your harness to have splices on every ecm wire?
My preferred method is to depin the entire ECM connector(s), cut the wires to match the new routing, then crimp on new pins at the ECM connector. This keeps splices in the harness to a minimum (like GM intended).
At the 203 connector, with new pins, you can normally crimp 2 wires into the pins and avoid a splice mid-wire.
I understand what you’re saying and I agree that’s the professional way of shortening the harness to fit the Fiero, but what I’m talking about is the step before then. I’m still trying to mate the Beretta’s ECM and engine wiring harness to the Fiero.
The mistake I think I was making was removing specific pins from the Beretta ECM plug and moving those wires to the C203 or C500, instead of adding a connection to those wires. In other words, if a wire is attached to a plug at the ECM, I need to keep that wire there (regardless of how I eventually shorten it). When the C203 or C500 calls for a certain wire, I need to find a Beretta wire that is on a plug that won’t be used in the Fiero, or add a connection to a wire that plugs into the ECM.
[This message has been edited by Quadfather (edited 07-21-2025).]
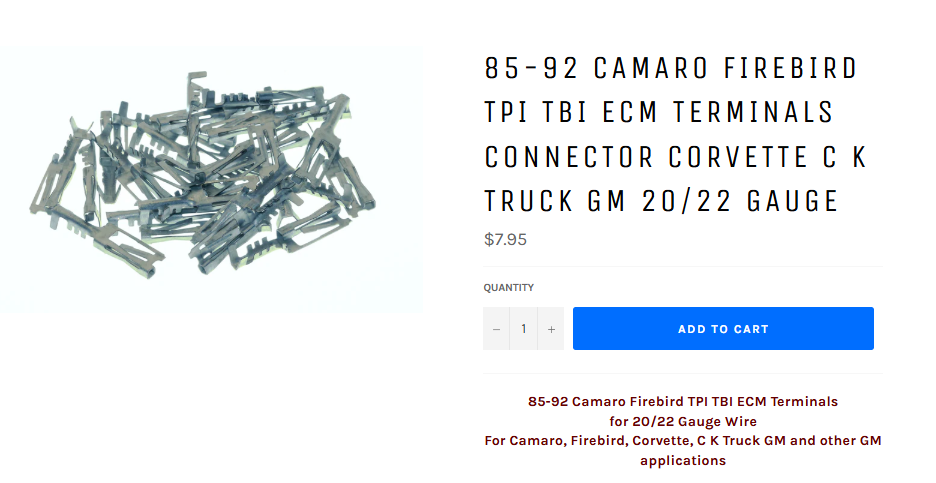
Maybe, just maybe, I'm getting this figured out. I've gone back through the wiring diagrams and found three wires I mistakenly unplugged from the Beretta computer. Now I'm waiting for replacement pins to arrive. I bought 75 of these because they're so cheap. Hope they're the correct parts.
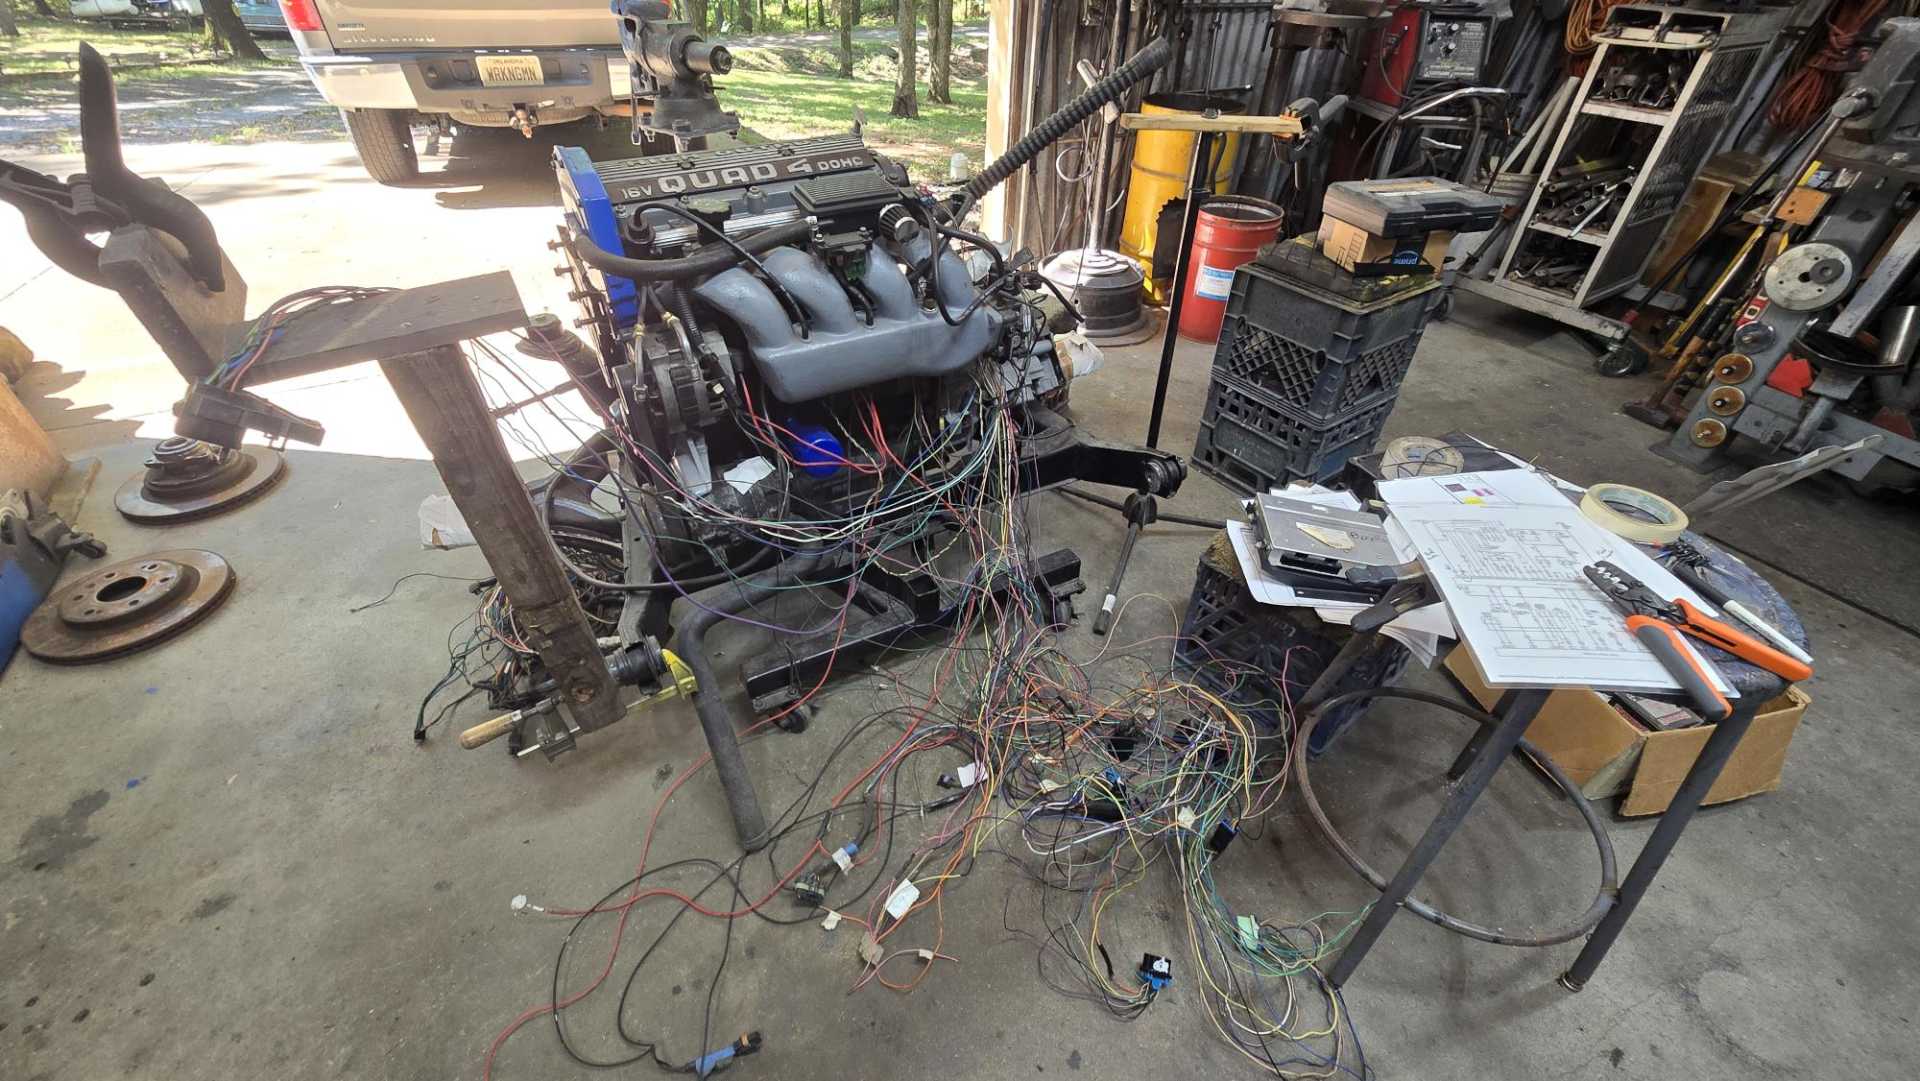
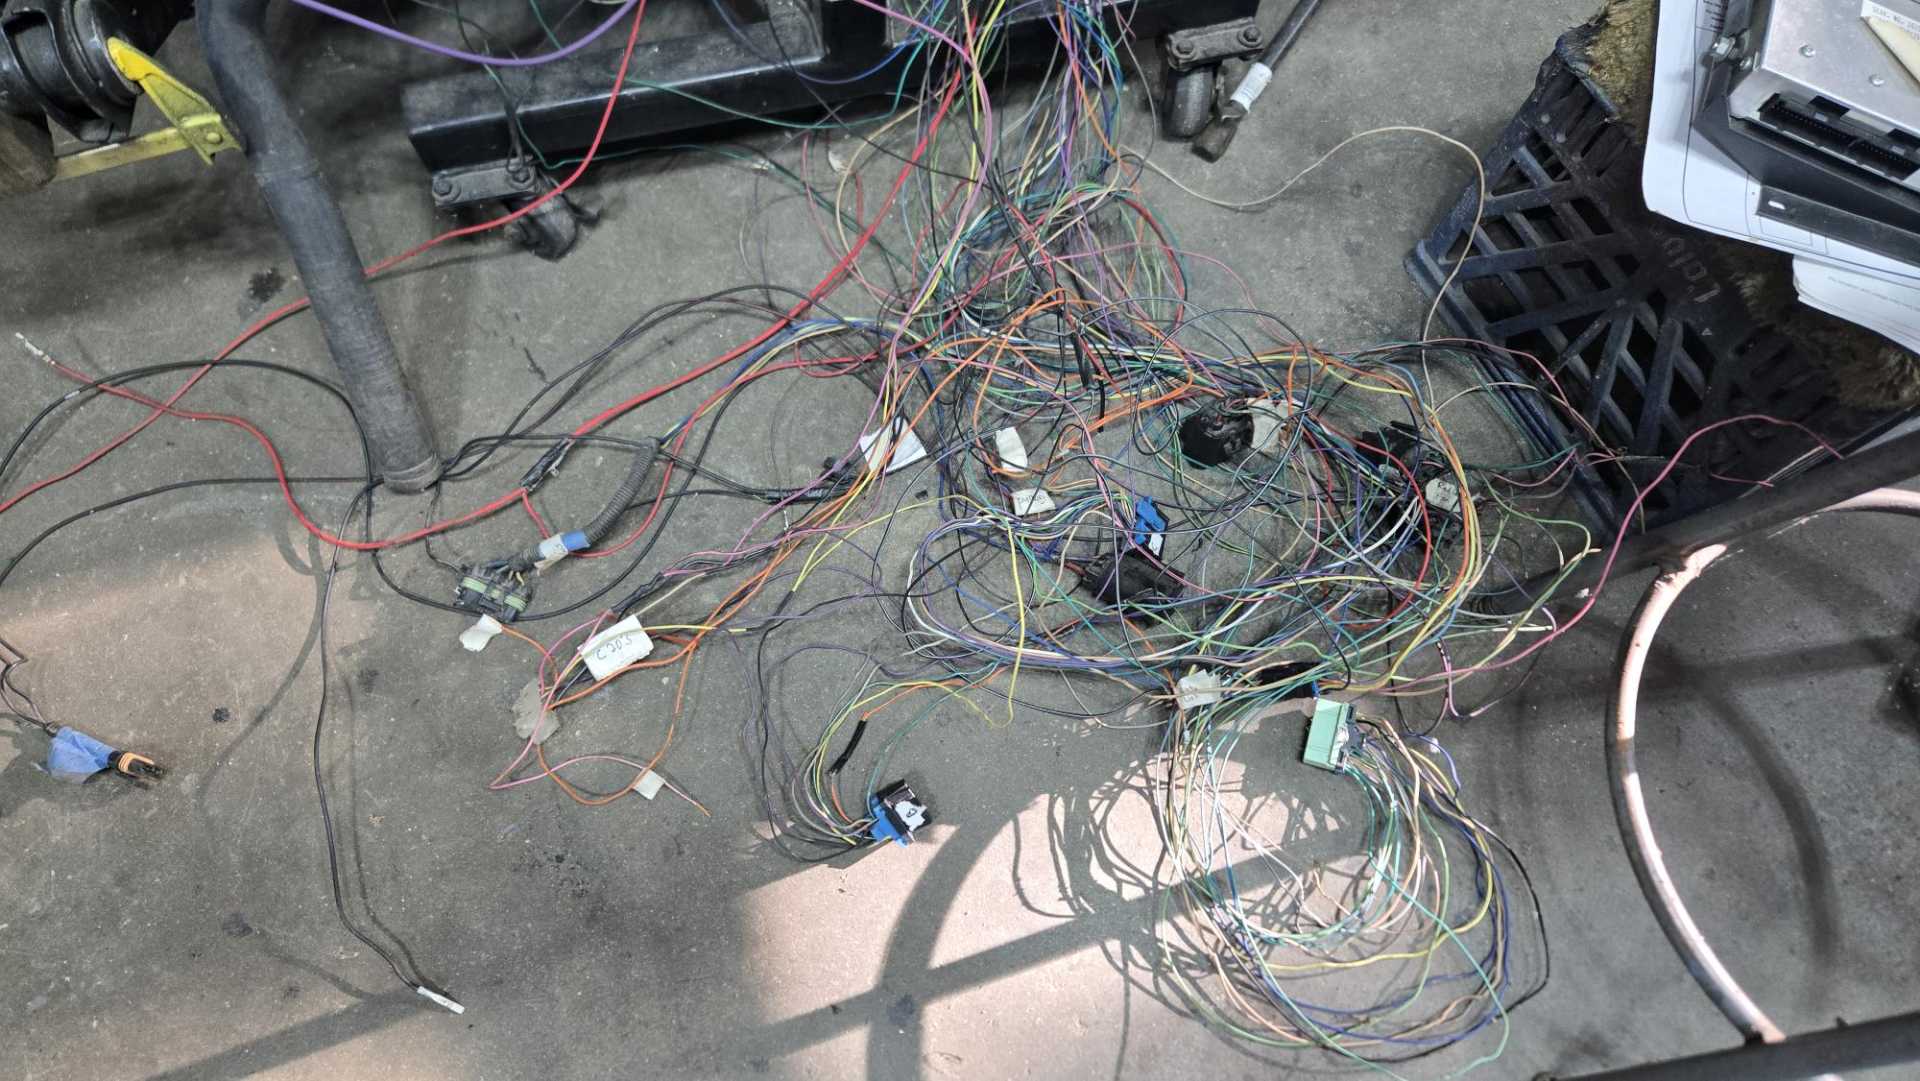
The whole thing is still a rat's nest.
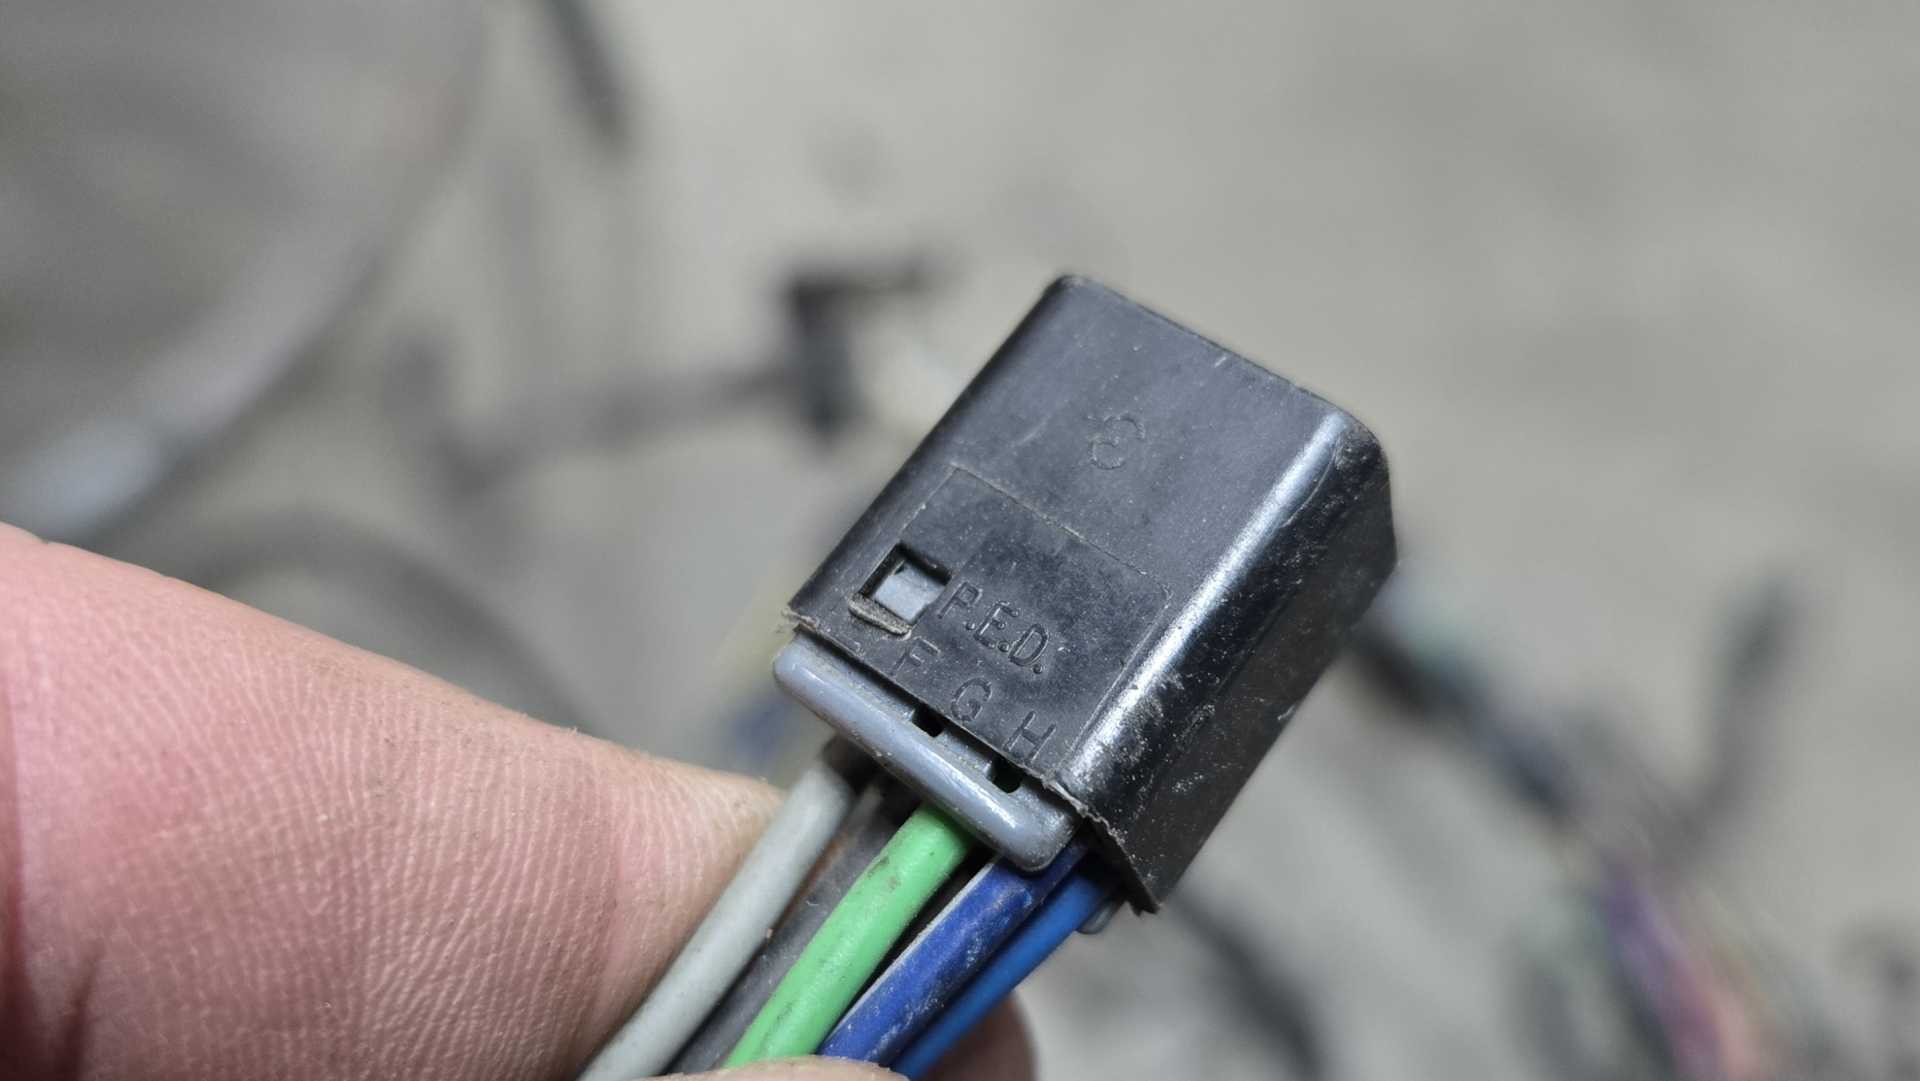
Once I get the new pins and restore the wires to the Beretta plugs, I'll start winnowing this out. Part of that challenge will be figuring out the small plug on the Fiero that's adjacent to the C203.
I don't remember ever seeing this plug identified in any of my diagrams, so I'll have to check them again. The Beretta version of it still has both sides.
It's difficult to describe how uncomfortable the weather is in Oklahoma right now, so spending time in the shop is real challenge. I'll be on vacation next week so no progress for a while.
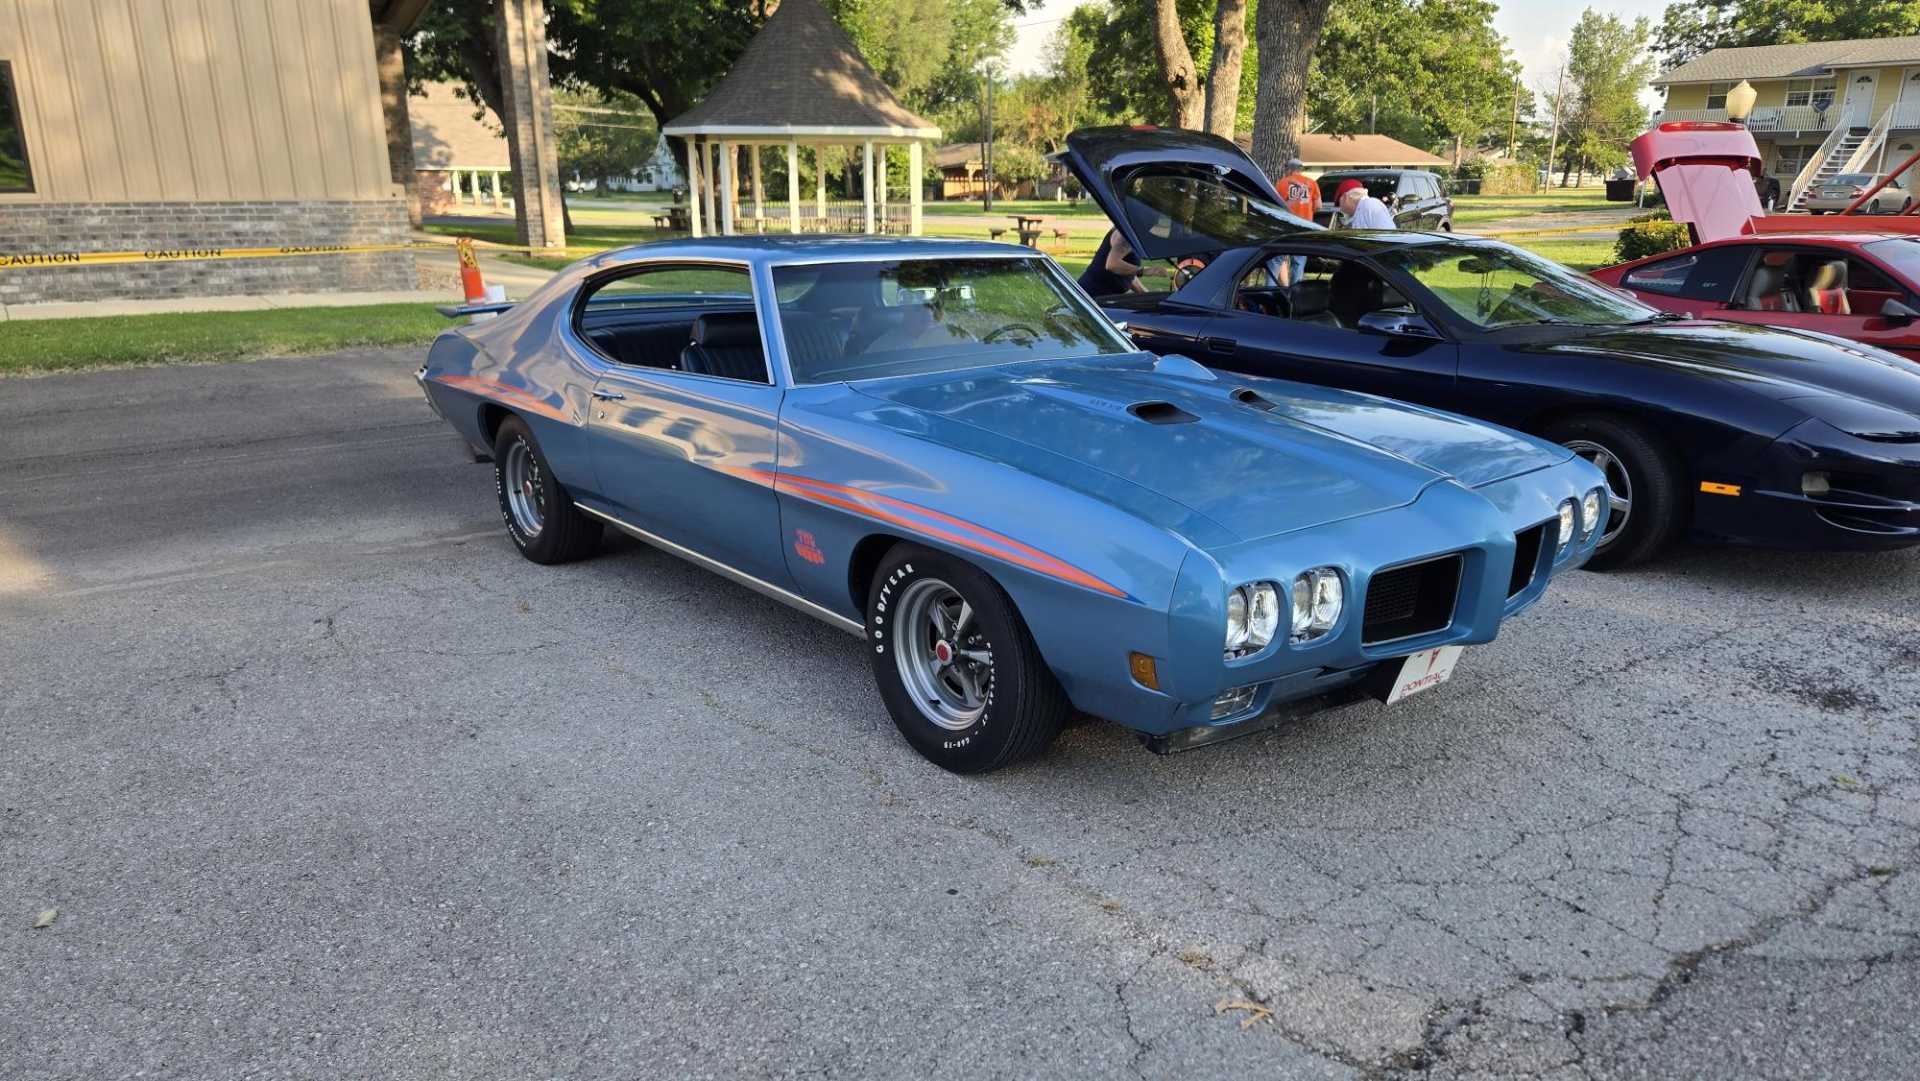
While running an errand Saturday morning I came across a little car show as part of Oologah's Frontier Days event. It included what was my dream car for decades, a blue, 1970 GTO Judge with the 4-speed transmission and a Hurst shifter.
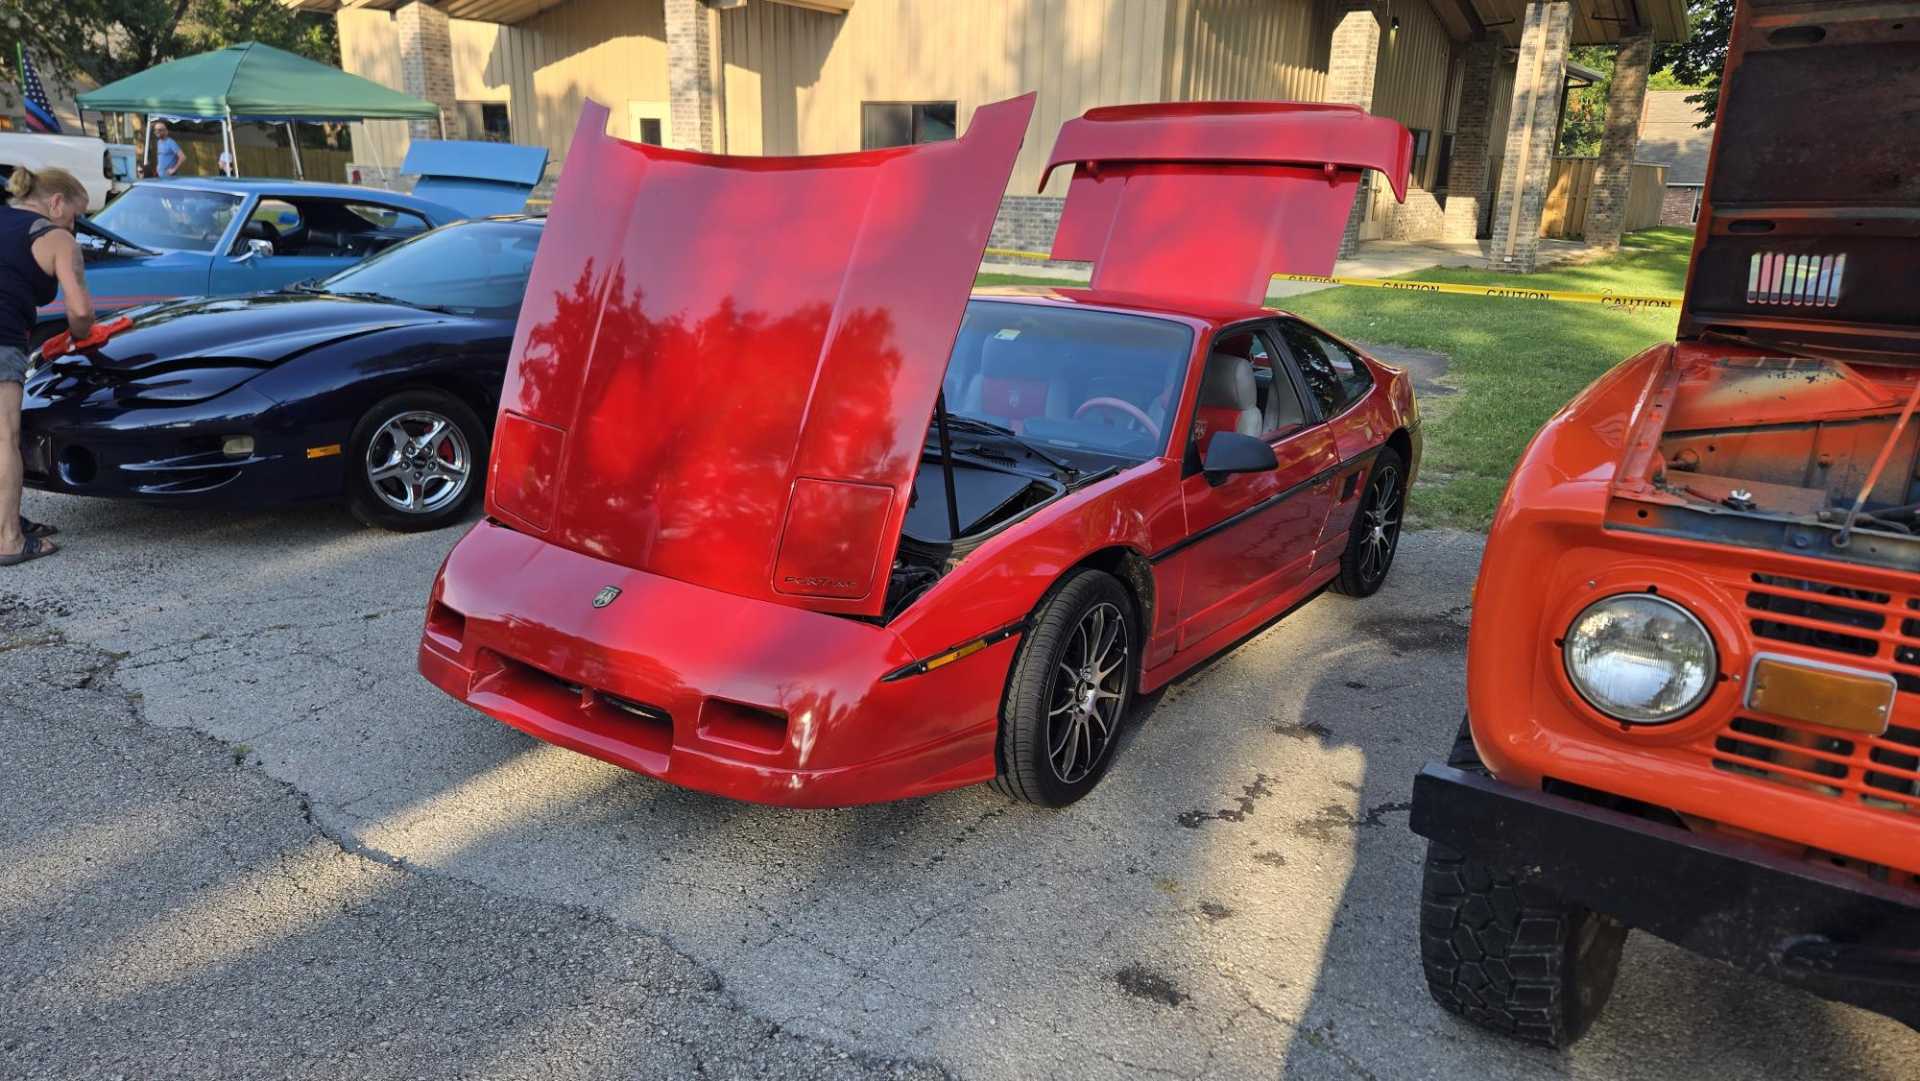
And, of course, a 1987 Fiero GT.
Had a really nice conversation with the owner. It has an Indy interior that's just beautiful. He wishes it was a manual car, but still loves it. Understandable.
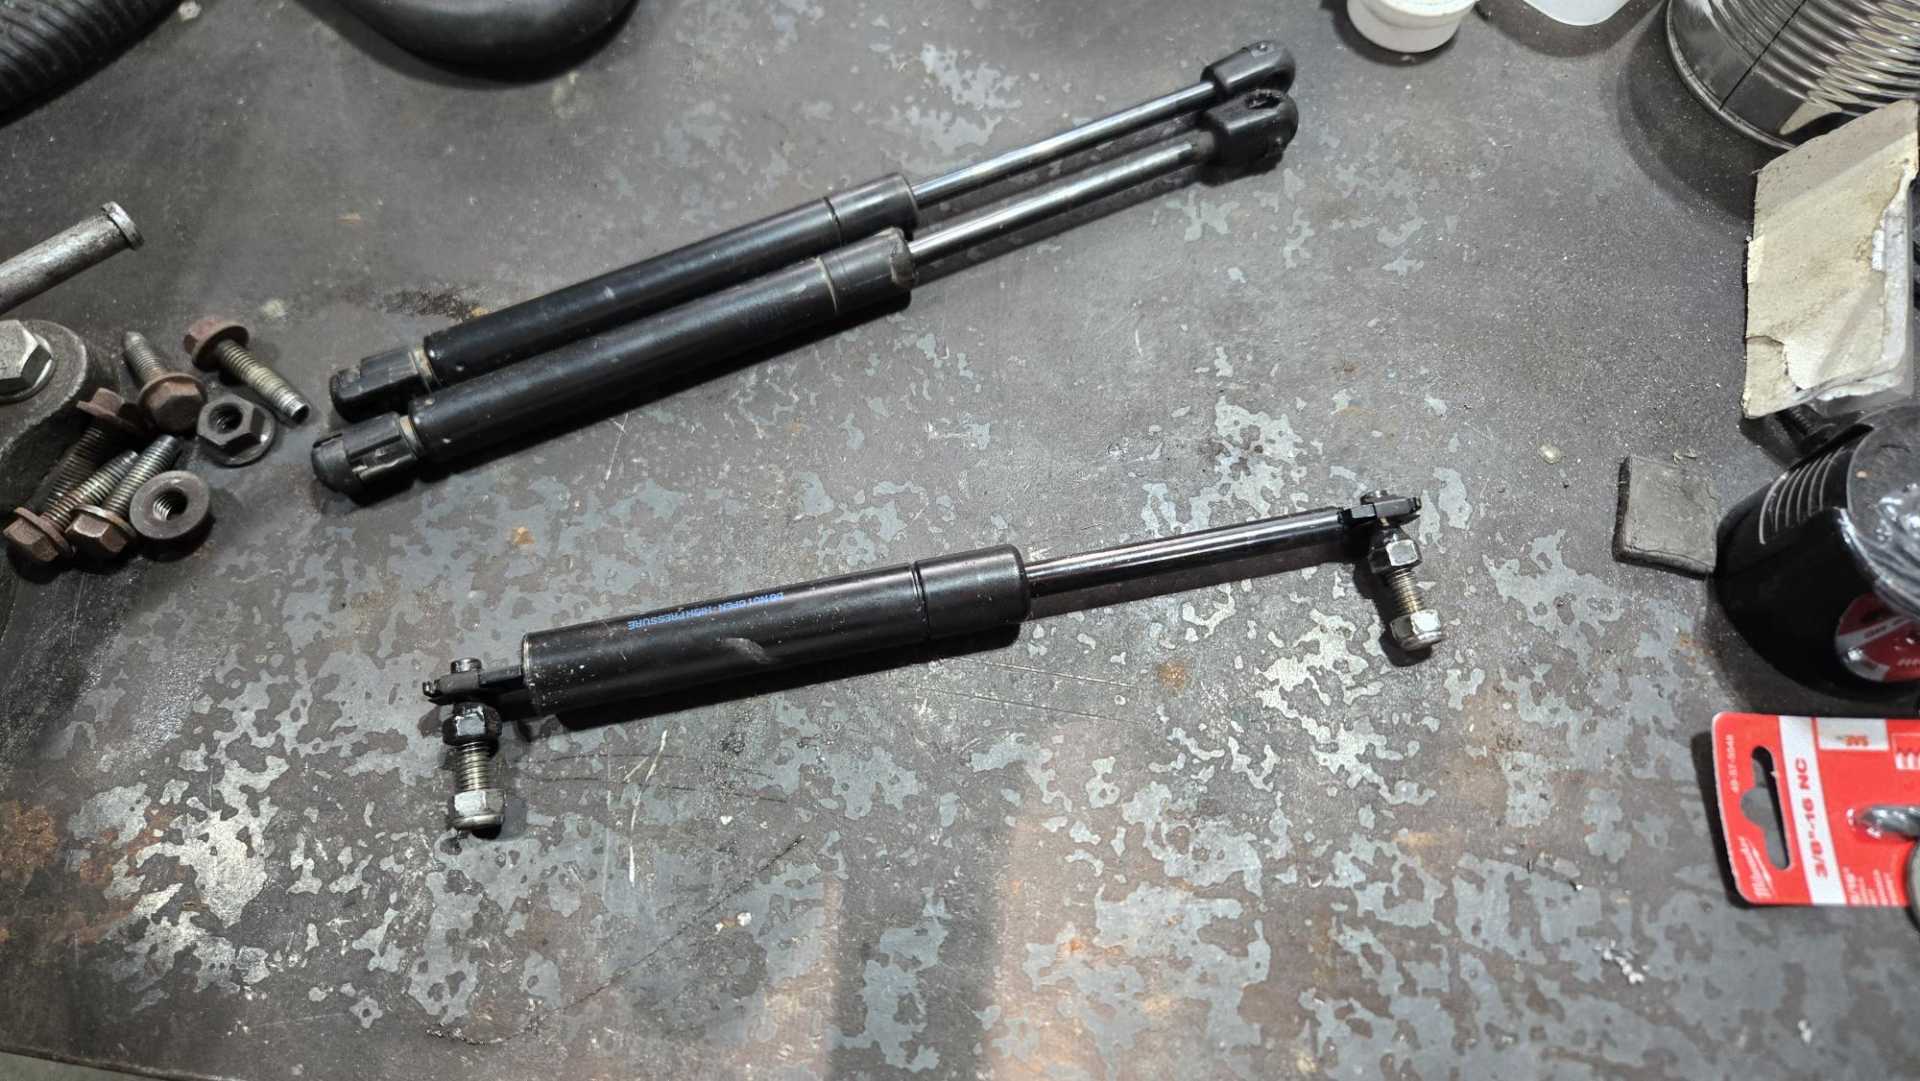
The weather is cooling off and I'm motivated to get this wiring harness finished. Now to find the time. I hadn't had a chance to get to the shop in several weeks and when I finally did I discovered the struts on the deck lid wouldn't hold it open anymore.
Oh well, any job worth doing is worth doing twice. I'll have to order some different struts. These must be weak because they're so old.
I spent a solid two hours in the shop today and got a couple connections made. I connected the orange wire to B1 and C16.
Next up will be to figure out where to connect the other end of that orange wire to Hot at all times/Fuel control fuse. I also need to connect a ground to A12.