Got a laugh out of that!.....In Michigan?..April?....Sun? DAY or TWO???
Lol, sorry. I have the luxury of waking up everyday and knowing exactly what the weather is going to be like...the same as yesterday. Hot and sunny. I haven't looked at a weather forecast in 3 years, since I moved here from VA.
Have fun with this project. My son was 13 when he found his '86 SE with a 4 speed automatic installed and a V6, fully loaded. He is now 18, the car is running and this summer the body work will finally get done. The car has over 230,000 miles on her.
One of the mnost difficult things in getting Kathryn to do and to understand has been, of all things, painting. Now before everyone things that we are recreating the works of the Masters here, or that we are even talking about running complex airguns......nope, just rattlecanning some of the interior parts. We seem to be getting either to close and it runs, or two far away and nothing gets done except to change the color of the old carpet we have down to catch the overspray........or we move the can to fast, or not fast enough. Well you know what they say, practice makes perfect, so she has gotten her fair share of sanding as well :-)
At least she cares that it looks right too. So here she is turning some grey parts yellow:
CLICK FOR FULL SIZE
CLICK FOR FULL SIZE
Since we were posting some of these photos, I thought I would include a few previous parts that she has completed. One of the fun ones were the side interior panels behind the seats. Especially since she decided that they should be black...not that big of a deal, but that she was pretty sure she wanted the vents to be yellow. After some trial and error, and a few resprays after sanding down some runs etc., here is what she ended up with.
CLICK FOR FULL SIZE
and a close up:
CLICK FOR FULL SIZE
Finally, here is one of the pieces of which she is most proud so far to date. The additional guages above the center stack. SEM Vinyl dye on the outer shell, guages tested before we started, then she had to polish the plastic lens since it was almost trashed! White faces on the gauges, Fusion Sunshine yellow on the bezel, and reassemble. Her she is with the completed pod.
CLICK FOR FULL SIZE
Now for a quick question. Does anyone have any good suggestions for removing the carpet from the lower section of the door panel? I know, I know....that is what the search function is for!
2. Remove the old carpet by spraying it with starting fluid spray (the stuff that starts your car in the winter). Do this outdoors, wear a mask and gloves, the dissolved glue will be very sticky. The door panel will also remain sticky, don't lay it down on the grass.
3. Spray glue the cardboard of the door panel (even though it is sticky), and the back of the new lower leather panel.
4. Position the top edge of the leather panel to the bottom of the original vinyl top. Press on.
5. Lift up on the leather, lightly spray the foam with glue, smooth out the leather.
6. Turn the door panel over. Glue and wrap the edges. Trim around the slots for the door panel clips.
[This message has been edited by datacop (edited 04-21-2011).]
Well, after a long weekend away to visit my parents, Kathryn's grandparents we arrived home in time to get a little bit of work done on the project! Time continues to tick on with just a little over 3 years left until the big birthday, so we need to keep motivated and doing.
Many of the parts that had been sprayed and recoated had cured while we were gone, so that is a good thing. One of the ones that Kathryn has been most proud of has been the seat tracks. If you will remember, they were so rusted together that we ended up having to beat on them with a hammer to get them to move. I was ready to write them off and just look for some decent used ones. Kathryn spent a whole day working on them with a wire wheel, some grease, and an air gun. Her process was to wheel off as much of the rust as she could. Place them in a vise and beat them back and forth with a mallet to get them to move. Then spray them out with an air gun to remove as much crud as she could work loose and do it all over again. At the end of 8 hours, Dad couldn't believe it but she had brought them back from the dead. I guess there is some motivation when you know you either have to fix it or buy new ones. She is trying to save as much as possible, so this was a resounding victory. She also decided to coat these parts so that they wouldn't rust out as quickly. When we came back they were cured, and so here is the result.
CLICK FOR FULL SIZE
and
CLICK FOR FULL SIZE
With just a little time before bed we decided to work on cleaning up the dash. Getting this out of the car was NOT FUN! According to Kathryn, and I have to say that Dad agrees, but with a little work and perseverence we managed. It is amazing how much gunk can accumulate in all the little hidden spots over the course of 25 years.
Since Kathryn's color scheme is Black and Yellow, the dash needs to be dyed Black. Her Vinyl dye arrived while we were gone so she is anxious to start on this part of the project. First though is the prep work, so everything has to be completely clean. Here she is working with a towel, some small cleaning clothes and the rubbing alcohol!
CLICK FOR FULL SIZE
CLICK FOR FULL SIZE
And now for a couple of questions.......
Has anyone ever had and success of removing the material and pocket that is on the dash? If so how have you done it? I know that sometimes individuals start taking off the material on the door panels with starting fluid. Same approach? Suggestions, Ideas, all are welcome. Here is the piece we are talking about.
CLICK FOR FULL SIZE
Also, how do you seperate the guages from the bracket. As far as I can tell all the screws and bolts are out. The guages are loose in the pod, but I can't seem to figure out how to wiggle them out. Need to get the clear face plate off as well as get the guages out before the housing is dyed black. The guages are going white faced. Again, any thoughts or ideas are appreciated.
CLICK FOR FULL SIZE
Finally, we will be letting Kathryn see the thread for the first time in a couple of months for her birthday. I am sure she will love seeing all of your comments and encouragement. In June we will let her start responding and asking questions here as well.
If you have not yet.. I *HIGHLY* recommend that you download the entire '86 service manual.. Note: this is the OEM version that the dealers use.. not the chilton's or haynes..
simply amazing.. i couldn't paint that well if my life depended on it. Its nice to see that kids even her age have an internist in cars especially an older one such as the fiero these cars were made over a decade before she was even around and she still likes them... keep up the good work on it. Still watching this thread in amazement.
Now for a quick question. Does anyone have any good suggestions for removing the carpet from the lower section of the door panel? I know, I know....that is what the search function is for!
-MH
This task isant for the faint of heart.... or sober for that matter (no dont hand a 12 year old a beer for god sakes ) i did mine manually with a knife but never finished the recovering. there is some kind of chemical others have used to do it acetone maybe? others will chime in on this.
very nice and very smart kid. i cant believe shes working on her own car and kept her word! most kids say but never do. my 7 year old daughter has a 1973 duster and i told her right out shes going to learn like i did. so i hope she does take interest in the task.
Ruffy, thanks for the compliments. What is in the Duster. I have seen a few done up really nice. Not a common restoration either, which makes it even cooler in my opinion.
good luck with. with it being her idea i guess she'll be more enthusiastic about it. i tried that with an '84 i picked up. i got it running, then decided i didn't want another project. tried to give it to a couple of my nephews but neither would bite. i ended up giving it away.
Great work on those seat rails -- you may want to invest in a can of PB Blaster for challenges like this. Its an essential part of a Fiero toolkit, and worth every penny it costs.
Those Mr Mike's seats will be a great addition -- just follow the video he sends with them. He gives good guidance on how to rebuild your foam if there is any damage.
Keep up the good work Kathryn -- you're going to have a great ride when its done.
[This message has been edited by fcsmls (edited 04-25-2011).]
Has anyone ever had and success of removing the material and pocket that is on the dash? If so how have you done it? I know that sometimes individuals start taking off the material on the door panels with starting fluid. Same approach? Suggestions, Ideas, all are welcome. Here is the piece we are talking about.
The map pocket is removable, you have to remove the AC duct work and there are four nuts that hold the dash pocket in.
So, Here we go with another update of what was accomplished last night.
Of course we had the gauge cluster out since we are working on going to white face gauges....after all, if you are taking it halfway apart, you might as well continue.
CLICK FOR FULL SIZE
Getting the gauges themselves out of the housing was a bit tricky. Luckily we didn't force anything but spent a little time, made sure we had all the screws and bolts out and......still jammed, A little creative ingenuity, geeeeeentle pressure and a little help from dad and presto!
CLICK FOR FULL SIZE
Then the clear face plate needed to come off.....
CLICK FOR FULL SIZE
and then the clear plastic was ready to be polished to get rid of 25 years of scratches and gunk. We'll be working on the white faces either tonight or tomorrow evening. Anything else that we should know or do while we are already this far into the cluster?
Once that was done we needed to move on to another project. So we moved back to the drivers side door. We got some free black carpet the other day so this was a good time to think about the lower door panels. Kathryn had previously dyed the tops to match her other yellow components. So now it was time to work on the bottoms.
CLICK FOR FULL SIZE
Thank you to whomever recommended starting fluid as the way to release the carpet from the lower section....this worked a treat! Spray and peel. We of course still need to work on getting off some of the old glue, but Kathryn was very impressed with how easily these sections came off.
CLICK FOR FULL SIZE
We of course saved the carpeting that came off to serve as a template for the new carpeting.
CLICK FOR FULL SIZE
for the final project before bed time, we got the first coat of new paint on the sail panels, so they should be dry tonight and ready for a second coat.
Last night I had a meeting so we got her started and this is what she managed to get accomplished, this time with a little help from Mom. After getting the gauges out and disassembled Kathryn was eager to get them cleaned up, white faces installed, and the clear plastic cover polished, and all back together. Having put the white faces on the auxillary gauges earlier, she had a pretty good understanding on how to do this. So off she went. We utilized a simply white face vinyl kit and installed over the top of the existing gauges. It can be kind of tight to get them over the needles. This was especially true for the fuel and temp guages.....but eventually, she managed.
CLICK FOR FULL SIZE
CLICK FOR FULL SIZE
If you look closely in the following picture you may see a few small wrinkles in the two gauge faces mentioned above, and somehow she has something stuck behind the speedo as well. However, the guages move free, and she did the work on her own. She learned a couple of things in the process and now thinks that there might be a better way to do this. While they might not be perfect, we are definitely accomplishing the goal of an education along the way. Like I told Kathryn, it isn't so much that you get it perfect as it is that you did you best. If you learned that there is a better way to do it as you go then that is even better.
Here she is installing the recently polished gauge lens.
CLICK FOR FULL SIZE
She cleaned the gauge housing last night, alcoholed and surface prepped it for vinyle dye to that will likely begin happening tonight. Until the housing is dyed and dried, there is nothing further that we can do with the gauge cluster, so on to other endeavors.
One of which was clearning all of the HVAC vents that go back in the dash. Kathryn was pretty disgusted with everything that had accumulated on them, in them, and behind them over the years. Amazingly, this wasn't actually that dirty of a car as you can see from her oritinal purchase photos, and yet grunge still accumulates in the most obscure and impossible to reach places. When it is the first time a car has been torn down completely it is amazing the stuff you will find.
As a complete aside, when pulling the dash apart we found that the car had been at an Ohio State/Michigan game very early in it's life. The parking stub ticket was fouind behind the venting inside the dash....now how in the heck did it get in there?!?! Her car is an 86 SE and was at the 86 game. So we know that the on November 22, 1986 it was in Columbus OH, We still need to find out where it was originally sold and registered. Perhaps it started in OH and has made its way to Michigan, or it was originally a Michigan car that had a fun road trip to the game with its new owners. Either way, the owner(s) were part of a record crowd of 90,674 that watched Michigan 26 beat Ohio St. 24. We'll keep the ticket stub for the scrap book. But I digress.
Here Kathryn is cleaning up the vents.
CLICK FOR FULL SIZE
CLICK FOR FULL SIZE
CLICK FOR FULL SIZE
And then on to the project that took the remainder of the evening for her. As you will remember when we last left it, Kathryn had stripped the door carpet from the driverside. So that mean that we were ready to build her template, and cut out her new replacement carpet. Unfortunately, I had to be out at a meeting so we didn't get any photos of the work in process, but we did get what she ended up with.
Since we had been very careful with the old carpet removal, Kathryn was able to carefully lay the old carpet out flat on a large piece of pattern paper. After tracing around the old carpet, (Kathryn's comment this morning was that it was a very sticky, icky mess) she was able to cut out a template of the carpet segment. That done it looked like this.
CLICK FOR FULL SIZE
She then pinned this pattern to some black carpet that we are using for the door panels and some other interior pieces and then carefullly cut out the carpet. That yeilded this.....
CLICK FOR FULL SIZE
So we are now ready to spray and staple........
She hwas been working pretty hard and learning a lot. I know it is kinda hard being the Dad, you always see things differently than someone from teh outside looking in. There have been some times where of course you get frustrated thinking, "I wish she woudl work on this or on that" "I wish she woudl finish that part" "I woudn't have done this that way" etc., etc., etc. However, I have to say, even being biasedI am pretty proud of how the kiddo is doing so far! If she keeps at it I think she will have a project that she can be pretty proud of. Aside from the updates here we are also working on keeping a scrap book of hte progress. We thought that if she decideds to take it to a show or anything when it is done, it might be impressive for individuals to see just what a 12-16 year old girl can do.
I am definitely impressed but wonder how is this project going to last 4 years if she works so fast!
She has been working pretty quick....which is a good thing, because not only do we have interior, we have: Engine Trans Aux systems (cooling, air, braking, etc.) and then Body and Paint.......
She'll be busy! I'm more worried about getting it done by 6/10/14 than getting done to early.....besides, although I'm more of a corvette guy perhaps if we get done early Dad could rebuild one of these for another toy car.....hmmmmm...
So tomorrow I will be in meeting all day and then a soccer all evening with the middle daughter, so I thought I should update on Kathryn's progress for the day. Feels like we actually got quite a bit done.
Due to some good advice from you all (Thank you, thank you, thank you). We quickly disassembled the rest of the dash, by taking out the vent work behind the dash and also removed the map pocket, which was in excellent shape. Still not sure what we might do with that and how we will treat it.....hmmm. A few ideas, but nothing concrete as of yet.
CLICK FOR FULL SIZE
CLICK FOR FULL SIZE
CLICK FOR FULL SIZE
That got us to the point of being ready to dye the dash in gloss black. This stuff works really well, very pleased with the SEM vinyl dye.
CLICK FOR FULL SIZE
CLICK FOR FULL SIZE
CLICK FOR FULL SIZE
While that was drying it was time to work on reassembly of some of the bezels, including the ashtray and manual shift boot, end vents for the dash, center vents, and the overhead light console.
And yes, I know that we are perpetuating a false rumor, but Kathryn liked the sticker so what can I say....lol!
CLICK FOR FULL SIZE
CLICK FOR FULL SIZE
CLICK FOR FULL SIZE
CLICK FOR FULL SIZE
CLICK FOR FULL SIZE
CLICK FOR FULL SIZE
With the bezels and vents reassembled we had some time to go back and work on the carpeting for the door. We managed to test fit the carpet and get it to lay smooth after cleaning off all of the old glue.
CLICK FOR FULL SIZE
CLICK FOR FULL SIZE
and now it is ready to be reglued.
CLICK FOR FULL SIZE
We also finished the inital coats of paint on the sail panel frames and they are now ready to be wet sanded. Tomorrow we should be ready to complete the reassembly of the main gauges, we need to reglue some of the center console vinyl that has begun to peel back and strip the other door carpet. Progress continues.
We found a good deal on a fuel pump for the Fiero today, so a little more babysitting money will leave Kathryn's account, and another part that desperately needs replaced will be finding it's way to our house. The fun and madness continues.
Ruffy, thanks for the compliments. What is in the Duster. I have seen a few done up really nice. Not a common restoration either, which makes it even cooler in my opinion.
-MH
Yes the cooool factor of the duster lol. it is a very nice car and not in bad shape. as for motor it had stock a 225 slant six (its second one because i was a moron). not sure what i want to put into it yet. DONT PICK ON ME but i was thinking of just doing a nice V6 in it or even the 5.7 hemi. remember this will be my daughters car not mine. so no indy hemi for this duster lol. but it will be mostly for looks. i will have to see what the future bring before any swap yet with the gas prices. shes only 7 now and 3 more years she will be out there doing body work.
Ruffy, No complaints from me at all. A V6 would be fine....a 5.7 would be a lot for a young driver too, I wouldn't overpower it either. Is she excited to work on it? I'm not a huge body work fan, but I'm sure we will be doing more than a little on this project. So any gratuitous photos of your daughters car for us?
Another weekend filled with all kinds of activities, but we did manage to get just a little bit done on Kathryn's car again, and since this will be a great way for her to remember the build, I thought I would update what we managed to accomplish this weekend.
1. We managed to get a bit more work done on the interior door skins! In fact, they are finished.....but let's not get to far ahead of ourselves. The first thing that we needed to determine was if both doors were mirror images of each other. Using the carpeting that we cut in a previous post we determined that indeed they were the same. This meant that it was time for Kathryn to get to work. So first things first.....we needed to strip the old carpeting. Out came the starting fluid and away she went.
CLICK FOR FULL SIZE
CLICK FOR FULL SIZE
CLICK FOR FULL SIZE
CLICK FOR FULL SIZE
Once the old carpet was off, it was time to make sure that we had a new piece cut to take it's place....
CLICK FOR FULL SIZE
While waiting for the panels to dry out and be ready to glue, it was time to see if Mom was available to help with the sun visors....
CLICK FOR FULL SIZE
CLICK FOR FULL SIZE
CLICK FOR FULL SIZE
That pretty much took care of that day.
By the morning it was time to begin work on test fitting the fixed dash, gauges, and bezels to see how they would look and fit. We had some cracks that needed repaired so needed to make sure that all was well there. These pieces will of course get wrapped up and put in the loft until it is time to completely reassemble the interior. First though it was off to sisters soccer game, and some other family activities.
Once we got home it was late afternoon, but there was still time to glue the new carpet on the door panels in place.
CLICK FOR FULL SIZE
CLICK FOR FULL SIZE
TA DA!
Then on the the dash......... Reattaching the defrost vent in the center went easily
CLICK FOR FULL SIZE
putting the bezel on the gauges
CLICK FOR FULL SIZE
CLICK FOR FULL SIZE
Seeing what it will all look like in place
CLICK FOR FULL SIZE
Once completed it was time for bed.
Sunday meant church and visiting with family, but this also meant going to see Uncle Bob and pulling the C4 out of storage. This also means getting a chance to check in on the car in the barn and selecting some new pieces to begin work on at home...Kathryn elected to pull the doors off the car so that we could remove the outer shells, replace the lock solenoids, check on the power windows, clean up all the contacts and mechanicals in the door, and replace the dew wipes, so off the doors came with some help from Uncle Bob and into the truck for the ride howe. (More to follow on this in a later post).
Once we got home there was still a bit of day light so onward with a couple of easy projects for the evening.
Since Kathryn was pretty excited for her sail panels and they have been in various stages of paint throughout the week, we decided to see if we could finish those up. Rather than replace the pontiac arrowheads on the sail panel frames, we had talked about either just painting them yellow in accordance with her color scheme, or some other option. Kathryn decided to try to fill in the arrowhead with a yellow/orange reflector. We made a template and cut and sanded one to match to see how this would look. She was pretty satisfied with the result, and it didn't cost anything, which when you are working with a 12 year old's budget is important.
Then it was time to test fit her new sail windows from FieroSails.com. These were a Christmas present for her this last year, and I must say they did a wonderful job for her!
CLICK FOR FULL SIZE
Once you know the test is good, it is time to apply them for real...only one shot here cause that tape is sticky!
CLICK FOR FULL SIZE
She was happy.....what do you all think?
CLICK FOR FULL SIZE
CLICK FOR FULL SIZE
CLICK FOR FULL SIZE
With the time left in the evening, Kathryn decided to work on removing the Fiero logo from the existing map pocket and put onto yellow interior fabric, for recovering....since the inside of the map pocket will soon be yellow. Here she is working on that.
CLICK FOR FULL SIZE
CLICK FOR FULL SIZE
CLICK FOR FULL SIZE
and in the meantime she conned Dad into working on sanding rims in preparation for finishing....
CLICK FOR FULL SIZE
These need A LOT MORE WORK!!!!!
Finally, it was time for bed, but Kathryn had forgotten to open the mail from yesterday......So before bed, she found.....
CLICK FOR FULL SIZE
CLICK FOR FULL SIZE
A new fuel pump! Thank you UPS Guy, or as he is affectionally known at our house, the Brown Santa Truck Driver.
More updates coming soon, and again, thanks to all of you for your kind words, support, and advice for Kathryn. She will be viewing the thread for the first time in early June.....we wanted to have something here for her to see first, and after that she will be updating and responding too. Thanks to all of you for helping to make her first car restoration so memorable.
I was thinking about you two pulling the fuel tank, replacing the pump and then re-installing it. Then I thought....nah, it's going to get a great paintjob first! If every part gets this kind of attention (and we're sure it will) it will be worth every ounce of effort. The dash looks awesome!
This thread is one of the most inspiring I've ever read on a public forum.. Really, the work is top notch and for a 12 year old to be doing it is astonishing. Makes me want to tear my car apart when I finish finals in 2 weeks and restore it half as well as you guys have.
By the way, what did you use to polish the gauge cluster cover? Thanks.
WOW! Thanks all for some wonderful replies. It is really cool to know that people are interested and supportive of what she is trying to accomplish. I am pretty proud of her dedication, and committment to the project as well as what she is learning along the way. Most importantly I am pretty proud of the young woman that she is becoming. I can barely wait to show her this thread in about a month with all of your thoughts and ideas as well as your support for her.
Glad it is some of your favorite threads......
Yes, we will definately completely clean and flush the tank while it is out as well as respray it so that it looks good.
Thank you all for the kind compliments on the interior, she has picked out how everything would look, at first I was a bit worried that it might come out looking a bit to peicemeal, but now that I can see how it is looking I'm pretty excited.....I have to tell you all that she is already talking about maybe buying a beater car so that this one doesn't get messed up once it is done....like only getting driven on nice days etc...lol!
Nitro, we used one of those little headlight polishing kits by turtle wax. It does a good job, but you just need to be really patient. If you aren't careful you can end up with more scratches than you start with. We used some old CD cases to practice with until we got the hang of it.
Such motivation and skill at a young age! You guys are doing a fantastic job, and I can only imagine what the end result will look like. MORE MORE MORE!!!
Sorry for the long delay in reposting, been crazy with everything. Trying to get ready for a business trip for a few weeks, wrapping up some yard work, etc. You all know how life gets in the way of living sometimes....lol! Anyway, not to fear, you should not think that work and progress has stopped.
Over the last week we have made some progress, and had some set backs as well. Unfortunately, the pictures will have to follow later tonight with more details. However, a few things that have moved forward.
1. We spent a good portion of one evening, boxing up parts that are "done" and ready to go back in the car when we get that far. Also, getting them organized and out of every room in the house and into only one room.
2. Cleaned up the firewall, Kathryn is still debating how she wants to recover this. What she doesn't know is that she has a yellow firewall cover coming from Mr. Mike for her birthday.
3. Sprayed the wheels- here is the disappointment. These did NOT come out as we wanted at all. They came out ok, but not great. So they might be being restripped and done again.....the verdict is still out on that one.
4. Map pocket has been recovered.....absolute PAIN to get right. Kathryn sewed her logo onto the new cover at least 3 times before it was right, we recut the material at least twice, just plain crazy......someone above mentioned attention to detail....wait till you see this on the dash.....amazing, but more work than one would think. Anyway, she is happy with it now so I guess that is the main thing.
5. Most of the console vinyle has now been glued and prepped, and is ready for dye. Kudo's to whoever discovered the Gorilla Glue and binder clip approach, and thnanks to those who shared it here. This has worked better than we could have imagined.
6. Power mirrors are off the doors.
7. Doors are ready to get the guts stripped out of them. We have new lock solenoids to go in, and new power lock switches. We need to order new dew wipes.....DIYSTU, we are coming to you. We'll clean up the insides and check the PW morots etc. Thinking that they will be ok once they are cleaned up a bit.
8. New Headliner and glue is here, so that will be ready to go together soon, Kathryn' still needs to clean that up a bit prior to the new material going on the potato chip. Since her's is a sunroof car, that headliner board is brittle, so we are taking out time with that.
9. Have headlight kit to rebuild her stripped out gear. Trying to debate whether to just fix the one that isn't working, or repaire the gears in both of them while they are out of the car. Thoughts?
10. Dad just ordered a new toy to help with the rest of the project and got a new blast cabinent and blaster.....hmmmm should be here soon.
So that is where we are so far. I will try to get some photos of the progress up this evening.
Originally posted by michhiker28: 10. Dad just ordered a new toy to help with the rest of the project and got a new blast cabinent and blaster.....hmmmm should be here soon.
-MH
Dad is going to LOVE his new toy.. Make sure Kathryn gets some blast time too
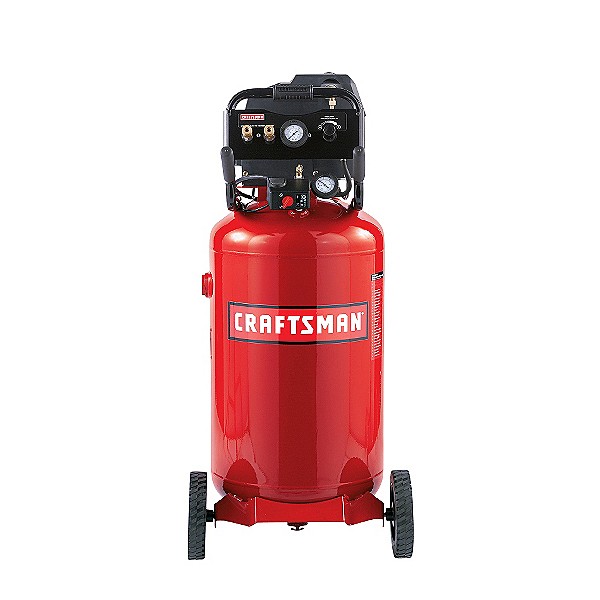
One thing with the blast cab.. they require a *LOT* of air to use.. I have a craftsman 6hp 33 gallon compressor.. and with my blast cab running full bore I can maintain 90lbs of pressure in the tank..
A little pancake compressor or a "portable" one won't be able to keep up with the cab.. you'll find yourself constantly waiting for the compressor to build up pressure again.
Oh.. one other thing.. get a canister line filter and put it as close to the compressor as possible.. I have mine in between the air hose and the blast cab inlet. You'll be surprised how much water that thing will collect (I have another line filter at the compressor too). Water and Alum Oxide (or whatever medium you use) don't mix.
Thanks DataCop, we'll do that. We're setting up the cabinent in my BIL's barn and he has a big compressor, so we should be all set. Thanks for the advice and kind words all.
Also if anyone would like to see Kathryn's website it is here www.myfiero.webs.com


 Topic Closed


.jpg)
.jpg)
.jpg)
.jpg)
.jpg)


.jpg)
.jpg)
.jpg)
.jpg)
.jpg)
.jpg)


 ) i did mine manually with a knife but never finished the recovering. there is some kind of chemical others have used to do it acetone maybe? others will chime in on this.
.JPG)
.jpg)
.jpg)
.jpg)
.jpg)
.jpg)
.jpg)
.jpg)
.jpg)
.jpg)
.jpg)
.jpg)
.jpg)
.jpg)
.jpg)

.jpg)
.jpg)
.jpg)
.jpg)
.jpg)
.jpg)
.jpg)
.jpg)
.jpg)
.jpg)
.jpg)
.jpg)
.jpg)
.jpg)
.jpg)
.jpg)
.jpg)
_1.jpg)
.jpg)
.jpg)
.jpg)
.jpg)
.jpg)
.jpg)
.jpg)
.jpg)
.jpg)
.jpg)
.jpg)
.jpg)
.jpg)
.jpg)
.jpg)
.jpg)
.jpg)
.jpg)
.jpg)
.jpg)
.jpg)
.jpg)