We are talking about a few options, just stay tuned.......
One of our concerns is how to address the two different beltline mouldings. Since the smooth moulding markers are different lengths than the ribbed markers, we are still trying to decide what to do.
1. Make the bumper work with smooth only since that option seems to be the most popular? 2. Make two versions of the bumper. One with smooth, one with ribbed? 3. Delete the moulding and do something custom (like an Arrowhead marker light)? 4. Do nothing and sell the bumper in a "some finishing required" state?
It's hard to know what the right thing to do will be.
You could try to make an insert. This would allow you to put in different options when the actual piece is molded.
Another option that Boost forgot to mention was that we were thinking of making the belt siding for the ribbed available as an option detachable piece that could be either ordered seperatly or all together therefor not having to make 2 bumper but keeping the one bumper with the optional applyable belt side molding.
I'm concerned about the availability of the pointed end of the ribbed moulding as seen on SE aero cars.
Are they available anywhere new? Anyone who has a bumperpad is going to need that piece. Likewise for "Formula" bumpers, you'll need the smooth moulding point found on GTs.
If you already have the aero bumper, you will have to remove and re-use those pieces. They are held on by two studs and nuts.
The bigger issue is the rear portion of the ribbed molding is molded in the fascia whereas the smooth round molding isn't and the removable piece is longer.
If you want to offer a ribbed version, you will either have to add the ribbed portion to the mold, or make a seperate short ribbed section that could be installed along with the ribbed marker light.
I'm concerned about the availability of the pointed end of the ribbed moulding as seen on SE aero cars.
Are they available anywhere new? Anyone who has a bumperpad is going to need that piece. Likewise for "Formula" bumpers, you'll need the smooth moulding point found on GTs.
If you already have the aero bumper, you will have to remove and re-use those pieces. They are held on by two studs and nuts.
I am in the process of making new Center Console Skeletons so I could possibly take this project on too.Just let me know if you need some help with that.I would just prefer to change the bolts to metal versus plastic ones that are easily broken.I have a smooth version that I can get specs from,now I just need a grooved version to see if I can get one to get the specs for making replacements.
[This message has been edited by fierogtlt1 (edited 07-23-2013).]
The bigger issue is the rear portion of the ribbed molding is molded in the fascia whereas the smooth round molding isn't and the removable piece is longer.
If you want to offer a ribbed version, you will either have to add the ribbed portion to the mold, or make a seperate short ribbed section that could be installed along with the ribbed marker light.
Absolutely correct. Something we are thinking about as well.
I am in the process of making new Center Console Skeletons so I could possibly take this project on too.Just let me know if you need some help with that.I would just prefer to change the bolts to metal versus plastic ones that are easily broken.I have a smooth version that I can get specs from,now I just need a grooved version to see if I can get one to get the specs for making replacements.
We just wrapped up a short session of bumper work. We ended up using most of our time for R&D and discussing some of the challenges we are facing. We did manage to get our hands on the bumper, though. Here are the newest pics! As always, questions and comments are welcome and encouraged. They keep the thread and the excitement rolling! We hope you like these!
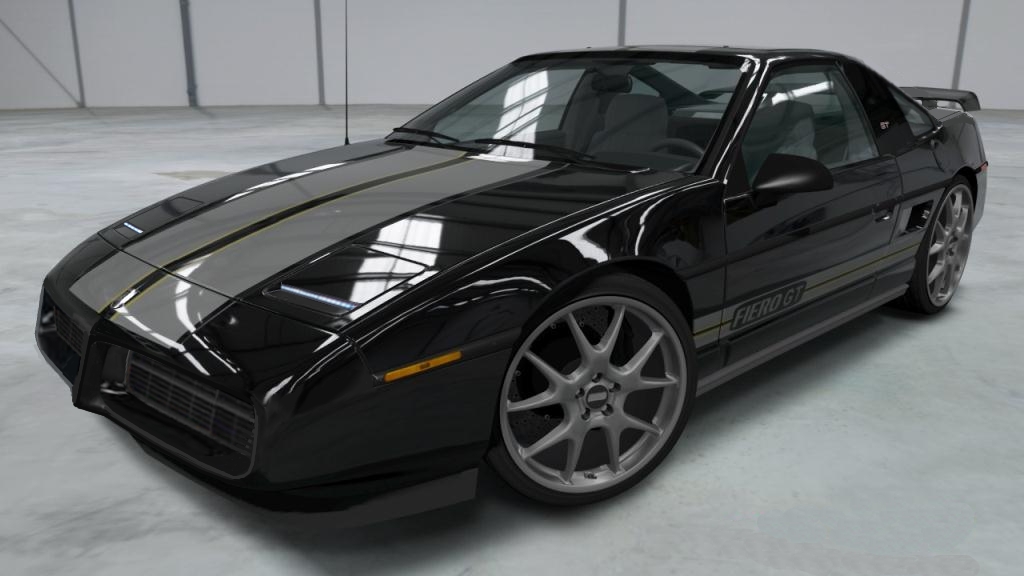
At the risk of sounding negative and if I do I am sorry, but IMHO it is way too blocky looking and the openings are too large and too squared off. This idea has potential but the way it looks right now personally I'm just not feeling it. Also the distance from the front of the nose to the hood looks too short somehow and the overhang is just not right. Those photoshopped pictures of the black car with the nose looked promising but it seemed much sleeker looking and the openings were considerably smaller looking to my eyes. Like I said hate to sound negative because you guys are working hard on this obviously and it could be cool with some more work. Good luck with it man. Peace
Pete
------------------ "May the grins begin when you turn the key and hear the engine roar over your shoulder" ......Gall57 (slightly modified LOL)
At the risk of sounding negative and if I do I am sorry, but IMHO it is way too blocky looking and the openings are too large and too squared off. This idea has potential but the way it looks right now personally I'm just not feeling it. Also the distance from the front of the nose to the hood looks too short somehow and the overhang is just not right. Those photoshopped pictures of the black car with the nose looked promising but it seemed much sleeker looking and the openings were considerably smaller looking to my eyes. Like I said hate to sound negative because you guys are working hard on this obviously and it could be cool with some more work. Good luck with it man. Peace
Pete
Not a problem, Pete. You are exactly right. It is too blocky...so far. We are still doing rough work. There is rounding and blending and adding and subtracting yet to do. You can see in the recent pics above the wierd looking piece on top in the middle. That is a scrap piece of foam that we stuck back on to do some re-shaping. There are other areas like that, too. That first piece is a test to see if that technique will work for adding material. If it does not, we may have to re-foam in some places. I'll admit we have gotten a little aggressive in a few areas and we'll just have to fill it back up with putty or something.
As to the length of the nose to the hood, I was thinking the exact opposite recently. It looks shorter in the pics, I think. One of the illusions is that it is cut too low on top. That will have to be raised to meet the level of the hood.
Thanks for watching and keep the comments coming! We're (mostly) an open book.
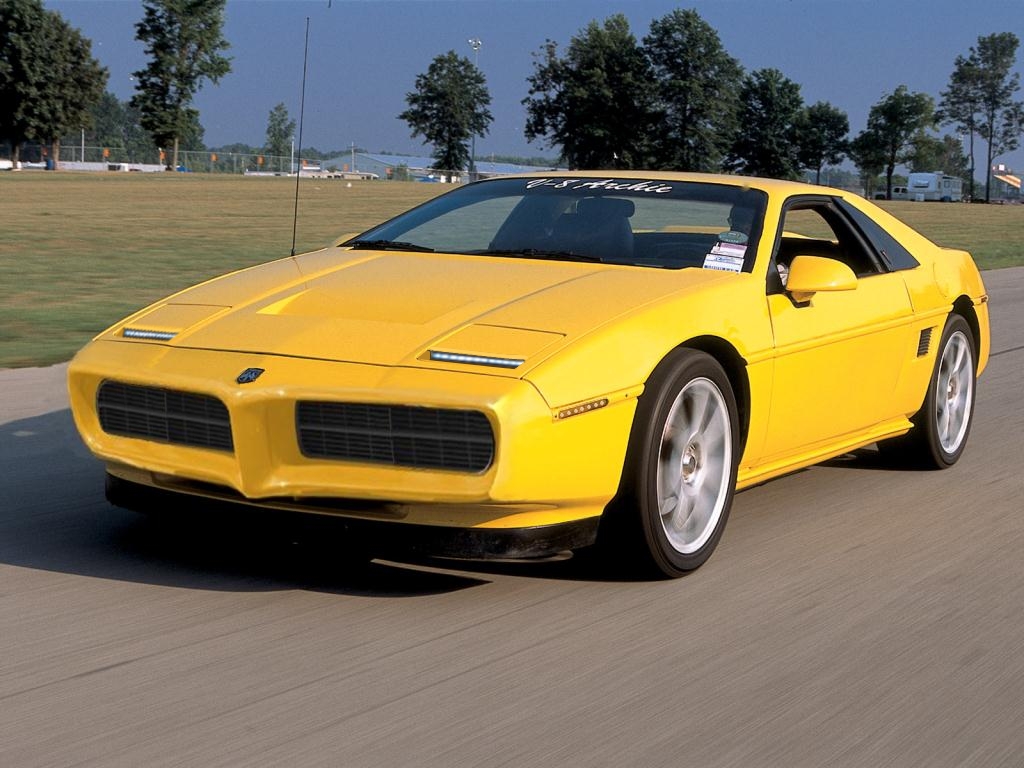
I've been thinking about the design and these two photoshops since the last time we worked on the bumper. I'm not satisfied with the top "horizontal" surface in the middle, just above where it comes to a point on the front. On the yellow car it is just too flat. That's the way the bumper is looking now.
I think it is time for an eleventh-hour change and add more of an upward pointing point in that area and blend it down to the front. I don't know if that makes any sense but I promise it will make it better.
You can see in the recent pics above the wierd looking piece on top in the middle. That is a scrap piece of foam that we stuck back on to do some re-shaping. There are other areas like that, too. That first piece is a test to see if that technique will work for adding material.
Jonathan
I wanted to see if the "repair" technique would work so I went out and spent about 10 minutes on it and came up with this. This is the "concept" of what I want the top to be but it is still out of proportion and it needs to be blended in much better. The important part is that the nice pointy division between the grills doesn't have a flattop anymore. Also good to know is that we can use our putty to "glue" foam back on.
Jason came over this morning and busted out some work for you guys! I didn't get to help today because I was wrapped up in homework. I was a little bit of a consultant and cheerleader, though! LOL
The first thing Jason wanted to address was the big wart I had put on the top center the last time I worked on it. The big problem with it was the surrounding surface was too low so it made the hump look too big. Jason added material to the top and brought that surface much closer to being in line with the level of the hood. One of the things that has driven this project is the fact that none of the factory bumpers seem to extend the lines of the hood. The hood is not flat and it doesn't have a constant curve. It actually curves MORE as it extends forward. The factory bumpers don't extend that trend. Instead they abruptly change the angle to that of the bumper. The bumperpad bumper might actually address this issue better than the Formula or the Aero bumpers but how many of us are lining up to trade for the bumperpads? No offence, but I'm not a fan.
In this first shot, I wanted to show how the new bumper flows from the hood. It's not perfect yet but you can see we are going in the right direction. We want it to not only look good, we want it to look RIGHT!! If anyone ever assumes this bumper is factory original, I'll know we reached our goal.
This second shot shows the front spoiler. Jason finished up getting it all lined up from side to side. I think that was the last of the roughest cuts to be made. It's mostly tweaking from here!
Here is a better angle of the top center. Compare it to the one in my last post. Believe it or not, the "hump" wasn't changed at all. Jason just built up the area around it and smoothed it all together. It is still a little high but it can't get its final shape until we are happy with the main upper surface.
A side shot for comparison. Notice the lower edge of the "point". It is very obvious in this shot that flat was a mistake and we'll have to round the lower part down under to match the upper "hump". I guess we'll have to find a Wednesday to work on it!
Here's an area that we had to toy with. We tried several ways to style the radiator intakes. We tried squared, rounded, and a combination of the two. This is a generalization of what the final will be. We are actually going to narrow the outter edges and possibly narrow the middle separation. We will be keeping the "Tylenol capsule" look of the long slit with rounded ends.
That's it for now! I will enjoy two weeks off before next semester begins so hopefully I can work on it some (a bunch).
We are looking at next Wednesday as to getting us both on the project at the same time. We will more than likely get a whole lot done in that one day = getting closer
Instead they abruptly change the angle to that of the bumper. The bumperpad bumper might actually address this issue better than the Formula or the Aero bumpers but how many of us are lining up to trade for the bumperpads? No offence, but I'm not a fan.
I am offended! Jk but I do like my bumper pad... Kicking it old school... I guess not as old school as this bumper
I am offended! Jk but I do like my bumper pad... Kicking it old school... I guess not as old school as this bumper
We are still going to be sanding down the bumper to look very similar to what is in the virtual picture above with still a few tweeks. Were are still looking into the grill section before we do too much shaving on the inside. Our main focus at the moments seems to be on making the bumers top edge look as factory made as possible but a "WOW" effect that pleases. We are going to meet up in the middle of this week and put some major time on this to speed things up. Jason
Did you need these pieces still? I have some laying around.
If you have a good pair of both the smooth and the ribbed points, I'd be interested in them!
I am currently in negotiations with another member for the production of something just a little different than the stock pieces. What I could really use would be two trashed Aero bumpers. One smooth moulding and one ribbed moulding. Anybody have one that is so bad you are about to throw it away? Got one that you are going to cut up to make an air dam or something? I need the upper side areas where the marker lights mount. Just cut them off and mail them. PM me.
Yes,that would be nice if someone would make replacements of these.
[This message has been edited by fierogtlt1 (edited 08-13-2013).]


.jpg)
.jpg)
.jpg)

.jpg)
.jpg)
.jpg)
.jpg)
.jpg)
.jpg)
.jpg)
 It's looking AWESOME!!!!

.jpg)
_(3).jpg)
_(640x478).jpg)
.jpg)
.jpg)
.jpg)
.jpg)
.jpg)
.jpg)


.jpg)
.jpg)
.jpg)
.jpg)
.jpg)


