I've been working on aligning all 4 wheels. The rear wheels are done with -1 degree of camber and .15 degree toe in each side. All done without any special tools other than a tape measure, a reference string between 2 jack stands, a protractor and a bubble level. The bolts just need final torque. The front passenger side is finally set to 5 degrees of castor and 0 degrees of camber. The toe in is close but I'm setting up the reference string now to set it properly. I'm not too sure it'll be correct as I needed to remove the sway bar links to keep the sway bar from hitting the alignment tool and the front end is sitting a little higher than it was. The objective is to get it close enough to drive without unnecessary tire wear.
I tried a couple laps around the block today and feel that there is likely an issue with the fuel system as I was having a lot of trouble with going lean. This condition has been becoming more noticeable of late even just idling so I'm thinking that the fuel tank has become contaminated again. It's been just over 6 years since I knocked most of the nasty rust-dust out of it... I will change the filter first to see if the current filter is clogged or has a substantial amount of rust particles in it. Then I'll hook up a pressure gauge and see if the pressure seems stable through some throttle blips. If all that checks ok then I'll give tuning a try again.
On a more positive note, the steering felt pretty good.
Changed the fuel filter. Was surprised to see the filter element flopping around in the old filter. The fuel residue was pretty clean but there was a slight rust tinge look to the fuel that drained out of the old filter. I hopped in the car to take my wife for a short drive around the block and it was acting the same as before. It wasn't until I was reving the engine a little to back it into the garage that it occurred to me. The exhaust note was much louder. I tucked it away in the garage until I have time to look it over but now I'm convinced that my homemade exhaust has cracked open and is playing havoc with the O2 sensor. If so, I'll likely drop the cradle and have a professional weld up the system properly.
Anyway, over dramatic I suppose. I jacked the car up and did a cursory inspection of the exhaust and was happy to not find any issues. (whew!) If there are any, they are hiding....
So, I hooked up the fuel pressure gauge and got a consistent 43psi each prime. Then I started the engine and it dropped to a steady 38psi. I blipped the throttle and held different rpms and the fuel pressure fluctuated between 35-38psi. next, I am going to remove the vacuum line to the regulator and check again. The fluctuations between 35-38 were not following the throttle blips as I expected. The pressure did not just drop away when I quickly opened the throttle. I still may need to drop the fuel tank but I will fiddle with it a little more first and I will also look at the Aurora book to see what they say...
I pulled the vacuum line off the fuel pressure regulator while the engine was running and the pressure jumped back up to 43psi. I will need to figure out if it is hooked up to the correct vacuum source... The engine is running on 6 or 7 cylinders and that just started the last few times I have run the motor. When I opened up the original Fram fuel filter I found that the element had separated and was not filtering any fuel at all. That leaves me with two likely possibilities, clogged injector screens or a failing injector driver in the Holley 950. Only the number 7 plug was easily accessible and it looked really good. There may be fouled plugs but I am leaning towards fouled injectors. I used a timing light and was able to pick up a spark signal from each of the 8 plug wires so I am thinking the coil packs are ok. In the morning I will remove and take the injectors to the local shop for cleaning and flow checking. If they are not the problem then I will try a noid light on the injector harness to look for a burnt out injector driver.
I got both my new and old injectors cleaned and flow checked today. If the flow sheets are accurate I'll be surprised if the cleaning makes much difference. There was improvement noted but not enough to cause 2-3 cylinders to not fire. Now that I have the air plenum off, I'll check the other seven plugs tomorrow before I try running it again. If the engine is still missing badly after that I'm afraid that maybe the Holley injector drivers are going bad. Same thing happened to Russ544. Crossing fingers.
I finished re-installing the cleaned injectors and I also pulled and visually checked the rest of the spark plugs. They all looked ok. I did notice that the even bank of plugs all had a little more carbon than the odd bank but they did not look fouled. I ran the car and it was the same. still missing a couple of cylinders. I did not try pulling plug wires off the coil pack one at a time as I am not sure if that would cause any damage. Does anyone know if that is ok to do with these engines? I did load a base fuel map that Russ544 sent me years ago and it was enough better to actually drive the car. I went and filled up on gas then drove it around for a few miles to get the feel of the suspension and transmission. I am very encouraged and think it will be a really fun car once the engine problems are sorted out. If anyone has any good ideas on diagnosing a couple of dropped cylinders, I am all ears!
Looks like one of the culprits might be my DIY WB O2 sensor. It appears to be out of calibration and is reading a couple numbers richer than the mixture really is. The other possible issue is that this engine was massaged by the guys at Shelby America for a supercharged Series 1 Roadster. I believe that involves retarding the cam timing. That may be part of the acceleration issue. I'm going to look into that and see if I need to drop the cradle and re-clock the cams.
Looks like one of the culprits might be my DIY WB O2 sensor. It appears to be out of calibration and is reading a couple numbers richer than the mixture really is. The other possible issue is that this engine was massaged by the guys at Shelby America for a supercharged Series 1 Roadster. I believe that involves retarding the cam timing. That may be part of the acceleration issue. I'm going to look into that and see if I need to drop the cradle and re-clock the cams.
Charlie
If you have a miss, then the unburned air going out the pipe will cause the O2 to read lean (even if it's a rich misfire). The controller will try to correct by adding fuel to all cylinders until it hits its adjustment limits. If those adjustment limits are wide open (as they might be on an aftermarket controller) then things can be pretty screwed up.
Are there two feedback loops (sensor for each bank), or just one sensor?
I have two O2 sensors installed but the computer can only use one at a time. I have the wb sensor in the rear bank and the narrow band in the front bank. It's pretty pricy for the new system that can use both sensors but I am seriously considering buying it. Also, I either scratched the tri-pot boot with the file I was using to clearance the engine block or the tri-pot wobbles enough that it rubbed on that boss that sticks out but the passenger side boot opened up enough to let the grease out. This is one of those things that I figured might happen and will have to deal with one way or the other.
Thank you, I will be considering that as an option. Alan from chrfab said to bump my fuel pressure up to 50psi at idle. I'm curious to see what difference that will make. If it does not help, I am that much closer to dropping the cradle for some moderate mods.
That doesn't make any sense... unless your computer is programmed for the wrong sized injectors.
kinda what I thought. But, willing to give it a try just for the fun of it. If that and a little programming doesn't smooth out the stumbling/lack of power then I'll be more inclined to buy into the newer computer.
Charlie
[This message has been edited by cptsnoopy (edited 09-01-2014).]
Took a look at using an intermediate shaft and it does not appear feasible with the way I made the motor mounts. I'm in the process of grinding away more of the boss that sticks out close to the tripot grease boot. I took the bolt out of the knuckle that holds the suspension links and loosened the sway bar link. That way I could separate the tripot joint without having to reset the camber. With the axle moved out and back I should be able to get a tool in there to help with grinding away the boss. I'm hoping to have the tripot grease boot done by tomorrow afternoon. After that's done I'll hook up a fuel pressure gauge and attempt to adjust the pressure regulator to 50psi at idle and see if that helps. I'll also see if it's possible to remove the o2 sensor and put a new one in. I got some help from a couple generous PFF members and now have the wing ready to install. If I cannot get a good tune on the engine then I'm thinking I'll invest in the upgraded Holley Dominator computer and stronger valve springs.
Finished banding the tripot grease boot today. Much better clearance now. At least 3/8" if not closer to 7/16". Getting the adel clamps off the o2 sensor lead took patience but getting the sensor out after that was pretty easy. I got the new sensor plugged in and calibrated but had to call it night at that point. If I'm around tomorrow I should be able to test the system and bump up the fuel pressure.
I tried a few more things to get the engine running smooth. What helped the most was bumping the timing at and near idle up from 13 to 25 but still, it did not get rid of the miss. It still runs and drives like an 8 cylinder engine running on 6 cylinders. So, I ordered the Holley dominator computer with dual wideband o2 sensors and for the most part that is all I will be taking advantage of. I need to drop the cradle anyway as I plan to install a brand new alternator and while the cradle is out of the car, install the stronger valve springs. That will allow the engine to rev to 8000. Here are a couple of pics with the wing on. The body is now complete and looks pretty good.
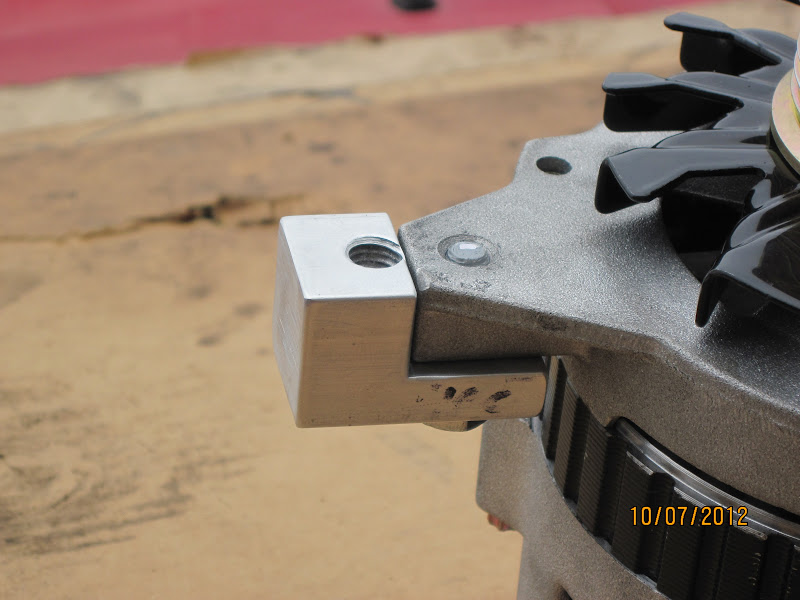
It took a couple of days but the engine is back out of the car. I have ordered a new AC-Delco alternator with hopes that it will last awhile since I have to remove the engine to change it. The alternator that I was using was purchased used online with no idea what the history on it was. I should receive the stronger valve springs in a couple of days and if the valve spring compressor tool I bought is the right one, I should have them installed by the end of next week. I will also see if there is any way to tell what cams I have installed when I have them out of the engine. It will be a week or two before the new Dominator ECM arrives and I need it to see where I can place it in the car or in the engine bay. Once I figure that out, I can give chrfab.com the info and they will make a wiring harness for me as part of the deal. So I am guessing the whole thing will be installed and ready to test in about 6 weeks or so. One of the things I noticed during every time I jacked the car up is that the rear bump stops have been crumbling apart. I need figure out an alternative as I am pretty sure it's the coilover springs that are slowly destroying the bump stops. if anyone has any ideas, I would love to hear them.
I have ordered a new AC-Delco alternator with hopes that it will last awhile since I have to remove the engine to change it. The alternator that I was using was purchased used online with no idea what the history on it was. I should receive the stronger valve springs in a couple of days and if the valve spring compressor tool I bought is the right one, I should have them installed by the end of next week. I will also see if there is any way to tell what cams I have installed when I have them out of the engine.
You should be able to change any alternator smaller than the CS144 with the engine in the car. I formerly had a CS144 and "downgraded" to a CS130. The smaller alternator still produces plenty of current to run the Fiero's low-demand electrical system, but can be R+R'd without dropping the cradle. I had to do this to fit it to the CS144 mount location:
Also, I'm sure you know how to measure lobe lift with calipers once you have the cam covers off. You have Shelby cams, right?
The Shelby cams supposedly had the L37 intakes ground 5 degrees advanced, so you may need to break out the degree wheel for that. However, the Shelby cams could be stamped with specific part numbers... For ref, the L37 has 266 degrees of intake duration and .370 lift. All flat tappet engines have 244 degrees exhaust duration and .339 lift.
[This message has been edited by Will (edited 09-11-2014).]
Thank you for the info Will. I'll look but I am pretty sure that my a/c compressor will still block removal of the smaller alternator. And IIRC the front crossmember makes it impossible to remove the a/c compressor. Hopefully I won't need to worry about it for awhile. I am also looking at making a heat shield for the rear of the alternator and a/c compressor.
I have been looking at some ideas for the rear bumpstops. From info I have gathered here on PFF, it looks like the first thing to do is to flip the top plate over. after that I will either need to clamp the top of the spring to the roof of the strut tower or attach a spring guide to the top plate similar to the WCF solution. After that, I will decide to either use the stock style of bump stop or something else to do the job.
Charlie
If the A/C compressor is on the stock brackets (and your crank centerline is where the 2.8's was) then the CS130 alternator will just fit between the A/C comp and the firewall. Once it makes it through that, it comes out past *my* crossmember easily. Yours may be a little further forward, but IIRC the big deal is clearance to the A/C comp and there's, comparatively, plenty of clearance to the crossmember.
that's the issue. I decided to use the v-5 compressor because the car is already wired for it and the v-5 is fatter than the stock caddy compressor. I would have to do a bit more work to swap the a/c system to a compressor cycling model.
It's confirmed, the intake cam on the Shelby L47 is the same part number as the intake cam on the L37. The sprockets appear to be stock which makes me wonder if the intake/exhaust cam timing isn't identical to the L37? Edit to add: I found more info that supports the idea that Shelby simply put L37 cams in their series one engines with no other changes. The cam timing is identical to the L37. I have the odd (RH) bank cams removed and will attempt swapping in the stronger springs tomorrow.
Charlie
[This message has been edited by cptsnoopy (edited 09-14-2014).]
Where are you getting the advertised cam timing numbers for the Shelby?
Where are you reading the part numbers?
I'm curious about this, as what I've heard is that the Shelby intakes used the L37 lobes ground 5 degrees advanced... they would use the same sprockets as everything else. I'd want to check with a degree wheel, but I know that's a PITA.
I tried finding the document that listed the cam specs for the 4 engines. The L37, LD8, L47 and the "Shelby" version of the L47
The cam specs including timing numbers were exactly the same for the L37 & the "Shelby" version of the L47, both intake and exhaust.
The cam specs including the timing numbers were exactly the same for the LD8 and the L47.
There was a change in I believe the L47 from 98 to 99 and the cam timing changed one degree. If I could find the doc, I would post it here. Anyway, I think the 5 degree advance probably comes from the LD8/L47 intake advance of 9 degrees BTDC to the "Shelby" version of the L47 being at 13 degrees BTDC. I know that's only 4 degrees but in the doc I read, the change of one degree either made it 4 or 5 degrees different. In my GM training manual, the L37 cam specs matched exactly to what the doc showed and they were identical to the specs listed for the intake on the "Shelby" version of the L47. Then I talked to a guy that was around when they were making the changes to the L47 for the Shelby and he said that he agrees that the only real change was to pull the stock intake cams and replace them with the stock L37 intake cams. There was no cam timing changes other than what came with the cams.
Here are pics of the cams in my engine.
Charlie
Right Head
Left Head
Cam part numbers in no particular order
Stronger valve spring on the left, stock on the right.
More parts showed up on Friday. The new alternator and the new computer.
After putting in 20 of the new springs last weekend, I stopped because the retainers just did not seem right. The spring is a bigger diameter and they were able to "float" around under the retainer an excess amount. chrfab.com sold me a set of new high-performance retainers and I got them on Thursday. So far I have been able to get 16 of them installed. Since the right side head now has the new springs and retainers, I will install the cams and check for spring binding but I don't expect any issues.
I still have no real idea why the engine started running weird and a thought came to me. Maybe the catalytic converter on the even bank got damaged when all the oil ran through it from the first engine. Since the car is not required to be smog legal, I decided to have a look. I opened the cat and pulled out the converter. It looked great. There was no indication of blockage. So I did the same to the odd bank cat and it was the same. They were not the problem. I decided then that if I did no actually need to have them installed that I would leave the converters out and rid the engine bay of the heat they produce. I did not want to leave the cans simply gutted and there was not enough room to install any available mufflers so I made my own "glass packs" using the cat housings and some perforated tubing from an opened up new glass pack muffler. I had read somewhere that the higher end straight thru mufflers use stainless steel wool instead of or in addition to fiberglass to help attenuate the noise. I found some at home depot and below are the pics of the cats being converted to mufflers. I am hoping to at least achieve the same or more noise attenuation as the cats themselves. The car was just a tad too loud for my liking.
Life got in the way for several months but finally getting back to the "project". Currently working on the wiring again as I had to pull it all apart to separate the 950 wires from the stock wires. Taking a hint from Russ544, I'm keeping the 2 harnesses separate this time.
If all goes as planned I should be test firing by the 18th if not sooner.
What I'd heard elsewhere through the grapevine was that the Shelby cams were the same as the L37 Caddy cams--which your data agrees with--but with the intakes ground 5 degrees advanced, which your data does not agree with.
Where did you get your info about the Shelby specs?
Also, the 266 lobe used in the L37 and Shelby intakes (obviously) has 22 degrees more duration than the 244 lobe used in the LD8 and Aurora engines. In order to maintain a valve overlap period which won't fail emissions, GM has to retard the intake lobe center for the long duration cam when used with the same 244 degree exhaust cam.
EDIT:
I forgot you'd posted so much info on the cams previously. I have a set of L37 cams on the shelf and I can compare part numbers next time I'm at my dad's house.
[This message has been edited by Will (edited 04-09-2015).]
They should be the same. When I look up the part numbers for the L-37 they are the same numbers.
I decided to carefully check for continuity on each of the wires in the custom wire harness I had made for me. Good thing as I found that the solder joints were not up to snuff. They just needed a squirt of liquid flux, reheating and a little more solder to make good joints. Bummer is that it took all week to remove the harness get the solder joints fixed and now I am back to where I was last Monday. Happy that I found what would have been a nightmare of an issue to troubleshoot but bummed that I am not already rolling the engine back under the car. I might get lucky and have it in by the 18th still but no guarantees with the limited time left...


.JPG)
.JPG)
.JPG)
.JPG)

.JPG)
.JPG)
.JPG)
.JPG)
.JPG)
.JPG)
.JPG)
.JPG)
.JPG)
.JPG)
.JPG)
.JPG)
.JPG)
.JPG)
.JPG)
.JPG)
.JPG)
.JPG)
.JPG)
.JPG)
.JPG)


