Keep up the good work man! I know what you mean about changing your mind, I’ve changes mine I don’t know how many times on what options to get on mine... money being the biggest factor. Look forward to seeing more.
------------------ This signature adds .5 bhp. When in doubt, gun it. 84 2m4 —in progress to— 84 2m6sc
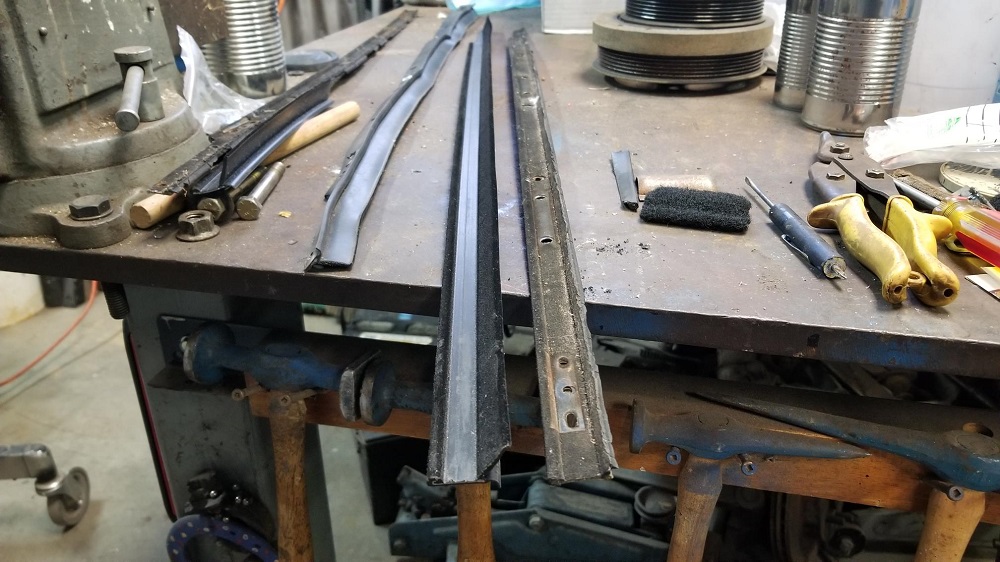
Finally finished my DIY outer dew wipes. I replaced all the felt pieces with Velcro material. I also replaced the rubber parts of the inserts with new weather stripping from Home Depot.
If you ever decide to do this, I recommend using some kind of hole punch to make the holes. Using a drill was imprecise and I'm worried about how much trouble I'll have installing these on the doors.
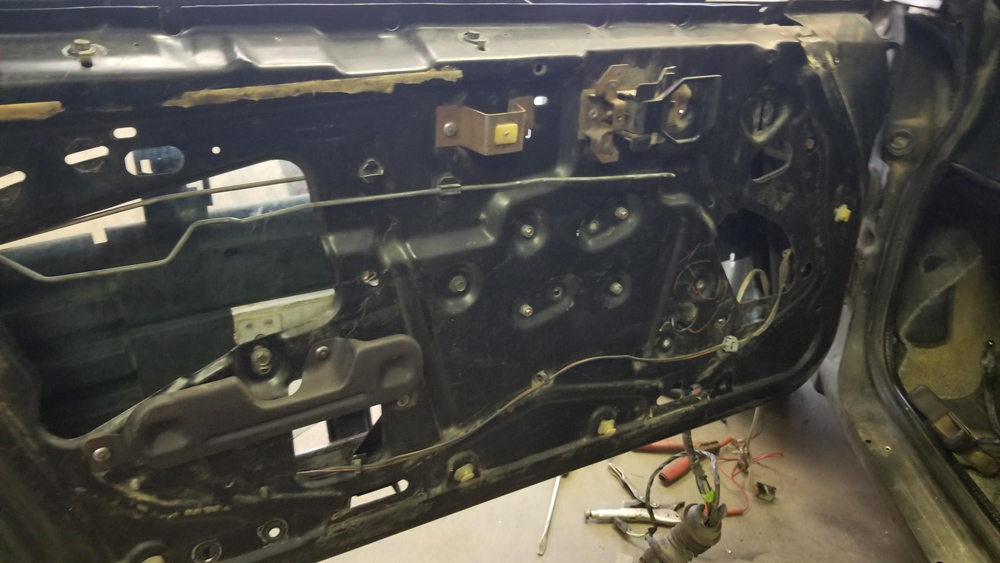
Weekend update. I installed the power equipment into the driver's side door. I underestimated how much time would be required to clean the inside of the door, the window glass, etc.
Bolting the power regulator to the door turned out to be a PITA. I had to grind down one of the bolts to get it to fit between the motor housing and the door. I didn't take a picture of the problem area because I was frustrated, but after wrestling with it for 20 minutes I got it installed.
As I told my wife, it's a little thing, but being able to actually install something instead of taking something off the car is a huge lift.
Here are couple more random photos I'd thought were lost.
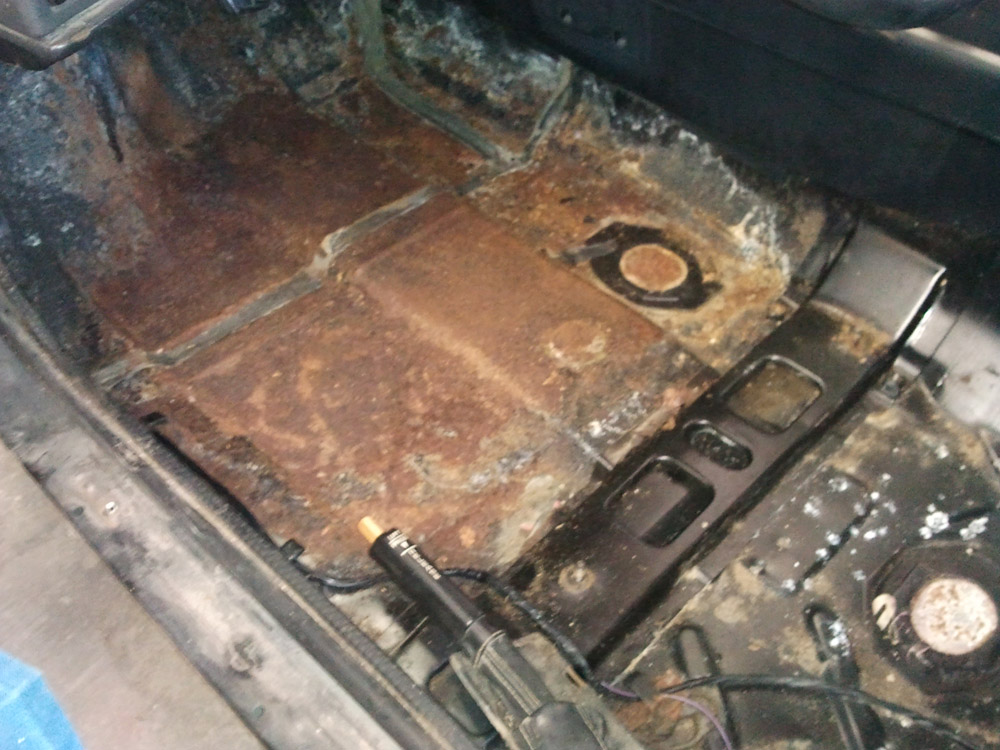
The first is what the driver's side floor pan looked like when I first pulled the carpet out. The car had very little rust, except for this.
I think the original owner must've spilled a coke down the console, because the bottom of the car looks great and there aren't any holes.
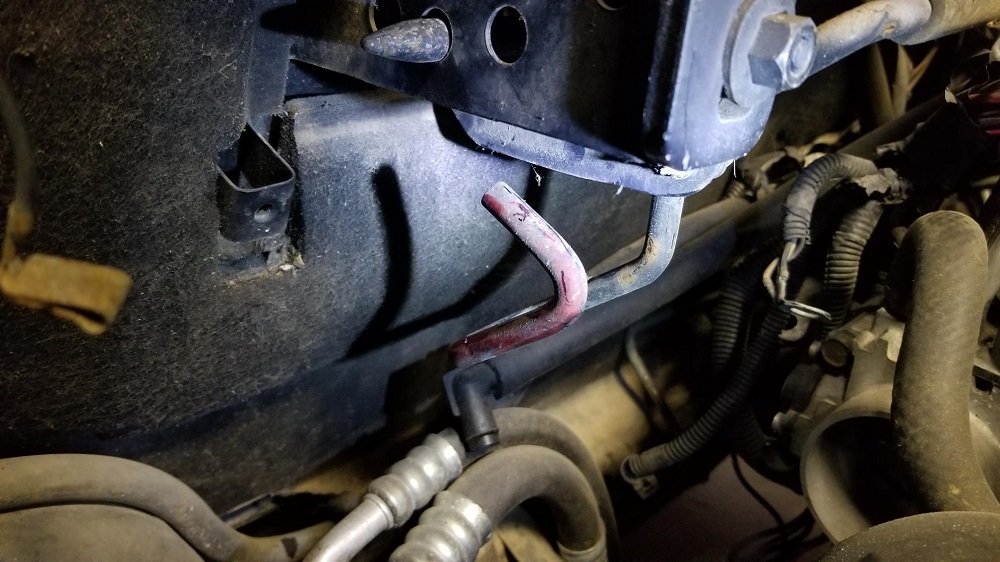
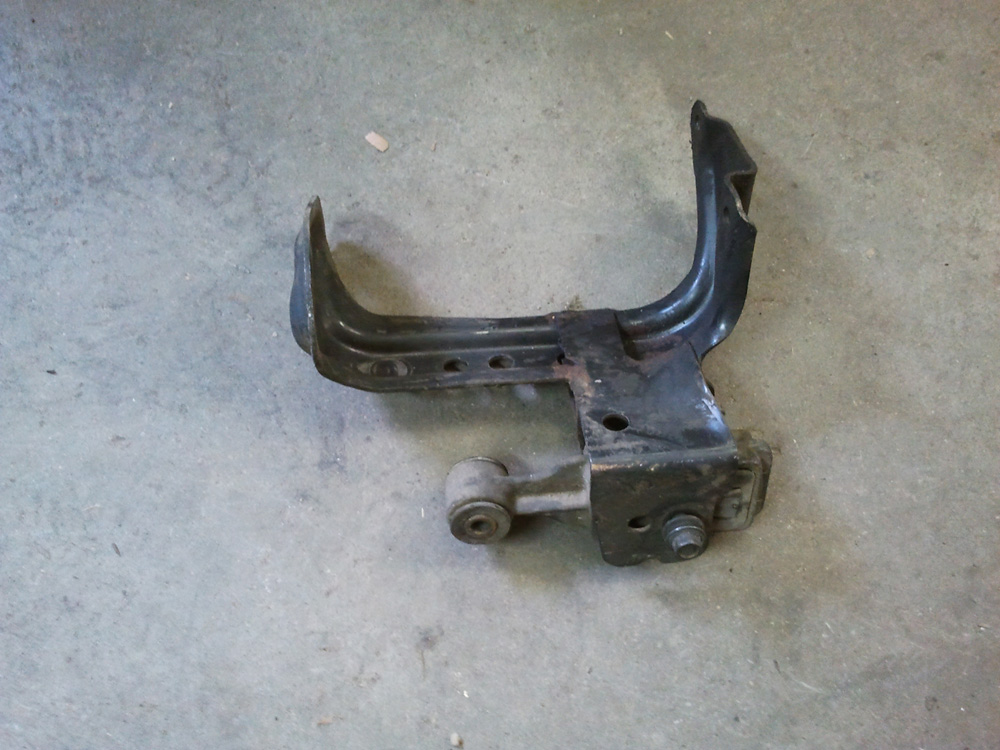
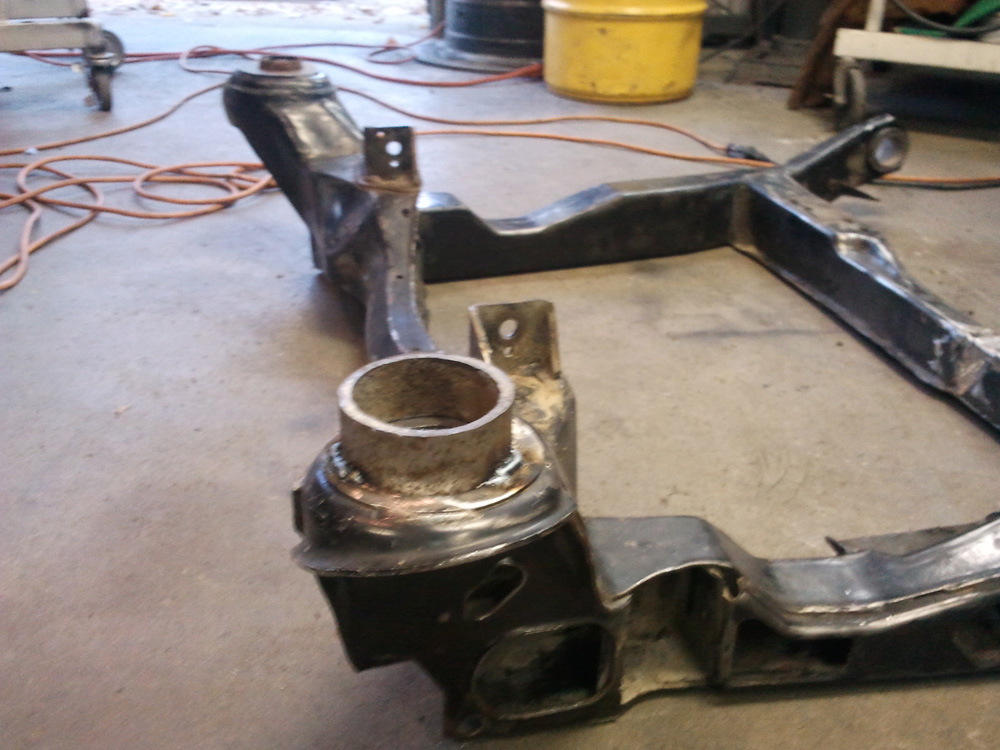
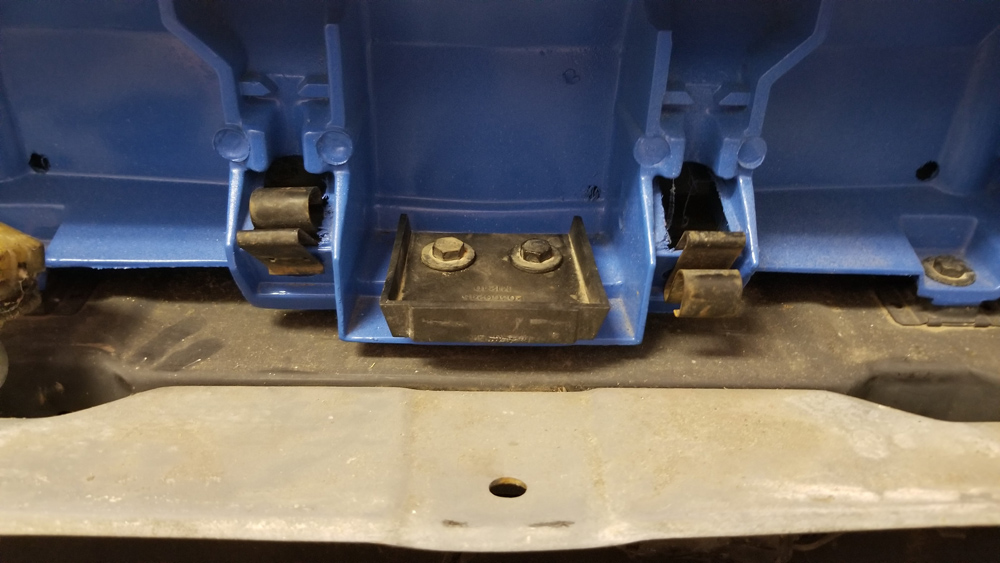
Next up is a photo of my GTZ's bottom engine mount. As I've mentioned before, I'd considered using the Grand Am style mounts, with one in front and one on the back of the engine, because that seemed to be the most common type. On the other hand, the GTZ style is very similar to the Iron Duke's mounting system and it doesn't clutter up the engine bay. I cut the flange off the GTZ bracket and I think I had to drill one hole to mate it to the Fiero engine mount.
Not much progress to report, but I did find some more photos of the beginning of the project.
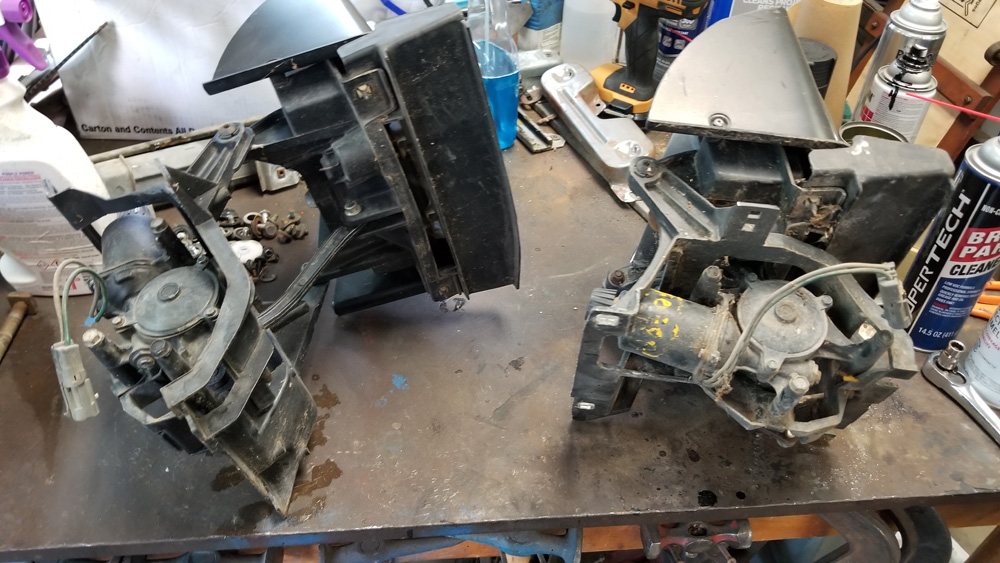
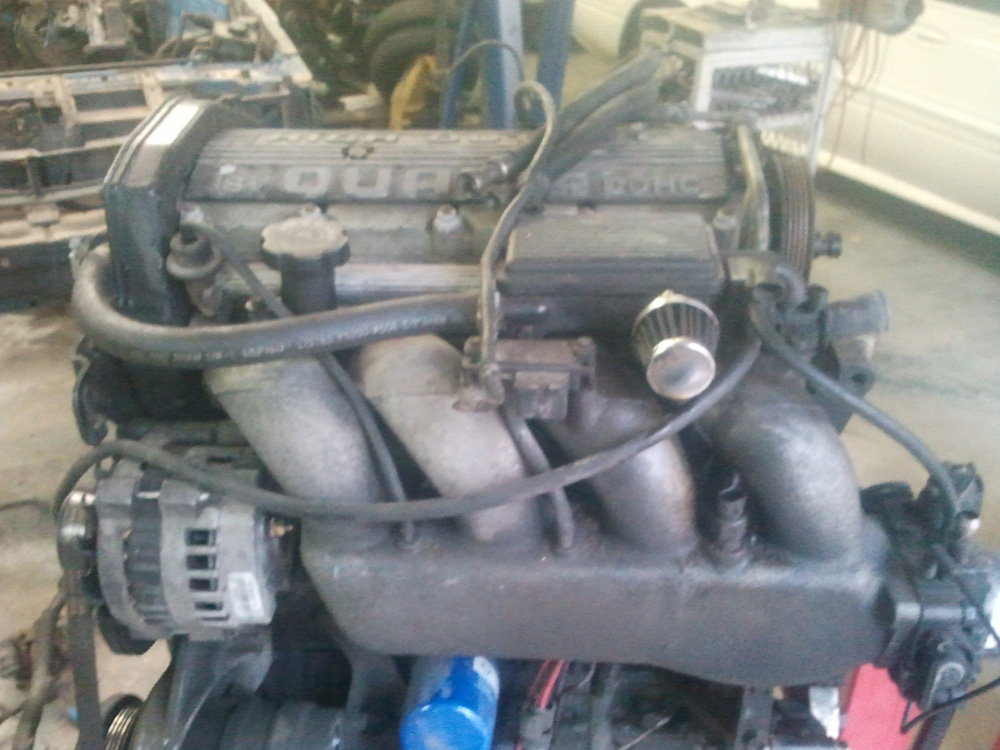
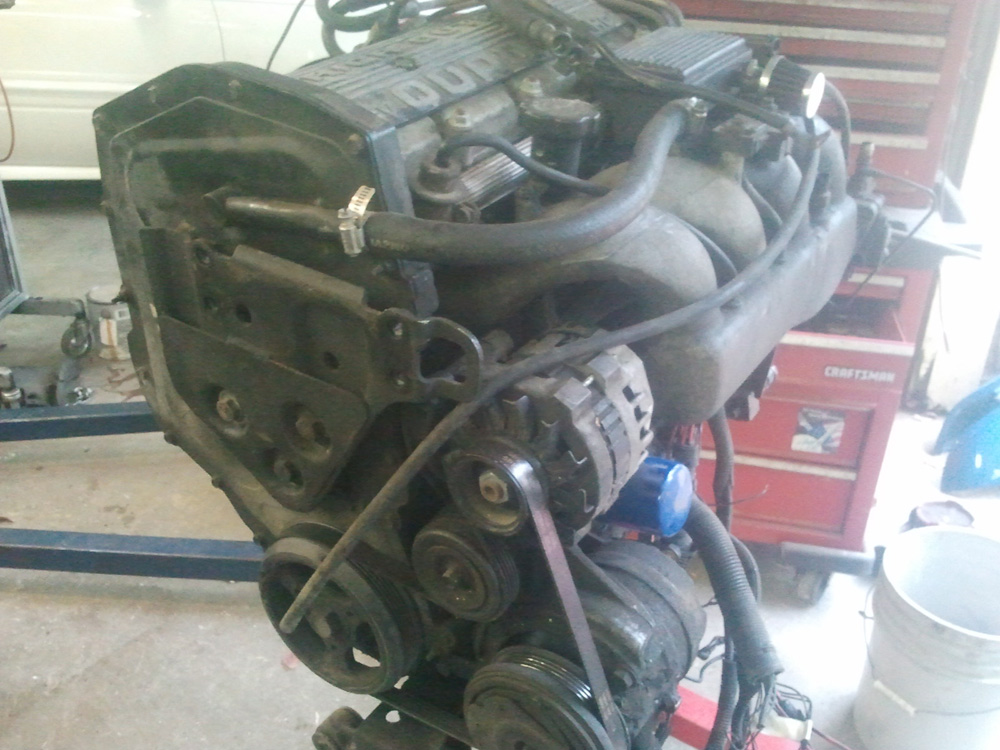
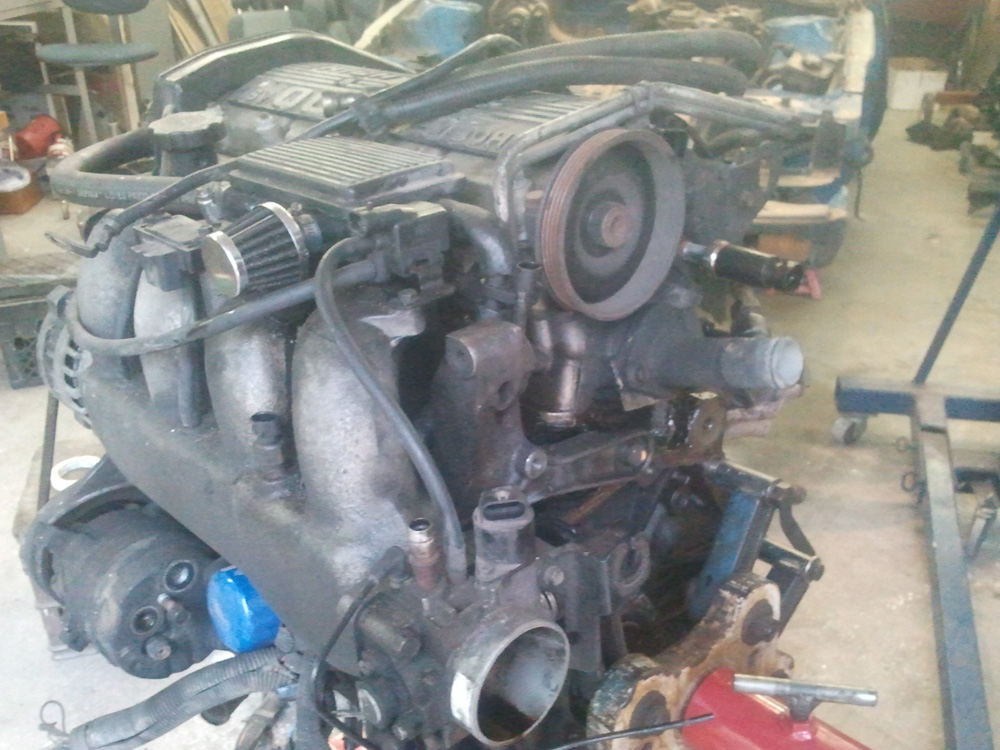
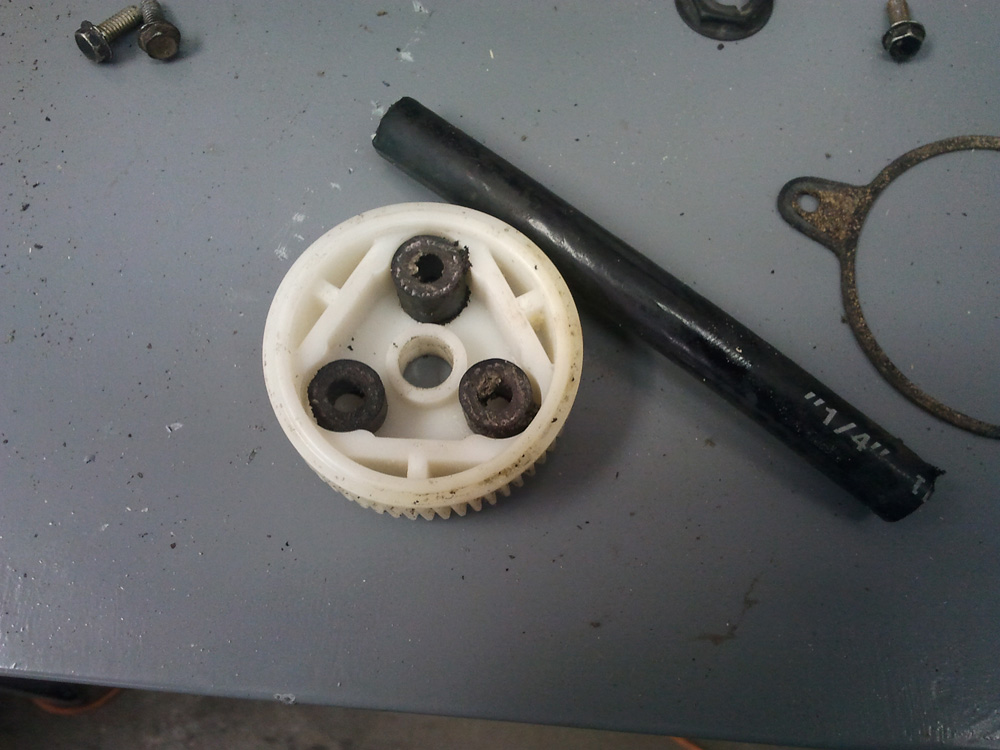
Here are photos of my Quad right after I removed it from my GTZ rust bucket. To review, my brother gave me the GTZ in 2008 with a blown head gasket. I put a new head on it and cleaned up the engine, then drove it every day for four years. I put more than 100,000 relatively trouble-free miles on it. As you can see, the engine was filthy.
The big pulley is for the power steering pump, which I'm obviously not using in my Fiero. Quad 4 power steering pulleys are notorious for being difficult to remove.
I bought an '88 cradle and suspension, but then decided to use my '87 because I didn't want to delay the swap with an extra project. I may switch to the '88 cradle at some point, but for now I decided to alter the '87. That meant shortening the tie rods, as I've previously mentioned, and also converting to solid mounts.
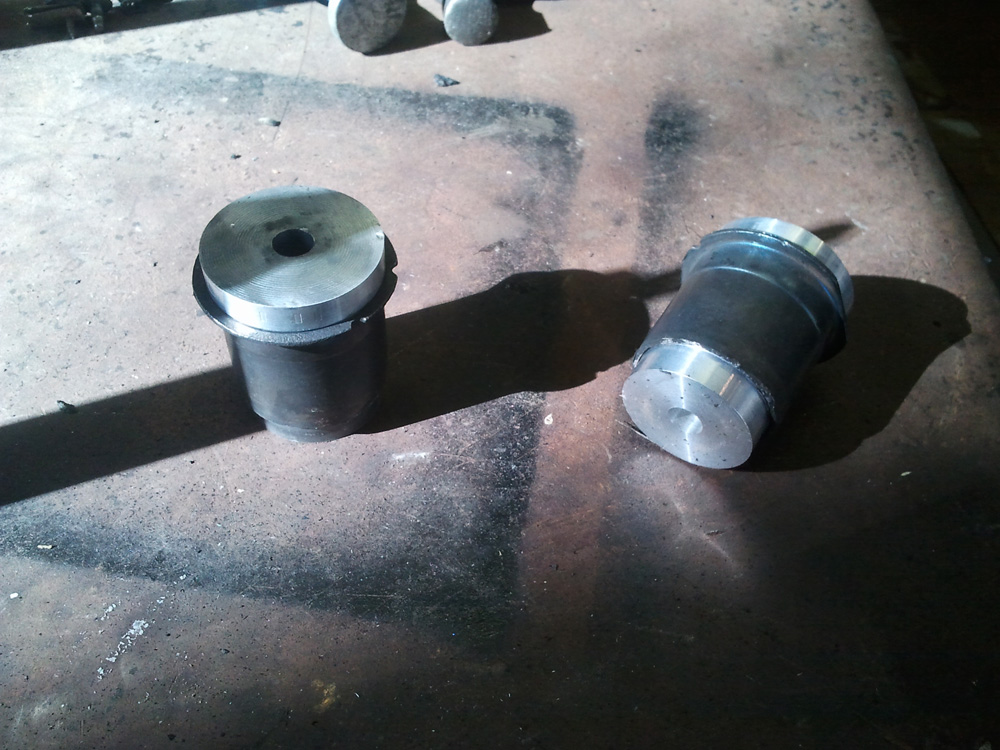
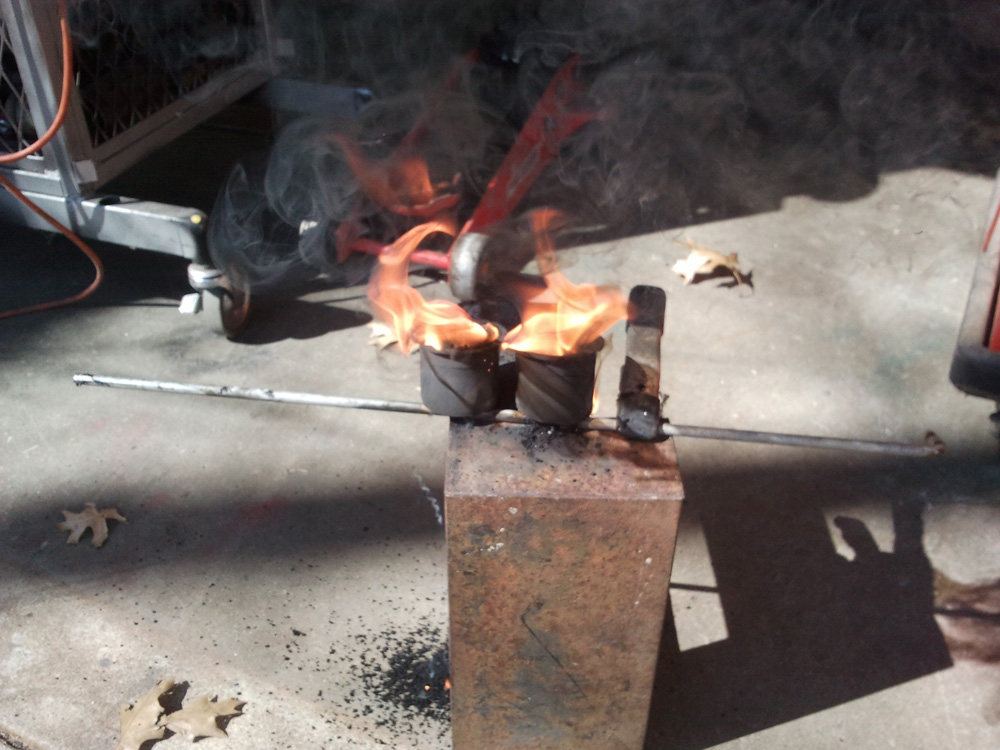
At the time, my nephew was working in a machine shop in California and he offered to turn me a couple front bushings out of aluminum.
It was a struggle to get the rubber out of the sleeves. I ended up burning it out.
The rear mounts were easier. I had some heavy-walled oilfield pipe lying around which I cut to length then welded on. I will probably grind about a 1/4 inch off of them because I think they're too tall.
[This message has been edited by Quad Raider (edited 03-10-2018).]
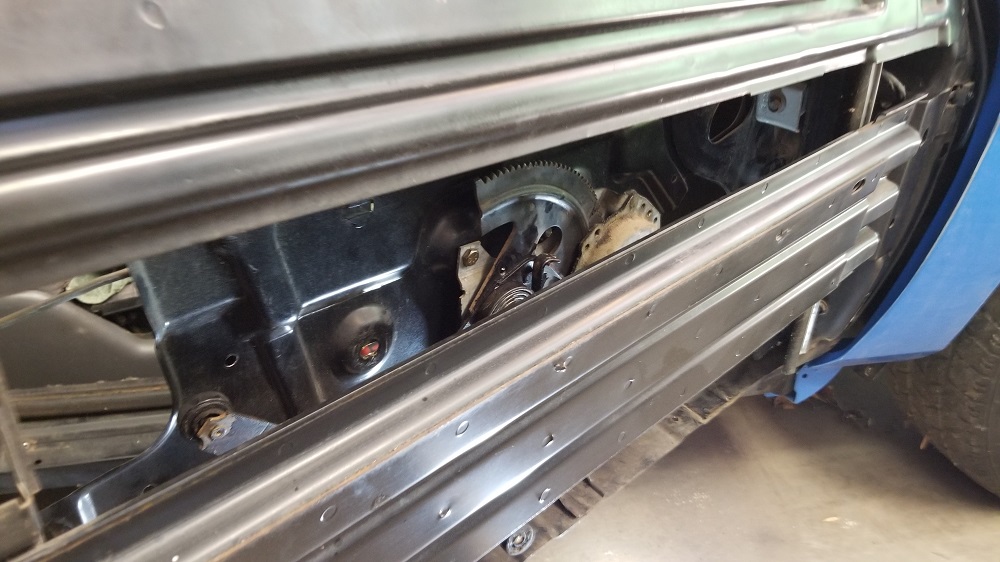
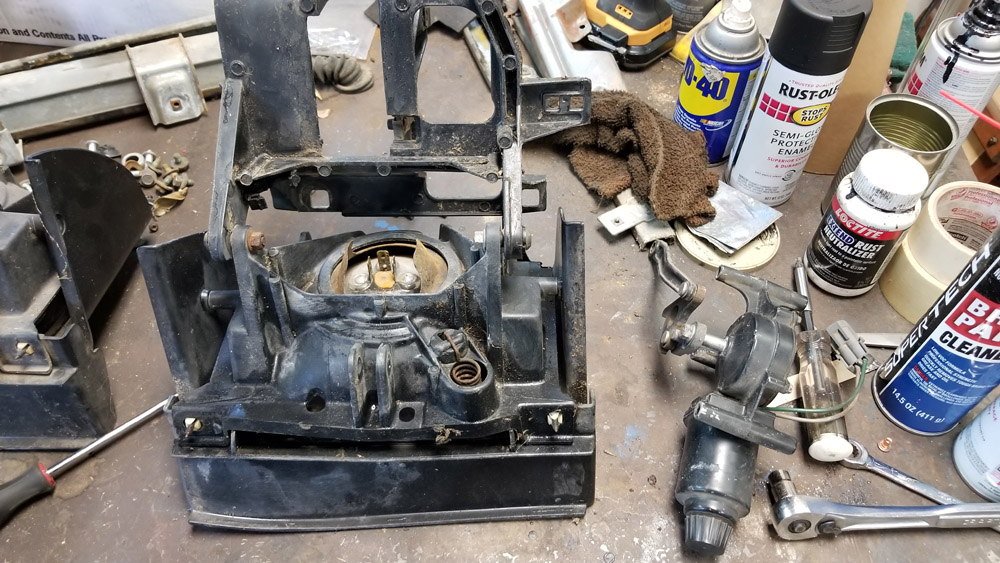
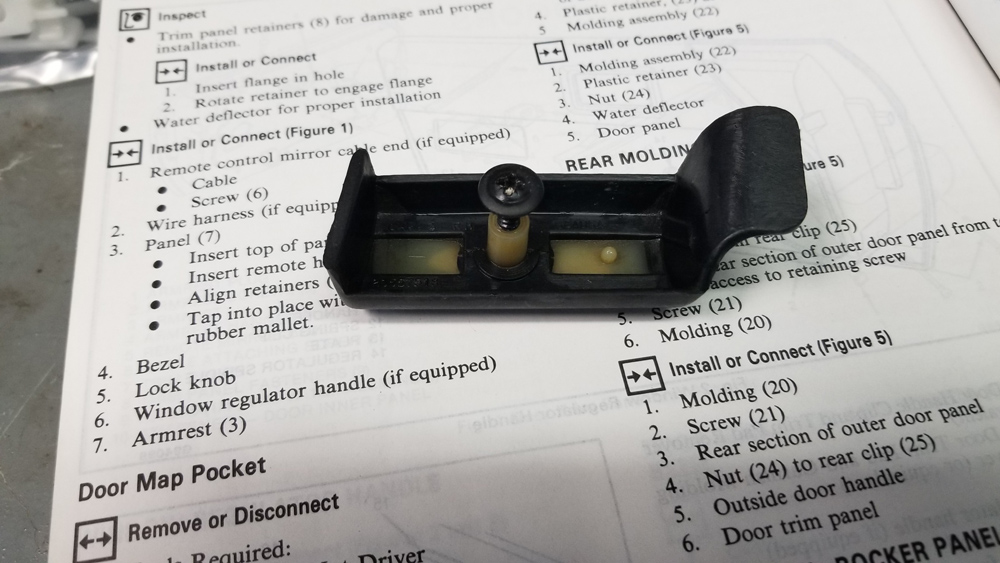
When I bought the car, the right front headlight was propped up with a piece of firewood. I disassembled the motors and found the "sand" inside. After reading everything I could find on this forum about replacing the plastic dowels, and playing around with the gears, I decided there was no reason I couldn't use sections of rubber fuel hose.
I figure the only reason the engineers used plastic dowels in the drive mechanism was to absorb shock. I put the motors back together and tested them and they worked fine. So come at me if you disagree.
Not much progress to report. As I mentioned, I'm a board member and referee for my local youth soccer club so my weekends are pretty full in the spring and fall.
-planning to re-do my DIY dew wipes with different rivets. The pop rivets protrude too far and keep the wipes from sealing tightly to the door. I finally found tinner's rivets at an Ace hardware store but haven't had time to change them out
-planning to do major painting this weekend. I'm using Rust-oleum and a spray gun. I'll post photos.
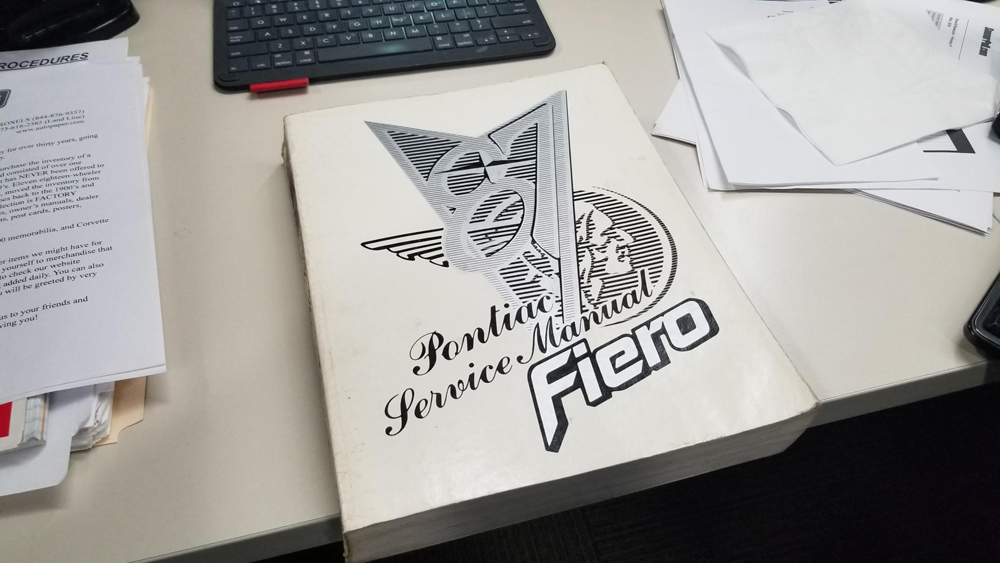
-got myself a birthday present from eBay and it just arrived.
I've just been thumbing through it and already answered several questions I've had about reassembling my car. Should've bought one of these years ago.
Lots of good work here and your mechanical prowess seems excellent. Very interesting and informative thread. I hope that the end result meets your expectations.
------------------ " THE BLACK PARALYZER" -87GT 3800SC Series III engine, custom ZZP /Frozen Boost Intercooler setup, 3.4" Pulley, Northstar TB, LS1 MAF, 3" Spintech/Hedman Exhaust, Autolite 104's, MSD wires, Custom CAI, 4T65eHD w. custom axles, HP Tuners VCM Suite. "THE COLUSSUS" 87GT - ALL OUT 3.4L Turbocharged engine, Garrett Hybrid Turbo, MSD ign., modified TH125H " ON THE LOOSE WITHOUT THE JUICE "
Lots of good work here and your mechanical prowess seems excellent. Very interesting and informative thread. I hope that the end result meets your expectations.
Thank you for the kind words. While my plans have changed multiple times, my goal for the project has not. I want to drive a cool car that I restored/customized myself and honor my brother in the process.
I’m a little disappointed that this manual doesn’t have any information about the formula-type body parts. I know I’ve seen pages with that info posted on this forum. Were they from an ‘88 manual?
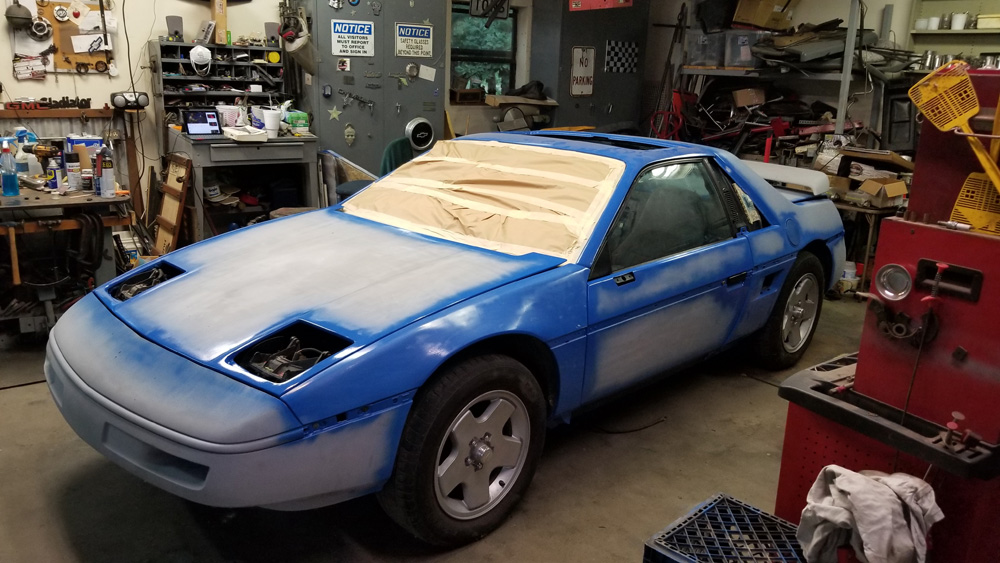
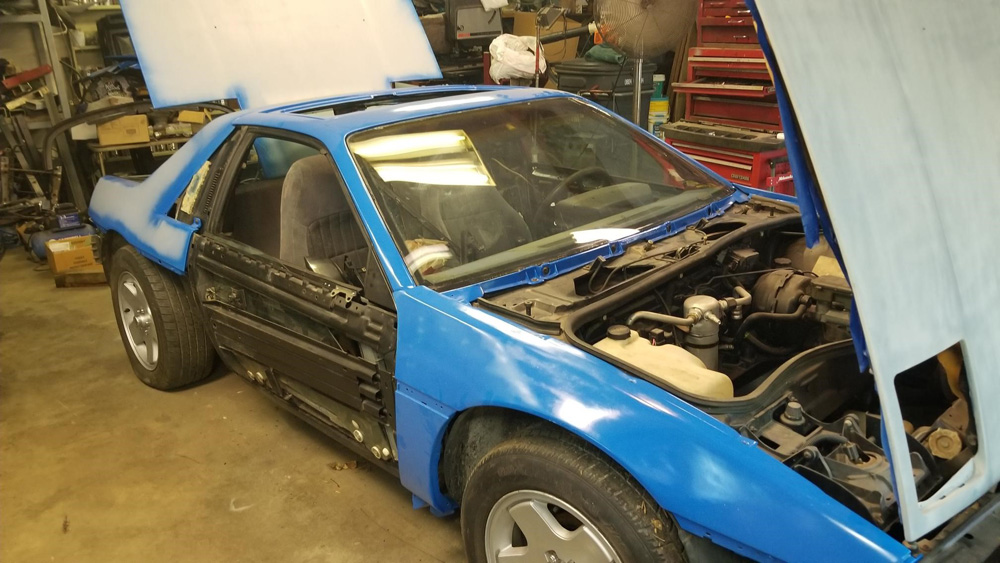
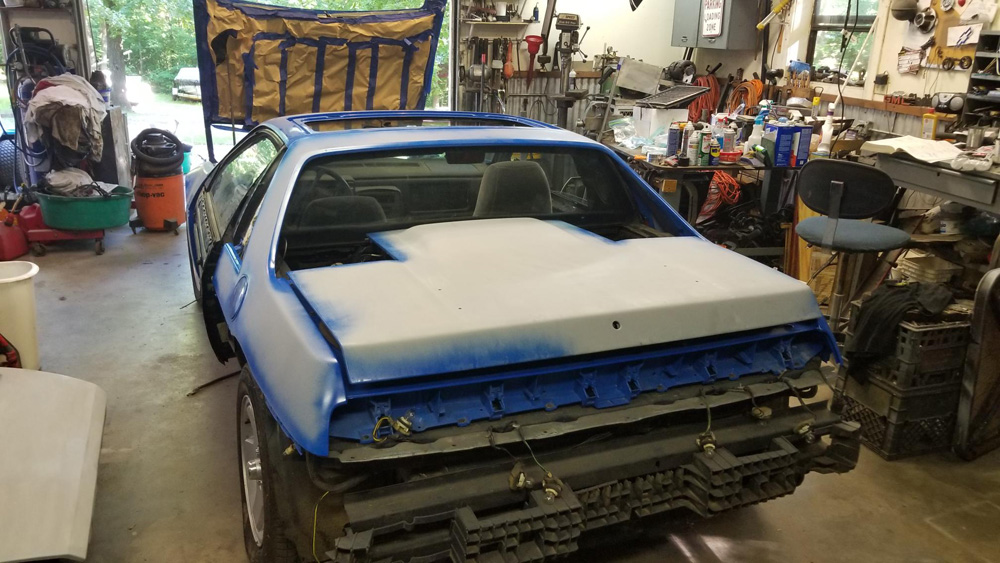
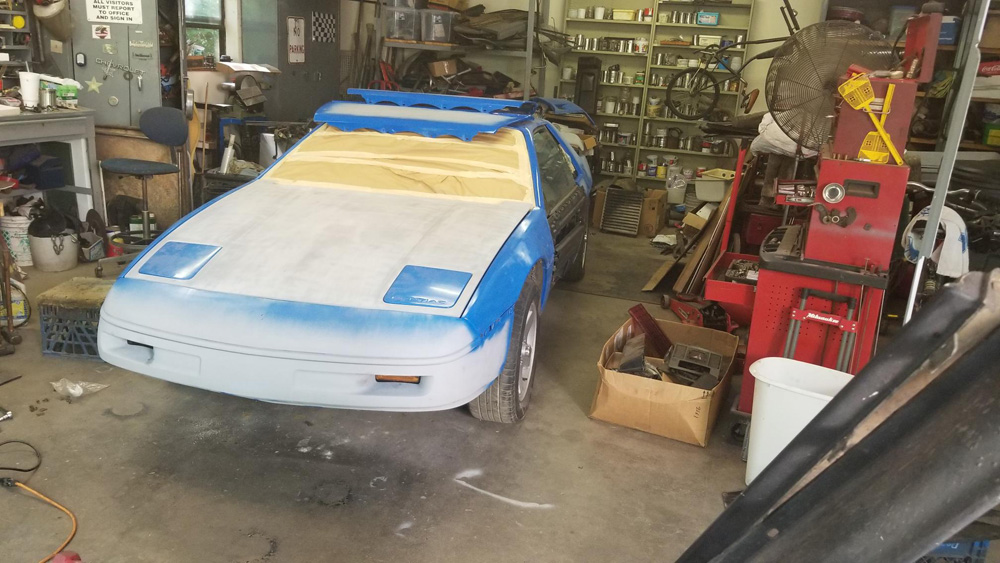
Thanks to the holiday weekend, I had some time to work on the car. I was working on painting all the body panels before reinstalling them, but they were taking up so much space I decided to put them back on the car and then paint them all at once. As usual, I underestimated how much time and effort it would take to reinstall them (you'd think I'd know by now).
I got the roof panels reinstalled, which feels like a major accomplishment.
So many reasons why reassembling the car is taking so long. For one, I have probably twice as many spare nuts, bolts and other fasteners than I do actual parts that came from my car. This is because any time I find a Fiero in the salvage, I always grab whatever I can, especially if I remove a part from it. I was careful to label every bag of parts, whether from my car or a salvage yard one, but now the shop is full of baggies with Fiero parts. So yesterday I spent 45 minutes putting all the spare fasteners into one box.
I've posted before that I accidentally deleted all the photos on my phone a couple years ago. They included all the pics I took of the disassembly process. So, while I have all the fasteners, not having the photos of where they came from really slows me down. When I found the metal clips that attach to the rear clip, I spent 10 minutes trying to figure out how they're oriented. Then I remembered that DKcustoms helped me out three years ago (THREE YEARS!):
quote
Originally posted by DKcustoms:
I didn't forget! Just got busy.
There are metal clips, both on the rear clip and taillights that are important for holding in the taillight screws.
Hope that helps
For the record, the correct way to install them is on the left:
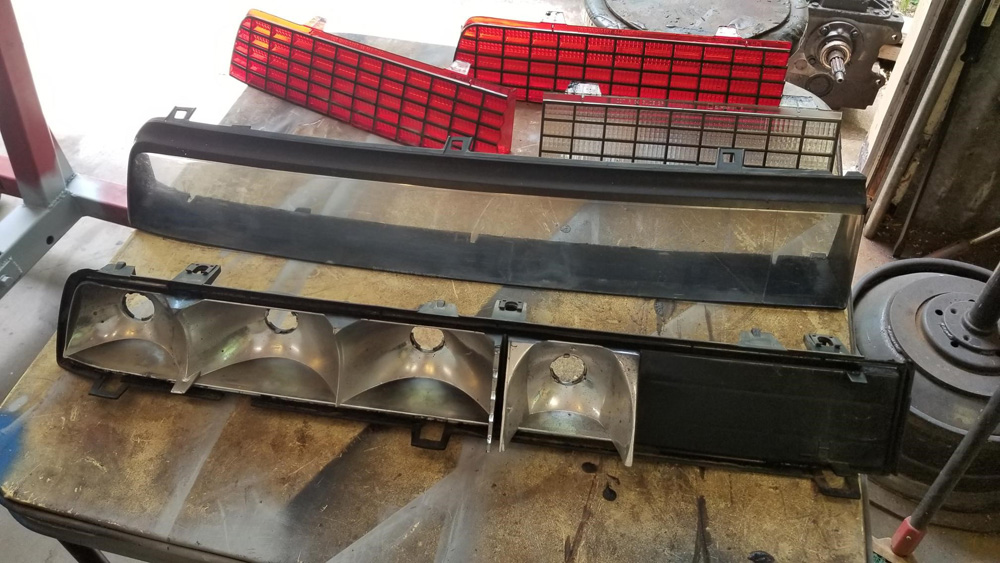
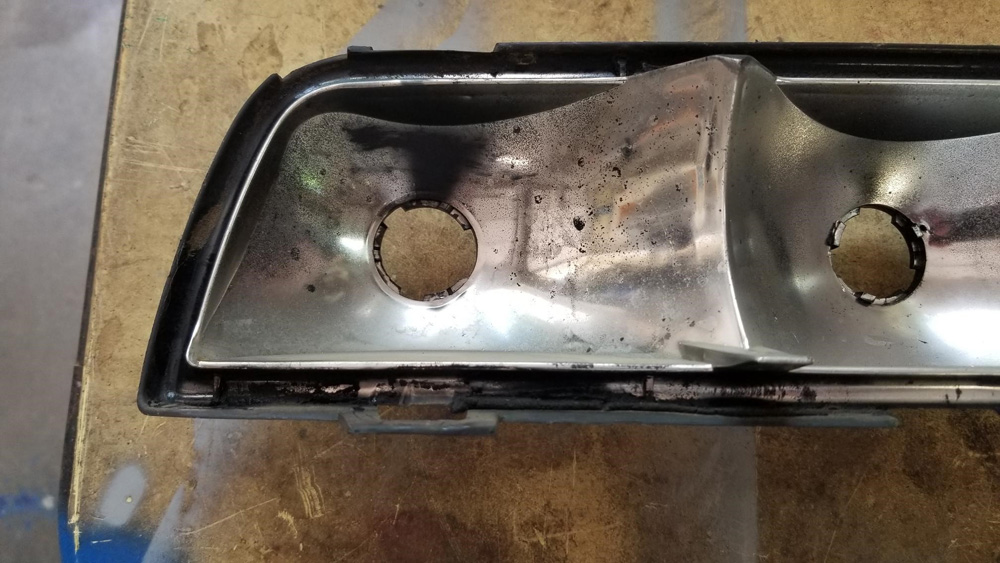
Both of my OE taillight lenses were cracked and broken. I bought a good replacement unit for the right one at the salvage years ago, but got just the lense for the left one. I've forgotten why I didn't get the whole unit for that side, but whatever the reason it meant I had to disassemble the stock one to replace the lense.
The plastic was brittle, but I got it apart without damaging anything. Of course, once I got it apart I found some of the reflective paint was worn off.
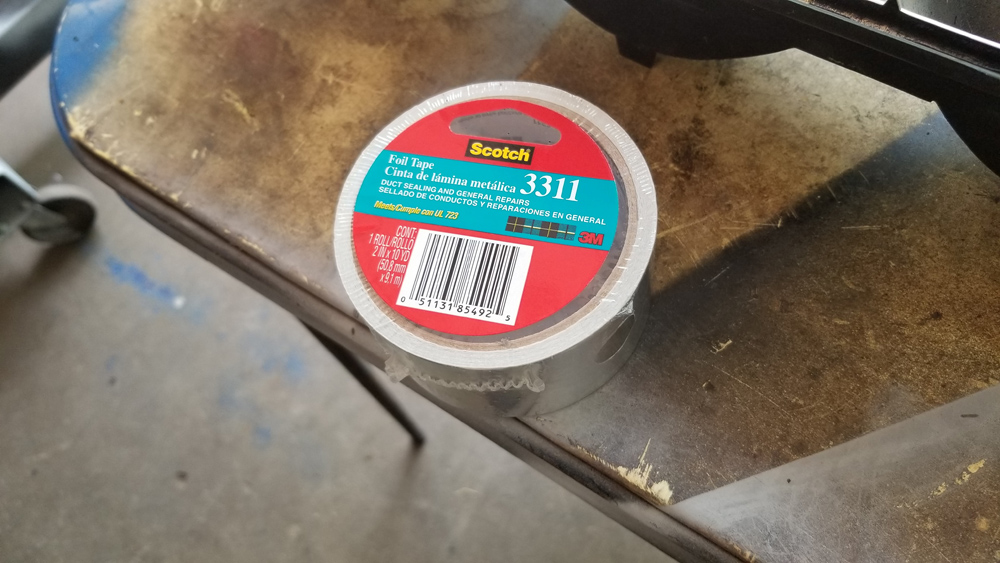
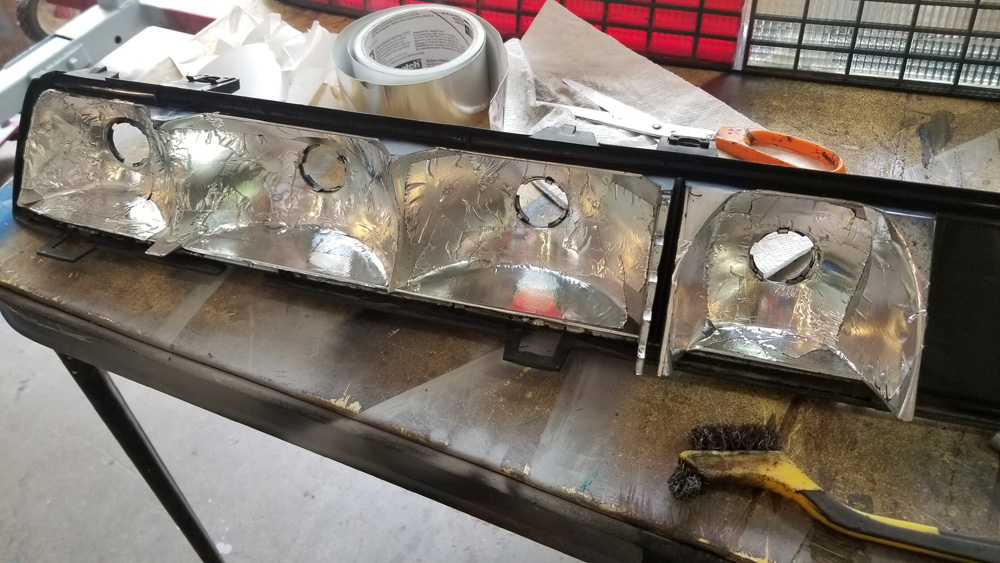
I checked the forum and saw that some folks repaint the reflectors, but others use foil tape because it resists heat.
A couple of notes if you go this route. One, the stuff is very sticky. It took me a few minutes to get the hang of using it. Second, there's no way to avoid wrinkles. At first I was disgusted by them, but then realized they don't matter. The idea is to reflect the light, and wrinkled tape will do that better than smooth plastic that's lost its shiny paint.
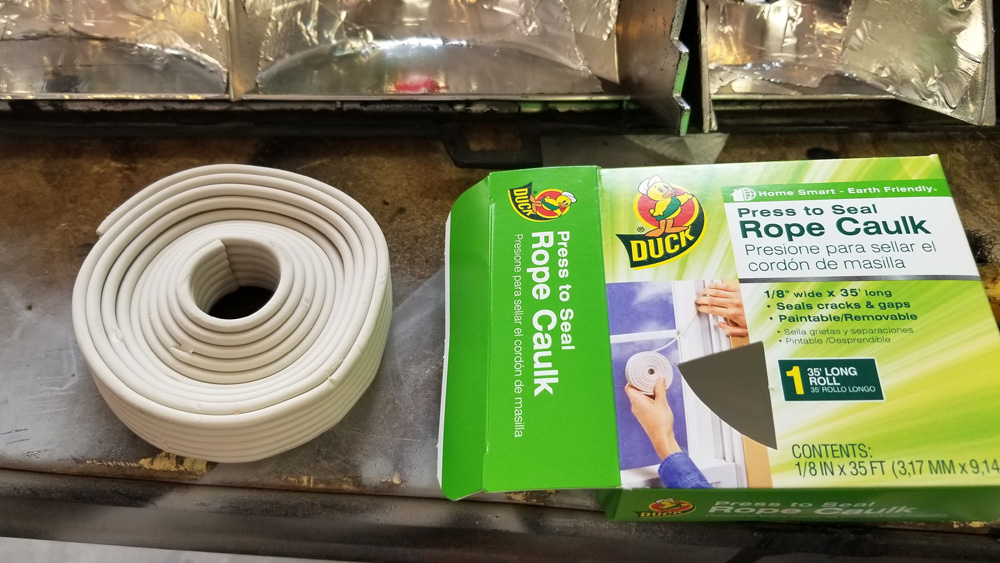
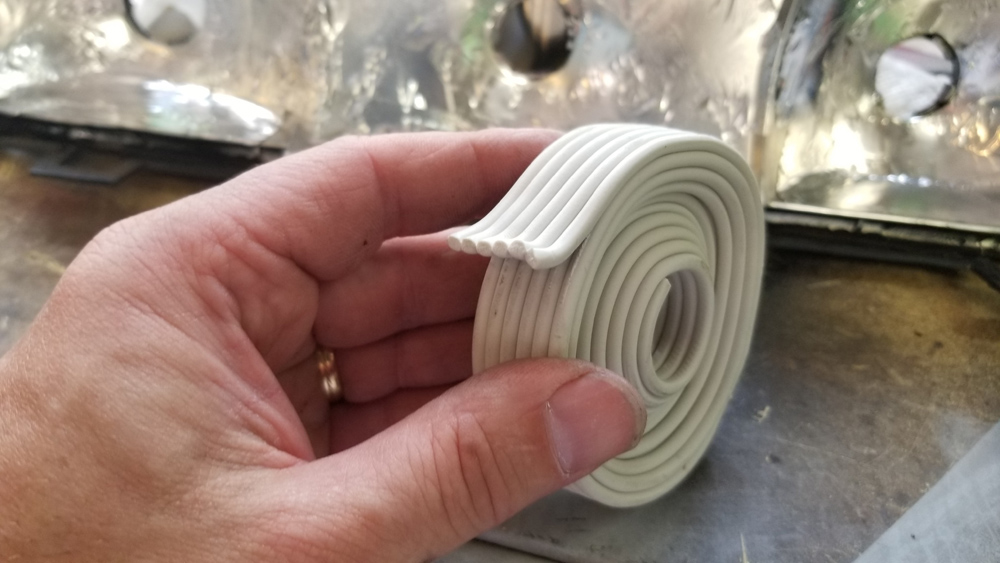
I pulled the butyl sealant out of the gap and replaced it with this 3M rope caulk. The stuff was less than $3 and was very easy to work with. I figured 35 feet would be plenty.
I used two strands of it, though thinking back on it now I realize I probably should have smushed the two together.
[This message has been edited by Quad Raider (edited 06-18-2018).]
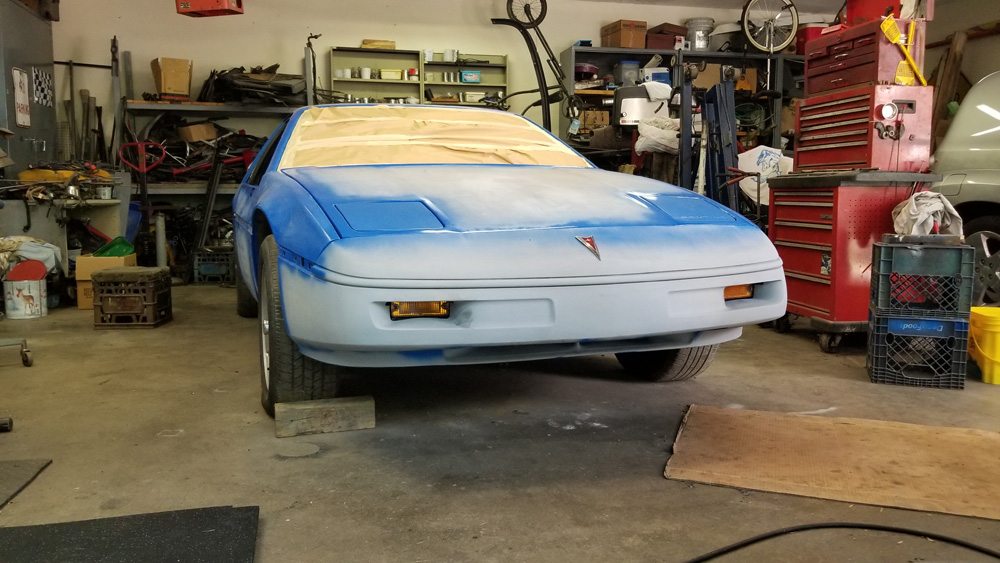
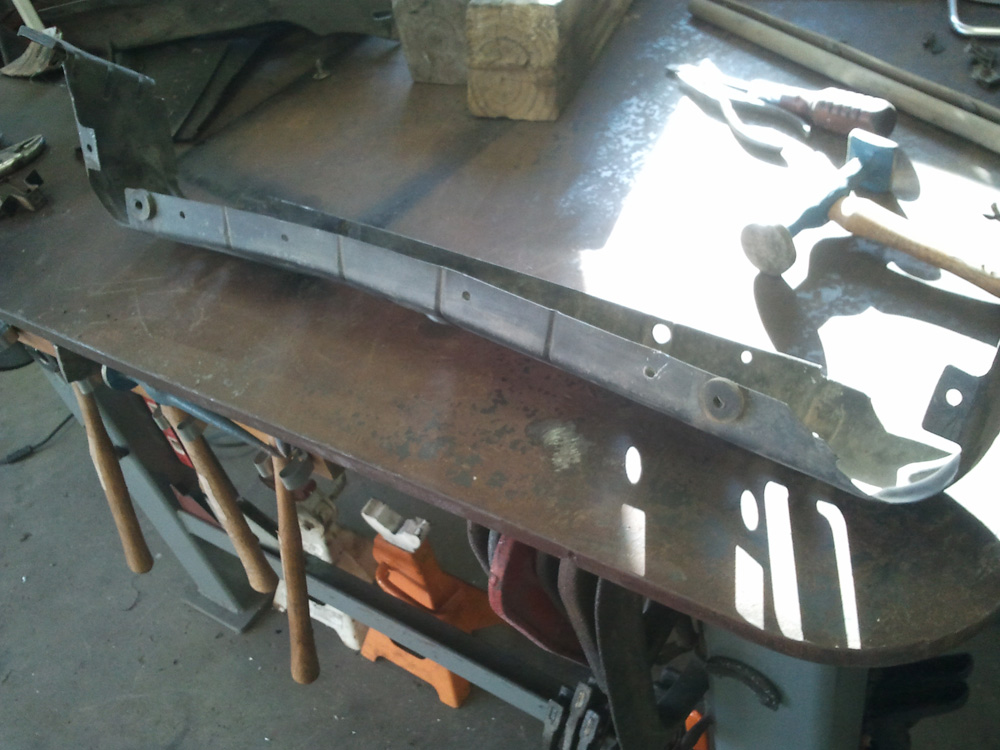
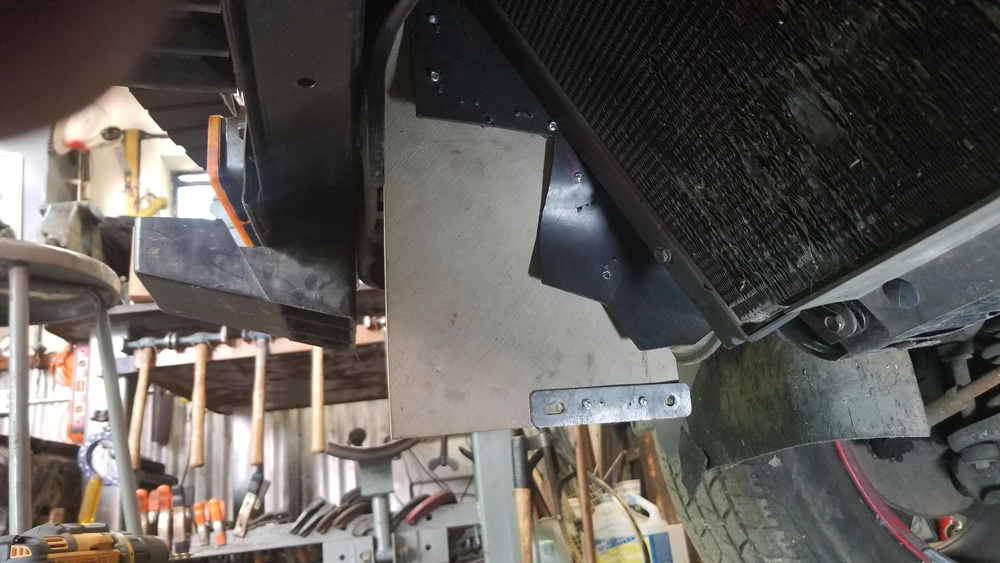
More progress to report. I'm working on getting all the body panels back on the car. Over the weekend I focused on the front fascia. The reinstallation process in general is taking much longer than I expected, for various reasons. In the case of the front fascia, there were a couple of problems. Years ago I removed the radiator and condenser to straighten and paint the mounting bracket.
I reinstalled the bracket and radiator soon after the work was done, but for some reason I didn't immediately reinstall the condenser and it'd been sitting in the trunk all this time. This weekend I struggled to get it to fit, then realized one of the mounting brackets had been installed backwards. I think the car took a pretty good hit in the front end in its previous life and whoever did the work took some liberties putting it back together.
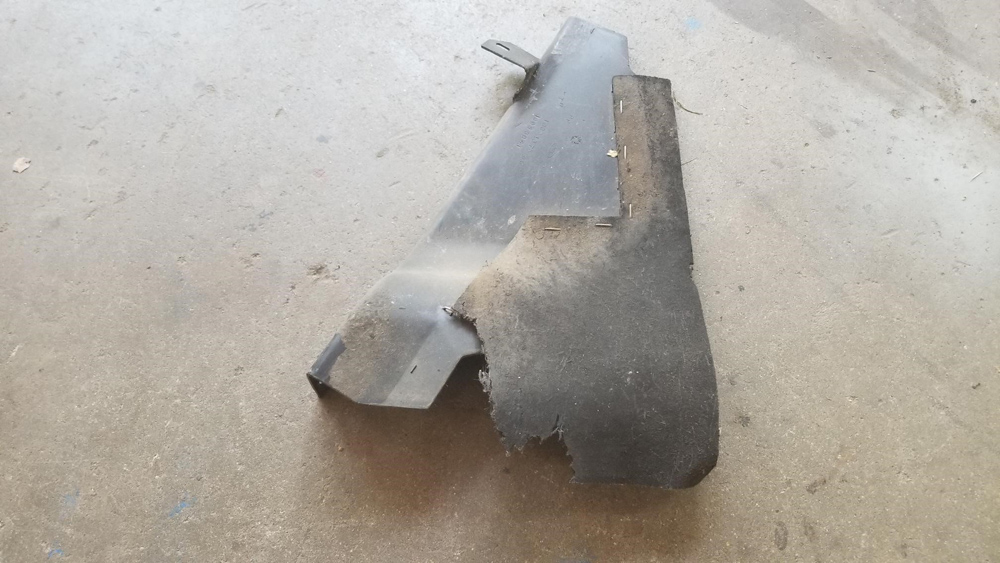
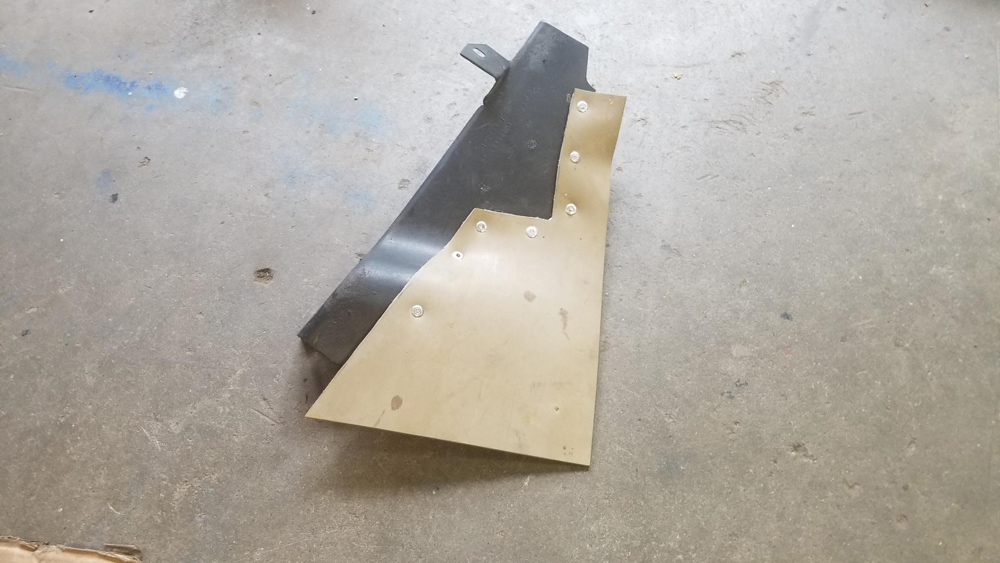
The other problem I rediscovered was that the flexible air duct material was ripped and the part that attaches to the fascia on the passenger side was missing.
I had some old rubber floor tiles lying around so I cut a piece to fit and used rivets to attach it to the plastic.
This is before I did the final trimming.
I have so much more work to do, but getting the front fascia completely reinstalled was a huge emotional lift. As my brother said, it's starting to look like a car again.
I also got the right quarter panel reinstalled.
Next up: -left quarter -finish reinstallation of the rear fascia -re-do the outer dew wipes -finish converting doors to power windows/locks -reinstall door skins -finish masking the car -spray the car
[This message has been edited by Quad Raider (edited 06-06-2018).]
I’m a little disappointed that this manual doesn’t have any information about the formula-type body parts. I know I’ve seen pages with that info posted on this forum. Were they from an ‘88 manual?
I'm somewhat confused by this. What type of body parts does the '87 Fiero manual show then... just the GT aero style? Aren't the "formula-type body parts" (from '88) basically just the same as the '87 coupe body parts?
[This message has been edited by Patrick (edited 06-04-2018).]
I'm somewhat confused by this. What type of body parts does the '87 Fiero manual show then... just the GT aero style? Aren't the "formula-type body parts" (from '88) basically just the same as the '87 coupe body parts?
It shows bumper pad and the aero style, not the formula/coupe style. Since posting that, I spent some time digging through the archive and remembered that I'd crossed this bridge before. The formula/coupe body style is covered in a separate manual, the P22, which is available here:
That's a great question. I'd imagine Pontiac figured that since so much of the car was still the same from '86 to '87, it could keep using the same factory manual and then released the supplement, the P22, some time later, maybe when the '88s came out. If I'm reading it right, it appears my manual was printed in November of 1986.
I'd imagine Pontiac figured that since so much of the car was still the same from '86 to '87, it could keep using the same factory manual...
The 4-banger duke changed a lot in '87 (different ignition, intake, etc). Which version of the duke do they have in the '87 manual... or did the newer version of the duke need to be covered in the supplement as well? Seems like a strange way to print up manuals!
The 4-banger duke changed a lot in '87 (different ignition, intake, etc). Which version of the duke do they have in the '87 manual... or did the newer version of the duke need to be covered in the supplement as well? Seems like a strange way to print up manuals!
Yes, the P22 supplement covers the 1987 duke and the V6, too. As confusing as it may be, it makes sense for GM to print manuals that way. There really weren’t that many changes to the car from 1986 to 1987, so printing a supplemental manual that covered the differences would be cheaper.
Reassembly continues. I installed the rear fascia and the left quarter panel and started working on the doors. When I installed my homemade outer dew wipe on the driver's side door I noticed it wasn't fitting flush against the door frame, but I had put the window back in and added the power window/lock/mirror equipment and wiring, so I was reluctant to take it all apart again.
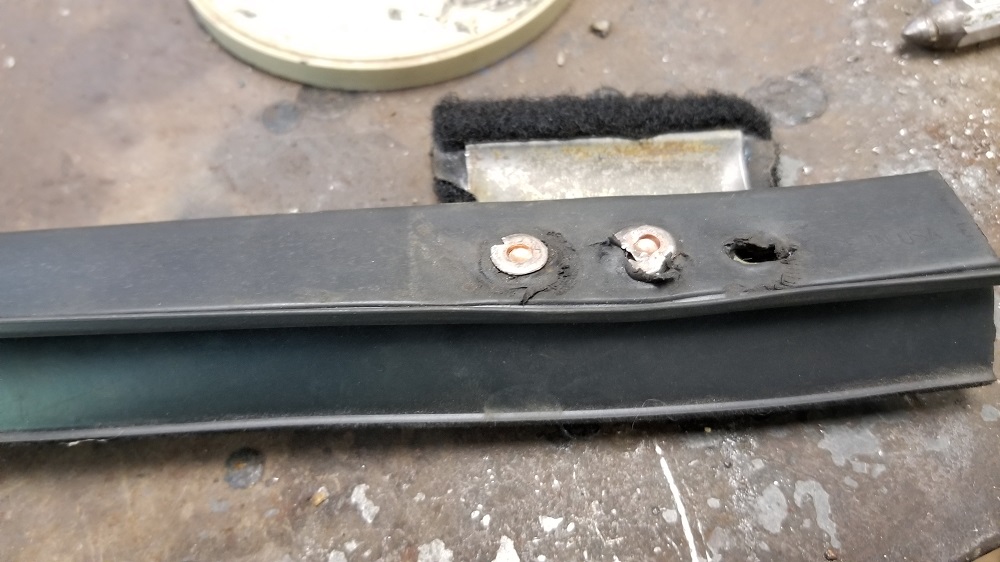
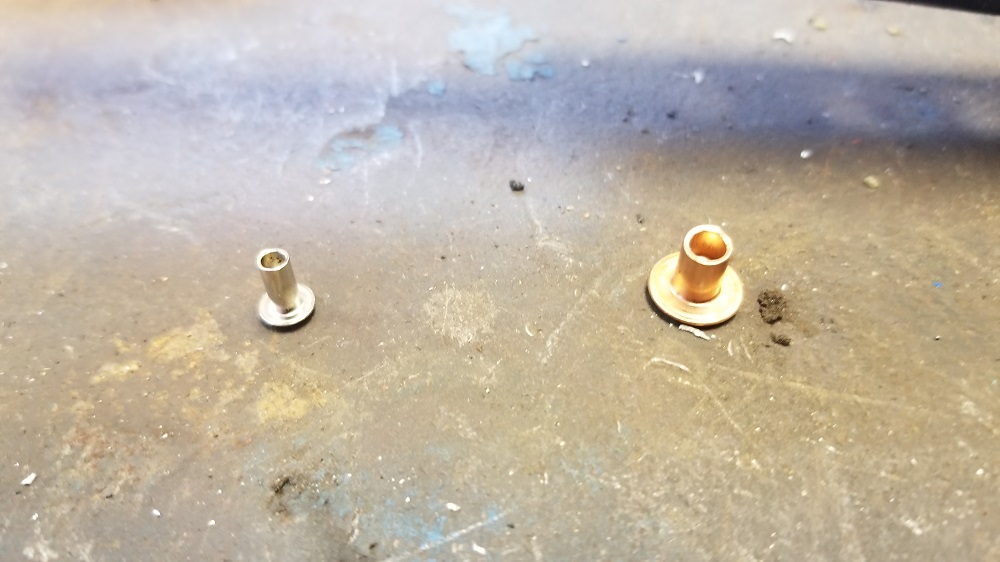
I used pop rivets the first time which stick out too far. I found some specialized rivets at the hardware store, but wasn't sure which size to get.
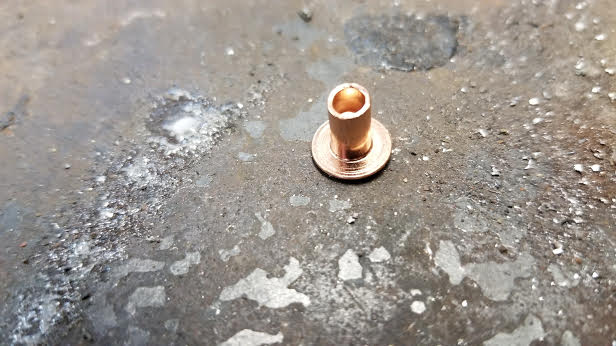
These rivets are hollow on one end, so you use a punch to flatten them down. Because these were a little too long, I made a hash of it.
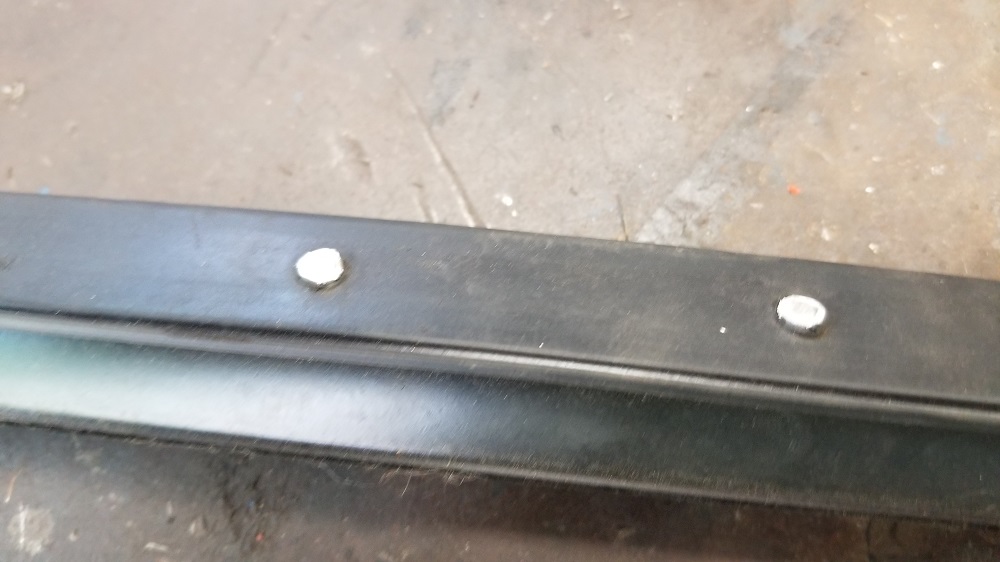
Instead of replacing all the pop rivets, I decided to use the trusty Dremel to grind them down.
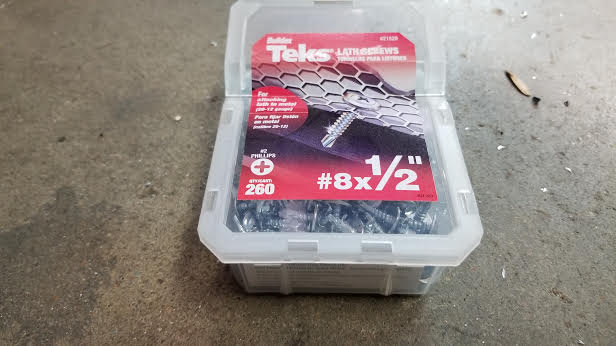
Then, instead of using the OE screws to install the wipes to the door, I used new, bigger flat head screws. Both dew wipes now sit flush on the door frames. I reinstalled the glass for the driver's side door and am set to convert the passenger side door to power window/lock/mirror.
Next up will be reinstalling the door skins, final sanding of the whole car then spraying paint.
[This message has been edited by Quad Raider (edited 06-13-2018).]
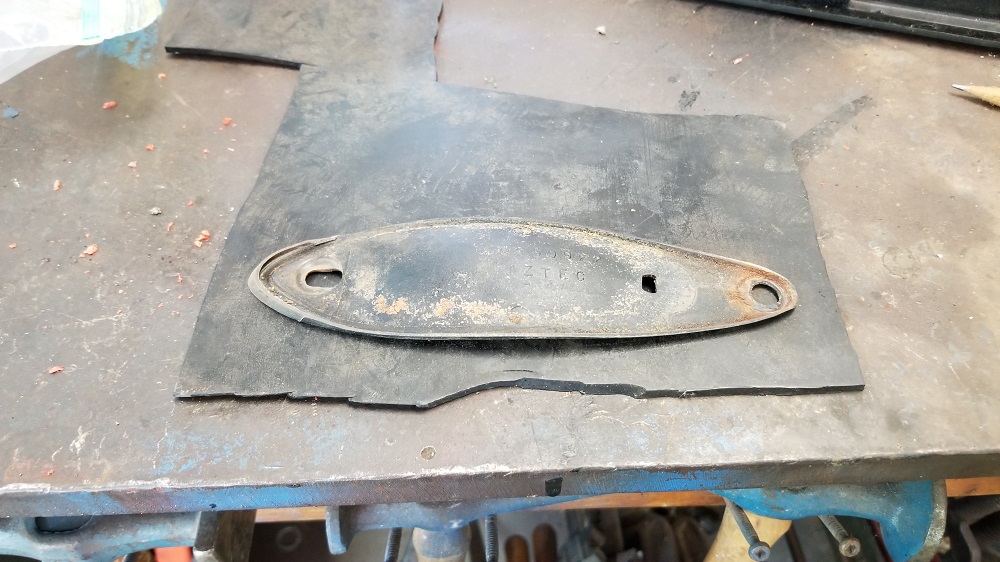
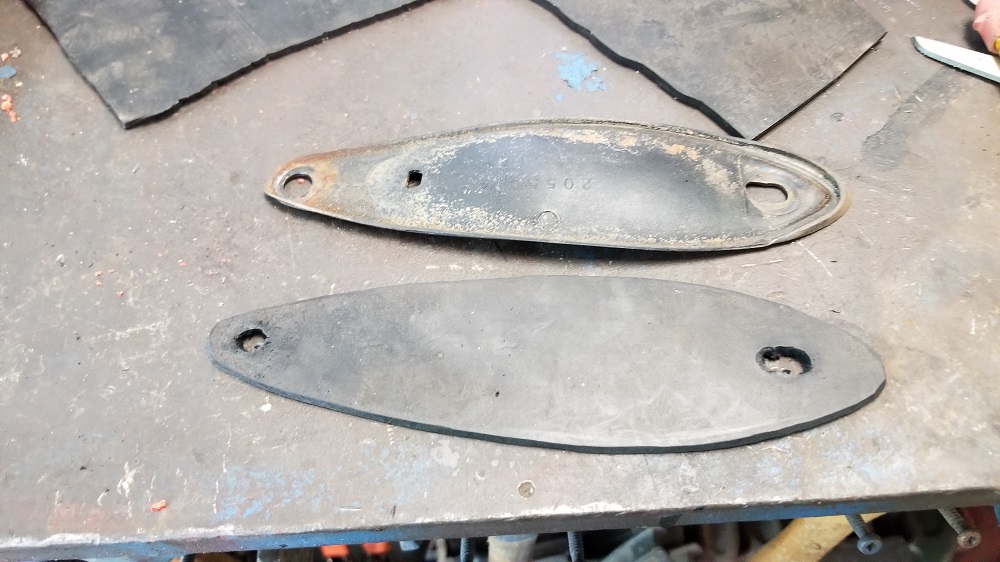
I had a few minutes to make new gaskets for the wing. I don't know where this sheet of rubber came from, but it was the perfect thickness. With the old gaskets as a pattern, I used scissors to cut out the new ones then the bench grinder to smooth and bevel the edges. Worked great.
My OE gaskets would still work, but the material has become very hard over the years.
[This message has been edited by Quad Raider (edited 06-13-2018).]
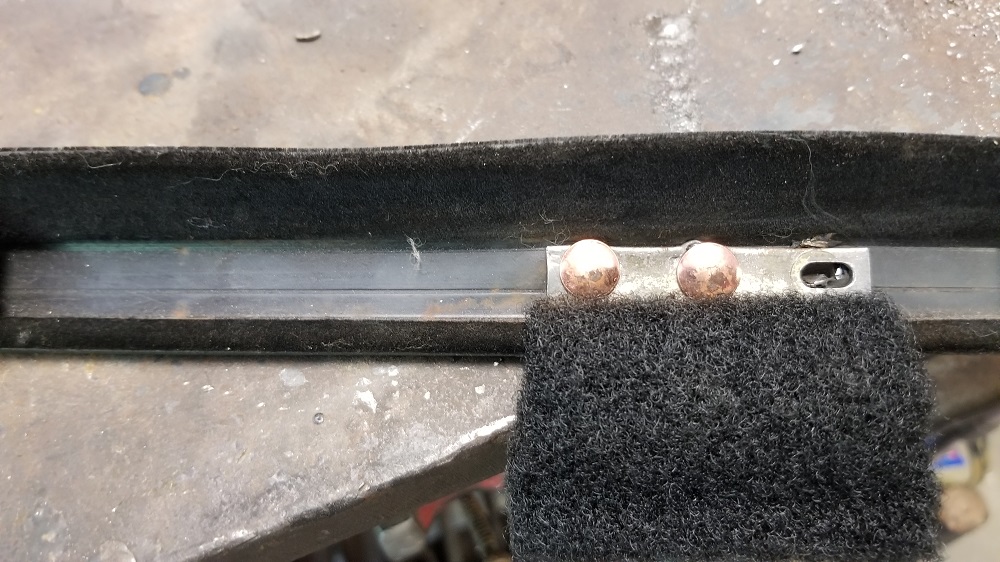
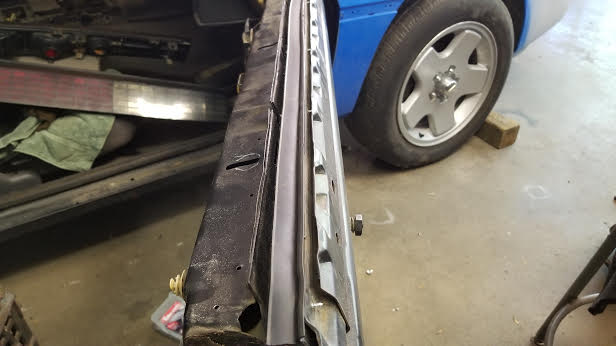
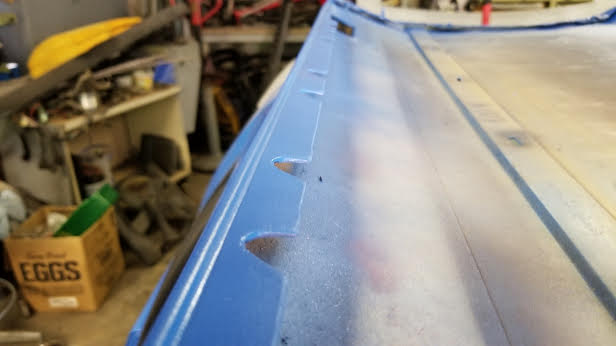
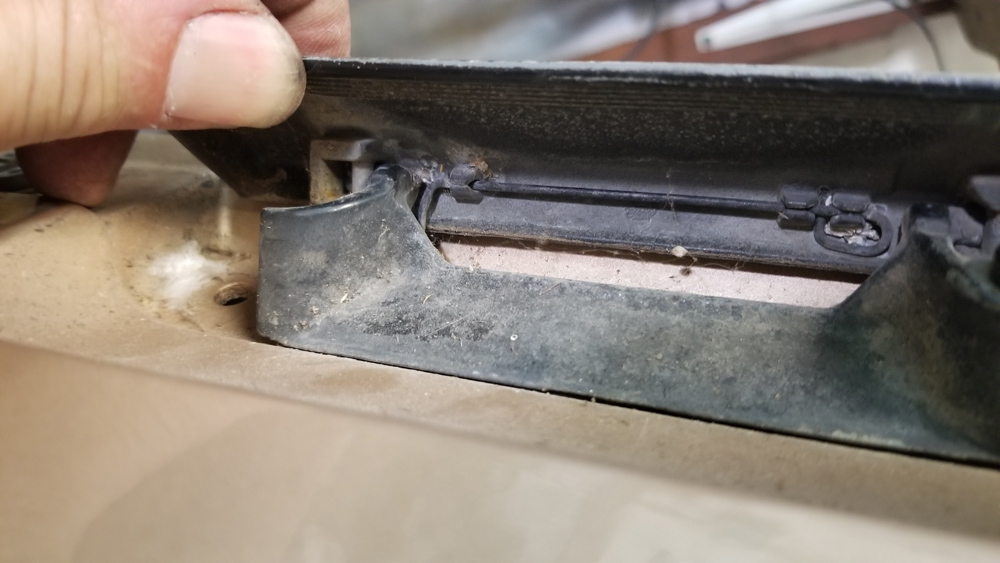
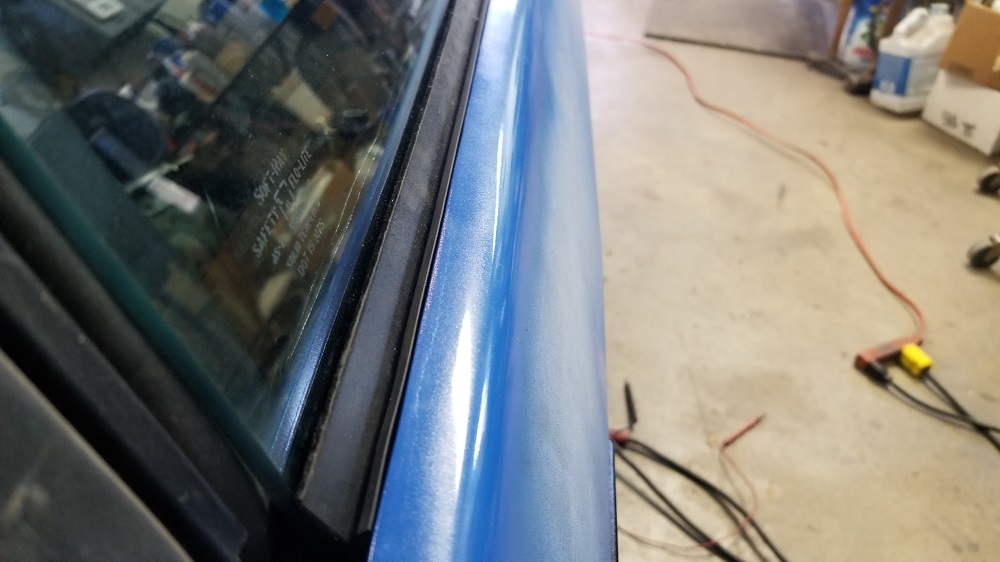
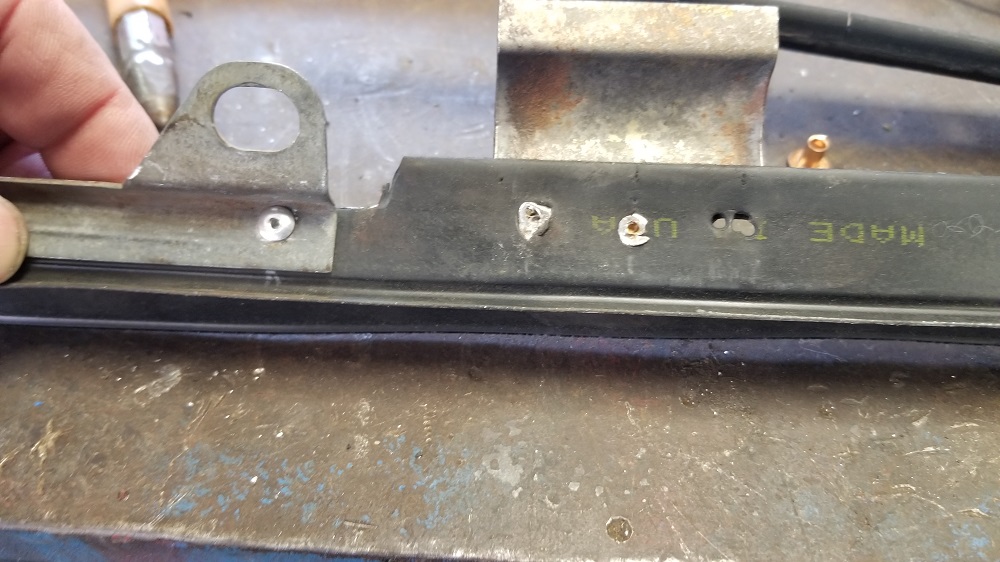
I installed my DIY dew wipe on the passenger door and decided to take some photos of the process. The wipes fit flush against the door frame now. The wipe is a little bowed in this photo, but once the window is installed it will push the wipe up against the metal.
I ground down the pop rivets, instead of drilling them out and using tinner's rivets to replace them. Tinner's rivets are the way to go, if you can find the right size. They're hollow on one end. The perfect size for this job would involve a rivet where the solid part ends inside the hole.
These rivets were a little too long.
I also ditched the original screws and went with these, since they have a bigger head.
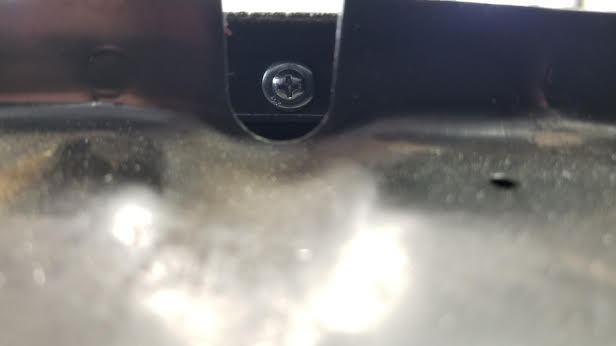
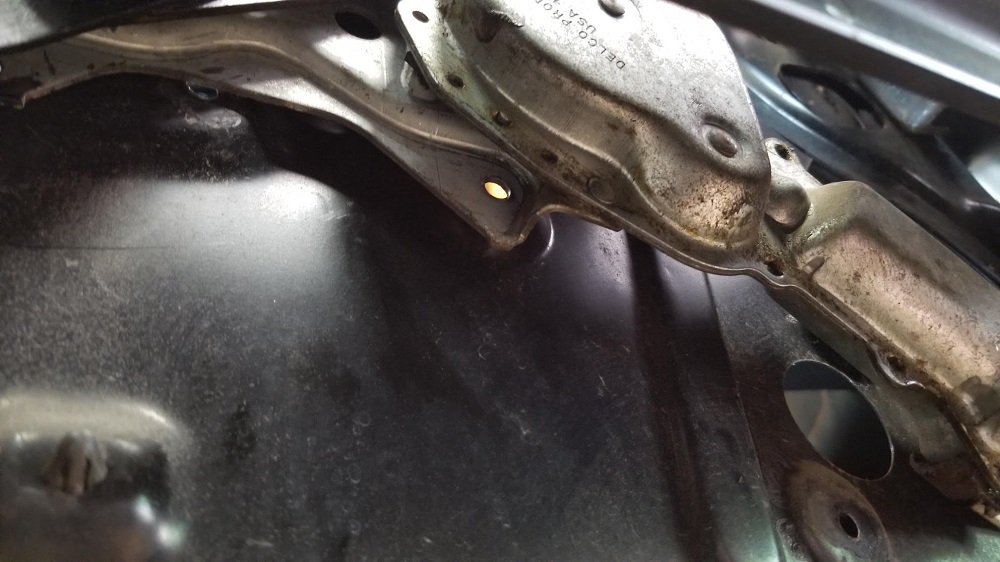
I was hesitant to use bigger screws because I worried they'd interfere with the door skins. No problem, the engineers put these little cutouts in the door skin to fit over the screws.
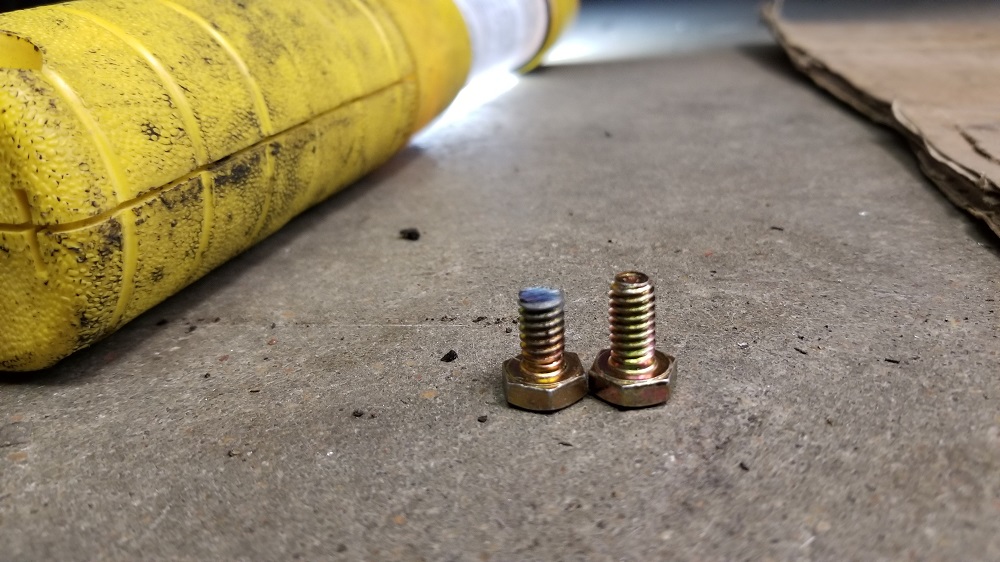
I used bolts and nylock nuts to attach the power regulator to the door. As I learned on the driver side door, one of the bolts has to be ground down to fit behind the motor casing.
I took about an 8th of an inch off of it.
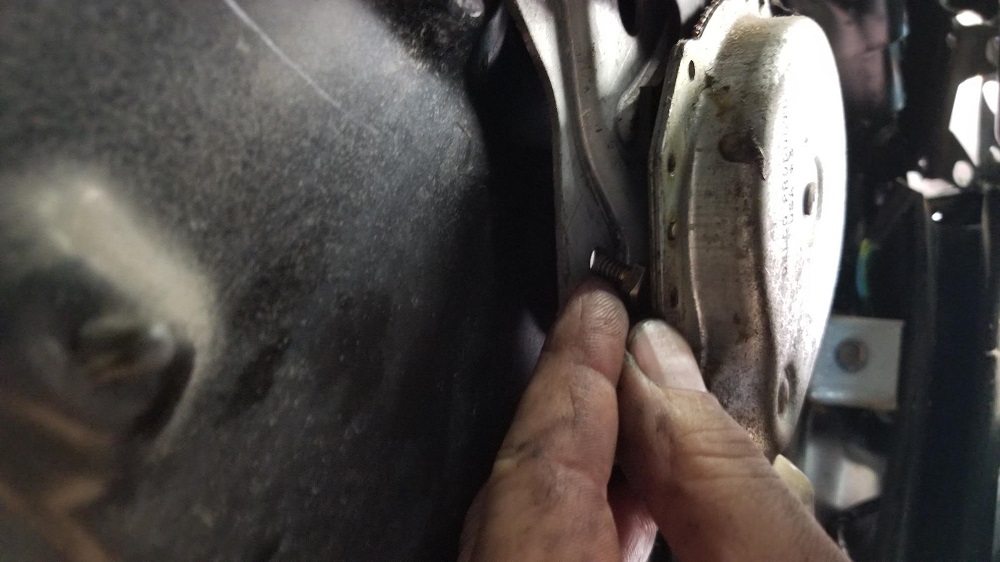
Still took some finagling but it fit.
The process is much easier with the door skin removed.
I installed the wiring harness for the door. I then spent 20 minutes fishing the two inner window felts out of that little pocket at the top of the door. What a pain.
I've misplaced one of the two plastic window stops so I'll have to remove one from one of my donor doors. After that will come installing the power lock mechanism and the braces, but I'll have to make a run to the hardware store because I ran out of nuts and bolts.
Once all that's done I can reinstall the door skins. Then I'll be ready to do one final wet sand of the car, mask and paint.
After that, I think I'll switch to the interior. I need to pull the dash, to run the wiring for the power equipment in the doors, but also to build a drink holder/glove compartment where the map pocket used to be. I also need to re-cover the headliner.
Two setbacks to report, as I attempt to reassemble the body to prepare for paint. Both involve the doors.
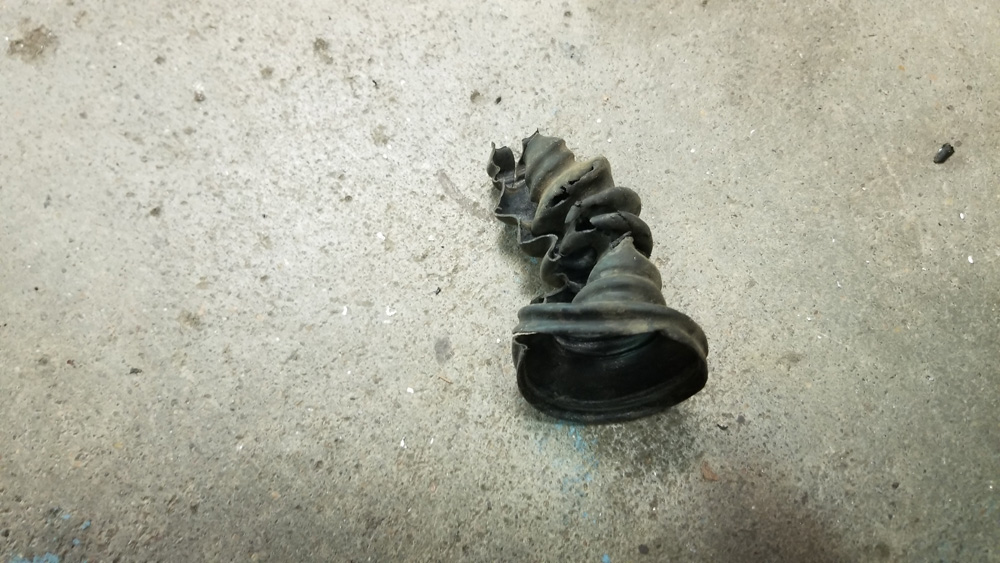
As I was attaching the bracket that holds the power lock actuator, I remembered that I had to enlarge the mounting holes to accept the bolts. As I drilled out the holes, the bit caught the rubber boot and shredded it. Now the boot looks like Dumbledore's hat.
I'll try to find a replacement at the salvage.
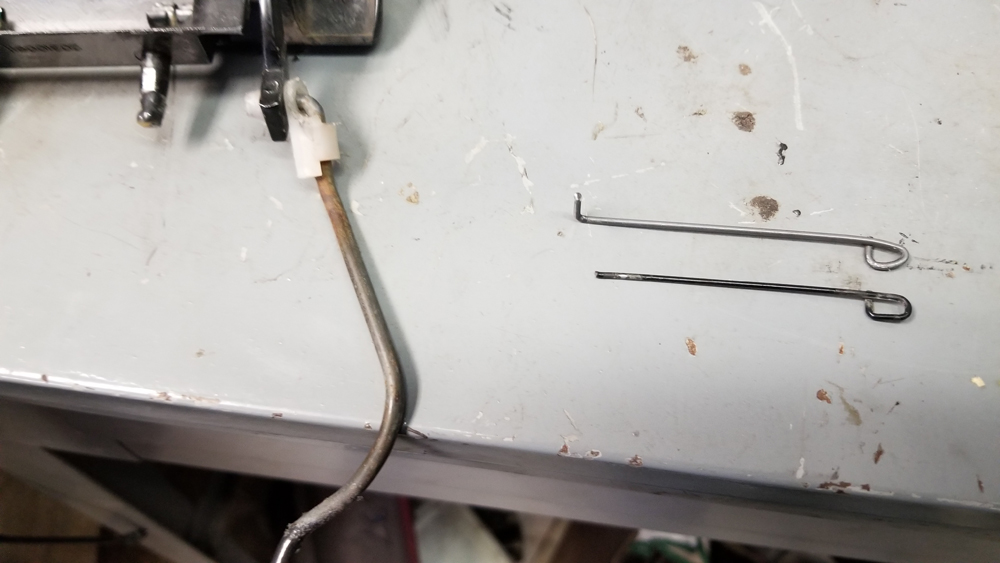
After that minor fiasco, I started cleaning up my door handles and the spring on the driver's side door broke.
I made a replacement spring out of a lawn mower spring.
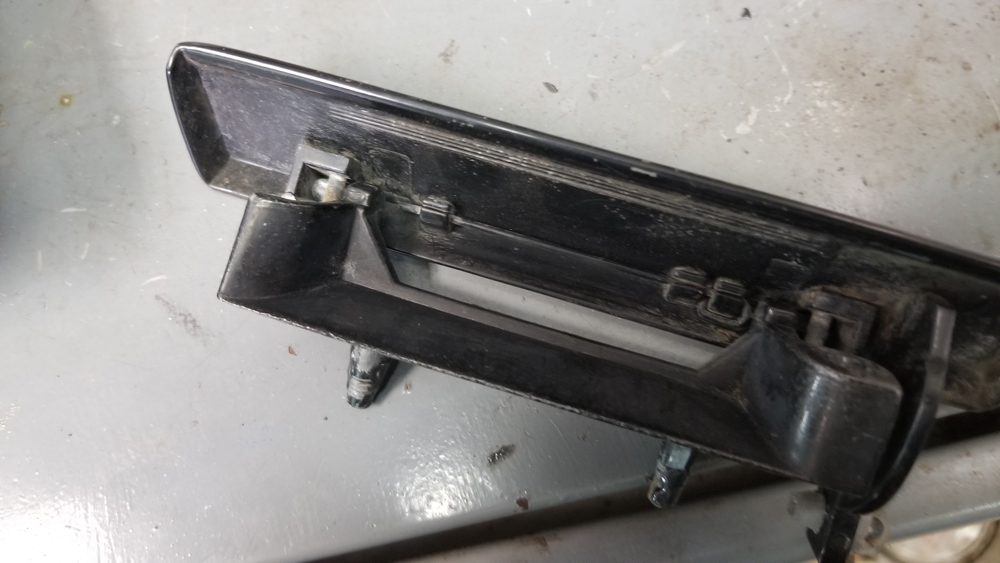
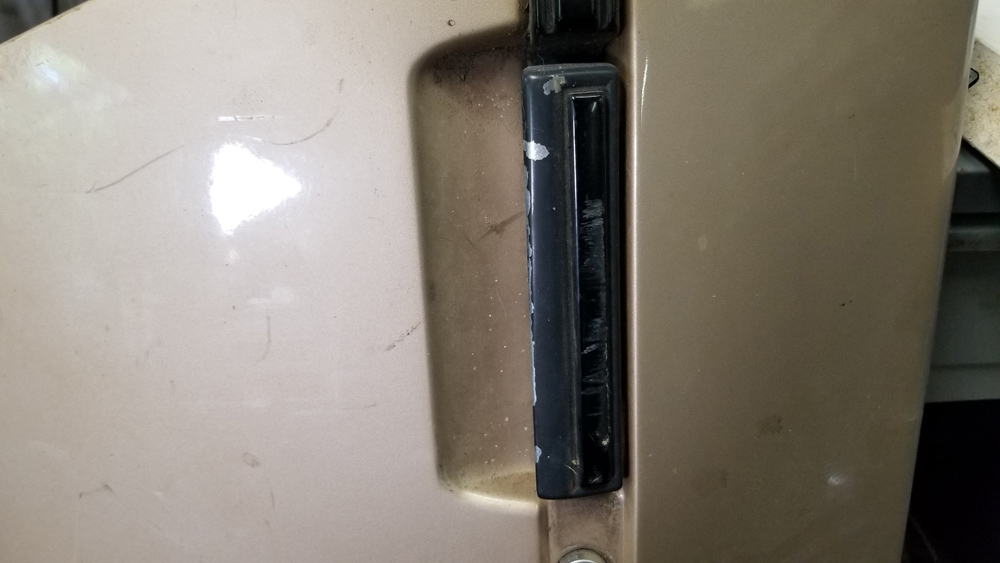
Everything was fine until I tried bending the tabs back into place over the replacement spring and they broke off. So that means using the handle from my salvage yard door. Because it's off an '86, it has the grooved molding, which for the door handle means a strip of flexible plastic glued to the middle of it. I pried it off but in the process decided the handle needs to be repainted.
I checked the other door handle and discovered it also had the same plastic strip glued to it.
[This message has been edited by Quad Raider (edited 06-19-2018).]
Had a little time over the weekend to reassemble more parts. While preparing to put the hood back on, I noticed that the broken headlight frame I'd repaired years ago was cracked again. This was one of the first repairs I ever made on the car.
I don't have the capability to weld aluminum, so I did the next best thing, I used JB Weld. After I rebuilt the headlight motors and made this repair, I tested the headlights about 10 times before moving onto more serious issues. The epoxy must have cracked during that testing.
Luckily, I grabbed the headlight assemblies from an '88 in the salvage last summer so I changed out the motors and installed the left side.
I have so much of the car disassembled I don't have an easy way to test the lights again.
Here are some photos of the strips on the door handles I mentioned before. My car has smooth molding so the door handles should be plain. When I removed the passenger side handle I was surprised to find a plastic strip on it. It's similar to but narrower than the strips on my salvage yard doors, which came from an '86 GT.
This picture shows my OE driver's side handle, with the two strips removed from the other handles.
I got the door skins reinstalled, but I'm not happy about how they fit, so I'll be working on them more this week.
[This message has been edited by Quad Raider (edited 06-25-2018).]
Quick update. I'm in a holding pattern because I can't get my homemade outer dew wipes to fit correctly. The outer edge of the dew wipe is supposed to fit over the top edge of the door. I must've drilled the mounting holes in the wrong location, because my wipes are too low.
I used the old wipes as patterns, so I have no idea how I messed this up. I figure my options are either biting the bullet and buying new wipes from The Fiero Store or drilling new holes in the door, unless someone knows a secret I'm missing.
While dealing with this process, I learned the small section of body trim has to be applied to the door skin BEFORE the skin is installed.
I searched all over the shop for that section, including my big Fiero parts bins and extra boxes. I finally found it, in the plastic container I used for all of the parts of the door when I originally took them apart last summer. I was so disgusted with the whole process I just left.
Summer has arrived in Oklahoma in all its humid grossness: Temps in the 90s with dew points of infinity. That means pretty much any excuse to stop working and go home to the AC is a good one.
I spent a couple hours in the shop today trying to get the passenger side dew wipe to fit up over the door skin. I carefully checked it with the OE wipe and confirmed that I drilled the holes 1/16 to 1/8 of an inch too high. I also noticed that the OE wipe is cupped along the length, with the concave part facing the door skin.
My plan is to buy new raw material and an industrial hole punch and start over.
Also today, met another Fiero family. My wife and son and I were out for a drive when I took the scenic route home from Collinsville, which is about eight miles from home. We were surprised to see a silver Fiero sitting in the driveway of a very nice home. I stopped to take a photo and we saw the homeowner mowing the lawn, so my family urged me to get out and say hi.
We spoke to the gentleman for about 20 minutes. The silver Fiero is an ‘88 coupe. He also had a black ‘88 in the garage. He had bought the black one for his 16-year-old son and discovered it has more issues than the seller admitted to. He bought the silver one because it was drivable and he got a good deal on it. He got into Fieros specifically because his son wanted one. How cool is that?
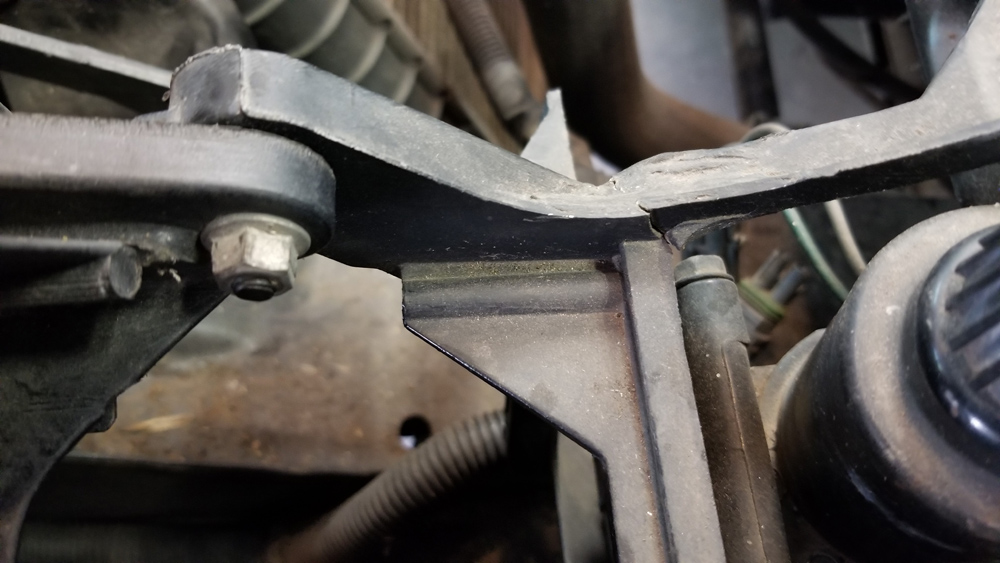
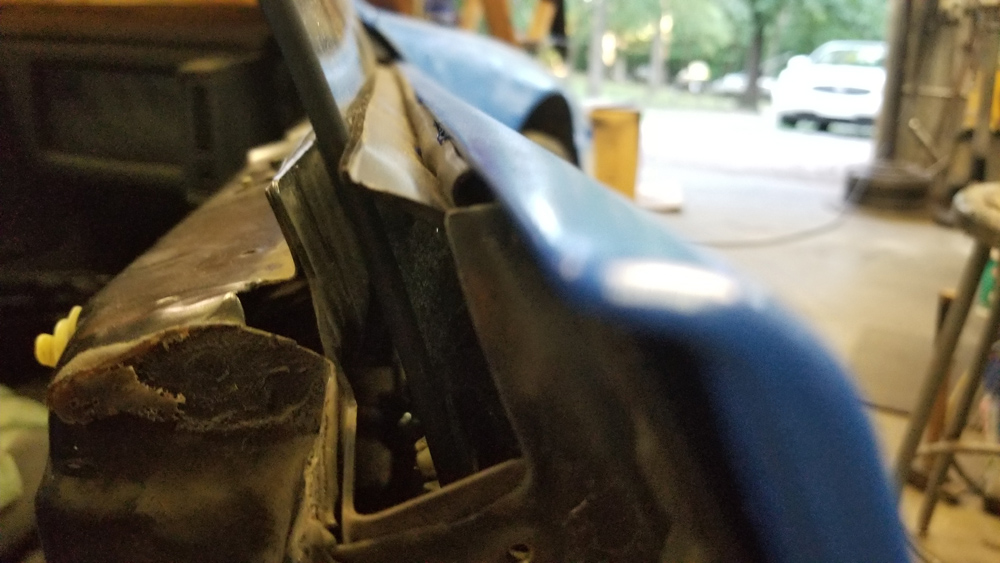
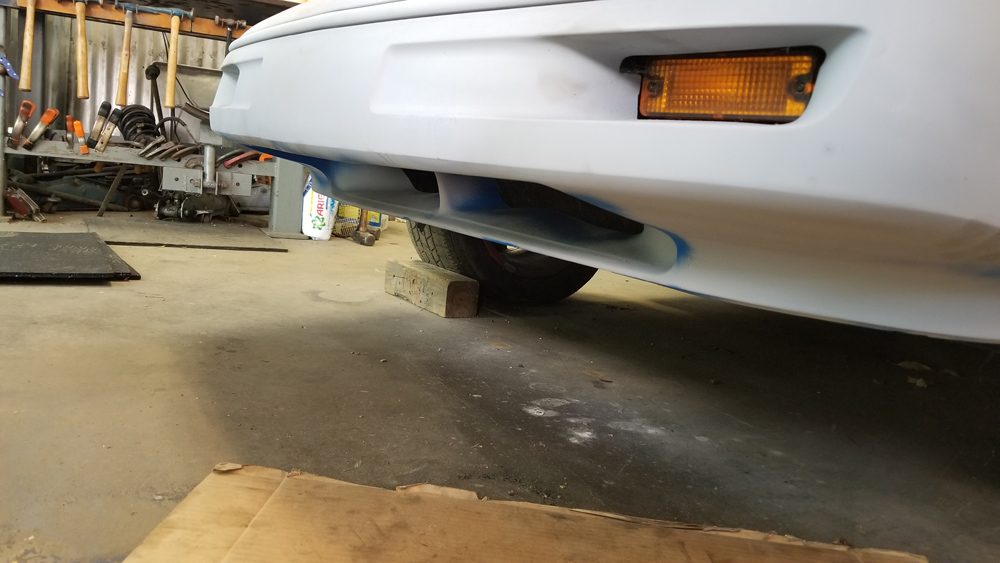
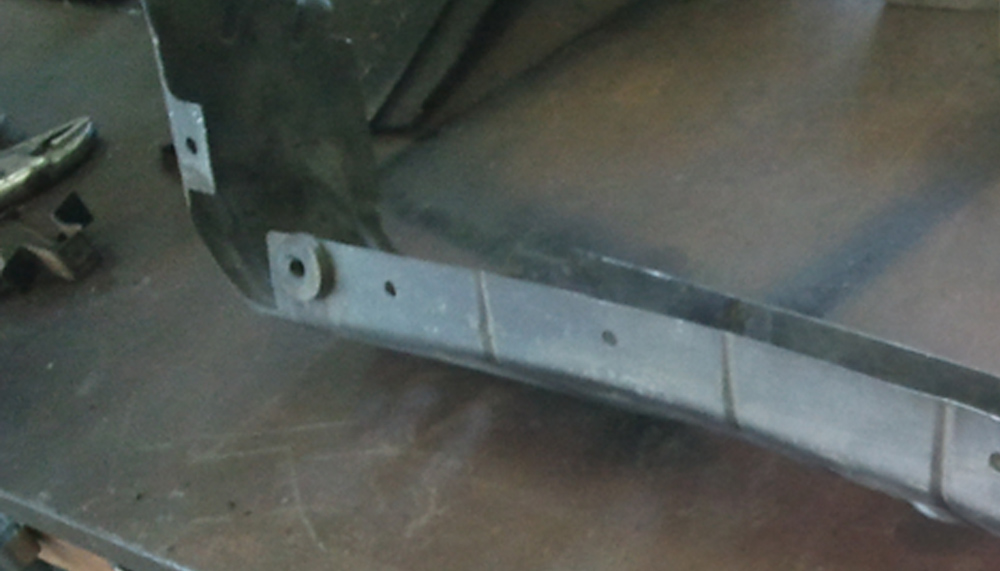
Haven't done much to the car recently for a variety of reasons. I'm trying to source dew wipe material locally but haven't had time to do a thorough search. In the meantime I can demonstrate how I fixed the sag in my front fascia. I tried using a piece of aluminum but it seemed too heavy so I worried it would cause more problems than it solved. I ended up using a ceiling fan blade and riveted it to the fascia. The fascia still had some sticky fiberglass resin on the back side from where I tried to attach the aluminum plate.
I will probably use a Dremel to trim the stiffener back even more, but no one but me will ever know it's there.
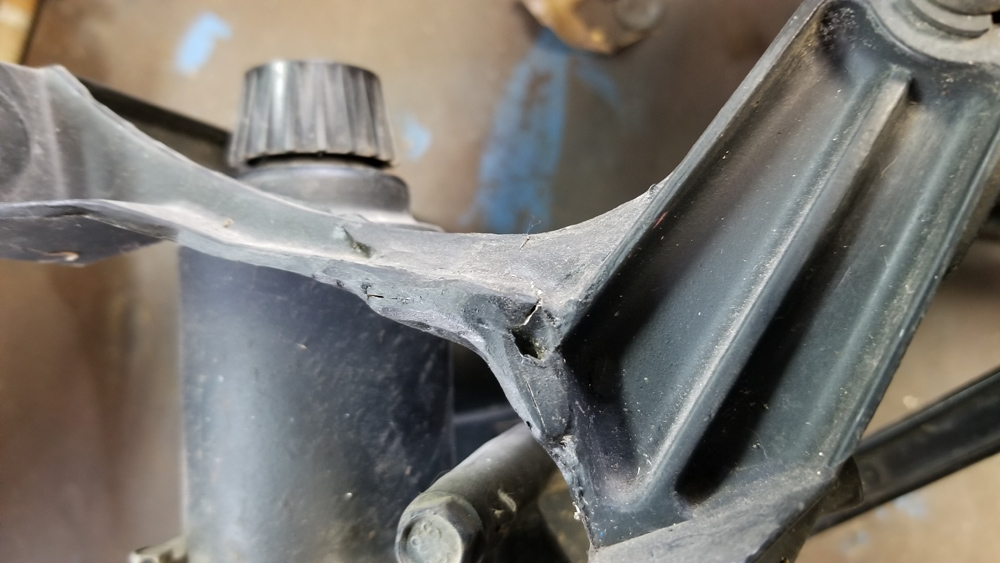
I learned during this process that the fascia can never be, and probably wasn't meant to be, perfectly flat everywhere. But this fix was easy and I'm satisfied with the result. It looks so much better than it did when I got the car home.
The Pontiac emblem in the photo is just resting there. I pulled it off the trunk of a G6 in the salvage yard on a brutally hot day last week. I've seen other forum members use one but wasn't sure if I liked the look. I do.
[This message has been edited by Quad Raider (edited 07-17-2018).]
Work on the car has been at a standstill for a variety of reasons, one of which is my annual early August vacation. Something Fiero-related happened on the trip and I posted it in a separate thread:
quote
Originally posted by Quad Raider:
"Fiero guy?" the security guard asked me. The question surprised me so much all I could say was, "What?"
"Fiero guy?" he asked again. I just started laughing and finally said, "Is it that obvious?" He smiled then said, "You're not the first."
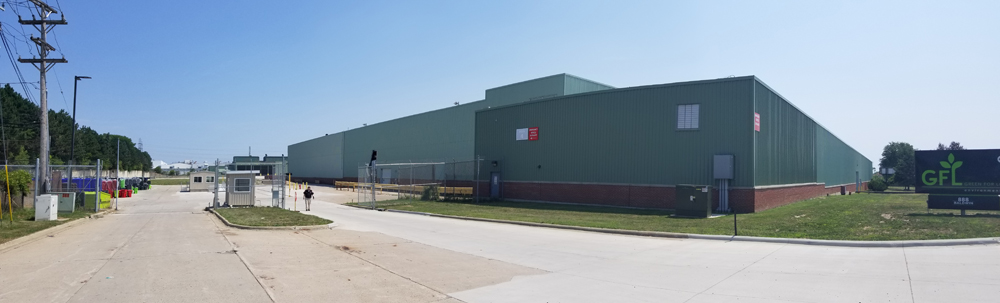
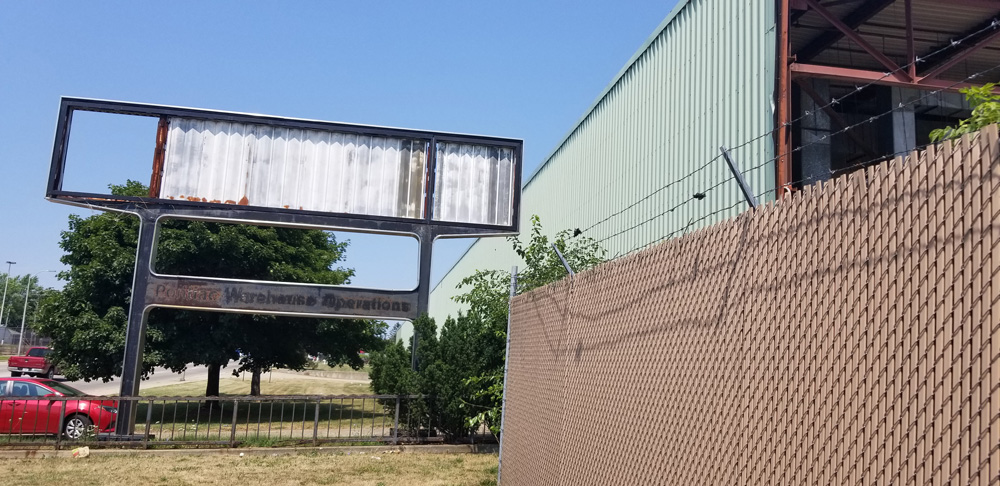
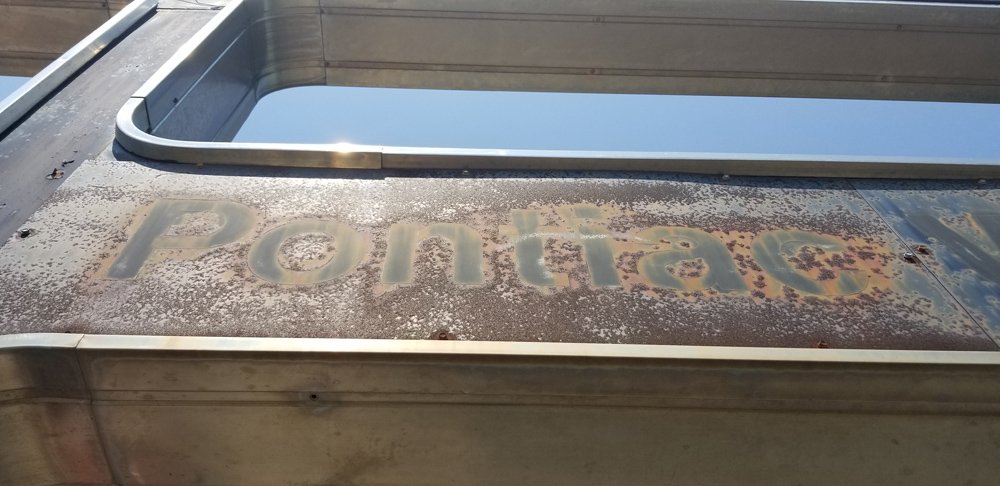
My wife and I had made a detour to the Detroit area on our yearly trip from Oologah, Oklahoma to visit my sister in southeast Pennsylvania. On the afternoon of Saturday, August 4th, 2018, I parked our rental car in that little side driveway outside the old Fiero factory at 900 Baldwin Avenue in Pontiac and got out to take pictures of the sign.
After a few minutes I moved the car to the north end of the building and was snapping more photos when the security guard finally walked up to me. I told him I'd bought my Fiero in January of 2011 but still hadn't gotten it on the road. "You will," he said. I laughed again and thanked him.
I took some more photos then got back in the car and headed south on Baldwin to resume the trip. About a hundred yards south of the factory a red GT in excellent condition passed us headed north. My wife and I started laughing at the serendipity.
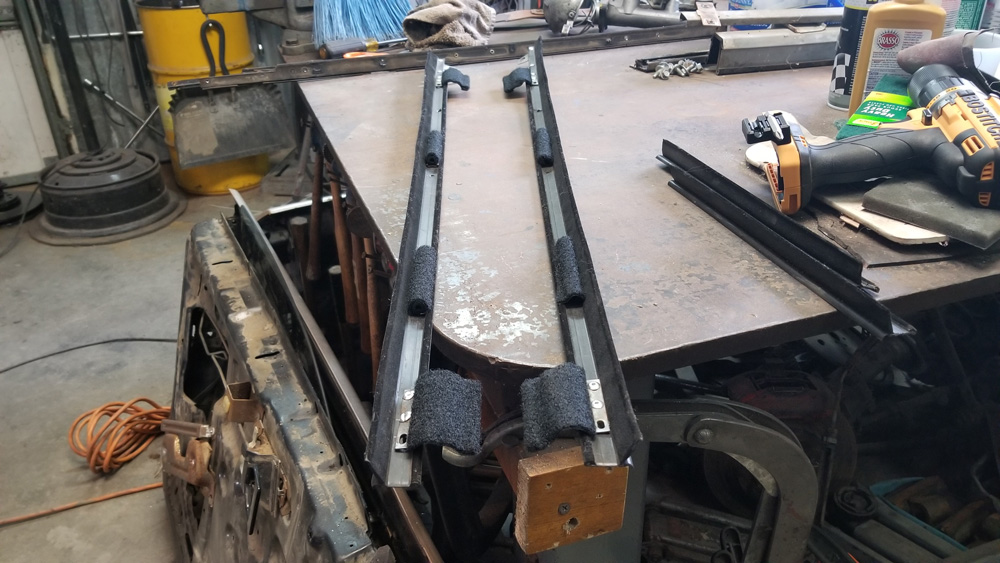
I'm slowly getting back into the groove. Still planning to make a new set of outer dew wipes, but haven't gotten around to ordering the raw material. In the meantime there's always more sanding to do on body panels.
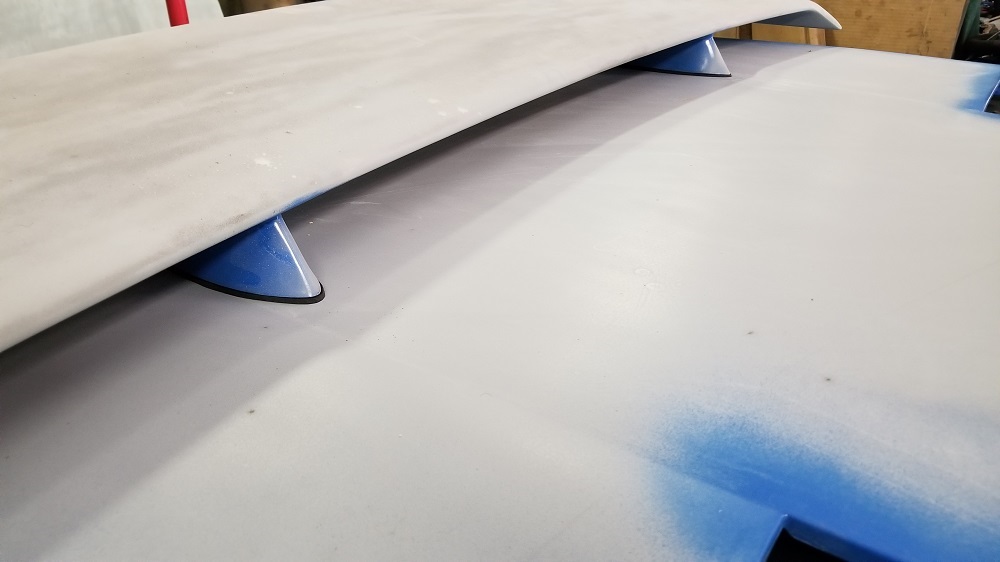
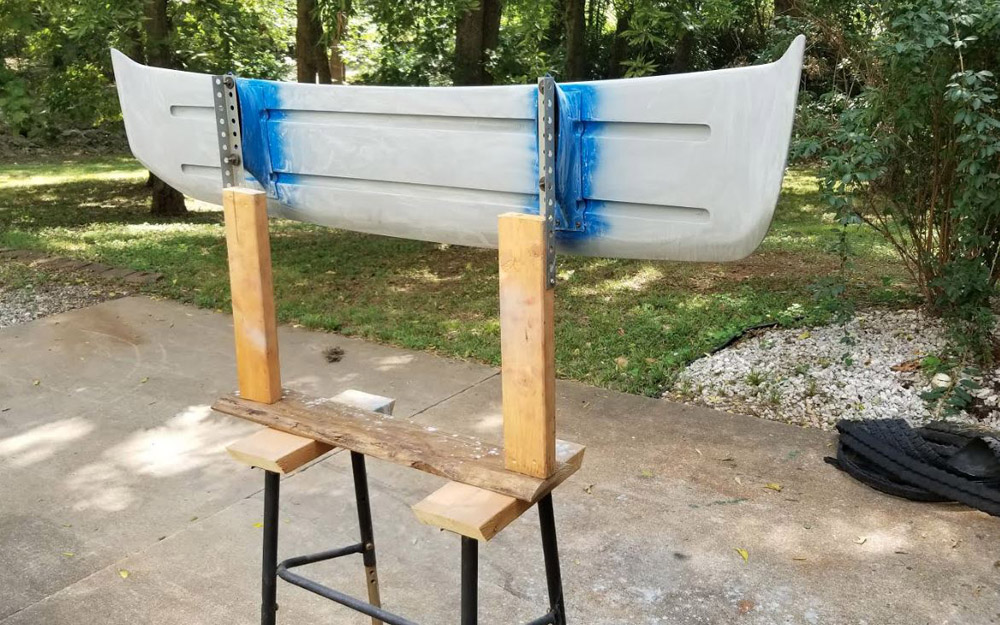
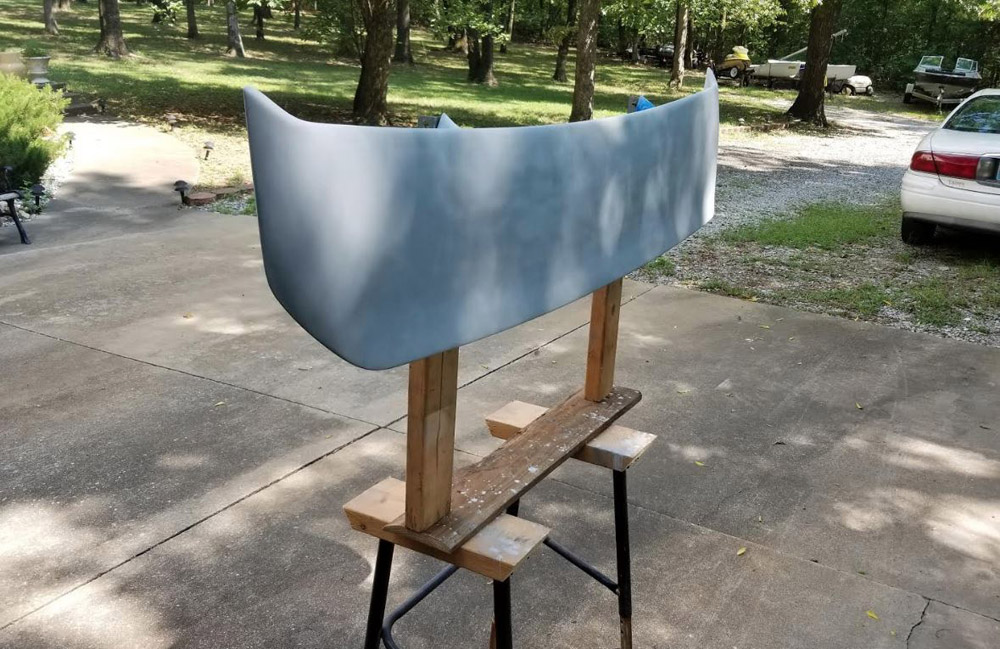
The last part to be primed and sanded is the wing. I didn't realize how big the wing is until I tried to sand and prime it. I came up with this mount to hold it. Anyone else have a better idea?
We're back to our usual August weather in Oklahoma, which means highs in the mid 90s and high humidity, and that makes it even tougher to get over to the shop to work. Here's to cooler, drier weather in the next couple of weeks. Of course, the arrival of fall means I'll be busy refereeing soccer again.
After almost three months, I'm back to work on the car, sort of. I'm on vacation this week so I have some time, but I picked up another project that I need to finish. My best friend's 2005 Ford F-150 needs new timing gears. He already bought a replacement truck so when I get this one fixed he'll sell it and share some of the money with me.
I ordered another set of dew wipe material and bought an industrial hole punch.
I'm a little nervous about punching the holes because I don't want to screw these up again. On the other hand, while moving the passenger side door skin around I got it to fit tighter to and lower on the door.
A couple of weeks ago when I had a few spare minutes, I tried to use the ratchet strap method to adjust the deck lid torsion springs. I'm adding a wing to my car, so I was browsing the forum one day and came across the instructions:
After reading through this whole thread, I could only thing I could think of was your name must be Murphy. I know I wouldn't have your patience to see this through. I admire your perseverance!
When you finally get your DIY dew wipes finished, would you consider posting a how-to thread with resources and all?
I redid my passenger side dew wipe and I'm still not happy with the results. The wipe sits up high enough for the rubber flange to fit over the top of the door, but there's still a gap. It appears tightening the screws is bending the wipe and forcing the rubber flange inboard so that it doesn't seal.
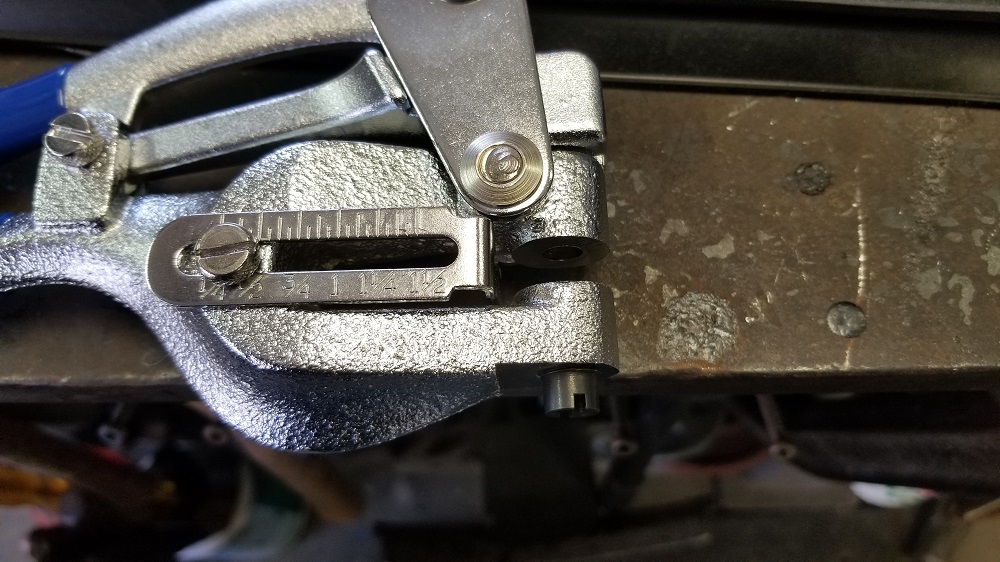
It was a very laborious process taking apart the first DIY dew wipe and getting the inserts and felts ready to be used for the second go-round. Buying the hole puncher was a good move, but it took me a few tries to get the hang of it.
The key to using it is being very careful when positioning it on the material. I used its guide on the OE wipe to get the placement of the holes.
I also used two sizes of rivets. Ace Hardware calls them tubular rivets. The smaller size is 1/8" by 1/4", the larger one is 3/16" by 1/4". The smaller size is for the mirror flange and the felts, the larger size is for the inserts.
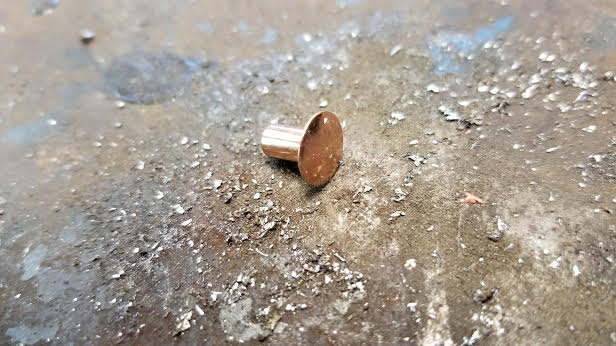
I used a chunk of plate in a vise as a backer and a punch to start spreading the end of each rivet. I flipped the punch over to finish flattening them. (This photo shows pop rivets in the mirror flange, but I removed them and used tubular rivets instead.
I thought I had posted a link to the thread where I learned about making my own wipes. Here's the link in case I didn't:
I may take the wipe off again and put some thin washers between it and the door to see if that helps. If it doesn't I'll buy new ones from the Fiero Store. For now I'm moving on to other tasks.
[This message has been edited by Quad Raider (edited 11-22-2018).]
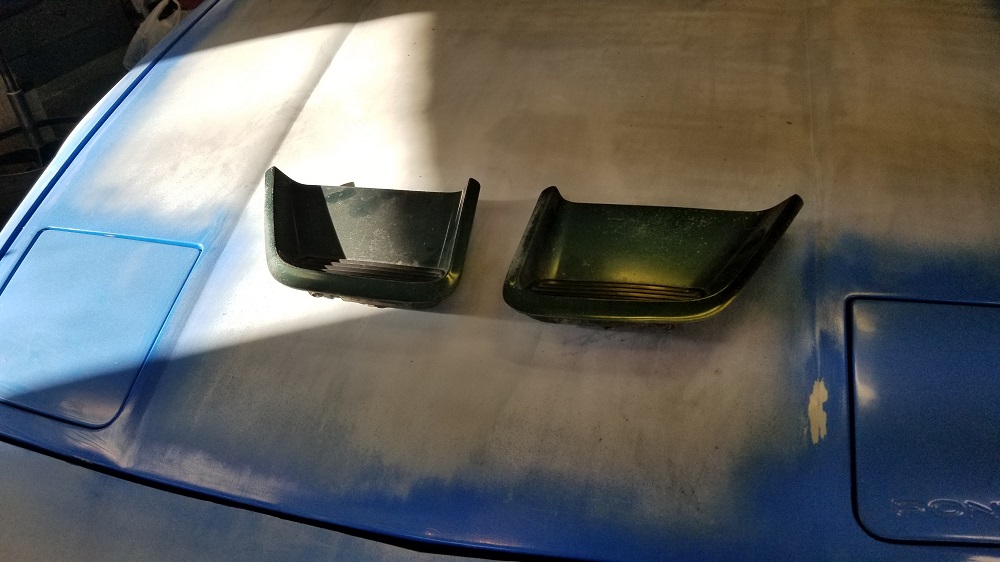
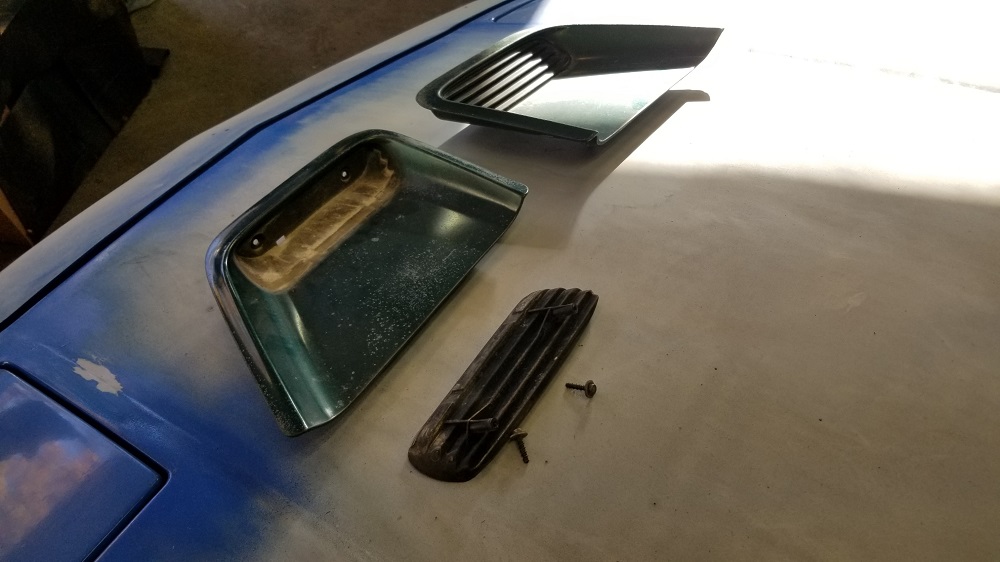
I spent some time in the salvage yard this week looking for parts for my wife's Grand Prix. I noticed a couple 90s model Firebirds with these non-functional hood-mounted heat extractors. Has anyone ever used these on a Fiero?
Since they're plastic it would be easy to cut an opening into them and glass them into/onto the hood. The yard charged me only $8 for both and there's another set if I need it.
My Quad tended to run hot when it was still in my GTZ so I'm concerned about keeping it cool in the Fiero. I've looked at a lot of different hood and decklid vents and only seen a couple I like.
I think these would be perfect if the edges were more parallet, like this:
I'm no expert at fiberglass or body work so this would be a massive amount of work. It's tempting to follow this tangent now as I prep the car for paint, but there's also a good argument for painting the car, finishing the other tasks and getting it on the road, then going back and doing tweaks.
[This message has been edited by Quad Raider (edited 11-22-2018).]


 What type of body parts does the '87 Fiero manual show then... just the GT aero style? Aren't the "formula-type body parts" (from '88) basically just the same as the '87 coupe body parts?