Yes I will post the process I’ll be using to produce the CF engine covers!
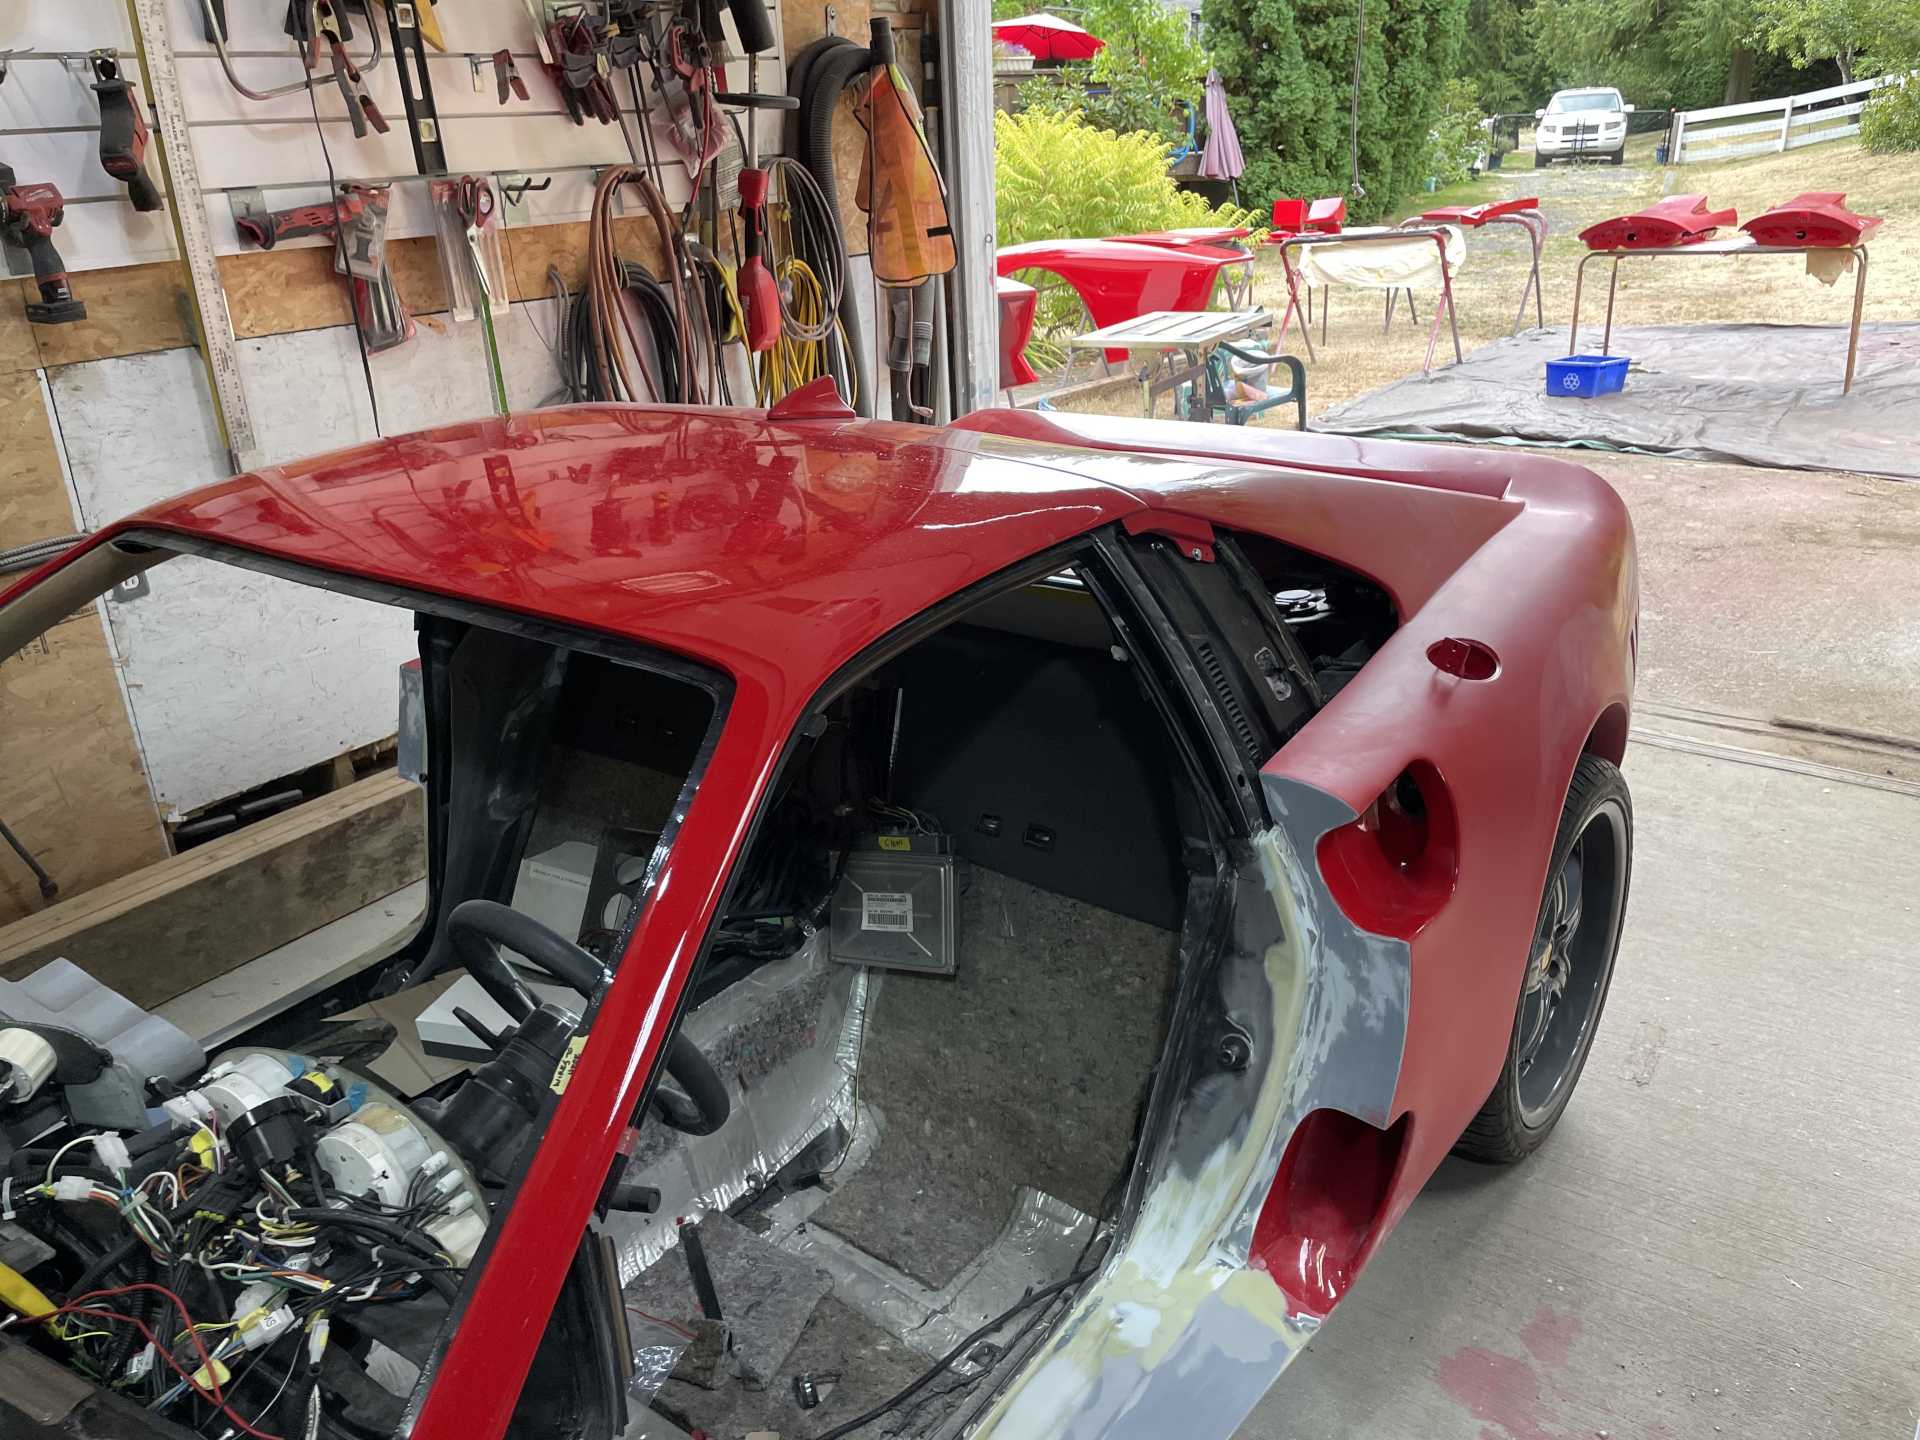
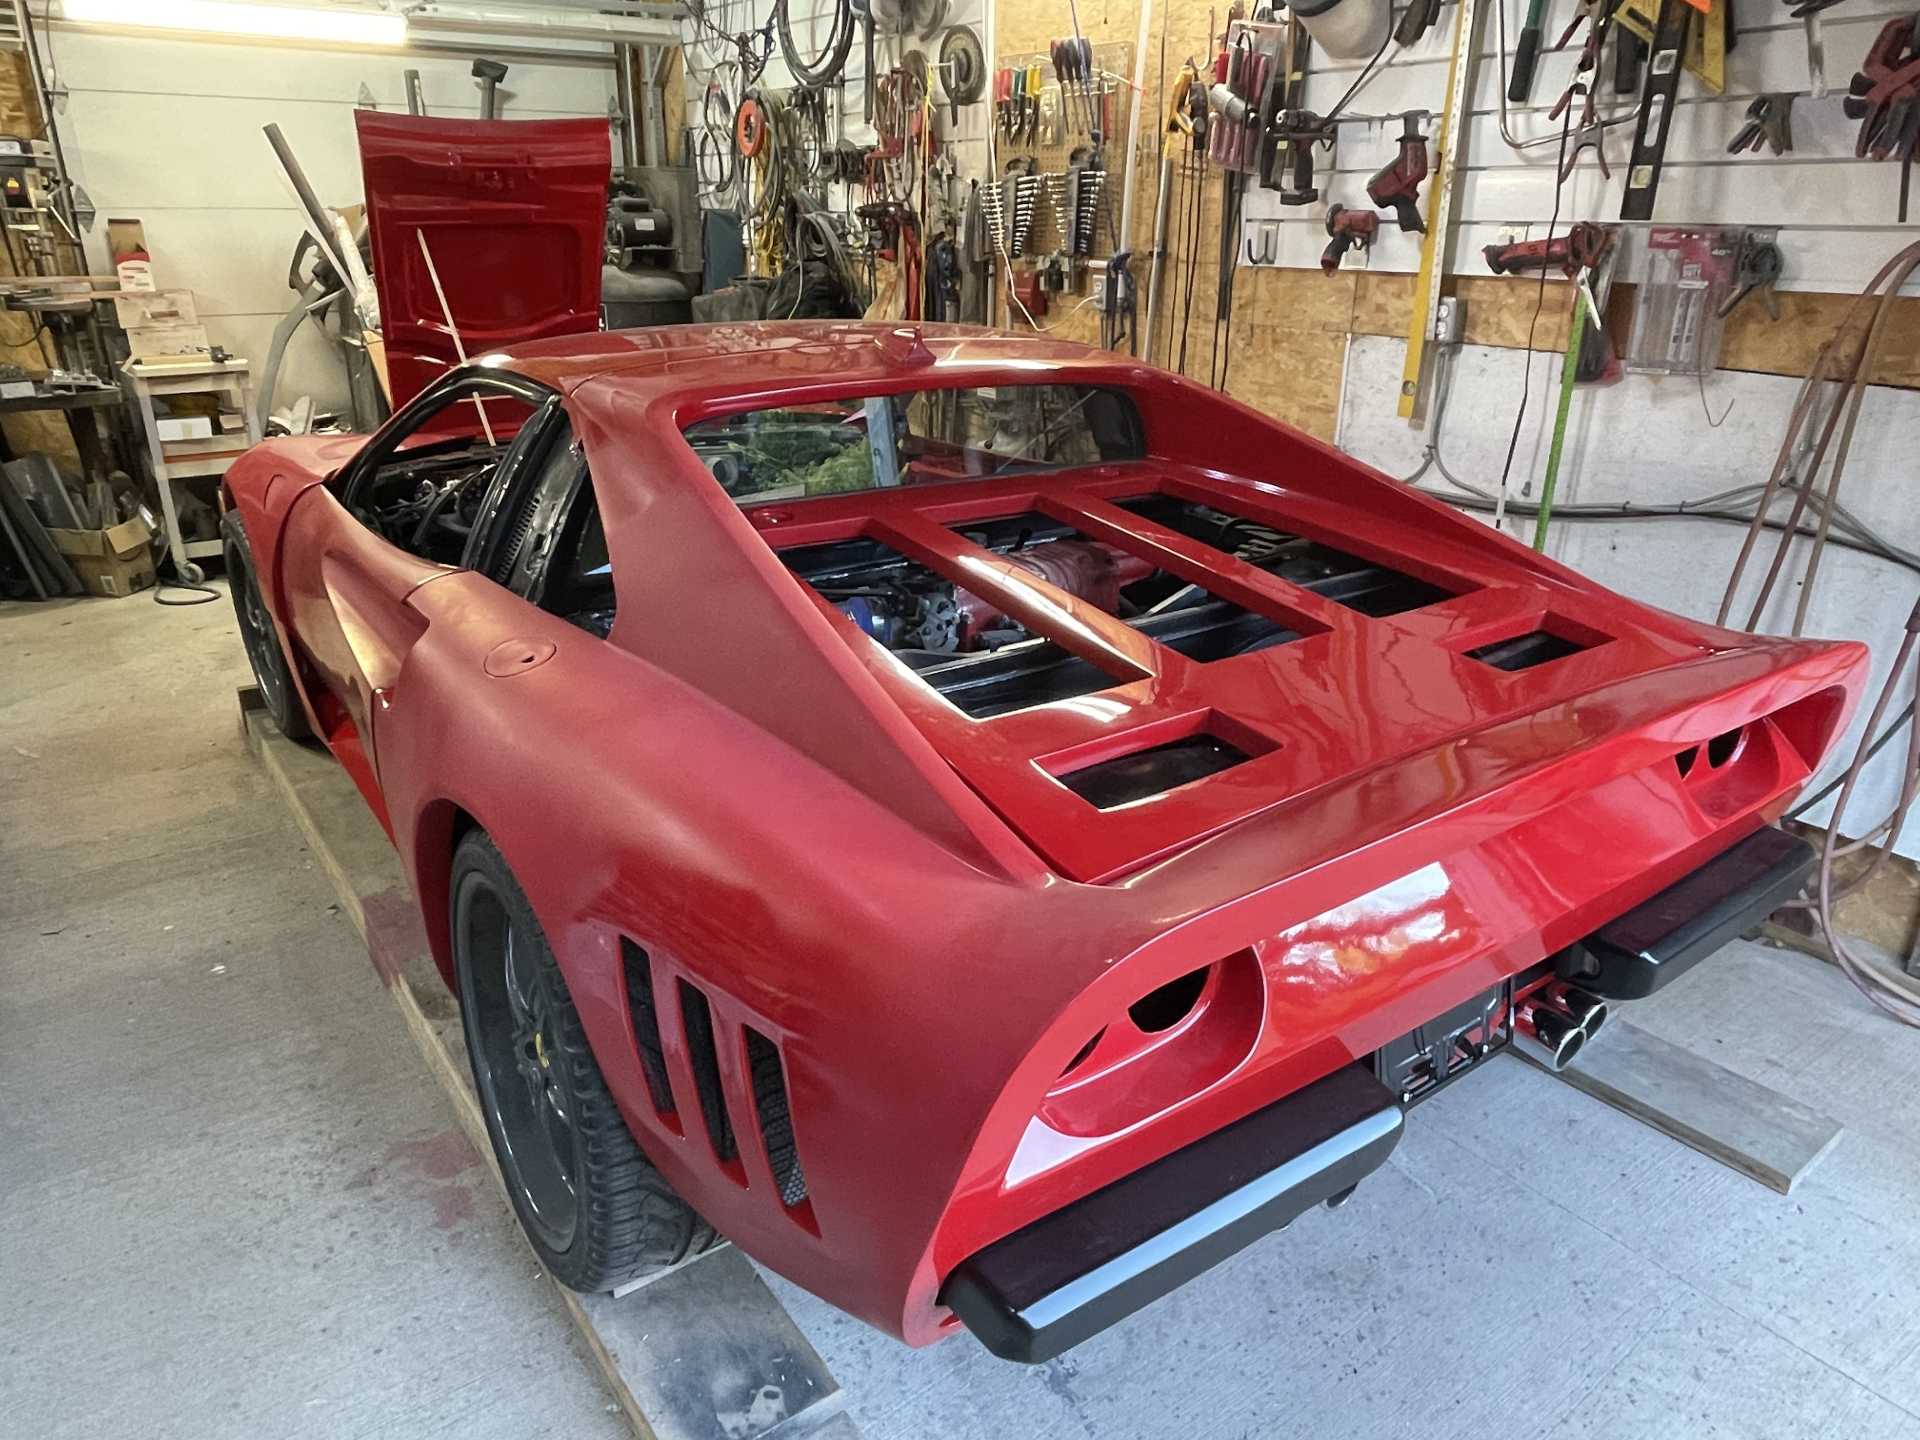
So with the help of a couple Good friends Don O. And Phil I’ve been able to cross off a bunch of things on my list to complete before the rear body is reinstalled for the last time. Phil is a certified welder and has been reattaching the part of the trunk I had cut out previously and welding the new floor into the trunk.
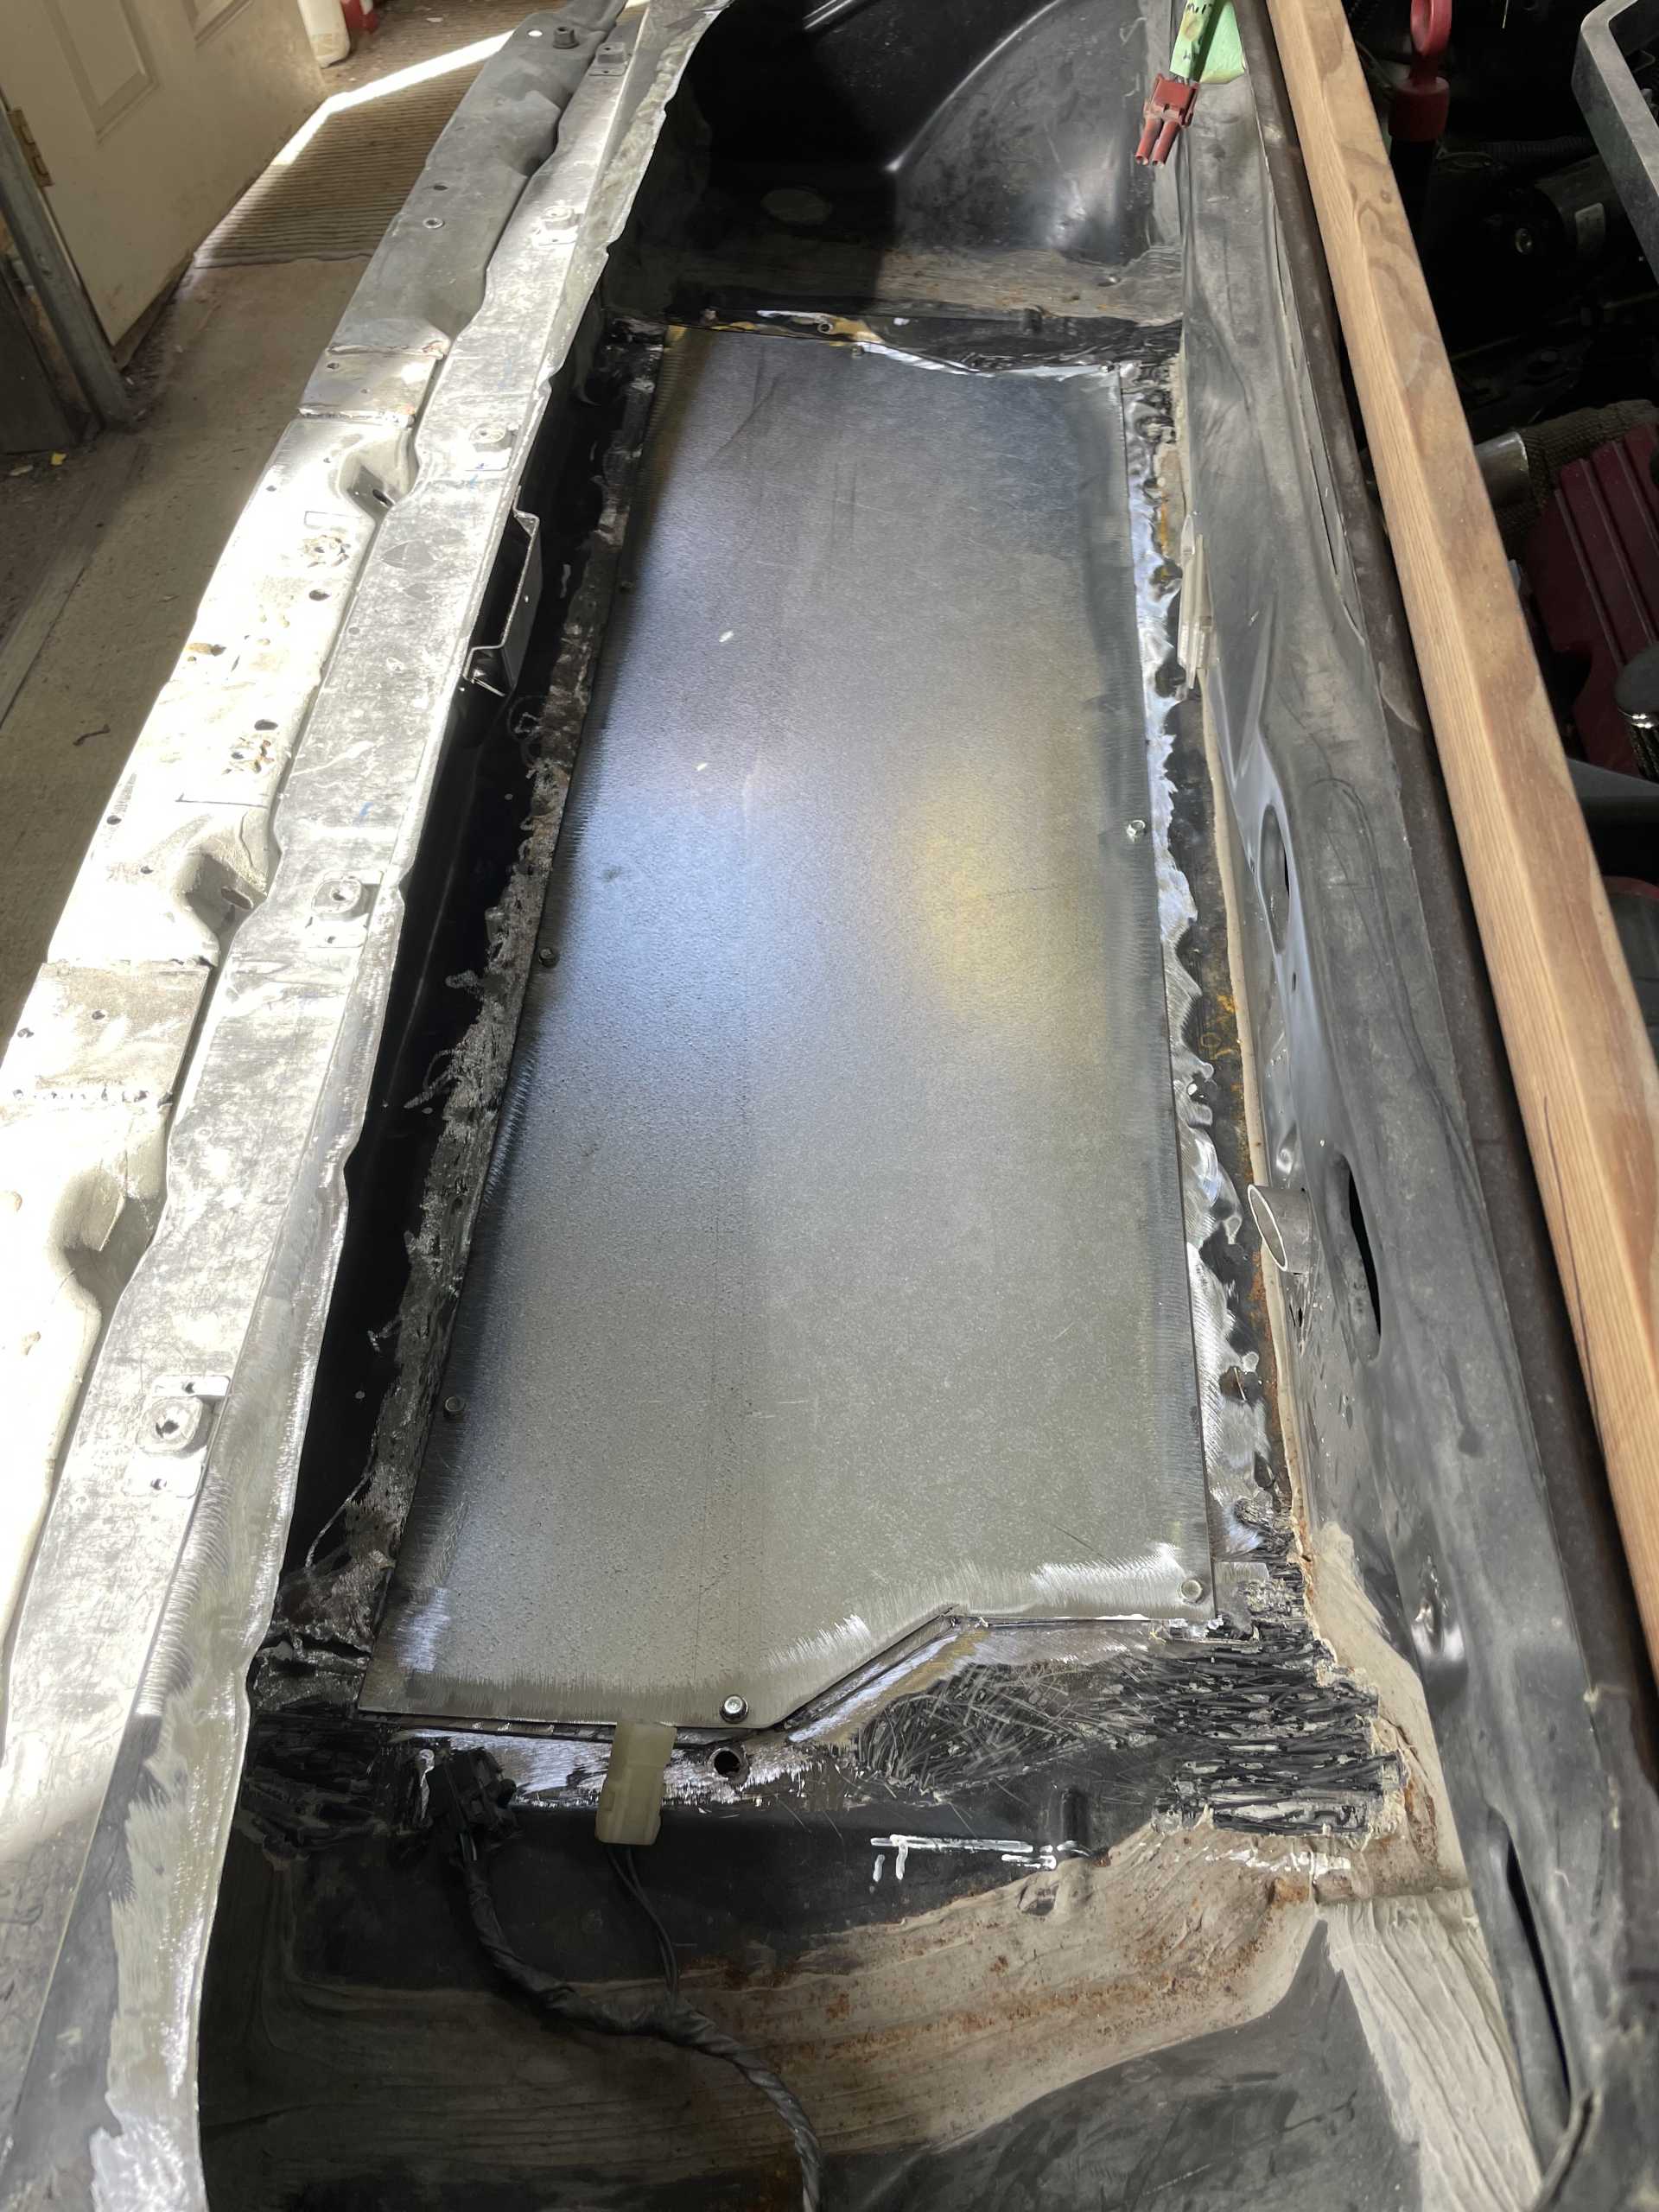
This is the new floor pan cut to size
This after it was tac welded in place, then fully welded
I seam sealed all the new panels
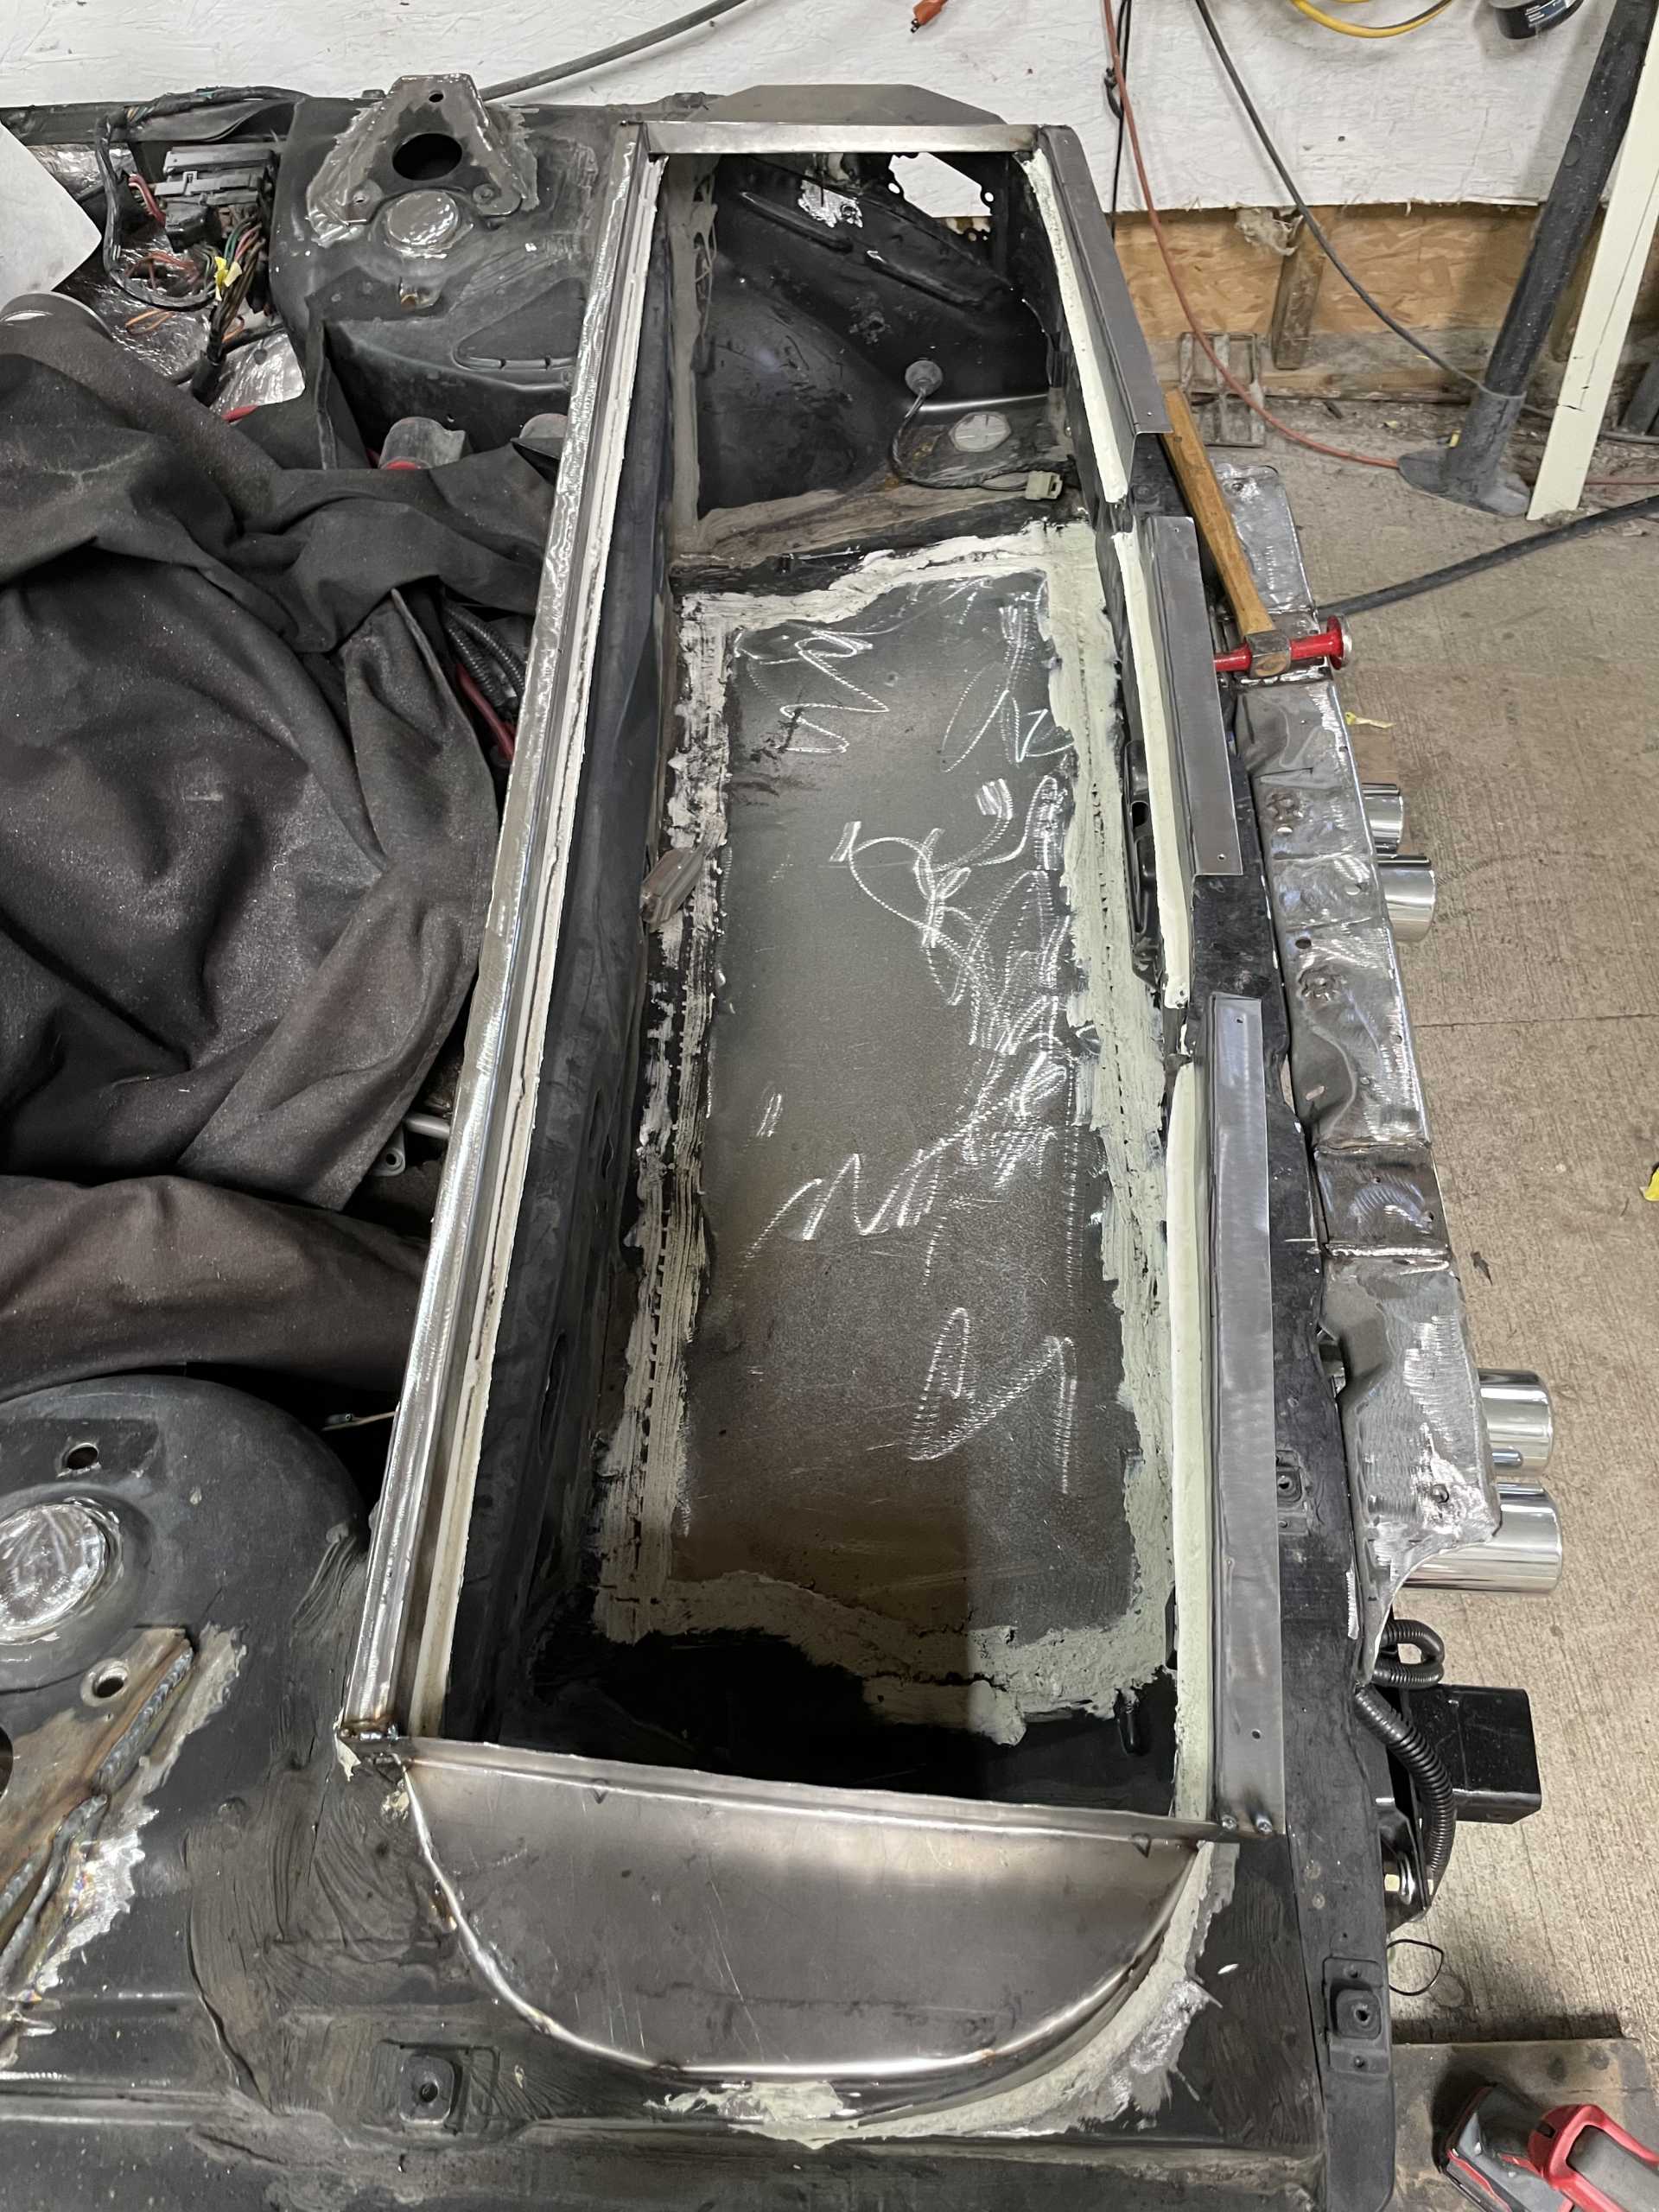
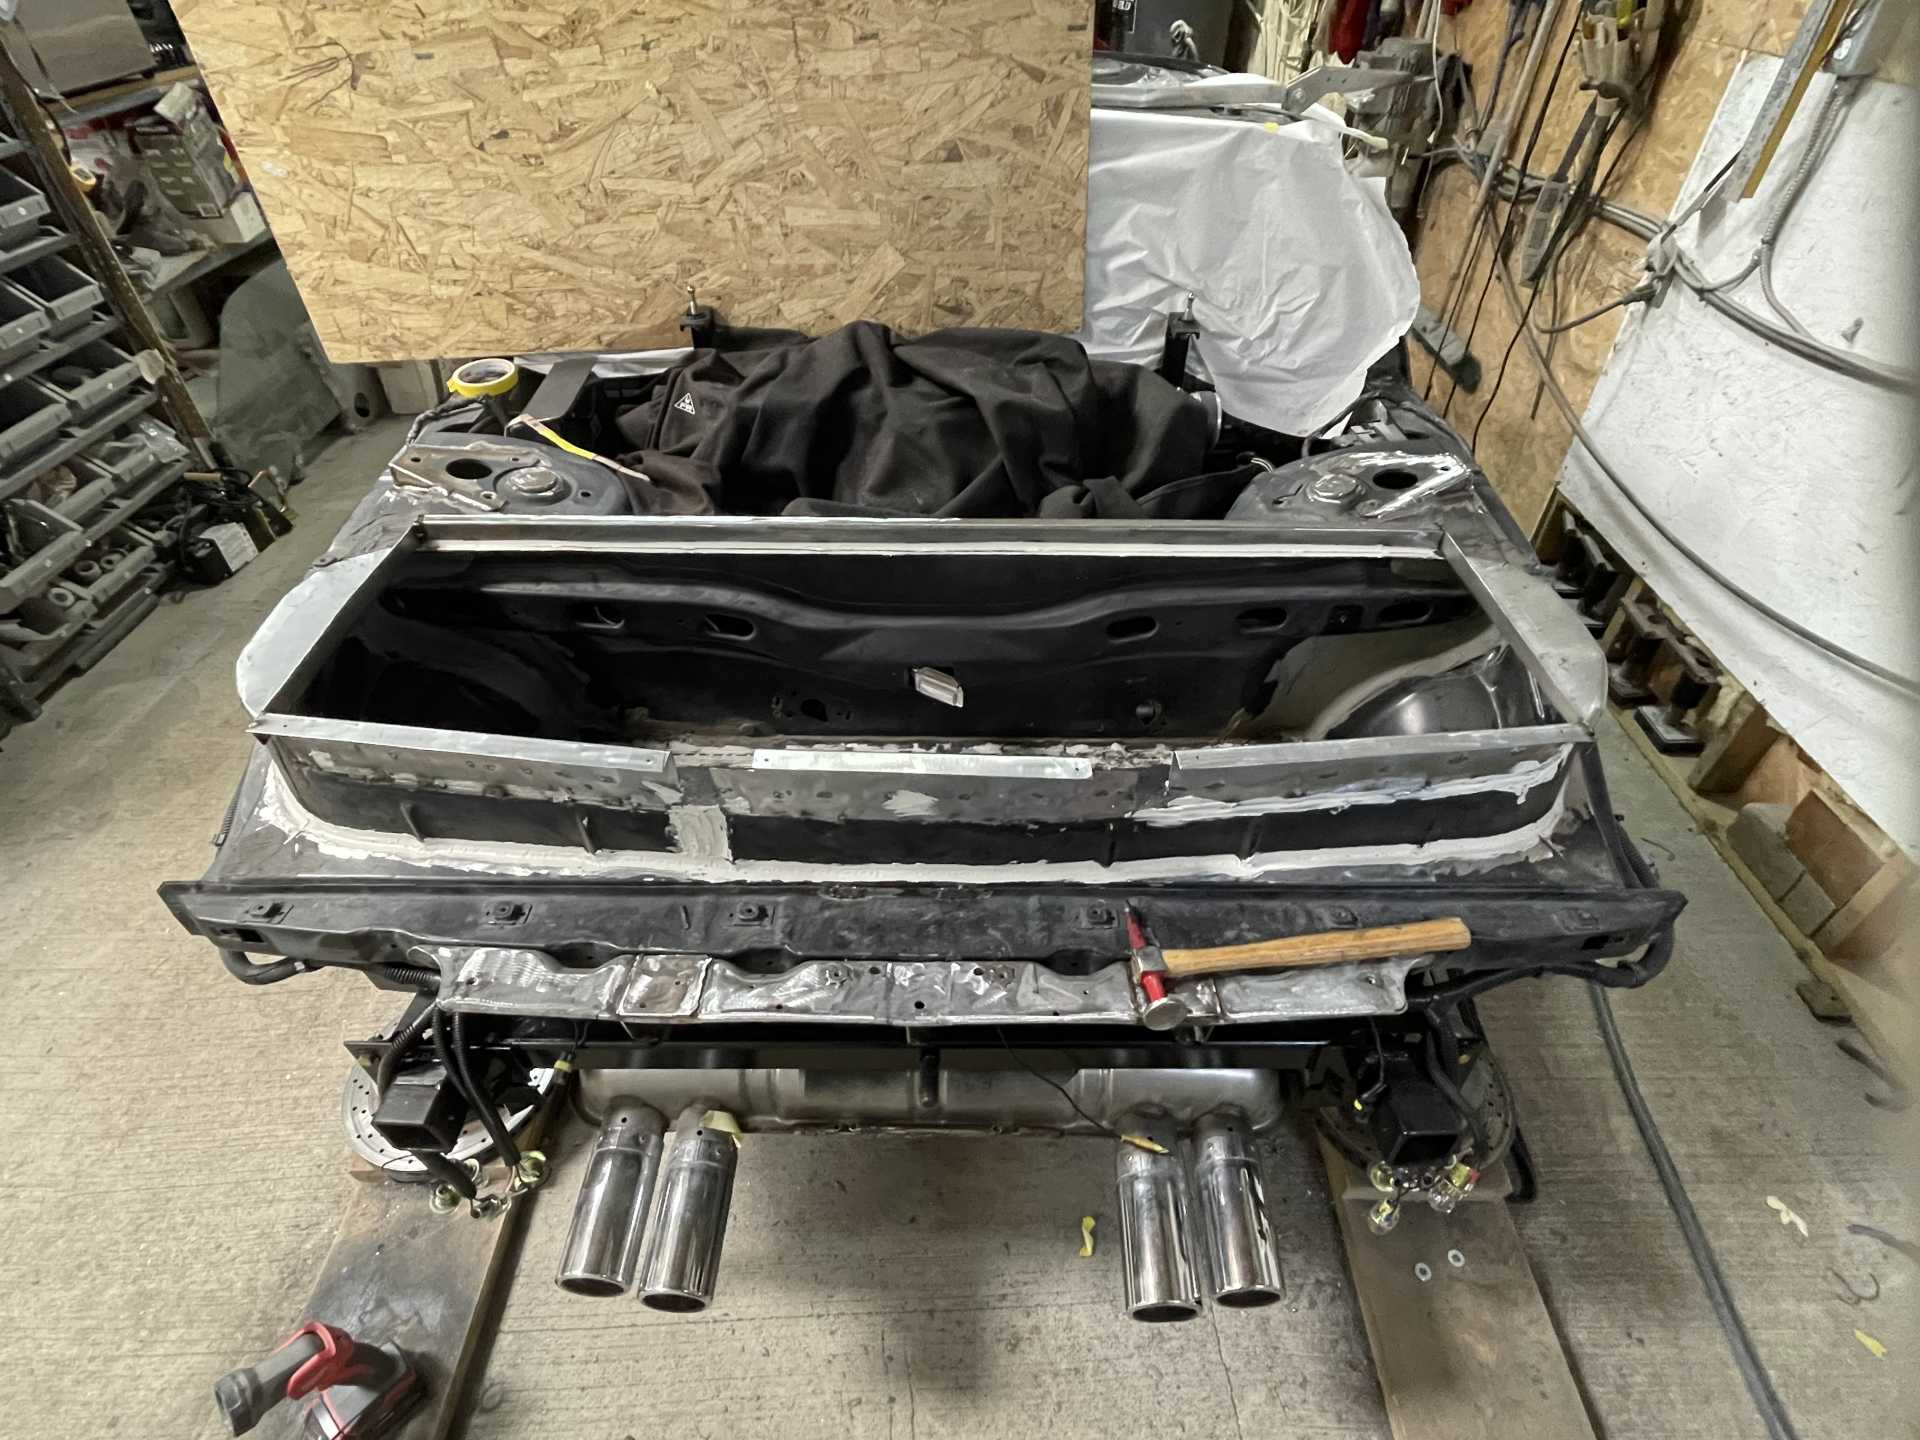
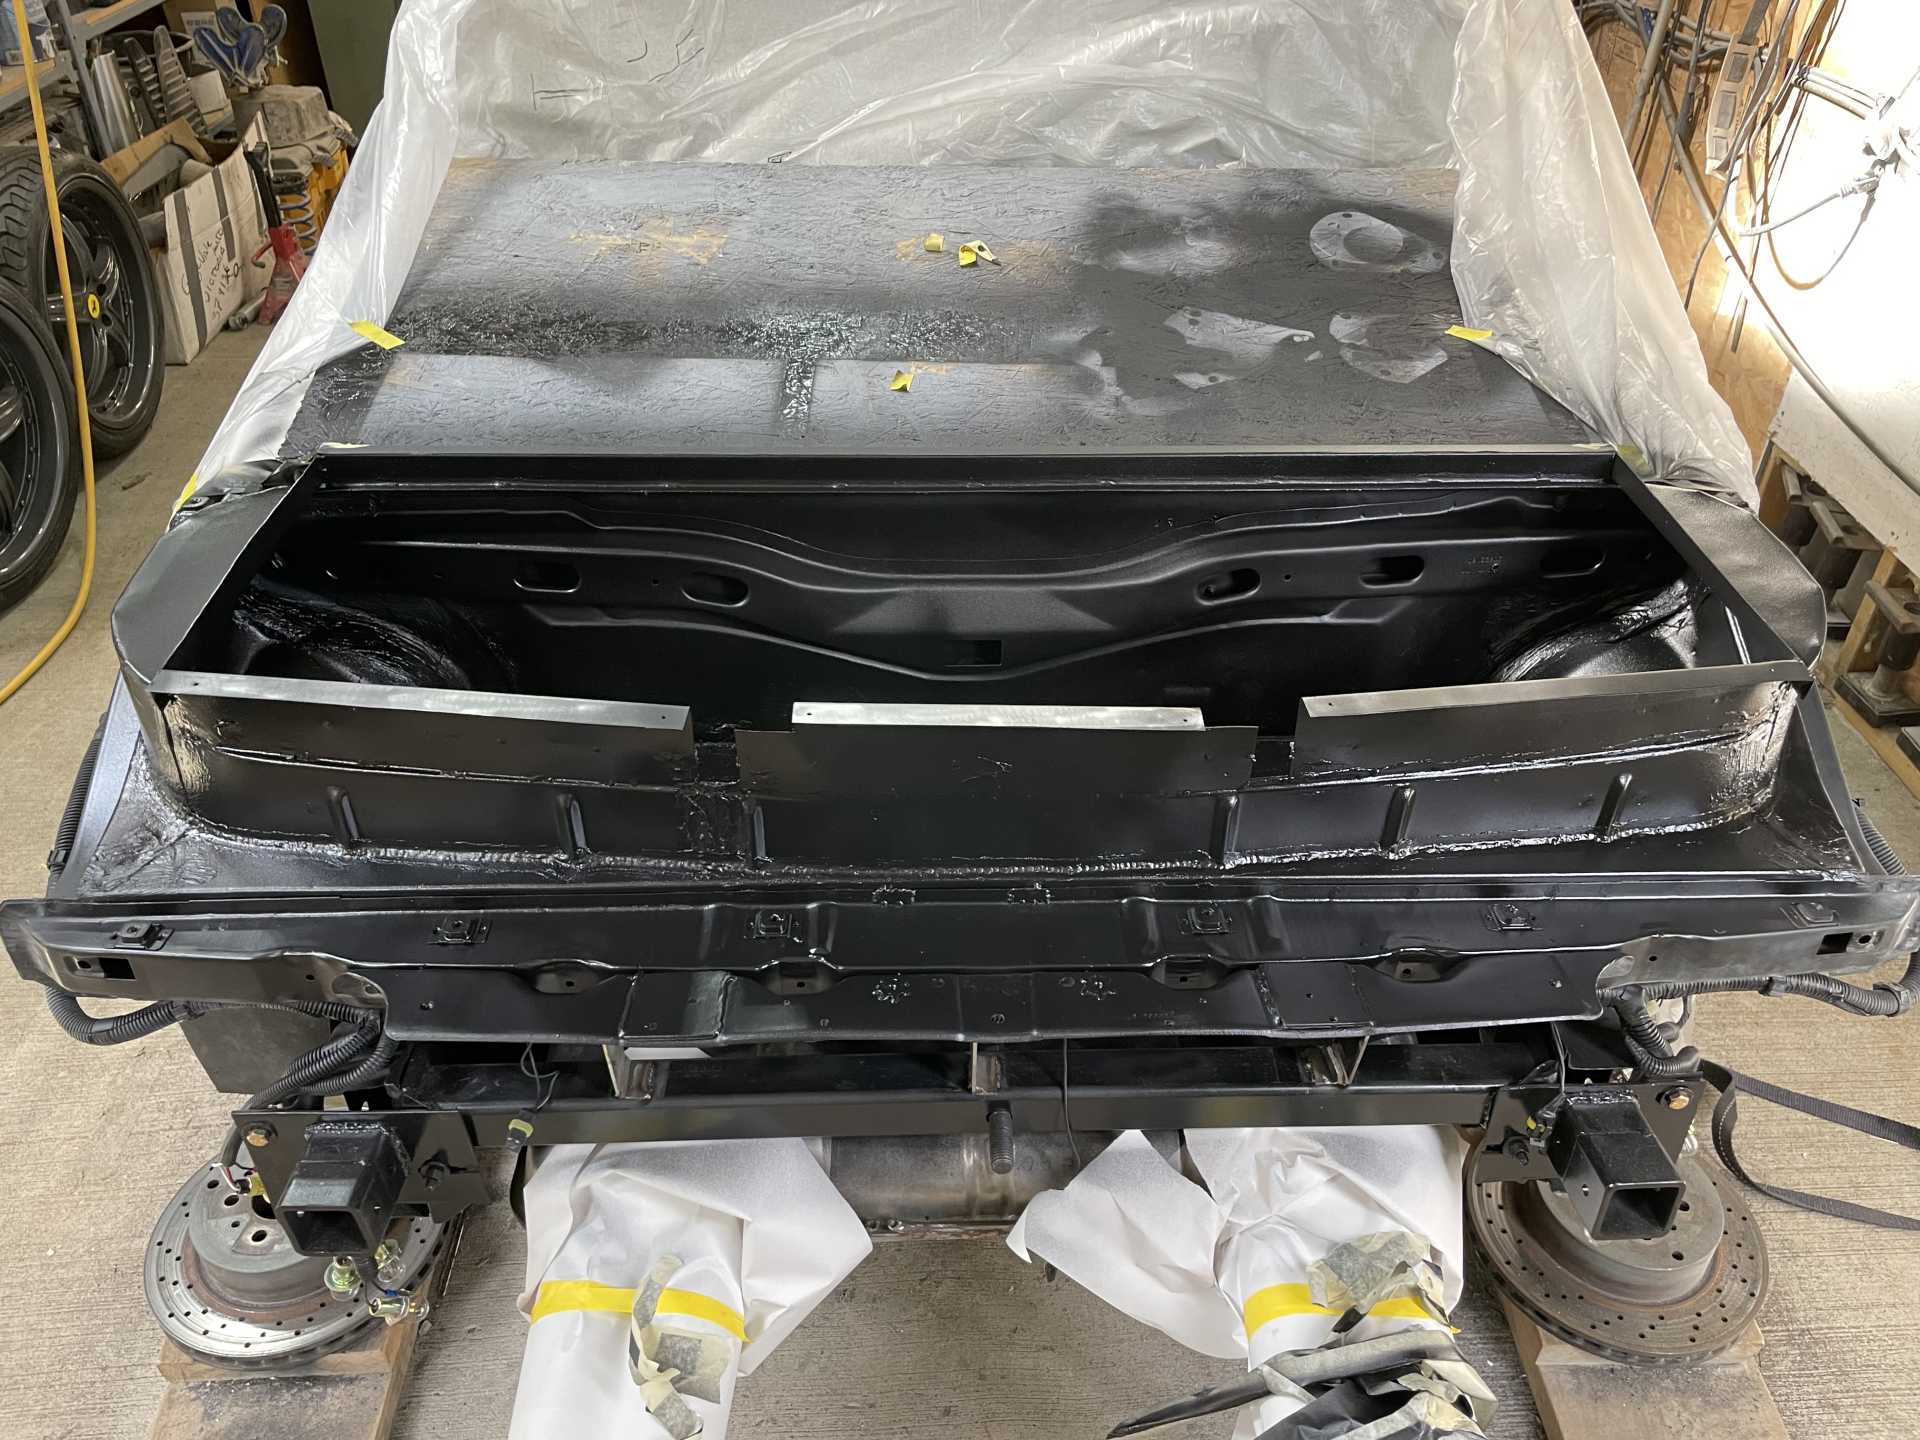
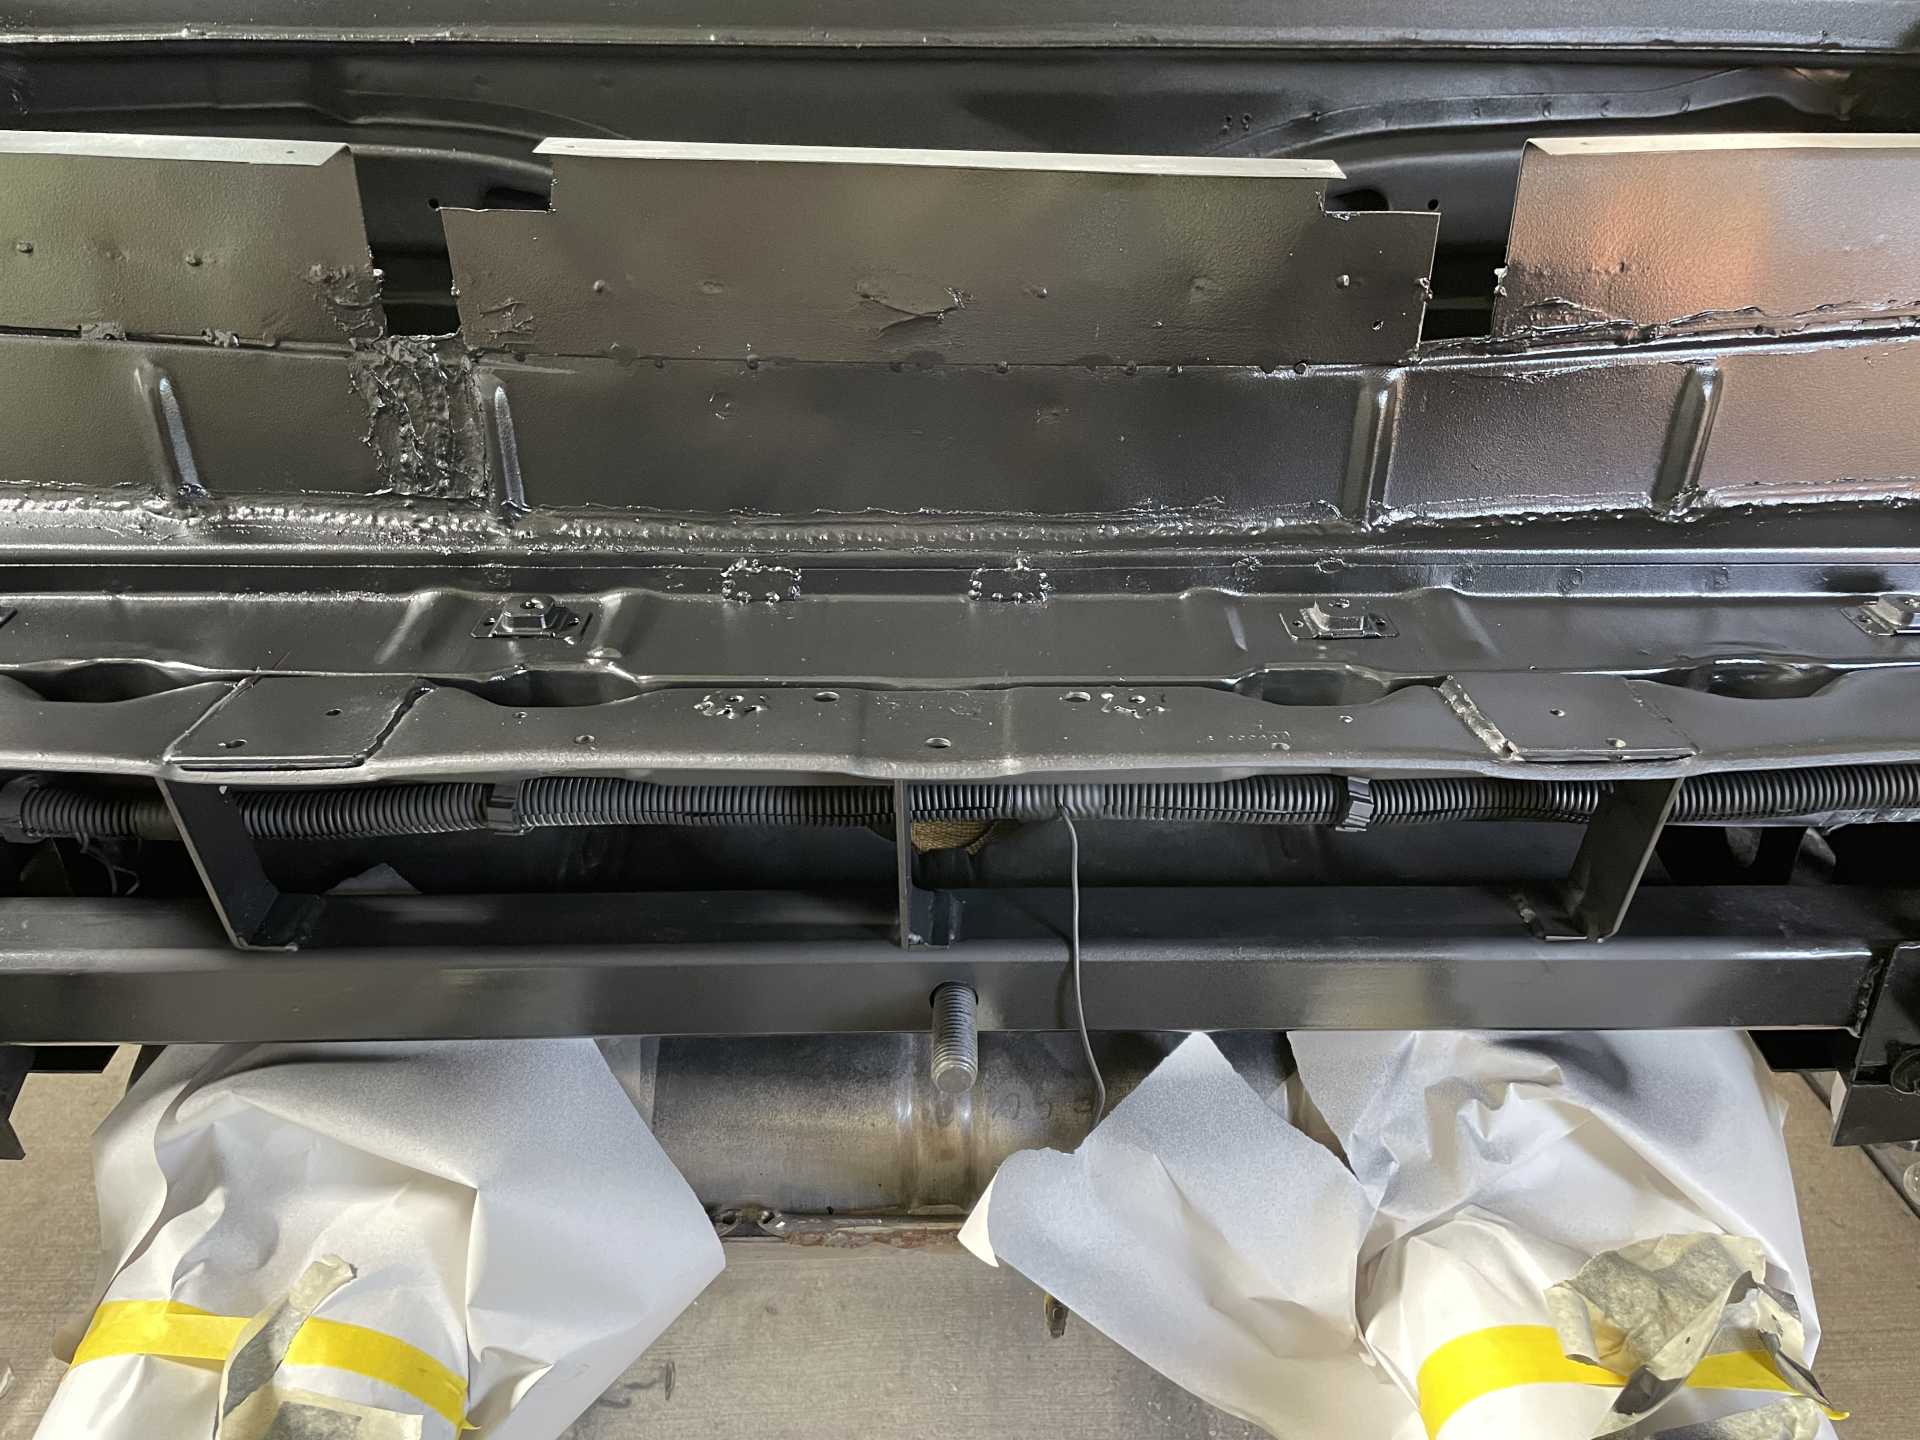
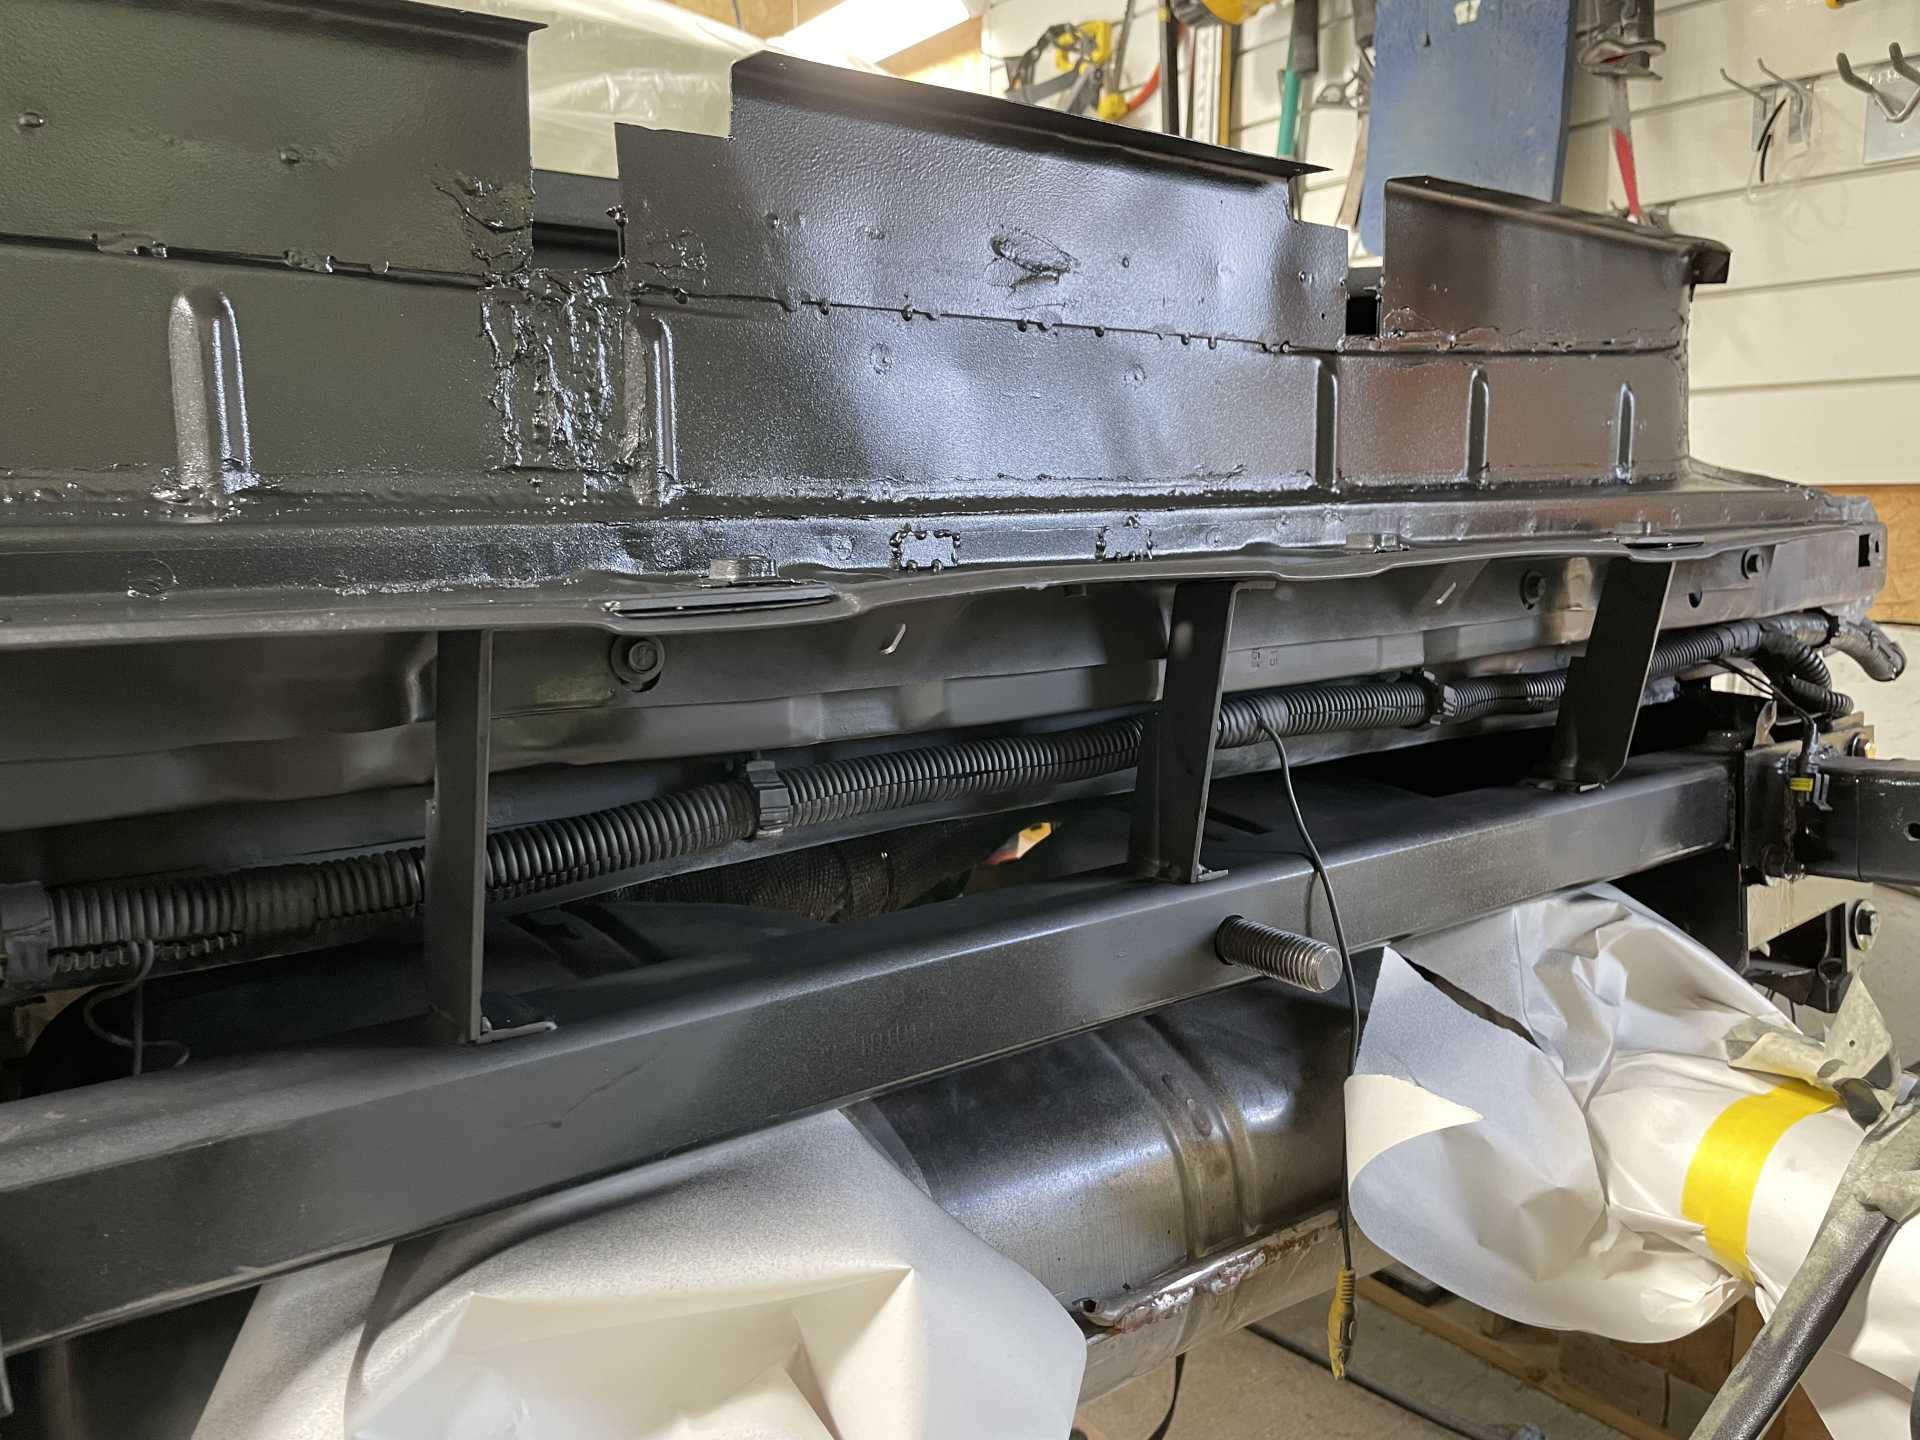
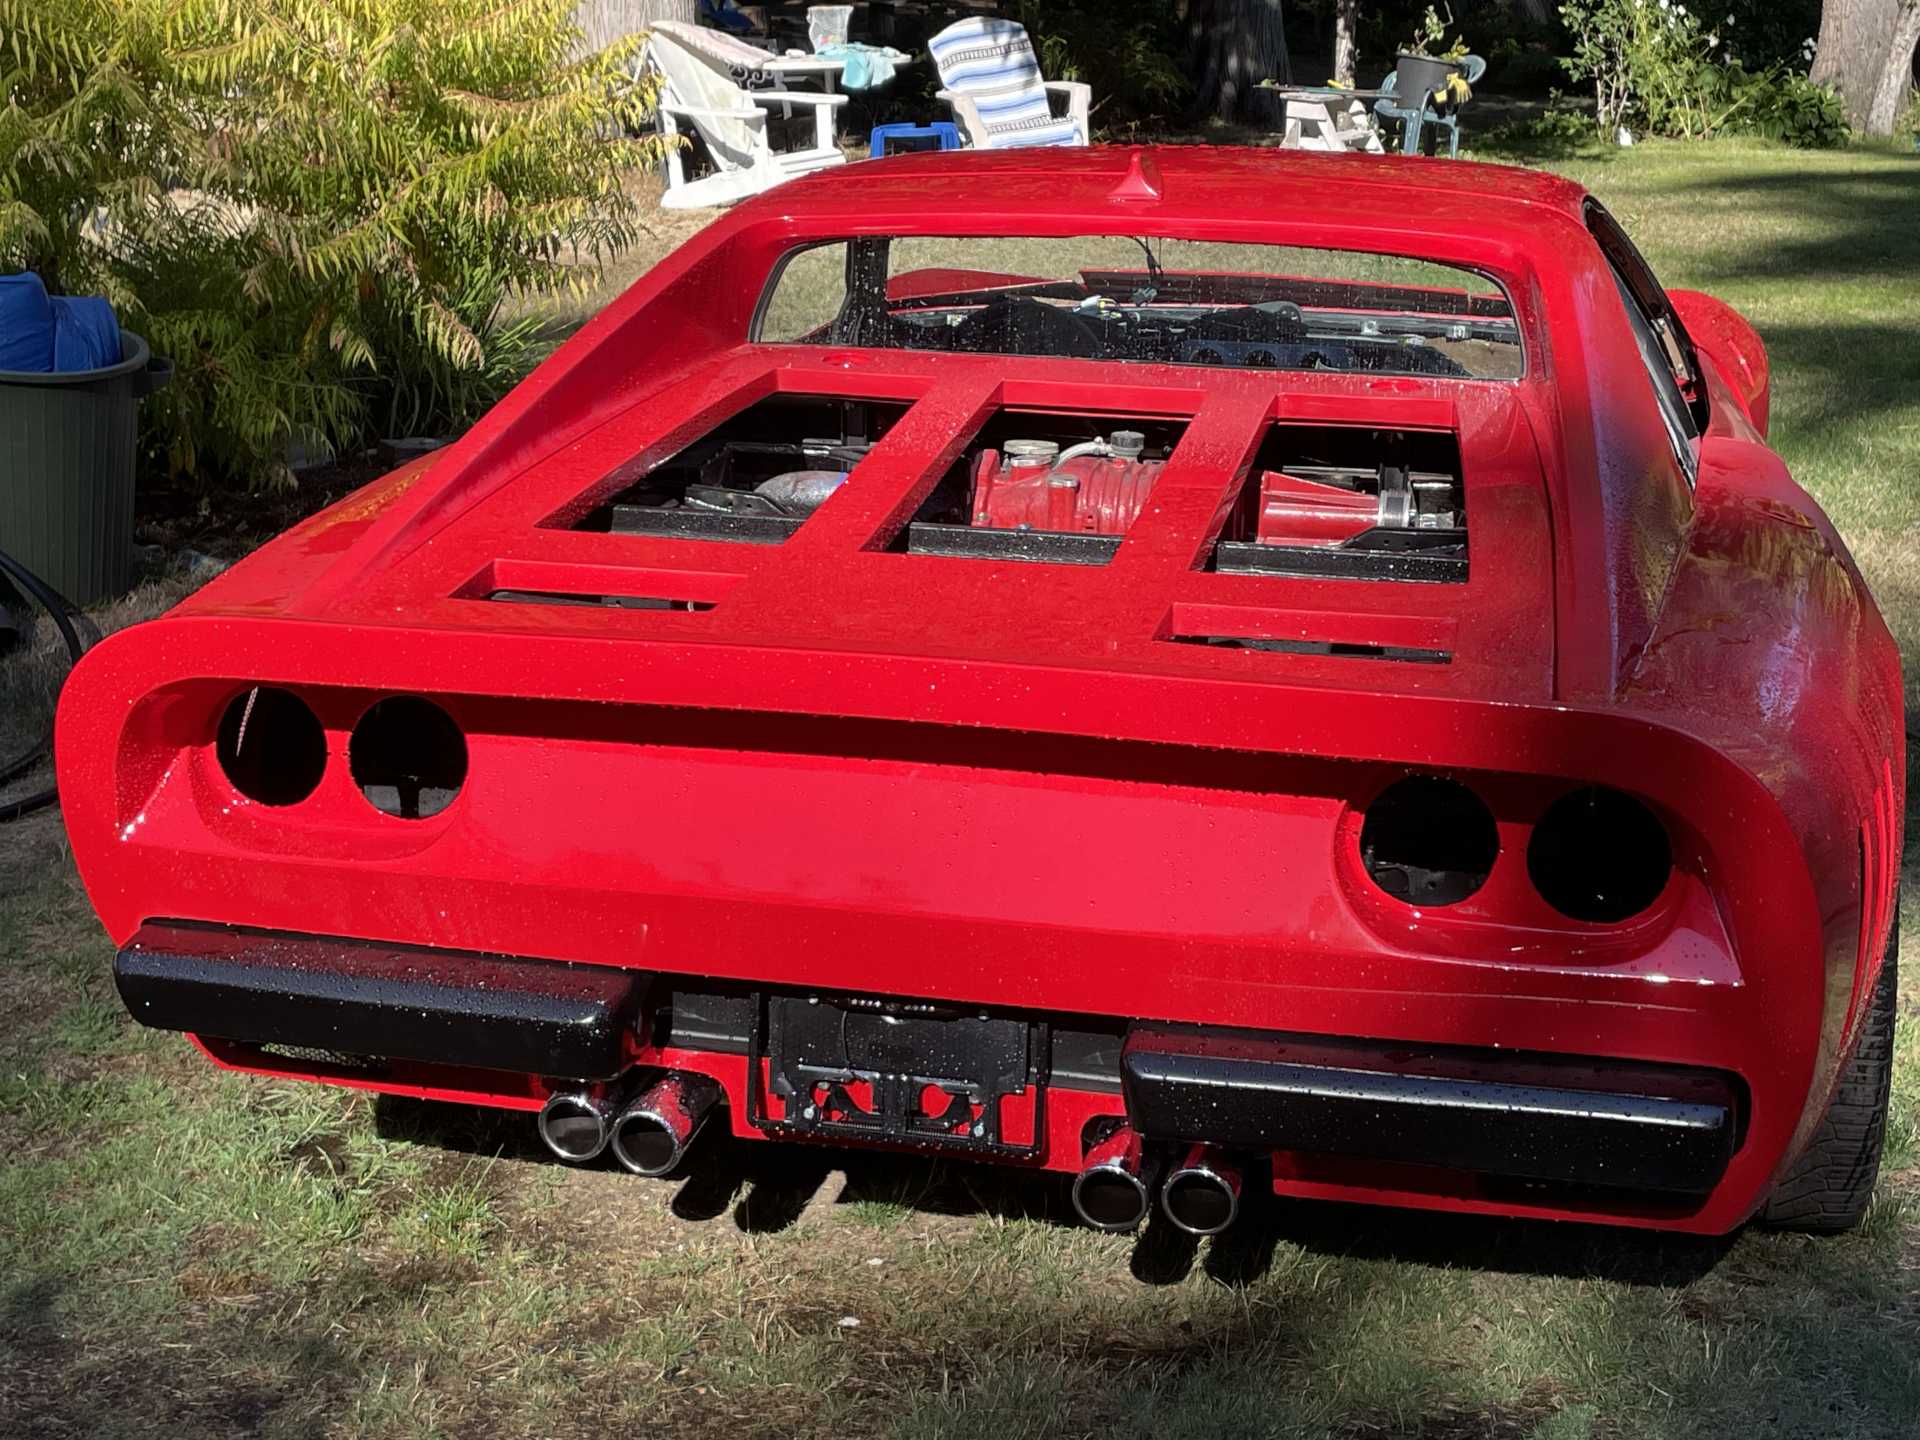
This shows all the new panels attached including end caps for the trunk that is under the body so everything is closed in except the trunk.
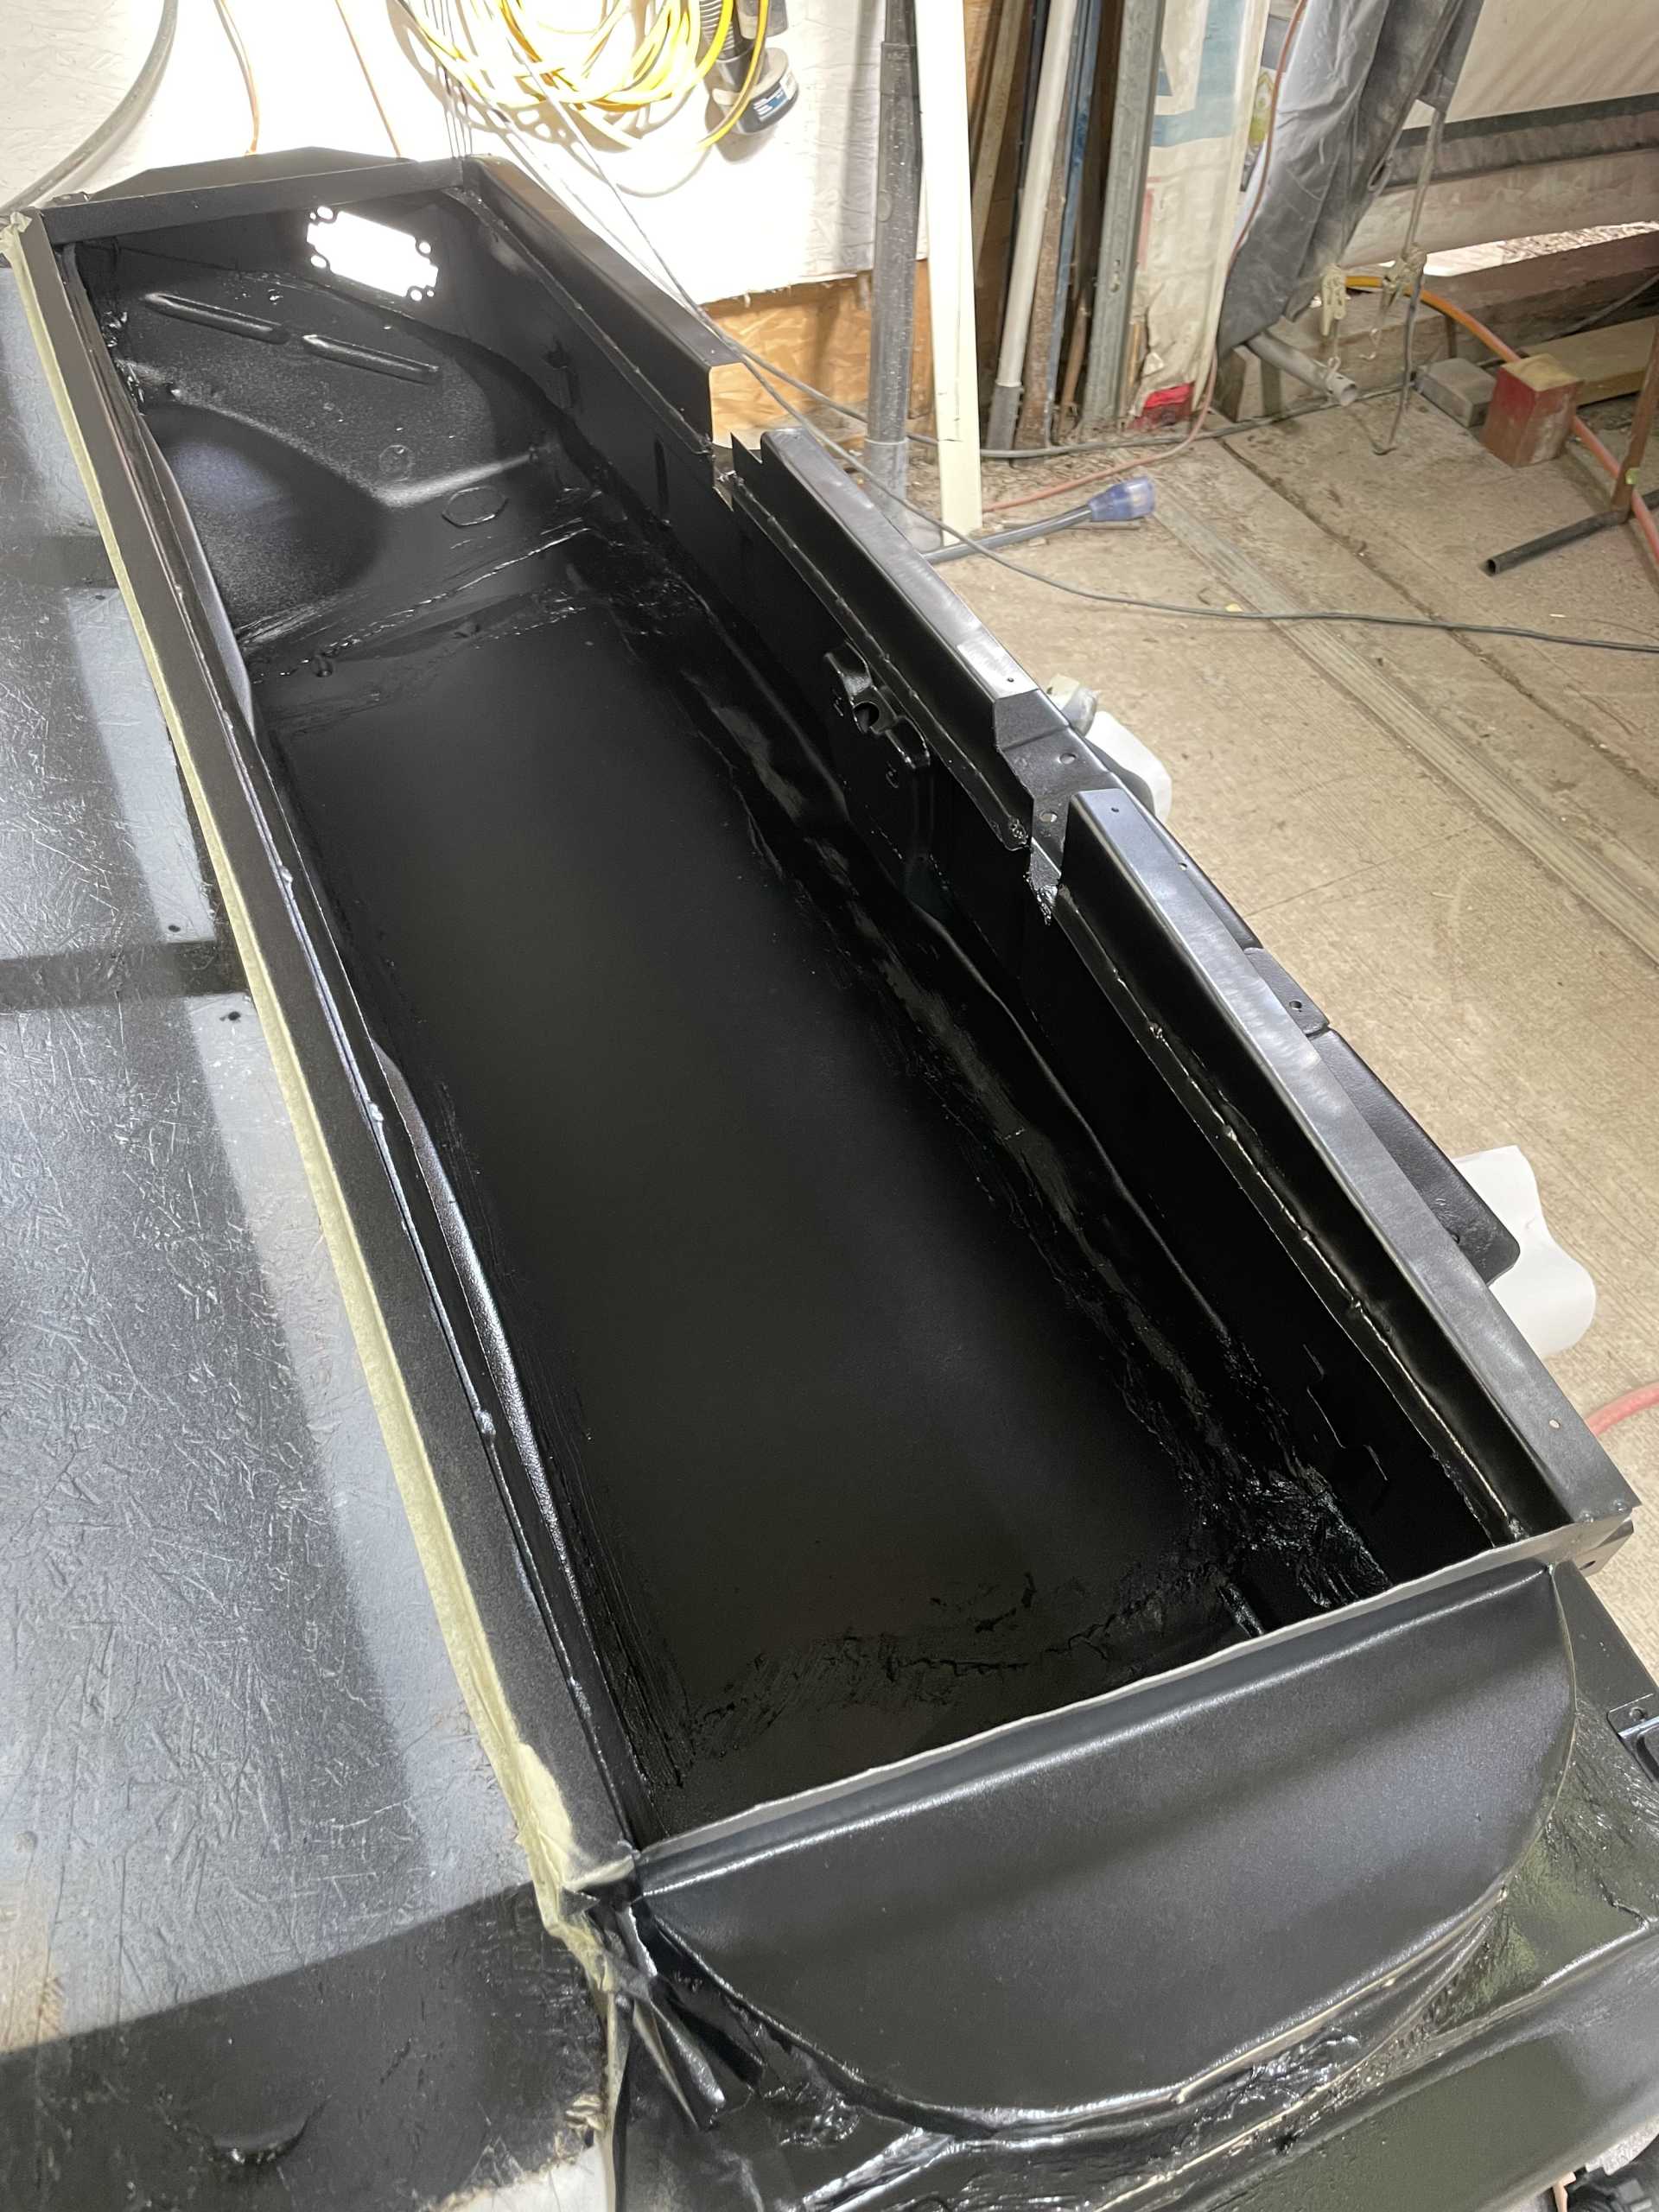
I then sprayed everything with Raptor Liner inside and out giving everything a durable surface
I made up some supports that will give the hinges and body additional support
Don O. Has taken on a big task to help me, on my push to get the car on the road this summer. Widen the front suspension, not in the conventional way of adding longer control arms which Creat their own problems. We’re cutting and adding 3” to the width. Giving me 1 1/2”s on each side. As the mod progress I’ll post some pics of the process.
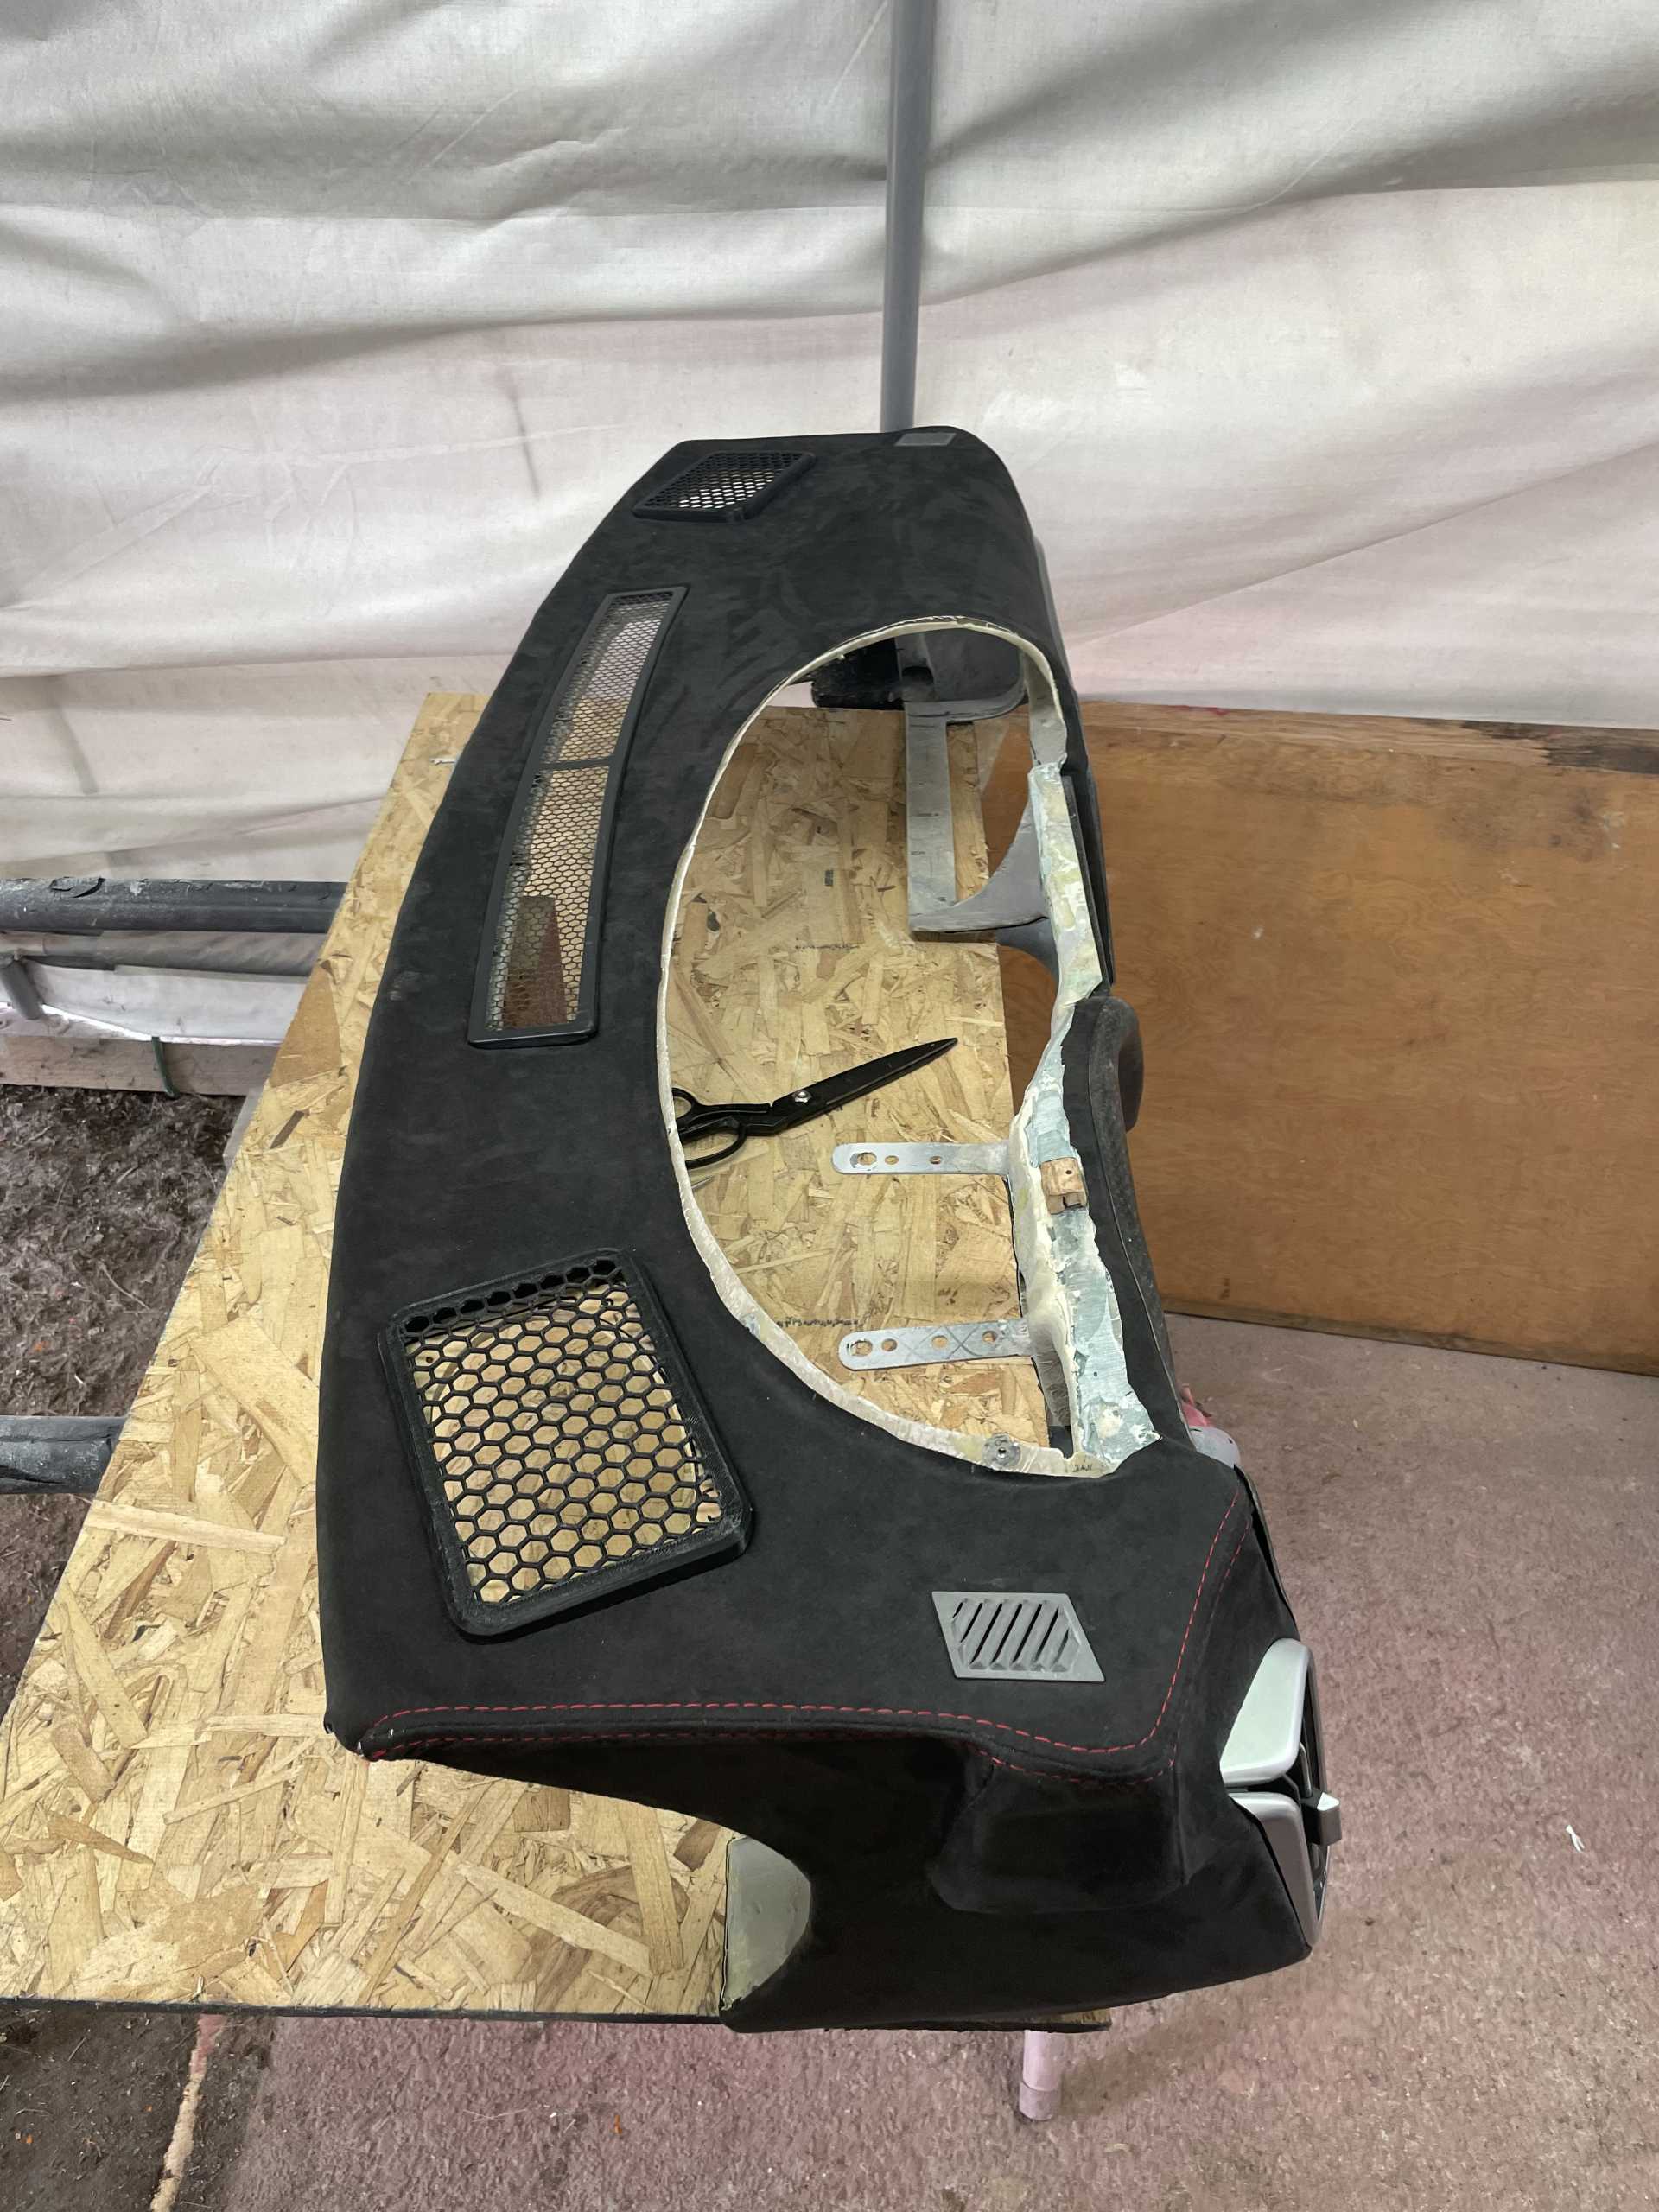
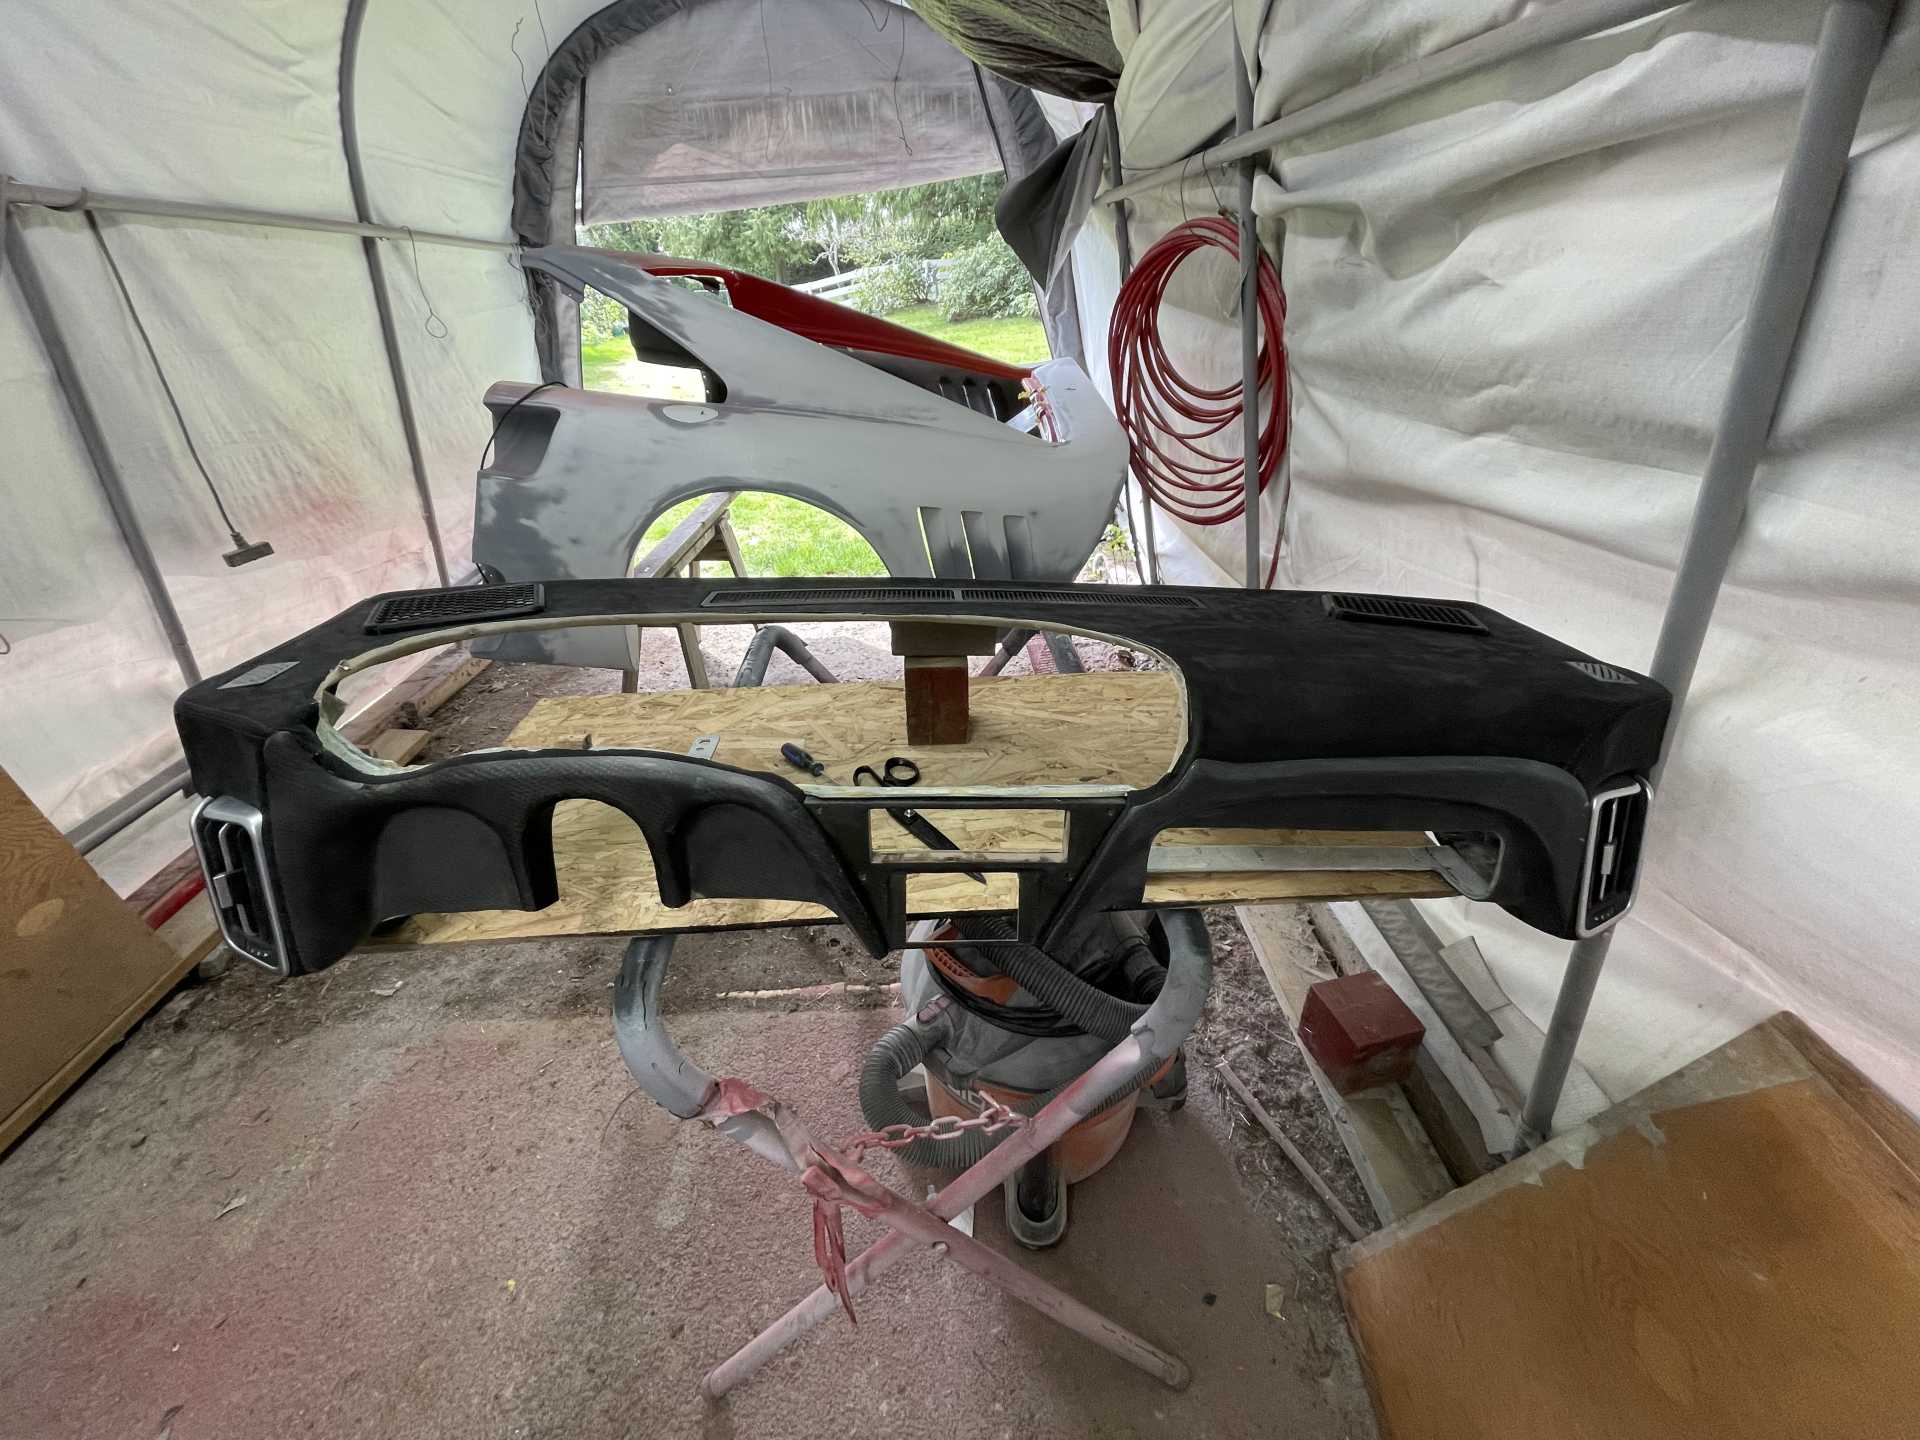
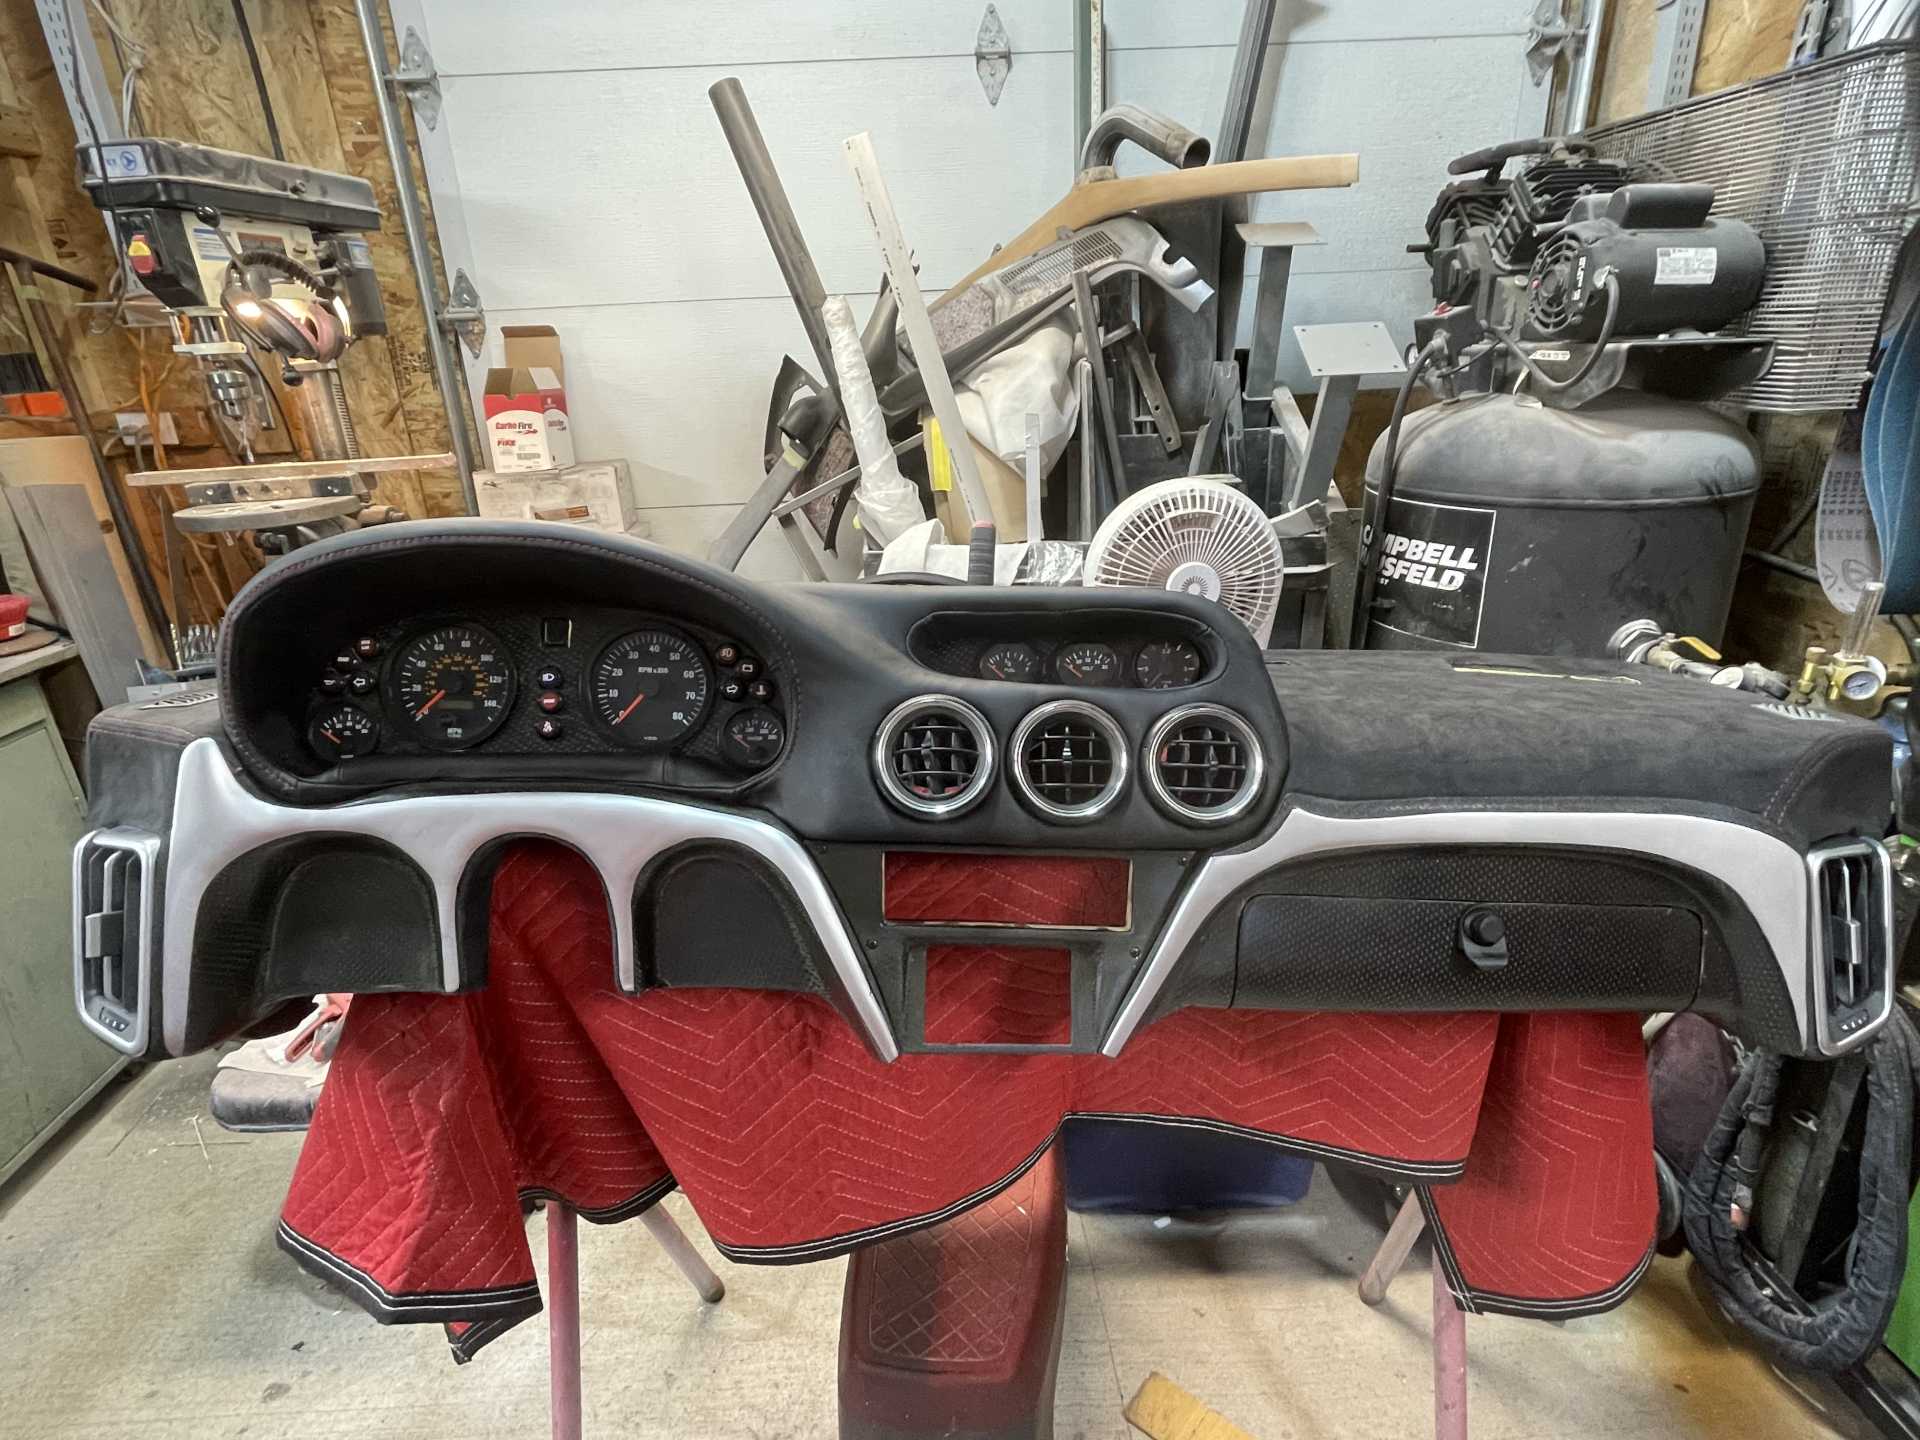
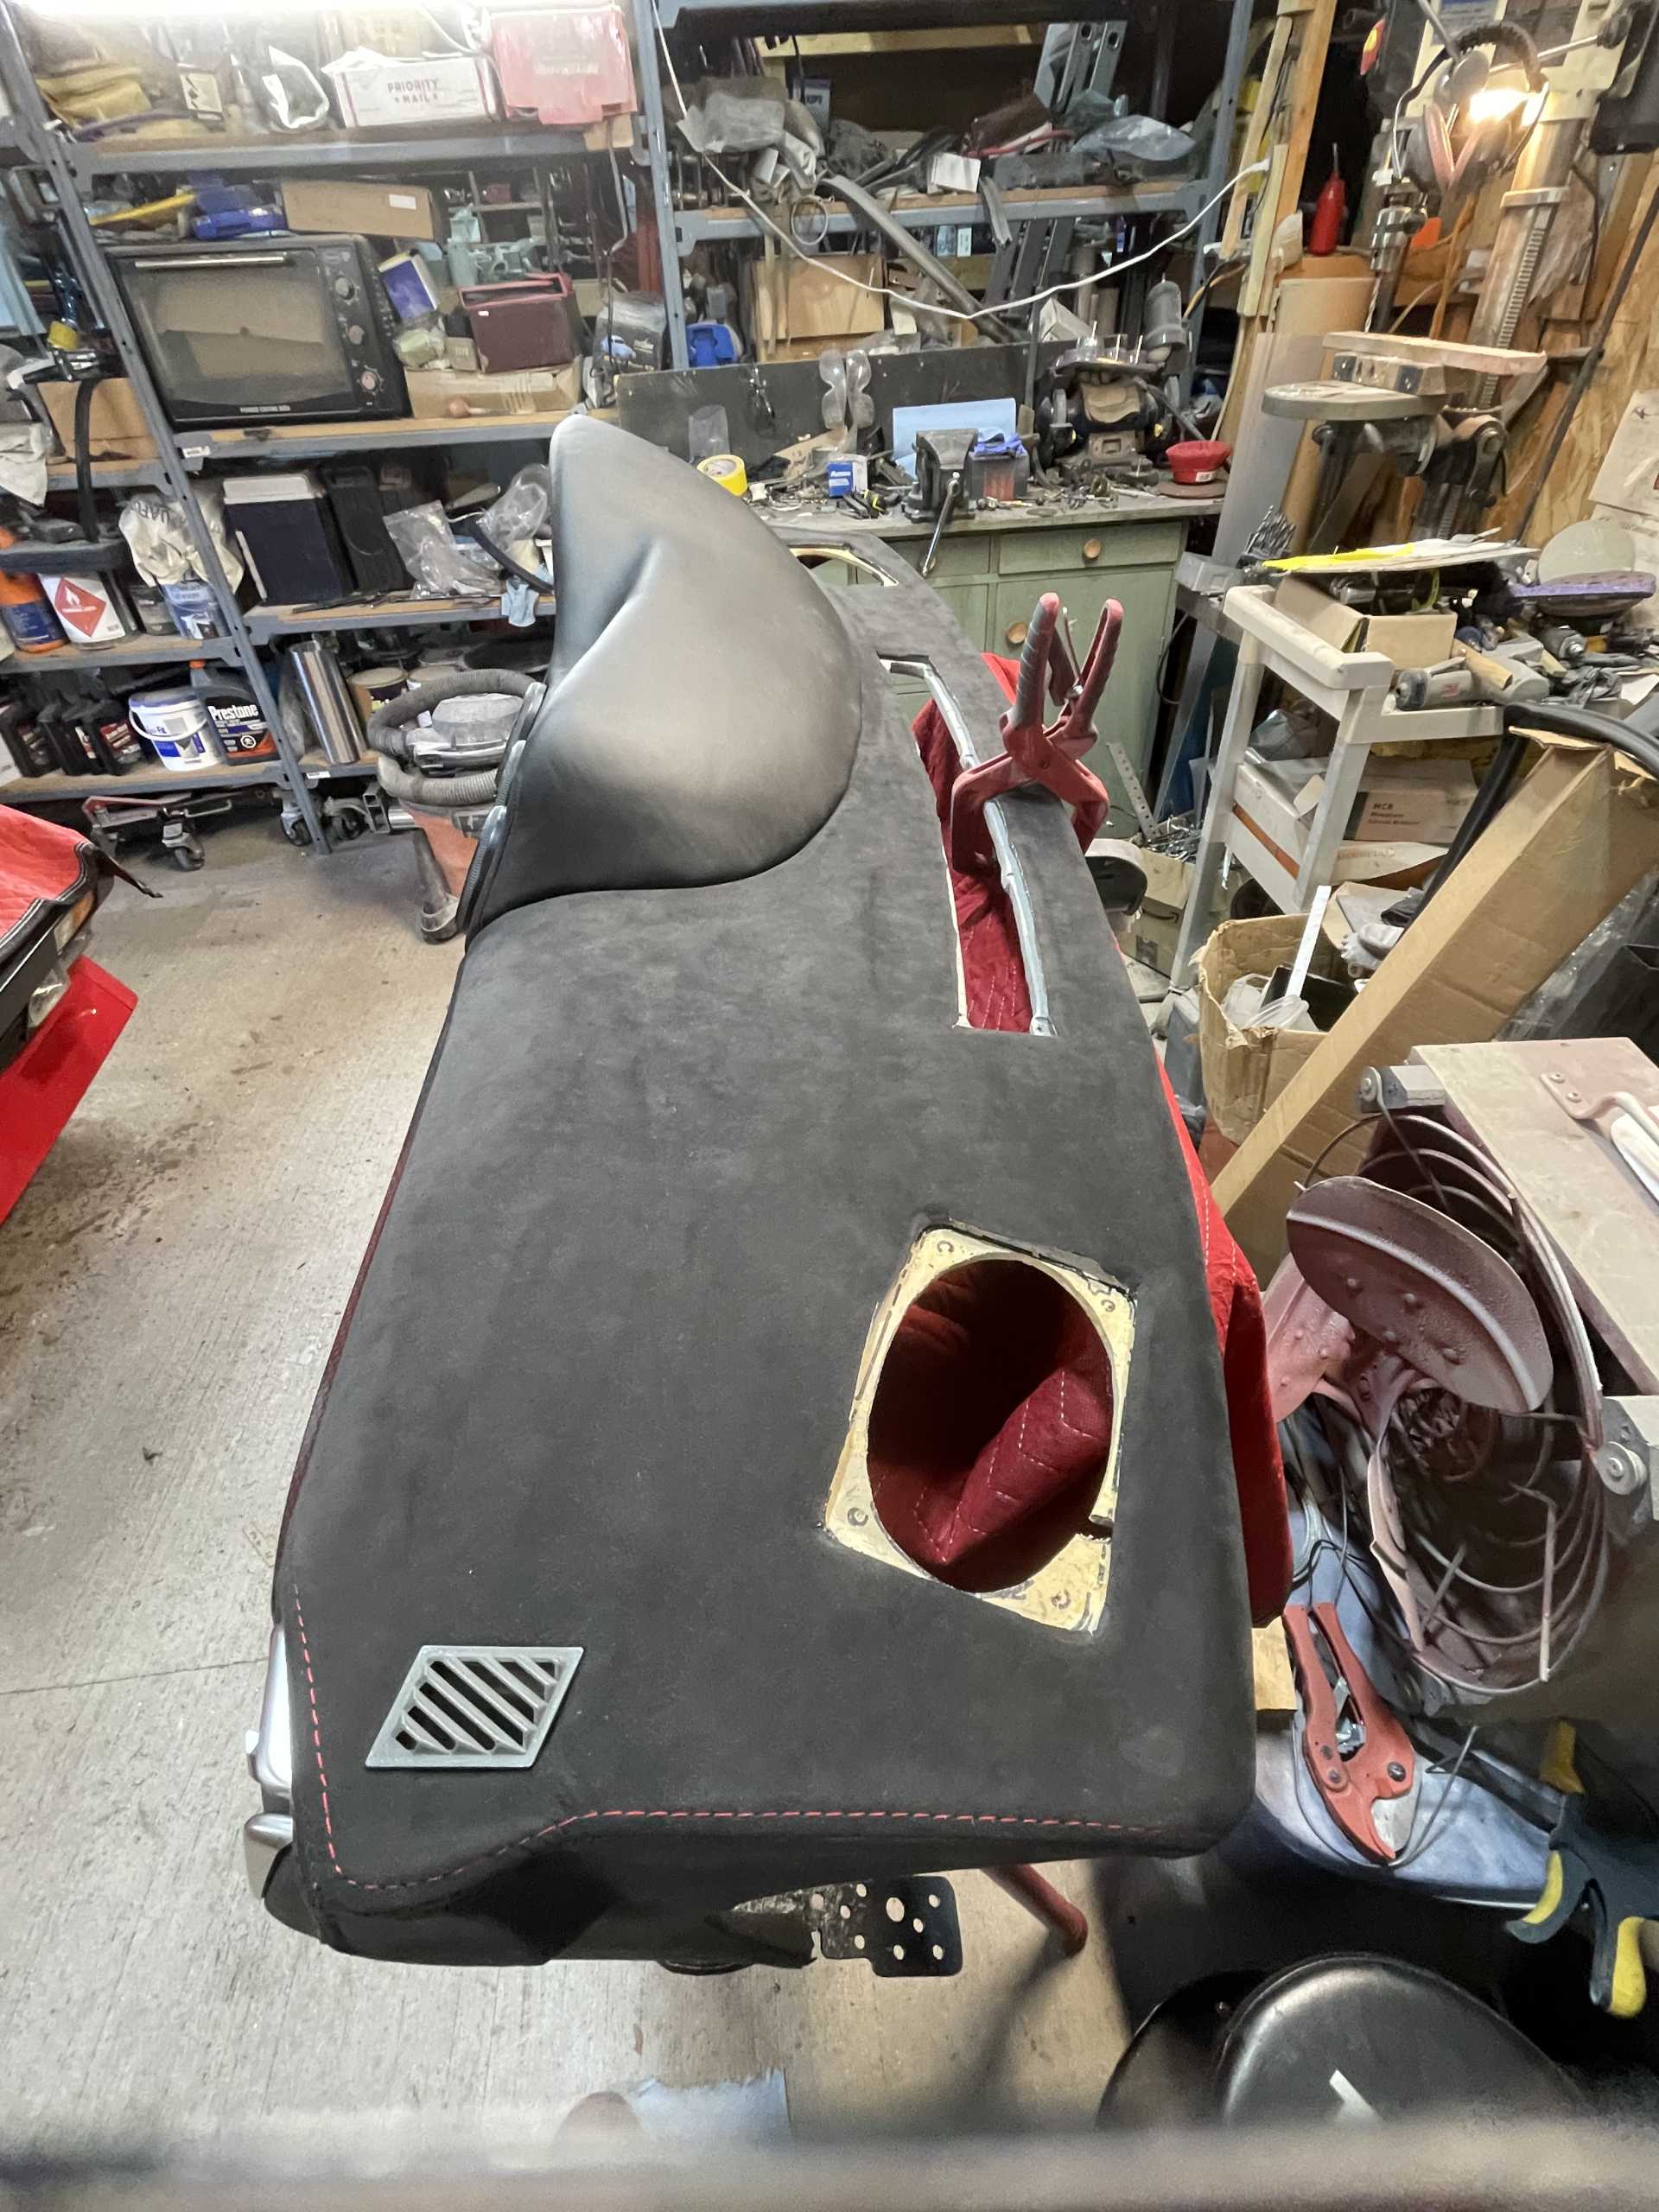
One last update is I got the first piece back from the upholsterer, the dash bottom. I still have some finishing to complete but I’m very happy..
That’s all for now , thanks for stopping by.
Wayne
[This message has been edited by dobie1 (edited 05-10-2023).]
Lots of things happening on the car right now, in the push to get it somewhat finished and driving this summer.
I have been extremely fortunate to have two fellow car building buddies that are helping me to complete modifications that might not have been finished anytime soon….
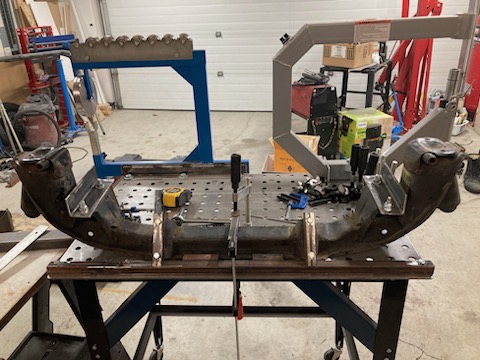
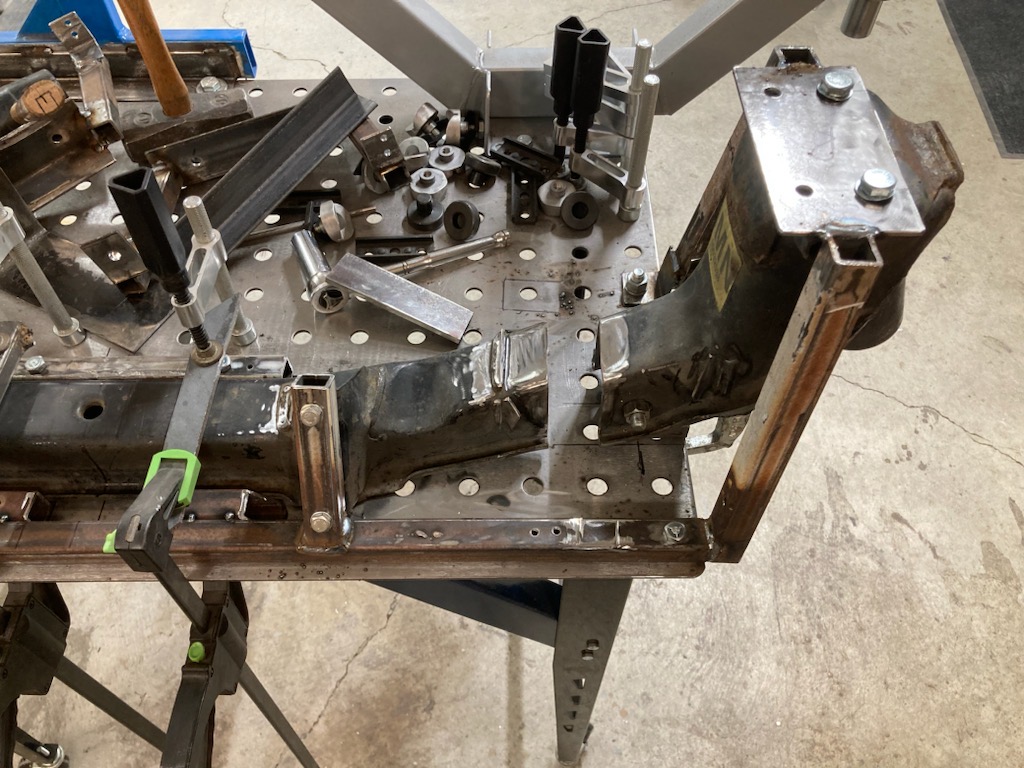
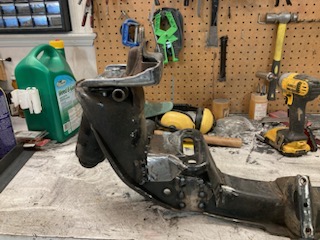
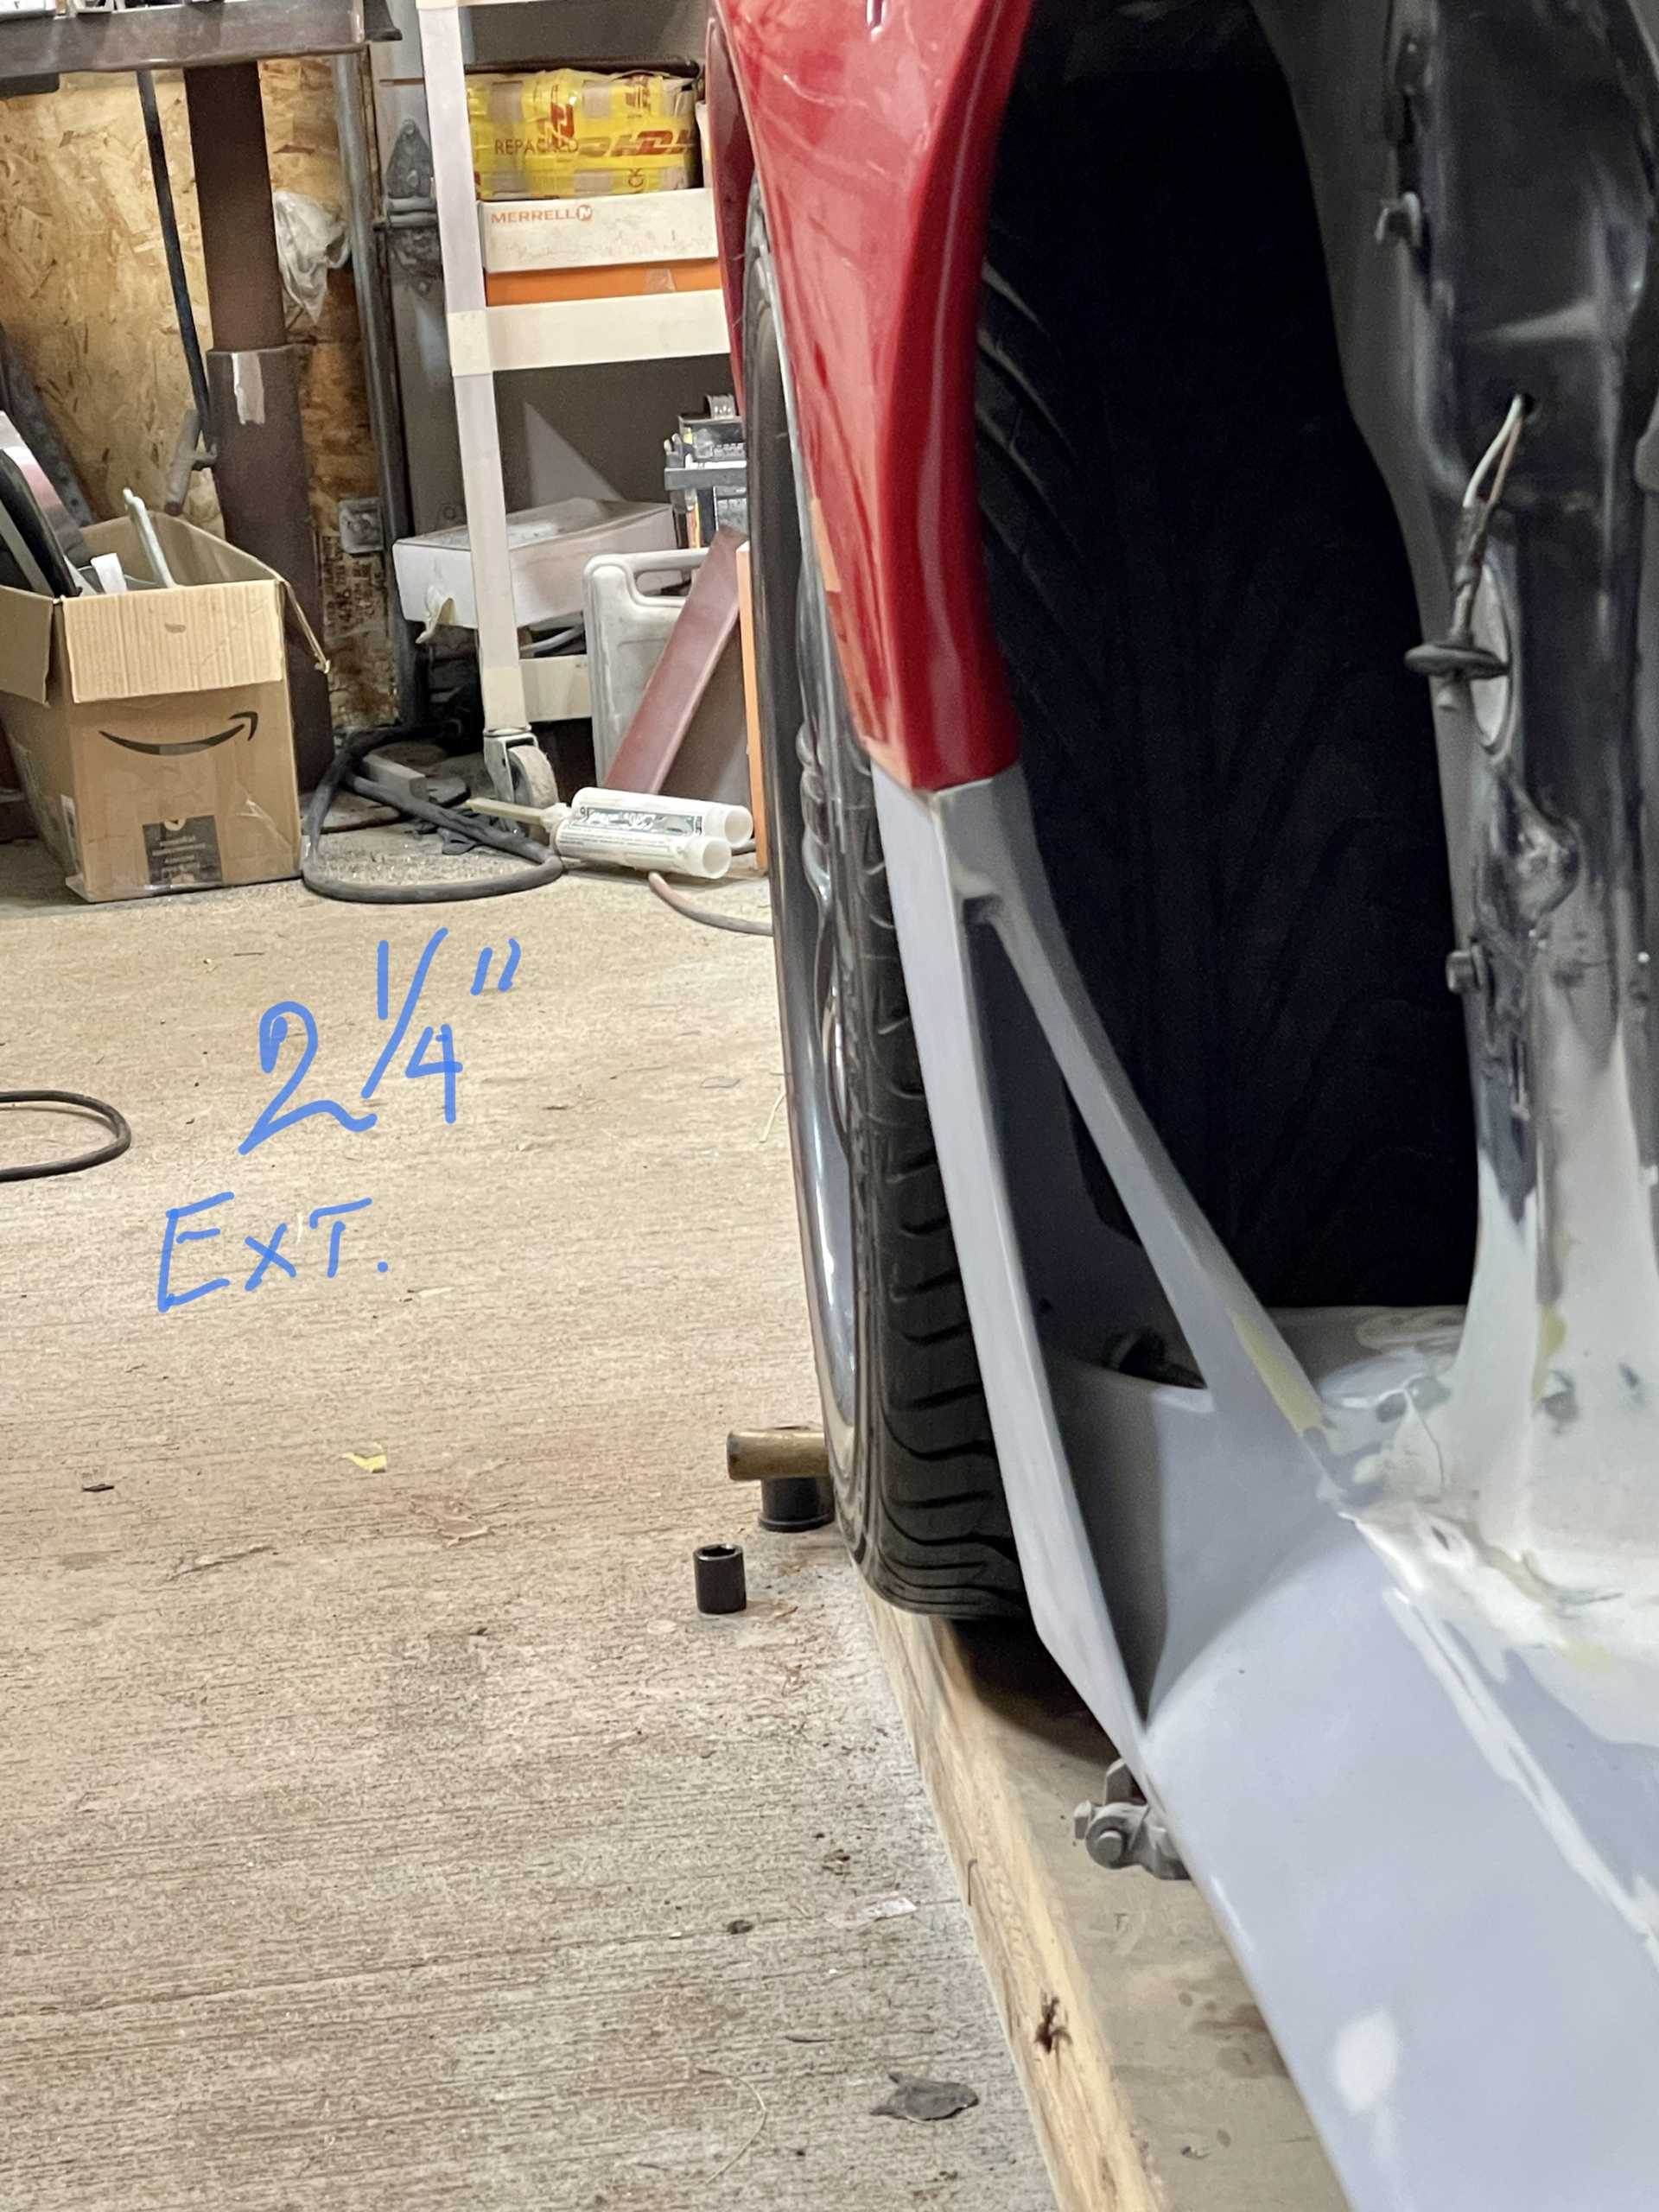
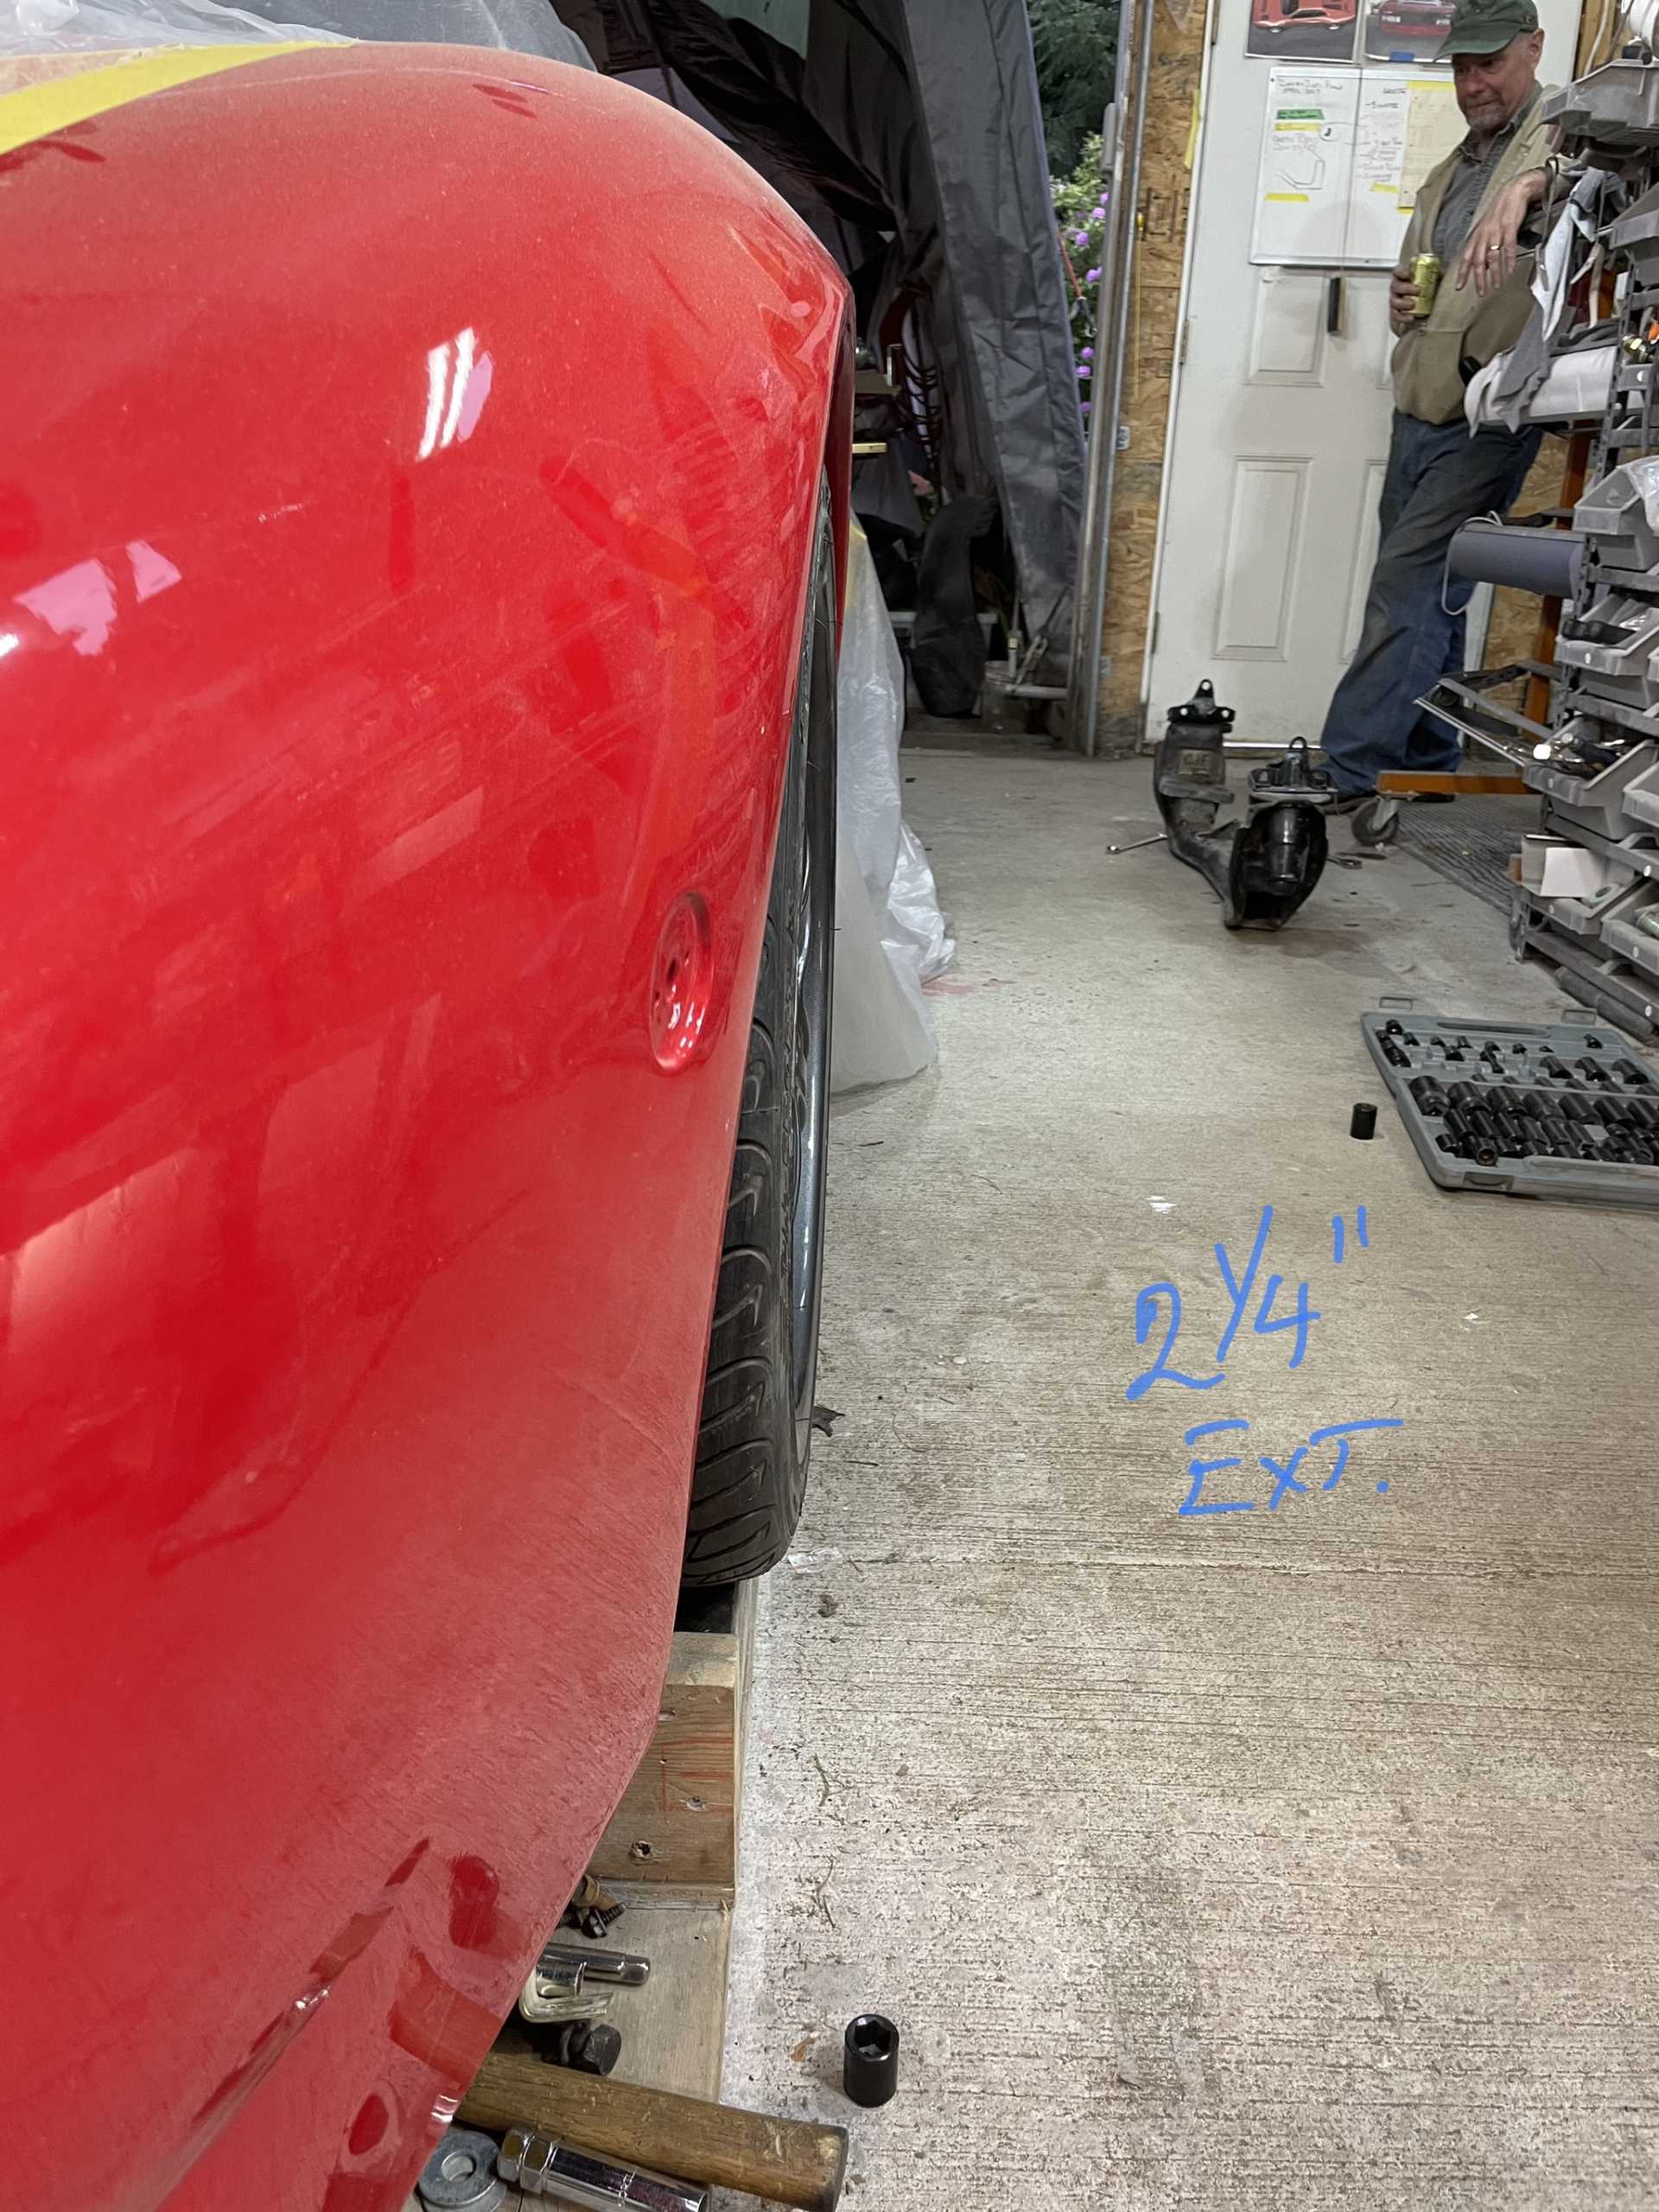
Don O. Recently sold his beautiful replica 308 , with a bit of freed up time has offered to widen the front cross member on my car. The stock wheel width needs to be widened 2 1/4” on each side. This will bring the wheels out to the wheel lip arch.
From what I’ve seen it’s a lot of work, first thing is to build a jig, this keeps everything straight and ensures all the frame and body mounting points are correct in the modified cross member.
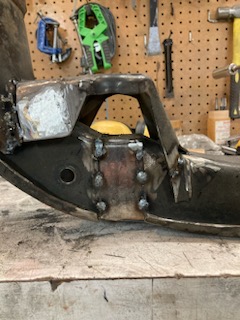
Then cut off the mounting brackets that will be relocation to the new mounting points in the cut cross member.
Tack weld the fill pieces in place
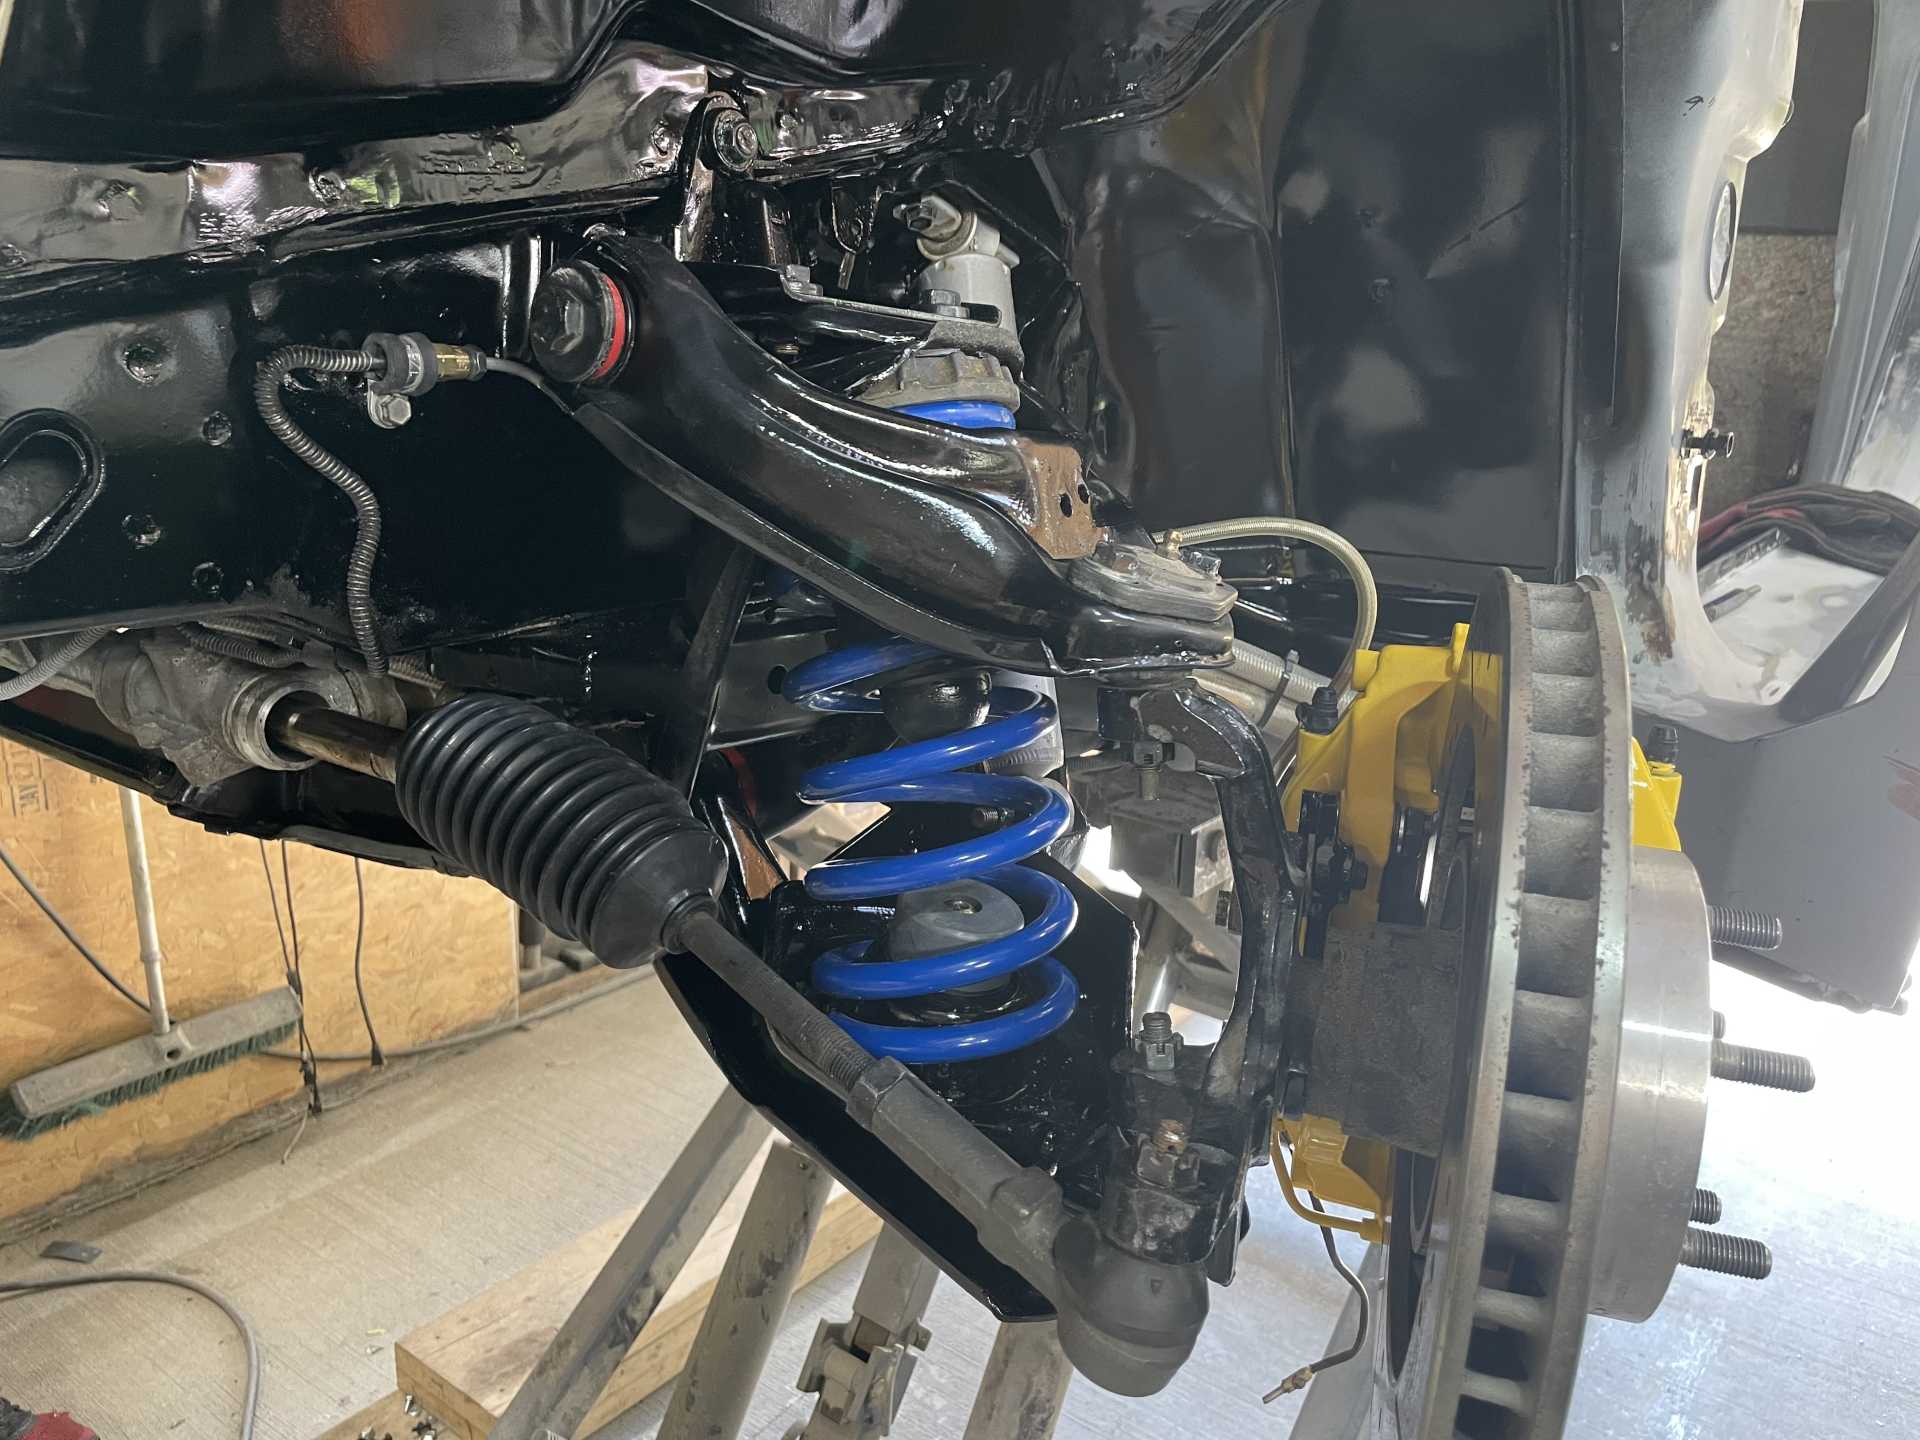
Everything was test fit into the car to ensure everything fit. We installed the upper and lower control arms and put the wheel on and judge for yourself!!!
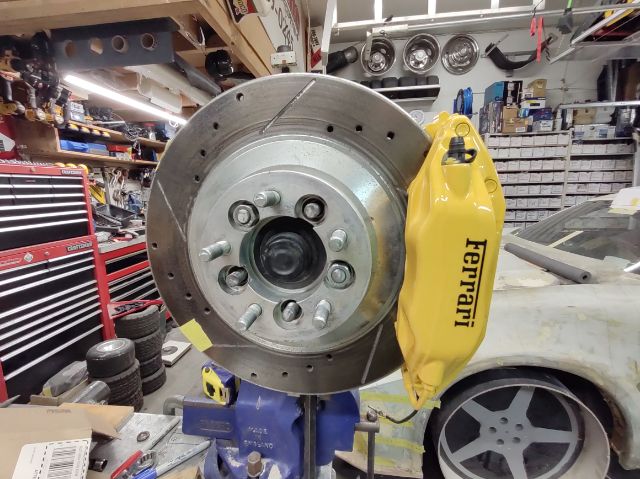
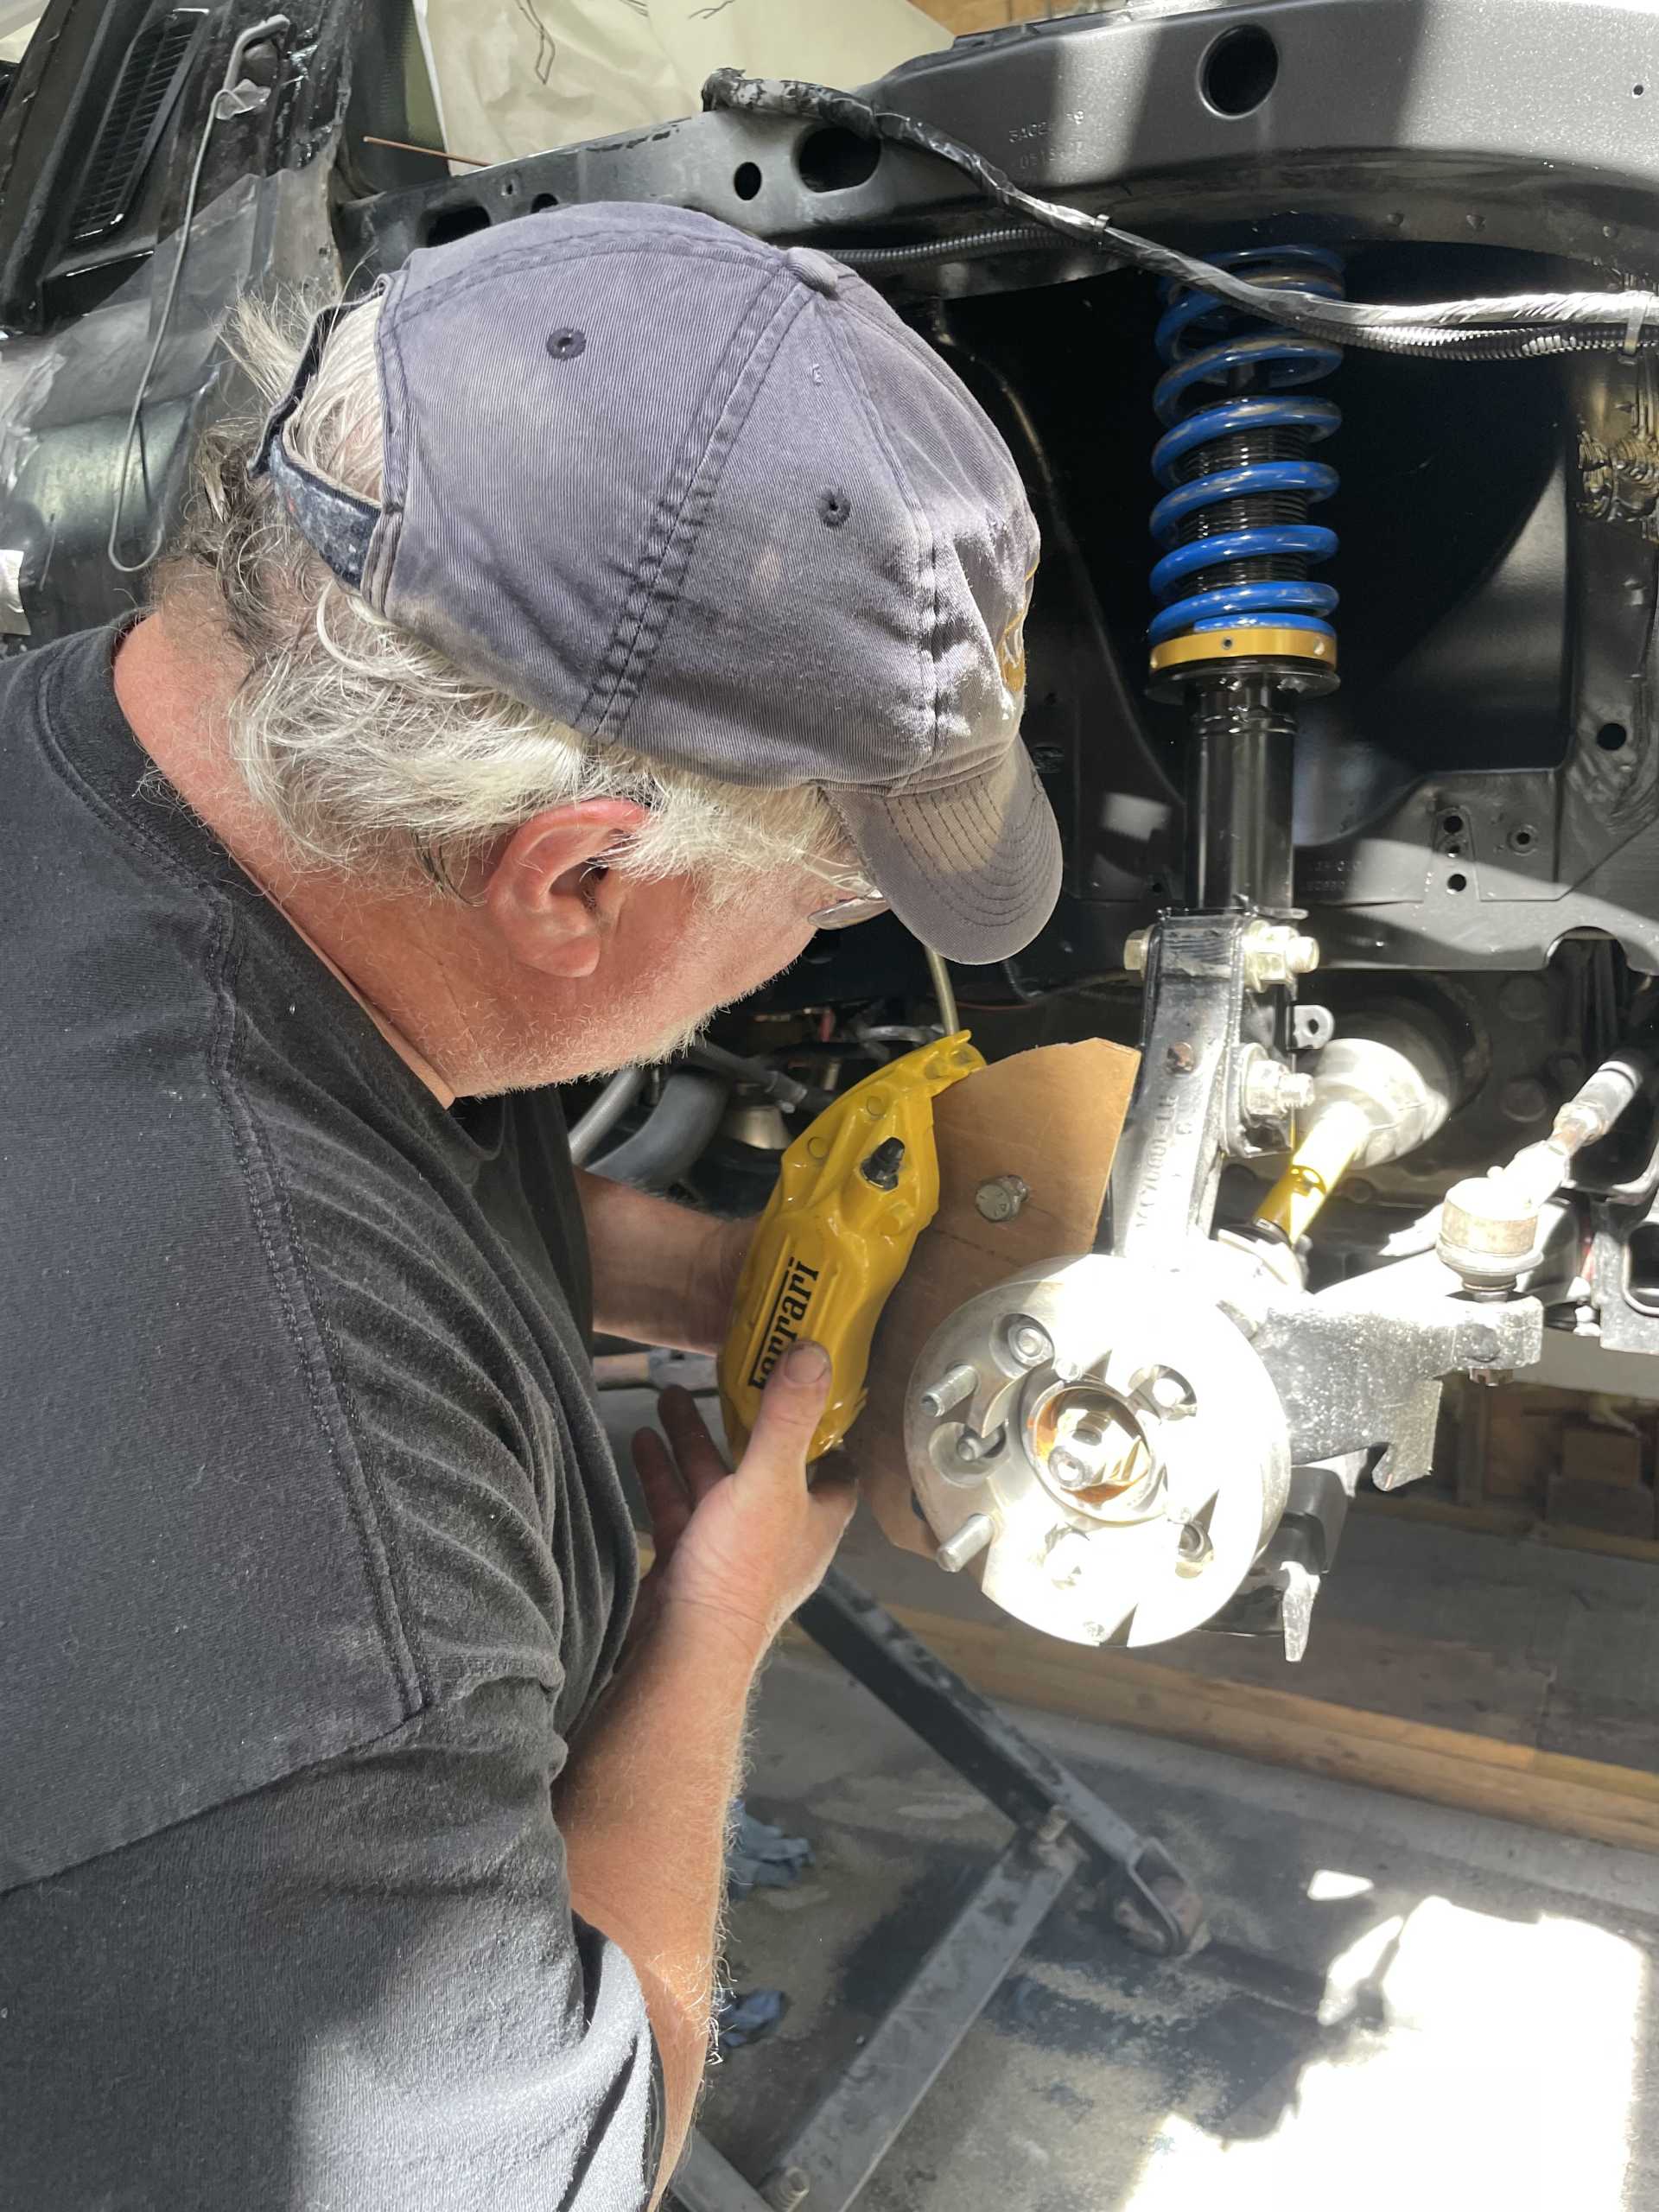
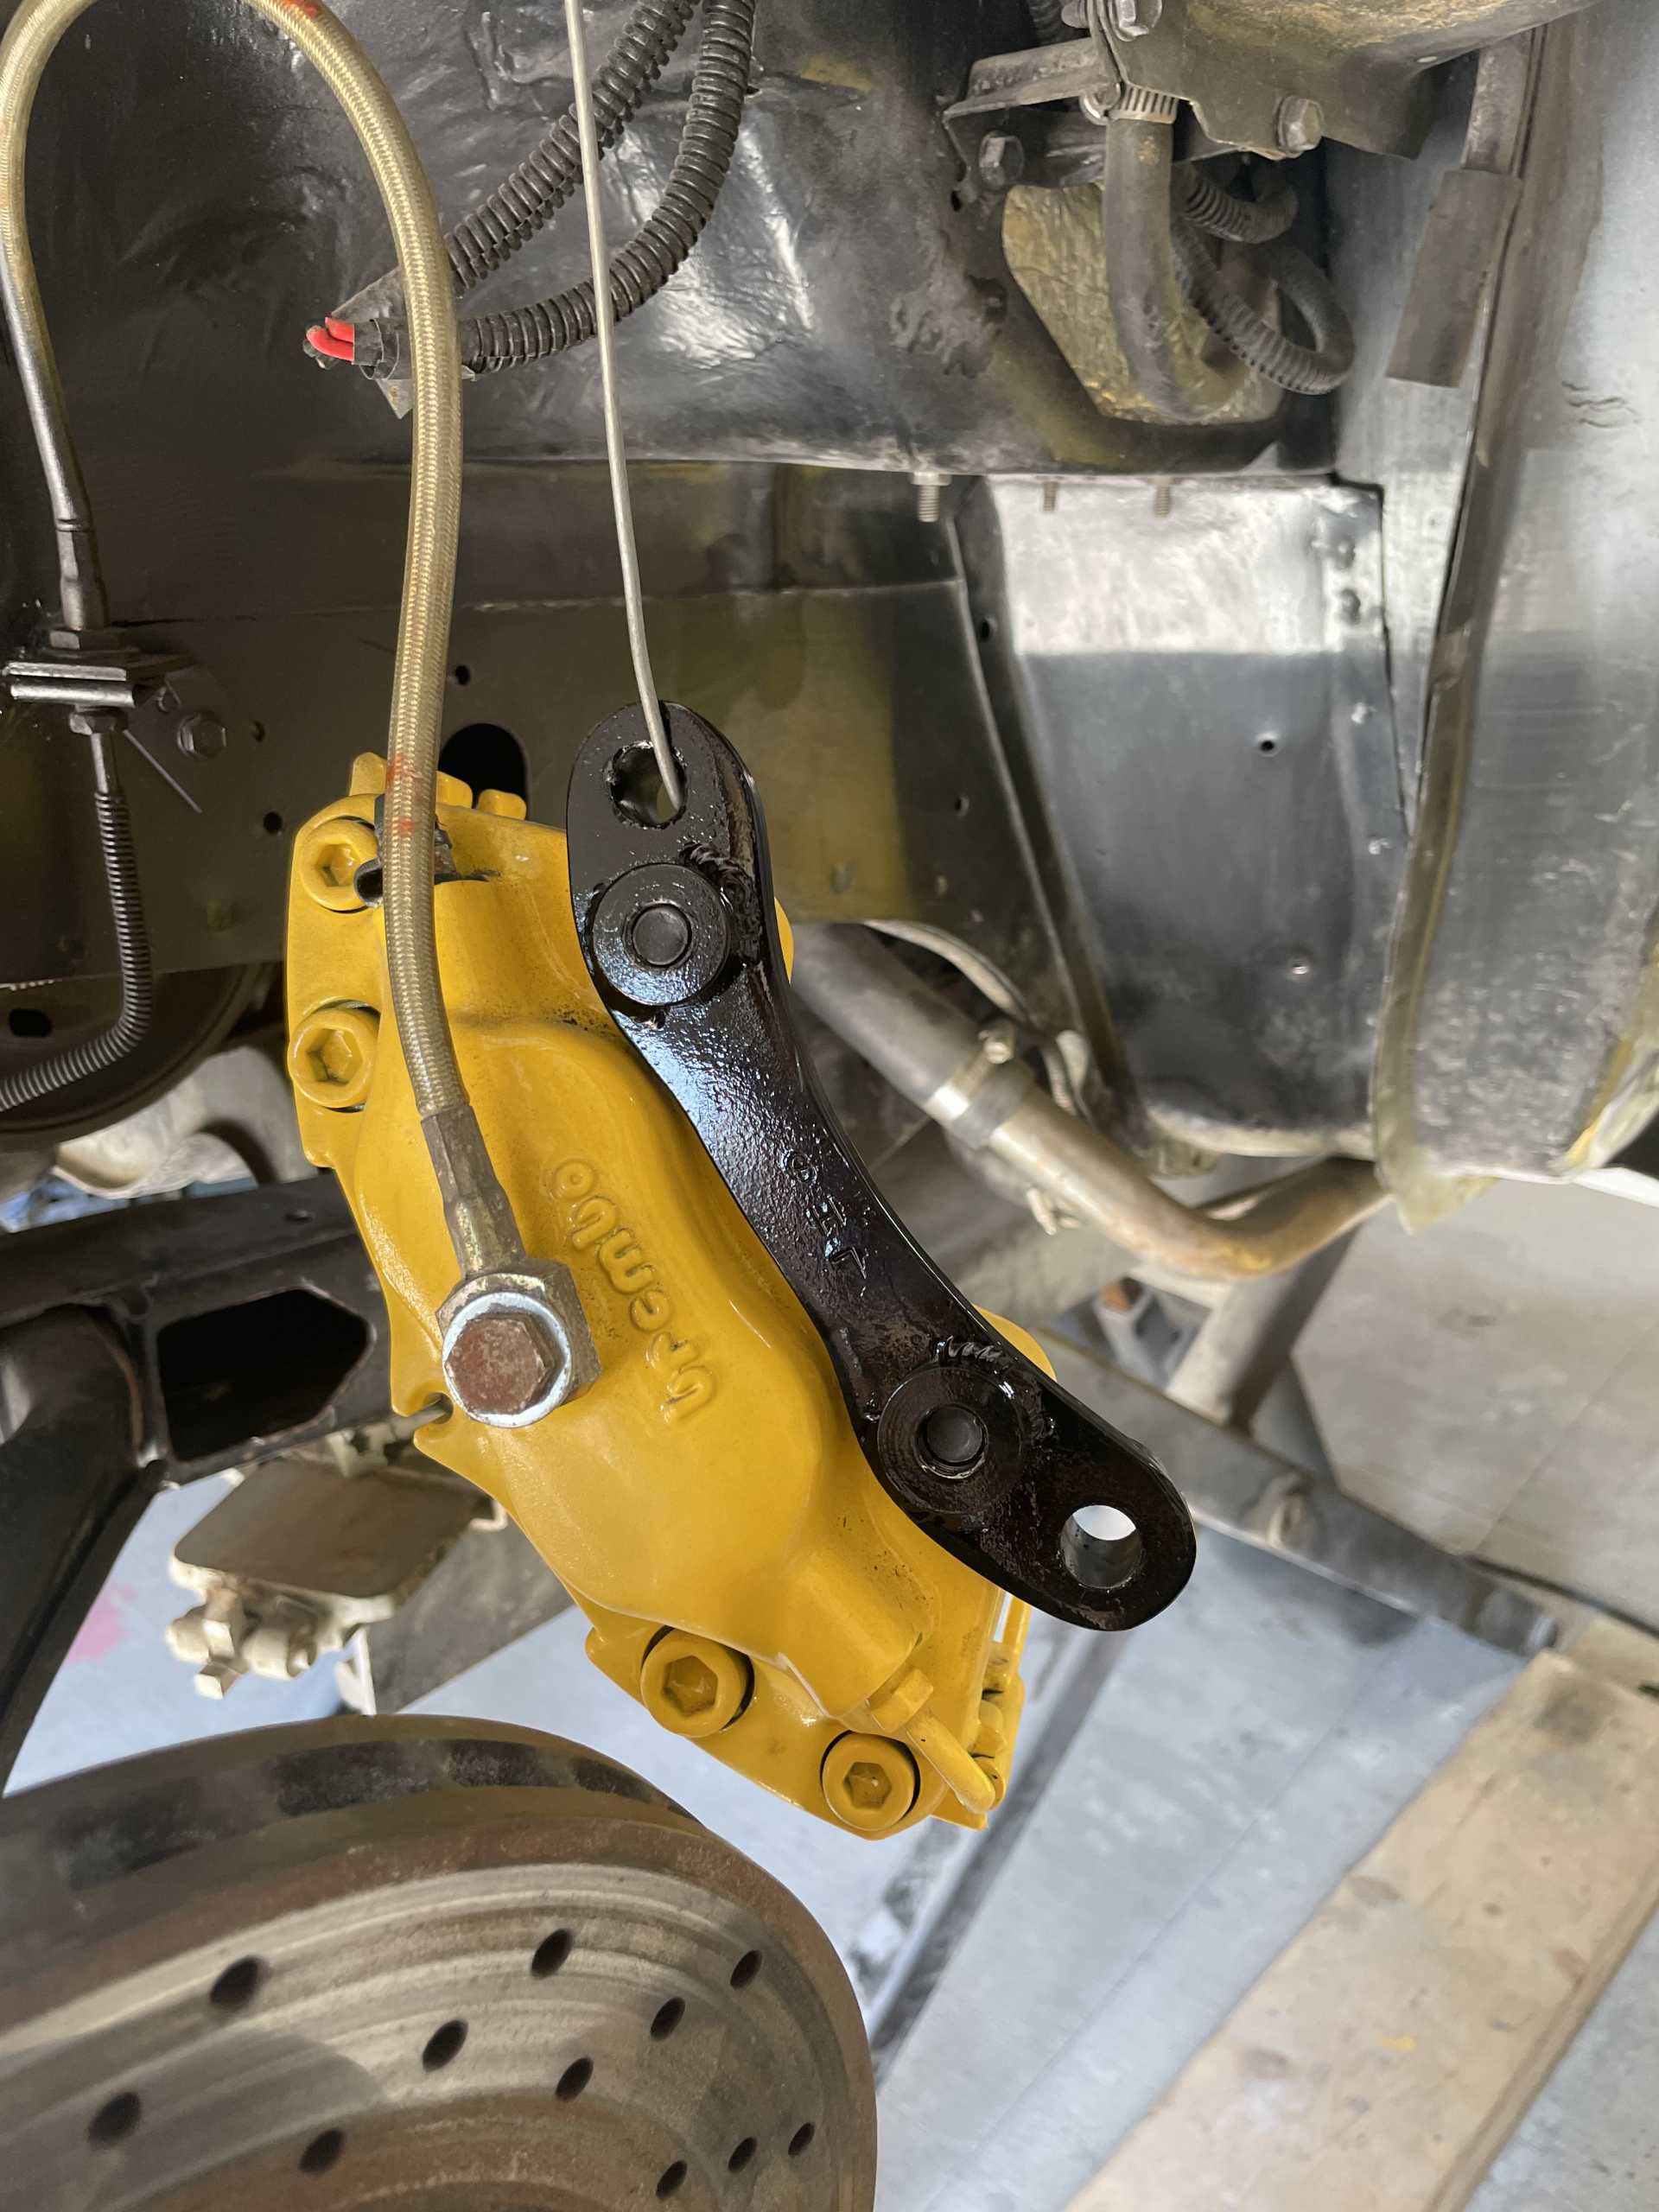
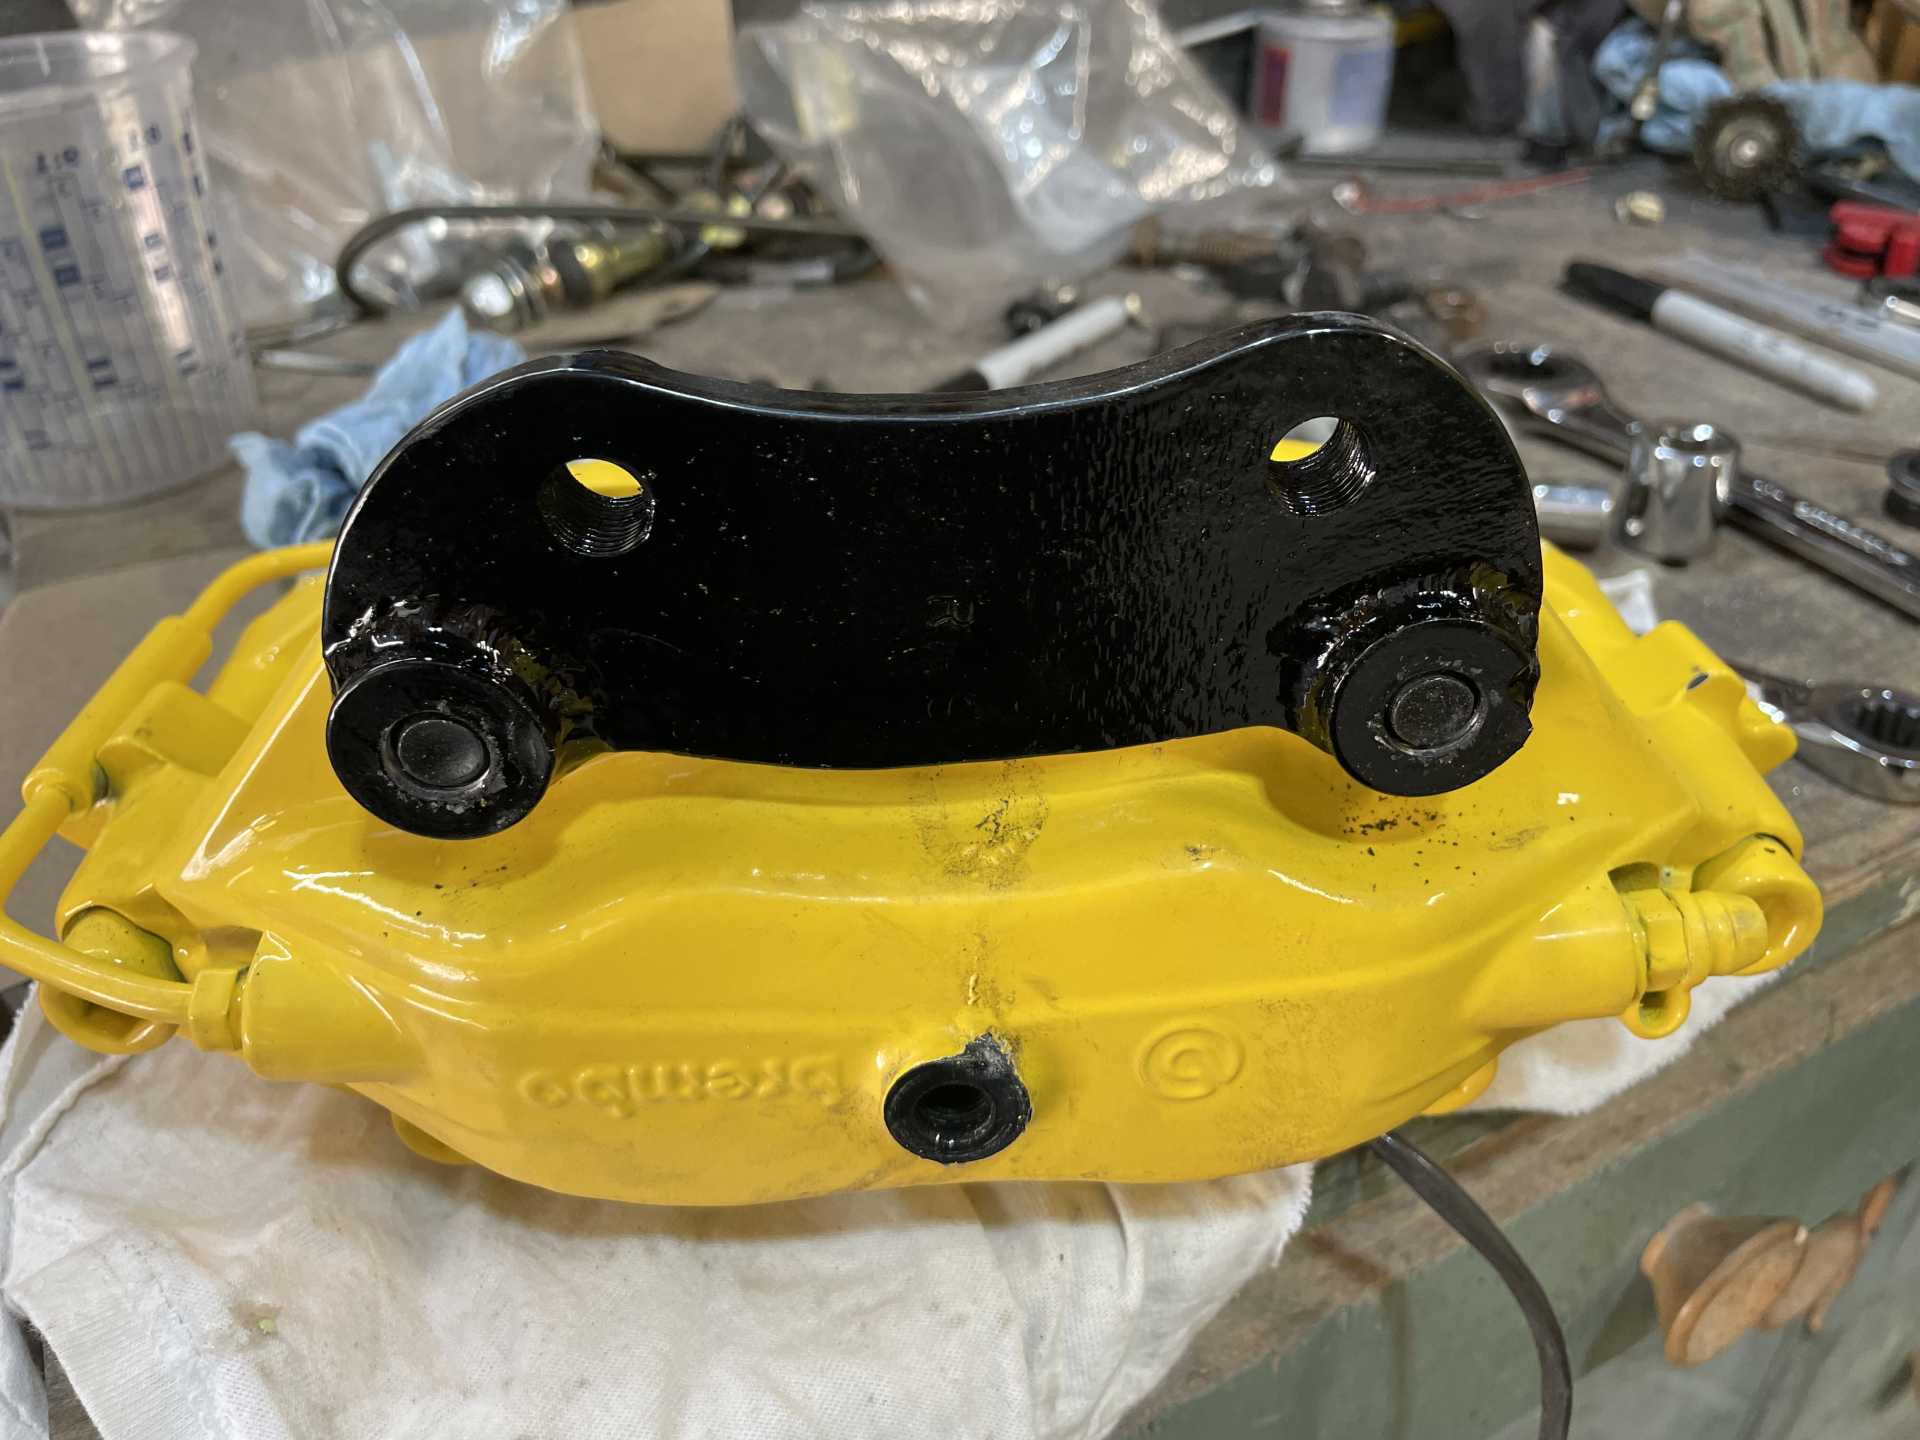
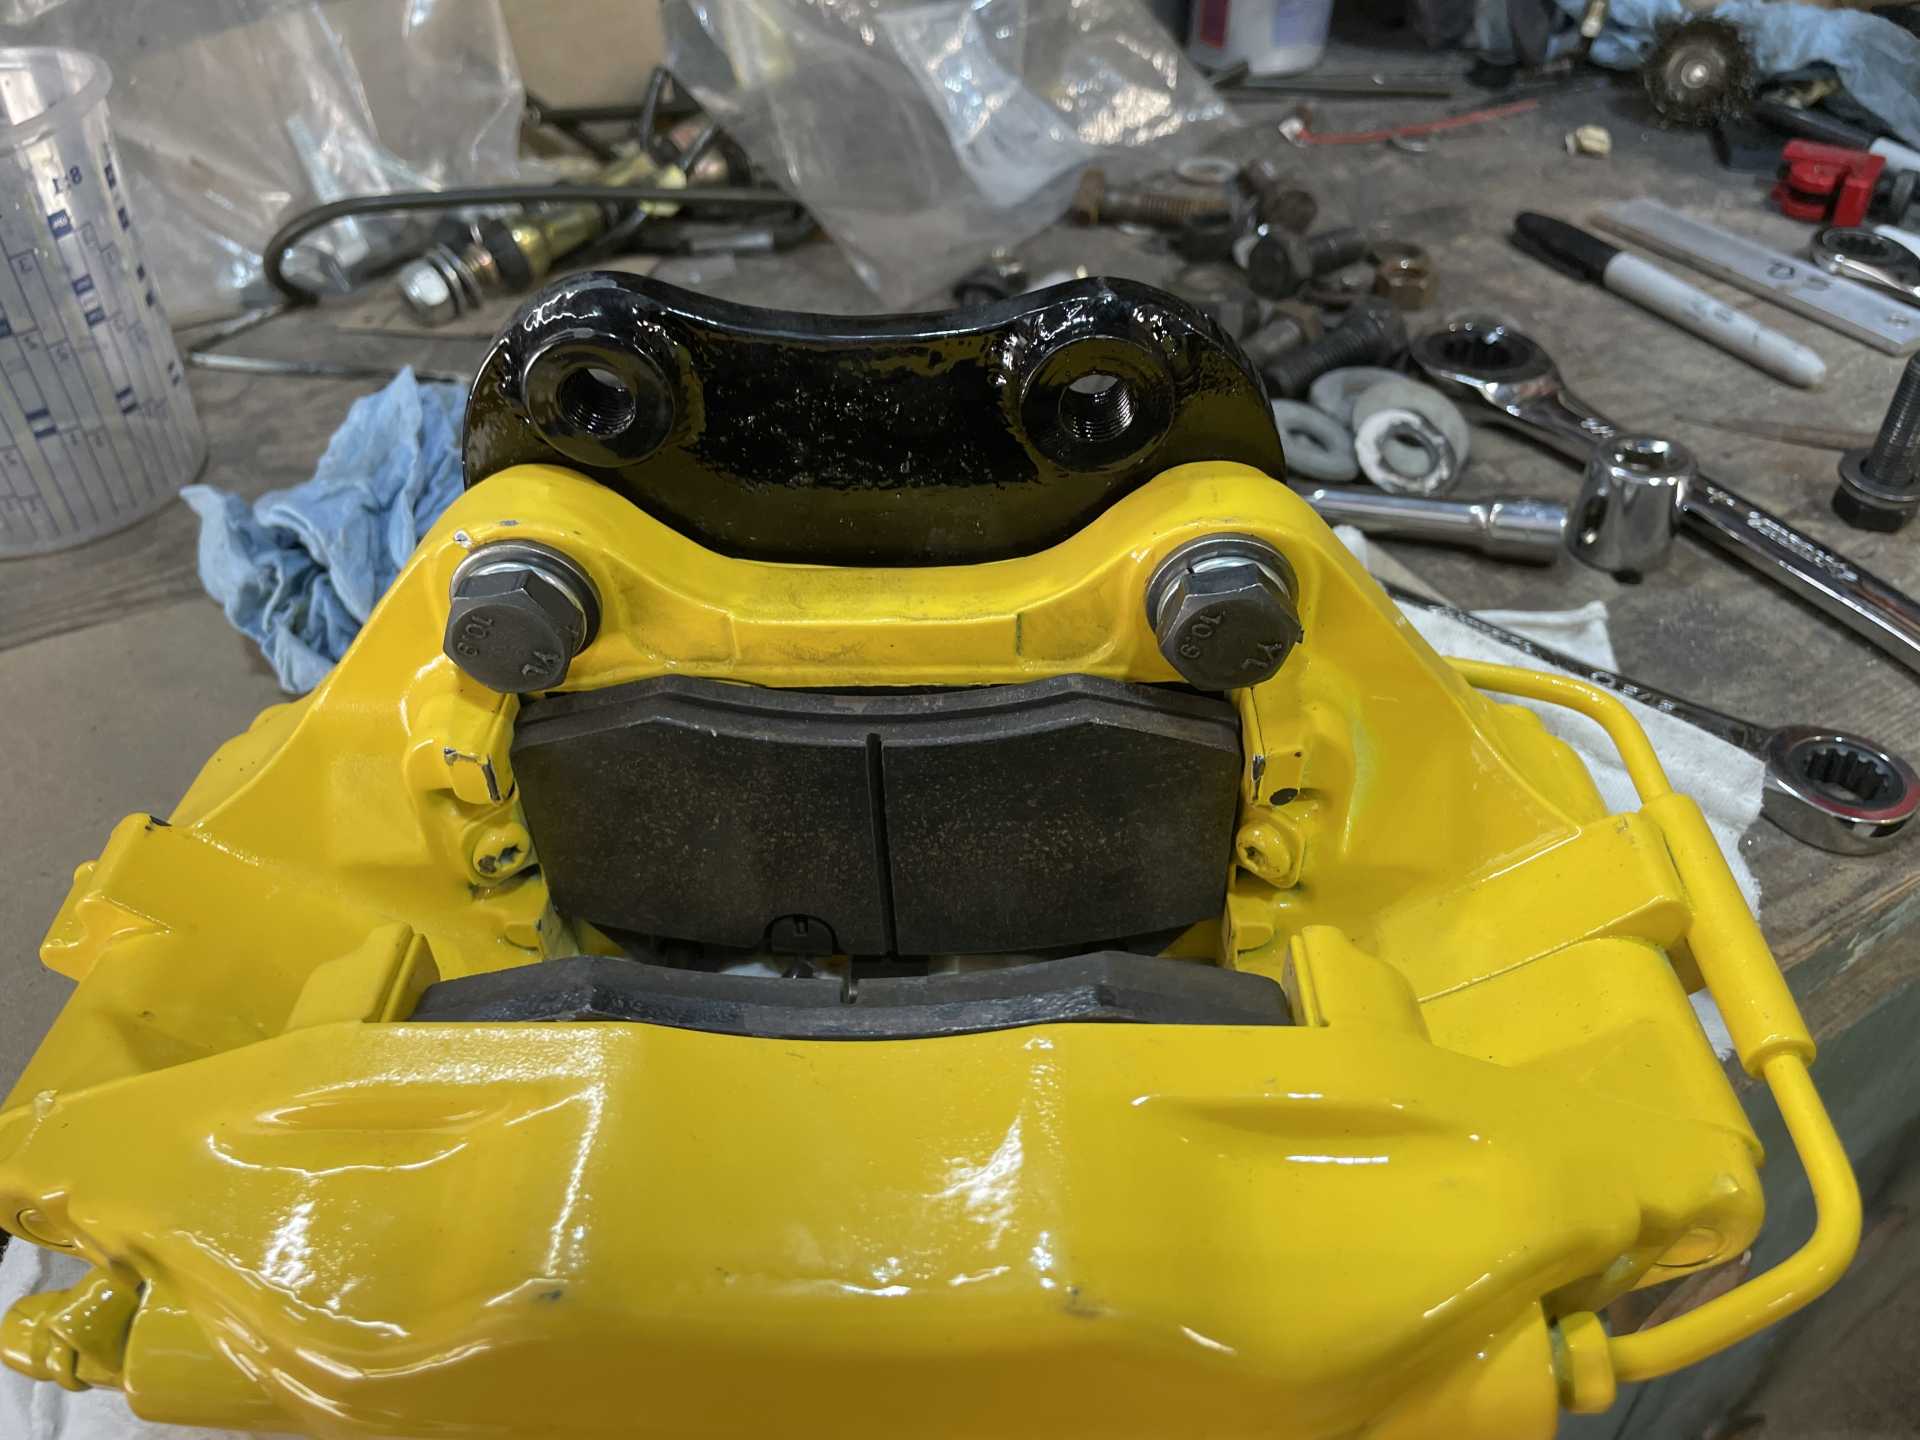
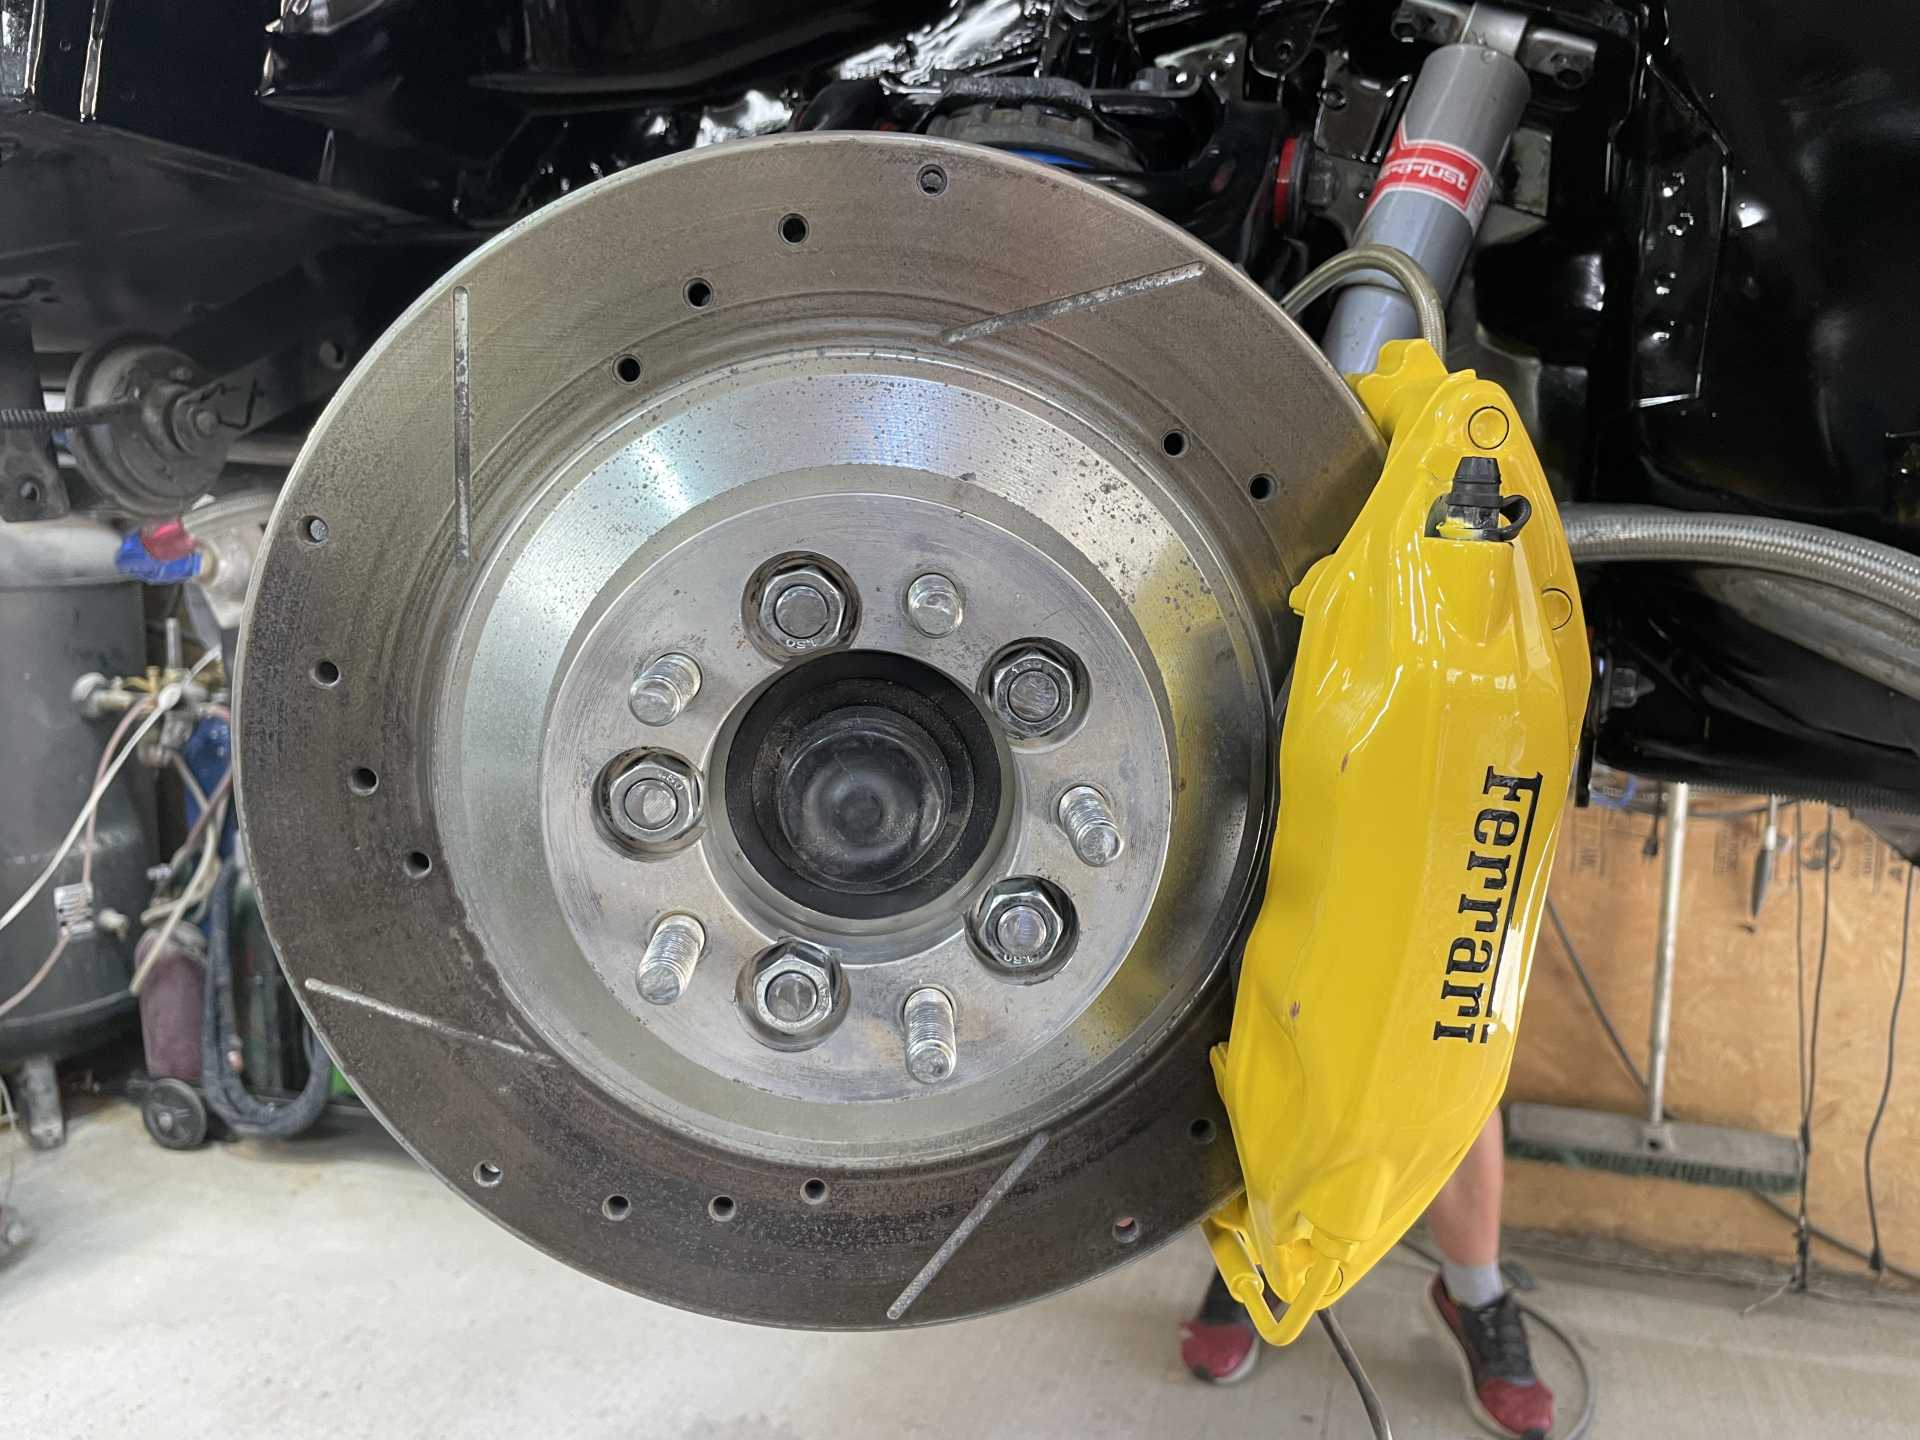
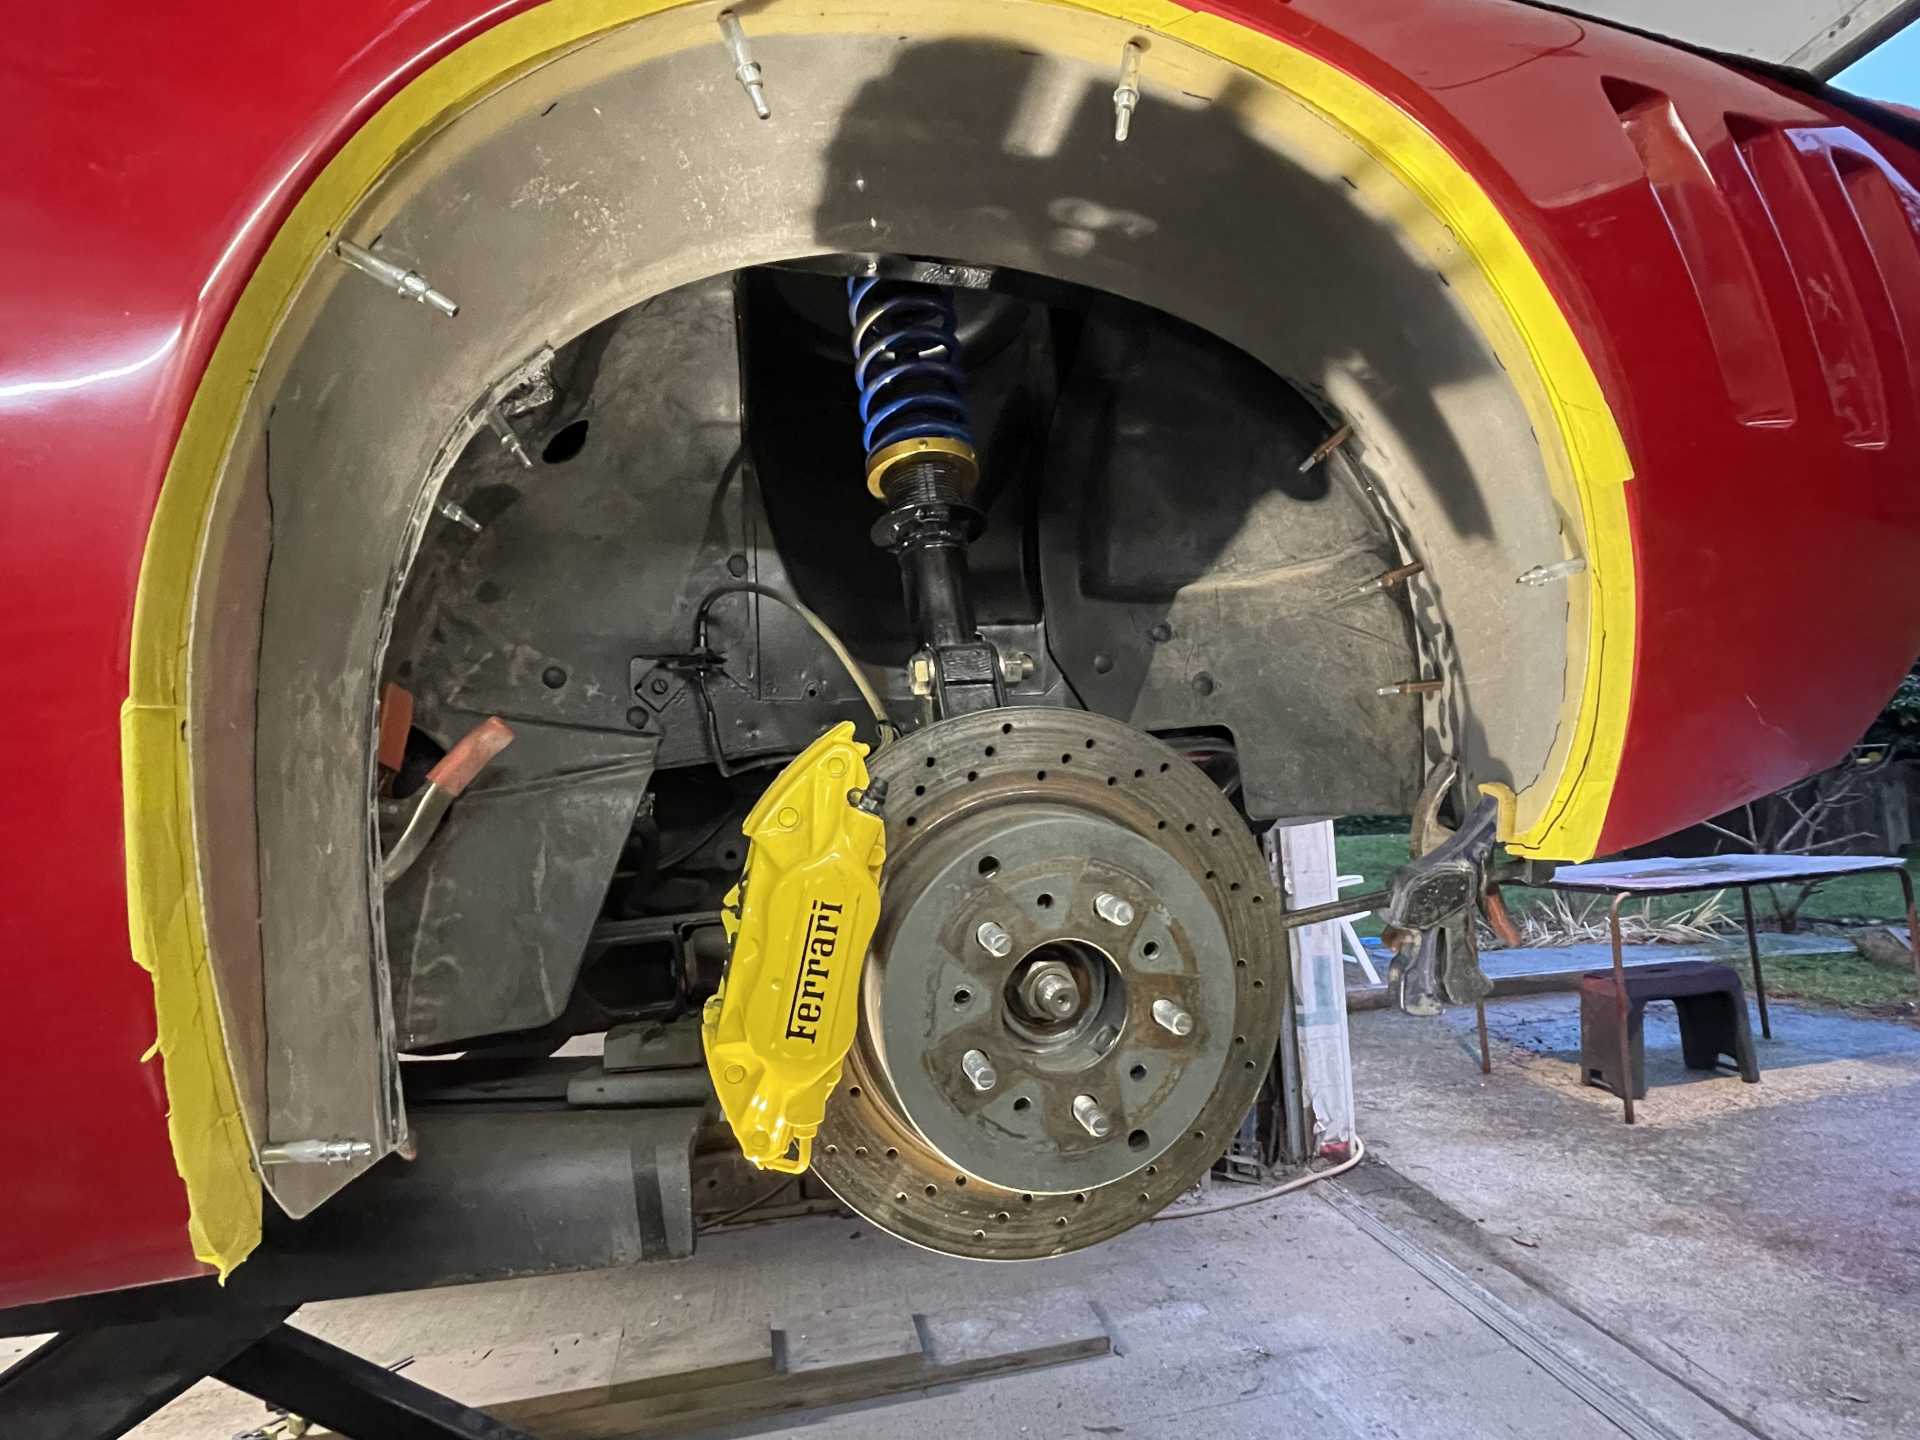
Phil the other buddy of mine is adapting the 6 piston Brembo front brakes that I have onto my car. He also didn’t like the way my back Brembo brakes were mounted and is building new adapter plates for mounting.
To say the least I’m really excited to get the front suspension and brakes completed.
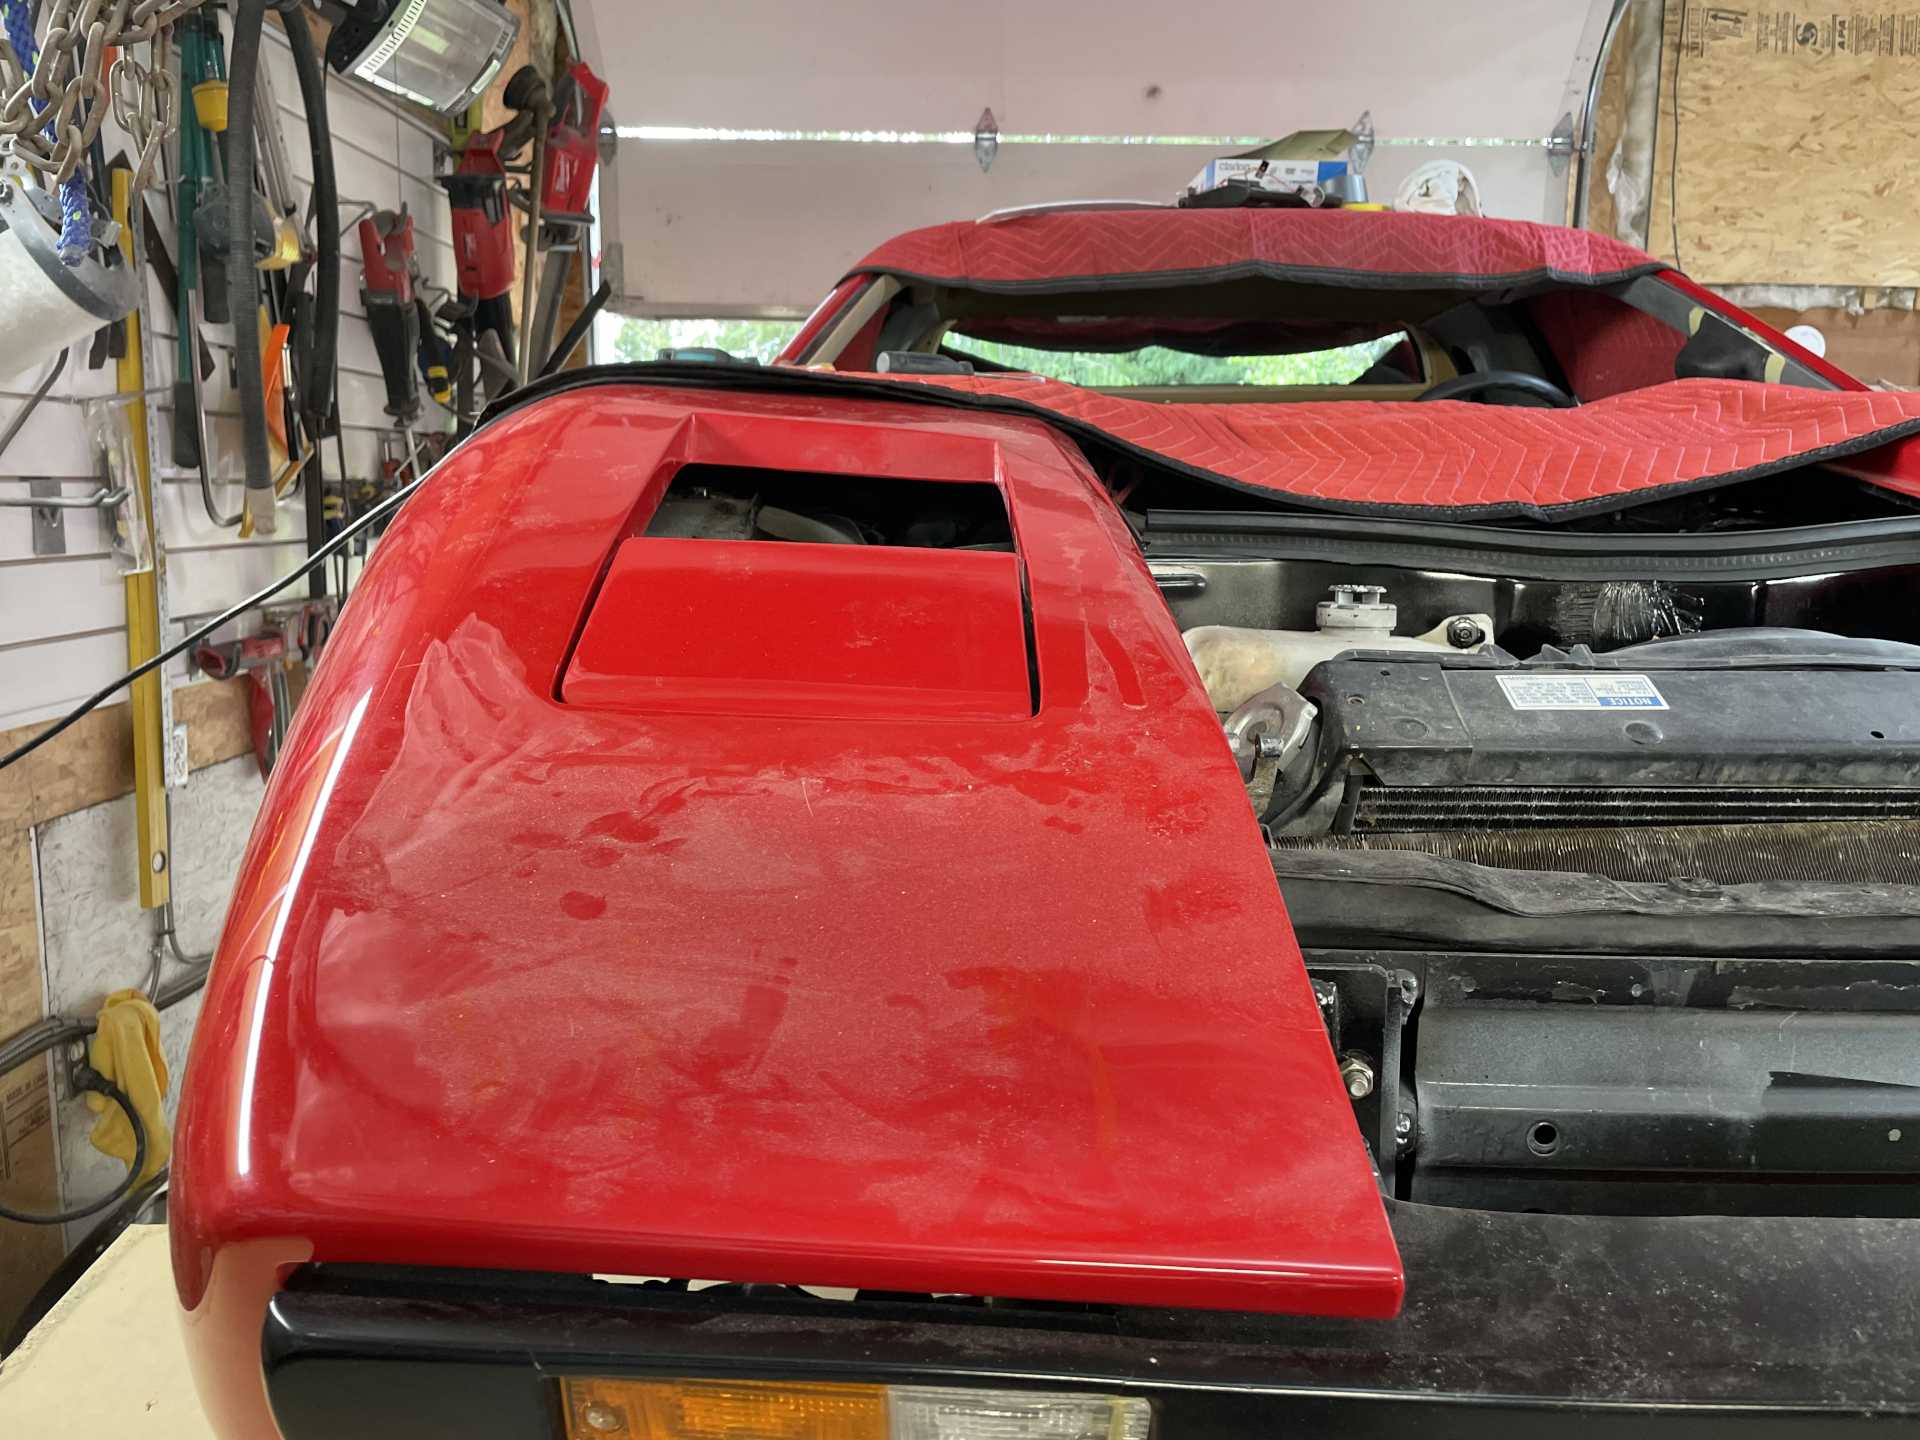
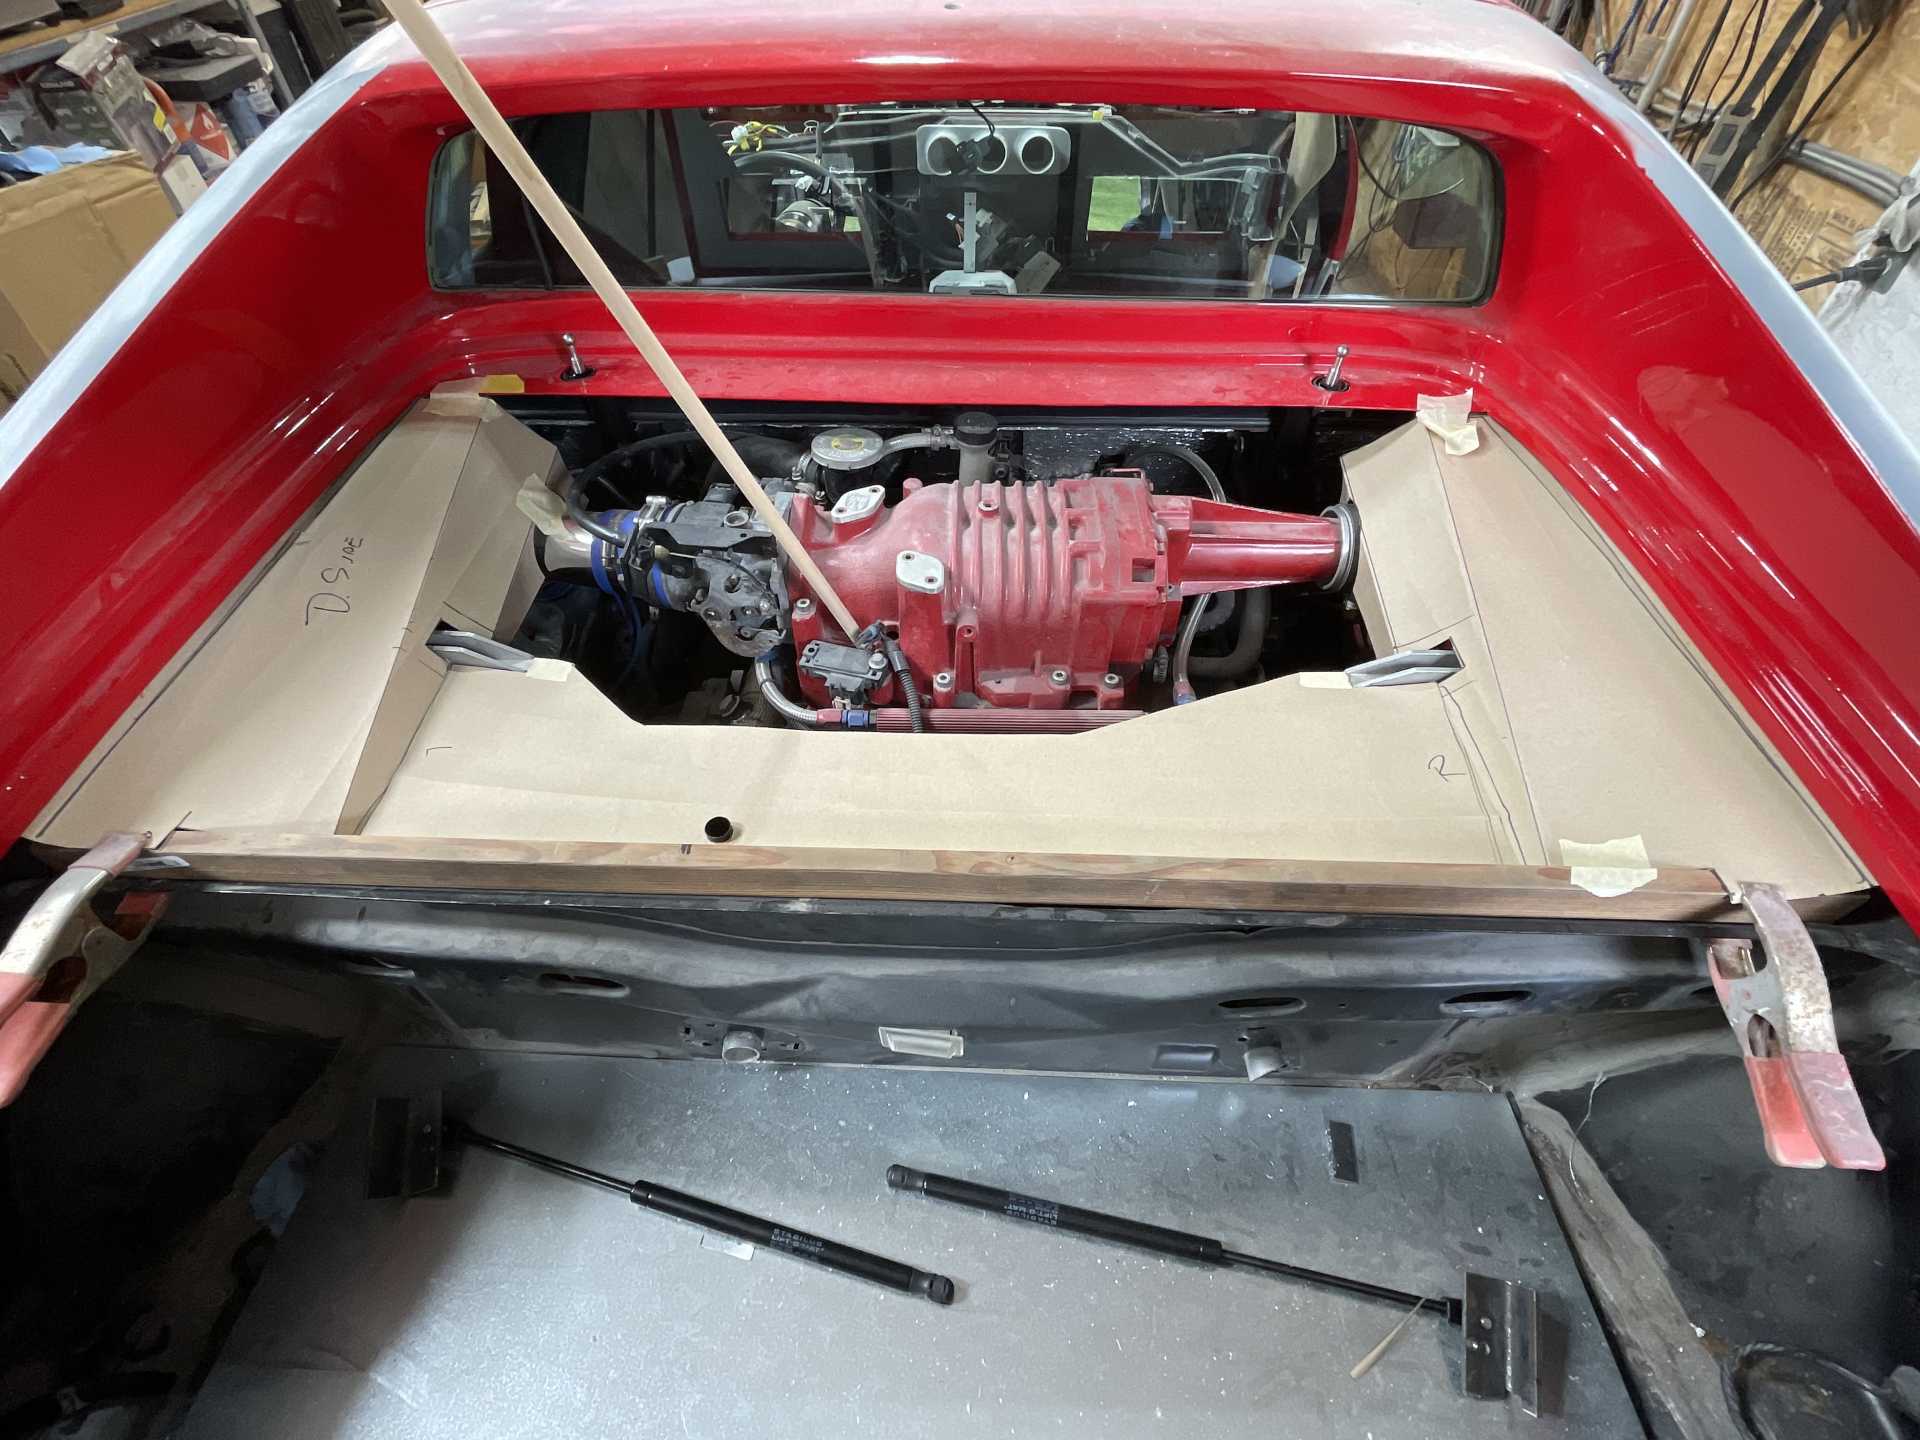
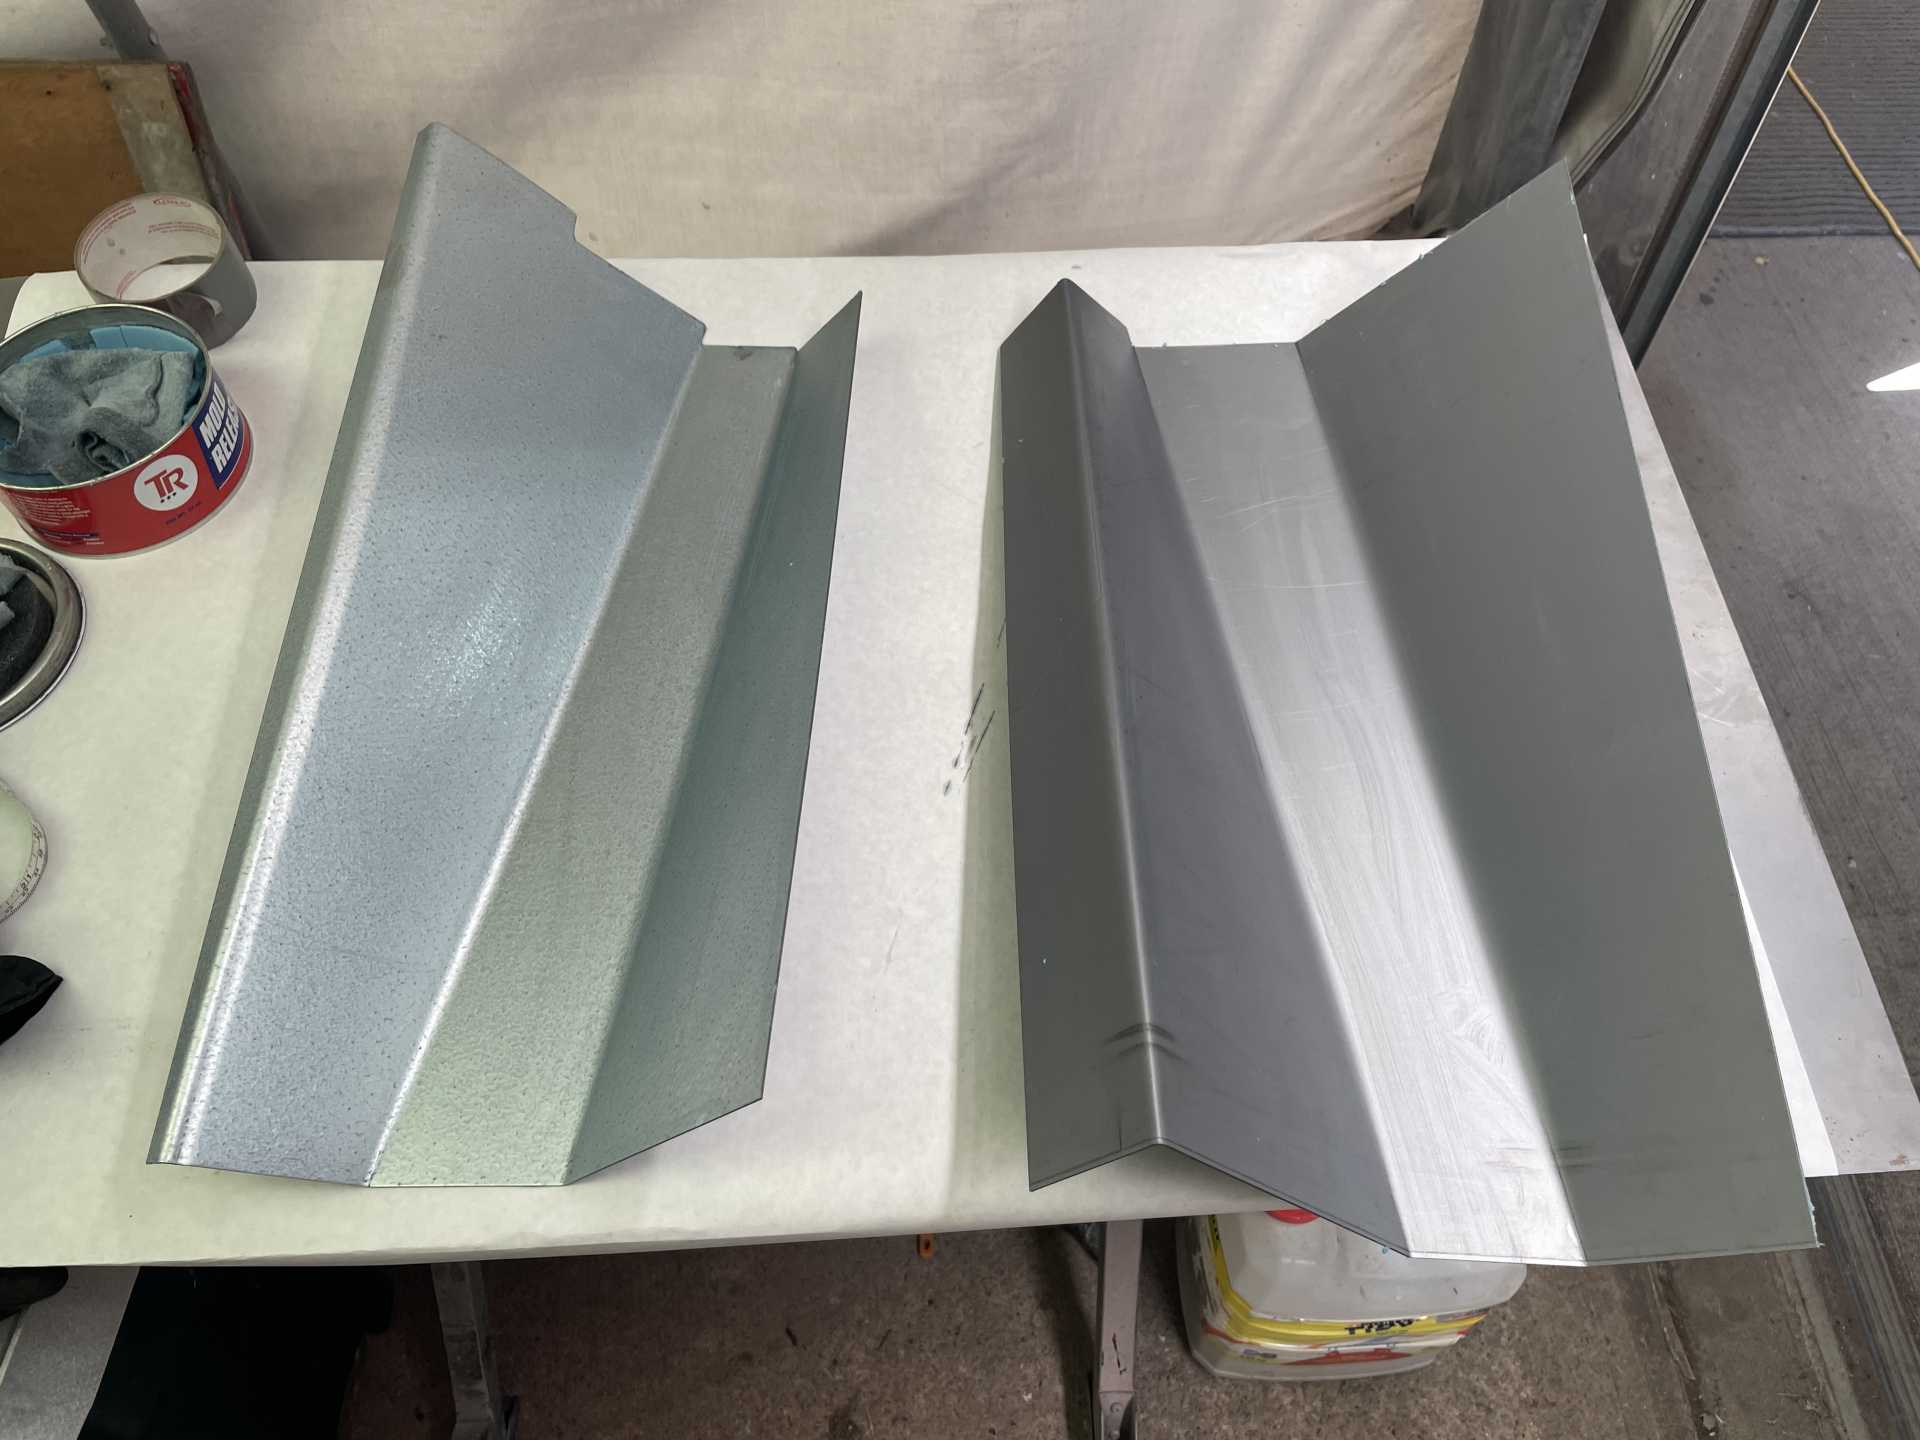
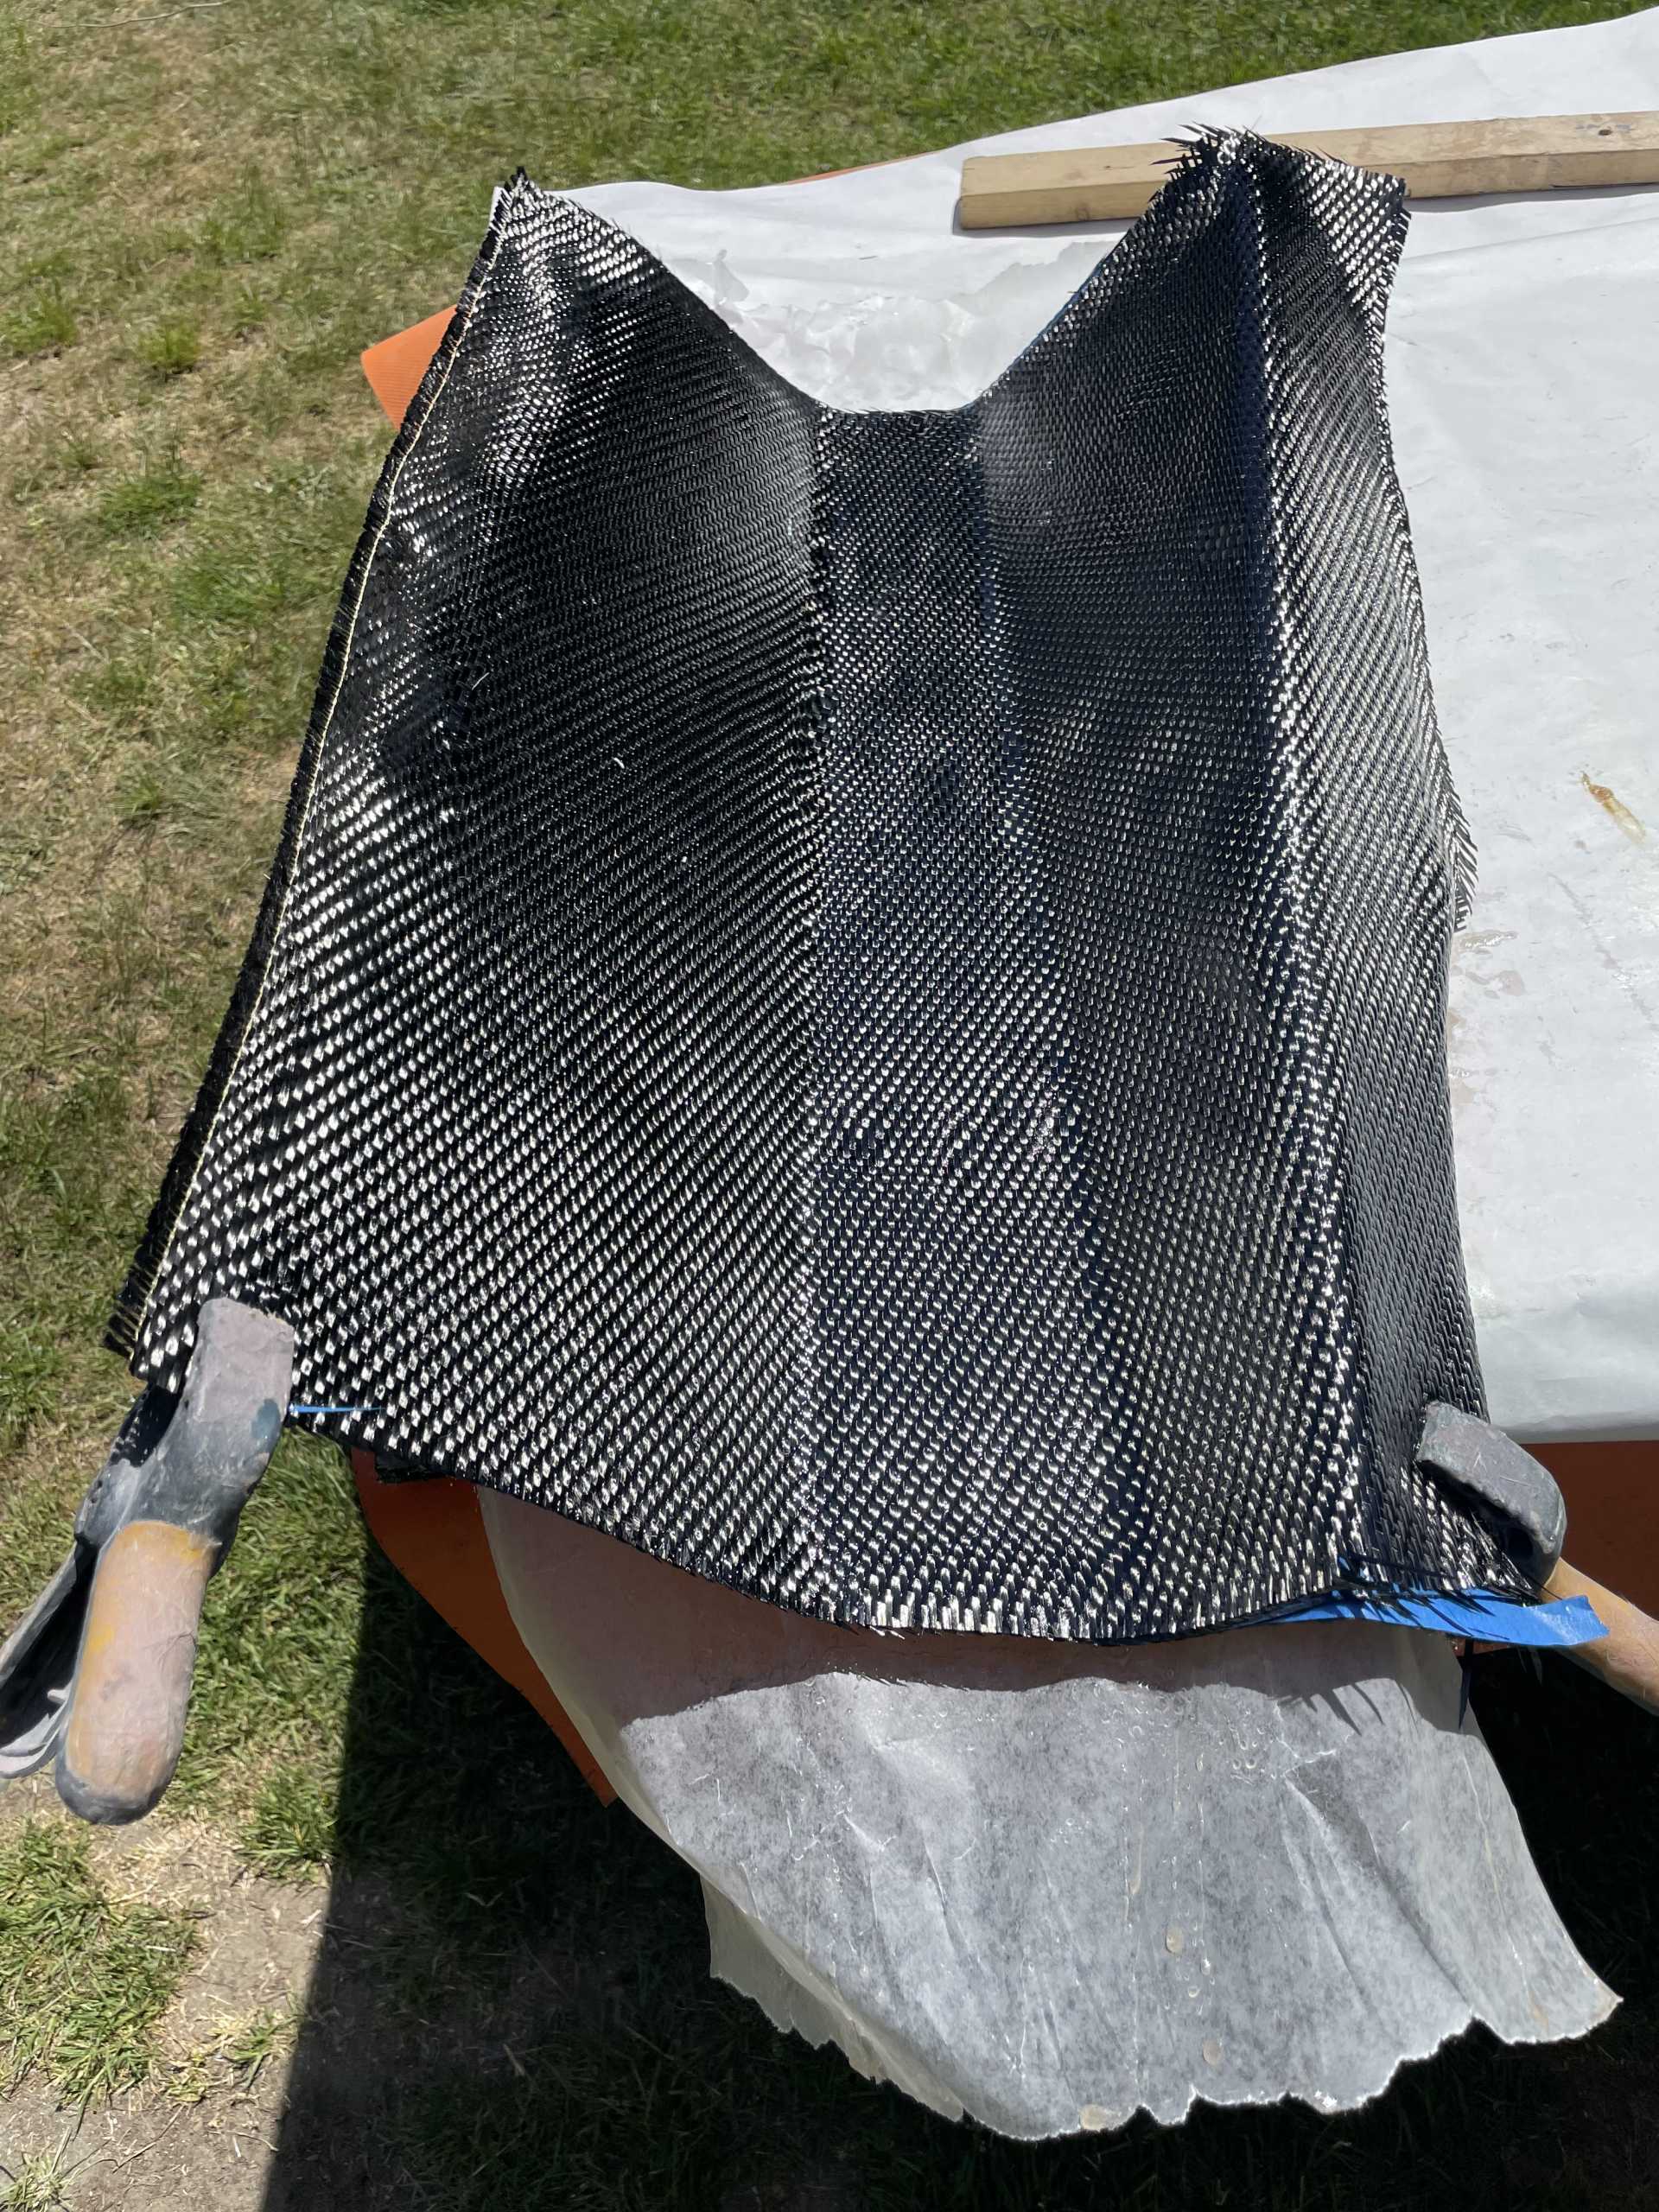
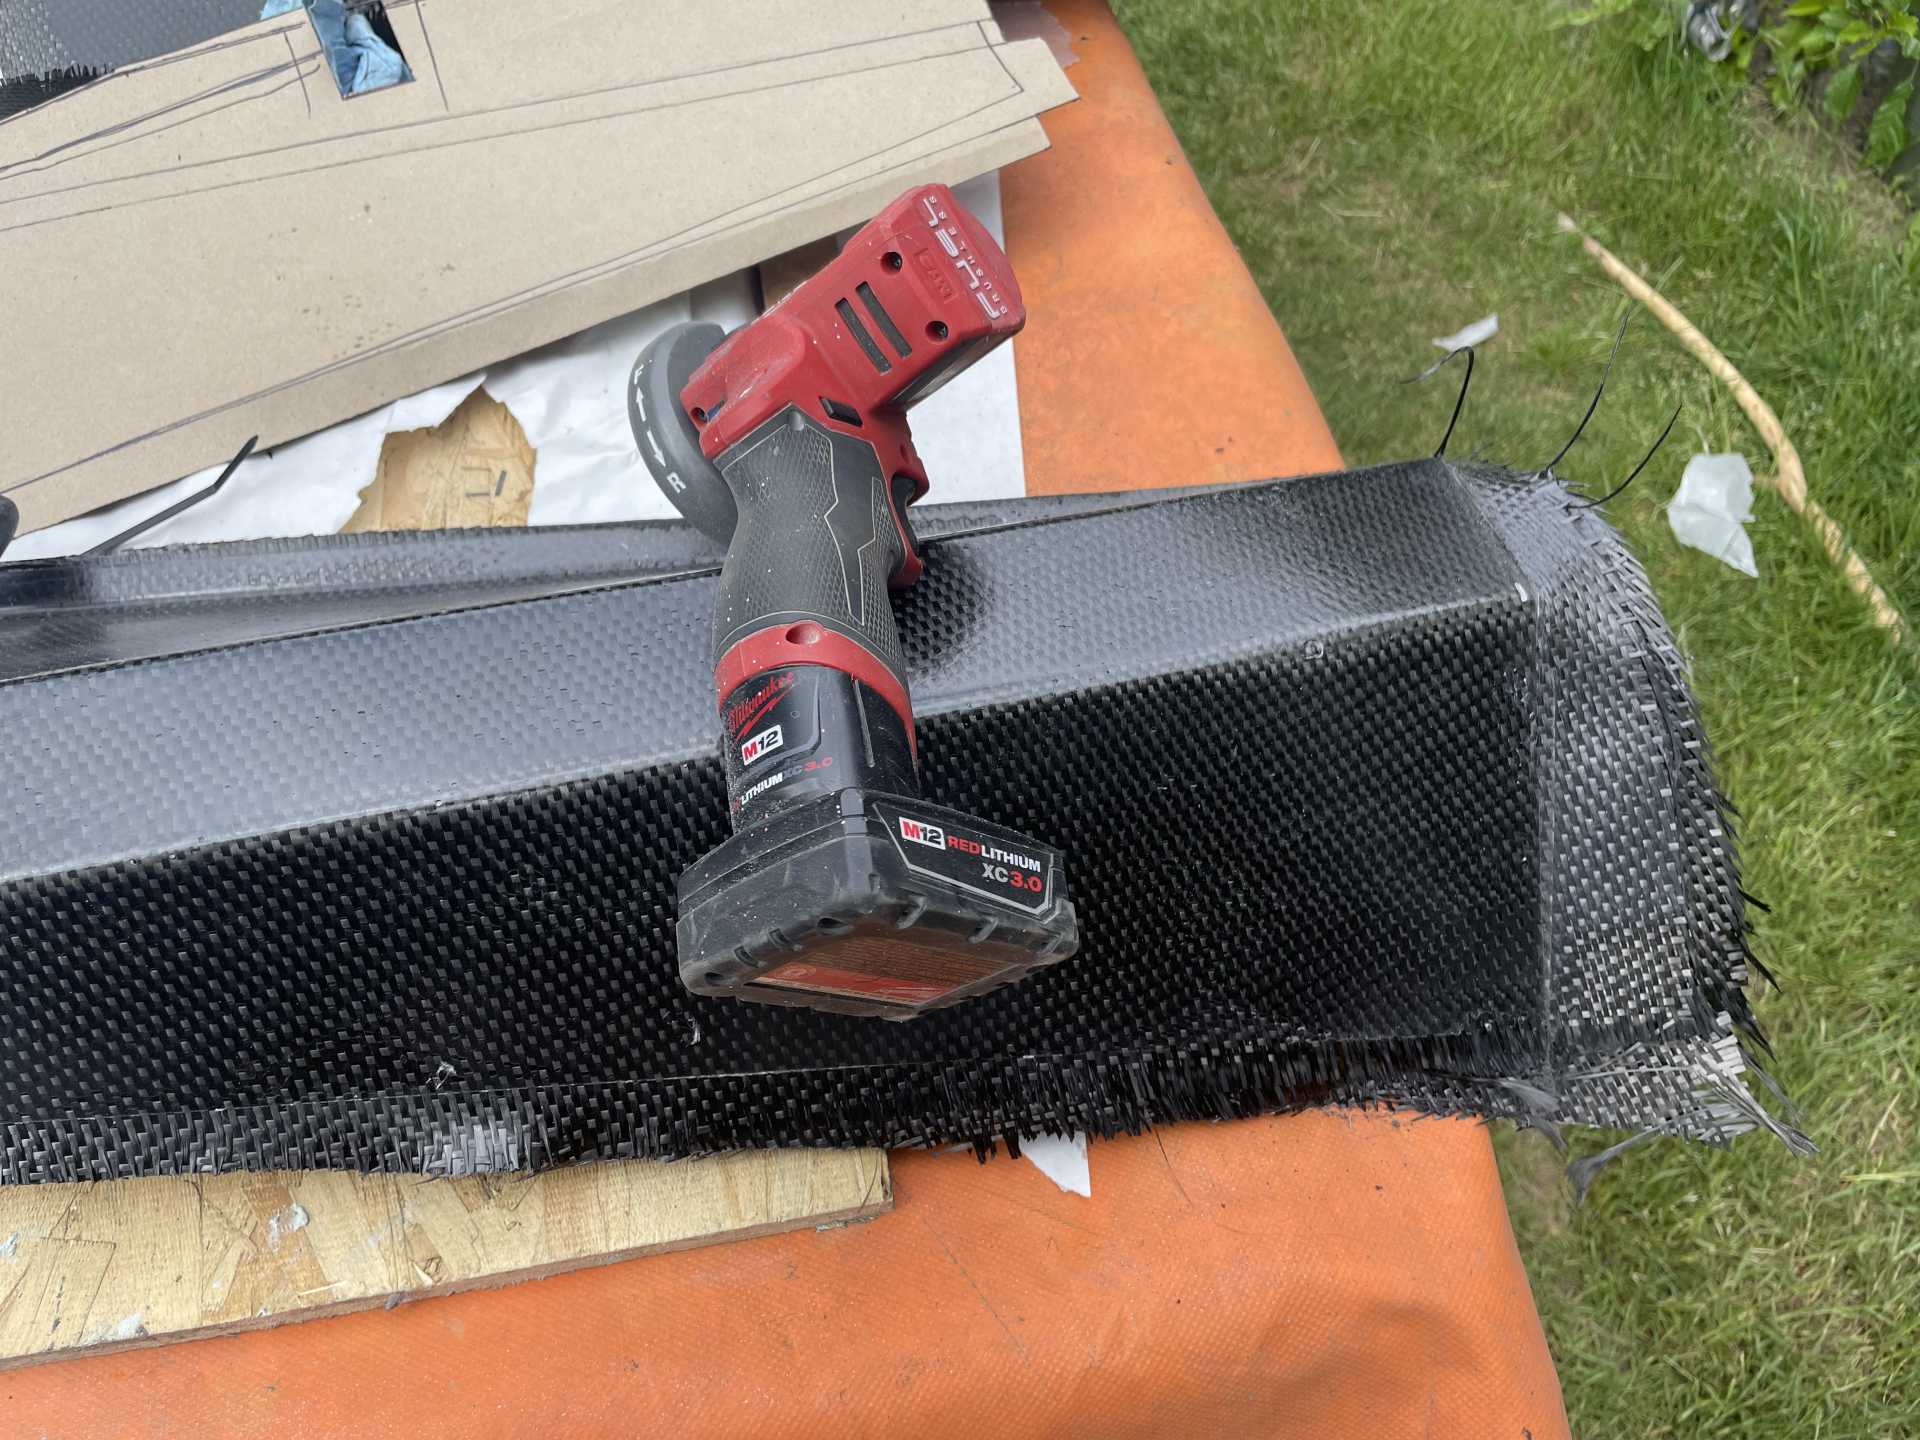
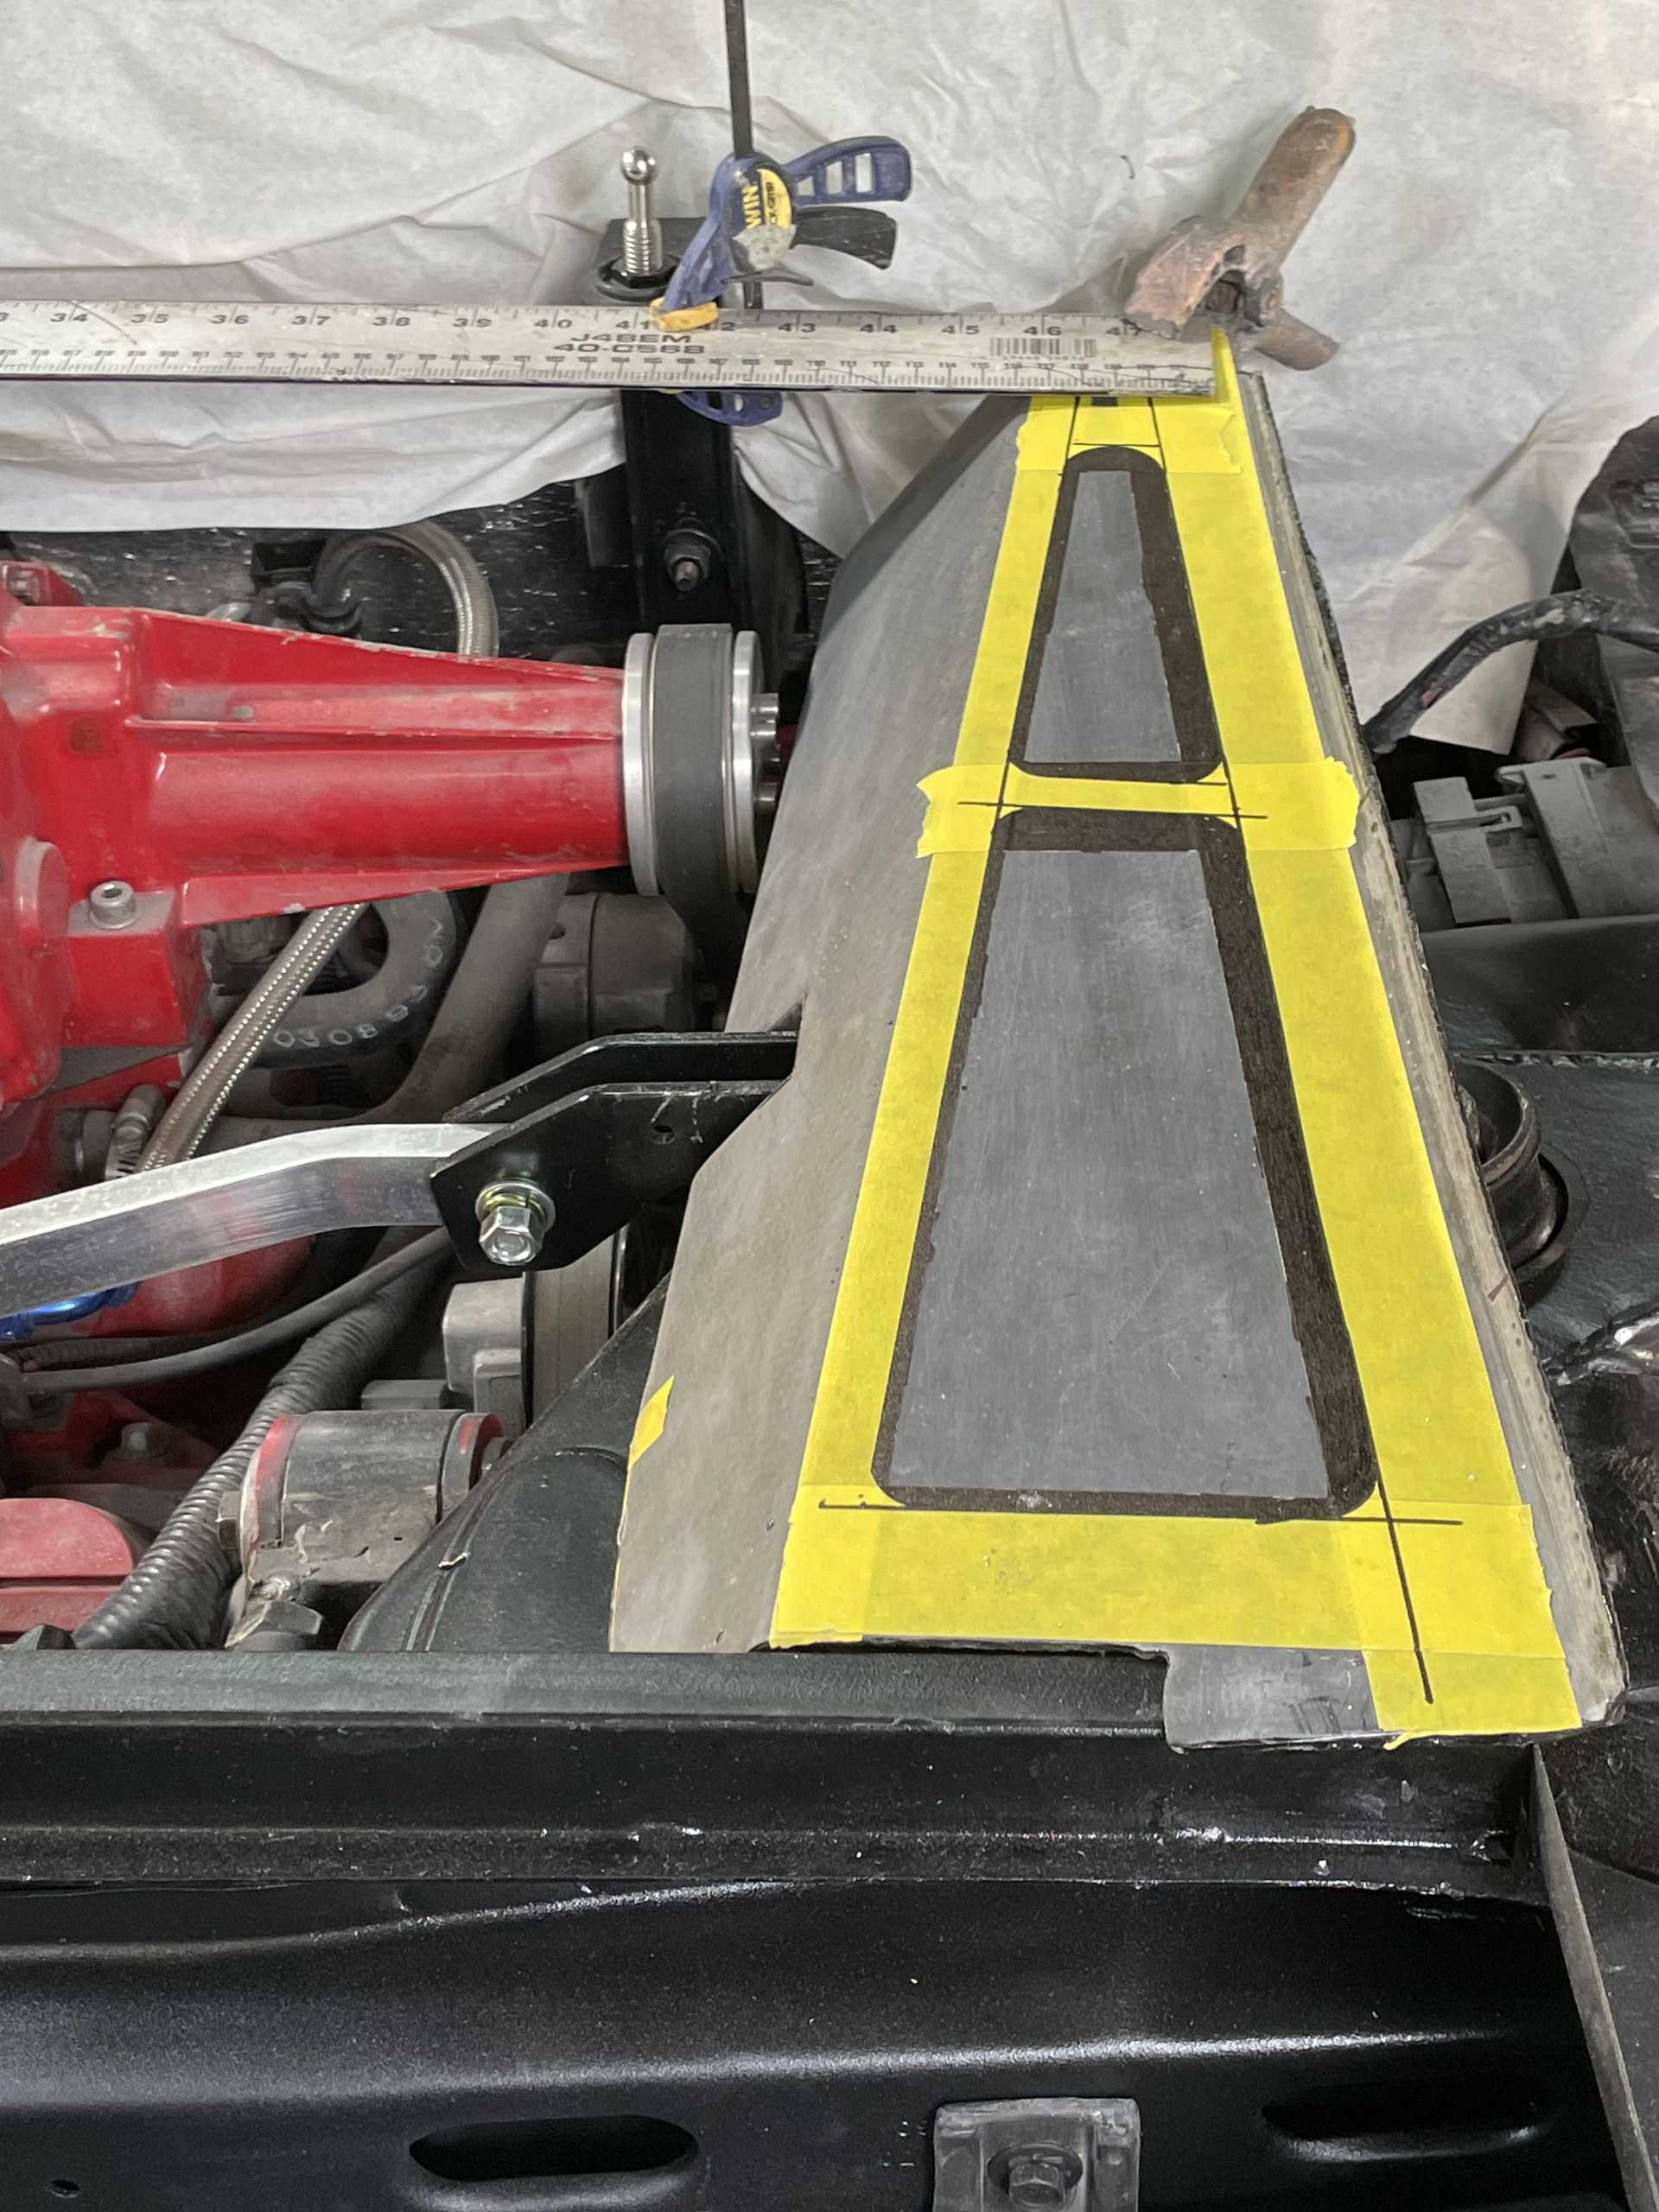
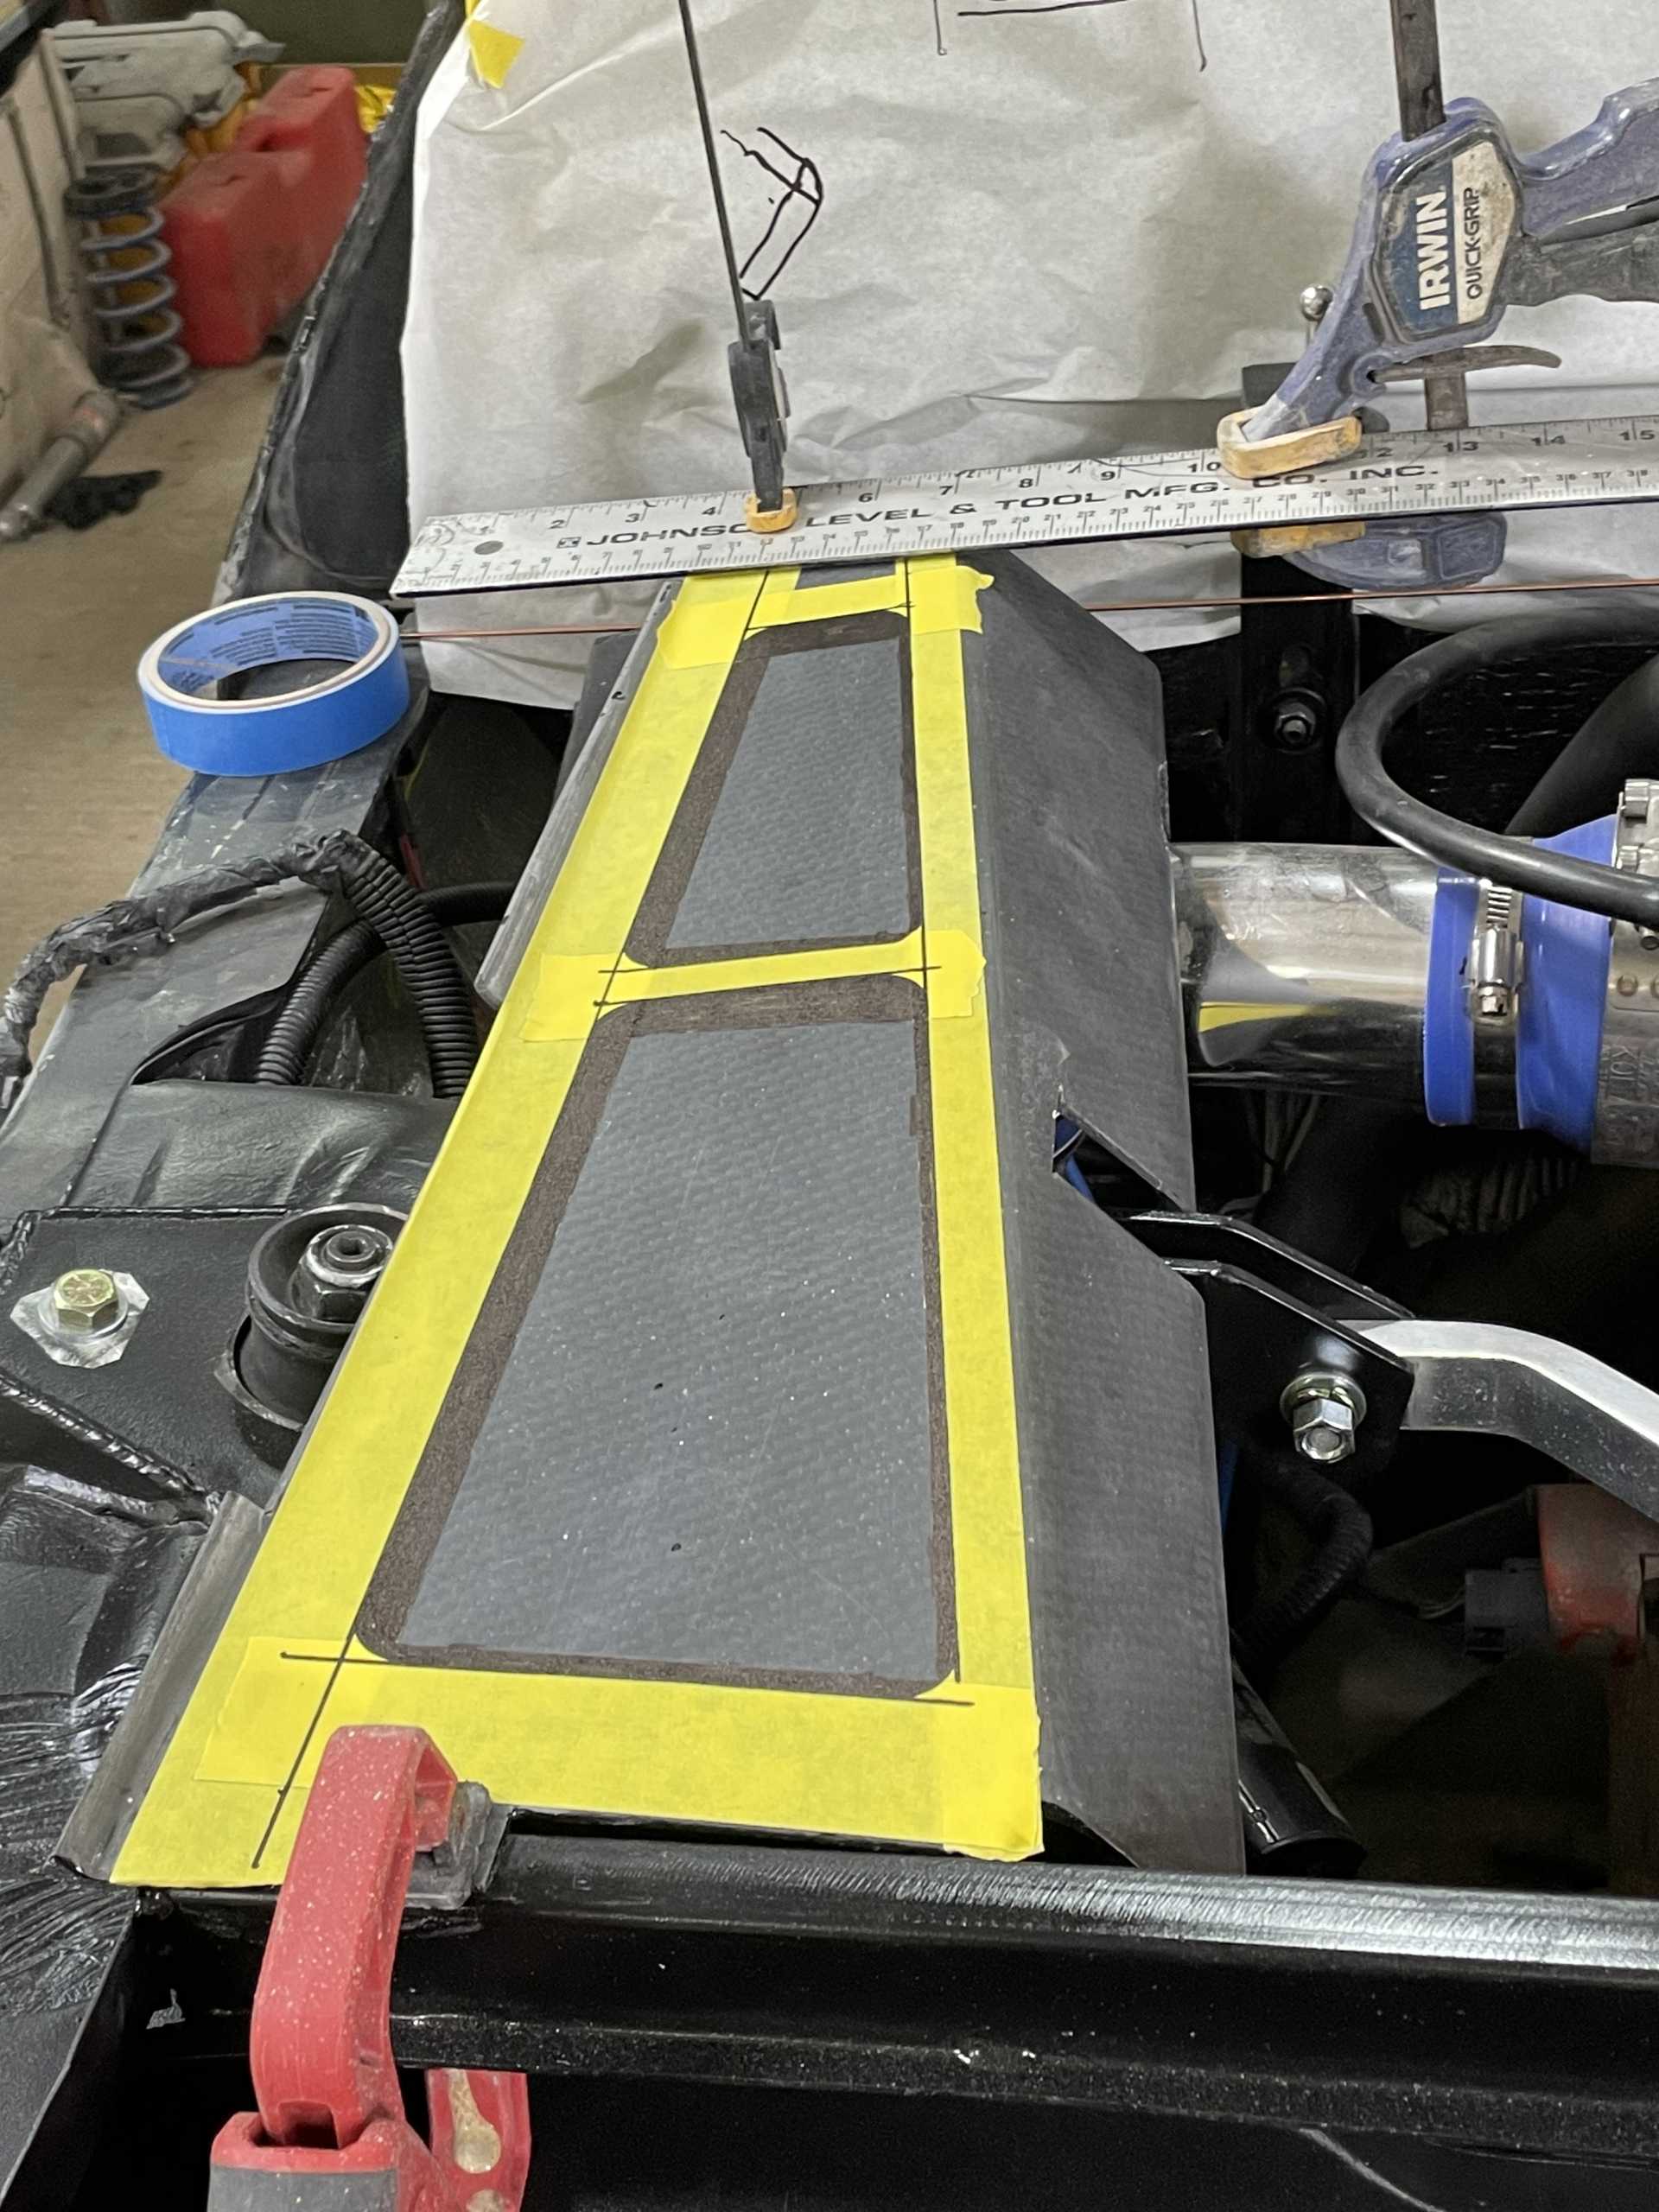
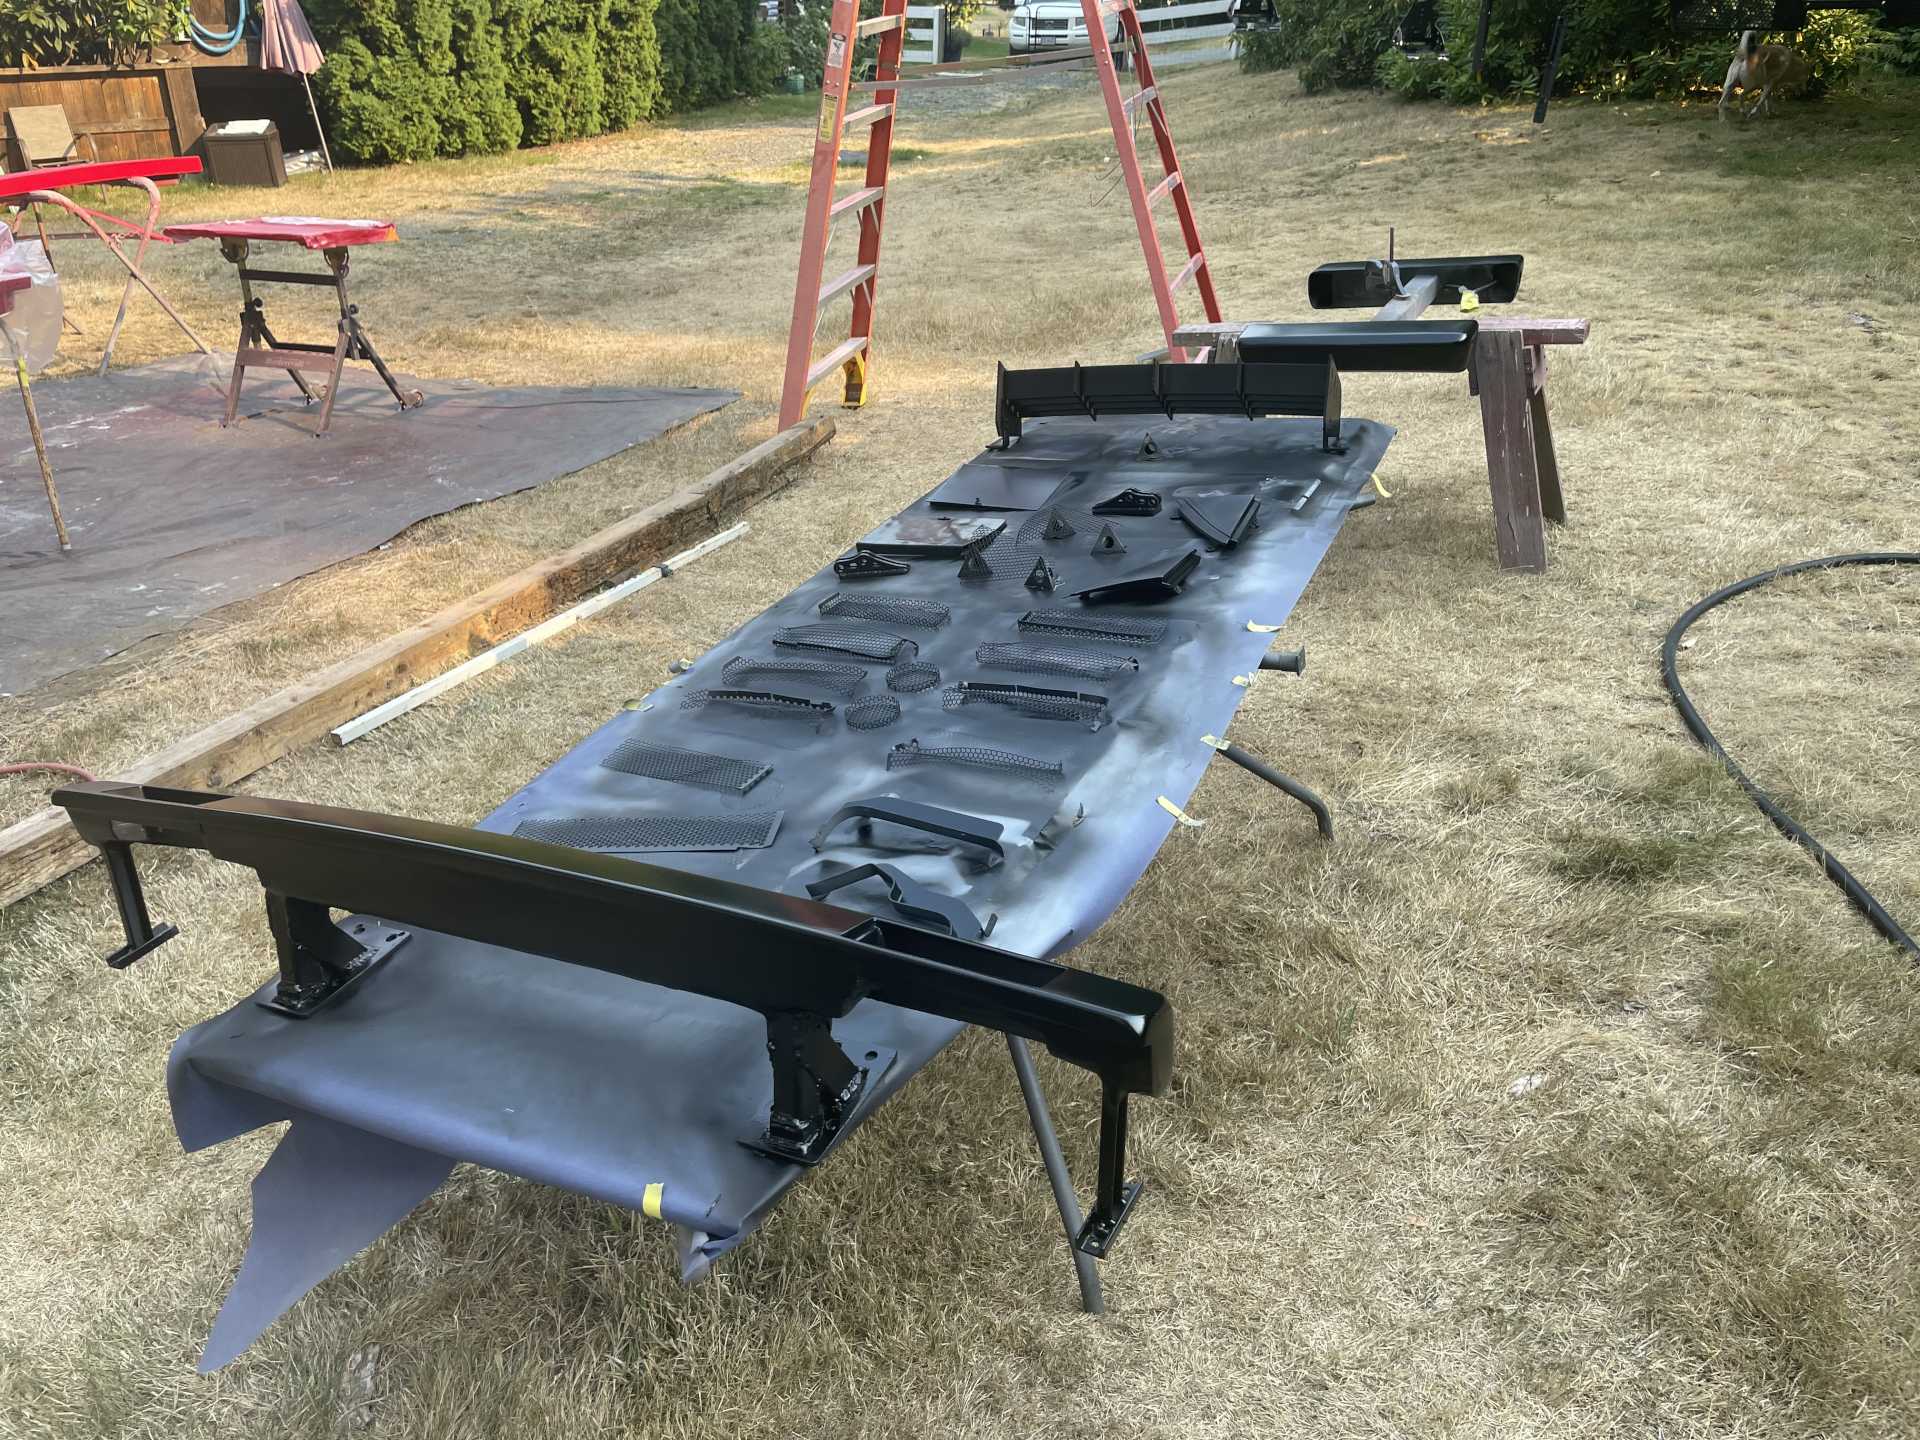
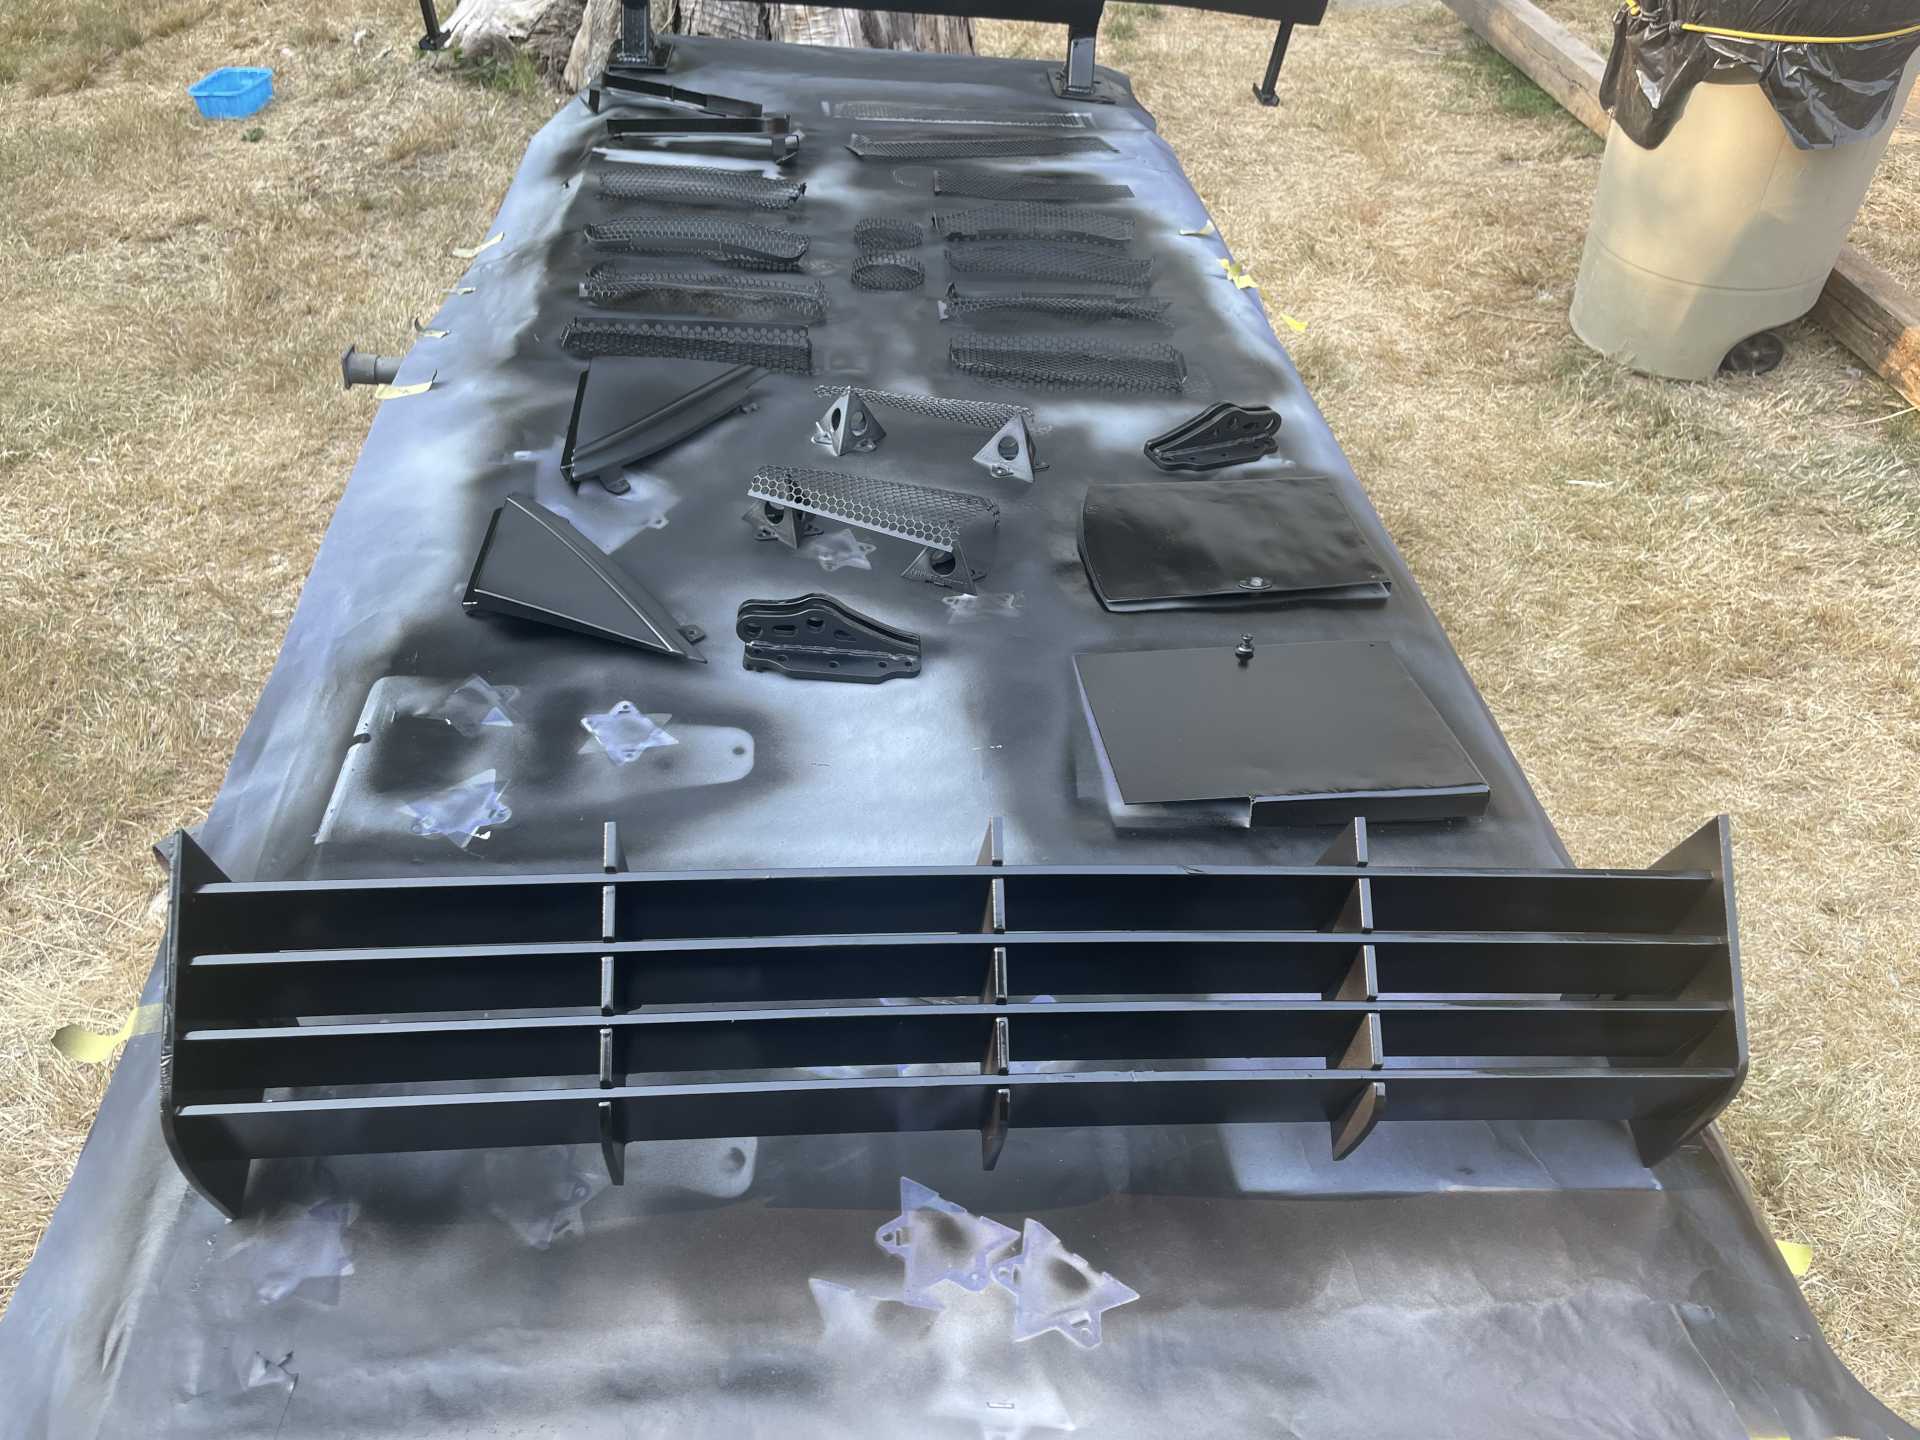
And then there is the Carbon Fiber engine compartment covers. I thought for those that are interested you might like the build process I used . Keep in mind there are other ways to build them I’ve chosen this method but you could do an infusion or vacuum bag but due to the shape and sharp edges of the metal this worked best For me. I started with the cardboard templates I made earlier
I took some 18ga metal and bent it to the shape of the cover, I then waxed it a couple times and then sprayed it with PVA mold release
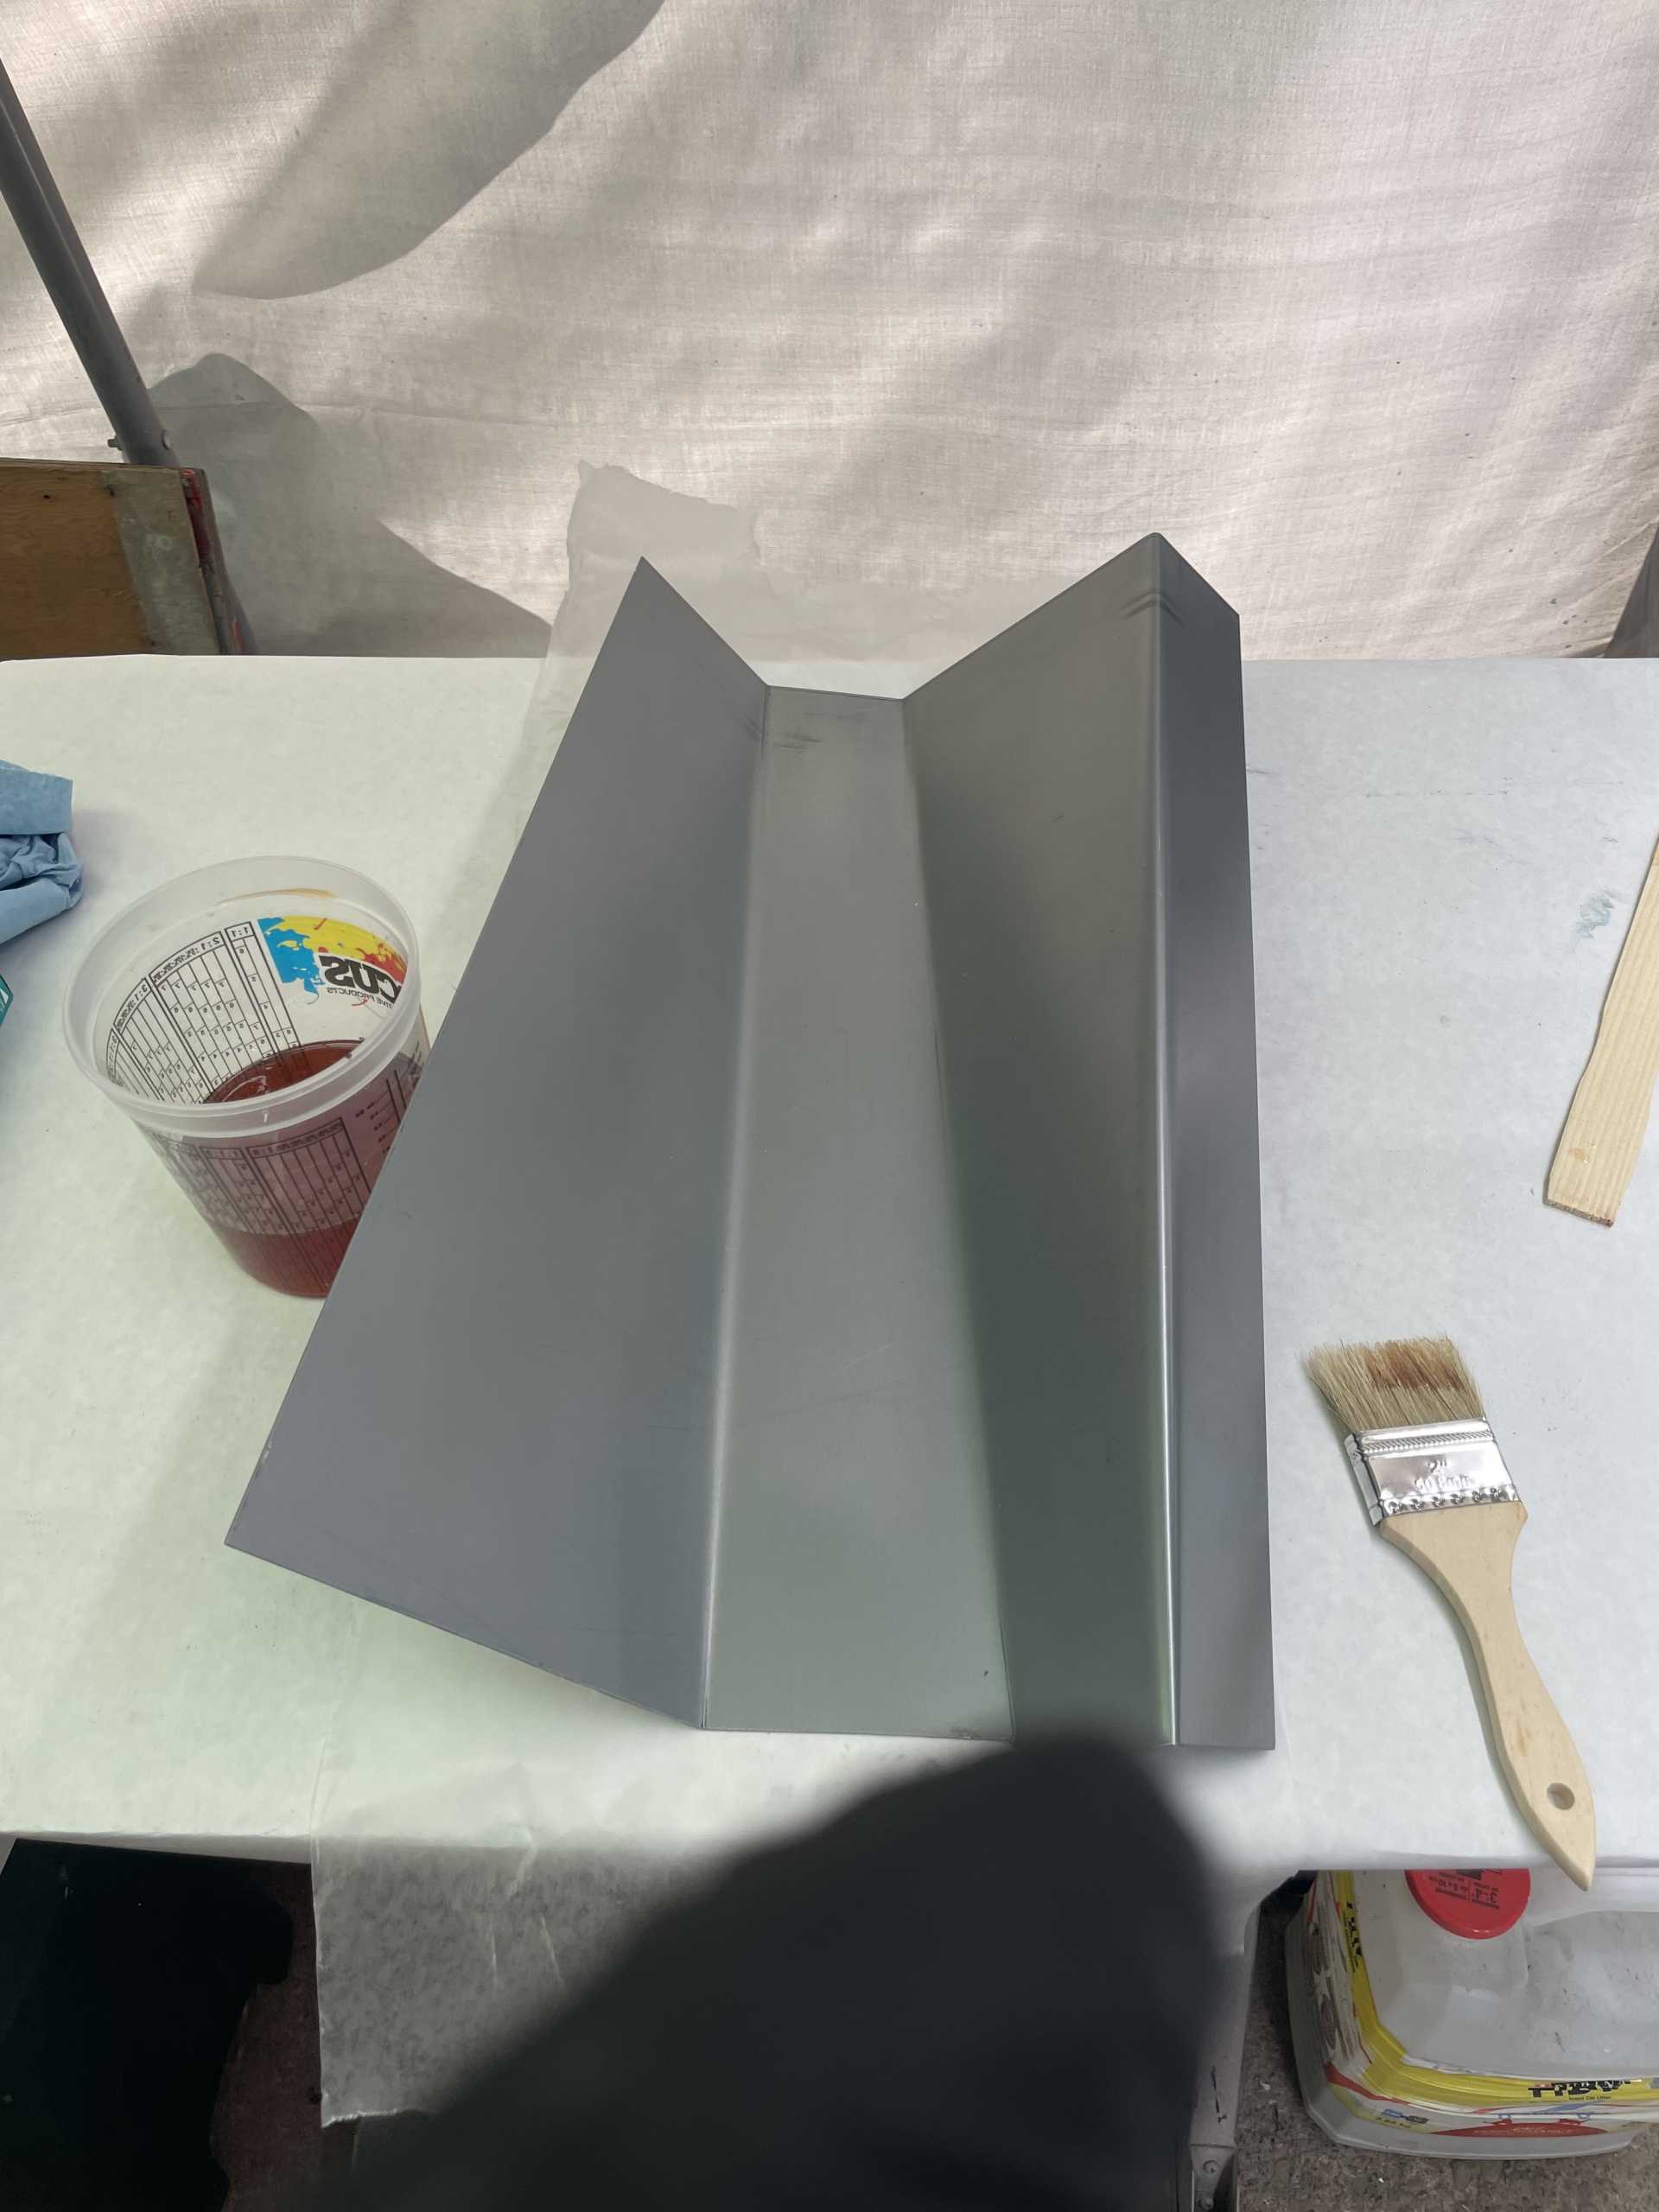
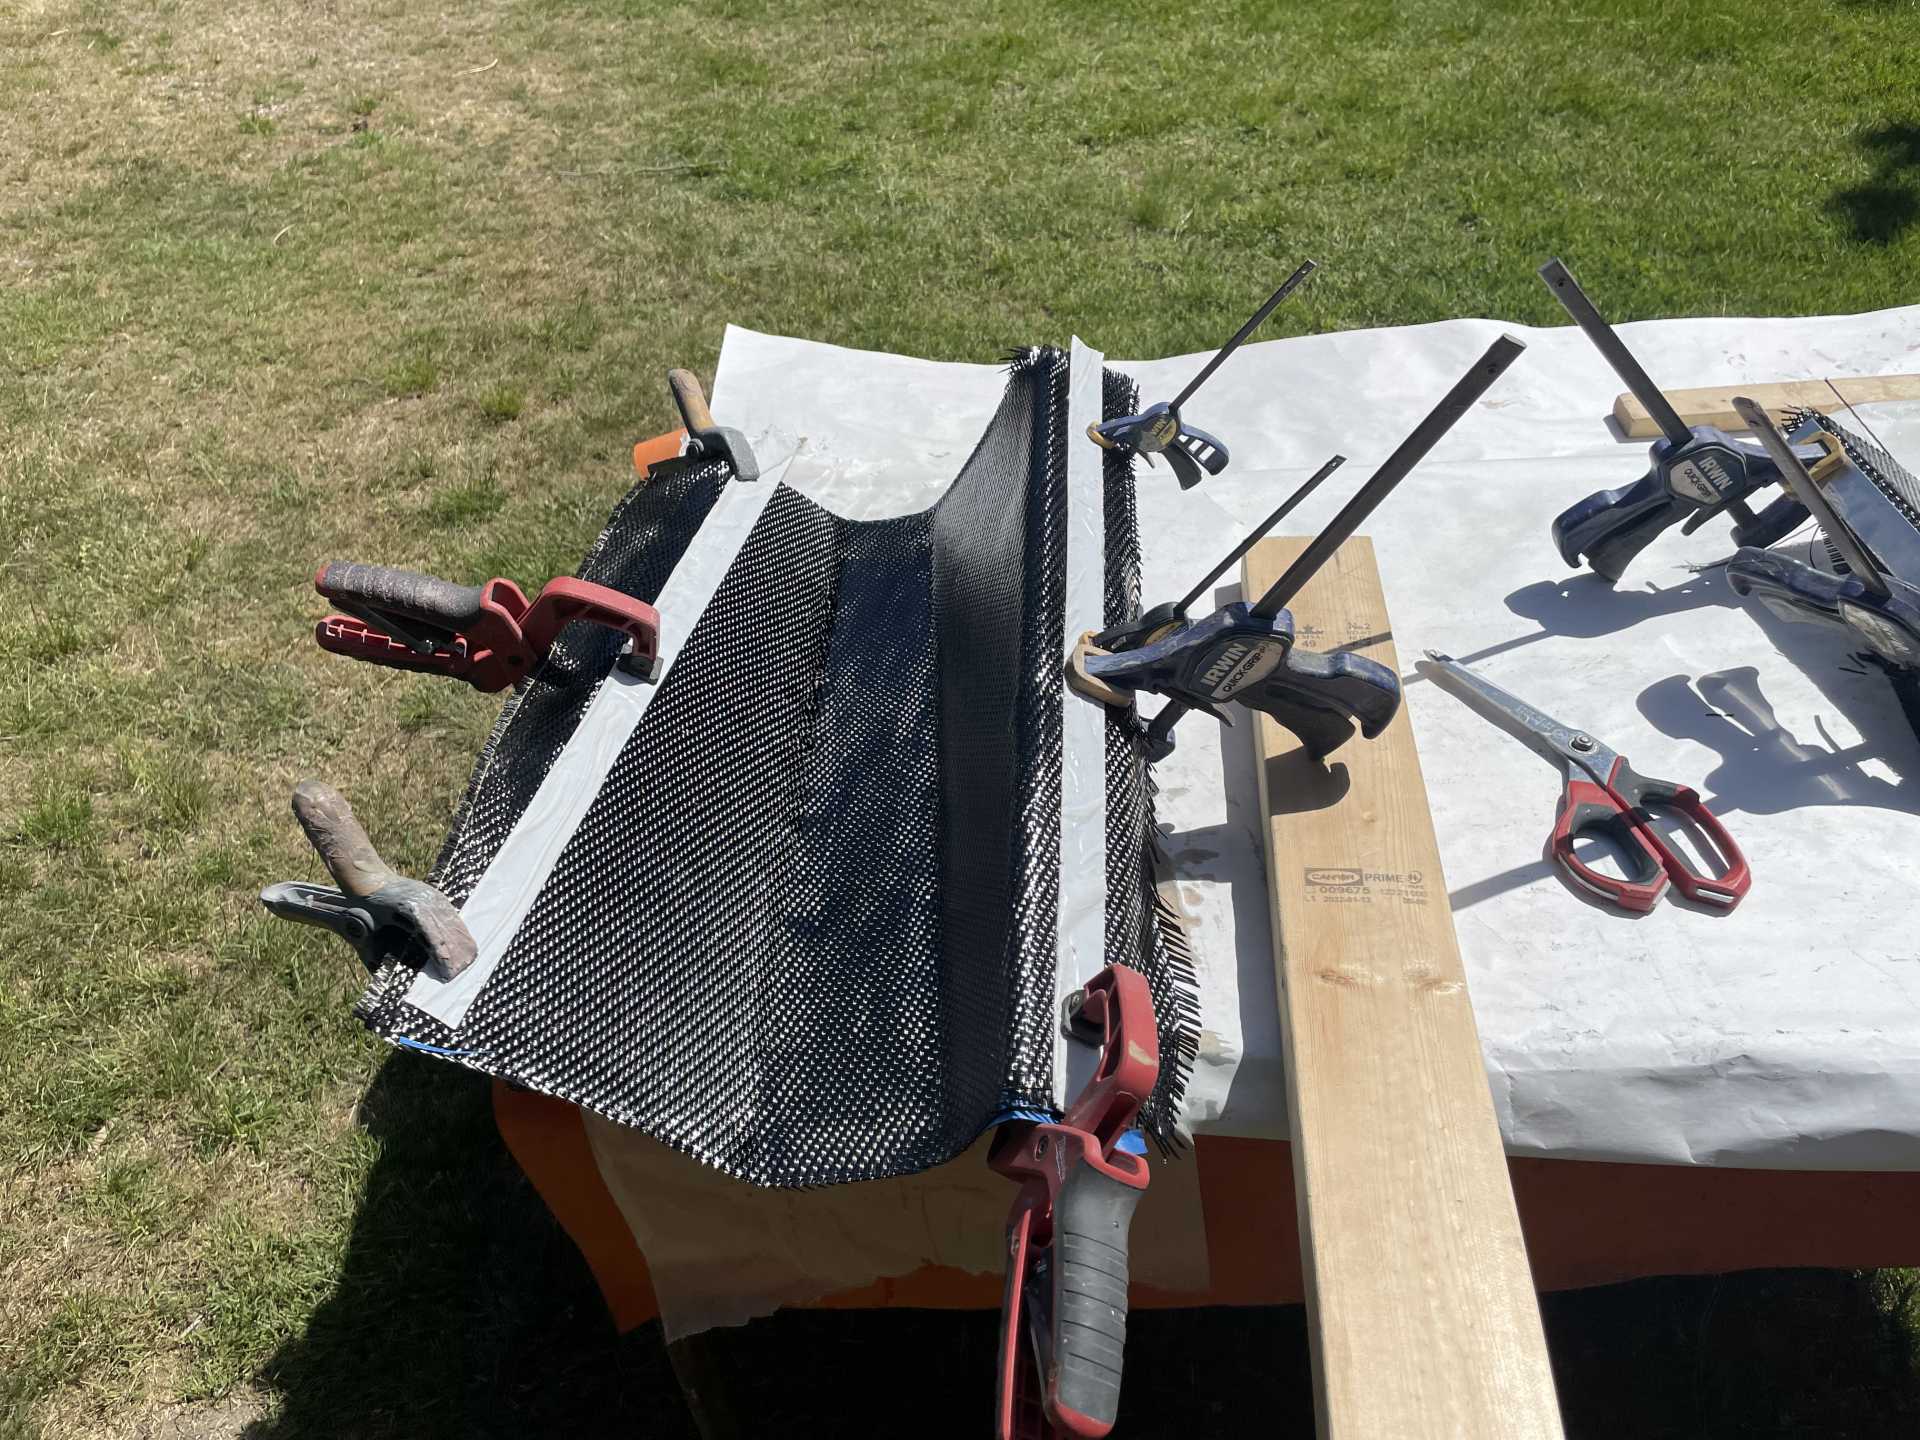
You can use a few different types of epoxy resin , I happen to have infusion resin , first coat the metal as best you can with the resin with an even coat . Then lay your first layer of cloth down. Take a brush and really impregnate the cloth very important as this is the finish, add your next layer and brush it with resin then the third and last layer same process. Once done to make sur the edges didn’t lift I added some strips along the edges and lightly clamped them so they don’t lift. Let cure overnight.
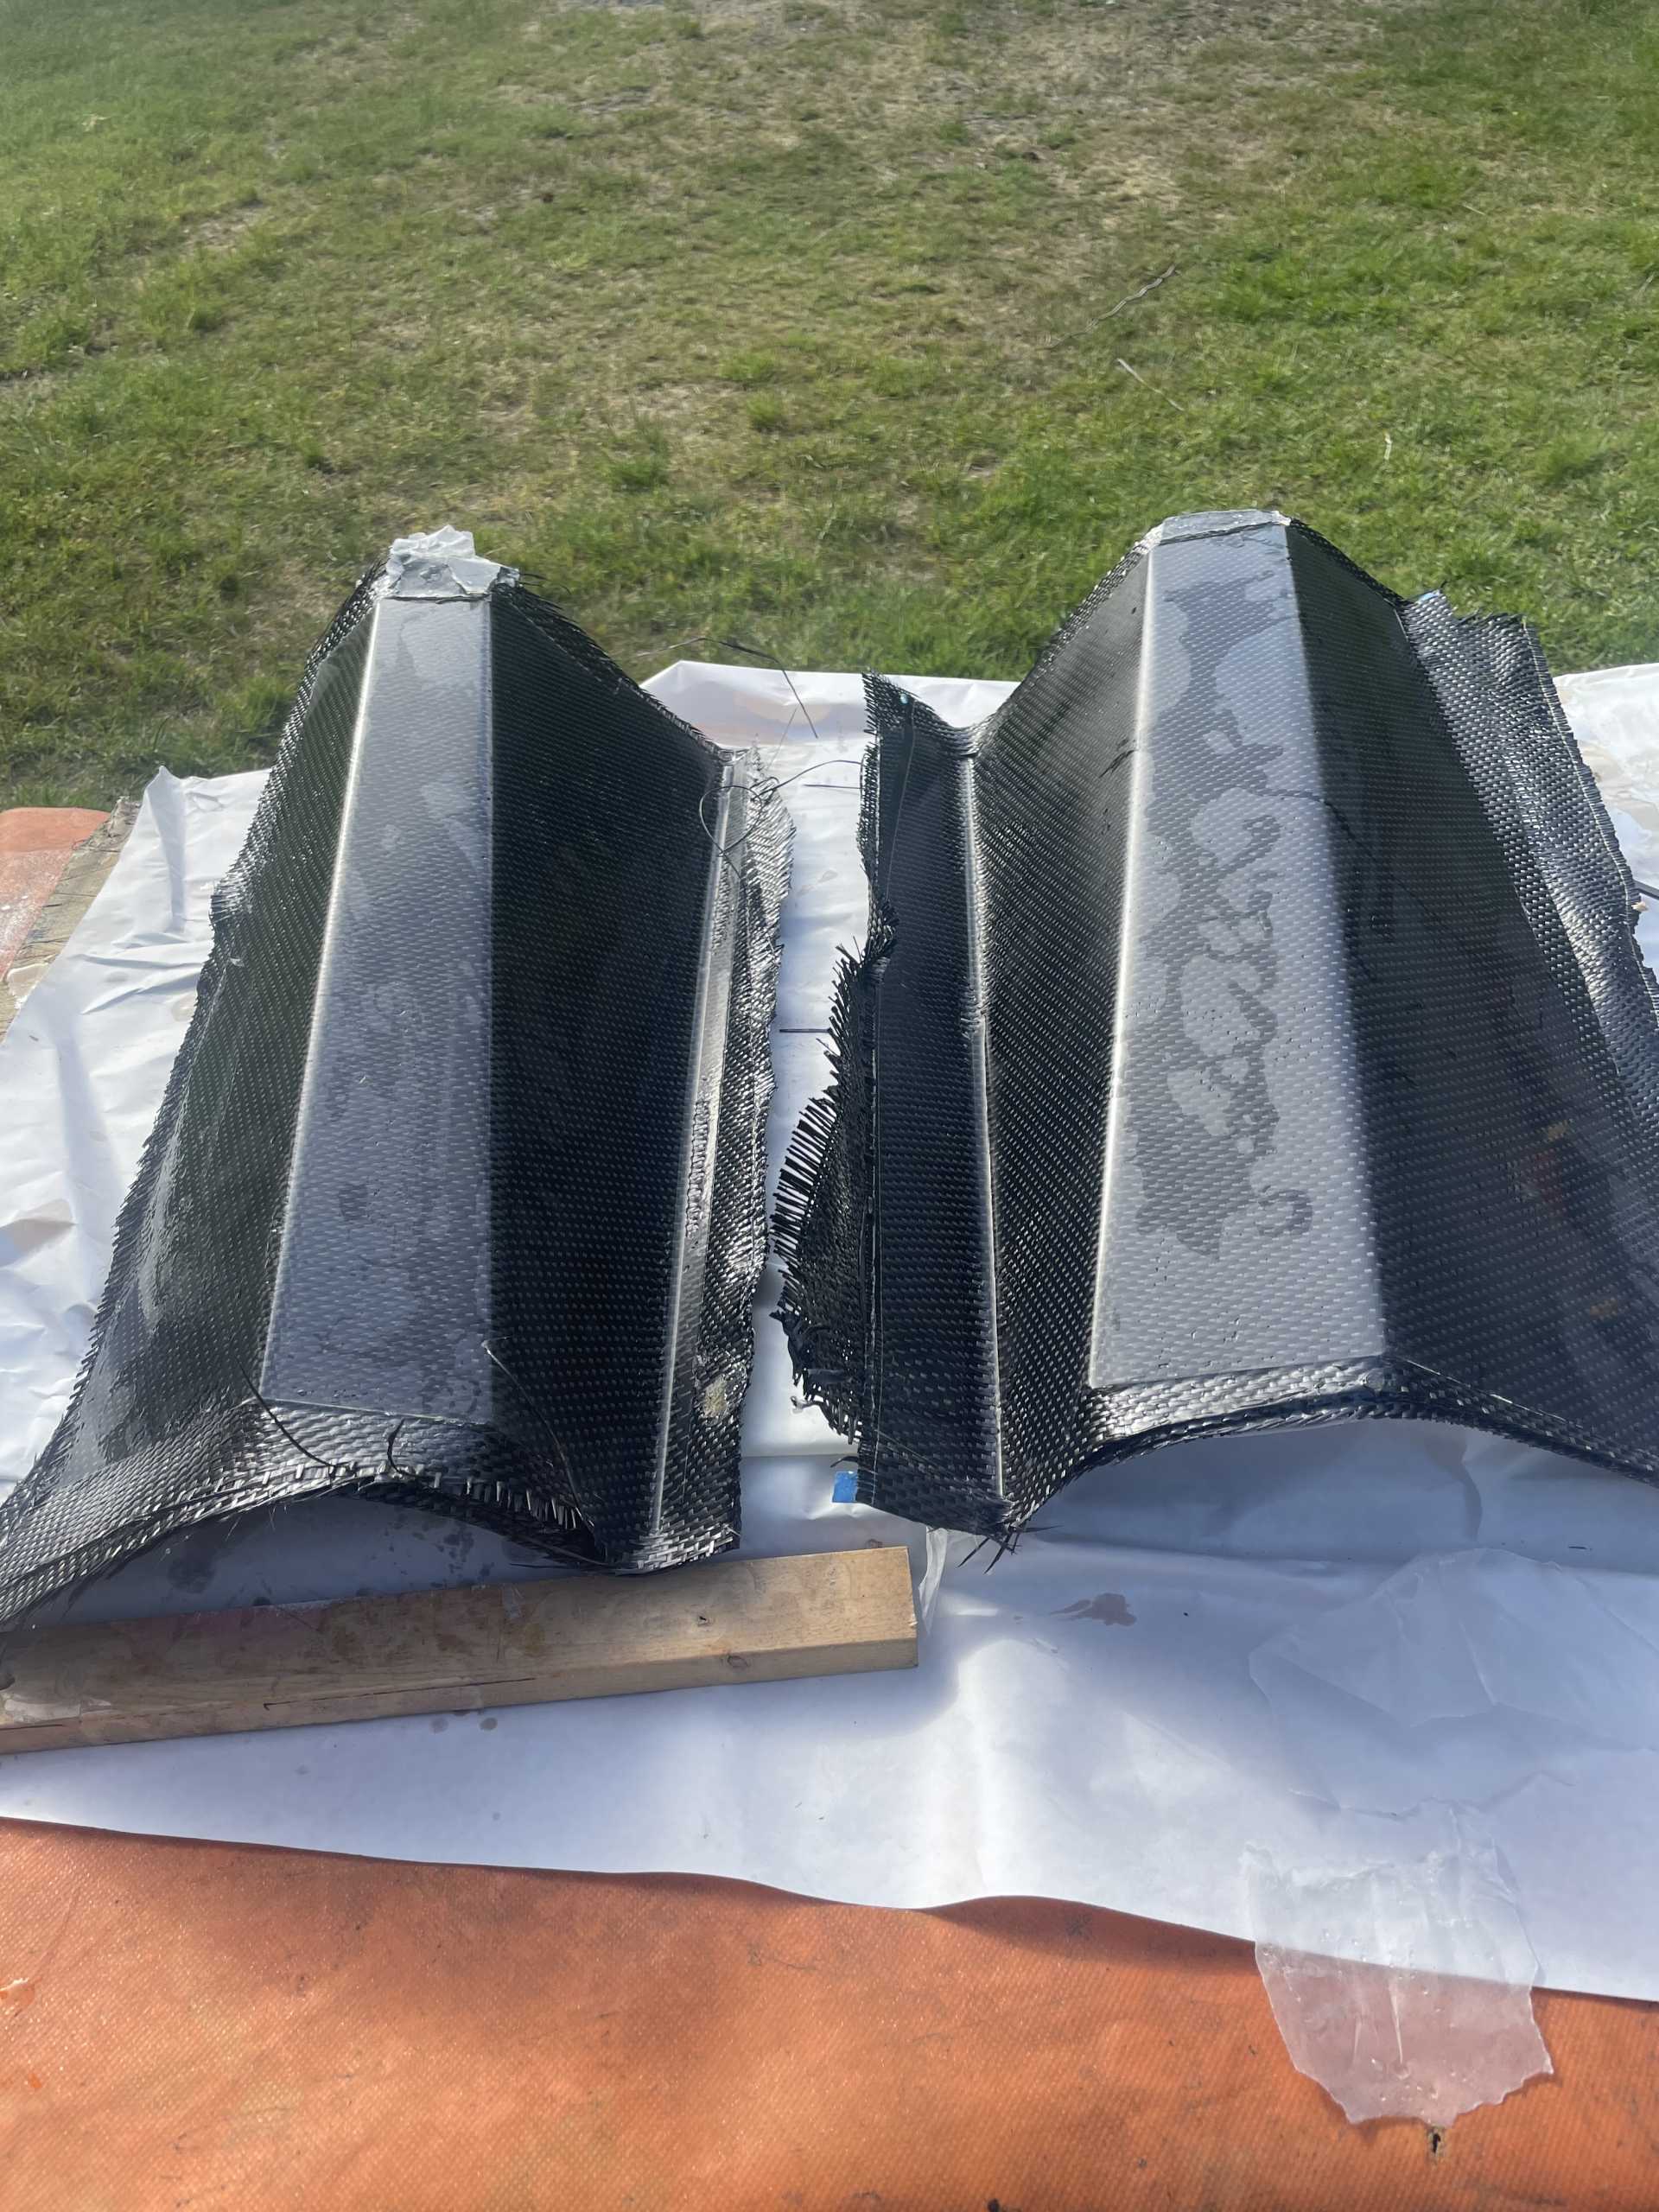
The next day I popped them off the form and trimmed them down to size and shape. This little cutoff works wonders for trimming. Make sure you’re wearing a mask carbon fiber ‘dust is very hazardous to your lungs!!!
A few tricks I use with carbon fiber: I first apply a few coats of resin and let it dry. Then adding the carbon fiber and resin. Less risk of pushing the cloth to far in and creating airpockets or pinholes. The thicker clear epoxy layer gives a "deeper" look to the carbon fiber but it is also easier to wetsand without fear of sanding into the carbon weave. After one layer of carbon fiber I just layup regular fiberglass cloth with a black tint added to the resin, saves a lot of carbon fiber that that I will never see. I found that a good finish (wetsanding, clearcoat and buffing) is worth it. I also found that epoxy resin is better because it doesn't shrink and warp like polyester resin.
Pinholes / airpockets you can fill with a little of the same resin and a small brush. After sanding smooth the "repair" is invisible !
Thanks a great idea!! I’ll try that on the flat third piece still to be built. It’s great to learn other techniques!!
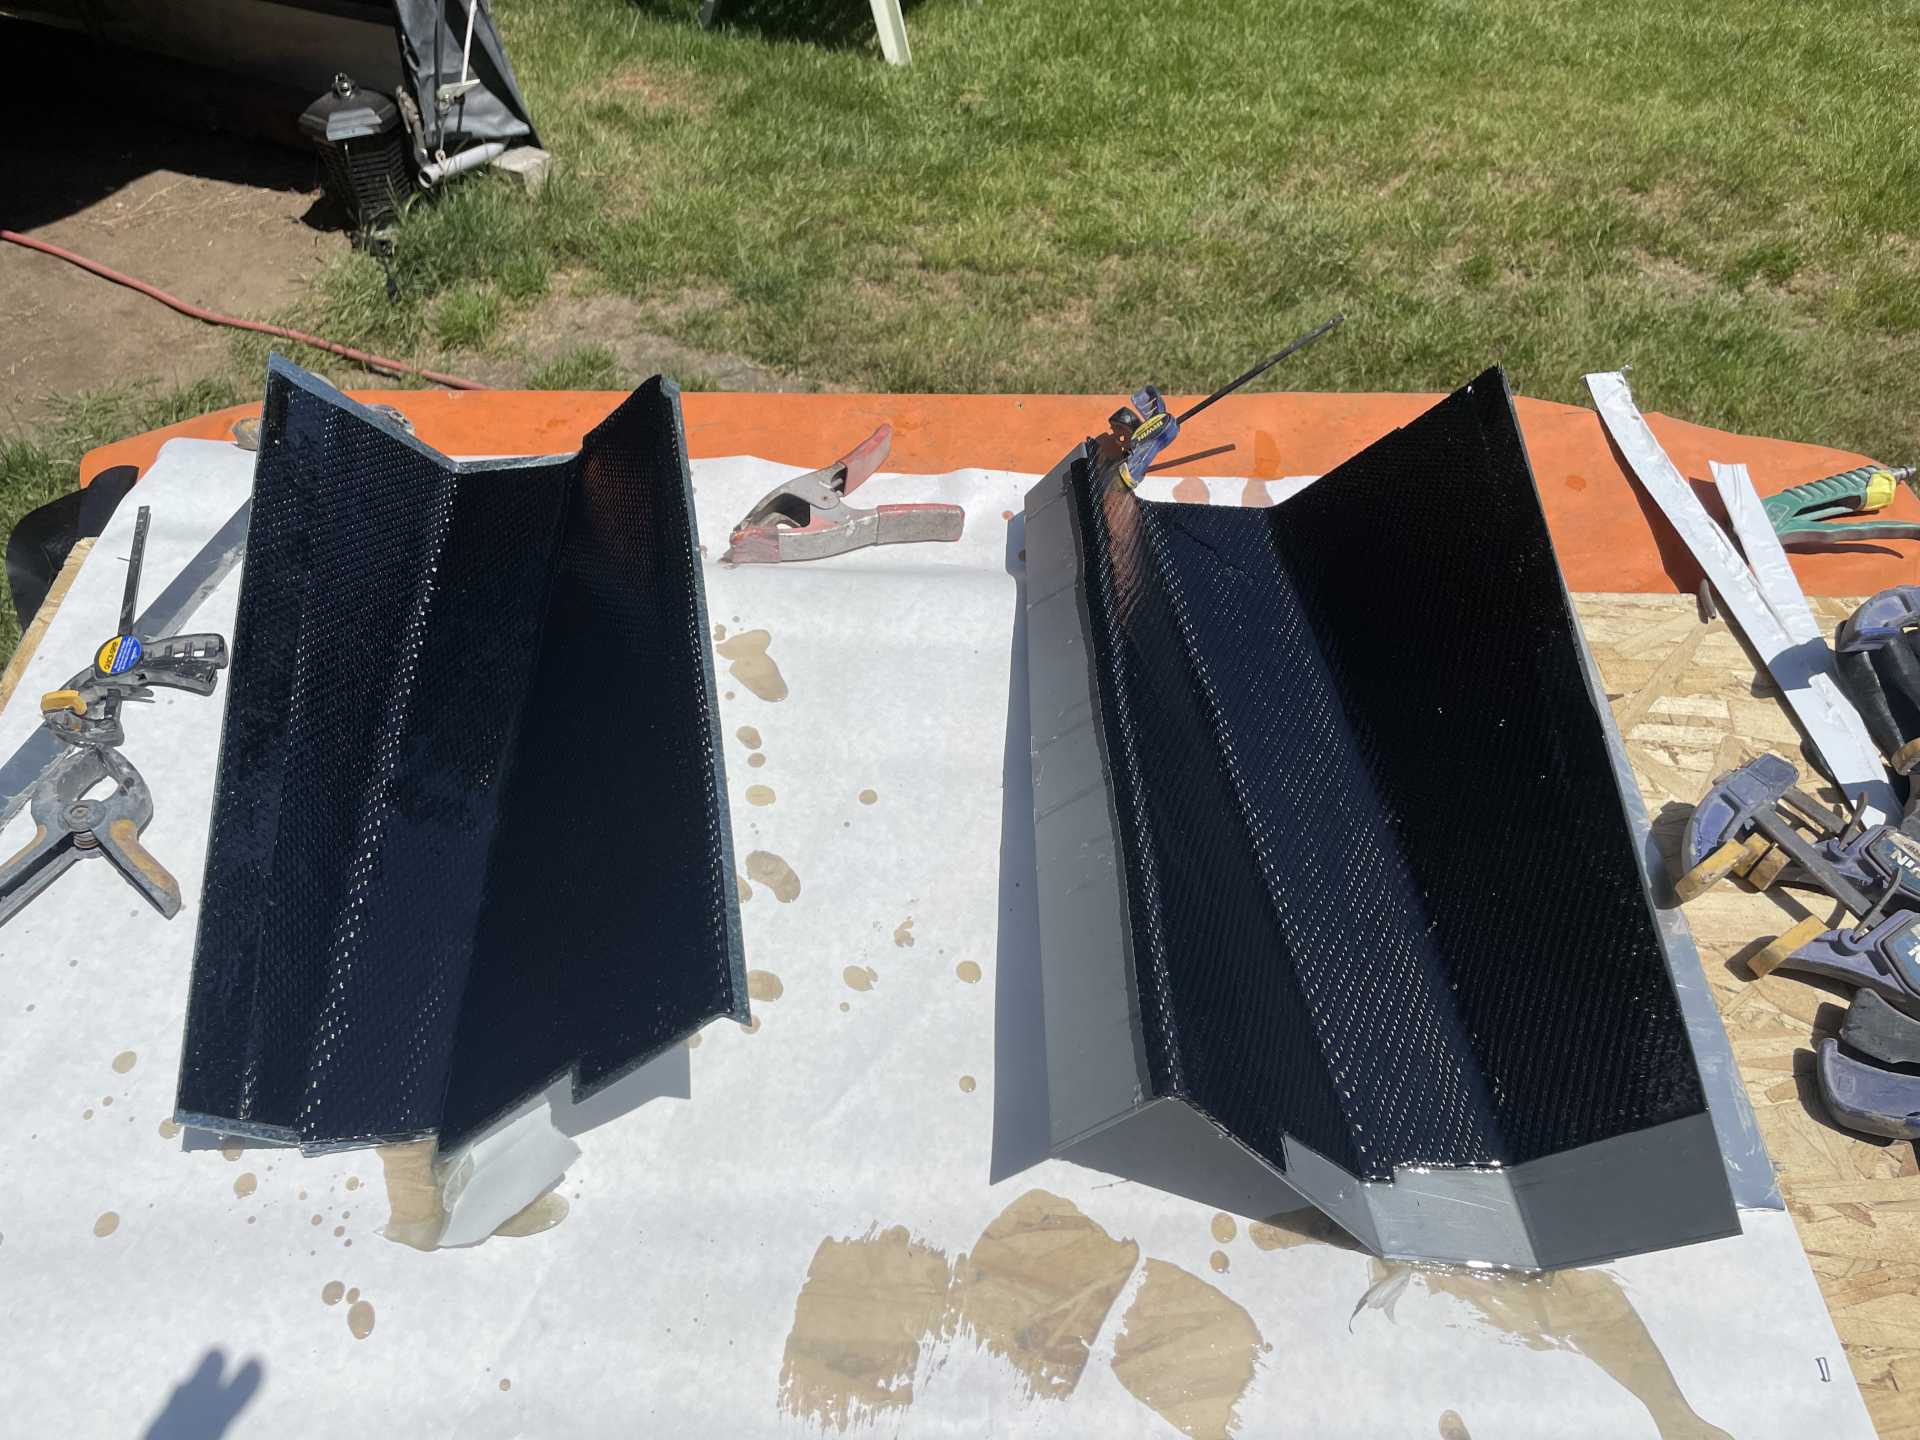
One question on putting the coats of resin down first , how do you do keep the resin from flowing down “sagging” my case the angles other than flat surfaces? In this layup after I pull the part I let it cure 24 hours then give it a light sand and give it 2 more coats of resin that I sand flat and in most cases eliminates most all if any flaws.
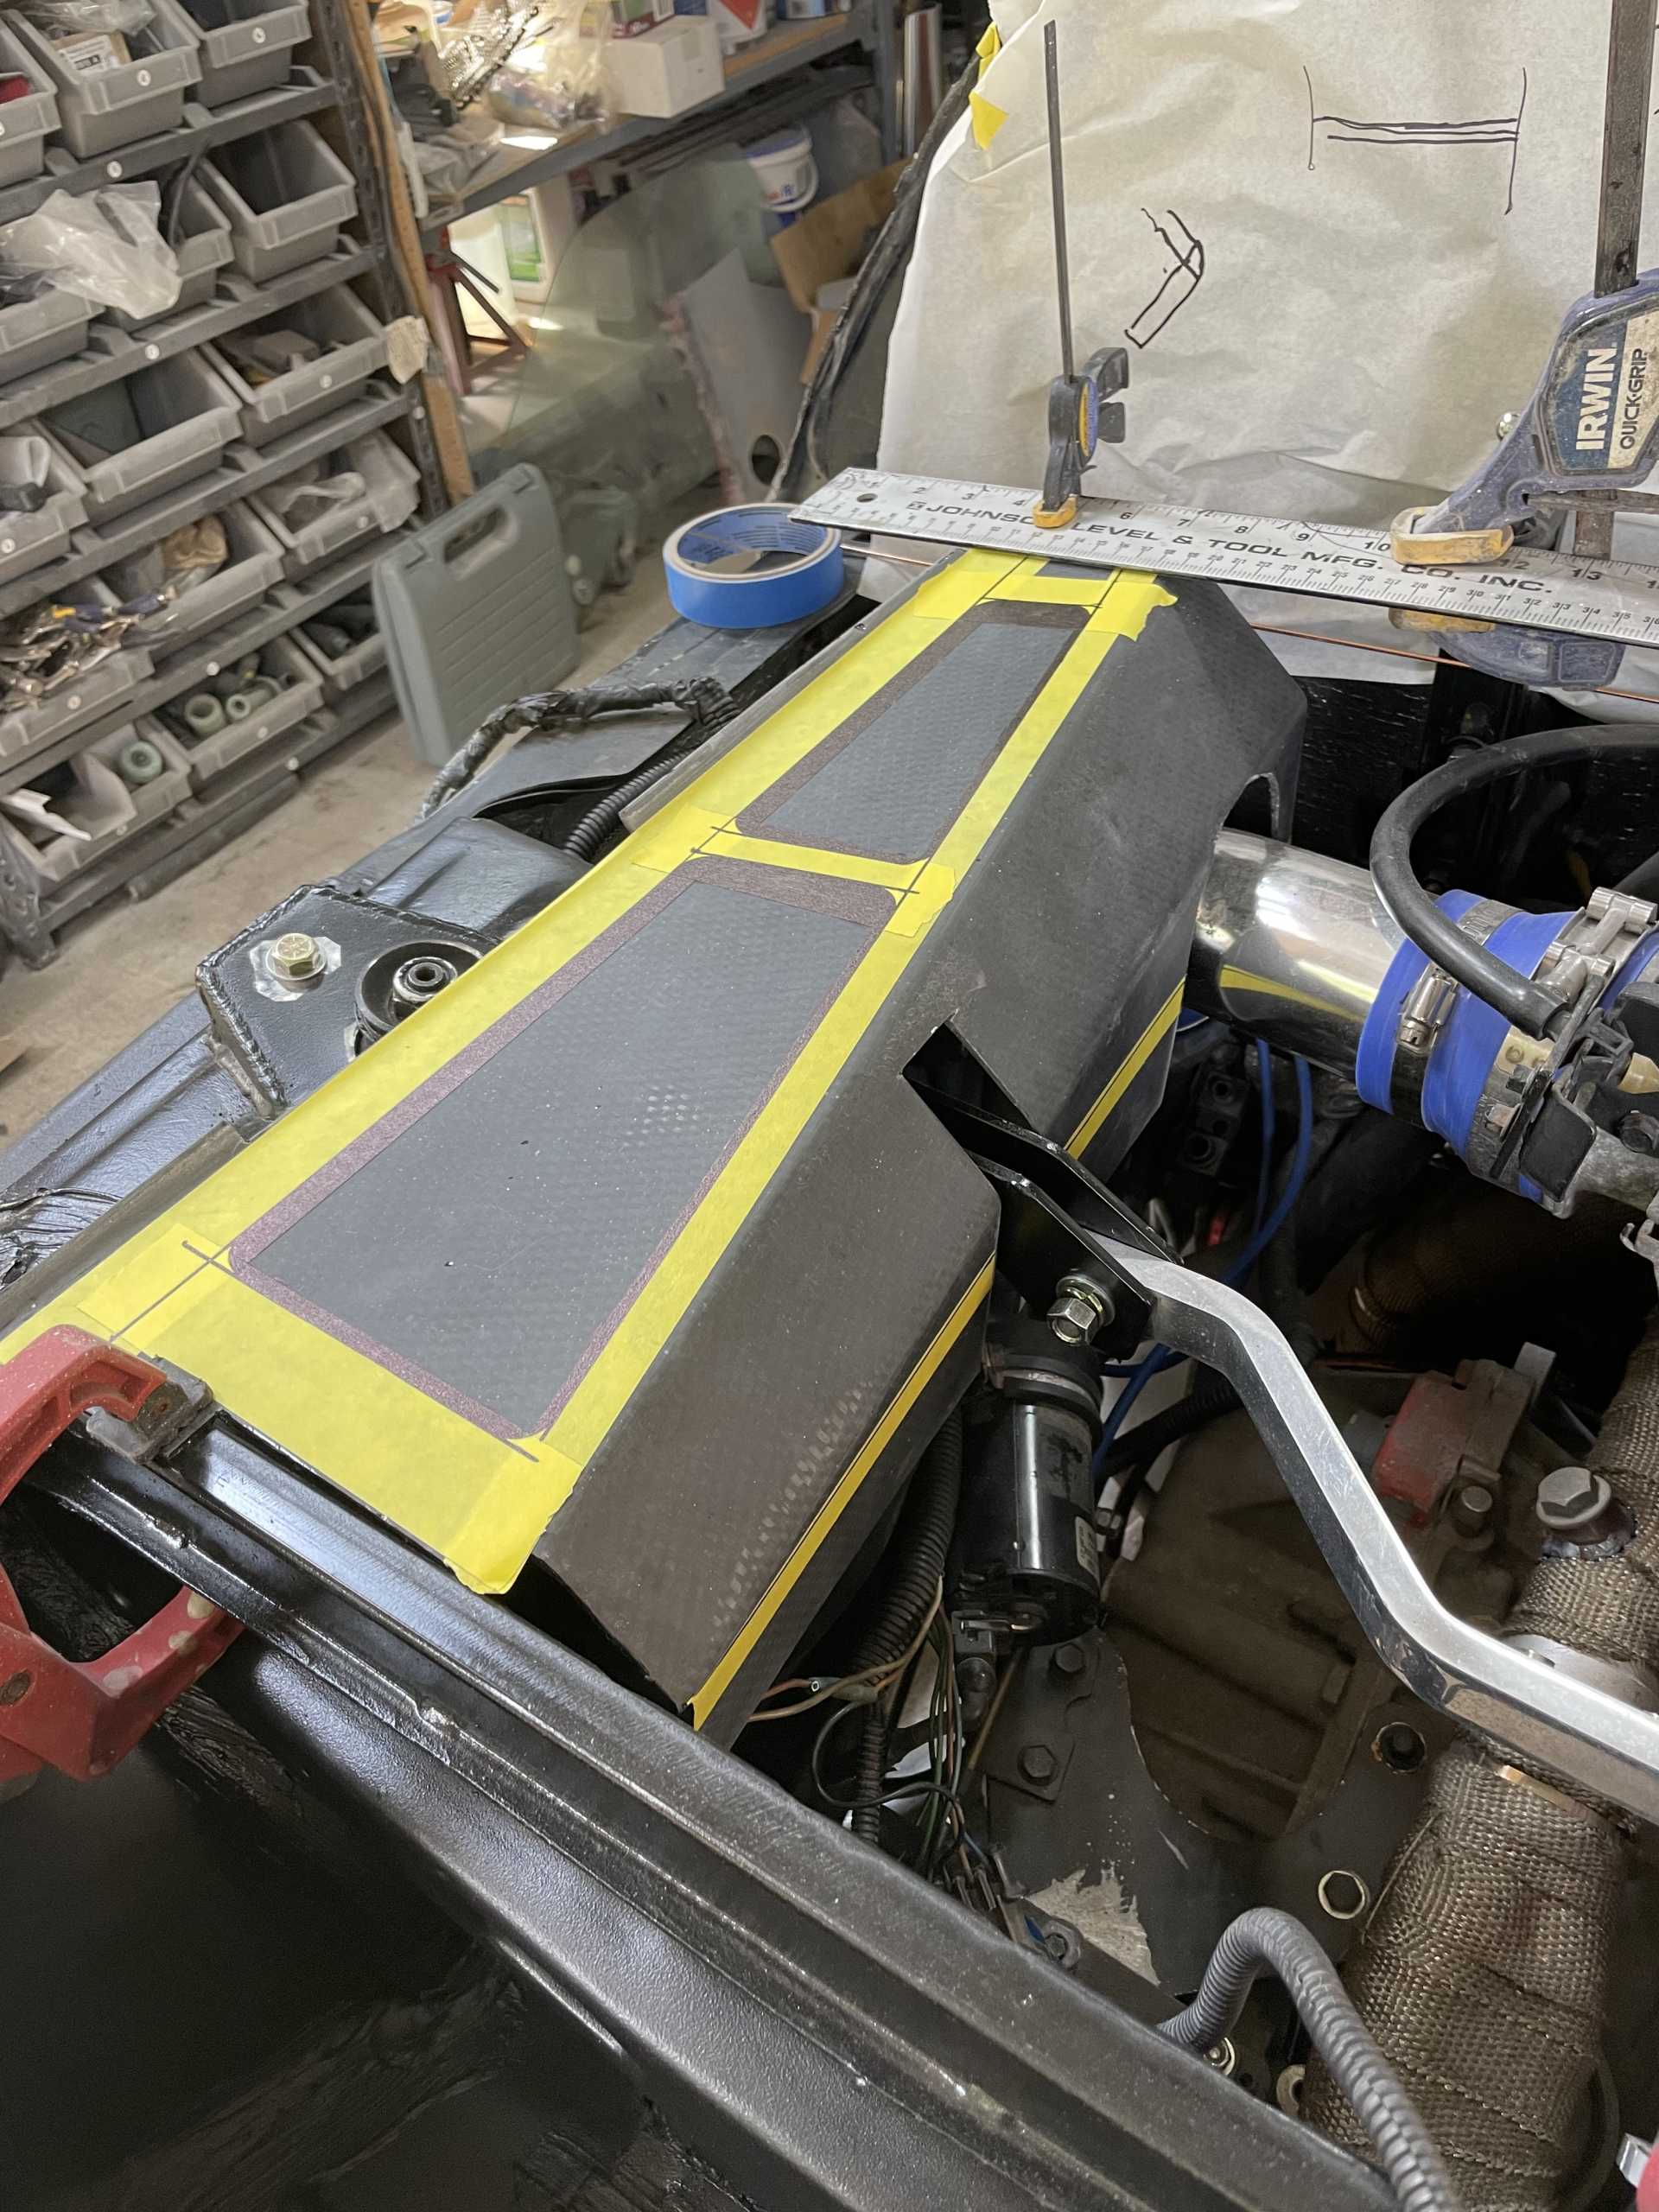
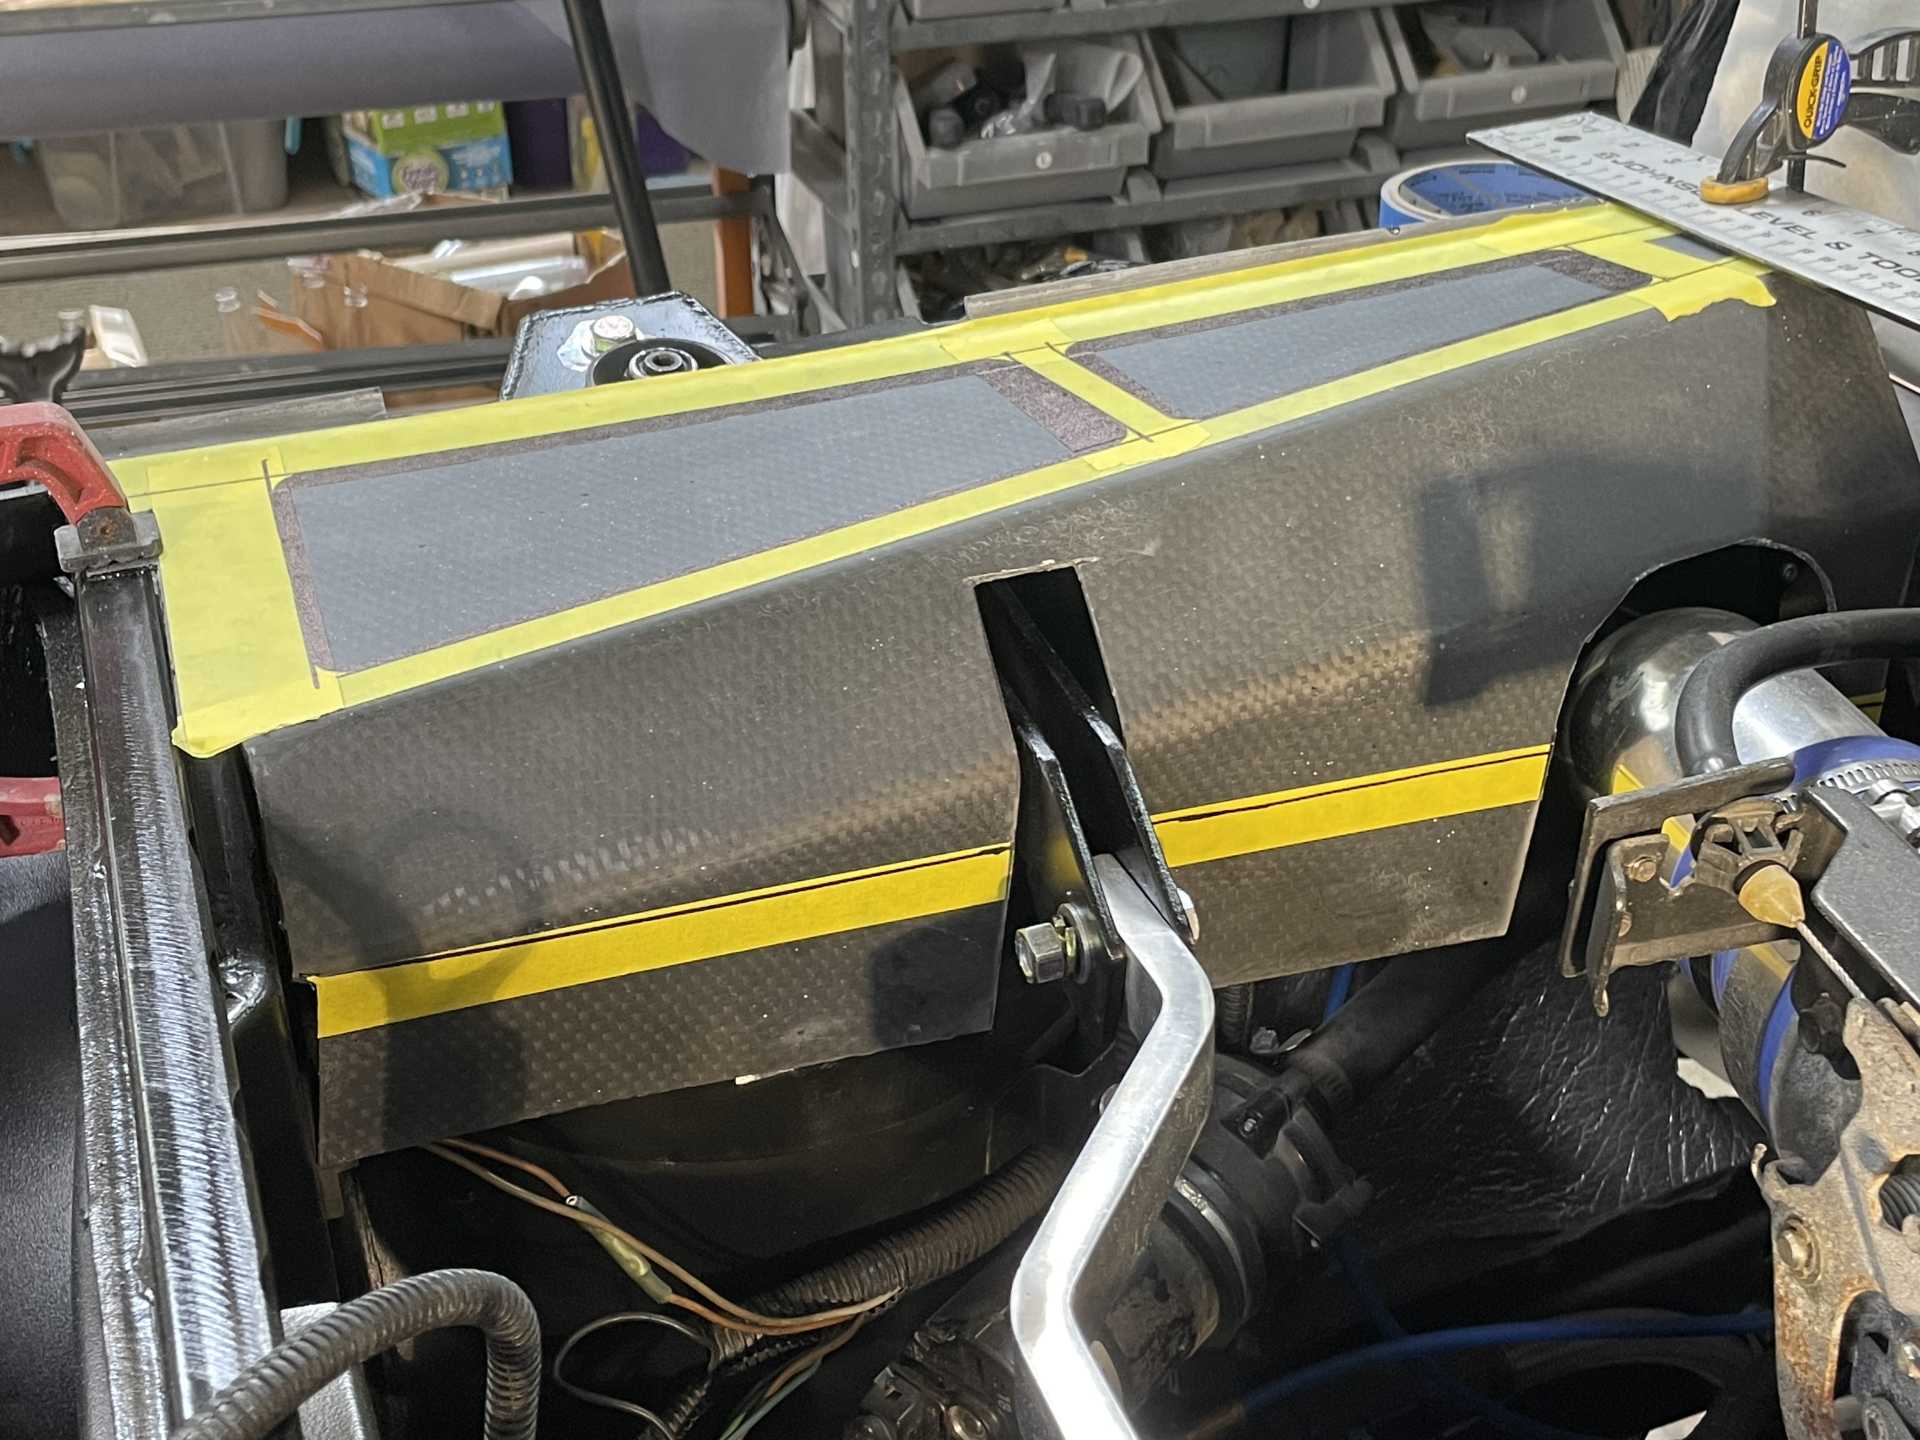
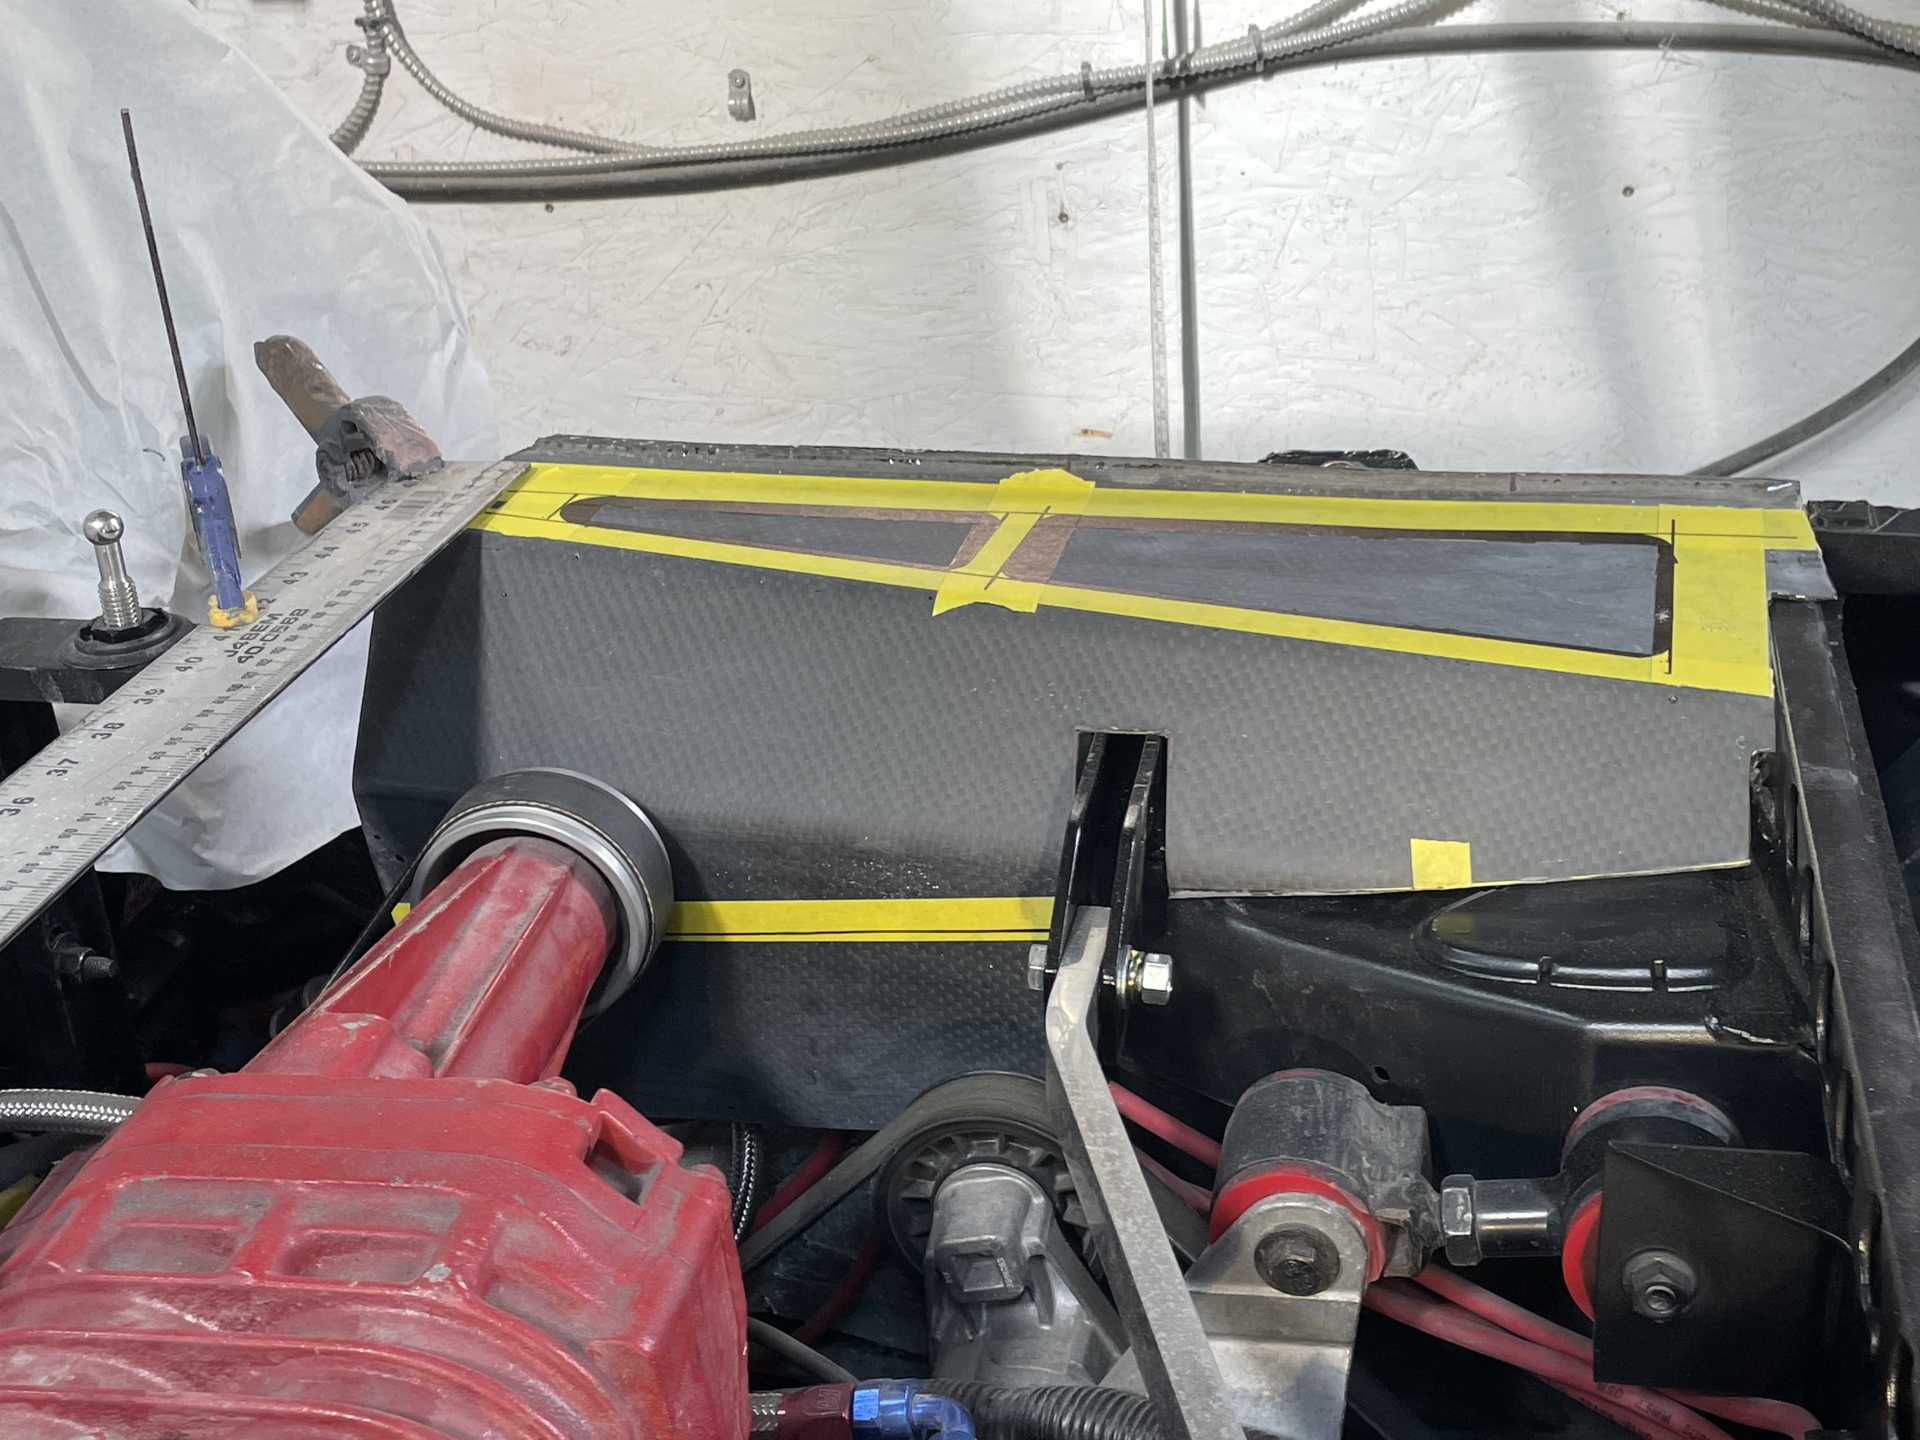
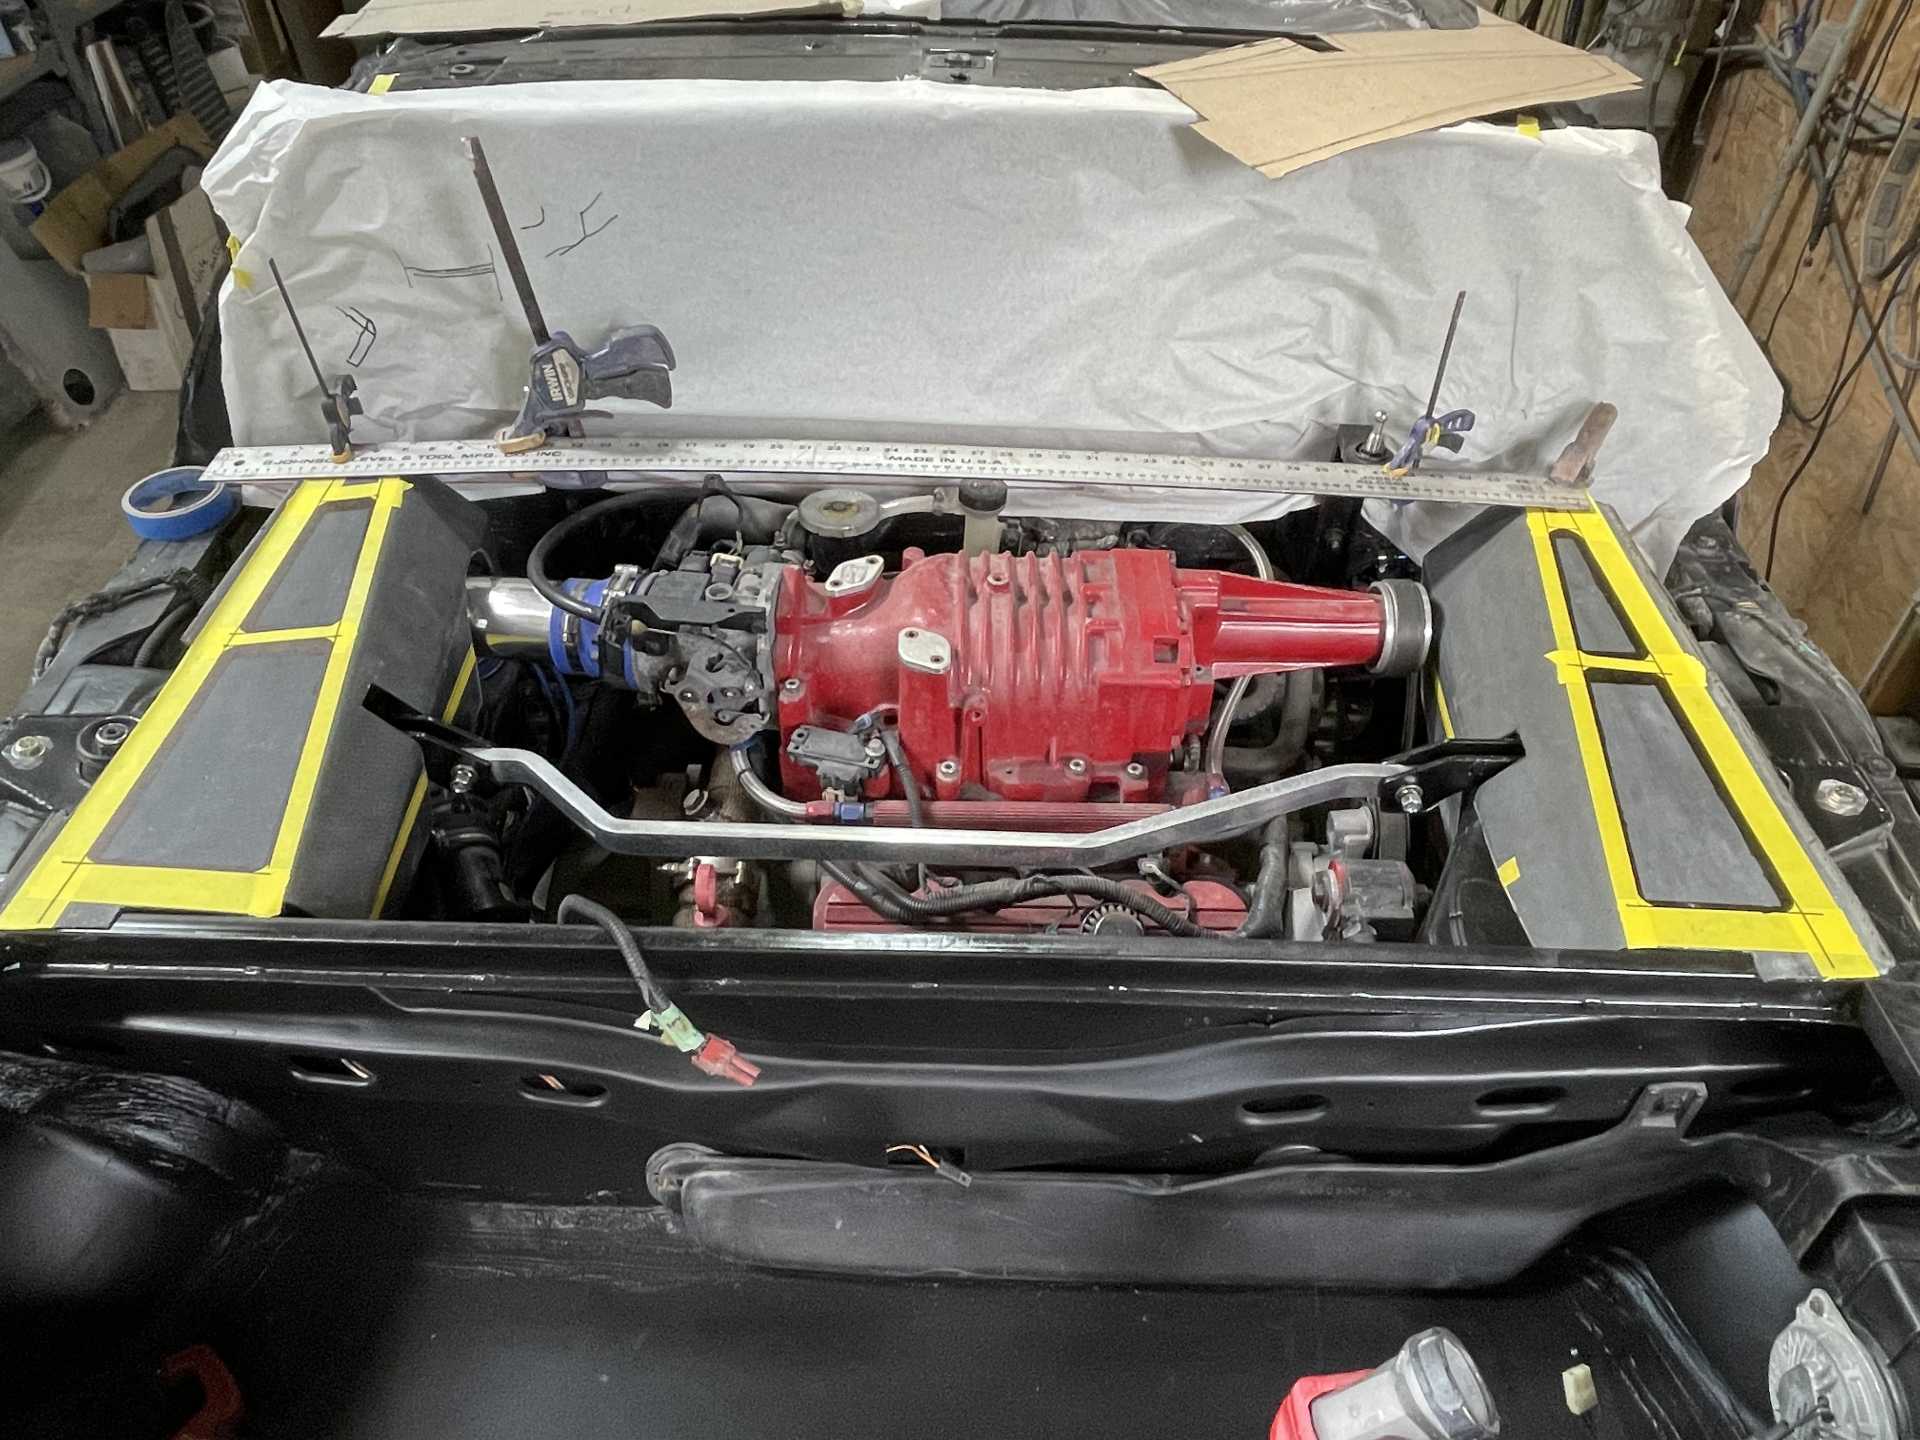
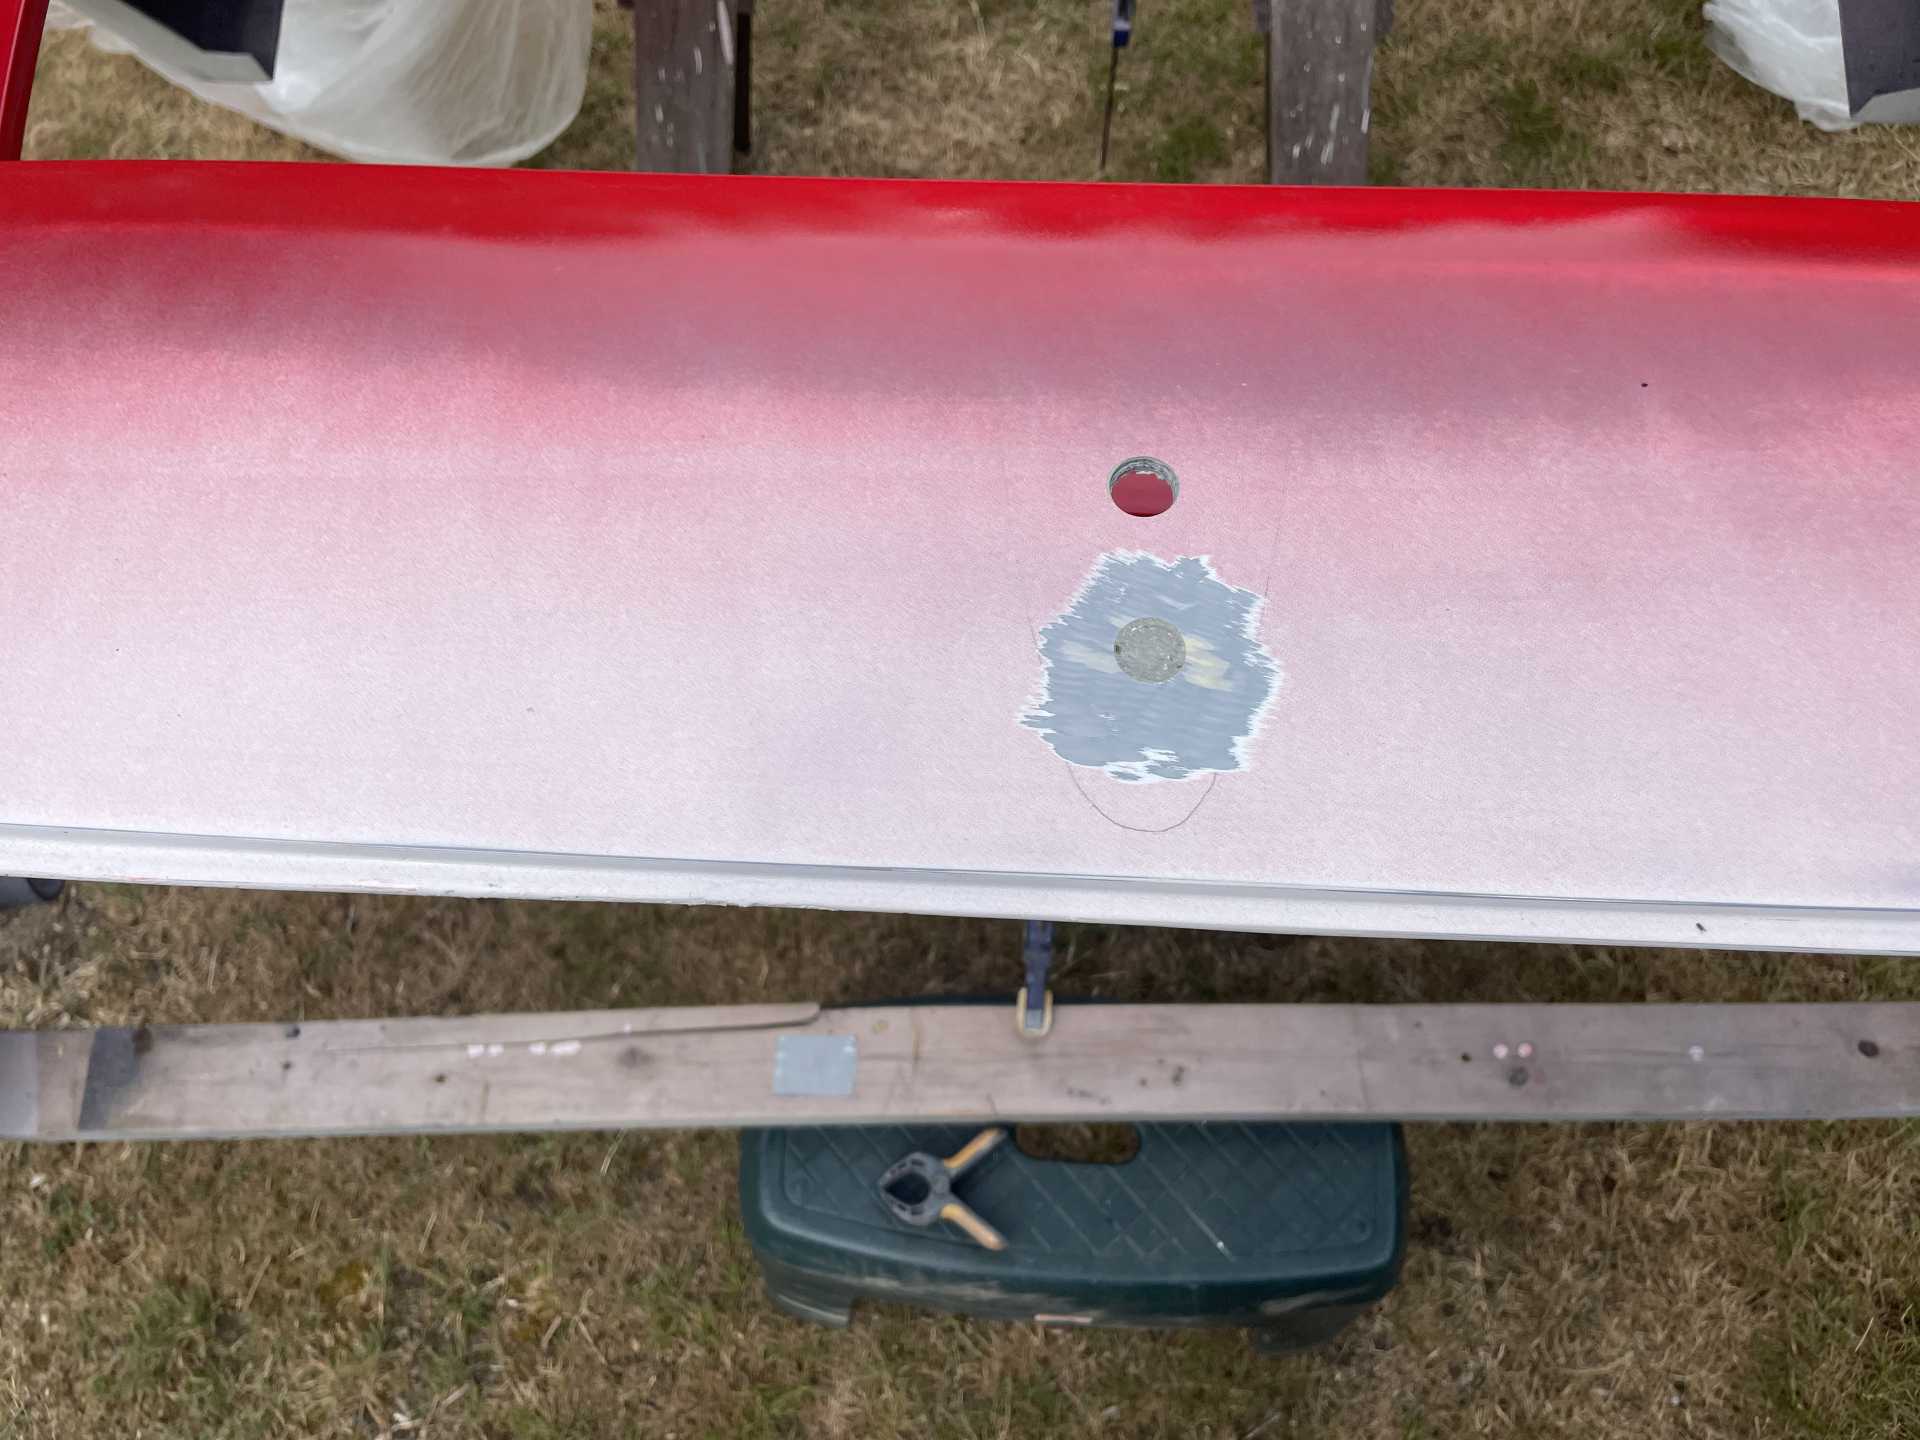
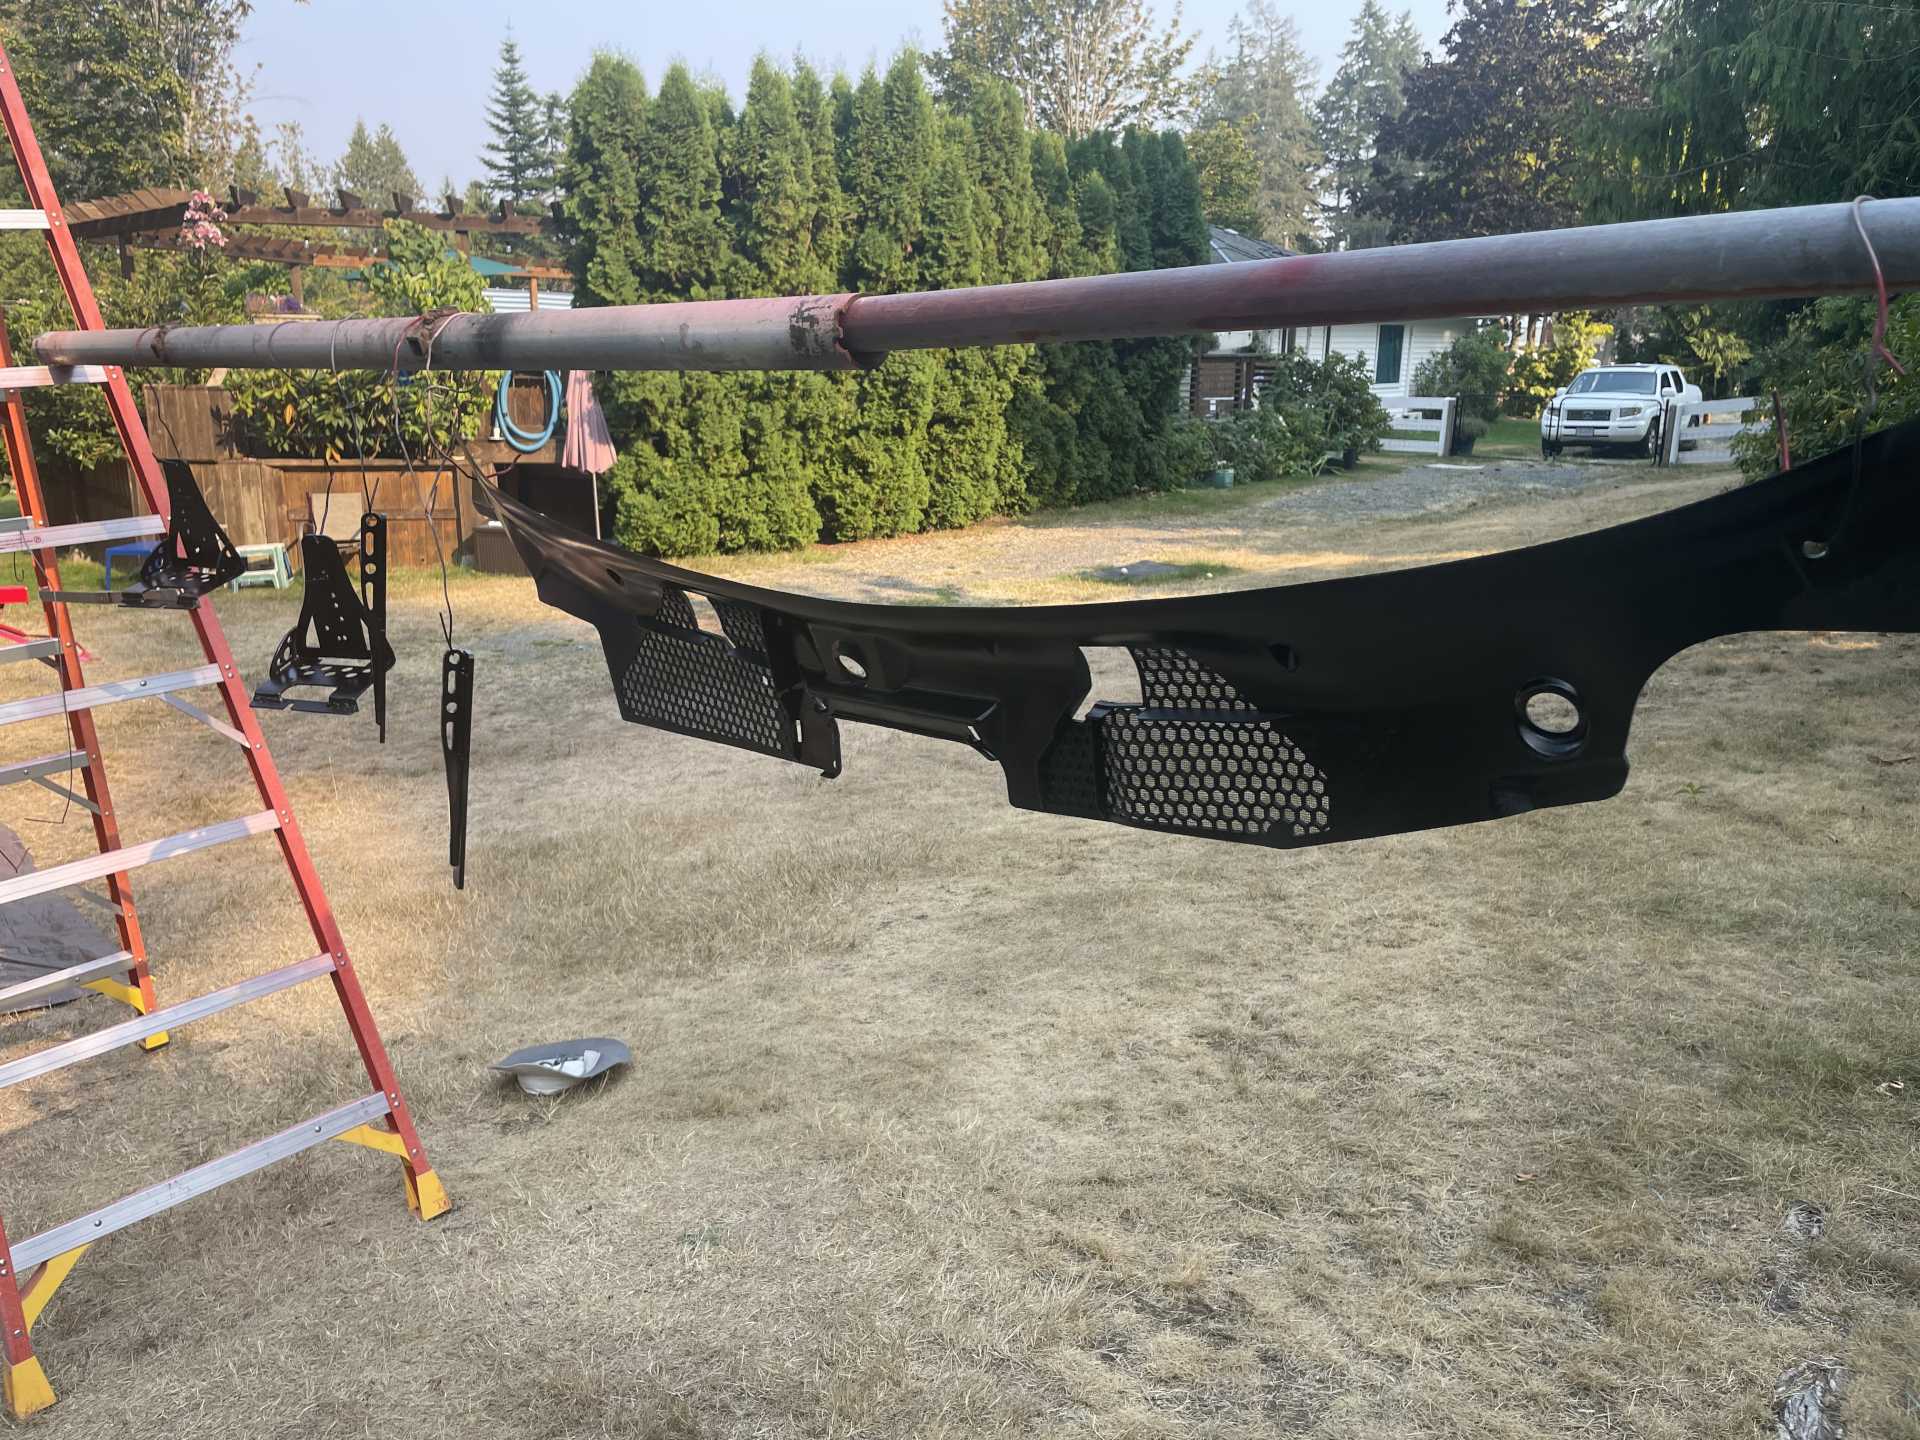
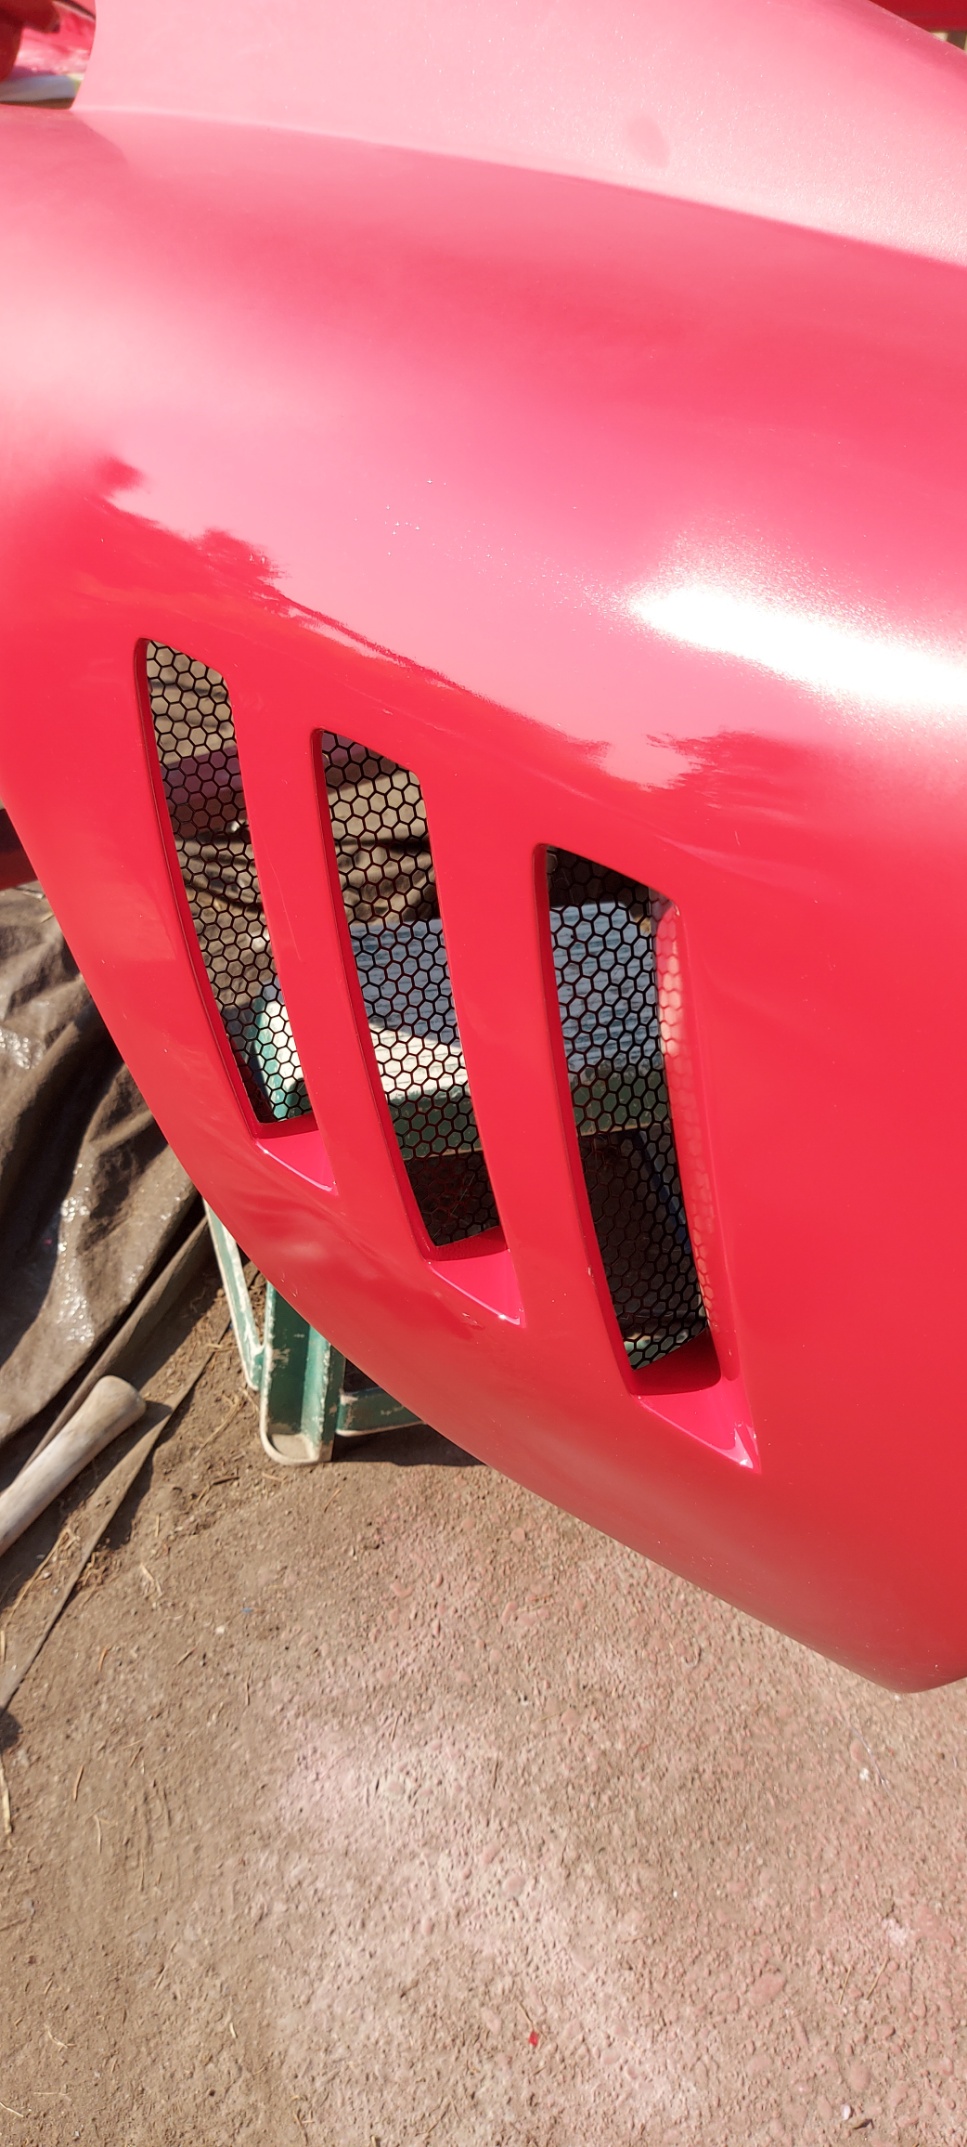
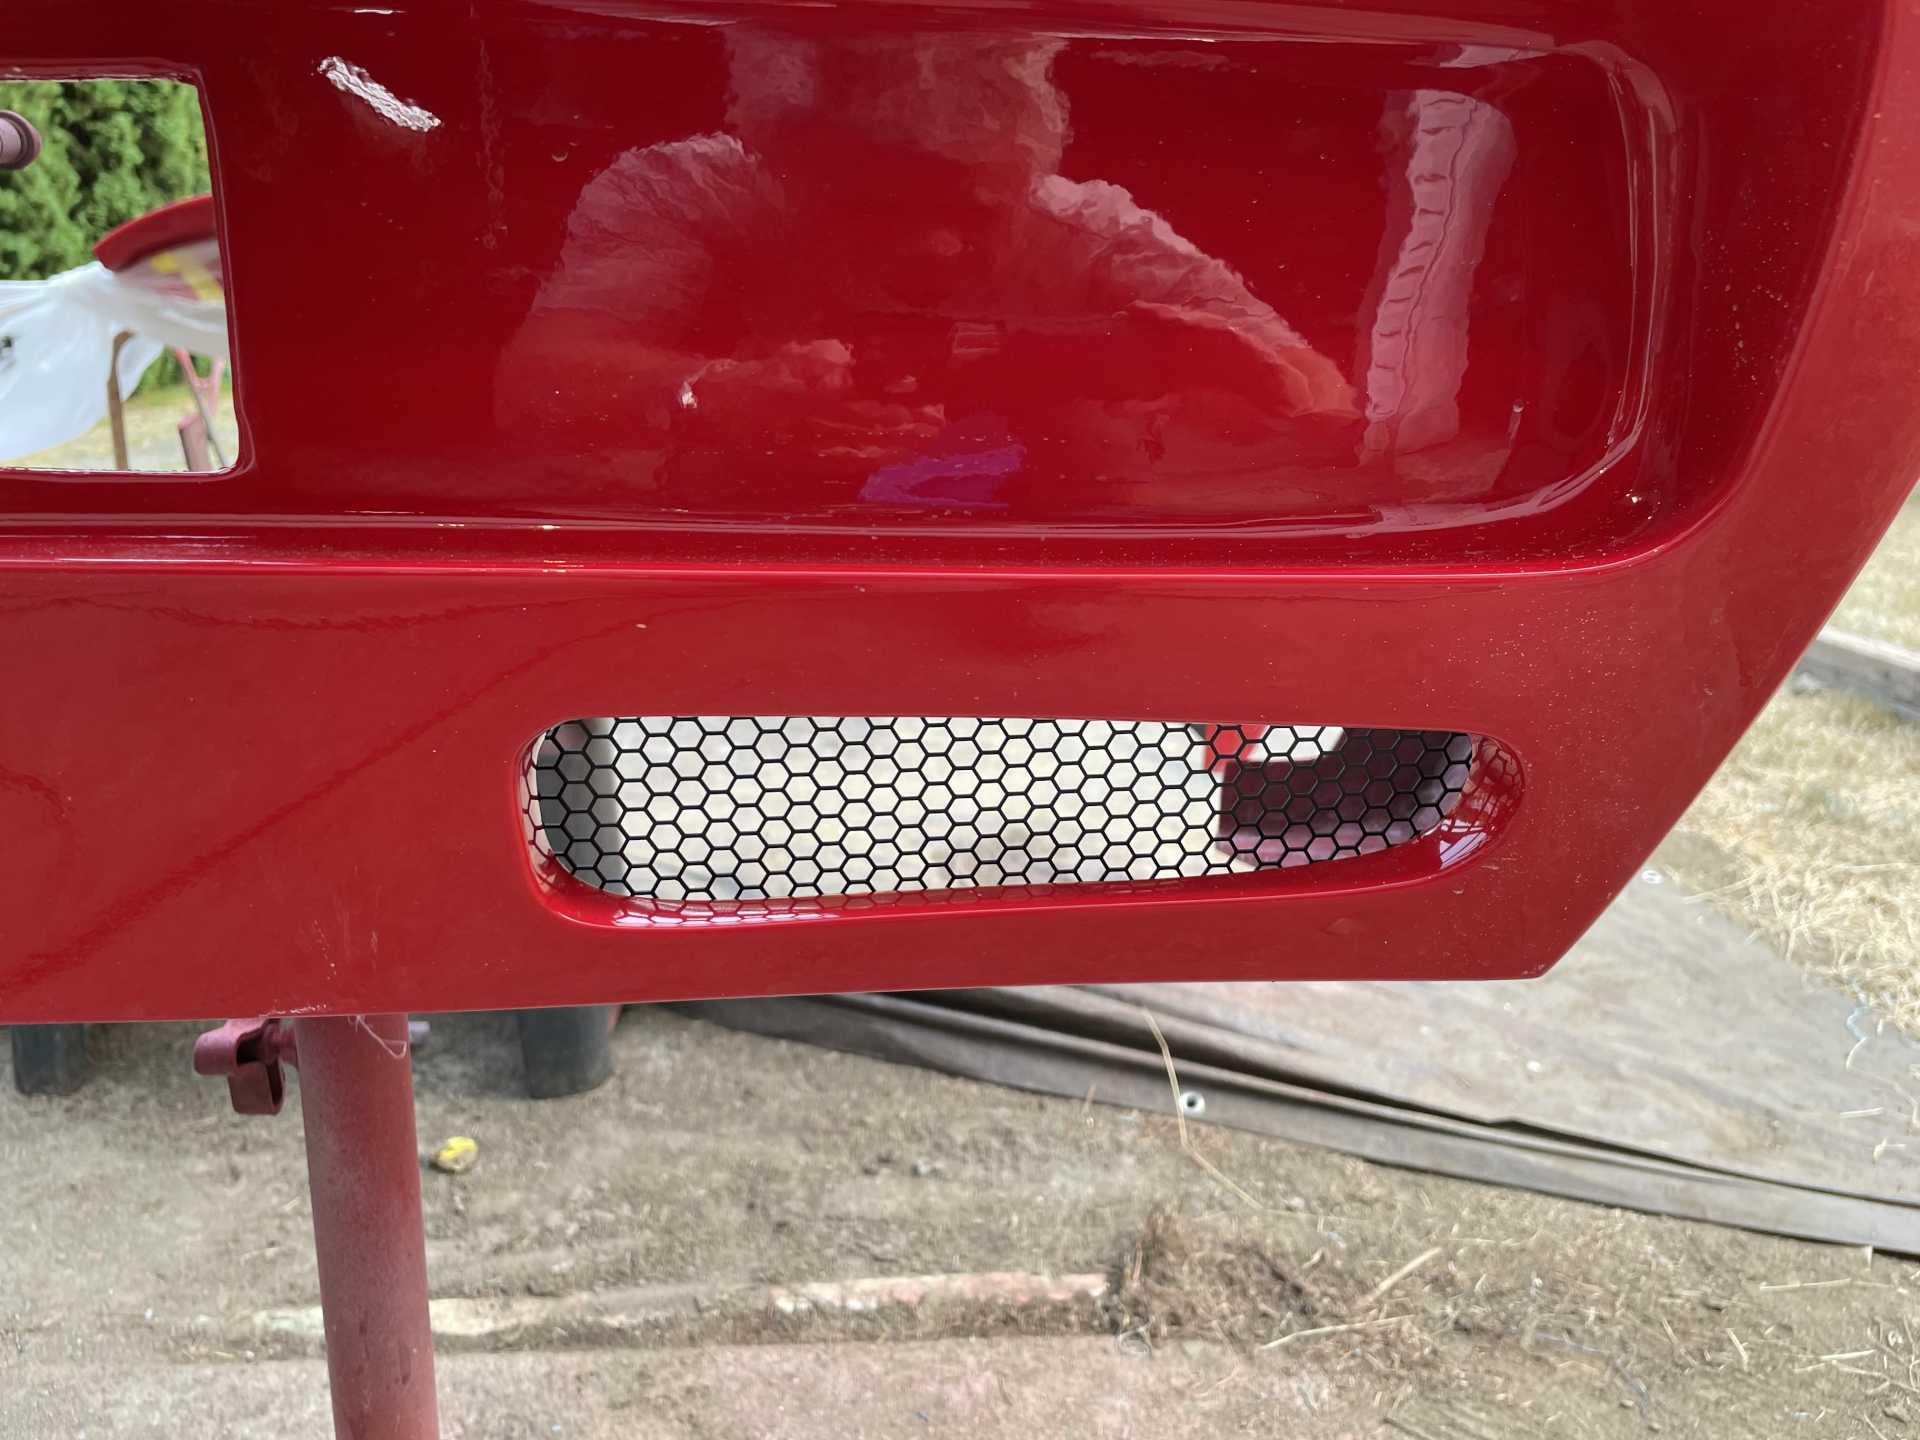
So today after sanding it flat I cut out the areas needed for installing it in place. As I’m planning on having vents in the top to allow the engine heat to escape easily. The blackened area on top of the yellow tape shows the areas I’ll be cutting out.
Once that’s all finished I’ll polish the piece . Enjoy
Man this thing is going to be so awesome when it's done!!
I hope to see it in person when it's finished, maybe you can bring it up to the show in Carlisle sometime!
Thanks Trinten, I’m not sure if that is in the the cards but you never know!!
Things are moving along not as quickly as I’d like but progress none the less. My buddies Don and Phil have almost finished the front cross member and test fit everything and it’s now being fully welded and then go for powder coating before final installation. Phil has made 3D printed Brembo brake adapters for the front and back calipers ,they have been tested and everything fits perfectly!! it’s amazing what you can do with a 3D printer when you know what you’re doing.
Now Phil is going to mill the brackets out of aluminum
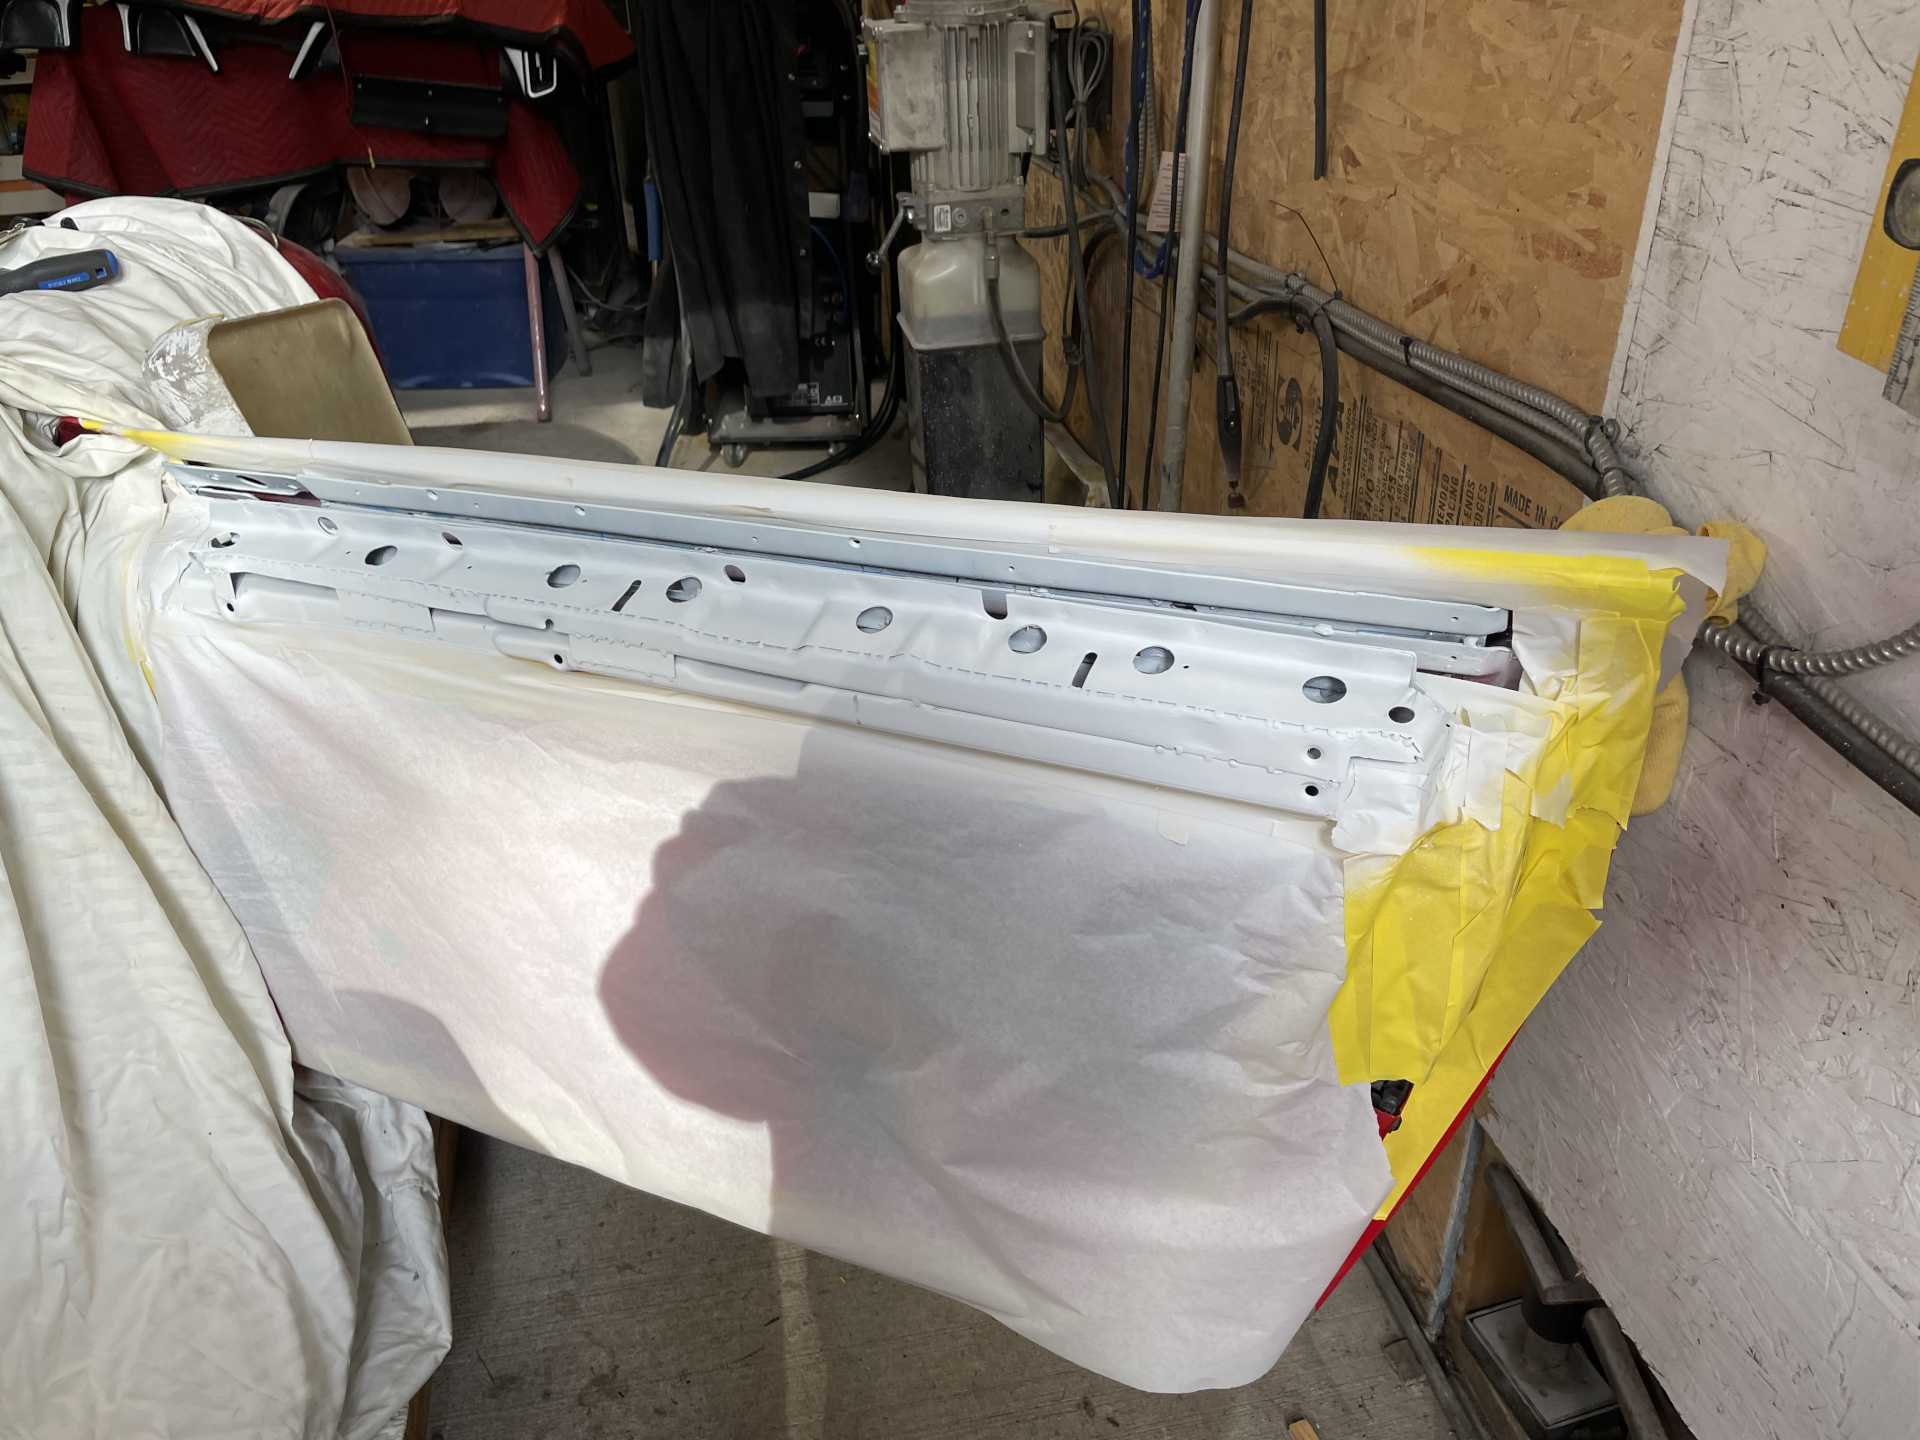
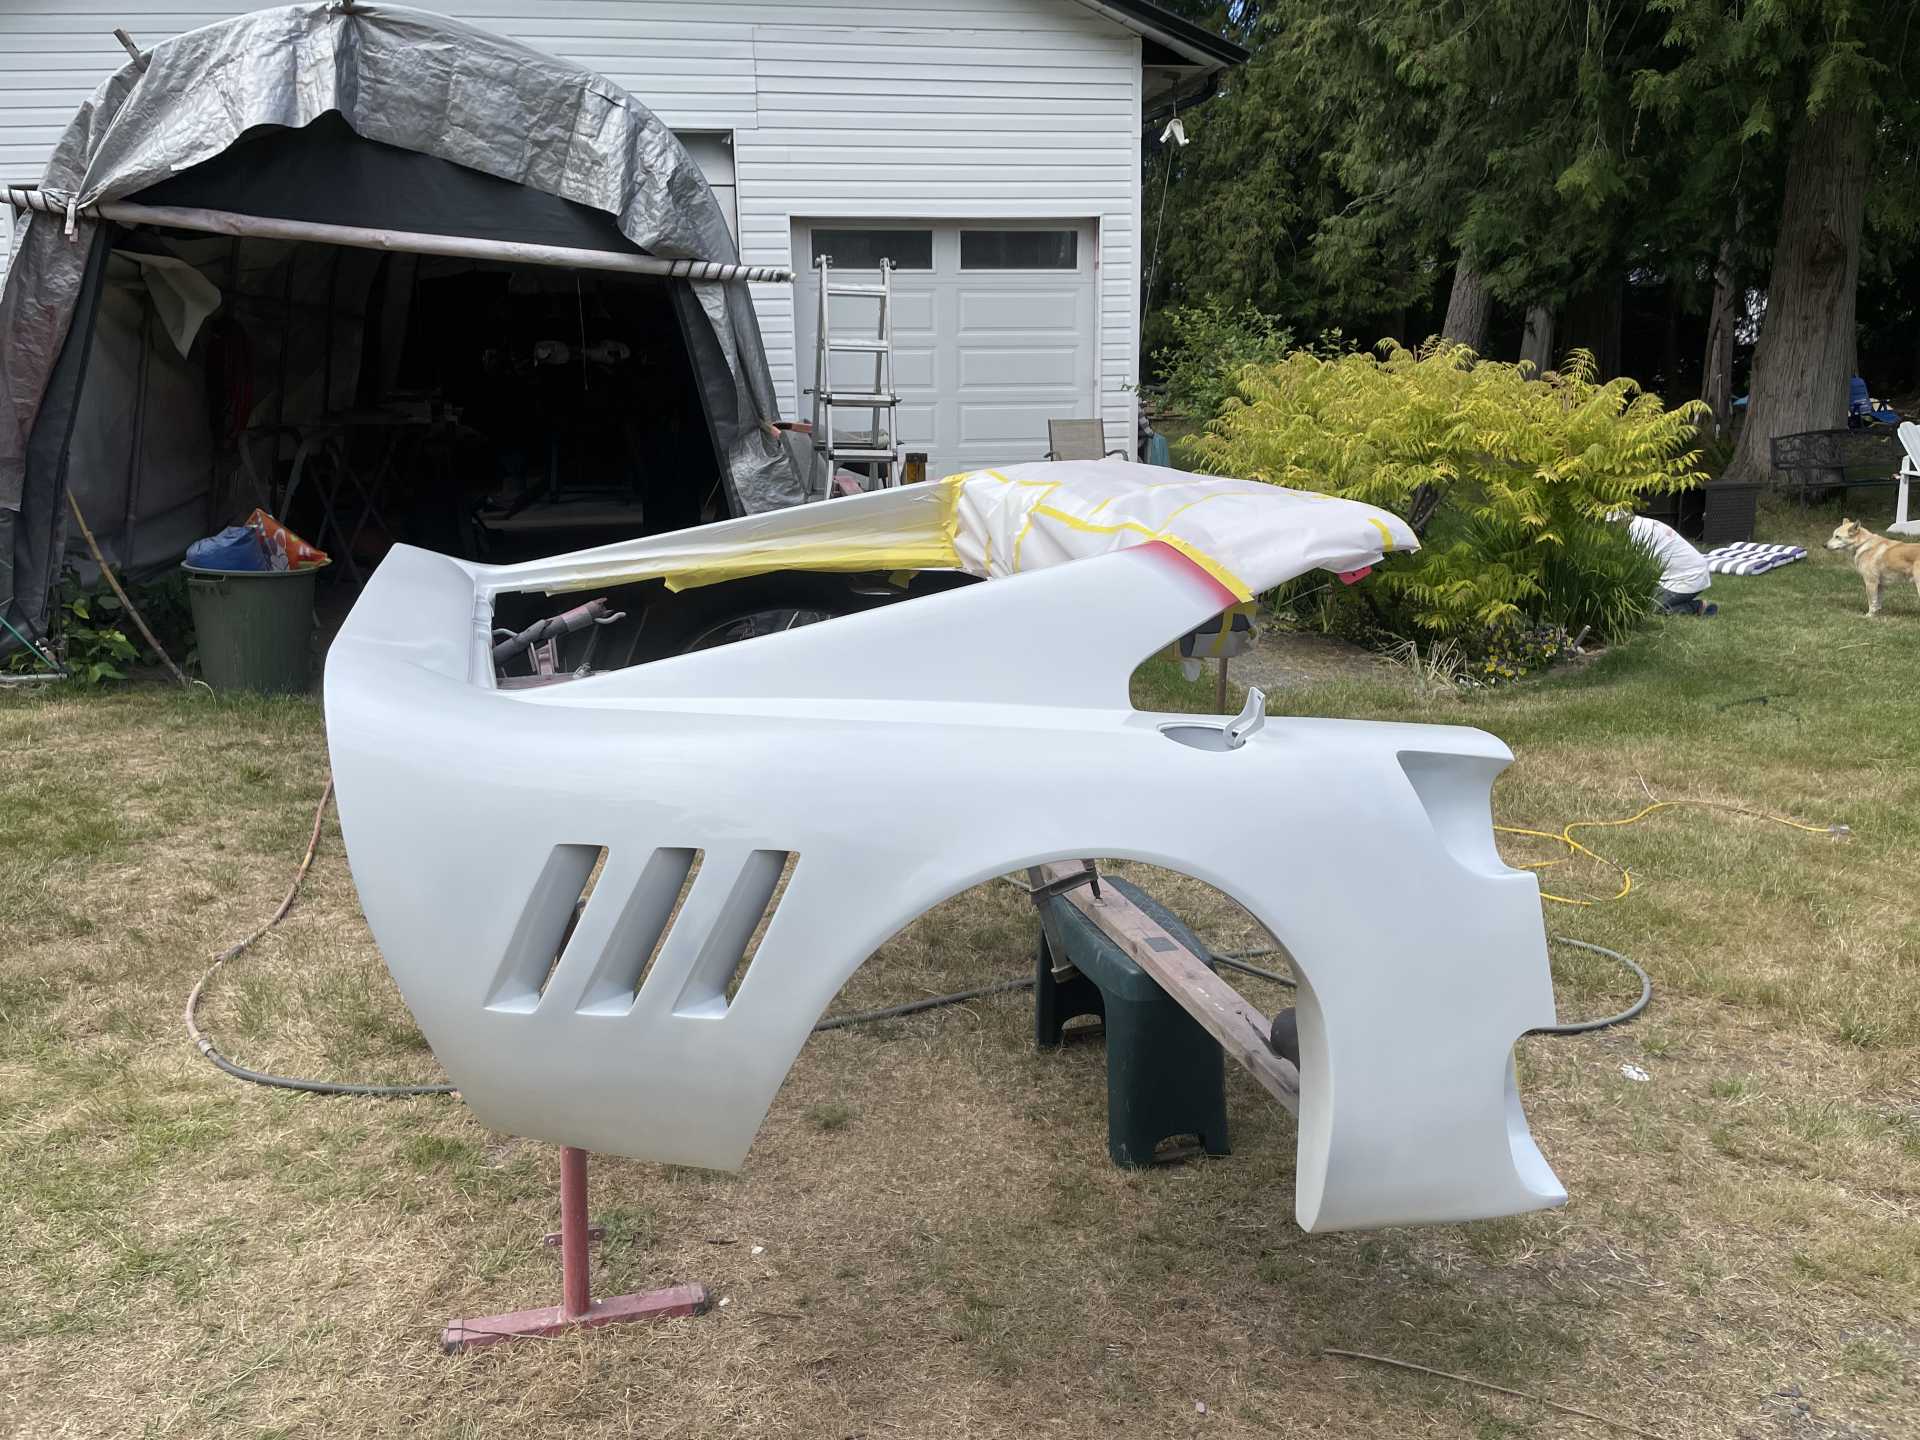
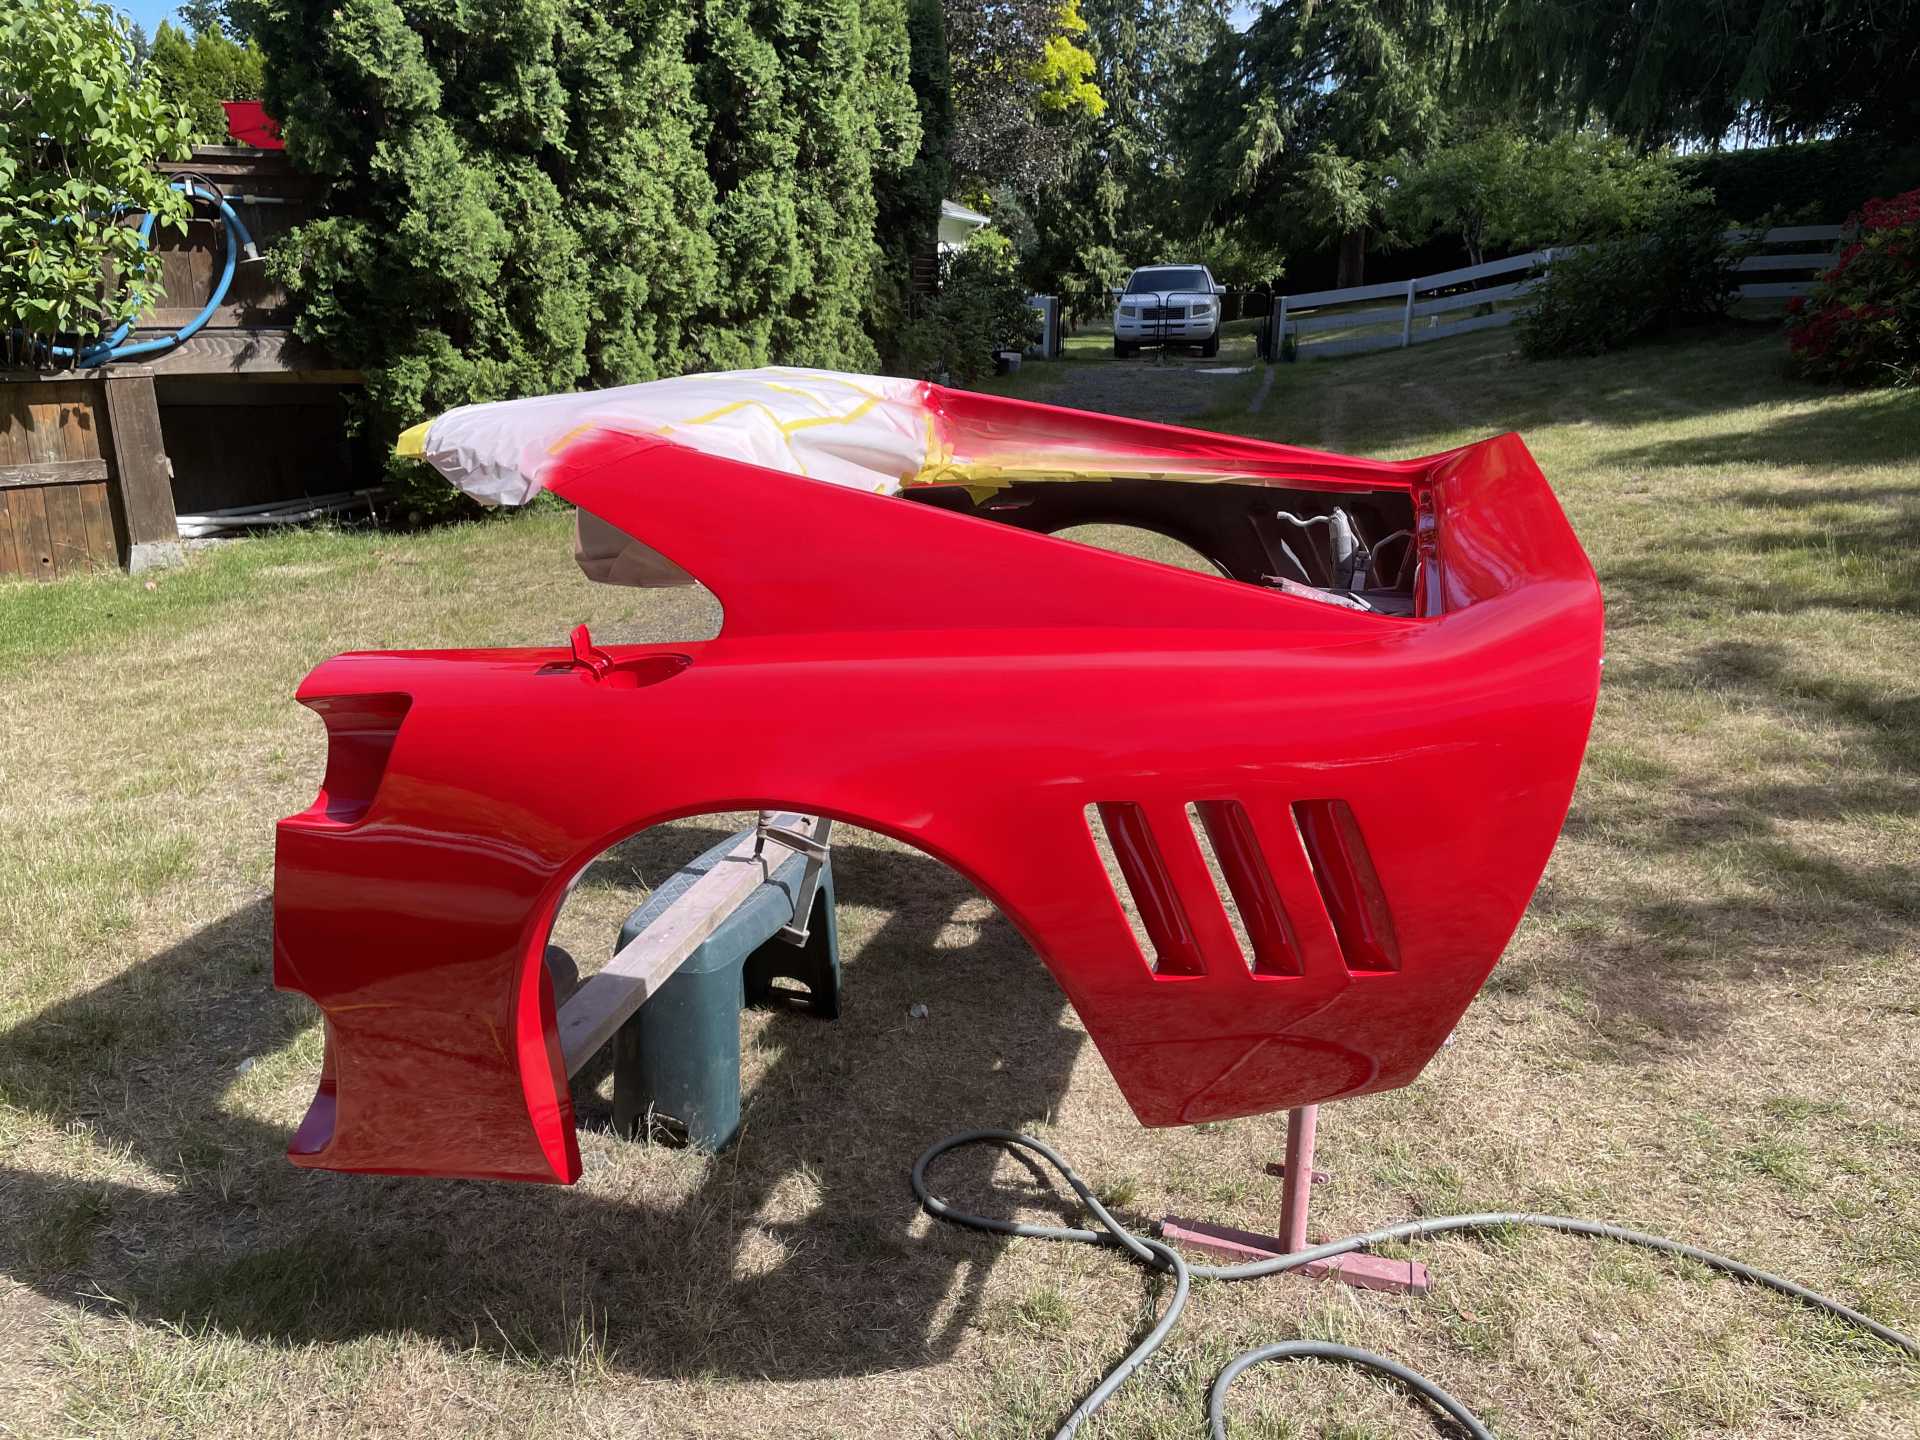
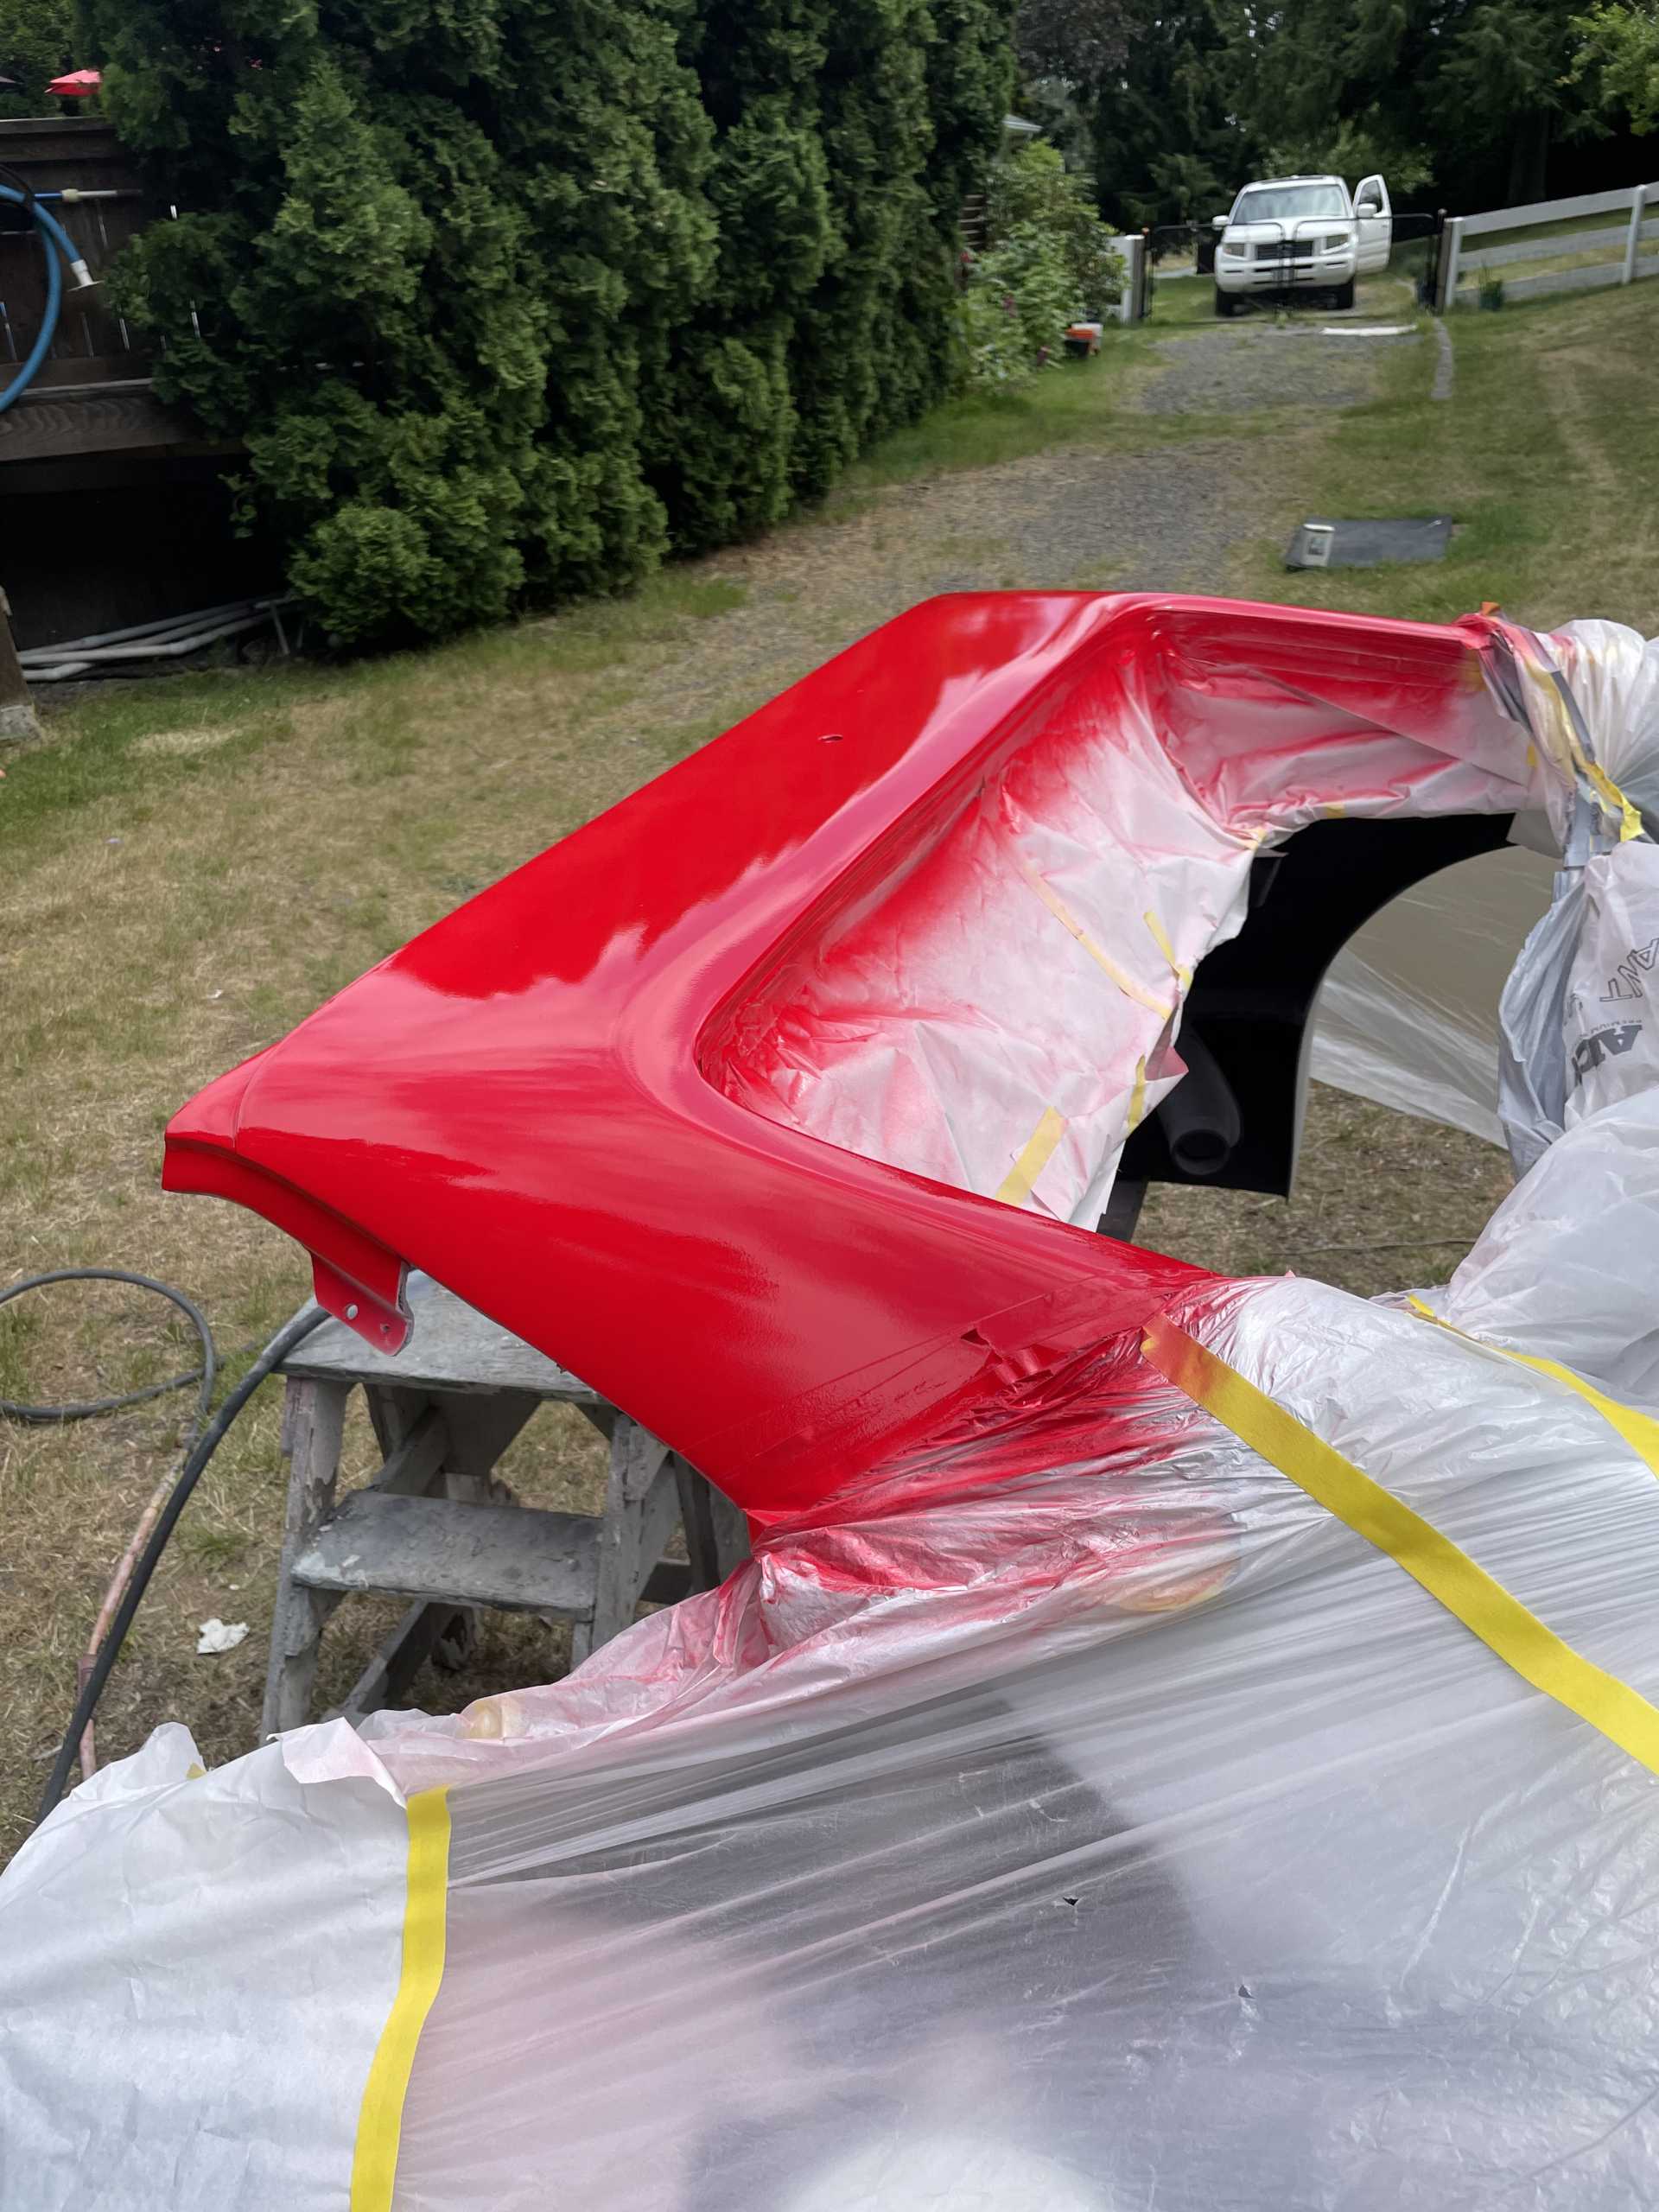
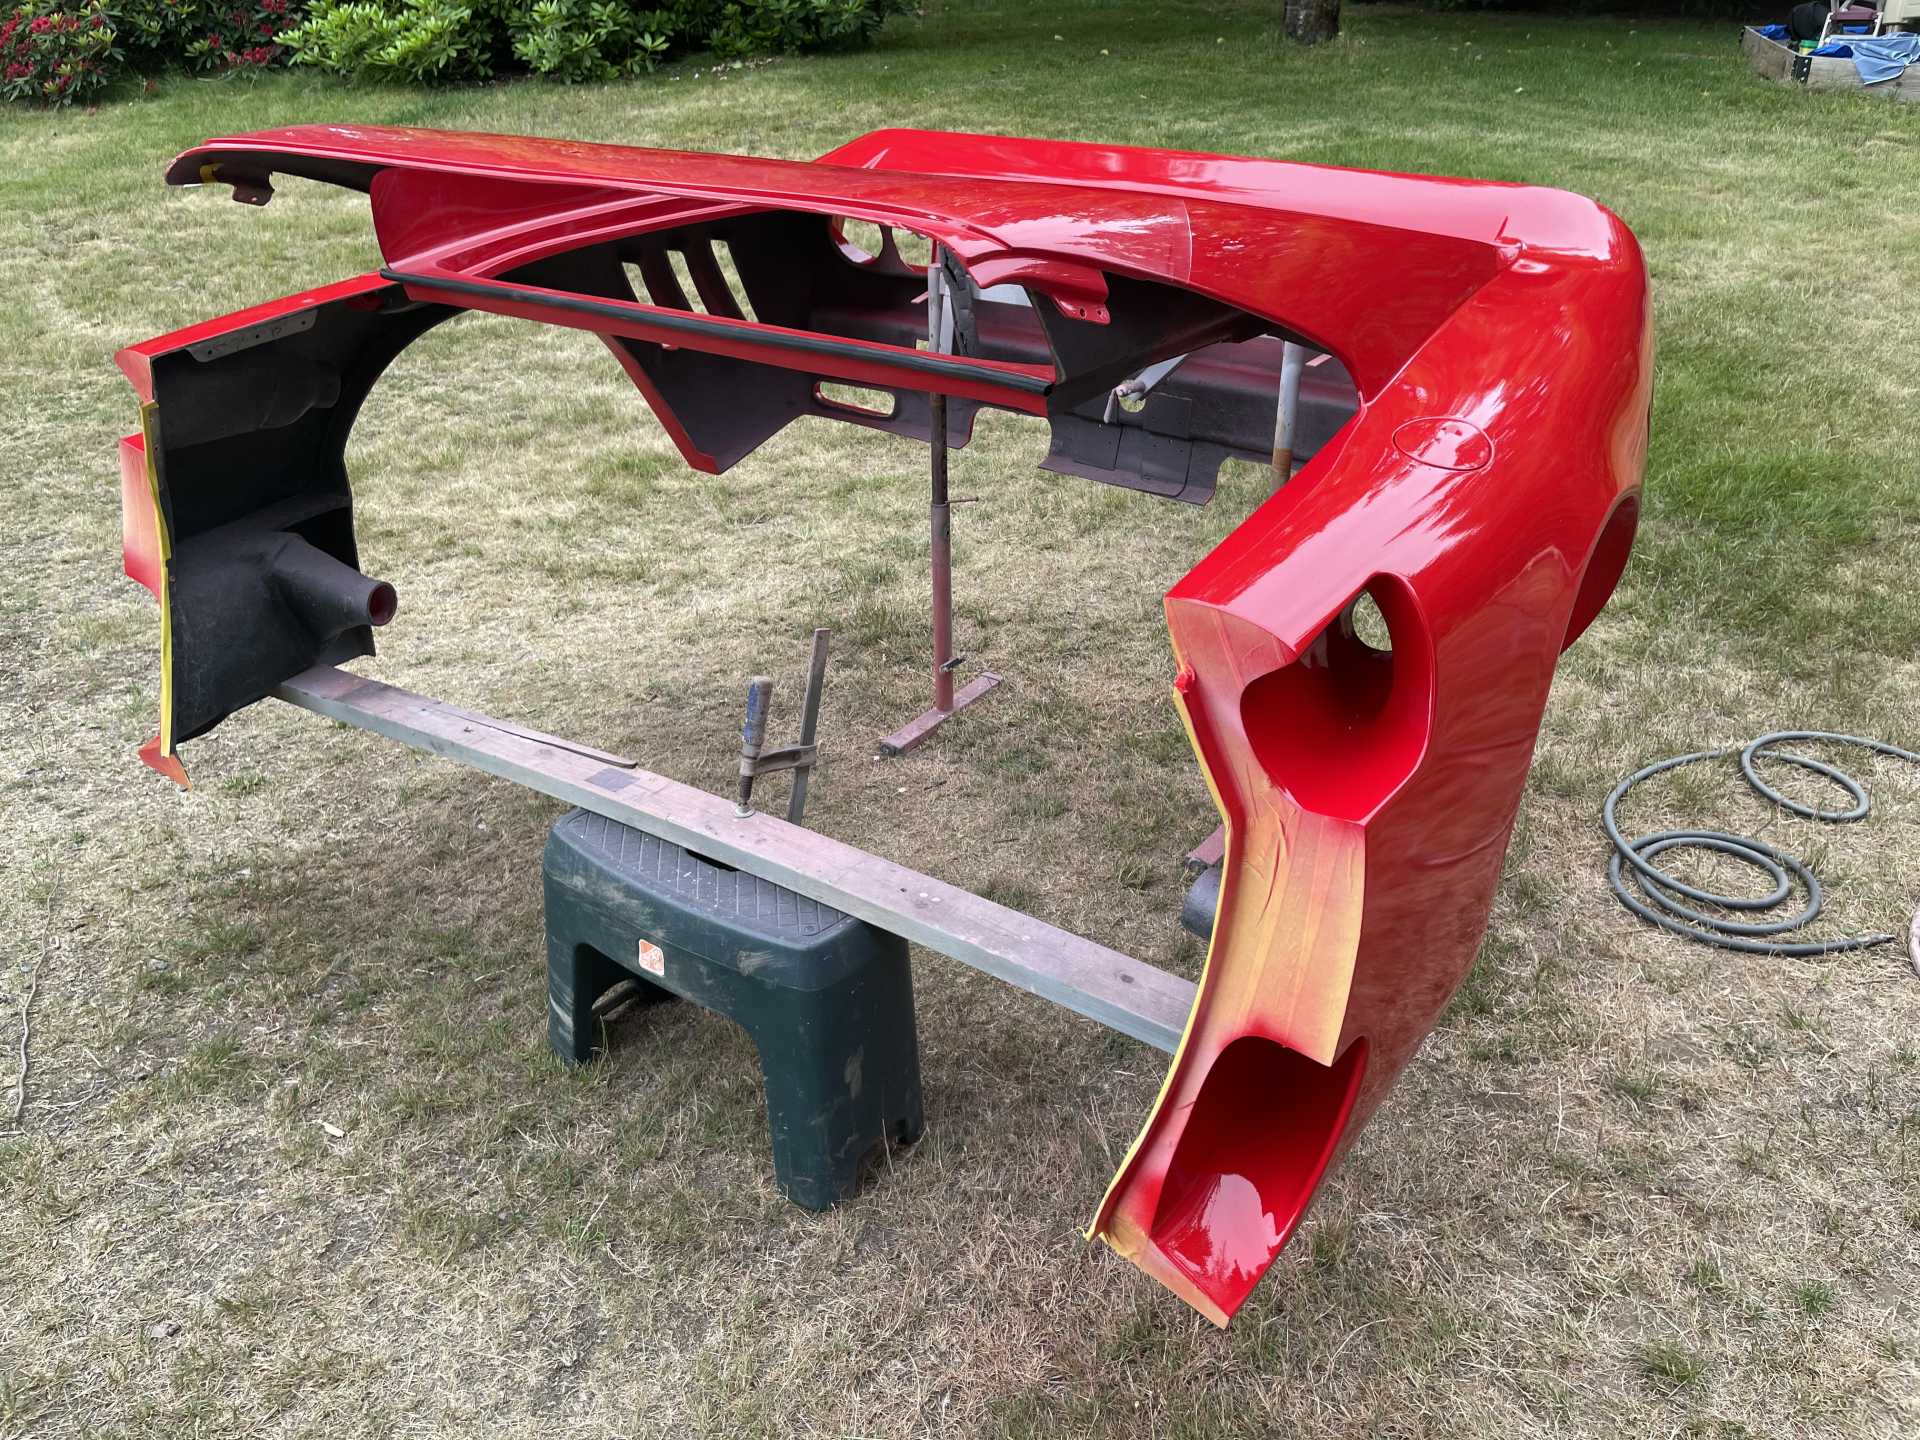
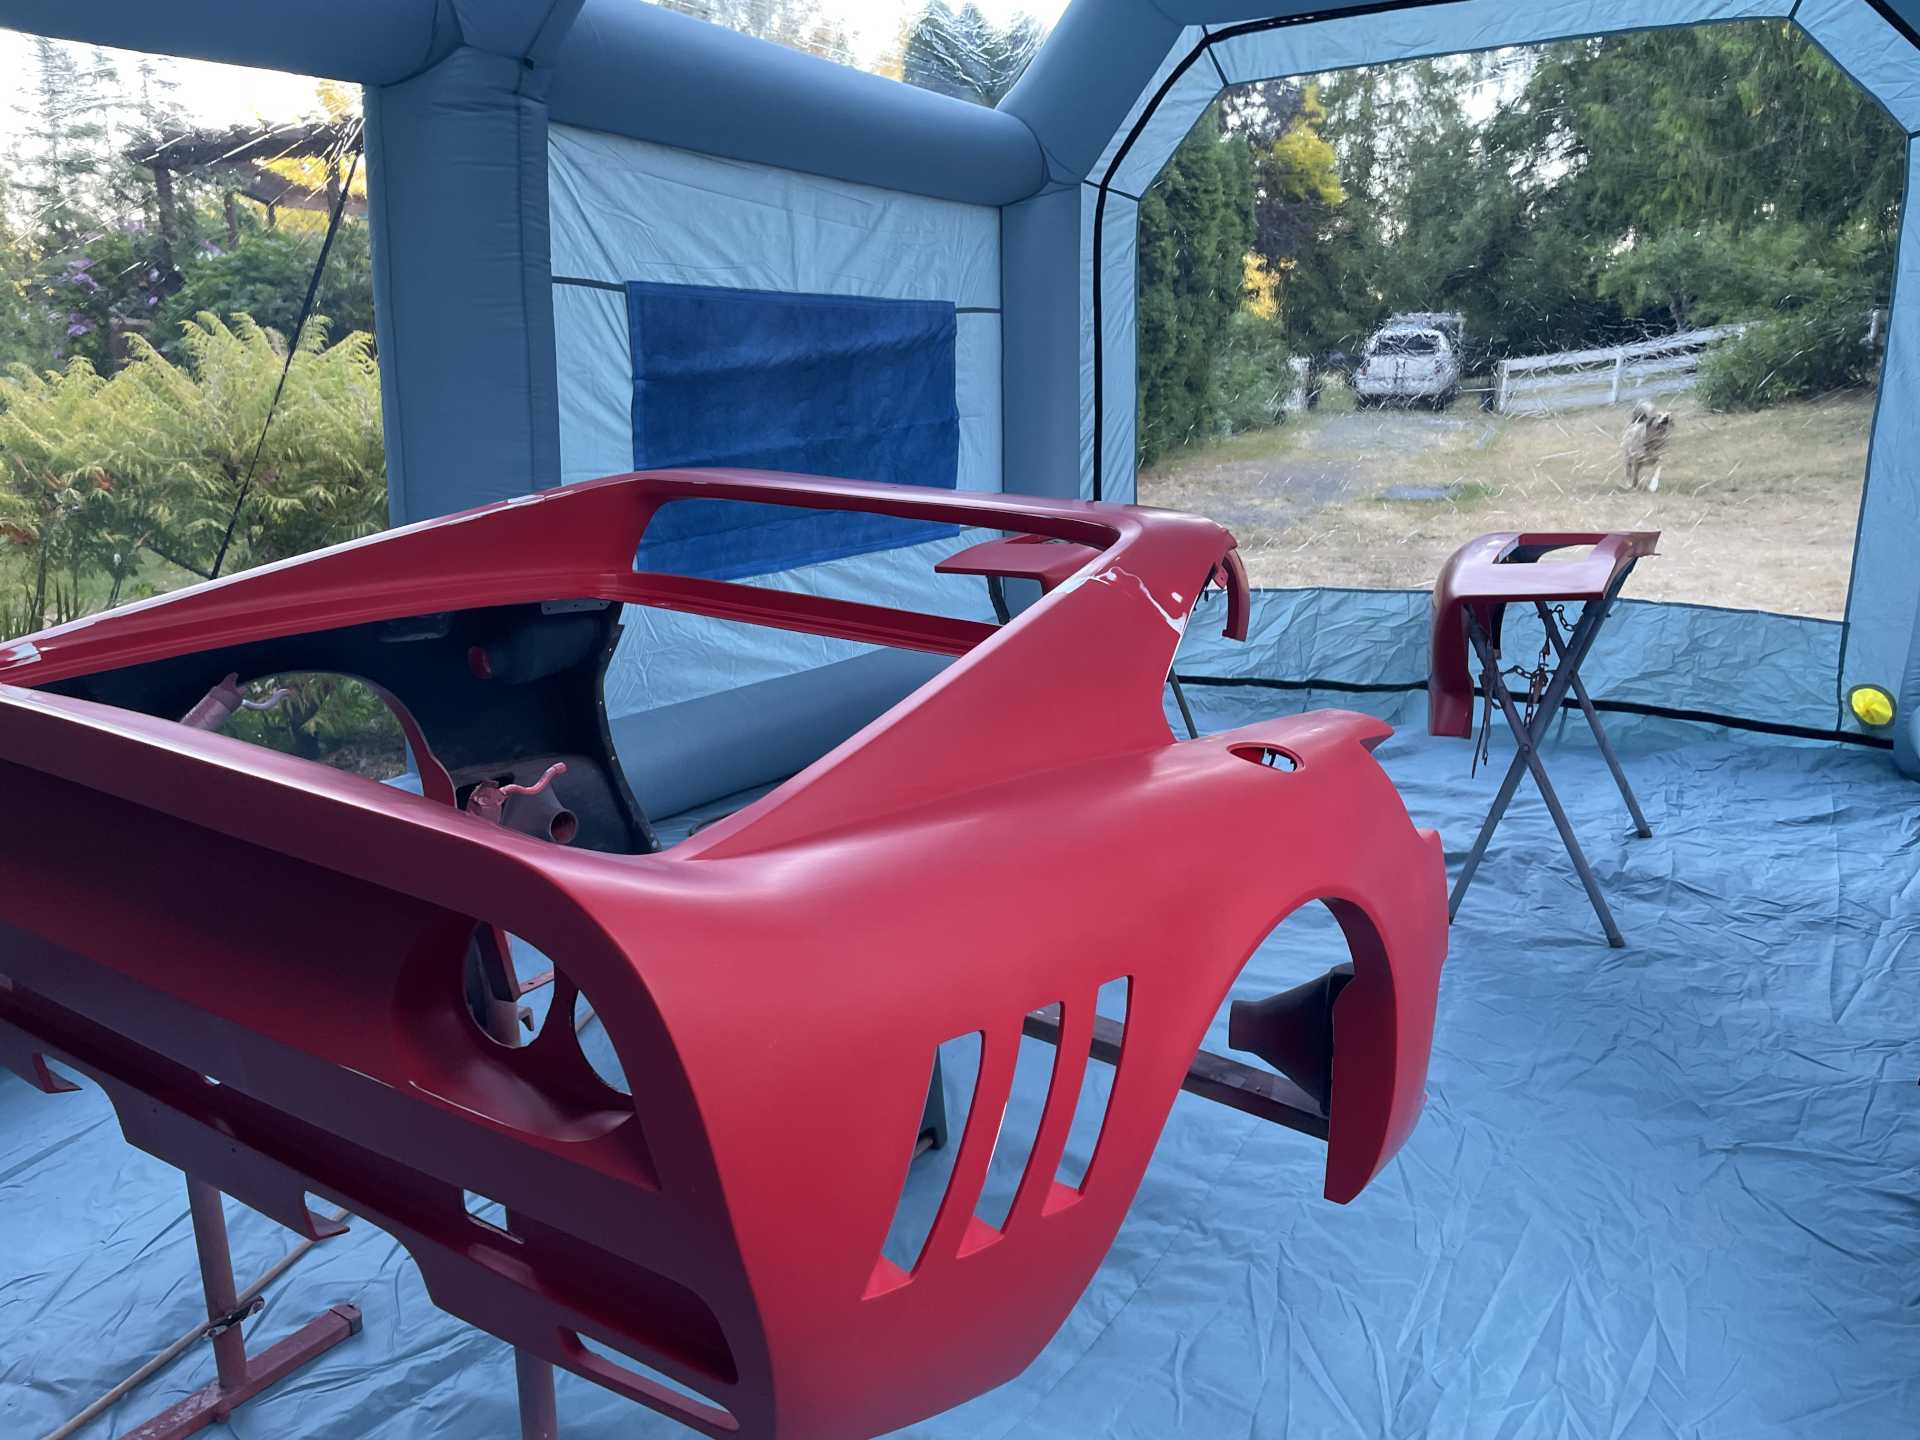
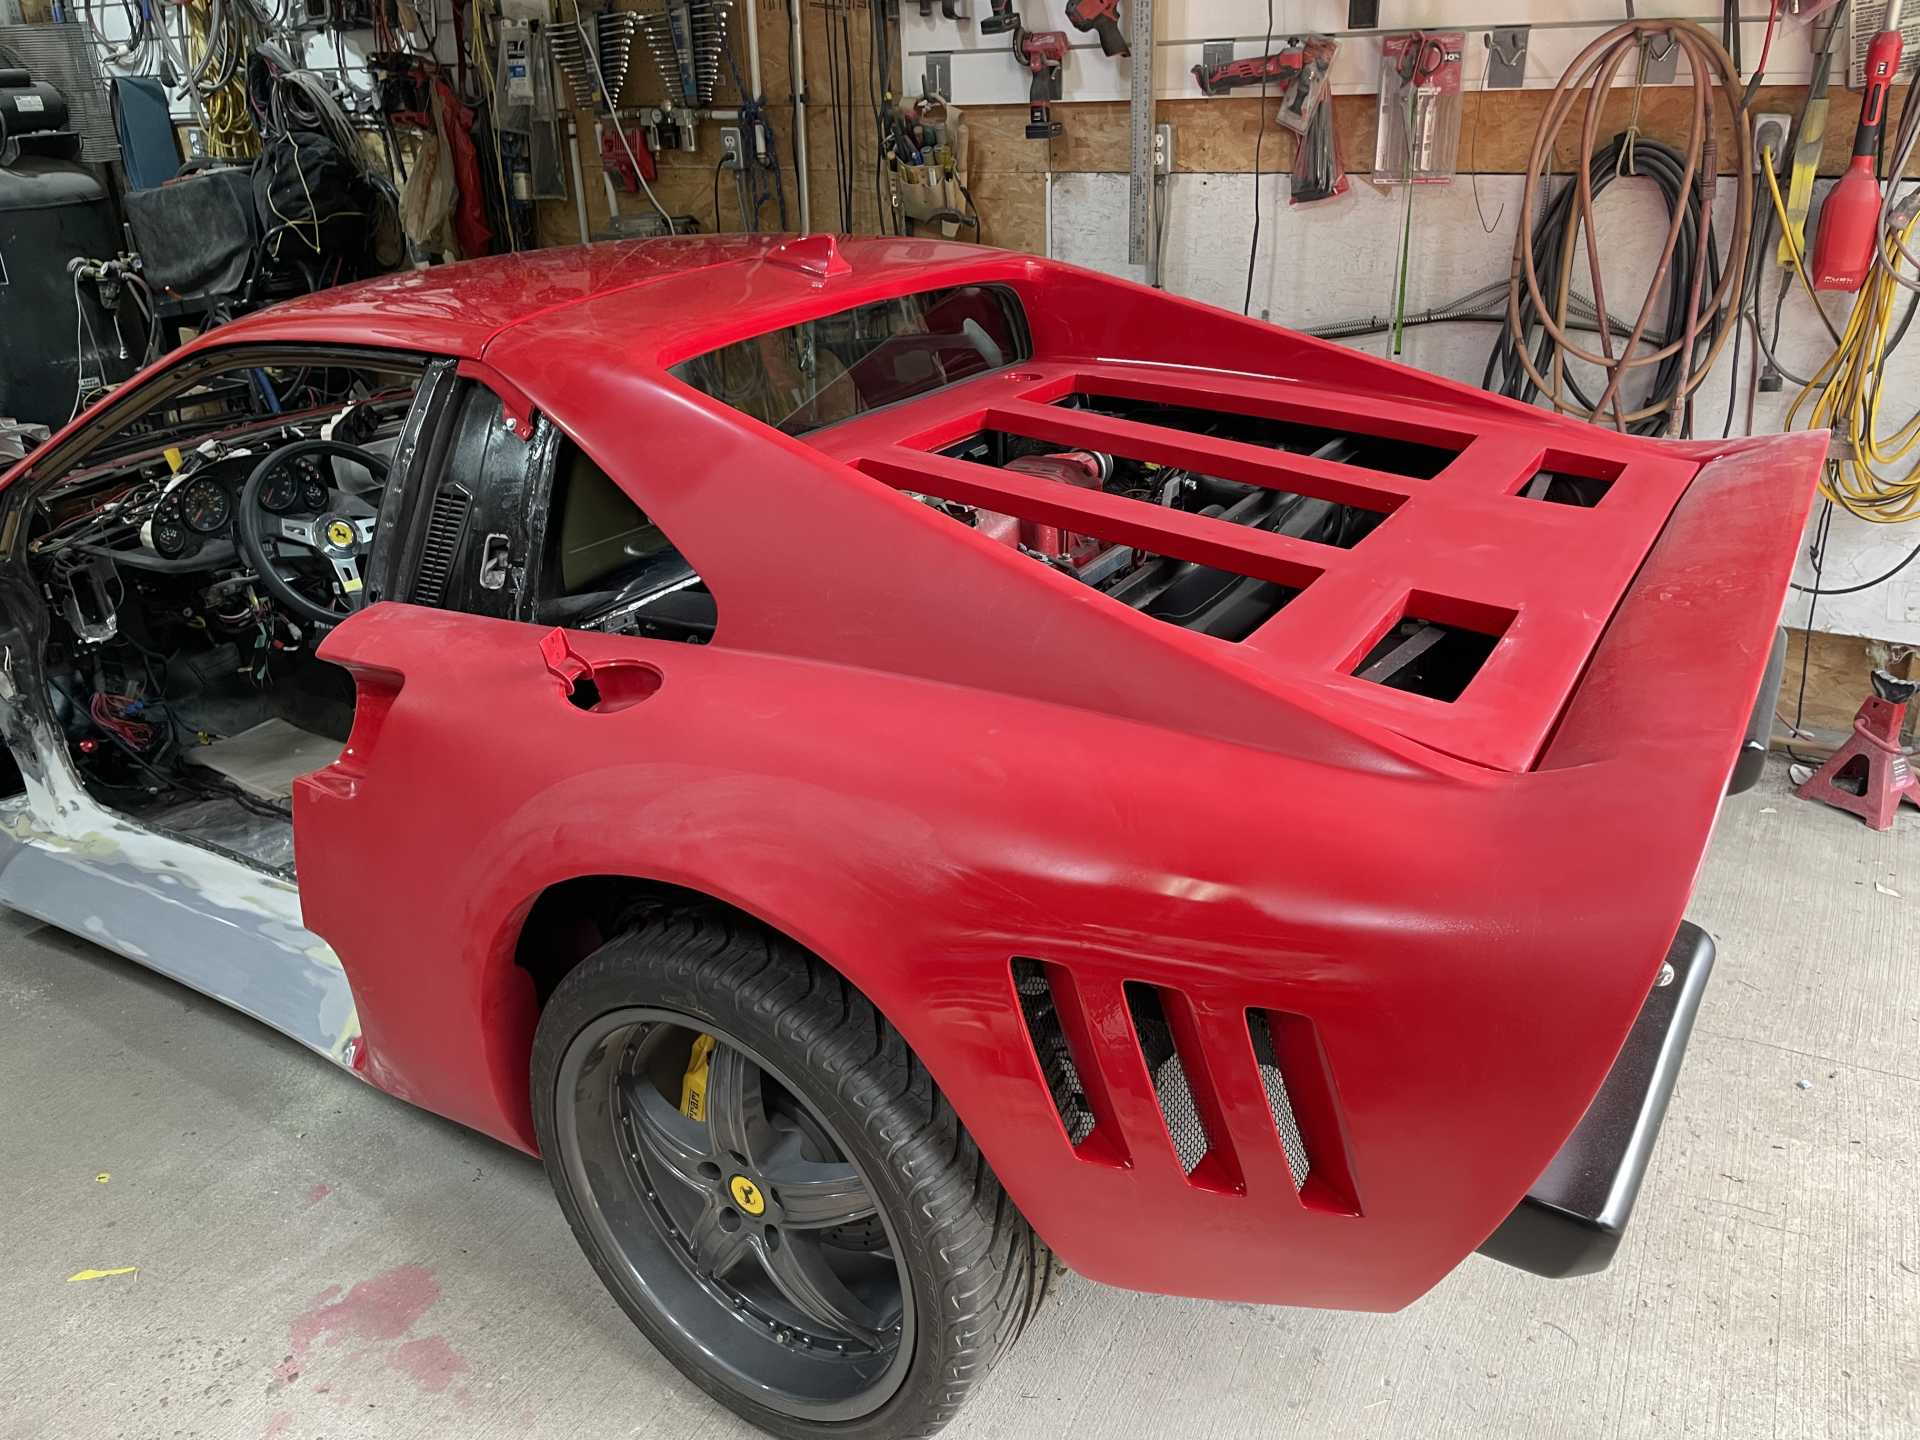
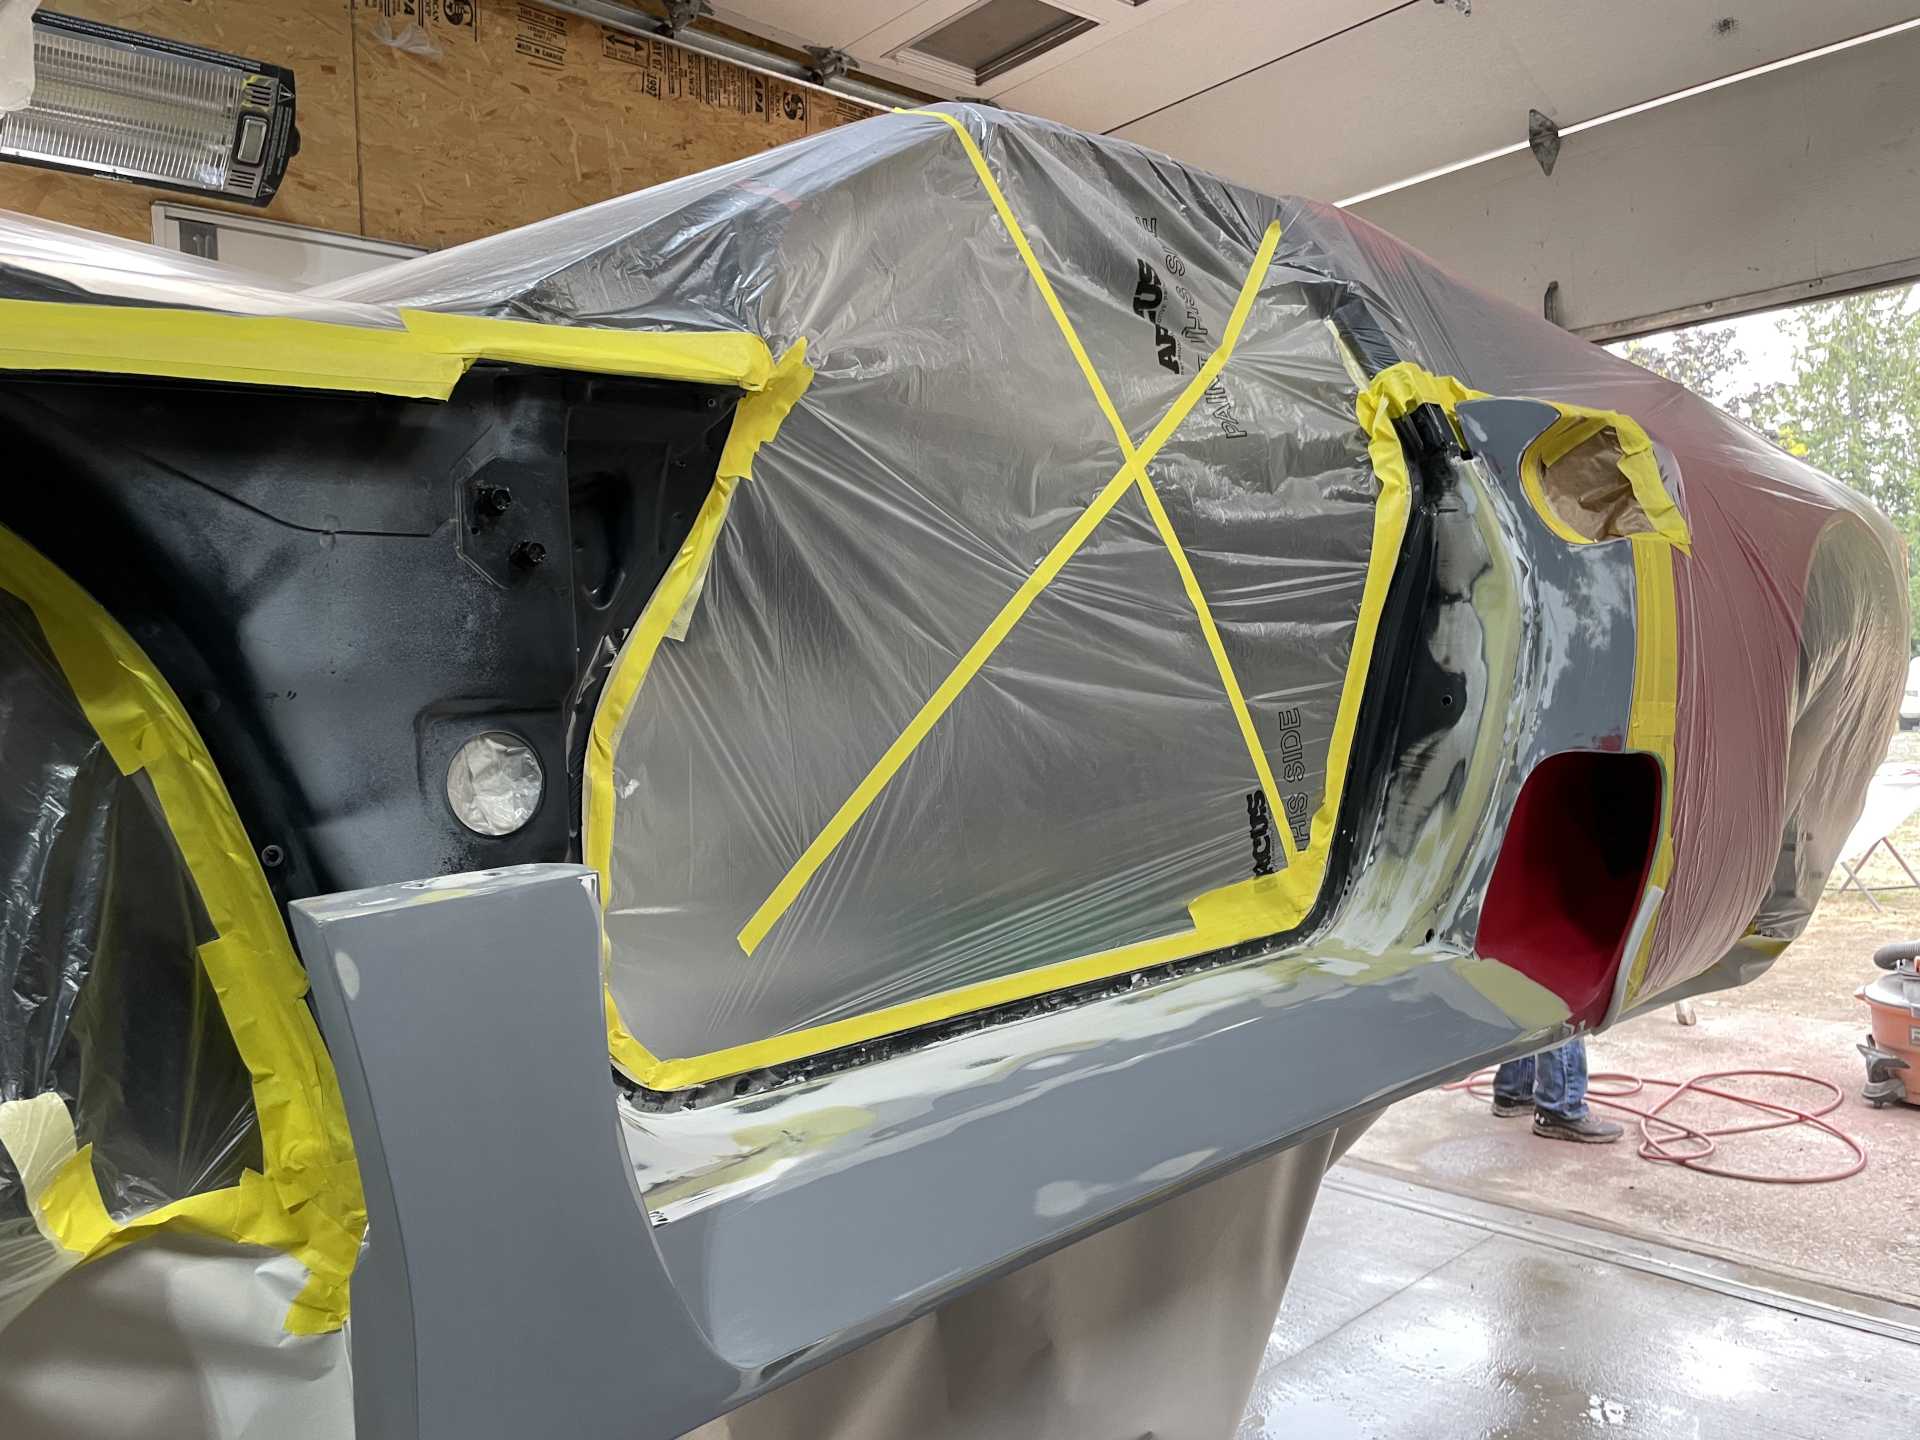
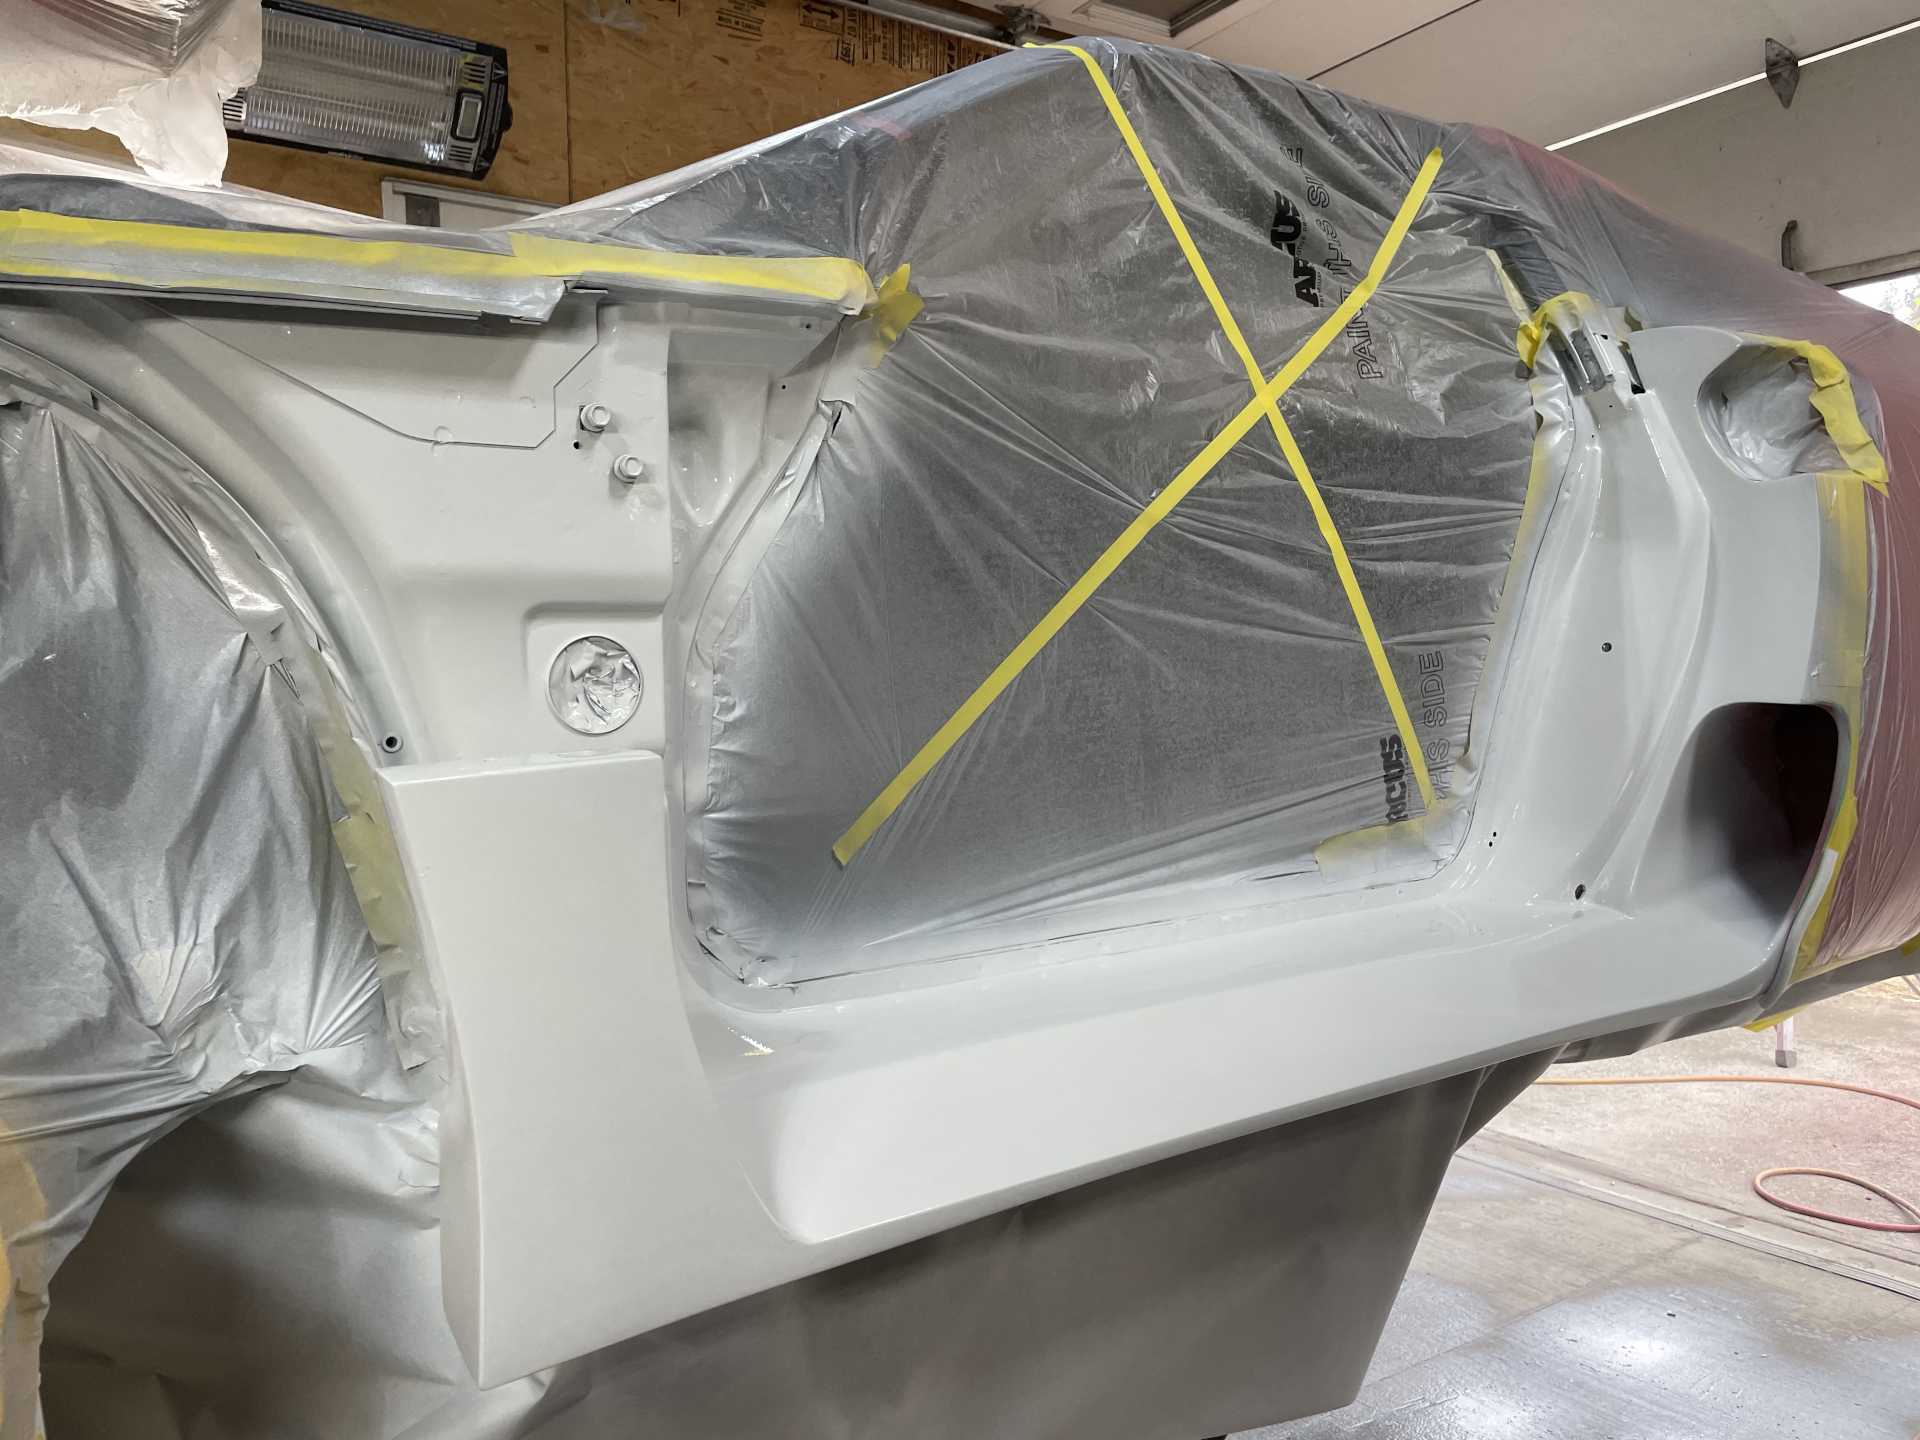
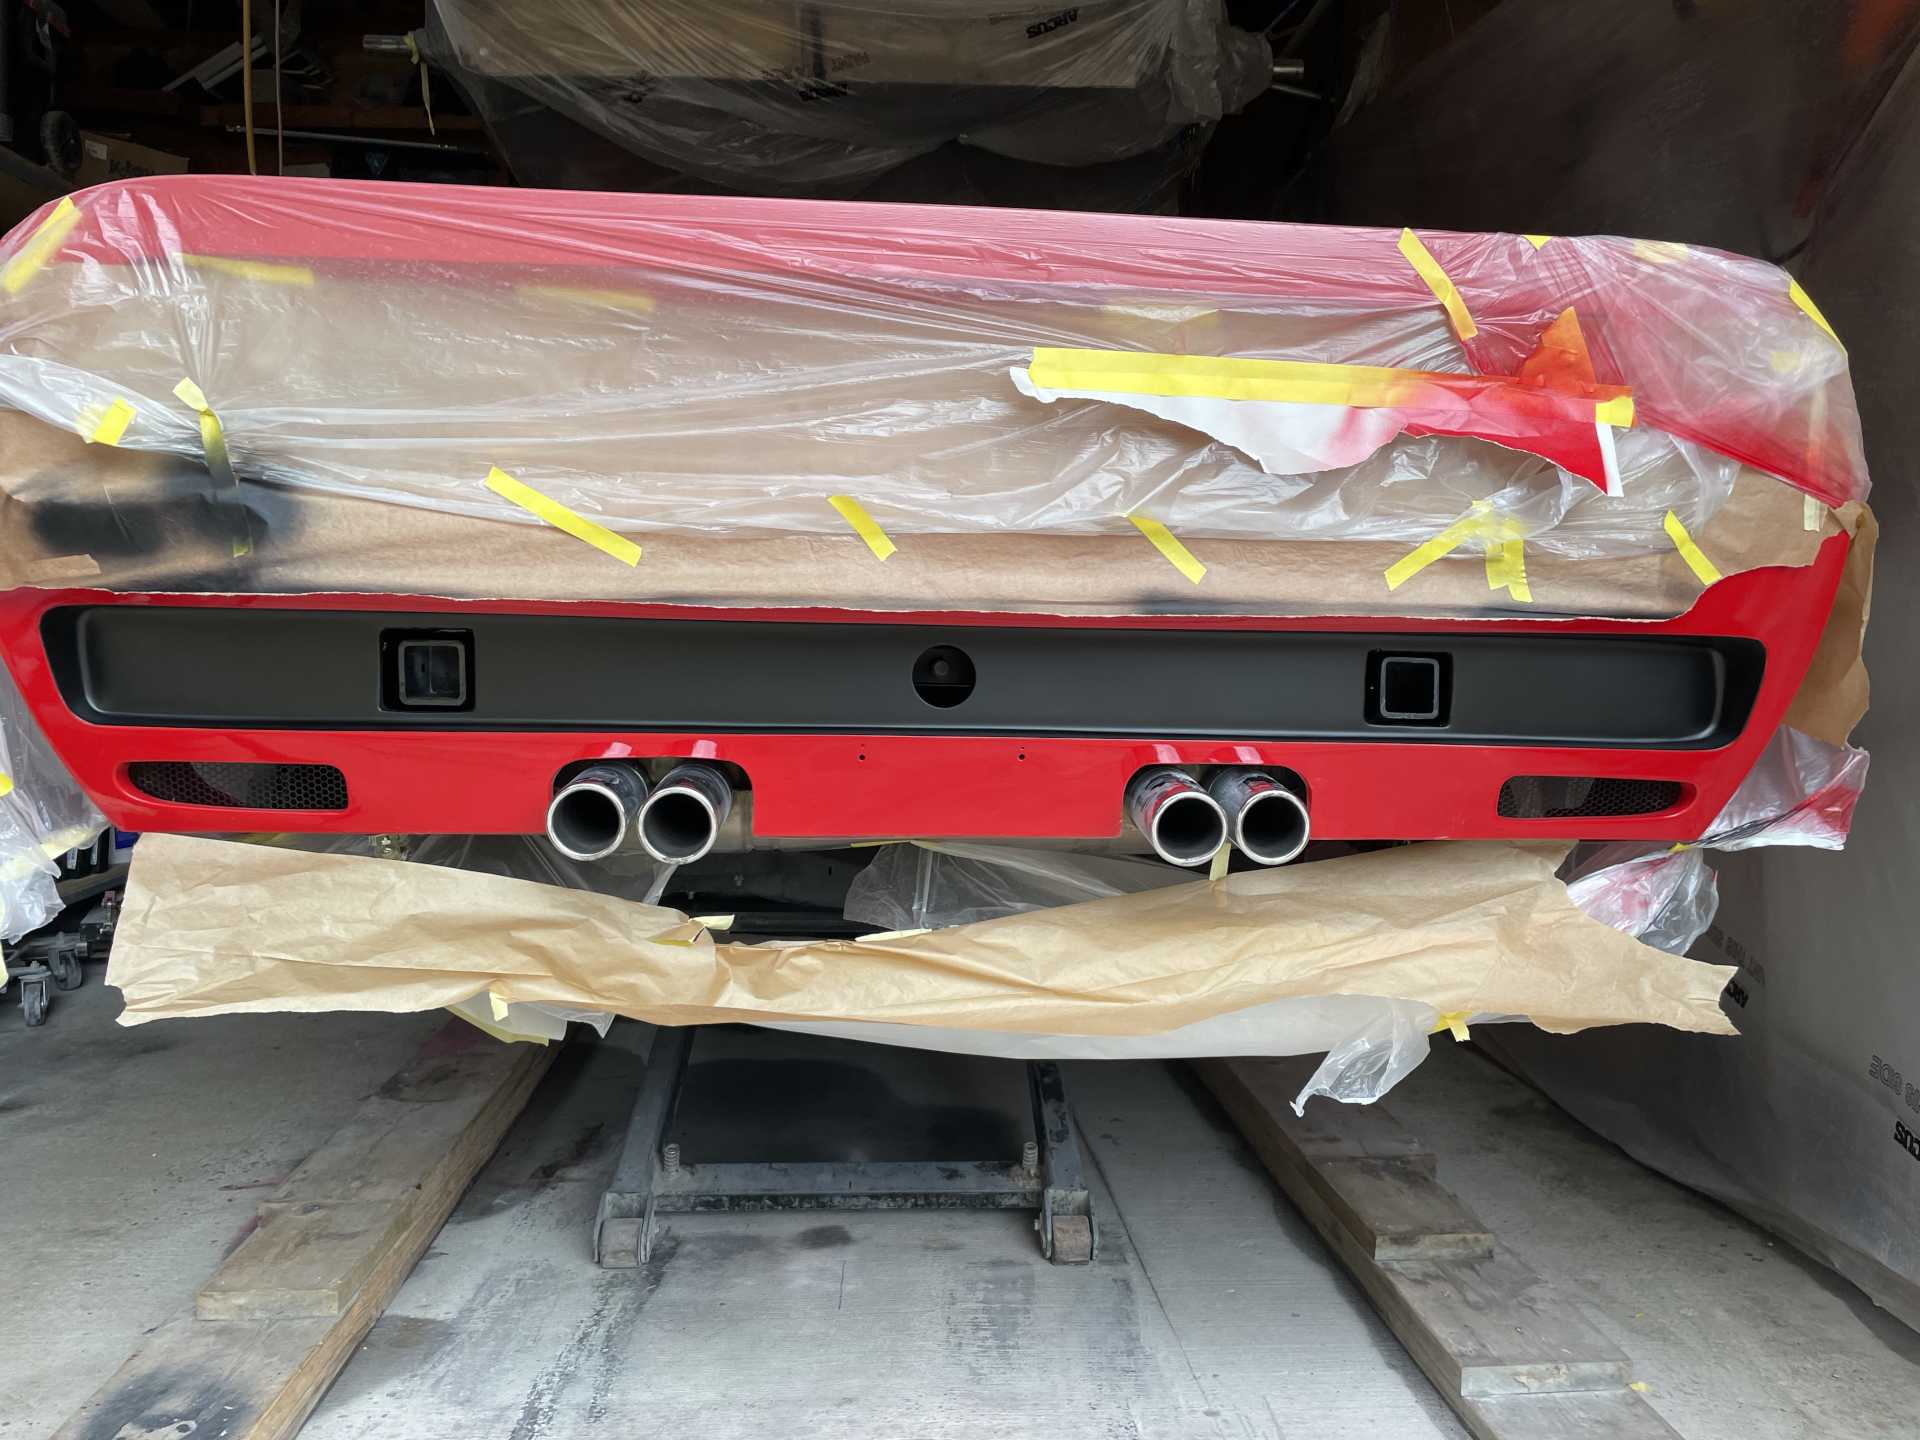
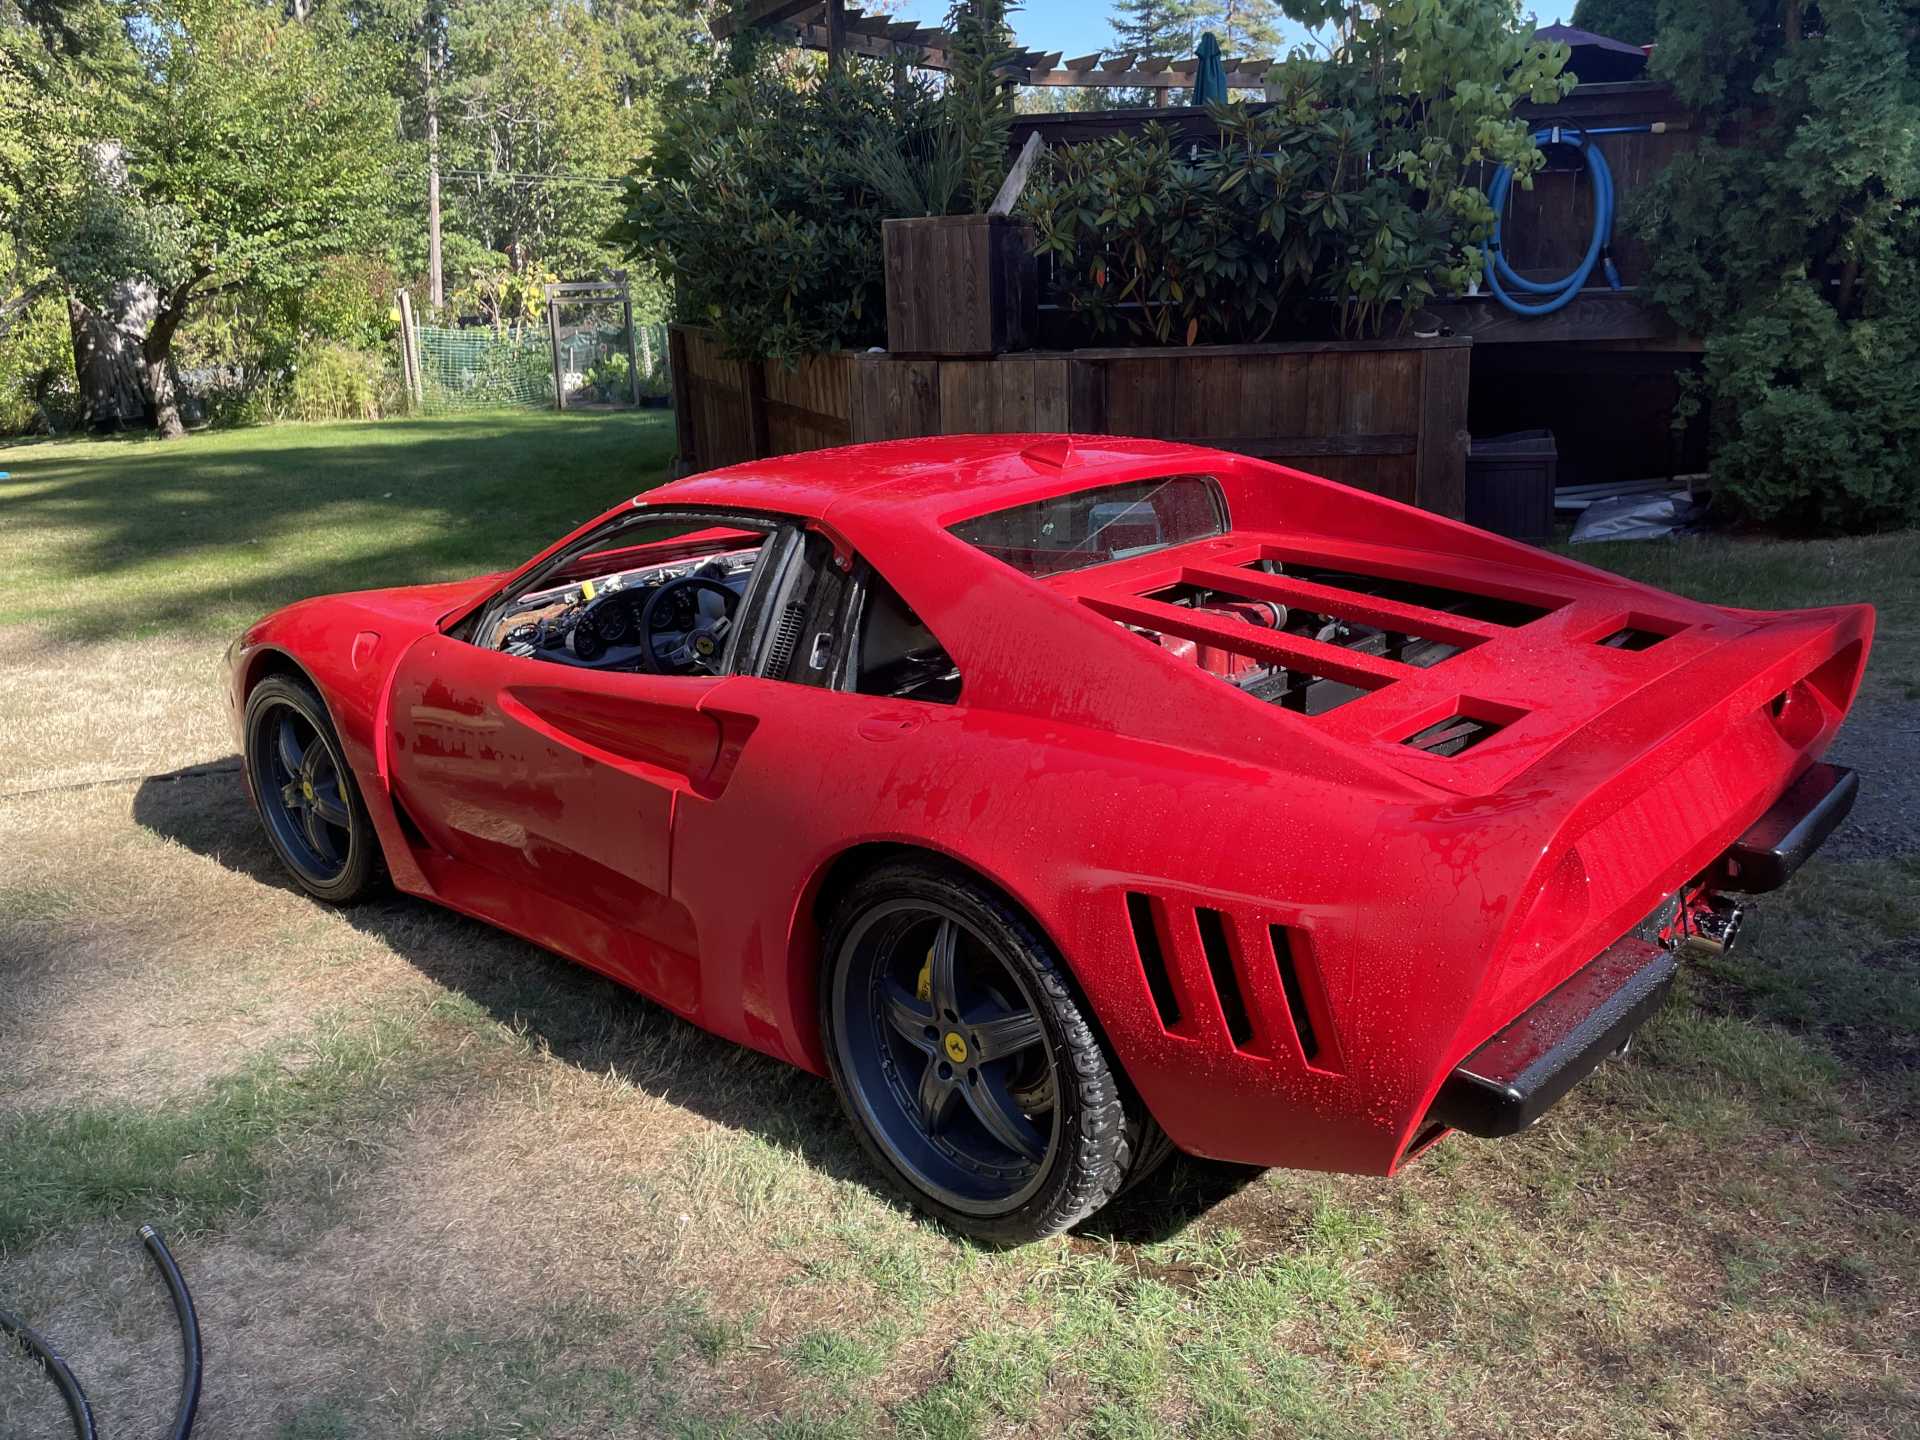
I also made the decision to paint the the back of the car while it is off. I needed to move the build along as I lost a bit of time.
This is painted white which is the value shade to get the proper red pop
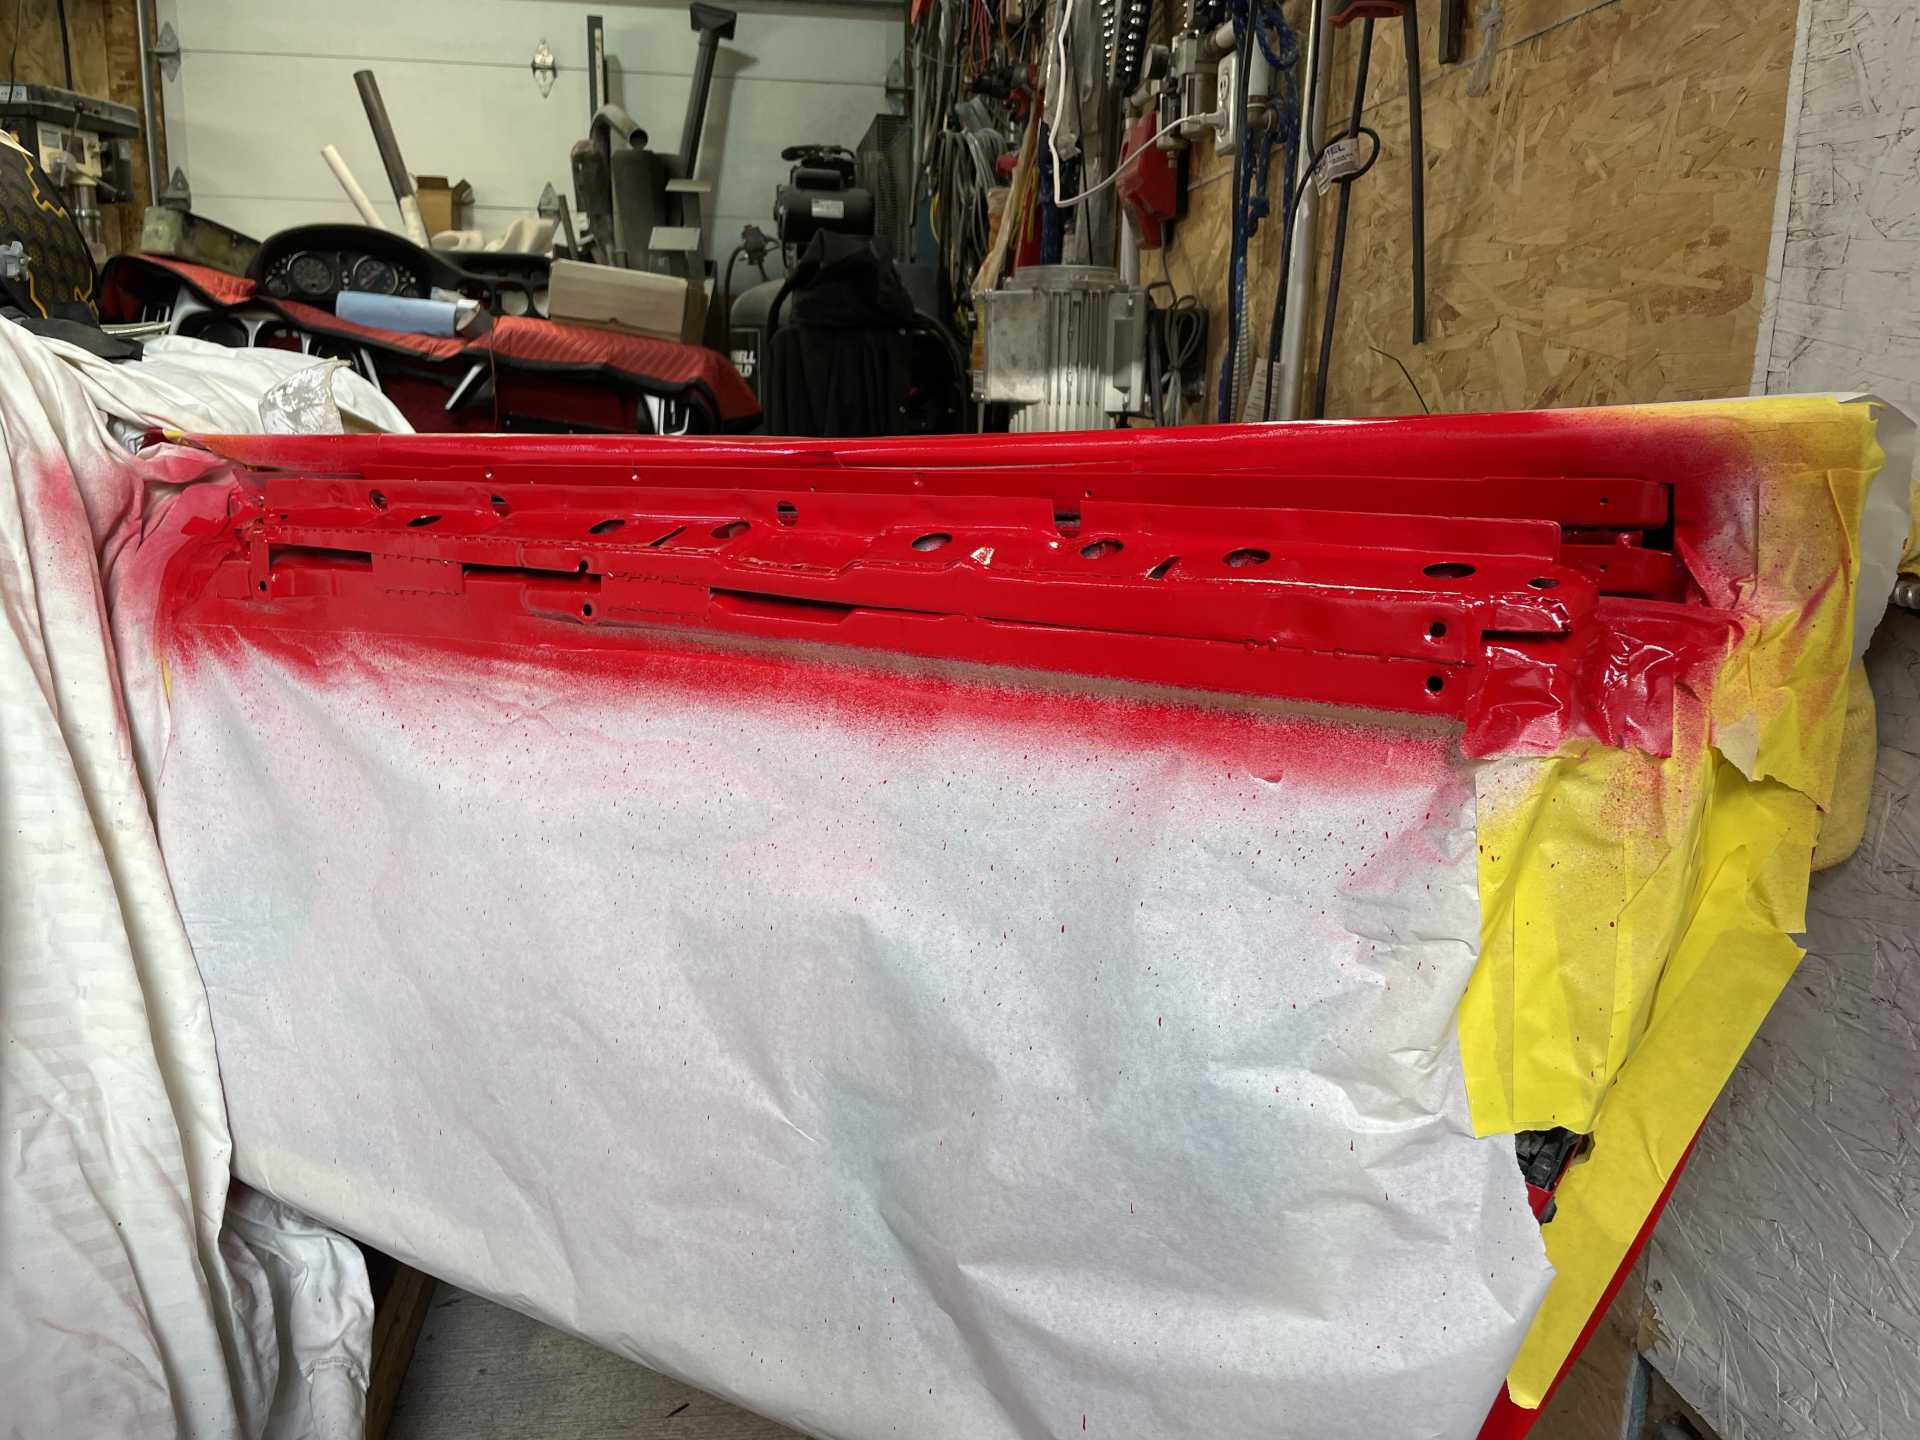
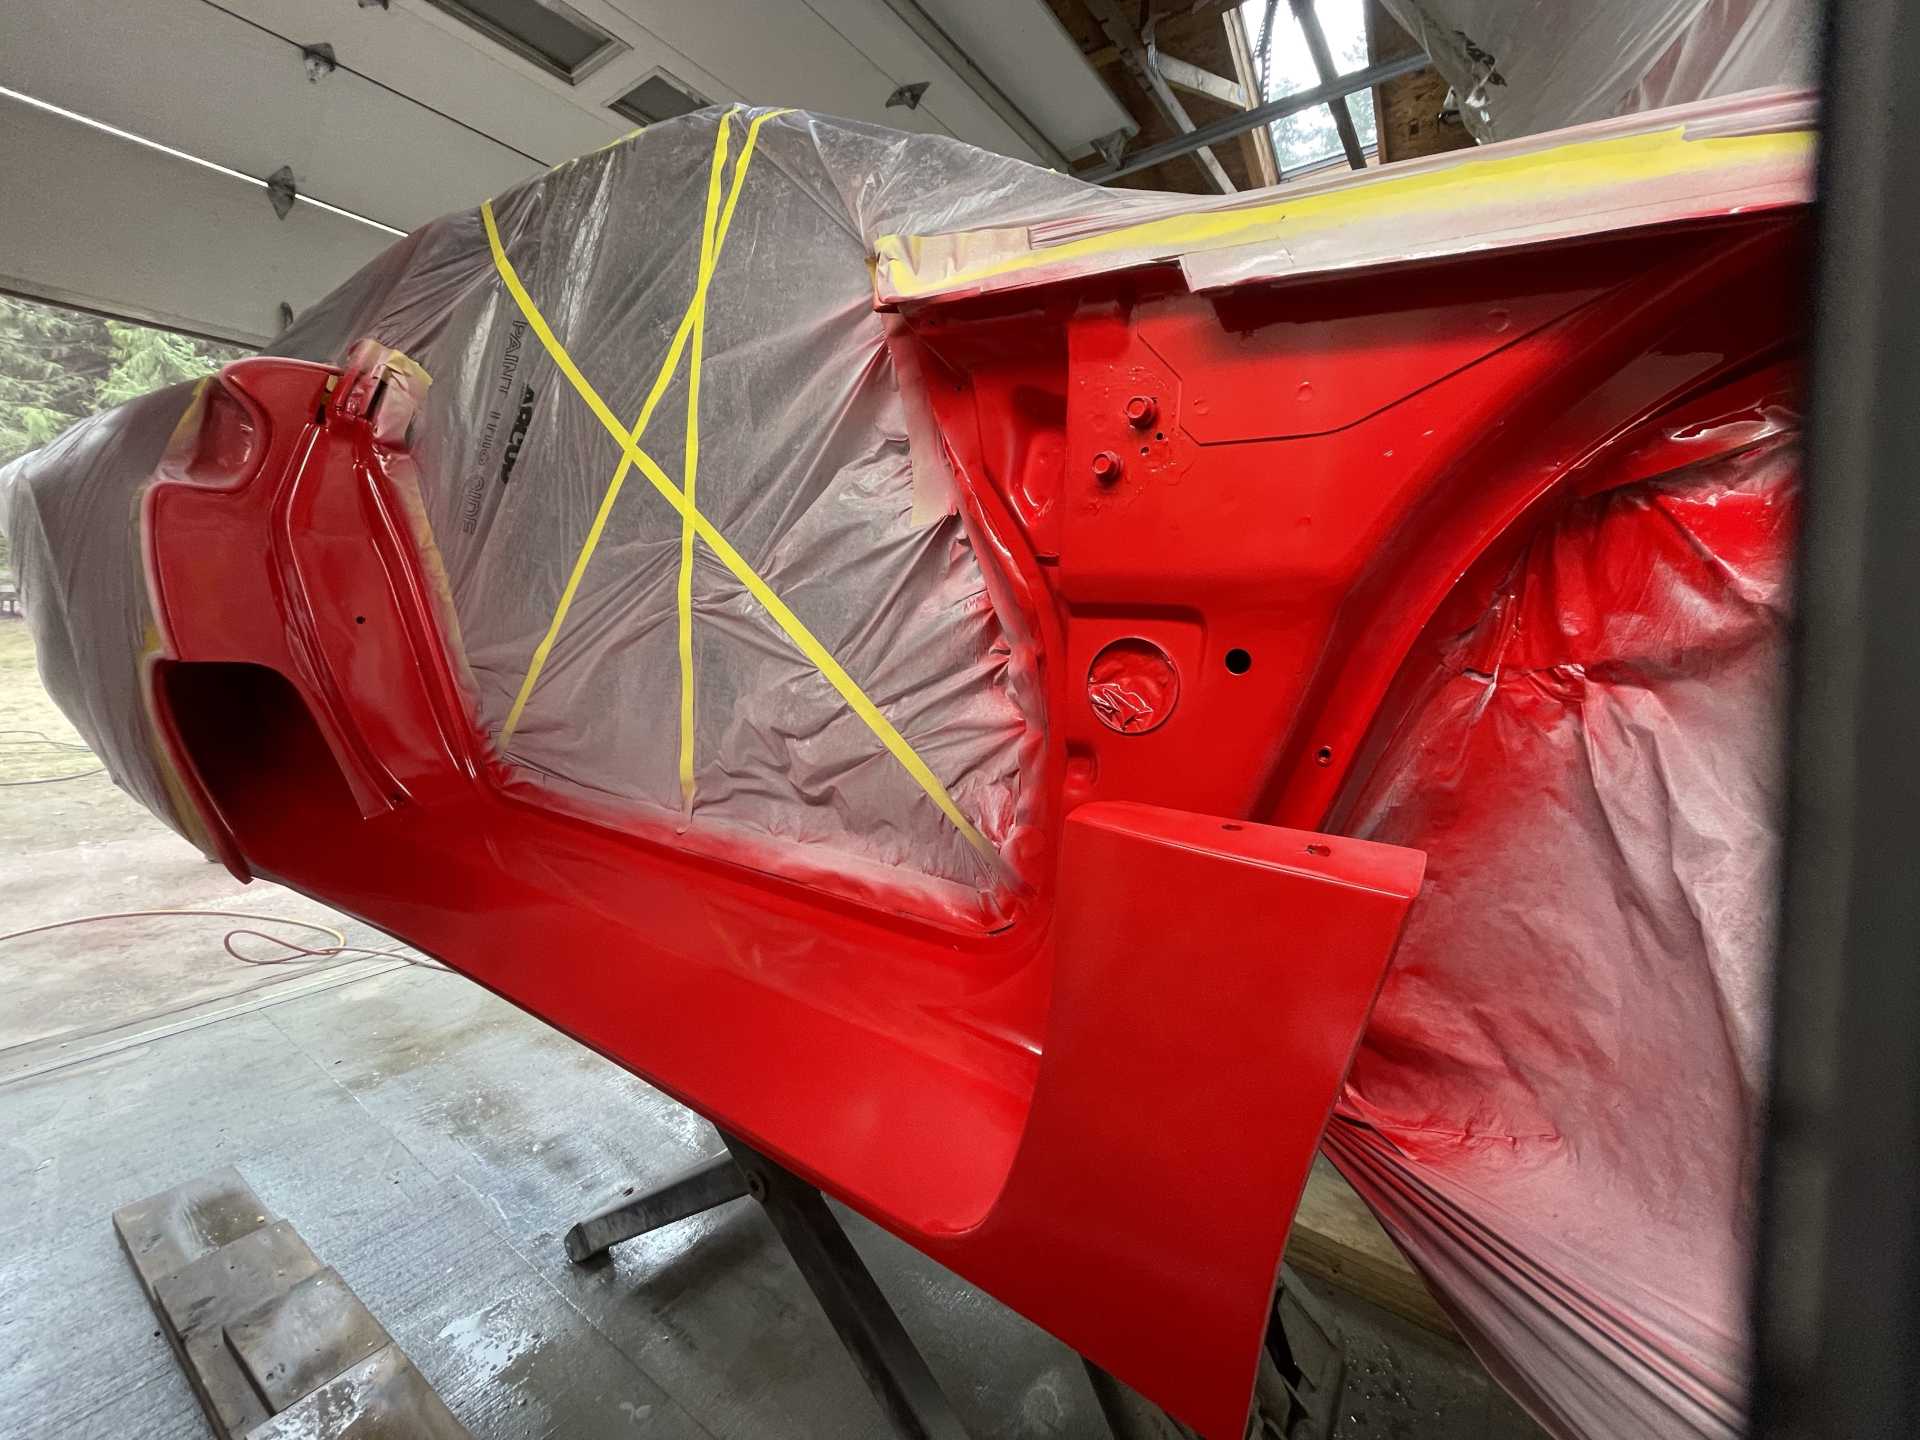
This is after one light coat of red
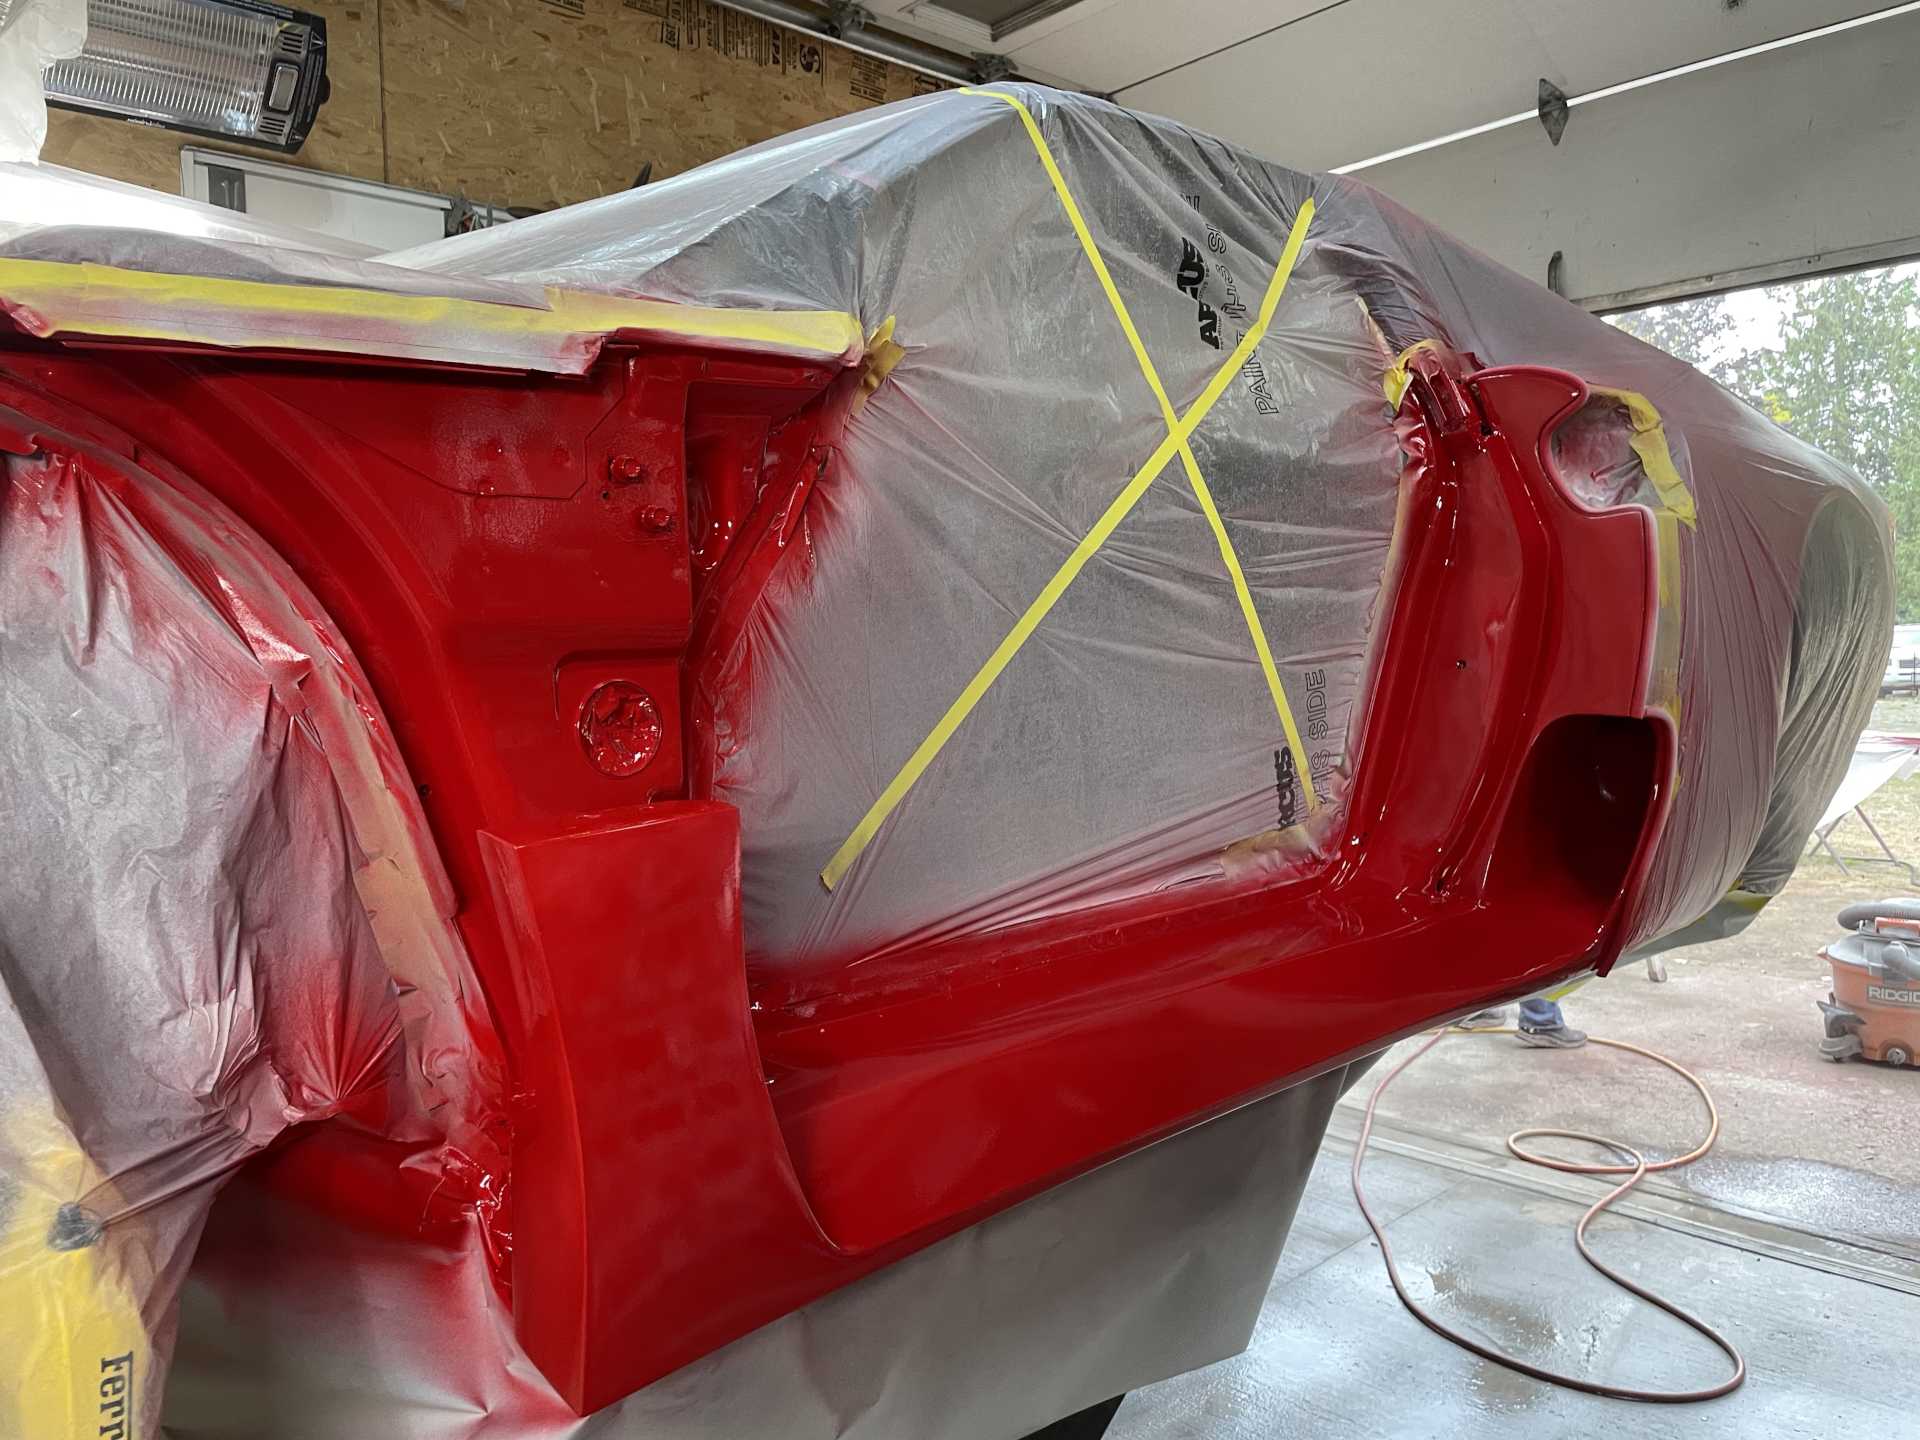
This is after the 3rd coat.
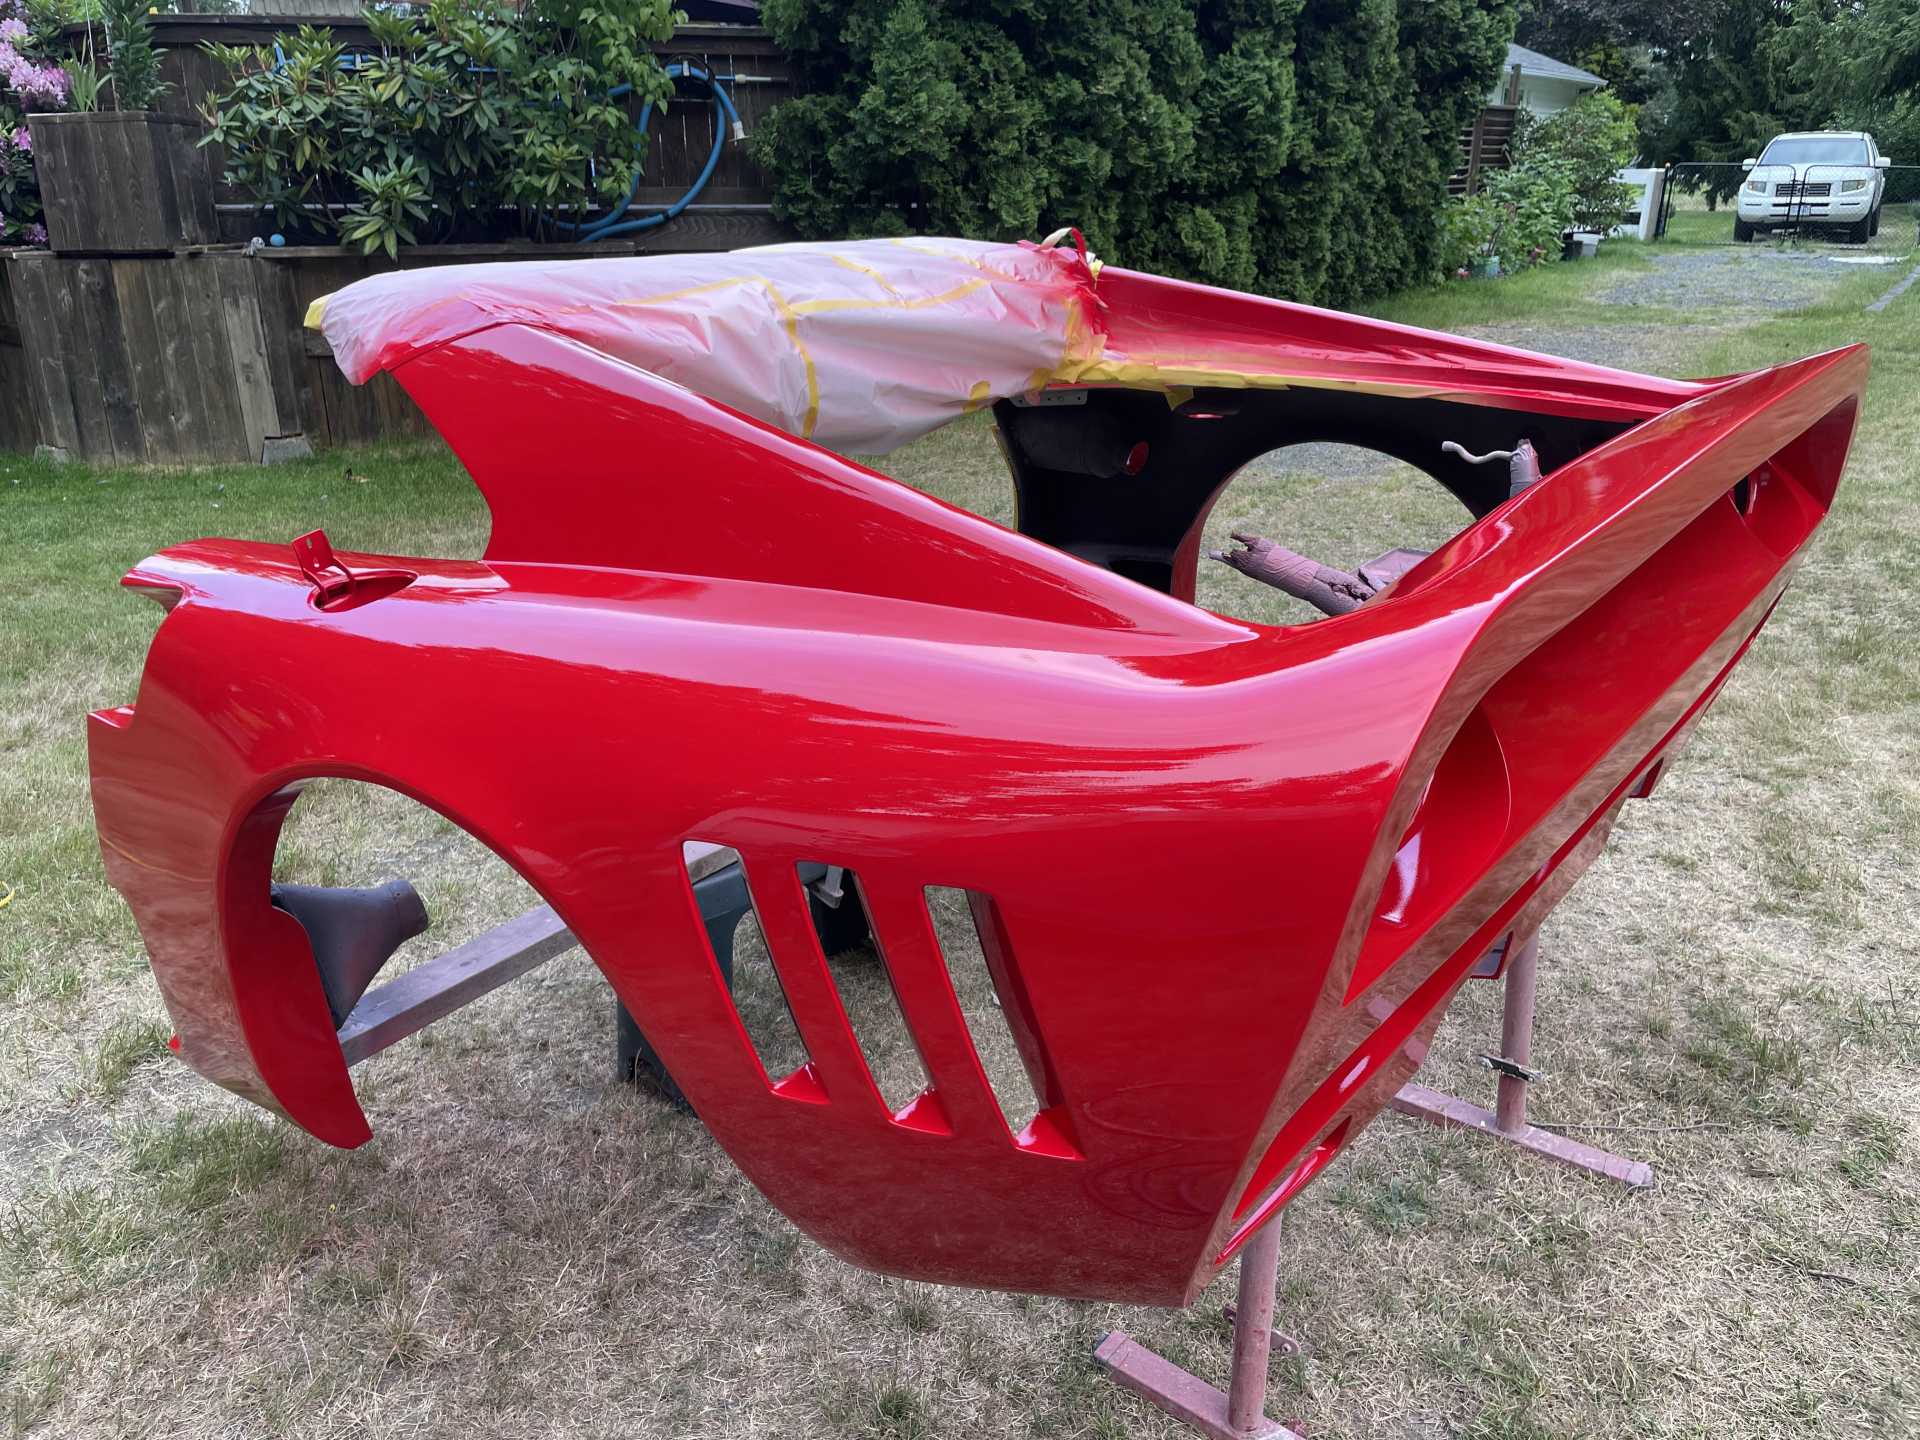
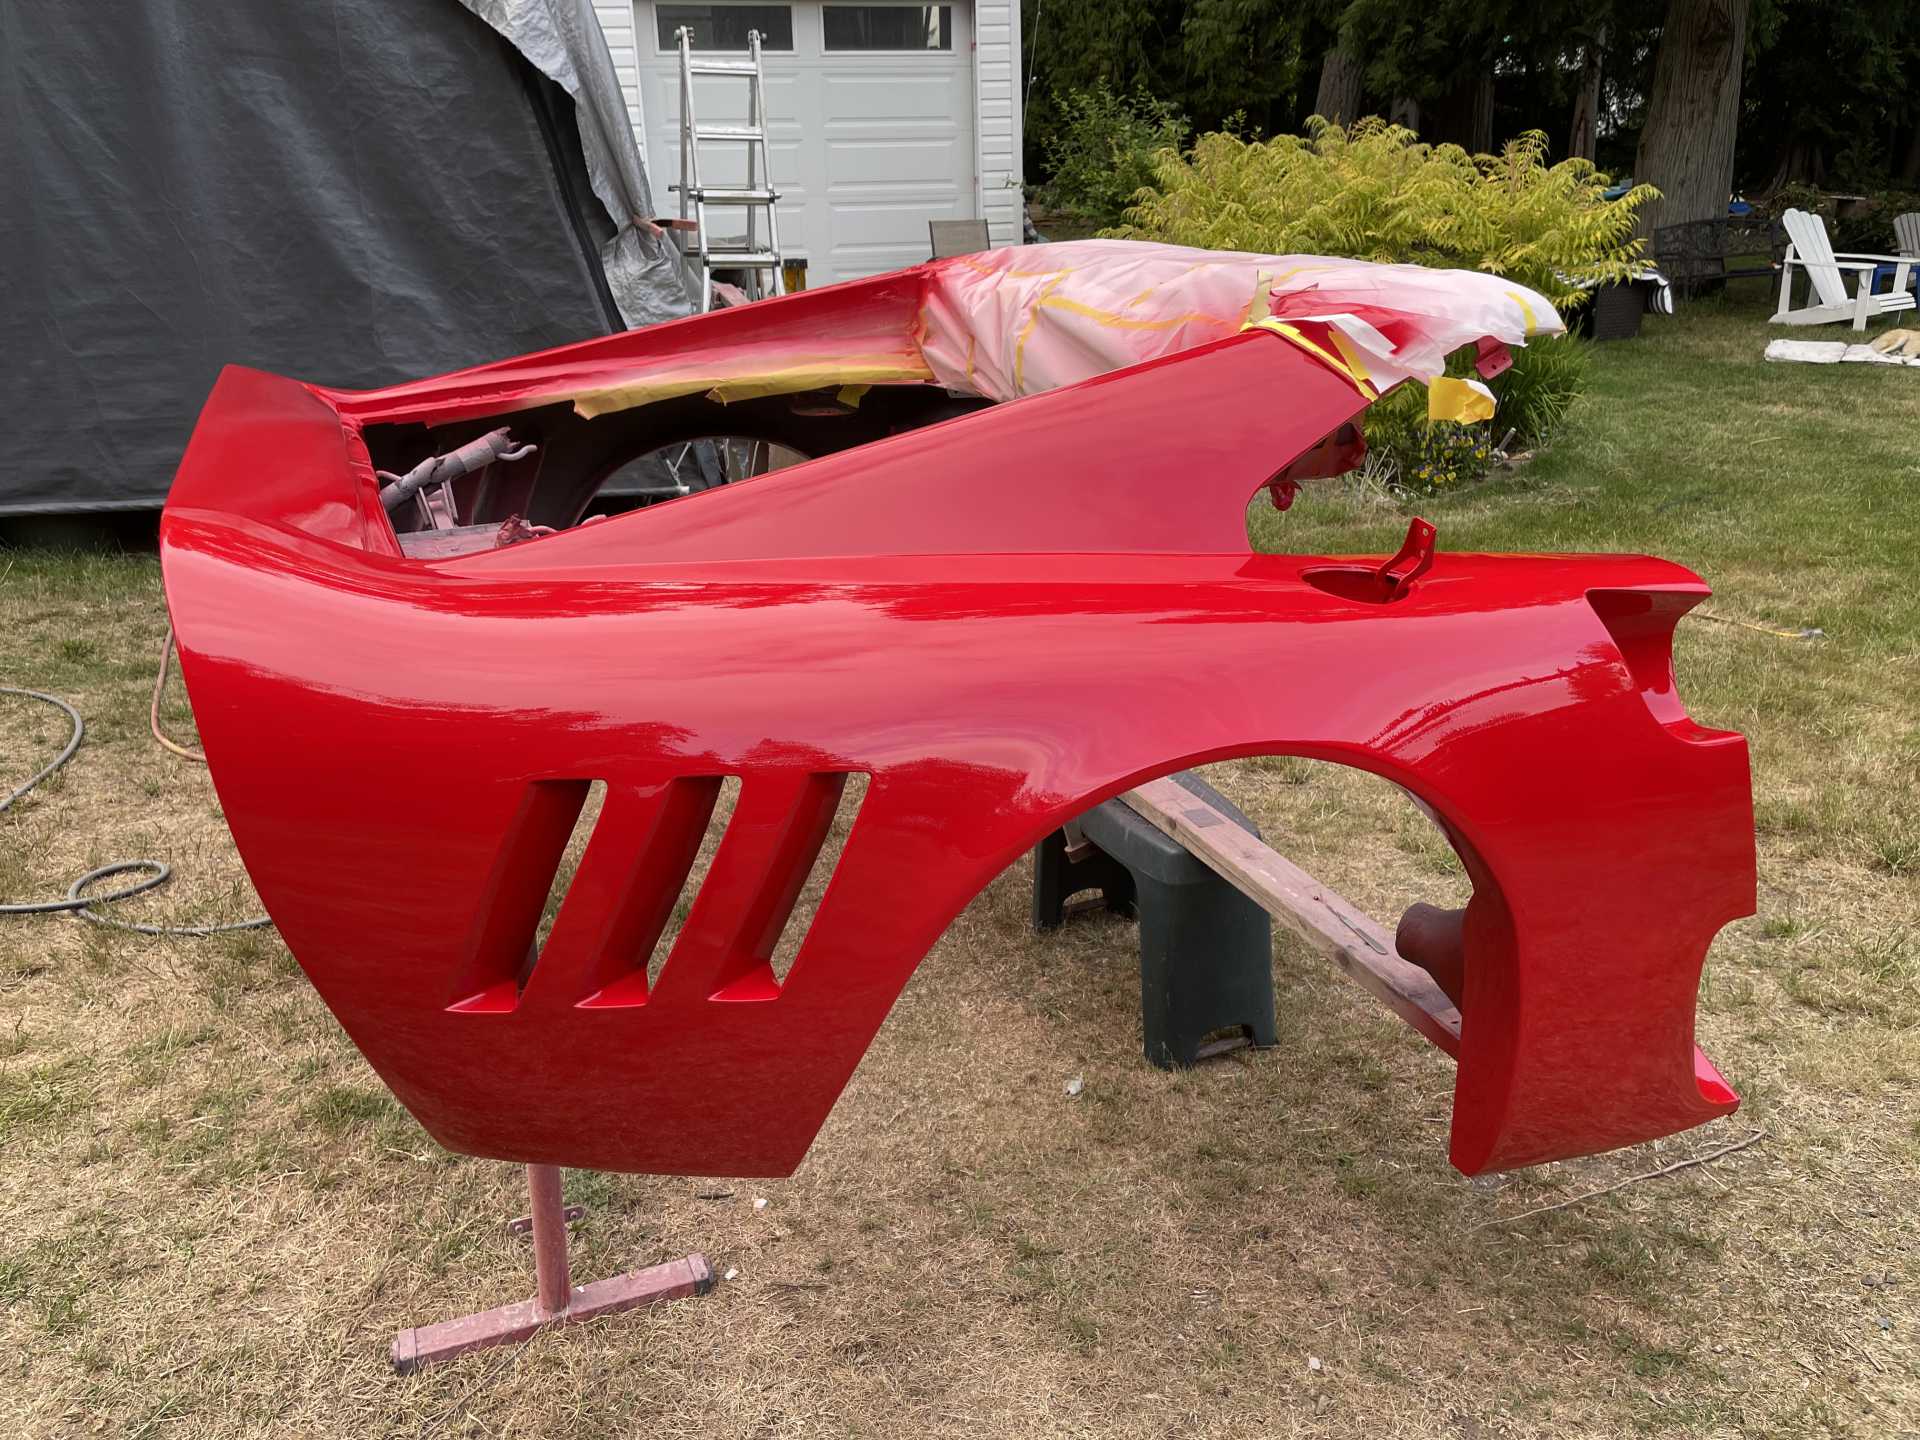
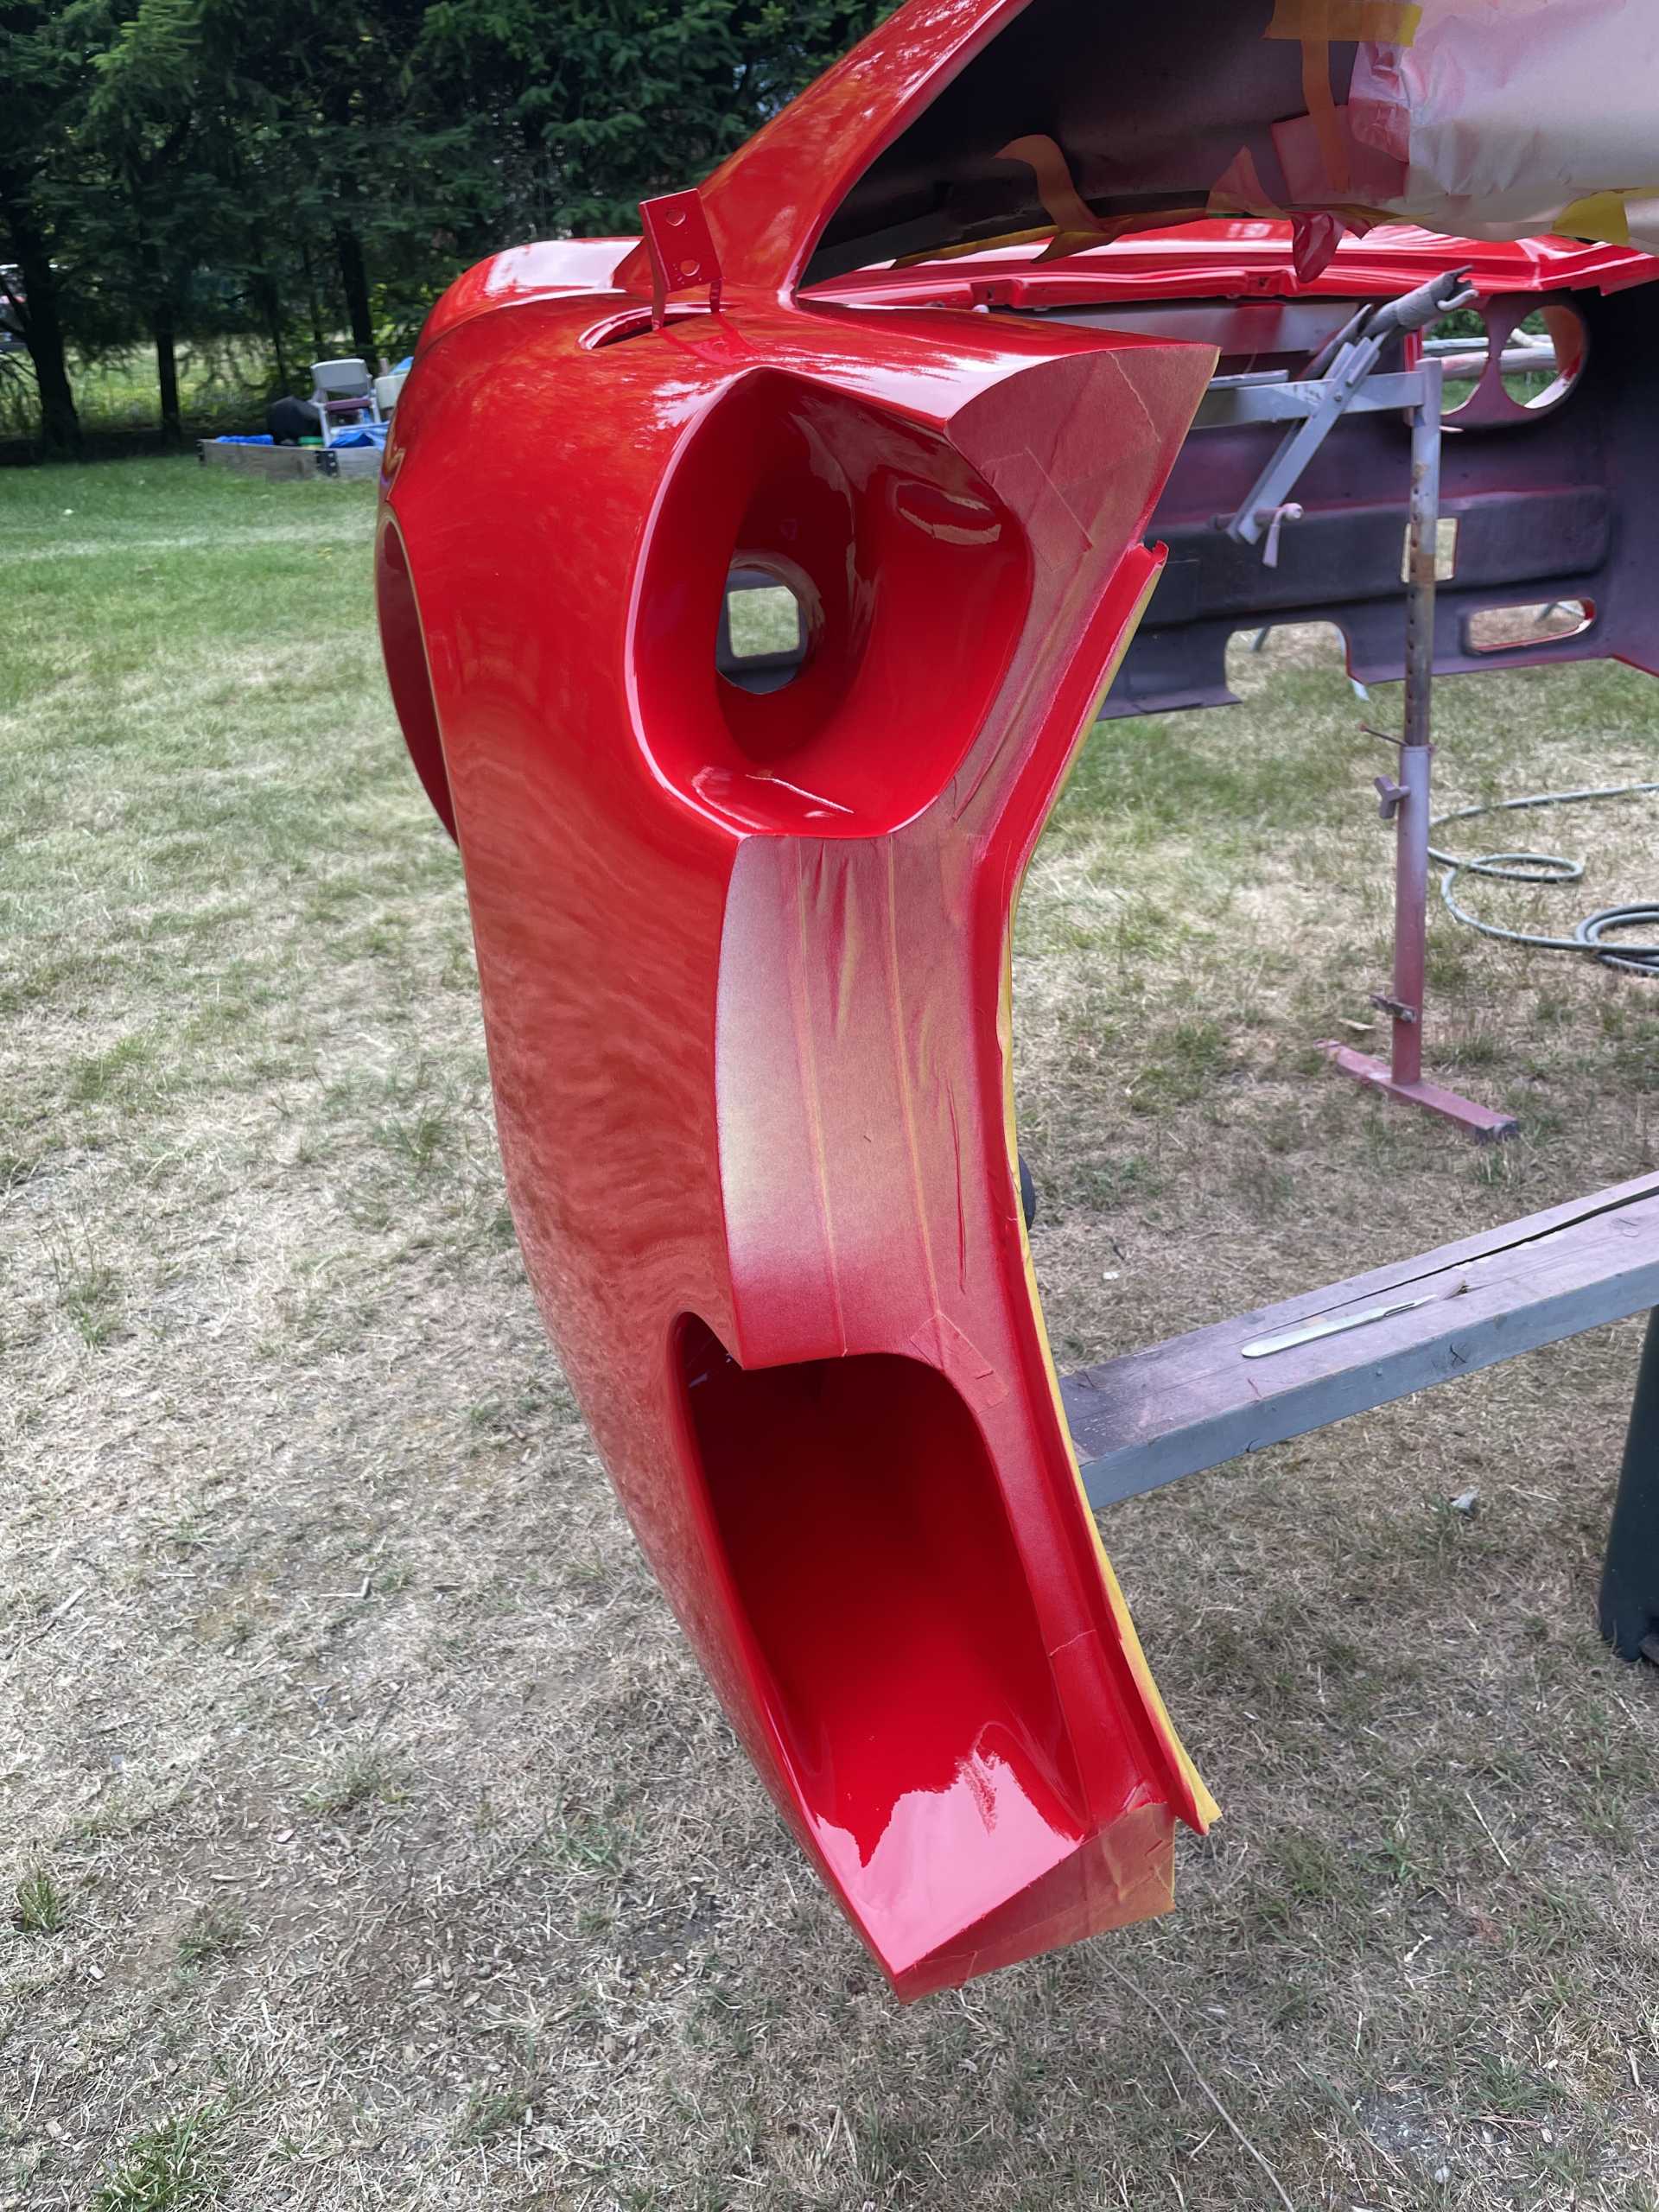
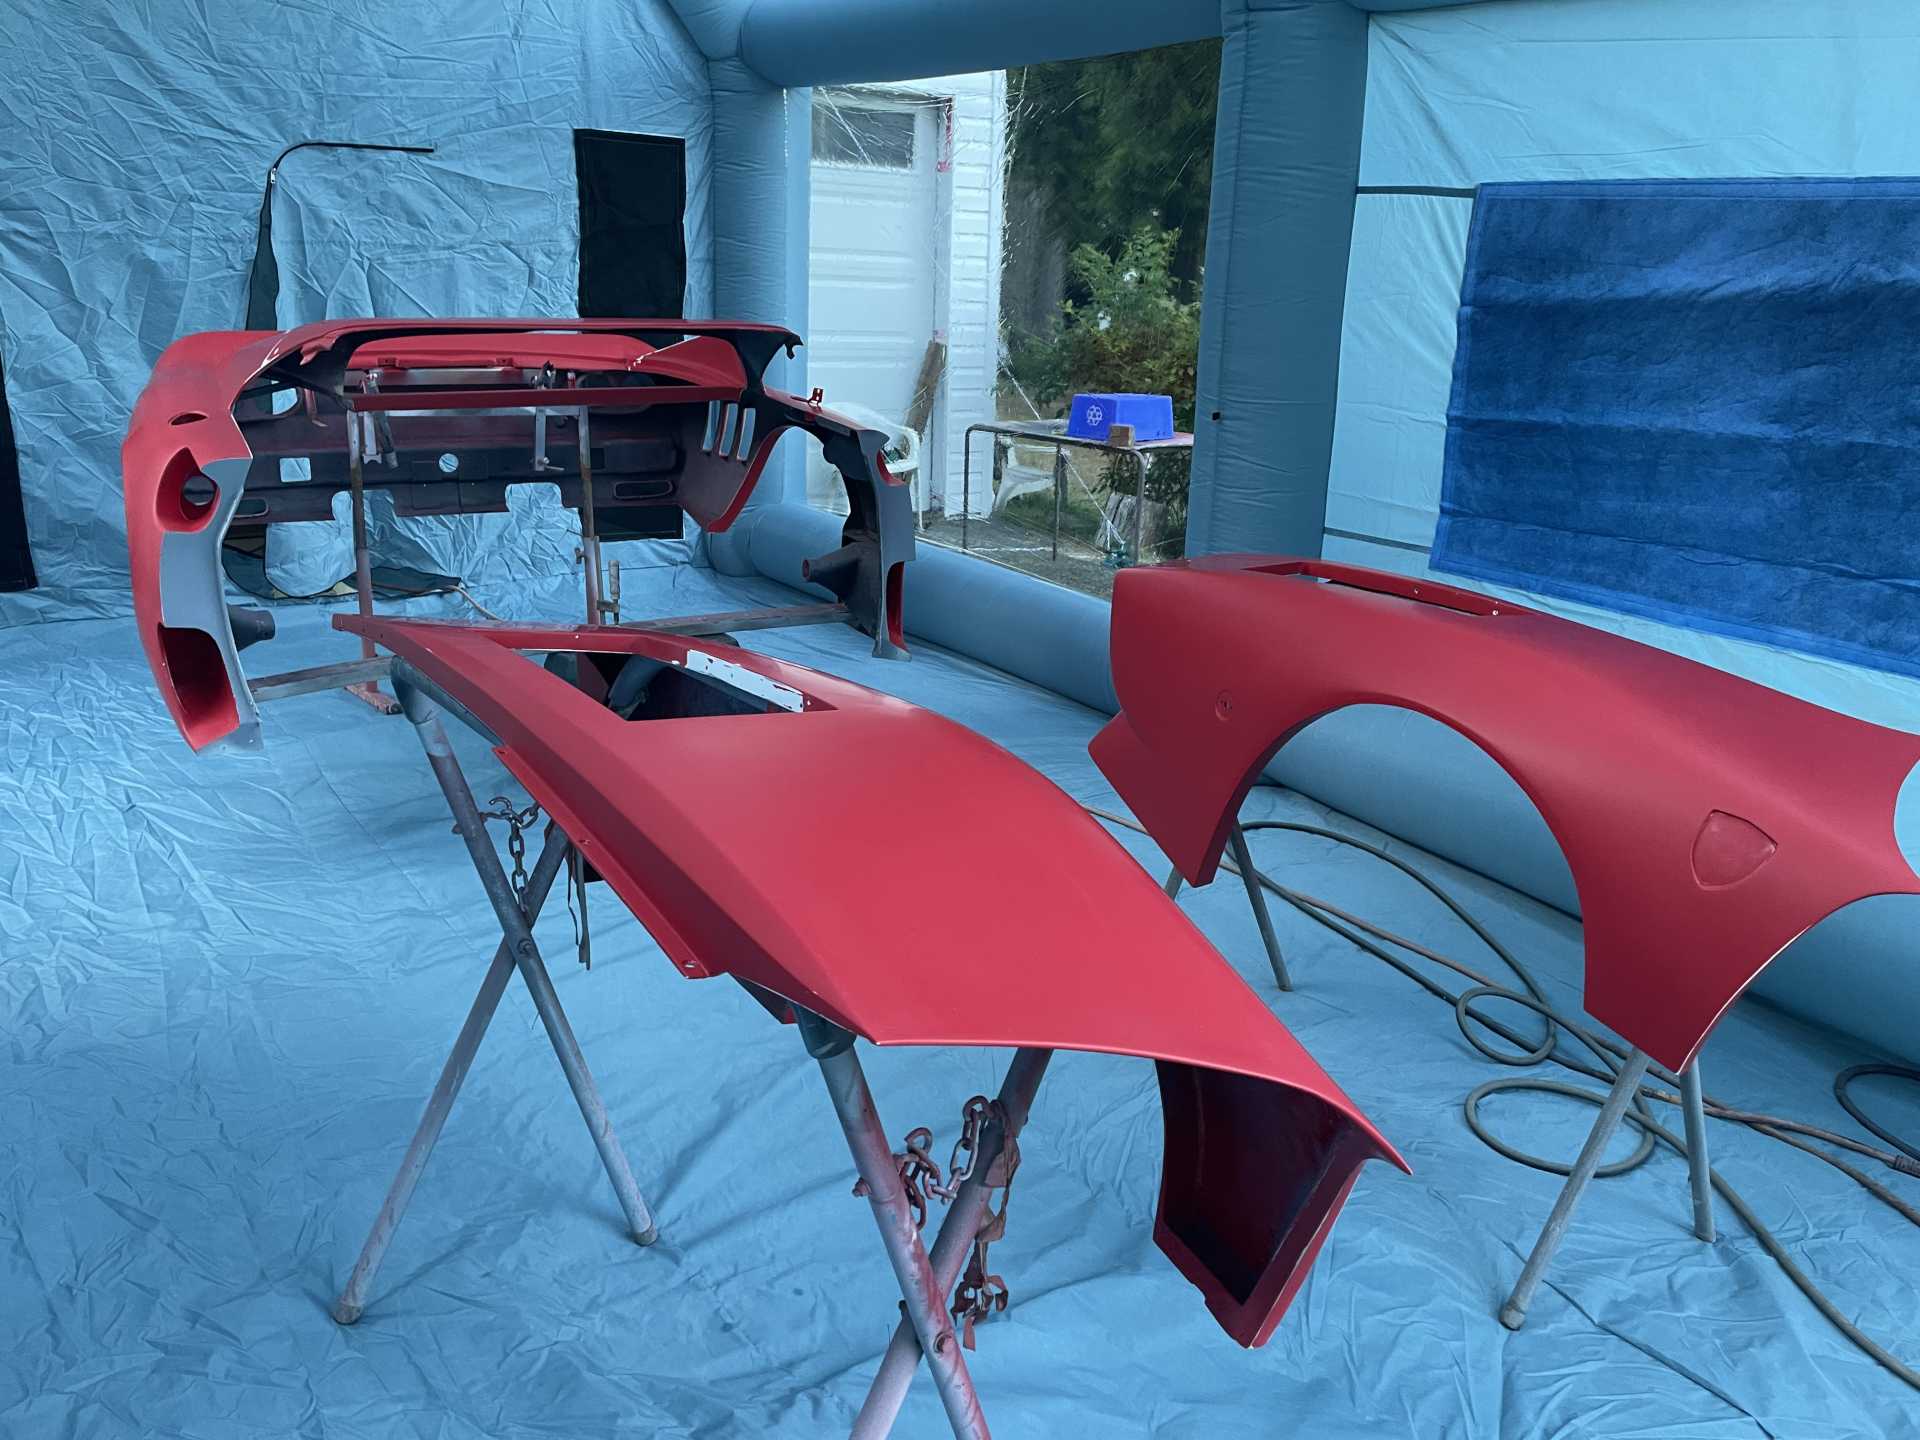
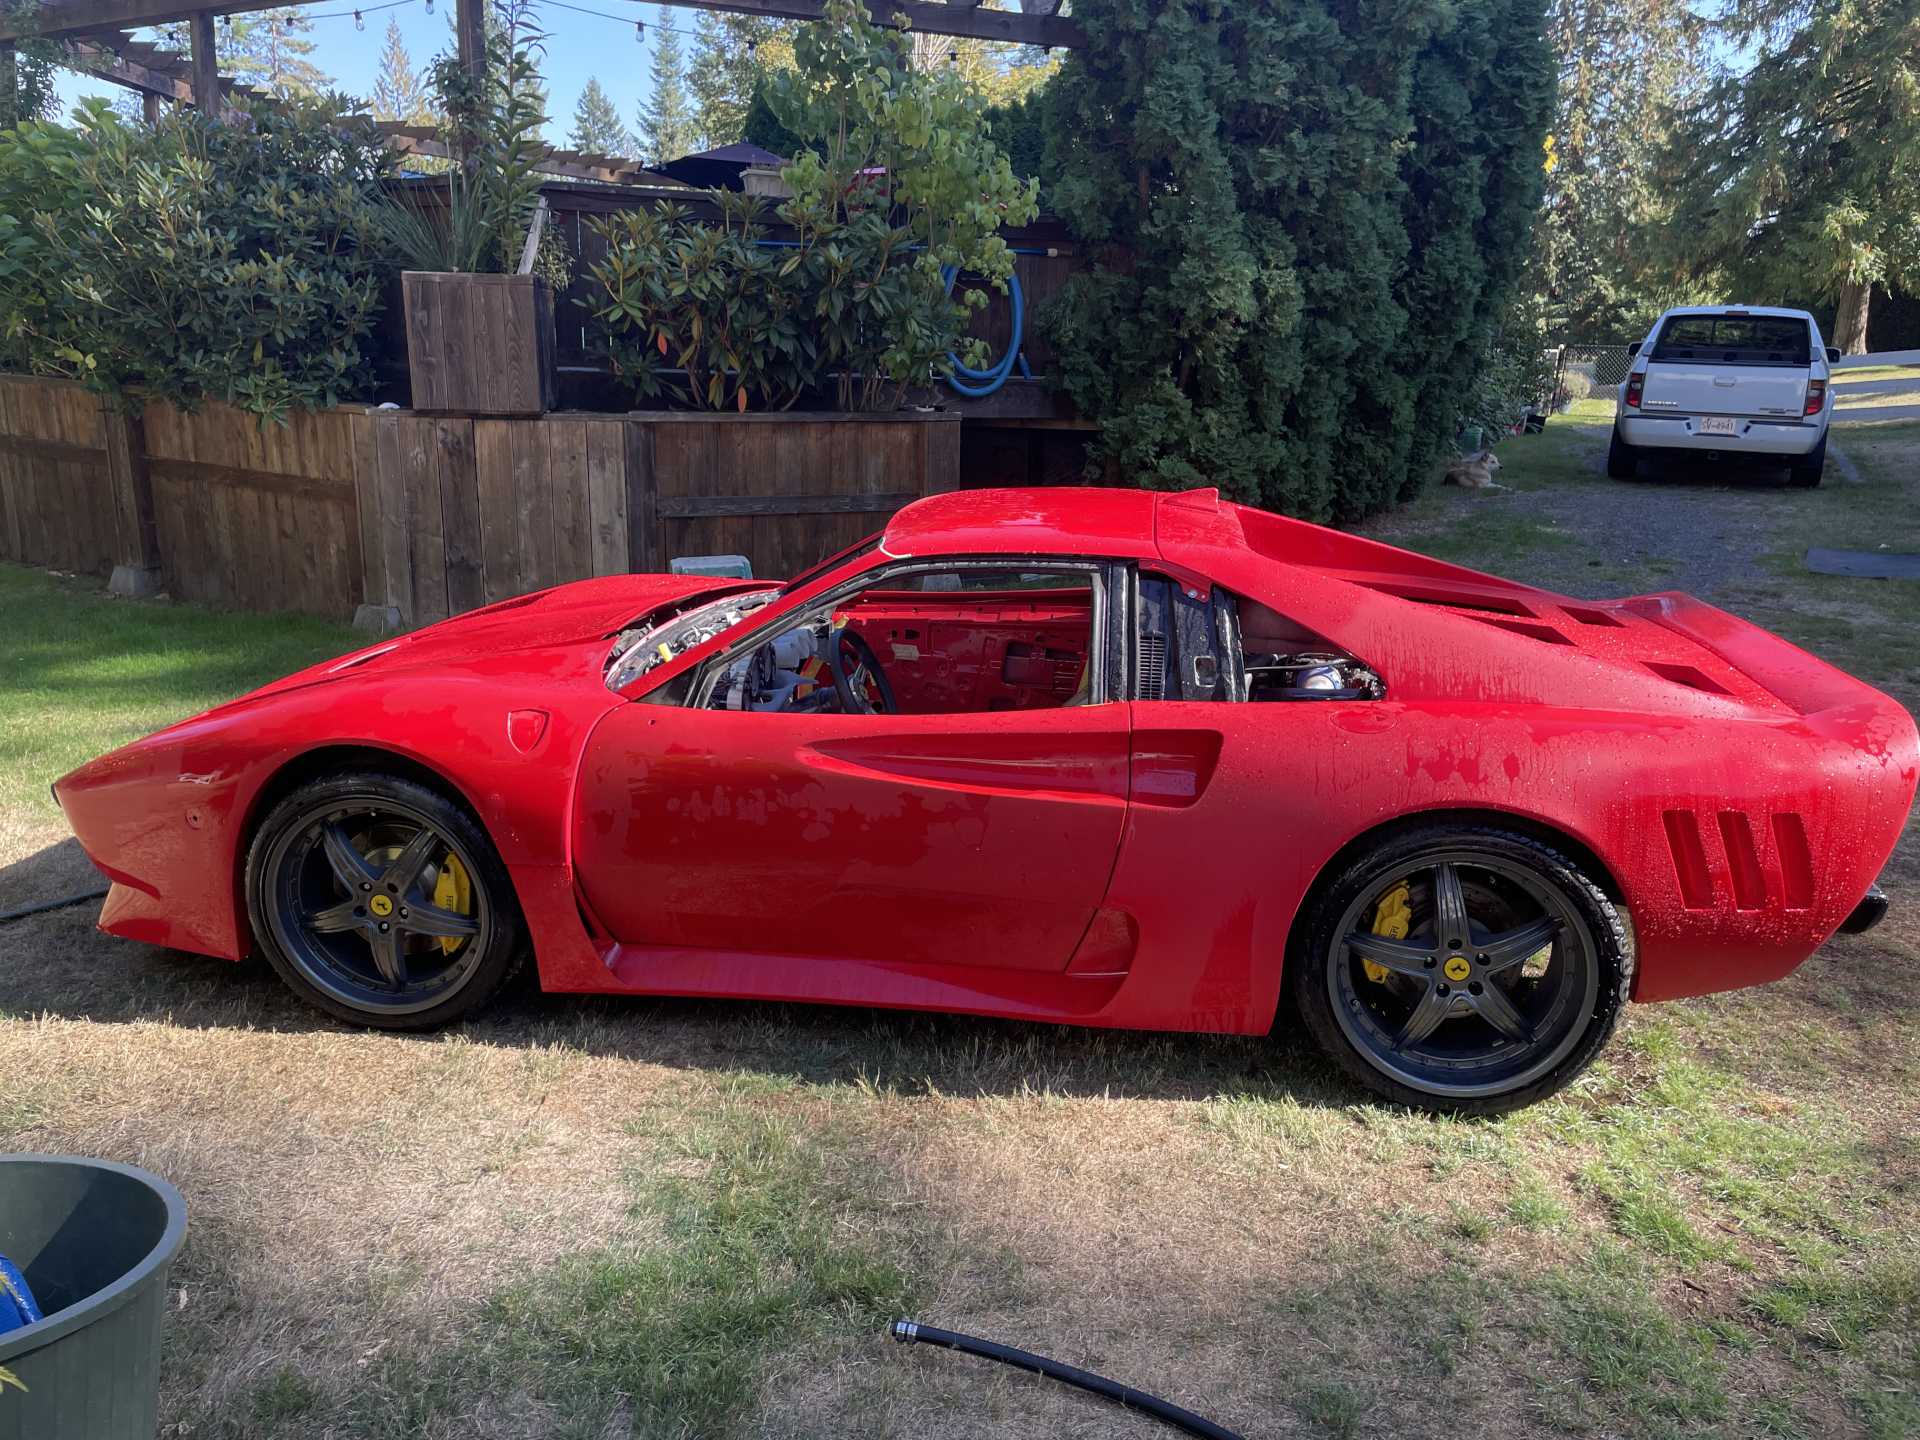
I’m sure some of are wondering why part of it is covered up, this is because I had previously painter the top, after filling and a bit of bodywork where the sharks fin antenna is to be mounted before the back end is mounted permanently
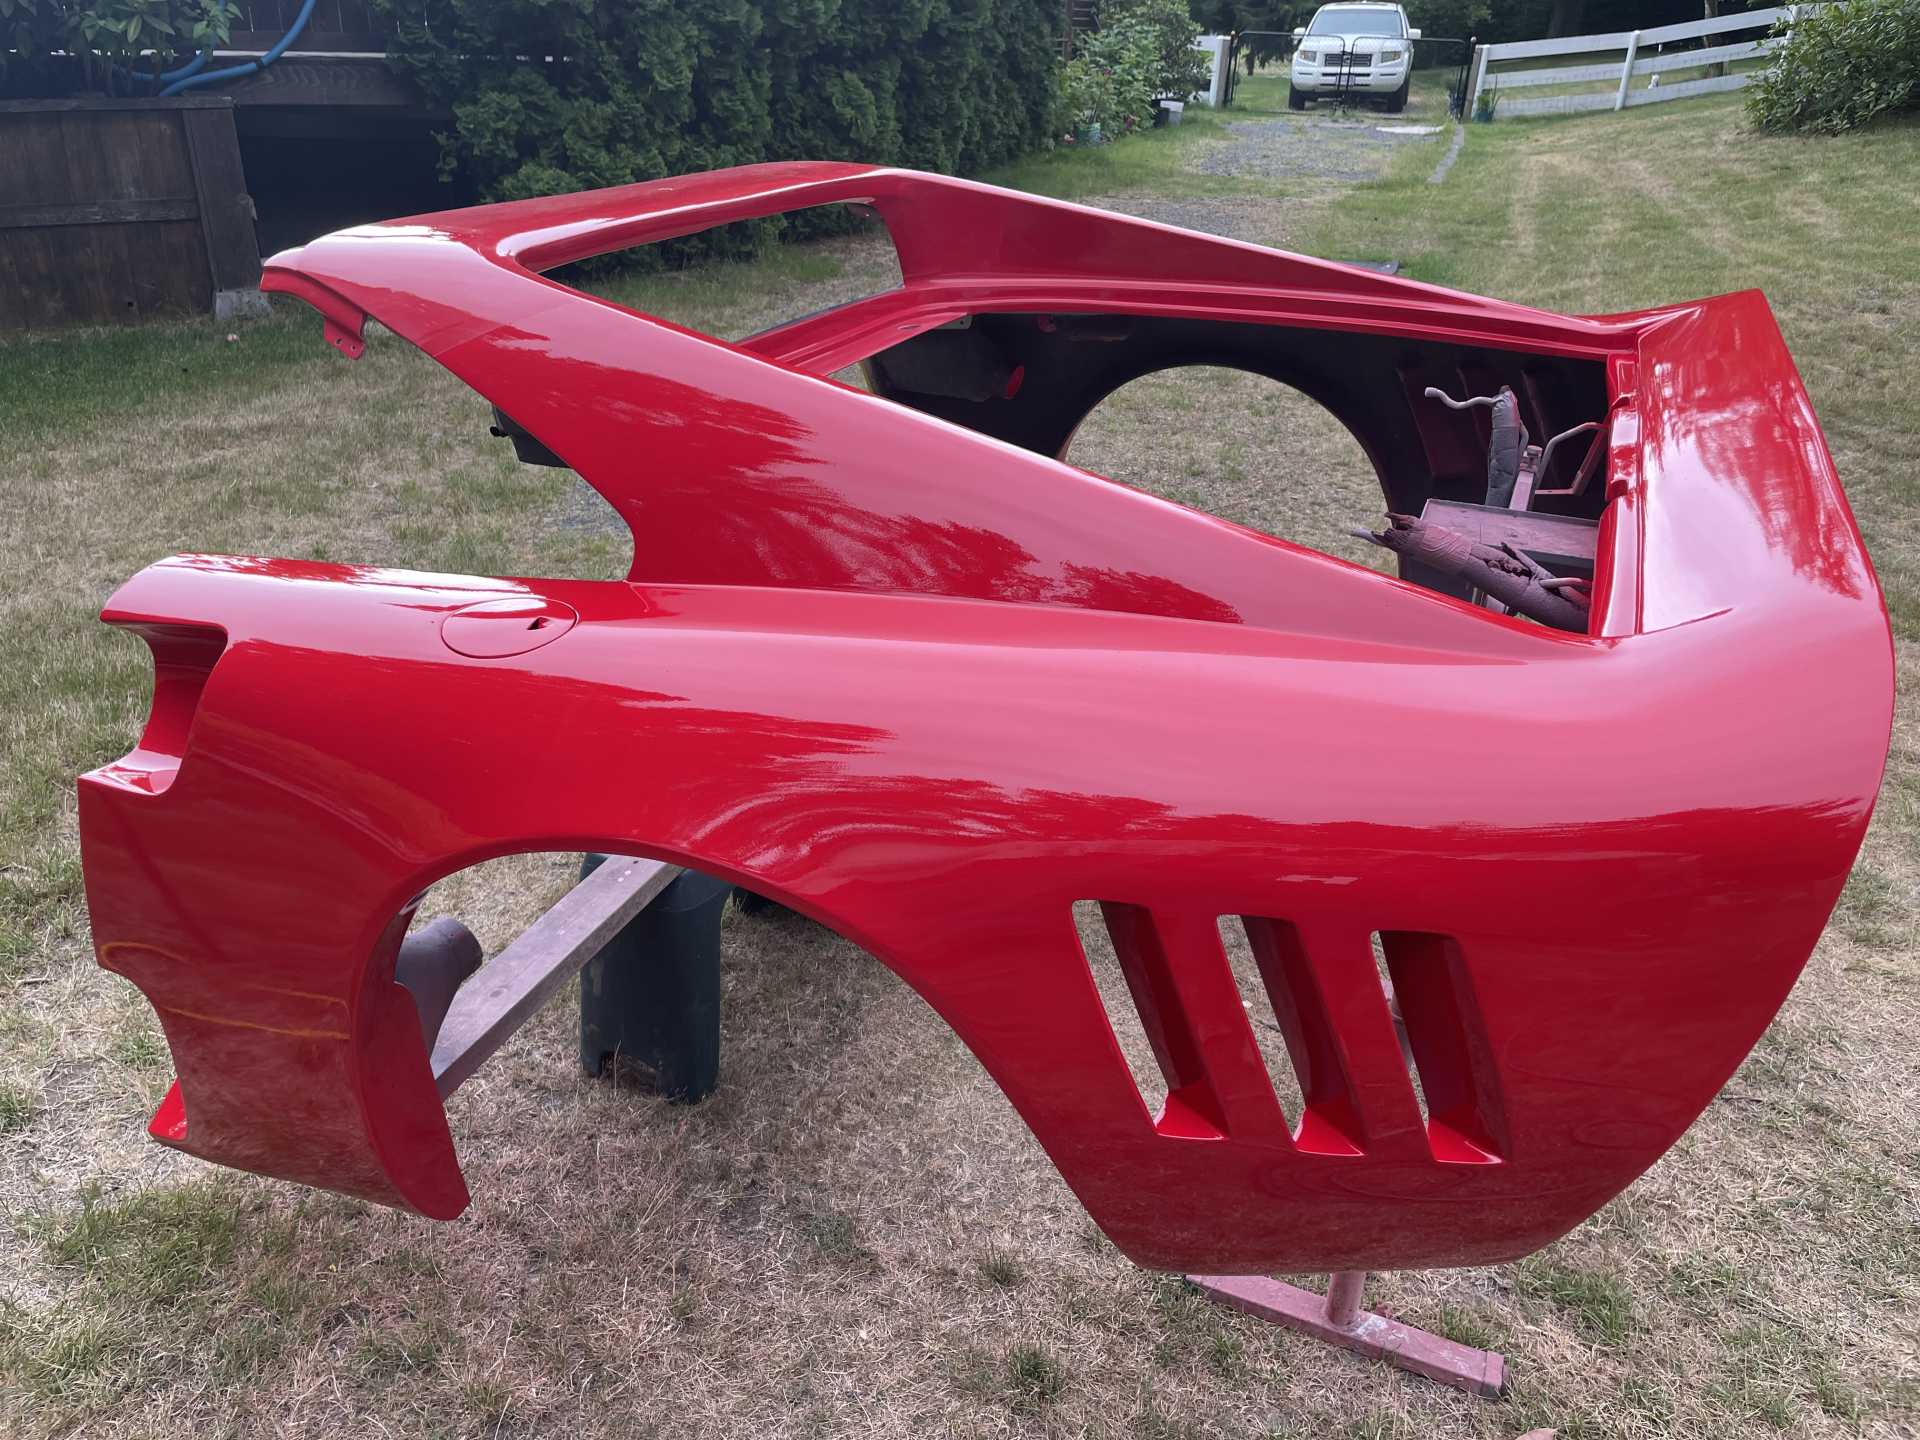
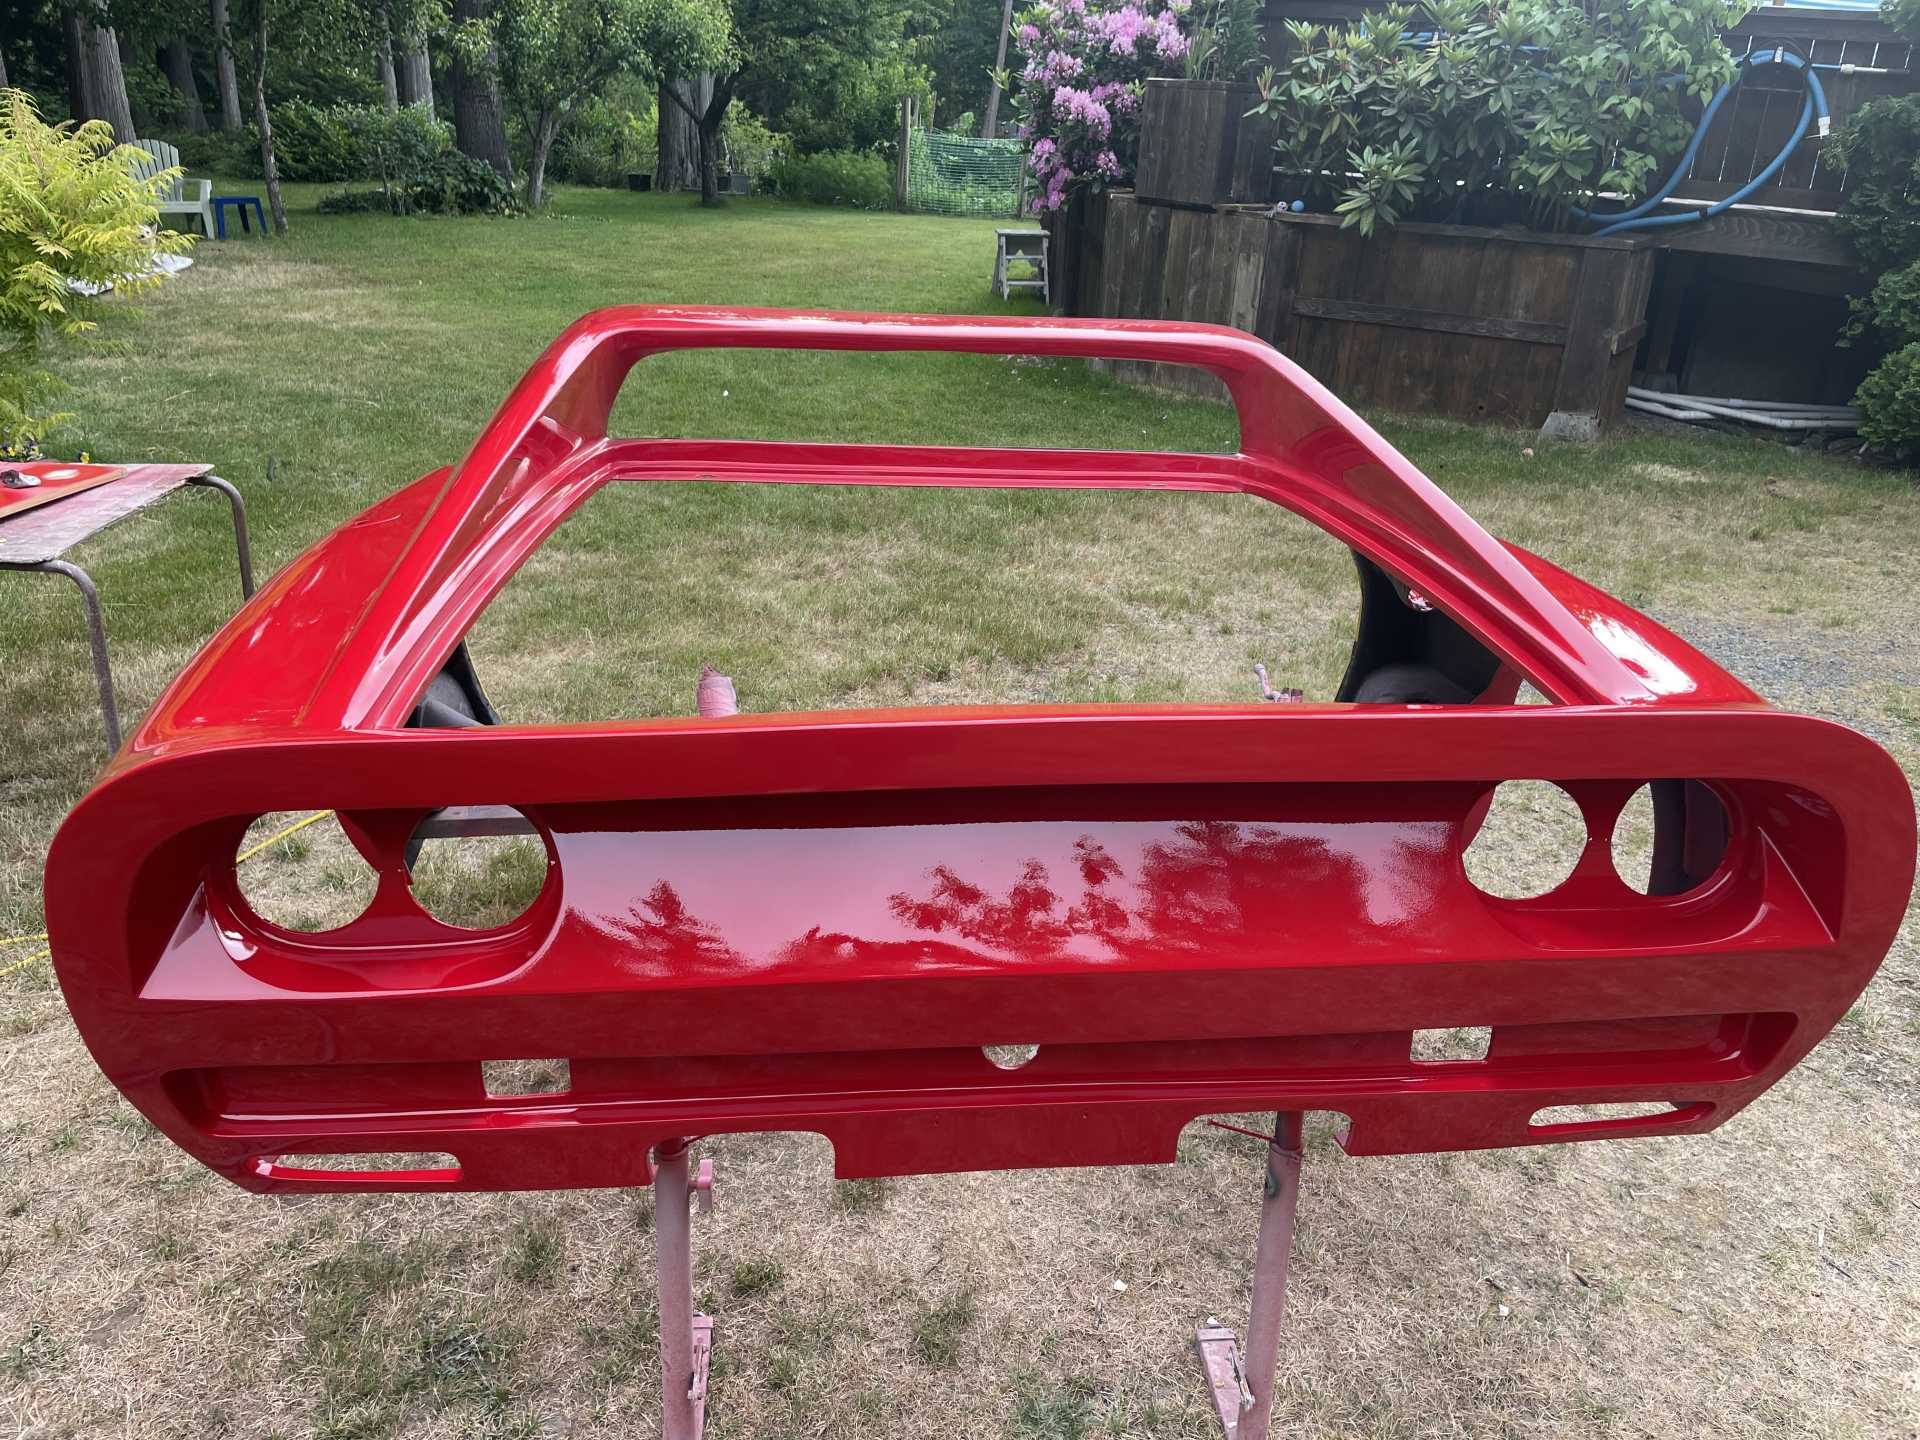
After doing that I decided to paint the rest of the body.
Pulled the tape and paper off, still needs to be wet sanded before clear coating in a week or so but came out really flat , supper happy!! being painted outside could have been a disaster In case you’re wondering the tape still left on near the scoop inlets is to protect it for to body work once the body I’d permanently installed.
Thanks for stopping by. Wayne
[This message has been edited by dobie1 (edited 06-16-2023).]
Won't be long now......looking forward to the first pic of you: A. posing beside it completed and road ready....B. in the drivers seat ready to hit the road!
Won't be long now......looking forward to the first pic of you: A. posing beside it completed and road ready....B. in the drivers seat ready to hit the road!
It’s been awhile since my last post, still lots happening…
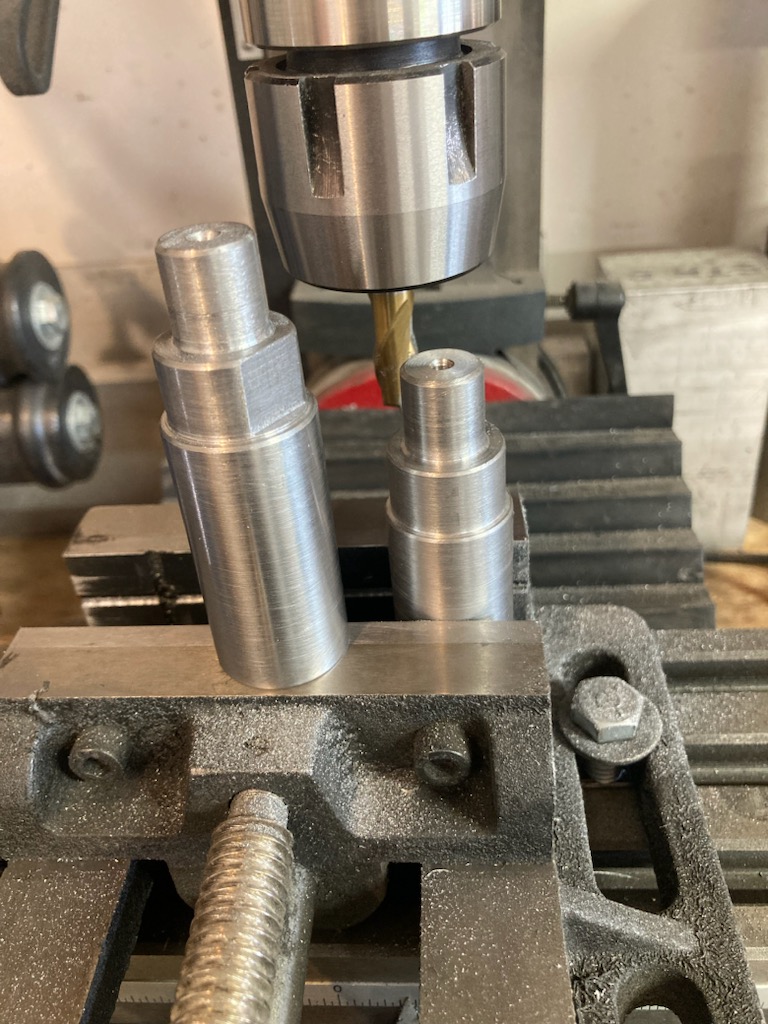
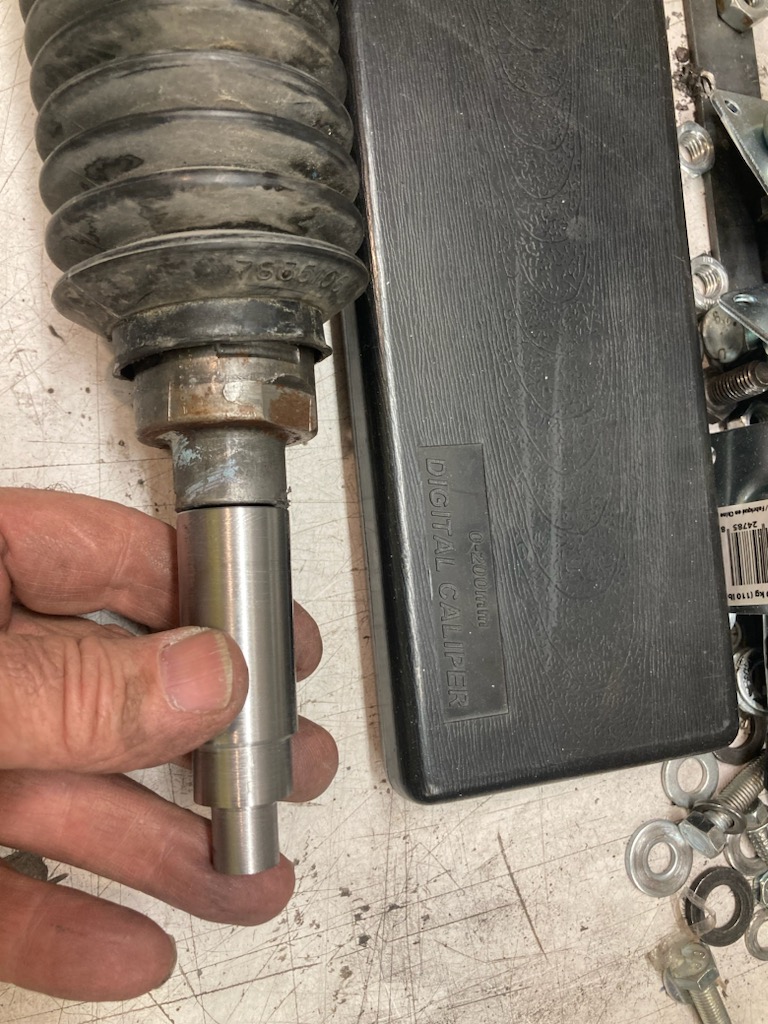
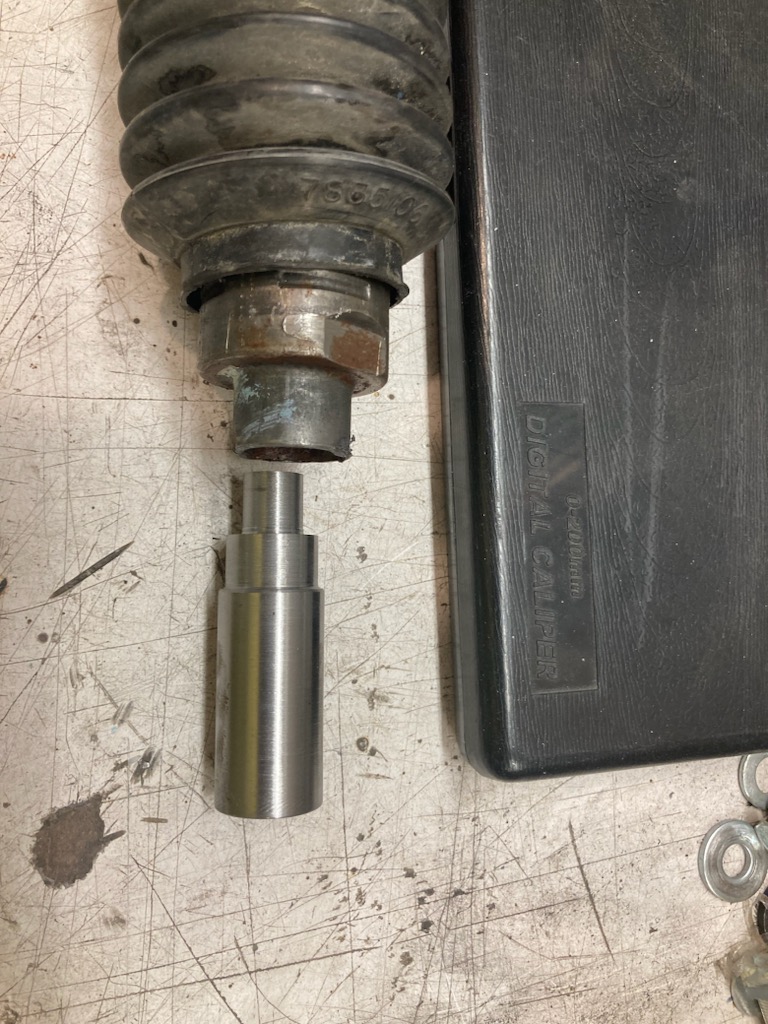
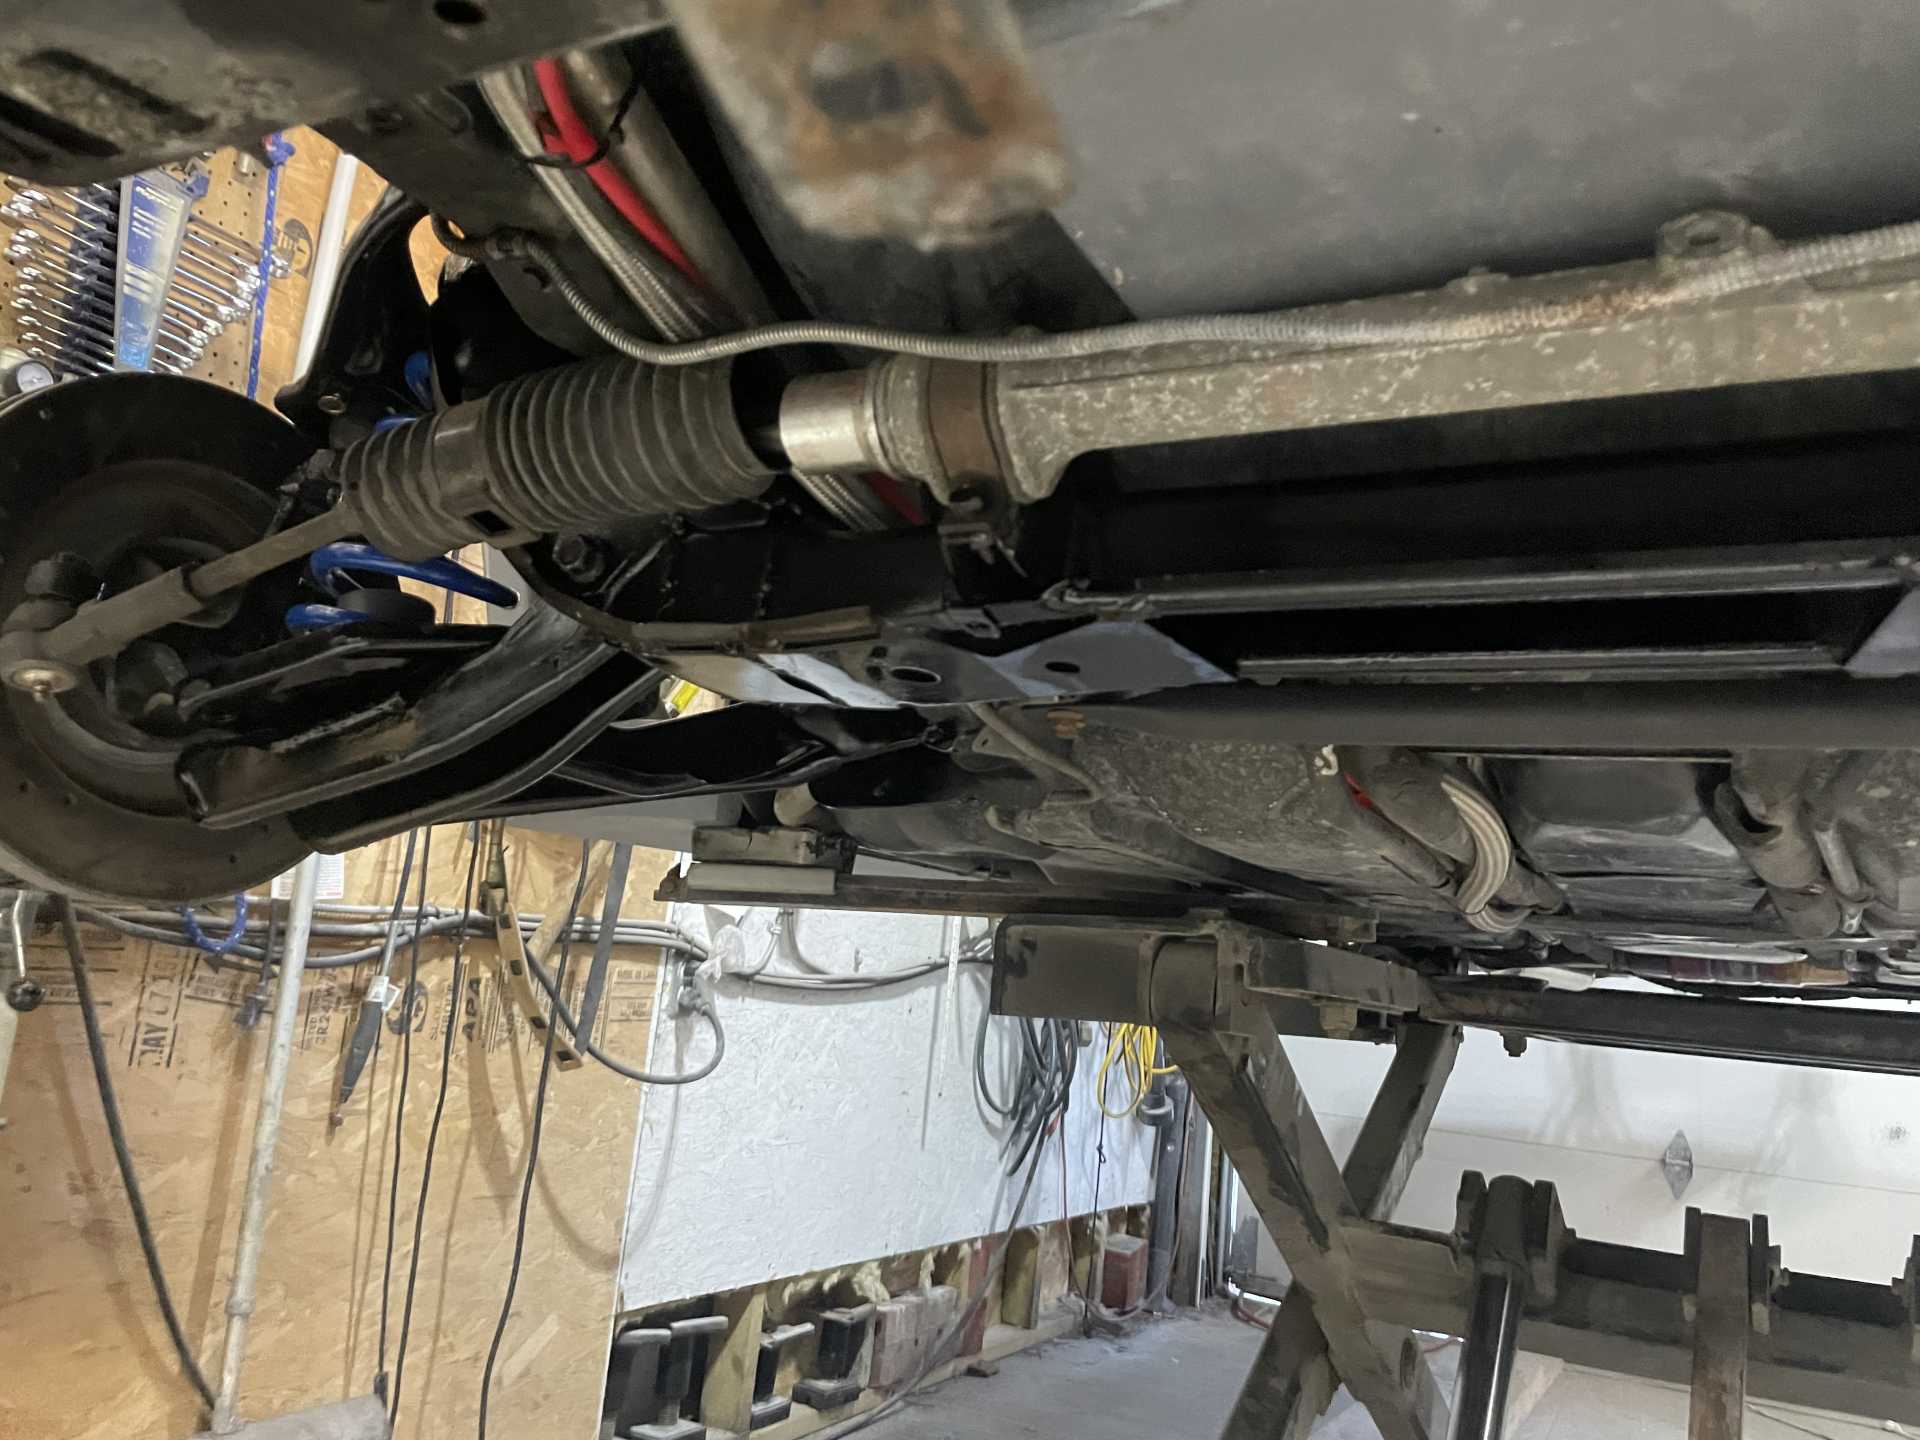
With the continued help from Phil and Don the front cross member has now completed the 4 1/2” extension 2 1/4” each side. It’s fully welded and everything mounts perfectly. The two final pieces to the puzzle were an extension to the steering rack Don turned the extensions on his metal lath then we we drilled and taped tapped the ends to mount to the steering rack.
Once everything was mounted the steering ball joint lines up perfectly so no bump steer introduced thank you Don!!
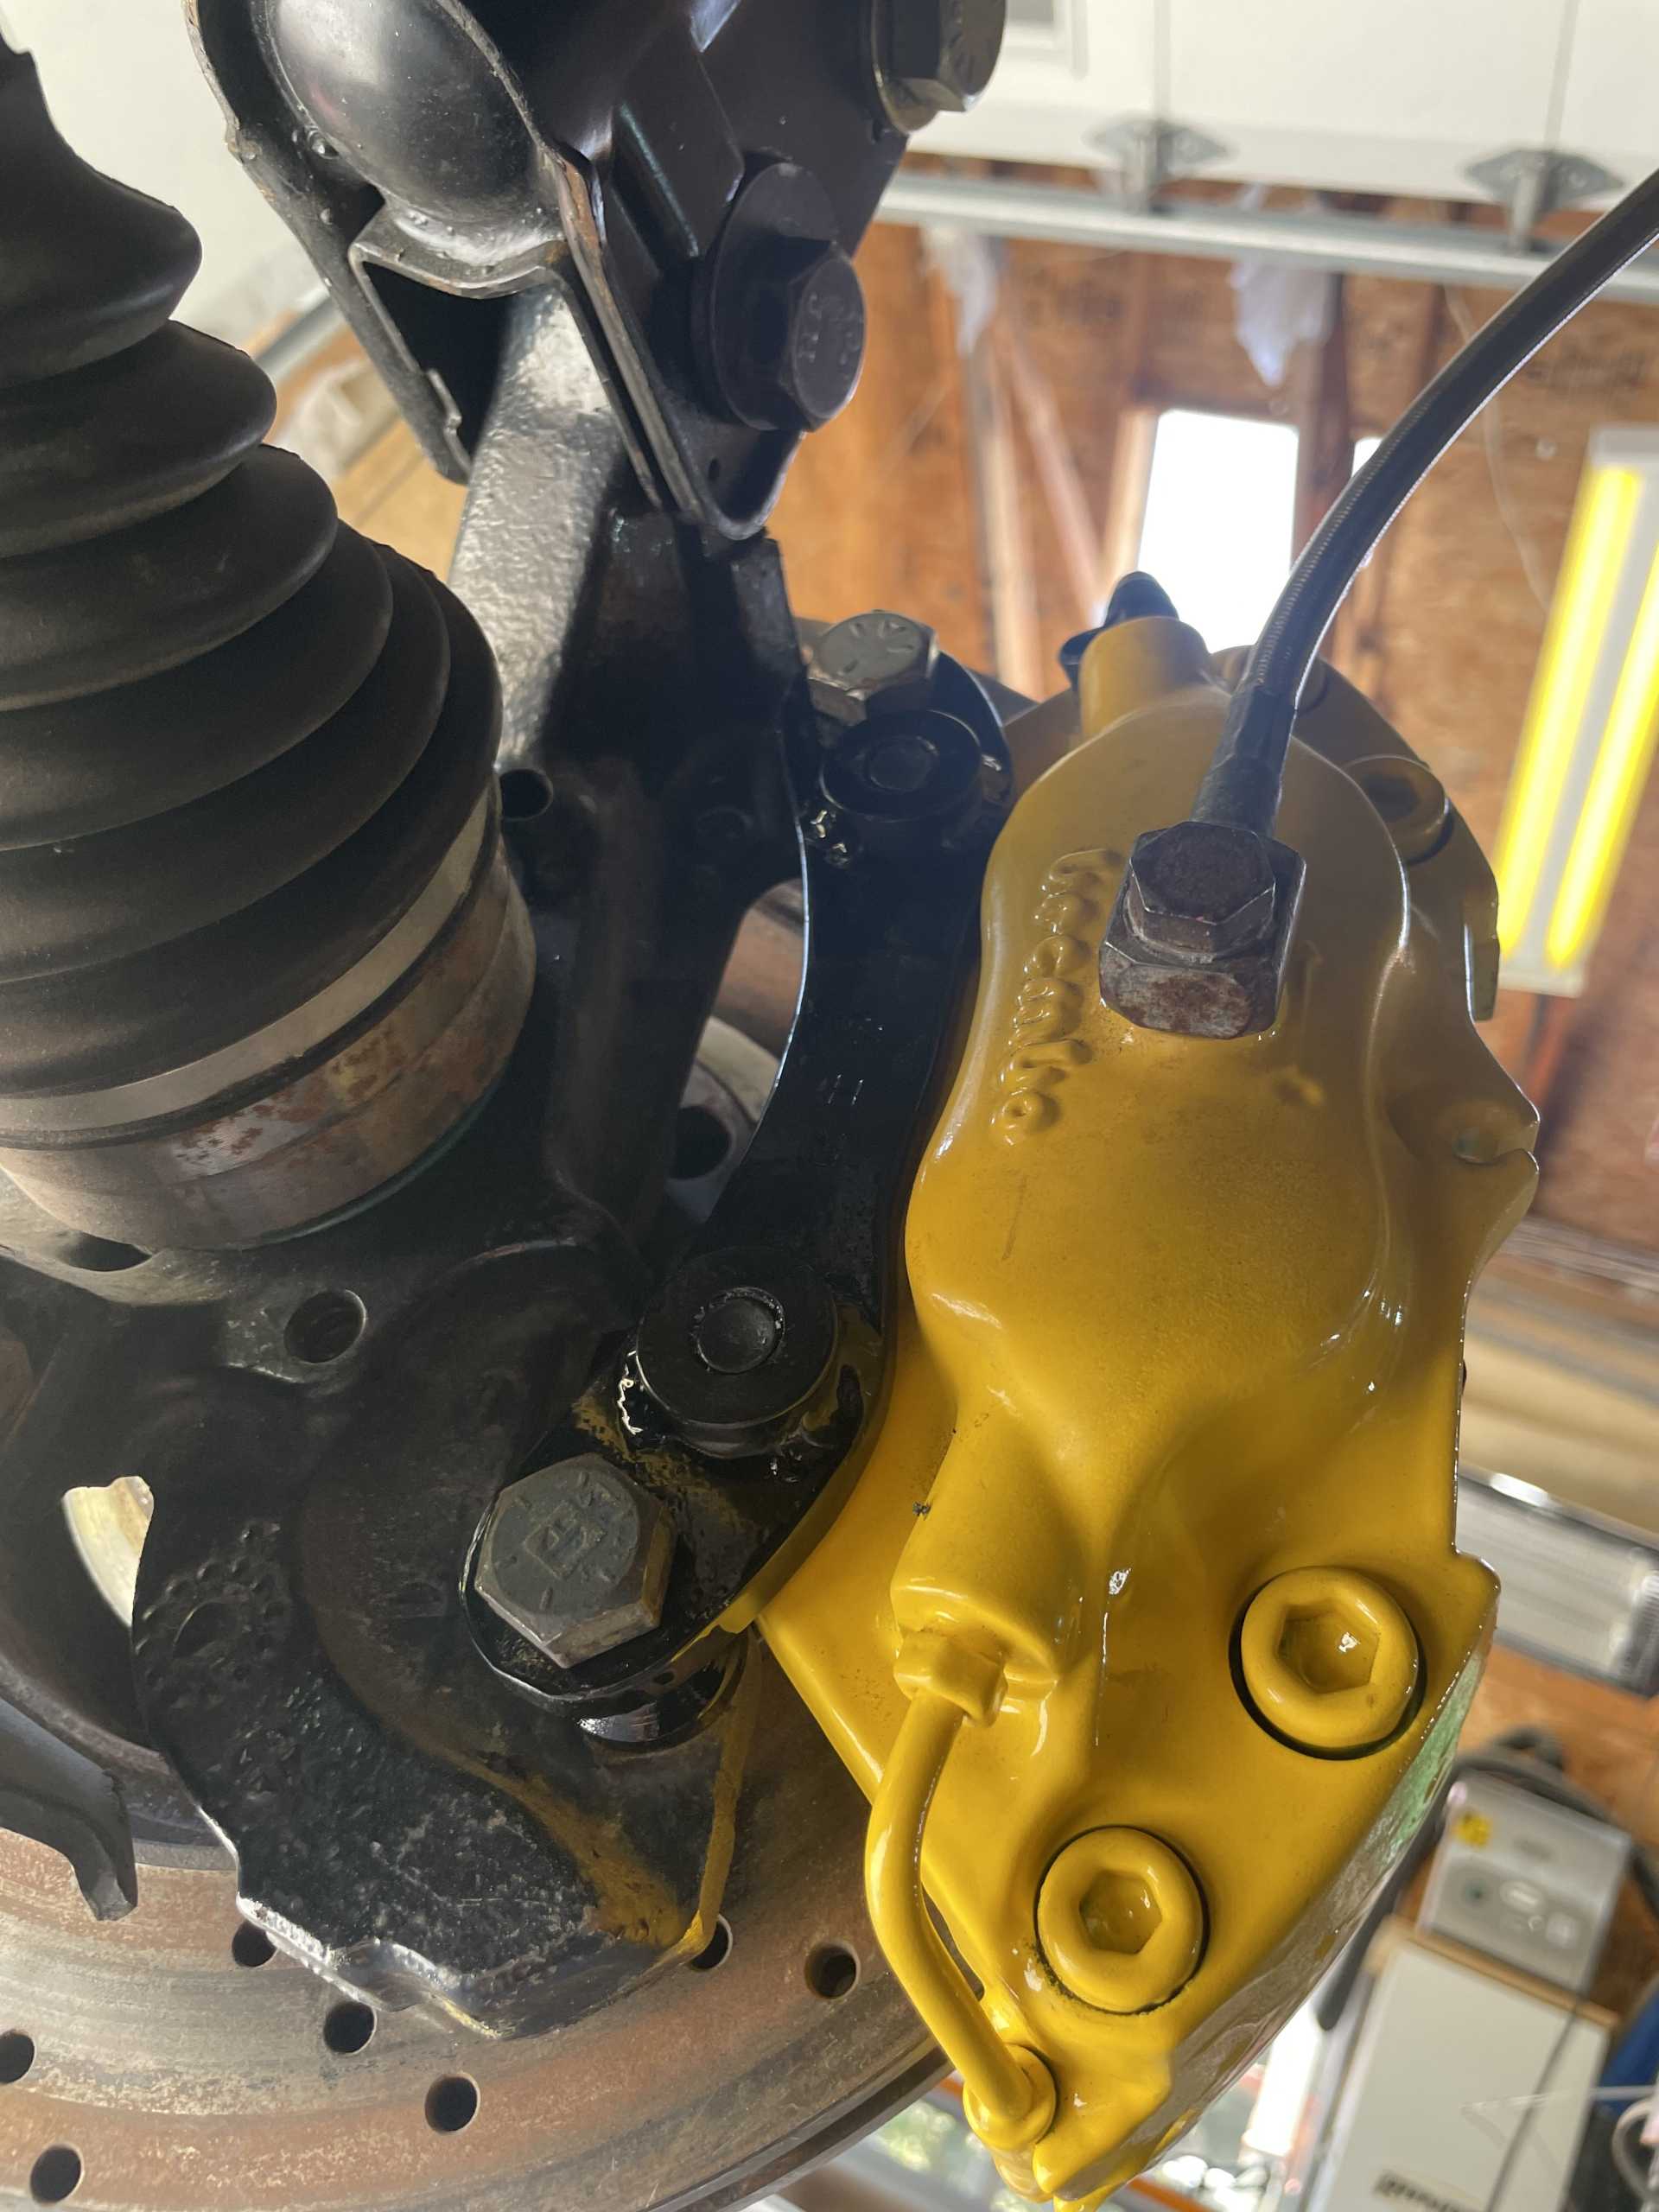
Phil completed the mounting brackets for the Brembo breaks front and rear, and everything fit perfectly These are for the rear brakes [font=Impact][/font] “I’m having a problem with the pics right now , I’ll get it worked out “
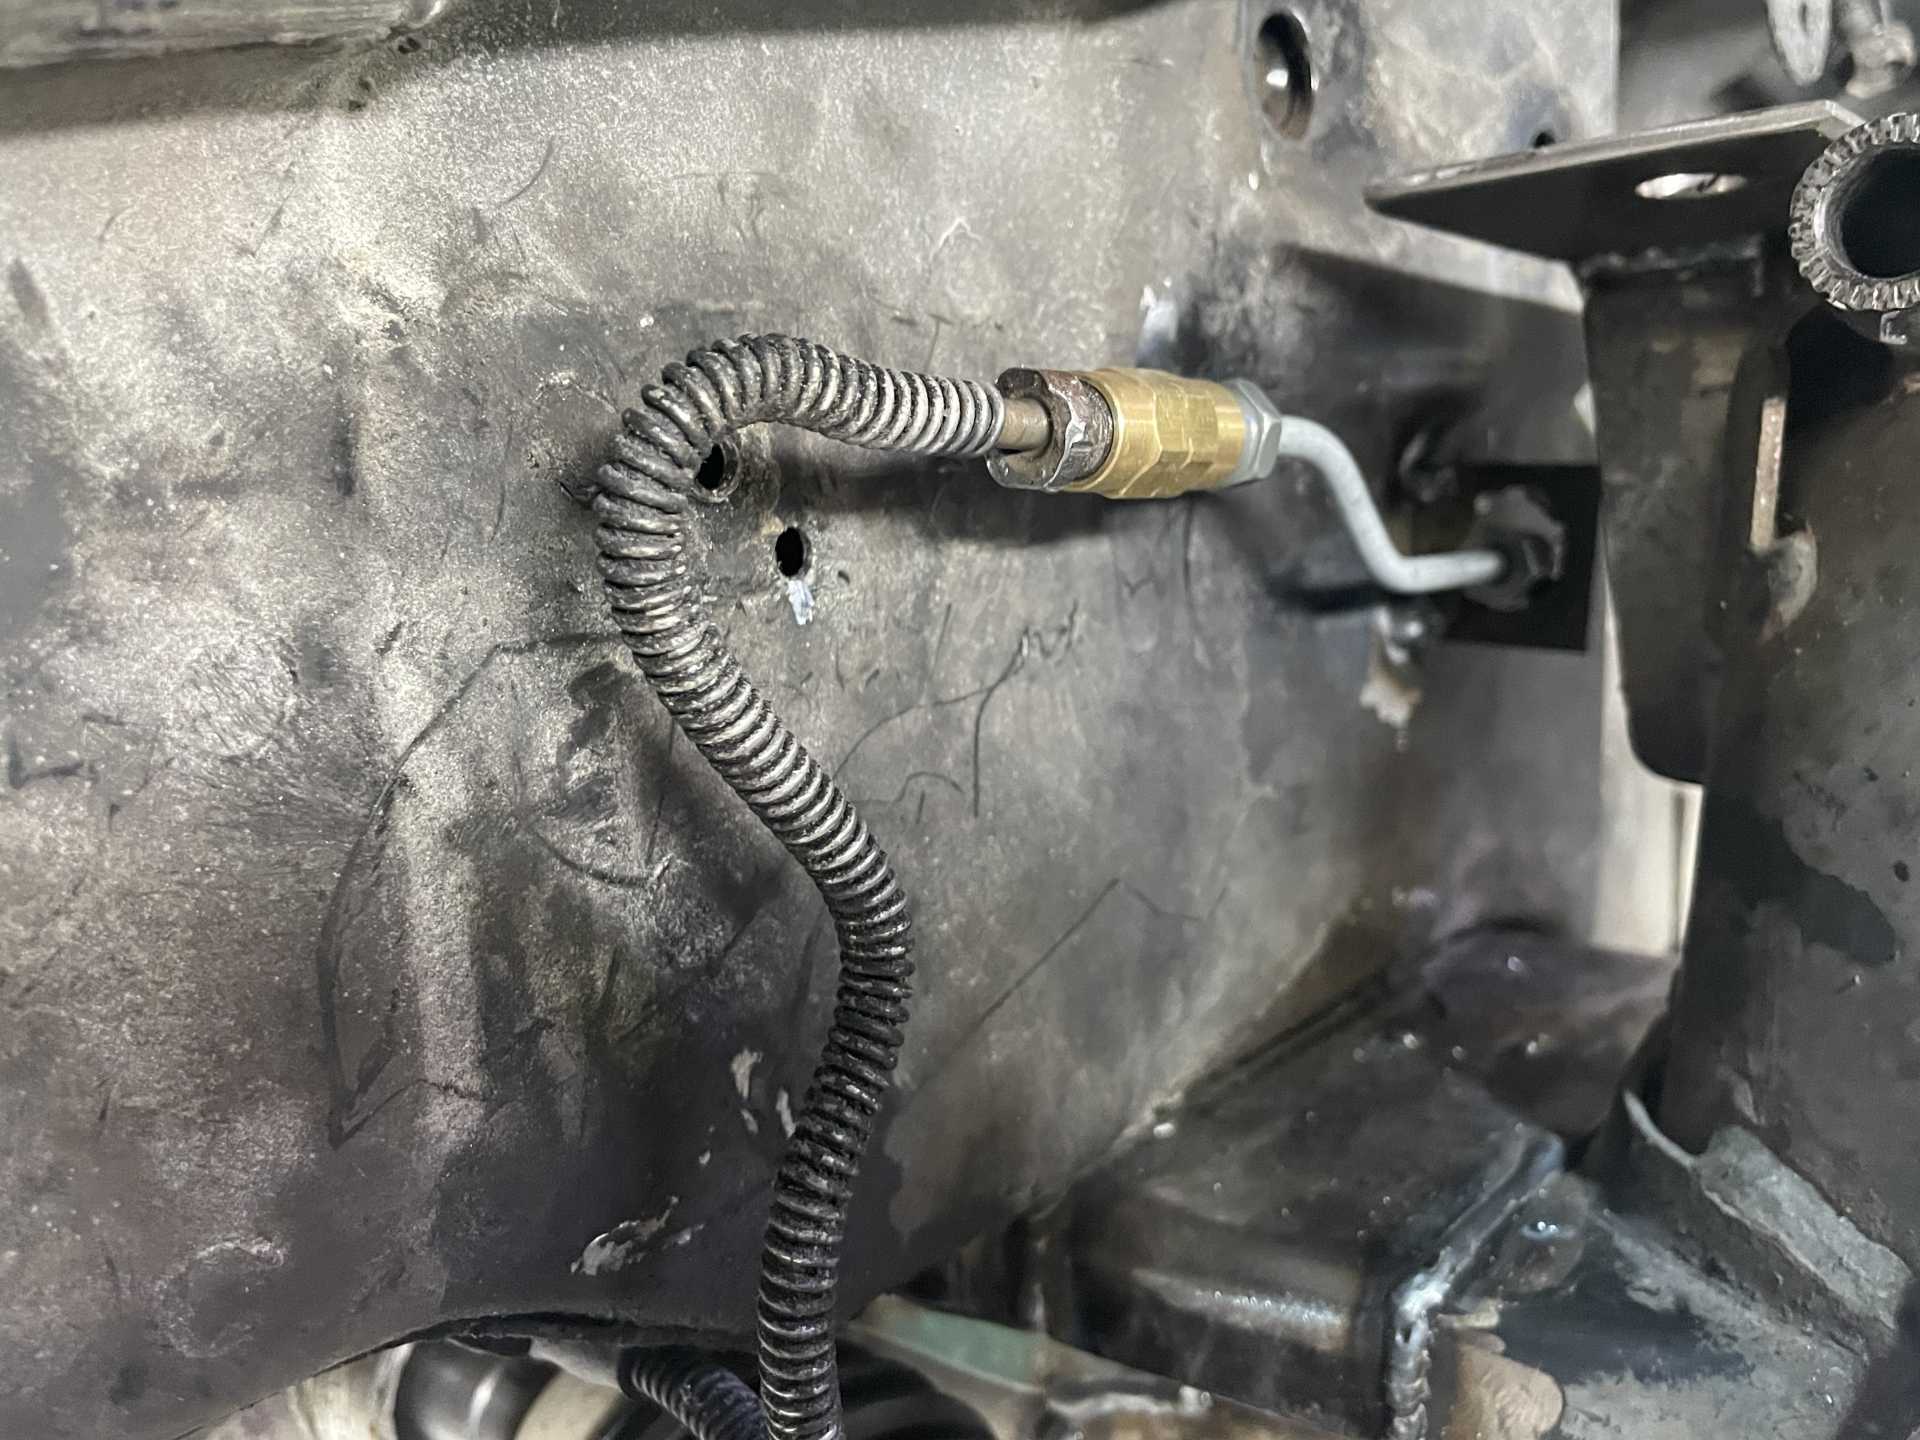
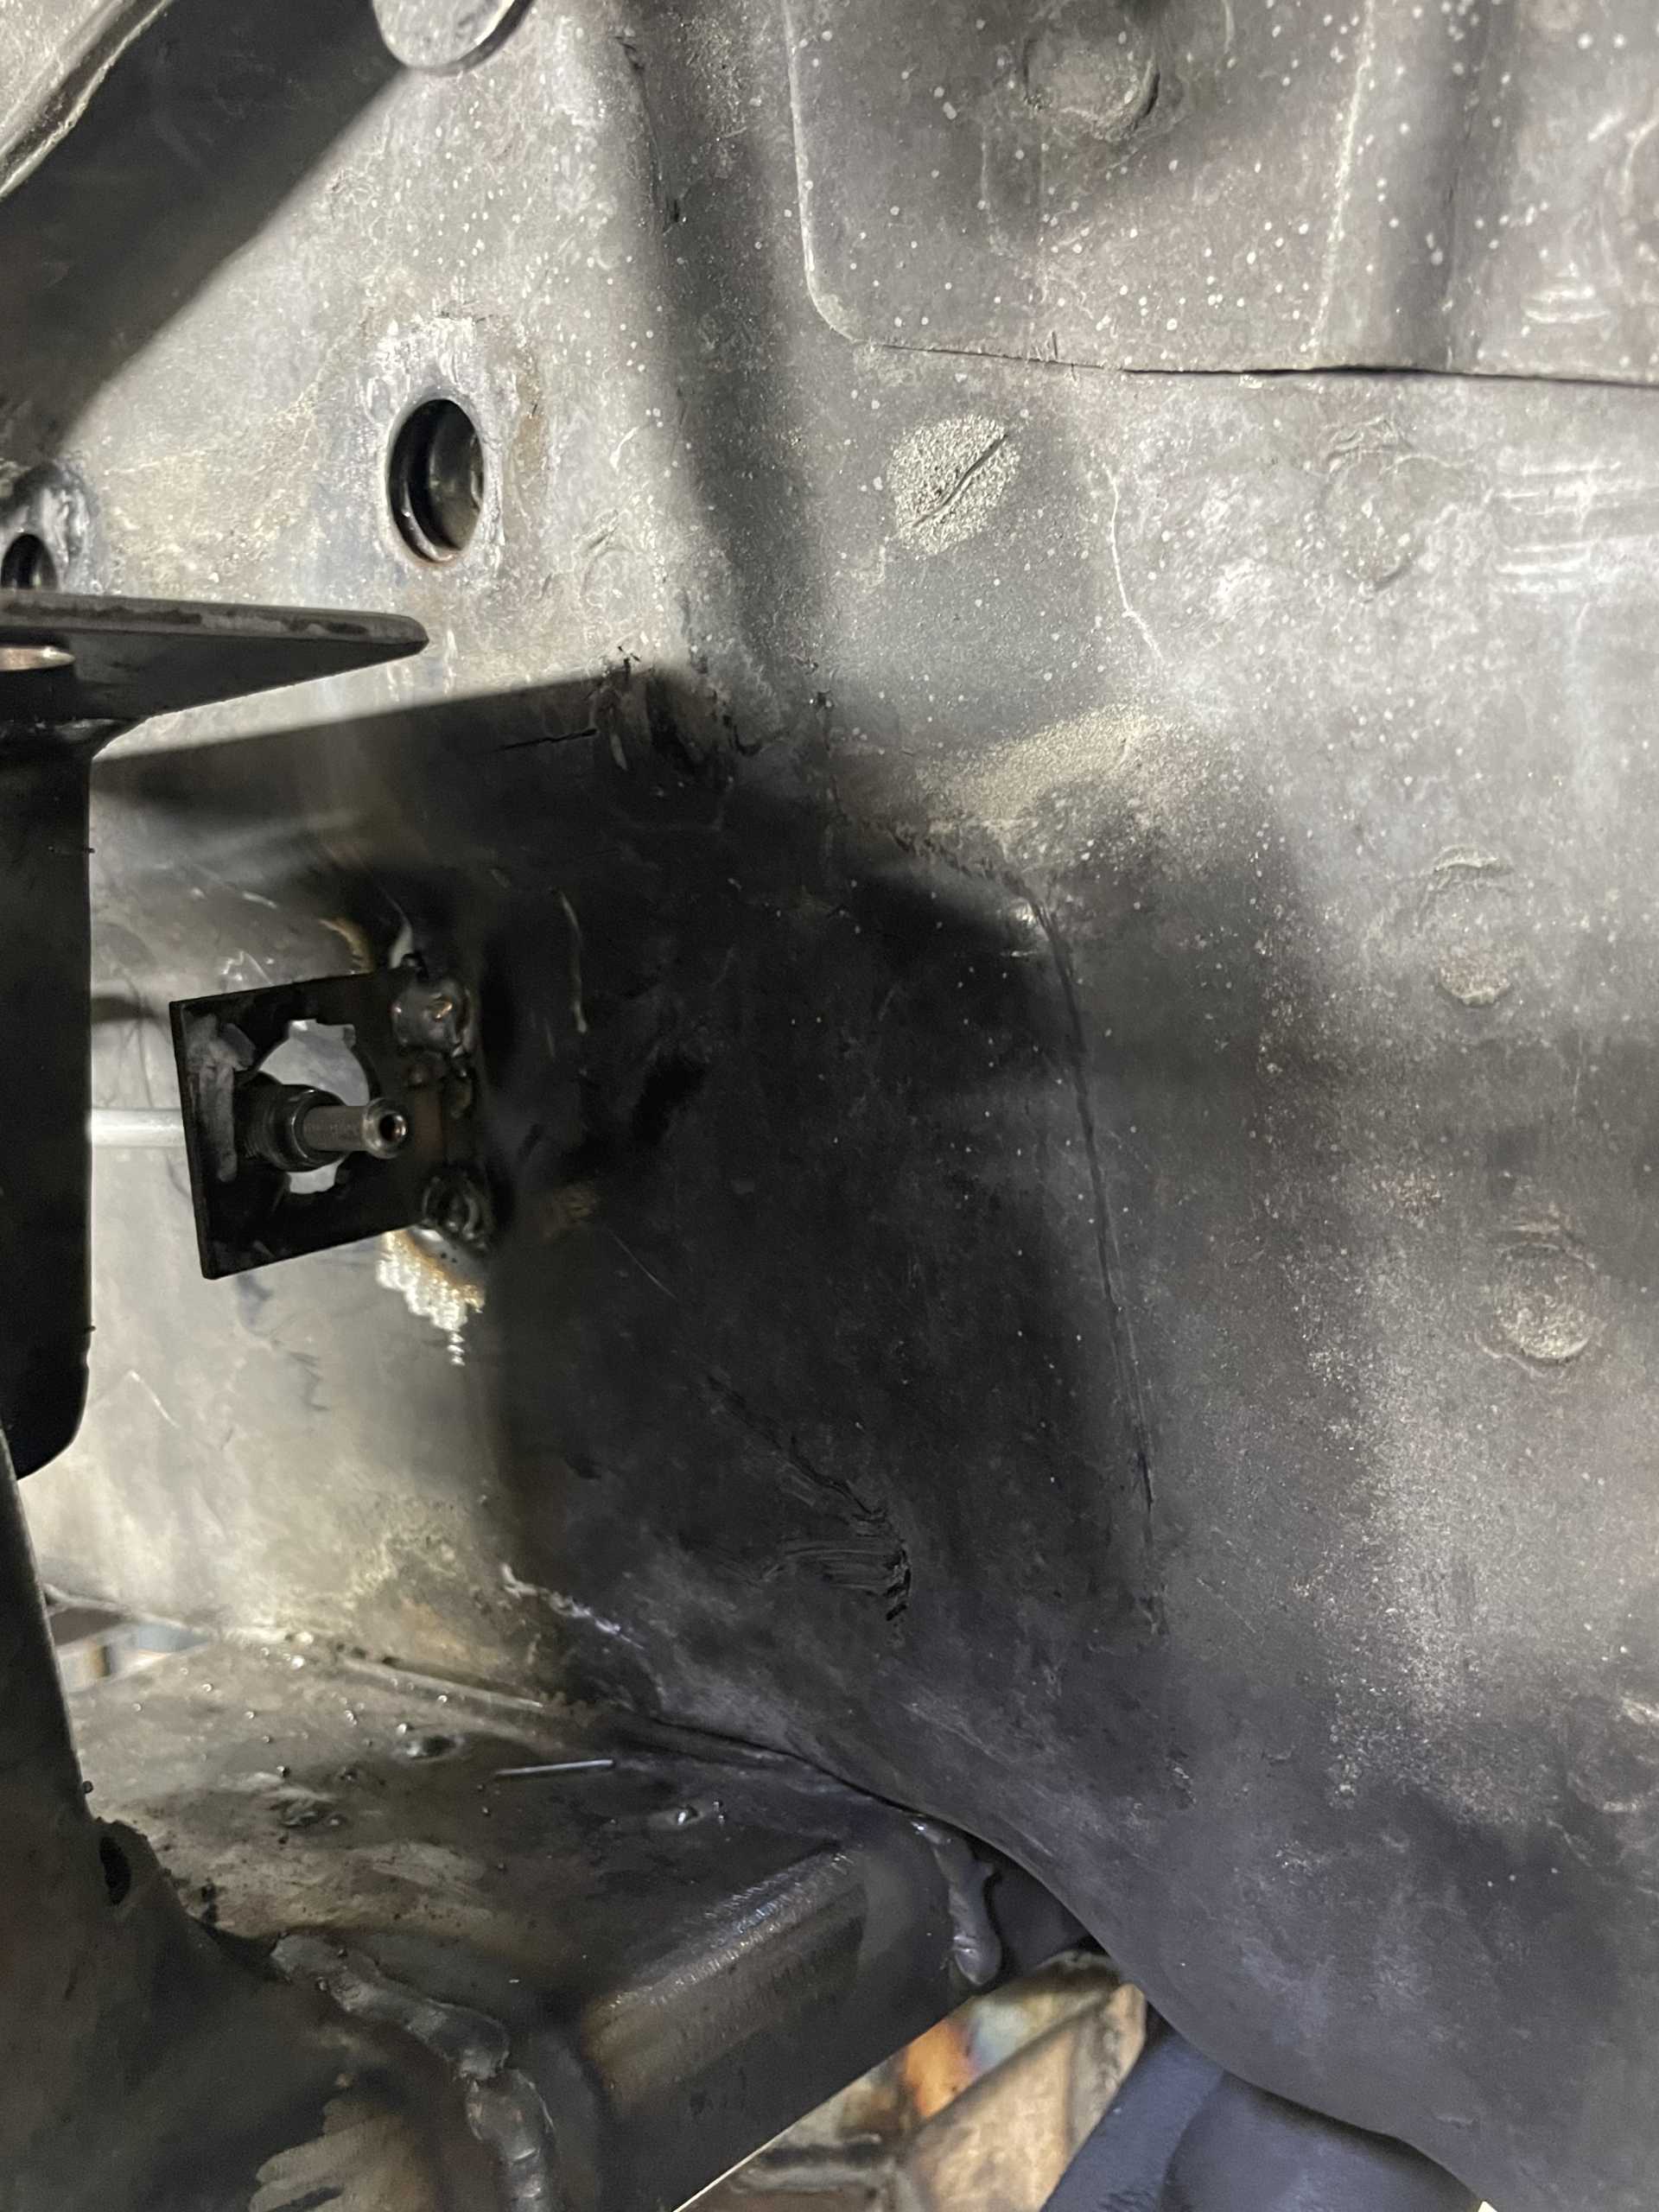
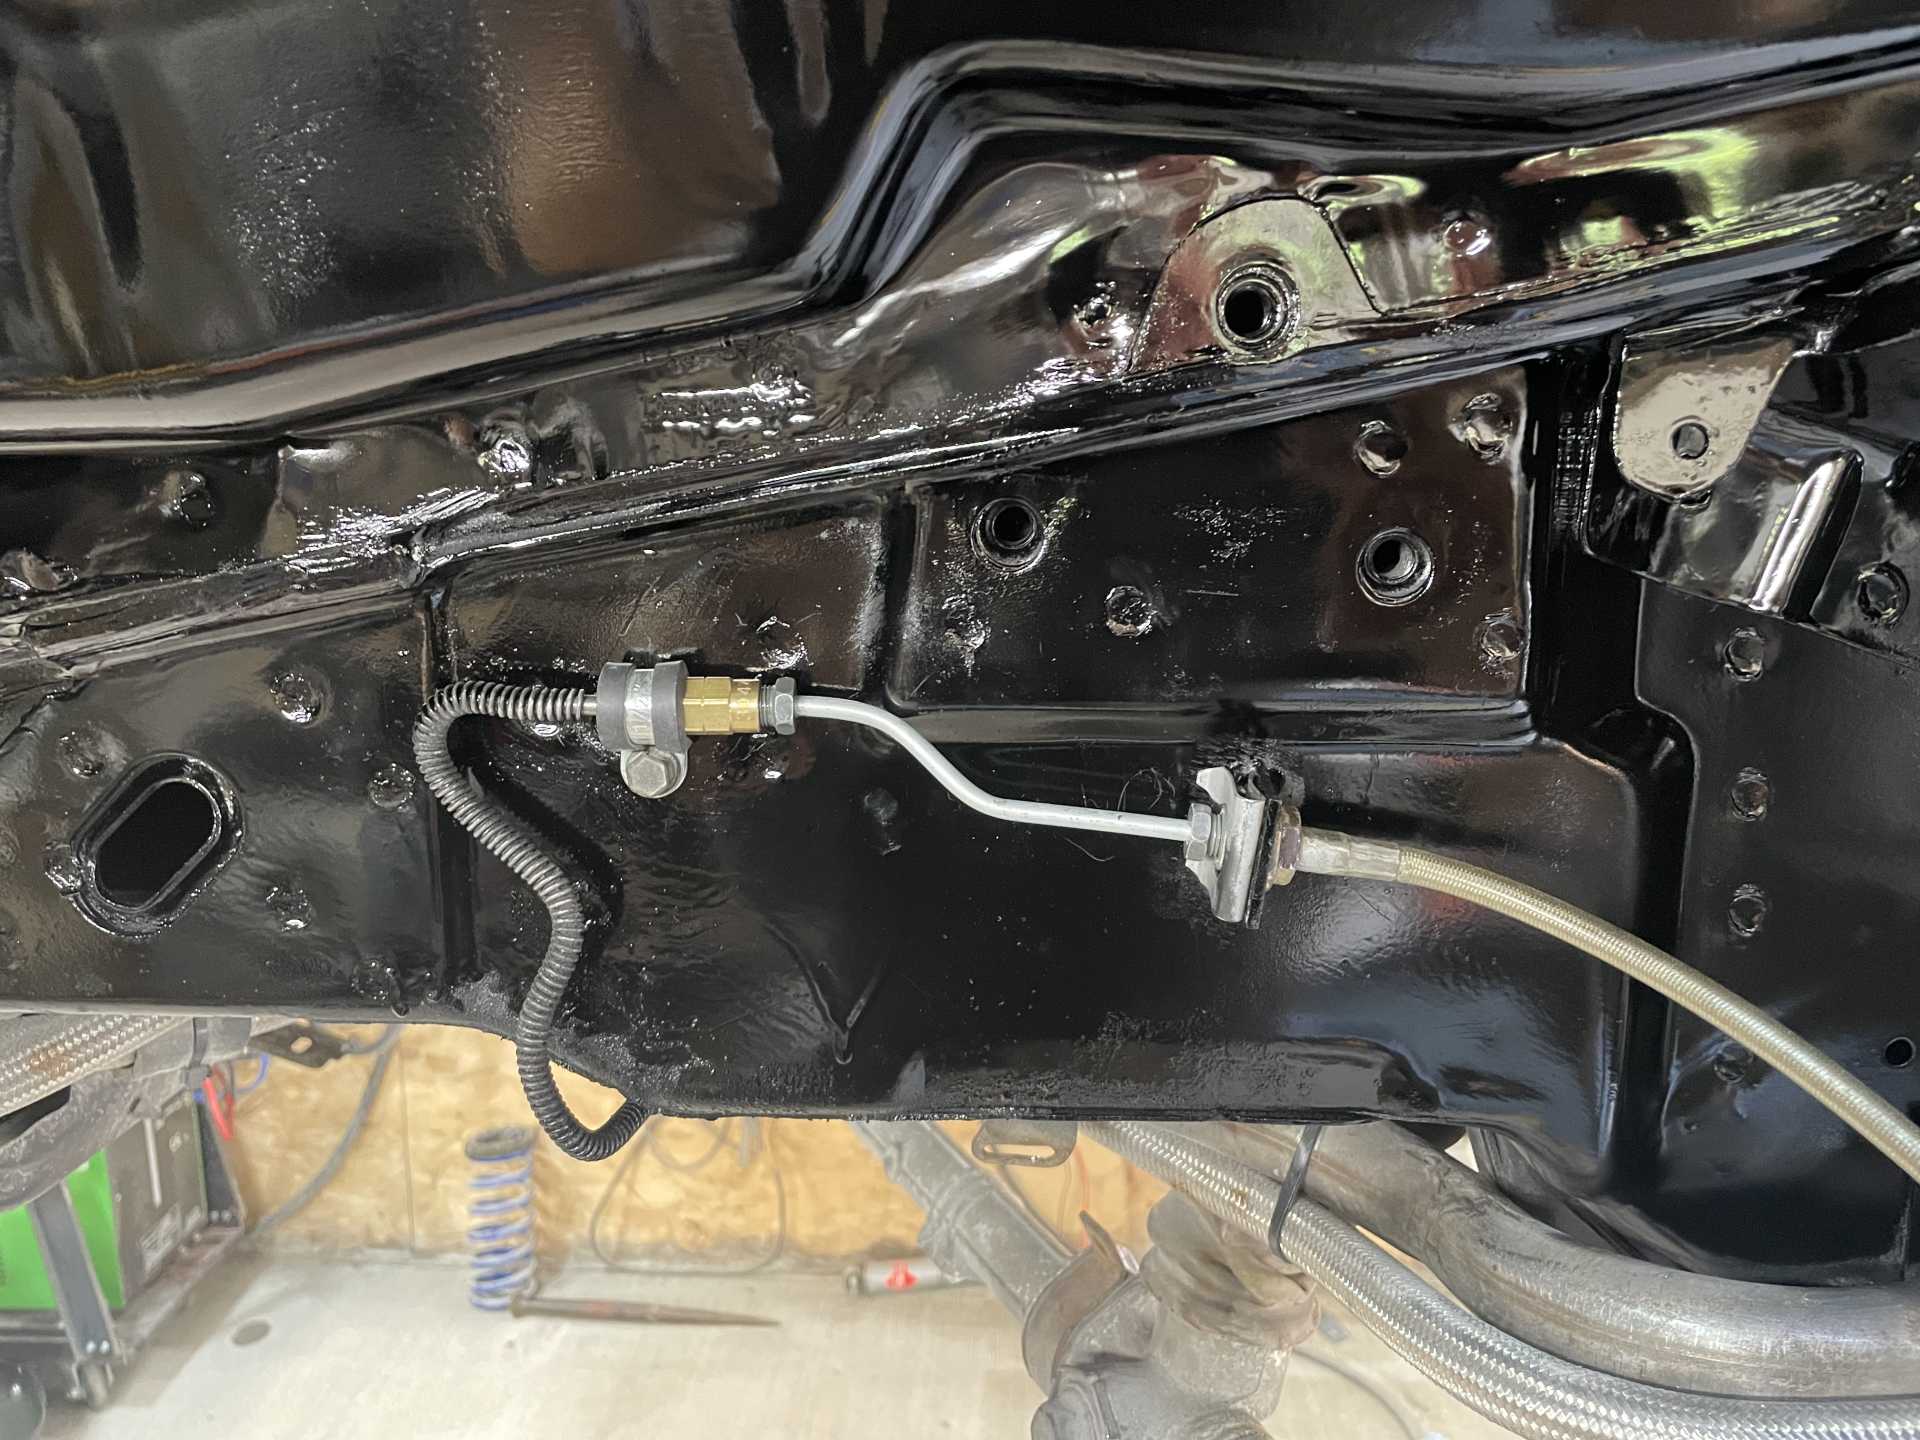
The front Corvette brakes were moved from the front side of the of the calipers and moved to the back side which made the steel braided lines too short so as we were already redoing the lines for the relocated parking brake. Fortunately with the widening of the crossmember space opened up along the frame. Phil moved the connection fixture and welded it to the frame.
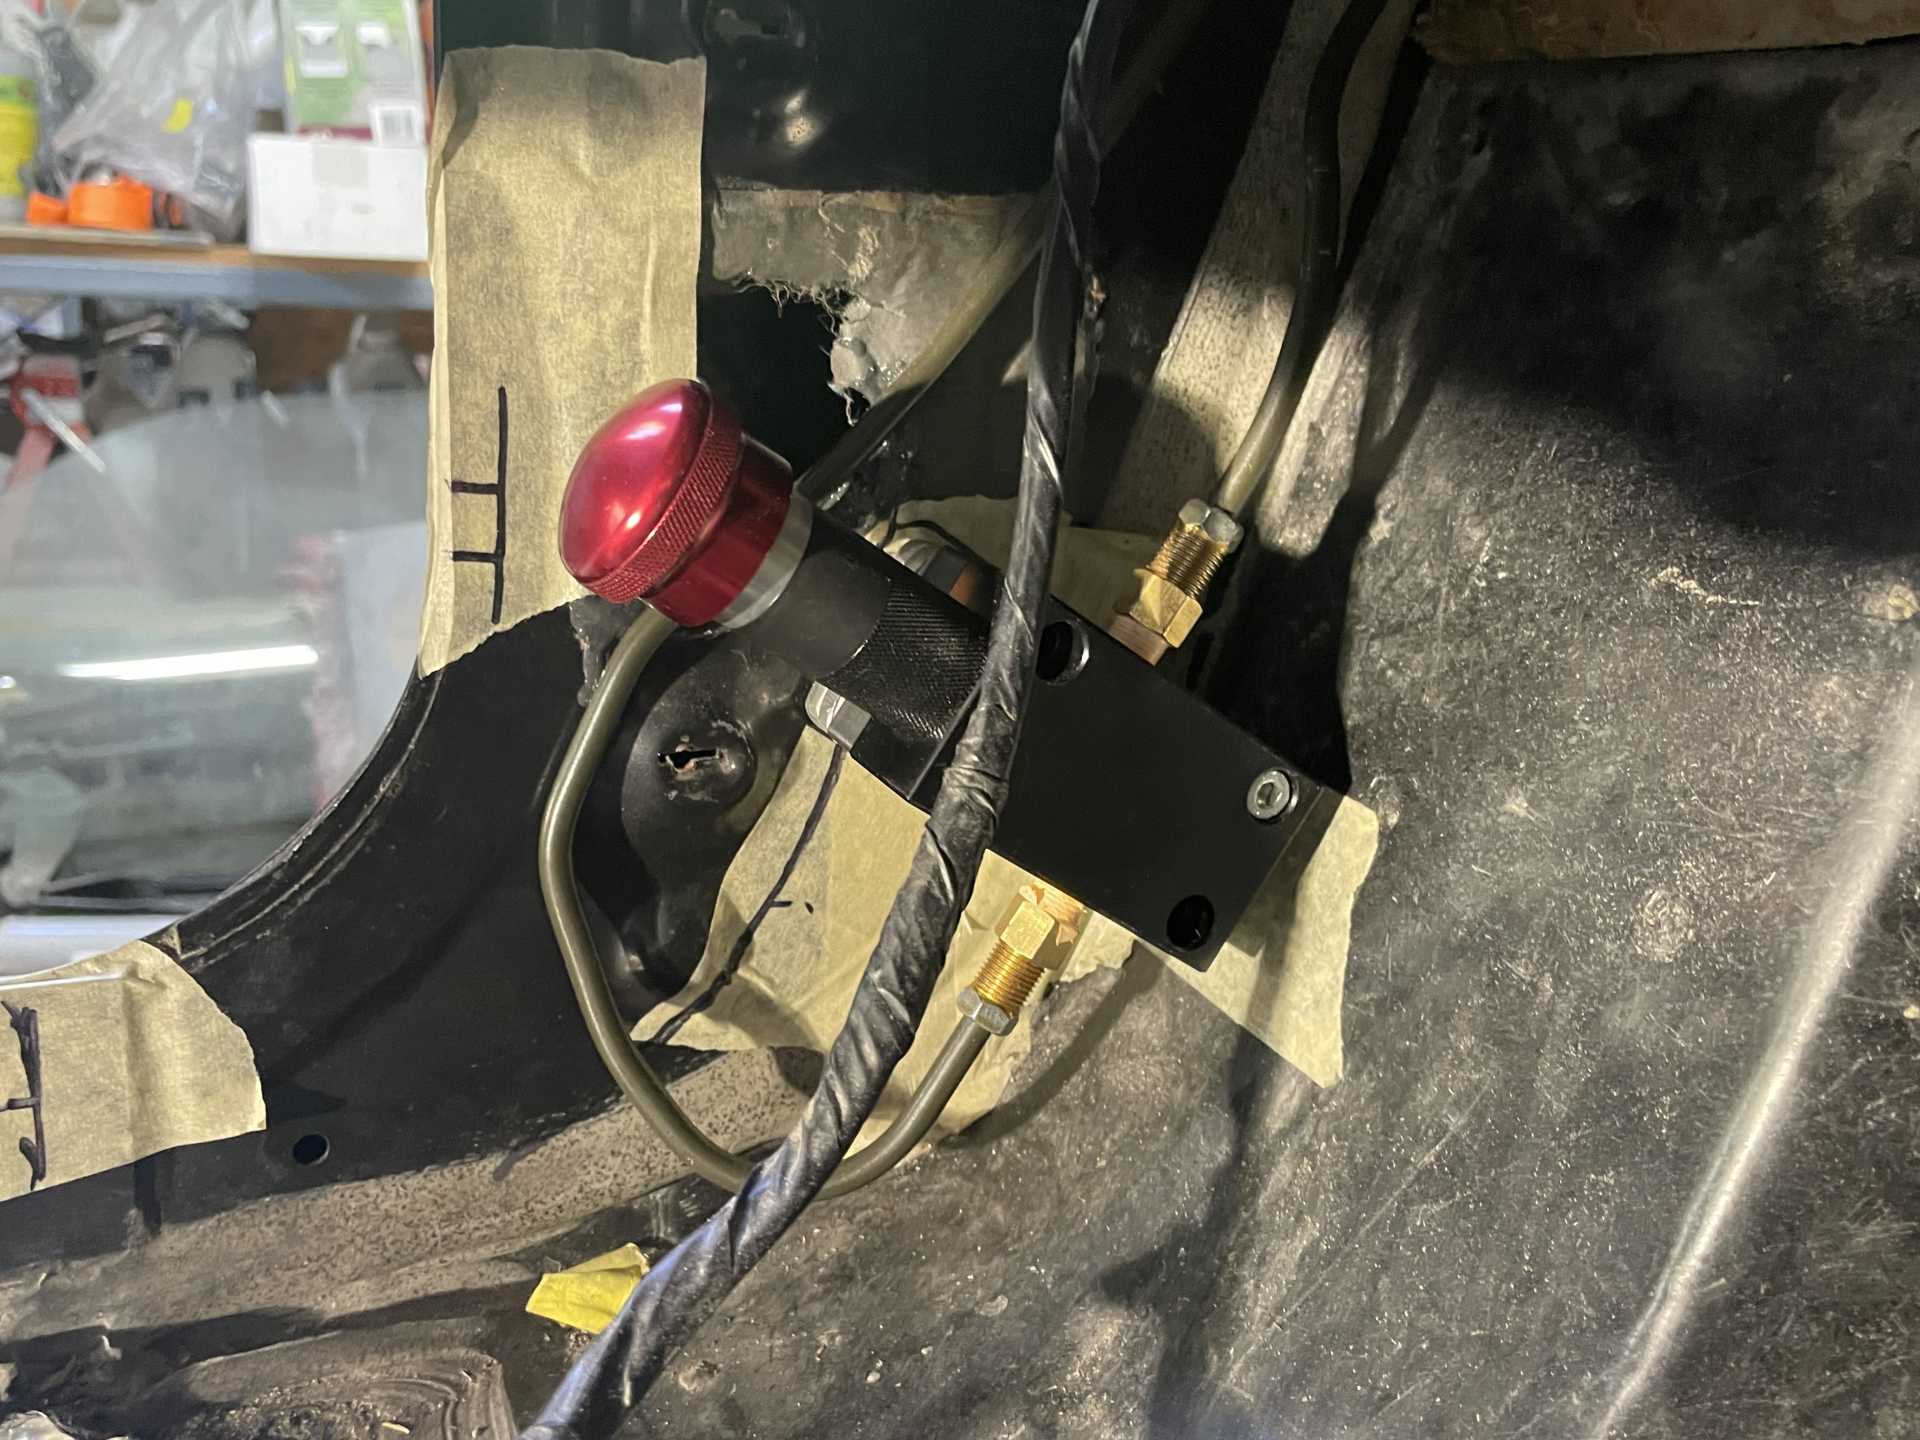
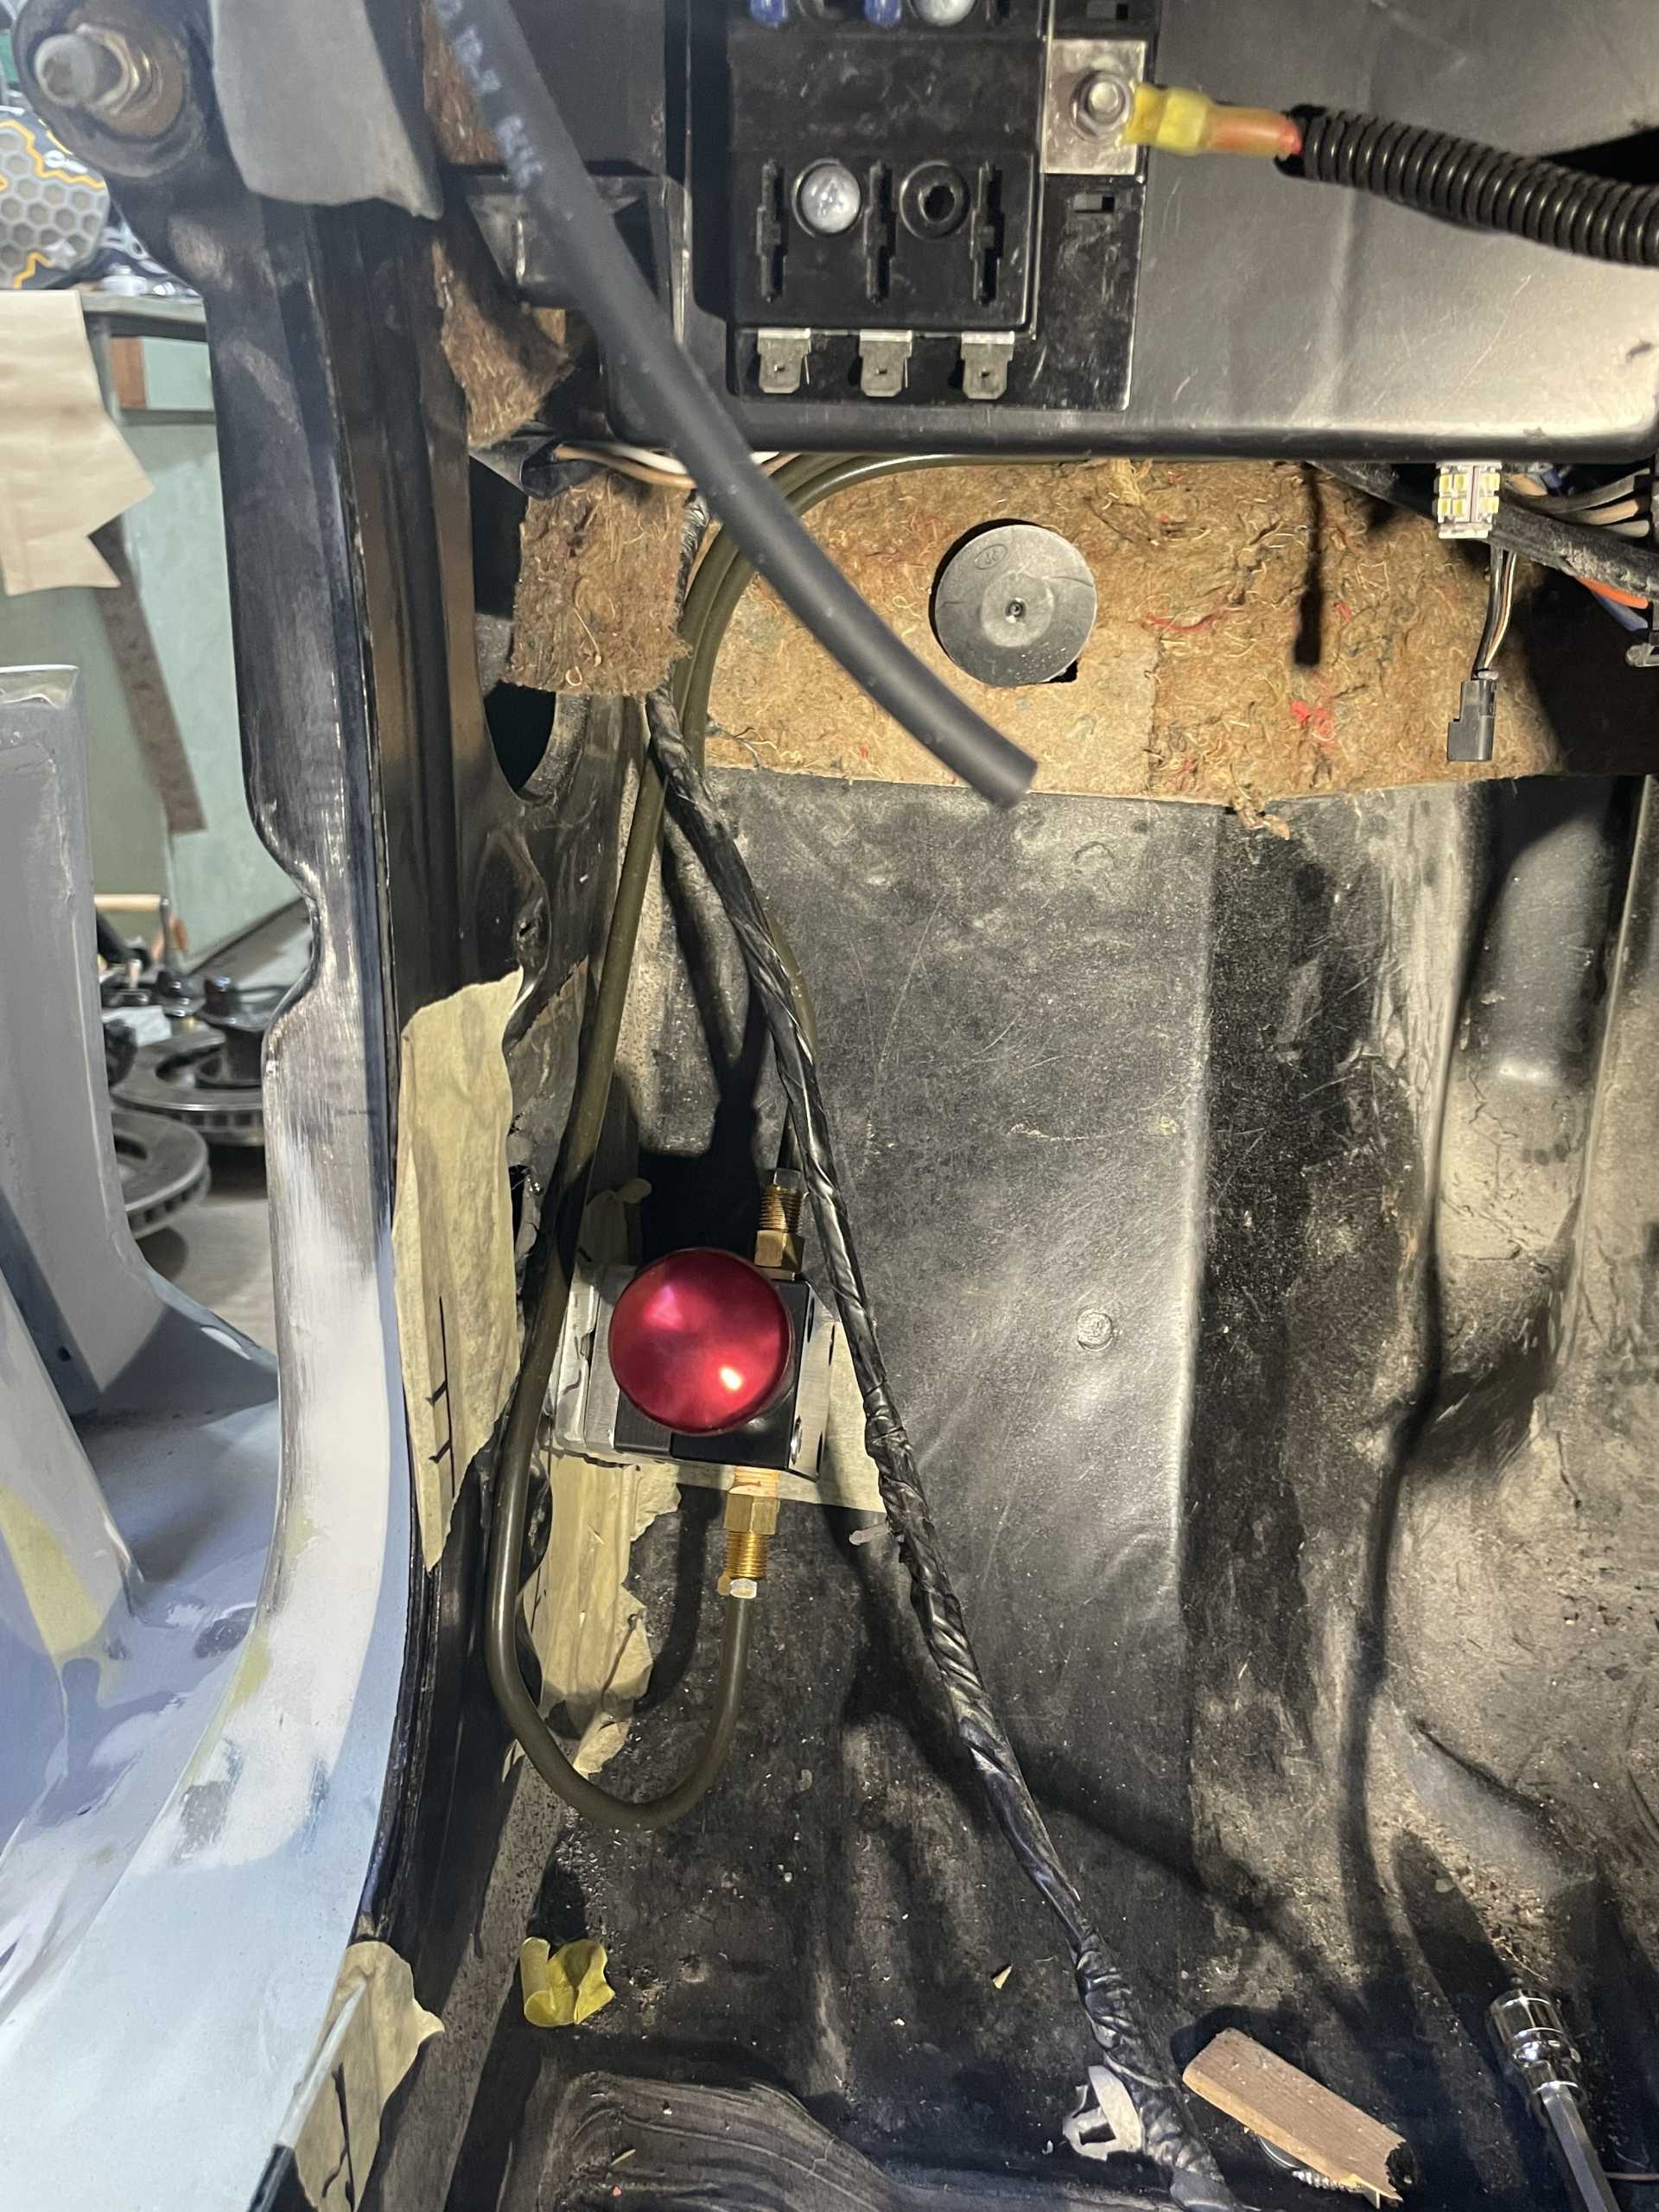
The hydraulic parking brake I originally installed wasn’t working and Phil didn’t like the location so we moved it to a more conventional location and rebending the brakelines .
The other mod to the suspension is being fabricated , the shock bottom needs to be moved inwards to compensate for the widened cross member. The relocated front brakes interfere and stop the steering rack from a full 3 turns “only 2 turn presently” .
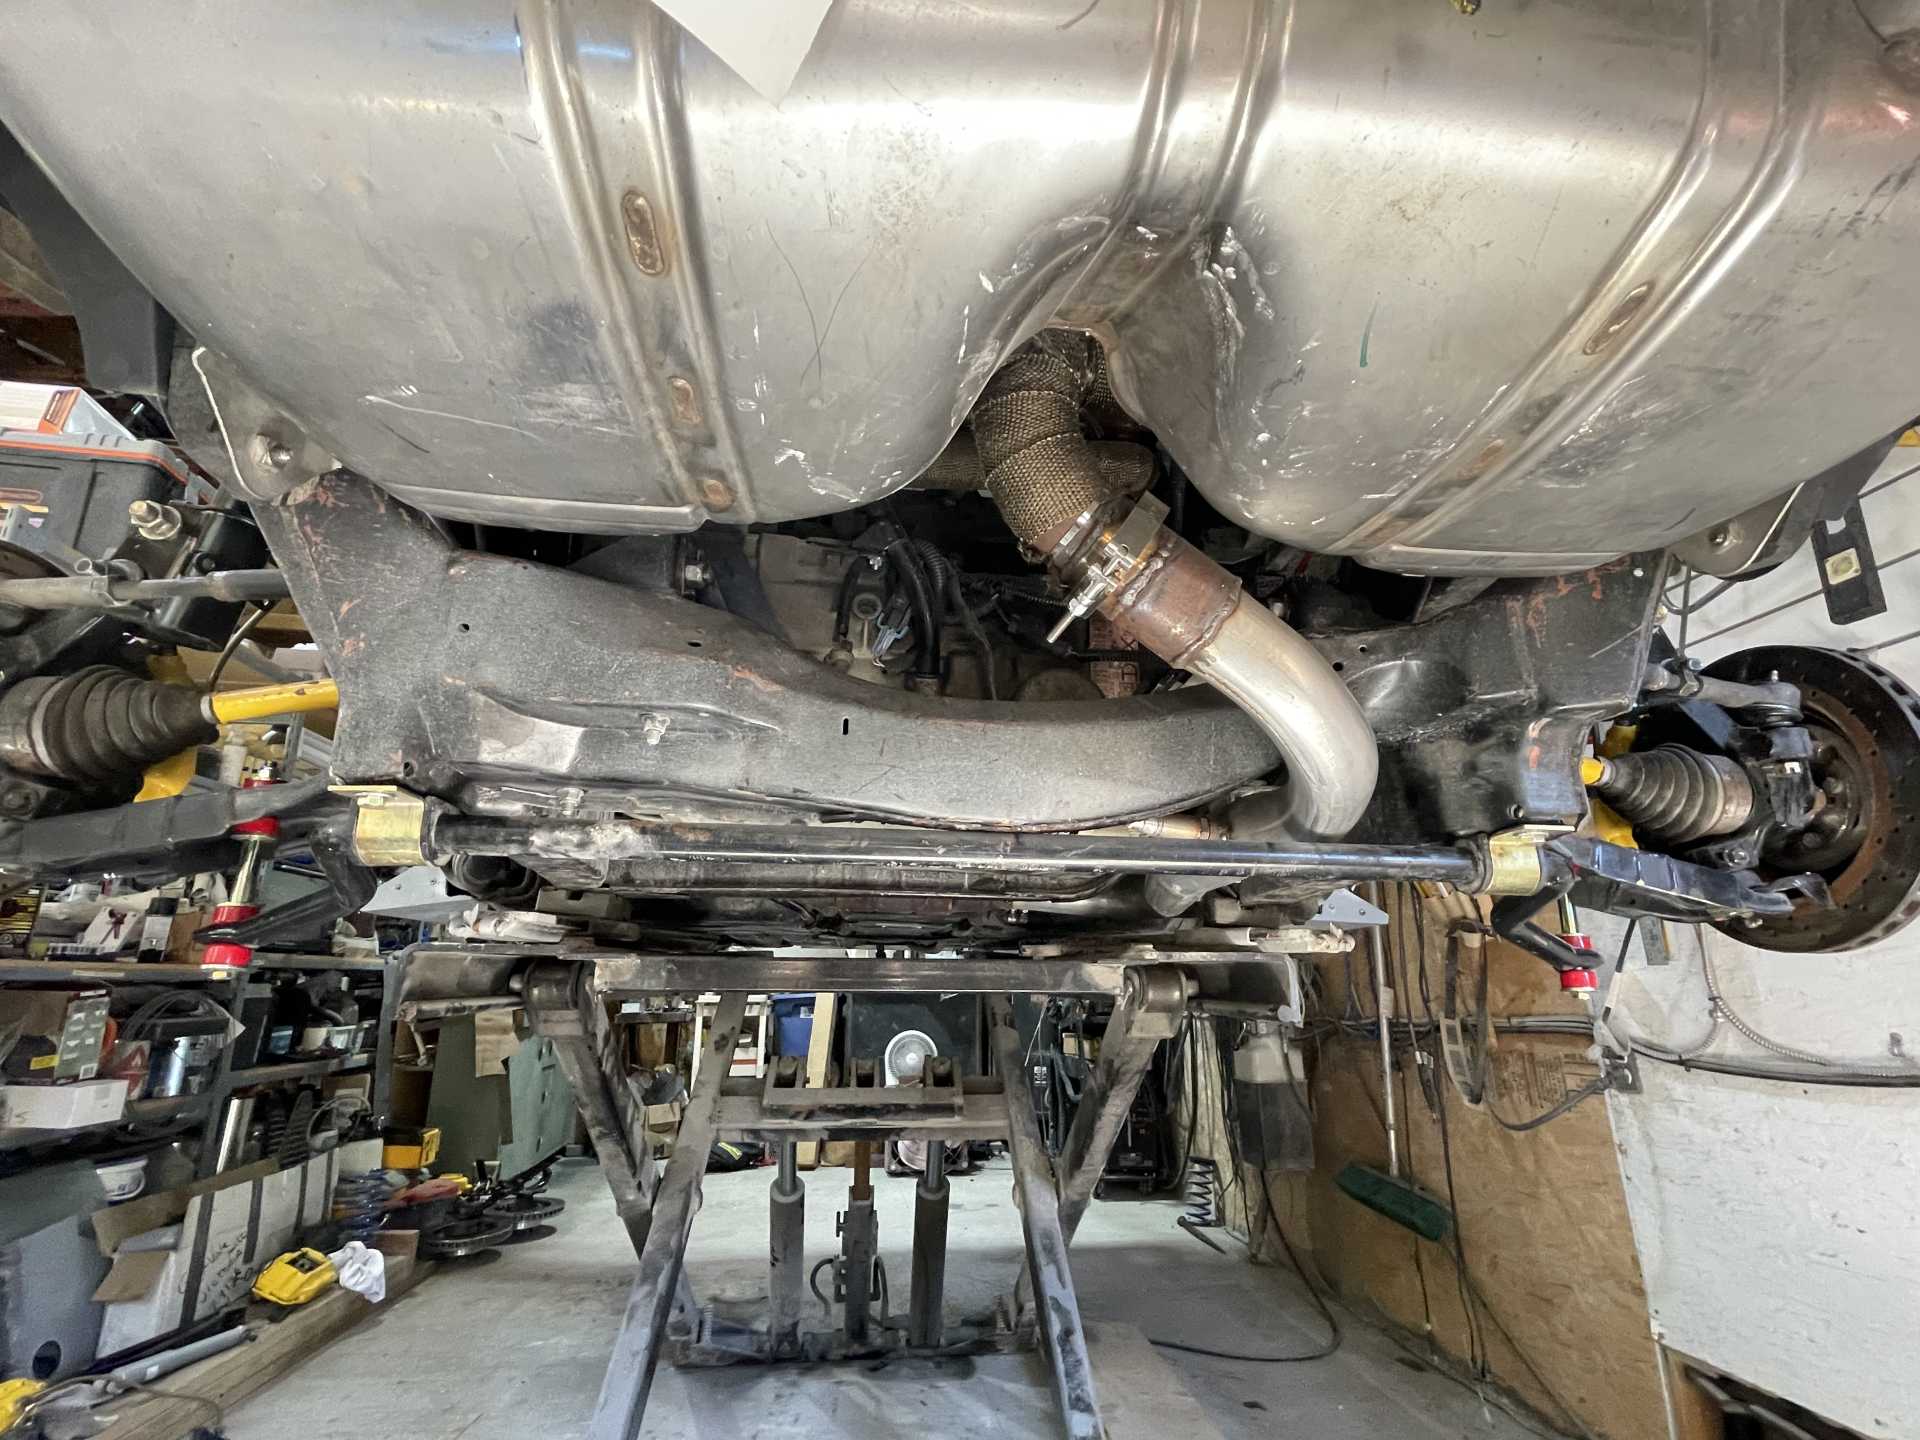
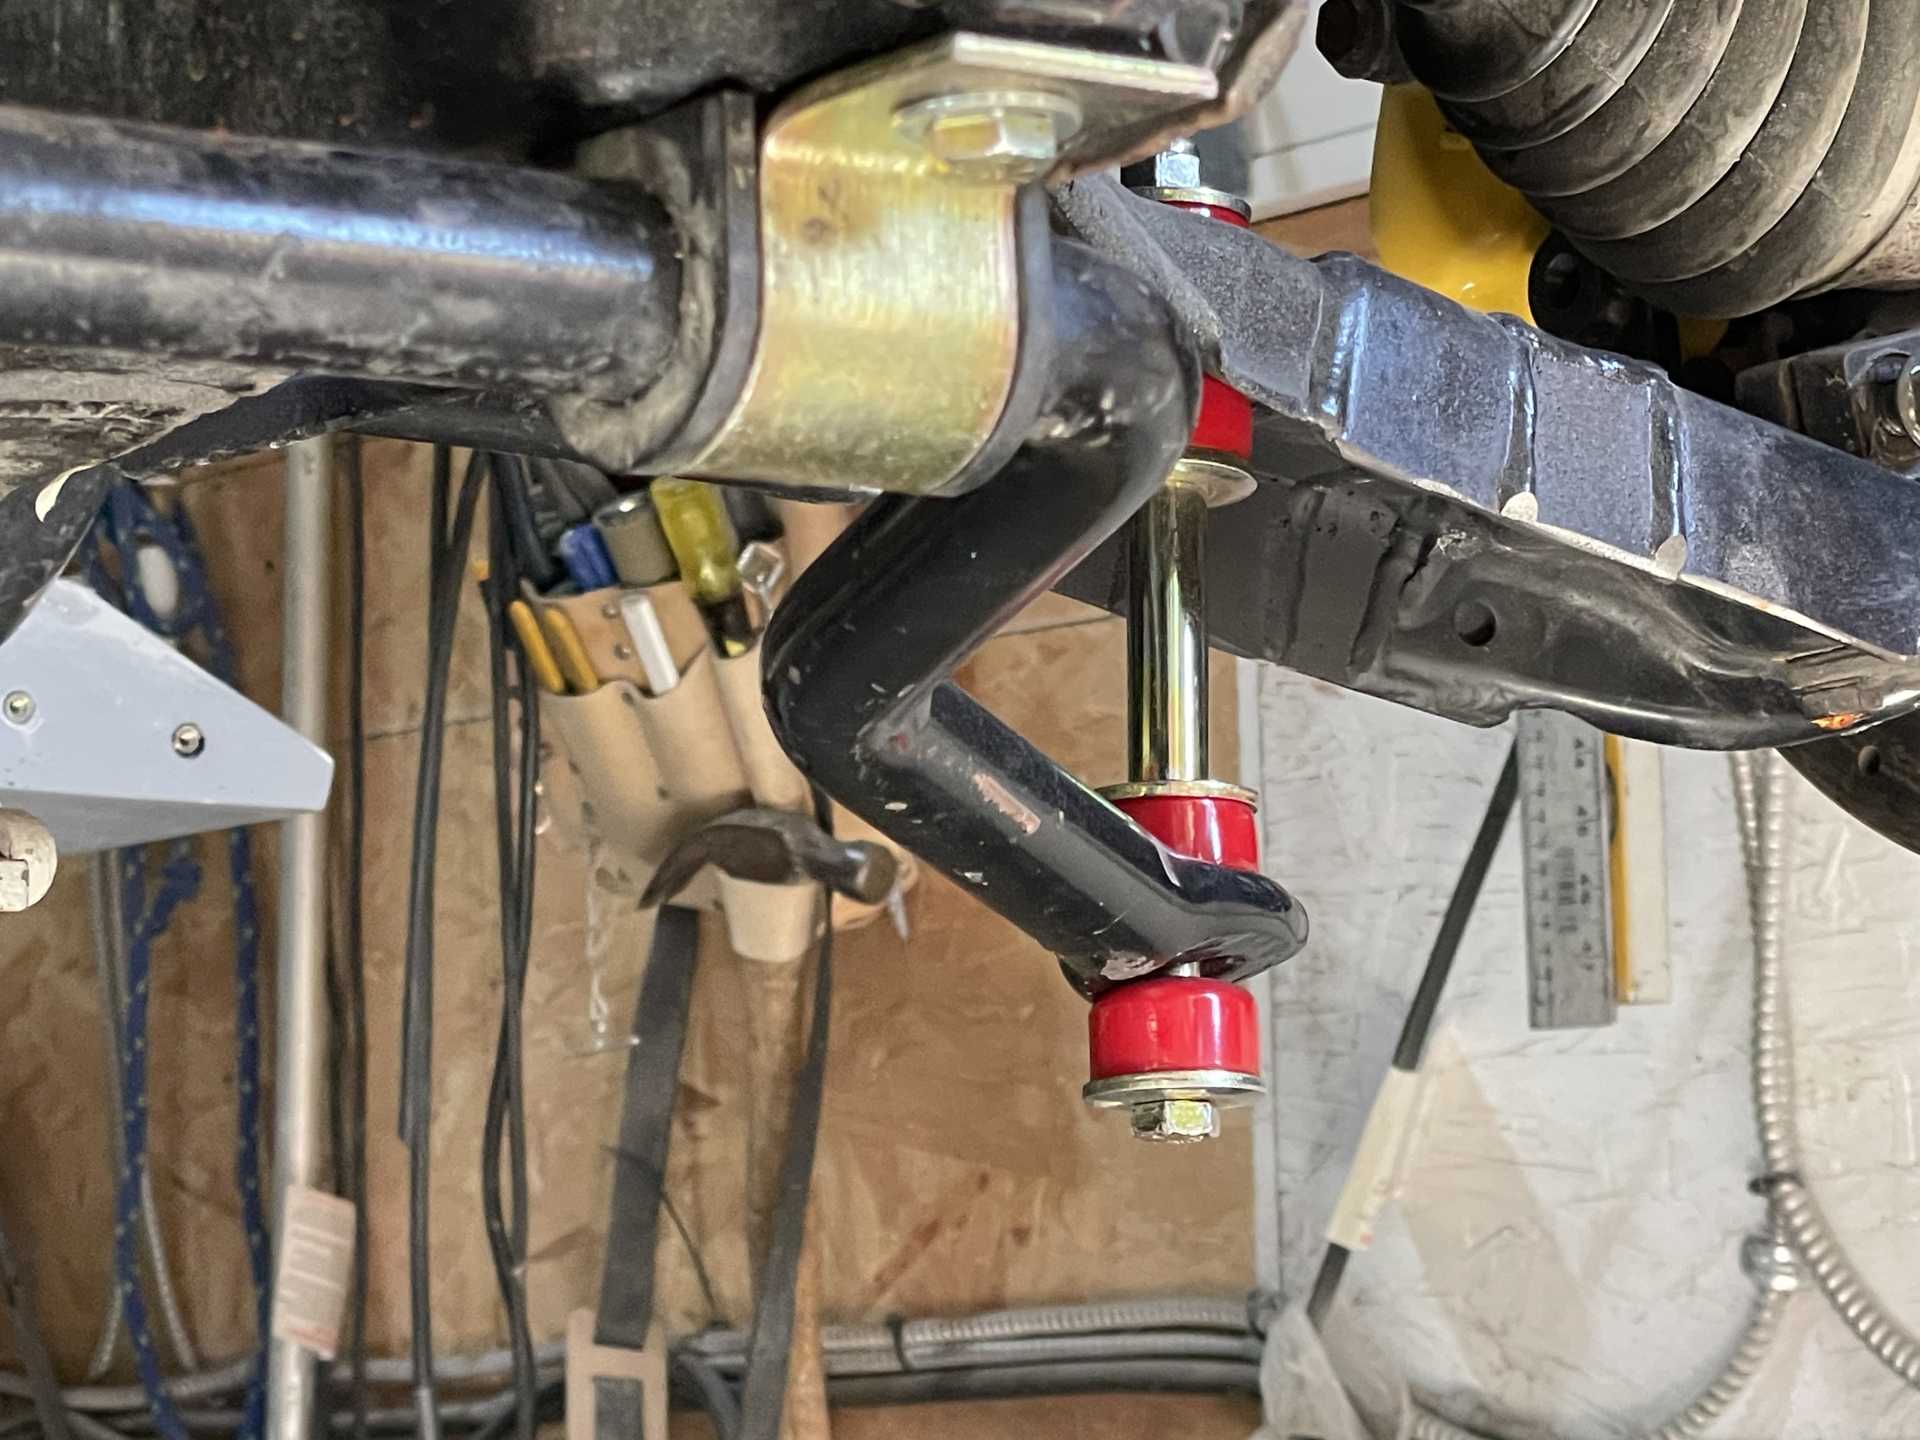
And the last item that was completed was a rear HD sway bar was added, I always planned on one but it was low on my list and I didn’t have one but with widening the front the HD one I was using no longer fit so we decided to repurpose it to the back!!
I’ll start the process to find a longer one for the front soon.
I’ve now removed the portable garage and am preparing to put up a portable paint booth and repaint and clear everything. Then onto the assembly!!
Thanks for stopping by everyone. Wayne
[This message has been edited by dobie1 (edited 07-17-2023).]
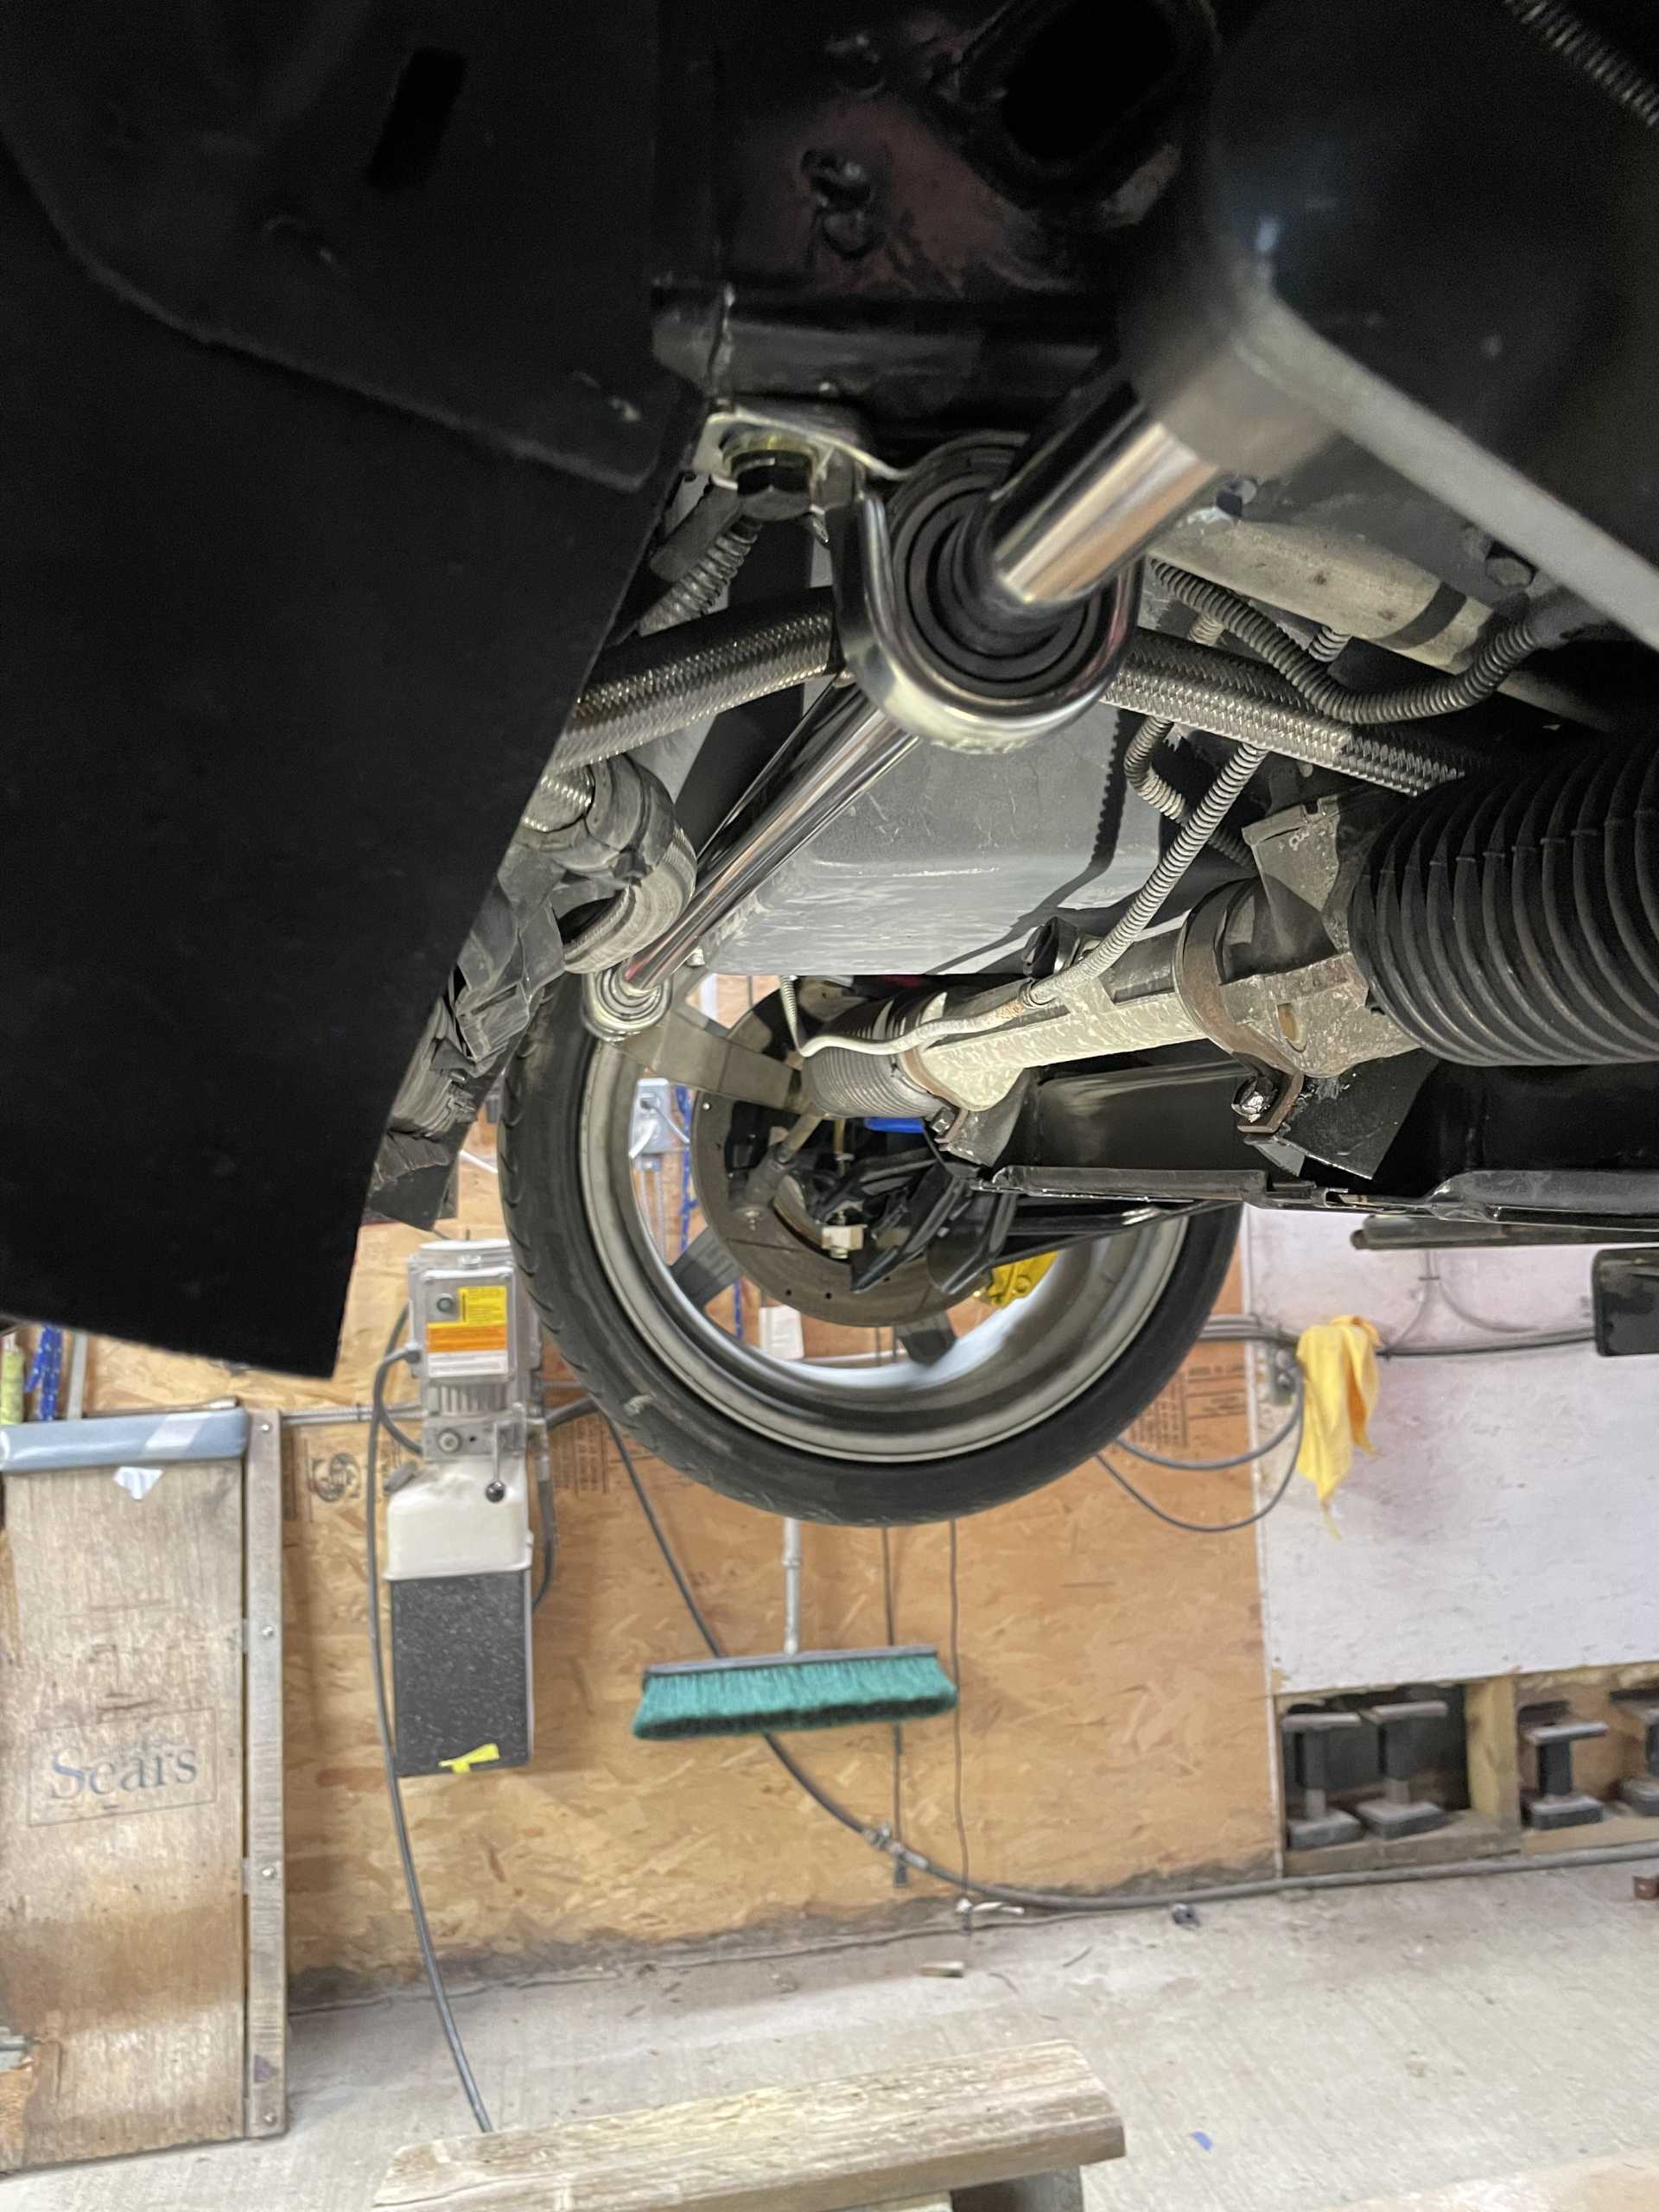
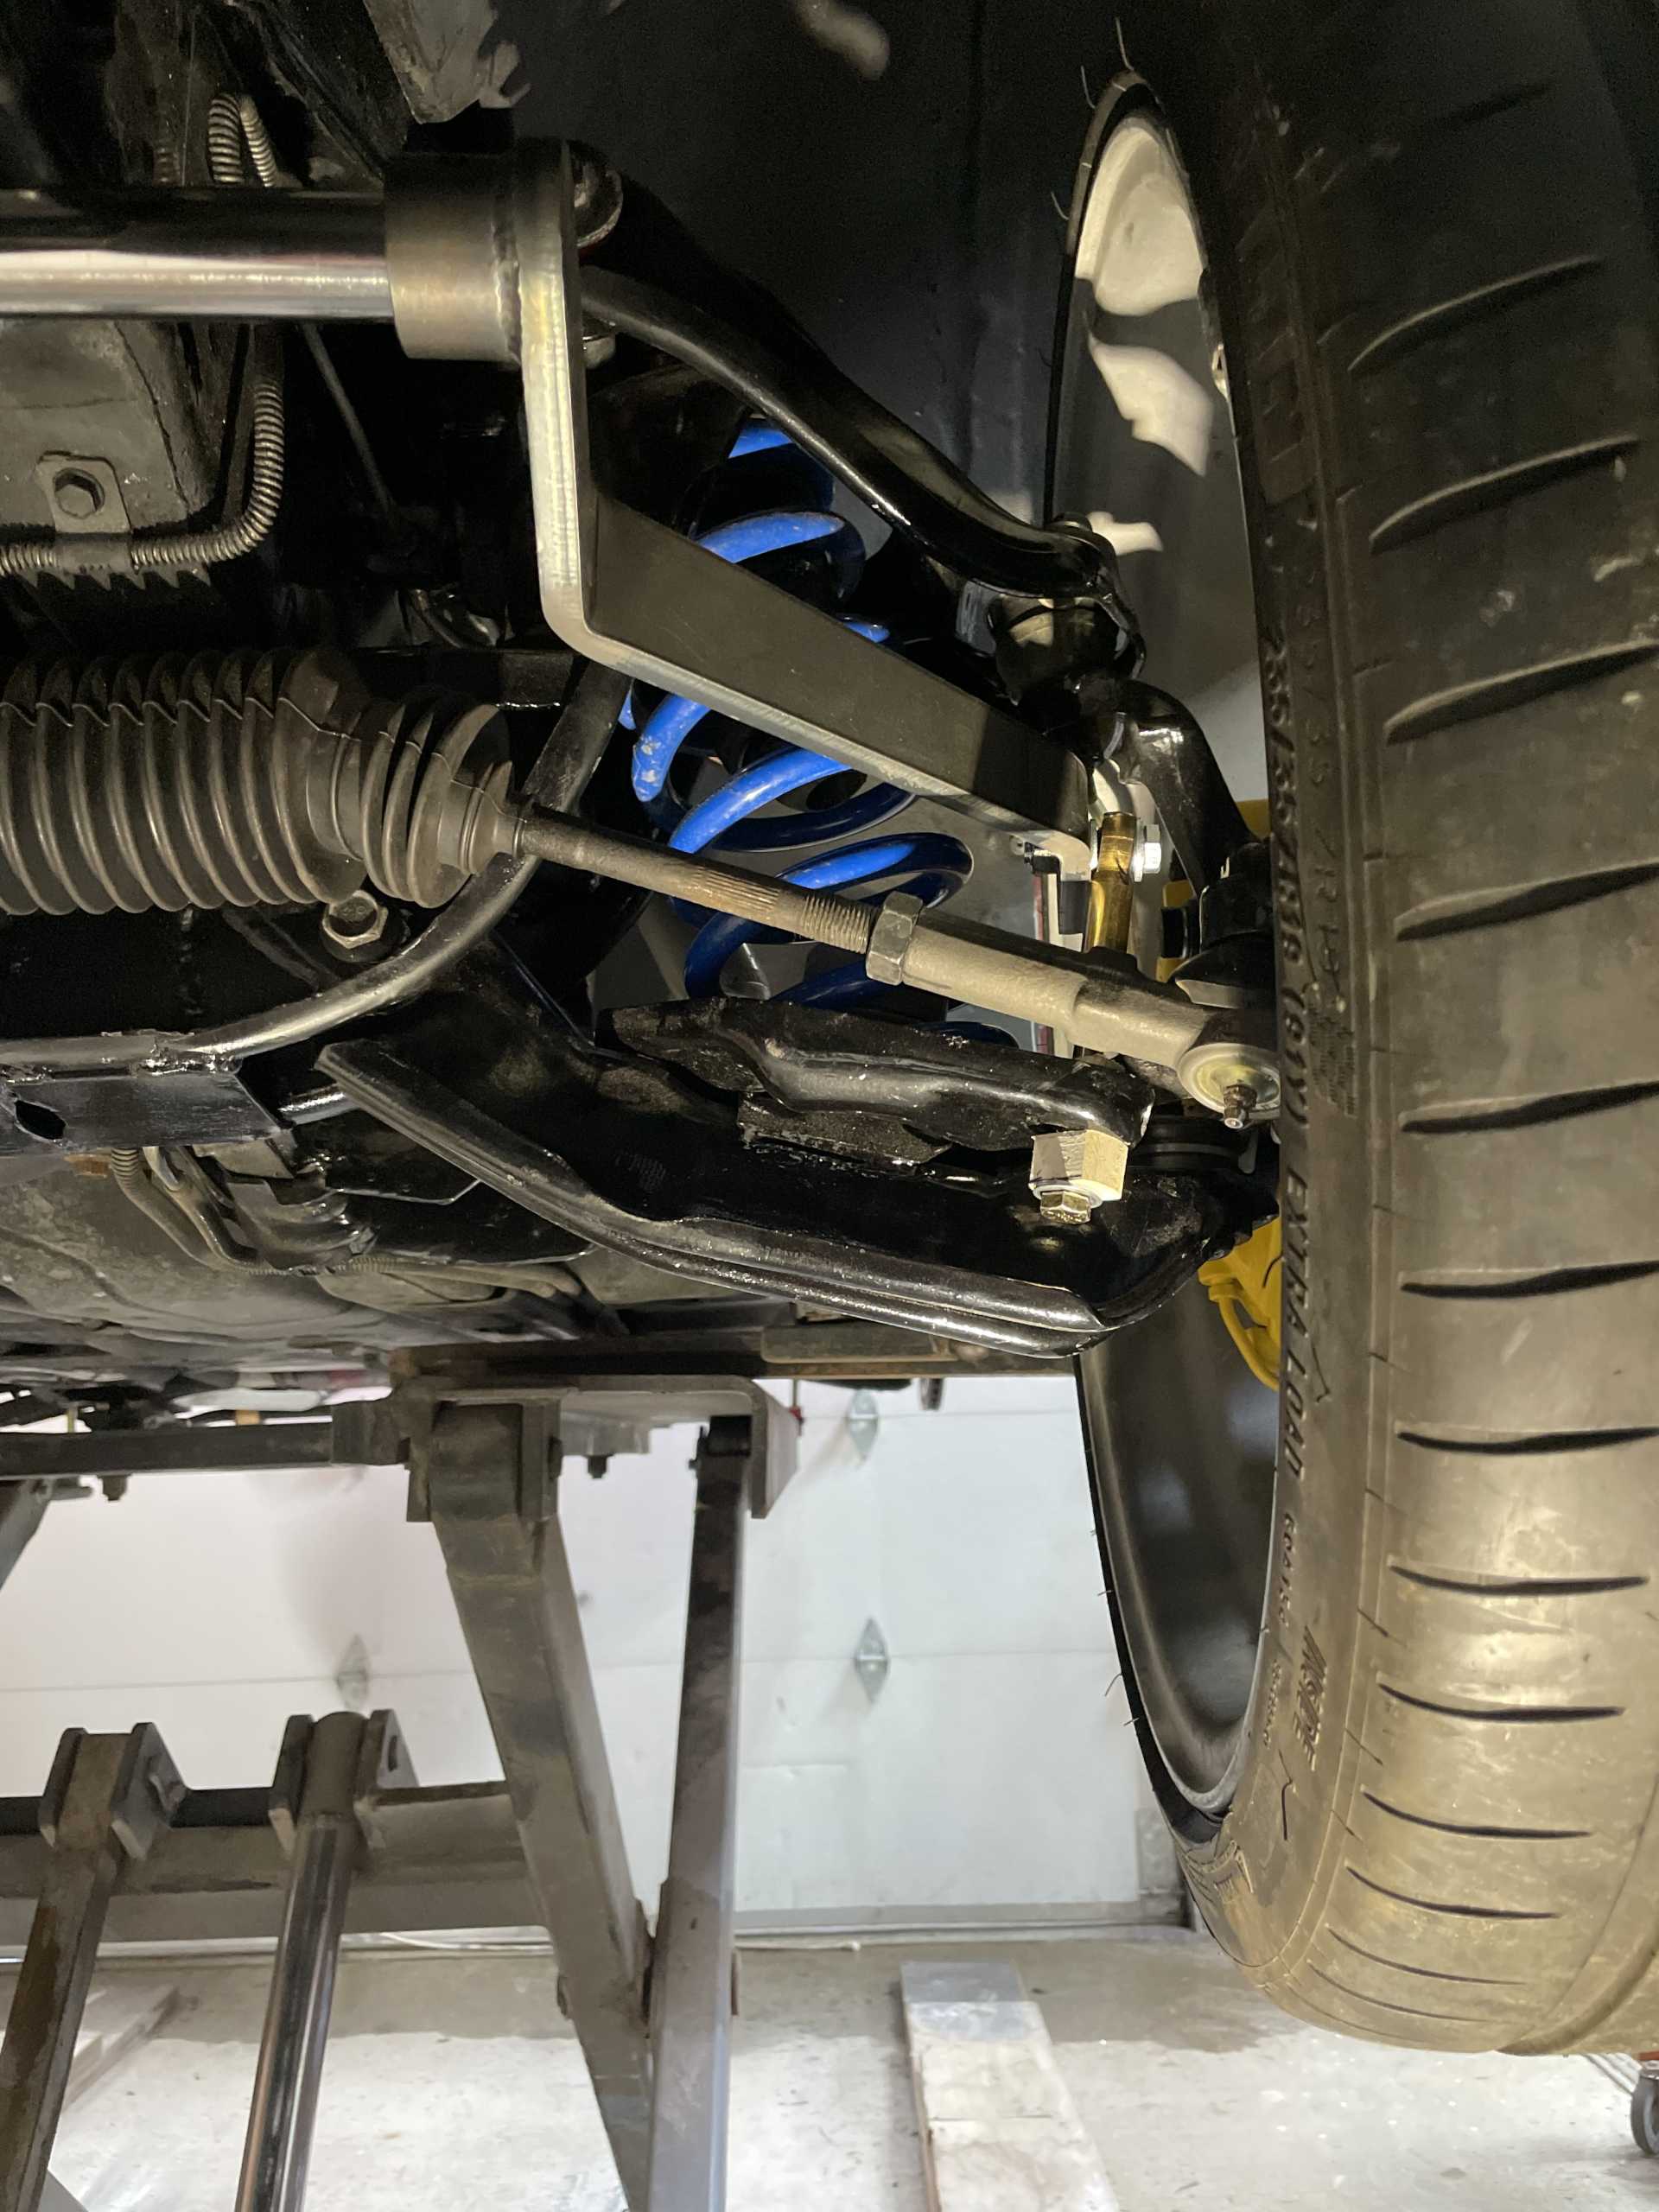
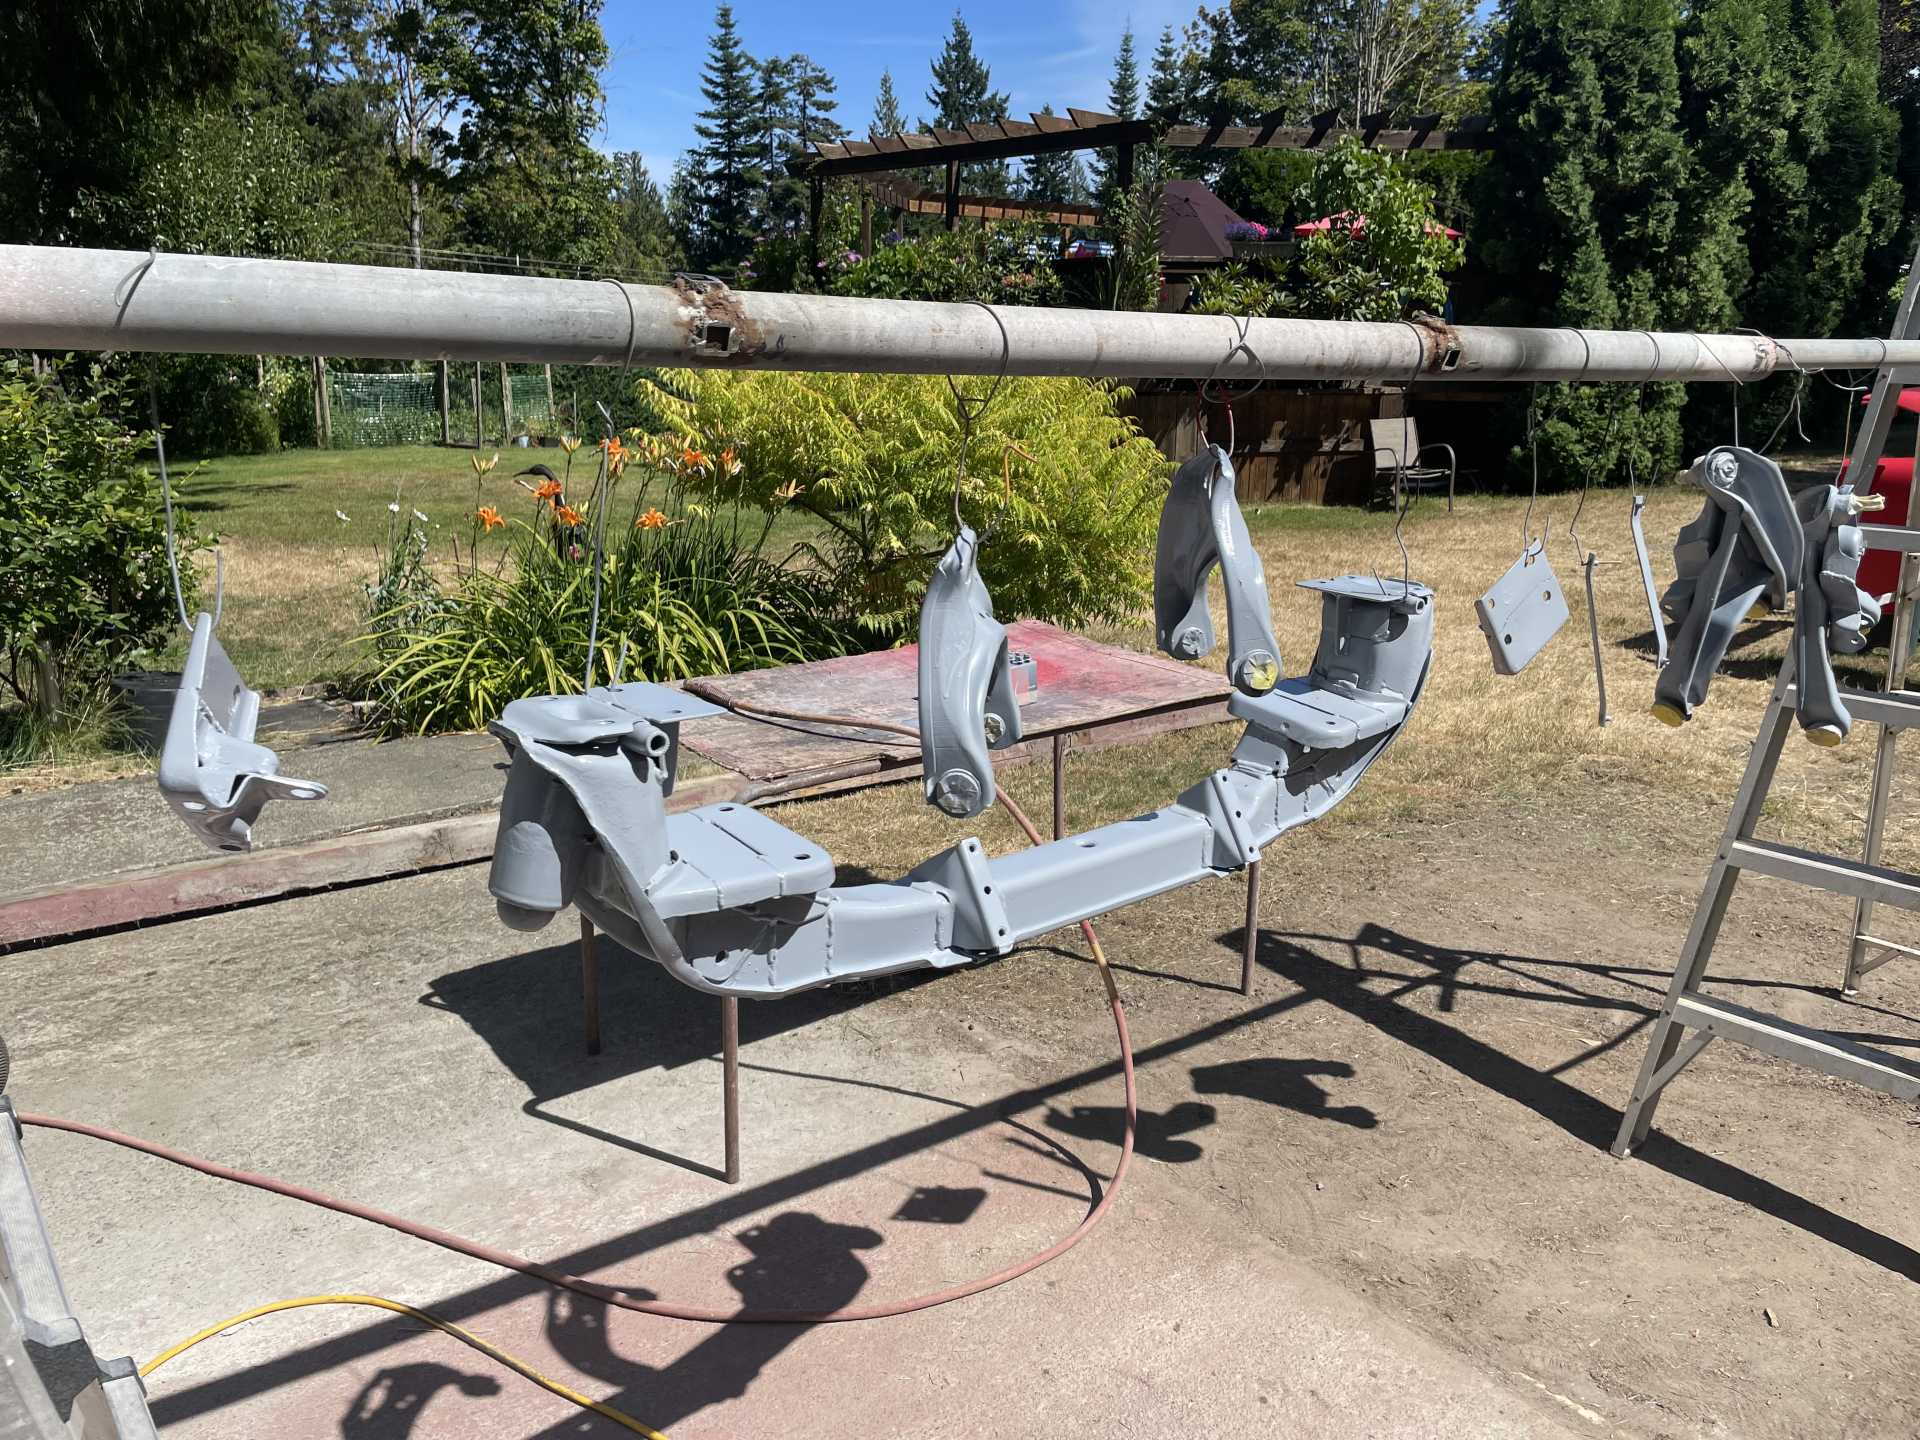
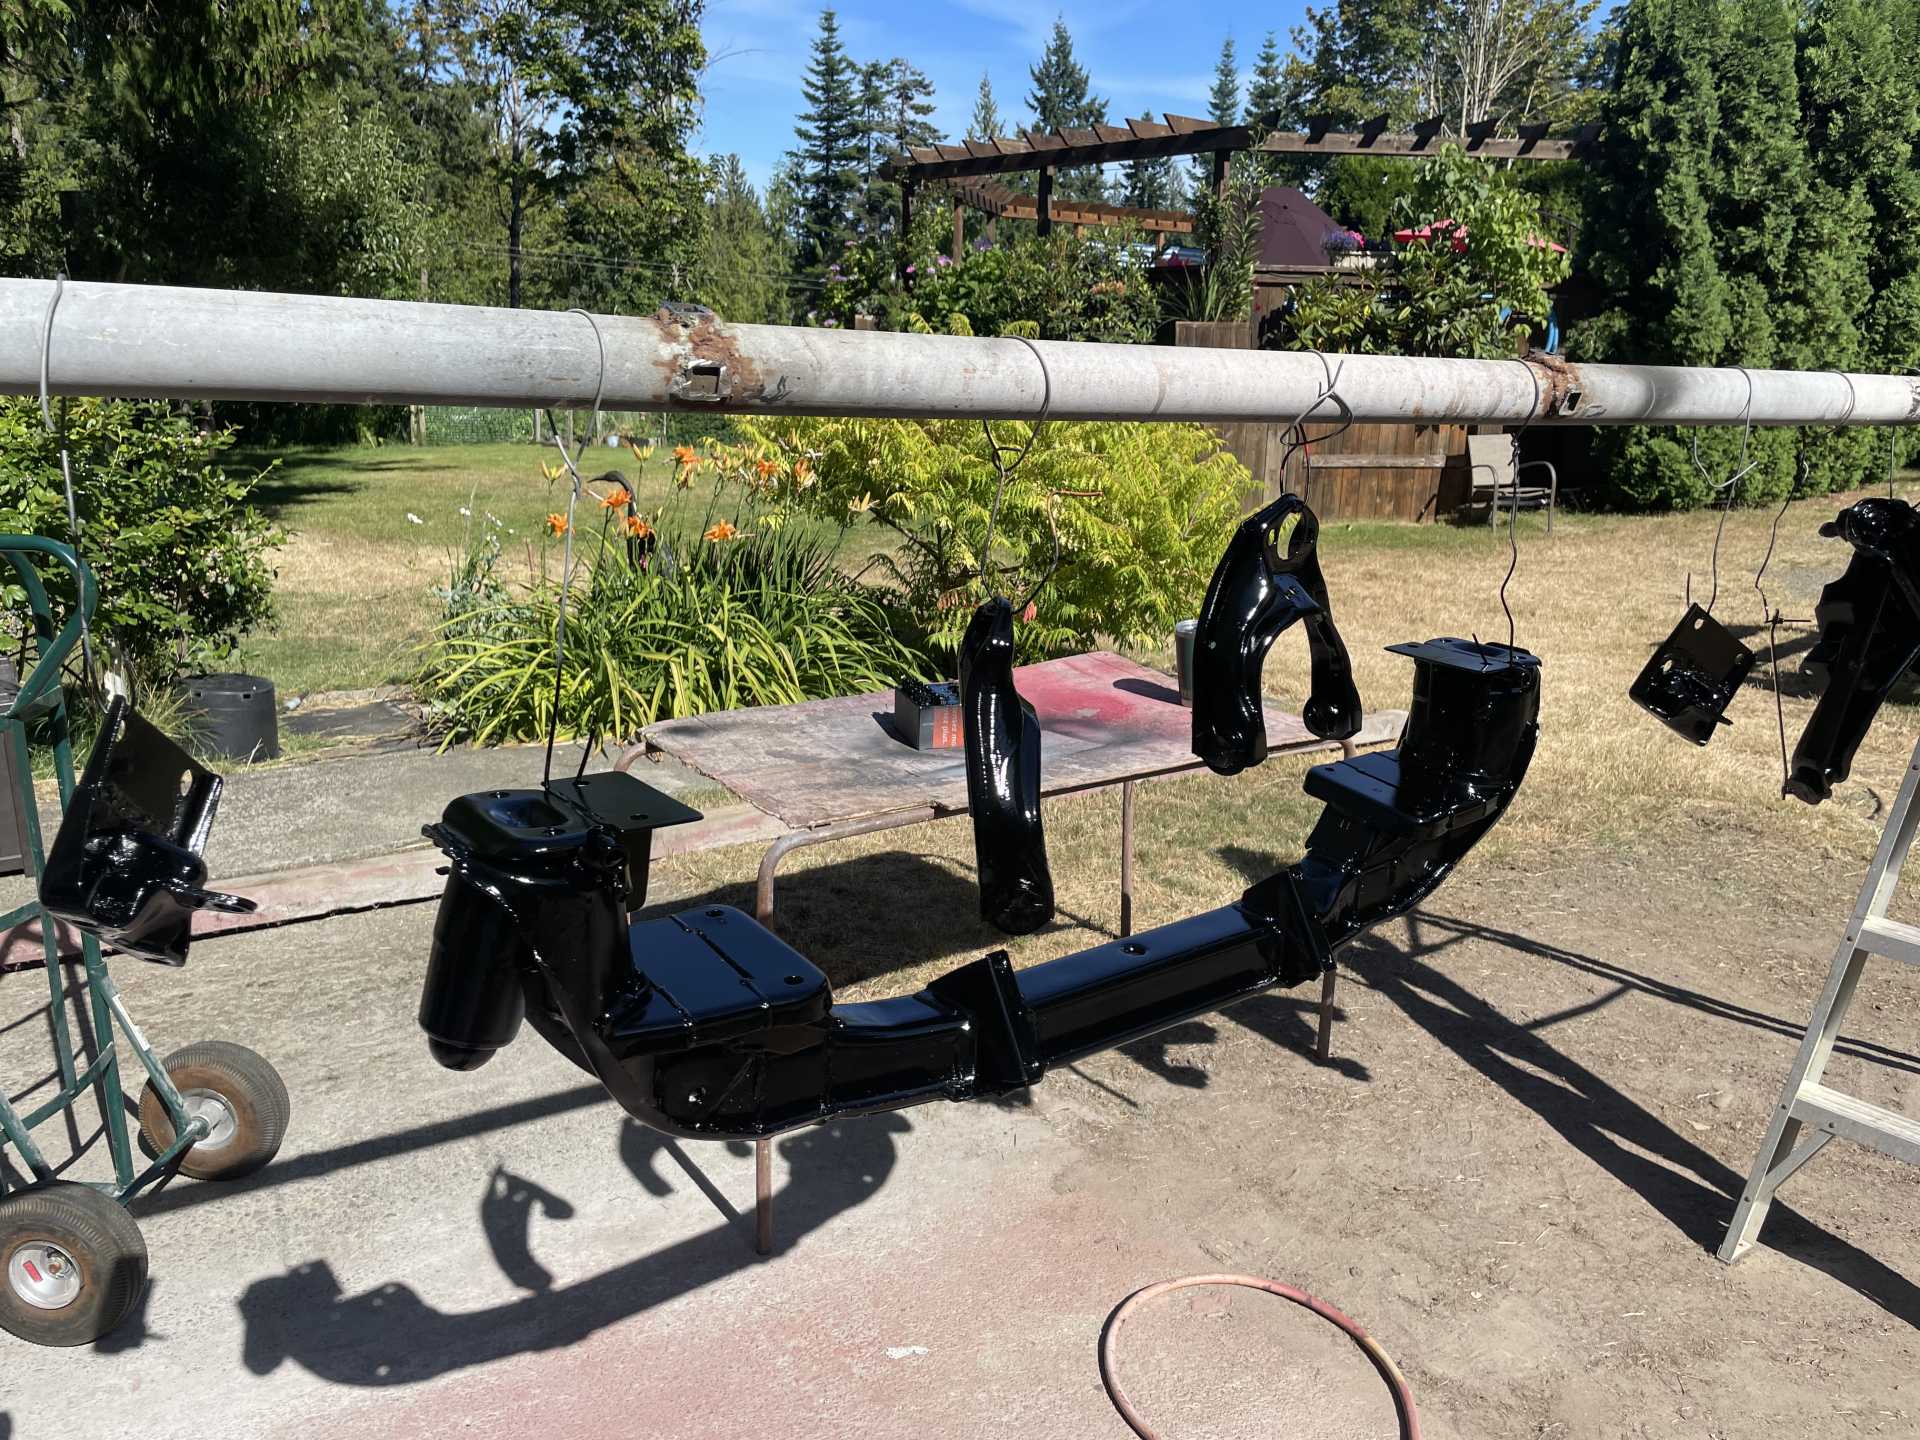
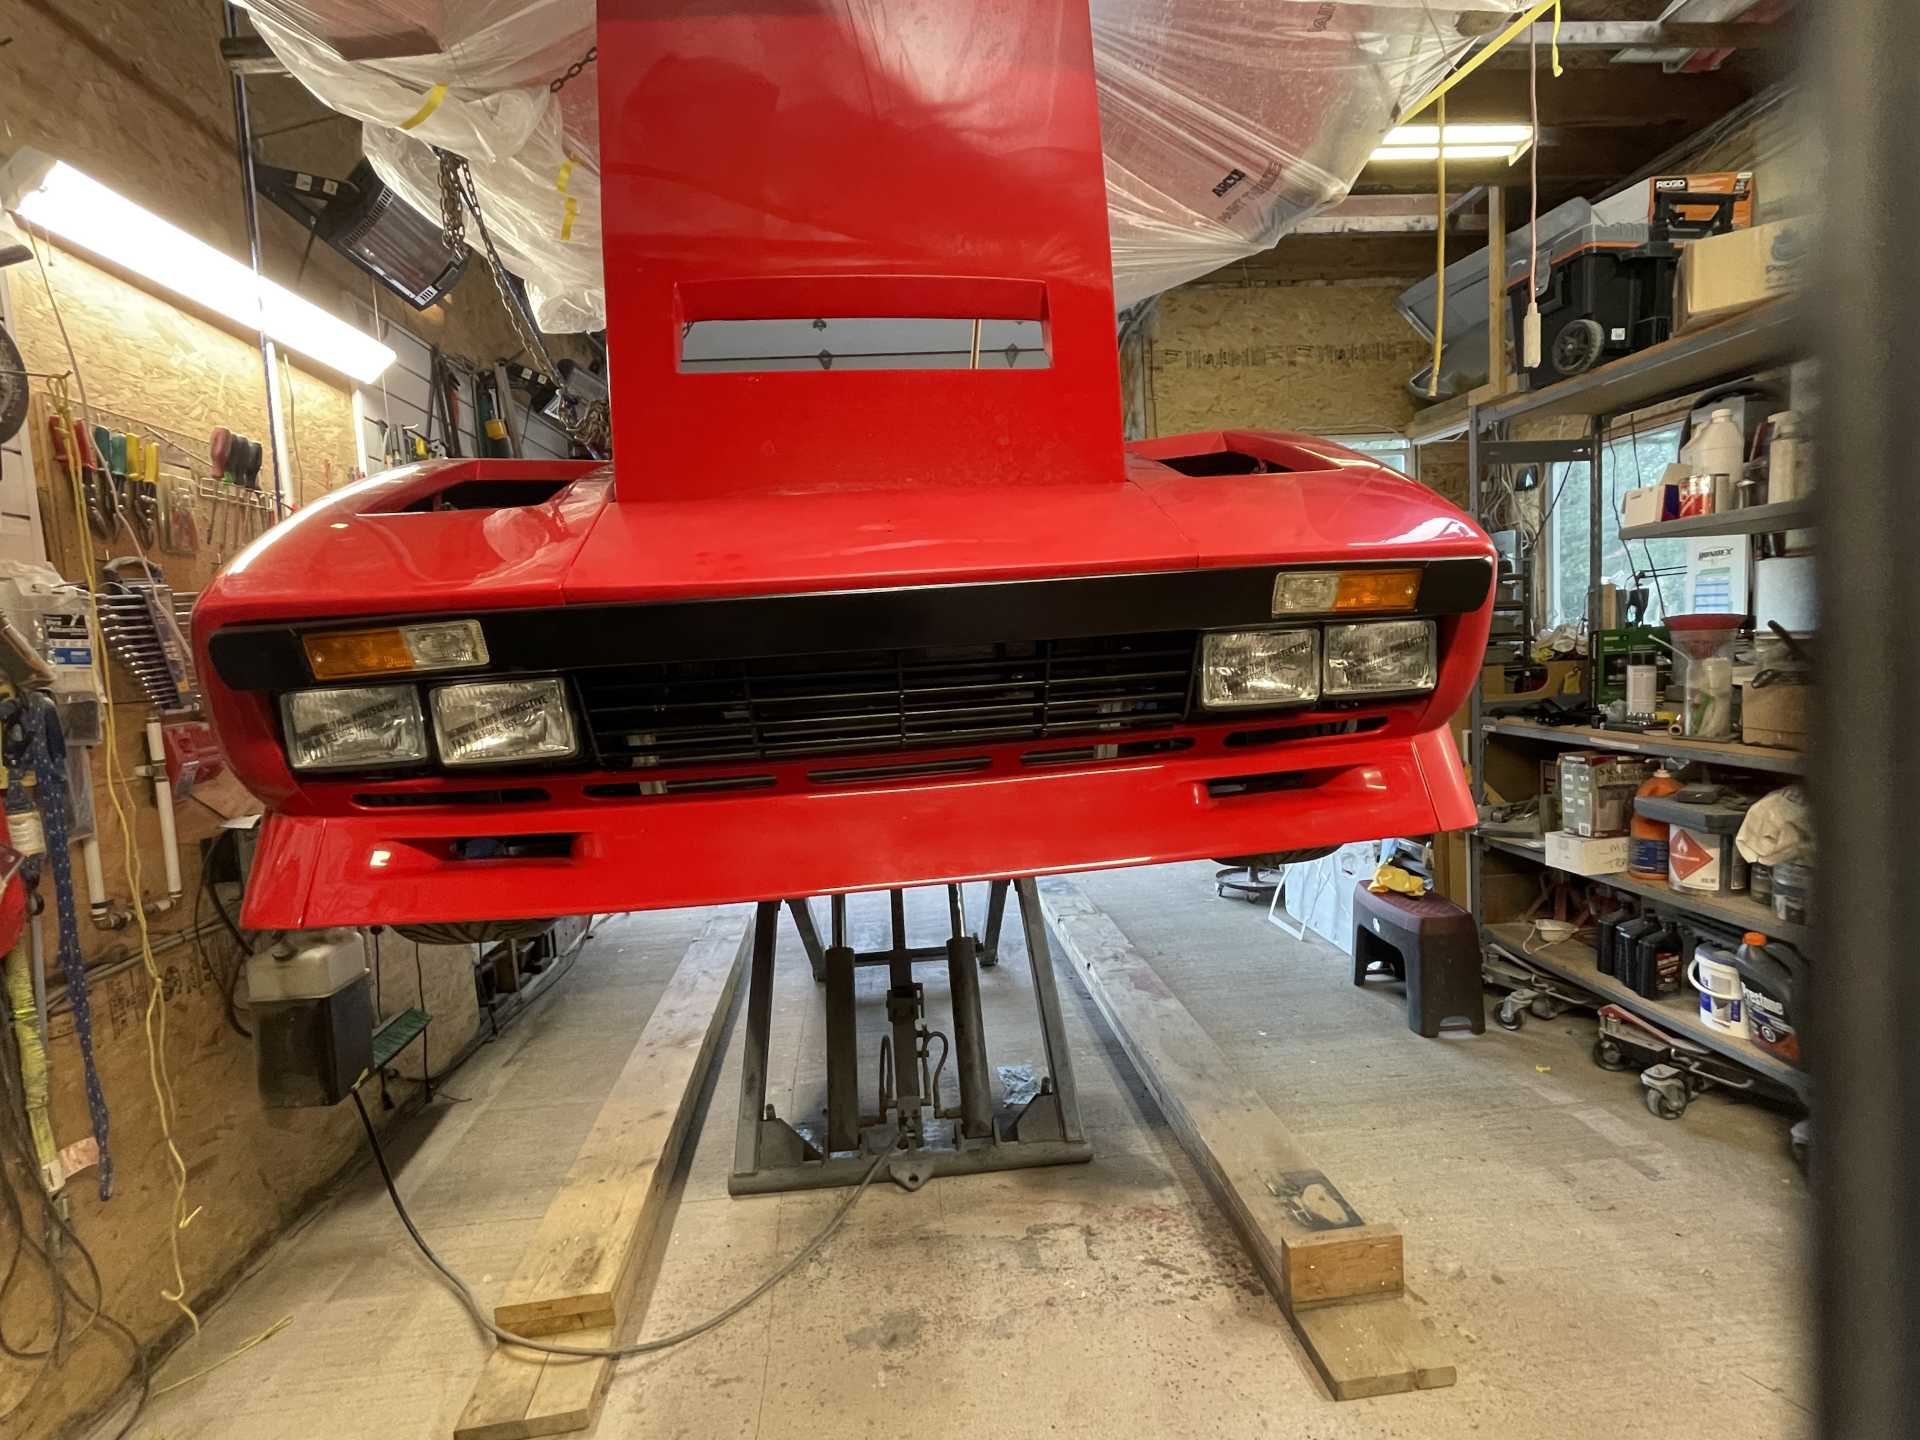
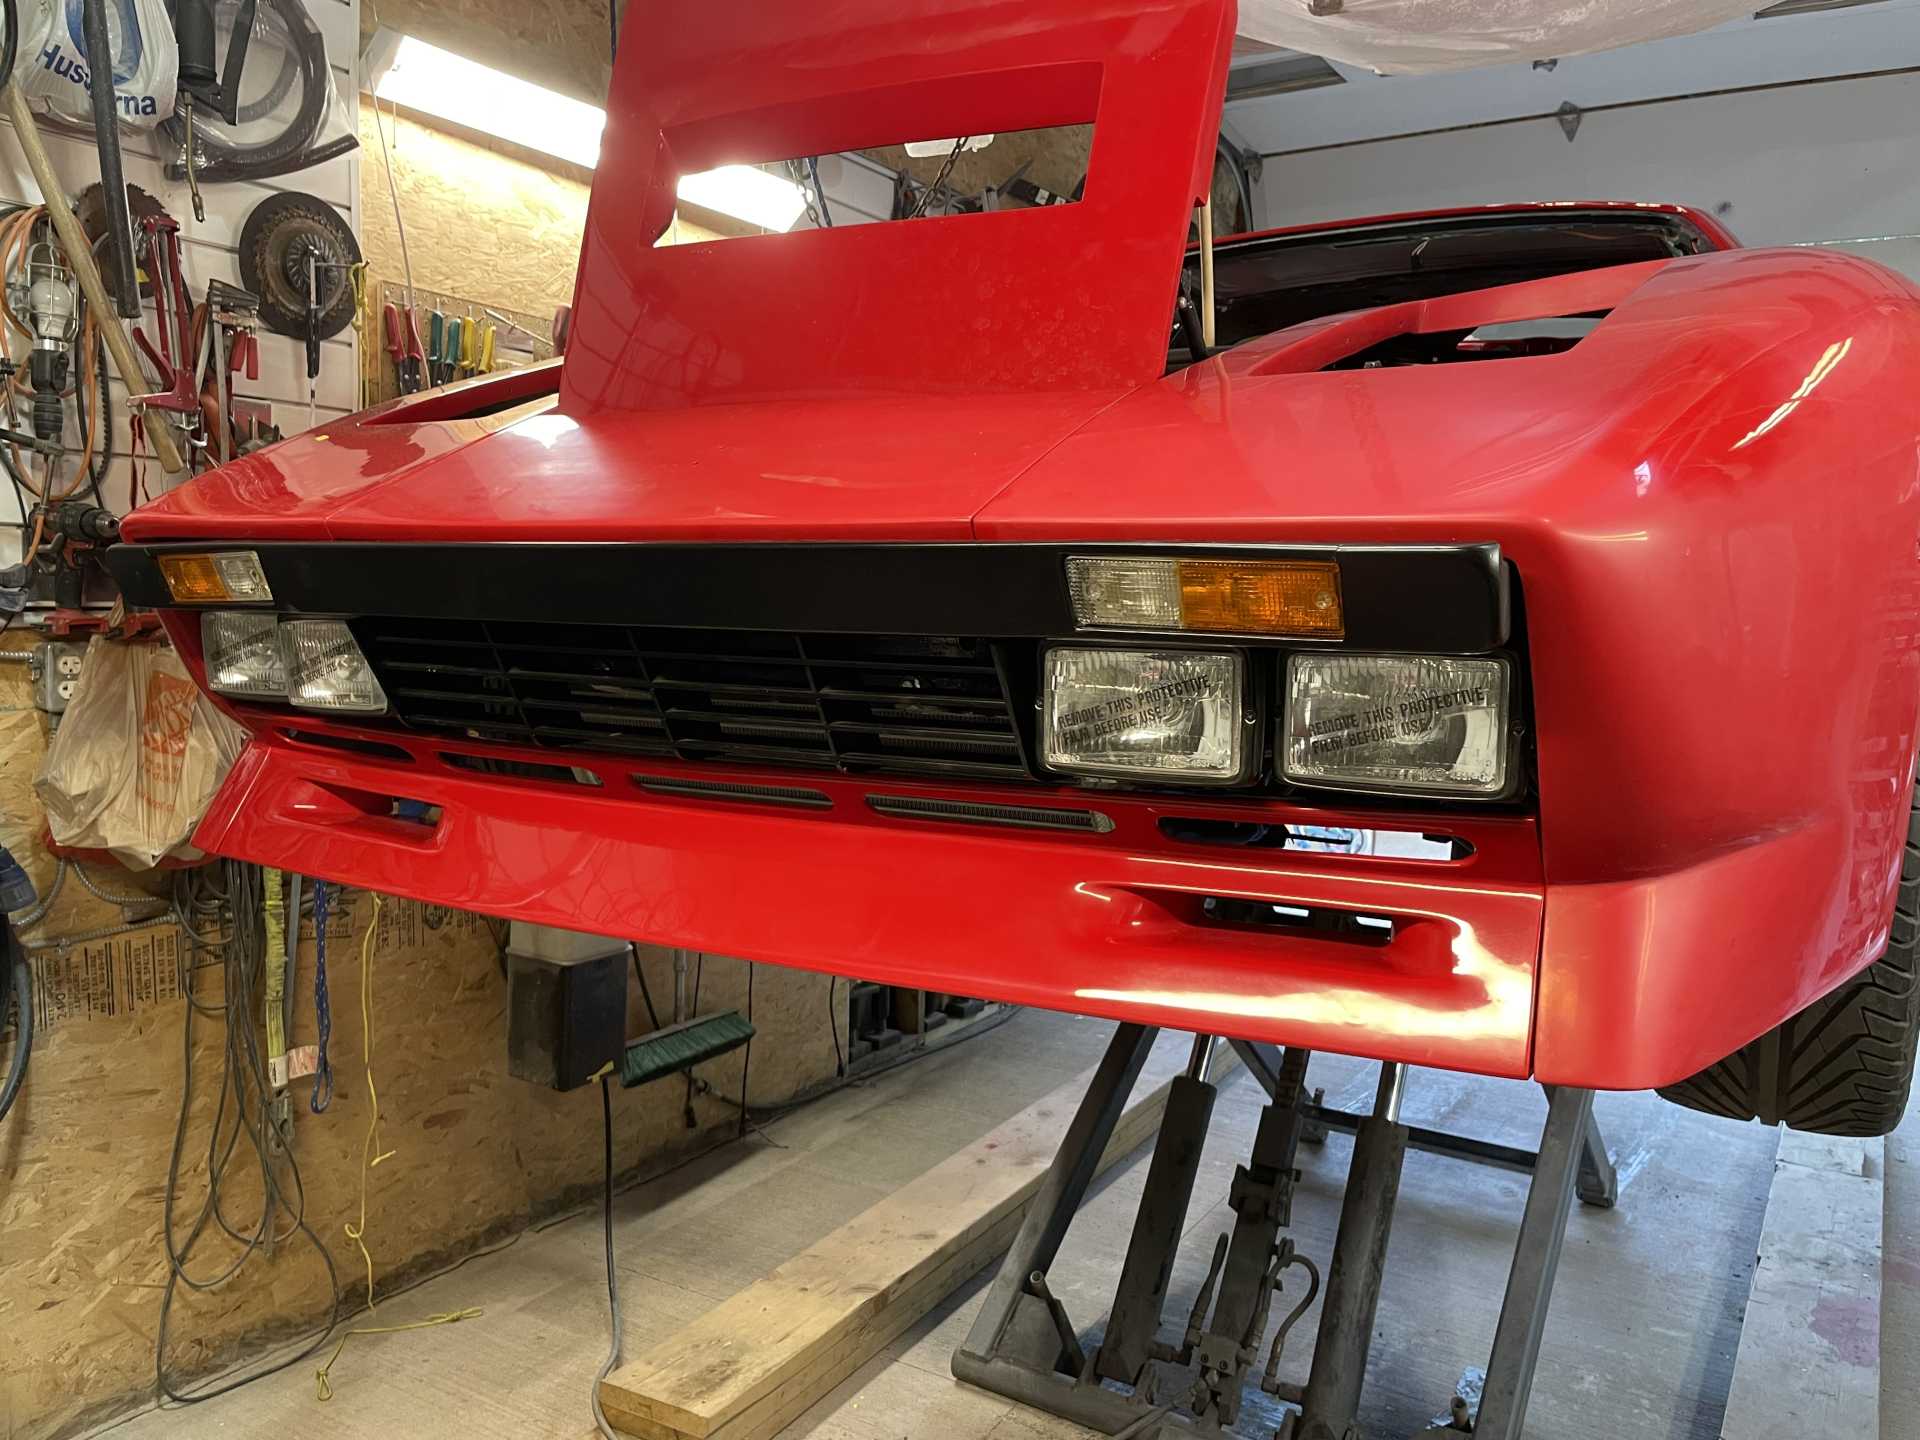
Well the front is now completed except for new longer boots for the steering rack and a new longer sway bar, both need to be sourced and ordered. With the extended cross member out, I prepared all the front suspension parts for paint “ hot rod black” same paint I used for the front trunk.
I cleaned everything with a degreaser then sprayed everything with epoxy primer
Then 30 minutes later sprayed with hot rod black
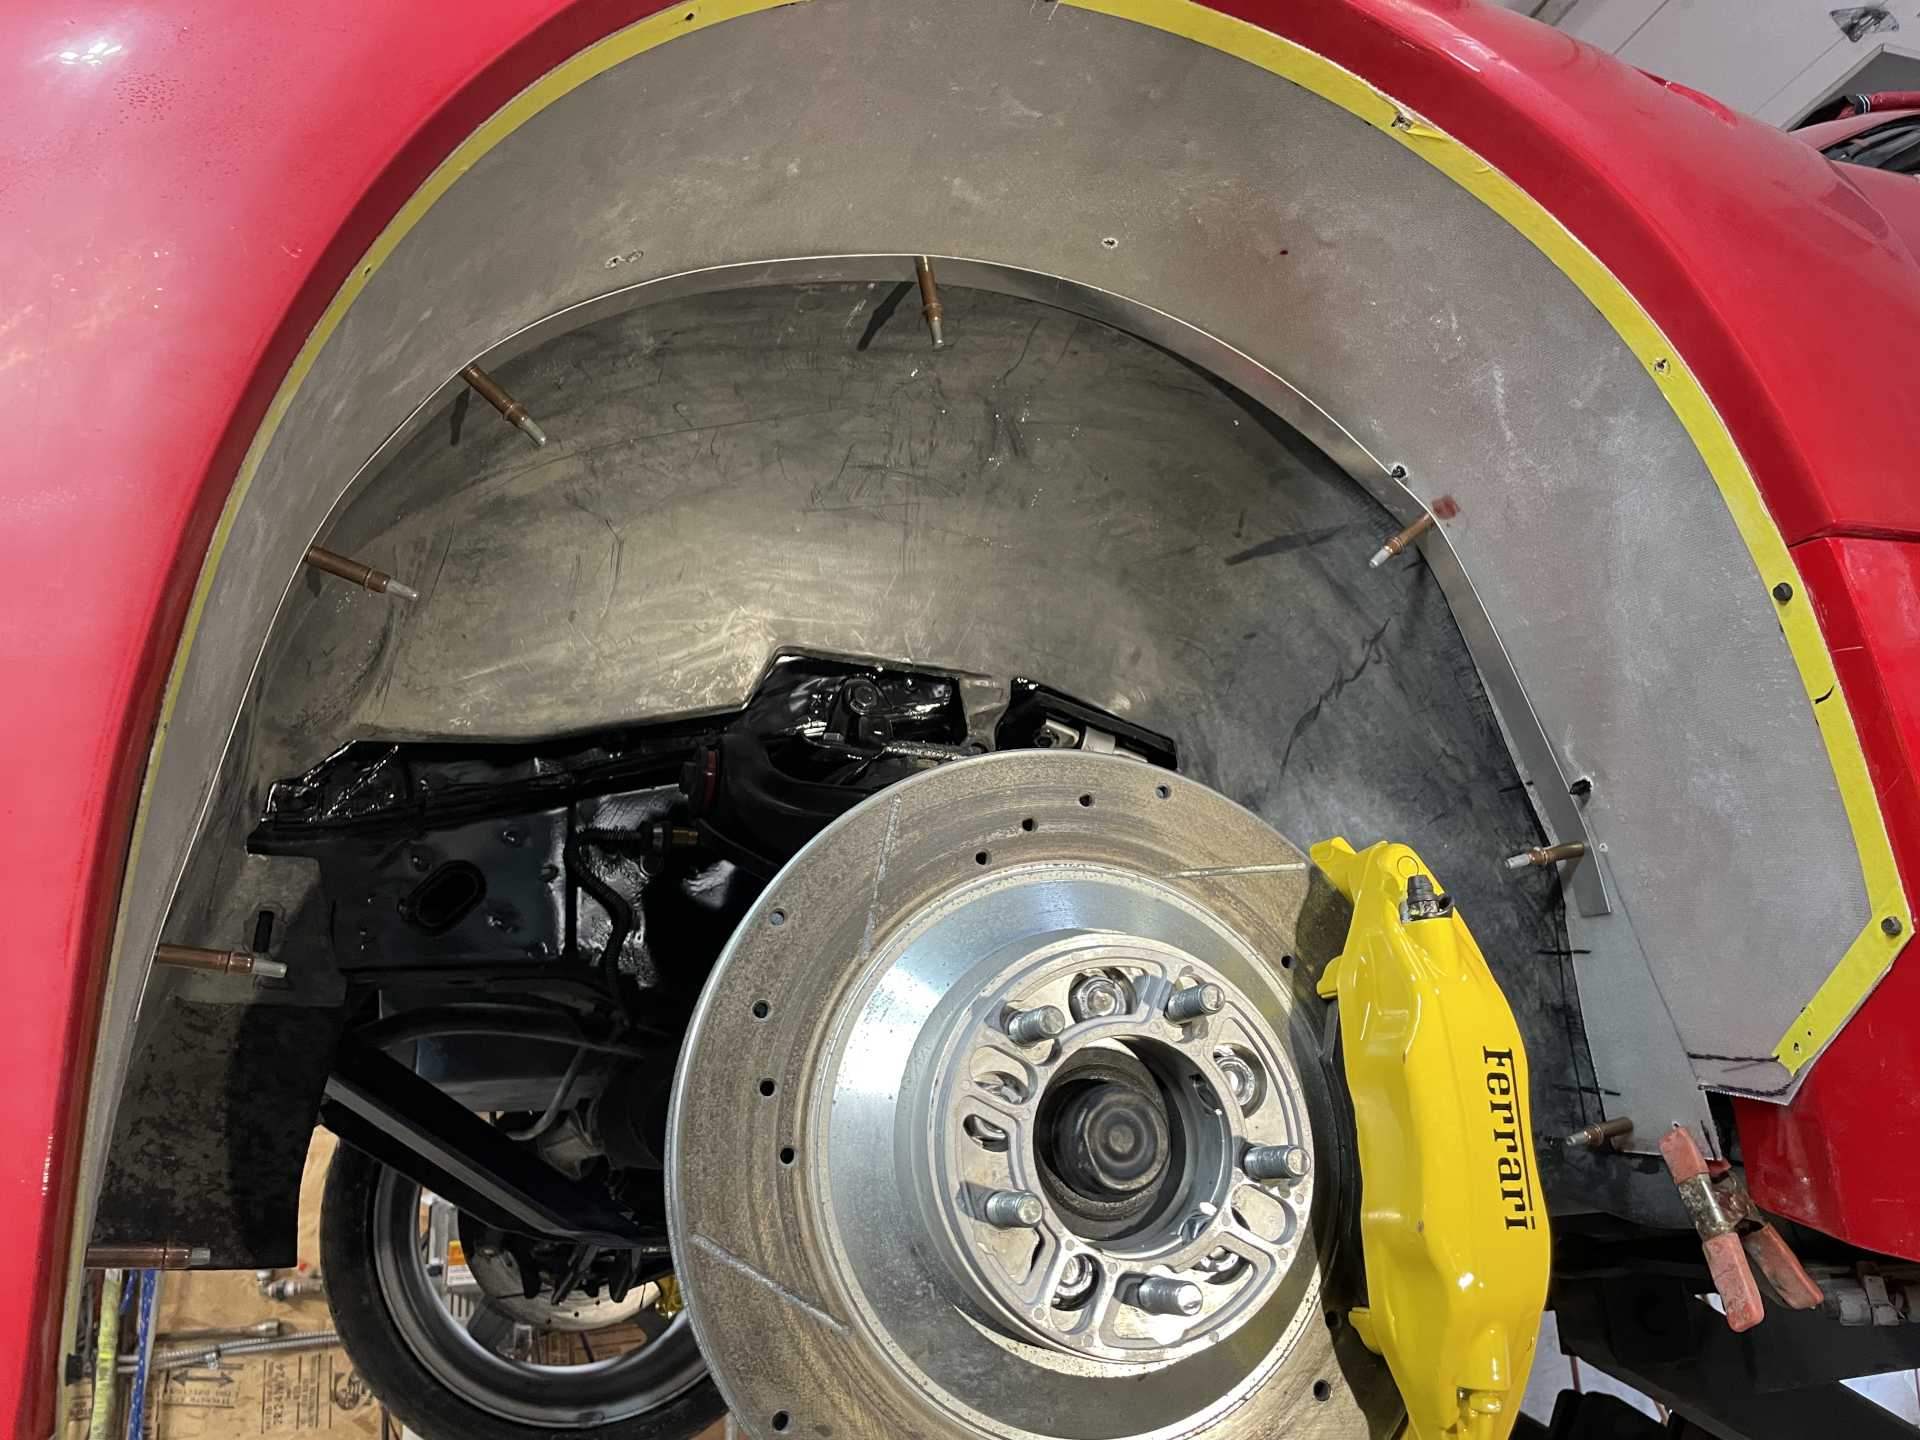
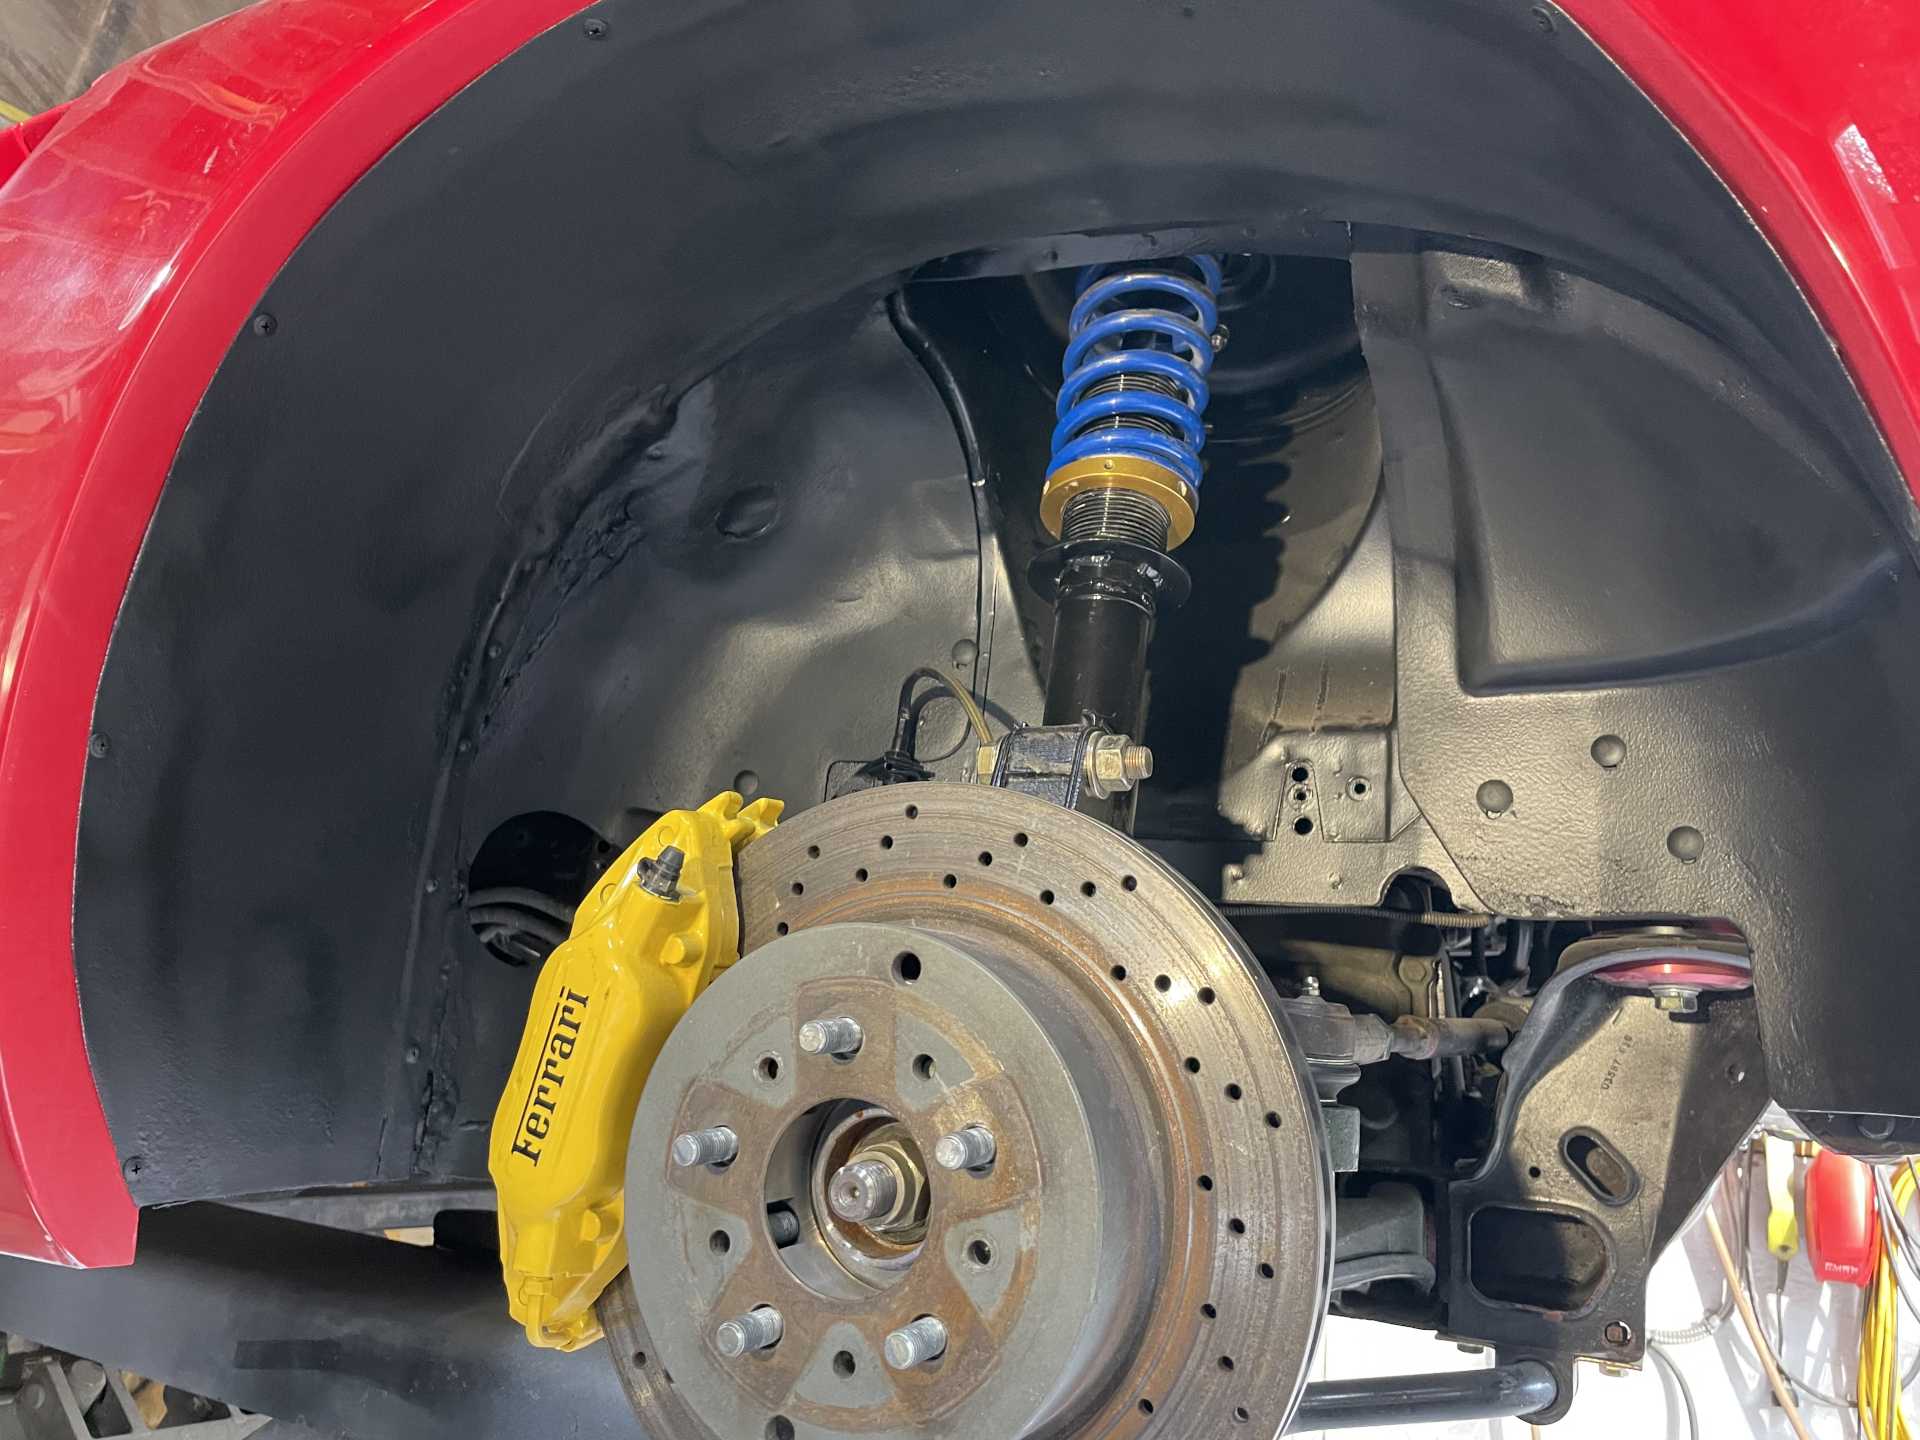
While everything was apart I cleaned and prepared the wheel well for a coat of black
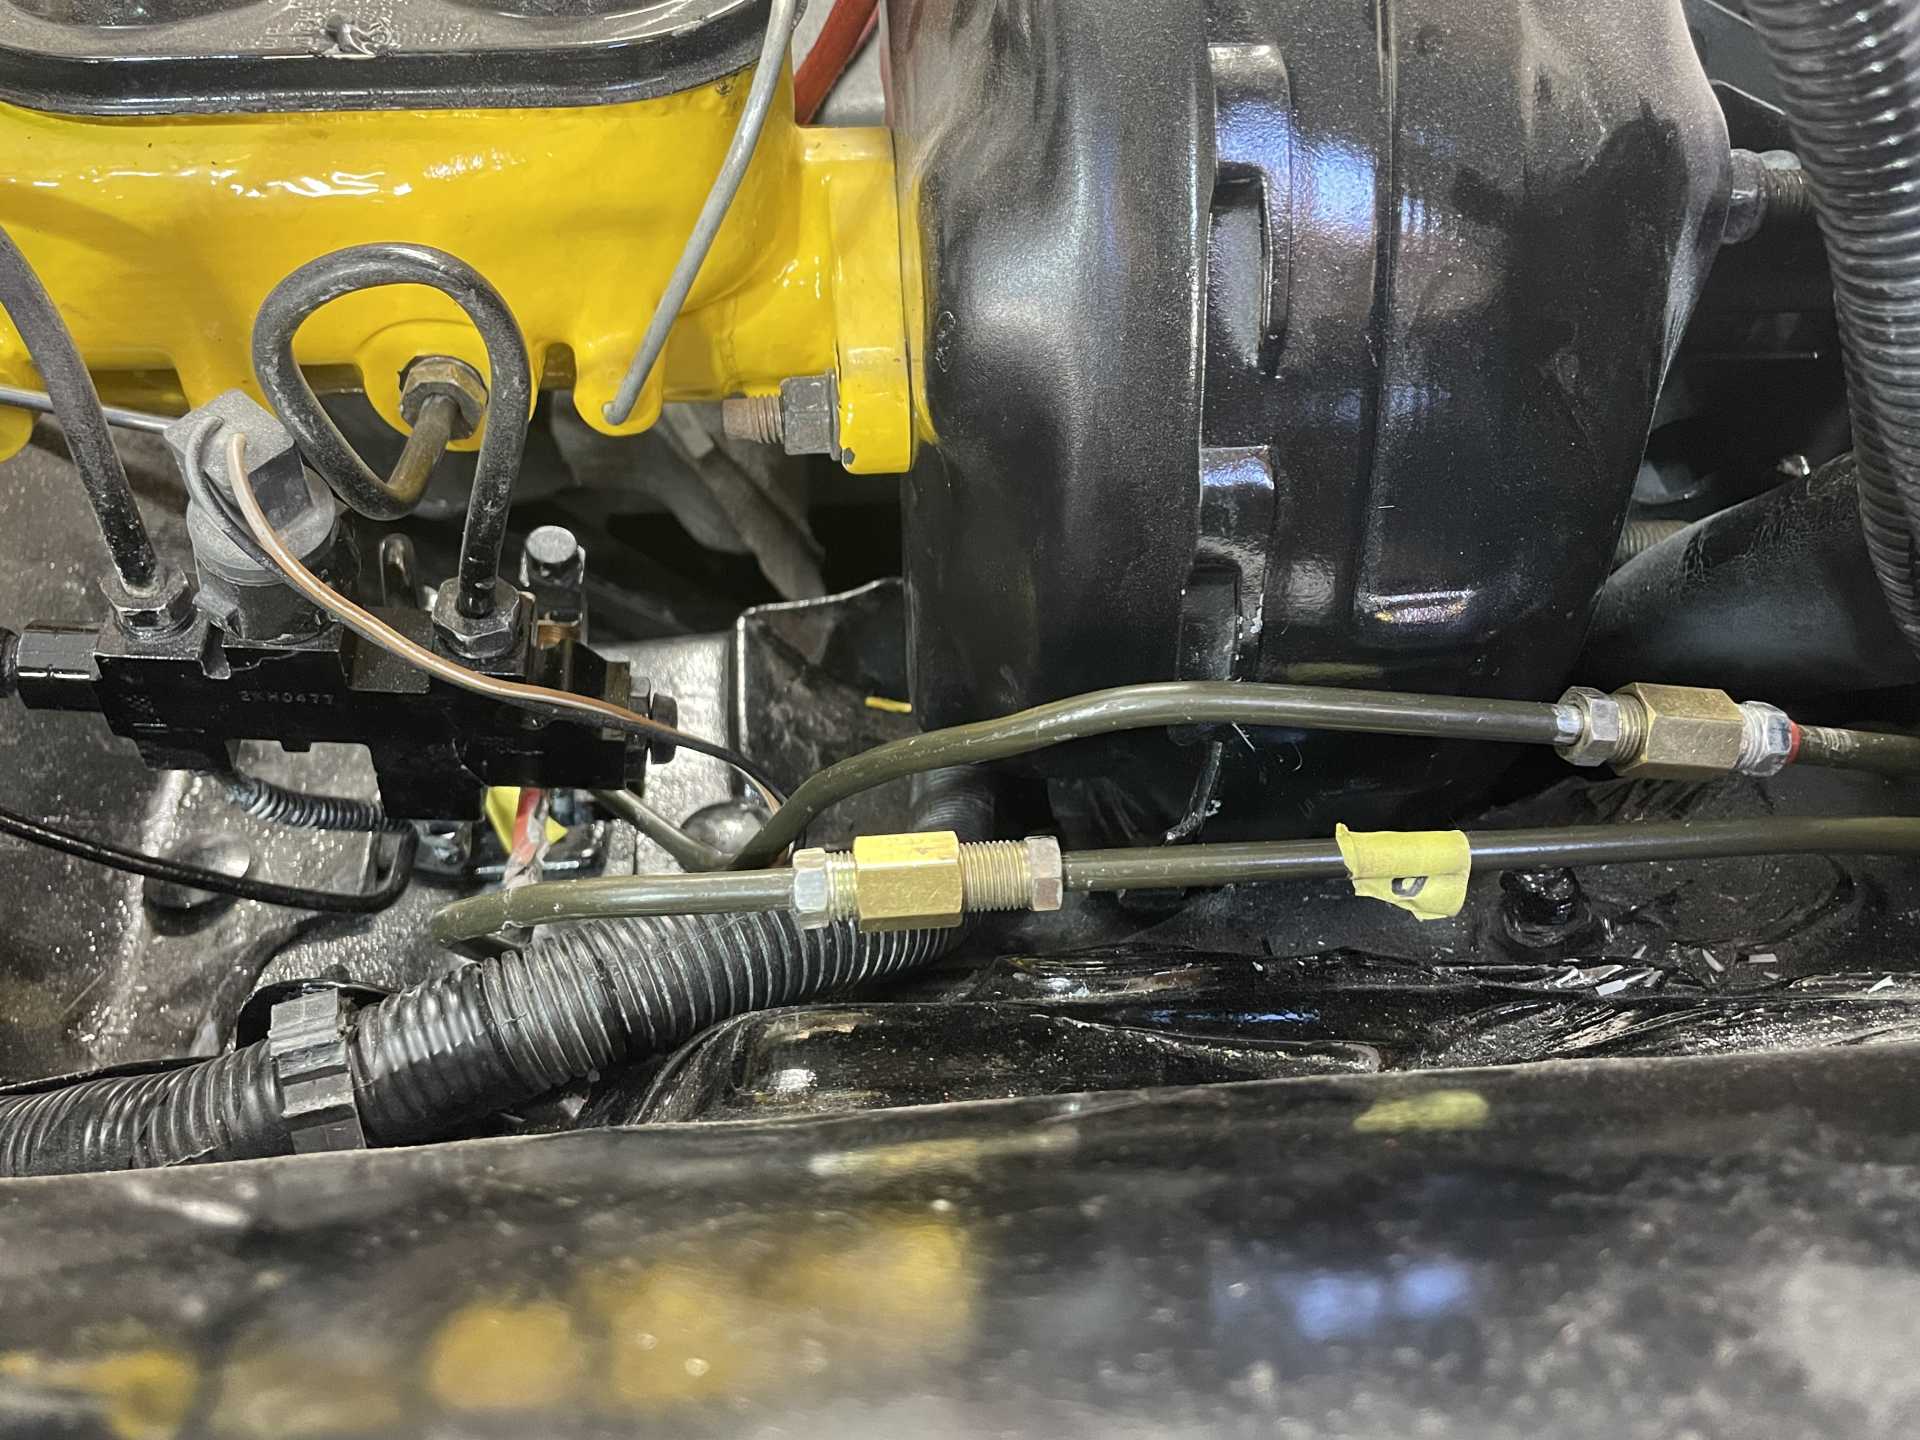
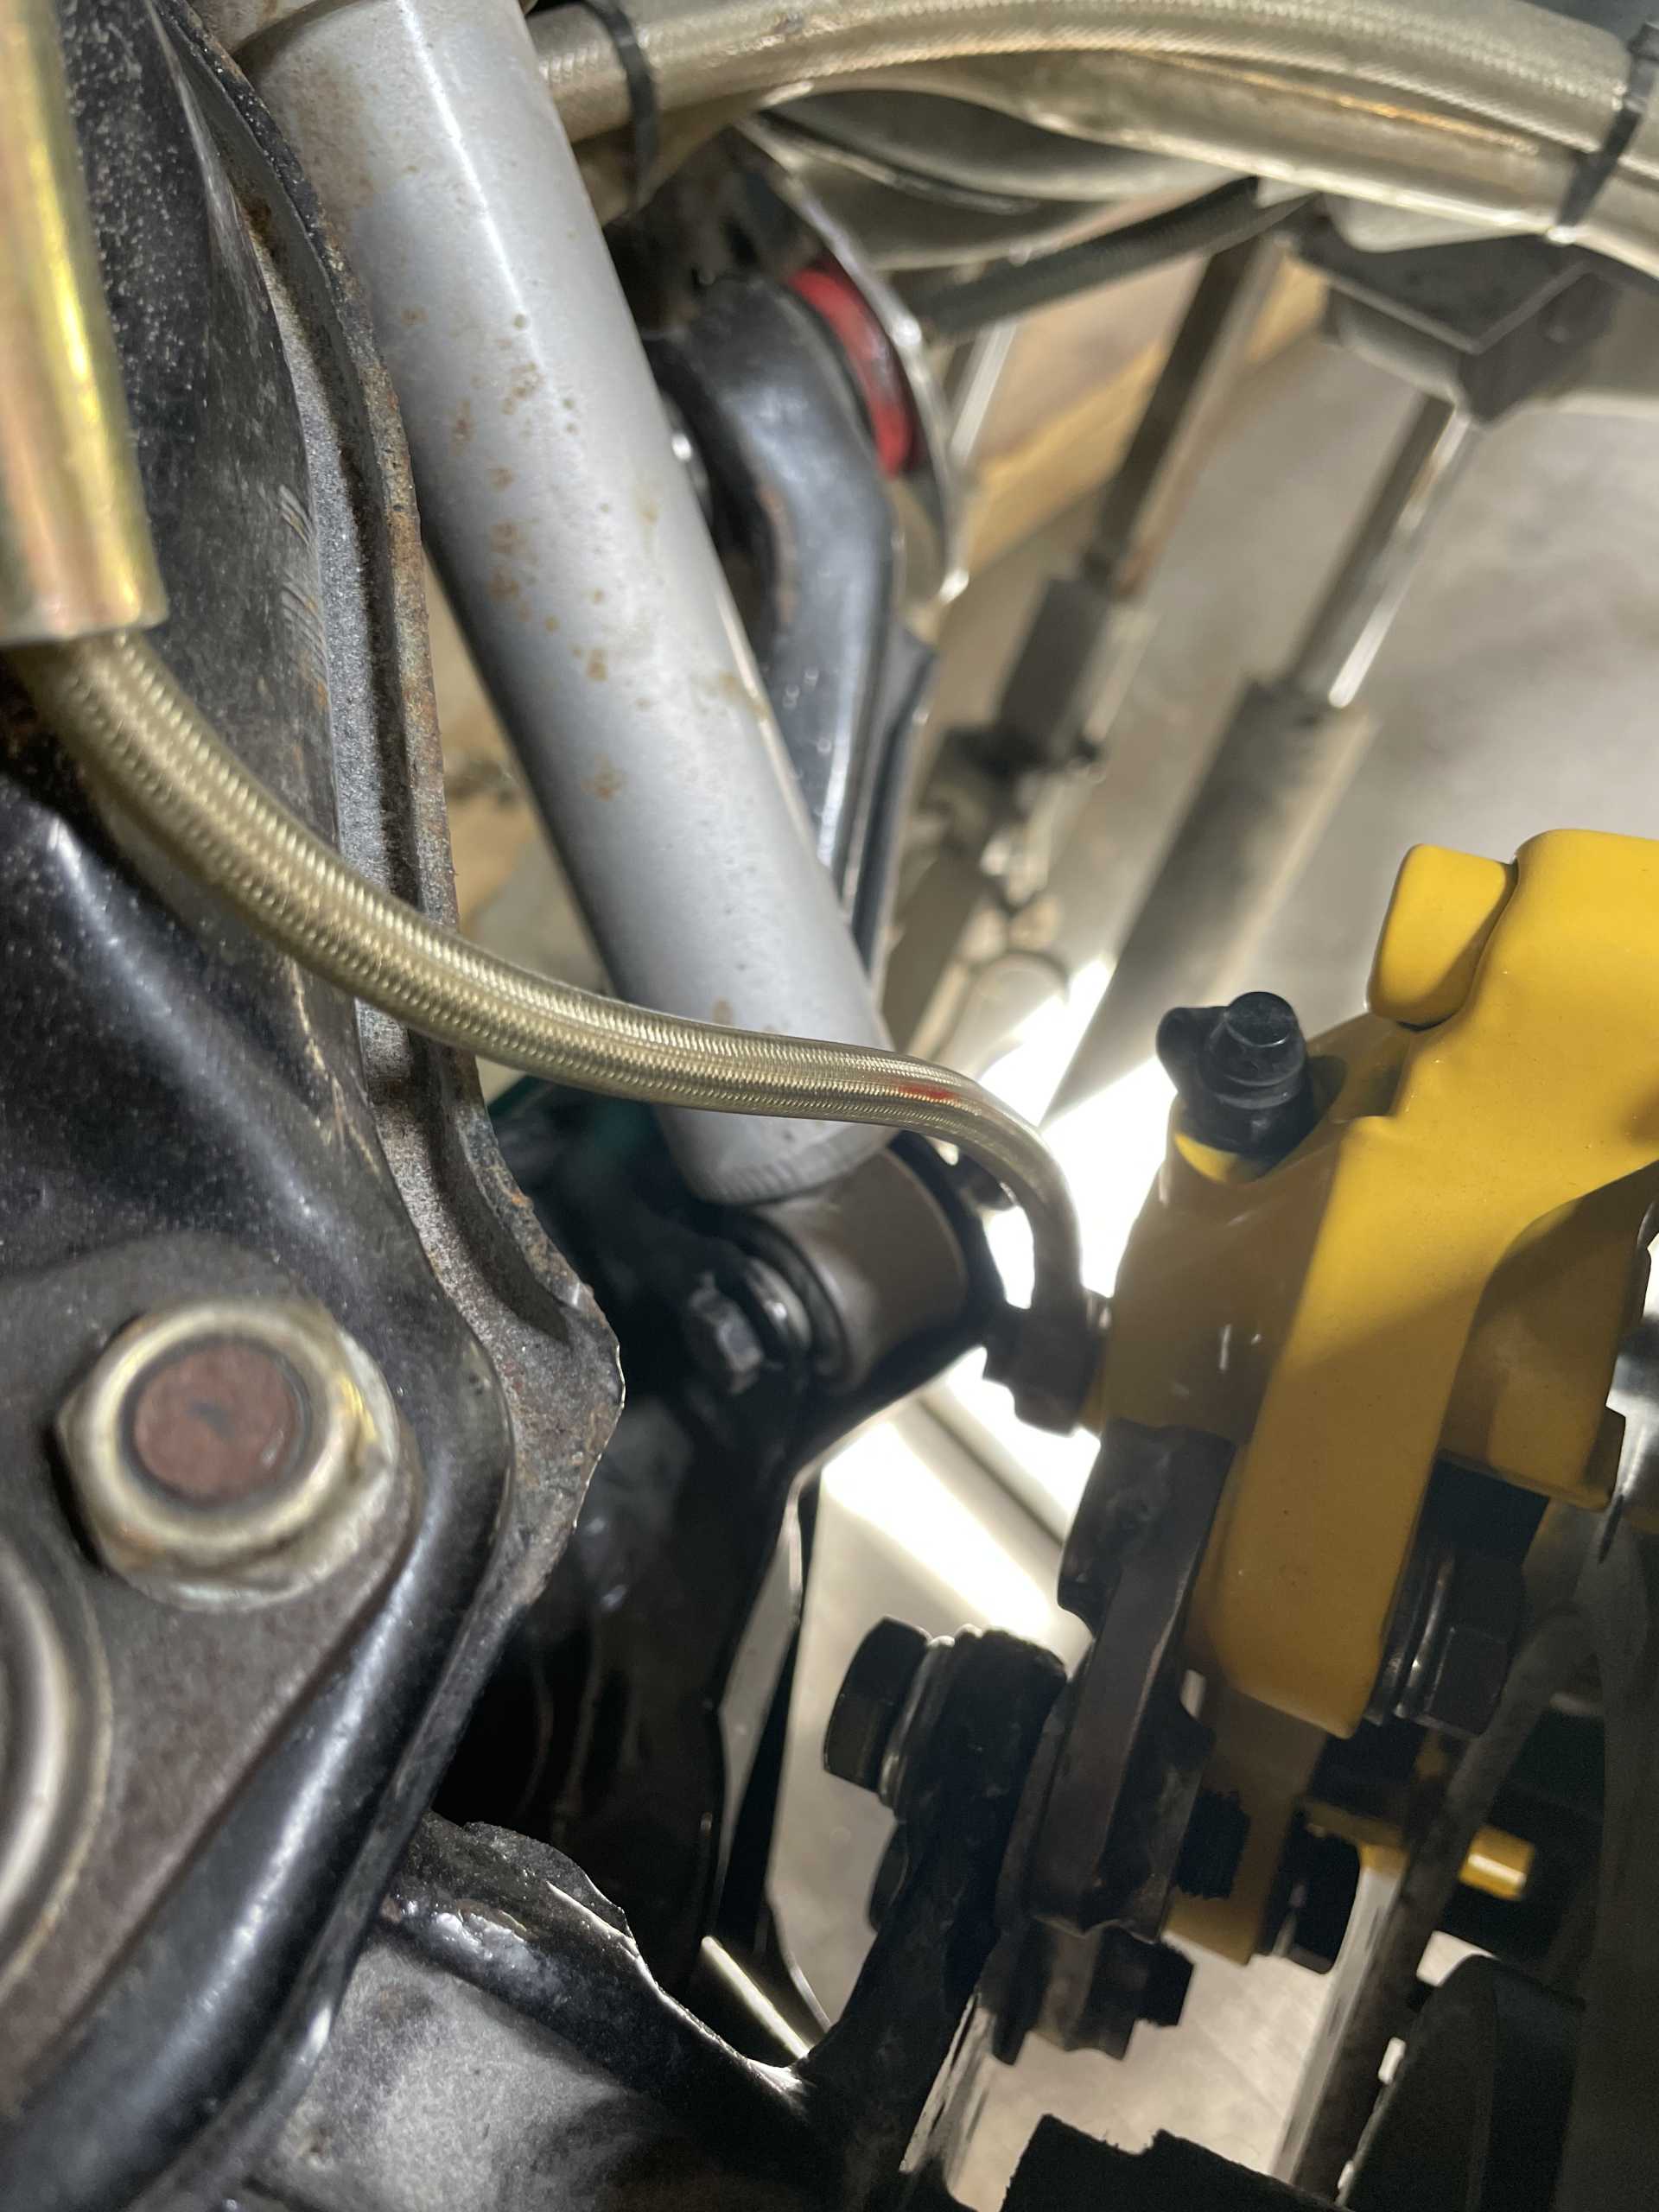
I completed the brake hard lines and installed steel braided lines
I left everything overnight to ensure a firm finish before handling and and installing The compete suspension.
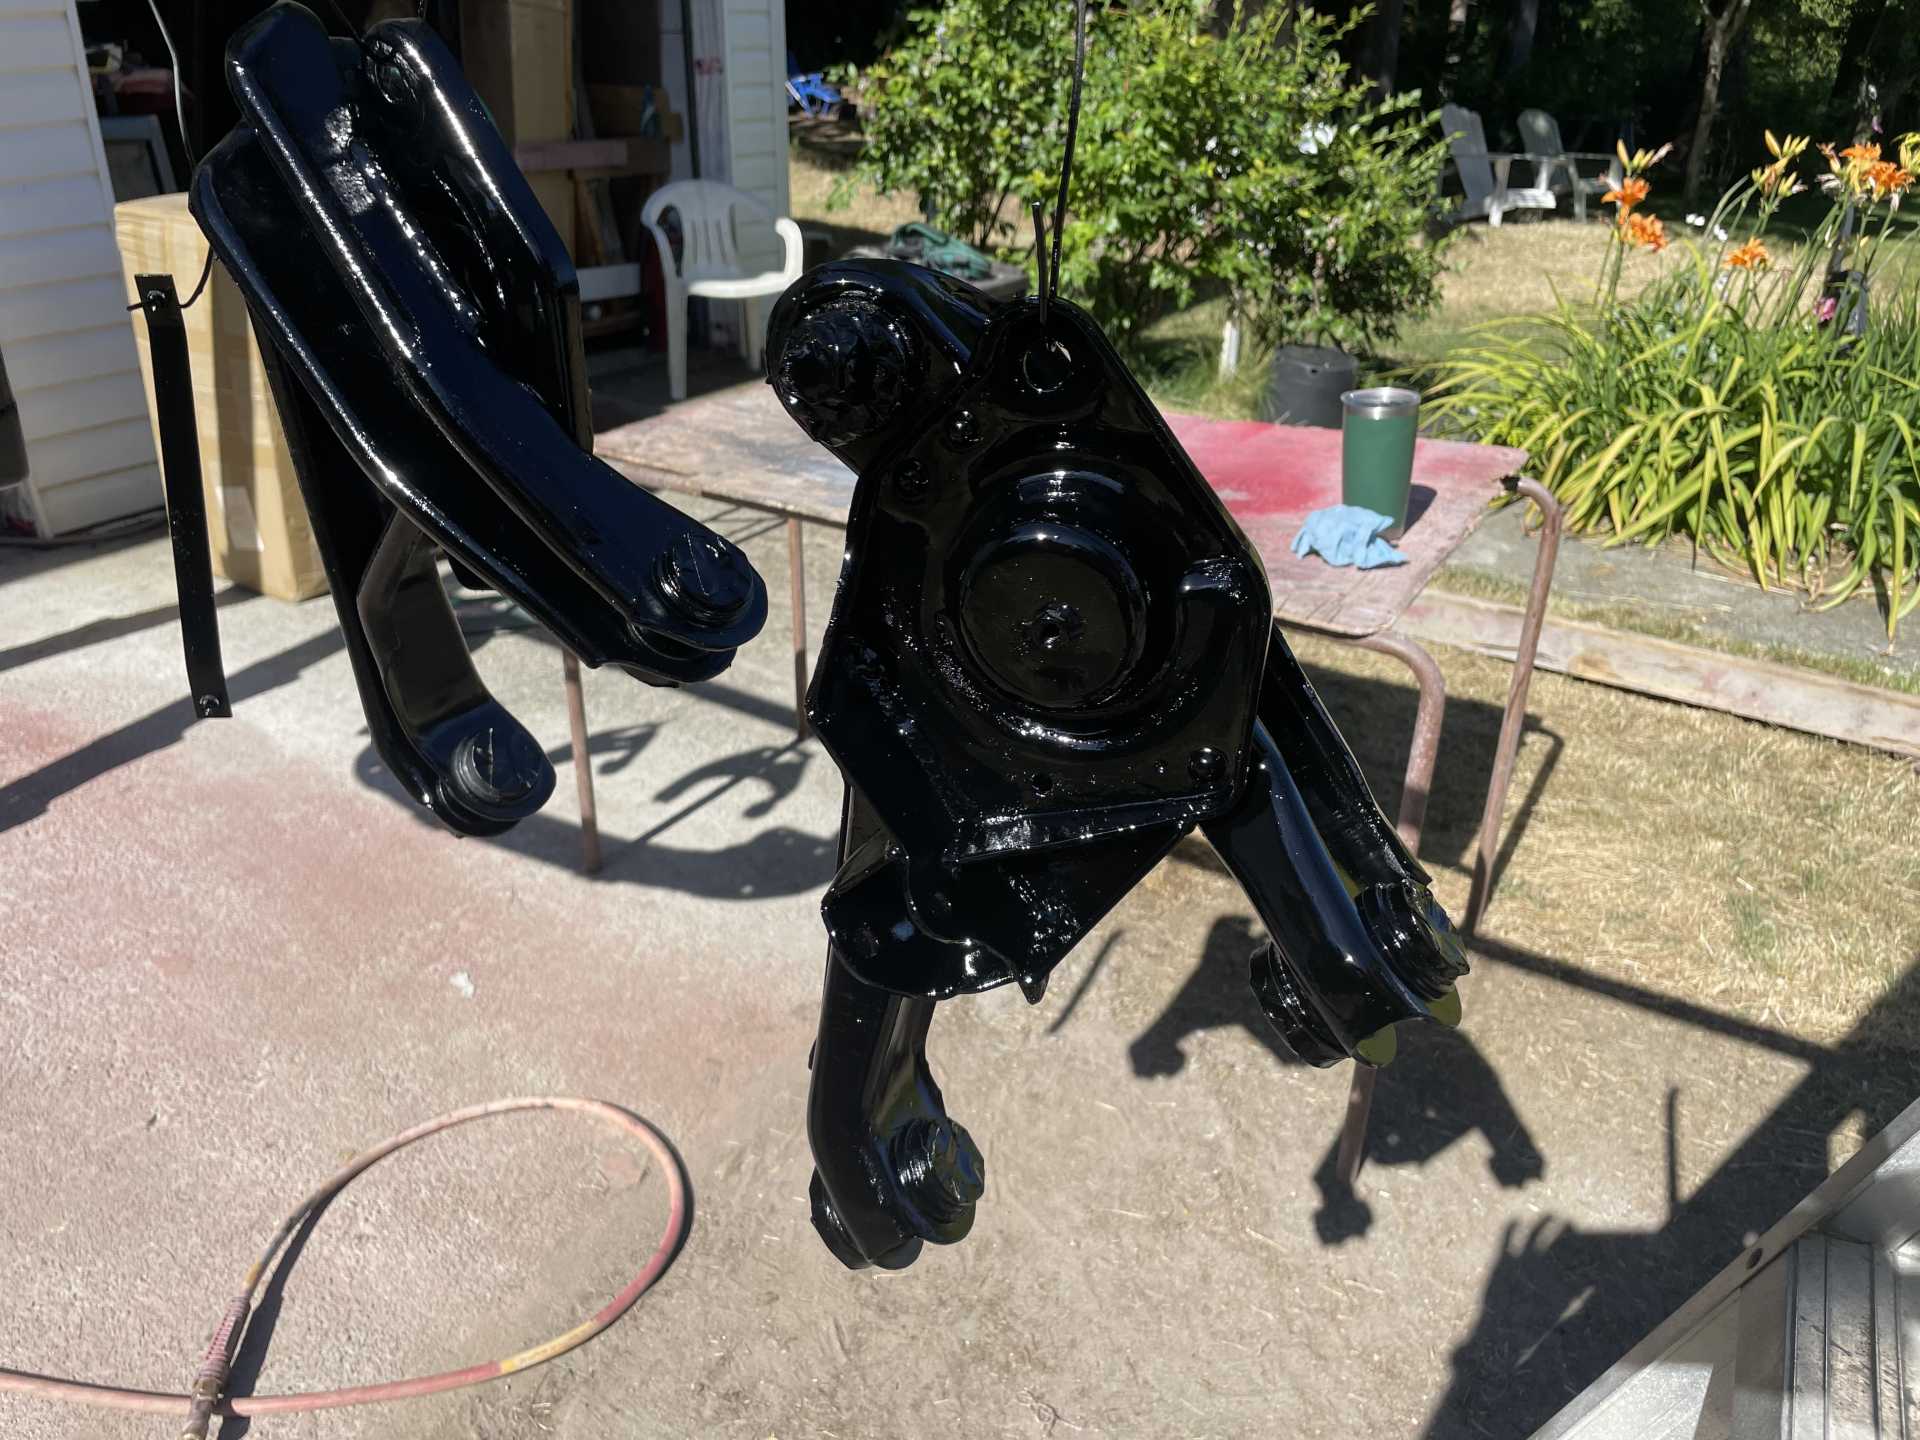
At the same time this was going on I painted the brake adapters that my buddy Phil fabricated for my Brembo brakes
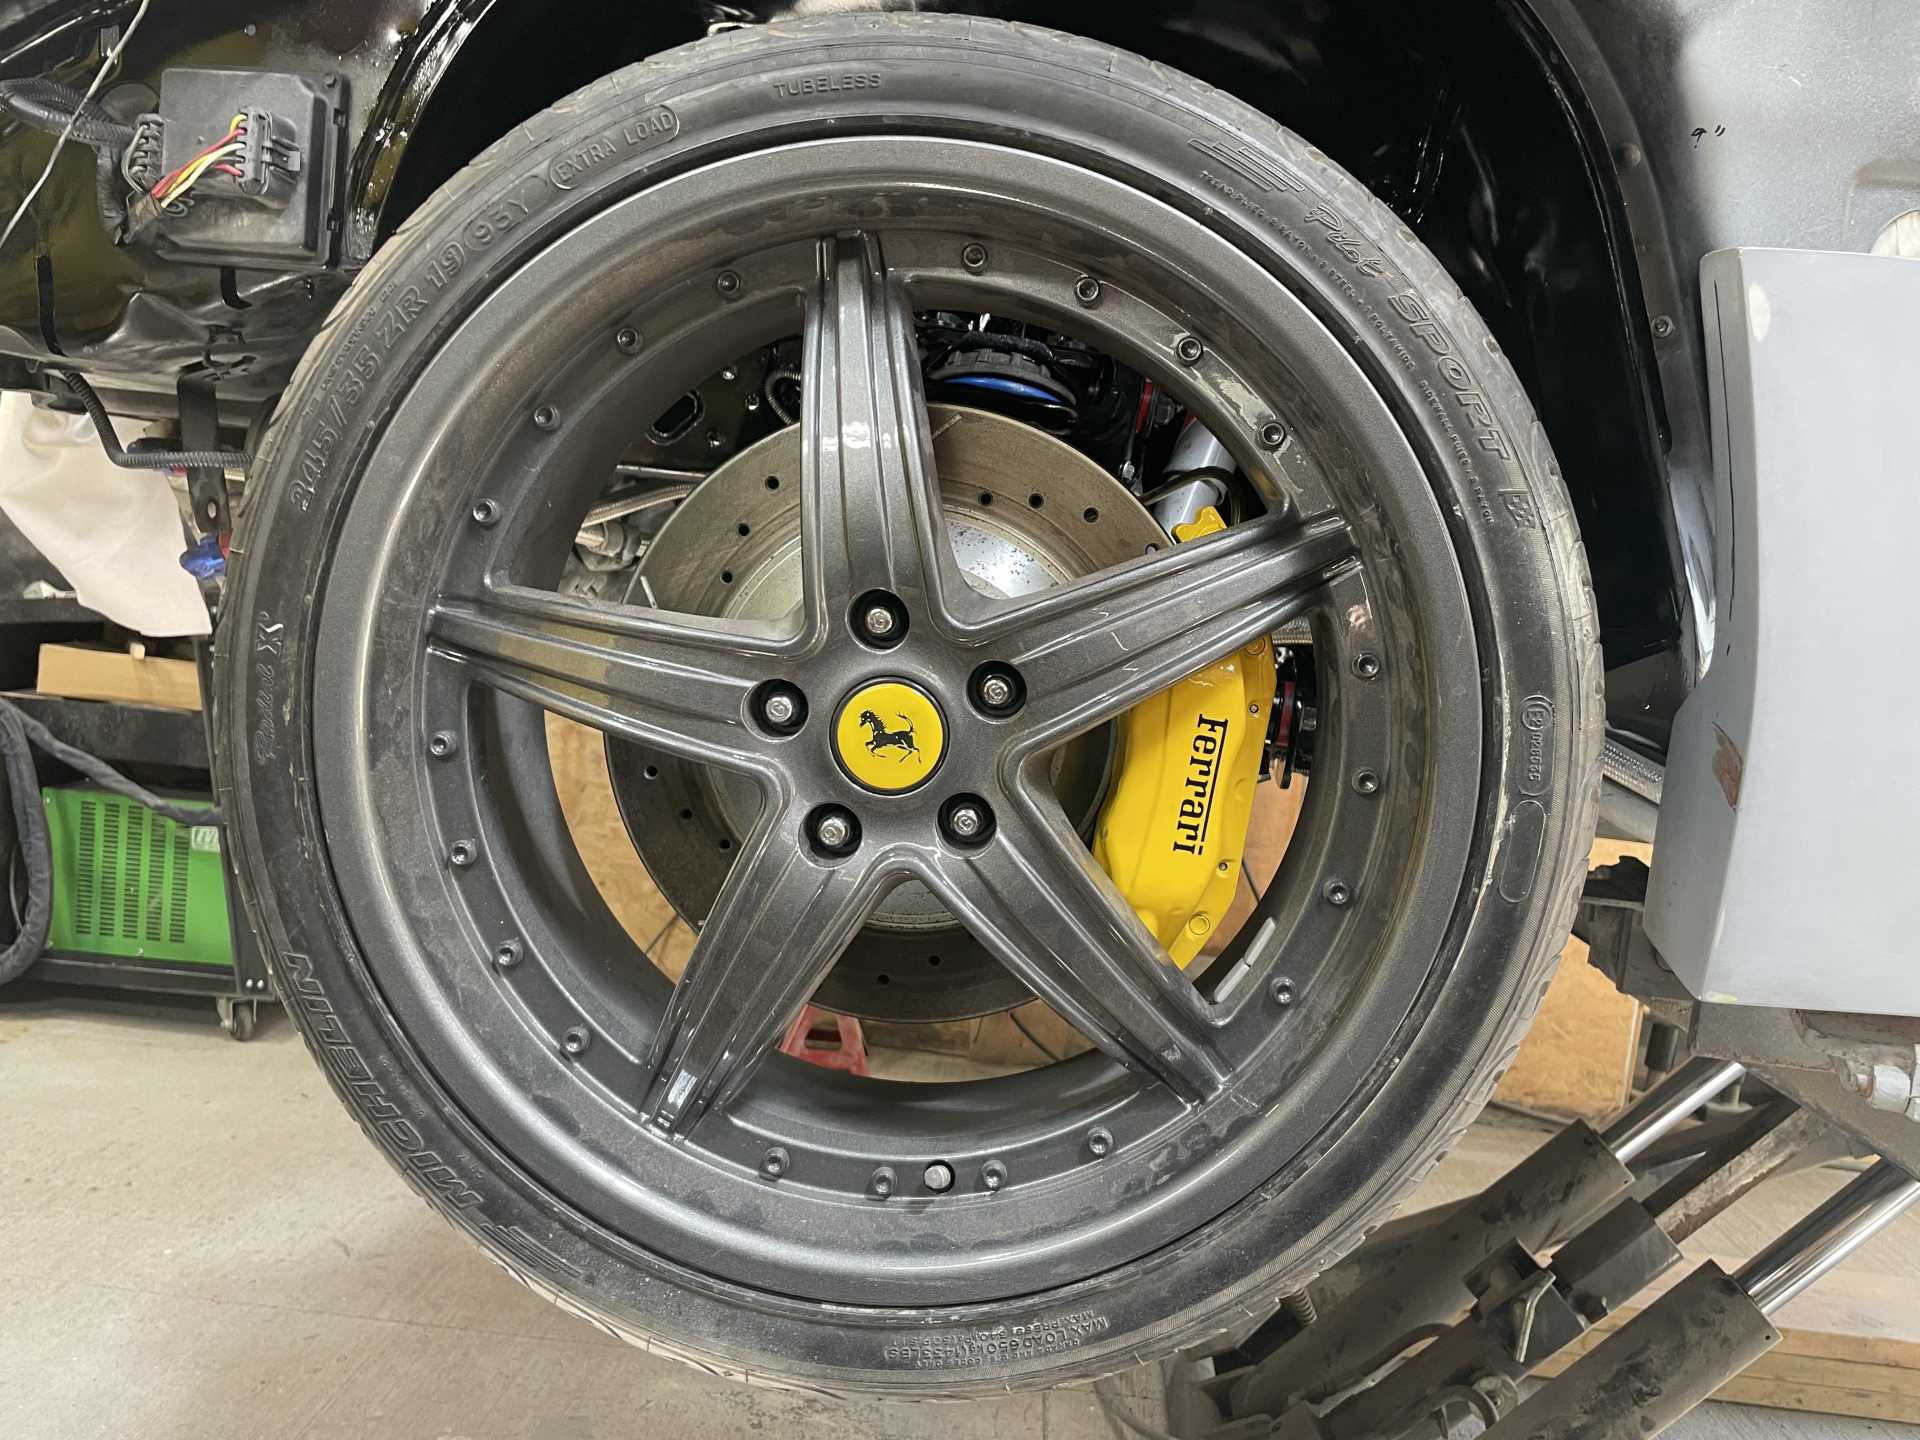
The front brakes are installed much the same way
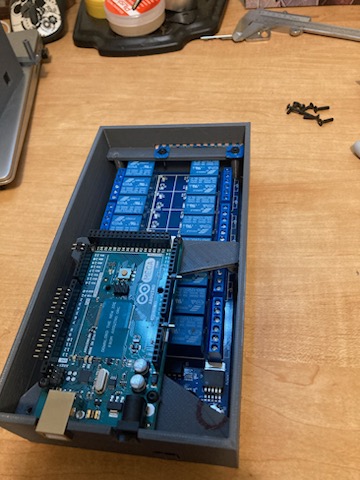
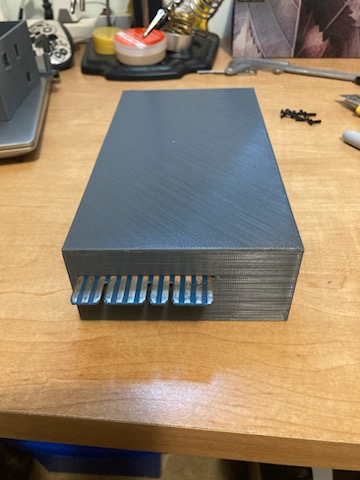
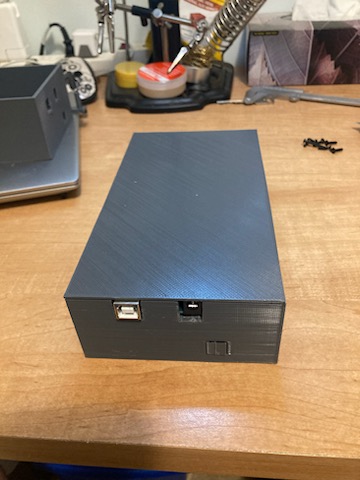
My other Buddy Don that fabricated the cross member extension also is building the HVAC / light controllers 3D printed case that the computer and relay board will be mounted into. It’s amazing what a tool a 3D printer is , much more time and cost effective.
Now that the front suspension is completed it’s onto a final full inspection and testing of all electrical components before the body is installed.
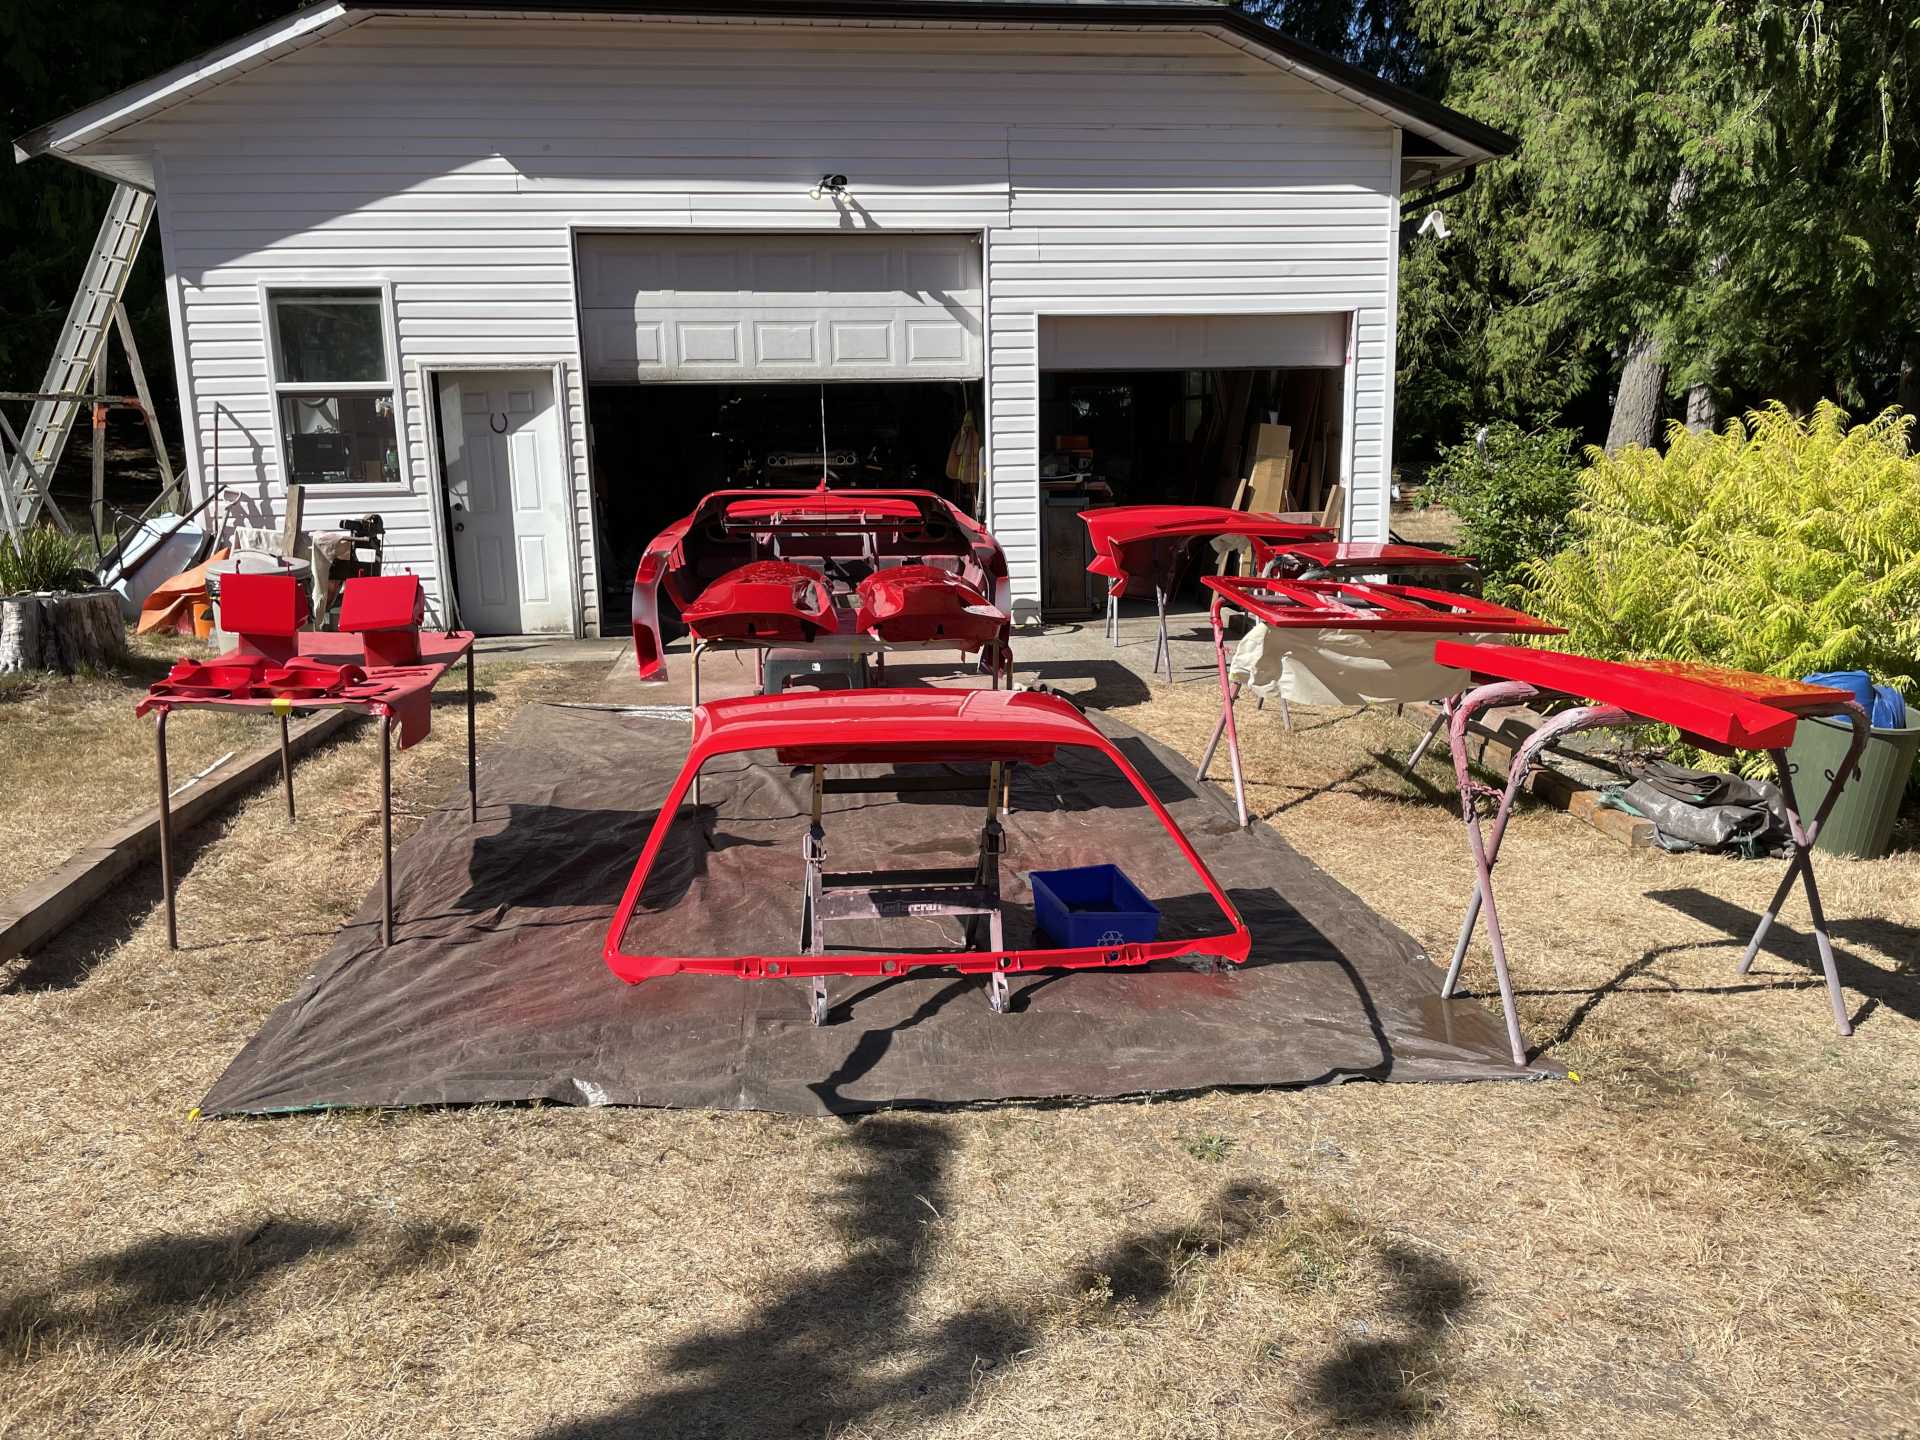
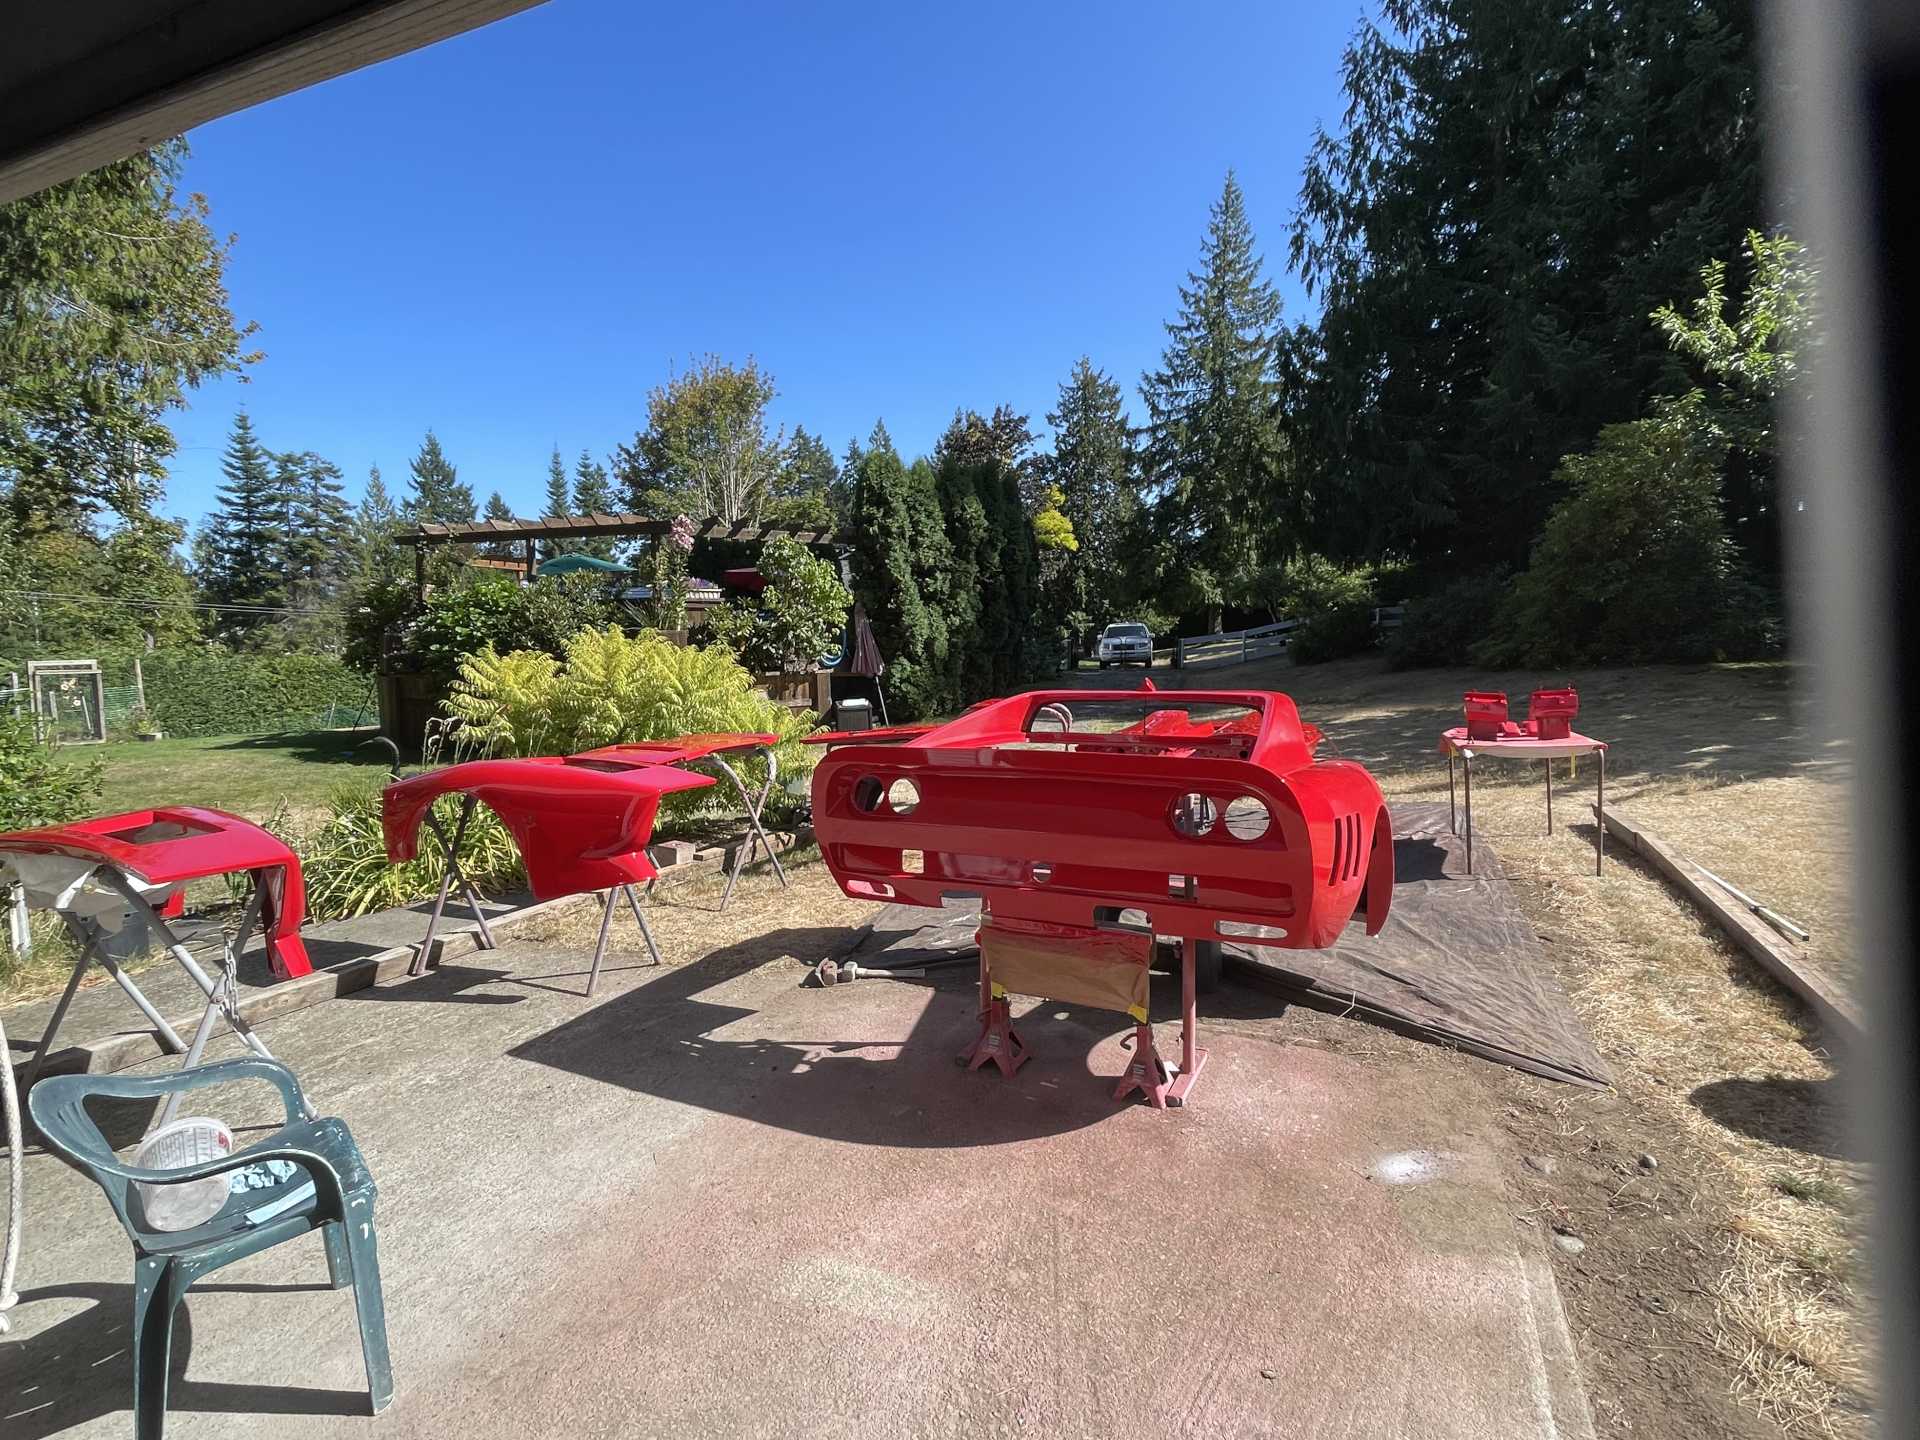
Thanks to lots of help from Phil my entire car electrical has been gone over front to back and all the gremlins are taken care of. My brakes are rock solid with an awesome hydraulic park brake installed. The suspension is complete although the front my need softer springs, but we will find that out once It’s on the road. I needed the electrical total complete before installing the body as access is very limited. I spent the last while Color sanding and polishing the body pieces , holy crap there are a lot of parts. I’ll be glad when everything is finished!!
Here are a few pics of everything
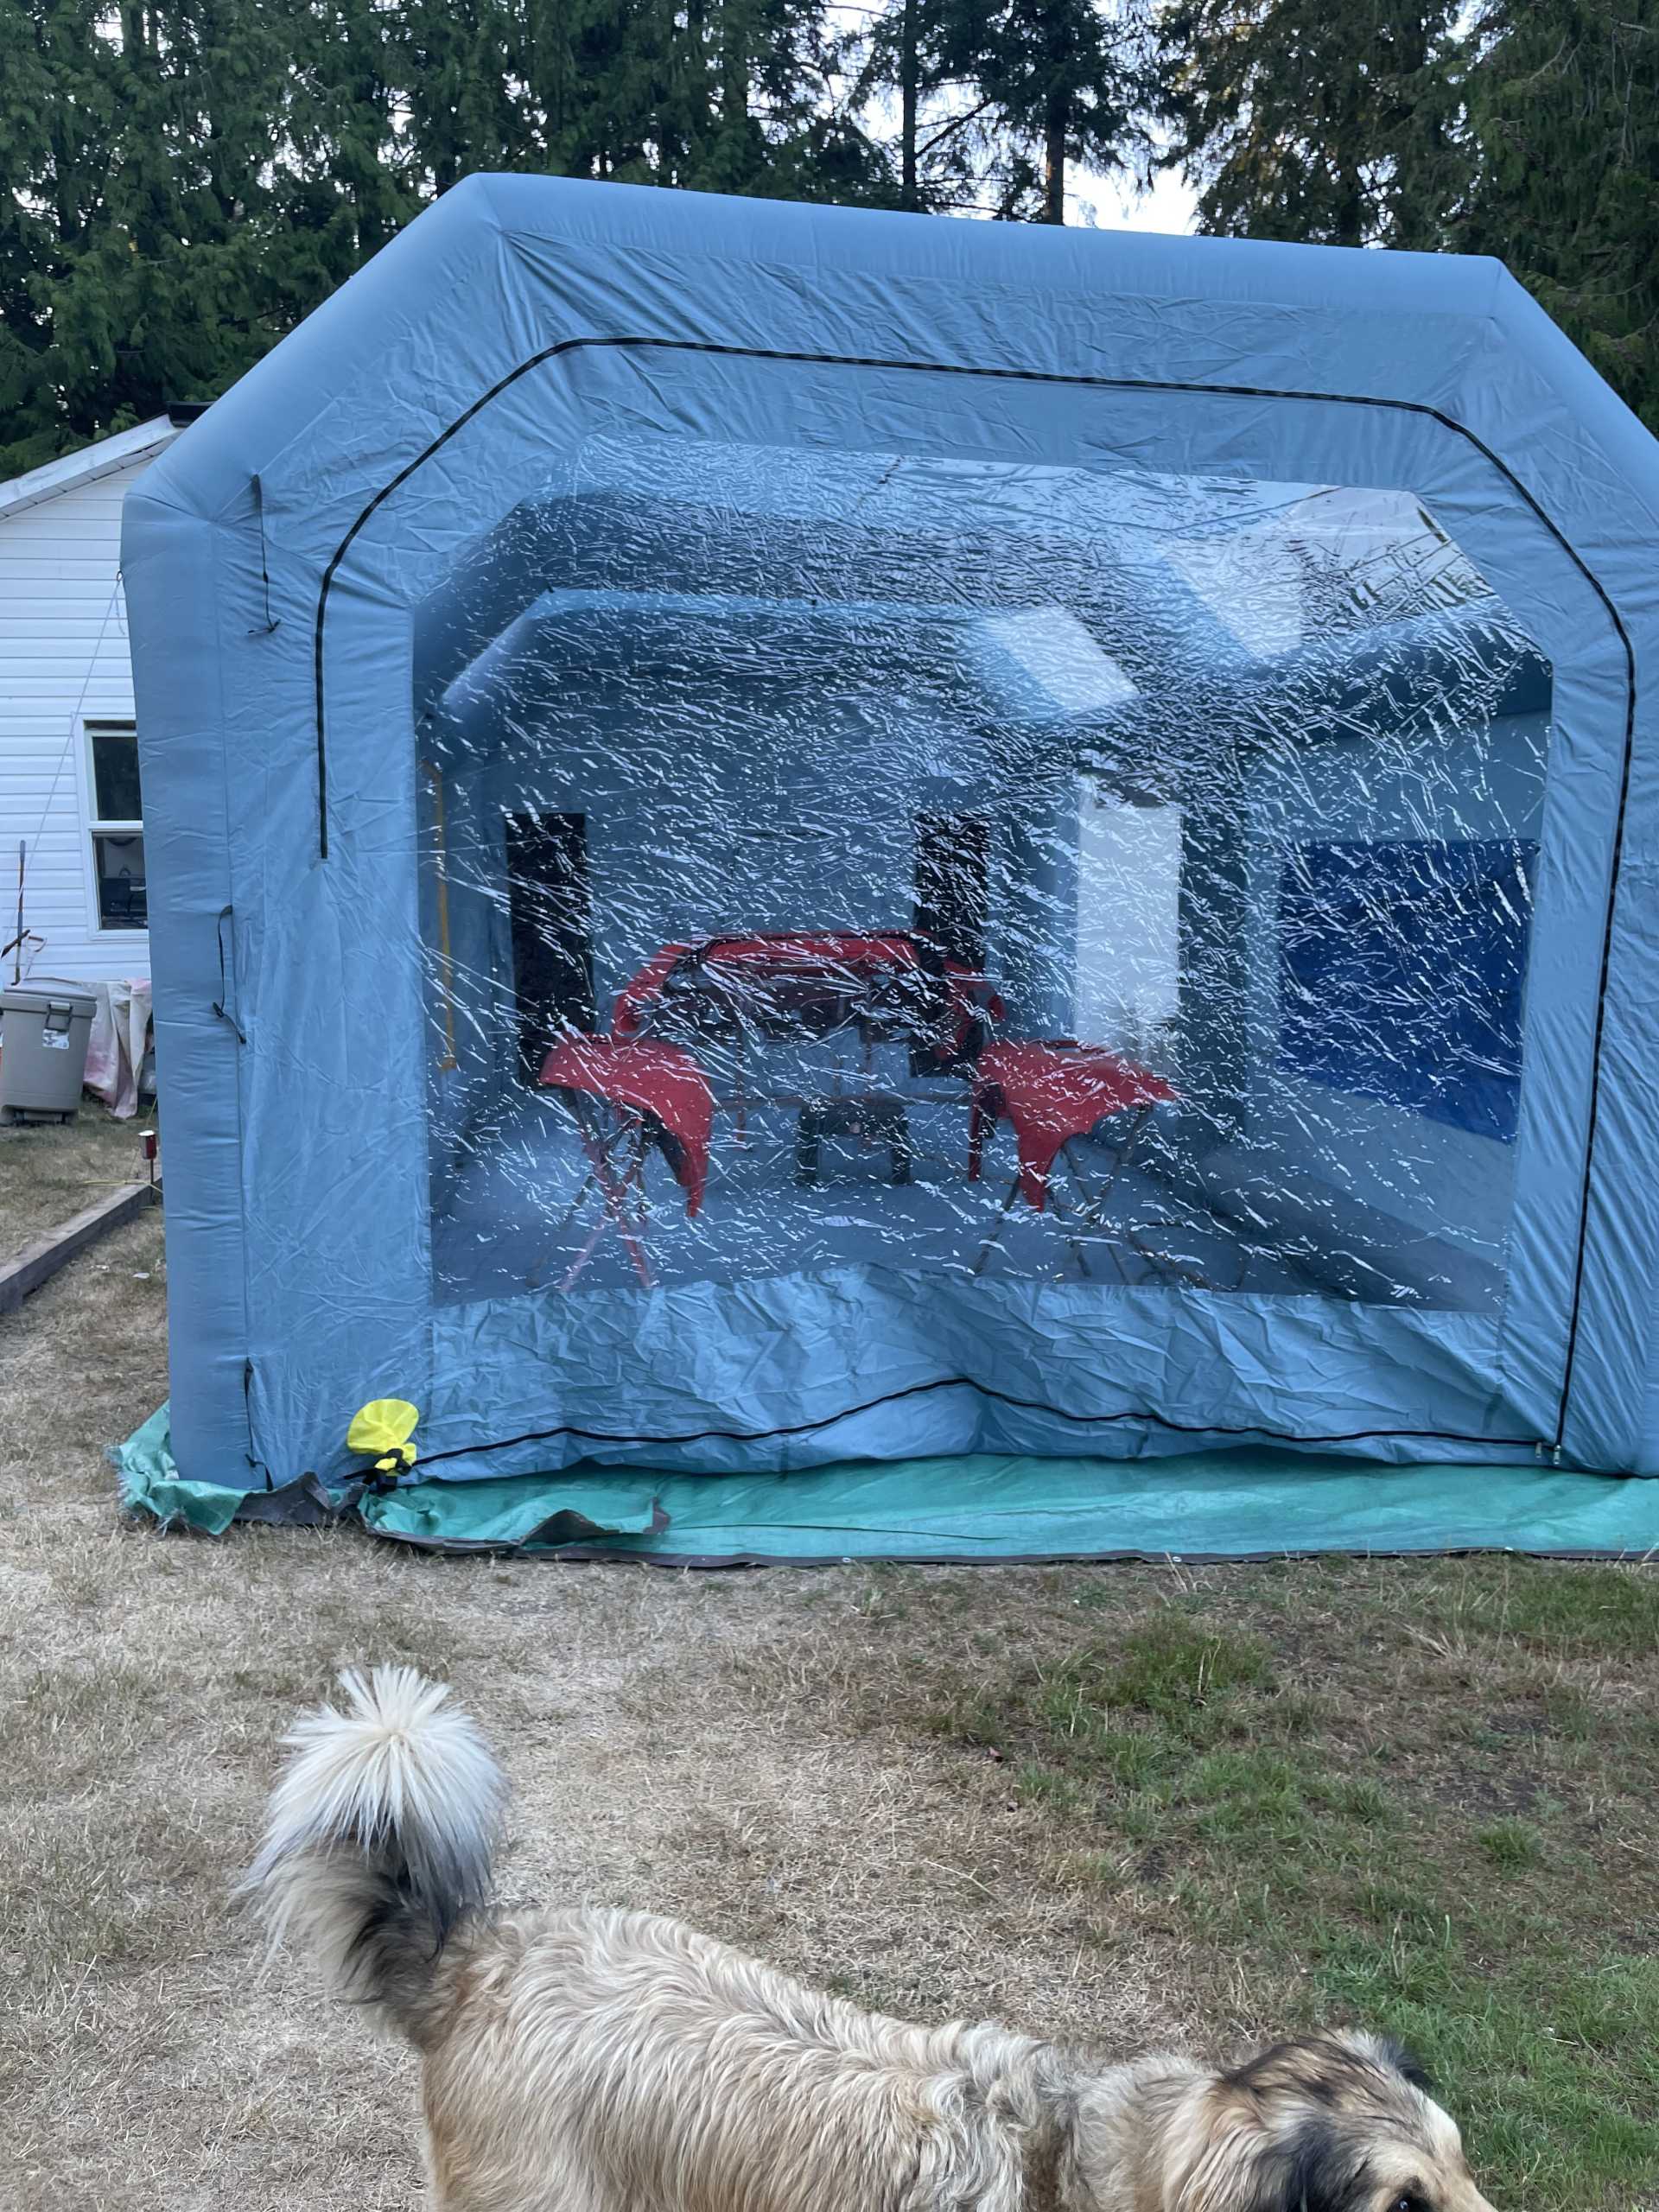
I used an inflatable paint booth, man it was soooo hot in there My buddy Kim and I must have lost 10 lbs during the 2 days it took to paint.
Don has almost finished building the HVAC / Light controller
I’m hoping to mount the rear body early next week , then I’ll complete the final assembly Thanks for stopping by. Wayne
Footnote....got the steering wheel installed finally! In the time it took me to install a steering wheel, you built an F-car! LOL!
Looking forward to seeing it all come together.
Thanks for posting your progress, it STILL serves as inspiration to some of us that have a hard time finding time to change our oil!
HAGO!
Thanks Sage, I’m glad to hear you put it to some use and found the time to install it. I hope you enjoy the latest updates.
Thanks Shem I’m pretty happy with how it turned out , still always to go but it’s progressing.
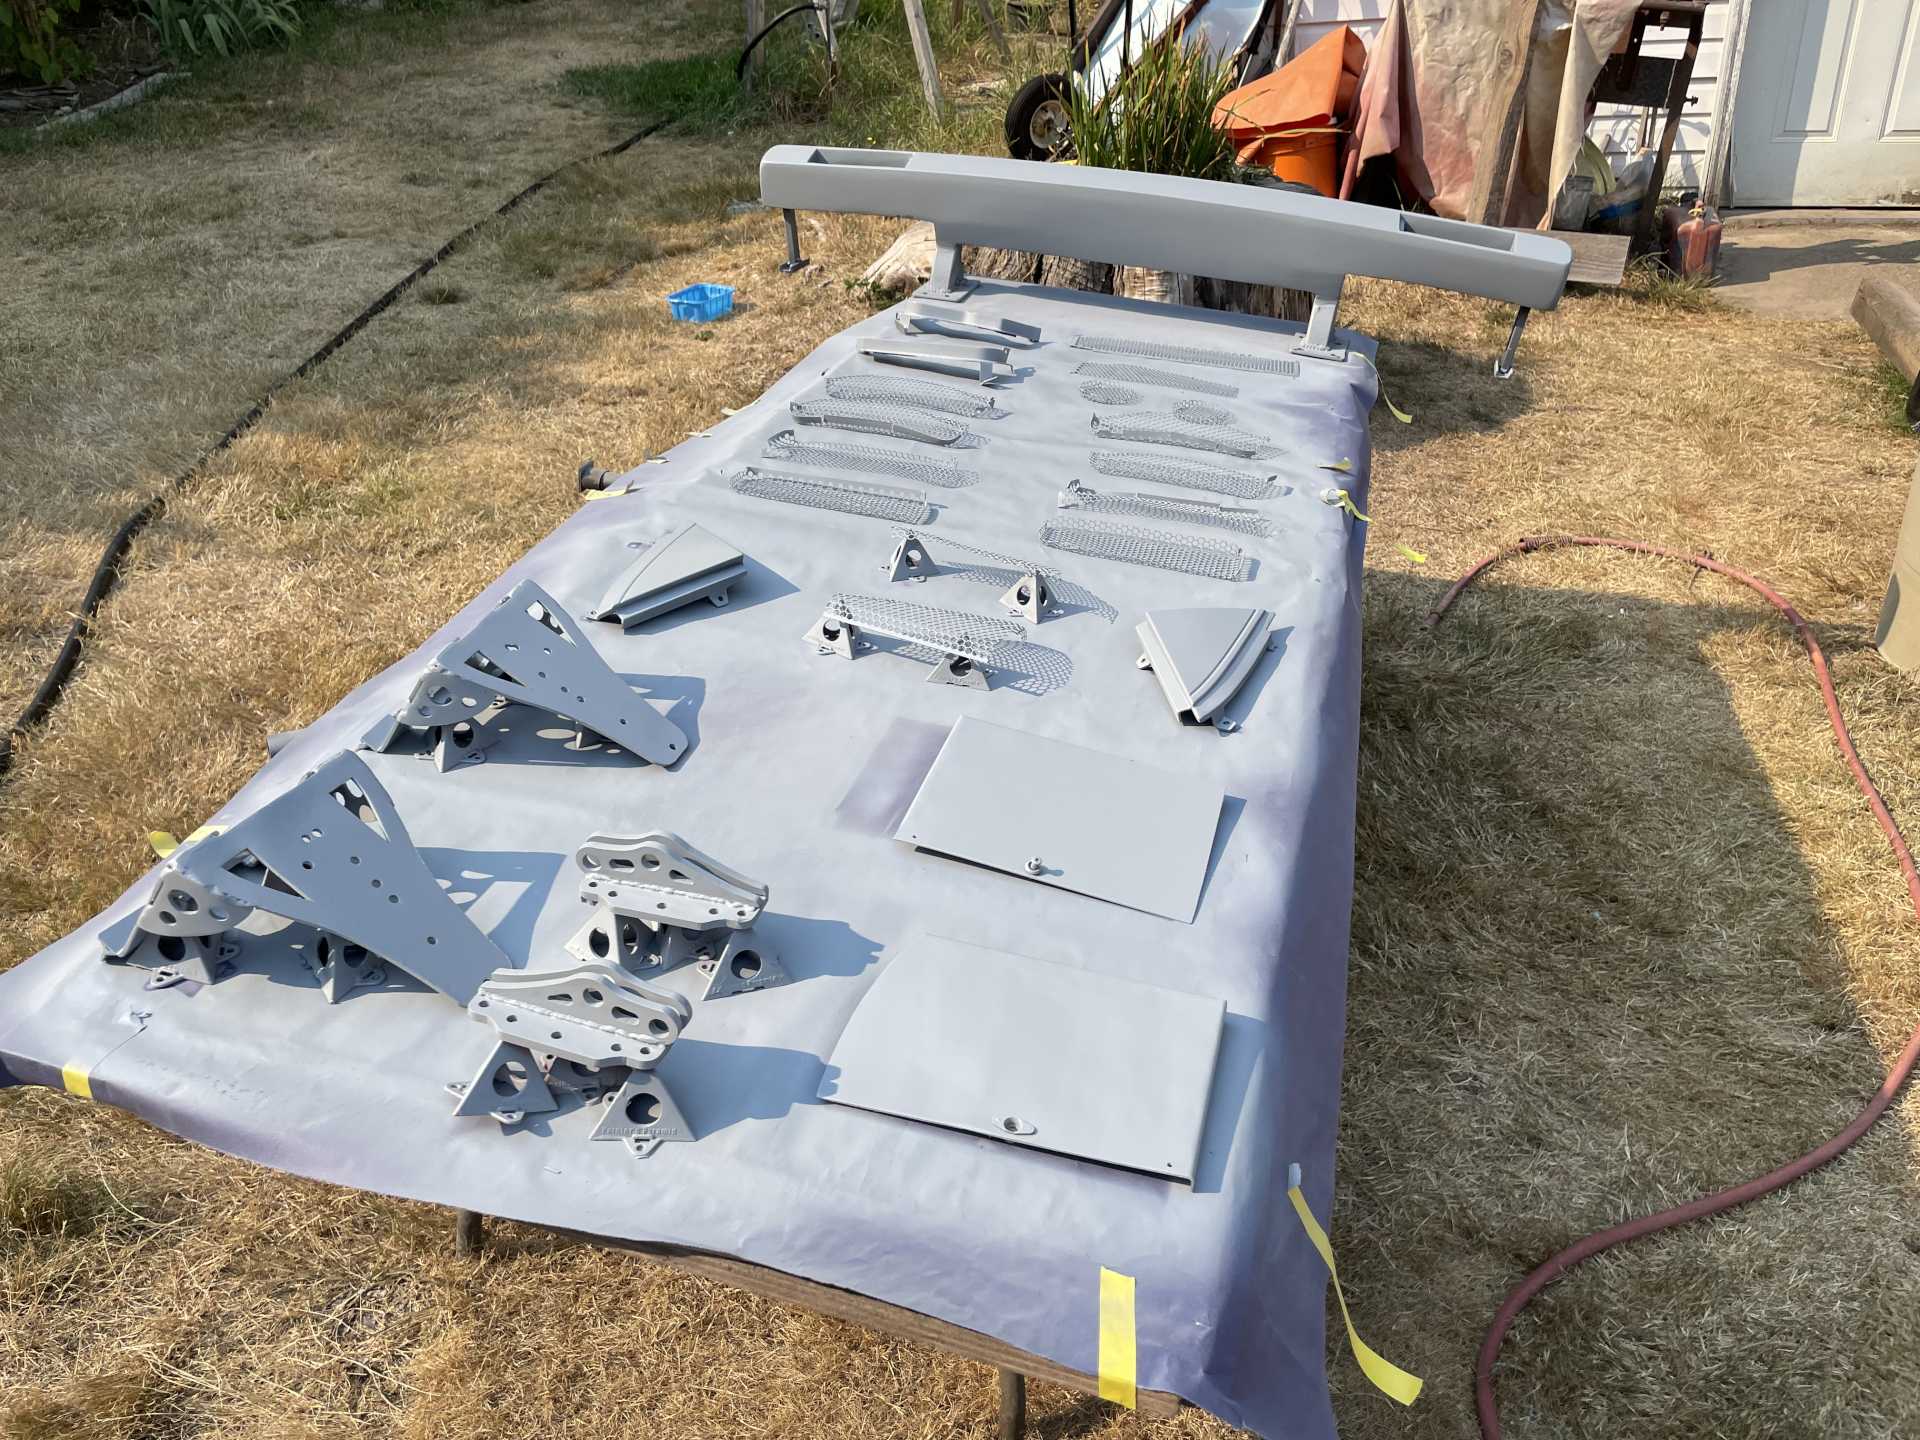
Here’s the latest I painted all the remaining black parts, I had just enough of the Satin Hot Rod Black left.
First painted everything with epoxy primer
Then top coated with the black
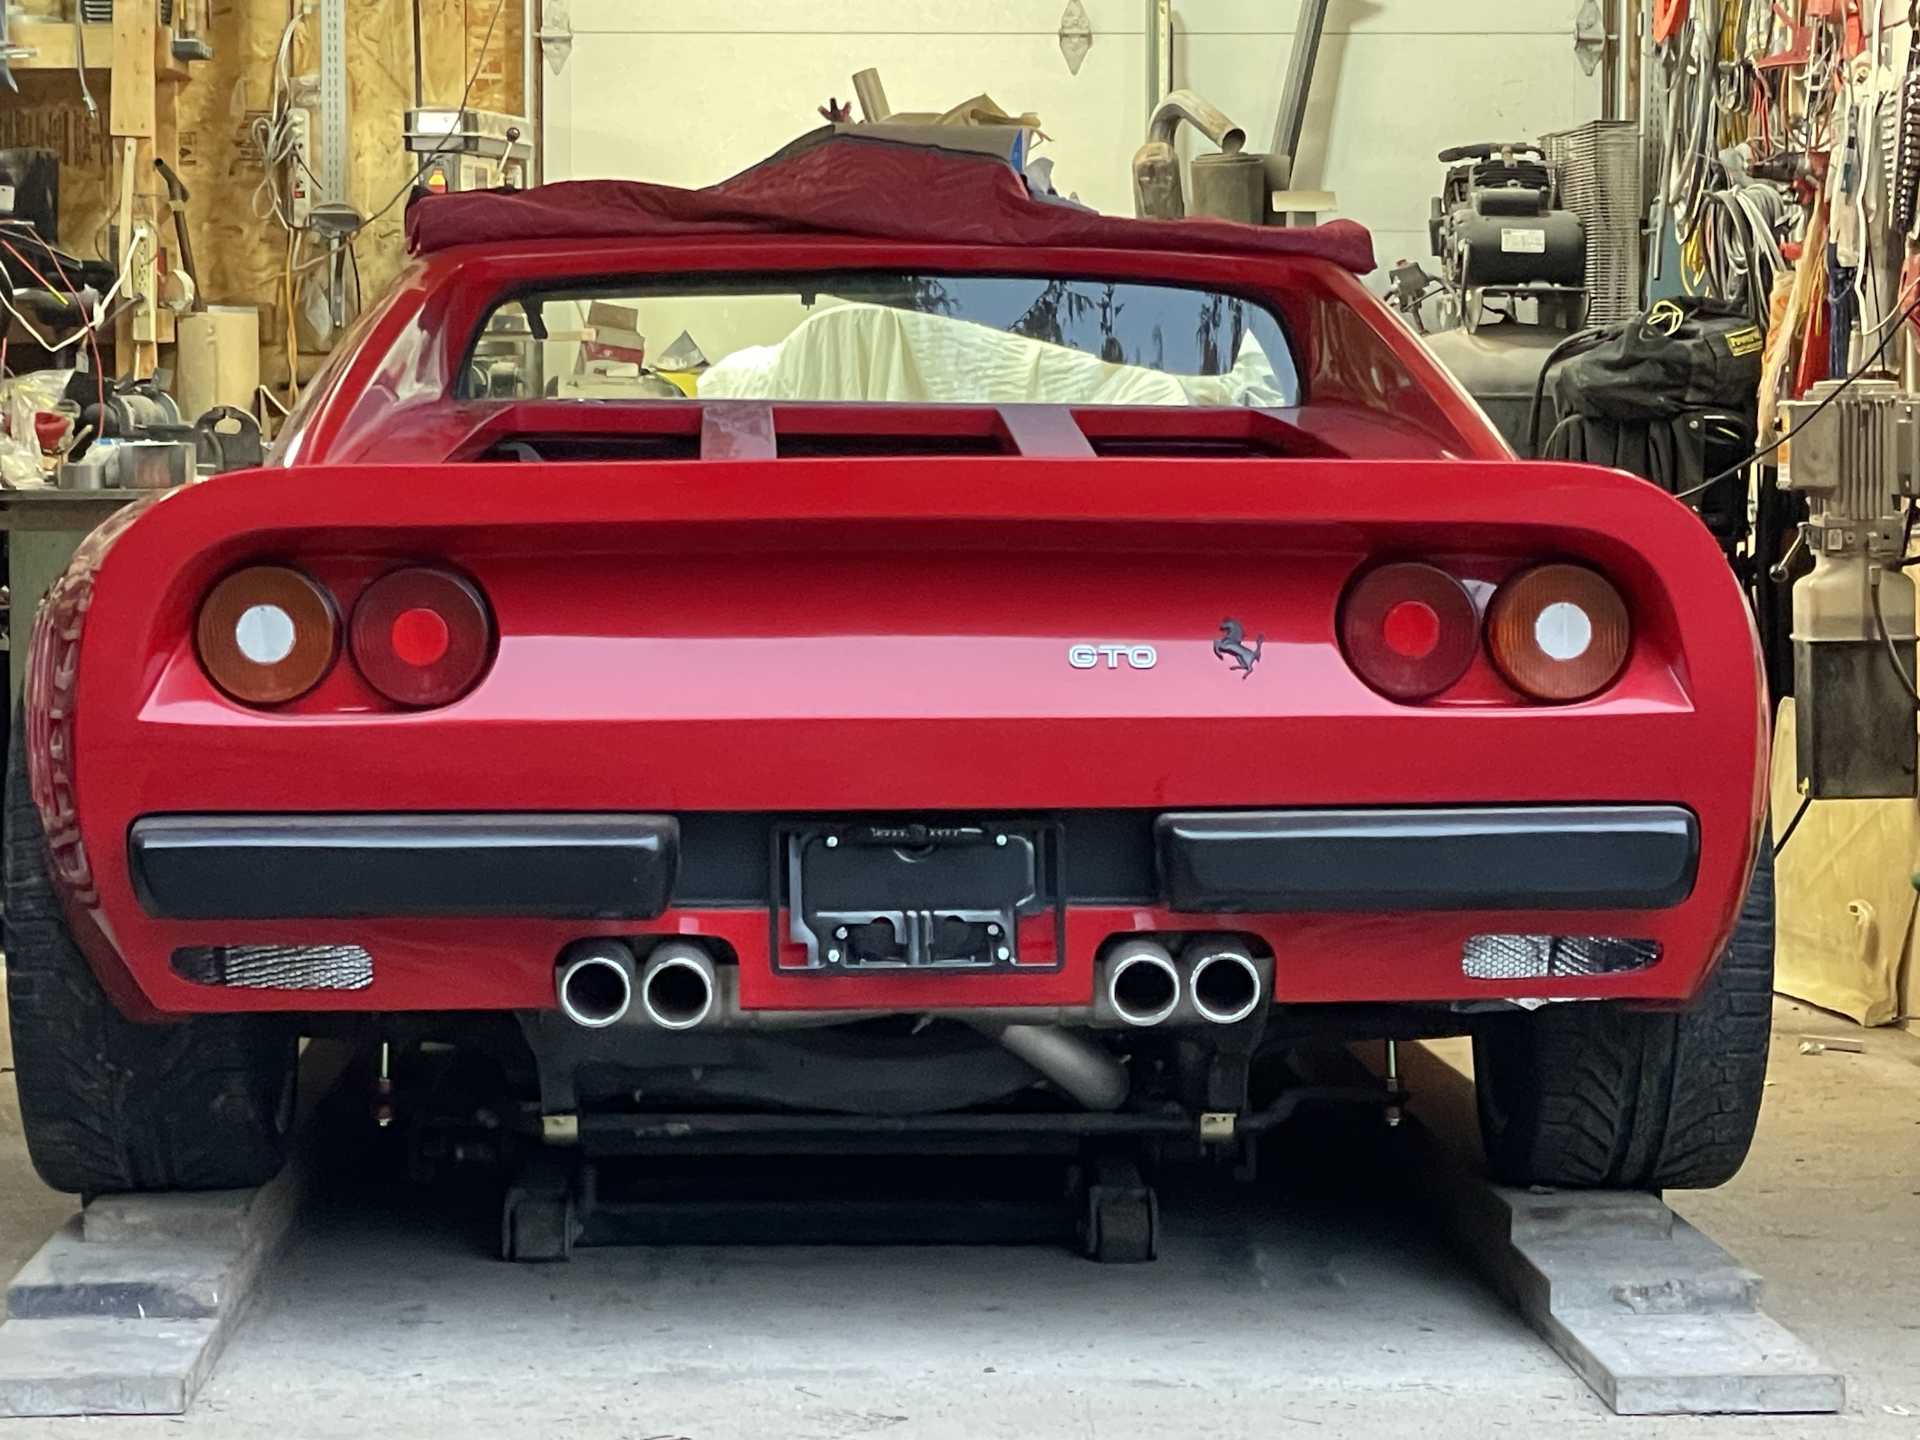
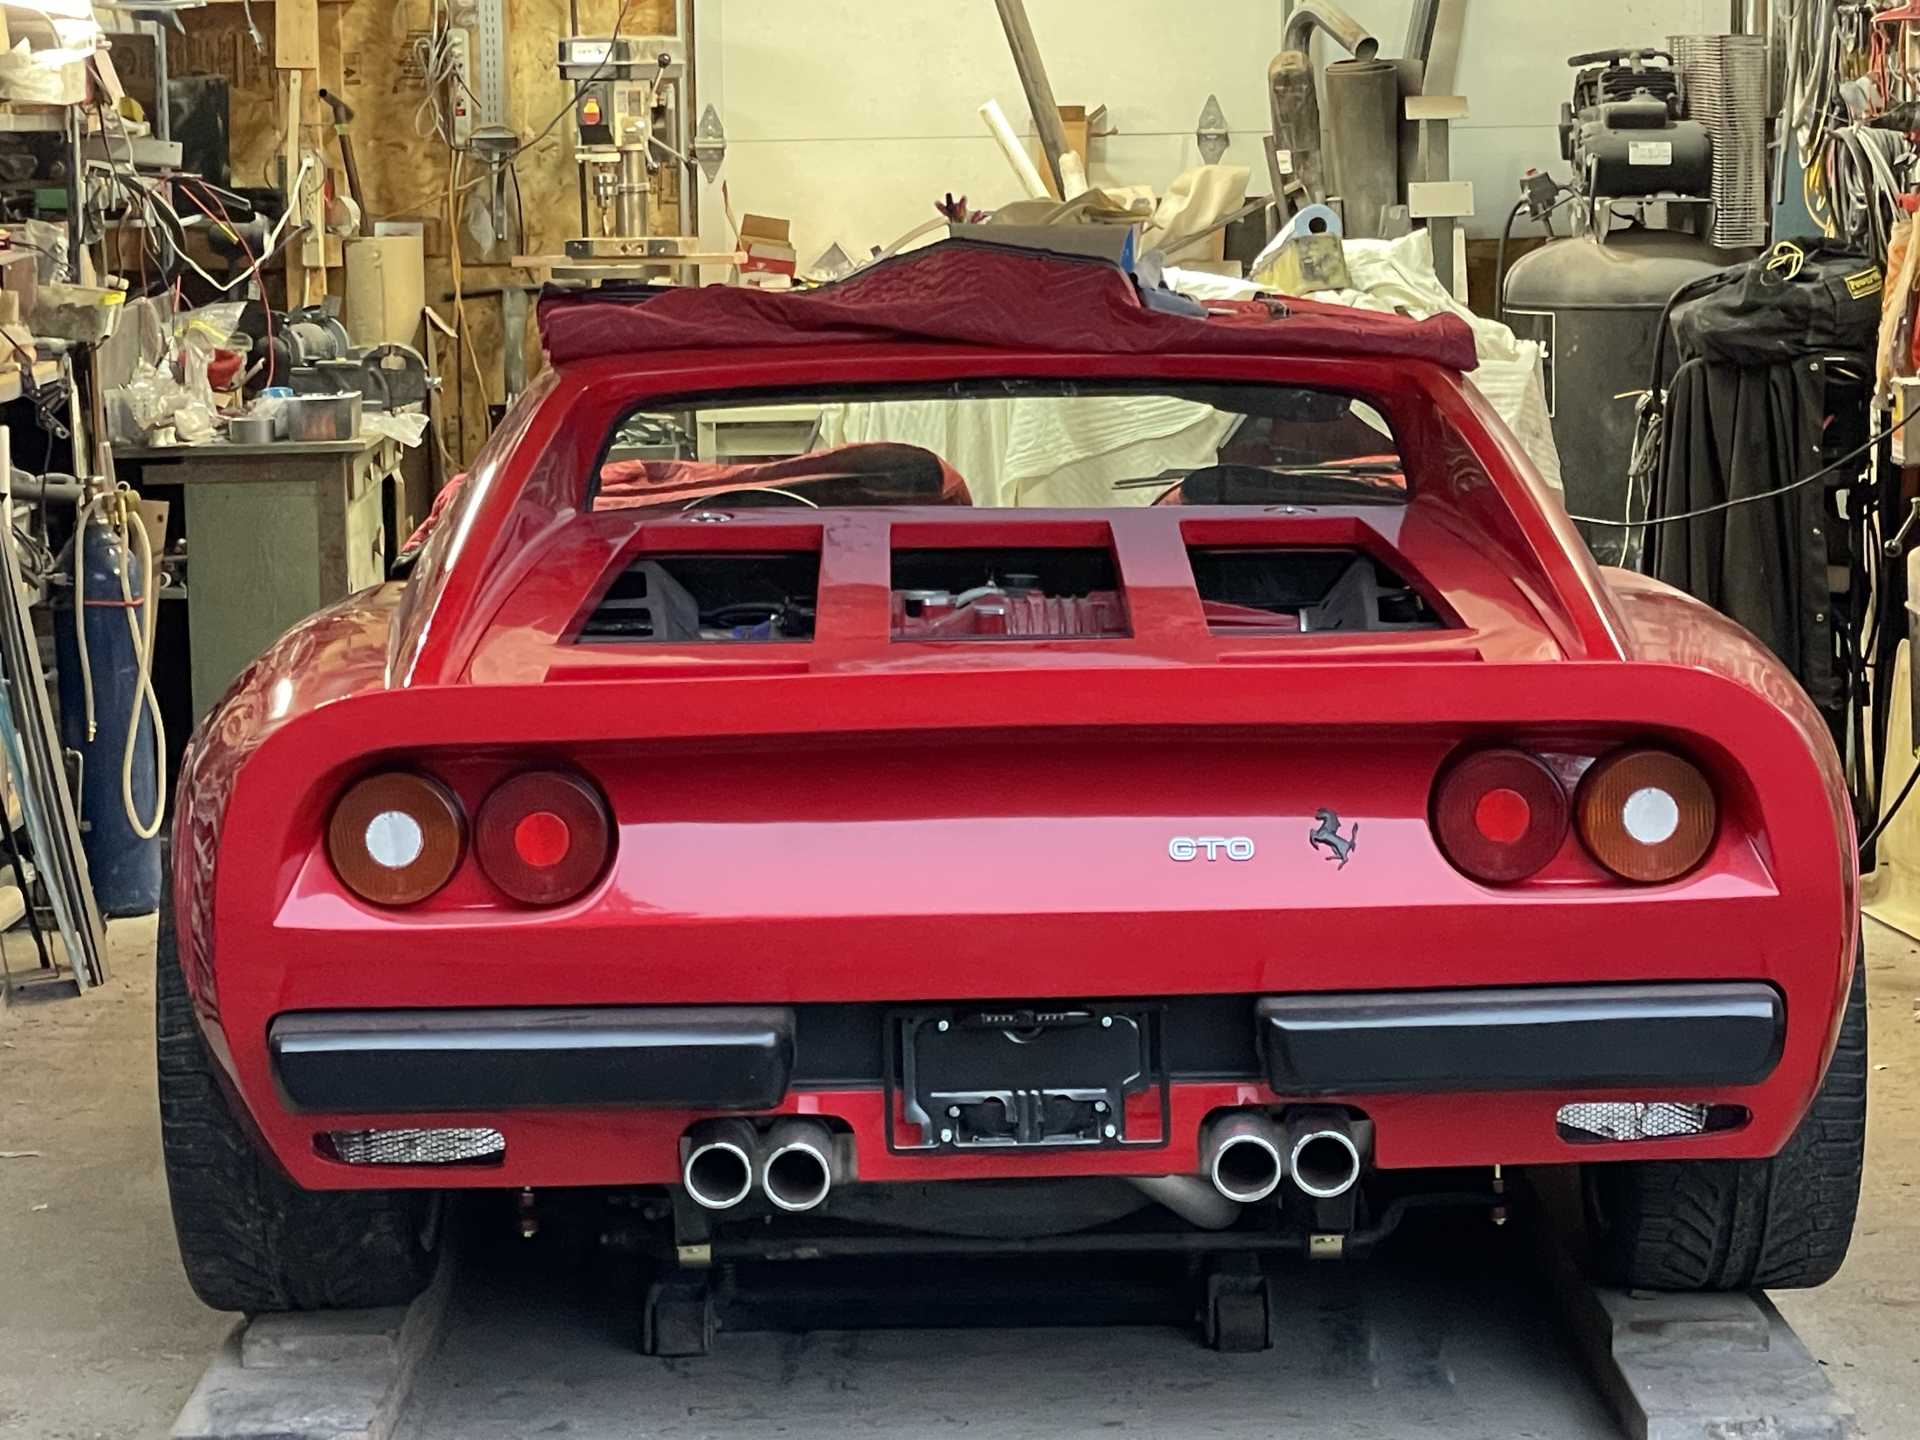
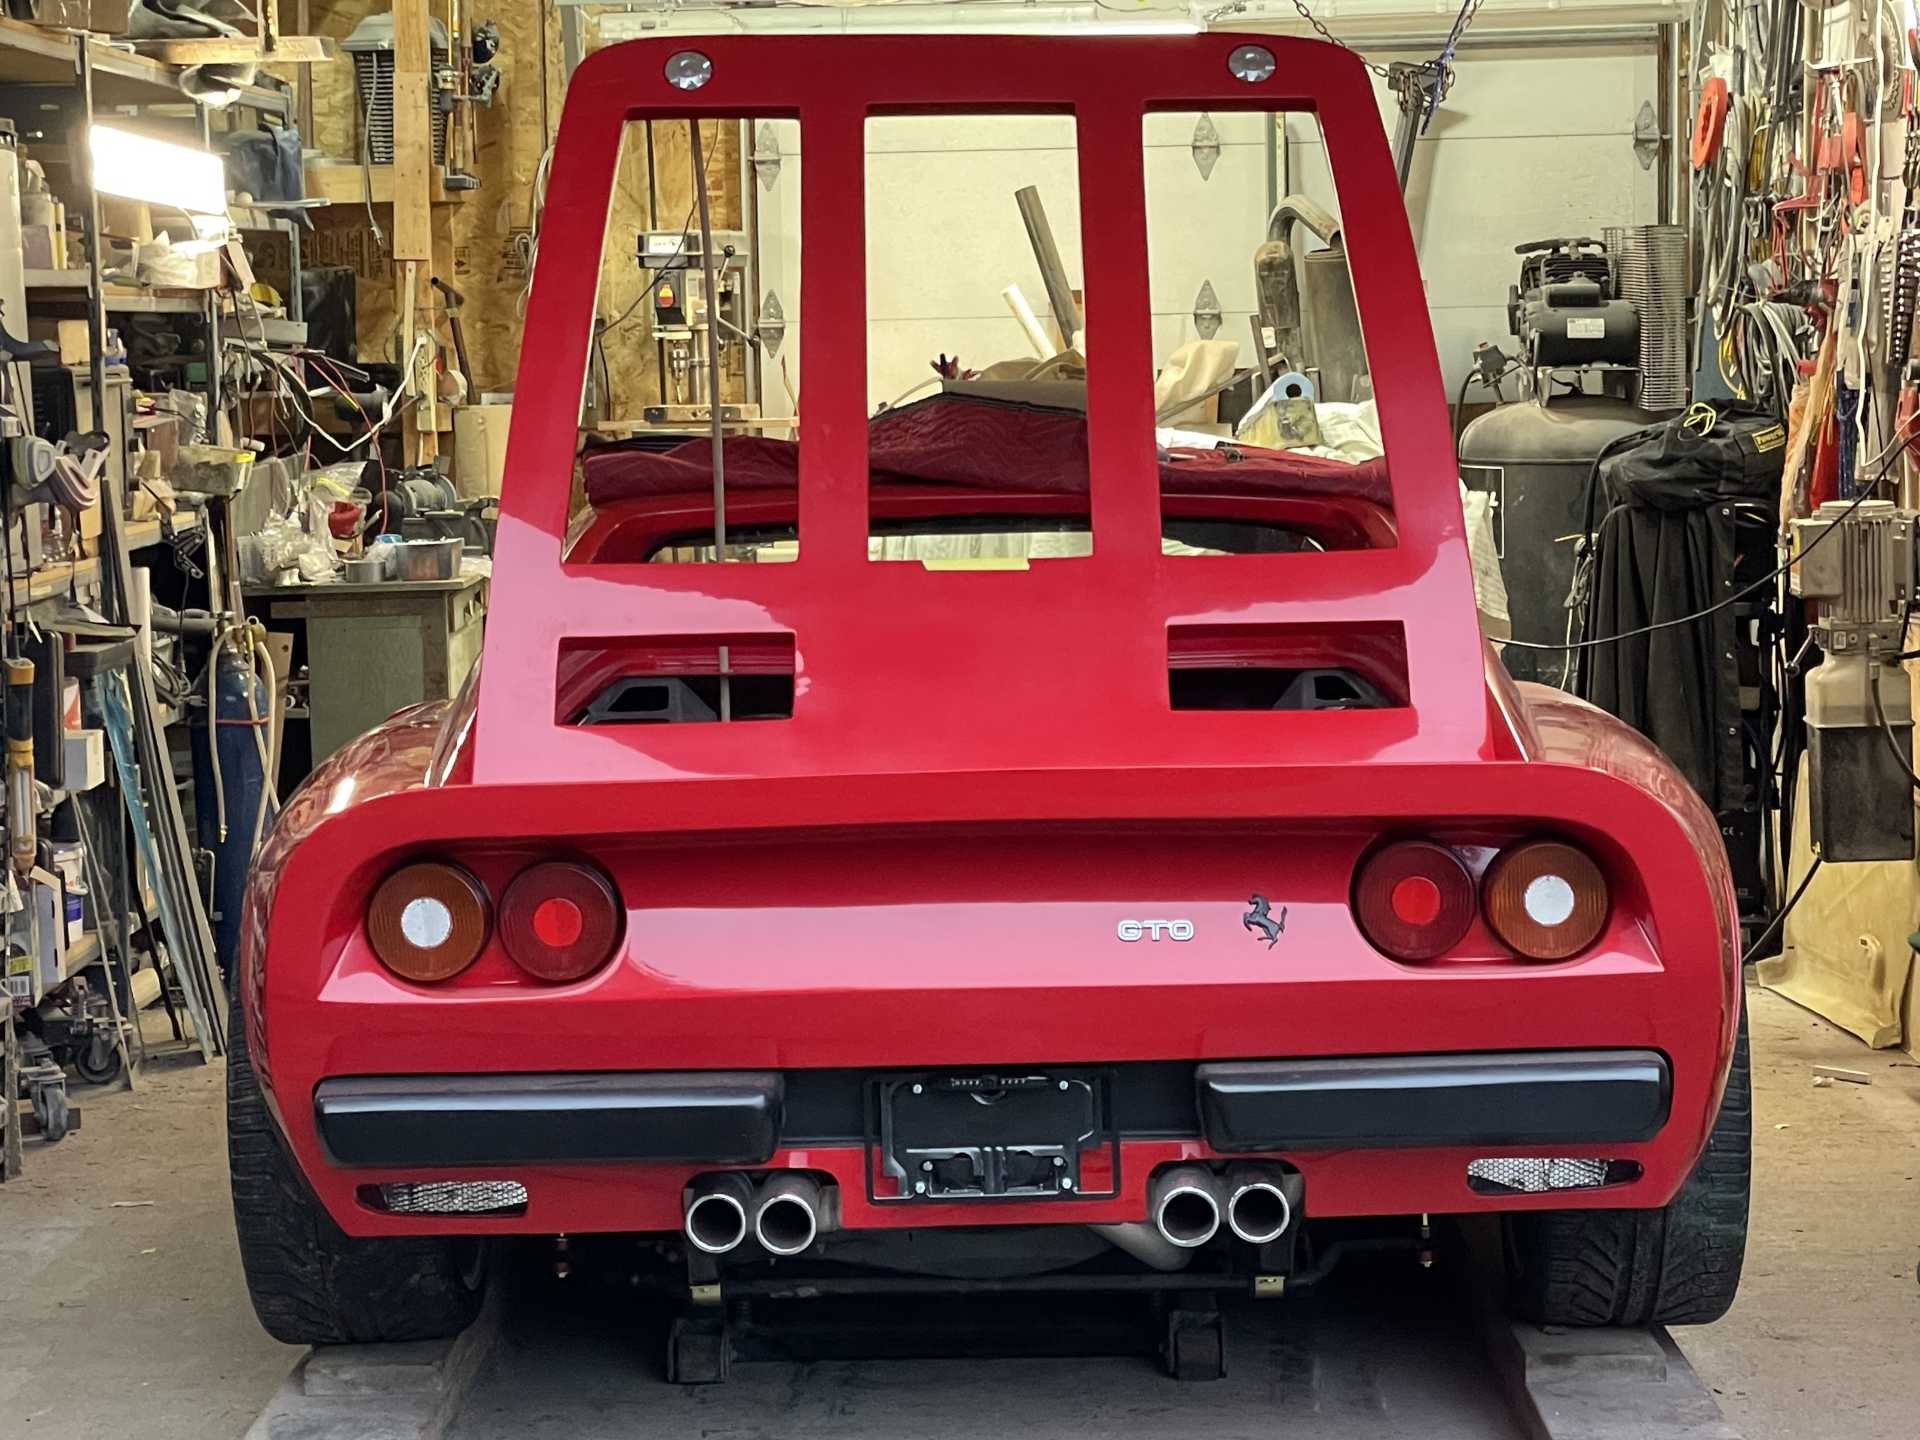
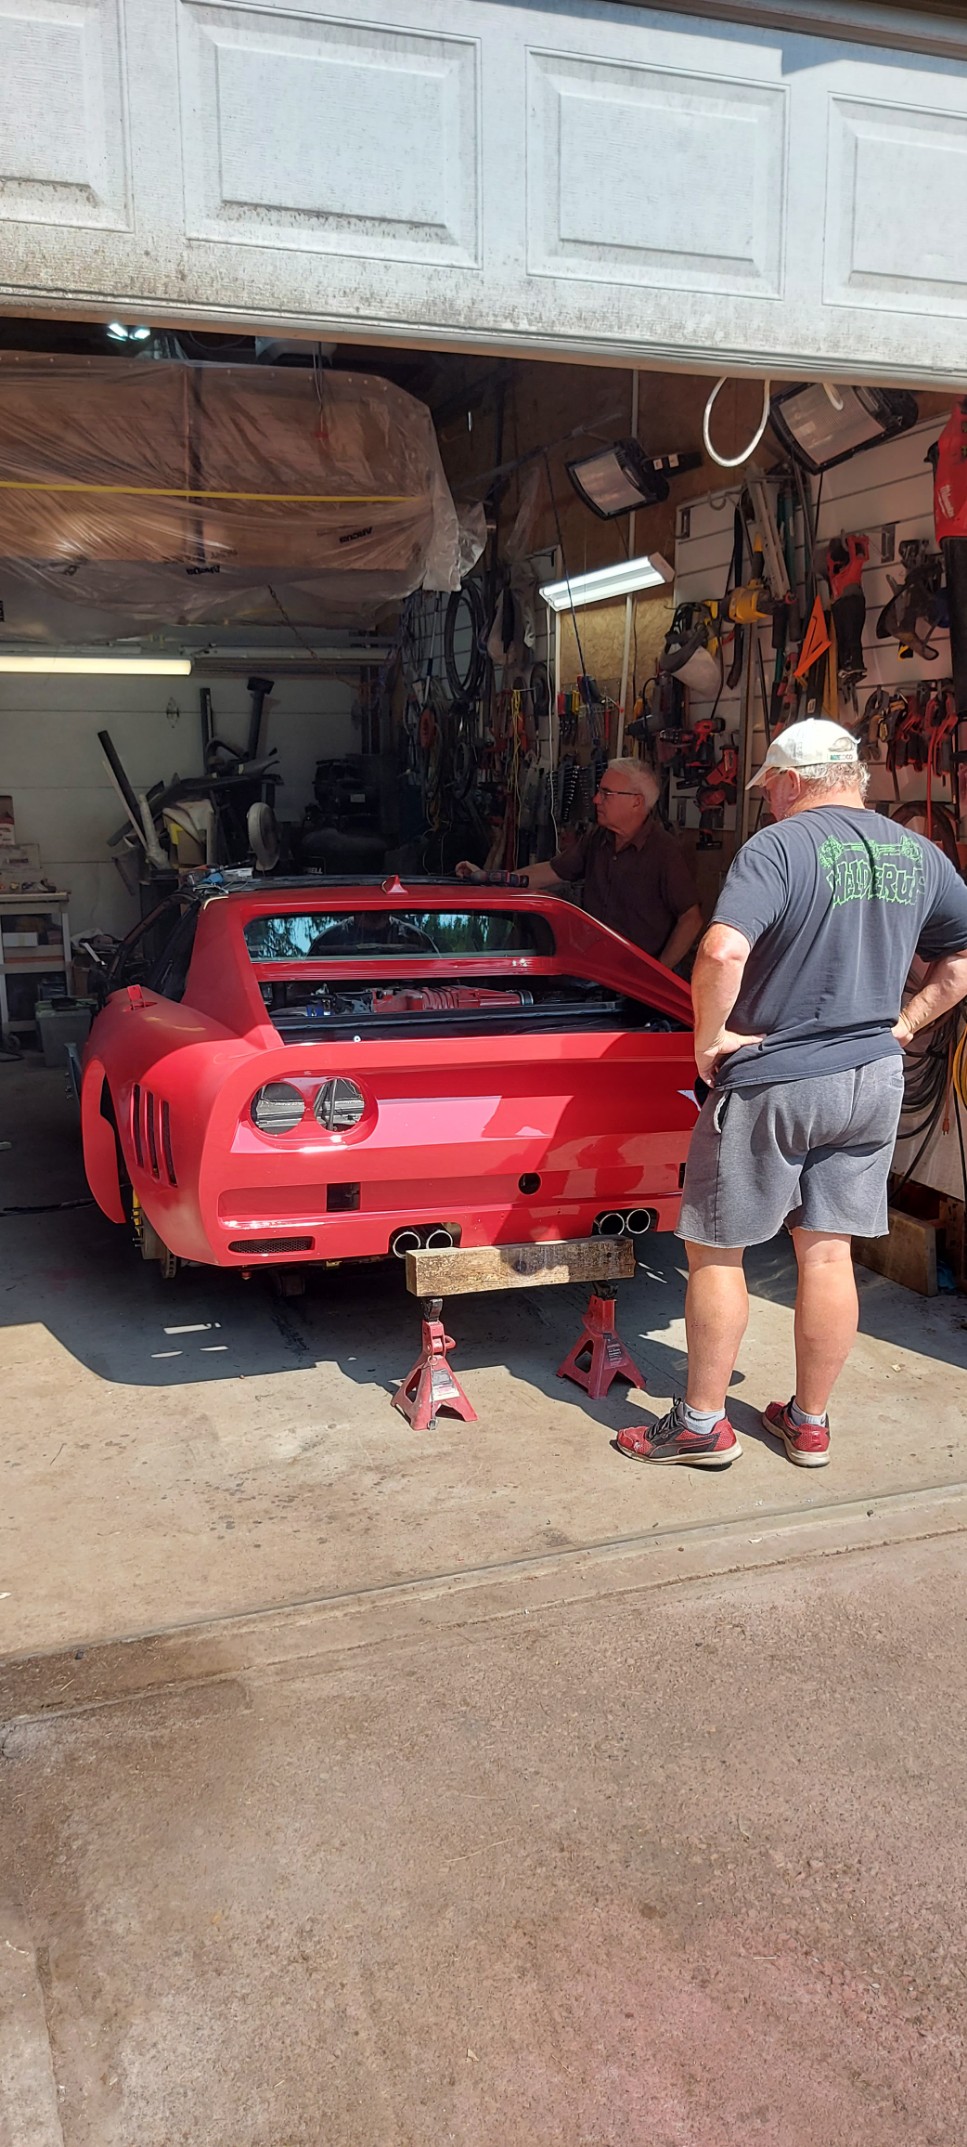
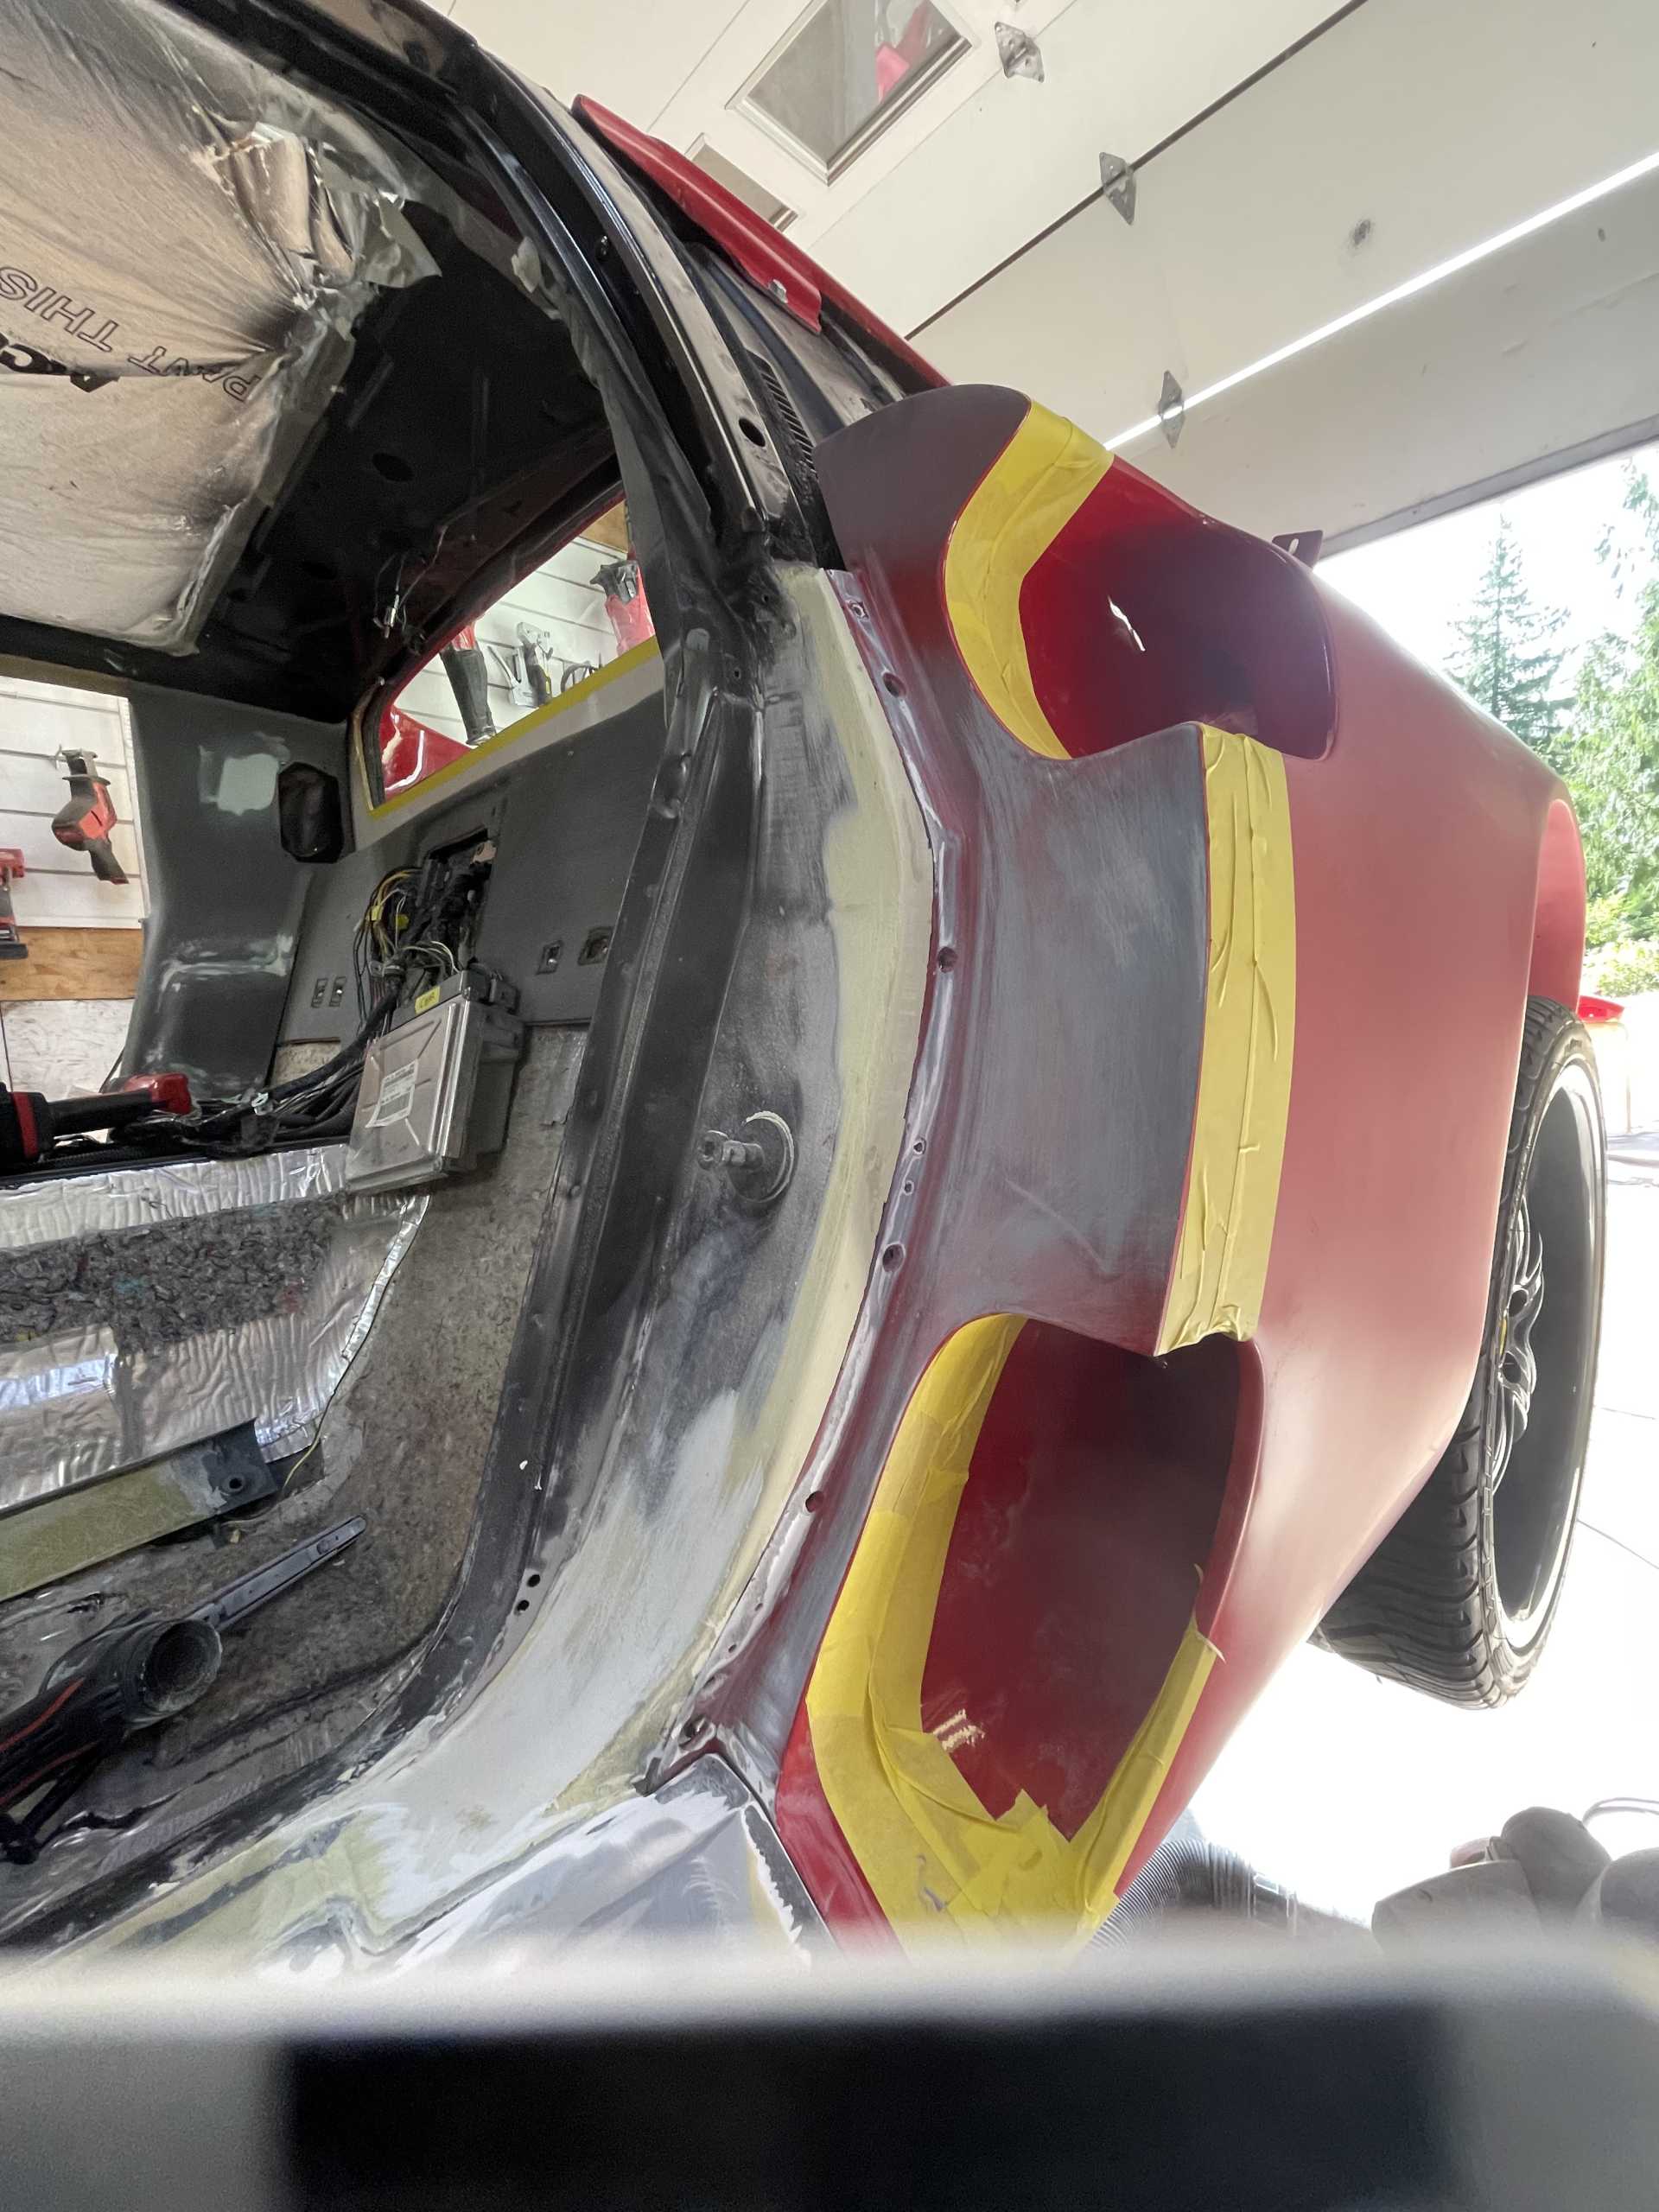
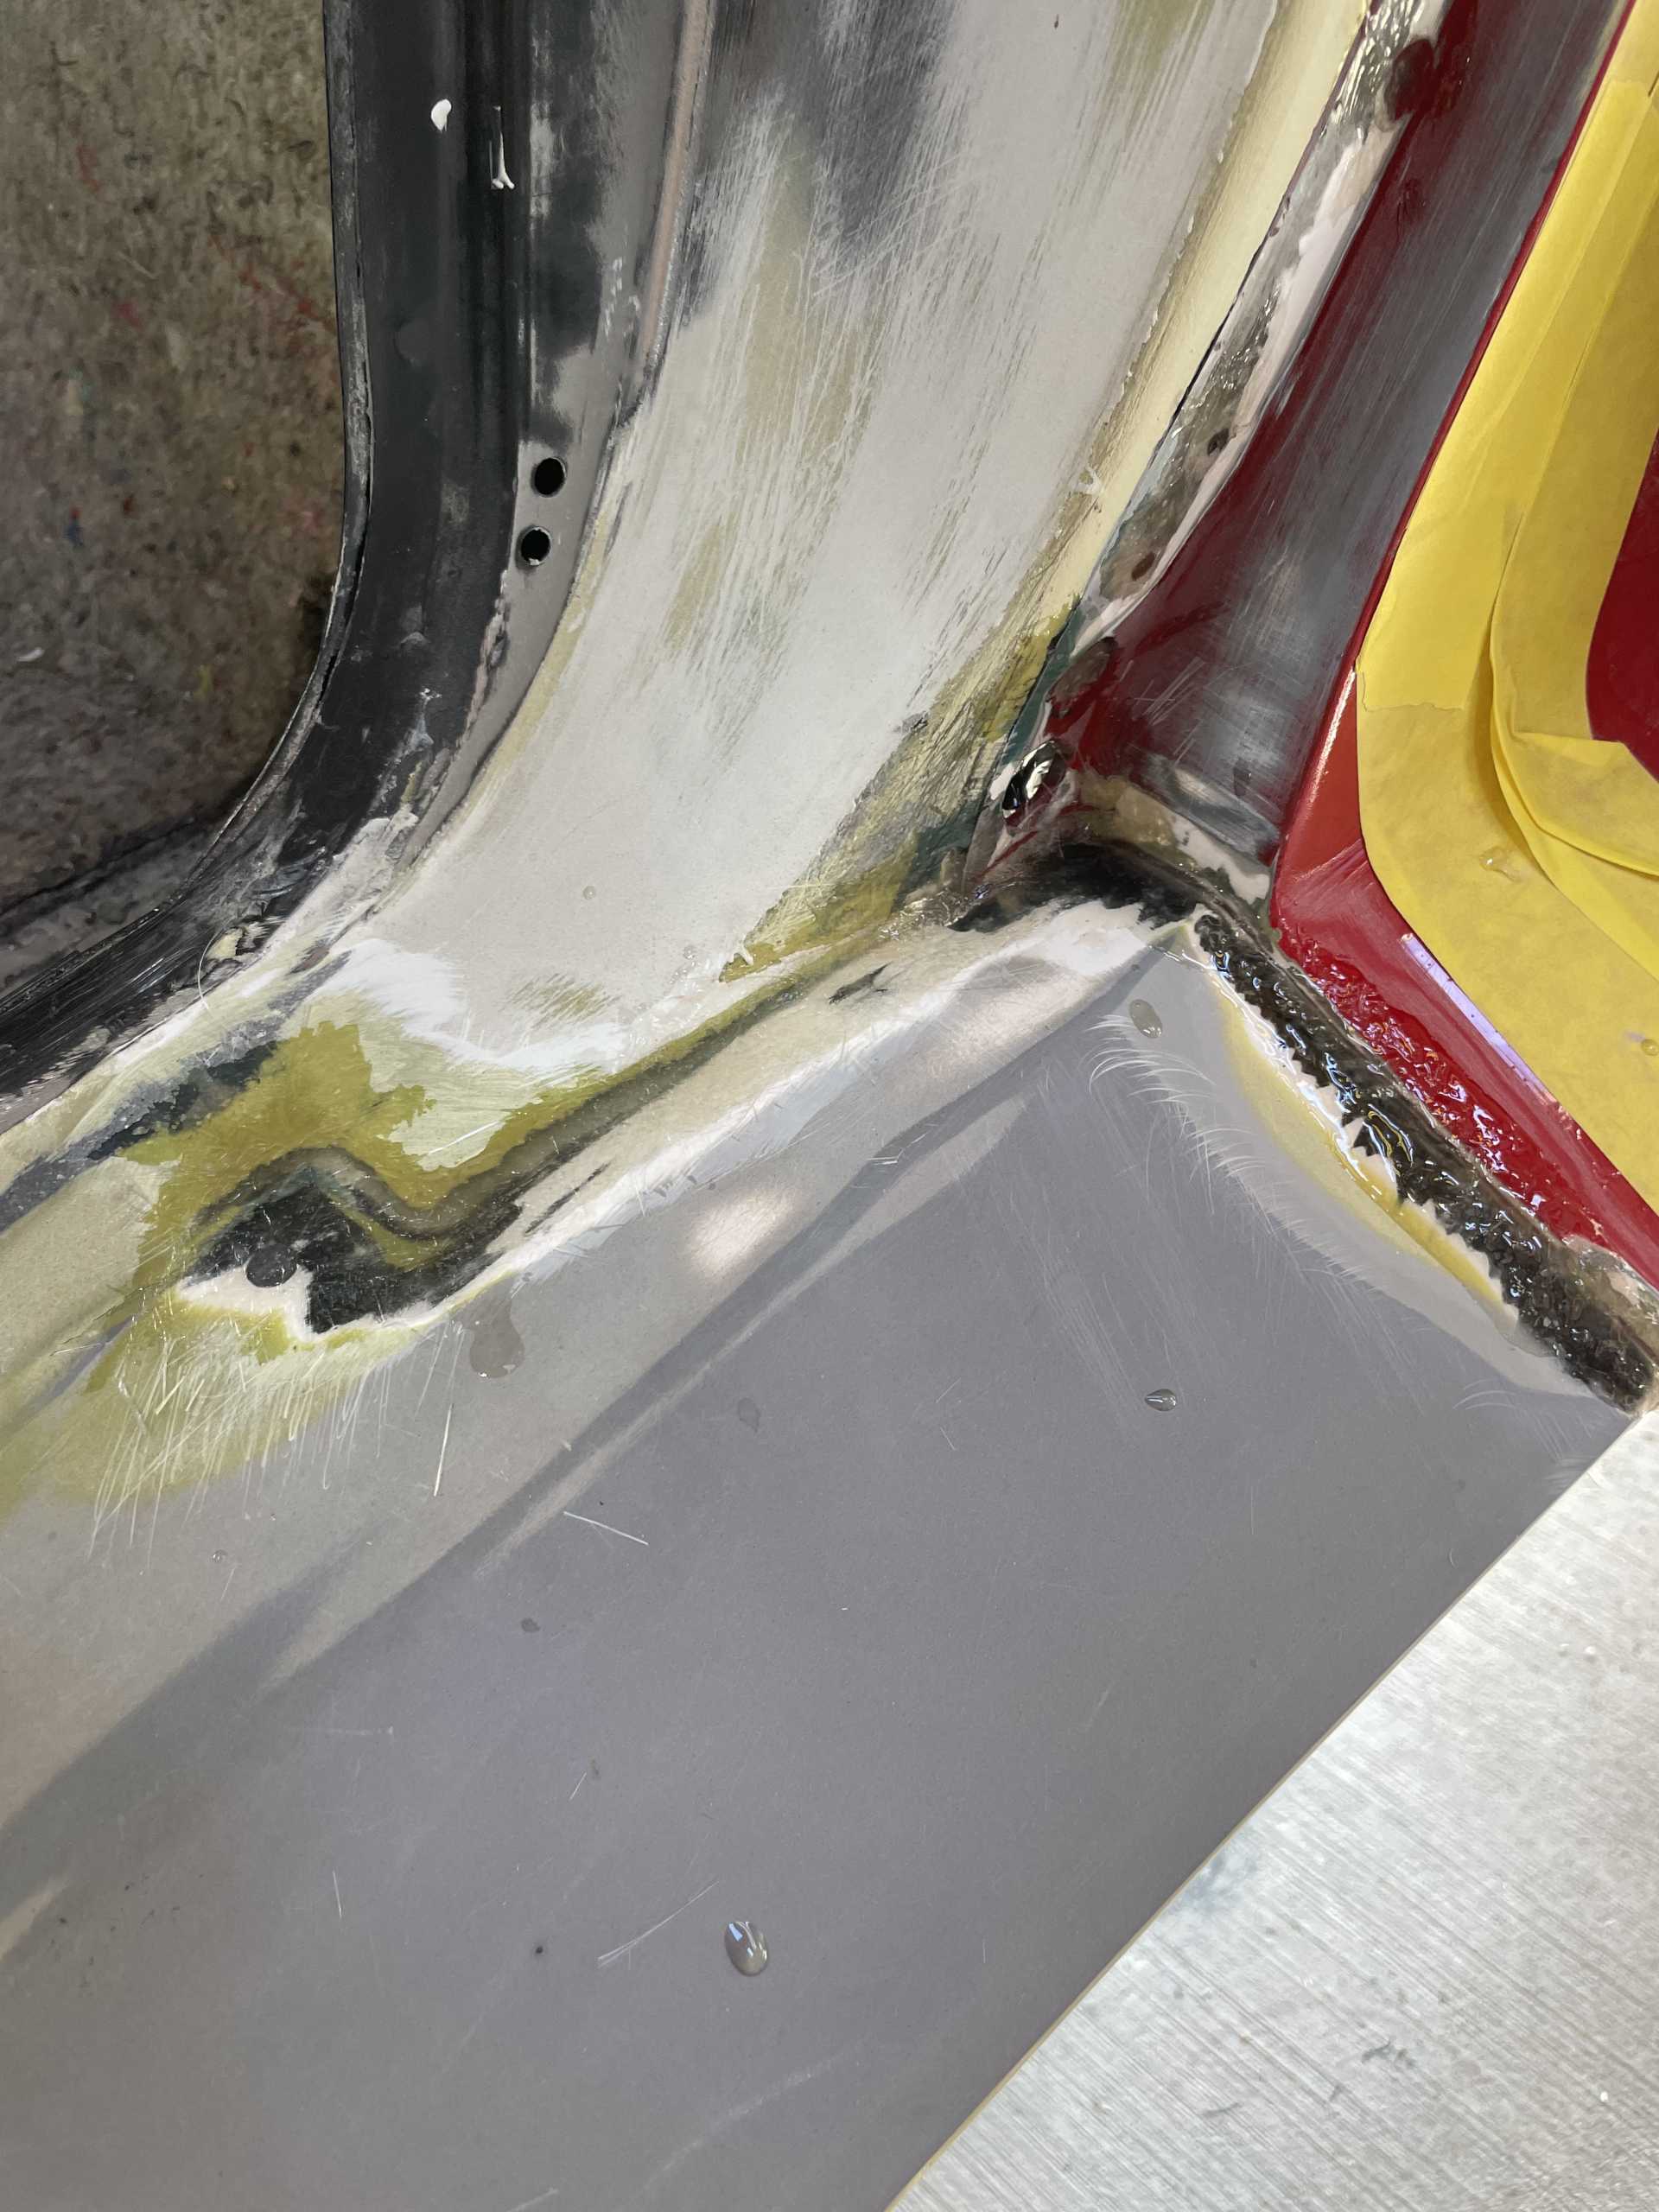
Then with the help of Phil, LD, and Kim we bonded and installed the rear body , we did a test fit before applying the panel bond just to work out all the bugs .
I let it sit for 24 hours before filling all the glue gaps with a fiberglass slurry
I then body worked the entire joint and it’s now ready to prime and paint.
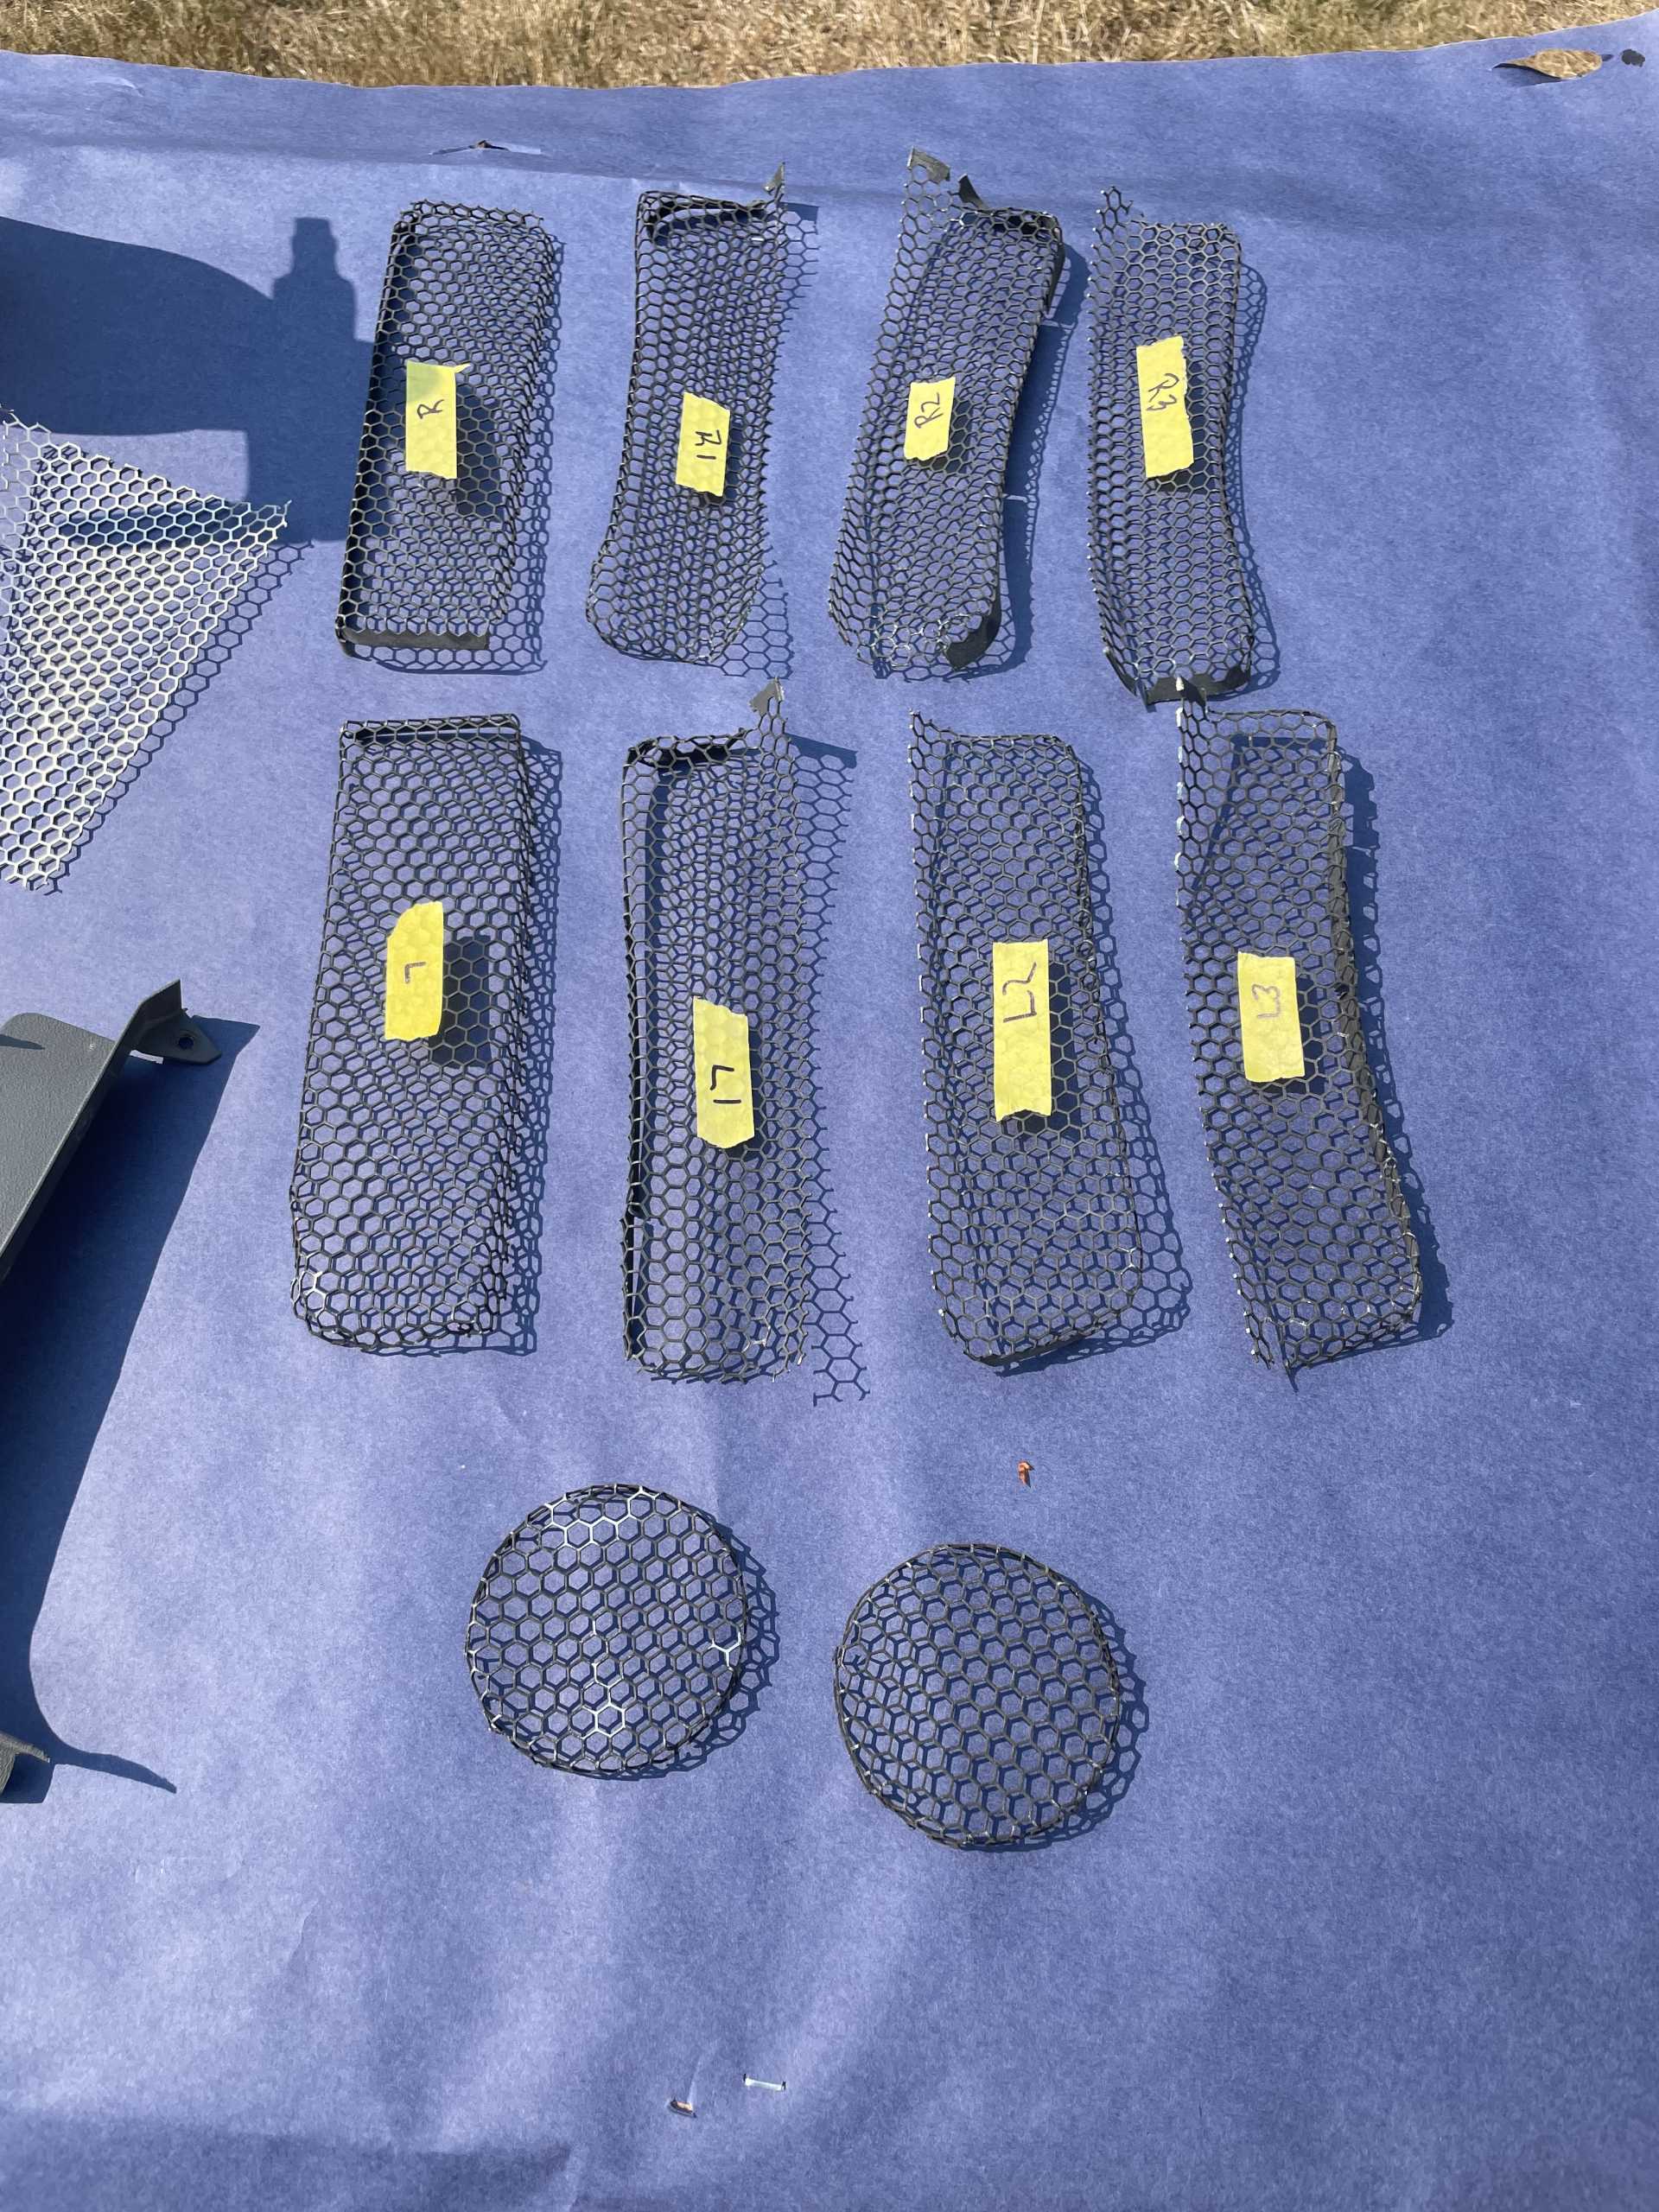
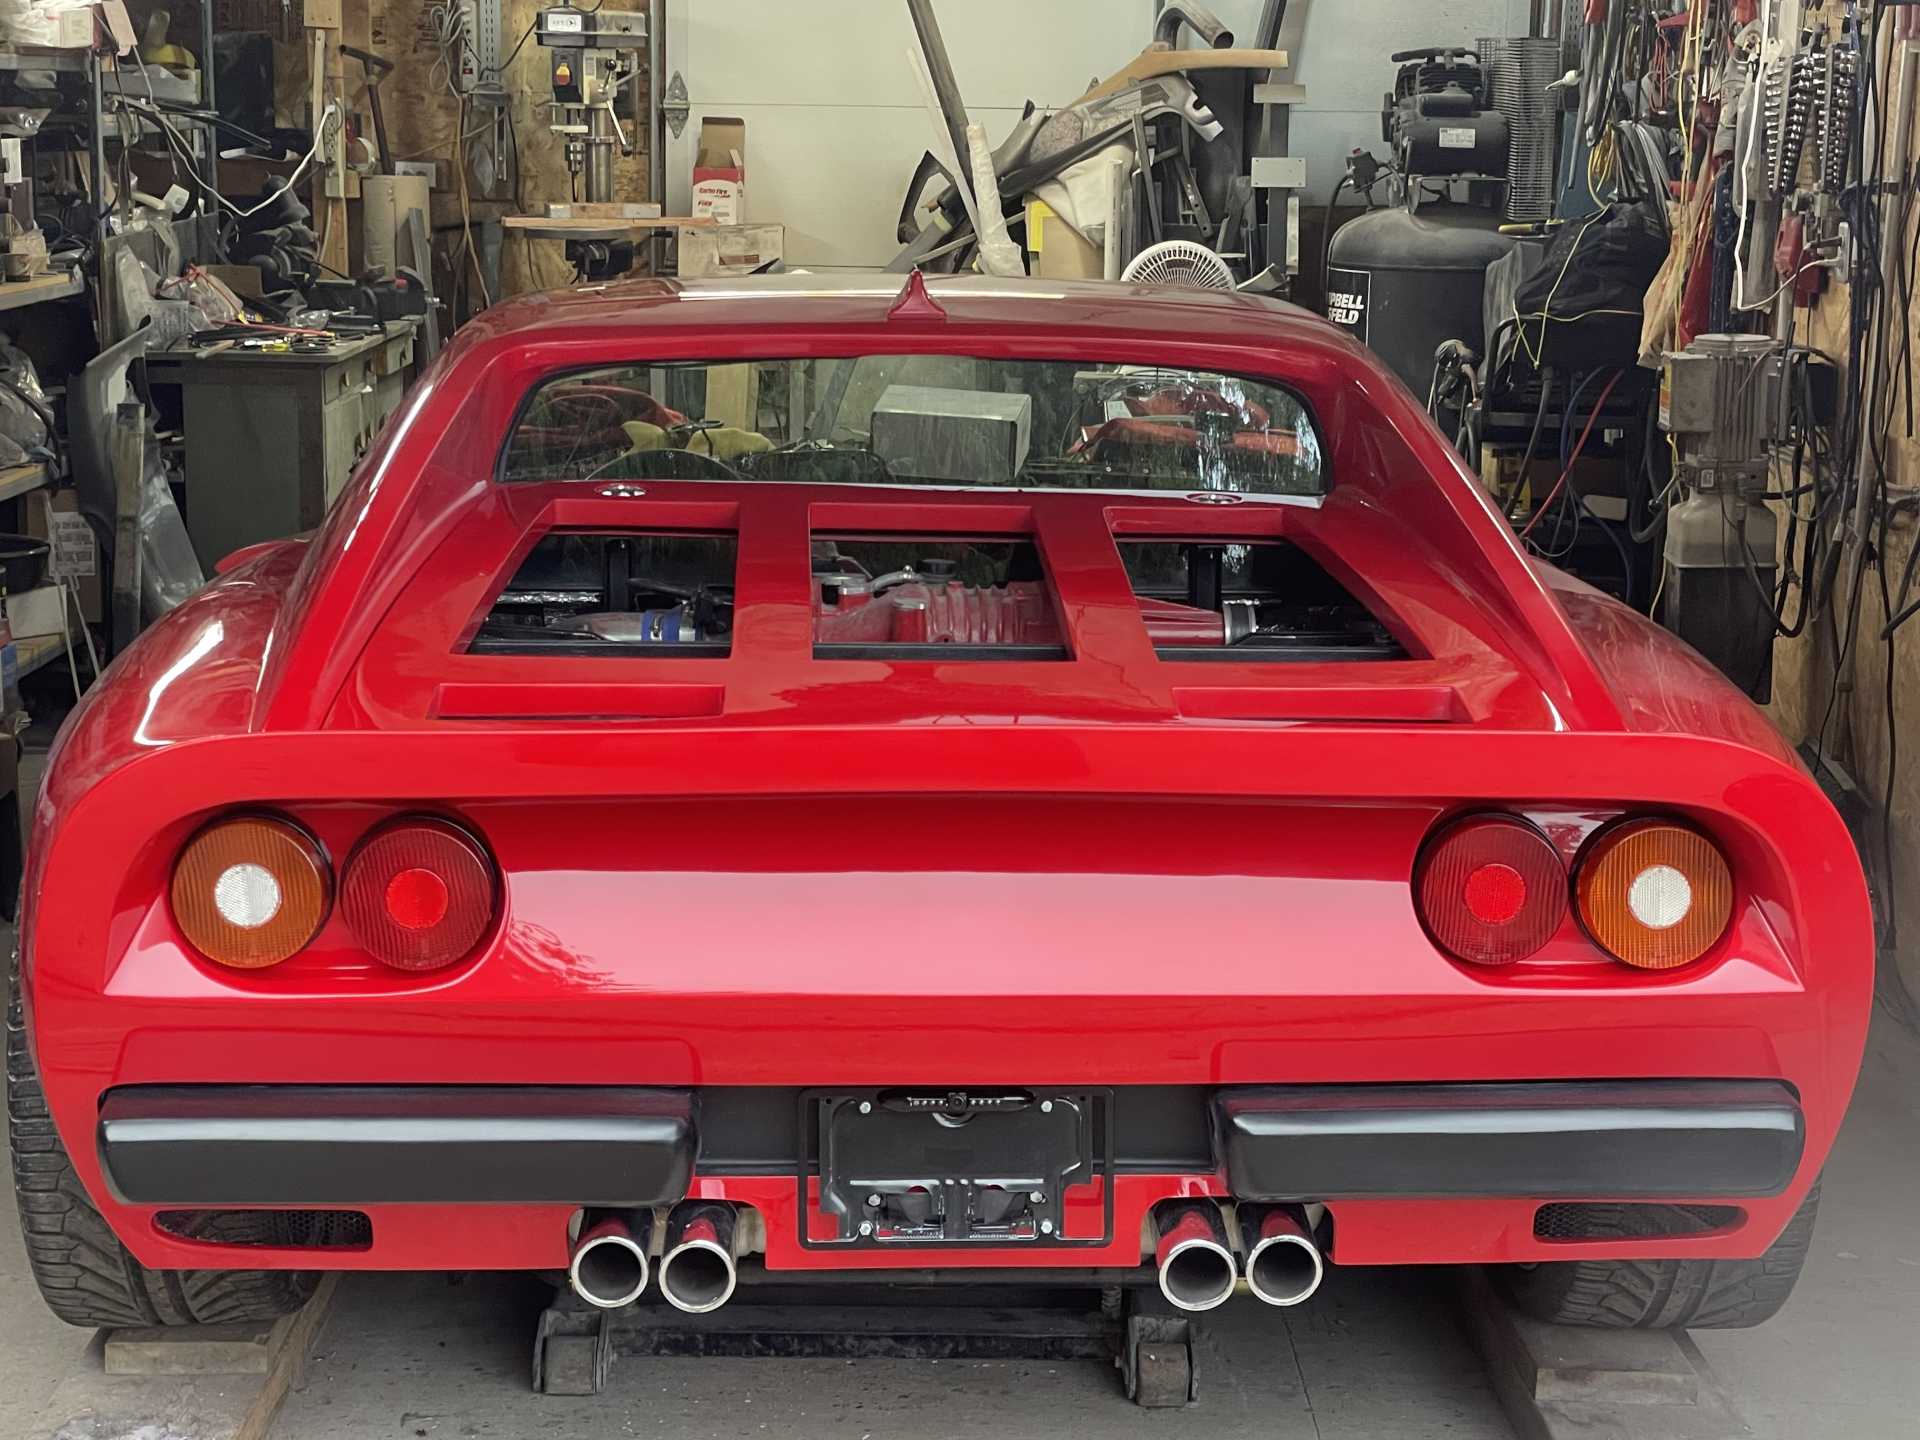
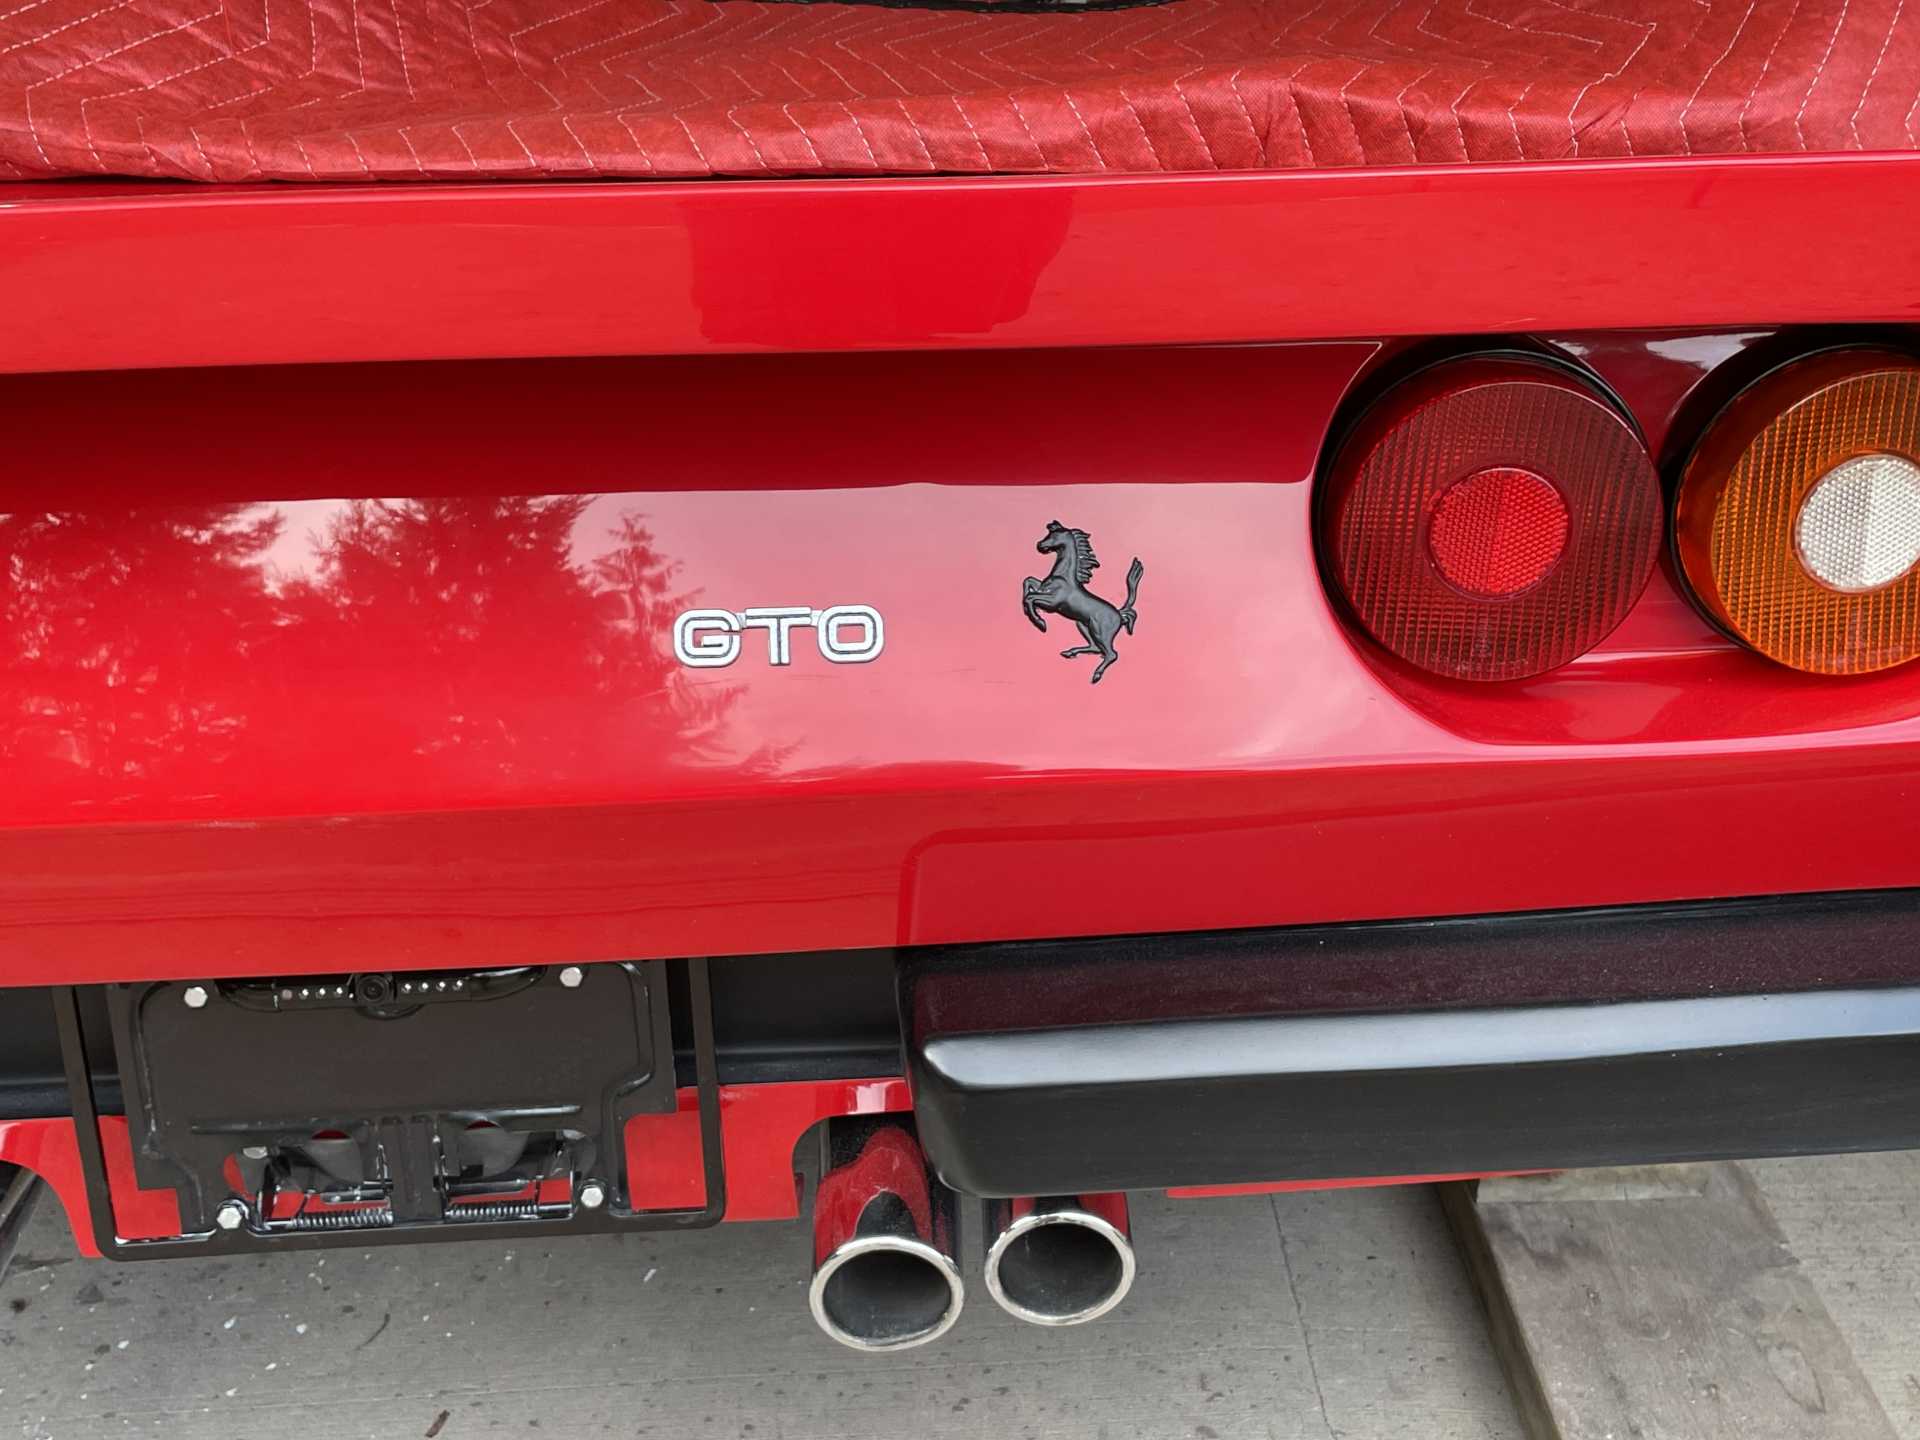
One of the really cool finishes to the GTO is the rear gills I finally got the inner grills bonded
I’m doing the last painting tomorrow , which will be another milestone.
A milestone has been reached ,all painting has now be completed on the project. Next to start putting it all together for hopefully the final time. the bonding body work turned out great you can't see the bonding joints.
The process as before shouting proper, white and red then finishing with the clear coat.
I painted the bumper area black to blend the bumpers into the area.
thanks for stopping by. Wayne
[This message has been edited by dobie1 (edited 08-26-2023).]
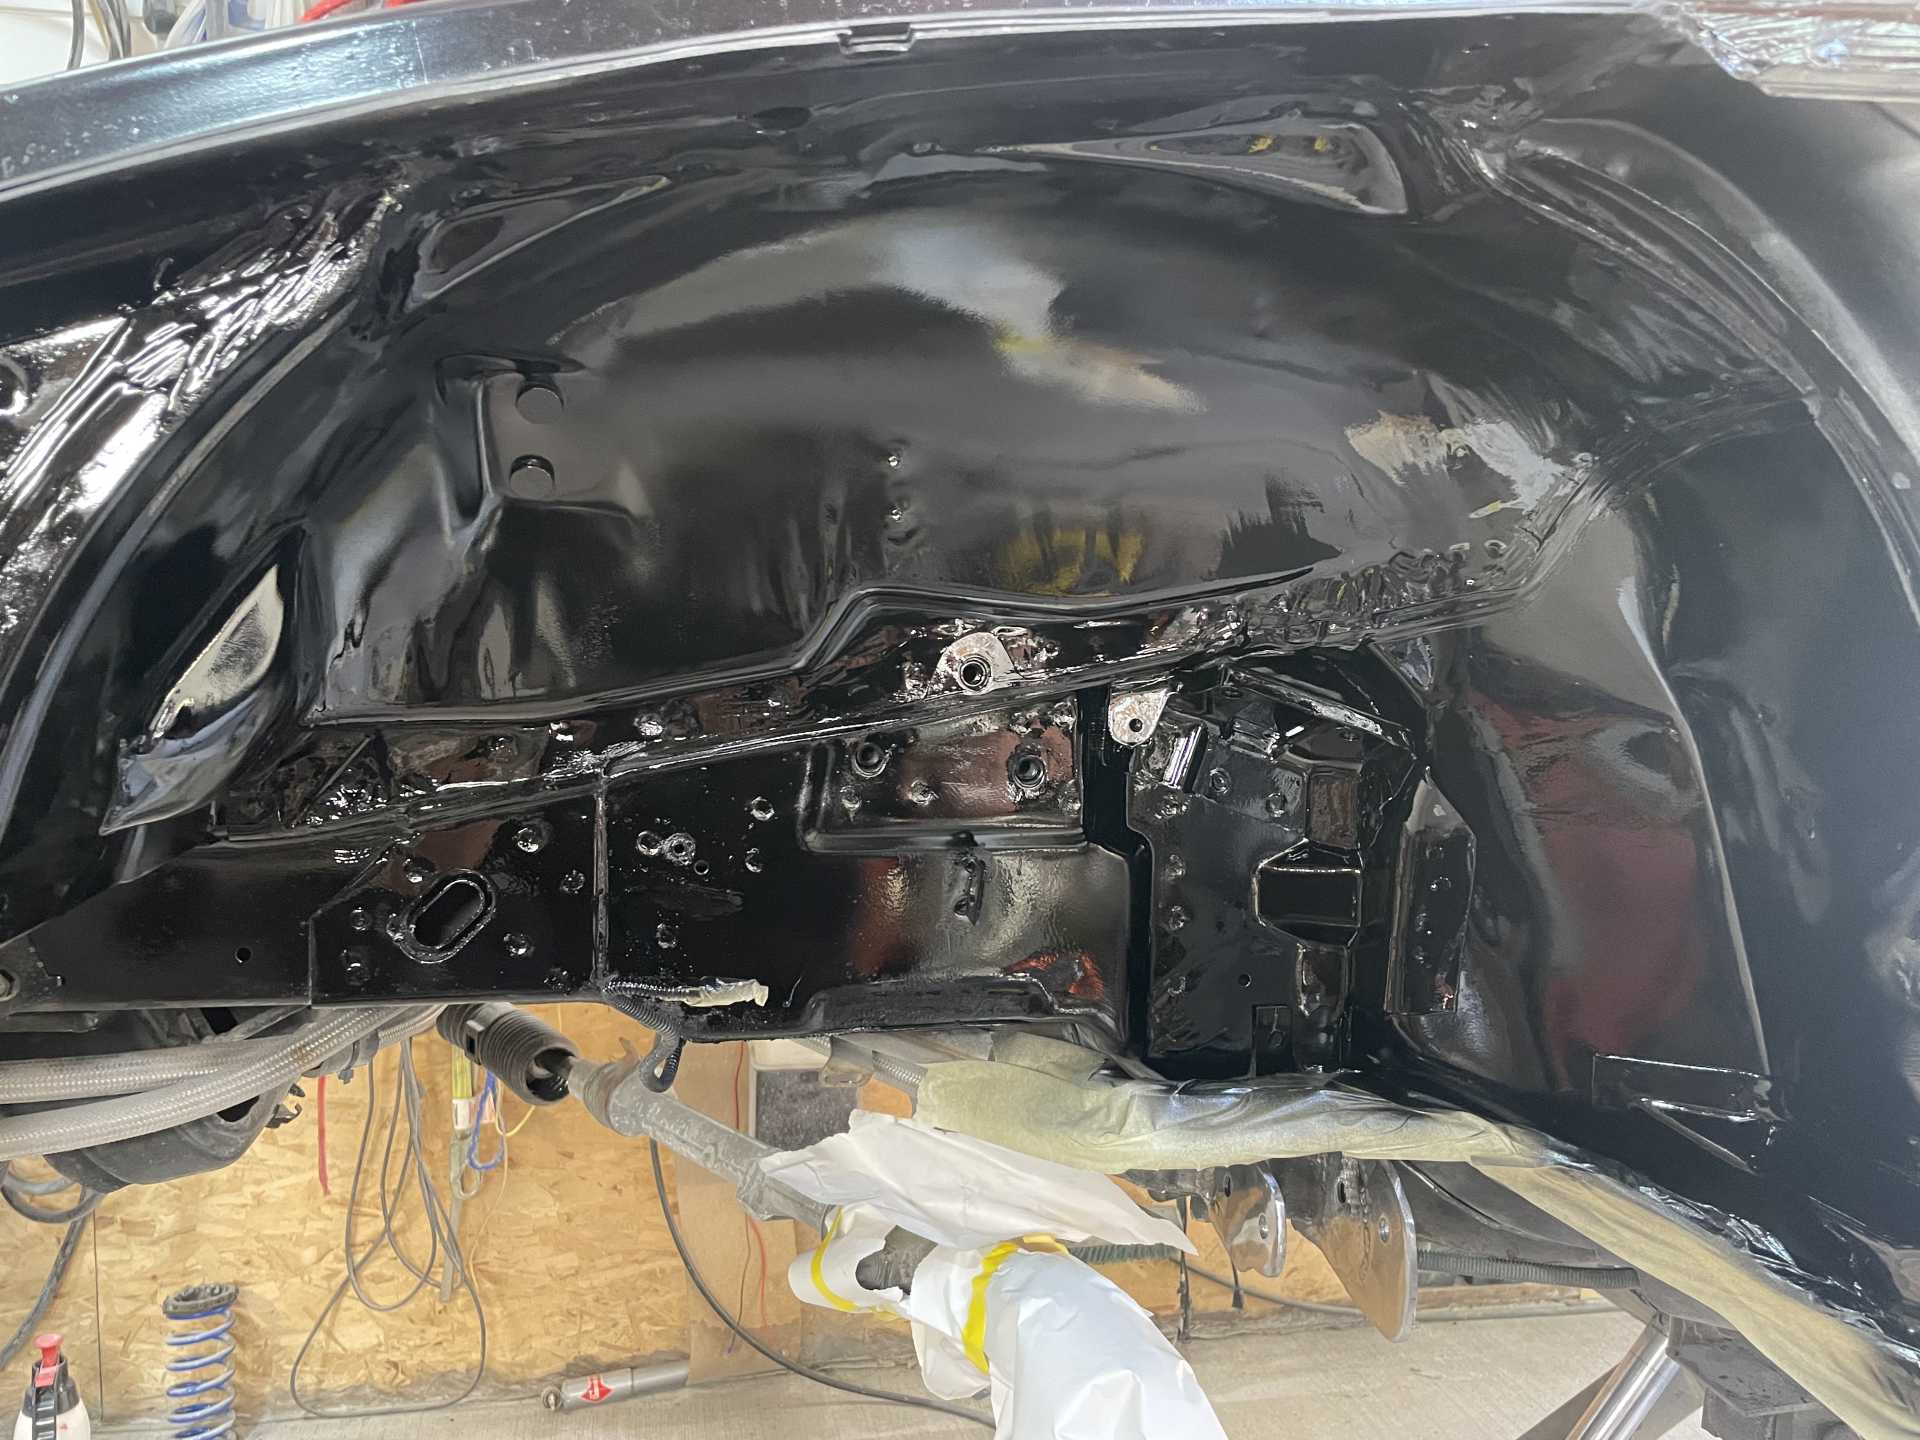
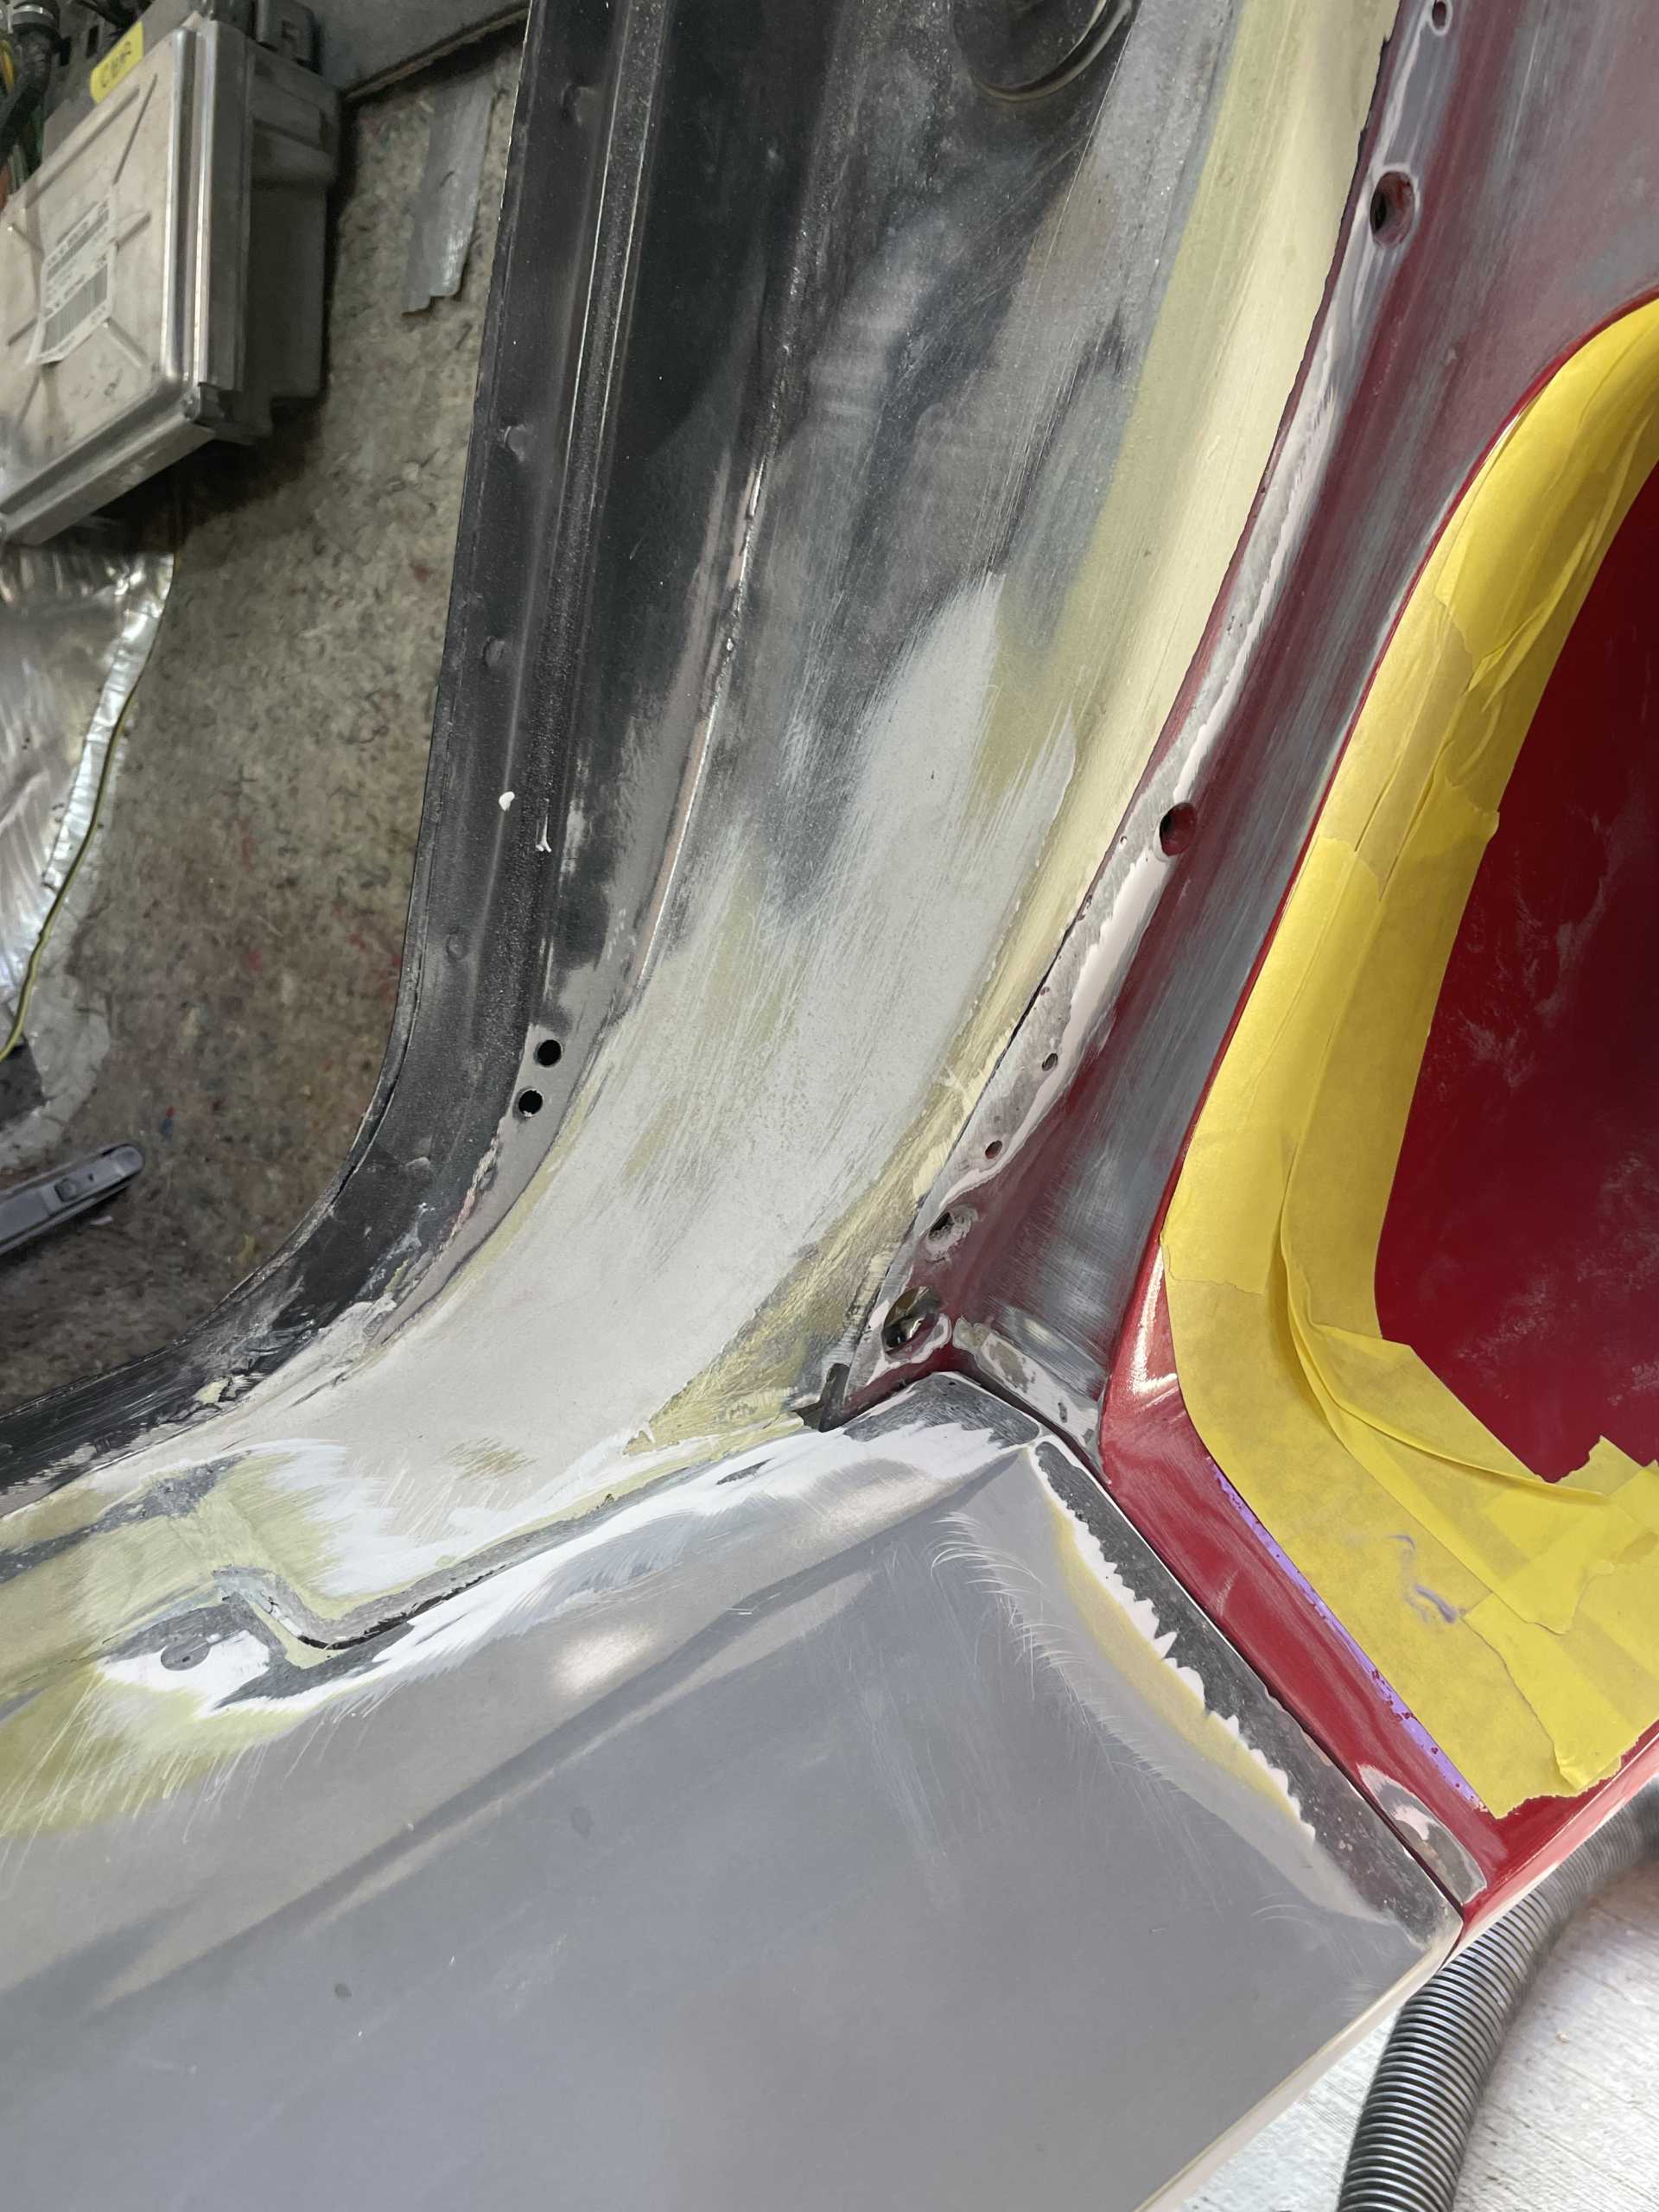
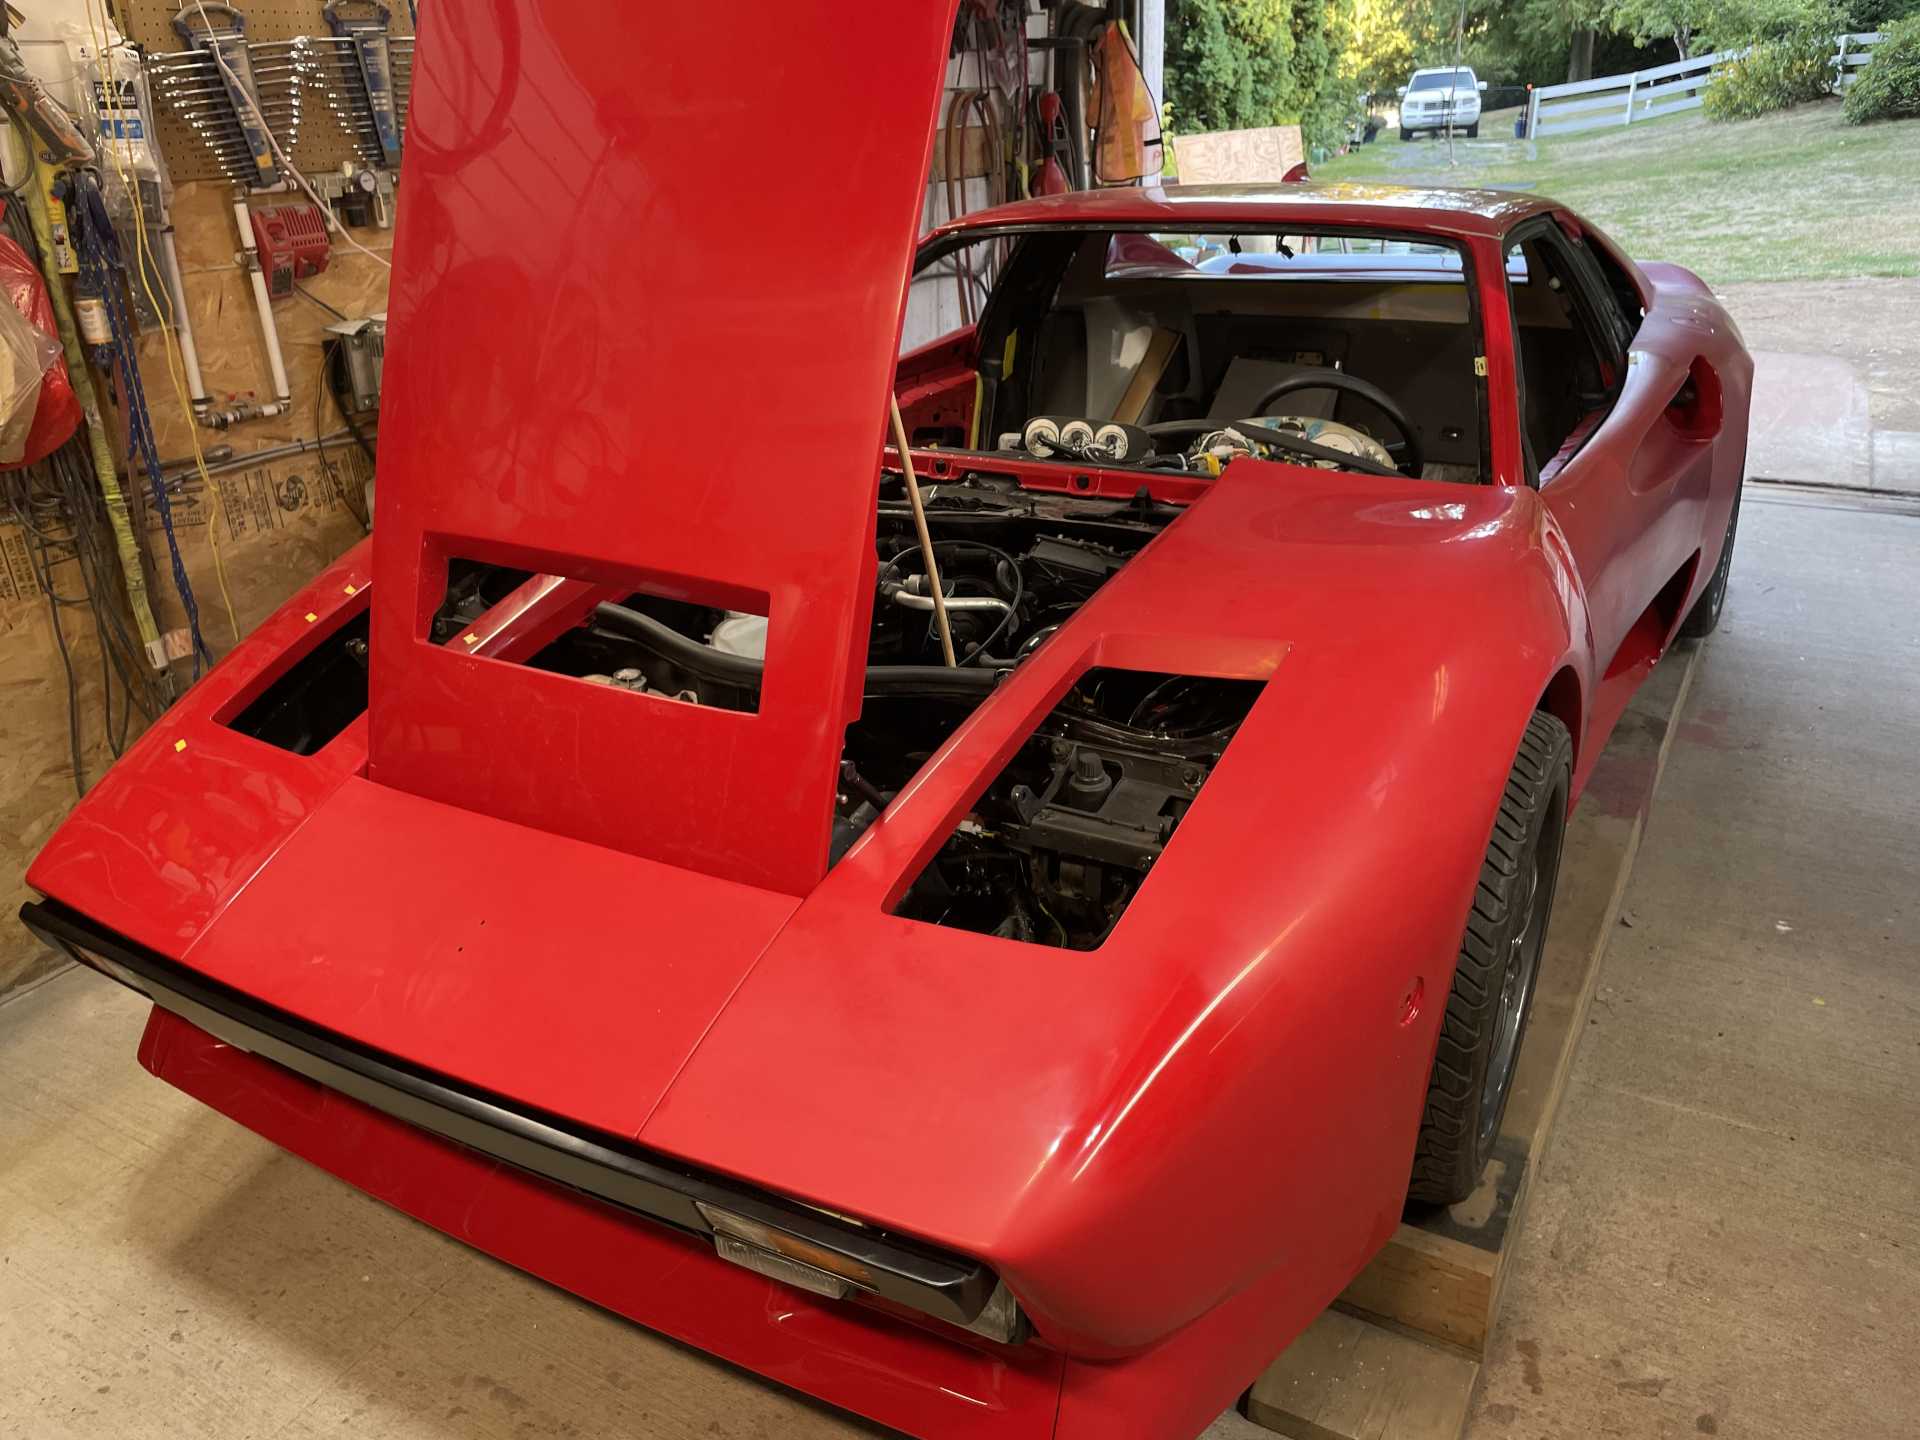
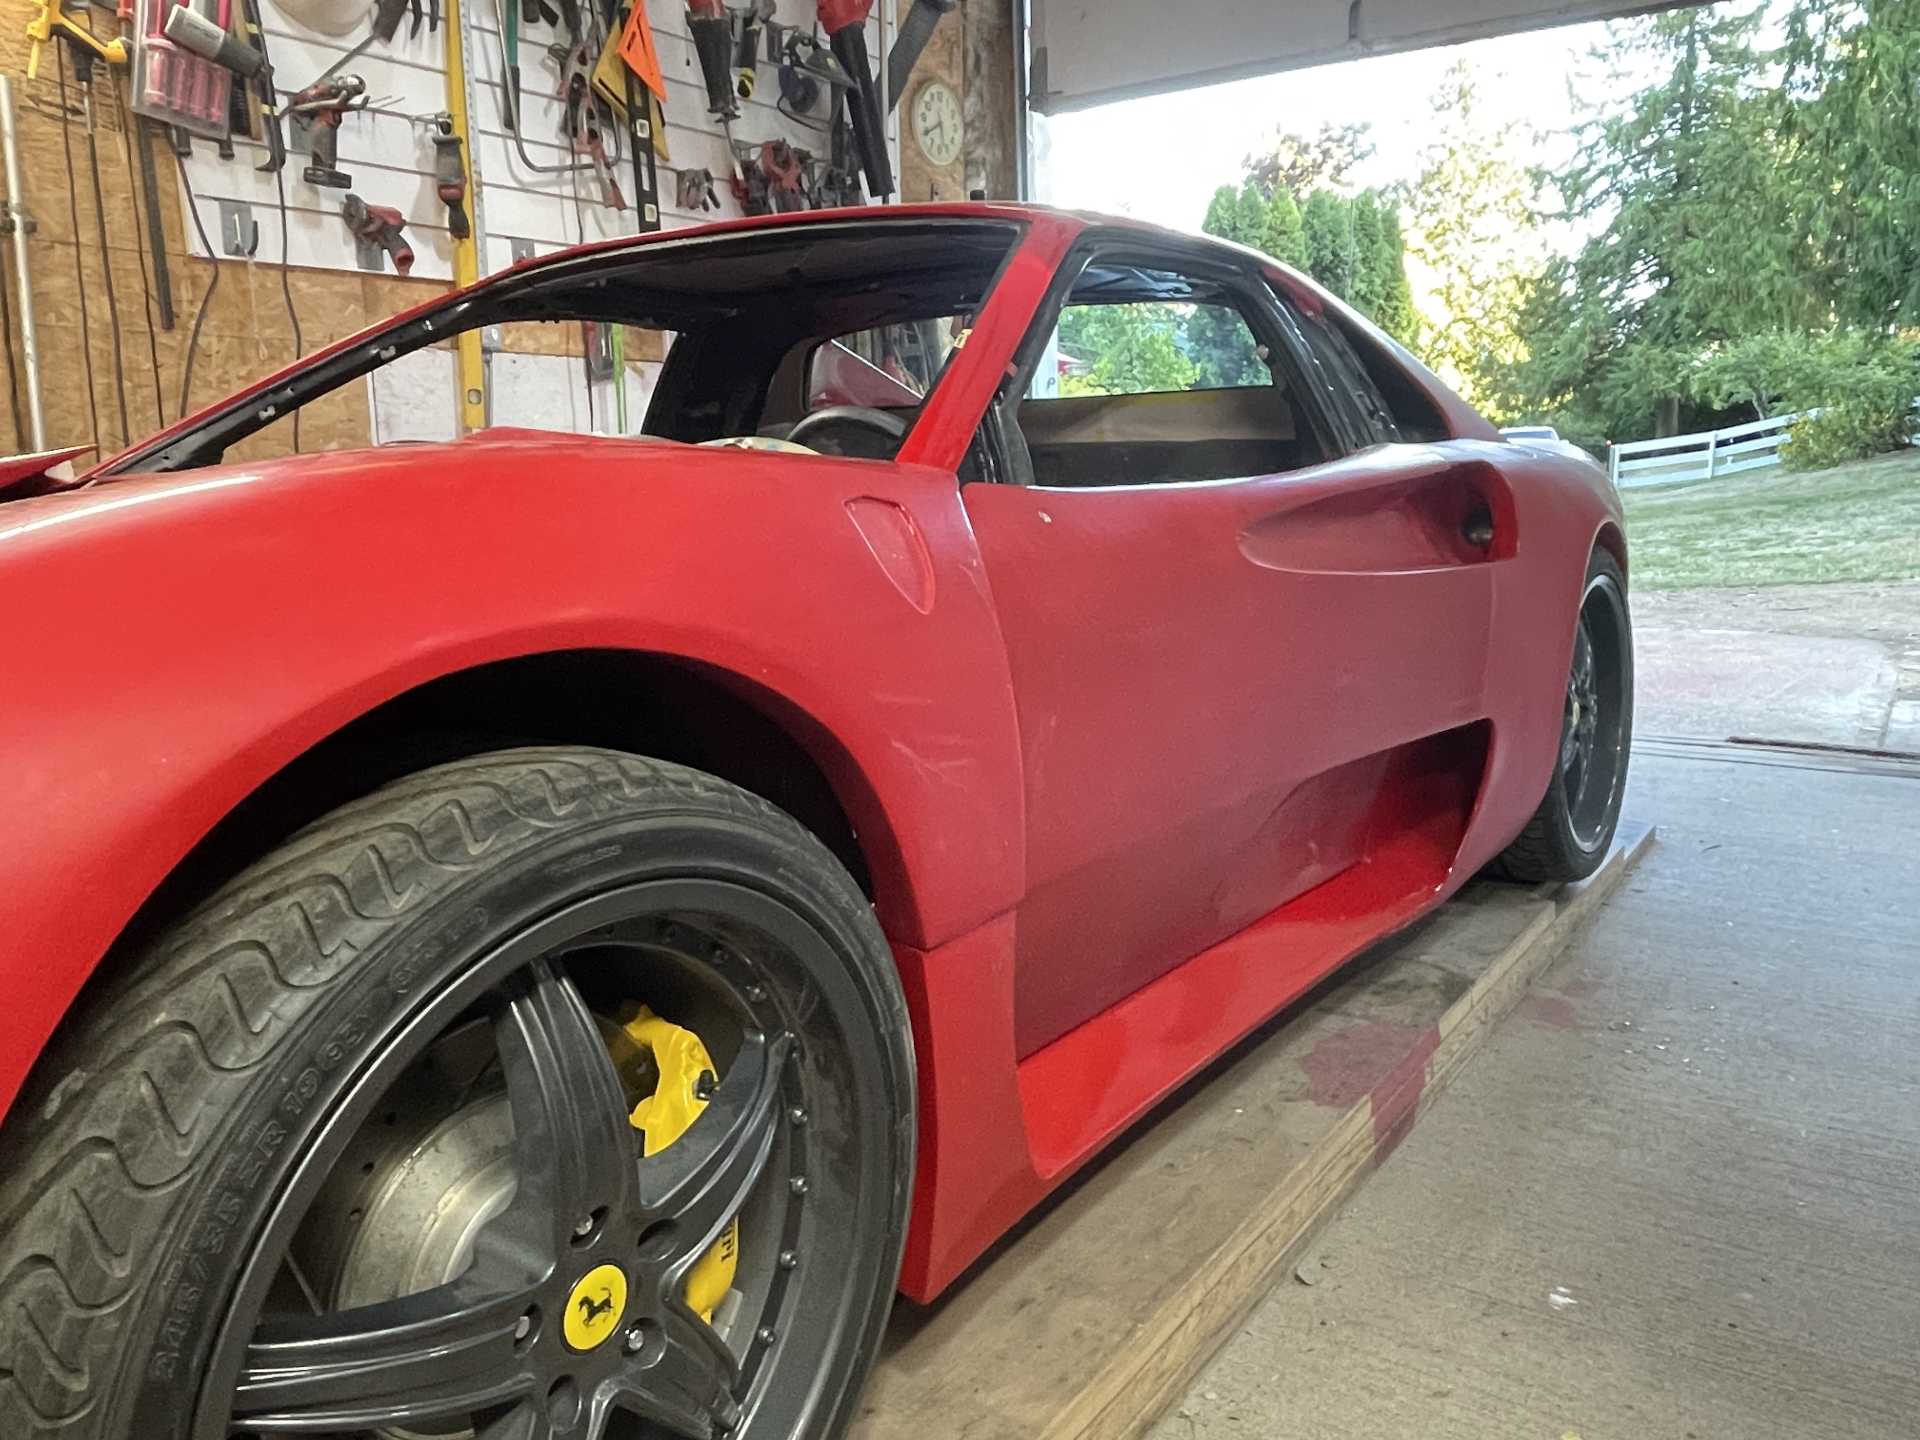
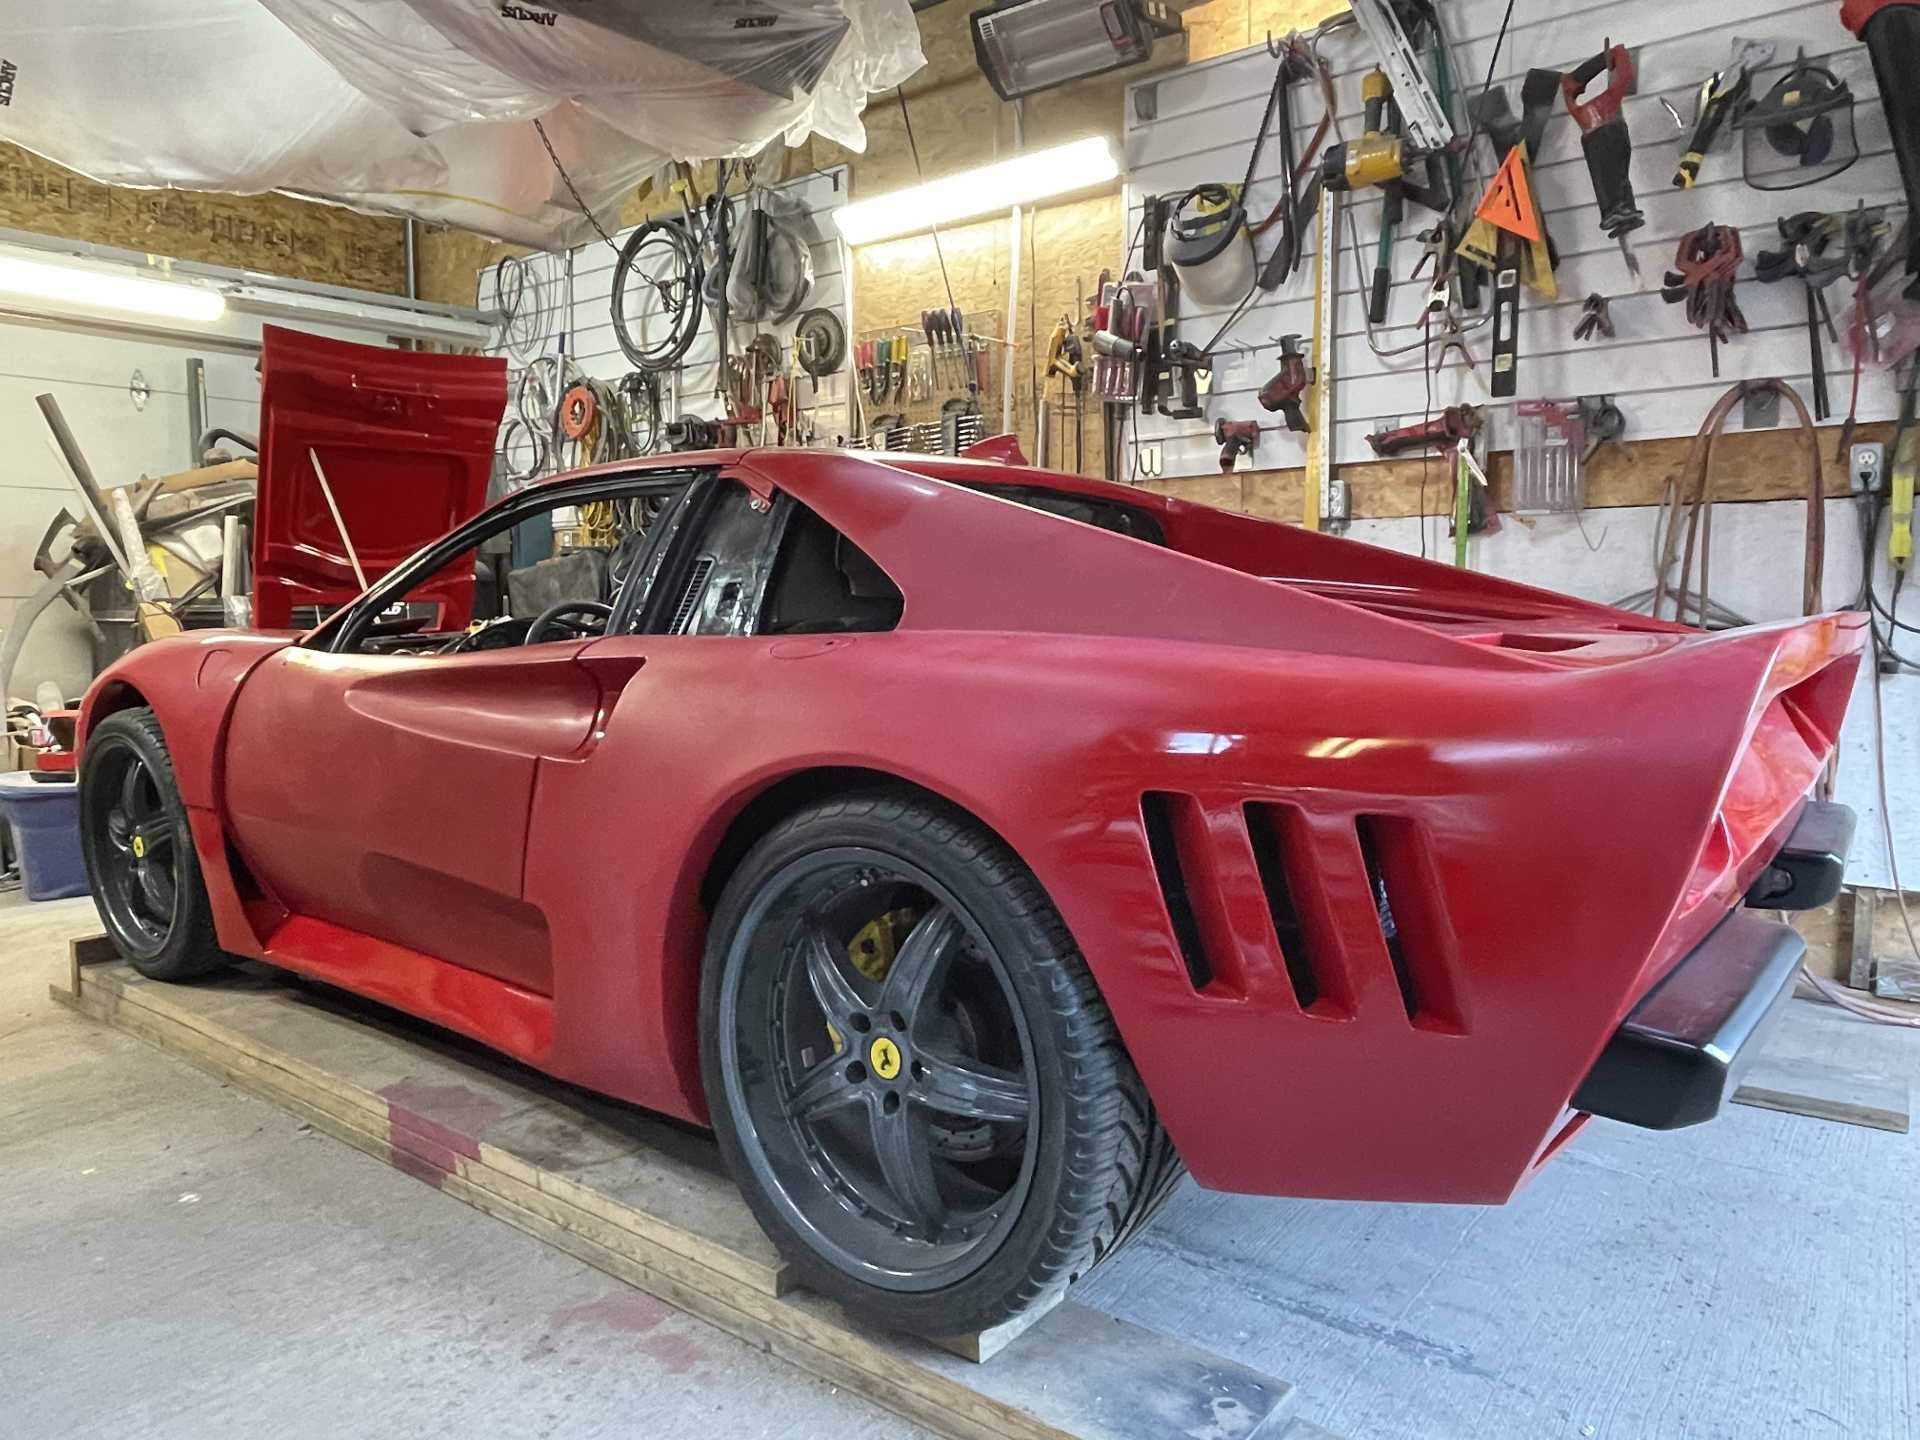
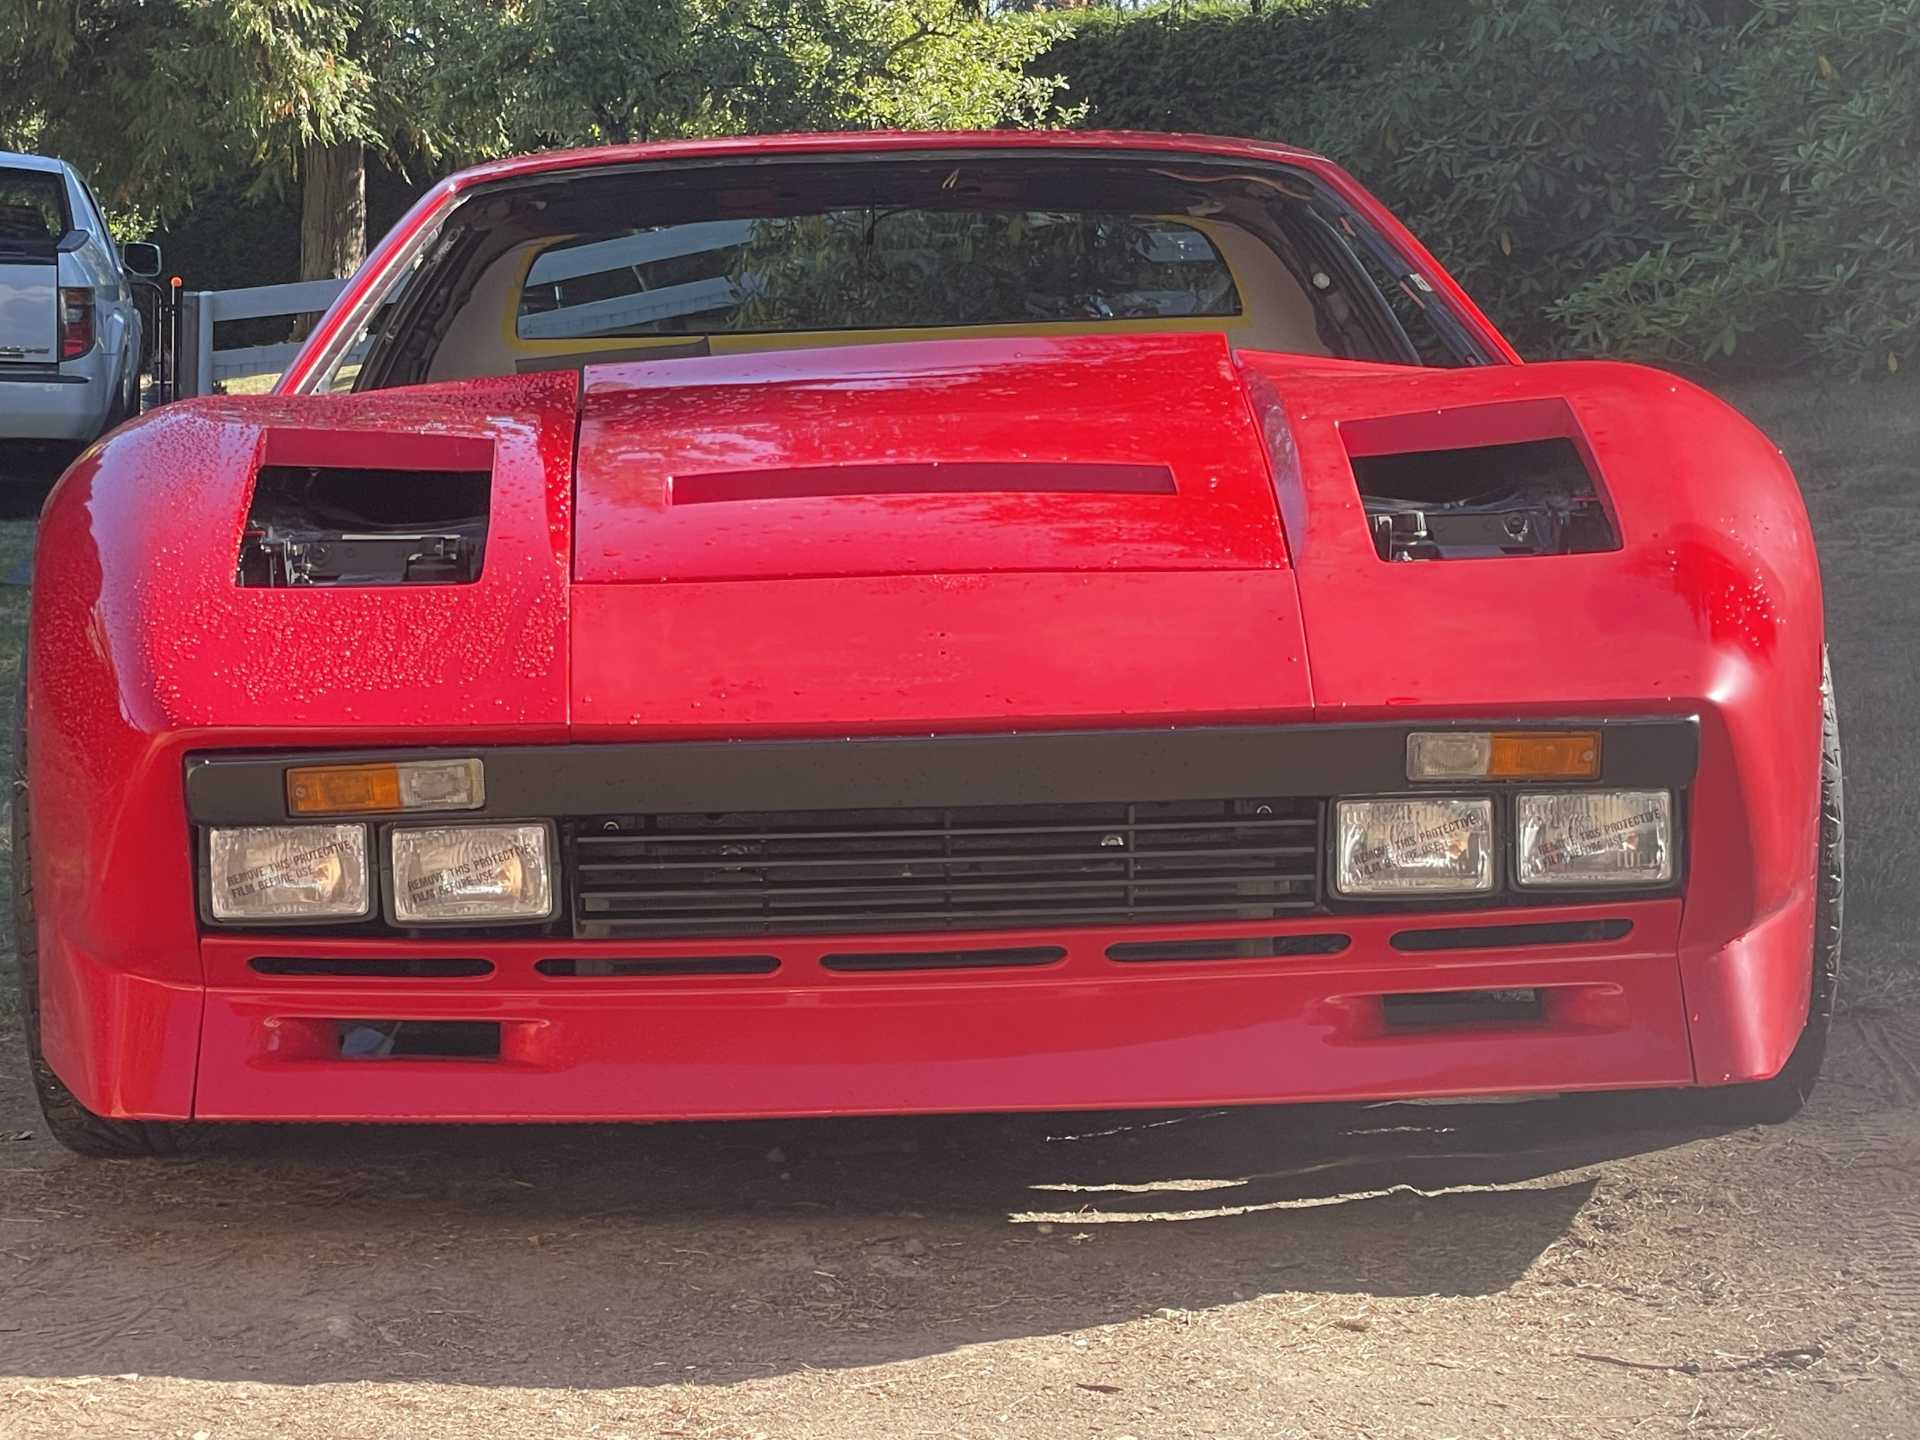
I’ve started to put the body panels back on the car after finishing all the final electrical final checks. I still have lots of wet sanding and buffing, and I still have to paint the “A” pillars black but it’s getting closer. Here are a few pics , thanks for stopping by.
I had the move the lift backwards in my shop as it keeps moving forward and to the right every time it goes up and down. So I had to move it outside to relocate and give me more room to work on the car. I took a few pics in the sun what a difference in the Color when it’s in the sunlight, And a full side view , I do need to finish the side quarter windows though. And a shot with a mirror on
Looks great. I like the Brembo brakes and plan to put some on my 88. What master did you use? Sorry if you had already mentioned it, but what did you harvest the calipers and rotors from? And what diameter are the rotors? Thanks
Looks great. I like the Brembo brakes and plan to put some on my 88. What master did you use? Sorry if you had already mentioned it, but what did you harvest the calipers and rotors from? And what diameter are the rotors? Thanks
Hi Rick it’s been awhile! Ok so I used a Corvette MC, as I originally did the big brake upgrade using 13” corvette rotor and C4 brakes all around. But I was able to find a complete set of Brembo brakes and rotors off a 456 Ferrari. If you go with Ferrari Brembo I have cad drawings for the brake adapters a buddy did for me. If you go with corvette I have the adapters that I used with the C4 brakes that I’ll be selling along with the brakes and rotors.
It’s be a busy few weeks for me , the build is moving along nicely. I got some of the Color polishing and buffing completed and bangles installed on the back it came our pretty good.
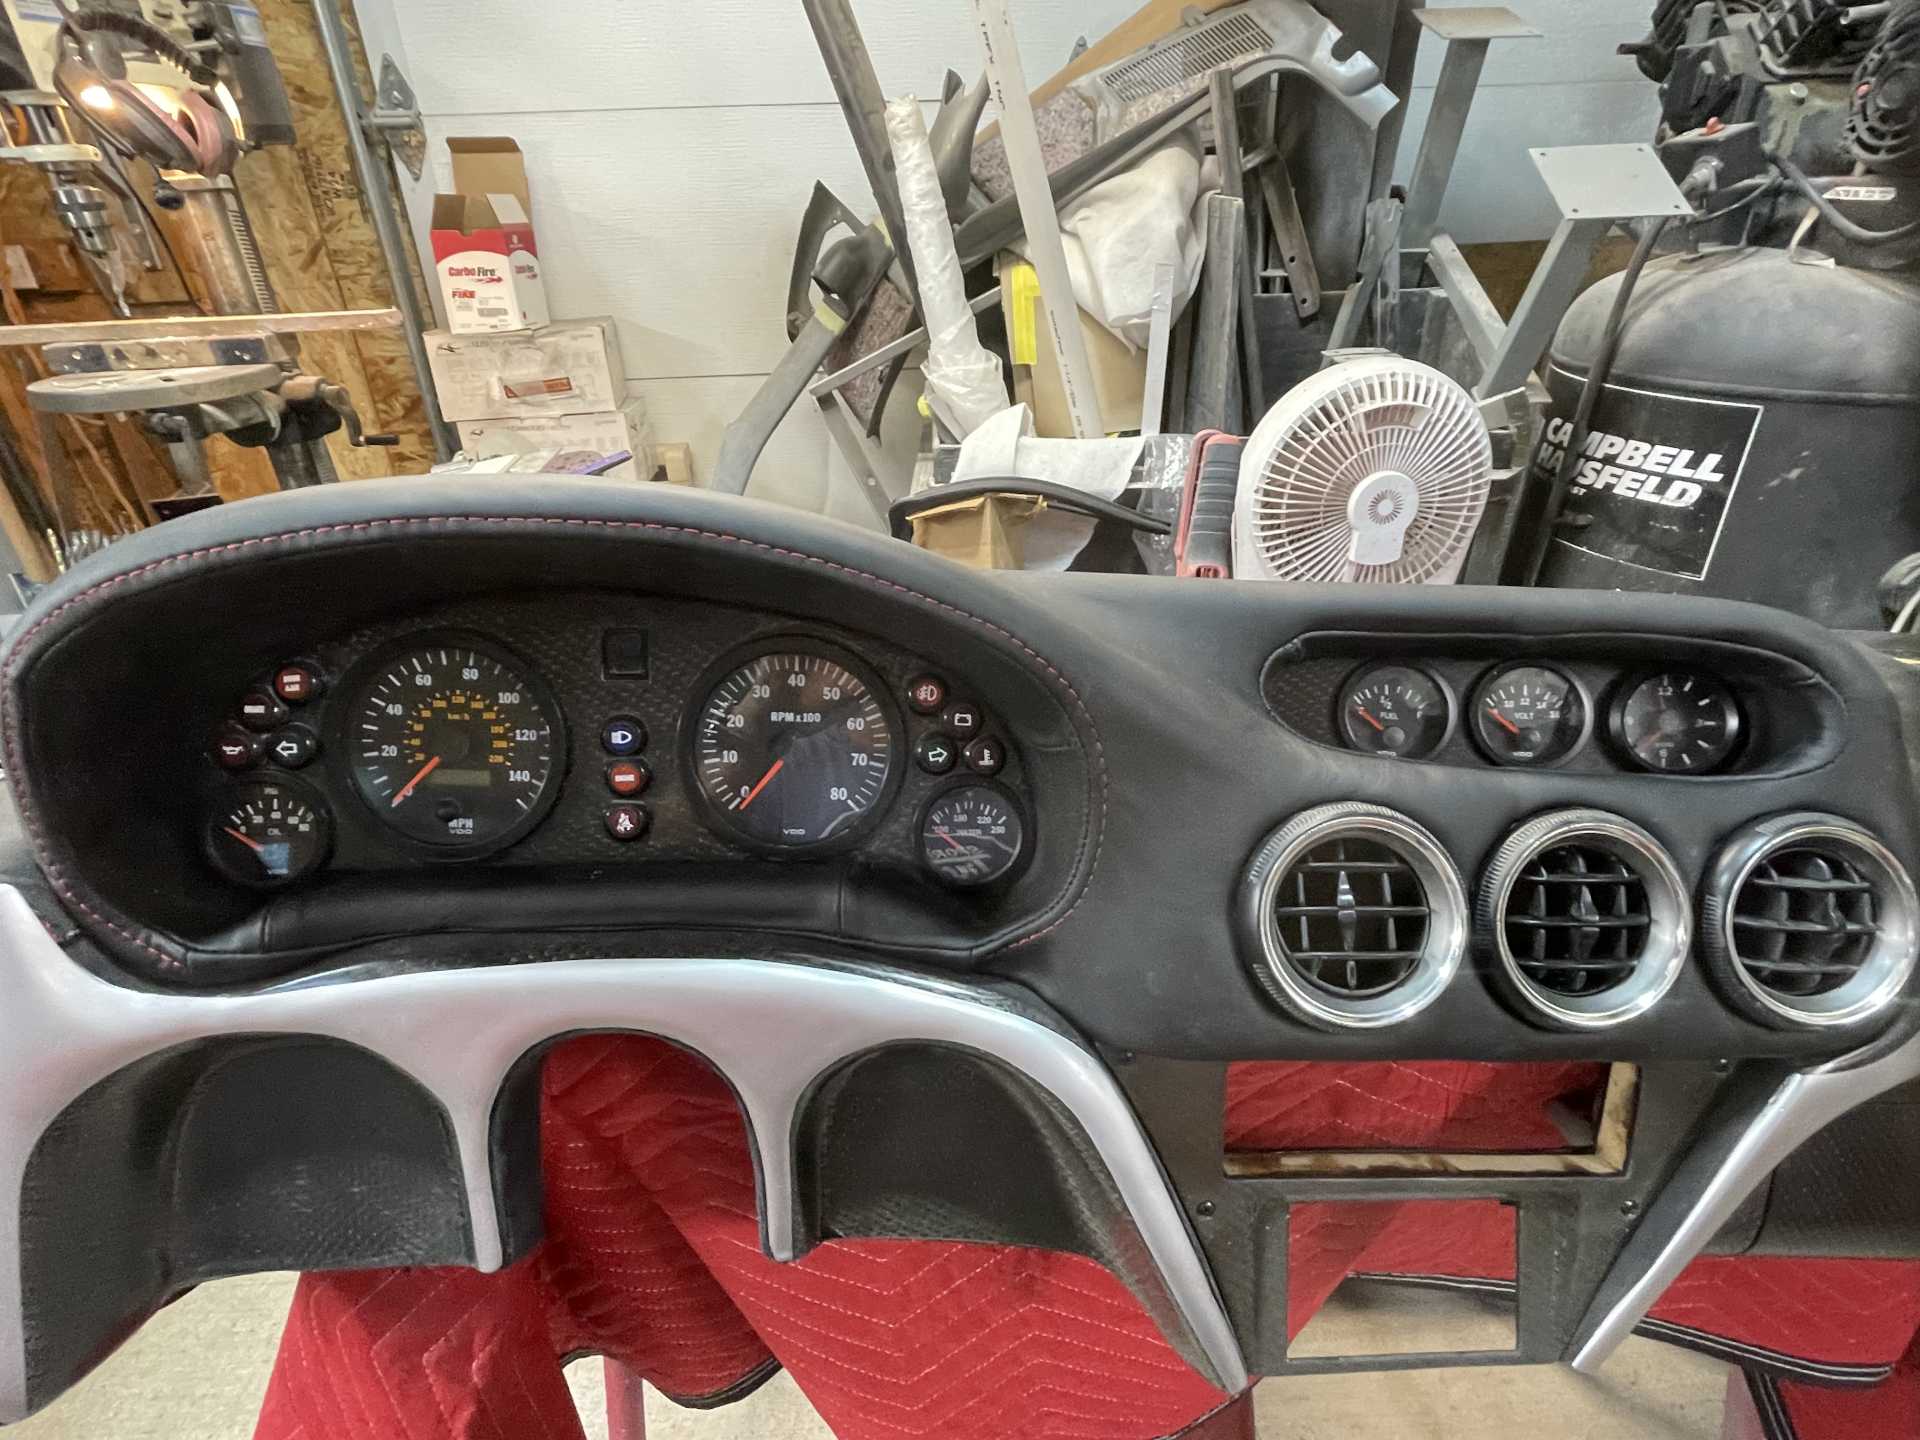
I also have the dash ready to install soon
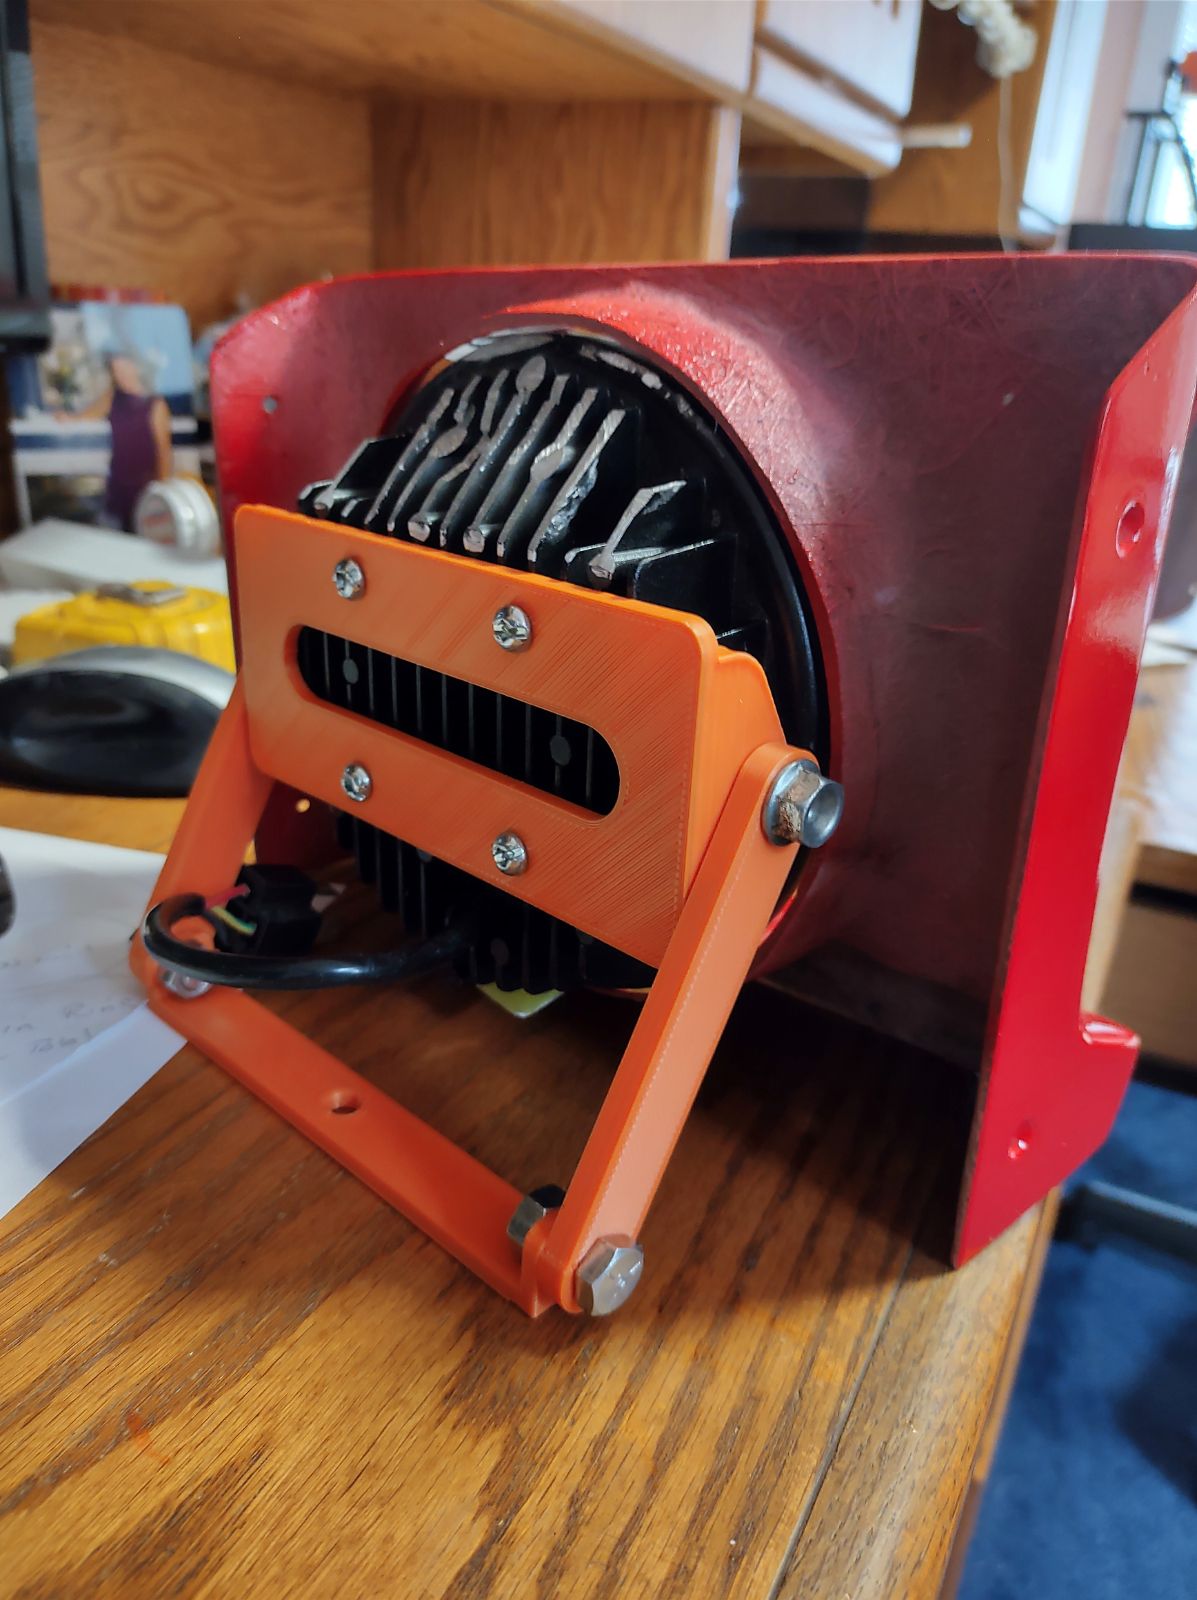
My buddy Phil built me a headlight mount to work with my pop up buckets, he 3D printed them using PetG with Carbon Fiber infused in the plastic it’s good for temps up to 230C.
The orange brackets were the test before using the more expensive filament
Phil is also 3D printing a bezel for my console to finish the push button control Lots happening I’ll post more pics soon. Stay safe Wayne
[This message has been edited by dobie1 (edited 10-11-2023).]
LOL, yah, it's been a while So, you say 13" C4, mine are 12". Is the 13 an option, or did you use something else? My plan is to actually machine custom calipers that will fit the Fiero, GTO and Solstice/Sky. But the newer rotors are SOOO heavy and thick. The C4 is thinner and lighter. This isn't a race car, so I am not that bothered by the loss of rotor mass.
LOL, yah, it's been a while So, you say 13" C4, mine are 12". Is the 13 an option, or did you use something else? My plan is to actually machine custom calipers that will fit the Fiero, GTO and Solstice/Sky. But the newer rotors are SOOO heavy and thick. The C4 is thinner and lighter. This isn't a race car, so I am not that bothered by the loss of rotor mass.
Hea buddy! yes I upgraded to 13” upfront and 12” on the back. I was going for the stopping power with the increased HP, plus the look of the Brembo….Sorry for the late reply. Wayne
I'm in the early stages of a 308 replica build, from what looks to be the identical kit that you started with. I wish I had 1/10 of your skillset!!!
A fellow Canuck!! Good luck on the build lots of work ahead of you. My 308 kit came from EVM Rob, it was ok but there were a few fitment problems and a bit of warping. It got me right into fiberglass fabrication. I fortunately got help from Don O. That mentored me until I figured it out.😁
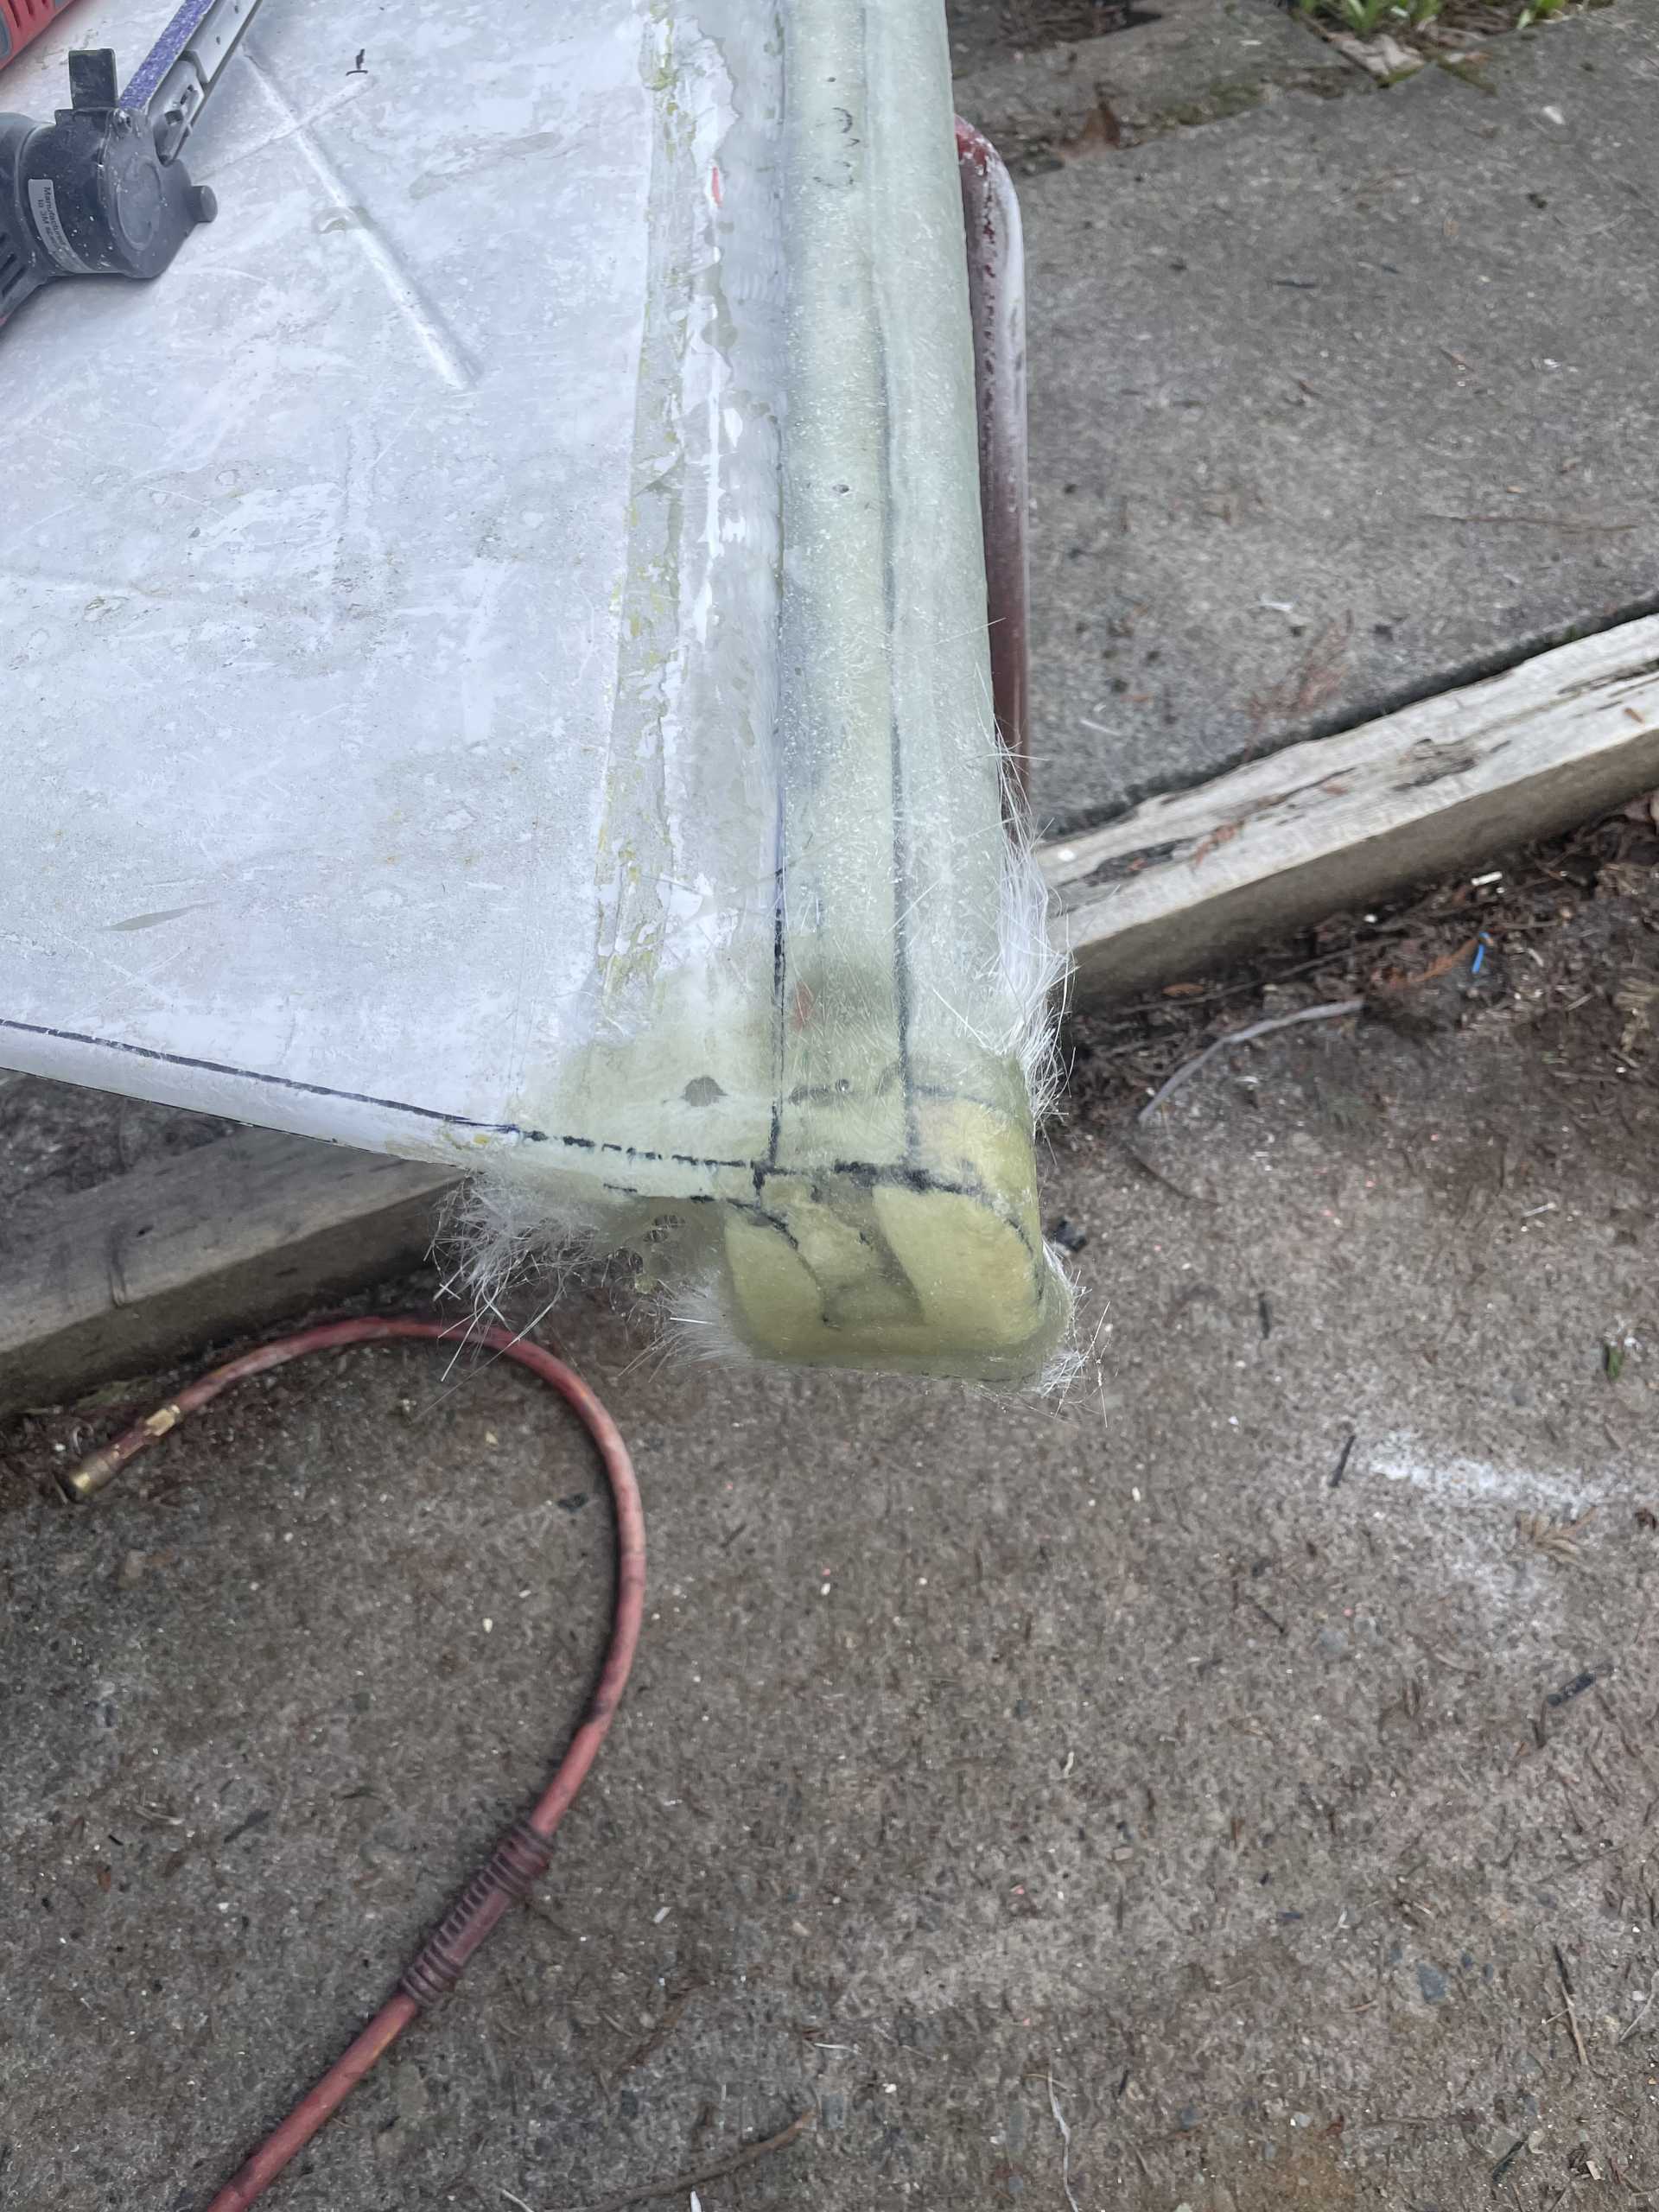
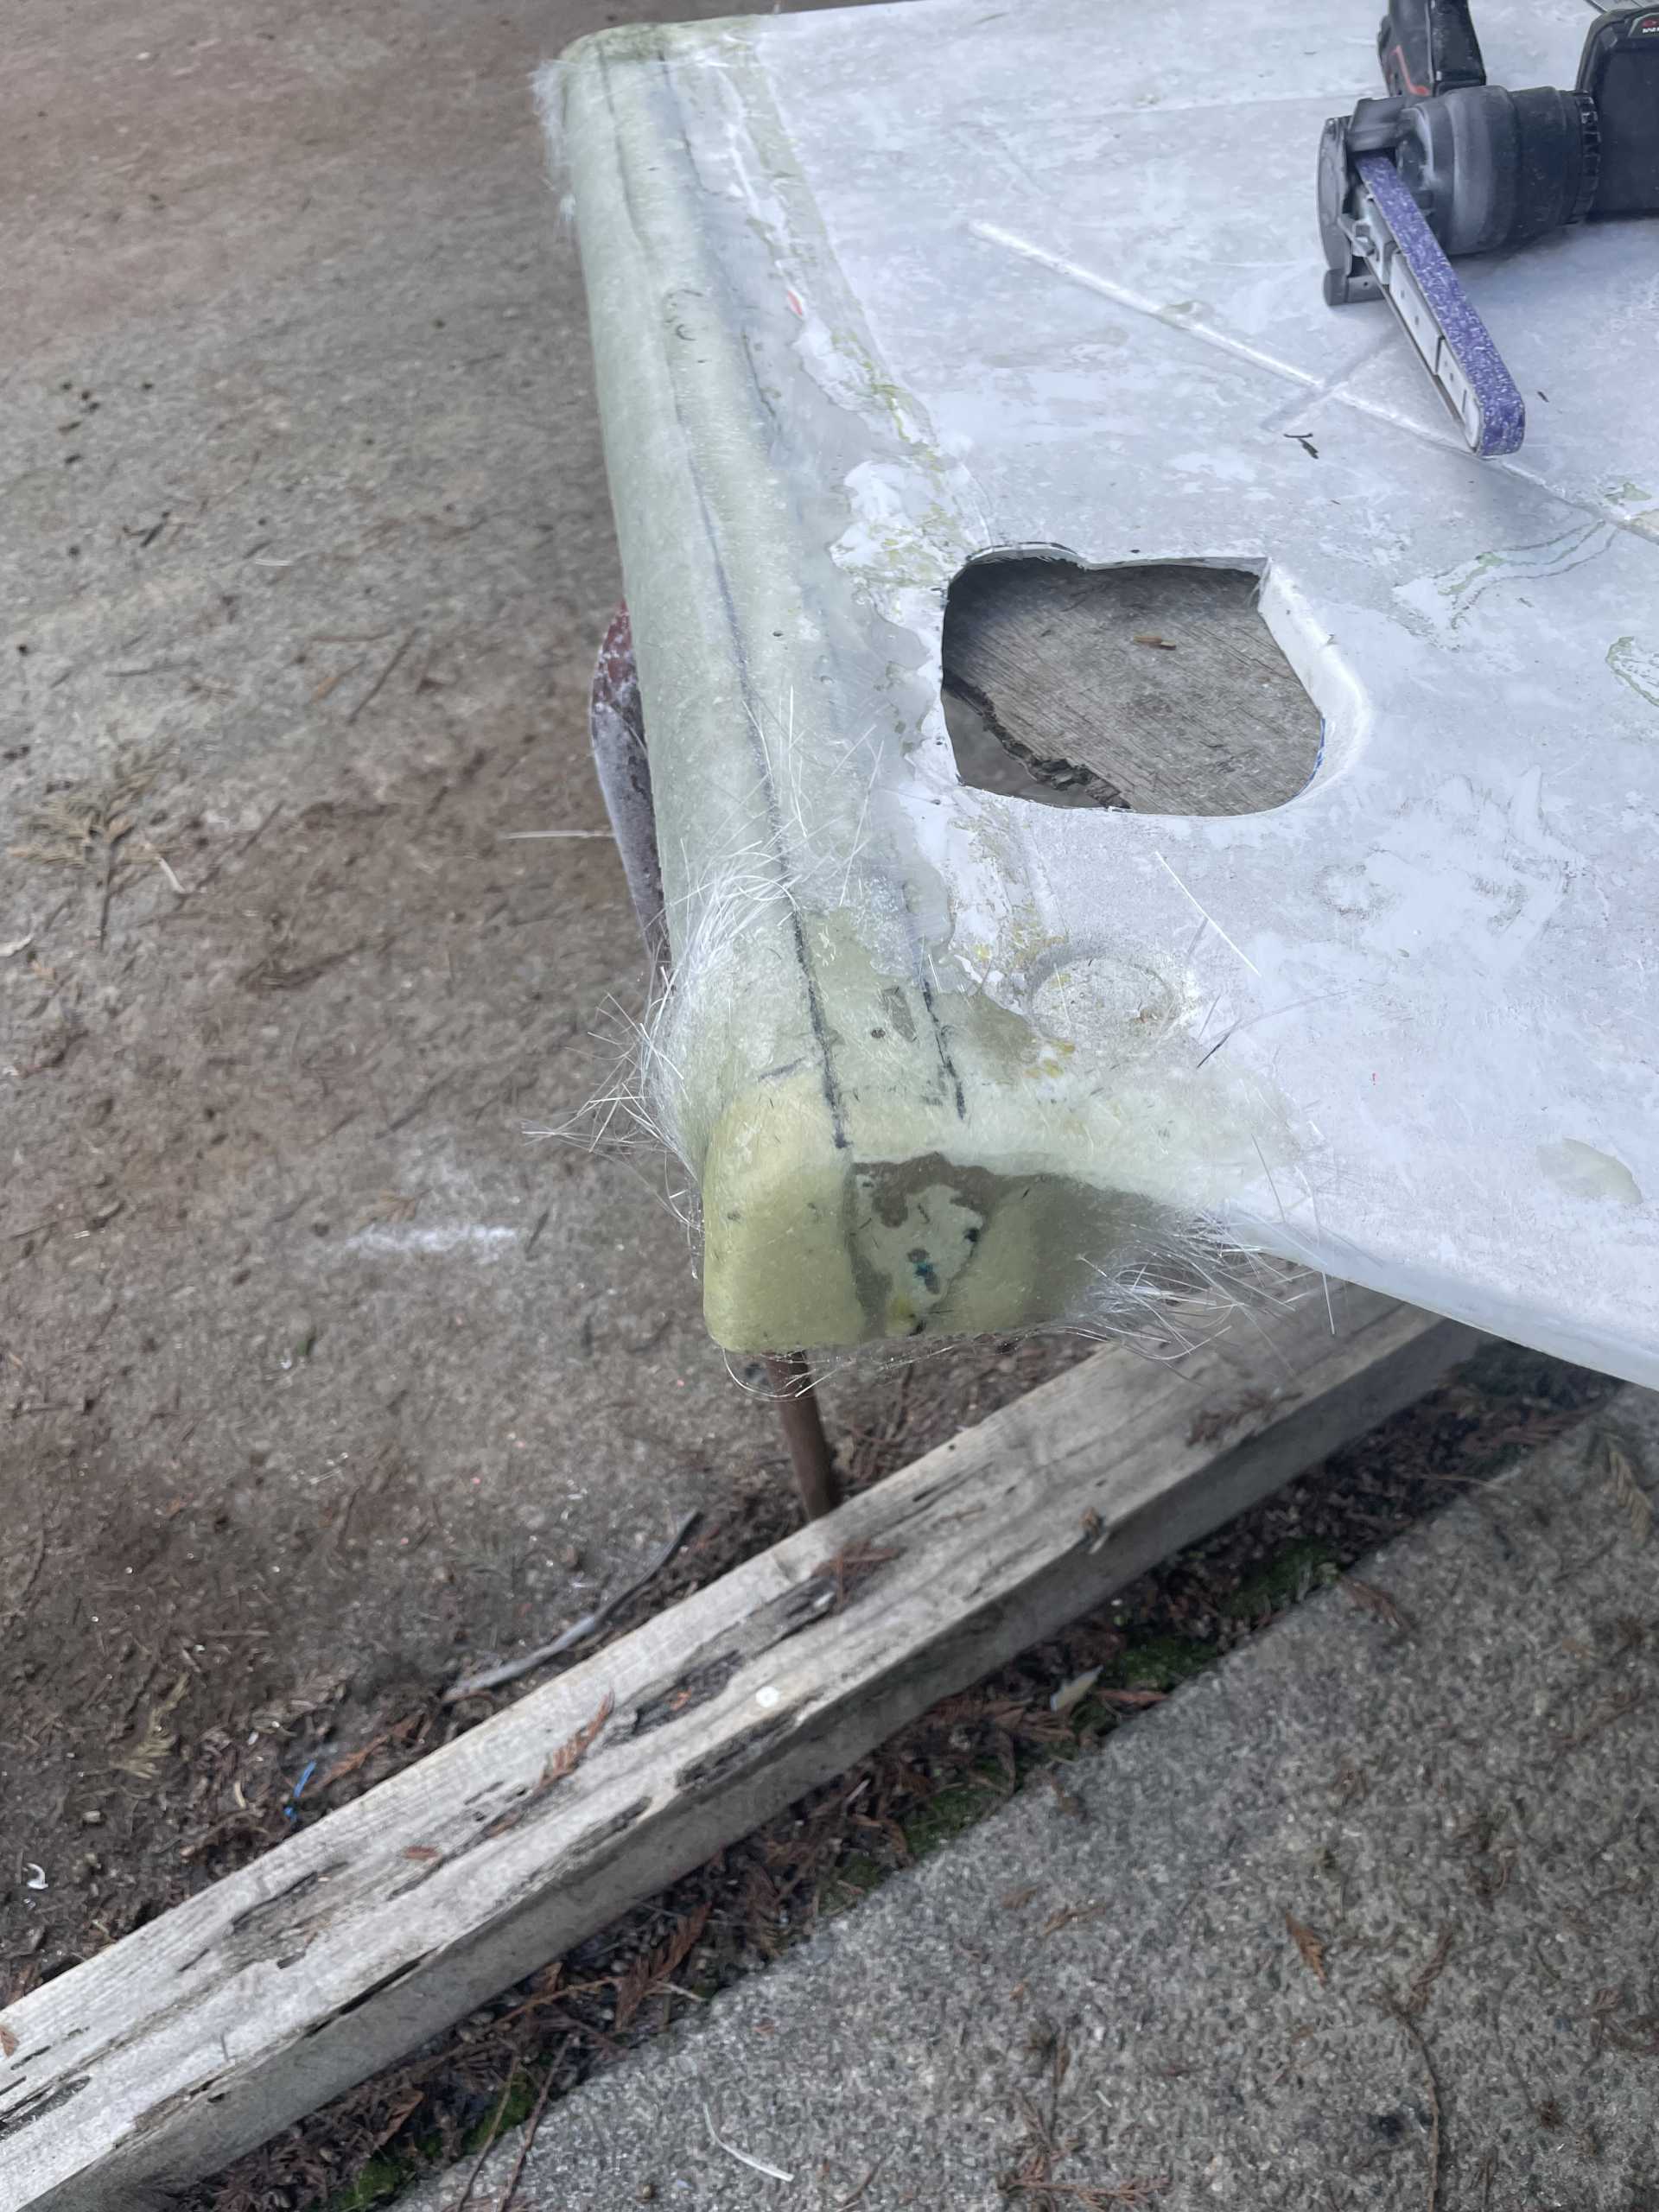
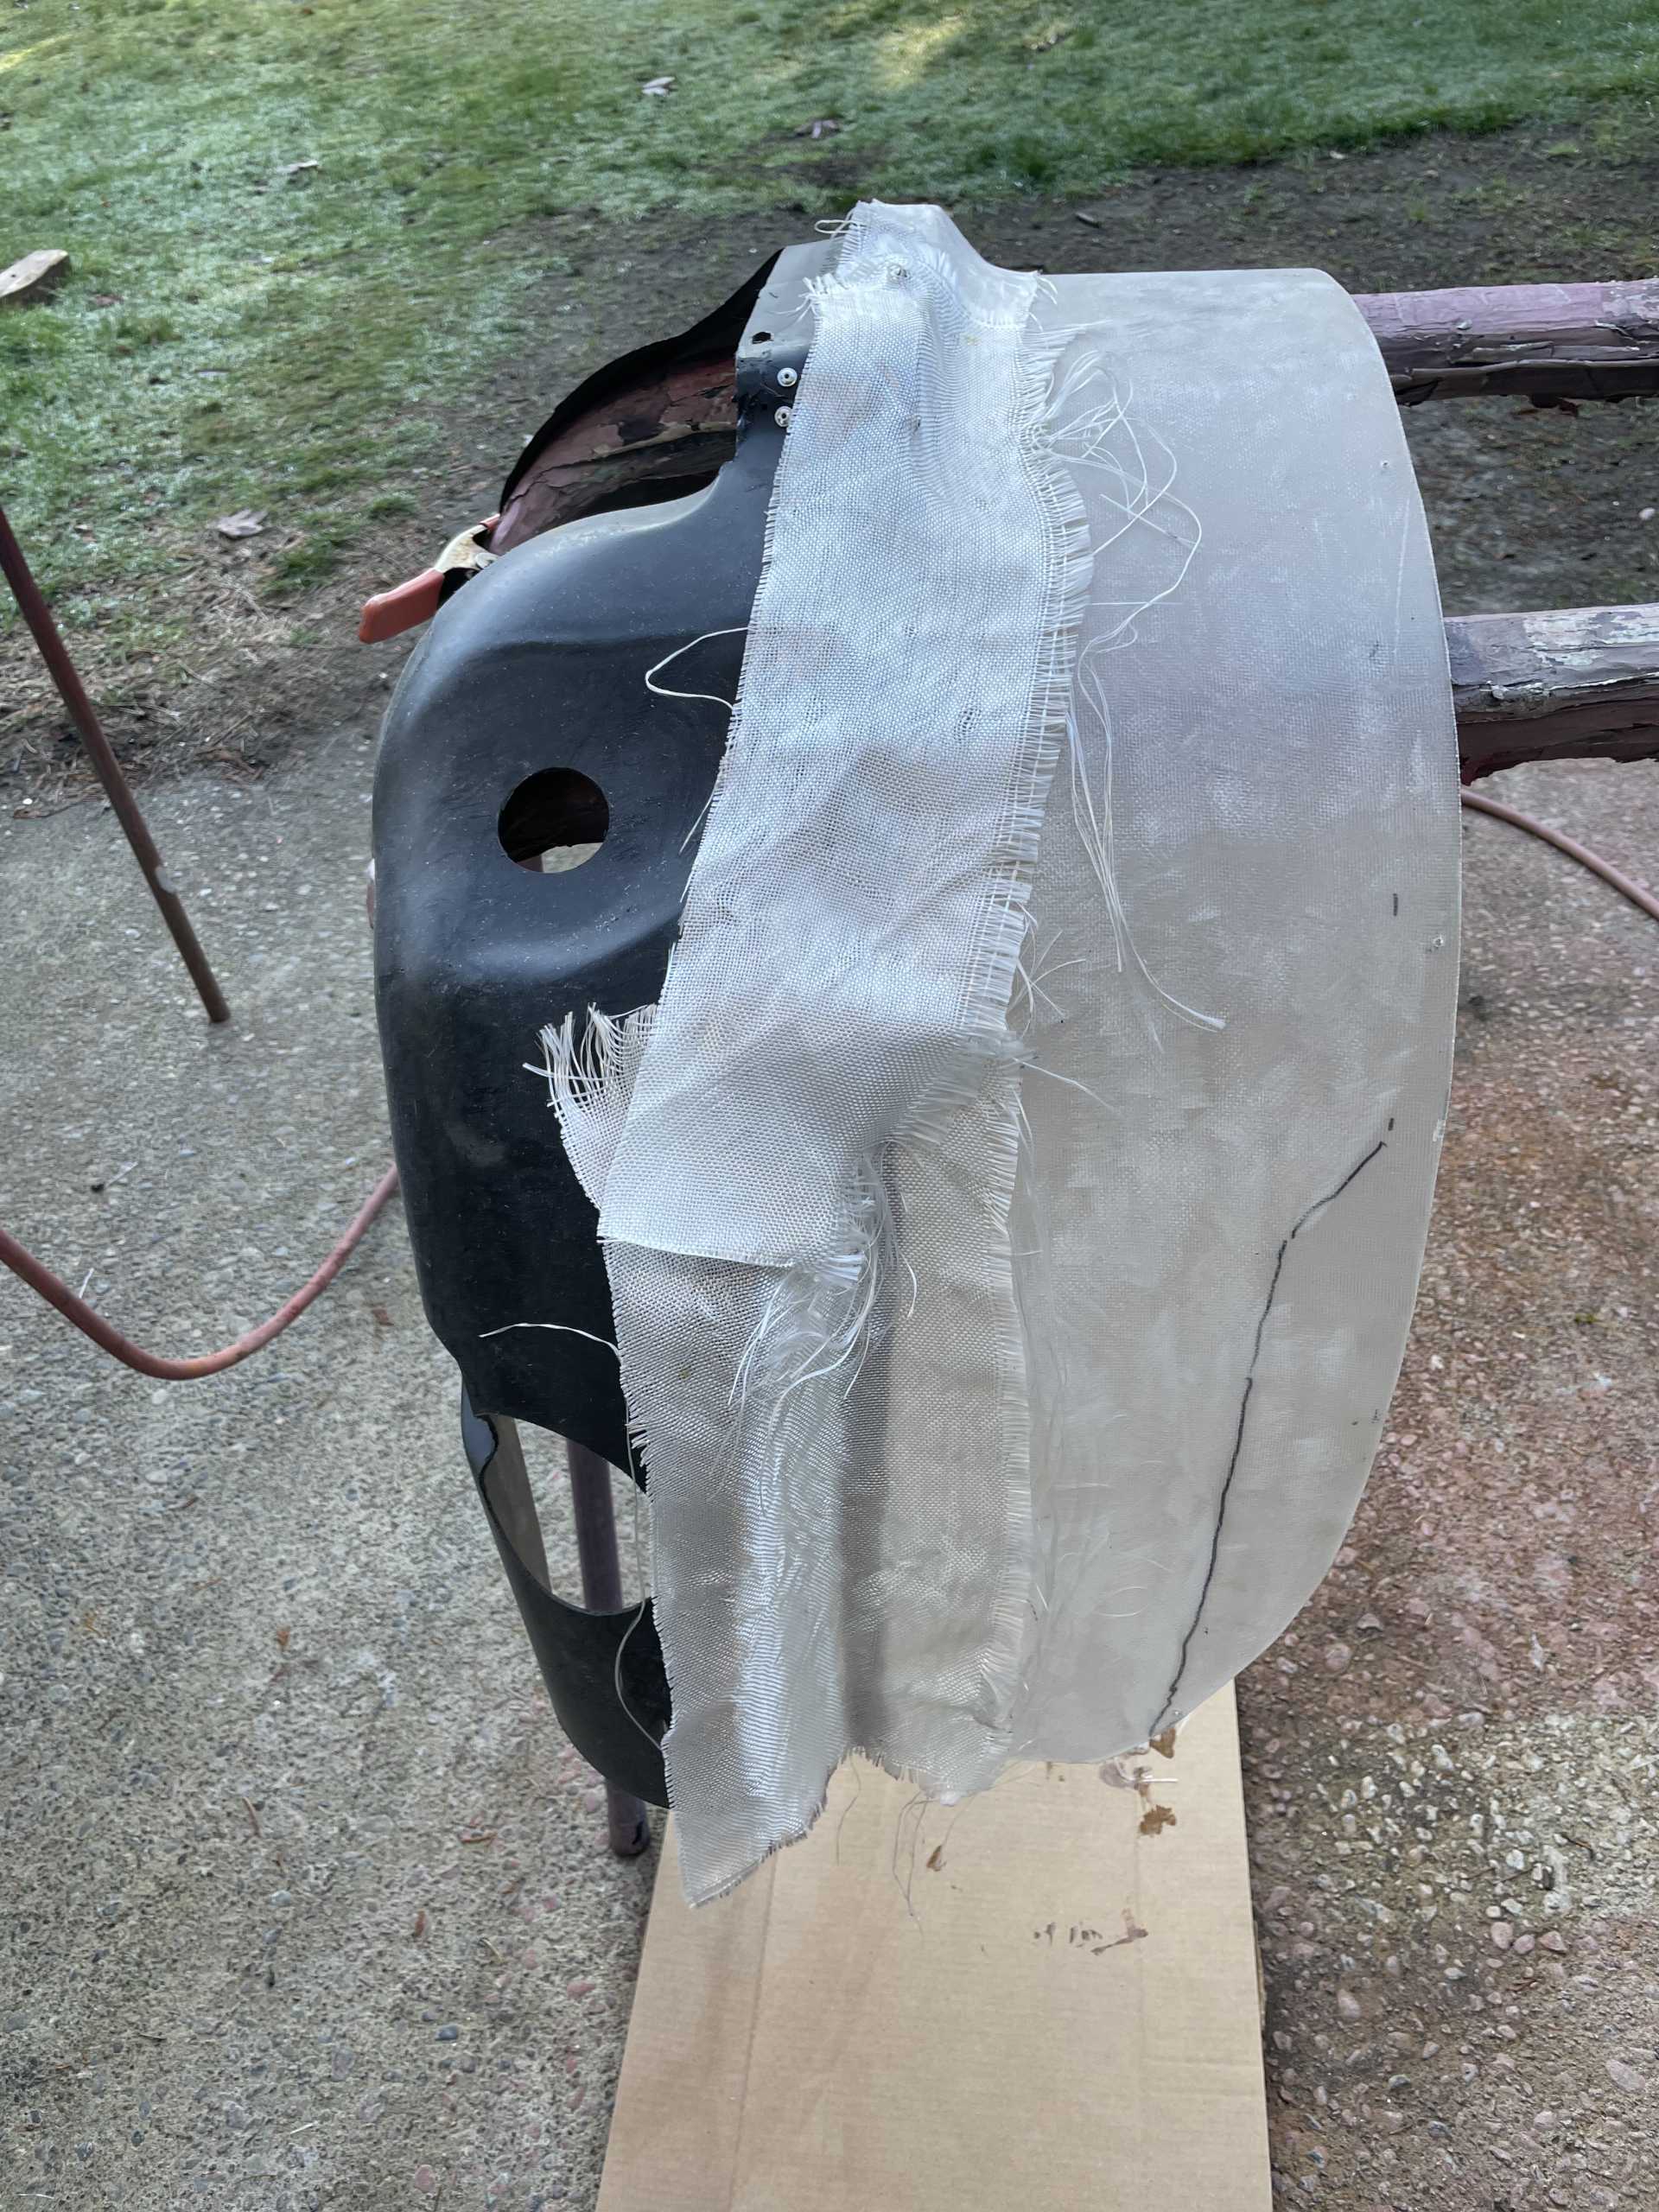
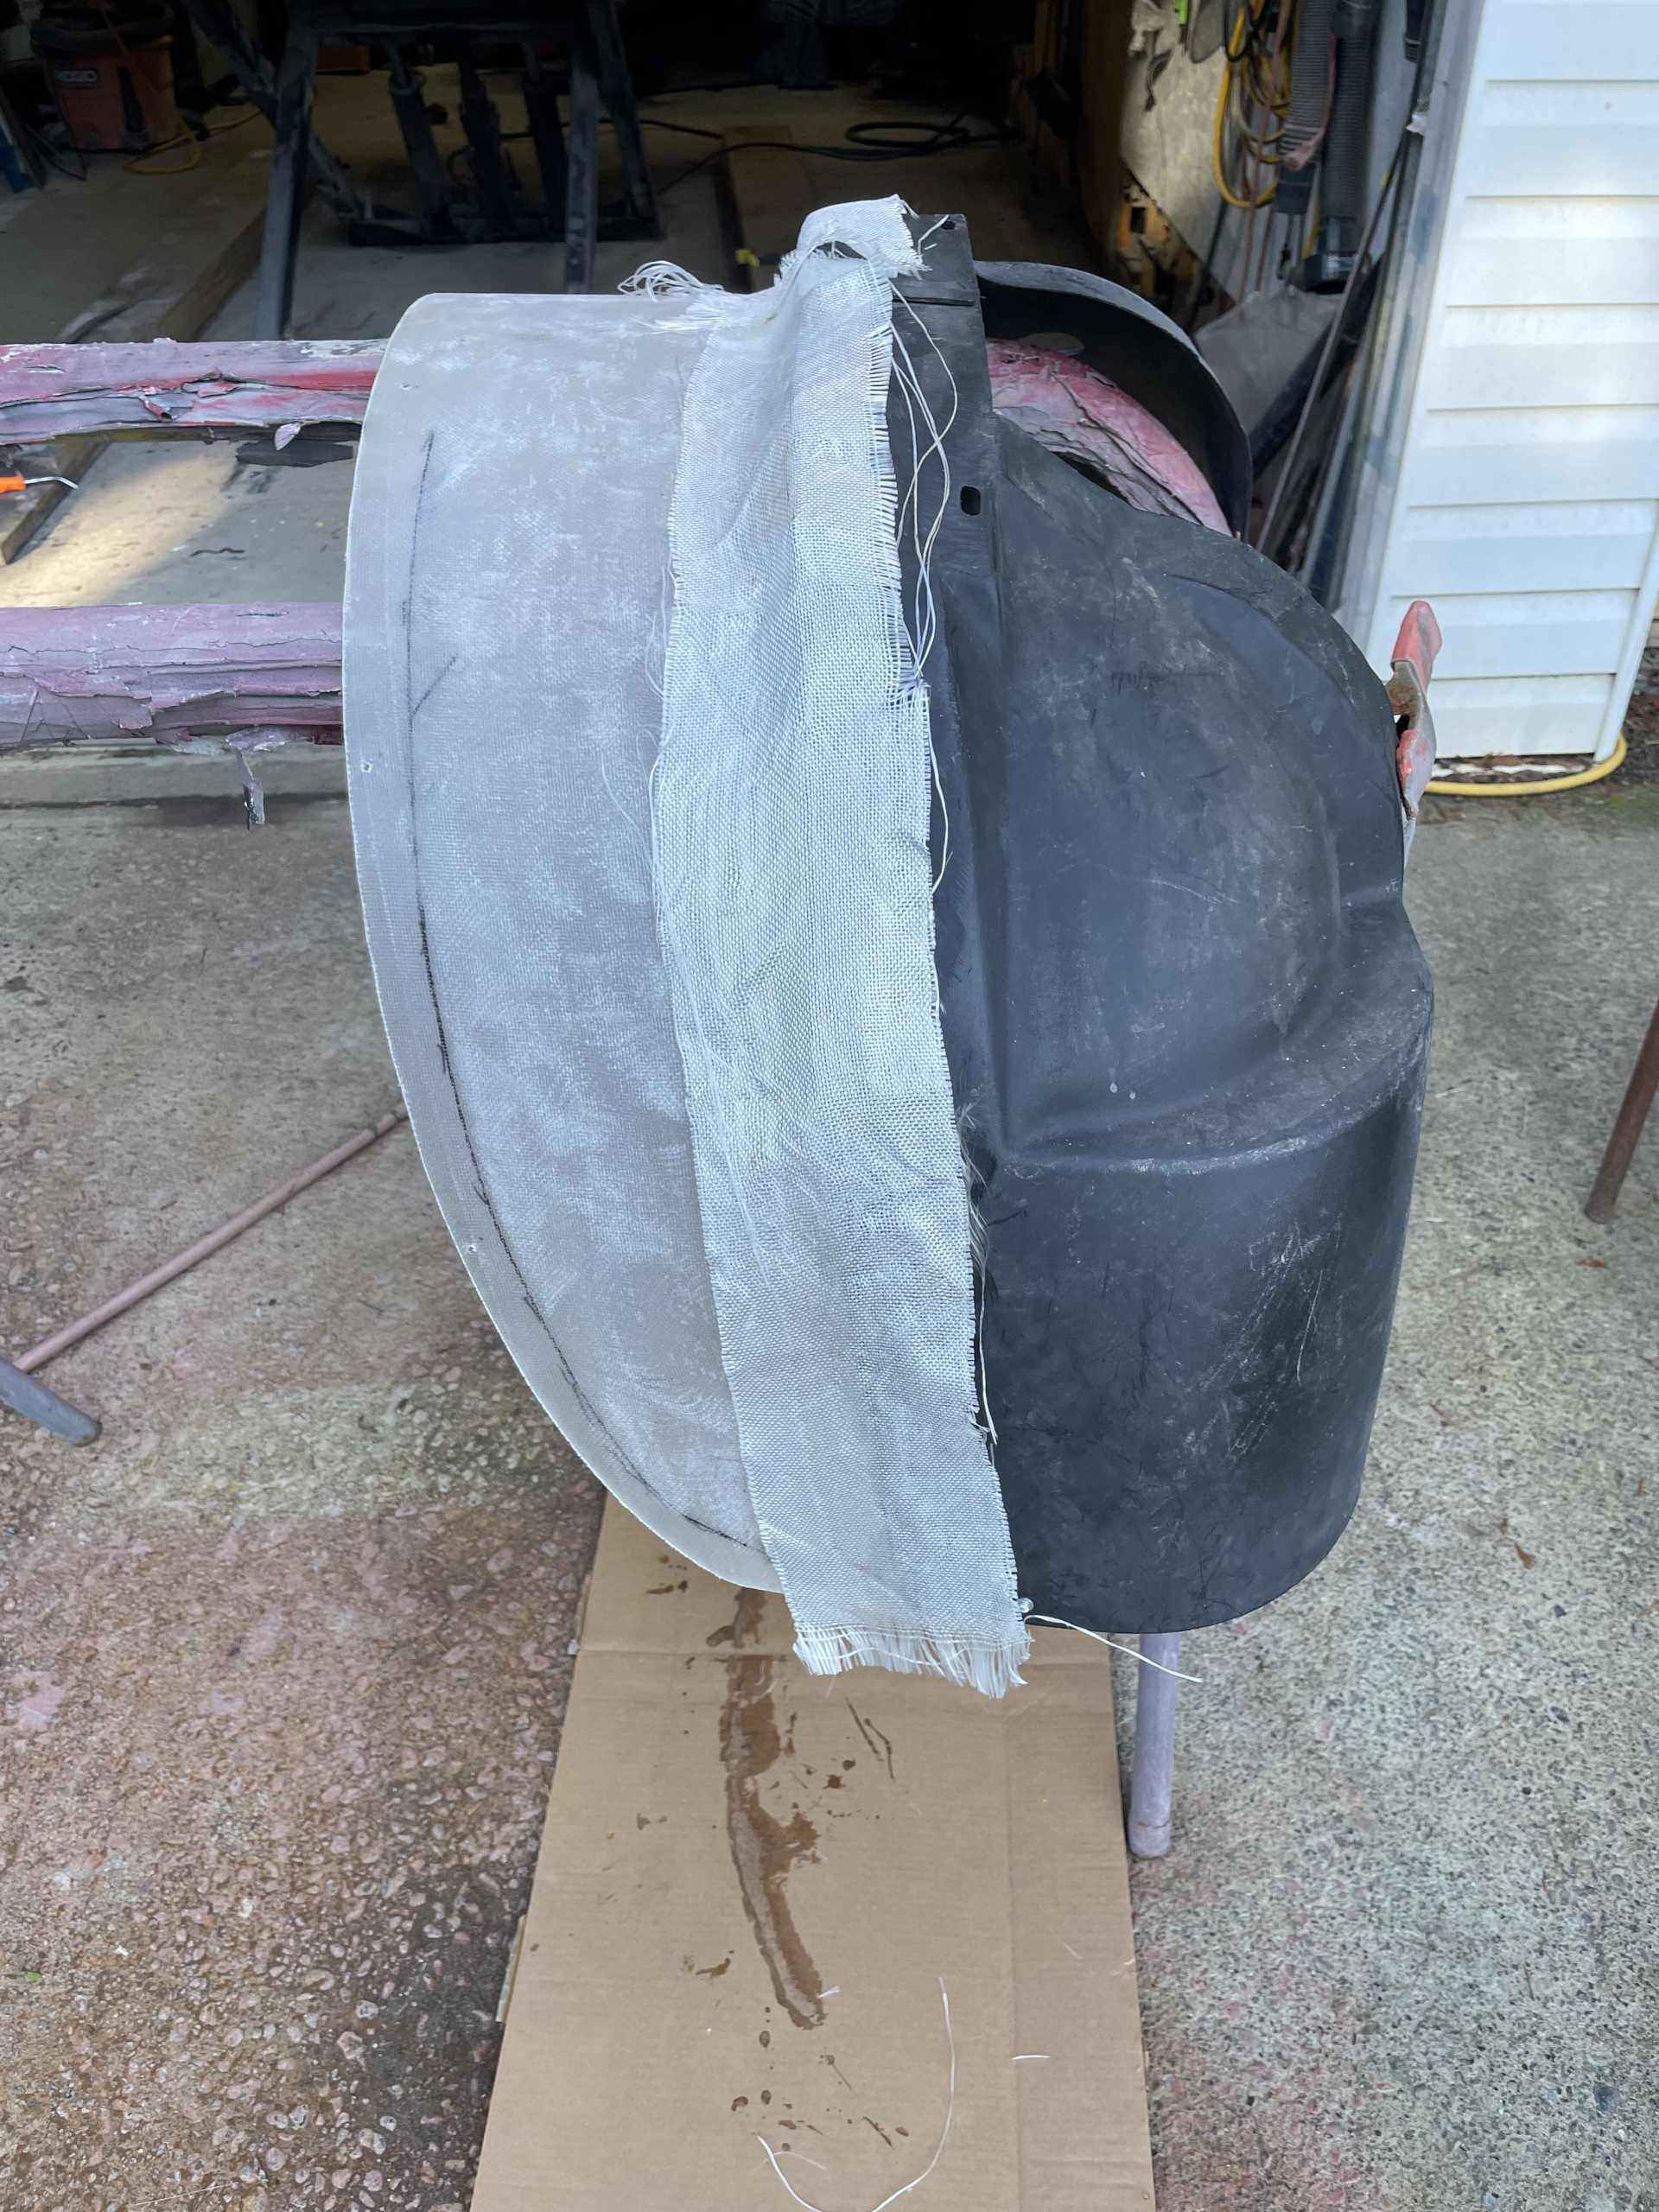
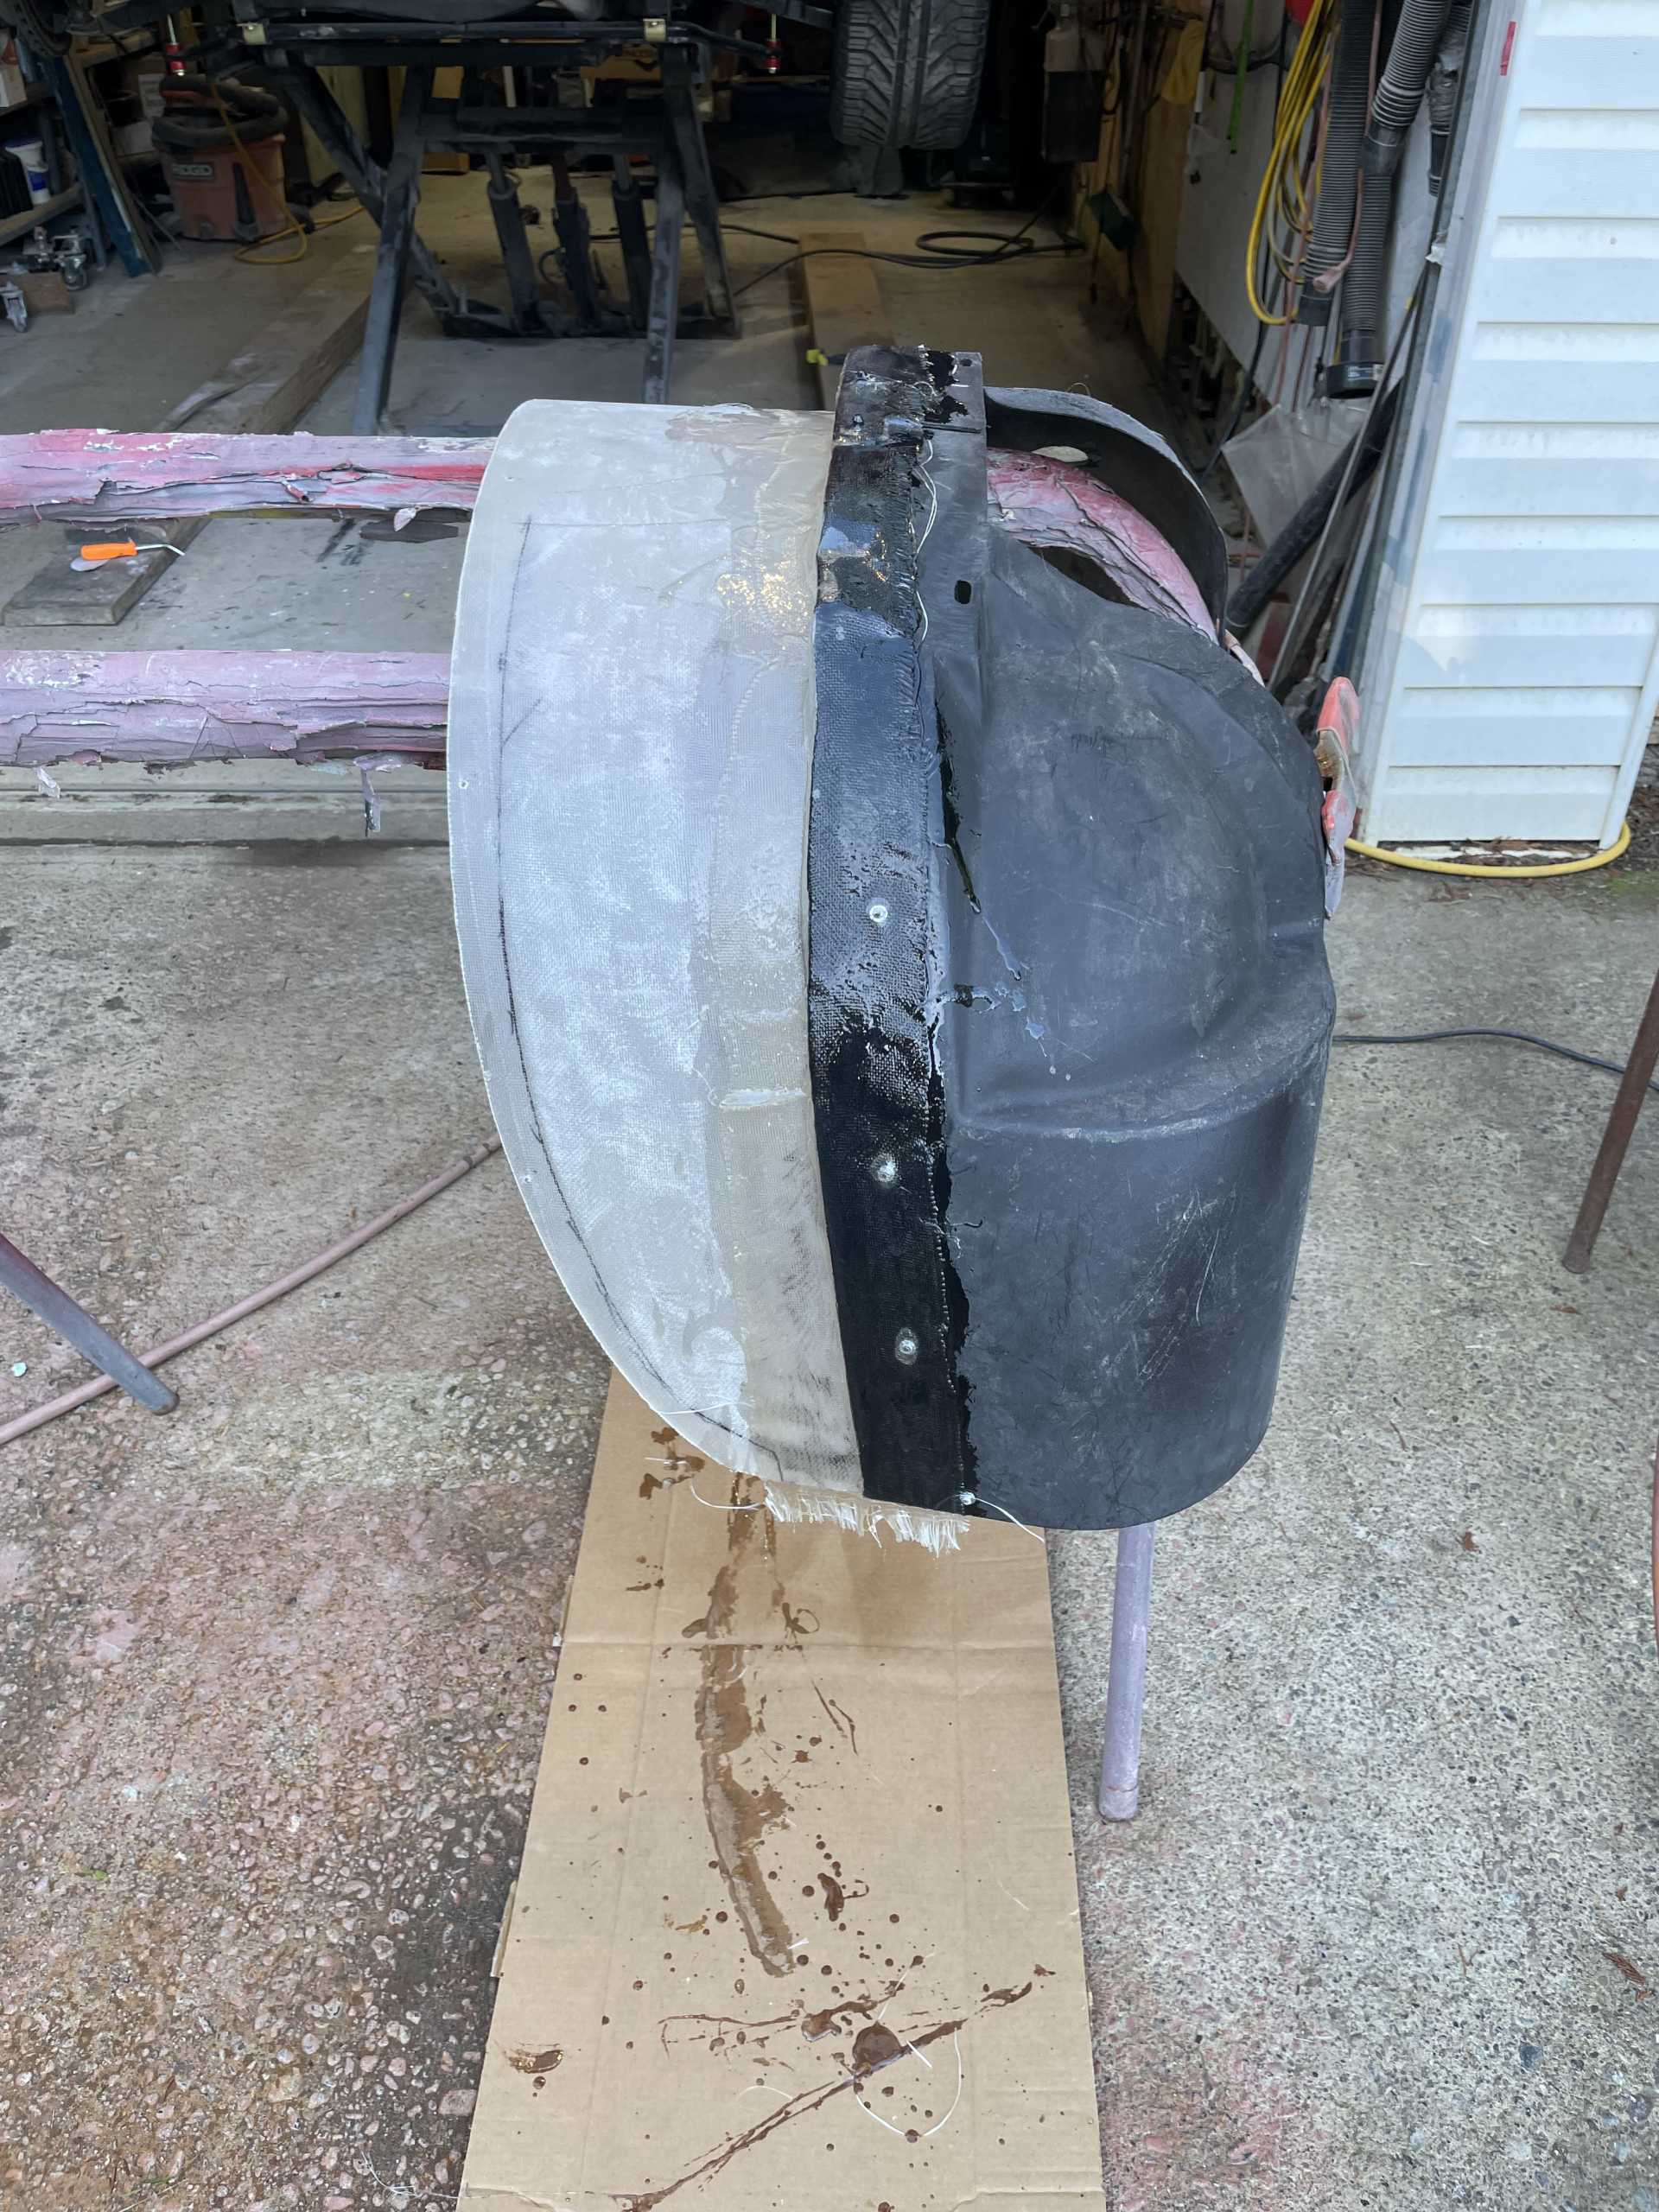
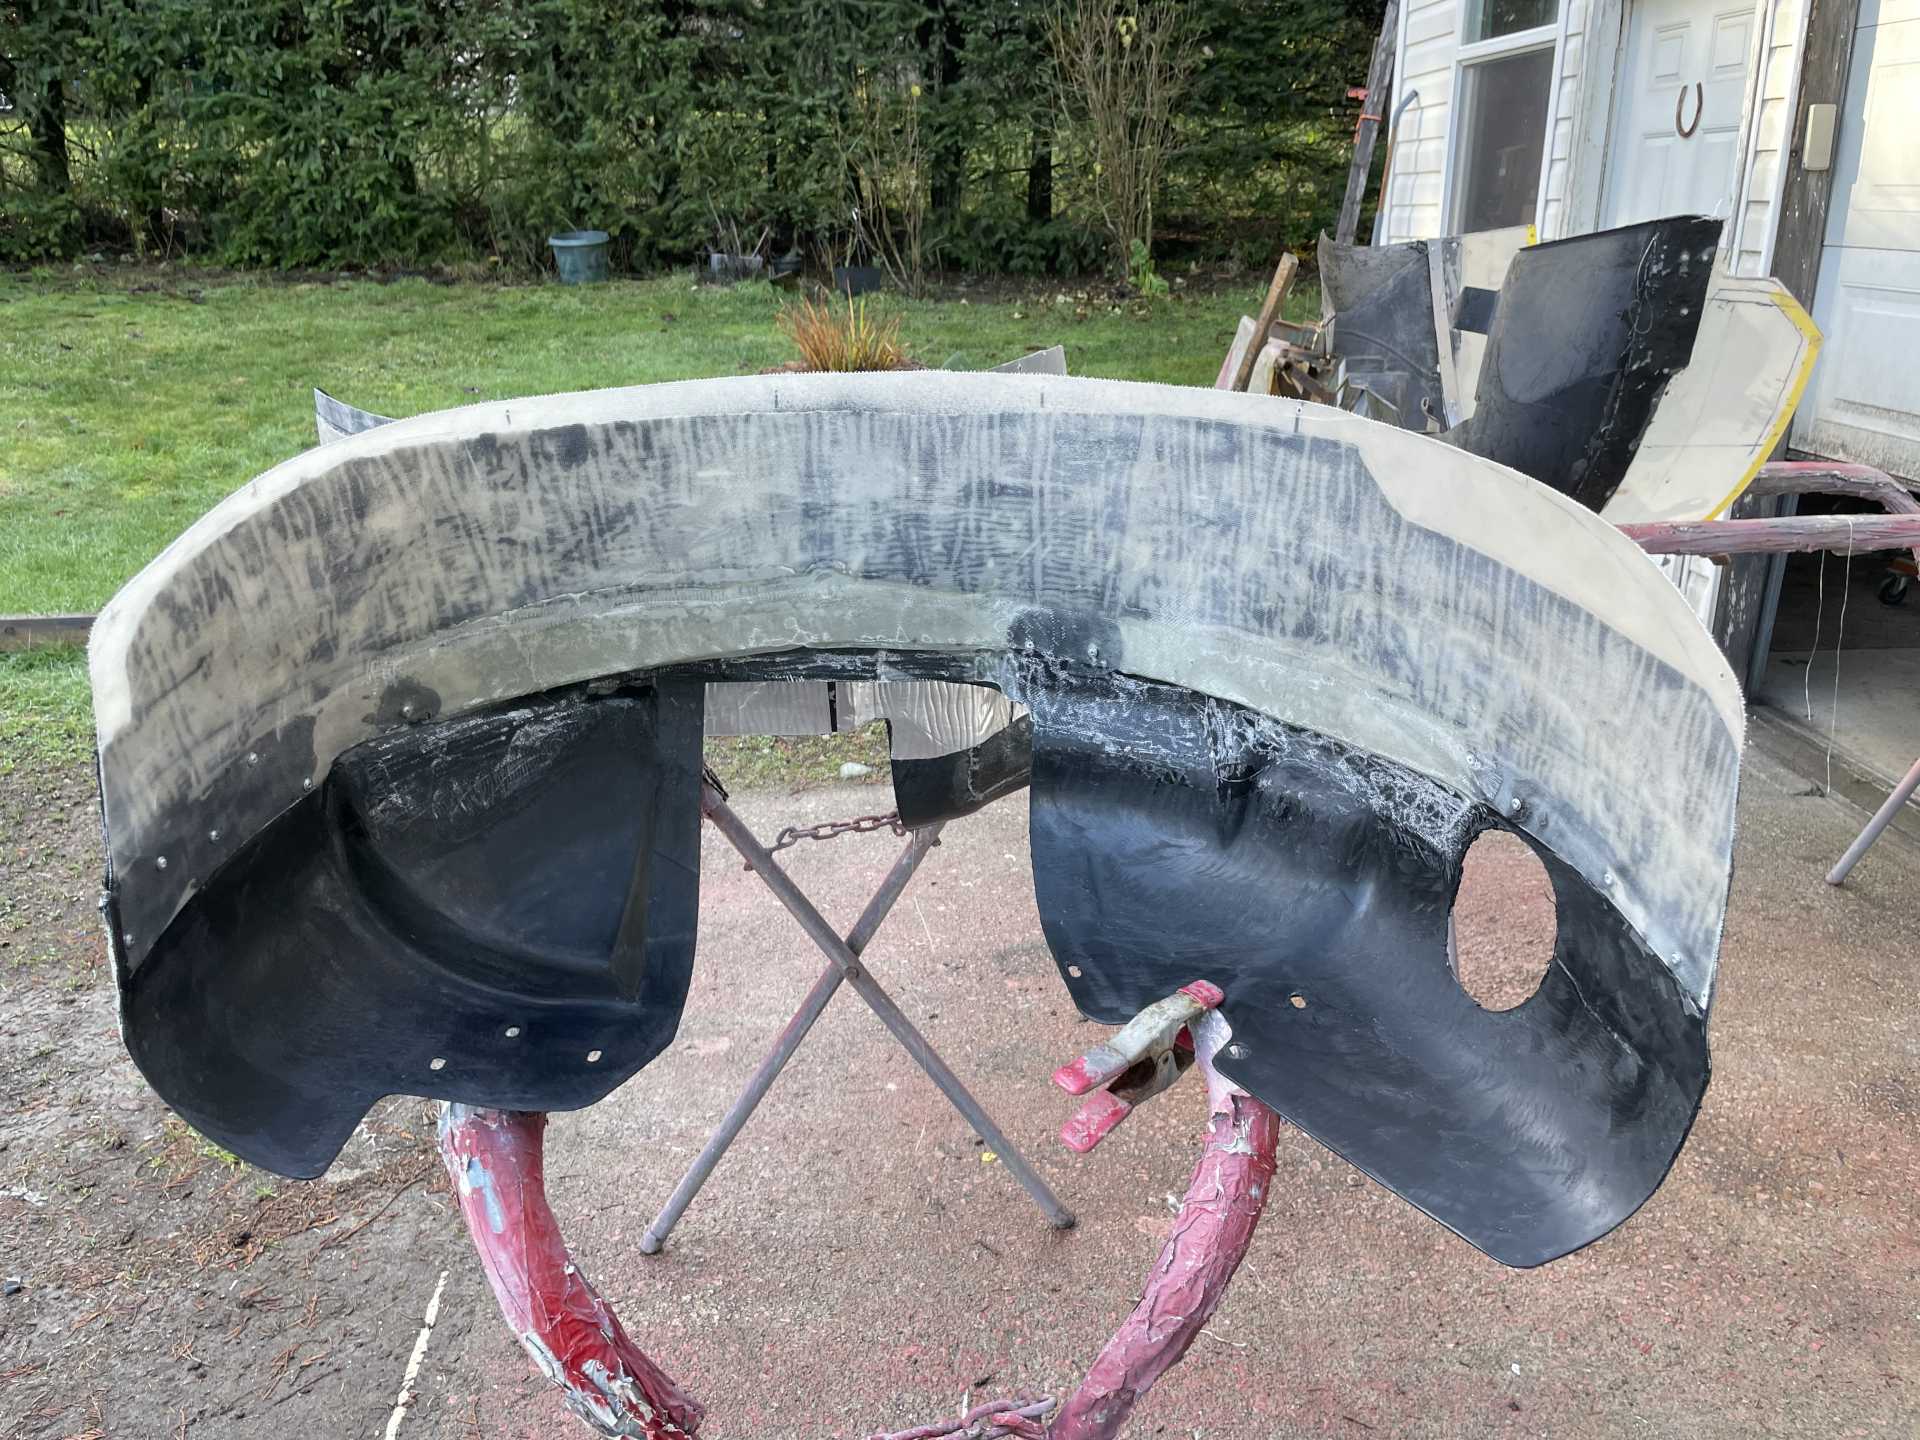
Sorry everyone that is following the build for the late update to the build. I’ve been busy cleaning up wiring preparing for the HVAC /light installation, Also shortening wires and securing everything. The last couple weeks I've been fabricating and building the front and rear inner fender wells. I didn’t want to reinvent the wheel as the inner portion of the OEM fiero ones still work but just weren’t wide enough. I’d did up a paper template to determine what I needed .
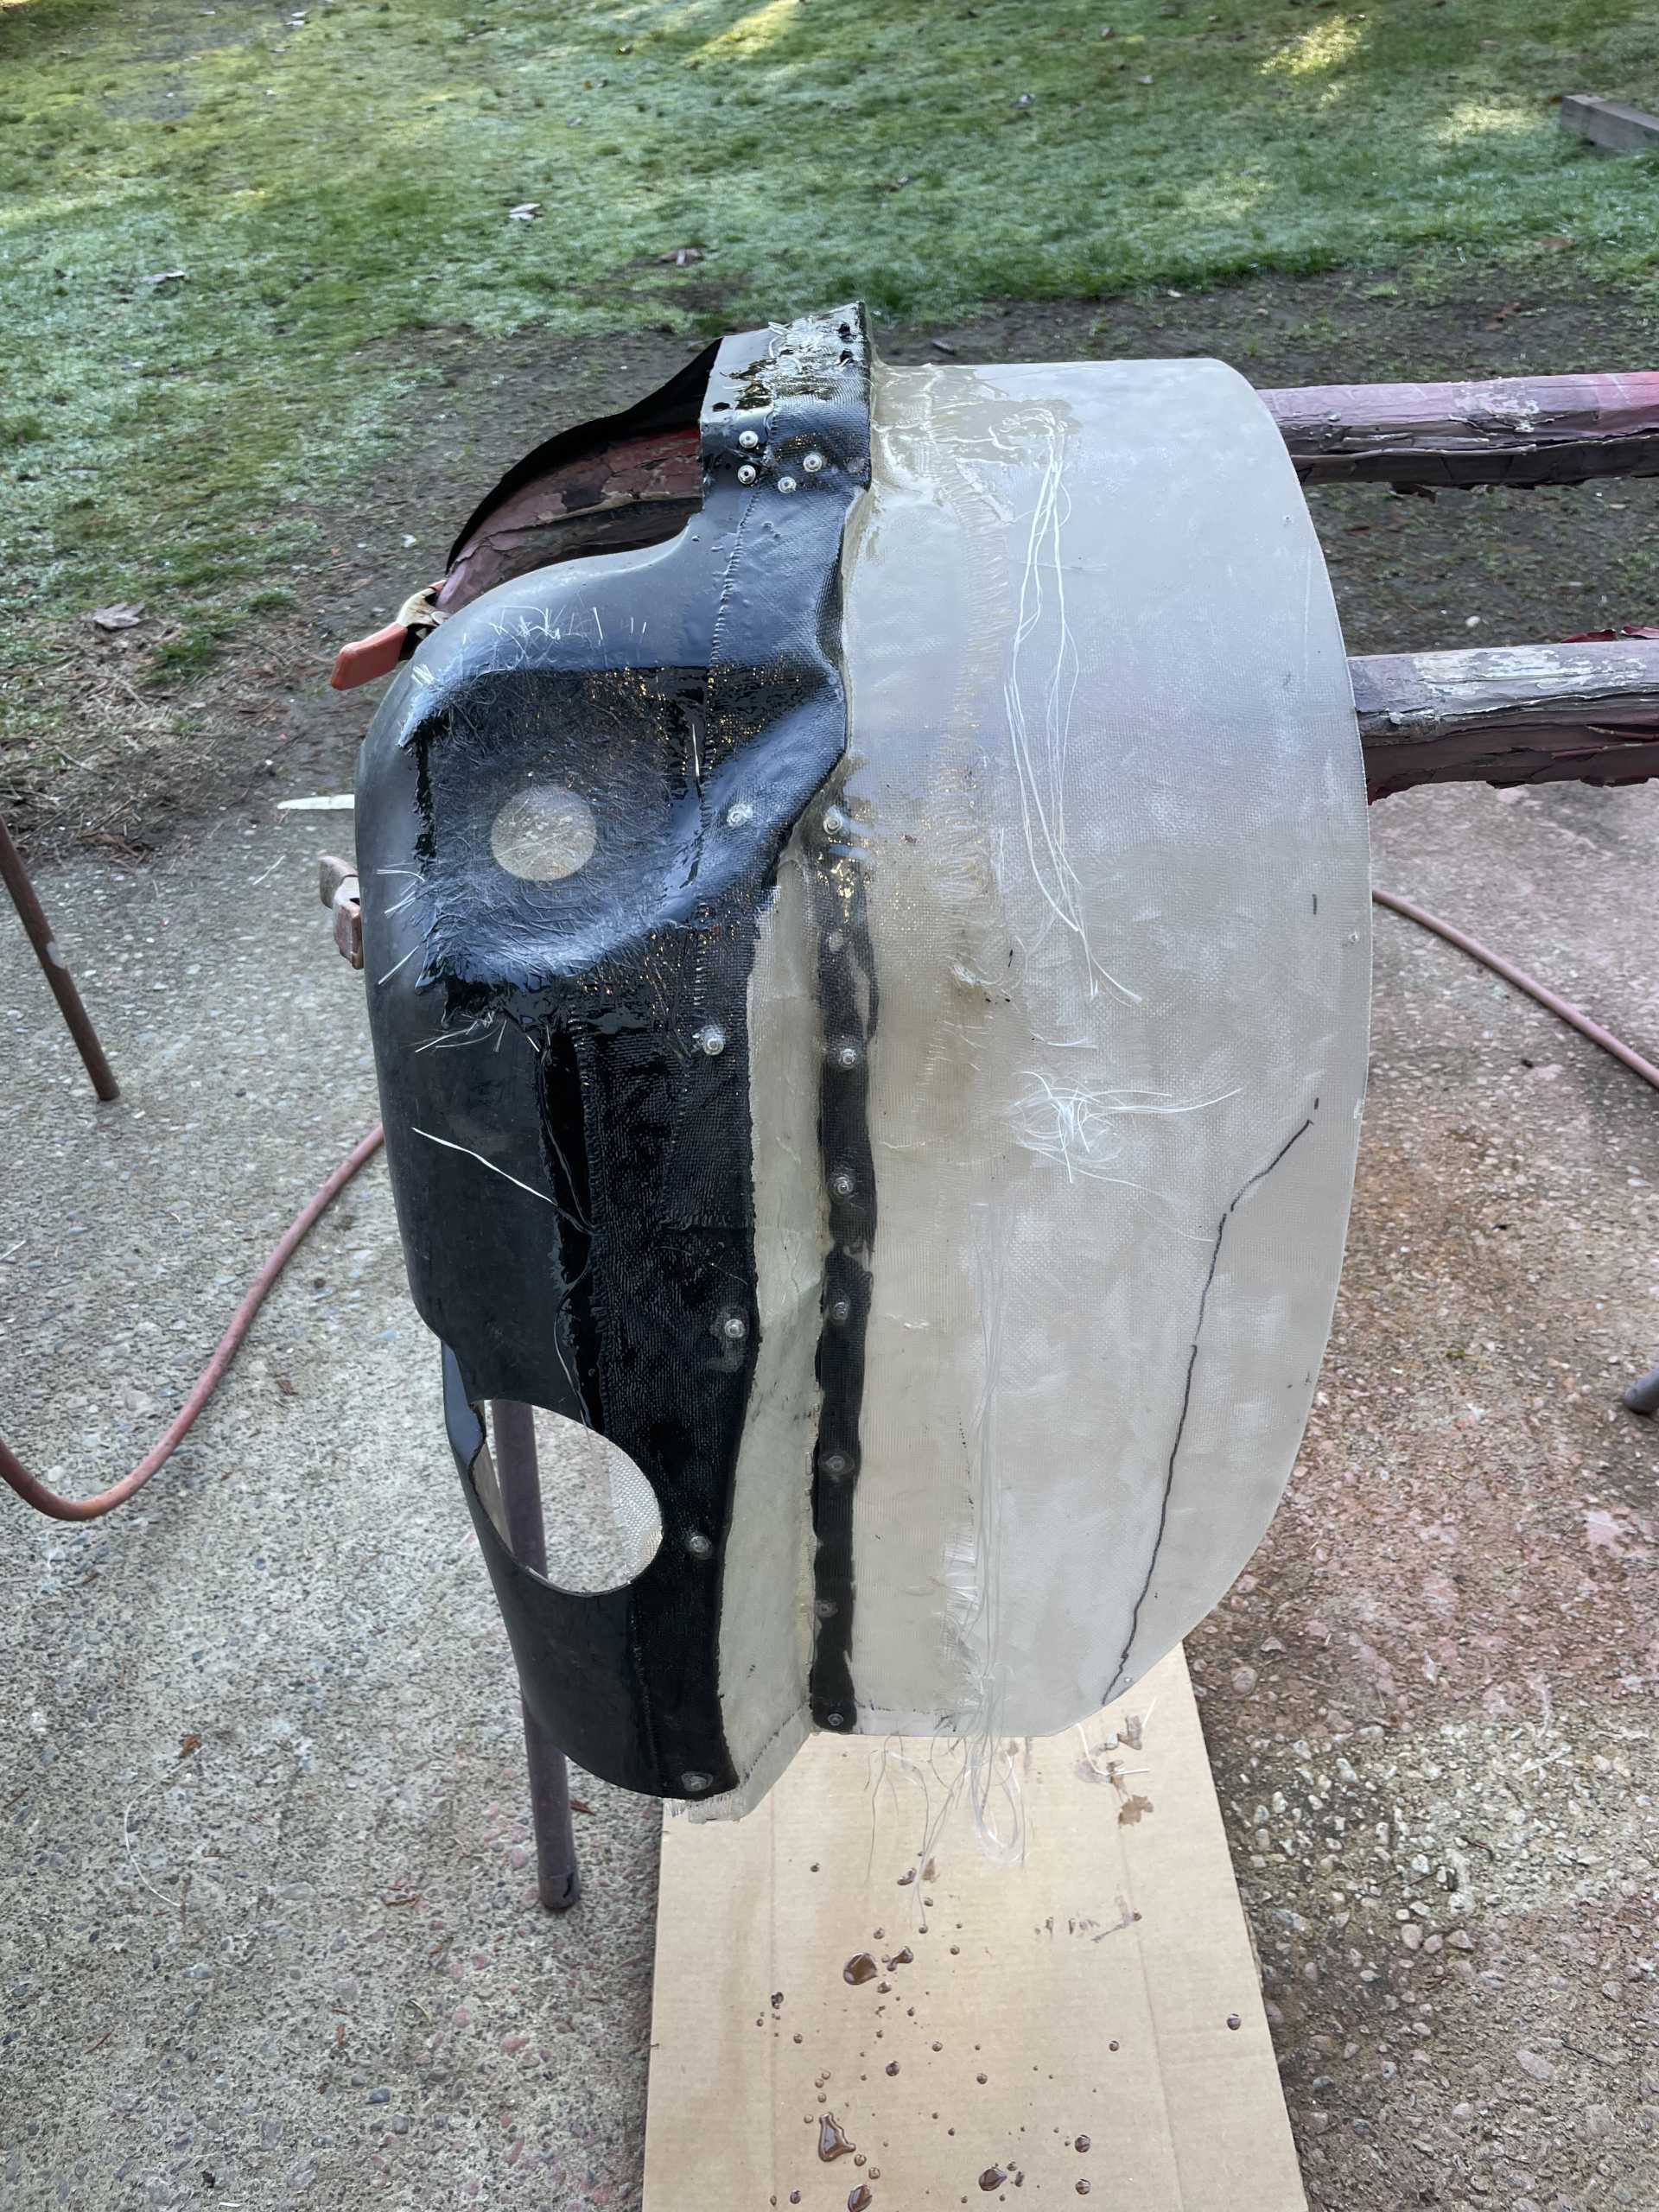
Then I layed up a sheet of 3 layers of “S” glass fiberglass cloth and made the 4 extensions I needed . I modified the OEM pieces and eliminated anything that was in my way and bonded and riveted the two parts together using a 3M panel bond.
Clekos are the best invention ever I can’t believe how many times I’ve used them in this build!
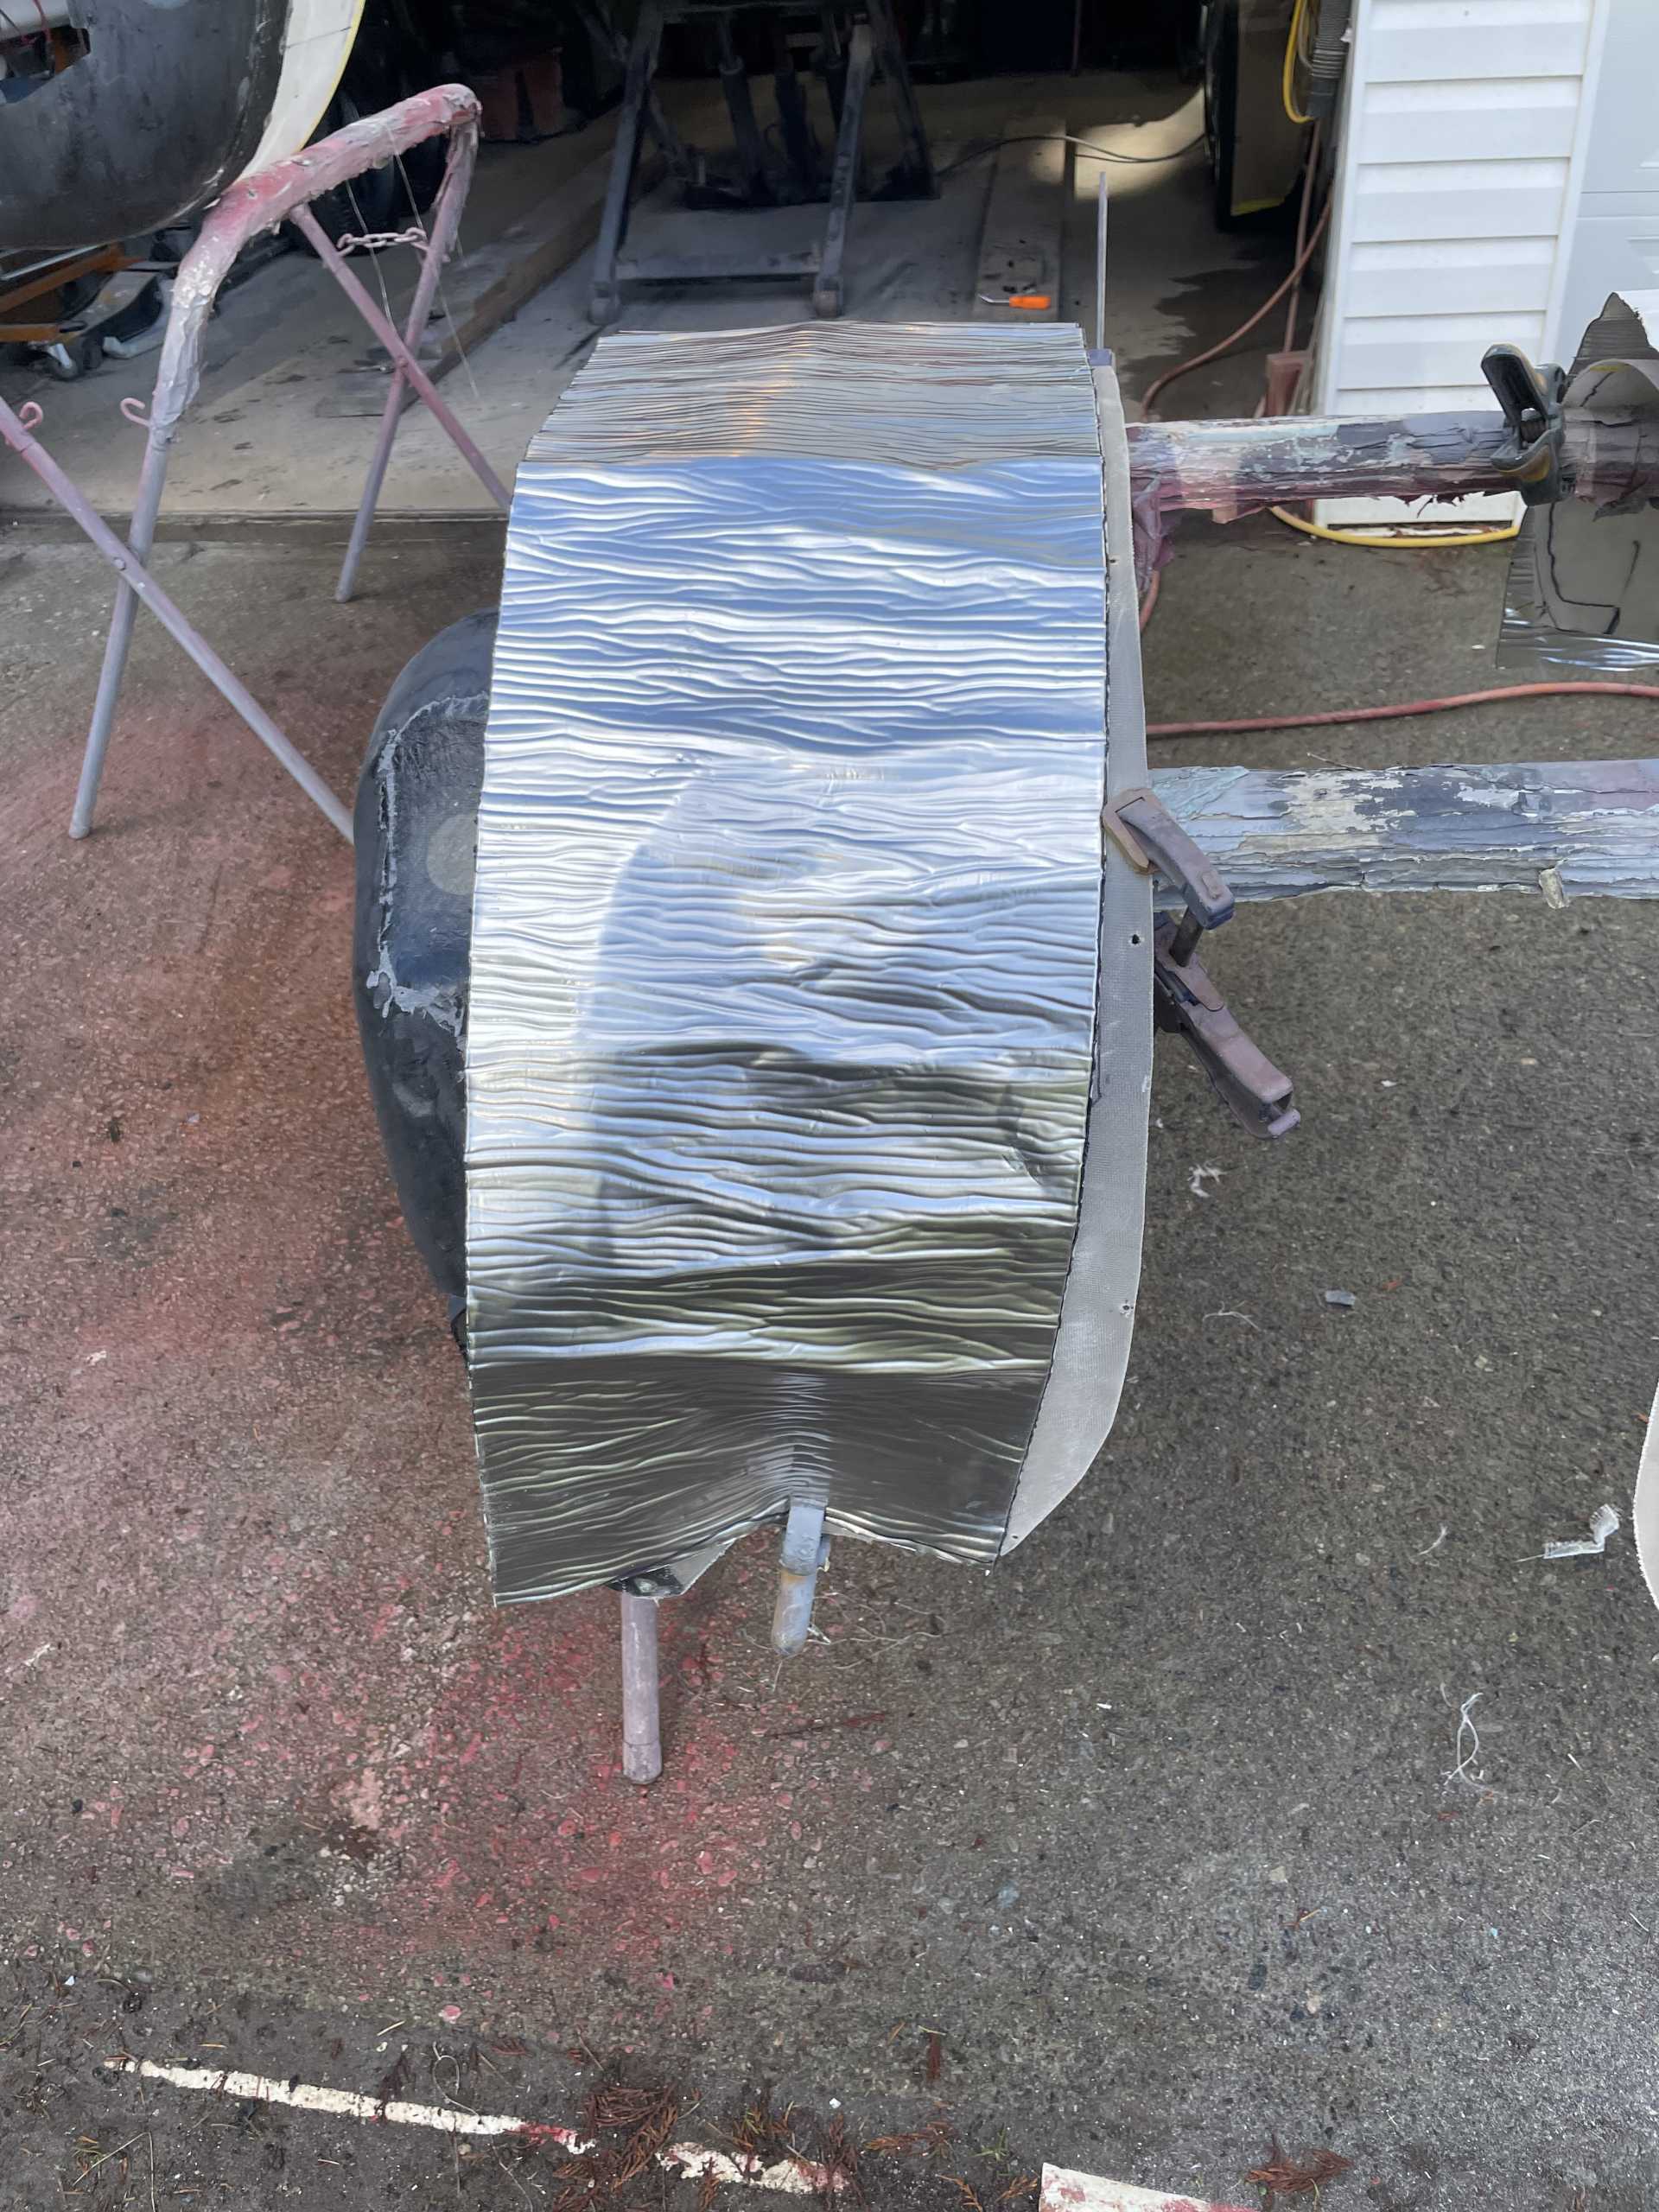
Once the epoxy panel bond was fully cured I waited a few days more than needed I took a 3” strip of glass cloth and glassed both front and back sides for re-enforcement of the joint.
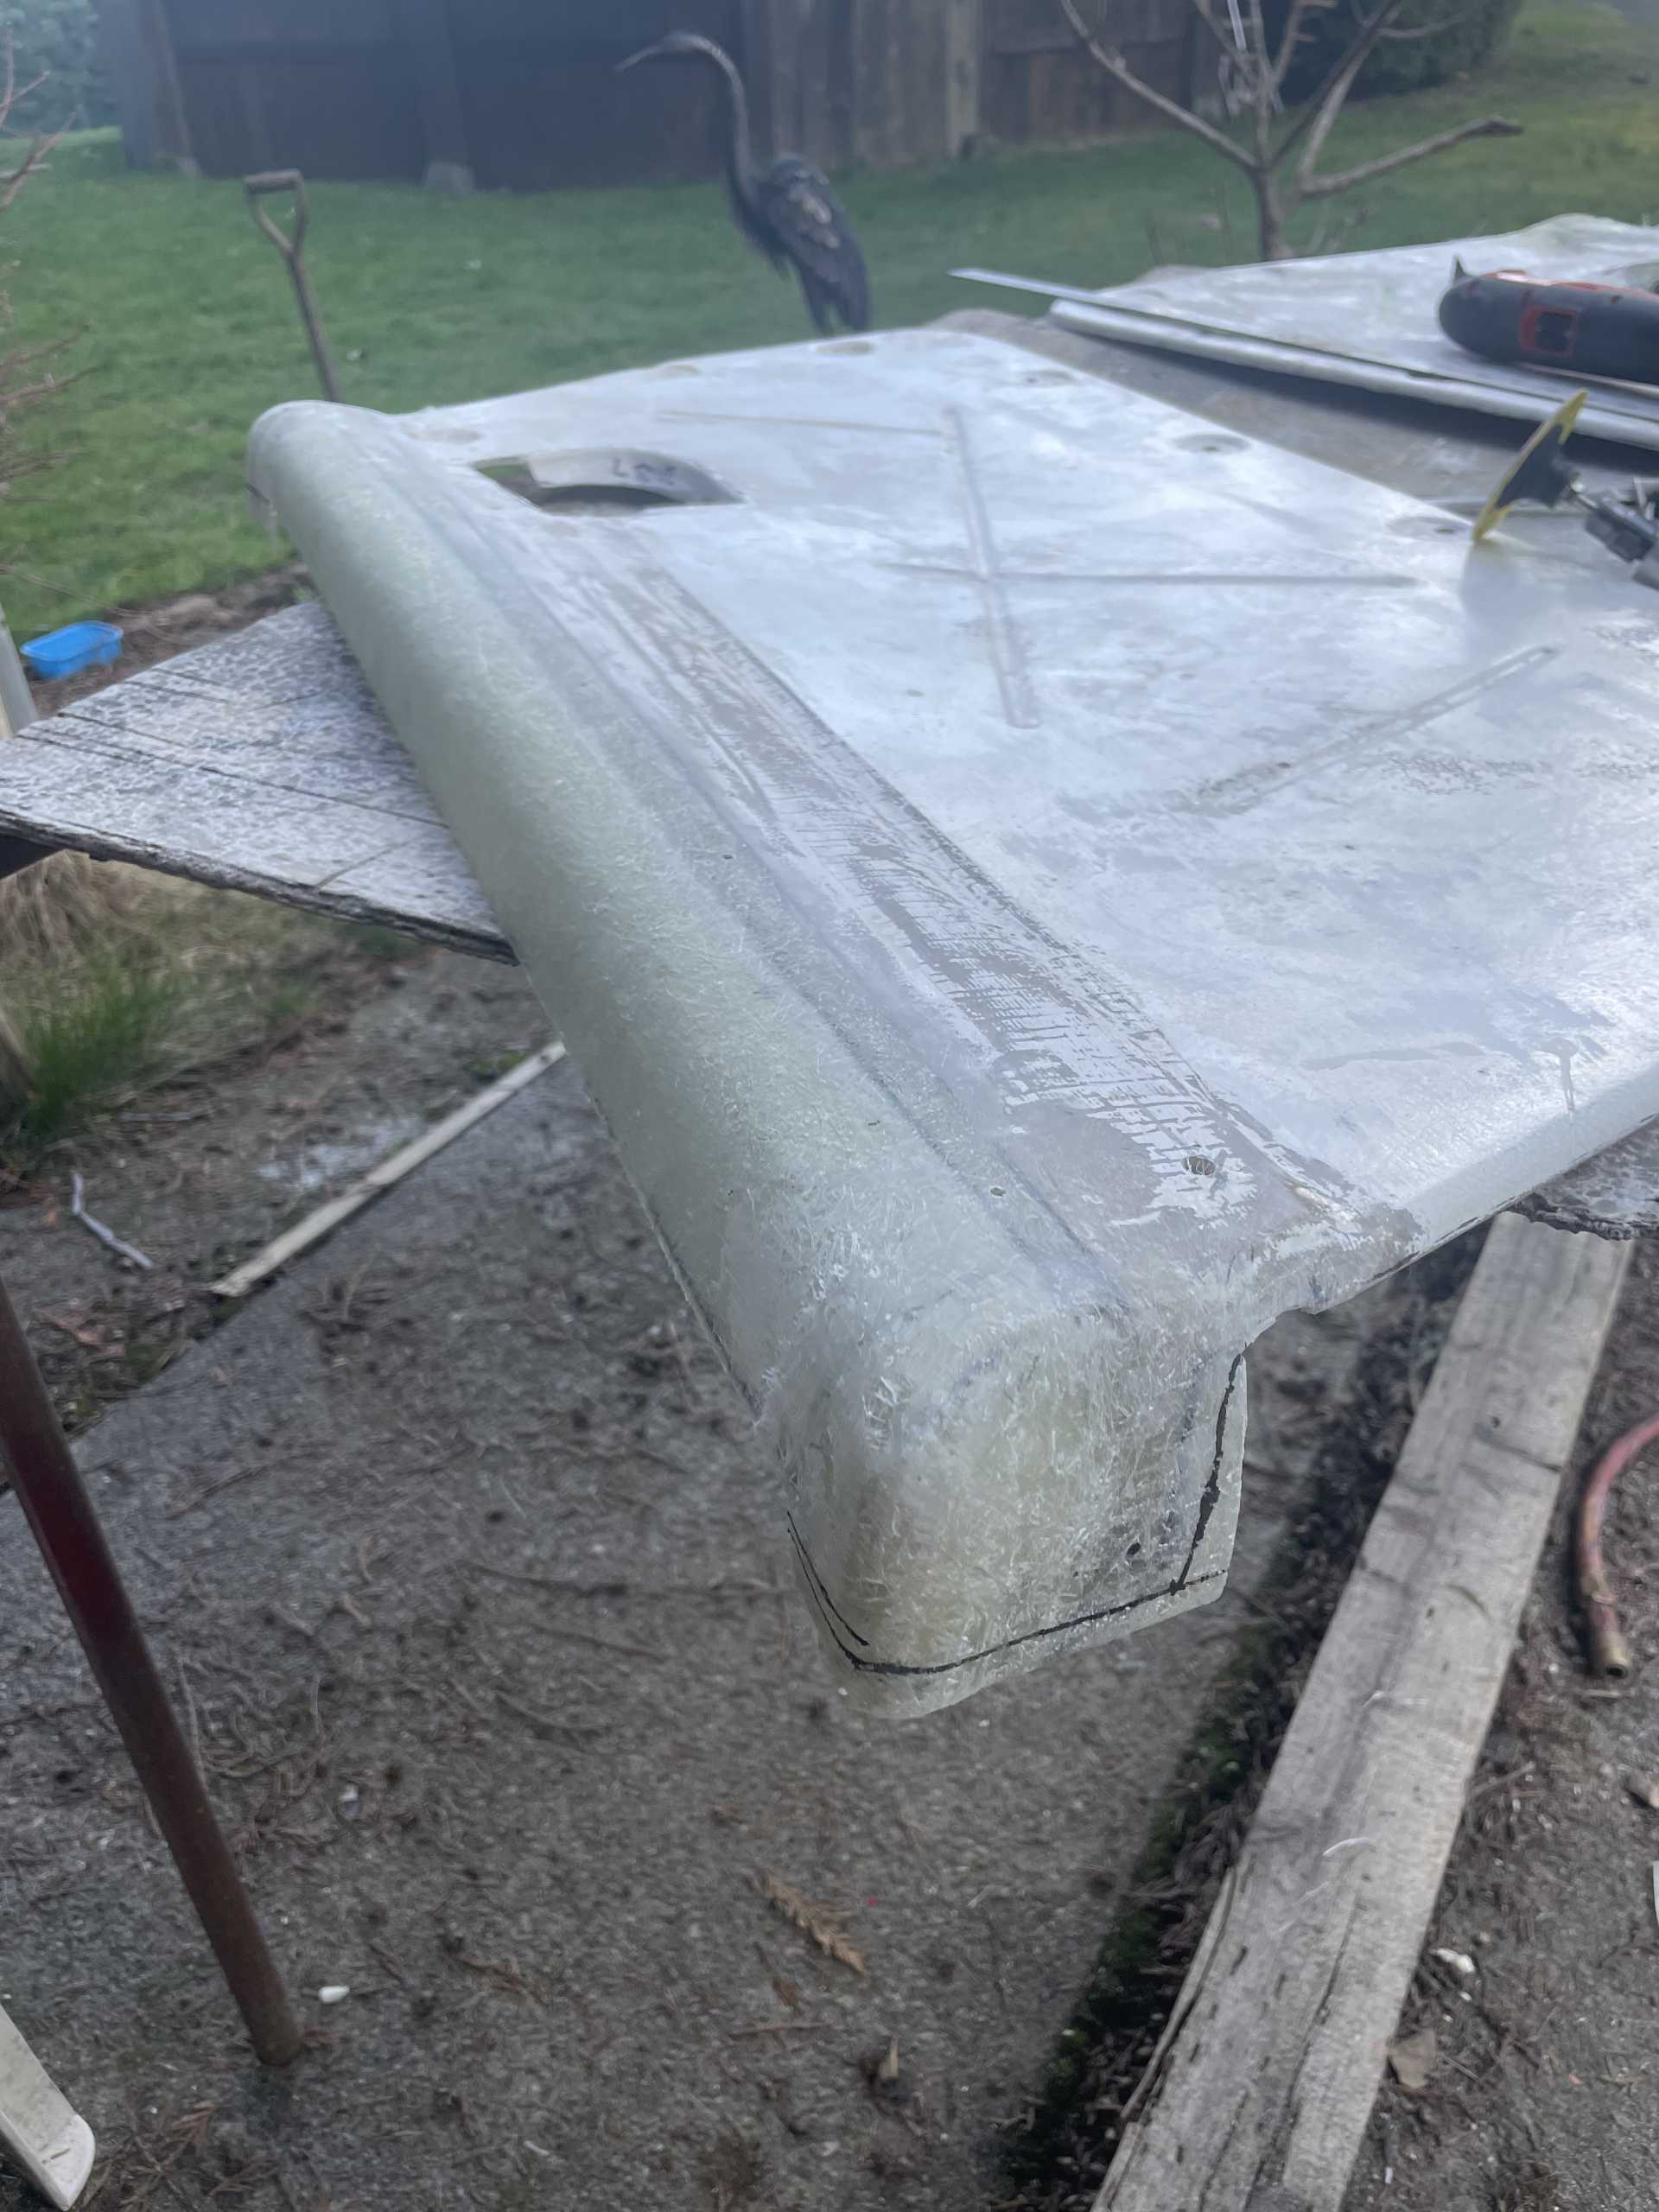
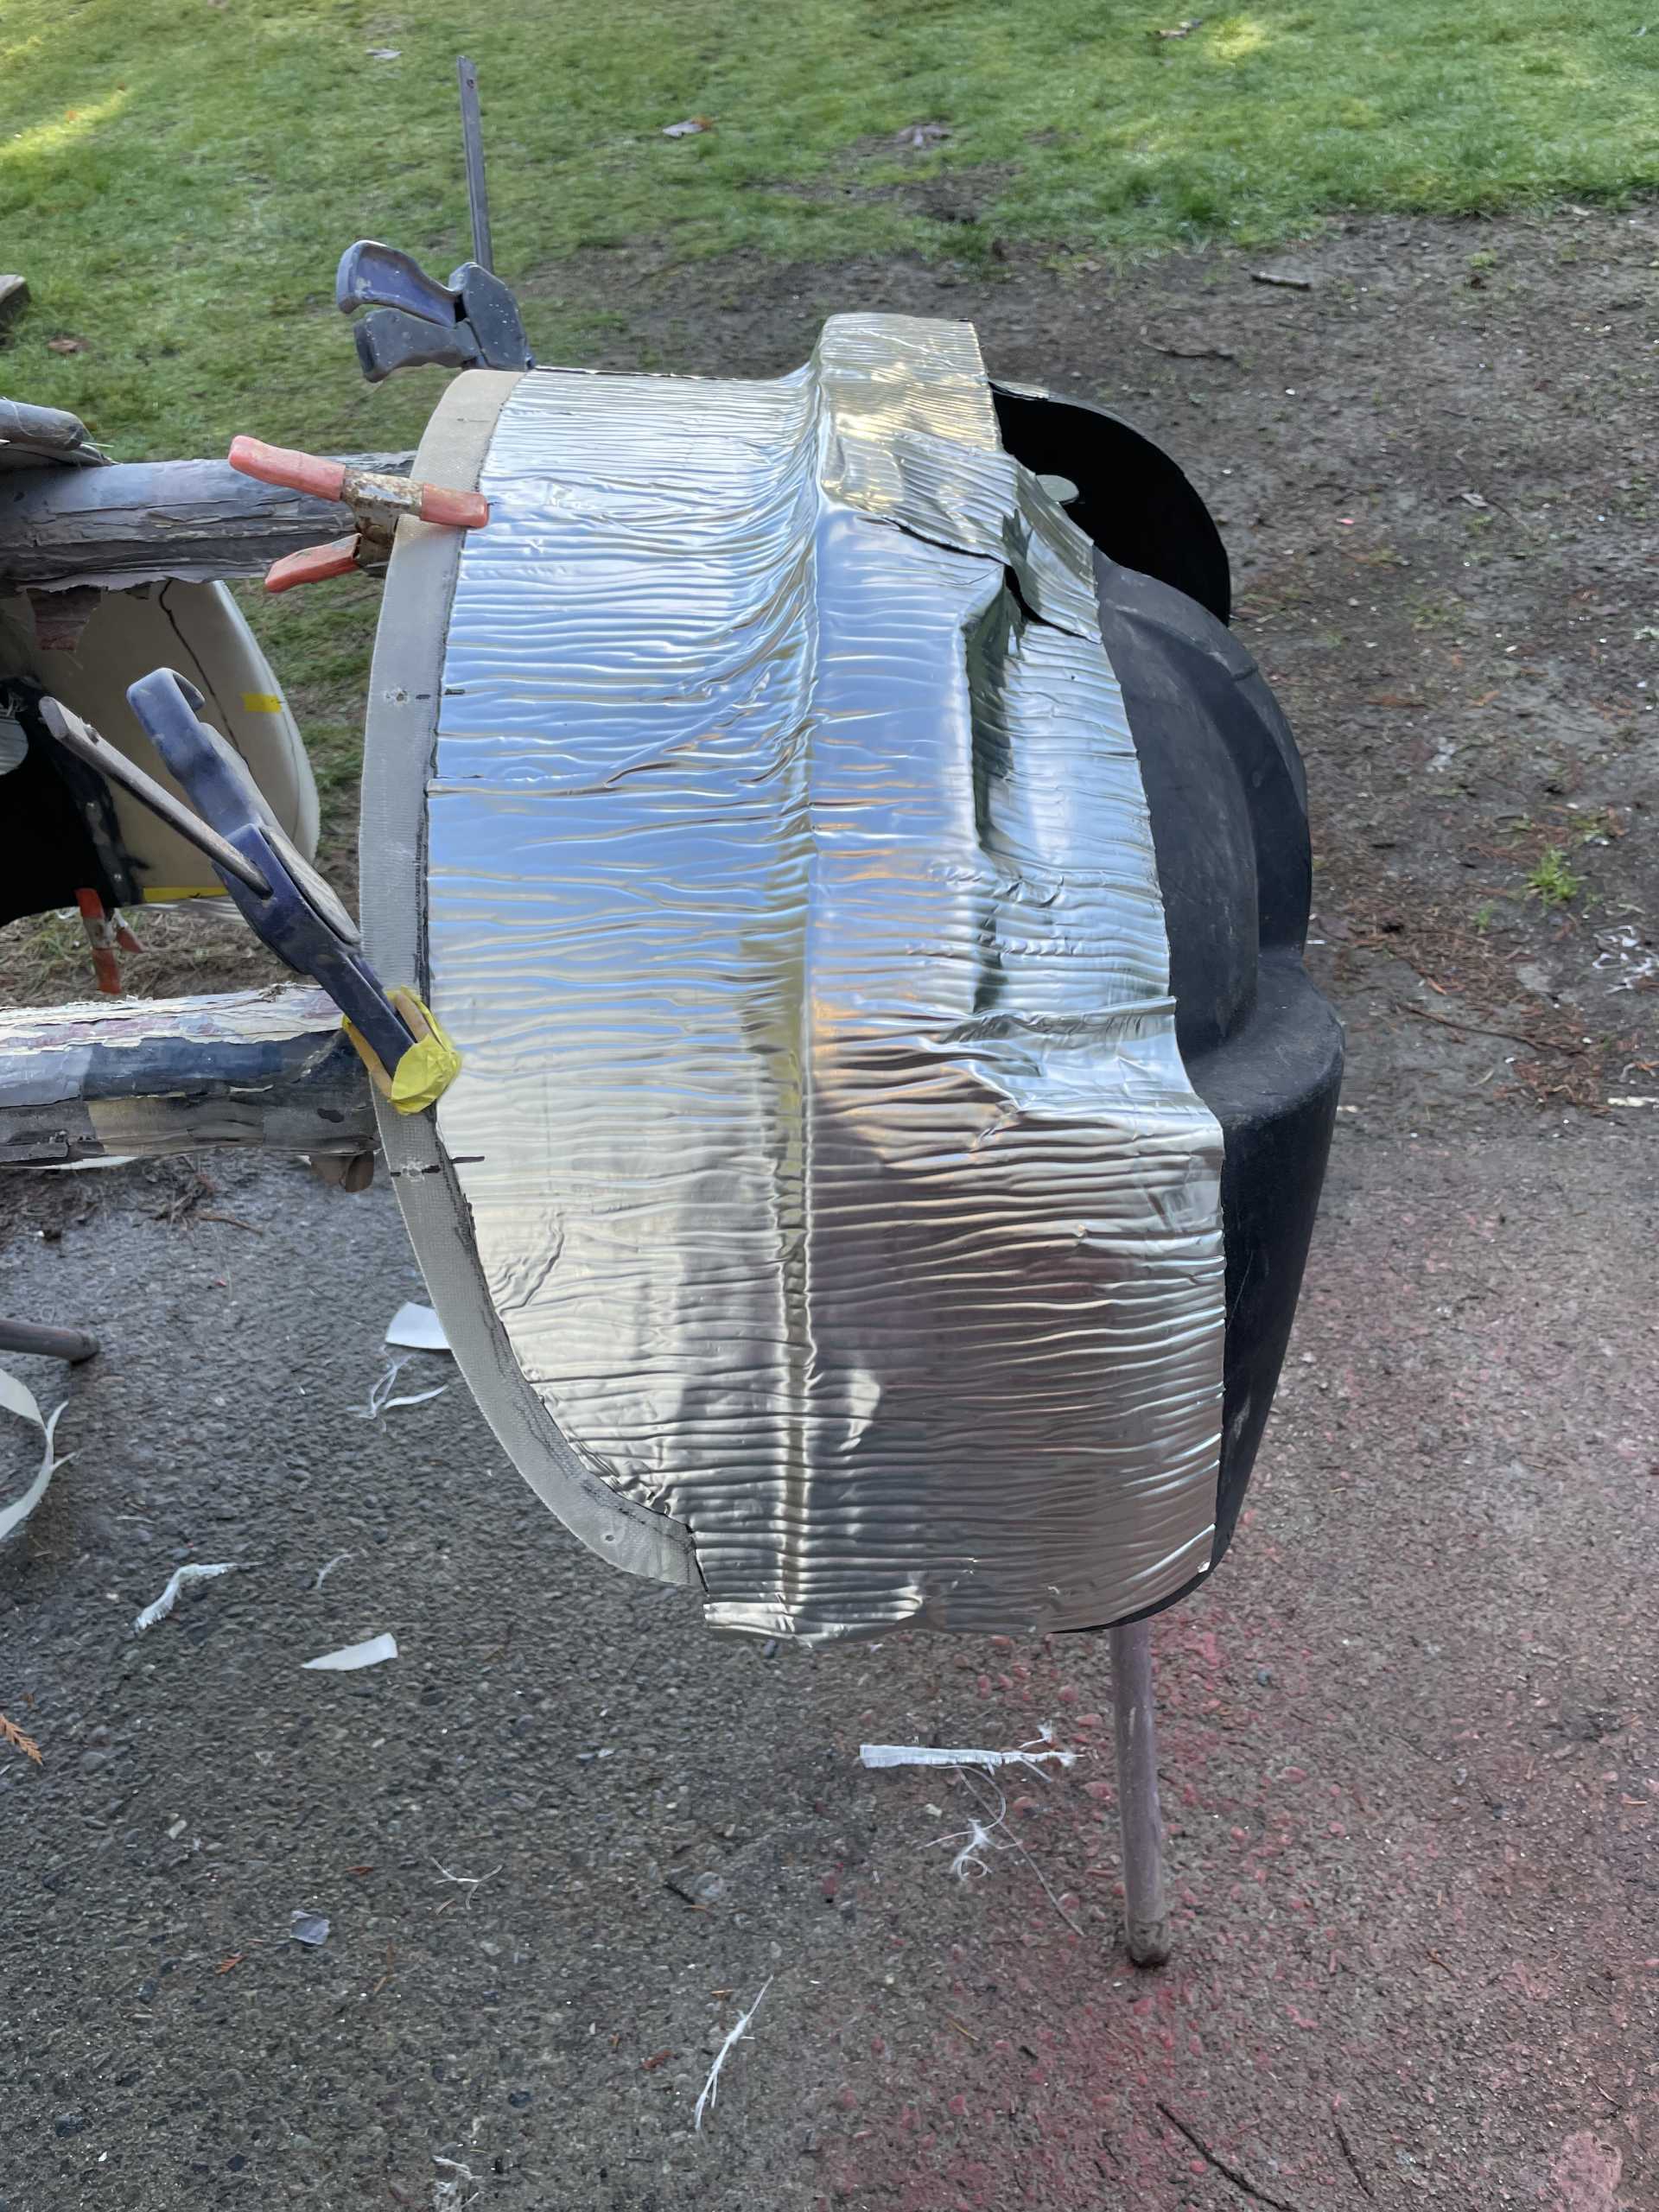
During all curing times I would reinstall the liners just to make sure that everything fit after the cure! Which is a day in between each process. To help eliminate any damage or noise from rocks etc. hitting the fiberglass portion I applied a layer of sound deadening nitrile mat on the upper side
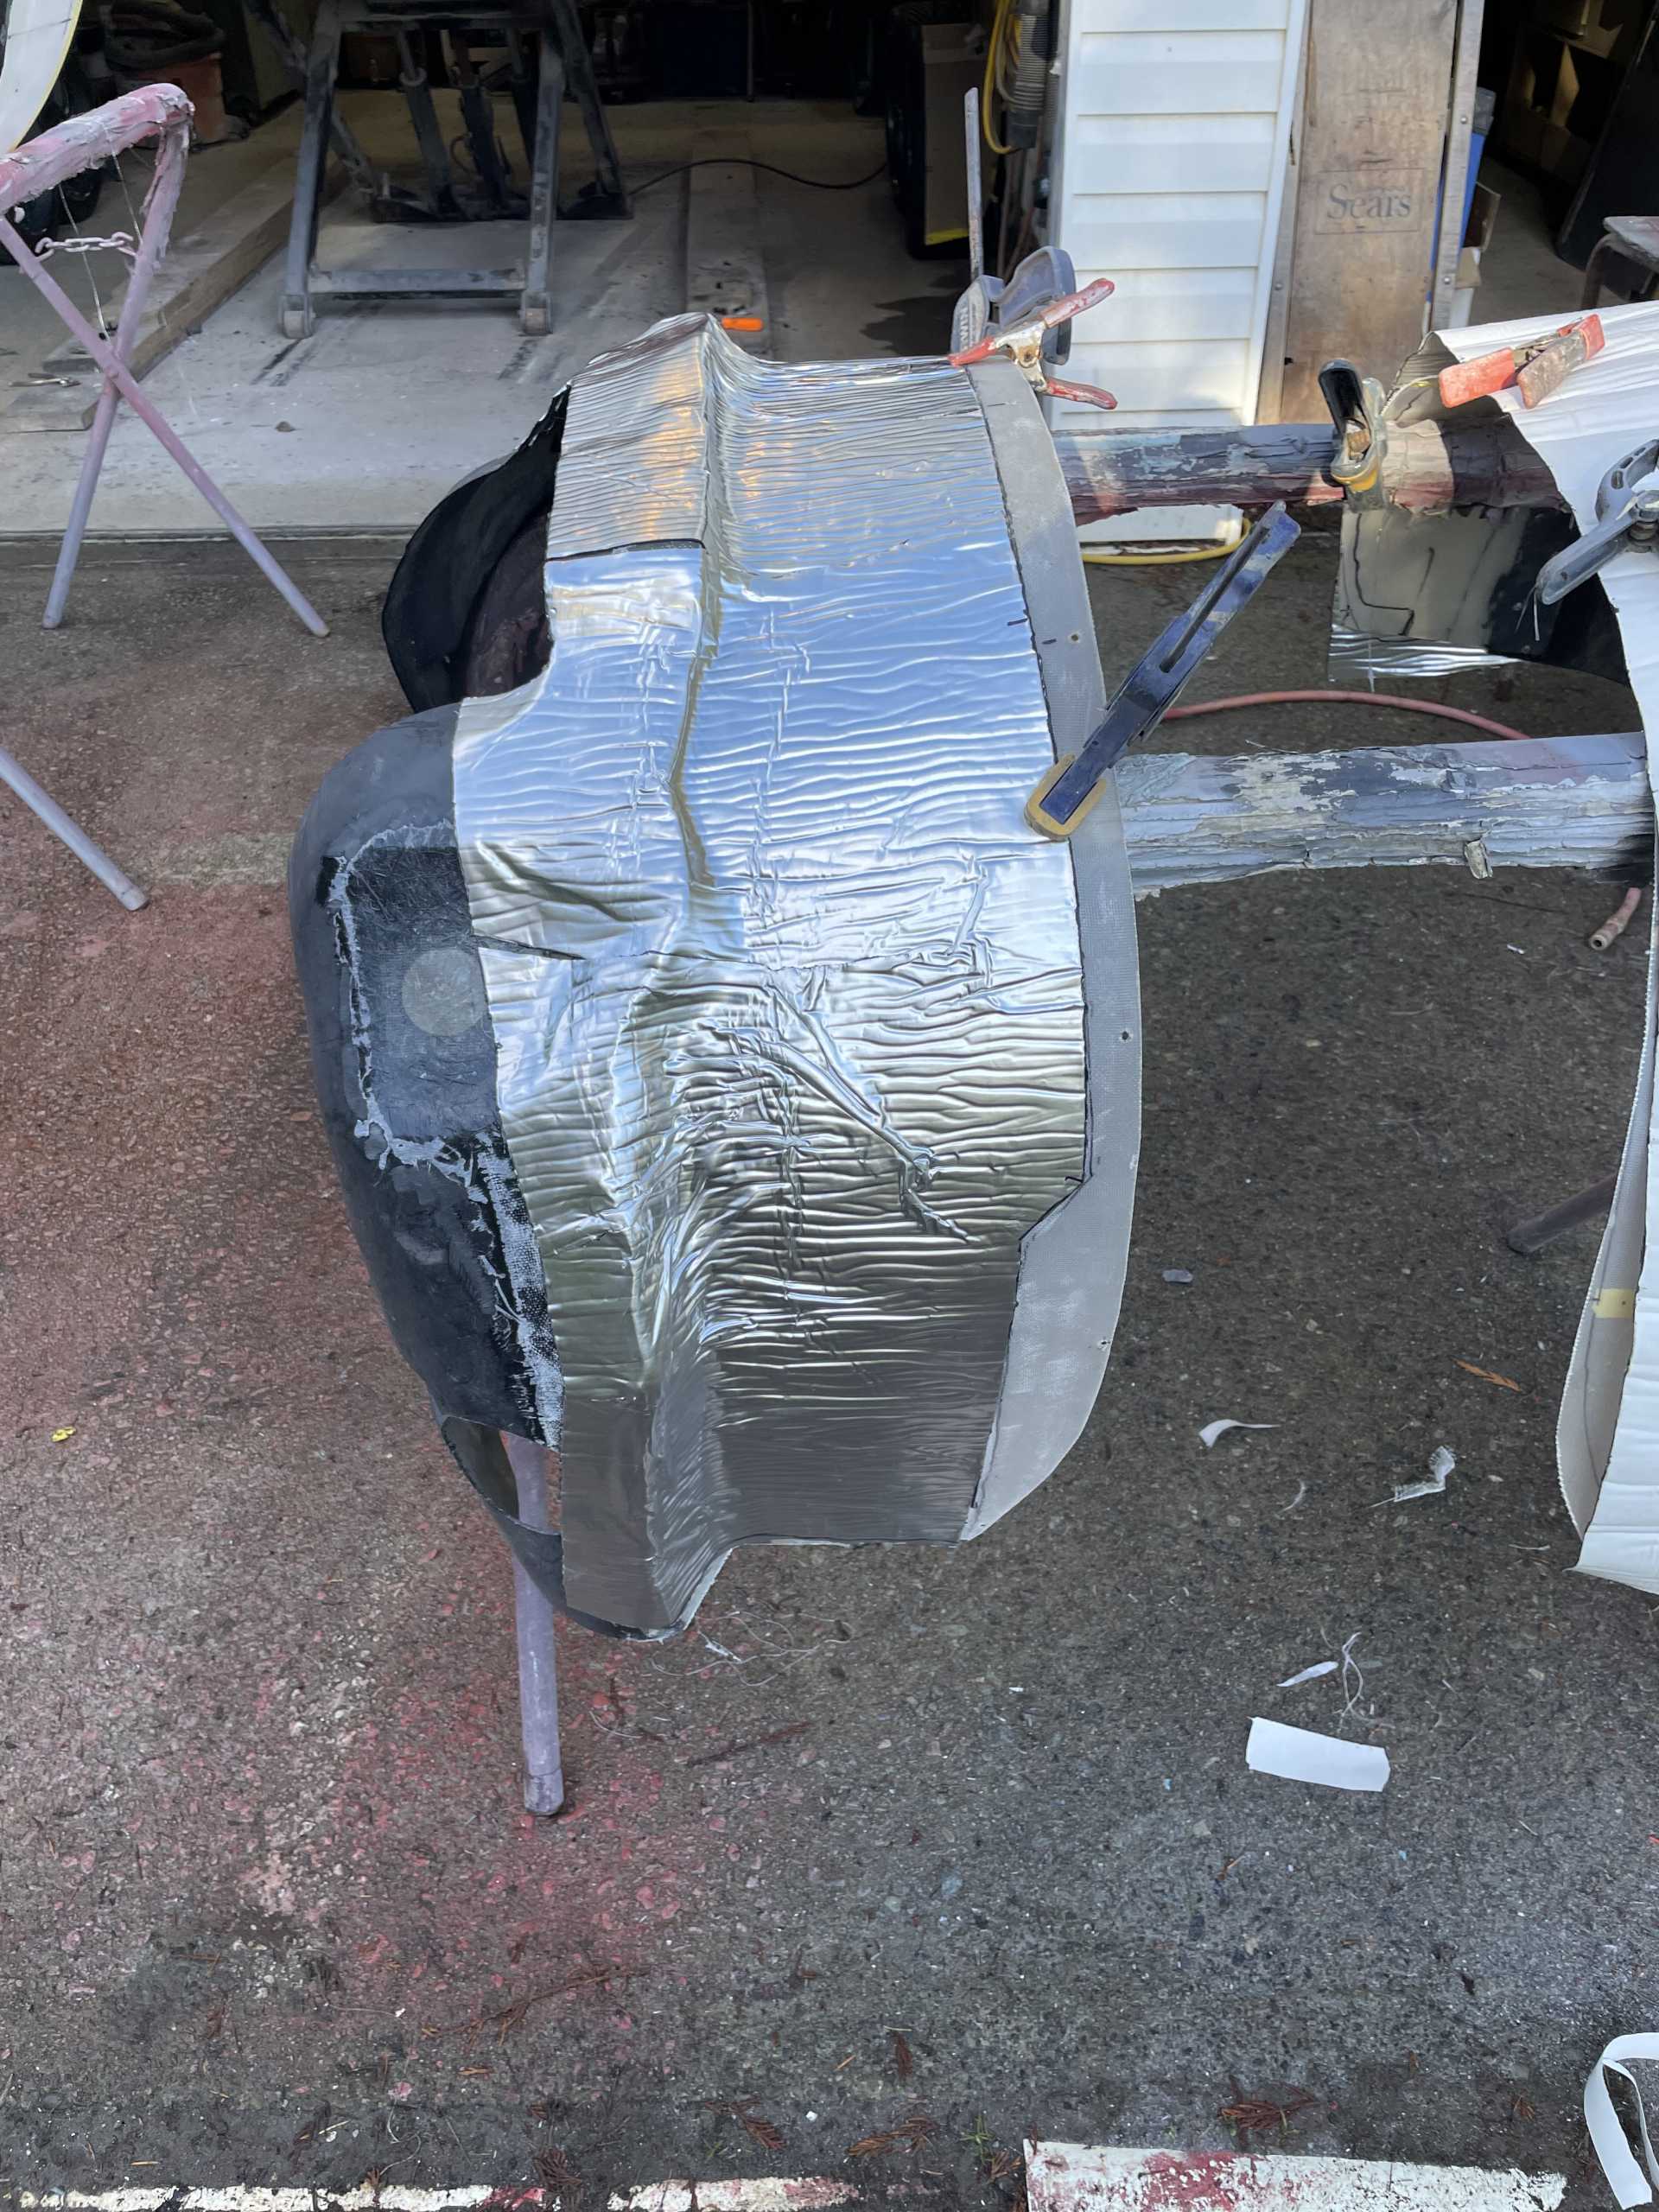
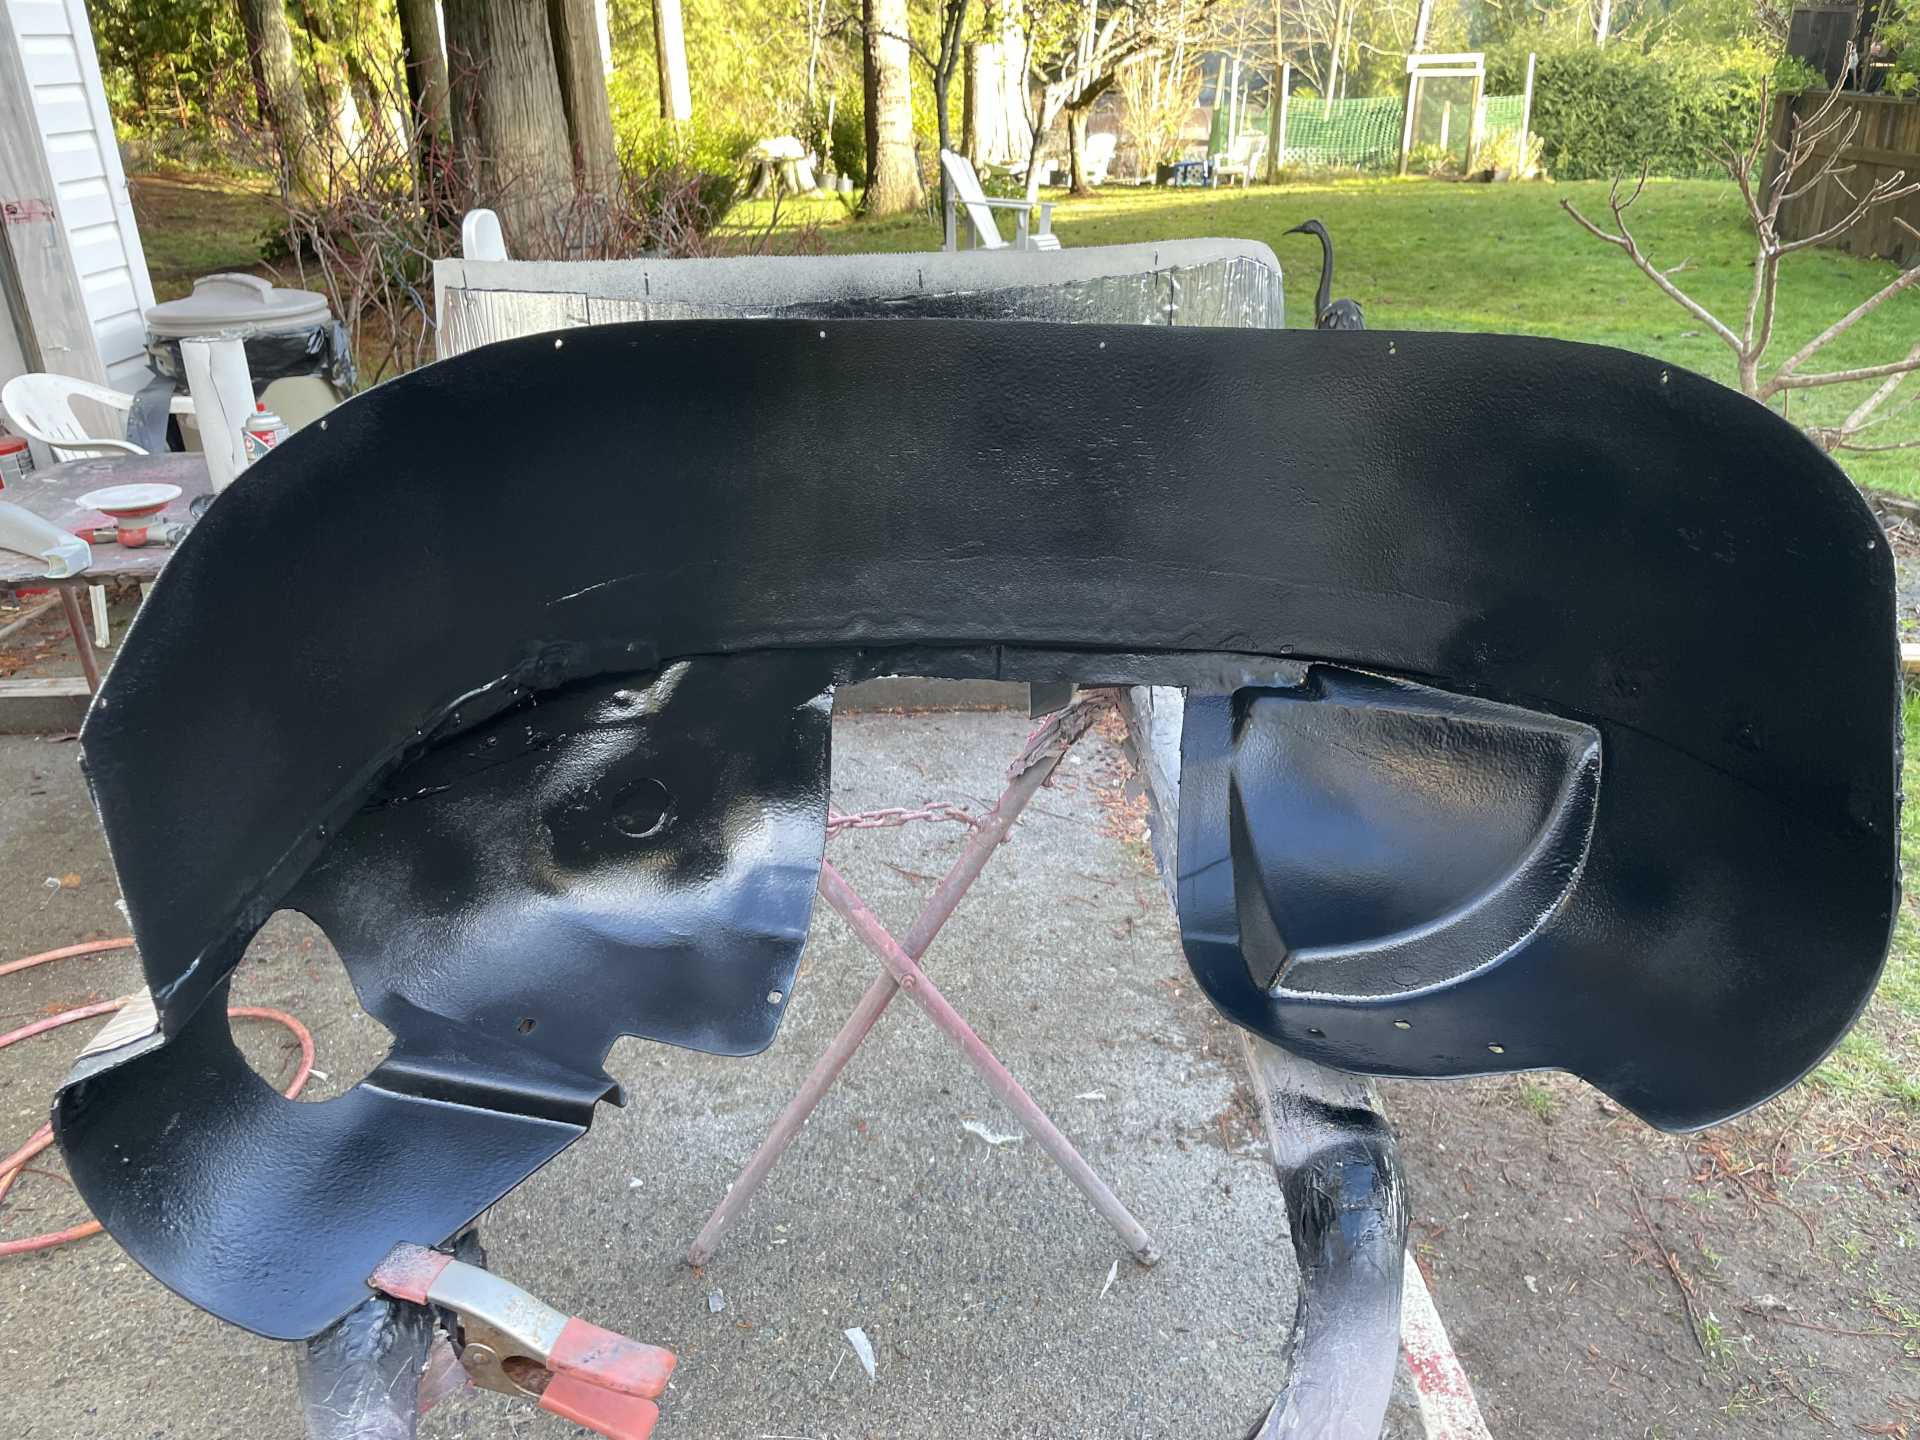
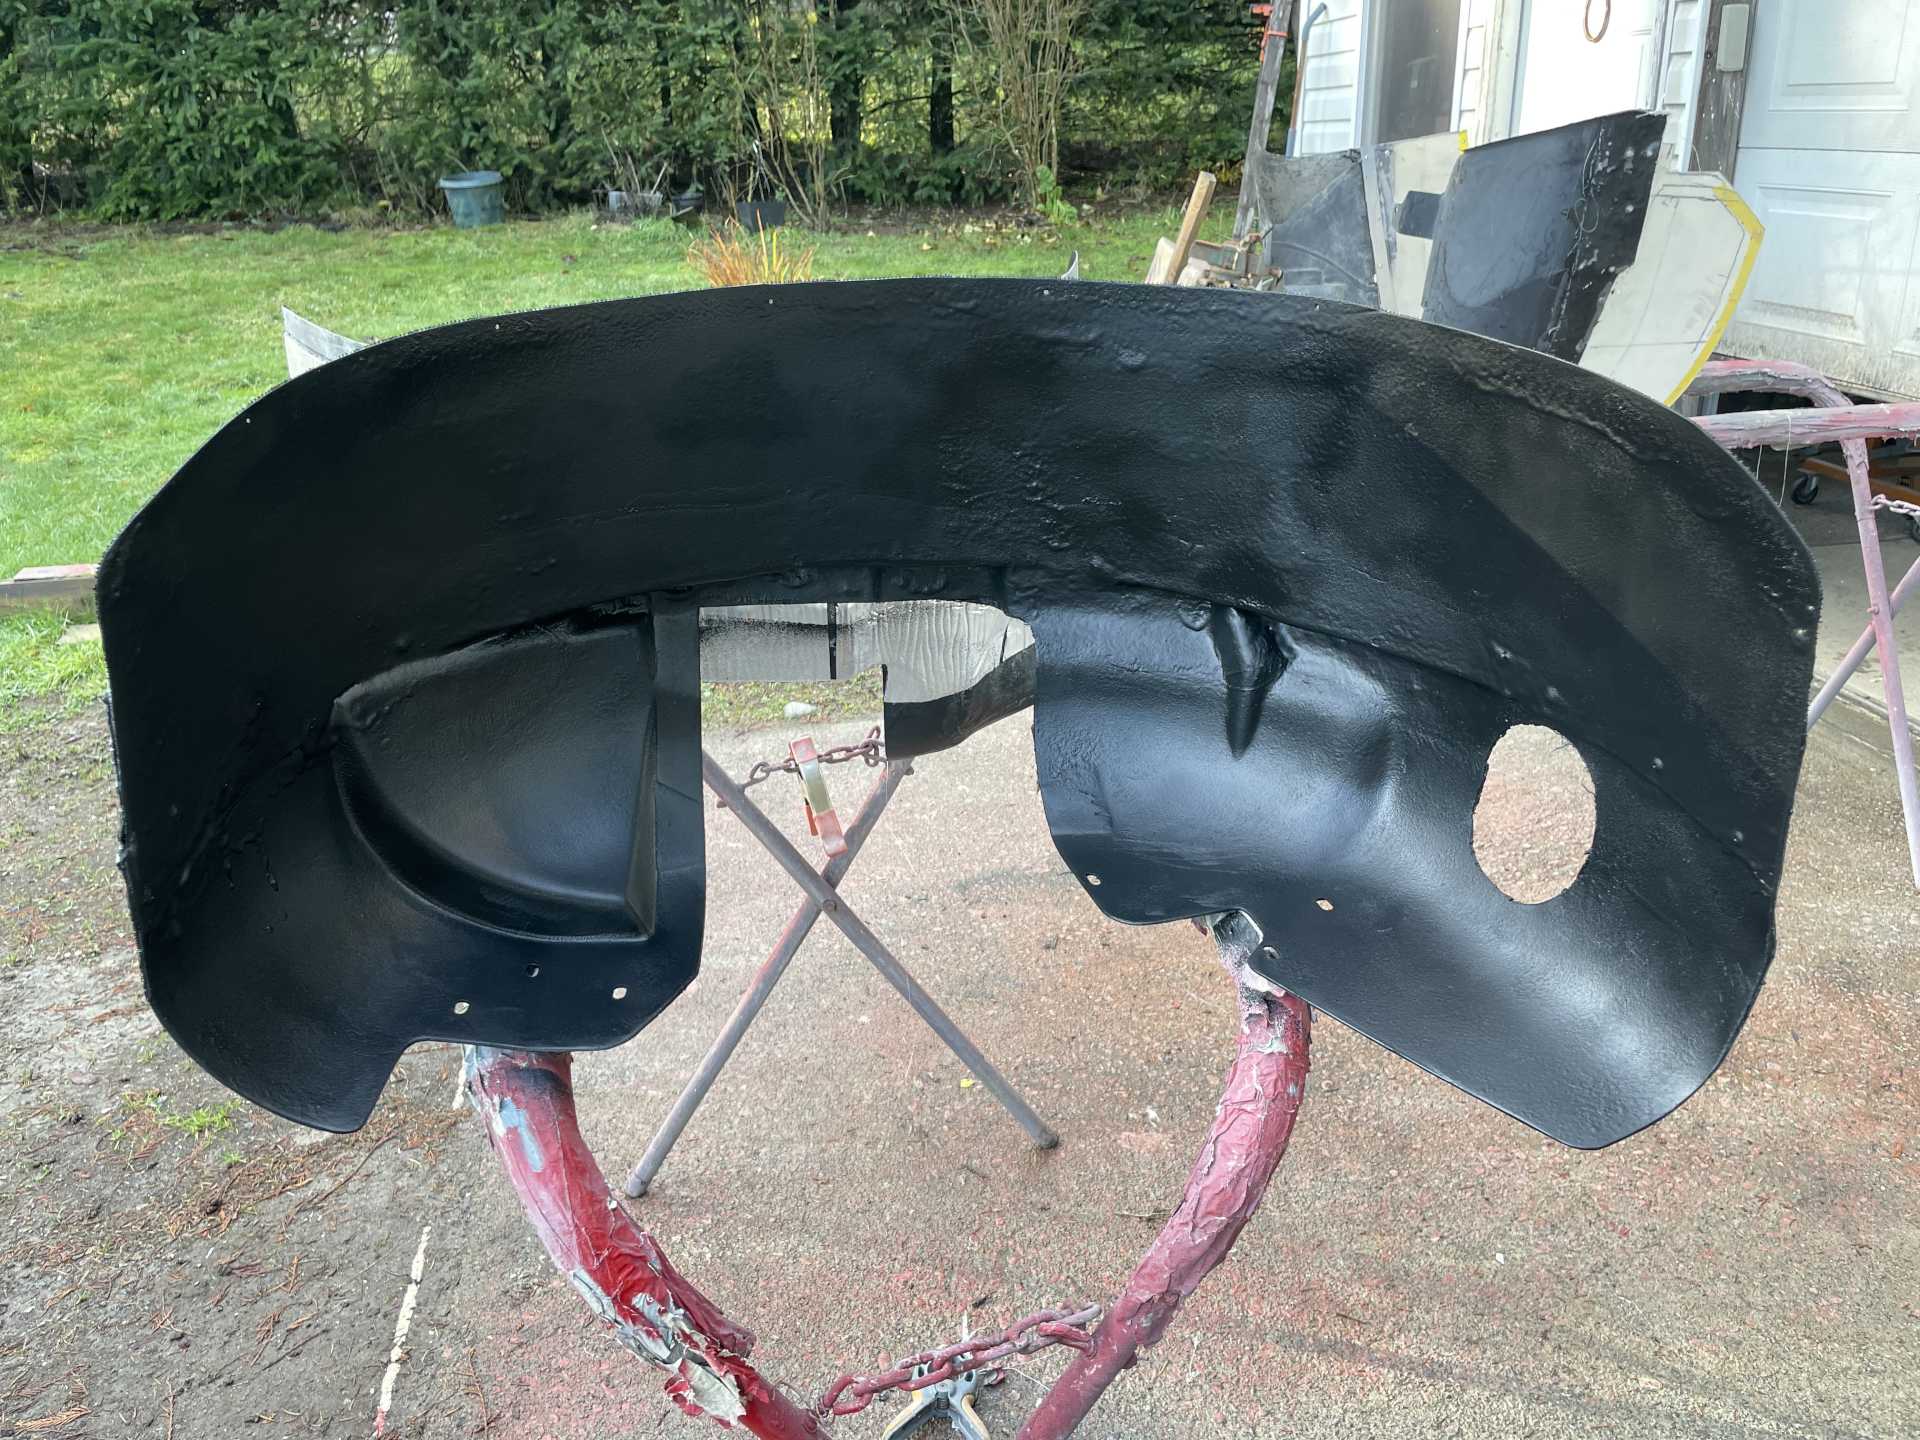
Then I flipped it over and prepared the inner surface sanding and scuffing all the surfaces and sprayed Rhino liner to the entire inner surface.
Then installed them to dry.
That’s it for now . Thanks for looking Wayne
[This message has been edited by dobie1 (edited 12-02-2023).]
Lots of different jobs going on at the moment with the car, I’ll break them down into individual updates as to much for a single post.
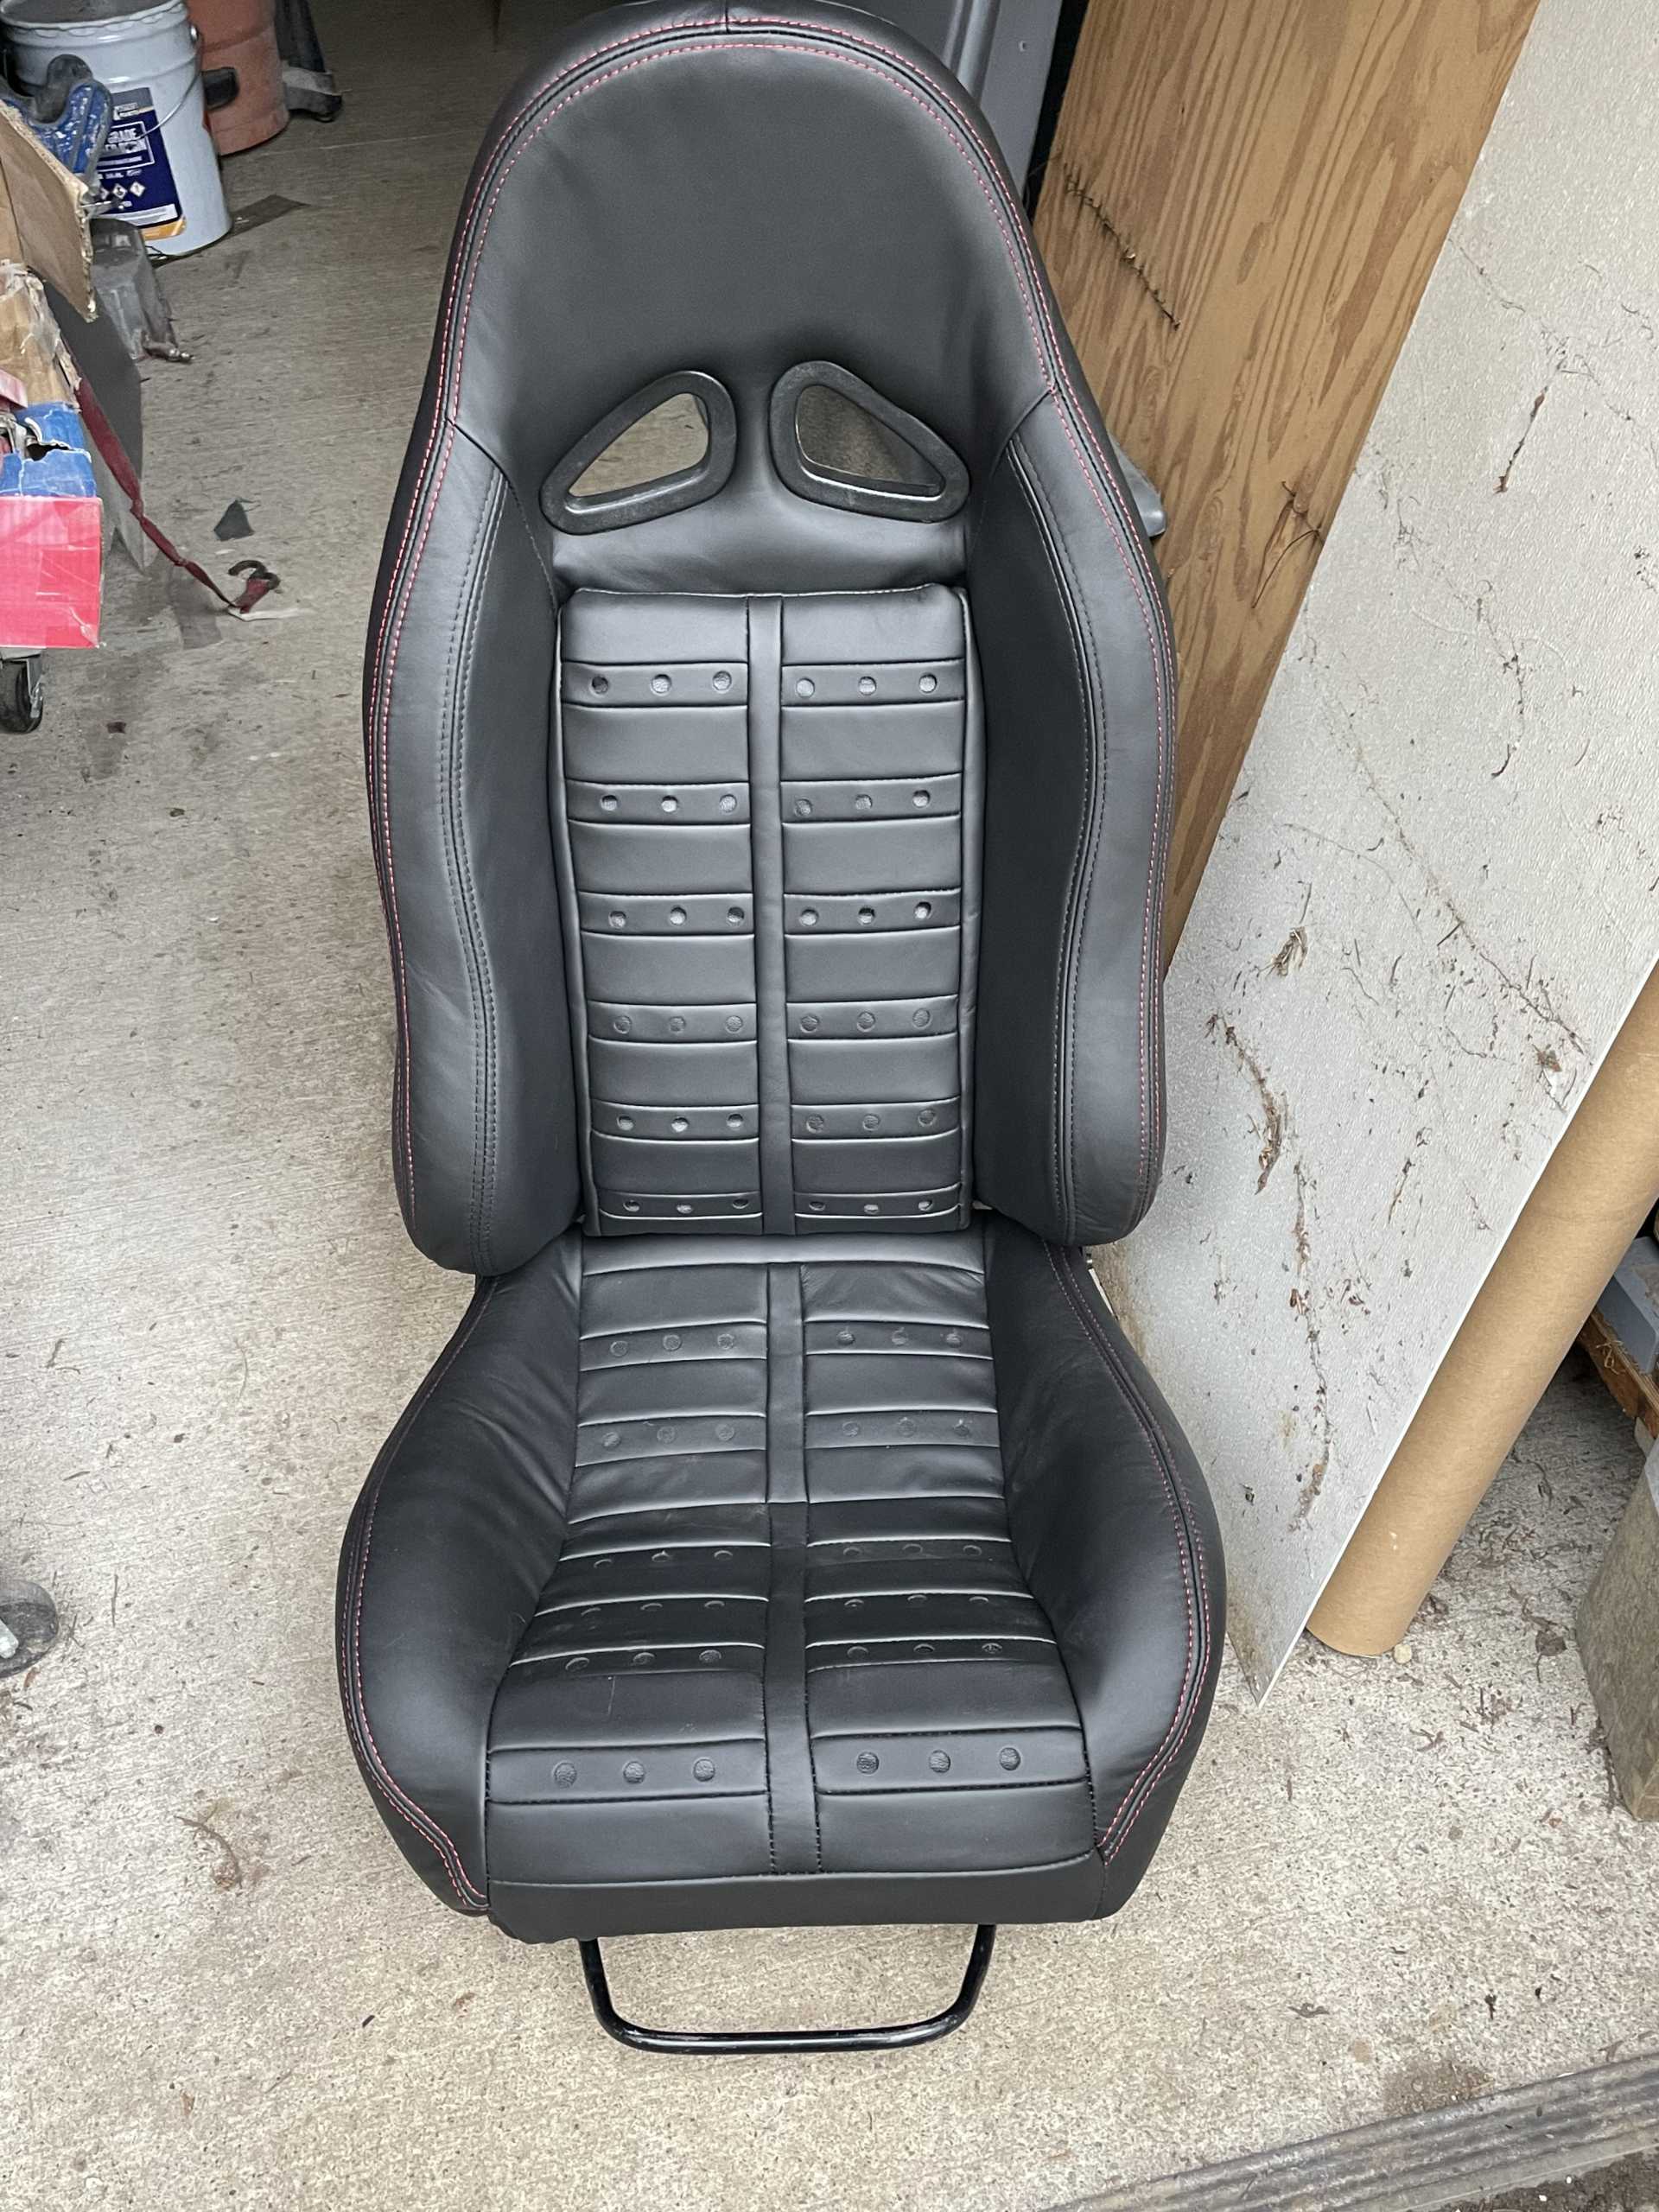
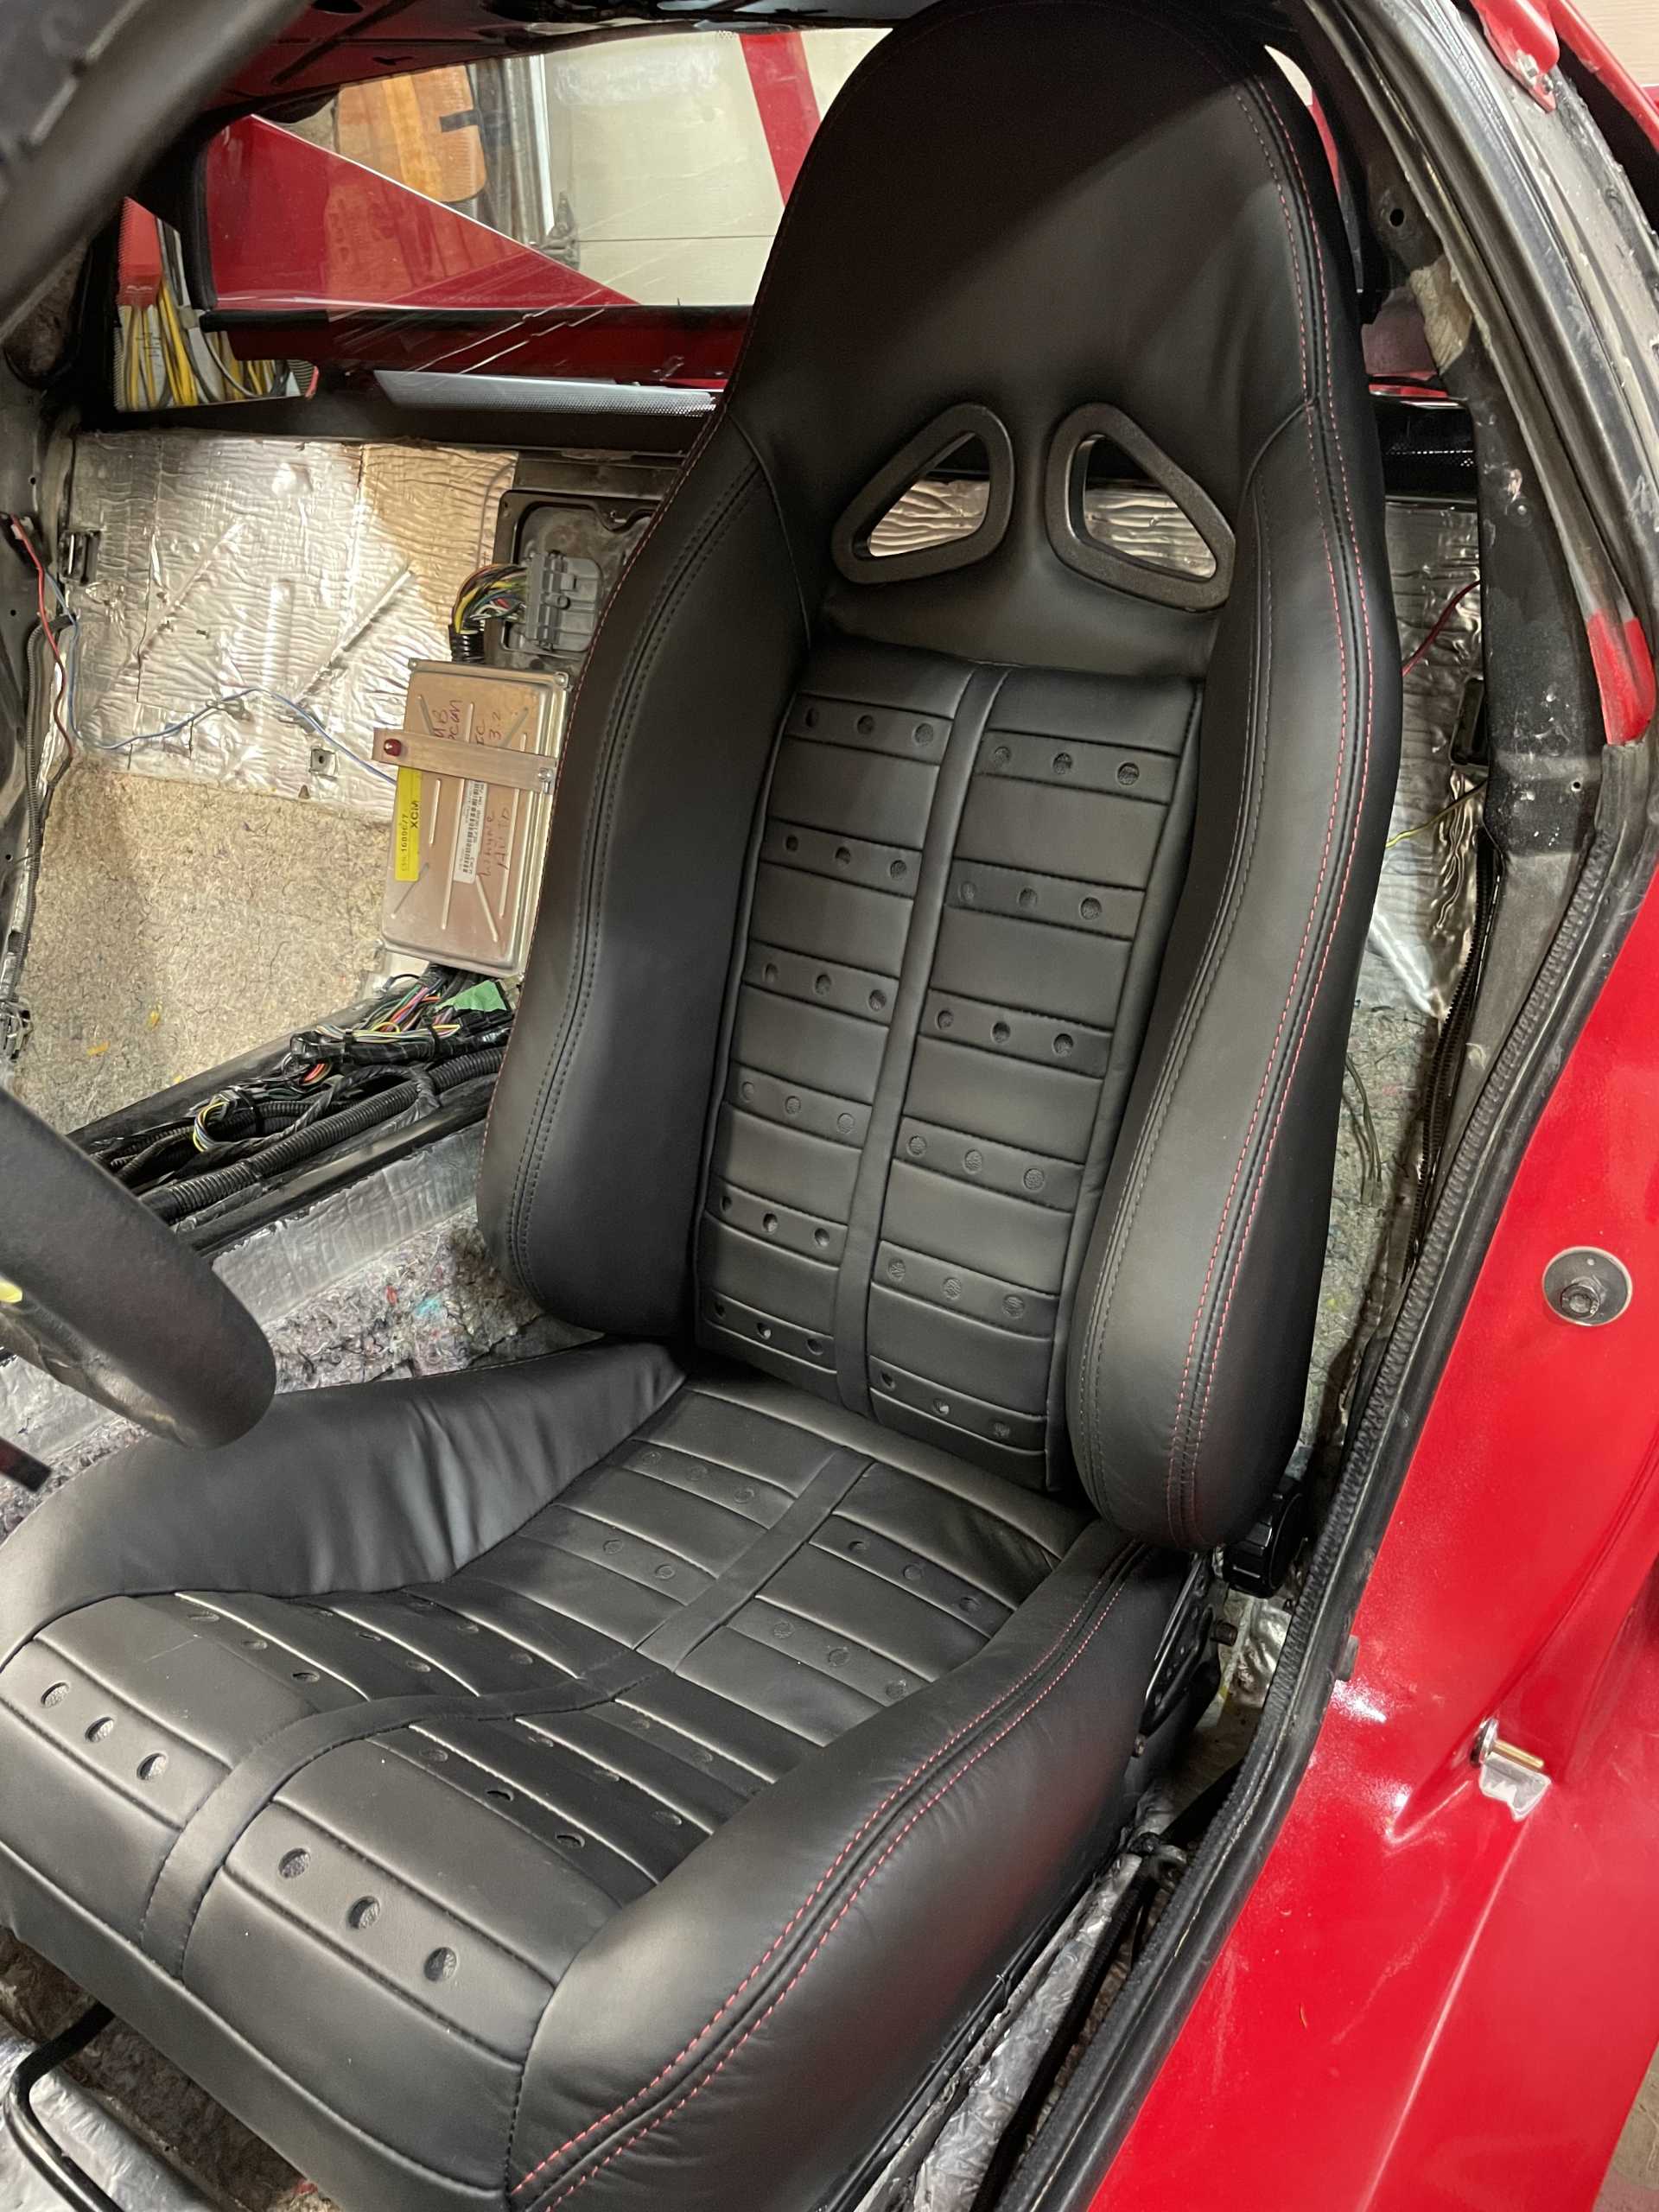
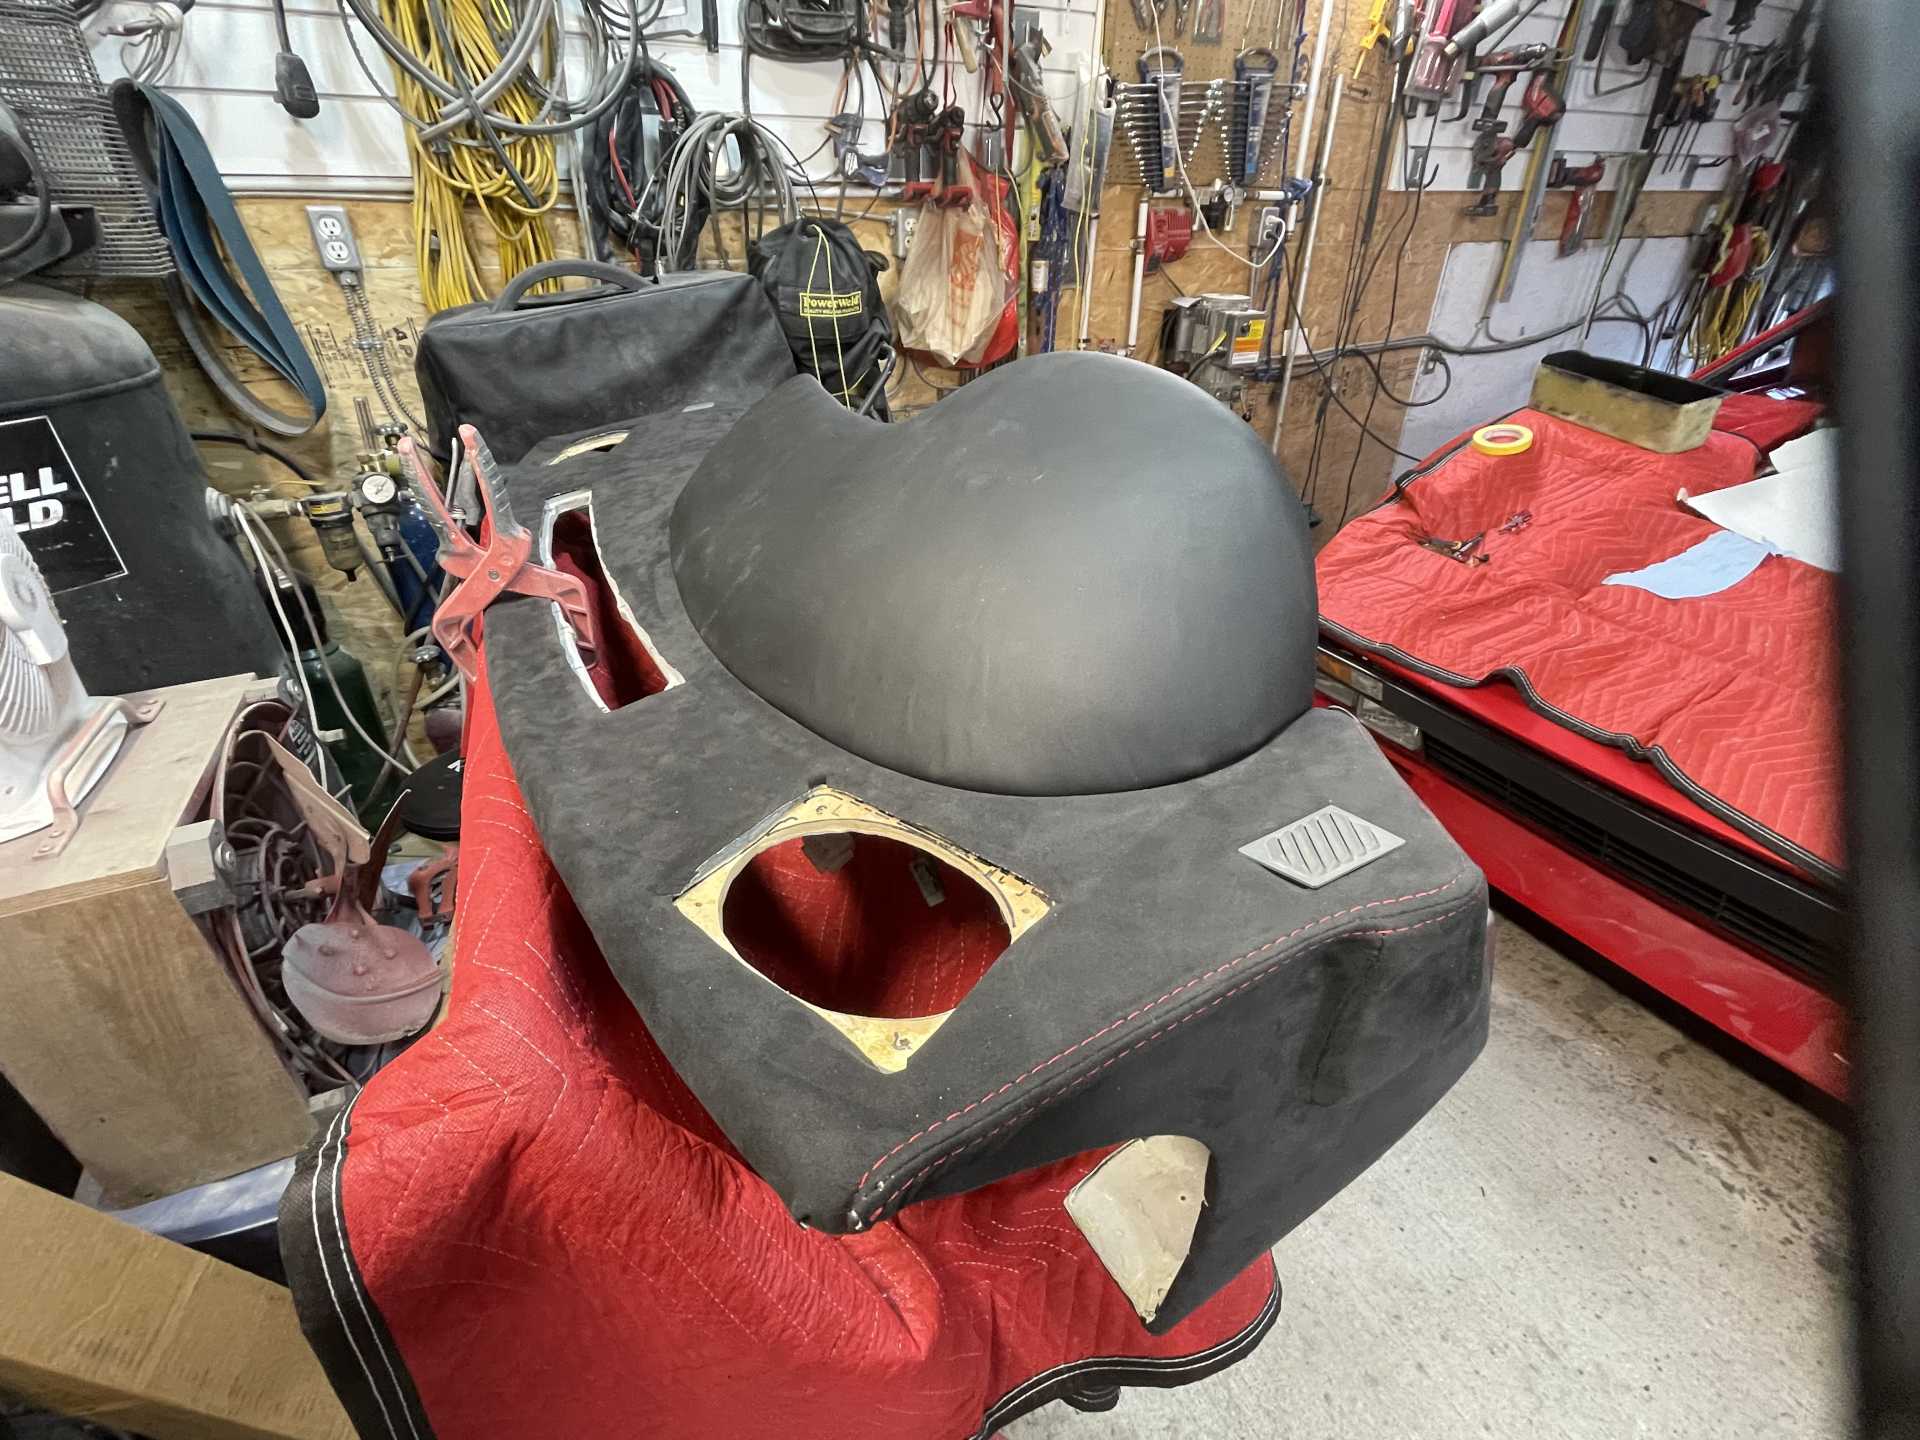
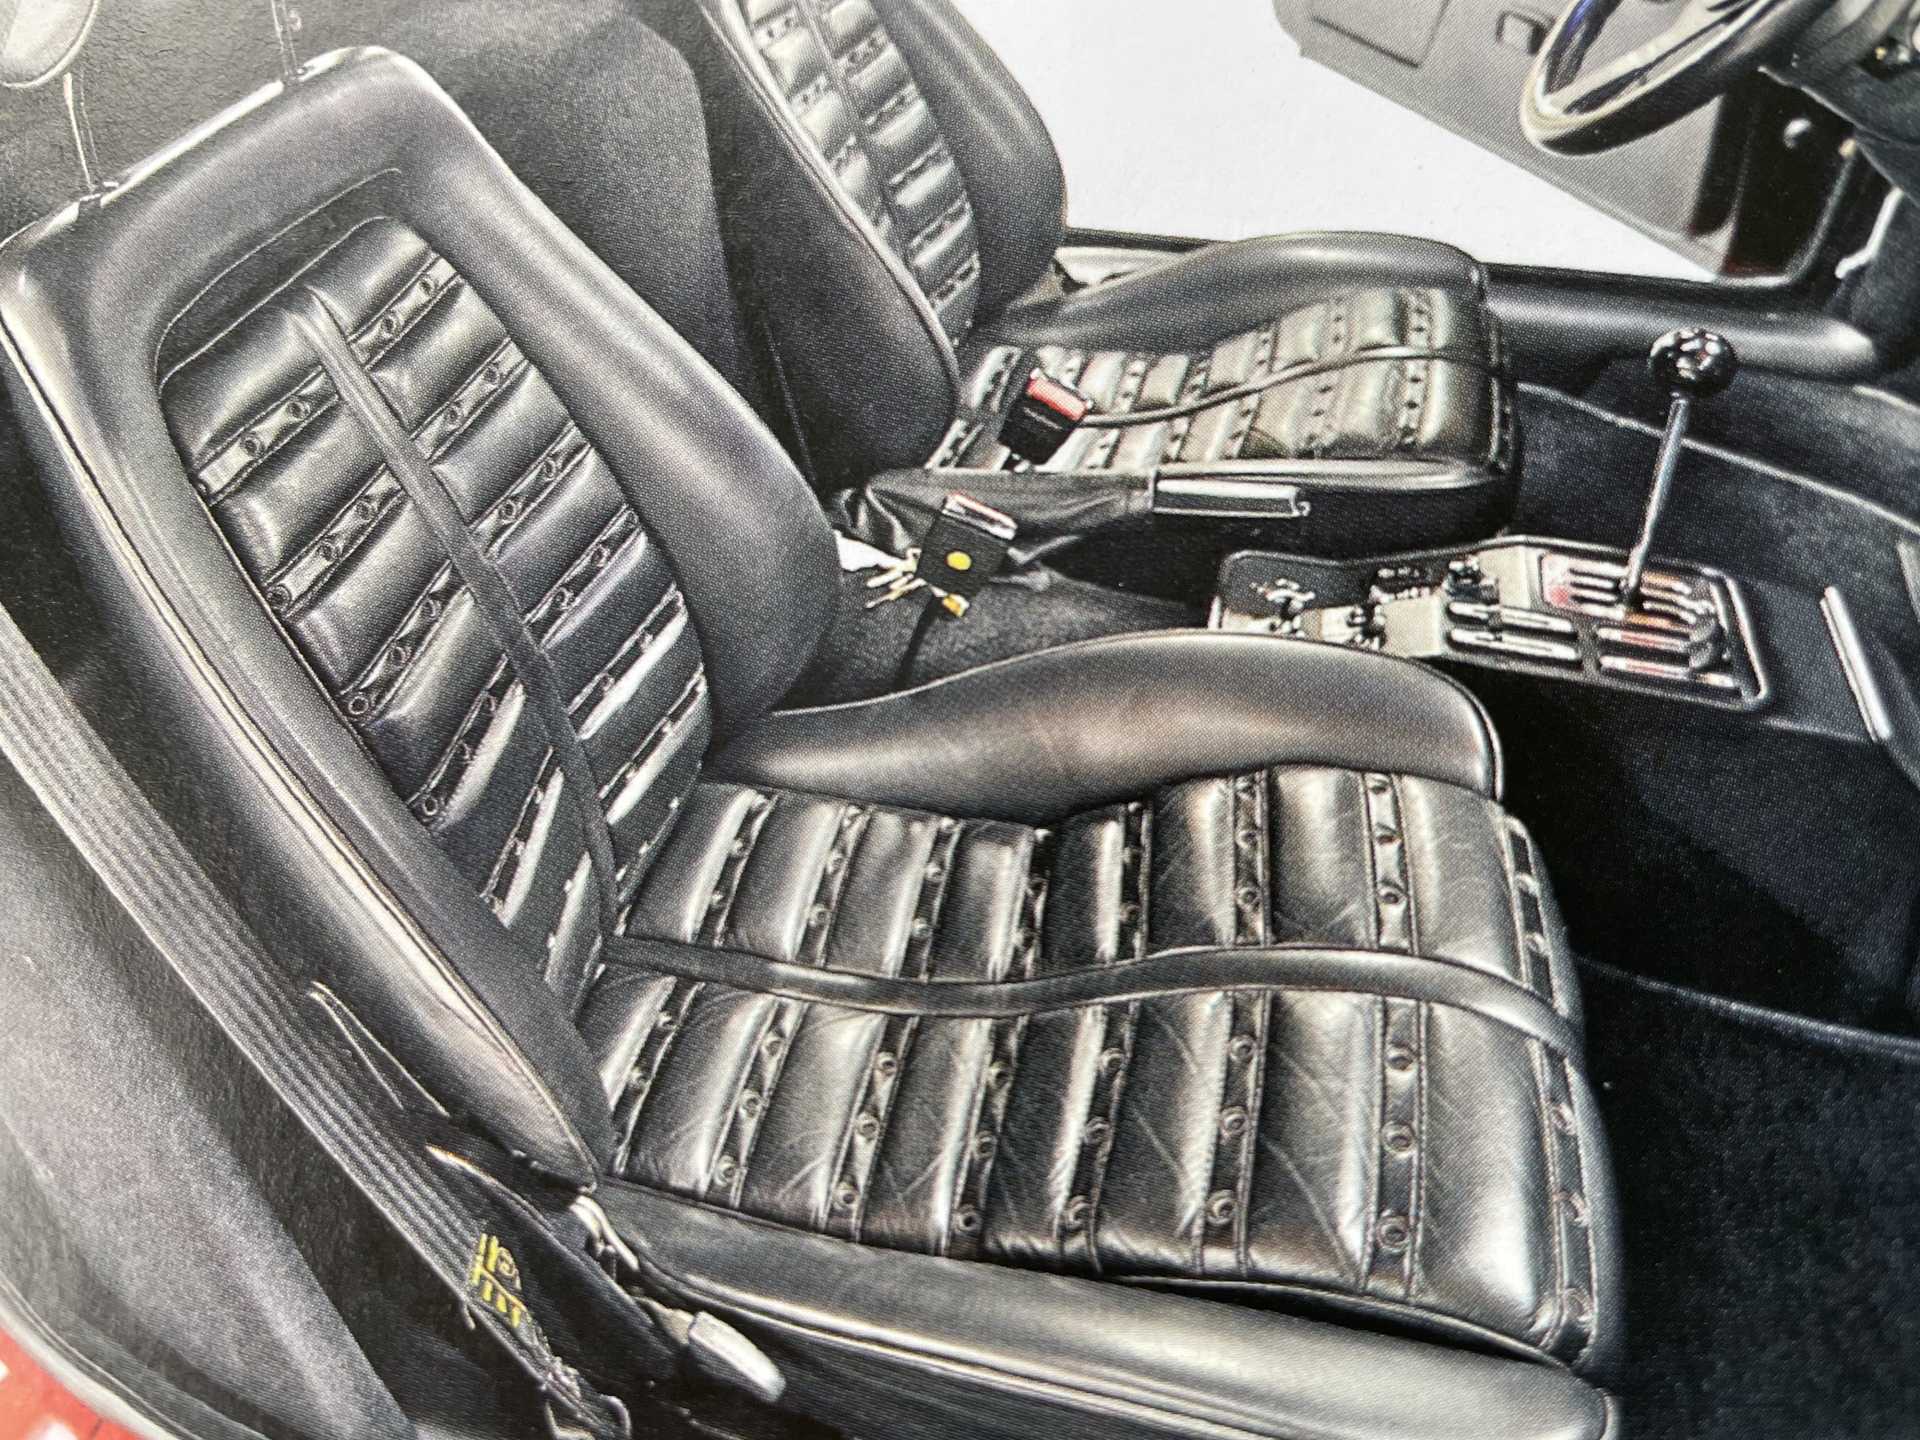
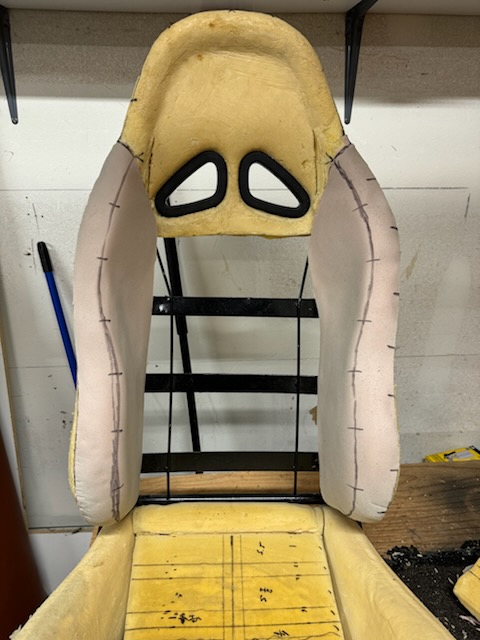
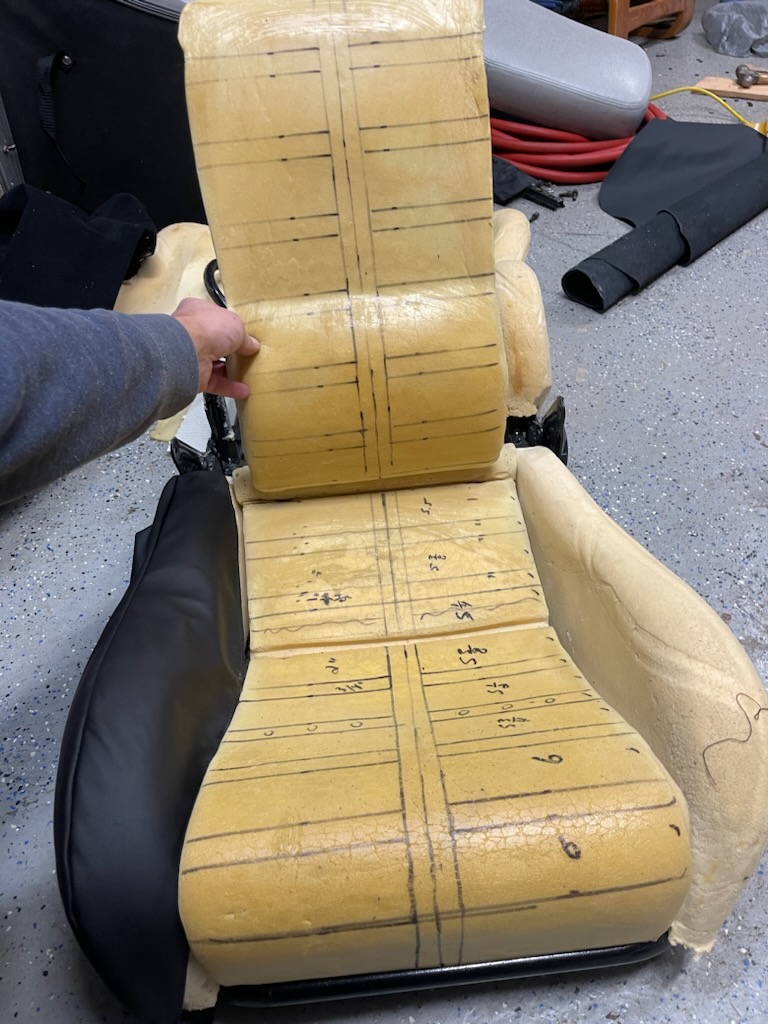
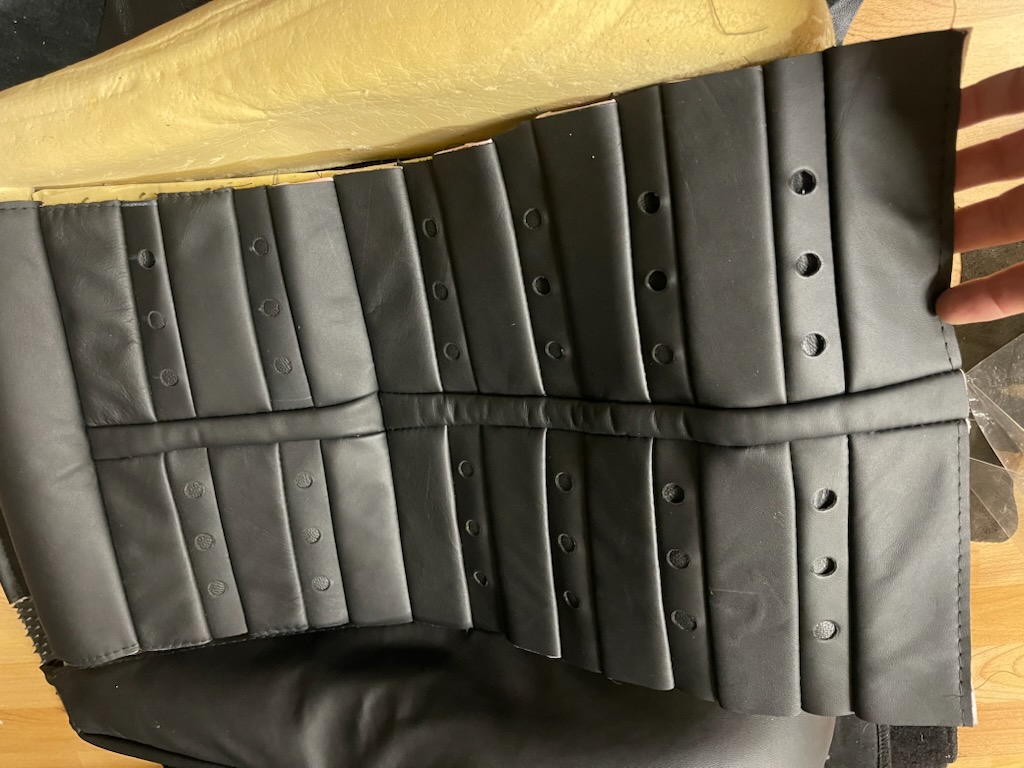
So my upholstery guy is really killing me with delays , it’s been extremely frustrating!! But when you’re building a custom car and a custom interior I guess patience is an important part of the build!! So you have all seen the finished dash and instrument pod and I’m very happy with the finished pieces. He has been working on the seats for over 4 months. Unfortunately for me he’s had a lot of personal matters during this time and not a lot has been finalized or finished. However they are progressing , my goal has been to modernize the OEM GTO seats keeping the original seat pattern but updating to high back buckets.
This is the OEM seats
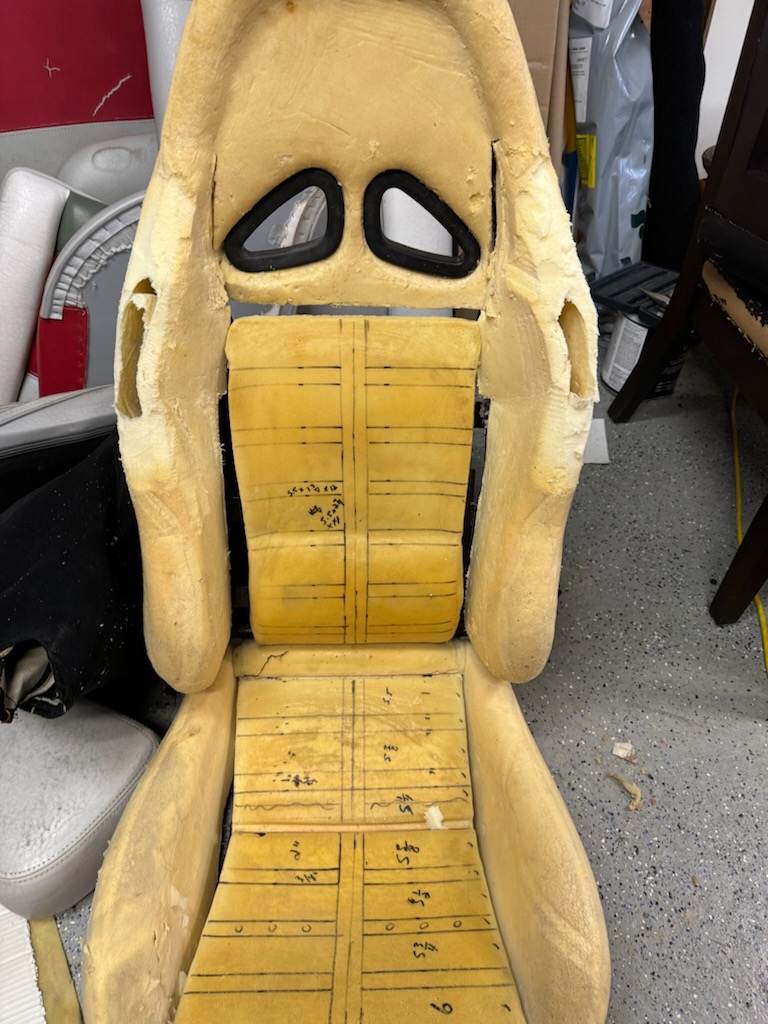
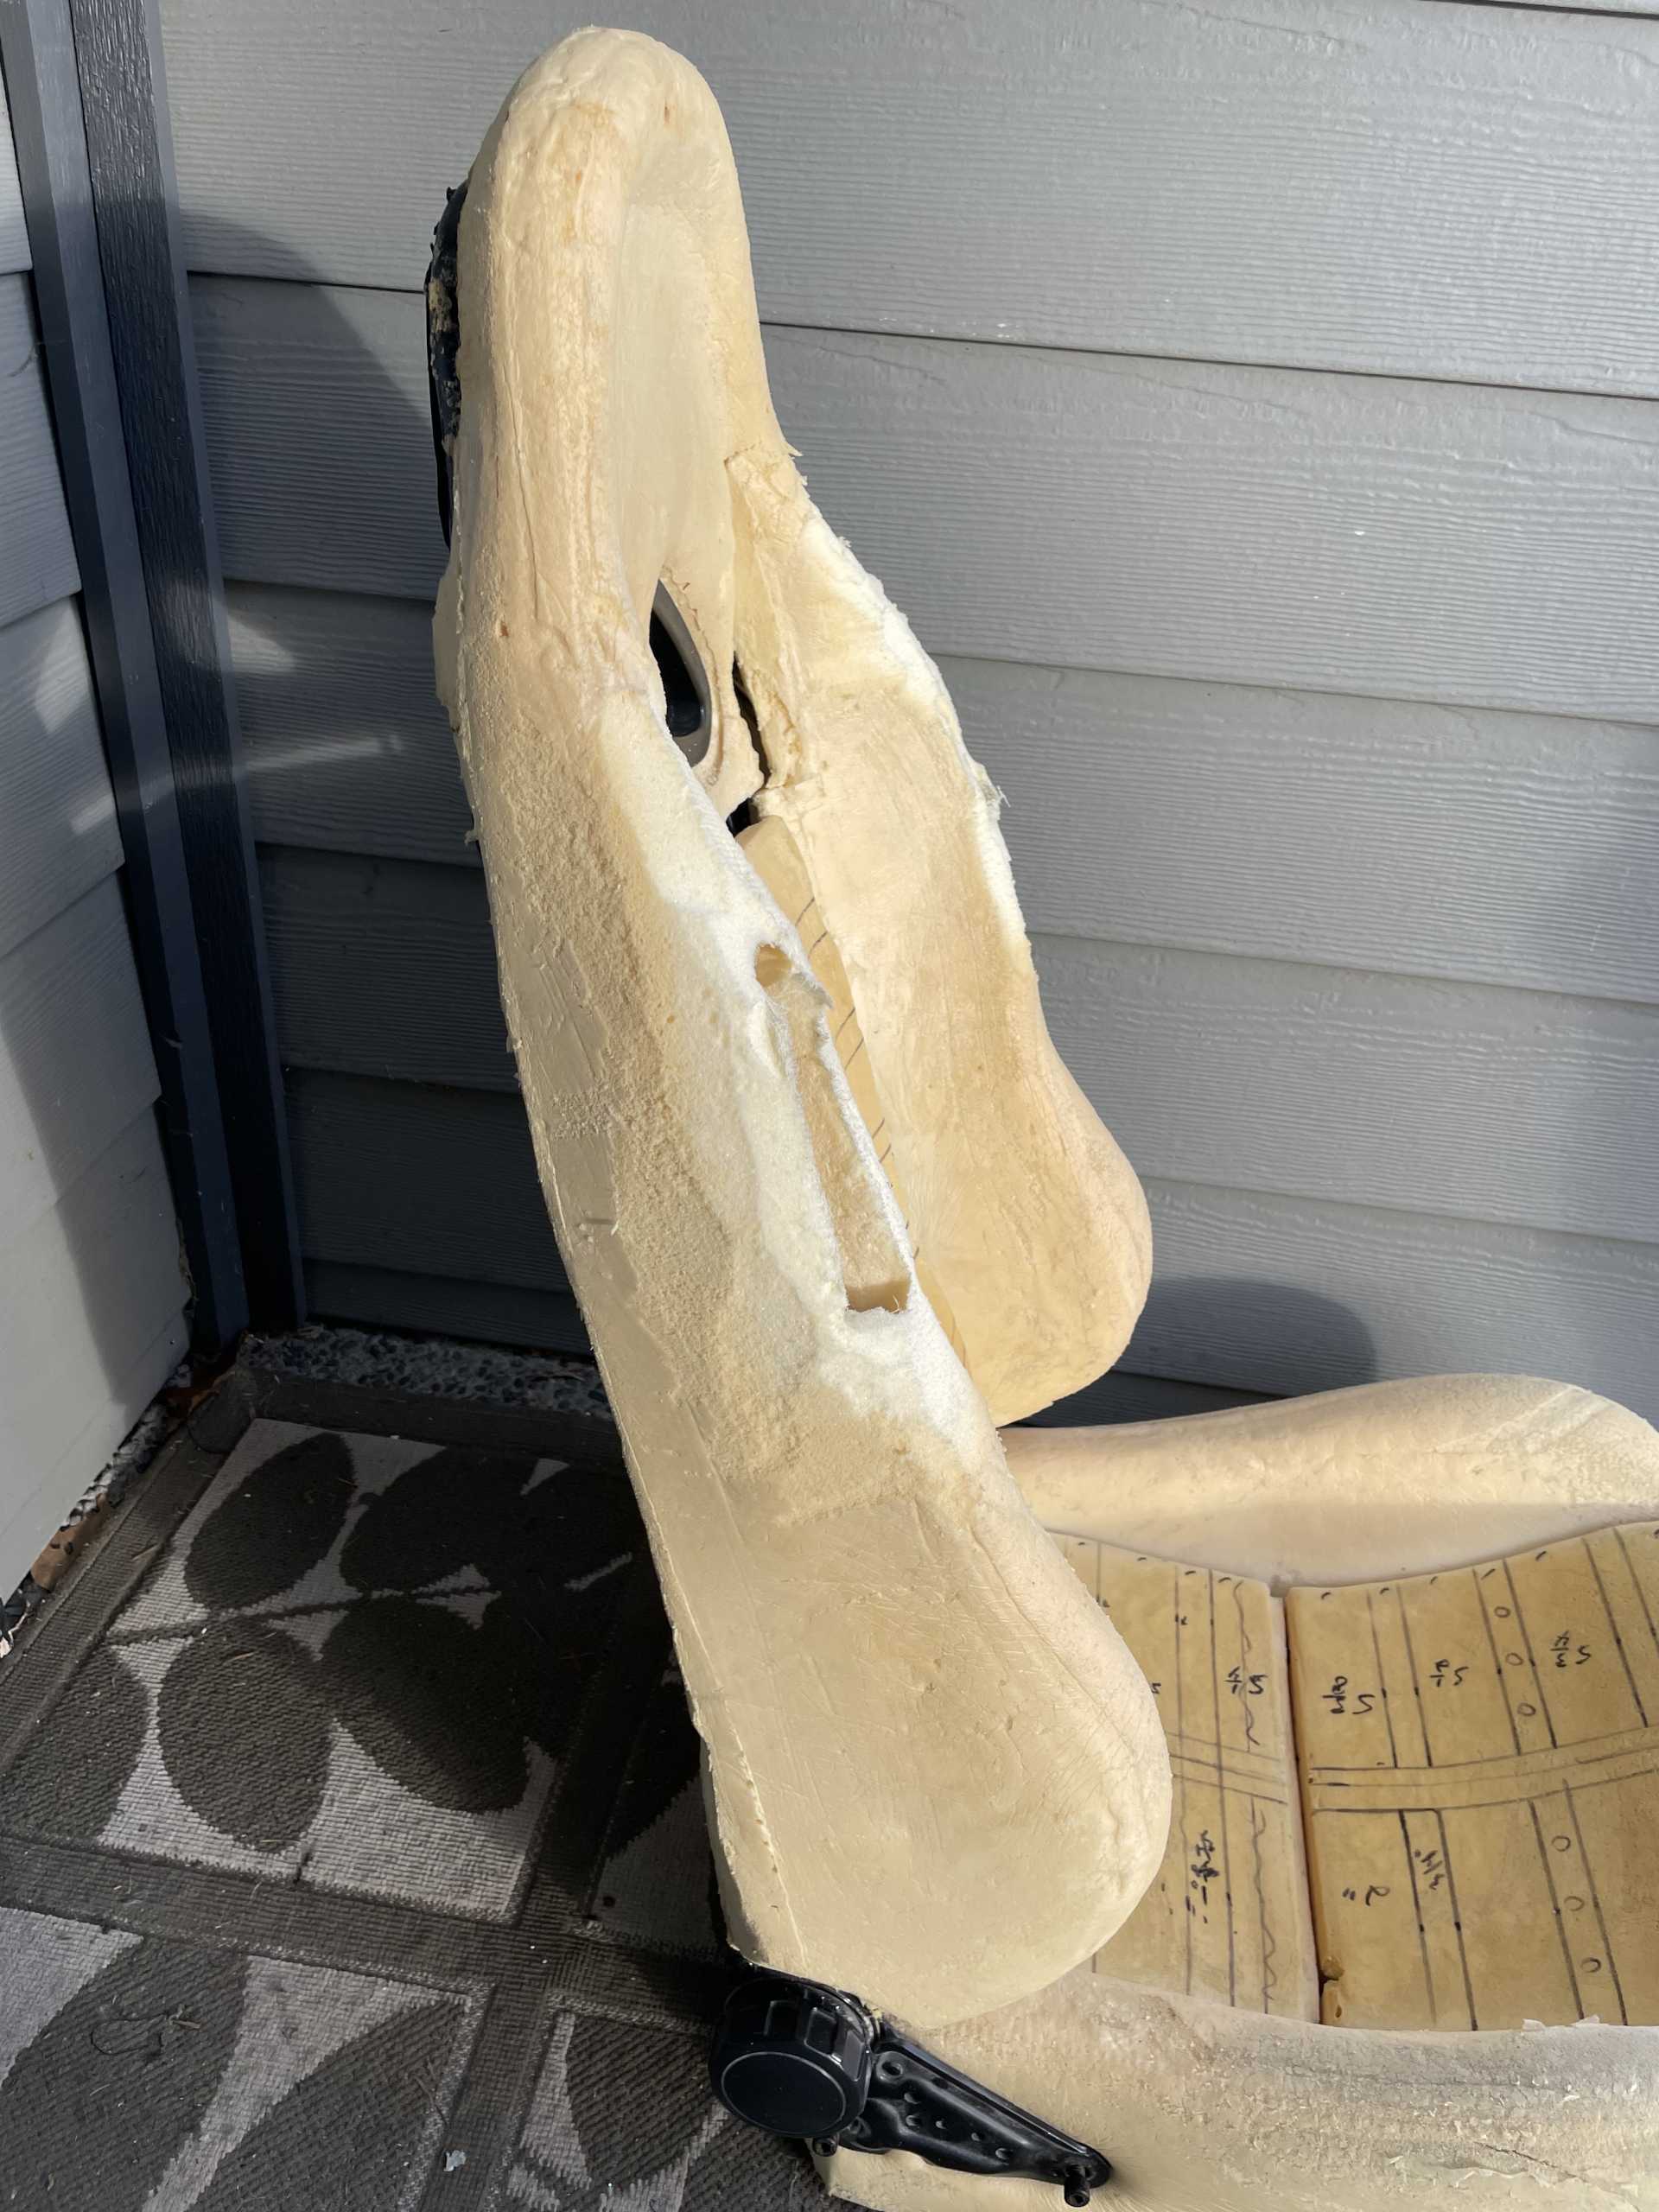
So the high back seats I have needed to be modified shaving down the side bolsters at the top as they ran into the “B” pillars , doing this mod requires the steel frame to be modified.
He then made up new side bolsters
He has drawn up the seat pattern design
And made the first panel
These are some of the other panels done for testing and I’m happy so far with the results h
I’m working currently on the rear window fill and B pillar mods currently , I’ll post some pics later
Here is one of the other areas I’ve been working on.
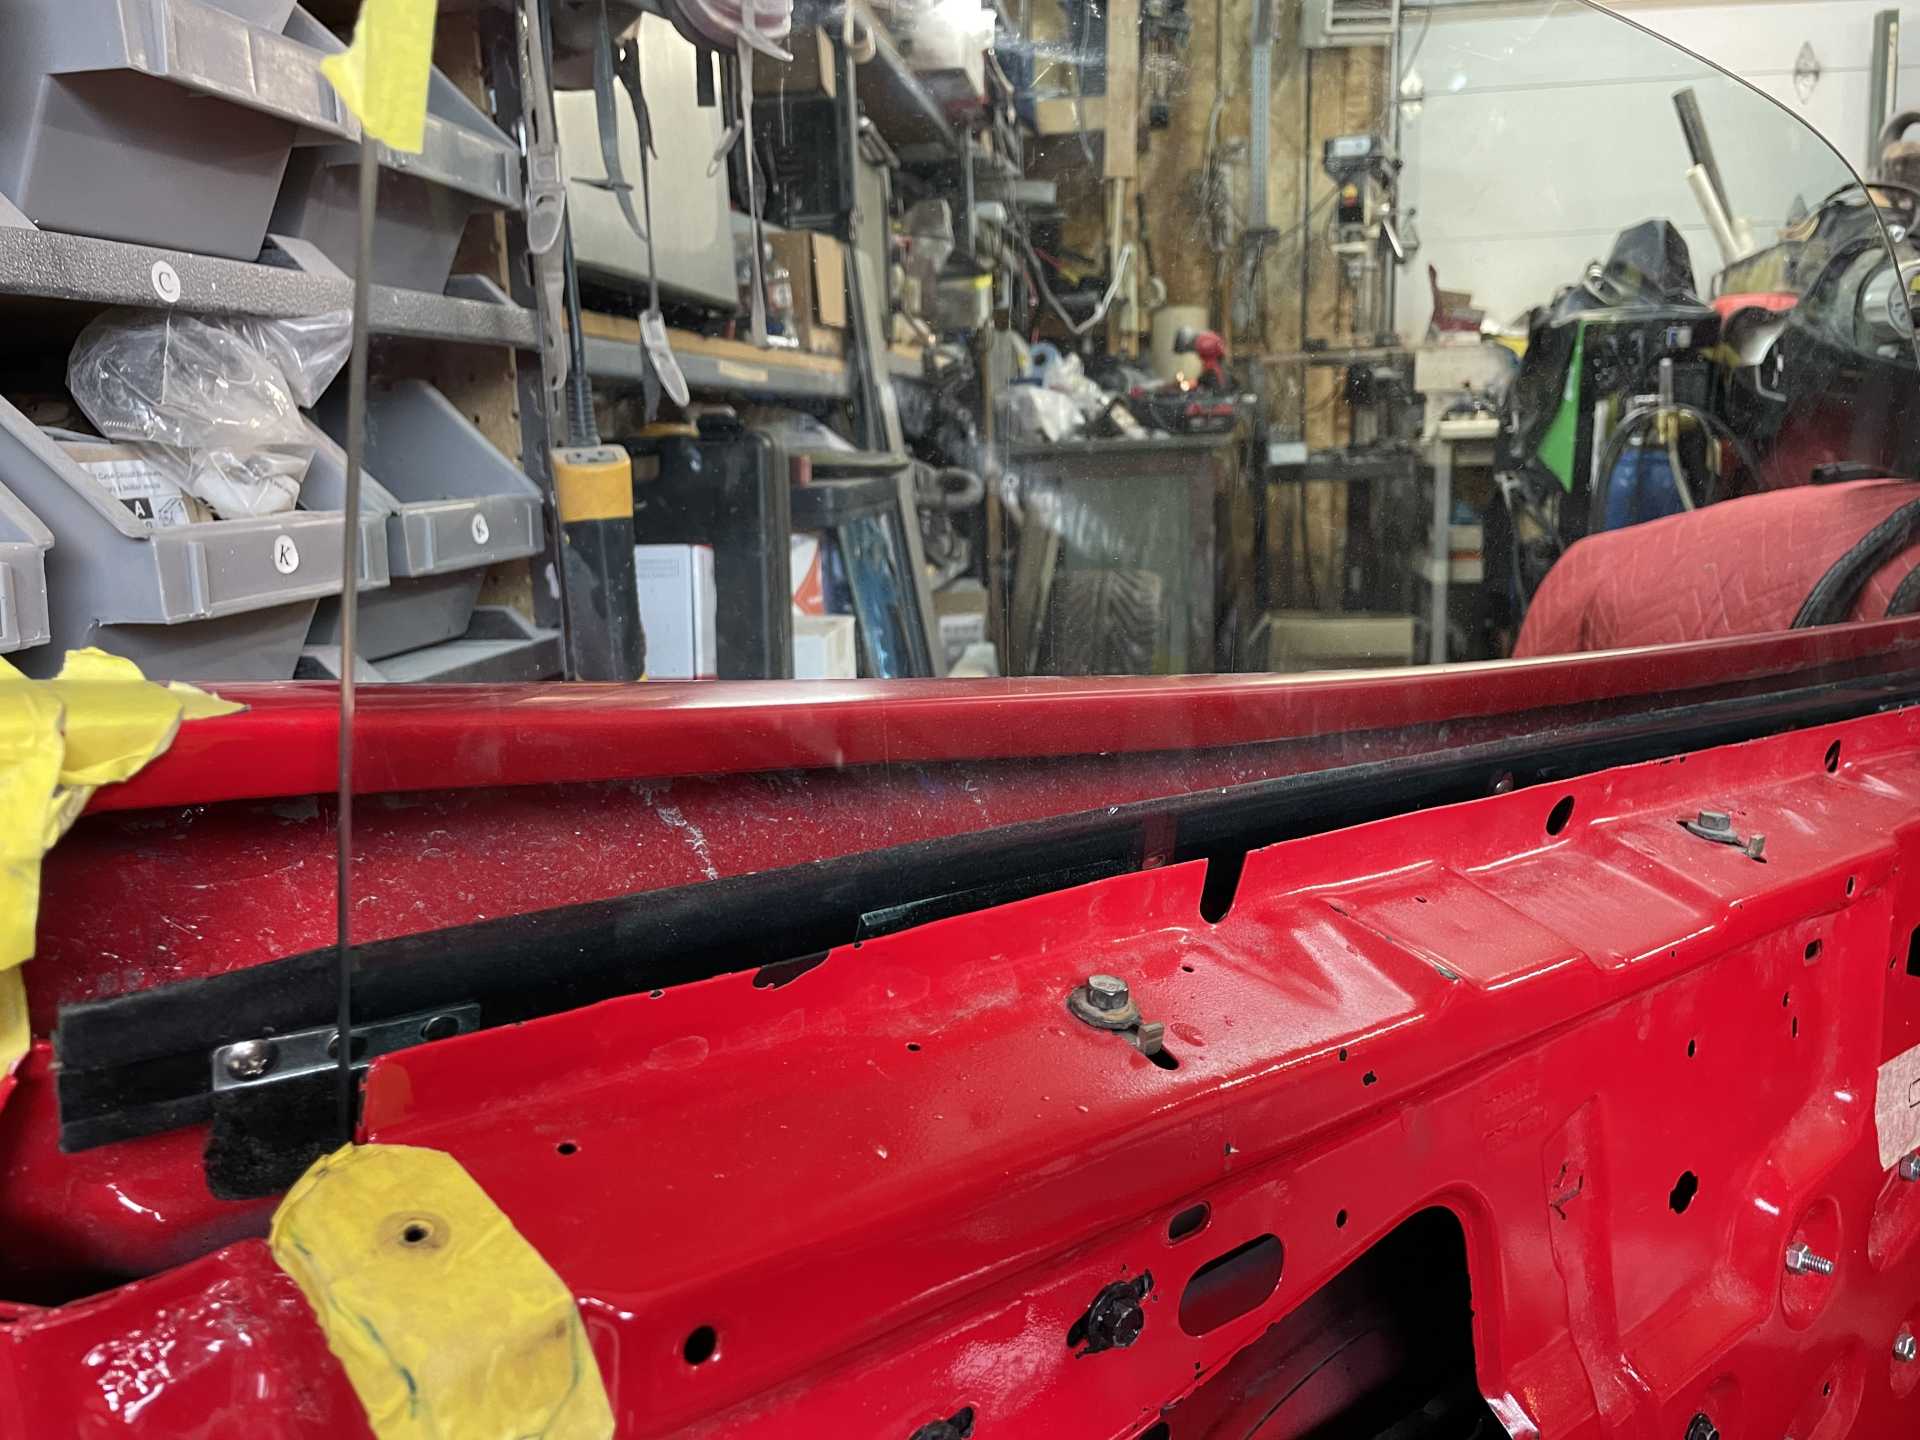
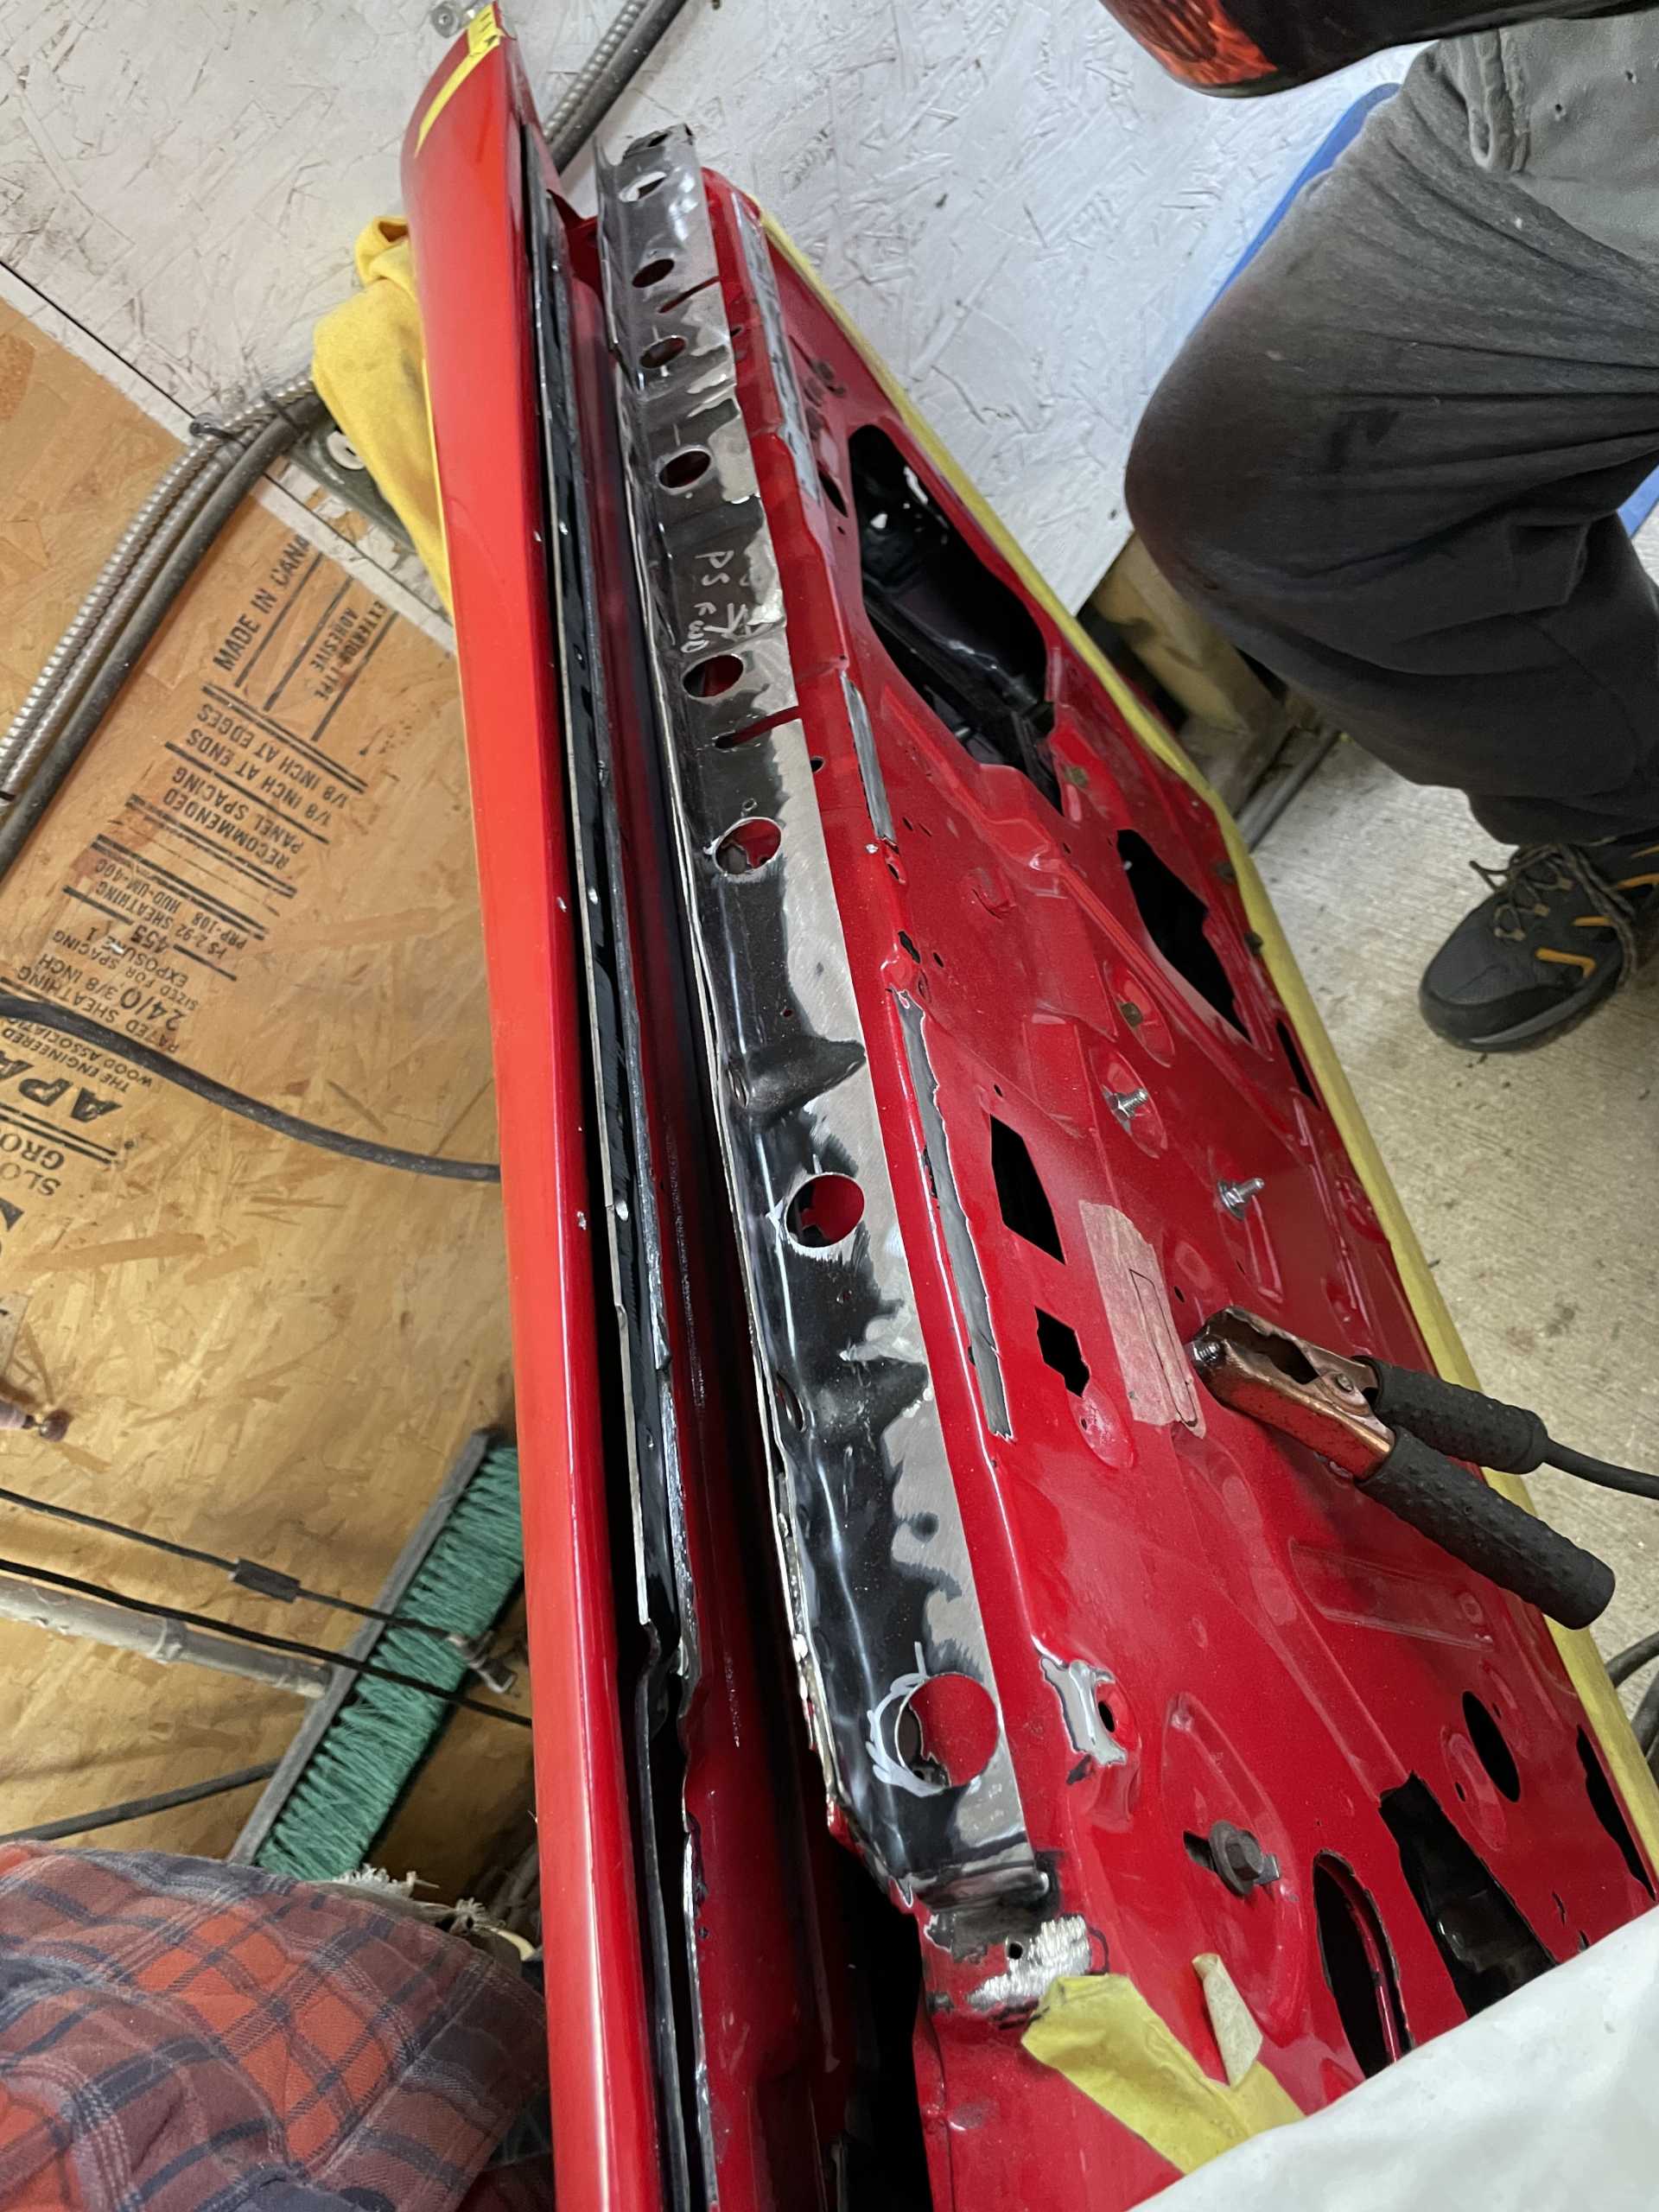
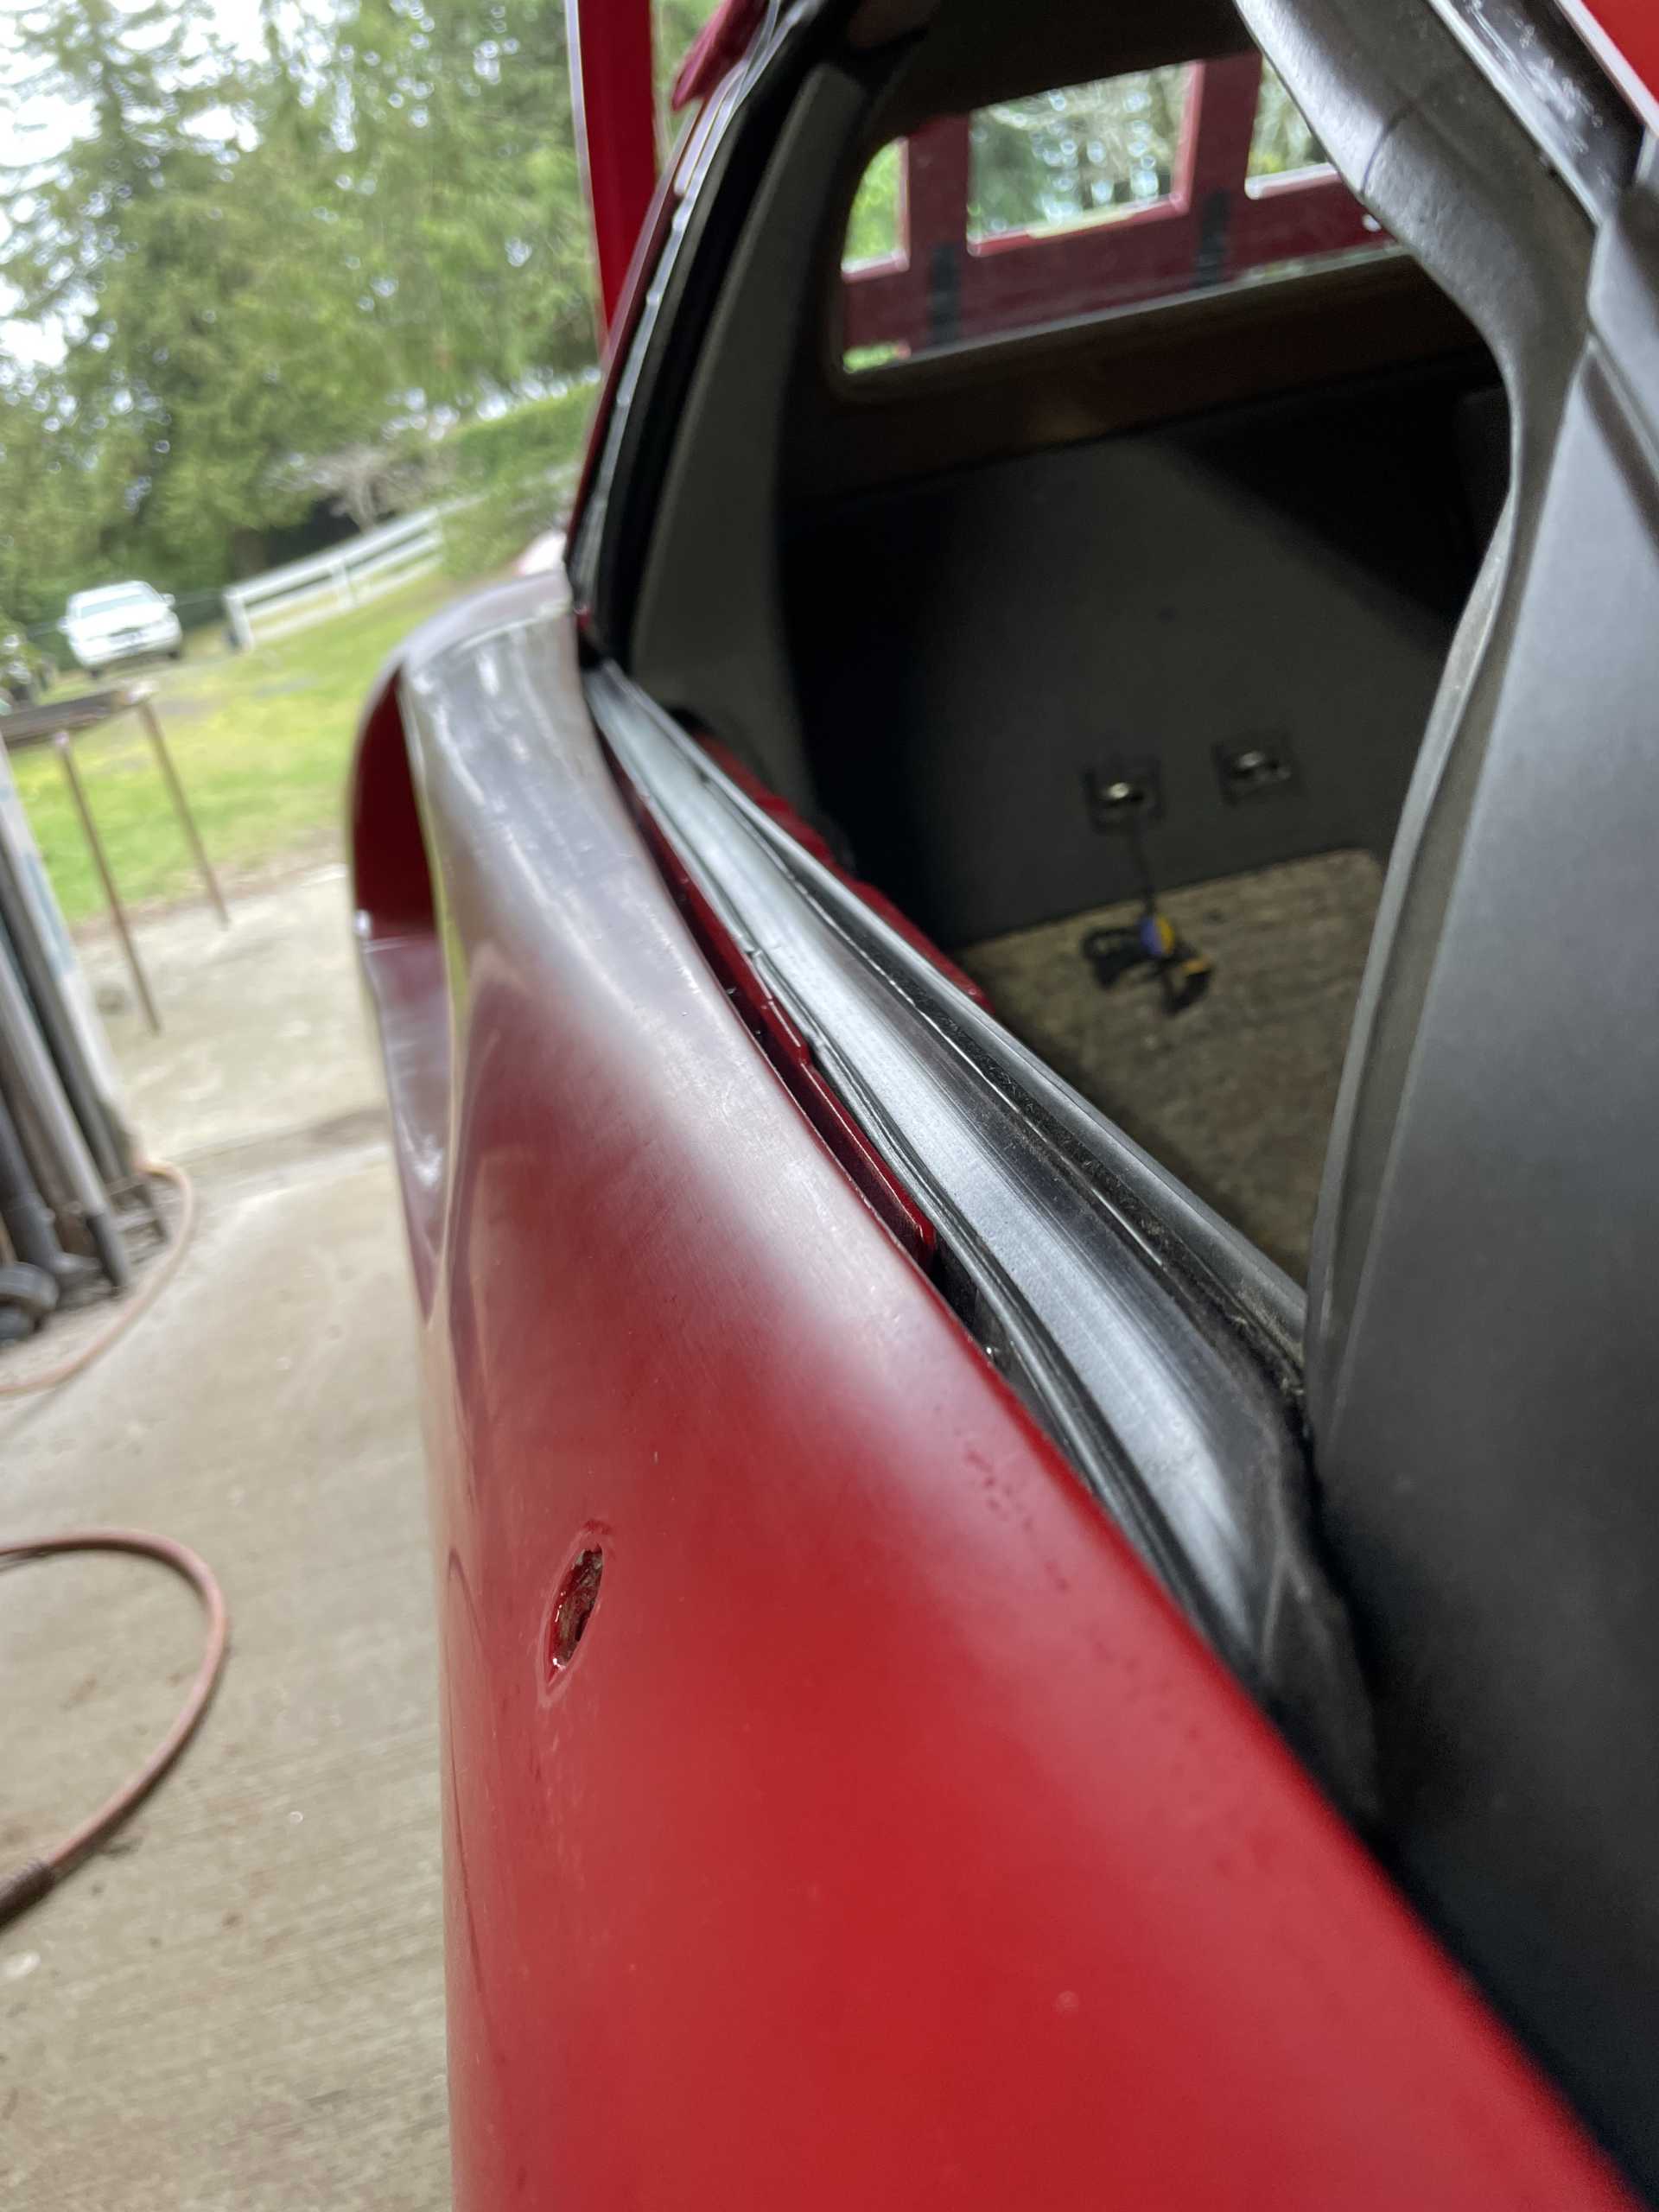
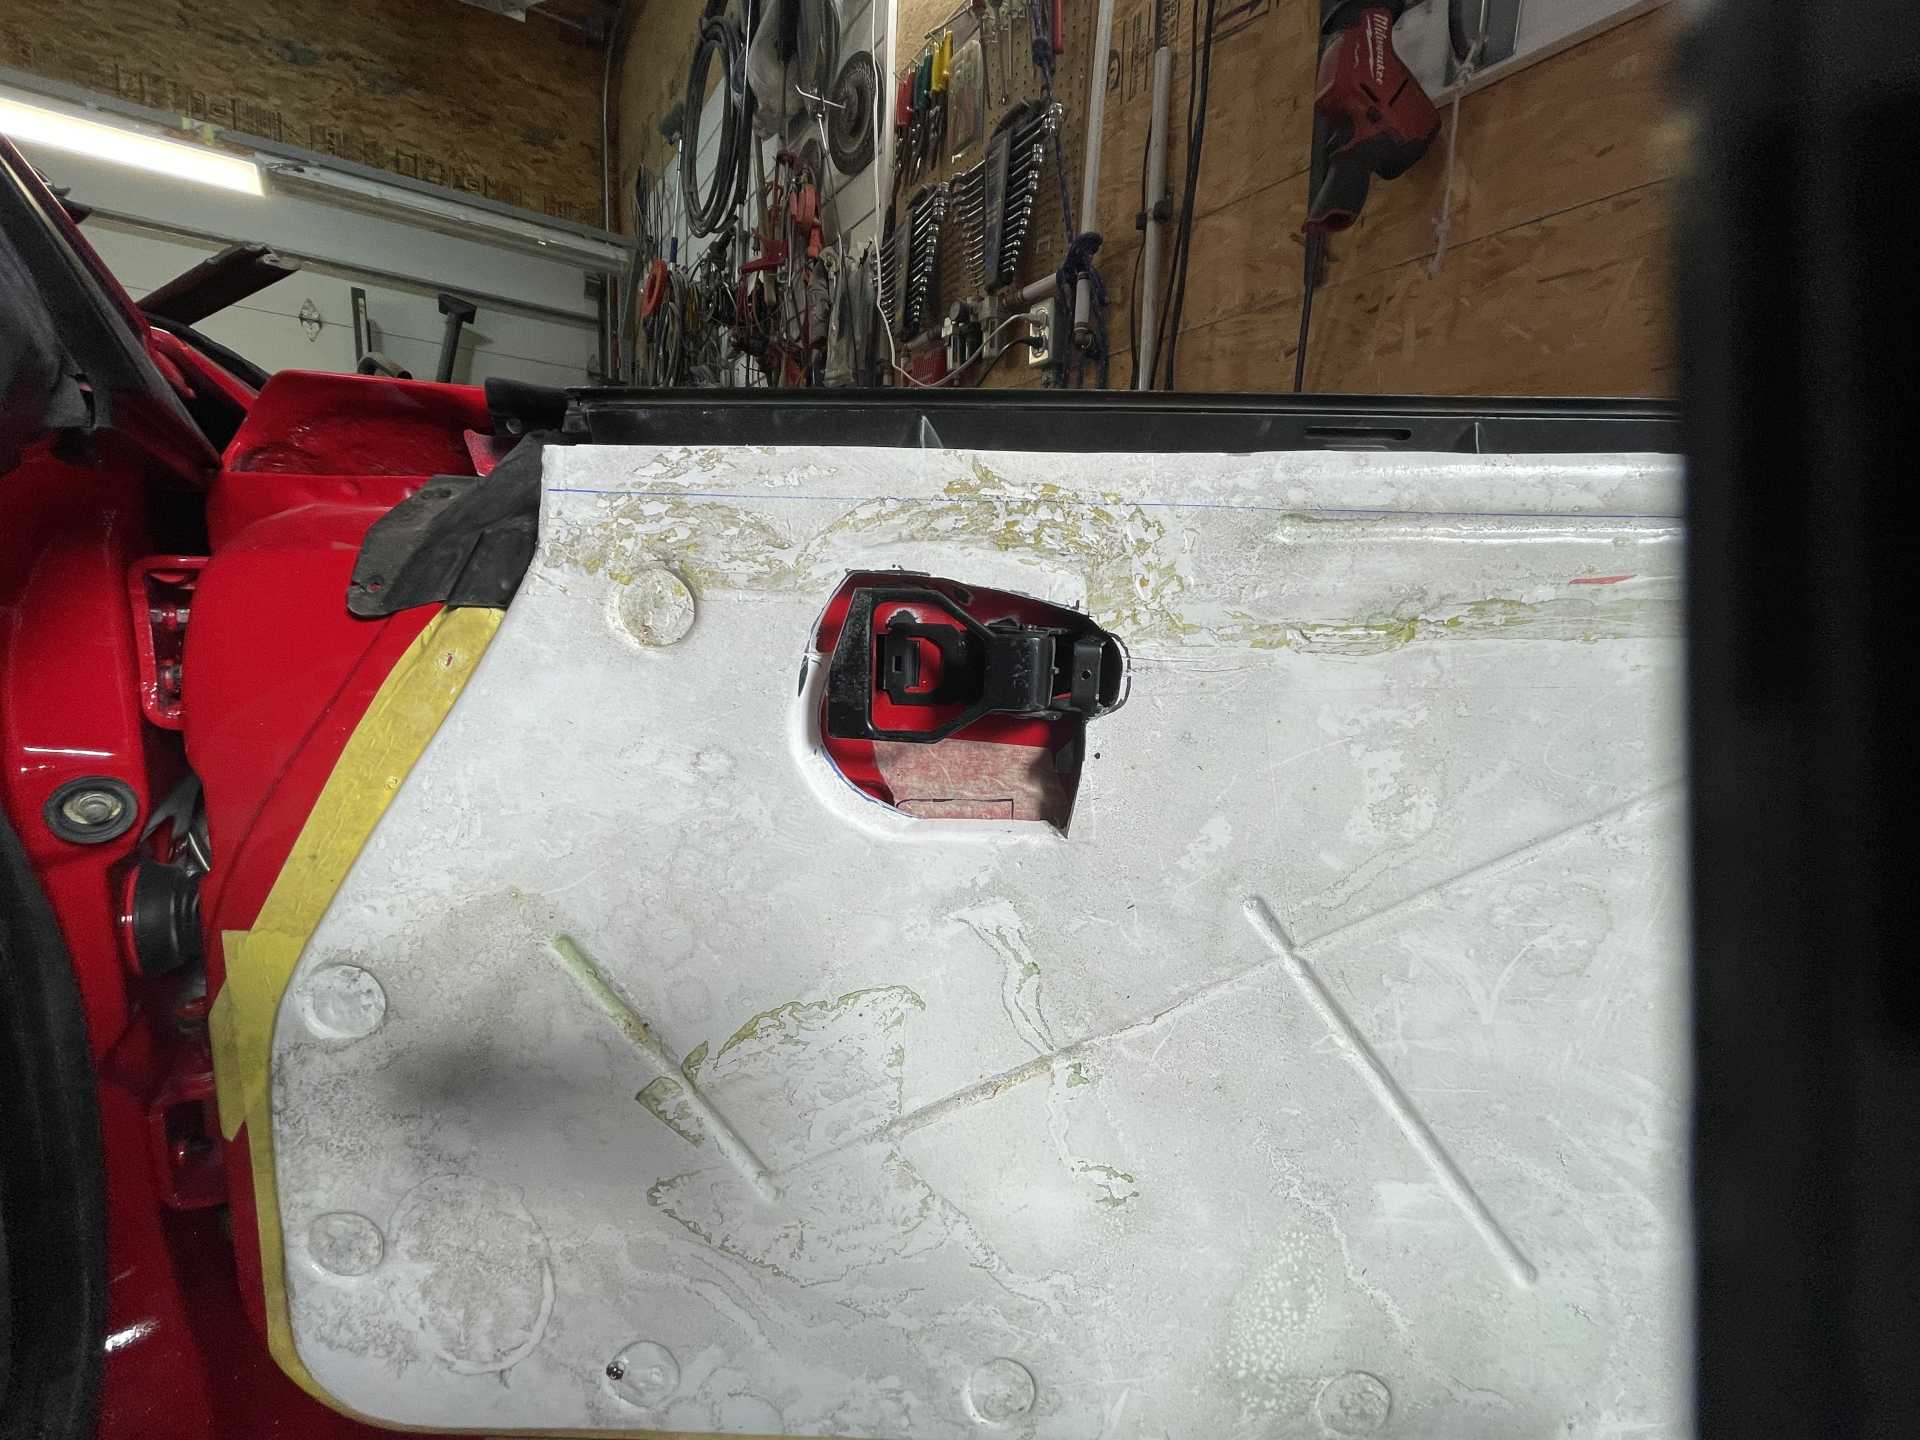
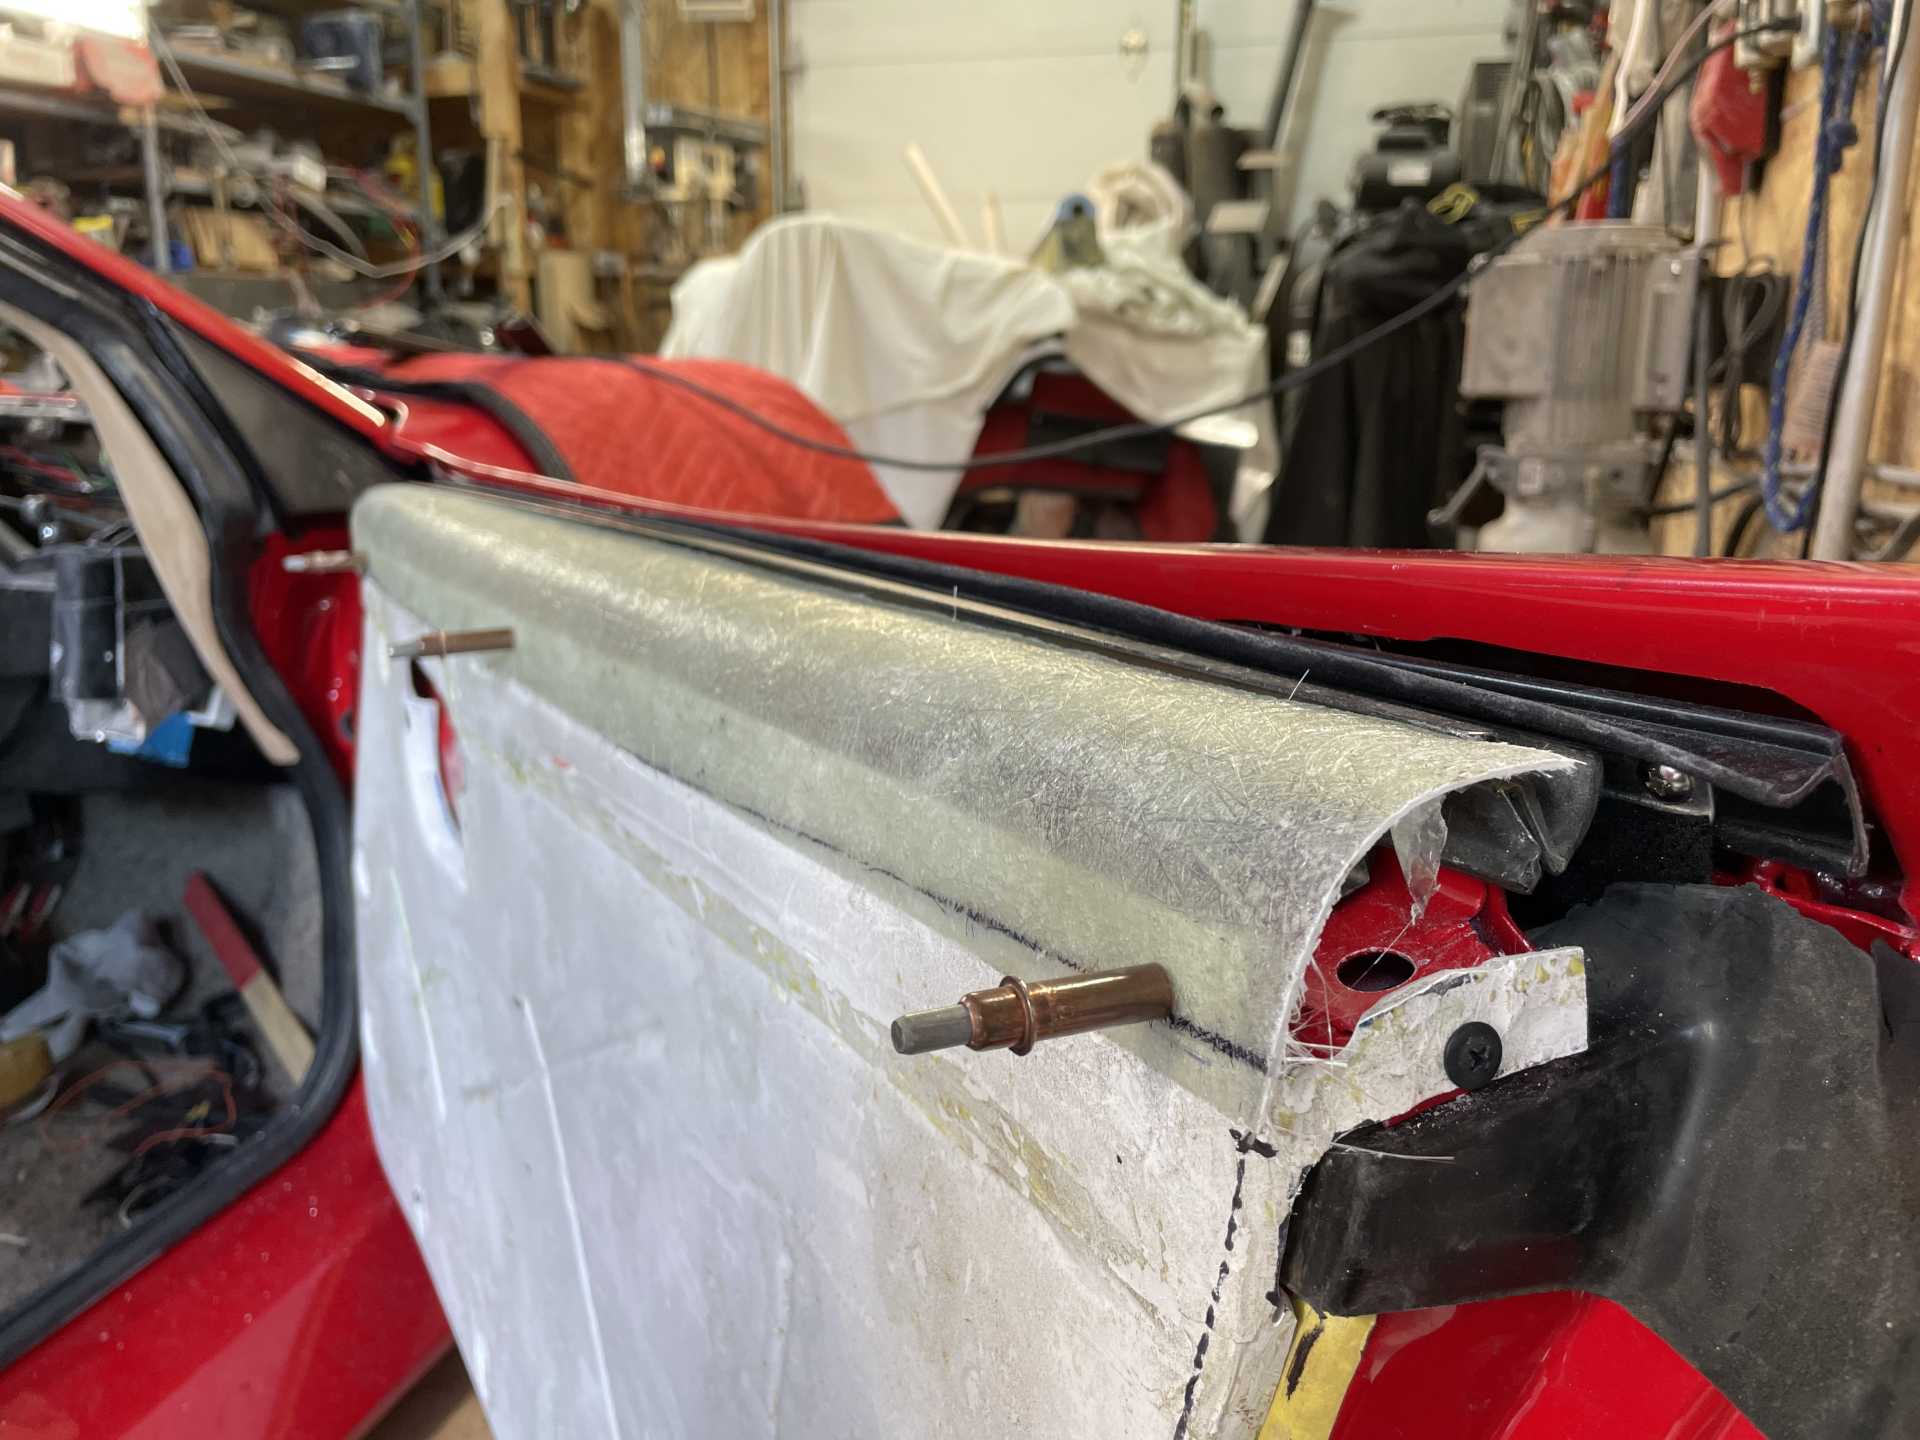
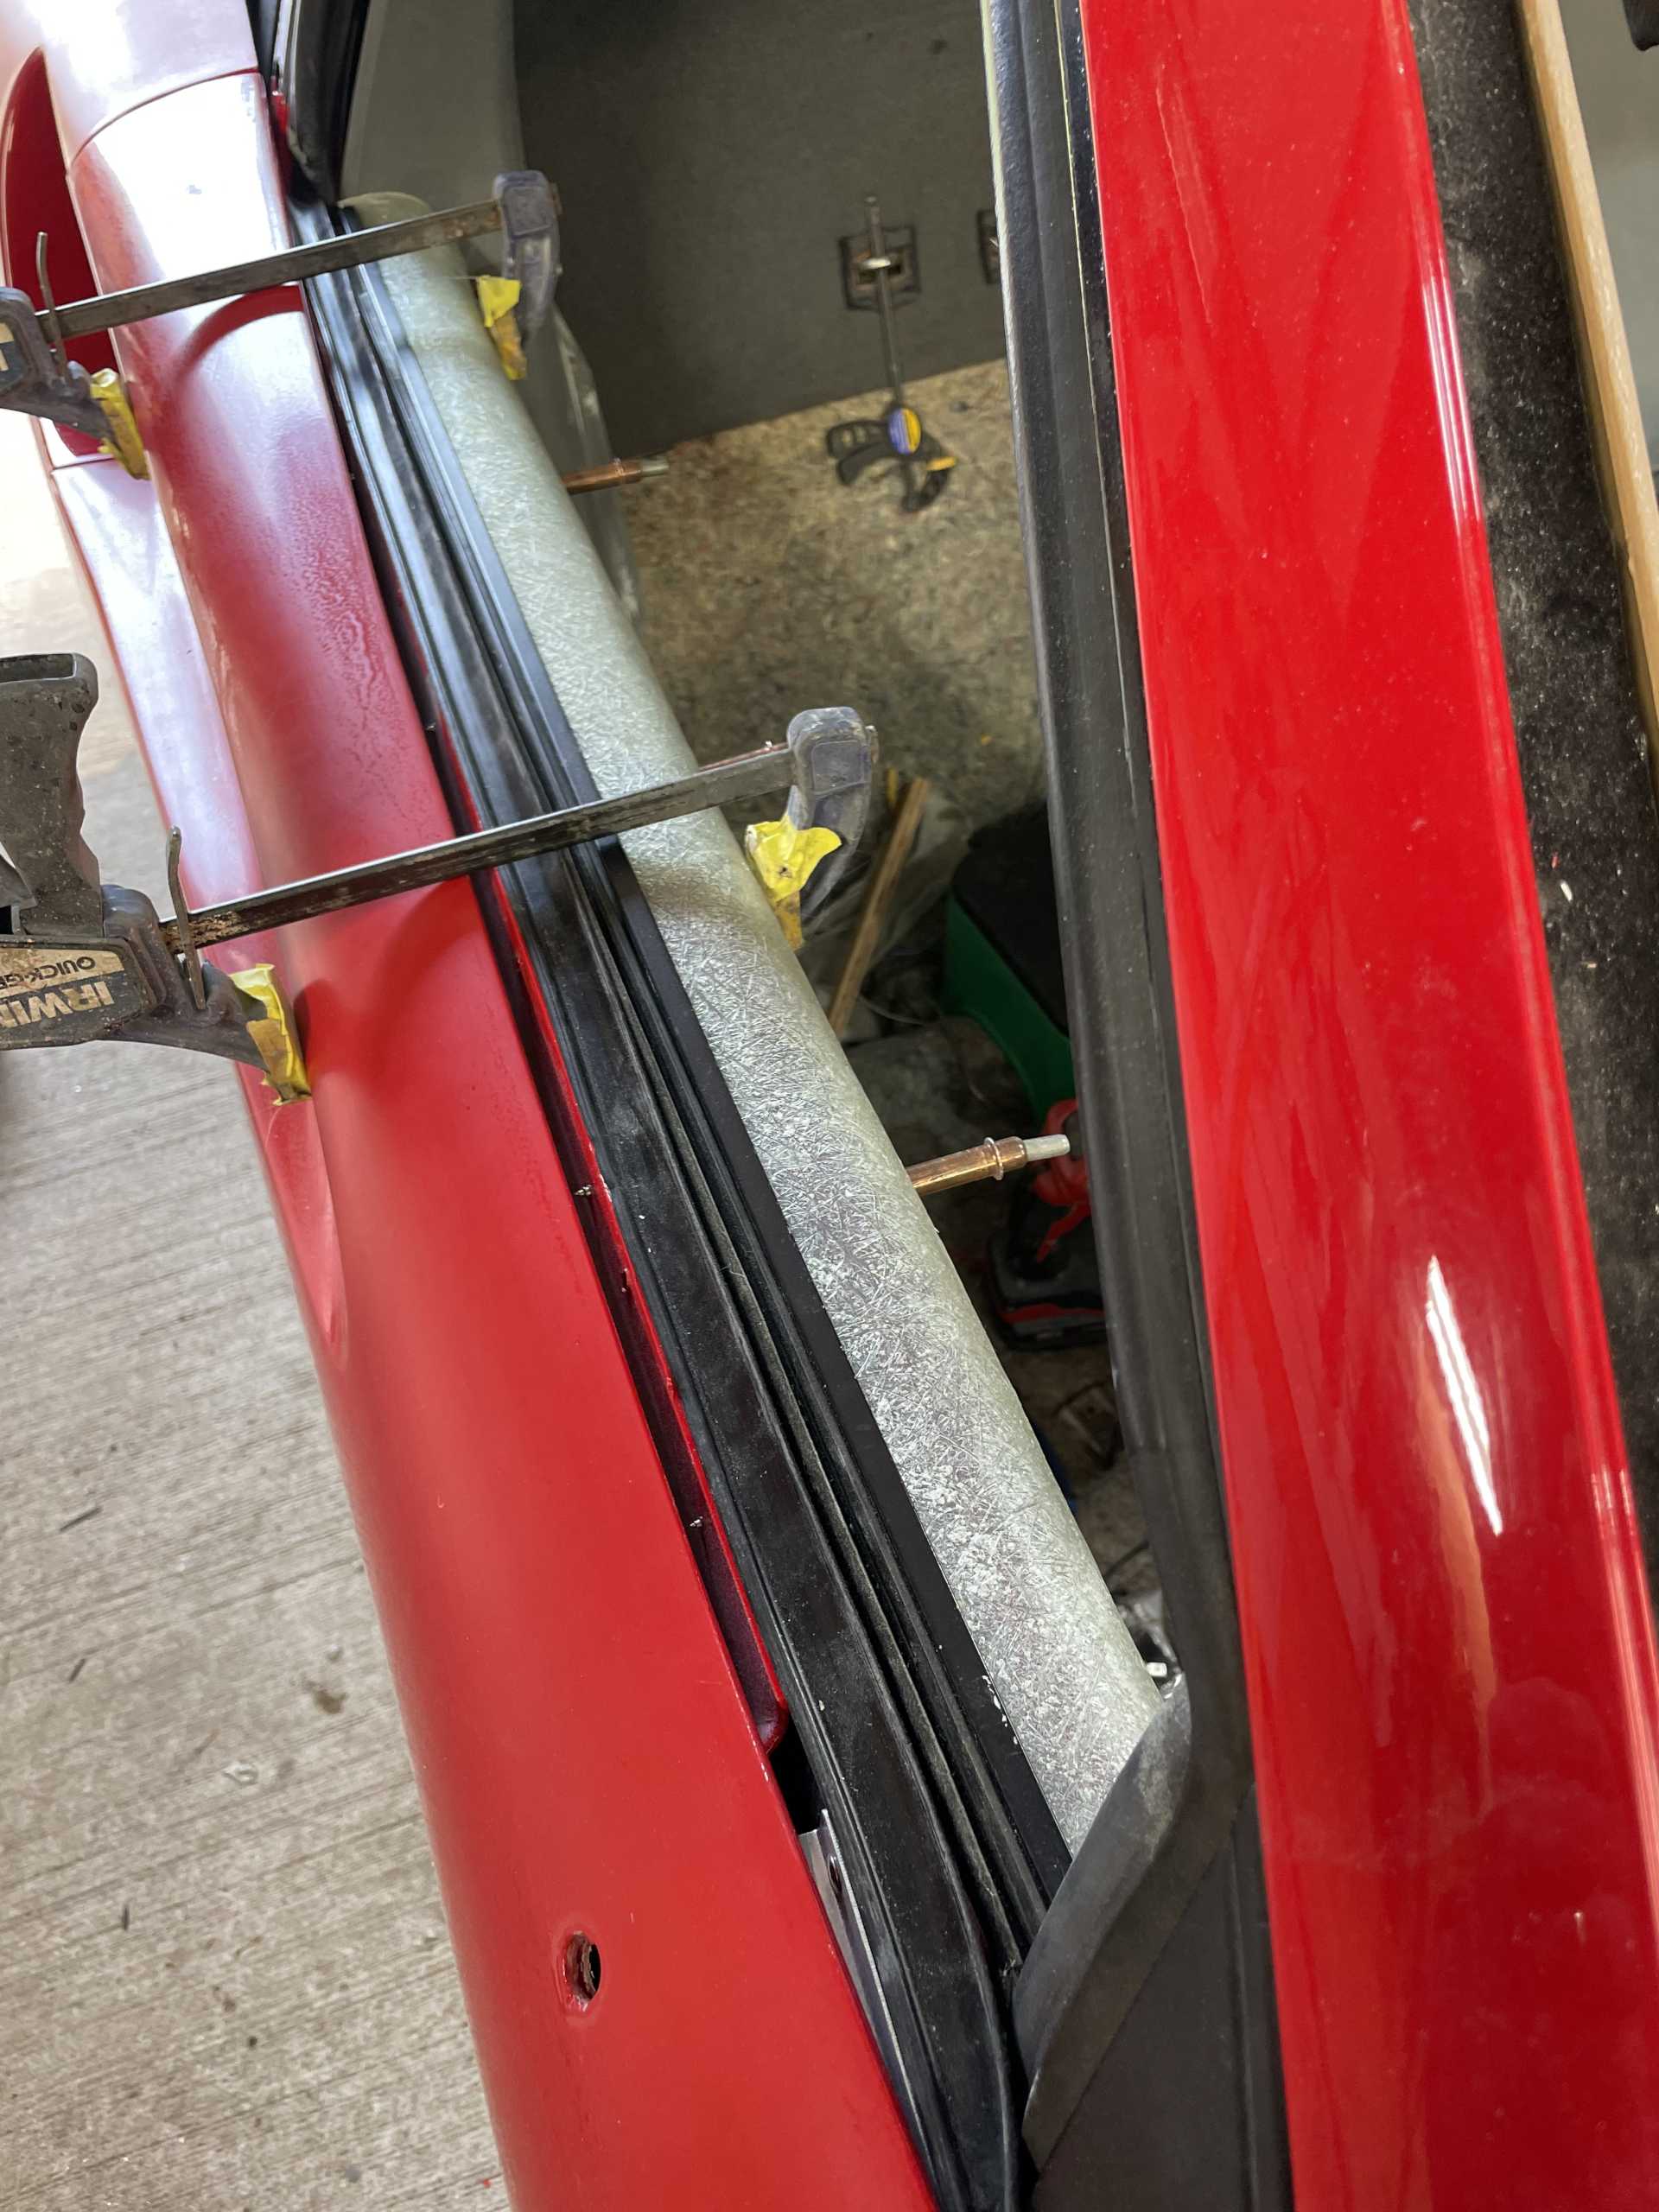
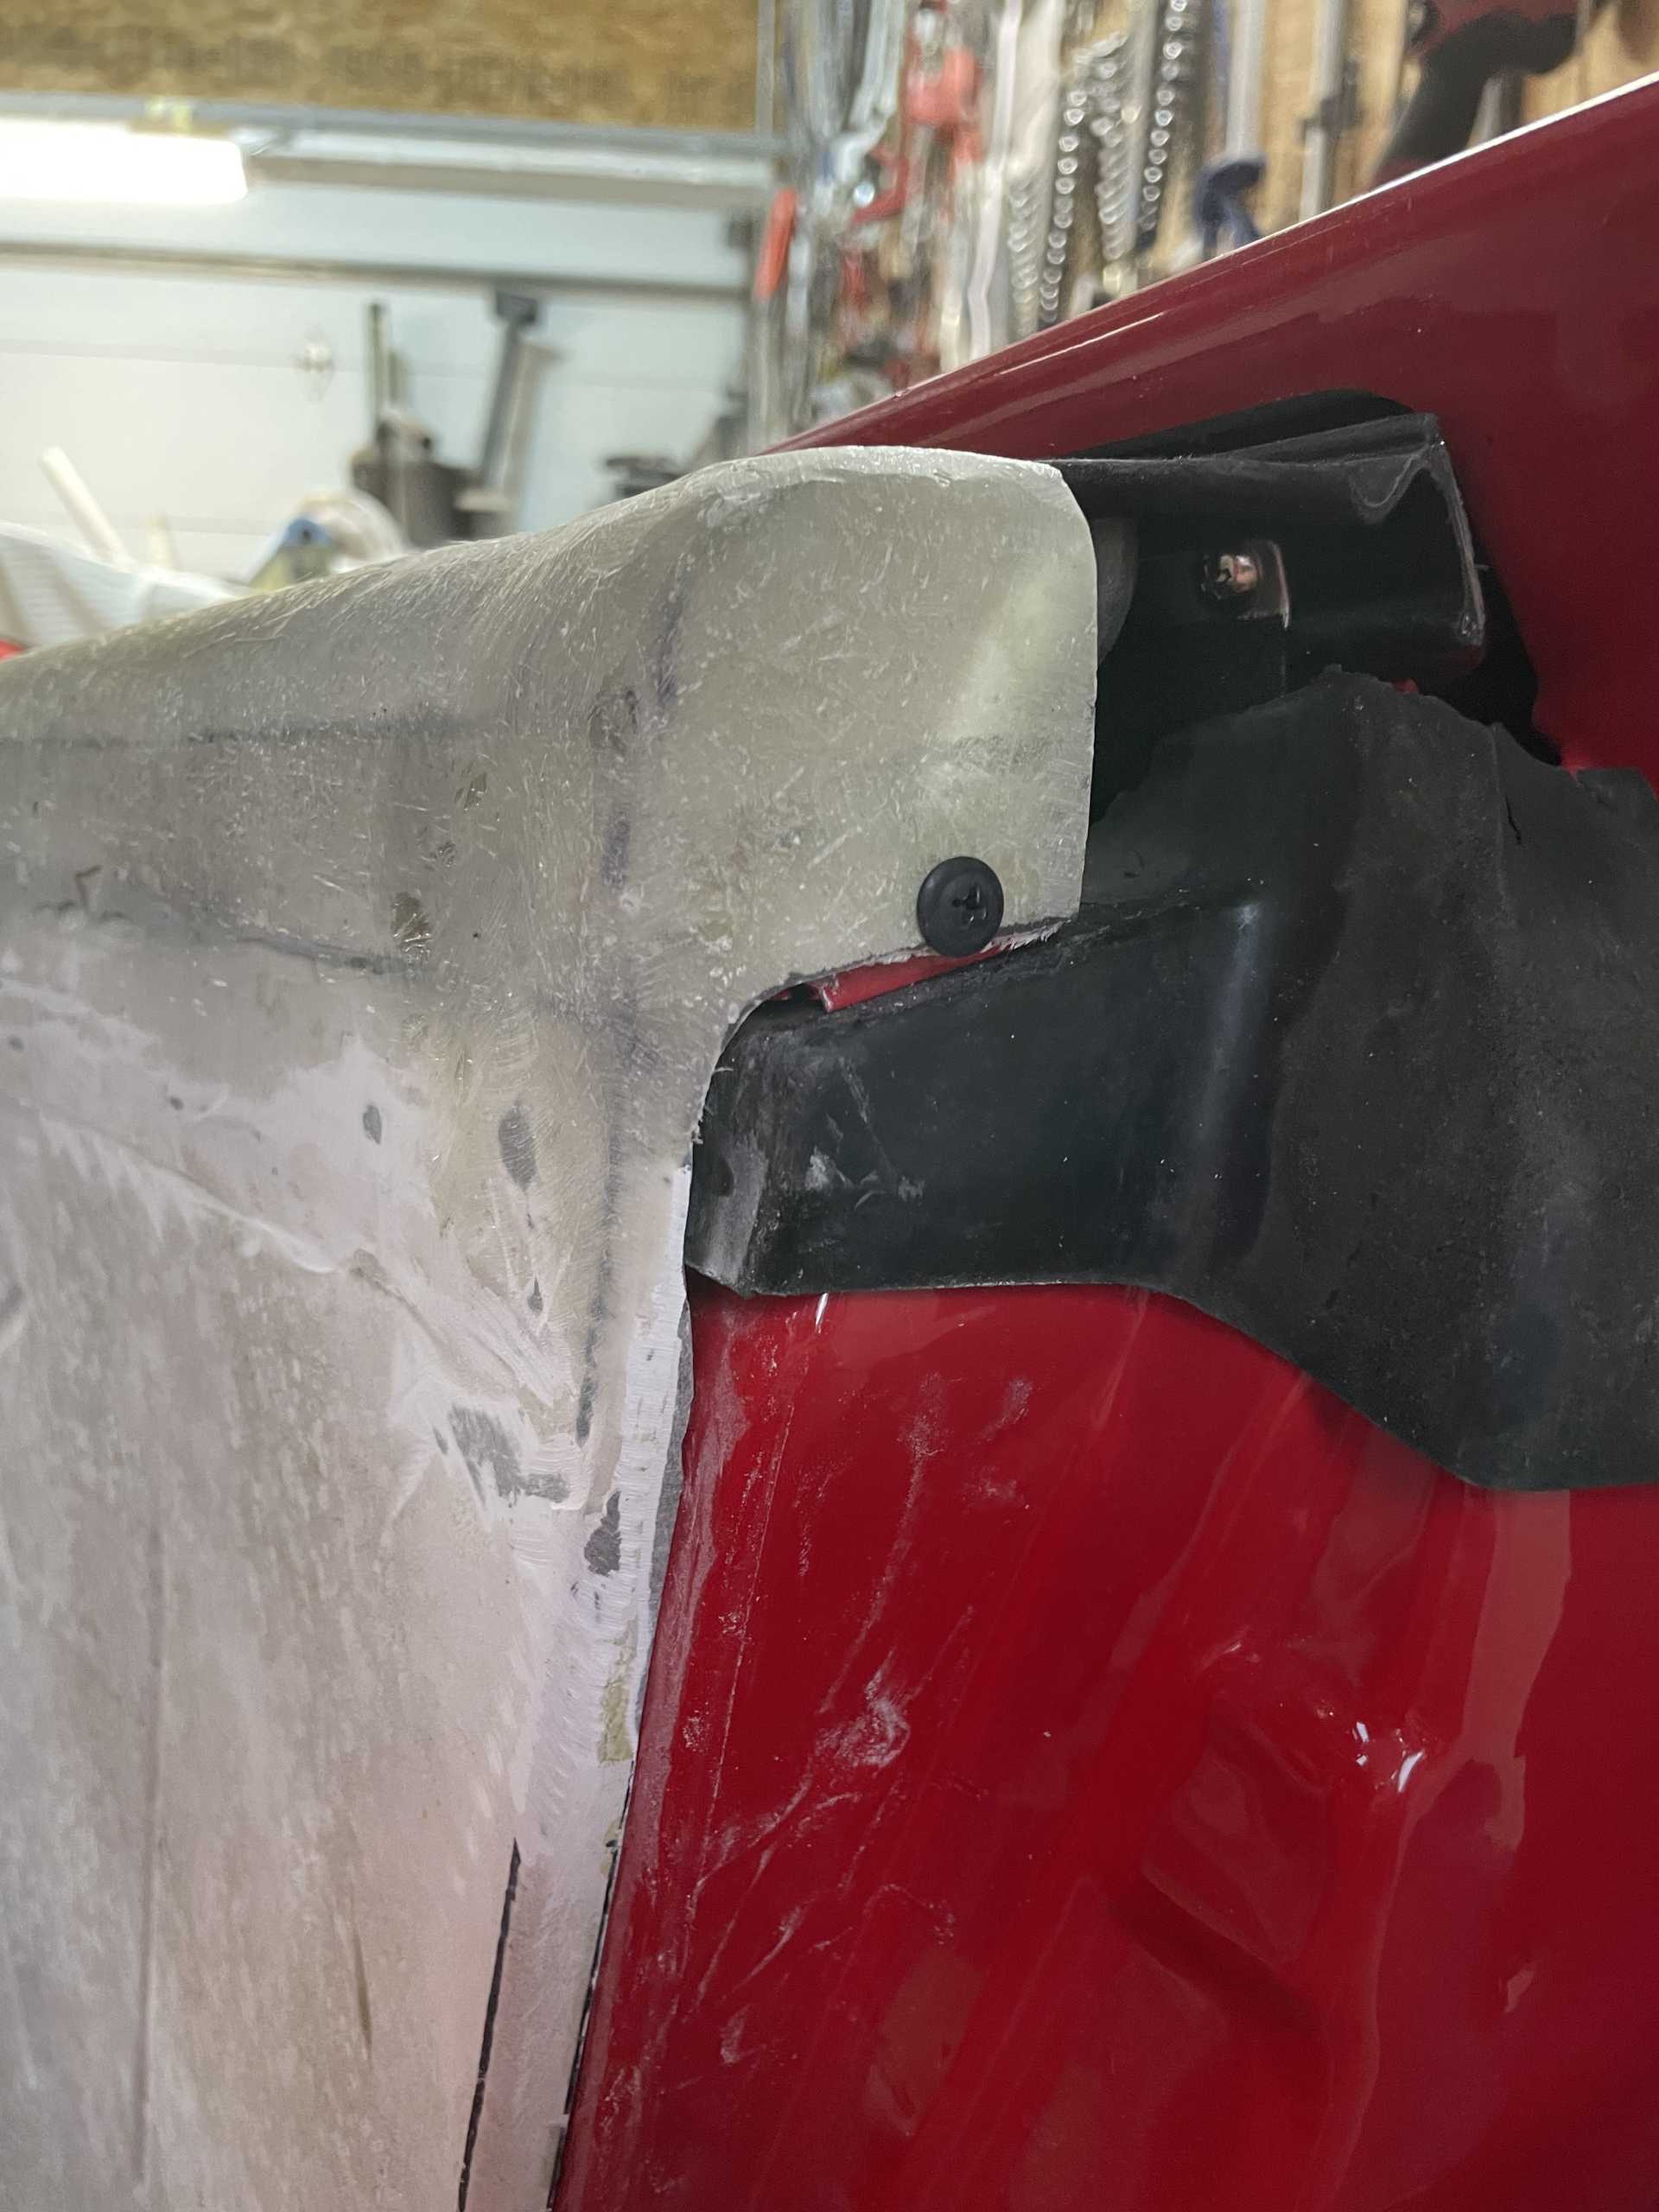
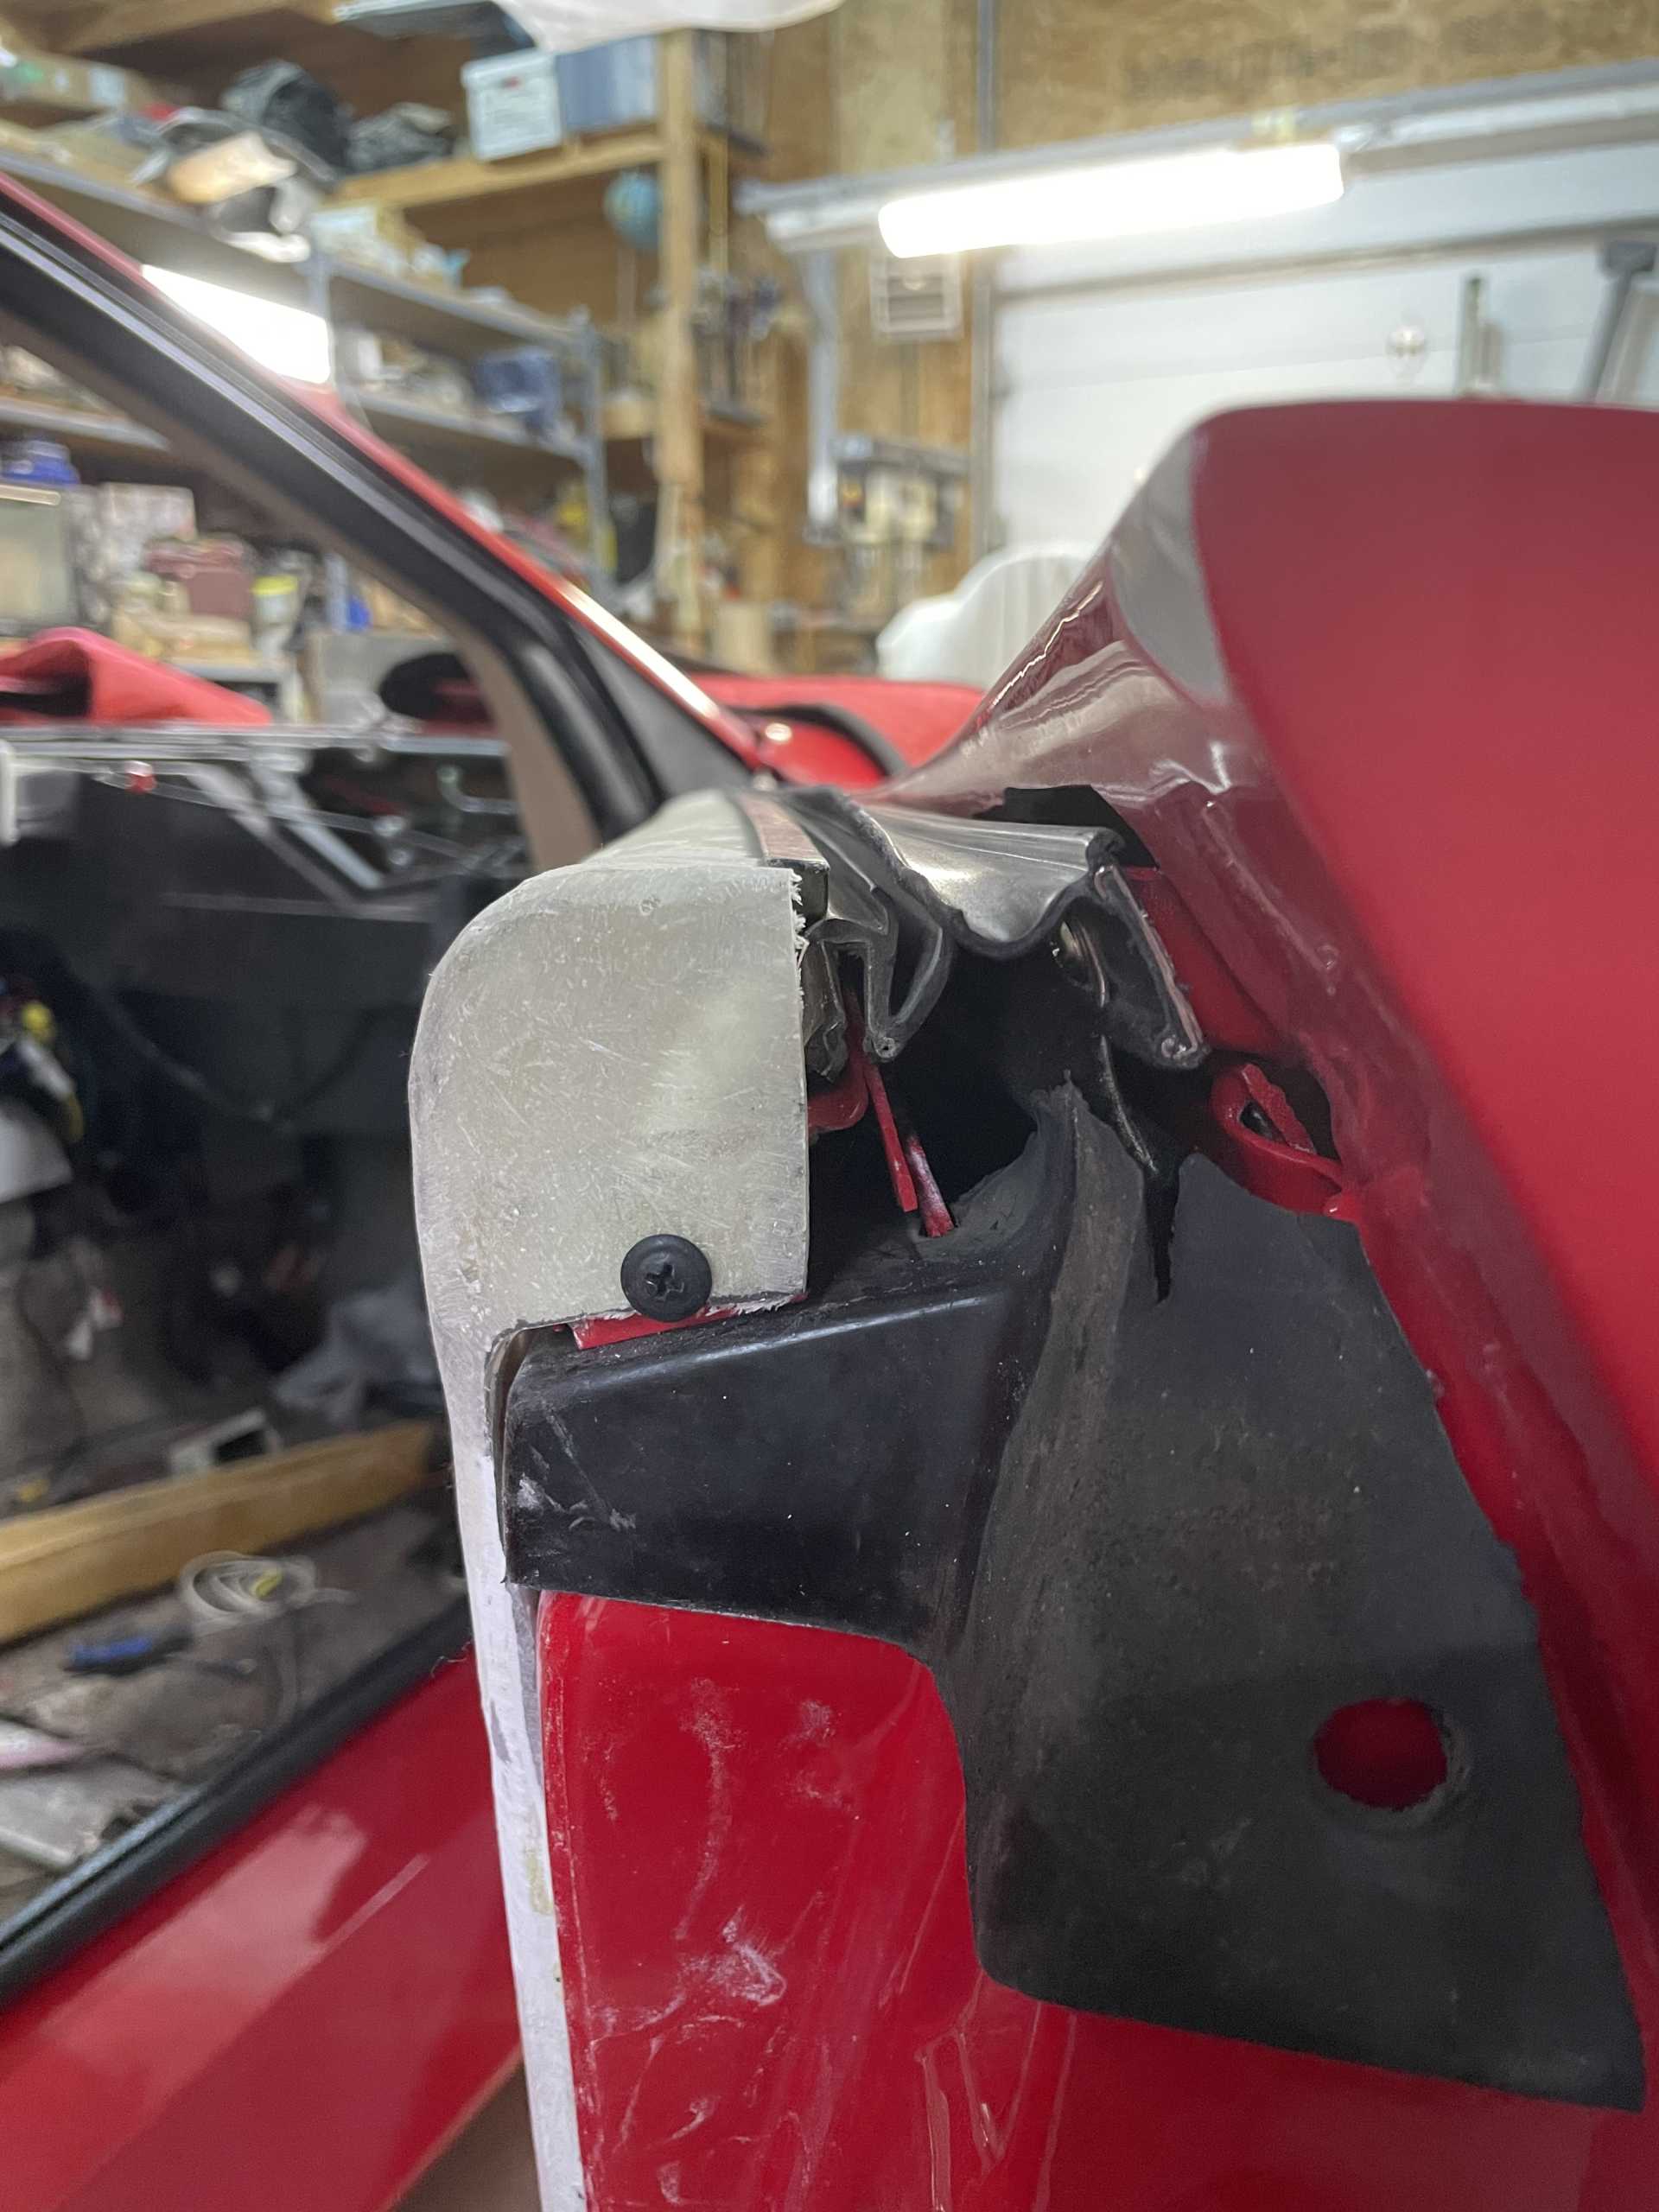
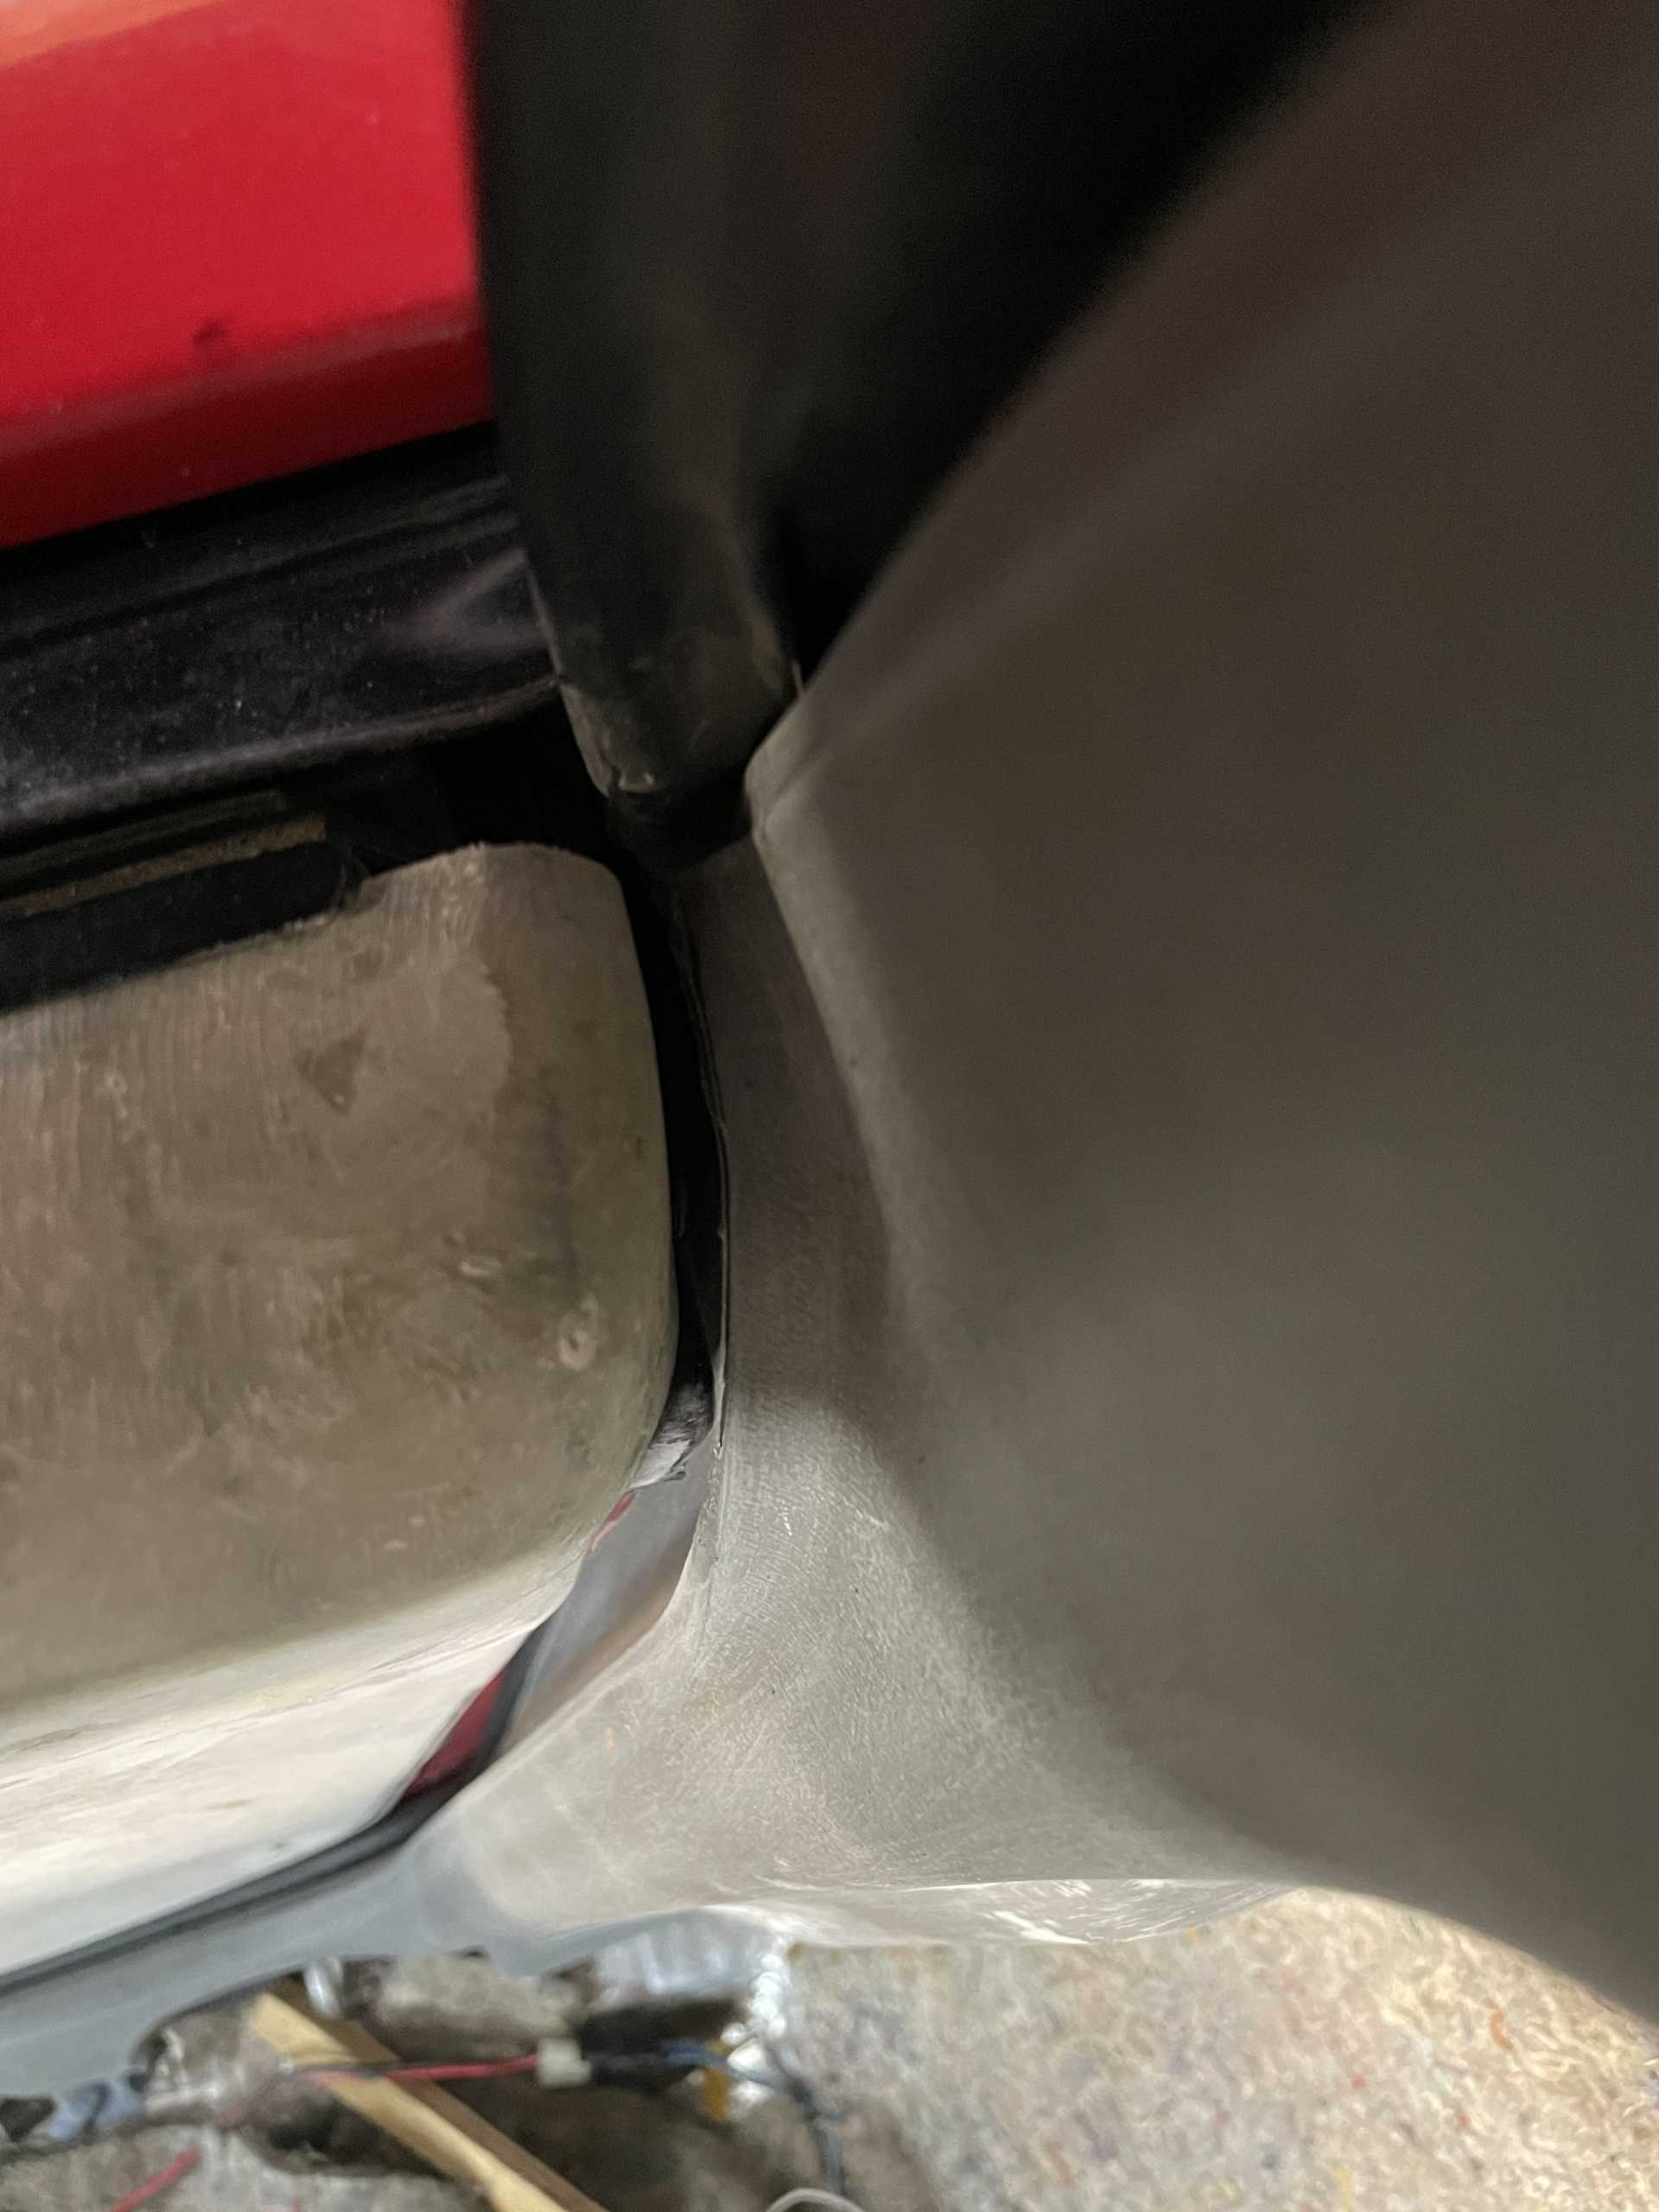
One of the modifications we’ve completed is raising the top of the inner door . When building a so called Kit car and using a fiero chassis , adding the outer door skin panels usually leaves a tell tail gap above the window seal whiskers . Most builders just add a fill piece on top of the inner door card.
You can see how high the door skin is above the window seal
So my buddy Phil talked me into raising the door and make it look more factory, he is a great fabricator and quite honestly I could not have done it on my own..
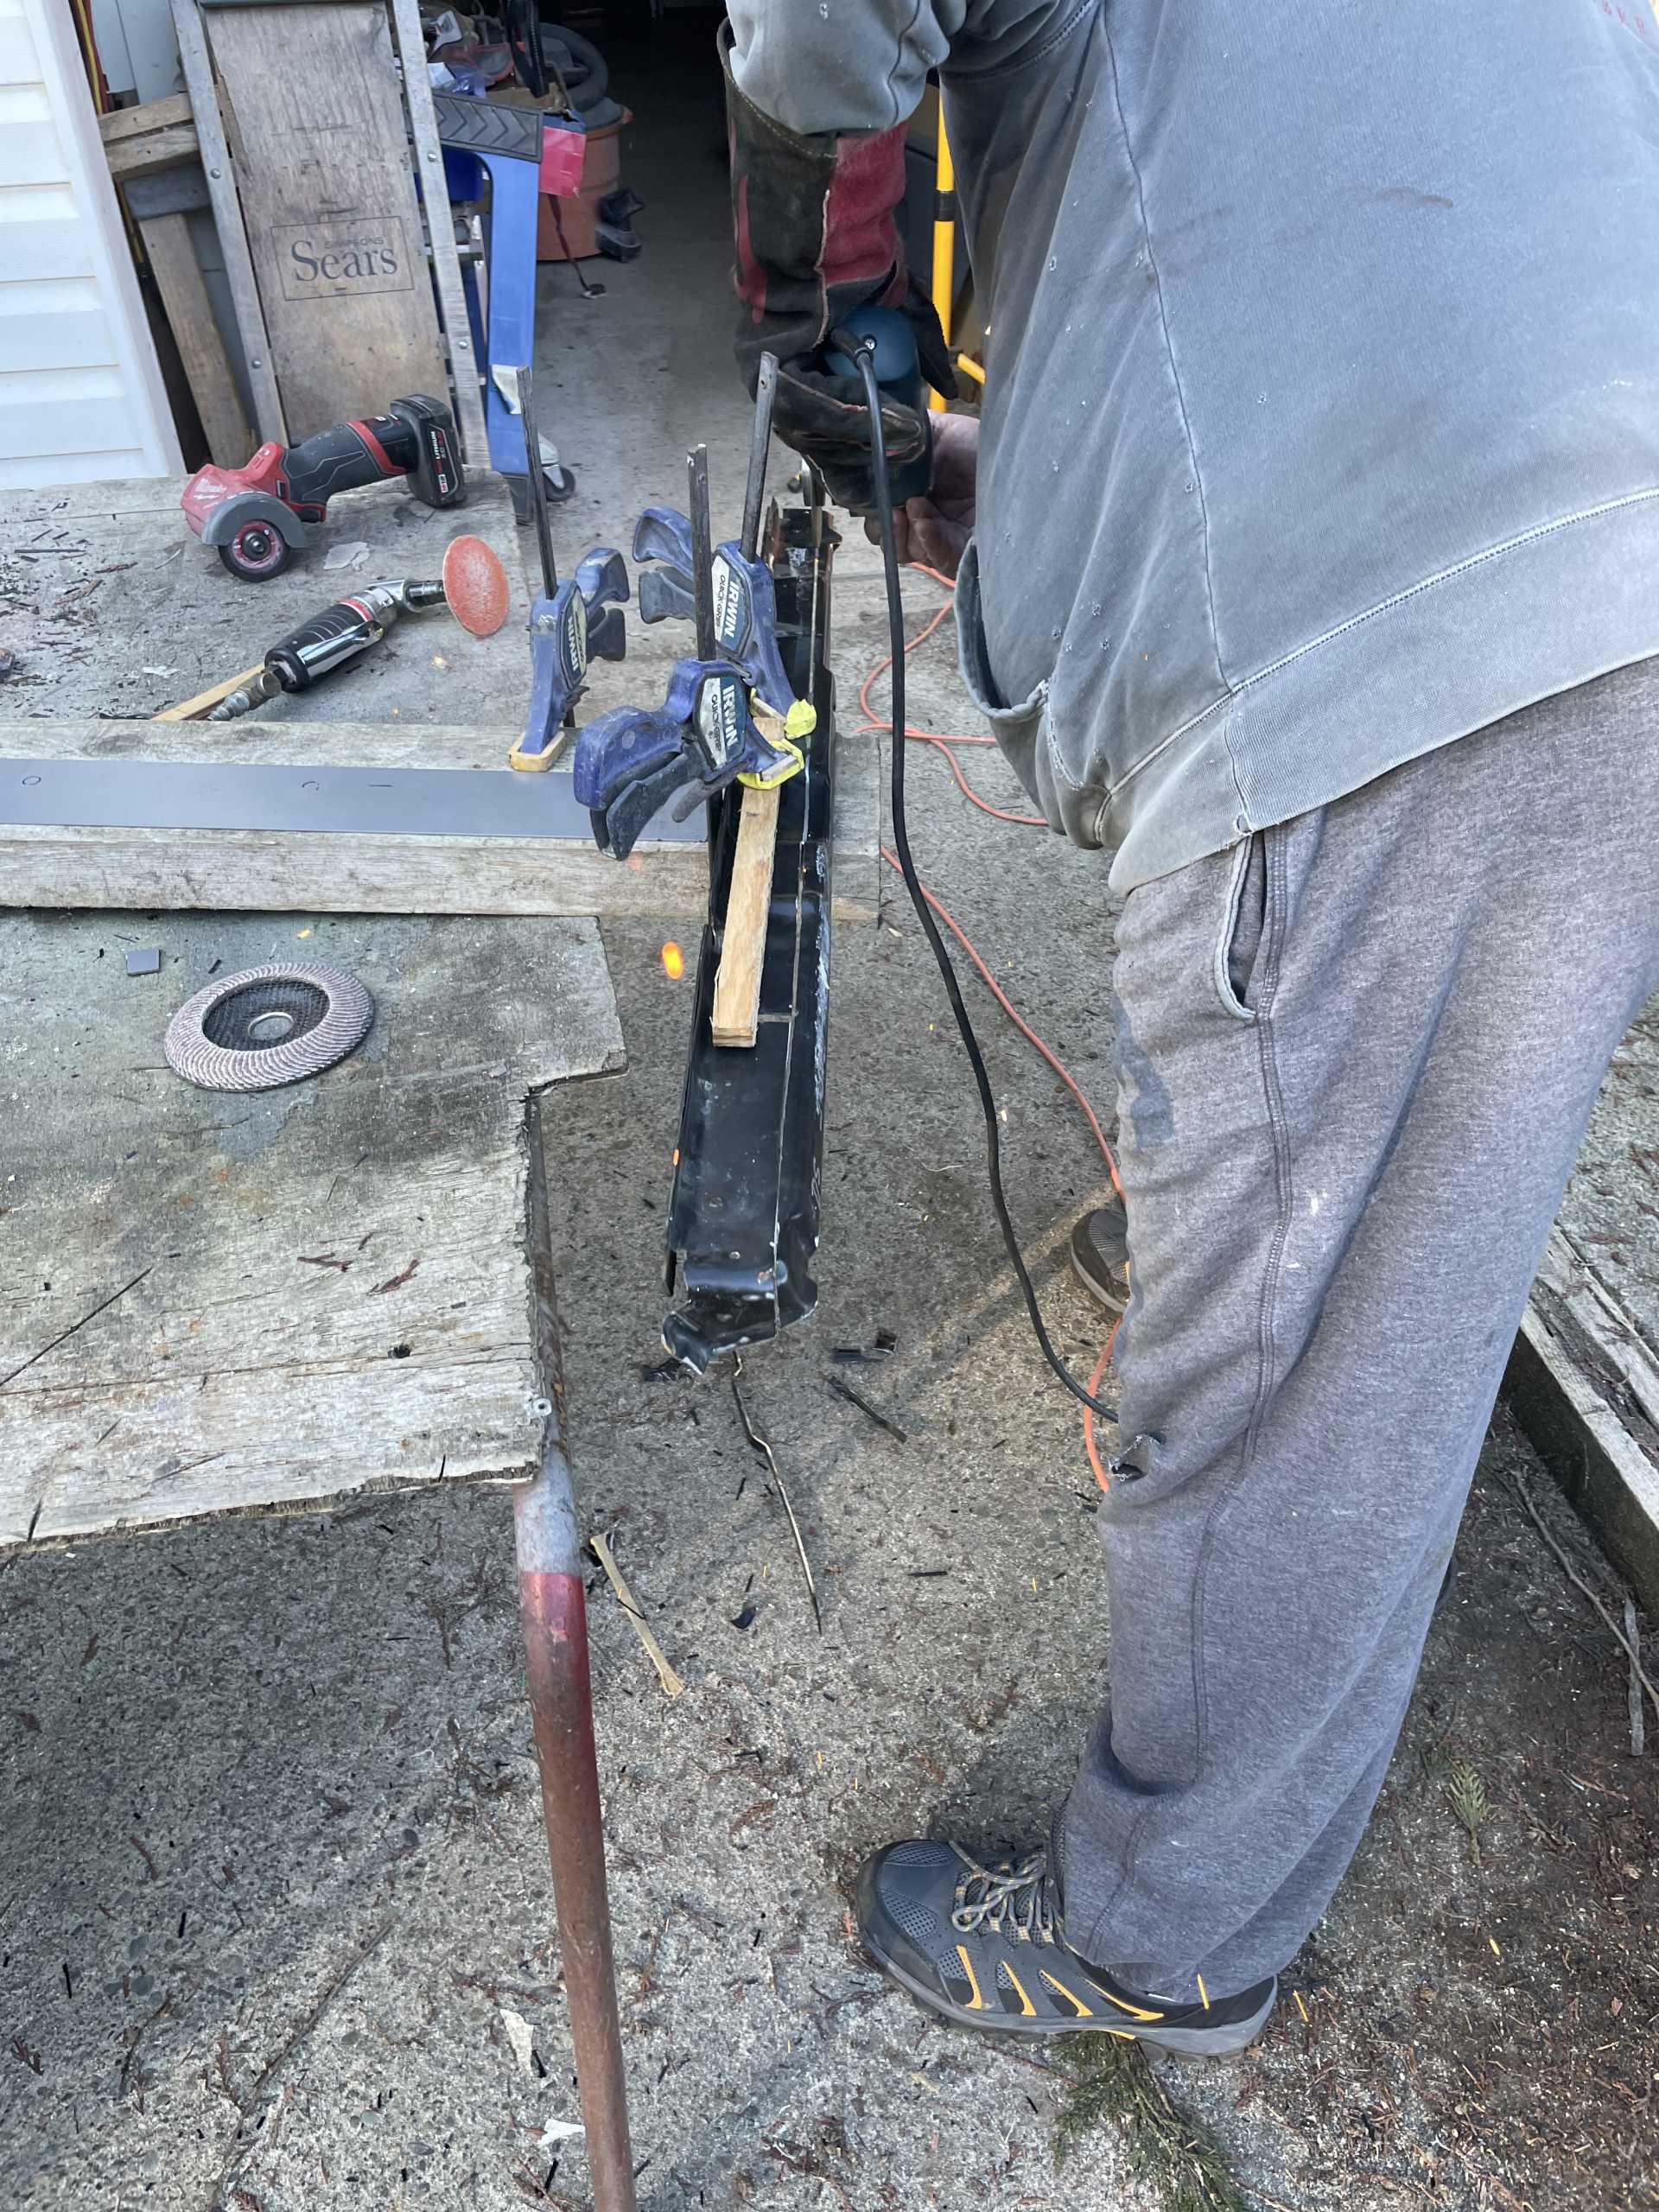
So we started by getting two more doors and cutting the tops off
We measured and determined they needed to be raised 1 3/8” up for both inner and outer window felts
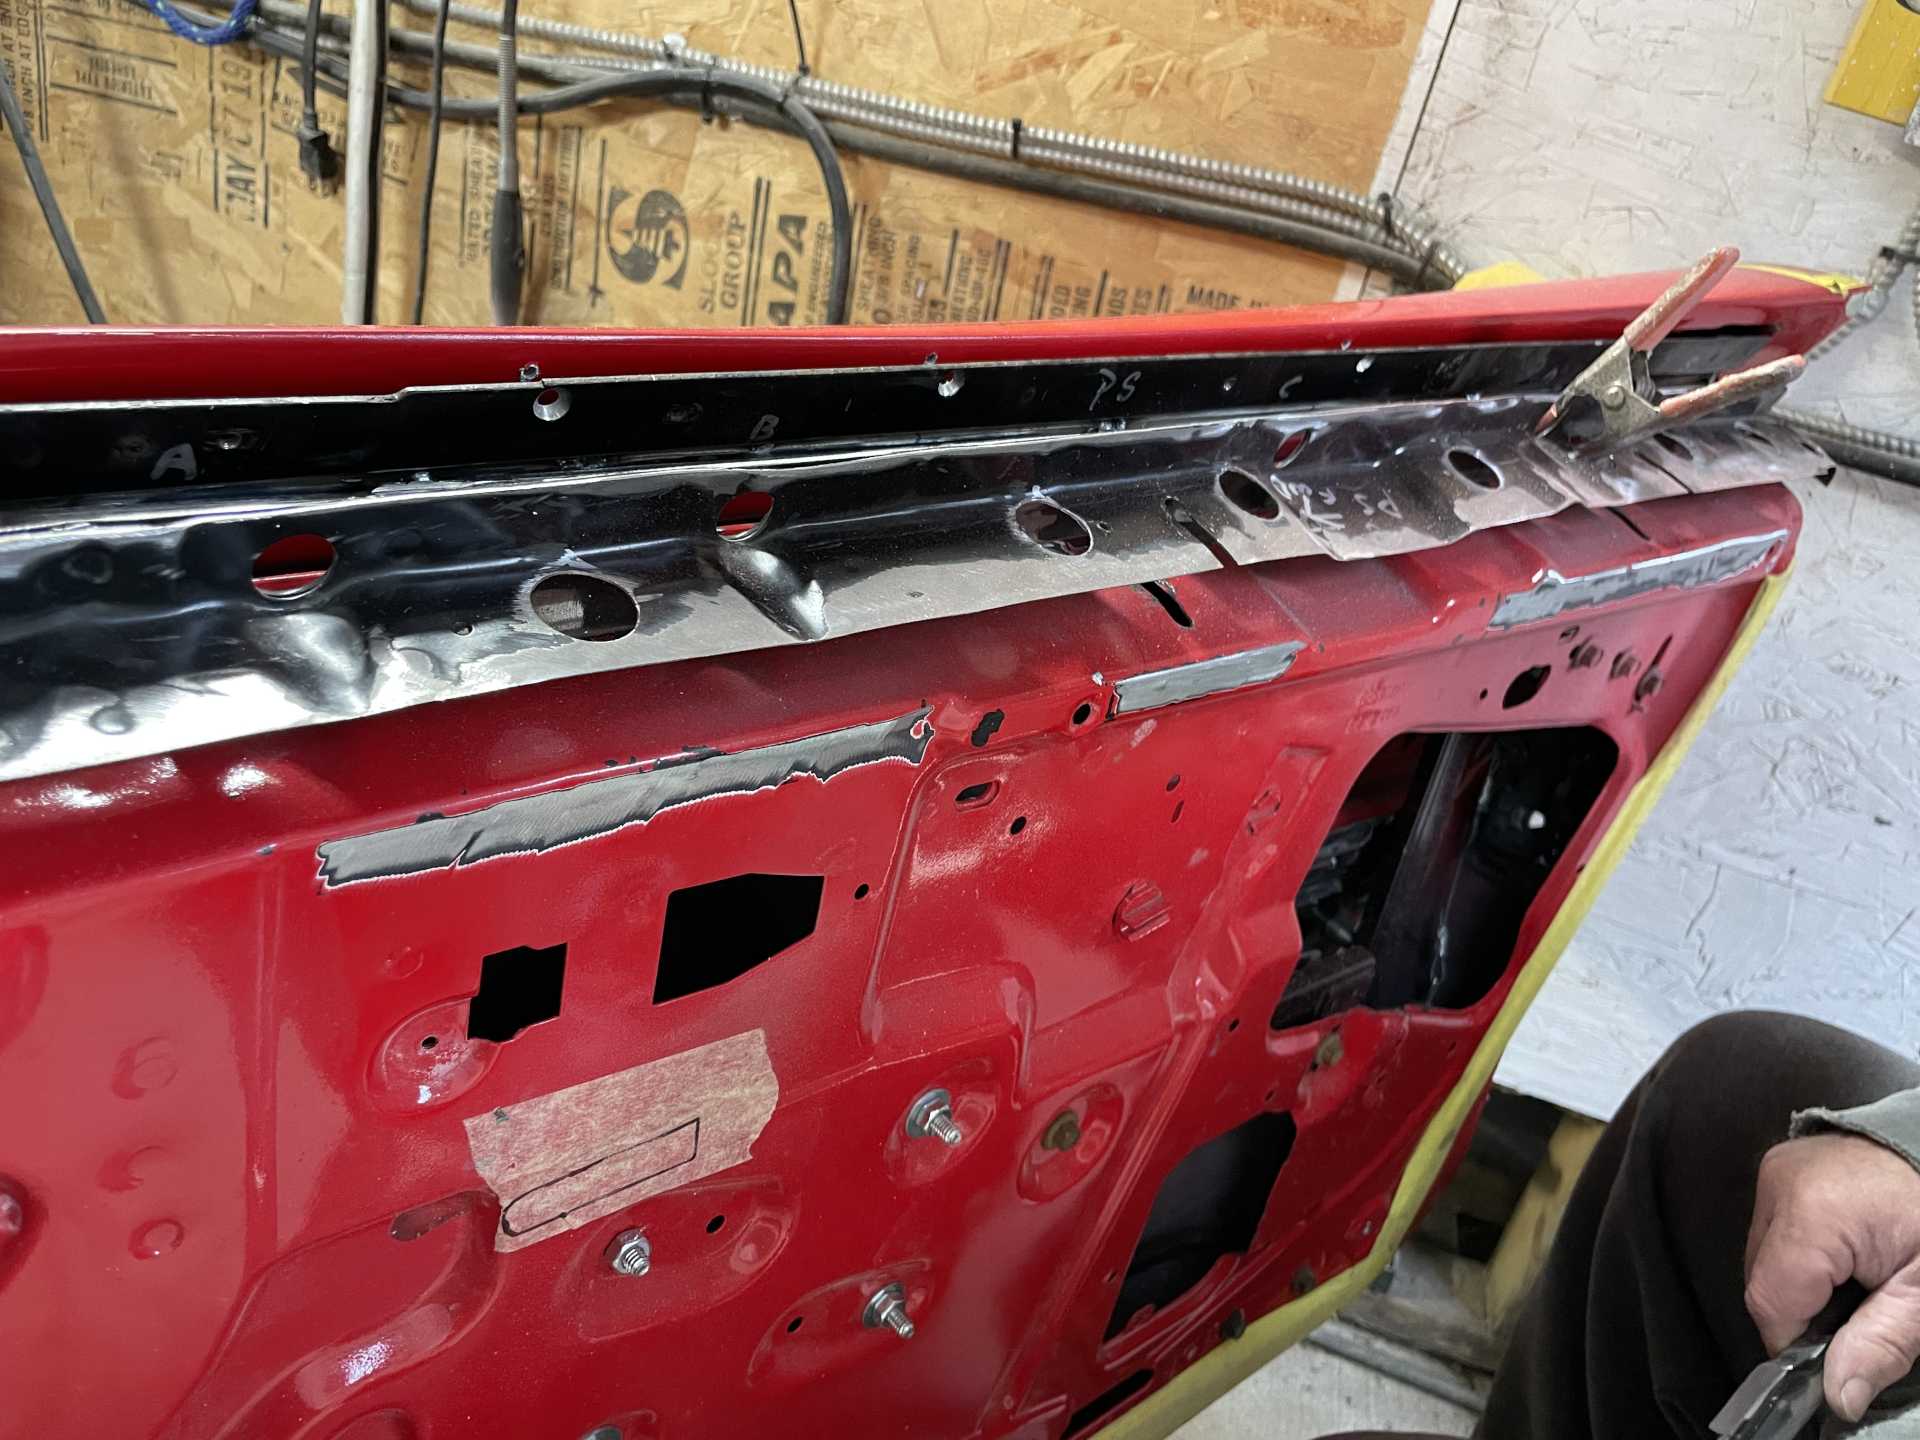
We tac welded everything in place and test fit the felts and window to ensure proper movement and fit .
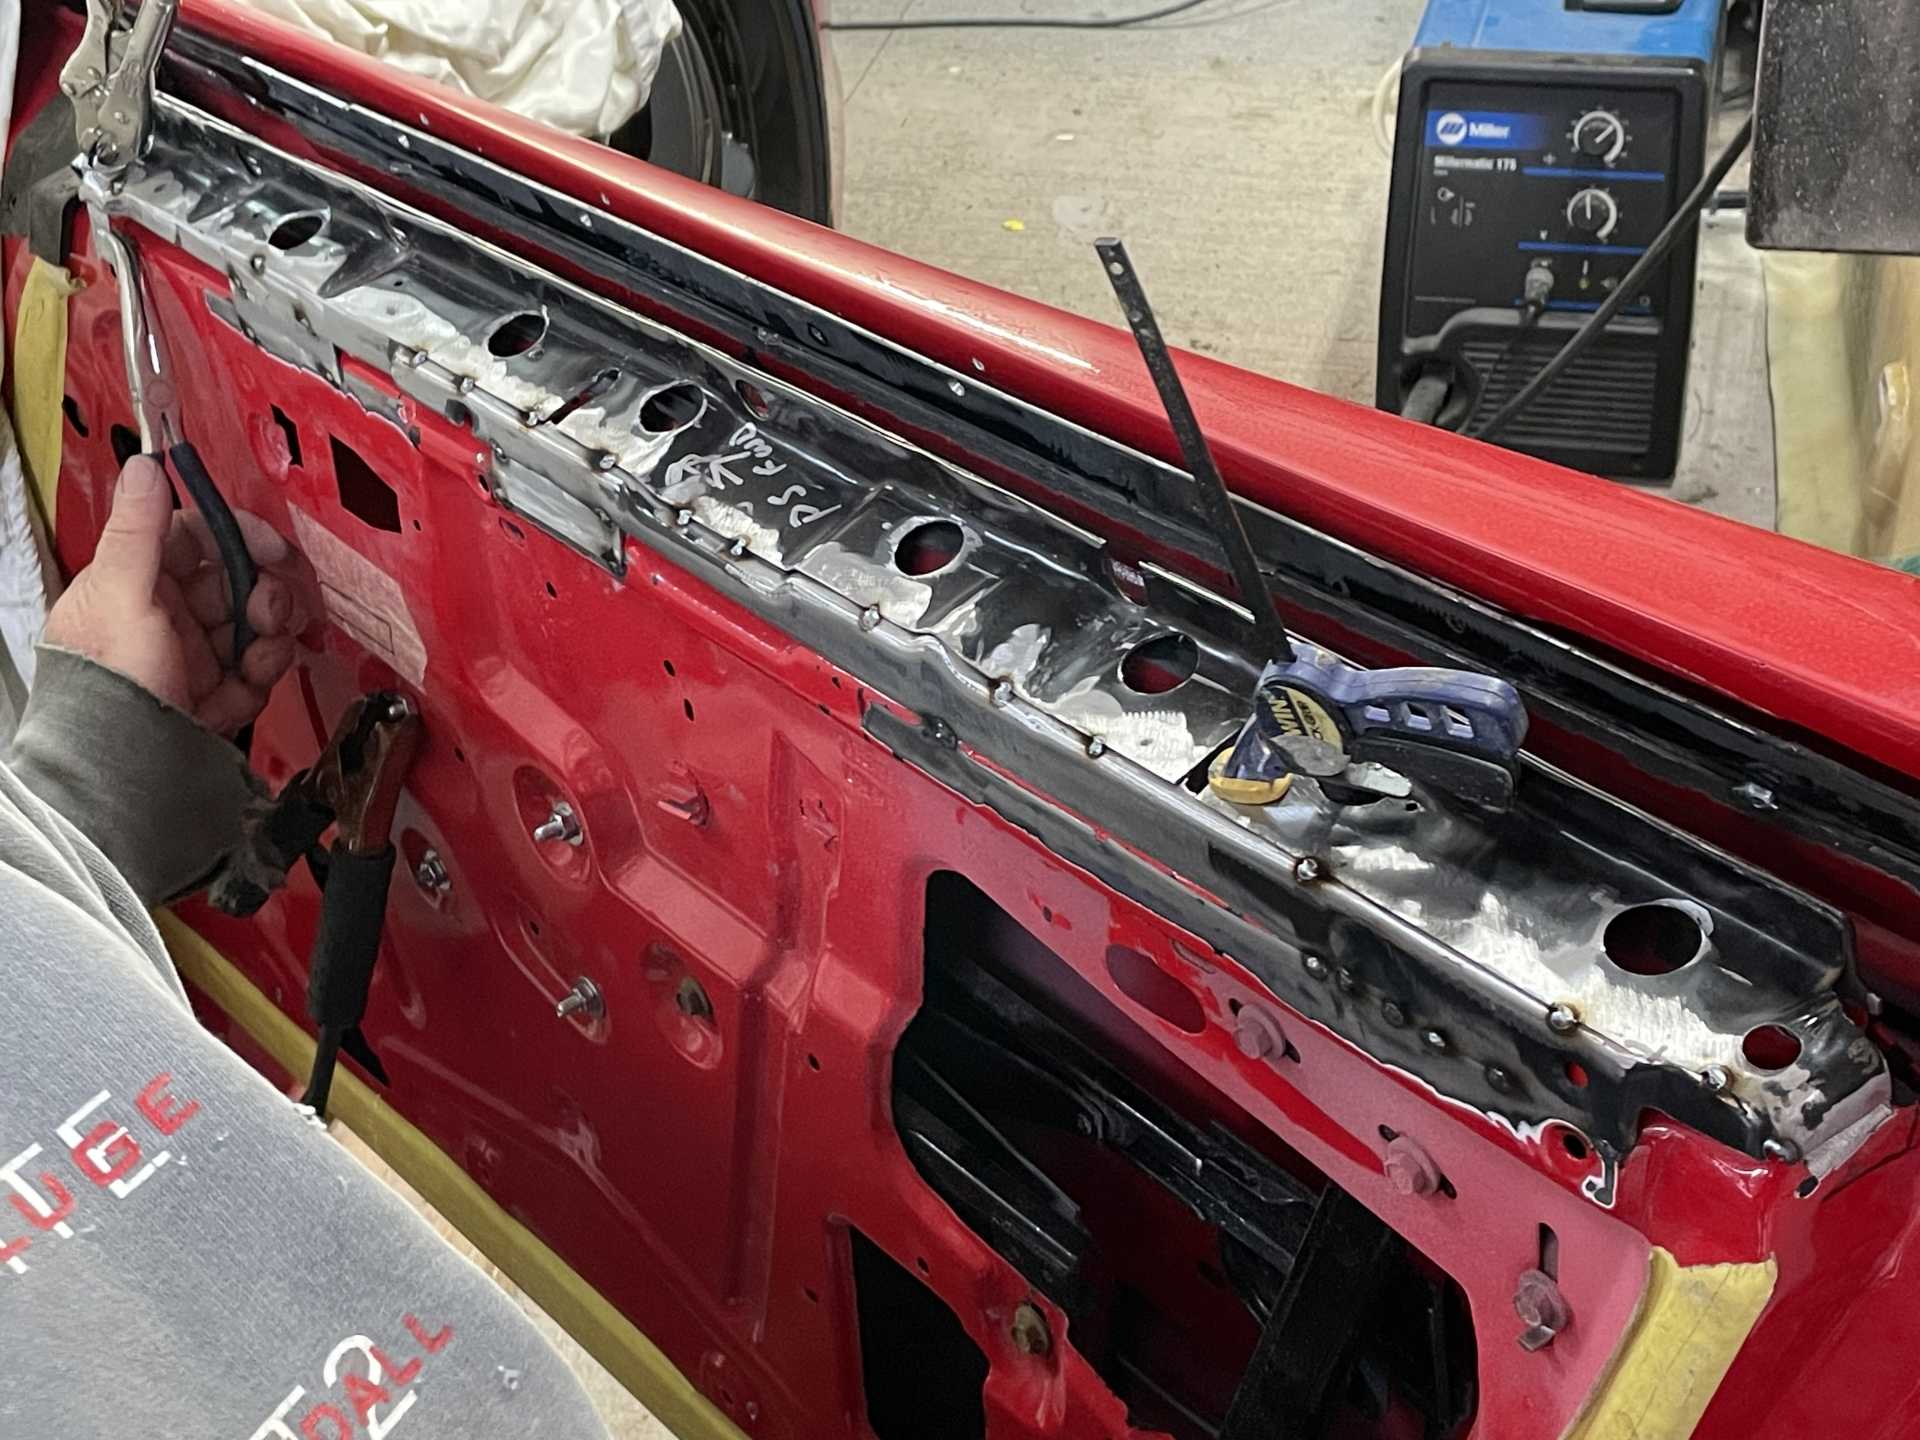
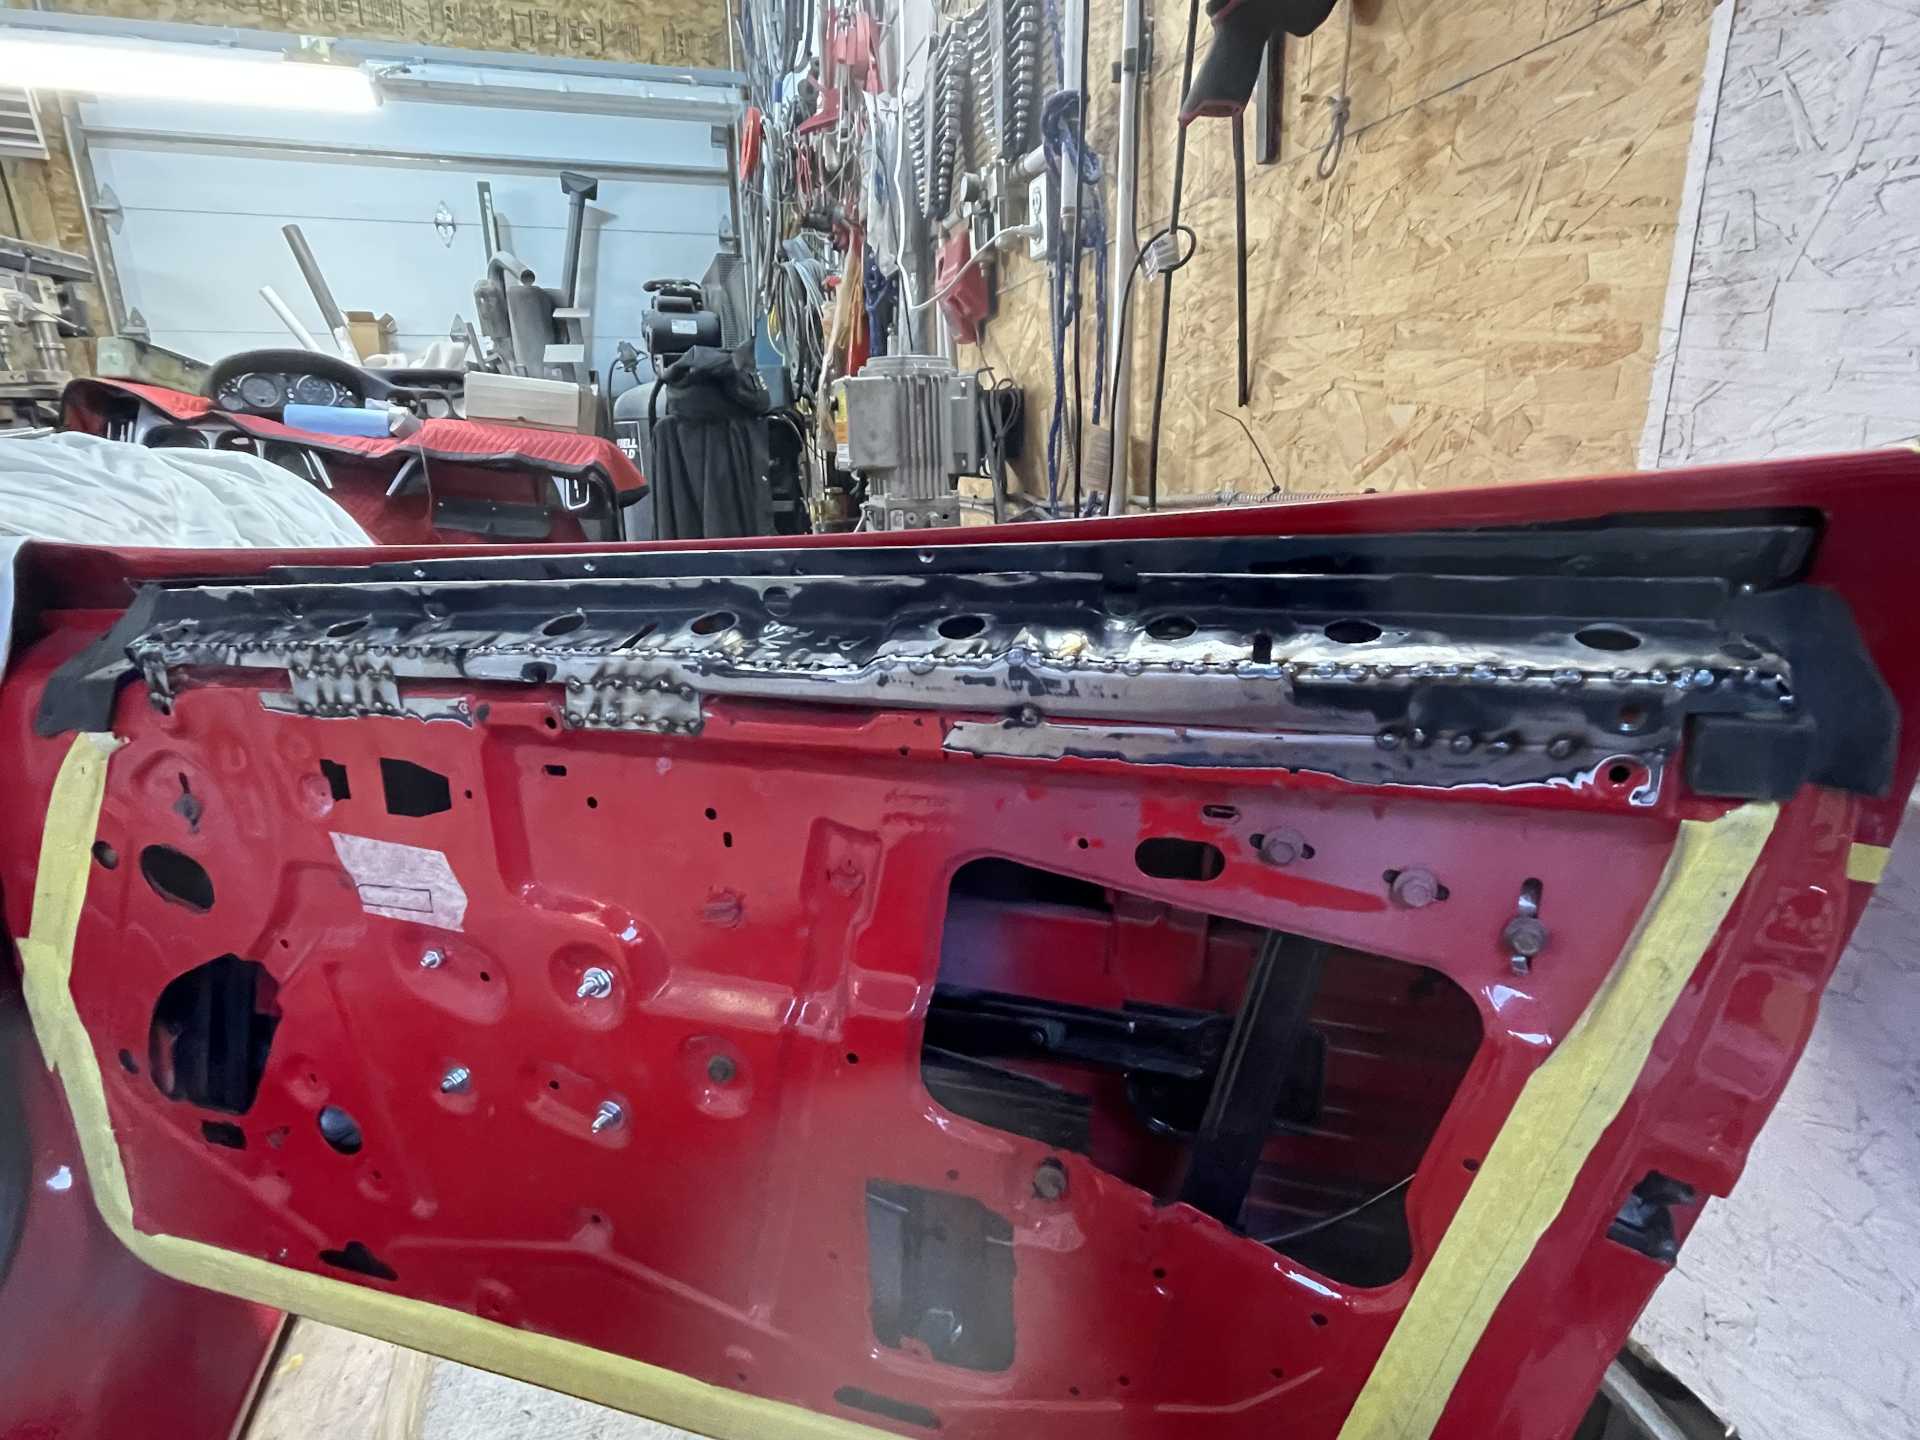
Then removed the window for probably the 10th time in the process. And finish welding everything
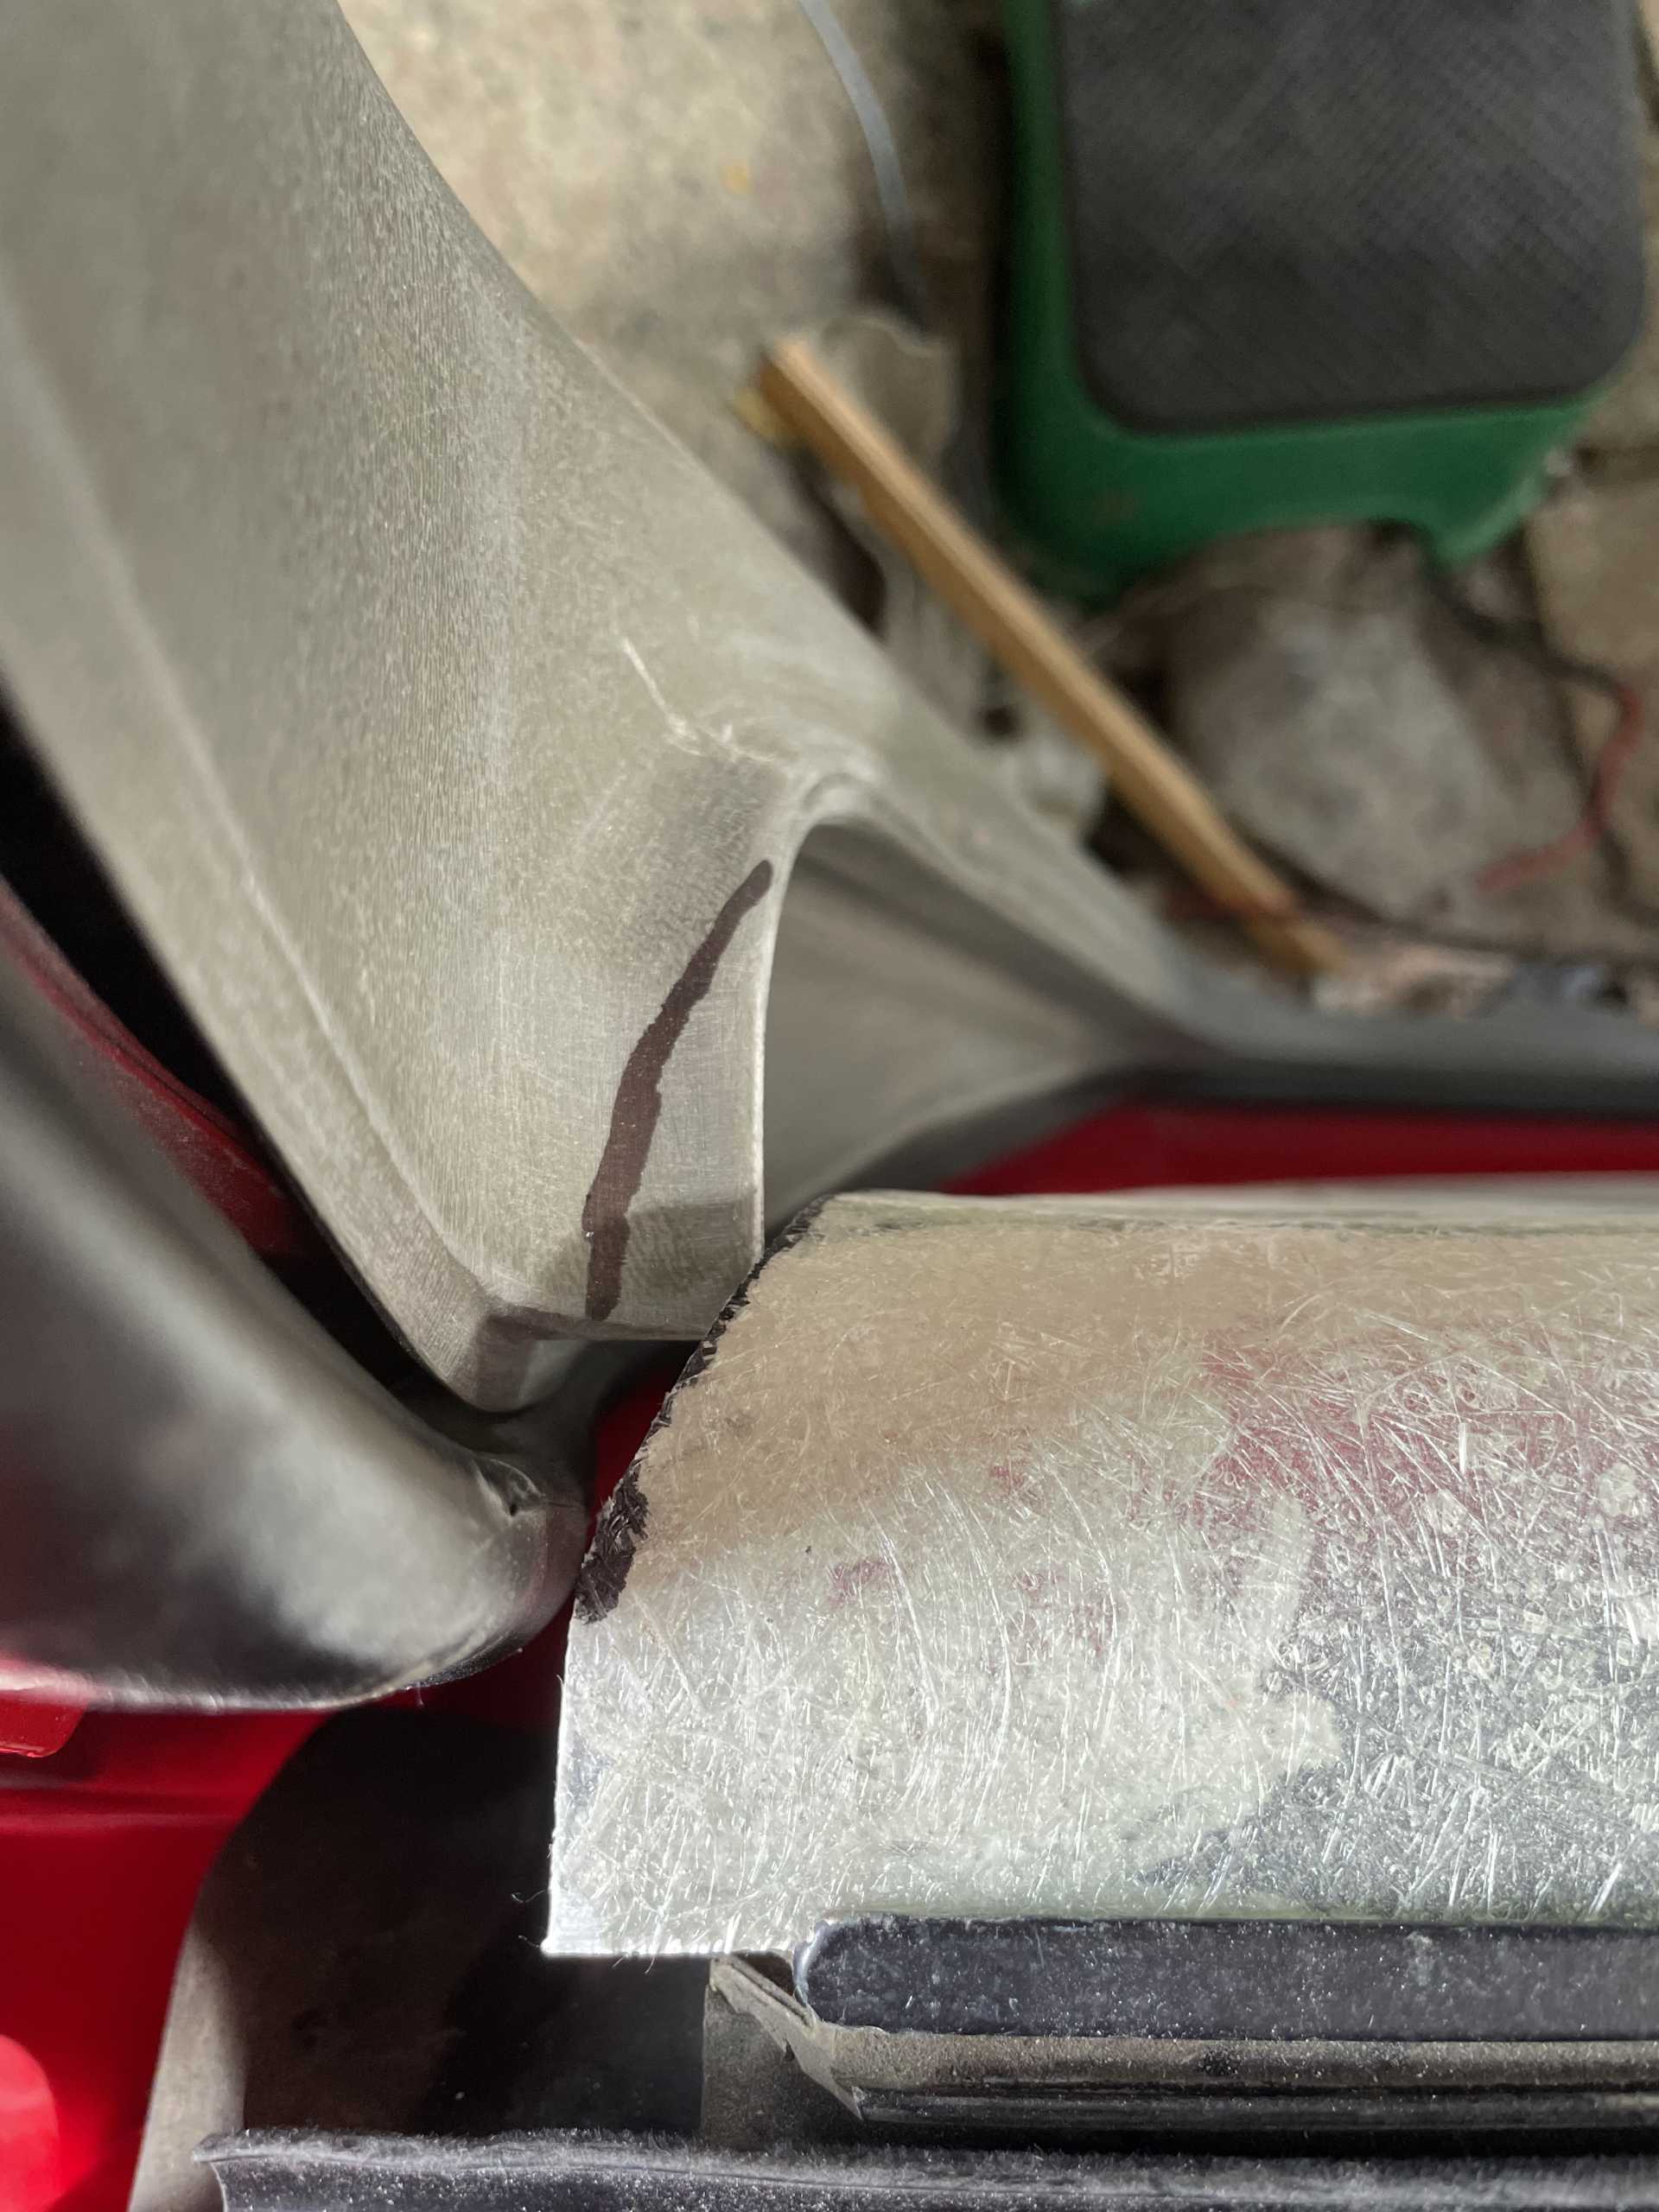
Then cleaned up the tack welds and prepared for Color painting
I have to strip out the doors one last time to clean all the grinding dust and crap before putting the doors together for hopefully the last time.
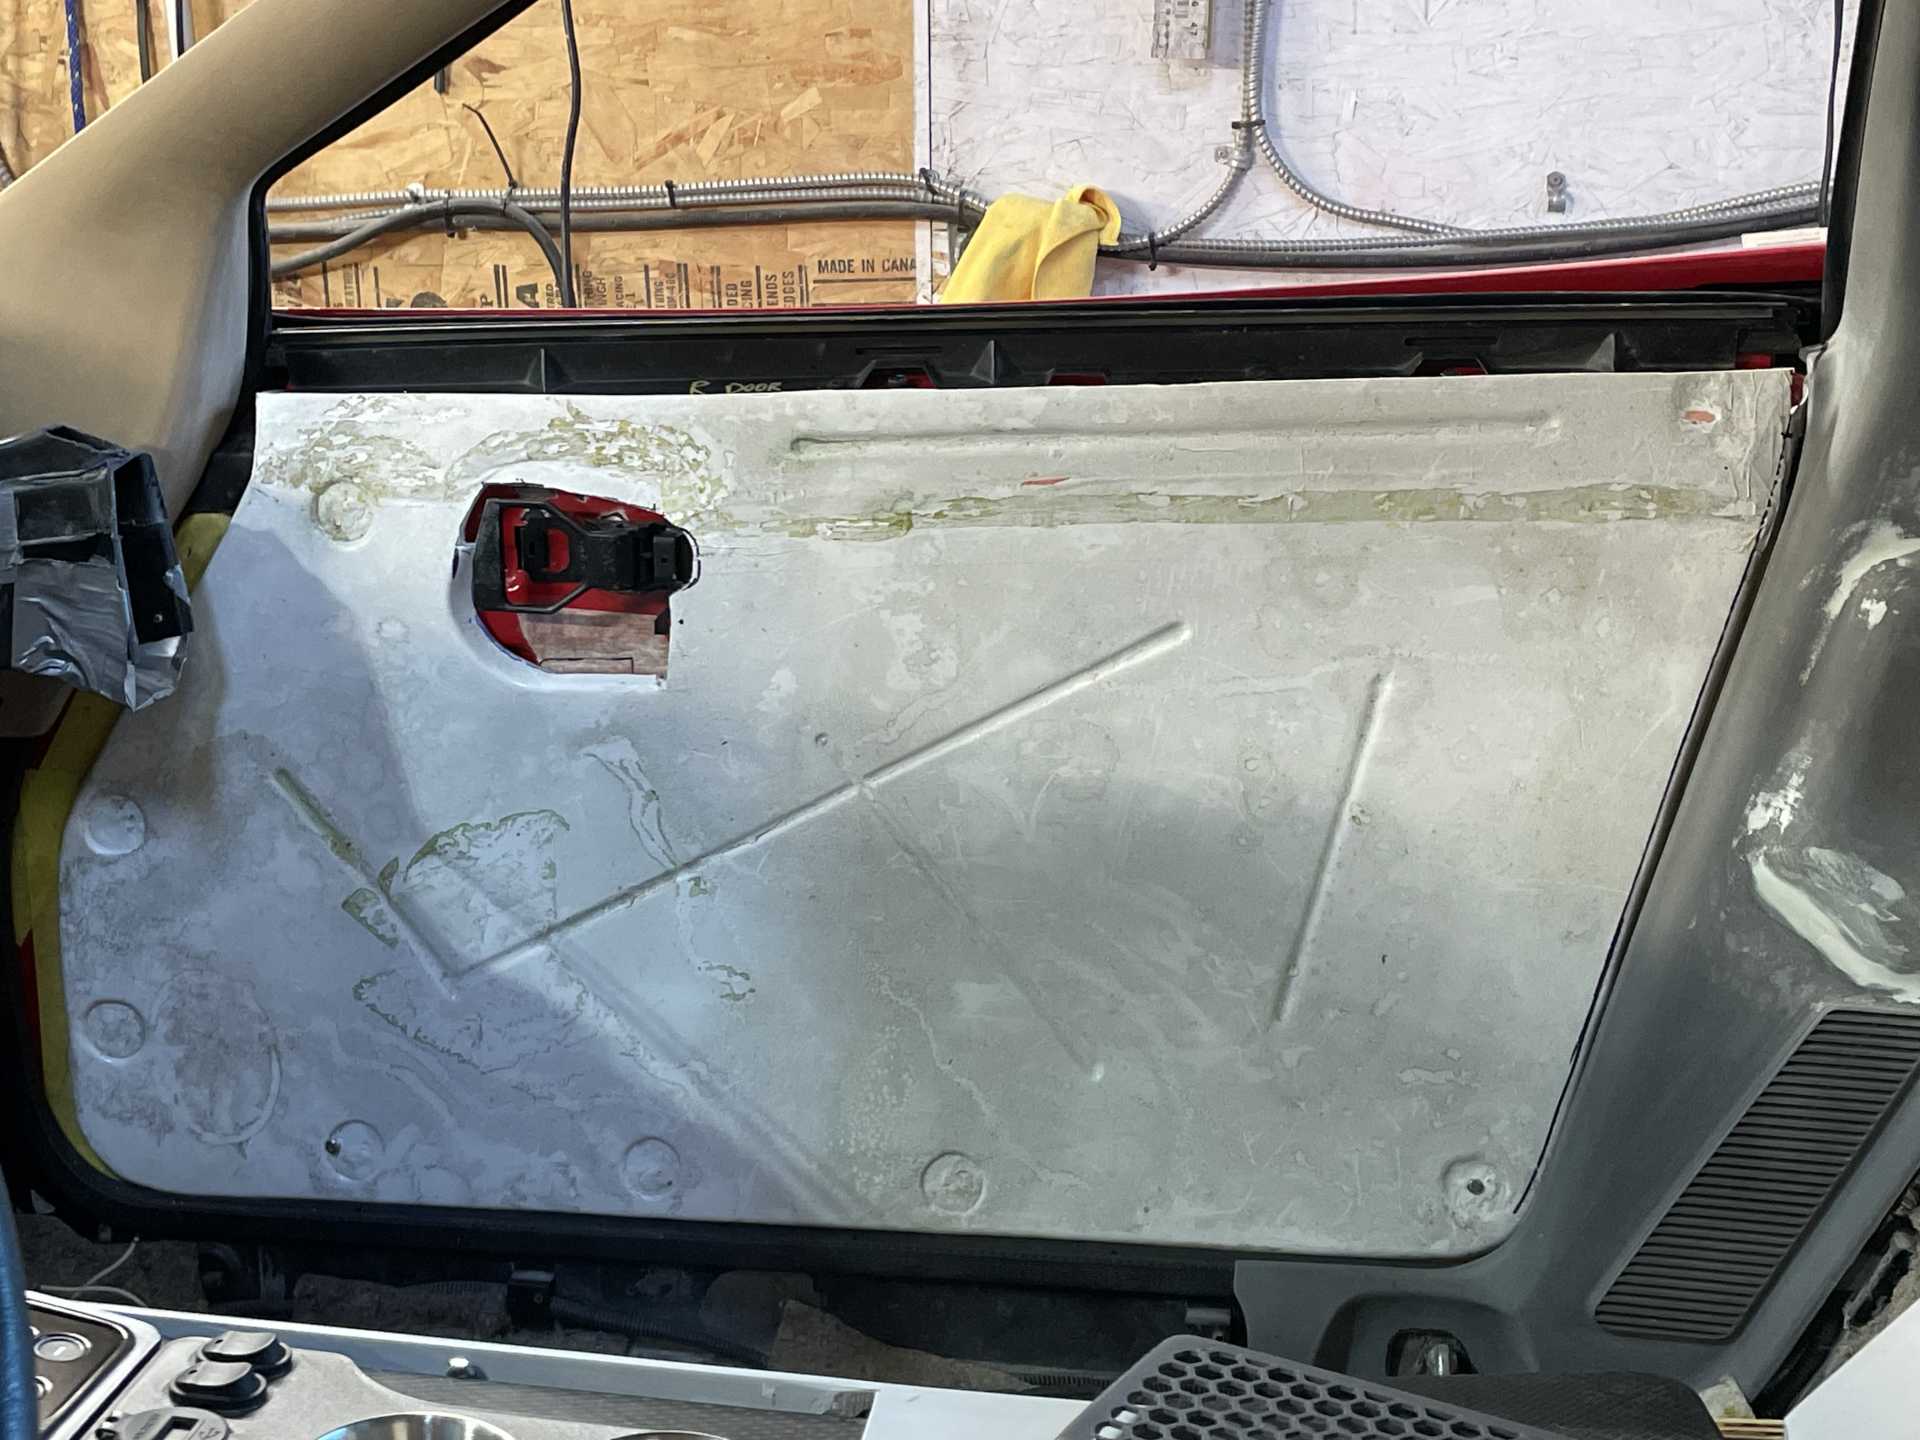
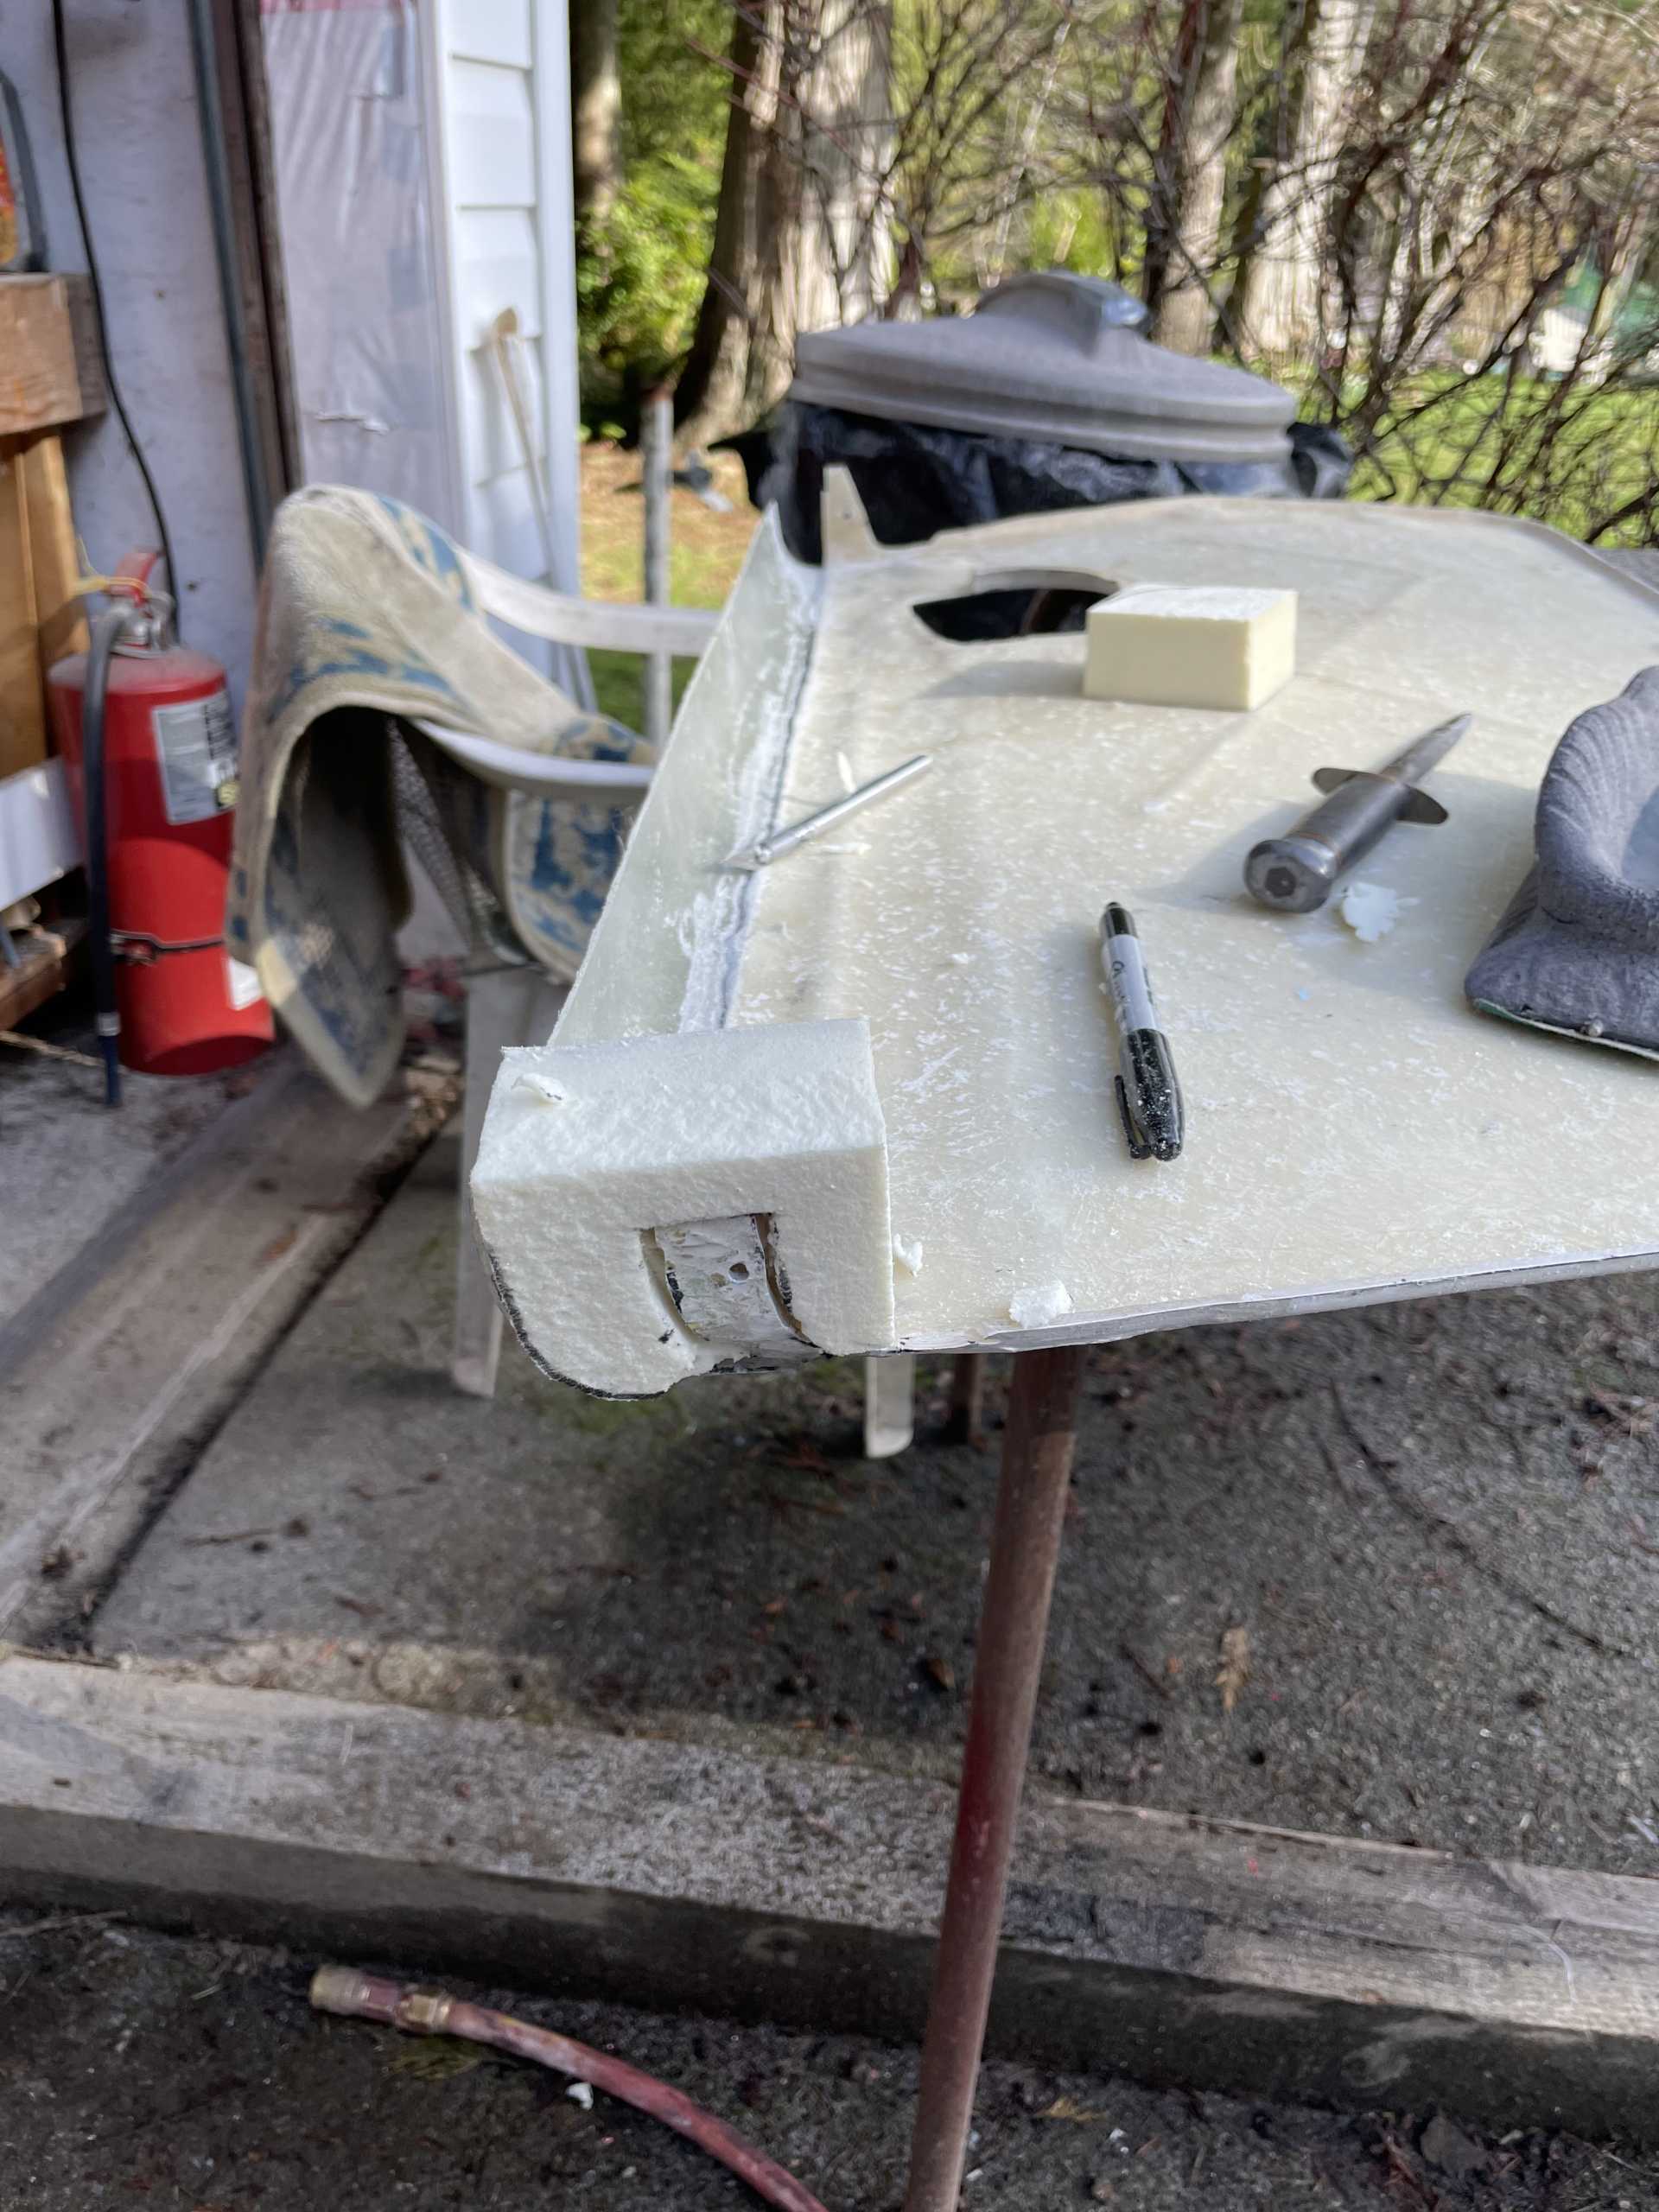
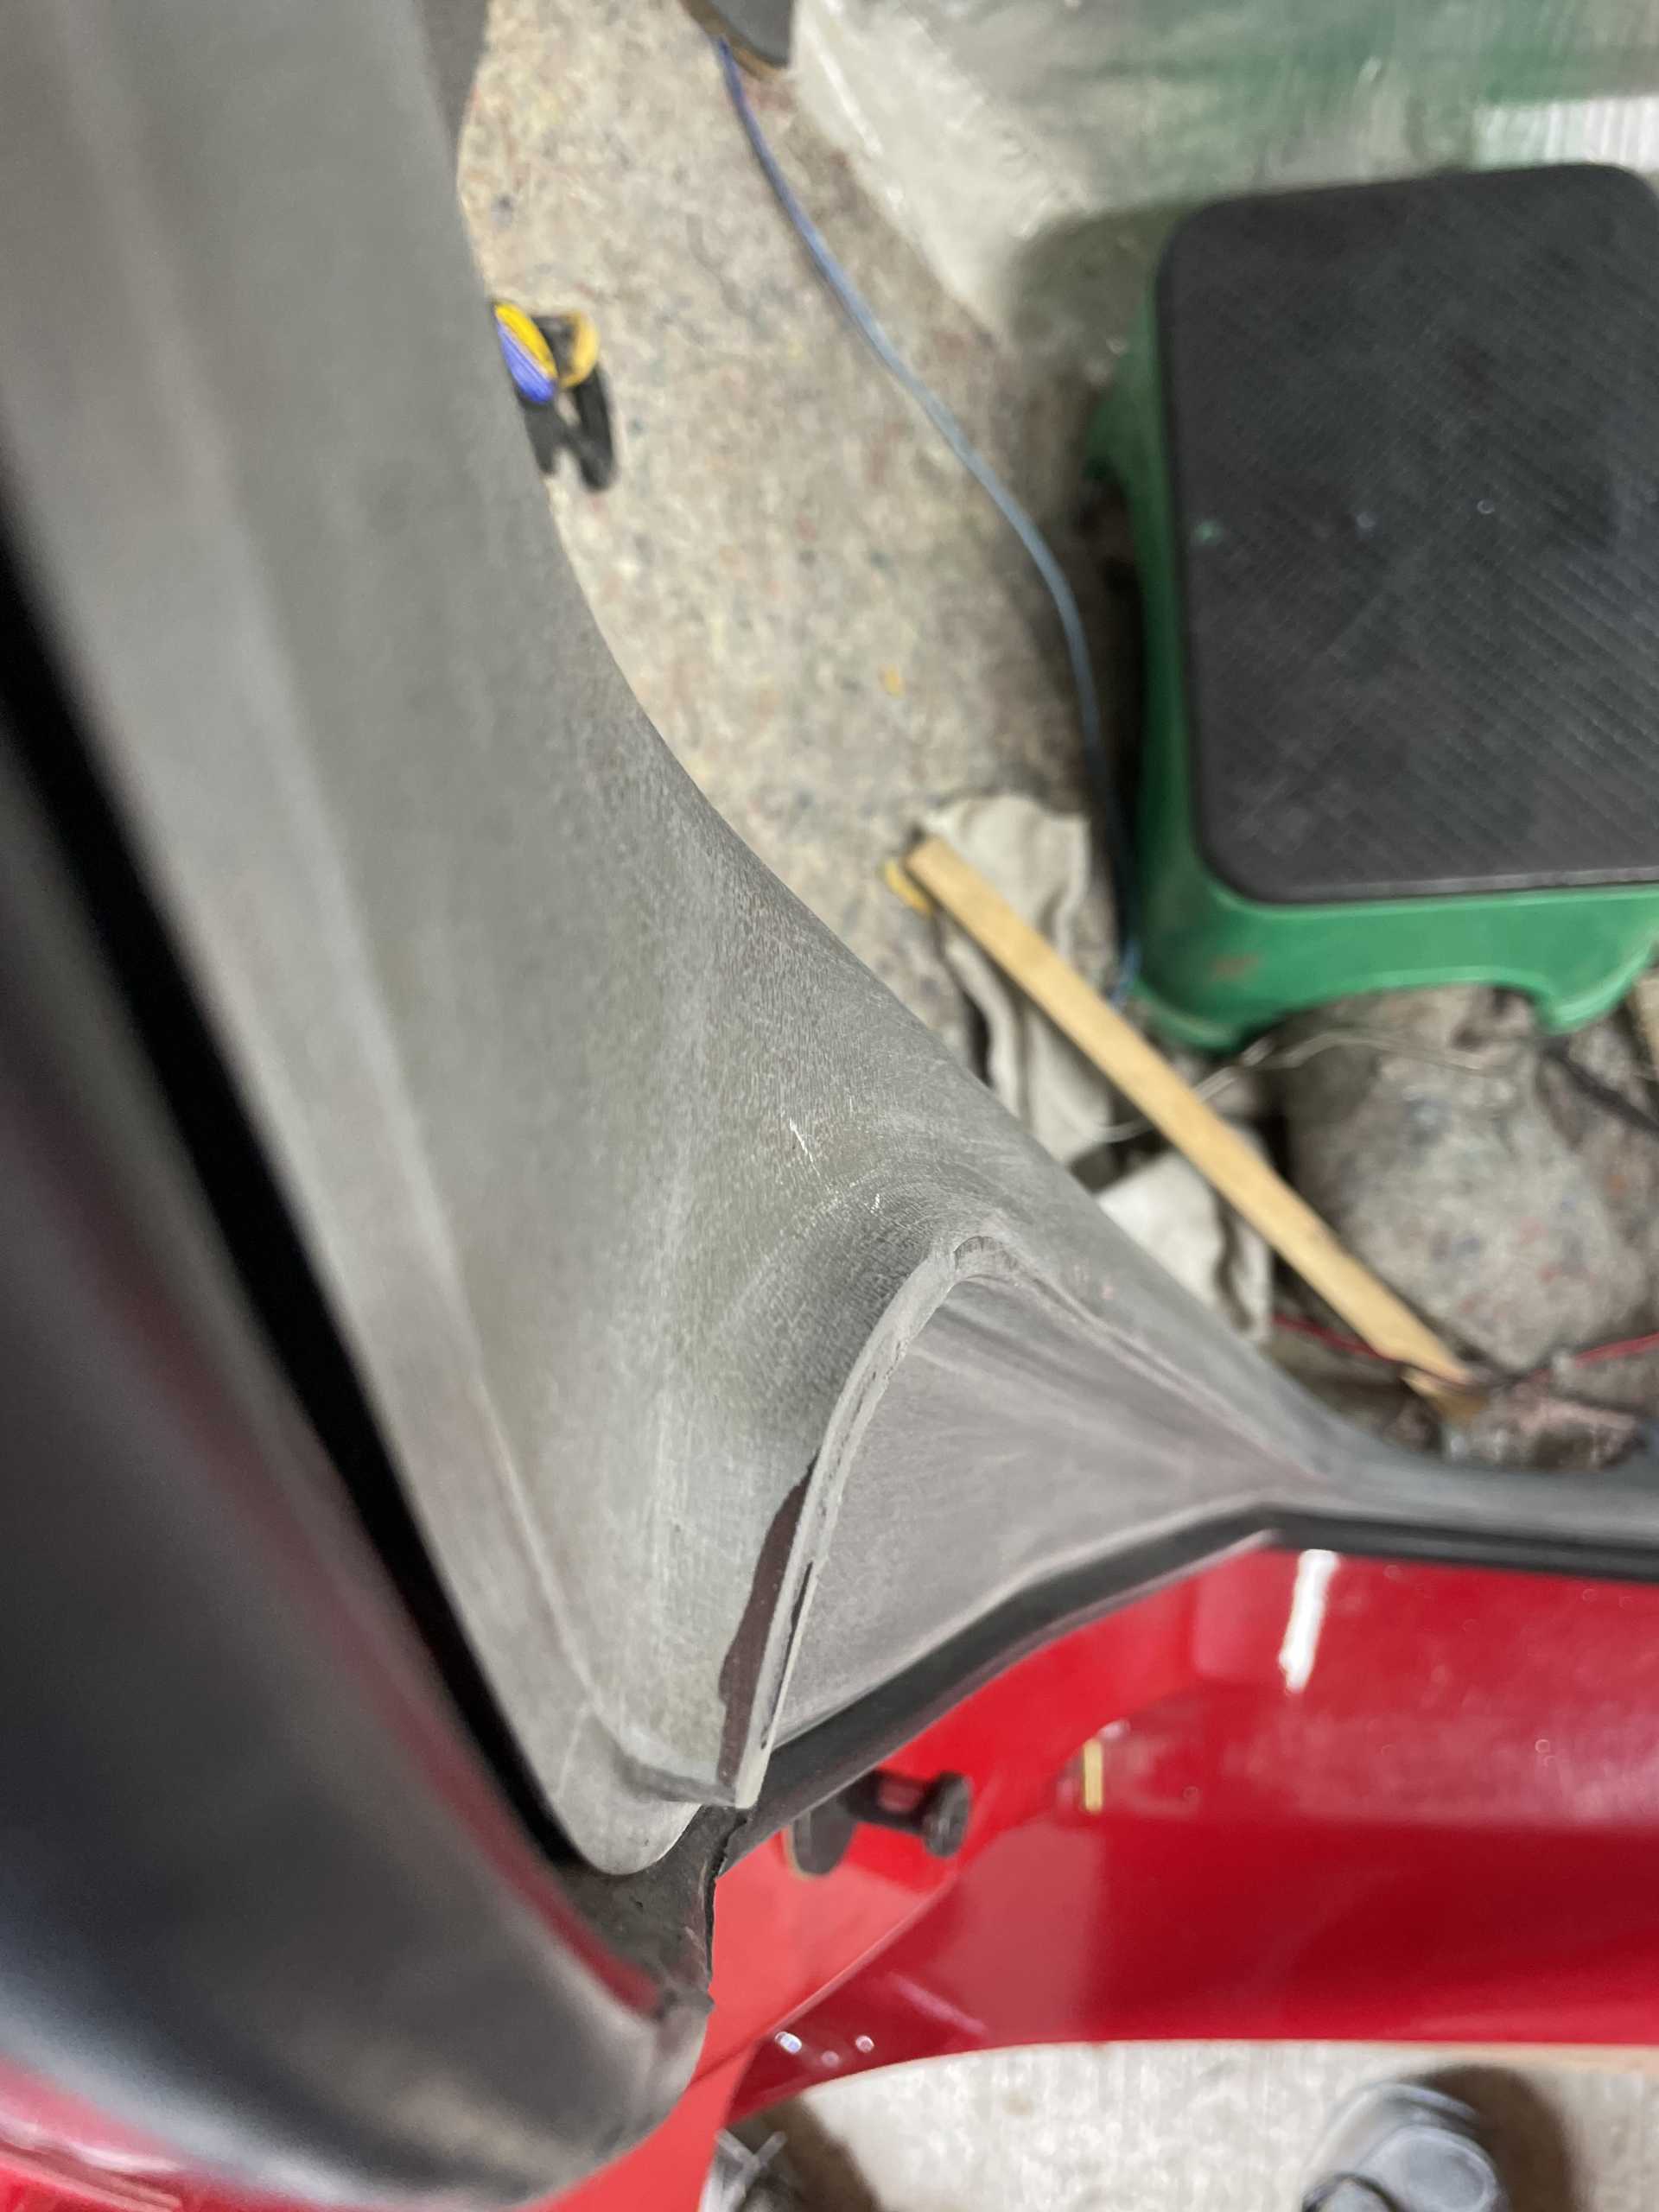
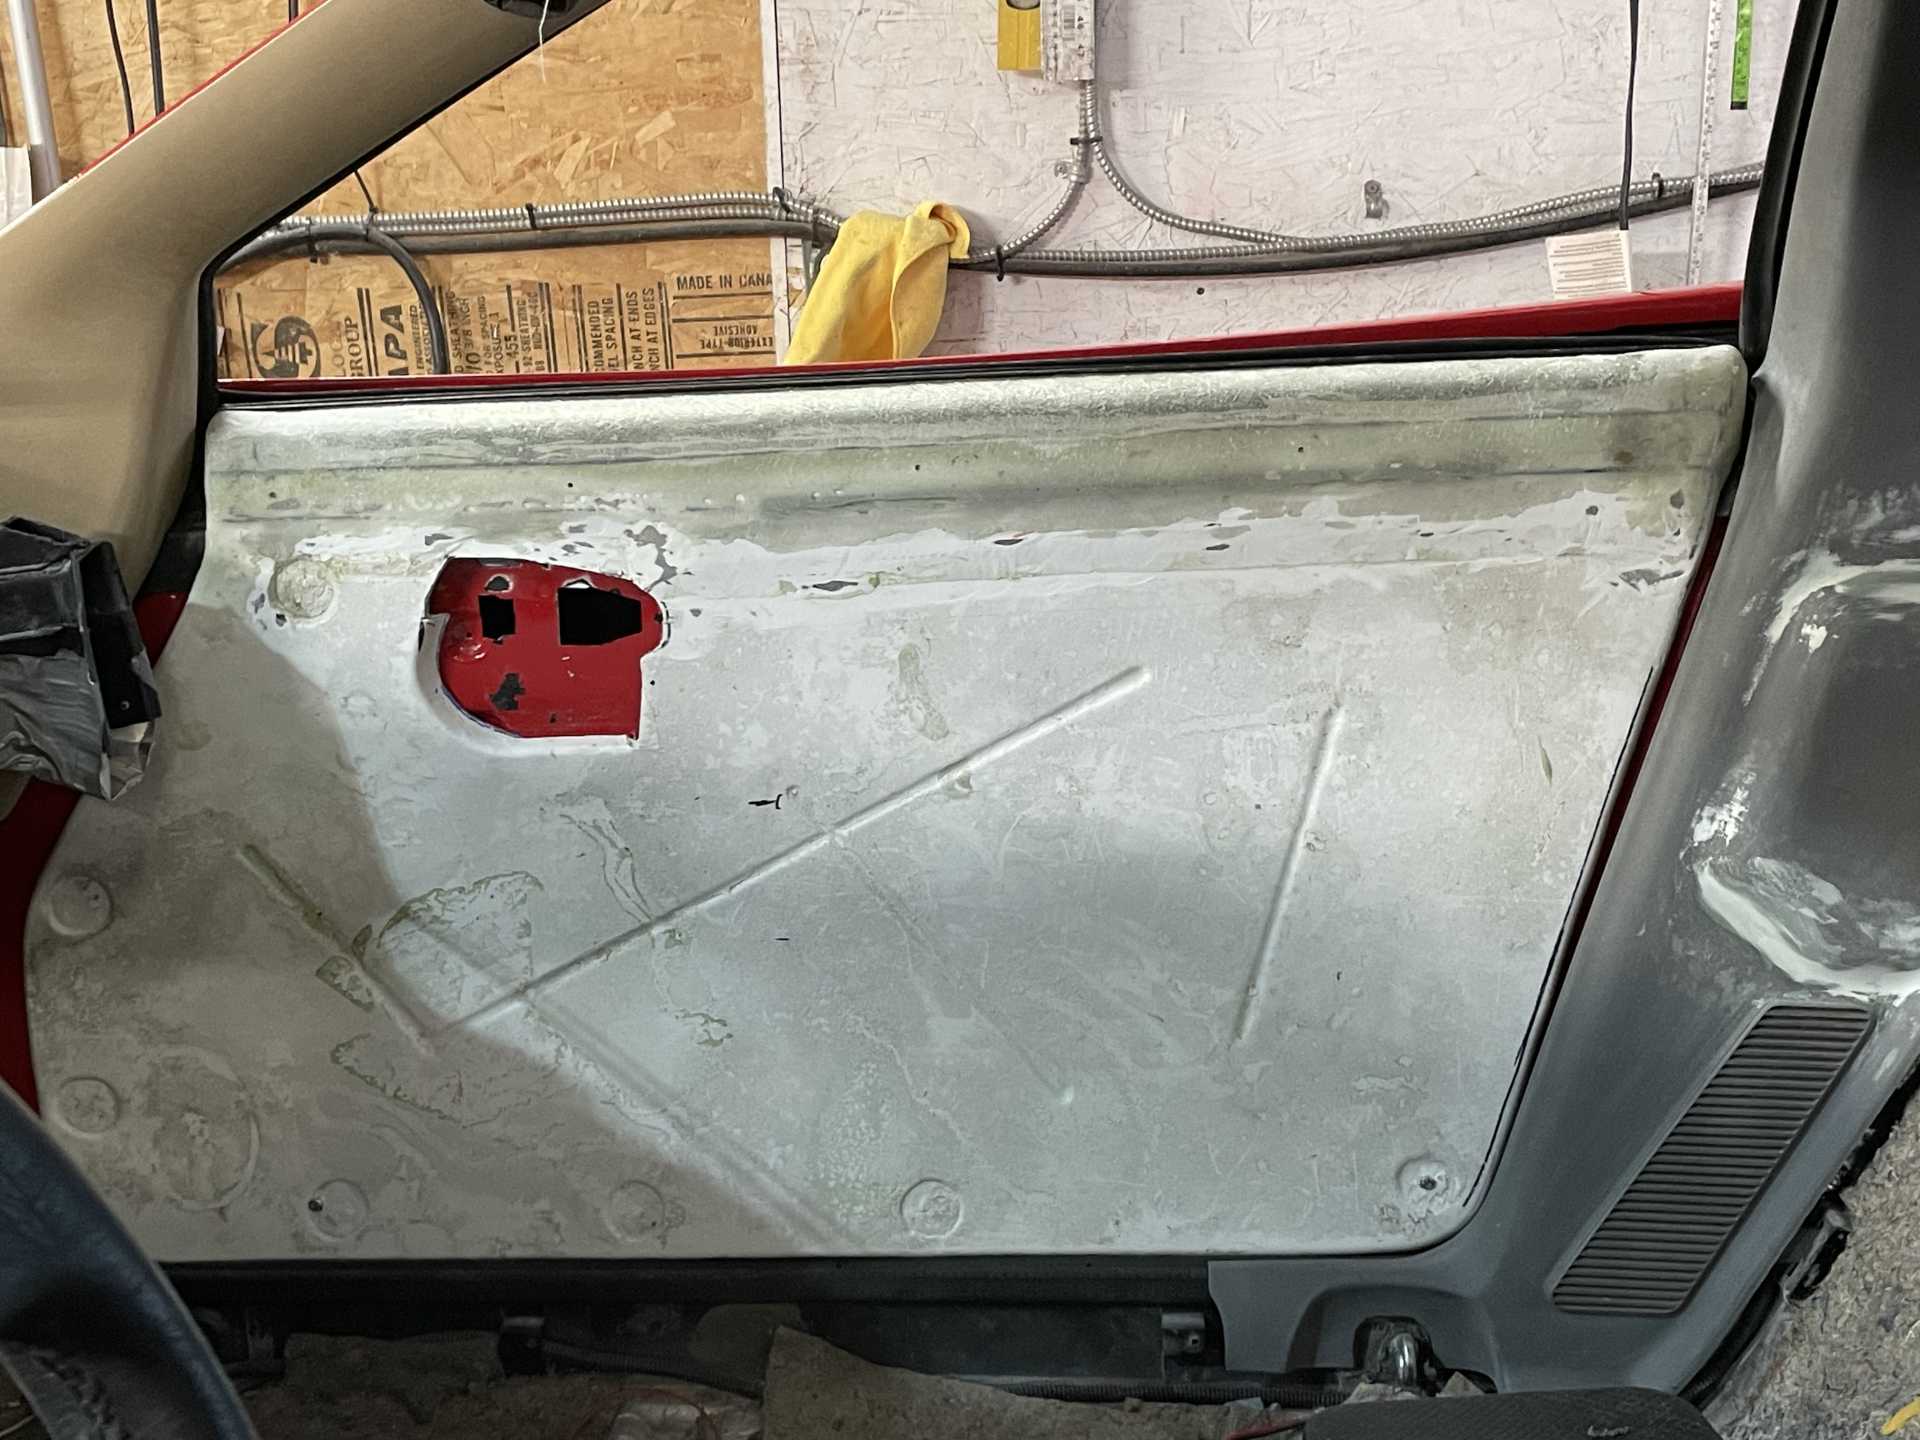
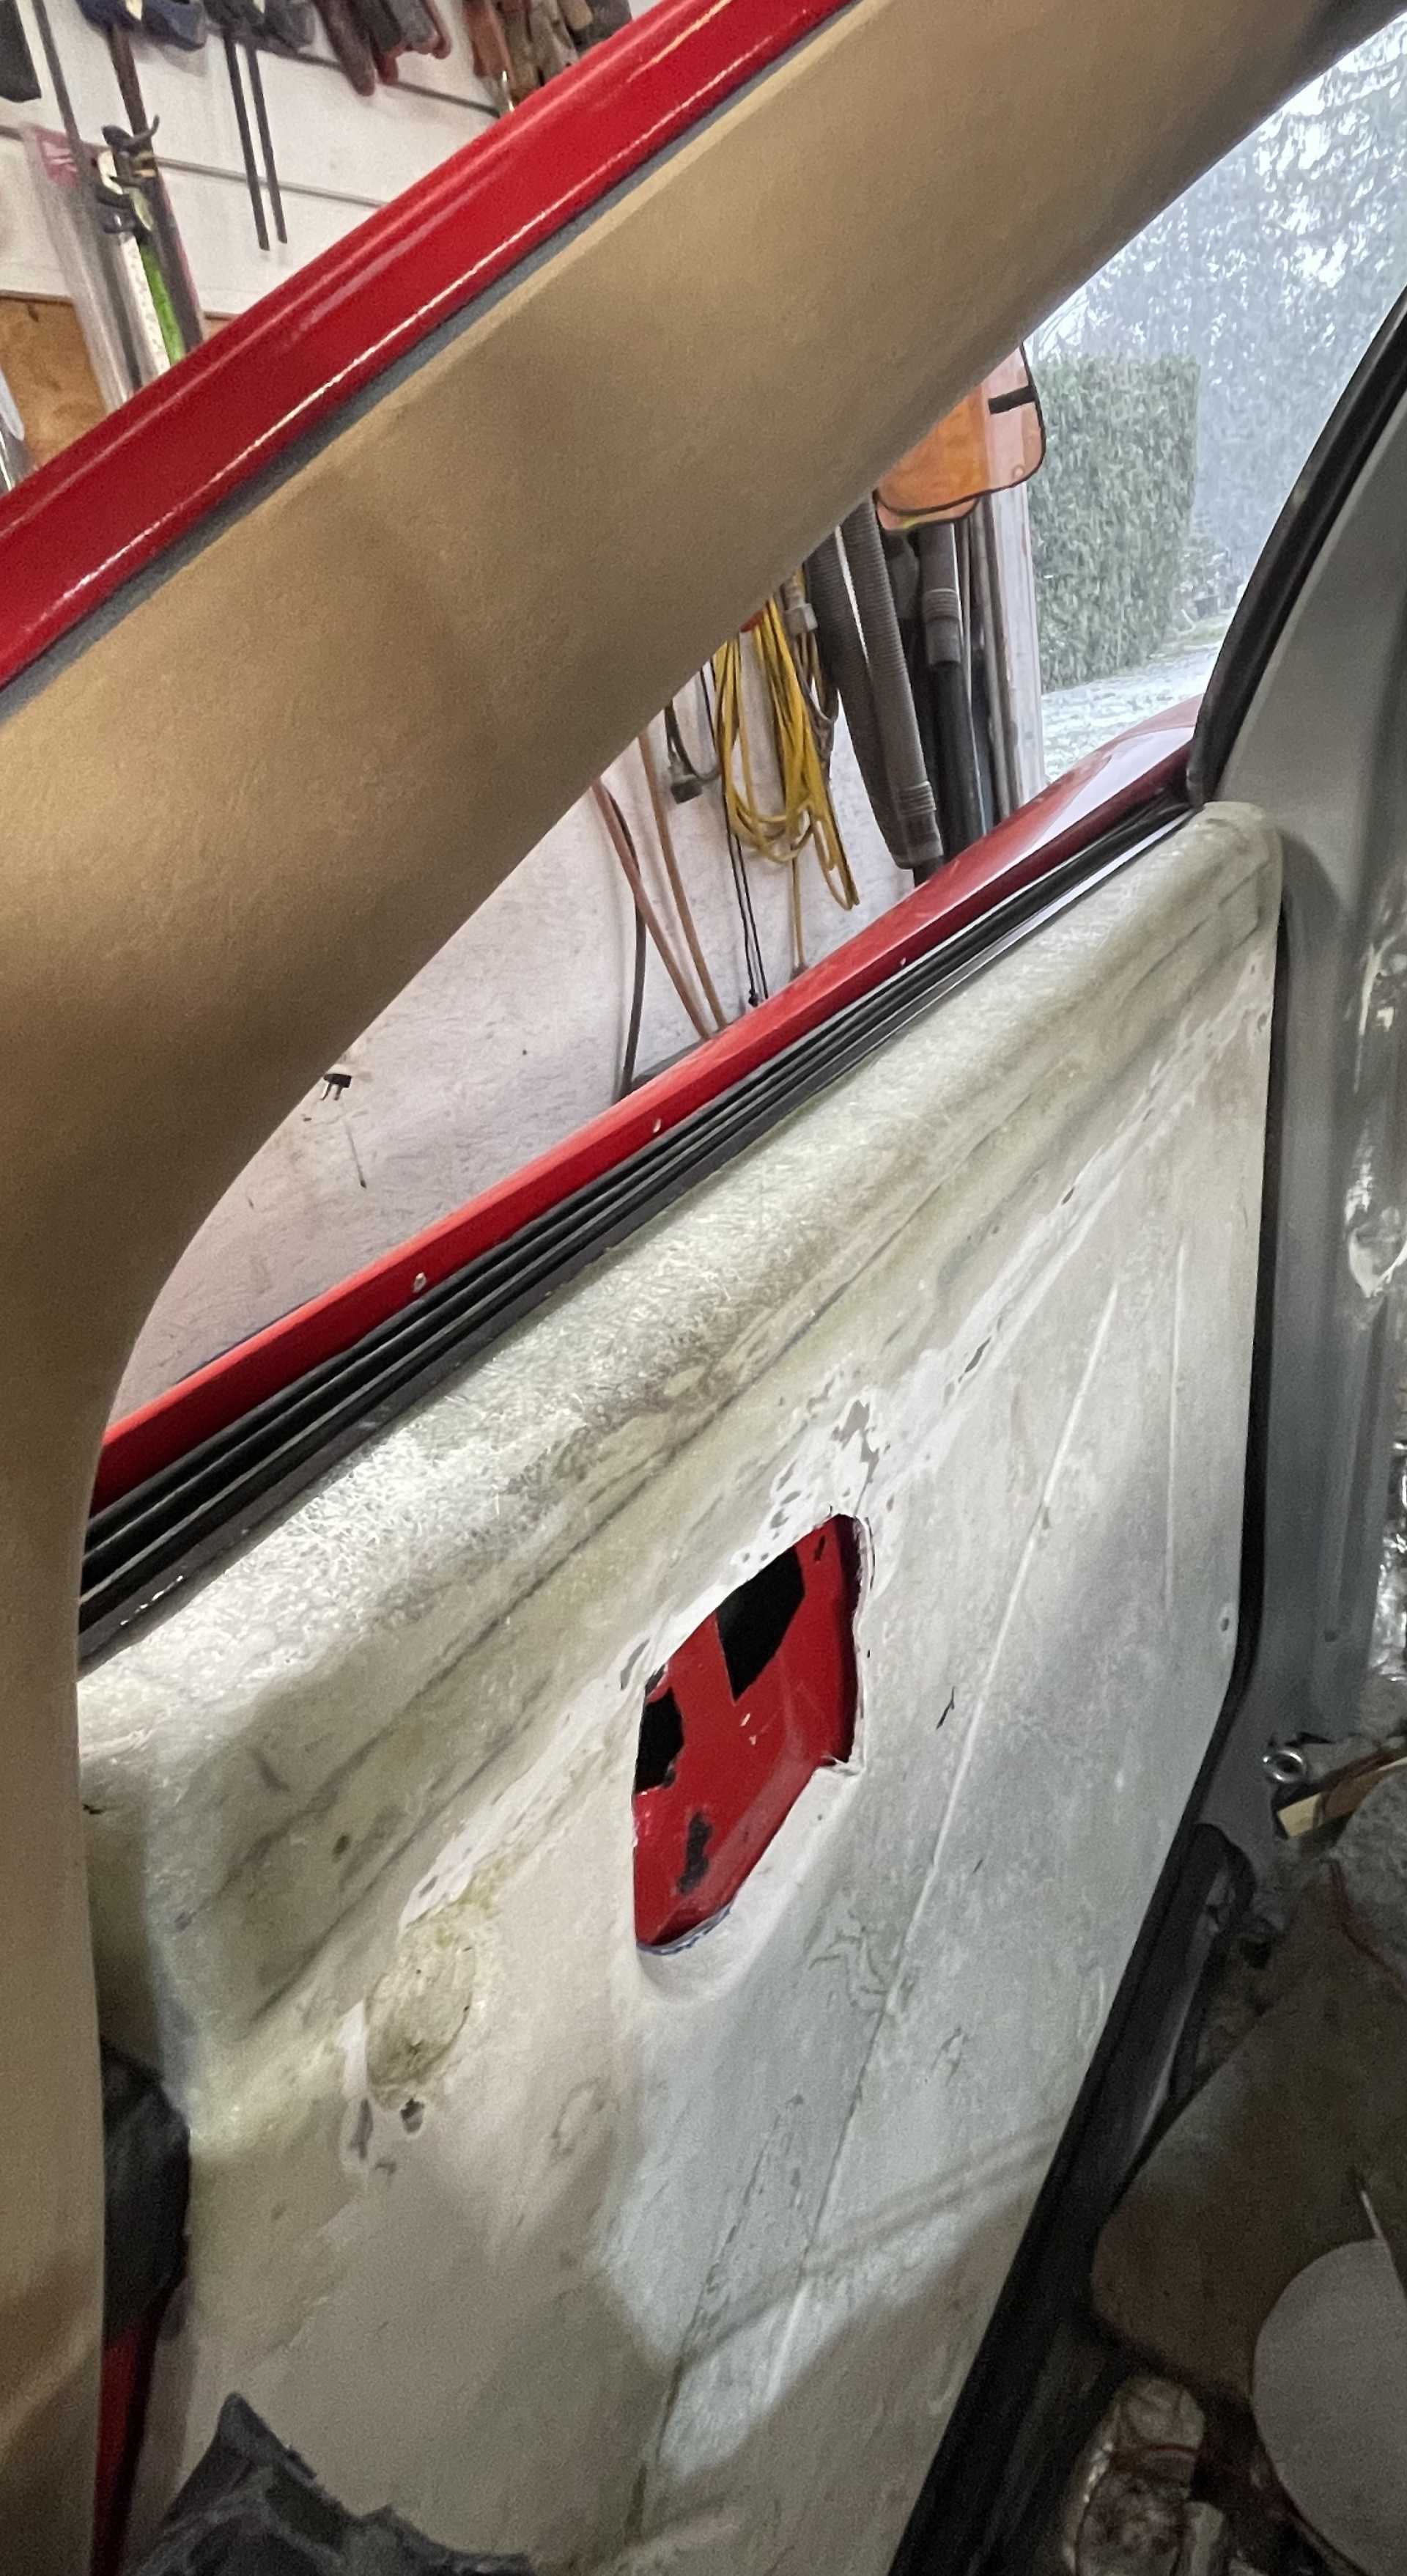
So with the window door seals and whiskers raised to a a proper height it was now time to finish and get the door cards modified to fit so they can be upholstered. The top of the door card although it was raised earlier in the build no longer was going to work, it required the top to be cut off and a new one made .
I determined the height I needed parallel to the dew strips
Then cut that piece off
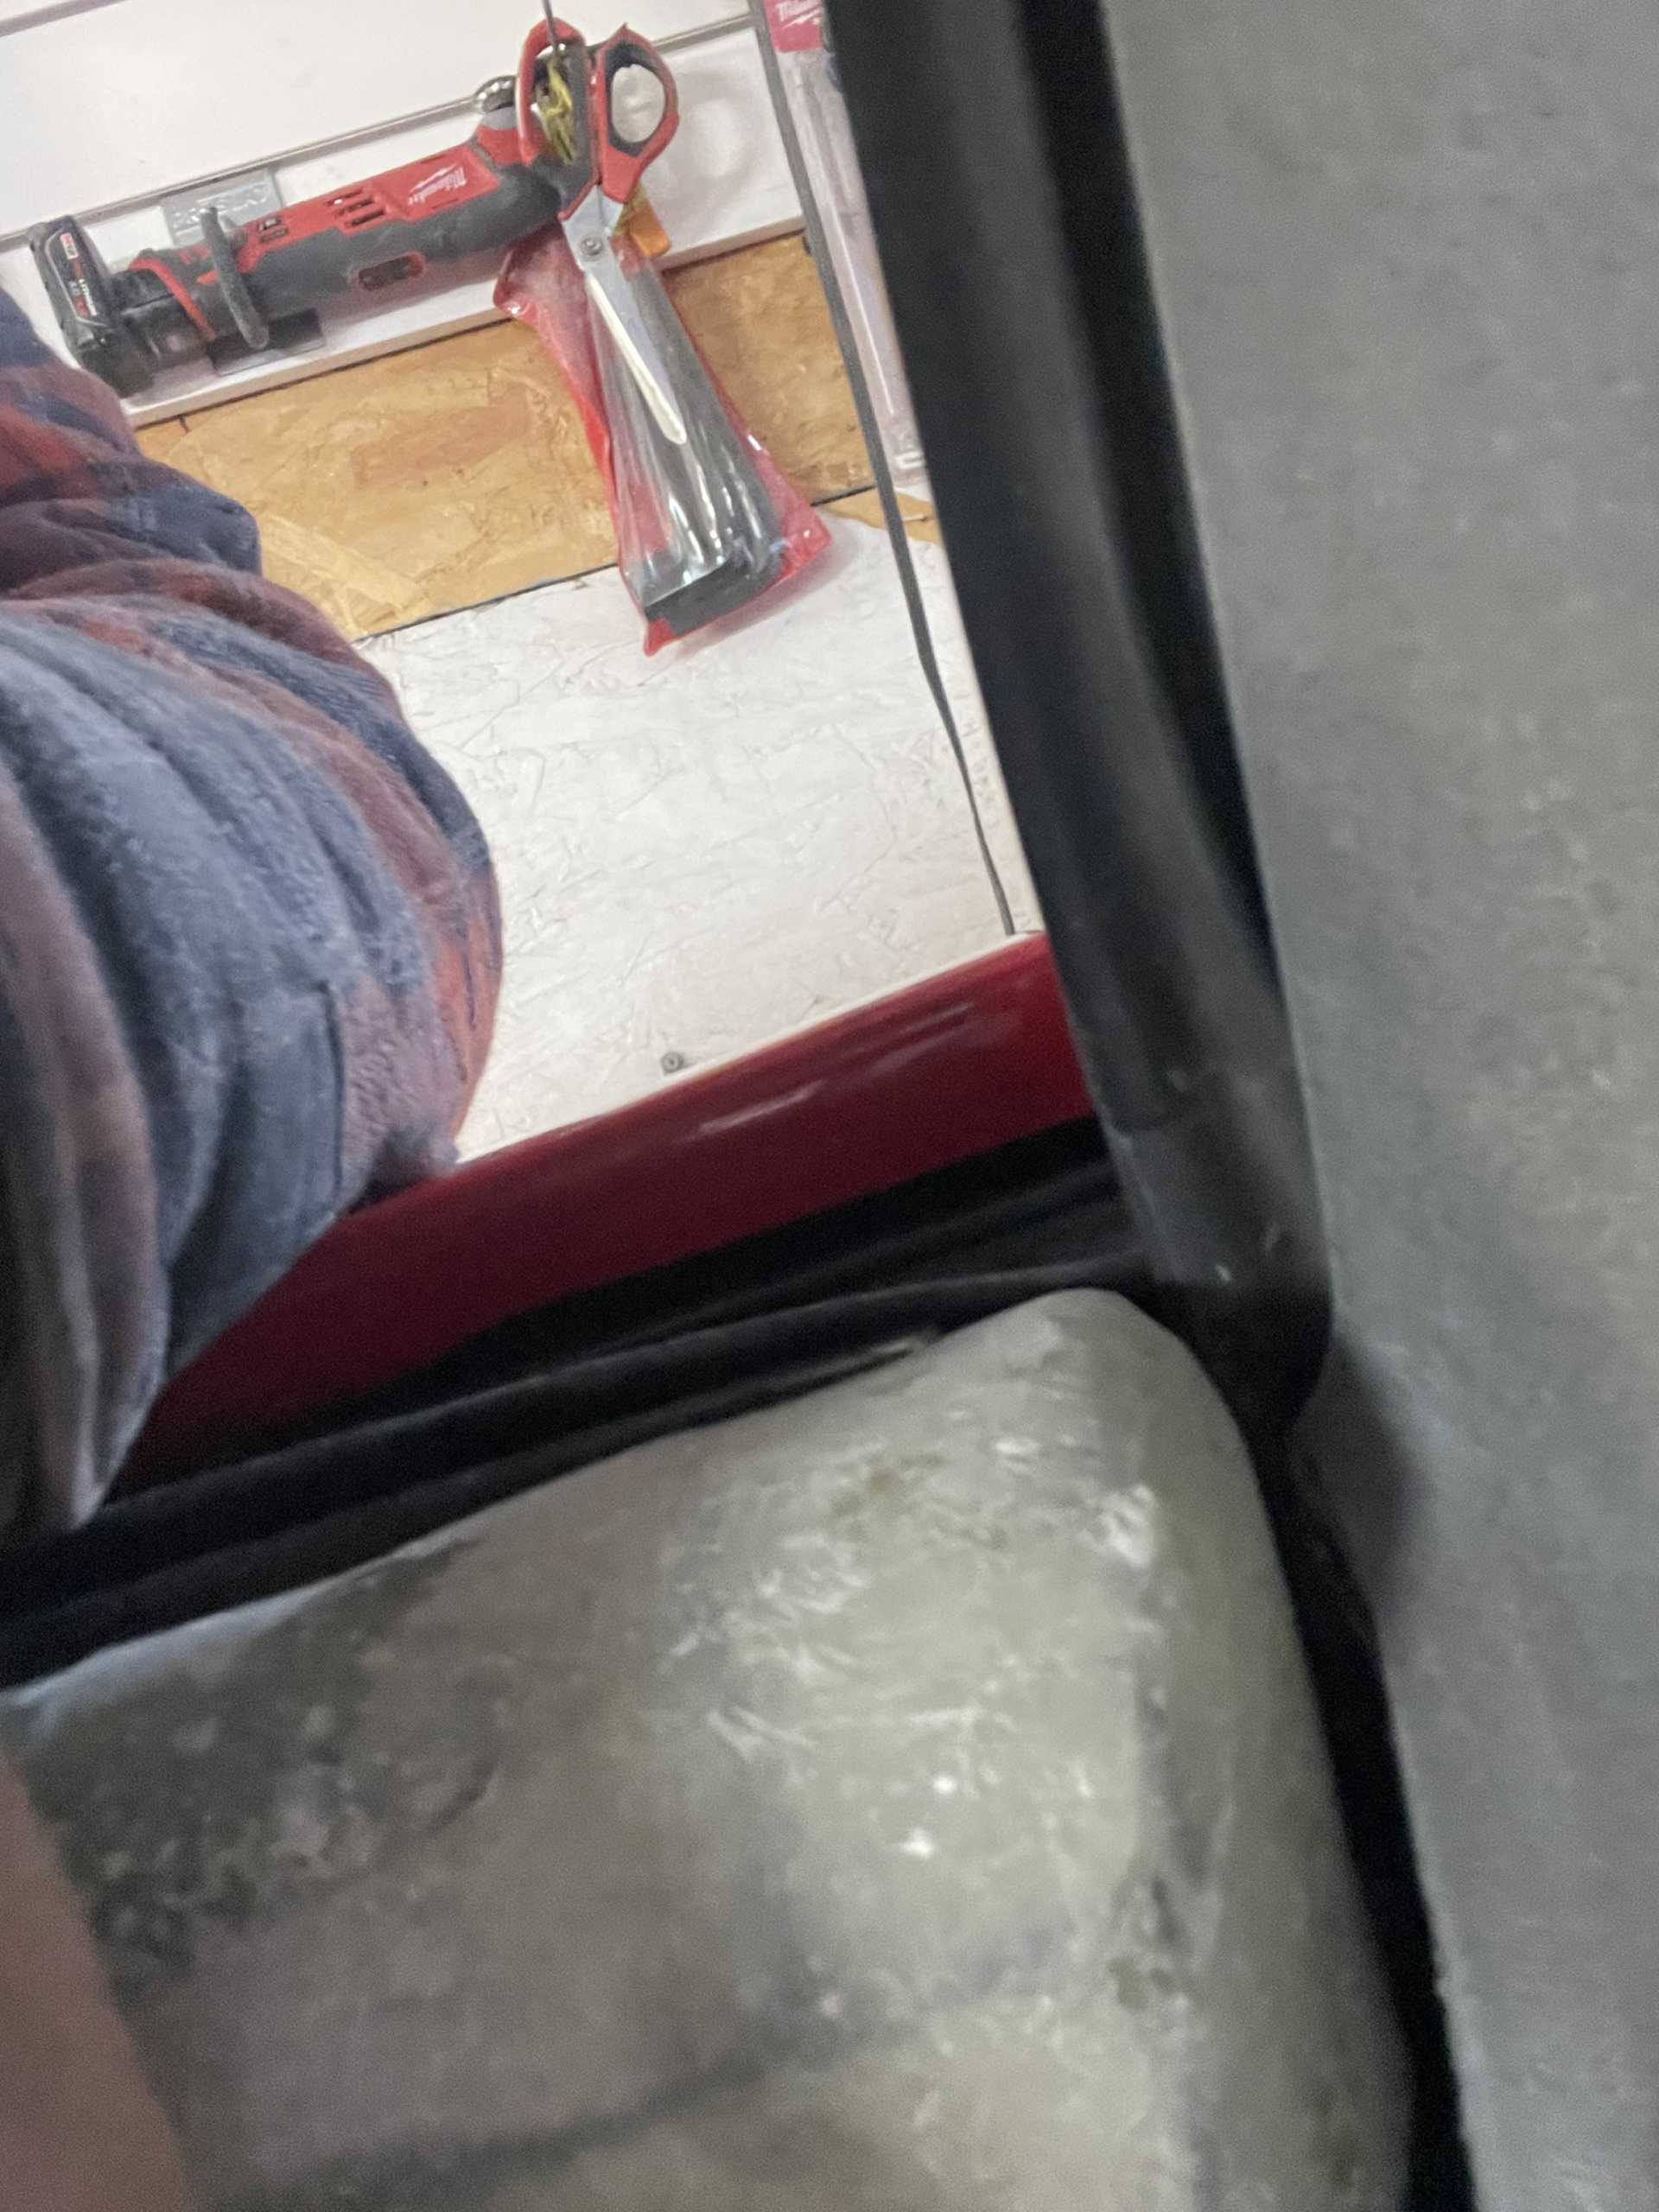
I then determined the curvature I needed and proceeded to make a buck. I found a piece of scrap plexiglass using a heat gun formed it over a piece of PVC pipe with the curvature I wanted
Then layed up a couple layer of glass then once it got to a leather stat not fully cured installed it onto the door card, and onto the door. By doing it this way ensures that the part will fit exactly.
Once it was fully cured next day the next step was to make the end caps. I used some of my foam and filled in the ends sanded to the shape I needed and glassed over the foam and let cure.
I then cleaned them up and fit them to the door
Then it was time to modify the “B” pillar to fit the door card
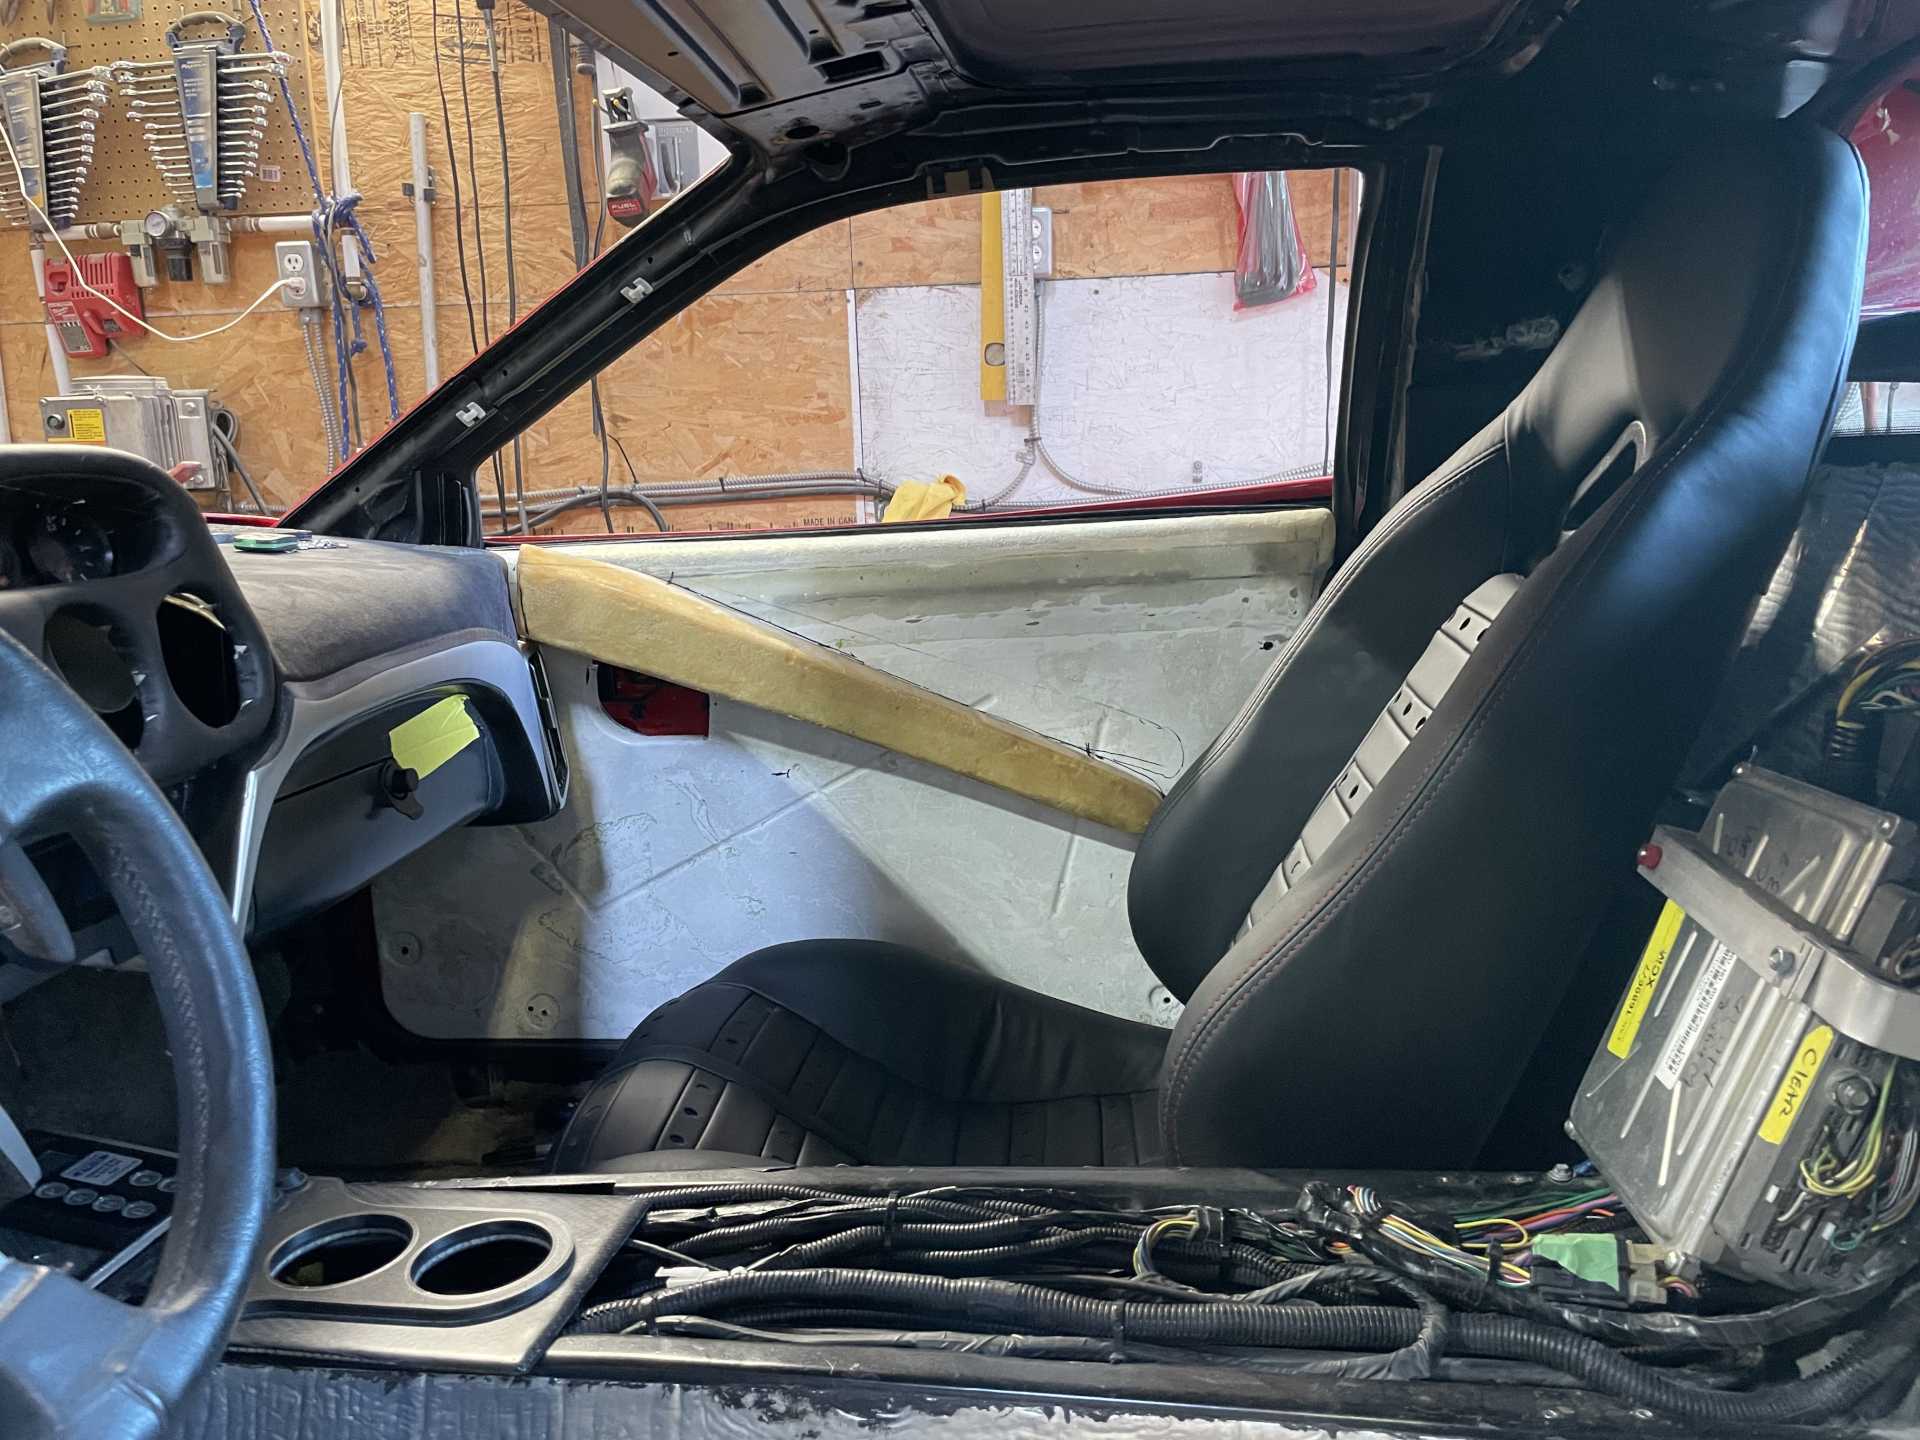
So the next step will be to install the dash so I can determine where the armrest will be attached …….
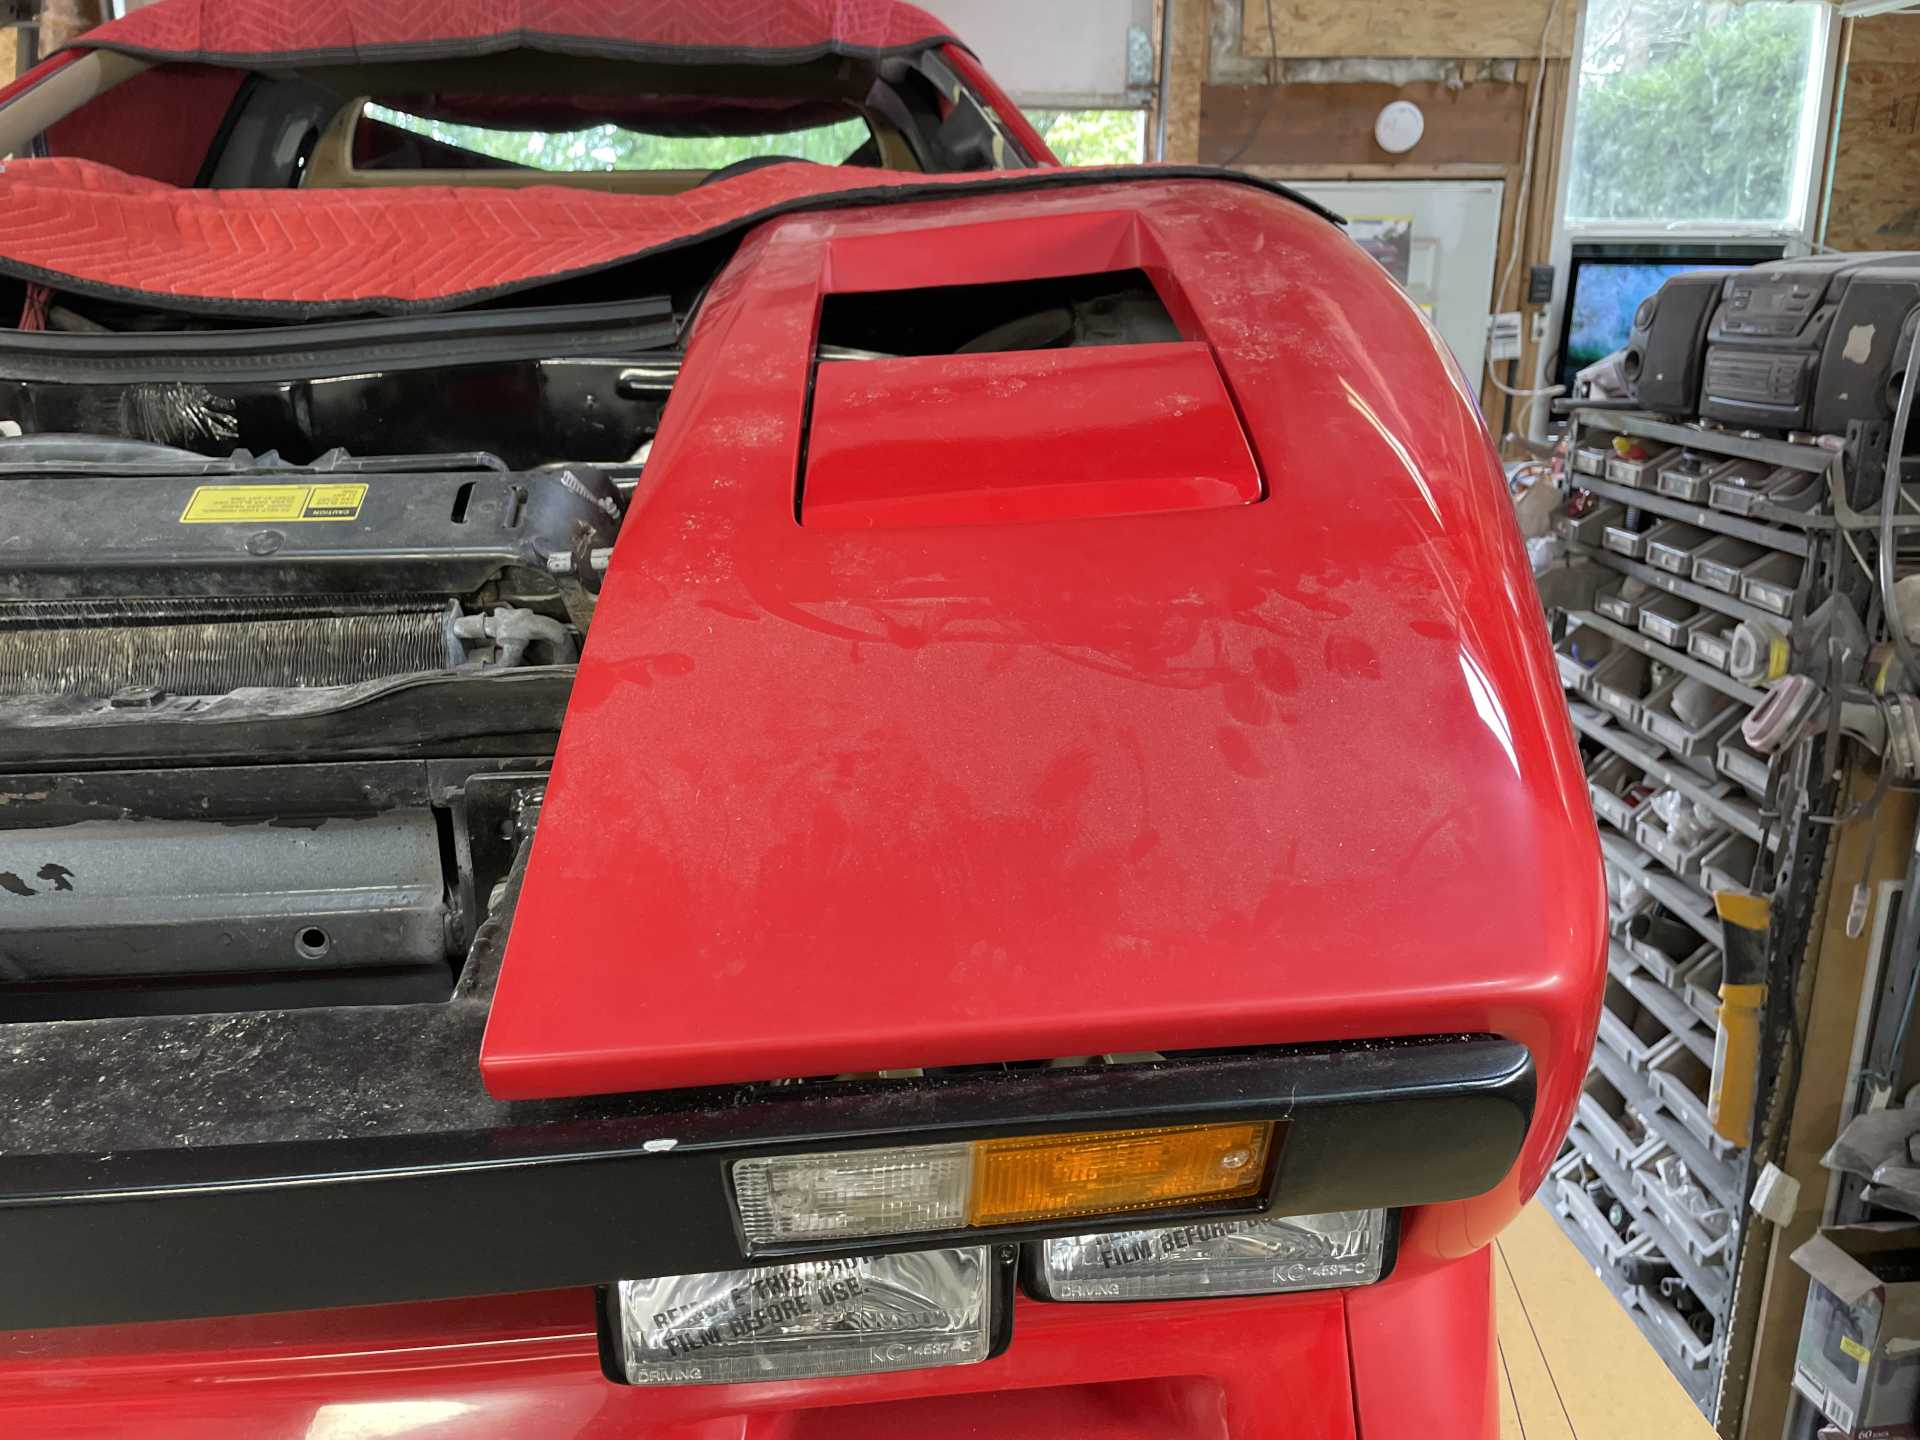
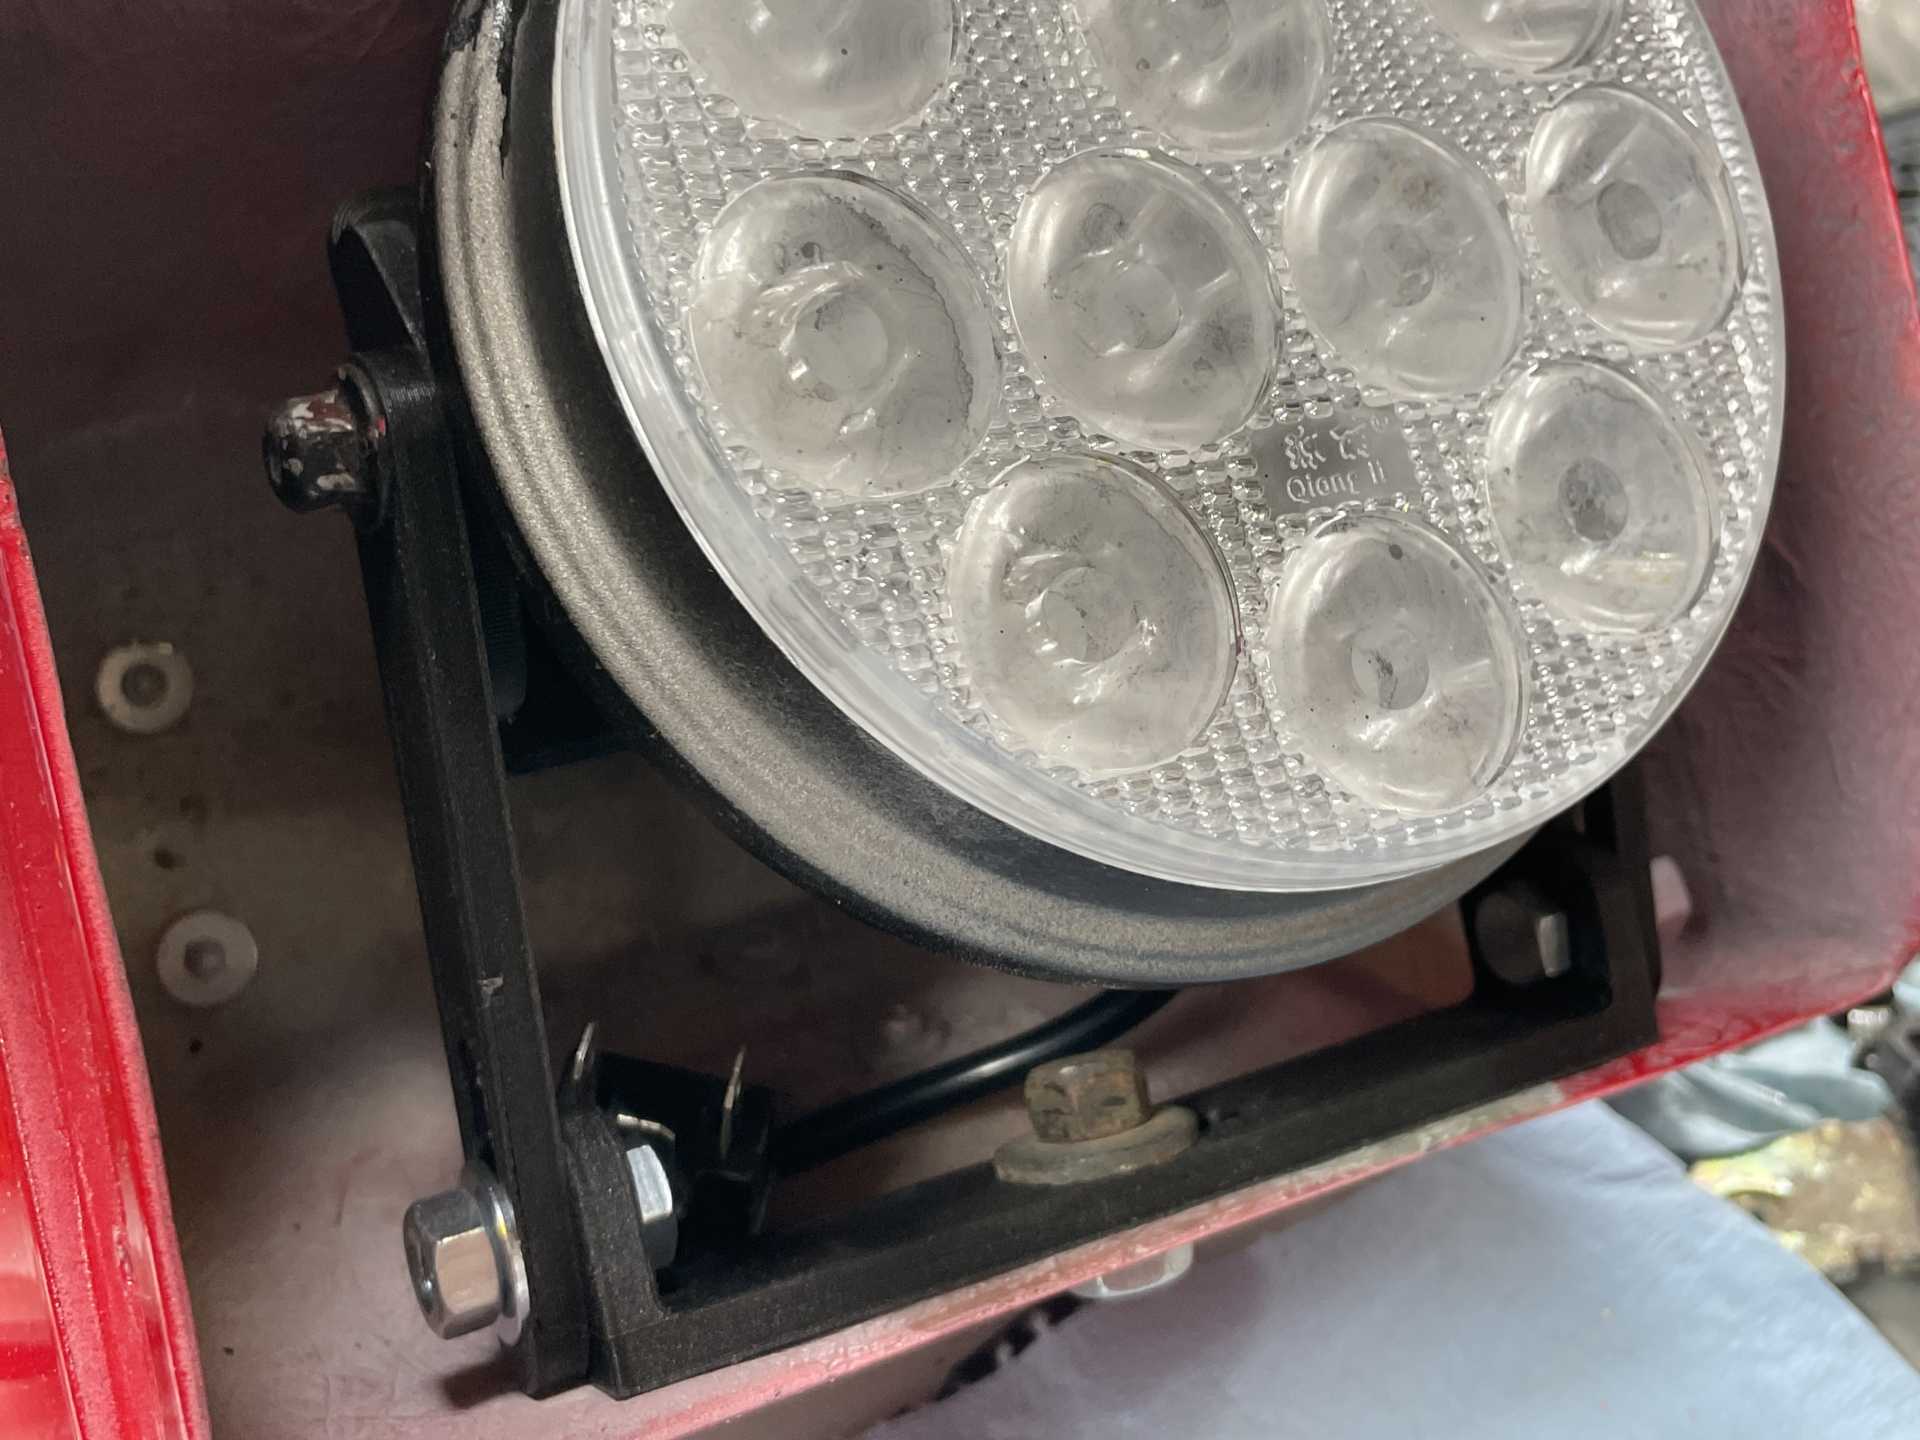
I also got the headlight buckets installed for a final check
Awesome work, it inspires me how you just keep making progress, working on it whenever you can. I get stuck in the trap of wanting to do nothing but make massive progress on the car and neglecting it if I am busy, even though I could fit in a few hours here or there.
Wayne, this is beyond belief! Trust you know I’m stealing all your great ideas for my Aldino convertible project. Right now I’m tired of removing four layers of old paint from the body panels. Looking to getting the car to the body paint shop later this spring. Wife is really tired of the seats stored in the bedroom! Dana
Thanks guys I really appreciate the positive support and comments.😁
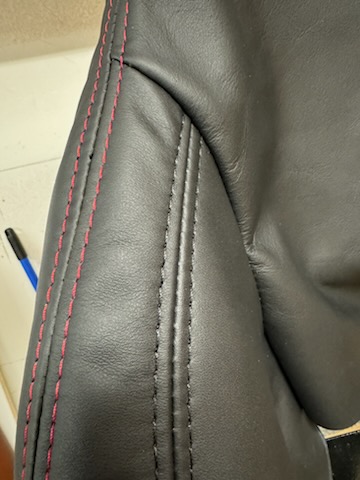
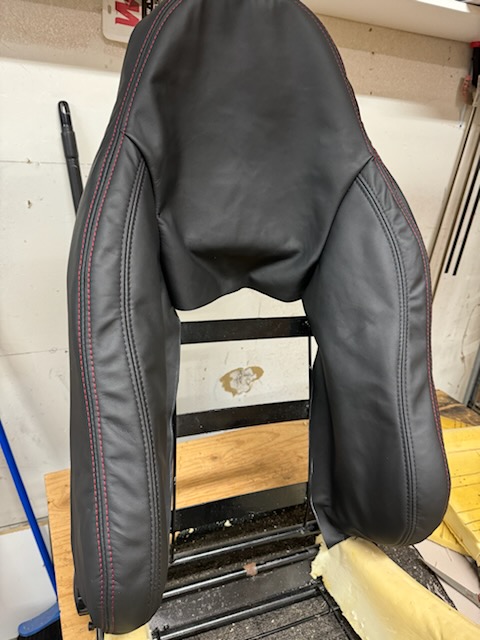
So I got my first seat back for upholstery and have to say it is worth the wait🥰
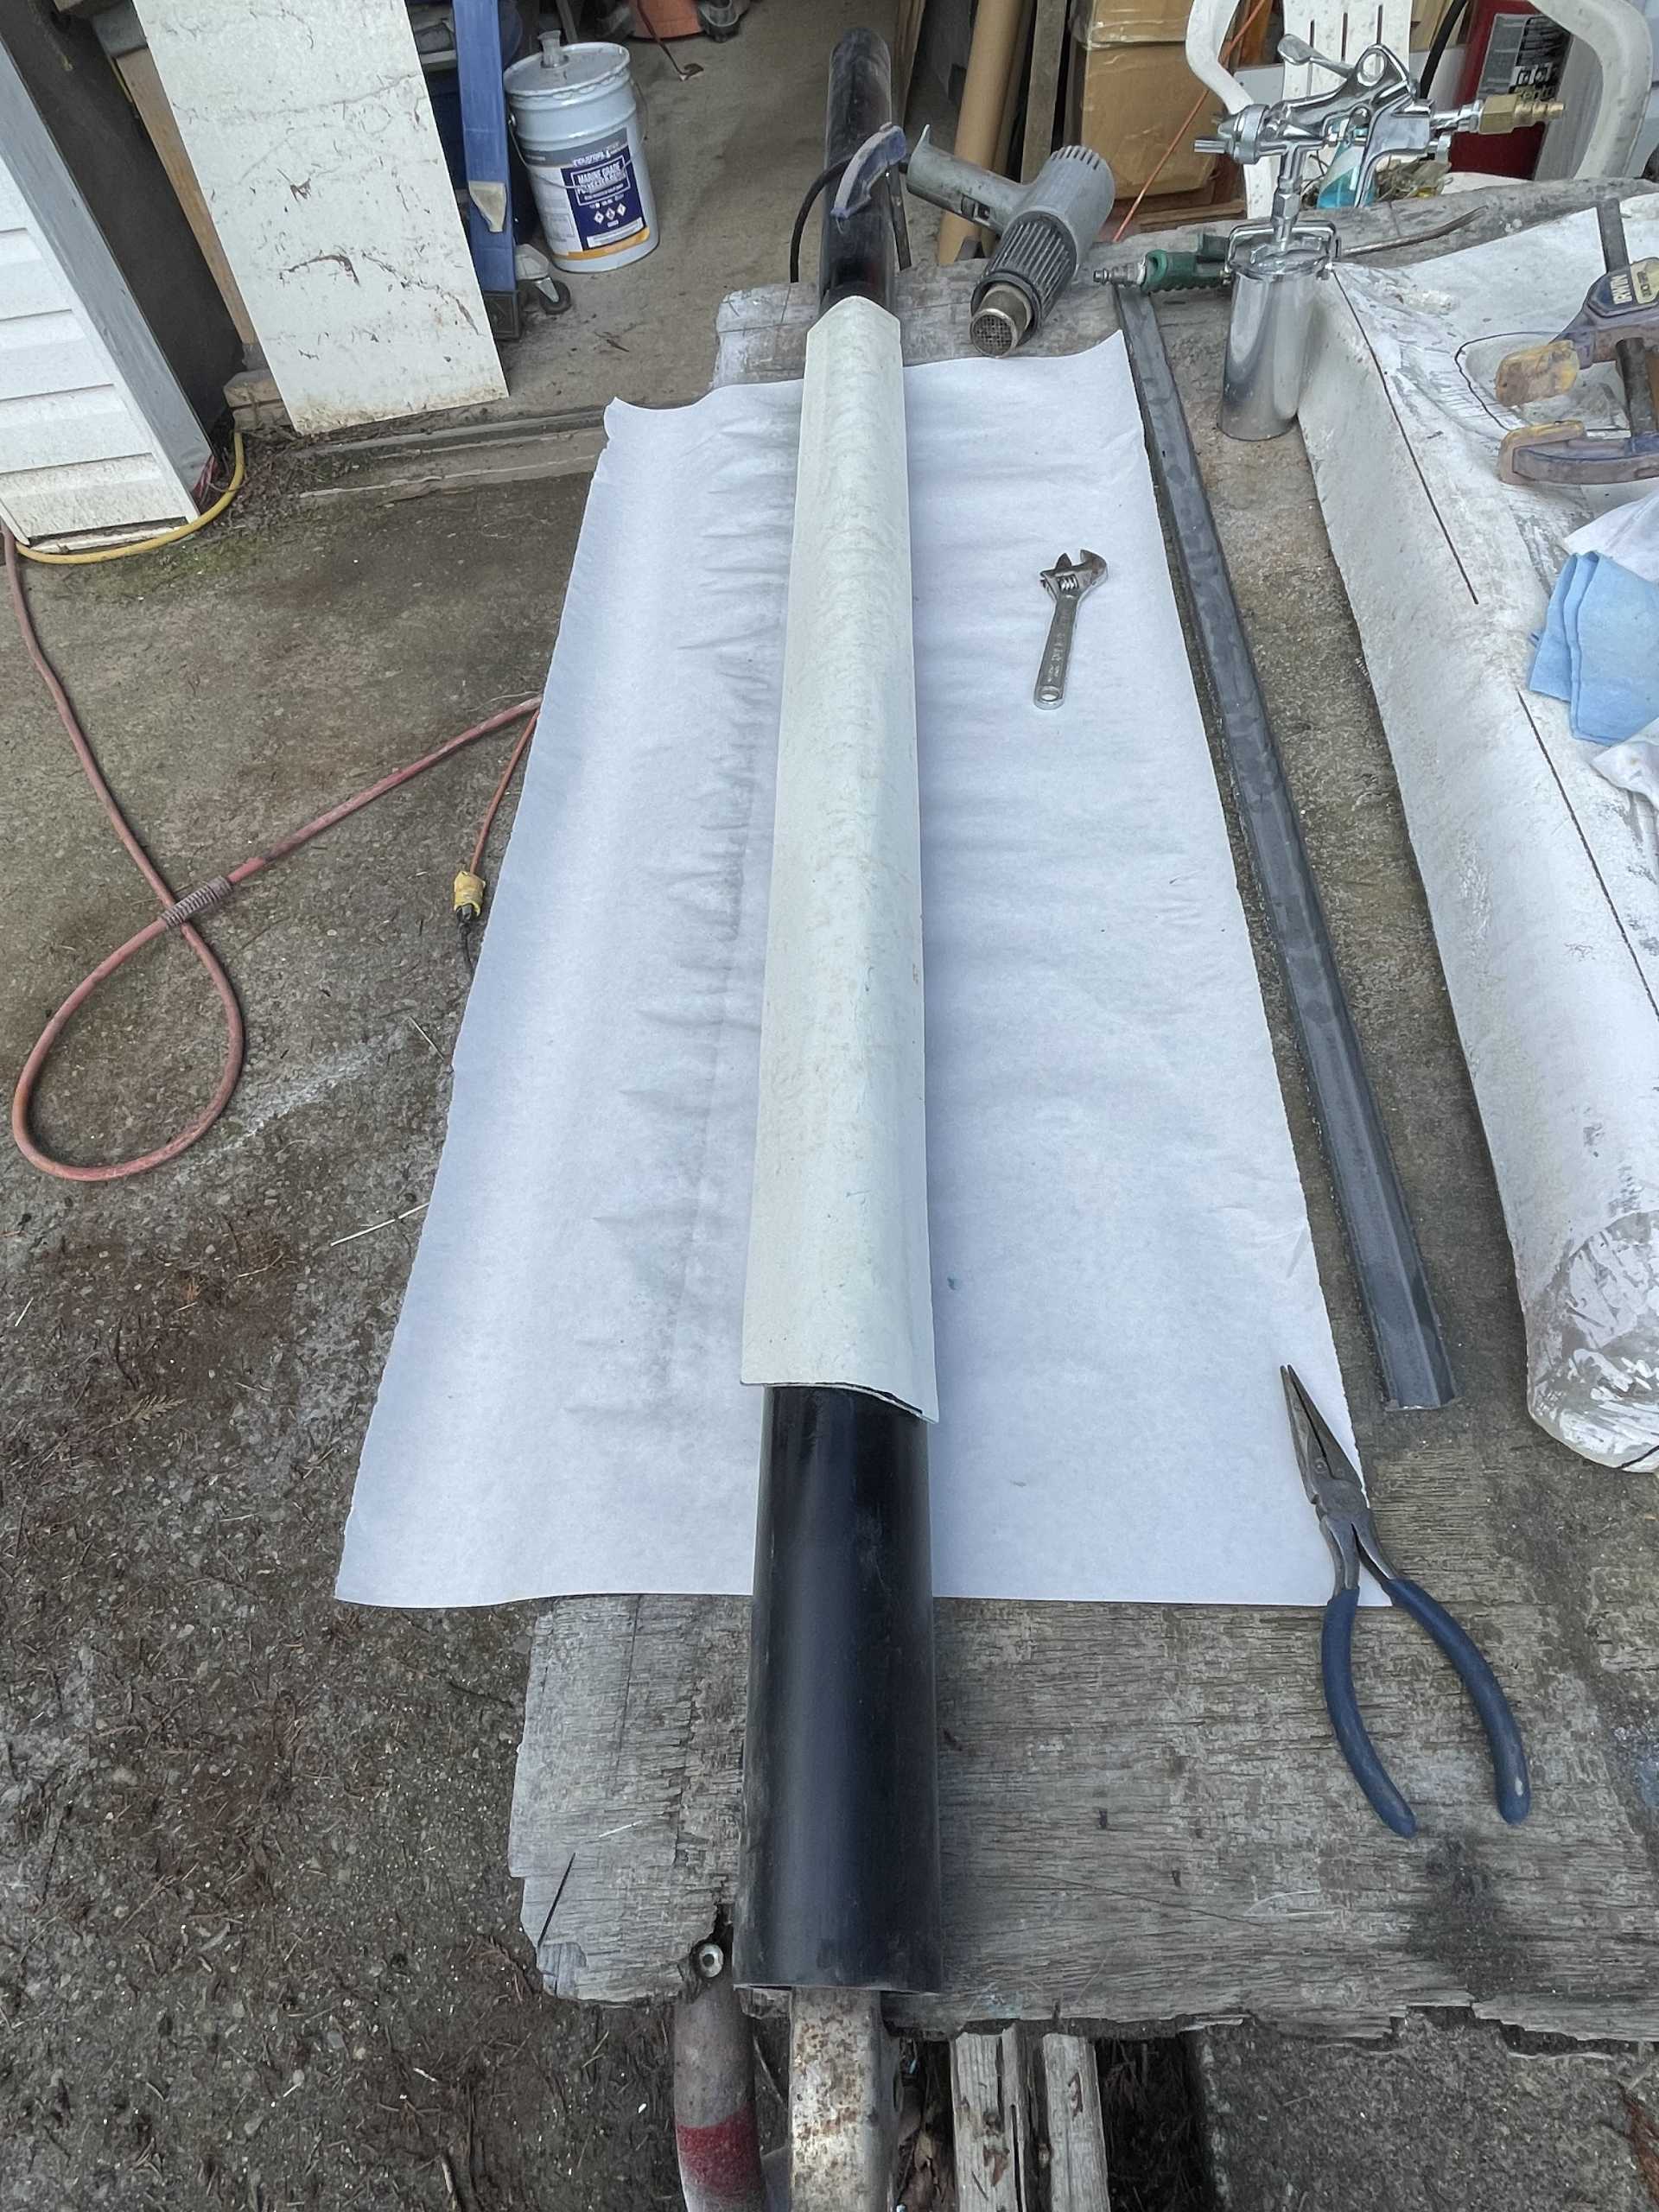
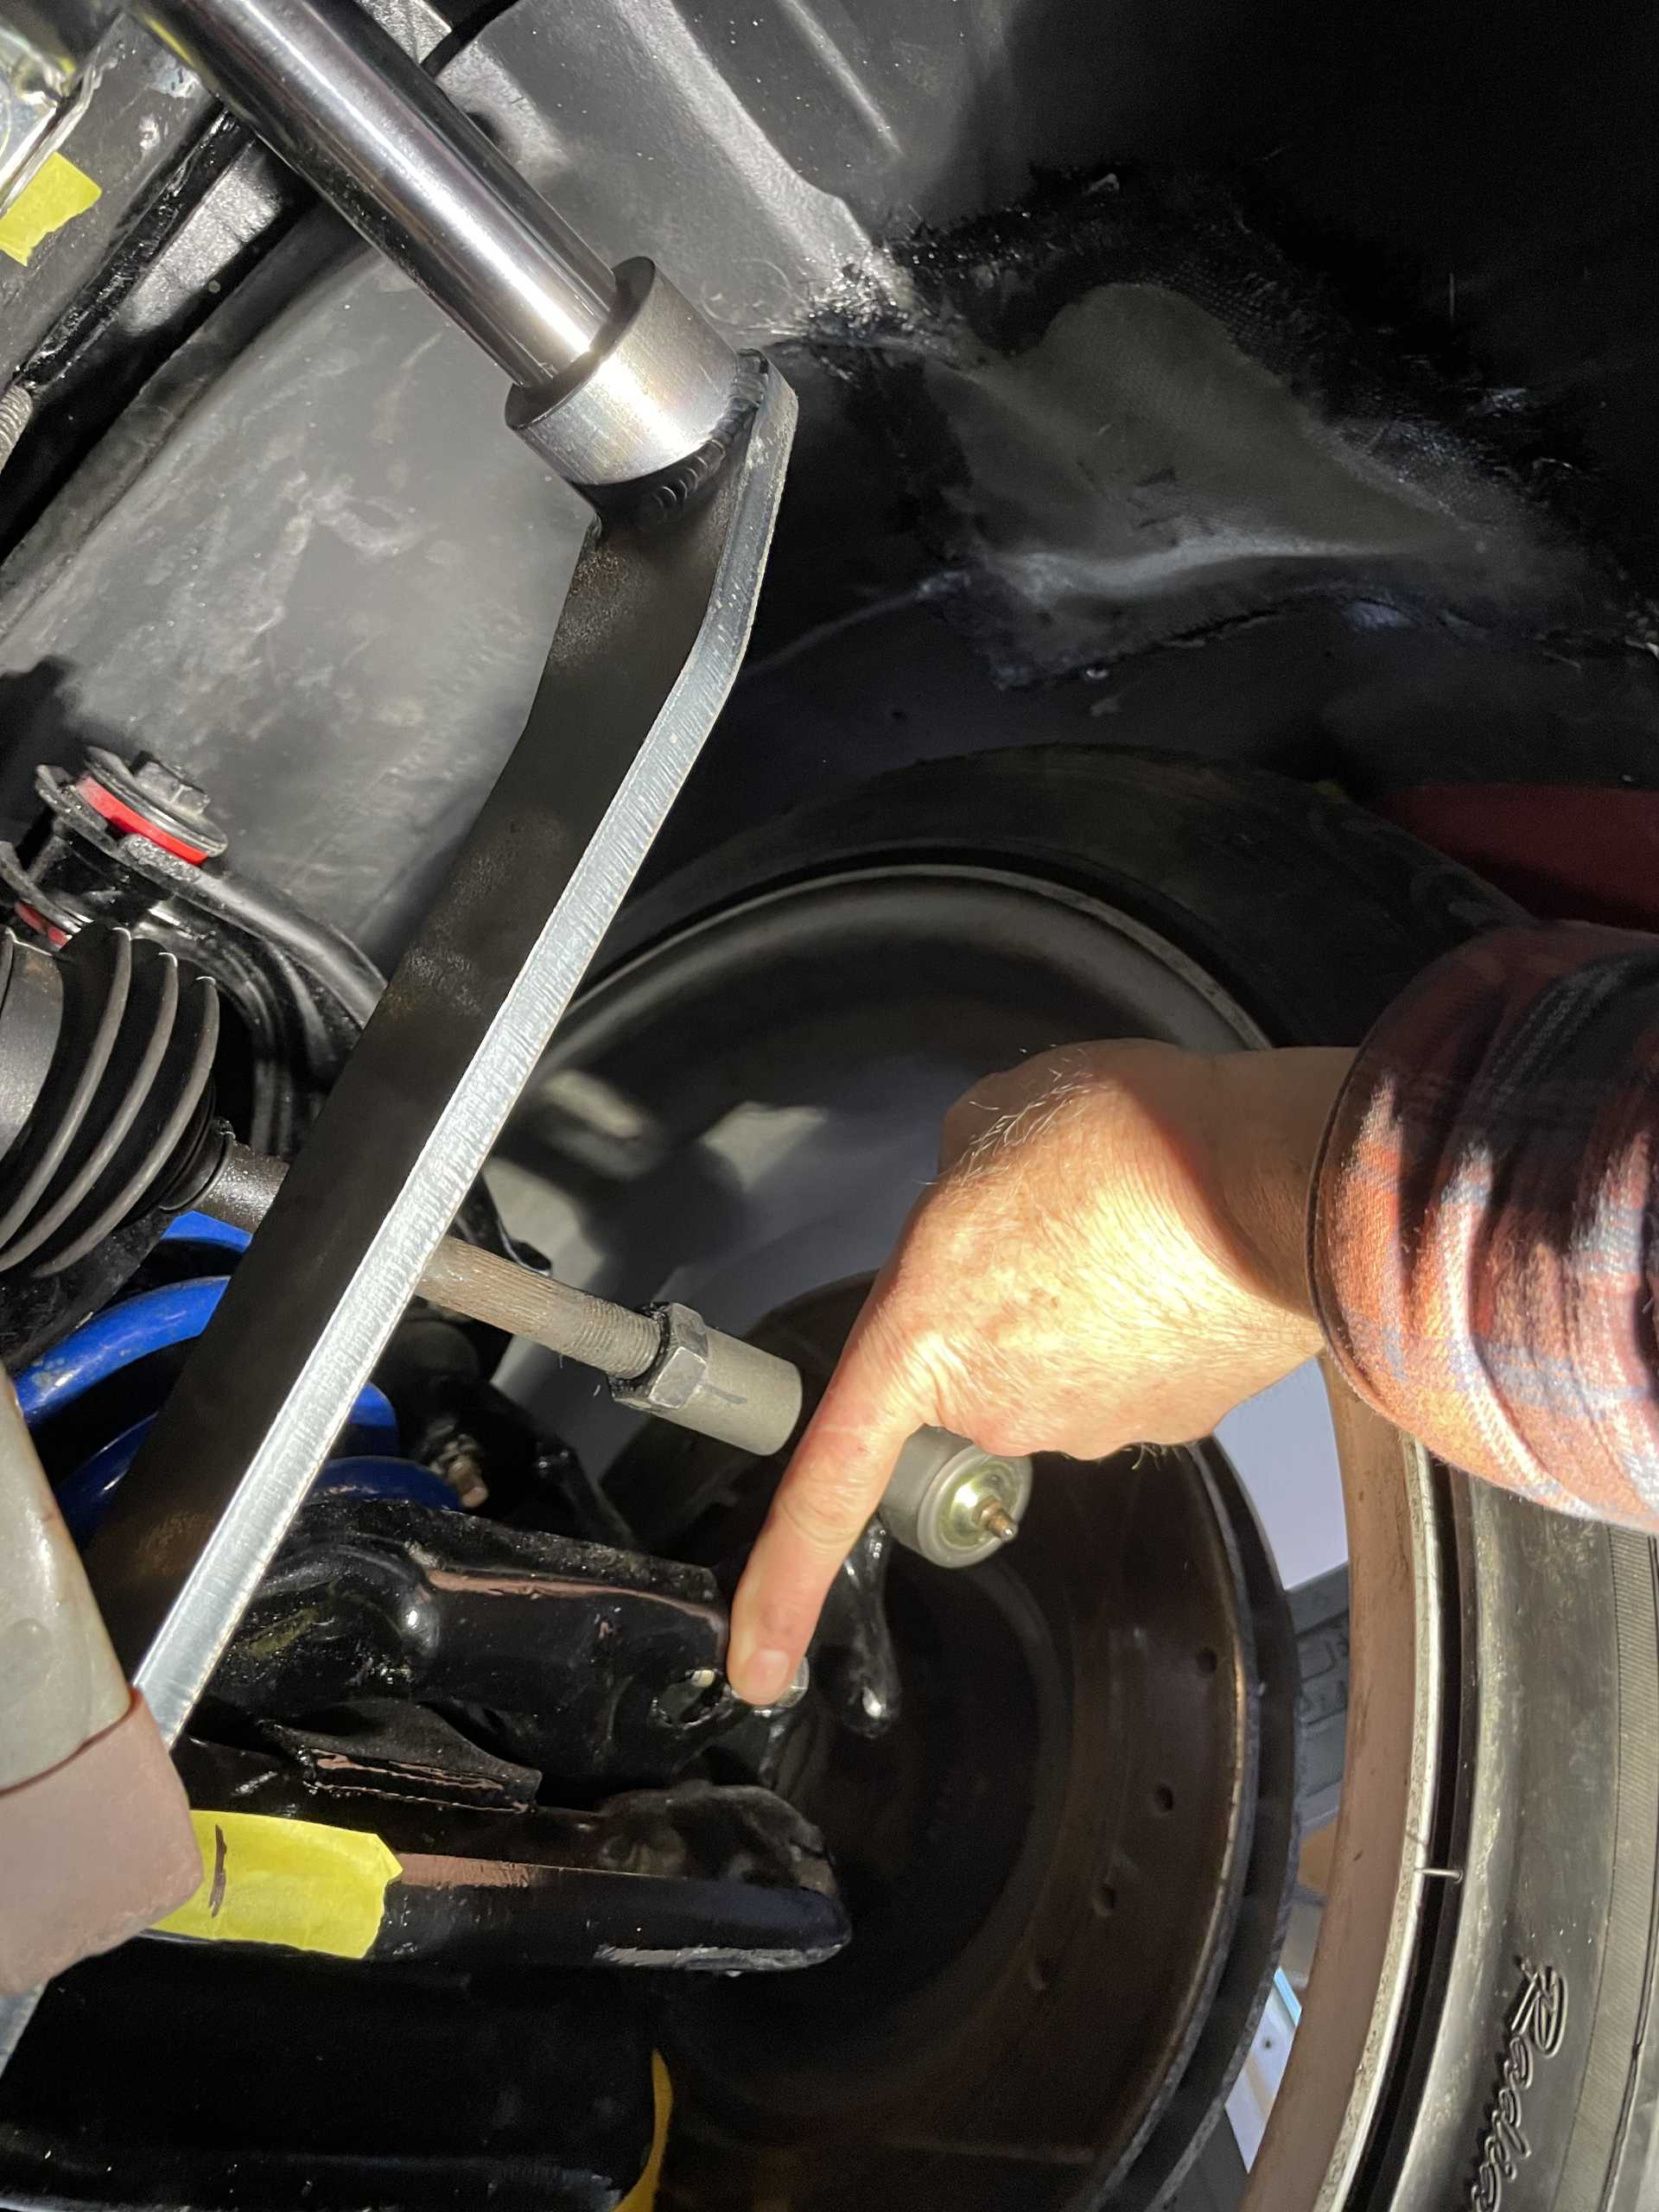
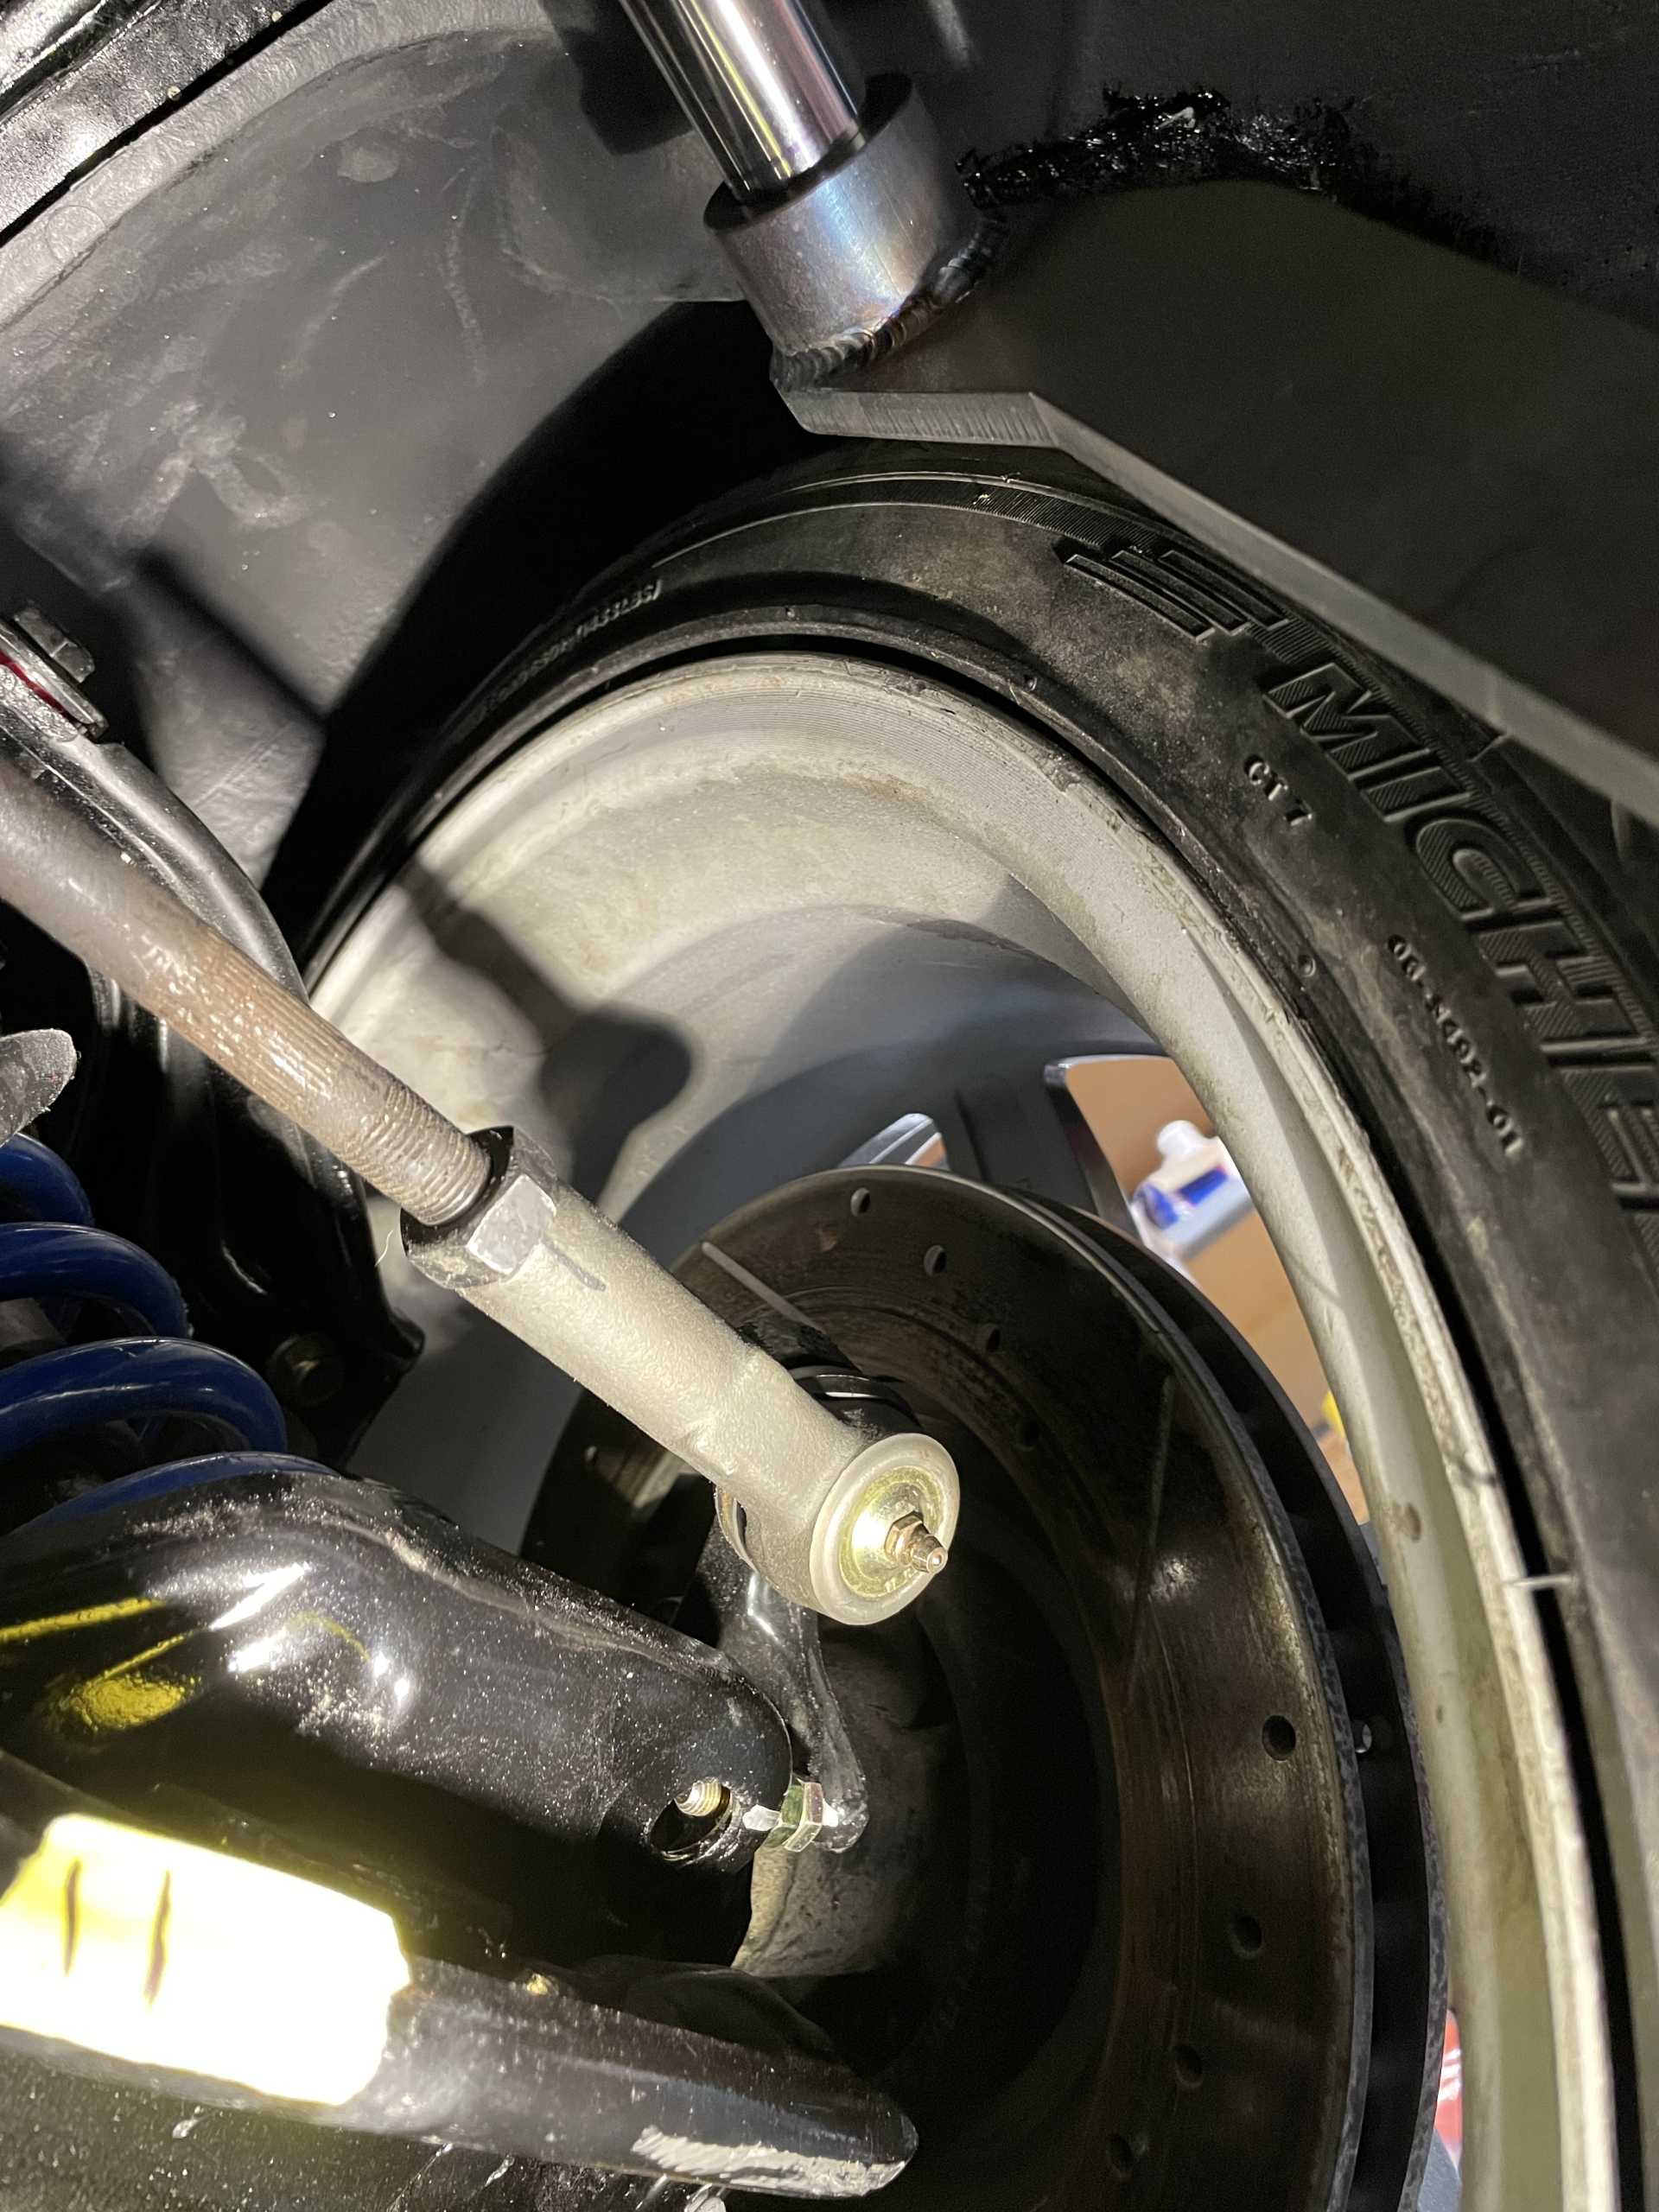
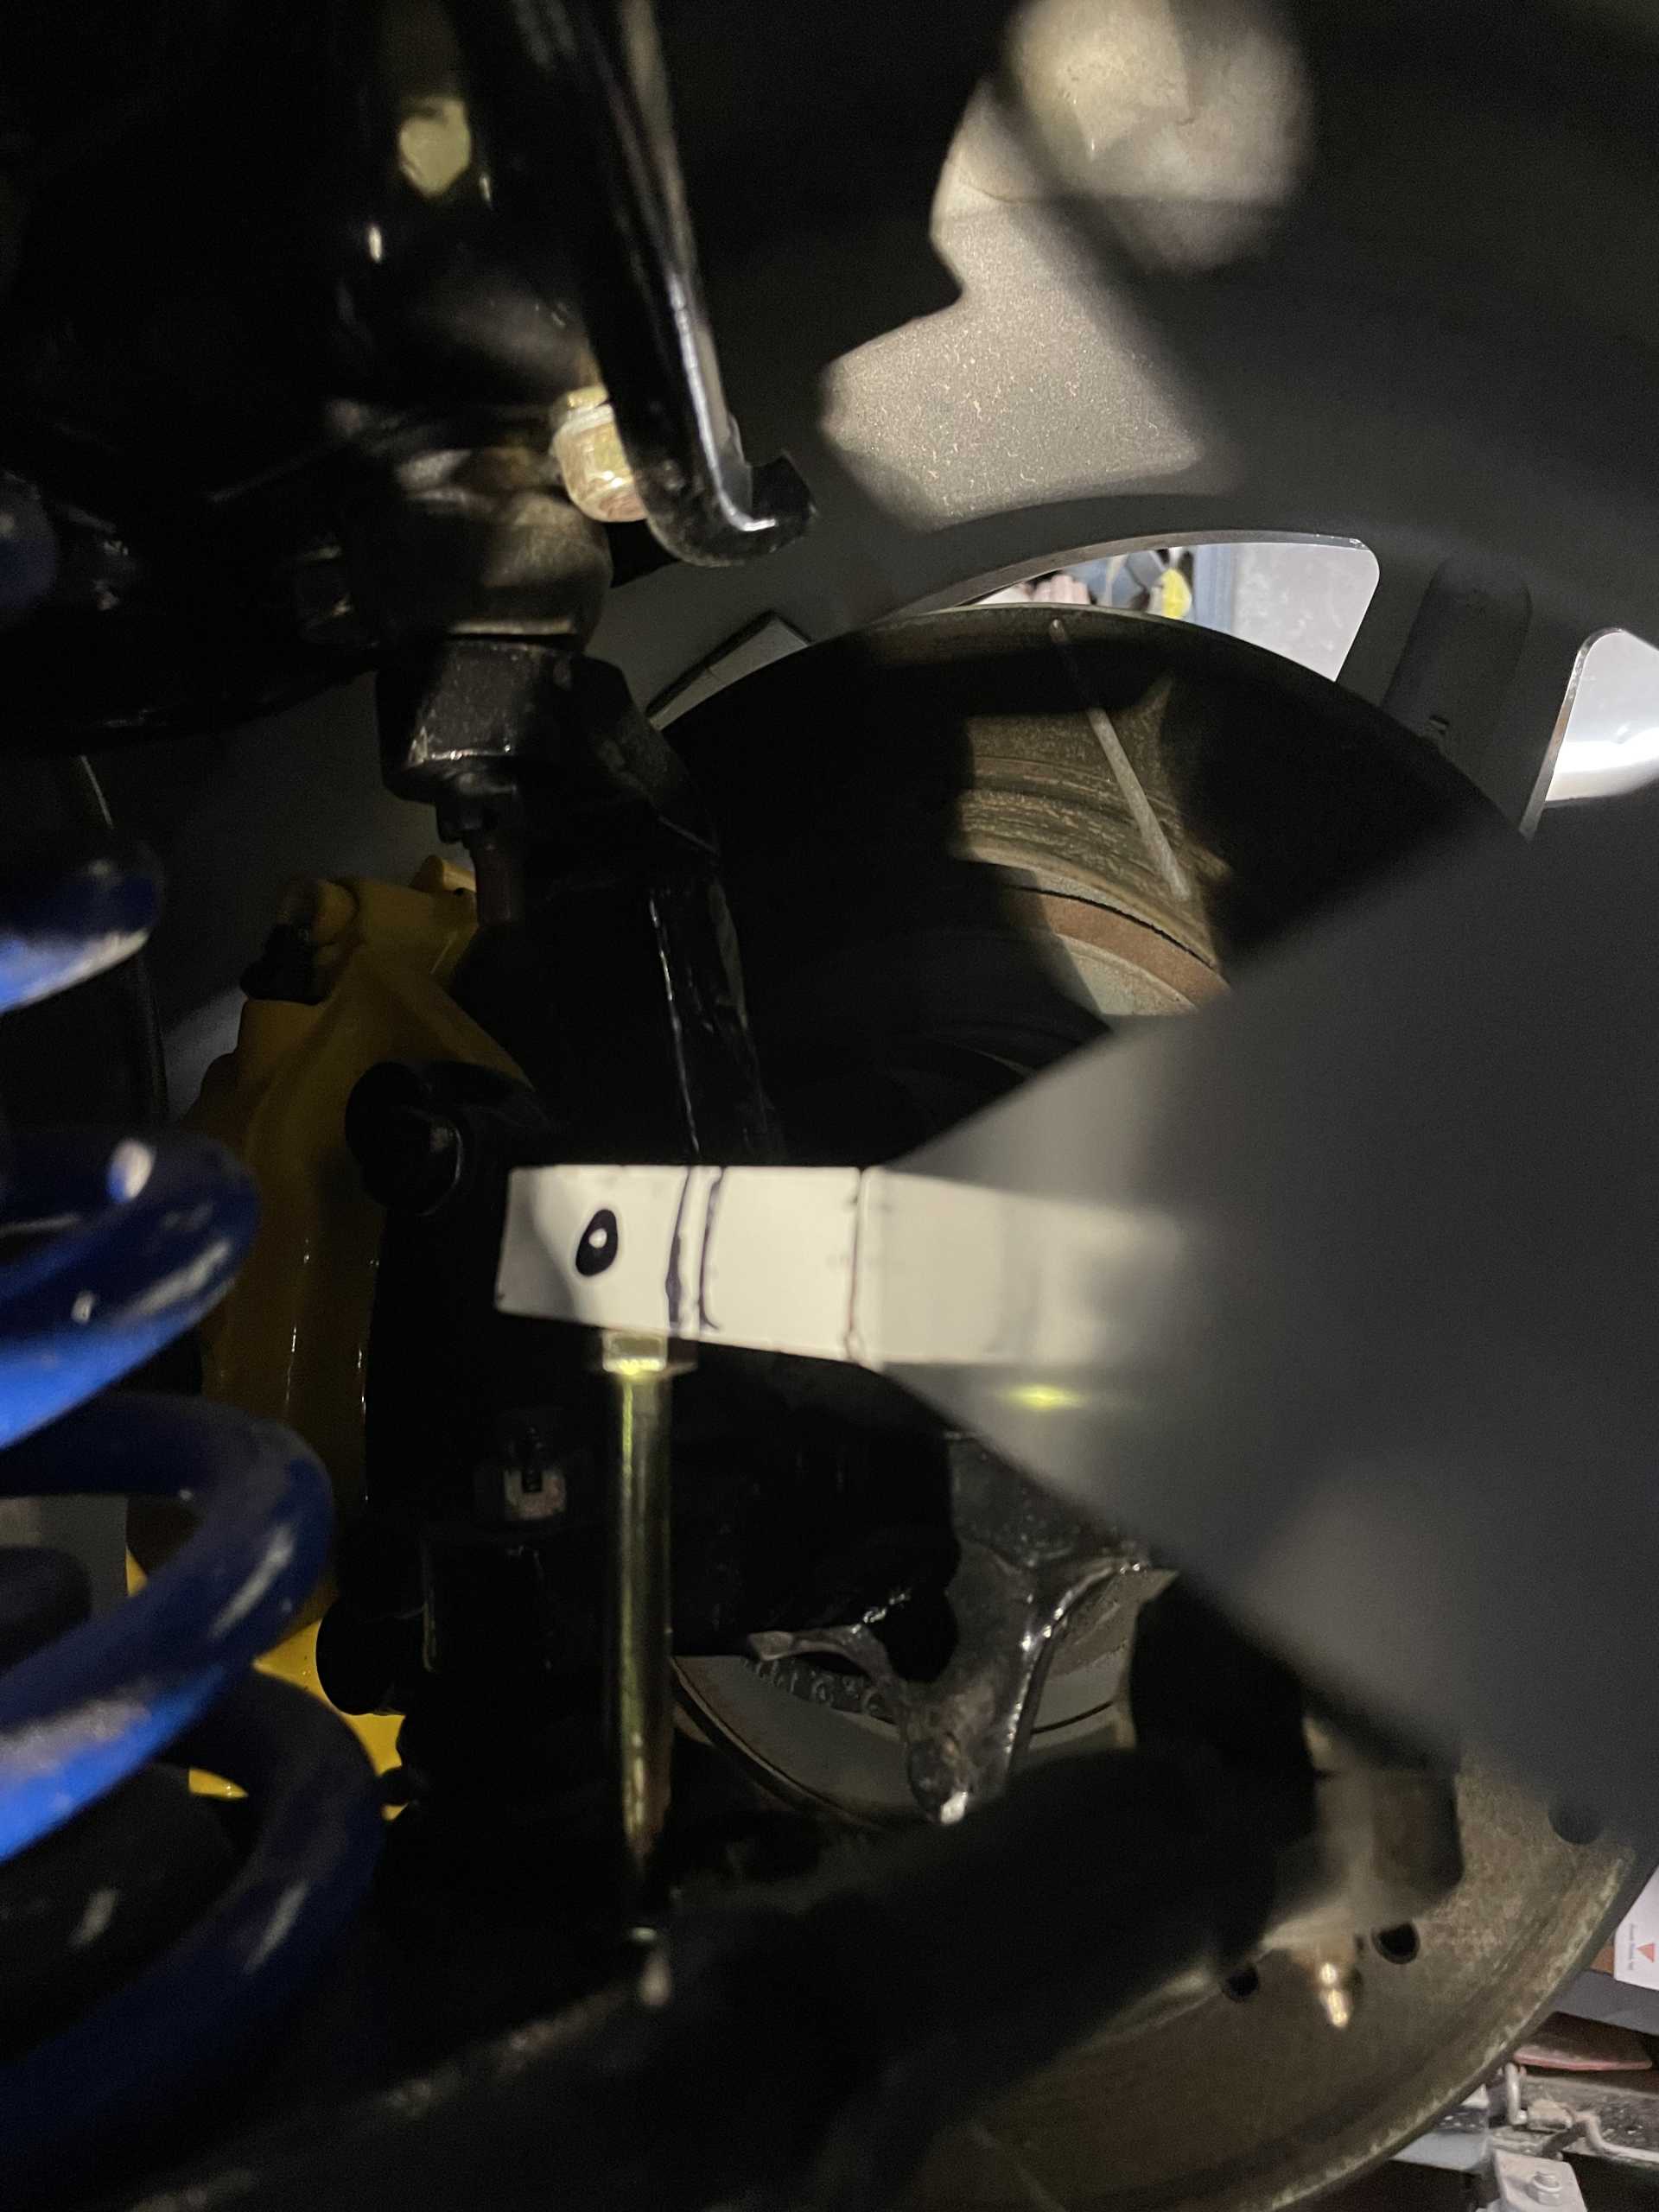
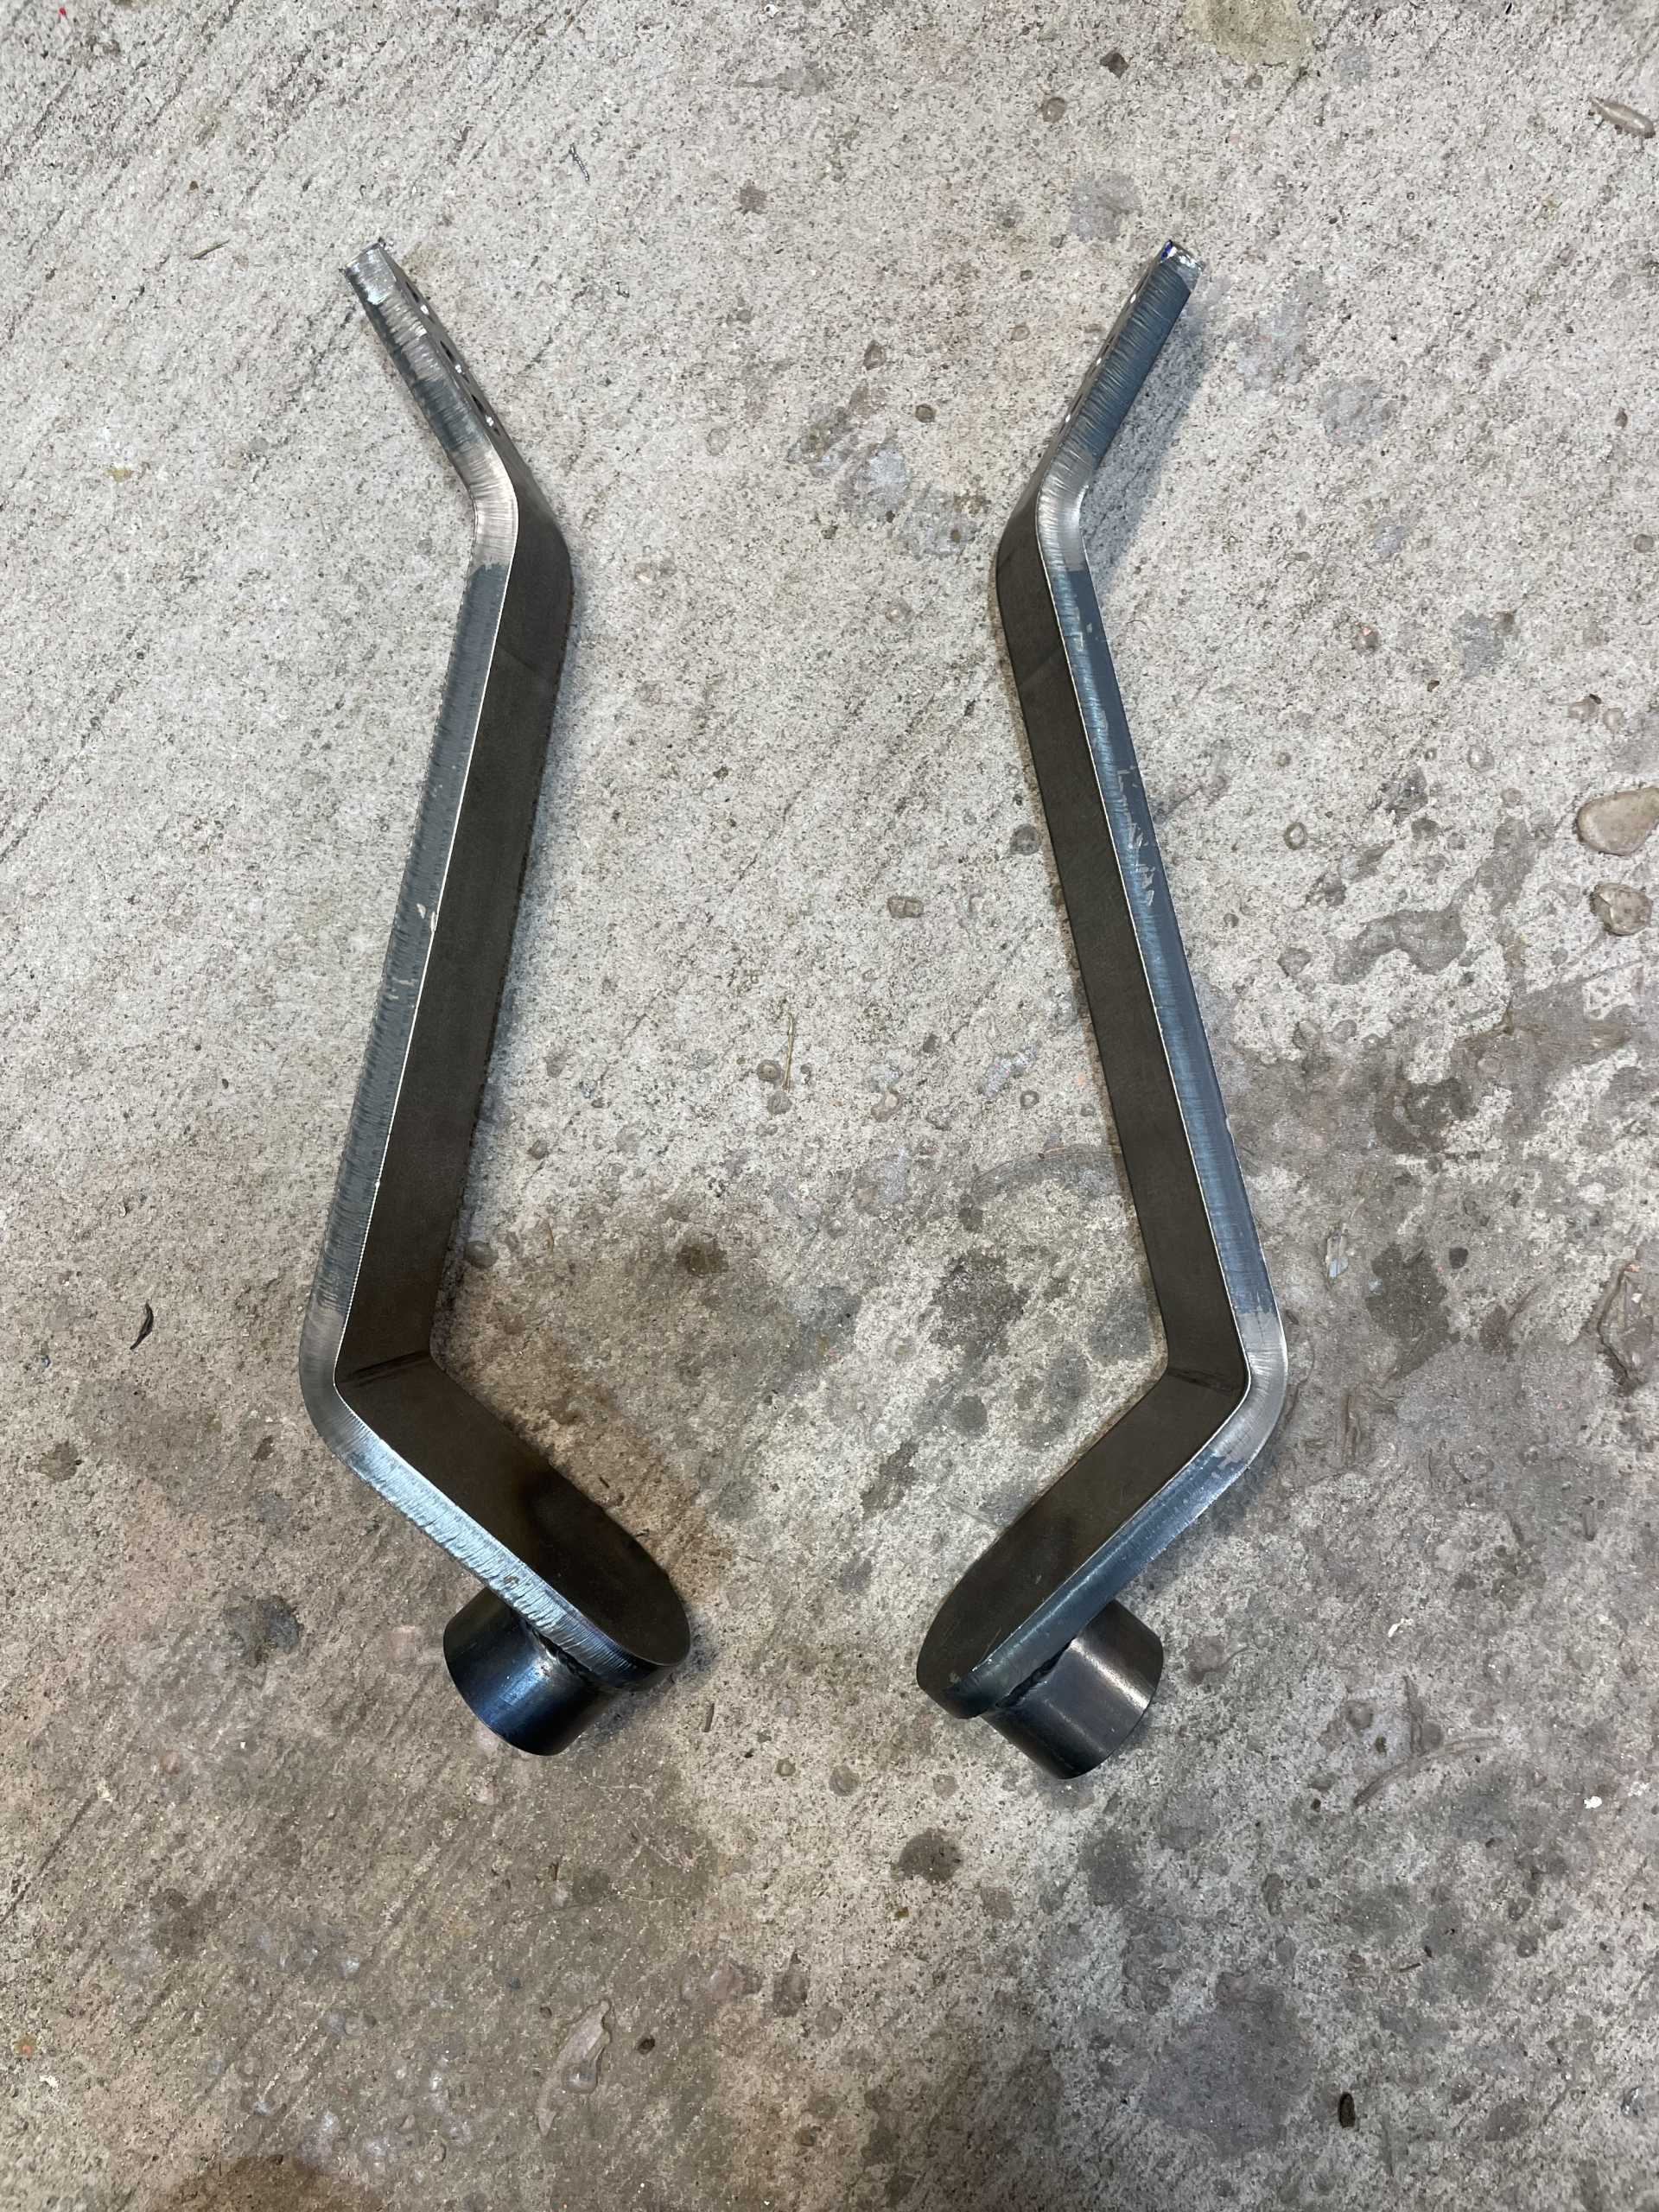
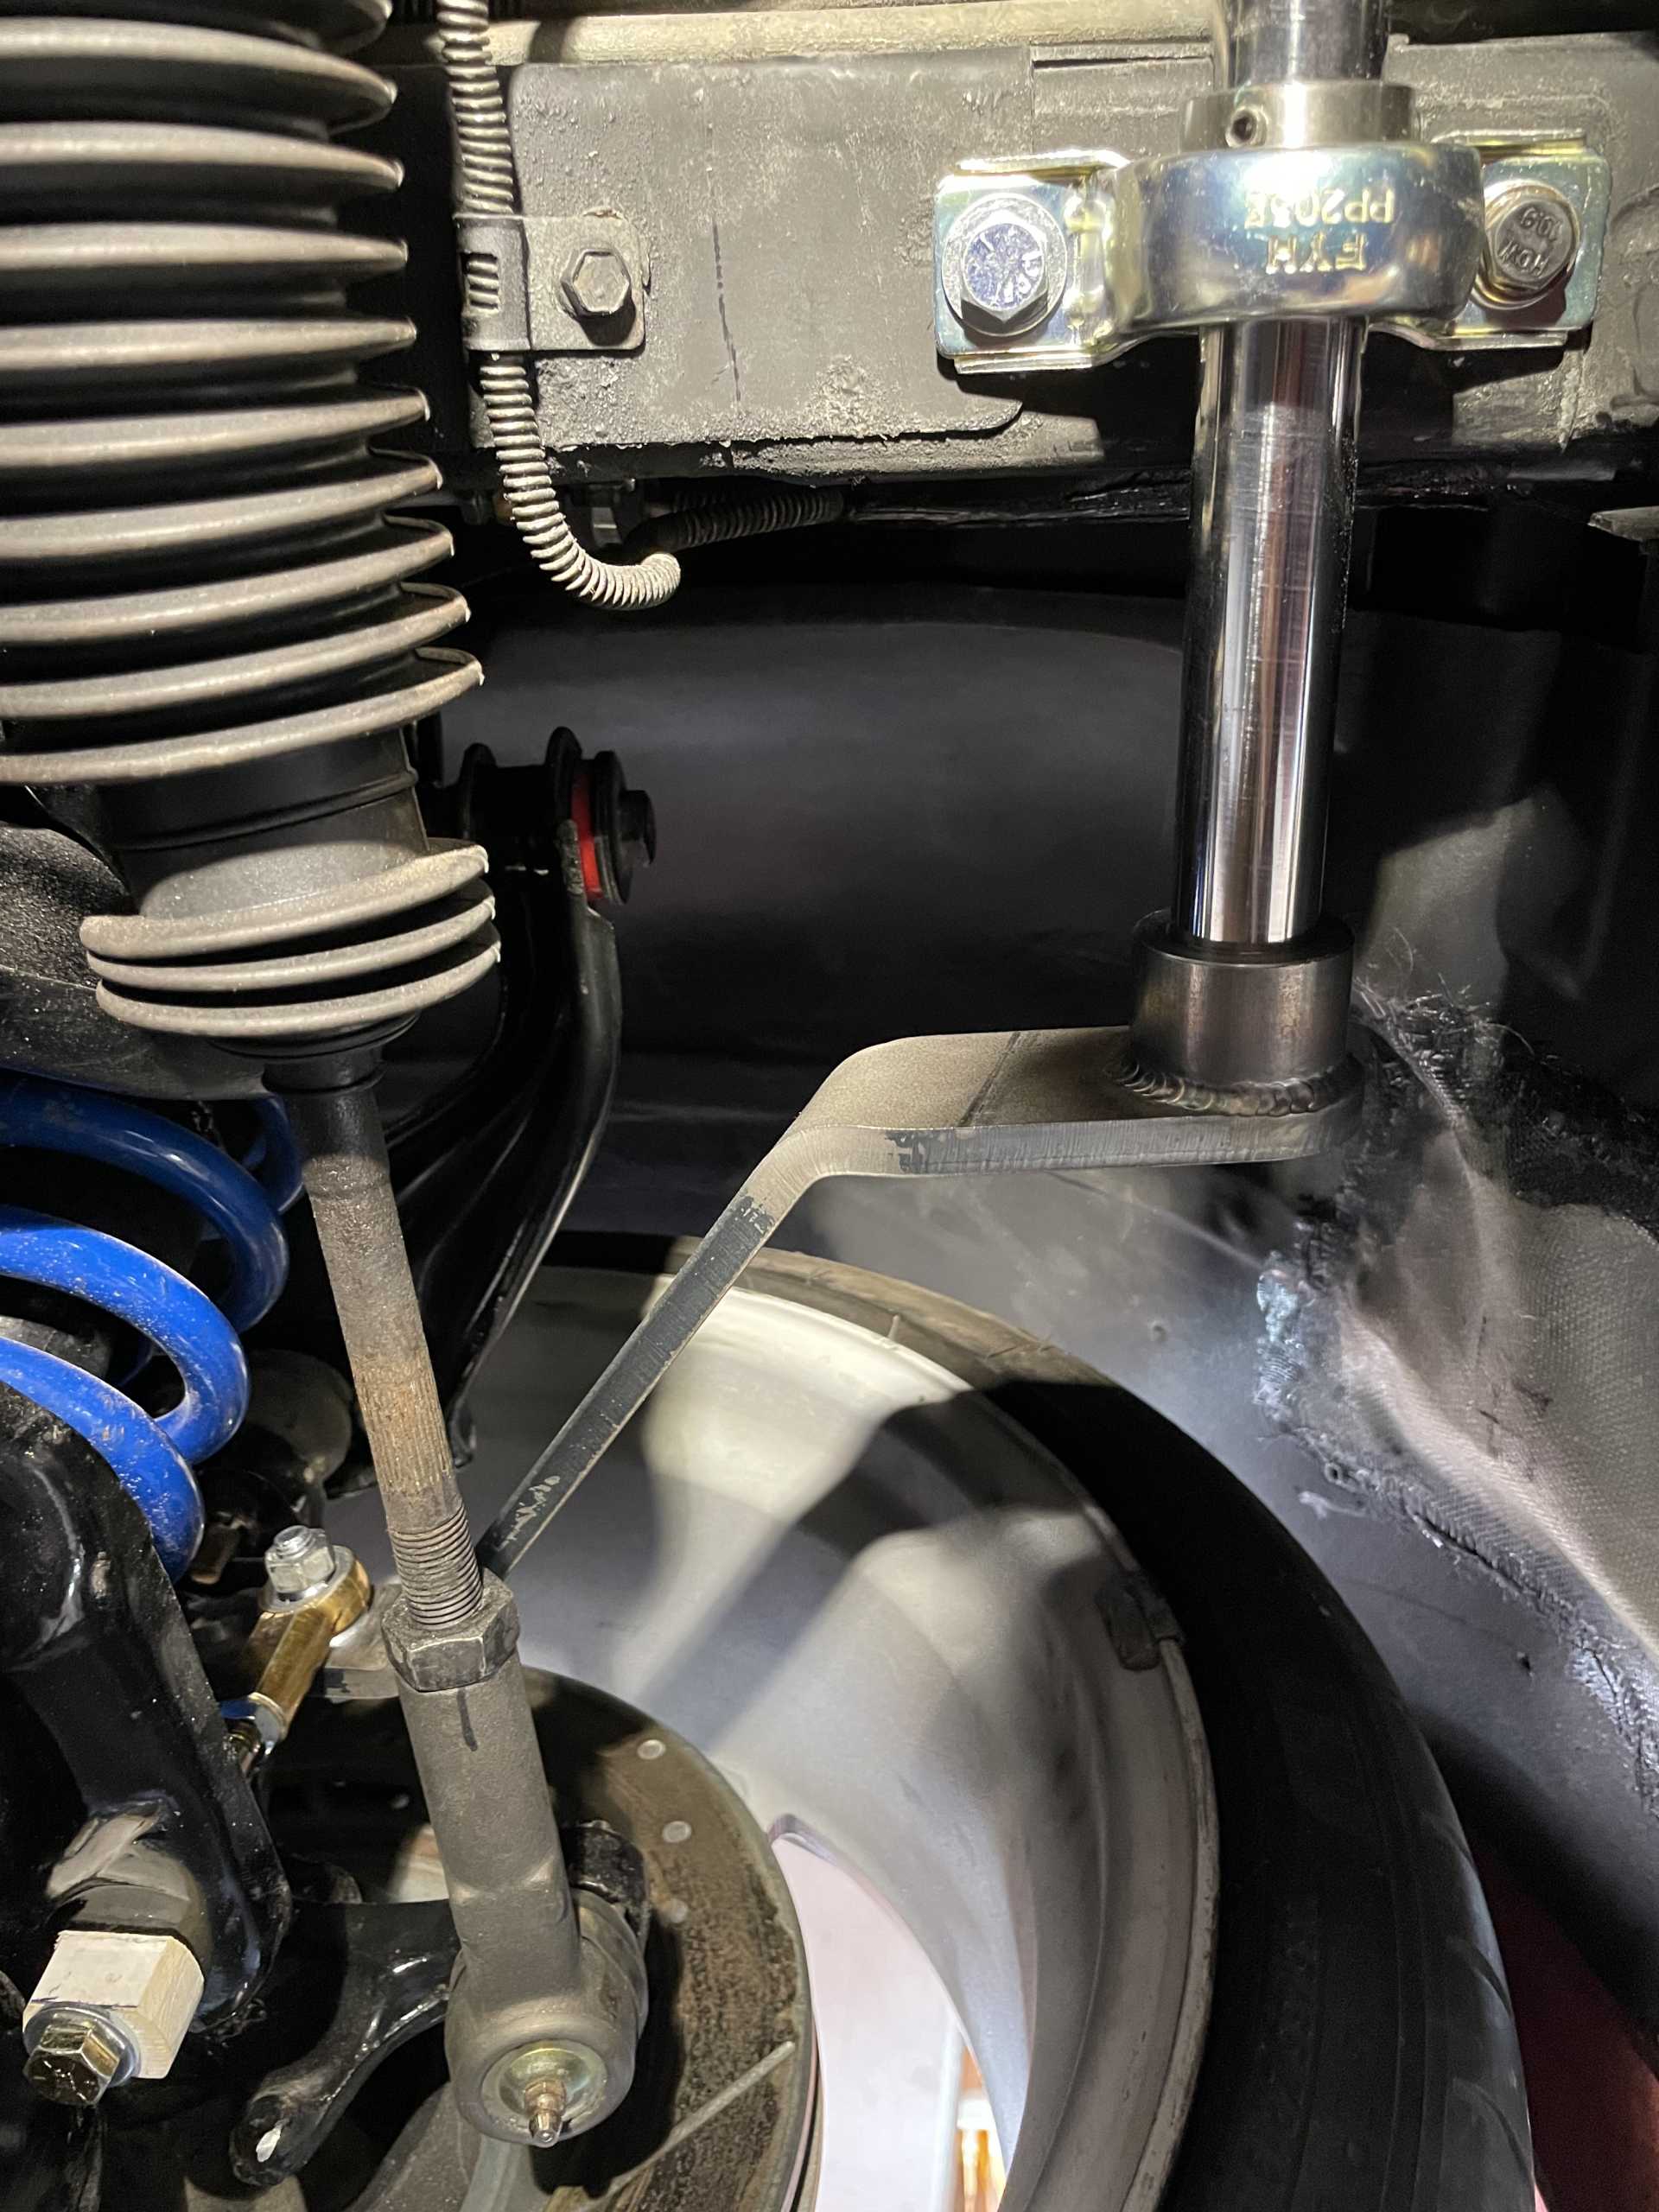
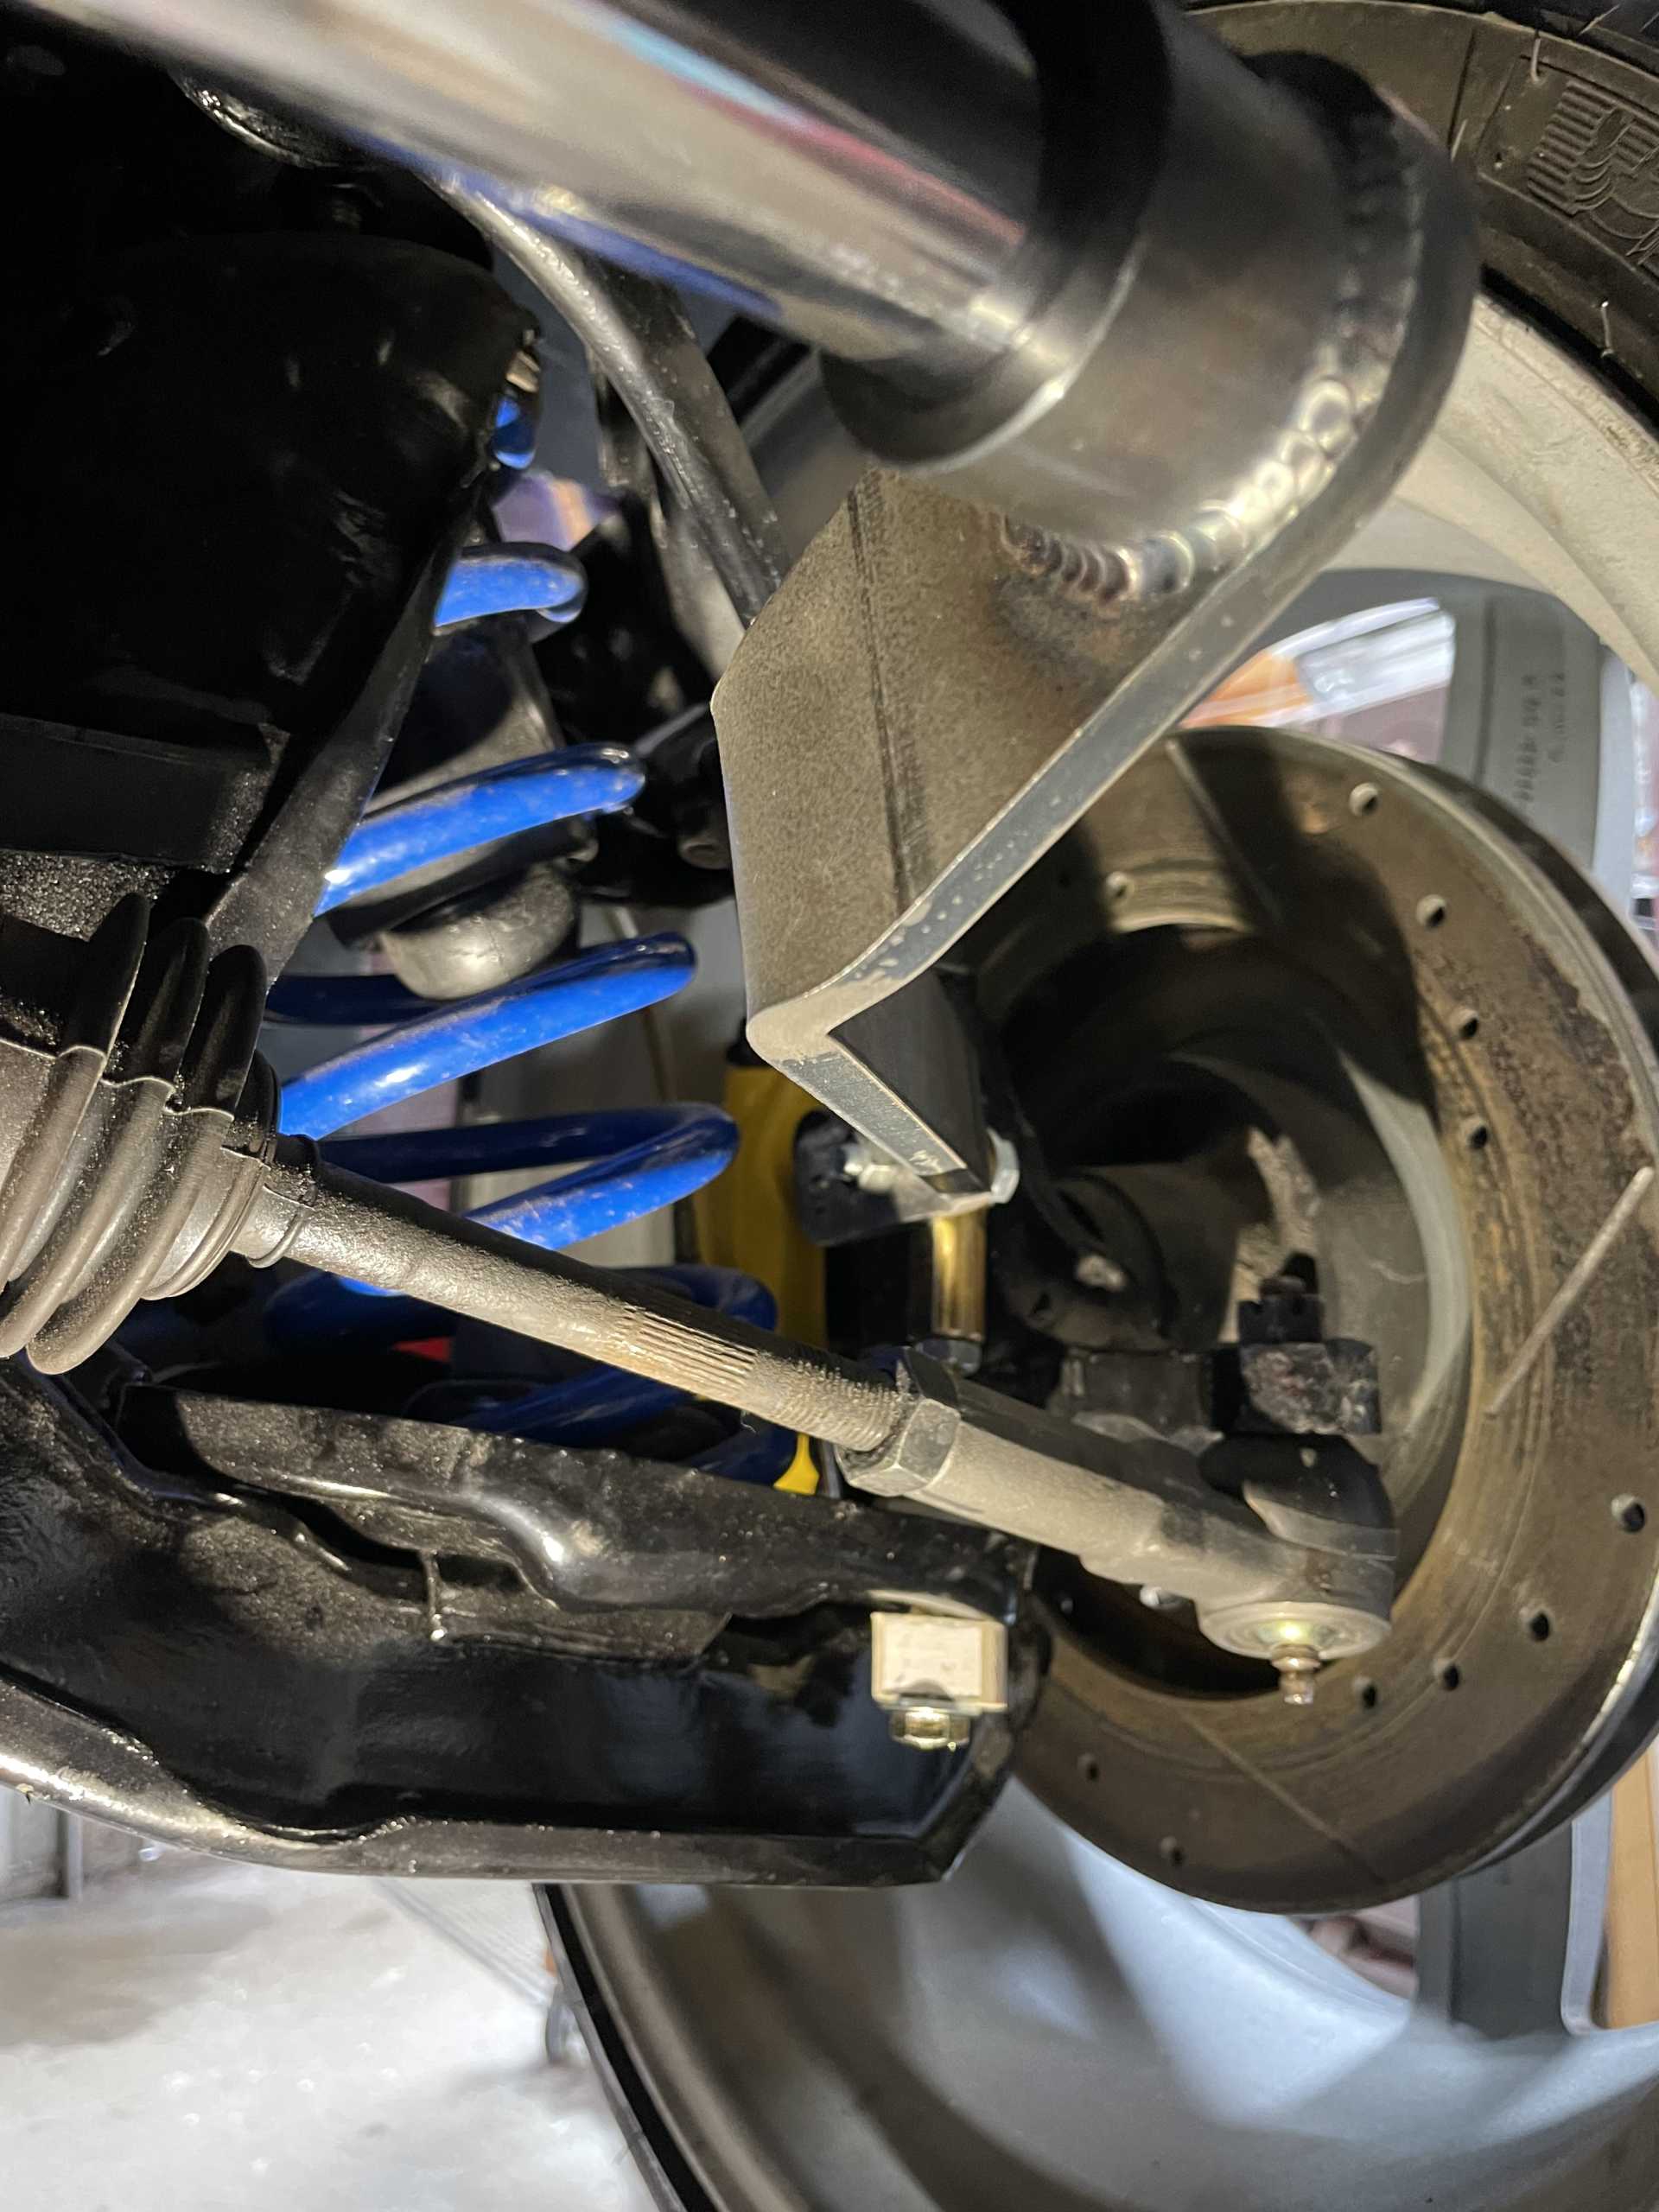
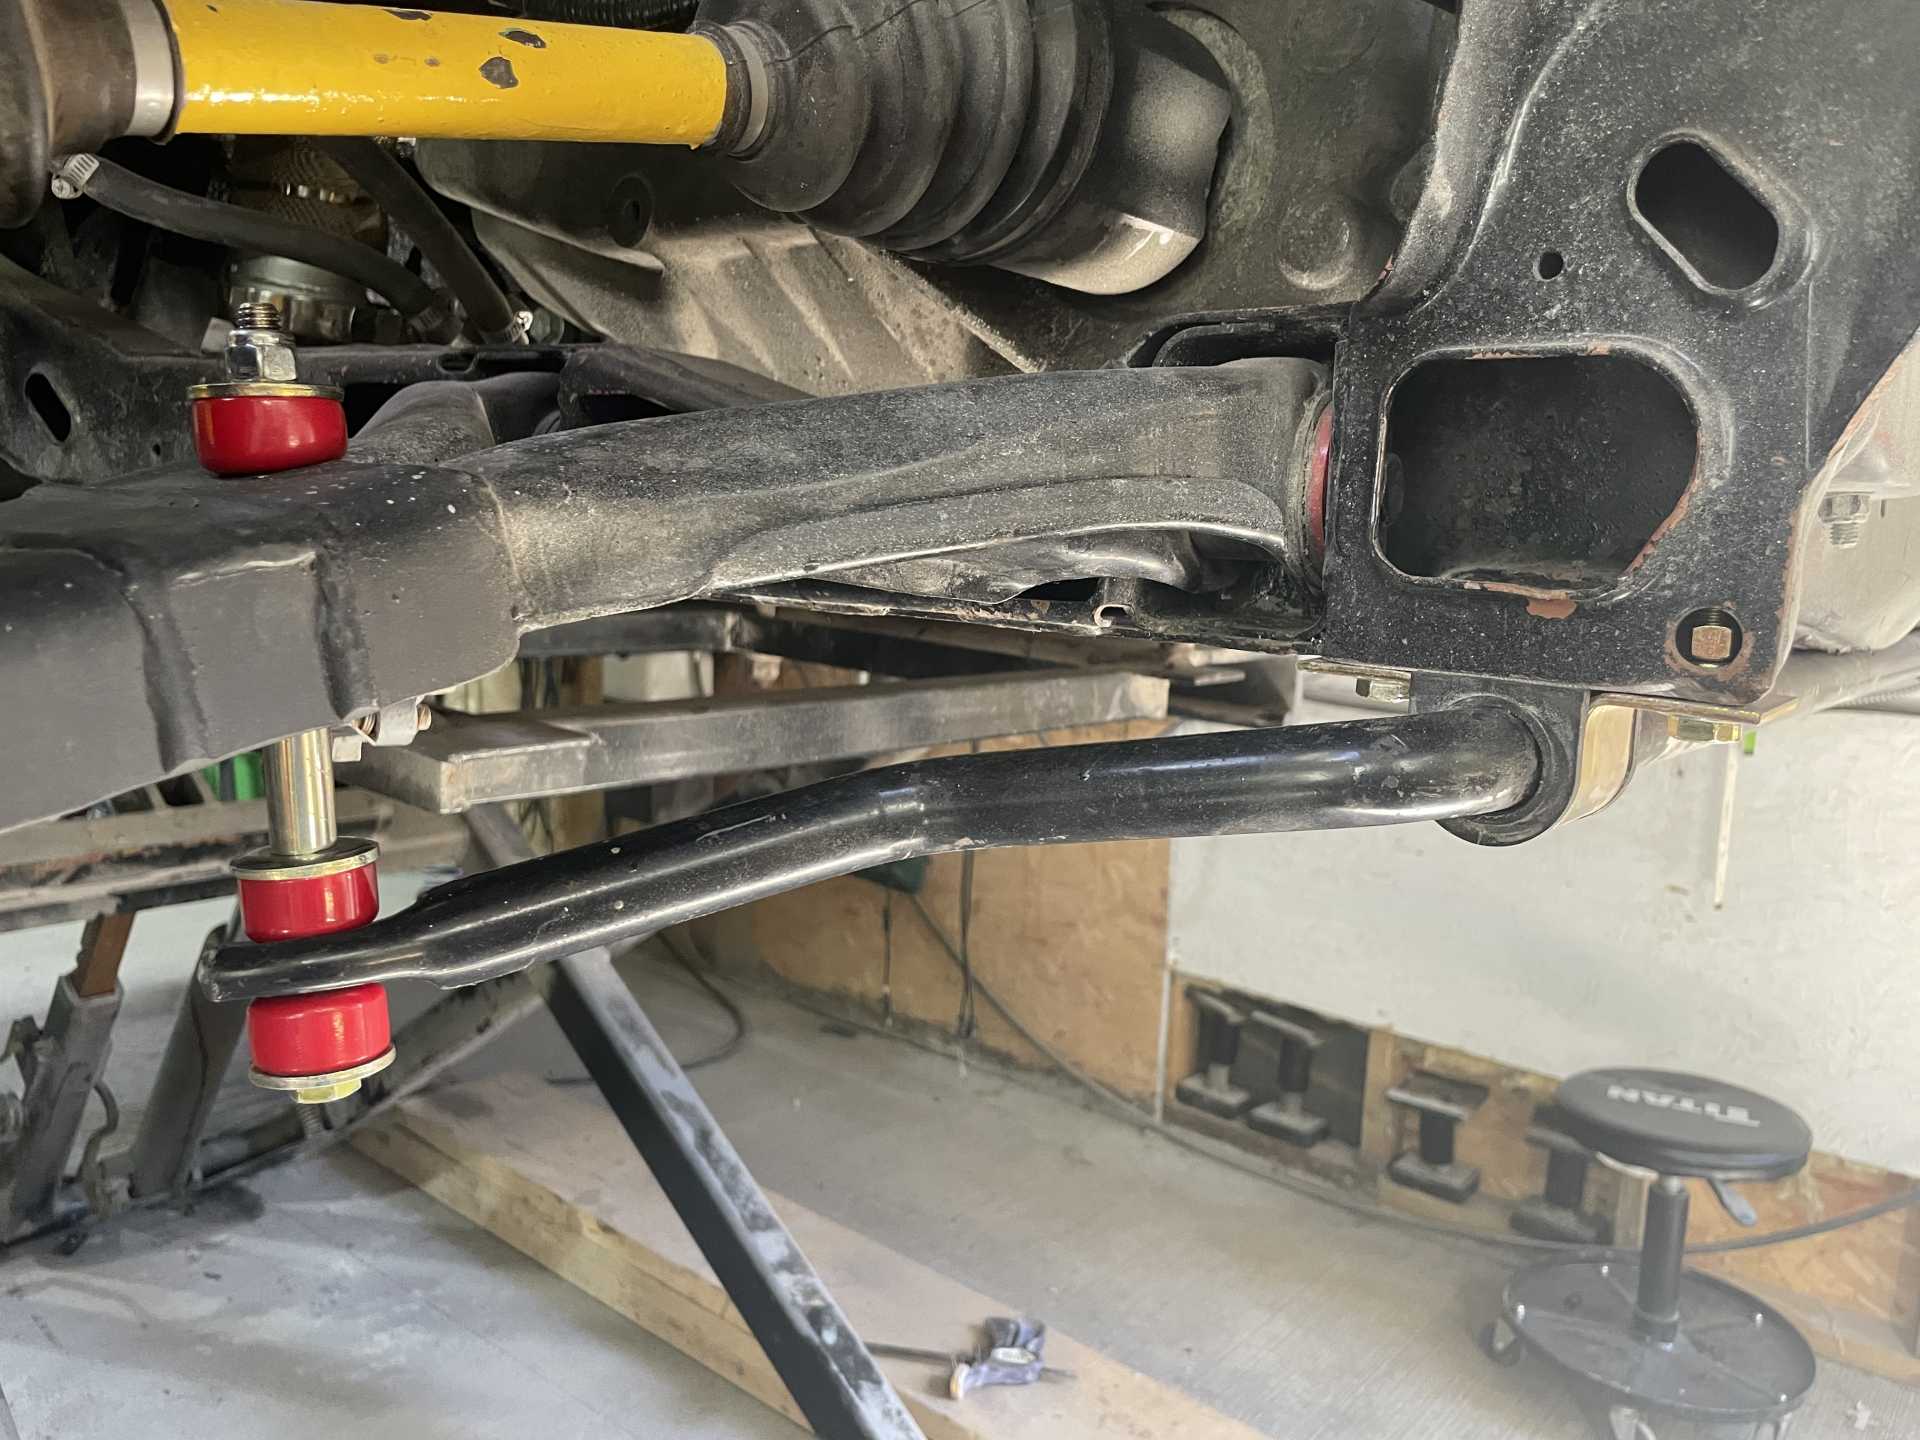
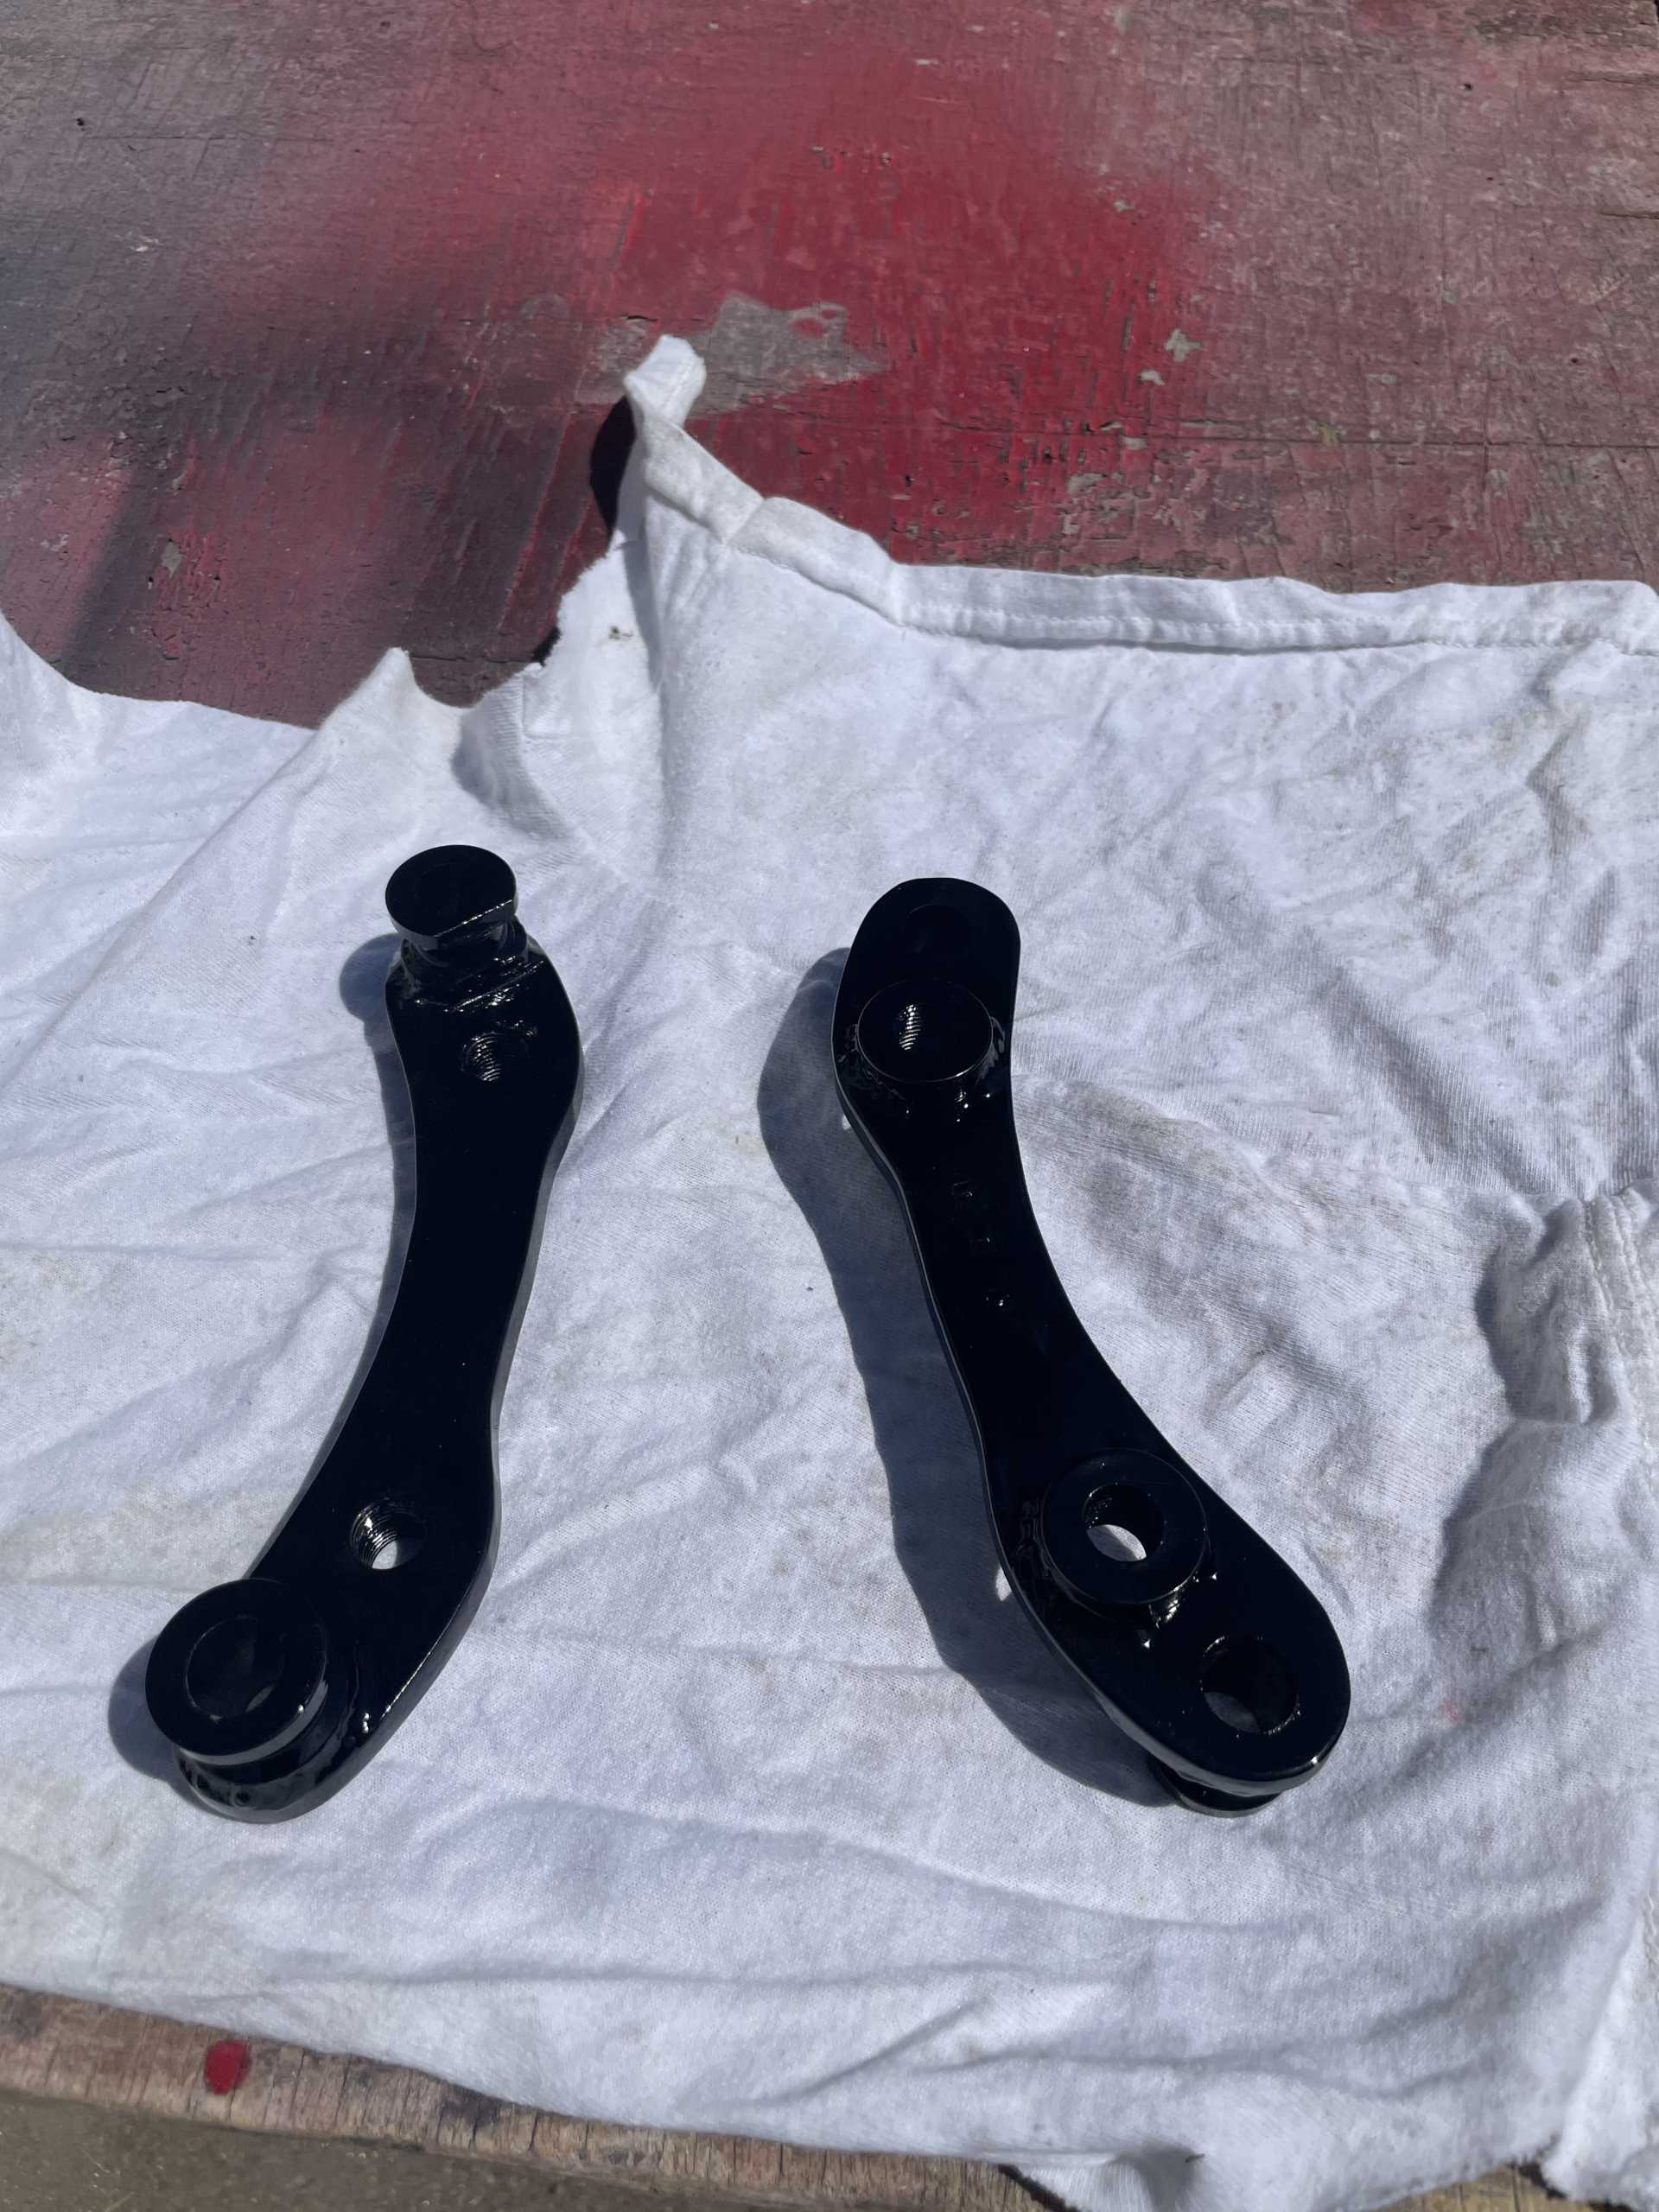
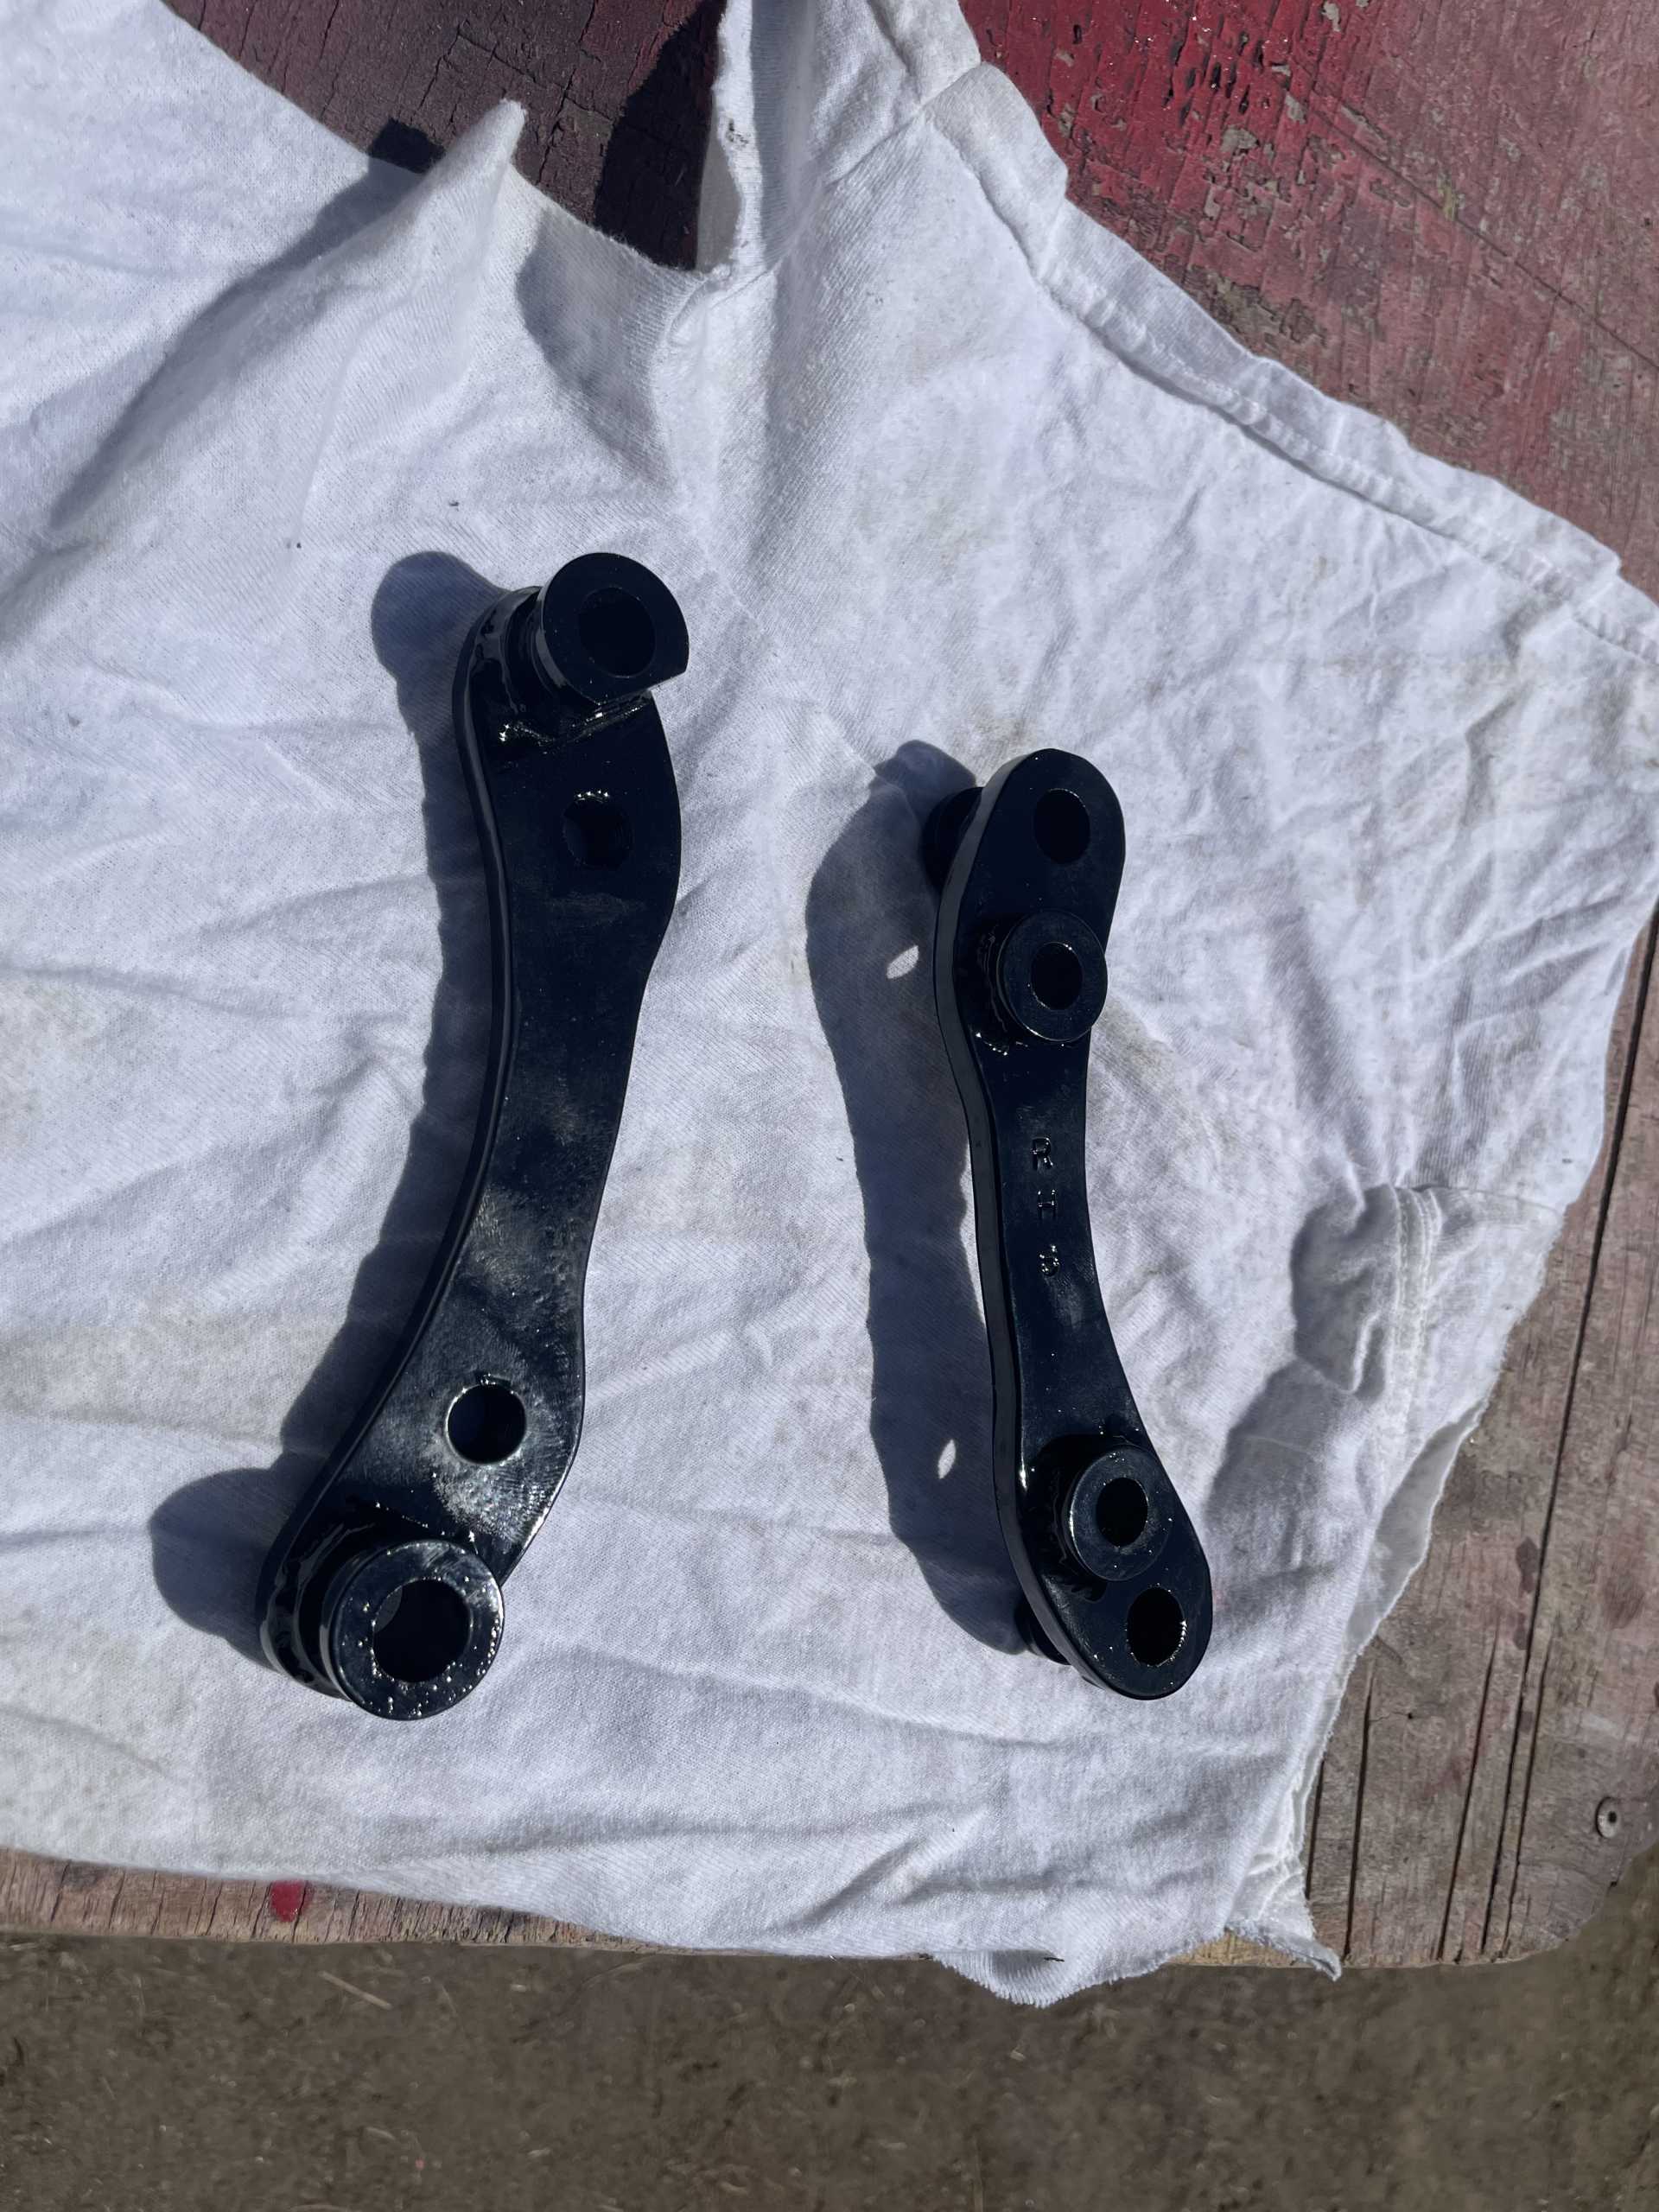
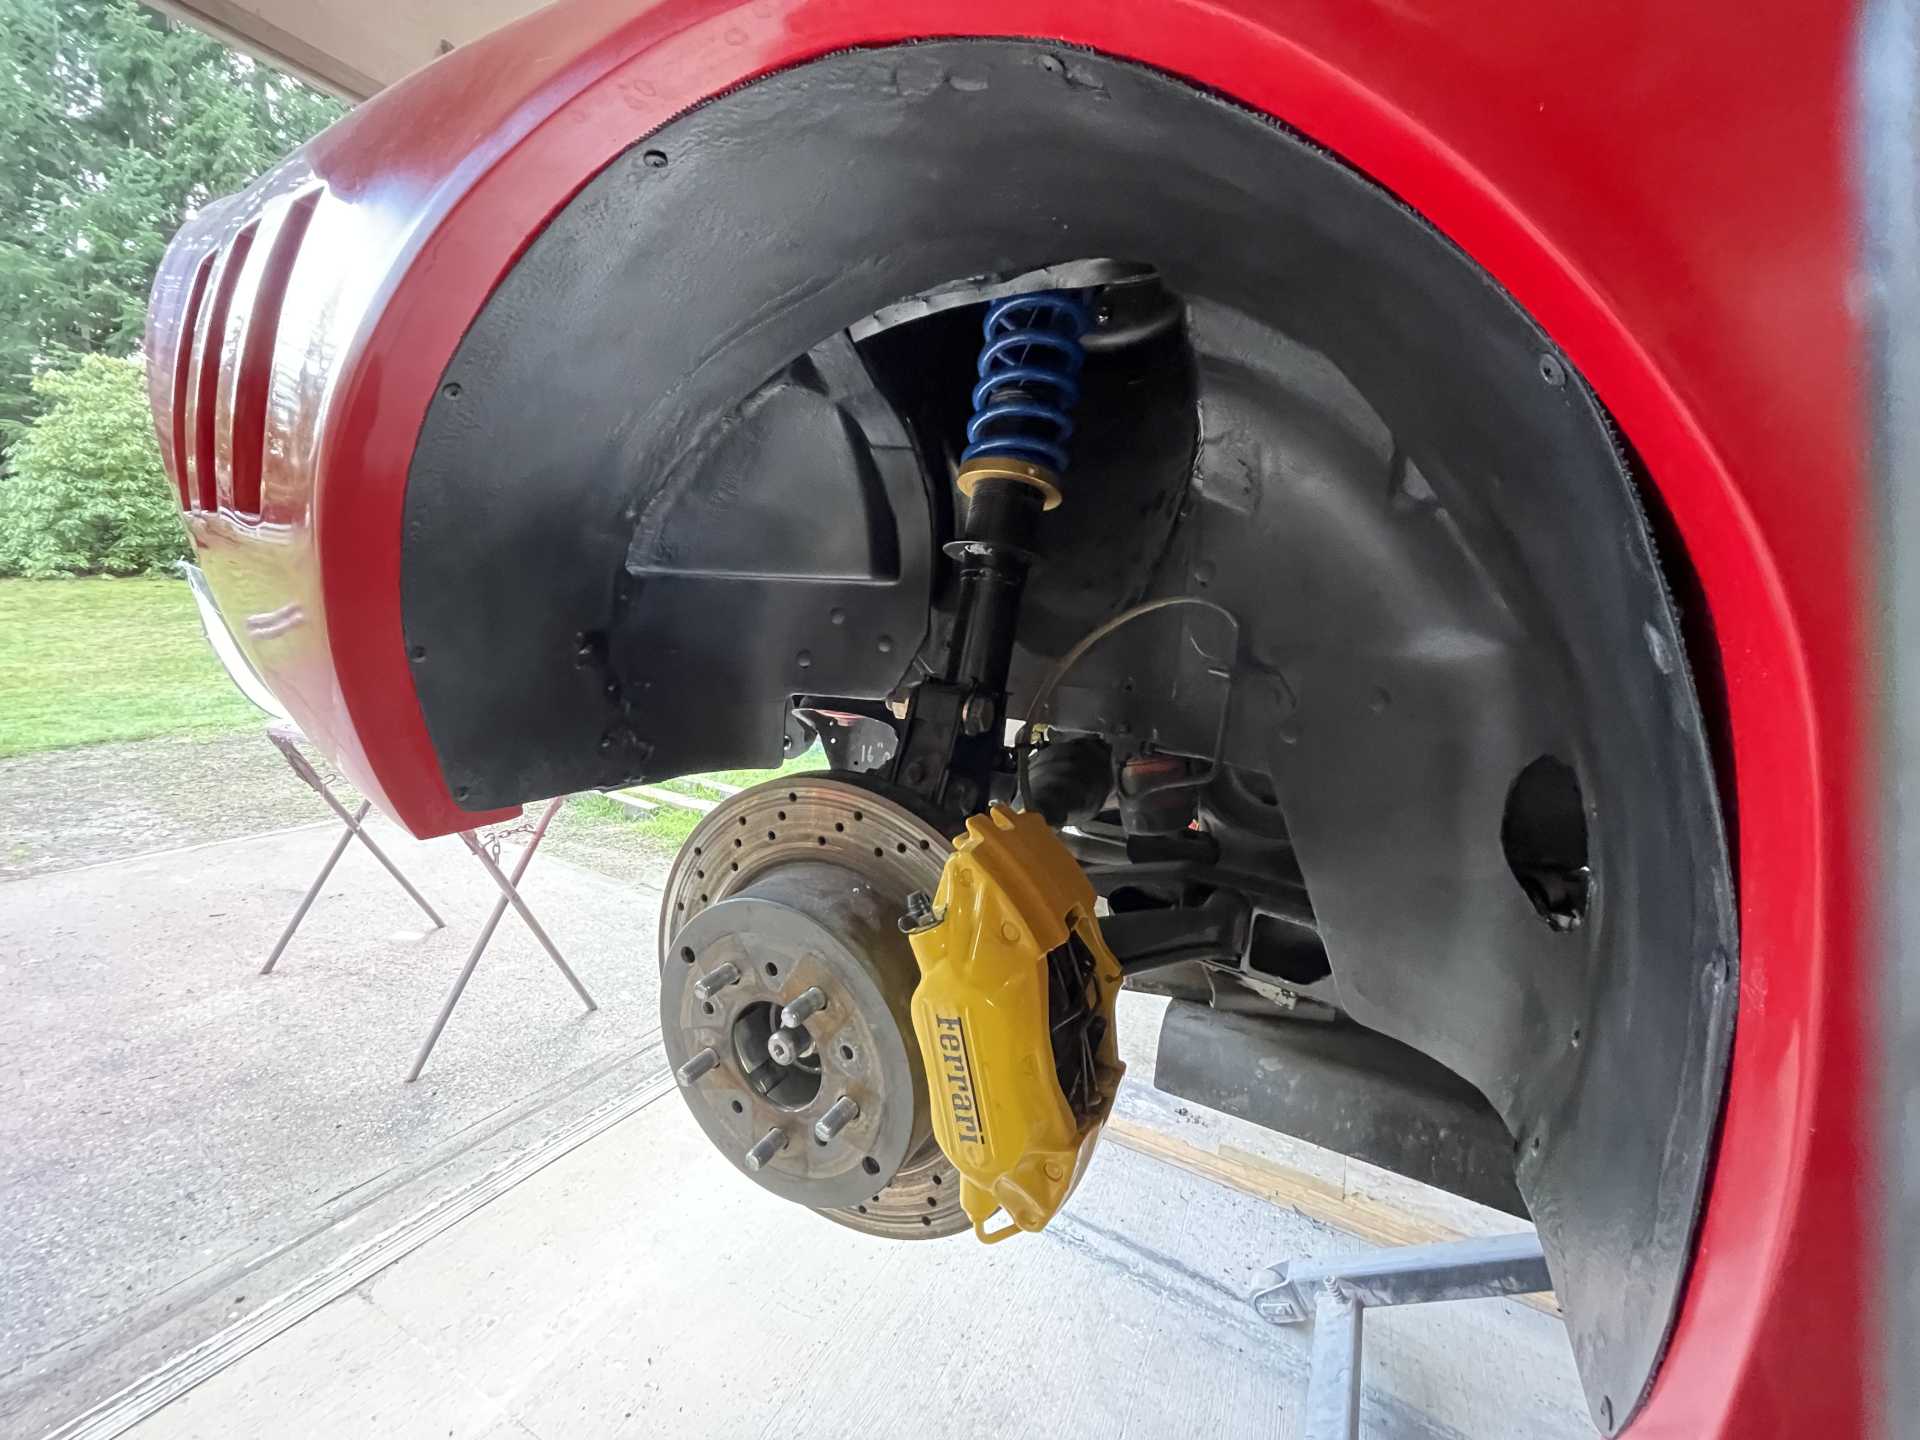
I also got my custom front sway bar fabricated up for my car. It had been a bit of a problem finding one that would fit the widened front end. The kit came with straight arms that needed to be bent to work in my application. So after making a template I had them bent , the metal brake was incredible 120 ton of pressure does short work of 3/8” steel 😁.
This is where the linkage between the arm and control arm link.
Finding the max length of the 1” polished steel bar mounted so the tire doesn’t hit.
Then bending the template to fit
The end result!!
I’ll remove them now and powder coat them before final installation and pinning.


 ...................................


 h
h