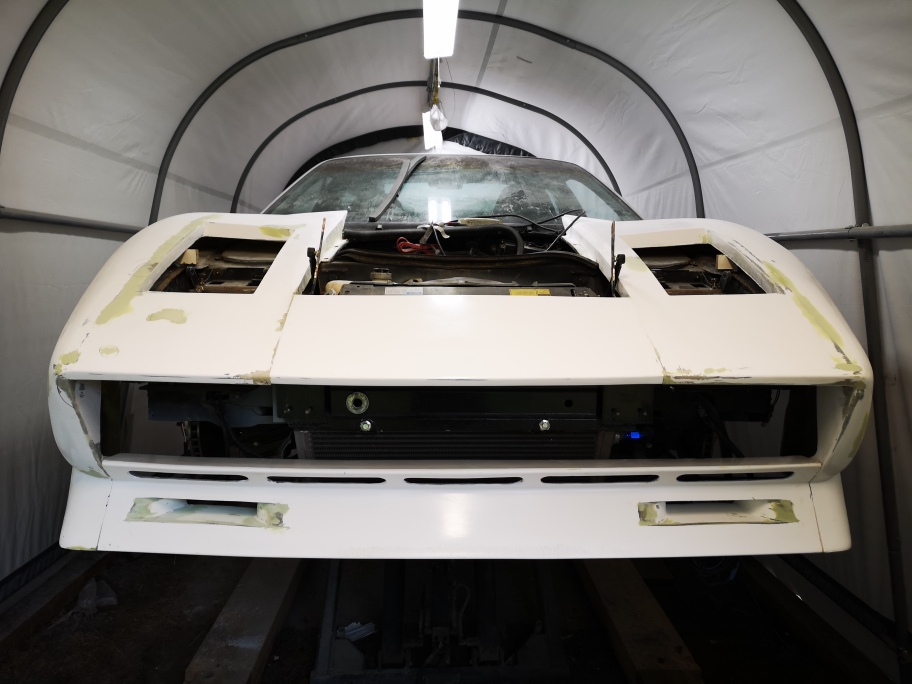
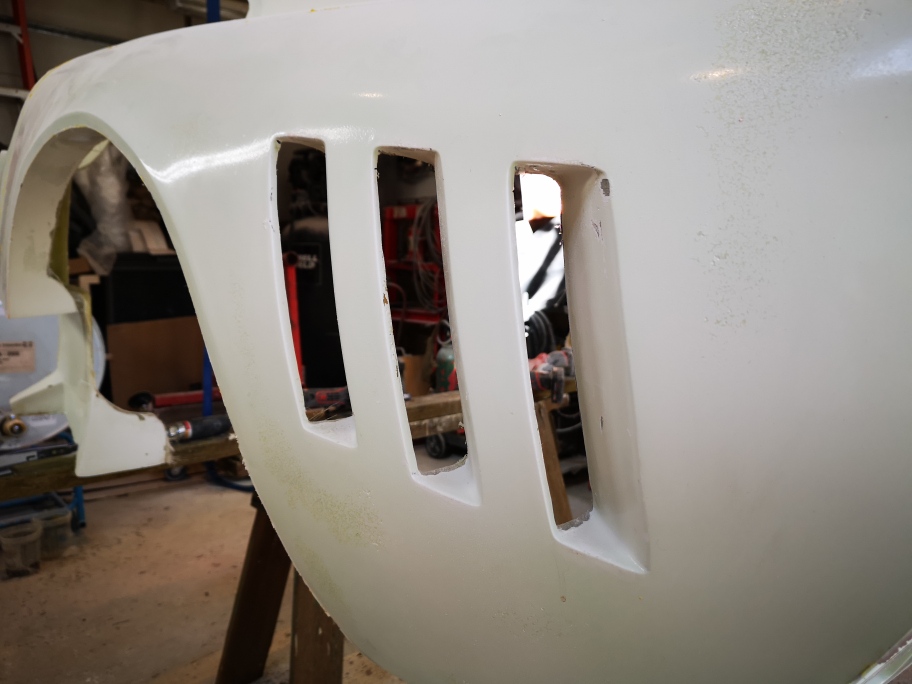
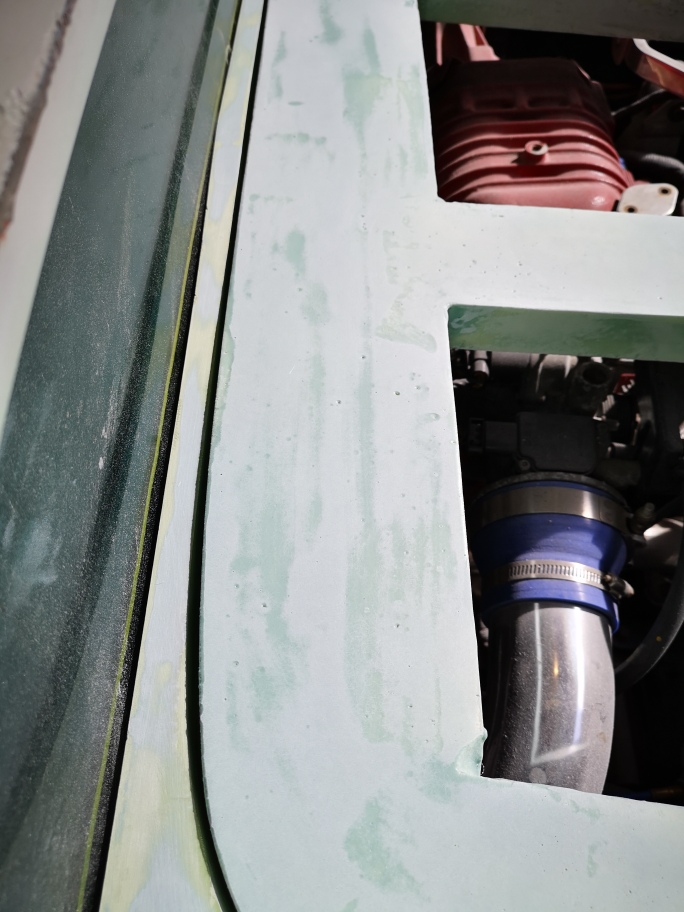
I got the front spoiler brake vents installed and sculpted the edges of the intake in the spoiler. Next I’ll shoot it with epoxy primer to seal it then spay a primer and do the final sanding before paint.
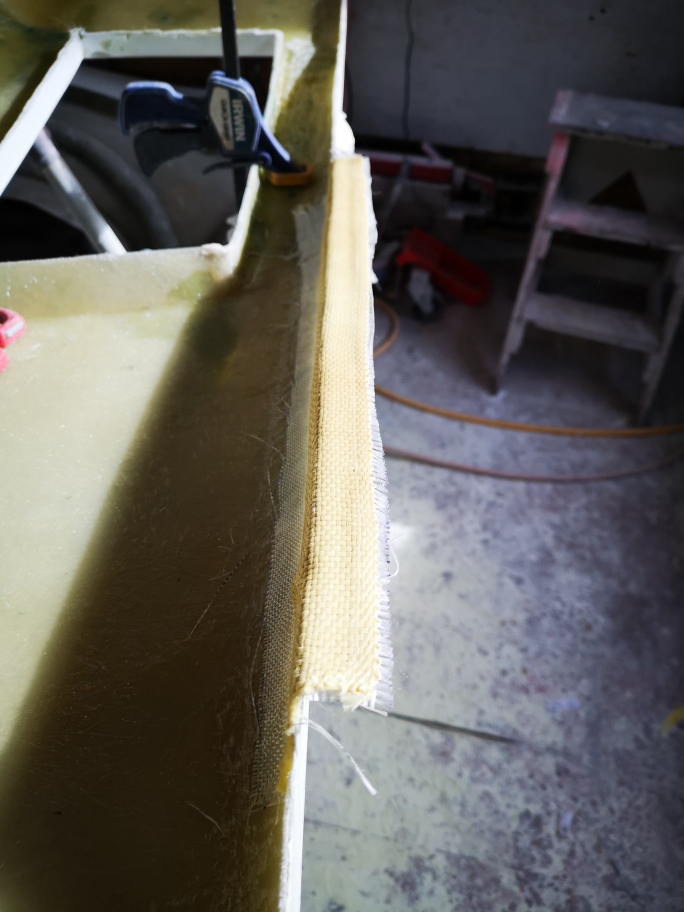
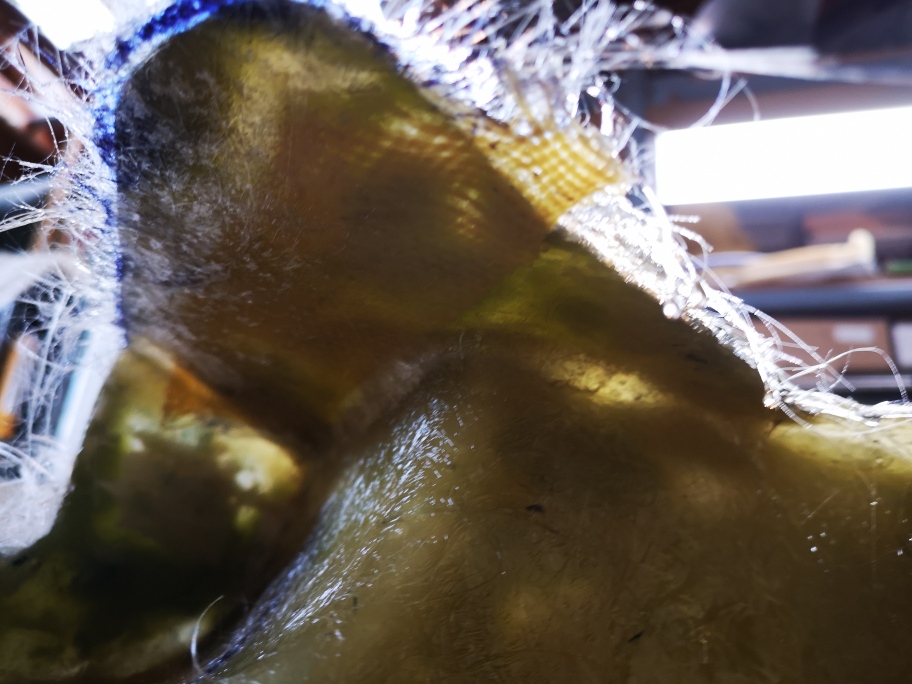
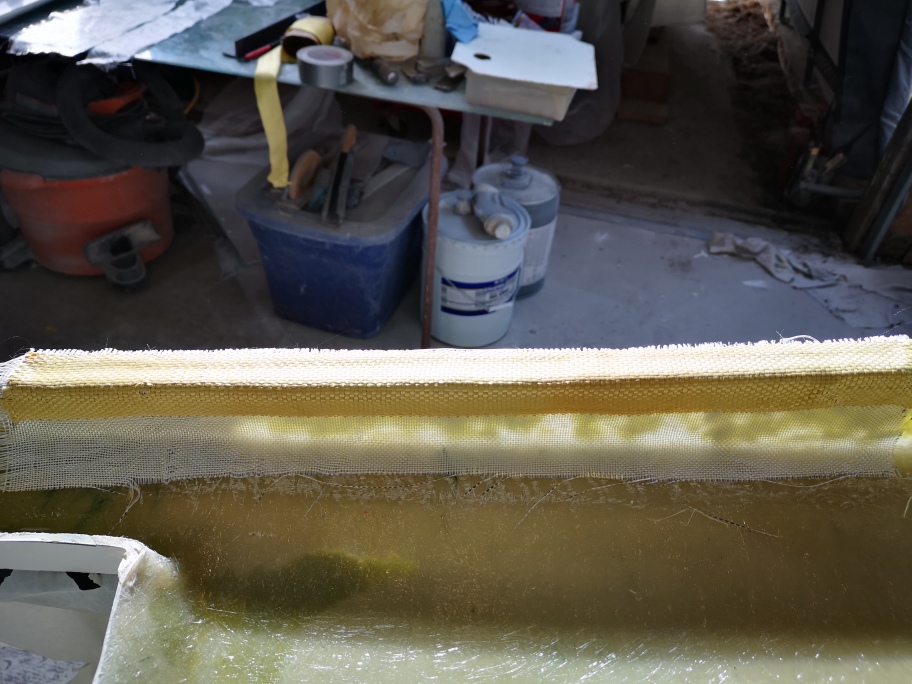
I’ve been busy prepping all the the molded parts I pulled from the molds the last couple weeks. Beefing up all the connections points. Adding a strip of 1 1/2” wide by 7” kevlar sandwiched between two layers of 12 oz S-cloth topped with a layer of 2oz Matt.
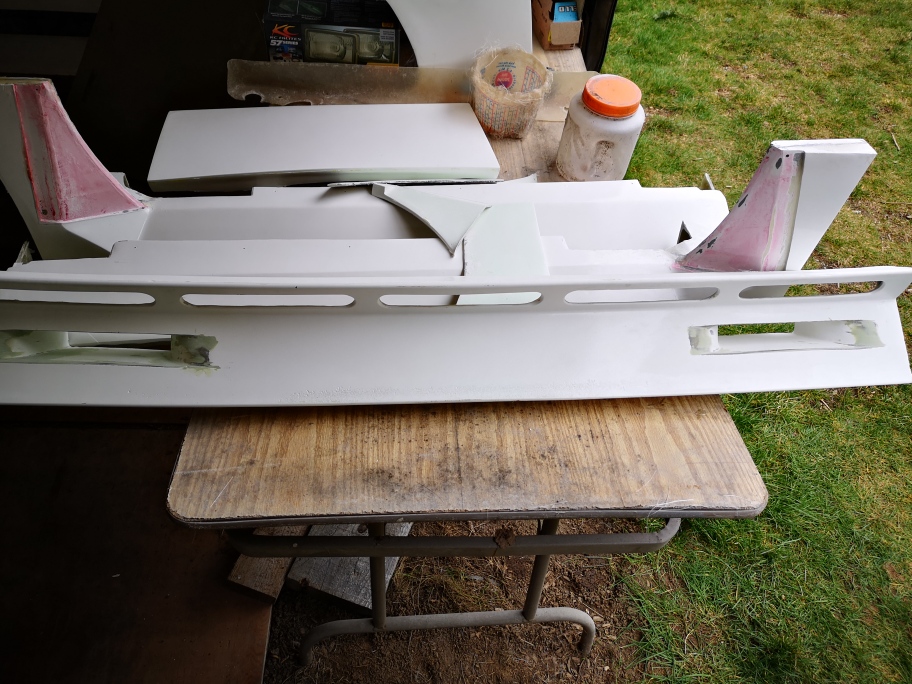
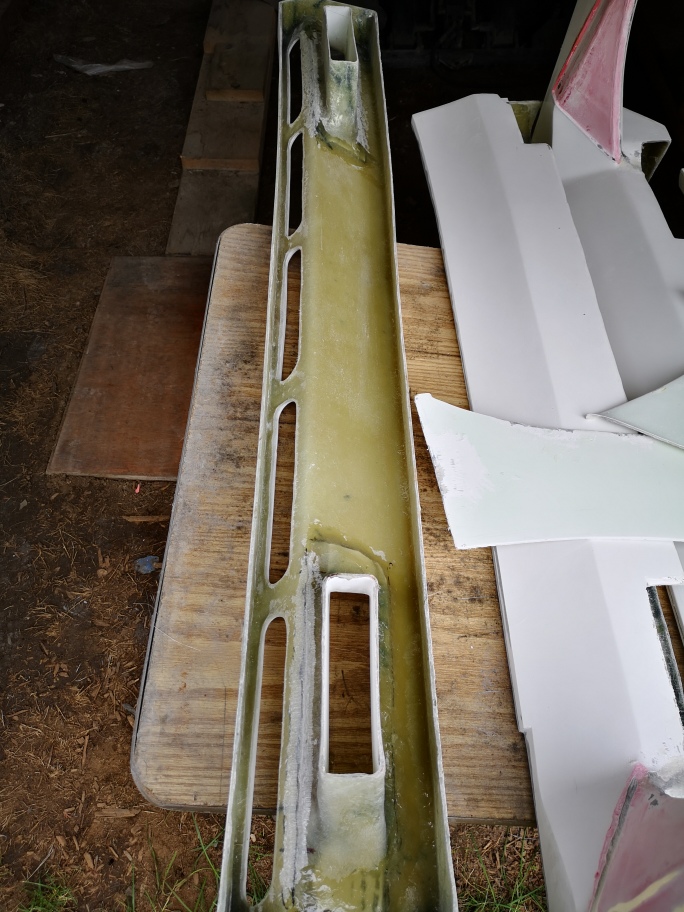
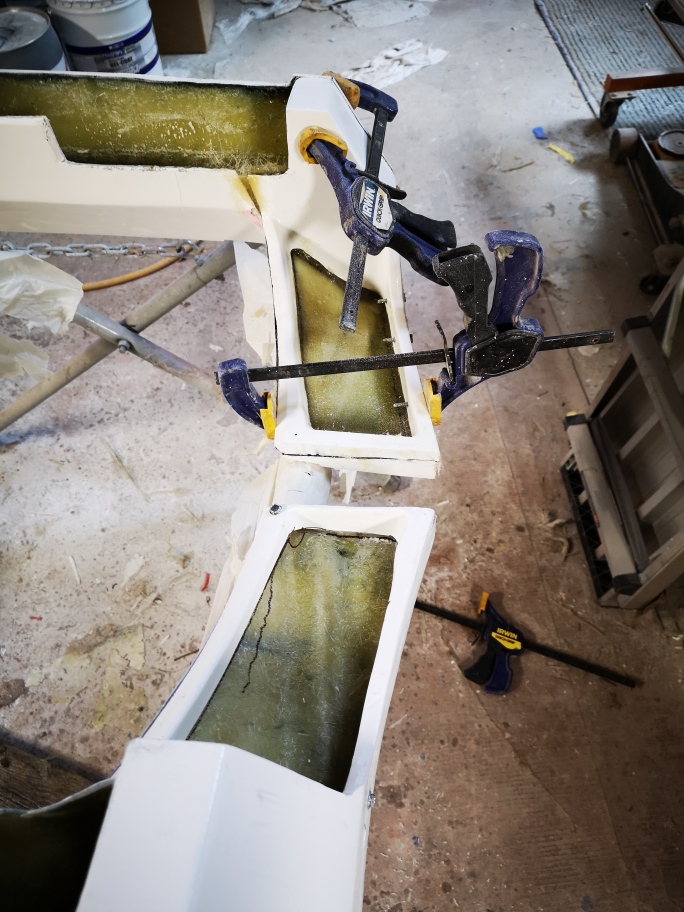
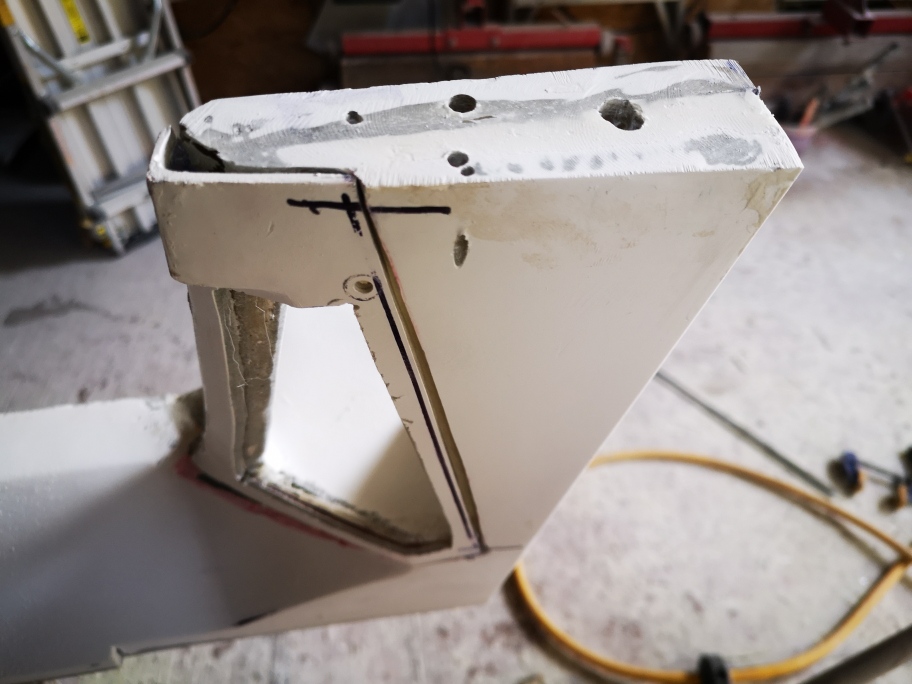
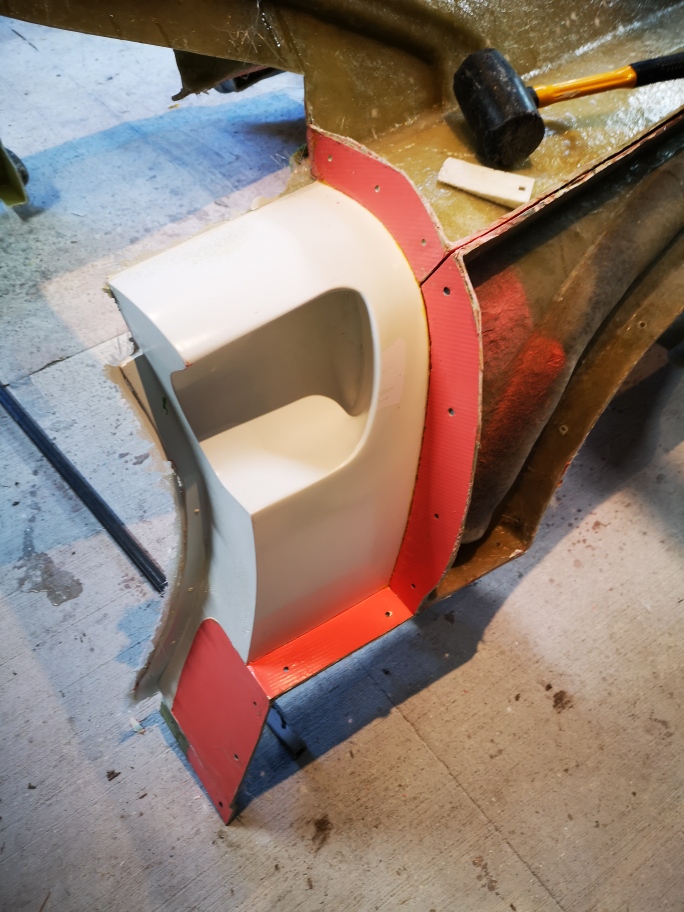
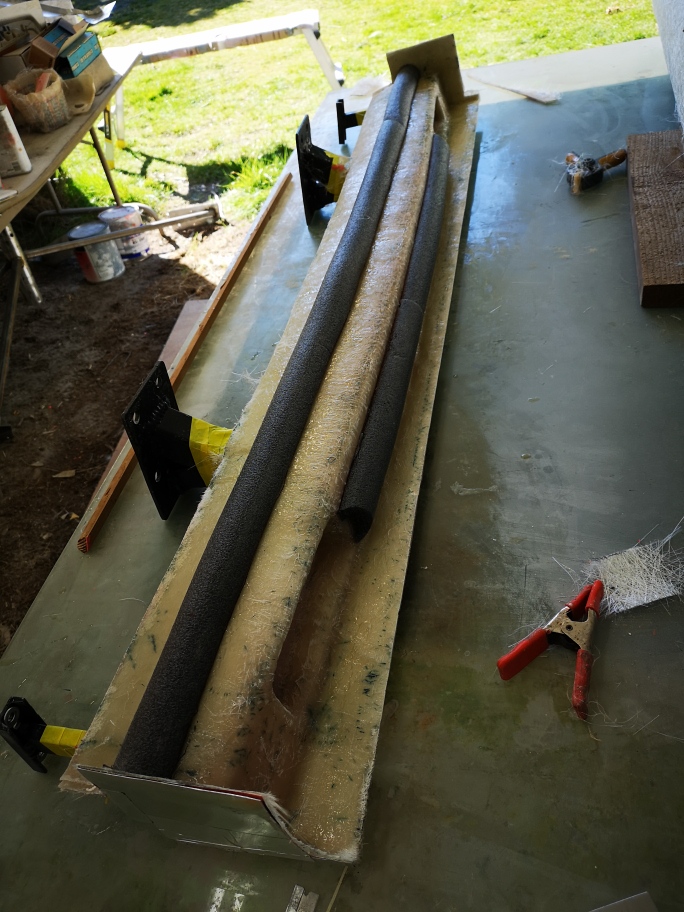
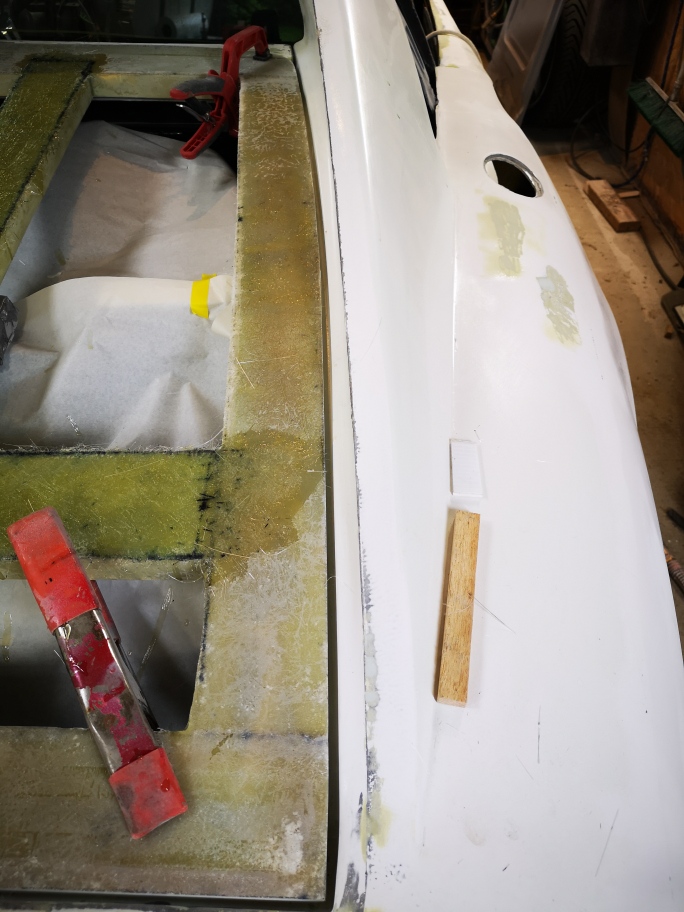
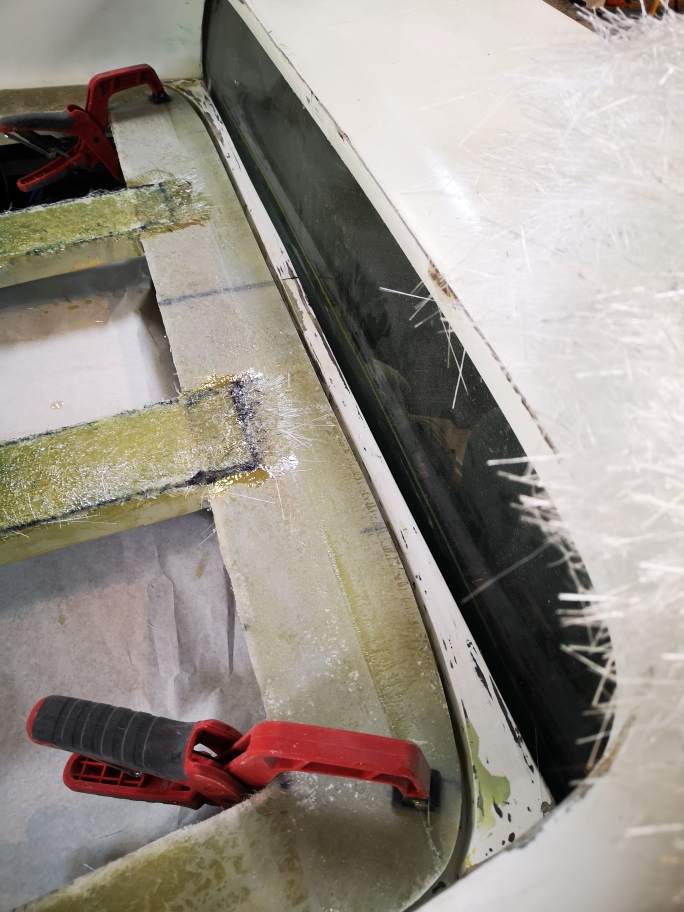
I also got the rockers completed using my slurry mixture filling the voids giving me a very strong part . I’ll cut out the area for the screen to be installed
I need to move the car out of the car port and clean out the garage in a couple of weeks. I want to drop the engine and get the new muffler installed before I can install the rear body , it will also allow me to do the final runs of wiring and harnesses and welding.
I also need to drop the fuel tank and replace the fuel pickup lines as well replace the fuel pump. I need to do a Final check of of everything under the car.
It’s time to get this thing finished before paint.
I’ve pulled all the parts from the molds and cleaned up all the slag, I’m found mounting everything while it’s off the frame is making processing and fitting the parts go very quickly.
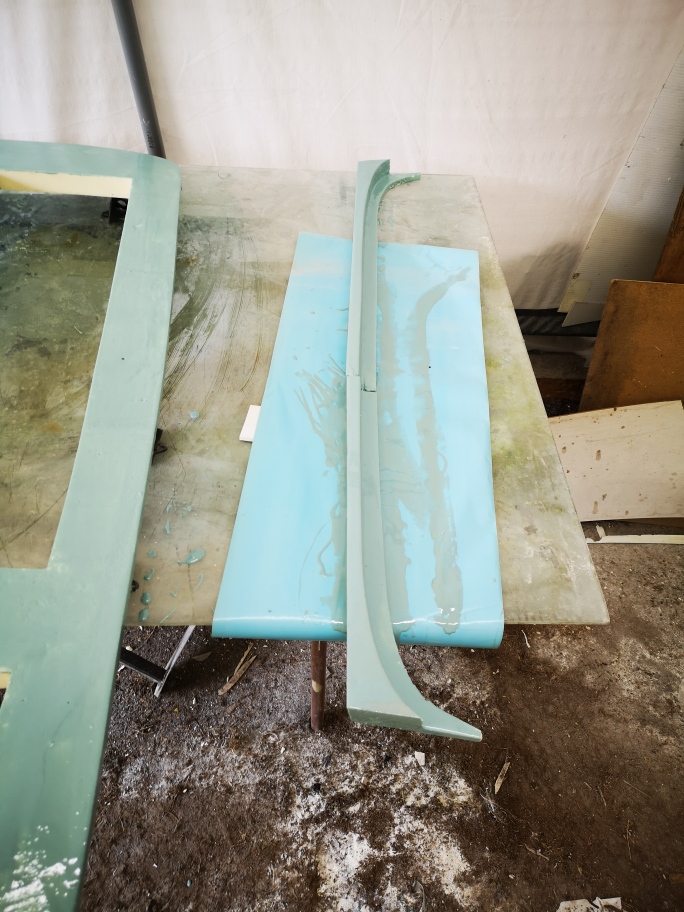
Mounting the front spoiler onto the fenders
trimming off the excess
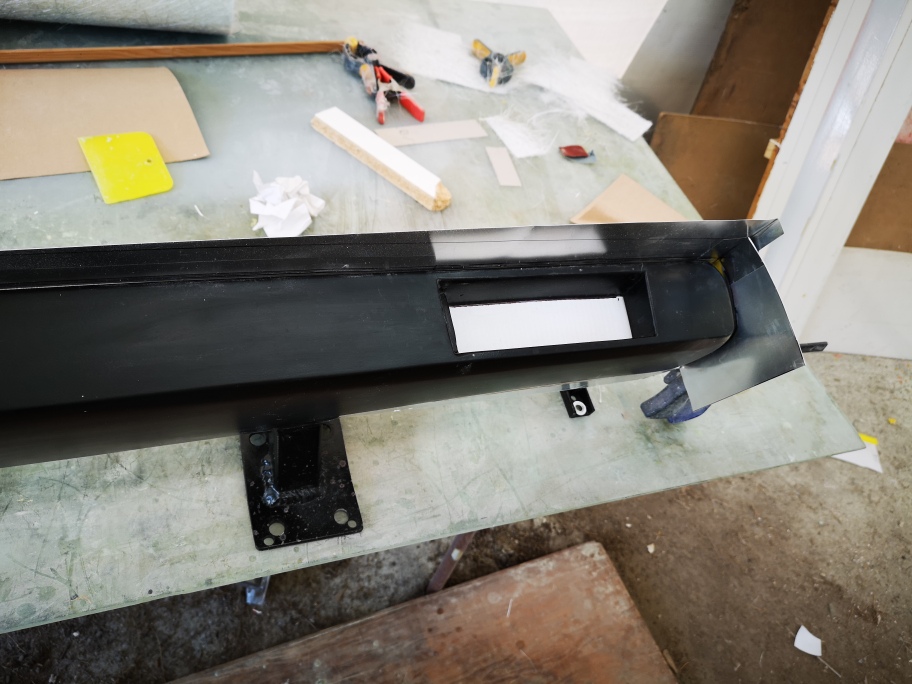
Then it was onto mounting the running board/fender onto the fender. The important reference is the back of both pieces are parallel.
Then drilling through the two , the bar is one of the standoff’s holding the two in place.
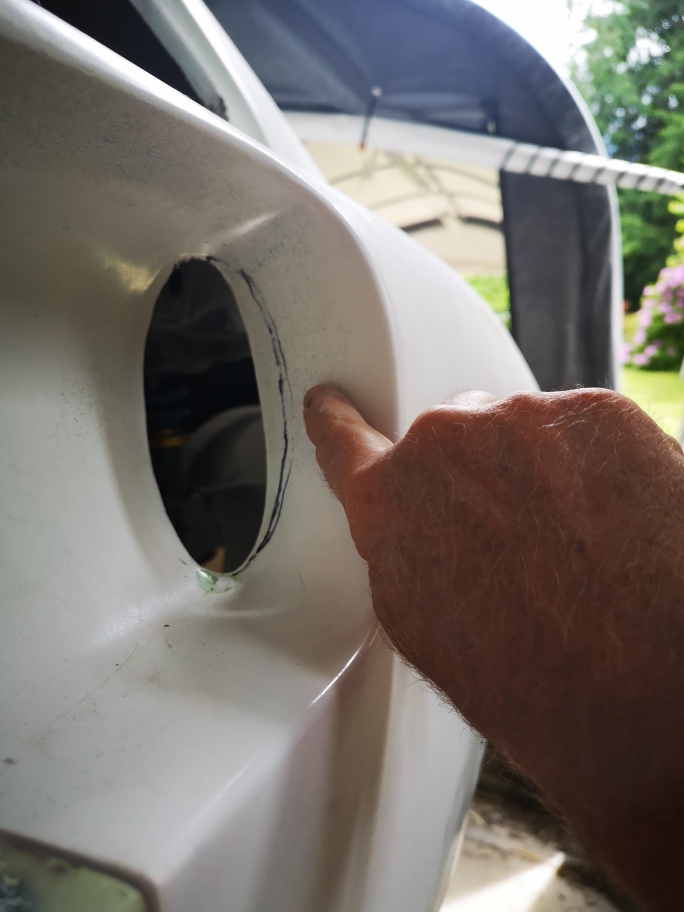
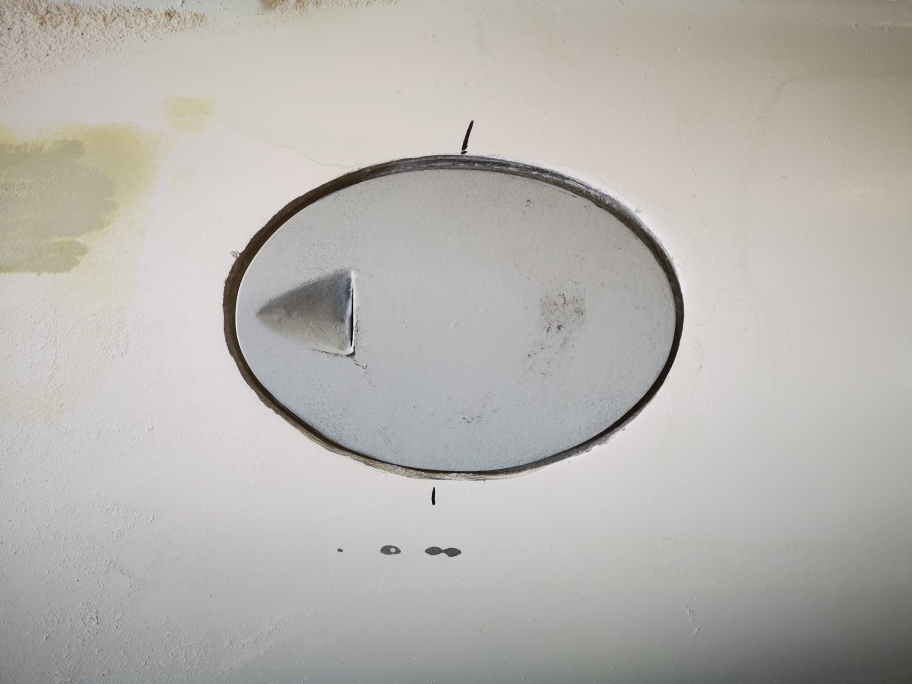
Next cutting out the vent area from wheel well , there is a wire screen to fill the hole.
Then mounting everything onto the front end
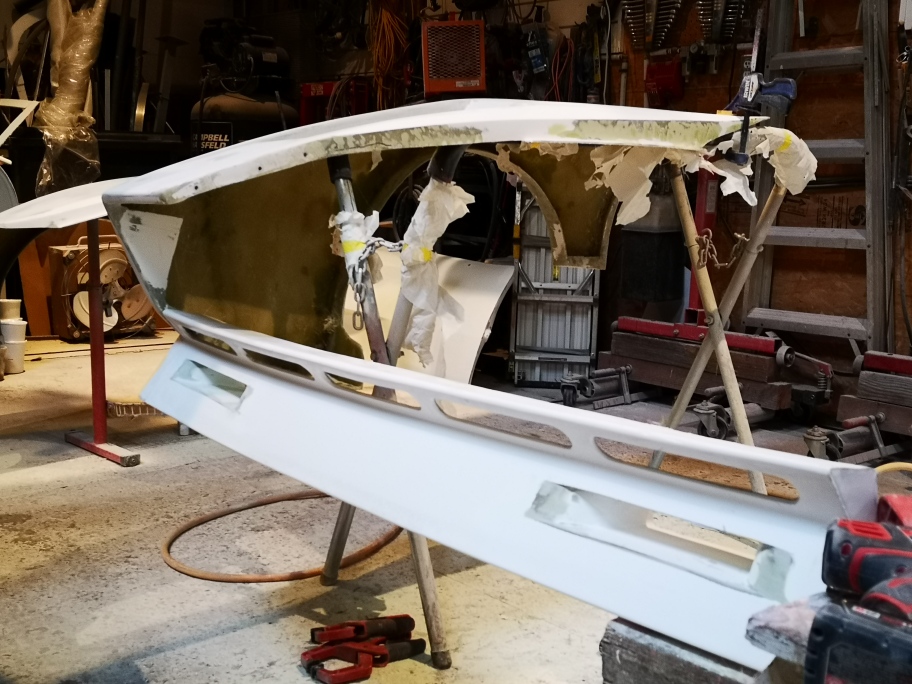
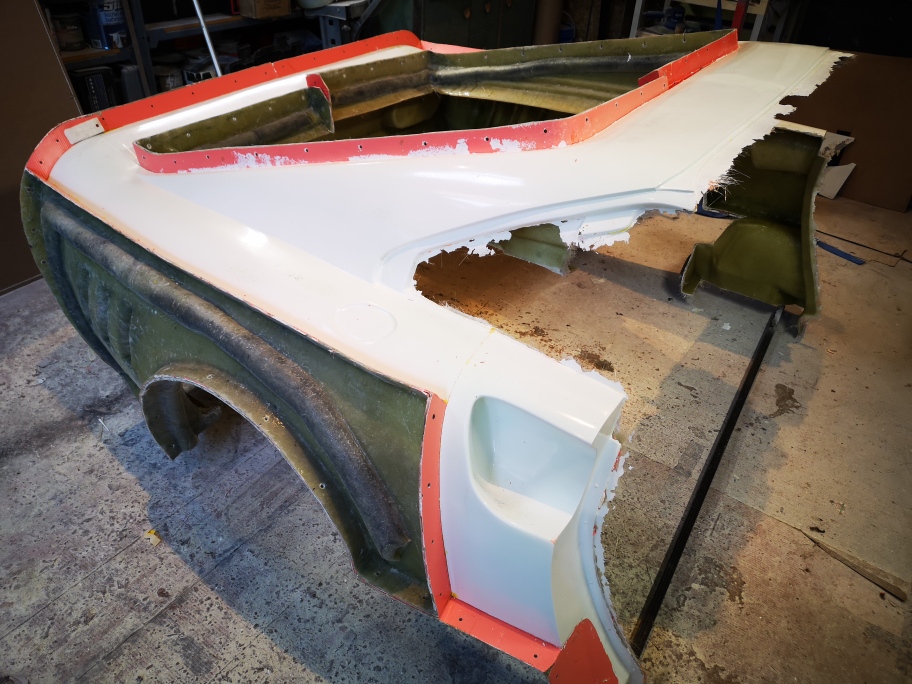
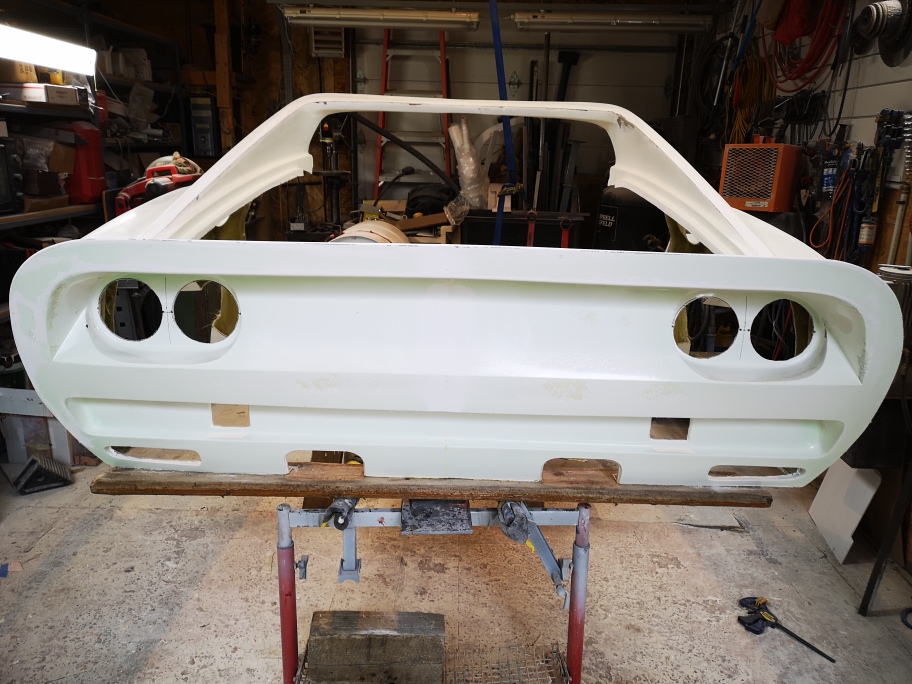
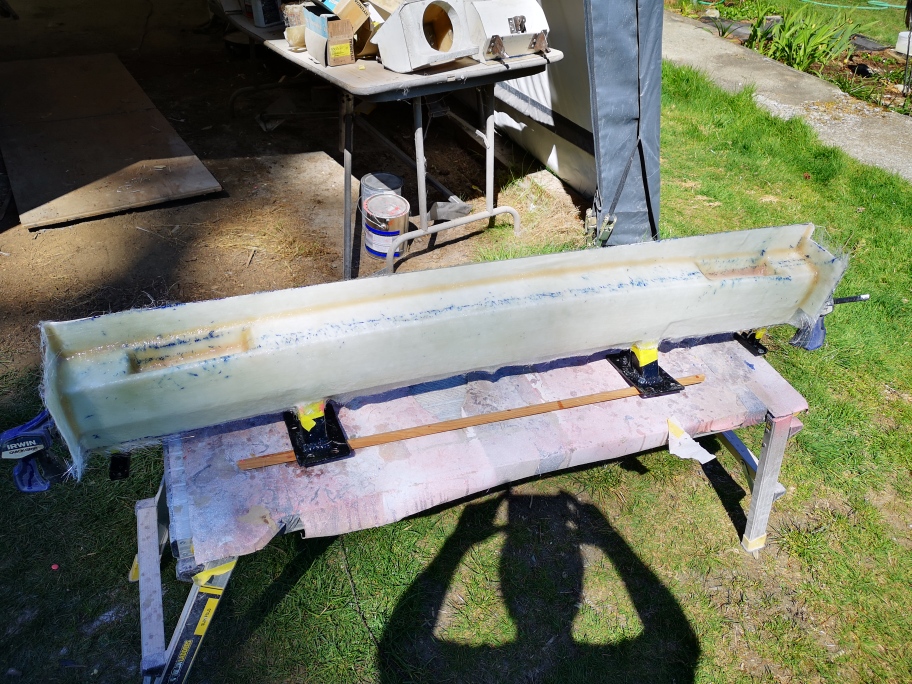
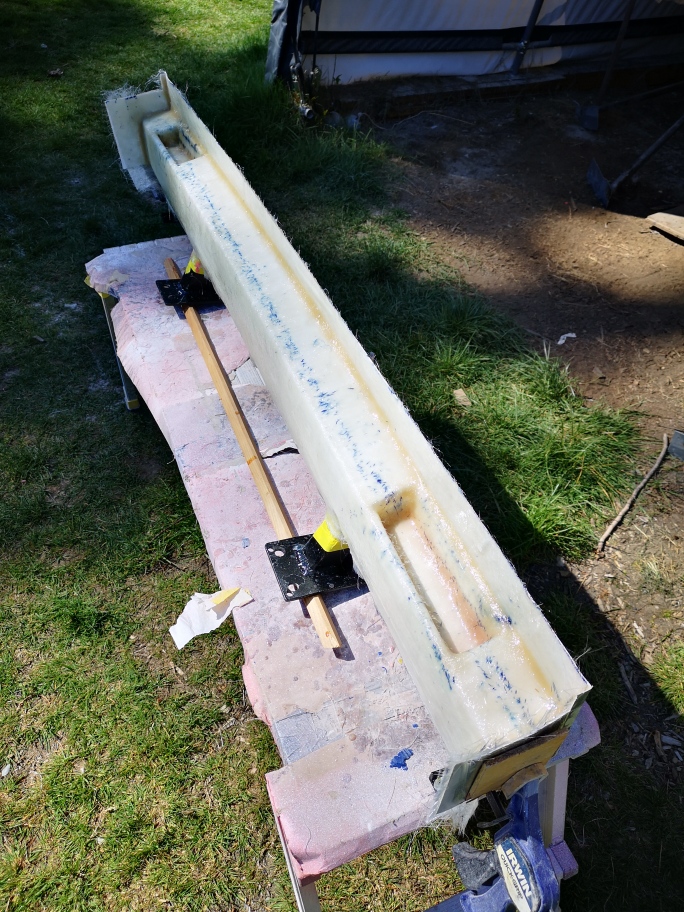
I pulled the the back half of the car out of the mold yesterday. Cleaned it up today , I’m pretty happy
I hope to get the bodywork finished tomorrow and mounting it this weekend.
Stay safe everyone Wayne
[This message has been edited by dobie1 (edited 03-25-2021).]
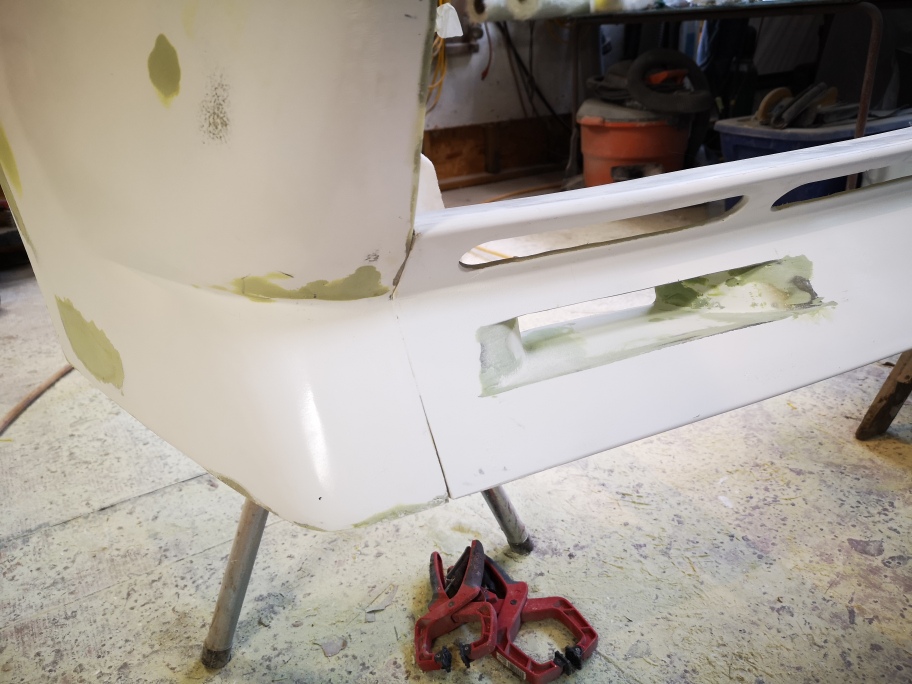
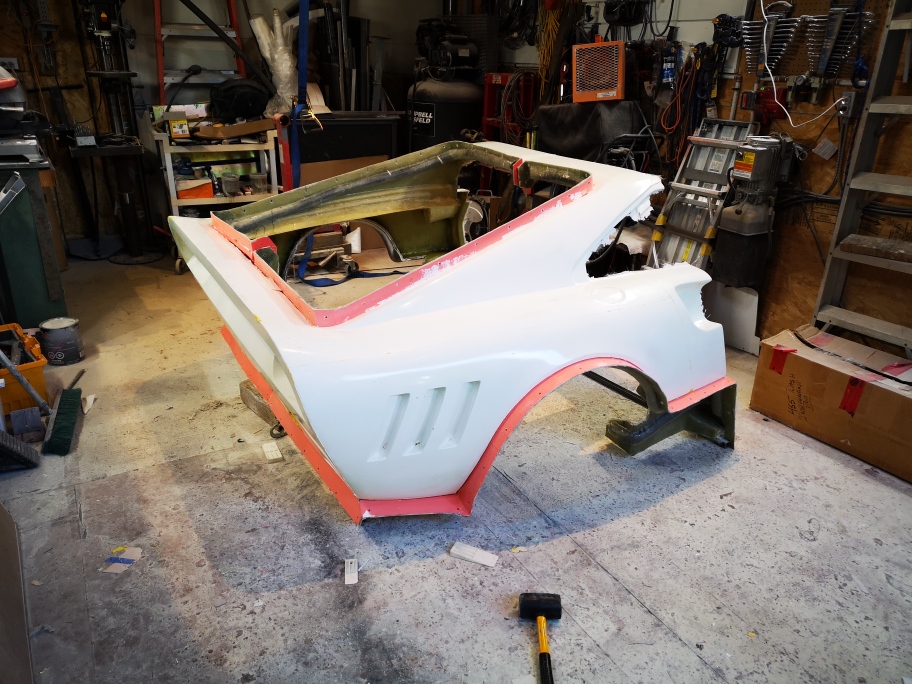
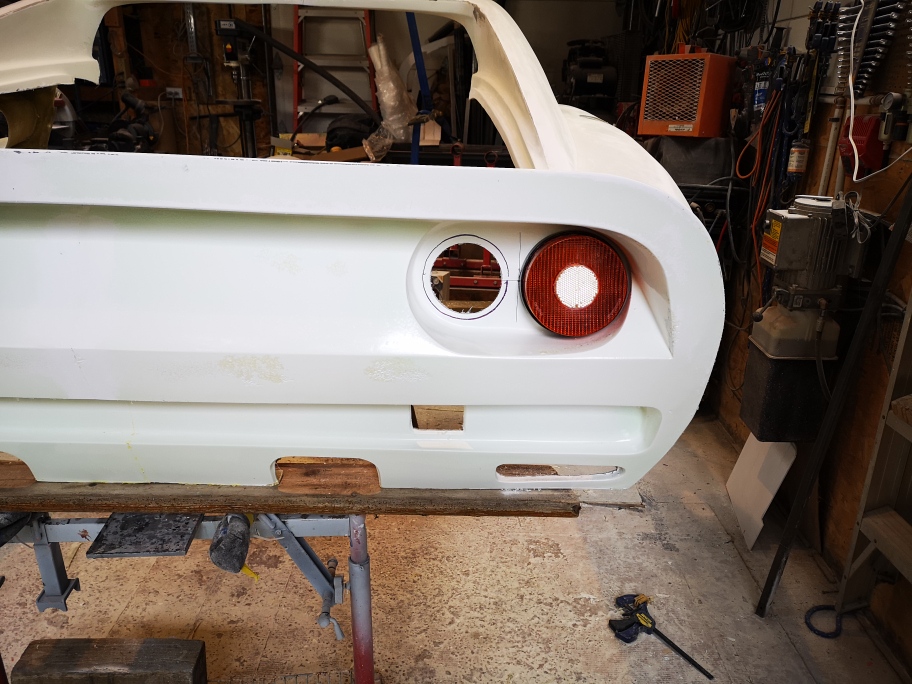
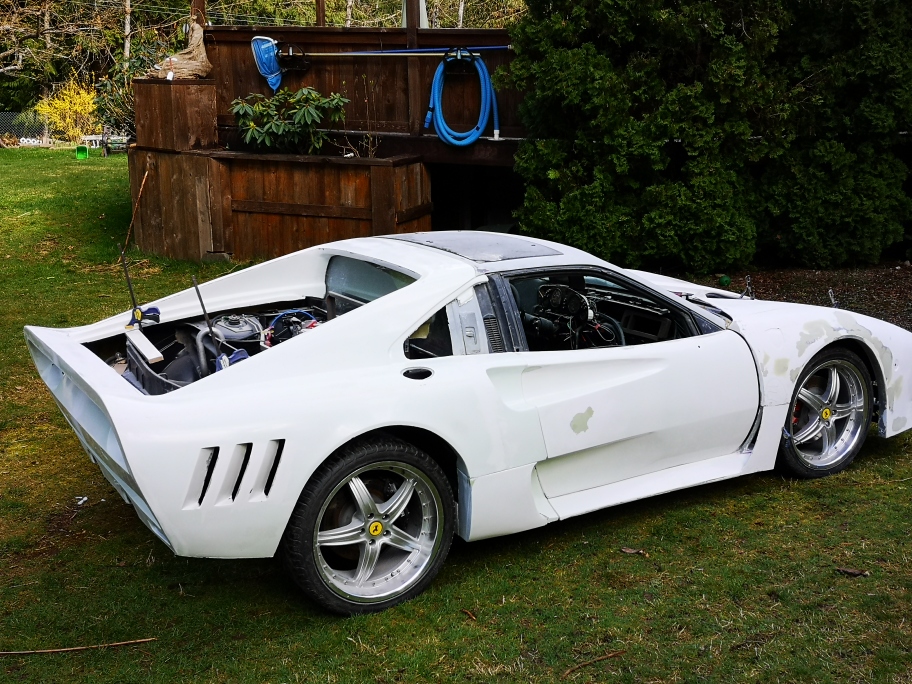
I finish preparing the rear clip for installation on the car, came out pretty well . I have calculated the new rear is only 1/3 the weight of the original. That’s about 200 lbs savings 🎉
Test for one of the tail lights.
Stay safe
Wayne
[This message has been edited by dobie1 (edited 03-27-2021).]
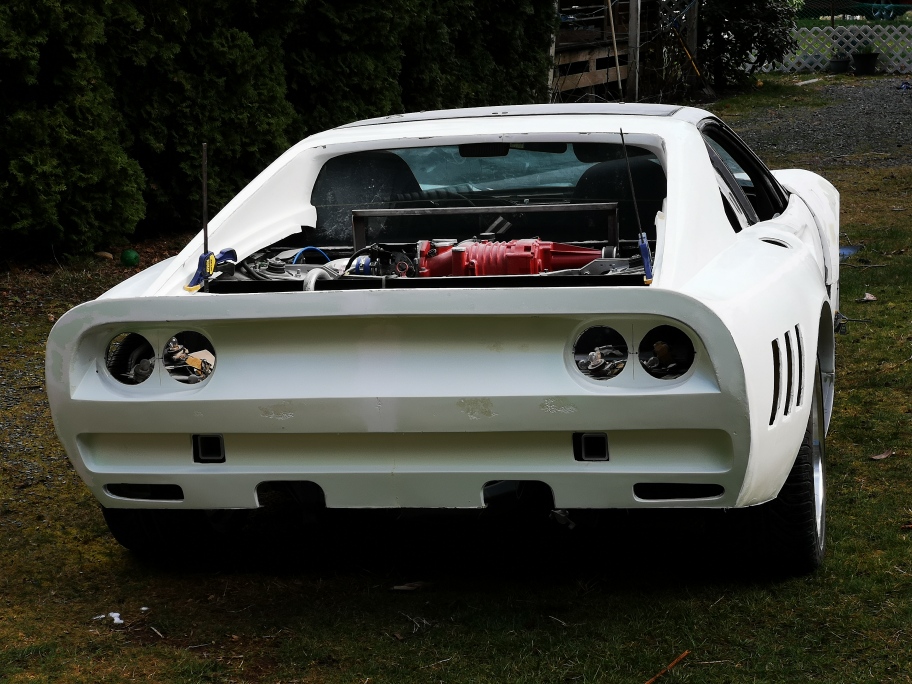
Hi Bob , thanks🙂. coming from you means a lot. Don O. Came over today to give me a hand we got the rear clip installed today.!! We pulled the car out of the portable garage and blew out a years worth of fiberglass dust from the shop. Moved the lift back into the main shop which now gives me the portable garage to do the spray painting of the panels it’s coming together really well.
I still need lots of finishing and alignment but it gives you the idea.
Looking great Wayne! We have a lot going on at the moment an working on a new shop so it’ll be awhile before we are ready to start producing these bodies. Any interest contact me thru email at scorpio792009@yahoo.com thanks to all involved and God bless 🙏
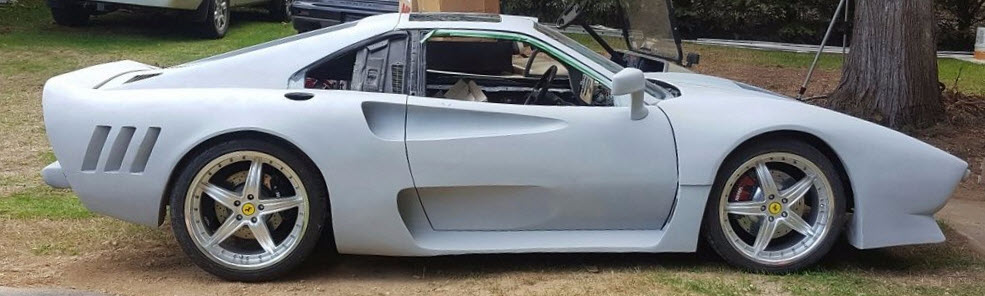
What really "sells" this car is that you have managed to eliminate the one thing that makes most Fiero replicas look horrible.....the annoying high roofline. The way the body curves upward as it goes to the rear of the car makes all the difference in the world as well as the slighty higher front end where it meets the windshield.
[This message has been edited by IMSA GT (edited 03-29-2021).]
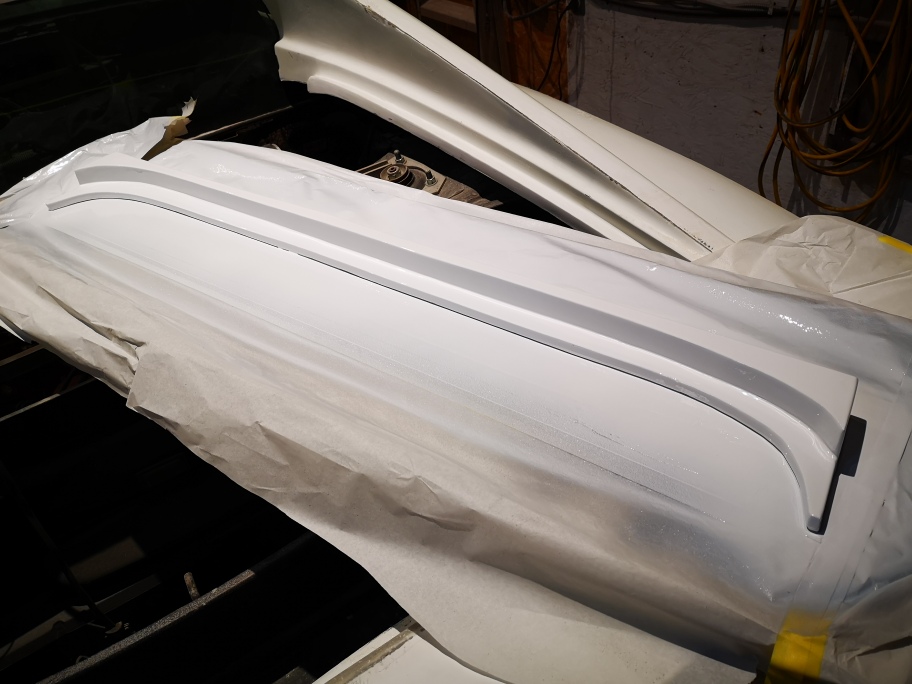
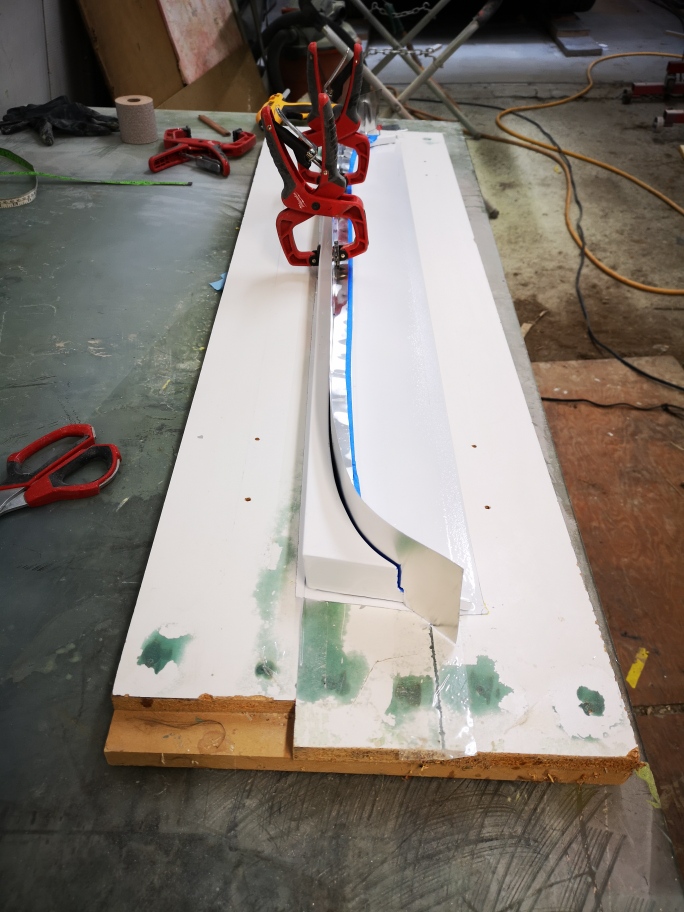
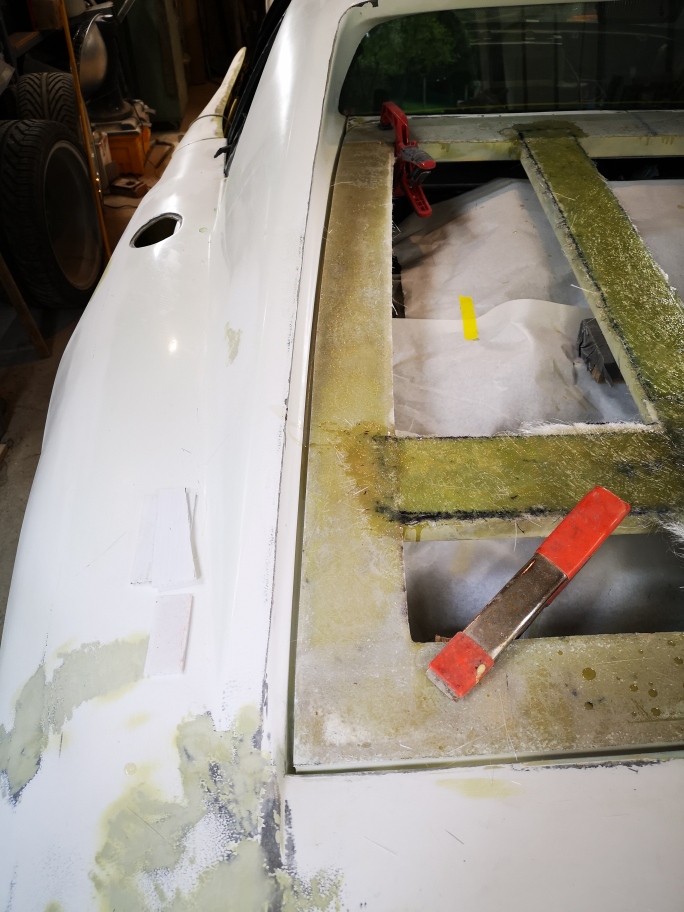
Thanks everyone for visiting, while Don O. Was here last Sunday he gave me a hand with fitting the rear deck lid. As I had mentioned earlier in a previous post the deck lid has multiple slopes and angles to it, after we got it set down on the lips of the sailplane the top was low in a couple areas requiring me to add foam to a few areas.
The next day I sanded the top down to the contours and it came out pretty good
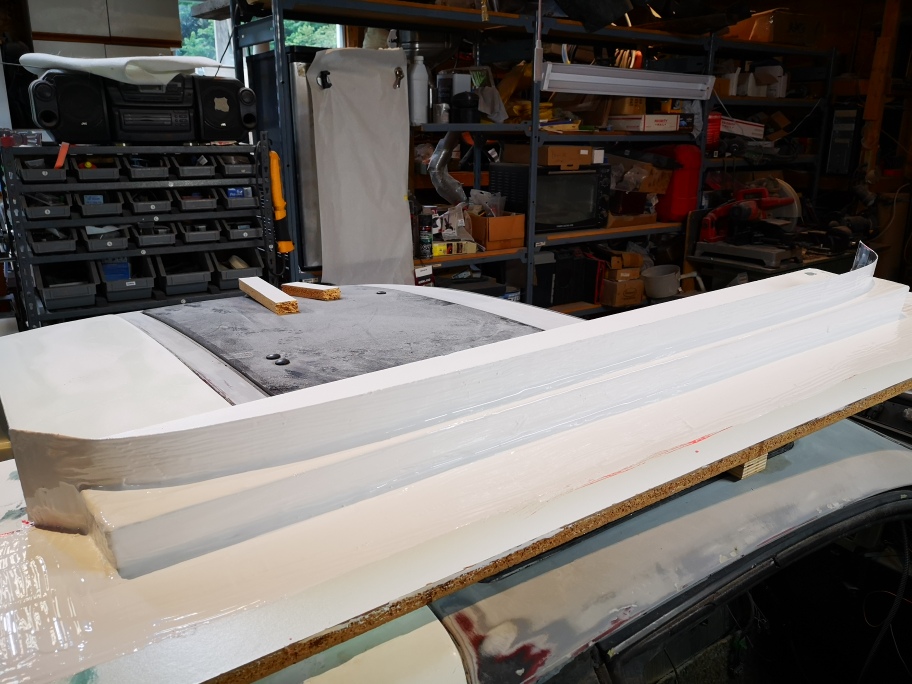
One thing I didn’t like was that the deck lid had an unfinished look near the rear window , on the real car they have a bridge between the sail planes at the window where the deck lid sits down on . So I decided I had to build one , having this piece does two things 1. Ties both sailplanes together making them solid and making sure the deck lid recess and gaps remain exactly the same. 2. Allows for a deck locking mechanism to be attached
The foam is a great medium to build something but it has no strength and is damage easily. I’ve used it before Rondo “ resin and bondo mixed” when it set up gives a hard surface to finish sand, and paint. I use it to make a quick mold from, then You use bondo to fill all the small divits then prime and get a perfect part before paint.
Stay safe everyone
Wayne
[This message has been edited by dobie1 (edited 04-05-2021).]
Originally posted by IMSA GT: What really "sells" this car is that you have managed to eliminate the one thing that makes most Fiero replicas look horrible.....the annoying high roofline. The way the body curves upward as it goes to the rear of the car makes all the difference in the world as well as the slighty higher front end where it meets the windshield.
Agreed, it does that well. The Plazma did it well too. Chops address it but create other dimensional issues. Low at the front of the door glass and inclinining to the rear of the glass is key.
Hi Wayne I have been trying to fallowing along when ever I get a chance , I have a cold at the moment so I am laying low at home , finally got caught up . It's totally awesome !!! really coming together nicely , it makes me believe there's hope for me , you know that overwhelming feeling , the omg there is all this still left to do . Keep up the great job , once the pandemic settles down I would love to come up to see it with Don . Cheers Phil
[This message has been edited by Falcata (edited 04-06-2021).]
Thanks for stopping by Alan yes I agree on the proportions being correct for the look of the car, I certainly was trying for the look.😅 Hi Phil I’m hoping to have you and Don up one day soon!
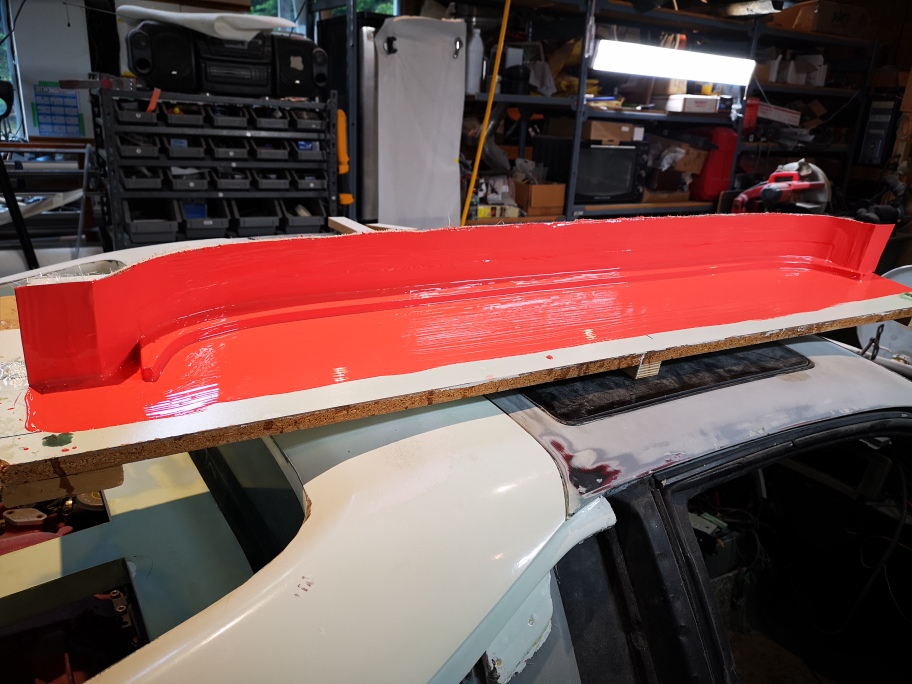
I’ve been busy building more molds , I completed the the mold for the rear deck filler piece. It’s amazing doesn’t matter how small the part is it still takes the same time for the fiberglass to setup and cure.
I had to finish paint it
Then gelcoat
Installing the metal flange
Adding the gelcoat
Then the fiberglass
One side done onto the backside
Reinforced added and final layers of glass.
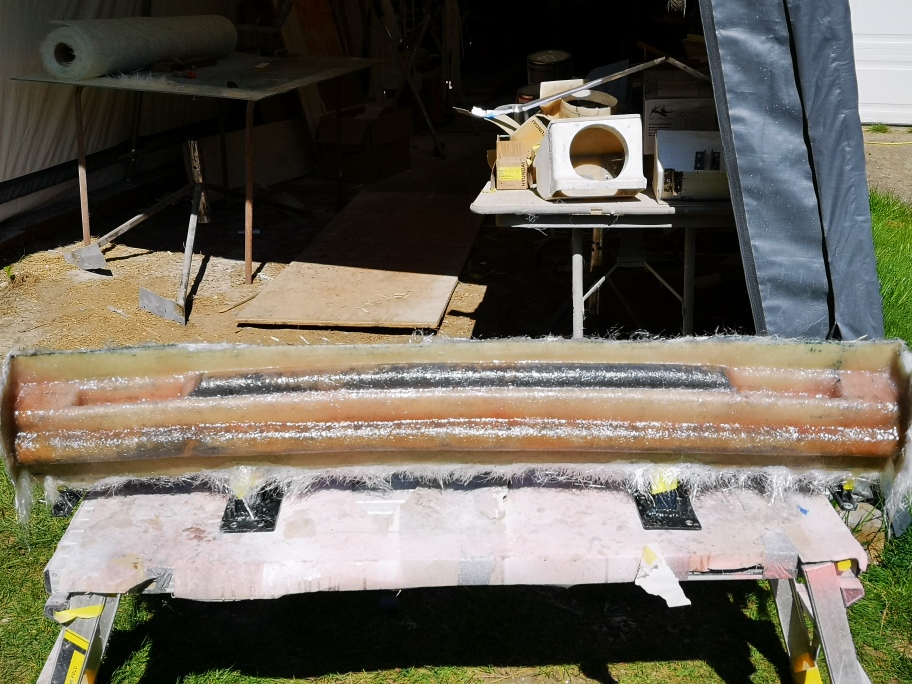
Next mold is the front bumper a bit more work but similar processes, this will be a 4 piece mold.
Adding the metal flange
First layer of glass, the gelcoat was already done no pics.
I’ll added the reinforcement tomorrow plus the final glass layers then onto the other side of the bumper.
Stay safe everyone
Wayne
[This message has been edited by dobie1 (edited 04-12-2021).]
Geez Wayne. A bit jealous here. You're just whipping that stuff out now. I certainly know the effort to do what I'm doing, so you're blowing me away with your work.
I like the idea of the support by the window. I looked at mine over the weekend. With my Aurora, I'm afraid to cover too much of the engine. It's already a pain to get to the front. I'll just stay the course.
Loving the look. Great job.
Bob
it’s all about retirement Bob!!! and a wife that’s giving me the time to hopefully get the car done for this summer.... fingers crossed. I have to admit being at this for as long as I have it’s getting easier.
Here is the latest update for those that are following the build .
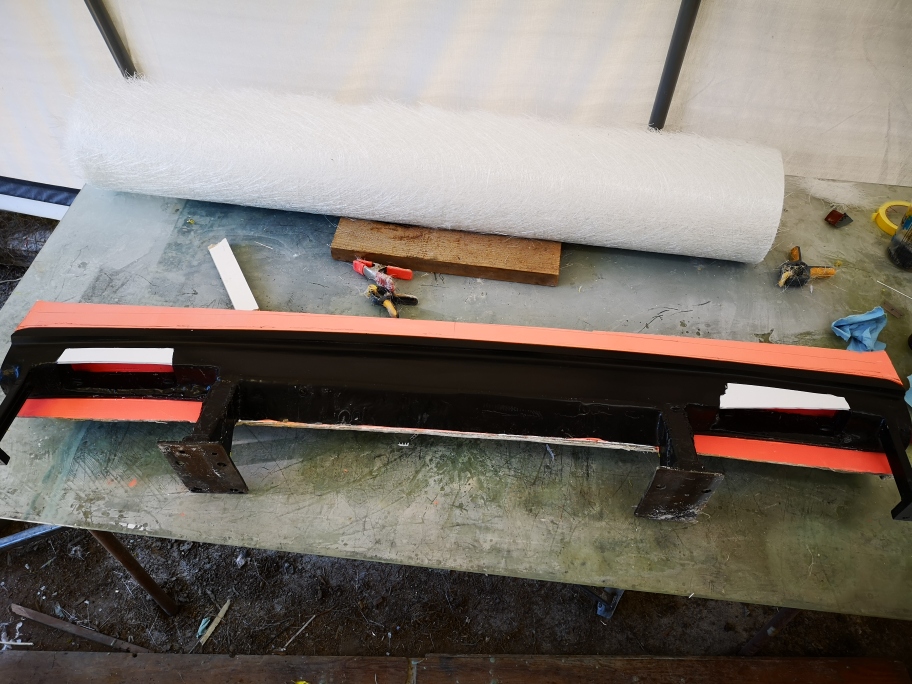
I completed the bumper mold it was a bit easier than I was thinking turned out to be a two piece mold.
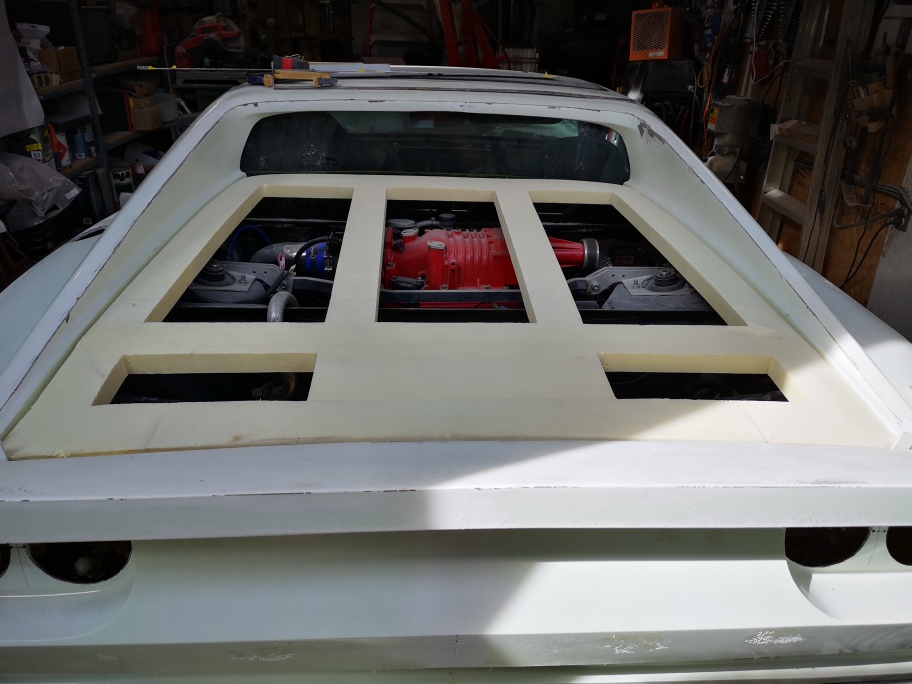
And after a couple days I laid up the filler piece for the rear deck . I added an additional extension that will be trimmed to accommodate the engine rad cap and intercooler reservoir cap as well as accessing the oil dip stick.
Once it is secured “bonded”it will give me final dimensions to trim the hood too. I’ll continue with the rear hood finishing so I can mold it And finally lay it up.
Hi Everyone It’s been awhile, I’ve been working very hard over the last few weeks I finished the 3 bumper molds and have been writing up a installation manual for the kits that will be built. I also removed the Fiero roof panel as it had been damaged a few years back , I’m considering doing a sunroof delete for a couple reasons first there is no place to put the glass if I remove it and secondly the 288 has no sunroof. I haven’t made a final decision yet but need to soon then find a good replacement.
I’ve also been working on the rear deck hood it is really a pain but I have a plan now I just need to execute.
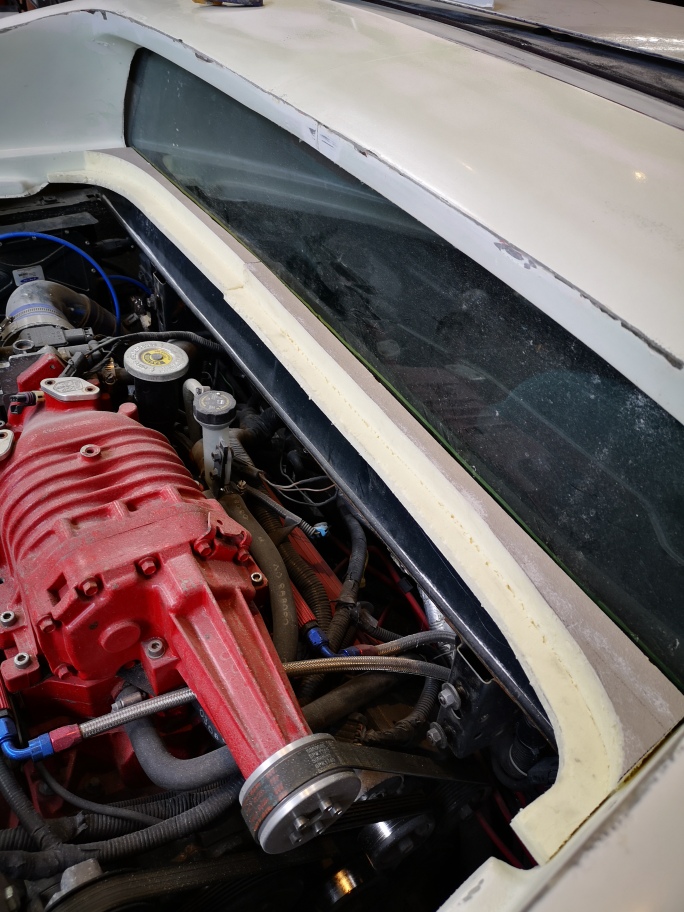
Because of the multiple angles both forward and back as well as left to right and level at the window I had to secure in the direction I was going to layup do three layers let it cure, secure for the other direction layup 3 layers let it cure. A total of 4 layups so about 8 days to this point.
At least I have the gaps I want 3/16” on all edges
I’ll do the sides next then the underside. Then sand / fill and finish the whole piece before primer and painting . Then yes mold the part and do a carbon fiber layup . Thank god this is the final part to the car so hopefully I’ll have the time to finish the car and be driving this summer.
Thanks for stopping by Ted and Bob always appreciated!!🤙
Lots of thinks going on in my life grandkids and the honey due list.... always seems to take time away from the build. I had to build a permanent fence for the dogs and grand kids , also preparing for a roofer to put a new roof on my shop should be finished tomorrow Gutter installation week this should be the last distraction for awhile.
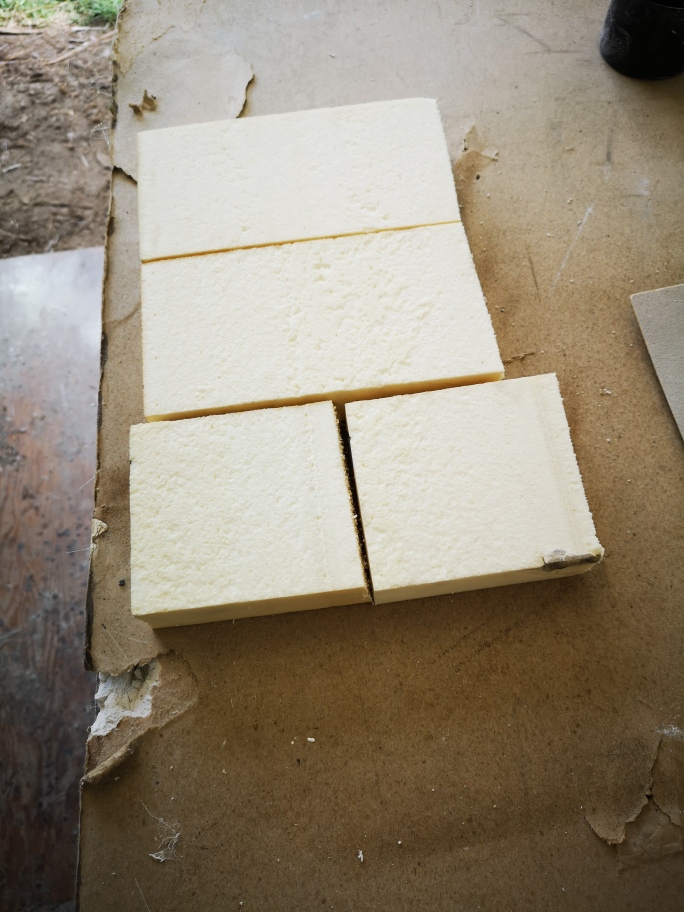
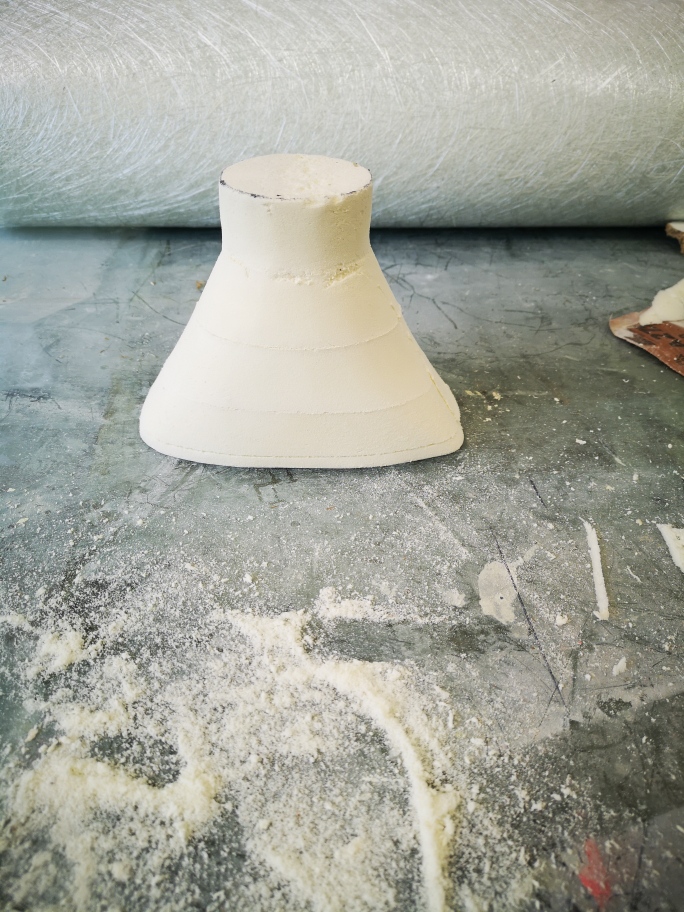
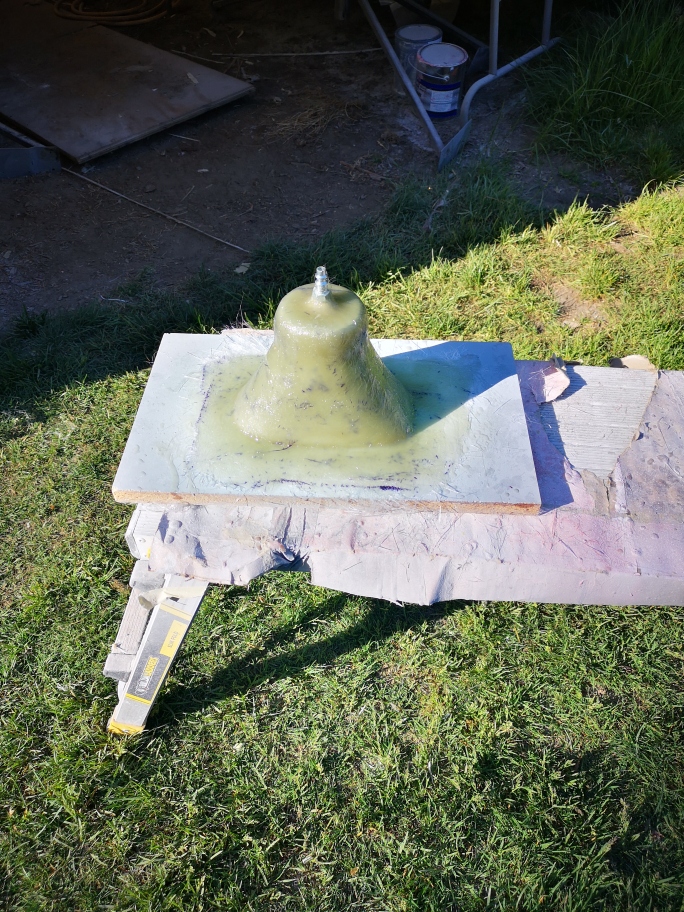
I was able to get a couple things done on the car. I needed to build a inner collector for the upper and lower scoops , the one I built will be able to be used on both left and right sides. I thought some of you might like to see the full process from start to finish on the mold. I tried something new in this mold adding a air valve to help in the demolding from the plug.
Starting with foam blocks
I attach them together using super77 spray glue
I carved and sanded the foam to the shape I wanted
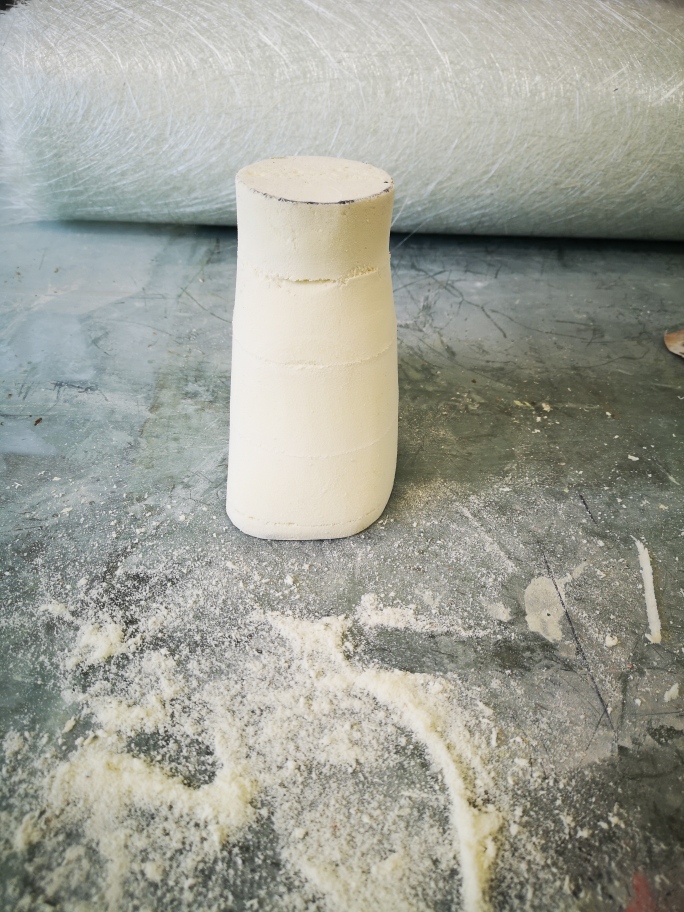
Then attaching to a piece of melamine board , I painted the foam with a coating of Rondo. I let it completely cure for a couple hours and sand to a 220 Grit finish.
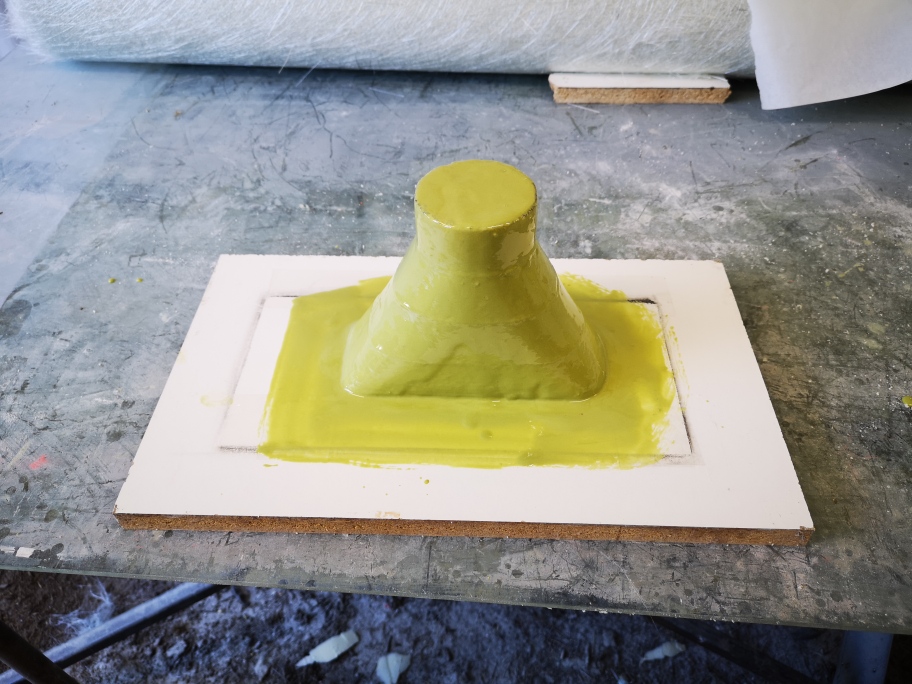
Then sprayed with 2k primer
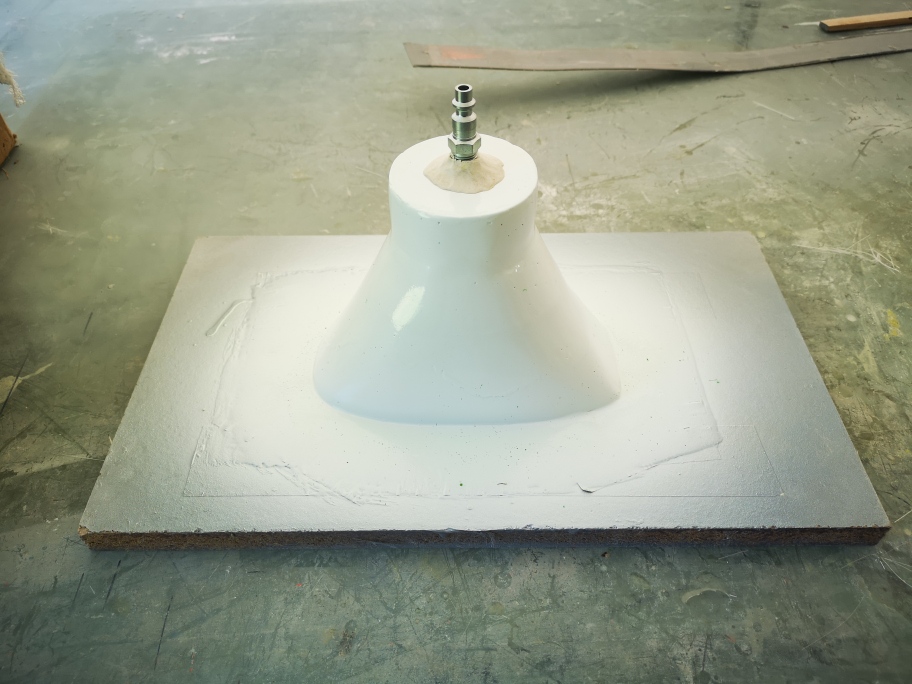
Then sprayed with with white single stage paint and using clay to seal and attach a air connector .
I then did a normal fiberglass layup on the part
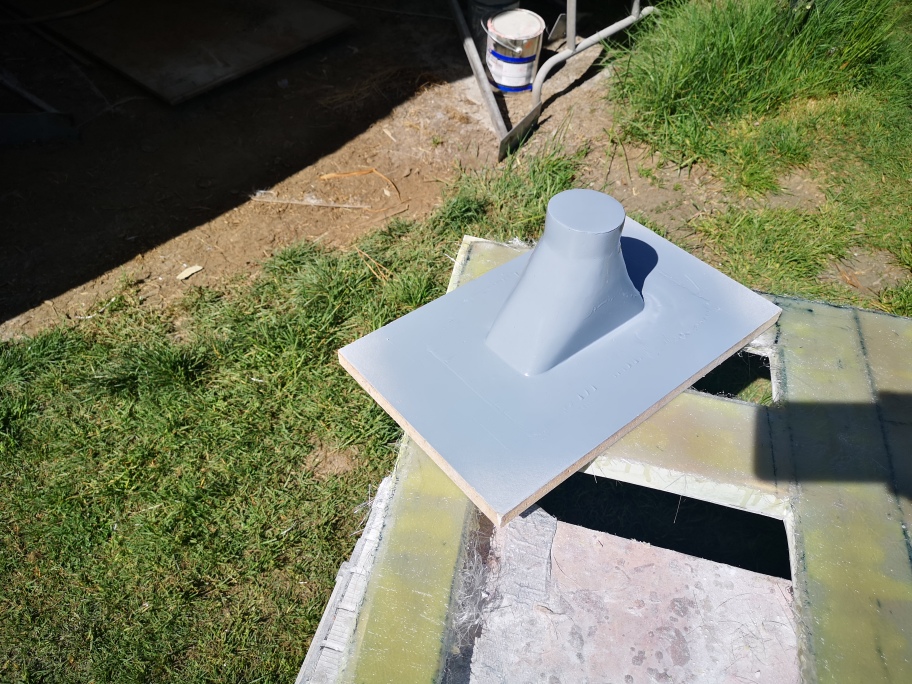
A couple days later I attach a air hose to the connector and opened up the valve and the mold just floated up off the plug. freaking cool🥳 I wish I had tried this earlier so much easier.
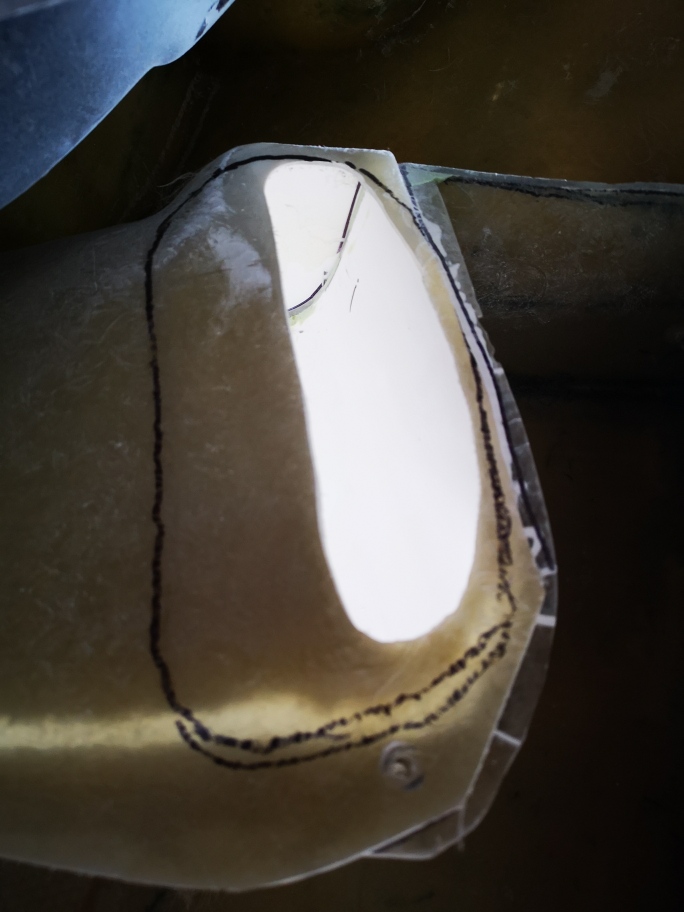
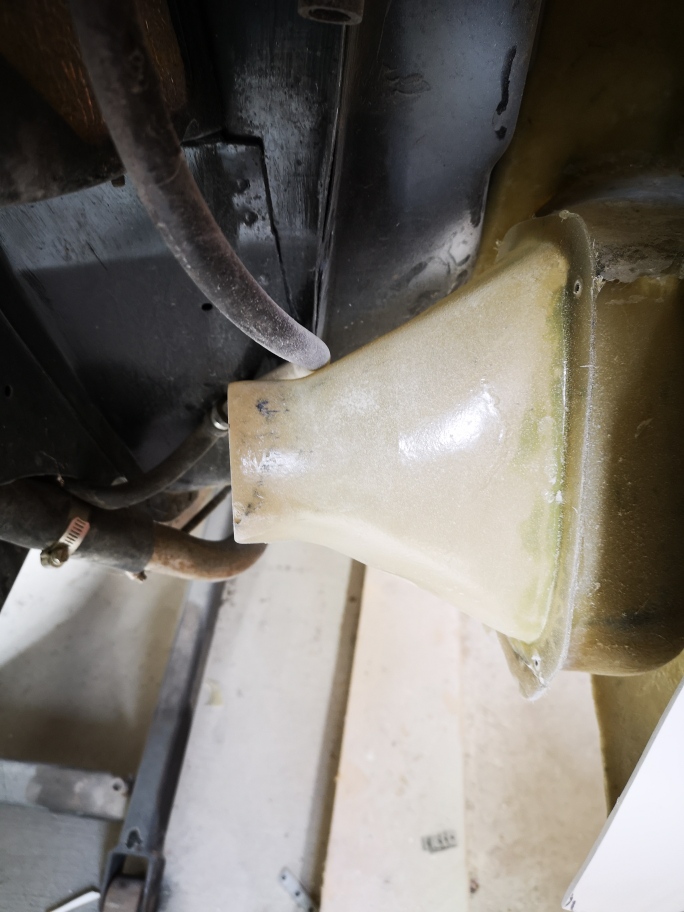
I hope everyone is doing well. I have been working in between family distractions, and I was able to finally finished the upper and lower inner ducts .In My last post I had built a mold to build the inner ducts , I had hoped that the new duct could be used on the upper and lower ducts but unfortunately they didn’t work as planned they were to large and shape was to different to fit the upper opening so I had to build a smaller versions. I built and finished them using the same process using rigid foam to carve to shape. While going thru the process installing the inner ducts I discovered I didn’t like the way the forward part of the wheel-well finished and looked. So decided to modify it at the same time I installed the lower duct. After the all the mods I permanently attached the outer scoop in place.
Here is a shot of the old opening and the enlarged one for the new duct still needs to be cut out.
After a bit of body work on all the glue joints it’s ready for finishing.
Attaching and keeping the upper duct in place while the glue setup was a bit of a challenge bungee cord worked out pretty well.
Lots of sanding and body work and All the transitions came out great. I also opened up the openings on the top ducks.
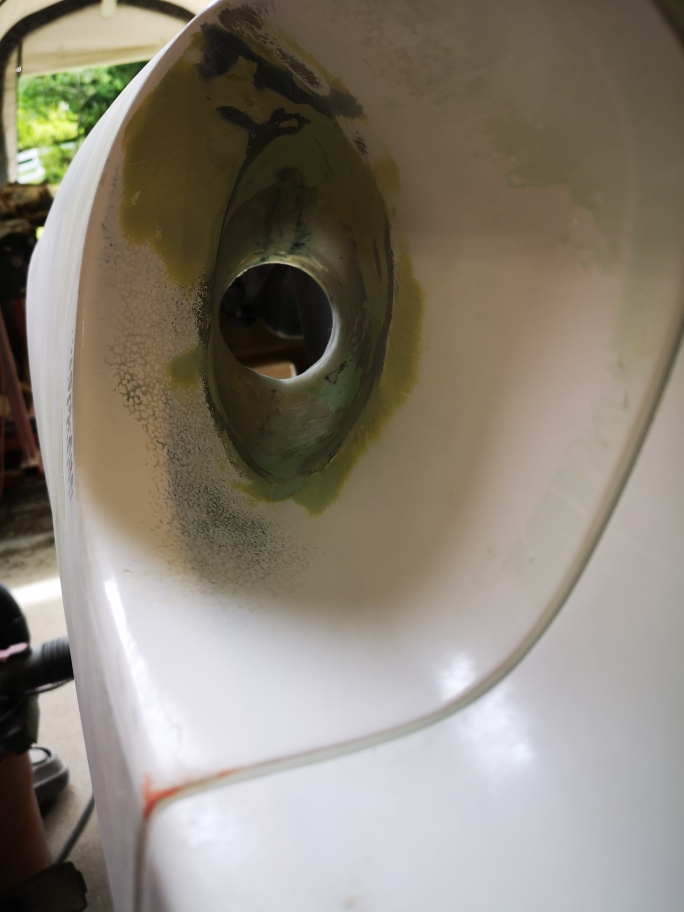
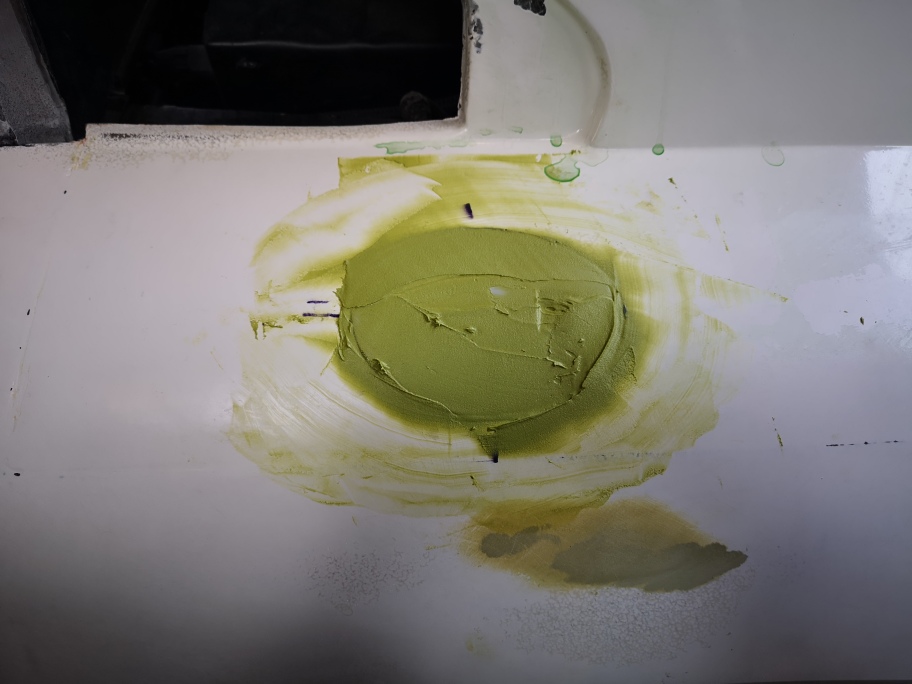
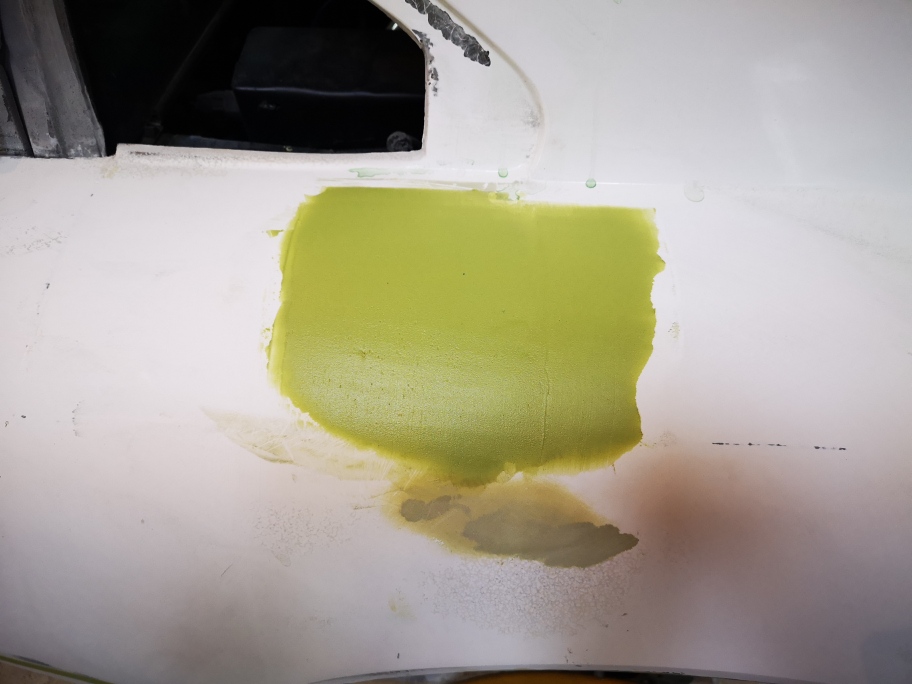
I’ve also started to install the gas caps , I started by creating a inner cap lip for the cap to sit on, I tapped the edges of the cap then took bondo and put a good bead of around the edge and seated it down on the lip to fill all the different contours.
The cap I’m starting with is correct but doesn’t have the fender curve that my car has so to solve this I attached it using hot glue . Then I Put a coat of bondo over the the whole thing then sanded it to fit the curve.
I’m planning on removing the rear body soon to finish all the underside, once completed I’ll plan on spraying epoxy primer to seal everything. Then spray a satin black paint to finish it.
Stay safe everyone. Wayne
[This message has been edited by dobie1 (edited 06-15-2021).]
The gas door treatment reminds me a little of how my "mentor" taught me to make Corvette doors fit right.
He said to put them in place, glass them solid, then with a very thin sawzall blade, cut them out the way they should've been in the first place!
Glad to see you're still at it...and believe me, if anybody knows about "family distractions".....I do...so you have my empathy and respect for being able to get ANYTHING done on your "projects"......seems to be an impossibility for me thus far.
Keep up the great job, and don't stop with the updates.....and pics!
Hey Wayne... Looks great. It's kind of hard to tell, but you're working on the lower scoops in the above pics? Really good stuff either way. I need to figure out what to do with my upper scoops, so this gives me some ideas.
I've been lurking more than working, so I guess I should get out there.
Thanks for stopping by Ted I know how busy you are always appreciated the encouragement.
Bob always good to hear from you I f you’d like I will happily layup 2 inner scoops for your build.
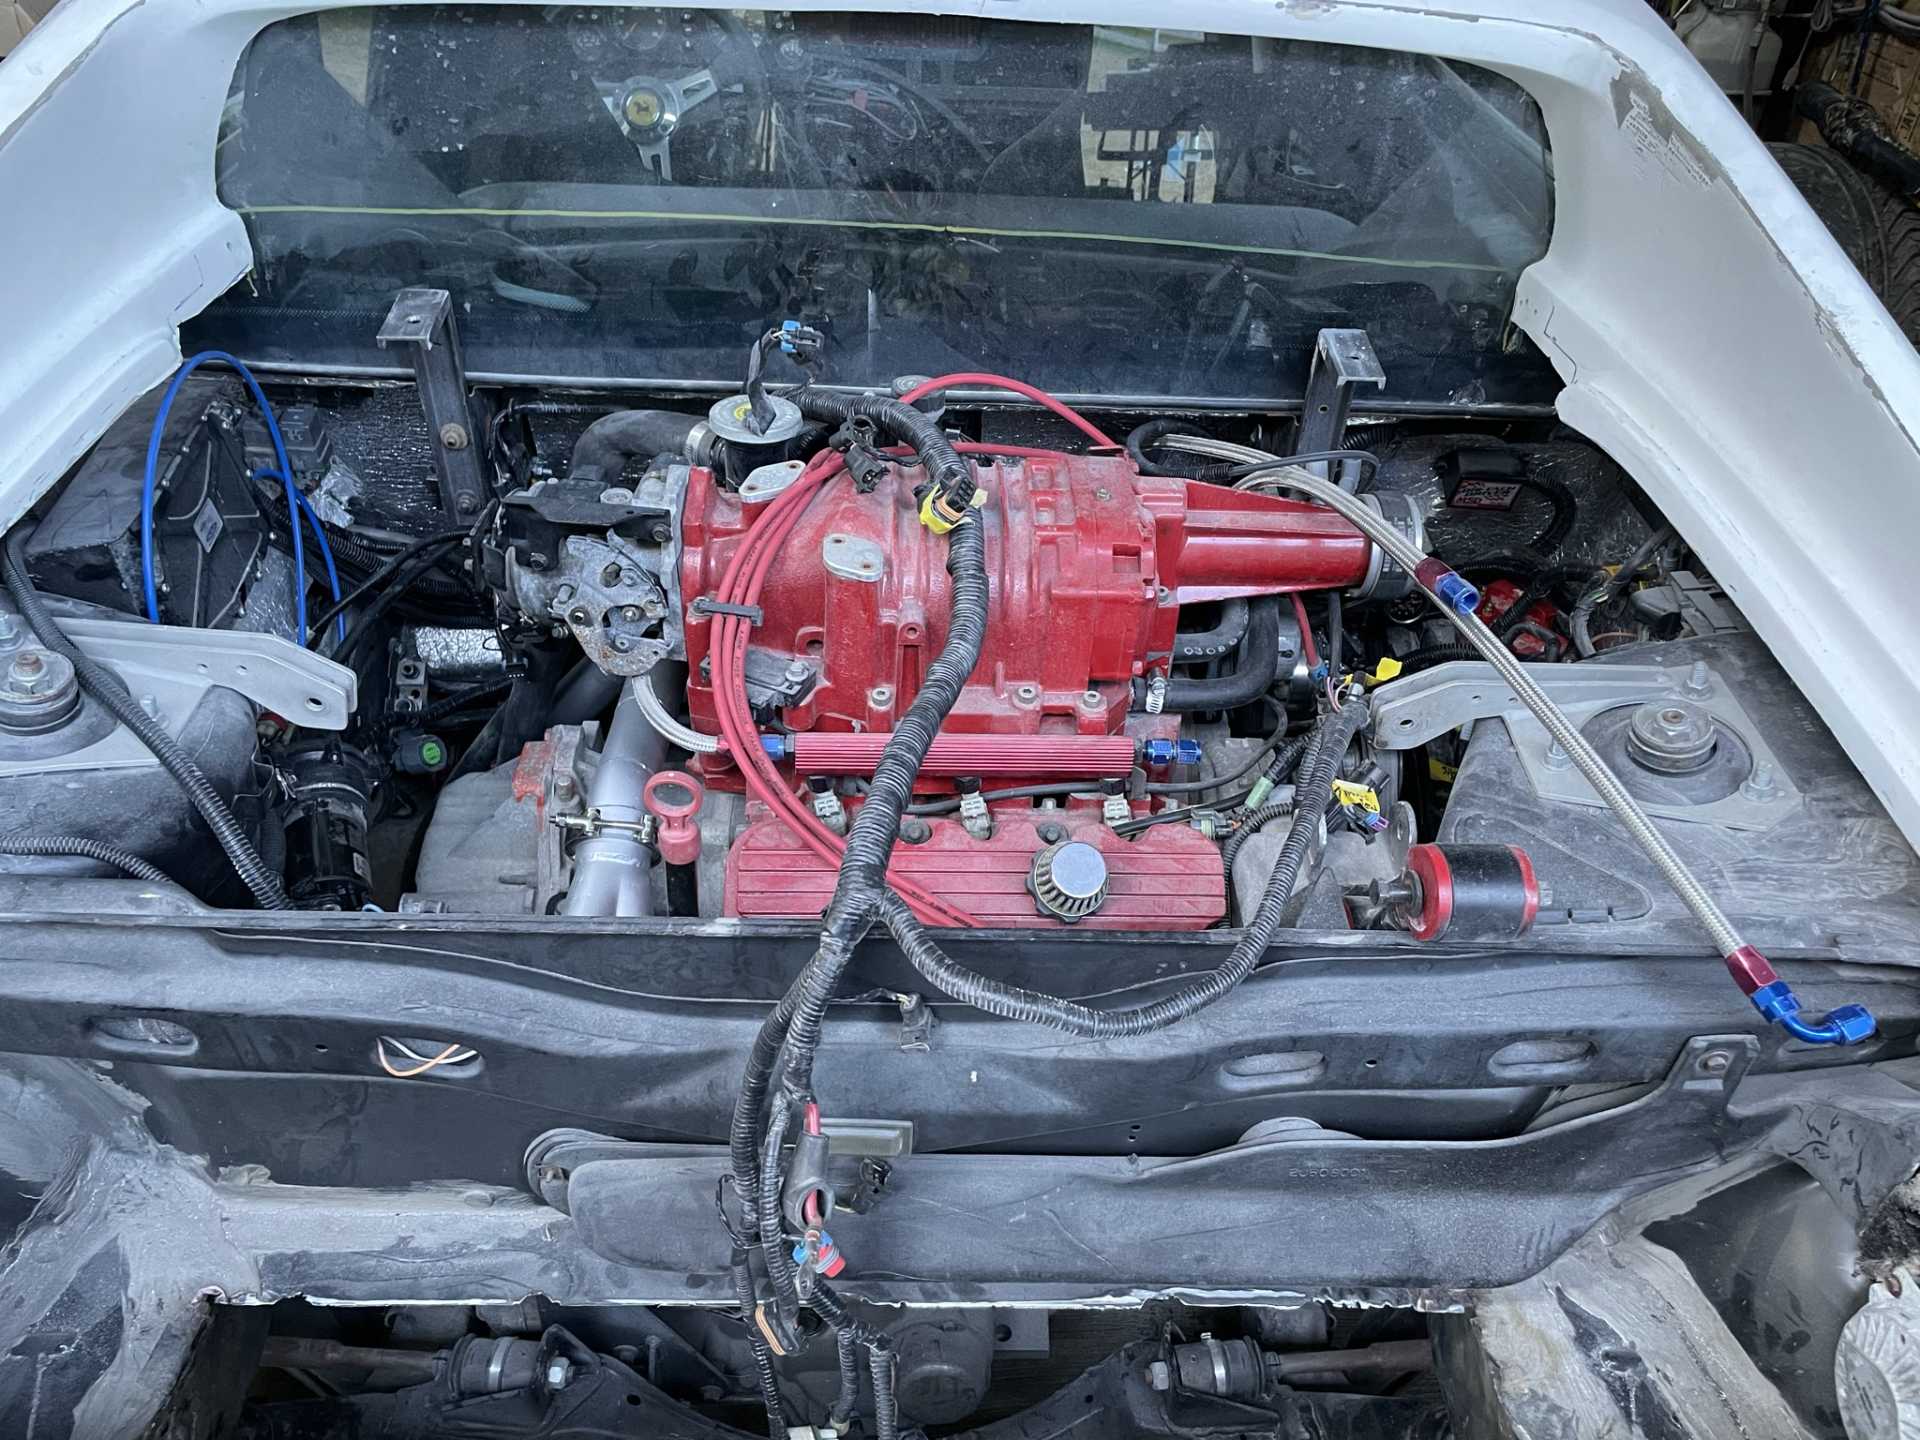
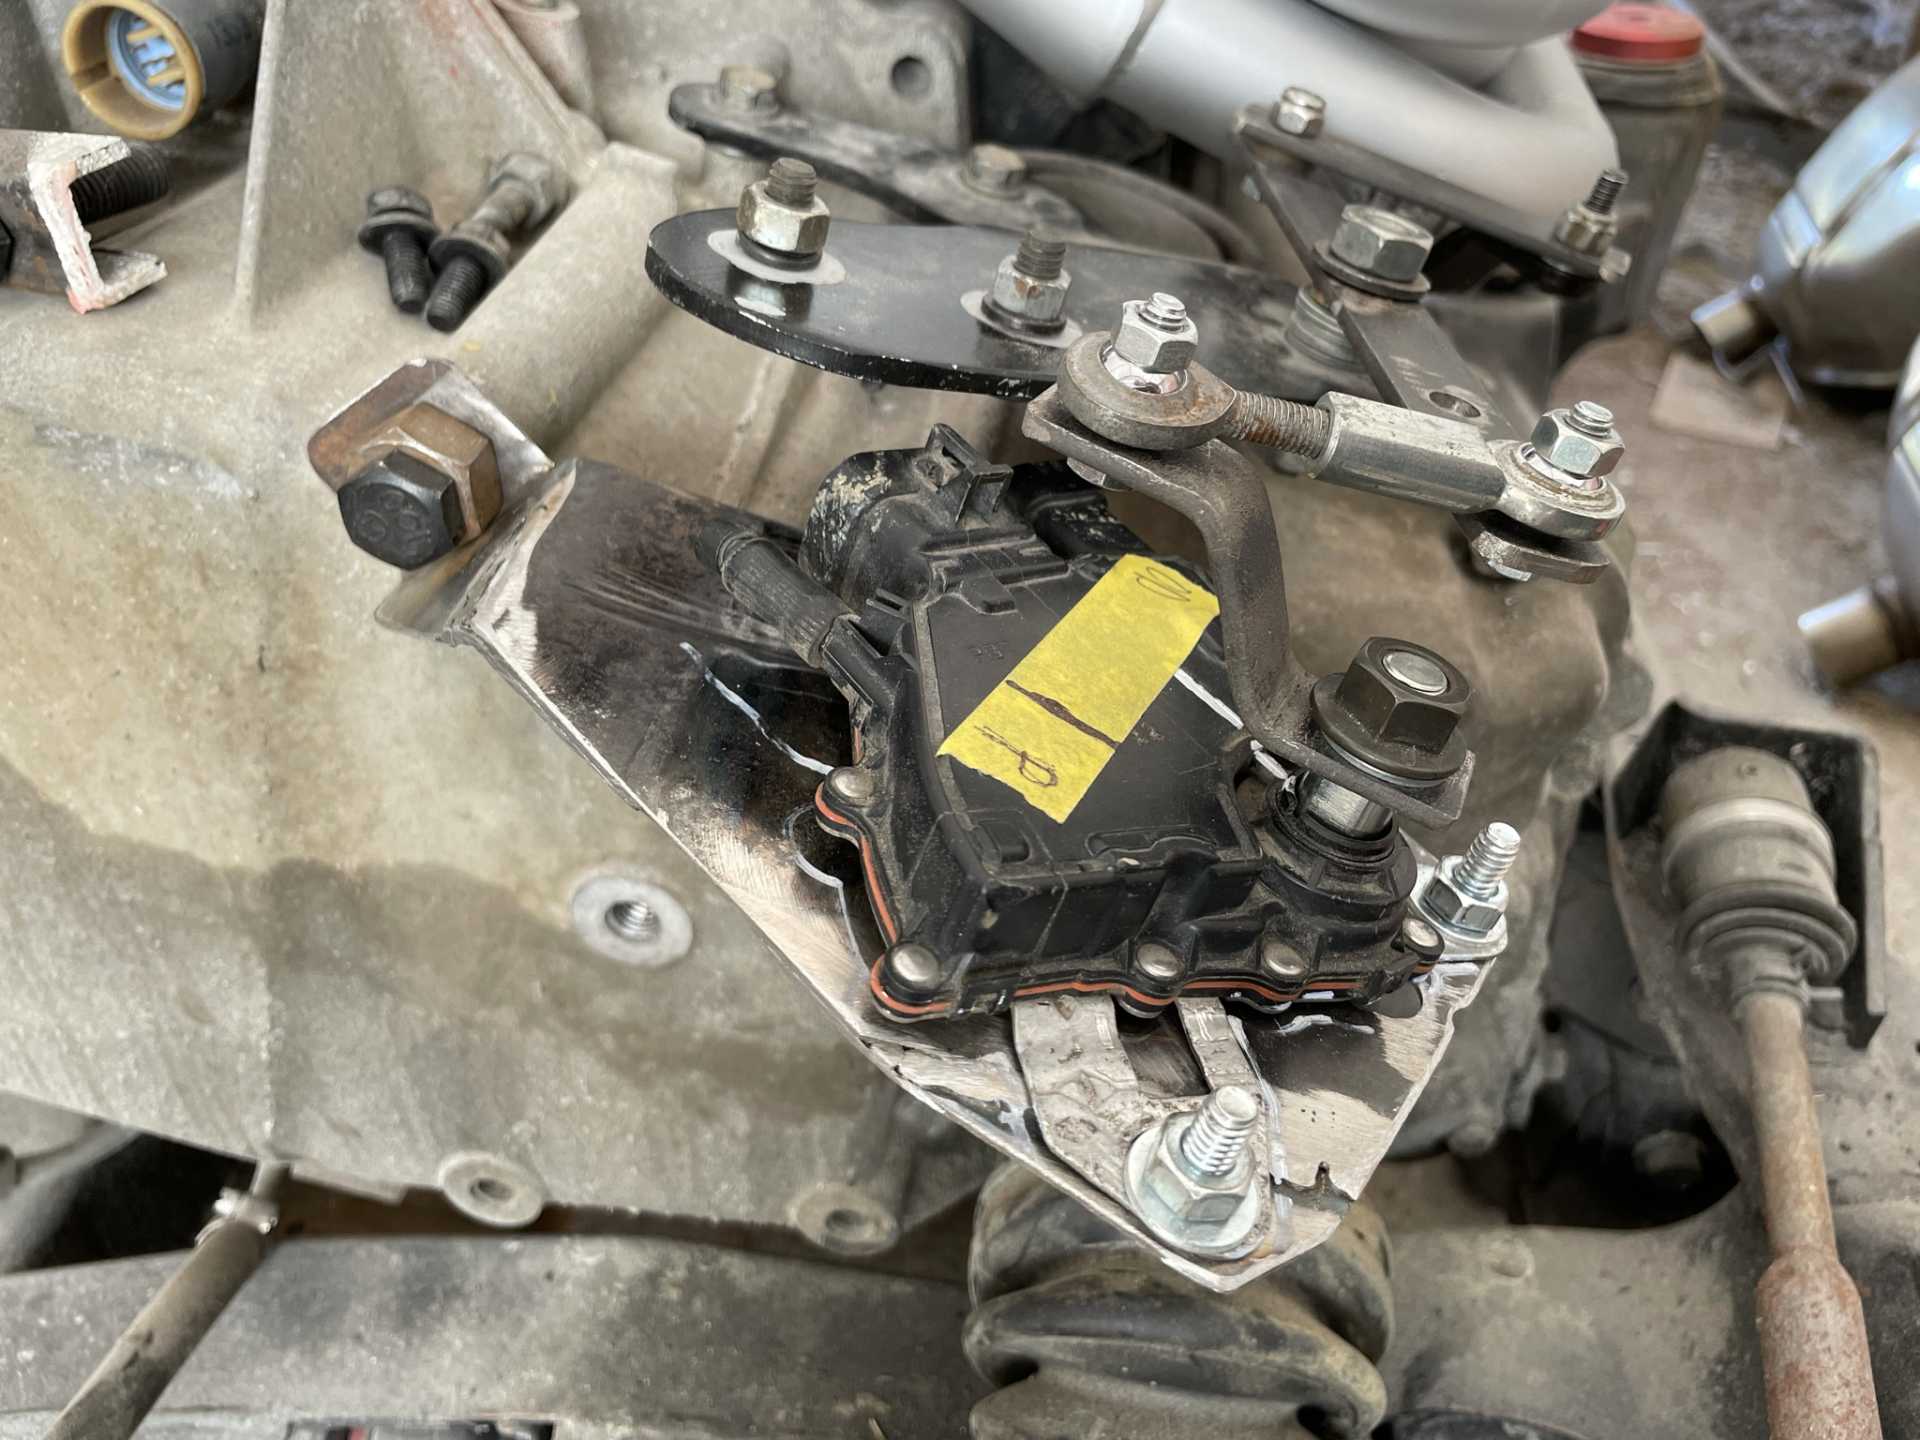
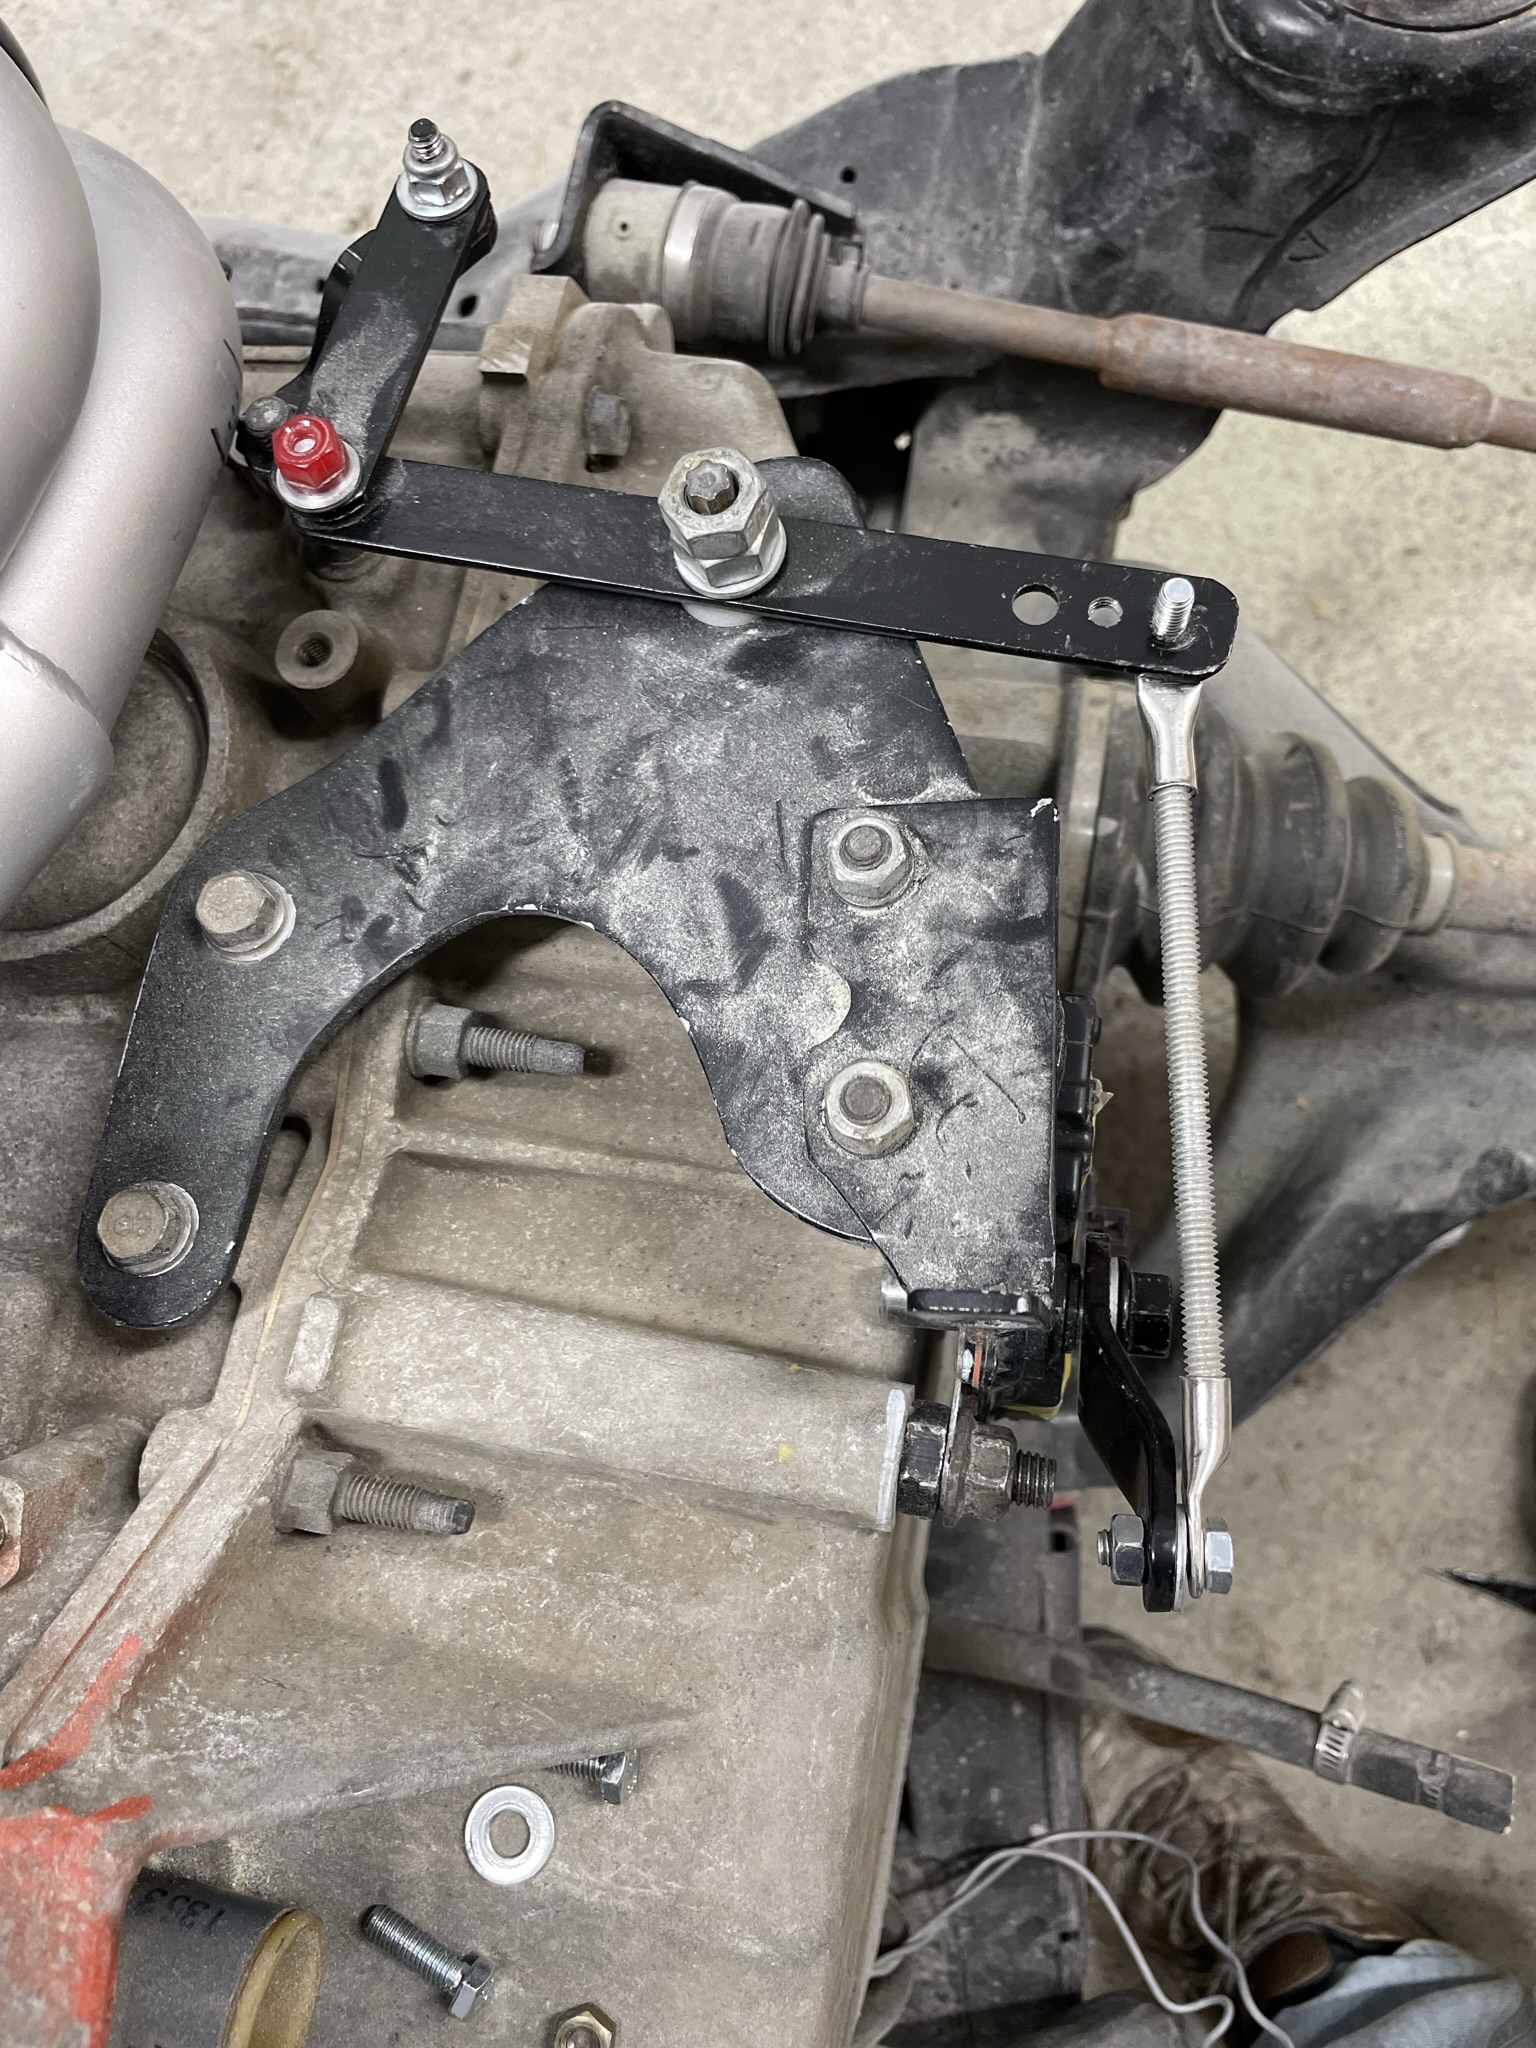
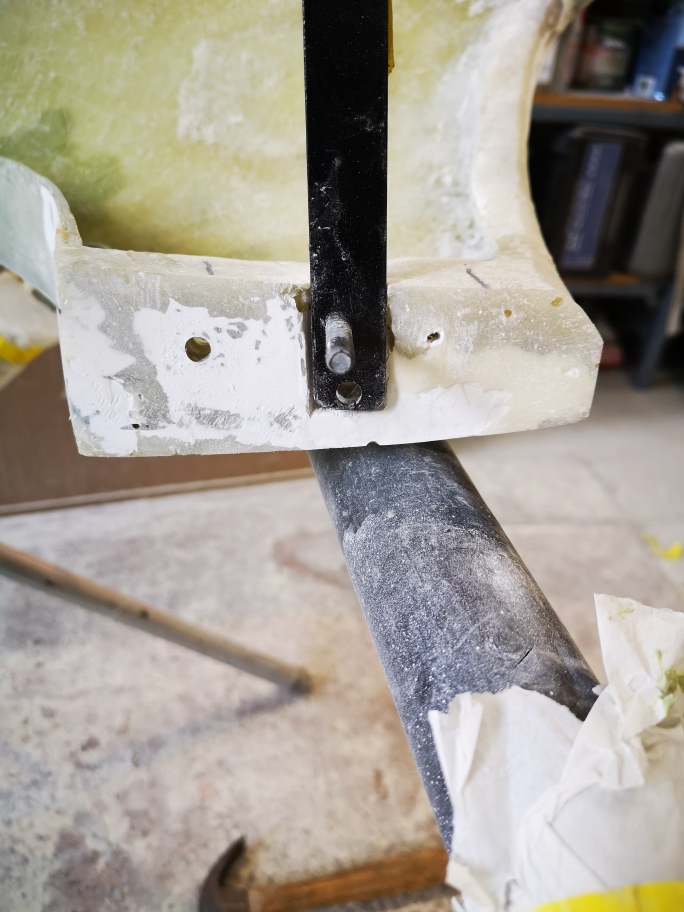
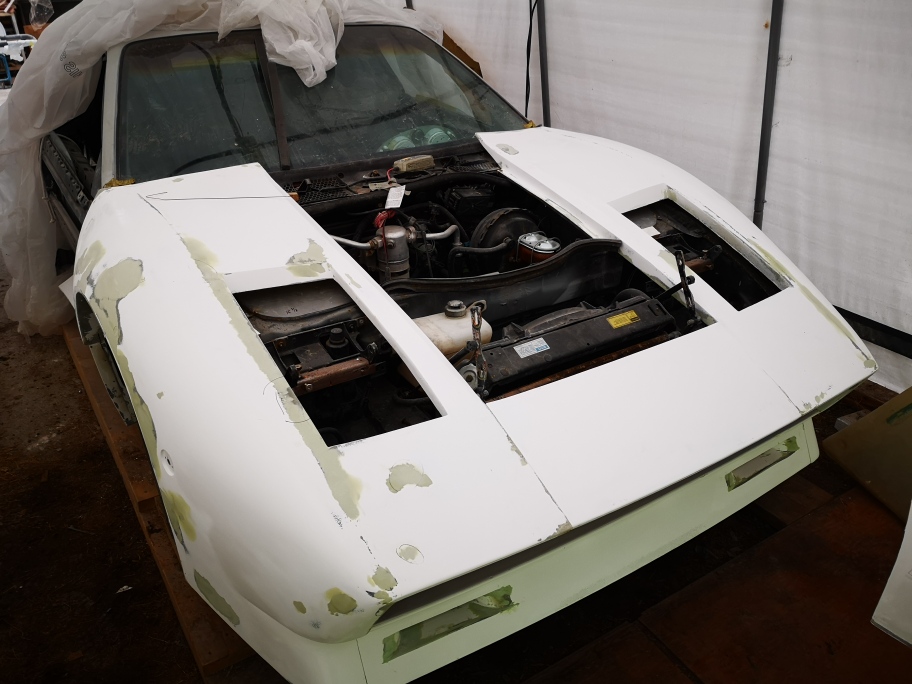
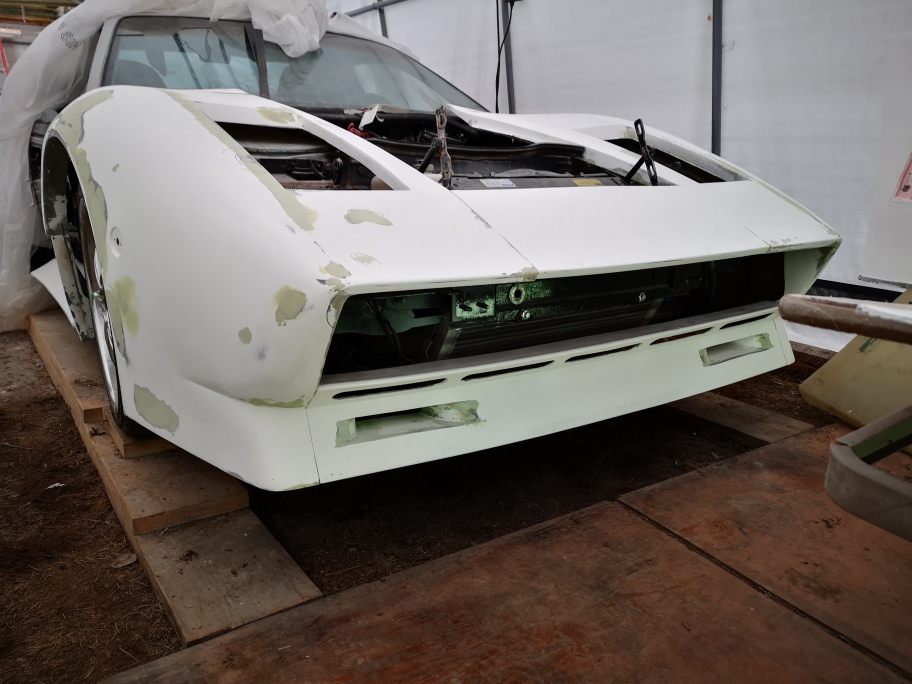
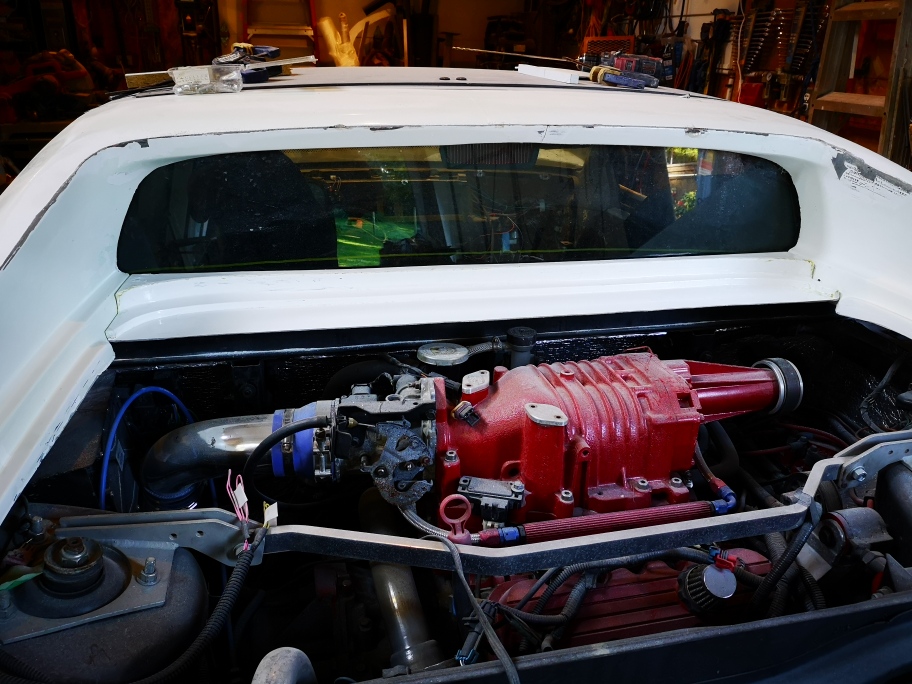
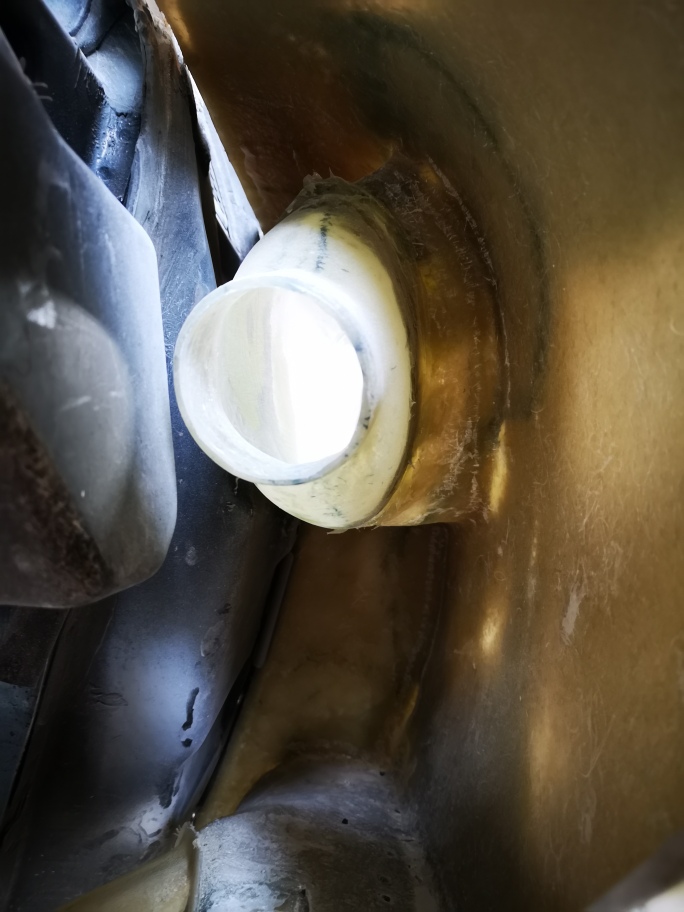
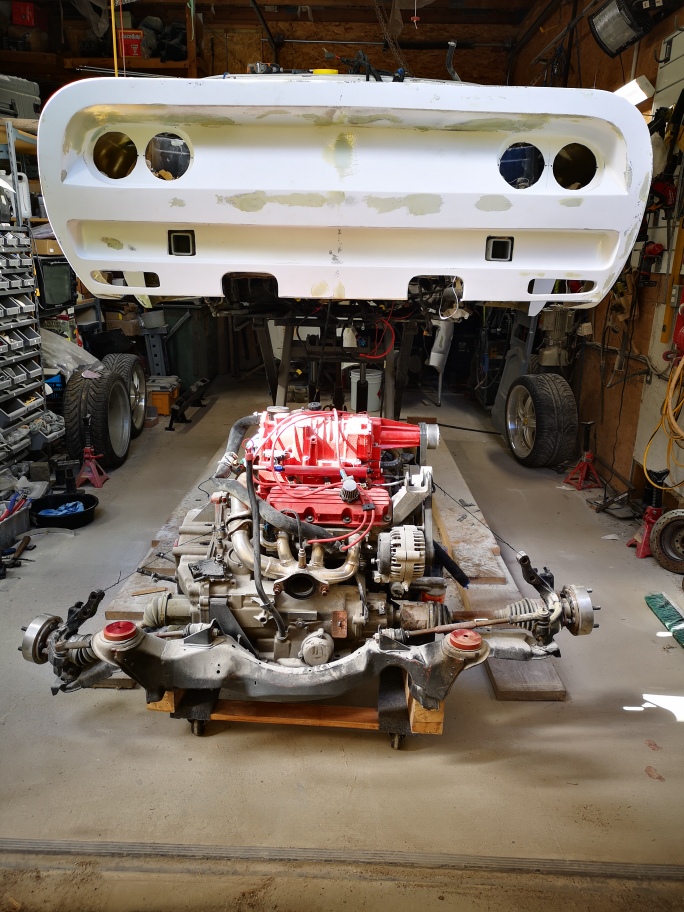
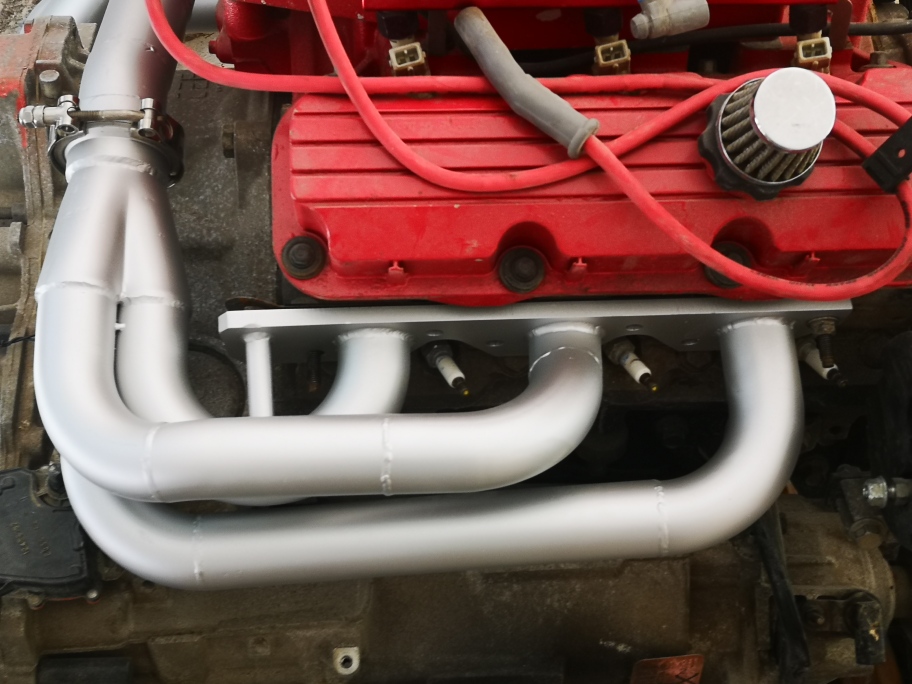
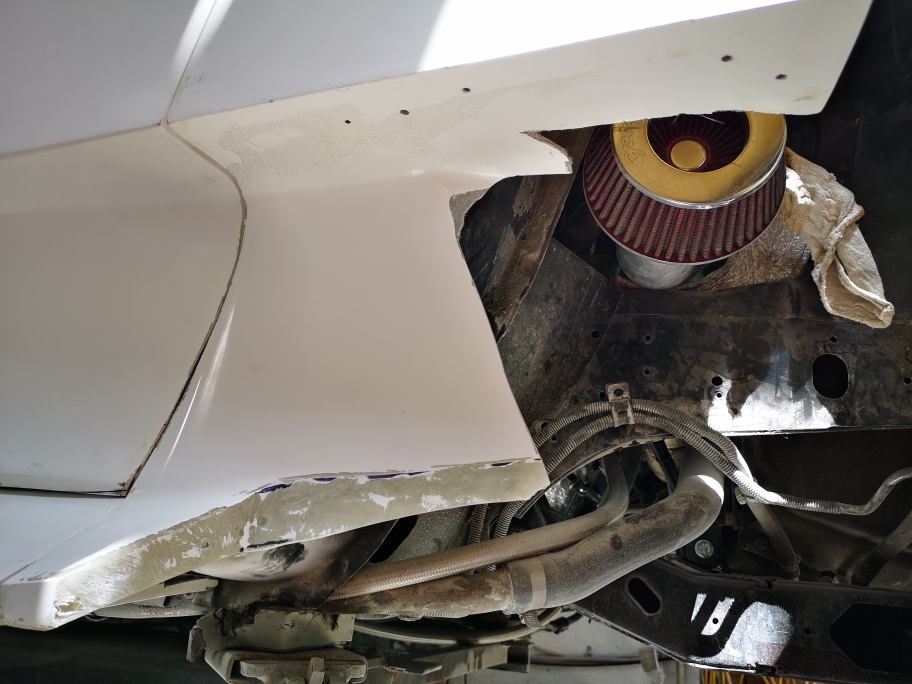
I dropped the engine and cradle the other day to do the final run of wiring and final cleanup for the engine bay. At the same time I removed the fuel tank. I’m replacing the expensive Holley High Performance external pump and going back to the stock location with a Walbro HP pump the only reason is that it was just too loud. I also removed the stock 3800 exhaust that I Jet coated a few years back I was really happy with how much cooler it ran but the flow master muffler I was running which is the one used in most 3800 swaps was to loud for my wife to ever ride with me . Because the stock 3800 exhaust exits to the rear of the engine it limited muffler location. Don O gave me a set of SS headers he no longer needed I had them ceramic coated and luckily they dump in the Fiero OEM allocation and exhaust run. Everything mounted perfectly until I went to mount the transmission electronic shifter controller. It was just to close to the headers to safely leave . After speaking with Don I find out the headers we for a standard not auto , so I need to find a new location to make everything work safely.
The todo list just keeps getting longer not shorter, this is not the direction I want the project going but things need to be done right .
I’m still working on the rear deck lid just pushed aside for a little bit .
Hi Bob sorry for the really late reply to your question. Yes I’m planning on relocating the Park neutral safety switch to the right and fabricating a new set of parallel shift levers that will shift the trans as well as positioning the switch sensor ring.
I’ll be out of commission for a couple months though, I injured my leg and am on crutches for at least two months with a torn Achilles/cafe muscle.
Talk to everyone in a few months. Just one delay after another.
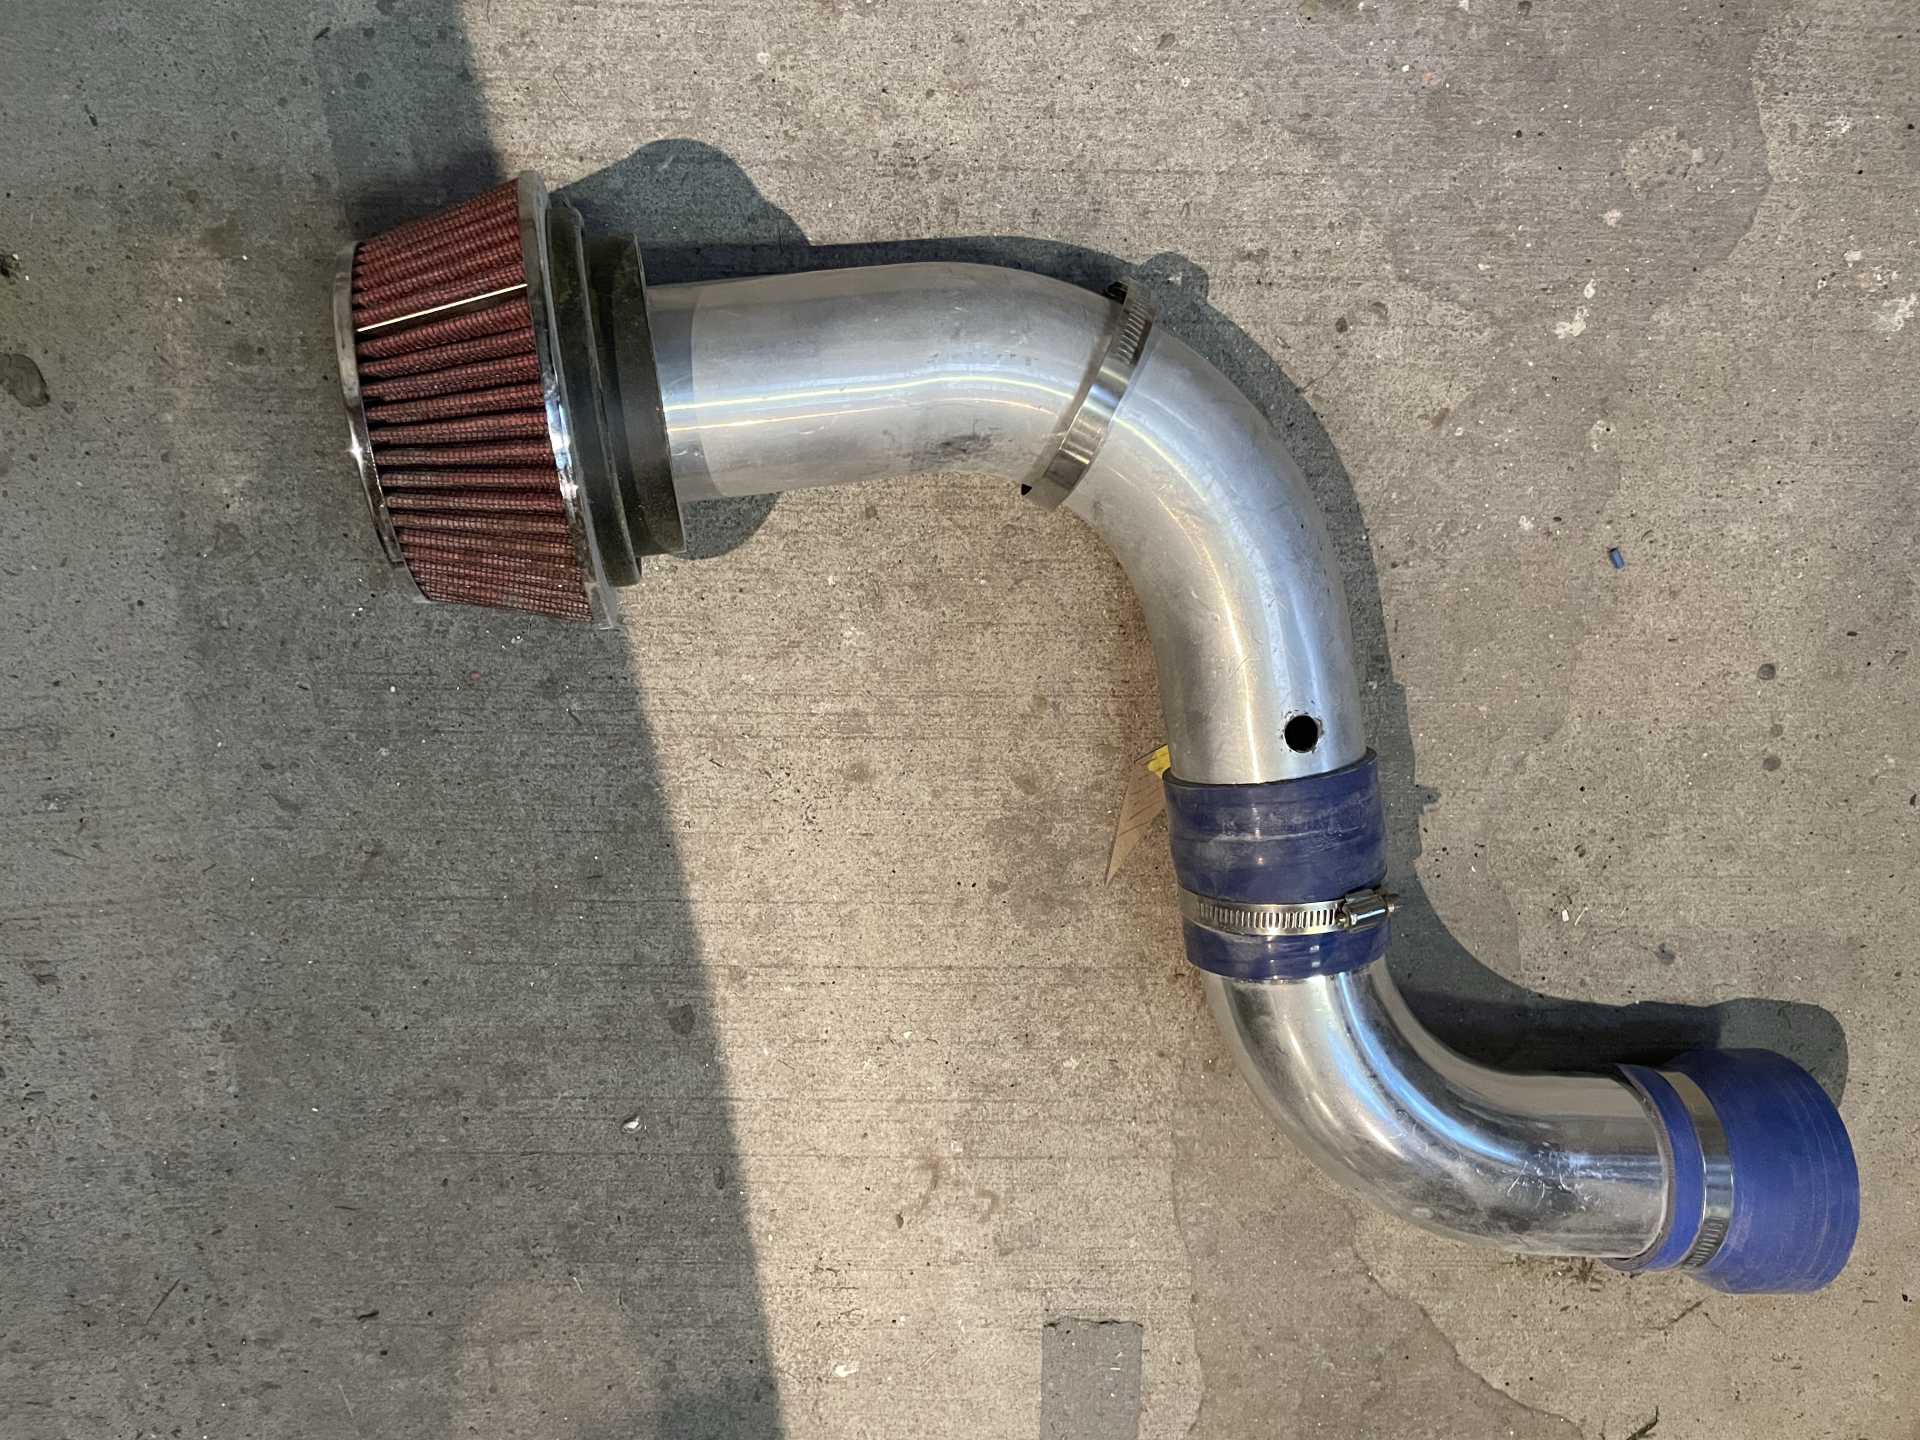
Hi Ace I used two 90 degree 3” diameter pieces of aluminum intake pipe with a silicone sleeve too attach to the carb.
Here is a update for everyone.
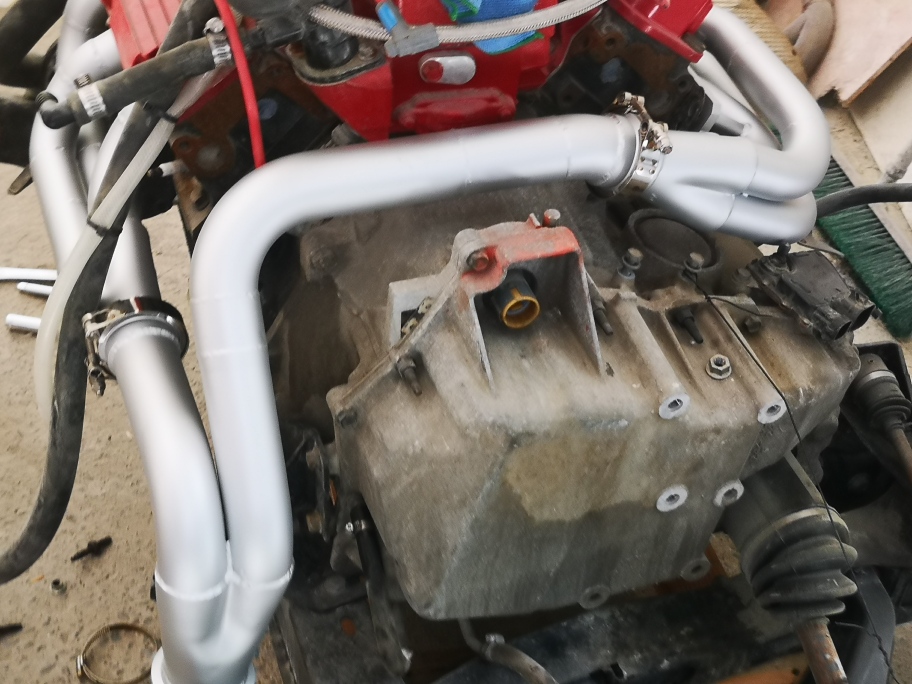
I was able to come up with a design that worked to relocate the PNP safety switch away from header. I cleaned up the engine compartment running all the wiring away from the heat of the header and reinstalled the fiero heat sheild, I’ve also reinstalled the engine and am hooking up all the plumbing.
I’m hoping to get back to work soon on finishing the read hood plug, I can then make a mold a finish the final part to complete the car.
More to come Stay safe Wayne
[This message has been edited by dobie1 (edited 09-11-2021).]
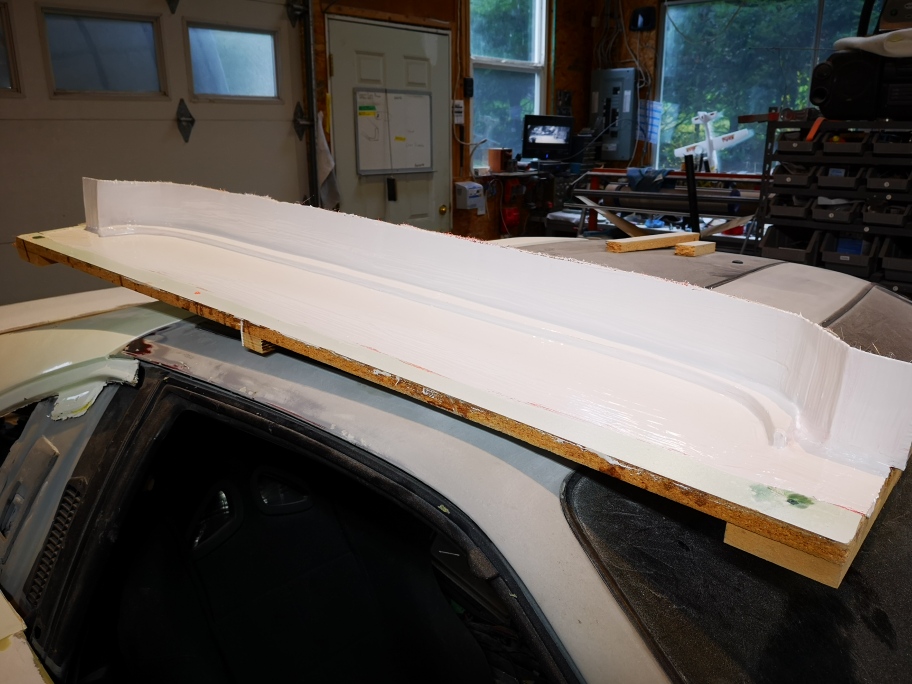
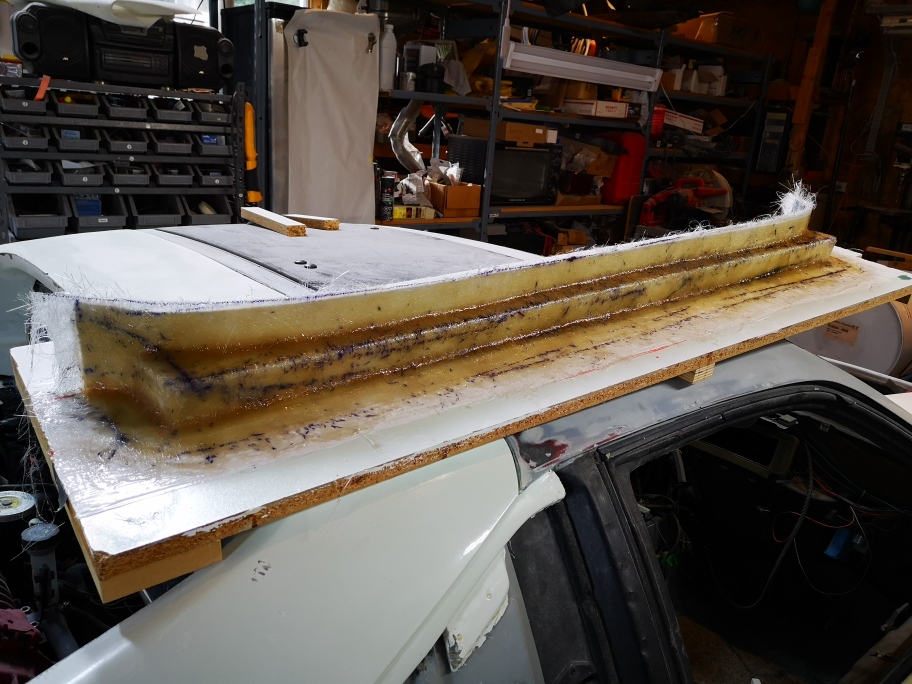
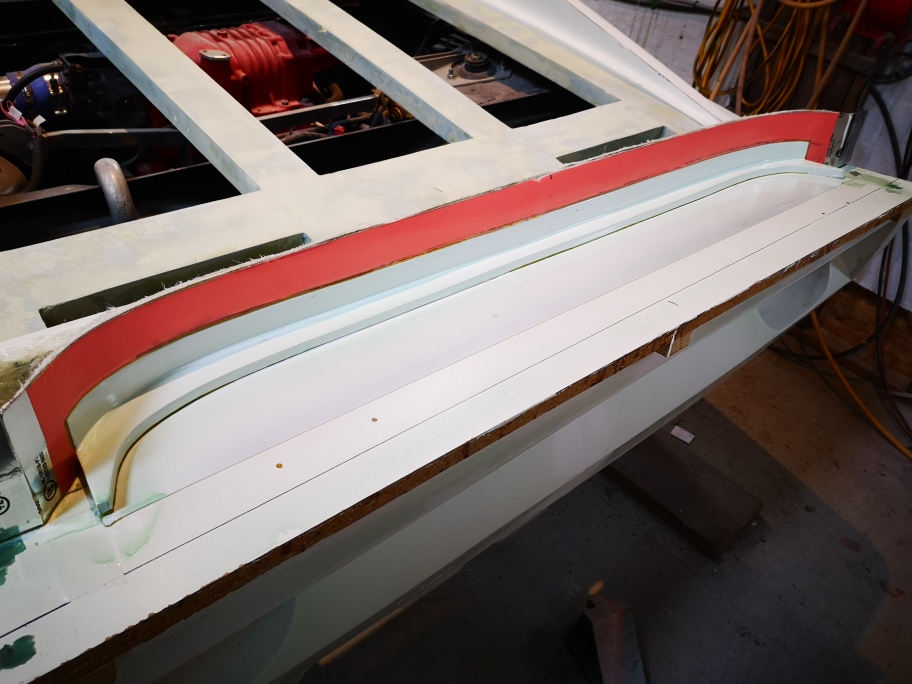
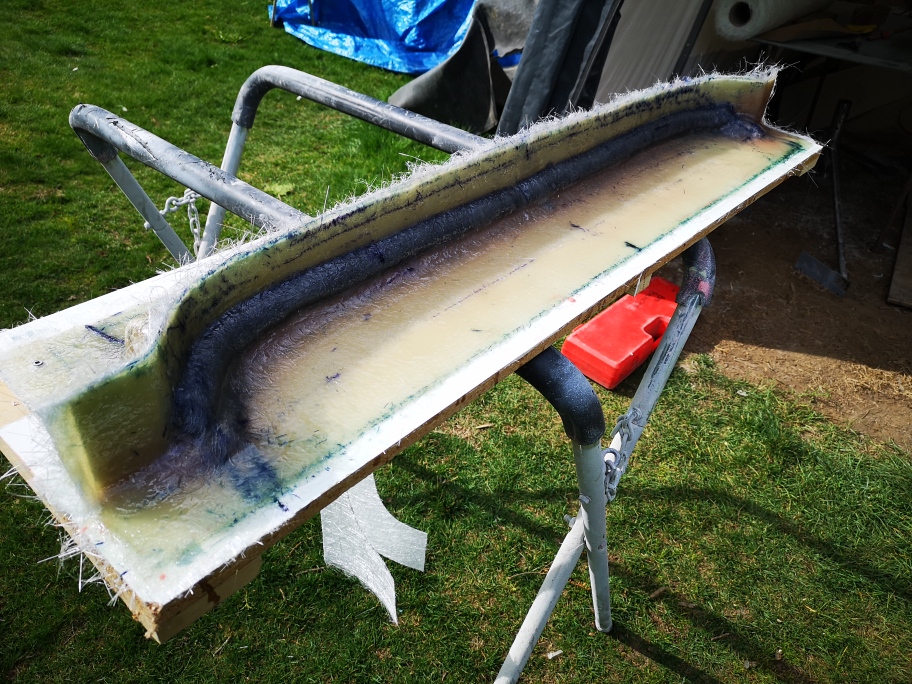
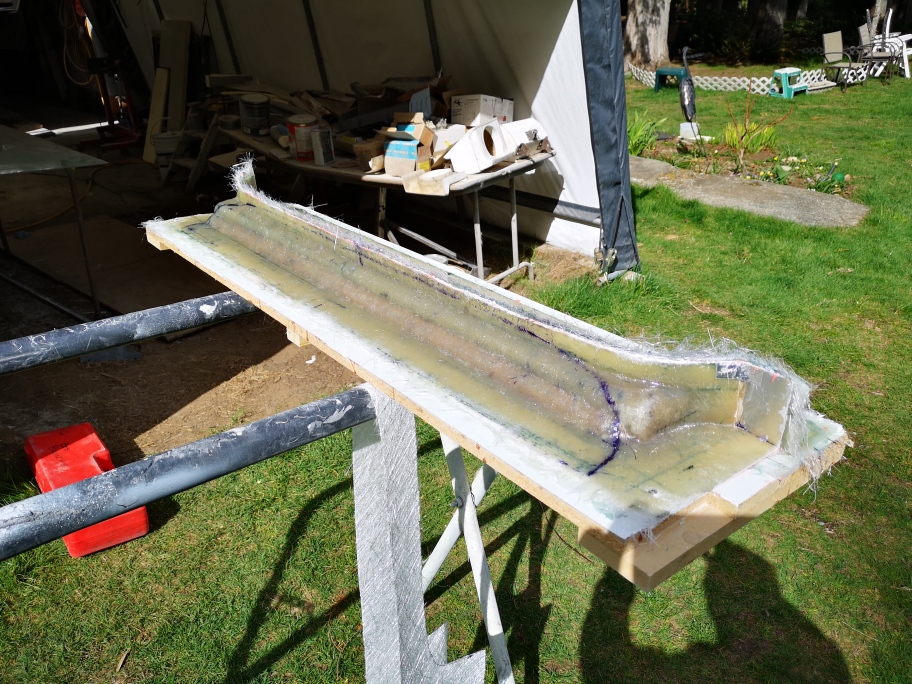
Hi everyone Sorry for the long delay. In a update. Life’s got in the way and recovery from my injury during the summer took longer than I would have ever imagined. But I’m back at it…. I put in a bunch of time on the engine rear deck, and I now have it ready to make a mold of it. This will be the final mold of the entire build which I have to say I’m looking forward to as I’m really ready to get out of fiberglassing and move onto finishing the car.
Rear deck painted white and ready for molding
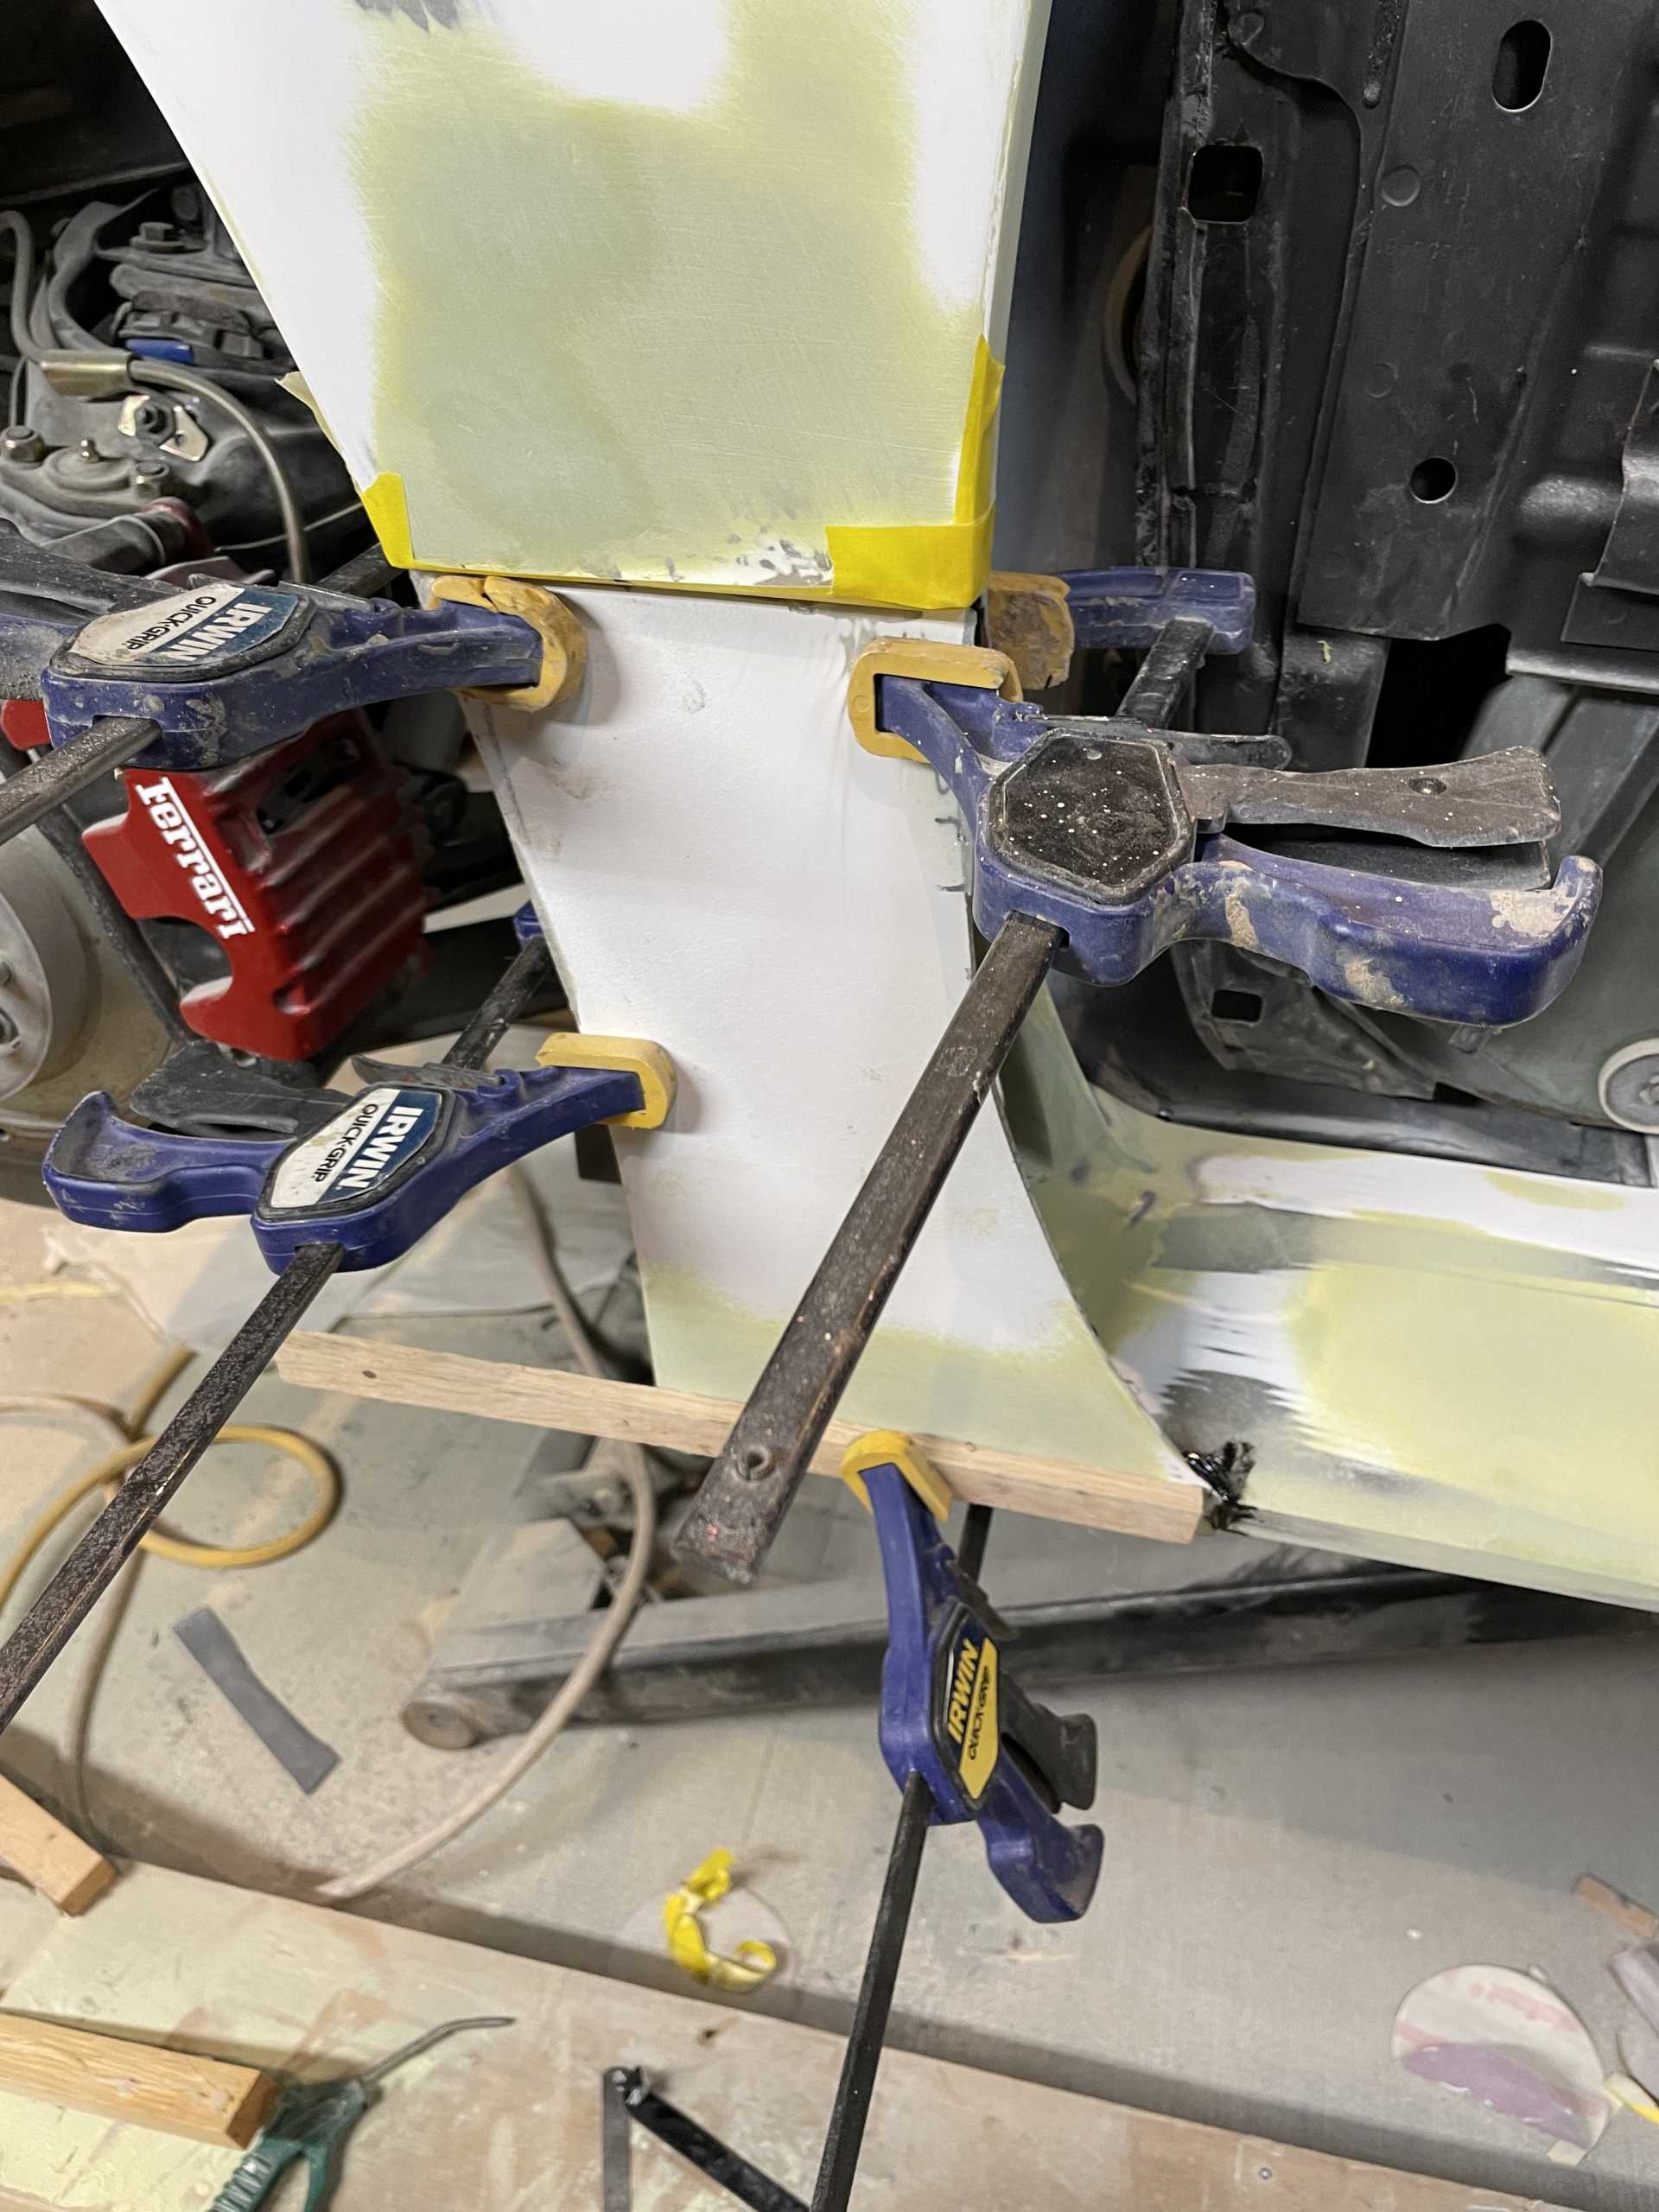
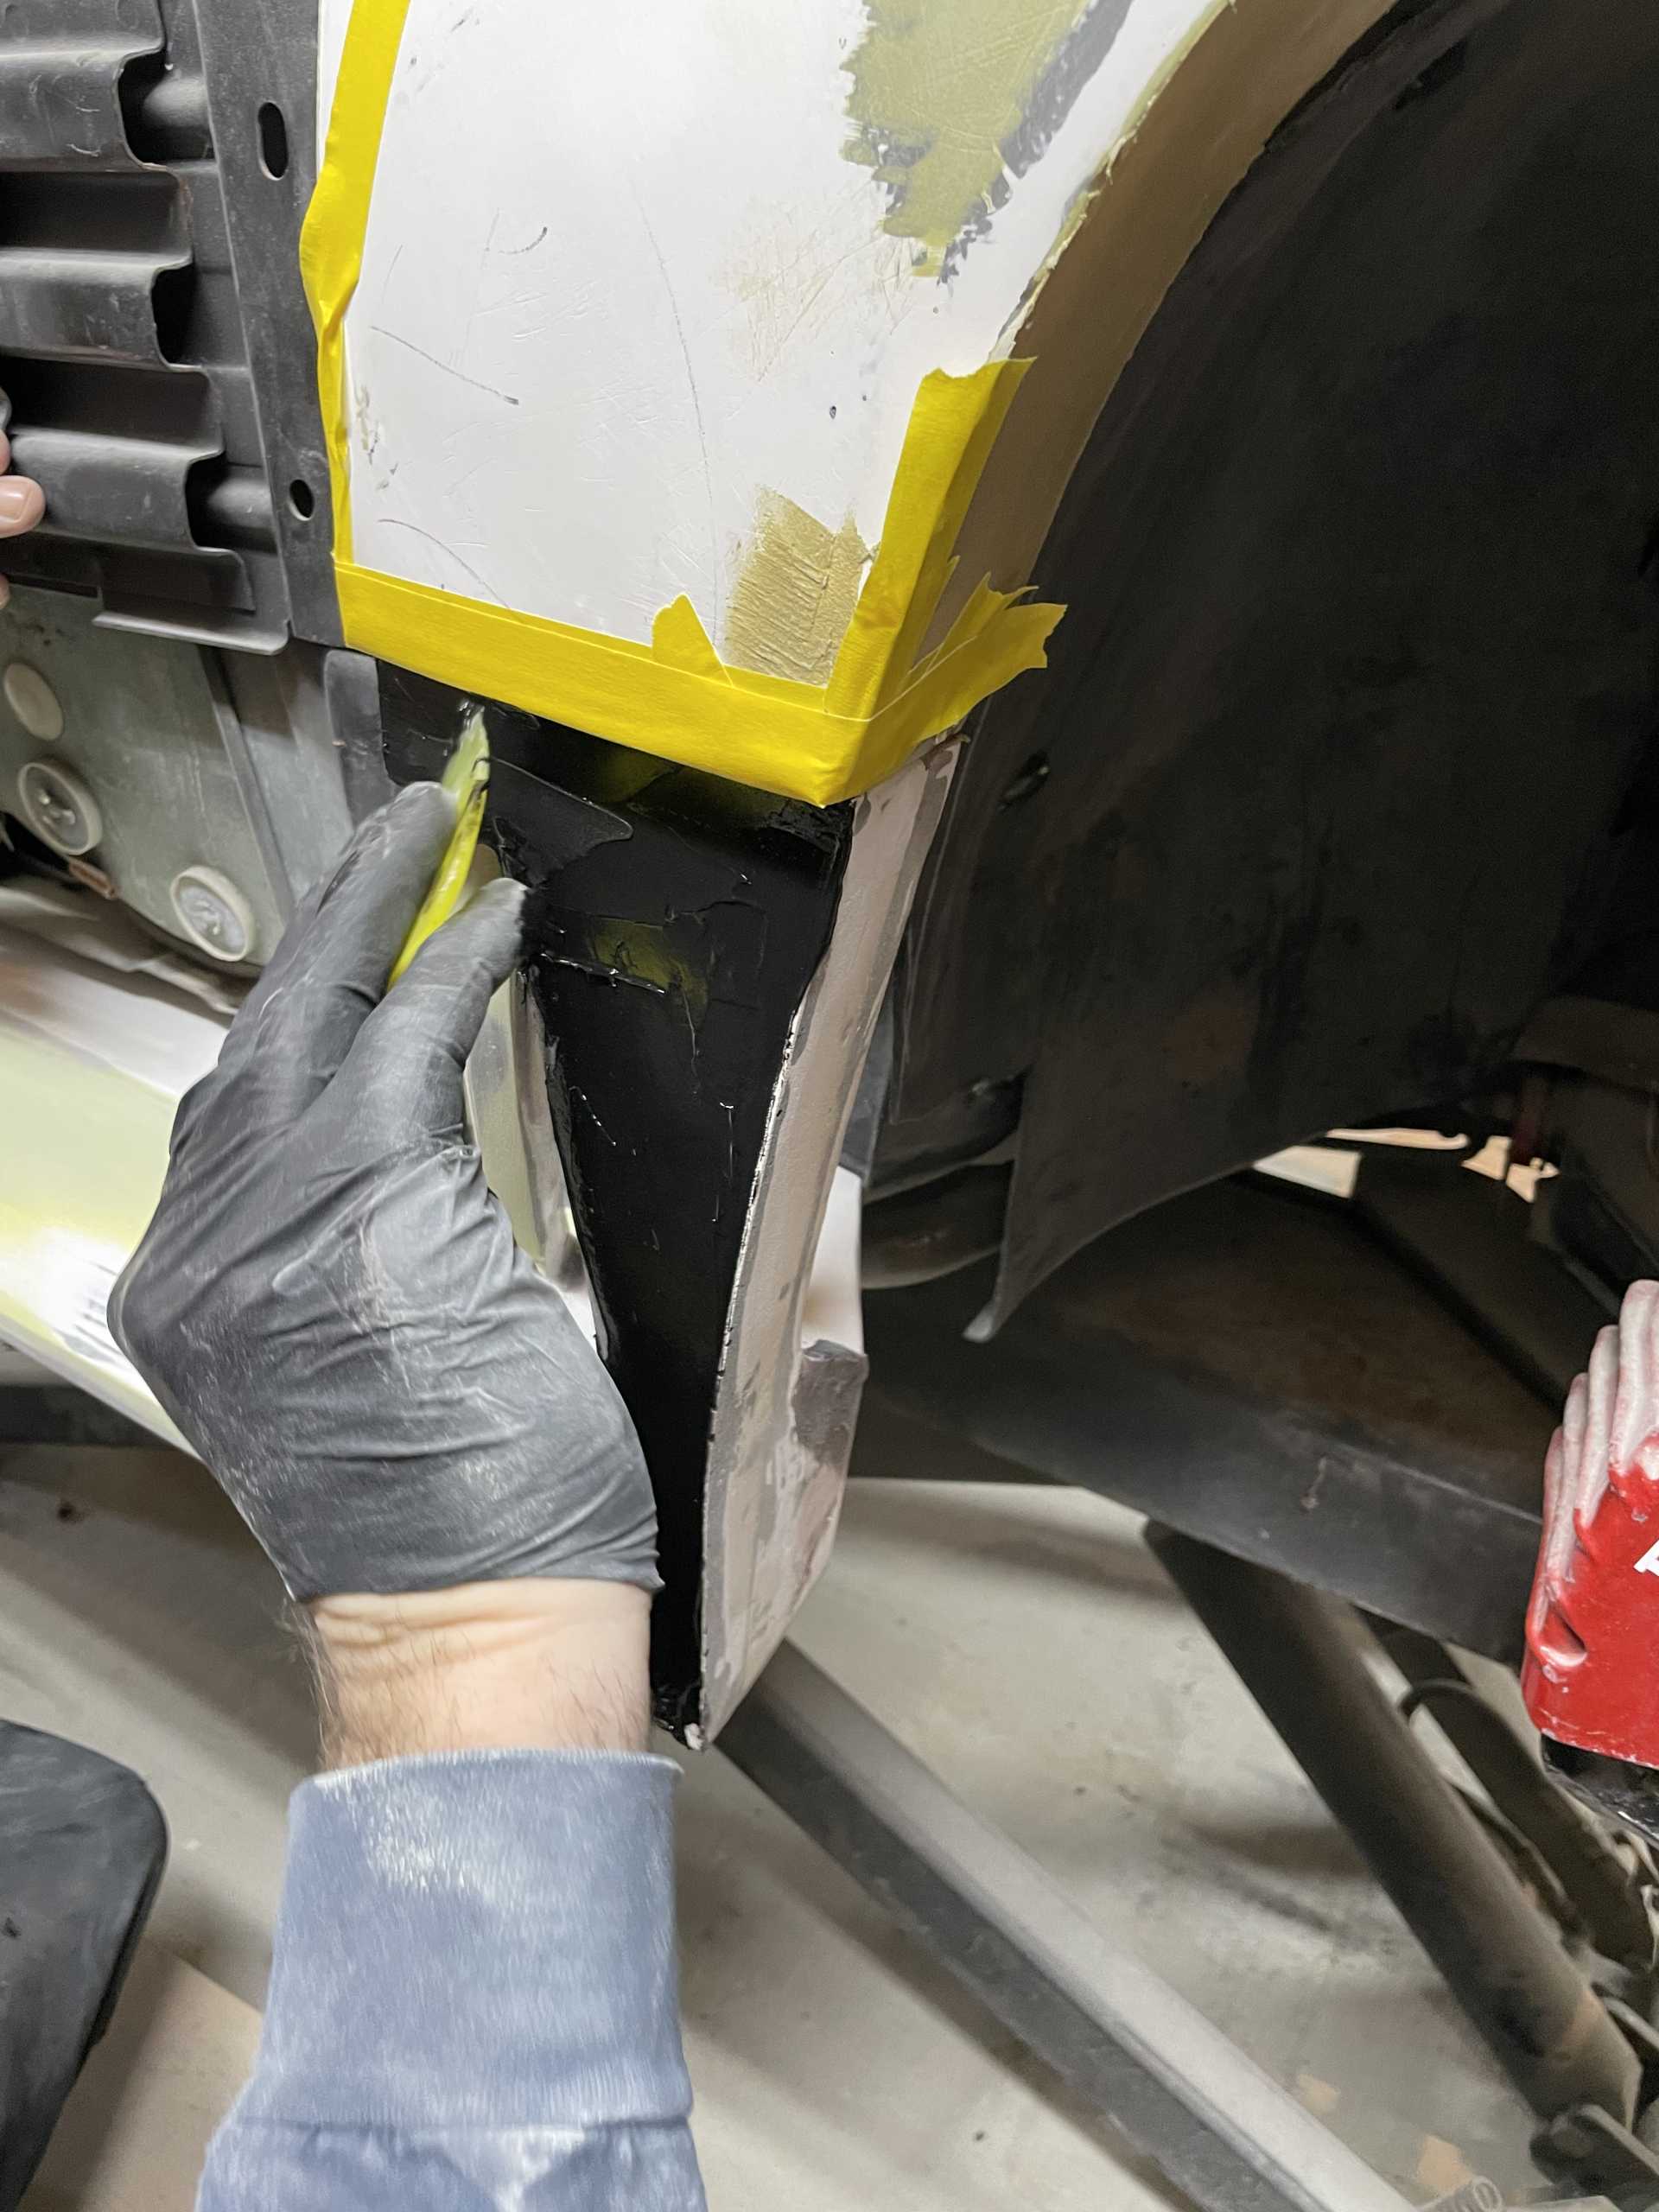
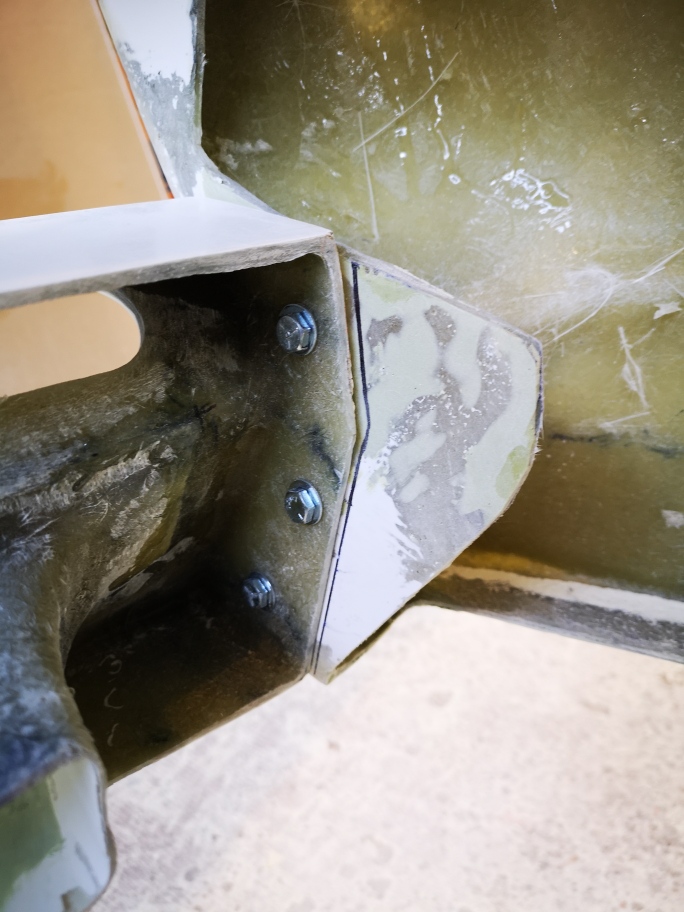
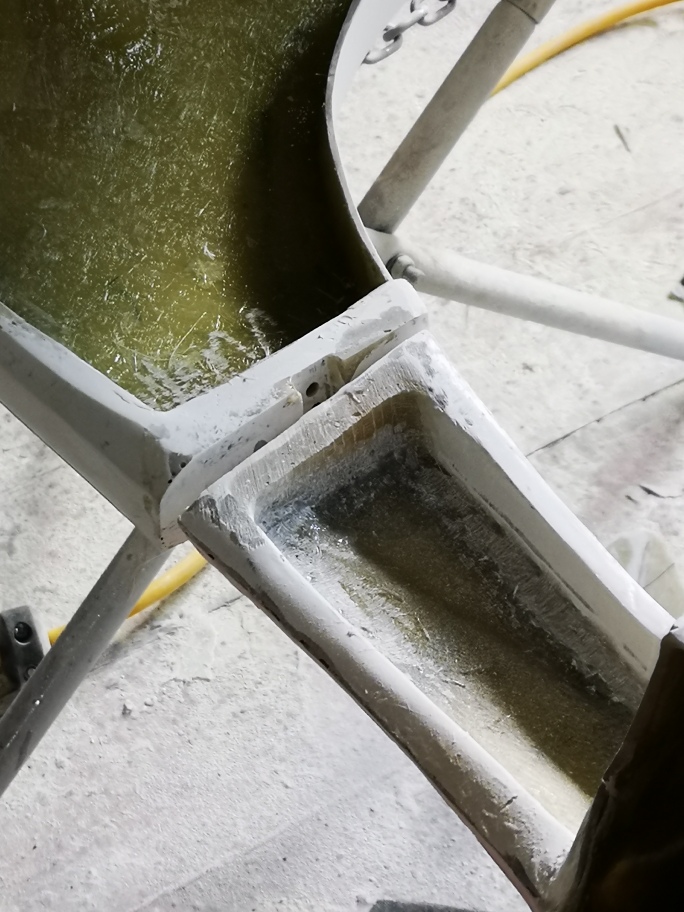
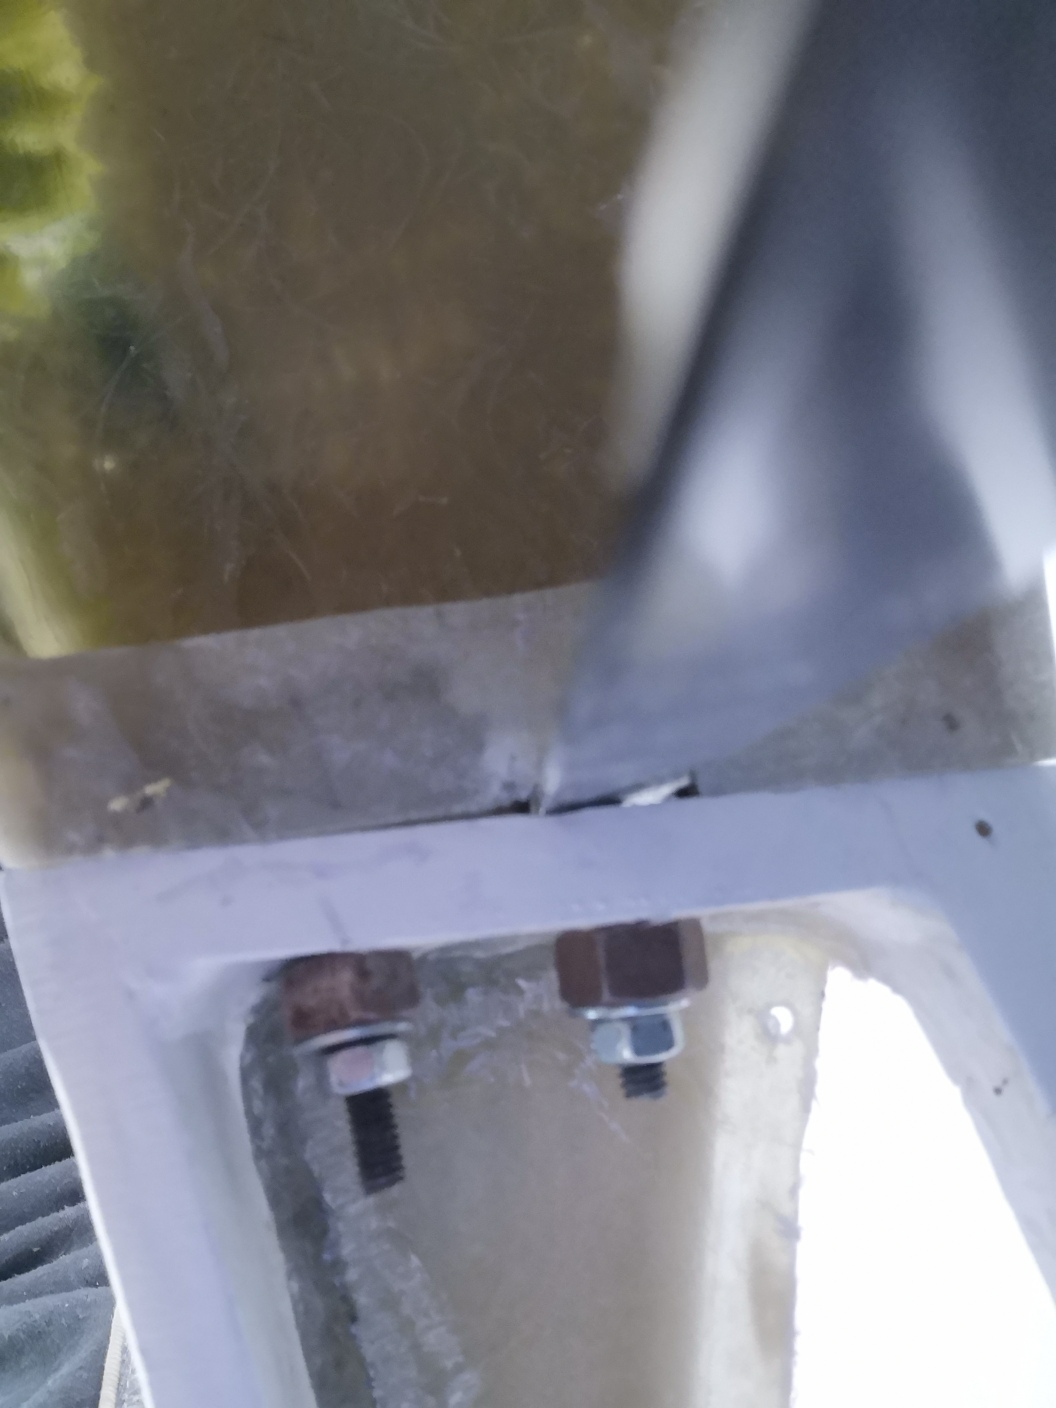
I’m also doing the final bodywork and installation of the panels I’ve already produced. I’m now bonding together all the parts and individual pieces of the lower rockers.
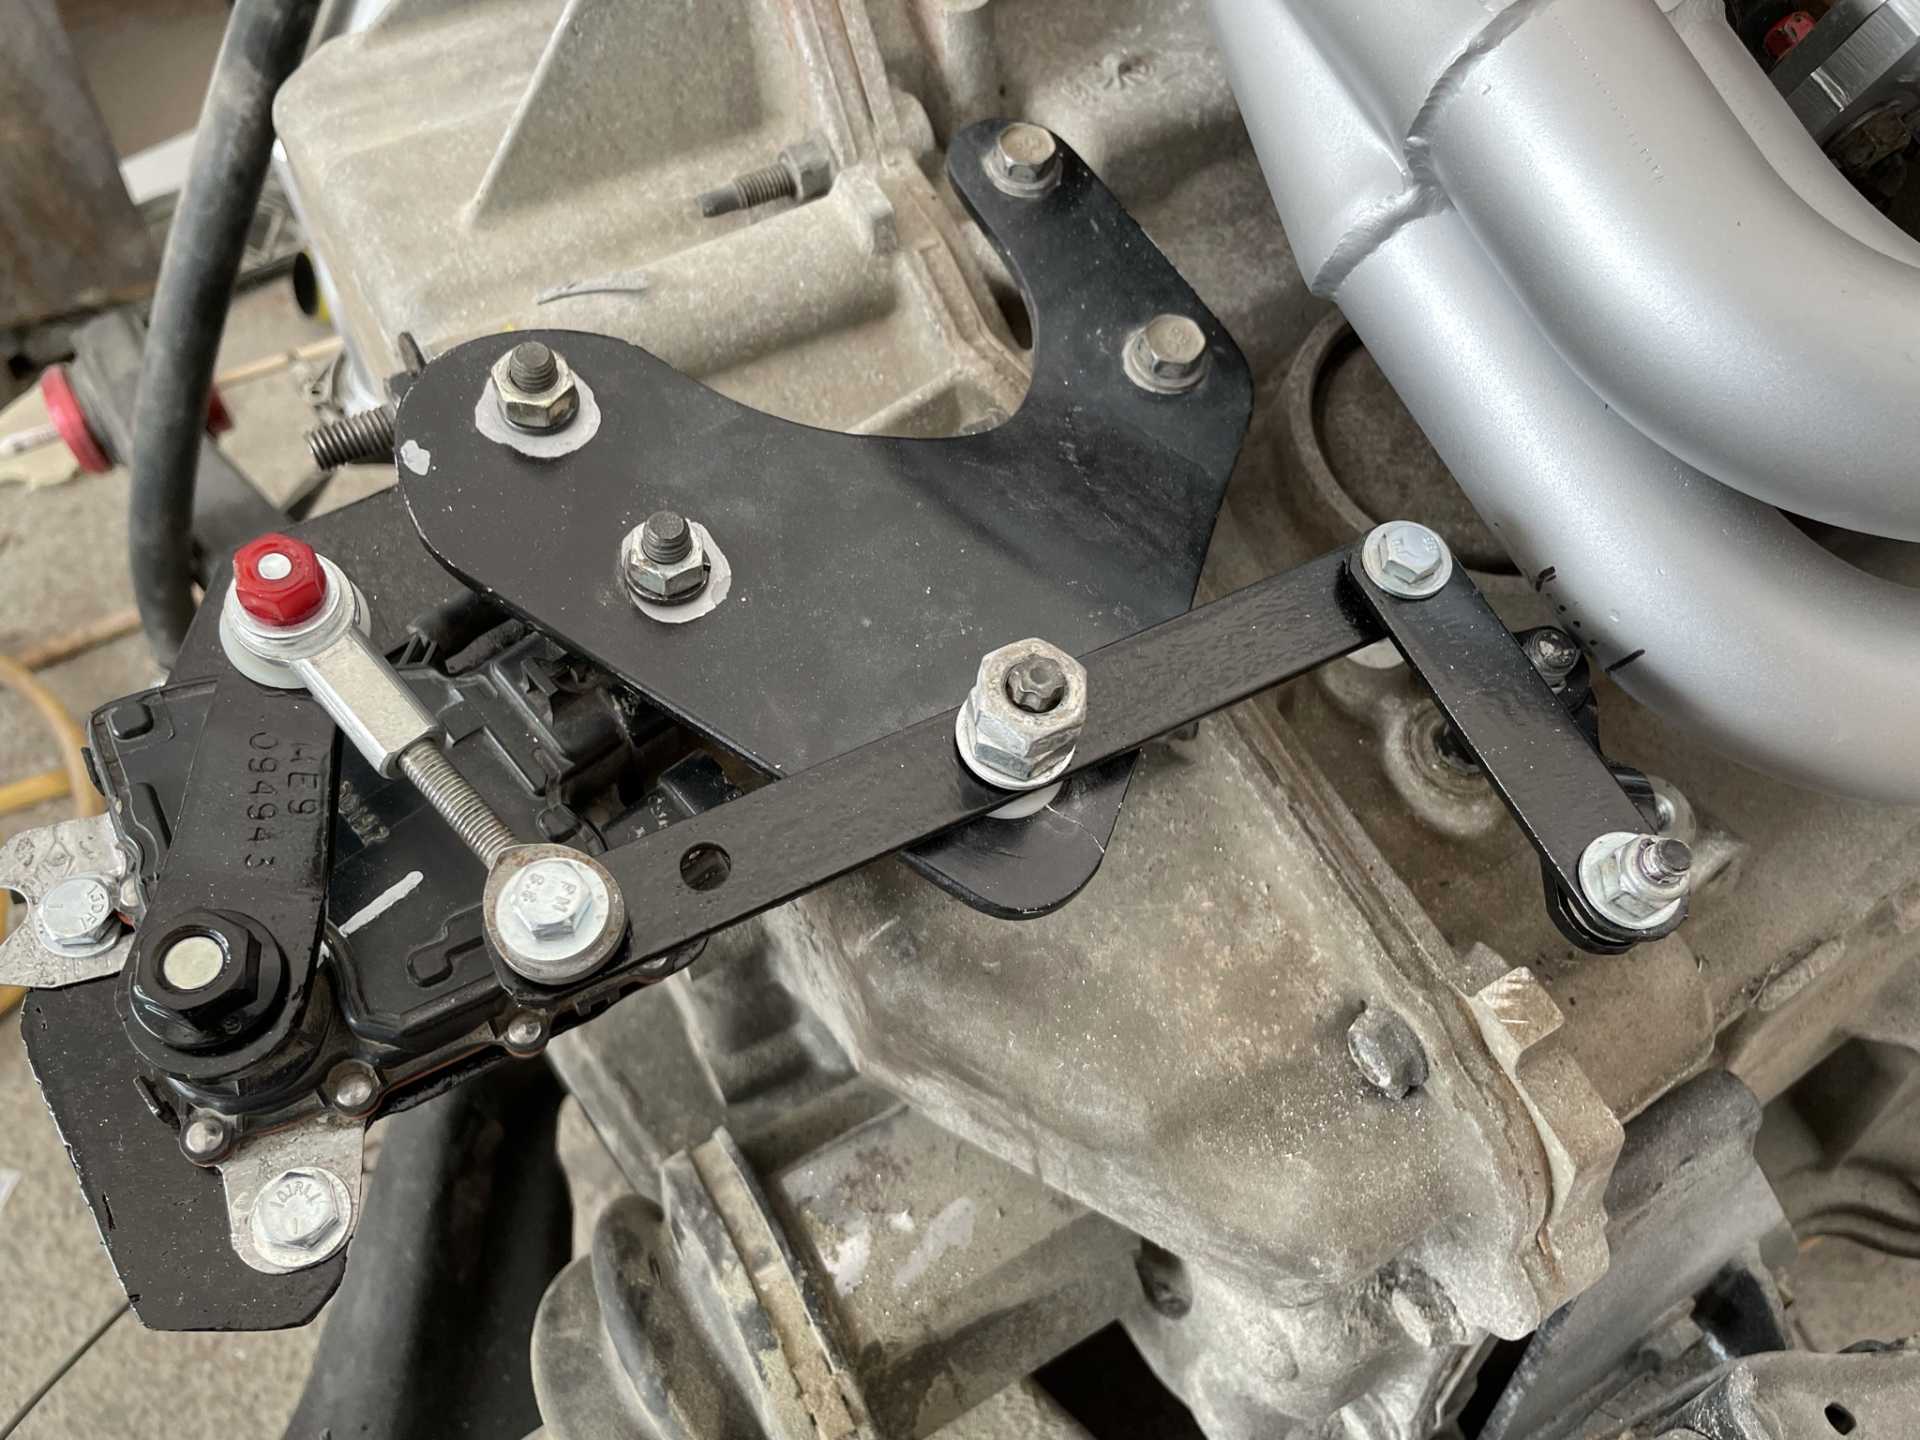
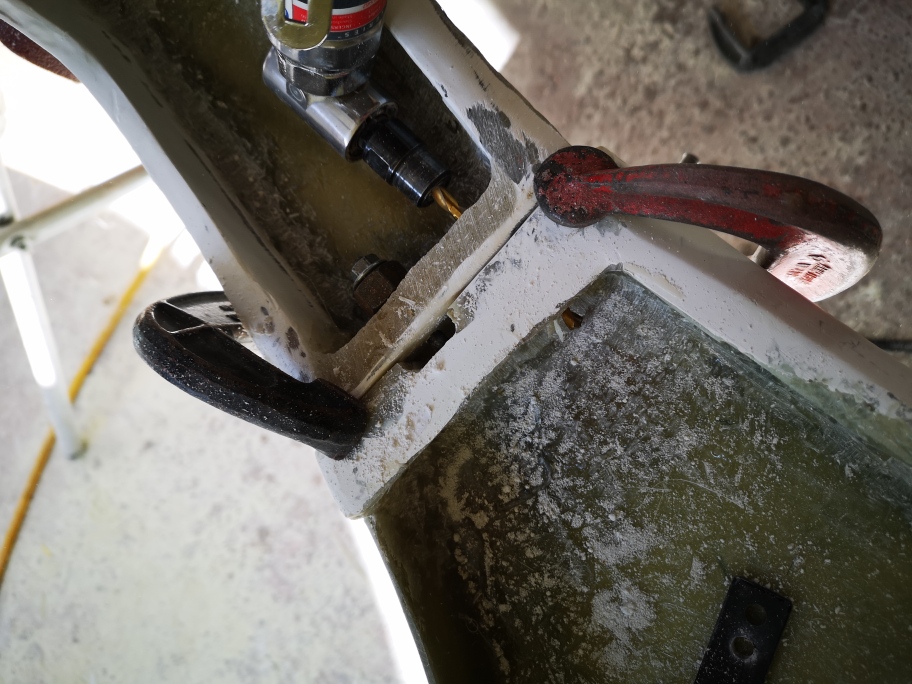
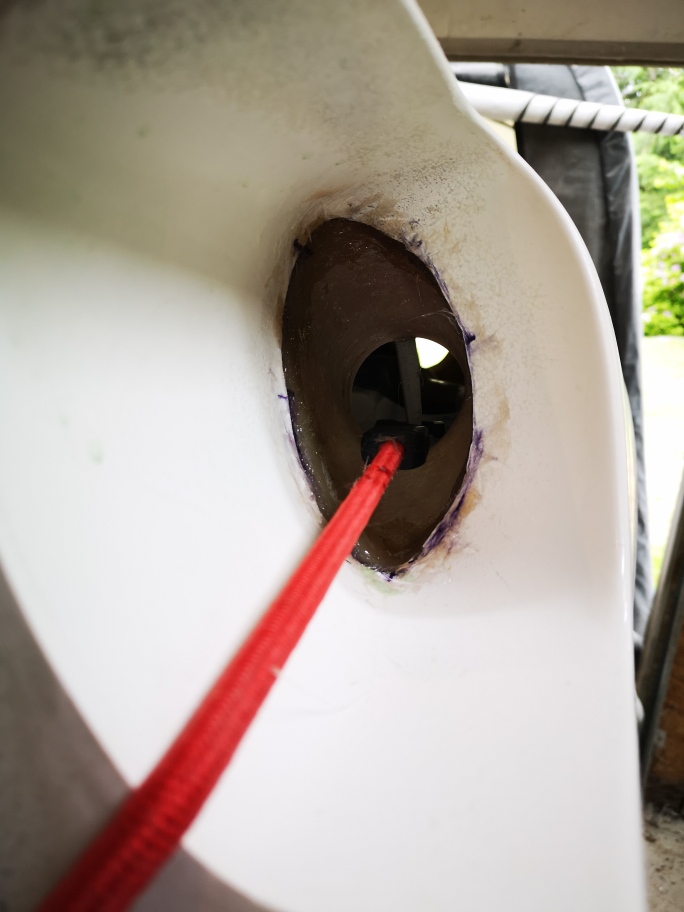
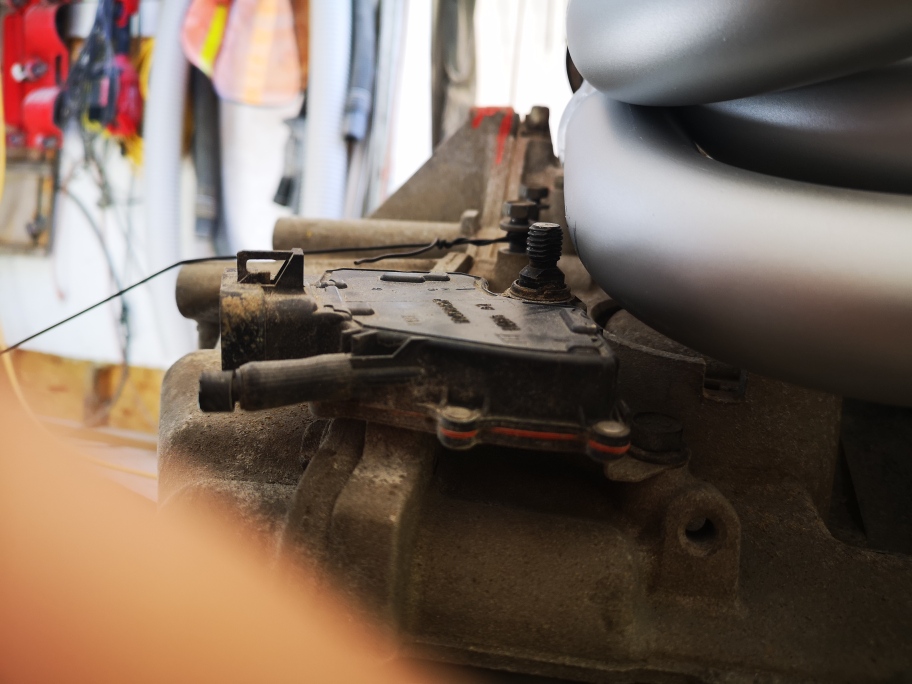
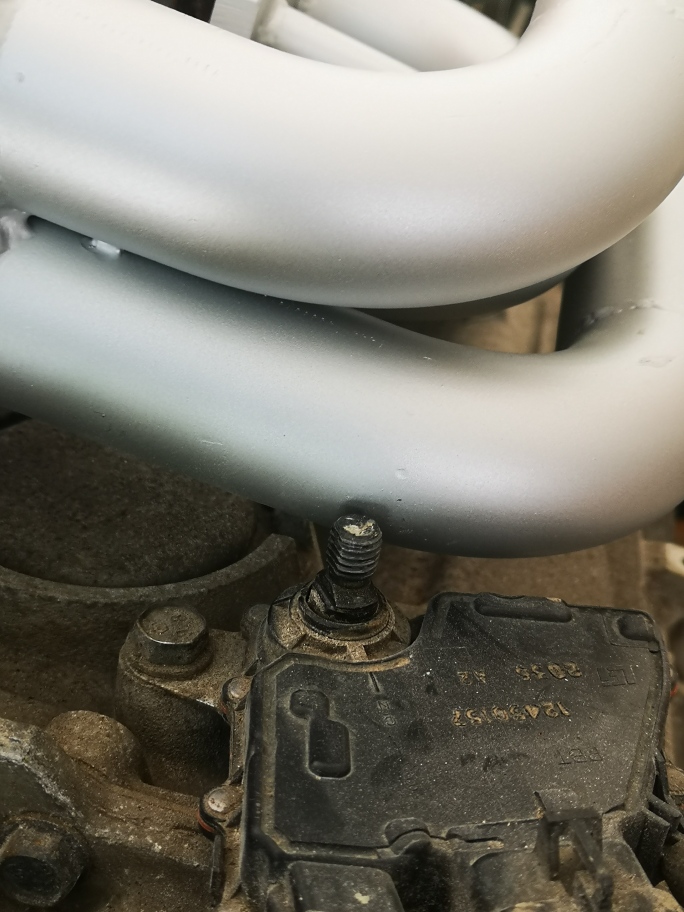
And one thing that has taken way more time than I imagined was the relocation of the PNP safety switch. I had found the problem when I was installing the headers , the switch was to close. I took some measurements and made a relocation plate, but because it was out of the car I screwed up and when I attempted to reinstall the engine nothing fit. So with the engine back in I took some actual measurements and found I had to mount the switch on the side. Hopefully the pics will answer any confusion you probably have from my babbling.
This is before
And this was the reworked relocation
I’m hoping to be spraying slick sand early next week and into primer the following week, then off to have some exhaust pipes fabricated to finish the New muffler I installed.
Stay safe everyone Wayne
[This message has been edited by dobie1 (edited 11-04-2021).]
Updates? I know this may be an irritating question, but I feel compelled to ask anyway. Can this be done in Kevlar and Carbon Fiber? I am just asking "for a friend". LOL
Hi Rick The quick answer is yes , I built the molds to enable vacuum bagging for carbon fibre/ Kevlar layups. I was originally planning on building one for myself, but have made the decision to sell the molds and the plug. I’ll be happy with the body I already layed up. Thanks for the question though, stay safe.
That is pretty damn slick what you made for the pnp switch, very very cool! Looking forward to seeing the car together, keep up the awesome work as always! why sell the molds? Will you make a body from the molds before you sell them?


 Hi Ace