Hi Shem thanks for visiting, Actually the body I’m currently working on came from my molds Shem. I was originally going to produce a few kits but changed my mind and am now just focusing on completing my car and enjoying it .
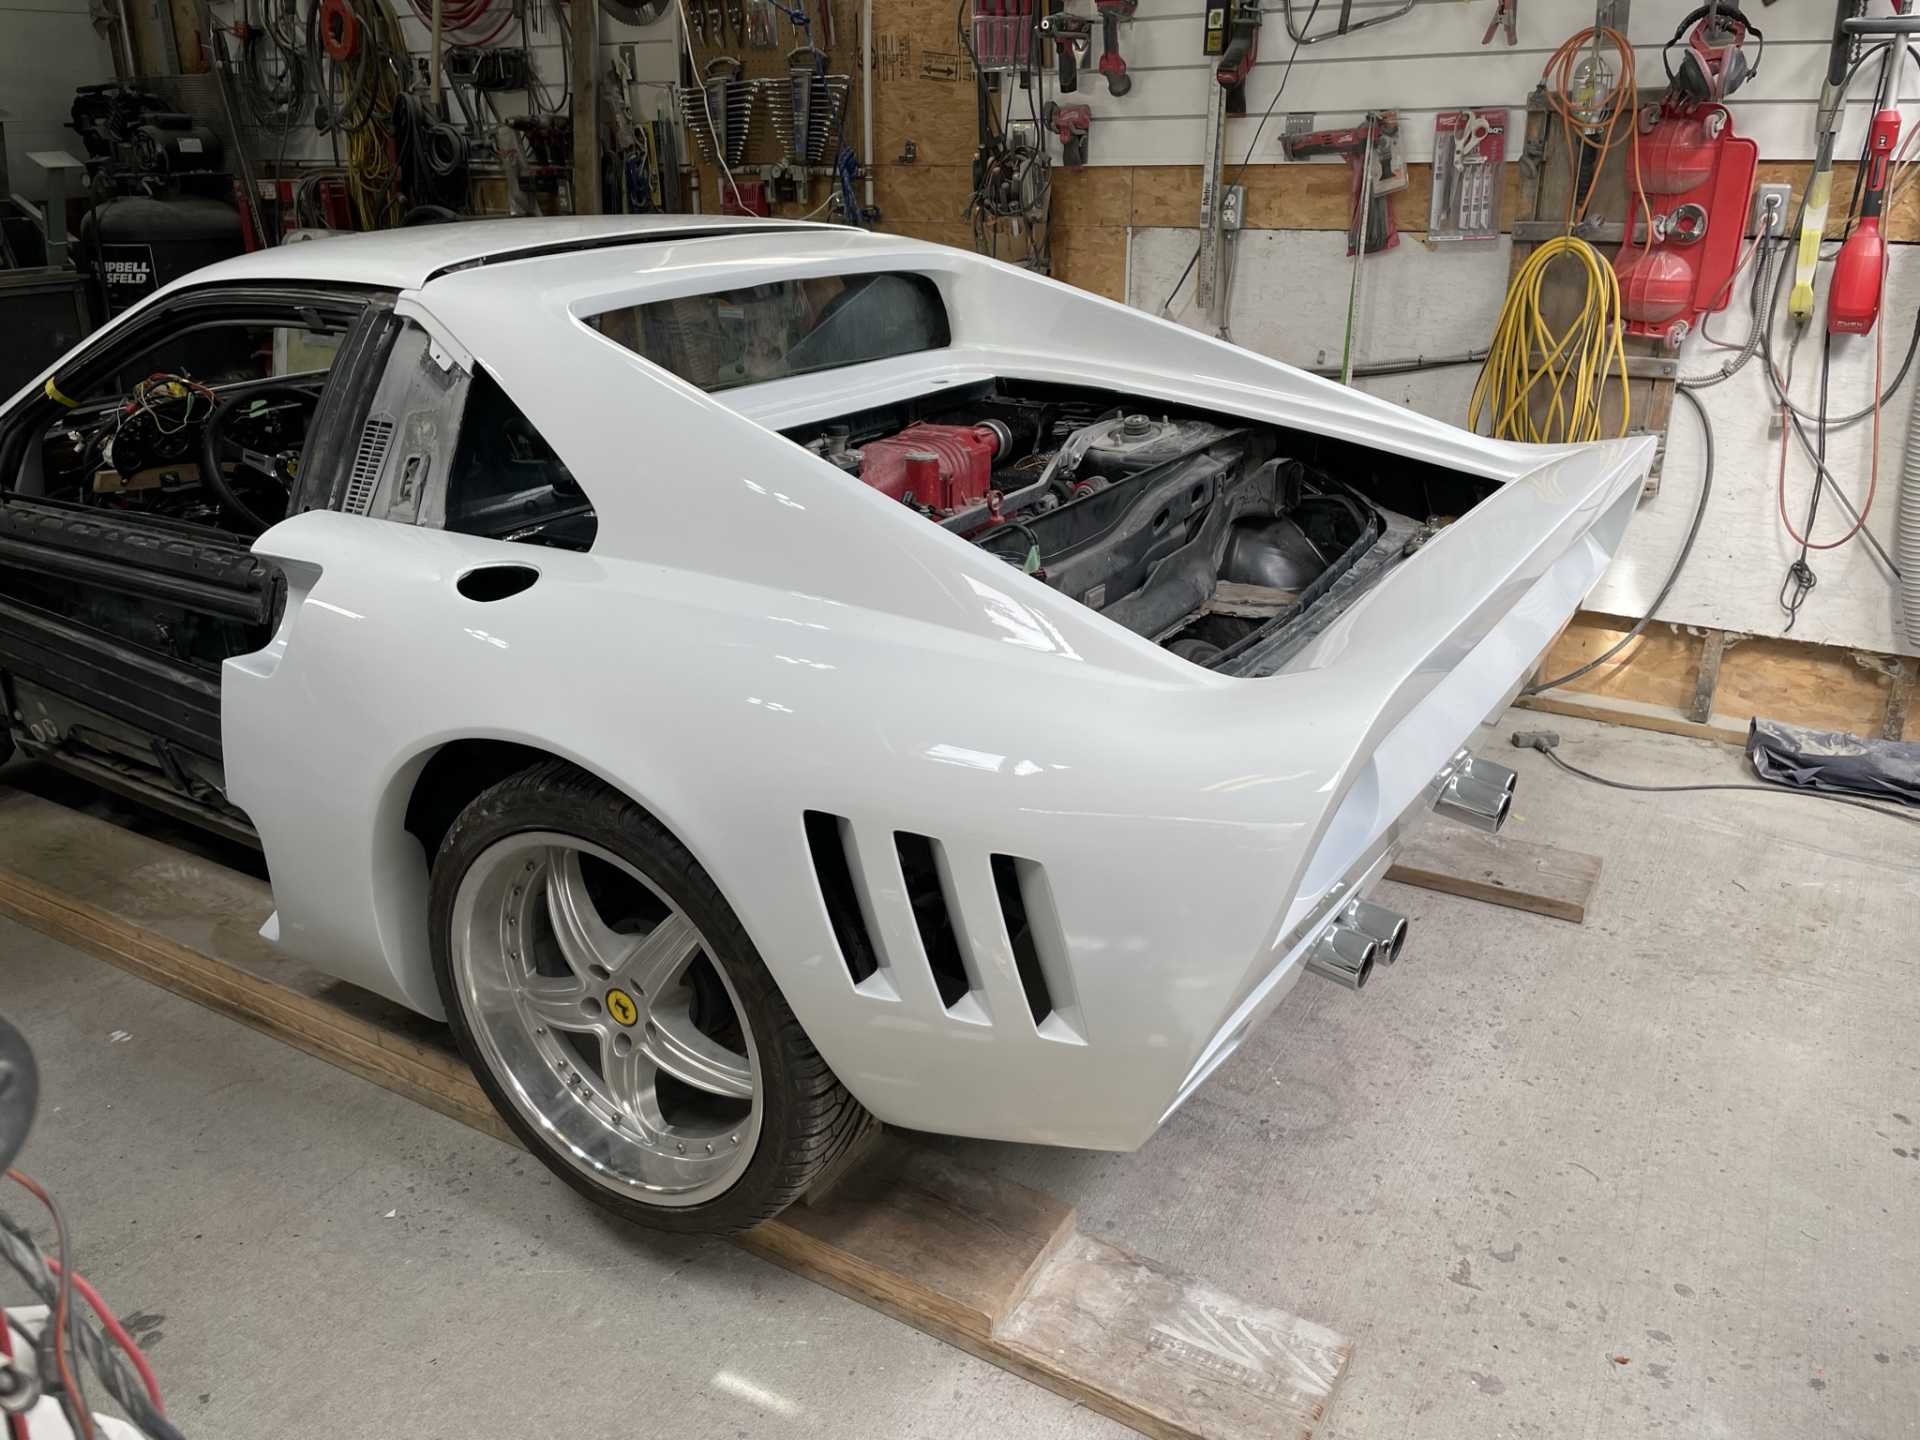
Now for a update on the build. The car is over having the exhaust completed with the new muffler. So I now have room in the shop to do the last of the fiberglassing and mold making.
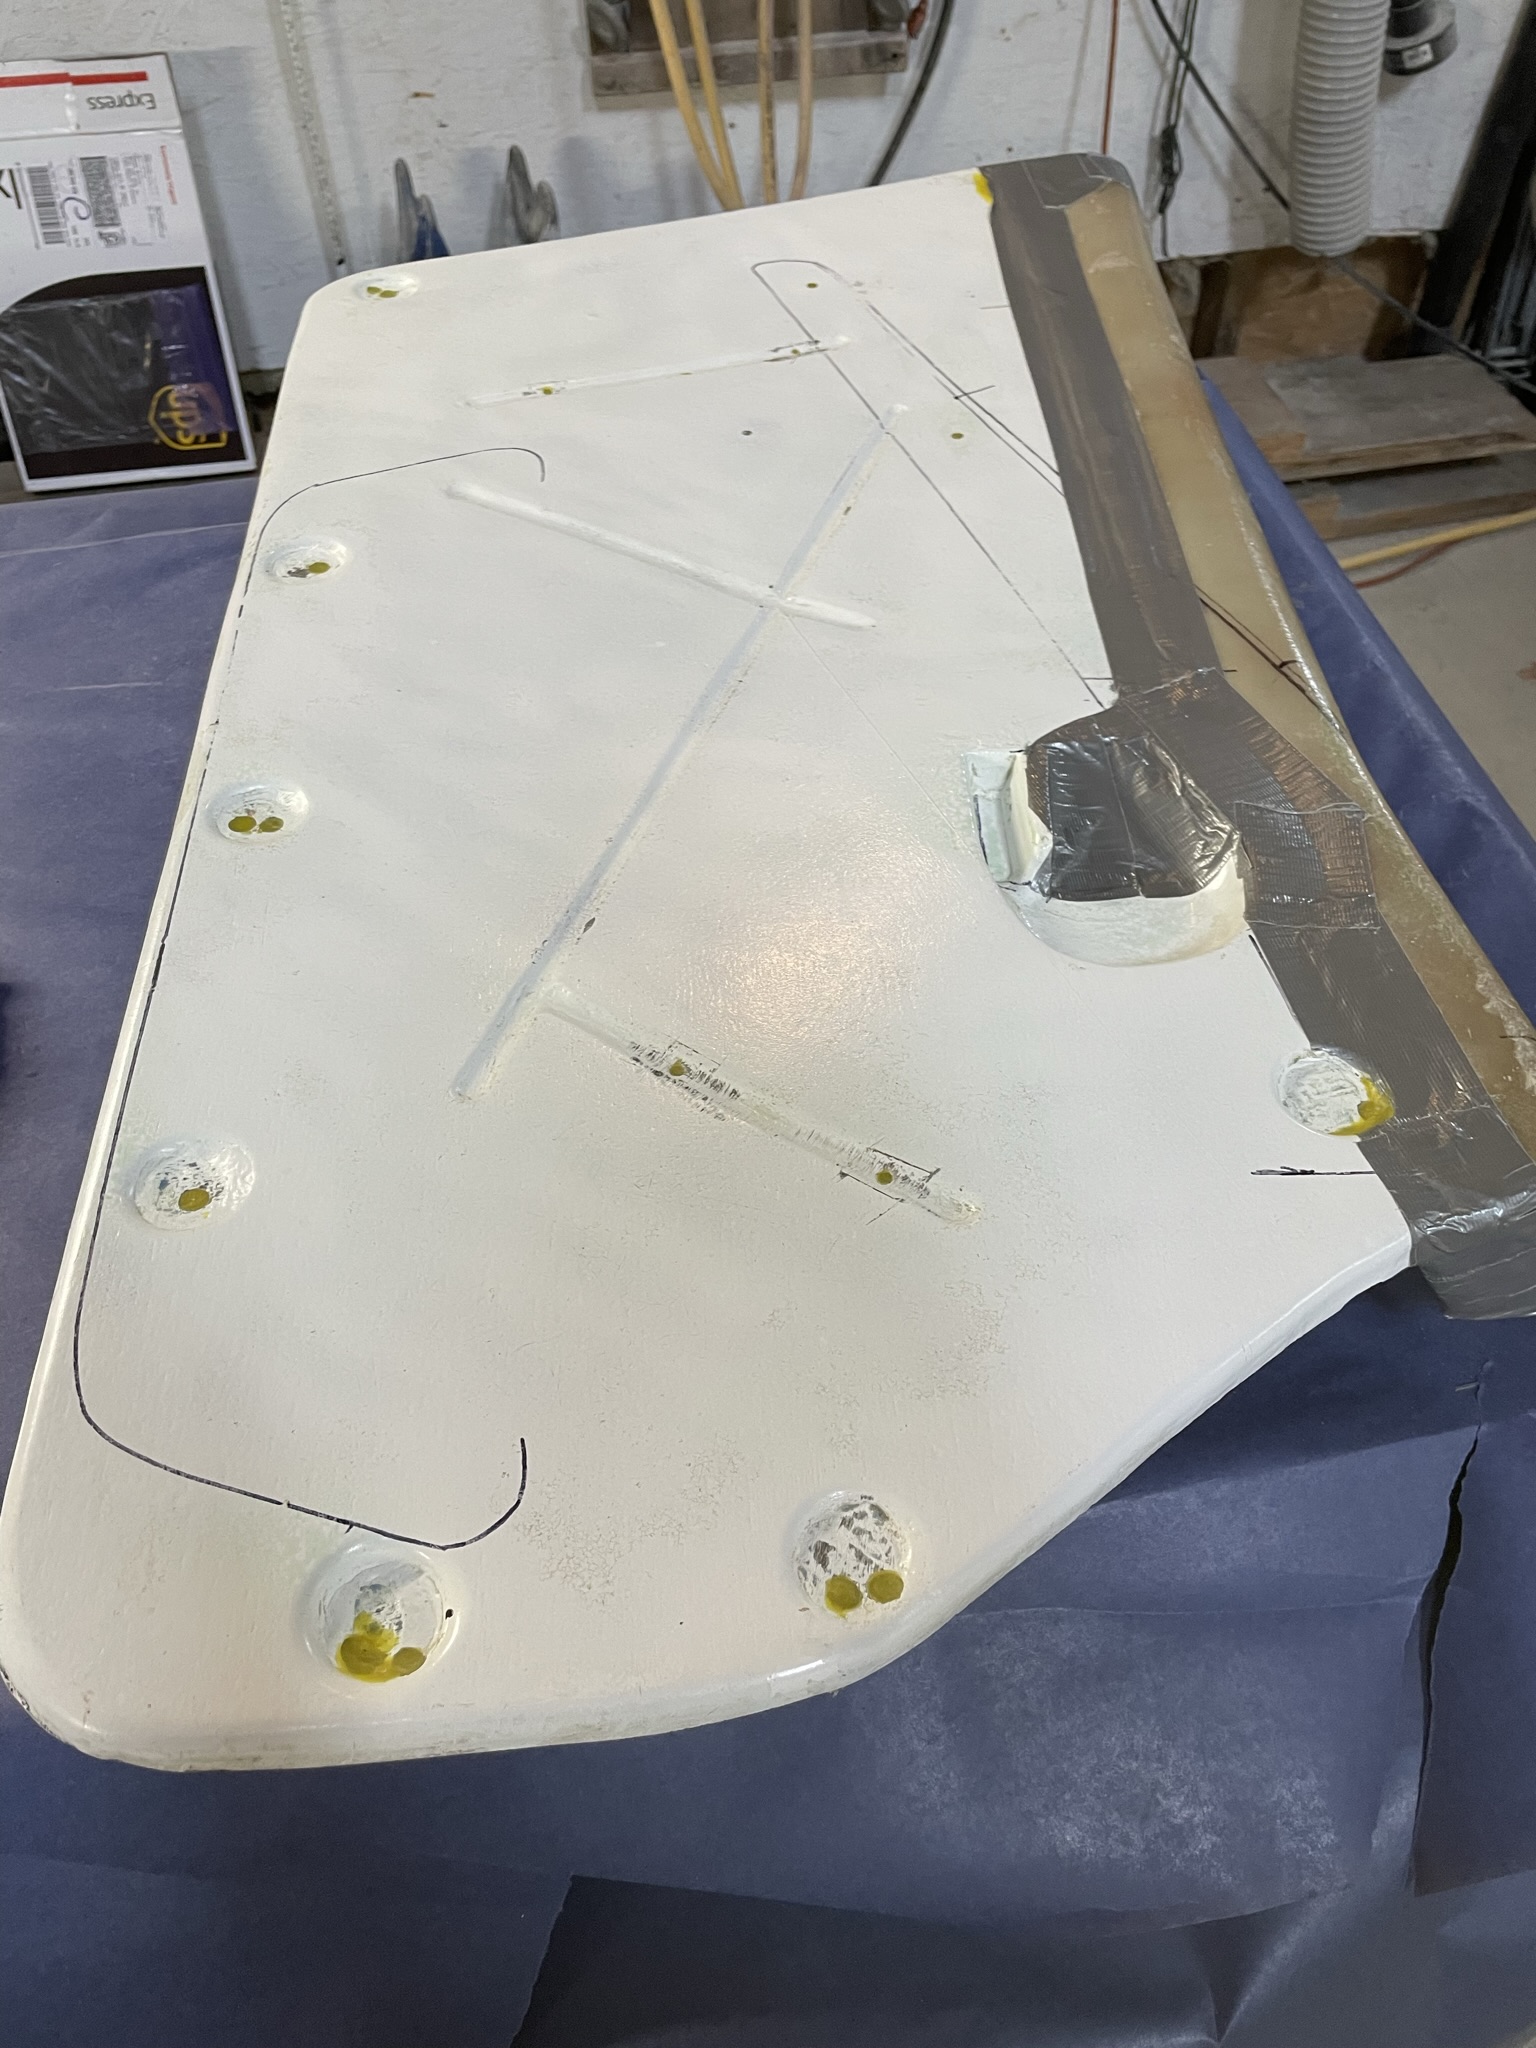
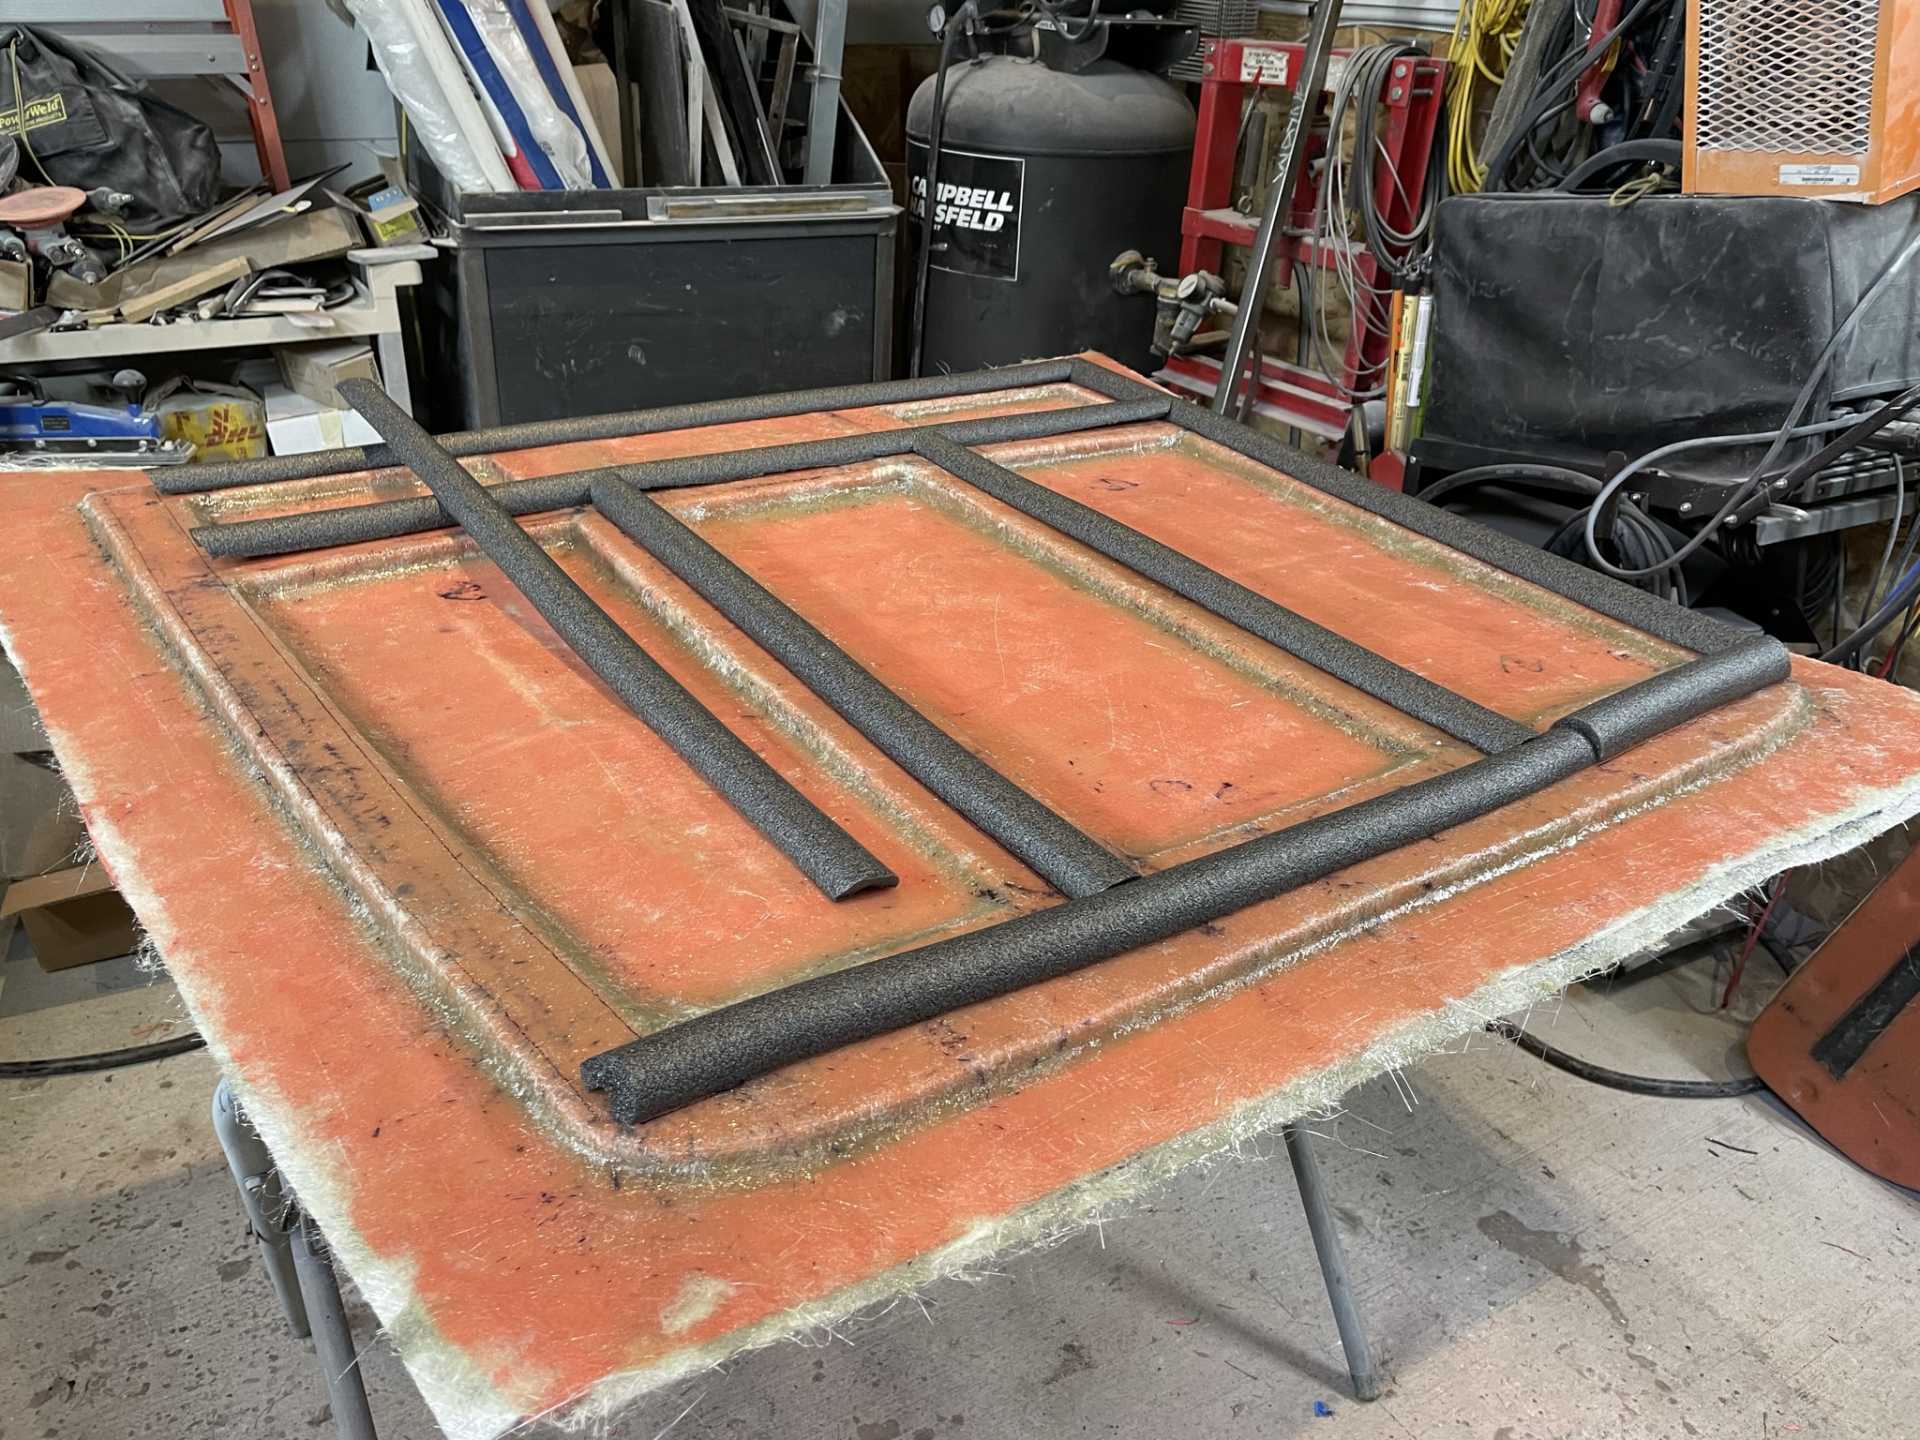
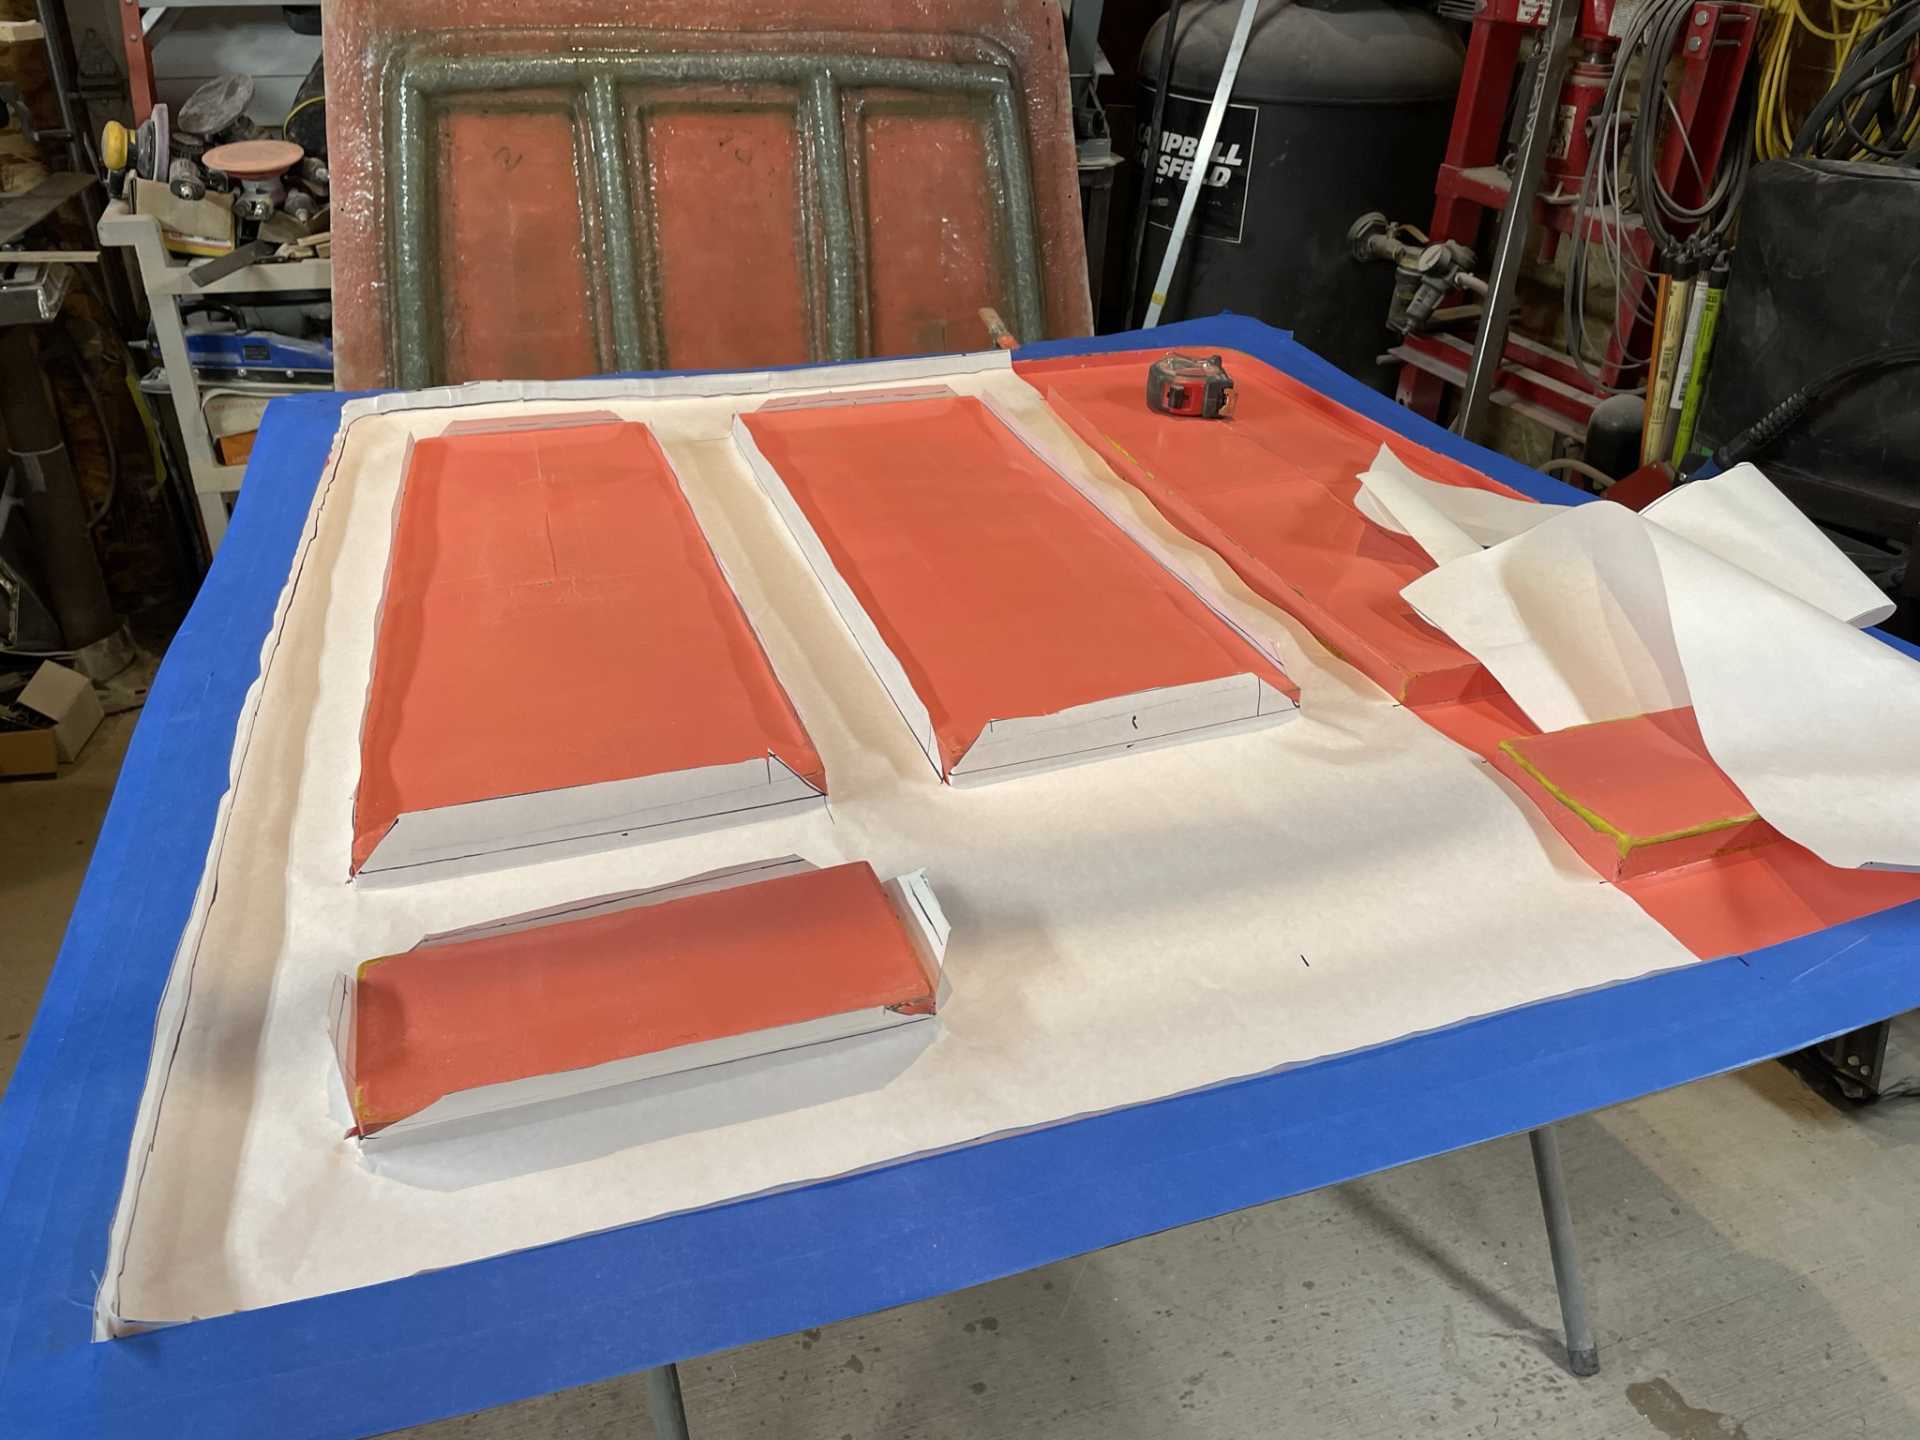
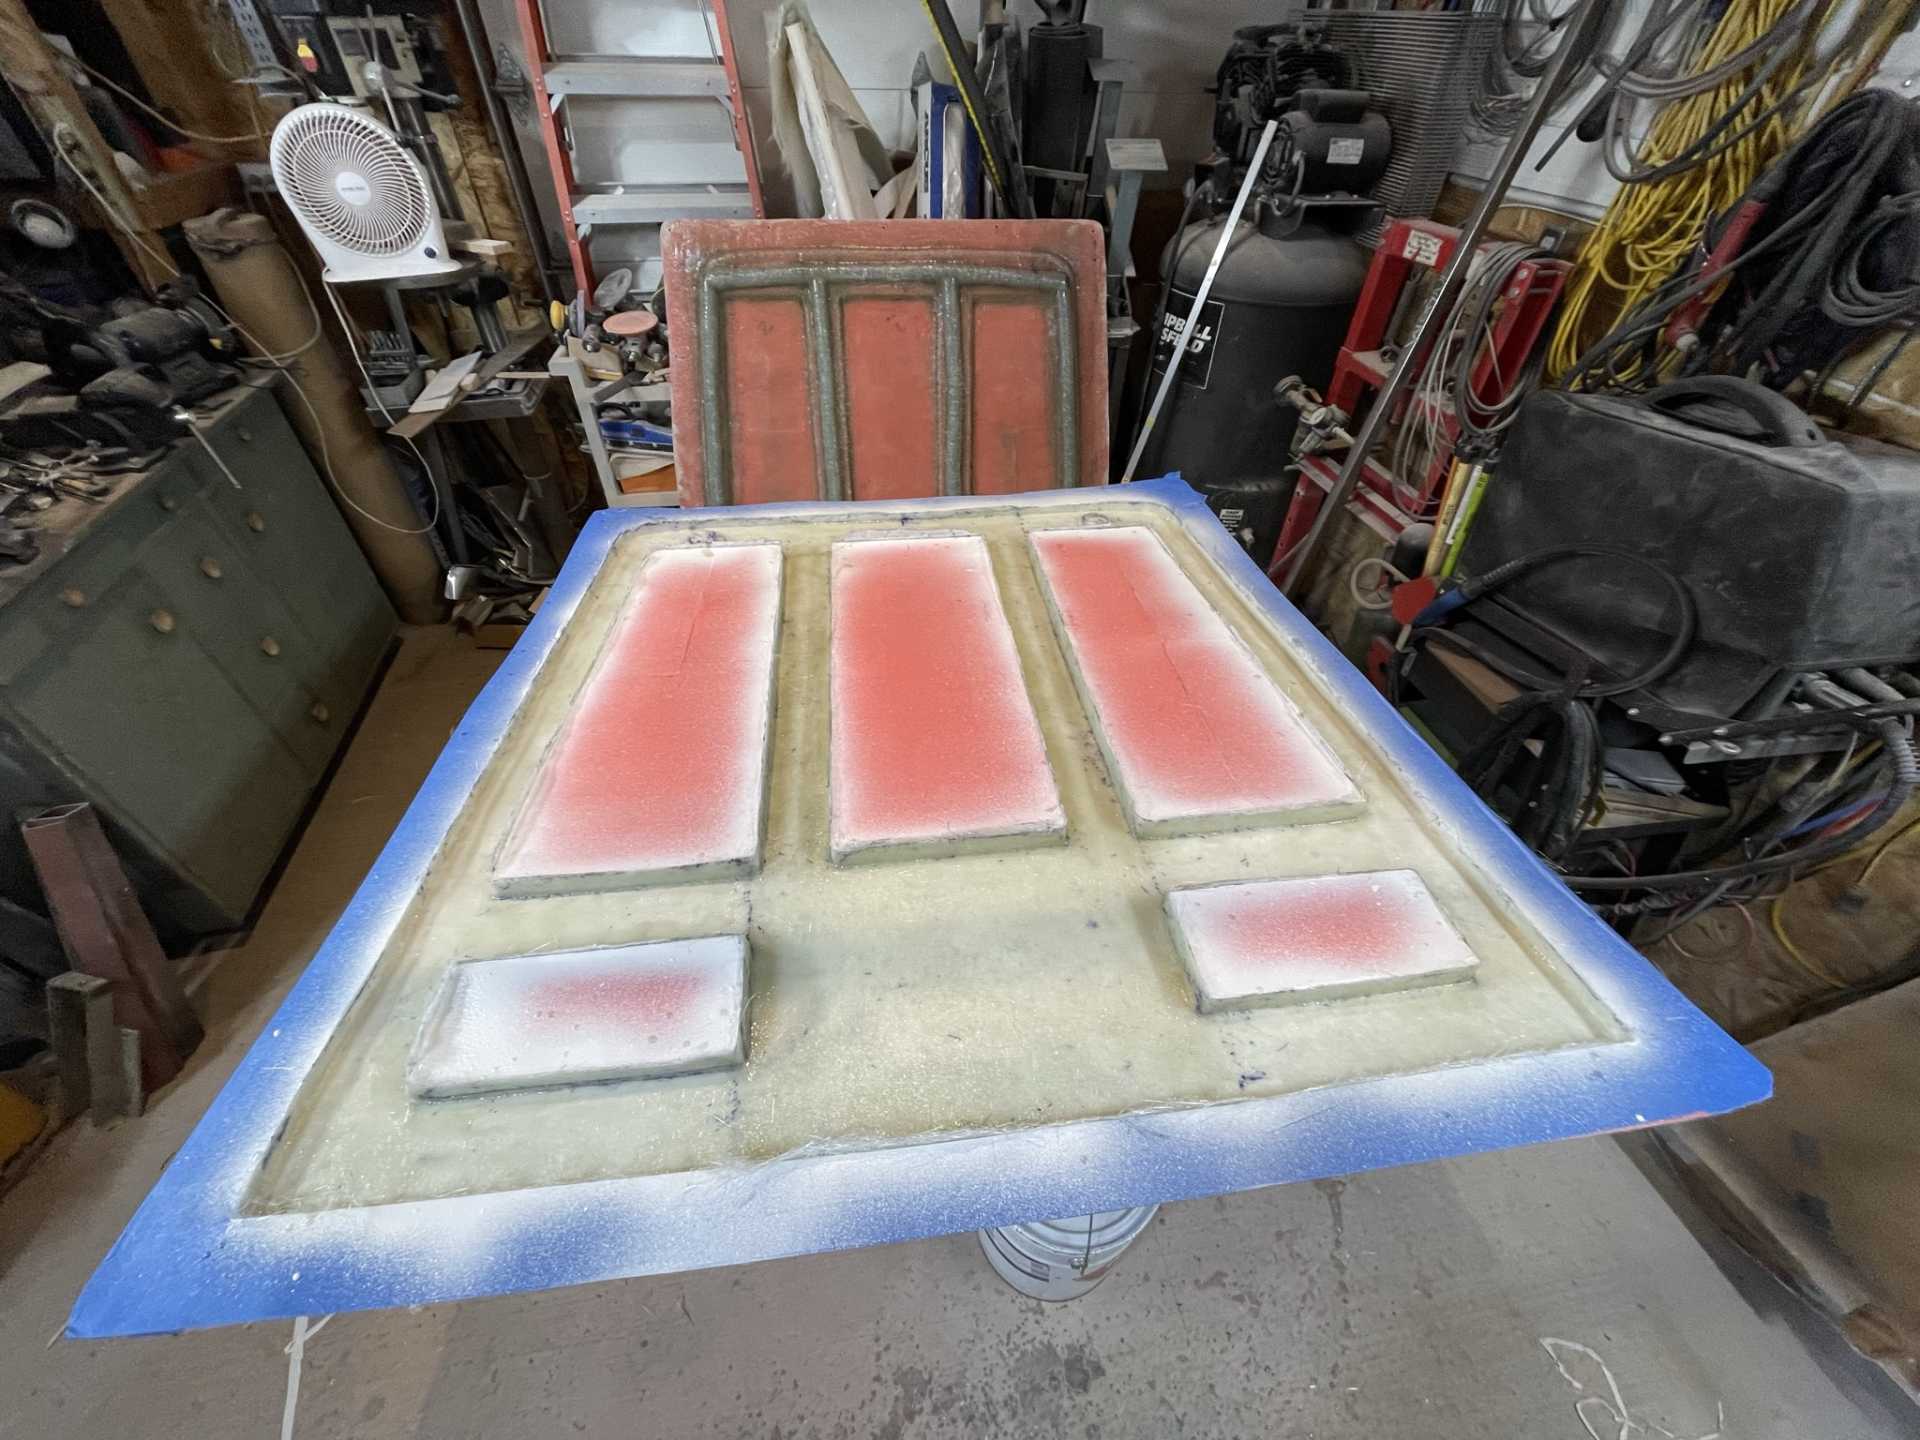
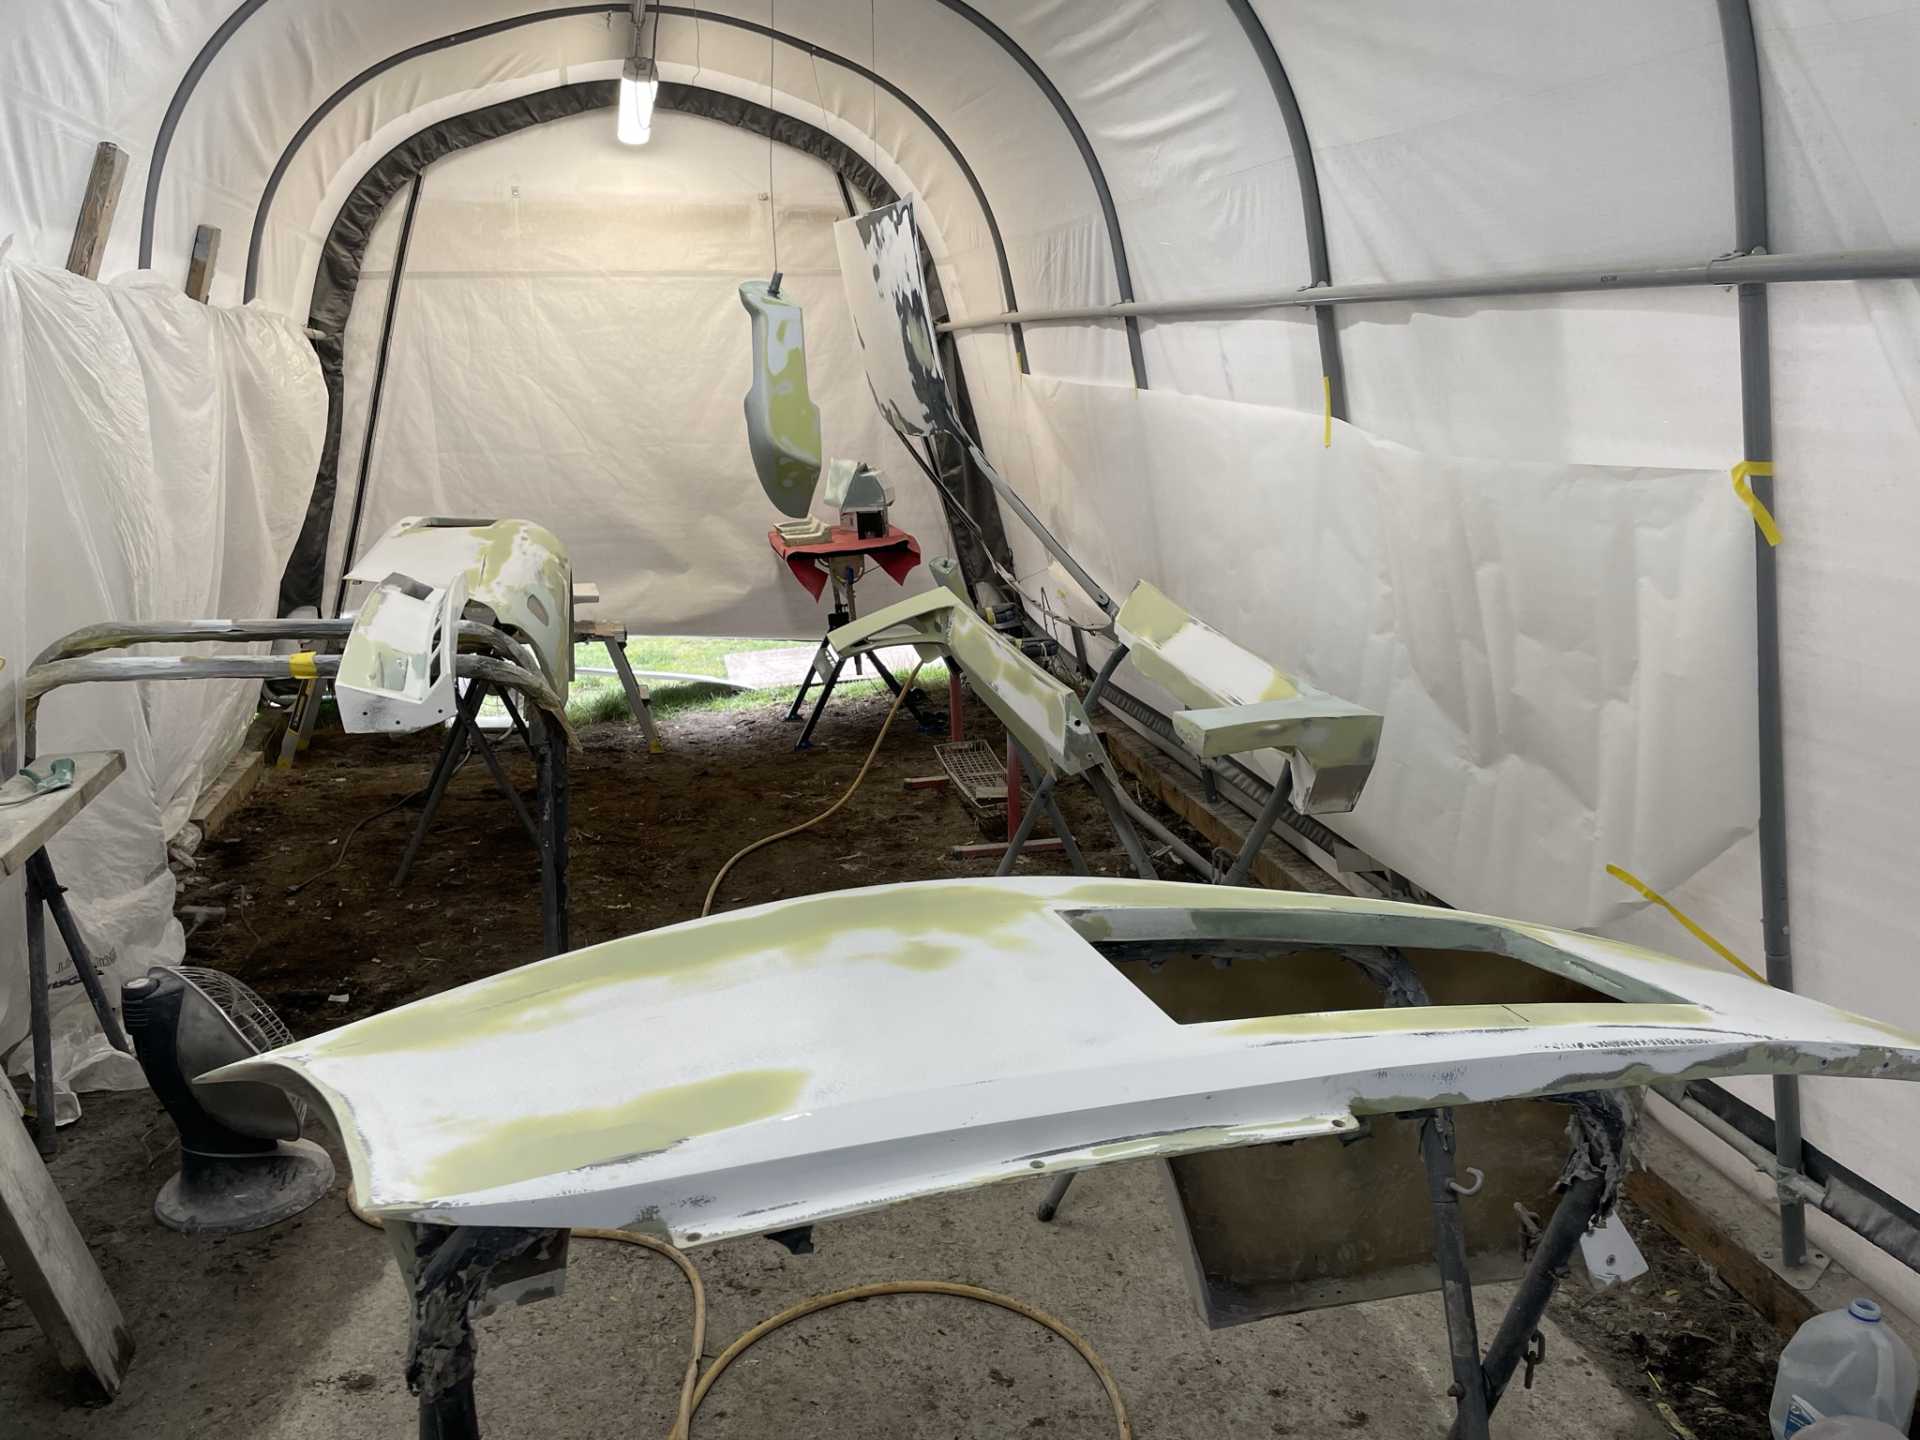
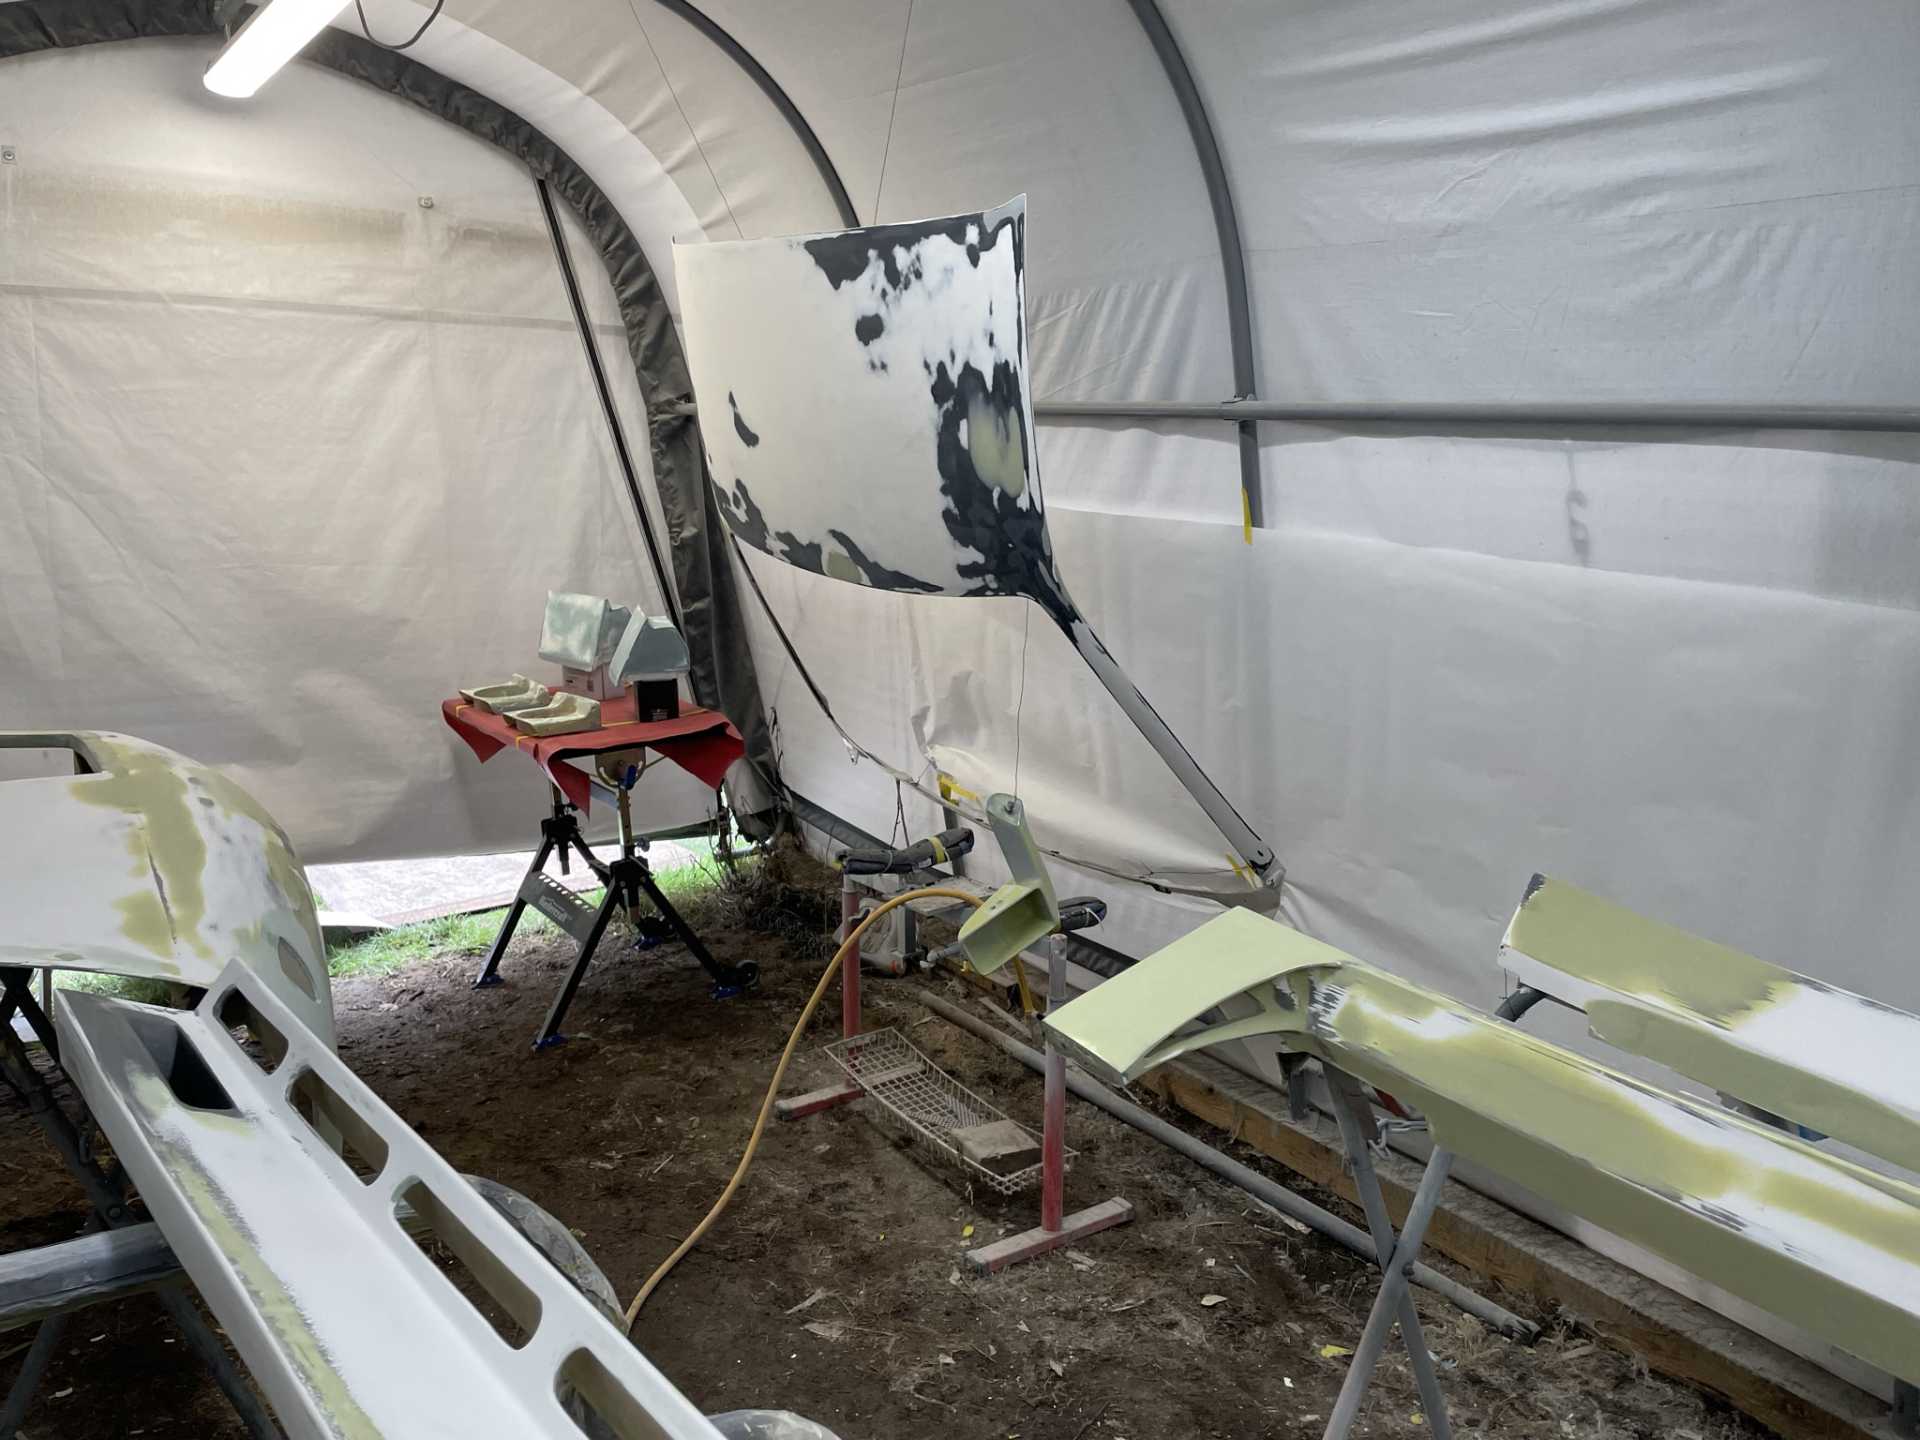
I started to layup new door panels with the the modifications to extend the top to match the outside door . I then made a partial mold of the top and made a new piece. I then attached it to the old door panel resulting in a correct dimensional panel. I then make a mold of it and end up with a finished panel. Very convoluted but it works and is done correctly. [img]https://images.fiero.nl/userimages/dobie1/757D2A95-5B91-4D0C-9D 64-49ADA29D9C8A.jpeg[/img][img]https://images.fiero.nl/userimages/do bie1/D7C6D29F-ACB3-490C-B31F-42F6336010D1.jpeg[/img]
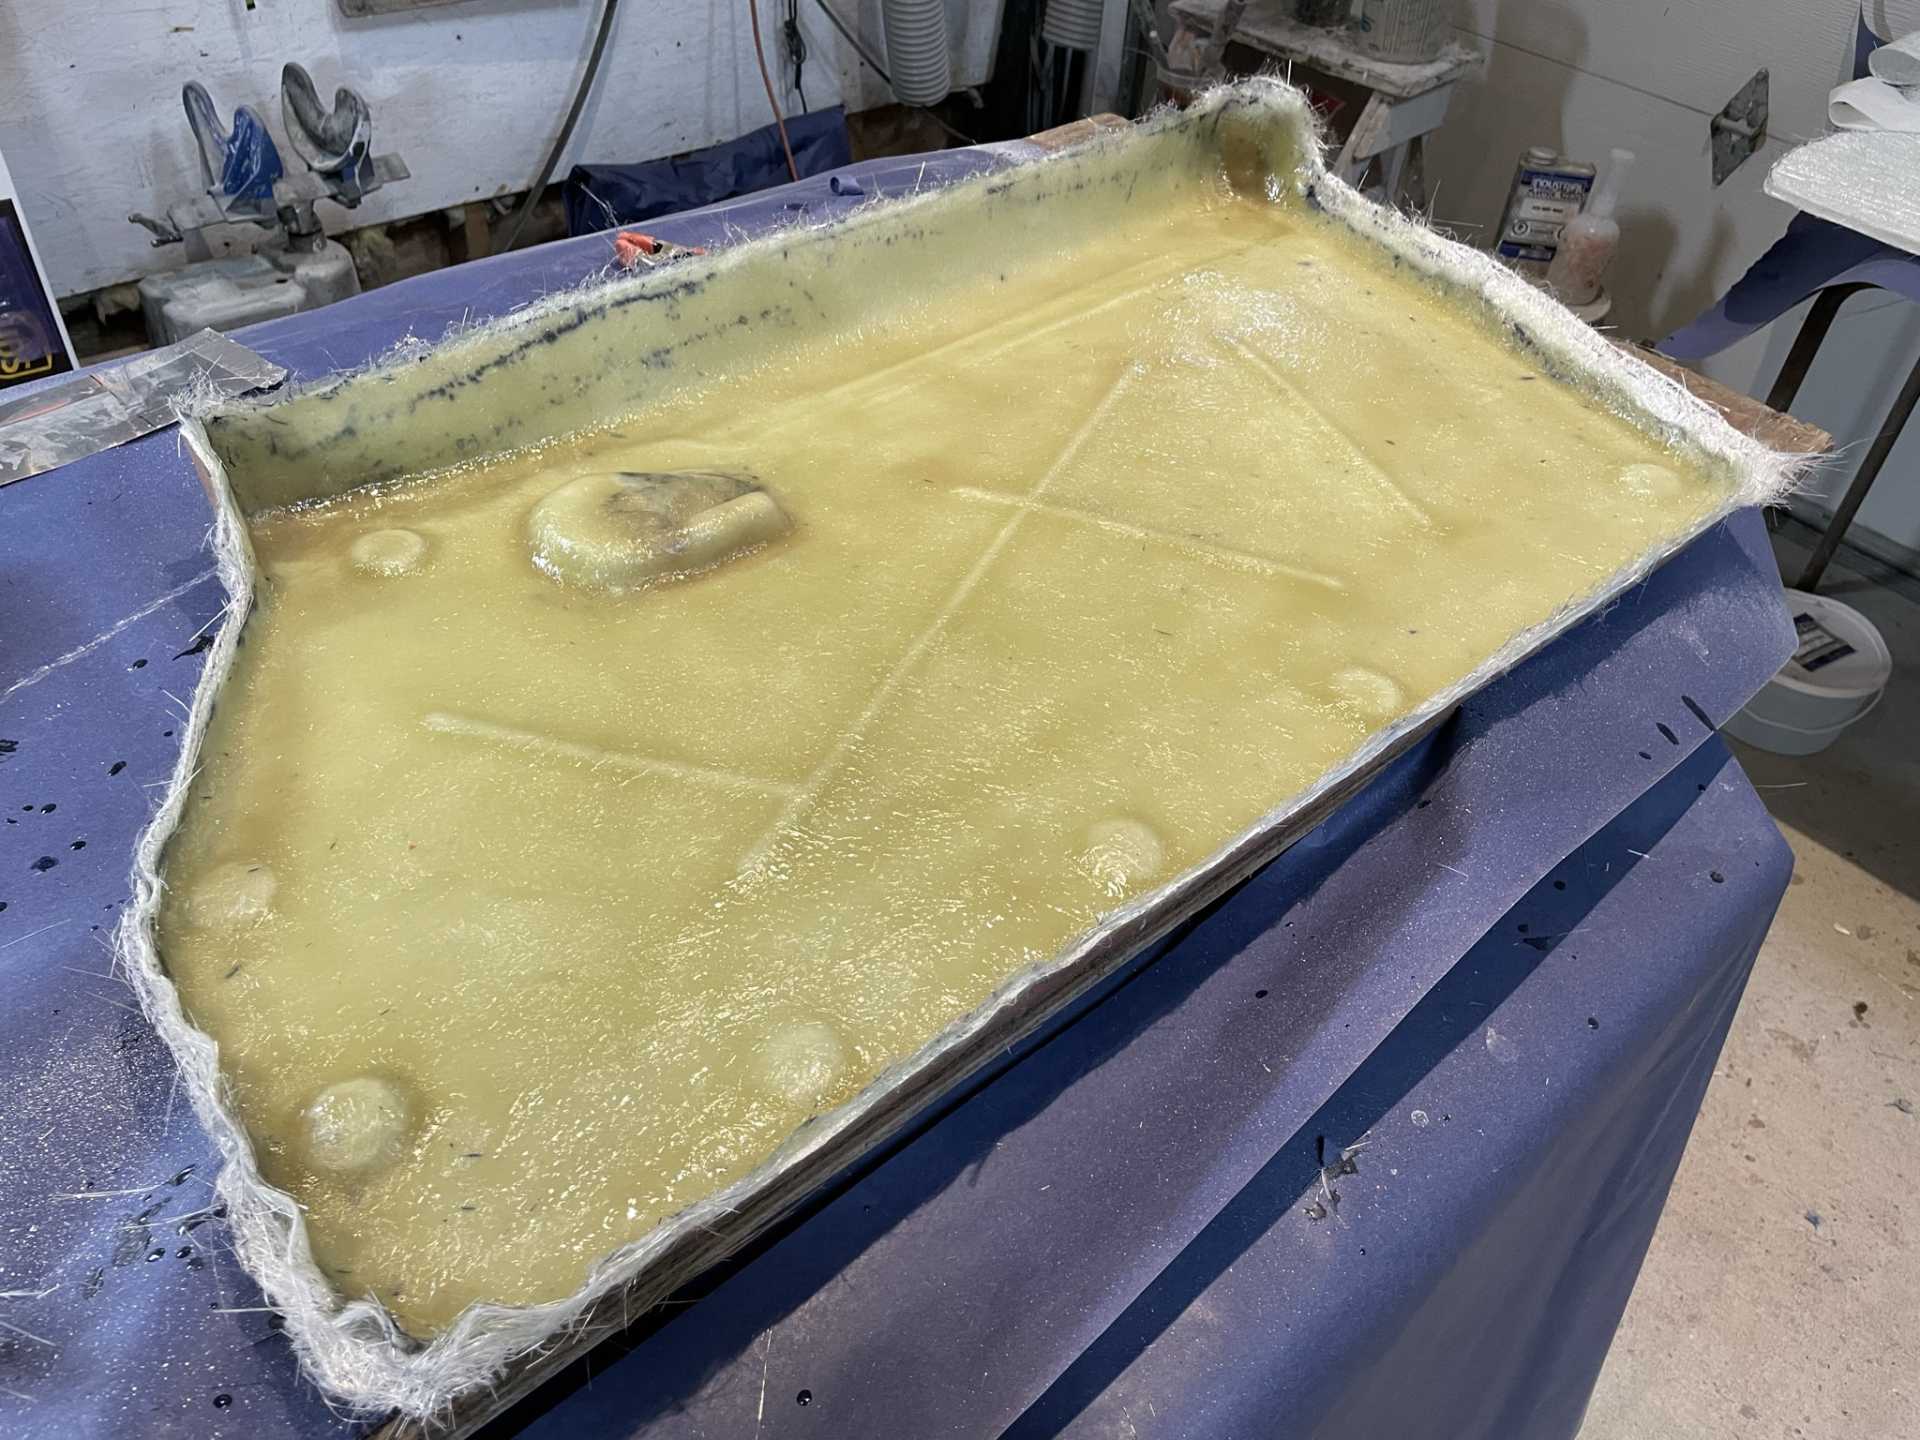
I also started to mold the rear deck for the car, I attached 4” flange around the edge to allow lots of area to attach the vacuum bag when I do the carbon fibre layup as well as flanges to fill all openings for a complete vacuum over the whole part.
I’m getting all the fiberglass mat cut up to expedite the mold build , I’ll be so glad once all the pieces are built fiberglassing complete and I can just Finish the car.
Stay safe everyone Wayne I got the rear deck waxed , PVC, and Gelcoat completed today so I’ll lay the first two layers tomorrow !!
[This message has been edited by dobie1 (edited 01-31-2022).]
Over the last week I was able to get one side of the rear deck mold completed. It was a bit more work than I anticipated with 16 right angle edges which took a lot of extra attention to ensure the fibreglass matt didn’t bridge. Everything turned out great just alot of time.
Then I flipped over the mold and took all the flanging off a cleaned it up preparing to mold the second side.
Then I demolded the modified inside door panel that I made earlier and cleaned it up ,I waxed and shot it with PVA mold release. I sprayed White gelcoat onto the mold surface let it set up and layed 3 layers of fibreglass mat. I’ll leave it a week to fully cure before I clean up the part for installation.
Hi Bob , it’s been awhile. I’m hoping that I’ll be on the road this summer if life doesn’t get in the way! Getting the last parts finished has taken way longer than I thought. The extensive electrical wire clean up and new wiring for all the new equipment has been really time consuming. I hope you’ll be back on your project soon.
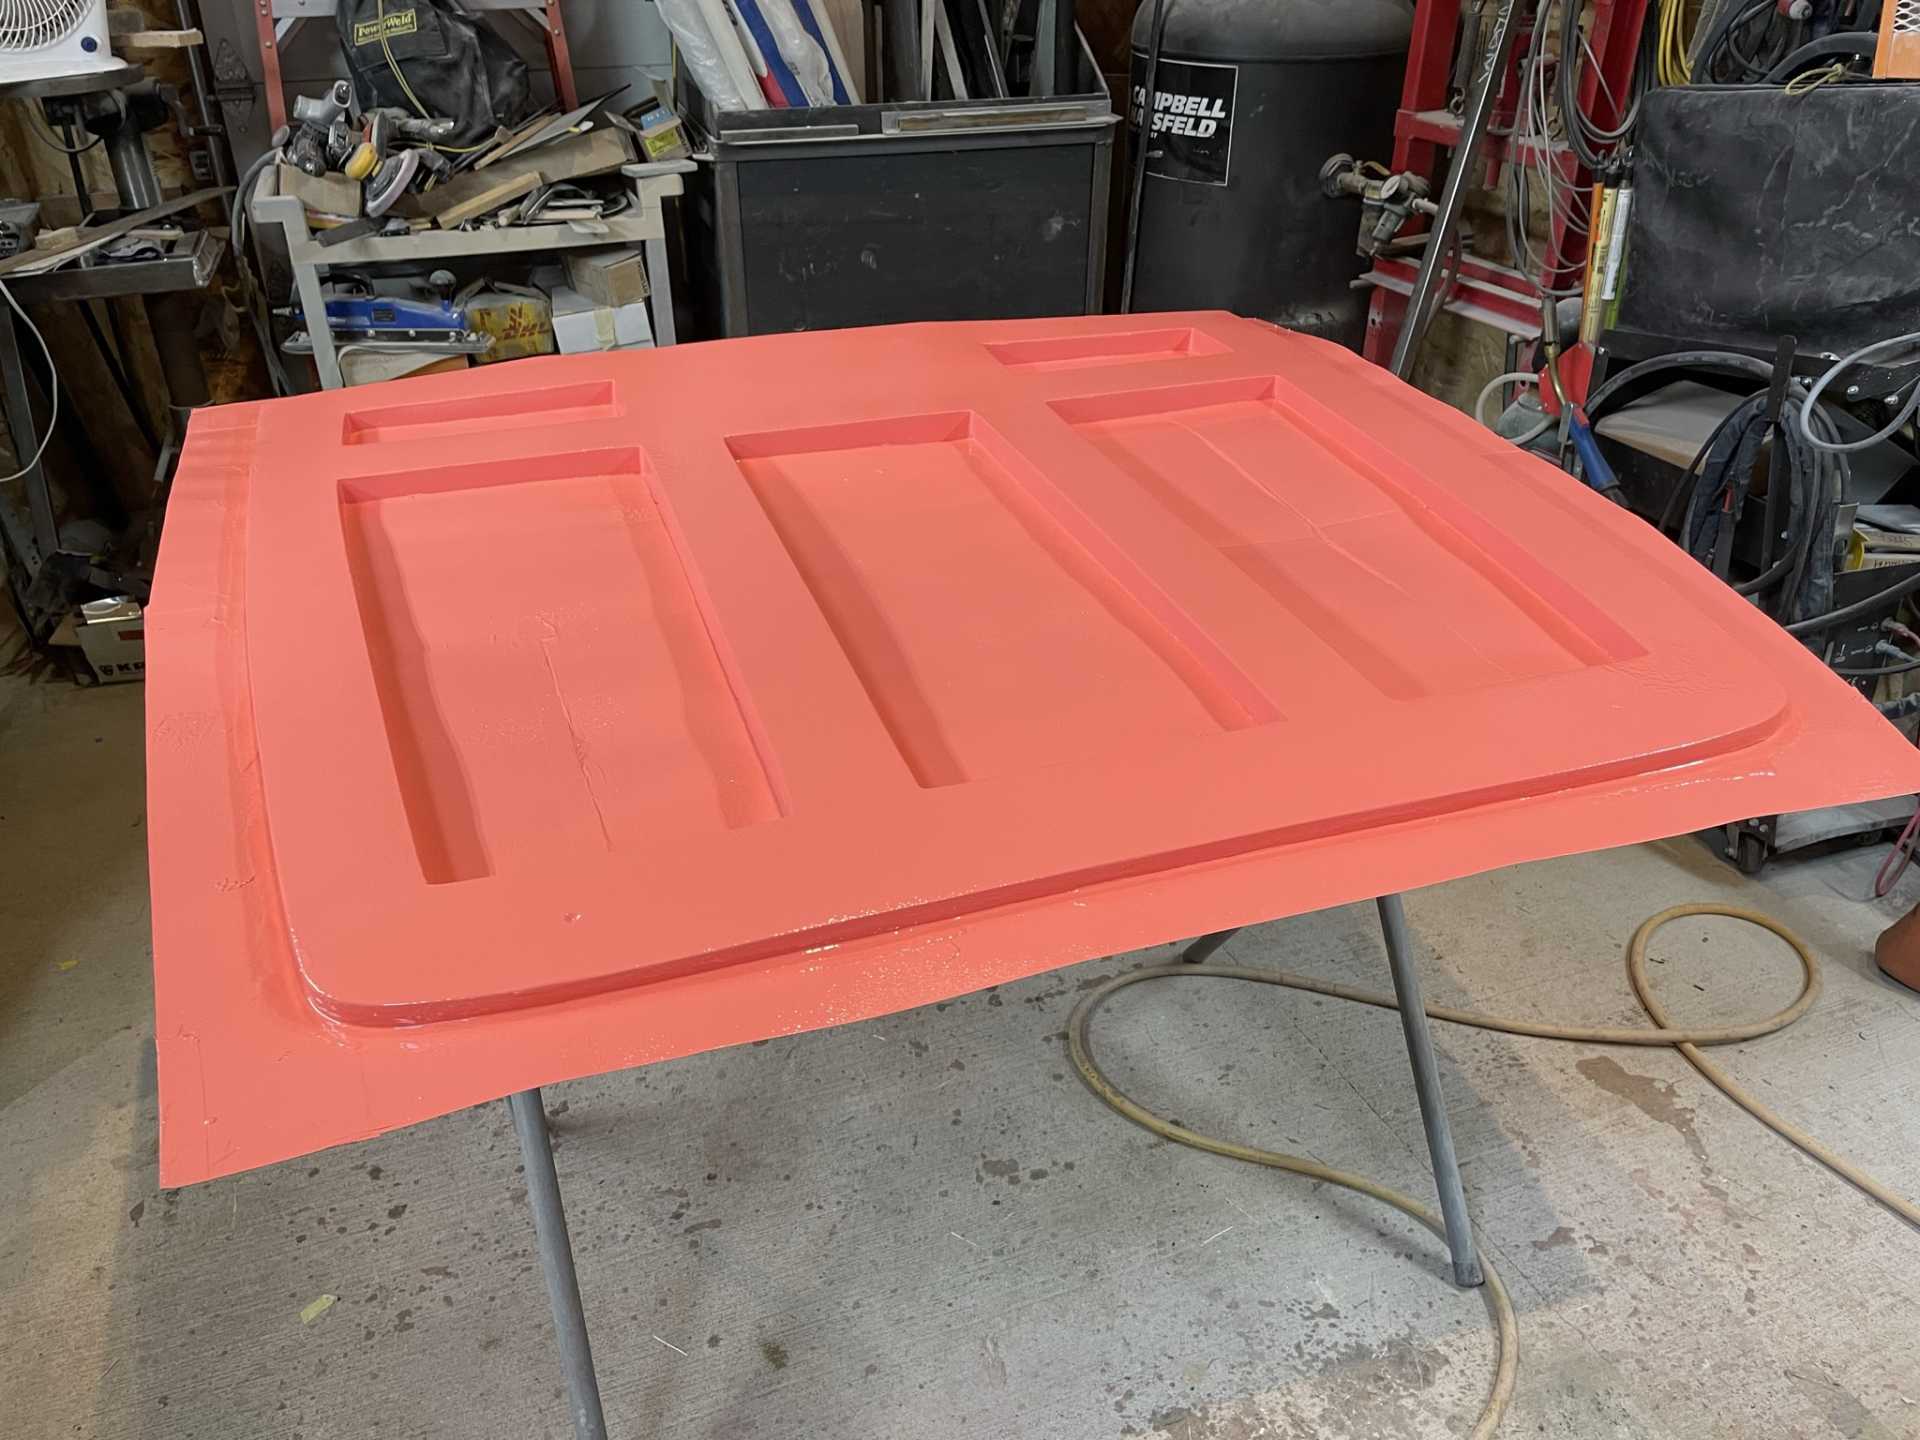
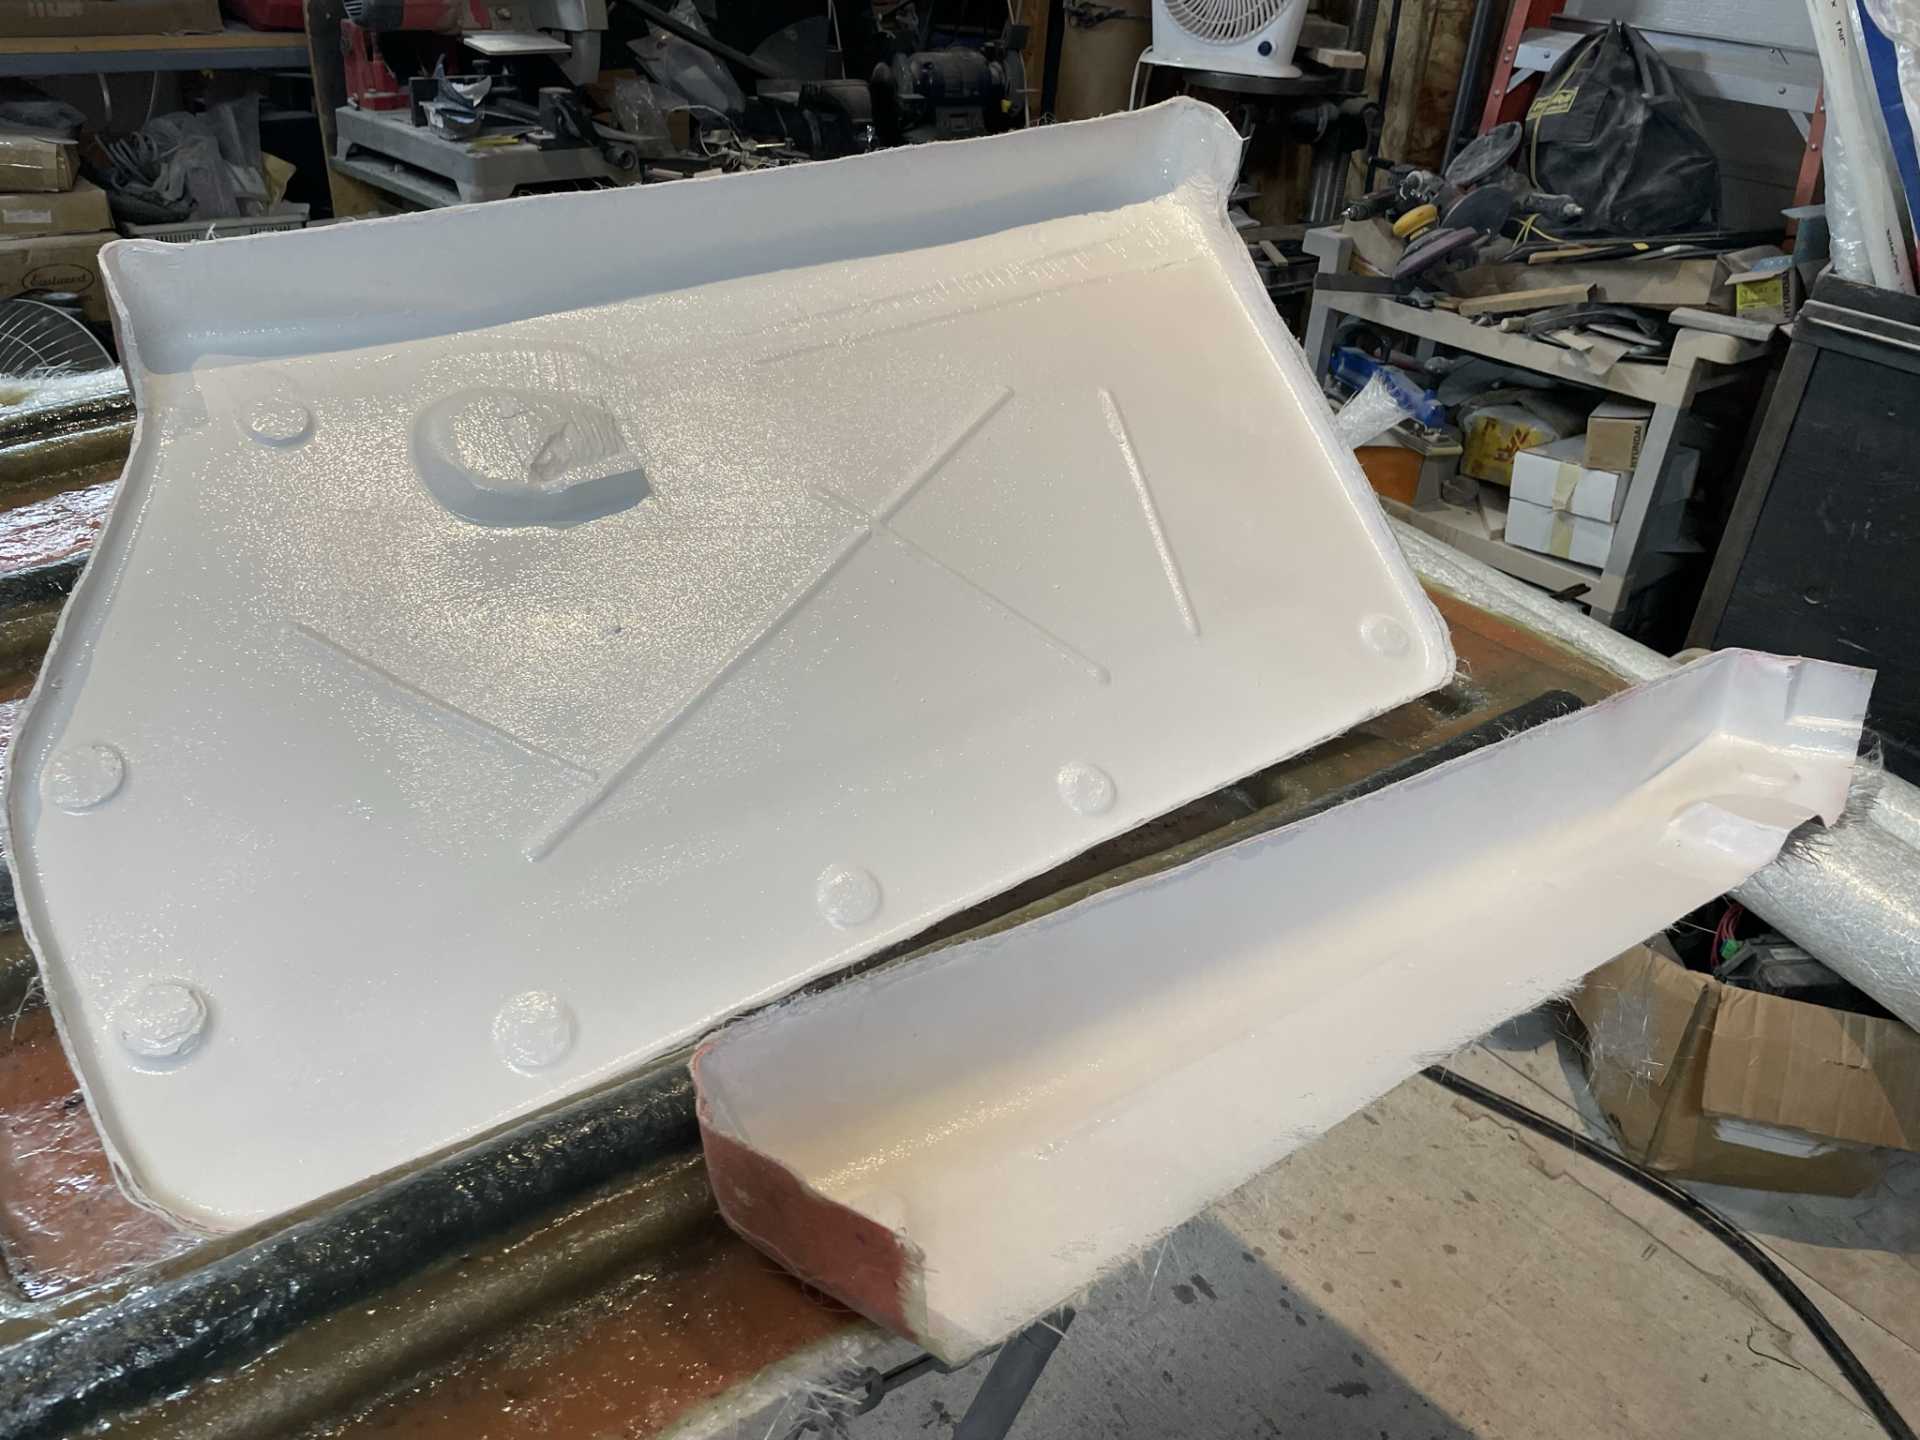
Here is a update for those that are following the build. I pulled the rear deck hood from the mold, it came out relatively easily. I then cleaned the mold up and prepared it for making the part. This time I made a template use to cut the fibreglass mat making sure no excess Matt is used trying to keep the weight down. I’ll lay up the topside mold first then the bottom then bond them together. I’m planning on doing a fibreglass hood first to work out all the bugs before I do a carbon fibre version which will cost about 4 times what it cost to do it in fibreglass.
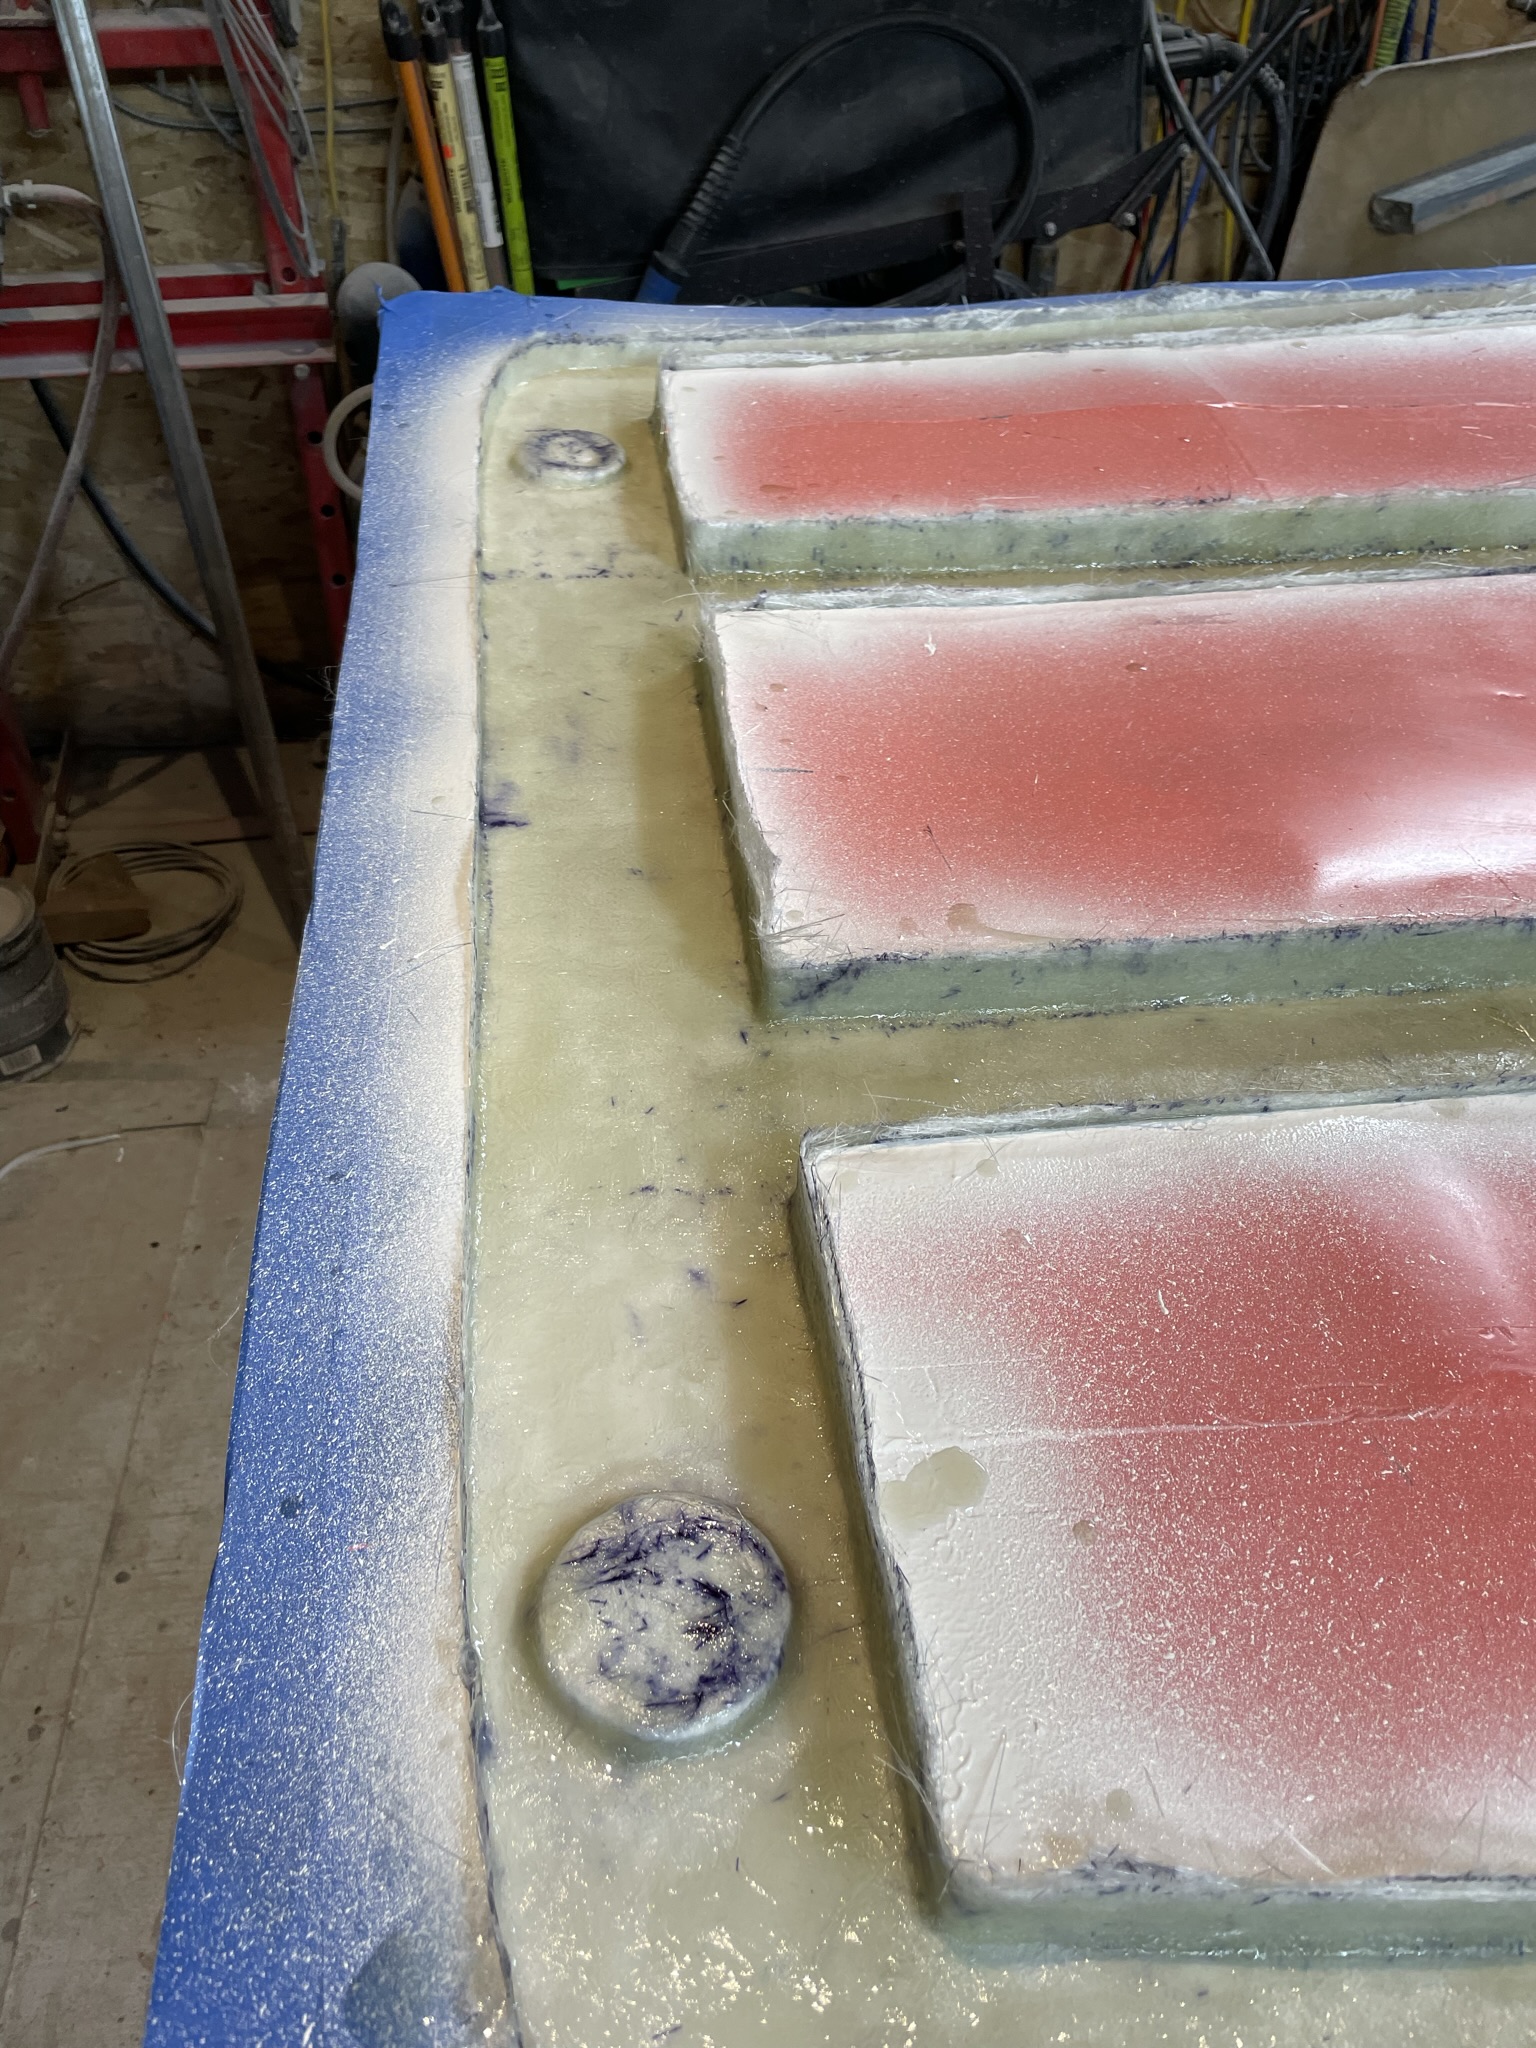
I thought I’d show the backside of the door panel to show the modification I made to the stock panel to give the a more finished look. It is a 1” rise in the panel. I riveted the new top onto the original panel , then bevel the new edge before make a mold of the new modified panel.
That’s it for now Stay safe everyone Wayne
[This message has been edited by dobie1 (edited 02-16-2022).]
Hi everyone Here’s a bit of a update on the layup on the rear deck hood.
I sprayed a layer of white gelcoat into the mold and let it set up
I laid the first layer of 1 oz fibreglass Matt and allowed it to setup
I’m using a couple of hood hold downs that I need to recess into the hood.
The method I’m using to allow the head to be recessed and flush to the top surface was to take a piece of wax formed to the Correct dimensions and do the layup over the wax. Fingers crossed !!
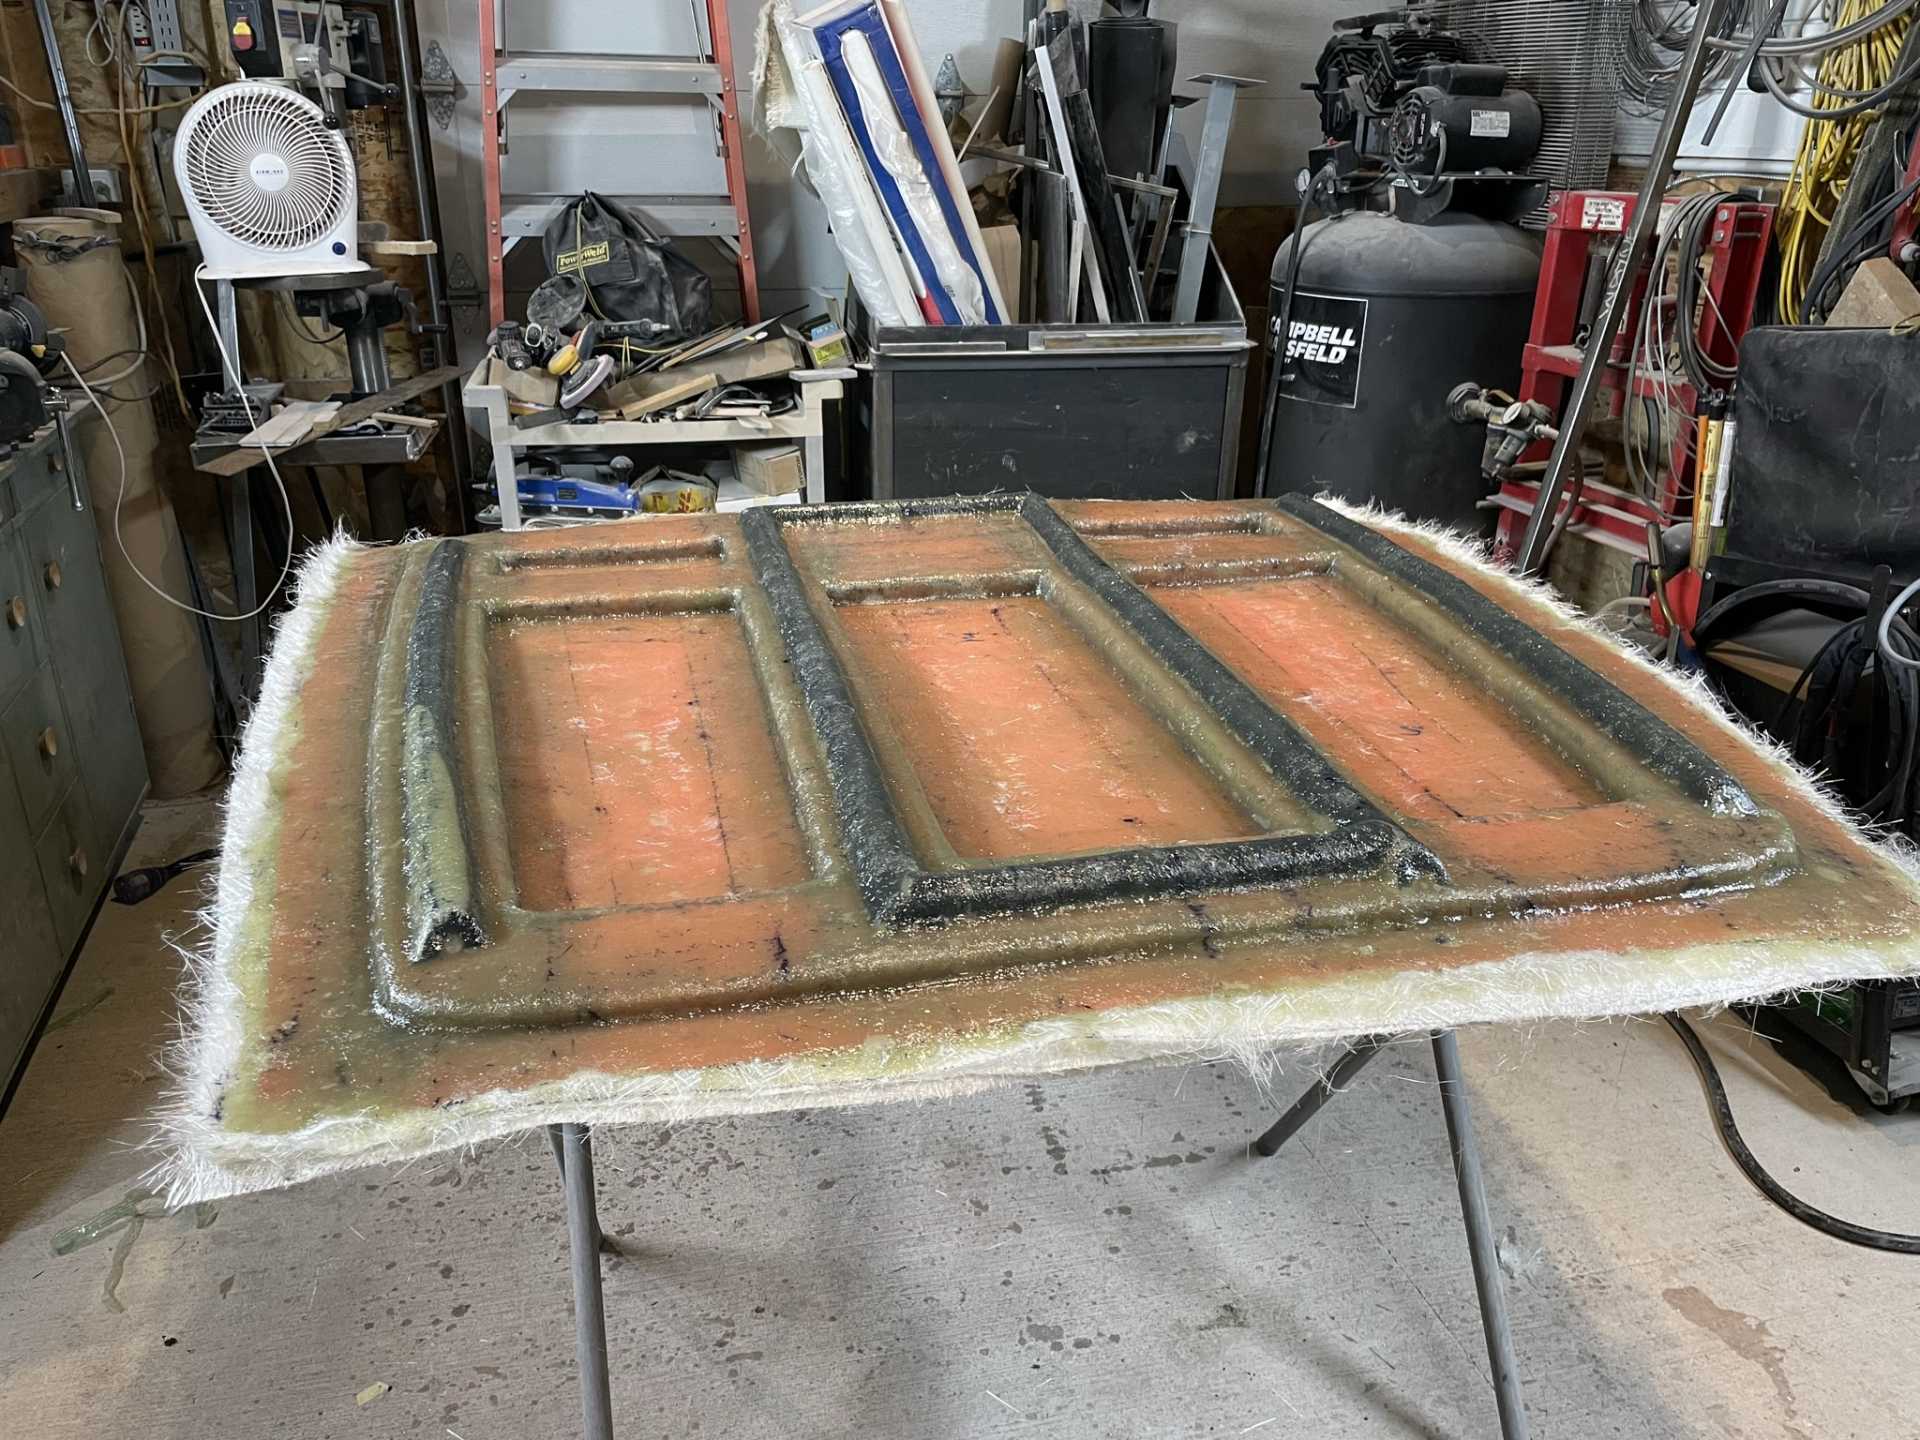
The layup is completed I’ll wait a week and pull the part from the mold, I’ll start the bottom tomorrow.
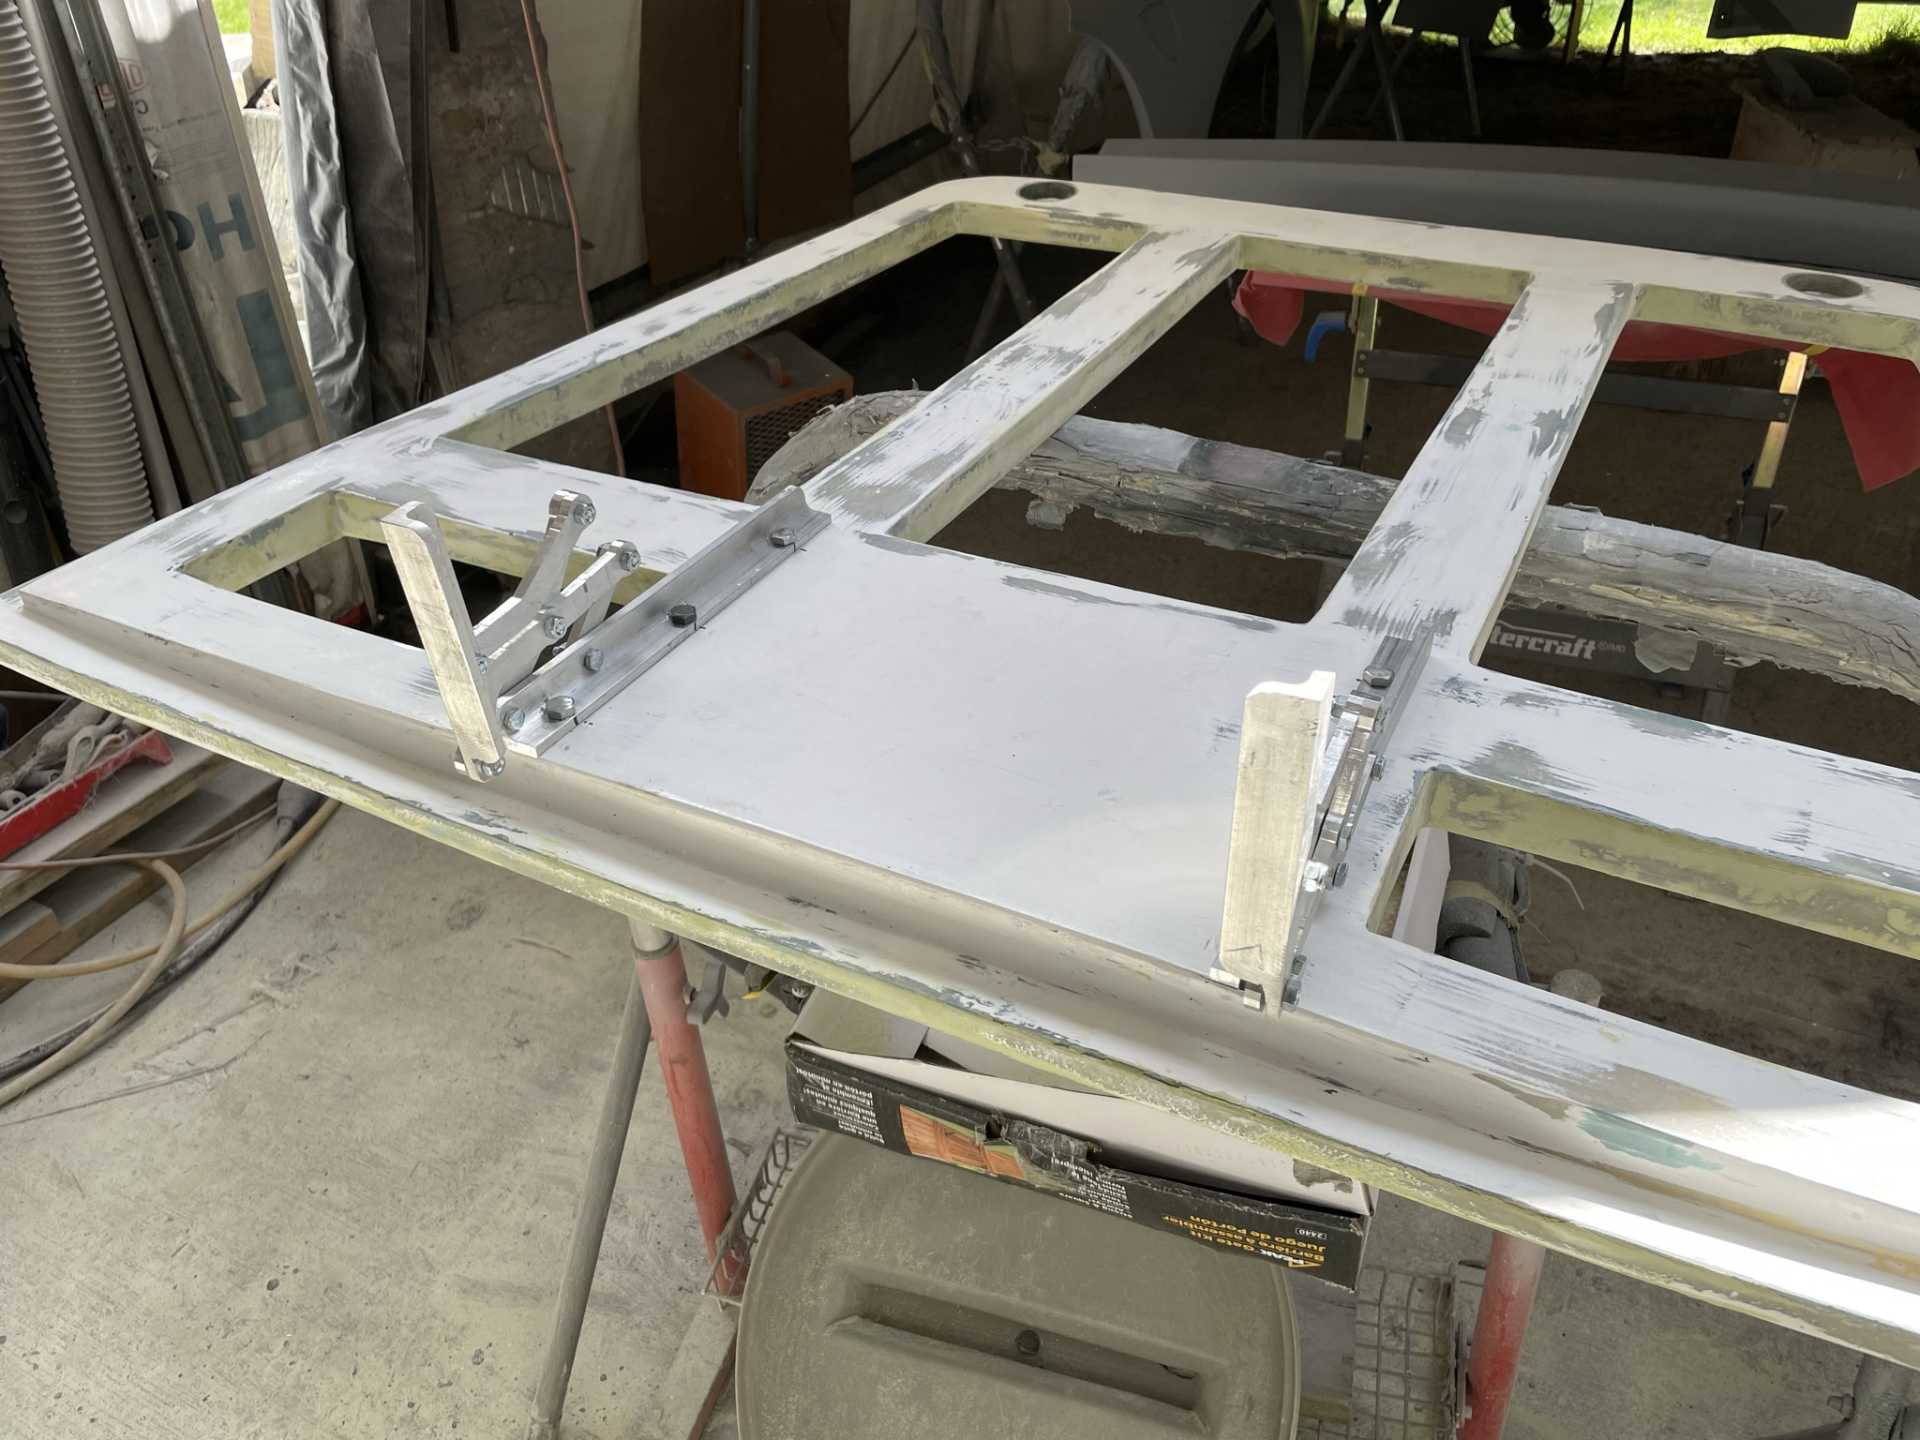
Lots happening on the project, I’ve finished the rear deck parts, just waiting to get the final setup for the hinge positioning before putting the two halves together.
My mechanic friend was having a problem with starting my car, we found the battery almost dead after a couple days of sitting. For no reason it Seems I have a heavy draw somewhere!!! We checked the alternator only to find it’s not putting out a charge seems like things just keep happening and not always good🤪
I got to hear the new custom exhaust running tonight!! everything I’d hoped for ,very quite.
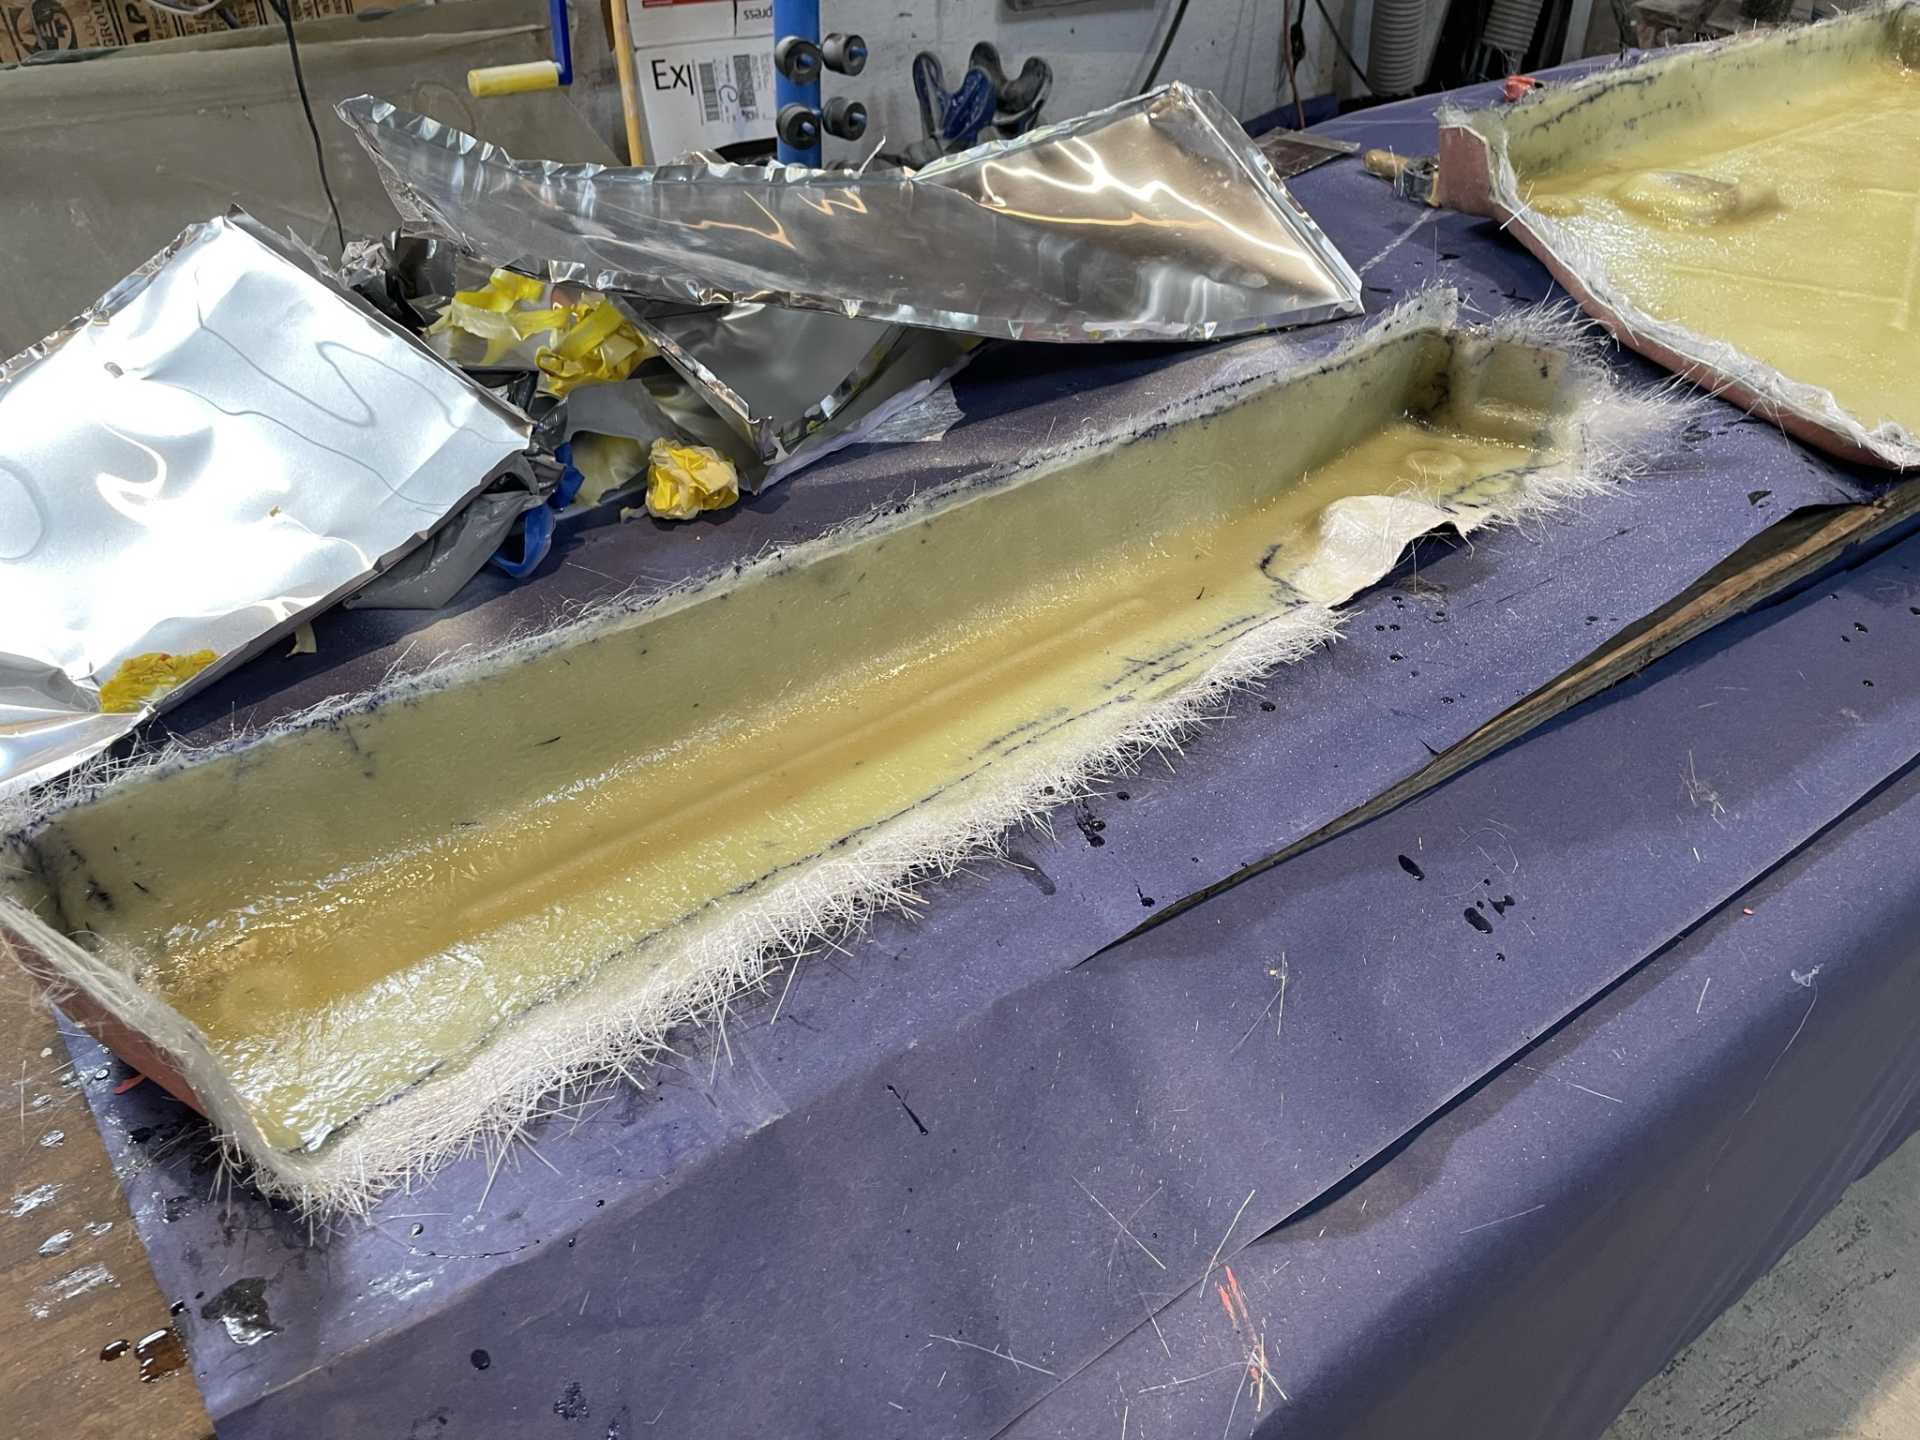
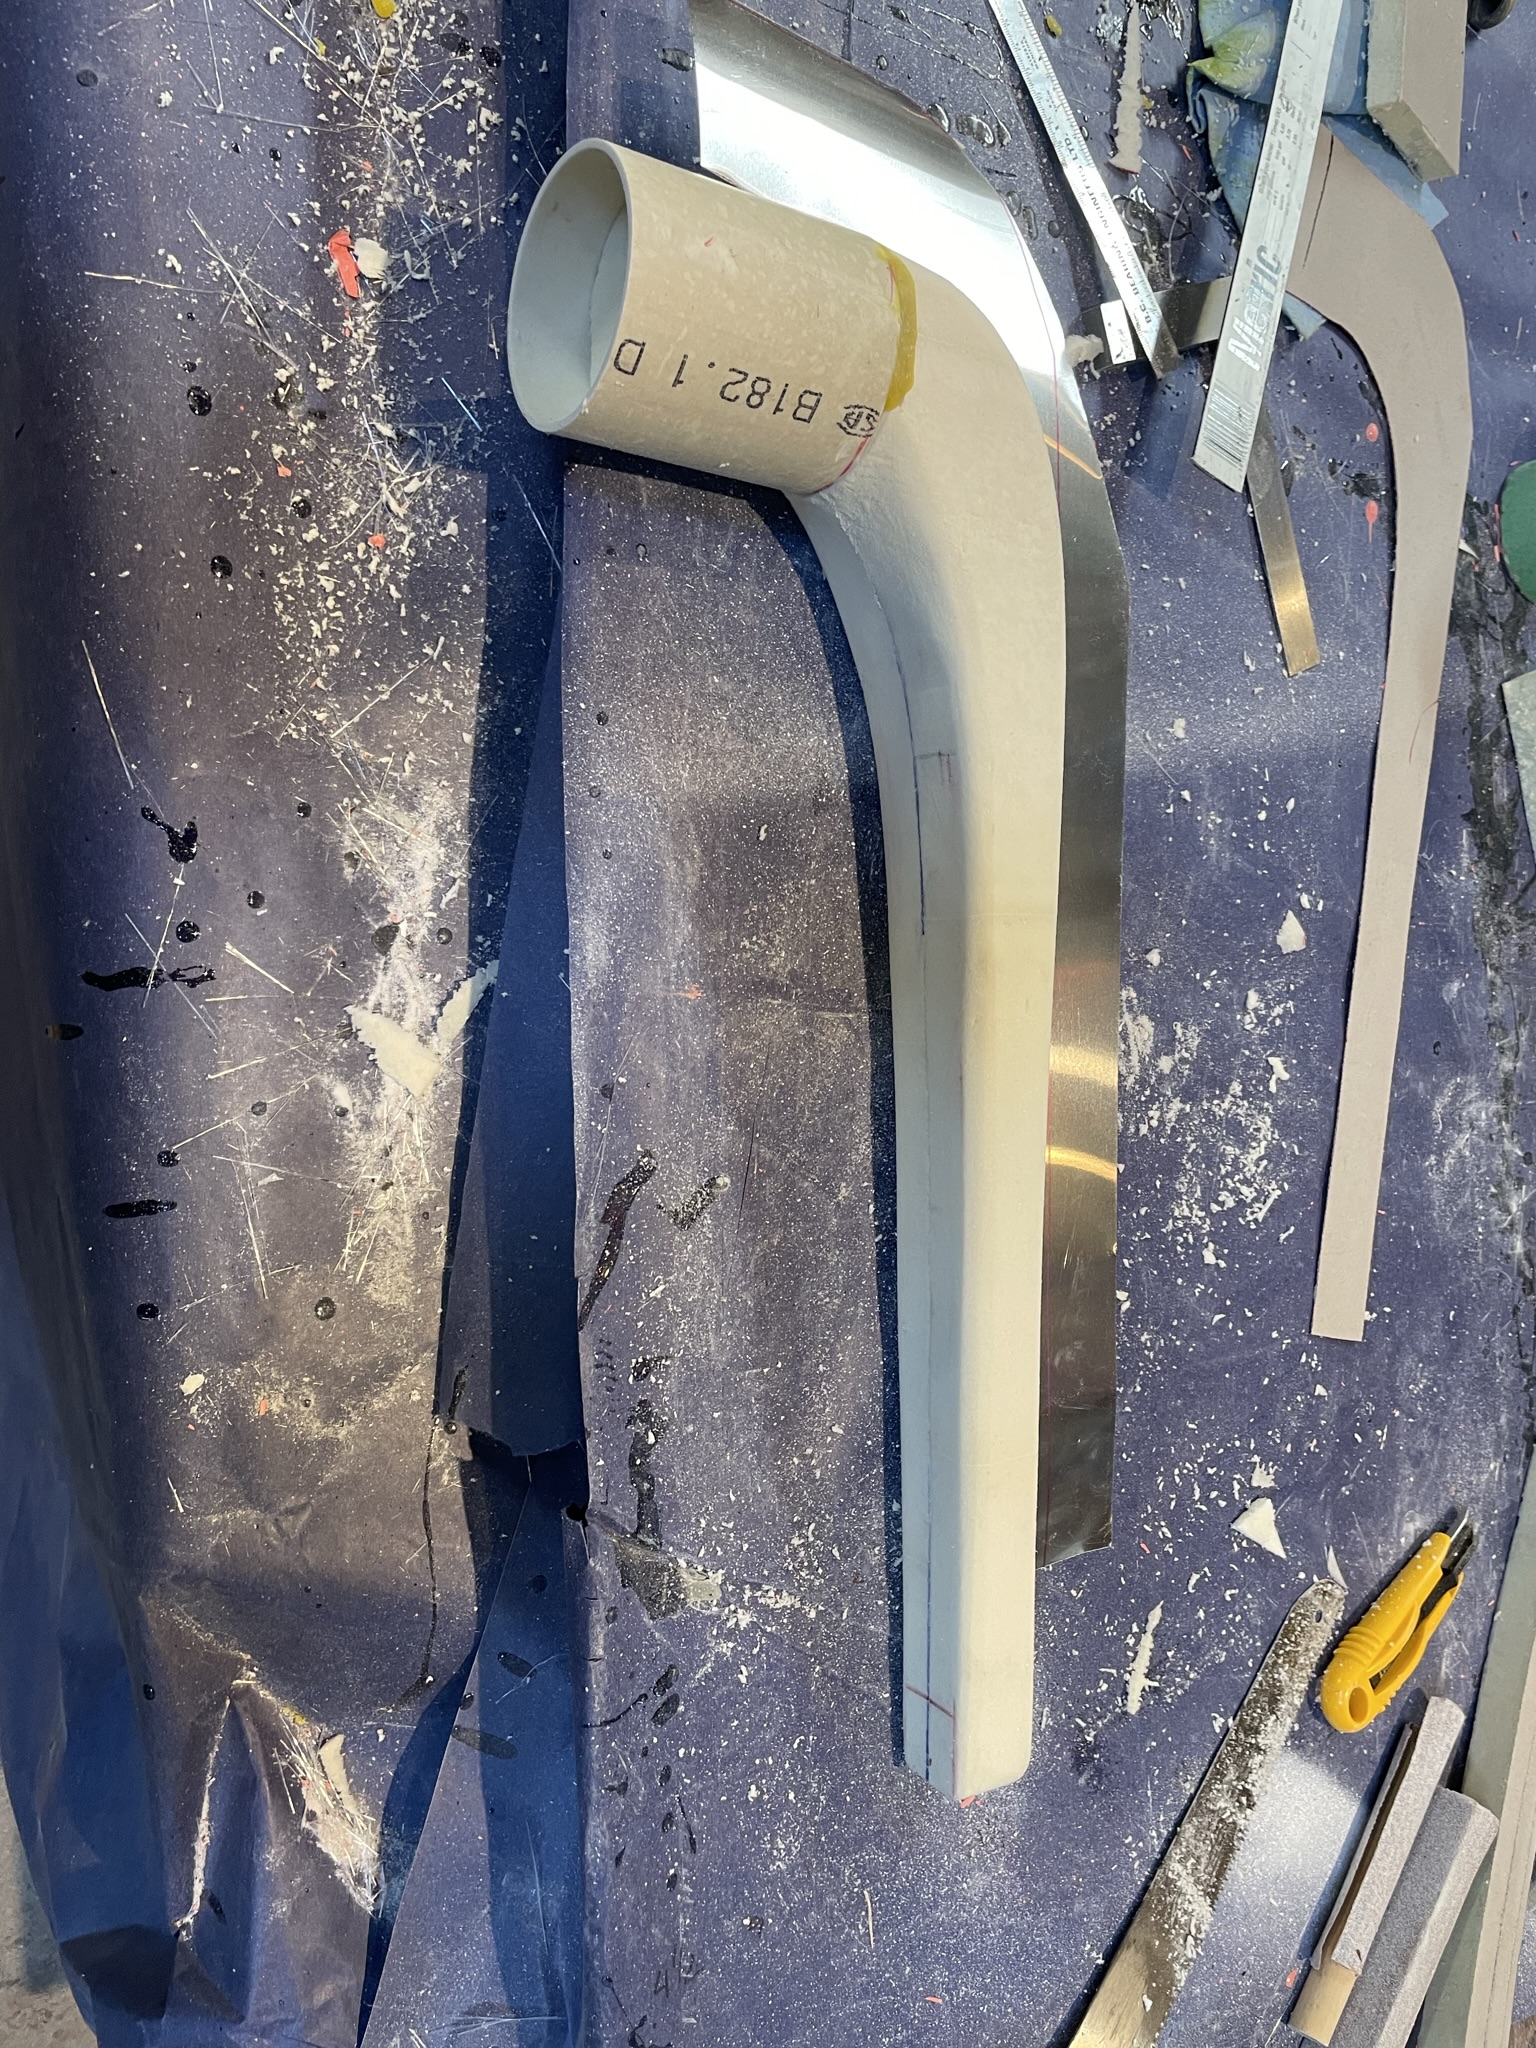
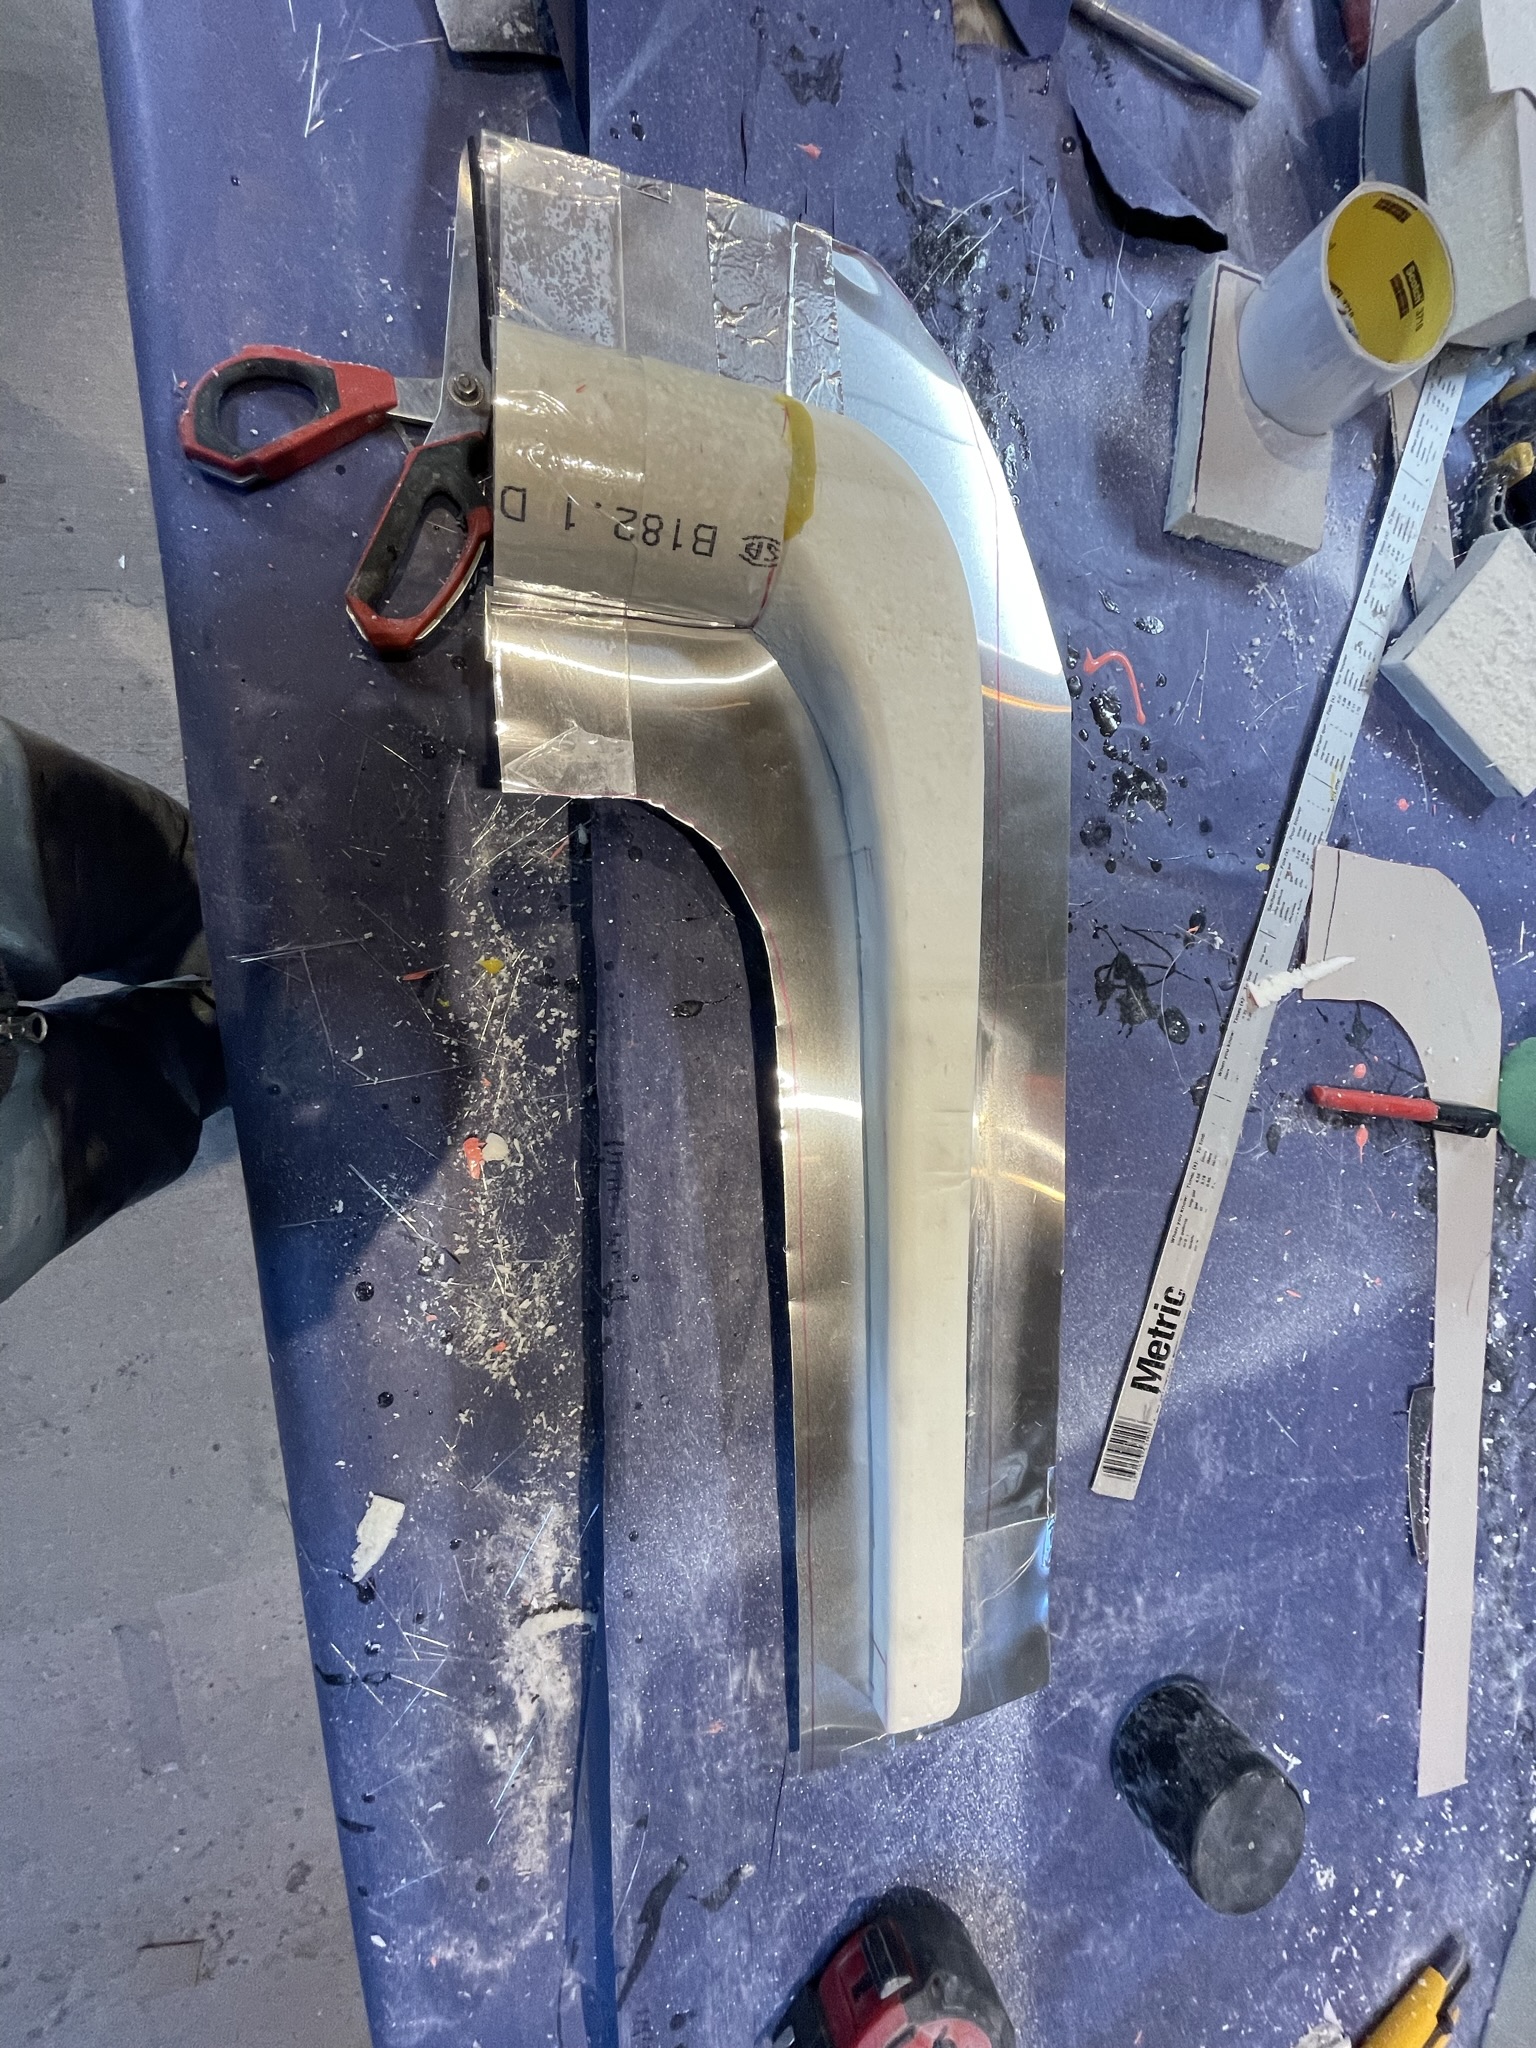
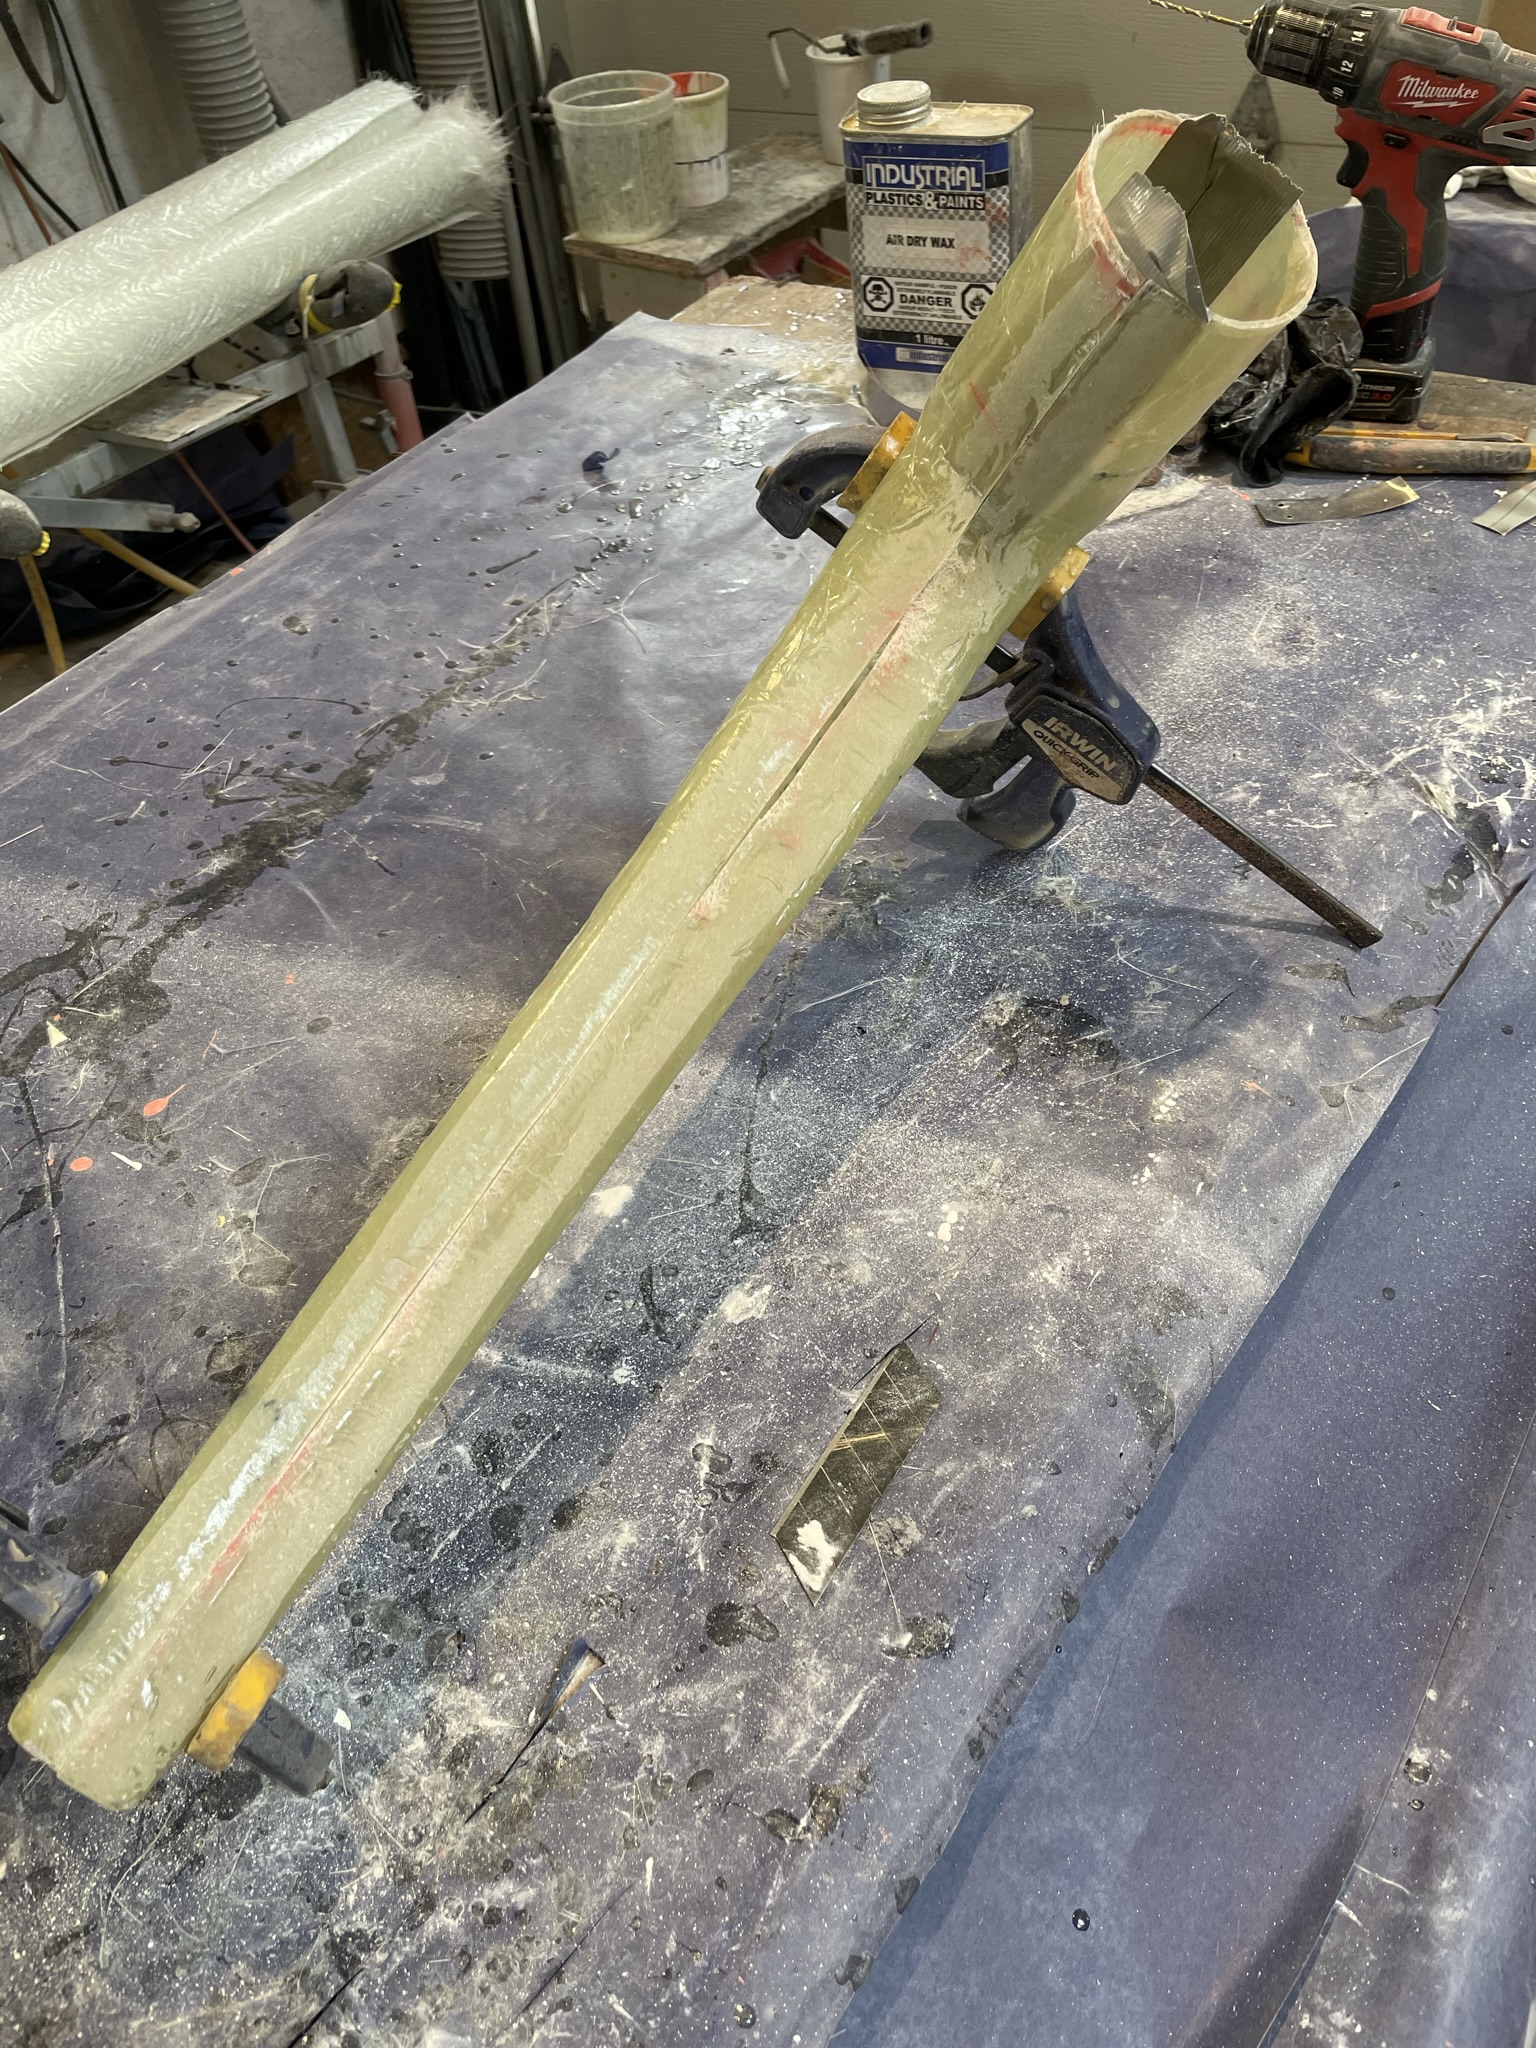
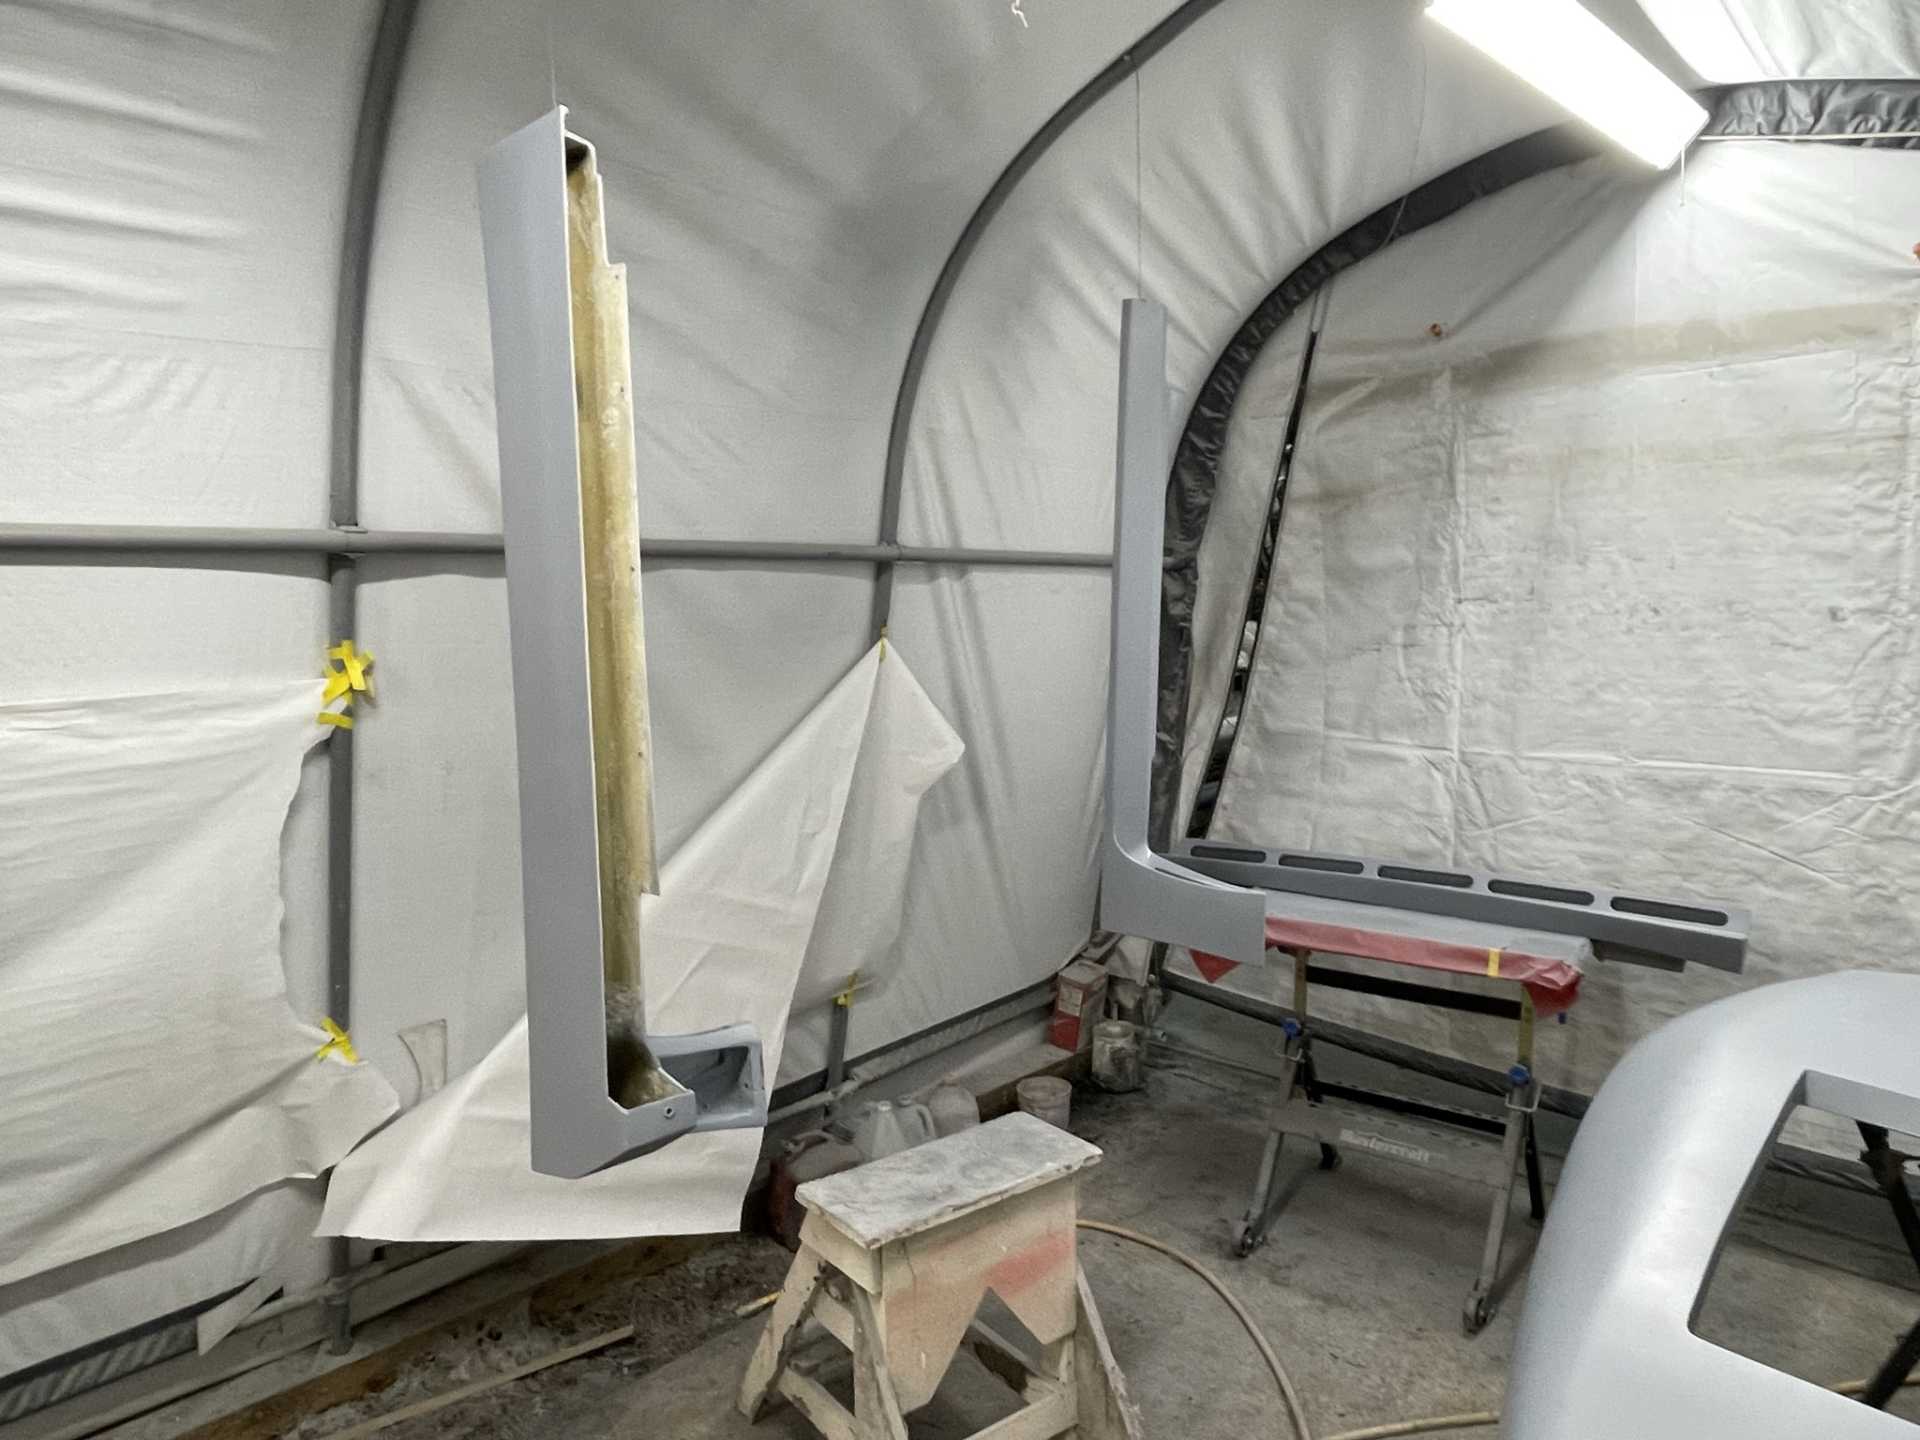
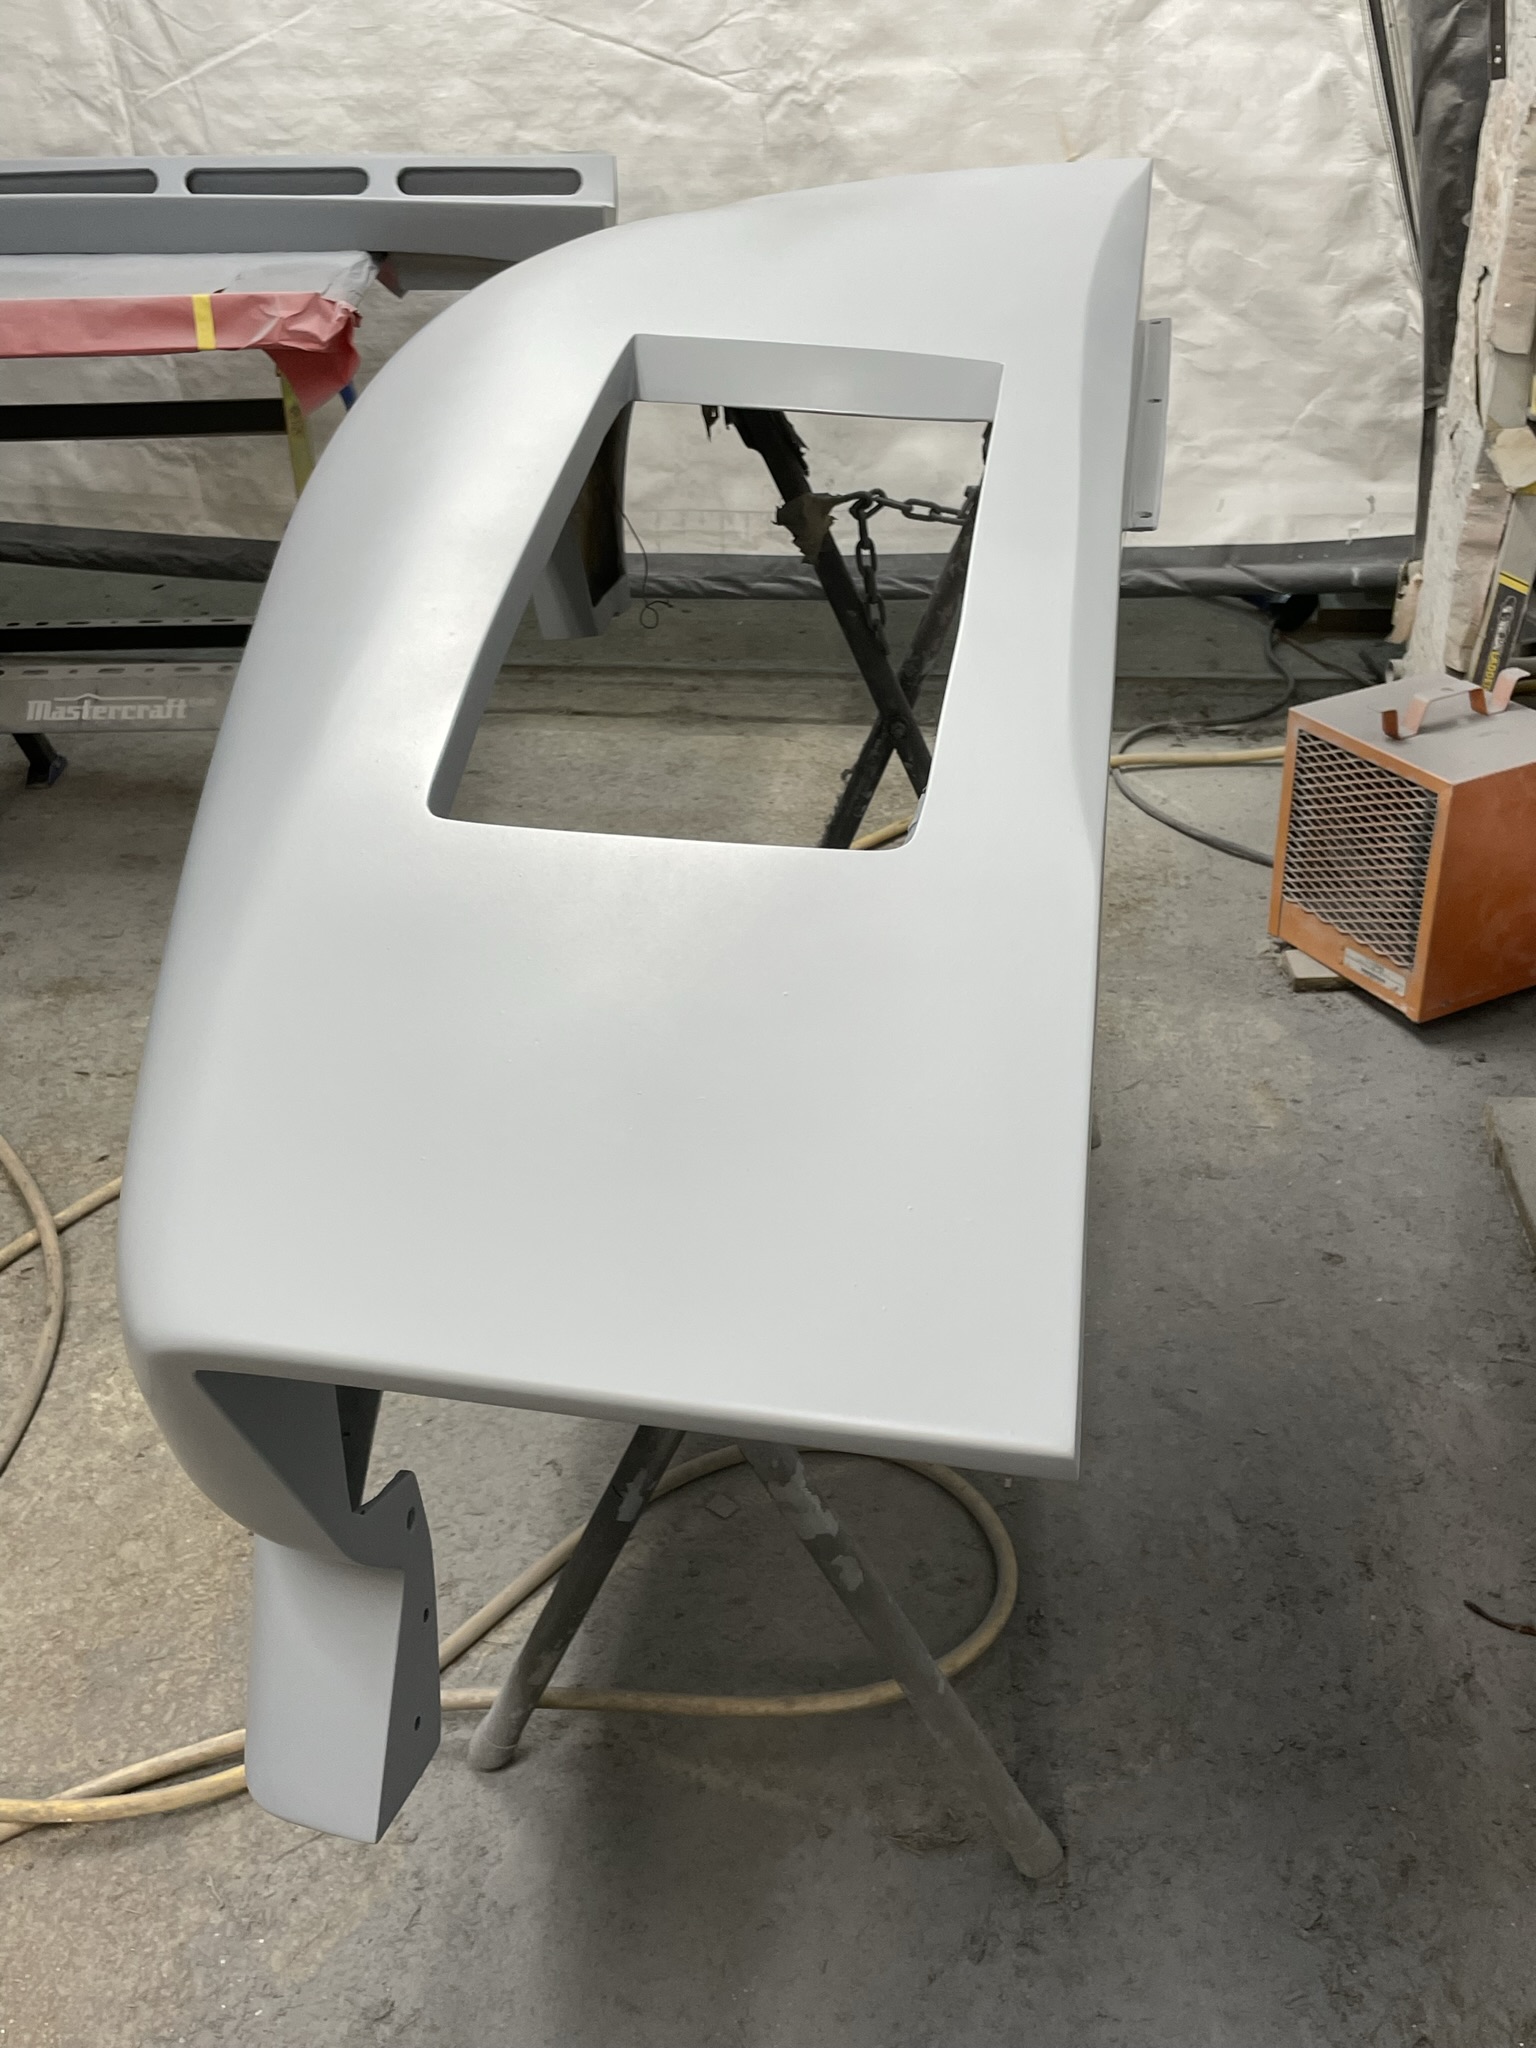
Well onto the the last part to design and and build. The lower ducts I built into the car design are for rear brake cooling. The duct terminates with a 3” exit, so I now need to build a extension to the wheels directing the air onto the rotors. It will be built in two halves then bonded together.
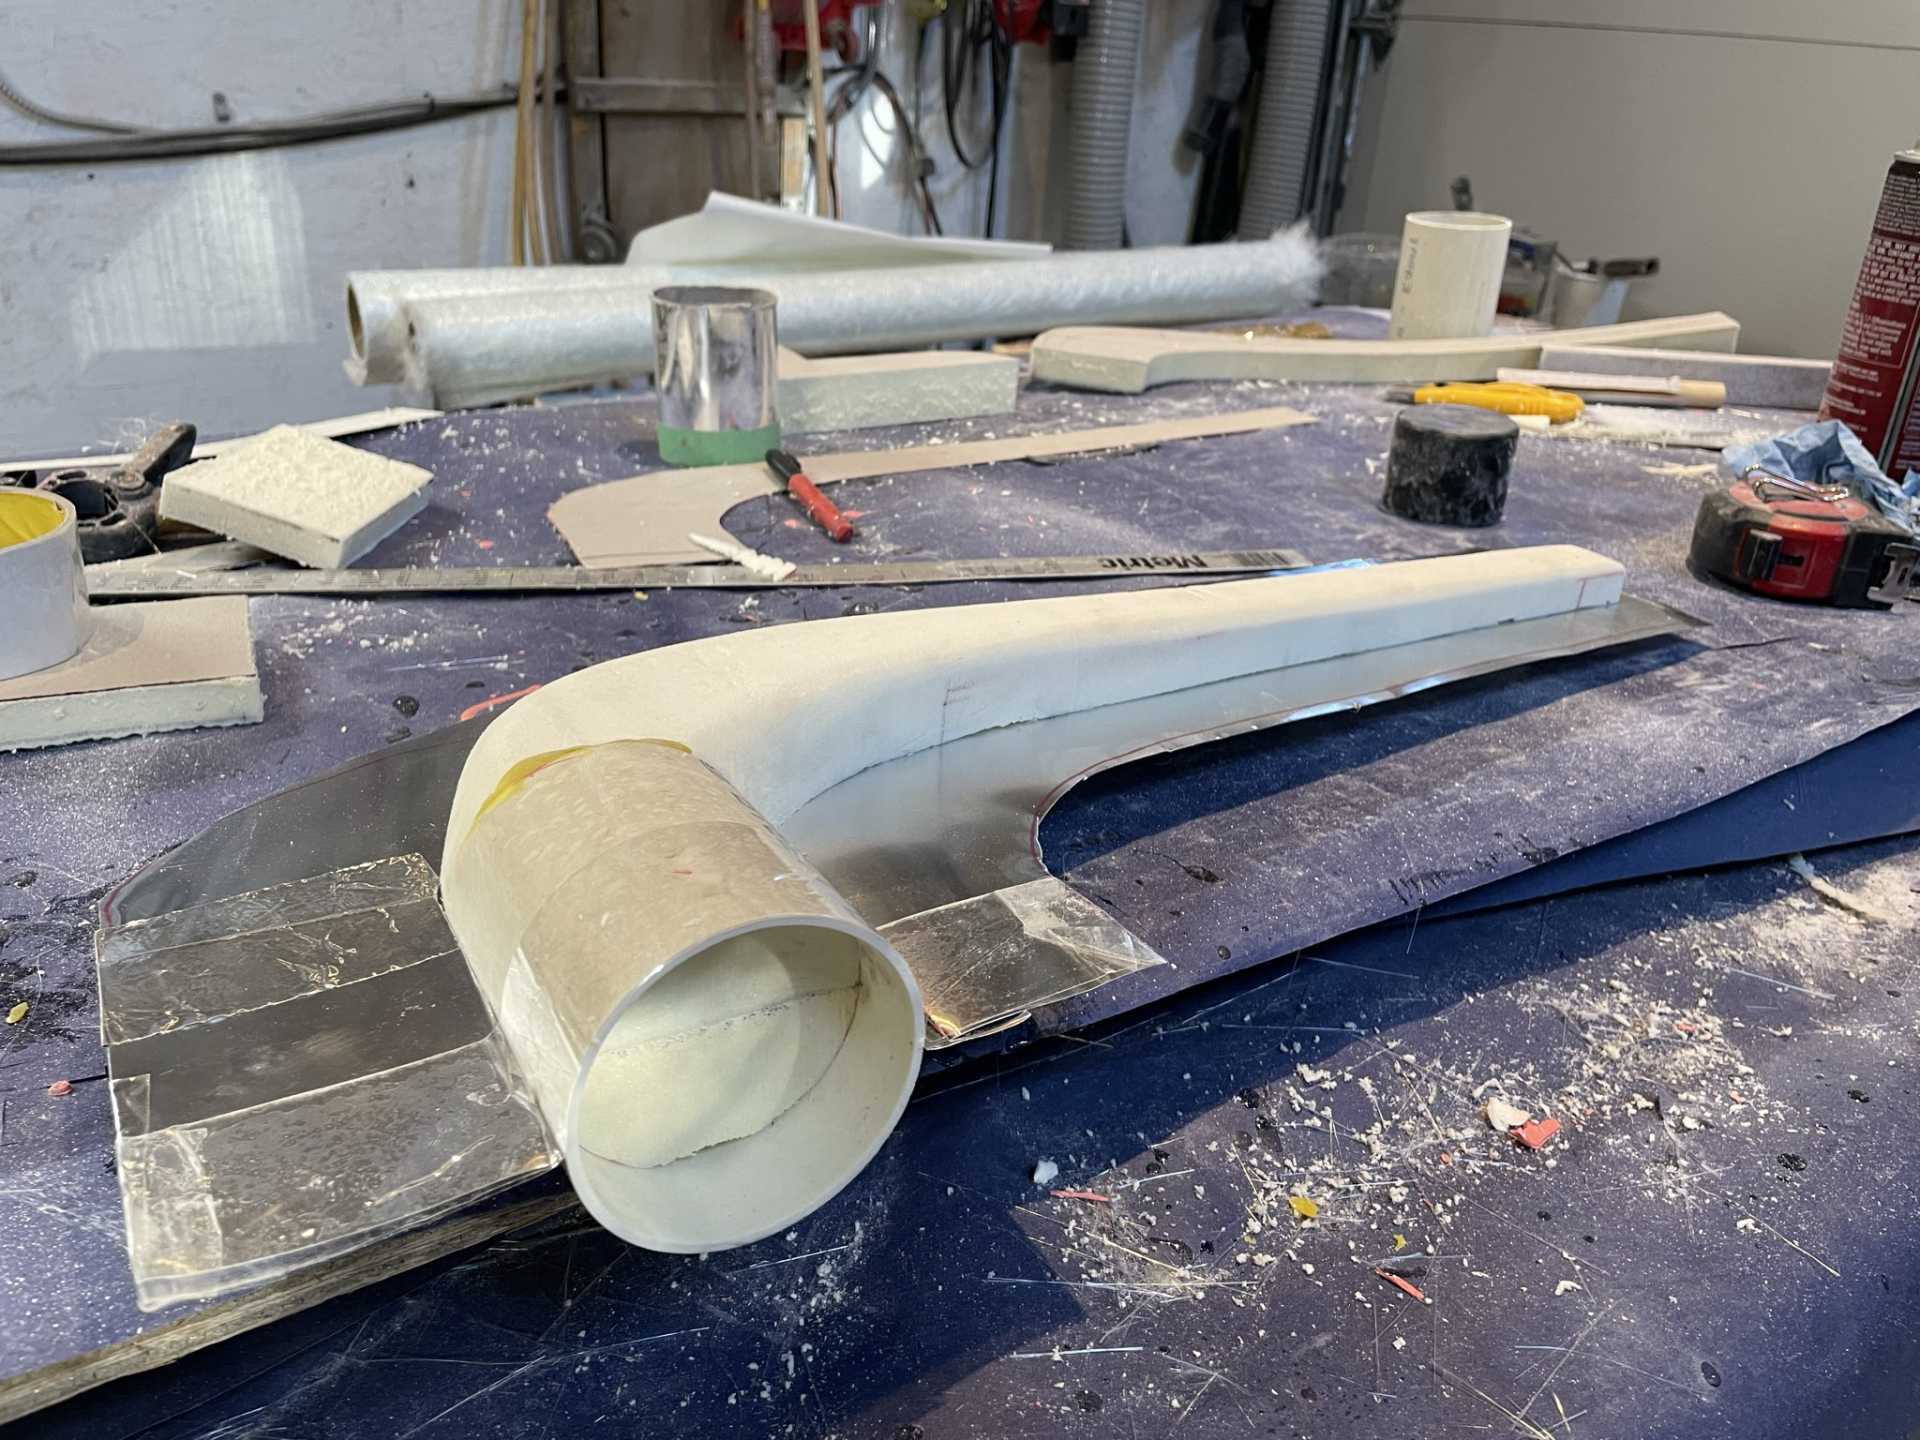
I used a piece of 3 1/2 ID PVC drainage pipe then some of my go to resin resistant foam that I sanded down to the design I wanted. I then took aluminum flashing to separate the two halves.
Then covered everything with packing tape and aluminum duct tape. Waxed and PVA before a layer of Gelcoat. I’ll put a few layers of fiberglass on today to produce the mold.
One side completed
Stay safe everyone
Wayne
[This message has been edited by dobie1 (edited 02-25-2022).]
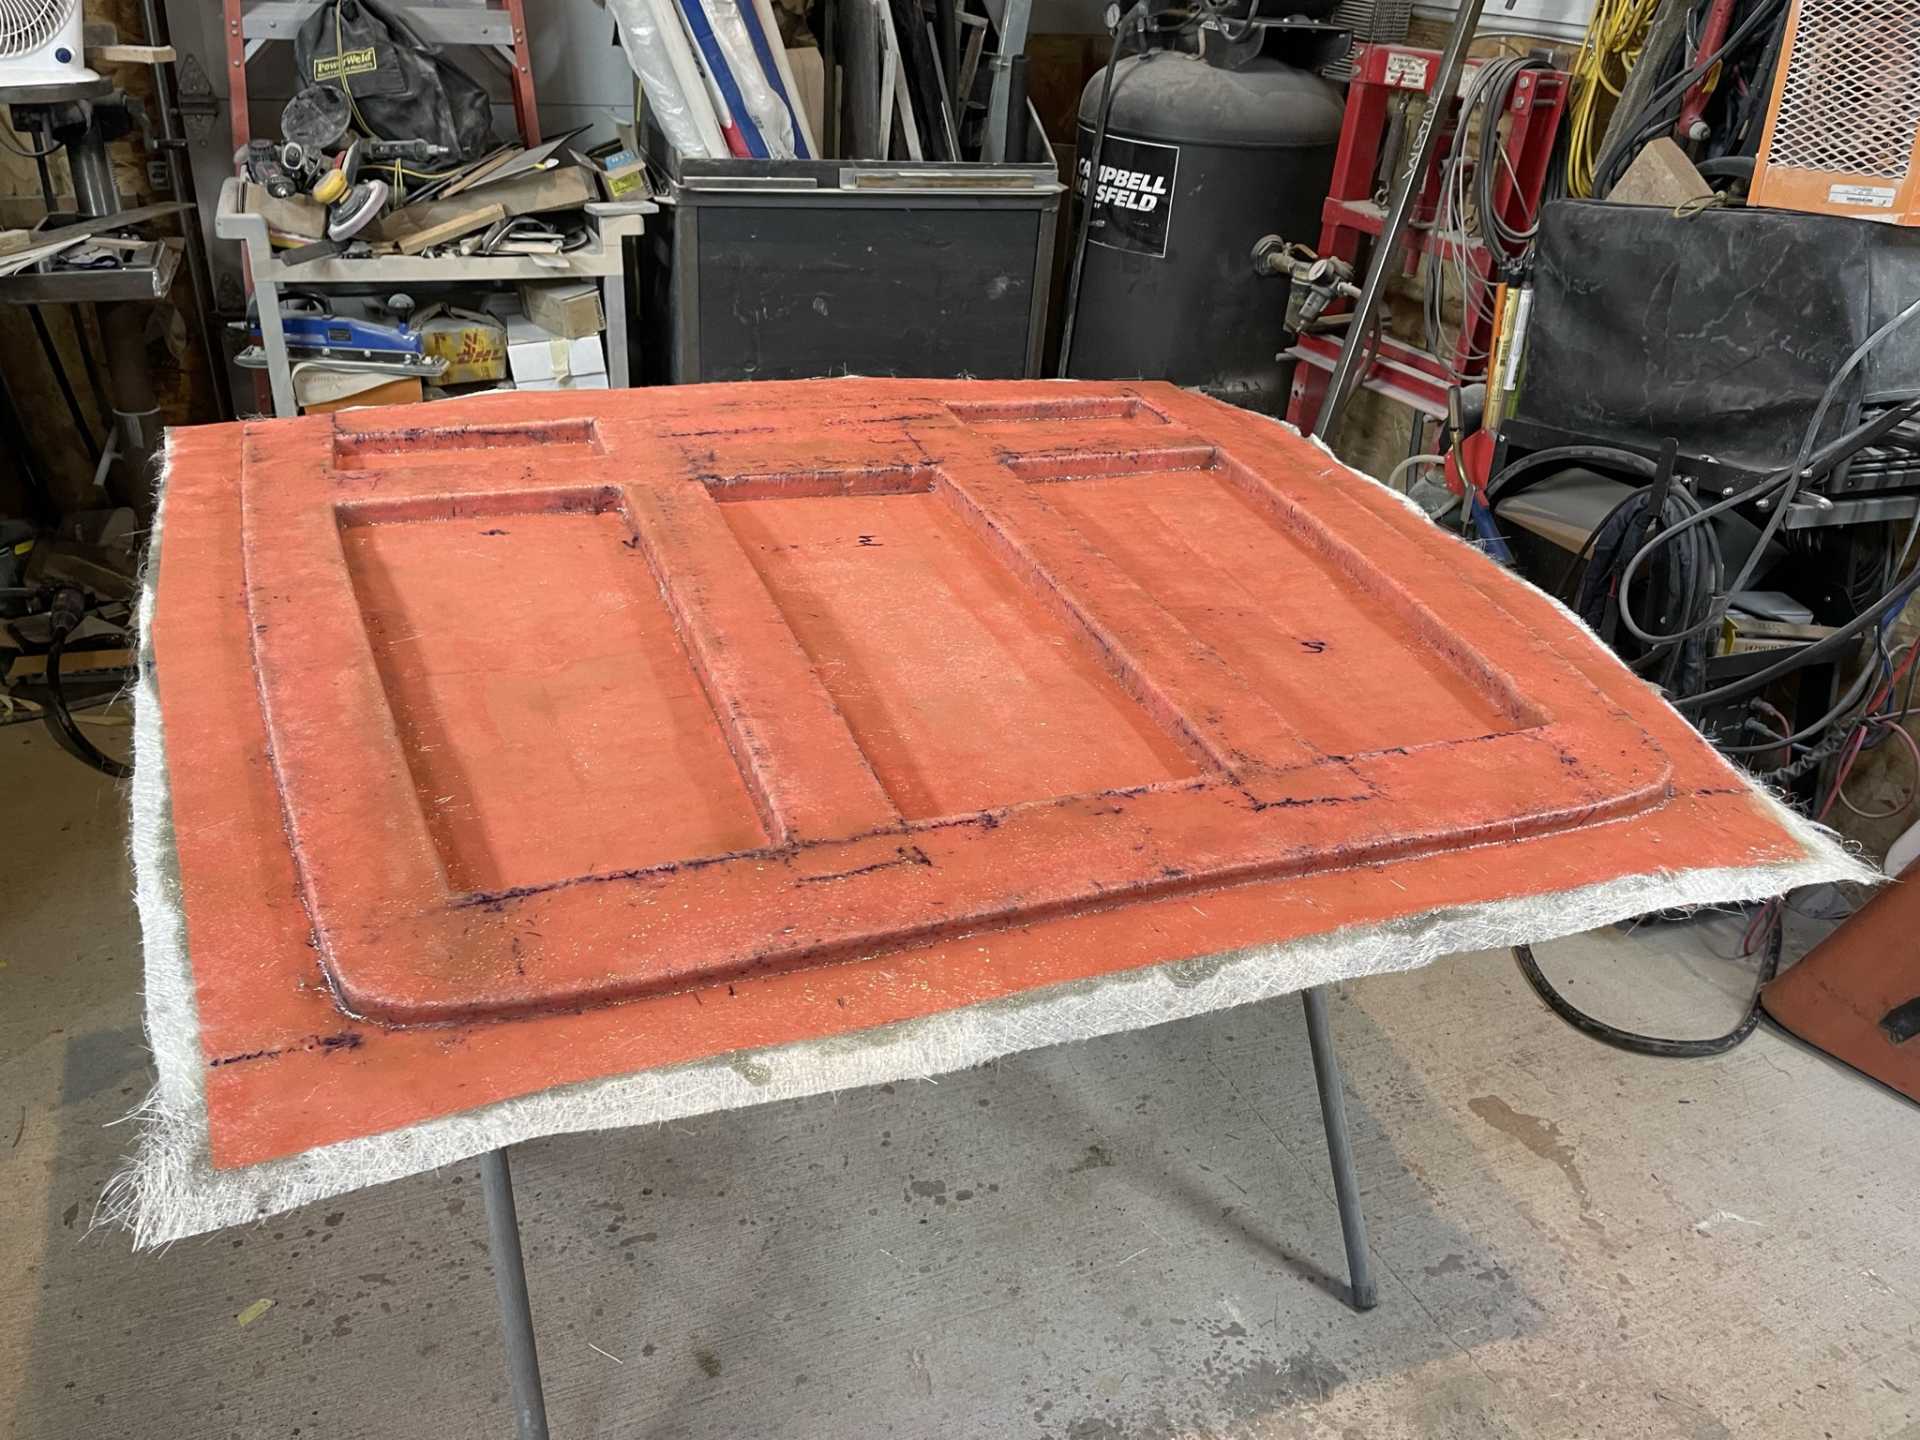
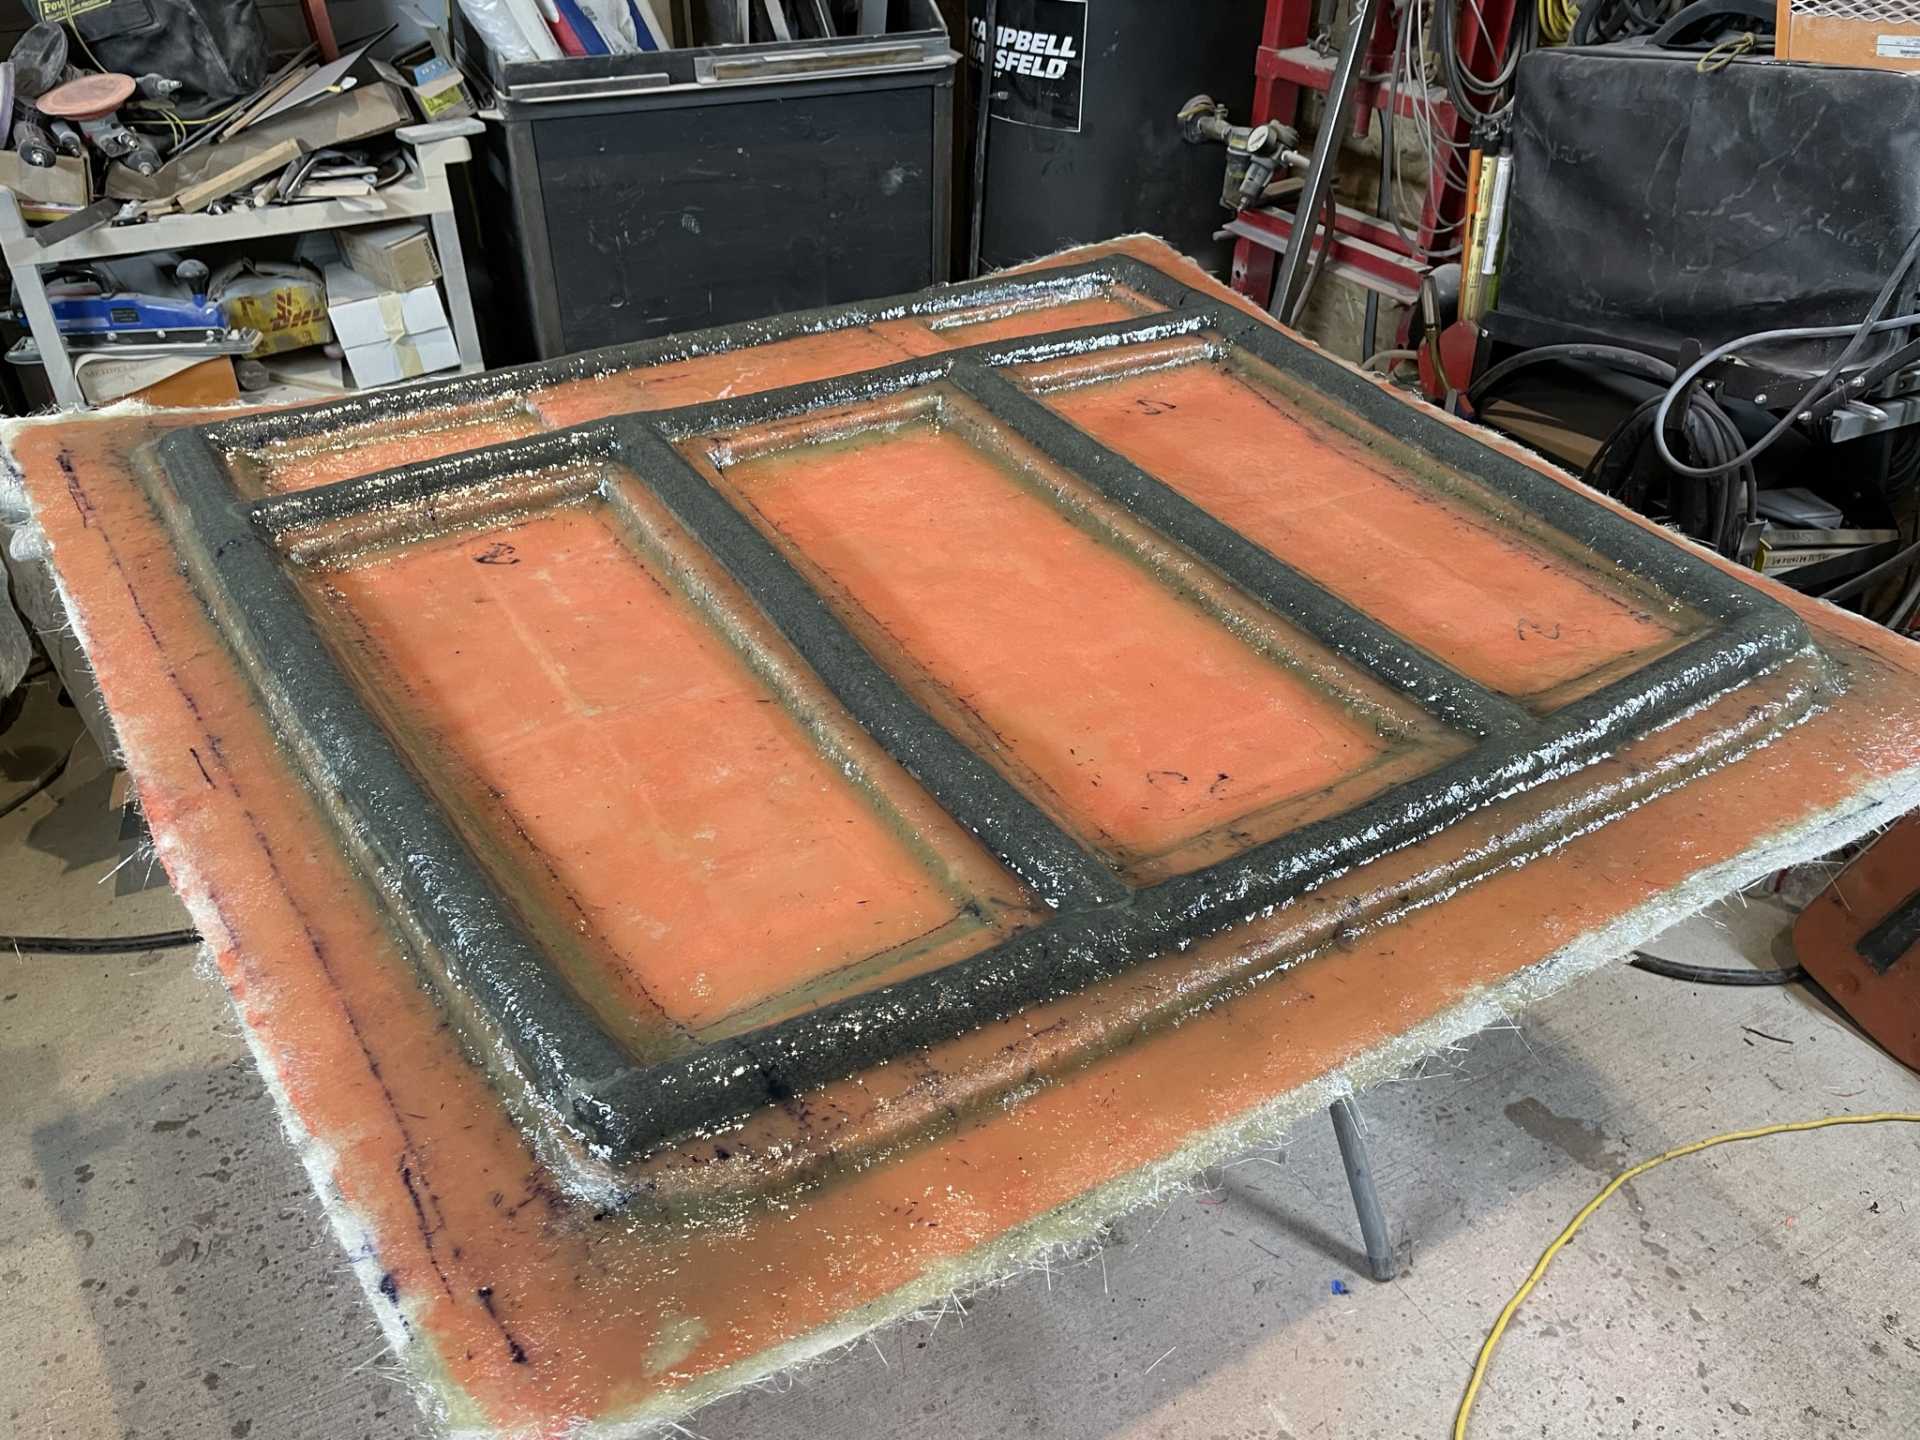
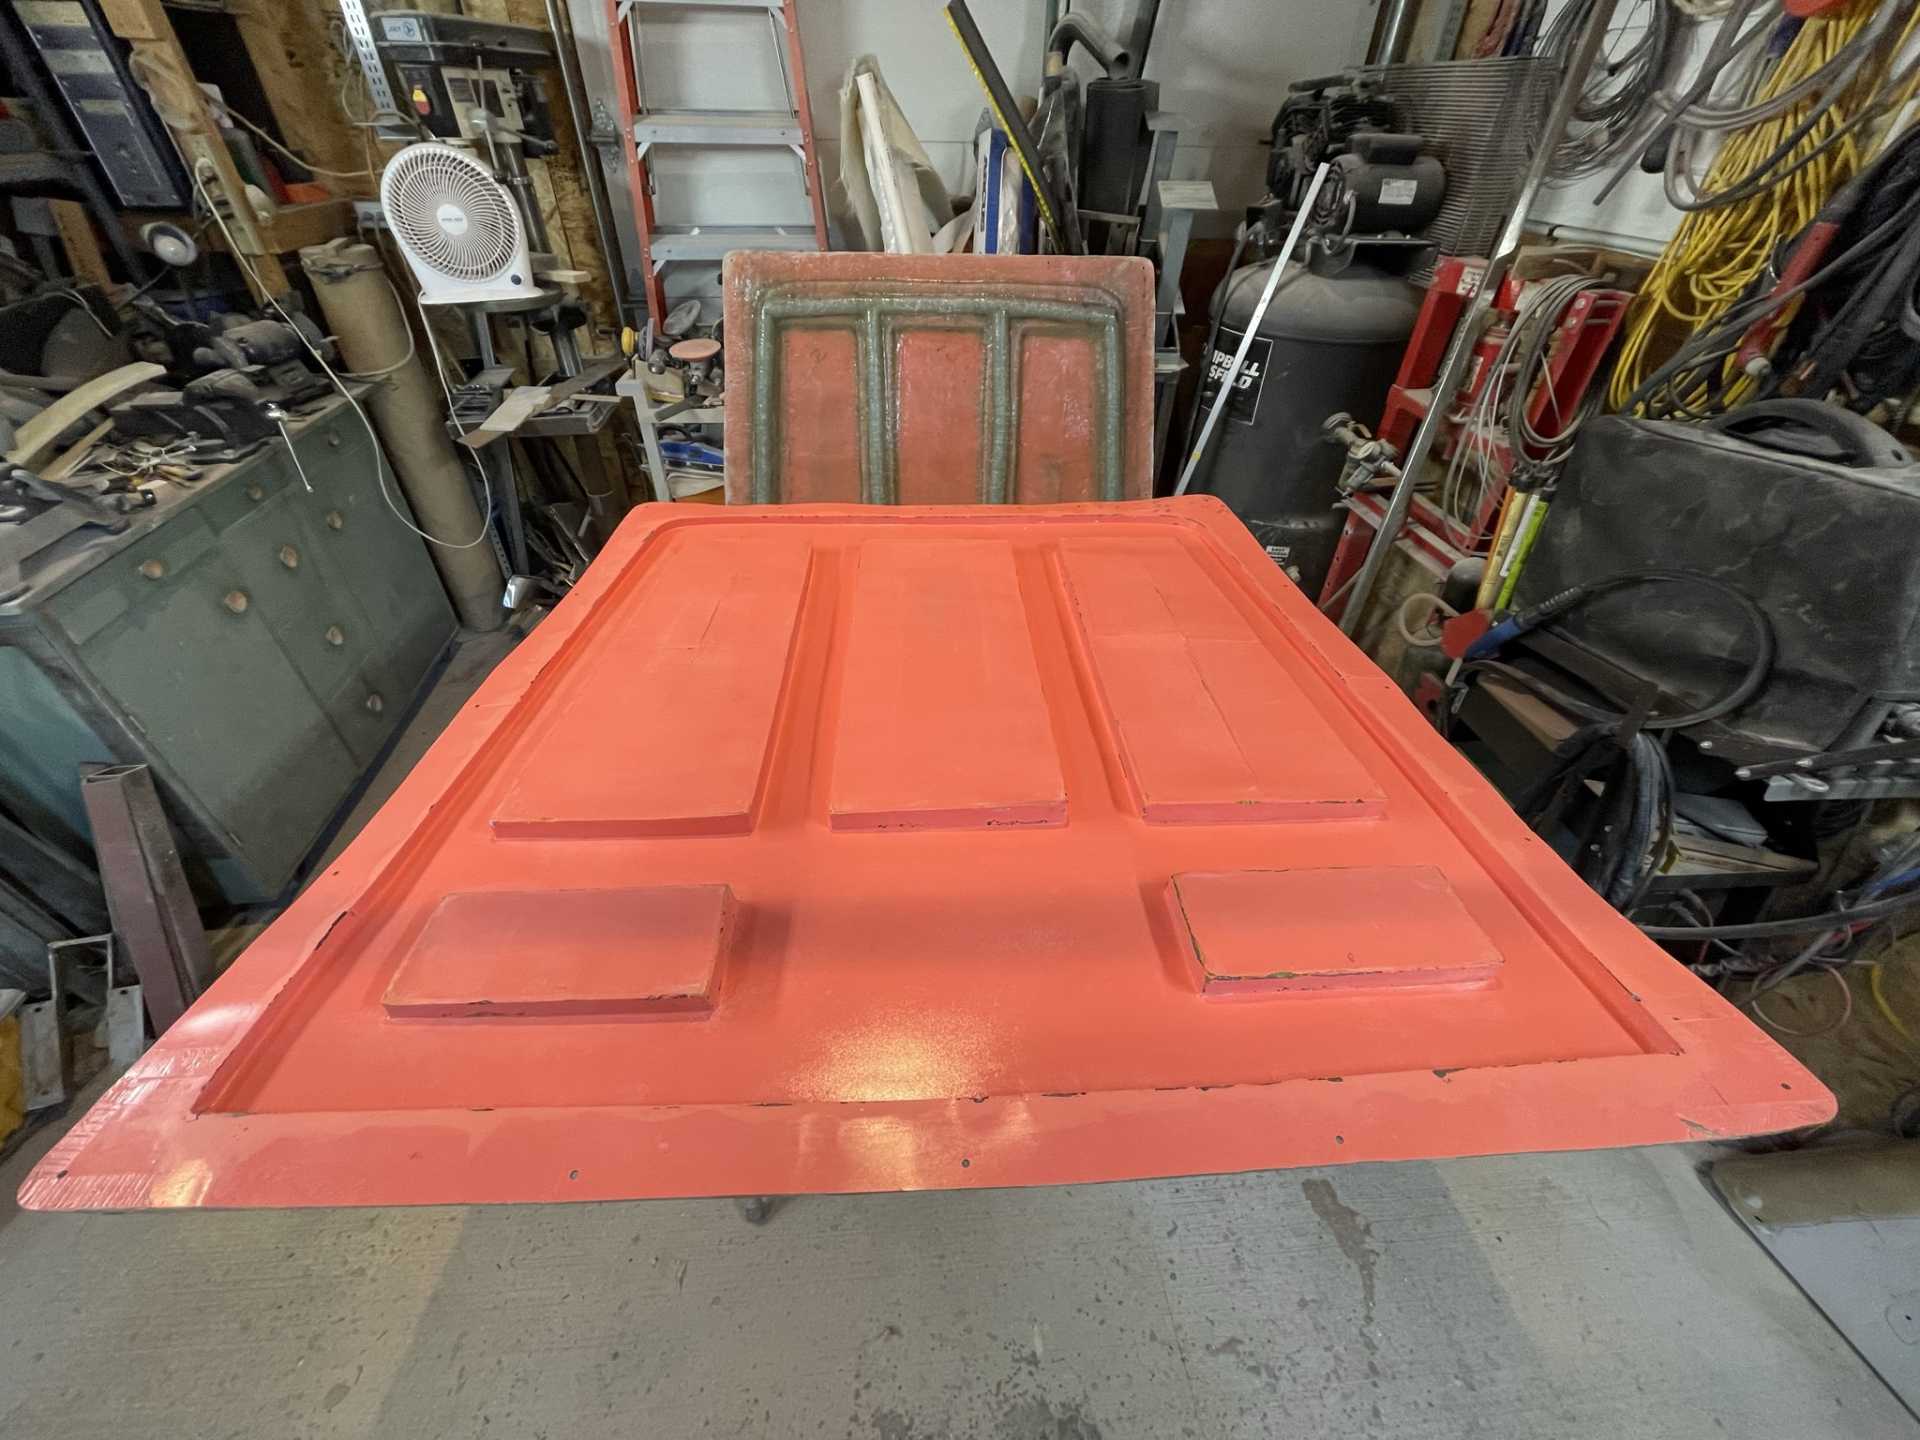
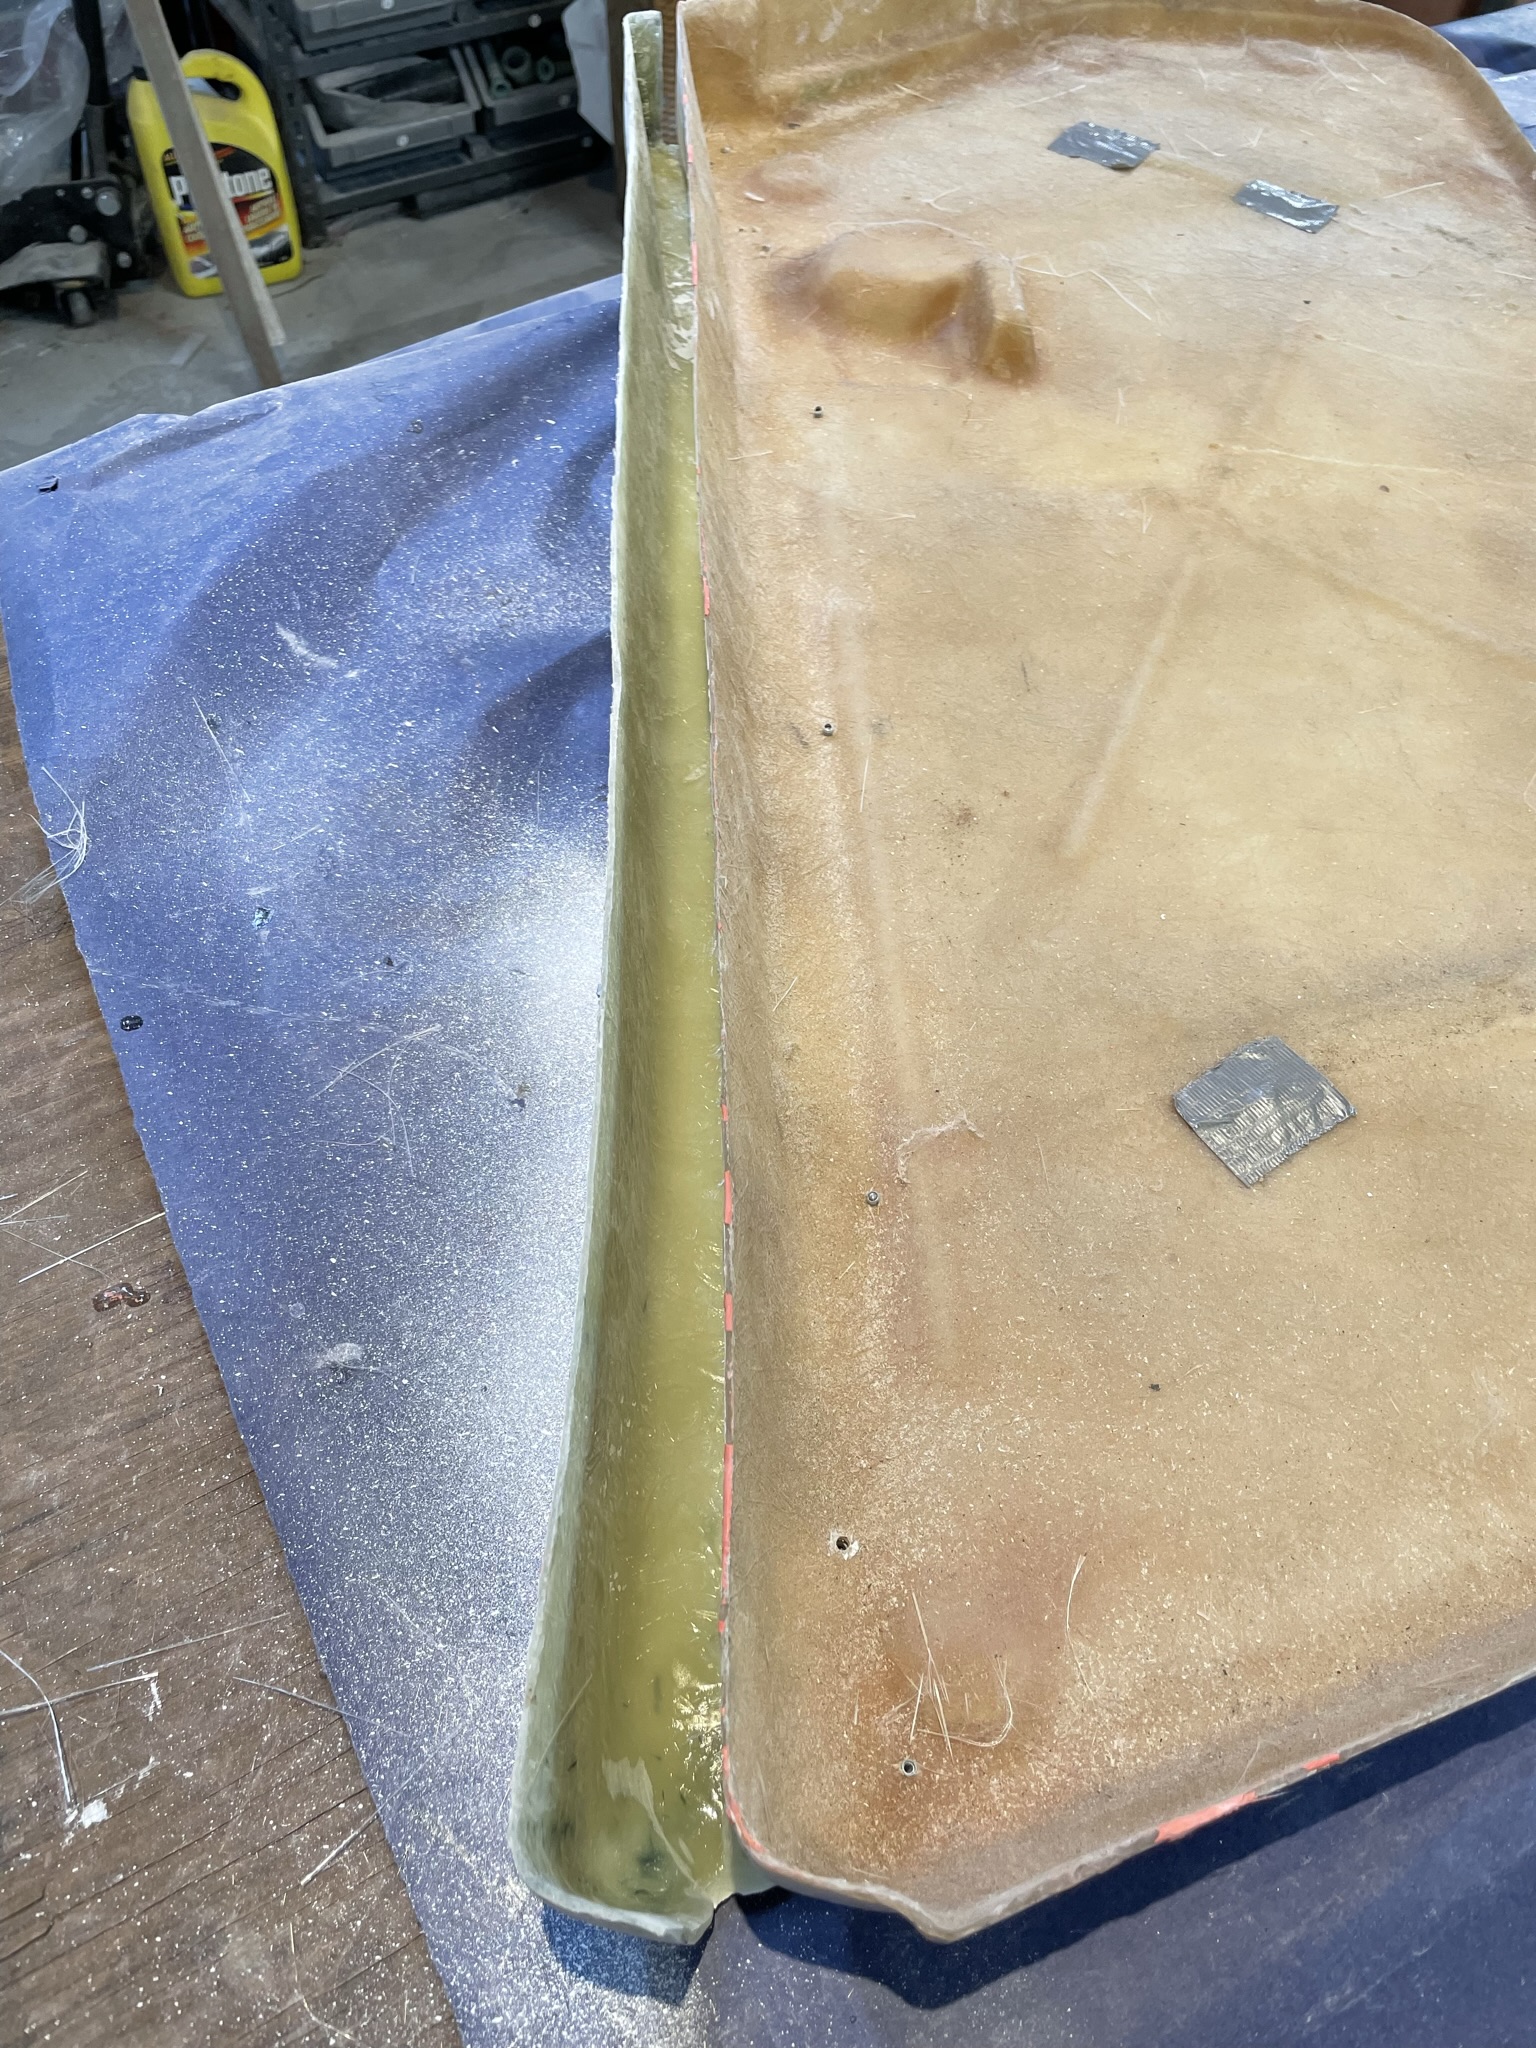
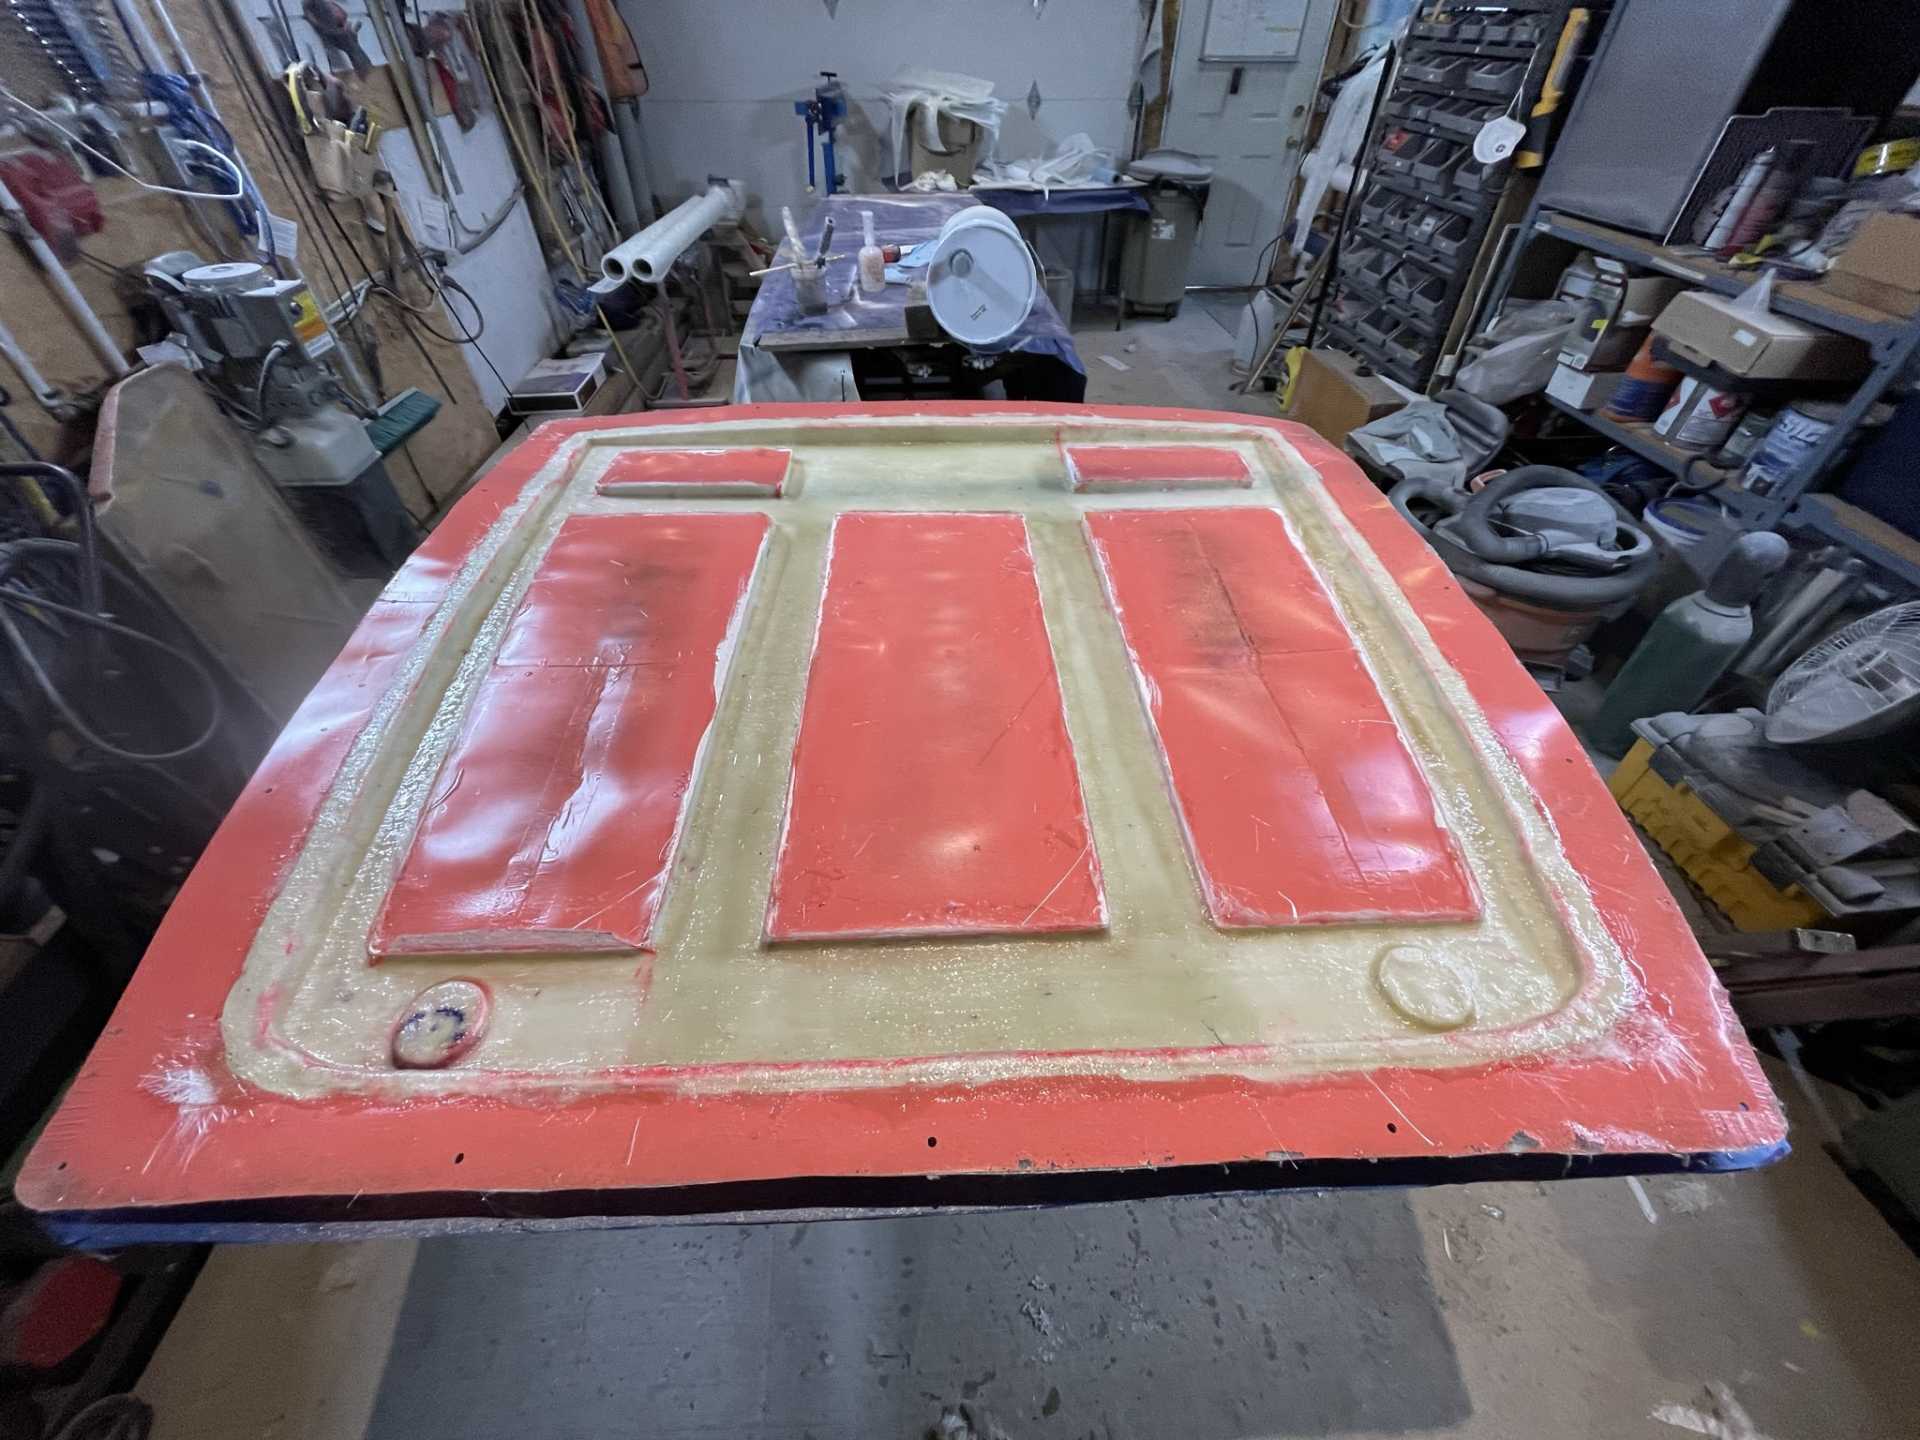
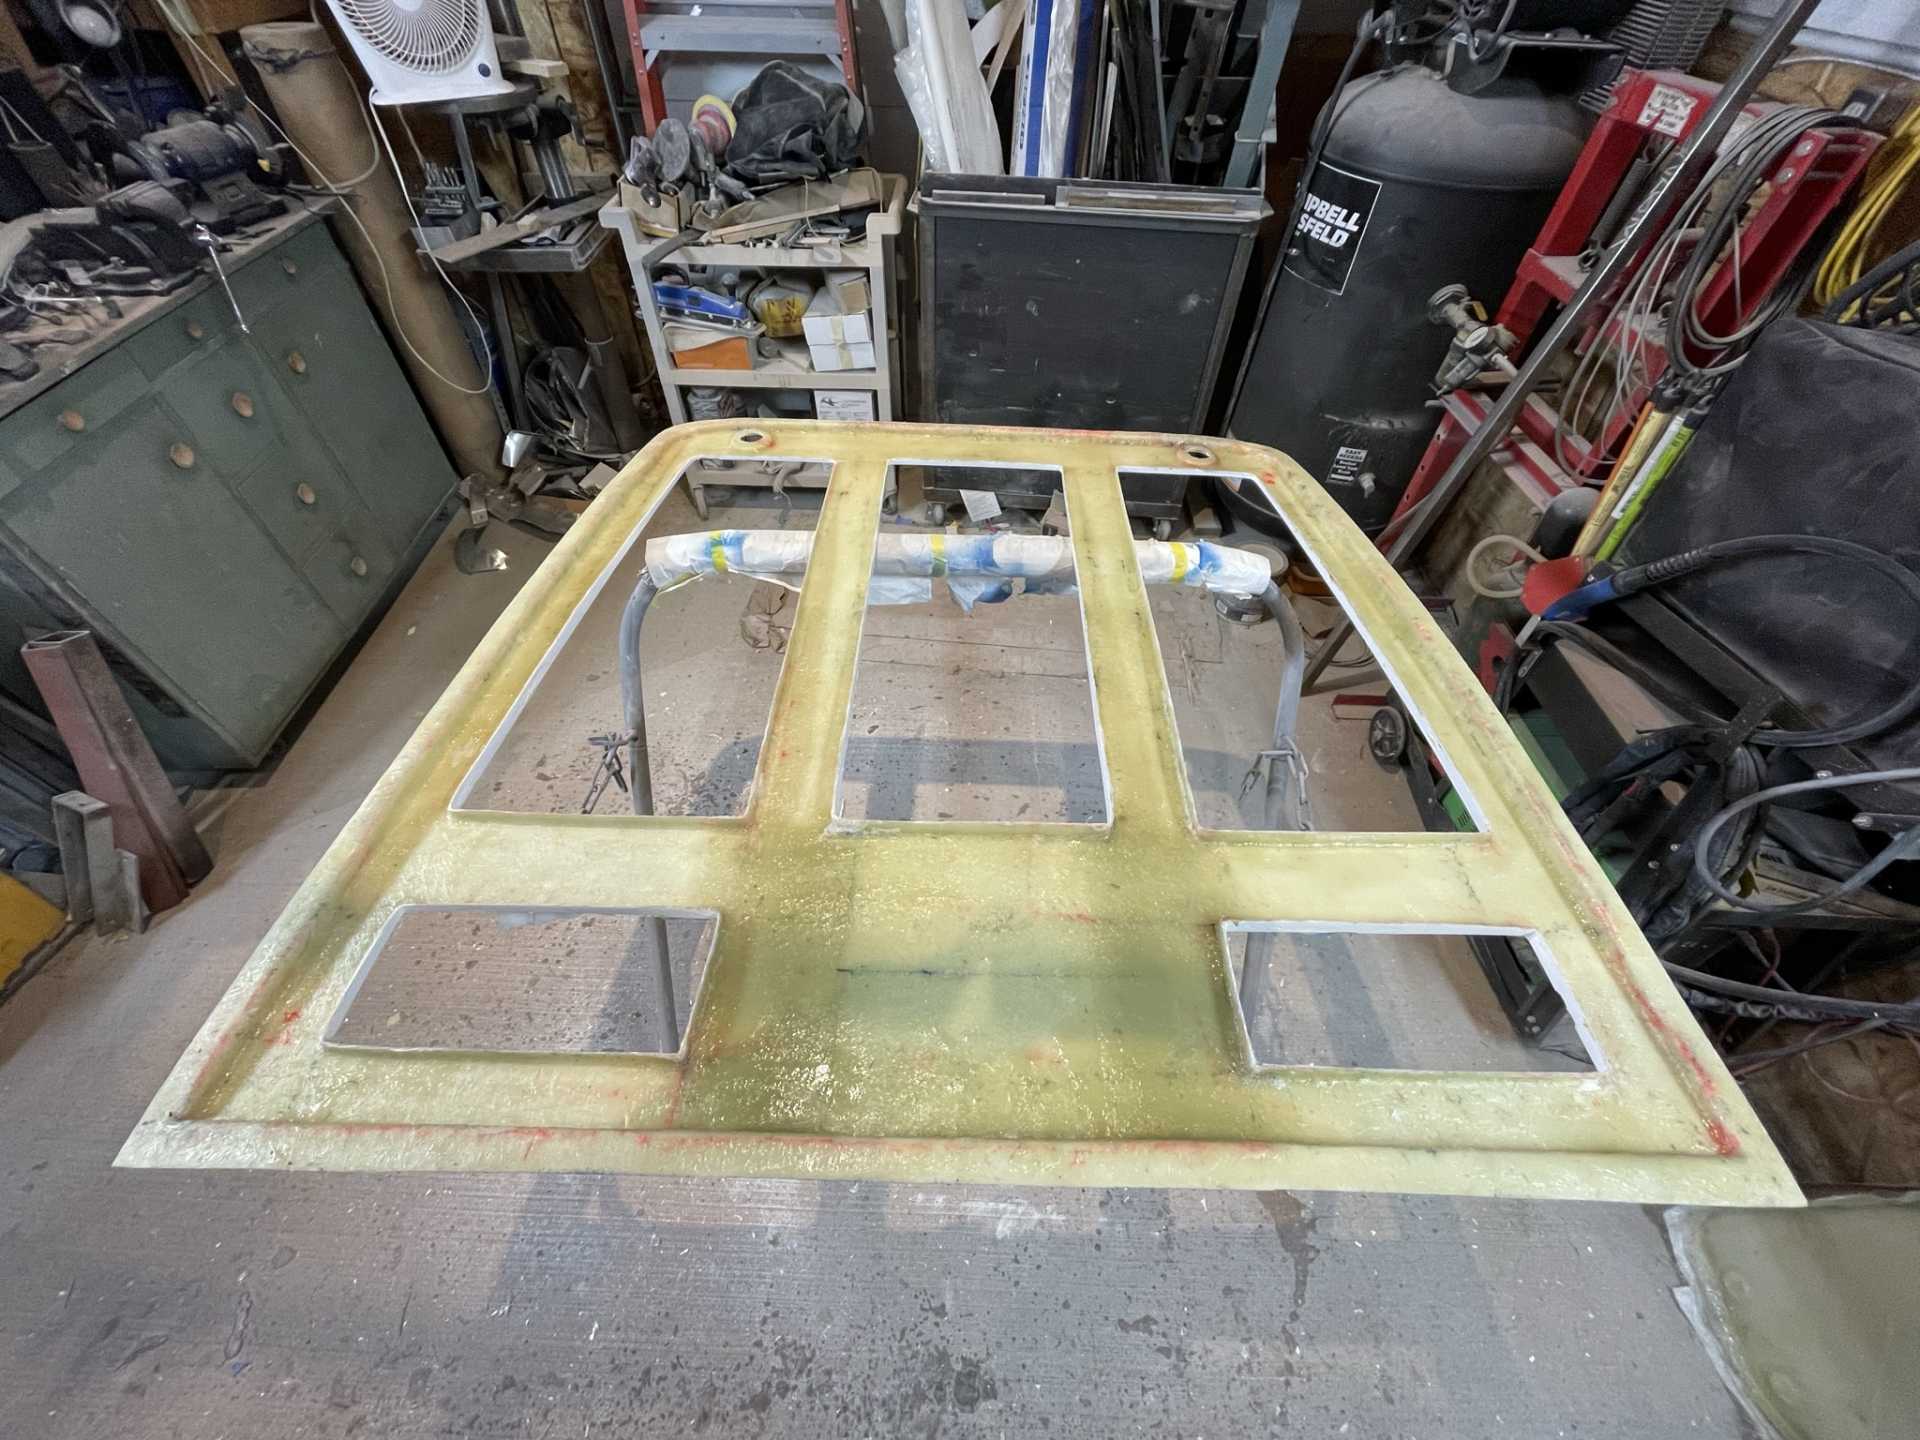
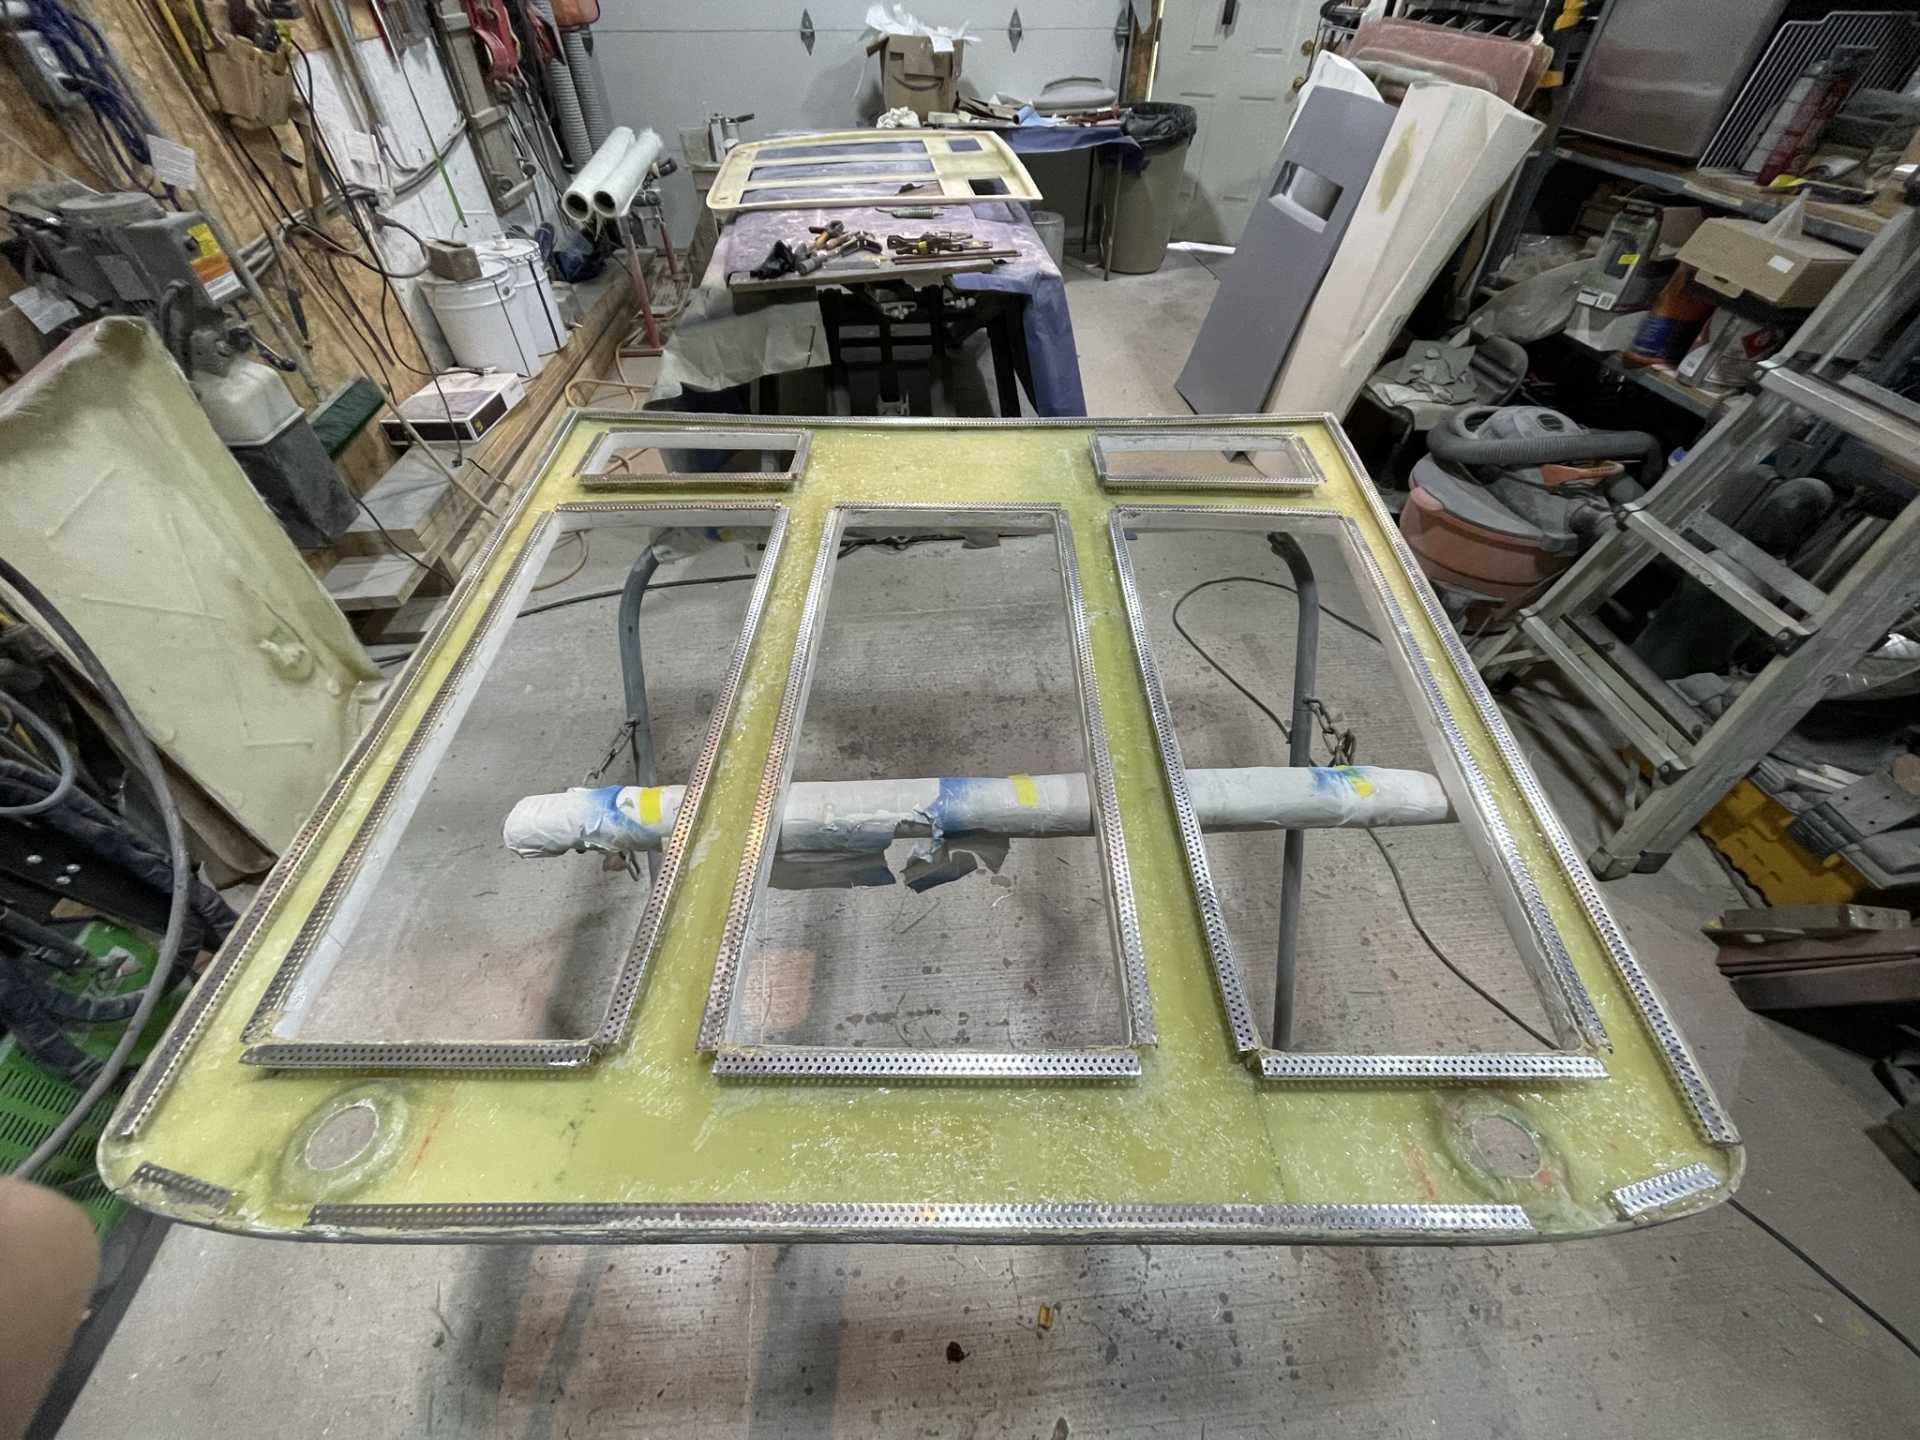
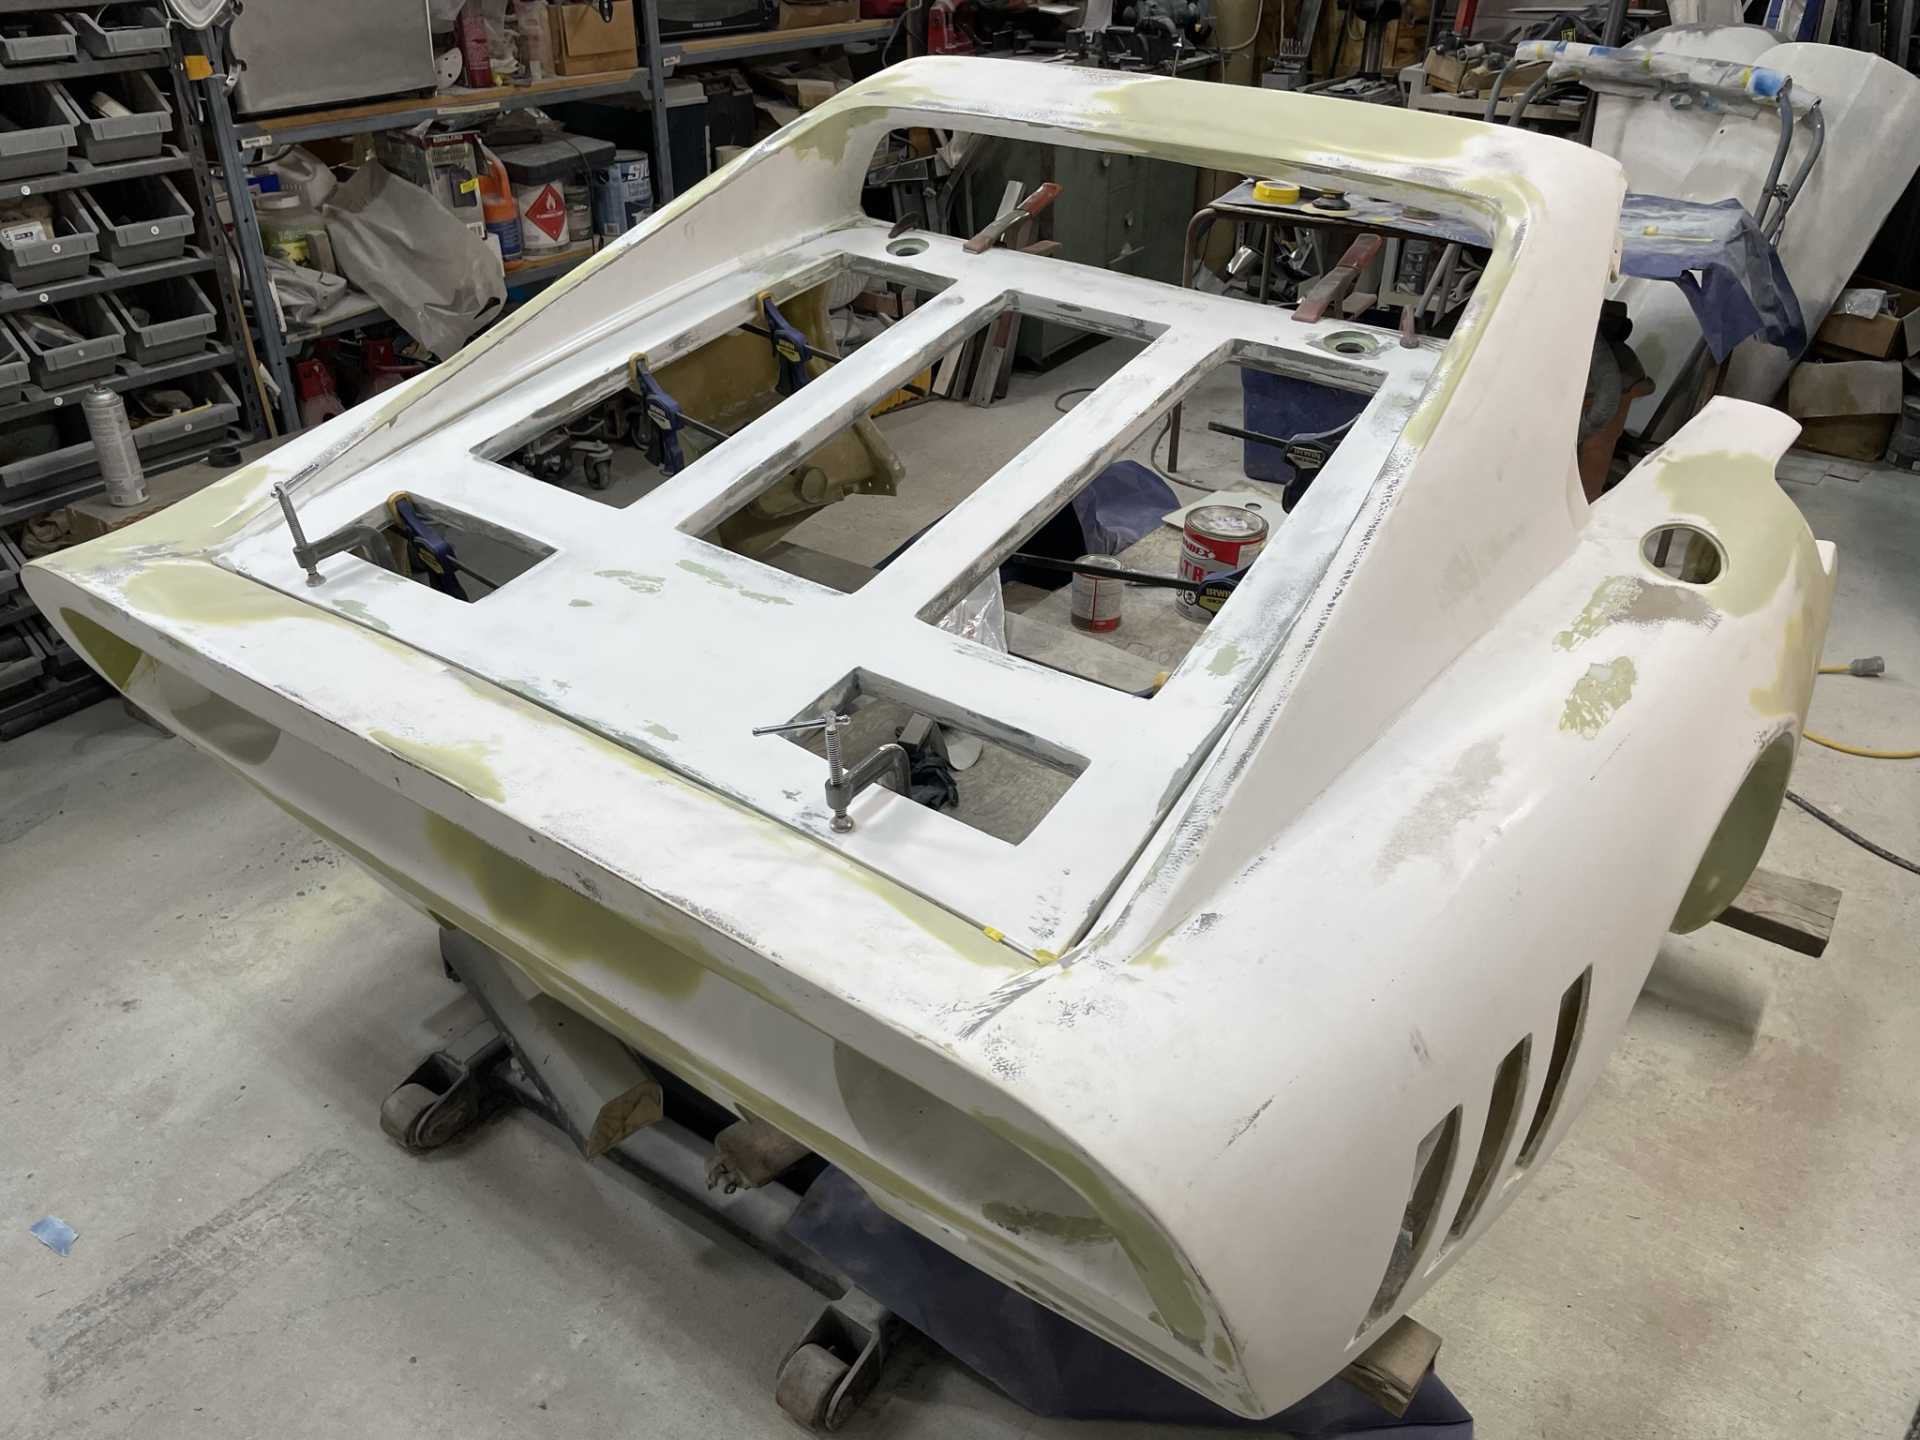
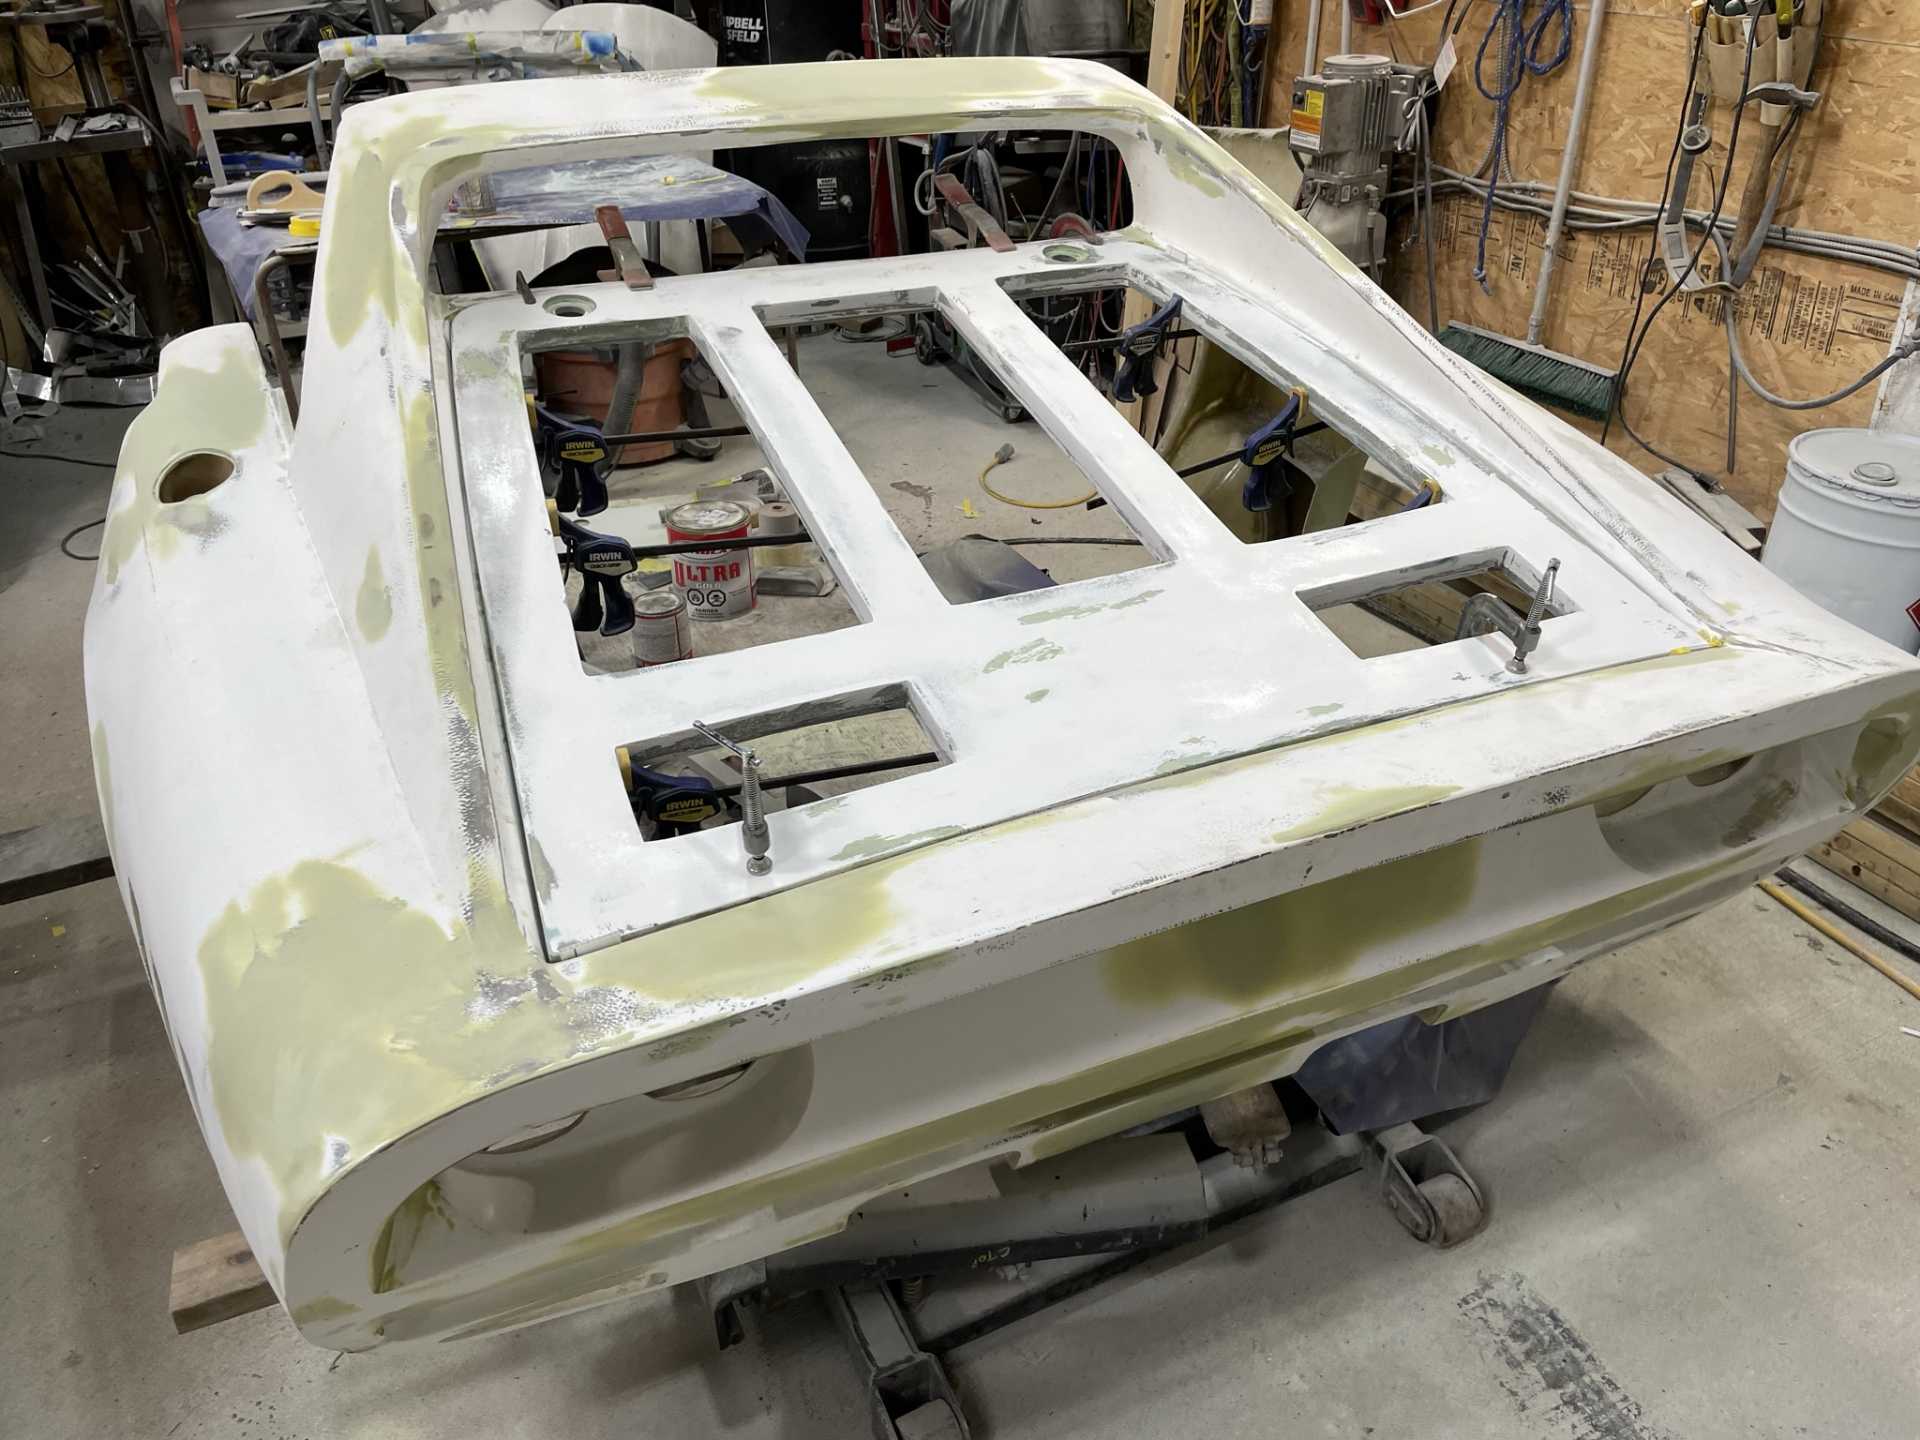
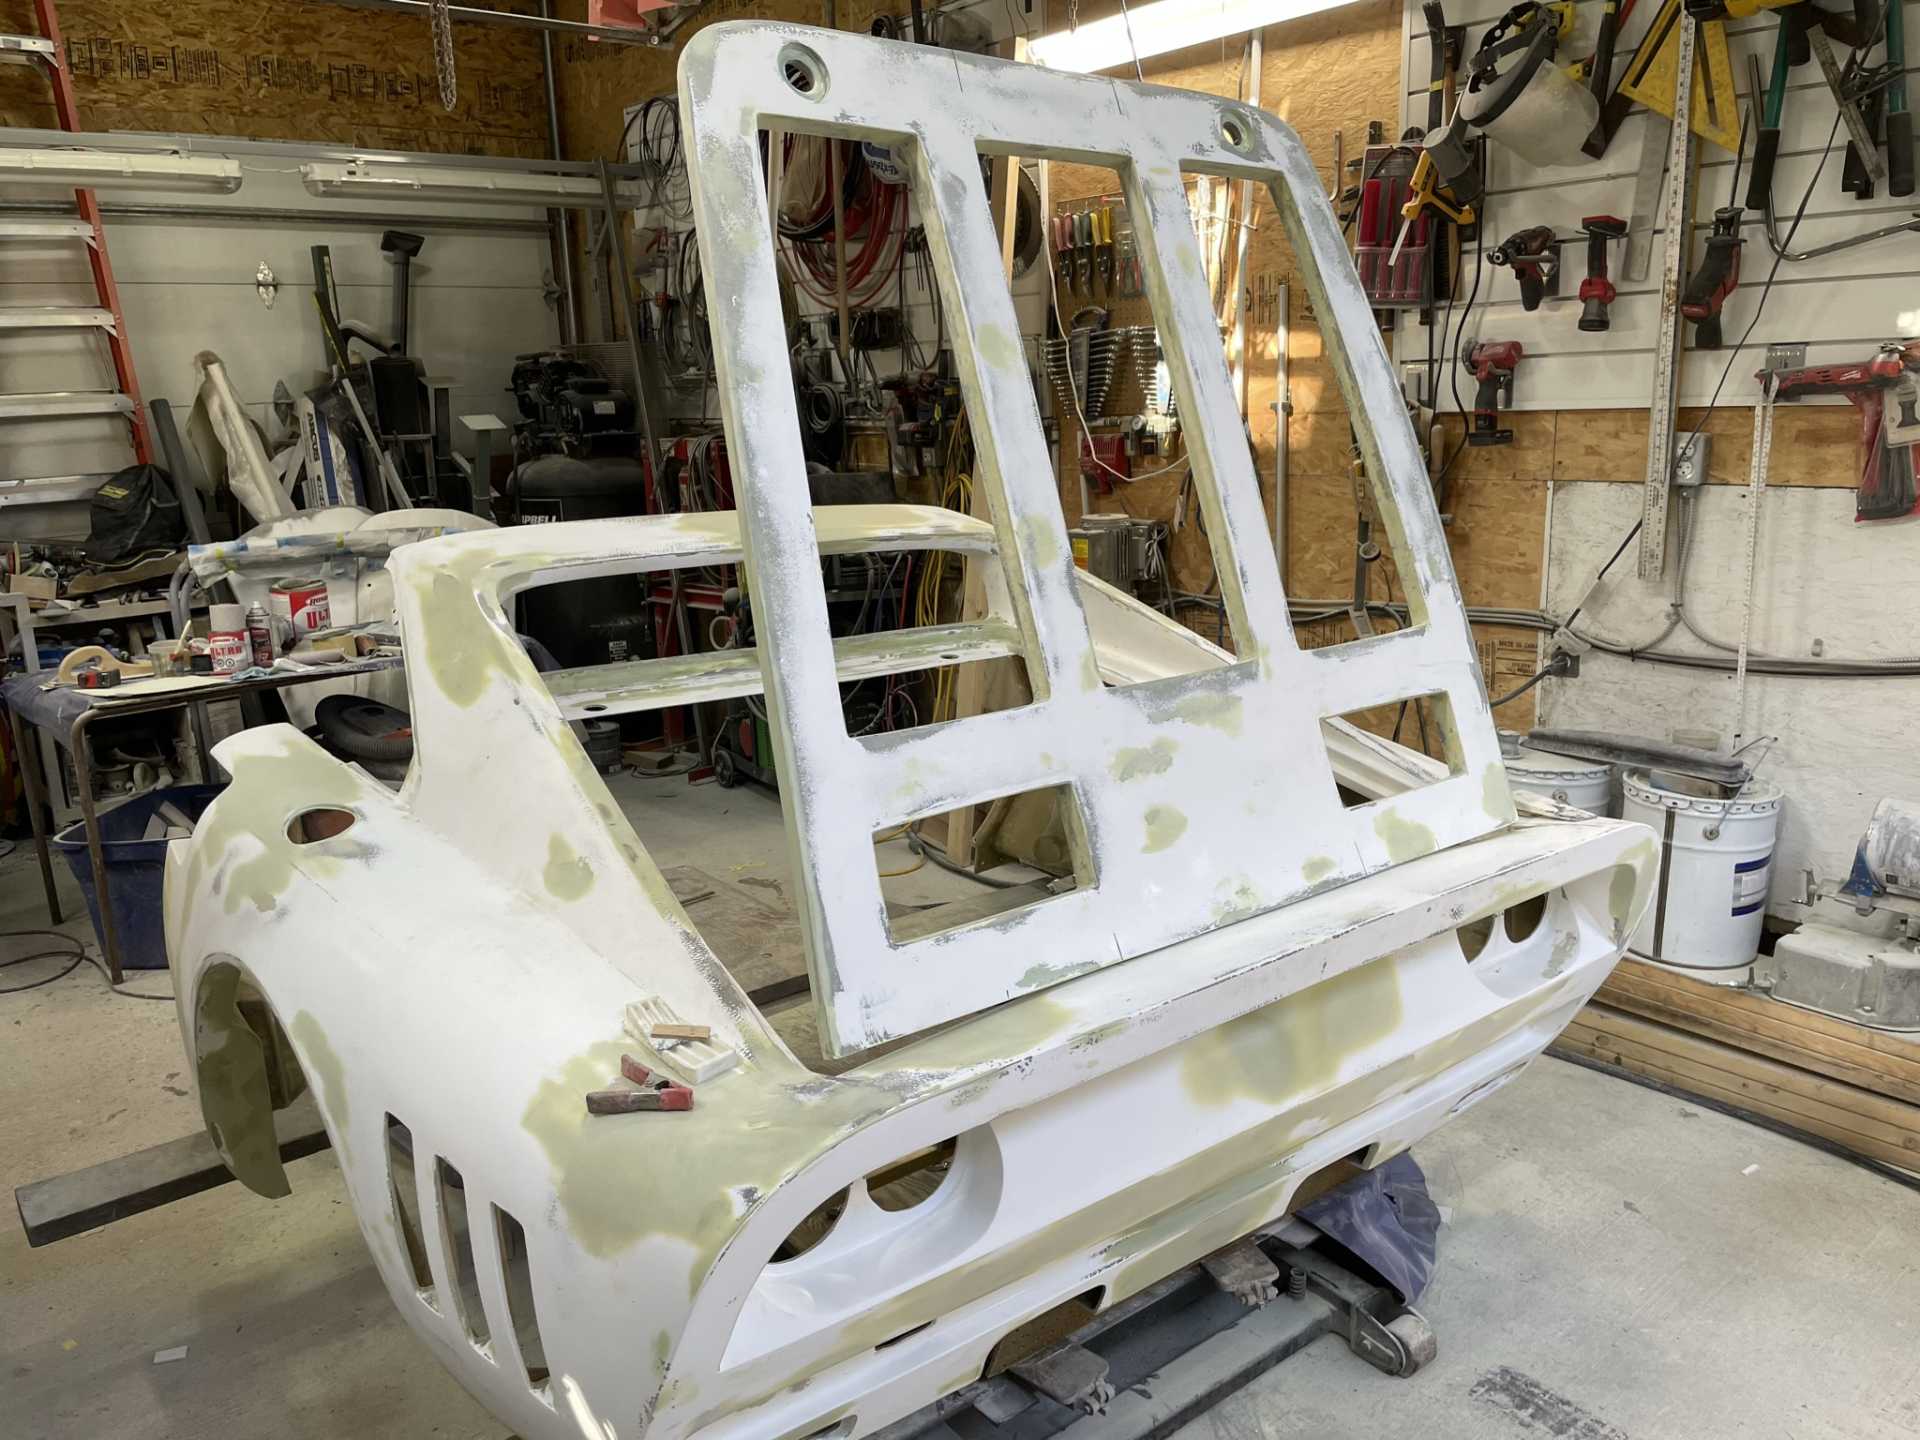
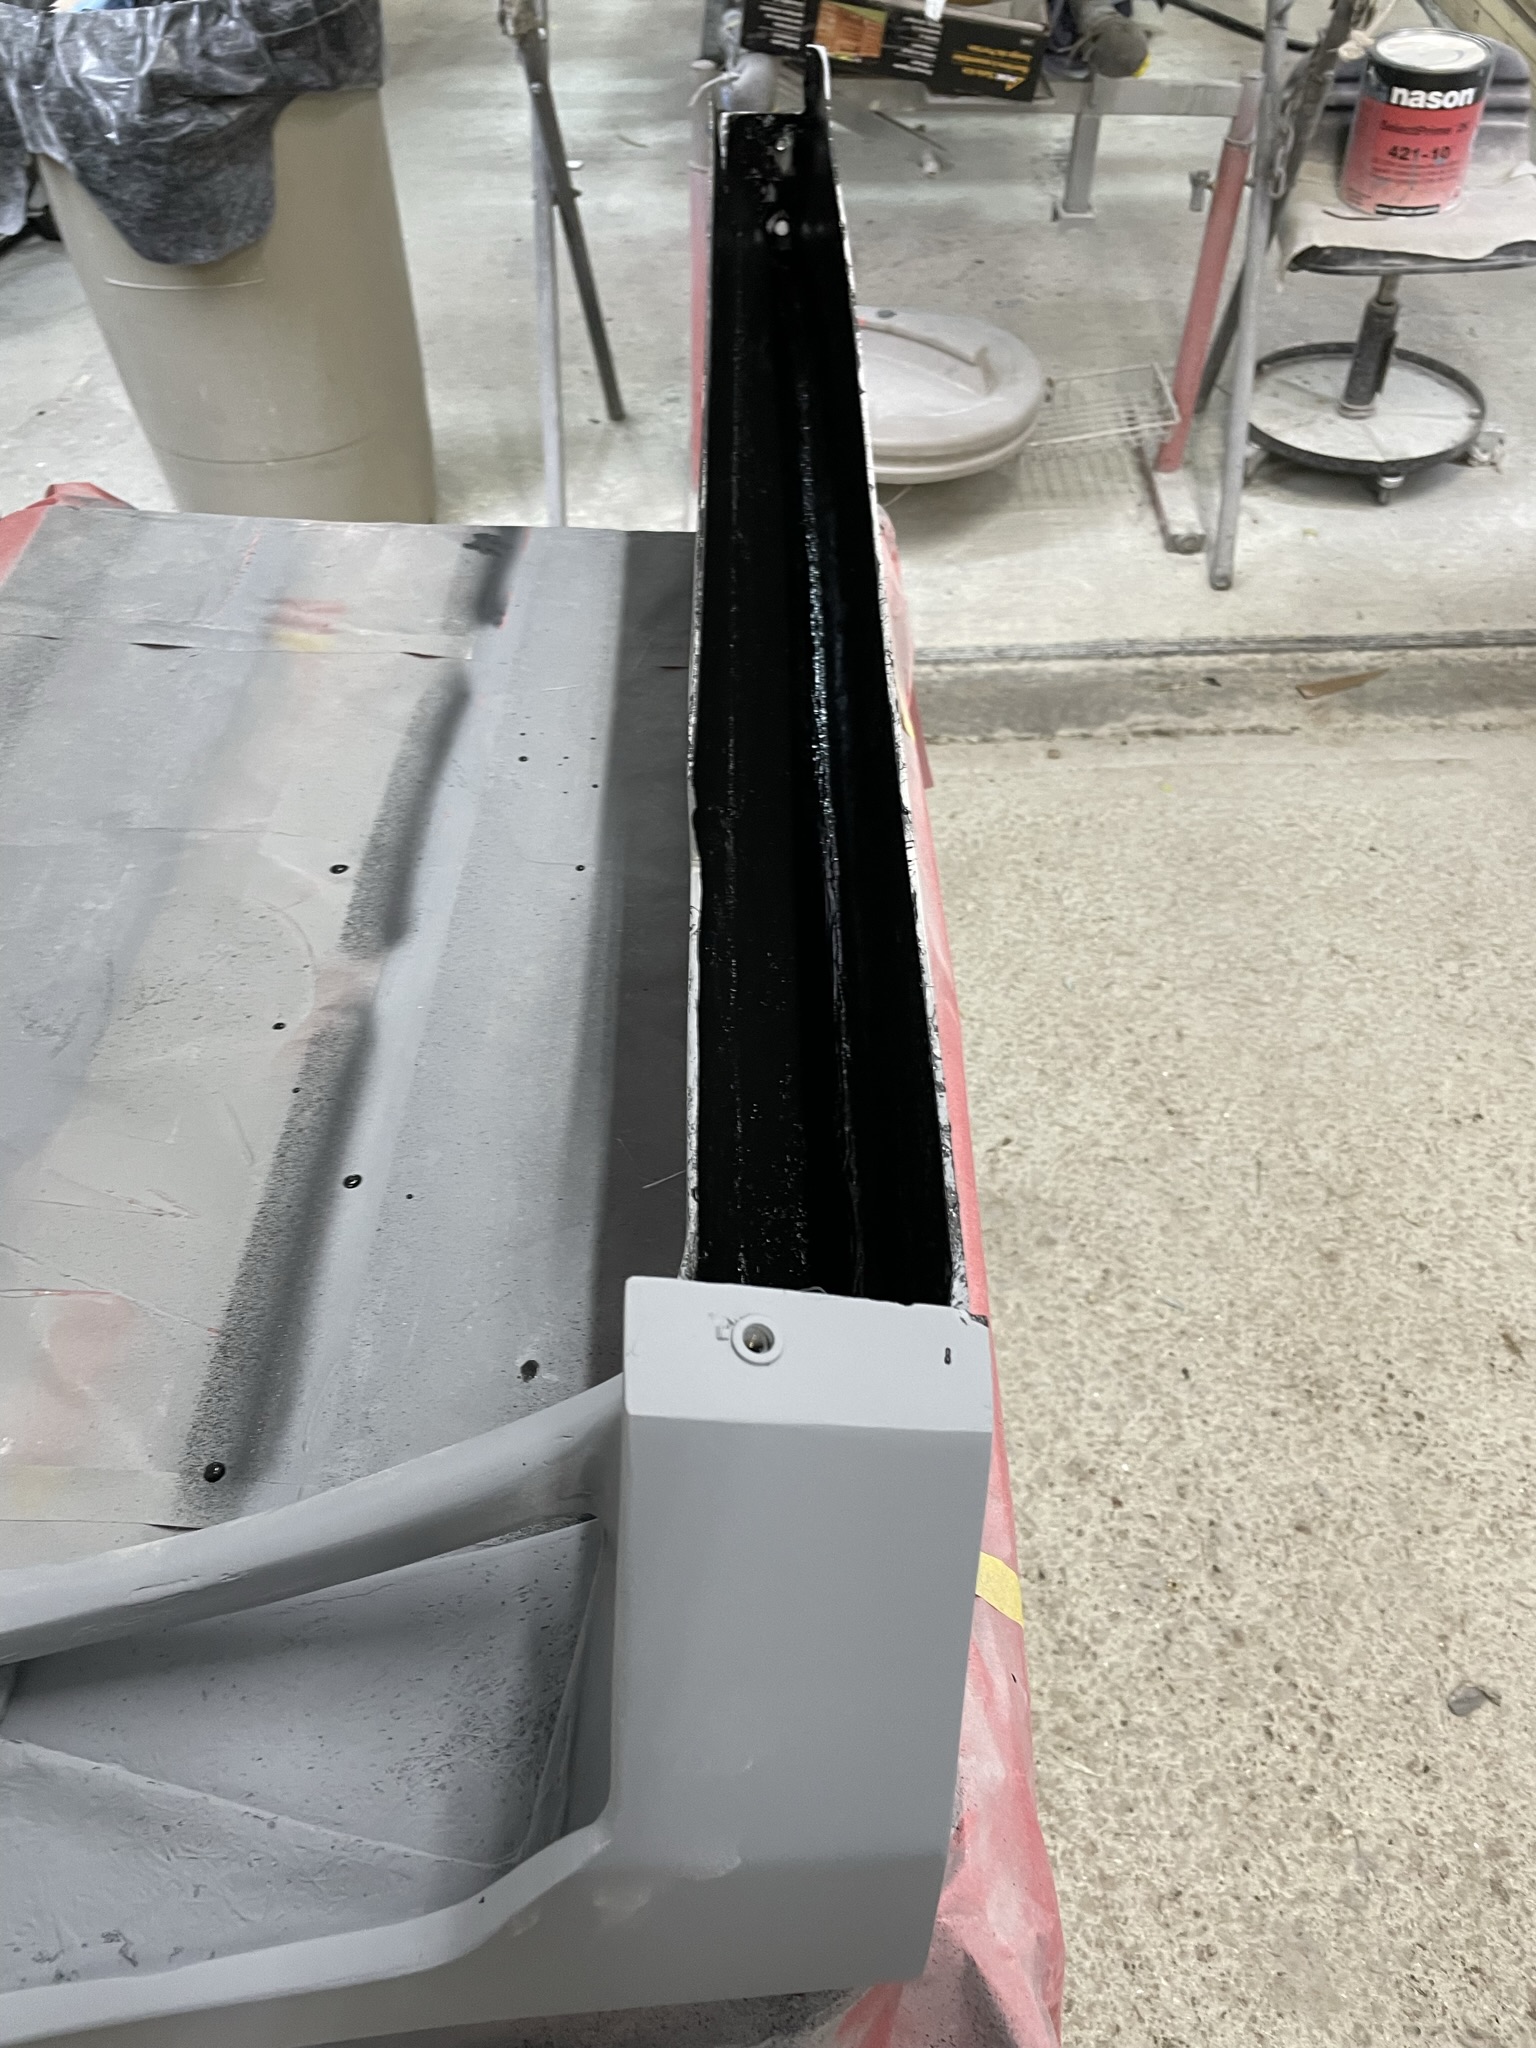
I finally pulled the two rear deck hood parts from the molds and started preparing them for bonding together. The first consideration I have is the grills (which still need to be built) will be 1” tall by what ever the hole length is. Once the grills are installed I want them 1/8” below the surface of the hood plus a similar amount below the grill making For 1 1/4” the final height . So I trimmed the upper half to 1” and the lower to 1/4” . The next item is to bond the two parts together, I’m using metal drywall J bead . This bead has holes drilled over the entire length giving lots of bite for the adhesive to a grip.
This is after the two halves have been modified to the right thickness.
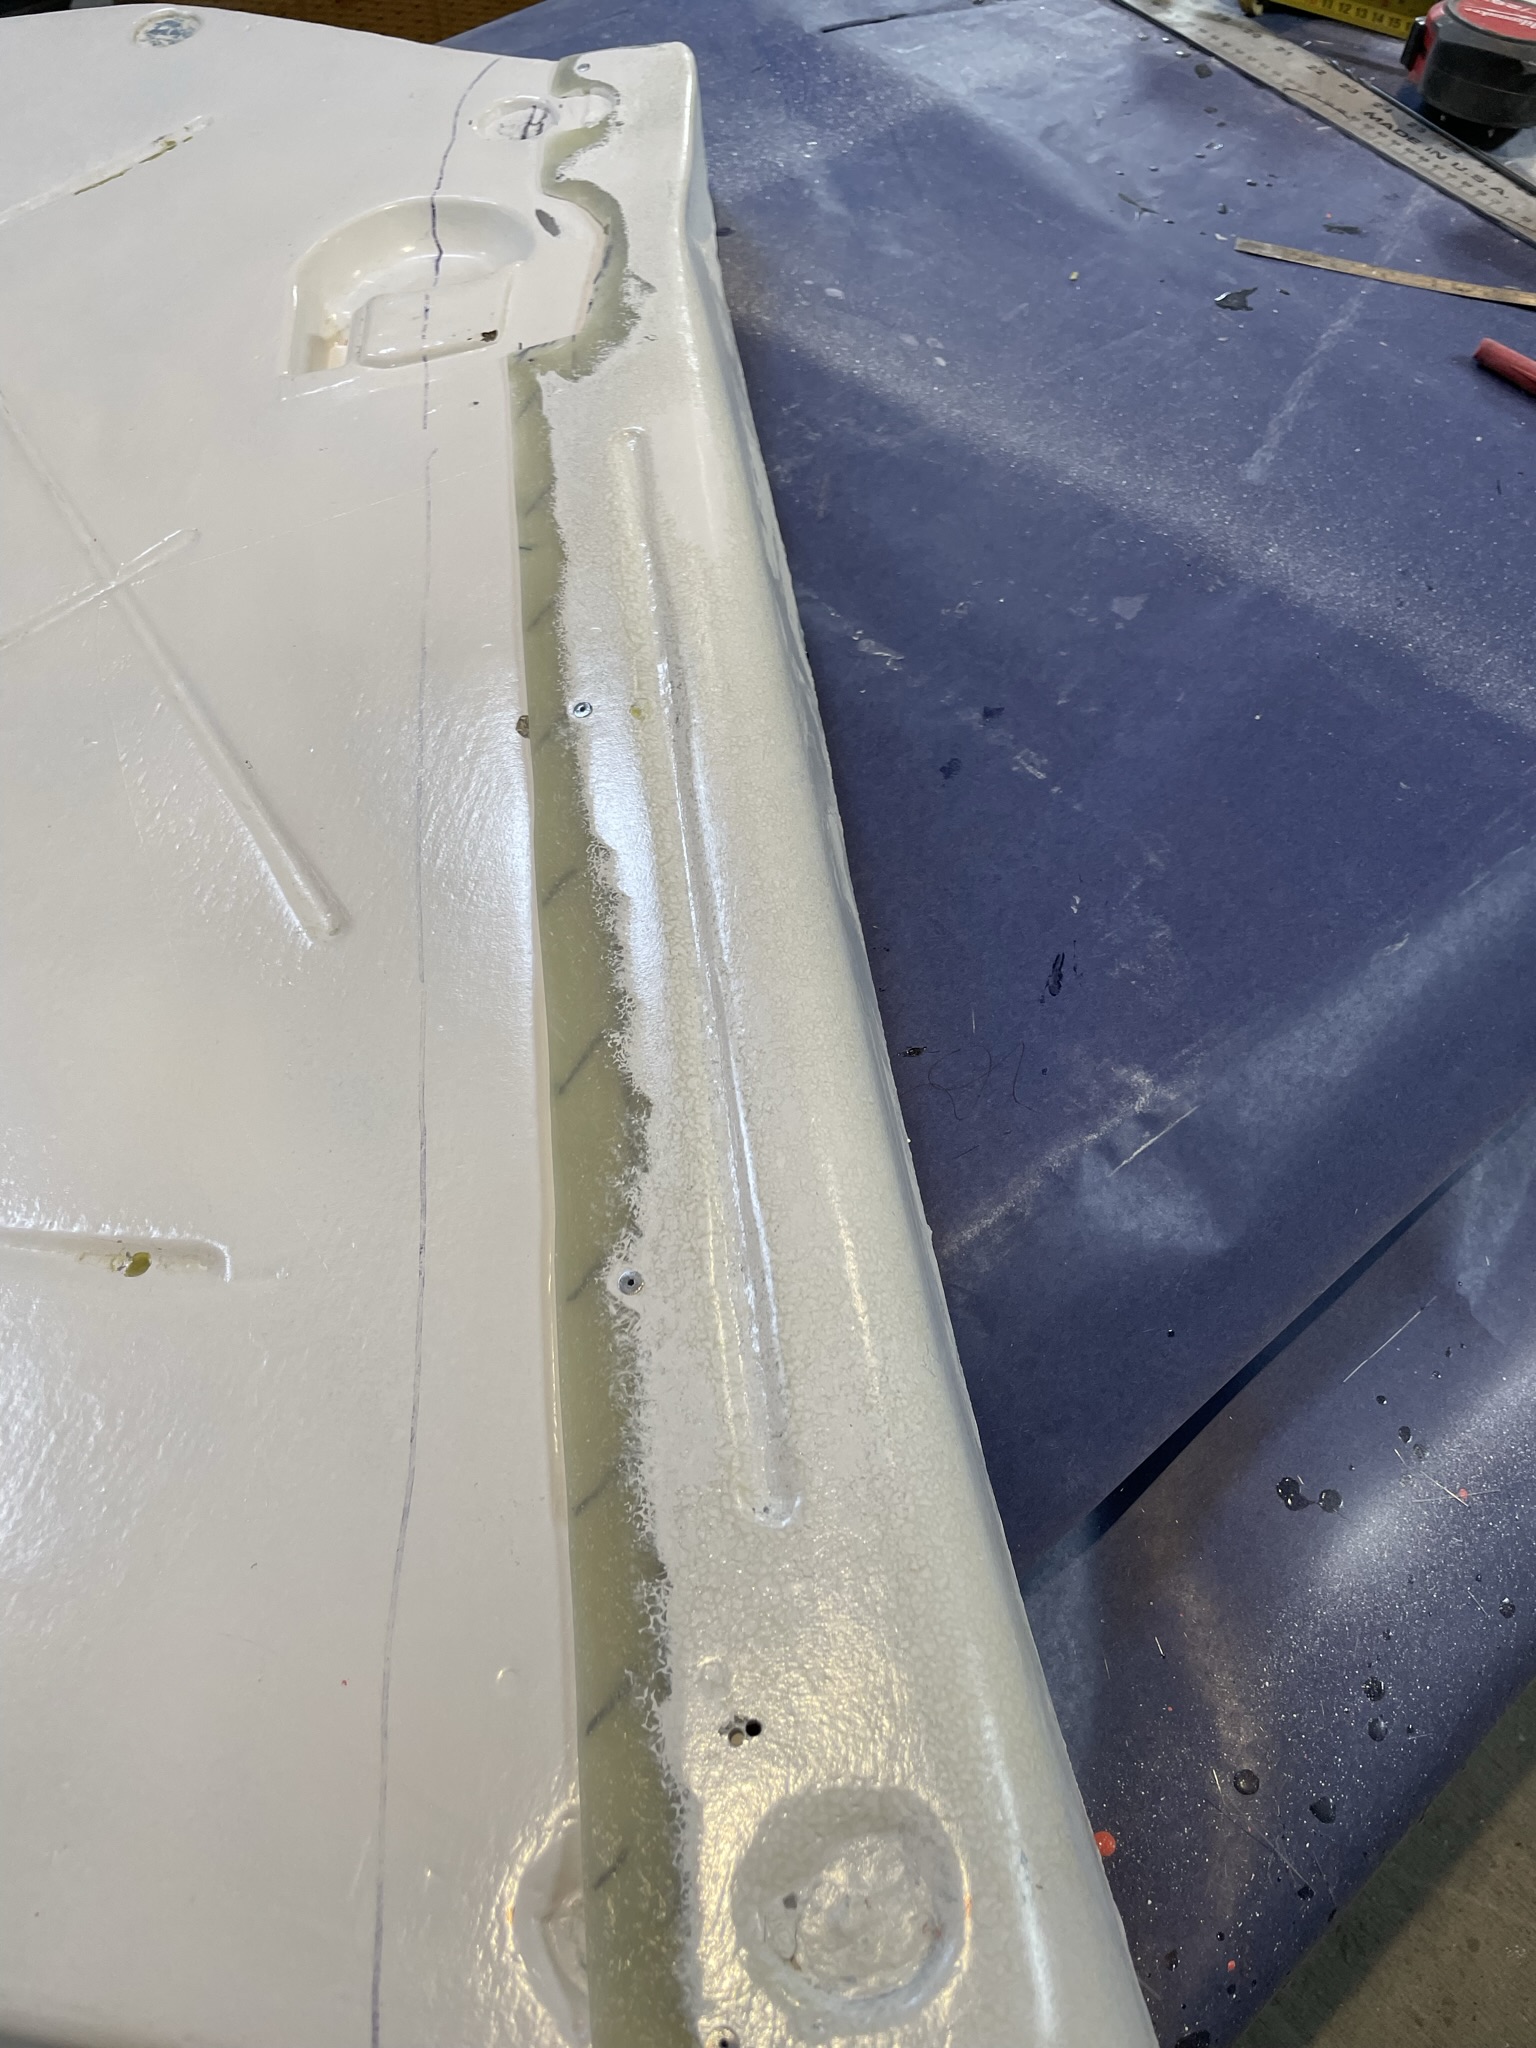
This is the corner bead and how I’ll attach to the inside edges
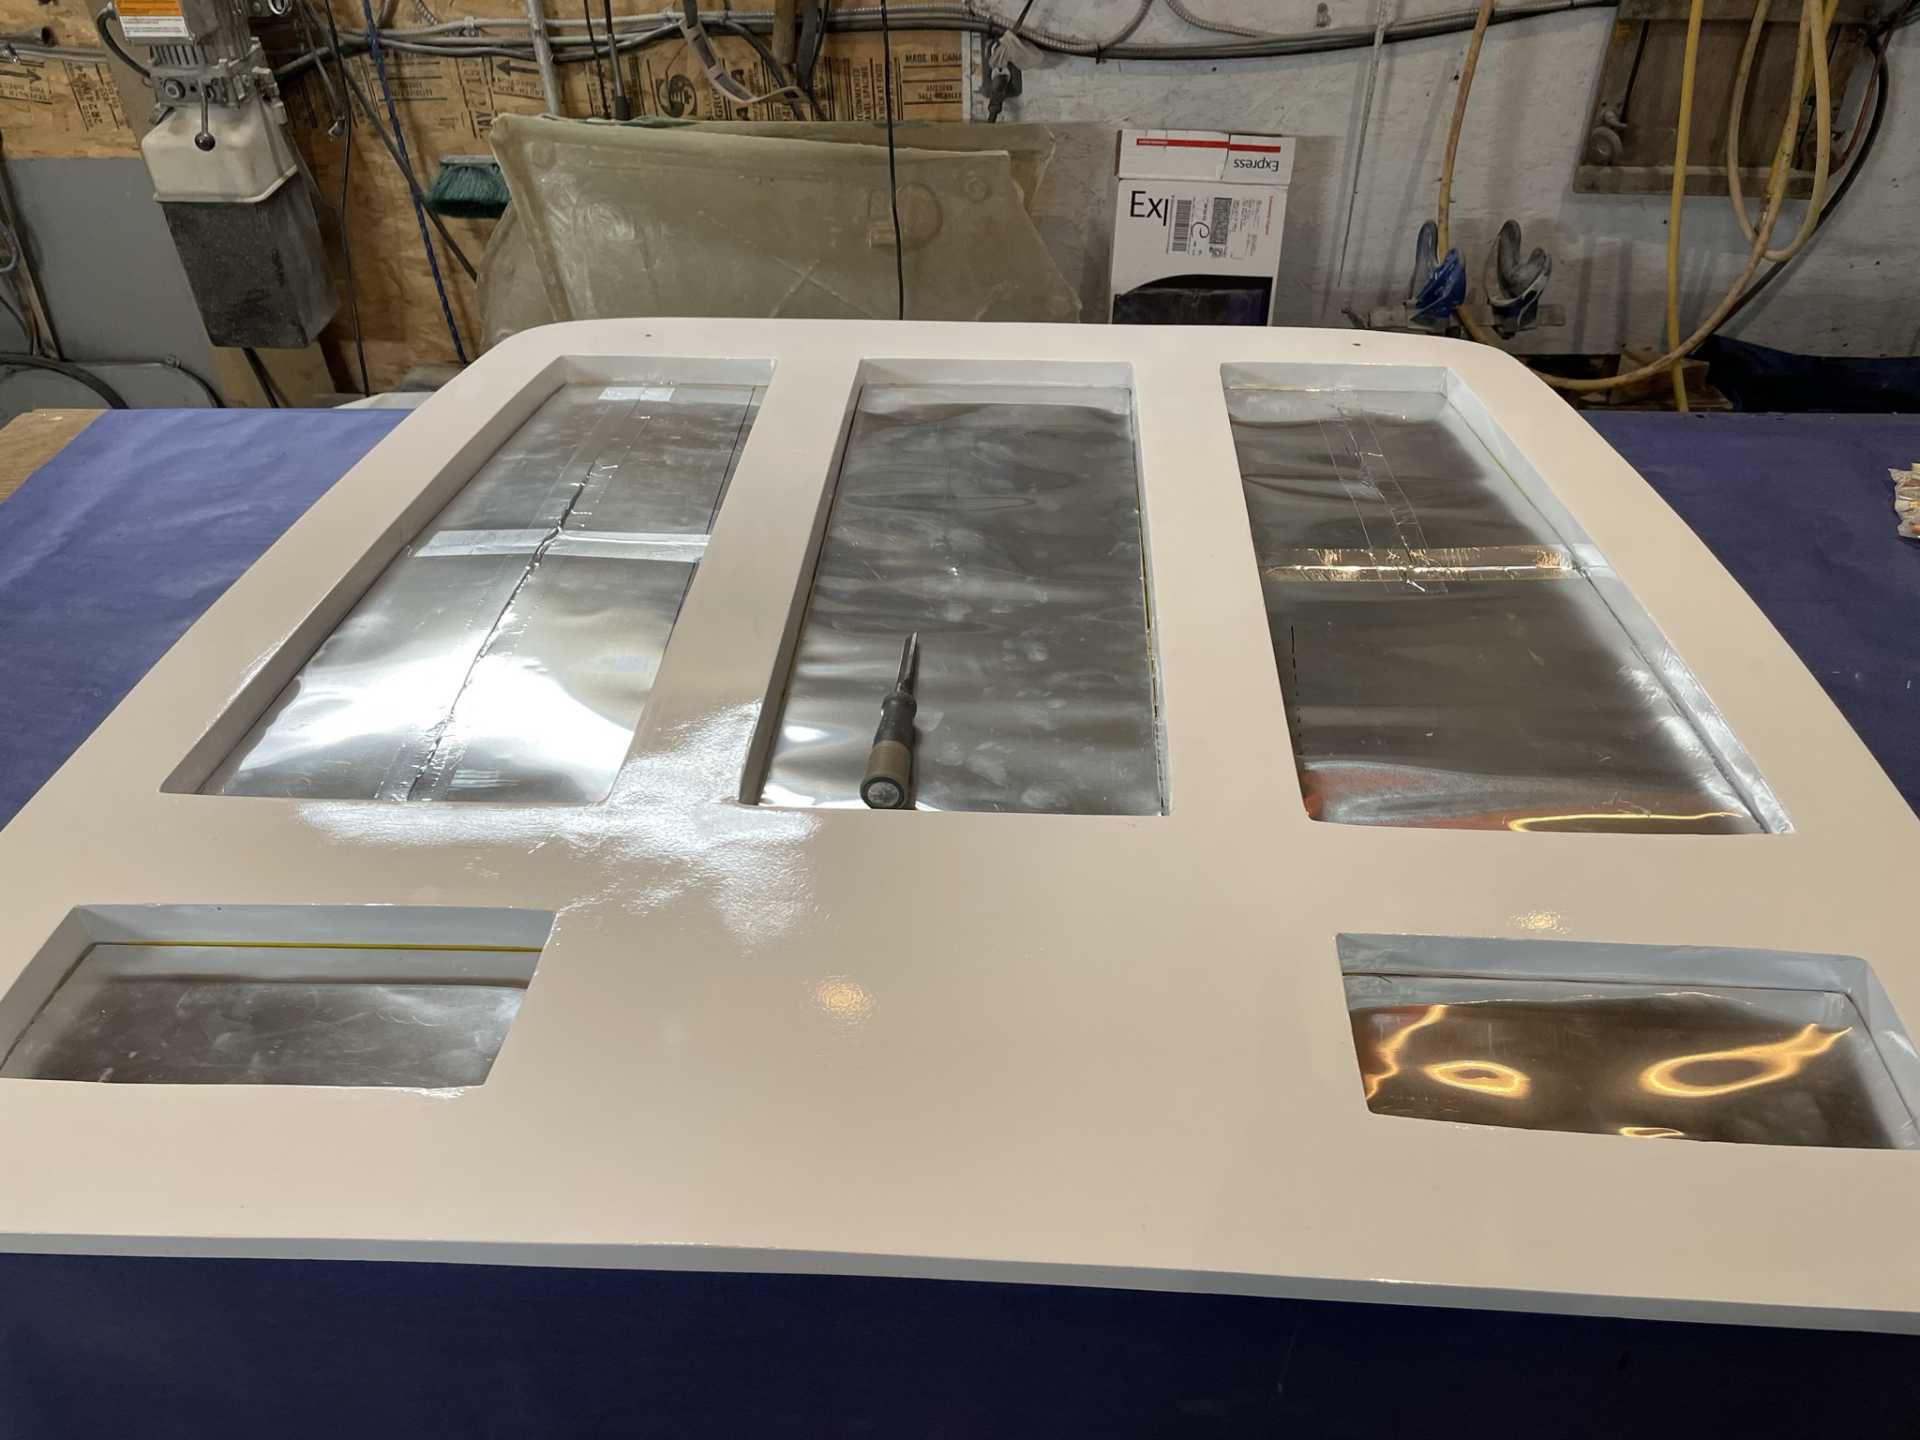
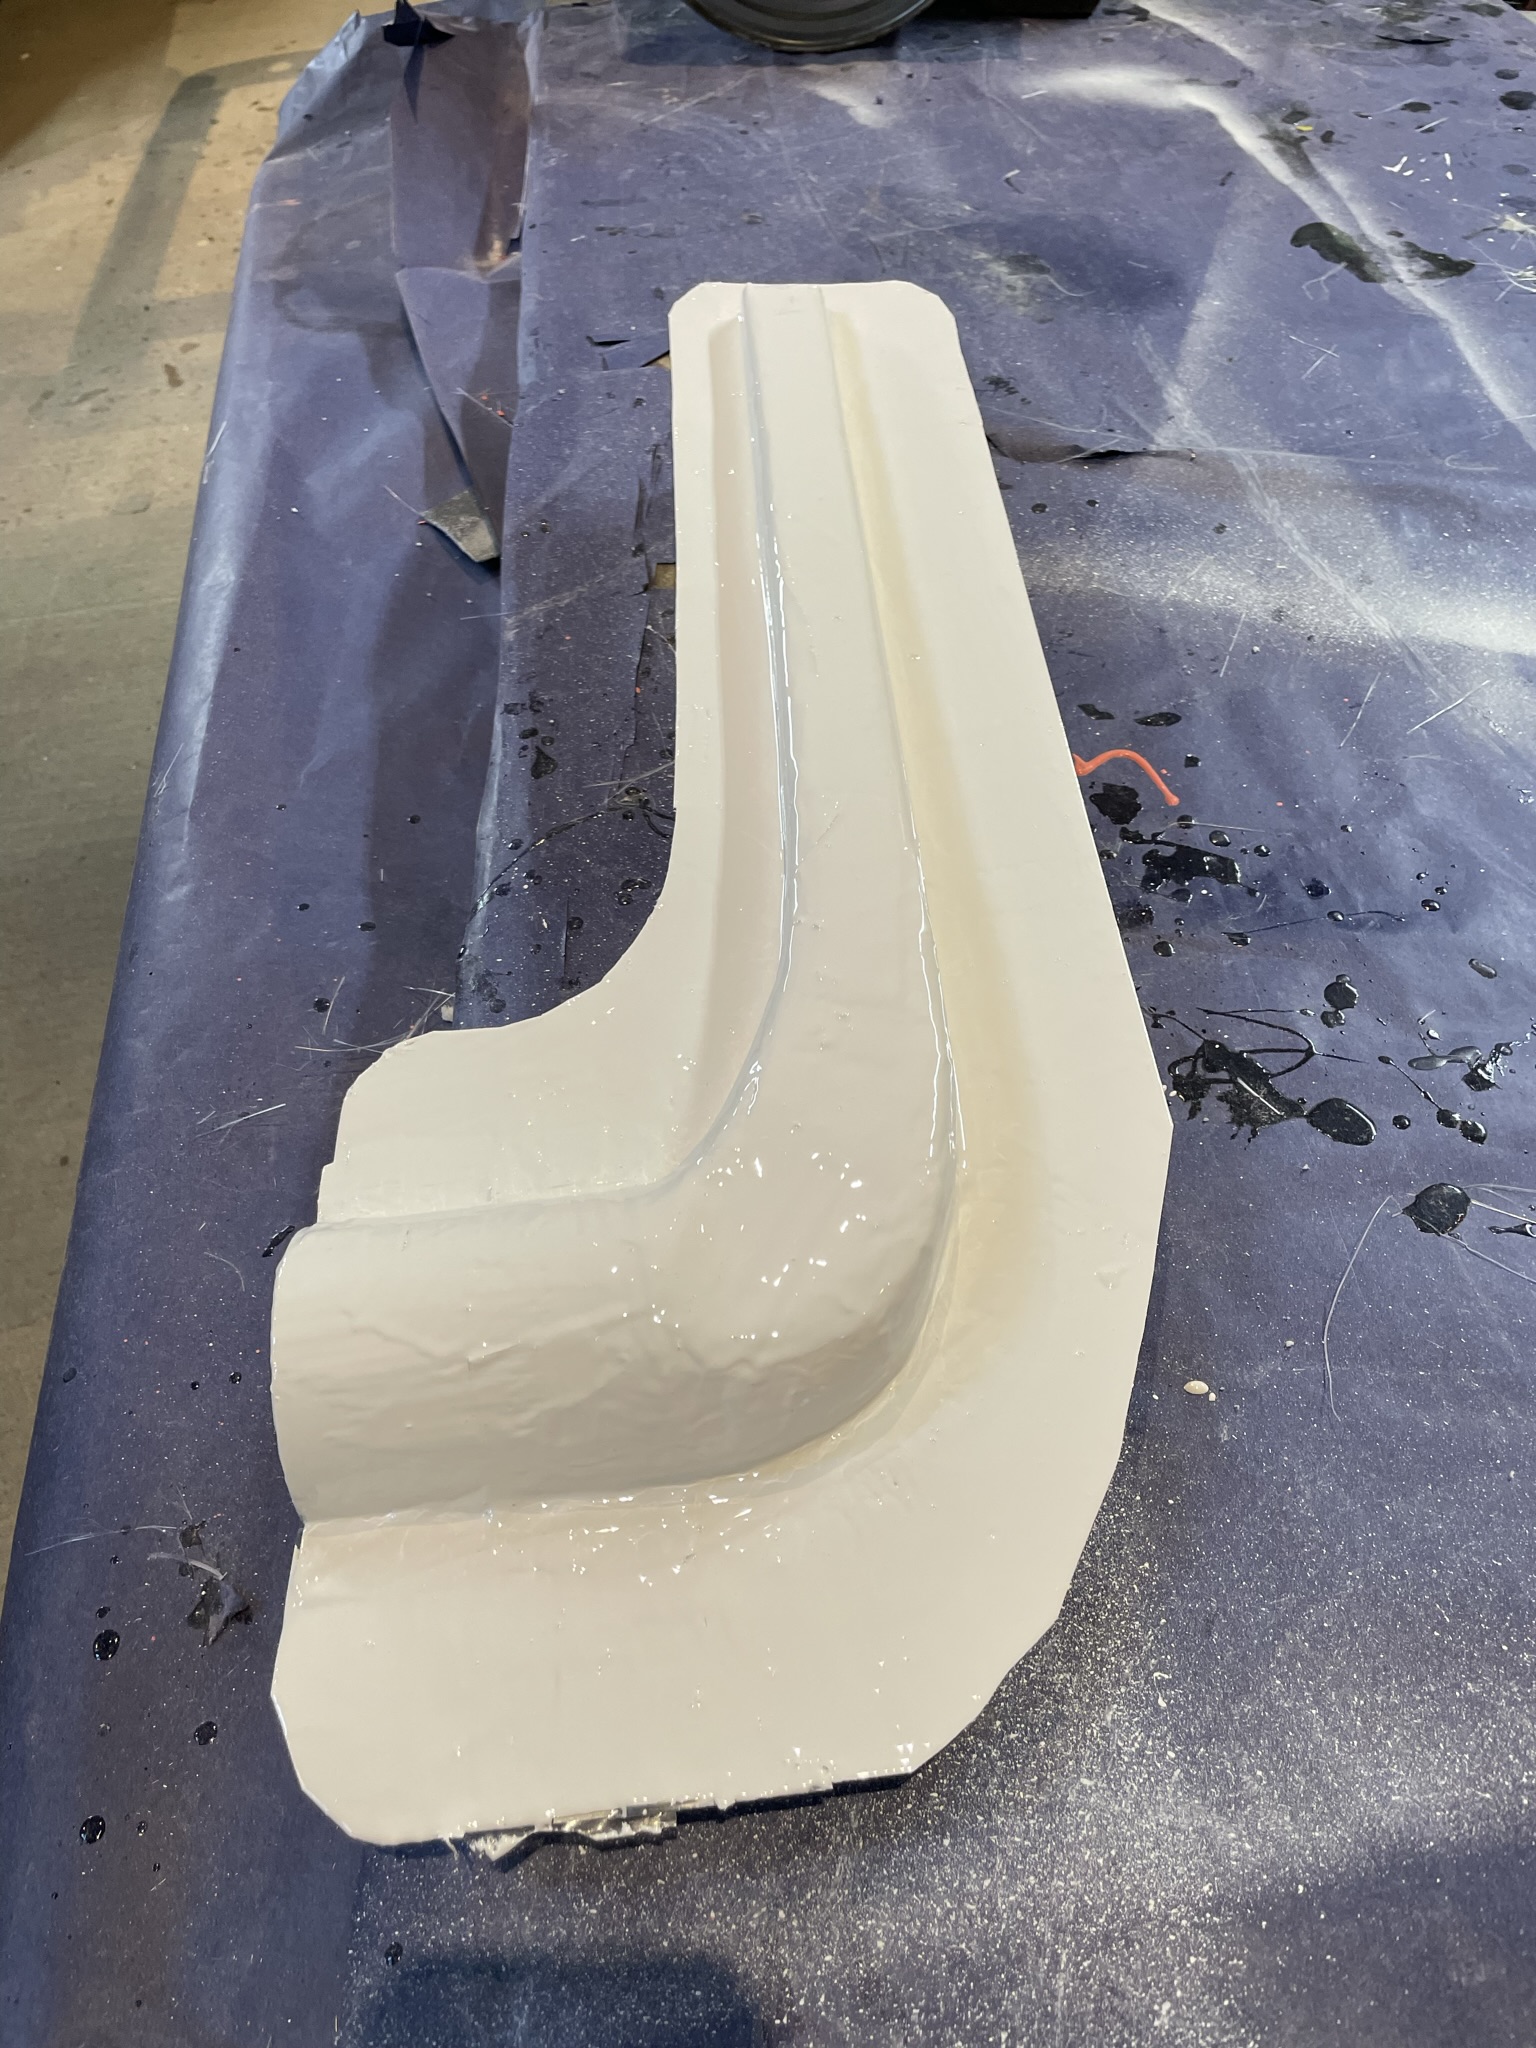
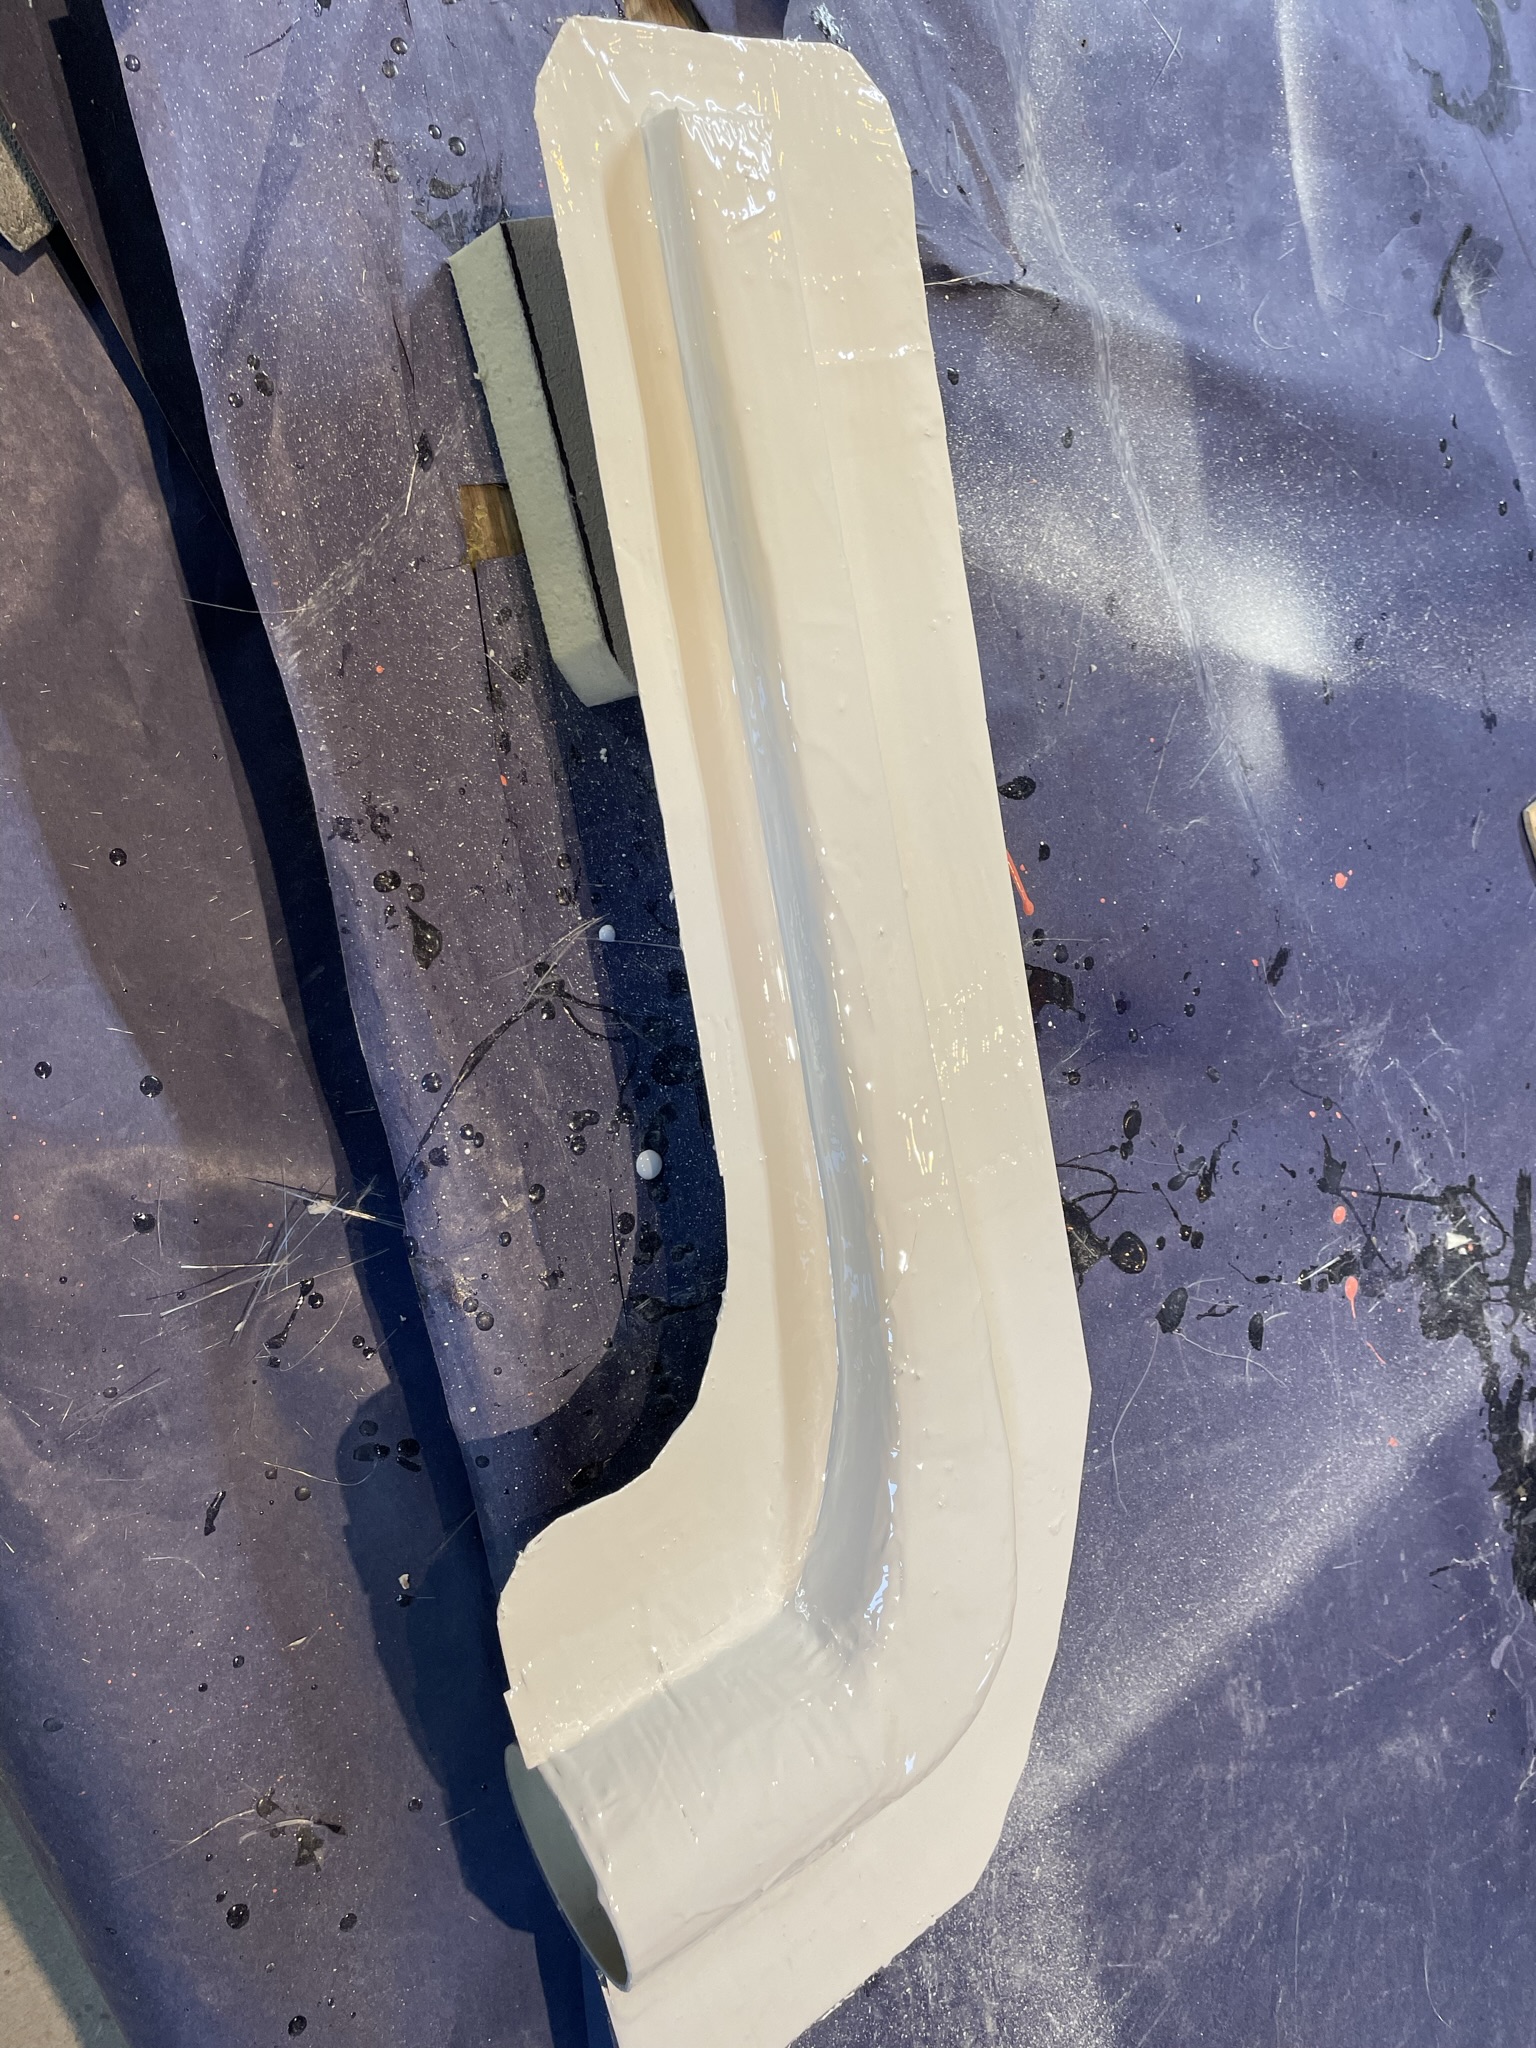
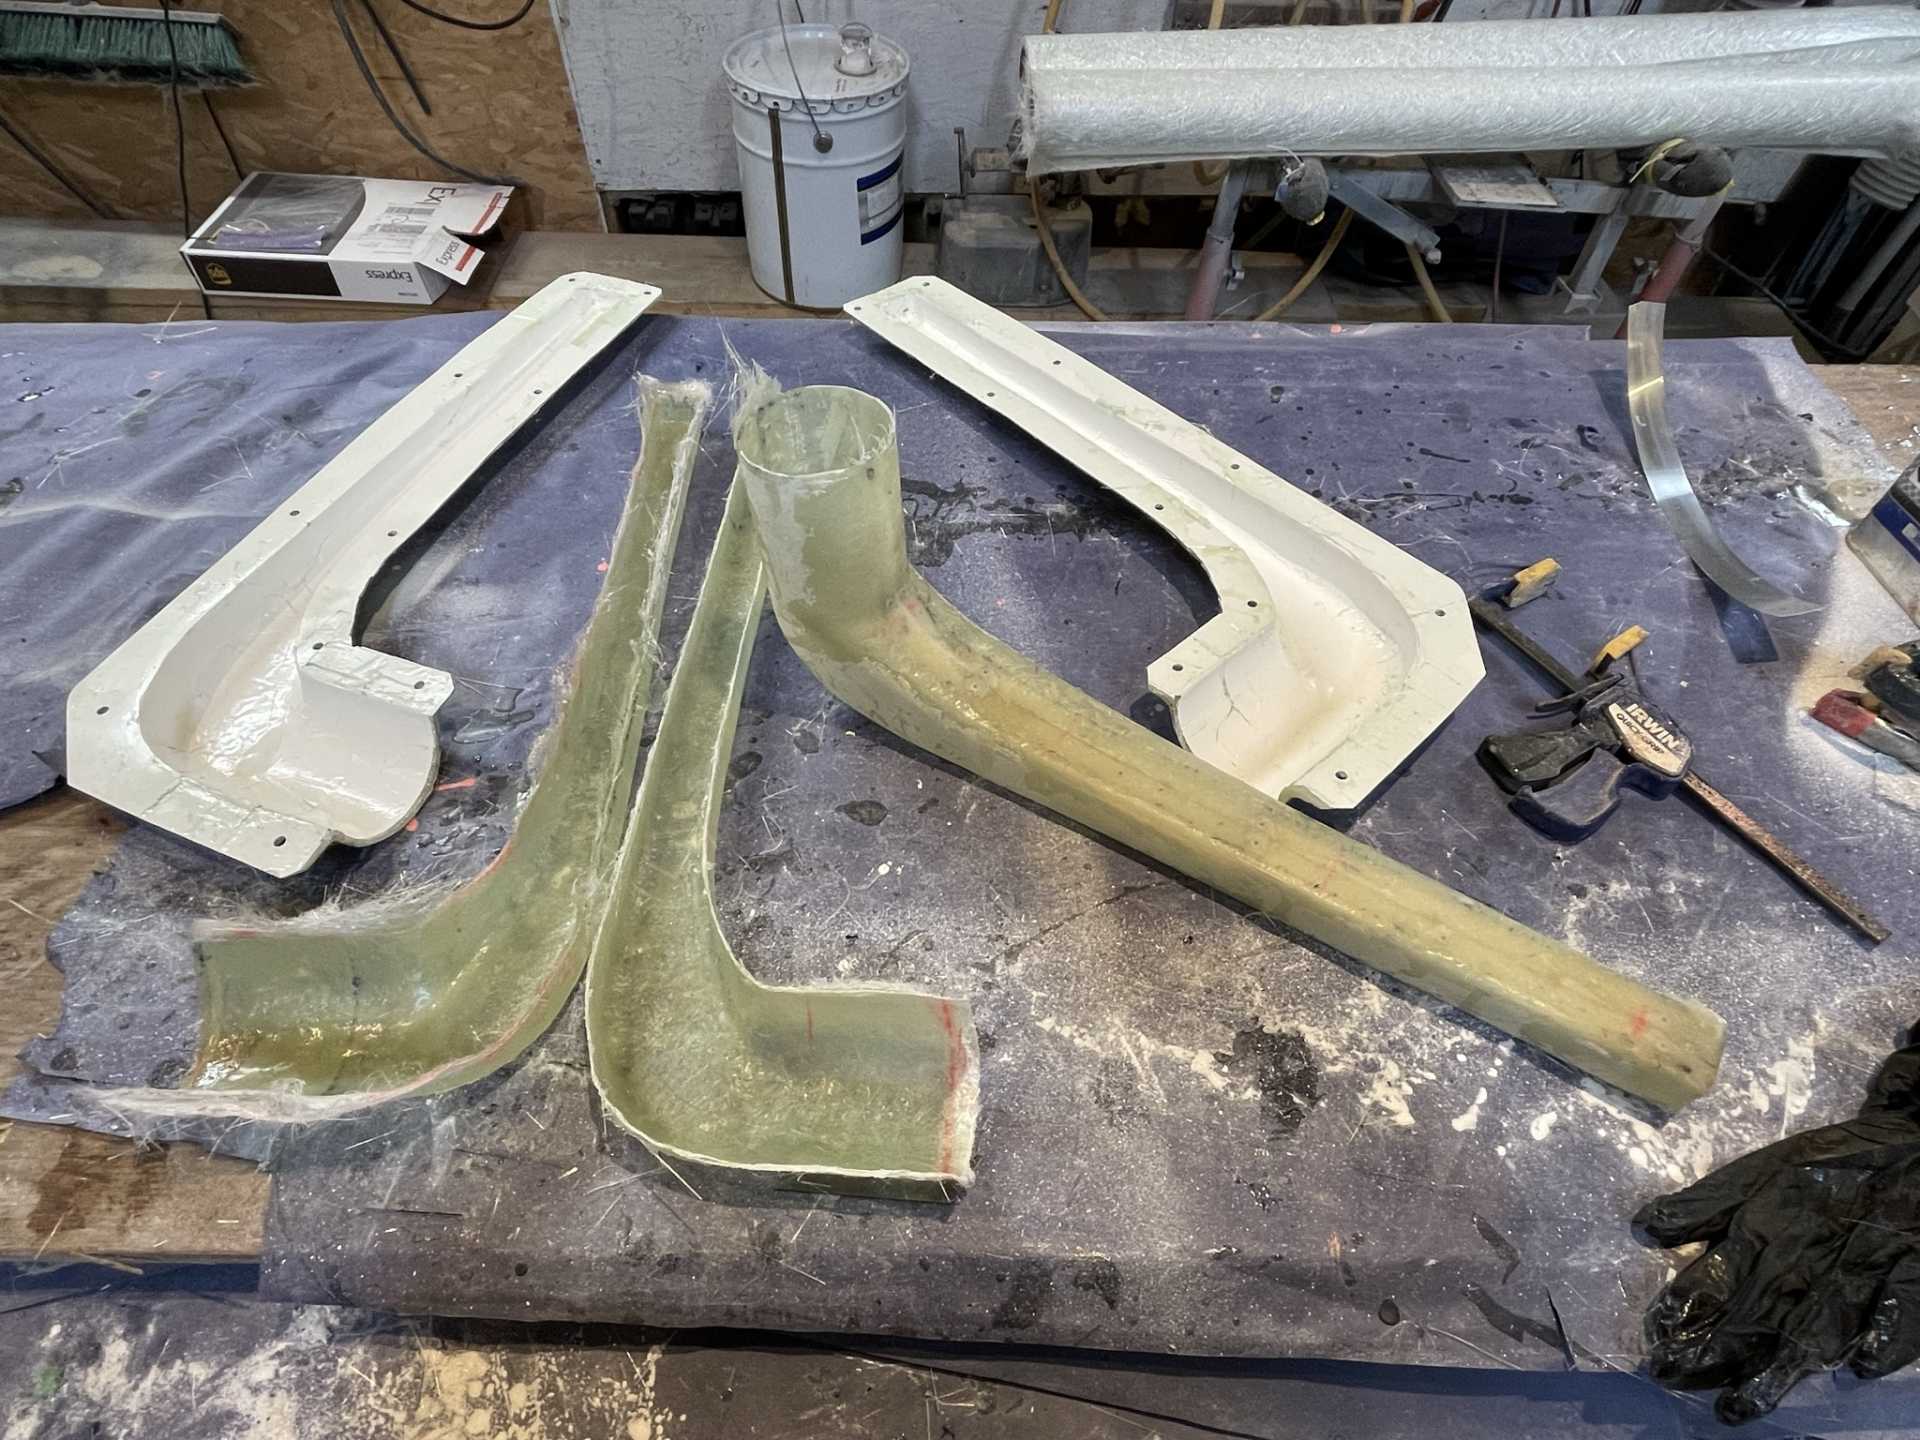
I also completed the two brake cooling ducts , they came out pretty well as I’d hoped. I’ll modify as needed . [IMG]https://images.fiero.nl/userimages/dobie1/100DA58A-FC1F-4D83-9D 5C-14321D84E9BA.jpeg[/IMG]
I’m hoping to get the car back soon so I can get back to finishing the body for paint.
Stay safe everyone Wayne
[This message has been edited by dobie1 (edited 03-01-2022).]
Here is the latest update, for those that have been following for soooo long🤪
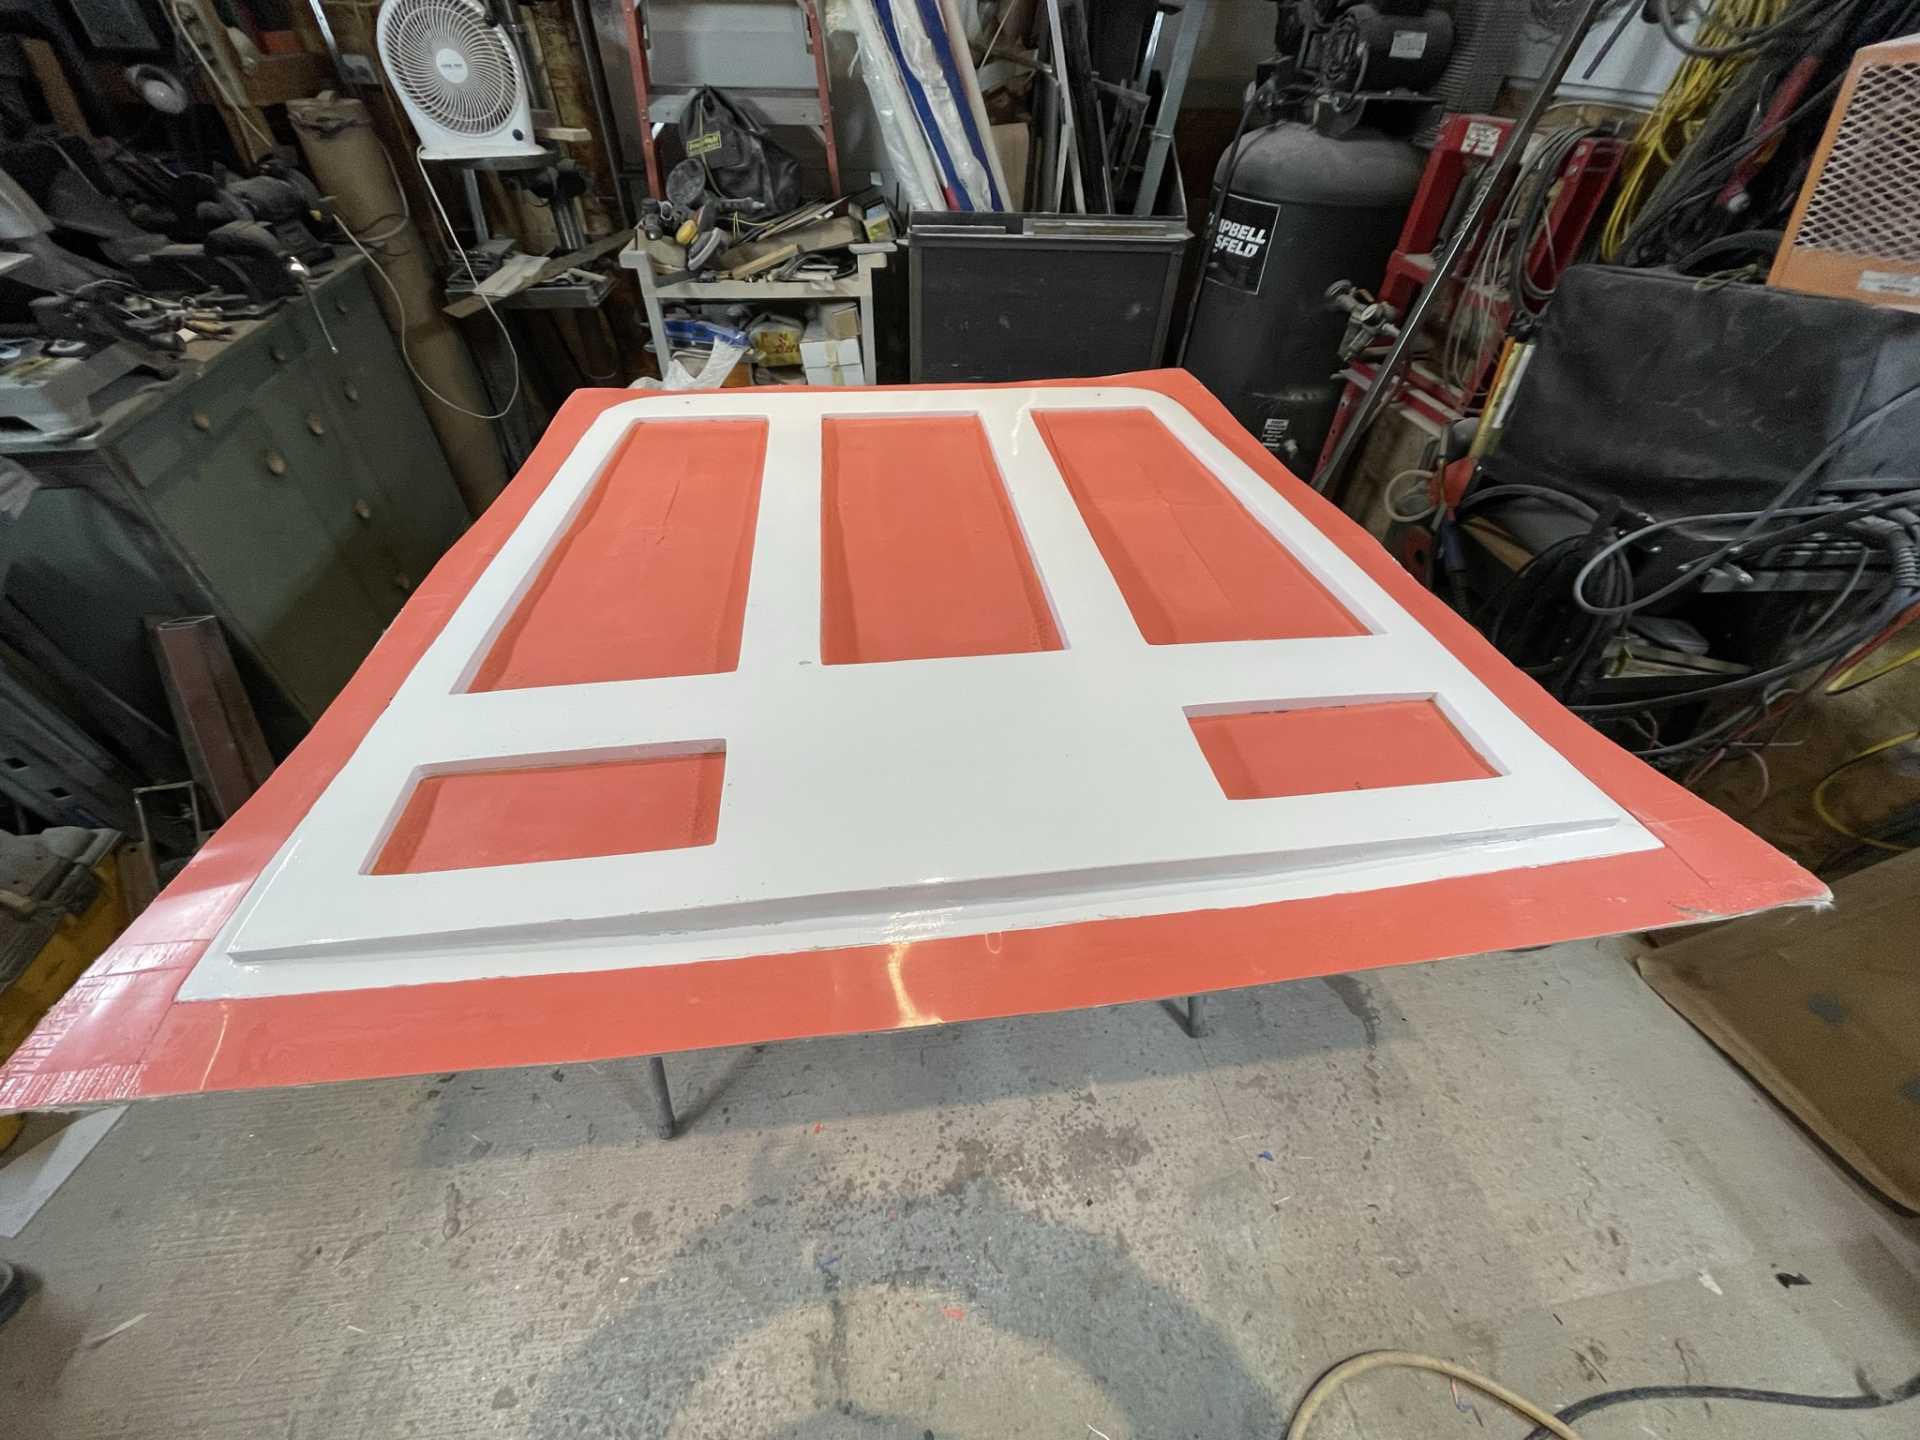
I finally got all the metal strips attached to the 24 edges of the top half of the rear hood.
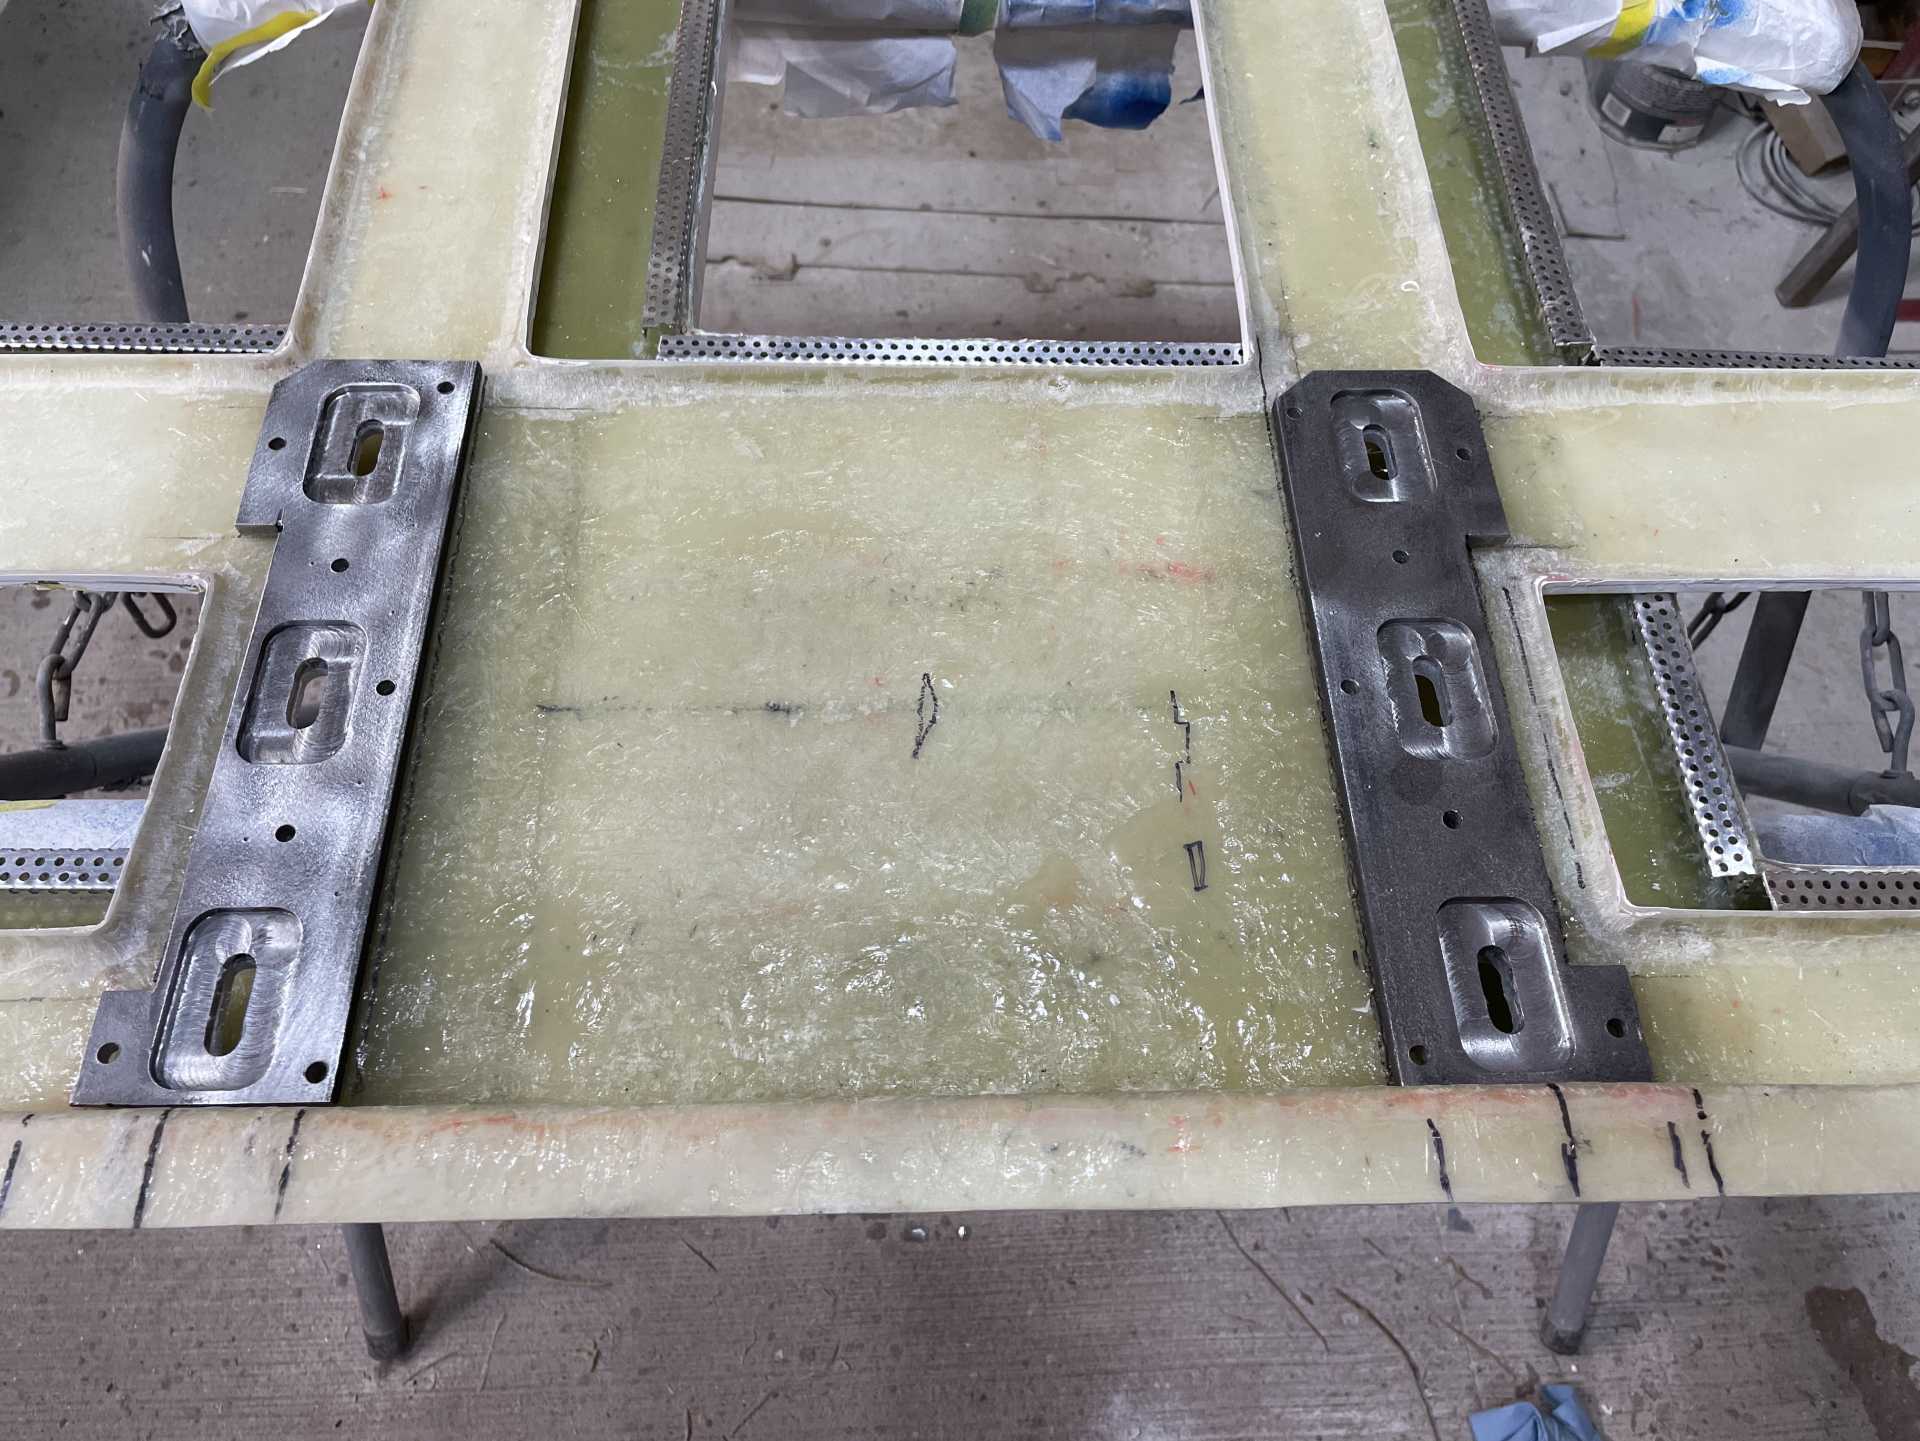
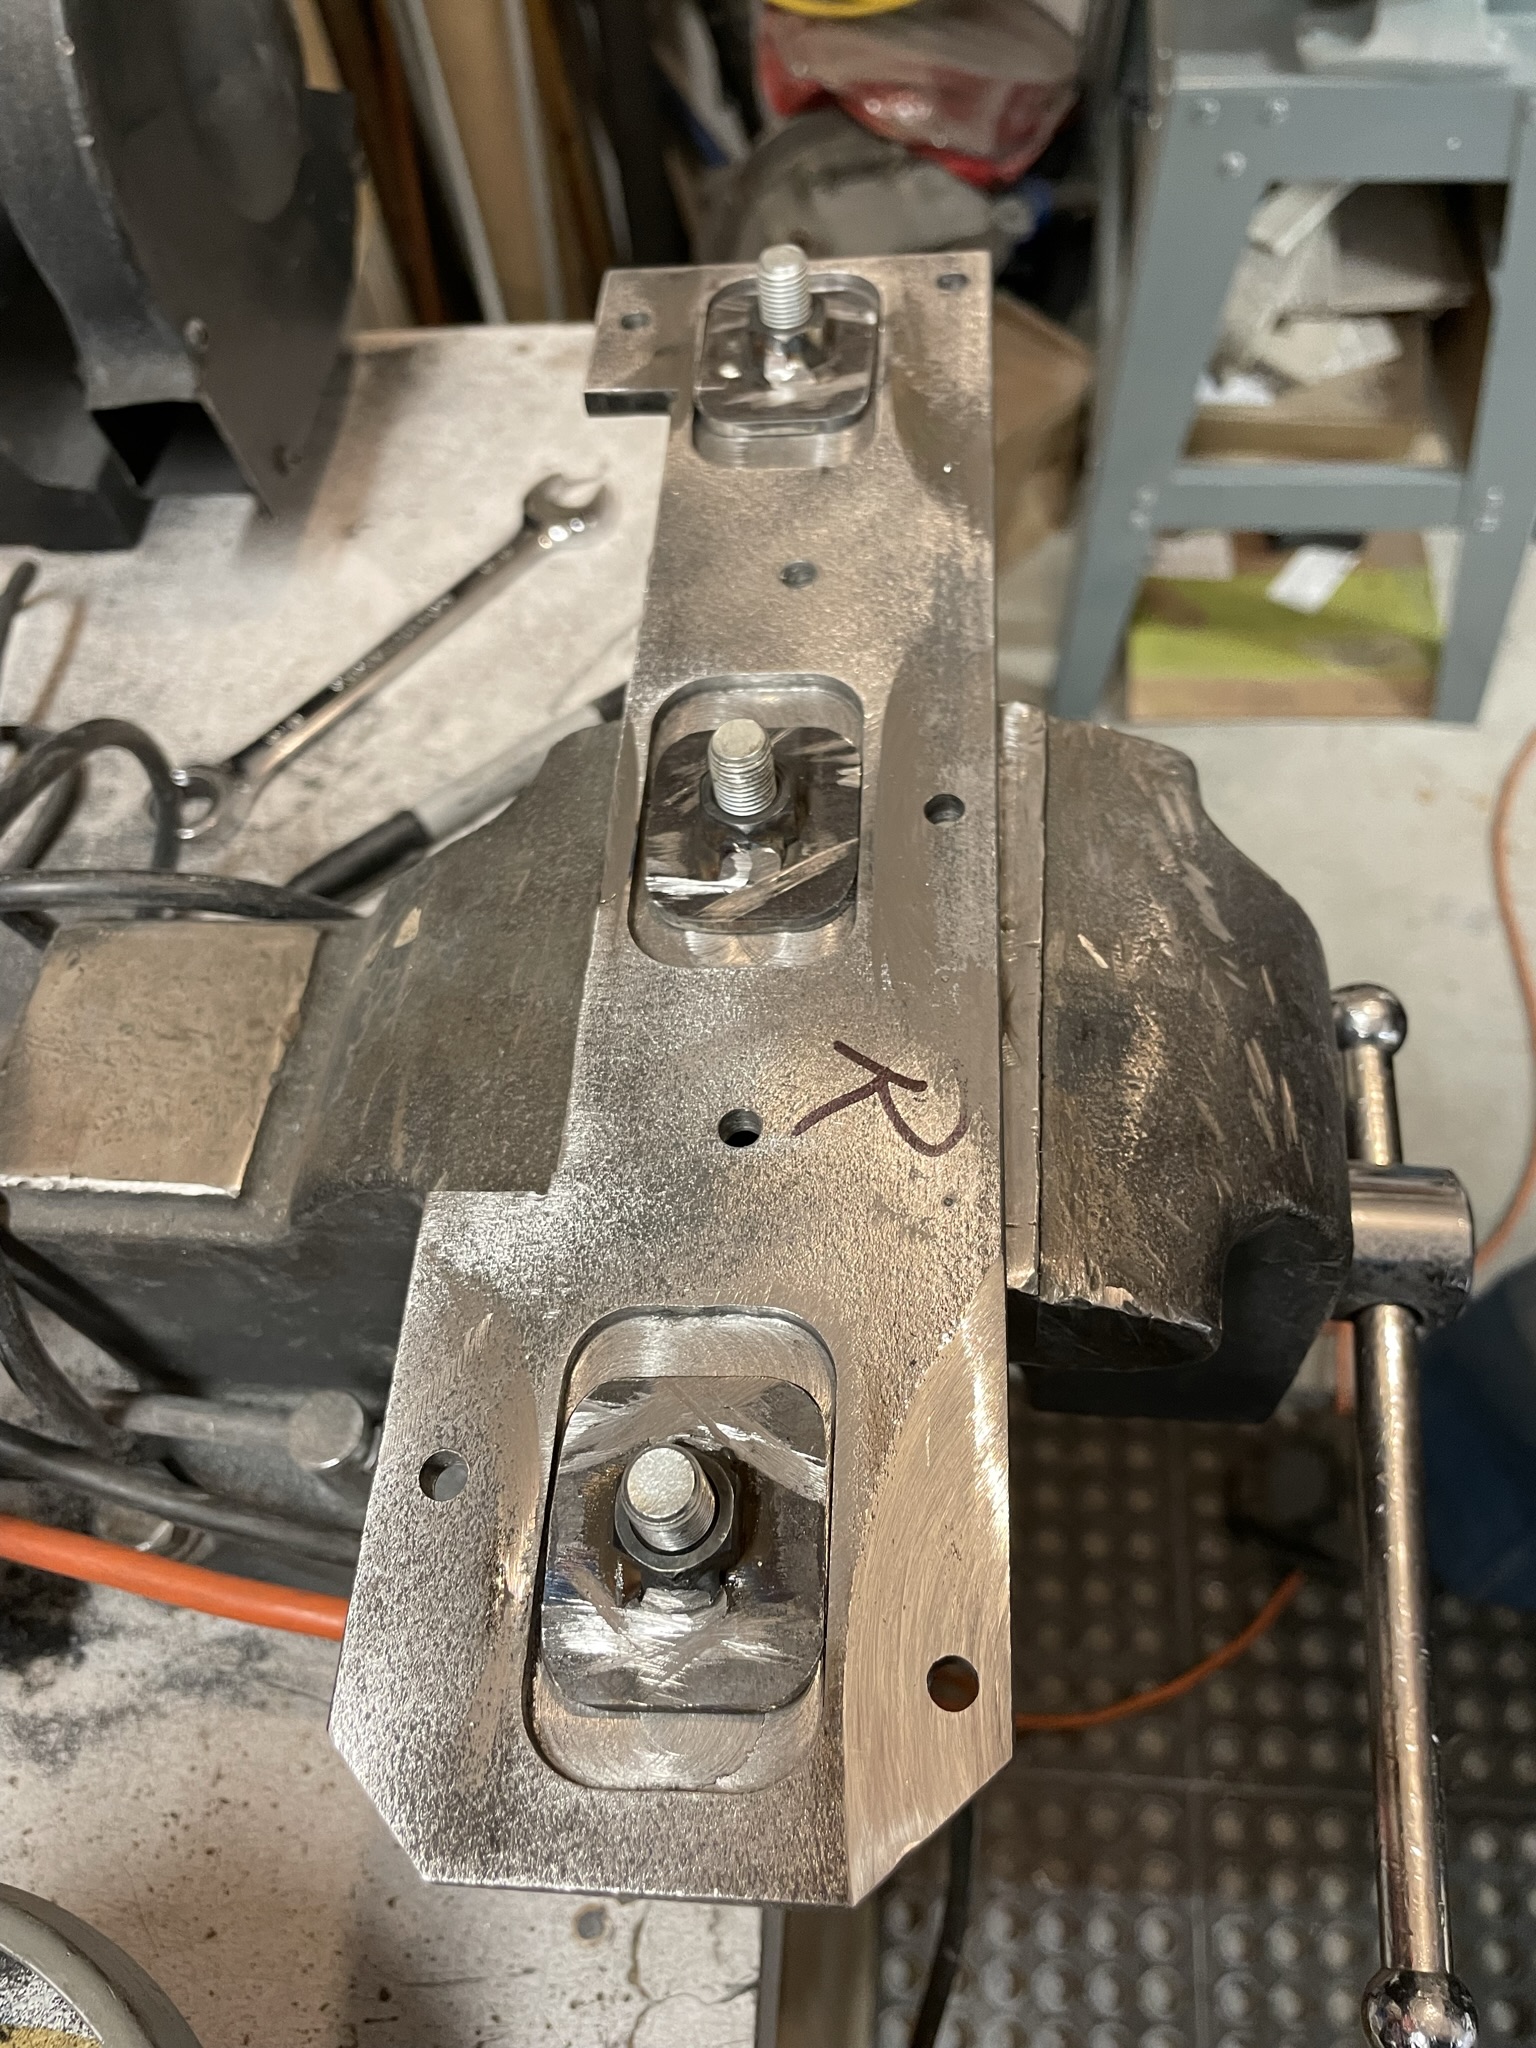
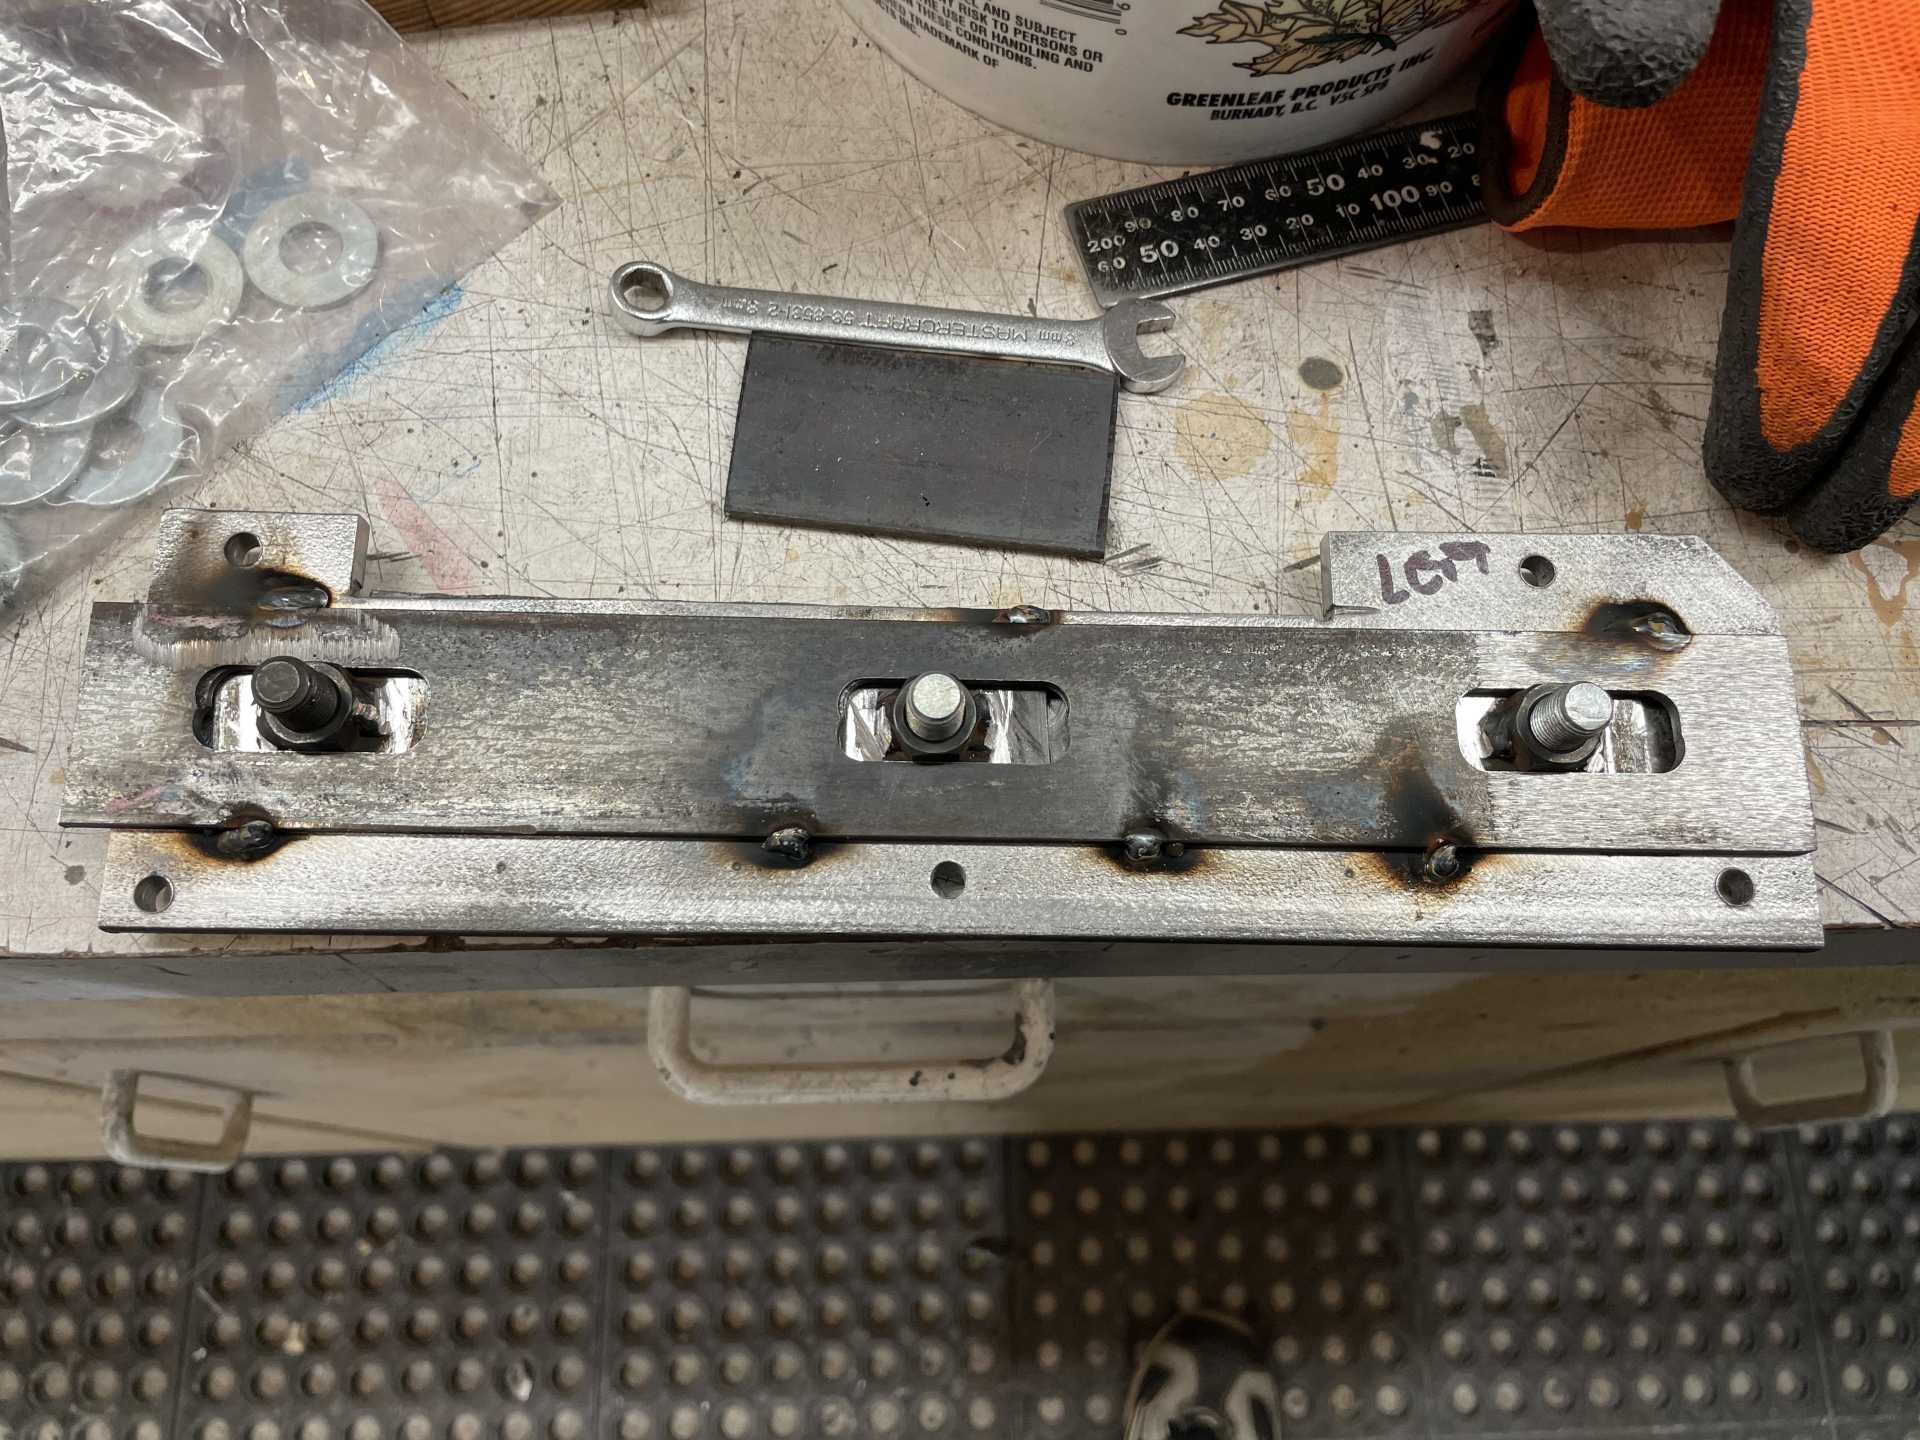
For the bottom half I took 2 pieces of 1/4” plate steel 3”x12” . I milled 3 recessed areas that a welded nut/washer will be secured To allow it to slide for adjustments. I’ll then bond the steel plates to the fiberglass , before bonding the two hood half’s together prior to finishing the bonded edges for primer and paint.
I was fortunate to visit Bloozeberry this summer out in Nova Scotia and see his extraordinary build, I wish I had his talents. Anyway I did a swap with him and got a set of hinges he designed for his car that will work perfectly for my build.
Well another busy week lots completed and still lots to go…
I got the rear deck finished this week , still needs some bodywork to be ready for paint but it all came together. With the help of Don O. I got the rear deck hinges finished, and I must say They came out really good.
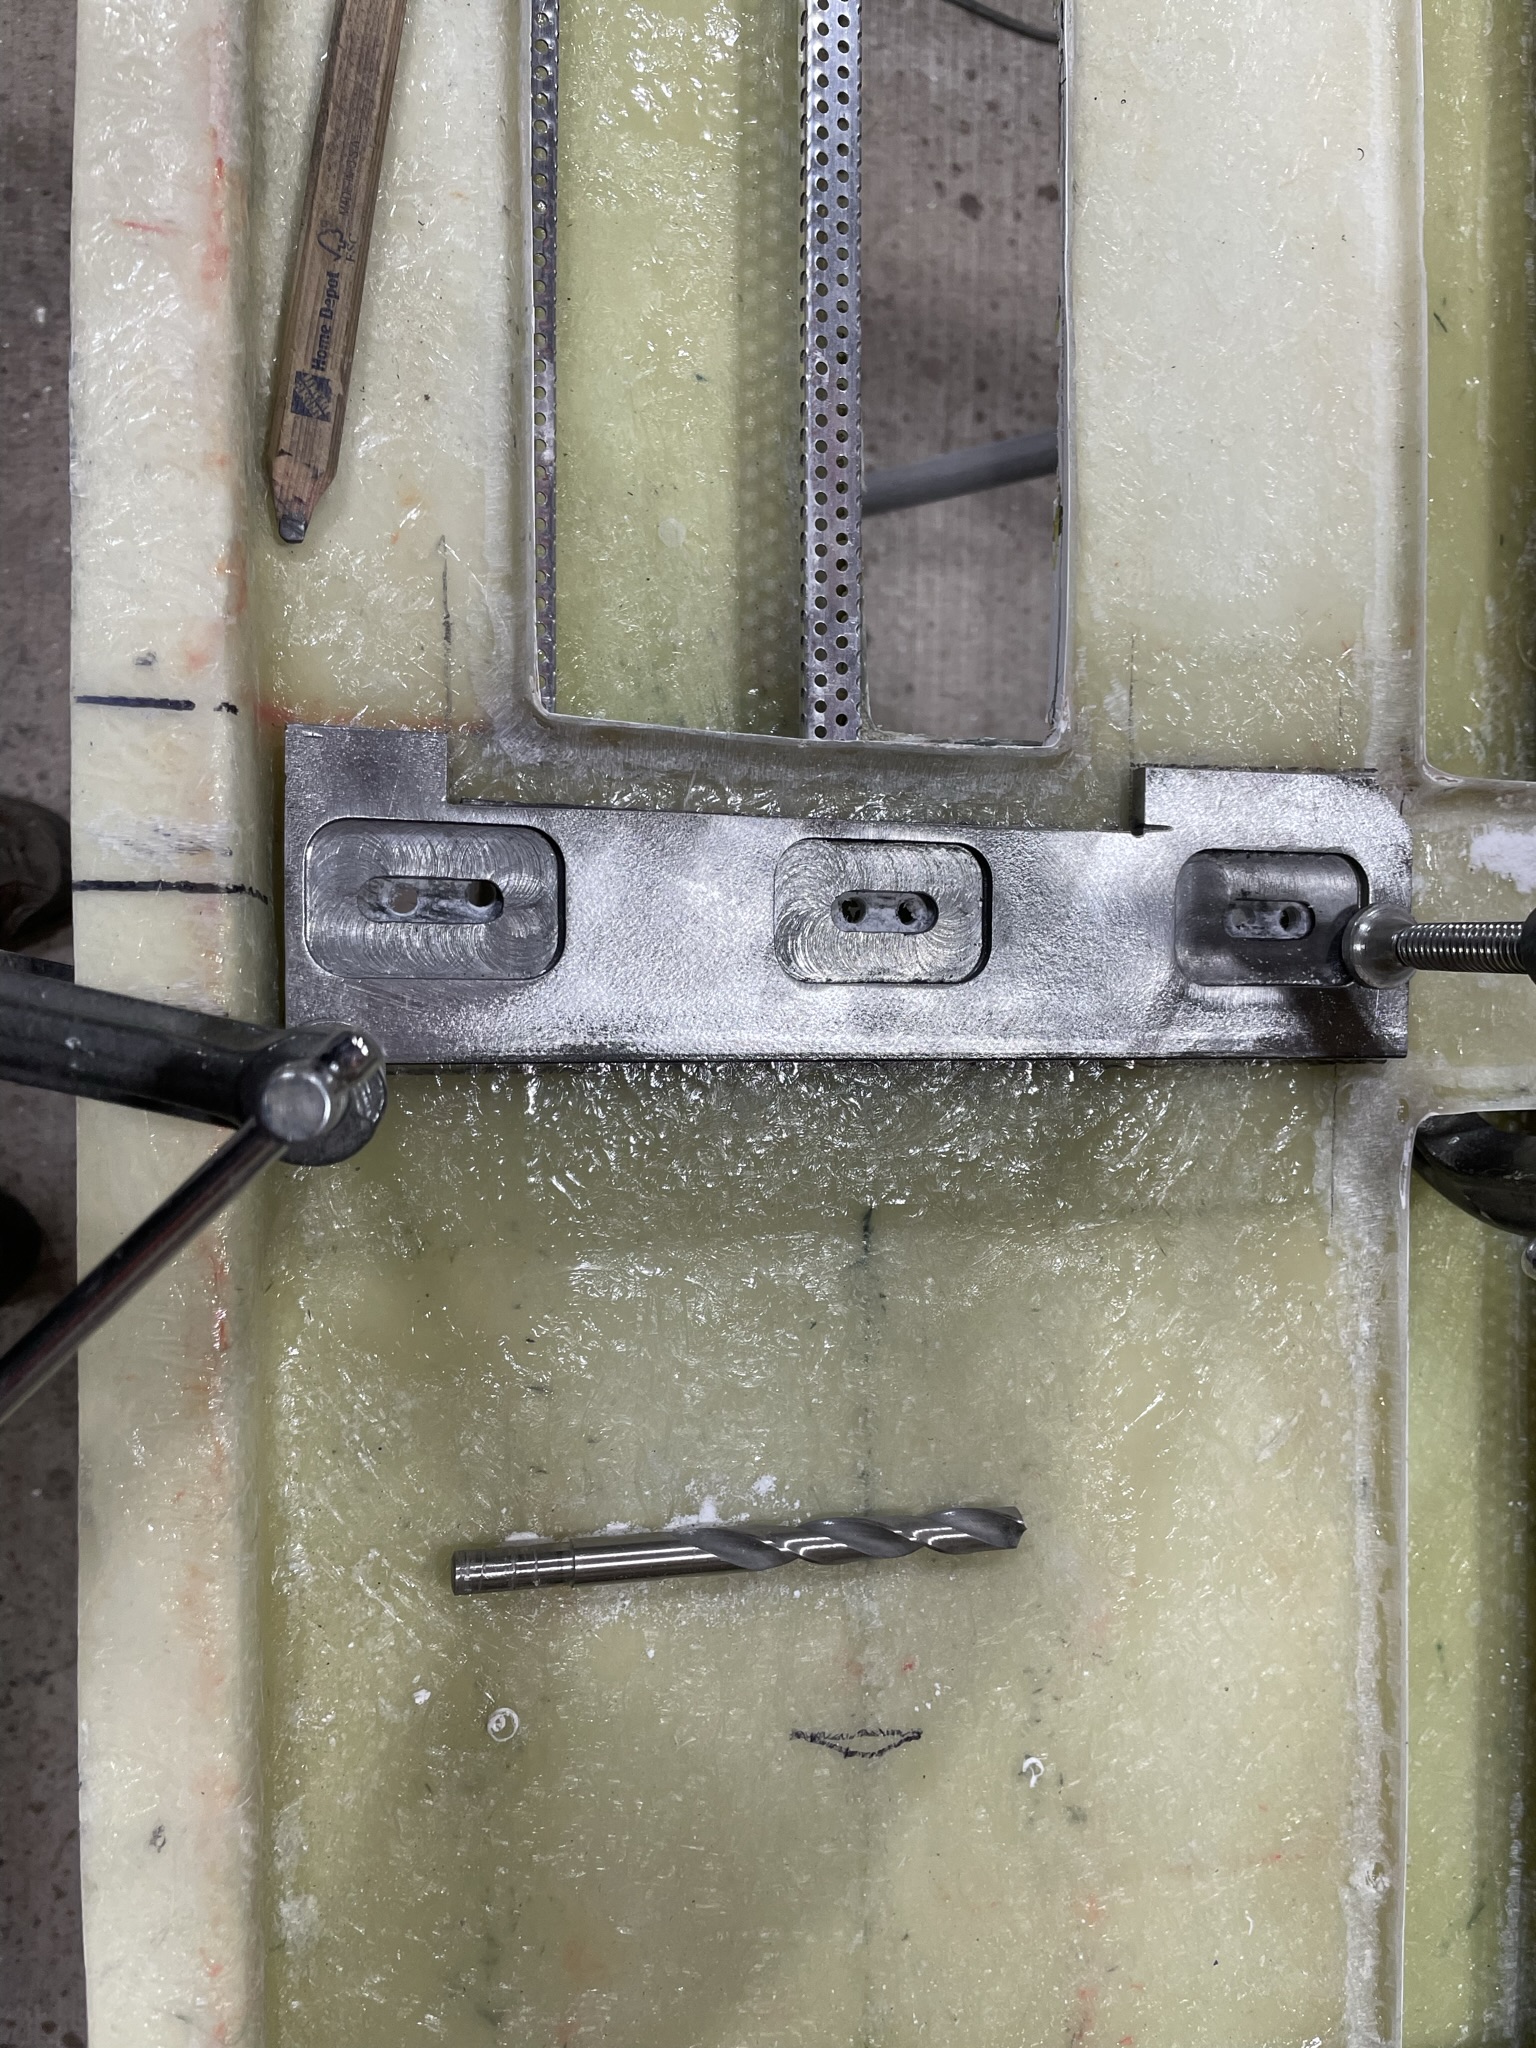
Here you can see the nuts welded to the rectangular 1/8” steel washers (Don O’s idea instead of large washers) they slide in the slots milled into the 1/4” steel plate
Then the capture plate milled out to the exact width of the nuts tack welded onto the main plate, this does two things one retains the nut/washer in place and second is a backup the to rectangular washer/nut when torquing down the hood to the bracket.
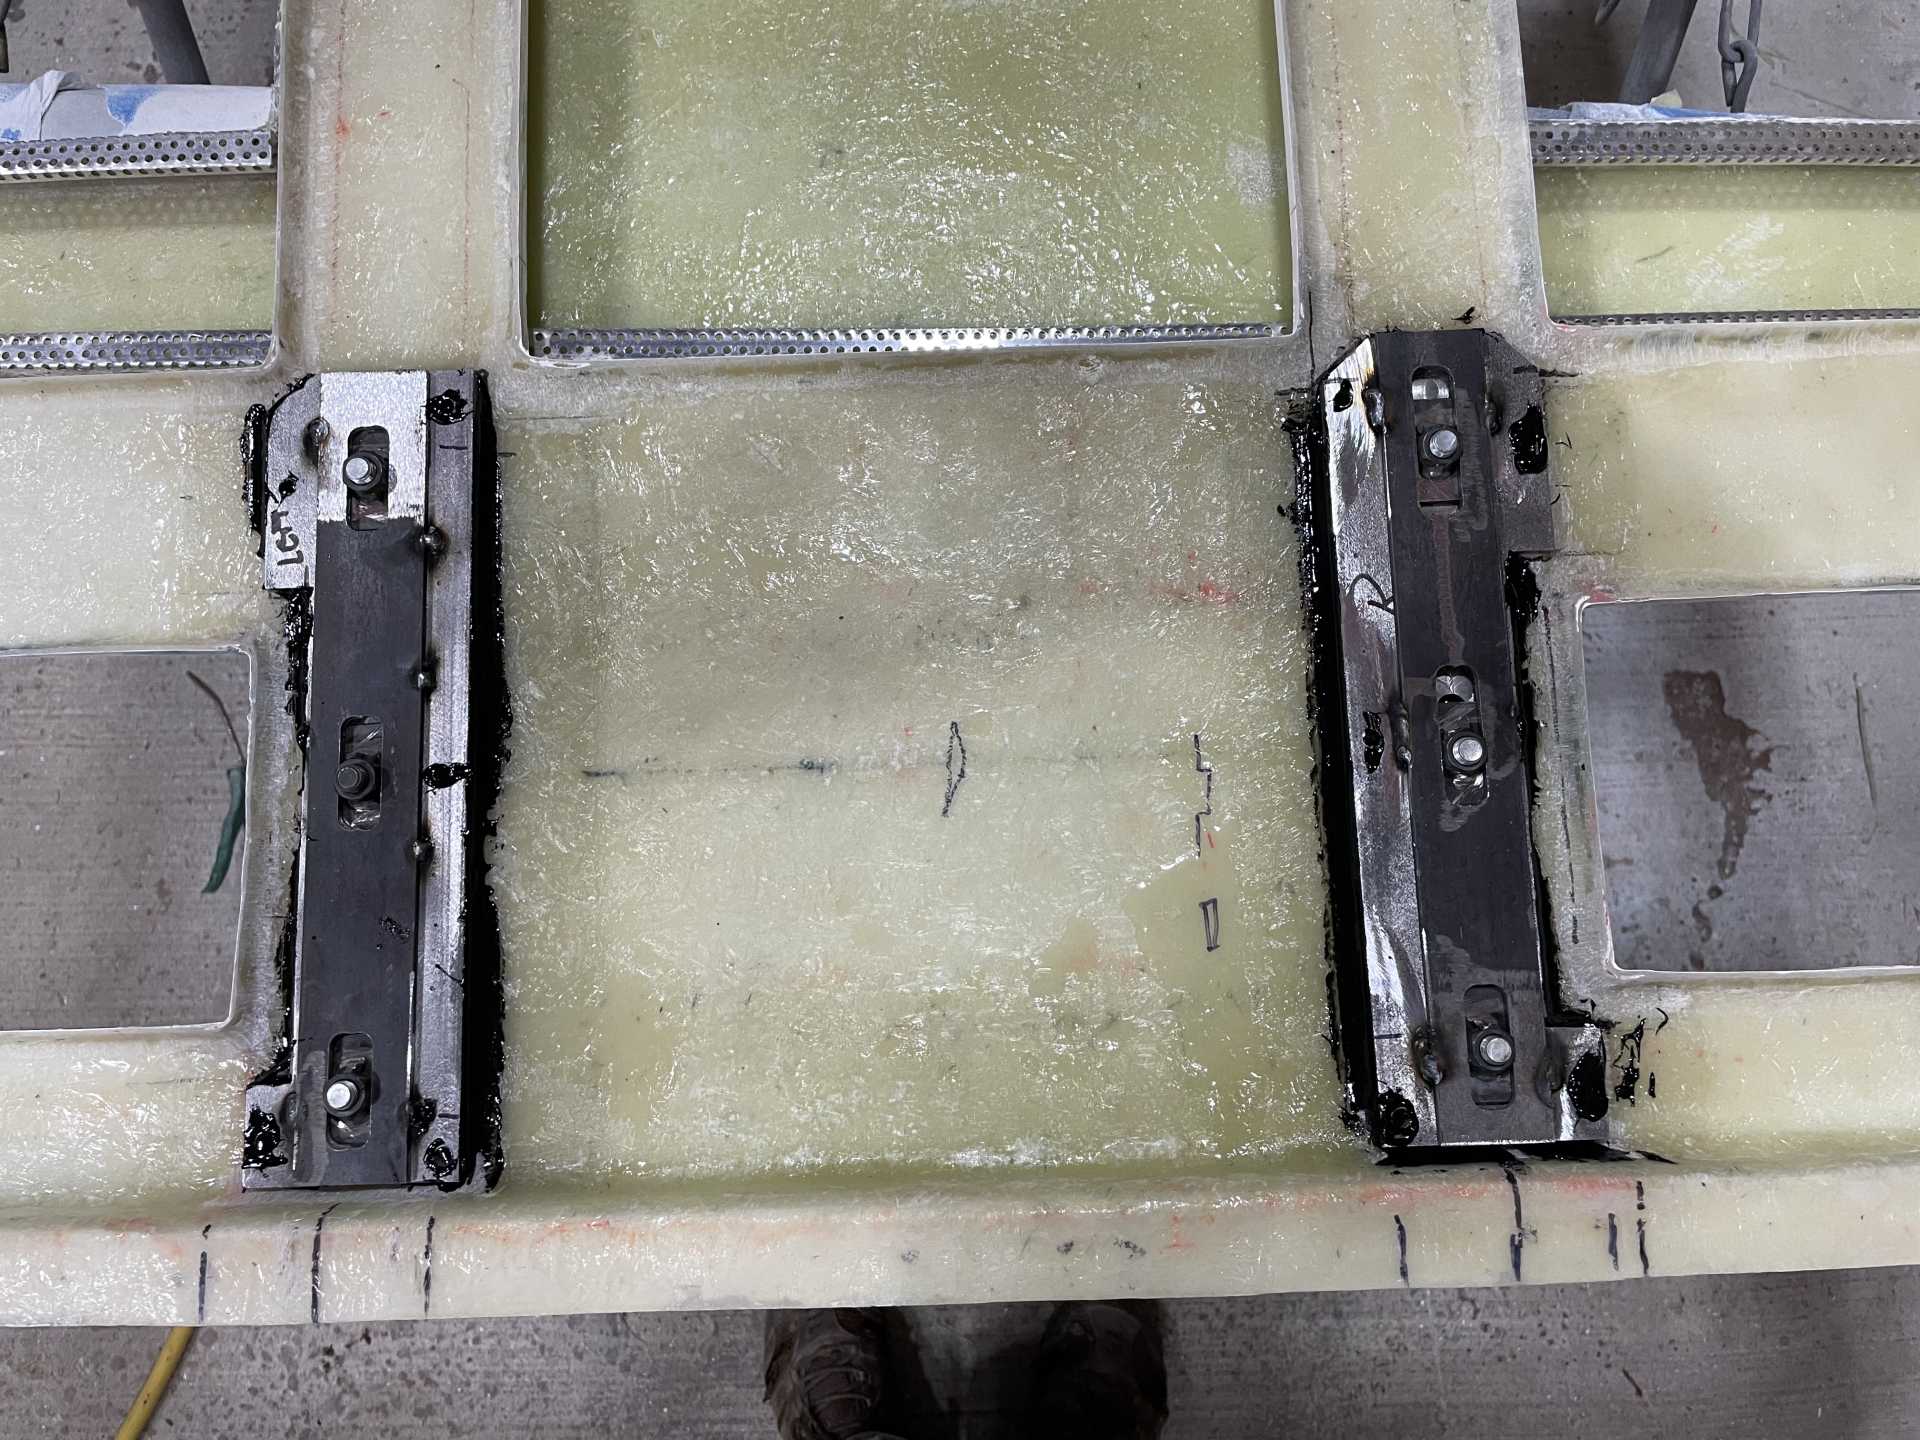
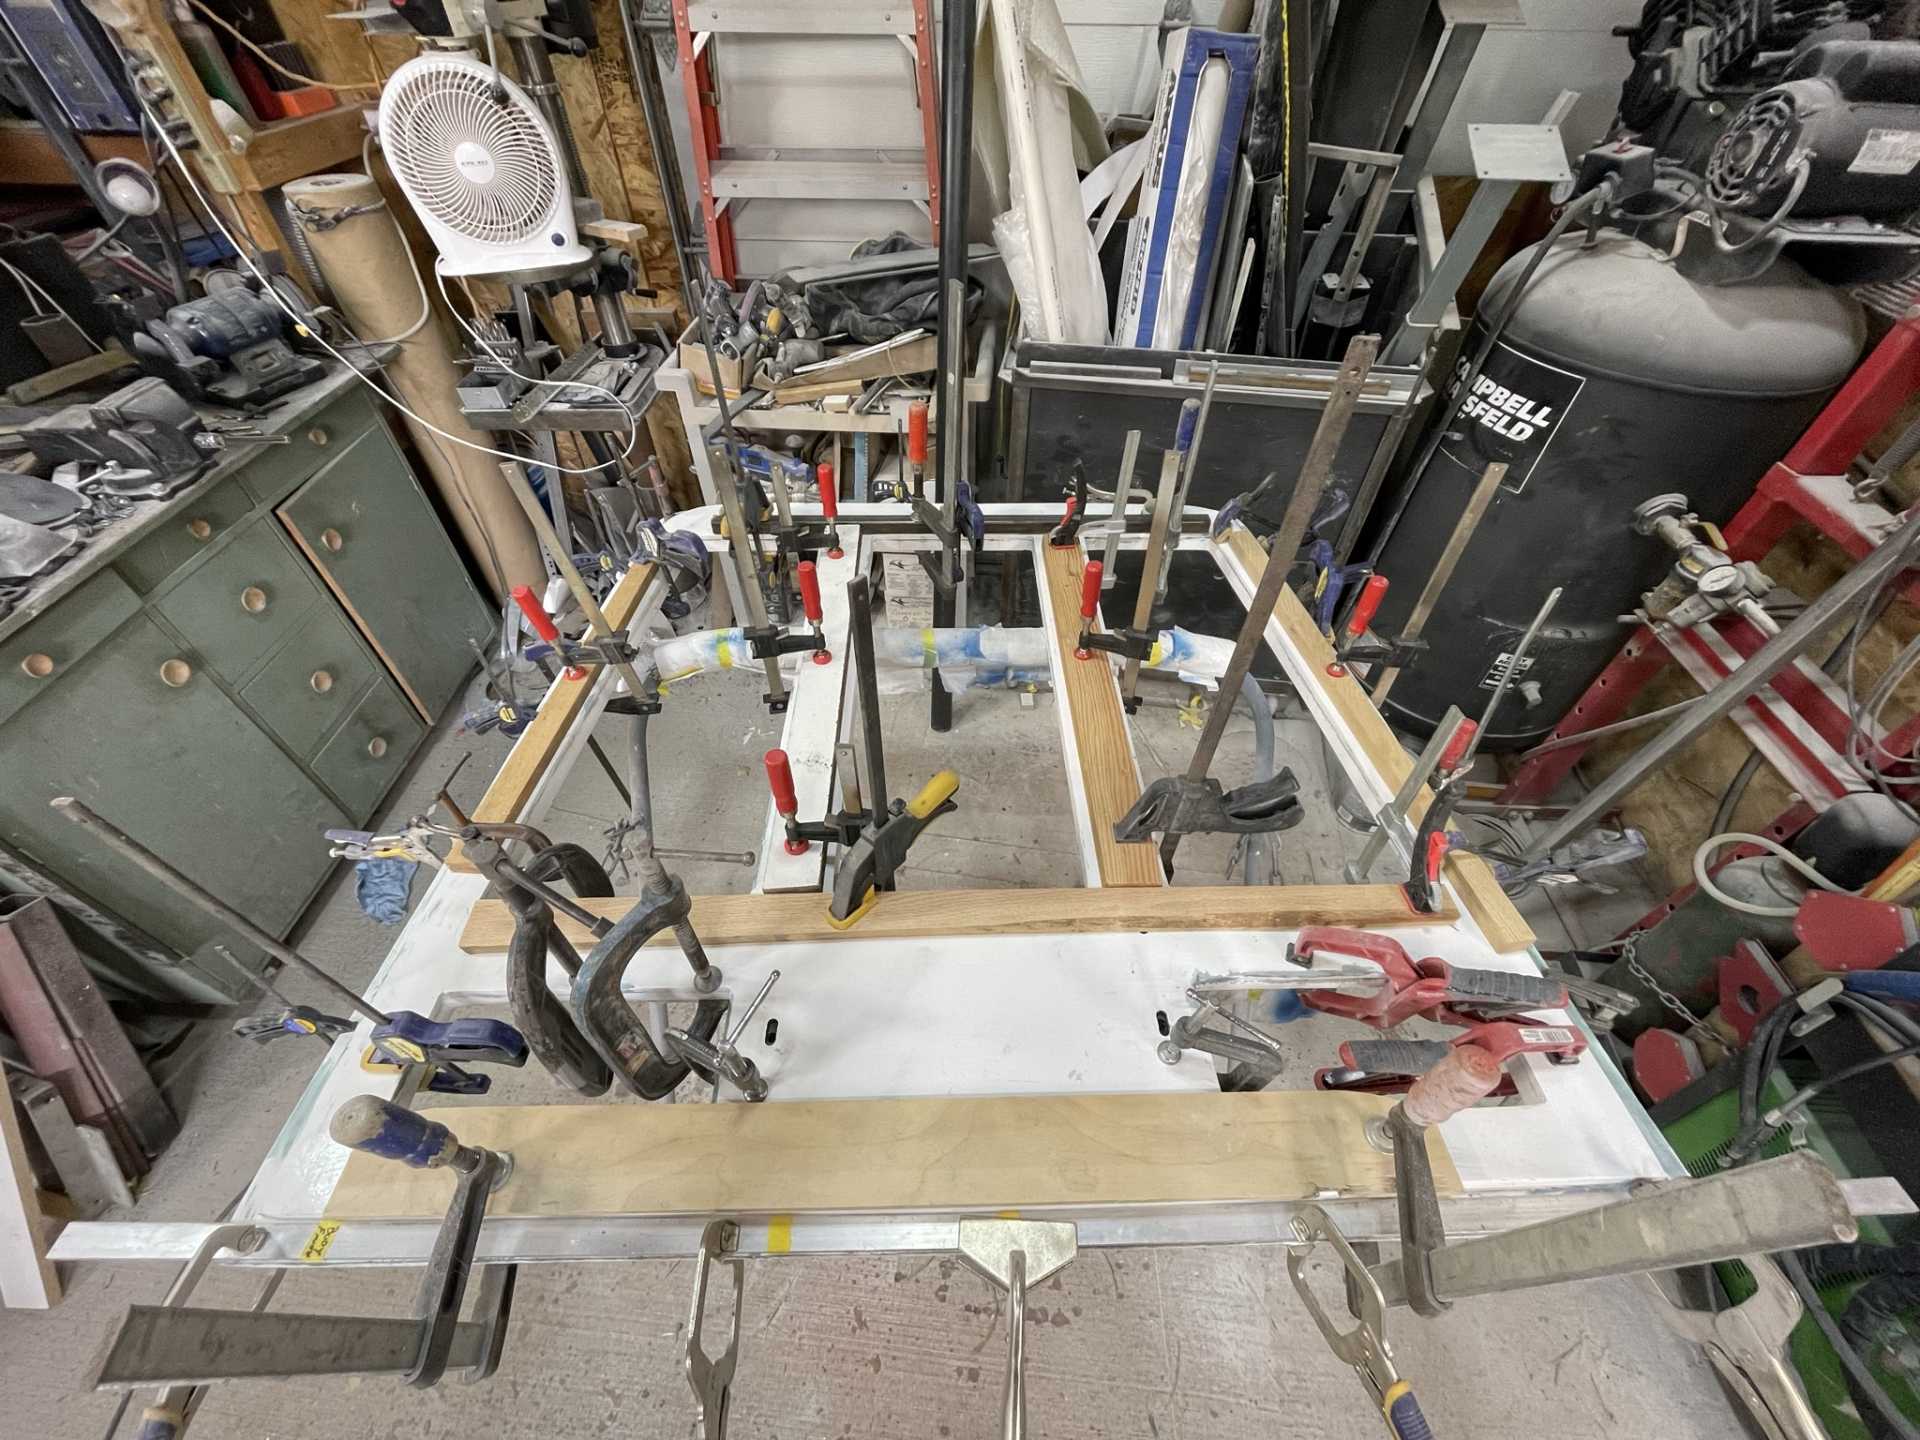
Then the whole assembly is bonded to the inside of the lower part of the hood using Pro Bond epoxy .
Then after applying Pro Bond on all bonding surfaces it was clamped for 24 hours to fully cure.
You can never have too many clamps
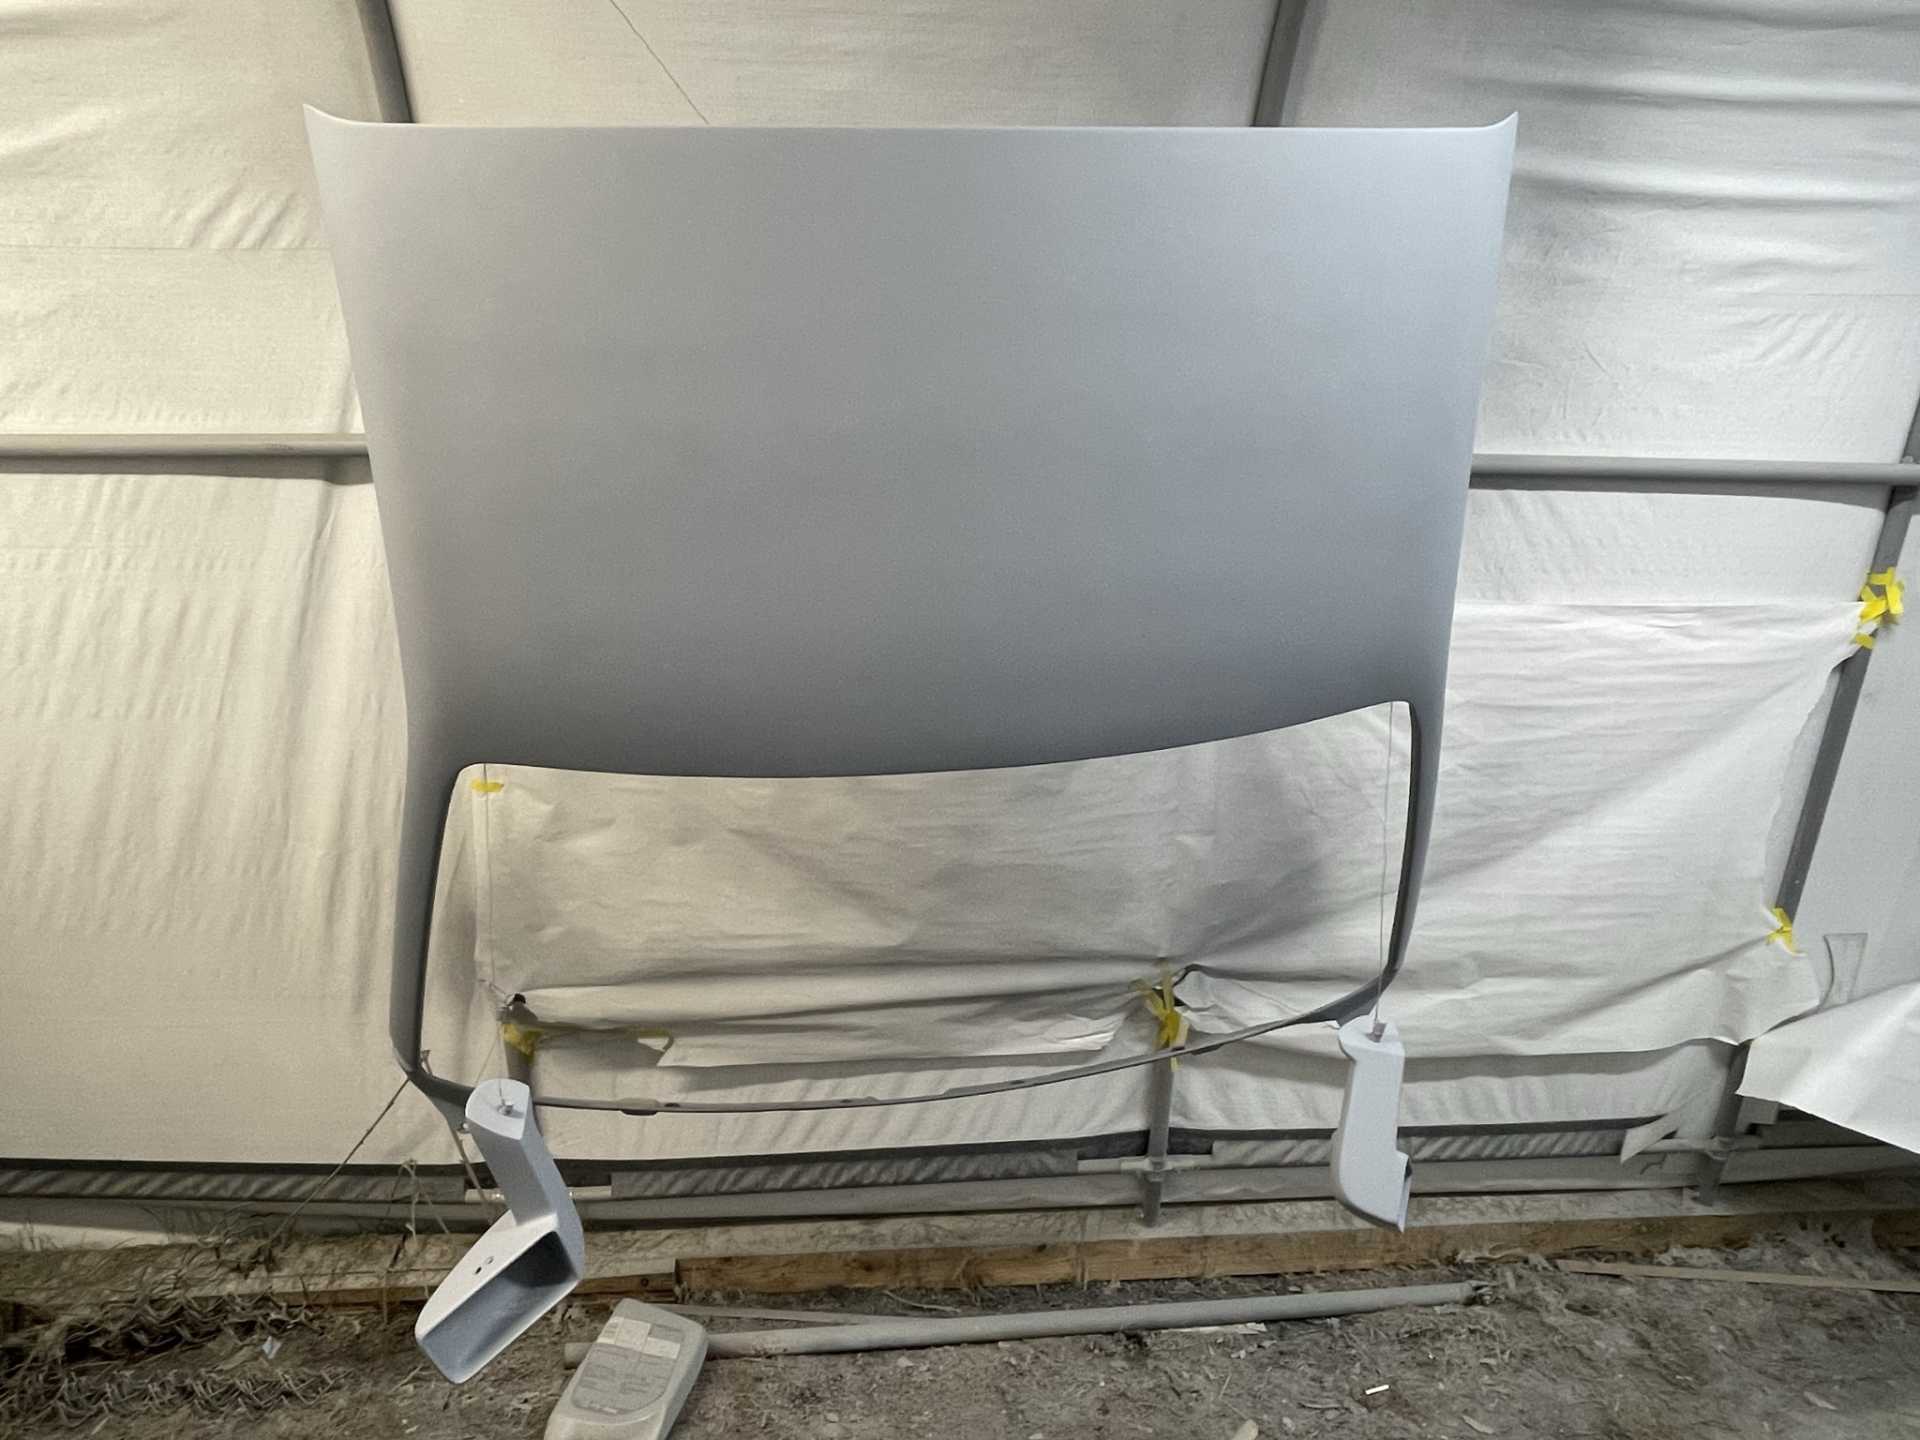
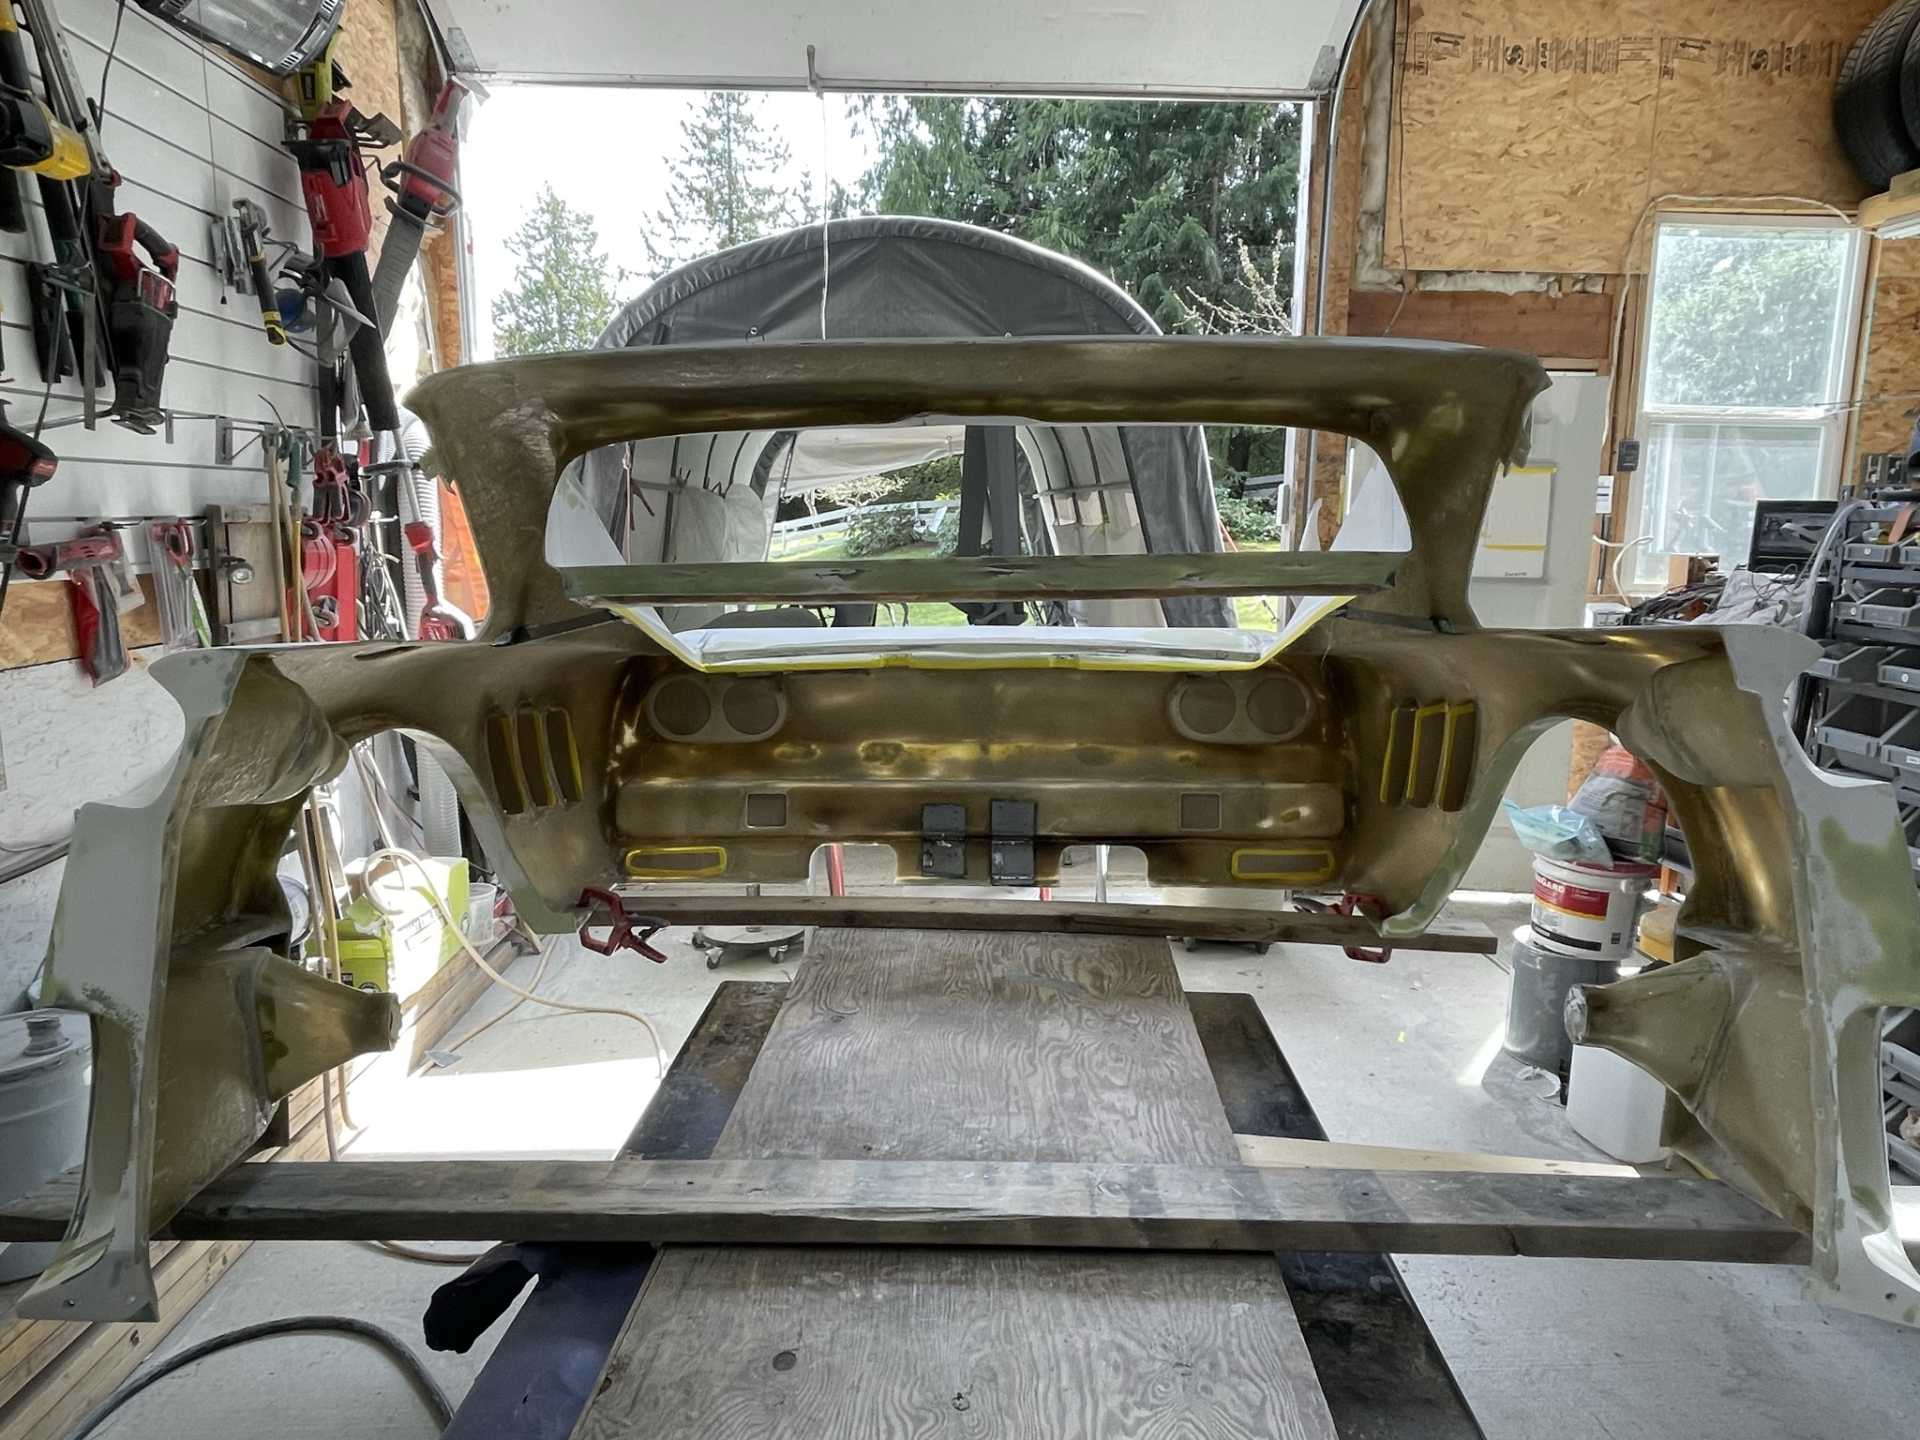
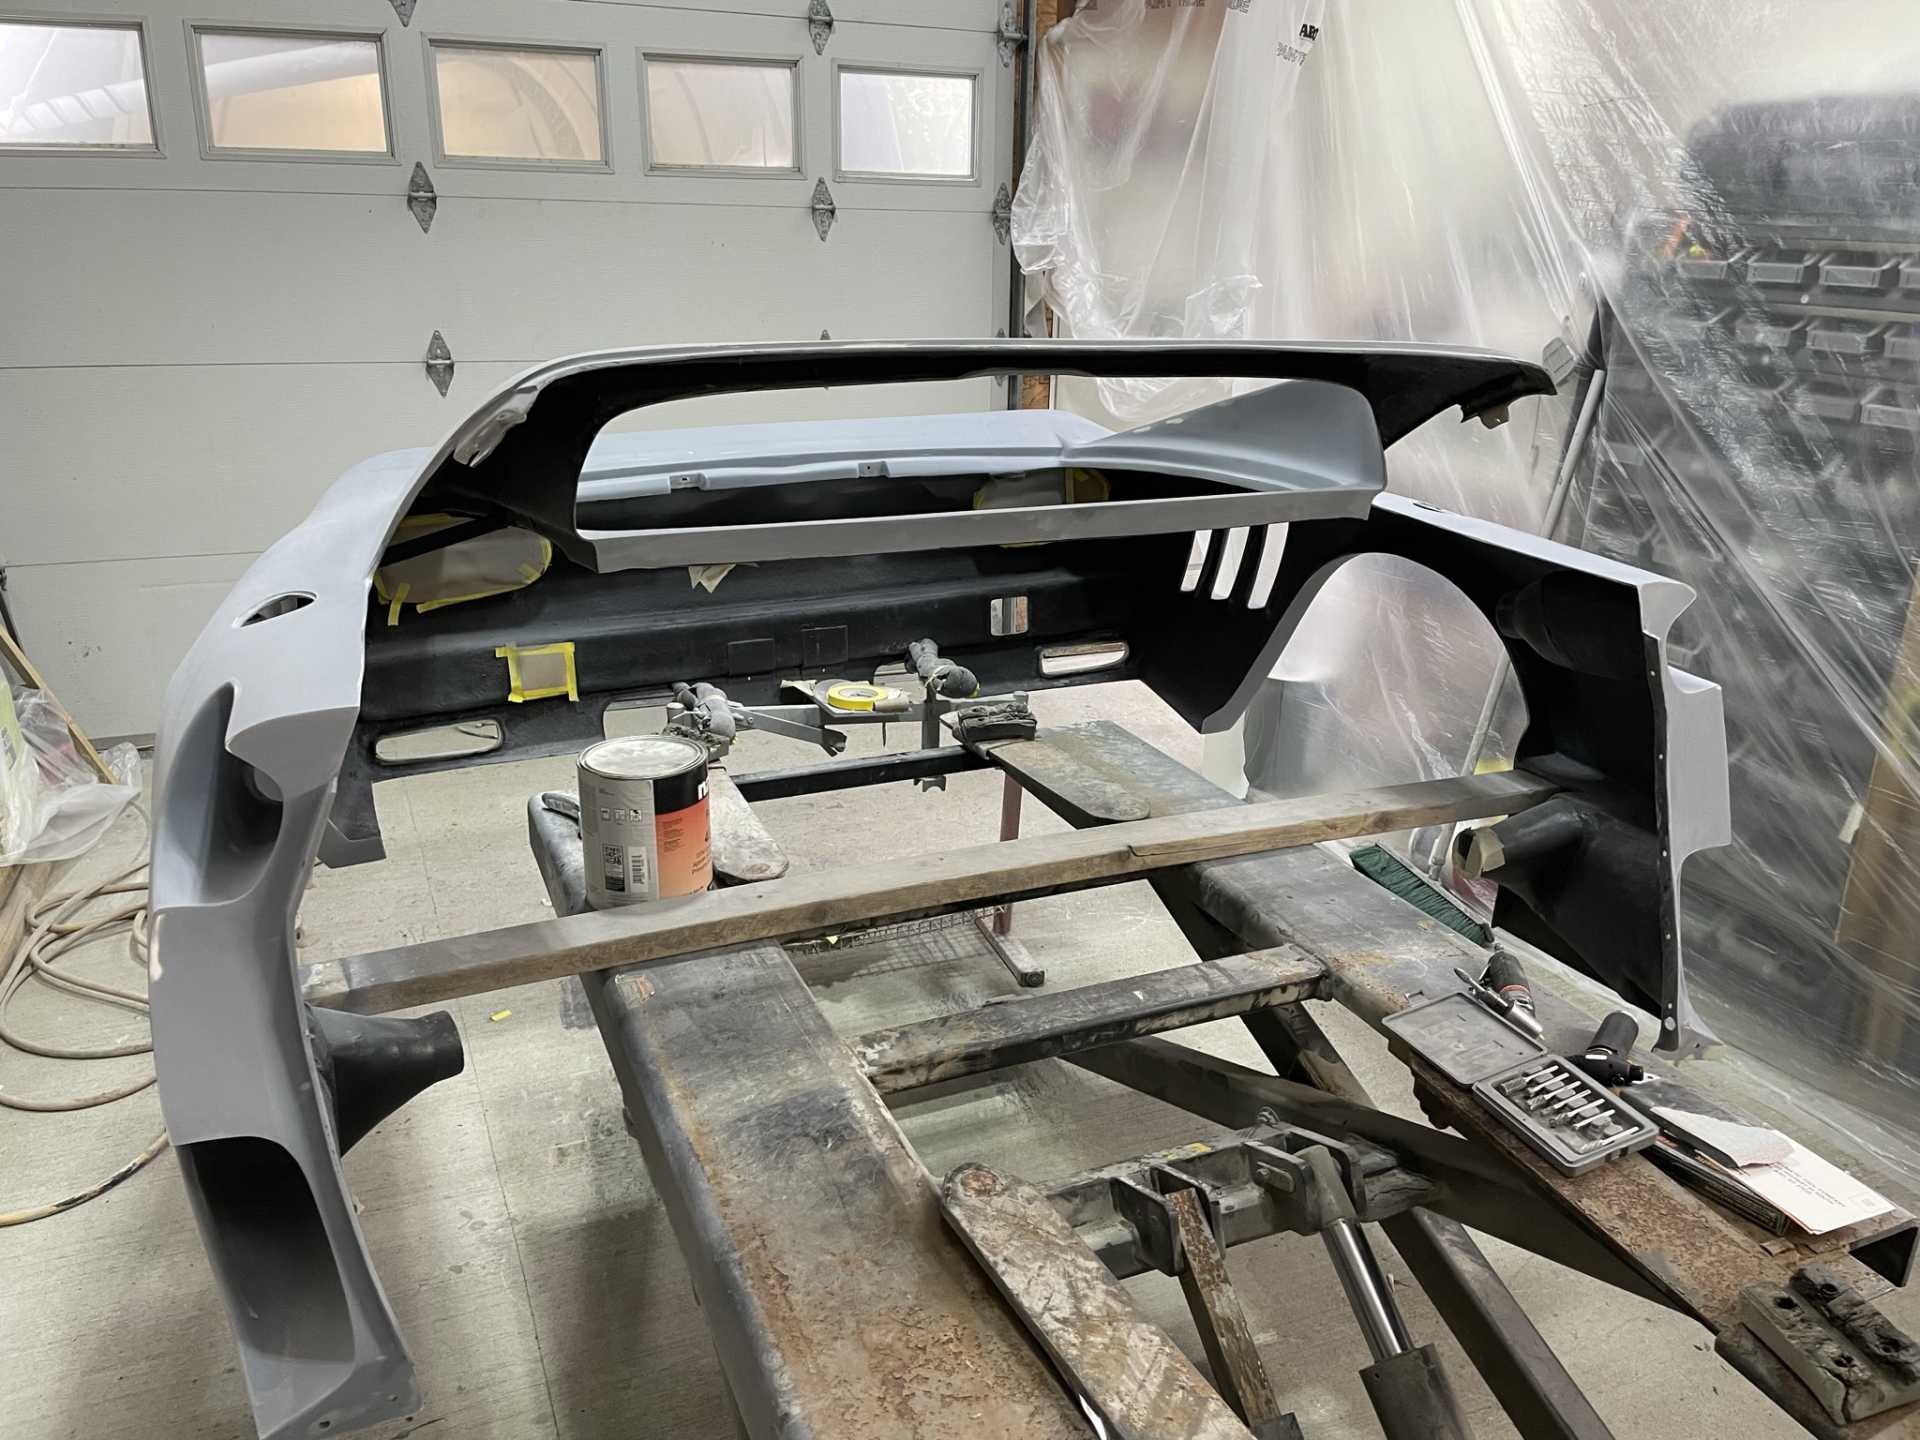
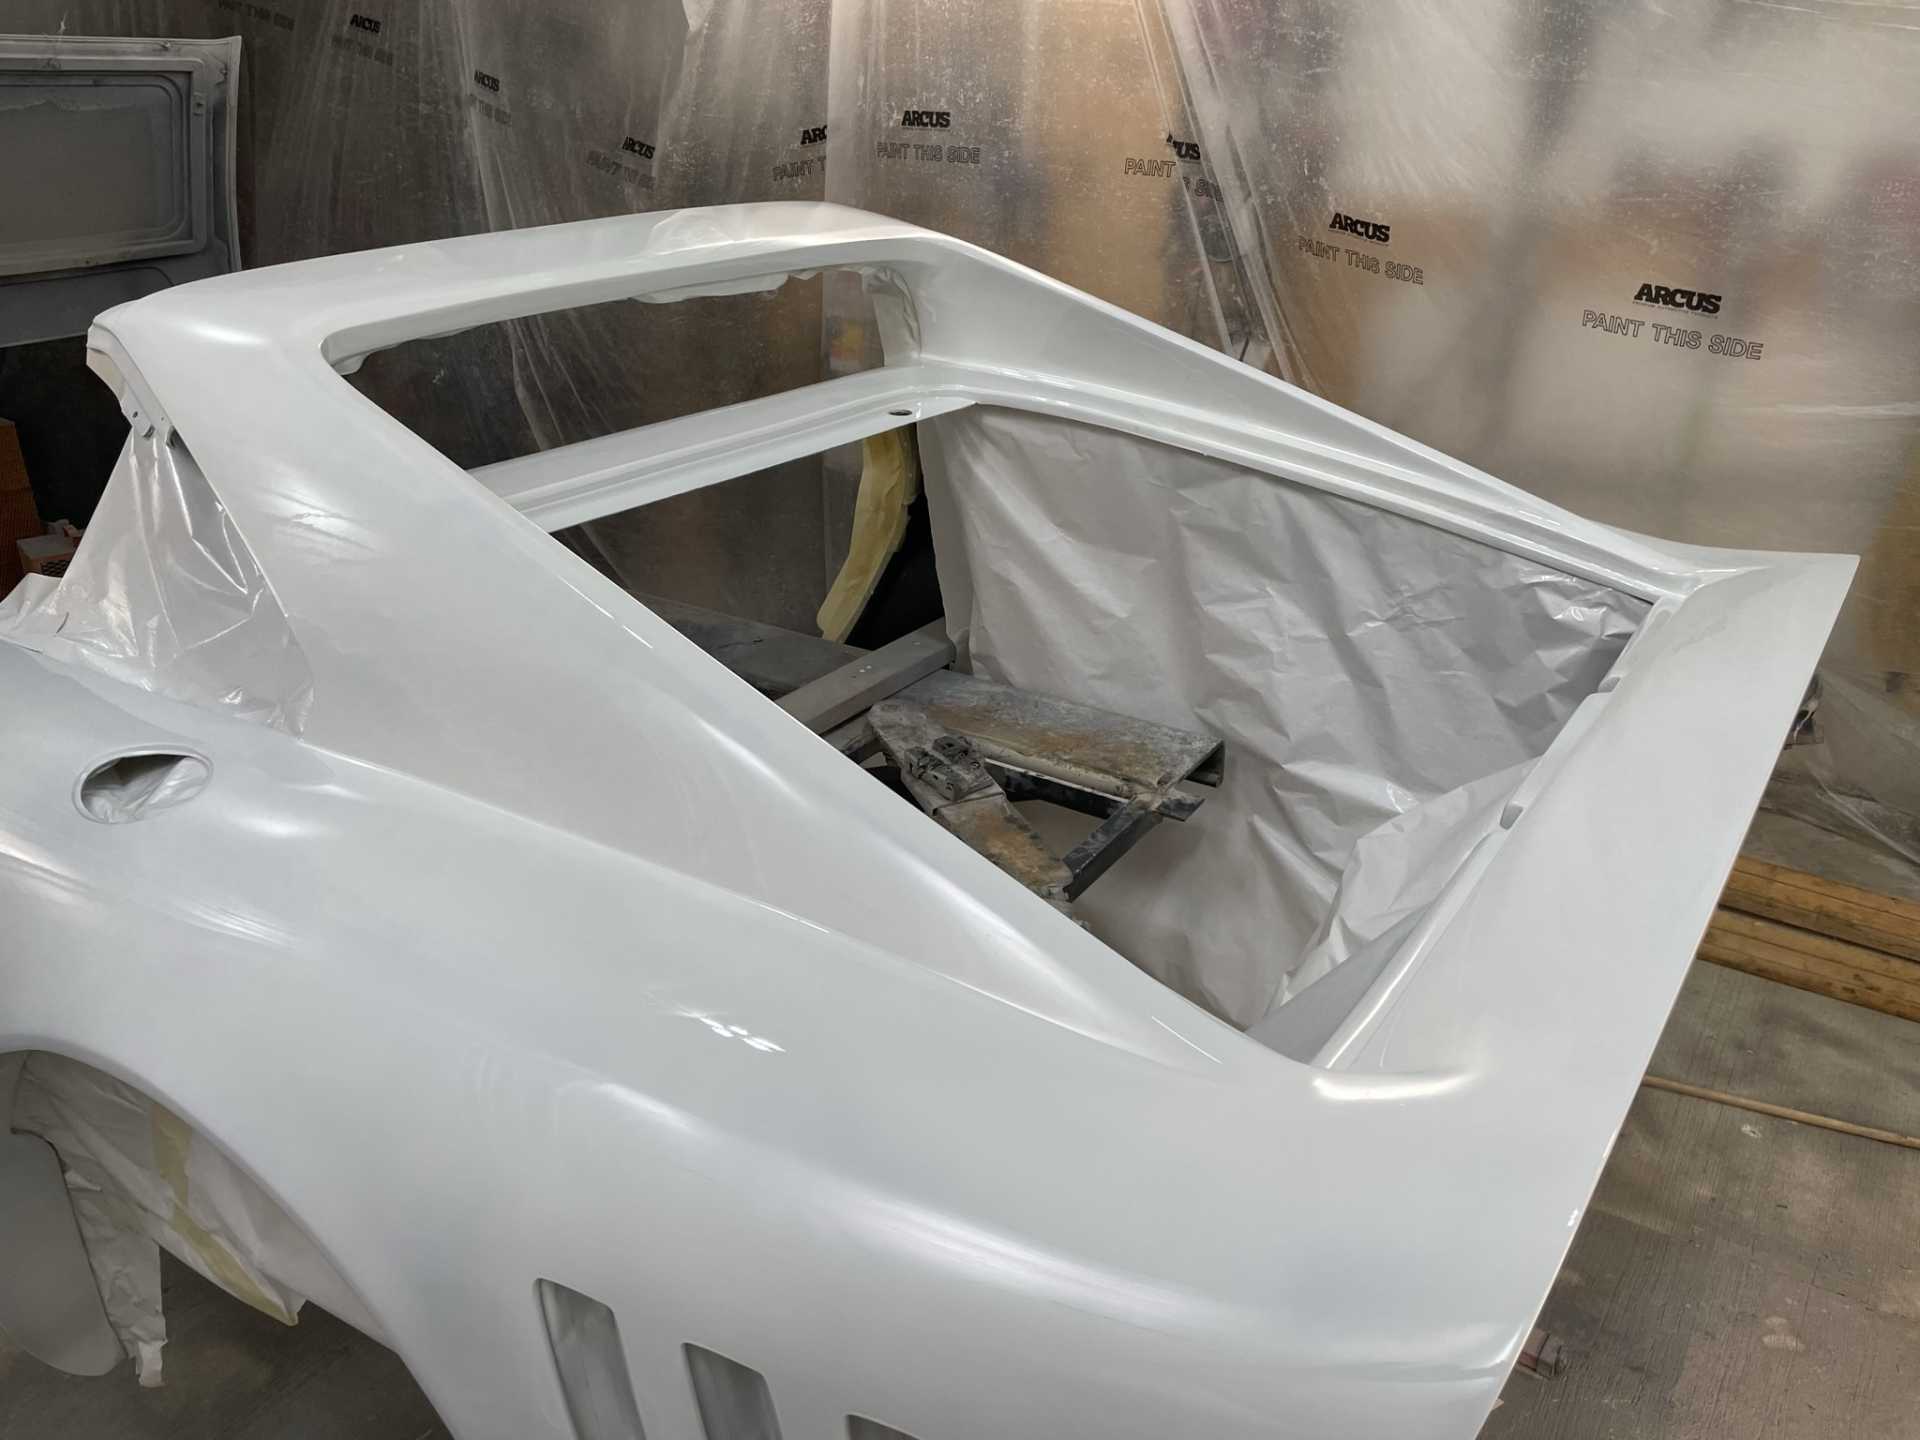
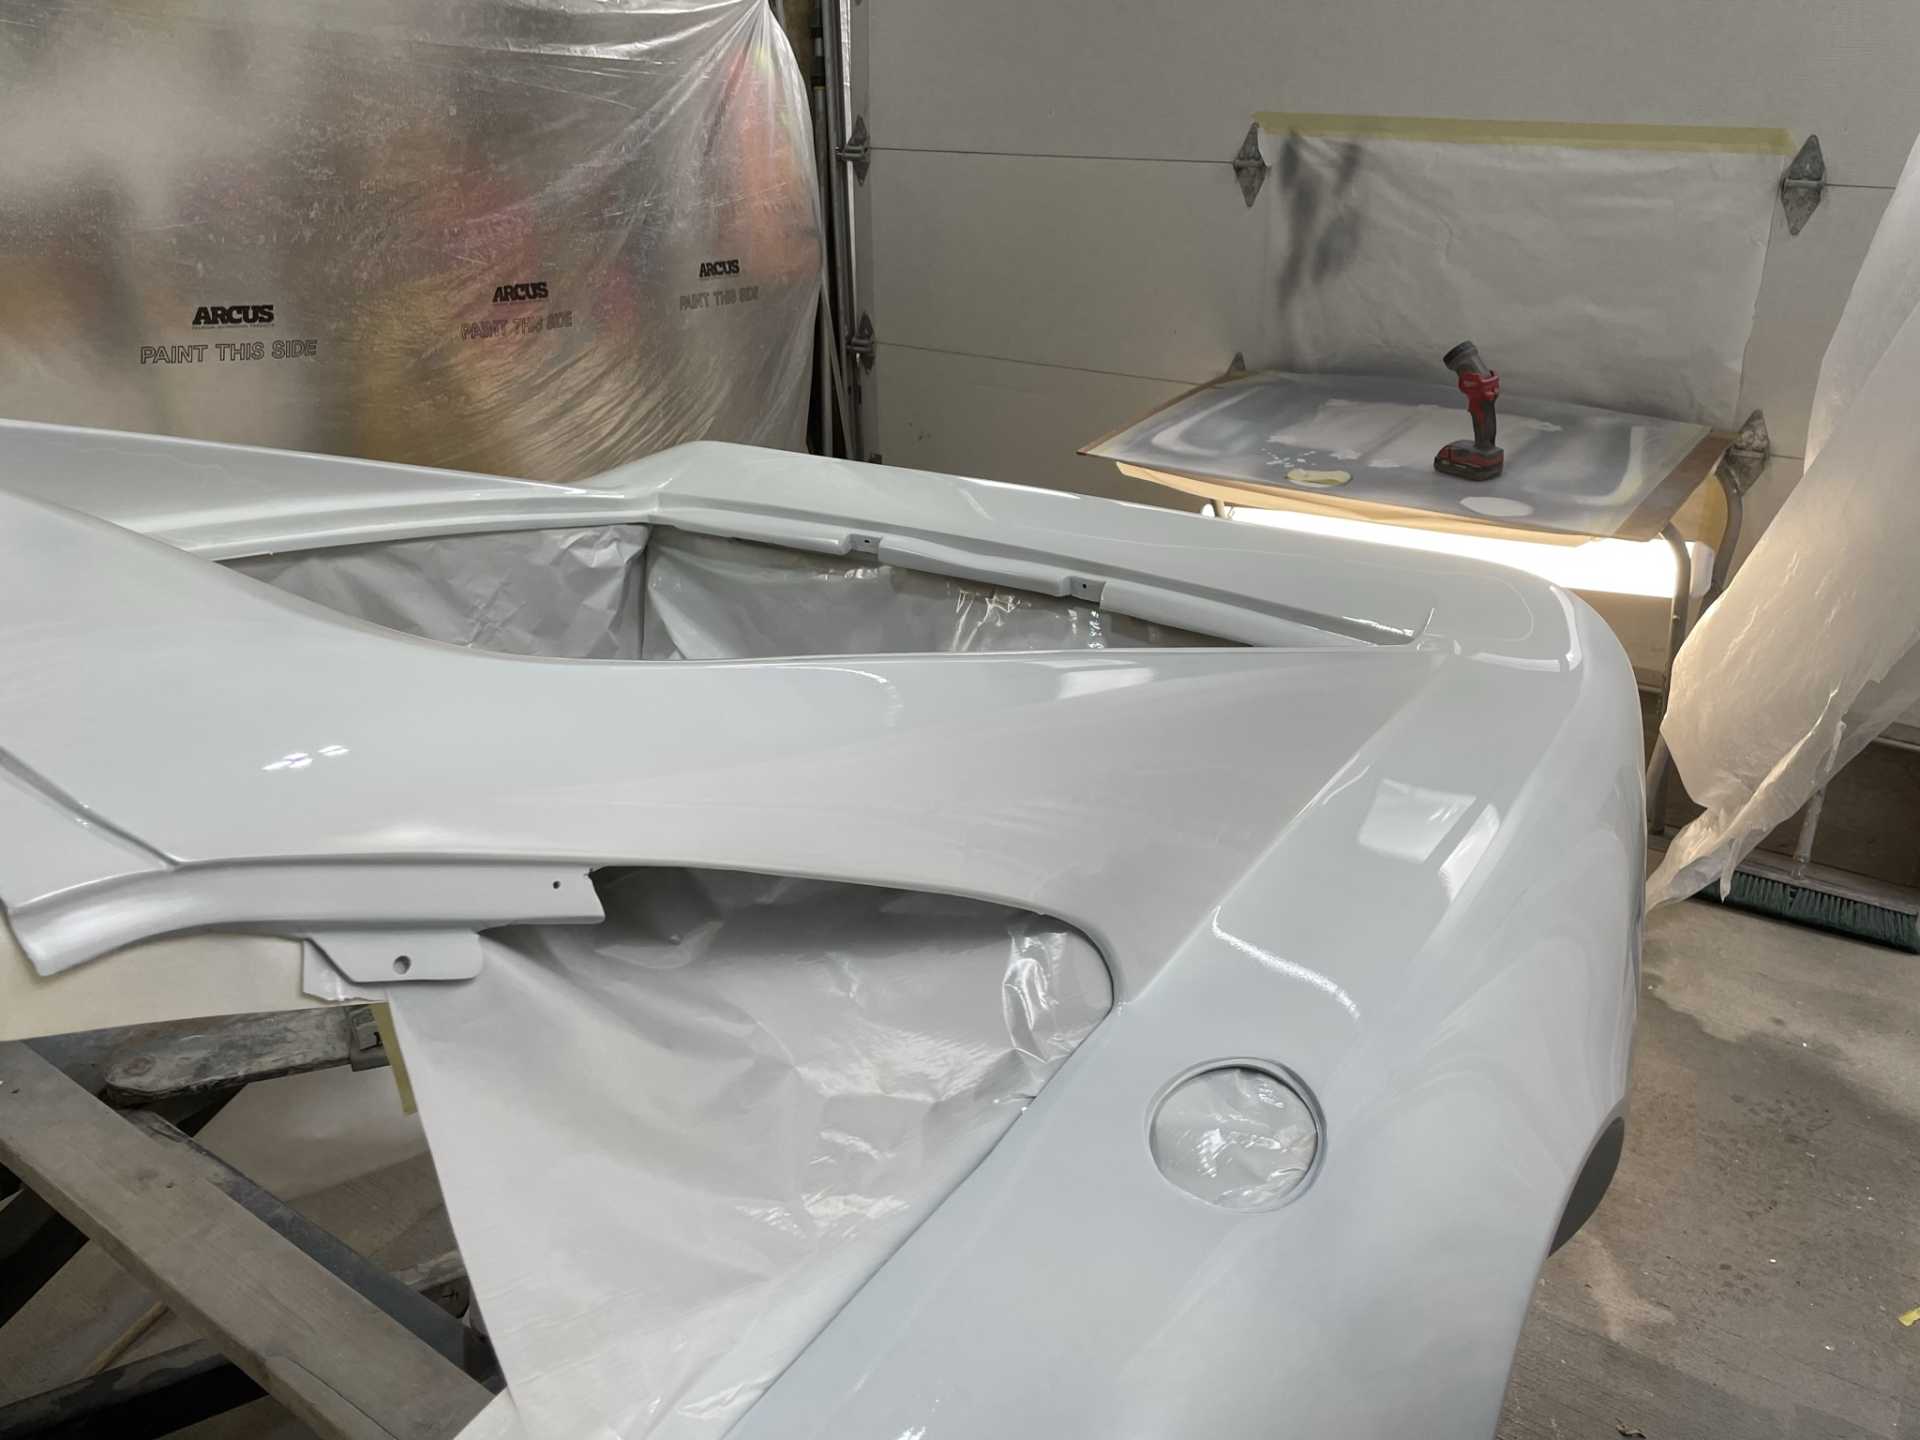
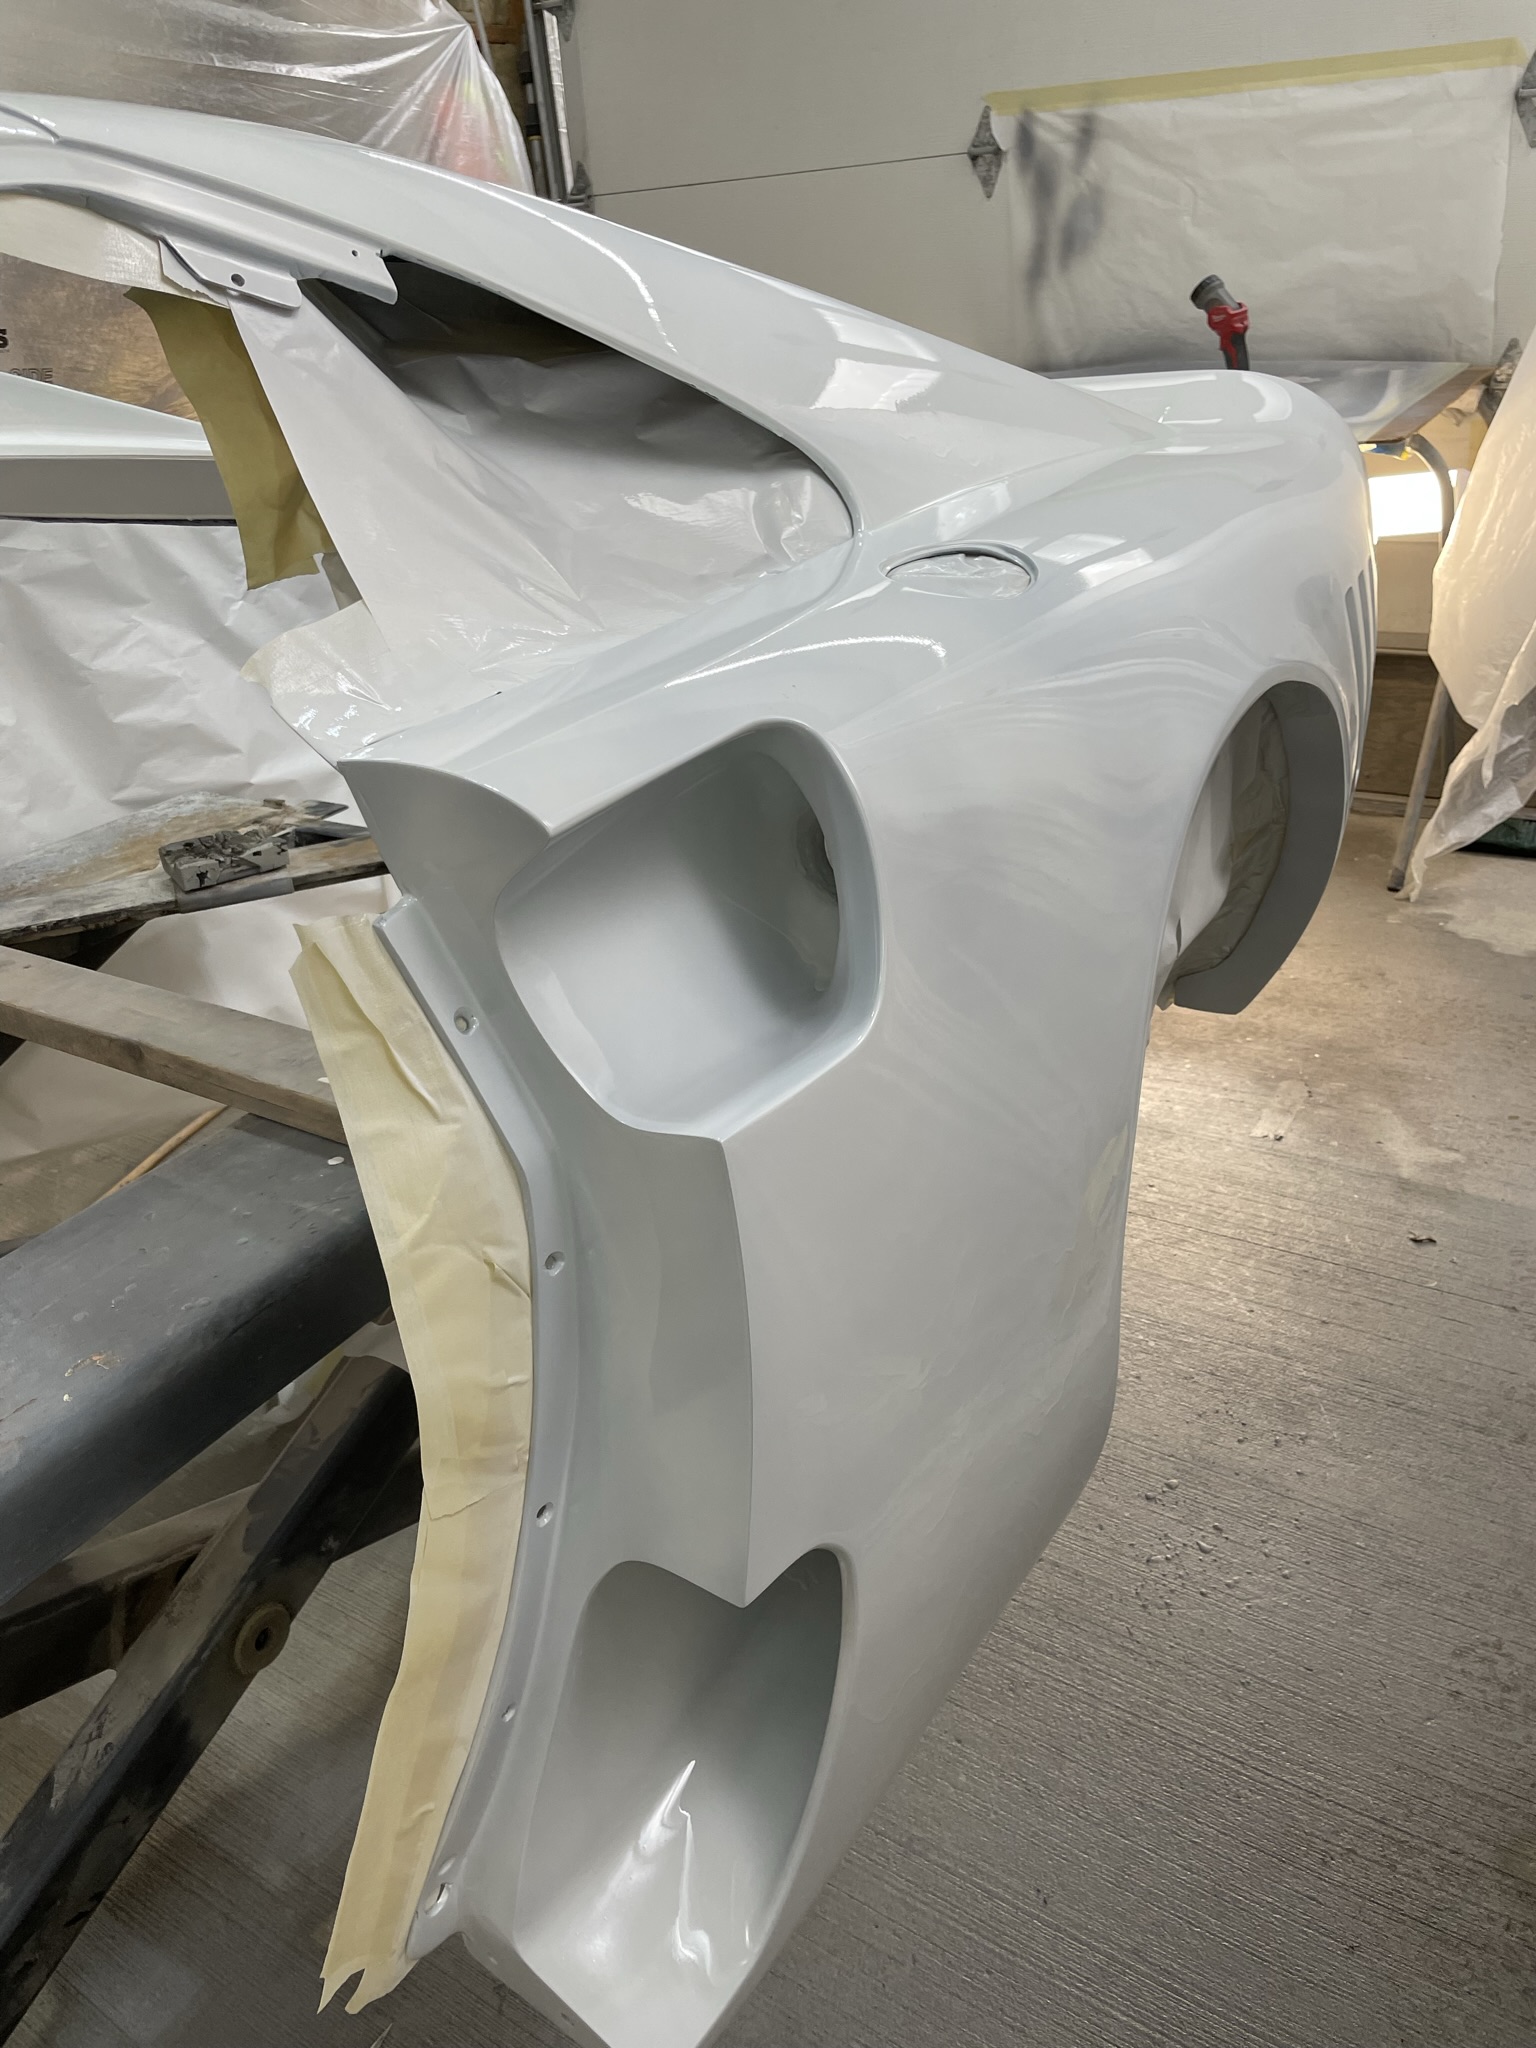
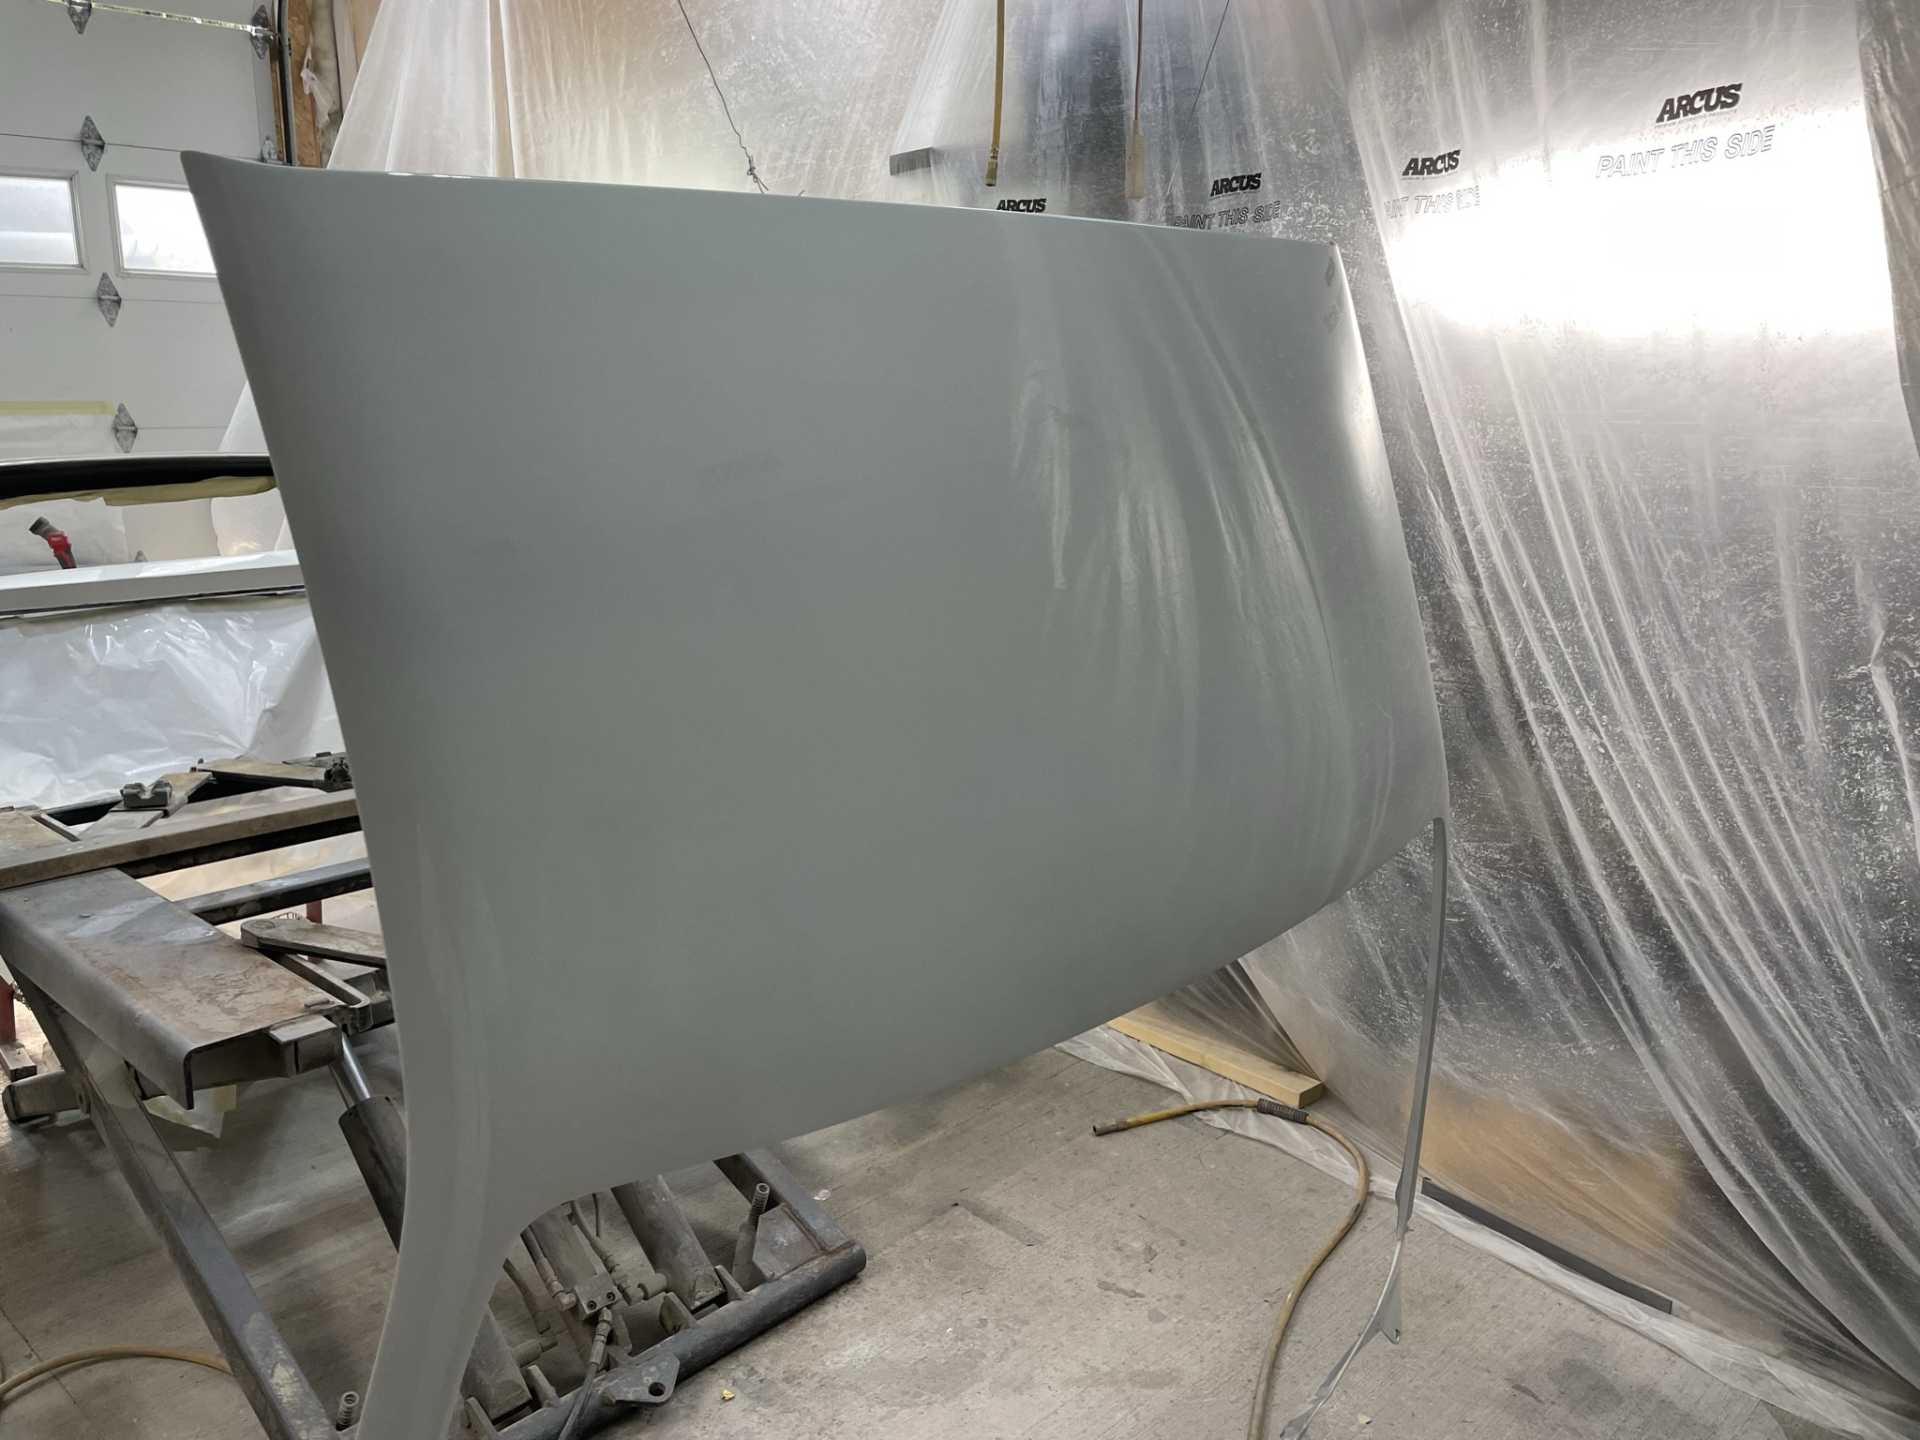
I have all the body panels (except for the rear body half) ready for final body work before painting
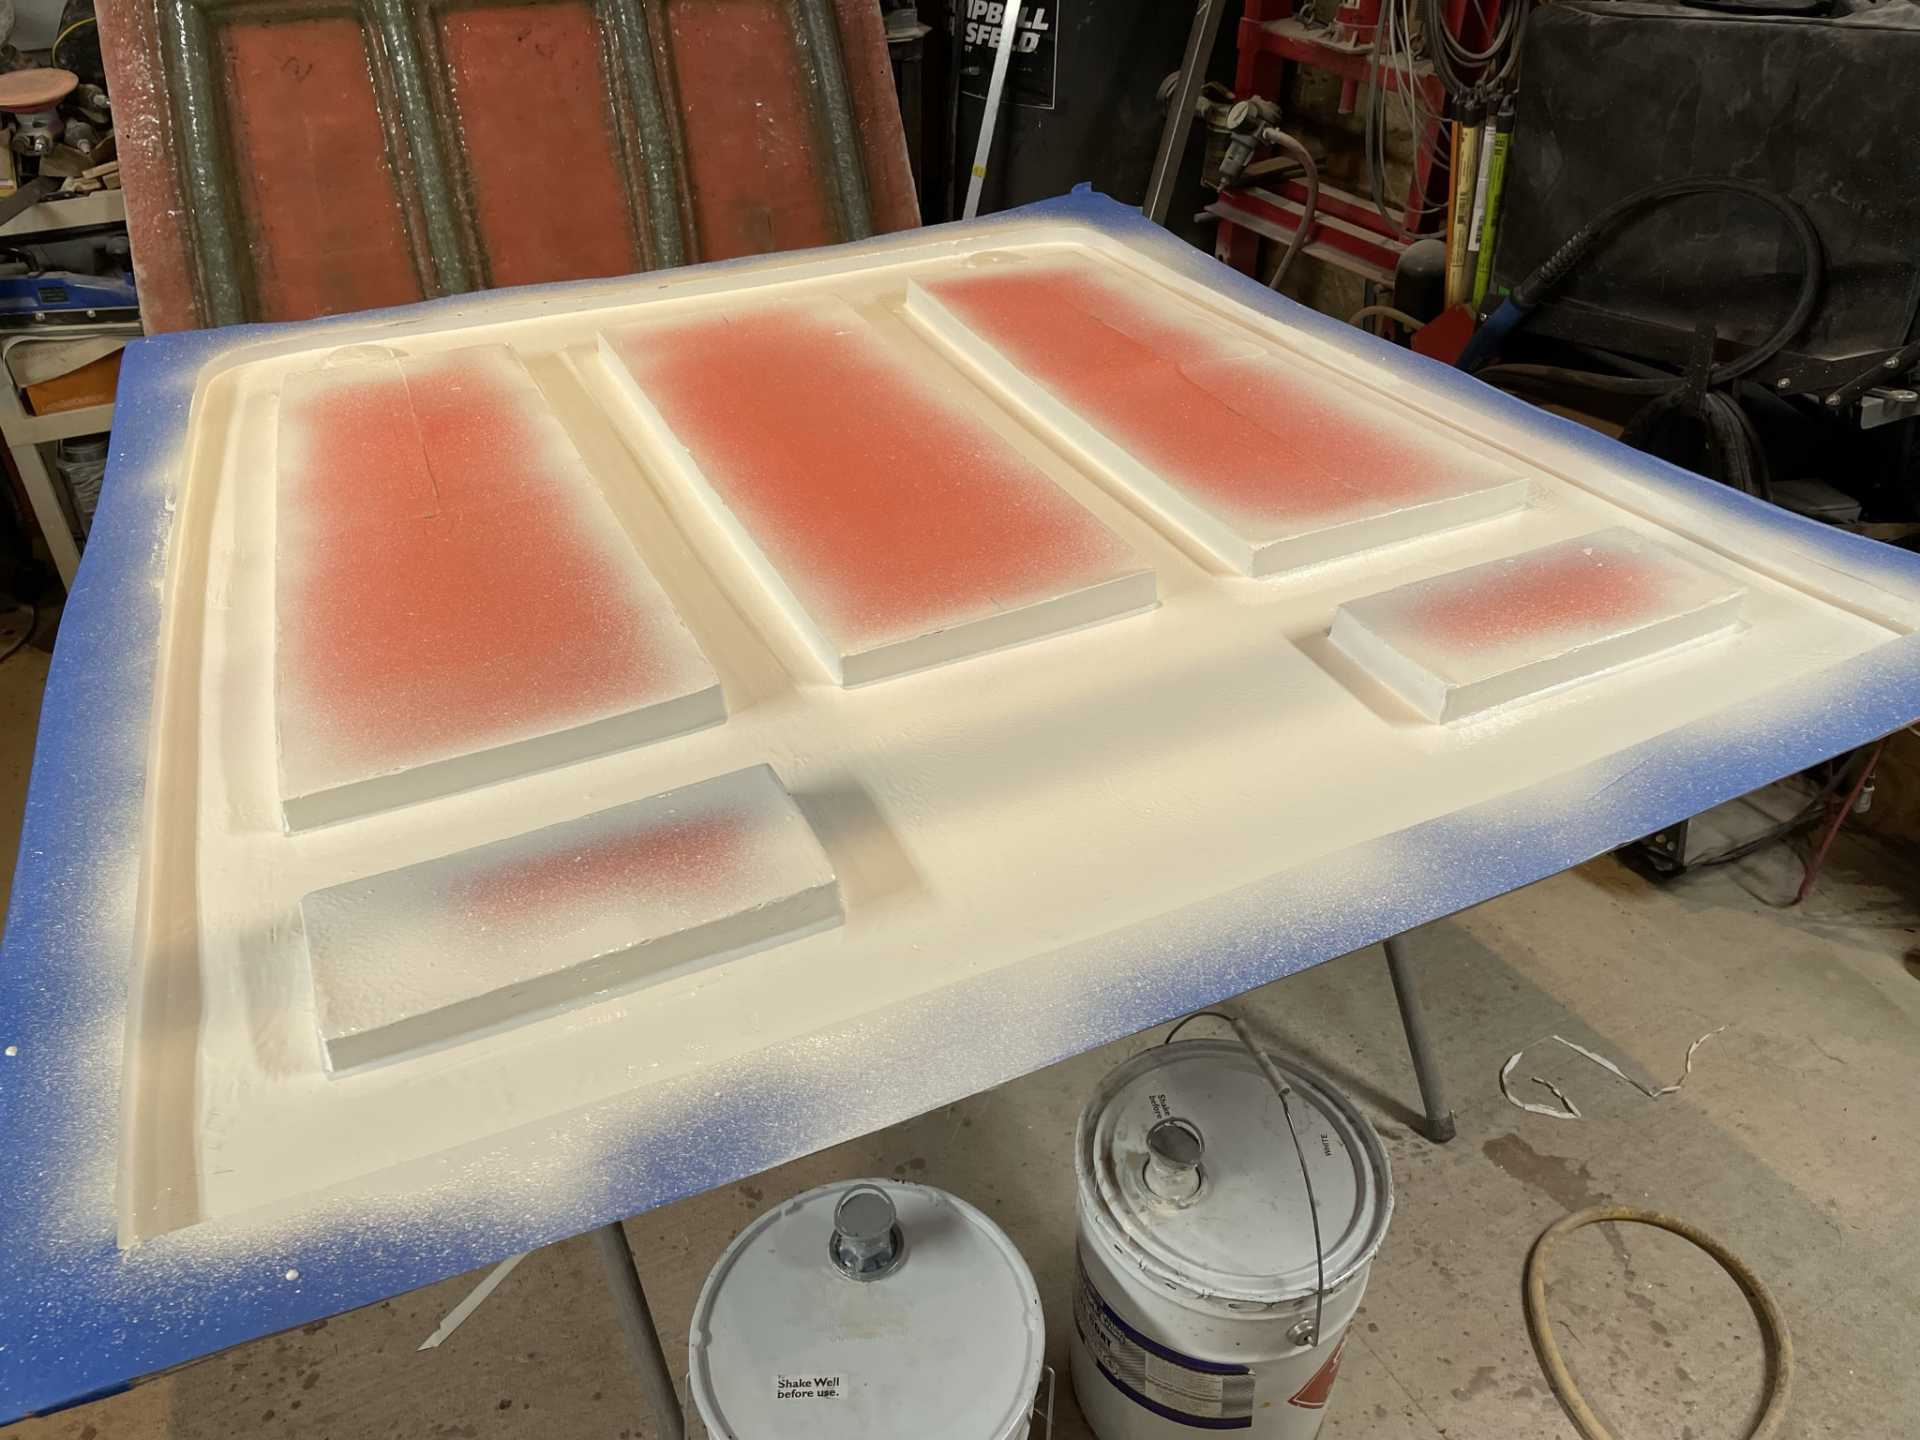
They have now been sprayed with slick sand and will be block sanded tomorrow (Monday) The plan is to be spray 2K primer final seal coat on Wednesday weather permitting.
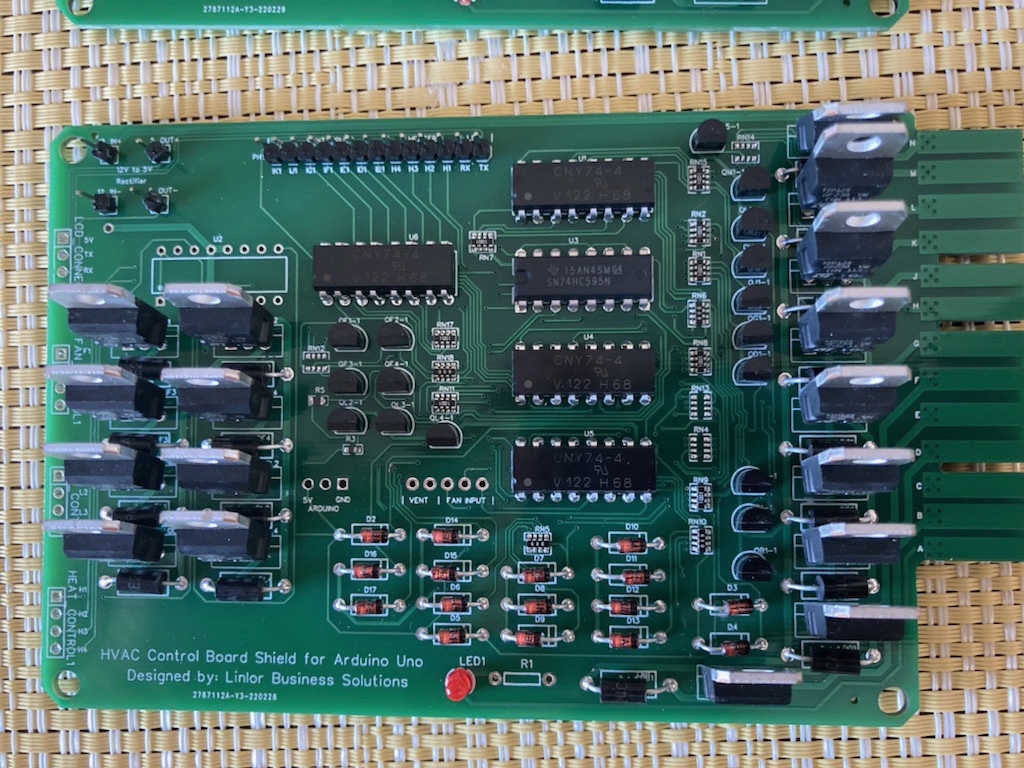
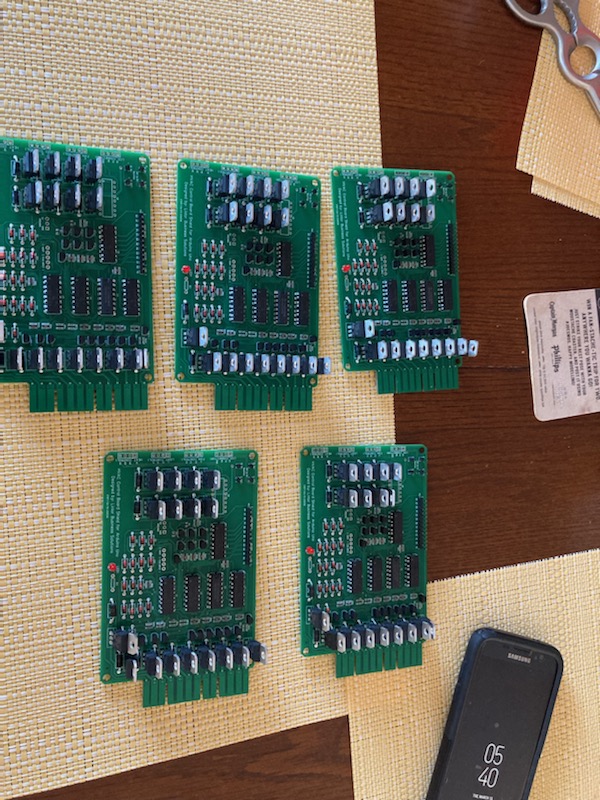
One last update on the HVAC/ Light switch touch pad controller, Don O. Completed the controller boards and had them built. We received them last week, next is the Arduino controller programming. It’s coming together nicely.
That’s it for now Stay safe everyone Wayne
[This message has been edited by dobie1 (edited 04-07-2022).]
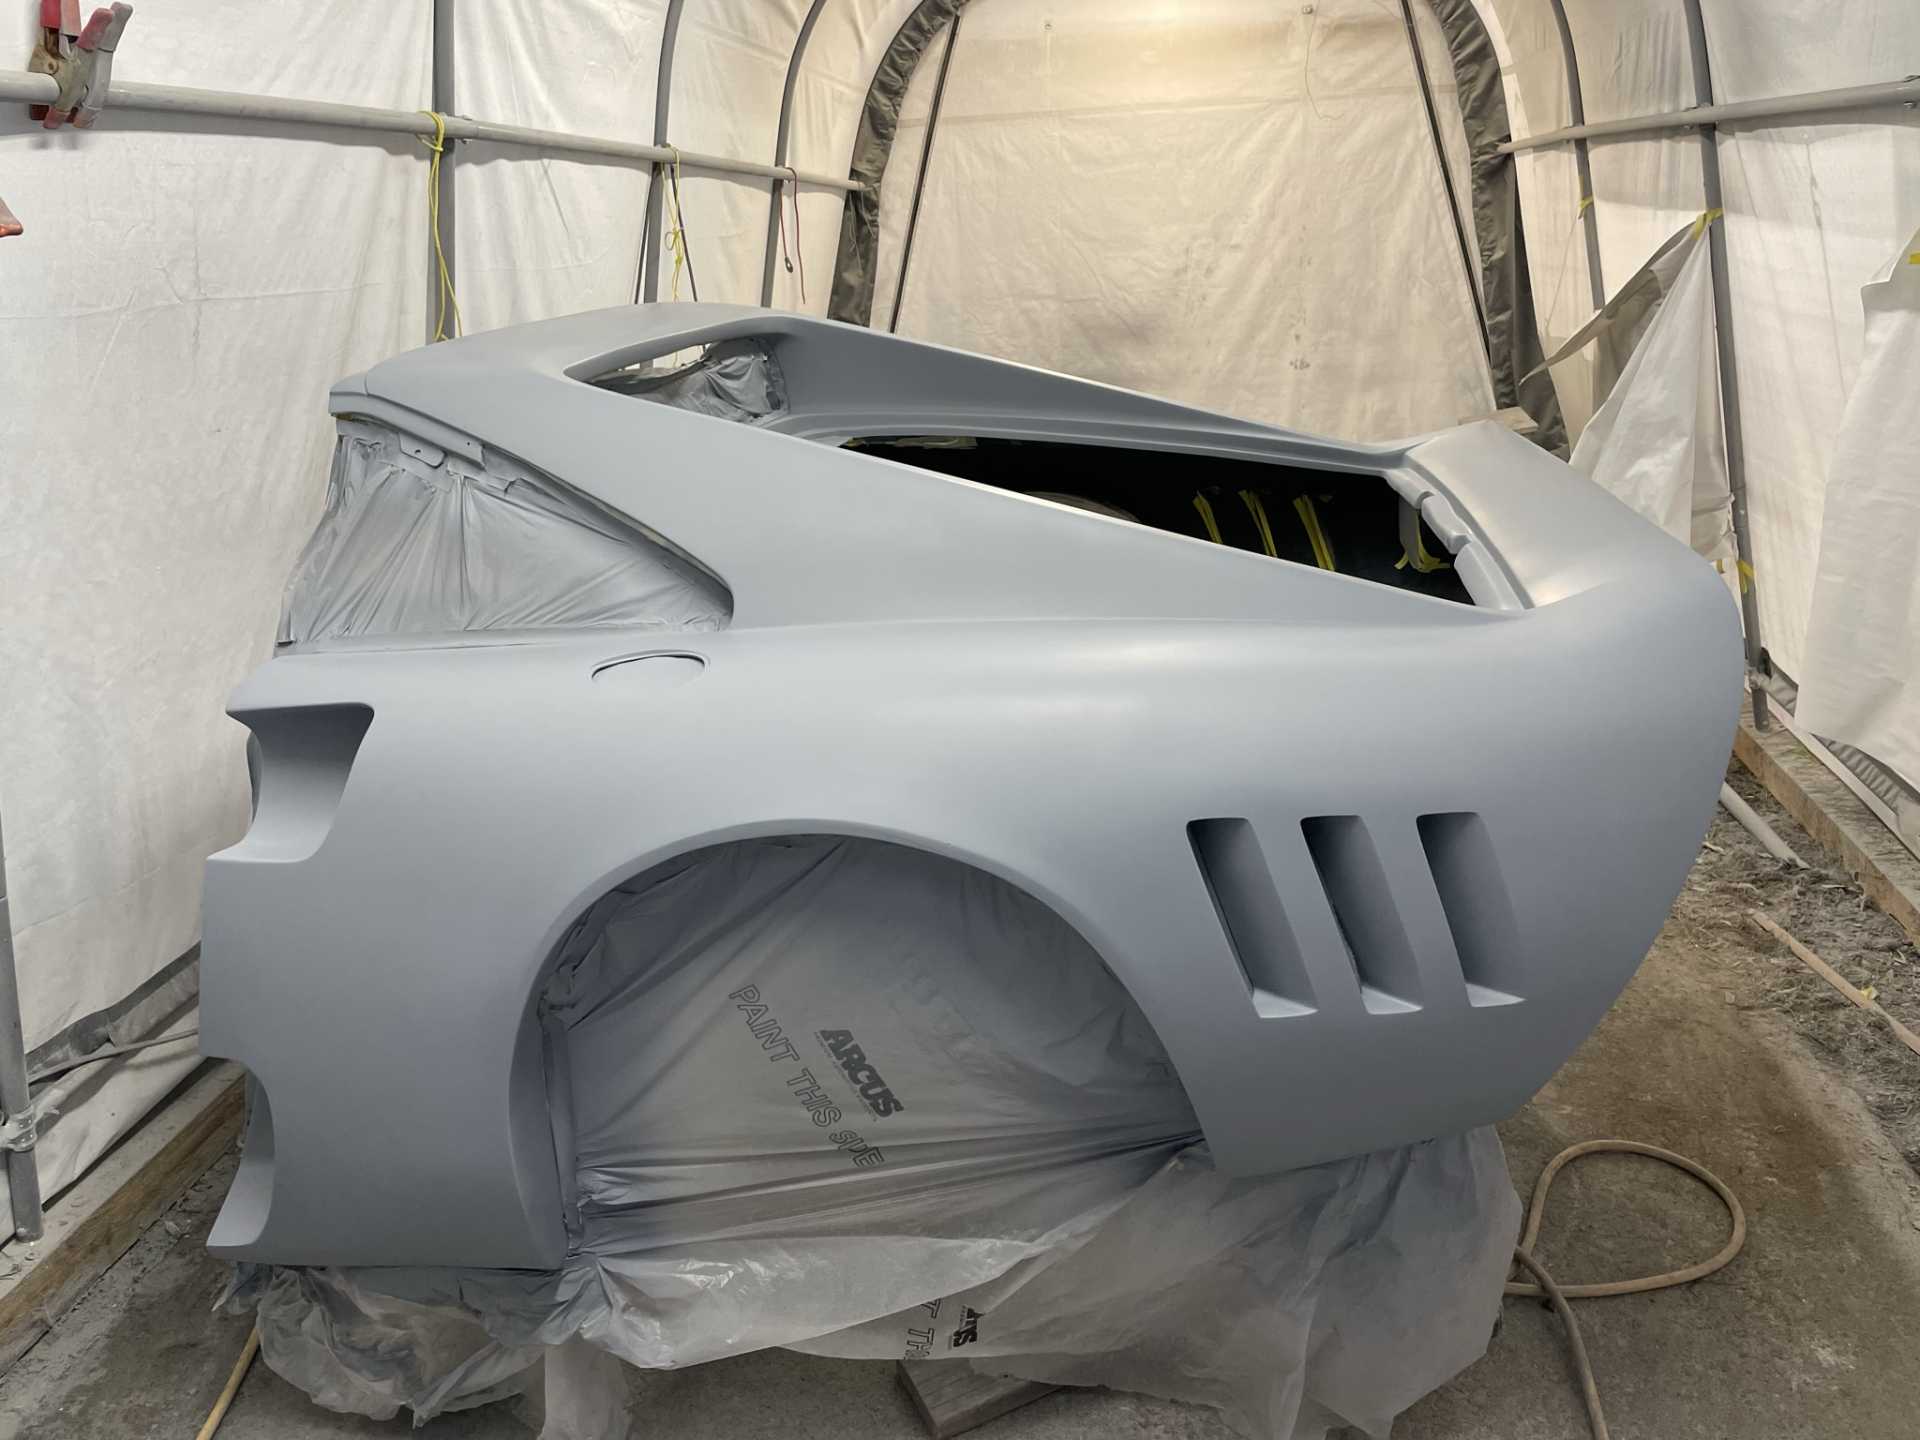
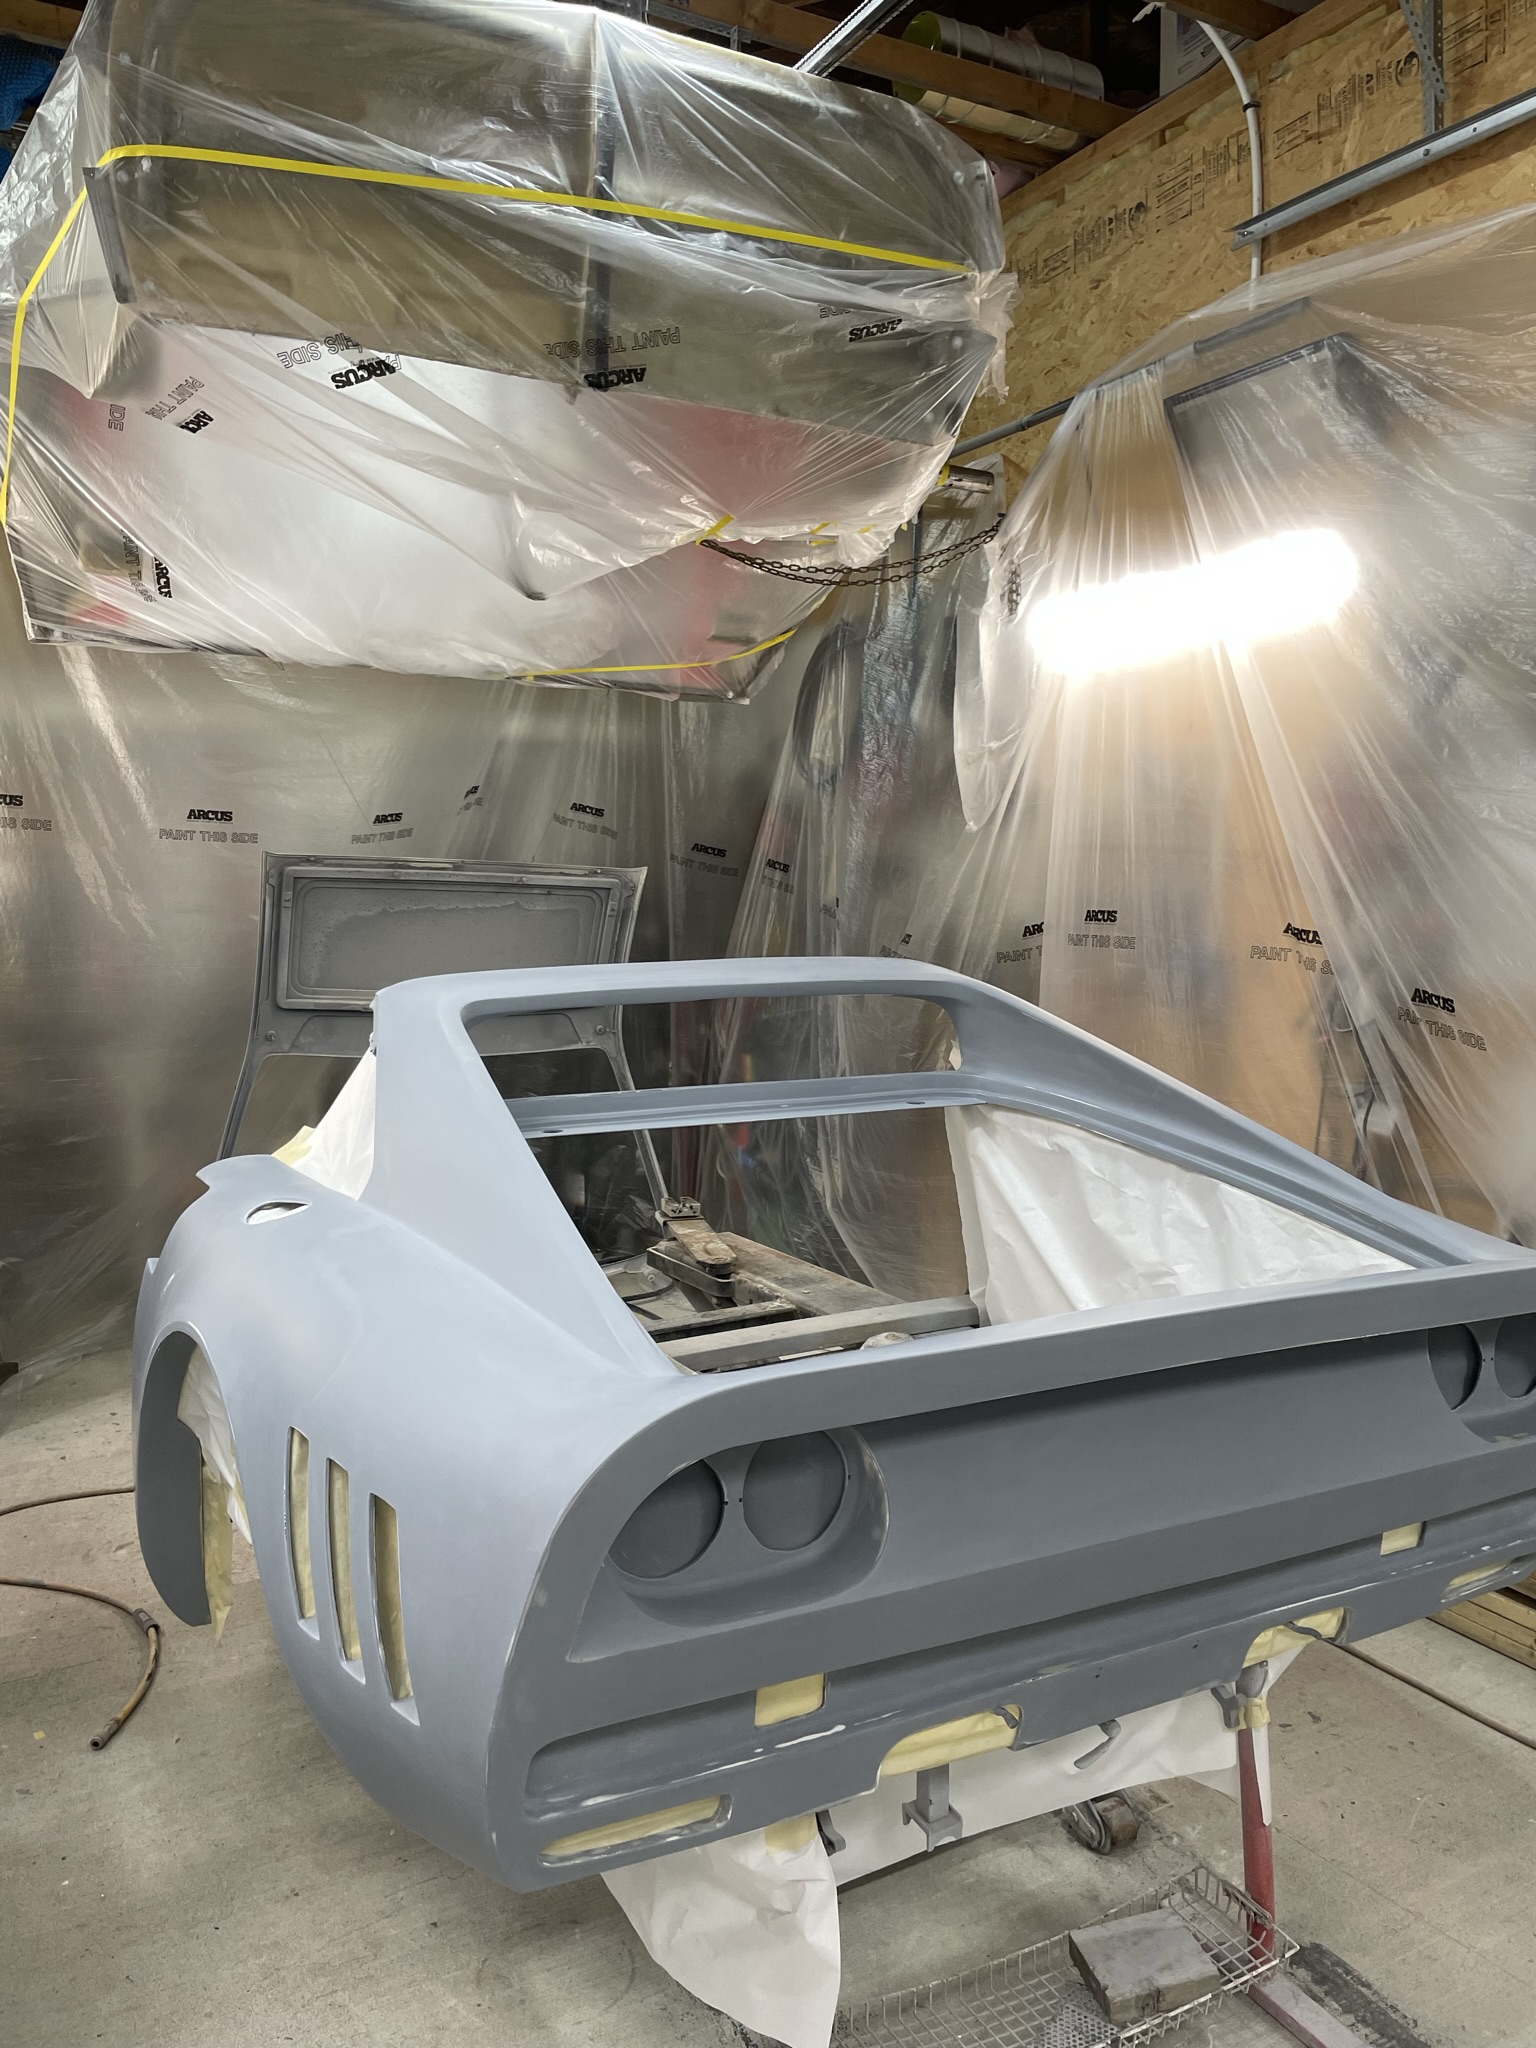
Exciting day !! One step closer as parts are one Color, albeit gray 2K primer all the preparation was worth it!!
Friday the parts were sprayed with slick sand a hi build primer , everything sat over the weekend. Then After a couple days getting everything block sanded and ready
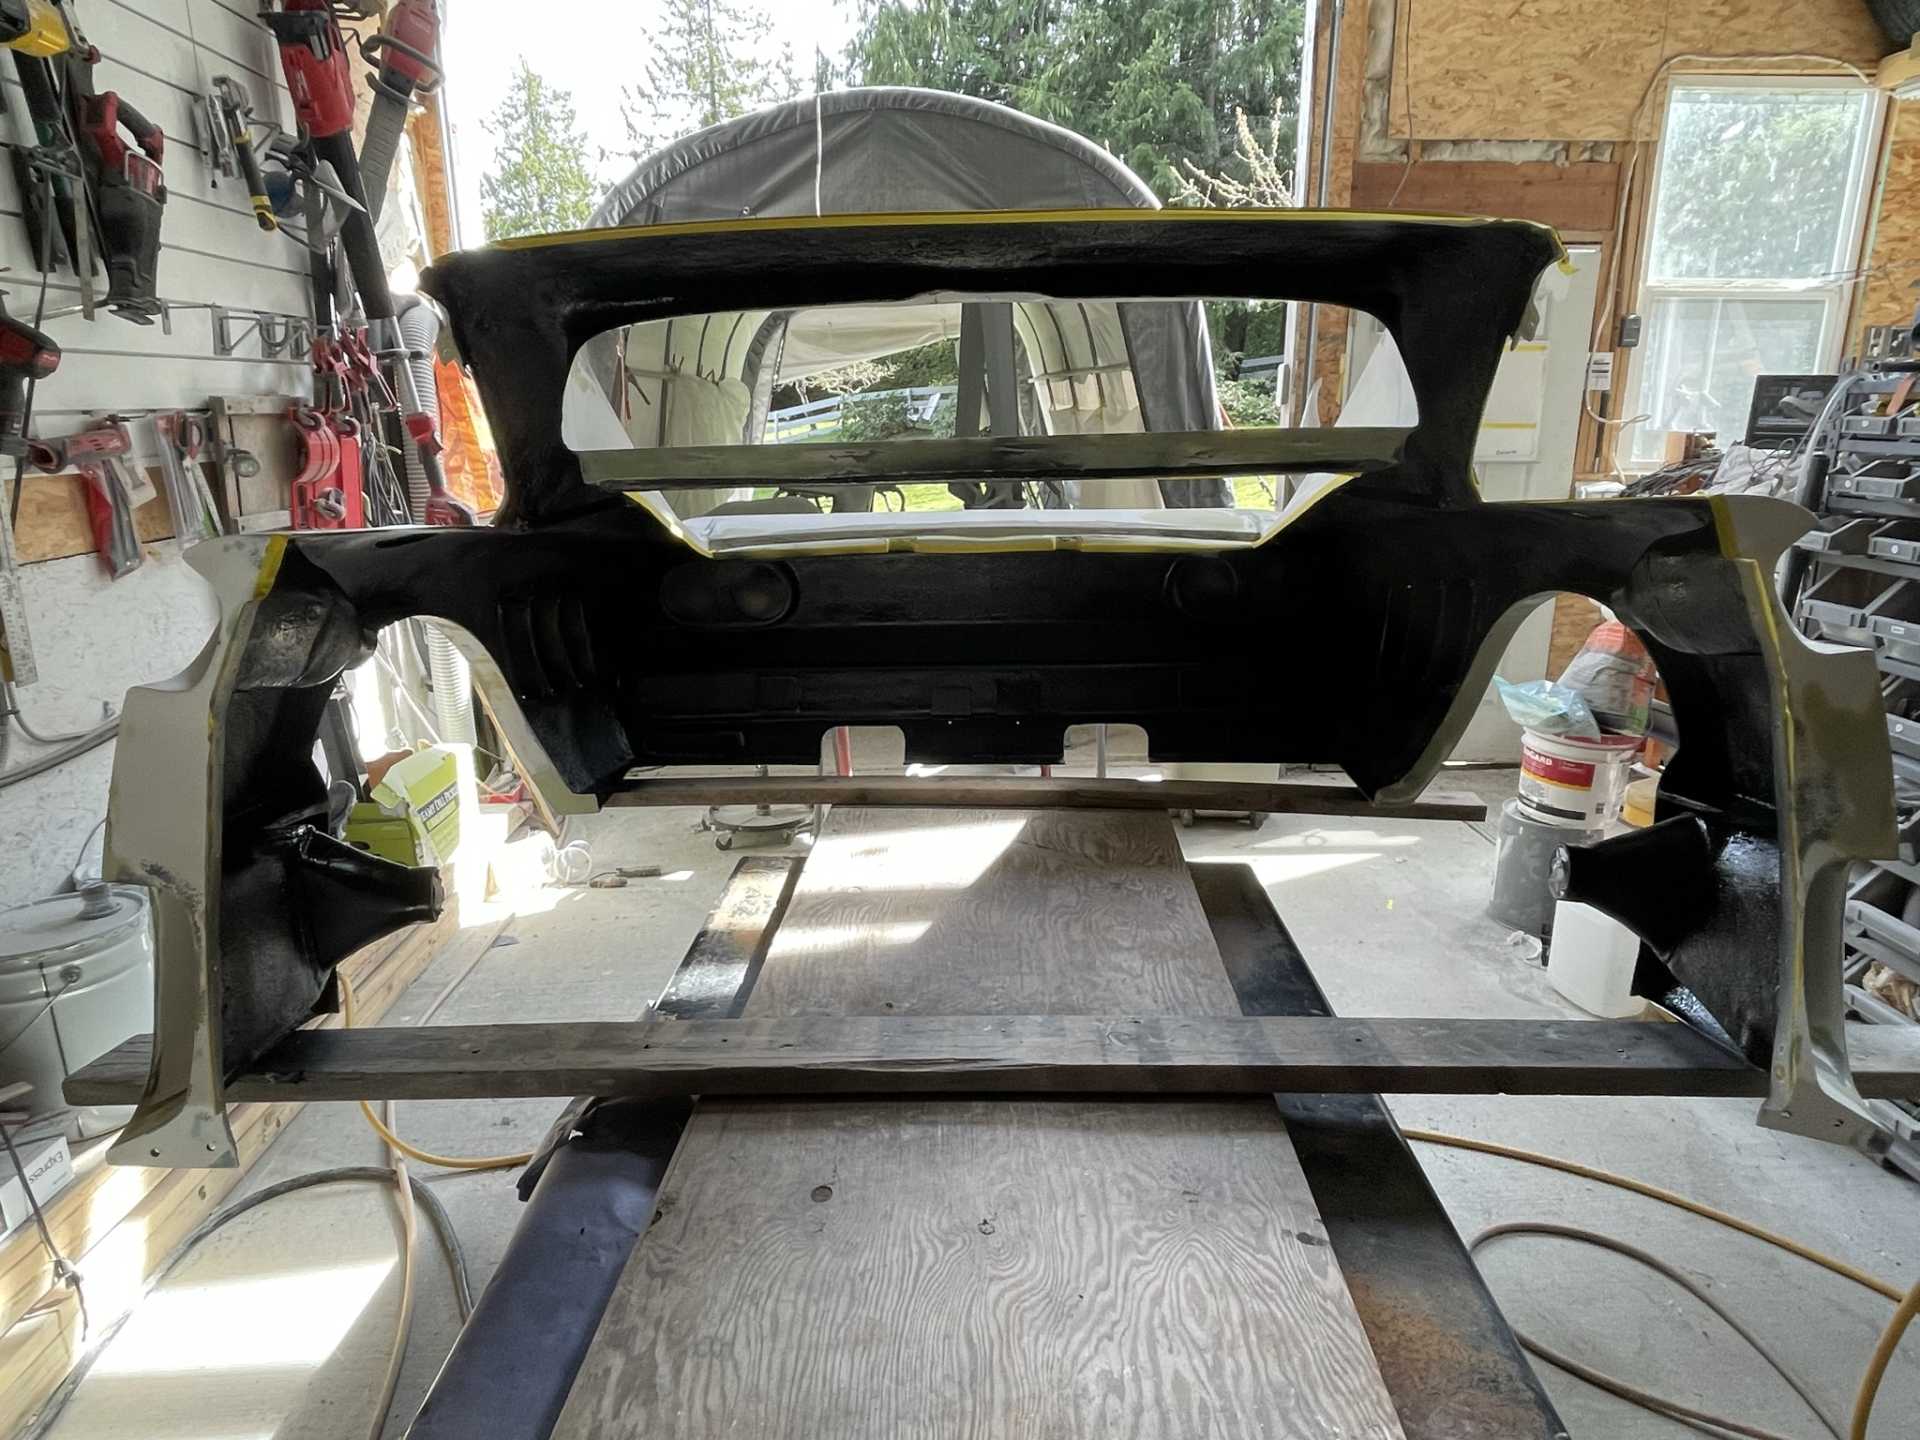
This picture shows the black speckles which is a guide coat when block sanding
This is after block sanding parts are wiped clean and degreased hung in preparation for spraying 2K primer.
Everything is sprayed with 3 coats of 2K primer.
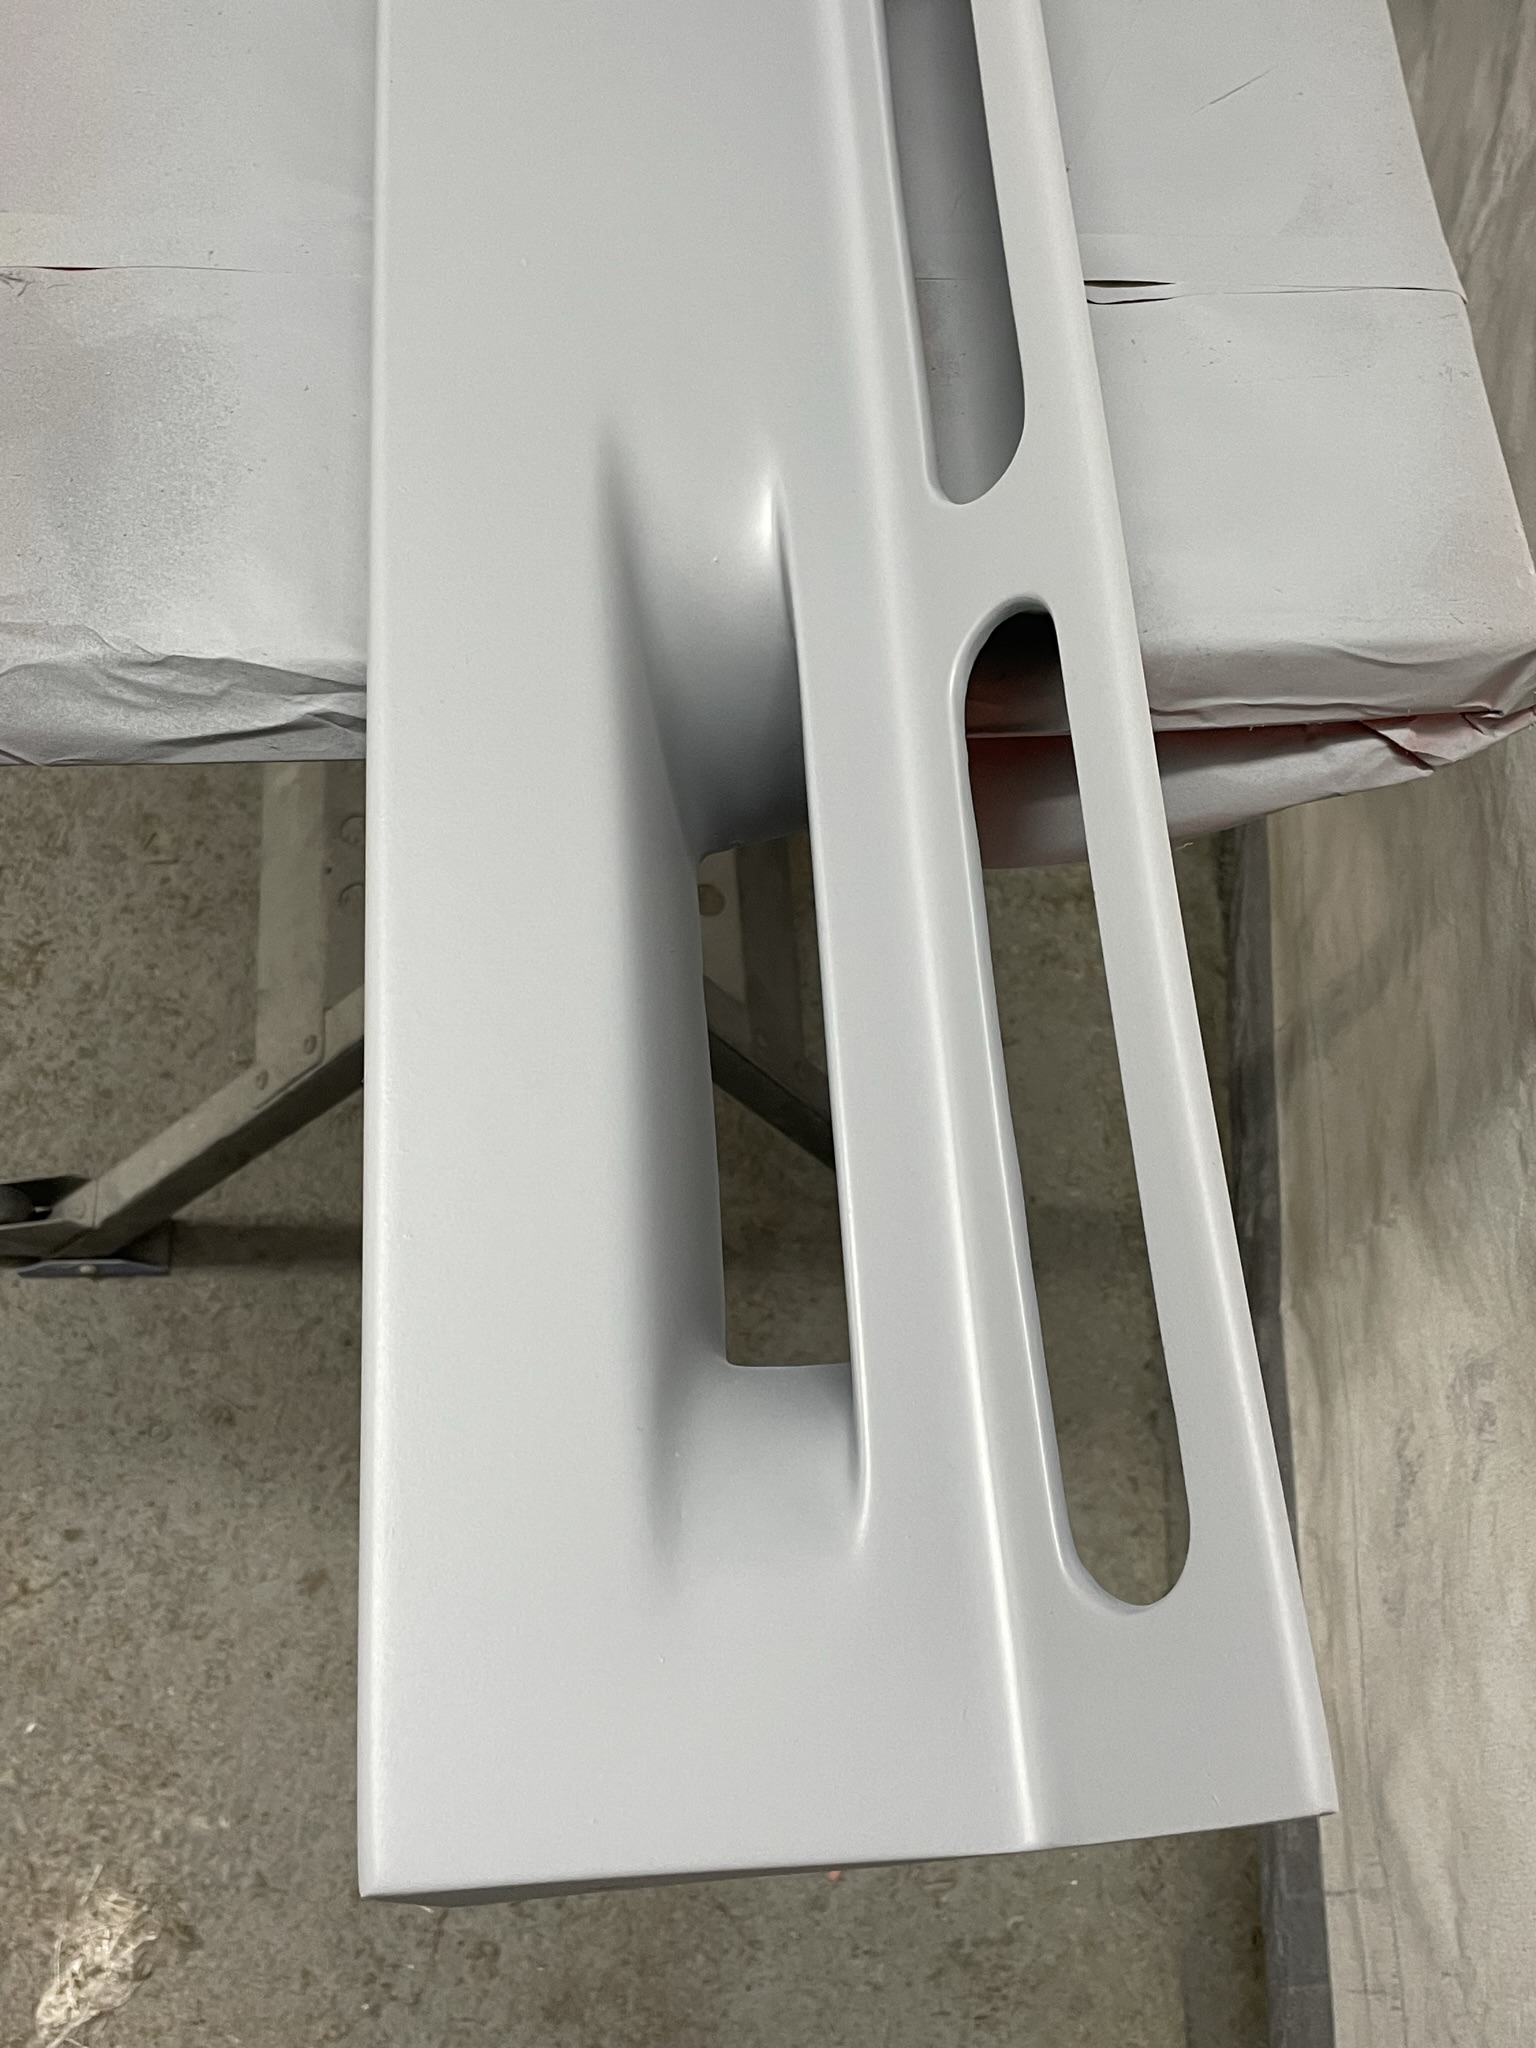
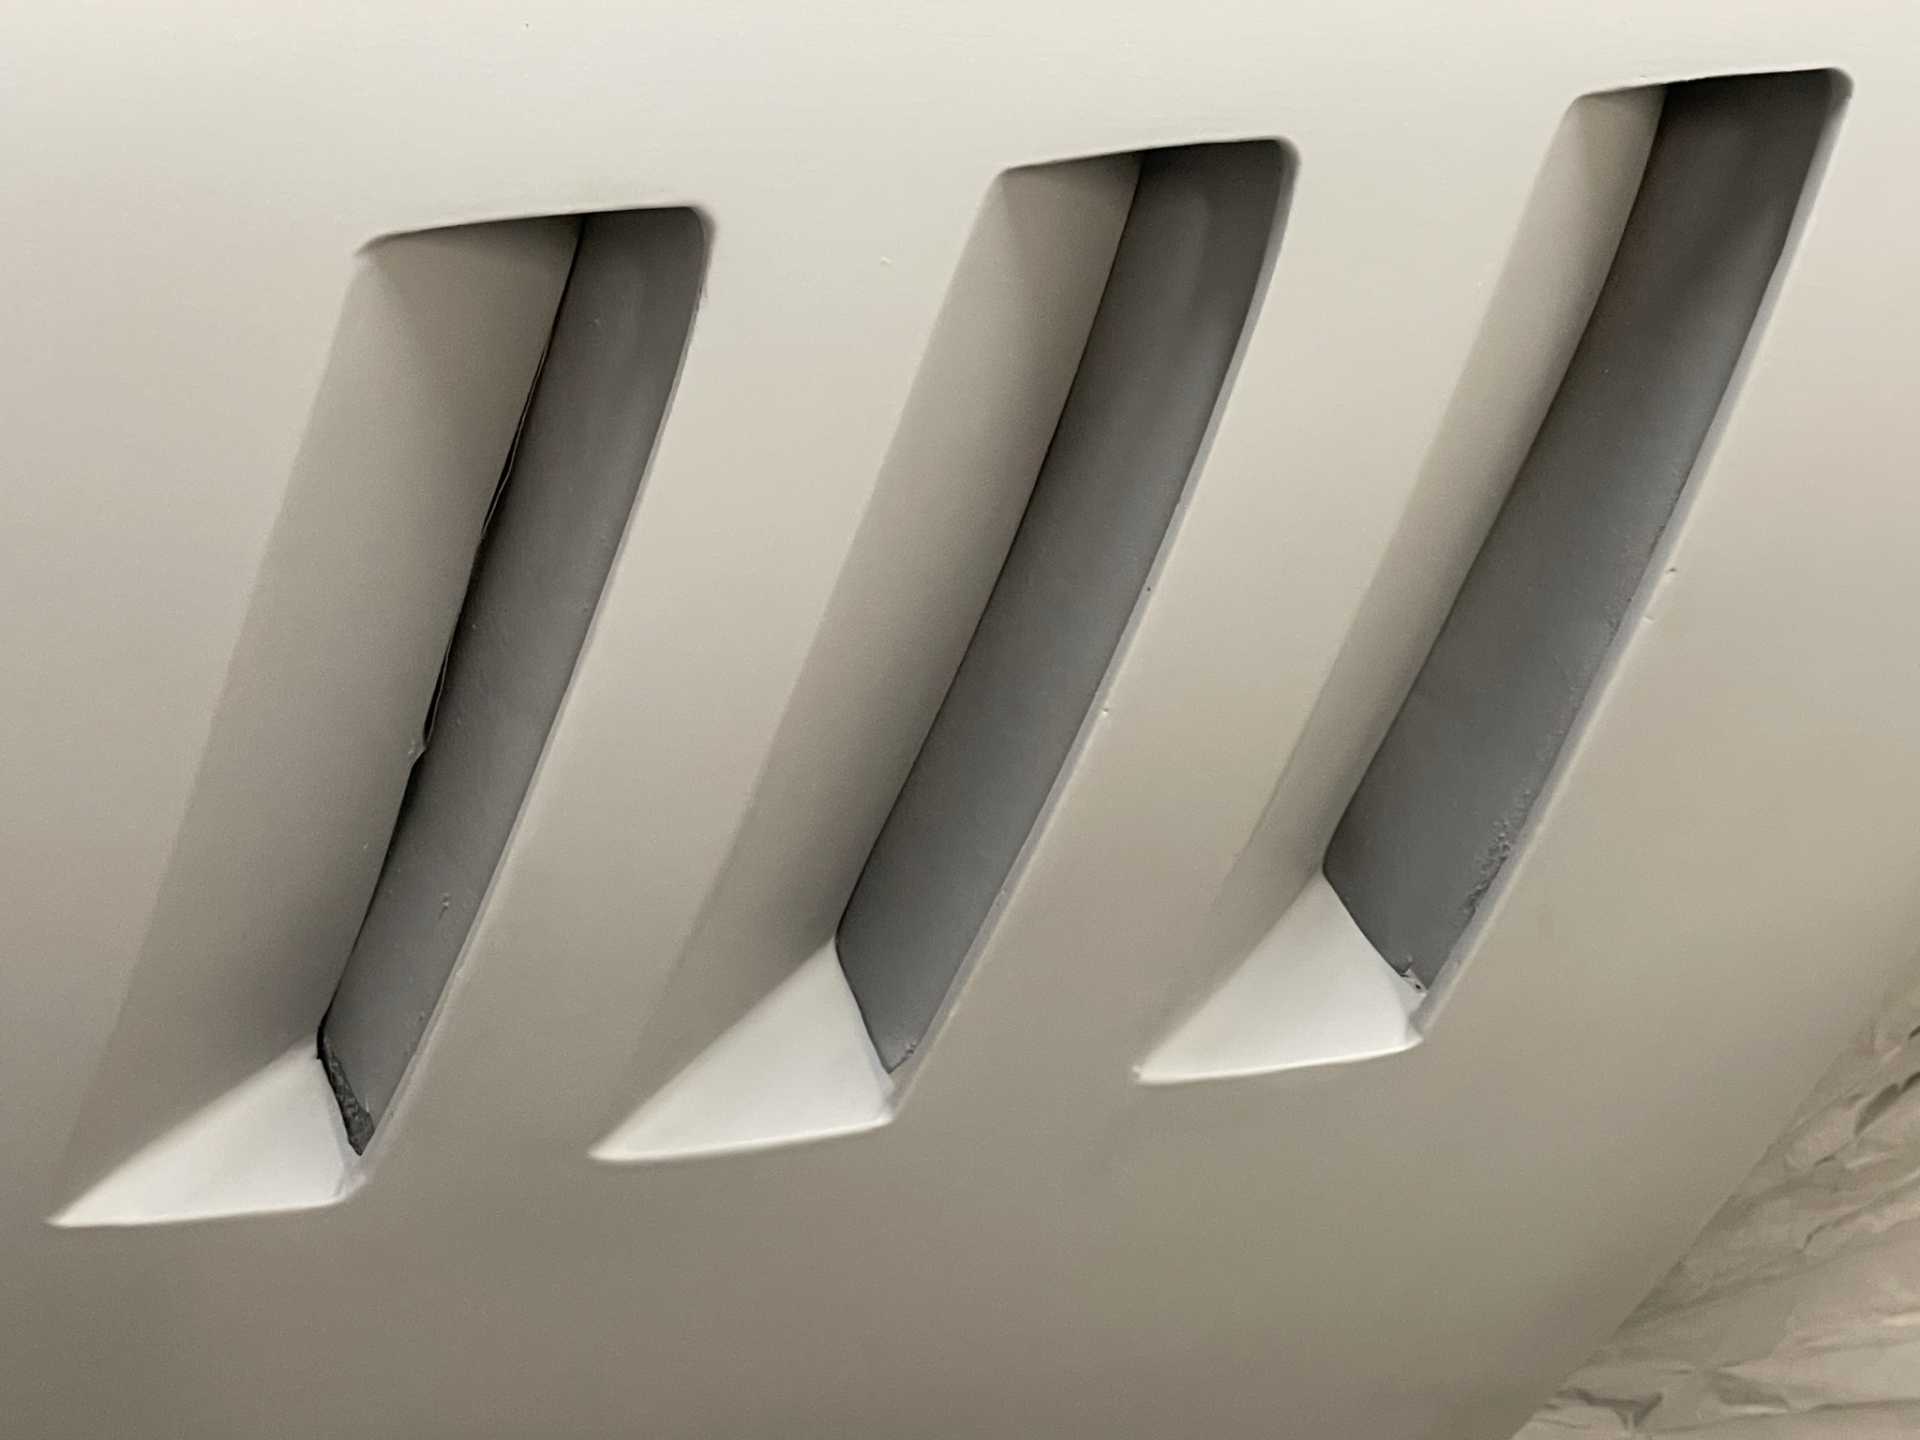
I’m really happy with how the front spoiler vent holes came out, totally awesome.
Everything will sit until Monday to fully cure and then I’ll block sand with 320 grit sandpaper before paint..
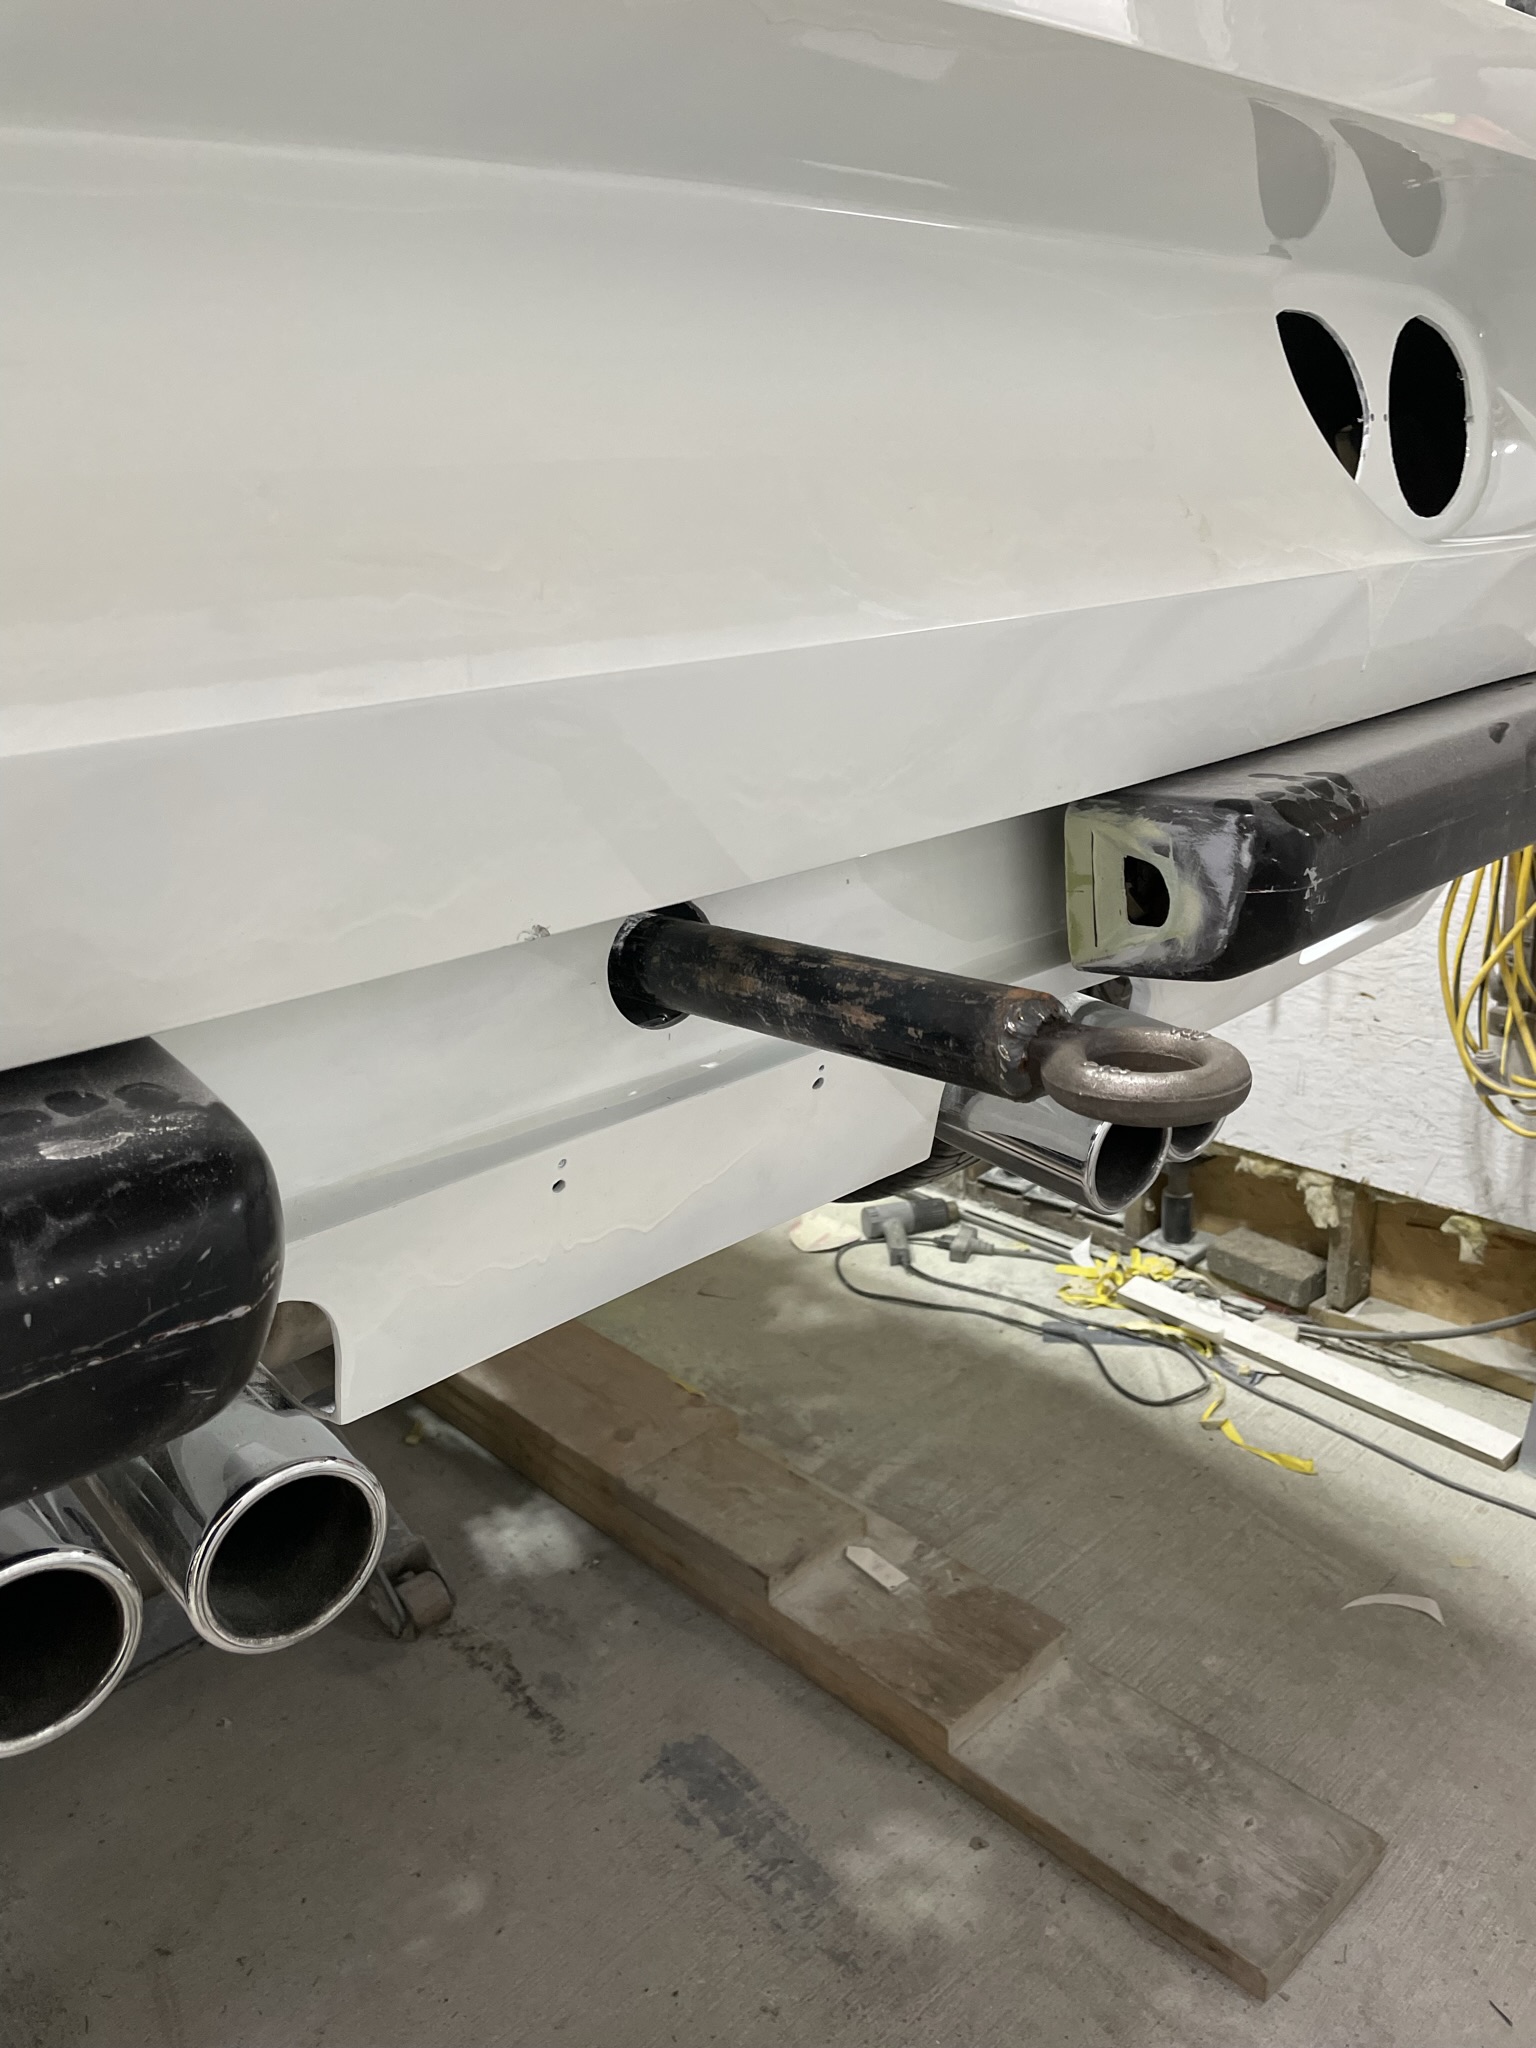
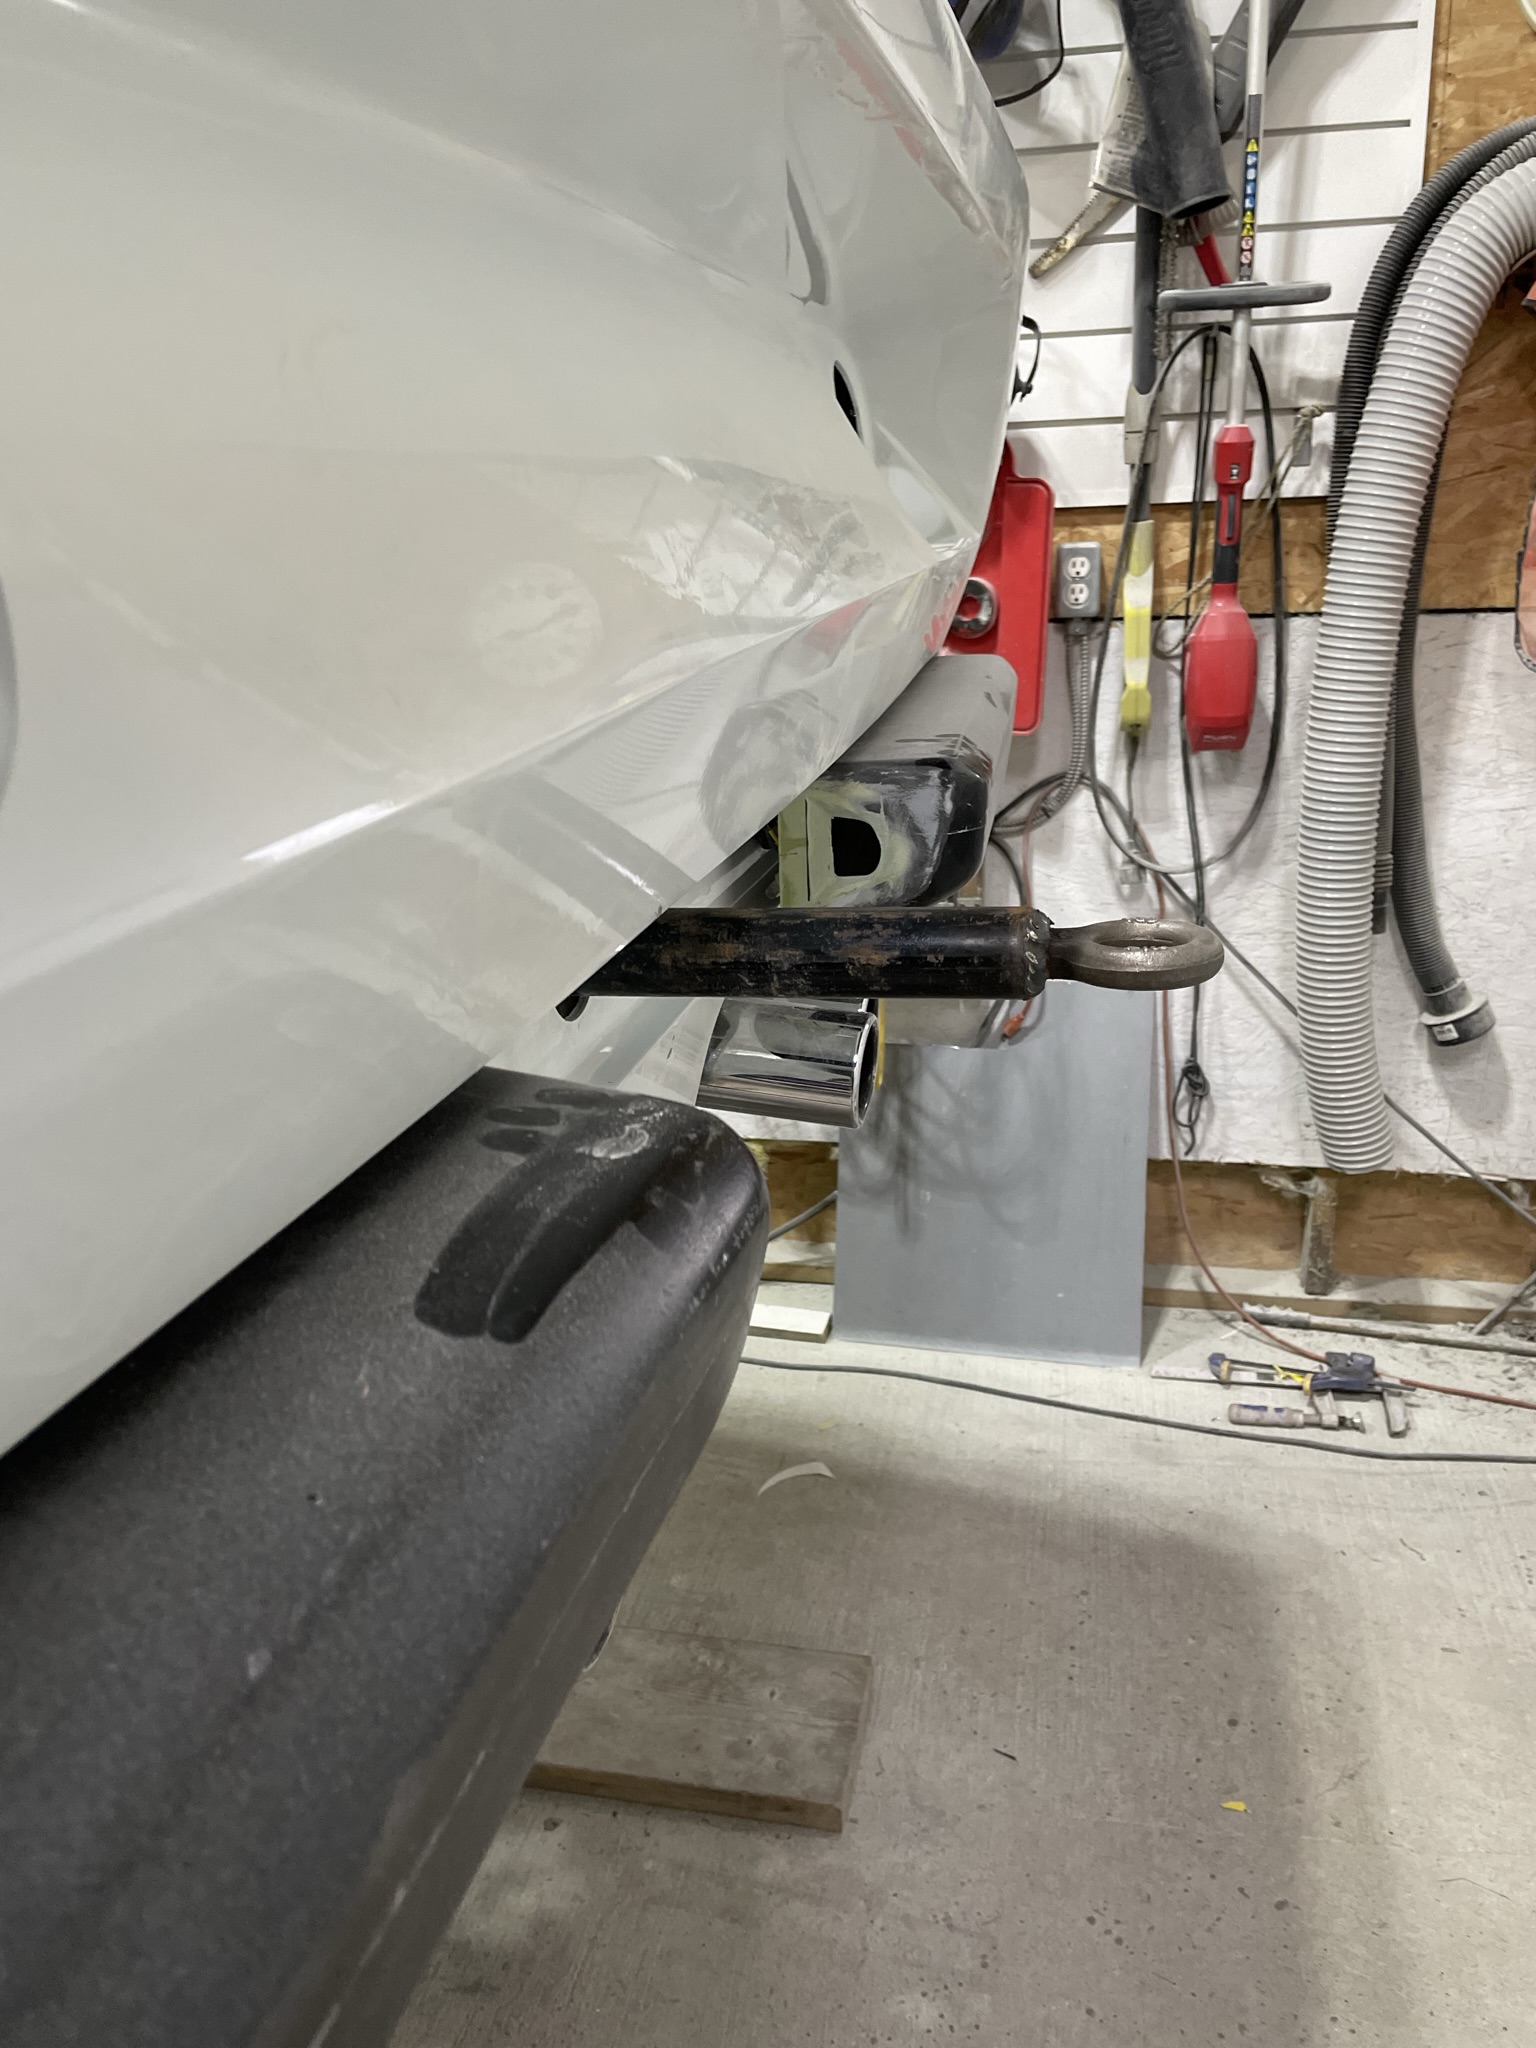
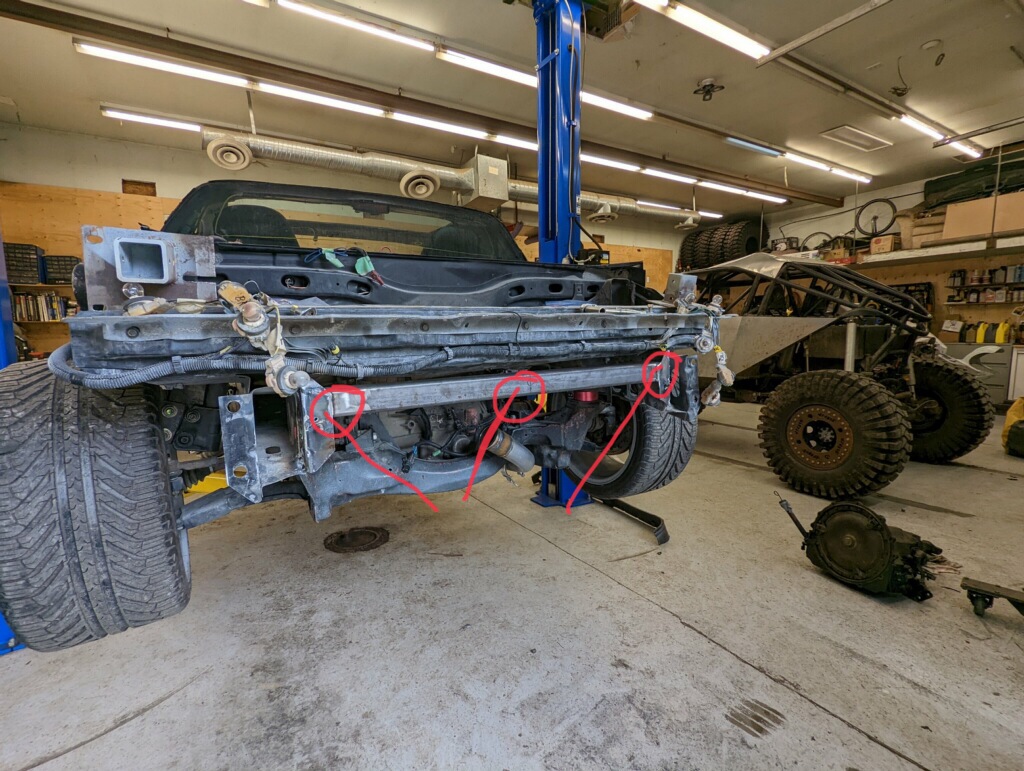
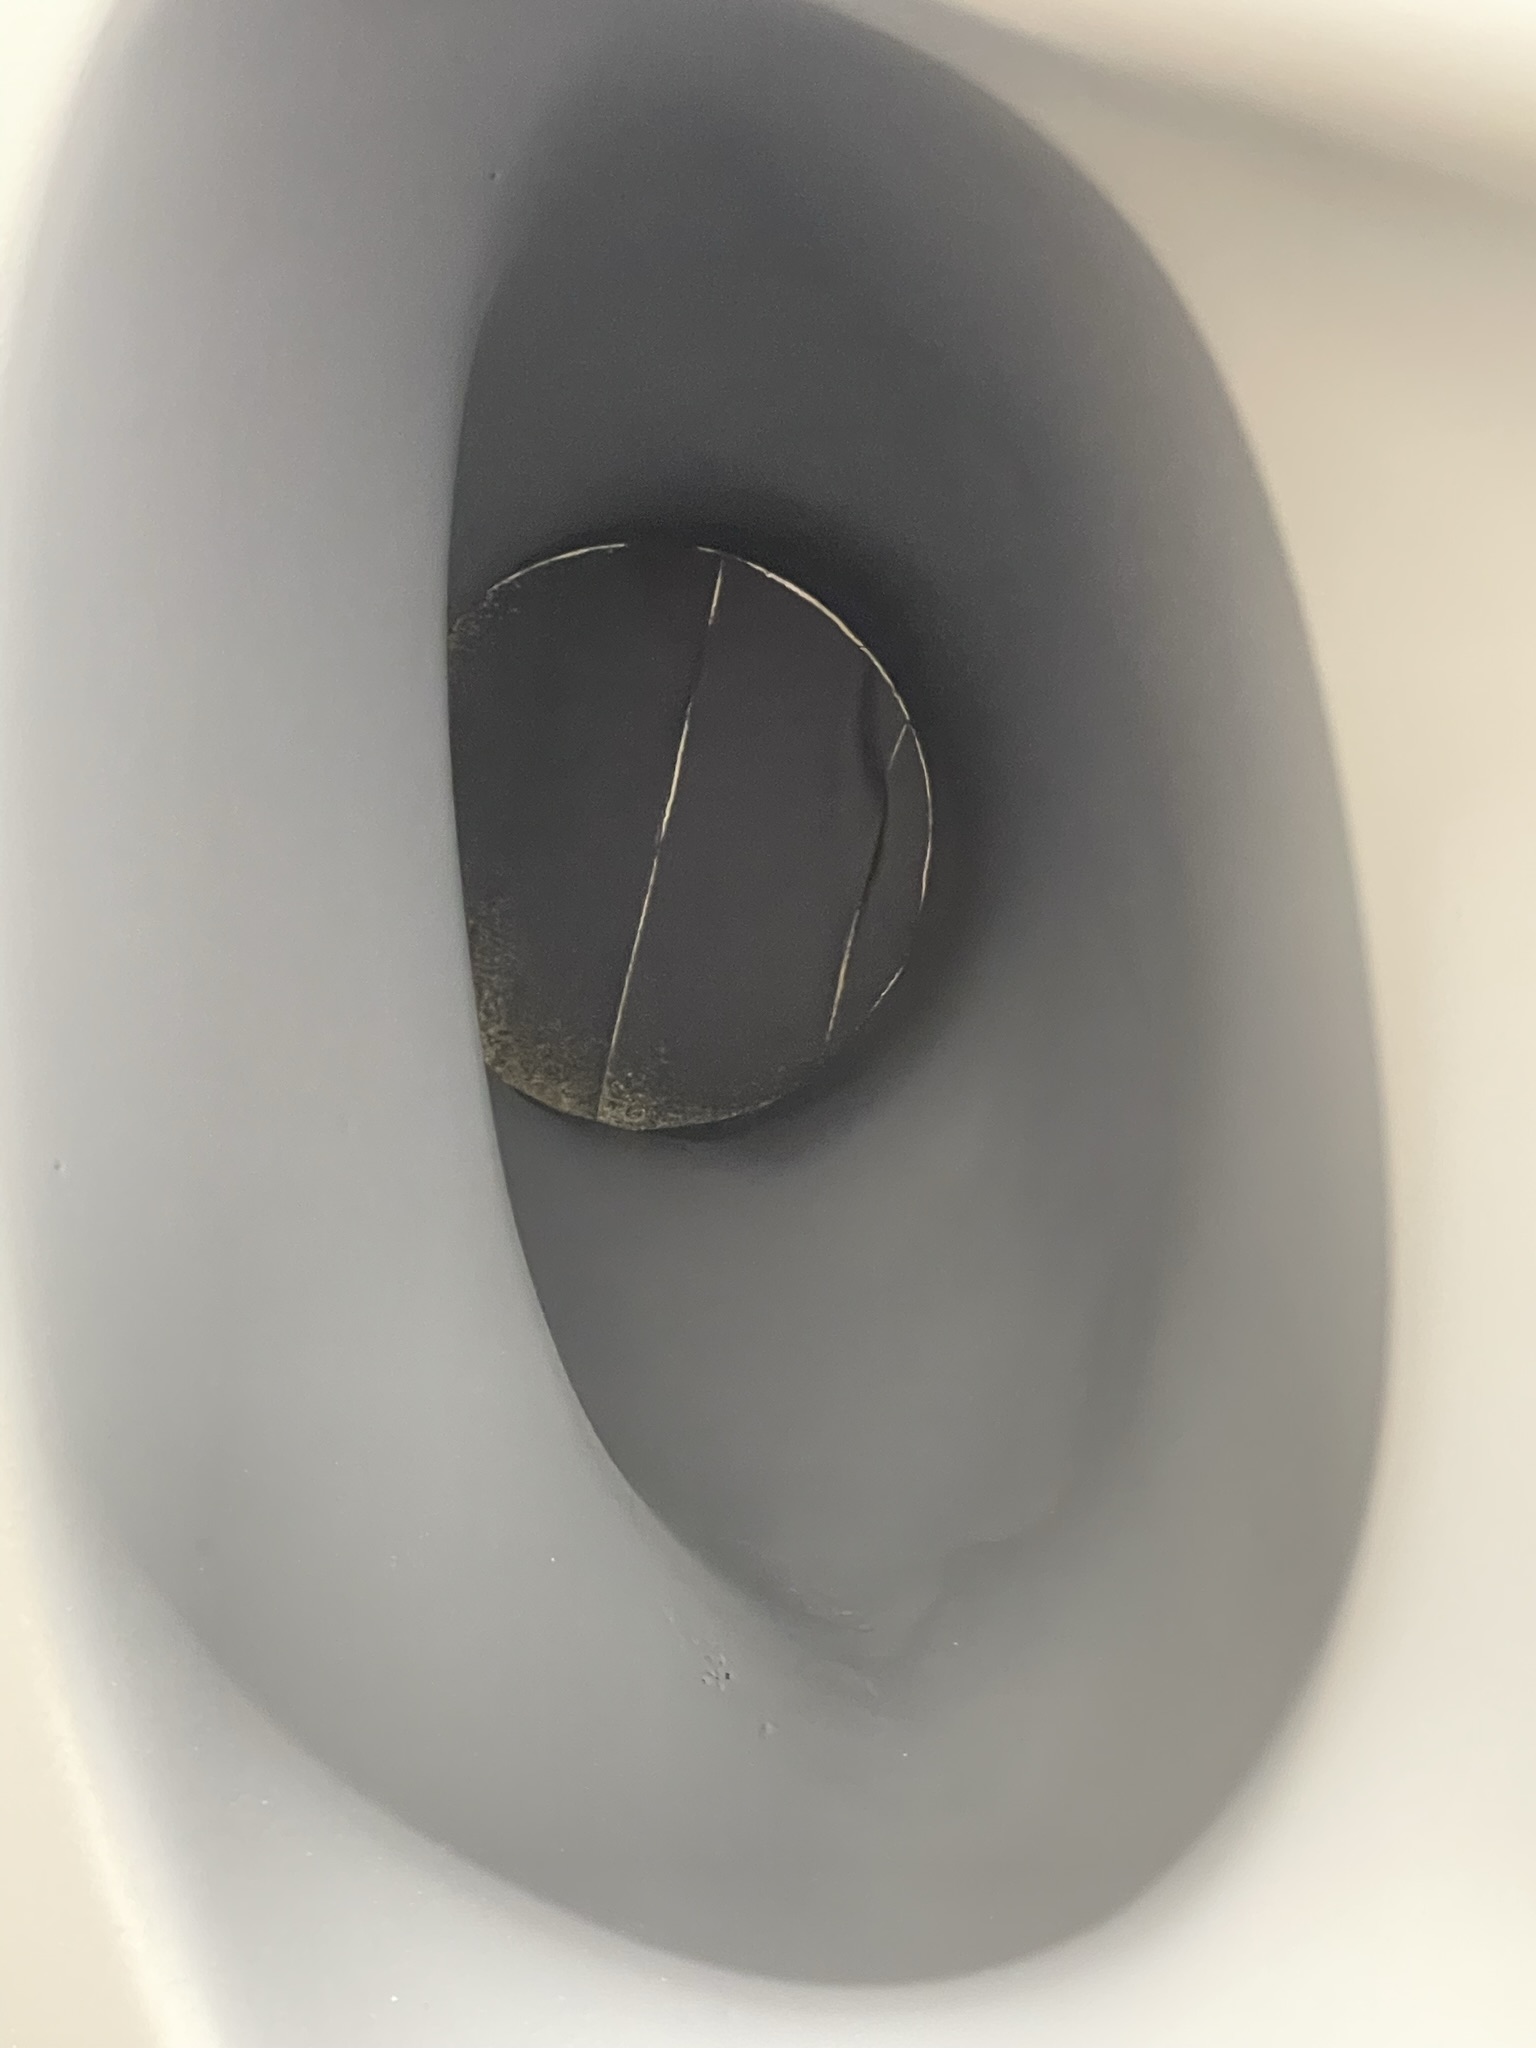
One small problem that arose with the build is there is no place to attach to the car for towing the vehicle. My idea is to attach a 2x2 1/4” steel Bar welded to the frame at the bumper level. Then I’ll drill a 3/4” hole thru both sides and weld a 5” threaded bolt in place. I will then take apiece of Dom steel pipe and weld some nuts on one end and a ring on the others . This allows a hook to attach to the screw in bar. A hole will be drilled through the body behind the fold down license plate. I’ll do something similar in the front once the grill is built and mounted to find a location.
More updates soon. Stay safe everyone Wayne
[This message has been edited by dobie1 (edited 03-24-2022).]
WOW!.......now I have to clean my keyboard....after salivating all over it.
That's the reaction I had to your pics...it just looks SOOOOOO good!
I believe you should compile all your pics from when you started, assemble them into book form with instructional text accompanying the pics and publish it as a "how to" for building a proper fiberglass body from an existing car.
Your work is just plain superb.
Thanks for documenting your progress...it serves to inspire those of us who just can't seem to get motivated...or just plain don't have enough hours in the day to do everything that "has" to be done and leave a little bit of time for what we'd "like" to get done.
I can't imagine the anticipation of wanting to see it painted, assembled and on the road...but I know I for one am champing at the bit to witness it.
Congratulations on getting there.....it WILL be worth it in the end.
Wow thanks for the kind words Ted. My hope has always been writing this blog that anyone interested would get most of the information from it they would need to build a car. But your right there isn’t a lot of how to info on the hobby!! But you never know!!
Here is a update on this week’s progress. I’ve been doing the final fitting on the rear deck hood before completing the body work. And hinge placement and installation.
Wayne that is going to look awesome when it's done.
I really envy the patience and dedication it takes to become skilled at things like this. Not to mention innate talent. I simply don't have it. This is going to look awesome. I hope you are able to have it at the 40th - even if you have to trailer it there!
Thanks Trinten for the comments always appreciated!
jdv thank you as well , as for the controller, I’ll ask my buddy Don O. If he is interested in selling any controllers once we gets everything worked out with my car.
Bob , I’ve been wondering where you are on your build , did you ever use the inner scoop ducting I Sent you? I’m looking forward to a update!!
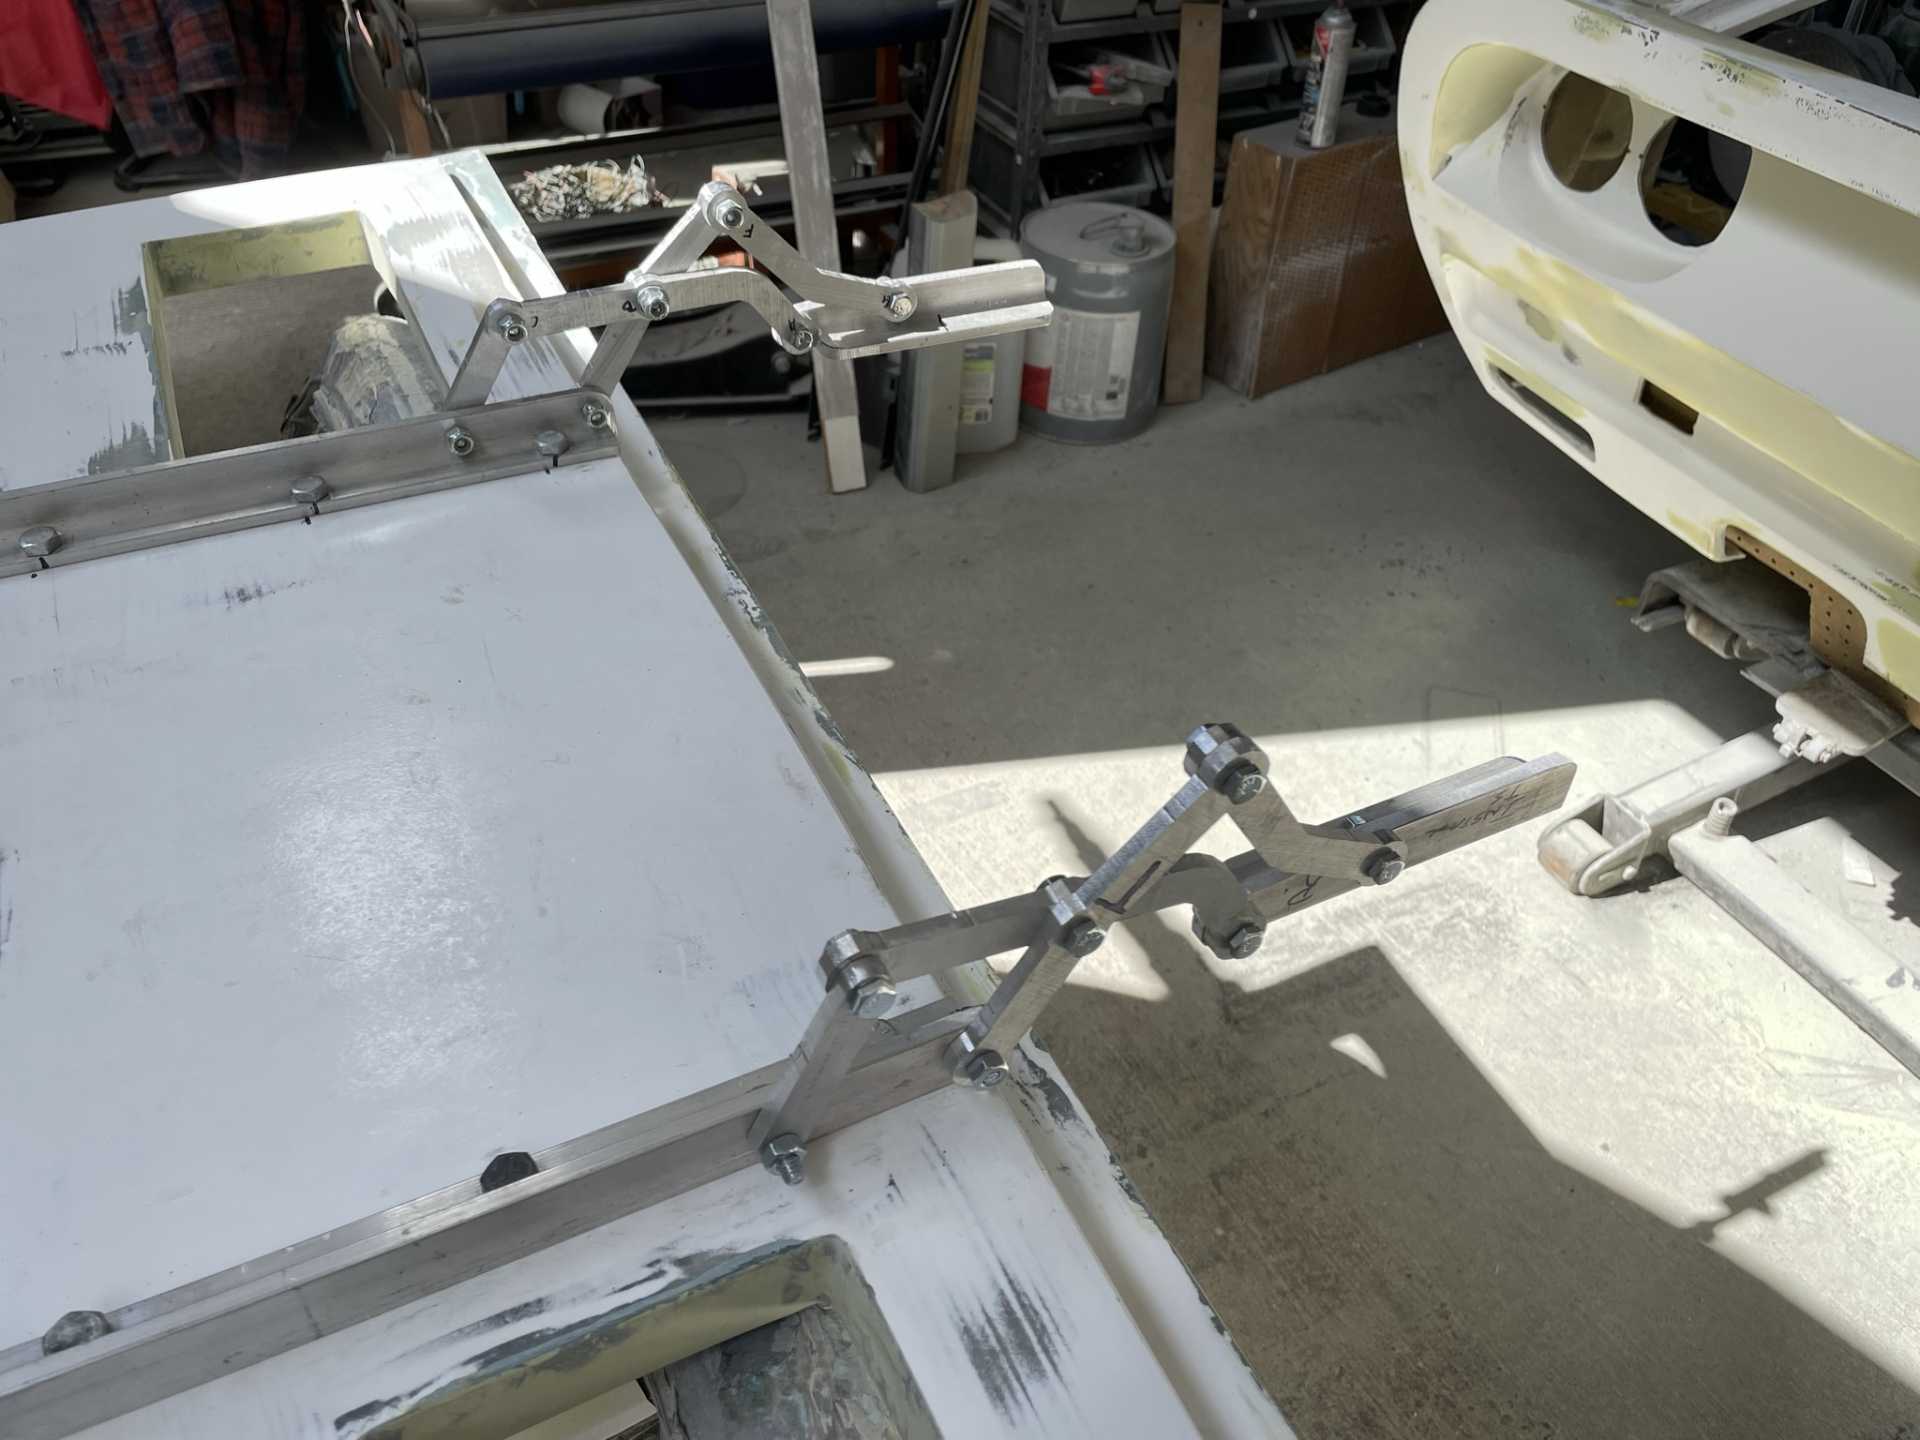
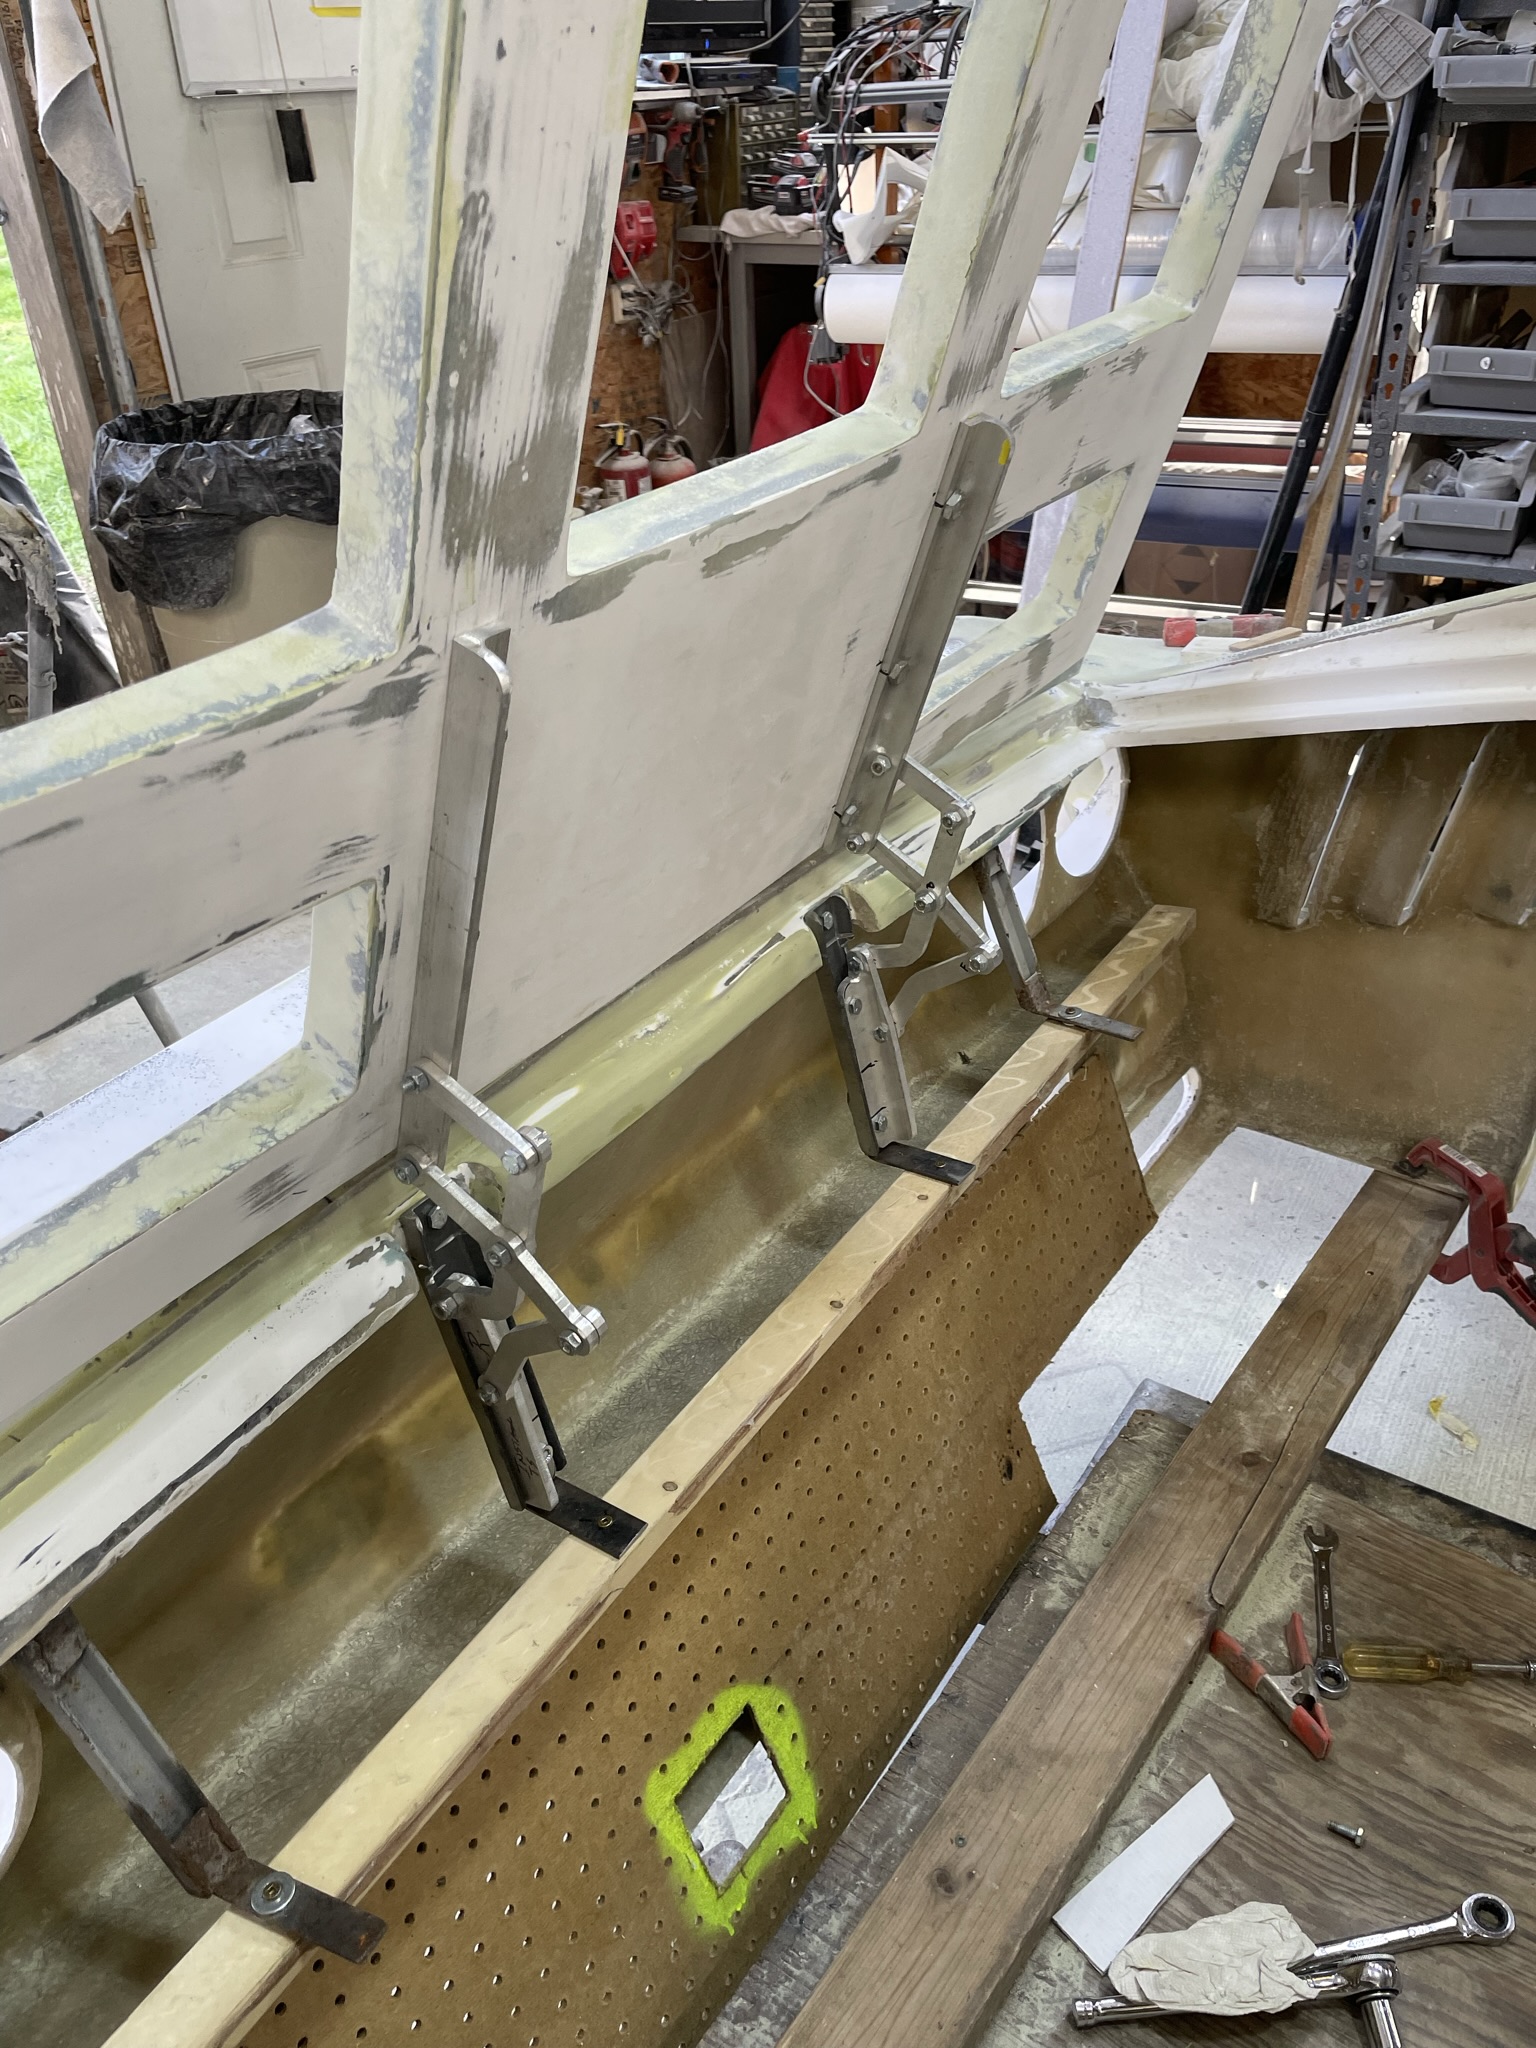
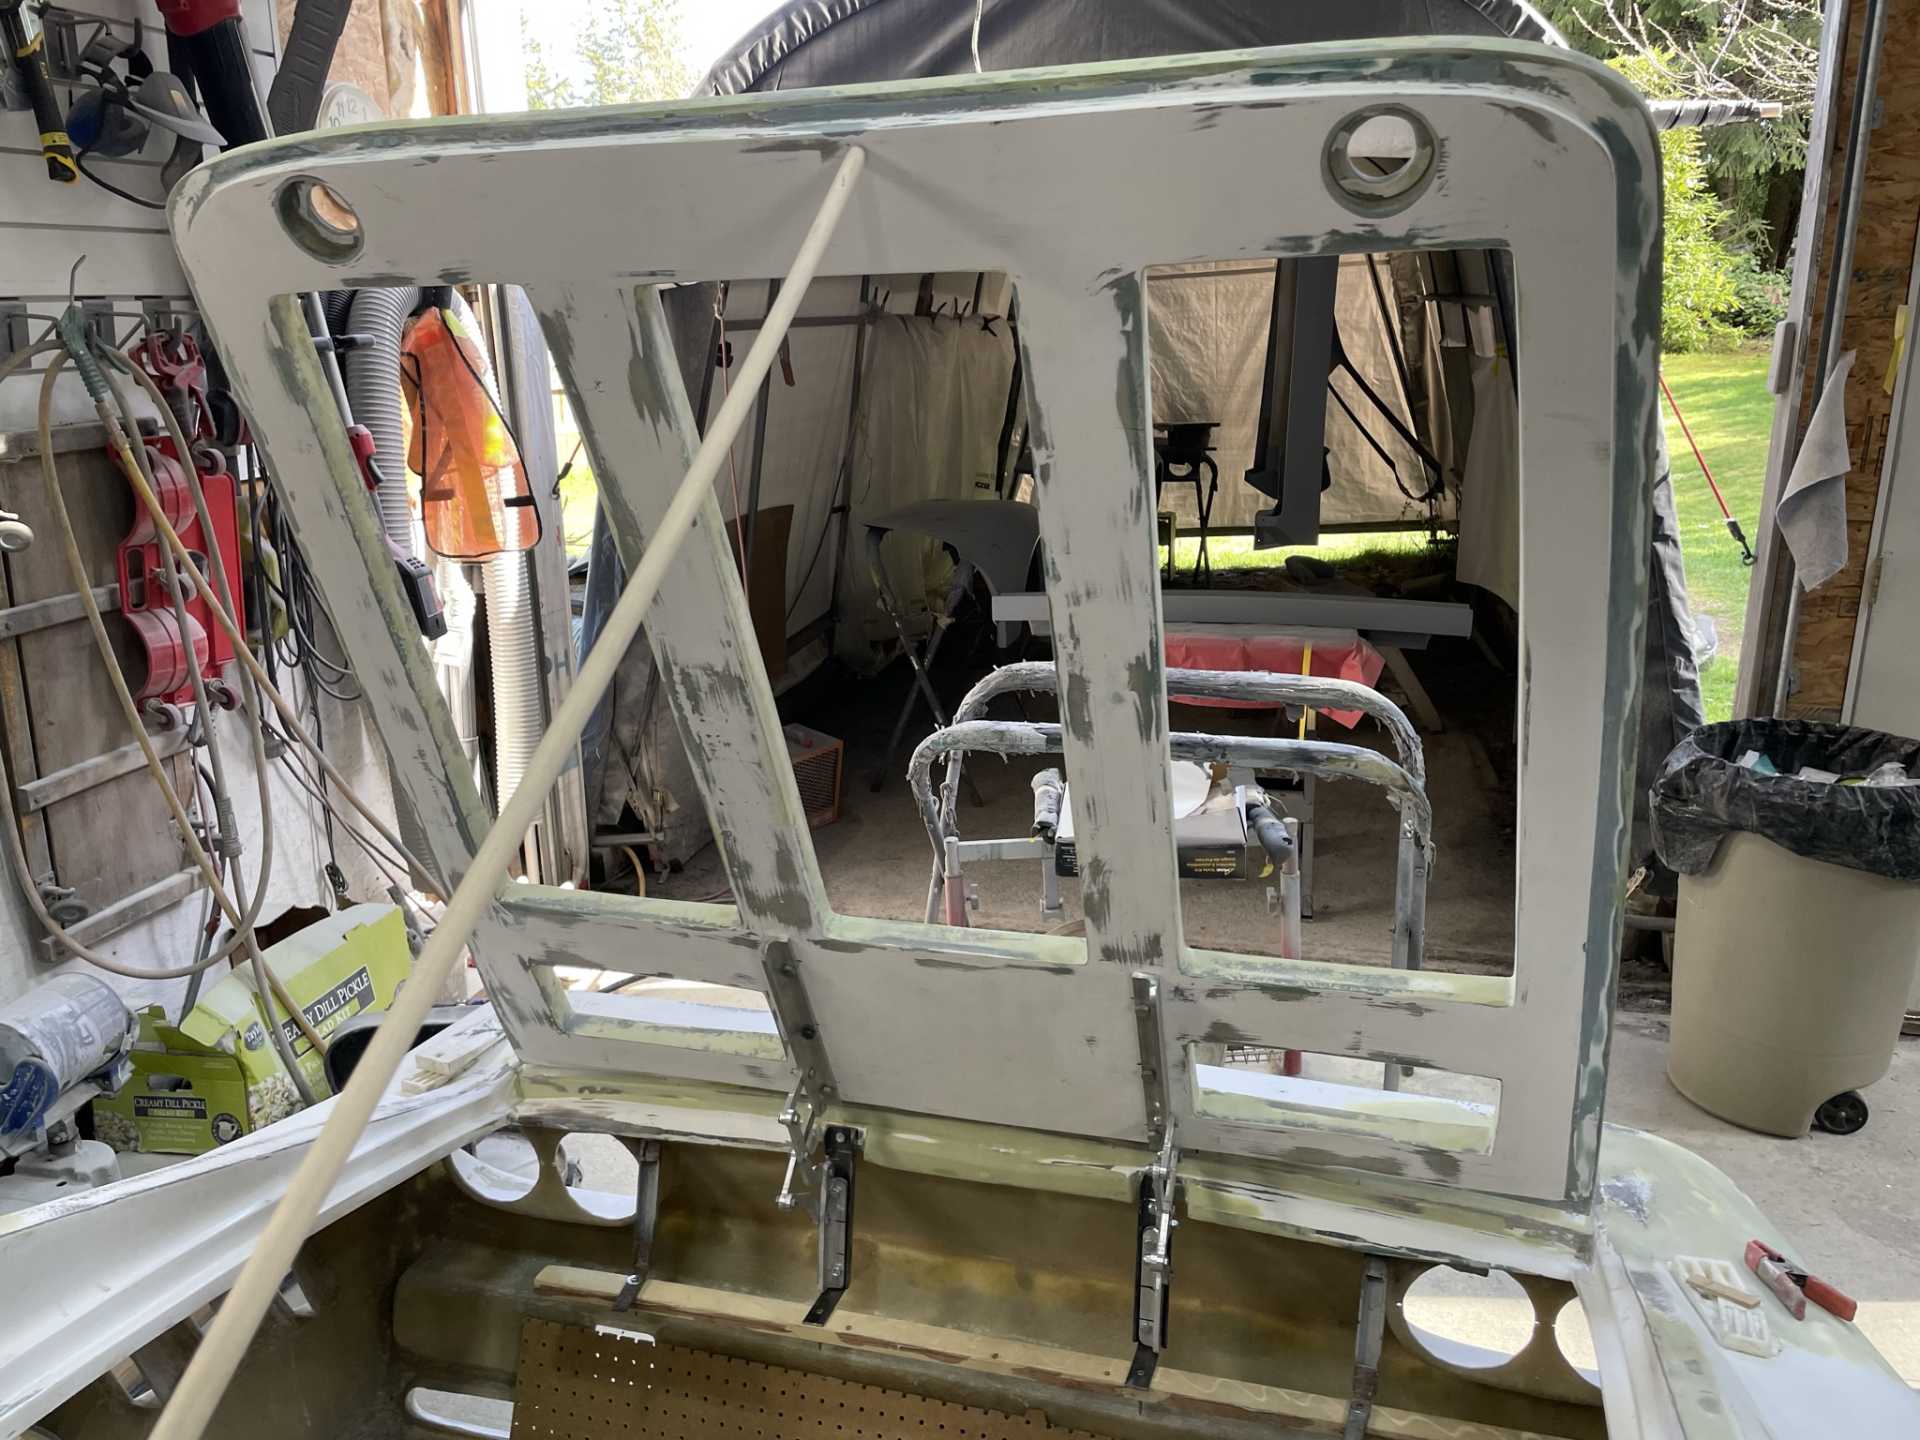
Here is the last est updates on my build, I haven’t gotten anymore done with spraying the rest of the parts as planned. I decided I needed to figure out and finish the rear deck hood hinge mounts and test the operation in case I needed to do any mods.
I mounted the hinges to the hood tested for full range of movement
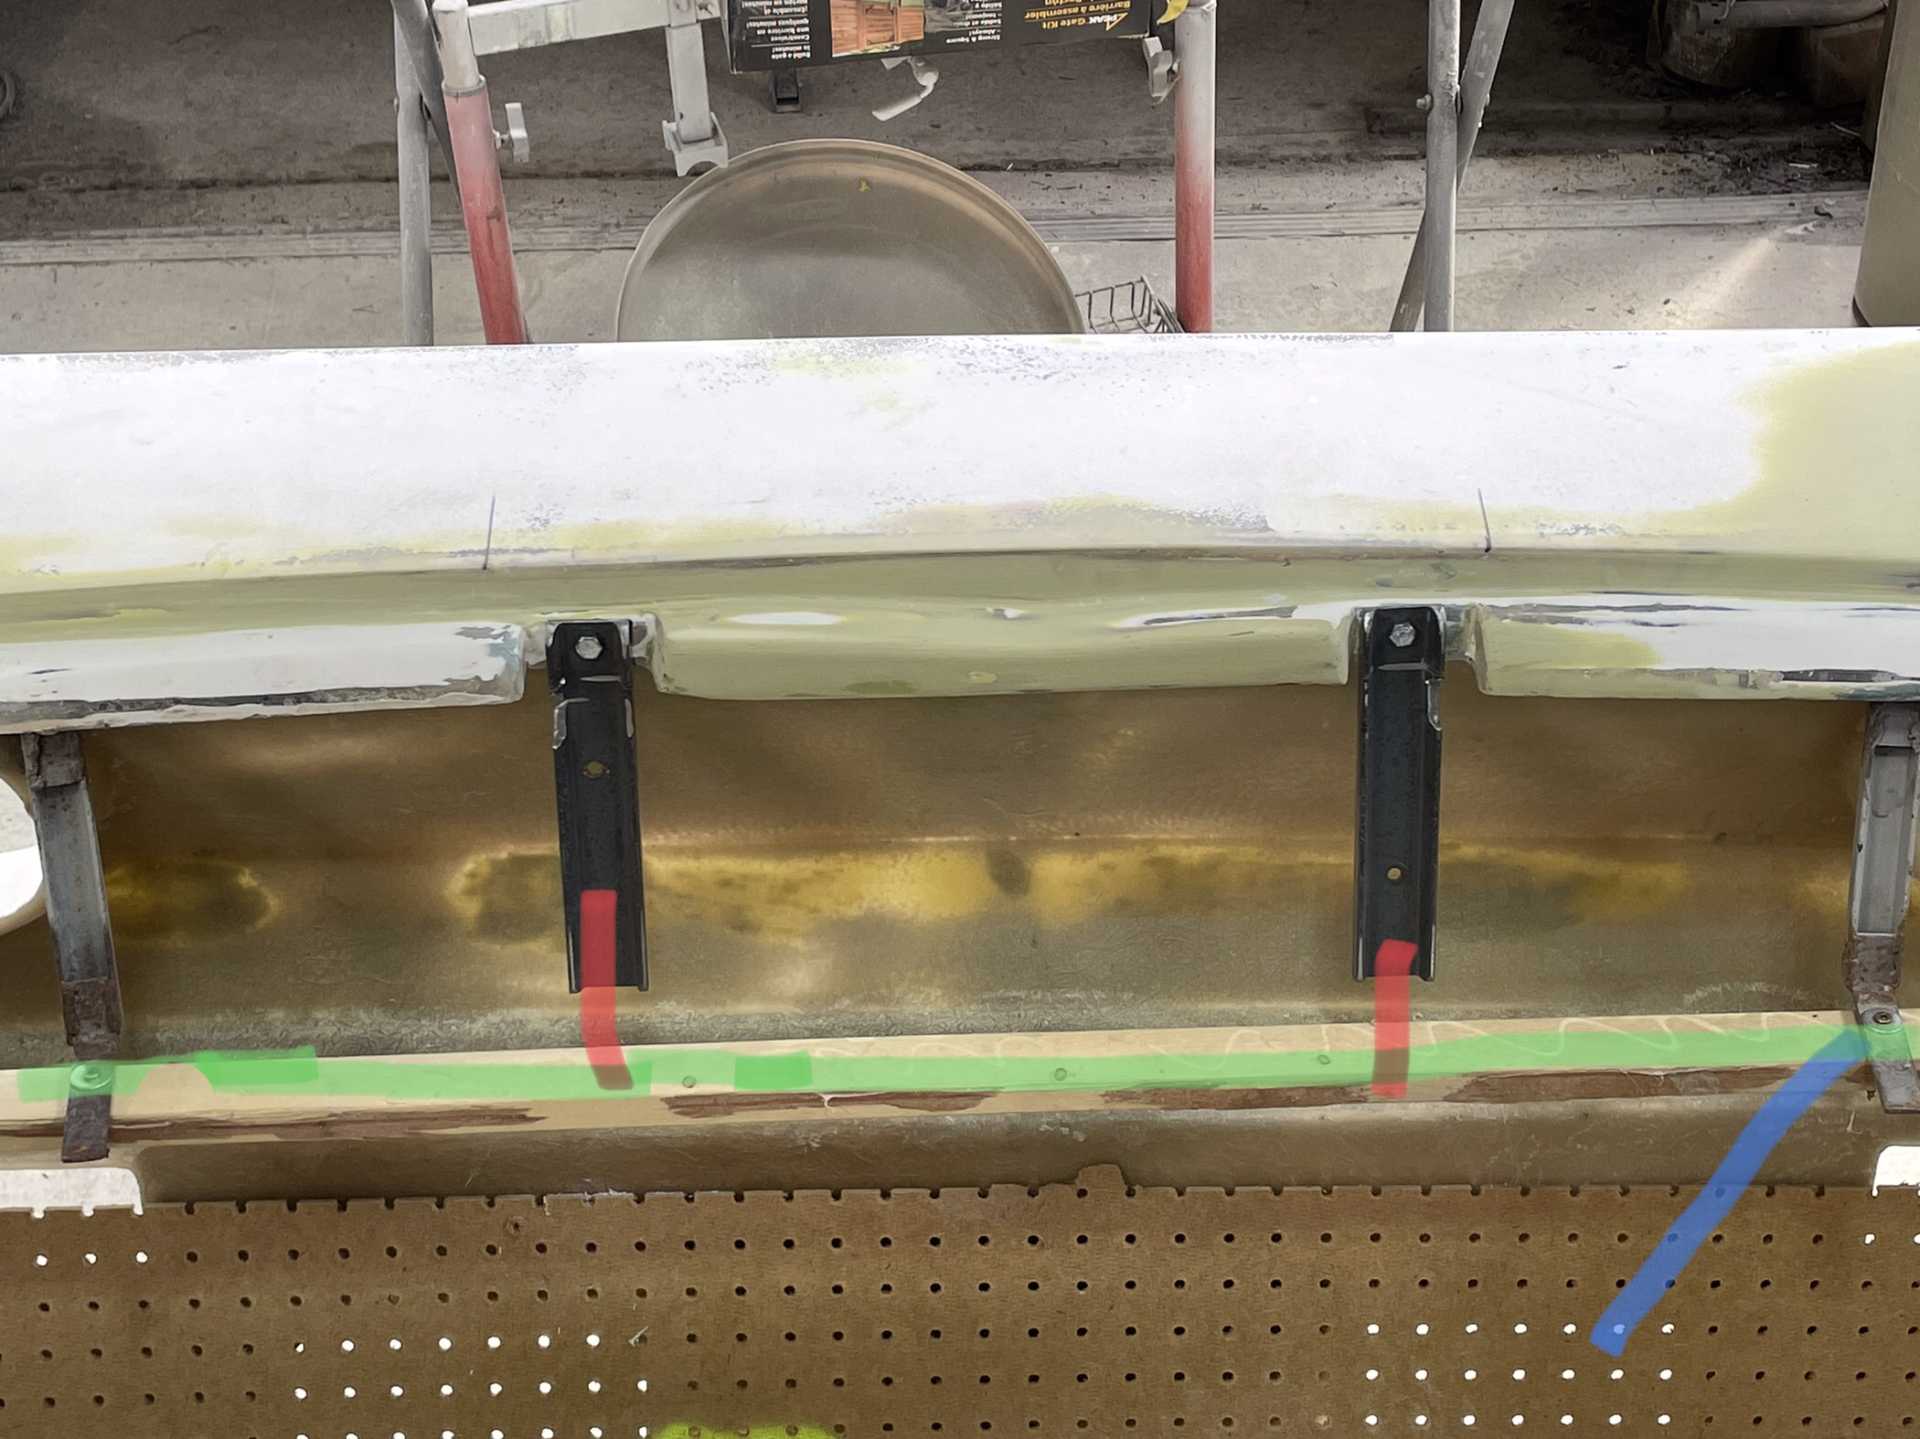
Next I needed To start And establish the mounting point for the brackets, which in this case is the wood highlighted in green. This is a steel plate that I mount the body supports too highlighted by the blue line. The two black bars attached to the body are then supported to the same steel plate as the body supports. Highlighted in red.
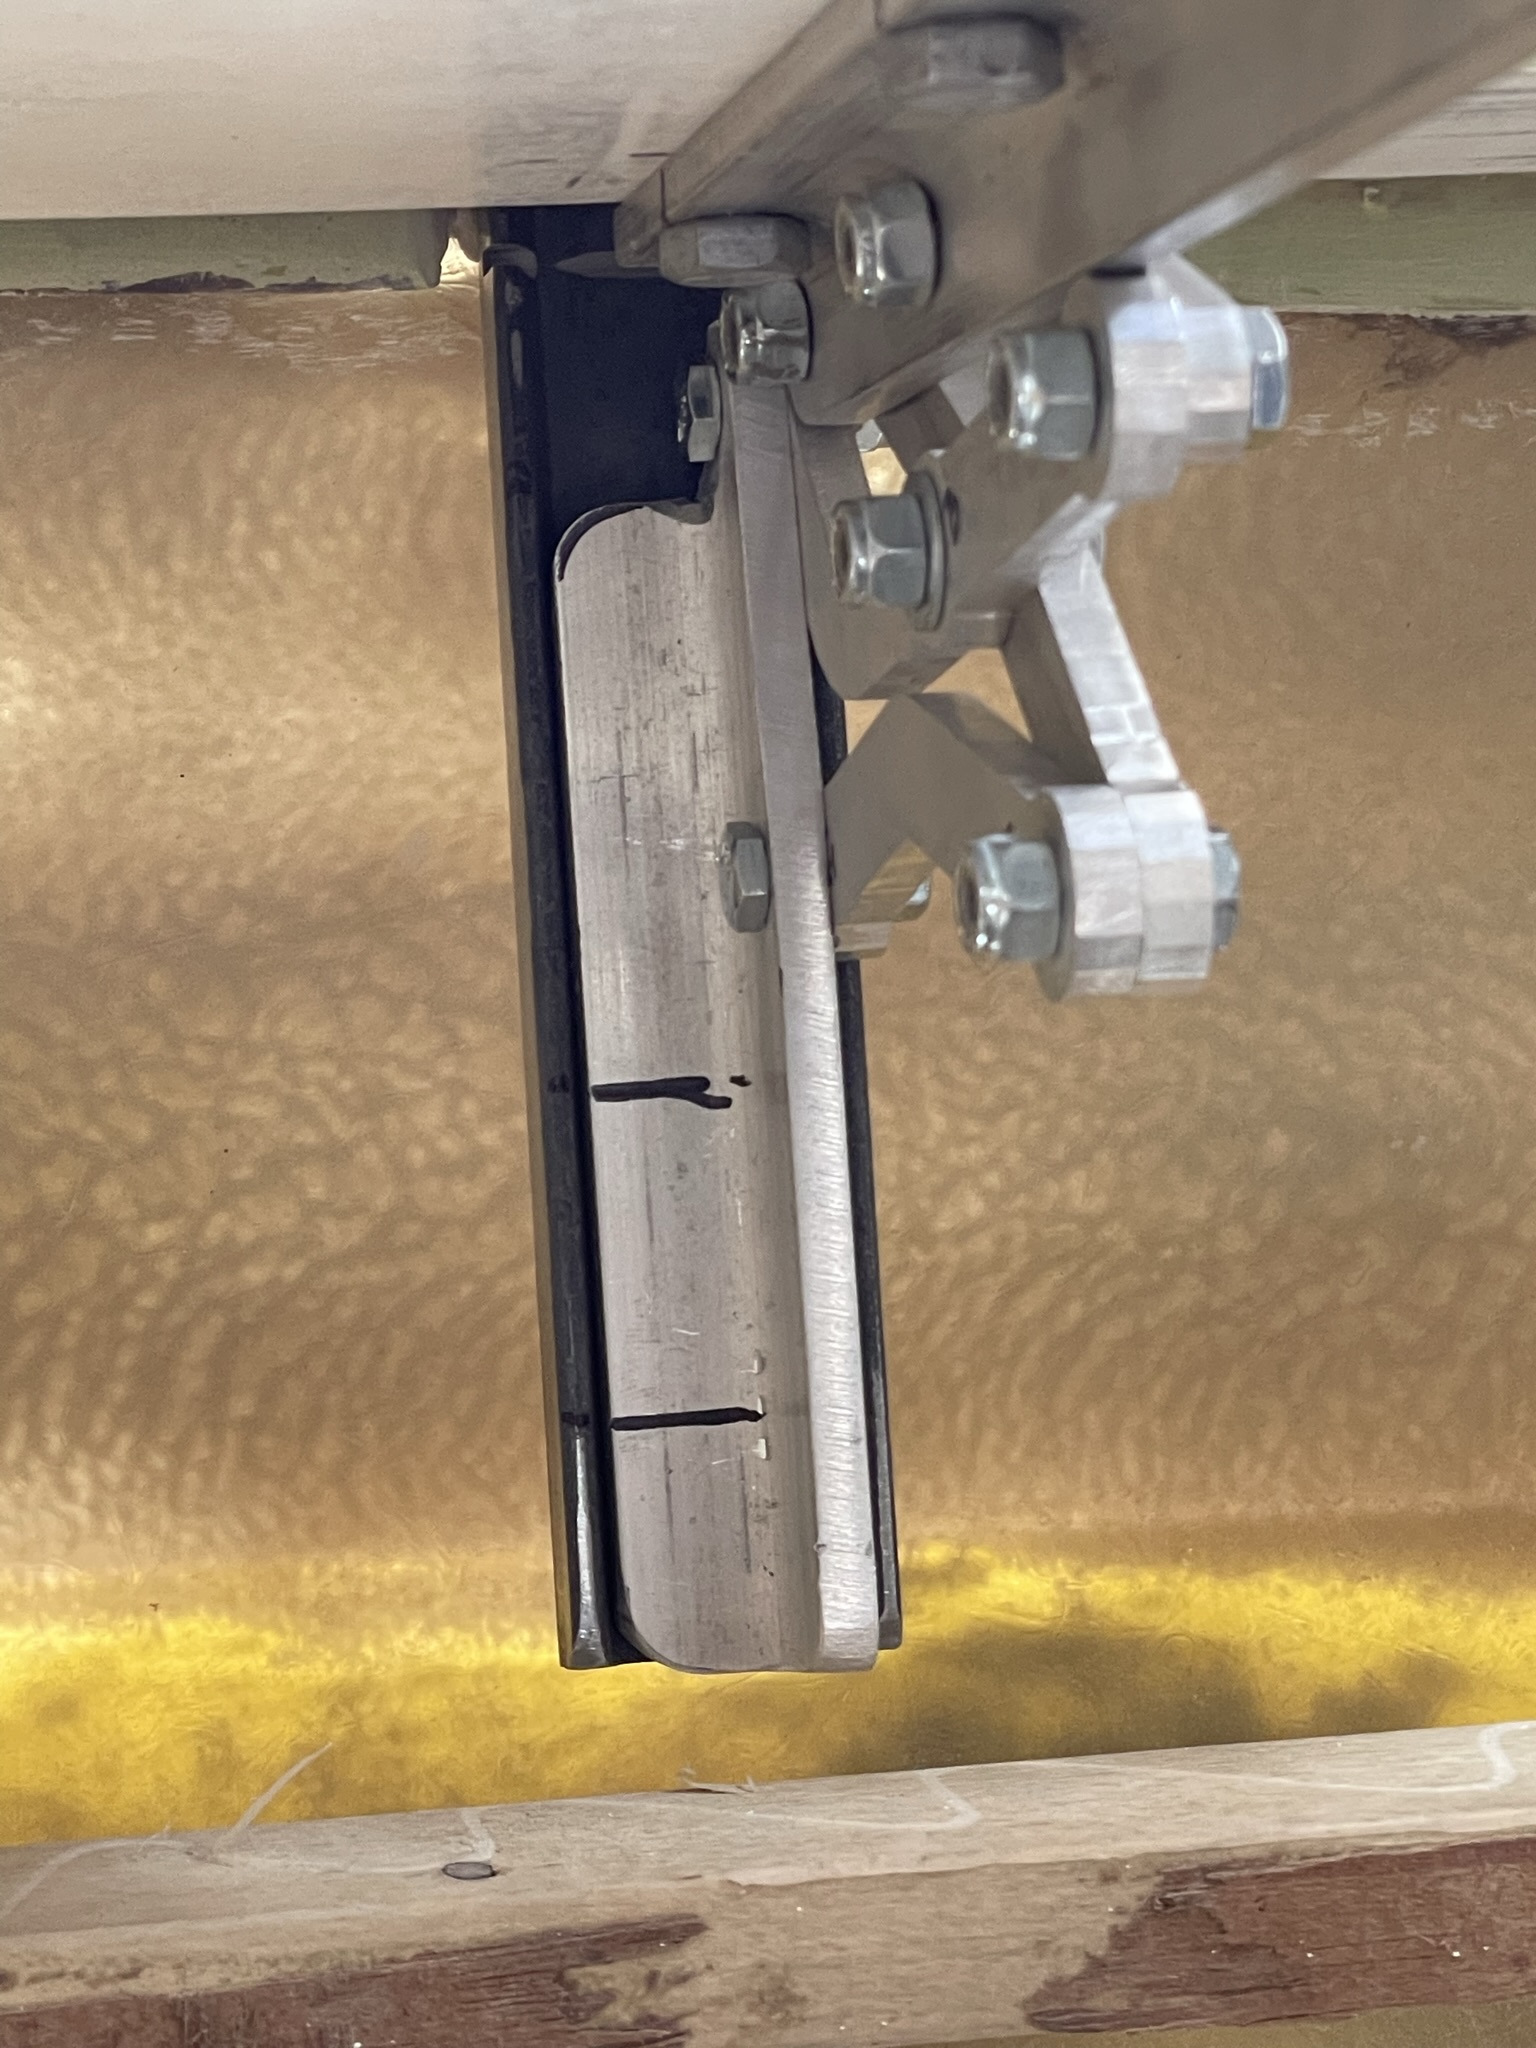
Once that was established I then proceeded to mount the hinges to the support discussed above.
I drilled into the steel support and attached the aluminum hinges in place.
I still need to do some adjustments and mount a spring air arm to keep the hood up when opened. The real cars use A manual arm to keep it open this is my upgrade.
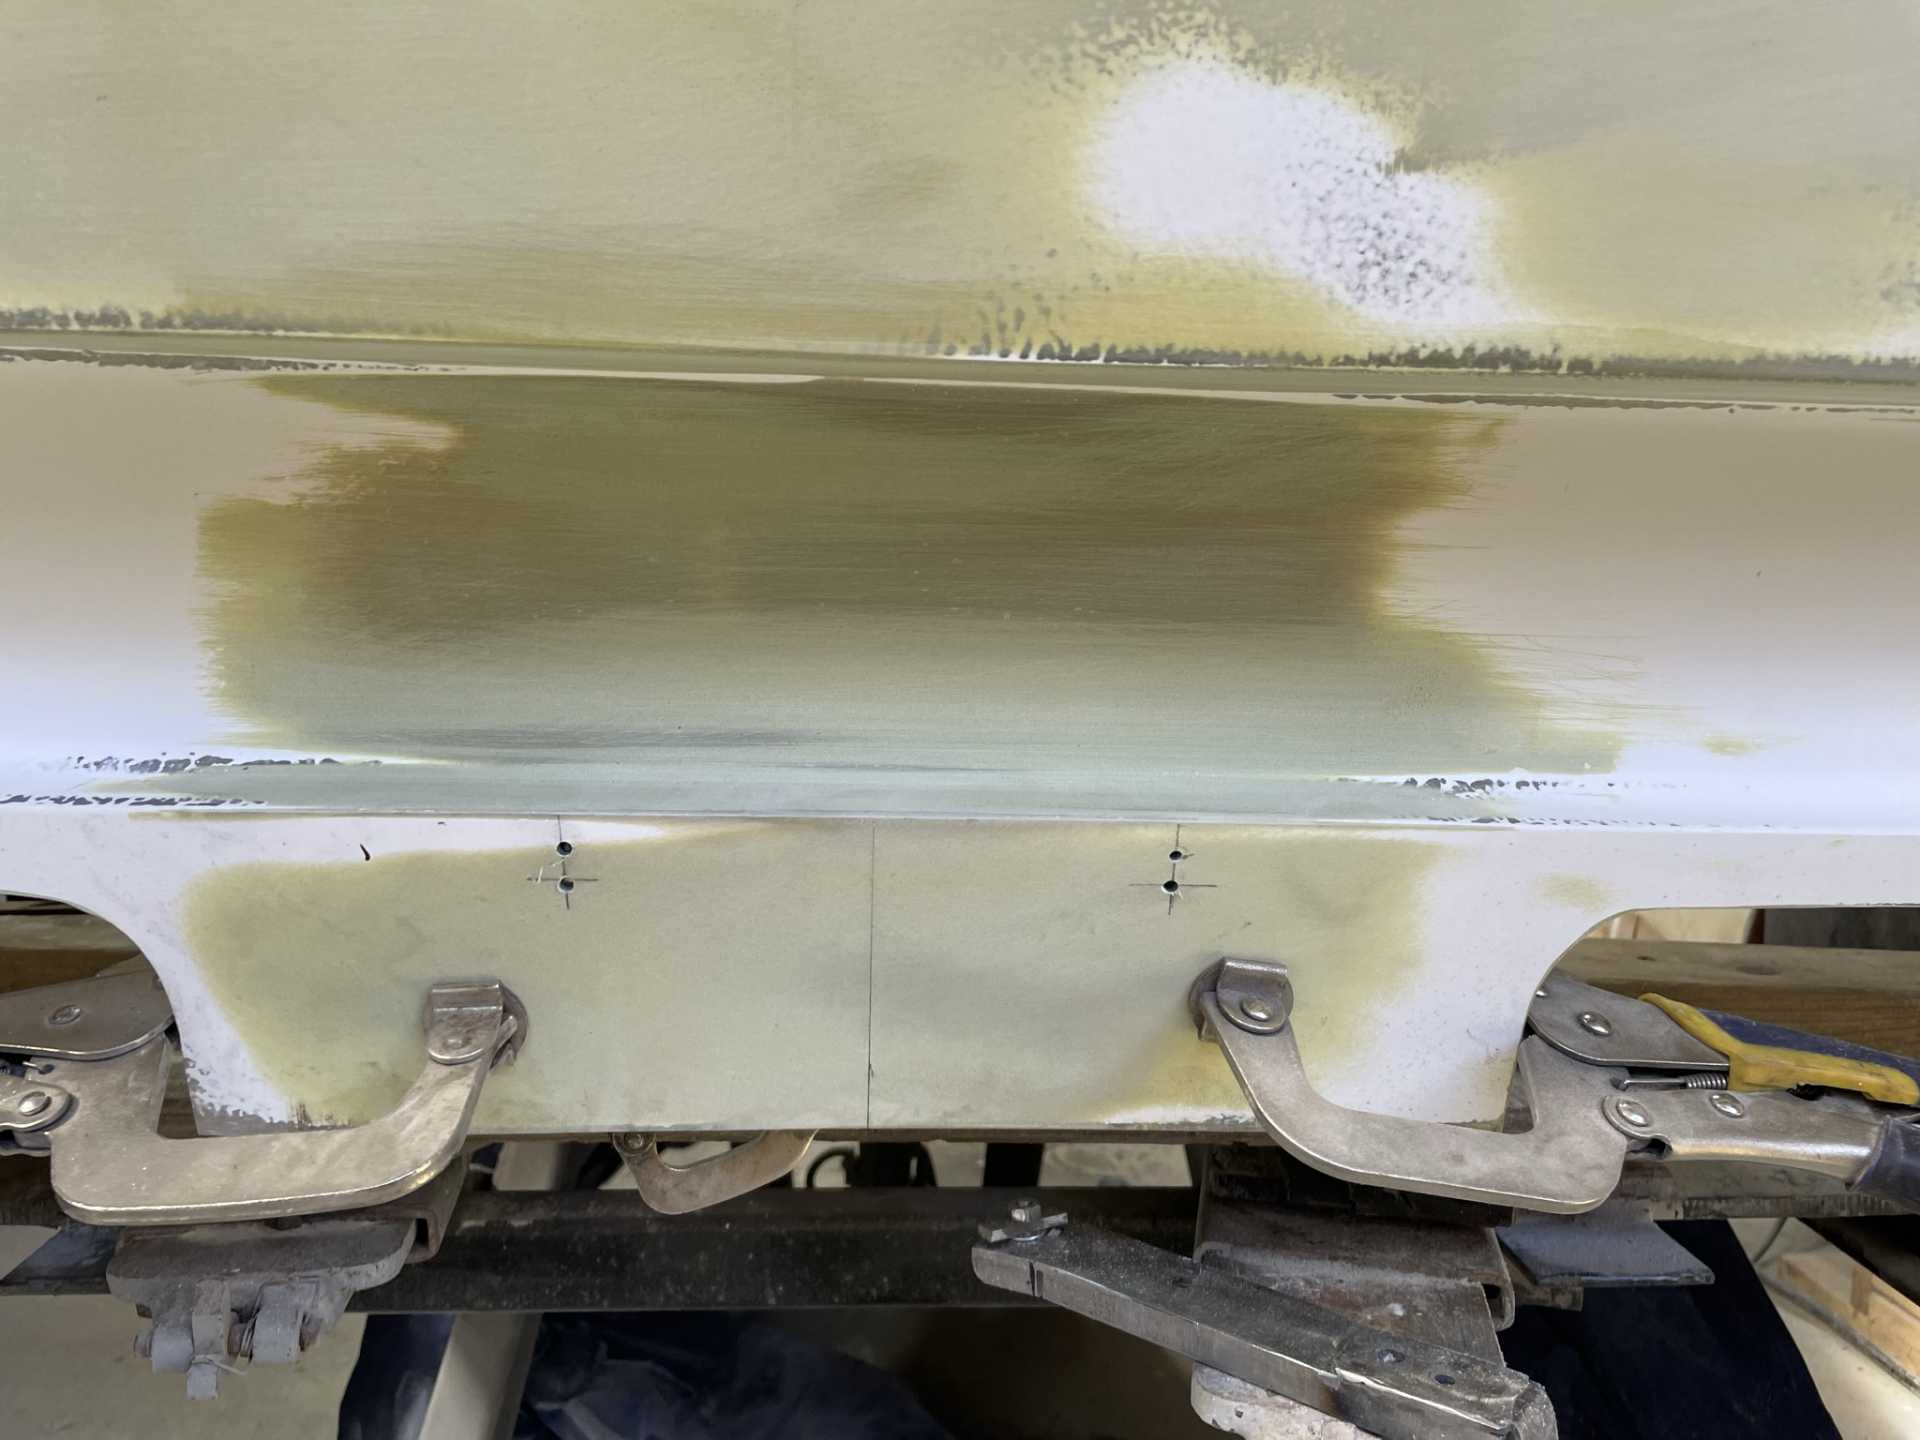
Hi everyone, so I’m getting down to the last construction items on the car’s back half before primer and paint. As I discussed previously for the tow bar there will be a 1 1/2” hole drilled into the body behind the license plate, I’m planning on using a spring Fold down license plate holder and there is a fairly strong spring installed which is fine but it requires a bit of reinforcement to the body behind the plate attachment point. I bent up some 1/8” steel plate and bonded it to the fiberglass body inside. The whole underside will be sprayed black so it will disappear.
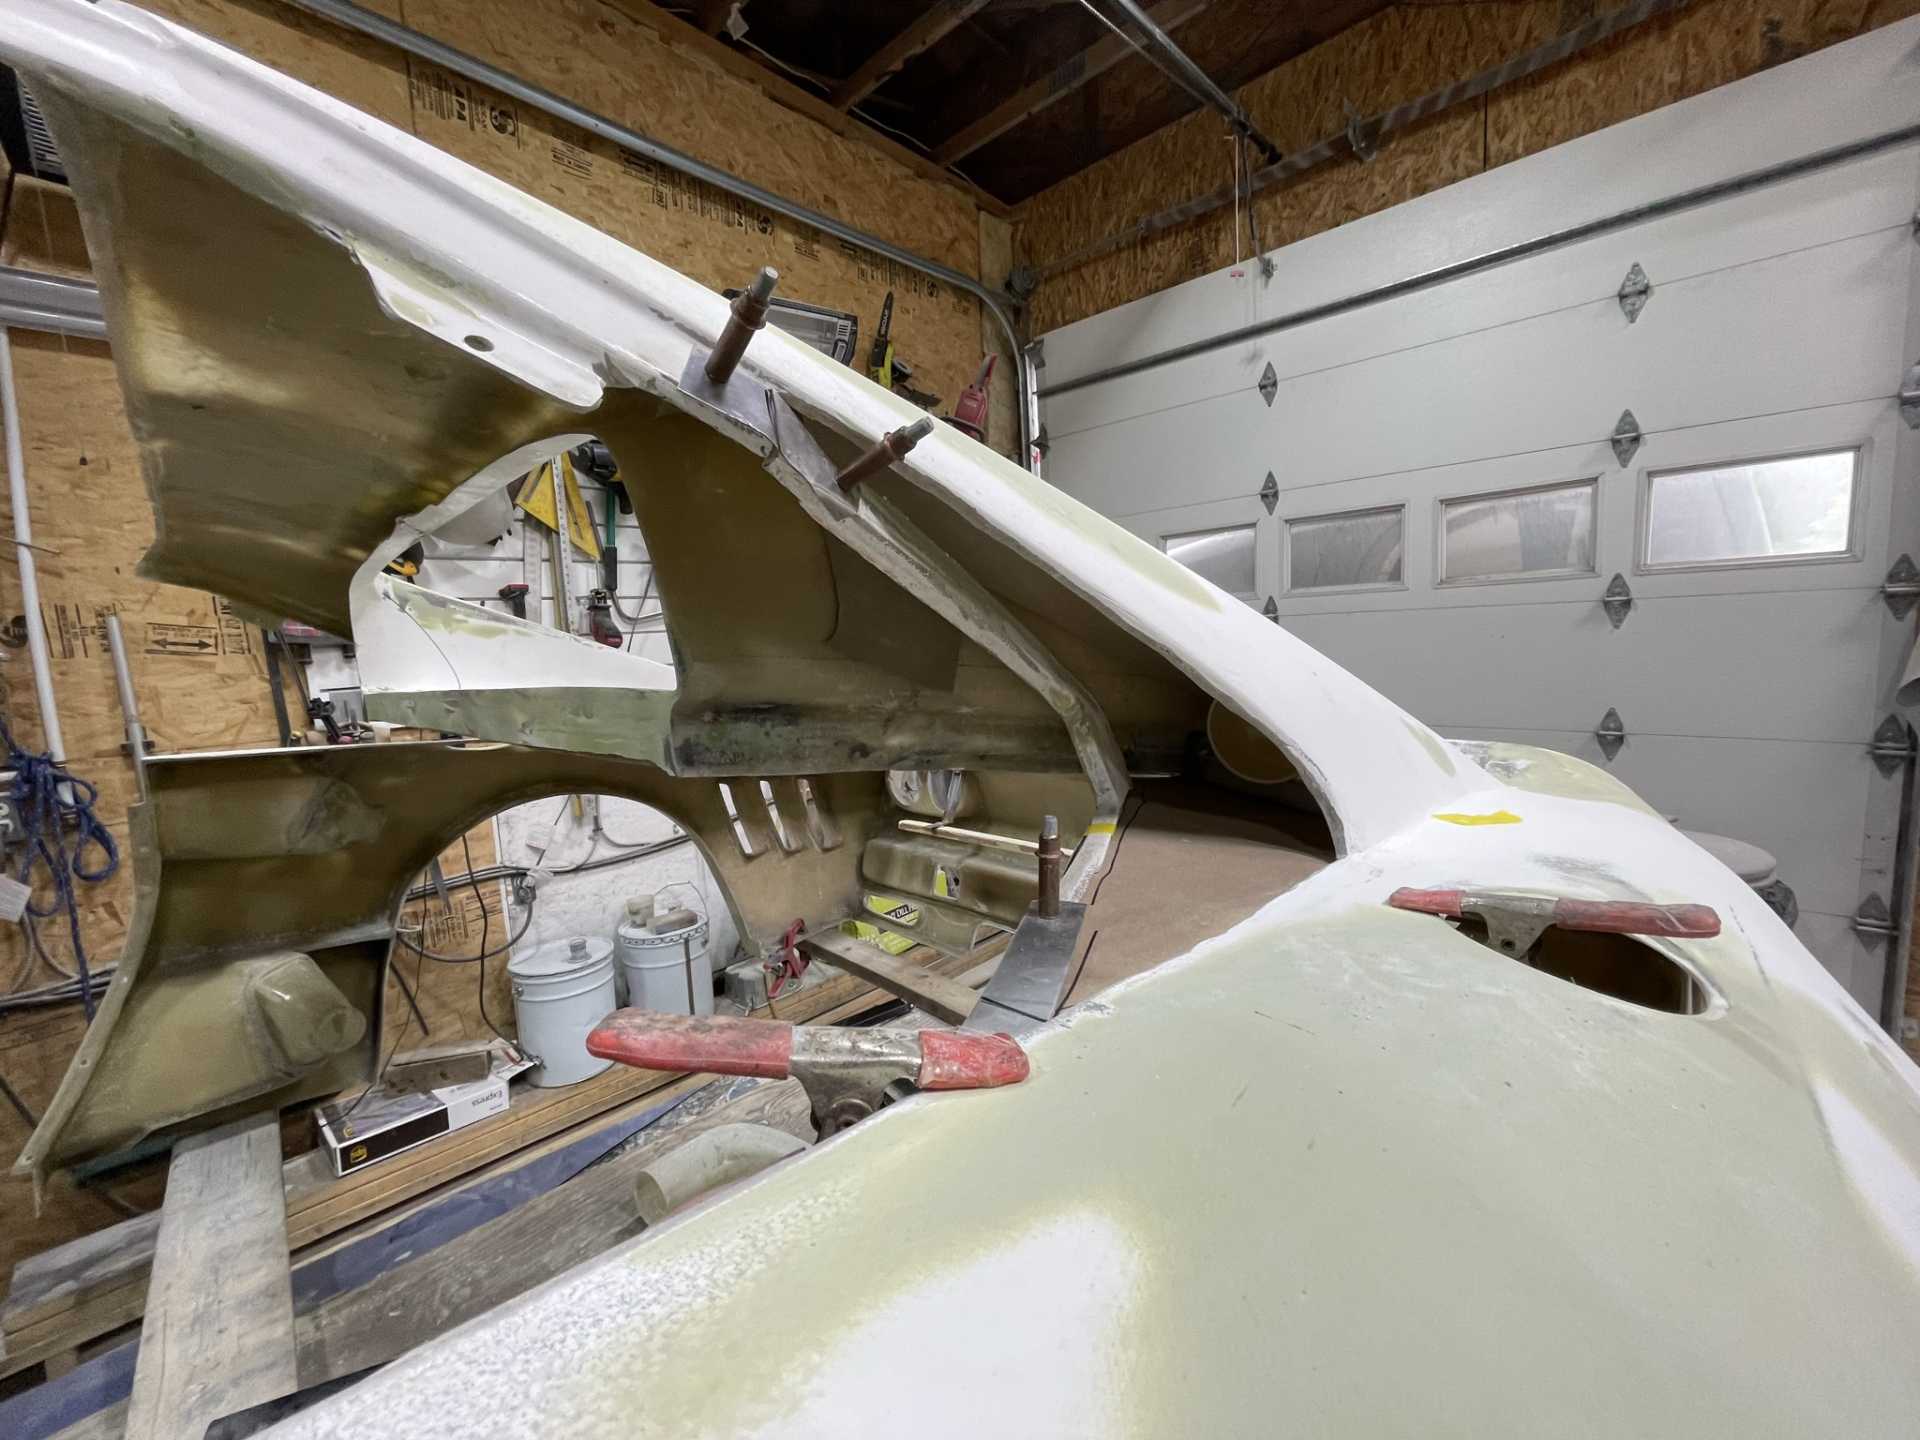
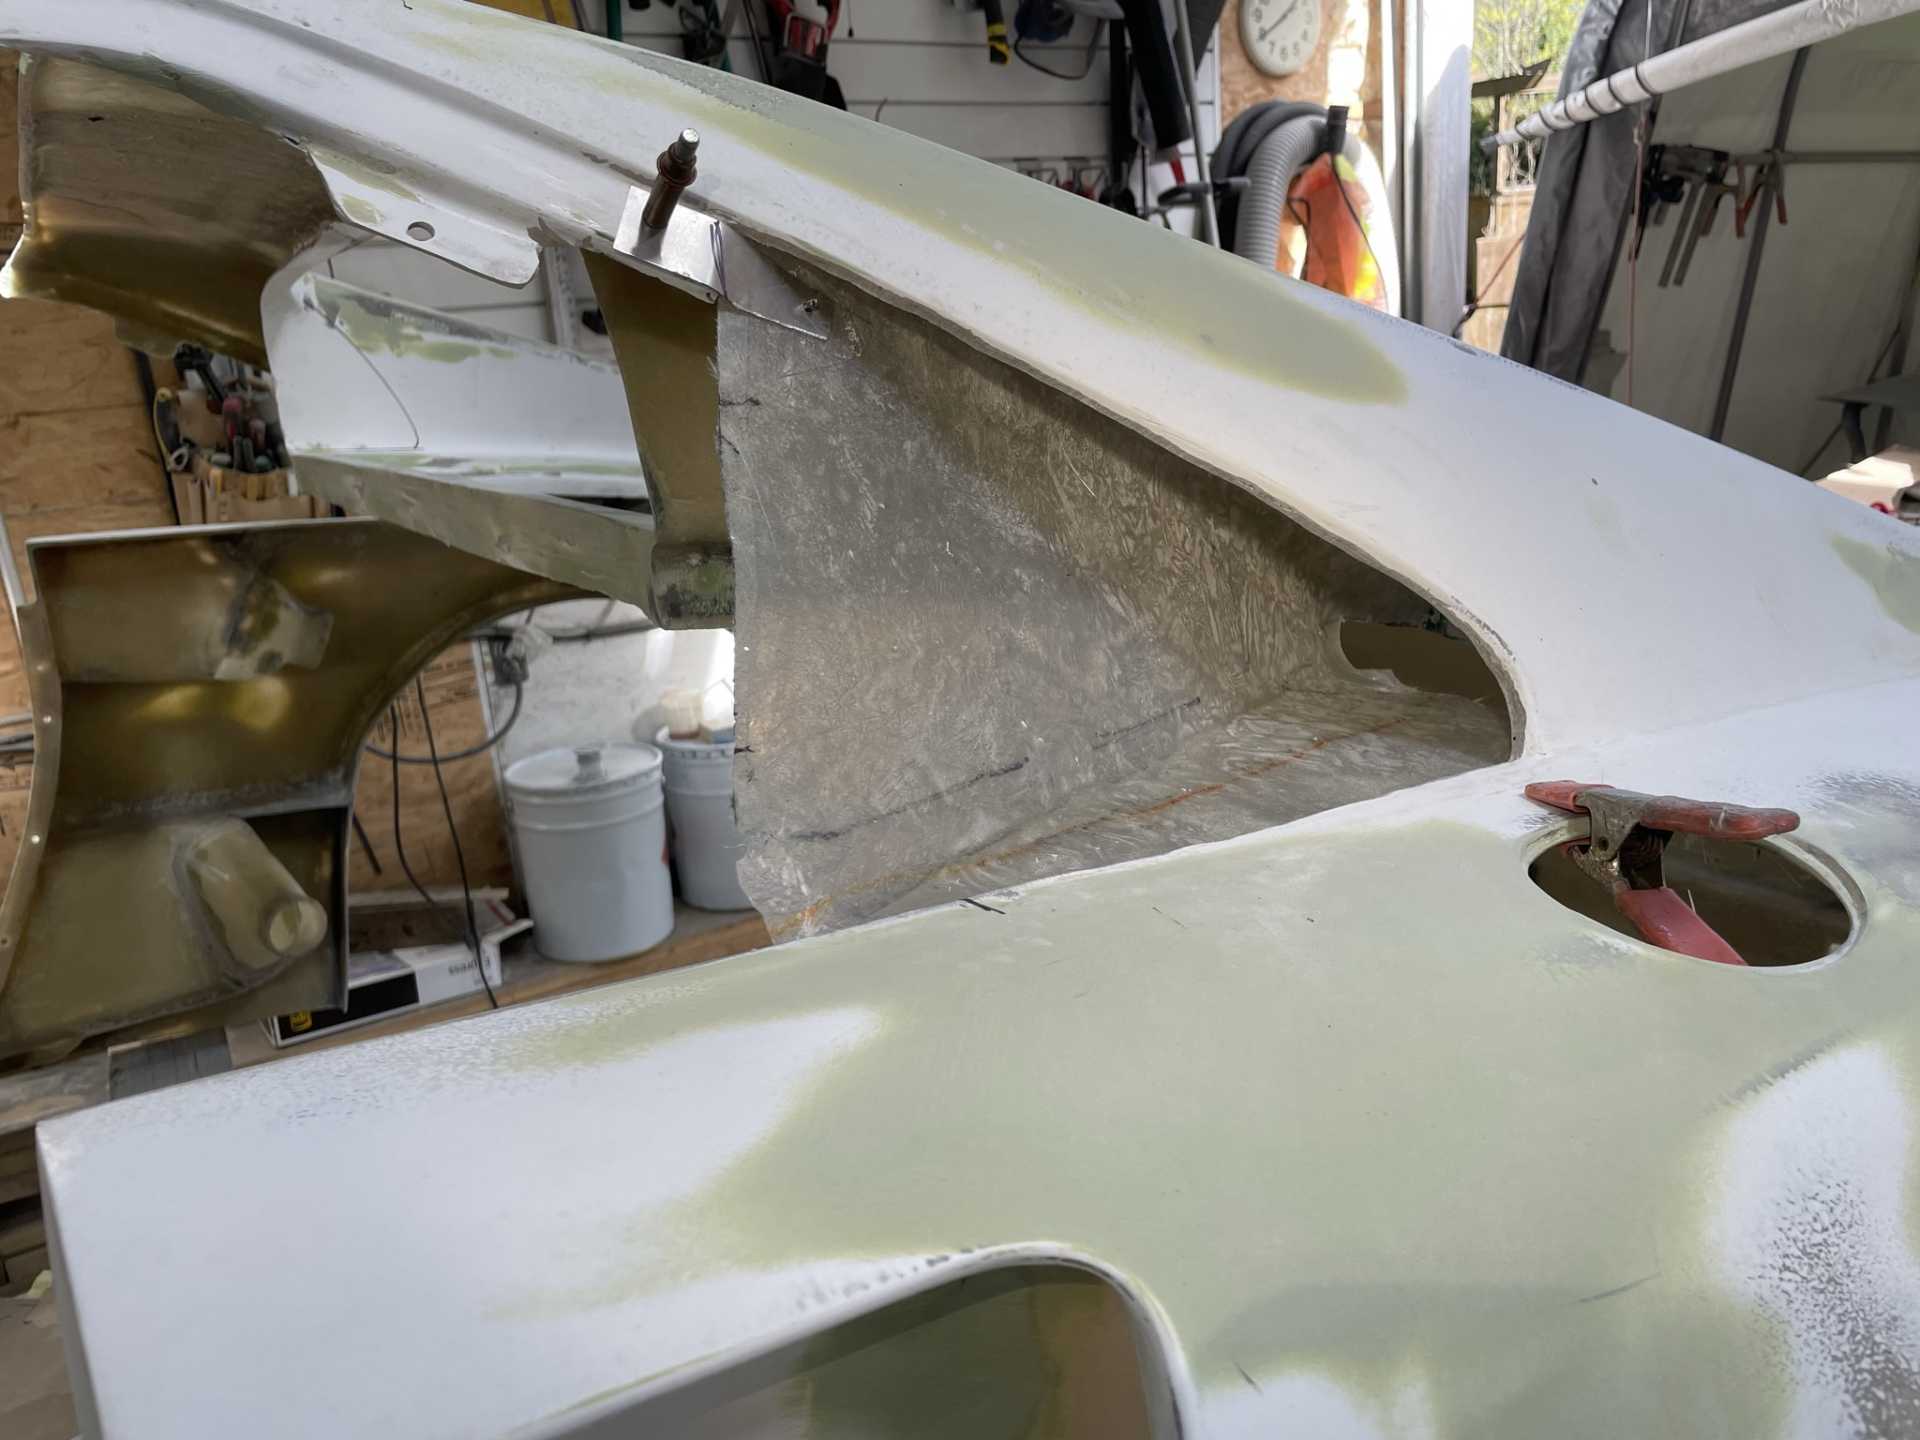
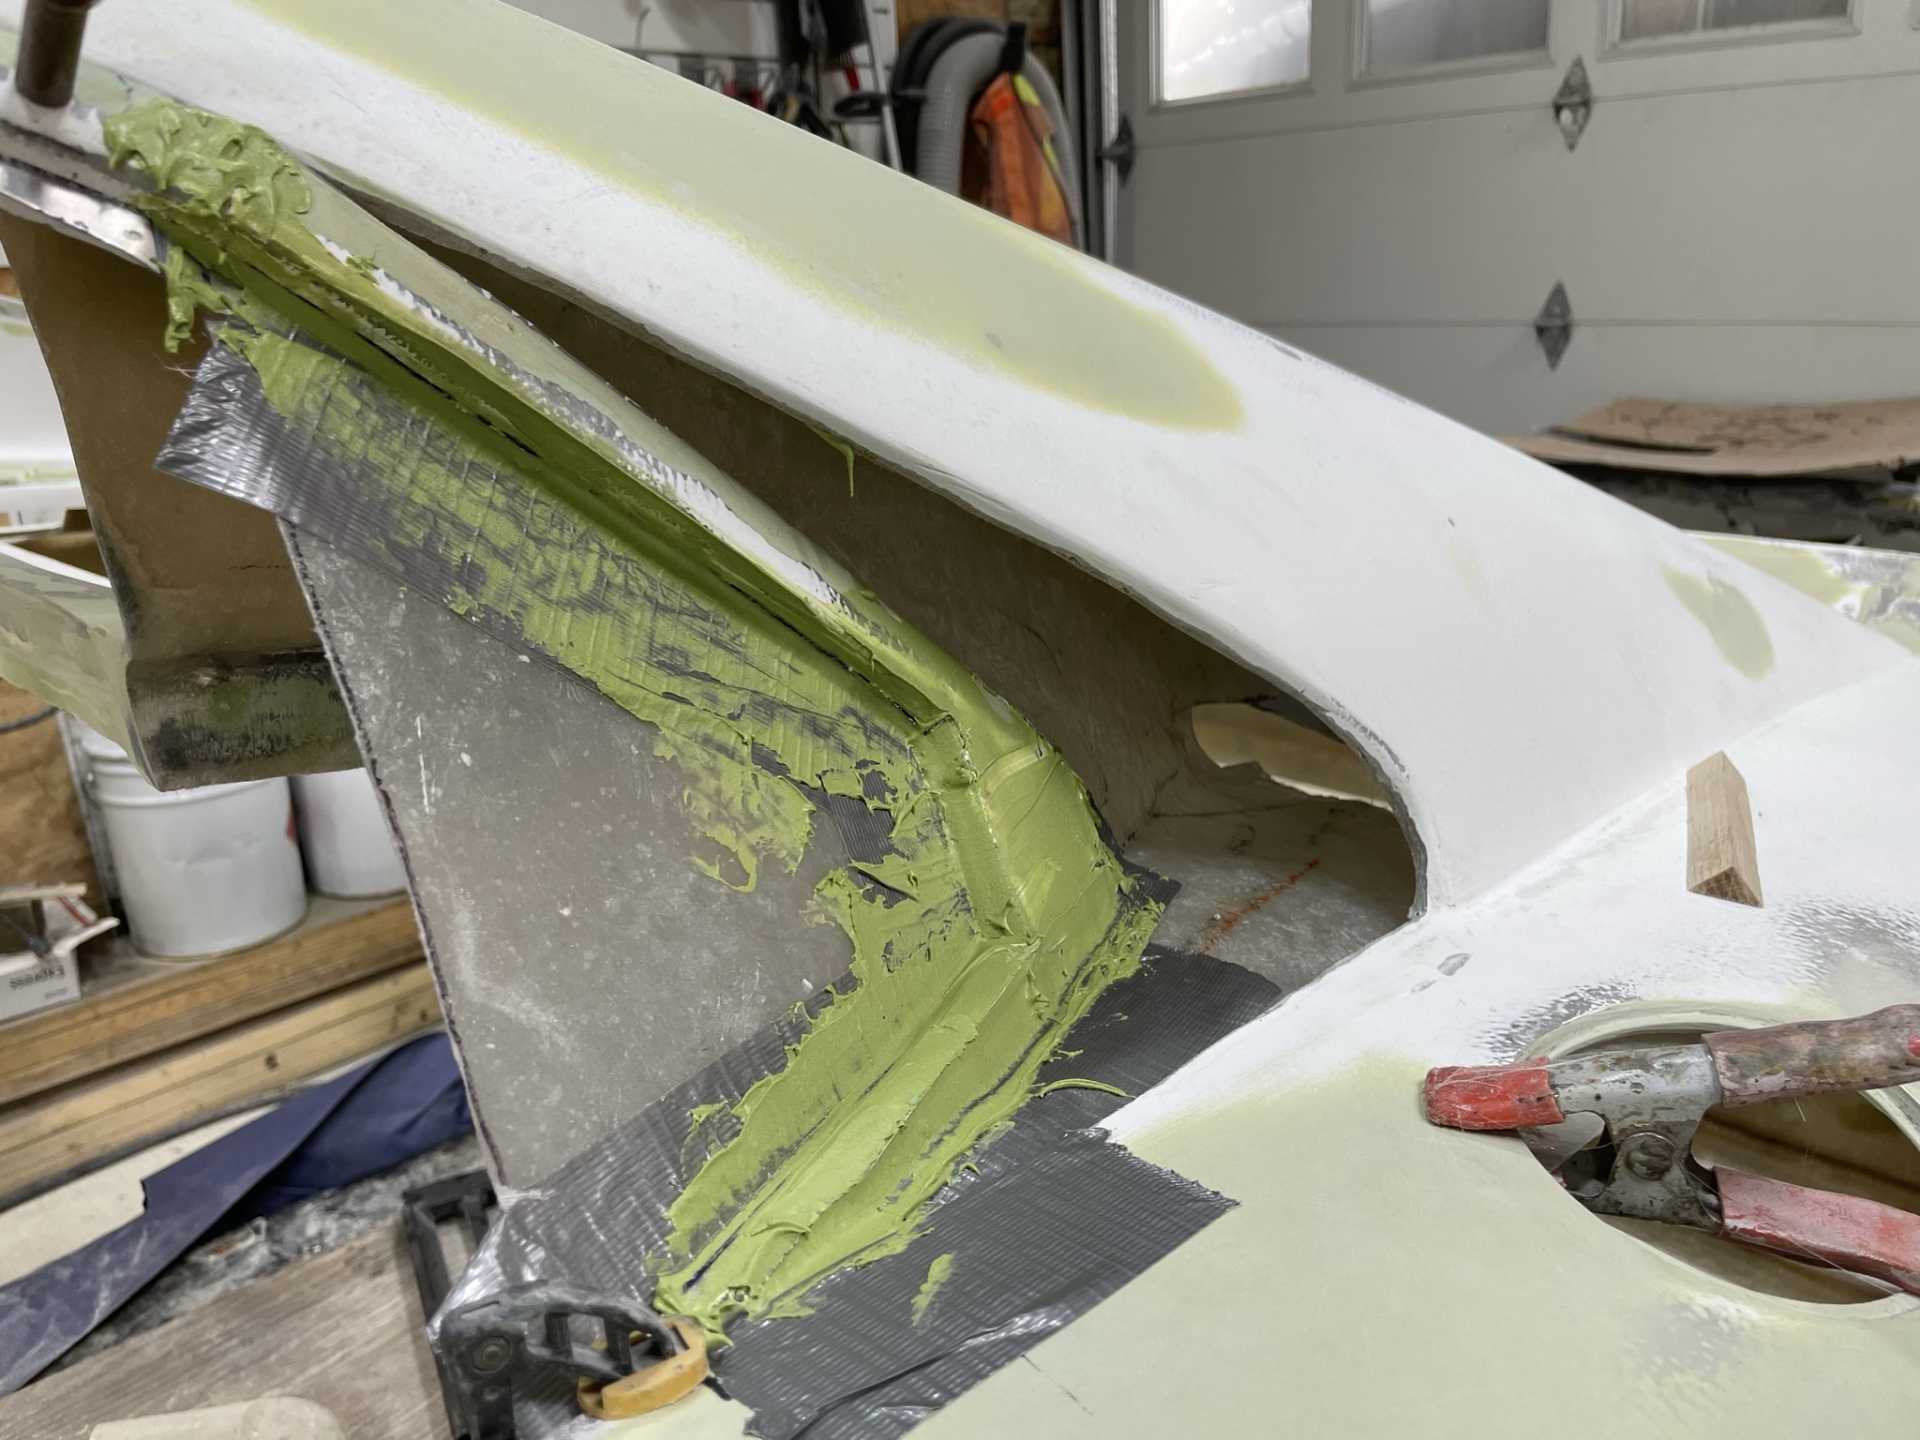
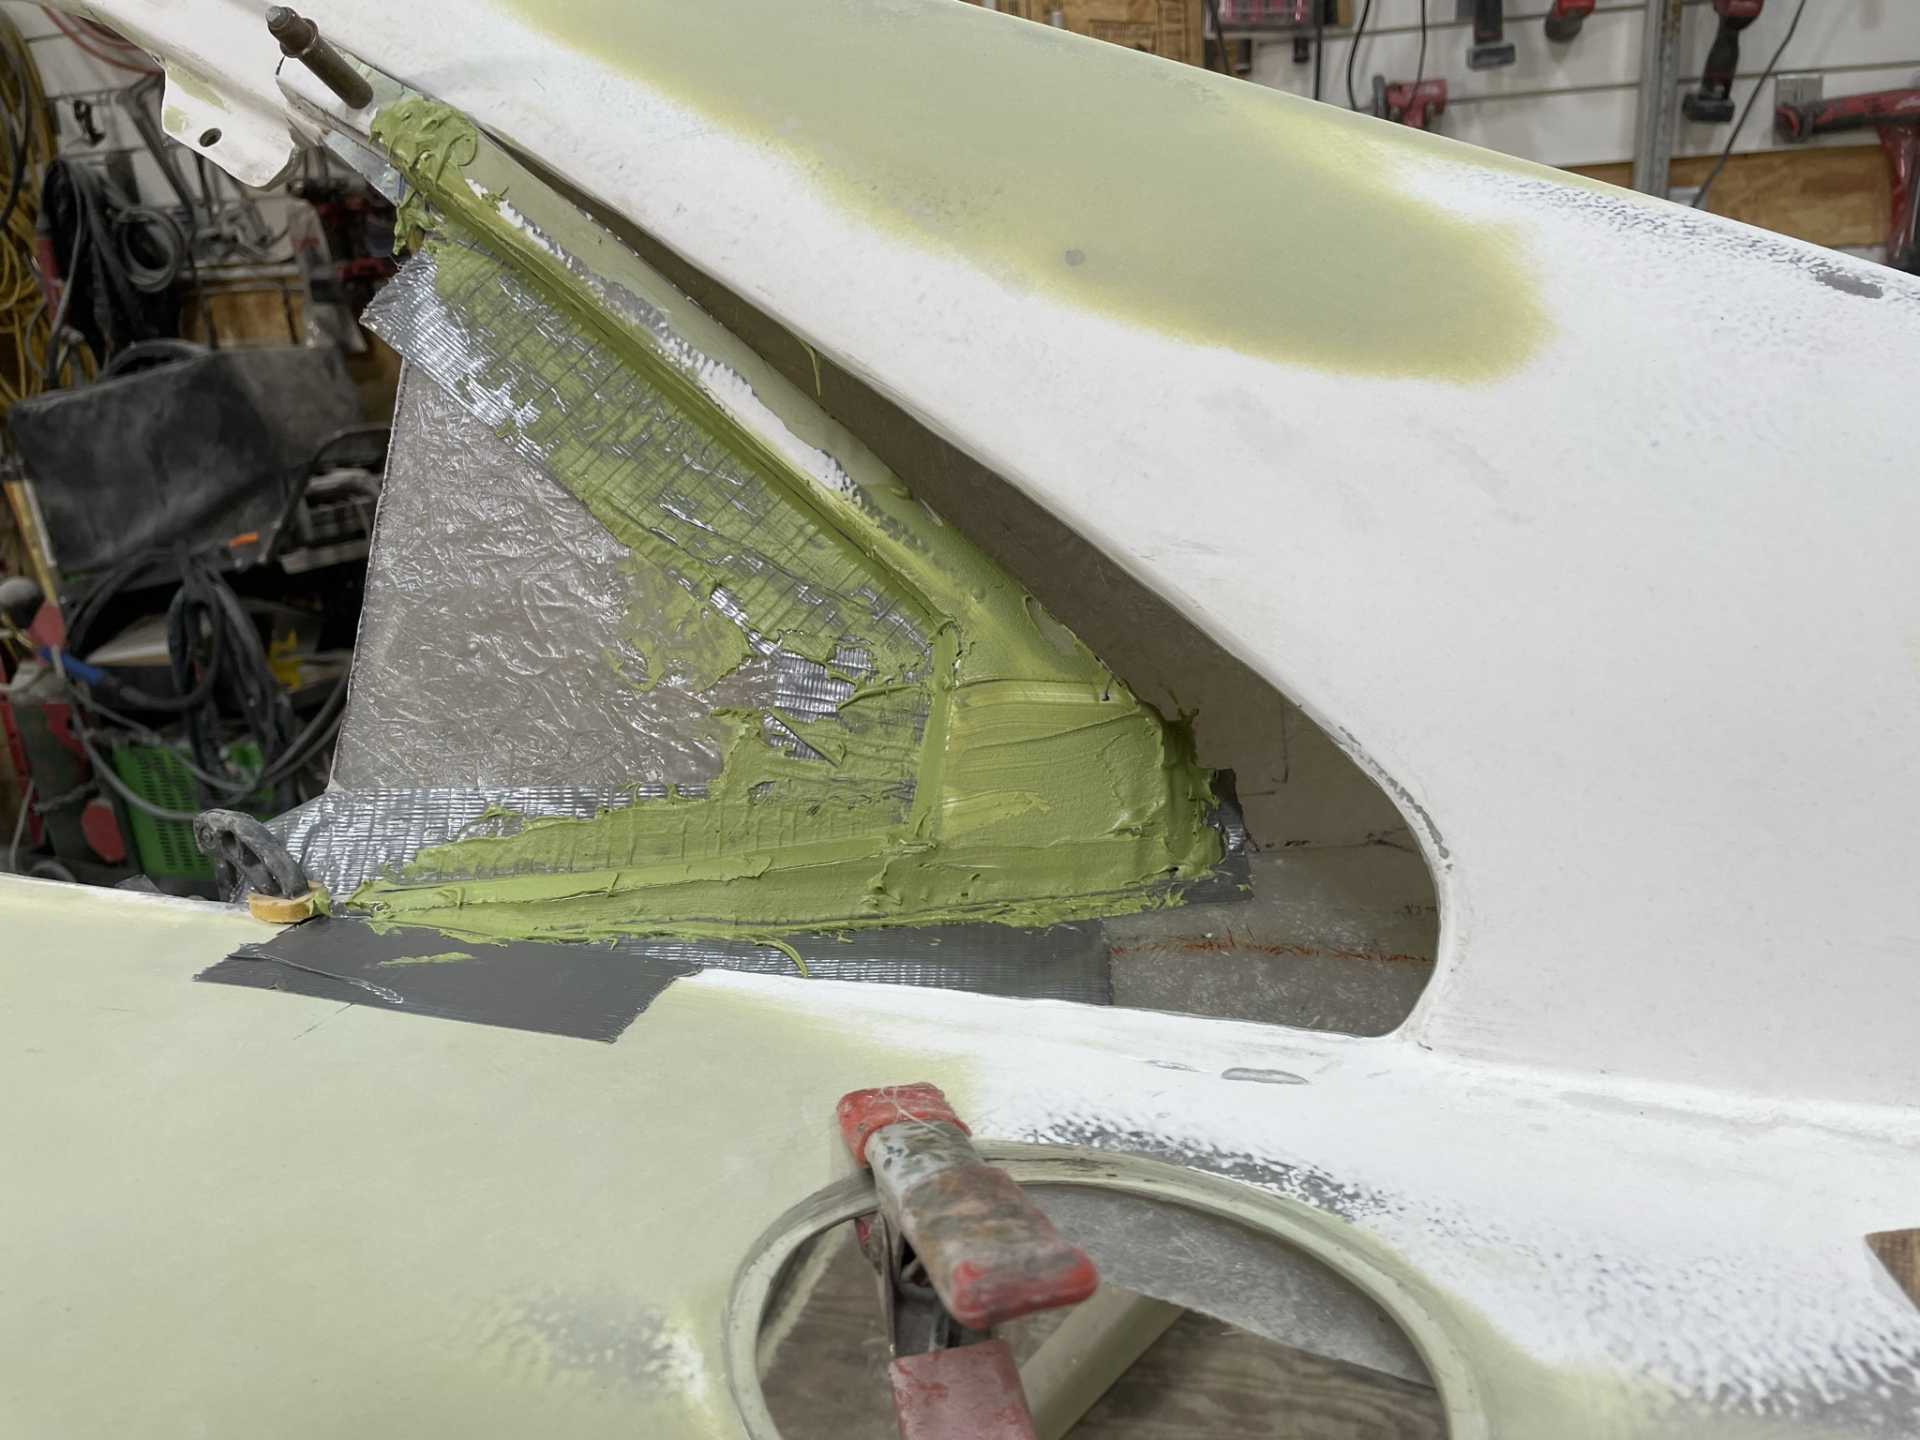
Then onto the final piece of the puzzle , on the real OEM GTO a the sailplane is actually a duct that directs air to the twin turbochargers. My car doesn’t actually have turbos but I feel it is an important design of the car that I’m building into mine.
The process I’m using is to start with the duct area behind the window and build forward. You actually do not really see The duct once everything is done.
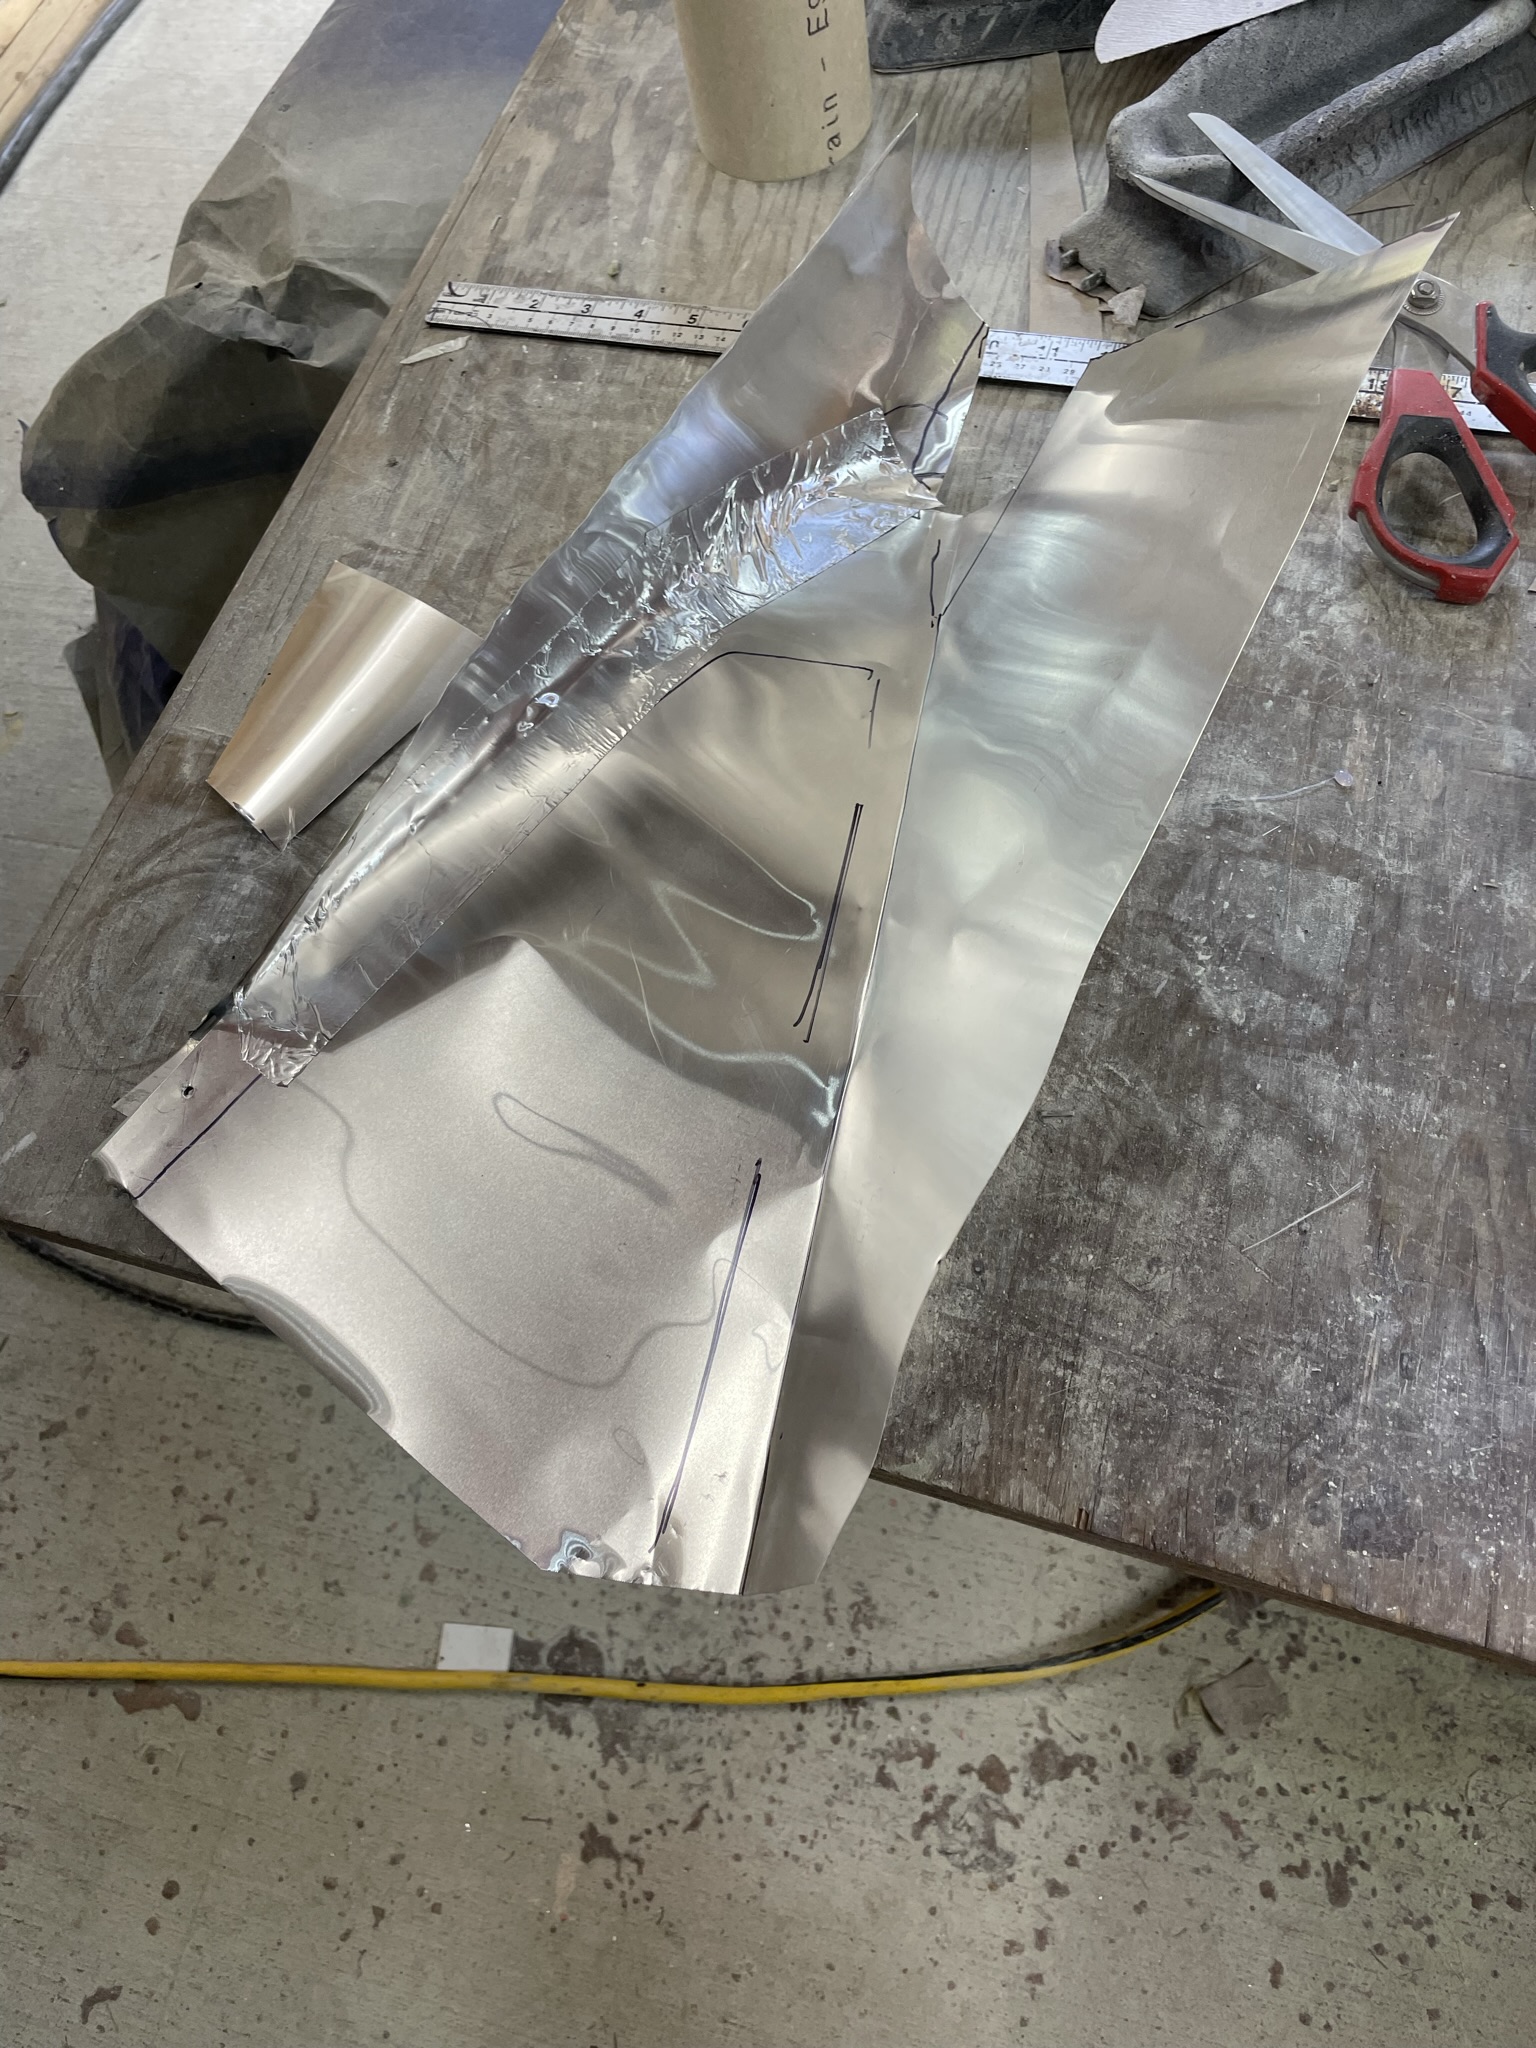
Then Made a template and cut up some aluminum ducting and made the shape I needed.
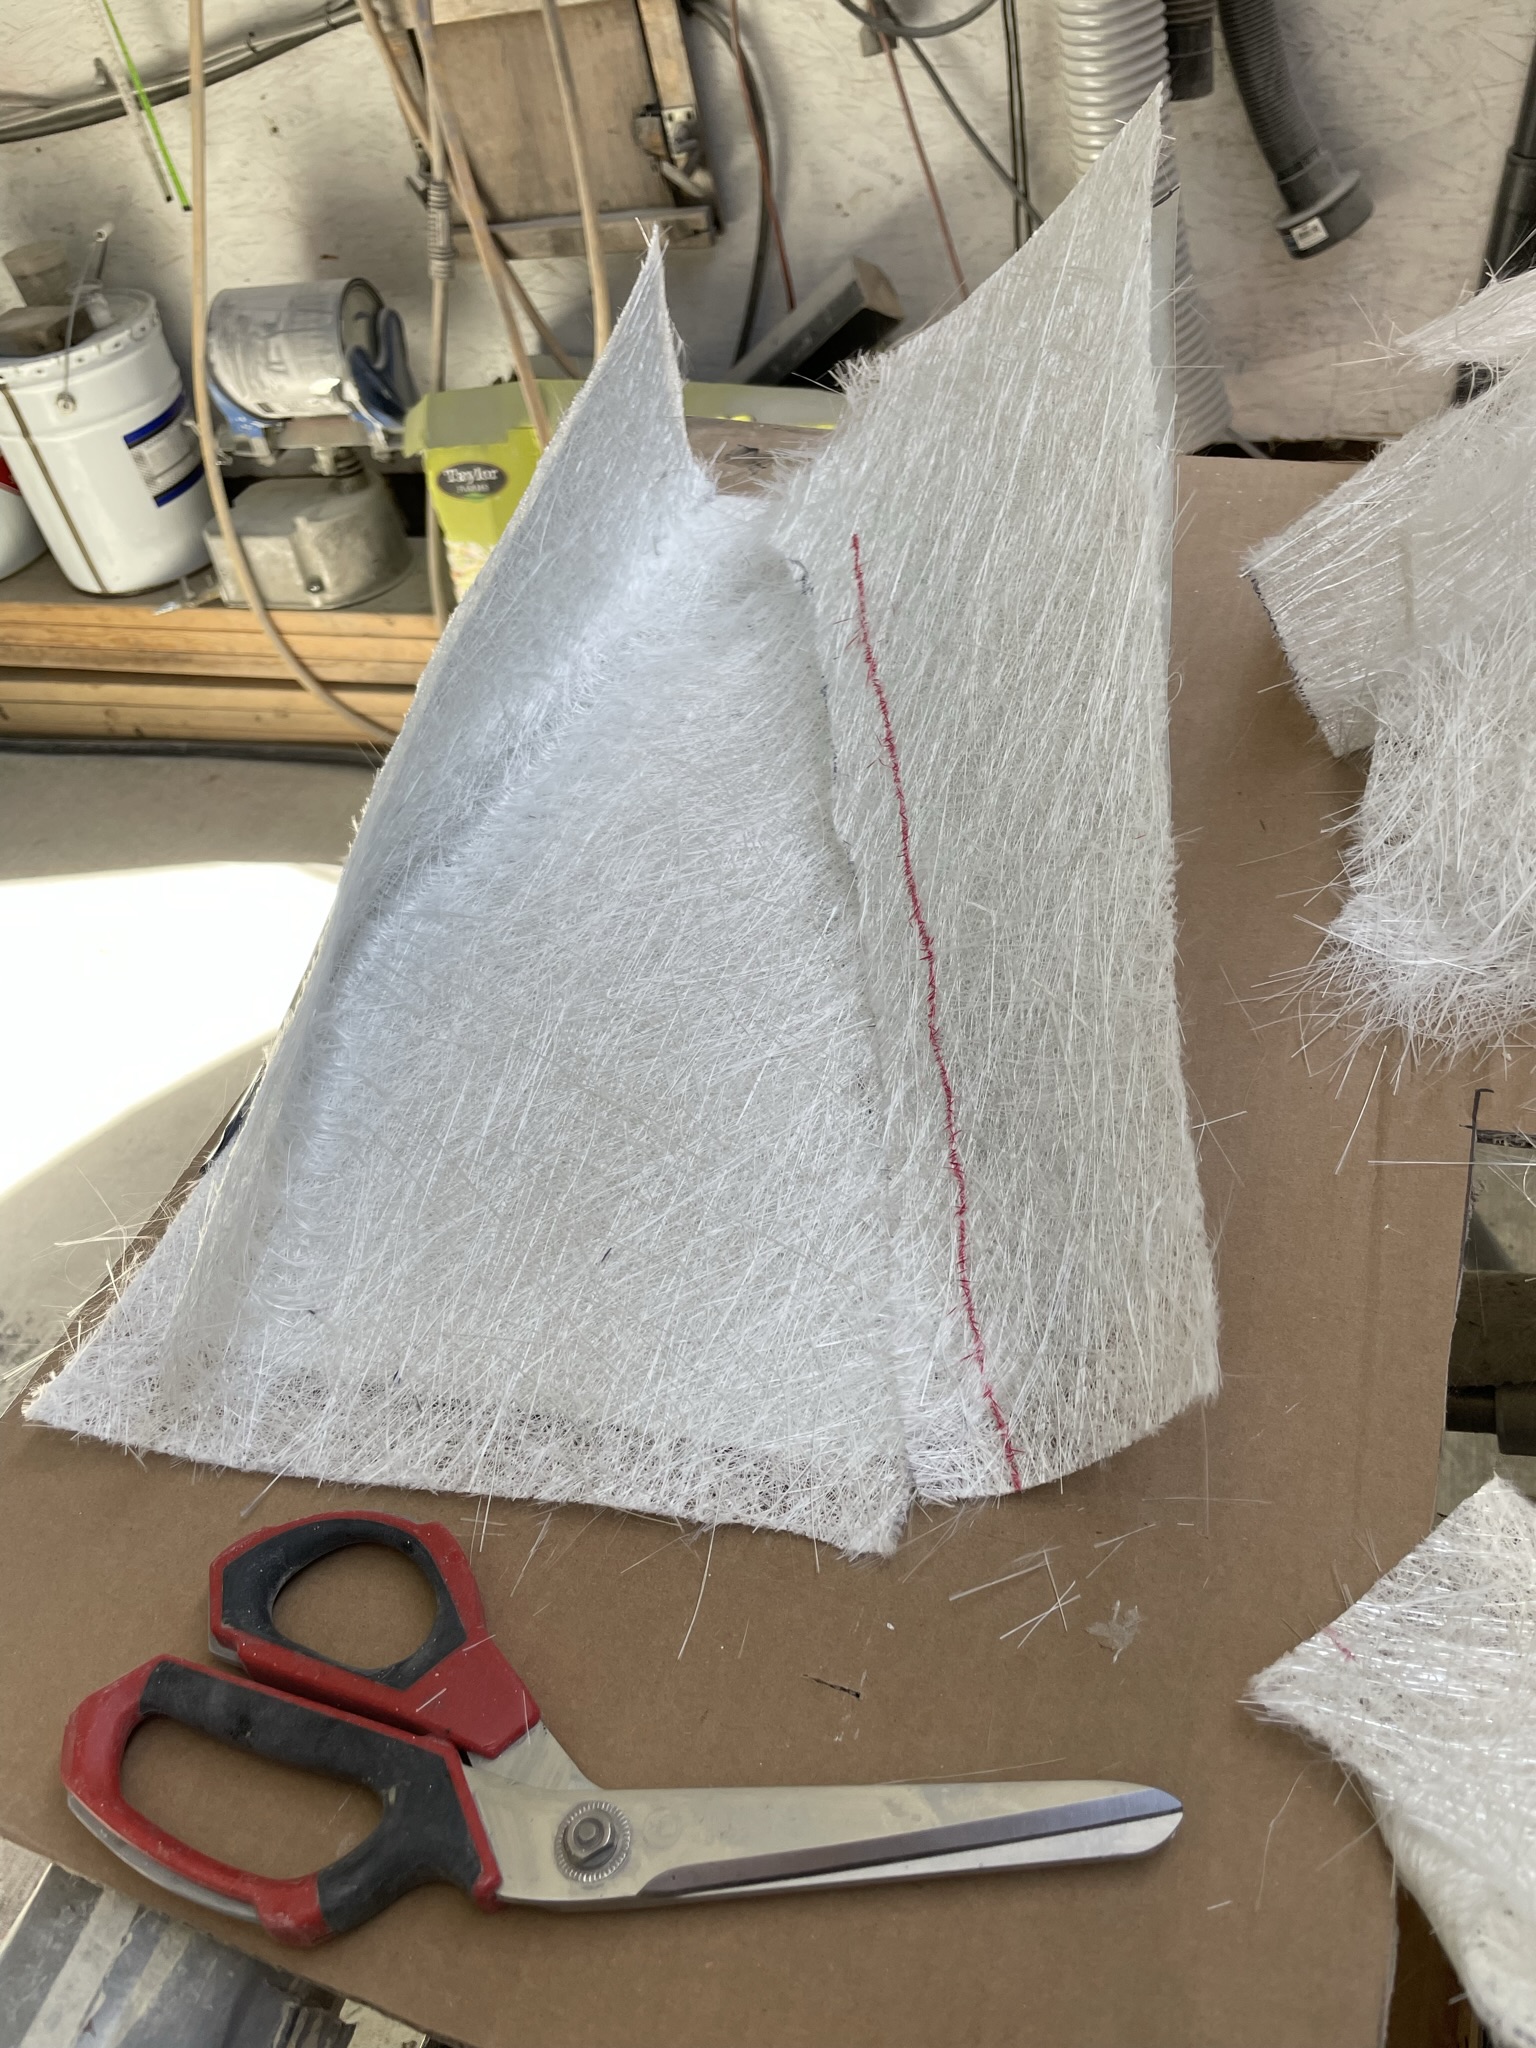
I then layed some mat using only one layer of 1 1/2 oz. mat as it’s not really structural
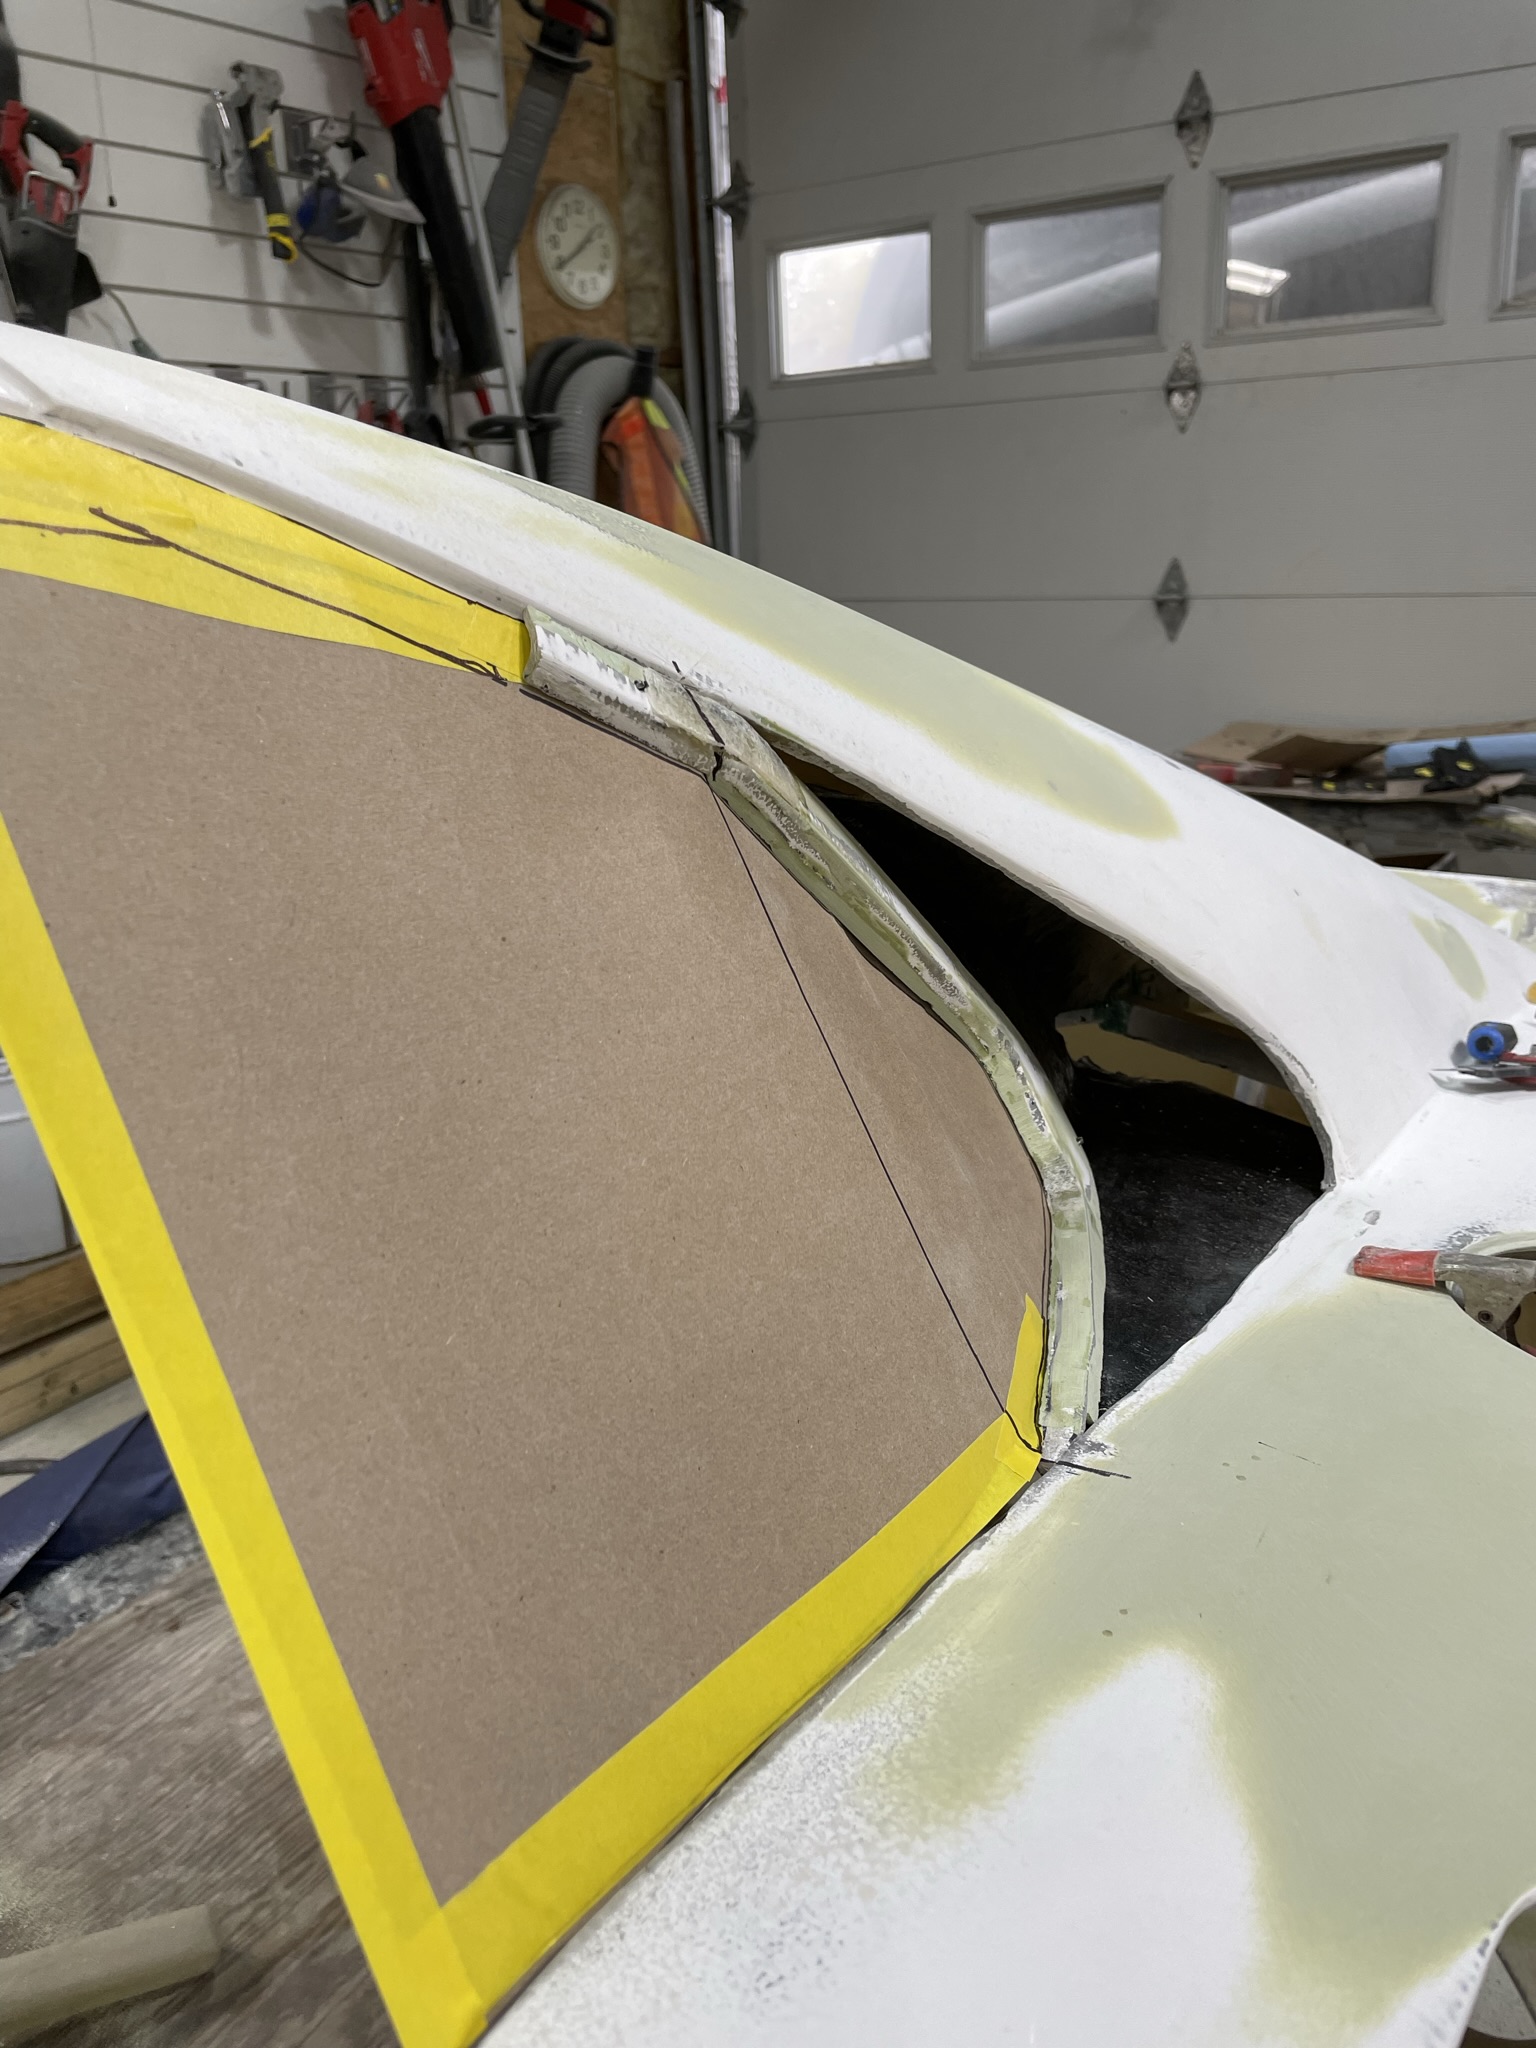
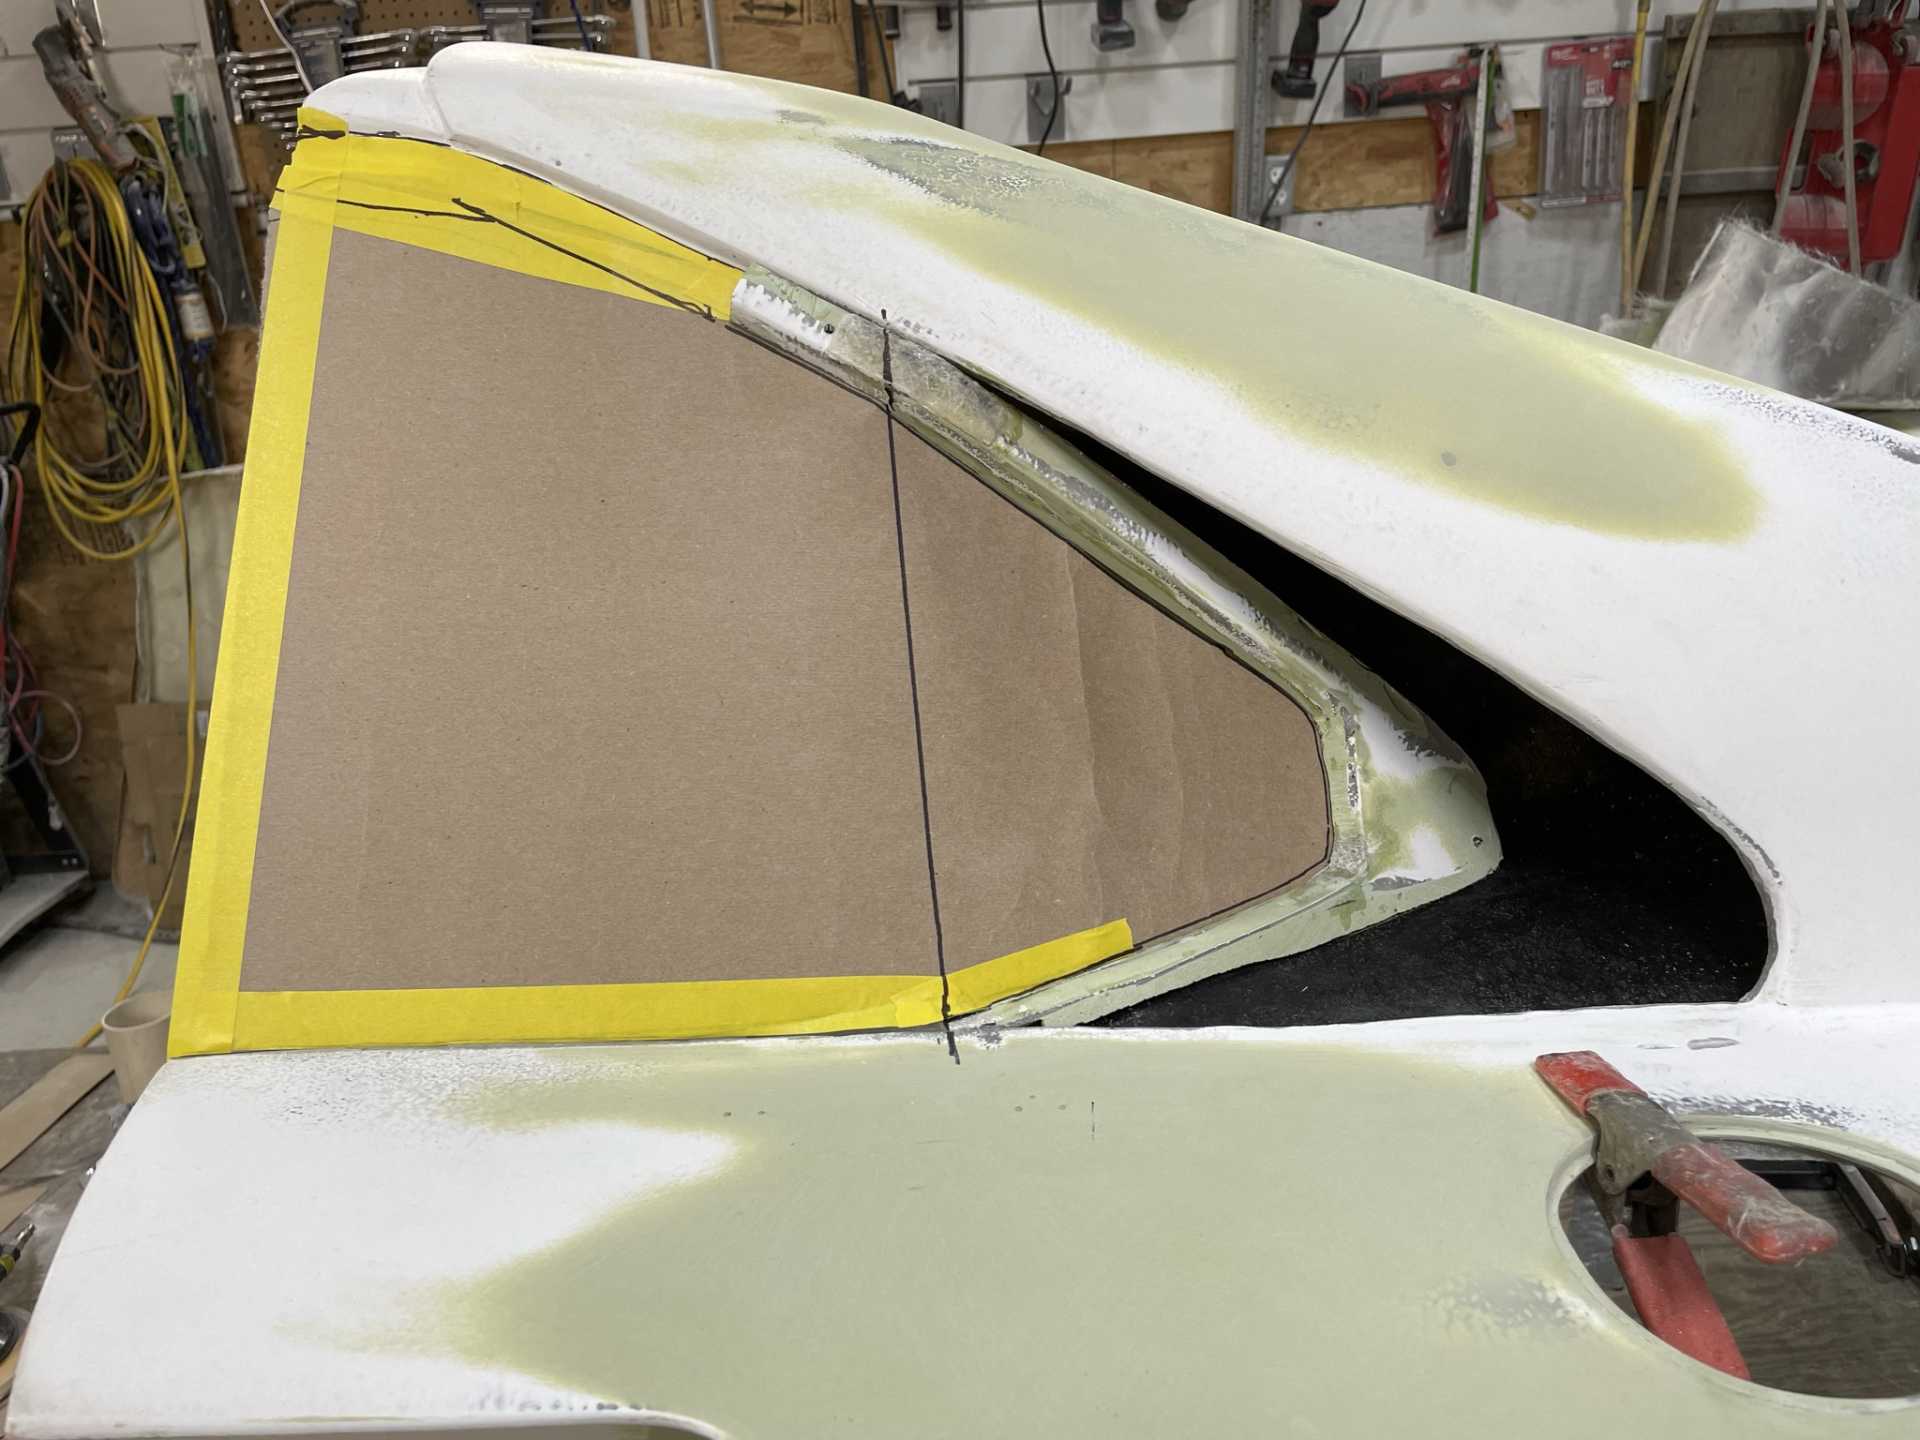
Next I added the window element to the design.On the real GTO the rear window actually curves inward much like the the Toyota MR2. But for my build it’s more for the look than function of the glass. I’ll be using black Lexan for a window. The green bondo is just to fill in the edges for a more finished piece. I’m hoping to build an aluminum frame to Frame and finish the Lexan window.
The paper will be a template for cutting the Lexan, it will be bent once I complete a buck for the proper curve of the glass.
Thanks for visiting Stay safe everyone Wayne
[This message has been edited by dobie1 (edited 04-14-2022).]
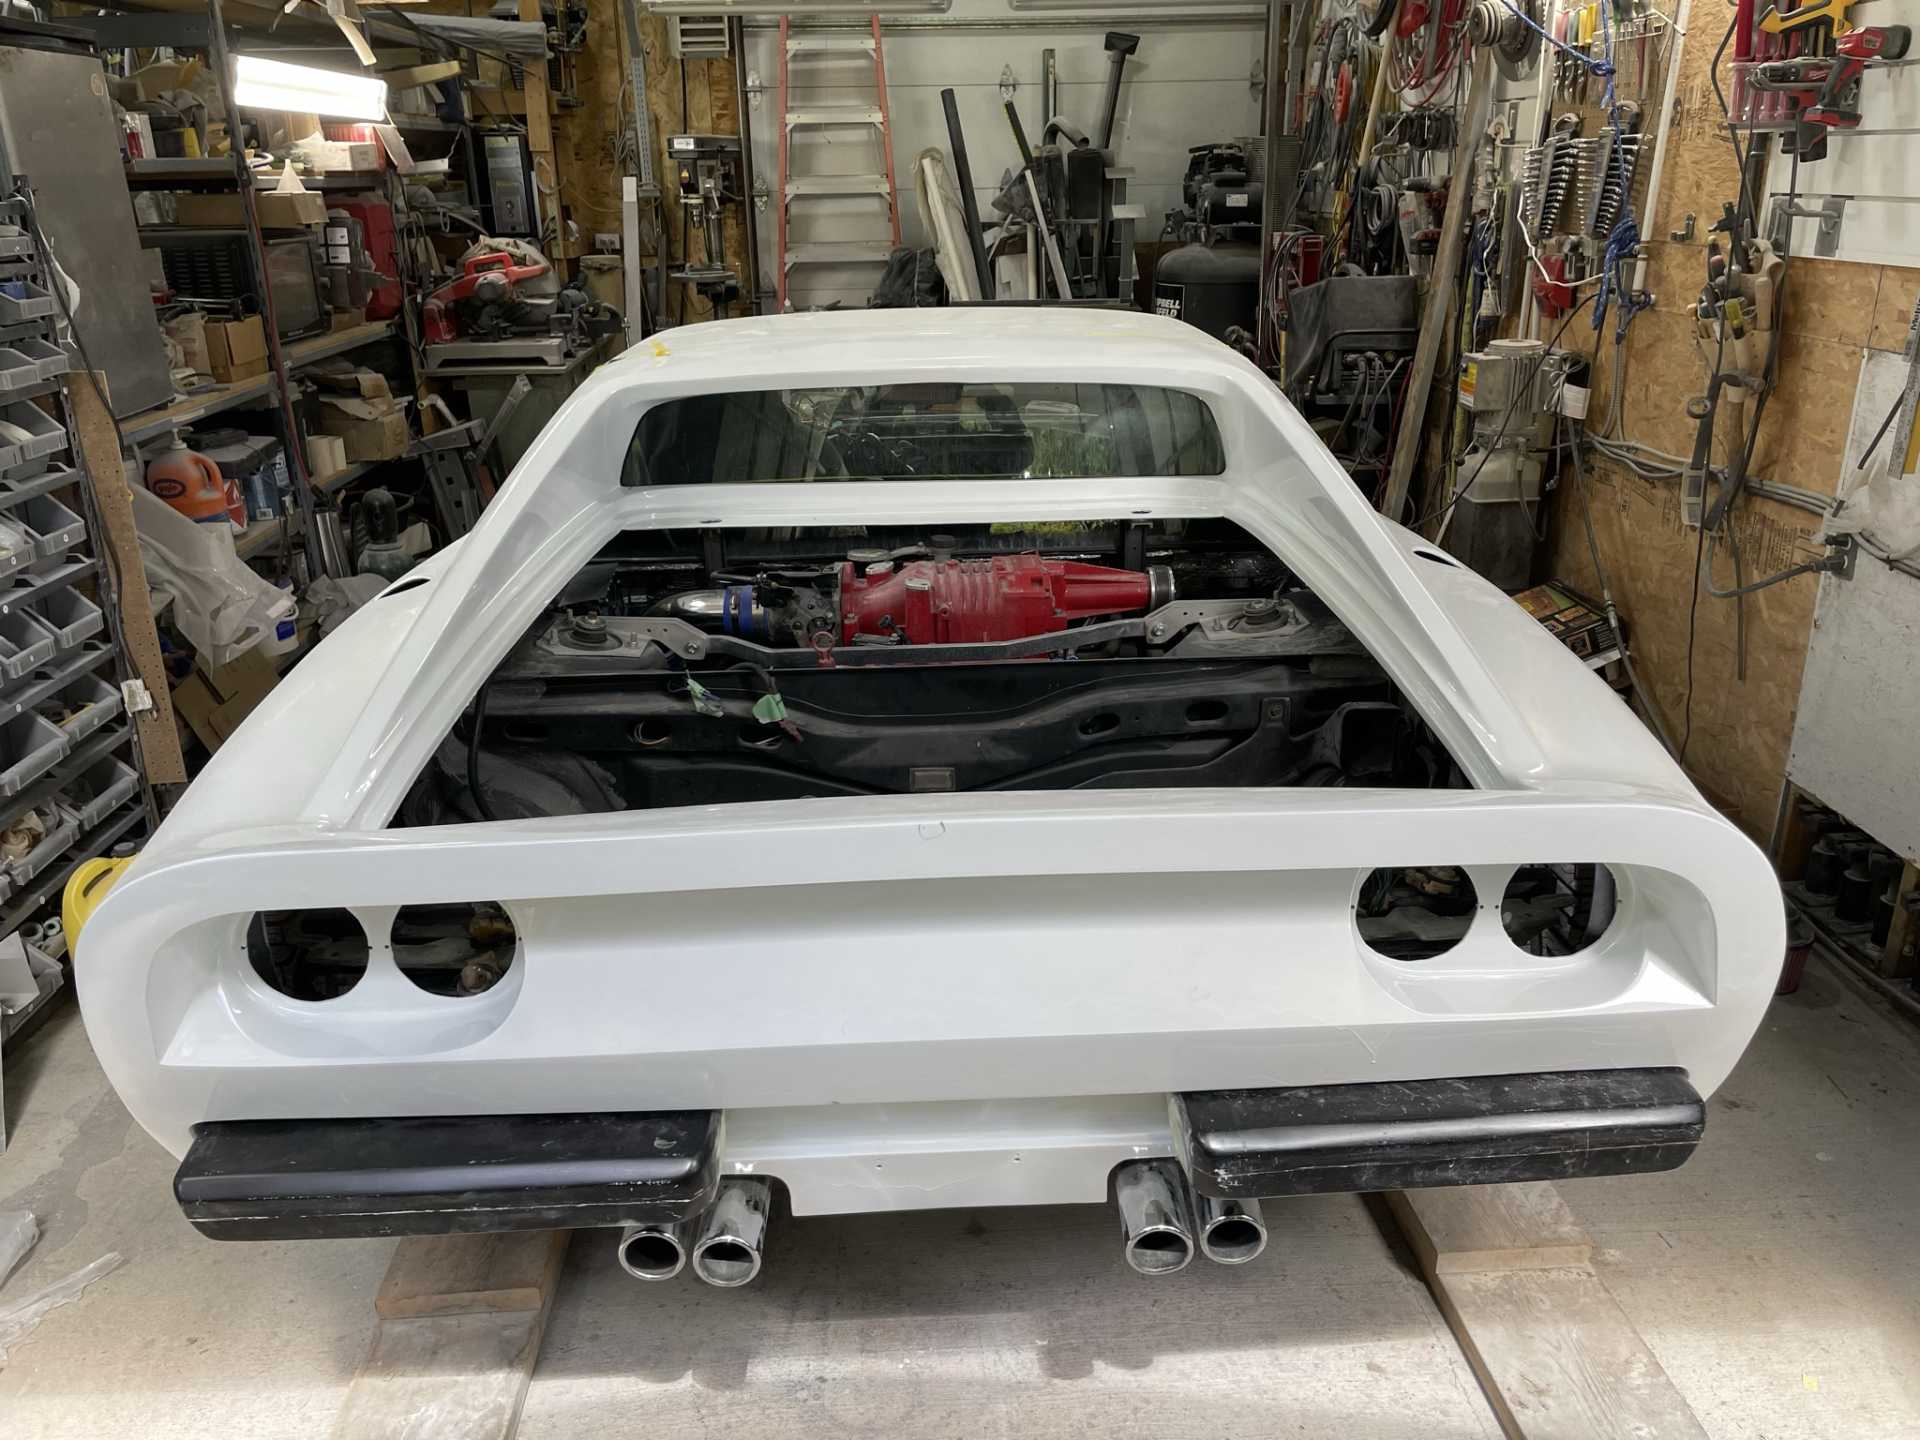
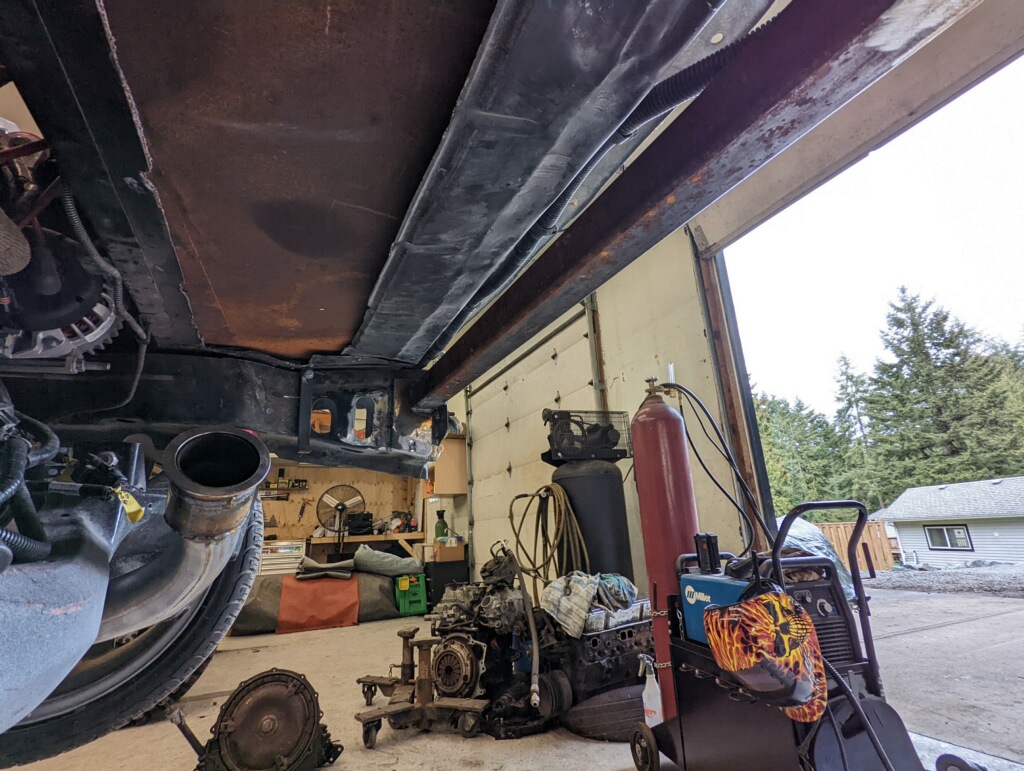
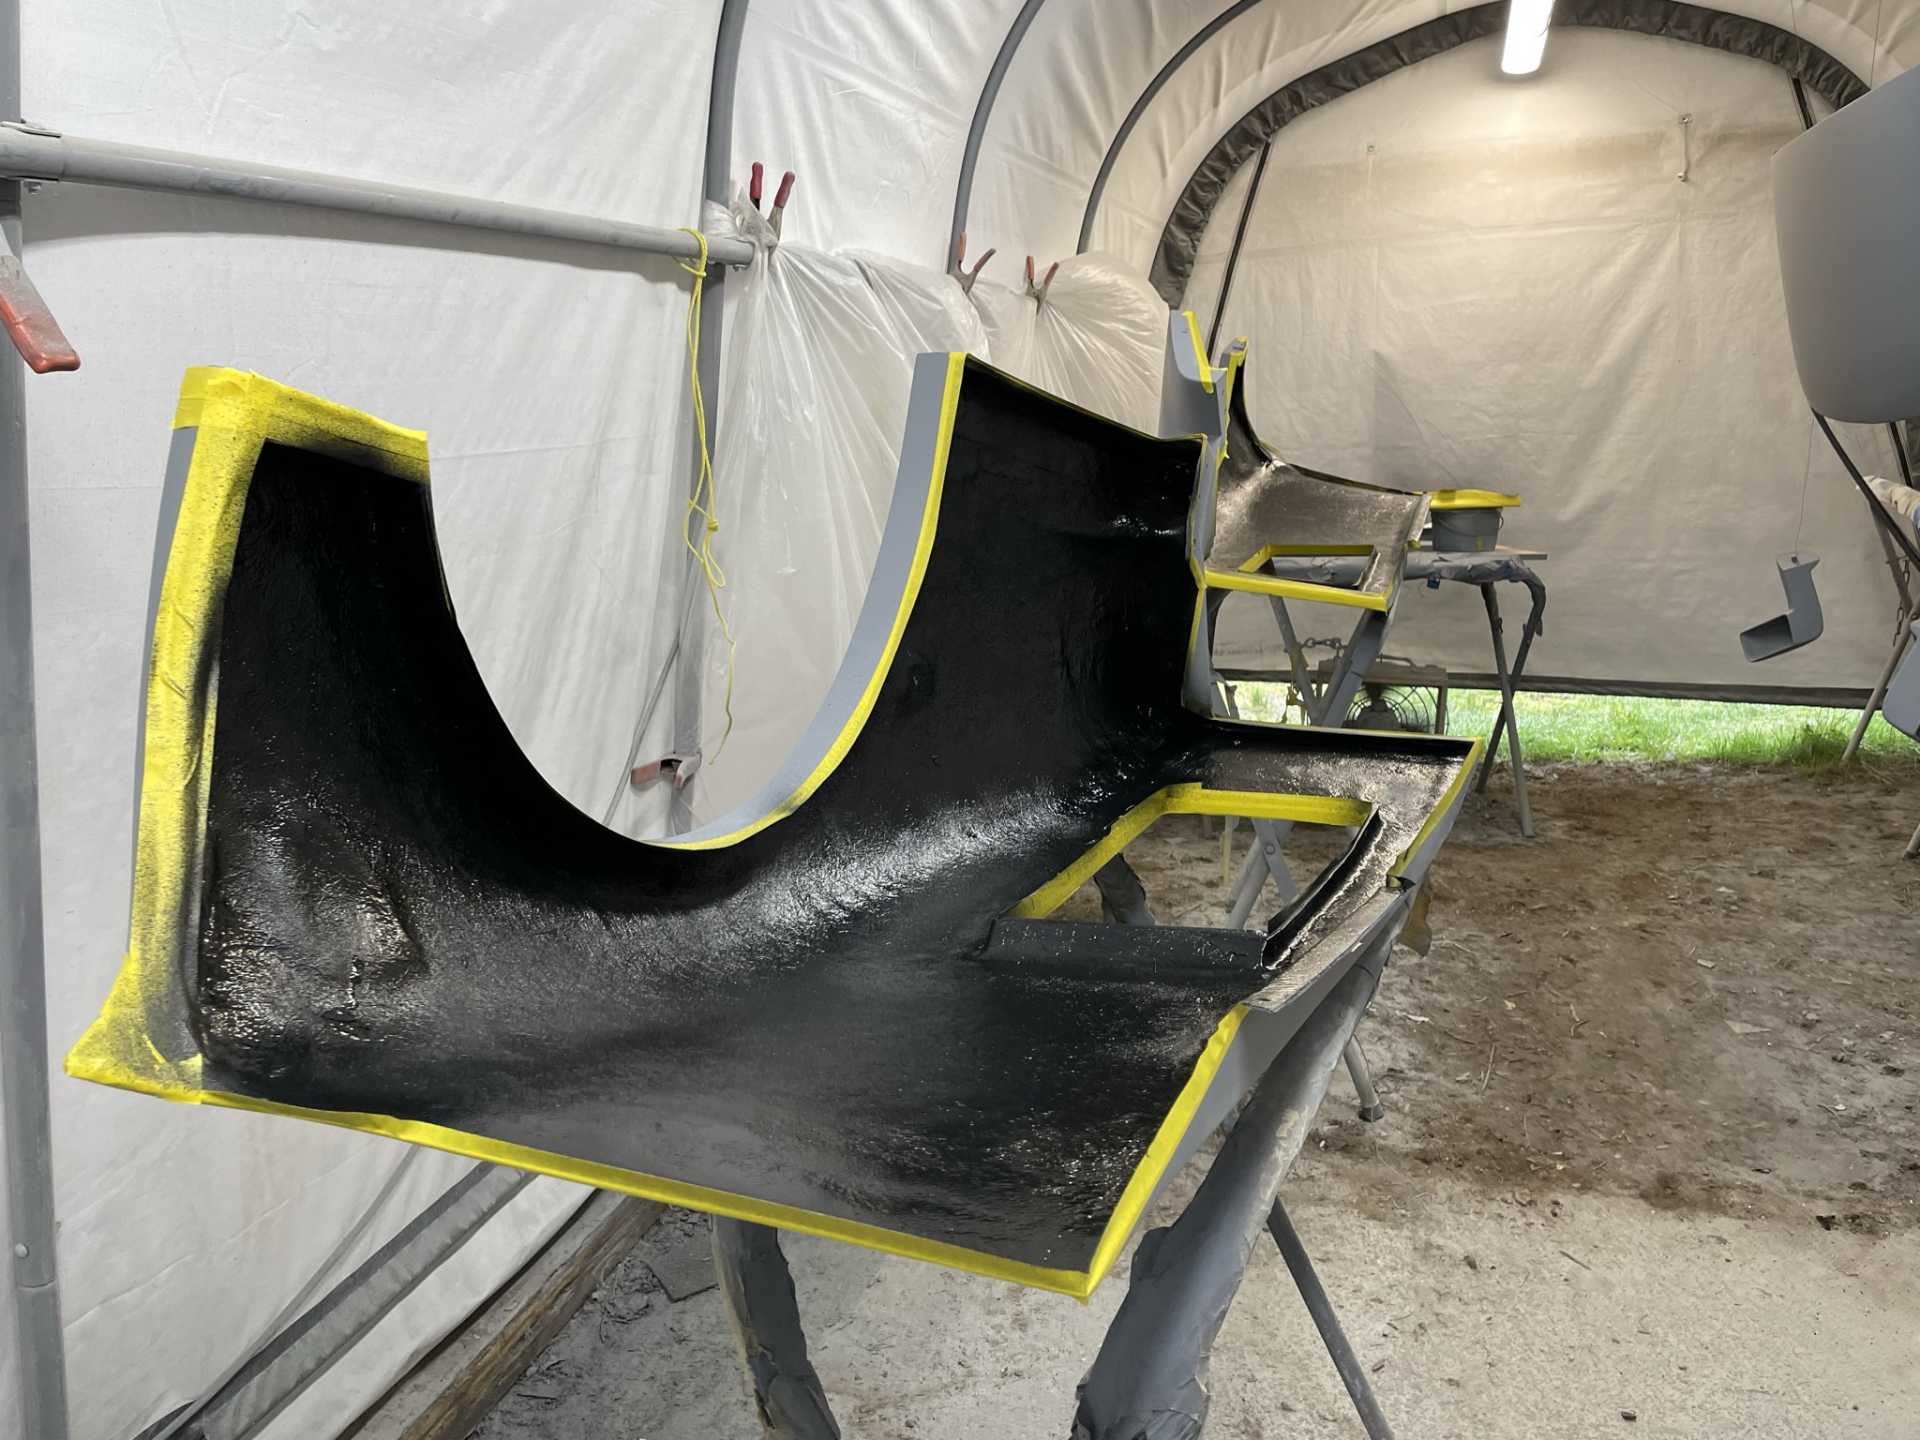
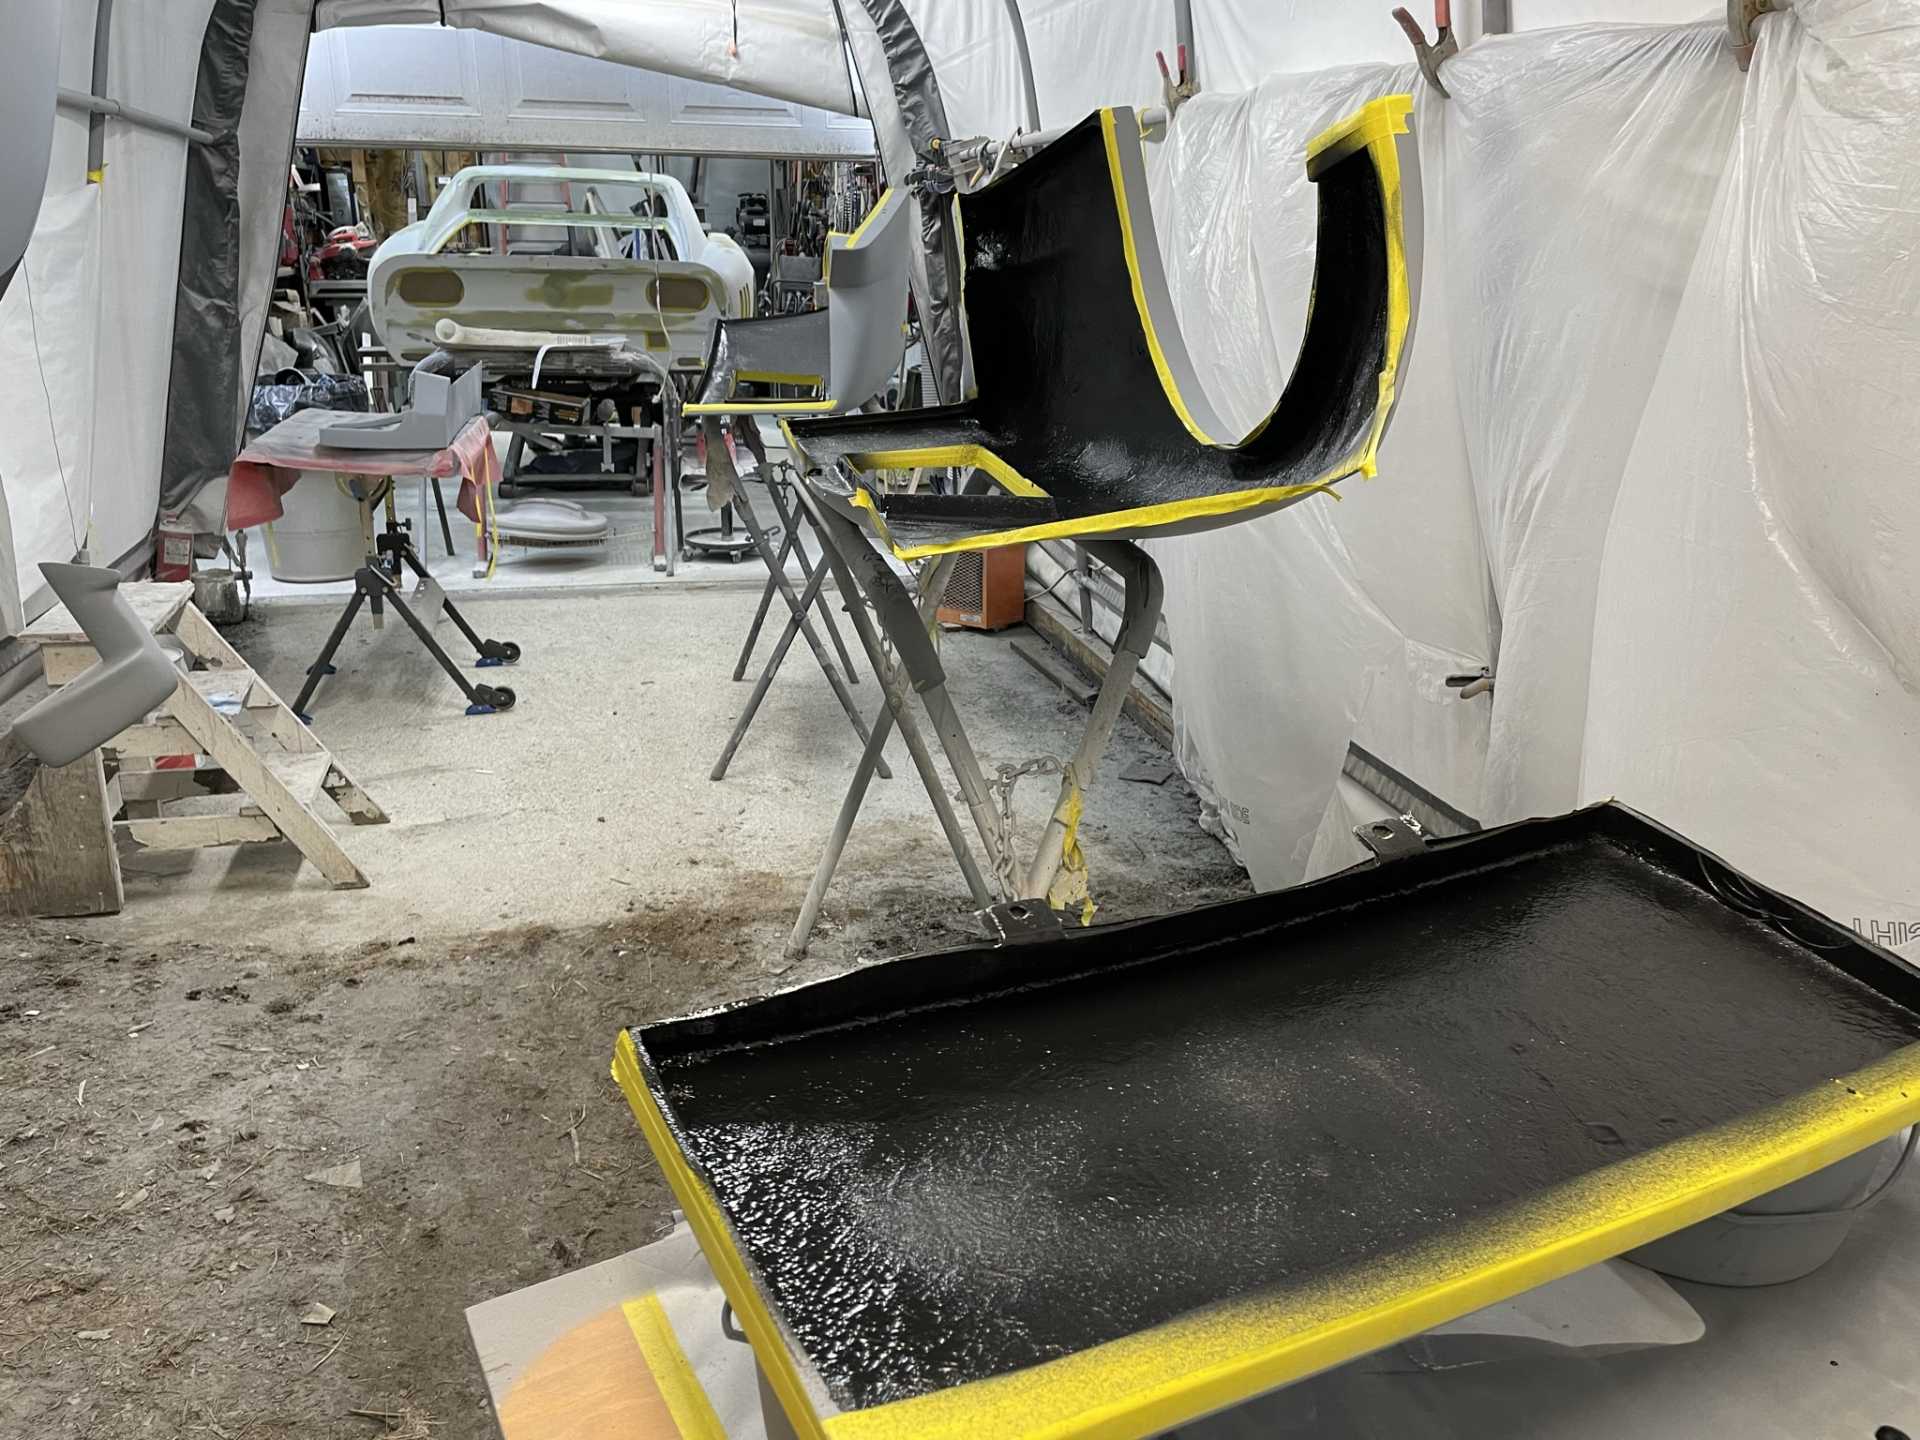
Here we go on the lastest progress. So the bodywork is completed on the rear body and I took the opportunity to spray the underside of the body panels to do two things seal the fiberglass and two give it a coat that is both washable and very durable to rocks and road debris. A body guy I know told me that I should use a product call “Raptor liner” it is relatively easy to use it can be sprayed , roller, or brushed on. It’s a two part product and I used my cup gun as this stuff is thick a 1.6 spray tip worked great. It’s very stinky and not something you want to breath or get on your skin or eyes so protective ware is a must . But boy does it ever work great!!!
I closed all the openings to keep the stuff of the surfaces I didn’t want it on.
I get the chassis back in a couple days and will be attaching everything for the final time before it gets painted , fingers crossed.
Stay safe everyone Wayne
[This message has been edited by dobie1 (edited 04-18-2022).]
That rear side window youre working on looks great! Much better than mine lol. Great idea to seal the inside of the body, ill do that too. Someday. Like the custom paint booth too, your build gives me lots of great ideas. Keep it up
Thanks Shem you’ll like the new spray booth I just hung ,I also bagged the rear body mold as I do not want any overspray on the inside mold surfaces.
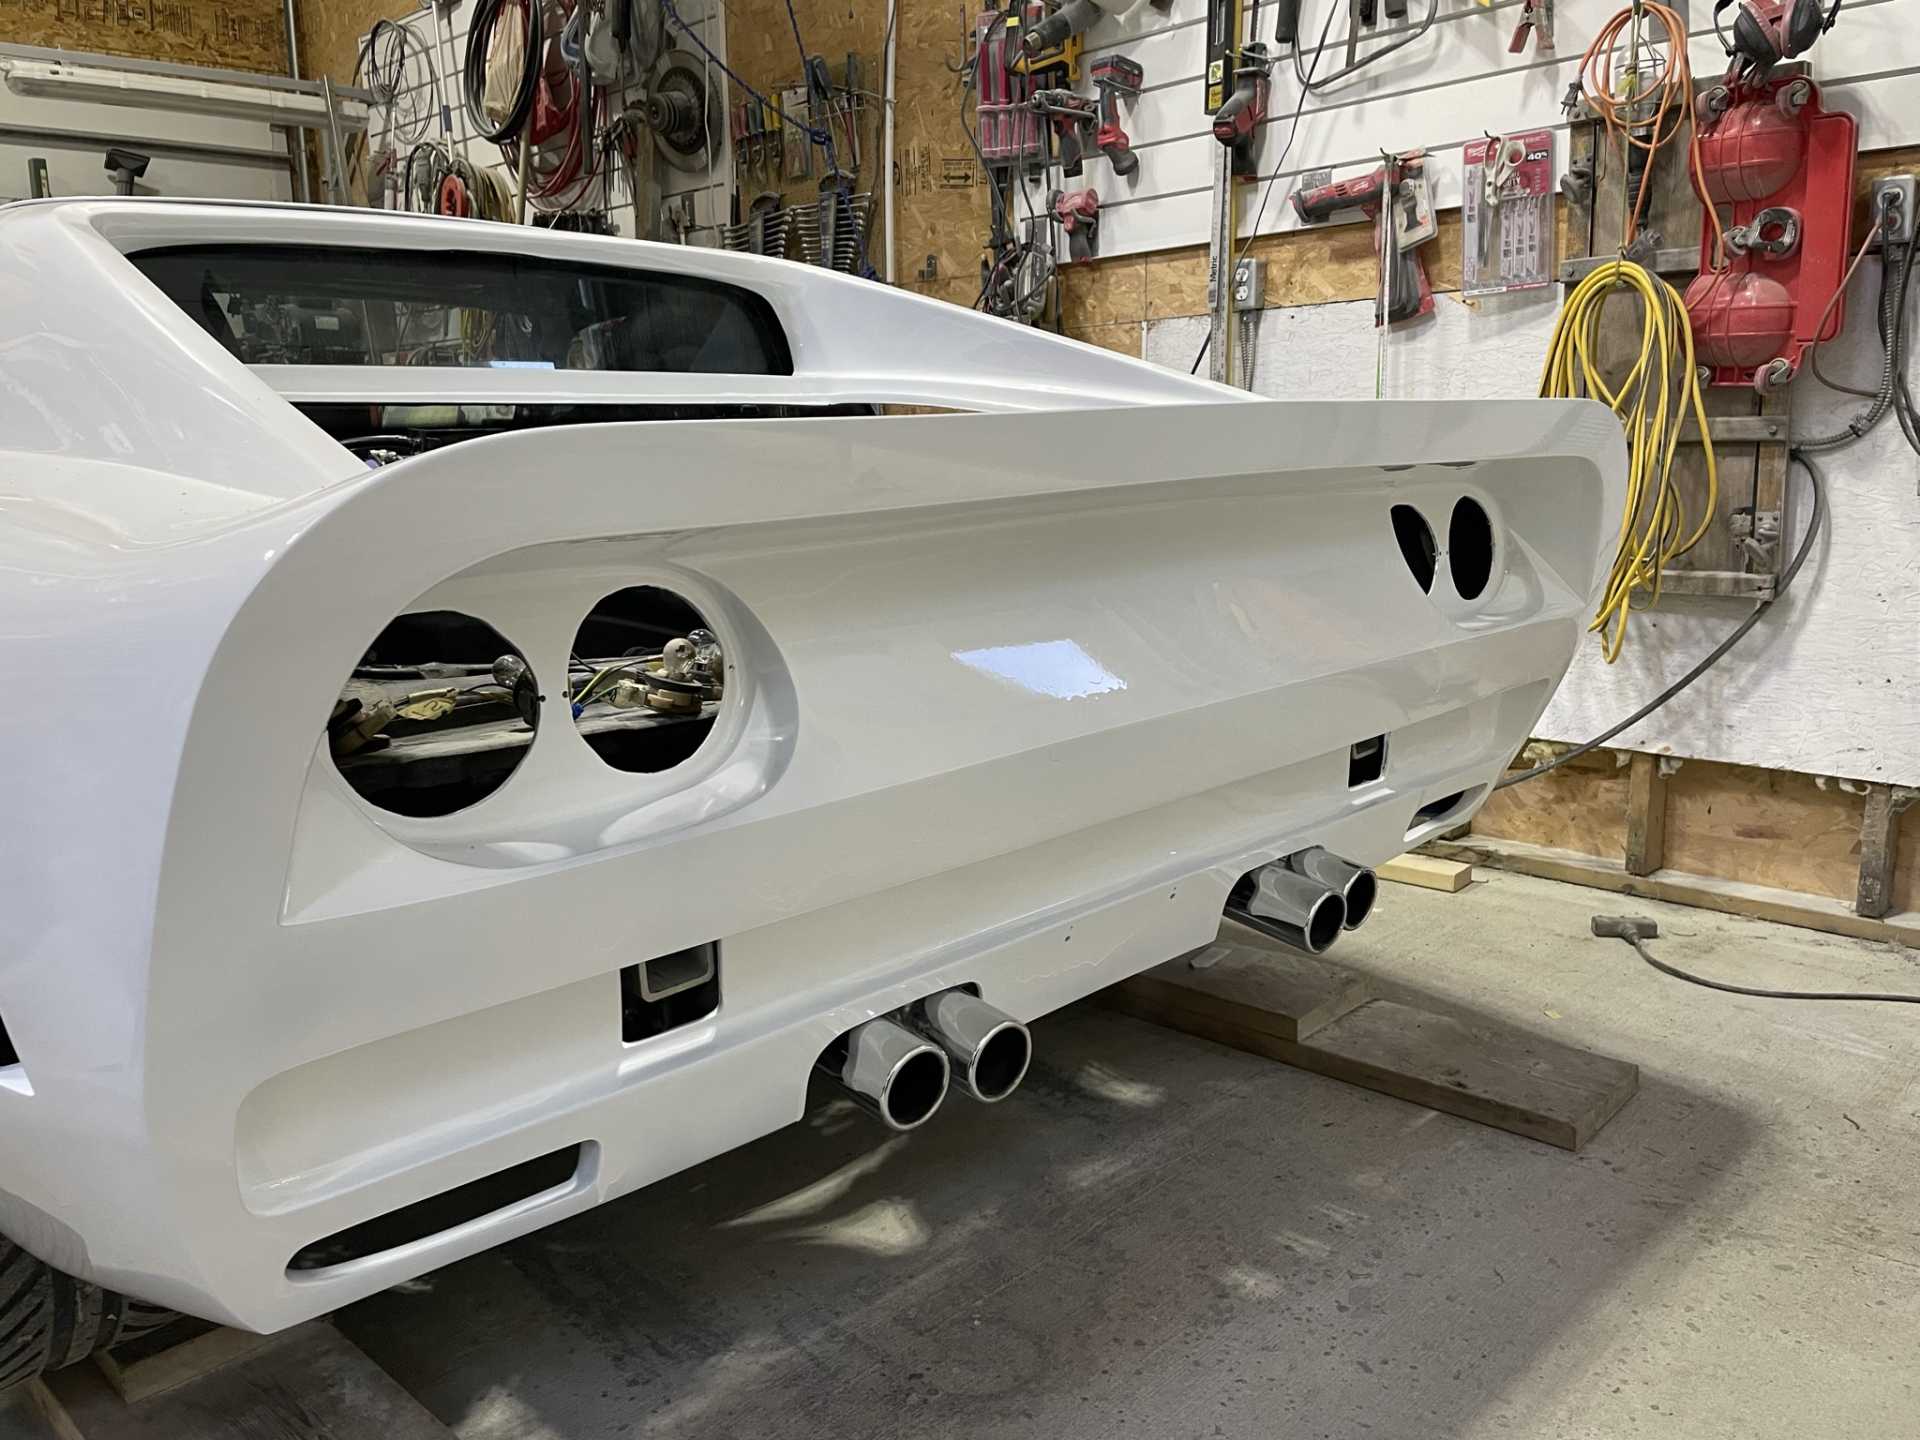
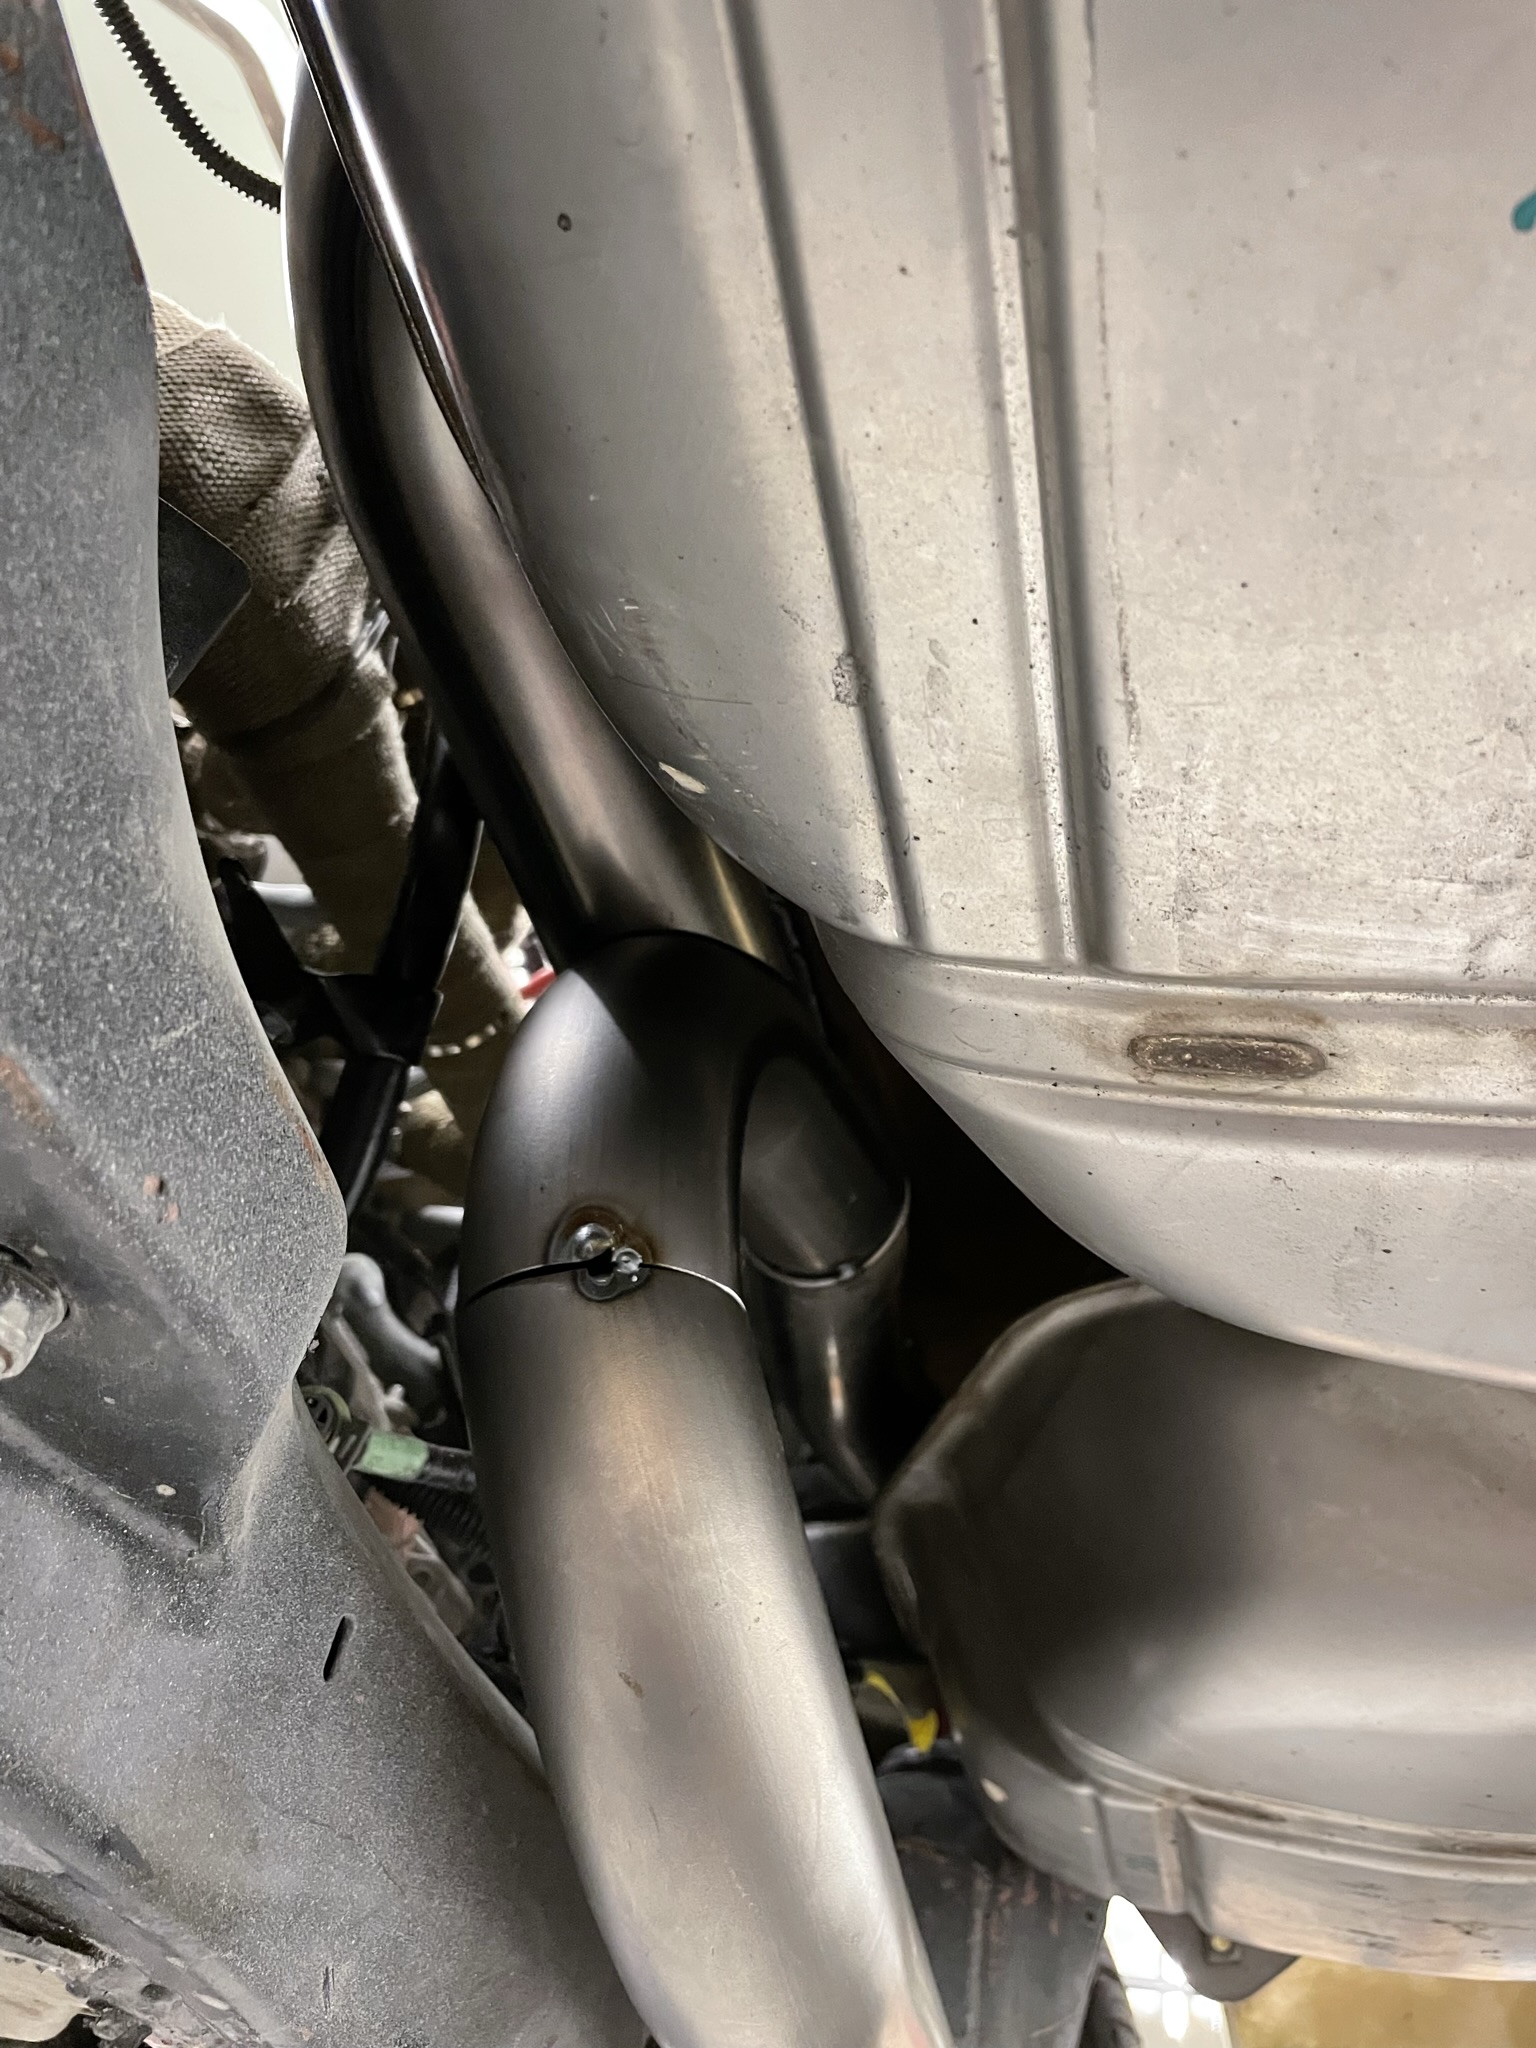
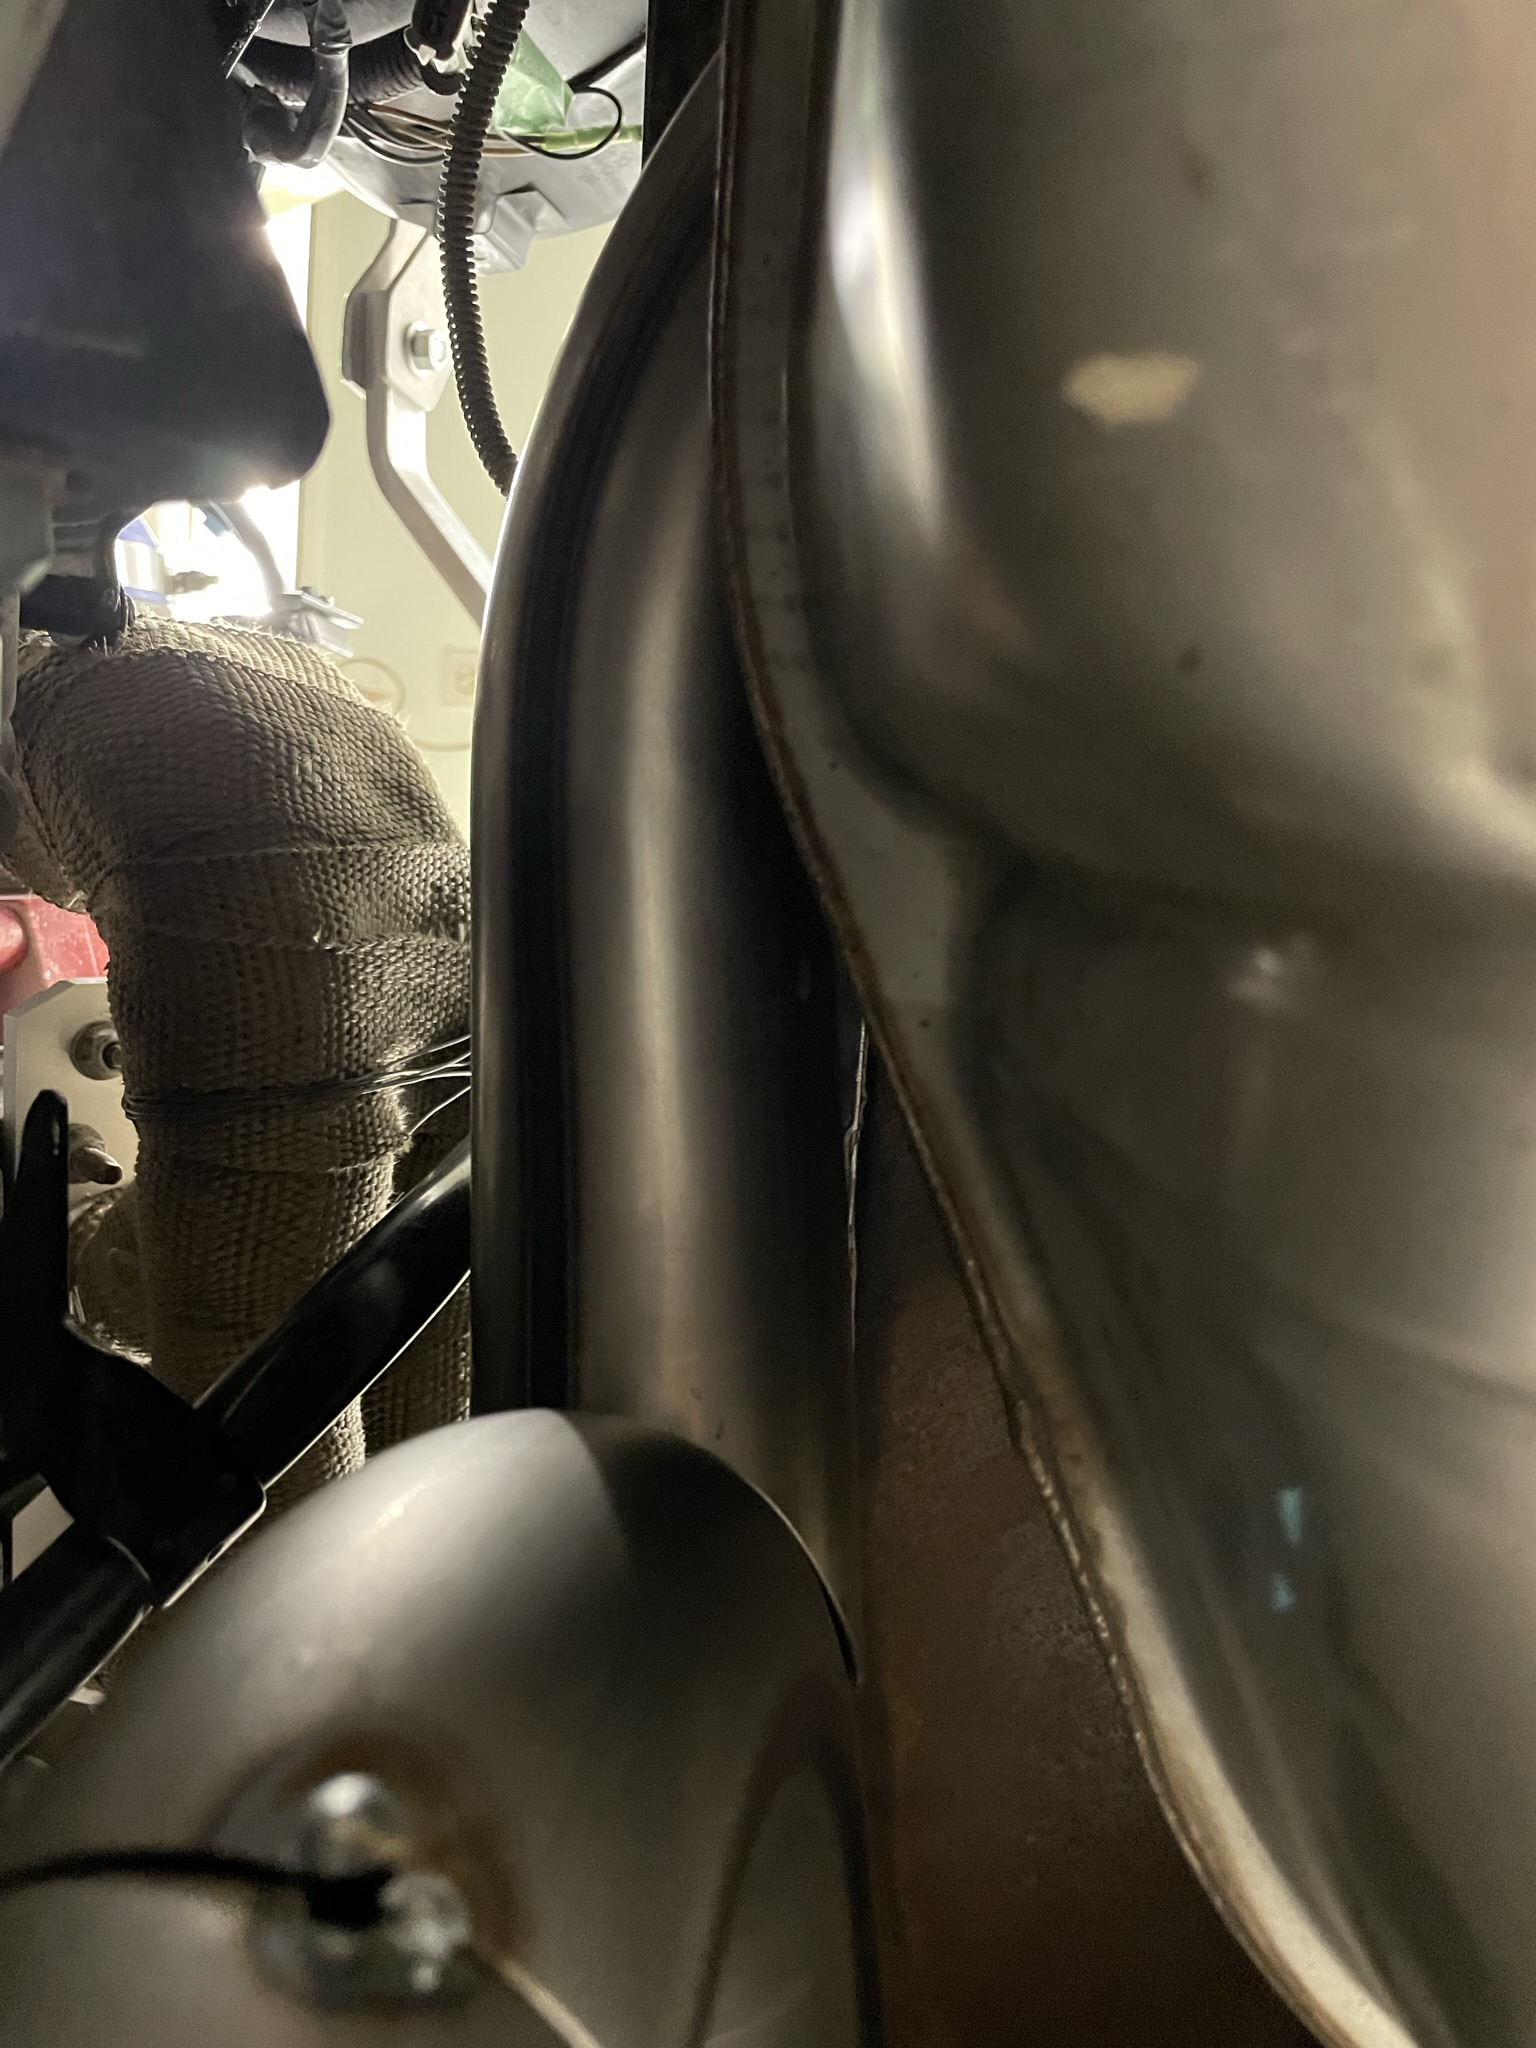
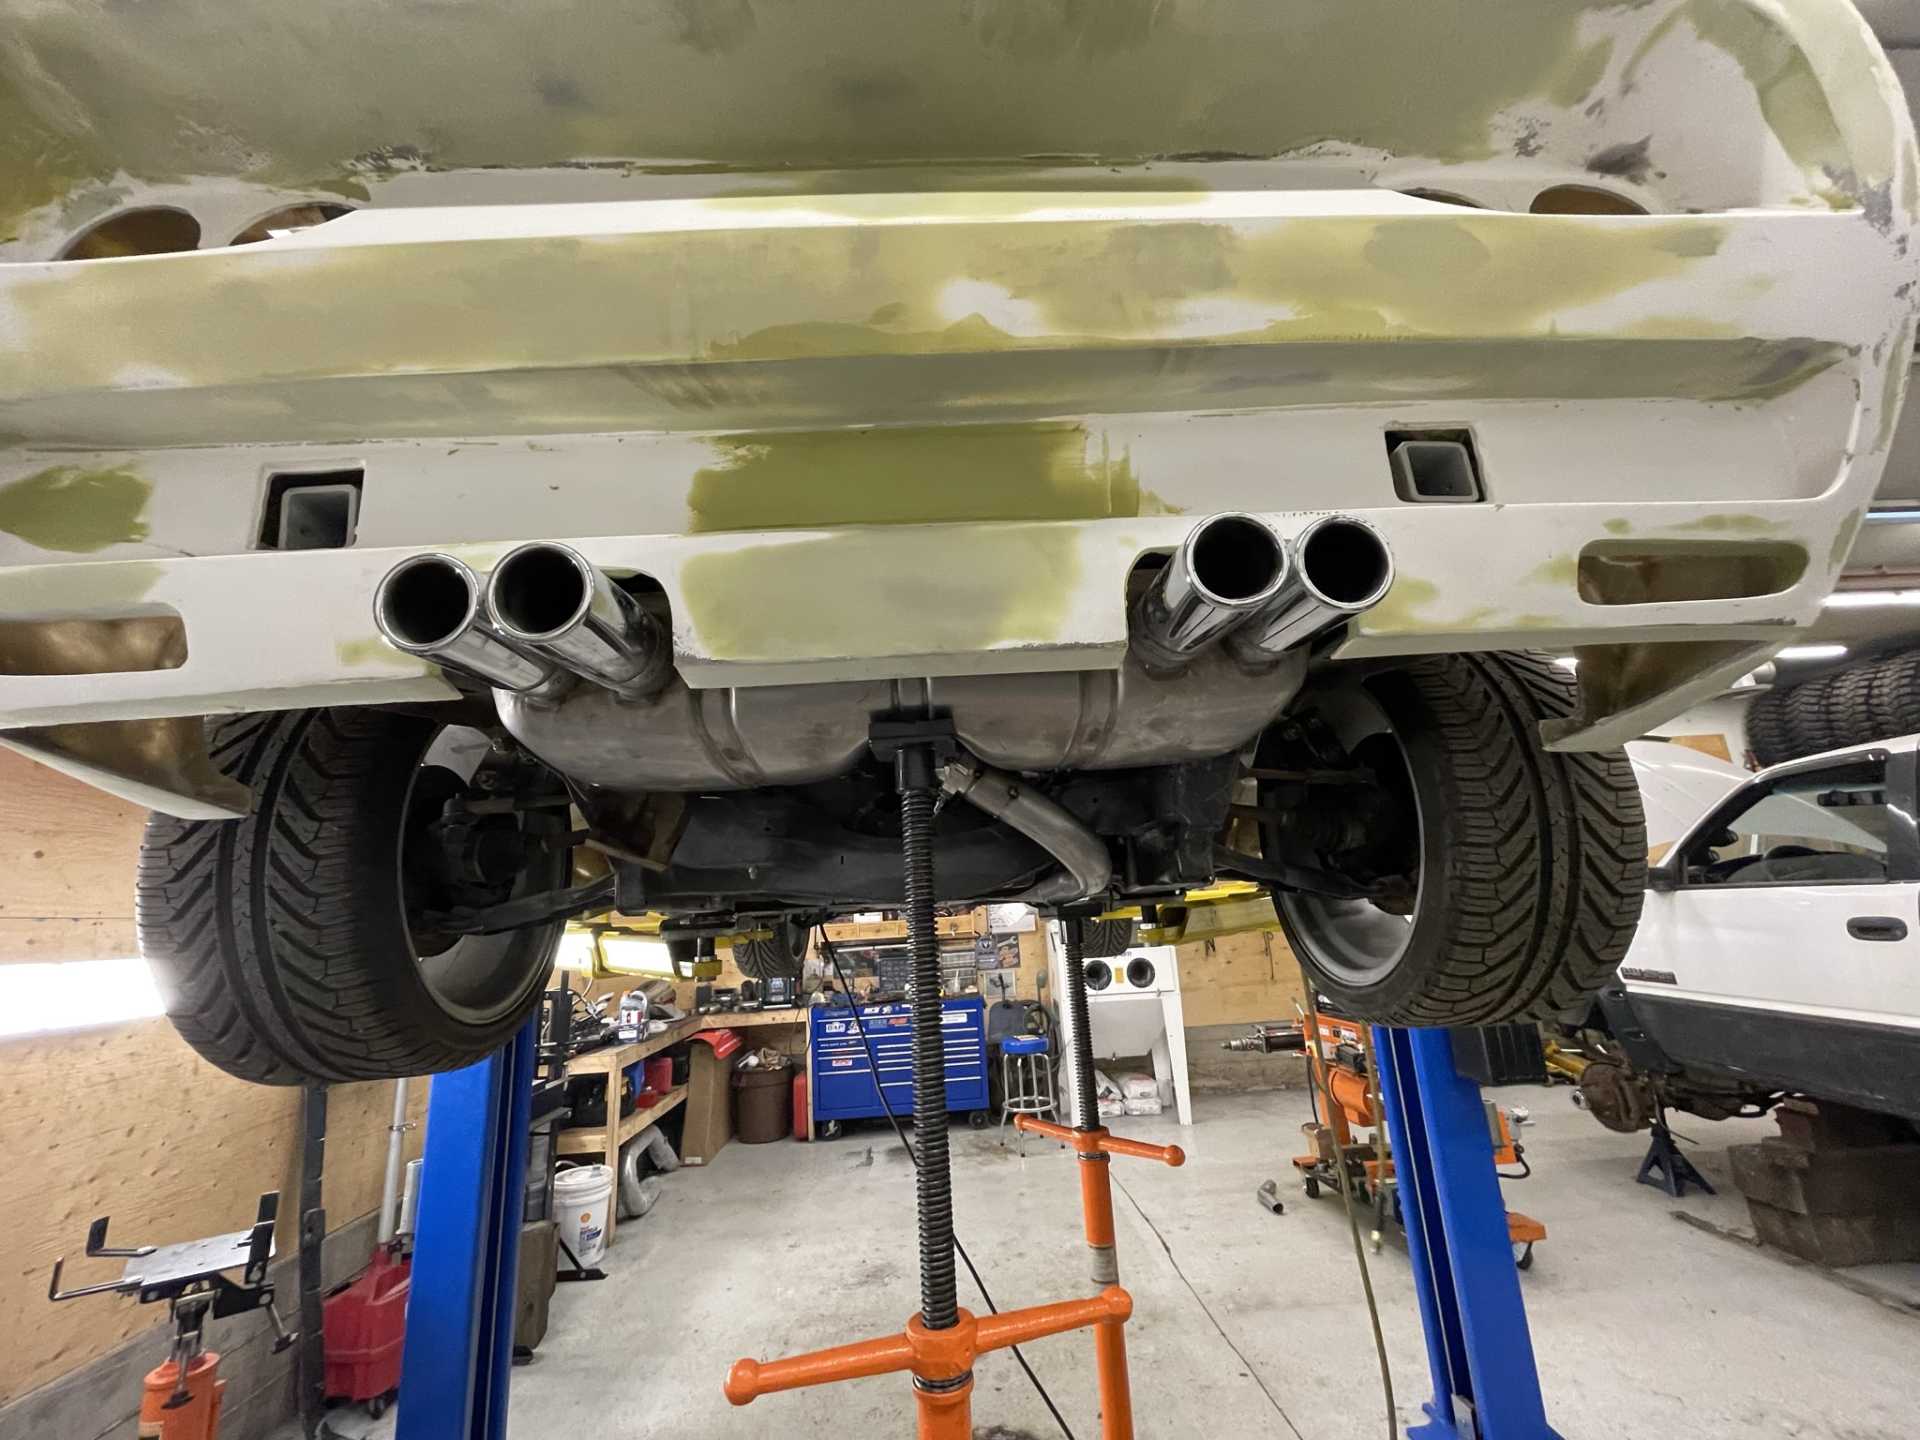
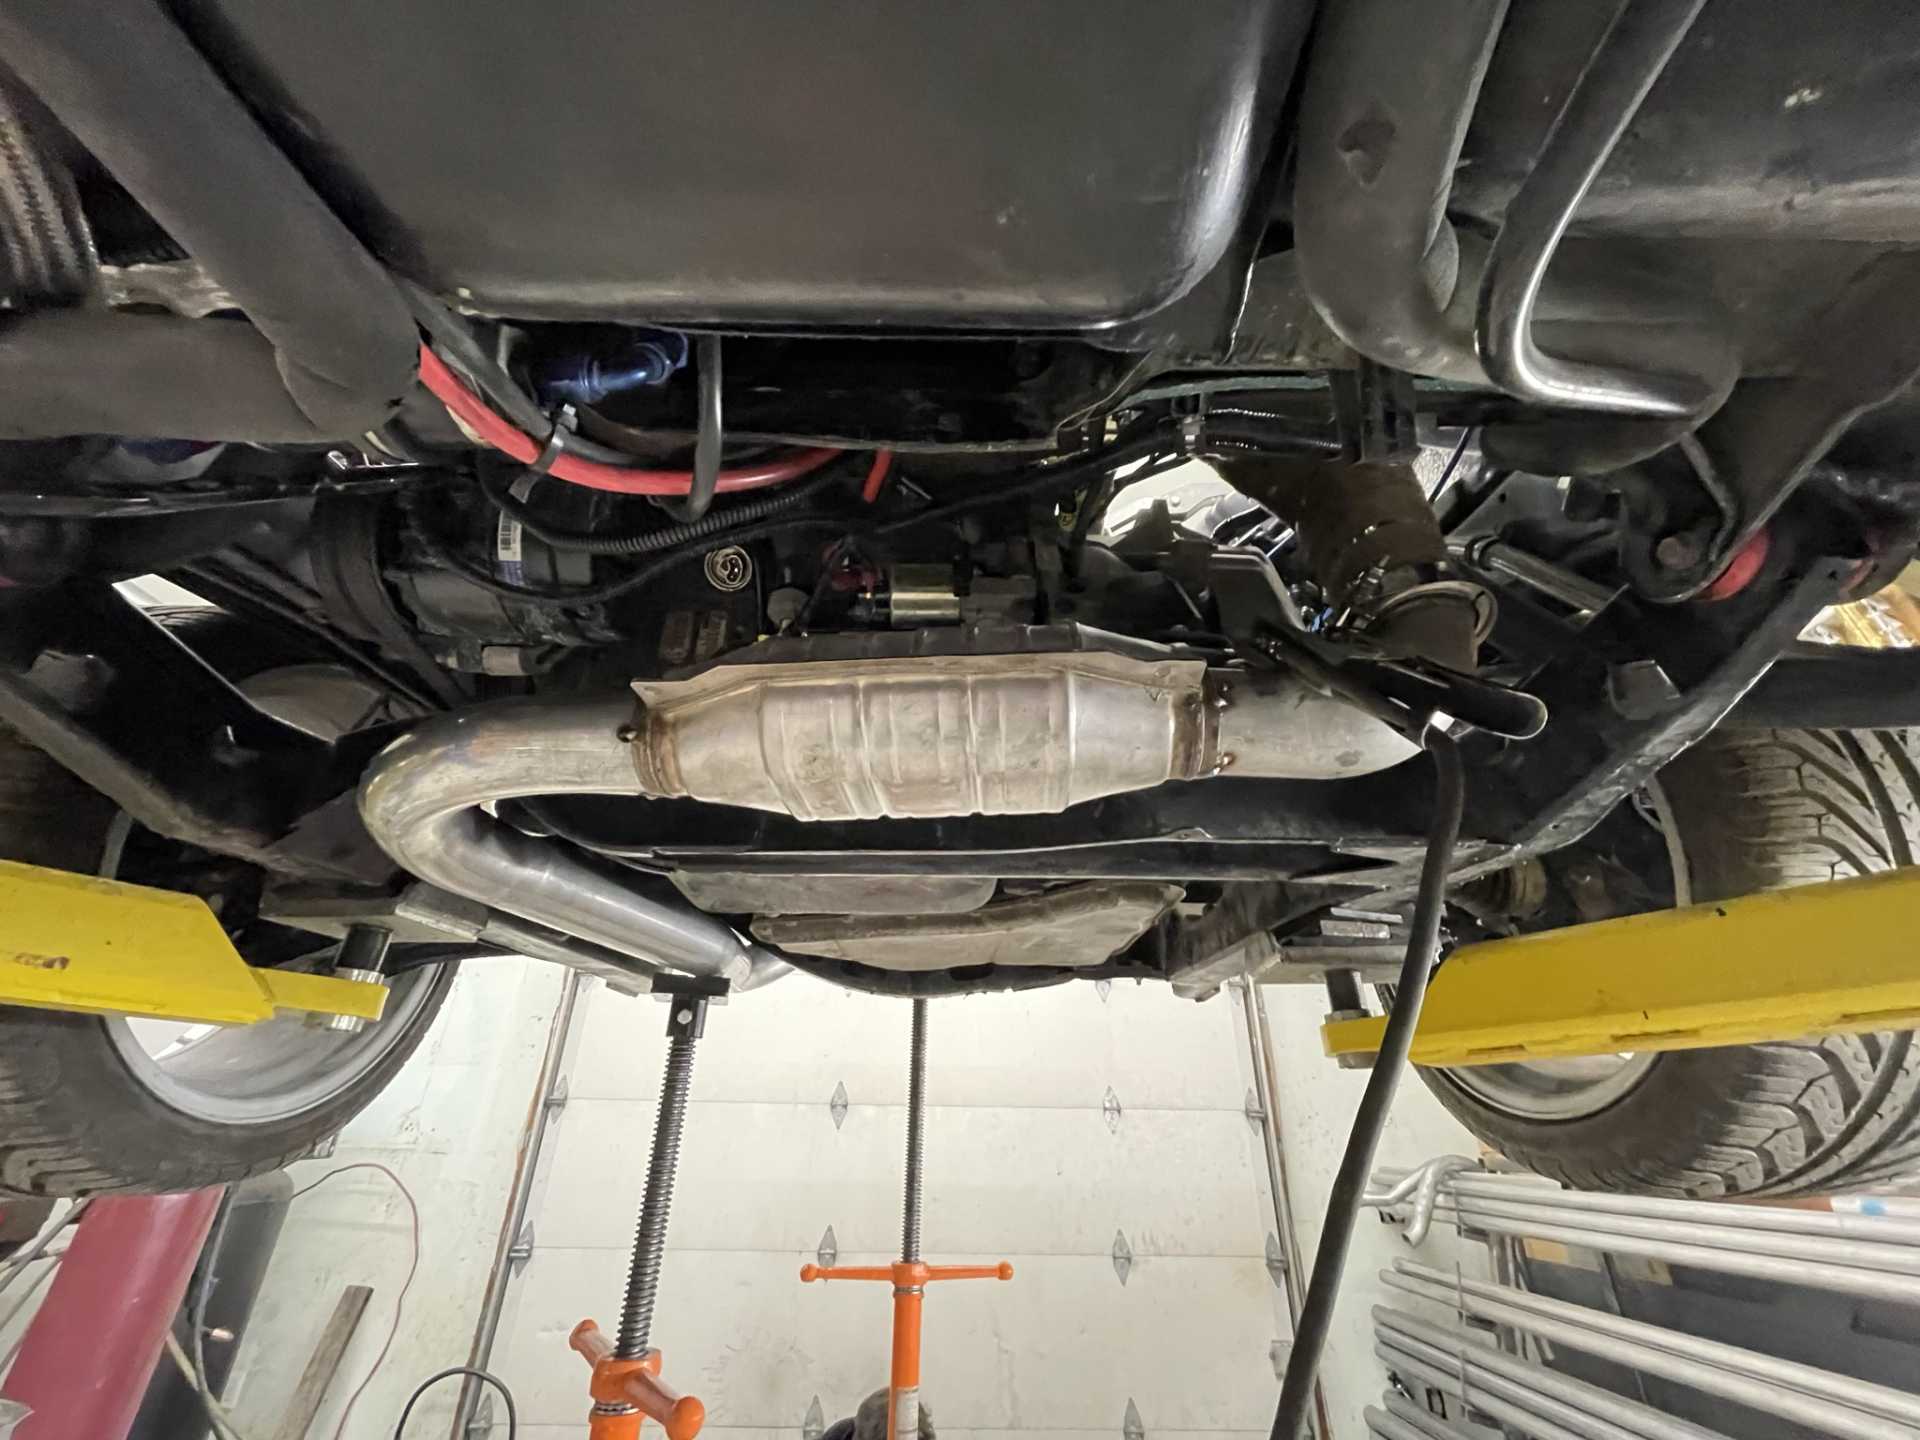
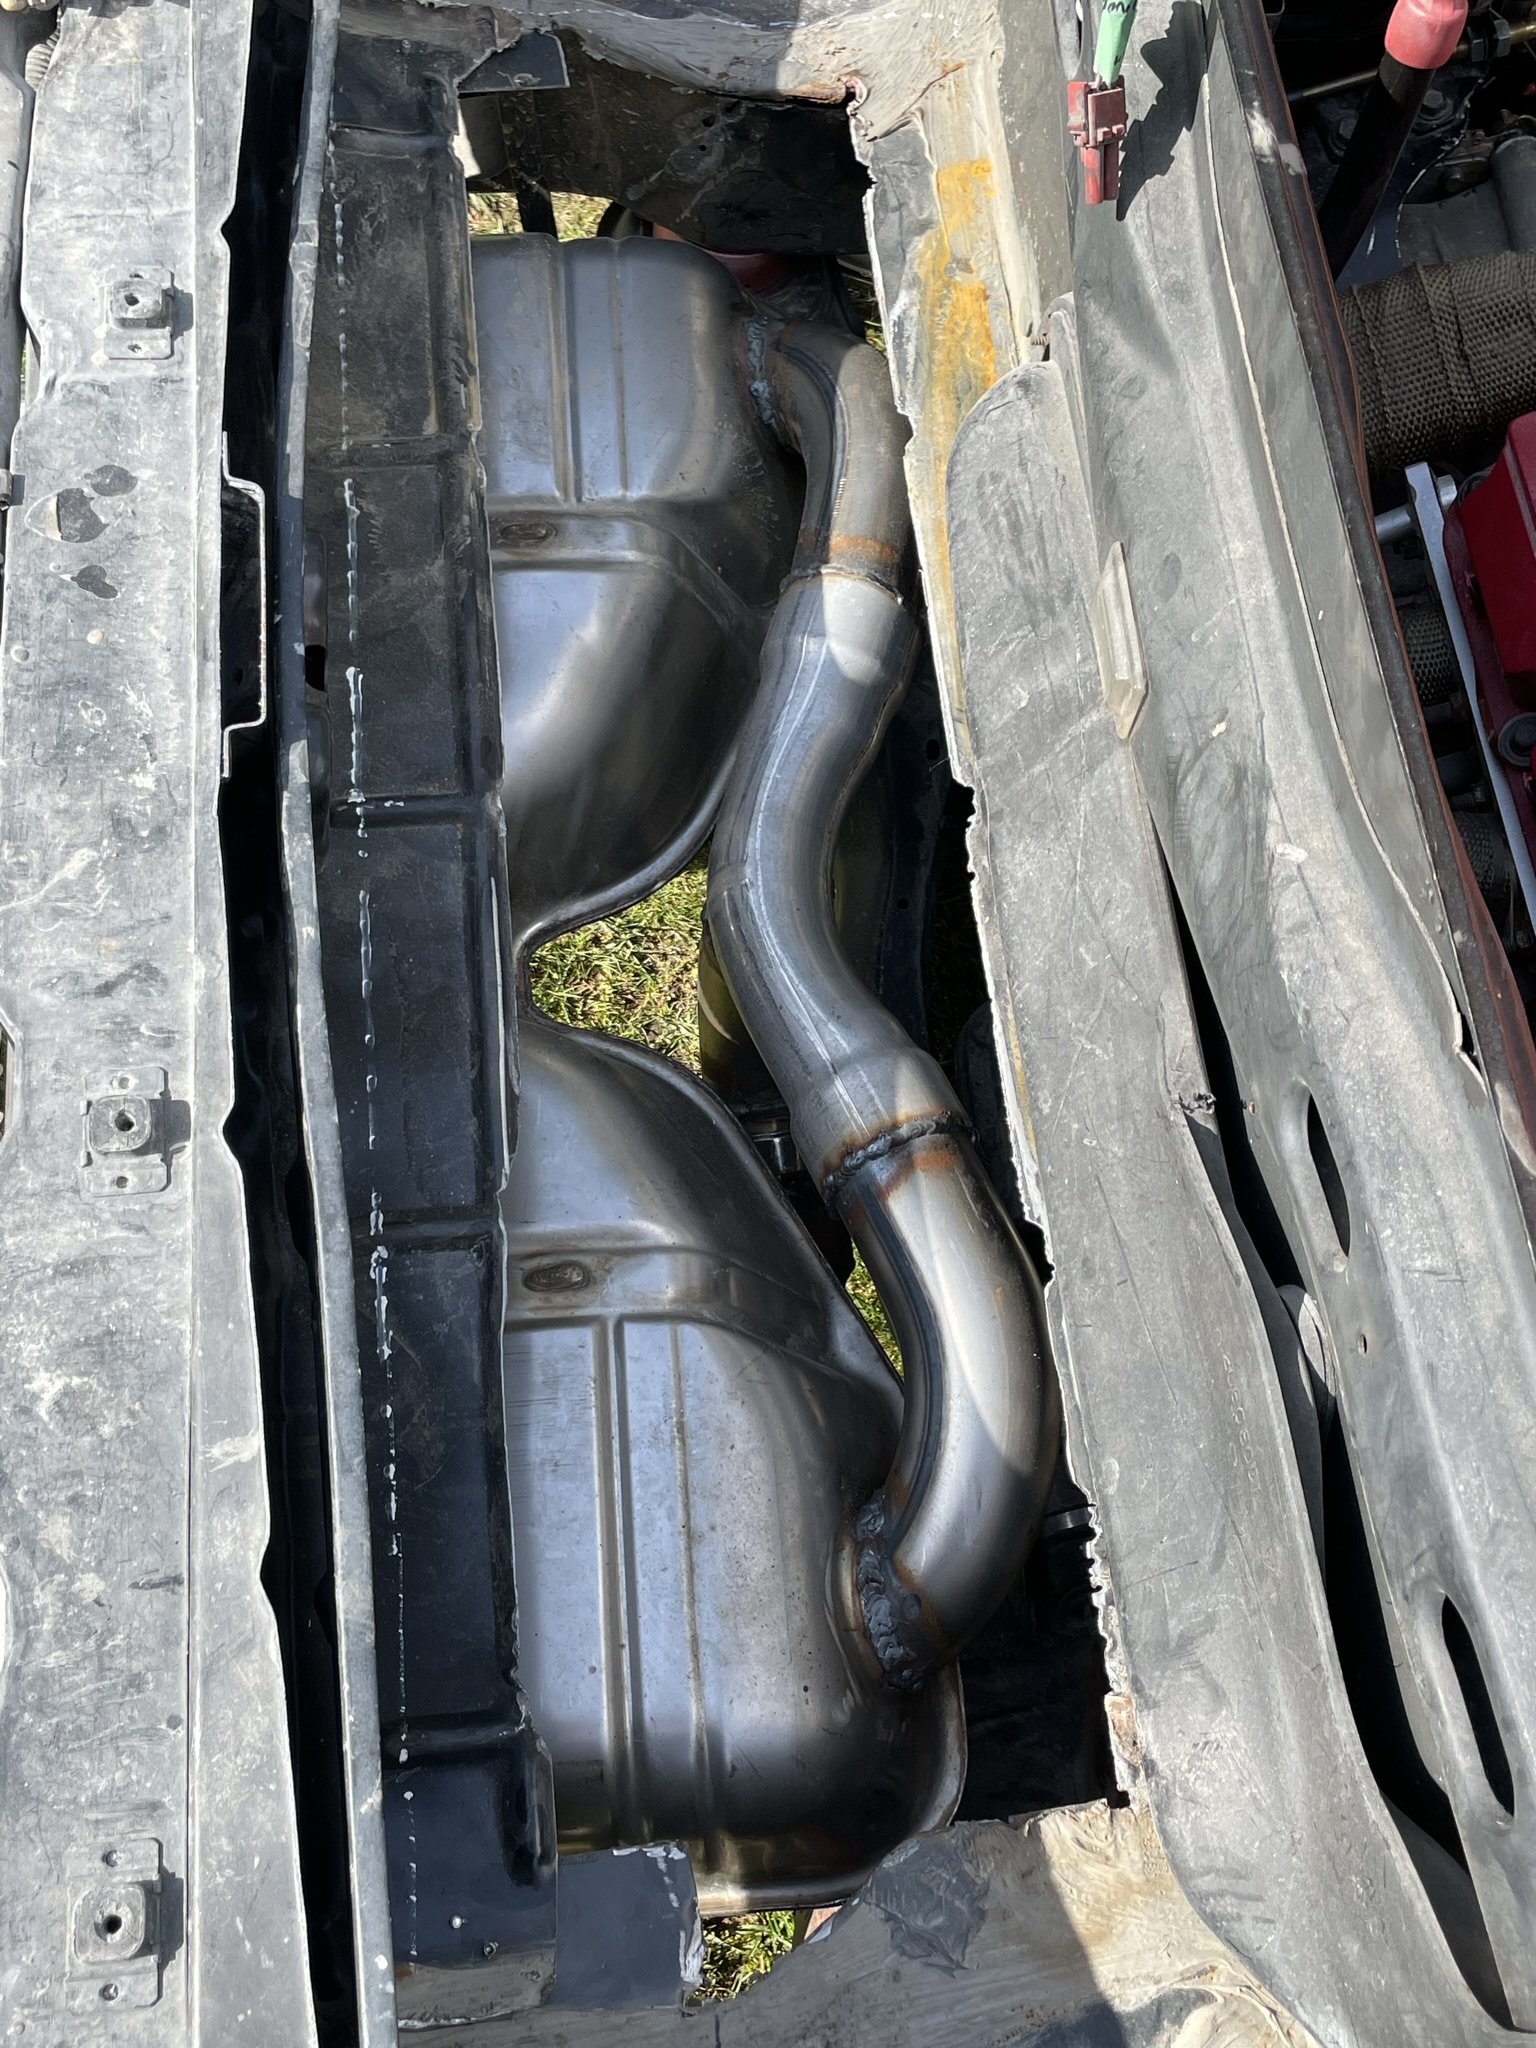
Here is a shot of the new muffler installed below the resized trunk , it still needs a floor welded in to complete but it turned out great.
So I’ve spent a fair amount of time the last while getting the rear body and roof ready for paint.
Slick sand then 2K primer blocking to 180 grit in between.
It came out really great. One thing that drove me nuts was small pin holes appearing , which required taking a finishing puddy to fill them then having to resand the area. This took a few days finding and filling but it’s done ya!
Then Block sanding the 2K primer up to 600 grit sand paper.
If everything goes according to my plan these parts will be in single stage white paint tomorrow, then I’ll be putting everything together one last time for final fitting before painting everything else.
I’ll be driving the car white for a few months while I workout any bugs and finish the interior before I paint the car Red .
Stay safe everyone Wayne.
[This message has been edited by dobie1 (edited 05-05-2022).]
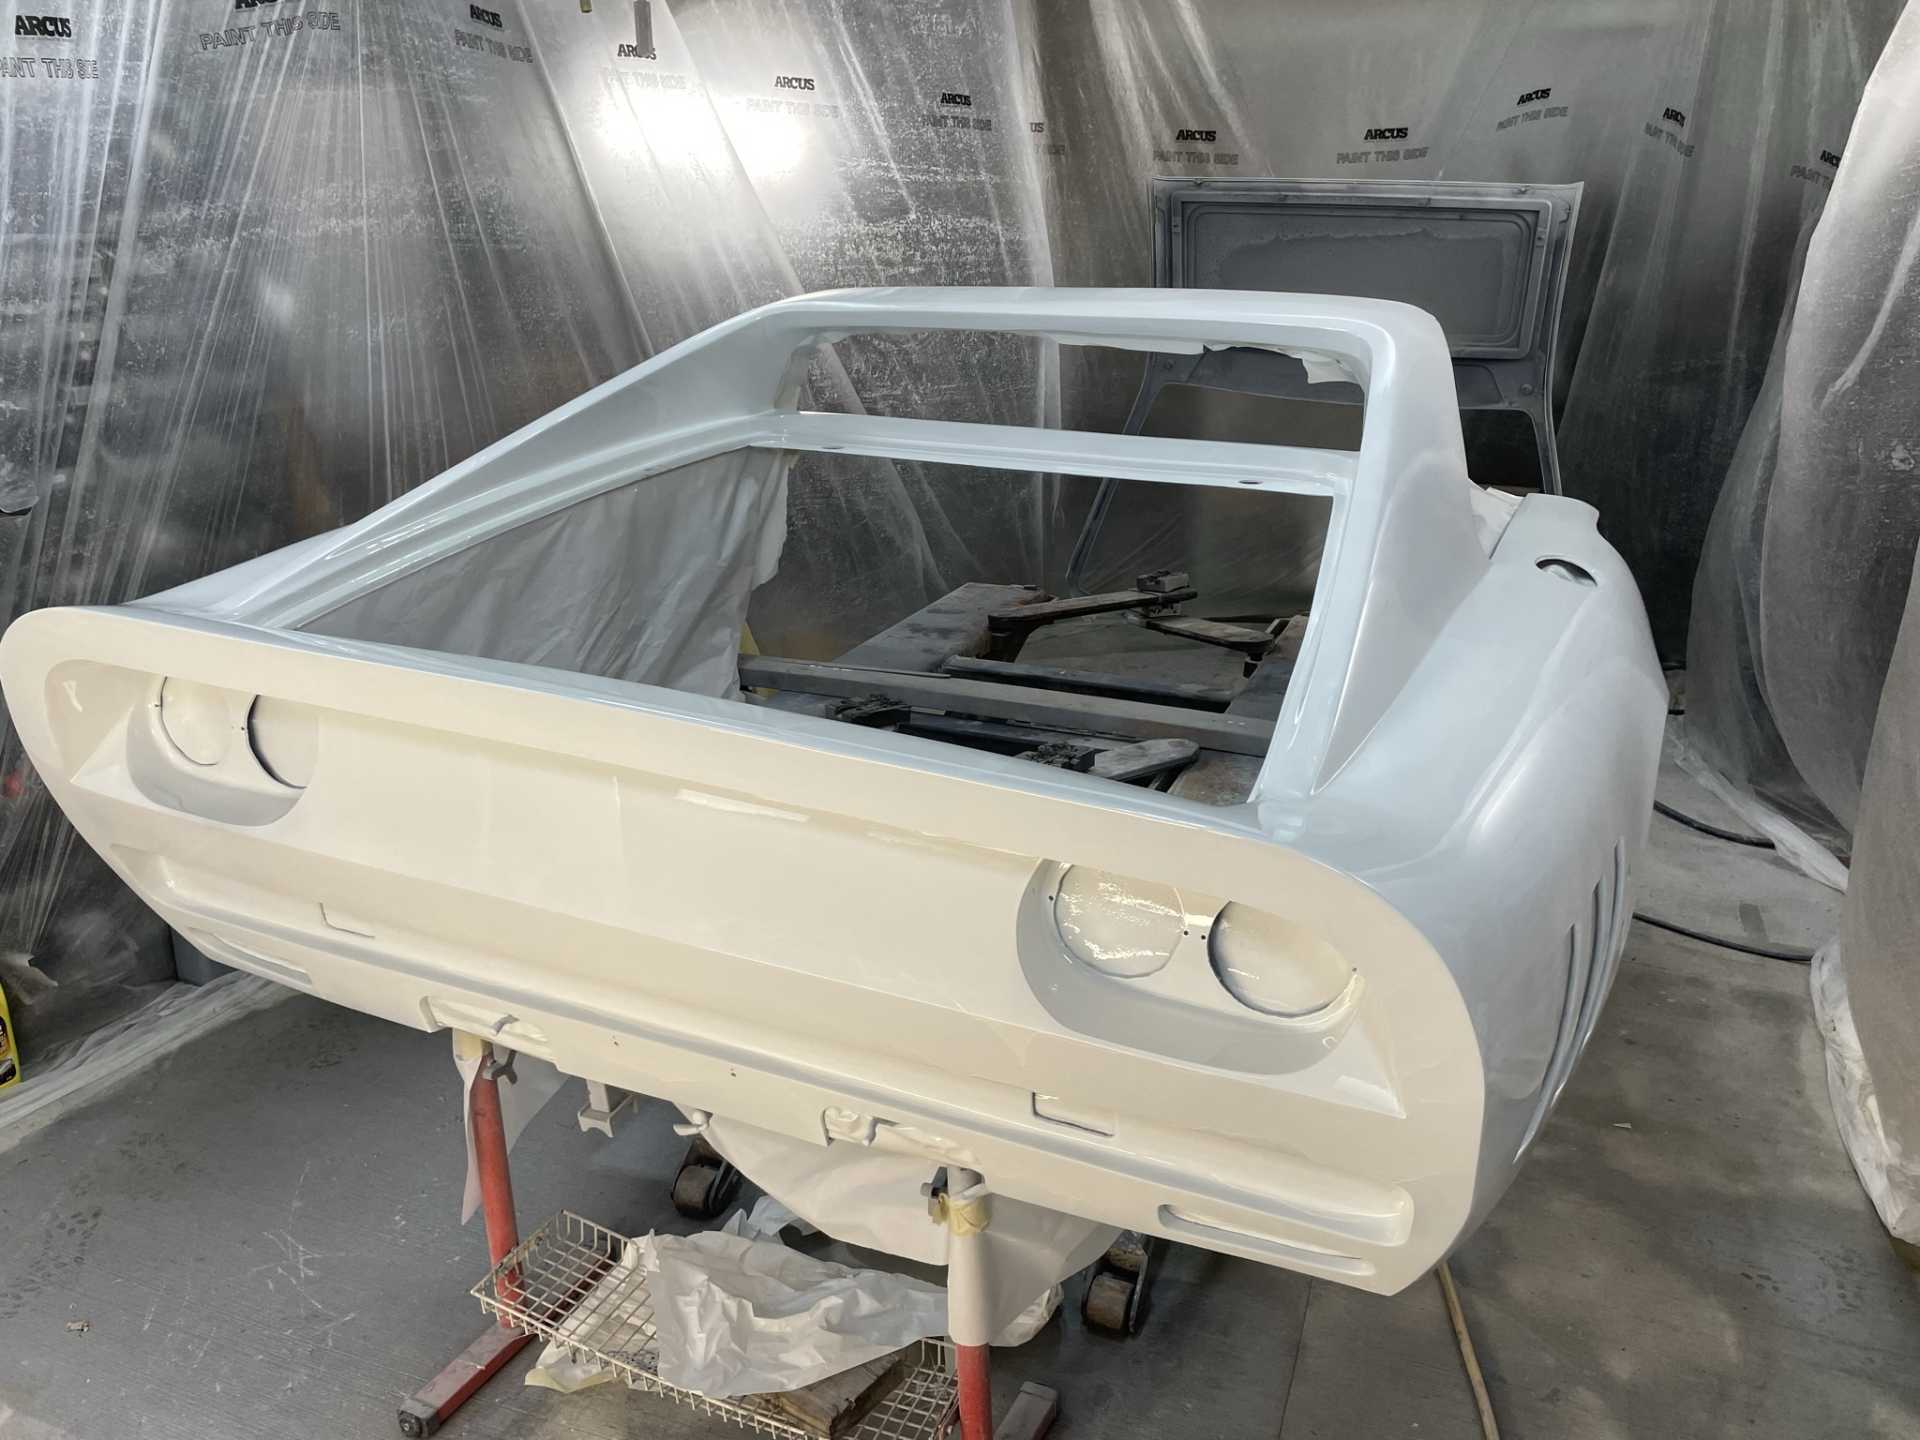
Well only one day late in painting my car, after accumulating all the products to paint I neglected to get a the paint activator. Fortunately it was delivered this morning by an employee of the paint supplier. So after two hours painting I’m pretty happy a couple runs I will have to address. I’ll give it a couple of days to cure then mount the body and it’s back to the muffler man to finish his install.
I put the rear body on today with the help of Don O and another friend nothing is secured just sitting there but we were tickled pink with the overall look.
.
Wayne😎
[This message has been edited by dobie1 (edited 05-07-2022).]
Hi Wayne It's looking fantastic !!! I guess if we never see another piece of sandpaper it will be too soon lol . Getting closer , how are you doing with the plexiglass forming ? Cheers Phil
Literally drooling! Cant wait to see it together. Must feel great to get to this stage congrats man almost there! Never get to really appreciate all the work we do till we see some major results like paint. Well done sir!
Is there a spot in your thread where you talk more about your muffler setup? That looks like you 'built' that muffler? When it's running, I'd love if you could get some decibel readings somehow (some smart phones have an app for that) outside and inside the car, just in case I'm not happy with how quiet my setup is, I can possible mimic your idea.
Second question, the HVAC controller(s) you had pictured, with the number of PCB boards up there, I'm guessing this is a project not just for your car but to sell? Can you share more details on that? Is it to replace the "half electronic, half motor/manual" controls we currently have? Will it support auto-climate control? I think it was PhoneDawgz that was selling the aftermarket hvac controller for the F355 Amida interiors, they had the auto-climate button, but the kit wasn't setup for it. I'd pay handsomely for an updated HVAC controller that had that ability!! Even if it wasn't plug and play, right now with the interior of my car entirely removed, changing any other components would be easy. Please let me know!
Thanks everyone for the positive comments It’s always appreciated.
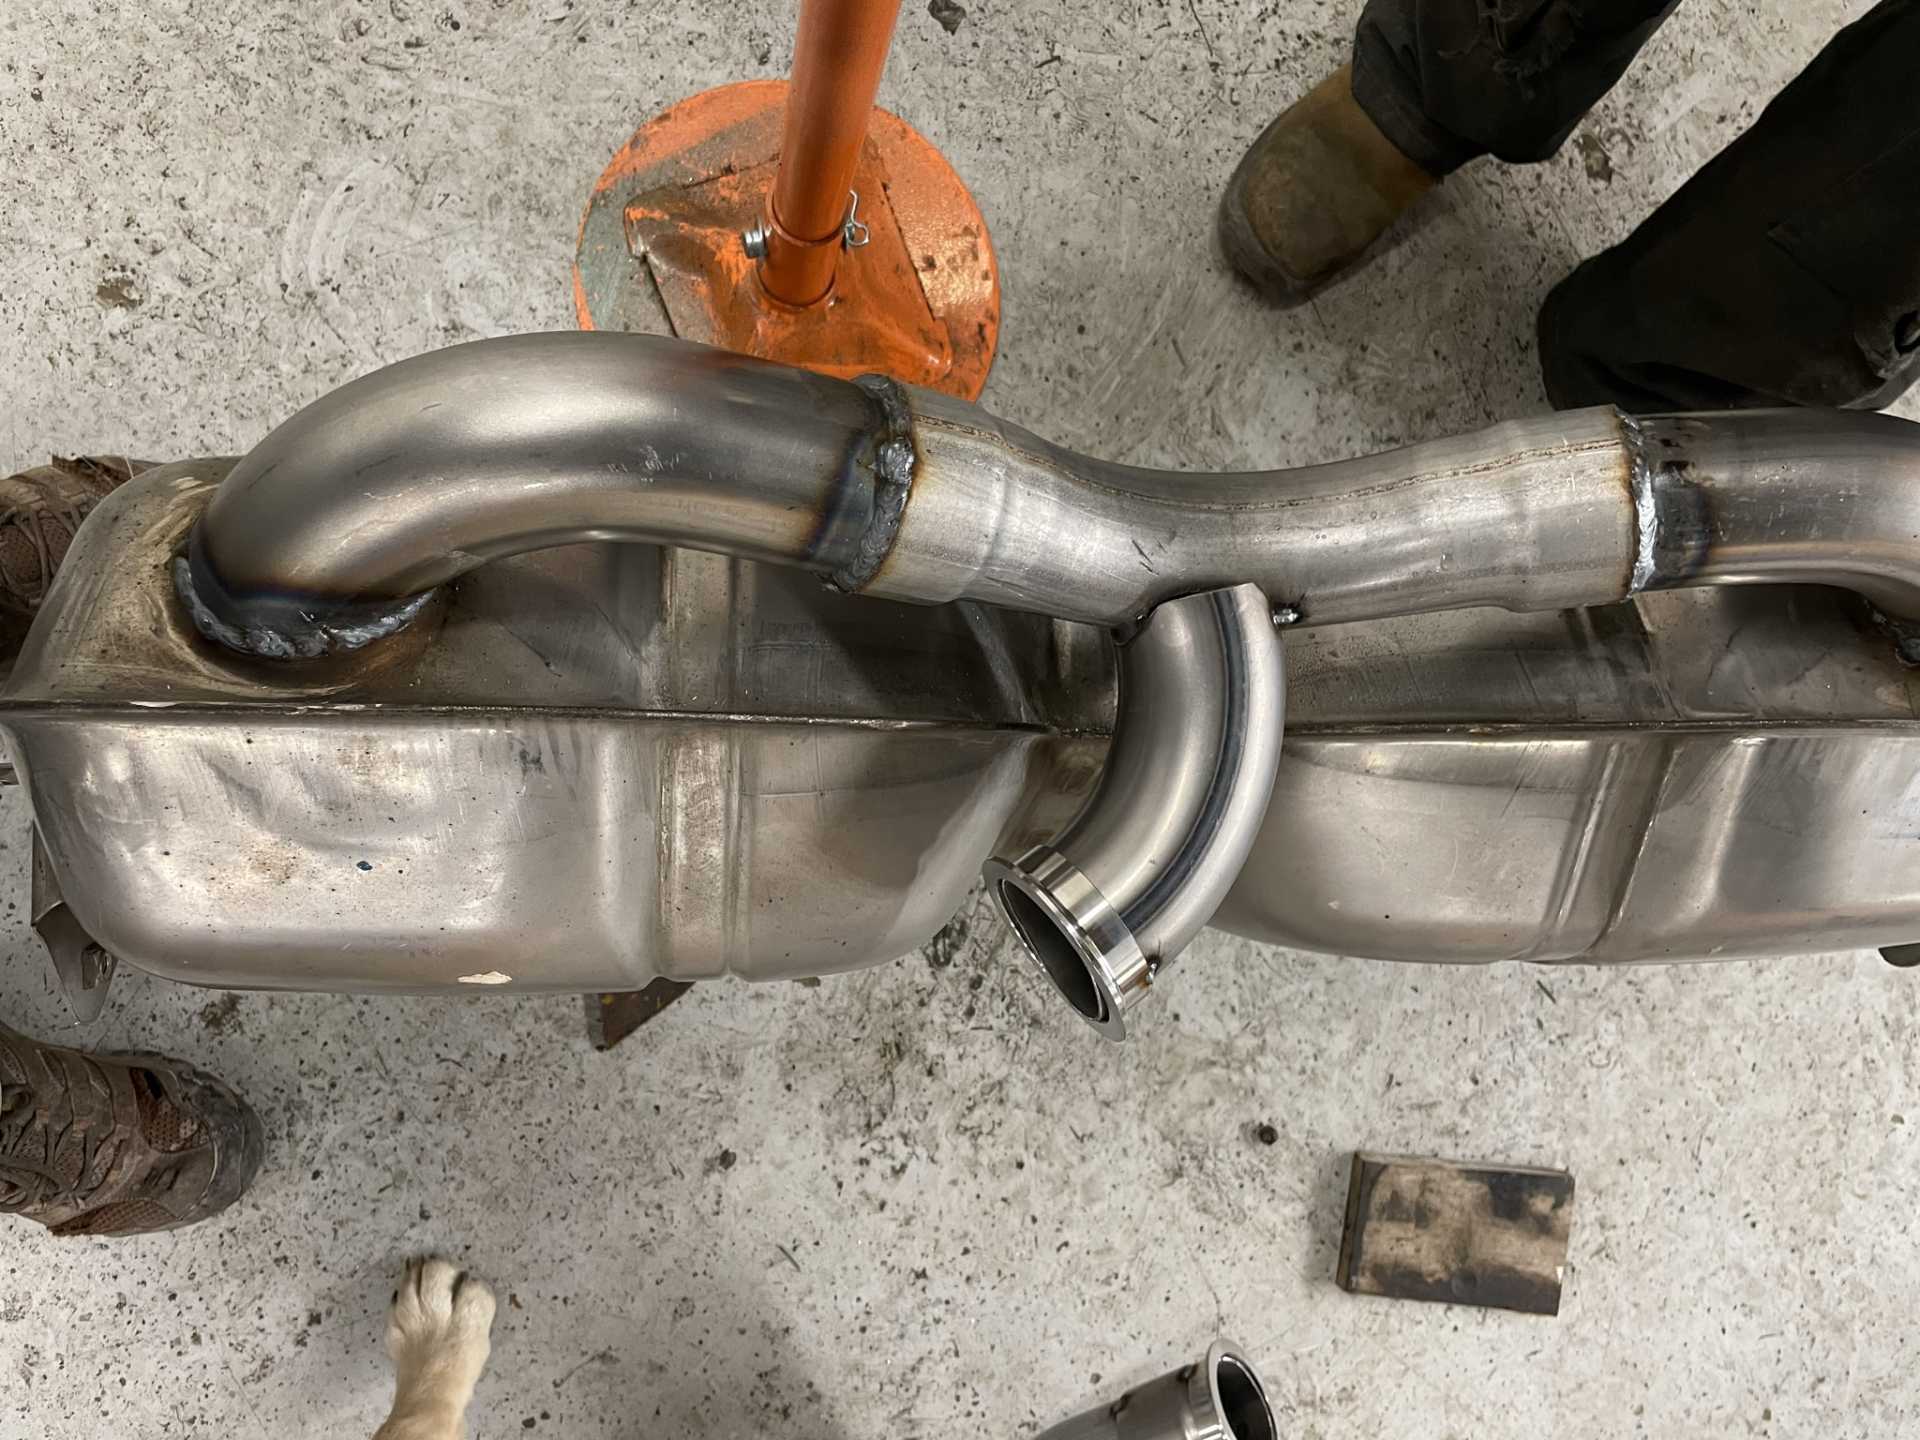
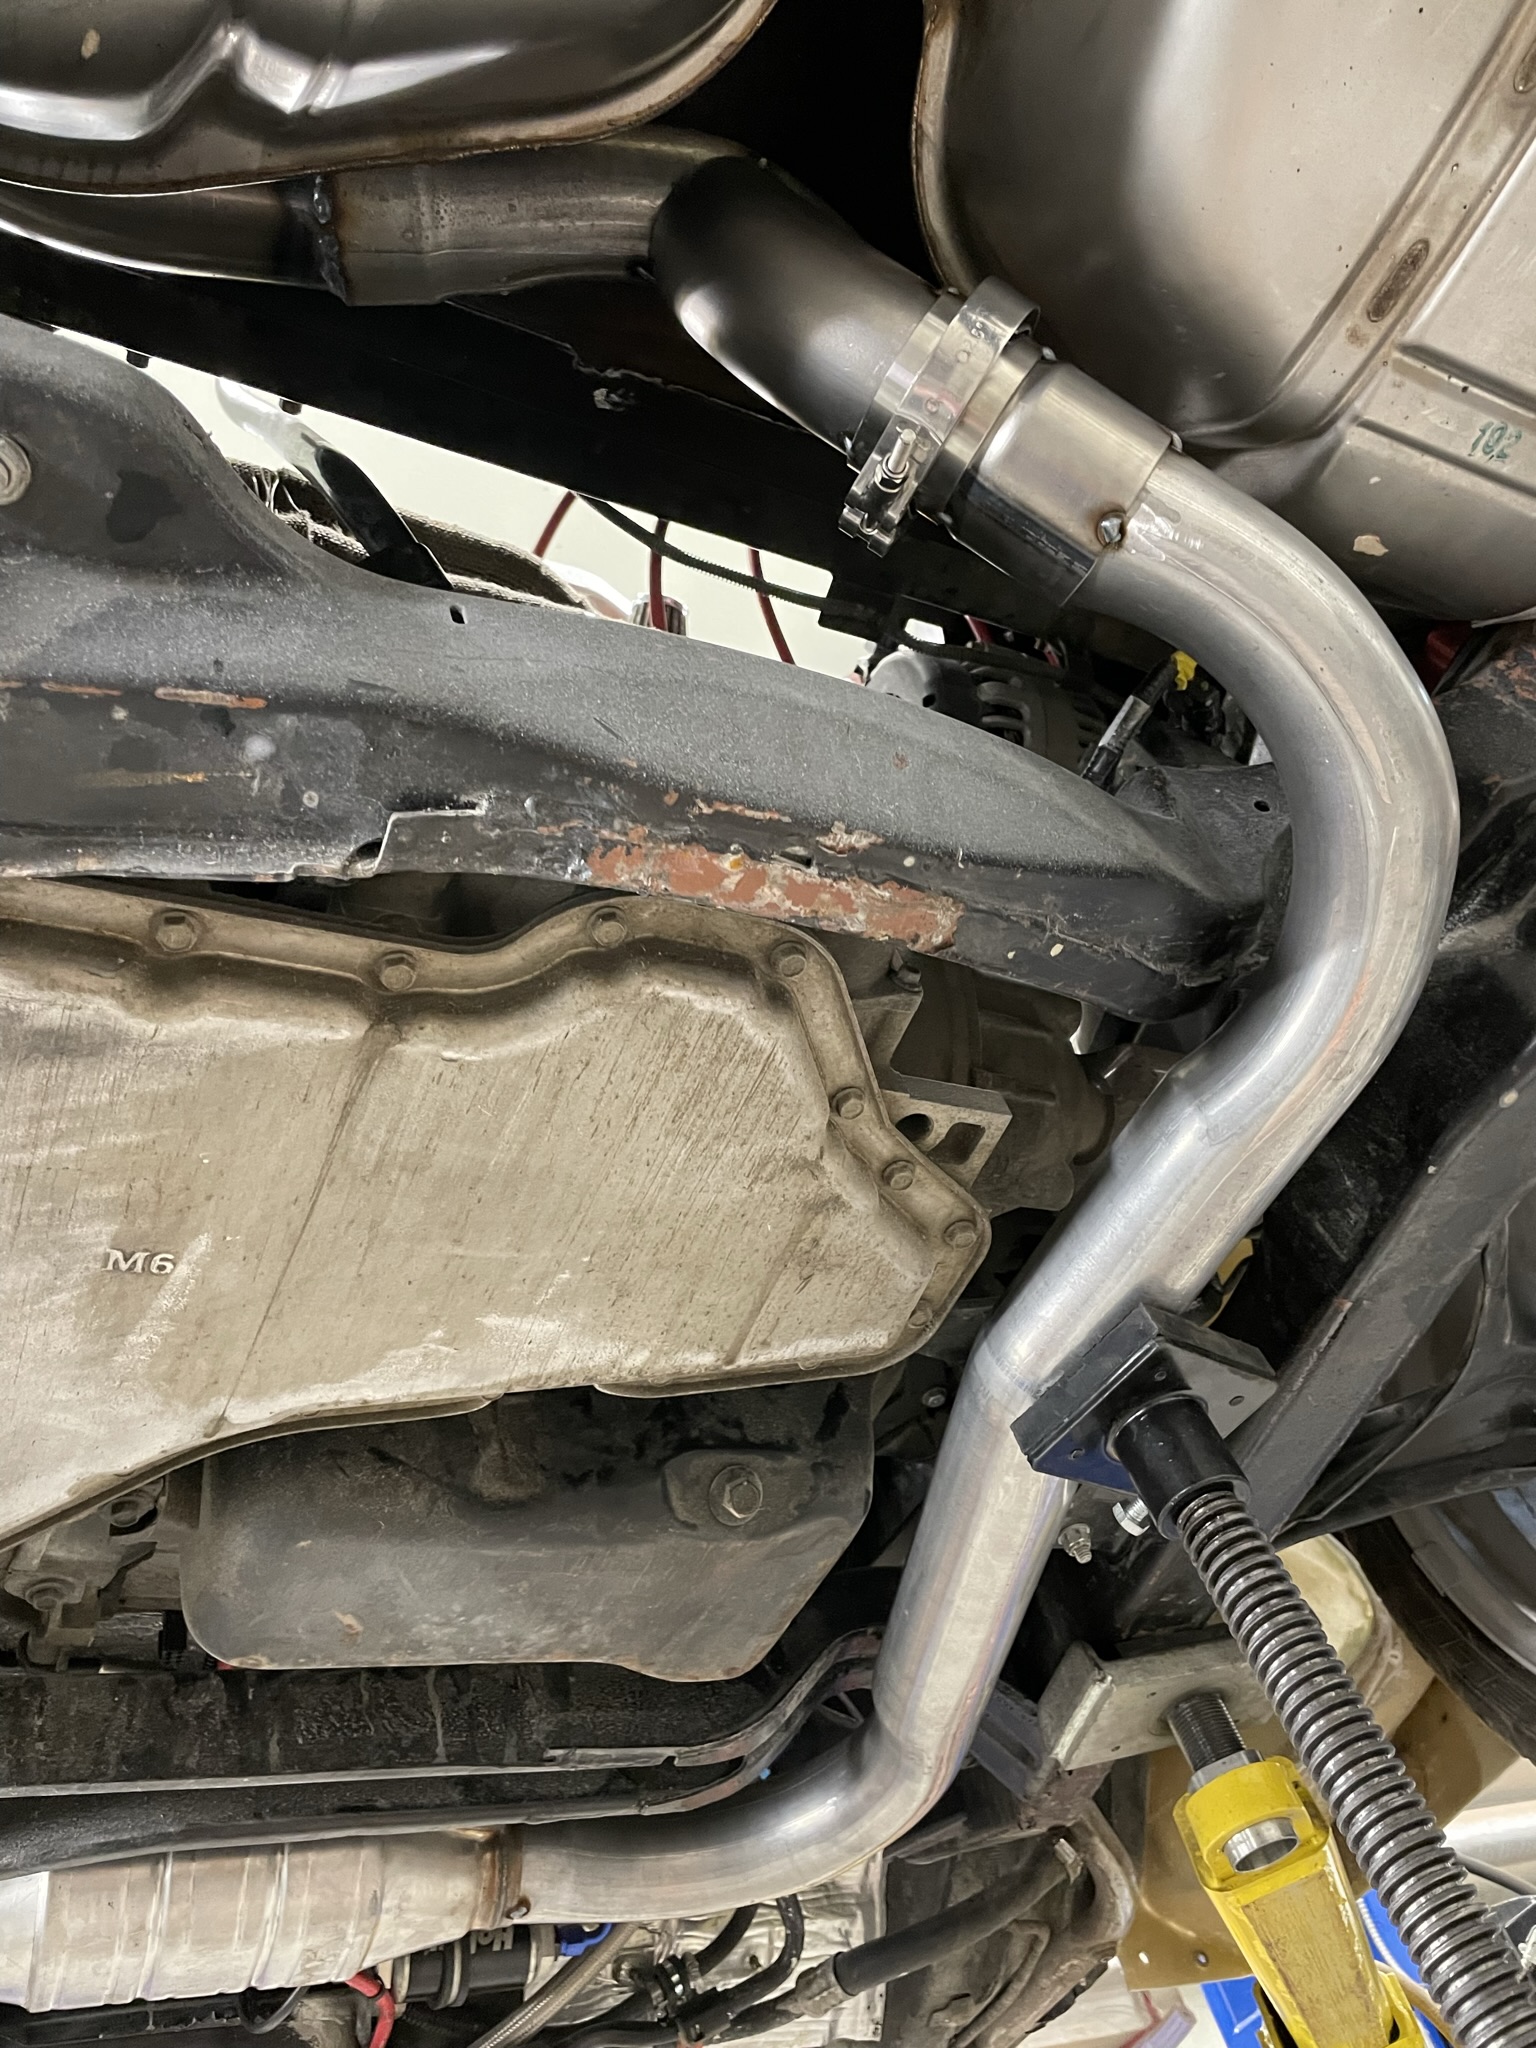
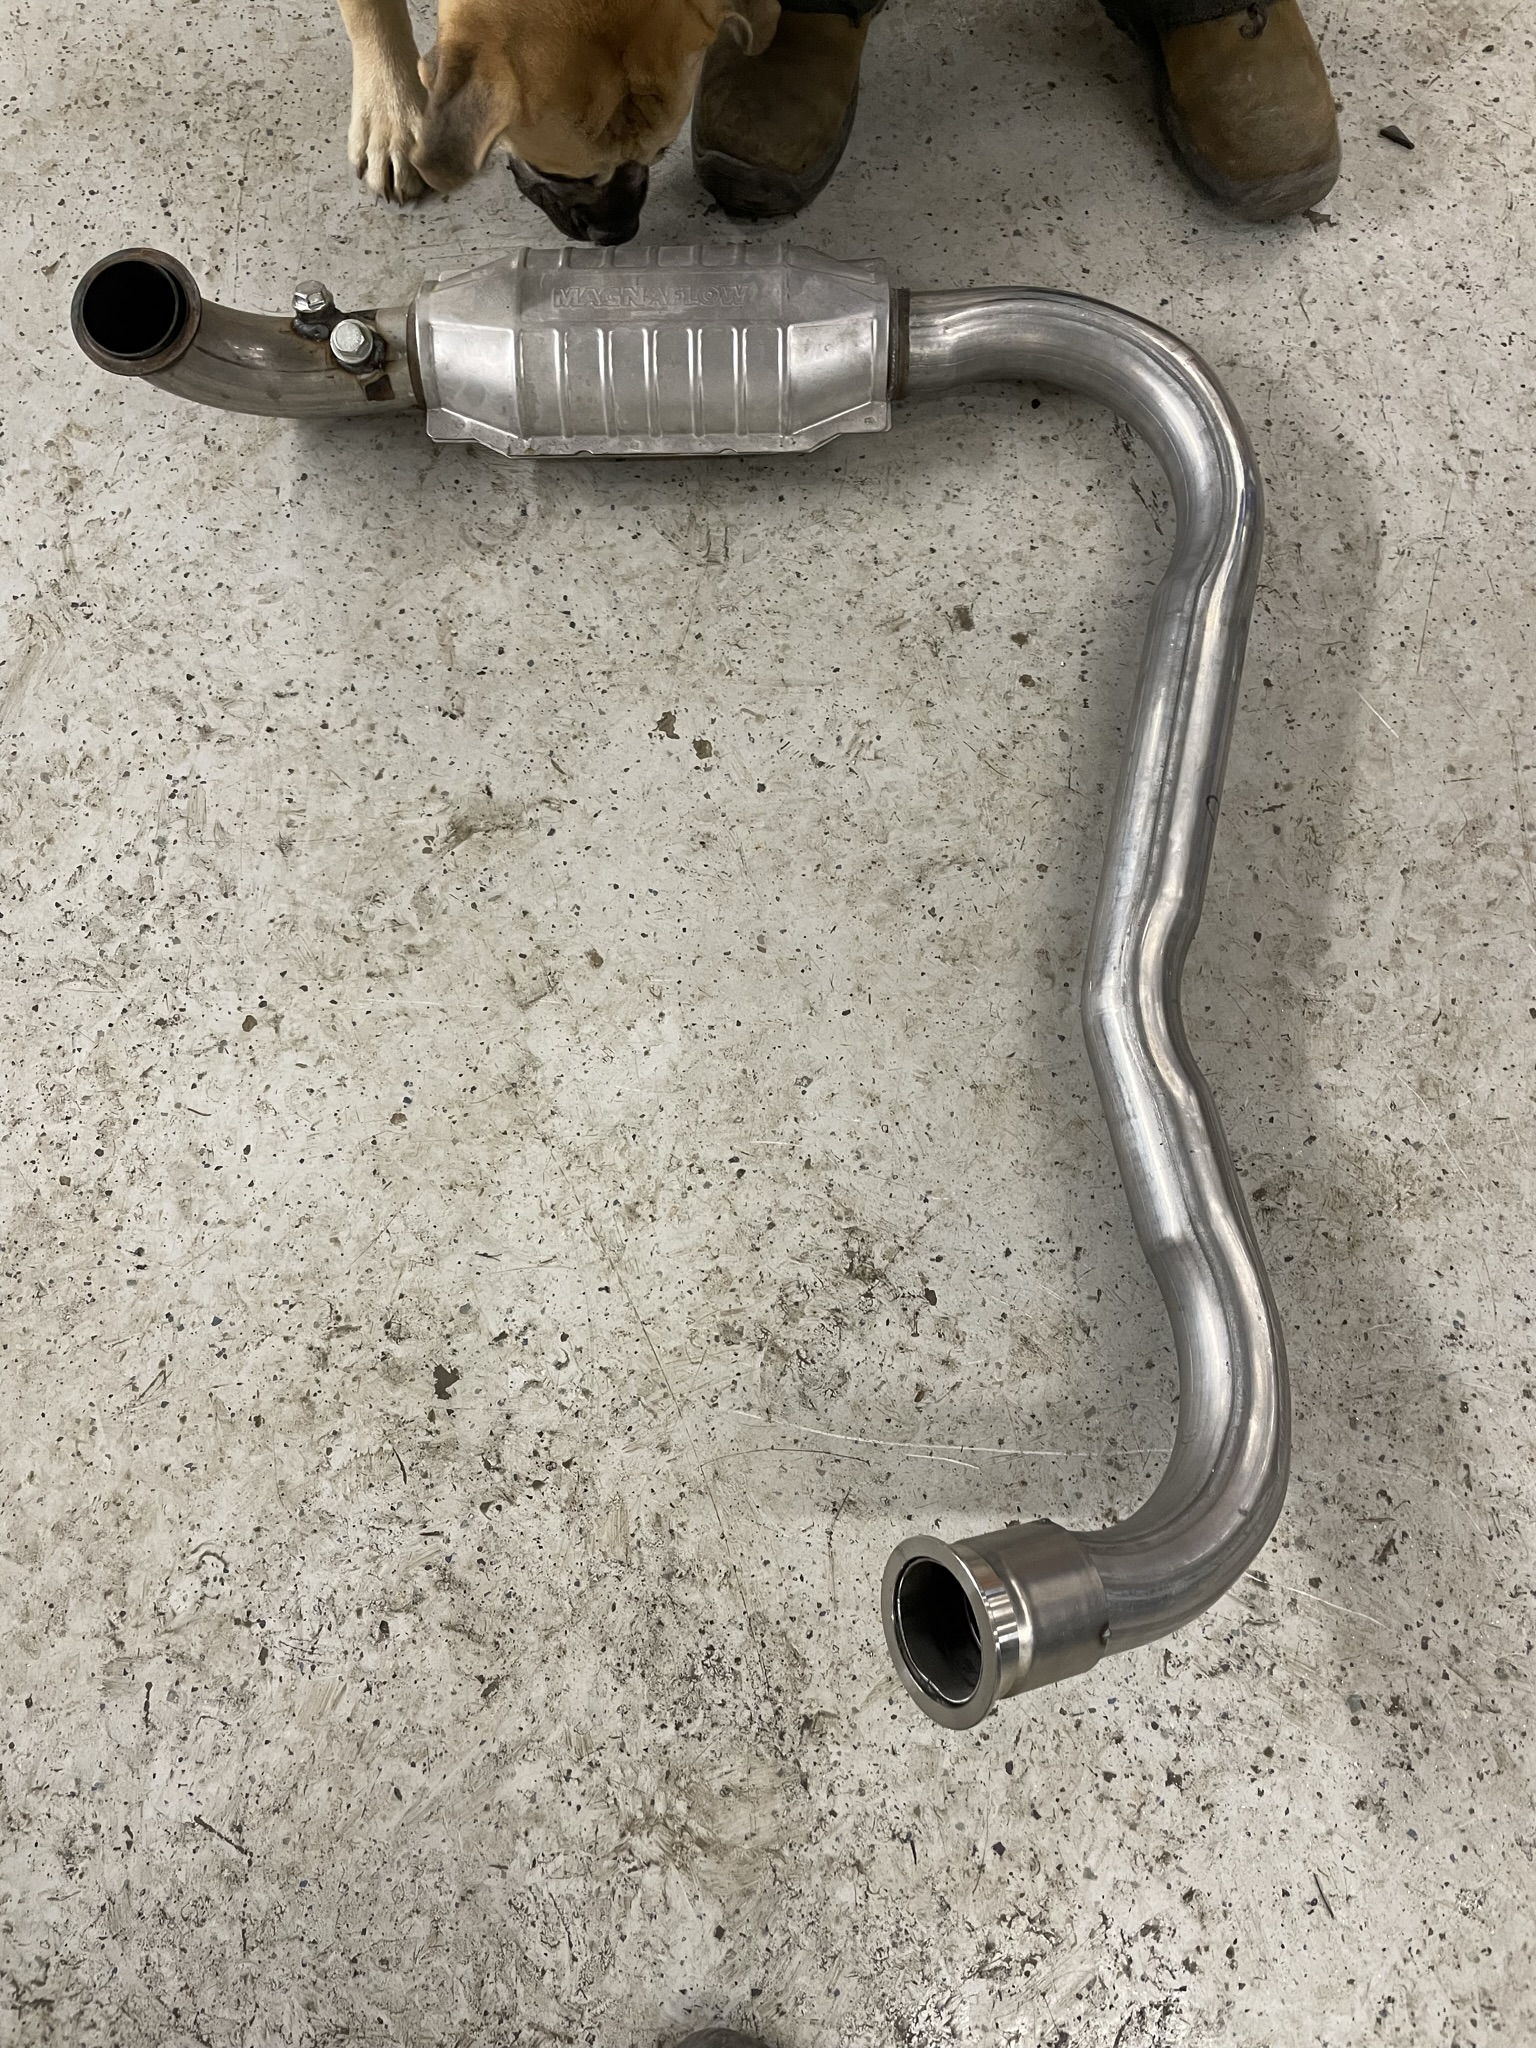
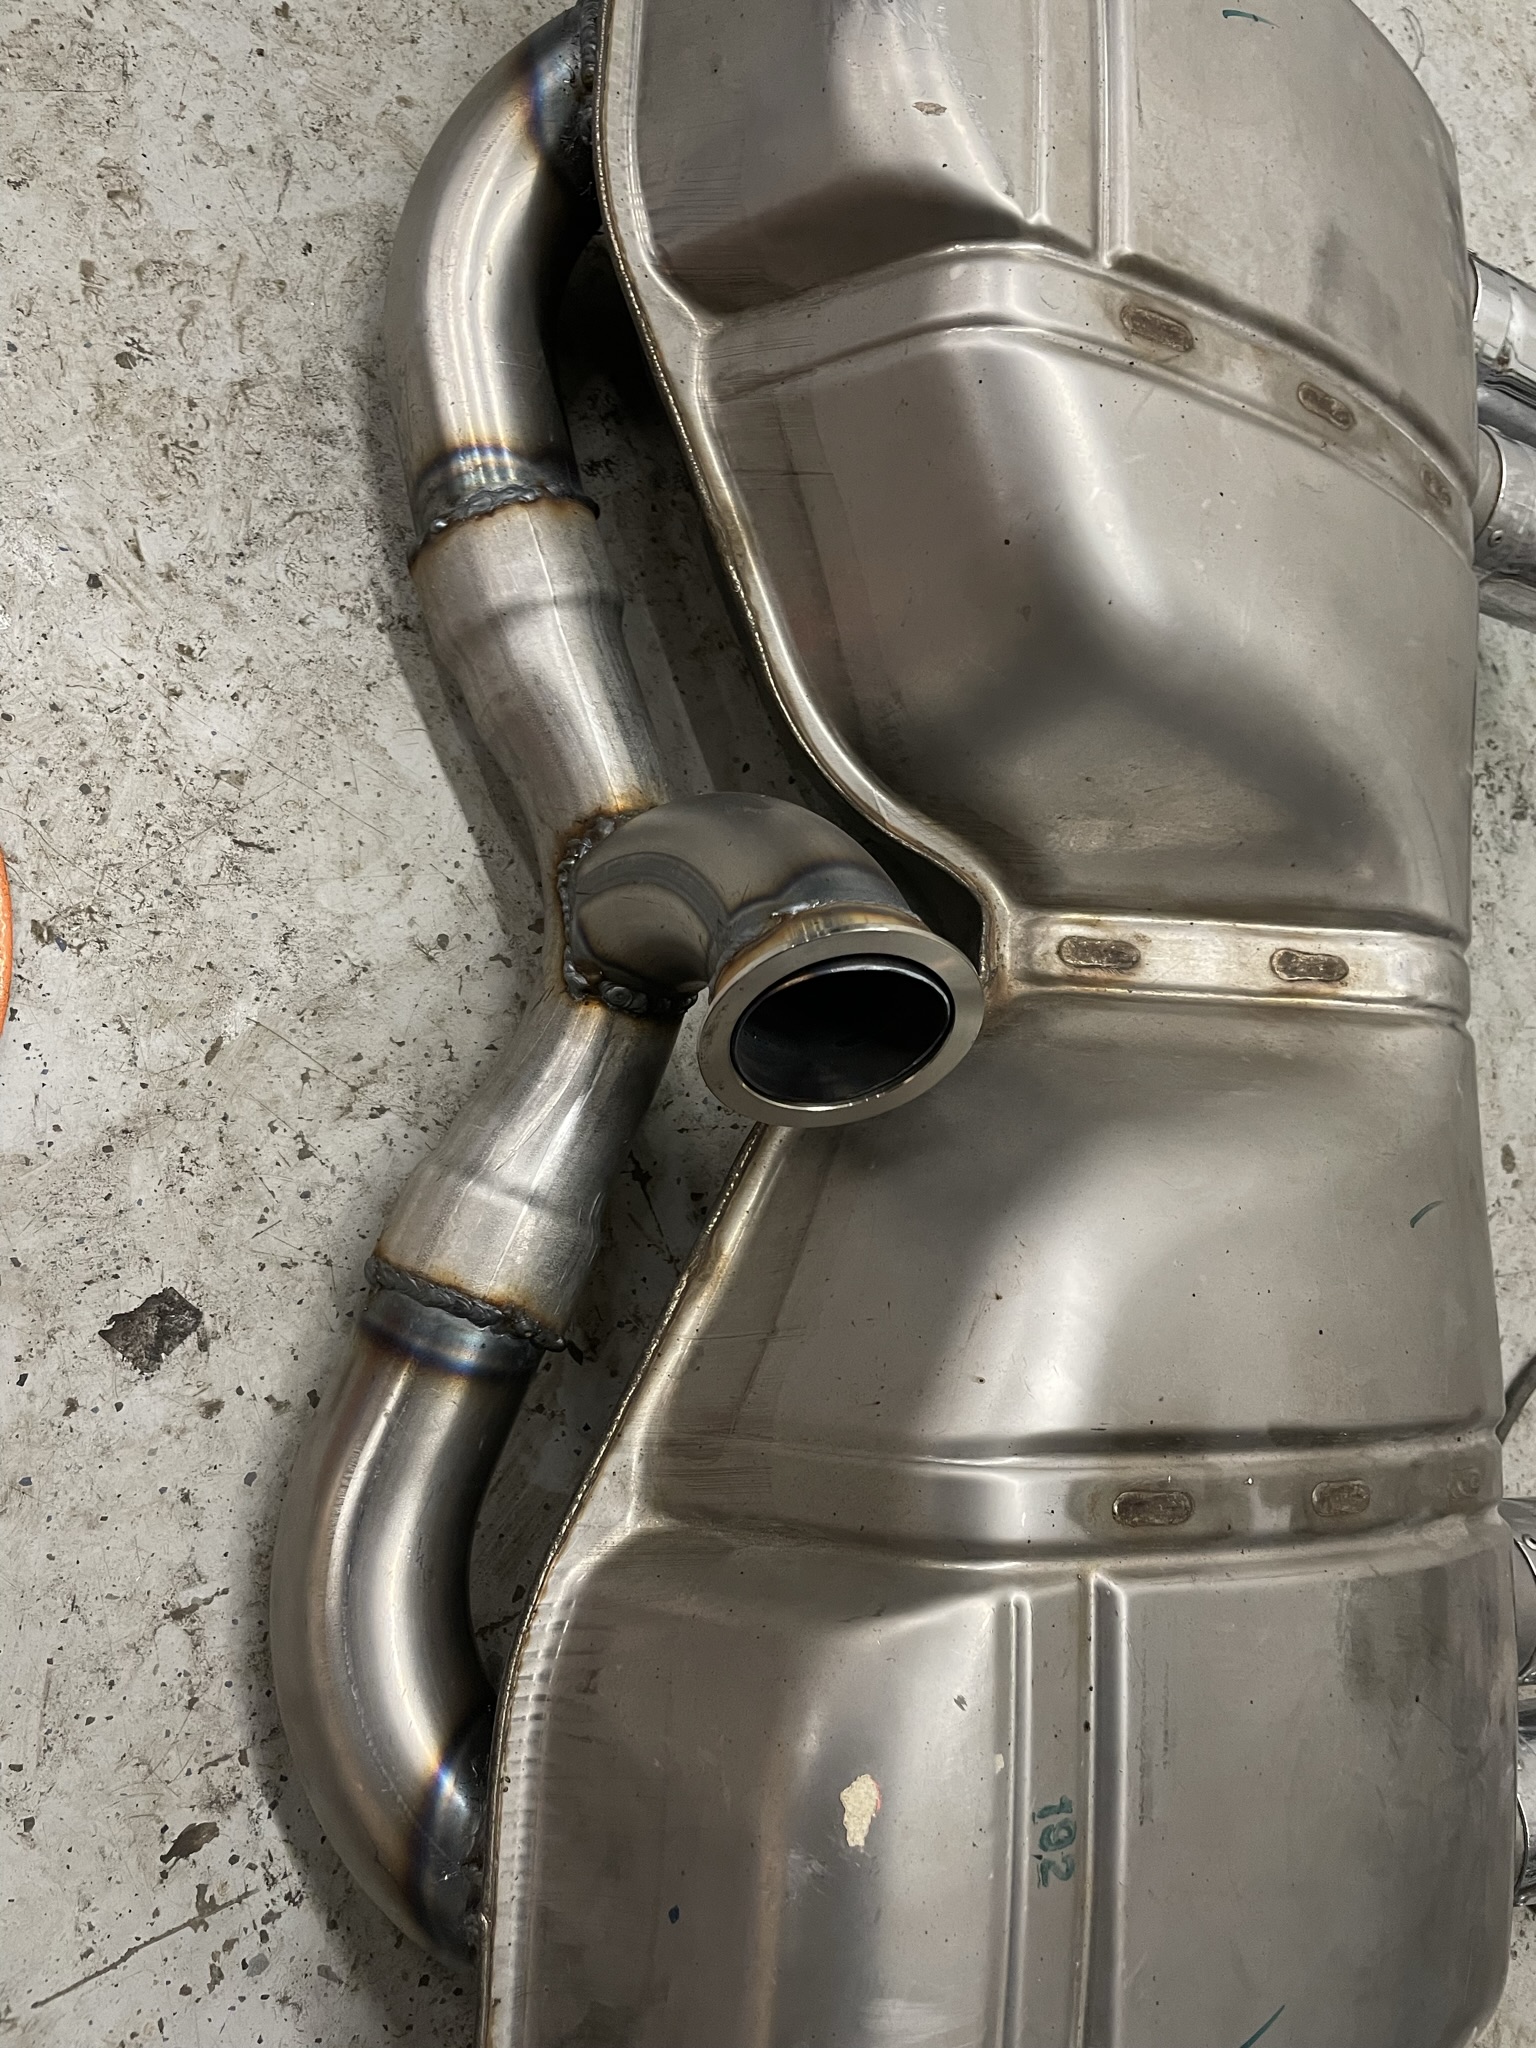
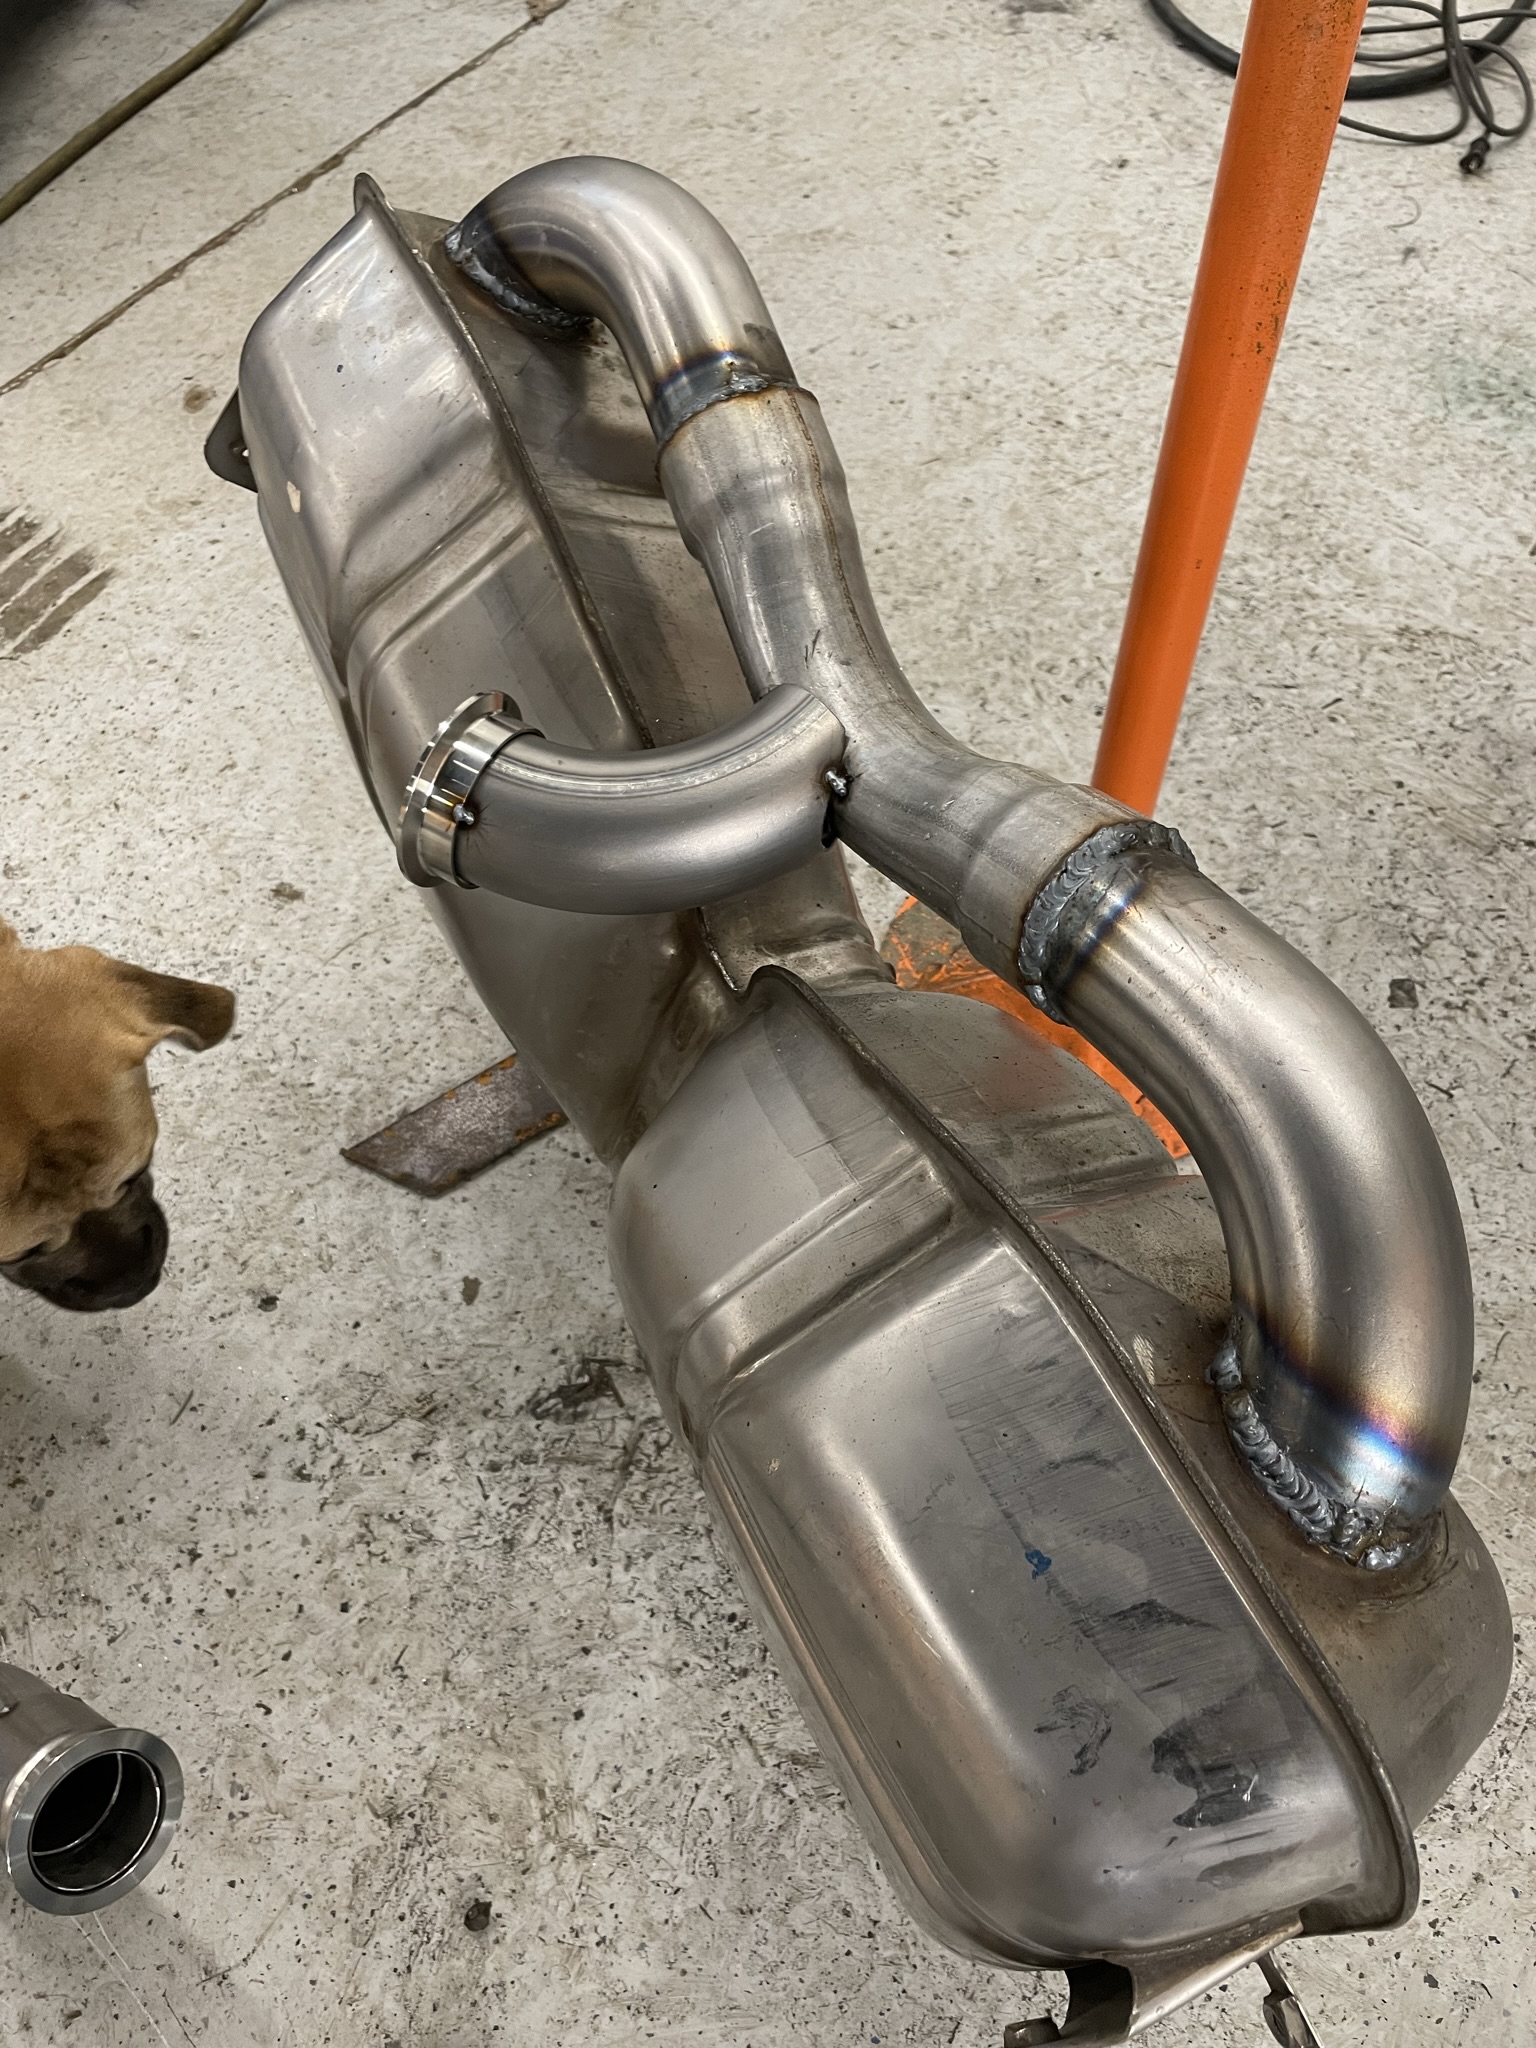
Trinten lots of good questions and I’ll try to answer them. So the muffler is further up on this page but I’ll try to discribed the install and what I used . So the actual muffler is a SS BMW V10 E90 muffler , I selected it from watching Utube sound clips of performance cars. I had a set of SS headers for a 3800 which dumps in the Fiero OEM routing which gave me a lot more options than using the stock manifolds of the 3800, It also allows for a HP cat which quiets it down even further. So the stock BMW muffler pipes are cut off at the muffler and the new pipe routed and welded on to the muffler. The lower trunk part is cut off To alow the muffler to mount in between the frame rails. As for sound it is very quiet yet still has a very nice tone. I’ll try to get a DB sound level .
As for the HVAC controller, My buddy Don O . Is building this controller for my car and his Countach is will be similar to Riceburners controller for the 355 in how it still uses the Fiero motors and is connected via the OEM connector. In my case it will control all lights , fan speeds and automatic temperature through an Audino ccountrol modual. Don has written the code to control everything. It will be operated via a touch screen below the radio in my dash console. I’m not sure if he is planning on selling any I know of one other that is interested and I have told Don to think about it. That’s about it.
Wayne
[This message has been edited by dobie1 (edited 05-11-2022).]
Thank you for the details and additional info on the muffler and the HVAC. I'm hoping the mufflers I selected are going to be quiet enough without hurting performance too much (it's a balancing act), but we did setup the exhaust so we can make changes to the mufflers easily in the future if I don't like what I got.
And thanks for correcting me on who was providing those other HVAC modules.
So the one you and Don are planning to use is going to be a (nearly) drop in unit that will have an updated interface, work with the existing HVAC mechanical portions, and auto-climate control?
Please send this to your friend:
In all seriousness, I understand projects like that take skill and time (just like our cars!). Feel free to PM me if he has a number in mind.
So I posted to YouTube a video of my exhaust it is “indoors only” DB at idle it is 65-69 reviving the engine goes to 85 DB . I think out doors it would be quieter over all.
The video is posted for anyone interested in a quite performance exhaust for our Fiero based builds.
Supercharged 3800 with SS headers BMW M3 E90 muffler and HP cat.
I also got the rear tow bar hole cut into the body and test fit the bar into and onto the mounting bolt. Remember this is behind the license plate so no one will see the mounting hole in the body.
Lots of clearance from the tow hook!! Stay safe. Wayne
[This message has been edited by dobie1 (edited 05-15-2022).]
Thank you, and I apologize, I didn't realize that the description you gave in your post was the title of the video. In hindsight, I should have, and yes would have been able to find it that way.
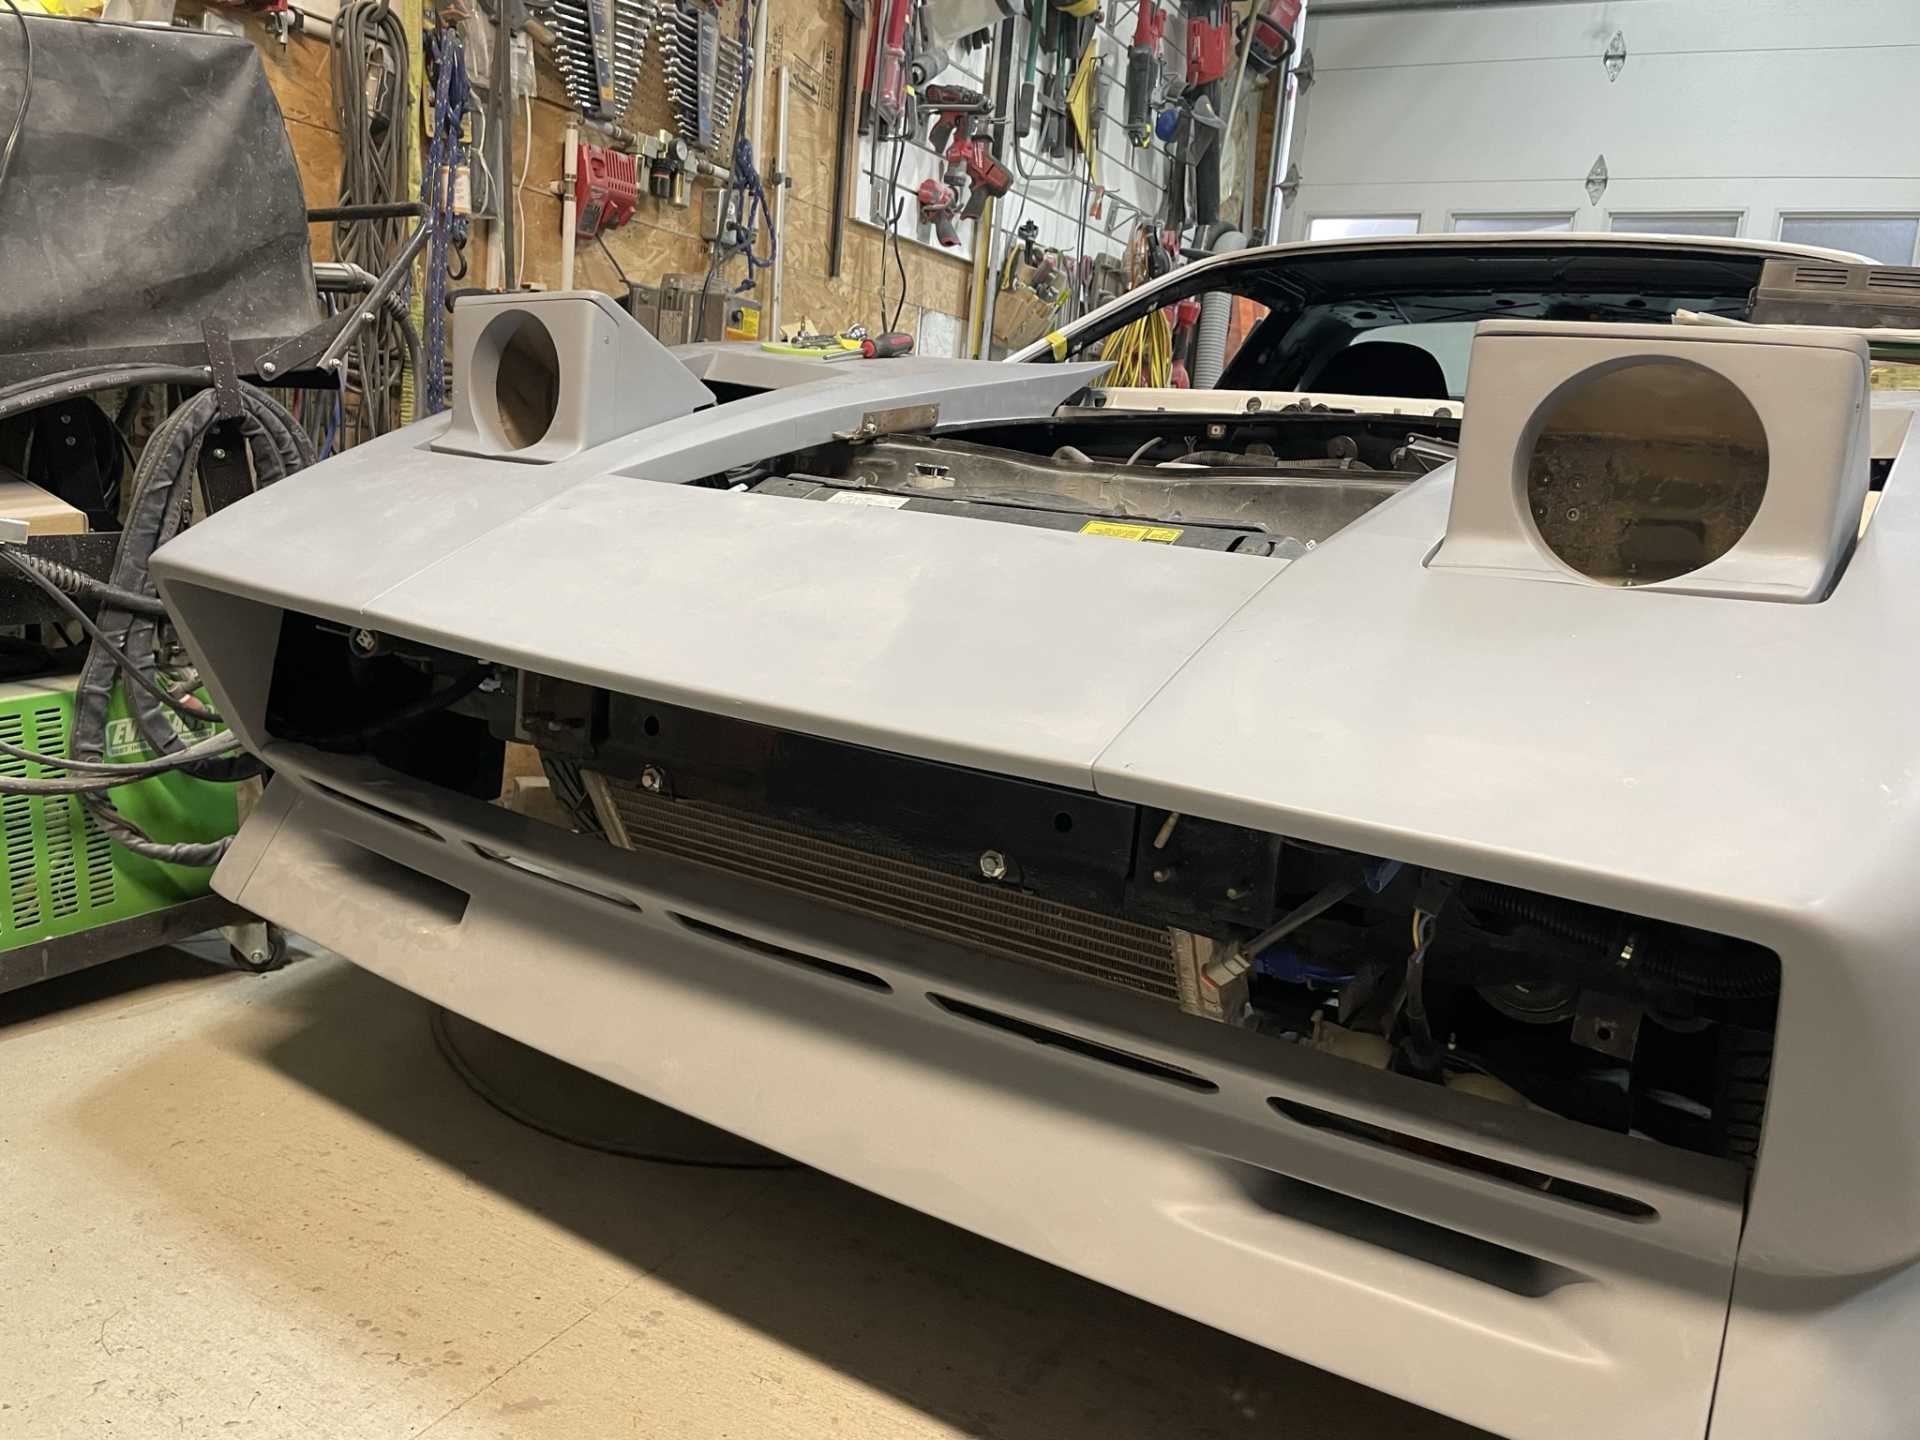
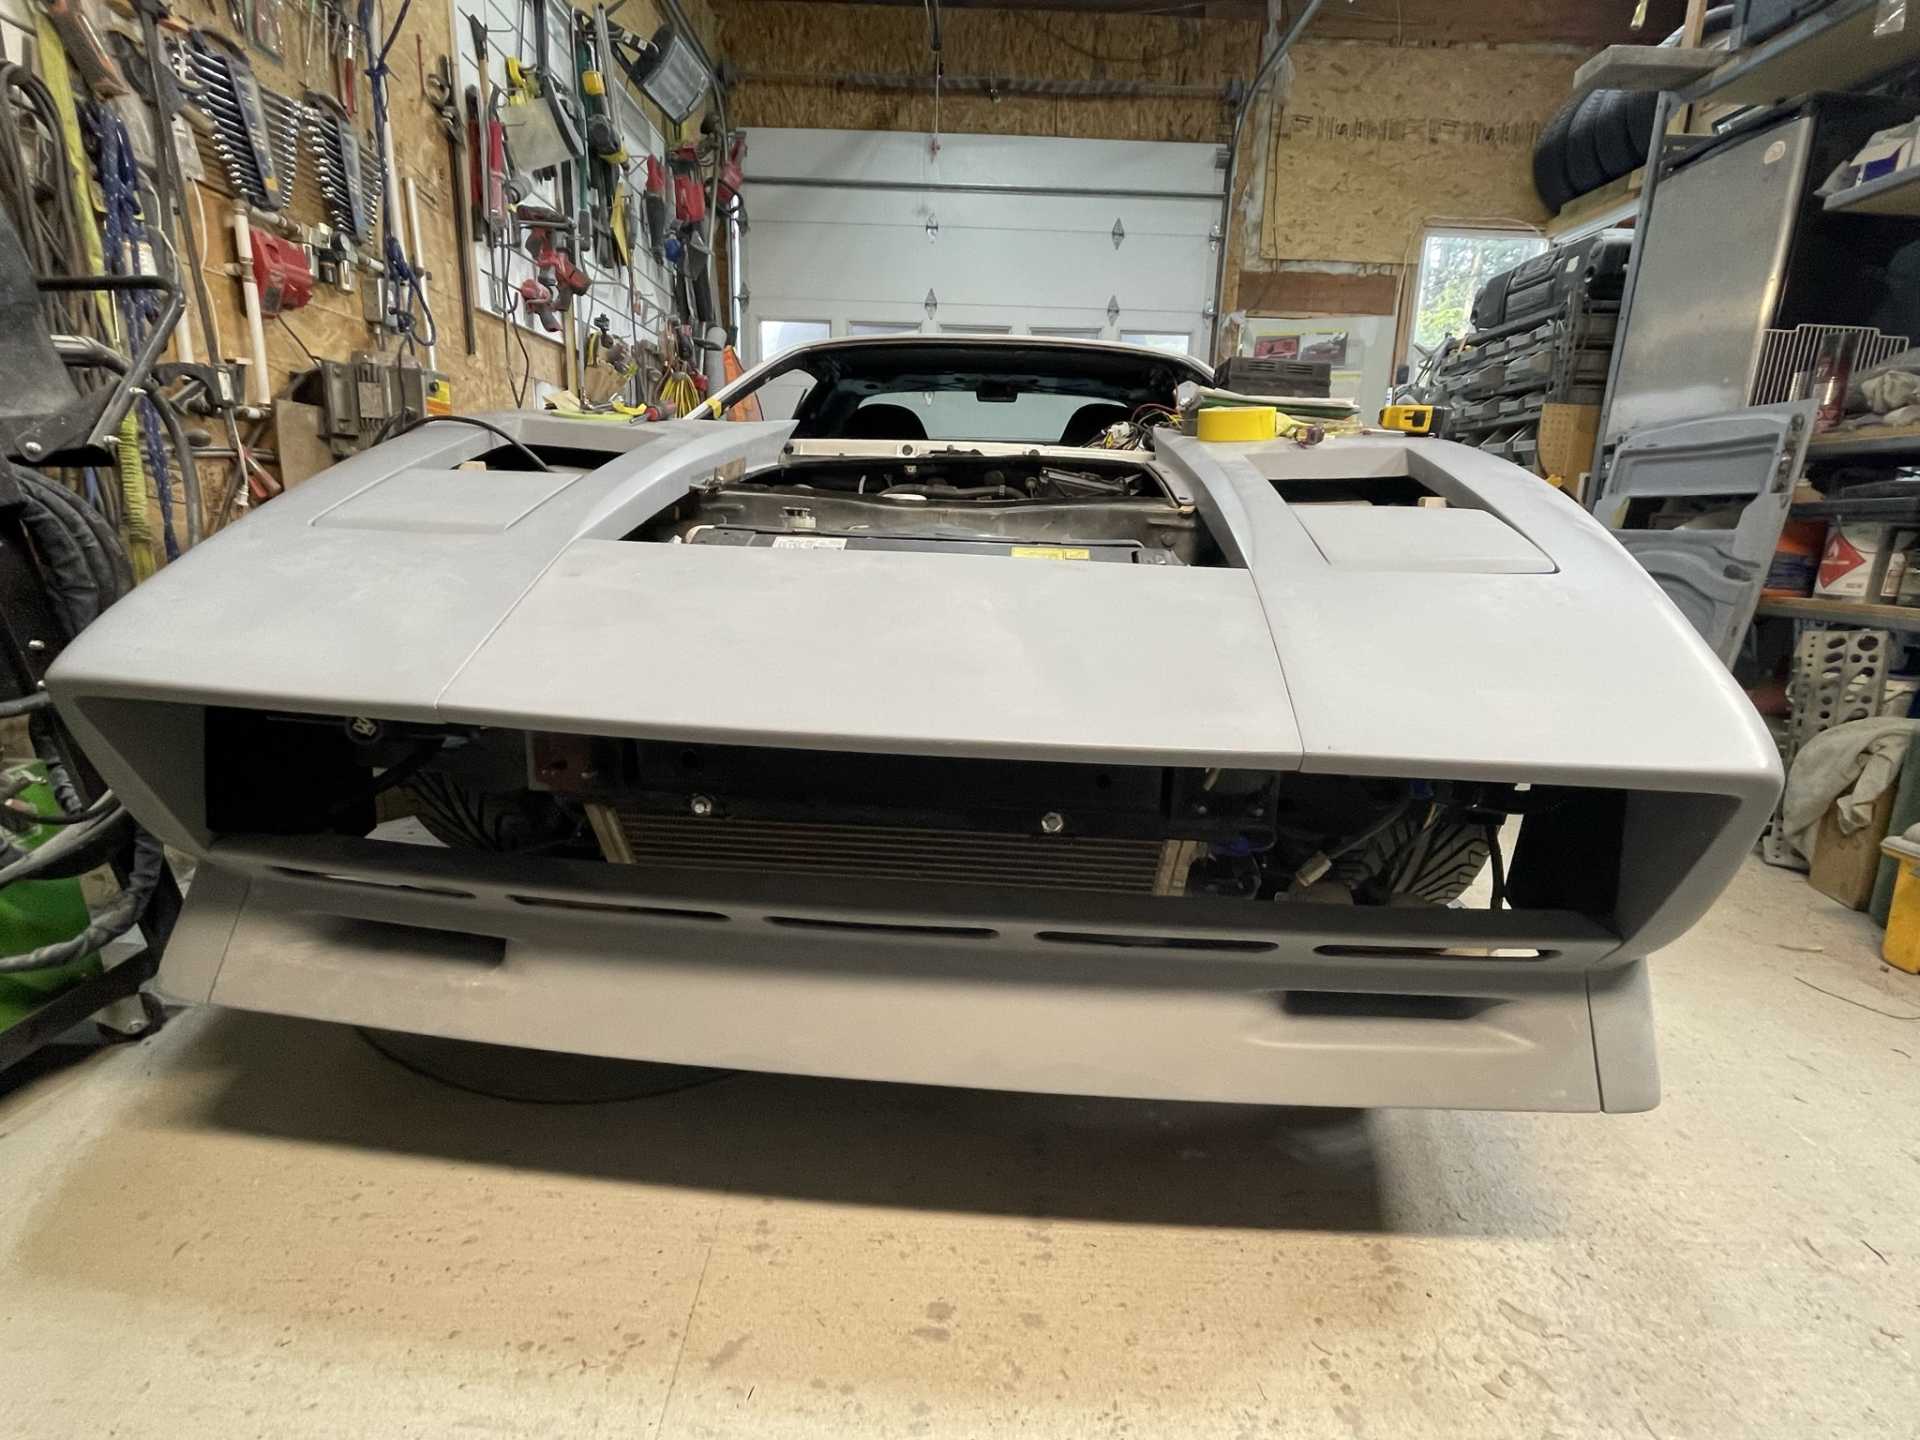
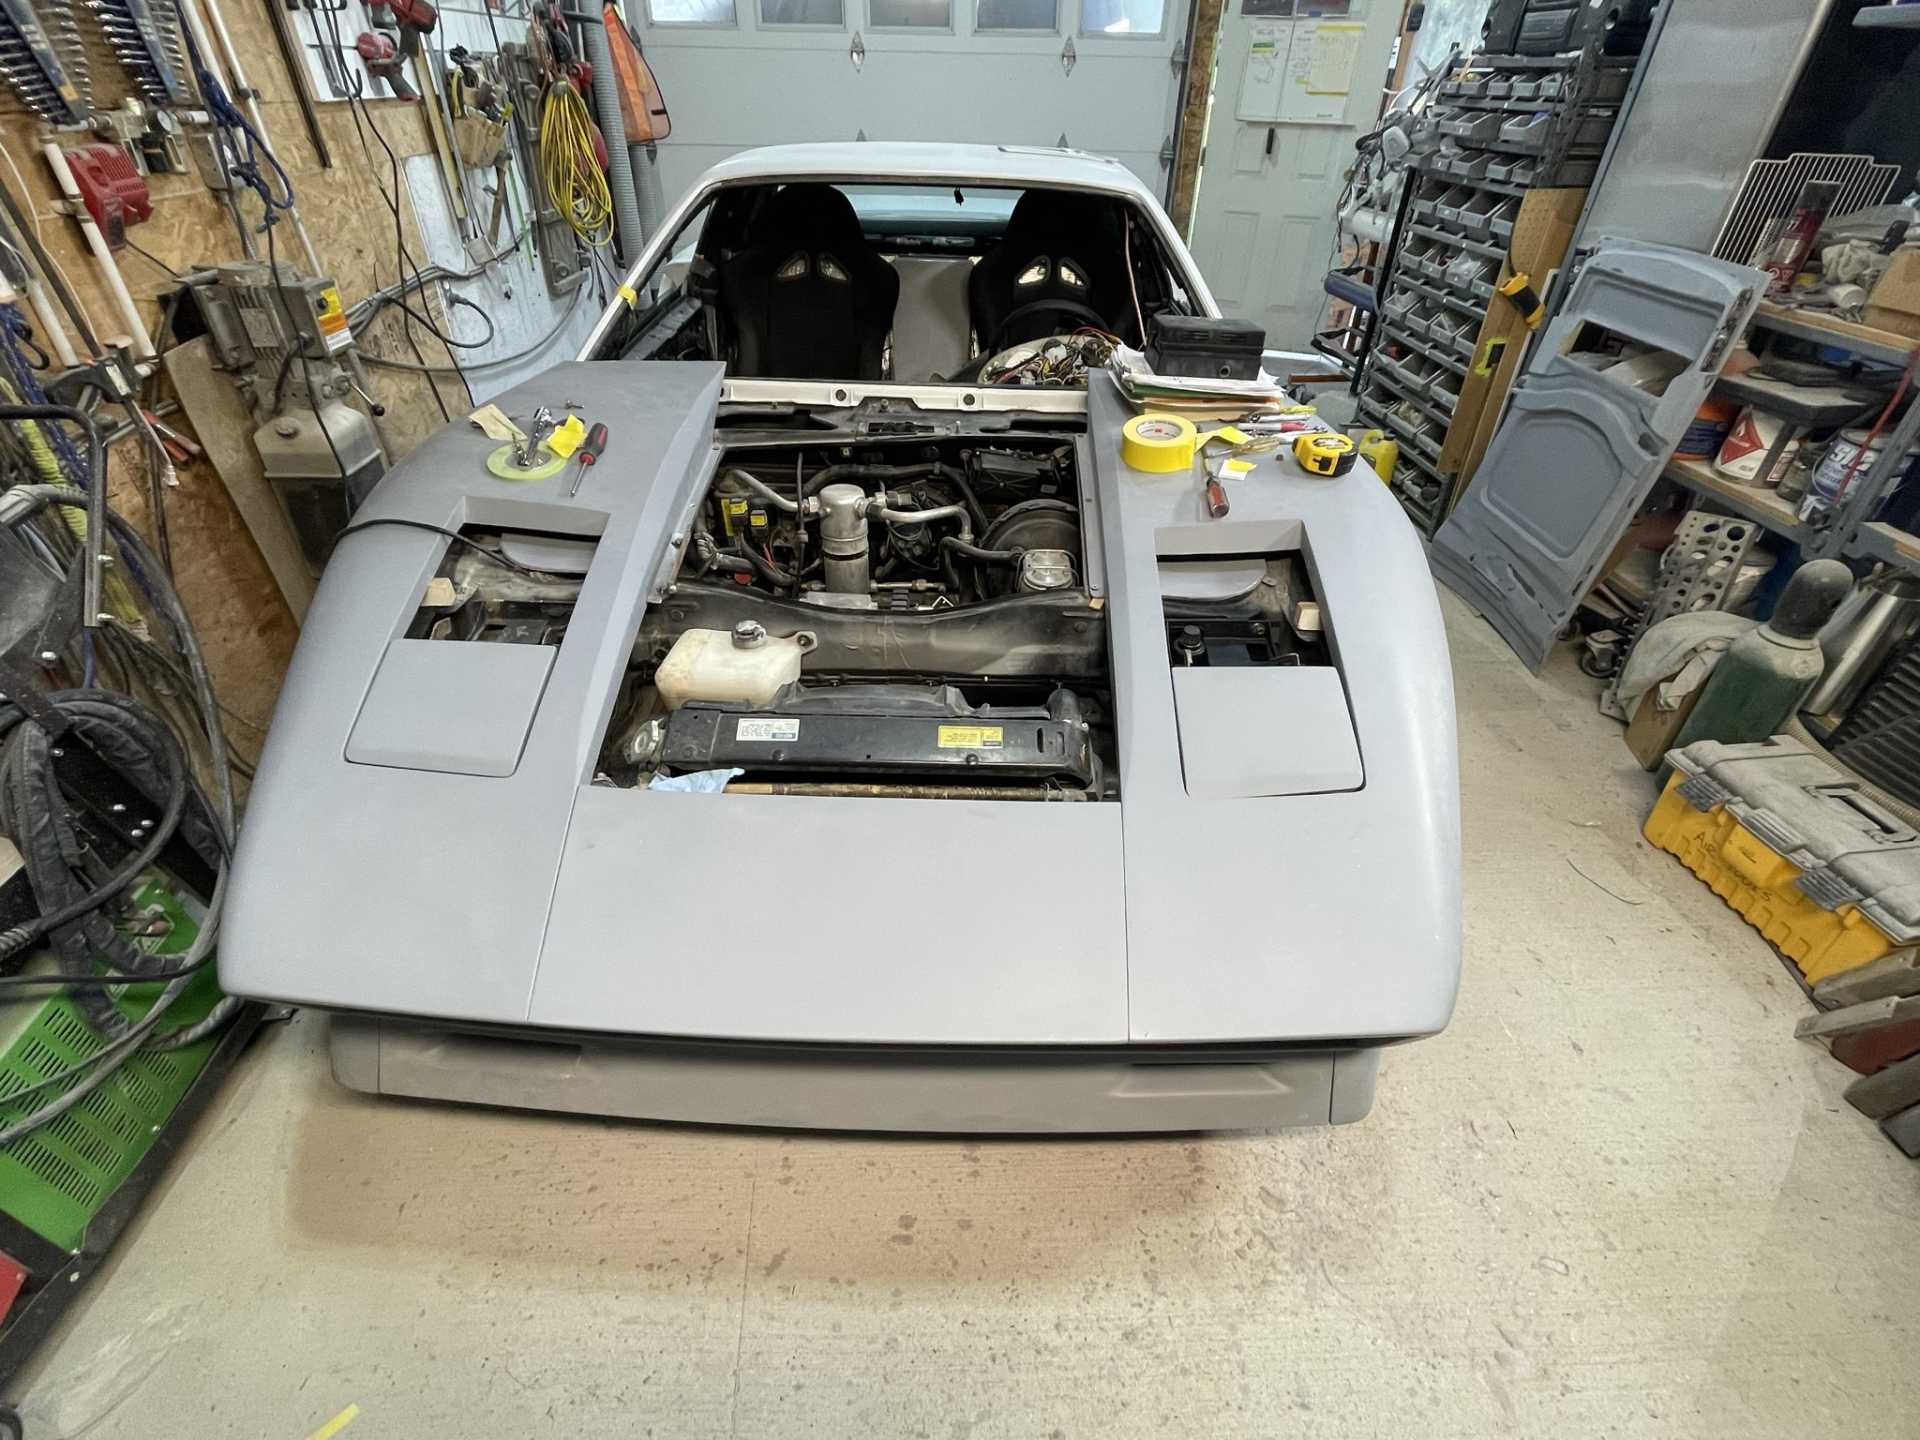
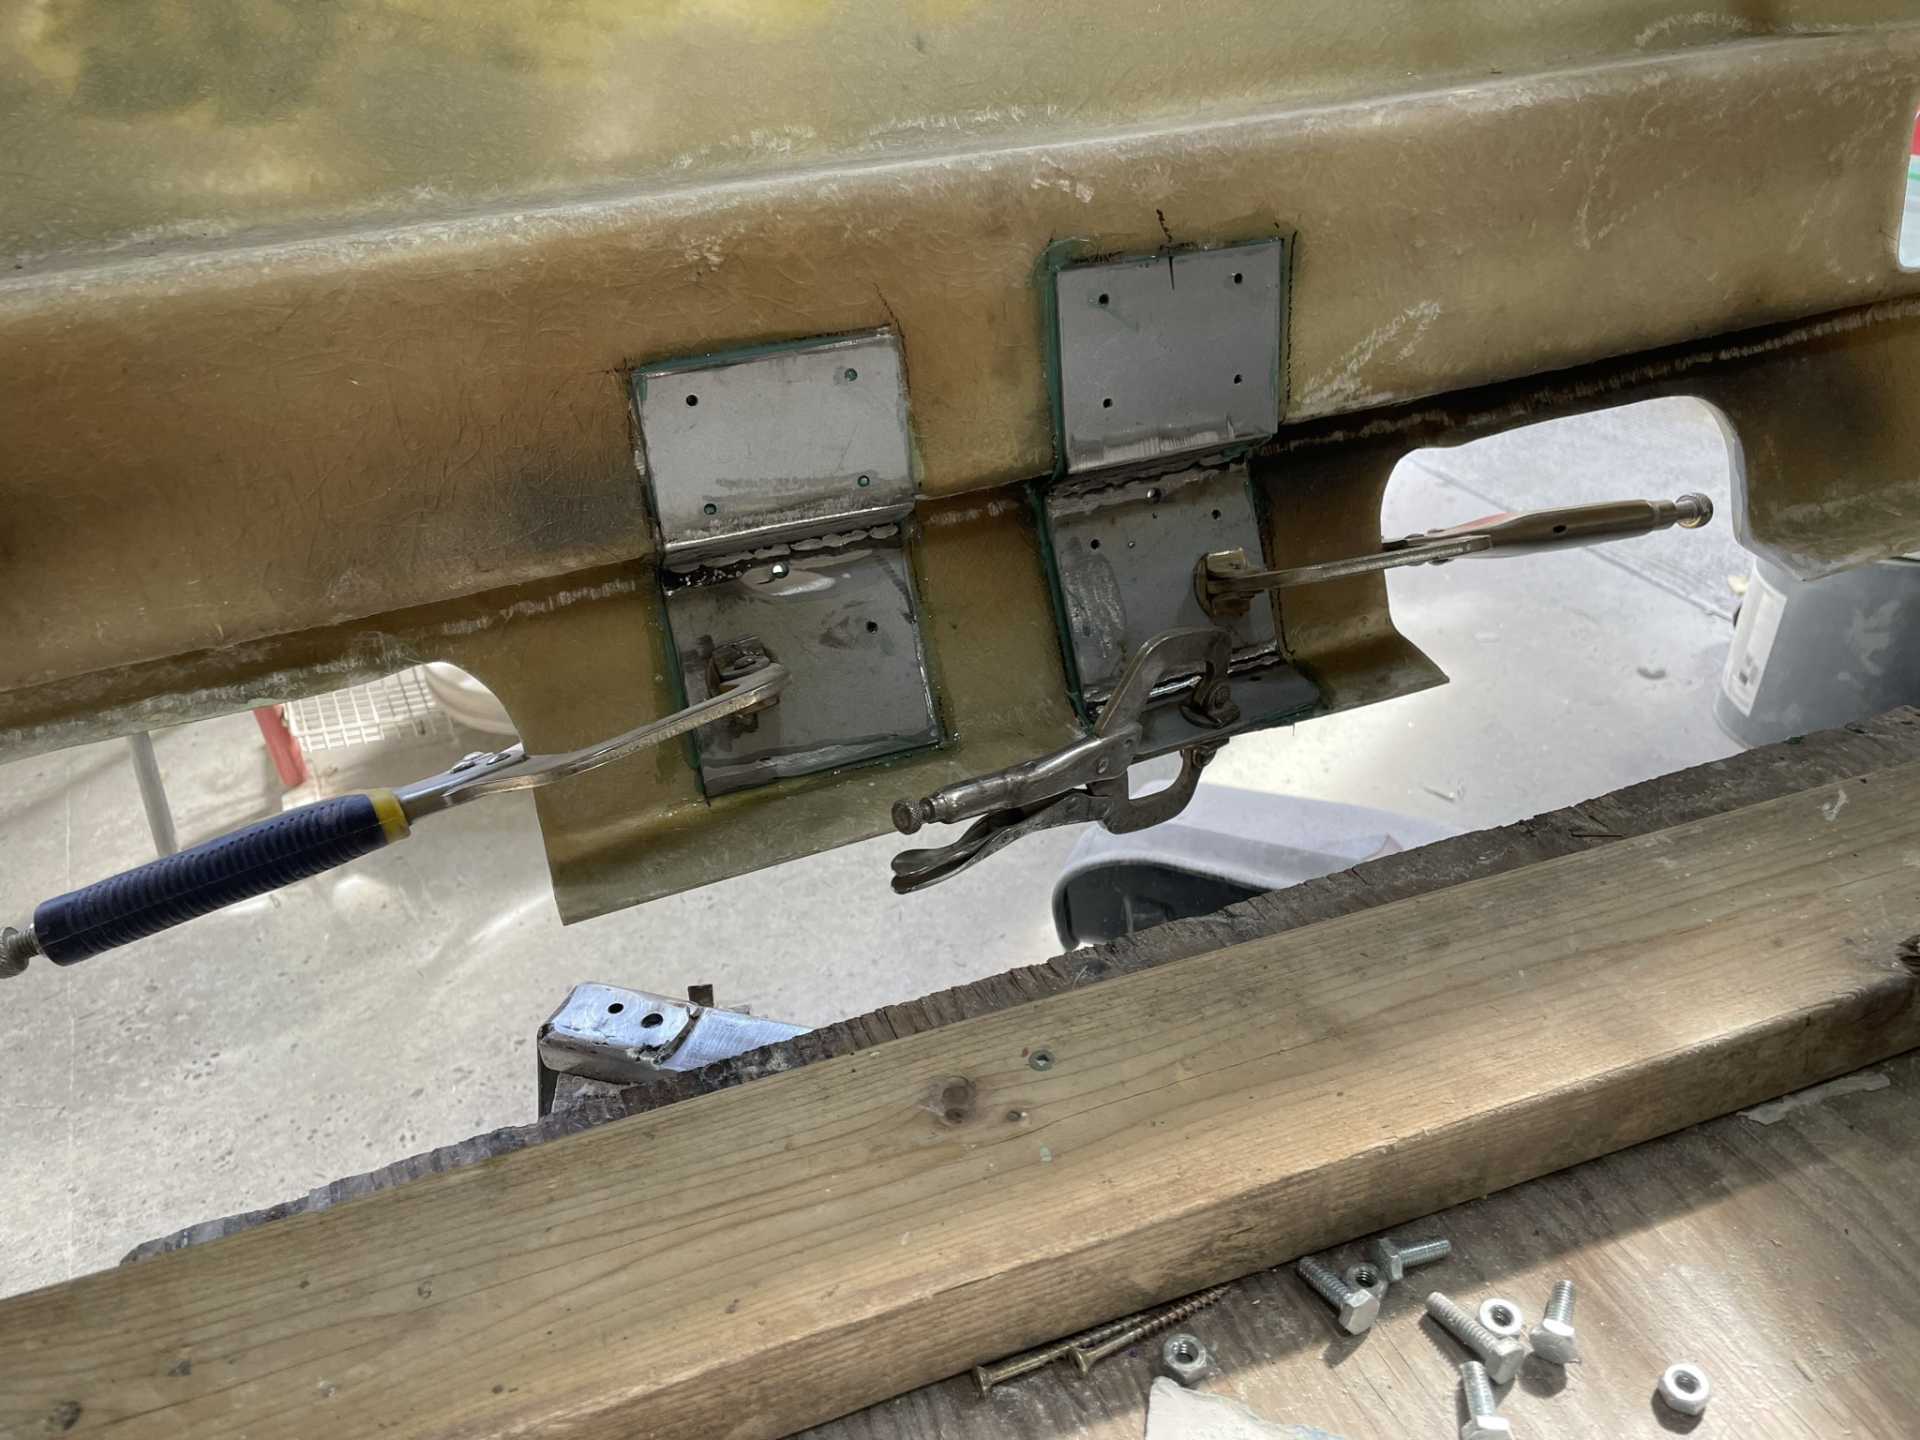
Here are the latest update on my journey to completion. After mounting all the body panels to the chassis it was interesting to find that I needed to replace all the 1/4 x20 rivenuts. I found that when I tightened them down one of two things happened, a couple ether just pulled out or spun in the hole. And a second finding that because they were aluminum rivnuts a couple bolts had oxidation. So I went with steel 6 x 10mm rivenuts mounted to 16gauge steel then bonded the piece to the inside/ backside of the fiberglass part. This gave me very strong torque points for the panels to attach to each other. So next thing that is coming up is bonding the outside door panels to the metal of the doors. A couple things that have come up is being able to guarantee that when I bond and clap the door to allow the glue to set the door is in exactly the right place both in height and position for door gaps. One thing has been decided though is the door is coming off the car , this will hopefully make bonding easier and at the same time I’ll paint the door jams. I finally got the pop up headlight buckets I made mounted, “Don O is the builder and designer of the light conversion buckets”
This is Don’s car
. Don also helped me with the first molds I ever made to reproduce his light buckets. I’m very happy with the final look still need a bit of alignment but function exactly as designed.


 [img]https://images.fiero.nl/userimages/dobie1/757D2A95-5B91-4D0C-9D 64-49ADA29D9C8A.jpeg[/img]
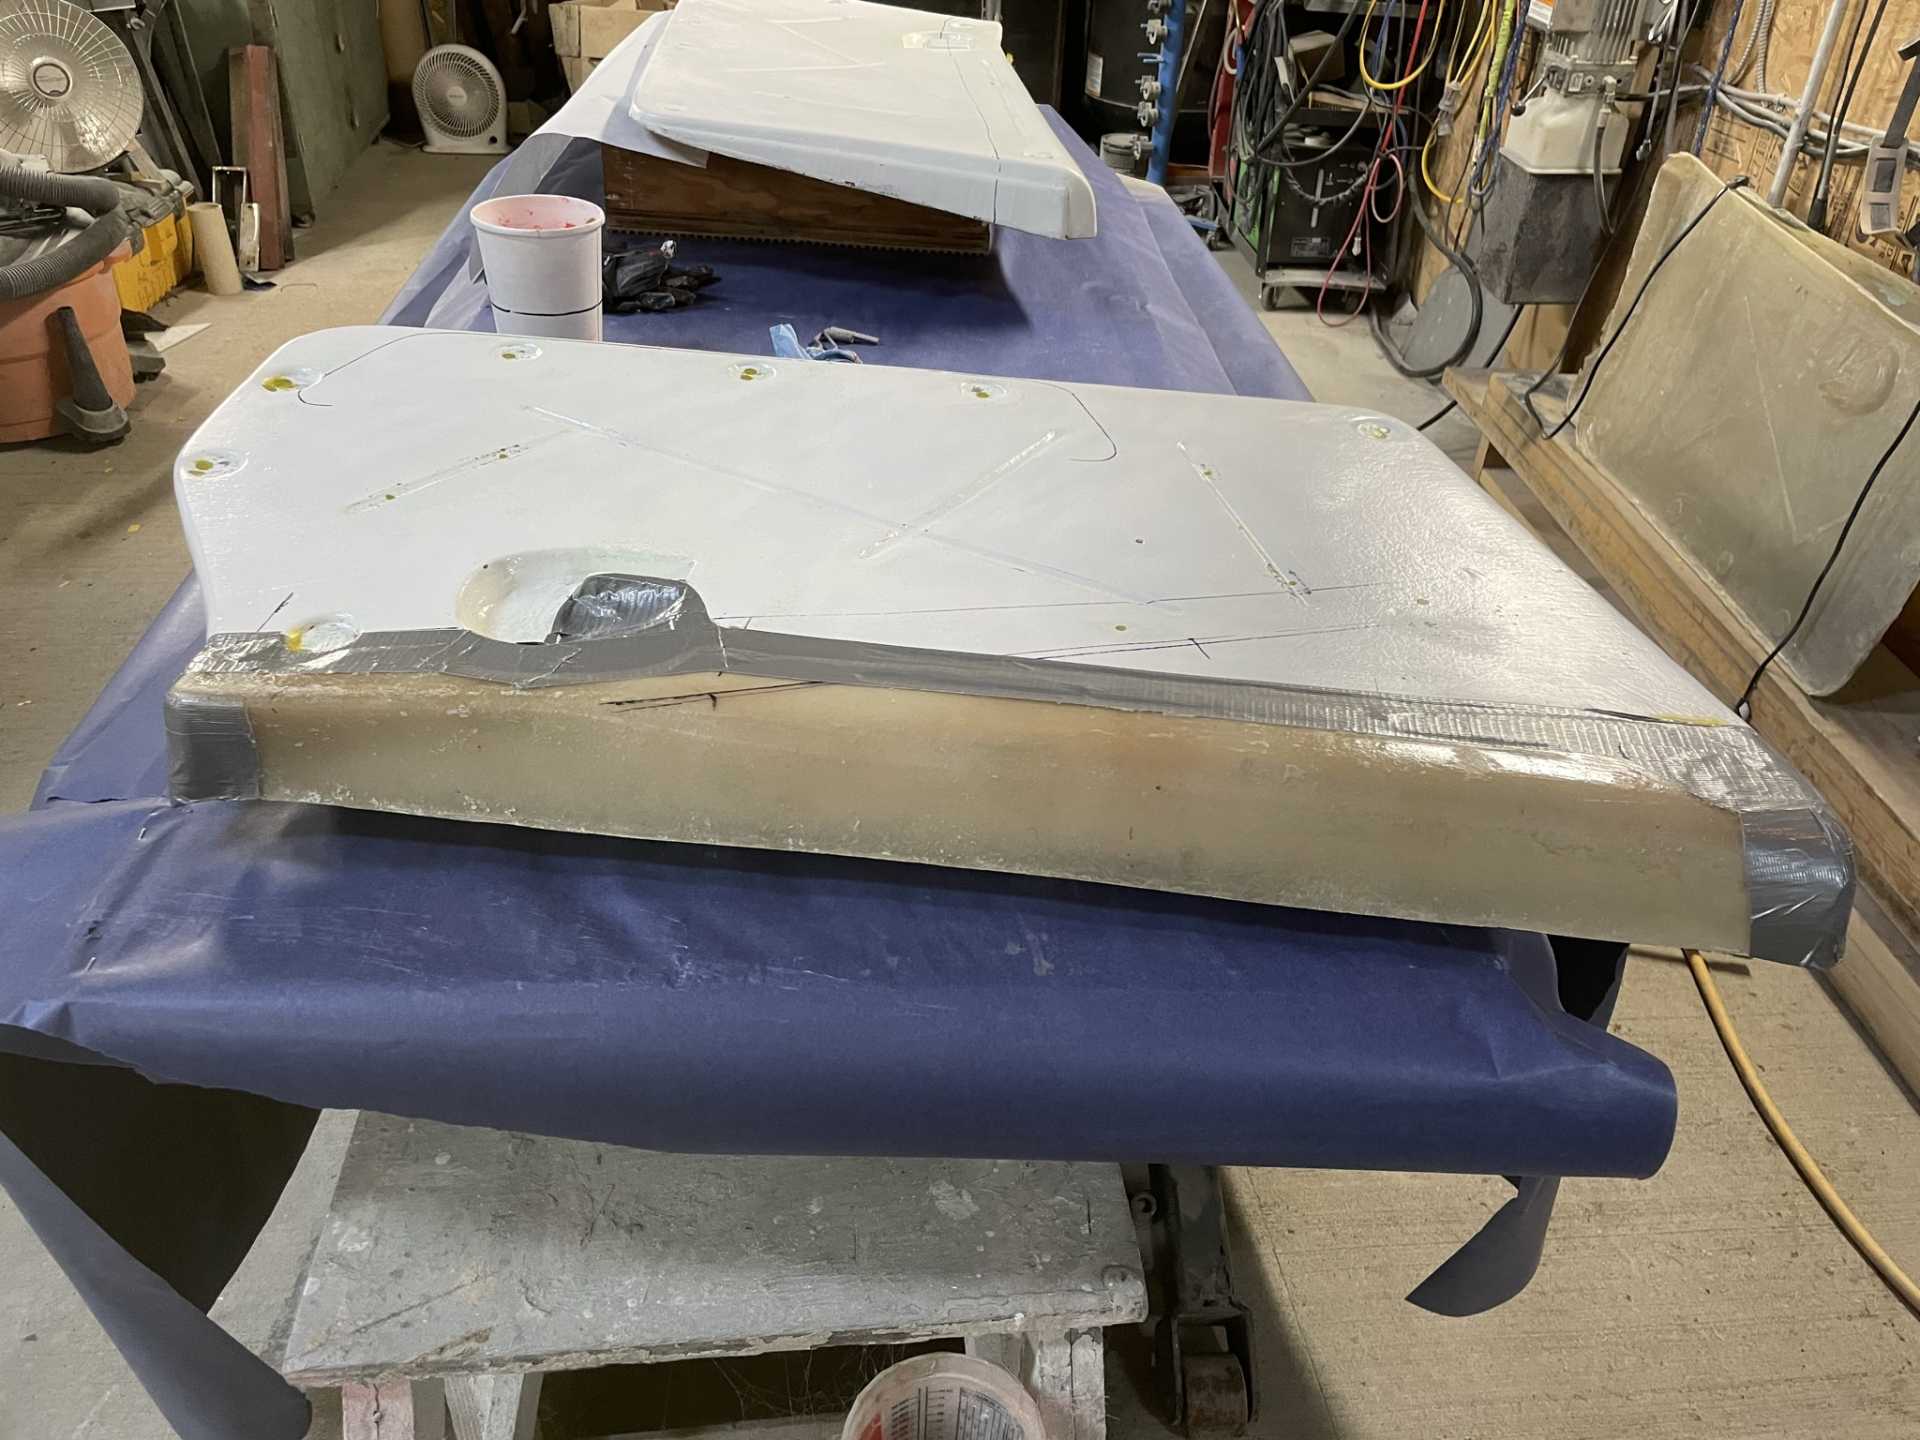
 [img]https://images.fiero.nl/userimages/do bie1/D7C6D29F-ACB3-490C-B31F-42F6336010D1.jpeg[/img]
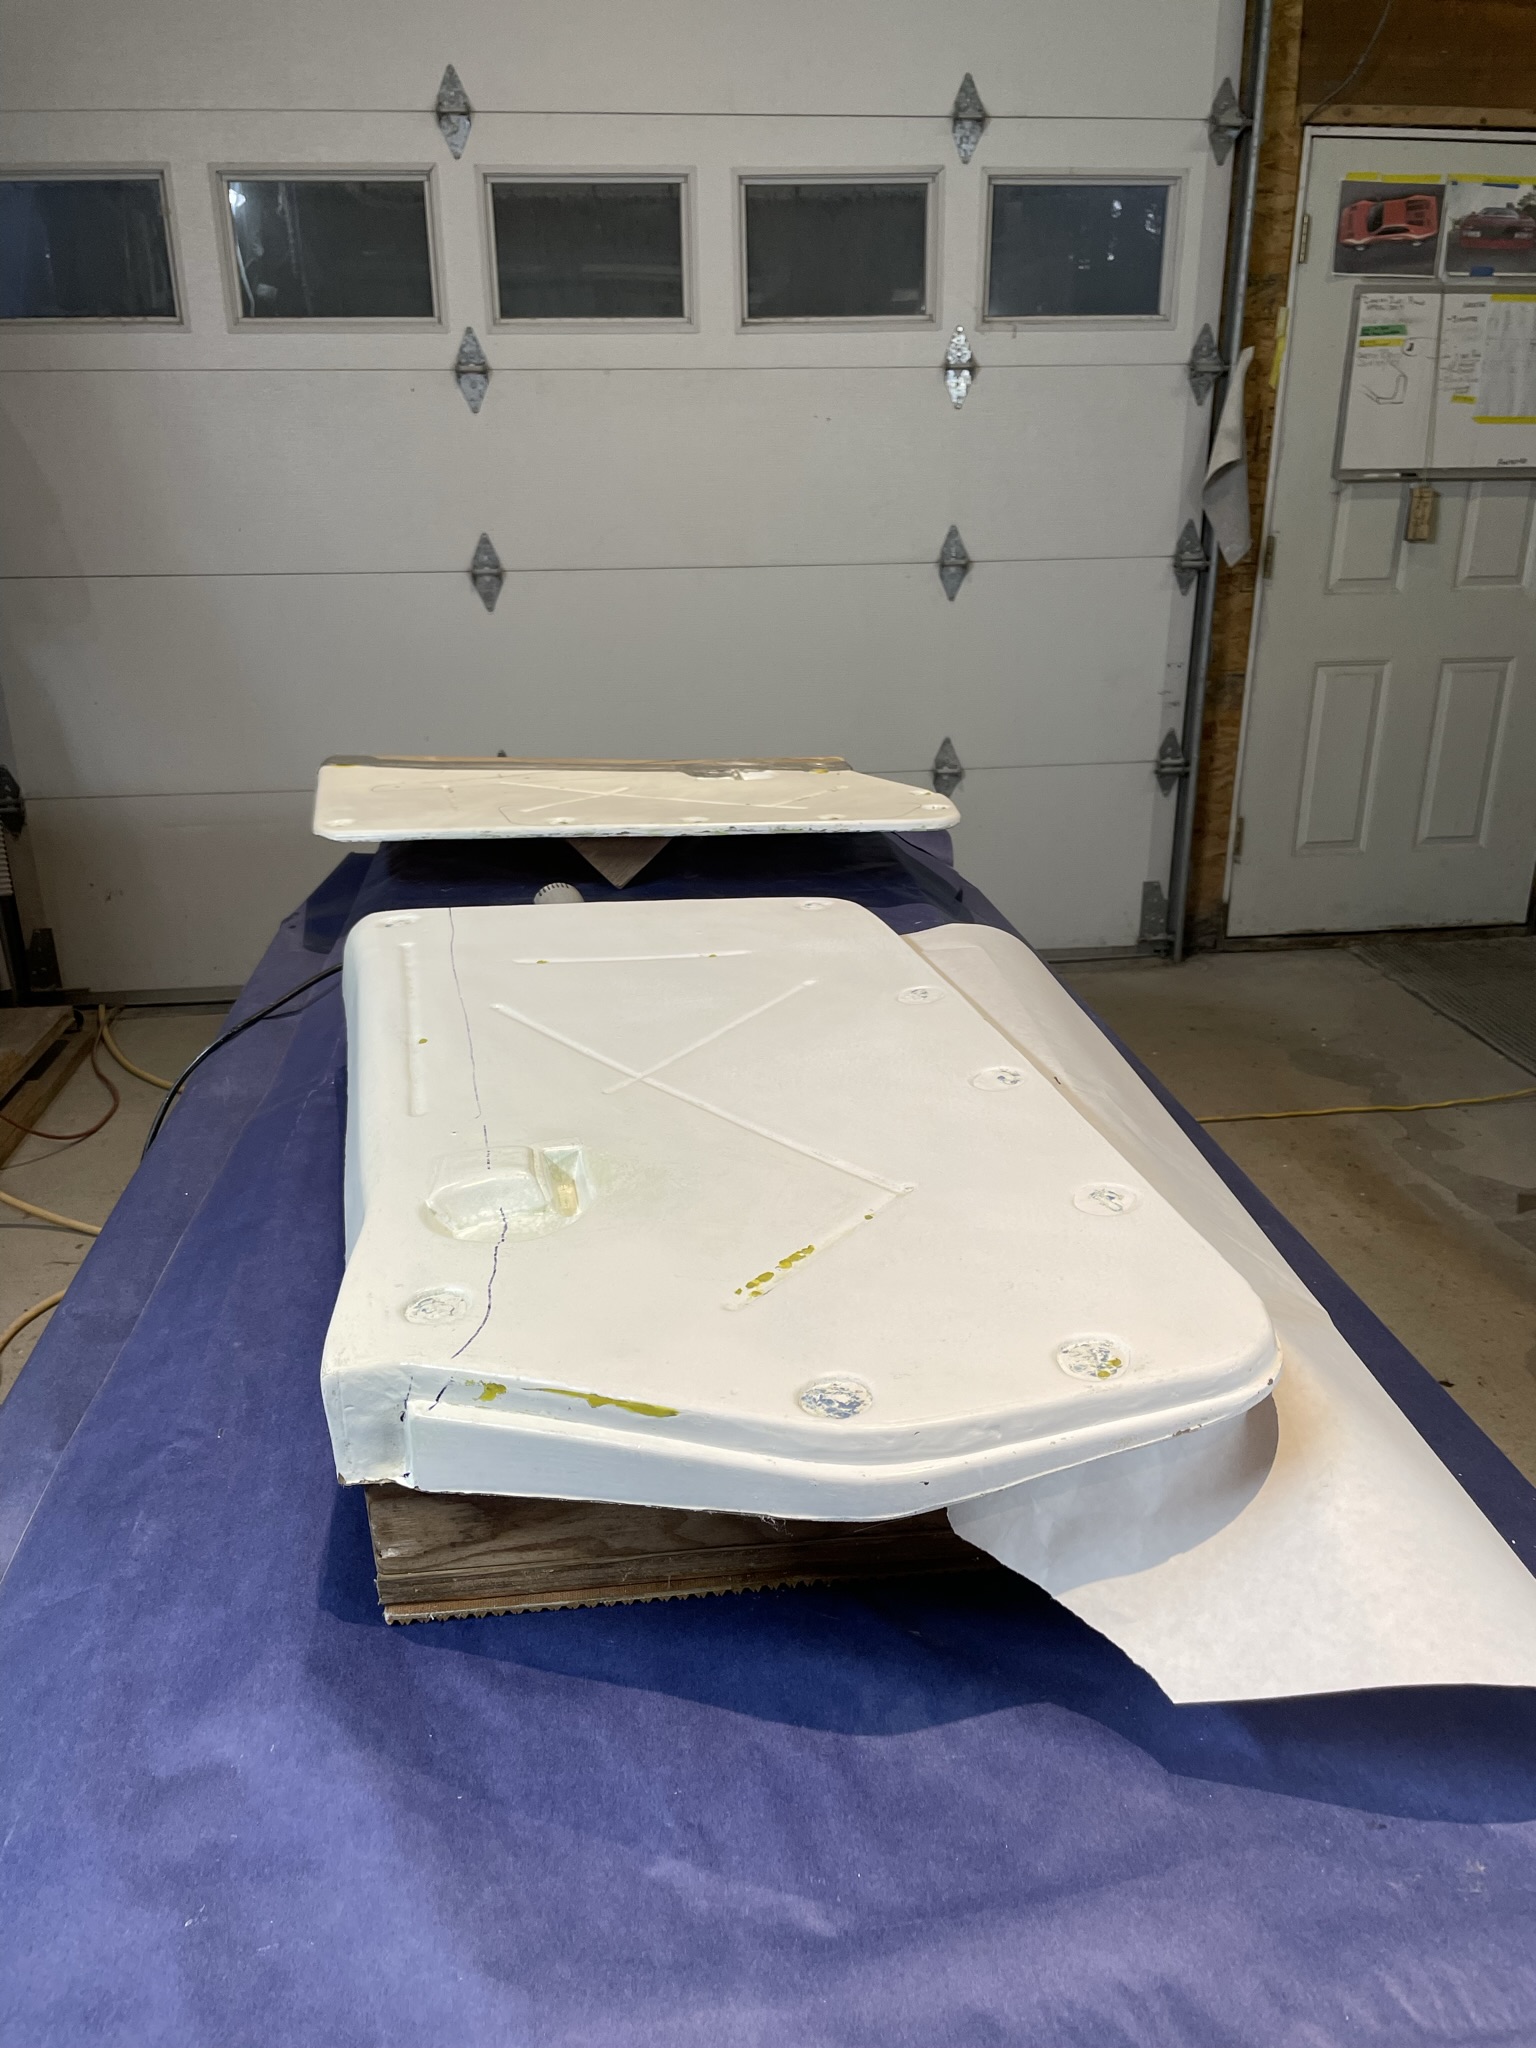


 [IMG]https://images.fiero.nl/userimages/dobie1/100DA58A-FC1F-4D83-9D 5C-14321D84E9BA.jpeg[/IMG]
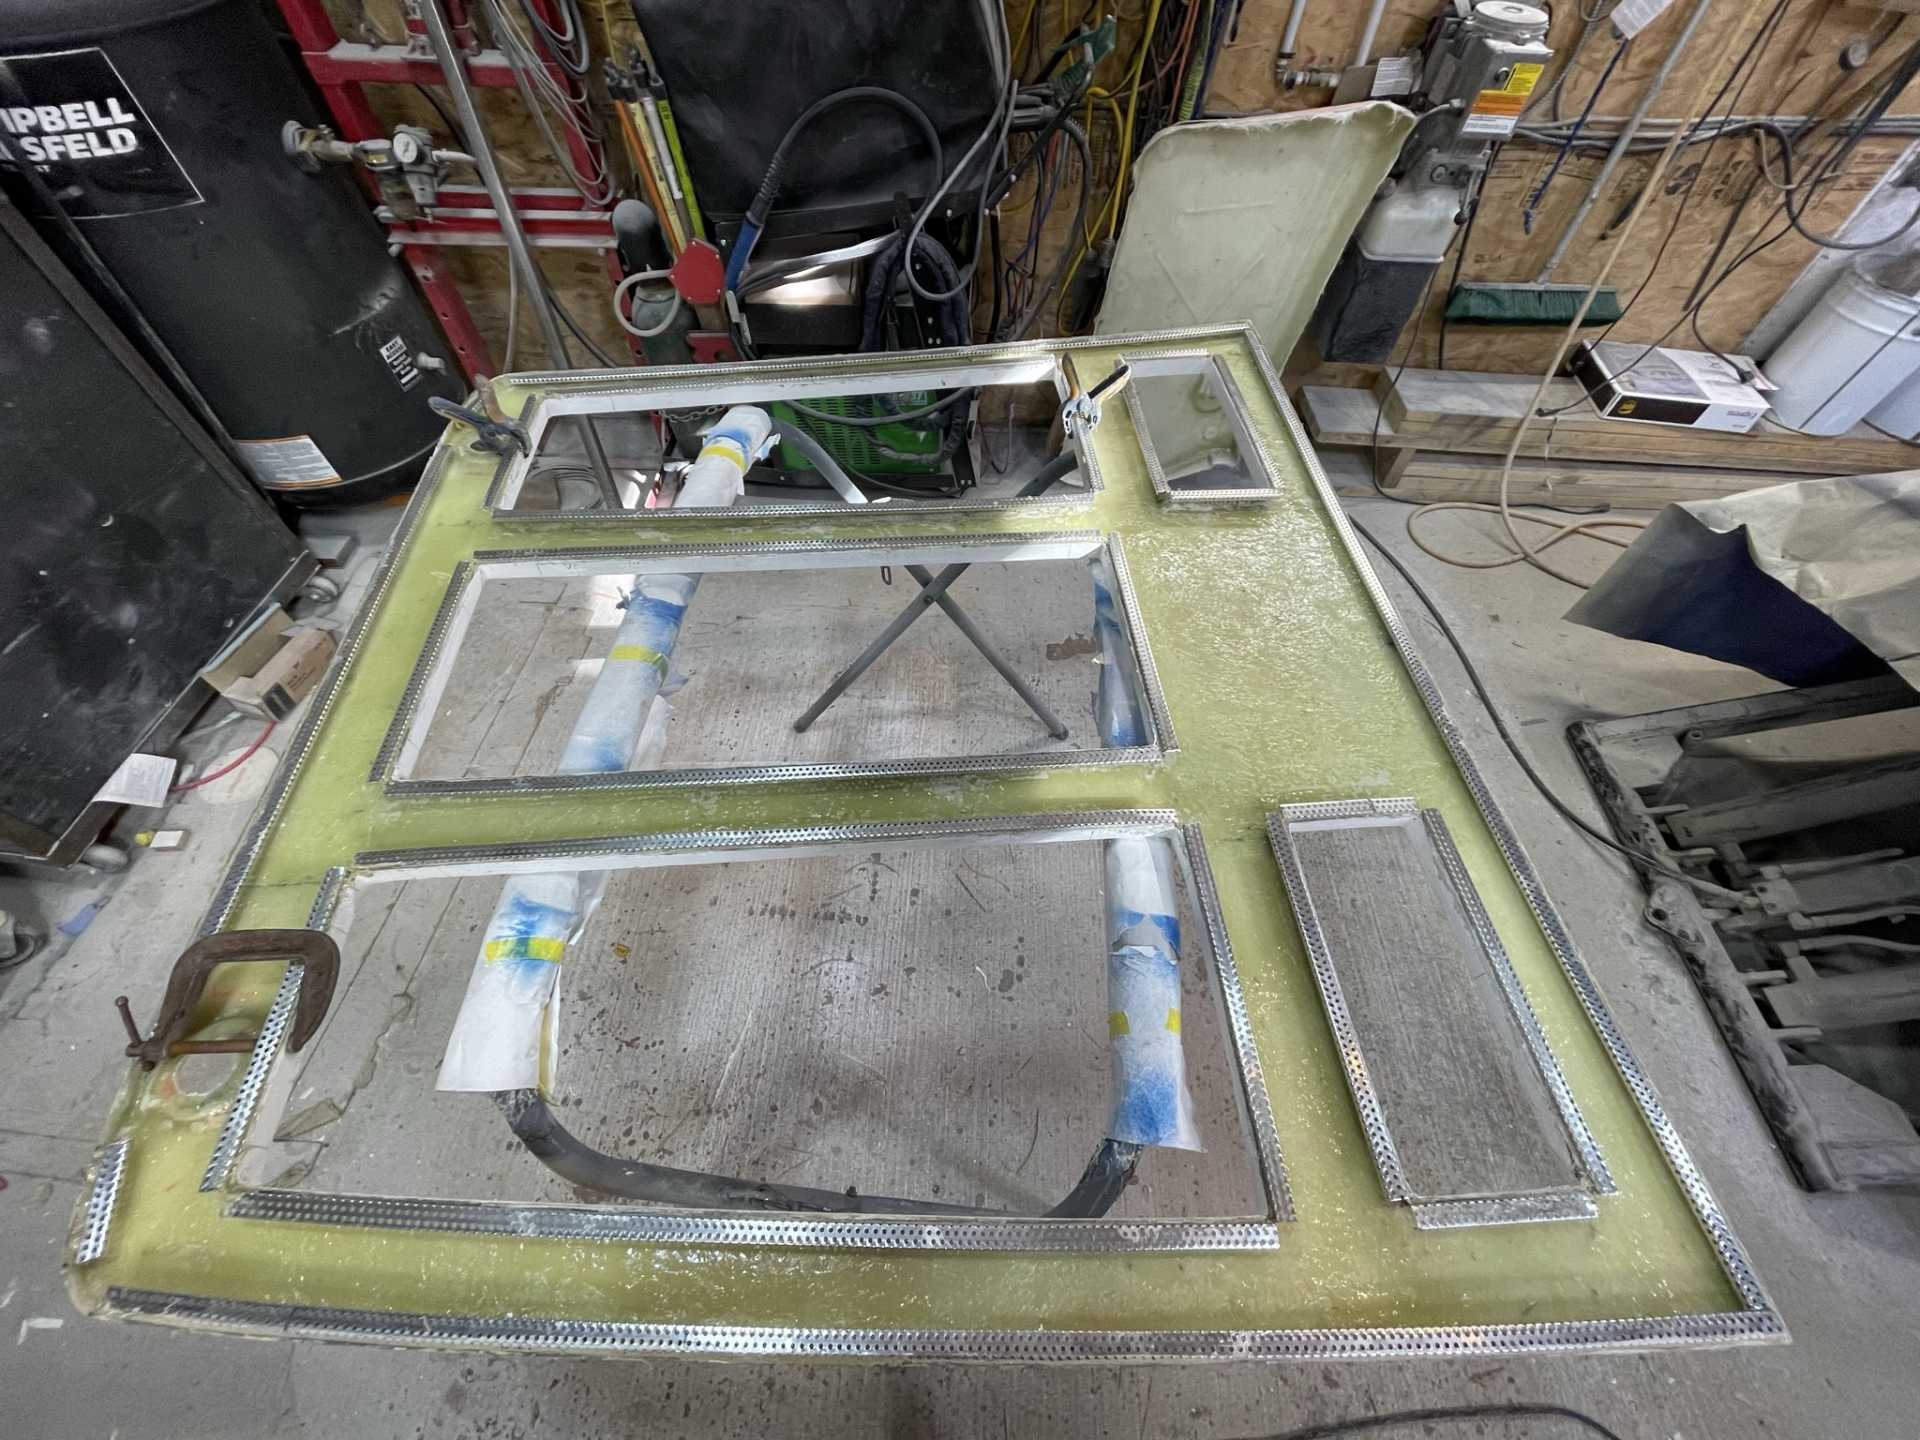


 .
.