I'm curious about how effective the vents will be in venting heat from the engine compartment. Since they face forward, I'd expect a fair amount of cool air to be forced in when up to speed, but what about extended periods of low speed or idling such as you'd encounter during rush hour?
Cheers
**edit** there you go, page two - time to load up on pictures again
[This message has been edited by TiredGXP (edited 02-22-2009).]
I'm curious about how effective the vents will be in venting heat from the engine compartment. Since they face forward, I'd expect a fair amount of cool air to be forced in when up to speed, but what about extended periods of low speed or idling such as you'd encounter during rush hour?
Cheers
**edit** there you go, page two - time to load up on pictures again
That question leads directly into the next item we're going to cover in this thread.
As you will see coming up, the qtr. window scoops will not be dicting any outside air into the engine compartment. They will be a part of the CAI only.
Let me show you as we get back into building the CAI......
We wanted to mock it up & didn’t want to scratch up the Polished tubes we had, so we used 4” Dia cardboard tube.
We needed to mock it up so that we could figure out where the 4” fiberglass tubes we made were going to have to be located in the qtr. Window scoops.
Here Kris made a triangular shaped flat fiberglass pc. That’ll fit inside the qtr. Window scoops. Then we positioned the scoops on the car & determined where the 4” Dia. Fiberglass tubes, that we had made, were going to have to be located. Here he is glassing those tubes onto the scoops.
Then it was time to fiberglass them onto the back sides of the scoops.
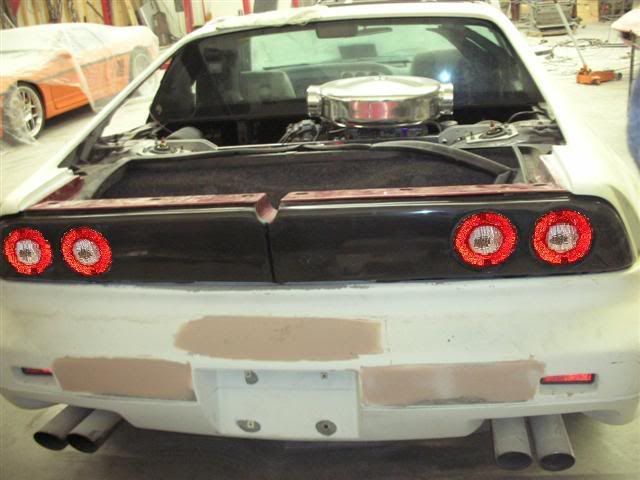
Finally we got back to working on the tail lights. We had to wait for the hatch “Buck” to be removed from the car we were fitting it to so we could use the MadArch WideBody rear clip to fit the tail lights into.
As we fitted them to the rear clip, the 2 lights didn’t come together in the middle tight enough & as a result the total width of the tail light parts were too wide for the tail light opening in the rear clip.
We couldn’t cut the CF layered outside surface to modify them so we had to modify the inboard ends slightly.
Kris made some brackets for mounting them & glassed those into place.
They look pretty good when we fit them into the car....
I wanted to see what the taillights were going to look like, so here's a quick job: Not too shabby for a noob at photoshop. BTW, Archie and crew, great job on this.
[This message has been edited by ClayTonto (edited 02-23-2009).]
I may use actuators on the rear because of the weight, I'm probably not going to mess with the flipper to much
My rear Dakata Digital (D.D) actuator comes in handy since it's hooked-up using the key fob. Press the button when it's raining to open, dump your stuff inside the trunk, hop back into the car, and press the button to close- beautiful.
I also have the key fob hooked-up to the front actuators, but I must admit- the rears is far more important than the fronts. Either way, it's cool if your parked at a gas station and you want to show-off. In your case, showing off the chrome-custom intake system is tight! I like new ideas.
(side note); if you decide to purchase D.D's system- place your order ahead of time prior to picking-up your car from Archie's. Apparently, D.D's actuator switches are on back order and it would be best to have Archie and the Crew hook-up the system.
Archie, i'm envious (sp) I was wanting to do a ram air intake like that, but with out the hatchback i have not the room. Is that one you fabricated yourself or is it by Air Inlet systems? Great work over there you and your crew are insperational. The fiberglassing really peeks my interest, thanx for sharing Ray
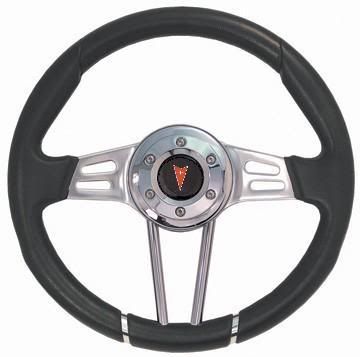
is that a Grant wheel that is available for everyone to buy?or is it a custom one off item? really like the car and this build .i would really like one of those steering wheels .
is that a Grant wheel that is available for everyone to buy?or is it a custom one off item? really like the car and this build .i would really like one of those steering wheels .
summit racing has them, you have to get an adapter and buy the pontiac horn button seperate
Is it me or do those exhaust tips look exceptionally long ?
It's you. J/K That must be a personal taste thing, I didn't know how they were going to look with the mad-arch rear bumper. I may cut an inch or two off in the future.
While we wait on current updates, I have a few tidbits/pointers for some issues I ran into during the V8/6-speed swap and installing Held's rear Wilwood brakes and bumpsteer correction kit.
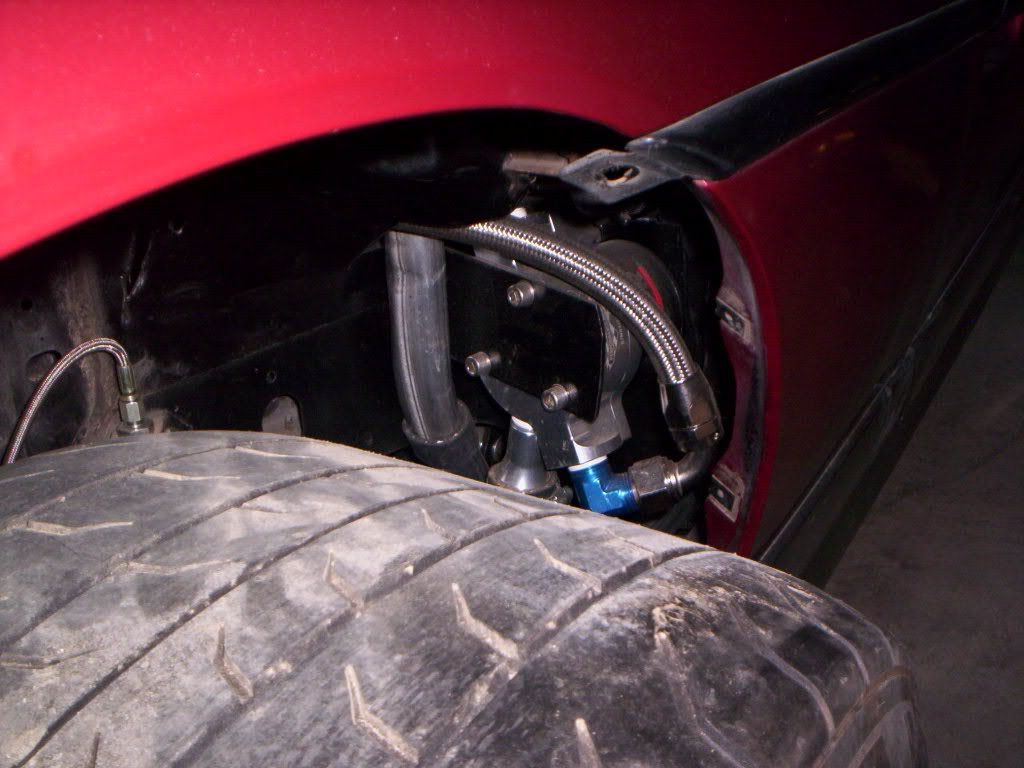
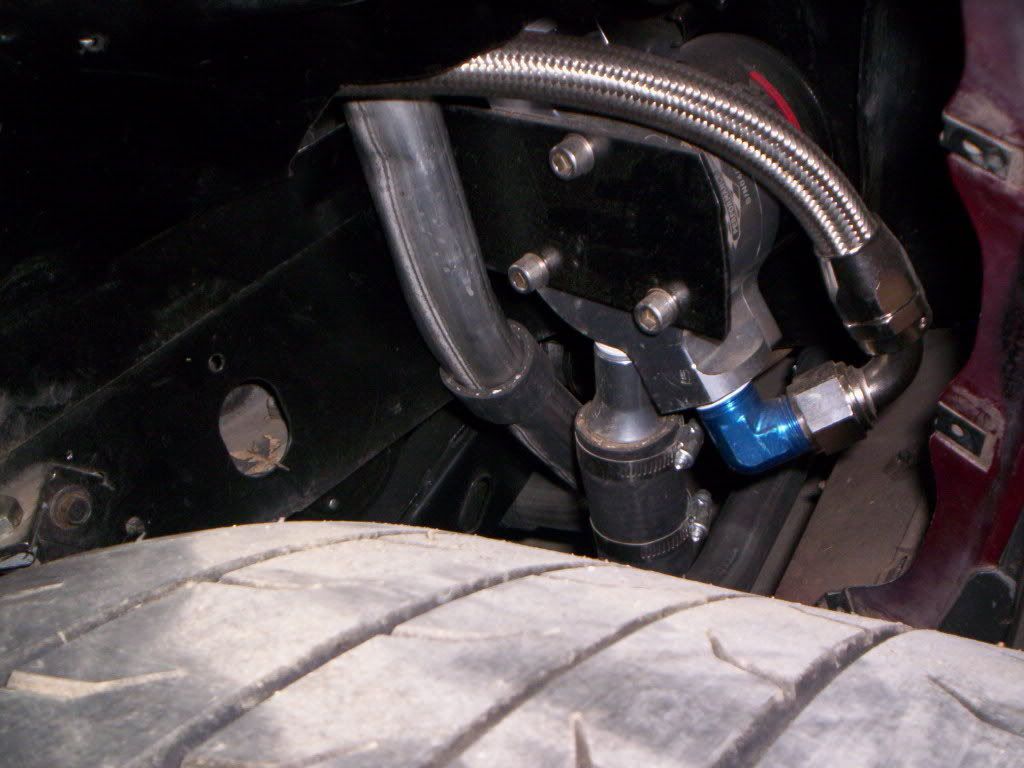
First off, and this was just a personal preference thing, I didn't want to cut a hole in the fender for the waterpump, so I mounted a remote pump in the passenger side area in front of the rear wheel and used some remote w/p block adapters and 12 AN lines from Jegs. This also helps when removing the engine. You only have to drain the coolant and unscrew the AN fittings instead of removing the w/p.
Another thing, if you are going to use the 6-speed and HTMotorsports rear bumpsteer kit together you will have to relocate the inboard toe link mounting tab to the bottom of the control arm, because it interferes with the trams. It won't sit any lower than the sway bar end link so you won't lose amy ground clearance.
Lastly, and this to me was a major issue, If you are planning on using Held's Wilwood brakes/ or if you already have them, consider this. The rear brake kit comes with a 3/8" adapter plate that bolts between the spindle and hub assembly. It also comes with a 3/8" aluminum spacer ring that goes on the end of the outboard CV to keep the CV from pulling up into the back of the spindle and locking down while using the 3/8" adapter plate for the calipers. However, this reduces the CV axle spline engagement in relation to the inside splines of the hub assemblies by 3/8". And with a little torque and traction you wind up with this: Those were brand new hubs! This happened to me in my driveway on my first hard launch. The pass. side one broke on the car, but what is scary is the driver side only cracked and upon removal for inspection, I accidently dropped it and it split also. Just imagine if you were going down the road and this happened. There goes your wheel. Now how many people are riding around with Held's brake kit? If you are using, or going to use this kit, first thing you need to do is throw away that 3/8" spacer ring for the CV axle and find a good machine shop. You can have 3/8" of material removed from the face of your spindle which takes care of this dangerous problem. It only cost me $80 to have this done. I have sinced launched the car pretty hard a few times and have no fear of splitting the hub assemblies, because the CV splines are fully engaging the hubs now.
I don't have this brake upgrade but I think thats something you should make Held aware of if you haven't already. I've seen a few guys on the forum with this set up, and usually if they invest this much in their brakes, they have something equally as serious propelling their car. Held should make customers aware of this issue or notify existing customers by email.
Is this a problem only with the 6speed and the length of those axles? or with stock axle length?
The 6 speed uses stock length axles and standard Fiero outer ends. I notified Held when I first encountered this problem, Lee (owner at that time) worked with me on making a custom bracket to move the e-brake spot caliper rearward to clear the shock after the spindle modification, but as far as I know nothing has been done to solve the problem on the standard kits, nor would he even recognize it as a problem. I presented the above solution. Maybe the new owner of Held will listen.
I see. I don't think it would hurt for them to just put a warning or something up on the website as a modification for this kit to fit and function properly. If you're spending that much money and modifying your car that extensively anyways, whats the big deal about taking your spindles in and getting them machined...
Thanks Archie, what I was trying to say is that the 6-speed axle overall width from the end of the driver side (where the axle nut screws on) to the other end on the passenger side does not change. In other words the 6-speed kit retains the stock Fiero track width and bolts up to the hub assemblies the same way a stock axle would. Now, where's some decklid pics?
For the last several weeks we've been working on building the "buck" for the inside skin of the rear hatch.
As you will see the shapes & contours on the inside of the hatch are a lot more work & are more complicated than the outside was.
All this & the fact that we have to make provisions to have steel in between the outside & inside pcs. of fiberglass. The steel will reinforce the fiberglass on both sides of the rear window & across the top of the window. This will all be tied into the hinge mounting areas.
Here's some pictures as we went along...
To be sure that the inside shape matches up to the outside, we sat the outside pc. of fiberglass back into the mold while we mocked up the inside buck.
Sanding & filling & shaping begins
To make the buck, the surfaces have to be sanded & filled & sanded to a finish that is as good or better than preping for a paint job......
We hope that by the end of the day tomorrow we'll have the buck ready to spray on the duratec finish.
Archie
[This message has been edited by Archie (edited 03-17-2009).]
Beautiful and Precise first class fiberglas work. The hatchback looks particularly nice but would like to know more about how the engine venting will work. I have the same concern on the convertible that I'm building and have just decided to install two large air vents ( old Chrysler turbo parts) on the decklid and place water catch pans with drains below. Perhaps the answer to the question on how much venting is required and how much engine compartment temps will vary according to the venting can be answered but no one that I've spoken with seems to have a definitive answer. SInce your crew works on Fieros full time maybe you have a better handle on it.
------------------ " THE BLACK PARALYZER" -87GT 3800SC Series III engine, 3.4" Pulley, N* TB, LS1 MAF, Flotech Exhaust Autolite 104's Custom CAI 4T65eHD w. custom axles, HP Tuners VCM Suite. "THE COLUSSUS" 87GT - ALL OUT 3.4L Turbocharged engine, Garrett Hybrid Turbo, MSD ign., modified TH125H " ON THE LOOSE WITHOUT THE JUICE "
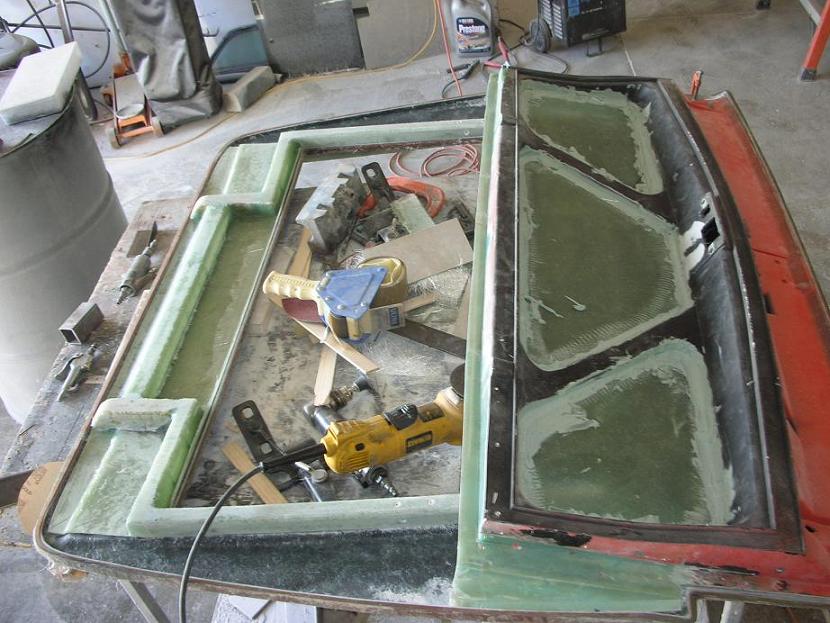
It is our opinion that there has to be some kind of vents in the hatch to let out the heat.
When you look at the outside skin area of this hatch, you'll notice a triangular "Flat" area on either side of the new rear hatch window. (Note: that area is actually not completely flat, it has some contour to it. I'm just calling it flat for this answer)
You'll also notice that this flat area is not covered on the inside by the inside skin.
I've rec'd. a lot of opinions on what types of vents to put in it. Some people want louvers, some want vents like we did on Curley's car & others' was various kinds of scoops.
We feel that you can't please them all if we just put in one kind of vent. So we decided to fabricate a few different kinds of vents & have them available as "inserts" based on what customers might want.
We also are going to have the hatch available with just the "flat" area for those that want to build their own unique vents into it.
Archie did you save the patterns from Curly's car to do the hatch for the chop tops? Clayton's car is looking great! when you are done with it I might ride up with him to come get it. we only live about 10 miles apart. I would love to see you, your crew and shop. D.
Archie did you save the patterns from Curly's car to do the hatch for the chop tops? Clayton's car is looking great! when you are done with it I might ride up with him to come get it. we only live about 10 miles apart. I would love to see you, your crew and shop. D.
There wasn't any patterns from Curley's car.
the 350Z rear window is the only common thing between the 2 designs.
If you look at earlier pictures of his car in this thread & look at the detailed pics in his build thread, you'll see that Curley's window was mounted about 2" farther forward. There was no hatch bodywork between the top of his window & the trailing edge of the Fiero roof. Due to the curve of the 350Z rear window, we had to arc the trailing edge of the roofline to match it. His car also had the "C" pillars move inboard a couple of inches.
As I stated earlier, my goal on this hatch is to make it so that no modifications to the Fiero GT rear clip have to be done to install it.
Regarding the question I answered a few days ago about the vent area on either side of the 350Z rear window.
In these pics we have the outside skin of the hatch laying in the mold (to keep it true to shape) then we have the inside skin "buck" laying on top of it. You can see the open (exposed) area on each side of the window opening...
Today we are working on pulling molds off of the inside "buck" for the hatch.
Making the inside "buck" was more work than making the outside one. As you can see there were a lot of surfaces to shape. Then there was a lot of wet sanding polishing & waxing to make it ready to pull molds off of.
Then we sprayed the tooling jelcoat onto the buck.
Today, we are laying up several layers of fiberglass to make the mold.
looking good Archie. are you goint to make one for the choptop?
There's not enough potential market in making another full set of molds for chop tops.
It will be a lot easier to modify these parts slightly for chop top use.
I know that you understand it, but a lot of people don't realize how much time & labor goes into making a perfect set of molds.
The sad thing is that you don't know if you have a perfect set of molds until you're all done with them.
Then when you're all done with the molds & designing all the parts including hinges to make it all work, someone will complain that the price is too high by saying "It's just fiberglass & that's too much for a couple pcs. of fiberglass."
Anyway, we should have the mold off of the buck by the end of the day Monday.
Archie
[This message has been edited by Archie (edited 03-21-2009).]
Archie and crew, this is looking good. I like how the bottom is turning out. Maybe we should put some trick hinged bars in there to hold it up when it's open like the Ferrari F50s use. BTW I went ahead and ordered that aluminum radiator we were talking about. (They were going up on the price and I didn't want to miss out) Should be there in a few days.
[This message has been edited by ClayTonto (edited 03-23-2009).]


.JPG)


.JPG)
.JPG)
.JPG)
.JPG)
.JPG)
.JPG)
_1.JPG)
_1.JPG)
.JPG)
_1.JPG)
.JPG)
.JPG)
.JPG)
.JPG)
.JPG)
.JPG)
.JPG)
.JPG)
_1.JPG)
_1.JPG)
.JPG)
.JPG)
.JPG)
.JPG)
.JPG)
.JPG)
.JPG)
.jpg)


 I like new ideas.
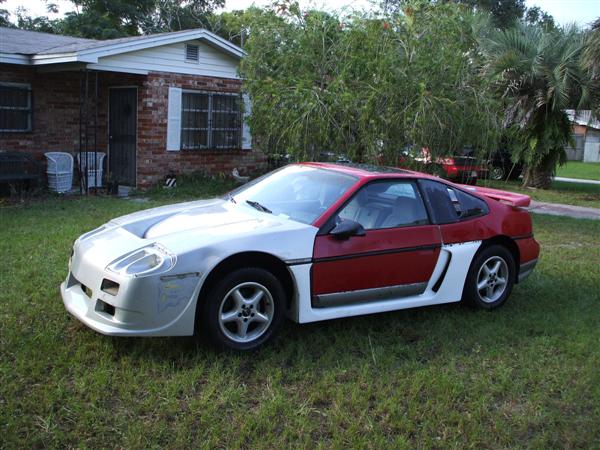
.JPG)
.JPG)
.JPG)
.JPG)
.JPG)
.JPG)
.JPG)
.JPG)
.JPG)
.JPG)
.JPG)
.JPG)
.JPG)

 Can't wait to show up at the local cruise night in that, the Hotrod guys in my town have never seen a Fiero of this caliber.


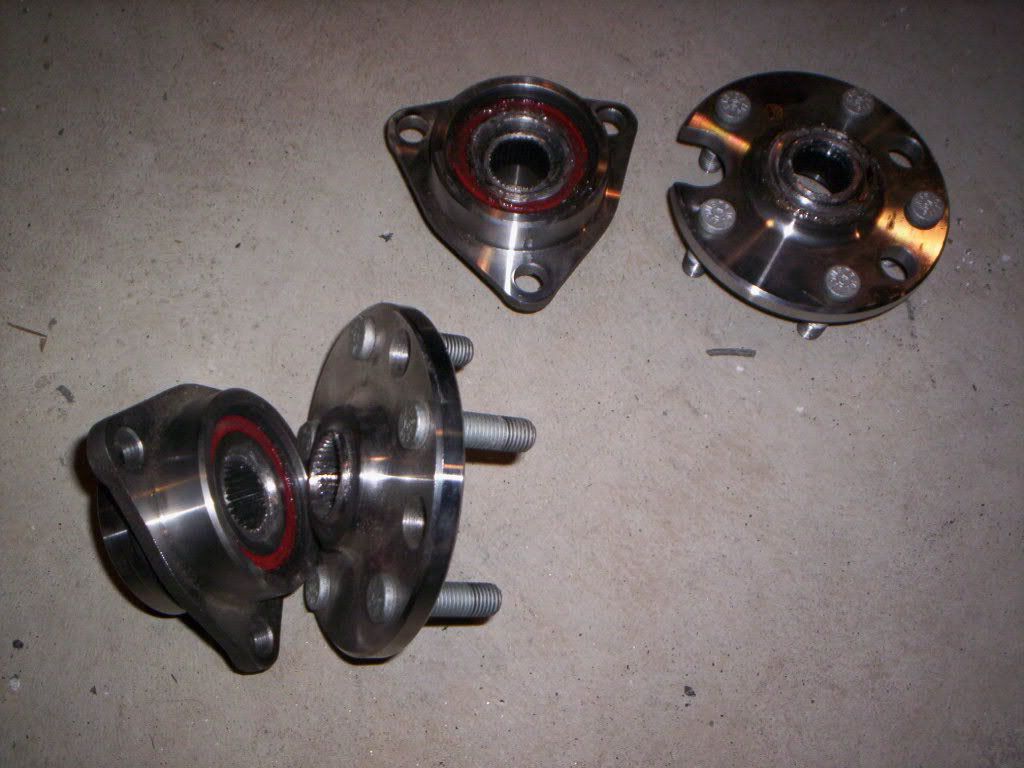
 This happened to me in my driveway on my first hard launch. The pass. side one broke on the car, but what is scary is the driver side only cracked and upon removal for inspection, I accidently dropped it and it split also. Just imagine if you were going down the road and this happened.
  There goes your wheel.
  Now how many people are riding around with Held's brake kit?


.JPG)
.JPG)
.JPG)
.JPG)
.JPG)
.JPG)
.JPG)


.JPG)
.JPG)
.JPG)
.JPG)
.JPG)
.JPG)
.JPG)
.JPG)

.JPG)
.JPG)


