Yes. I certianly don't profess to be an expert, but I'm amazed at the results. I degrease with a mineral spirits parts washer, sandblast with fine grit black oxide, preheat to 450 for outgassing, cool off and shoot powder, and bake at 400 for 20 min. My oven is a throw-away from the university apartments :>
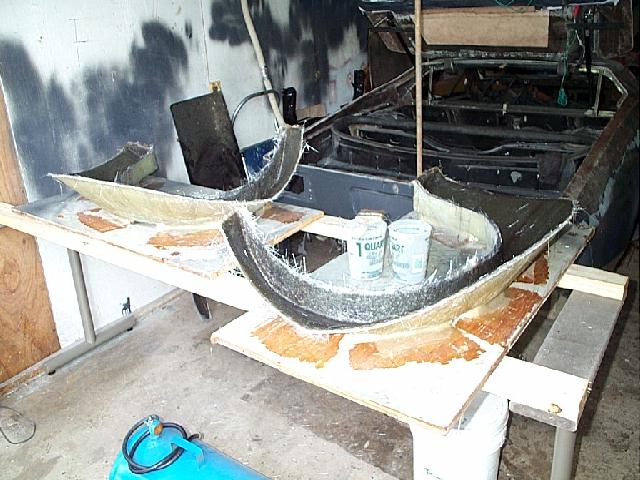
Anyhow, two sets of steel side braces were welded up. The tabs fit onto the stock Fiero chassis mounts, and they are slotted so you can tweak the fit, if needed.
A gussett plate was tacked onto the rear-end steel bracing, and the side braces were bolted to the chassis, clamped to the gussett, and glassed in.
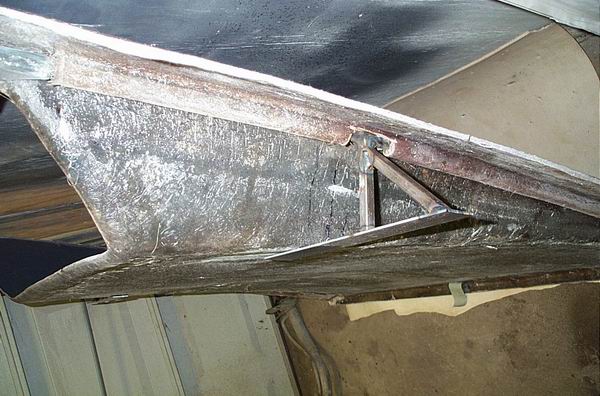
After the clamshell hinges were finalized, I added these support braces. They rest on an adjustable bolt in the top of the strut tower, where the Fiero has a Nylon height adjuster. The bolt just replaces the nylon part. But together, they allow for fine tuning the panel to panel fit of the clamshell and the rest of the body. And they will provide a handy place to attach gas lift struts for the clamshell.
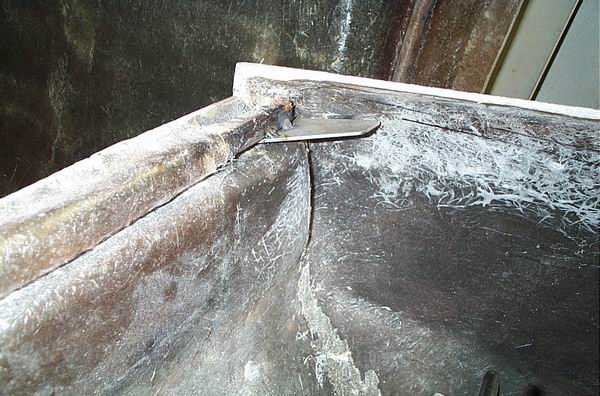
The Fiero rear decklid was cut to make removing the subframe easier. A bit of hammer & chisel action with a stout putty knife seperated the subframe. The subframe is bonded to the Pantera clamshell, so you get a completely sealed trunk, and a latch mechanism.
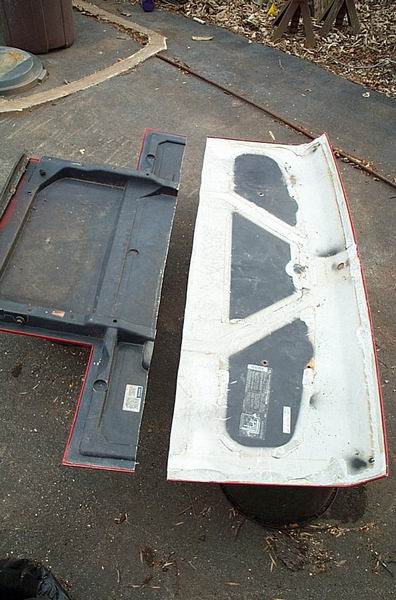
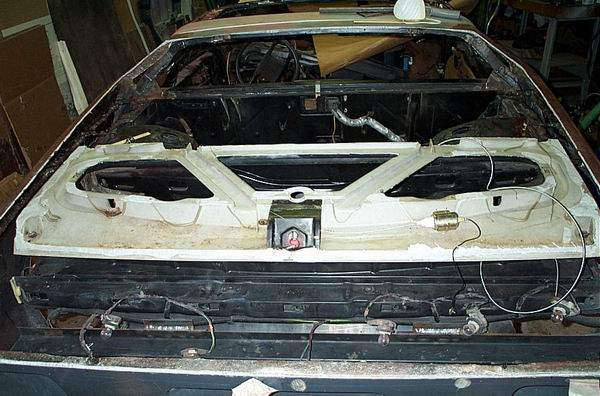
This is the subframe in place. A bit is trimmed from the edges all around, and the entire thing is roughed up with 40 grit sandpaper for later bonding. Eventually, the subframe is set in place and the clamshell closed down on it. Then builders foam is shot into the channels, bonding it to the clamshell. After opening the clamshell, the foam gets cleaned up and the whole assemble gets glassed onto the clamshell.
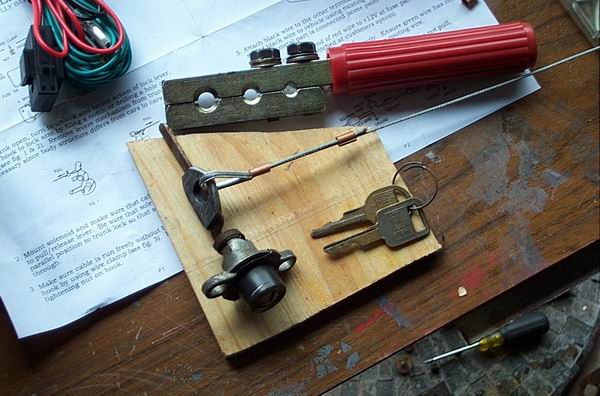
I don't trust the Fiero electric trunk opener, so I bought a nice set of shaved door solenoids and a cheap trunk solenoid. Don't do that. :> I wound up using the Fiero trunk solenoid, but instead of relying on the latch for electrical ground, I ran a ground wire for it, also. Works great. Then I welded a loop onto the lockset connector shaft, and attached a mechanical backup opening system. That is, I got a standard chake control and connected it, so you can reach into the engine bay from the back window opening, and pull the choke control, and release the trunk. Probably should do that for my daily driver Fiero :>
Above is a cheap, weak solenoid. Not enough snort.
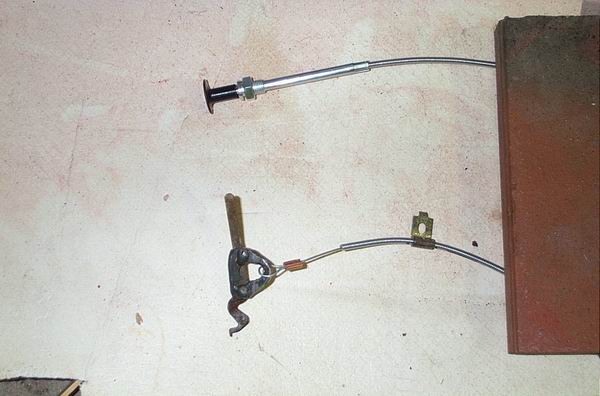
Choke cable attachment.
Mechanical realease system in place. Since both the wires for the latch solenoid and the mechanical system wer to be run thru the foam & fiberglass attaching the subframe to the clamshell, I ran them thru an oversized wire loom, and wrapped it with electrical tape. Once everything is finished, I can still service both systems with no problems.
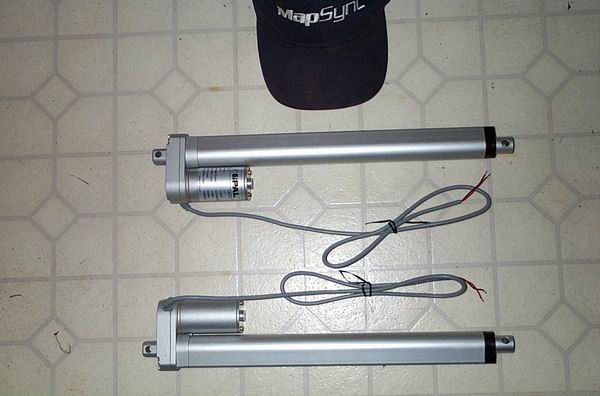
They can lift 110 lbs and could be pretty impressive lifting a hatch. Only problem is that battery power is REQUIRED - without power (dead battery) you can't lift the actuator (it's a screw-type mechanism). Might be OK for anything except the place where the battery is ....
PaulJK, the linear actuators would be cool. I have measured and they could very easily be used with the tilting rear-clip. It is balanced so well that it really requires very little effort to lift or lower it. We'll see what transpires later this sumer when I go thru the yellow prototype car.
Using actuators on the clamshell would also be interesting. For now I've ordered a couple of gas lift struts which I'll try first. Cost is much lower, and the obvious "electrical failure" situation is avoided. Looking at the Autoloc documentation on installing linear actuators, it looks like they could be installed in the same location as the gas struts. If that is the case, then a quick release pin located near the rear window pivot point might do for the failure mode.
An additional layer of Coremat and woven fiberglass cloth was applied to the backside of the clamshell to resist deflection. Learn as you go. I'll include these layers in every rear clip that I make, while it's being layed up in the mold.
The Fiero trunk liner skeleton was trimed a bit more and sanded for attachment with fiberglass tapes. I filled the channels with expanding foam, but I'm not sure you'd need to do that.
After the atachment layup, everything worked fine. The clamshell closes and the latch clicks shut. Both the manual and electrical releases work fine. Later, I'll install a couple of poppers to slightly raise the lid when the release is hit. The outer edges of the liner will also get glassed in later. For now I'm leaving them open incase additional wiring is run, or whatever.
Lousy pic, but this is a lip for the clamshell to rest on. For the front half of the clamshell, I applied duct tape to the inside edge of the clamshell, and metal furnace tape to the outside edge of the rear clip itself. Then I closed the clamshell and applied a 3" tape where you see the lip. 1" was under the clamshell and 2" glassed to the inside face of the rear clip. After curing, the tape worked as a release, and a lip was formed. I've trimmed it back to about a 1/2" lip.
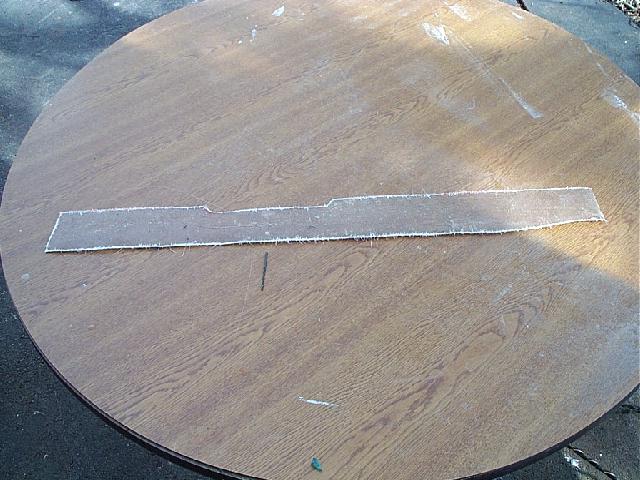
For the rest of the clamshell lip, I used a lip that I had made previously. After the rear clip had been modified to fit the choptop chassis, I turned the clip over and used duct tape as above to preform a lip for later use. I knew about where the clamshell cut line would be, and made a 4" wide lip to cover te general area. Now you see a portion of that lip, cut to fit and ready for sanding for bonding. Notice the drill bit is just below a hole in the lip. Before removing the lip from the ductape I drilled a few pilot holes to be used later for precisely locating the lip to the body contours. Works great.
And here is that lip, held by clamps in place while the resin sets. After removing the clamps, and additional fiberglass tape will be installed to further attach the preformed lip to the rear clip.
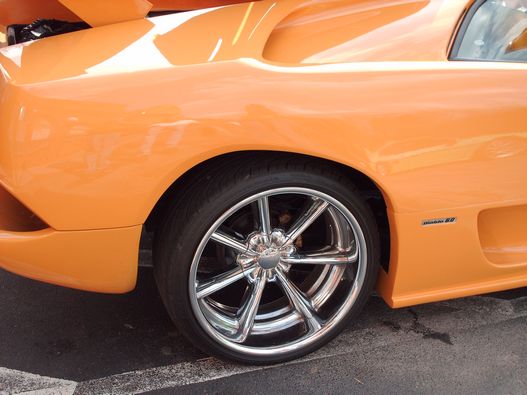
You can also see one of the wheel flares, held in place with clamps. I've trimmed the flares to the mold trim lines and am very pleased how little final sanding was needed to get a nice close fit. The wheel flares and front airdam are fitted, so a bit of preparation sanding and I'll be attaching them.
I've also been working on the front clip. Back around Thanksgiving, Blackrams and I essentially installed the front clip in one weekend. This included the few cuts needed to move the headlights, and fabricating the mounting steel. It went very well.
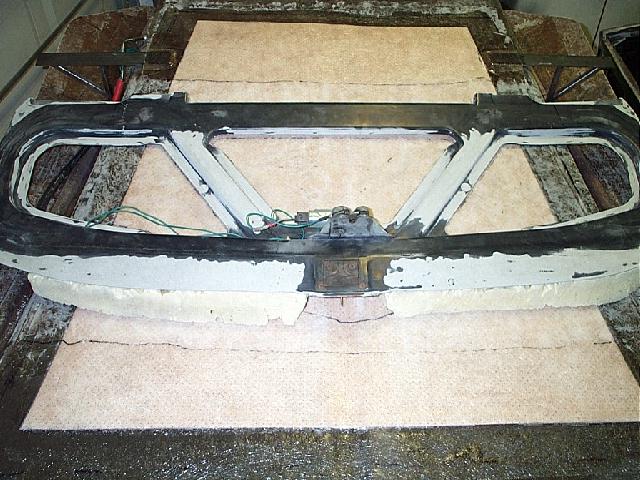
Here you see the front trunk lid liner, in place, and your looking at the topside, which gets the lid skin bonded to it. The idea here is to install the hinges and latch to the liner, get that working, and then attach the skin to it. That allows you to trim to a nice close body panel gap.
You'll notice a slot I've cut from the portion near the latch, on the driver's side. Took me forever to figure out what was going on here. The prototype car used the liner with out the slot cut. This was sone by bending down the 1/4" lip along the top edge of the trunk. No big problem. But in cutting out this slot, I've found an alternative method of installing the liner. The existing mold can easily be modified to reshape the liner to where you get the clearance and don't have to cut the slot, or bend down near as much of the lip.
You'll also notice the relocaated windshield wiper posts. I solved the wiper delima be moving them over 5 1/2" so they are positioned in the Pantera vents, as on a real Pantera. Blackrams and I have worked out a couple of different methods of getting functioning wipers, and that info is way back in this thread, somewhere. For this, I simply cut the decking loose that the wiper posts mount to, and scooted the whole works over 5 1/2", and welded it back in place. This meant that the short arm of the wiper linkage, the one that attaches to the motor, had to be shortened 5 1/2" also. Didn't work at first, untill I welded that short arm back with a gooseneck shape, instead of a straight line. Works great.
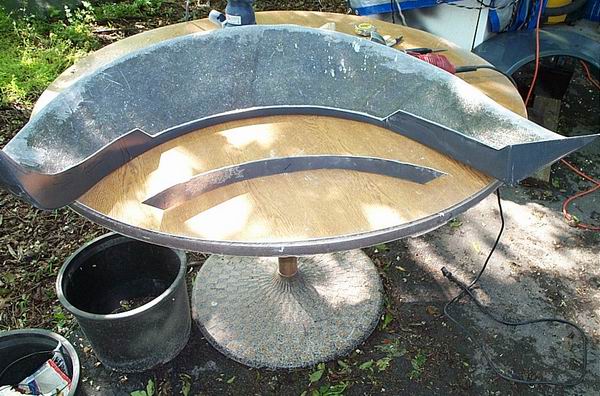
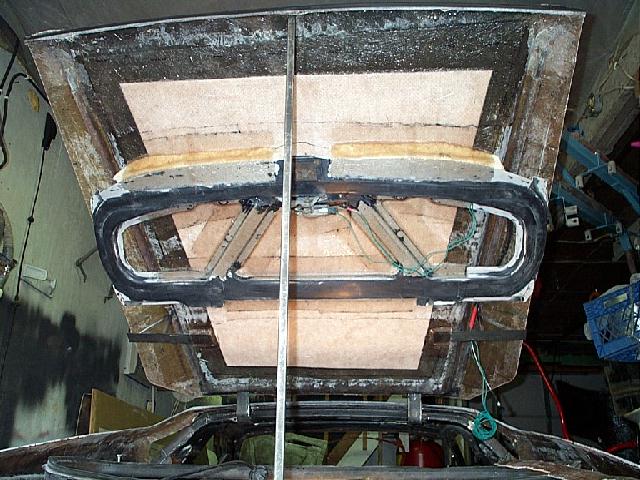
And here is the bottom side of the liner, or the side you will see when you raise the front trunk lid. This liner is an exact replica of the real Pantera liner, and it's a work of art. It has a curving profile that fits into the trunk lid opening and presets the contour for the trunk lid skin. The channels that you see give it super rigidity so you don't need to use a steel structure. With this liner in place, I reached under thru various openings to check clearances. It's amazing how well this liner and front clip fit the Fiero chassis You'll notice a bit of alligatoring on this one, from back when I was going thru the learning curve of gelcoat application.
Waiting on a fresh batch of resin and some more hardware to come in.
David Breeze
[This message has been edited by opm2000 (edited 04-03-2006).]
Yup; Looks like more fun with fiberglass. As if I don't have enough projects in the fire allready, I'm starting to think I'd like to do one of these! Thanks Guys. lol. Cheers Beers n Gears. Joe
Originally posted by madcurl: Man...look at those massive fender flares!!! How much longer before this beautiful creation is finished?
Filling those flares is my challenge. Think about it. $$$$$$ Accepting reasonably priced suggestions, anyone?????
------------------ Ron Freedom isn't Free, it's always earned. My imagination is the only limiting factor to my Fiero. Well, there is that money issue.
[This message has been edited by blackrams (edited 04-04-2006).]
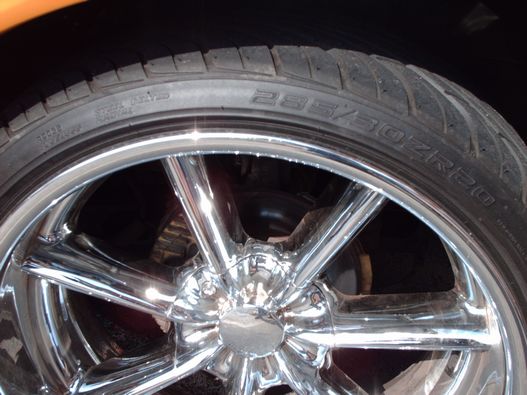
price is modest, and I think you can specify how the wheel is built. I haven't spoken with these guys yet, sort of waiting untill the wheel flares are on and axels in place. Good time for measurements I'd prefer a deep dish Campanello-like look, but these sizes and offsets are hard to come by. I'm looking to hold 275 or wider on the rears, and as big as will comfortably drive on the fronts.
As to when this project will actually roll out the door.....soon. But not that soon. Every step is being scrutinized with future builders in mind. One thing I can certianly share with you, is that it is one thing to design and build a prototype. Quite another to figure out how to assemble another one, when another one has never been assembled yet.
Originally posted by opm2000: One thing I can certianly share with you, is that it is one thing to design and build a prototype. Quite another to figure out how to assemble another one, when another one has never been assembled yet.
David Breeze
Thats why I will stick to Customizing my car and just winging everything, I don't have a timeline, nor have anything to make my car resemble. I know how much work goes into your cars, I follow your thread whenever I see it. You guys are doing a great job given that you have to make your car look like another. Again mine is whatever I want it to be. You guys have it alot harder than me. Best of luck, and keep up the great work!
Originally posted by opm2000: Works great. Above is a cheap, weak solenoid. Not enough snort. Choke cable attachment. Mechanical realease system in place. Once everything is finished, I can still service both systems with no problems.
David Breeze
Dave, I've said this to you in the shop, I'll say it in public. Hi tech gadgetry is cool, but reliability is the key. Cost is another big factor. I like the system you've worked out and if I was going to build my Pantero like yours, it would be the way youv'e done it. We've looked at so many ways to do these things, it makes my head hurt just to think about it. Great job!!!
------------------ Ron Freedom isn't Free, it's always earned. My imagination is the only limiting factor to my Fiero. Well, there is that money issue.
Since the Pantera was a 70's-era design, I'd use a nice set of 16, 17 or 18 inch rim and tire set. The 17's should be reasonably priced. Persomally, I Love 16 " - nice ride, rarely worry about bending a rim, reaonably priced and it looks "Normal".
[This message has been edited by PaulJK (edited 04-16-2006).]
Originally posted by PaulJK: Since the Pantera was a 70's-era design, I'd use a nice set of 16, 17 or 18 inch rim and tire set. The 17's should be reasonably priced. Persomally, I Love 16 " - nice ride, rarely worry about bending a rim, reaonably priced and it looks "Normal".
Paul, Agreed, 16" or 17"" is my goal. The problem is finding the right 7" tp 7.5" wheels for the front and then a matching 8.5" to 9.5" set that will fill the back. Those "massive" flares look great and I love them but it's going to take a pretty good set of tires to fill that up so that it doesn't look like we're running around on a set of those mini spares. I'm also attempting to stick with the era style wheels. Not many choices IMO there.
------------------ Ron Freedom isn't Free, it's always earned. My imagination is the only limiting factor to my Fiero. Well, there is that money issue.
[This message has been edited by blackrams (edited 04-16-2006).]
Well, I looked around but couldn't find anything I would call "reasonably" priced. i was trying to get you a lead on cobra-type wheels with the spinner in the center, but, MAN, were they expensive.
Here's a place I looked through a littel bit (i have NO experience with these guys):
I did talk with a shop that specializes in widening aluminum wheels. They can easily widen the "backside", moving the inner rim inboard. With the shallow faced rims found on most front wheel drive cars, they are hesitant to try widening the outer rim outboard, mostly for cosmetic reasons. This may work out for the rears, once they are moved out with spacers. We'll see.
A quick update:
I had gotten to the point of having the front airdam and all four wheel flares trimed and ready to mount. But these were the first set of flares made from the new molds, so last weekend I decided to make up a new set. These will come out of the molds saturday and get trimmed for final fitting.
This pic got squeezed a bit:
I tried 2 200lb gas struts on the clamshell lift, and they were way, way to stout. So I went to the other end and tried 2 80lb struts. They pop the trunk open and hold about one foot open, but don't hold when full open. I'll either try stronger struts, or seriously consider the jackscrew lifts. But this is fine for now.
A lot of work has gone into the fuel door. With the tilt-back clip there is absolutely nothing to do. But with the clamshell, you have to relocate it. Adding wheel flares narrows the available space on the fender down considerably. I don't want a "Pantera" fuel door located in the Gill, because I like scoops, and plan to have scoops where the Gills are.
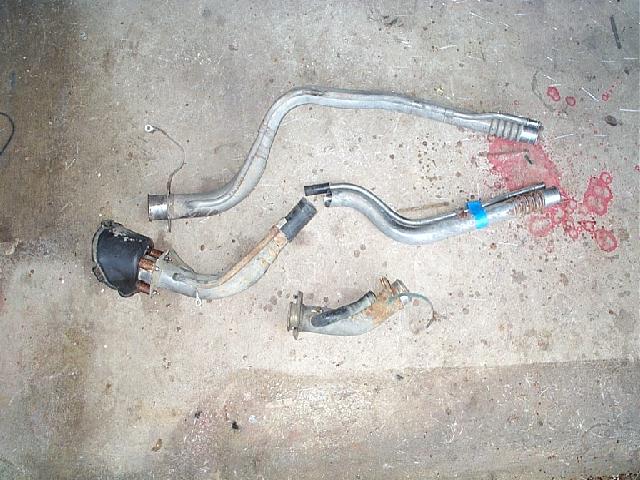
So, I looked into rerouting the Fiero fuel door to the one spot available. I have figured out two ways to reroute the fuel standpipe. But most of the Fiero fuel door hardware just won't fit the space. First culprit was the beveled plastic "funnel" that surrounds the actual screw-off gas cap. I found that the same piece on many GMC trucks has the right angle to match the fender.
Then I figured out two methods of rerouting the standpipe. One method uses all Fiero pipe, but with a cut in it, and rejoined with a piece of filler hose. The other method uses a GMC truck standpipe gooseneck and filler hose, reconnected to the remains of the Fiero standpipe. I haven't settled on which one to use, but fell it will work out. I worried about this at first, but then I saw that all of our trucks at the University have a hose section between the gooseneck and the standpipe.
On tap for this weekend: rear flares get demolded and trimmed. The airdam gets mounted.
Well, a lot of good work has been done. I've made up four new wheel flares. The molds I make have a two elements built in: a large flange surrounding the part on the outside edges, and a trim line, which is imparted onto the made part. These have been working out very well. I'll get some pics of this stuff up later this weekend.
Meanwhile, the front clip was turned upsidedown onto sawhorses, and the front grill and front turnsignal cutouts made. A 1 1/4" lip was left inside the grill cutout, for mounting the steel grill to, but it may be reduced down to as little as 1/2" when it's all done.
Here you can also see I've marked lines for sanding of the gelcoat, for the attachment tapes. Doing this upside down works great, since the airdam easily rests on the clip, and fine tuning the fit can be done. Mostly, I used a 4" welding grinder fitted with an 80 grit sanding flap to trim to the parting lines I mentioned. Then it's just a matter of beveling that edge to match the contours of the clip. The larger sanding disc makes it much easier than trying to do it with a dremel tool, which can dip & dive as you are sanding along.
Here you see the airdam trimmed and setting in place, with two clecos holding it firmly in position. A bit of vasaline is dabbed onto the shafts of the cleco before inserting, and the attachment tapes can be glassed right in. The vasaline acts as a release, and after a few hours, the clecos can be removed.
Once the fit was achieved and the marked areas sanded, the whole works was moved back indoors, and the airdam was attached using two layers of bid cloth, along the entire underside edge of the airdam, where it meets the front clip. I also used a squeezeout of a mix of resin, cabosil, milled fiber, and 1/4" chopped fiber. This stiff mix was used both as a gap filling squeezeout and as a valley filling fillet, and applied just before the attaching tapes. This cured to an incredibly strong attachment. The next day the whole works was turned right side up, and a purely cosemetic layup was sone on the outside to cover the joints, using two layers of 1 oz. mat.
And these badboyz arrived. I have to round up a couple of relays, but will soon be replacing the gas struts.
On tap for this weekend is attaching the four wheel flares. That said, it is Derby weekend here. And my daughter is going to her first prom, so I'll try to get more posted by late sunday.
Fierogt3800, I'm sticking to the kit prices which are in a couple of places, further back in this thread. I've pretty well proved the molds to my satisfaction, and discovered what areas need extra or special reinforcement, while in the mold, to yield a good stout product.
While I imagine that the only turnkey or rolling chassis Panteras that I build will all be choptops, I still don't think I'll be producing a mold strictly for a choptop. Two reasons: each choptop done by a different builder is going to be demensionally different, just a bit. That might just throw off the fit of a "choptop fiberglass body", and I just don't want to sell anything to someone who is going to be disappointed. The other reason is that I found it very simple to modify the stock fiberglass rear clip to fit a choptop chassis. I'll be including the pics & text to walk the builder thru that process, if they go that route. Plus, I'm only a phone call away, whenever a bit of help is needed.
On a side note, if you happen to live in the eastern half of the US, I will be willing to work out a delivery method to help defray the cost of shipping, as much as I can.
It's been a while since I've posted. I guess you never made Carlisle. Do you have any estimates of completion at this time? and, when kit production will begin?
I did talk with a shop that specializes in widening aluminum wheels. They can easily widen the "backside", moving the inner rim inboard. With the shallow faced rims found on most front wheel drive cars, they are hesitant to try widening the outer rim outboard, mostly for cosmetic reasons. This may work out for the rears, once they are moved out with spacers. We'll see.
is this place somewhere in ky? did you or could you ask about filling in and redrilling aluminum wheels for a new bolt pattern?
Philphine, They are in Michigan. http://www.weldcraftwheels.com/ is their website. And james@weldcraftwheels.com is their email tech questions. They can give you a better answer with an indepth email or chat from you, the devil is in the details you know
Bobm, Hello again. Yes, I missed Carslile. To make it I was faced with either starting to take shortcuts in the build of the choptop Pantera, or just not taking it.
I decided to continue the process I've been following: building and documenting each step, trying to troubleshoot the build process or part fabrication process, so that the new builder has as easy a job as possable. I like stout parts that fit. I'm sure we've all seen extremely thin fiberglass parts, or parts that looked cratered like the face of the moon, or even entire kits where most of the body panels have to be re-cut and re-sized to fit the Fiero chassis, or where the chassis has to be cut and resized or even entirely replaced.
I'm looking at rolling the choptop pantera out of the indoor workspace by the end of this month or by the middle of next month at the latest. I've been gearing up the molds and materials to starting the first for-sale kit then. Pretty much on the same schedule we had discussed earlier.
There will be a one week layoff in mid-late july when my son & I go fishing in Canada, before he goes to Iraq. Other than that, it will be full time, one kit at a time
[This message has been edited by opm2000 (edited 05-12-2006).]
The fender flares have just been glassed to the body, those of you that like the wide body look are gonna love this. Dave, is a magician when it comes to taking a concept to reality. Dave's Choptop is really cool. Now I just have to get him to quit playing with, oh, almost let the cat out of the bag. I guess you'll just have to follow the thread. When Dave's ready, he'll post pics.
------------------ Ron Freedom isn't Free, it's paid for with the blood and dreams of those that have gone before us. My imagination is the only limiting factor to my Fiero. Well, there is that money issue.
[This message has been edited by blackrams (edited 05-27-2006).]
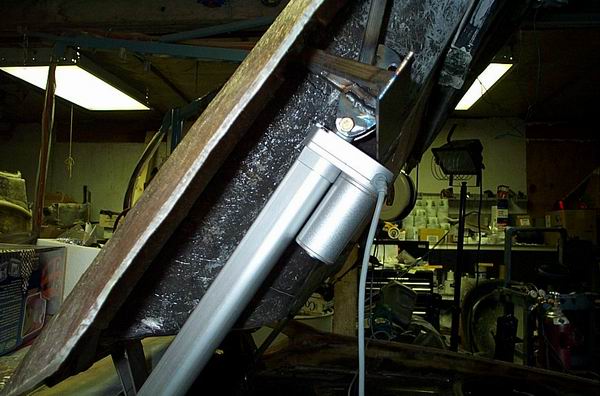
Well, the cat is out of the bag, The linear actuators are installed and I just don't know how to tell you just how cool they are.
In the above pic, the motor is installed facing down. I did that to ensure full range of motion and to confirm clearance when closed. Turns out the motors can be installed facing upwards, tucked out of the way visually, from the same bracket position.
These are really cool. They are controlled by two entirely seperate electrical circuts, the remote door latch controller, and a panel mounted switch. Manusl backup is that the forward bracket bolts or soon to be quick release pins, are easily accessable when in the closed position.
While the gas struts were nice, they weren't remarkable. The actuators get the same ear splitting grin when I show them to someone, and they come out with something like "starship enterprise!". No kidding.
Anyhow, the entire system works like a swis watch. The actuators stay syncronised at all times, raising & lowering. They can be stopped at any point of the lift or run to full lift and they stop by themselves. They lower and settle snugly onto the hatch lip, and you hear the trunk latch snick shut, and the actuators turn off. I honestly don't think the latch is required with actuators in place, but I'll keep it there for the time being.
And many thanks to the forum members who suggested considering linear actuators. It helps to have a constant input of fresh ideas or perspectives.
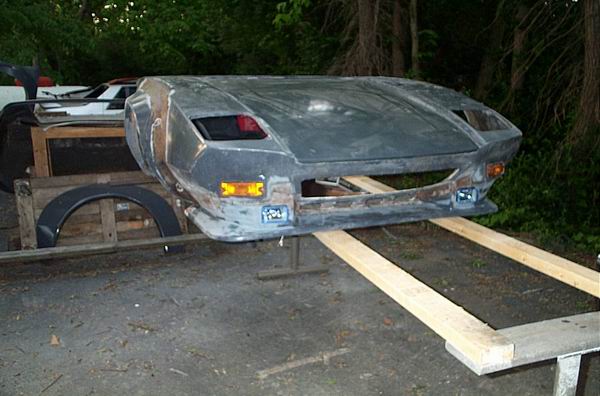
As Blackrams said, all 4 wheel flares are glassed on. The process is to fit them to the body, glass on from the outside, reshape the wheelwell opening on the inside, and glass on from the inside.
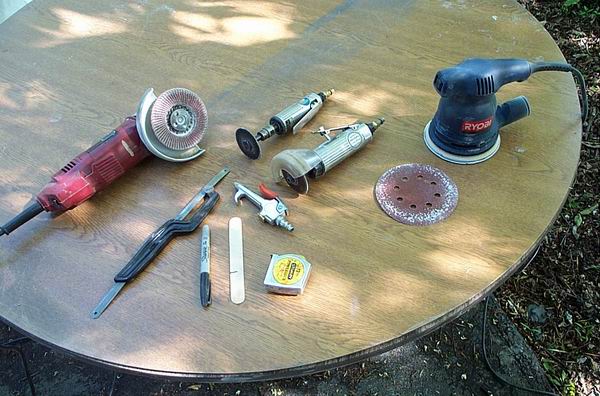
Tools of choice:
cutting out the wheelwell notch after preliminary body fitting
flares clecoed on , gelcoat sanded, ready to apply 4" tapes
Ireally wanted to sand the attachments and shoot a coat of Duratec primer on before showing these, but what the heck.
Just to keep stuff straight, no where in my previous post did I mention those actuators. I didn't let that cat out!
------------------ Ron Freedom isn't Free, it's paid for with the blood and dreams of those that have gone before us. My imagination is the only limiting factor to my Fiero. Well, there is that money issue.
[This message has been edited by blackrams (edited 06-21-2006).]
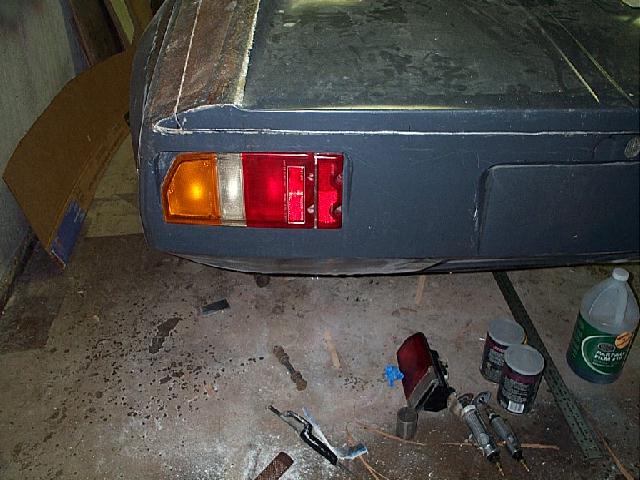
The Tracker tailight assy didn't quite fill the stock space, so I tried cutting a part off another assy and adding it. Not sure if I'll go with this or a set of stock Pantera tailights I have. I do like the look of the European lens colors, and the overall shape as it somewhat matches the contours of the rearend, and the cost and availability of these tailights.
The past month hasn't seen a lot of progress due to having to move my wife's business to our home. Priorities get set by the war department, you know, and we go forth from there BTW, networking with Fiero folks has saved the day with Patty's office move. Chester & Renee came over and graced Patty's office computers with their considerable skills. We've horse traded a bit to pay for these services, and I'm sure you'll see more of the Dirty Rat in the day's to come.
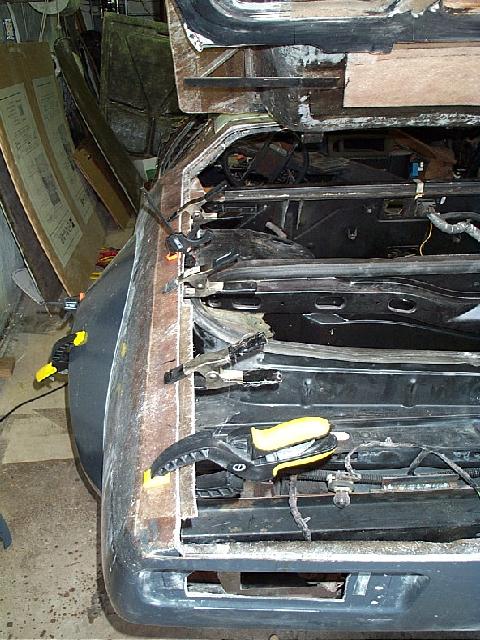
Blackrams did come over and we worked out a set of templates for interior rear clip panels. These will closeout the space between the Fiero trunk and the back end of the Pantera rear clip. We also made templates for panels that closeout the sides, running from the rear of the clip all the way up to the back window.
The rear clip is now ready to remove so it can get a final detailing, and the chassis gets painted and the engine installed.
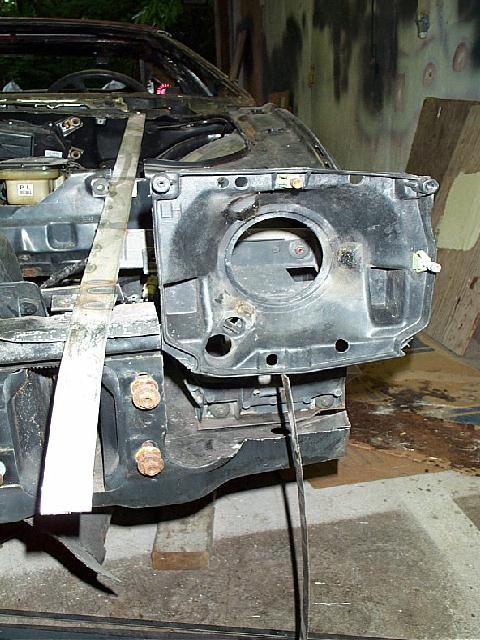
Installing the front clip was super easy, and we did this back before Thanksgiving. Here you get a glimpse of the mounting rail and the headlight cutout. Cutting out for moving the headlights forward is very easy, a portion of the front wall gets removed, and a portion of the side wall, and the headlight buckets get "streamlined" a bit, cutting off small protruding bits.
Here you can see the headlight mount bracket which is attached to the main front clip bracket. Fabricating these brackets is easy, since they align to stock Fiero mounting points.
And here is another view.
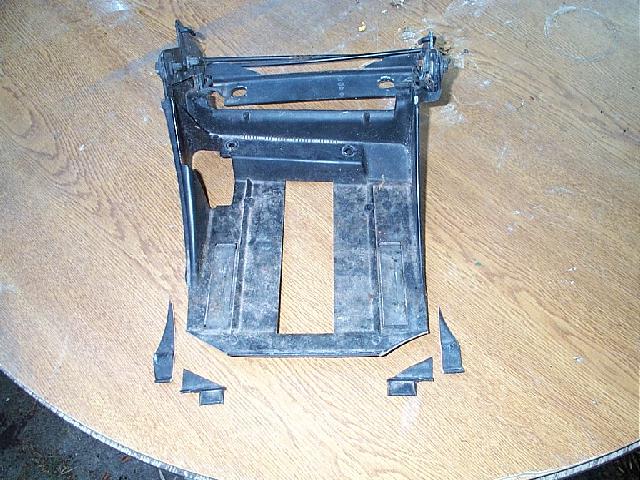
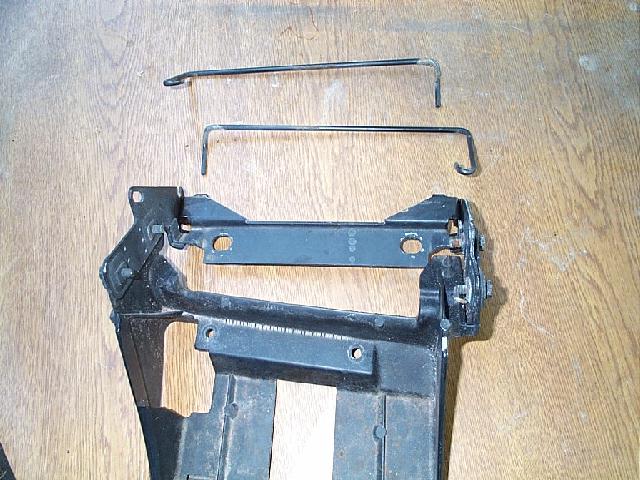
The skin is removed from the trapdoor assy by removing two plastic rivets, to reveal the spring-loaded mount and trapdoor skelton. The skelton is "streamlined" and the hinges temporarily removed to aid aligning the mount.
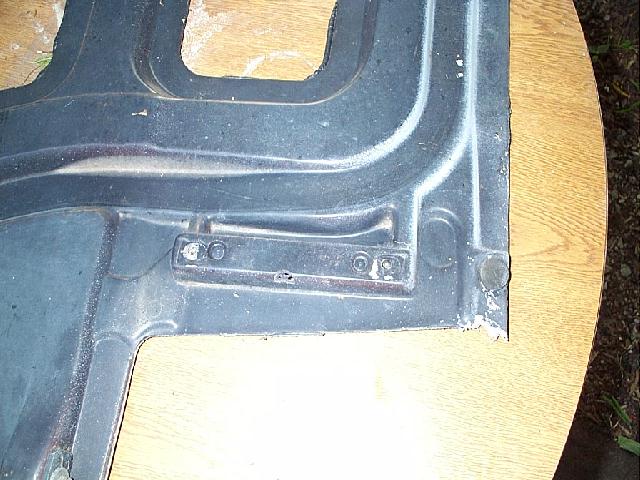
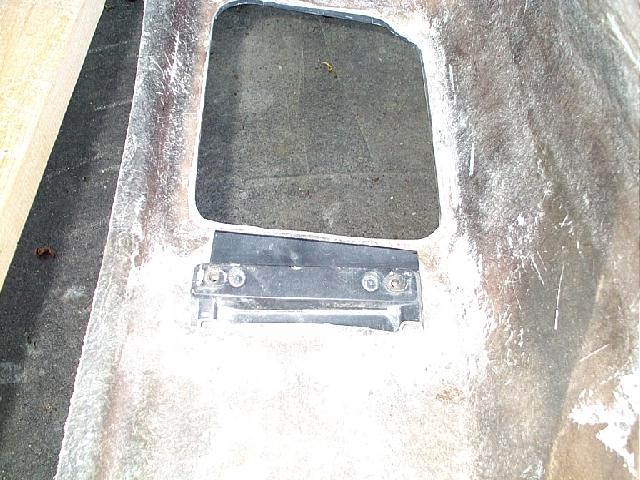
A portion of the stock Fiero trapdoor mount is removed and prepared for glassing to the front clip. It is easily positioned by using the skelton/hinge assy, making sure the skelton can get full rotation....and by the fact that you simply remove 1/4" from the stock leading edge of the mount and align it with the back edge of the opening in the front clip.
The Pantera trapdoor skin is bonded onto the mounted skelton later.
David Breeze
[This message has been edited by opm2000 (edited 06-21-2006).]
Bubba, I'll talk to Dave about posting some more pics this weekend. We are making progress, it just takes time when the majority of work takes place on the weekends. But we'll catch everyone up soon.
------------------ Ron Freedom isn't Free, it's paid for with the blood and dreams of those that have gone before us. My imagination is the only limiting factor to my Fiero. Well, there is that money issue.
[This message has been edited by blackrams (edited 06-30-2006).]
you are doing a great job with this car but I dont understand why you did not enlarge the trunk space as you have a huge empty space behind the stock trunk
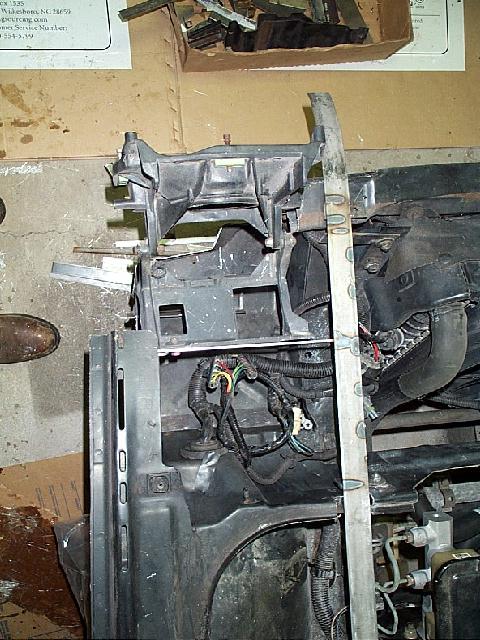
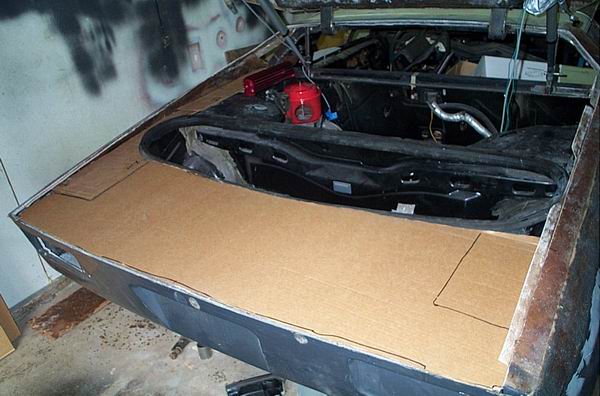
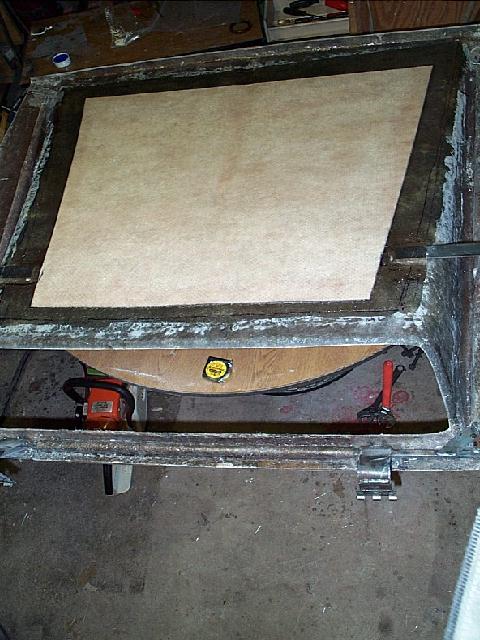
Bubbajoe, your point is well taken. This pic shows the templates made for the trunk close-out panels. The area just behind the trunk and above the internal Fiero bumper is totally available. It looks like one could easily double the available trunk space by extending the trunk back directly from the "shelf" level of the Fiero trunk.
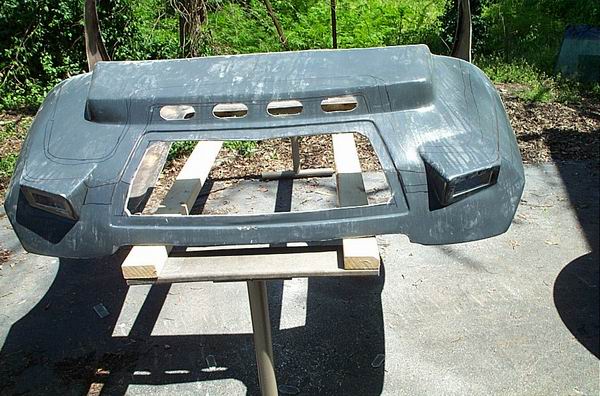
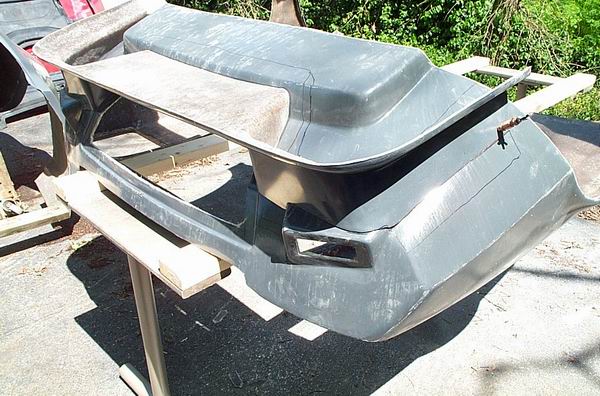
For now, though, I'm going with the stock trunk. Along these lines, I've been preparing the headlight cover molds, the 4 Pantera bumper molds, the front hood mold, the gill/scoops and the engine cold air tube for a new layup. I'm thinking I'm going to make all of these pieces with this fabric:
As these develop, I'll show you whats involved in doing carbon fiber parts both from molds and as overlays.
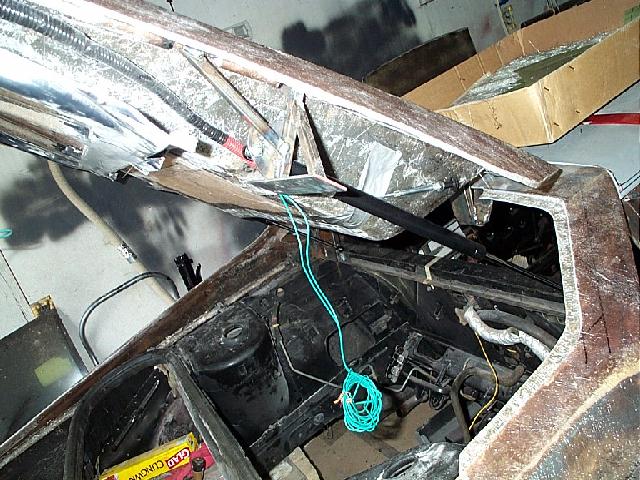
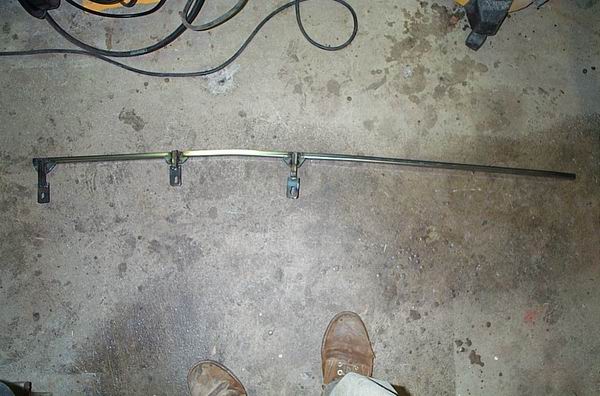
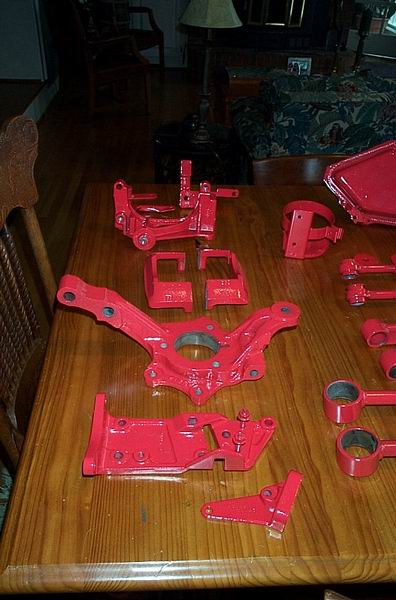
Most of my time lately has been sent disassembling the front end. Finally got it all taken apart and the bushings removed, and everything is ready for sandblasting and powdercoating. I did verify that the trans oil cooler and engine oil cooler would fit where I wanted them. Here is the engine oil cooler in place:
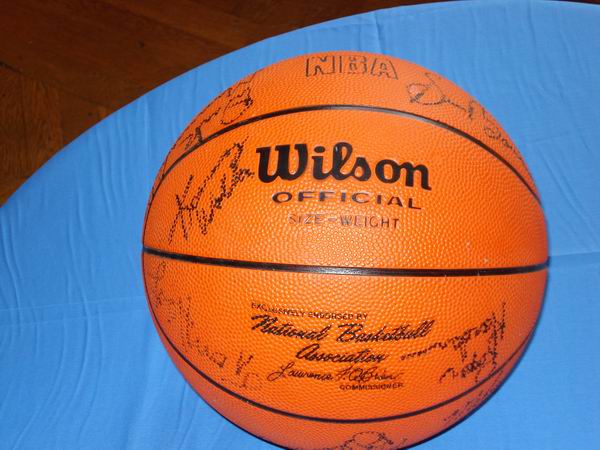
For those of you who are into that sort of thing, I'm raising funds for my favorite charity. This auction is still open:
(just ebay under Kentucky Basketball)
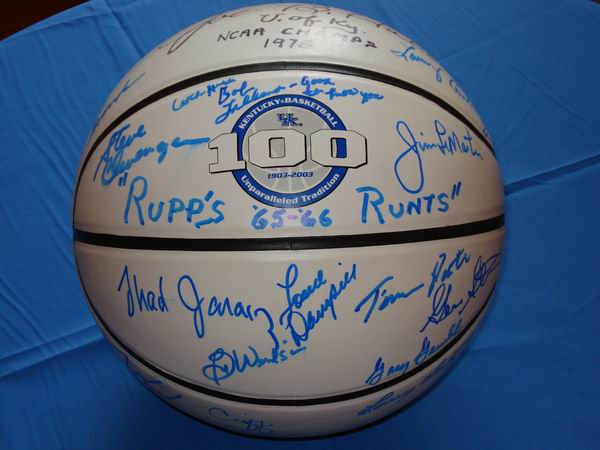
and this one just closed:
(sold for $2,500)
Next saturday, my son and I head for Bubbajoe's territory. We're going to :


 You'll notice a bit of alligatoring on this one, from back when I was going thru the learning curve of gelcoat application.